

Operation Manual - Whip Mix
Operation Manual - Whip Mix
Operation Manual - Whip Mix

You also want an ePaper? Increase the reach of your titles
YUMPU automatically turns print PDFs into web optimized ePapers that Google loves.
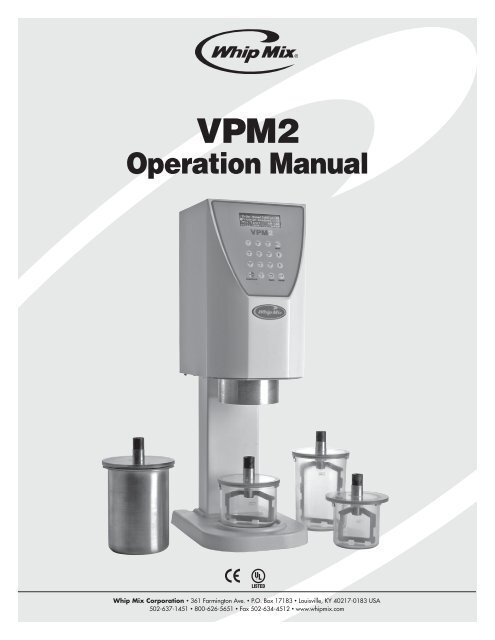
VPM2<strong>Operation</strong> <strong>Manual</strong><strong>Whip</strong> <strong>Mix</strong> Corporation • 361 Farmington Ave. • P.O. Box 17183 • Louisville, KY 40217-0183 USA502-637-1451 • 800-626-5651 • Fax 502-634-4512 • www.whipmix.com
VPM2 <strong>Operation</strong> <strong>Manual</strong>Features• The <strong>Whip</strong> <strong>Mix</strong> VPM2 is designed for mixing all typesof gypsum, plaster and investment material.• Powerful Vacuum – The twin-chamber vacuum pumpquickly creates a high vacuum.• Hands Free <strong>Mix</strong>ing – The powerful vacuum allowsthe unit to hold the Vac-U-<strong>Mix</strong>er to the unit.• 30 Flexible Programs – Advanced electronics allowuser to pre-program speed and mix time for specificmaterials.• Premixing – The Vacuum <strong>Mix</strong>er includes a uniquemixing feature which eliminates the need for handincorporation. It gives the user the option to premixup to 8 stages. Premixing is customizable with optionsto adjust the speed, time and direction in all 8 stages.• Program Descriptions – Up to 9 characters maydescribe the type of program stored in any locationfor easy recall.SpecificationsDimensions: 58.4 cm H x 20.3 cm W x 28 cm D(23" H x 8" W x 11" D)Weight: 20.4 kg (45 lbs.)Voltage: 100 – 120 Vac, 5A200 – 240 Vac, 2.5A50/60 Hz<strong>Mix</strong>ing Speed: 100 Rpm – 500 Rpm(Premix, 100 Rpm – 400 Rpm)Vacuum: 27.5 In Hg (930 mbar)User Programs: 30Display Characters: 4 Lines x 20 Characters<strong>Operation</strong>al Altitude: Sea level – 2,000 meters (6,560 feet)<strong>Operation</strong>al Temperature: 13° C – 41° C (55° F – 105° F)Maximum Relative Humidity: 80% for temperatures upto 35° C (95° F) decreasing linearly to 50% relativehumidity at 35° C (104° F)Pollution Tolerance: Level 2 (in accordance with IEC 664)Recommended Environment: Vertical position, indoorswithin operational parameters (see Installation formore detail)<strong>Mix</strong>ing Time: 1 Second – 255 Seconds (4.25 Minutes)Fuse Type: 5 Amp Fast ActingContents#6585 500 mL Vac-U-<strong>Mix</strong>erPower Cord — 1User <strong>Manual</strong> — 1Extra Vacuum Filter — 1Allen Wrench — 1 (230V only)Accessories#4485 300 mL Vac-U-<strong>Mix</strong>er#6585 500 mL Vac-U-<strong>Mix</strong>er#6685 875 mL Vac-U-<strong>Mix</strong>er#7685 1,200 mL Vac-U-<strong>Mix</strong>erWall BracketStandSymbols Used= Safety Ground
VPM2 <strong>Operation</strong> <strong>Manual</strong>InstallationAfter unpacking the unit, check for possible damageduring shipping or transport. Should there be anydamage please notify you dealer or <strong>Whip</strong> <strong>Mix</strong> immediately.Installation on Optional Bench Stand1. Connect the base to the stand column using two flatwashers, two lock washers and two 1/4" x 1/2" bolts.<strong>Mix</strong>er2. Assemble the column to the mixer usingfour 1/4" bolts, flat washers and lock washers.3. The power connector in the back of the mixershould be open through the slot in the column.Stand ColumnCAUTION: Do not use nearFlammable LiquidsBaseInstallation on BracketPreparationThe only hardware supplied with the unit is one #8-32 nut.See the instructions below for more information regardinghardware.MountingMake sure the wall can support 20.4 kg (45 lbs.) of weight.1. Mount the bracket to the wall using four 1/4" bolts,screws and lock washers.2. Place the Bracket Clip on the back and bottomof the VPM2 with the screw hole facing down.3. Slide the VPM2 down onto the wall mount bracket.(Make sure the place the unit is mounted can handlethe weight.)4. Install the #8-32 nut onto the threaded stud.See the illustrations below.Note:• Make sure the unit is anchored on wall studs,either directly or using a plywood board.• The drive shaft must point downward.• Keep a minimum distance of 9" (23 cm) betweenthe bottom of the mixing ring and the bench or table.Move the unitdown from topof the bracketuntil secureMountingBracketBracketClipBracketNutBracketClip Slot
VPM2 <strong>Operation</strong> <strong>Manual</strong><strong>Operation</strong>The vacuum mixer is ready for immediate operation afterplugging the power supply cable into the back of the unit.Switch the unit to “ON” position.Once the Start/Stop button is pressed and the bowl isplaced on the chuck, the program begins and the vacuumpump starts. The vacuum will rise until there is no need tohold the bowl in place. <strong>Mix</strong>ing occurs automatically fromthis point until the end of the program. When a programfinishes, the VPM2 will play the program finished tunerepeatedly and the vacuum will continue to run until theStart/Stop button is pressed.Note: Make sure to support the bowl when the Start/Stopbutton is pressed at end of mix cycle. Vacuum is releasedonce Start/Stop is pressed and cycle ends allowingpaddle/bowl assembly to separate from the unit.On/Off SwitchThe start-up message “<strong>Whip</strong> <strong>Mix</strong> VPM2 Ver. X.X” willbe displayed briefly followed by Program 0 (or the lastprogram run). Once Program 0 is displayed you canchoose to run that program or select another programas follows:1. Select a Program Number using the Step(Arrow) buttons or the number pad.Hold the bowl andpaddle up until thevacuum supportsboth and the paddlebegins to turn.2. Press the Start/Stop button.3. Place the paddle/bowl assembly into the chuck.Liquid Crystal Display(4 lines x 20 characters)Prgm Name:Program Number: 0<strong>Mix</strong> Time: 5Press MENU for Setup16-Button KeypadMenu ButtonUp Arrow ButtonDown Arrow ButtonStart/Stop ButtonEnter ButtonBack Button
VPM2 <strong>Operation</strong> <strong>Manual</strong>To add a program to memory:1. Press the Menu button.2. Use the Step (Arrow) buttons to selectAdd/Delete Programs.3. Press the Enter button.4. Use the Step (Arrow) buttons to selectAdd Program.5. Press the Enter button.6. Select a memory number slot to program using theStep (Arrow) buttons or the number pad.7. Press the Enter button.8. Use the alphanumeric keypad to enter the name ofthe program (9 characters are available). Press theEnter button after each letter to accept.Note:• Pressing the same alphanumeric keypad buttonwill scroll through the characters on that button.• Pressing the Enter button without selectinga character will move the cursor right.• Use the Down Arrow key to move backand erase a character.9. Once all the characters have been entered pressthe Enter button until the next screen is displayed.10. Premix Yes? will be displayed. If no premix isdesired press an Arrow button to change from yesto no and press the Enter button again. If a Premixis desired press the Enter button and enter thespeed, time and direction as prompted.11. Pre Vacuum? No will be displayed. If Pre Vacuumis desired press an Arrow button and the Enterbutton then select the amount of time for PreVacuum. If no Pre Vacuum is desired press theEnter button again.12. <strong>Mix</strong> Speed? will be displayed. Use the numberpad to enter the desired <strong>Mix</strong> Speed (100 rpm –500 rpm).13. Press the Enter button.14. <strong>Mix</strong> Time – using the alphanumeric keypad entera number between 1 and 255 seconds for theamount of mix time needed.15. Press the Enter button.16. Post Vacuum? No is displayed. Use the Arrowkeys to choose yes or no. <strong>Mix</strong> cycle w/o POSTVAC beeps immediately after mixing is complete.POST VAC allows for continued vac for allottedtime after mix is complete. Important for PhosphateInvestments and yes, if you did not program PSTVAC you could achieve it by ignoring the ENDCYCLE tune for 10–15 seconds.17. Press the Enter button.18. If yes was selected in step 16, use the numberpad to enter the amount of time needed forPost Vacuum (0 – 30 seconds).19. Press the Enter button.20. When the program is complete the Main Menuwill be displayed and another memory slot maybe selected for programming.The addition of the program should be complete.Press Enter button to select program to run.
VPM2 <strong>Operation</strong> <strong>Manual</strong>To delete a program from memory:1. Press the Menu button.2. Use the Step (Arrow) buttons to selectAdd/Delete Programs.3. Press the Enter button.4. Use the Step (Arrow) buttons to selectDelete Program.6. Use the Arrow keys or the alphanumeric keypadto select a program number to delete.7. Press the Enter button.8. Use the Step (Arrow) buttons to select Yes.9. Press the Enter button. The deletion of theprogram should be complete.5. Press the Enter button.Change a specific program parameter:• Change <strong>Mix</strong> Time• Change <strong>Mix</strong> Speed• Change Premix• Change Pre Vacuum• Change Post Vacuum• Change Program NameTo Modify a Program:1. Press the Menu button.2. Use the Step (Arrow) buttonsto select Modify Program.3. Press the Enter button.4. Use the Step (Arrow) buttons oralphanumeric keypad to select a program number.5. Press the Enter button.6. Use the Step (Arrow) buttons to selecta program parameter to change.7. Press the Enter button.8. Follow the screen prompts.Personalize the mixer:• Change Language• Change TuneTo Change Setup Options:1. Press the Menu button.2. Using the Step (Arrow) buttonsto select Setup Options.3. Press the Enter button.4. Follow the screen prompts.
VPM2 <strong>Operation</strong> <strong>Manual</strong>Premix/<strong>Mix</strong>ingBefore using – rinse the bowl and lid assembly. Shakeoff the excess water. This is most important wheneverwater and material are measured. Proportion water andmaterial (water first – material next) into bowl accordingto manufacturer’s specifications.Premixing eliminates the need to hand incorporate themix before placing the bowl into the mixer. The unitincludes a default premix option and also the ability tocustomize the premix parameters according to materialand volume being mixed. The allowable parametersinclude the ability to customize the speed, time andpaddle direction in up to eight stages.The default parameters are:CW = CLOCKWISECCW = COUNTER CLOCK WISEProgram 0 – GypsumPremixStage 1 100 RPM 3 seconds CWStage 2 200 RPM 3 seconds CCWStage 3 300 RPM 3 seconds CWStage 4 400 RPM 3 seconds CCWStage 5 400 RPM 3 seconds CWStage 6 400 RPM 3 seconds CCWStage 7 400 RPM 3 seconds CWStage 8 400 RPM 3 seconds CCW<strong>Mix</strong>Main <strong>Mix</strong> 450 RPM 30 seconds CWPost Vac. 0Program 1 – Invest 45PremixStage 1 100 RPM 3 seconds CWStage 2 200 RPM 3 seconds CCWStage 3 300 RPM 3 seconds CWStage 4 400 RPM 3 seconds CCW<strong>Mix</strong>Main <strong>Mix</strong> 450 RPM 45 seconds CWPost Vac. 10 secondsProgram 2 – Invest 60PremixStage 1 100 RPM 3 seconds CWStage 2 200 RPM 3 seconds CCWStage 3 300 RPM 3 seconds CWStage 4 400 RPM 3 seconds CCW<strong>Mix</strong>Main <strong>Mix</strong> 450 RPM 60 seconds CWPost Vac. 10 secondsProgram 3 – Invest 90PremixStage 1 100 RPM 3 seconds CWStage 2 200 RPM 3 seconds CCWStage 3 300 RPM 3 seconds CWStage 4 400 RPM 3 seconds CCW<strong>Mix</strong>Main <strong>Mix</strong> 450 RPM 90 seconds CWPost Vac. 10 secondsProgram 4 – Formula 1PremixStage 1 100 RPM 3 seconds CWStage 2 200 RPM 3 seconds CCWStage 3 300 RPM 3 seconds CWStage 4 400 RPM 3 seconds CCW<strong>Mix</strong>Main <strong>Mix</strong> 450 RPM 120 seconds CWPost Vac. 0The mixing portion of the program is customizableaccording to the needs of the material manufacturewith the ability to include a premix, pre vacuum andpost vacuum. All mixing stages include the ability tocustomize the speed, time and direction of the paddle.Before starting a program, make sure the paddle andbowl are clean.Start the program and place the appropriate mixingpaddle on the Vac-U-<strong>Mix</strong>er bowl. Hold the bowl andpaddle up until the vacuum supports the bowl andpaddle. The rest is automatic.
VPM2 <strong>Operation</strong> <strong>Manual</strong>TroubleshootingUnit Will Not Turn On – Check the power cord to makesure the unit is plugged into a working outlet. Make surethe power switch is in the on position. Check the fuse inthe fuseholder of the power connector. The unit is shippedwith a spare fuse in the fuseholder. Note: Use only a 5amp fast acting fuse.Motor Will Not Start – Check for vacuum, by looking atthe vacuum display bars >>>>. If the bars do not go allthe way across the screen, vacuum is low. If the unit doesnot sense enough vacuum the motor will not start. Makesure all seals are in place and are clean and free of debris.Make sure the vacuum filter is not clogged. Make surethe paddle is engaged properly. Try a different paddleand bowl. If they work, order a replacement for the sizethat does not work. If a loud clicking noise is heardwhen the paddle is supposed to begin turning calltechnical support.Program Restarts – If the vacuum drops in the middle ofa program, the program will play a warning sound andbowl will drop. The program will stop and go back to theprogram selection screen. Check to make sure the correctprogram is selected. Reposition the bowl and ensure agood seal before leaving the bowl.Display Is Not Working – Check to see if the unit is on.Reset (cycle the power off then back on) the unit; if thestart-up tune is played but the display is still blank calltechnical support.Start Button Does Not Start the Program – Reset theunit (cycle the power off then back on) and try again. If theproblem persists the button is probably bad and needs tobe replaced. Call technical support.Maintenance/CleaningPainted Surface – The VPM2 has been painted withspecial epoxy based powder coat paint. To clean thesurface, use Windex ® or water and a clean cloth. Neveruse Windex ® on the display screen as this may cause thescreen to become dry and easy to scratch.Bowls – Keep bowls clean. Residual materials, setgypsum or investment, can create contamination issues.Replace bowls when they show signs of wear. Wornbowls can reduce reactions of phosphate investmentsresulting in casting inconsistency. For a list of solventsthat will harm the bowls call technical support.O-Ring Maintenance – Lubriplate has been applied tothe O-Rings of the VPM2 to maintain suppleness. If theO-Rings dry they may not seal properly. Apply Lubriplatemonthly to maintain the O-Rings on both the lids andVPM2.Vacuum Filter – An extra filter has been supplied with theVPM2. Replace the filter when the vacuum is clogged orthe filter is soiled. Preventing the vacuum pump becomingcontaminated will extend the life of the VPM2.WarrantyThe VPM2 is covered by a standard <strong>Whip</strong> <strong>Mix</strong> three yearwarranty. All parts and labor for three years on purchasesmade after 9/1/05.ServiceContact Information:800-626-5651 or 502-637-1451361 Farmington Ave.P.O. Box 17183Louisville, KY 40217 USAReplacement PartsPart # Description4485 300 mL Vac-U-<strong>Mix</strong>er6585 500 mL Vac-U-<strong>Mix</strong>er6685 875 mL Vac-U-<strong>Mix</strong>er7685 1,200 mL Vac-U-<strong>Mix</strong>er5515 Inlet Filter5516 O-Ring5550 5 Amp Fuse (Package of 2)5520 Control Pad OverlayMPL30485 6/07


