Create successful ePaper yourself
Turn your PDF publications into a flip-book with our unique Google optimized e-Paper software.
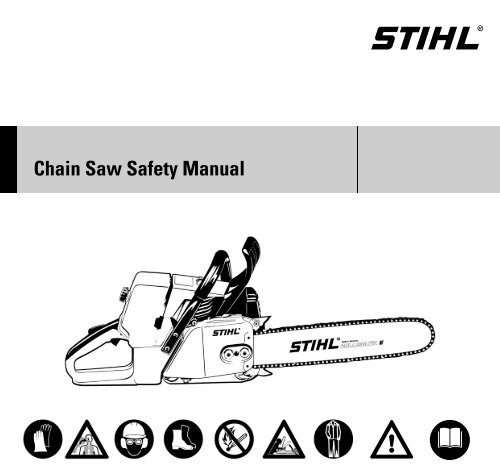
<strong>Chain</strong> <strong>Saw</strong> <strong>Safety</strong> <strong>Manual</strong><br />
{
Original Instruction <strong>Manual</strong><br />
Printed on chlorine-free paper<br />
Printing inks contain vegetable oils, paper can be recycled.<br />
© ANDREAS <strong>STIHL</strong> AG & Co. KG, 2009<br />
0457-184-0121. M4.L09.FST.<br />
0000000553_001_GB<br />
Contents<br />
<strong>Safety</strong> Precautions and Working<br />
Techniques 2<br />
Maintenance and Care 14<br />
Main Parts 16<br />
{<br />
<strong>Chain</strong> <strong>Saw</strong> <strong>Safety</strong> <strong>Manual</strong><br />
English<br />
This manual contains the safety<br />
precautions and re<strong>com</strong>mended cutting<br />
techniques outlined in the instruction<br />
manuals for <strong>STIHL</strong> chain saws.<br />
The chapter on "Main Parts of the <strong>Saw</strong>"<br />
shows the MS 211 as an example. Other<br />
chain saw models may have different<br />
parts and controls.<br />
This manual contains references to<br />
various chapters in the model-specific<br />
instruction manuals.<br />
You should therefore always refer to the<br />
instruction manual of your particular saw<br />
model.<br />
Please contact your <strong>STIHL</strong> dealer if you<br />
any questions after reading this manual.<br />
1
English<br />
<strong>Safety</strong> Precautions and<br />
Working Techniques<br />
Observe the national safety regulations<br />
issued, for example, by the employers'<br />
liability insurance association, social<br />
security institutions, occupational safety<br />
and health authorities or other<br />
organizations.<br />
If you have never used a power tool<br />
before: Ask the salesperson or another<br />
expert to explain how to use it safely – or<br />
attend a training course.<br />
Minors should never be allowed to use a<br />
chain saw – except for young trainees<br />
over the age of 16 when working under<br />
supervision.<br />
Keep children, animals and bystanders<br />
well away from the machine.<br />
2<br />
Special safety precautions<br />
must be observed<br />
when using a chain saw<br />
because the work goes<br />
faster than with an axe<br />
and a hand saw, because<br />
the chain runs at very<br />
high speeds, and<br />
because the cutters are<br />
extremely sharp.<br />
It is important that you<br />
carefully read the entire<br />
Instruction <strong>Manual</strong> before<br />
using the machine for the<br />
first time and keep it in a<br />
safe place for future reference.<br />
Non-<strong>com</strong>pliance<br />
with the Instruction <strong>Manual</strong><br />
may cause serious or<br />
even fatal injury.<br />
When not using the machine, it must be<br />
laid down in such a way that it does not<br />
endanger anyone. Ensure that the<br />
machine cannot be used without<br />
authorization.<br />
The user is responsible for accidents or<br />
risks involving third parties or their<br />
property.<br />
The machine should only be provided or<br />
loaned to people familiar with this model<br />
and its operation – and the Instruction<br />
<strong>Manual</strong> should always be handed over<br />
with the machine.<br />
The machine may only be operated by<br />
people who are fit, in good physical<br />
health and in good mental condition. If<br />
you have any condition that might be<br />
aggravated by strenuous work, check<br />
with your doctor before operating a<br />
power tool.<br />
If you have a pacemaker: The ignition<br />
system of your machine produces an<br />
electromagnetic field of very low<br />
intensity. An effect on individual<br />
pacemaker types cannot be excluded<br />
entirely. <strong>STIHL</strong> re<strong>com</strong>mends that you<br />
consult your doctor and the<br />
manufacturer of your pacemaker in<br />
order to avoid all health hazards.<br />
Anyone who has consumed alcohol,<br />
medicines affecting their ability to react<br />
or drugs must not operate a power tool.<br />
Postpone the work if the weather is bad<br />
(rain, snow, ice, wind) - higher risk of<br />
accidents!<br />
Do not cut any material other than wood<br />
or wooden objects.<br />
Other uses are not permitted and may<br />
lead to accidents or damage to the<br />
machine. The machine must not be<br />
modified in any way - this may also lead<br />
to accidents or damage to the machine.<br />
Only use tools, guide bars, chains, chain<br />
sprockets or accessories that have been<br />
approved by <strong>STIHL</strong> for this machine or<br />
which are technically equivalent.<br />
Contact a dealer if in doubt. Only use<br />
high-quality tools or accessories.<br />
Otherwise there may be a risk of<br />
accidents or damage to the machine.<br />
<strong>STIHL</strong> re<strong>com</strong>mends the use of genuine<br />
<strong>STIHL</strong> tools, guide bars, chains, chain<br />
sprockets and accessories. These have<br />
been optimized for the product and the<br />
user's requirements.<br />
Clothing and equipment<br />
Wear proper protective clothing and<br />
equipment.<br />
Clothing must be sturdy<br />
and snug-fitting, but allow<br />
<strong>com</strong>plete freedom of<br />
movement. Wear snug fitting<br />
clothing with cutretardant<br />
pads – an<br />
overall, not a loose-fitting<br />
jacket.<br />
Clothing which could be<strong>com</strong>e trapped in<br />
wood, brush or moving parts of the<br />
machine should not be worn. Do not<br />
wear a scarf, tie or jewelry when<br />
operating the machine. Long hair must<br />
be tied up and covered (headscarf, cap,<br />
helmet, etc.).<br />
<strong>Chain</strong> <strong>Saw</strong> <strong>Safety</strong> <strong>Manual</strong>
Wear safety boots –<br />
with cut-retardant material,<br />
non-slip soles and<br />
steel toe caps<br />
<strong>STIHL</strong> can supply a <strong>com</strong>prehensive<br />
range of protective clothing and<br />
equipment.<br />
Transporting the chain saw<br />
Always engage the chain brake and<br />
attach the chain scabbard – even before<br />
transporting the saw for short distances.<br />
When transporting the saw for longer<br />
distances (more than approx. 50 m),<br />
also stop the engine.<br />
Always carry the saw by the handlebar –<br />
with the hot muffler away from your<br />
body, the guide bar must point to the<br />
rear. Avoid touching hot parts of the<br />
machine, especially the surface of the<br />
muffler – risk of burns!<br />
In vehicles: When transporting in a<br />
vehicle, properly secure your machine to<br />
prevent turnover, damage and fuel<br />
spillage.<br />
<strong>Chain</strong> <strong>Saw</strong> <strong>Safety</strong> <strong>Manual</strong><br />
Wear a hard hat – if<br />
objects could fall on you.<br />
Wear safety glasses or<br />
a face shield and "personal"<br />
hearing<br />
protection – e.g., ear<br />
defenders.<br />
Wear heavy-duty, nonslip<br />
gloves – preferably<br />
made of leather.<br />
Refueling<br />
Gasoline is an<br />
extremely flammable<br />
fuel – keep clear of<br />
naked flames and fire –<br />
do not spill any fuel – no<br />
smoking.<br />
Switch off the engine before refueling.<br />
Never refuel the machine while the<br />
engine is still hot – the fuel may spill over<br />
– risk of fire!<br />
Open the filler cap carefully so that any<br />
excess pressure is relieved gradually<br />
and fuel does not splash out.<br />
The machine may only be refueled in a<br />
well ventilated place. Clean the machine<br />
immediately if fuel is spilled. Change<br />
your clothes immediately if they are<br />
contaminated with fuel.<br />
A number of different filler caps are<br />
installed as standard at the factory.<br />
Close the filler cap as<br />
tightly as possible after<br />
refueling.<br />
Place the cliplock filler<br />
cap (bayonet-type) in<br />
position, turn it until it will<br />
go no further and fold the<br />
cliplock down.<br />
This helps reduce the risk of unit<br />
vibrations causing an incorrectly<br />
tightened filler cap to loosen or <strong>com</strong>e off<br />
and spill quantities of fuel.<br />
Before starting<br />
English<br />
Check that saw is properly assembled<br />
and in good condition - refer to<br />
appropriate chapters in the Instruction<br />
<strong>Manual</strong>:<br />
– functional chain brake, front hand<br />
guard<br />
– Correctly mounted guide bar<br />
– Correctly tensioned chain<br />
– The throttle trigger and throttle<br />
trigger interlock must move easily –<br />
throttle trigger must return<br />
automatically to the idle position<br />
when released.<br />
– Master control/stop switch must<br />
move easily to STOP or 0<br />
– Check that the spark plug boot is<br />
secure. A loose boot can lead to<br />
flying sparks which may ignite the<br />
escaping fuel/air mixture – risk of<br />
fire!<br />
– Never attempt to modify the controls<br />
or safety devices<br />
– Keep the handles dry and clean –<br />
free from oil and pitch – for safe<br />
control of the chain saw.<br />
The chain saw should only be used if it<br />
is in full working order – risk of<br />
accident!<br />
Starting the engine<br />
Move at least 3 meters away from the<br />
place at which the machine was refueled<br />
and never in enclosed spaces.<br />
3
English<br />
The machine is operated by only one<br />
person – there should not be any other<br />
person within the working area – not<br />
even when starting the machine.<br />
Lock the chain with the chain brake<br />
before starting – risk of personal injury<br />
due to rotating chain!<br />
Do not drop-start the engine – start as<br />
described in the Instruction <strong>Manual</strong>.<br />
Do not start the chain saw if the chain is<br />
in a cut.<br />
During work<br />
In the event of impending danger or in<br />
an emergency, switch off the engine<br />
immediately by moving the Master<br />
Control/stop switch to STOP or 0.<br />
Never let the machine run unattended.<br />
When the engine is running: Note that<br />
the chain continues to rotate for a short<br />
period after your let go of the throttle<br />
trigger – coasting effect.<br />
Exercise caution with slippery surfaces,<br />
water, snow, ice, steep slopes, uneven<br />
ground or green wood that has just been<br />
stripped of its bark –danger of slipping!<br />
Use caution with tree stumps, roots,<br />
ditches – danger of stumbling!<br />
Ensure you always have a firm and safe<br />
footing.<br />
Do not work alone – keep within calling<br />
distance of others in case help is<br />
needed.<br />
More care and attention than usual are<br />
required when wearing ear protection,<br />
since warning sounds (shouts, alarms,<br />
etc.) cannot be heard properly.<br />
4<br />
Take breaks in due time in order to<br />
prevent tiredness and exhaustion – risk<br />
of accidents!<br />
Keep easily <strong>com</strong>bustible materials (e.g.,<br />
wood chips, bark, dry grass, fuel) away<br />
from hot exhaust gases and hot mufflers<br />
– risk of fire! Mufflers with catalytic<br />
converters can be<strong>com</strong>e especially hot.<br />
Your power tool produces<br />
toxic exhaust fumes as<br />
soon as the engine is<br />
running. These gases<br />
may be colorless and<br />
odourless and may contain<br />
unburnt<br />
hydrocarbons and benzene.<br />
Never run the<br />
engine indoors or in<br />
poorly ventilated areas,<br />
even if your model is<br />
equipped with a catalytic<br />
converter.<br />
Ensure proper ventilation when working<br />
in trenches, hollows or other confined<br />
areas. Toxic fumes can kill!<br />
If you feel sick, if you have a headache,<br />
vision problems (e.g., your field of vision<br />
gets smaller), hearing problems,<br />
dizziness or inability to concentrate, stop<br />
work immediately. Such symptoms may<br />
be caused by an excessively high<br />
concentration of exhaust emissions –<br />
risk of accident!<br />
Dust (e.g., sawdust), fumes and smoke<br />
produced while using the machine may<br />
be hazardous to health. Wear a dust<br />
mask if dust is generated.<br />
No smoking when working with or near<br />
the machine - risk of fire! Combustible<br />
fuel vapor may escape from the fuel<br />
system.<br />
If the machine is subjected to unusually<br />
high loads for which it was not designed<br />
(e.g., heavy impact or a fall), always<br />
check that it is in good condition before<br />
continuing work - refer also to the<br />
section "Before starting". Check the fuel<br />
system for leaks and make sure the<br />
safety devices are working properly.<br />
Never continue using a power tool that is<br />
not in perfect working order. Consult a<br />
<strong>STIHL</strong> dealer if in doubt.<br />
Make certain that the saw chain does<br />
not continue rotating when the engine is<br />
idling – if necessary, correct the low<br />
speed setting – if the chain continues to<br />
keep rotating in idle, have it checked by<br />
a servicing dealer.<br />
Reactive forces<br />
The most <strong>com</strong>mon reactive forces are:<br />
kickback, pushback and pull-in.<br />
Dangers of kickback<br />
Kickback can result in<br />
fatal cuts.<br />
<strong>Chain</strong> <strong>Saw</strong> <strong>Safety</strong> <strong>Manual</strong>
Kickback occurs when the saw is<br />
suddenly thrown up and back in an<br />
uncontrolled arc towards the operator.<br />
Kickback occurs if, for example,<br />
– the saw chain in the area of the<br />
upper quarter of the guide bar nose<br />
unintentionally <strong>com</strong>es into contact<br />
with wood or a solid object – e.g.,<br />
unintentionally touches another limb<br />
during limbing<br />
– the saw chain at the nose of the<br />
guide bar is pinched in the cut<br />
<strong>Chain</strong> <strong>Saw</strong> <strong>Safety</strong> <strong>Manual</strong><br />
001BA036 KN<br />
001BA093 LÄ<br />
Quickstop chain brake:<br />
This device reduces the risk of injury in<br />
certain situations - it cannot prevent<br />
kickback. When activated, the chain<br />
brake stops the saw chain within a<br />
fraction of a second –<br />
for a description of this device refer to<br />
the section "<strong>Chain</strong> Brake" in this<br />
Instruction <strong>Manual</strong><br />
Reduce the risk of kickback<br />
– Work cautiously and methodically<br />
– Hold the chainsaw firmly with both<br />
hands and maintain a secure grip.<br />
– Always cut at full throttle<br />
– Be aware of the location of the guide<br />
bar nose<br />
– Do not cut with the guide bar nose<br />
– Be especially careful with small,<br />
tough limbs, undergrowth and<br />
offshoots – the saw chain may<br />
be<strong>com</strong>e caught in them<br />
– Never cut several limbs at once<br />
– Do not lean too far forward<br />
– Do not cut above shoulder height<br />
– Use extreme caution when reentering<br />
a previous cut.<br />
– Do not attempt plunge cuts if you<br />
are not experienced in this cutting<br />
technique<br />
– Be alert for shifting of the log or<br />
other forces that may cause the cut<br />
to close and pinch the chain<br />
English<br />
– Always cut with a correctly<br />
sharpened, properly tensioned saw<br />
chain - the depth gauge setting<br />
must not be too large.<br />
– Use low-kickback saw chains as<br />
well as narrow-radius guide bars<br />
Pull-in (A)<br />
When the chain on the bottom of the bar<br />
– overbucking – is suddenly pinched,<br />
caught or encounters a foreign object in<br />
the wood, the chain saw may suddenly<br />
be drawn forward toward the log – to<br />
avoid this, engage the bumper spike<br />
firmly in the wood.<br />
Pushback (B)<br />
A<br />
B<br />
When the chain on the top of the bar –<br />
underbucking – is suddenly pinched,<br />
caught or encounters a foreign object in<br />
the wood, the chain saw may suddenly<br />
be driven straight back toward the<br />
operator – to avoid this:<br />
001BA037 KN<br />
001BA038 KN<br />
5
English<br />
– Do not allow the top of the guide bar<br />
to be<strong>com</strong>e jammed<br />
– Do not twist the guide bar in the cut<br />
Be very careful<br />
– with freely hanging limbs<br />
– with trunks that are under tension<br />
between other trees because they<br />
fell unfavorably<br />
– when working in windbreaks<br />
In these cases, do not use a chain saw –<br />
use a hoist, winch or dragline instead.<br />
Pull out trunks that are lying about and<br />
have been cut free. Whenever possible,<br />
deal with them in open areas.<br />
Deadwood (brittle, rotten or dead wood)<br />
poses a substantial, highly<br />
unpredictable hazard. It is extremely<br />
difficult or even practically impossible to<br />
recognize the danger. Use aids such as<br />
winches or draglines.<br />
Always be especially careful<br />
whenfelling timber near roads,<br />
railway lines, power lines etc. If<br />
necessary, notify police, power<br />
<strong>com</strong>panies or railway authorities.<br />
6<br />
Holding and guiding the machine<br />
Always hold the chain saw firmly with<br />
both hands: Right hand on the rear<br />
handle – even if you are left-handed. To<br />
ensure reliable control, wrap your<br />
thumbs tightly around the handlebar and<br />
handle.<br />
<strong>Saw</strong>ing<br />
Do not use the starting throttle position<br />
for cutting. Engine speed cannot be<br />
controlled with the throttle trigger in this<br />
position.<br />
Work calmly and methodically – only<br />
with good lighting and visibility. Do not<br />
endanger others – stay alert at all times.<br />
Use the shortest possible guide bar: The<br />
chain, guide bar and chain sprocket<br />
must match each other and your saw.<br />
001BA087 LÄ<br />
001BA082 KN<br />
Make certain that all parts of your body<br />
are well clear of the extended range of<br />
travel of the saw chain.<br />
Always pull the saw out of the cut with<br />
the saw chain running.<br />
Use the chain saw only for sawing – not<br />
for prying or shoveling away limbs or<br />
roots.<br />
Do not underbuck freely hanging limbs.<br />
Be careful when cutting shattered wood<br />
– risk of injury from slivers being<br />
caught and thrown in your direction!<br />
Make sure your saw does not touch any<br />
foreign materials: Stones, nails, etc. may<br />
be flung off and damage the saw chain –<br />
the saw may kick back unexpectedly.<br />
<strong>Chain</strong> <strong>Saw</strong> <strong>Safety</strong> <strong>Manual</strong>
On slopes, always stand above or to the<br />
side of the trunk or felled tree. Watch out<br />
for rolling trunks.<br />
When working above ground level:<br />
– always use a lift bucket<br />
– never work on a ladder<br />
– not in a tree<br />
– not in unsteady locations<br />
– not above shoulder height<br />
– not with one hand<br />
Begin cutting with the saw at full throttle<br />
and engage the bumper spike – then<br />
saw.<br />
Never use the chain saw without the<br />
bumper spike, the saw may pull you<br />
forward suddenly. Always engage the<br />
bumper spike securely.<br />
<strong>Chain</strong> <strong>Saw</strong> <strong>Safety</strong> <strong>Manual</strong><br />
001BA033 KN<br />
At the end of the cut, the chain saw is no<br />
longer supported by the cutting<br />
attachment in the cut. The machine's<br />
weight must be borne by the user – risk<br />
of loss of control!<br />
Felling<br />
Felling may only be carried by persons<br />
who have had special training. Persons<br />
who are not experienced chain saw<br />
users should carry out neither felling nor<br />
limbing – increased risk of accidents!<br />
Comply with national regulations<br />
regarding felling technique.<br />
Only persons who are engaged in felling<br />
may be present in the felling area.<br />
Make certain that no one is endangered<br />
by the falling tree – engine noise can<br />
drown out shouting.<br />
2 / 1 1 1/ 2 1<br />
2<br />
The distance to the next worksite must<br />
be at least 2 1/2 tree lengths<br />
Determine direction of fall and<br />
escape paths<br />
Select a gap in the timber stand into<br />
which the tree can be felled.<br />
Pay special attention to the following<br />
points:<br />
001BA088 LÄ<br />
English<br />
– the natural inclination of the tree<br />
– unusually heavy limb structure,<br />
asymmetrical growth, damage to<br />
tree<br />
– wind direction and speed – do not<br />
fell trees in high winds<br />
– direction of slope<br />
– neighboring trees<br />
– snow load<br />
– Take the general condition of the<br />
tree into account – be especially<br />
careful with trunk damage or<br />
deadwood (brittle, rotten or dead<br />
wood)<br />
A<br />
A direction of fall<br />
B escape paths<br />
B<br />
45°<br />
45°<br />
B 001BA040 KN<br />
7
English<br />
– Establish escape paths for each<br />
worker – approx. 45° diagonally<br />
backwards<br />
– Clear escape paths, eliminate<br />
obstacles<br />
– Put down tools and equipment at a<br />
safe distance – but not on the<br />
escape paths<br />
– When felling, stand only to the side<br />
of the falling trunk and only move<br />
back laterally onto the escape route<br />
– Plan escape routes on slopes<br />
parallel to the slope<br />
– When getting out of the way, watch<br />
out for falling branches and the<br />
crown area<br />
Preparing the work area at the trunk<br />
– Clear the work area at the trunk of<br />
branches, brush and other<br />
obstacles – secure footing for all<br />
workers<br />
– Carefully clear the base of the trunk<br />
(e.g., with an axe) – sand, stones<br />
and other foreign objects will dull the<br />
saw chain<br />
– Remove large buttresses: remove<br />
the largest buttress first – saw first<br />
vertically, then horizontally – only if<br />
the tree is in sound condition<br />
8<br />
001BA146 KN<br />
Making a felling notch<br />
With the help of the gunning sight on the<br />
shroud and fan housing of the chain<br />
saw, it is possible to check the direction<br />
of fall when cutting the felling notch.<br />
When making the felling notch, orient<br />
the chain saw so that the gunning sight<br />
points precisely in the direction in which<br />
you want the tree to fall.<br />
Several possibilities are permissible<br />
when it <strong>com</strong>es to the sequence of<br />
horizontal and diagonal cuts – observe<br />
national regulations with regard to felling<br />
technique.<br />
001BA153 KN<br />
C<br />
C<br />
The felling notch (C) determines the<br />
direction of fall.<br />
<strong>STIHL</strong> re<strong>com</strong>mends the following<br />
procedure:<br />
N Make a horizontal cut – in doing so,<br />
check the direction of fall with the<br />
gunning sight<br />
N Start a diagonal cut at an<br />
approx. 45° angle<br />
N Check the felling notch – then<br />
correct the felling notch, if<br />
necessary<br />
Important:<br />
– Felling notch at right angle to<br />
direction of fall<br />
– As close to the ground as possible<br />
– cut to a depth of approx. 1/5 to 1/3<br />
of the diameter of the trunk<br />
001BA143 KN<br />
<strong>Chain</strong> <strong>Saw</strong> <strong>Safety</strong> <strong>Manual</strong>
Sapwood cuts<br />
With long-fibered wood, sapwood cuts<br />
prevent the sapwood from splintering<br />
when felling the trunk – saw both sides<br />
of the trunk at the level of the felling<br />
notch base to approx. 1/10 of the<br />
diameter of the trunk – with thicker<br />
trunks, not more than the width of the<br />
guide bar.<br />
Do not use sapwood cuts on diseased<br />
trees.<br />
<strong>Chain</strong> <strong>Saw</strong> <strong>Safety</strong> <strong>Manual</strong><br />
001BA150 KN<br />
Felling cut<br />
D<br />
D<br />
Give a warning cry of "timber!" before<br />
making the felling cut.<br />
N Make the felling cut (D) slightly<br />
higher than the horizontal cut of the<br />
felling notch<br />
– Exactly horizontal<br />
– approx. 1/10 of the diameter of the<br />
trunk must remain standing<br />
between the felling cut and the<br />
notch = bridge<br />
Insert wedges in the felling cut in time –<br />
use only wedges made of wood, light<br />
metal or plastic - no steel wedges. Steel<br />
wedges damage the saw chain and can<br />
cause kickback.<br />
001BA144 KN<br />
E<br />
E<br />
English<br />
The bridge (E) functions as a hinge to<br />
guide the tree to the ground.<br />
– Never saw through the bridge while<br />
felling – otherwise the tree with fall<br />
in a direction other than the one<br />
planned – risk of accident!<br />
– With rotten trunks, leave a wider<br />
bridge<br />
Immediately before felling the tree, give<br />
out a second warning cry of "timber!".<br />
001BA145 KN<br />
9
English<br />
Thin trunks: simple fan cut<br />
N Engage the spiked bumper behind<br />
the hinge. Pivot the chain saw<br />
around this point – only as far as the<br />
bridge – the spiked bumper rolls<br />
against the trunk.<br />
10<br />
001BA147 KN<br />
Large diameter trunks: sectioning<br />
method<br />
1<br />
Use the sectioning method if the<br />
diameter of the trunk exceeds the length<br />
of the chain saw guide bar.<br />
1. First cut<br />
The nose of the guide bar should<br />
enter the wood just behind the hinge<br />
– hold the saw absolutely<br />
horizontally and swing it as far as<br />
possible – use the spiked bumper<br />
as a pivot point – reposition the<br />
chain saw as little as possible.<br />
001BA148 KN<br />
2<br />
4<br />
2. While repositioning for the next cut,<br />
keep the guide bar fully engaged in<br />
the cut in order to avoid an uneven<br />
felling cut - apply the spiked bumper<br />
again, etc..<br />
3. Insert wedge (3)<br />
4. Last cut: Position the chain saw as<br />
for the simple fan cut – do not saw<br />
through the hinge!<br />
Special cutting techniques<br />
Plunge-cutting and heartwood cutting<br />
require training and experience.<br />
Plunge-cutting<br />
– for felling leaners<br />
– for relieving cuts during bucking<br />
– for DYI projects<br />
<strong>Chain</strong> <strong>Saw</strong> <strong>Safety</strong> <strong>Manual</strong>
1<br />
N use a low kickback chain and be<br />
especially cautious<br />
1. Begin the cut by applying the lower<br />
portion of the guide bar nose – do<br />
not use the upper portion – risk of<br />
kickback! Cut until the depth of the<br />
kerf is twice the width of the guide<br />
bar<br />
2. Swing the saw slowly into the<br />
plunge-cutting position – risk of<br />
kickback or pushback!<br />
3. Make the plunge cut very carefully –<br />
danger of pushback!<br />
Heartwood cut<br />
– if the diameter of the trunk exceeds<br />
twice the length of the guide bar<br />
– if a piece of heartwood remains<br />
uncut on large diameter trunks<br />
<strong>Chain</strong> <strong>Saw</strong> <strong>Safety</strong> <strong>Manual</strong><br />
2<br />
3<br />
001BA179 KN<br />
– with trees that are difficult to fell<br />
(oak, beech), to make possible to<br />
maintain the planned direction of fall<br />
more precisely and prevent the<br />
heartwood from splintering<br />
– with soft deciduous trees to relieve<br />
tension in horizontal trunks and<br />
prevent slivers of wood from being<br />
torn out of the trunk<br />
N Make the plunge cut in the felling<br />
notch very carefully – danger of<br />
pushback! – then swing in the<br />
direction of the arrow<br />
Limbing<br />
Limbing may only be carried by persons<br />
who have had special training. Persons<br />
who are not experienced chain saw<br />
users should carry out neither felling nor<br />
limbing – risk of accidents!<br />
– use a low-kickback saw chain<br />
– Support the chain saw as much as<br />
possible<br />
– Do not stand on the trunk when<br />
limbing<br />
– Do not cut with the guide bar nose<br />
– Watch out for limbs that are under<br />
tension<br />
– Never cut several limbs at once<br />
<strong>Saw</strong>ing thin wood<br />
English<br />
– Use a sturdy, stable fixture –<br />
sawhorse<br />
– Do not hold the wood in place with<br />
your foot<br />
– Other persons must neither be<br />
allowed to hold the wood nor help in<br />
any other way<br />
Lying or standing logs under tension<br />
Always make the cuts in the correct<br />
order (first <strong>com</strong>pression side (1), then<br />
tension side (2), otherwise the chain<br />
saw may pinch or kick back – risk of<br />
injury!<br />
N Make relieving cut in the<br />
<strong>com</strong>pression side (1)<br />
N Make bucking cut in the tension<br />
side (2)<br />
1<br />
2<br />
2<br />
1<br />
001BA151 KN<br />
001BA152 KN<br />
11
English<br />
If the bucking cut is made from the<br />
bottom upwards (underbuck) – risk of<br />
pushback!<br />
Ripping<br />
<strong>Saw</strong>ing technique without use of the<br />
spiked bumper – risk of pull-in – position<br />
the guidebar at as shallow an angle as<br />
possible – be especially careful –<br />
increased risk of kickback!<br />
Vibrations<br />
Prolonged use of the power tool may<br />
result in vibration-induced circulation<br />
problems in the hands ("white finger<br />
disease").<br />
12<br />
Lying logs must not touch the<br />
ground at the point where the cut<br />
is made – otherwise the chain will<br />
be damaged.<br />
001BA189 KN<br />
No general re<strong>com</strong>mendation can be<br />
given for the length of usage because it<br />
depends on several factors.<br />
The period of usage is prolonged by:<br />
– Hand protection (wearing warm<br />
gloves)<br />
– Work breaks<br />
The period of usage is shortened by:<br />
– Any personal tendency to suffer<br />
from poor circulation (symptoms:<br />
frequently cold fingers, tingling<br />
sensation)<br />
– Low outside temperatures<br />
– Amount of gripping force (holding<br />
the power tool tightly restricts<br />
circulation)<br />
Users who use the machine periodically<br />
or for long periods or users who<br />
repeatedly experience corresponding<br />
symptoms (e.g., tingling sensation in<br />
fingers), should undergo a medical<br />
examination.<br />
Maintenance and repairs<br />
The machine must be serviced regularly.<br />
Do not attempt any maintenance or<br />
repair work not described in the<br />
Instruction <strong>Manual</strong>. All other work should<br />
be carried out by a servicing dealer.<br />
<strong>STIHL</strong> re<strong>com</strong>mends that maintenance<br />
and repair work be carried out only by<br />
authorized <strong>STIHL</strong> dealers. <strong>STIHL</strong><br />
dealers receive regular training and are<br />
supplied with technical information.<br />
Use only high-quality replacement parts,<br />
in order to avoid the risk of accidents or<br />
damage to the machine. Contact a<br />
dealer if in doubt.<br />
<strong>STIHL</strong> re<strong>com</strong>mends the use of genuine<br />
<strong>STIHL</strong> spare parts. Such parts have<br />
been optimized for the machine and the<br />
user's requirements.<br />
Before starting any maintenance or<br />
repair work and before cleaning the<br />
machine, always stop the engine and<br />
disconnect the spark plug boot – risk<br />
of injury if the engine starts up<br />
inadvertently! – Exception: adjustment<br />
of carburetor and idle speed.<br />
To reduce the risk of fire due to ignition<br />
outside the cylinder, move the slide<br />
control / stop switch to STOP or 0 before<br />
turning the engine over on the starter<br />
with the spark plug boot removed or the<br />
spark plug unscrewed.<br />
Do not service or store the machine near<br />
a naked light - risk of fire due to the fuel.<br />
Check fuel cap regularly for tightness.<br />
Use only spark plugs that are in perfect<br />
condition and have been approved by<br />
<strong>STIHL</strong> – see Specifications.<br />
Inspect ignition lead (insulation in good<br />
condition, secure connection).<br />
Check that the muffler is in perfect<br />
working condition.<br />
Do not use the machine if the muffler is<br />
damaged or missing – risk of fire! –<br />
Hearing damage!<br />
Never touch a hot muffler – risk of<br />
burns!<br />
The condition of the antivibration<br />
elements influences vibration behavior –<br />
inspect antivibration elements<br />
periodically.<br />
Inspect chain catcher – replace if<br />
damaged.<br />
<strong>Chain</strong> <strong>Saw</strong> <strong>Safety</strong> <strong>Manual</strong>
Switch off engine<br />
– to check the chain tension<br />
– to retension the chain<br />
– to change chains<br />
– for remedying malfunctions<br />
Observe sharpening instructions –<br />
for safe and proper handling, always<br />
keep the chain and guide bar in flawless<br />
condition. Keep the chain properly<br />
sharpened, tensioned and well<br />
lubricated.<br />
Change chain, guide bar and chain<br />
sprocket in due time.<br />
Check that the clutch drum is in perfect<br />
working condition.<br />
Always store fuel and chain lubricant<br />
only in the specified type of containers<br />
and ensure they are correctly labeled.<br />
Avoid direct skin contact with gasoline.<br />
Do not inhale gasoline vapors – danger<br />
to health!<br />
In the event of a chain brake<br />
malfunction, switch off the machine<br />
immediately – risk of injury! Consult a<br />
dealer – do not use the machine until the<br />
malfunction has been remedied, see<br />
"chain brake".<br />
<strong>Chain</strong> <strong>Saw</strong> <strong>Safety</strong> <strong>Manual</strong><br />
English<br />
13
English<br />
Maintenance and Care<br />
The following maintenance intervals apply for normal operating conditions only. If your daily working<br />
time is longer or operating conditions are difficult (very dusty work area, resin-rich wood, tropical<br />
wood, etc.), shorten the specified intervals accordingly. If you only use the saw occasionally, extend<br />
the intervals accordingly.<br />
Visual inspection (condition, leaks) X X<br />
Complete machine<br />
Clean X<br />
Throttle trigger, trigger interlock, choke lever, stop<br />
switch, Master Control lever (depending on<br />
version)<br />
Check operation X X<br />
<strong>Chain</strong> brake<br />
14<br />
before starting work<br />
Check operation X X<br />
Have checked by dealer1) X<br />
Check X<br />
Pickup body/filter in fuel tank<br />
Clean, replace filter element X X<br />
Replace X X X<br />
Fuel tank Clean X<br />
<strong>Chain</strong> oil tank Clean X<br />
<strong>Chain</strong> Lubrication Check X<br />
<strong>Saw</strong> chain<br />
Inspect, also check sharpness X X<br />
Check chain tension X X<br />
Sharpen X<br />
Check (wear, damage) X<br />
Guide bar<br />
Clean and turn over X<br />
Deburr X<br />
Replace X X<br />
<strong>Chain</strong> sprocket Check X<br />
Air filter<br />
Anti-vibration elements<br />
Clean X X<br />
Replace X<br />
Check<br />
Have replaced by dealer<br />
X X<br />
1)<br />
after finishing work or daily<br />
after each refueling stop<br />
weekly<br />
monthly<br />
every 12 months<br />
if problem<br />
if damaged<br />
X<br />
if required<br />
<strong>Chain</strong> <strong>Saw</strong> <strong>Safety</strong> <strong>Manual</strong>
The following maintenance intervals apply for normal operating conditions only. If your daily working<br />
time is longer or operating conditions are difficult (very dusty work area, resin-rich wood, tropical<br />
wood, etc.), shorten the specified intervals accordingly. If you only use the saw occasionally, extend<br />
the intervals accordingly.<br />
Cooling inlets Clean X<br />
Cylinder fins Clean X X<br />
Carburetor<br />
<strong>Chain</strong> <strong>Saw</strong> <strong>Safety</strong> <strong>Manual</strong><br />
English<br />
Check idle adjustment – chain must not rotate X X<br />
Adjusting Idle Speed X<br />
Readjust electrode gap X<br />
Spark plug<br />
All accessible screws and nuts (not adjusting<br />
screws)<br />
Replace after 100 hours of operation<br />
2) Retighten X<br />
Spark arresting screen in muffler (not all markets) Check1) X<br />
Clean, replace if necessary 1) X<br />
Check X<br />
<strong>Chain</strong> catcher<br />
Replace X<br />
<strong>Safety</strong> labels Replace X<br />
1) <strong>STIHL</strong> re<strong>com</strong>mends a <strong>STIHL</strong> servicing dealer.<br />
2)<br />
Firmly tighten down the cylinder base screws of professional saws (3.4 kW or more) after 10 to 20 hours of operation.<br />
before starting work<br />
after finishing work or daily<br />
after each refueling stop<br />
weekly<br />
monthly<br />
every 12 months<br />
if problem<br />
if damaged<br />
if required<br />
15
English<br />
Main Parts<br />
16<br />
7<br />
8<br />
13<br />
14<br />
1<br />
17 18<br />
#<br />
16<br />
15<br />
2<br />
3<br />
19<br />
4<br />
7<br />
20<br />
21<br />
6<br />
22<br />
5<br />
8<br />
23<br />
9<br />
24<br />
26<br />
25<br />
10<br />
11<br />
12<br />
533BA015 KN<br />
1 Shroud lock<br />
2 Carburetor adjusting screws<br />
3 Fuel pump (easy start 1) )<br />
4 Shutter (summer / winter operation,<br />
MS 211 only)<br />
5 <strong>Chain</strong> brake<br />
6 <strong>Chain</strong> sprocket<br />
7 <strong>Chain</strong> sprocket cover<br />
8 <strong>Chain</strong> catcher<br />
9 <strong>Chain</strong> tensioner (side)<br />
10 Bumper spike<br />
11 Guide bar<br />
12 Oilmatic saw chain<br />
13 Adjusting wheel (quick chain<br />
tensioner)<br />
14 Handle of wingnut 1) (quick chain<br />
tensioner)<br />
15 Oil filler cap<br />
16 Muffler<br />
17 Front hand guard<br />
18 Front handle (handlebar)<br />
19 Spark plug boot<br />
20 Starter grip<br />
21 Fuel filler cap<br />
22 Master Control lever<br />
23 Throttle trigger<br />
24 Throttle trigger interlock<br />
25 Rear handle<br />
26 Rear hand guard<br />
# Serial number<br />
1) Depending on model<br />
<strong>Chain</strong> <strong>Saw</strong> <strong>Safety</strong> <strong>Manual</strong>
0457-184-0121<br />
englisch<br />
G<br />
www.stihl.<strong>com</strong><br />
*04571840121*<br />
0457-184-0121


