Create successful ePaper yourself
Turn your PDF publications into a flip-book with our unique Google optimized e-Paper software.
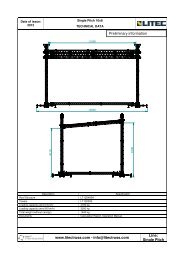
copyright © ROBERT JULIAT 2007 copyright © ROBERT JULIAT 2007
615As soon as the first menu option is displayed, you can access sequentially and cyclically allother options, simply by pressing + and - keys.Pressing the EXIT key will allow reaccess to the "root" display (rJxxx). Pressing SELECT thenallows access to the displayed function.When one function of the menu is selected, the keys have the following significance:- + and - keys allow you to change the displayed level upwards or downwards.- Pressing EXIT for one second allows you to return to the same item in the menu.- The SELECT key allows the user, for certain functions, to modify the selected item;for example - to choose a channel between 1 and 6.- Combining EXIT and - allows you to reset the parameters.- Combining EXIT and + allows you to display the channel number.(Please refer to the following text for further detail.)Note: For comfort of utilization, some fonctions are delayed: initial entry into the menu, exit from any function withthe EXIT key, and the parameter reset.3.2 OPTIONS MENU3.2.1 CHANNEL OPTIONThe menu "Circ" represents the option channel, which allows the user to select the digitalassignment of the first channel. Once selected, the dimming unit recognizes which informationcoming from a lightboard will be considered for the first channel, as well as the following ones.For example, if the number chosen for the first channel is 126, the six channels in the dimmingunit will be assigned the following numbers in sequence : 126, 127, 128, 129, 130, 131.To change the number of the first channel, the syntax is as follows:When "Circ" displays (the first item in the menu), press the SELECT key. The display shows d1(for the first channel), followed by the channel number selected for the firstchannel (1, 2 or 3 digits). Keys + or - allow modification, up or down, of the number of thefirst channel. The modification proceeds step by step, by successively pressing the keys + or -,or by continuous pressure of either. In using continuous pressure, the digit changes slowly tobegin with, then increases in rapidity. You can also combine the two techniques to obtain thedesired number quickly. The values follow each other in a cyclical manner ; #1 preceded by thelargest channel number assignable - 512 in DMX, 256 in AVAB - which in turn is followed by#1. With the patch on, each channel can be set independently.Once the number of the first channel is chosen, you may press EXIT to go back to the Menu.Note: The channel numbers above DATA size (>256 AVAB, >512 DMX) will not be decoded by the unit.Les pas DMX /DMX steps6465666768697071727374757677787980818283848586878889909192939495Décimal (%)2525252626272727282829292930303031313232323333343434353536363637Héxadecimal404142434445464748494A4b4C4d4E4F505152535455565758595A5b5C5d5E5FLes pas DMX /DMX steps96979899100101102103104105106107108109110111112113114115116117118119120121122123124125126127Décimal (%)3738383839394040404141414242434343444445454546464747474848494949Héxadecimal606162636465666768696A6b6C6d6E6F707172737475767778797A7b7C7d7E7Fcopyright © ROBERT JULIAT 2009copyright © ROBERT JULIAT 2009
147Les pas DMX /DMX steps012345678910111213141516171819202122232425262728293031Décimal (%)00011122333445556677788999101010111112Héxadecimal000102030405060708090A0b0C0d0E0F101112131415161718191A1b1C1d1E1FLes pas DMX /DMX steps3233343536373839404142434445464748495051525354555657585960616263Décimal (%)1212131314141415151616161717181818191920202021212122222323232424Héxadecimal202122232425262728292A2b2C2d2E2F303132333435363738393A3b3C3d3E3F3.2.2 CURVES OPTIONThis option, symbolized by "Courb" (Curves) in the menu, makes possible the assignment of anincoming/outcoming curve to each channel. To do this, the followingsyntax is used :Press the SELECT key. The display will show "C1" (for the first channel), followed byone of the following symbols:- linL : Linear Light curve.- lint : Linear Voltage curve.- FLU : Fluorescence curve.- rEL : Static Relay.Pressing + and - will cyclically display the five curves. When the desired curve is selected,press SELECT to access the next channel. After the last channel (C6), C1 reappears. It is alwayspossible to return to the menu by pressing EXIT (for one or more seconds).In assigning a curve, keys + and - must be pressed step by step.Once a channel is assigned a curve which is not the default Linear Light curve, the small reddot on the second of five displays begins to blink. Otherwise, if all the curves are the LinearLight type, the blinking dot is extinguished. This function is called CURVES ACTIVE.It is always visible on the menu.3.2.3 LOCAL OPTIONThis option, symbolized by "LOCAL" on the menu, makes assignment of local level ordersbetween 0% and 100% to each channel possible. Press SELECT to access this function. Thedisplay changes to "L1" (for the first channel) followed by "=" and the local channel level, whichwill be "0" for 0%, "xx" for an intermediate level and "FF" for 100%.The local level of the channel selected can be modified by using the + and - keys. At 100%(FF), the + key will not modify the local level ; similarly, at 0% the - key is no longer active.Either key can be pressed step by step, or continuously.The level orders which are incoming from the lightboard are between 0 and 255. The samedisplay (10% for example) can correspond to different levels (here, 26, 27 or 28).Thus, individual pressing of the + and - keys, while always inducing a modification of the levelorder, does not necessarily modify the level displayed.copyright © ROBERT JULIAT 2009copyright © ROBERT JULIAT 2009
813The "=" sign is blinking while the local channel level is below external levels of the samechannel. As soon as the local level equals the highest external level (digital or analog), the "="sign stays lit continuously.Once the desired level is set, press SELECT to access the next channel adjustment. After the lastchannel (C6) is set, C1 appears again. You may always return to the menu by pressing EXIT.Once a local level is greater than 0, the small red light over the last of the five displays willbegin blinking. If, however, all local levels equal 0, this red light extinguishes. This displayfunction is called "ACTIVE LOCAL". It is visible on the root, in the menu, and during all otheroptions.3.2.4 LIMIT OPTIONThe option “Limit” allows the setting of a maximum output value for each channel. A channelat 100% is not modified, a channel limited at 0% will have no output value, whatever the ordersent to it.For intermediary values, the limit level chosen will apply to the order received. For instance,a channel limited at 80% dimmed down at 50% will have an output value of 40% (50/100 x80/100).Press SELECT and the display shows "li 1 FF" which means that channel 1 is at 100% (FF forfull).The "+" and "-" keys enable to change the limit value from 100% to 0%. "SELECT" gives accessto the channels C1 to C6 (after C6, back to C1) and also to the set up.You may always return to the menu by pressing EXIT. If at least 1 limit value is different fromFF (Full), the small red dot over the fourth display starts blinking. This feature is called ACTIVELIMITATION and can be found in the various menus.3.2.5 STAGE OPTIONThe option symbolized by "Stage" allows viewing of order levels for each channel.Press SELECT, and the display shows "P1" for the first channel, followed by two digits whichrepresent the highest external order (digital or analog). After a brief moment, the displaychanges automatically and indicates the local order level. To differentiate between the externaland local order levels, the external order (coming from a lightboard) appears as a "P" andthe local order as an "L" with the "=" sign. As long as no keys are pressed, the display flashesalternately between external (P) and local level (L).SELECT allows access to channels C1 to C6. After C6, C1 returns, and the search for levelsproceeds again. EXIT allows return to the menu at any time.3.2.6 TEST OPTIONThe option, represented by "tESt" on the menu, allows assignment of local levels which arepreset at 50% for each channel. During the test, this level replaces the existing local level. Thelight output will of course follow the curve of the channel being tested.The SELECT key allows access to the test function. The display indicates "t1" for thefirst channel, "=" for local levels, and "50" for the percent. The 50% local test level actuallybecomes the commanding level if it is higher than external levels for the same channel.PIN12345CABLAGE ANALOG 0/+10V.0/+10. ANALOG WIRING1 à / to 6 : Ch8 + 9 : 0V.7 : Non utilisé /Not usedAPPENDIXCABLAGE DATA XLR 5 /XLR 5 DATA WIRINGDMX 5120vData -Data +--AVAB0vData -Data +--copyright © ROBERT JULIAT 2009copyright © ROBERT JULIAT 2009
1293.3.3 Hardware ResetThe hardware reset is obtained by pressing the RESET key. It governs the immediate restartfunction of the DIGI 6 without changing the parameters and channels’ levels in the unit.3.4 CHANNEL NUMBER DISPLAYThe six channels are always indicated in every option by the numbers 1 to 6. If you want toremember which number is assigned to which channel, press the SELECT and "+" keyssimultaneously. While pressing the two keys, you will see the Channel Data Number. Afterrelease of the keys, the display returns to its previous condition.The Channel Number Display function is active in the Curves (Courb), Limit, Local, Test andStage options.When SELECT is pressed a second time, the second channel is tested, and the first channelreturns to its original level. As with all other options, the display returns to channel 1 afterchannel 6. At any time, pressing EXIT allows you to return to the menu, and all local levelsreturn to their previously set levels.3.2.7 PREFERENCES OPTIONThis option allows you to configure several hard/soft parameters. Once a parameter changesfrom its default value, the 5th LCD dot begins to blink.PreferencsSoft start :Patch :Booster :Smoothing :Display :Analog :DisplayStPbFnAnDefaultOnOffOffOnDecimal0/10v3.2.7.1. Soft startThis option will prevent potential problems created by peaks of current (generated when awhole rig is turned on for instance).3.2.7.2. PatchWith this function, each channel number can be set independently.3.2.7.3 BoosterThe BOOSTER function provides a very reliable wiring; each mobile unit is provided with acircuit for reamplifying the digital signal, in order to preserve the signal quality. The function isimplemented in hardware for the mobile units (it is not necessary for units in cabinets).Press "+" or "-" to disable (and re-enable) the booster. The default value is Booster OFF.Note: When the units are turned off, the BOOSTER function is automatically by-passed.copyright © ROBERT JULIAT 2009copyright © ROBERT JULIAT 2009
10113.2.7.4 SmoothingThis function was added to perform a better light control by increasing the digital input commandresolution from 256 steps to 7500 steps.3.2.7.5 Number of stepsThis function allows you to choose the input level display base: DECimal (100 steps) orHExaDecimal (256 steps). Which is very useful for checking the digital transmission duringservice operations.Press "+" and "-" to make your choice. The default value is decimal. If you choose hexadecimal,the 4th LCD dot will blink. The annexe table gives, for the 256 steps of a digital DMX or AVABorder, the decimal and hexadecimal display values.3.2.7.6 Analog input levelThis function allows you to choose the input analog level 0/+10V or 0/+5V for a 0% to 100%order.Press "+" and "-" to make your choice. The default value is decimal. If you choose hexadecimal,the 4th LCD dot will blink.3.2.8 INFORMATION OPTIONThe option "InFO" allows you to know the parameters which are recognized by the DIGI 6.3.2.8.1 ProtocolPress SELECT to see on the first display either the letter "D" or "A", or the sign "-" followed by "Pro",which indicates which protocol has been recognized ; "D" for DMX512 protocol, and "A" forAVAB protocol. The hyphen "-" indicates that no protocol has beenrecognized, or that the series line is missing or of bad quality.Information about the presence and quality of the series link is also given by two redand green LEDs in the middle of the display. They illuminate or extinguish according to theseries status, regardless of which selection has been chosen in the menu.The green DATA LED blinks if a signal is detected on the data line (even parasites). The redDATA LED remains extinguished if the signal respects a known protocol, or if no signal isreceived. The red LED alights if the signal does not respect the DMX512 or AVAB protocols.3.2.8.2 ErrorsThis function specifies the erroneous packet rate for 1000 input packets. The display shows "ER000" for a proper line series.Press EXIT to return to the menu, or press SELECT to have access to the frequency function.3.2.8.3 FrequencyWhile pushing SELECT when series errors are displayed, you have access to the thirdinformation option - the frequency option. The frequency is given in the form xxHx. Here,"H" symbolizes the Hertz frequency unit. The dimmer is not designed to act as a frequencymeter. Thus, the level displayed is merely an indication of power stability. As always, EXIT allowsyou to leave the option ; SELECT allows reaccess to the protocol function.3.3 RESETYou have several reset possibilities, software or hardware. The software resets concern theDIGI 6 parameters; the first channel number, the restitution curves, the local orders and thepreferences.The default levels are 1 for the first channel, Linear Light for the curves, 0% for the local levels,booster (for preferences, see tab in the "Preferences" section). Of course, you are free to modifyany or all of the parameters. The new levels will be saved (on a static RAM) - even when theDIGI 6 is not operating.To put parameters back to their default levels, use the following software reset functions.3.3.1 Full parameter resetThe reset of all parameters (PARAMETER RESET) recharges the default values. To do this, youmust return to the root (rJxxx) by pressing the EXIT key once or twice (wait a moment - thiskey is delayed). Then, press the EXIT and "-" keys simultaneously, for at least one second. Duringyour reset, the message "rESEt" appears on the display, indicating that reset is occuring.After reset, the display returns to "rJ1", and the red light dots remain unlit.3.3.2 Parameter reset by groups.The reset of selected parameters is accomplished by choosing an option, and then pressingthe EXIT and "-" keys simultaneously. In the Circ option, you return to the number of the firstchannel, Number 1. In the curves option (Courb), however, all channels return to linear lightcurve. The reset of local orders can be accomplished in Local, Test, or Stage options. Thepreferences reset is accomplished in Preferences or Information options.The local reset is also delayed by about one second. During the reset, the "rESEt" messageappears on the display, indicating that it is being executed.copyright © ROBERT JULIAT 2009copyright © ROBERT JULIAT 2009