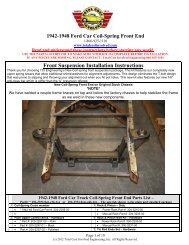
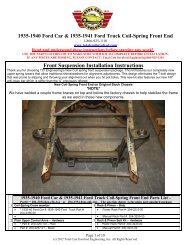
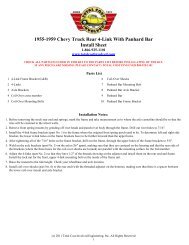
1967-1969 Camaro Rear Torque Arm Install Sheet - Total Cost ...
1967-1969 Camaro Rear Torque Arm Install Sheet - Total Cost ...
1967-1969 Camaro Rear Torque Arm Install Sheet - Total Cost ...
- No tags were found...

You also want an ePaper? Increase the reach of your titles
YUMPU automatically turns print PDFs into web optimized ePapers that Google loves.
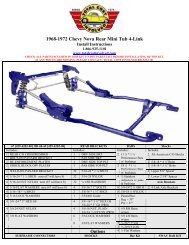
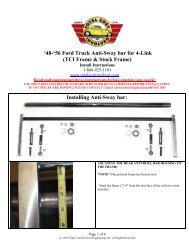
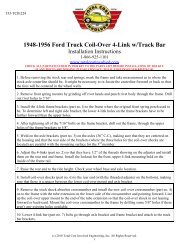
The torque arm tabs are welded on by using thesupplied fixture tool. Bolt fixture to the lowest 2 thirdmember bolts flat against the housing flange. Bolt onthe two supplied tabs using the ½ by 3½ inch bolt andwith the longer tab to the passenger side of thehousing. Bottom of tabs may need sanding to fit.Weld outside and wrap welds also to the inside.Finish welding the axle brackets and the panard barbracket as pictured. If an optional sway bar is beingused the sway bar brackets are located on the frontof the axle tubes at axle centerline on 33 inch centers.The pinion support brackets are installed next. Usingthe furnished fixture tool, using the three 3/8 by 24nuts, bolt the fixture onto the top three studs of thethird member housing with the locating tabs facingforward. Bolt the ¼ inch laser cut brackets to theoutside of the fixture tool using the two ½ inch boltswith the wider bracket on the passenger side and theshorter bracket on the driver side. Note; Some fittingmay be required to get the bracket flush with the topof the third member. The distance between the 2brackets should be 6.45 inches after welding. Becauseof the distortion from welding the housing will needto be straightened at this time.