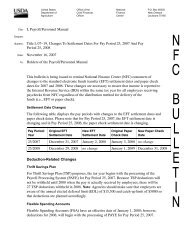
STARWEB Training Manual - National Finance Center
STARWEB Training Manual - National Finance Center
STARWEB Training Manual - National Finance Center

Create successful ePaper yourself
Turn your PDF publications into a flip-book with our unique Google optimized e-Paper software.
Access to the Internet with an Internet Explorer browser of 6.0 or higher or a Netscape Navigator browserof 6.2.3. Printer capable of printing Web pages. An NFC User ID with access to STAR 4.25.For more information please see Title 1, Chapter 7, Section 5.Regulations/Resources/ContactsIn order to fully understand STAR 4.25, users should familiarize themselves with the following:NFC EXTERNAL PROCEDURESTITLE I, PAYROLL/PERSONNEL MANUALCHAPTER 7, TIME AND ATTENDANCE PROCEDURESSECTION 5, SYSTEM FOR TIME AND ATTENDANCE REPORTING (STAR 4.25 WEB-BASEDVERSION)If you need a copy of the procedure, go to www.nfc.usda.gov and click the Pubs & Forms icon.For training, security issues, or assistance with the system, please contact Customer Support personnel at504-255-5230 .STAR 4.25 UsersThe local Agency Security Officer requests access for STAR 4.25 users by either sending an e-mail to theInformation Systems Security Officer (ISSO) or by sending a fax which contains the Security Officer’ssignature. Roles are assigned in STAR 4.25 based upon the Security Officer’s Request. Note: The requestshould identify the contact point(s) that the user will have access to.The available roles are as follows:Timekeeper: Performs T&A functions and establishes, maintains, and prints employee data.Transmitter: Establishes Job Control Language (JCL) and transmits T&As to NFC.Application Administrator: Establishes T&A contact points and assigns T&A contact point to users. Theagency must designate an individual(s) to serve in this role. This role is responsible for safeguarding STAR4.25 at the agency location, provide guidance to users, and act as a liaison between STAR 4.25 users andNFC for STAR 4.25 matters.NFC Administrator: The NFC Administrator role is limited to NFC personnel. It is an NFC only role. TheNFC Administrator maintains and updates the STAR 4.25 Transaction Codes (TC), leave type,and payperiod tables at NFC. The NFC Administrator updates the STAR 4.25 TC and leave tables only when therehas been an update to the TCs (and the TC Descriptors) and/or leave types in Table Management System(TMGT) Table 032, Transaction Codes.2
Logging On To STAR 4.25STAR 4.25 Logon Page1. Logon to the Internet.2. Connect to the NFC home page at www.nfc.usda.gov.3. Double-click the STAR 4.25 icon. The STAR 4.25 Logon page is displayed.STAR 4.25 Logon page4. On the Logon page complete the fields as follows:User ID - Type your NFC Mainframe user ID.Password - Type your NFC Mainframe password.5. Click [Logon] to log onto STAR 4.25.Click [Reset] to clear the fields.Change Password Pop-upOR1. On the STAR 4.25 Logon page, select [Change Password]. The Change Password pop-upappears.3
Change Password pop-up2. On the Change Password pop-up, complete the fields as follows:New Password - Type your new NFC Mainframe password. A password change will be requireddue to either expiration of the old password or any valid security issue.Verify New Password - Verify your new NFC Mainframe password by typing the samepassword that you typed in the New Password field.3. Click [Logon].Drop-down MenusSTAR 4.25 operates with various drop-down menus depending on the window you are currentlyworking in and/or the function you are performing. The first drop-down menu displayed is theSelect An Action drop-down menu. STAR 4.25 drop-down menus are displayed below:Select An Action drop-down menu (for the Contact Point List)To use the Select An Action (for the Contact Point List) drop-down menu:1. On the Contact Point List window, click the down arrow. The Select An Action drop-downmenu (for the Contact Point list) is displayed.2. Select from the following actions on the menu:Add Contact Point. The Add Contact Pointl option is used add contacts for a timekeeper. Thisfunction is performed by the Administrator. The Contact Point tab is displayed when you selectthis option.Change Database. The Change Database option displays the Select A Database drop downmenu if a timekeeper has access to more than one database. From this menu, a timekeeper canchange the database that he/she is working in.4
Clear All. The Clear All option deselects any contact points that were selected on the ContactPoint List. You do not need to have all contact points selected to use this option.Contact Point/JCL Detail. The Contact Point Detail/JCL Detail option is used to display theContact Point JCL (Job Control Language) and the Contact Point tabs. You can modify the JCL orcontact point information using this option.Contact Point List. The Contact Point List option is a list of contact points available tothat timekeeper within a database. The Contact Point List also indicates whether or not aJob Control Language (JCL) has been established for that contact point.Copy JCL. The Copy JCL option is used to copy JCL from one contact point to another contactpoint(s). This option is used in conjunction with the Paste JCL option. This function is used by theApplication Administrator only.Delete Contact Point. The Delete Contact Point option is used to delete contact point(s) froma timekeeper’s contact point list.Leave Error Report. The Leave Error Report option is used to access the leave error reportfor the contact point for which you are currently processing T&As.Paste JCL. The Paste JCL option is used to paste a copied JCL from one contact point toanother contact point(s). This option is used in conjunction with the Copy JCL option. Thisfunction is used by the Application Administrator only.Select All. The Select All option selects all contact points a timekeeper has access to. Thisoption can be used even if one (or multiple) contact point(s) is already selected.Transmission Results. The Transmission Results option is used to check the status oftransmitted T&As.3. After selecting the applicable option, perform the desired function.To use the Select An Action drop-down (for the Employee List) menu:1. On the Contact Point List window, double-click the applicable contact point. The Select An Action(for the Employee List) drop-down menu is displayed.5
Select An Action (For The Employee List) drop-down menu2. Select from the following options:Add Employee. The Add Employee option is used to add a new employee into STAR 4.25. Thisis used only for employees who have not previously been processed in STAR 4.25 or thePayroll/Personnel database.Add T&A. The Add T&A option is used to add a new T&A for an employee.Change Contact Point. The Change Contact Point option is used to change an employee’scontact point on the Employee Detail.Change Database. The Change Database option is used to change the database and select adifferent database in which to display T&As for.Clear All. The Clear All option is used to clear all name(s) selected on the Employee List.Contact Point Detail. The Contact Point Detail/ option is used to display contact pointinformation for an employee(s).Correct T&A. The Correct T&A option is used to prepare a corrected T&A for employee selectedon the Employee List.Delete Employee. The Delete Employee option is used to delete an employee from theEmployee List. Once a T&A has been prepared for an employee, that employee cannot bedeleted.Delete T&A. The Delete T&A option is used to delete a T&A for an employee. You cannot deletea T&A that has already been transmitted.Filter List. The Filter List option allows the user to perform various options. For more informationon the Filter List option, see To Use The Filter List Drop-Down Menu.6
Import. The Import option is used to import T&A(s) for one or more employees from the NFCPayroll/Personnel database into STAR 4.25.Merge T&A. The Merge T&A option is used to merge a split T&A back into a regular T&A.Move Employees. The Move Employees option is used to move an employee(s) from onecontact point to a different contact point.Pay Period List. The Pay Period List option is used to view a list of available pay period with thecorresponding dates.Print Selected T&As. The Print Selected T&As option is used to print T&As for any name(s)selected on the Employee List.Refresh. The Refresh option closes the open window and displays the Employee List withupdated processed information.Rollover. The Rollover option is used to roll over all of the T&As for a contact point from one payperiod to the next.Select All. The Select All option is used to select all names on the Employee List.Show All T&As. The Show All T&As option displays the current T&A for an employee.Show T&A. The Show T&A option displays the current T&A for an employee.Split T&A. The Split T&A option is used to prepare a split T&A for an employee.Transmit Selected T&As. The Transmit Selected T&As option is used to transmit T&As for anyname(s) selected on the Employee List.The Select A Database drop-down menu is displayed when you select the Change Databaseoption on the Select An Action drop-down (for the Employee List) menu.To use the Select A Database drop-down menu:1. On the Select An Action drop-down (for the Employee List) menu, select Change Database. TheSelect A Database drop-down menu is displayed.2. Select from the applicable database.The Show All T&A’s drop-down menu is displayed when you select Show All T&A’s for anemployee on the Select An Action drop-down (for the Employee List) menu. Theapplicable employee’s T&A List is also displayed with the Show All T&As drop-downmenu.To use the Show All T&As drop-down menu:1. On the Select An Action drop-down (for the Employee List) menu, select Show All T&As for aspecific employee. The Show All T&As drop-down menu along with the applicable T&A List isdisplayed.7
Show all T&As drop-down menuT&A List2. Select from the following options:Change Contact Point. The Change Contact Point option is used to change anemployee’s contact point on the Employee Detail.Clear All. The Clear All option clears any T&A(s) that were previously selected on theT&A List.Refresh. The Refresh option closes the open window and displays the Employee Listwith updated processed information.To use the Filter List drop-down menu:1. On the Select An Action drop-down (for the Employee List) menu, select Filter List. The Filter Listdrop-down menu is displayed.8
Filter List Drop Down Menu2. Select from the following options:All. The All option is used to display all employees on the employee list.Error. The Error option is used to display all T&As on the employee list that are in error status.In Progress. The In Progress option is used to display all T&As on the employee list that arein progress.New. The New option is used to display all new T&As on the employee list.No T&A. The No T&A option is used to display all employees on the employee list that have noT&As.Released. The Released option is used to display all T&As on the employee list that havebeen released to NFC for processing.Transmitted. The Transmitted option is used to display all T&As on the employee list thathave been picked up by NFC and are in transmitted status.Verified. The Verified option is used to display all T&As on the employee list that have beenverified.Submitted. The Submitted option designates that a transmitted T&A has been receivedand is waiting to be edited by TIME.FeedbackYou can comment about STAR 4.25 to NFC via a Feedback link on each STAR 4.25window.To use the Feedback option:1. On any STAR 4.25 window, click the Feedback link. The Feedback pop-up appears.9
Feedback pop-up2. On the Feedback pop-up, complete the fields as indicated.3. Click [Submit].10
STAR 4.25 ButtonsButtonBuildCancelClearClear TACloseDeleteFindGoHelpLessLogonMoreOKPrintResetSaveVerify?STAR 4.25 Command ButtonsDescriptionUsed to build JCL.Used to cancel a function.Used to clear certain fields on the Employee Detail tab.Used to clear all fields on the Bi-Weekly T&A tab.Used to close a pop-up.Used to delete.Used to search for the data entered.Used to perform an action.Used to display window-level help. Pop-ups do not havewindow-level help.Used to take away lines on the T&A.Used to logon onto STAR 4.25.Used to add lines to the T&A.Used to close a window and save data.Used to print the T&A.Used to refresh the fields.Used to save entered data.Used to verify the information entered on the T&A.Used to display field-level help.11
Button...STAR 4.25 Command ButtonsDescriptionUsed to display lists of data.Message Pop-upsThroughout STAR 4.25, message pop-ups appear when certain actions are performed. These pop-upsnotify the user of an action that must be taken and/or an error condition that must be corrected. Commandbuttons are used on these pop-ups. These command buttons accept or cancel the message. You mustclick a command button in order for the pop-up to disappear and to be returned to the active window.Following is an example of a message pop-up.Example of a Message pop-up12
Contact Point MaintenanceThe Contact Point option is used by NFC to identify the source of T&As being sent in for payment. TheAdministrator can establish contact points in STAR 4.25. A contact point added in STAR 4.25 must be inaccordance with the 10-position contact points listed in TMGT, Table 003, T&A Contact Point Name andAddress.To establish/update a contact point in STAR 4.25:1. To establish a new contact point, on the Select An Action drop-down menu, select Add ContactPoint. The Contact Point tab is displayed.ORTo update a contact point, select the applicable contact point on the Select An Actiondrop-down menu.2. Select Contact Point/JCL. The applicable Contact Point Tab is displayed.Contact Point tab3. Complete the fields as follows:Agency - Type the agency code.State Code - Type the state code.13
Town - Type the town code.Unit - Type the unit code.TK Number - Type the timekeeper number.Street 1 - Type the first line of the street address.Street 2 - Type the second line of the street address.City - Type the city.State - Type the state abbreviation.Zip - Type the ZIP+4 code.Phone - Type the phone number in the XXX-XXX-XXXX format.14
Comp Time Rollover - Click this box to roll over your compensatory time. If this box is left blank,the compensatory time balance is zeroed out at the beginning of the leave year. Note: Comp TimeRollover Box wll automatically be checked. If you do not want your compensatory time to roll overclick the box and the checkmark will be deleted.4. Click [Add]. The Contact Point that was added will appear on the contact point list on the left sideof the window.Search For A Contact Point1. Complete the fields below the contact point list as follows:Ag - Type the agency code.St - Type the state code.Tn - Type the town code.Un - Type the unit code.Tk - Type the timekeeper code.15
2. Click [GO]. The applicable contact point(s) is displayed on the contact point list on the left side ofthe window.Move An Employee From One Contact Point To AnotherIf an employee moves from one contact point to another, the application administrator canmove the employee to the new contact point.To move an employee from one contact point to another:1. On the Employee List, select the applicable employee to be moved.2. On the Select An Action (for the Employee List) menu, select Move Employees. The STAR MoveEmployees pop-up appears.3. On the drop down menu, select Move Employees. The STAR Move Employees pop-up appears.STAR Move Employees pop-up4. On the STAR Move Employees pop-up, select the applicable contact point from the list box. Thisis the contact point that you want to move the employee to.ORTo locate the applicable contact point, complete the fields as indicated.5. If you selected a contact point from the list box, click [GO]. The employee is moved.ORIf you completed the fields, click [OK]. The applicable contact point is displayed in the listbox.16
6. After clicking [OK], select the displayed contact point and click [Go]. The employee is moved.Navigating The Contact Point ListIf a timekeeper has access to more than one contact point, a Contact Point List isdisplayed when he/she first logs on to STAR 4.25. The Contact Point List contains a list ofcontact points available to that timekeeper within a database. The Contact Point List alsoindicates whether or not a Job Control Language (JCL) has been established for thatcontact point. From the Contact Point List, the timekeeper can select the applicablecontact point and navigate in STAR 4.25.Note: You can return to the Contact Point List at any time by clicking the Contact PointList Link above the list displayed on the left-hand side of the active window.Contact Point ListTo Use The Contact Point List1. Log on to STAR 4.25. The Contact Point List is displayed with a list of contact points available tothe timekeeper. A corresponding Select An Action drop-down menu is also displayed listing theactions available to the timekeeper.2. On the Select An Action drop-down menu, select the applicable action.ORDouble-click the applicable contact point to display the corresponding Employee List forthat contact point.17
Employee List18
Building JCLThe Building JCL option allows the Transmitter to build JCL. The JCL that is built is displayed in thePreview JCL Deck box.JCL is used when transmitting T&As to NFC for processing. The Contact Point JCL option is usedby the Transmitter to establish or change JCL. JCL must reflect your agency’s specifications totransmit files before data can be transmitted to NFC. All T&As must be submitted with JCL.To Build JCL:1. On the Select An Action (For The Employee List) menu, select Contact Point JCL. The ContactPoint JCL tab is displayed.Contact Point JCL tab2. On the Contact Point JCL tab, complete the fields as follows:Test/Prod - The JCL files can be changed to send transmission files as a test (Test) or can bechanged to send transmission files to production (Prod). If “test” is entered, the cursor moves tothe Remote Id field. If “Prod” is entered the cursor moves to the Job Name Id field.Job Name Id - Type FP for USDA agencies. For Non-USDA agencies, type the 2 charactersassigned to your agency.19
Remote Id - Type your NFC-assigned printer ID.Job Card Comments - Type agency information, as needed, such as telephone number,initials, contact information, etc.JCL Identifier - This field is system generated based upon information entered in the abovefields.3. Click [Build] to display the resulting JCL. JCL is established and appears in the middle portion ofthe window.4. Click [Save].5. If further updates are needed after the JCL is established, make the applicable changes in theJCL Parm box and click [Build] to change the JCL.6. Once all changes have been made, click [Save].Copy JCL To Another Contact PointThis option allows the Transmitter to copy JCL from one contact point to one or more contact point(s).On the Contact Point/JCL Detail tab:1. Select the applicable contact point that contains the JCL to be copied.2. Select Copy JCL. The Copy pop-up appears.3. Click [OK].4. Select Paste JCL. The JCL is copied.20
TablesTables are maintained by the NFC Administrator. Users can access the TC, TC descriptors, and leavetypes tables by clicking the [Select Transaction Code from the list] button on the Bi-Weekly T&A. Thepay period calendar is displayed by selecting the pay period calendar in the upper right-hand corner of anySTAR 4.25 window.Transaction Code (TC) TableThe TC table contains a list of TCs contained in the Payroll/Personnel System. In the event that a new TCis added to the Payroll/Personnel System, the NFC Administrator will add the TC to the table in STAR4.25. TCs cannot be deleted from the TC table, only added or updated.To display the Transaction Code table:1. On the Bi-Weekly T&A tab, click the [Select Transaction Code from the list] button. This buttonis located between the Suffix and Description fields. The TC table is displayed.Transaction Code tableTransaction Code Descriptor TableThe TC descriptor table displays a list of TC descriptors to be used on the Descriptor field in conjunctionwith various TCs for reporting purposes. The Descriptor field is an optional field.To display the Transaction Code Descriptors table:1. On the TC table, select Transaction Code Descriptors from the drop-down menu on theTransaction Code table. The Tables drop-down menu is displayed.21
Tables drop-down menuORClick the Select A Descriptor For This Transaction Code button on the Bi-Weekly T&A tab. This buttonis located between the Accounting and Descriptor fields. The Transaction Code Descriptors table isdisplayed.Transaction Code Descriptors field2. On the Tables drop-down menu, select Transaction Code Descriptors. The Transaction CodeDescriptors table is displayed.Leave Types TableThe Leave Type table contains a list of leave types contained in the Payroll/Personnel System. In theevent that a new leave type TC is added to the Payroll/Personnel System, the NFC Administrator will addthe TC for the leave type to the table in STAR 4.0. TCs for the leave type cannot be deleted from the LeaveType table, only added or updated.To display the Leave Type Table:1. On the TC table, select Leave Types from the drop-down menu on the Transaction Code table.The Tables drop-down menu is displayed.Tables drop-down menuOR22
Click the Select button on the Leave Acct tab. This button is located between the Description and Forwardfields. The Leave Types table is displayed.Leave Type table2. On the Tables drop-down menu, select Leave Types. The Leave Types table is displayed.Pay Period CalendarThe Pay Period calendar displays two pay periods at a time. You can use the scroll bar to search forprevious or subsequent pay periods.Pay Period Calendar23
Importing A T&AThe importing a T&A option allows the timekeeper to retrieve the latest T&A for either an individualemployee or a group of employees from the NFC database.For the first pay period that a timekeeper prepares T&As in STAR 4.25, he/she must import T&Asfrom the Payroll/Personnel database. Once these records are imported into STAR 4.25, thetimekeeper may begin working in STAR 4.25. Unless a timekeeper gains access to anothercontact point or a new employee whose T&A was not previously recorded in STAR 4.25, but wasalready in the Payroll/Personnel database, this is a one time function.Note: If a timekeeper is either adding a new employee or is preparing T&As for employees notpreviously in the Payroll/Personnel database, the Import option does not work. The AddEmployee option must be used for any employee(s) not previously in the NFC Payroll/Personneldatabase:To Import T&A’sIn STAR 4.251. Double click the applicable contact point. The Employee list for this contact point is displayed.Select Import from the Select An Action drop-down menu. The Import pop-up appears.2. On the drop down menu, select Select All to import ALL T&A’s for a contact point.ORSelect the applicable employee from the employee list to import one employee’s T&A.3. On the drop down menu, Select Import. A pop-up appears.Import pop-up4. Click [OK].A pop-up appears acknowledging that the T&A(’s) have been imported. Note: There will not bean imported T&A for a new employee.5. A pop-up appears indicating the number of employees imported.25
Successful Import pop-up6. Click [OK]. The Employee List is displayed. You should proceed to Rollover to begin a new payperiod for the imported T&A(’s).7. Note: When the initial import is completed, only the Annual and Sick leave data will be carriedover. Any other leave data the employee may have will need to be re-entered.26
RolloverThe rollover option allows the timekeeper to create a new pay period for all employee records on theemployee list that were successfully transmitted the previous pay period.A timekeeper has the option of rolling over T&As from one pay period to the next. By doing this, allof the information recorded in STAR 4.25 for a given pay period is brought forward to the next payperiod. When the Rollover option is selected, all T&As (for that contact point) that weresuccessfully processed the previous pay period are marked for roll over.In STAR 4.25:1. Double-click the applicable contact point.2. Select Rollover from the Select An Action drop-down menu.3. A Rollover pop-up appears, asking the timekeeper whether or not you want to roll over from onepay period to another. The dates of the applicable pay periods are displayed with the question.Rollover pop-up4. On the Rollover pop-up, click [OK]. A message appears indicating the number of T&A’ssuccessfully rolled over.T&As Successfully Rolled Over pop-up27
5. Click [OK] to accept the message and return to the Employee List for the new pay period..Employee List28
Contact Point ListThe Contact Point List option displays a list of contact points available to a specific timekeeper.Select Applicable Contact Point1. Log on to STAR 4.25. Double-click the applicable contact point record on the Contact Point List.Note: If the timekeeper has access to more than one contact point, the Contact Point List isdisplayed.Contact Point ListSearch Contact Point ListYou can search for a contact point record on the Contact Point List.1. Complete the fields as follows:Ag – Type the agency code.29
St – Type the state code.Tn - Type the town code.Un – Type the agency-assigned number that identifies the unit. The unit code identifies eachcontact point location within a town.Tk - Type the agency assigned number that identifies the timekeeper.2. Click [GO]. A list of contact points meeting the search criteria is displayed.3. Select the desired contact point and proceed with a drop down menu item selection.30
Employee ListThe Employee List option displays a list of all employees for the selected contact point.Employee List31
T&A PreparationThere are several options available from the Bi-Weekly T&A tab, T&A Header tab, Leave Acct tab and theEmployee Detail tab. Following is a list of available options depending on what tab you are working in: [Employee Detail] – This option allows you to view or update the Employee Detail record. If informationis modified, click [Save]. [T&A Header] –This option allows you to view or update information on the T&A Header tab. Ifinformation is modified, click [Save]. [Leave Acct] – This option allows you to view, add, or update information on the Leave Acct. Completethe applicable fields and click [Save]. [Save] – This option is used to save each line on the T&A. [Verify] – After the T&A is completed, verify the T&A to determine if any errors exist. [Print] - This option allows you to print all T&A’s from the Bi-Weekly T&A. See the Printing Reportsfeature for printing instructions. [Clear T&A] - This option is used to clear all information on the T&A. [Clear]- This option is used to clear certain fields on the Employee Detail tab.33
Add An Employee RecordNew Employees may be added in STAR 4.25 when a timekeeper obtains a new employee at an agency oran employee who was not previously in NFC’s Payroll/Personnel database. Note: If a timekeeper obtainsan employee who was previously in NFC’s Payroll/Personnel database, an Import may be done for thatemployee if the employee is with the same agency. An employee’s detail record may also be updatedusing this option.1. Double-click the contact point.2. On the Select An Action (for the Employee List) drop down menu, select Add Employee to add anew employee.ORDouble-click the applicable employee on the Employee List to update an employeerecord. The employee detail tab is displayed.Employee Detail tab3. Complete the fields as follows:SSN - Type the employee’s 9-digit SSN. Note: No spaces, dashes, etc.Last Name - Type the employee’s last name.First Name - Type the employee’s first name.35
Middle Name - Type the employee’s middle name.Work Schedule - Click the down arrow to select the employee’s work schedule. (Defaults to FullTime)Full Time – Full time employees – Tour of duty is 80 hours.Part Time – Part Time Employee – If Part Time Employee is selected, then the tour of dutycannot exceed 79.75 hours.Intermittent – Intermittent employees – If intermittent is selected, then day limitation must bechecked.Intermittent 6 – An Intermittent employee who substitutes for a Full-Time employee.Ist 40 Hours – The first 40 hours of work performed in a week defines the tour of duty for thatparticular week.Pay Plan - Click the down arrow to select the employee’s pay plan.General Schedule – General Schedule Pay Plan (e.g., GS, GW, GH, GM, etc.)Wage Grade – Federal Wage System Pay Plan (e.g., WG, WL, WS, etc.)Other – All other types of employee pay plans (e.g., ED, AD, YV, ES, EX, etc.)Special Type – Click the down arrow to select the employee’s special employment type code.Collaborators – Record Overtime Hours OnlyFire Chief – Bi-Weekly Duty Hours Greater than 8036
Fire Fighter – Bi-Weekly Duty Hours Greater than 80Other -Tour of Duty - Type the number of hours in the employee’s tour of duty. Type the number of hoursin the first 7 positions, and if fractions are necessary, type a “.” and the fraction in the last 2positions. (This field defaults to 80.00 hours) If Work Schedule is Part Time, than tour of dutycannot exceed 79.75 hours..25 = ¼ hour.50 = ½ hour.75 = ¾ hour1.00 = 1 hourDay Limitation - Click this field if the employee’s tour of duty has a day limitation. This fielddefaults to blank.Annual Leave Category – Click the down arrow to select the employee’s annual leave category.(This field defaults to 4)Sick Leave Category – Click the down arrow to select the employee’s sick leave category.(This field defaults to 4)37
4. Click [Add] to add the changes. The employee is added to that contact point. The EmployeeDetail Tab is displayed.Employee Detail Tab5. Click [Save] to save the changes. The Bi-Weekly T&A Tab is displayed.Bi-W eekly T&A Tab38
Exercise 1New EmployeeEmployee Detail tab1. SSN 111-1 1-XXXX2. LAST NAME Newbee3. FIRST NAME Jane4. MIDDLE (Leave Blank)5. WORK SCHEDULE Full Time6. PAY PLAN GS7. SPECIAL TYPE (Leave Blank)8. TOUR OF DUTY 80.009. DAY LIMITATION (Leave Blank)39
Exercise 2New EmployeeEmployee Detail tab1. SSN 222-22-XXXX2. LAST NAME Doe3. FIRST NAME Jane4. MIDDLE (Leave Blank)5. WORK SCHEDULE Full Time6. PAY PLAN GS7. SPECIAL TYPE (Leave Blank)8. TOUR OF DUTY 80.009. DAY LIMITATION (Leave Blank)41
Update And DeleteUpdate An Employee RecordEmployee records are updated on the employee’s employee detail tab.1. Double-click the desired employee.2. Make the applicable changes.3. Click Save. The applicable changes are saved.Delete An Employee RecordFrom the Employee List:1. Select the applicable employee.2. On the drop-down menu, select Delete Employee. A pop-up appears.3. Click OK. The employee is deleted.Note: An employee can only be deleted if there are no T&As for that employee. Once a T&A isprepared for an employee, the employee can no longer be deleted from the Employee List. Adeletion restriction pop-up will appear if you attempt to delete an employee once the T&A processhas begun.43
Maintain A Header RecordThis option allows you to maintain information on an employee. The employee’s header record containsinformation regarding the employee’s work schedule, advance leave status, standby/administrativelyuncontrollable overtime (AUO)/ availability status, whether the T&A is for a new employee or a final T&Afor an employee, and remarks by the timekeeper.1. Double-click the applicable T&A contact point from the Contact Point List. The Employee List isdisplayed.2. On the Employee List, double-click the applicable employee. The Bi-Weekly T&A tab isdisplayed.ORSelect the applicable employee from the employee list.3. On the drop down menu, select Add T&A. The Bi-Weekly T&A tab is displayed.Bi-W eekly T&A tab4. Click [T&A Header] tab. The T&A Header tab is displayed.45
T&A Header tabThe T&A Header tab contains all of the employee’s T&A Header information for the pay period.There is certain information on the T&A Header that is system generated based on previouslyentered information. These fields are as follows:Pay PeriodBegin DateStatusCorrected/RecordSplit/Part5. Complete the fields as follows:New Employee - Click this field only if the employee is a new employee.Accrue Leave – Click this box if the employee is eligible to accrue leave. Note: This field is onlyused for a new employee or a final T&A.Begin Day – Click the down arrow to select the beginning day of the pay period for the employeeif the employee is new, or designate starting day for a Split T&A.46
Date – System generated based on the Begin Day selected.End Day – Click the down arrow to select the ending day of the pay period for the employee.This field is only used when completing a final T&A for an employee, or designate ending day for asplit T&A.Date – System generated based on the End Day selected.Final T&A – Click the down arrow to indicate if this is the final T&A for an employee. Only to beused if the “End Day” is completed.AWS – Click the down arrow to select an alternate work schedule (AWS) option. This fielddefaults to “Normal Schedule”.Days Worked - Click the down arrow to select the number of days worked by employee. Validvalues are 00-14. This should only be used for employees who are under day limitationappointments.47
Advance Leave – Click the down arrow to select the type of advanced leave that an employeehas been granted.Wage Shift FEGLI – Click the down arrow if the employee is eligible for Federal EmployeesGroup Life Insurance (FEGLI) wage shift. If the employee is coded as General Scheduleemployee, the valid values are:If the employee is coded as Wage Grade employee the valid values are:Standby/AUO/Avail Pay - This group of fields is used when the employee is eligible forstandby/AUO hours.48
Flag – Click this field if the employee is eligible for standby/AUO hours. These are hours and paydifferential entitlements for employees who receive premium pay on an annual basis foradministratively uncontrollable overtime or regularly scheduled standby duty. The default is blank.First (lst) Week – Type the number of standby/AUO hours (2 positions) authorized for the firstweek of the pay period. Only fill in this block if the “Flag” is checked.Second (2nd) Week – Type the number of standby/AUO hours (2 positions) authorized for thesecond week of the pay period. Only complete this block if the “Flag” and “First Week” fields arecompleted.Percent (%) Premium – Click the down arrow to display the percentage of pay differentialentitlements that will be used to compute the employee’s pay for Standby/AUO worked. Validvalues are 02, 05, 07, 10, 12, 15, 17, 20, 22, 25, or 99. Only fill in this block if the “Flag”, “FirstWeek”, and “Second Week” are completed.Accounting Data Usage Code – Click the down arrow to indicate whether or not to use storedaccounting. The default is “Accounting on each line”.Note: Accounting cannot be stored on a corrected T&A.Store Accounting on First Line – Select this option if you want to store the accounting on the firstline of the T&A. Accounting may not be entered on any other line if this option is selected. The49
accounting code stored will be retrieved in future pay periods when the T&A is processed with anAccounting Date Usage Code of 2-Use Stored Accounting.Use Stored Accounting- Select this option if you would like to use the accounting stored on theNFC database. No accounting will be reflected on the biweekly T&A. This option cannot be usedfor a new employee.Accounting on Each Line – Select this option if you want to distribute accounting for eachtransaction code on the Bi-Weekly T&A. This option may be used even if accounting has beenpreviously stored.Stored Accounting - Type any accounting to be stored in this field.Remarks – Use this field to enter any remarks by the Timekeeper. These remarks appear on theT&A, however, only the first 23 positions are transmitted to NFC. (optional, alphanumeric, 254positions max)NFC Use – Click the down arrow to display the type of employee. (This field is used by NFCpersonnel only.)6. Click [Save] to update the header record.50
Establish And Maintain Leave AccountsThe Leave Acct tab option displays leave data for an employee.The leave information recorded on the T&A is a method of maintaining an employee’s leave record. Whenan employee is imported into STAR 4.25, the employee’s annual and sick leave balances are broughtforward. All other leave types must be added. The leave account consists of leave brought forward fromthe prior pay period, leave earned during the current pay period, leave used for the processing pay period,and the leave balance to date.Note: When an employee’s annual leave category changes, you must update the Annual Leave Categoryfield on the Employee Detail tab. A Bi-Weekly T&A must be created before a leave account can beupdated.The Leave Error Report is used to verify current leave balances in STAR 4.25 against current leavebalances in the Payroll/Personnel database at NFC. The Leave Error Report is available in STAR 4.25,and is only available for the most recent pay period.To run the Leave Error Report:1. On the Select An Action drop-down menu (for the Contact Point List), select the applicable contactpoint.2. Select Leave Error Report. The Leave Error report is displayed.Leave Error reportAdvanced LeaveAn employee may be granted:1. Advanced annual leave up to the number of hours to be accrued in the remainder of the leaveyear.51
2. Advanced sick leave up to a maximum of 240 hours.Advanced leave should not be entered in STAR 4.25 until after you receivedocumentation to support the transaction. An employee’s Header record must be codedappropriately before a T&A with a negative leave balance may be verified.The balance in the Forward field may be updated to a negative balance at any time.However, in order for a T&A with a negative balance to be verified, the Advance Leavefield on the employee’s T&A Header tab must be properly coded. After the T&A Headertab is updated to allow the advanced leave, the T&A may be verified with a negativeending balance.Annual Leave CeilingIf the employee’s balance displayed on the Leave Acct tab is greater than the valuedisplayed in the Annual Leave Ceiling field, the Forward field is reset to the Annual LeaveCeiling value.Annual Leave Category ChangeWhen an employee’s annual leave category changes, you must update the Annual LeaveCategory field on the Employee Detail tab. If you forget to do this before transmitting theT&A, you must make the appropriate change and prepare a corrected T&A. You canmake corrections to an employee’s leave account at any time during the pay period.Before updating an employee’s annual leave category, you must:1. Receive a personnel action to support the category change.2. Update the Annual Leave Category field on the Employee Detail tab.The change is not displayedon the Leave Acct tab until the T&A is verified.Add, Update, Or Delete An Employee Leave Type RecordOn the Employee List:1. Select the applicable employee record.2. Select the Leave Acct tab. The Leave Acct tab for that employee is displayed.52
Leave Acct tabThe Employee’s SSN, Name, and Leave Accrual are generated from the Employee Detail tab.Note: On the Leave Account Screen when the initial import is being done, only the Annual andSick leave date will be carried over. Any other leave the employee may have will have to bere-entered.Add A Leave Type To An Employee’s Leave Account1. On the Leave Acct tab, click the table button for the list of leave types. Note: The table button islocated between the Description and Forward fields.2. Select the applicable leave type. The new leave type will appear in the Description of the LeaveAcct.53
3. Click the Forward box. Type the number of whole hours in the first four positions. If fractions mustbe recorded, type a “.”(period) and the fraction in the last 2 positions. (.25, .50, .75).4. Click [Save].Update A Leave Type1. On the Leave Acct tab, select the leave type.2. Click the Forward box and make the appropriate changes to the Forward value.3. Click [Save].54
Prepare A Bi- Weekly T&AFor a new employee, on the Bi-W eekly T&A tab, the Transaction Code, Description, Week 1 Hrs, Week 2Hrs and Accounting fields will be blank. One of two functions can be utilized to reflect the appropriate TCinfo on a T&A: A TC may be added if it does not currently appear on the Bi-Weekly T&A. TC information that appears on the Bi-Weekly T&A may be updated.If this is a new employee, no TC information will be present.The Transaction Code Table is used to select a TC. Use the table button to display the TC Table. You mayclick [Select] to display a TC on the Bi-Weekly T&A.T&As are prepared for employees for each two week pay period. These T&As are prepared, verified,printed, and initialed by the timekeeper; initialed by the employee; and signed by the supervisor beforetransmission to NFC may occur. The Bi-Weekly T&A tab is used to prepare these T&As.To prepare an employee’s Bi-Weekly T&A:1. On the Employee List, double-click the employee for whom you wish to prepare the T&A.2. Select the Bi-Weekly T&A tab. The Bi-Weekly tab is displayed.Bi-W eekly T&A tabNote: If you need more lines than are displayed on the T&A, you can click [MORE] todisplay additional lines. If you click [MORE], you will need to use the scroll bar tonavigate on the T&A. You can also click [LESS] if you do not need the additional lines.Note: You can click [SELECT A TRANSACTION CODE FROM THE LIST] to select aTC for the line.OR55
You can click [Select A Descriptor For This Transaction Code] to display a descriptorfor the TC.Transaction Code Table1. Complete the fields on the Bi-Weekly T&A tab as follows:Week 1 Hours - Type the applicable hours.Week 2 Hours - Type the applicable hours.Accounting - Complete this field if 1 or 3 was selected on the T&A Header. If 2 was selected, noaccounting classification needed. A 2 indicates that stored accounting is being used.56
2. Click [Save] to save the information entered on the T&A. This option is used if a timekeeper hasnot completed the T&A and needs to close the T&A and return to it later. This option does notverify the T&A, it only saves data that has already been entered.ORClick [Verify] to verify the T&A. This option is used to verify the T&A after all of theinformation has been entered by the timekeeper. A T&A must be verified before it can beprinted and signed by the appropriate parties. You must click [Save] before clicking[Verify] before saving, an error message will appear. If there is an error on the T&AAfter all of the information has been entered by the timekeeper. A T&A must be verifiedbefore it can be printed and signed by the appropriate parties. You must click [Save]before clicking [Verify]. If you attempt to [Verify] before saving, an error message willappear. If there is an error on the T&A (i. e., the Bi-Weekly total does not equal 80 hoursfor a full-time employee), a message will appear at this time. All errors must beresolved before a T&A can be verified.Note: Although the STAR Web System will allow the timekeeper to verify a T&A with anincorrect accounting code, research should be done to find the correct accounting code.Click [Print] to print the T&A. This option is used after a T&A has been verified. ThePrint Selected T&As options can be accessed from the drop-down menu, theBi-W eekly T&A tab, or the T&A List.ORClick [Clear] to clear the T&A. This option is used to erase all data entered on the T&A.ORSelect a TC to be deleted and select Delete. After selecting Delete, you must click [Save]to save the deletion. This deletes the TC and the line. This does not delete the entireT&A.Status -The status of the T&A is displayed in the Status field. Valid values for the Status field are New, InProgress, Error, Verified, Released, and Transmitted.Note: The status on the T&A will change to Verified if there are no errors. If there are errors, apop-up will appear telling you what the error is and status field will display error.57
Exercise 3New Employee’s 80 Hour T&AEmployee List1. SSN 111-1 1-XXXX2. LAST NAME Newbee3. FIRST NAME Jane4. MIDDLE (Leave Blank)T&A Header1. NEW EMPLOYEE Yes2. ACCRUE LEAVE Yes3. BEGIN DAY Day 14. AWS Normal5. ACCOUNTING DATA USAGE CODE Accounting on each lineBi-weekly T&A1. TRANSACTION CODESWeek 1 Week 2 Accounting01-40 hrs 01-40 hrs 9019999987659
Exercise 4New Employee’s 80 Hour T&AEmployee List1. SSN 222-22-XXXX2. LAST NAME Doe3. FIRST NAME Jane4. MIDDLE (Leave Blank)T&A Header1. NEW EMPLOYEE Yes2. ACCRUE LEAVE No3. BEGIN DAY Day 94. AWS Normal5. ACCOUNTING DATA USAGE CODE Accounting on each lineBi-weekly T&A1. TRANSACTION CODESWeek 1 Week 2 Accounting00 hrs 01-40 hrs 9019999987661
Exercise 5New Employee and Coding an 80 Hour T&AEmployee Detail1. SSN 555-55-XXXX2. LAST NAME Lamb3. FIRST NAME Mary4. MIDDLE (Leave Blank)5. WORK SCHEDULE Full Time6. PAY PLAN GS7. SPECIAL TYPE (Leave Blank)8. TOUR OF DUTY 80.009. DAY LIMITATION (Leave Blank)10. LEAVE CATEGORY Annual - 8Leave Acct tab1. LEAVE BROUGHT FORWARD Annual Leave - 92.75Sick Leave - 247.75T&A Header1. NEW EMPLOYEE Yes2. ACCRUE LEAVE Yes3. BEGIN DAY Day 14. AWS Normal5. ACCOUNTING DATA USAGE CODE Stored Accounting on first lineBi-weekly T&A1. TRANSACTION CODESWeek 1 Week 2 Accounting01-40 hrs 01-40 hrs 9999123463
Exercise 6New Employee and Resignation (Final T&A)Employee Detail1. SSN 666-66-XXXX2. LAST NAME Island3. FIRST NAME Avery4. MIDDLE (Leave Blank)5. WORK SCHEDULE Full Time6. PAY PLAN GS7. SPECIAL TYPE (Leave Blank)8. TOUR OF DUTY 80.009. DAY LIMITATION (Leave Blank)10. LEAVE CATEGORY Annual - 4Leave Acct tab1. LEAVE BROUGHT FORWARD Annual Leave - 0Sick Leave - 0T&A Header1. NEW EMPLOYEE Yes2. ACCRUE LEAVE No3. FINAL T&A Final T&A4. BEGIN DAY Day 45. END DAY Day 56. AWS Normal7. ACCOUNTING DATA USAGE CODE Accounting on each lineBi-weekly T&A1. TRANSACTION CODESWeek 1 Week 2 Accounting01-16 hrs 00 hrs 9996666665
Exercise 7Coding an 80 Hour T&AEmployee Detail1. SSN 777-77-XXXX2. LAST NAME Gras3. FIRST NAME Mardi4. MIDDLE (Leave Blank)5. WORK SCHEDULE Full Time6. PAY PLAN GS7. SPECIAL TYPE (Leave Blank)8. TOUR OF DUTY 80.009. DAY LIMITATION (Leave Blank)10. LEAVE CATEGORY Annual - 6Leave Acct tab1. LEAVE BROUGHT FORWARD Annual Leave - 234Sick Leave - 581.25T&A Header1. AWS Normal2. ACCOUNTING DATA USAGE CODE Accounting on each lineBi-weekly T&A1. TRANSACTION CODESWeek 1 Week 2 Accounting01-40 hrs 01-40 hrs 901999999967
Exercise 8Coding an 80 Hour T&AEmployee Detail1. SSN 888-88-XXXX2. LAST NAME Tuesday3. FIRST NAME Fat4. MIDDLE (Leave Blank)5. WORK SCHEDULE Intermittent6. PAY PLAN GS7. SPECIAL TYPE (Leave Blank)8. TOUR OF DUTY (Leave Blank)9. DAY LIMITATION Yes10. LEAVE CATEGORY Annual - 0Leave Acct tab1. LEAVE BROUGHT FORWARD Annual Leave - 0Sick Leave - 0T&A Header1. AWS Variable day in 402. ACCOUNTING DATA USAGE CODE Accounting on each lineBi-weekly T&A1. TRANSACTION CODESWeek 1 Week 2 Accounting01-4 hrs 01-24 hrs 999111169
Exercise 9Coding an 80 Hour T&AEmployee Detail1. SSN 999-99-XXXX2. LAST NAME Off3. FIRST NAME Day4. MIDDLE (Leave Blank)5. WORK SCHEDULE Full Time6. PAY PLAN ES7. SPECIAL TYPE (Leave Blank)8. TOUR OF DUTY 80.009. DAY LIMITATION (Leave Blank)10. LEAVE CATEGORY Annual - 4Leave Acct tab1. LEAVE BROUGHT FORWARD Annual Leave - 12Sick Leave - 8T&A Header1. AWS Normal2. ACCOUNTING DATA USAGE CODE Stored AccountingBi-weekly T&A1. TRANSACTION CODESWeek 1 Week 2 Accounting01-32 hrs 01-24 hrs (Leave Blank)61-08 hrs 61-8 hrs (Leave Blank)66-8 hrs (Leave Blank)71
Exercise 10Coding an 80 Hour T&AEmployee Detail1. SSN 101-01-XXXX2. LAST NAME Night3. FIRST NAME Twelfth4. MIDDLE (Leave Blank)5. WORK SCHEDULE Full Time6. PAY PLAN ES7. SPECIAL TYPE (Leave Blank)8. TOUR OF DUTY 80.009. DAY LIMITATION (Leave Blank)10. LEAVE CATEGORY Annual - 4Leave Acct tab1. LEAVE BROUGHT FORWARD Annual Leave - 240Sick Leave - 20T&A Header1. AWS Normal2. ACCOUNTING DATA USAGE CODE Stored AccountingBi-weekly T&A1. TRANSACTION CODESWeek 1 Week 2 Accounting01-32 hrs 01-24 hrs (Leave Blank)66-8 hrs (Leave Blank)61-08 hrs 61-8 hrs (Leave Blank)73
Exercise 11Resignation (Final T&A)Employee Detail1. SSN 333-33-XXXX2. LAST NAME Fest3. FIRST NAME Jazz4. MIDDLE (Leave Blank)5. WORK SCHEDULE Full Time6. PAY PLAN GS7. SPECIAL TYPE (Leave Blank)8. TOUR OF DUTY 80.009. DAY LIMITATION (Leave Blank)10. LEAVE CATEGORY Annual - 6Leave Acct tab1. LEAVE BROUGHT FORWARD Annual Leave - 240Sick Leave - 585.25T&A Header1. AWS FINAL T&A Final T&A2. END DAY Day 143. AWS Normal4. ACCOUNTING DATA USAGE CODE Accounting on each lineBi-weekly T&A1. TRANSACTION CODESWeek 1 Week 2 Accounting01-40 hrs 01-40 hrs 901999999921-1.50 hrs 901999876575
Exercise 12Employee in Advanced Sick Leave and Coding an 80 Hour T&AEmployee Detail1. SSN 121-21-XXXX2. LAST NAME Festival3. FIRST NAME Essence4. MIDDLE (Leave Blank)5. WORK SCHEDULE Full Time6. PAY PLAN GS7. SPECIAL TYPE (Leave Blank)8. TOUR OF DUTY 80.009. DAY LIMITATION (Leave Blank)10. LEAVE CATEGORY Annual - 8Leave Acct tab1. LEAVE BROUGHT FORWARD Annual Leave - 0Sick Leave - 12T&A Header1. AWS Normal2. ADVANCE LEAVE Sick Leave3. ACCOUNTING DATA USAGE CODE Stored AccountingBi-weekly T&A1. TRANSACTION CODESWeek 1 Week 2 Accounting01-20 hrs 01-24 hrs (Leave Blank)66-8 hrs (Leave Blank)62-20 hrs 62-8 hrs (Leave Blank)77
Exercise 13Employee with Military Leave and Coding an 80 Hour T&AEmployee Detail1. SSN 131-31-XXXX2. LAST NAME Day3. FIRST NAME Veterans4. MIDDLE (Leave Blank)5. WORK SCHEDULE Full Time6. PAY PLAN GS7. SPECIAL TYPE (Leave Blank)8. TOUR OF DUTY 80.009. DAY LIMITATION (Leave Blank)10. LEAVE CATEGORY Annual - 8Leave Acct tab1. LEAVE BROUGHT FORWARD Annual Leave - 181Sick Leave - 0Military Leave Used - 2T&A Header1. AWS Normal2. ACCOUNTING DATA USAGE CODE Stored AccountingBi-weekly T&A1. TRANSACTION CODESWeek 1 Week 2 Accounting01-40 hrs 01-24 hrs (Leave Blank)65-16 hrs (Leave Blank)79
Exercise 14Wage Grade, Part Time Employee and Coding T&A with A Time OffAwardEmployee Detail1. SSN 141-41-XXXX2. LAST NAME Fest3. FIRST NAME French4. MIDDLE Q5. WORK SCHEDULE Part Time6. PAY PLAN WG7. SPECIAL TYPE (Leave Blank)8. TOUR OF DUTY 56.009. DAY LIMITATION (Leave Blank)10. LEAVE CATEGORY Annual - 6Leave Acct tab1. LEAVE BROUGHT FORWARD Annual Leave - 101Sick Leave - 24Time Off Award - 6P/T Unapplied - Annual Leave - 8P/T Unapplied - Sick Leave - 1T&A Header1. AWS Normal2. ACCOUNTING DATA USAGE CODE Stored AccountingBi-weekly T&A1. TRANSACTION CODESWeek 1 Week 2 Accounting01/1-30 hrs 01/1-24 hrs (Leave Blank)66/1-6 hrs (Leave Blank)81
Changing A T&AThe Change a T&A option is used to update or change a T&A at any time prior to when a T&A is Releasedor Transmitted and picked up by the T&A Validation Processing System (TIME). You can make changes tothe T&A header record, the employee’s leave account, or the employee’s T&A. Once a T&A has beentransmitted, you must prepare a corrected T&A to make any changes to the T&A. Corrected T&A’s may besubmitted up to 26 pay periods after the original T&A was transmitted.Note: Only use the Change option for a New, In Progress, or Verified T&A.To Change a T&A:1. Double-click the applicable contact point. If the timekeeper has access to more than one contactpoint, the Contact Point List is displayed. If the timekeeper only has access to one contact point,the Employee List is displayed.2. Double-click the applicable employee from the Employee List.3. Select the Bi-Weekly T&A tab.4. Make the applicable changes.5. Click [Save] to save the changes.6. Click [Verify] to verify the information.83
Exercise 15Changing an 80 Hour T&AEmployee Detail1. SSN 111-1 1-XXXX2. LAST NAME Newbee3. FIRST NAME Jane4. MIDDLE (Leave Blank)Bi-weekly T&A1. TRANSACTION CODESWeek 1 Week 2 Accounting01-20 hrs 01-40 hrs 903999999961-20 hrs85
Exercise 16Changing an 80 Hour T&AEmployee Detail1. SSN 222-22-XXXX2. LAST NAME Doe3. FIRST NAME Jane4. MIDDLE (Leave Blank)T&A Header1. ACCOUNTING DATA USAGE CODE Stored AccountingBi-weekly T&A1. TRANSACTION CODESWeek 1 Week 2 Accounting01-24 hrs (Leave Blank)61-8 hrs (Leave Blank)66-8 hrs (Leave Blank)87
Preparing A Split T&AThe Split T&A option is used to prepare a split T&A. A split T&A is prepared when a change occurs duringthe pay period, and different variables are applied to part of the pay period (i.e., LWOP balances). A splitT&A requires the completion of two T&A’s. When preparing a split T&A, select the applicable day beforethe change was effective in the Split Part 1 End Day box and the effective day of the change in the SplitPart 2 Begin Day box.Prepare A Split T&A1. Double-click the applicable contact point. Note: If the timekeeper has access to more than onecontact point, the Contact Point List is displayed. If the timekeeper only has access to one contactpoint, the Employee List is displayed.2. From the Select An Action (For The Employee List) menu, select Split T&A. The Split End andStart pop-up appears.Split End And Start pop-up3. Select the applicable start and end dates for the spilt T&A.4. Click [OK] to confirm your selection and continue with the Split T&A process.Note: Leave data should be recorded only on the second T&A. Also, if you use TC 65, RegularMilitary Leave, when preparing a split T&A, you must record the number of hours of military leaveused on the Leave Acct.If you click [OK] the T&A will appear on the T&A List on two lines, one for each part of the T&A(Split Part1 and Split Part 2).89
5. Select each part individually from the T&A List. On the employee list double click Part 1.6. Complete the necessary T&A information on Part 1.7. Click [Save] to save the information entered on Split #1.8. On the employee list double click Part 2.9. Complete the necessary T&A information on Part 2.10. Click Save to save the information on Split #2.11. Click [Verify] to verify both Split #1 and Split #2. Both parts of the T&A will be verified.Note: If you attempt to [Verify] after completing Split #1, an error message will appear.Both parts must be completed before the T&A may be verified. You do not have to goback and click [Verify] on Split #1. Clicking [Verify] on Split #2 verifies both parts.Merging A Split T&A Back Into One T&AThe Merge T&A option is used to merge a split T&A back into one T&A (i.e., a timekeeperinadvertently prepared a split T&A when it was not necessary).1. Double-click the applicable contact point. If the timekeeper has access to more than one contactpoint, the Contact Point List is displayed. If the timekeeper only has access to one contact point,the Employee List is displayed.2. Select the applicable employee from the Employee List.3. Select either record of a split T&A on the T&A List to be merged.4. Click Merge T&A. The Merge T&A pop-up appears.Merge T&A pop-up5. Click [OK] to merge the T&A. The T&A is now merged back into one T&A. Only the data fromSplit #2 is retained.Note: The merge process does not combine Part 1 and Part 2 TC’s. Only the data fromPart 2 of the split is retained. You must update the T&A to reflect the correct informationafter choosing the merge option.90
Exercise 17Split T&A with 80 HoursEmployee Detail1. SSN 777-77-XXXX2. LAST NAME Gras3. FIRST NAME Mardi4. MIDDLE (Leave Blank)Split T&A InformationPart one begin day (default 0)Part one end day 07Part two begin day 08Part two end day (default 0)Part 1 of Split Bi-weekly T&A1. TRANSACTION CODESWeek 1 Accounting01-40 hrs 90199999999Part 2 of Split Bi-weekly T&A1. TRANSACTION CODESWeek 2 Accounting01-40 hrs 9019999999991
Print Selected T&AsThe Print Selected T&As option is used to print T&As. T&As are printed prior to transmission. The PrintSelected T&As options can be accessed from the drop-down menu, the Bi-Weekly T&A tab, or the T&AList.Print Reports1. On the Contact Point List, double-click the applicable T&A contact point. Note: If the timekeeperhas access to more than one contact point, the Contact Point List is displayed. If the timekeeperonly has access to one contact point, the Employee List is displayed.2. On the Select An Action drop-down (for the Employee List) menu, click Select All to print all ofthe T&As for a contact point.ORSelect only those T&As to be printed.3. On the Select An Action drop-down (for the Employee List) menu, click Print Selected T&As.The Print Stored Accounting pop-up appears.Print Stored Accounting pop-up4. On the Print Stored Accounting pop-up, click [OK] to print any applicable stored accounting. ThePrint T&A window is displayed.5. The Print T&A window displays all of the T&As (in the print format) for a contact point. You canscroll through the T&As to be printed.ORFrom the employee’s Bi-Weekly T&A tab click [Print]. The Print T&A window is displayed.93
Print T&A Window6. Click [Print] to print the T&A(s).94
Transmitting T&AsThe Transmitting T&As option is used by the Transmitter to transmit T&As to NFC. After T&As havebeen verified, printed, and signed, they are ready for transmit to NFC. T&As should be transmittedby the close of business on Tuesday following the end of the pay period. The TransmissionResults option can be used to check the status of transmitted T&A(s).Note: You can transmit from the Employee List at any time by clicking the transmit linkabove the Employee List.Transmit T&As1. On the Contact Point List, double click the applicable contact point. Note: If the timekeeper hasaccess to more than one contact point, the Contact Point List is displayed. If the timekeeper onlyhas access to one contact point, the Employee List is displayed.2. On the Select An Action drop-down (for the Employee List) menu, click Select All to transmit allT&A’s for a contact point.ORSelect only those T&As to be transmitted.3. On the Select An Action drop-down (for the Employee List) menu, click Transmit SelectedT&As to select only those T&As to be transmitted. TheTransmit Selected T&As pop-upappears.Transmit Selected T&As pop-up4. Click [OK] to transmit theT&A(s). After clicking [OK], the Status of the T&A is Released until thePayroll/Personnel database picks up the T&A(s). Once the T&A(s) are picked up, the Status isupdated to Transmitted. The Successfully Transmitted pop-up appears.Successfully Transmitted pop-up95
5. Click [OK].To check the status of the transmission file:1. On the Contact Point List, select the applicable contact point.2. Select Transmission Results. The T&A Transmission Confirmation report is displayed.T&A Transmission Confirmation ReportConfirm The TransmissionNFC confirms receipt of T&A data by transmitting a Confirmation Report(s) to the designated printer listedin the JCL.Preceding the Confirmation Report is the JCL printout, which provides information relating to the file (job)that has been transmitted.Immediately following the JCL printout is a 3-page report, JES2 Log-System SYSB-NODE NFC. Thisreport indicates if the transmission is complete, incomplete, or abended.The confirmation transmittal contains total hours, TC, and T&A totals.Note: Do not discard or misplace the Confirmation Report. It is only generated once and cannot bereproduced.The following fields are displayed on the Confirmation Report. Blk/Batch - This field displays the block and batch number assigned by NFC. This is displayed in a2-position block number, the pay period number, and the sequential batch number.Total - This field displays the total number of batches received by NFC. The maximum is 200 T&As perbatch.T&A’s. This field displays the total number of T&As received by NFC. If this number does not match thenumber displayed on the Successfully Transmitted pop-up, the timekeeper should contact his/her agencyT&A Coordinator or NFC Customer Support.80 Char Rcds - This field displays the number of 80-character records received at NFC. Each T&A containstwelve 80-character records.Transmitted from Ag St Town Un Tmpk - This field displays the contact point on the last T&A transmitted.Displayed Message - This field displays a system-generated message that identifies the total number ofT&As by type and pay period number.96
Job Step ReportThe Job Step Report displays the steps involved in transmission. The system-generated message, JobHas Completed Successfully, indicates that the job has run successfully at NFC. If this message is notdisplayed for each step in the transmission process, the timekeeper should re-transmit the T&As.97
Preparing A Corrected T&AThe Preparing A Corrected T&A option is used to prepare a corrected T&A for a transmitted T&A from theT&A List. Once a T&A has been transmitted, you must prepare a corrected T&A to make any changes tothe T&A. Corrected T&As may be submitted up to 26 pay periods after the original T&A was transmitted.Prepare current Pay Period during processing cycle1. Double-click the applicable contact point. Note: If the timekeeper has access to more than onecontact point, the Contact Point List is displayed. If the timekeeper only has access to one contactpoint, the Employee List is displayed.2. Double-click the applicable employee from the Employee List.3. On the Select An Action (for the Employee List) drop-down menu, select Correct T&A. TheCorrect pop-up appears.Correct pop-up4. On the Correct pop-up, click [OK]. The employee’s Bi-Weekly T&A is displayed.5. Make the applicable corrections.6. Click [Save] to save the information.7. Click [Verify] to verify the information.Prepare corrected T&A for Prior Pay Period1. Select the drop down arrow and click pay period. A l ist of pay periods is displayed.2. Select the pay period of the corrected T&A.3. Select GO.4. On the employee list, select the applicable employee.5. Select Correct T&A from the drop down arrow (select an action).6. Once the corrected T&A is selected a pop-up will appear “Correct the selected employeeT&A”. Click OK.7. Correct the appropriate data for the prior T&A.8. Click [Save] to save the information.9. Click [Verify] to verify the information.99
100
Exercise 18Corrected T&A to Add OvertimeImportEmployee Detail1. SSN 555-55-XXXX2. LAST NAME Lamb3. FIRST NAME Mary4. MIDDLE (Leave Blank)5. WORK SCHEDULE Full Time6. PAY PLAN GS7. SPECIAL TYPE (Leave Blank)8. TOUR OF DUTY 80.009. DAY LIMITATION (Leave Blank)10. LEAVE CATEGORY Annual - 8Leave Acct tab1. LEAVE BROUGHT FORWARD Annual Leave - 100.75Sick Leave - 251.75T&A Header1. AWS Normal2. ACCOUNTING DATA USAGE CODE Stored AccountingBi-weekly T&A1. TRANSACTION CODESWeek 1 Week 2 Accounting01-40 hrs 01- 40 hrs (Leave Blank)21-10 hrs 21 - 15 hrs (Leave Blank)101
102