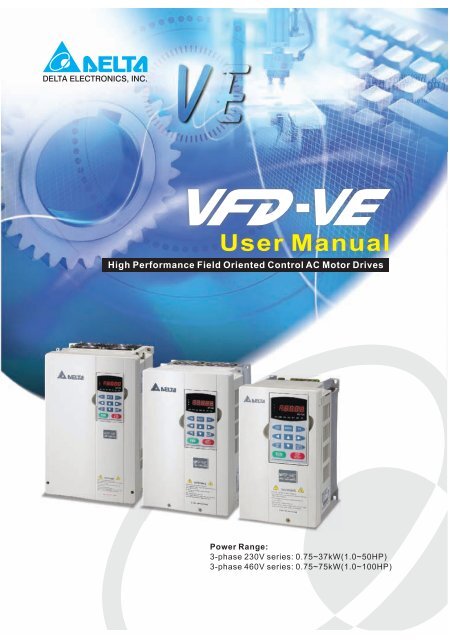
Delta VFD-VE user manual - Womack Machine Supply Company
Delta VFD-VE user manual - Womack Machine Supply Company
Delta VFD-VE user manual - Womack Machine Supply Company

Create successful ePaper yourself
Turn your PDF publications into a flip-book with our unique Google optimized e-Paper software.
PrefaceThank you for choosing DELTA’s high-performance <strong>VFD</strong>-<strong>VE</strong> Series. The <strong>VFD</strong>-<strong>VE</strong> Series ismanufactured with high-quality components and materials and incorporates the latestmicroprocessor technology available.This <strong>manual</strong> is to be used for the installation, parameter setting, troubleshooting, and dailymaintenance of the AC motor drive. To guarantee safe operation of the equipment, read the followingsafety guidelines before connecting power to the AC motor drive. Keep this operating <strong>manual</strong> athand and distribute to all <strong>user</strong>s for reference.To ensure the safety of operators and equipment, only qualified personnel familiar with AC motordrive are to do installation, start-up and maintenance. Always read this <strong>manual</strong> thoroughly beforeusing <strong>VFD</strong>-<strong>VE</strong> series AC Motor Drive, especially the WARNING, DANGER and CAUTION notes.Failure to comply may result in personal injury and equipment damage. If you have any questions,please contact your dealer.PLEASE READ PRIOR TO INSTALLATION FOR SAFETY.DANGER!1. AC input power must be disconnected before any wiring to the AC motor drive is made.2. A charge may still remain in the DC-link capacitors with hazardous voltages, even if the powerhas been turned off. To prevent personal injury, please ensure that power has turned off beforeopening the AC motor drive and wait ten minutes for the capacitors to discharge to safe voltagelevels.3. Never reassemble internal components or wiring.4. The AC motor drive may be destroyed beyond repair if incorrect cables are connected to theinput/output terminals. Never connect the AC motor drive output terminals U/T1, V/T2, andW/T3 directly to the AC mains circuit power supply.5. Ground the <strong>VFD</strong>-<strong>VE</strong> using the ground terminal. The grounding method must comply with thelaws of the country where the AC motor drive is to be installed. Refer to the Basic WiringDiagram.6. <strong>VFD</strong>-<strong>VE</strong> series is used only to control variable speed of 3-phase induction motors, NOT for 1-phase motors or other purpose.7. <strong>VFD</strong>-<strong>VE</strong> series shall NOT be used for life support equipment or any life safety situation.
WARNING!1. DO NOT use Hi-pot test for internal components. The semi-conductor used in AC motor driveeasily damage by high-voltage.2. There are highly sensitive MOS components on the printed circuit boards. These componentsare especially sensitive to static electricity. To prevent damage to these components, do nottouch these components or the circuit boards with metal objects or your bare hands.3. Only qualified persons are allowed to install, wire and maintain AC motor drives.CAUTION!1. Some parameters settings can cause the motor to run immediately after applying power.2. DO NOT install the AC motor drive in a place subjected to high temperature, direct sunlight,high humidity, excessive vibration, corrosive gases or liquids, or airborne dust or metallicparticles.3. Only use AC motor drives within specification. Failure to comply may result in fire, explosion orelectric shock.4. To prevent personal injury, please keep children and unqualified people away from theequipment.5. When the motor cable between AC motor drive and motor is too long, the layer insulation of themotor may be damaged. Please use a frequency inverter duty motor or add an AC outputreactor to prevent damage to the motor. Refer to appendix B Reactor for details.6. The rated voltage for AC motor drive must be ≤ 240V (≤ 480V for 460V models) and the mainssupply current capacity must be ≤ 5000A RMS (≤10000A RMS for the ≥ 40hp (30kW) models).
Table of ContentsPreface ............................................................................................................. iTable of Contents .......................................................................................... iiiChapter 1 Introduction................................................................................ 1-11.1 Receiving and Inspection ................................................................... 1-21.1.1 Nameplate Information................................................................ 1-21.1.2 Model Explanation ...................................................................... 1-21.1.3 Series Number Explanation ........................................................ 1-31.1.4 Drive Frames and Appearances ................................................. 1-31.2 Preparation for Installation and Wiring ............................................... 1-41.2.1 Ambient Conditions..................................................................... 1-41.2.2 Remove Keypad ......................................................................... 1-61.2.3 Remove Front Cover................................................................... 1-71.2.4 Lifting .......................................................................................... 1-81.3 Dimensions......................................................................................... 1-9Chapter 2 Installation and Wiring .............................................................. 2-12.1 Wiring ................................................................................................. 2-22.2 External Wiring ................................................................................... 2-42.3 Main Circuit ........................................................................................ 2-52.3.1 Main Circuit Connection.............................................................. 2-52.3.2 Main Circuit Terminals ................................................................ 2-9
2.4 Control Terminals .............................................................................2-10Chapter 3 Digital Keypad Operation and Start Up ....................................3-13.1 Digital Keypad KPV-CE01 ..................................................................3-13.1.1 Description of the Digital Keypad KPV-CE01 ..............................3-13.1.2 How to Operate the Digital Keypad KPV-CE01...........................3-33.1.3 Dimension of the Digital Keypad .................................................3-53.1.4 Reference Table for the LCD Display of the Digital Keypad........3-53.1.5 Operation Method........................................................................3-63.2 Start-up...............................................................................................3-63.2.1 Preparations before Start-up .......................................................3-63.2.2 Trial Run......................................................................................3-8Chapter 4 Parameters..................................................................................4-14.1 Summary of Parameter Settings.........................................................4-24.2 Version Differences ..........................................................................4-264.2.1 Version 2.02 ..............................................................................4-264.2.2 Version 2.04 ..............................................................................4-264.3 Description of Parameter Settings ....................................................4-38Chapter 5 Troubleshooting .........................................................................5-15.1 Over Current (OC) ..............................................................................5-15.2 Ground Fault.......................................................................................5-25.3 Over Voltage (OV) ..............................................................................5-25.4 Low Voltage (Lv).................................................................................5-35.5 Over Heat (oH1, oH2, oH3) ................................................................5-45.6 Overload .............................................................................................5-45.7 Display of KPV-CE01 is Abnormal......................................................5-5
5.8 Phase Loss (PHL) .............................................................................. 5-55.9 Motor cannot Run............................................................................... 5-65.10 Motor Speed cannot be Changed..................................................... 5-75.11 Motor Stalls during Acceleration....................................................... 5-85.12 The Motor does not Run as Expected .............................................. 5-85.13 Electromagnetic/Induction Noise ...................................................... 5-95.14 Environmental Condition .................................................................. 5-95.15 Affecting Other <strong>Machine</strong>s ............................................................... 5-10Chapter 6 Fault Code Information and Maintenance................................ 6-16.1 Fault Code Information....................................................................... 6-16.1.1 Common Problems and Solutions............................................... 6-16.1.2 Reset .......................................................................................... 6-66.2 Maintenance and Inspections............................................................. 6-7Appendix A Specifications ........................................................................ A-1Appendix B Accessories ........................................................................... B-1B.1 All Brake Resistors & Brake Units Used in AC Motor Drives..............B-1B.1.1 Dimensions and Weights for Brake Resistors ............................B-4B.1.2 Specifications for Brake Unit ......................................................B-6B.1.3 Dimensions for Brake Unit..........................................................B-7B.2 No-fuse Circuit Breaker Chart ............................................................B-9B.3 Fuse Specification Chart..................................................................B-10B.4 AC Reactor ......................................................................................B-11B.4.1 AC Input Reactor Recommended Value...................................B-11B.4.2 AC Output Reactor Recommended Value................................B-11
B.4.3 Applications for AC Reactor......................................................B-13B.5 Zero Phase Reactor (RF220X00A) ................................................. B-15B.6 DC Choke Recommended Values................................................... B-16B.7 Remote Controller RC-01................................................................ B-17B.8 PG Card (for Encoder) .................................................................... B-18B.8.1 EMV-PG01X .............................................................................B-18B.8.2 EMV-PG01O.............................................................................B-21B.8.3 EMV-PG01L..............................................................................B-25B.9 AMD-EMI Filter Cross Reference .................................................... B-29B.9.1 Dimensions ...............................................................................B-33B.10 Multi-function I/O Extension Card.................................................. B-40B.10.1 Functions ................................................................................B-40B.10.2 Dimensions .............................................................................B-42B.10.3 Wiring......................................................................................B-42Appendix C How to Select the Right AC Motor Drive.............................. C-1C.1 Capacity Formulas ............................................................................ C-1C.2 General Precaution ........................................................................... C-3C.3 How to Choose a Suitable Motor....................................................... C-5
Chapter 1 IntroductionThe AC motor drive should be kept in the shipping carton or crate before installation. In order toretain the warranty coverage, the AC motor drive should be stored properly when it is not to be usedfor an extended period of time. Storage conditions are:CAUTION!1. Store in a clean and dry location free from direct sunlight or corrosive fumes.2. Store within an ambient temperature range of -10 ° C to +40 ° C.3. Store within a relative humidity range of 0% to 90% and non-condensing environment.4. Store within an air pressure range of 86 kPA to 106kPA.5. DO NOT place on the ground directly. It should be stored properly. Moreover, if the surroundingenvironment is humid, you should put exsiccator in the package.6. DO NOT store in an area with rapid changes in temperature. It may cause condensation andfrost.7. If the AC motor drive is stored for more than 3 months, the temperature should not be higherthan 30 °C. Storage longer than one year is not recommended, it could result in the degradationof the electrolytic capacitors.8. When the AC motor drive is not used for longer time after installation on building sites or placeswith humidity and dust, it’s best to move the AC motor drive to an environment as stated above.Revision August 2008, 03<strong>VE</strong>, SW V2.04 1-1
Chapter 1 Introduction|1.1 Receiving and InspectionThis <strong>VFD</strong>-<strong>VE</strong> AC motor drive has gone through rigorous quality control tests at the factory beforeshipment. After receiving the AC motor drive, please check for the following:• Check to make sure that the package includes an AC motor drive, the User Manual/QuickStart and CD.• Inspect the unit to assure it was not damaged during shipment.• Make sure that the part number indicated on the nameplate corresponds with the partnumber of your order.1.1.1 Nameplate InformationExample for 5HP/3.7kW 3-phase 230V AC motor driveAC Drive ModelInput Spec.Output Spec.Output Frequency RangeEnclosure typeSerial Number & Bar CodeMODE : <strong>VFD</strong>037V23A-2INPUT : 3PH 200-240V 50/60Hz 19.6AOUTPUT : 3PH 0-240V 17A 6.5kVA 5HPFreq. Range : 0.00~600.00HzENCLOSURE: TYPE 1037V23A2T63600011.1.2 Model Explanation<strong>VFD</strong> 037 V 23 A-2 <strong>VFD</strong>-<strong>VE</strong> SeriesVersion TypeMains Input Voltage23: 230V Three phase 43: 460V Three phaseVector SeriesApplicable motor capacity007: 1 HP(0.7kW) 150: 20HP(15kW)022: 3 HP(2.2kW) 220: 30 HP(22kW)037: 5 HP(3.7kW) 300: 40HP(30kW)055: 7.5HP(5.5kW) 370: 50 HP(37kW)075: 10 HP(7.5kW) 450: 60HP(45kW)110: 15 HP(11kW) 550: 75HP(55kW)750: 100HP(75kW)Series Name ( Variable Frequency Drive)1-2 Revision August 2008, 03<strong>VE</strong>, SW V2.04
1.1.3 Series Number Explanation037V23A2 T 7 36Chapter 1 Introduction|230V 3-phase 5HP(3.7kW)Production numberProduction weekProduction year 2007Production factory(T: Taoyuan, W: Wujian)ModelIf the nameplate information does not correspond to your purchase order or if there areany problems, please contact your distributor.1.1.4 Drive Frames and Appearances1-5HP/0.75-3.7kW (Frame B) 7.5-15HP/5.5-11kW (Frame C)Revision August 2008, 03<strong>VE</strong>, SW V2.04 1-3
Chapter 1 Introduction|15-30HP/11-22kW (Frame D) 40-100HP/30-75kW (Frame E)Frame Power rangeB (B1) 1-3hp (0.75-2.2kW)B (B2) 5hp (3.7kW)Models<strong>VFD</strong>007V23A/43A-2, <strong>VFD</strong>015V23A/43A-2,<strong>VFD</strong>022V23A/43A-2<strong>VFD</strong>037V23A/43A-2C 7.5-15hp (5.5-11kW) <strong>VFD</strong>055V23A/43A-2, <strong>VFD</strong>075V23A/43A-2, <strong>VFD</strong>110V43B-2D15-30hp (11-22kW)E (E1) 40-60hp (30-45kW)E (E2) 40-100hp (30-75kW)<strong>VFD</strong>110V23A/43A-2, <strong>VFD</strong>150V23A/43A-2,<strong>VFD</strong>185V23A/43A-2, <strong>VFD</strong>220V23A/43A-2Please refer to Chapter 1.3 for exact dimensions.1.2 Preparation for Installation and Wiring1.2.1 Ambient Conditions<strong>VFD</strong>300V43A-2, <strong>VFD</strong>370V43A-2, <strong>VFD</strong>450V43A-2<strong>VFD</strong>300V23A-2, <strong>VFD</strong>370V23A-2, <strong>VFD</strong>550V43C-2,<strong>VFD</strong>750V43C-2Install the AC motor drive in an environment with the following conditions:1-4 Revision August 2008, 03<strong>VE</strong>, SW V2.04
FWDREVPROGDATAChapter 1 Introduction|OperationAir Temperature:Relative Humidity:Atmospherepressure:Installation SiteAltitude:Vibration:Temperature:-10 ~ +40°C (14 ~ 122°F)
Chapter 1 Introduction|CAUTION!1. Operating, storing or transporting the AC motor drive outside these conditions may causedamage to the AC motor drive.2. Failure to observe these precautions may void the warranty!3. Mount the AC motor drive vertically on a flat vertical surface object by screws. Other directionsare not allowed.4. The AC motor drive will generate heat during operation. Allow sufficient space around the unitfor heat dissipation.5. The heat sink temperature may rise to 90°C when running. The material on which the AC motordrive is mounted must be noncombustible and be able to withstand this high temperature.6. When AC motor drive is installed in a confined space (e.g. cabinet), the surroundingtemperature must be within -10 ~ 40°C with good ventilation. DO NOT install the AC motordrive in a space with bad ventilation.7. When installing multiple AC more drives in the same cabinet, they should be adjacent in a rowwith enough space in-between. When installing one AC motor drive below another one, use ametal separation between the AC motor drives to prevent mutual heating.8. Prevent fiber particles, scraps of paper, saw dust, metal particles, etc. from adhering to theheatsink.1.2.2 Remove Keypad1-5HP/0.75-3.7kW (Frame B) 7.5-15HP/5.5-11kW (Frame C)1-6 Revision August 2008, 03<strong>VE</strong>, SW V2.04
Chapter 1 Introduction|15-30HP/11-22kW (Frame D) 40-100HP/30-75kW (Frame E)1.2.3 Remove Front Cover1-5HP/0.75-3.7kW (Frame B) 7.5-15HP/5.5-11kW (Frame C)Revision August 2008, 03<strong>VE</strong>, SW V2.04 1-7
Chapter 1 Introduction|15-30HP/11-22kW (Frame D) 40-100HP/30-75kW (Frame E)1.2.4 LiftingPlease carry only fully assembled AC motor drives as shown in the following.For 40-100HP (Frame E and E1)Step 1 Step 21-8 Revision August 2008, 03<strong>VE</strong>, SW V2.04
Step 3 Step 4Chapter 1 Introduction|1.3 DimensionsRevision August 2008, 03<strong>VE</strong>, SW V2.04 1-9
Chapter 1 Introduction|Frame BWW1DD1D2S1H1HS2Unit: mm[inch]Frame W W1 H H1 D D1 D2 S1 S2B1150.0[5.91]135.0[5.32]260.0[10.24]244.3[9.63]160.2[6.31]67.0[2.64]4.0[0.16]8.0[0.32]6.5[0.26]B2150.0[5.91]135.0[5.32]272.1[10.72]244.3[9.63]183.7[7.24]67.0[2.64]4.0[0.16]8.0[0.32]6.5[0.26]NOTEFrame B1: <strong>VFD</strong>007V23A/43A-2, <strong>VFD</strong>015V23A/43A-2, <strong>VFD</strong>022V23A/43A-2Frame B2: <strong>VFD</strong>037V23A/43A-21-10 Revision August 2008, 03<strong>VE</strong>, SW V2.04
Frame CWW1Chapter 1 Introduction|DH1HS1S2Unit: mm[inch]Frame W W1 H H1 D - - S1 S2C200.0[7.88]185.6[7.31]323.0[12.73]244.3[9.63]160.2[6.31]- -7.0[0.28]7.0[0.28]NOTEFrame C: <strong>VFD</strong>055V23A/43A-2, <strong>VFD</strong>075V23A/43A-2, <strong>VFD</strong>110V43B-2Revision August 2008, 03<strong>VE</strong>, SW V2.04 1-11
Chapter 1 Introduction|Frame DWW1DD1D2H1HS1Unit: mm[inch]Frame W W1 H H1 D D1 D2 S1 -D250.0[9.85]226.0[8.90]408.2[16.07]384.0[15.13]205.4[8.08]110.0[4.33]10.0[0.39]10.0[0.39]-NOTEFrame D: <strong>VFD</strong>110V23A/43A-2, <strong>VFD</strong>150V23A/43A-2, <strong>VFD</strong>185V23A/43A-2, <strong>VFD</strong>220V23A/43A-21-12 Revision August 2008, 03<strong>VE</strong>, SW V2.04
Frame EWW1Chapter 1 Introduction|DD1HH2H1S3D2S1S2Unit: mm[inch]Frame W W1 H H1 H2 D D1 D2 S1 S2 S3E1370.0[14.57]335.0[13.19]-589.0[23.19]560.0[22.05]260.0[10.24]132.5[5.22]18.0[0.71]13.0[0.51]13.0[0.51]18.0[0.71]E2370.0[14.57]335.0[13.19]595.0[23.43]589.0[23.19]560.0[22.05]260.0[10.24]132.5[5.22]18.0[0.71]13.0[0.51]13.0[0.51]18.0[0.71]NOTEFrame E1: <strong>VFD</strong>300V43A-2, <strong>VFD</strong>370V43A-2, <strong>VFD</strong>450V43A-2Frame E2: <strong>VFD</strong>300V23A-2, <strong>VFD</strong>370V23A-2, <strong>VFD</strong>550V43C-2, <strong>VFD</strong>750V43C-2Revision August 2008, 03<strong>VE</strong>, SW V2.04 1-13
Chapter 1 Introduction|This page intentionally left blank1-14 Revision August 2008, 03<strong>VE</strong>, SW V2.04
Chapter 2 Installation and WiringAfter removing the front cover (see chapter 1.2.3 for details), check if the power and control terminalsare clear. Be sure to observe the following precautions when wiring.• General Wiring InformationApplicable CodesAll <strong>VFD</strong>-<strong>VE</strong> series are Underwriters Laboratories, Inc. (UL) and Canadian UnderwritersLaboratories (cUL) listed, and therefore comply with the requirements of the NationalElectrical Code (NEC) and the Canadian Electrical Code (CEC).Installation intended to meet the UL and cUL requirements must follow the instructionsprovided in “Wiring Notes” as a minimum standard. Follow all local codes that exceed ULand cUL requirements. Refer to the technical data label affixed to the AC motor drive andthe motor nameplate for electrical data.The "Line Fuse Specification" in Appendix B, lists the recommended fuse part number foreach <strong>VFD</strong>-<strong>VE</strong> Series part number. These fuses (or equivalent) must be used on allinstallations where compliance with U.L. standards is a required.CAUTION!1. Make sure that power is only applied to the R/L1, S/L2, T/L3 terminals. Failure to comply mayresult in damage to the equipment. The voltage and current should lie within the range asindicated on the nameplate.2. Check following items after finishing the wiring:A. Are all connections correct?B. No loose wires?C. No short-circuits between terminals or to ground?DANGER!1. A charge may still remain in the DC bus capacitors with hazardous voltages even if the powerhas been turned off. To prevent personal injury, please ensure that the power is turned off andwait ten minutes for the capacitors to discharge to safe voltage levels before opening the ACmotor drive.2. All the units must be grounded directly to a common ground terminal to prevent lightning strikeor electric shock.3. Only qualified personnel familiar with AC motor drives is allowed to perform installation, wiringand commissioning.4. Make sure that the power is off before doing any wiring to prevent electric shock.Revision August 2008, 03<strong>VE</strong>, SW V2.04 2-1
Chapter 2 Installation and Wiring|2.1 WiringUsers must connect wires according to the circuit diagrams on the following pages. Do not plug amodem or telephone line to the RS-485 communication port or permanent damage may result. Thepins 1 & 2 are the power supply for the optional copy keypad KPV-CE01 only and should not be usedfor RS-485 communication.Figure 1 for models of <strong>VFD</strong>-<strong>VE</strong> Series (15 HP/11kW and below)<strong>VFD</strong>007V23A/43A-2, <strong>VFD</strong>015V23A/43A-2, <strong>VFD</strong>022V23A/43A-2, <strong>VFD</strong>037V23A/43A-2,<strong>VFD</strong>055V23A/43A-2, <strong>VFD</strong>075V23A/43A-2, <strong>VFD</strong>110V43B-2, <strong>VFD</strong>110V23A/43A-2DC choke(optional)Brake resistor(optional)JumperFuse/NFB(No Fuse Breaker)R(L1)+1 +2/B1 B2 -R(L1) U(T1)S(L2)S(L2) V(T2)T(L3)T(L3) W(T3)ERecommended CircuitSAEwhen power supplyis turned OFF by aMC RBRAfault output.If the fault occurs, the OFF ONRCRBcontact will be ON to turnMCoff the power and protect the power system.RC+24VFactory setting:FWD/STOPMRAFWDSINK ModeREV/STOPSinkREVSw1Multi-step 1MRCFactoryMI1SourcesettingMulti-step 2MO1Please refer toMI2Figure 3 for wiringMulti-step 3MI3of SINK mode and Multi-step 4SOURCEmode.MI4No functionMI5MO2No functionMI6Digital Signal Common* Don't apply the mains voltage directlyDCMMCMto above terminals.EDFMACI current/voltage selection+10VACI Switch3Power supplyMake sure that power is OFF+10V 20mAbefore changing the switch 5K 2AVIMaster Frequencysetting.DCM10 to 10V 47k0-20mA 0-10VACI4~20mA/0~10VAUI-10~+10VACMAnalog Signal CommonAnalog Multi-function Output TerminalEAFM analog output selectionAFM 0~10VDC/2mAAFM SwitchMake sure that power is OFFbefore changing the switchsetting.0-10V 0-20mAACMAnalog Signal commonEMotorIM3~Multi-function contact output 1(relay)factory setting: fault indicationMulti-function contact output 2(relay)48VDC 50mAfactory setting:indicates that it is runningMulti-function contact output 3(photocoupler)Multi-function contact output 4(photocoupler)Multi-functionPhotocoupler OutputDigital Frequency OutputTer minalfactory setting: 1:1Duty=50%, 10VDCDigital Signal CommonDFM output signal selectionDFM SwitchMake sure that power is OFFbefore changing the switchsetting.OC TPRS-485 serial communication1: +EV2: GND For communication,3: SG- it needs to use4: SG+ <strong>VFD</strong>-USB01/IFD85005: NC to connect to PC.6: NCMain circuit (power) terminals Control circuit terminals Shielded leads & CableNOTEThe brake resistor is built-in to model <strong>VFD</strong>110V43B.2-2 Revision August 2008, 03<strong>VE</strong>, SW V2.04
Chapter 2 Installation and Wiring|Figure 2 for models of <strong>VFD</strong>-<strong>VE</strong> Series (20HP/15kW and above)<strong>VFD</strong>150V23A/43A-2, <strong>VFD</strong>185V23A/43A-2, <strong>VFD</strong>220V23A/43A-2, <strong>VFD</strong>300V43A-2, <strong>VFD</strong>370V43A-2,<strong>VFD</strong>450V43A-2, <strong>VFD</strong>300V23A-2, <strong>VFD</strong>370V23A-2, <strong>VFD</strong>550V43C-2, <strong>VFD</strong>750V43C-2<strong>VFD</strong>BJumperFuse/NFB(No Fuse Breaker)R(L1)S(L2)T(L3)+1R(L1)S(L2)T(L3)E+2Recommended CircuitSAwhen power s upplyis turned OFF by afault output.If the fault occurs, the OFFMCONRBRCcontact will be ON to turnMCoff the power and protect the power system.+24VFWD/STOPFactory setting:SINK ModeSinkSw1FactorySourcesettingPlease refer toFigure 3 for wiringof SINK mode andSOURCEmode.REV/STOPMulti-step 1Multi-step 2Multi-step 3Multi-step 4No functionNo functionDigital Signal Common* Don't apply the mains voltage directlyto above terminals.ACI current/voltage selectionACI Switch3Make sure that power is OFFbefore changing the switchsetting.5K 20-20mA 0-10V1Analog Multi-function Output TerminalAFM analog output selectionAFM SwitchMake sure that power is OFFbefore changing the switchsetting.0-10V 0-20mADC choke(optional)brake unit(optional)U(T1)V(T2)W(T3)EIM3~Main circuit (power) terminals Control circuit terminals Shielded leads & CableRARBRCMRAMotorMulti-function contact output 1(relay)factory setting: fault indicationFWDMulti-function contact output 2(relay)REVMRC 48VDC 50mAMI1factory setting:indicates that it is runningMI2 MO1Multi-function contact output 3MI3(photocoupler)MI4MO2Multi-function contact output 4MI5(photocoupler)MI6Multi-functionDCMMCM Photocoupler OutputEDFM Digital Frequency Output+10VTerminalPower supplyfactory setting: 1:1+10V 20mADuty=50%, 10VDCAVIDigital Signal CommonMaster Frequency DCM DFM output signal selection0 to 10V 47kDFM SwitchACI4~20mA/0~10VMake sure that power is OFFAUIbefore changing the switch-10~+10Vsetting.ACMAnalog Signal CommonOC TPEAFM 0~10VDC/2mAACMAnalog Signal commonEbrake resistor(optional)-(minus sign)RS-485 serial communication1: +EV2: GND For communication,3: SG- it needs to use4: SG+ <strong>VFD</strong>-USB01/IFD85005: NC to connect to PC.6: NCNOTEThe brake resistor is built-in to model <strong>VFD</strong>110V43B.Revision August 2008, 03<strong>VE</strong>, SW V2.04 2-3
Chapter 2 Installation and Wiring|Figure 3 Wiring for SINK(NPN) mode and SOURCE(PNP) modeSINK/NPN ModeSinkSW1SourceFactorysettingFWD/STOPREV/STOPMulti-step1Multi-step2Multi-step3Multi-step4No FunctionNo FunctionDigital Signal Common*Don't apply the mains voltage directlyto above terminals.SOURCE/PNP ModeSinkFWD/STOPSW1REV/STOPSourceMulti-step1Multi-step2Multi-step3Factorysetting Multi-step4No FunctionNo Function*Don't apply the mains voltage directlyto above terminals.+24VFWDREVMI1MI2MI3MI4MI5MI6DCME+24VFWDREVMI1MI2MI3MI4MI5MI6DCMECAUTION!1. The wiring of main circuit and control circuit should be separated to prevent erroneous actions.2. Please use shield wire for the control wiring and not to expose the peeled-off net in front of theterminal.3. Please use the shield wire or tube for the power wiring and ground the two ends of the shieldwire or tube.2.2 External Wiring2-4 Revision August 2008, 03<strong>VE</strong>, SW V2.04
Chapter 2 Installation and Wiring|Power <strong>Supply</strong>EMI FilterR/L1 S/L2 T/L3U/T1 V/T2 W/T3FUSE/NFBMagneticcontactorInput ACLine Reactor+/B1B2-Zero-phaseReactorEBreak resistor(optional)Break unit (optional)BRZero-phaseReactorBreak resistor(optional)ItemsPowersupplyFuse/NFB(Optional)Magneticcontactor(Optional)Input ACLine Reactor(Optional)Zero-phaseReactor(Ferrite CoreCommonChoke)(Optional)EMI filter(Optional)ExplanationsPlease follow the specific powersupply requirements shown inAppendix A.There may be an inrush currentduring power up. Please check thechart of Appendix B and select thecorrect fuse with rated current. Use ofan NFB is optional.Please do not use a Magneticcontactor as the I/O switch of the ACmotor drive, as it will reduce theoperating life cycle of the AC drive.Used to improve the input powerfactor, to reduce harmonics andprovide protection from AC linedisturbances (surges, switchingspikes, short interruptions, etc.). ACline reactor should be installed whenthe power supply capacity is 500kVAor more or advanced capacity isactivated .The wiring distance shouldbe ≤ 10m. Refer to appendix B fordetails.Zero phase reactors are used toreduce radio noise especially whenaudio equipment is installed near theinverter. Effective for noise reductionon both the input and output sides.Attenuation quality is good for a widerange from AM band to 10MHz.Appendix B specifies the zero phasereactor. (RF220X00A)To reduce electromagneticinterference, please refer to AppendixB for more details.Output ACLine ReactorBrakeResistor(Optional)Used to reduce the deceleration timeof the motor. Please refer to the chartin Appendix B for specific BrakeResistors.MotorOutput ACLine Reactor(Optional)Motor surge voltage amplitudedepends on motor cable length. Forapplications with long motor cable(>20m), it is necessary to install areactor at the inverter output side2.3 Main Circuit2.3.1 Main Circuit ConnectionRevision August 2008, 03<strong>VE</strong>, SW V2.04 2-5
Chapter 2 Installation and Wiring|Figure 1 for the main terminalsBr ak e res istor(O pti onal)No-fuse breaker(NFB)RSTMC+1 +2/B1 B2 -R(L1)S(L2)T(L3)U(T1)V(T2)W(T3)EEMotorIM3~Figure 2 for the main terminalsRSTNo-fuse breaker(NFB)MC<strong>VFD</strong>B+1 +2 -R(L1)S(L2)T(L3)U(T1)V(T2)W(T3)EEBrak e res istor(optional)MotorIM3~Terminal SymbolR/L1, S/L2, T/L3U/T1, V/T2, W/T3Explanation of Terminal FunctionAC line input terminals (1-phase/3-phase)AC drive output terminals for connecting 3-phaseinduction motor+1, +2 Connections for DC Choke (optional)+2/B1, B2Connections for Brake Resistor (optional)+2~(-), +2/B1~(-) Connections for External Brake Unit (<strong>VFD</strong>B series)Earth connection, please comply with local regulations.2-6 Revision August 2008, 03<strong>VE</strong>, SW V2.04
Chapter 2 Installation and Wiring|Mains power terminals (R/L1, S/L2, T/L3)• Connect these terminals (R/L1, S/L2, T/L3) via a no-fuse breaker or earth leakagebreaker to 3-phase AC power (some models to 1-phase AC power) for circuit protection. Itis unnecessary to consider phase-sequence.• It is recommended to add a magnetic contactor (MC) in the power input wiring to cut offpower quickly and reduce malfunction when activating the protection function of AC motordrives. Both ends of the MC should have an R-C surge absorber.• Please make sure to fasten the screw of the main circuit terminals to prevent sparkswhich is made by the loose screws due to vibration.• Please use voltage and current within the regulation shown in Appendix A.• When using leakage-current breaker to prevent leakage current,• Do NOT run/stop AC motor drives by turning the power ON/OFF. Run/stop AC motordrives by RUN/STOP command via control terminals or keypad. If you still need torun/stop AC drives by turning power ON/OFF, it is recommended to do so only ONCE perhour.• Do NOT connect 3-phase models to a 1-phase power source.Output terminals for main circuit (U, V, W)• When the AC drive output terminals U/T1, V/T2, and W/T3 are connected to the motorterminals U/T1, V/T2, and W/T3, respectively, the motor will rotate counterclockwise (asviewed on the shaft end of the motor) when a forward operation command is received. Topermanently reverse the direction of motor rotation, switch over any of the two motorleads.Forwardrunning• DO NOT connect phase-compensation capacitors or surge absorbers at the outputterminals of AC motor drives.• With long motor cables, high capacitive switching current peaks can cause over-current,high leakage current or lower current readout accuracy. To prevent this, the motor cableshould be less than 20m for 3.7kW models and below. And the cable should be less than50m for 5.5kW models and above. For longer motor cables use an AC output reactor.• Use well-insulated motor, suitable for inverter operation.Terminals [+1, +2] for connecting DC reactorDC reactorJumper+1Revision August 2008, 03<strong>VE</strong>, SW V2.04 2-7
Chapter 2 Installation and Wiring|• To improve power factor and reduce harmonics connect a DC reactor between terminals[+1, +2]. Please remove the jumper before connecting the DC reactor.NOTE Models of 15kW and above have a built-in DC reactor.Terminals [+2/B1, B2] for connecting brake resistor and terminals [+1, +2/B1] forconnecting external brake unitBrake resistor(optional)BRBrake unit(optional)<strong>VFD</strong>BRefer to Appendix B for the use ofBRspec ial braking resis tor/unit+2/B1B2+2/B1 -• Connect a brake resistor or brake unit in applications with frequent deceleration ramps,short deceleration time, too low brake torque or requiring increased brake torque.• If the AC motor drive has a built-in brake chopper (all models of 11kW and below),connect the external brake resistor to the terminals [+2/B1, B2].• Models of 15kW and above don’t have a built-in brake chopper. Please connect anexternal optional brake unit (<strong>VFD</strong>B-series) and brake resistor. Refer to <strong>VFD</strong>B series <strong>user</strong><strong>manual</strong> for details.• Connect the terminals [+(P), -(N)] of the brake unit to the AC motor drive terminals[+2(+2/B1), (-)]. The length of wiring should be less than 5m with twisted cable.• When not used, please leave the terminals [+2/B1, -] open.WARNING!1. Short-circuiting [B2] or [-] to [+2/B1] can damage the AC motor drive.Grounding terminals ( )• Make sure that the leads are connected correctly and the AC drive is properly grounded.(Ground resistance should not exceed 0.1Ω.)• Use ground leads that comply with local regulations and keep them as short as possible.• Multiple <strong>VFD</strong>-<strong>VE</strong> units can be installed in one location. All the units should be groundeddirectly to a common ground terminal, as shown in the figure below. Ensure there are noground loops.excellentgoodnot allowed2-8 Revision August 2008, 03<strong>VE</strong>, SW V2.04
IM3Chapter 2 Installation and Wiring|2.3.2 Main Circuit TerminalsFrame BMain circuit terminalsR/L1, S/L2, T/L3, U/T1, V/T2, W/T3,, +1, +2/B1, -, B2+1 +2 B1 - B2 U/T1 V/T2 W/T3Screw Torque :18Kgf-cmWire Gauge :18~10AWGModels Wire Torque Wire Type<strong>VFD</strong>007V23A-2<strong>VFD</strong>007V43A-2<strong>VFD</strong>015V23A-2<strong>VFD</strong>015V43A-2<strong>VFD</strong>022V23A-2<strong>VFD</strong>022V43A-2<strong>VFD</strong>037V23A-2<strong>VFD</strong>037V43A-214-10 AWG(2.1-5.3mm 2 )18kgf-cm(15.6in-lbf)Strandedcopper only,75 o CR/L1 S/L2 T/L3Frame CMain circuit terminalsR/L1, S/L2, T/L3, U/T1, V/T2, W/T3,, +1, +2/B1, -, B2Models Wire Torque Wire Type<strong>VFD</strong>055V23A-2<strong>VFD</strong>075V23A-212-8 AWG 30kgf-cmStranded<strong>VFD</strong>110V43B-2(3.3-8.4mm 2 copper only,) (26in-lbf)75 o C<strong>VFD</strong>055V43A-2<strong>VFD</strong>075V43A-2POWERMOTORRevision August 2008, 03<strong>VE</strong>, SW V2.04 2-9
Screw Torque:IM POWER 200kgf-cm (173in-lbf)3 MOTORIM3POWERALARMChapter 2 Installation and Wiring|Frame DMain circuit terminalsR/L1, S/L2, T/L3, U/T1, V/T2, W/T3, , +1, +2, -R/L1 S/L2 T/L3 +1 +2 -POWER DC ( + ) DC (-)V/T2 W/T3MOTORModels Wire Torque Wire Type<strong>VFD</strong>110V23A-2<strong>VFD</strong>110V43A-2<strong>VFD</strong>150V43A-2<strong>VFD</strong>150V23A-2 8-2 AWG 30kgf-cmStranded<strong>VFD</strong>185V23A-2 (8.4-33.6mm 2 copper only,) (26in-lbf)75 o C<strong>VFD</strong>185V43A-2<strong>VFD</strong>220V43A-2<strong>VFD</strong>220V23A-2Frame EMain circuit terminalsR/L1, S/L2, T/L3, U/T1, V/T2, W/T3, , +1, +2, -Models Wire Torque Wire TypeCHARGES/L2 R/L1 T/L3 +2 +1 U/T1 V/T2 W/T3<strong>VFD</strong>300V43A-2<strong>VFD</strong>370V43A-2<strong>VFD</strong>450V43A-24-2 AWG<strong>VFD</strong>300V23A-2(21.2-33.6mm 2 )<strong>VFD</strong>370V23A-2<strong>VFD</strong>550V43C-257kgf-cm(49in-lbf)200kgf-cm(173in-lbf)Strandedcopperonly, 75 o C<strong>VFD</strong>750V43C-2NOTE# To connect 6 AWG (13.3 mm 2 ) wires, use Recognized Ring Terminals2.4 Control TerminalsCircuit diagram for digital inputs (SINK current 16mA.)2-10 Revision August 2008, 03<strong>VE</strong>, SW V2.04
SINK Mode+24Chapter 2 Installation and Wiring|SOURCE ModeDCMmulti-inputterminalMulti-InputTerminalMRADCMRA+24VInternal CircuitThe Position of the Control TerminalsInternal CircuitRCMCM +24V FWD MI1 MI3 MI5 DFM +10V AVI ACMMRCRBMO1 MO2DCMREVMI2MI4MI6AFMAUIACIRevision August 2008, 03<strong>VE</strong>, SW V2.04 2-11
Chapter 2 Installation and Wiring|Terminal symbols and functionsTerminalSymbolTerminal FunctionFactory Settings (SINK)ON: Connect to DCMFWDForward-Stop CommandON:OFF:Run in FWD directionStop acc. to Stop MethodREVReverse-Stop CommandON:OFF:Run in REV directionStop acc. to Stop Method+24V DC Voltage Source +24VDC, 80mA, used for SOURCE mode.MI1 Multi-function Input 1MI2 Multi-function Input 2MI3 Multi-function Input 3MI4 Multi-function Input 4MI5 Multi-function Input 5Refer to Pr.02-01 to Pr.02-06 for programmingthe Multi-function Inputs.ON: the activation current is 6.5mA. OFF:leakage current tolerance is 10μA.MI6 Multi-function Input 6DFMDCMRARBRCMRAMRCDigital Frequency Meter(Open Collector Output)DFM-DCMMax: 48V50mAJ550%internal circuitDigital Signal Common100%Multi-function Relay Output 1(N.O.) aMulti-function Relay Output 1(N.C.) bMulti-function Relay CommonMulti-function Relay Output 2(N.O.) aMulti-function Relay CommonPulse voltage output monitor signal,proportional to output frequencyDuty-cycle: 50%Ratio:Pr.02-18Min. load:4.7kΩMax. current: 50mAMax. voltage: 48VdcJumper:DFM jumper, factorysetting is OCCommon for digital inputs and used for SINKmode.Resistive Load:5A(N.O.)/3A(N.C.) 240VAC5A(N.O.)/3A(N.C.) 24VDCInductive Load:1.5A(N.O.)/0.5A(N.C.) 240VAC1.5A(N.O.)/0.5A(N.C.) 24VDCTo output monitor signal, including in operation,frequency arrival, overload and etc.Refer to Pr.02-11~02-12 for programming2-12 Revision August 2008, 03<strong>VE</strong>, SW V2.04
TerminalSymbolTerminal FunctionChapter 2 Installation and Wiring|Factory Settings (SINK)ON: Connect to DCM+10V Potentiometer Power <strong>Supply</strong> +10VDC 20mA (variable resistor 3-5kohm)MCMMO1Multi-function OutputCommon (Photocoupler)Multi-function Output 1(Photocoupler)Max. 48VDC 50mAMaximum 48VDC, 50mARefer to Pr.02-13 to Pr.02-14 for programmingMO1~MO2-DCMMax: 48Vdc50mAMO2Multi-function Output 2(Photocoupler)MO1~MO2MCMInternal CircuitAnalog voltage Input+10VAVI circuitImpedance:Resolution:200kΩ12 bitsAVIAVIRange:0 ~ 10VDC = 0 ~ Max. OutputFrequency (Pr.01-00)Set-up:Pr.03-00 ~ Pr.03-02ACMinternal circuitACIAUIAnalog current InputACI circuitACIACMinternal circuitAuxiliary analog voltage input+10~ AUI circuit-10VAUIACMinternal circuitImpedance: 250ΩResolution: 12 bitsRange: 4 ~ 20mA/0~10V =0 ~ Max. Output Frequency(Pr.01-00)Set-up: Pr.03-00 ~ Pr.03-02Jumper: ACI jumper, factory setting is4-20mAImpedance: 200kΩResolution: 12 bitsRange: -10 ~ +10VDC =0 ~ Max. Output Frequency(Pr.01-00)Set-up: Pr.03-00 ~ Pr.03-02Revision August 2008, 03<strong>VE</strong>, SW V2.04 2-13
Chapter 2 Installation and Wiring|TerminalSymbolTerminal FunctionFactory Settings (SINK)ON: Connect to DCMAFMACMAnalog output meterAFMACMAnalog control signal(common)0~20mAImpedance:Output currentResolution:Range:Function:18.5kΩ (voltage output)1.1mΩ (current output)20mA maxmax. frequency corresponds to0-10V0 ~ 10V/0 ~ 20mAPr.03-18Switch: AFM switch, factory setting is 0-10VCommon for AVI, ACI, AUI, AFM*Control signal wiring size: 18 AWG (0.75 mm 2 ) with shielded wire.Analog input terminals (AVI, ACI, AUI, ACM)• Analog input signals are easily affected by external noise. Use shielded wiring and keep itas short as possible (
Chapter 2 Installation and Wiring|General• Keep control wiring as far as possible from the power wiring and in separate conduits toavoid interference. If necessary let them cross only at 90º angle.• The AC motor drive control wiring should be properly installed and not touch any livepower wiring or terminals.NOTE• If a filter is required for reducing EMI (Electro Magnetic Interference), install it as close aspossible to AC drive. EMI can also be reduced by lowering the Carrier Frequency.• When using a GFCI (Ground Fault Circuit Interrupter), select a current sensor withsensitivity of 200mA, and not less than 0.1-second detection time to avoid nuisancetripping.DANGER!Damaged insulation of wiring may cause personal injury or damage to circuits/equipment if it comesin contact with high voltage.The specification for the control terminalsThe Position of the Control TerminalsMRA RA RCMCM +24V FWD MI1 MI3 MI5 DFM +10VAVIACMMRCRBMO1 MO2DCMREVMI2MI4MI6AFMAUIACIFrame Torque WireB, C, D, E, E1 8 kgf-cm (6.9 in-lbf) 22-14 AWG (0.3-2.1mm 2 )NOTEFrame B: <strong>VFD</strong>007V23A/43A-2, <strong>VFD</strong>015V23A/43A-2, <strong>VFD</strong>022V23A/43A-2, <strong>VFD</strong>037V23A/43A-2;Frame C: <strong>VFD</strong>055V23A/43A-2, <strong>VFD</strong>075V23A/43A-2, <strong>VFD</strong>110V43B-2,Frame D: <strong>VFD</strong>110V23A/43A-2, <strong>VFD</strong>150V23A/43A-2, <strong>VFD</strong>185V23A/43A-2, <strong>VFD</strong>220V23A/43A-2Frame E: <strong>VFD</strong>300V43A-2, <strong>VFD</strong>370V43A-2, <strong>VFD</strong>450V43A-2Frame E1: <strong>VFD</strong>300V23A-2, <strong>VFD</strong>370V23A-2, <strong>VFD</strong>550V43C-2, <strong>VFD</strong>750V43C-2Revision August 2008, 03<strong>VE</strong>, SW V2.04 2-15
Chapter 3 Digital Keypad Operation and Start Up3.1 Digital Keypad KPV-CE013.1.1 Description of the Digital Keypad KPV-CE01FHUKPV-CE01EXTPULED DisplayDisplay frequency, current, voltageand error, etc.Part NumberStatus DisplayDisplay of driver statusMODE Selection KeyPress this key to view differentoperating valuesJOGPULeft Keymoves cursor to the leftRight KeyMoves the cursor rightFWD/REV Direction KeyRUN keyRUNSTOPRESETSTOP/RESETDisplay MessageDescriptionsDisplays the AC drive Master Frequency.Displays the actual output frequency present at terminals U/T1, V/T2, andW/T3.User defined unit (where U = F x Pr.00-05)Displays the output current present at terminals U/T1, V/T2, and W/T3.The counter value (C).Revision August 2008, 03<strong>VE</strong>, SW V2.04 3-1
Chapter 3 Digital Keypad Operation and Start Up|Display MessageDescriptionsDisplays the selected parameter.Displays the actual stored value of the selected parameter.External Fault.Display “End” for approximately 1 second if input has been accepted bypressing key. After a parameter value has been set, the newvalue is automatically stored in memory. To modify an entry, use the, and keys.Display “Err”, if the input is invalid.3-2 Revision August 2008, 03<strong>VE</strong>, SW V2.04
Chapter 3 Digital Keypad Operation and Start Up|3.1.2 How to Operate the Digital Keypad KPV-CE01Selection modeSTARTFHUMODEFHUMODEFHUMODEFHUMODEFHUMODENOTE: In the selection mode, pressto set the parameters.GO STARTTo set parametersFHUFHUFHUFHUparameter set successfullyFHUMODEmove to previous displayparameter set errorNOTE: In the parameter setting mode, you can pressMODEto return to the selection mode.To shift cursorFHUSTARTFHUFHUFHUFHUTo modify dataFHUSTARTFHUFHUTo switch display modeFHUSTARTFHUFHUFHUFHUMODEMODEFHUFHUFHUFHUFHURevision August 2008, 03<strong>VE</strong>, SW V2.04 3-3
Chapter 3 Digital Keypad Operation and Start Up|To copy parameters 1Copy parameters from the AC Motor Drive to the KPV-CE01FHUFHUFHUFHUFHUabout 2-3 secondsFHUstart blinkingFFHHUUIt will display "End" to indicate thatthe first parameter is saved, thenreturn to "rEAd0".FHUFHUFHUFHUFHUFHUF FHHUUstart blinkingabout 2-3 secondsFFHHUUIt will display "End" to indicate thatthe second parameter is saved, thenreturn to "rEAd1".To copy parameters 2Copy parameters fromthe KPV-CE01 to the AC Motor DriveFHUFHUFHUFHUFHUFHUabout 2-3 secondsFHUstart blinkingFHUFHUIt will display "End" to indicate thatthe first parameter is saved, thenreturn to "SAvEv".FHUFHUFHUFHUFHUFHUFHUFHUabout 2-3 secondsFHUstart blinkingFFHHUUIt will display "End" to indicate thatthe second parameter is saved, thenreturn to "SAvEv".3-4 Revision August 2008, 03<strong>VE</strong>, SW V2.04
3.1.3 Dimension of the Digital KeypadChapter 3 Digital Keypad Operation and Start Up|Unit: mm [inch]FHUKPV-CEO1RUN STOP JOG FWD REV EXT PUJOGMODEPUFWDREVRUNPROGDATASTOPRESETLABEL 13.1.4 Reference Table for the LCD Display of the Digital KeypadDigital 0 1 2 3 4 5 6 7 8 9LCDEnglishalphabetA b Cc d E F G Hh I JjLCDEnglishalphabetK L n Oo P q r S Tt ULCDEnglishalphabetv Y ZLCDRevision August 2008, 03<strong>VE</strong>, SW V2.04 3-5
Chapter 3 Digital Keypad Operation and Start Up|3.1.5 Operation MethodRefer to 3.1.2 How to operate the digital keypad KPV-CE01 and chapter 4 parameters forsetting. Please choose a suitable method depending on application and operation rule. Theoperation is usually used as shown in the following table.Operation MethodFrequency SourceOperation CommandSourceSTOPKPV-CE01 keypad RUN RESETOperate fromexternal signalFactory setting:SINK ModeSinkSw1FactorySource settingPlease refer toFigure 3 for wiringof SINK mode andSOURCEmode.FWD/STOPREV/STOPMulti-step 1Multi-step 2Multi-step 3Multi-step 4No functionNo functionDigital Signal Common* Don't apply the mains voltage directlyto abov e terminals.ACI current/voltage selectionACI Switch3Make sure that power is OFFbefore changing the switchsetting.5K 20-20mA 0-10V1Analog Multi-function Output TerminalAFM analog output selectionAFM SwitchMake sure that power is OFFbefore changing the switchsetting.0-10V 0-20mAMain circuit (power) terminalsControl circuit terminals+24VFWDREVMI1MI2MI3MI4MI5MI6DCME+10VPower supply+10V 20mAAVIMaster Frequency0 to 10V 47kACI4~20mA/0~10VAUI-10~+10VACMAnalog Signal CommonEAFM 0~10VDC/2mAACMAnalog Signal commonEShielded leads & CableOperate fromcommunicationPlease refer to the communication address 2000H and 2119H settings in thecommunication address definition.3.2 Start-up3.2.1 Preparations before Start-up3-6 Revision August 2008, 03<strong>VE</strong>, SW V2.04
Chapter 3 Digital Keypad Operation and Start Up|Carefully check the following items before proceeding.• Make sure that the wiring is correct. In particular, check that the output terminals U, V, W.are NOT connected to power and that the drive is well grounded.• Verify that there are no short-circuits between terminals and from terminals to ground ormains power.• Check for loose terminals, connectors or screws.• Verify that no other equipment is connected to the AC motor• Make sure that all switches are OFF before applying power to ensure that the AC motordrive doesn’t start running and there is no abnormal operation after applying power.• Make sure that the front cover is well installed before applying power.• Do NOT operate the AC motor drive with humid hands.• The keypad shows briefly "<strong>Delta</strong>" and then should light up as follows (normal status withno error)FHUKPV-CE01EXT PUJOGPURUNSTOPRESET- If the drive has built-in fan (2hp/1.5kW and above) it should run. The factory settingof Fan Control Pr.07-19=00 (Fan always on).Revision August 2008, 03<strong>VE</strong>, SW V2.04 3-7
Chapter 3 Digital Keypad Operation and Start Up|3.2.2 Trial RunAfter finishing checking the items in “3.2.1 preparation before start-up”, you can perform atrial run. The factory setting of operation source is from keypad (Pr.00-20=00).1. After applying power, verify that LED “F”is on and the display shows 60.00Hz.2. Setting frequency to about 5Hz by usingkey.3. Pressing RUN key for forward running.And if you want to change to reverseKPV-CE01RUN STOP JOG FWD REV EXT PUFKPV-CE01RUN STOP JOG FWD REV EXT PUFKPV-CE01RUN STOP JOG FWD REV EXT PUFKPV-CE01RUN STOP JOG FWD REV EXT PUrunning, you should presskey. TheLED will display the status. And if youwant to decelerate to stop, please pressFKPV-CE01RUN STOP JOG FWD REV EXT PUFKPV-CE01RUN STOP JOG FWD REV EXT PUSTOPRESETkey.4. Check following items:• Check if the motor direction of rotationis correct.• Check if the motor runs steadilywithout abnormal noise and vibration.• Check if acceleration and decelerationare smooth.If the results of trial run are normal, pleasestart formal run.FKPV-CE01RUN STOP JOG FWD REV EXT PUFKPV-CE01RUN STOP JOG FWD REV EXT PUFKPV-CE01RUN STOP JOG FWD REV EXT PUKPV-CE01RUN STOP JOG FWD REV EXT PUFKPV-CE01RUN STOP JOG FWD REV EXT PUFKPV-CE01RUN STOP JOG FWD REV EXT PUPURUNKPV-CE01RUN STOP JOG FWD REV EXT PUKPV-CE01RUN STOP JOG FWD REV EXT PU3-8 Revision August 2008, 03<strong>VE</strong>, SW V2.04
NOTEChapter 3 Digital Keypad Operation and Start Up|1. Please stop running immediately if any fault occurs and refer to troubleshooting for solving theproblem.2. Please do NOT touch output terminals U, V, W when power is still applied to L1/R, L2/S, L3/Teven when the AC motor drive has stopped. The DC-link capacitors may still be charged tohazardous voltage levels, even if the power has been turned off.3. To avoid damage to components, do not touch them or the circuit boards with metal objects oryour bare hands.Revision August 2008, 03<strong>VE</strong>, SW V2.04 3-9
Chapter 3 Digital Keypad Operation and Start Up|This page intentionally left blank.3-10 Revision August 2008, 03<strong>VE</strong>, SW V2.04
Chapter 4 ParametersThe <strong>VFD</strong>-<strong>VE</strong> parameters are divided into 12 groups by property for easy setting. In most applications,the <strong>user</strong> can finish all parameter settings before start-up without the need for re-adjustment duringoperation.The 12 groups are as follows:Group 0: System ParametersGroup 1: Basic ParametersGroup 2: Digital Input/Output ParametersGroup 3: Analog Input/Output ParametersGroup 4: Multi-Step Speed ParametersGroup 5: Motor ParametersGroup 6: Protection ParametersGroup 7: Special ParametersGroup 8: High-function PID ParametersGroup 9: Communication ParametersGroup 10: Speed Feedback Control ParametersGroup 11: Advanced ParametersRevision August 2008, 03<strong>VE</strong>, SW V2.04 4-1
Chapter 4 Parameters|4.1 Summary of Parameter Settings: The parameter can be set during operation.Group 0 System ParametersFactoryPr. Explanation SettingsVF VFPG SVC FOCPG TQRPGSettingIdentity Code of the AC Read-only 0 ○ ○ ○ ○ ○00-00 motor driveRated Current Display of Read-only 0 ○ ○ ○ ○ ○00-01 the AC motor drive0: No function0 ○ ○ ○ ○ ○1: Read only2: Enable group 11 parameters setting00-02 Parameter Reset8: Keypad lock9: All parameters are reset to factory settings (50Hz,220V/380V)10: All parameters are reset to factory settings (60Hz,220V/440V)0: Display the frequency command value (LED F)1: Display the actual output frequency (LED H)00-03 Start-up Display Selection2: Multifunction display, see Pr.00-04 (LED U)3: Display the output current (A)0 ○ ○ ○ ○ ○0: Display output current (A)0 ○ ○ ○ ○ ○1: Display counter value (C)2: Display output frequency (H)00-04Content of Multi FunctionDisplay3: Display DC-BUS voltage ( u )4: Display output voltage (E)5: Output power factor angle (n)6: Display output power (kW)7: Display actual motor speed (HU)8: Display estimate output torque (kg-m)9: Display PG position (G) (refer to Pr.10-00 and Pr.10-01)10: Display PID feedback11: Display AVI (%)12: Display ACI (%)13: Display AUI (%)14: Display the temperature of heat sink (°C)15: Display the temperature of IGBT (°C)16: The status of digital input (ON/OFF)17: The status of digital output (ON/OFF)18: Multi-step speed19: The corresponding CPU pin status of digital input20: The corresponding CPU pin status of digital output21: Number of actual motor revolution (PG1 of PG card)22: Pulse input frequency (PG2 of PG card)23: Pulse input position (PG2 of PG card)Digit 4: decimal point number (0 to 3)Digit 0-3: 40 to 999900-05 User-Defined Coefficient K0 ○ ○ ○ ○ ○00-06 Software Version Read-only #.# ○ ○ ○ ○ ○00-07 Password Input1 to 9998 and 10000 to 655350 ○ ○ ○ ○ ○0 to 2: times of wrong password1 to 9998 and 10000 to 655350 ○ ○ ○ ○ ○00-08 Password Set0: No password set or successful input in Pr.00-071: Password has been set00-09 Energy Saving Gain 10~1000 % 100% ○00-10 Control Method00-11 V/f Curve Selection00-1200-13Constant/Variable TorqueSelectionOptimalAcceleration/DecelerationSetting0: V/f Control1: V/f Control + Encoder (VFPG)2: Sensorless vector control (SVC)3: FOC vector control + Encoder (FOCPG)4: Torque control + Encoder (TQRPG)0: V/f curve determined by group 011: 1.5 power curve2: Square curve0: Constant Torque (100%)1: Variable Torque (125%)0: Linear accel./decel. I1: Auto accel., linear decel.2: Linear accel., auto decel.3: Auto accel./decel.0 ○ ○ ○ ○ ○0 ○ ○0 ○ ○ ○ ○0 ○ ○ ○ ○4-2 Revision August 2008, 03<strong>VE</strong>, SW V2.04
Chapter 4 Parameters|Pr. Explanation SettingsFactoryVF VFPG SVC FOCPG TQRPGSetting4: Stall prevention by auto accel./decel. (limited by 01-12to 01-21)Time Unit for0: Unit: 0.01 second0 ○ ○ ○ ○00-14 Acceleration/Deceleration 1: Unit: 0.1 secondand S Curve00-15 Reserved00-16 Reserved00-17 Carrier Frequency 1~15KHz 10 ○ ○ ○ ○ ○0: Enable AVR0 ○ ○ ○ ○ ○Auto Voltage Regulation00-18 1: Disable AVR(AVR) Function2: Disable AVR when deceleration stopAuto Energy-saving 0: Disable0 ○ ○ ○ ○00-19 Operation1: Enable0: Digital keypad (KPV-CE01)0 ○ ○ ○ ○1: RS-485 serial communication2: External analog input (Pr. 03-00)Source of the Master00-20 3: External UP/DOWN terminalFrequency Command4: Pulse input without direction command (Pr.10-15without direction)5: Pulse input with direction command (Pr.10-15)00-21Source of the OperationCommand00-22 Stop Method 0: Ramp to stop1: Coast to stop0: Enable reverse00-23 Reverse Operation 1: Disable reverse2: Disable forward0: Digital keypad (KPV-CE01)1: External terminals. Keypad STOP disabled.2: RS-485 serial communication (RJ-11). Keypad STOPdisabled.0 ○ ○ ○ ○ ○0 ○ ○ ○ ○ ○0 ○ ○ ○ ○ ○Revision August 2008, 03<strong>VE</strong>, SW V2.04 4-3
Chapter 4 Parameters|Group 1 Basic ParametersPr. Explanation SettingsFactoryVF VFPG SVC FOCPG TQRPGSetting01-00Maximum Output 50.00~600.00Hz 60.00/ ○ ○ ○ ○ ○Frequency50.0001-011st Output Frequency 0.00~600.00Hz 60.00/ ○ ○ ○ ○ ○Setting 150.0001-021st Output Voltage 230V: 0.1V~255.0V220.0 ○ ○ ○ ○ ○Setting 1460V: 0.1V~510.0V440.001-032nd Output Frequency 0.00~600.00Hz 0.50 ○ ○Setting 12nd Output Voltage 230V: 0.1V~255.0V5.0 ○ ○01-04 Setting 1460V: 0.1V~510.0V10.001-053rd Output Frequency 0.00~600.00Hz 0.50 ○ ○Setting 13rd Output Voltage 230V: 0.1V~255.0V5.0 ○ ○01-06 Setting 1460V: 0.1V~510.0V10.001-074th Output Frequency 0.00~600.00Hz 0.00 ○ ○ ○ ○Setting 14th Output Voltage 230V: 0.1V~255.0V0.0 ○ ○ ○01-08 Setting 1460V: 0.1V~510.0V0.001-09 Start Frequency 0.00~600.00Hz 0.50 ○ ○ ○ ○01-10Output Frequency Upper600.00 ○ ○ ○ ○0.00~600.00HzLimit01-11Output Frequency Lower0.00 ○ ○ ○ ○0.00~600.00HzLimit10.00/ ○ ○ ○ ○01-12 Accel Time 1 0.00~600.00 sec/0.00~6000.0 sec10.010.00/ ○ ○ ○ ○01-13 Decel Time 1 0.00~600.00 sec/0.00~6000.0 sec10.010.00/ ○ ○ ○ ○01-14 Accel Time 2 0.00~600.00 sec/0.00~6000.0 sec10.010.00/ ○ ○ ○ ○01-15 Decel Time 2 0.00~600.00 sec/0.00~6000.0 sec10.010.00/ ○ ○ ○ ○01-16 Accel Time 3 0.00~600.00 sec/0.00~6000.0 sec10.010.00/ ○ ○ ○ ○01-17 Decel Time 3 0.00~600.00 sec/0.00~6000.0 sec10.010.00/ ○ ○ ○ ○01-18 Accel Time 4 0.00~600.00 sec/0.00~6000.0 sec10.001-19 Decel Time 40.00~600.00 sec/0.00~6000.0 sec 10.00/ ○ ○ ○ ○10.001-20 JOG Acceleration Time 0.00~600.00 sec/0.00~6000.0 sec1.00/ ○ ○ ○ ○1.001-21 JOG Deceleration Time 0.00~600.00 sec/0.00~6000.0 sec1.00/ ○ ○ ○ ○1.001-22 JOG Frequency 0.00~600.00Hz 6.00 ○ ○ ○ ○ ○1st/4th Accel/decel 0.00~600.00Hz 0.00 ○ ○ ○ ○01-23 FrequencyS-curve for Acceleration 0.00~25.00 sec/0.00~250.0 sec 0.2/0.0 ○ ○ ○ ○01-24 Departure Time 1S-curve for Acceleration 0.00~25.00 sec /0.00~250.0 sec 0.2/0.0 ○ ○ ○ ○01-25 Arrival Time 2S-curve for Deceleration 0.00~25.00 sec /0.00~250.0 sec 0.2/0.0 ○ ○ ○ ○01-26 Departure Time 1S-curve for Deceleration 0.00~25.00 sec /0.00~250.0 sec 0.2/0.0 ○ ○ ○ ○01-27 Arrival Time 201-28Skip Frequency 1 (upper 0.00~600.00Hz 0.00 ○ ○ ○ ○limit)01-29Skip Frequency 1 (lower 0.00~600.00Hz 0.00 ○ ○ ○ ○limit)01-30Skip Frequency 2 (upper 0.00~600.00Hz 0.00 ○ ○ ○ ○limit)01-31Skip Frequency 2 (lower 0.00~600.00Hz 0.00 ○ ○ ○ ○limit)01-32Skip Frequency 3 (upper 0.00~600.00Hz 0.00 ○ ○ ○ ○limit)01-33Skip Frequency 3 (lower 0.00~600.00Hz 0.00 ○ ○ ○ ○limit)01-340: Output Waiting0 ○ ○ ○ ○Mode Selection when1: Zero-speed operationFrequency < Fmin2: Fmin (4th output frequency setting)01-35 1st Output Frequency 0.00~600.00Hz 60.00/ ○ ○ ○ ○ ○4-4 Revision August 2008, 03<strong>VE</strong>, SW V2.04
Chapter 4 Parameters|Pr. Explanation SettingsFactoryVF VFPG SVC FOCPG TQRPGSettingSetting 2 50.0001-361st Output Voltage 230V: 0.1V~255.0V220.0 ○ ○ ○ ○ ○Setting 2460V: 0.1V~510.0V440.001-372nd Output Frequency 0.00~600.00Hz 0.50 ○ ○Setting 22nd Output Voltage 230V: 0.1V~255.0V5.0/ ○ ○01-38 Setting 2460V: 0.1V~510.0V10.001-393rd Output Frequency 0.00~600.00Hz 0.50 ○ ○Setting 23rd Output Voltage 230V: 0.1V~255.0V5.0/ ○ ○01-40 Setting 2460V: 0.1V~510.0V10.001-414th Output Frequency 0.00~600.00Hz 0.00 ○ ○ ○ ○ ○Setting 24th Output Voltage 230V: 0.1V~255.0V0.0/ ○ ○01-42 Setting 2460V: 0.1V~510.0V0.0Revision August 2008, 03<strong>VE</strong>, SW V2.04 4-5
Chapter 4 Parameters|Group 2 Digital Input/Output ParametersPr. Explanation Settings02-00 2-wire/3-wire OperationControl0: FWD/STOP, REV/STOP1: FWD/STOP, REV/STOP (Line Start Lockout)2: RUN/STOP, REV/FWD3: RUN/STOP, REV/FWD (Line Start Lockout)4: 3-wire (momentary push button)5: 3-wire (momentary push button and Line StartLockout)FactoryVF VFPG SVC FOCPG TQRPGSetting0 ○ ○ ○ ○ ○02-01 Multi-Function Input 0: no function 1 ○ ○ ○ ○ ○Command 1 (MI1)(it is Stop terminal for 3-wire operation)1: multi-step speed command 1/multi-step positioncommand 12: multi-step speed command 2/ multi-step position○○○○○○○○command 202-02Multi-Function InputCommand 2 (MI2)3: multi-step speed command 3/ multi-step positioncommand 34: multi-step speed command 4/ multi-step position2 ○○○○○○○○command 402-03 Multi-Function Input 5: Reset 3 ○ ○ ○ ○ ○Command 3 (MI3) 6: JOG command○ ○ ○ ○02-04 Multi-Function Input 7: acceleration/deceleration speed inhibit 4 ○ ○ ○ ○Command 4 (MI4) 8: the 1st, 2nd acceleration/deceleration time selection ○ ○ ○ ○02-05 Multi-Function Input 9: the 3rd, 4th acceleration/deceleration time selection 0 ○ ○ ○ ○Command 5 (MI5) 10: EF input (07-36) ○ ○ ○ ○ ○02-06 Multi-Function Input0 ○ ○ ○ ○ ○Command 6 (MI6)11: B.B. input(specific terminal forTRG)12: Output stop ○ ○ ○ ○ ○02-23 Multi-Function Input 13: cancel the setting of the optimal0 ○ ○ ○ ○Command 7acceleration/deceleration time02-24 Multi-Function Input0 ○ ○ ○ ○14: switch between drive settings 1 and 2Command 802-25 Multi-Function Input0 ○ ○ ○ ○15: operation speed command form AVICommand 902-26 Multi-Function Input0 ○ ○ ○ ○16: operation speed command form ACICommand 1002-27 Multi-Function Input0 ○ ○ ○ ○17: operation speed command form AUICommand 1102-28 Multi-Function Input0 ○ ○ ○ ○ ○18: Emergency Stop (07-36)Command 1202-29 Multi-Function Input0 ○ ○ ○ ○19: Digital Up commandCommand 1302-30 Multi-Function Input0 ○ ○ ○ ○20: Digital Down commandCommand 1421: PID function disabled ○ ○ ○ ○22: clear counter ○ ○ ○ ○ ○23: input the counter value (multi-function input○ ○ ○ ○ ○command 6)24: FWD JOG command ○ ○ ○ ○25: REV JOG command ○ ○ ○ ○26: TQC+PG/FOC+PG model selection ○ ○27: ASR1/ASR2 selection ○ ○28: Emergency stop (EF1) ○ ○ ○ ○ ○29: Signal confirmation for Y-connection ○ ○ ○ ○30: Signal confirmation for Δ−connection ○ ○ ○ ○31: High torque bias (by Pr.07-29) ○ ○ ○ ○ ○32: Middle torque bias (by Pr.07-30) ○ ○ ○ ○ ○33: Low torque bias (by Pr.07-31) ○ ○ ○ ○ ○34: Enable multi-step position control ○ ○35: Enable position control ○ ○36: Enable position learning function (valid at stop) ○ ○37: Enable pulse position input command ○ ○38: Disable write EEPROM function ○ ○ ○ ○ ○39: Torque command direction ○40: Force stop ○ ○ ○ ○ ○41: Serial position clock ○42: Serial position input ○43: Analog input resolution selection ○4-6 Revision August 2008, 03<strong>VE</strong>, SW V2.04
Chapter 4 Parameters|Pr. Explanation SettingsFactoryVF VFPG SVC FOCPG TQRPGSetting44: Reset initial reel diameter ○ ○ ○ ○ ○45: Reset initial reel diameter 0 ○ ○ ○ ○ ○46: Reset initial reel diameter 1 ○ ○ ○ ○ ○47: Reset PID control integration of tension ○ ○ ○ ○ ○48: Mechanical gear ratio switch ○ ○ ○49: Reserved50: Reserved02-07 UP/DOWN Key Mode0: up/down by the accel/decel time0 ○ ○ ○ ○1: up/down constant speed (Pr.02-08)The0.01 ~ 1.00Hz/ms 0.01 ○ ○ ○ ○Acceleration/Deceleration02-08 Speed of the UP/DOWNKey with Constant SpeedDigital Input Response 0.001~ 30.000 sec 0.005 ○ ○ ○ ○ ○02-09 TimeDigital Input Operation 0 ~ 65535 0 ○ ○ ○ ○ ○02-10 DirectionMulti-function Output 1 0: No function 11 ○ ○ ○ ○ ○02-11 RA, RB, RC(Relay1) 1: Operation indication ○ ○ ○ ○ ○Multi-function Output 2 2: Operation speed attained 1 ○ ○ ○ ○ ○02-12 MRA, MRC (Relay2) 3: Desired frequency attained 1 (Pr.02-19) ○ ○ ○ ○ ○Multi-function Output 3 4: Desired frequency attained 2 (Pr.02-21) 0 ○ ○ ○ ○02-13(MO1)5: Zero speed (frequency command) ○ ○ ○ ○6: Zero speed with stop (frequency command) ○ ○ ○ ○7: Over torque (OT1) (Pr.06-06~06-08) ○ ○ ○ ○ ○8: Over torque (OT2) (Pr.06-09~06-11) ○ ○ ○ ○ ○02-14Multi-function Output 4 9: Drive ready 0 ○ ○ ○ ○ ○(MO2) 10: User-defined Low-voltage Detection ○ ○ ○ ○ ○11: Malfunction indication ○ ○ ○ ○ ○02-35Multi-function Output 5 12: Mechanical brake release (Pr.02-31) ○ ○ ○ ○ ○(MO3) 13: Overheat ○ ○ ○ ○ ○14: Software brake signal ○ ○ ○ ○ ○02-36Multi-function Output 6 15: PID feedback error ○ ○ ○ ○ ○(MO4) 16: Slip error (oSL) ○ ○ ○ ○17: Terminal count value attained (Pr.02-16) ○ ○ ○ ○ ○02-37Multi-function Output 7 18: Preliminary count value attained (Pr.02-17) ○ ○ ○ ○ ○(MO5) 19: Baseblock (B.B.) Indication ○ ○ ○ ○ ○20: Warning output ○ ○ ○ ○ ○02-38Multi-function Output 8 21: Over voltage warning ○ ○ ○ ○ ○(MO6) 22: Over-current stall prevention warning ○ ○ ○ ○ ○23: Over-voltage stall prevention warning ○ ○ ○02-39Multi-function Output 9 24: Operation mode indication ○ ○ ○ ○ ○(MO7) 25: Forward command ○ ○ ○ ○26: Reverse command ○ ○ ○ ○02-40Multi-function Output 10 27: Output when current >= Pr.02-32 ○ ○ ○ ○ ○(MO8) 28: Output when current < Pr.02-32 ○ ○ ○ ○ ○29: Output when frequency >= Pr.02-33 ○ ○ ○ ○ ○02-41Multi-function Output 11 30: Output when frequency < Pr.02-33 ○ ○ ○ ○ ○(MO9) 31: Y-connection for the motor coil ○ ○ ○ ○32: Δ connection for the motor coil ○ ○ ○ ○02-42Multi-function Output 12 33: Zero speed (actual output frequency) ○ ○ ○ ○(MOA) 34: Zero speed with Stop (actual output frequency) ○ ○ ○ ○35: Error output selection 1 (Pr.06-23) ○ ○ ○ ○ ○36: Error output selection 2 (Pr.06-24) ○ ○ ○ ○ ○37: Error output selection 3 (Pr.06-25) ○ ○ ○ ○ ○38: Error output selection 4 (Pr.06-26) ○ ○ ○ ○ ○39: Position attained (Pr.10-19) ○40: Speed attained (including zero speed) ○ ○ ○ ○41: Multi-position attained ○42: Crane function ○ ○ ○ ○43: Motor zero-speed output (Pr.02-43) ○ ○ ○ ○Revision August 2008, 03<strong>VE</strong>, SW V2.04 4-7
Chapter 4 Parameters|FactoryPr. Explanation SettingsVF VFPG SVC FOCPG TQRPGSetting44: Max. reel diameter attained ○ ○ ○ ○ ○45: Empty reel diameter attained ○ ○ ○ ○ ○46: Broken belt detection ○ ○ ○ ○ ○47: Break release at stop ○ ○ ○ ○48: Error PID feedback of tension ○ ○ ○ ○ ○49: Reserved50: Reserved02-15Multi-output Direction 0 ~ 65535 0 ○ ○ ○ ○ ○02-16Terminal Count Value 0 ~ 65535 0 ○ ○ ○ ○ ○02-17Preliminary Counter0 ○ ○ ○ ○ ○0 ~ 65535Value02-18Digital Output Gain 1 ~ 40 1 ○ ○ ○ ○ ○02-19Desired Frequency60.00/ ○ ○ ○ ○0.00 ~ 600.00HzAttained 150.0002-20The Width of the Desired2.00 ○ ○ ○ ○0.00 ~ 600.00HzFrequency Attained 102-21Desired Frequency60.00/ ○ ○ ○ ○0.00 ~ 600.00HzAttained 250.0002-22The Width of the Desired2.00 ○ ○ ○ ○0.00 ~ 600.00HzFrequency Attained 202-31Brake Delay Time 0.000~65.000 Sec 0.000 ○ ○ ○ ○ ○02-32Output Current Level0 ○ ○ ○ ○ ○Setting for External 0~100%Terminals02-33Output Boundary for0.00 ○ ○ ○ ○ ○0.00~+-60.00Hz (it is motor speed when using PG)External TerminalsExternal Operation0 ○ ○ ○02-340: DisableControl Selection after1: Drive runs if run command exists after resetReset02-43Zero-speed Level of0 ○ ○ ○ ○ ○0~65535 rpmMotor4-8 Revision August 2008, 03<strong>VE</strong>, SW V2.04
Group 3 Analog Input/Output ParametersChapter 4 Parameters|FactoryPr. Explanation SettingsVF VFPG SVC FOCPG TQRPGSettingAnalog Input 1 (AVI) 0: No function 1 ○ ○ ○ ○ ○03-00Analog Input 2 (ACI) 1: Frequency command (torque limit under TQR control 0 ○ ○ ○ ○ ○03-01mode)Analog Input 3 (AUI) 2: torque command (torque limit under speed mode) 0 ○03-023: Torque compensation command ○ ○ ○ ○ ○03-0303-0403-0503-0603-0703-0803-0903-1003-1103-1203-1303-1403-1503-1603-1703-1803-2103-244: PID target value (refer to group 8) ○ ○ ○ ○5: PID feedback signal (refer to group 8) ○ ○ ○ ○6: P.T.C. thermistor input value ○ ○ ○ ○ ○7: Positive torque limit ○8: Negative torque limit ○9: Regenerative torque limit ○10: Positive/negative torque limit ○11: PID feedback signal of tension ○ ○ ○ ○ ○12: Line speed ○ ○ ○ ○ ○13: Reel diameter ○ ○ ○ ○ ○14: PID target value of tension (tension closed-loop) ○ ○ ○ ○ ○15: Tension setting (tension open-loop) ○16: Zero-speed tension ○17: Tension taper ○Analog Input Bias 10 ○ ○ ○ ○ ○-100.0~100.0%(AVI)Analog Input Bias 20 ○ ○ ○ ○ ○-100.0~100.0%(ACI)Analog Input Bias 30 ○ ○ ○ ○ ○-100.0~100.0%(AUI)Positive/negative Bias 0: Zero bias0 ○ ○ ○ ○ ○Mode (AVI)1: Lower than bias=biasPositive/negative Bias 2: Greater than bias=bias0 ○ ○ ○ ○ ○Mode (ACI)3: The absolute value of the bias voltage while servingPositive/negative Bias as the center0 ○ ○ ○ ○ ○Mode (AUI)4: Serve bias as the centerAnalog Input Gain 1100.0 ○ ○ ○ ○ ○-500.0~500.0%(AVI)Analog Input Gain 2100.0 ○ ○ ○ ○ ○-500.0~500.0%(ACI )Analog Input Gain 3100.0 ○ ○ ○ ○ ○-500.0~500.0%(AUI)ACI/AVI2 Selection 0: ACI0 ○ ○ ○ ○ ○1: AVI 2Analog Input Delay0.01 ○ ○ ○ ○ ○0.00~2.00 secTime (AVI)Analog Input Delay0.01 ○ ○ ○ ○ ○0.00~2.00 secTime (ACI)Analog Input Delay0.01 ○ ○ ○ ○ ○0.00~2.00 secTime (AUI)Addition Function of 0: Disable (AVI, ACI, AUI)○ ○ ○ ○ ○the Analog Input 1: EnableLoss of the ACI Signal 0: Disable0 ○ ○ ○ ○ ○1: Continue operation at the last frequency2: Decelerate to stop3: Stop immediately and display E.F.Analog Output 0: Output frequency (Hz) 0 ○ ○ ○ ○ ○Selection 1 1: Frequency command (Hz) ○ ○ ○ ○ ○Analog Output 2: Motor speed (Hz) ○ ○ ○ ○ ○Selection 2 3: Output current (rms) ○ ○ ○ ○ ○Analog Output 4: Output voltage ○ ○ ○ ○ ○Selection 3 5: DC Bus Voltage ○ ○ ○ ○ ○6: Power factor ○ ○ ○ ○ ○7: Power ○ ○ ○ ○ ○8: Output torque ○ ○ ○ ○ ○Revision August 2008, 03<strong>VE</strong>, SW V2.04 4-9
Chapter 4 Parameters|Pr. Explanation SettingsFactorySettingVF VFPG SVC FOCPG TQRPG9: AVI ○ ○ ○ ○ ○10: ACI ○ ○ ○ ○ ○11: AUI ○ ○ ○ ○ ○12: q-axis current ○ ○ ○ ○ ○13: q-axis feedback value ○ ○ ○ ○ ○14: d-axis current ○ ○ ○ ○ ○15: d-axis feedback value ○ ○ ○ ○ ○16: q-axis voltage ○ ○ ○ ○ ○17: d-axis voltage ○ ○ ○ ○ ○18: Torque command ○ ○ ○ ○ ○19: Pulse frequency command ○ ○ ○ ○ ○03-19Analog Output Gain 1 0~200.0% 100.0 ○ ○ ○ ○ ○03-20Analog Output Value 0: Absolute value in REV direction0 ○ ○ ○ ○ ○in REV Direction 1 1: Output 0V in REV direction2: Enable output voltage in REV direction03-22Analog Output Gain 2 0~200.0% 100.0 ○ ○ ○ ○ ○03-23Analog Output Value 0: Absolute value in REV direction0 ○ ○ ○ ○ ○in REV Direction 2 1: Output 0V in REV direction2: Enable output voltage in REV direction03-25Analog Output Gain 3 0~200.0% 100.0 ○ ○ ○ ○ ○03-26Analog Output Value 0: Absolute value in REV direction0 ○ ○ ○ ○ ○in REV Direction 3 1: Output 0V in REV direction2: Enable output voltage in REV direction4-10 Revision August 2008, 03<strong>VE</strong>, SW V2.04
Chapter 4 Parameters|Group 4 Multi-Step Speed ParametersPr. Explanation SettingsFactorySettingVF VFPG SVC FOCPG TQRPG04-001st Step Speed 0.00~600.00Hz 0.00 ○ ○ ○ ○Frequency04-012nd Step Speed 0.00~600.00Hz 0.00 ○ ○ ○ ○Frequency04-023rd Step Speed 0.00~600.00Hz 0.00 ○ ○ ○ ○Frequency04-034th Step Speed 0.00~600.00Hz 0.00 ○ ○ ○ ○Frequency04-045th Step Speed 0.00~600.00Hz 0.00 ○ ○ ○ ○Frequency04-056th Step SpeedFrequency0.00~600.00Hz 0.00 ○ ○ ○ ○04-067th Step SpeedFrequency0.00~600.00Hz 0.00 ○ ○ ○ ○04-078th Step SpeedFrequency0.00~600.00Hz 0.00 ○ ○ ○ ○04-089th Step SpeedFrequency0.00~600.00Hz 0.00 ○ ○ ○ ○04-0910th Step SpeedFrequency0.00~600.00Hz 0.00 ○ ○ ○ ○04-1011th Step SpeedFrequency0.00~600.00Hz 0.00 ○ ○ ○ ○04-1112th Step SpeedFrequency0.00~600.00Hz 0.00 ○ ○ ○ ○04-1213th Step SpeedFrequency0.00~600.00Hz 0.00 ○ ○ ○ ○04-1314th Step SpeedFrequency0.00~600.00Hz 0.00 ○ ○ ○ ○04-1415th Step SpeedFrequency0.00~600.00Hz 0.00 ○ ○ ○ ○04-15Multi-position 1 0~65535 0 ○ ○04-16Multi-position 2 0~65535 0 ○ ○04-17Multi-position 3 0~65535 0 ○ ○04-18Multi-position 4 0~65535 0 ○ ○04-19Multi-position 5 0~65535 0 ○ ○04-20Multi-position 6 0~65535 0 ○ ○04-21Multi-position 7 0~65535 0 ○ ○04-22Multi-position 8 0~65535 0 ○ ○04-23Multi-position 9 0~65535 0 ○ ○04-24Multi-position 10 0~65535 0 ○ ○04-25Multi-position 11 0~65535 0 ○ ○04-26Multi-position 12 0~65535 0 ○ ○04-27Multi-position 13 0~65535 0 ○ ○04-28Multi-position 14 0~65535 0 ○ ○04-29Multi-position 15 0~65535 0 ○ ○Revision August 2008, 03<strong>VE</strong>, SW V2.04 4-11
Chapter 4 Parameters|Group 5 Motor ParametersPr. Explanation Settings05-00 Motor Auto Tuning 0: No function1: Rolling test2: Static Test3: Reserved05-01 Full-load Current ofMotor 105-0205-03Rated speed of Motor 1 0~65535(rpm)1710 (60Hz, 4 poles), 1410 (50Hz, 4 poles)FactoryVF VFPG SVC FOCPG TQRPGSetting0 ○ ○ ○40-100% #.## ○ ○ ○ ○ ○Rated power of Motor 1 0~655.35 #.## ○ ○ ○1710 ○ ○ ○ ○05-04 Number of Motor Poles 1 2~20 4 ○ ○ ○ ○ ○05-05 No-load Current of Motor 0-factory setting of Pr.05-01 #.## ○ ○ ○ ○105-06 Rotor Resistance R1 of 0~65.535Ω #.### ○ ○ ○Motor 105-07 Rr of Motor 1 0~65.535Ω #.### ○ ○ ○05-08 Lm of Motor 1 0~6553.5mH #.# ○ ○ ○05-09 Lx of Motor 1 0~6553.5mH #.# ○ ○ ○05-10 Motor 1/Motor 2 1: Motor 11 ○ ○ ○ ○ ○Selection2: Motor 205-11Frequency for Y- 0.00~600.00Hz 60.00 ○ ○ ○ ○connection/Δ−connection Switch05-12 Y-connection0: Disable0 ○ ○ ○ ○/Δ−connection Switch 1: Enable05-13 Full-load Current of 40-100% #.## ○ ○ ○ ○ ○Motor 205-14Rated Power of Motor 2 0~655.35 #.## ○ ○ ○05-15Rated Speed of Motor 2 0~65535 1710 ○ ○ ○ ○(rpm)05-16 Number of Motor Poles 2 2~20 4 ○ ○ ○ ○ ○05-17 No-load Current of Motor 0- factory setting of Pr.05-01 #.## ○ ○ ○ ○205-18 Rs of Motor 2 0~65.535Ω #.### ○ ○ ○05-19 Rr of Motor 2 0~65.535Ω #.### ○ ○ ○05-20 Lm of Motor 2 0~6553.5mH #.# ○ ○ ○05-21 Lx of Motor 2 0~6553.5mH #.# ○ ○ ○05-22Torque Compensation 0.001~10.000sec 0.020 ○ ○ ○Time Constant05-23Slip Compensation Time 0.001~10.000sec 0.100 ○ ○Constant05-24Torque Compensation 0~10 0 ○ ○Gain05-25Slip Compensation Gain 0.00~10.00 0.00 ○ ○05-2605-2705-2805-29Slip Deviation Level 0~1000% (0: disable) 0 ○ ○ ○Detection Time of SlipDeviation0.0~10.0 sec 1.0 ○ ○ ○0: Warn and keep operation0 ○ ○ ○Over Slip Treatment 1: Warn and ramp to stop2: Warn and coast to stopHunting Gain 0~10000 (0: disable) 2000 ○ ○ ○05-30Delay Time for Y- 0~60.000 sec 0.200 ○ ○ ○ ○connection/Δ −connection05-31 Accumulative Motor 00~1439 0 ○ ○ ○ ○ ○Operation Time (Min.)05-32 Accumulative MotorOperation Time (day)00~65535 0 ○ ○ ○ ○ ○4-12 Revision August 2008, 03<strong>VE</strong>, SW V2.04
Group 6 Protection ParametersChapter 4 Parameters|Pr. Explanation SettingsFactorySettingVF VFPG SVC FOCPG TQRPG06-00Low Voltage Level 160.0~220.0Vdc 180.0 ○ ○ ○ ○ ○320.0~440.0Vdc 360.0 ○ ○ ○ ○ ○06-01Over-voltage Stall 0.0: DisablePrevention350.0~450.0Vdc 380.0 ○ ○ ○ ○ ○700.0~900.0Vdc 760.0 ○ ○ ○ ○ ○06-02Phase-loss Protection 0: Warn and keep operation0 ○ ○ ○ ○ ○1: Warn and ramp to stop2: Warn and coast to stop06-03Over-current Stall 00~250% 170 ○ ○ ○Prevention duringAcceleration06-04Over-current Stall 00~250% 170 ○ ○ ○Prevention duringOperation06-05Accel./Decel. Time 0: by current accel/decel time0 ○ ○ ○Selection of Stall 1: by the 1st accel/decel timePrevention at constant 2: by the 2nd accel/decel timespeed3: by the 3rd accel/decel time4: by the 4th accel/decel time5: by auto accel/decel time06-06Over-torque DetectionSelection (OT1)0: disable1: over-torque detection during constant speedoperation, continue to operate after detection2: over-torque detection during constant speedoperation, stop operation after detection3: over-torque detection during operation, continue tooperate after detection4: over-torque detection during operation, stopoperation after detection0 ○ ○ ○ ○ ○10~250% 150 ○ ○ ○ ○ ○06-07Over-torque DetectionLevel (OT1)06-08Over-torque Detection 0.0~60.0 sec 0.1 ○ ○ ○ ○ ○Time (OT1)06-09Over-torque Detection0 ○ ○ ○ ○ ○Selection (OT2)06-1006-1106-1206-1306-1406-1506-160: disable1: over-torque detection during constant speedoperation, continue to operate after detection2: over-torque detection during constant speedoperation, stop operation after detection3: over-torque detection during operation, continue tooperate after detection4: over-torque detection during operation, stopoperation after detectionOver-torque Detection 10~250% 150 ○ ○ ○ ○ ○Level (OT2)Over-torque Detection 0.0~60.0 sec 0.1 ○ ○ ○ ○ ○Time (OT2)Current Limit 0~250% 150 ○ ○Electronic Thermal 0: Inverter motor2 ○ ○ ○ ○ ○Relay Selection (Motor 1: Standard motor1)2: DisableElectronic Thermal 30.0~600.0 sec 60.0 ○ ○ ○ ○ ○Characteristic forMotor 1Heat Sink Over-heat 0.0~110.0 °C 85.0 ○ ○ ○ ○ ○(OH) WarningStall Prevention Limit 0~100% (refer to Pr.06-03, Pr.06-04) 50 ○ ○ ○Level06-17 Present Fault Record 0: No fault 0 ○ ○ ○ ○ ○1: Over-current during acceleration (ocA) ○ ○ ○ ○ ○06-18Second Most Recent 2: Over-current during deceleration (ocd) 0 ○ ○ ○ ○ ○Fault Record 3: Over-current during constant speed (ocn) ○ ○ ○ ○ ○4: Ground fault (GFF) ○ ○ ○ ○ ○06-19Third Most Recent 5: IGBT short-circuit (occ) 0 ○ ○ ○ ○ ○Fault Record 6: Over-curent at stop (ocS) ○ ○ ○ ○ ○7: Over-voltage during acceleration (ovA) ○ ○ ○ ○ ○06-20 Fourth Most Recent 8: Over-voltage during deceleration (ovd) 0 ○ ○ ○ ○ ○Fault Record 9: Over-voltage during constant speed (ovn) ○ ○ ○ ○ ○10: Over-voltage at stop (ovS) ○ ○ ○ ○ ○Revision August 2008, 03<strong>VE</strong>, SW V2.04 4-13
Chapter 4 Parameters|Pr. Explanation SettingsFactorySettingVF VFPG SVC FOCPG TQRPG11: Low-voltage during acceleration (LvA) ○ ○ ○ ○ ○06-21 Fifth Most Recent 12: Low-voltage during deceleration (Lvd) ○ ○ ○ ○ ○Fault Record 13: Low-voltage during constant speed (Lvn) ○ ○ ○ ○ ○14: Low-voltage at stop (LvS) 0 ○ ○ ○ ○ ○15: Phase loss (PHL) ○ ○ ○ ○ ○16: IGBT heat sink over-heat (oH1) ○ ○ ○ ○ ○06-22 Sixth Most Recent 17: Heat sink over-heat (oH2)(for 40HP above) 0 ○ ○ ○ ○ ○Fault Record 18: TH1 open loop error (tH1o) ○ ○ ○ ○ ○19: TH2 open loop error (tH2o) ○ ○ ○ ○ ○20: Fan error signal output ○ ○ ○ ○ ○21: over-load (oL) (150% 1Min) ○ ○ ○ ○ ○22: Motor 1 over-load (EoL1) ○ ○ ○ ○ ○23: Motor 2 over-load (EoL2) ○ ○ ○ ○ ○24: Motor PTC overheat (oH3) ○ ○ ○ ○ ○25: Fuse error (FuSE) ○ ○ ○ ○ ○26: over-torque 1 (ot1) ○ ○ ○ ○ ○27: over-torque 1 (ot2) ○ ○ ○ ○ ○28: Reserved29: Reserved30: Memory write-in error (cF1) ○ ○ ○ ○ ○31: Memory read-out error (cF2) ○ ○ ○ ○ ○32: Isum current detection error (cd0) ○ ○ ○ ○ ○33: U-phase current detection error (cd1) ○ ○ ○ ○ ○34: V-phase current detection error (cd2) ○ ○ ○ ○ ○35: W-phase current detection error (cd3) ○ ○ ○ ○ ○36: Clamp current detection error (Hd0) ○ ○ ○ ○ ○37: Over-current detection error (Hd1) ○ ○ ○ ○ ○38: Over-voltage detection error (Hd2) ○ ○ ○ ○ ○39: Ground current detection error (Hd3) ○ ○ ○ ○ ○40: Auto tuning error (AuE) ○ ○ ○41: PID feedback loss (AFE) ○ ○ ○ ○ ○42: PG feedback error (PGF1) ○ ○ ○43: PG feedback loss (PGF2) ○ ○ ○44: PG feedback stall (PGF3) ○ ○45: PG slip error (PGF4) ○ ○46: PG ref input error (PGr1) ○ ○ ○ ○ ○47: PG ref loss (PGr2) ○ ○ ○ ○ ○48: Analog current input loss (ACE) ○ ○ ○ ○ ○49: External fault input (EF) ○ ○ ○ ○ ○50: Emergency stop (EF1) ○ ○ ○ ○ ○51: External Base Block (B.B.) ○ ○ ○ ○ ○52: Password error (PcodE) ○ ○ ○ ○ ○53: Reserved54: Communication error (cE1) ○ ○ ○ ○ ○55: Communication error (cE2) ○ ○ ○ ○ ○56: Communication error (cE3) ○ ○ ○ ○ ○57: Communication error (cE4) ○ ○ ○ ○ ○58: Communication Time-out (cE10) ○ ○ ○ ○ ○59: PU time-out (cP10) ○ ○ ○ ○ ○60: Brake transistor error (bF) ○ ○ ○ ○ ○61: Y-connection/Δ-connection switch error (ydc) ○ ○ ○ ○62: Decel. Energy Backup Error (dEb) ○ ○ ○ ○ ○63: Slip error (oSL) ○ ○ ○ ○64: Broken belt error (bEb) ○ ○ ○ ○ ○65: Error PID feedback signal of tension (tdEv) ○ ○ ○ ○ ○06-23Fault Output Option 1 0~65535 (refer to bit table for fault code) 0 ○ ○ ○ ○ ○06-24Fault Output Option 2 0~65535 (refer to bit table for fault code) 0 ○ ○ ○ ○ ○06-25Fault Output Option 3 0~65535 (refer to bit table for fault code) 0 ○ ○ ○ ○ ○06-26Fault Output Option 4 0~65535 (refer to bit table for fault code) 0 ○ ○ ○ ○ ○06-27Electronic Thermal 0: Inverter motor2 ○ ○ ○ ○ ○Relay Selection (Motor 1: Standard motor2)2: Disable4-14 Revision August 2008, 03<strong>VE</strong>, SW V2.04
Chapter 4 Parameters|Pr. Explanation SettingsFactorySettingVF VFPG SVC FOCPG TQRPG06-28Electronic Thermal 30.0~600.0 sec 60.0 ○ ○ ○ ○ ○Characteristic forMotor 206-29PTC (Positive 0: Warn and keep operation0 ○ ○ ○ ○ ○Temperature1: Warn and ramp to stopCoefficient) Detection 2: Warn and coast to stopSelection06-30PTC Level 0.0~100.0% 50.0 ○ ○ ○ ○ ○06-31Filter Time for PTC 0.00~10.00sec 0.20 ○ ○ ○ ○ ○DetectionOutput Frequency for 0.00~655.35 Hz 0.00 ○ ○ ○ ○ ○06-32 MalfunctionOutput AC Voltage for 0.0~6553.5 V 0.0 ○ ○ ○ ○ ○06-33 MalfunctionDC Voltage for 0.0~6553.5 V 0.0 ○ ○ ○ ○ ○06-34 MalfunctionCurrent Value for 0.00~655.35 Amp 0.00 ○ ○ ○ ○ ○06-35 MalfunctionIGBT Temperature for 0.0~6553.5 °C 0.0 ○ ○ ○ ○ ○06-36 MalfunctionRevision August 2008, 03<strong>VE</strong>, SW V2.04 4-15
Chapter 4 Parameters|Group 7 Special ParametersPr. Explanation SettingsFactorySettingVF VFPG SVC FOCPG TQRPG07-00Software Brake Level 230V: 350.0~450.0Vdc380.0 ○ ○ ○ ○ ○460V: 700.0~900.0Vdc760.007-01DC Brake Current 0~100% 0 ○ ○Level07-02DC Brake Time during 0.0~60.0 sec 0.0 ○ ○Start-up07-03DC Brake Time during 0.0~60.0 sec 0.0 ○ ○Stopping07-04Start-point for DC 0.00~600.00Hz 0.00 ○ ○ ○Brake07-05 DC Brake Voltage 1~500 50 ○ ○ ○Gain07-06Momentary Power 0: Operation stop after momentary power loss0 ○ ○ ○ ○ ○Loss Operation 1: Operation continues after momentary power loss,Selectionspeed search starts with the Master Frequencyreference value2: Operation continues after momentary power loss,speed search starts with the minimum frequency07-07Maximum Allowable 0.1~5.0 sec 2.0 ○ ○ ○ ○ ○Power Loss Time07-08B.B. Time for Speed 0.1~5.0 sec 0.5 ○ ○ ○ ○ ○Search07-09Current Limit for 20~200% 150 ○ ○ ○ ○ ○Speed Search07-10Base-block SpeedSearch07-11Auto Restart afterFault07-12Speed Search duringStart-up07-13Decel. Time Selectionfor Momentary PowerLoss0: Stop operation1: Speed search starts with last frequency command2: Speed search starts with minimum output frequency0 ○ ○ ○ ○ ○0~10 0 ○ ○ ○ ○ ○0: Disable1: Speed search from maximum frequency2: Speed search from start-up frequency3: Speed search from minimum frequency0: Disable1: 1 st decel. time2: 2 nd decel. time3: 3 rd decel. time4: 4 th decel. time5: Current decel. time6: Auto decel. Time0 ○ ○ ○ ○0 ○ ○ ○ ○ ○07-14DEB Return Time 0.0~25.0 sec 0.0 ○ ○ ○ ○07-15Dwell Time at Accel. 0.00~600.00sec 0.00 ○ ○ ○ ○07-16Dwell Frequency at 0.00~600.00Hz 0.00 ○ ○ ○ ○Accel.07-17Dwell Time at Decel. 0.00~600.00sec 0.00 ○ ○ ○ ○07-18Dwell Frequency at 0.00~600.00Hz 0.00 ○ ○ ○ ○Decel.07-19Fan Control0: Fan always ON0 ○ ○ ○ ○ ○1: 1 minute after AC motor drive stops, fan will be OFF2: AC motor drive runs and fan ON, AC motor drivestops and fan OFF3: Fan ON to run when preliminary heat sinktemperature attained4: Fan always OFF07-20Torque Command -100.0~100.0% (Pr. 07-22 setting=100%) 0.0 ○07-21Torque Command 0: Digital keypad0 ○Source1: RS485 serial communication (RJ-11)2: Analog signal (Pr.03-00)07-22Maximum Torque 0~500% 100 ○Command07-23Filter Time of Torque 0.000~1.000 sec 0.000 ○Command07-24 Speed Limit Selection 0: By Pr.07-25 and Pr.07-260 ○1: Frequency command source (Pr.00-20)07-25Torque Mode +Speed 0~120% 10 ○Limit07-26Torque Mode-Speed 0~120% 10 ○Limit4-16 Revision August 2008, 03<strong>VE</strong>, SW V2.04
Chapter 4 Parameters|Pr. Explanation SettingsFactorySettingVF VFPG SVC FOCPG TQRPG07-27Source of Torque 0: Disable0 ○ ○ ○Offset1: Analog input (Pr.03-00)2: Torque offset setting3: Control by external terminal (by Pr.07-29 to Pr.07-31)07-28Torque Offset Setting 0.0~100.0% 0.0 ○ ○ ○07-29High Torque Offset 0.0~100.0% 30.0 ○ ○ ○07-30Middle Torque Offset 0.0~100.0% 20.0 ○ ○ ○07-31Low Torque Offset 0.0~100.0% 10.0 ○ ○ ○07-32Forward Motor Torque 0~500% 200 ○ ○Limit07-33Forward Regenerative 0~500% 200 ○ ○Torque Limit07-34Reverse Motor Torque 0~500% 200 ○ ○Limit07-35Reverse Regenerative 0~500% 200 ○ ○Torque Limit07-36Emergency Stop (EF) 0: Coast stop0 ○ ○ ○ ○ ○& Forced Stop 1: By deceleration Time 1Selection2: By deceleration Time 23: By deceleration Time 34: By deceleration Time 45: System Deceleration6: Automatic DecelerationRevision August 2008, 03<strong>VE</strong>, SW V2.04 4-17
Chapter 4 Parameters|Group 8 High-function PID ParametersPr. Explanation Settings08-00Input Terminal for PIDFeedback0: No function1: Negative PID feedback from external terminal AVI(Pr.03-00)2: Negative PID feedback from PG card (Pr.10-15, skipdirection)3: Negative PID feedback from PG card (Pr.10-15)4: Positive PID feedback from external terminal AVI(Pr.03-00)5: Positive PID feedback from PG card (Pr.10-15, skipdirection)6: Positive PID feedback from PG card (Pr.10-15)FactorySettingVF VFPG SVC FOCPG TQRPG0 ○ ○ ○ ○08-01 Proportional Gain (P) 0.0~500.0% 80.0 ○ ○ ○ ○08-02 Integral Gain (I) 0.00~100.00 sec 1.00 ○ ○ ○ ○08-03 Derivative Control (D) 0.00~1.00 sec 0.00 ○ ○ ○ ○Upper limit for Integral08-04 Control0.0~100.0% 100.0 ○ ○ ○ ○PID Output Frequency08-05 Limit0.0~110.0% 100.0 ○ ○ ○ ○08-06 PID Offset -100.0~+100.0% 0.0 ○ ○ ○ ○08-07 PID Delay Time 0.0~2.5 sec 0.0 ○ ○ ○ ○Feedback Signal Detection08-08 0.0~3600.0 secTime0.0 ○ ○ ○ ○0: Warn and keep operating08-09 Feedback Fault Treatment 1: Warn and ramp to stop02: Warn and coast to stop○ ○ ○ ○3: Warn and keep at last frequency08-10 Sleep Frequency 0.00~600.00Hz 0.00 ○ ○ ○ ○08-11 Wake-up Frequency 0.00~600.00Hz 0.00 ○ ○ ○ ○08-12 Sleep Time 0.0~6000.0 sec 0.0 ○ ○ ○ ○08-13 PID Deviation Level 1.0~50.0% 10.0 ○ ○ ○ ○08-14 PID Deviation Time 0.1~300.0 sec 5.0 ○ ○ ○ ○Filter Time for PID08-15 Feedback0.1~300.0 sec 5.0 ○ ○ ○ ○08-16| Reserved08-2008-21Tension Control Selection 0: Disable 0 ○ ○ ○ ○1: Closed-loop, speed mode ○ ○ ○ ○2: Line speed, speed mode ○ ○ ○ ○3: Reserved4: Open-loop, torque mode ○08-22Wind Mode0: Rewind0 ○ ○ ○ ○ ○1: Unwind08-23Mechanical Gear Ratio A 1-65535 100 ○ ○ ○ ○ ○08-24Mechanical Gear Ratio B 1-65535 100 ○ ○ ○ ○ ○08-25Source of the Tension 0: Parameter setting (Pr.08-26)0 ○ ○ ○ ○ ○Command/Line Speed 1: RS-485 communication setting (Pr.08-26)2: Analog input (Pr. 03-00~03-02 is set to 14 PID targetvalue of tension, 03-00~03-02 is set to 12 line speed)PID Target Value of 0.0~100.0% 50.0 ○ ○ ○ ○ ○08-26Tension/Line Speed08-2708-28Source of Tension/LineSpeed PID FeedbackAuto-tuning Tension PID0: Analog input (Pr. 03-00~03-02 is set to 11 PIDfeedback of tension)1: Pulse input (Pr.08-40)0: Disable1: Reel diameter (08-29~08-31corresponds to 08-44,08-32~08-34 corresponds to 08-43)2: Frequency (08-29~08-31 corresponds to 01-07, 08-32~08-34 corresponds to 01-00)0 ○ ○ ○ ○ ○○ ○ ○ ○ ○Tension PID P108-290.0~1000.0 50.0 ○ ○ ○ ○ ○Tension PID I108-300.00~500.00 sec 1.00 ○ ○ ○ ○ ○08-31Reserved4-18 Revision August 2008, 03<strong>VE</strong>, SW V2.04
Chapter 4 Parameters|Pr. Explanation SettingsFactorySettingVF VFPG SVC FOCPG TQRPGTension PID P208-320.0~1000.0 50.0 ○ ○ ○ ○ ○Tension PID I208-330.00~500.00 sec 1.00 ○ ○ ○ ○ ○08-34 ReservedPID/Line Speed Output08-35Status08-36Tension/Line Speed PIDOutput Limit08-37Source of Line SpeedInput Command0: Positive output0 ○ ○ ○ ○ ○1: Negative output0~100.00% (according to Pr,01-00) 20.00 ○ ○ ○ ○ ○0: Disable1: Analog input (Pr. 03-00~03-02 is set to 12 line speed)2: RS-485 communication setting (Pr.08-41)3: Pulse input (Pr.08-40)4: DFM-DCM pulse input (Pr.02-18)0 ○ ○ ○ ○ ○08-38Max. Line Speed 0.0~3000.0m/min 1000.0 ○ ○ ○ ○ ○08-39Min. Line Speed 0.0~3000.0m/min 0.0 ○ ○ ○ ○ ○08-40Pulse Number for Each 0.0~6000.0 0.0 ○ ○ ○ ○ ○MeterCurrent Line Speed08-410.0~3000.0m/min 0.0 ○ ○ ○ ○ ○08-42Source of Reel Diameter 0: Calculated by line speed0 ○ ○ ○ ○ ○1: Calculated by integrating thickness (encoder is onreel shaft)(Pr.08-49~51, Pr.10-15)2: Calculated by integrating thickness (encoder is onmotor)(Pr.08-23~08-24, 08-50~08-51, 10-00~10-01)3: Calculated by analog input (Pr.03-00~03-02 is set to13)08-43Max. Reel Diameter 1.0~6000.0mm 6000.0 ○ ○ ○ ○ ○08-44Empty Reel Diameter 1.0~6000.0mm 1.0 ○ ○ ○ ○ ○08-45Source of Initial Reel 0: RS-485 communication setting (Pr.08-46)0 ○ ○ ○ ○ ○Diameter1: Analog input (Pr.03-00-Pr.03-02 is set to 13)Initial Reel Diameter08-461.0~6000.0mm 1.0 ○ ○ ○ ○ ○08-47Initial Reel Diameter 1 1.0~6000.0mm 1.0 ○ ○ ○ ○ ○08-48Initial Reel Diameter 2 1.0~6000.0mm 1.0 ○ ○ ○ ○ ○08-49Number of Pulse per 1~10000ppr 1 ○ ○ ○ ○ ○Revolution08-50Coil Number for Each 0.001~60.000mm 1.000 ○ ○ ○ ○ ○Layer08-51Material Thickness 0.001~60.000mm 1.000 ○ ○ ○ ○ ○Filter Time of Reel 0.00 to 100.00 seconds 1.00 ○ ○ ○ ○ ○08-52Diameter08-53Auto Compensation of 0: Disable1.00 ○ ○ ○ ○ ○Reel Diameter1: EnableCurrent Reel Diameter08-541.0~6000.0mm 1.0 ○ ○ ○ ○ ○08-55Smart Start0: Disable1 ○ ○ ○ ○ ○1: Enable2: In unwind mode, rewind in reverse direction08-56Switch Level for Smart 0.0~100.0% (according to Pr.08-26) 15.0 ○ ○ ○ ○ ○Start and PID function08-57Frequency for Smart Start 0.00~600.00Hz 2.00 ○ ○ ○ ○ ○Accel. Time for Smart Start 0.01~600.00 seconds08-583.00 ○ ○ ○ ○08-59Broken Belt Detection 0: Disable0 ○ ○ ○ ○1: Enable08-60Min. Line Speed of Broken 0.0~3000.0m/min 0.0 ○ ○ ○ ○Belt Detection08-61Allowance Error of Line 1.0~6000.0mm 100.0 ○ ○ ○ ○Speed of Broken BeltDetection08-62Detection Time of Broken 0.00~100.00 sec 1.00 ○ ○ ○ ○Belt08-63Allowance Error Level of 0~100% 100 ○ ○ ○ ○Tension/Line Speed PIDFeedback08-64Allowance Error Detection 0.0~10.0 sec 0.5 ○ ○ ○ ○Time of Tension PIDFeedbackRevision August 2008, 03<strong>VE</strong>, SW V2.04 4-19
Chapter 4 Parameters|Pr. Explanation Settings08-65Error Treatment of TensionPID Feedback0: Warn and keep operation1: Warn and coast to stop2: Warn and ramp to stopFactorySettingVF VFPG SVC FOCPG TQRPG0 ○ ○ ○ ○08-66Upper Limit of Tension PID 0.0~100.0% 100.0 ○ ○ ○ ○ ○Feedback08-67Lower Limit of Tension PID 0.0~100.0% 0.0 ○ ○ ○ ○ ○Feedback08-68Reserved08-69DFM Selection0: Output frequency0 ○ ○ ○ ○ ○1: Frequency command08-70Low-pass Filter Time of 0.00~100.00 sec 0.00 ○ ○ ○ ○ ○Line Speed08-71| Reserved08-7508-76Source of Tension Setting 0: Communication RS-485 (Pr.08-78)0 ○1: Analog input (Pr. 03-00~03-02 is set to 15 tensionsetting) (Pr.08-78)08-77Max. Tension 0~30000 N 0 ○08-78Tension Setting 0~30000 N 0 ○08-79Source of Zero-speed 0: Disable0 ○Tension Setting1: Communication RS-485 (Pr.08-80)2: Analog input (Pr. 03-00~03-02 is set to 16 zerospeedtension) (Pr.08-80)08-80Setting of Zero-speed 0~30000 N 0 ○Tension08-81Source of Tension Taper 0: Communication RS-485 (Pr.08-82)0 ○1: Analog input (Pr. 03-00~03-02 is set to 17 tensiontaper)(Pr.08-82)08-82Tension Taper 0~100% 0 ○08-83Friction Compensation 0.0~100.0% 0.0 ○08-84Compensation Coefficient 0~30000 0 ○of Material Inertial08-85Torque Feedforward Gain 0.0~100.0% 50.0 ○08-86Low Pass Filter Time of 0.00~100.00 5.00 ○Torque Feedforward08-87| Reserved08-994-20 Revision August 2008, 03<strong>VE</strong>, SW V2.04
Group 9 Communication ParametersChapter 4 Parameters|Pr. Explanation SettingsFactorySettingVF VFPG SVC FOCPG TQRPG09-00Communication 1~254 1 ○ ○ ○ ○ ○Address09-01COM1 Transmission 4.8~115.2Kbps 9.6 ○ ○ ○ ○ ○Speed09-02COM1 Transmission 0: Warn and keep operation3 ○ ○ ○ ○ ○Fault Treatment 1: Warn and ramp to stop2: Warn and coast to stop3: No warning and keep operation09-03COM1 Time-out 0.0~100.0 sec 0.0 ○ ○ ○ ○ ○Detection09-04COM1 CommunicationProtocol09-05COM2 TransmissionSpeed (Keypad)09-06COM2 TransmissionFault Treatment(Keypad)0: 7N1 (ASCII)1: 7N2 (ASCII)2: 7E1 (ASCII)3: 7O1 (ASCII)4: 7E2 (ASCII)5: 7O2 (ASCII)6: 8N1 (ASCII)7: 8N2 (ASCII)8: 8E1 (ASCII)9: 8O1 (ASCII)10: 8E2 (ASCII)11: 8O2 (ASCII)12: 8N1 (RTU)13: 8N2 (RTU)14: 8E1 (RTU)15: 8O1 (RTU)16: 8E2 (RTU)17: 8O2 (RTU)1 ○ ○ ○ ○ ○4.8~115.2Kbps 9.6 ○ ○ ○ ○ ○0: Warn and keep operation1: Warn and ramp to stop2: Warn and coast to stop3: No warning and keep operation3 ○ ○ ○ ○ ○09-07COM2 Time-out 0.0~100.0 sec 0.0 ○ ○ ○ ○ ○Detection (Keypad)09-08COM2 Communication 0: 7N1 (ASCII)13 ○ ○ ○ ○ ○Protocol (Keypad) 1: 7N2 (ASCII)2: 7E1 (ASCII)3: 7O1 (ASCII)4: 7E2 (ASCII)5: 7O2 (ASCII)6: 8N1 (ASCII)7: 8N2 (ASCII)8: 8E1 (ASCII)9: 8O1 (ASCII)10: 8E2 (ASCII)11: 8O2 (ASCII)12: 8N1 (RTU)13: 8N2 (RTU)14: 8E1 (RTU)15: 8O1 (RTU)16: 8E2 (RTU)17: 8O2 (RTU)09-09 Response Delay Time 0.0~200.0ms 2.0 ○ ○ ○ ○ ○09-10Transmission Master 0.00~600.00Hz 60.00 ○ ○ ○ ○Frequency09-11Block Transfer 1 0~65535 0 ○ ○ ○ ○ ○09-12Block Transfer 2 0~65535 0 ○ ○ ○ ○ ○09-13Block Transfer 3 0~65535 0 ○ ○ ○ ○ ○09-14Block Transfer 4 0~65535 0 ○ ○ ○ ○ ○09-15Block Transfer 5 0~65535 0 ○ ○ ○ ○ ○09-16Block Transfer 6 0~65535 0 ○ ○ ○ ○ ○09-17Block Transfer 7 0~65535 0 ○ ○ ○ ○ ○09-18Block Transfer 8 0~65535 0 ○ ○ ○ ○ ○09-19Block Transfer 9 0~65535 0 ○ ○ ○ ○ ○Revision August 2008, 03<strong>VE</strong>, SW V2.04 4-21
Chapter 4 Parameters|Pr. Explanation SettingsFactorySettingVF VFPG SVC FOCPG TQRPG09-20Block Transfer 10 0~65535 0 ○ ○ ○ ○ ○09-21Multi-function Output 0~65535 Readonly○ ○ ○ ○ ○Status09-22AFM2 Status 0~4095 Readonly○ ○ ○ ○ ○09-23AFM3 Status 0~4095 Readonly○ ○ ○ ○ ○4-22 Revision August 2008, 03<strong>VE</strong>, SW V2.04
Group 10 Speed Feedback Control ParametersChapter 4 Parameters|Pr. Explanation SettingsFactorySettingVF VFPG SVC FOCPG TQRPG10-00 Encoder Pulse 1~20000 600 ○ ○ ○10-01 Encoder Input TypeSetting0: Disable1: Phase A leads in a forward run command and phaseB leads in a reverse run command2: Phase B leads in a forward run command and phaseA leads in a reverse run command3: Phase A is a pulse input and phase B is a directioninput. (low input=reverse direction, high input=forwarddirection)4: Phase A is a pulse input and phase B is a directioninput. (low input=forward direction, high input=reversedirection)5: Single-phase input0 ○ ○ ○10-0210-0310-0410-0510-0610-0710-0810-0910-10PG Feedback FaultTreatmentDetection Time for PGFeedback FaultASR (Auto SpeedRegulation) Control( P) 10: Warn and keep operation1: Warn and ramp to stop2: Warn and coast to stop2 ○ ○ ○0.00~10.0 sec 1.0 ○ ○ ○0~40 10 ○ ○ASR (Auto SpeedRegulation) Control (I)10.000~10.000 sec 0.100 ○ ○ASR (Auto Speed 0~40 10 ○ ○Regulation) Control( P) 2ASR (Auto Speed 0.000~10.000 sec 0.100 ○ ○Regulation) Control (I)2ASR 1/ASR2 Switch 5.00~600.00Hz 7.00 ○ ○FrequencyASR Primary Low 0.000~0.350 sec 0.008 ○Pass Filter GainPG Stall Level 0~120% (0: disable) 115 ○ ○10-1110-1210-1310-1410-1510-1610-1710-1810-1910-20PG Stall Detection 0.0~2.0 sec 0.1 ○ ○TimePG Slip Range 0~50% (0: disable) 50 ○ ○PG Slip DetectionTimePG Stall and Slip ErrorTreatmentPulse Input TypeSettingOutput Setting forFrequency Division(denominator)PG Electrical Gear A(Channel 1 of PGcard)PG Electrical Gear B(Channel 2 of PGcard)PG Position ControlPoint (Home)0.0~10.0 sec 0.5 ○ ○0: Warn and keep operation1: Warn and ramp to stop2: Warn and coast to stop2 ○ ○0: Disable1: Phase A leads in a forward run command and phaseB leads in a reverse run command2: Phase B leads in a forward run command and phaseA leads in a reverse run command3: Phase A is a pulse input and phase B is a directioninput. (low input=reverse direction, high input=forwarddirection)4: Phase A is a pulse input and phase B is a directioninput. (low input=forward direction, high input=reversedirection)0 ○ ○ ○ ○ ○1~255 1 ○ ○ ○1~5000 100 ○ ○1~5000 100 ○ ○0~20000 0 ○ ○Range for PG Position 0~20000 10 ○ ○Attained (Home range)Revision August 2008, 03<strong>VE</strong>, SW V2.04 4-23
Chapter 4 Parameters|FactoryPr. Explanation SettingsVF VFPG SVC FOCPG TQRPGSetting10-21 P Gain of Zero Speed 0~40 10 ○ ○10-22 I Gain of Zero Speed 0.000~10.000 sec 0.100 ○ ○ ○ ○10-23Feed Forward Gain of 0~100 30 ○ ○APR10-24Decelerate Time of 0.00~600.00 sec/00~6000.0 sec 3.00 ○ ○Position3.010-25Max. Frequency for 50.00~600.00Hz 50.00 ○ ○ ○ ○ ○Resolution Switch10-26 Reserved10-27PG Mechanical Gear 1~65535 100 ○ ○ ○A110-28PG Mechanical Gear 1~65535 100 ○ ○ ○B110-29PG Mechanical Gear 1~65535 100 ○ ○ ○A210-30PG Mechanical Gear 1~65535 100 ○ ○ ○B24-24 Revision August 2008, 03<strong>VE</strong>, SW V2.04
Group 11 Advanced ParametersPr. Explanation Settings11-00 System Controlbit 0: ASR Auto tuningbit 1: Inertia estimate (only for FOCPG mode)bit 2: Zero Servobit 3: Reservedbit 4: Enable gain adjustment of position loop KPChapter 4 Parameters|FactorySettingVF VFPG SVC FOCPG TQRPG0 ○11-01Per Unit of System 1~65535 (256=1PU) 400 ○ ○Inertia11-02 Low-speed Bandwidth 0~40Hz 10 ○ ○ ○11-03 High-speed Bandwidth 0~40Hz 10 ○ ○ ○11-04 PDFF Gain Value 0~200% 30 ○Gain Value of Flux 0~200% 90 ○ ○11-05 Weakening Curve forMotor 1Gain Value of Flux 0~200% 90 ○ ○11-06 Weakening Curve forMotor 211-07Detection Time for 0.01~600.00 sec 0.20 ○ ○ ○ ○ ○Phase-loss11-08 Reserved11-09 Level of Phase-loss 0.0~320.0 60.0 ○ ○ ○ ○ ○11-10Speed Feed Forward 0~100% 0 ○Gain11-11 Zero-speed Bandwidth 0~40Hz 10 ○ ○ ○11-12Speed Response of 0: Disable65 ○Flux Weakening Area 0~150%11-13 Notch Filter Depth 0~20db 0 ○11-14 Notch Filter Frequency 0.00~200.00 0.00 ○11-15Gain Value of SlipCompensation0.00~1.00 1.00 ○11-16Low-pass Filter Timeof Keypad Display0.001~65.535sec 0.100 ○ ○ ○ ○ ○11-17Low-pass Filter Timeof PG2 Pulse Input0.000~65.535sec 0.100 ○ ○ ○ ○11-18 APR Gain 0.00~40.00 10.00 ○11-19 APR Curve Time 0.00~655.35 sec 3.00 ○11-20| Reserved11-2811-29AccumulativeOperation Time of 0~65535 (hour) 0 ○ ○ ○ ○ ○Phase-loss11-30|11-40ReservedRevision August 2008, 03<strong>VE</strong>, SW V2.04 4-25
Chapter 4 Parameters|4.2 Version Differences4.2.1 Version 2.02New or update parameter groups are:Group 2: Digital Input/Output ParametersGroup 3: Analog Input/Output ParametersGroup 6: Protection ParametersGroup 8: High-function PID ParametersGroup 10: Speed Feedback Control Parameters4.2.2 Version 2.04New or update parameter groups are:Group 0 System ParametersGroup 2: Digital Input/Output ParametersGroup 3: Analog Input/Output ParametersGroup 5: Motor ParametersGroup 6: Protection ParametersGroup 8: High-function PID ParametersGroup 10: Speed Feedback Control ParametersVersion 2.02Group 2 Digital Input/Output ParametersNew settings are marked in bold. In version 2.02, the parameters are from Pr.02-00 to Pr.02-34.Pr. Explanation SettingsFactoryVF VFPG SVC FOCPG TQRPGSetting02-01 Multi-Function Input Command 1 (MI1)○ ○27: ASR1/ASR2 selection(it is Stop terminal for 3-wire operation)02-02 Multi-Function Input Command 2 (MI2) 28: Emergency stop (EF1) ○ ○ ○ ○ ○02-03 Multi-Function Input Command 3 (MI3) 29: Signal confirmation for Y-connection ○ ○ ○ ○02-04 Multi-Function Input Command 4 (MI4) 30: Signal confirmation for Δ−connection ○ ○ ○ ○02-05 Multi-Function Input Command 5 (MI5) 31: High torque bias (by Pr.07-29) ○ ○ ○ ○ ○02-06 Multi-Function Input Command 6 (MI6)○ ○ ○ ○ ○32: Middle torque bias (by Pr.07-30)(specific terminal for TRG)02-23 Multi-Function Input Command 7 33: Low torque bias (by Pr.07-31) ○ ○ ○ ○ ○02-24 Multi-Function Input Command 8 34: Enable multi-step position control ○ ○02-25 Multi-Function Input Command 9 35: Enable position control ○ ○02-26 Multi-Function Input Command 10 36: Enable position learning function○ ○(valid at stop)02-27 Multi-Function Input Command 11 37: Enable pulse position input○ ○command02-28 Multi-Function Input Command 12 38: Disable write EEPROM function ○ ○ ○ ○ ○02-29 Multi-Function Input Command 13 39: Torque command direction ○02-30 Multi-Function Input Command 14 40: Force stop ○ ○ ○ ○ ○41: Serial position clock ○42: Serial position input ○43: Analog input resolution selection ○Multi-function Output 1 RA, RB,29: Output when frequency >= Pr.02-33 ○ ○ ○ ○ ○02-11 RC(Relay1)Multi-function Output 230: Output when frequency < Pr.02-33 ○ ○ ○ ○ ○02-12 MRA, MRC (Relay2)02-13Multi-function Output 3 (MO1) 31: Y-connection for the motor coil ○ ○ ○ ○02-14Multi-function Output 4 (MO2) 32: Δ connection for the motor coil ○ ○ ○ ○4-26 Revision August 2008, 03<strong>VE</strong>, SW V2.04
Chapter 4 Parameters|Pr. Explanation SettingsFactoryVF VFPG SVC FOCPG TQRPGSetting02-35Multi-function Output 5 (MO3)33: Zero speed (actual output○ ○ ○ ○frequency)02-36Multi-function Output 6 (MO4)34: Zero speed with Stop (actual output○ ○ ○ ○frequency)02-37Multi-function Output 7 (MO5) 35: Error output selection 1 (Pr.06-23) ○ ○ ○ ○ ○02-38Multi-function Output 8 (MO6) 36: Error output selection 2 (Pr.06-24) ○ ○ ○ ○ ○02-39Multi-function Output 9 (MO7) 37: Error output selection 3 (Pr.06-25) ○ ○ ○ ○ ○02-40Multi-function Output 10 (MO8) 38: Error output selection 4 (Pr.06-26) ○ ○ ○ ○ ○02-41Multi-function Output 11 (MO9) 39: Position attained (Pr.10-19) ○02-42Multi-function Output 12 (MOA)40: Speed attained (including zero○ ○ ○ ○speed)41: Multi-position attained ○42: Crane function ○ ○ ○ ○Group 3 Analog Input/Output ParametersIn version 2.02, the parameters are from Pr.03-00 to Pr.03-20. The settings for Pr.03-00 toPr.03-02 are from 0 to 10Pr. Explanation SettingsFactoryVF VFPG SVC FOCPG TQRPGSetting03-00Analog Input 1 (AVI)2: torque command (torque limit under 0 ○speed mode)3: Torque compensation command ○ ○ ○ ○ ○03-01Analog Input 2 (ACI) 4: PID target value (refer to group 8) ○ ○ ○ ○5: PID feedback signal (refer to group○ ○ ○ ○8)03-02Analog Input 3 (AUI) 6: P.T.C. thermistor input value ○ ○ ○ ○ ○7: Positive torque limit ○8: Negative torque limit ○9: Regenerative torque limit ○10: Positive/negative torque limit ○03-20Analog Output Value in REV Direction 0: Absolute value in REV direction 0 ○ ○ ○ ○ ○1: Output 0V in REV direction2: Enable output voltage in REVdirectionGroup 6 Protection ParametersIn version 2.02, the parameters are from Pr.06-00 to Pr.06-31. The settings of Pr.06-01 areshown as follows. The settings for Pr.06-17 to Pr.06-22 are from 0 to 62.Pr. Explanation SettingsFactoryVF VFPG SVC FOCPG TQRPGSetting06-01Over-voltage Stall Prevention0.0: Disable350.0~450.0Vdc 380.0 ○ ○ ○ ○ ○700.0~900.0Vdc 760.0 ○ ○ ○ ○ ○06-17 Present Fault Record 0: No fault0 ○ ○ ○ ○ ○06-18 Second Most Recent Fault Record 1: Over-current during acceleration 0 ○ ○ ○ ○ ○06-19 Third Most Recent Fault Record(ocA)0 ○ ○ ○ ○ ○2: Over-current during deceleration06-20 Fourth Most Recent Fault Record (ocd)0 ○ ○ ○ ○ ○06-21 Fifth Most Recent Fault Record 3: Over-current during constant speed 0 ○ ○ ○ ○ ○06-22 Sixth Most Recent Fault Record (ocn) 0 ○ ○ ○ ○ ○Revision August 2008, 03<strong>VE</strong>, SW V2.04 4-27
Chapter 4 Parameters|Pr. Explanation SettingsFactoryVF VFPG SVC FOCPG TQRPGSetting4: Ground fault (GFF)5: IGBT short-circuit (occ)6: Over-curent at stop (ocS)7: Over-voltage during acceleration(ovA)8: Over-voltage during deceleration(ovd)9: Over-voltage during constant speed(ovn)10: Over-voltage at stop (ovS)11: Low-voltage during acceleration(LvA)12: Low-voltage during deceleration(Lvd)13: Low-voltage during constant speed(Lvn)14: Low-voltage at stop (LvS)15: Phase loss (PHL)16: IGBT heat sink over-heat (oH1)17: Heat sink over-heat (oH2)(for 40HPabove)18: TH1 open loop error (tH1o)19: TH2 open loop error (tH2o)20: Fan error signal output21: over-load (oL) (150% 1Min)22: Motor 1 over-load (EoL1)23: Motor 2 over-load (EoL2)24: Motor PTC overheat (oH3)25: Fuse error (FuSE)26: over-torque 1 (ot1)27: over-torque 1 (ot2)28: Insufficient torque 129: Insufficient torque 230: Memory write-in error (cF1)31: Memory read-out error (cF2)32: Isum current detection error (cd0)33: U-phase current detection error(cd1)34: V-phase current detection error(cd2)35: W-phase current detection error(cd3)36: Clamp current detection error (Hd0)37: Over-current detection error (Hd1)38: Over-voltage detection error (Hd2)39: Ground current detection error (Hd3)40: Auto tuning error (AuE)41: PID feedback loss (AFE)42: PG feedback error (PGF1)43: PG feedback loss (PGF2)44: PG feedback stall (PGF3)45: PG slip error (PGF4)46: PG ref input error (PGr1)47: PG ref loss (PGr2)48: Analog current input loss (ACE)49: External fault input (EF)50: Emergency stop (EF1)51: External Base Block (B.B.)52: Password error (PcodE)53: Software error (ccodE)54: Communication error (cE1)55: Communication error (cE2)56: Communication error (cE3)57: Communication error (cE4)58: Communication Time-out (cE10)59: PU time-out (cP10)60: Brake transistor error (bF)61: Y-connection/Δ-connection switcherror (ydc)62: Decel. Energy Backup Error (dEb)06-31Filter Time for PTC Detection 0.00~10.00sec 0.20 ○ ○ ○ ○ ○Group 8 High-function PID Parameters4-28 Revision August 2008, 03<strong>VE</strong>, SW V2.04
In version 2.02, the parameters are from Pr.08-00 to Pr.08-15.Chapter 4 Parameters|FactoryPr. Explanation SettingsSetting VF VFPG SVC FOCPG TQRPGFilter Time for PID Feedback 0.1~300.0 sec 5.0 ○ ○ ○ ○08-15Group 10 Speed Feedback Control ParametersIn version 2.02, the parameters are from Pr.10-00 to Pr.10-28.FactoryPr. Explanation SettingsVF VFPG SVC FOCPG TQRPGSetting10-28 PG Mechanical Gear B1 1~5000 100 ○ ○ ○Group 11 Advanced ParametersIn version 2.02, the parameters are from Pr.11-00 to Pr.11-30.Pr. Explanation SettingsFactoryVF VFPG SVC FOCPG TQRPGSetting11-09 Level of Phase-loss 0.0~320.0 60.0 ○ ○ ○ ○ ○11-10 Reserved11-18| Reserved11-2811-29Accumulative Operation Time of Phaseloss0~65535 (hour) 0 ○ ○ ○ ○ ○11-30 APR Curve Time 0.00~655.35 sec 3.00 ○Version 2.04Group 0 System ParametersPr. Explanation Settings0: Display the frequency command value (LED F)1: Display the actual output frequency (LED H)00-03 Start-up Display Selection2: Multifunction display, see Pr.00-04 (LED U)3: Display the output current (A)0: Display output current (A)1: Display counter value (C)2: Display output frequency (H)00-04Content of Multi FunctionDisplay3: Display DC-BUS voltage ( u )4: Display output voltage (E)5: Output power factor angle (n)6: Display output power (kW)7: Display actual motor speed (HU)8: Display estimate output torque (kg-m)9: Display PG position (G) (refer to Pr.10-00 and Pr.10-01)10: Display PID feedback11: Display AVI (%)12: Display ACI (%)13: Display AUI (%)14: Display the temperature of heat sink (°C)15: Display the temperature of IGBT (°C)16: The status of digital input (ON/OFF)17: The status of digital output (ON/OFF)18: Multi-step speed19: The corresponding CPU pin status of digital input20: The corresponding CPU pin status of digital output21: Number of actual motor revolution (PG1 of PGcard)22: Pulse input frequency (PG2 of PG card)23: Pulse input position (PG2 of PG card)FactoryVF VFPG SVC FOCPG TQRPGSetting0 ○ ○ ○ ○ ○0 ○ ○ ○ ○ ○Group 2 Digital Input/Output ParametersRevision August 2008, 03<strong>VE</strong>, SW V2.04 4-29
Chapter 4 Parameters|New settings 44~50 for Pr.02-00~Pr.02-06 and new parameter 02-43.Pr. Explanation Settings02-00 2-wire/3-wire OperationControl0: FWD/STOP, REV/STOP1: FWD/STOP, REV/STOP (Line Start Lockout)2: RUN/STOP, REV/FWD3: RUN/STOP, REV/FWD (Line Start Lockout)4: 3-wire (momentary push button)5: 3-wire (momentary push button and Line StartLockout)FactoryVF VFPG SVC FOCPG TQRPGSetting0 ○ ○ ○ ○ ○02-01 Multi-Function Input 0: no function 1 ○ ○ ○ ○ ○Command 1 (MI1)(it is Stop terminal for 3-wire operation)1: multi-step speed command 1/multi-step positioncommand 12: multi-step speed command 2/ multi-step position○○○○○○○○command 202-02Multi-Function InputCommand 2 (MI2)3: multi-step speed command 3/ multi-step positioncommand 34: multi-step speed command 4/ multi-step position2 ○○○○○○○○command 402-03 Multi-Function Input 5: Reset 3 ○ ○ ○ ○ ○Command 3 (MI3) 6: JOG command○ ○ ○ ○02-04 Multi-Function Input 7: acceleration/deceleration speed inhibit 4 ○ ○ ○ ○Command 4 (MI4) 8: the 1st, 2nd acceleration/deceleration time selection ○ ○ ○ ○02-05 Multi-Function Input 9: the 3rd, 4th acceleration/deceleration time selection 0 ○ ○ ○ ○Command 5 (MI5) 10: EF input (07-36) ○ ○ ○ ○ ○02-06 Multi-Function Input 11: B.B. input 0 ○ ○ ○ ○ ○Command 6 (MI6)○ ○ ○ ○ ○(specific terminal forTRG)12: Output stop02-23 Multi-Function Input 13: cancel the setting of the optimal0 ○ ○ ○ ○Command 7acceleration/deceleration time02-24 Multi-Function Input0 ○ ○ ○ ○14: switch between drive settings 1 and 2Command 802-25 Multi-Function Input0 ○ ○ ○ ○15: operation speed command form AVICommand 902-26 Multi-Function Input0 ○ ○ ○ ○16: operation speed command form ACICommand 1002-27 Multi-Function Input0 ○ ○ ○ ○17: operation speed command form AUICommand 1102-28 Multi-Function Input0 ○ ○ ○ ○ ○18: Emergency Stop (07-36)Command 1202-29 Multi-Function Input0 ○ ○ ○ ○19: Digital Up commandCommand 1302-30 Multi-Function Input0 ○ ○ ○ ○20: Digital Down commandCommand 1421: PID function disabled ○ ○ ○ ○22: clear counter ○ ○ ○ ○ ○23: input the counter value (multi-function input○ ○ ○ ○ ○command 6)24: FWD JOG command ○ ○ ○ ○25: REV JOG command ○ ○ ○ ○26: TQC+PG/FOC+PG model selection ○ ○27: ASR1/ASR2 selection ○ ○28: Emergency stop (EF1) ○ ○ ○ ○ ○29: Signal confirmation for Y-connection ○ ○ ○ ○30: Signal confirmation for Δ−connection ○ ○ ○ ○31: High torque bias (by Pr.07-29) ○ ○ ○ ○ ○32: Middle torque bias (by Pr.07-30) ○ ○ ○ ○ ○33: Low torque bias (by Pr.07-31) ○ ○ ○ ○ ○34: Enable multi-step position control ○ ○35: Enable position control ○ ○36: Enable position learning function (valid at stop) ○ ○37: Enable pulse position input command ○ ○38: Disable write EEPROM function ○ ○ ○ ○ ○39: Torque command direction ○40: Force stop ○ ○ ○ ○ ○41: Serial position clock ○42: Serial position input ○43: Analog input resolution selection ○4-30 Revision August 2008, 03<strong>VE</strong>, SW V2.04
Chapter 4 Parameters|Pr. Explanation SettingsFactoryVF VFPG SVC FOCPG TQRPGSetting44: Reset initial reel diameter ○ ○ ○ ○ ○45: Reset initial reel diameter 0 ○ ○ ○ ○ ○46: Reset initial reel diameter 1 ○ ○ ○ ○ ○47: Reset PID control integration of tension ○ ○ ○ ○ ○48: Mechanical gear ratio switch ○ ○ ○49: Reserved50: ReservedMulti-function Output 1 0: No function 11 ○ ○ ○ ○ ○02-11 RA, RB, RC(Relay1) 1: Operation indication ○ ○ ○ ○ ○Multi-function Output 2 2: Operation speed attained 1 ○ ○ ○ ○ ○02-12 MRA, MRC (Relay2) 3: Desired frequency attained 1 (Pr.02-19) ○ ○ ○ ○ ○Multi-function Output 3 4: Desired frequency attained 2 (Pr.02-21) 0 ○ ○ ○ ○02-13(MO1)5: Zero speed (frequency command) 0 ○ ○ ○ ○6: Zero speed with stop (frequency command) ○ ○ ○ ○7: Over torque (OT1) (Pr.06-06~06-08) ○ ○ ○ ○ ○8: Over torque (OT2) (Pr.06-09~06-11) ○ ○ ○ ○ ○02-14Multi-function Output 4 9: Drive ready 0 ○ ○ ○ ○ ○(MO2) 10: User-defined Low-voltage Detection ○ ○ ○ ○ ○11: Malfunction indication ○ ○ ○ ○ ○02-35Multi-function Output 5 12: Mechanical brake release (Pr.02-31) ○ ○ ○ ○ ○(MO3) 13: Overheat ○ ○ ○ ○ ○14: Software brake signal ○ ○ ○ ○ ○02-36Multi-function Output 6 15: PID feedback error ○ ○ ○ ○ ○(MO4) 16: Slip error (oSL) ○ ○ ○ ○17: Terminal count value attained (Pr.02-16) ○ ○ ○ ○ ○02-37Multi-function Output 7 18: Preliminary count value attained (Pr.02-17) ○ ○ ○ ○ ○(MO5) 19: Baseblock (B.B.) Indication ○ ○ ○ ○ ○20: Warning output ○ ○ ○ ○ ○02-38Multi-function Output 8 21: Over voltage warning ○ ○ ○ ○ ○(MO6) 22: Over-current stall prevention warning ○ ○ ○ ○ ○23: Over-voltage stall prevention warning ○ ○ ○02-39Multi-function Output 9 24: Operation mode indication ○ ○ ○ ○ ○(MO7) 25: Forward command ○ ○ ○ ○26: Reverse command ○ ○ ○ ○02-40Multi-function Output 27: Output when current >= Pr.02-32 ○ ○ ○ ○ ○10 (MO8) 28: Output when current < Pr.02-32 ○ ○ ○ ○ ○29: Output when frequency >= Pr.02-33 ○ ○ ○ ○ ○02-41Multi-function Output 30: Output when frequency < Pr.02-33 ○ ○ ○ ○ ○11 (MO9) 31: Y-connection for the motor coil ○ ○ ○ ○32: Δ connection for the motor coil ○ ○ ○ ○02-42Multi-function Output 33: Zero speed (actual output frequency) ○ ○ ○ ○12 (MOA) 34: Zero speed with Stop (actual output frequency) ○ ○ ○ ○35: Error output selection 1 (Pr.06-23) ○ ○ ○ ○ ○36: Error output selection 2 (Pr.06-24) ○ ○ ○ ○ ○37: Error output selection 3 (Pr.06-25) ○ ○ ○ ○ ○38: Error output selection 4 (Pr.06-26) ○ ○ ○ ○ ○39: Position attained (Pr.10-19) ○40: Speed attained (including zero speed) ○ ○ ○ ○41: Multi-position attained ○42: Crane function ○ ○ ○ ○43: Motor zero-speed output (Pr.02-43) ○ ○ ○ ○44: Max. reel diameter attained ○ ○ ○ ○ ○45: Empty reel diameter attained ○ ○ ○ ○ ○46: Broken belt detection ○ ○ ○ ○ ○47: Break release at stop ○ ○ ○ ○48: Error PID feedback of tension ○ ○ ○ ○ ○49: ReservedRevision August 2008, 03<strong>VE</strong>, SW V2.04 4-31
Chapter 4 Parameters|Pr. Explanation Settings02-43Zero-speed Level ofMotor50: Reserved0~65535 rpmFactoryVF VFPG SVC FOCPG TQRPGSetting0 ○ ○ ○ ○ ○Group 3 Analog Input/Output ParametersNew settings 11~16 for Pr.03-00~Pr.03-02 and new parameters 03-21~03-26.Pr. Explanation SettingsFactoryVF VFPG SVC FOCPG TQRPGSetting03-00Analog Input 1 (AVI) 0: No function 1 ○ ○ ○ ○ ○03-01Analog Input 2 (ACI) 1: Frequency command (torque limit under TQR 0 ○ ○ ○ ○ ○control mode)03-02Analog Input 3 (AUI) 2: torque command (torque limit under speed mode) 0 ○3: Torque compensation command ○ ○ ○ ○ ○4: PID target value (refer to group 8) ○ ○ ○ ○5: PID feedback signal (refer to group 8) ○ ○ ○ ○6: P.T.C. thermistor input value ○ ○ ○ ○ ○7: Positive torque limit ○8: Negative torque limit ○9: Regenerative torque limit ○10: Positive/negative torque limit ○11: PID feedback signal of tension ○ ○ ○ ○ ○12: Line speed ○ ○ ○ ○ ○13: Reel diameter ○ ○ ○ ○ ○14: PID target value of tension (tension closedloop)○ ○ ○ ○ ○15: Tension setting (tension open-loop) ○16: Zero-speed tension ○17: Tension taper ○03-18Analog Output Selection 0: Output frequency (Hz) 0 ○ ○ ○ ○ ○1: Frequency command (Hz) ○ ○ ○ ○ ○03-21Analog Output 2: Motor speed (Hz) ○ ○ ○ ○ ○Selection 2 3: Output current (rms) ○ ○ ○ ○ ○03-24Analog Output 4: Output voltage ○ ○ ○ ○ ○Selection 3 5: DC Bus Voltage ○ ○ ○ ○ ○6: Power factor ○ ○ ○ ○ ○7: Power ○ ○ ○ ○ ○8: Output torque ○ ○ ○ ○ ○9: AVI ○ ○ ○ ○ ○10: ACI ○ ○ ○ ○ ○11: AUI ○ ○ ○ ○ ○12: q-axis current ○ ○ ○ ○ ○13: q-axis feedback value ○ ○ ○ ○ ○14: d-axis current ○ ○ ○ ○ ○15: d-axis feedback value ○ ○ ○ ○ ○16: q-axis voltage ○ ○ ○ ○ ○17: d-axis voltage ○ ○ ○ ○ ○18: Torque command ○ ○ ○ ○ ○19: Pulse frequency command ○ ○ ○ ○ ○03-22Analog Output Gain 2 0~200.0% 100.0 ○ ○ ○ ○ ○03-23Analog Output Value in 0: Absolute value in REV direction0 ○ ○ ○ ○ ○REV Direction 2 1: Output 0V in REV direction2: Enable output voltage in REV direction03-25Analog Output Gain 3 0~200.0% 100.0 ○ ○ ○ ○ ○03-26Analog Output Value in 0: Absolute value in REV direction0 ○ ○ ○ ○ ○REV Direction 3 1: Output 0V in REV direction2: Enable output voltage in REV direction4-32 Revision August 2008, 03<strong>VE</strong>, SW V2.04
Chapter 4 Parameters|Group 5 Motor ParametersPr. Explanation SettingsFactorySettingVF VFPG SVC FOCPG TQRPG05-00 Motor Auto Tuning 0: No function0 ○ ○ ○1: Rolling test2: Static Test3: Reserved05-01 Full-load Current of 40-100% #.## ○ ○ ○ ○ ○Motor 105-02Rated power of Motor 1 0~655.35 #.## ○ ○ ○05-03Rated speed of Motor 1 0~655351710 ○ ○ ○ ○(rpm)1710 (60Hz, 4 poles), 1410 (50Hz, 4 poles)Group 6 Protection ParametersNew setting 0 for Pr.06-01, new settings 64~65 for Pr.06-17~Pr.06-22 and new parameters 06-32~06-36.FactorySettingVF VFPG SVC FOCPG TQRPG0.0: Disable350.0~450.0Vdc 380.0 ○ ○ ○ ○ ○Pr. Explanation Settings06-01Over-voltage StallPrevention700.0~900.0Vdc 760.0 ○ ○ ○ ○ ○06-17 Present Fault Record 0: No fault 0 ○ ○ ○ ○ ○1: Over-current during acceleration (ocA) ○ ○ ○ ○ ○06-18Second Most Recent 2: Over-current during deceleration (ocd) 0 ○ ○ ○ ○ ○Fault Record 3: Over-current during constant speed (ocn) ○ ○ ○ ○ ○4: Ground fault (GFF) ○ ○ ○ ○ ○06-19Third Most Recent Fault 5: IGBT short-circuit (occ) 0 ○ ○ ○ ○ ○Record 6: Over-curent at stop (ocS) ○ ○ ○ ○ ○7: Over-voltage during acceleration (ovA) ○ ○ ○ ○ ○06-20 Fourth Most Recent 8: Over-voltage during deceleration (ovd) 0 ○ ○ ○ ○ ○Fault Record 9: Over-voltage during constant speed (ovn) ○ ○ ○ ○ ○10: Over-voltage at stop (ovS) ○ ○ ○ ○ ○11: Low-voltage during acceleration (LvA) ○ ○ ○ ○ ○06-21 Fifth Most Recent Fault 12: Low-voltage during deceleration (Lvd) ○ ○ ○ ○ ○Record 13: Low-voltage during constant speed (Lvn) ○ ○ ○ ○ ○14: Low-voltage at stop (LvS) 0 ○ ○ ○ ○ ○15: Phase loss (PHL) ○ ○ ○ ○ ○16: IGBT heat sink over-heat (oH1) ○ ○ ○ ○ ○06-22 Sixth Most Recent Fault 17: Heat sink over-heat (oH2)(for 40HP above) 0 ○ ○ ○ ○ ○Record 18: TH1 open loop error (tH1o) ○ ○ ○ ○ ○19: TH2 open loop error (tH2o) ○ ○ ○ ○ ○20: Fan error signal output ○ ○ ○ ○ ○21: over-load (oL) (150% 1Min) ○ ○ ○ ○ ○22: Motor 1 over-load (EoL1) ○ ○ ○ ○ ○23: Motor 2 over-load (EoL2) ○ ○ ○ ○ ○24: Motor PTC overheat (oH3) ○ ○ ○ ○ ○25: Fuse error (FuSE) ○ ○ ○ ○ ○26: over-torque 1 (ot1) ○ ○ ○ ○ ○27: over-torque 1 (ot2) ○ ○ ○ ○ ○28: Reserved ○ ○ ○ ○ ○29: Reserved ○ ○ ○ ○ ○30: Memory write-in error (cF1) ○ ○ ○ ○ ○31: Memory read-out error (cF2) ○ ○ ○ ○ ○32: Isum current detection error (cd0) ○ ○ ○ ○ ○33: U-phase current detection error (cd1) ○ ○ ○ ○ ○34: V-phase current detection error (cd2) ○ ○ ○ ○ ○35: W-phase current detection error (cd3) ○ ○ ○ ○ ○36: Clamp current detection error (Hd0) ○ ○ ○ ○ ○37: Over-current detection error (Hd1) ○ ○ ○ ○ ○38: Over-voltage detection error (Hd2) ○ ○ ○ ○ ○Revision August 2008, 03<strong>VE</strong>, SW V2.04 4-33
Chapter 4 Parameters|Pr. Explanation SettingsFactoryVF VFPG SVC FOCPG TQRPGSetting39: Ground current detection error (Hd3) ○ ○ ○ ○ ○40: Auto tuning error (AuE) ○ ○ ○41: PID feedback loss (AFE) ○ ○ ○ ○ ○42: PG feedback error (PGF1) ○ ○ ○43: PG feedback loss (PGF2) ○ ○ ○44: PG feedback stall (PGF3) ○ ○45: PG slip error (PGF4) ○ ○46: PG ref input error (PGr1) ○ ○ ○ ○ ○47: PG ref loss (PGr2) ○ ○ ○ ○ ○48: Analog current input loss (ACE) ○ ○ ○ ○ ○49: External fault input (EF) ○ ○ ○ ○ ○50: Emergency stop (EF1) ○ ○ ○ ○ ○51: External Base Block (B.B.) ○ ○ ○ ○ ○52: Password error (PcodE) ○ ○ ○ ○ ○53: Reserved ○ ○ ○ ○ ○54: Communication error (cE1) ○ ○ ○ ○ ○55: Communication error (cE2) ○ ○ ○ ○ ○56: Communication error (cE3) ○ ○ ○ ○ ○57: Communication error (cE4) ○ ○ ○ ○ ○58: Communication Time-out (cE10) ○ ○ ○ ○ ○59: PU time-out (cP10) ○ ○ ○ ○ ○60: Brake transistor error (bF) ○ ○ ○ ○ ○61: Y-connection/Δ-connection switch error (ydc) ○ ○ ○ ○62: Decel. Energy Backup Error (dEb) ○ ○ ○ ○ ○63: Slip error (oSL) ○ ○ ○ ○64: Broken belt error (bEb) ○ ○ ○ ○ ○65: Error PID feedback signal of tension (tdEv) ○ ○ ○ ○ ○Output Frequency for 0.00~655.35 Hz 0.00 ○ ○ ○ ○ ○06-32 MalfunctionOutput AC Voltage for 0.0~6553.5 V 0.0 ○ ○ ○ ○ ○06-33 MalfunctionDC Voltage for 0.0~6553.5 V 0.0 ○ ○ ○ ○ ○06-34 MalfunctionCurrent Value for 0.00~655.35 Amp 0.00 ○ ○ ○ ○ ○06-35 MalfunctionIGBT Temperature for 0.0~6553.5 °C 0.0 ○ ○ ○ ○ ○06-36 MalfunctionGroup 8 High-function PID ParametersNew parameters 08-21~08-99Pr. Explanation Settings08-0008-0108-21Input Terminal for PIDFeedback0: No function1: Negative PID feedback from external terminal AVI(Pr.03-00)2: Negative PID feedback from PG card (Pr.10-15,skip direction)3: Negative PID feedback from PG card (Pr.10-15)4: Positive PID feedback from external terminal AVI(Pr.03-00)5: Positive PID feedback from PG card (Pr.10-15,skip direction)6: Positive PID feedback from PG card (Pr.10-15)Proportional Gain (P) 0.0~500.0%Tension Control 0: DisableSelection1: Closed-loop, speed mode2: Line speed, speed mode3: Reserved4: Open-loop, torque modeFactorySettingVF VFPG SVC FOCPG TQRPG0 ○ ○ ○ ○80.0 ○ ○ ○ ○0 ○ ○ ○ ○○ ○ ○ ○○ ○ ○ ○○4-34 Revision August 2008, 03<strong>VE</strong>, SW V2.04
Pr. Explanation Settings08-22Wind Mode0: Rewind1: Unwind08-23Mechanical Gear Ratio 1-65535A08-24Mechanical Gear Ratio 1-65535B08-25Source of the TensionCommand/Line Speed0: Parameter setting (Pr.08-26)1: RS-485 communication setting (Pr.08-26)2: Analog input (Pr. 03-00~03-02 is set to 14 PIDtarget value of tension, 03-00~03-02 is set to 12line speed)Chapter 4 Parameters|FactoryVF VFPG SVC FOCPG TQRPGSetting0 ○ ○ ○ ○ ○100 ○ ○ ○ ○ ○100 ○ ○ ○ ○ ○0 ○ ○ ○ ○ ○08-26PID Target Value of 0.0~100.0%Tension/Line Speed50.0 ○ ○ ○ ○ ○08-27Source of Tension/Line 0: Analog input (Pr. 03-00~03-02 is set to 11 PIDSpeed PID Feedback feedback of tension)0 ○ ○ ○ ○ ○1: Pulse input (Pr.08-40)08-28Auto-tuning Tension 0: DisablePID1: Reel diameter (08-29~08-31corresponds to 08-○ ○ ○ ○ ○44, 08-32~08-34 corresponds to 08-43)2: Frequency (08-29~08-31 corresponds to 01-07,08-32~08-34 corresponds to 01-00)08-29Tension PID P1 0.0~1000.050.0 ○ ○ ○ ○ ○08-30Tension PID I10.00~500.00 sec1.00 ○ ○ ○ ○ ○08-31Reserved08-32Tension PID P2 0.0~1000.0 50.0 ○ ○ ○ ○ ○08-33Tension PID I2 0.00~500.00 sec 1.00 ○ ○ ○ ○ ○08-34 Reserved08-35PID/Line Speed Output 0: Positive output0 ○ ○ ○ ○ ○Status1: Negative output08-36Tension/Line Speed PID 0~100.00% (according to Pr,01-00) 20.00 ○ ○ ○ ○ ○Output Limit08-37Source of Line Speed 0: Disable0 ○ ○ ○ ○ ○Input Command 1: Analog input (Pr. 03-00~03-02 is set to 12 linespeed)2: RS-485 communication setting (Pr.08-41)3: Pulse input (Pr.08-40)4: DFM-DCM pulse input (Pr.02-18)08-38Max. Line Speed 0.0~3000.0m/min 1000.0 ○ ○ ○ ○ ○08-39Min. Line Speed 0.0~3000.0m/min 0.0 ○ ○ ○ ○ ○08-40Pulse Number for Each 0.0~6000.0 0.0 ○ ○ ○ ○ ○Meter08-41Current Line Speed 0.0~3000.0m/min 0.0 ○ ○ ○ ○ ○08-42Source of ReelDiameter0: Calculated by line speed1: Calculated by integrating thickness (encoderis on reel shaft)(Pr.08-49~51, Pr.10-15)2: Calculated by integrating thickness (encoderis on motor)(Pr.08-23~08-24, 08-50~08-51, 10-00~10-01)3: Calculated by analog input (Pr.03-00~03-02 isset to 13)0 ○ ○ ○ ○ ○08-43Max. Reel Diameter 1.0~6000.0mm 6000.0 ○ ○ ○ ○ ○08-44Empty Reel Diameter 1.0~6000.0mm 1.0 ○ ○ ○ ○ ○08-45Source of Initial Reel 0: RS-485 communication setting (Pr.08-46)0 ○ ○ ○ ○ ○Diameter1: Analog input (Pr.03-00-Pr.03-02 is set to 13)08-46Initial Reel Diameter 1.0~6000.0mm 1.0 ○ ○ ○ ○ ○08-47Initial Reel Diameter 1 1.0~6000.0mm 1.0 ○ ○ ○ ○ ○08-48Initial Reel Diameter 2 1.0~6000.0mm 1.0 ○ ○ ○ ○ ○08-49Number of Pulse per 1~10000ppr 1 ○ ○ ○ ○ ○Revolution08-50Coil Number for Each 0.001~60.000mm 1.000 ○ ○ ○ ○ ○Layer08-51Material Thickness 0.001~60.000mm 1.000 ○ ○ ○ ○ ○08-52Filter Time of Reel 0.00 to 100.00 seconds 1.00 ○ ○ ○ ○ ○Diameter08-53Auto Compensation of 0: Disable 1.00 ○ ○ ○ ○ ○Revision August 2008, 03<strong>VE</strong>, SW V2.04 4-35
Chapter 4 Parameters|Pr. Explanation SettingsFactoryVF VFPG SVC FOCPG TQRPGSettingReel Diameter1: Enable08-54Current Reel Diameter 1.0~6000.0mm 1.0 ○ ○ ○ ○ ○08-55Smart Start0: Disable1 ○ ○ ○ ○ ○1: Enable2: In unwind mode, rewind in reverse direction08-56Switch Level for Smart 0.0~100.0% (according to Pr.08-26) 15.0 ○ ○ ○ ○ ○Start and PID function08-57Frequency for Smart 0.00~600.00Hz 2.00 ○ ○ ○ ○ ○Start08-58Accel. Time for Smart 0.01~600.00 seconds 3.00 ○ ○ ○ ○Start08-59Broken Belt Detection 0: Disable0 ○ ○ ○ ○1: Enable08-60Min. Line Speed of 0.0~3000.0m/min 0.0 ○ ○ ○ ○Broken Belt Detection08-61Allowance Error of Line 1.0~6000.0mm 100.0 ○ ○ ○ ○Speed of Broken BeltDetection08-62Detection Time of 0.00~100.00 sec 1.00 ○ ○ ○ ○Broken Belt08-63Allowance Error Level 0~100% 100 ○ ○ ○ ○of Tension/Line SpeedPID Feedback08-64Allowance Error 0.0~10.0 sec 0.5 ○ ○ ○ ○Detection Time ofTension PID Feedback08-65Error Treatment of 0: Warn and keep operation0 ○ ○ ○ ○Tension PID Feedback 1: Warn and coast to stop2: Warn and ramp to stop08-66Upper Limit of Tension 0.0~100.0% 100.0 ○ ○ ○ ○ ○PID Feedback08-6708-6808-6908-7008-71|08-7508-7608-7708-7808-7908-8008-8108-8208-8308-8408-8508-8608-87|08-99Lower Limit of TensionPID Feedback0.0~100.0% 0.0 ○ ○ ○ ○ ○ReservedDFM Selection0: Output frequency0 ○ ○ ○ ○ ○1: Frequency commandLow-pass Filter Time of 0.00~100.00 sec 0.00 ○ ○ ○ ○ ○Line SpeedReservedSource of TensionSetting0: Communication RS-485 (Pr.08-78)1: Analog input (Pr. 03-00~03-02 is set to 15tension setting) (Pr.08-78)0 ○Max. Tension 0~30000 N 0 ○Tension Setting 0~30000 N 0 ○Source of Zero-speed 0: Disable0 ○Tension Setting 1: Communication RS-485 (Pr.08-80)2: Analog input (Pr. 03-00~03-02 is set to 16 zerospeedtension) (Pr.08-80)Setting of Zero-speed 0~30000 N 0 ○TensionSource of TensionTaper0: Communication RS-485 (Pr.08-82)1: Analog input (Pr. 03-00~03-02 is set to 17tension taper)(Pr.08-82)0 ○Tension Taper 0~100% 0 ○Friction Compensation 0.0~100.0% 0.0 ○Compensation0~30000 0 ○Coefficient of MaterialInertialTorque Feed Forward 0.0~100.0% 50.0 ○GainLow Pass Filter Time of 0.00~100.00 5.00 ○Torque Feed ForwardReserved4-36 Revision August 2008, 03<strong>VE</strong>, SW V2.04
Group 9 Communication ParametersChapter 4 Parameters|Pr. Explanation SettingsFactoryVF VFPG SVC FOCPG TQRPGSetting09-21Multi-function Output 0~65535 Readonly○ ○ ○ ○ ○Status09-22AFM2 Status 0~4095 Readonly○ ○ ○ ○ ○09-23AFM3 Status 0~4095 Readonly○ ○ ○ ○ ○Group 10 Speed Feedback Control ParametersNew parameters 10-29~10-30Pr. Explanation SettingsFactoryVF VFPG SVC FOCPG TQRPGSetting10-04ASR (Auto Speed 0~40 10 ○ ○Regulation) Control ( P) 110-06ASR (Auto Speed 0~40 10 ○ ○Regulation) Control ( P) 210-21 P Gain of Zero Speed 0~40 10 ○ ○10-29PG Mechanical Gear A2 1~5000 100 ○ ○ ○10-30PG Mechanical Gear B2 1~5000 100 ○ ○ ○Group 11 Advanced ParametersUpdated parameters 11-00 and 11-09~11-10 and new parameters 11-18~11-40.Pr. Explanation SettingsFactorySettingVF VFPG SVC FOCPG TQRPGbit 0: ASR Auto tuning0 ○11-00 System Controlbit 1: Inertia estimatebit 2: Zero Servobit 3: Reservedbit 4: Enable gain adjustment of position loop KP11-07Detection Time for 0.01~600.00 sec 0.20 ○ ○ ○ ○ ○Phase-loss11-08 Reserved11-09 Level of Phase-loss 0.0~320.0 60.0 ○ ○ ○ ○ ○Speed Feed Forward 0~100% 0 ○11-10 Gain11-11Zero-speed0~40Hz 10 ○ ○ ○Bandwidth11-12Speed Response of 0: Disable65 ○Flux Weakening Area 0~150%11-13 Notch Filter Depth 0~20db 0 ○11-14Notch Filter0.00~200.00 0.00 ○Frequency11-15Gain Value of SlipCompensation0.00~1.00 1.00 ○11-16Low-pass Filter Timeof Keypad Display0.001~65.535sec 0.100 ○ ○ ○ ○ ○11-17Low-pass Filter Timeof PG2 Pulse Input0.000~65.535sec 0.100 ○ ○ ○ ○11-18 APR Gain 0.00~40.00 10.00 ○11-19 APR Curve Time 0.00~655.35 sec 3.00 ○11-20| Reserved11-2811-29AccumulativeOperation Time of 0~65535 (hour) 0 ○ ○ ○ ○ ○Phase-loss11-30|11-40ReservedRevision August 2008, 03<strong>VE</strong>, SW V2.04 4-37
Chapter 4 Parameters|4.3 Description of Parameter SettingsGroup 0 User Parameters00-00 Identity Code of the AC Motor DriveControlmodeVF VFPG SVC FOCPG TQRPGSettingsRead Only00-01 Rated Current Display of the AC Motor DriveControlmodeVF VFPG SVC FOCPG TQRPGSettingsRead Only: This parameter can be set during operation.Factory setting: ##Factory setting: ##Pr. 00-00 displays the identity code of the AC motor drive. The capacity, rated current, ratedvoltage and the max. carrier frequency relate to the identity code. Users can use the followingtable to check how the rated current, rated voltage and max. carrier frequency of the AC motordrive correspond to the identity code.Pr.00-01 displays the rated current of the AC motor drive. By reading this parameter the <strong>user</strong>can check if the AC motor drive is correct.The factory setting is rated current for the constant torque and can be set in Pr.00-12.230V SerieskW 0.75 1.5 2.2 3.7 5.5 7.5 11 15 18.5 22 30 37HP 1.0 2.0 3.0 5.0 7.5 10 15 20 25 30 40 50Pr.00-00 4 6 8 10 12 14 16 18 20 22 24 26Rated Currentfor Constant 5 7.5 11 17 25 33 49 65 75 90 120 146Torque (A)Rated Currentfor Variable 6.3 9.4 13.8 21.3 31.3 41.3 61.3 81.3 93.8 113 150 183Torque (A)Max. CarrierFrequency15kHz9kHz460V SerieskW 0.75 1.5 2.2 3.7 5.5 7.5 11 15 18.5 22 30 37 45 55 75HP 1.0 2.0 3.0 5.0 7.5 10 15 20 25 30 40 50 60 75 100Pr.00-00 5 7 9 11 13 15 17 19 21 23 25 27 29 31 33Rated Currentfor Constant 3 4.2 6 8.5 13 18 24 32 38 45 60 73 91 110 150Torque (A)Rated Currentfor Variable 3.8 5.3 7.5 10.6 16.3 22.5 30 40 47.5 56.3 75 91.3 113.8 138 188Torque (A)Max. CarrierFrequency15kHz 9kHz 6kHz4-38 Revision August 2008, 03<strong>VE</strong>, SW V2.04
00-02 Parameter ResetControlmodeChapter 4 Parameters|VF VFPG SVC FOCPG TQRPG Factory setting: 0Settings 0 No Function1 Read Only2 Enable Group 11 Parameters Setting8 Keypad Lock9 All parameters are reset to factory settings (50Hz, 220V/380V)10 All parameters are reset to factory settings (60Hz, 220V/440V)When it is set to 1, all parameters are read only except Pr.00-00~00-07 and it can be usedwith password setting for password protection.This parameter allows the <strong>user</strong> to reset all parameters to the factory settings except the faultrecords (Pr.06-17 ~ Pr.06-22).50Hz: Pr.01-01 is set to 50Hz and Pr.01-02 is set to 230V or 400V.60Hz: Pr.01-01 is set to 60Hz and Pr.01-02 is set to 230Vor 460V.When Pr.00-02=08, the KPV-CE01 keypad is locked and only Pr.00-02 can be set. To unlockthe keypad, set Pr.00-02=00.When Pr.00-02 is set to 1 or 8, Pr.00-02 setting should be set to 0 before setting to othersetting.After setting Pr.00-02 to 2, it can display group 11 to re-connect the keypad after disconnectionor re-power on after the power off.00-03 Start-up Display SelectionControlmodeVF VFPG SVC FOCPG TQRPG Factory setting: 0Settings 0 Display the frequency command value. (LED F)1 Display the actual output frequency (LED H)2 Multifunction display, see Pr.00-04 (LED U)3 Display the output current (A)This parameter determines the start-up display page after power is applied to the drive.00-04 Content of Multi-Function function DisplayControlmodeVF VFPG SVC FOCPG TQRPG Factory setting: 0Revision August 2008, 03<strong>VE</strong>, SW V2.04 4-39
Chapter 4 Parameters|00-04 Content of Multi-Function function DisplaySettings 0 Display the output current in A supplied to the motorU1Display the counter value which counts the number ofpulses on TRG terminalU2 Display actual output frequency (H)U3456789Display the actual DC BUS voltage in VDC of the ACmotor driveDisplay the output voltage in VAC of terminals U, V, Wto the motor.Display the power factor angle in º of terminals U, V, Wto the motor.Display the output power in kW of terminals U, V and Wto the motor.Display the actual motor speed in rpm (enabled whenusing with PG card).Display the estimated value of torque in Nm as it relatesto current.Display PG position. When Pr.10-01 is set to 1 or 2, itmeans that motor angle is 0~4XPr.10-00.UUUUUUU10 Display analog feedback signal value in %.U111213Display the signal of AVI analog input terminal in %.Range 0~10V corresponds to 0~100%. (1.)Display the signal of ACI analog input terminal in %.Range 4~20mA/0~10V corresponds to 0~100%. (2.)Display the signal of AUI analog input terminal in %.Range -10V~10V corresponds to 0~100%. (3.)UUU14 Display the temperature of heat sink in °C.U15 Display the temperature of IGBT in °C.U16 Display digital input status ON/OFF (i)U17 Display digital output status ON/OFF (o)U18 Display multi-step speedU19 The corresponding CPU pin status of digital input (i.)U20 The corresponding CPU pin status of digital output (o.)U4-40 Revision August 2008, 03<strong>VE</strong>, SW V2.04
Chapter 4 Parameters|00-04 Content of Multi-Function function Display21 Number of actual motor revolution (PG1 of PG card) (Z)U22 Pulse input frequency (PG2 of PG card) (4)U23 Pulse input position (PG2 of PG card) (4.)U This parameter sets the display when Pr. 00-03 is set to 2.It is used to display the content when LED U is ON. It is helpful for getting the AC motor drive’sstatus by this parameter.Terminal MI14 MI13 MI12 MI11 MI10 MI9 MI8 MI7 MI6 MI5 MI4 MI3 MI2 MI1 REV FWDStatus 0 0 0 0 0 0 0 0 1 0 0 0 0 1 1 00: OFF, 1: ONMI1: Pr.02-01 is set to 1 (multi-step speed command 1/multi-step position command 1)MI6: Pr.02-06 is set to 8 (the 1st, 2nd acceleration/deceleration time selection)If REV, MI1 and MI6 are ON, the value is 0000 0000 1000 01102 in binary and 0086H in HEX.At the meanwhile, if Pr.00-04 is set to “16” or “19”, it will display “0086” with LED U is ON onthe keypad KPV-CE01. The setting 16 is the status of digital input and the setting 19 is thecorresponding CPU pin status of digital input. User can set to 16 to monitor digital input statusand then set to 19 to check if the wire is normal.Terminal Reserved Reserved Reserved MO2 MO1 RA MRAStatus 0 0 0 0 0 0 0 0 1 0 0 0 0 1 1 0MRA: Pr.02-11 is set to 9 (Drive ready).After applying the power to the AC motor drive, if there is no other abnormal status, thecontact will be ON. At the meanwhile, if Pr.00-04 is set to 17 or 20, it will display 0001 withLED U is ON on the keypad. The setting 17 is the status of digital output and the setting 20 isthe corresponding CPU pin status of digital output. User can set 17 to monitor the digitaloutput status and then set to 20 to check if the wire if normal.00-05 User Defined Coefficient KRevision August 2008, 03<strong>VE</strong>, SW V2.04 4-41
Chapter 4 Parameters|ControlmodeVF VFPG SVC FOCPG TQRPG Factory setting: 0Settings Digit 4: decimal point number (0 to 3)Digit 0-3: 40 to 9999It is used digital setting methodDigital 4: decimal point number (0: no decimal point, 1: 1 decimal point and so on.)Digit 0-3: 40 to 9999 (the corresponding value for the max. frequency).Digital43FHU210corresponding valuedecimal point number For example, if use uses rpm to display the motor speed and the corresponding value to the 4-pole motor 60Hz is 1800. This parameter can be set to 01800 to indicate that thecorresponding value for 60Hz is 1800rpm. If the unit is rps, it can be set 10300 to indicate thecorresponding value for 60Hz is 30.0 (a decimal point).00-06 Software VersionControlmodeVF VFPG SVC FOCPG TQRPG Factory setting: Read OnlySettings Read OnlyDisplay #.##00-07 Password Input Unit: 1ControlmodeVF VFPG SVC FOCPG TQRPG Factory setting: 00Settings 1 to 9998 and 10000 to 65535Display 00~02 (times of wrong password) The function of this parameter is to input the password that is set in Pr.00-08. Input the correctpassword here to enable changing parameters. You are limited to a maximum of 3 attempts.After 3 consecutive failed attempts, a blinking “PcodE” will show up to force the <strong>user</strong> to restartthe AC motor drive in order to try again to input the correct password. When forgetting password, you can decode by setting 9999 and press button twice.Please note that all the settings will be set to factory setting.00-08 Password Set Unit: 14-42 Revision August 2008, 03<strong>VE</strong>, SW V2.04
ControlmodeChapter 4 Parameters|VF VFPG SVC FOCPG TQRPG Factory setting: 00Settings 1 to 9998 and 10000 to 65535Display 00 No password set or successful input in Pr. 00-0701 Password has been setTo set a password to protect your parameter settings.If the display shows 00, no password is set or password has been correctly entered in Pr.00-07. All parameters can then be changed, including Pr.00-08.The first time you can set a password directly. After successful setting of password the displaywill show 01.Be sure to record the password for later use.To cancel the parameter lock, set the parameter to 00 after inputting correct password into Pr.00-07.The password consists of min. 2 digits and max. 5 digits.How to make the password valid again after decoding by Pr.00-07:Method 1: Re-input original password into Pr.00-08 (Or you can enter a new password if youwant to use a changed or new one).Method 2: After rebooting, password function will be recovered.Password Decode Flow ChartPassword Setting Decoding Flow Chart00-0800-0800-07Displays 01 whenentering correctpassword intoPr.00-08.Displays 00 whenentering correctpassword intoPr.00-07.Correct PasswordENDIncorrect PasswordEND00-0800-07Forgetting Passwrod00-07After entering 9999, presstwice to decode. The parametersetting will be set to factory setting.Displays 00 whenentering correctpassword intoPr.00-07.3 chances to enter the correctpassword.1st time displays "01" ifpassword is incorrect.2nd time displays "02", ifpassword is incorrect.3rd time displays "P code"(blinking)If the password was enteredincorrectly after three tries,the keypad will be locked.Turn the power OFF/ON tore-enter the password.Revision August 2008, 03<strong>VE</strong>, SW V2.04 4-43
Chapter 4 Parameters|00-09 Energy Saving Gain Unit: 1ControlmodeFOCPG Factory setting: 100%Settings 10~1000 %When Pr.00-19 is set to1, this parameter can be used for energy saving. The setting should bedecreased when the energy saving is not well. When the motor is vibrated, the setting shouldbe increased.00-10 Control MethodControlmodeVF VFPG SVC FOCPG TQRPG Factory setting: 0Settings 0 V/f control1 V/f + Encoder (VFPG)2 Sensorless vector control (SVC)3 FOC vector control + Encoder (FOCPG)4 Torque control + Encoder (TQRPG)This parameter determines the control method of the AC motor drive:Setting 0: <strong>user</strong> can design V/f ratio by requirement and control multiple motors simultaneously.Setting 1: User can use PG card with Encoder to do close-loop speed control.Setting 2: To have optimal control characteristic by auto-tuning.Setting 3: To increase torque and control speed precisely. (1:1000)Setting 4: To increase accuracy for torque control.00-11 V/f Curve SelectionControlmodeVF VFPG Factory setting: 0Settings 0 V/f curve determined by group 011 1.5 power curve2 Square curveWhen it is set to 0, the V/f curve setting for the motor 1 is according to Pr.01-01~Pr.01-08 andPr. 01-35~01-42 are for the motor 2.When setting to 1 or 2, the settings of the 2 nd voltage/frequency and the 3 rd voltage/frequencyare invalid.4-44 Revision August 2008, 03<strong>VE</strong>, SW V2.04
Chapter 4 Parameters|01-02 voltage%1009080701.5 Power curve60504030Square curve2010020 40 60 80 10001-01 Frequency%00-12 Constant/Variable Torque SelectionControlmodeVF VFPG SVC FOCPG Factory setting: 0Settings 0 Constant Torque (100%)1 Variable Torque (125%)When “1” is selected, the oL level is 125% of rated drive current. All other overload ratings willnot change, example: 150% of rated drive current for 60 seconds.00-13 Optimal Acceleration/Deceleration SettingControlmodeVF VFPG SVC FOCPG Factory setting: 0Settings 0 Linear accel./decel. I1 Auto accel., linear decel.2 Linear accel., auto decel.3 Auto accel./decel. I4 Stall prevention by auto accel./decel. (limited by 01-12 to 01-21)It can decrease the drive’s vibration during load starts and stops by setting this parameter.Also it will speed up to the setting frequency with the fastest and smoothest start-up currentwhen it detects small torque. At deceleration, it will auto stop the drive with the fastest and thesmoothest deceleration time when the regenerated voltage of the load is detected.Revision August 2008, 03<strong>VE</strong>, SW V2.04 4-45
Chapter 4 Parameters|Frequency01-00Max.Frequency121 When Pr.00-13 is set to 0.2 When Pr.00-13 is set to 3.Min.Frequency01-05accel. time01-12 01-1401-16 01-18Accel./Decel. Timedecel. time01-13 01-1501-17 01-19Time00-14 Time Unit for Acceleration/Deceleration and S CurveControlmodeVF VFPG SVC FOCPG Factory setting: 0Settings 0 Unit: 0.01 second1 Unit: 0.1 secondThis parameter determines the time unit for the Acceleration/Deceleration setting. Refer toPr.01-12 ~ Pr.01-19 (accel./decel. Time 1 to 4), Pr. 01-20~Pr.01-21 (JOG accel./decel. Time)and Pr. 01-24~Pr.01-27 (S curve accel./decel. Time).00-15 Reserved00-16 Reserved00-17 Carrier Frequency Unit: 1ControlmodeVF VFPG SVC FOCPG TQRPG Factory setting: 10Settings1~15kHzThis parameter determinates the PWM carrier frequency of the AC motor drive.230V/460V SeriesModels1-5HP 7.5-25HP 30-60HP 75-100HP0.75-3.7kW 5.5-18.5kW 22-45kW 55-75KwSetting Range 01~15kHz 01~15kHz 01~09kHz 01~06kHzFactory Setting 10kHz 9kHz 6kHz 6kHzCarrierFrequency1kHzAcousticNoiseSignificantElectromagnetic HeatNoise or Leakage DissipationCurrentMinimal MinimalCurrentWave8kHz15kHzMinimalSignificant Significant4-46 Revision August 2008, 03<strong>VE</strong>, SW V2.04
Chapter 4 Parameters|From the table, we see that the PWM carrier frequency has a significant influence on theelectromagnetic noise, AC motor drive heat dissipation, and motor acoustic noise.00-18 Auto Voltage Regulation (AVR) FunctionControlmodeVF VFPG SVC FOCPG TQRPG Factory setting: 0Settings 0 Enable AVR1 Disable AVR2 Disable AVR when deceleration stopIt is used to select the AVR mode. AVR is used to regulate the output voltage to the motor. Forexample, if V/f curve is set to AC200V/50Hz and the input voltage is from 200 to 264VAC, theoutput voltage won’t excess AC200V/50Hz. If the input voltage is from 180 to 200V, the outputvoltage to the motor and the input voltage will be in direct proportion.When setting Pr.00-18 to 1 during ramp to stop and used with auto accel./decel. function, theacceleration will be smoother and faster.00-19 Auto Energy-saving OperationControlmodeVF VFPG SVC FOCPG Factory setting: 0Settings 0 Disable1 EnableWhen the Auto Energy-saving function is enabled, the drive will operate with full voltage duringacceleration and deceleration. At constant speed, the AC drive will calculate the optimal outputvoltage value for the load. It is possible for the output voltage to be 25% below MaximumOutput Voltage during auto energy-saving operation. This function should not be used withvariable loads or continuous rated output loads.When output frequency is constant, i.e. constant operation, the output voltage will be autodecreased with load reduction. To make the AC motor drive runs under the energy-saving withthe minimum value of the product of voltage and current.Revision August 2008, 03<strong>VE</strong>, SW V2.04 4-47
Chapter 4 Parameters|Output Voltage100%75%The maximum output voltagereduction is 25%.Auto Energy-saving Operation00-20 Source of the Master Frequency CommandControlmodeFrequencyVF VFPG SVC FOCPG Factory setting: 0Settings 0 Digital keypad (KPV-CE01)1 RS-485 serial communication2 External analog input (Pr. 03-00)3 External UP/DOWN terminal4 Pulse input without direction command (Pr.10-15 without direction)5 Pulse input with direction command (Pr.10-15)This parameter determines the drive’s master frequency source.00-21 Source of the Operation CommandControlmodeVF VFPG SVC FOCPG TQRPG Factory setting: 0Settings 0 Digital keypad (KPV-CE01)1 External terminals. Keypad STOP disabled.2 RS-485 serial communication (RJ-11). Keypad STOP disabled.When Pr.00-21 is set to 1, it also needs to set Pr.00-20 and Pr.00-21 to 0. After pressing PUkey to make LED PU to be light, RUN, JOG and STOP key are valid now.00-22 Stop MethodControlmodeVF VFPG SVC FOCPG TQRPG Factory setting: 0Settings 0 Ramp to stop1 Coast to stop4-48 Revision August 2008, 03<strong>VE</strong>, SW V2.04
Chapter 4 Parameters|The parameter determines how the motor is stopped when the AC motor drive receives a validstop command.OutputFrequencyOutputFrequencyOperationCommandTimeFree runningRUN STOPOperationCommand RUNto stopSTOPTimeRamp to stop: the AC motor drive decelerates from the maximum output frequency (Pr. 01-00) to minimum output frequency (Pr. 01-09) according to the deceleration time and thenstop.Coast to stop: the AC motor drive stops the output instantly upon a STOP command andthe motor free runs until it comes to a complete standstill.(1) It is recommended to use “ramp to stop” for safely of personnel or to prevent materialfrom being wasted in applications where the motor has to stop after the drive is stopped.The deceleration time has to be set accordingly.(2) If the motor free running is allowed or the load inertia is large, it is recommended toselect “coast to stop”. For example, blowers, punching machines and pumps.The stop method of the torque control is also set by Pr.00-22.00-23 Reverse OperationControlmodeVF VFPG SVC FOCPG TQRPG Factory setting: 0Settings 0 Enable reverse1 Disable reverse2 Disable forwardThis parameter enables the AC motor drives to run in the Reverse Direction. It may be used toprevent a motor from running in a direction that would consequently injure humans or damagethe equipment.Revision August 2008, 03<strong>VE</strong>, SW V2.04 4-49
Chapter 4 Parameters|Group 1 Basic Parameters01-00 Maximum Output Frequency Unit: 0.01ControlmodeVF VFPG SVC FOCPG TQRPG Factory setting: 60.00/50.00Settings50.0 to 600.00HzThis parameter determines the AC motor drive’s Maximum Output Frequency. All the ACmotor drive frequency command sources (analog inputs 0 to +10V, 4 to 20mA and -10V to+10V) are scaled to correspond to the output frequency range.01-01 1st Output Frequency Setting 101-35 1st Output Frequency Setting 2 Unit: 0.01ControlmodeVF VFPG SVC FOCPG TQRPG Factory setting: 60.00/50.00Settings0.00~600.00HzThese are for the base frequency and motor rated frequency.This value should be set according to the rated frequency of the motor as indicated on themotor nameplate. If the motor is 60Hz, the setting should be 60Hz. If the motor is 50Hz, itshould be set to 50Hz.Pr.01-35 is used for the application occasion that uses double base motor.01-02 1st Output Voltage Setting 101-36 1st Output Voltage Setting 2 Unit: 0.1ControlmodeVF VFPG SVC FOCPG TQRPGSettings 230V series 0.1 to 255.0V Factory Setting: 220.0460V series 0.1 to 510.0V Factory Setting: 440.0These are for the base frequency and motor rated frequency.This value should be set according to the rated voltage of the motor as indicated on the motornameplate. If the motor is 220V, the setting should be 220.0. If the motor is 200V, it should beset to 200.0.There are many motor types in the market and the power system for each country is alsodifference. The economic and convenience method to solve this problem is to install the ACmotor drive. There is no problem to use with the different voltage and frequency and also canamplify the original characteristic and life of the motor.01-03 2nd Output Frequency Setting 1 Unit: 0.014-50 Revision August 2008, 03<strong>VE</strong>, SW V2.04
ControlmodeChapter 4 Parameters|VF VFPG SVC Factory setting: 0.50Settings0.00~600.00Hz01-04 2nd Output Voltage Setting 1 Unit: 0.1ControlmodeVF VFPG SVCSettings 230V series 0.1 to 255.0V Factory Setting: 5.0460V series 0.1 to 510.0V Factory Setting: 10.001-37 2nd Output Frequency Setting 2 Unit: 0.01ControlmodeVF VFPG SVC Factory setting: 0.50Settings0.00~600.00Hz01-38 2nd Output Voltage Setting 2 Unit: 0.1ControlmodeVF VFPG SVCSettings 230V series 0.1 to 255.0V Factory Setting: 5.0460V series 0.1 to 510.0V Factory Setting: 10.001-05 3rd Output Frequency Setting 1 Unit: 0.01ControlmodeVF VFPG SVC Factory Setting: 0.50Settings0.00~600.00Hz01-06 3rd Output Voltage Setting 1 Unit: 0.1ControlmodeVF VFPG SVCSettings 230V series 0.1 to 255.0V Factory Setting: 5.0460V series 0.1 to 510.0V Factory Setting: 10.001-39 3rd Output Frequency Setting 2 Unit: 0.01ControlmodeVF VFPG SVC Factory Setting: 0.50Settings0.00~600.00Hz01-40 3rd Output Voltage Setting 2 Unit: 0.1ControlmodeVF VFPG SVCSettings 230V series 0.1 to 255.0V Factory Setting: 5.0460V series 0.1 to 510.0V Factory Setting: 10.001-07 4th Output Frequency Setting 1 Unit: 0.01ControlmodeVF VFPG SVC FOCPG Factory Setting: 0.00Settings0.00~600.00Hz01-08 4th Output Voltage Setting 1 Unit: 0.1Revision August 2008, 03<strong>VE</strong>, SW V2.04 4-51
Chapter 4 Parameters|ControlmodeVF VFPG SVCSettings 230V series 0.1 to 255.0V Factory Setting: 0.0460V series 0.1 to 510.0V Factory Setting: 0.001-41 4th Output Frequency Setting 2 Unit: 0.01ControlmodeVF VFPG SVC FOCPG TQRPG Factory Setting: 0.00Settings0.00~600.00Hz01-42 4th Output Voltage Setting 2 Unit: 0.1ControlmodeVF VFPG SVCSettings 230V series 0.1 to 255.0V Factory Setting: 0.0460V series 0.1 to 510.0V Factory Setting: 0.0V/f curve setting is usually set by the motor’s allowable loading characteristics. Pay specialattention to the motor’s heat dissipation, dynamic balance, and bearing lubricity, if the loadingcharacteristics exceed the loading limit of the motor.For the V/f curve setting, it should be Pr.01-01≥ Pr.01-03≥ Pr.01-05≥ Pr.01-07. There is nolimit for the voltage setting, but a high voltage at the low frequency may cause motor damage,overheat, stall prevention or over-current protection. Therefore, please use the low voltage atthe low frequency to prevent motor damage.Pr.01-35 to Pr.01-42 is the V/f curve for the motor 2. When multi-function input terminals Pr.02-01 to Pr.02-14 is set to 14 and enabled or switch to the Δ-connection, the AC motor drive willact as the 2nd V/f curve.01-09 Start Frequency Unit: 0.01ControlVF VFPG SVC FOCPG Factory Setting: 0.50modeSettings 0.00~600.00HzWhen start frequency is higher than the min. output frequency, drives’ output will be from startfrequency to the setting frequency. Please refer to the following diagram for details.Fcmd=frequency command,Fstart=start frequency (Pr.01-09),fstart=actual start frequency of drive,Fmin=4th output frequency setting (Pr.01-07/Pr.01-41),Flow=output frequency lower limit (Pr.01-11)4-52 Revision August 2008, 03<strong>VE</strong>, SW V2.04
Chapter 4 Parameters|Fcmd>FminNOby Pr.01- 34YESFstart>FminNOfstart=FminFlow=0YESH=FcmdYESfstart=FstartFlow=0operation afterstart-up NONOFcmd>FlowHzFcmdFminFstartTimeNObyPr.01-34NOYESFcmd>FminFcmdFlow&Fcmd1>FminTimeby Pr.01-34Fcmd2>Flow&Fcmd2Fcmd1>FminTimeby Pr.01-34Fmin>Fcmd2Revision August 2008, 03<strong>VE</strong>, SW V2.04 4-53
Chapter 4 Parameters|Fcmd>FminNOby Pr.01-34YESFstart>FminNOfstart=FminFlow=0YESH=FcmdYESfstart=FstartFlow=0operation afterstart-up NONOFcmd>FlowHzFcmdFminFstartTimeNObyPr.01-34NOYESFcmd>FminFcmdFlow &Fcmd1>FminTimeby Pr.01-34Fcmd2>Flow &Fcmd2Fcmd1>FminTimeby Pr.01-34Fmin>Fcmd201-10 Output Frequency Upper Limit Unit: 0.01ControlmodeVF VFPG SVC FOCPG Factory Setting: 600.00Settings0.00~600.00Hz01-11 Output Frequency Lower Limit Unit: 0.01ControlmodeVF VFPG SVC FOCPG Factory Setting: 0.00Settings0.00~600.00HzThe upper/lower output frequency setting is used to limit the actual output frequency. If thefrequency setting is higher than the upper limit, it will run with the upper limit frequency. Ifoutput frequency lower than output frequency lower limit and frequency setting is higher than4-54 Revision August 2008, 03<strong>VE</strong>, SW V2.04
Chapter 4 Parameters|min. frequency, it will run with lower limit frequency. The upper limit frequency should be set tobe higher than the lower limit frequency.VoltageOutput Frequency1st Output Output FrequencyUpper LimitVoltage Setting 1 01-11 Lower Limit01-1001-02Frequency output2nd Outputranges limitationVoltage Setting 101-04Regular V/f Curve3rd OutputSpecial V/f CurveVoltage Setting 101-064th OutputVoltage Setting 101-08 01-07 01-09 01-05 01-03 01-014th Freq.Start Freq. 3rd Freq. 1st Freq.2nd Freq.V/f CurveFrequency01-00Maximum OutputFrequency01-12 Accel. Time 1 Unit: 0.1/0.0101-13 Decel. Time 1 Unit: 0.1/0.0101-14 Accel. Time 2 Unit: 0.1/0.0101-15 Decel. Time 2 Unit: 0.1/0.0101-16 Accel. Time 3 Unit: 0.1/0.0101-17 Decel. Time 3 Unit: 0.1/0.0101-18 Accel. Time 4 Unit: 0.1/0.0101-19 Decel. Time 4 Unit: 0.1/0.01ControlmodeVF VFPG SVC FOCPG Factory Setting: 10.00/10.0Settings0.00~600.00 sec/0.00~6000.0 sec01-20 JOG Acceleration Time Unit: 0.1/0.0101-21 JOG Deceleration Time Unit: 0.1/0.01ControlmodeVF VFPG SVC FOCPG Factory Setting: 1.00/1.0Settings0.00~600.00 sec/0.00~6000.0 secThe Acceleration Time is used to determine the time required for the AC motor drive to rampfrom 0Hz to Maximum Output Frequency (Pr.01-00).The Deceleration Time is used to determine the time require for the AC motor drive todecelerate from the Maximum Output Frequency (Pr.01-00) down to 0Hz.The Acceleration/Deceleration Time is invalid when using Pr.00-13 OptimalAcceleration/Deceleration Setting.Revision August 2008, 03<strong>VE</strong>, SW V2.04 4-55
Chapter 4 Parameters|The Acceleration/Deceleration Time 1, 2, 3, 4 are selected according to the Multi-function InputTerminals settings. See Pr.02-01 to Pr.02-30 for details.When enabling torque limit and stall prevention function, actual accel./decel. time will longerthan the above action time.Frequency01-00Max. OutputFrequencyFrequencySettingaccel. timedecel. time01-12,14,16,18,20 01-13,15,17,19,21Accel./Decel. TimeTime01-22 JOG Frequency Unit: 0.01ControlVF VFPG SVC FOCPG TQRPG Factory Setting: 6.00modeSettings 0.00~600.00HzBoth external terminal JOG and key “JOG” on the keypad can be used. When the jogcommand is ON, the AC motor drive will accelerate from 0Hz to jog frequency (Pr.01-22).When the jog command is OFF, the AC motor drive will decelerate from Jog Frequency to zero.The used Accel./Decel. time is set by the Jog Accel./Decel. time (Pr.01-20, Pr.01-21).01-23 1st/4th Accel./decel. Frequency Unit: 0.01ControlmodeVF VFPG SVC FOCPG Factory Setting: 0.00Settings0.00~600.00Hz This parameter selects the frequency point for transition from acceleration/deceleration time 1to acceleration/deceleration time 4.The transition from acceleration/deceleration time 1 to acceleration/deceleration time 4, mayalso be enabled by the external terminals (Pr. 02-01 to 02-08). The external terminal haspriority over Pr. 01-23.01-24 S-curve for Acceleration Departure Time 1 Unit: 0.1/0.0101-25 S-curve for Acceleration Arrival Time 2 Unit: 0.1/0.0101-26 S-curve for Deceleration Departure Time 1 Unit: 0.1/0.014-56 Revision August 2008, 03<strong>VE</strong>, SW V2.04
Chapter 4 Parameters|01-27 S-curve for Deceleration Arrival Time 2 Unit: 0.1/0.01ControlmodeVF VFPG SVC FOCPG Factory Setting: 0.2/0.0Settings0.00~25.00 sec /0.00~250.0 secIt is used to give the smoothest transition between speed changes. The accel./decel. curvecan adjust the S-curve of the accel./decel. When it is enabled, the drive will have differentaccel./decel. curve by the accel./decel. time. The S-curve function is disabled when Pr.00-13 is set to 0. The Actual Accel. Time = selected accel. Time + (Pr.01-24 + Pr.01-25)/2The Actual Decel. Time = selected decel. Time + (Pr.01-26 + Pr.01-27)/2Frequency01-25 01-2601-2401-27Time01-28 Skip Frequency 1 (upper limit) Unit: 0.0101-29 Skip Frequency 1 (lower limit) Unit: 0.0101-30 Skip Frequency 2 (upper limit) Unit: 0.0101-31 Skip Frequency 2 (lower limit) Unit: 0.0101-32 Skip Frequency 3 (upper limit) Unit: 0.0101-33 Skip Frequency 3 (lower limit) Unit: 0.01ControlmodeVF VFPG SVC FOCPG Factory Setting: 0.00Settings 0.00~600.00HzThese parameters are used to set the skip frequency of the AC drive. The skip frequencies areuseful when a motor has vibration at a specific frequency bandwidth. By skipping thisfrequency, the vibration will be avoided.01-34 Mode Selection when Frequency< FminControlmodeVF VFPG SVC FOCPG Factory Setting: 0Settings 0 Output Waiting1 Zero-speed operationRevision August 2008, 03<strong>VE</strong>, SW V2.04 4-57
Chapter 4 Parameters|2 Fmin (4th output frequency setting)When the frequency is less than Fmin (Pr.01-07 or Pr.01-41), it will operate by this parameter.When it is set to 0, the AC motor drive will be in waiting mode without voltage output fromterminals U/V/W.When setting 1, it will execute DC brake by Vmin(Pr.01-08 and Pr.01-42) in V/f, VFPG andSVC modes.When it is set to 2, the AC motor drive will run by Fmin (Pr.01-07, Pr.01-41) and Vmin (Pr.01-08, Pr.01-42) in V/f, VFPG, SVC and FOCPG modes.In V/f, VFPG and SVC modesfout01-34=0stop output01-34=101-34=2fmin01-070Hz0Hzstop waiting for output0Hz operation(DC brake)In FOCPG mode, when Pr.01-34 is set to 2, it will act according Pr.01-34 setting.fout01-34=001-34=101-34=2fmin01-07frequency commandfrequency command4-58 Revision August 2008, 03<strong>VE</strong>, SW V2.04
Group 2 Digital Input/Output Parameters02-00 2-wire/3-wire Operation ControlControlmodeChapter 4 Parameters|VF VFPG SVC FOCPG TQRPG Factory setting: 0Settings 0 FWD/STOP, REV/STOP1 FWD/STOP, REV/STOP (Line Start Lockout)2 RUN/STOP, REV/FWD3 RUN/STOP, REV/FWD (Line Start Lockout)4 3-wire (momentary push button)5 3-wire (momentary push button and Line Start Lockout)Three of the six methods include a “Line Start Lockout” feature. When line start lockout isenabled, the drive will not run once applying the power. The Line Start Lockout feature doesn’tguarantee the motor will never start under this condition. It is possible the motor may be set inmotion by a malfunctioning switch.02-00 Control Circuits of the External Terminal0, 12-wire operation control (1)FWD/STOPREV/STOPFWD/STOPREV/STOPFWD:("OPEN":STOP)("CLOSE":FWD)REV:("OPEN": STOP)("CLOSE": REV)DCM<strong>VFD</strong>-<strong>VE</strong>2, 32-wire operation control (2)RUN/STOPREV/FWDRUN/STOPFWD/REVFWD:("OPEN":STOP)("CLOSE":RUN)REV:("OPEN": FWD)("CLOSE": REV)DCM<strong>VFD</strong>-<strong>VE</strong>4, 53-wire operation controlSTOPRUNFWD "CLOSE":RUNMI1 "OPEN":STOPREV/FWDREV/FWD "OPEN": FWD"CLOSE": REVDCM<strong>VFD</strong>-<strong>VE</strong>02-01 Multi-Function Input Command 1 (MI1)02-02 Multi-Function Input Command 2 (MI2)02-03 Multi-Function Input Command 3 (MI3)Factory Setting: 1Factory Setting: 2Factory Setting: 3Revision August 2008, 03<strong>VE</strong>, SW V2.04 4-59
41Consigned by and raised at Winbak Farm, Chesapeake City, MarylandARTIST NIGHT(NEW YORK & MARYLAND ELIGIBLE)BAY COLT Foaled March 14, 2010 Tattoo No. 6H0850Barn 8Western Hanover p,3,1:50.4Western Ideal p,1:48 ----------------Leah Almahurst p,3,1:52.3American Ideal p,3,1:47.4 -----------Matt's Scooter p,3,T1:48.2Lifetime Success p,3,1:52.2 -------Three Diamonds p,3,1:53.1ARTIST NIGHTAbercrombie p,4,1:53Artsplace p,4,1:49.2 -----------------Miss Elvira p,2,2:00.1fMidnight Art p,4,1:54 ------------------Falcon Seelster p,3,1:51hWhats New p,3,1:53.3 ---------------Shocking Secret p,3,1:54.1By AMERICAN IDEAL p,3,1:47.4. Sire of 85 in 2:00, 25 in 1:55, incl.: GREAT VINTAGEp,2,1:50.4, IDYLLIC (M) p,2,1:51, AMERICAN JEWEL (M) p,2,1:51-'11, SOME GIRLS DO (M)p,3,1:52f-'11, HESTON BLUE CHIP p,2,1:52f-'11, ACHILLES BLUE CHIP p,3,1:52.1-'11, etc.1st DamMIDNIGHT ART p,2,1:55.2; 4,1:54 ($66,405) by Artsplace. 5 wins, 2 thru 4. At 2, second inLate Closer at Lexington. At 3, third in leg Tender Loving Care Ser. at Meadowlands.At 4, winner Final White Ruffles Ser. at Meadowlands; second in leg Night Styles Ser.at Meadowlands, 2 legs White Ruffles Ser. at Meadowlands; third in leg Night StylesSer. at Meadowlands. From 4 previous foals, dam of 2 winners, 2 in 1:53, including:MANCHINE p,3,1:54.2; 4,1:52.2 ($146,126) (Western Ideal). 18 wins, 3 thru 6. At 2,second in leg Kindergarten Classic Ser. at Tioga; third in leg Kindergarten ClassicSer. at Vernon. At 4, winner Final New Hampshire Sweepstakes; third in elim. NewHampshire Sweepstakes.MIDNIGHT TRAIN p,3,1:55.2f; 4,1:51.1f ($91,550) (Western Ideal). 8 wins at 3 and 4.Midnight Beau (Western Ideal). Now 3.2nd DamWHATS NEW p,2,2:02; 3,1:53.3 ($17,440) by Falcon Seelster. 3 wins at 2 and 3. At 3, secondin elim. Mistletoe Shalee P. Full-sister to FALCON'S SECRET p,2,1:56f ($244,070;dam of SECRET WEAPON p,2,1:59h; 3,1:51.2; 4,1:50.3-$474,023, ARMBROPEREGRINE p,2,1:54.3; 3,1:54.2; 4,1:51.3-$459,621, ARMBRO REPUBLICANp,3,1:57.3f; 4,1:51-$418,002, ARMBRO DANE p,3,1:56h; 1:49-$182,314, ARMBROVULCAN p,3,1:55.1f; 4,1:52.3-$124,229, BRING THE PAIN p,2,Q2:02.1; 3,1:55.4h;1:55.1h-$119,414, NUCLEAR SHOCK p,2,1:54.2; 3,1:52.2-$103,142, ARMBROAMBUSH p,3,1:53.2; 4,1:51.3, HIGHLAND ROCKS p,3,1:52), SHOCK BROKERp,2,2:01h; 3,1:58h; 1:55.3 ($122,085); half-sister to SECRET DIEDENTITY p,2,1:54.3(dam of CLANDESTINE p,2,1:56.2f; 3,1:54.3h; 4,1:53.2-$159,340), etc. From 11foals, dam of 7 winners, 1 in 1:50, 5 in 1:55, 6 in 2:00, including:GOOD NEWS LADY (M) p,2,1:52.3; 3,1:51.1 ($775,760) (Western Ideal). 8 wins, 2 thru 4.At 2, winner Eternal Camnation P., Bluegrass S., John Simpson Mem.; second inKentuckiana Stallion Mgmt P.; third in elim. Breeders Crown at Meadowlands. At 3,winner Jugette, Bluegrass S.; second in Final Mistletoe Shalee P., Valley Forge P.,Final Lismore P., elim. Breeders Crown at Meadowlands, elim. Miss New Jersey S.;third in Nadia Lobell P., Final Miss New Jersey S., Glen Garnsey Mem., leg NewJersey Sires S. at Meadowlands, elim. Mistletoe Shalee P.DIEBERSPACE p,2,1:54; 3,1:51; 1:49.4 ($622,271) (Die Laughing). 28 wins, 2 thru 9. At2, winner 2 legs New Jersey Sires S. at Meadowlands; third in Niatross S., BluegrassS., elim. Woodrow Wilson P. At 3, winner leg New Jersey Sires S. at Meadowlands,cons. New Jersey Classic; second in Jug Preview, Final New Jersey Sires S. atFreehold, leg New Jersey Sires S. at Meadowlands, Garden State; third in BluegrassS., elim. Berry's Creek P. At 4, second in 2 legs Aquarius Ser. at Meadowlands; thirdin leg Four Leaf Clover Ser. at Meadowlands.IDEAL NEWS (M) p,2,Q1:55.3; 3,1:51.4f ($268,975) (Western Ideal). 9 wins at 3. At 2,third in 2 Late Closers at Lexington. At 3, winner Final Miss New Jersey S., 2 legs andFinal Blossom Ser. at Meadowlands, Adioo Volo S., 2 legs New Jersey Sires S. atMeadowlands, elim. Fan Hanover S.; second in elim. Miss New Jersey S.WESTERN NEWS (M) p,2,1:54.3 ($154,735) (Western Hanover). 3 wins at 2. At 2, winnerKentucky Stbd. Sale Co. P., International Stallion S., Arden Downs S.; third in legPennsylvania Sires S. at The Meadows, elim. Three Diamonds P. Dam of CAM'SWESTERN p,3,Q2:00.1f; 4,1:54.3f.MIDNIGHT ART (M) p,2,1:55.2; 4,1:54 ($66,405) (Artsplace). As above.DIEWITNESS NEWS (M) p,3,1:58.2 ($11,045) (Die Laughing). 2 wins at 3. Dam ofAMAZING STAND p,2,Q2:01.1h; 3,1:59h; 4,1:53.3h ($135,257), WITNESS STANDp,2,Q1:58.4f; 3,1:56f; 1:53f.Producer: Newsletter (dam of COLLAGE p,2,Q1:57; 3,Q1:53-’11, SOCIAL NETWORKp,2,Q1:55.2-‘11).Next Dam - SHOCKING SECRET p,3,1:54.1 (Landslide-CO<strong>VE</strong>R STORY p,3,2:01.1-Fulla Napoleon)Delvin Miller AdiosArden DownsBluegrass SeriesBreeders CrownCane PaceChamplainCleveland ClassicEmpire BreedersFox StakeGreat MidwestMax B. HemptHistoric SeriesHoosier StakeHorseman No. 104Int'l. StallionENGAGEMENTSLittle Brown JugManitoba G.W.Maryland Stdb.MessengerNY Sires & FairsProgress PaceReviewReynoldsArt RooneySimcoeJohn SimpsonStandardbredTattersallsTompkins-Geers
Chapter 4 Parameters|Settings Functions Descriptions0 No Function1Multi-step speedcommand 1/multi-stepposition command 1234Multi-step speedcommand 2/ multi-stepposition command 2Multi-step speedcommand 3/ multi-stepposition command 3Multi-step speedcommand 4/ multi-stepposition command 415 step speeds could be conducted through the digitalstatuses of the 4 terminals, and 17 in total if the master speedand JOG are included. (Refer to Pr. 04-00~04-29)5 ResetAfter the error of the drive is eliminated, use this terminal toreset the drive.6 JOG Command JOG operation7Acceleration/decelerationSpeed InhibitWhen this function is enabled, acceleration and decelerationis stopped and the AC motor drive start to accel./decel. fromthe inhibit point.89The 1 st , 2 nd accelerationor deceleration timeselectionThe 3 rd , 4 th accelerationor deceleration timeselectionThe acceleration/deceleration time of the drive could beselected from this function or the digital statuses of theterminals; there are 4 acceleration/deceleration speeds intotal for selection.10 EF Input External fault input terminal11 B.B. Input12 Output StopIf the ON/OFF function of the terminal is pre-determined,output of the drive will be cut off immediately, and the motorwill then be of the B.B. status. And once the ON/OFF functionis restored, the drive will then trace from the bottom upward tocatch up with its mutual rotation speed with the samefrequency before B.B., then speed up to the pre-setfrequency. Even if the motor is of a complete stop after B.B.,as long as the ON/OFF status is restored, the speed-tracingfunction could still be operated.If the ON/OFF function of the terminal is pre-determined,output of the drive will be cut off immediately, and the motorwill then be free run. And once the ON/OFF function isrestored, the drive will accelerate to the setting frequency.13 Cancel the setting of the Before using this function, Pr.00-13 should be set to4-62 Revision August 2008, 03<strong>VE</strong>, SW V2.04
Settings Functions DescriptionsChapter 4 Parameters|optimal accel./decel. time 01/02/03/04 first. When this function is enabled, OFF is forauto mode and ON is for linear accel./decel.14151617Switch between drivesettings 1 and 2Operation speedcommand form AVIOperation speedcommand form ACIOperation speedcommand form AUIWhen this function is enabled, the drive will start to use motor2 parameters.When this function is enabled, the source of the frequency willforce to be AVI.When this function is enabled, the source of the frequency willforce to be ACI.When this function is enabled, the source of the frequency willforce to be AUI.18 Emergency Stop (07-36)When this function is enabled, the drive will ramp to stop byPr.07-36 setting.19 Digital Up command20 Digital Down commandWhen this function is enabled, the frequency will be increasedand decreased. If this function keeps ON, the frequency willbe increased/decreased by Pr.02-07/Pr.02-08. This function isthe same as the ▲▼ key on the keypad.21 PID function disabled When this function is ON, the PID function is disabled.22 Clear counter23Input the counter value(multi-function inputcommand 6)24 FWD JOG command25 REV JOG commandWhen this function is enabled, it will clear current countervalue and display “0”. Only when this function is disabled, itwill keep counting upward.When this function is enabled, the counter value will increase1.When this function is enabled, the drive will execute forwardJog command.When this function is enabled, the drive will execute reverseJog command.26TQC+PG/FOC+PGmodel selectionOFF: FOC+PG speed control mode.ON: TQR+PG torque control mode.27 ASR1/ASR2 selection28 Emergency stop (EF1)ON: speed will be adjusted by ASR 2 setting.OFF: speed will be adjusted by ASR 1 setting.When it is ON, the drive will execute emergency stop. (it willhave fault code record)29Signal confirmation for Y-connectionWhen it is ON, the drive will operate by 1st V/f.3031Signal confirmation forΔ−connectionHigh torque bias (byPr.07-29)When it is ON, the drive will operate by 2nd V/f.The high torque bias is according to the Pr.07-29 setting.Revision August 2008, 03<strong>VE</strong>, SW V2.04 4-63
Chapter 4 Parameters|Settings Functions Descriptions3233Middle torque bias (byPr.07-30)Low torque bias (byPr.07-31)The middle torque bias is according to the Pr.07-30 setting.The low torque bias is according to the Pr.07-31 setting.When this function is enabled, the corresponding 15-stepspeed for the multi-function inputs 1-4 will be 15 positions.(Refer to Pr.04-15 to Pr.04-29)speed mode position mode speed modeRunMI=d35MI=d34MI=d11100MI=d20000MI=d31111MI=d4111134Enable multi-stepposition control10-19 04-27 04-2604-11position multipositiopositionspeedmulti-12th step(Home)13 12 frequencyspeed mode position modeRunMI=d34MI=d35MI=d11110MI=d20000MI=d31111MI=41111主 速04-1213th step 04-27speed multipositionfrequency1304-26multiposition124-64 Revision August 2008, 03<strong>VE</strong>, SW V2.04
Settings Functions DescriptionsChapter 4 Parameters|When this function is enabled, the AC motor drive will start toexecute position control.MotorFrequencyPGFeedback10-0010-0110-19RUNMI=d3535 Enable position controlMO=d39TimeMotorfrequencyPGfeedback10-0010-0110-19RUNMI=d35RUNRUNMO=d39Time36Enable position learningfunction (valid at stop)When this function is enabled, it will select the correspondingmulti-position by the ON/OFF status of multi-function inputs 1-4 and written the current motor position into the correspondingmulti-position.Revision August 2008, 03<strong>VE</strong>, SW V2.04 4-65
Chapter 4 Parameters|Settings Functions DescriptionsRun/StopMI=d110112=11correspondsto Pr.04-25110102=10corresponds toPr.04-240 0MI=d211 1MI=d3MI=d40 0 01 1 1MI=d36The motor positionis from encoder feedbackand written into thecorresponding multipositionof ON/OFFstatus of MI1 to MI4( Pr.04-25)The motor positionis from encoder feedbackand written into thecorresponding multipositionof ON/OFFstatus of MI1 to MI4( Pr.04-24)When this function is enabled, the pulse of PG card willchange from speed command to position command. It isrecommended to set Pr.10-23 to 0.Example: When it is controlled by pulse (Pr.00-20 is set to 5),please refer to the following diagram for returning home.37Enable pulse positioninput commandRUNMI=d35MO=d5MI=d37Time3839Disable write EEPROMfunctionTorque commanddirectionWhen this function is enabled, you can’t write into EEPROM.When the torque command source is AVI or ACI, it canchange torque direction by enabling this function.40 Force stop When this function is enabled, the drive will free run to stop.41 Serial position clock The position method of the main shaft:4-66 Revision August 2008, 03<strong>VE</strong>, SW V2.04
Settings Functions DescriptionsChapter 4 Parameters|When using setting 41 and setting 42, it needs to use with 2input terminals for multi-position control.CNCCon tro ller(PLC)DO SPI Position Command Clock DIDO SPI Position Command DataDIPG positionco ntrol pointPr.10-19mainshaft<strong>VFD</strong>-<strong>VE</strong>42 Serial position inputtransmission start1 2 3 4 11 12OSSClockRea dy for t ra nsmissionOSSDat aPG positionco ntr ol pointPr.10-19main shaft<strong>VFD</strong>-<strong>VE</strong>43444546474849|50Analog input resolutionselectionReset initial reeldiameterReset initial reeldiameter 0Reset initial reeldiameter 1Reset PID controlintegration of tensionMechanical Gear RatioSwitchReservedtest exampleangle Encoder b11 b1 0 b9 b8 b7 b6 b5 b4 b3 b2 b1 b036 0 40 96 0 0 0 0 0 0 0 0 0 0 0 040 95 1 1 1 1 1 1 1 1 1 1 1 118 0 20 48 1 0 0 0 0 0 0 0 0 0 0 090 10 24 0 1 0 0 0 0 0 0 0 0 0 045 51 2 0 0 1 0 0 0 0 0 0 0 0 013 7 15 58 0 1 1 0 0 0 0 1 0 1 1 030 8 35 04 1 1 0 1 1 0 1 1 0 0 0 036 87 1 1 1 0 0 1 1 0 0 1 1 1Refer to Pr.10-25.When this function is enabled, the initial reel diameter is reset.When this function is enabled, Pr.08-46~08-48 is valid.When this function is enabled, the PID control integration oftension is reset.When this functioni is enabled, the mechanical gear ratioswitch will be the second group A2/B2 (refer to Pr.10-29 andPr.10-30).02-07 UP/DOWN Key ModeControlmodeVF VFPG SVC FOCPG Factory setting: 0Settings 0 Up/down by the accel/decel time1 Up/down constant speed (Pr.02-08)Revision August 2008, 03<strong>VE</strong>, SW V2.04 4-67
Chapter 4 Parameters|02-08Controlmode The Acceleration/Deceleration Speed of the UP/DOWN Keywith Constant SpeedUnit: 0.01VF VFPG SVC FOCPG Factory setting: 0.01Settings0.01 ~ 1.00Hz/ms These settings are used when multi-function input terminals are set to 19/20.02-09 Digital Input Response Time Unit: 0.001ControlmodeVF VFPG SVC FOCPG TQRPG Factory setting: 0.005Settings0.001~ 30.000 secThis parameter is used for digital input terminal signal delay and confirmation. The delay timeis confirmation time to prevent some uncertain interferences that would result in error (exceptfor the counter input) in the input of the digital terminals (FWD, REV and MI1~6). Under thiscondition, confirmation for this parameter could be improved effectively, but the response timewill be somewhat delayed.02-10 Digital Input Operation Direction Unit: 1ControlmodeVF VFPG SVC FOCPG TQRPG Factory setting: 0Settings 0 ~ 65535This parameter is used to set the input signal level and it won’t be affected by theSINK/SOURCE status.Bit0 is for FWD terminal, bit1 is for REV terminal and bit2 to bit15 is for MI1 to MI14.User can change terminal status by communicating.For example, MI1 is set to 1 (multi-step speed command 1), MI2 is set to 2 (multi-step speedcommand 2). Then the forward + 2 nd step speed command=1001(binary)=9 (Decimal). Onlyneed to set Pr.02-10=9 by communication and it can forward with 2 nd step speed. It doesn’tneed to wire any multi-function terminal.bit15 bit14 bit13 bit12 bit11 bit10 bit9 bit8 bit7 bit6 bit5 bit4 bit3 bit2 bit1 bit0MI14 MI13 MI12 MI11 MI10 MI9 MI8 MI7 MI6 MI5 MI4 MI3 MI2 MI1 REV FWD02-11 Multi-function Output 1 RA, RB, RC (Relay1)02-12 Multi-function Output 2 MRA, MRC (Relay2)Factory Setting: 114-68 Revision August 2008, 03<strong>VE</strong>, SW V2.04
Chapter 4 Parameters|Factory Setting: 102-13 Multi-function Output 3 (MO1) Factory Setting: 002-14 Multi-function Output 4 (MO2)02-35 Multi-function Output 5 (MO3) (need to use with EMV-APP01)02-36 Multi-function Output 5 6 (MO4) (need to use with EMV-APP01)Factory Setting: 0Factory Setting: 0Factory Setting: 002-37 Multi-function Output 5 7 (MO3MO5) (need to use with EMV-APP01)Factory Setting: 002-38 Multi-function Output 8 (MO6) (need to use with EMV-APP01)Factory Setting: 002-39 Multi-function Output 9 (MO7) (need to use with EMV-APP01)Factory Setting: 002-40 Multi-function Output 10 (MO8) (need to use with EMV-APP01)Factory Setting: 002-41 Multi-function Output 11 (MO9) (need to use with EMV-APP01)02-42 Multi-function Output 12 (MOA) (need to use with EMV-APP01)Settings 0-50Factory Setting: 0Factory Setting: 0SettingsControl ModeVF VFPG SVC FOCPG TQRPG0: No function1: Operation indication ○ ○ ○ ○ ○2: Operation speed attained ○ ○ ○ ○ ○3: Desired frequency attained 1 (Pr.02-19) ○ ○ ○ ○ ○4: Desired frequency attained 2 (Pr.02-21) ○ ○ ○ ○5: Zero speed (frequency command) ○ ○ ○ ○6: Zero speed with stop (frequency command) ○ ○ ○ ○7: Over torque (OT1) (Pr.06-06~06-08) ○ ○ ○ ○ ○8: Over torque (OT2) (Pr.06-09~06-11) ○ ○ ○ ○ ○9: Drive ready ○ ○ ○ ○ ○10: User-defined Low-voltage Detection ○ ○ ○ ○ ○11: Malfunction indication ○ ○ ○ ○ ○Revision August 2008, 03<strong>VE</strong>, SW V2.04 4-69
Chapter 4 Parameters|SettingsControl ModeVF VFPG SVC FOCPG TQRPG12: Mechanical brake release (Pr.02-31) ○ ○ ○ ○ ○13: Overheat ○ ○ ○ ○ ○14: Software brake signal ○ ○ ○ ○ ○15: PID feedback error ○ ○ ○ ○ ○16: Slip error (oSL) ○ ○ ○ ○17: Terminal count value attained (Pr.02-16) ○ ○ ○ ○ ○18: Preliminary count value attained (Pr.02-17) ○ ○ ○ ○ ○19: Baseblock (B.B.) Indication ○ ○ ○ ○ ○20: Warning output ○ ○ ○ ○ ○21: Over voltage warning ○ ○ ○ ○ ○22: Over-current stall prevention warning ○ ○ ○23: Over-voltage stall prevention warning ○ ○ ○ ○ ○24: Operation mode indication ○ ○ ○ ○ ○25: Forward command ○ ○ ○ ○ ○26: Reverse command ○ ○ ○ ○ ○27: Output when current >= Pr.02-32 ○ ○ ○ ○ ○28: Output when current < Pr.02-32 ○ ○ ○ ○ ○29: Output when frequency >= Pr.02-33 ○ ○ ○ ○ ○30: Output when frequency < Pr.02-33 ○ ○ ○ ○ ○31: Y-connection for the motor coil ○ ○ ○ ○32: Δ connection for the motor coil ○ ○ ○ ○33: Zero speed (actual output frequency) ○ ○ ○ ○34: Zero speed with Stop (actual output frequency) ○ ○ ○ ○35: Error output selection 1 (Pr.06-23) ○ ○ ○ ○ ○36: Error output selection 2 (Pr.06-24) ○ ○ ○ ○ ○37: Error output selection 3 (Pr.06-25) ○ ○ ○ ○ ○38: Error output selection 4 (Pr.06-26) ○ ○ ○ ○ ○39: Position attained (Pr.10-19) ○40: Speed attained (including zero speed) ○ ○ ○ ○41: Multi-position attained ○42: Crane function ○ ○ ○ ○43: Motor zero-speed output (Pr.02-43) ○ ○ ○ ○44: Max. reel diameter attained ○ ○ ○ ○ ○45: Empty reel diameter attained ○ ○ ○ ○ ○46: Broken belt detection ○ ○ ○ ○ ○47: Break release at stop ○ ○ ○ ○ ○48: Error PID feedback of tension ○ ○ ○ ○ ○49: Reserved50: ReservedSettings Functions Descriptions0 No Function1 Operation Indication Active when the drive is not at STOP.23Master FrequencyAttainedDesired FrequencyAttained 1 (Pr.02-19)Active when the AC motor drive reaches the output frequencysetting.Active when the desired frequency (Pr.02-19) is attained.4-70 Revision August 2008, 03<strong>VE</strong>, SW V2.04
Settings Functions DescriptionsChapter 4 Parameters|45678Desired FrequencyAttained 2 (Pr.02-21)Zero Speed (frequencycommand)Zero Speed with Stop(frequency command)Over Torque (OT1)(Pr.06-06~06-08)Over Torque (OT2)(Pr.06-09~06-11)Active when the desired frequency (Pr.02-21) is attained.Active when frequency command =0. (the drive should be atRUN mode)Active when frequency command =0 or stop.Active when detecting over-torque. Refer to Pr.06-06 (overtorquedetection selection-OT1), Pr.06-07 (over-torquedetection level-OT1) and Pr.06-08 (over-torque detection time-OT1).Active when detecting over-torque. Refer to Pr.06-09 (overtorquedetection selection-OT2), Pr.06-10 (over-torquedetection level-OT2) and Pr.06-11 (over-torque detection time-OT2).9 Drive Ready Active when the drive is ON and no abnormality detected.10User-defined LowvoltageDetectionActive when the DC Bus voltage is too low. (refer to Pr.06-00low voltage level)11 Malfunction Indication Active when fault occurs (except Lv stop).12Mechanical BrakeRelease (Pr.02-31)When drive runs after Pr.02-31, it will be ON. This functionshould be used with DC brake and it is recommended to usecontact ”b”(N.C).13 Overheat14 Software Brake SignalActive when IGBT or heat sink overheats to prevent OH turnoff the drive. (refer to Pr.06-05)This function is used in conjunction with a <strong>VFD</strong>B Brake Unit.The output will be activated when the drive needs help brakingthe load. A smooth deceleration is achieved by using thisfunction. (refer to Pr.07-00)15 PID Feedback Error Active when the feedback signal is abnormal.16 Slip Error (oSL) Active when the slip error is detected.171819Terminal Count ValueAttainedPreliminary CounterValue AttainedBaseblock (B.B.)IndicationActive when the counter reaches Terminal Counter Value(Pr.02-16).Active when the counter reaches Preliminary Counter Value(Pr.02-17).Active when the output of the AC motor drive is shut off duringbaseblock.20 Warning Output Active when the warning is detected.Revision August 2008, 03<strong>VE</strong>, SW V2.04 4-71
Chapter 4 Parameters|Settings Functions Descriptions21 Over-voltage Warning Active when the over-voltage is detected.222324Over-current StallPrevention WarningOver-voltage Stallprevention WarningOperation ModeIndicationActive when the over-current stall prevention is detected.Active when the over-voltage stall prevention is detected.Active when the operation command is controlled by externalterminal.25 Forward Command Active when the operation direction is forward.26 Reverse Command Active when the operation direction is reverse.27Output when Current >=Pr.02-32Active when current is >= Pr.02-32.28293031323334Output when Current = Pr.02-33Output when Frequency< Pr.02-33Y-connection for theMotor CoilΔ-connection for theMotor CoilZero Speed (actualoutput frequency)Zero Speed with Stop(actual outputfrequency)Active when current is < Pr.02-32.Active when frequency is >= Pr.02-33.Active when frequency is < Pr.02-33.Active when PR.05-12 is less than PR.05-11 and time is morethan Pr.05-30.Active when PR.05-12 is higher than PR.05-11 and time ismore than Pr.05-30.Active when the actual output frequency is 0. (the drive shouldbe at RUN mode)Active when the actual output frequency is 0 or Stop.35363738Error Output Selection 1(Pr.06-23)Error Output Selection 2(Pr.06-24)Error Output Selection 3(Pr.06-25)Error Output Selection 4(Pr.06-26)Active when Pr.06-23 is ON.Active when Pr.06-24 is ON.Active when Pr.06-25 is ON.Active when Pr.06-26 is ON.39Position Attained(Pr.10-19)Active when the PG position control point reaches Pr.10-19.4-72 Revision August 2008, 03<strong>VE</strong>, SW V2.04
Settings Functions DescriptionsChapter 4 Parameters|40Speed Attained(including zero speed)Active when the output frequency reaches frequency setting orstop.41 Multi-position Attained42 Crane FunctionUser can set any three multi-function input terminals to 41. Thecurrent position action status of these three terminals will beoutputted. Example: if setting Pr.02-11, Pr.02-12 and Pr.02-13to 41 and only the multi-position of the second point has beendone. Therefore, current status are RA (OFF), MRA (ON) andMO1 (OFF). In this way, their status is 010.This function should be used with Pr.02-31, Pr.02-32 andPr.02-33.Active when setting Pr.07-16=Pr.02-33 and Fcmd > Pr.02-33and output current > Pr.02-32 and Time > Pr.02-31.The example of the crane application is in the following foryour reference.434445Motor Zero-speedOutput (Pr.02-43)Max. Reel DiameterAttainedEmpty Reel DiameterAttainedActive when motor actual speed is less than Pr.02-43.Active when the reel diameter is equal to Pr.08-43.Active when the reel diameter is equal to Pr.08-44.46 Broken Belt Detection47 Break Release at StopThe broken belt occurs when 1. line speed is higher thanPr.08-61, 2. the error of reel diameter exceeds Pr.08-61, 3.detection time exceeds Pr.08-62When drive stops, the corresponding multi-function terminalwill be ON if the frequency is less than Pr.02-33. After it is ON,it will be OFF when brake delay time exceeds Pr.02-31.FrequencycommandFrequencycommand
Chapter 4 Parameters|Settings Functions Descriptions50 ReservedExample of crane functionFrequencycommandFreq. command>02-31& output current >02-32Freq. command02-32 and time>02-31)02-3102-31It is recommended to be used with Dwell function (Pr.07-15 to Pr.07-18) as shown in the following:Set 07-16=02-33andoutput current >02-32Set 07-18=02-33 andoutput current = 02-33output current > 02-32Time > 02-31)02-31Brake Delay Time02-31Brake Delay TimeMechanical breakerCrane function will be activated whensetting 07-16=02-33 and Fcmd>02-33and output current>02-32 andTime > 02-3102-15 Multi-output Direction Unit:1ControlmodeVF VFPG SVC FOCPG TQRPG Factory setting: 0Settings 0 ~ 65535This parameter is set via bit setting. If a bit is 1, the corresponding output acts in the oppositeway.Example:If Pr02-11=1 and Pr02-15=0, Relay 1 RA-RC is closed when the drive runs and is open whenthe drive is stopped.4-74 Revision August 2008, 03<strong>VE</strong>, SW V2.04
Chapter 4 Parameters|If Pr02-11=1 and Pr02-15=1, Relay 1 RA-RC is open when the drive runs and is closed whenthe drive is stopped.Bit settingbit3 bit2 bit1 bit0MO2 MO1 RA MRAPr02-150 0 0 0 00 0 0 1 10 0 1 0 20 0 1 1 30 1 0 0 40 1 0 1 50 1 1 0 60 1 1 1 71 0 0 0 81 0 0 1 91 0 1 0 101 0 1 1 111 1 0 0 121 1 0 1 131 1 1 0 141 1 1 1 1502-16 Terminal Count Value Unit:1ControlVF VFPG SVC FOCPG TQRPG Factory setting: 0modeSettings 0 ~ 65535The counter trigger can be set by the multi-function terminal MI6 (set Pr.02-06 to 23). Uponcompletion of counting, the specified output terminal will be activated (Pr.02-11 to Pr.02-14 isset to 17).02-17 Preliminary Count Value Unit:1ControlVF VFPG SVC FOCPG TQRPG Factory setting: 0modeSettings 0 ~ 65535When the counter value reaches this value, the corresponding multi-function output terminalwill be activated, provided one of Pr. 02-11 to 02-14 set to 18 (Preliminary Count ValueSetting). This parameter can be used for the end of the counting to make the drive runs fromthe low speed to stop.Revision August 2008, 03<strong>VE</strong>, SW V2.04 4-75
Chapter 4 Parameters|Display value[00-04=01]TRG [02-06=23]Counter TriggerThe width of trigger signal(output signal)Preliminary Counter Value(Pr.02-11 ~Pr.02-14)02-13=1802-17=3Terminal Counter Value02-14=17 02-16=502-18 Digital Output Gain Unit:1ControlmodeVF VFPG SVC FOCPG TQRPG Factory setting: 1Settings 1 ~ 40It is used to set the signal for the digital output terminals (DFM-DCM) and digital frequencyoutput (pulse X work period=50%). Output pulse per second = output frequency X Pr.02-18.02-19 Desired Frequency Attained 1 Unit: 0.01ControlmodeVF VFPG SVC FOCPG Factory setting: 60.00/50.0002-20 The Width of the Desired Frequency Attained 1 Unit: 0.01ControlmodeVF VFPG SVC FOCPG Factory setting: 2.0002-21 Desired Frequency Attained 2 Unit: 0.01ControlmodeVF VFPG SVC FOCPG Factory setting: 60.00/50.0002-22 The Width of the Desired Frequency Attained 2 Unit: 0.01ControlmodeVF VFPG SVC FOCPG Factory setting: 2.00Settings0.00 ~ 600.00HzOnce output frequency reaches desired frequency and the corresponding multi-function outputterminal is set to 3 or 4 (Pr.02-11~Pr.02-14), this multi-function output terminal will be ON.4-76 Revision August 2008, 03<strong>VE</strong>, SW V2.04
HChapter 4 Parameters|Fcmd=60Hz02-21=40Hz02-22=2Hz42Hz40Hz38Hz02-19=10Hz02-20=2Hz12Hz10Hz8HzT02-11~14=302-11~14=402-31 Brake Delay Time Unit:0.001ControlmodeVF VFPG SVC FOCPG TQRPG Factory setting: 0.000Settings0.000~65.000 SecWhen the AC motor drive runs after Pr.02-31 delay time, the corresponding multi-functionoutput terminal (12: mechanical brake release) will be ON. This function should be used withDC brake.Motor sp ee d/Output frequency07 -0 2DC br aketime duringstar t-upDC br ake07 -0 3DC br aketime duringstop pi ngDC br akeRUN/STOP ON STOPMul ti- func ti on o utpu t(me cha ni cal b rake re le ase )Pr.02 -11 to 0 2-1 4=1202 -3 1 b rake d el ay timeMec han i cal br akebounce time of mechanical brakebr ake d release br ake d02-32 Output Current Level Setting for External Terminals Unit:1ControlmodeVF VFPG SVC FOCPG TQRPG Factory setting: 0Revision August 2008, 03<strong>VE</strong>, SW V2.04 4-77
Chapter 4 Parameters|Settings 0~100%When output current is higher than Pr.02-32, it will activate multi-function output terminal(Pr.02-11 to Pr.02-14 is set to 27).When output current is lower than Pr.02-32, it will activate multi-function output terminal(Pr.02-11 to Pr.02-14 is set to 28).02-33 Output Boundary for External Terminals Unit:0.01ControlmodeVF VFPG SVC FOCPG TQRPG Factory setting: 0.00Settings0.00~+-60.00HzWhen output frequency is higher than Pr.02-33, it will activate the multi-function terminal(Pr.02-11 to Pr.02-14 is set to 29).When output frequency is lower than Pr.02-33, it will activate the multi-function terminal(Pr.02-11 to Pr.02-14 is set to 30).02-34 External Operation Control Selection after Reset Unit:1ControlmodeVF VFPG SVC Factory setting: 0Settings0: Disable1: Drive runs if run command exists after resetAfter clearing fault once a fault is detected and the external terminal for RUN keeps ON, thedrive can run after pressing RESET key.02-43 Zero-speed Level of Motor Unit: 1ControlmodeVF VFPG SVC FOCPG TQRPG Factory setting: 0Settings0~65535rpm4-78 Revision August 2008, 03<strong>VE</strong>, SW V2.04
Group 3 Analog Input/Output ParametersChapter 4 Parameters|03-00 Analog Input 1 (AVI)Factory Setting: 103-01 Analog Input 2 (ACI)03-02 Analog Input 3 (AUI)Factory Setting: 0Factory Setting: 0SettingsControl ModeVF VFPG SVC FOCPG TQRPG0: No function ○ ○ ○ ○ ○1: Frequency command (torque limit under TQR control ○ ○ ○ ○ ○mode)2: torque command (torque limit under speed mode) ○3: Torque compensation command ○ ○ ○ ○ ○4: PID target value (refer to group 8) ○ ○ ○ ○5: PID feedback signal (refer to group 8) ○ ○ ○ ○6: P.T.C. thermistor input value ○ ○ ○ ○ ○7: Positive torque limit ○8: Negative torque limit ○9: Regenerative torque limit ○10: Positive/negative torque limit ○11: PID feedback signal of tension ○ ○ ○ ○ ○12: Line speed ○ ○ ○ ○ ○13: Reel diameter ○ ○ ○ ○ ○14: PID target value of tension (tension closed-loop) ○ ○ ○ ○ ○15: Tension setting (tension open-loop) ○16: Zero-speed tension ○17: Tension taper ○ When it is frequency command or TQR speed limit, the corresponding value for 0~±10V/4~20mA is 0 – max. output frequency(Pr.01-00) When it is torque command or torque limit, the corresponding value for 0~±10V/4~20mA is 0 –max. output torque (Pr.07-22).When it is torque compensation, the corresponding value for 0~±10V/4~20mA is 0 – ratedtorque.Revision August 2008, 03<strong>VE</strong>, SW V2.04 4-79
Chapter 4 Parameters|03-00~02=9Regenerativetorque limitPositive torque03-00~02=7Positive torque limit03-00~02=10Positive/negative torque limitReverseForward03-00~02=10Positive/negative torque limit 03-00~02=9Regenerativetorque limit03-00~02=8Negative torque limitNegative Torque03-03 Analog Input Bias 1 (AVI) Unit: 0.1ControlmodeVF VFPG SVC FOCPG TQRPG Factory setting: 0Settings -100.0~100.0% It is used to set the corresponding AVI voltage of the external analog input 0.03-04 Analog Input Bias 1 (ACI) Unit: 0.1ControlmodeVF VFPG SVC FOCPG TQRPG Factory setting: 0Settings -100.0~100.0% It is used to set the corresponding ACI voltage of the external analog input 0.03-05 Analog Input Bias 1 (AUI) Unit: 0.1ControlmodeVF VFPG SVC FOCPG TQRPG Factory setting: 0Settings -100.0~100.0% It is used to set the corresponding AUI voltage of the external analog input 0.03-06 Positive/negative Bias Mode (AVI)03-07 Positive/negative Bias Mode (ACI)03-08 Positive/negative Bias Mode (AUI)4-80 Revision August 2008, 03<strong>VE</strong>, SW V2.04
ControlmodeChapter 4 Parameters|VF VFPG SVC FOCPG TQRPG Factory setting: 0Settings 0 Zero bias1 Lower than bias=bias2 Greater than bias=bias3 The absolute value of the bias voltage while serving as the center4 Serve bias as the centerIn a noisy environment, it is advantageous to use negative bias to provide a noise margin. It isrecommended NOT to use less than 1V to set the operation frequency.03-00to03-0203-09~03-11 gain is positive0 Zero bias4 41 Lower than bias =bias2 Greater than bias=biasThe absolute value of the bias voltage3while serving as the center4 Serve bias as the center2 2-10V -9 -8 -7-6 -5 -4 -3 -2 -1 1 2 3 4 5 6 7 8 9 10VNegative biasbias24biasPositive bias03-09 Analog Input Gain 1 (AVI) Unit: 103-10 Analog Input Gain 1 (ACI) Unit: 103-11 Analog Input Gain 1 (AUI) Unit: 1ControlmodeVF VFPG SVC FOCPG TQRPG Factory setting: 100.0Settings -500.0~500.0%Parameters 03-03 to 03-11 are used when the source of frequency command is the analogvoltage/current signal.03-12 ACI/AVI2 SelectionControlmodeVF VFPG SVC FOCPG TQRPG Factory setting: 0Settings 0 ACI1 AVI 2There are two AVI analog inputs can be used when this parameter is set to 1 and the SW2 onthe control board is set to AVI2. At this moment, ACI is for voltage input.03-13 Analog Input Delay Time (AVI) Unit: 0.01Revision August 2008, 03<strong>VE</strong>, SW V2.04 4-81
Chapter 4 Parameters|03-14 Analog Input Delay Time (ACI) Unit: 0.0103-15 Analog Input Delay Time (AUI) Unit: 0.01ControlmodeVF VFPG SVC FOCPG TQRPG Factory setting: 0.01Settings0.00 to 2.00 secThese input delays can be used to filter noisy analog signal.03-16 Addition Function of the Analog InputControlmodeVF VFPG SVC FOCPG TQRPG Factory setting: 0Settings 0 Disable (AVI, ACI, AUI)1 EnableWhen Pr.03-16 is set to 0 and the analog input setting is the same, the priority for AVI, ACIand AUI are AVI>ACI>AUI.FrequencyVoltageFcommand=[(ay bias)*gain]* Fmax(01-00)10V or 16mAFcommand: the correspondingfrequency for 10V or 20mAay : 10 or 16mAbias : Pr.03-03,Pr. 03-04, Pr.03-05gain : Pr.03-09, Pr.03-10, Pr.03-1103-17 Loss of the ACI SignalControlmodeVF VFPG SVC FOCPG TQRPG Factory setting: 0Settings 0 Disable1 Continue operation at the last frequency2 Decelerate to stop3 Stop immediately and display E.F.This parameter determines the behavior when ACI is lost.03-18 Analog Output Selection 1 Unit: 103-21 Analog Output Selection 2 (need to be used with EMV-APP01) Unit: 103-24 Analog Output Selection 3 (need to be used with EMV-APP01) Unit: 1ControlmodeVF VFPG SVC FOCPG TQRPG Factory setting: 04-82 Revision August 2008, 03<strong>VE</strong>, SW V2.04
Settings 0 to 19Chapter 4 Parameters|Settings Functions Descriptions0 Output frequency (Hz) Max. frequency Pr.01-00 is regarded as 100%.1Frequency command(Hz)Max. frequency Pr.01-00 is regarded as 100%.2 Motor speed (Hz) 600Hz is regarded as 100%3 Output current (rms) 2.5 X rated current is regarded as 100%4 Output voltage 2 X rated voltage is regarded as 100%5 DC Bus Voltage 450V (900V)=100%6 Power factor -1.000~1.000=100%7 Power Rated power is regarded as 100%8 Output torque Full-load torque is regarded as 100%9 AVI 0~10V=0~100%10 ACI 0~20mA=0~100%11 AUI -10~10V=0~100%12 q-axis current (2.5 X rated current) is regarded as 100%13 q-axis feedback value (2.5 X rated current) is regarded as 100%14 d-axis current15 d-axis feedback value(2.5 X rated current) is regarded as 100%(2.5 X rated current) is regarded as 100%16 q-axis voltage 250V (500V) =100%17 d-axis voltage 250V (500V) =100%18 Torque command Rated torque is regarded as 100%Revision August 2008, 03<strong>VE</strong>, SW V2.04 4-83
Chapter 4 Parameters|Settings Functions Descriptions19Pulse frequencycommandMax. frequency Pr.01-00 is regarded as 100%.03-19 Analog Output Gain 1 Unit: 0.103-22 Analog Output Gain 2 (need to be used with EMV-APP01) Unit: 0.103-25 Analog Output Gain 3 (need to be used with EMV-APP01) Unit: 0.1ControlmodeVF VFPG SVC FOCPG TQRPG Factory setting: 100.0Settings 0 to 200.0%It is used to adjust the analog voltage level that terminal AFM outputs. This parameter is set the corresponding voltage of the analog output 0.03-20 Analog Output Value in REV Direction 103-23 Analog Output Value in REV Direction 203-26 Analog Output Value in REV Direction 3ControlmodeVF VFPG SVC FOCPG TQRPG Factory setting: 0Settings 0 Absolute value in REV direction1 Output 0V in REV direction2 Enable output voltage in REV direction10V(20mA)10V(20mA)10V(20mA)0V(0mA)03-1803-2103-240V Frequency(0mA)5V Frequency(12mA)03-20=003-23=003-26=003-20=103-23=103-26=1Selections for the analog output direction03-20=203-23=203-26=24-84 Revision August 2008, 03<strong>VE</strong>, SW V2.04
Group 4 Multi-Step Speed ParametersChapter 4 Parameters|04-00 1st Step Speed Frequency Unit: 0.0104-01 2nd Step Speed Frequency Unit: 0.0104-02 3rd Step Speed Frequency Unit: 0.0104-03 4th Step Speed Frequency Unit: 0.0104-04 5th Step Speed Frequency Unit: 0.0104-05 6th Step Speed Frequency Unit: 0.0104-06 7th Step Speed Frequency Unit: 0.0104-07 8th Step Speed Frequency Unit: 0.0104-08 9th Step Speed Frequency Unit: 0.0104-09 10th Step Speed Frequency Unit: 0.0104-10 11th Step Speed Frequency Unit: 0.0104-11 12th Step Speed Frequency Unit: 0.0104-12 13th Step Speed Frequency Unit: 0.0104-13 14th Step Speed Frequency Unit: 0.0104-14 15th Step Speed Frequency Unit: 0.01ControlmodeVF VFPG SVC FOCPG Factory setting: 0.00Settings0.00 to 600.00 Hz04-15 Multi-position 1 Unit: 104-16 Multi-position 2 Unit: 104-17 Multi-position 3 Unit: 104-18 Multi-position 4 Unit: 104-19 Multi-position 5 Unit: 104-20 Multi-position 6 Unit: 104-21 Multi-position 7 Unit: 104-22 Multi-position 8 Unit: 104-23 Multi-position 9 Unit: 104-24 Multi-position 10 Unit: 104-25 Multi-position 11 Unit: 104-26 Multi-position 12 Unit: 104-27 Multi-position 13 Unit: 104-28 Multi-position 14 Unit: 104-29 Multi-position 15 Unit: 1ControlmodeVFPG FOCPG Factory setting: 0Revision August 2008, 03<strong>VE</strong>, SW V2.04 4-85
Chapter 4 Parameters|Settings 0 to 65535Please refer to the explanation of Pr.02-00 to Pr.02-06.MI4 MI3 MI2 MI1Pr.10-19 setting 0 0 0 0 Master frequency04-15 multi-position 1 0 0 0 1 04-00 1 st step speed frequency04-16 multi-position2 0 0 1 0 04-01 2 nd step speed frequency04-17 multi-position 3 0 0 1 1 04-02 3 rd step speed frequency04-18 multi-position 4 0 1 0 0 04-03 4 th step speed frequency04-19 multi-position 5 0 1 0 1 04-04 5 th step speed frequency04-20 multi-position 6 0 1 1 0 04-05 6 th step speed frequency04-21 multi-position 7 0 1 1 1 04-06 7 th step speed frequency04-22 multi-position 8 1 0 0 0 04-07 8 th step speed frequency04-23 multi-position 9 1 0 0 1 04-08 9 th step speed frequency04-24 multi-position 10 1 0 1 0 04-09 10 th step speed frequency04-25 multi-position 11 1 0 1 1 04-10 11 th step speed frequency04-26 multi-position 12 1 1 0 0 04-11 12 th step speed frequency04-27 multi-position 13 1 1 0 1 04-12 13 th step speed frequency04-28 multi-position 14 1 1 1 0 04-13 14 th step speed frequency04-29 multi-position 15 1 1 1 1 04-14 15 th step speed frequency4-86 Revision August 2008, 03<strong>VE</strong>, SW V2.04
Group 5 Motor Parameters05-00 Motor Auto TuningControlmodeChapter 4 Parameters|SVC FOCPG TQRPG Factory setting: 0Settings 0 No function1 Rolling test2 Static Test3 ReservedStarting auto tuning by pressing RUN key and it will write the measure value into Pr.05-05 toPr.05-09 for motor 1 and Pr.05-17 to Pr.05-21 for motor 2. The steps to AUTO-Tuning are: (when setting to 1)1. Make sure that all the parameters are set to factory settings and the motor wiring iscorrect.2. Make sure the motor has no-load before executing auto-tuning and the shaft is notconnected to any belt or gear motor. It is recommended to set to 2 or 3 if the motor can’tseparate from the load.3. Motor 1: fill in Pr.01-02, Pr.01-01, Pr.05-01, Pr.05-02, Pr.05-03 and Pr.05-04 with correctvalues. Refer to motor capacity to set accel./decel. time.Motor 2: fill in Pr.01-36, Pr.01-35, Pr.05-13, Pr.05-14, Pr.05-15 and Pr.05-16 with correctvalues. Refer to motor capacity to set accel./decel. time.4. When Pr.05-00 is set to 1, the AC motor drive will execute auto-tuning immediately afterreceiving a “RUN” command. (NOTE: the motor will run!)5. After executing, please check if there are values filled in Pr.05-05 to Pr.05-09 for motor 1and Pr.05-17 to Pr.05-21 for motor 2. If Pr.05-00 is set to 2, it needs to input Pr.05-05 for motor 1/Pr.05-17 for motor 2.NOTE1. In torque/vector control mode, it is not recommended to have motors run in parallel.2. It is not recommended to use torque/vector control mode if motor rated power exceeds therated power of the AC motor drive.3. When tuning 2 motors, it needs to set multi-function input terminals or change Pr.05-10 formotor 1/motor 2 selection.4. The no-load current is usually 20~50% X rated current.5. The rated speed can’t be larger or equal to 120f/p.Revision August 2008, 03<strong>VE</strong>, SW V2.04 4-87
Chapter 4 Parameters|05-01 Full-load Current of Motor 1ControlmodeVF VFPG SVC FOCPG TQRPG Factory setting: #.##Settings 40 to 100%This value should be set according to the rated frequency of the motor as indicated on themotor nameplate. The factory setting is 90% X rated current.Example: The rated current for 7.5HP (5.5kW) is 25 and factory setting is 22.5A. The range forsetting will be 10~30A.(25*40%=10 and 25*120%=30)05-02 Rated Power of Motor 1 Unit: 0.01ControlmodeSVC FOCPG TQRPG Factory setting: #.##Settings0 to 655.35 kWIt is used to set rated power of the motor 1. The factory setting is the power of the drive.05-03 Rated Speed of Motor 1 (rpm) Unit: 1ControlmodeVFPG SVC FOCPG TQRPGSettings 0 to 65535Factory setting: 1710 (60Hz, 4 poles)1410 (50Hz, 4 poles)It is used to set the rated speed of the motor and need to set according to the value indicatedon the motor nameplate.05-04 Number of Motor Poles 1ControlmodeVF VFPG SVC FOCPG TQRPG Factory setting: 4Settings 2 to 20It is used to set the number of motor poles (must be an even number).05-05 No-load Current of Motor 1 Unit: AmpControlmodeVFPG SVC FOCPG TQRPG Factory setting: #.##Settings0 to factory setting of Pr.05-01The factory setting is 40% X rated current.4-88 Revision August 2008, 03<strong>VE</strong>, SW V2.04
Chapter 4 Parameters|05-06 Rotor Resistance R1 of Motor 1 Unit: 0.00105-07 Rr of Motor 1 Unit: 0.001ControlmodeSVC FOCPG TQRPG Factory setting: #.###Settings0~65.535Ω05-08 Lm of Motor 1 Unit: 0.105-09 Lx of Motor 1 Unit: 0.1ControlmodeSVC FOCPG TQRPG Factory setting: #.#Settings0~6553.5mH05-10 Motor 1/Motor 2 SelectionControlmodeVF VFPG SVC FOCPG TQRPG Factory setting: 1Settings 1 Motor 12 Motor 2It is used to set the motor that driven by the AC motor drive.05-11 Frequency for Y-connection/ Δ−connection Switch Unit: 0.01ControlmodeVF VFPG SVC FOCPG TQRPG Factory setting: 60.00Settings0.00 to 600.00Hz05-12 Y-connection /Δ−connection SwitchControlmodeVF VFPG SVC FOCPG TQRPG Factory setting: 0Settings 0 Disable1 Enable05-30 Delay Time for Y-connection/Δ −connection Unit: 0.001ControlmodeVF VFPG SVC FOCPG Factory setting: 0.200Settings 0 to 60.000Pr.05-12 is used to enable/disable Y-connection/ Δ−connection Switch.When Pr.05-12 is set to 1, the drive will select by Pr.05-11 setting and current motor frequencyto switch motor to Y-connection or Δ−connection. AT the same time, it will also affect motorparameters (Pr.05-01 to 05-10/Pr.05-13 to Pr.05-21).Pr.05-30 is used to set the switch delay time of Y-connection/Δ −connection.Revision August 2008, 03<strong>VE</strong>, SW V2.04 4-89
Chapter 4 Parameters| When output frequency reaches Y-connection/Δ −connection switch frequency, drive will delayby Pr.05-30 before multi-function output terminals are active.Y- connection switch: can be used for wide range motorY connection for low speed: higher torque can be used for rigid tappingconnection for high speed: higher torque can be used for high-speed drillingconnection is finishedPr.02-01~06=30MI1Y-connection is finishedPr.02-01~06=29MI2UVWconnection controlPr.02-11~14=32RAY connection controlPr.02-11~14=31MRAU V WIMX Y ZY-connectionconfirmation inputPr.05-11Y- △ switchfrequencyMotor speed/frequencyY-connection outputONIf switch point is 60Hz,the accel. switch point is 62HzIn this area, motor is in freerun status. AC motor drivestops outputting.Pr. 05-30 Delay Time for Y-connection/D -connection(Min. is 0.2 seconds)Pr.02-11~14=31Decel. switch point is 58HzONBandwidth is 2HzMotor speed willdecreaseby load inertia.Y-conenctionconfirmation inputONPr.02-11~14=29ON△-connection outputPr.02-11~14=32△-connectionconfirmation inputPr.02-11~14=30ONON:mechanical bounce time4-90 Revision August 2008, 03<strong>VE</strong>, SW V2.04
Chapter 4 Parameters|free run statusoutputfrequencyY-connection outputPr.02-11~14=31Y-connectionconfirmation inputPr.02-01~06=29△-connection outputPr.02-11~14=32△-connectionconfirmation inputPr.02-01~06=30Y- △ switch errorfrequencyONONdelay timePr.05-30ON2 secondsON05-13 Full-load Current of Motor 2 Unit: 1%ControlmodeVF VFPG SVC FOCPG TQRPG Factory setting: #.##Settings 40 to 100%This value should be set according to the rated frequency of the motor as indicated on themotor nameplate. The factory setting is 90% X rated current.Example: The rated current for 7.5HP (5.5kW) is 25 and factory setting is 22.5A. The range forsetting will be 10~30A.(25*40%=10 and 25*120%=30)05-14 Rated Power of Motor 2 Unit: 0.01ControlmodeSVC FOCPG TQRPG Factory setting: #.##Settings 0 to 655.35It is used to set rated power of the motor 2. The factory setting is the power of the drive.05-15 Rated Speed of Motor 2 (rpm) Unit: 1ControlmodeVFPG SVC FOCPG TQRPG Factory setting: 1710Settings 0 to 65535It is used to set the rated speed of the motor and need to set according to the value indicatedon the motor nameplate.Revision August 2008, 03<strong>VE</strong>, SW V2.04 4-91
Chapter 4 Parameters|05-16 Number of Motor Poles 2ControlmodeVF VFPG SVC FOCPG TQRPG Factory setting: 4Settings 2 to 20It is used to set the number of motor poles (must be an even number).05-17 No-load Current of Motor 2 Unit: AmpControlmodeVFPG SVC FOCPG TQRPG Factory setting: #.##Settings0 to factory setting of Pr.05-01The factory setting is 40% X rated current.05-18 Rotor Resistance R1 of Motor 2 Unit: 0.00105-19 Rr of Motor 2 Unit: 0.001ControlmodeSVC FOCPG TQRPG Factory setting: #.###Settings0~65.535Ω05-20 Lm of Motor 2 Unit: 0.105-21 Lx of Motor 2 Unit: 0.1ControlmodeSVC FOCPG TQRPG Factory setting: #.#Settings0~6553.5mHIt will have different setting by the rated current.05-22 Torque Compensation Time Constant Unit: 0.001ControlmodeVF VFPG SVC Factory setting: 0.020Settings0.001 to 10.000 sec05-23 Slip Compensation Time Constant Unit: 0.001ControlmodeVFPG SVC Factory setting: 0.100Settings0.001 to 10.000 secSetting Pr.05-22 and Pr.05-23 change the response time for the compensation.When Pr.05-22 and Pr.05-23 are set to 10.00 seconds, its response time for the compensationwill be the longest. But if the settings are too short, unstable system may occur.4-92 Revision August 2008, 03<strong>VE</strong>, SW V2.04
Chapter 4 Parameters|05-24 Torque Compensation Gain Unit: 1ControlmodeVF VFPG Factory setting: 0Settings0 to10This parameter may be set so that the AC motor drive will increase its voltage output to obtaina higher torque. Only to be used for SVC control mode.Too high torque compensation can overheat the motor.05-25 Slip Compensation Gain Unit: 0.01ControlmodeVF SVC Factory setting: 0.00Settings0.00 to10.00When the asynchronous motor is driven by the drive, the load and slip will be increased. Thisparameter can be used to correct frequency and lower the slip to make the motor can run nearthe synchronous speed under rated current. When the output current is larger than the motorno-load current, the drive will compensate the frequency by Pr.05-25 setting. If the actualspeed is slower than expectation, please increase the setting and vice versa.It is only valid in SVC/VF mode.The factory settings are:A. In SVC mode, the factory setting is 1.00.B. In VF mode, the factory setting is 0.00.05-26 Slip Deviation Level Unit: 1ControlmodeVFPG SVC FOCPG Factory setting: 0Settings 0 to 1000% (0: disable)05-27 Detection time of Slip Deviation Unit: 0.1ControlmodeVFPG SVC FOCPG Factory setting: 1.0Settings 0.0 to 10.0 sec05-28 Over Slip TreatmentControlmodeVFPG SVC FOCPG Factory setting: 0Settings 0 Warn and keep operation1 Warn and ramp to stop2 Warn and coast to stopRevision August 2008, 03<strong>VE</strong>, SW V2.04 4-93
Chapter 4 Parameters| Pr.05-26 to Pr.05-28 are used to set allowable slip level/time and over slip treatment when thedrive is running.05-29 Hunting Gain Unit: 1ControlmodeVF VFPG SVC Factory setting: 2000Settings0 to 10000 (0: disable)The motor will have current wave motion in some specific area. It can improve this situation bysetting this parameter. (When it is high frequency or run with PG, Pr.05-29 can be set to 0.when the current wave motion happens in the low frequency, please increase Pr.05-29.)05-31 Accumulative Motor Operation Time (Min.) Unit: 1ControlmodeVF VFPG SVC FOCPG TQRPG Factory setting: 00Settings00 to143905-32 Accumulative Motor Operation Time (Day) Unit: 1ControlmodeVF VFPG SVC FOCPG TQRPG Factory setting: 00Settings 00 to 65535Pr. 05-31 and Pr.05-32 are used to record the motor operation time. They can be cleared bysetting to 00 and time won’t be recorded when it is less than 60 seconds.4-94 Revision August 2008, 03<strong>VE</strong>, SW V2.04
Group 6 Protection ParametersChapter 4 Parameters|06-00 Low Voltage Level Unit: 0.1ControlmodeVF VFPG SVC FOCPG TQRPGSettings 230V series 160.0~220.0Vdc Factory Setting: 180.0460V series 320.0~440.0Vdc Factory Setting: 360.0It is used to set the Lv level.input voltage30V(60V)Pr. 06-00LV06-01 Over-Voltage Stall Prevention Unit: 0.1ControlmodeVF VFPG SVC FOCPG TQRPGSettings 230V series 350.0~450.0Vdc Factory Setting: 380.0460V series 700.0~900.0Vdc Factory Setting: 760.00.0: disable (when brake resistor used)During deceleration, the DC bus voltage may exceed its Maximum Allowable Value due tomotor regeneration. When this function is enabled, the AC motor drive will not deceleratefurther and keep the output frequency constant until the voltage drops below the preset valueagain.outputfrequencyDeceleration characteristicwhen Over-Voltage StallPrevention enabledFrequency Heldpreviousdeceleration timetimeRevision August 2008, 03<strong>VE</strong>, SW V2.04 4-95
Chapter 4 Parameters|06-02 Phase-loss ProtectionControlmodeVF VFPG SVC FOCPG TQRPG Factory Setting: 0Settings 0 Warn and keep operation1 Warn and ramp to stop2 Warn and coast to stopIt is used to set the phase-loss treatment. The phase-loss will effect driver’s controlcharacteristic and life.06-03 Over-Current Stall Prevention during Acceleration Unit: 1ControlmodeVF VFPG SVC Factory Setting: 170Settings 00~250%During acceleration, the AC drive output current may increase abruptly and exceed the valuespecified by Pr.06-03 due to rapid acceleration or excessive load on the motor. When thisfunction is enabled, the AC drive will stop accelerating and keep the output frequency constantuntil the current drops below the maximum value.06-03Over-CurrentDetectioncurrentLevelOver-Current Stallprevention duringAcceleration,frequency heldOutputFrequencyactual acceleration time when over-current stallprevention is enabled06-04 Over-current Stall Prevention during Operation Unit: 1ControlmodetimeVF VFPG SVC Factory Setting: 170Settings 00 to 250%If the output current exceeds the setting specified in Pr.06-04 when the drive is operating, thedrive will decrease its output frequency to prevent the motor stall. If the output current is lowerthan the setting specified in Pr.06-04, the drive will accelerate again to catch up with the setfrequency command value.4-96 Revision August 2008, 03<strong>VE</strong>, SW V2.04
Chapter 4 Parameters|Over-Current StallPrevention duringOperation, outputOver-Currentfrequency decreaseDetection Level06-04 Output CurrentOutputFrequencyTimeover-current stall prevention during operation06-05 Accel./Decel. Time Selection of Stall Prevention at Constant SpeedControlmodeVF VFPG SVC Factory Setting: 0Settings 0 by current accel/decel. time1 by the 1 st accel/decel. time2 by the 2 nd accel/decel. time3 by the 3 rd accel/decel. time4 by the 4 th accel/decel. time5 by auto accel/decel. timeIt is used to set the accel./decel. Time selection when stall prevention occurs at constantspeed.06-06 Over-torque Detection Selection (OT1)ControlmodeVF VFPG SVC FOCPG TQRPG Factory Setting: 0Settings 0 Over-Torque detection disabled.1 Over-torque detection during constant speed operation, continue tooperate after detection2 Over-torque detection during constant speed operation, stopoperation after detection3 Over-torque detection during operation, continue to operate afterdetection4 Over-torque detection during operation, stop operation afterdetection06-07 Over-torque Detection Level (OT1) Unit: 1ControlmodeVF VFPG SVC FOCPG TQRPG Factory Setting: 150Revision August 2008, 03<strong>VE</strong>, SW V2.04 4-97
Chapter 4 Parameters|Settings 10 to 250%06-08 Over-torque Detection Time (OT1) Unit: 0.1ControlmodeVF VFPG SVC FOCPG TQRPG Factory Setting: 0.1Settings0.0 to 60.0 sec06-09 Over-torque Detection Selection (OT2)ControlmodeVF VFPG SVC FOCPG TQRPG Factory Setting: 0Settings 0 Over-Torque detection disabled.1 Over-torque detection during constant speed operation, continue tooperate after detection2 Over-torque detection during constant speed operation, stopoperation after detection3 Over-torque detection during operation, continue to operate afterdetection4 Over-torque detection during operation, stop operation afterdetection06-10 Over-torque Detection Level (OT2) Unit: 1ControlmodeVF VFPG SVC FOCPG TQRPG Factory Setting: 150Settings 10 to 250%06-11 Over-torque Detection Time (OT2) Unit: 0.1ControlmodeVF VFPG SVC FOCPG TQRPG Factory Setting: 0.1Settings0.0 to 60.0 secPr.06-06 and Pr.06-09 determine the operation mode of the drive after the over-torque isdetected via the following method: if the output current exceeds the over-torque detection level(Pr.06-19) and also exceeds the Pr.06-08 Over-Torque Detection Time, the fault code“OT1/OT2” is displayed. If a Multi-Functional Output Terminal is to over-torque detection, theoutput is on. Please refer to Pr.02-11~02-14 for details.4-98 Revision August 2008, 03<strong>VE</strong>, SW V2.04
currentChapter 4 Parameters|5% Pr.06-07,Pr.06-10Pr.06-08, 06-1106-12 Current Limit Unit: 1ControlmodeFOCPG TQRPG Factory Setting: 150Settings 0 to 250%It is used to set the current limit.06-13 Electronic Thermal Relay Selection (Motor 1)ControlmodeVF VFPG SVC FOCPG TQRPG Factory Setting: 2Settings 0 Operate with a Inverter Motor (forced external cooling)1 Operate with a Standard Motor (self-cooled by fan)2 Disabled06-27 Electronic Thermal Relay Selection (Motor 2)ControlmodeVF VFPG SVC FOCPG TQRPG Factory Setting: 2Settings 0 Operate with a Inverter Motor (forced external cooling)1 Operate with a Standard Motor (self-cooled by fan)2 DisabledIt is used to prevent self-cooled motor overheats under low speed. User can use electricalthermal relay to limit driver’s output power.06-14 Electronic Thermal Characteristic for Motor 1 Unit: 0.1ControlVF VFPG SVC FOCPG TQRPG Factory Setting: 60.0modeSettings 30.0 to 600.0 sec06-28 Electronic Thermal Characteristic for Motor 2 Unit: 0.1ControlVF VFPG SVC FOCPG TQRPG Factory Setting: 60.0modeSettings 30.0 to 600.0 secRevision August 2008, 03<strong>VE</strong>, SW V2.04 4-99
Chapter 4 Parameters|The parameter is set by the output frequency, current and operation time of the drive foractivating the I 2 t electronic thermal protection function. The function will be activated for the150% * setting current for the setting of Pr.06-14/Pr.06-28.Operationtime(min)5432160Hz or more50Hz10Hz5Hz0 20 40 60 80100120140160180200Loadfactor (%)06-15 Heat Sink Over-heat (OH) Warning Unit: 0.1ControlVF VFPG SVC FOCPG TQRPG Factory Setting: 85.0modeSettings 0.0 to 110.0 o C06-16 Stall Prevention Limit Level Unit: 1ControlVF VFPG SVC Factory Setting: 50modeSettings 0 to 100% (refer to Pr.06-03, Pr.06-04)When operation frequency is larger than Pr.01-01, Pr06-03=150%, Pr. 06-04=100% and Pr.06-28=80%:Stall Prevention Level during acceleration = 06-03x06-28=150x80%=120%.Stall Prevention Level at constant speed= 06-03x06-28=100x80%=80%.06-17 Present Fault Record06-18 Second Most Recent Fault Record06-19 Third Most Recent Fault Record06-20 Fourth Recent Fault Record06-21 Fifth Most Recent Fault Record06-22 Sixth Most Recent Fault RecordSettings 0 to 65 Factory Setting: 0SettingsControl ModeVF VFPG SVC FOCPG TQRPG4-100 Revision August 2008, 03<strong>VE</strong>, SW V2.04
Chapter 4 Parameters|SettingsControl ModeVF VFPG SVC FOCPG TQRPG0: No fault ○ ○ ○ ○ ○1: Over-current during acceleration (ocA) ○ ○ ○ ○ ○2: Over-current during deceleration (ocd) ○ ○ ○ ○ ○3: Over-current during constant speed (ocn) ○ ○ ○ ○ ○4: Ground fault (GFF) ○ ○ ○ ○ ○5: IGBT short-circuit (occ) ○ ○ ○ ○ ○6: Over-curent at stop (ocS) ○ ○ ○ ○ ○7: Over-voltage during acceleration (ovA) ○ ○ ○ ○ ○8: Over-voltage during deceleration (ovd) ○ ○ ○ ○ ○9: Over-voltage during constant speed (ovn) ○ ○ ○ ○ ○10: Over-voltage at stop (ovS) ○ ○ ○ ○ ○11: Low-voltage during acceleration (LvA) ○ ○ ○ ○ ○12: Low-voltage during deceleration (Lvd) ○ ○ ○ ○ ○13: Low-voltage during constant speed (Lvn) ○ ○ ○ ○ ○14: Low-voltage at stop (LvS) ○ ○ ○ ○ ○15: Phase loss (PHL) ○ ○ ○ ○ ○16: IGBT heat sink over-heat (oH1) ○ ○ ○ ○ ○17: Heat sink over-heat (oH2)(for 40HP above) ○ ○ ○ ○ ○18: TH1 open loop error (tH1o) ○ ○ ○ ○ ○19: TH2 open loop error (tH2o) ○ ○ ○ ○ ○20: Fan error signal output ○ ○ ○ ○ ○21: over-load (oL) (150% 1Min) ○ ○ ○ ○ ○22: Motor 1 over-load (EoL1) ○ ○ ○ ○ ○23: Motor 2 over-load (EoL2) ○ ○ ○ ○ ○24: Motor PTC overheat (oH3) ○ ○ ○ ○ ○25: Fuse error (FuSE) ○ ○ ○ ○ ○26: over-torque 1 (ot1) ○ ○ ○ ○ ○27: over-torque 1 (ot2) ○ ○ ○ ○ ○28: Reserved29: Reserved30: Memory write-in error (cF1) ○ ○ ○ ○ ○31: Memory read-out error (cF2) ○ ○ ○ ○ ○32: Isum current detection error (cd0) ○ ○ ○ ○ ○33: U-phase current detection error (cd1) ○ ○ ○ ○ ○34: V-phase current detection error (cd2) ○ ○ ○ ○ ○35: W-phase current detection error (cd3) ○ ○ ○ ○ ○36: Clamp current detection error (Hd0) ○ ○ ○ ○ ○37: Over-current detection error (Hd1) ○ ○ ○ ○ ○38: Over-voltage detection error (Hd2) ○ ○ ○ ○ ○39: Ground current detection error (Hd3) ○ ○ ○ ○ ○40: Auto tuning error (AuE) ○ ○ ○41: PID feedback loss (AFE) ○ ○ ○ ○ ○42: PG feedback error (PGF1) ○ ○ ○43: PG feedback loss (PGF2) ○ ○ ○44: PG feedback stall (PGF3) ○ ○45: PG slip error (PGF4) ○ ○46: PG ref input error (PGr1) ○ ○ ○ ○ ○47: PG ref loss (PGr2) ○ ○ ○ ○ ○48: Analog current input loss (ACE) ○ ○ ○ ○ ○49: External fault input (EF) ○ ○ ○ ○ ○50: Emergency stop (EF1) ○ ○ ○ ○ ○51: External Base Block (B.B.) ○ ○ ○ ○ ○Revision August 2008, 03<strong>VE</strong>, SW V2.04 4-101
Chapter 4 Parameters|SettingsControl ModeVF VFPG SVC FOCPG TQRPG52: Password error (PcodE) ○ ○ ○ ○ ○53: Reserved54: Communication error (cE1) ○ ○ ○ ○ ○55: Communication error (cE2) ○ ○ ○ ○ ○56: Communication error (cE3) ○ ○ ○ ○ ○57: Communication error (cE4) ○ ○ ○ ○ ○58: Communication Time-out (cE10) ○ ○ ○ ○ ○59: PU time-out (cP10) ○ ○ ○ ○ ○60: Brake transistor error (bF) ○ ○ ○ ○ ○61: Y-connection/Δ-connection switch error (ydc) ○ ○ ○ ○62: Decel. Energy Backup Error (dEb) ○ ○ ○ ○ ○63: Slip error (oSL) ○ ○ ○ ○64: Broken belt error (bEb) ○ ○ ○ ○ ○65: Error PID feedback signal of tension (tdEv) ○ ○ ○ ○ ○It will record when the fault occurs and force stopping. For the Lv, it will record when it isoperation, or it will warn without record.Setting 62: when DEB function is enabled, the drive will execute DEB and record to the Pr.06-17 to Pr.06-22 simultaneously.06-23 Fault Output Option 1 Unit: 106-24 Fault Output Option 2 Unit: 106-25 Fault Output Option 3 Unit: 106-26 Fault Output Option 4 Unit: 1ControlmodeVF VFPG SVC FOCPG TQRPG Factory Setting: 0Settings0 to 65535 sec (refer to bit table for fault code) These parameters can be used with multi-function output (set Pr.02-11 to Pr.02-14 to 35-38)for the specific requirement. When the fault occurs, the corresponding terminals will beactivated (It needs to convert binary value to decimal value to fill in Pr.06-23 to Pr.06-26).Fault codeBit0 Bit1 Bit2 Bit3 Bit4 Bit5 Bit6current Volt. OL SYS FBK EXI CE0: No fault1: Over-current during acceleration(ocA)2: Over-current during deceleration(ocd)3: Over-current during constantspeed (ocn)●●●4-102 Revision August 2008, 03<strong>VE</strong>, SW V2.04
Fault codeChapter 4 Parameters|Bit0 Bit1 Bit2 Bit3 Bit4 Bit5 Bit6current Volt. OL SYS FBK EXI CE4: Ground fault (GFF) ●5: IGBT short-circuit (occ) ●6: Over-curent at stop (ocS) ●7: Over-voltage during acceleration(ovA)8: Over-voltage during deceleration(ovd)9: Over-voltage during constantspeed (ovn)●●●10: Over-voltage at stop (ovS) ●11: Low-voltage duringacceleration (LvA)12: Low-voltage duringdeceleration (Lvd)13: Low-voltage during constantspeed (Lvn)●●●14: Low-voltage at stop (LvS) ●15: Phase loss (PHL) ●16: IGBT heat sink over-heat (oH1) ●17: Heat sink over-heat (oH2)(for40HP above)●18: TH1 open loop error (tH1o) ●19: TH2 open loop error (tH2o) ●20: Fan error signal output ●21: over-load (oL) (150% 1Min) ●22: Motor 1 over-load (EoL1) ●23: Motor 2 over-load (EoL2) ●24: Motor PTC overheat (oH3) ●25: Fuse error (FuSE) ●26: over-torque 1 (ot1) ●Revision August 2008, 03<strong>VE</strong>, SW V2.04 4-103
Chapter 4 Parameters|Fault codeBit0 Bit1 Bit2 Bit3 Bit4 Bit5 Bit6current Volt. OL SYS FBK EXI CE27: over-torque 1 (ot2) ●28: Reserved29: Reserved30: Memory write-in error (cF1) ●31: Memory read-out error (cF2) ●32: Isum current detection error(cd0)33: U-phase current detection error(cd1)34: V-phase current detection error(cd2)35: W-phase current detectionerror (cd3)36: Clamp current detection error(Hd0)37: Over-current detection error(Hd1)38: Over-voltage detection error(Hd2)39: Ground current detection error(Hd3)●●●●●●●●40: Auto tuning error (AuE) ●41: PID feedback loss (AFE) ●42: PG feedback error (PGF1) ●43: PG feedback loss (PGF2) ●44: PG feedback stall (PGF3) ●45: PG slip error (PGF4) ●46: PG ref input error (PGr1) ●47: PG ref loss (PGr2) ●48: Analog current input loss(ACE)●49: External fault input (EF) ●4-104 Revision August 2008, 03<strong>VE</strong>, SW V2.04
Fault codeChapter 4 Parameters|Bit0 Bit1 Bit2 Bit3 Bit4 Bit5 Bit6current Volt. OL SYS FBK EXI CE50: Emergency stop (EF1) ●51: External Base Block (B.B.) ●52: Password error (PcodE) ●53: Reserved54: Communication error (cE1) ●55: Communication error (cE2) ●56: Communication error (cE3) ●57: Communication error (cE4) ●58: Communication Time-out(cE10)●59: PU time-out (cP10) ●60: Brake transistor error (bF) ●61: Y-connection/Δ-connectionswitch error (ydc)●62: Decel. Energy Backup Error(dEb)●63: Slip error (oSL) ●64: Broken belt error (bEb) ●65: Error PID feedback signal oftension (tdEv)●06-29 PTC (Positive Temperature Coefficient) Detection SelectionControlmodeVF VFPG SVC FOCPG TQRPG Factory Setting: 0Settings 0 Warn and keep operating1 Warn and ramp to stop2 Warn and coast to stopIt is used to set the treatment after detecting PTC.06-30 PTC Level Unit: 0.1ControlmodeVF VFPG SVC FOCPG TQRPG Factory Setting: 50.0Revision August 2008, 03<strong>VE</strong>, SW V2.04 4-105
Chapter 4 Parameters|Settings 0.0 to 100.0%It is used to set the PTC level, and the corresponding value for 100% is max. analog inputvalue.06-31 Filter Time for PTC Detection Unit: 0.01ControlmodeVF VFPG SVC FOCPG TQRPG Factory Setting: 0.20Settings0.00 to 10.00 sec06-32 Output Frequency for Malfunction Unit: 0.01ControlmodeVF VFPG SVC FOCPG TQRPG Factory Setting: 0.00Settings0.00 to 655.35 Hz06-33 Output AC Voltage for Malfunction Unit: 0.1ControlmodeVF VFPG SVC FOCPG TQRPG Factory Setting: 0.0Settings0.0~6553.5 V06-34 DC Voltage for Malfunction Unit: 0.1ControlmodeVF VFPG SVC FOCPG TQRPG Factory Setting: 0.0Settings0.0~6553.5 V06-35 Current Value for Malfunction Unit: 0.01ControlmodeVF VFPG SVC FOCPG TQRPG Factory Setting: 0.00Settings0.00~655.35 Amp06-36 IGBT Temperature for Malfunction Unit: 0.1ControlmodeVF VFPG SVC FOCPG TQRPG Factory Setting: 0.0Settings 0.0~6553.5 °C4-106 Revision August 2008, 03<strong>VE</strong>, SW V2.04
Group 7 Special ParametersChapter 4 Parameters|07-00 Software Brake Level Unit: 0.1ControlmodeVF VFPG SVC FOCPG TQRPGSettings 230V series 350.0~450.0Vdc Factory Setting: 380.0460V series 700.0~900.0Vdc Factory Setting: 760.0This parameter sets the DC-bus voltage at which the brake chopper is activated.07-01 DC Brake Current Level Unit: 1ControlmodeVF VFPG SVC FOCPG TQRPG Factory Setting: 0Settings 0 to 100%This parameter sets the level of DC Brake Current output to the motor during start-up andstopping. When setting DC Brake Current, the Rated Current (Pr.00-01) is regarded as 100%.It is recommended to start with a low DC Brake Current Level and then increase until properholding torque has been attained.When it is in FOCPG/TQRPG mode, it can enable DC brake function by setting to any value.07-02 DC Brake Time during Start-up Unit: 0.1ControlVF VFPG SVC FOCPG TQRPG Factory Setting: 0.0modeSettings 0.0 to 60.0 secThis parameter determines the duration of the DC Brake current after a RUN command. Whenthe time has elapsed, the AC motor drive will start accelerating from the Minimum Frequency(Pr.01-05).07-03 DC Brake Time during Stopping Unit: 0.01ControlVF VFPG SVC FOCPG TQRPG Factory Setting: 0.00modeSettings 0.00 to 60.00 secThis parameter determines the duration of the DC Brake current during stopping.07-04 Start-Point for DC Brake Unit: 0.01ControlVF VFPG SVC TQRPG Factory Setting: 0.00modeSettings 0.00 to 600.00HzThis parameter determines the frequency when DC Brake will begin during deceleration.Revision August 2008, 03<strong>VE</strong>, SW V2.04 4-107
Chapter 4 Parameters|Output frequency01-09MinimumoutputfrequencyStart-point forDC brakingtime duringstoppingDC Braking Timeduring StoppingRun/StopOFFONTimeDC Braking TimeDC Brake during Start-up is used for loads that may move before the AC drive starts, such asfans and pumps. Under such circumstances, DC Brake can be used to hold the load inposition before setting it in motion.DC Brake during stopping is used to shorten the stopping time and also to hold a stopped loadin position. For high inertia loads, a dynamic brake resistor may also be needed for fastdecelerations.07-05 DC Brake Proportional Gain Unit: 1ControlmodeVF VFPG SVC Factory Setting: 50Settings1 to 500HzIt is used to set the output voltage gain when DC brake.07-06 Momentary Power Loss Operation SelectionControlmodeVF VFPG SVC FOCPG TQRPG Factory Setting: 0Settings 0 Operation stops after momentary power loss.1 Operation continues after momentary power loss, speed searchstarts with the Master Frequency reference value.2 Operation continues after momentary power loss, speed searchstarts with the minimum frequency.This parameter determines the operation mode when the AC motor drive restarts from amomentary power loss.In PG control mode, the AC motor drive will execute the speed search function automaticallyby the PG speed when this setting isn’t set to 0.07-07 Maximum Allowable Power Loss Time Unit: 0.1ControlmodeVF VFPG SVC FOCPG TQRPG Factory Setting: 2.04-108 Revision August 2008, 03<strong>VE</strong>, SW V2.04
Settings0.1 to 5.0 secChapter 4 Parameters|If the duration of a power loss is less than this parameter setting, the AC motor drive willresume operation. If it exceeds the Maximum Allowable Power Loss Time, the AC motor driveoutput is then turned off (coast stop).The selected operation after power loss in Pr.07-06 is only executed when the maximumallowable power loss time is ≤5 seconds and the AC motor drive displays “Lu”.But if the AC motor drive is powered off due to overload, even if the maximum allowable powerloss time is ≤5 seconds, the operation mode as set in Pr.07-06 is not executed. In that case itstarts up normally.07-08 Baseblock Time for Speed Search (BB) Unit: 0.1ControlVF VFPG SVC FOCPG TQRPG Factory Setting: 0.5modeSettings 0.1 to 5.0 secWhen momentary power loss is detected, the AC drive will block its output and then wait for aspecified period of time (determined by Pr.07-08, called Base-Block Time) before resumingoperation. This parameter should be set at a value to ensure that any residual regenerationvoltage from the motor on the output has disappeared before the drive is activated again.7Output frequency(H)Output voltage(V)Output current A07-09Current Limit forSpeed SearchFWD RunInput B.B. signalStop output voltageDisable B.B. signalWaiting time Pr.07-08Speed searchSynchronization speed detection7 Frequency command before B.B.TimeB.B.B.B. Search with last output frequency downward timing chartRevision August 2008, 03<strong>VE</strong>, SW V2.04 4-109
Chapter 4 Parameters|Output frequency(H)Output voltage(V)output current A07-09 Current Limitfor Speed Search SpeedInput B.B. signalStop output voltageDisable B.B. signalWaiting time 08.07Speed SearchSynchronization speed detectionTimeFWD RunB.B.B.B. Search with minimum output frequency upward timing chartOutput frequency(H)Output voltage(V)Output current A06-03Over-Current StallPreventionduring Accel.FWD RunTimeInput B.B. signalStop voltage outputDisable B.B. signalWaiting time Pr.07-08Speed searchSynchronization speed detectionB.B.B.B. Search with minimum output frequency upward timing chart07-09 Current Limit for Speed Search Unit: 1ControlmodeVF VFPG SVC FOCPG TQRPG Factory Setting: 150Settings 20 to 200%Following a momentary power loss, the AC motor drive will start its speed search operationonly if the output current is greater than the value set by Pr.8-07. When the output current isless than the value of Pr.8-07, the AC motor drive output frequency is at “speedsynchronization point”. The drive will start to accelerate or decelerate back to the operatingfrequency at which it was running prior to the power loss.When executing speed search, the V/f curve is operated by group 1 setting. The maximumcurrent for the optimum accel./decel. and start speed search is set by Pr.07-09.4-110 Revision August 2008, 03<strong>VE</strong>, SW V2.04
Chapter 4 Parameters|07-10 Base Block Speed SearchControlmodeVF VFPG SVC FOCPG TQRPG Factory Setting: 0Settings 0 Stop operation1 Speed search starts with last frequency command2 Speed search starts with minimum output frequencyThis parameter determines the AC motor drive restart method after External Base Block isenabled.In PG control mode, the AC motor drive will execute the speed search function automaticallyby the PG speed when this setting isn’t set to 0.07-11 Auto Restart After Fault Unit: 1ControlVF VFPG SVC FOCPG TQRPG Factory Setting: 0modeSettings 0 to 10Only after an over-current OC or over-voltage OV fault occurs, the AC motor drive can bereset/restarted automatically up to 10 times.Setting this parameter to 0 will disable the reset/restart operation after any fault has occurred.When enabled, the AC motor drive will restart with speed search, which starts at the frequencybefore the fault. To set the waiting time before restart after a fault, please set Pr. 07-08 BaseBlock Time for Speed Search.07-12 Speed Search during Start-upControlmodeVF VFPG SVC FOCPG TQRPG Factory Setting: 0Settings 0 Disable1 Speed search from maximum frequency2 Speed search from start-up frequency3 Speed search from minimum frequencyThis parameter is used for starting and stopping a motor with high inertia. A motor with highinertia will take a long time to stop completely. By setting this parameter, the <strong>user</strong> does notneed to wait for the motor to come to a complete stop before restarting the AC motor drive. If aPG card and encoder is used on the drive and motor, then the speed search will start from thespeed that is detected by the encoder and accelerate quickly to the commanded frequency.The output current is set by the Pr.07-09.Revision August 2008, 03<strong>VE</strong>, SW V2.04 4-111
Chapter 4 Parameters| In PG control mode, the AC motor drive will execute the speed search function automaticallyby the PG speed when this setting isn’t set to 0.07-13 Decel. Time Selection for Momentary Power Loss (DEB function)ControlmodeVF VFPG SVC FOCPG TQRPG Factory Setting: 0Settings 0 Disable1 1st decel. time2 2nd decel. time3 3rd decel. time4 4th decel. time5 Current decel. time6 Auto decel. timeThis parameter is used for the decel. time selection for momentary power loss.07-14 DEB Return Time Unit: 0.1ControlVF VFPG SVC FOCPG Factory Setting: 0.0modeSettings 0.0 to 25.0 secThe DEB (Deceleration Energy Backup) function is the AC motor drive decelerates to stopafter momentary power loss. When the momentary power loss occurs, this function can beused for the motor to decelerate to 0 speed with deceleration stop method. When the power ison again, motor will run again after DEB return time.Status 1: Insufficient power supply due to momentary power-loss/unstable power (due to lowvoltage)/sudden heavy-load4-112 Revision August 2008, 03<strong>VE</strong>, SW V2.04
DC BUS voltageThe level for DEB return time(Lv=+30V+58V)The level for soft start relay to be ON(Lv+30)Lv levelChapter 4 Parameters|it doesn't needmulti-function terminalsSoft start relay atpower sideDEB function is activatedOutput frequencyPr.07-13 Decel. time selection formomentary power lossDEB return time07-14NOTEWhen Pr.07-14 is set to 0, the AC motor drive will be stopped and won't re-startat the power-on again.Status 2: unexpected power off, such as momentary power lossDC BUS voltageThe level for DEB return time(Lv=+30V+58V)The level for soft start relay to be ON(Lv+30)Lv levelSoft start relay atpower sideDEB function is activatedOutput frequencyPr.07-13 Decel. time selection formomentary power lossDEB return time07-14NOTEFor example, in textile machinery, you will hope that all the machines can be decelerated to stop toprevent broken stitching when power loss. In this case, the host controller will send a message to theAC motor drive to use DEB function with deceleration time via EF.Revision August 2008, 03<strong>VE</strong>, SW V2.04 4-113
Chapter 4 Parameters|07-15 Dwell Time at Accel. Unit: 0.01ControlmodeVF VFPG SVC FOCPG Factory Setting: 0.00Settings0.00 to 600.00 sec07-16 Dwell Frequency at Accel. Unit: 0.01ControlmodeVF VFPG SVC FOCPG Factory Setting: 0.00Settings0.00 to 600.00 Hz07-17 Dwell Time at Decel. Unit: 0.01ControlmodeVF VFPG SVC FOCPG Factory Setting: 0.00Settings0.00 to 600.00 sec07-18 Dwell Frequency at Decel. Unit: 0.01ControlmodeVF VFPG SVC FOCPG Factory Setting: 0.00Settings0.00 to 600.00 HzIn the heavy load situation, Dwell can make stable output frequency temporarily.Pr.07-15 to Pr.07-18 is for heavy load to prevent OV or OC occurs.Frequency07-16DwellFrequencyat Accel.07-15Dwell Timeat Accel.Dwell at accel./decel.07-17Dwell Timeat Decel.07-18DwellFrequencyat Decel.Time07-19 Fan ControlControlmodeVF VFPG SVC FOCPG TQRPG Factory Setting: 0Settings 0 Fan always ON1 1 minute after AC motor drive stops, fan will be OFF2 AC motor drive runs and fan ON, AC motor drive stops and fan OFF3 Fan ON to run when preliminary heat sink temperature attained4 Fan always OFFThis parameter is used for the fan control.4-114 Revision August 2008, 03<strong>VE</strong>, SW V2.04
Chapter 4 Parameters|07-20 Torque Command Unit: 0.1ControlmodeTQRPG Factory Setting: 0.0Settings -100.0 to 100.0%(Pr. 07-22 setting=100%)This parameter is torque command. When Pr.07-22 is 250% and Pr.07-20 is 100%, the actualtorque command = 250%X100% X motor rated torque.07-21 Torque Command SourceControlmodeTQRPG Factory Setting: 0Settings 0 Digital keypad1 RS485 serial communication (RJ-11)2 Analog signal (Pr.03-00)This parameter is torque command source and the torque command is in Pr.07-20.07-22 Maximum Torque Command Unit: 1ControlmodeTQRPG Factory Setting: 100Settings 0 to 500% This parameter is for the max. torque command (motor rated torque is 100%).07-23 Filter Time of Torque Command Unit: 0.001ControlTQRPG Factory Setting: 0.000modeSettings 0.000 to 1.000 secWhen the setting is too long, the control will be stable but the control response will be delay.When the setting is too short, the response will be quickly but the control maybe unstable.User can adjust the setting by the control and response situation.07-24 Speed Limit SelectionControlmodeTQRPG Factory Setting: 0Settings 0 By Pr.07-25 and Pr.07-261 Frequency command source (Pr.00-20)Revision August 2008, 03<strong>VE</strong>, SW V2.04 4-115
Chapter 4 Parameters|torque torque torquefrequency frequency frequency07-26 07-25Pr.07-24=0Running/opposite runningdirection arelimited by Pr.07-25and Pr.07-26.07-26 00-20 00-20 07-2507-24=1 07-24=1When it is forward running,running direction is limitedby Pr.00-20opposite running directionis limited by Pr.07-26.When it is reverse running,running direction is limitedby Pr.07-25opposite running directionis limited by Pr.00-20.07-25 Torque Mode +Speed Limit Unit: 107-26 Torque Mode-Speed Limit Unit: 1ControlmodeTQRPG Factory Setting: 10Settings 0 to 120%These parameters are used in the torque mode to limit the running direction and oppositedirection. (Pr.01-00 max. output frequency=100%)07-27 Source of Torque OffsetControlmodeSVC FOCPG TQRPG Factory Setting: 0Settings 0 Disable1 Analog input (Pr.03-00)2 Torque offset setting3 Control by external terminal (by Pr.07-29 to Pr.07-31)This parameter is the source of torque offset.When it is set to 3, the source of torque offset will decide to Pr.07-29, Pr.07-30 and Pr.07-31by the multi-function input terminals setting (31, 32 or 33).02-01~02-06 is set to 31 02-01~02-06 is set to 32 02-01~02-06 is set to 33 Torque offsetOFF OFF OFF NoneOFF OFF ON 07-33OFF ON OFF 07-32OFF ON ON 07-33+07-32ON OFF OFF 07-31ON OFF ON 07-31+07-33ON ON OFF 07-31+07-32ON ON ON 07-31+07-32+07-334-116 Revision August 2008, 03<strong>VE</strong>, SW V2.04
Chapter 4 Parameters|07-28 Torque Offset Setting Unit: 0.1ControlmodeSVC FOCPG TQRPG Factory Setting: 0.0Settings 0.0 to 100.0% This parameter is torque offset. The motor rated torque is 100%.07-29 High Torque Offset Unit: 0.1ControlmodeSVC FOCPG TQRPG Factory Setting: 30.0Settings 0.0 to 100.0%07-30 Middle Torque Offset Unit: 0.1ControlmodeSVC FOCPG TQRPG Factory Setting: 20.0Settings 0.0 to 100.0%07-31 Low Torque Offset Unit: 0.1ControlmodeSVC FOCPG TQRPG Factory Setting: 10.0Settings 0.0 to 100.0%When it is set to 3, the source of torque offset will decide to Pr.07-29, Pr.07-30 and Pr.07-31by the multi-function input terminals setting (31, 32 or 33). The motor rated torque is 100%.07-32 Forward Motor Torque Limit Unit: 107-33 Forward Regenerative Torque Limit Unit: 107-34 Reverse Motor Torque Limit Unit: 107-35 Reverse Regenerative Torque Limit Unit: 1ControlmodeFOCPG TQRPG Factory Setting: 200Settings 0 to 500%The motor rated torque is 100%. The settings for Pr.07-32 to Pr.07-35 will compare with Pr.03-00=7, 8, 9, 10. The minimum of the comparison result will be torque limit as shown in thefollowing figure.According to the formula of motor rated torque:P(ω), where P(ω) is Pr.05-T ( N.M ) =W ( rad / s)RPM60× 2π02 and W(rad/s) is Pr.05-03.= rad / sRevision August 2008, 03<strong>VE</strong>, SW V2.04 4-117
Chapter 4 Parameters|PositivetorqueReverse motor modeForward motor mode06-12 current limit 06-12 current limitExternal analog terminalsPr.03-00~027: positive torque limit10: positive/negative torque limit9: regenerative torque limitExternal analog terminalsPr.03-00~027: positive torque limit10: positive/negative torque limitThe level of torque limit will bethe min. value of following three values1. torque limit of Pr.07-32 to Pr.07-352. Torque limit of external analog terminals(AVI, ACI and AUI)3. Pr.06-12 current limitspeedPr.07-35Reverse regenerativetorque limitQuadrant IIPr.07-34Reverse motortorque limitQuadrant IQuadrant III Quadrant IVPr.07-32Forward motortorque limitPr.07-33Forward regenerativetorque limitspeedExternal analog terminalsPr.03-00~03-028: negative torque limit10: positive/negative torque limitExternal analog terminalsPr.03-00~03-028: negative torque limit10: positive/negative torque limit06-12 current limit 06-12 current limitReverse motor modeNegativeForward motor modetorque07-36 Emergency Stop (EF) & Forced Stop SelectionControlmodeVF VFPG SVC FOCPG TQRPG Factory Setting: 0Settings 0 Coast stop1 By deceleration Time 12 By deceleration Time 23 By deceleration Time 34 By deceleration Time 45 System Deceleration6 Automatic DecelerationWhen the multi-function input terminal is set to 10 or 18 and it is ON, the AC motor drive will beoperated by Pr.07-36.4-118 Revision August 2008, 03<strong>VE</strong>, SW V2.04
Group 8 High-function PID ParametersChapter 4 Parameters|08-00 Input Terminal for PID FeedbackControlmodeVF VFPG SVC FOCPG Factory Setting: 0Settings 0 No function1 Negative PID feedback from external terminal AVI (Pr.03-00)2 Negative PID feedback from PG card (Pr.10-15, skip direction)3 Negative PID feedback from PG card (Pr.10-15)4 Positive PID feedback from external terminal AVI (Pr.03-00)5 Positive PID feedback from PG card (Pr.10-15, skip direction)6 Positive PID feedback from PG card (Pr.10-15)Negative feedback means: +target value – feedback. It is used for the detection value will beincreased by increasing the output frequency.Positive feedback means: -target value + feedback. It is used for the detection value will bedecreased by increasing the output frequency.08-01 Proportional Gain (P) Unit: 0.1ControlVF VFPG SVC FOCPG Factory Setting: 80.0modeSettings 0.0 to 500.0%This parameter determinates the gain of the feedback loop. If the gain is large, the responsewill be strong and immediate (if the gain is too large, vibration may occur). If the gain is small,the response will weak and slow.08-02 Integral Gain (I) Unit: 0.01ControlVF VFPG SVC FOCPG Factory Setting: 1.00modeSettings 0.00 to 100.00 secThis parameter determines the speed of response for the PID feedback loop. If the integraltime is long, the response will be slow. If the integral time is short, the response will be quick.Be careful not to set(I) too small, since a rapid response may cause oscillation in the PID loop.If the integral time is set as 0.00, Pr.08-02 will be disabled.Revision August 2008, 03<strong>VE</strong>, SW V2.04 4-119
Chapter 4 Parameters|08-03 Derivative Control (D) Unit: 0.01ControlmodeVF VFPG SVC FOCPG Factory Setting: 0.00Settings0.00 to 1.00 secThis parameter determines the damping effect for the PID feedback loop. If the differential timeis long, any oscillation will quickly subside. If the differential time is short, the oscillation willsubside slowly.08-04 Upper limit for Integral Control Unit: 0.1ControlmodeVF VFPG SVC FOCPG Factory Setting: 100.0Settings 0.0 to 100.0%This parameter defines an upper bound or limit for the integral gain (I) and therefore limits theMaster Frequency.The formula is: Integral upper bound = Maximum Output Frequency (Pr.01-00) x (Pr.08-04).08-05 PID Output Frequency Limit Unit: 0.1ControlVF VFPG SVC FOCPG Factory Setting: 100.0modeSettings 0.0 to 110.0%This parameter defines the percentage of output frequency limit during the PID control. Theformula is Output Frequency Limit = Maximum Output Frequency (Pr.01-00) X Pr.08-05 %.This parameter will limit the Maximum Output Frequency.08-06 PID Offset Unit: 0.1ControlVF VFPG SVC FOCPG Factory Setting: 0.0modeSettings -100.0 to 100.0%08-07 PID Delay Time Unit: 0.1ControlVF VFPG SVC FOCPG Factory Setting: 0.0modeSettings 0.0 to 2.5 sec4-120 Revision August 2008, 03<strong>VE</strong>, SW V2.04
Inp ut Selection of thePID Targe ted Value00-20:KPV-CE0 1/RS48503-00~0 2:UP/D ownke y PGDisplay of th e PID fee dback00-14=1 0 display o f t hePID feed backInp ut Selectionof the PID Fee dback08-00:AVI/ACIAUI /PGPID Cancelled08-00=0or 02-01~06=21(pid off)12+P DProportion Differential+ga in Time- 08-01 08-03 +I08-02 08-04Int egral Time uppe r limitforInt egralChapter 4 Parameters|PID offset08-06PIDDelayTime08-07+Output08-05PID Freq.out putcommandlimitTreatme nt o f t heFeedback Signal Fau ltIf Hz>08 -05time over0 8-08=>08-09PI Control: controlled by the P action only, and thus, the deviation cannot be eliminatedentirely. To eliminate residual deviations, the P + I control will generally be utilized. And whenthe PI control is utilized, it could eliminate the deviation incurred by the targeted value changesand the constant external interferences. However, if the I action is excessively powerful, it willdelay the responding toward the swift variation. The P action could be used solely on theloading system that possesses the integral components.PD Control: when deviation occurred, the system will immediately generate some operationload that is greater than the load generated single handedly by the D action to restrain theincrement of the deviation. If the deviation is small, the effectiveness of the P action will bedecreasing as well. The control objects include occasions with integral component loads,which are controlled by the P action only, and sometimes, if the integral component isfunctioning, the whole system will be vibrating. On such occasions, in order to make the Paction’s vibration subsiding and the system stabilizing, the PD control could be utilized. Inother words, this control is good for use with loadings with no brake functions over theprocesses.PID Control: Utilize the I action to eliminate the deviation and the D action to restrain thevibration, thereafter, combine with the P action to construct the PID control. Use of the PIDmethod could obtain a control process with no deviations, high accuracies and a stable system.08-08 Feedback Signal Detection Time Unit: 0.1Revision August 2008, 03<strong>VE</strong>, SW V2.04 4-121
Chapter 4 Parameters|ControlmodeVF VFPG SVC FOCPG Factory Setting: 0.0Settings0.0 to 3600.0 secThis parameter defines the time during which the PID feedback must be abnormal before awarning is given. It also can be modified according to the system feedback signal time.If this parameter is set to 0.0, the system would not detect any abnormality signal.08-09 Feedback Fault TreatmentControlmodeVF VFPG SVC FOCPG Factory Setting: 0Settings 0 Warn and keep operating1 Warn and RAMP to stop2 Warn and COAST to stop3 Warn and keep at last frequencyAC motor drive acts when the feedback signals (analog PID feedback or PG (encoder)feedback) are abnormal.08-10 Sleep Frequency Unit: 0.01ControlVF VFPG SVC FOCPG Factory Setting: 0.00modeSettings 0.00 to 600.00Hz08-11 Wake-up Frequency Unit: 0.01ControlVF VFPG SVC FOCPG Factory Setting: 0.00modeSettings 0.00 to 600.00Hz08-12 Sleep Time Unit: 0.1ControlVF VFPG SVC FOCPG Factory Setting: 0.0modeSettings 0.0 to 6000.0secThese parameters determine sleep functions of the AC drive. If the command frequency fallsbelow the sleep frequency, for the specified time in Pr. 08-12, then the drive will shut off theoutput and wait until the command frequency rises above Pr. 08-11. Please see the belowdiagram.4-122 Revision August 2008, 03<strong>VE</strong>, SW V2.04
Chapter 4 Parameters|08-11Wake-up frequencyFrequency commandactual output frequency08-10Sleep frequencysleep time08-12Sleep Function0Hz08-13 PID Deviation Level Unit: 0.1ControlmodeVF VFPG SVC FOCPG Factory Setting: 10.0Settings 1.0 to 50.0%08-14 PID Deviation Time Unit: 0.1ControlmodeVF VFPG SVC FOCPG Factory Setting: 5.0Settings0.1 to 300.0 sec08-15 Filter Time for PID Feedback Unit: 0.1ControlmodeVF VFPG SVC FOCPG Factory Setting: 5.0Settings0.1 to 300.0 sec08-16 Reserved08-17 Reserved08-18 Reserved08-19 Reserved08-20 Reserved08-21 Tension Control SelectionSettings 0 to 4 Factory Setting: 0SettingsControl ModeVF VFPG SVC FOCPG TQRPG0: Disable1: Closed-loop, speed mode ○ ○ ○ ○2: Line speed, speed mode ○ ○ ○ ○3: Reserved4: Open-loop, torque mode ○Closed-loop, speed modeRevision August 2008, 03<strong>VE</strong>, SW V2.04 4-123
Chapter 4 Parameters|08-25&08-26+ -08-27PI08-29 & 08-3008-32 & 08-33LimitPID output frequency08-35=0 *1+08-35=1 *-1 +outputfrequency08-23 & 08-24mechanical gear ratioreel diameterline speedmaster frequencyMotorMotoroperationcommandfrequencysettingAFM or DFMFWD orREVAIMO=d1tension feedbackline speed inputoperation commandAIAI or PG2FWDDrive 2Drive 1Line speed, speed mode08-23 or 08-24mechanical gear ratio A/B08-42 reel diameter08-25=2,08-2608-27=1line speedcommandline speedfeedbackmasterfrequency++frequency command08-36PI08-29~08-3008-32~08-33+-08-25=2, 08-26line speedcommand08-27=1line speed feedback4-124 Revision August 2008, 03<strong>VE</strong>, SW V2.04
Chapter 4 Parameters|EncoderMotorOpen-loop, torque modeline speedfeedbackline speedcommandPG2AI orcommunicationdriveMotortensioncommandAI PG1operationcommandFWDtorque commanddirection MI=d39line speedinputAI or PG2(not indispensable)drivetorquecompensation08-83~08-86tensionsettingtensiontaper08-76/08-79 torque08-81value + +calculationtorquetorquecommandreel diameter08-4208-42reel diameterRevision August 2008, 03<strong>VE</strong>, SW V2.04 4-125
Chapter 4 Parameters|08-22 Wind ModeControlmodeVF VFPG SVC FOCPG TQRPG Factory Setting: 0Settings 0 Rewind1 Unwind08-23 Mechanical Gear Ratio A Unit: 108-24 Mechanical Gear Ratio B Unit: 1ControlmodeVF VFPG SVC FOCPG TQRPG Factory Setting: 100Settings 1 to 65535Application without EncoderDrivermechanicalgear ratio ALoad1:10Gear ratio10:1Motormechanicalgear ratio B08-25 Source of the Tension Command/Line SpeedControlmodeVF VFPG SVC FOCPG TQRPG Factory Setting: 0Settings 0 Parameter setting (Pr.08-26)1 RS-485 communication setting (Pr.08-26)2 Analog input (Pr. 03-00~03-02 is set to 14 PID target value oftension, 03-00~03-02 is set to 12 line speed)08-26 PID Target Value of Tension/Line Speed Unit: 0.1ControlVF VFPG SVC FOCPG TQRPG Factory Setting: 50.0modeSettings 0.0 to 100.0%The setting range is from 0.0 to 100.0%. In tension mode, when Pr.08-21 is set to 1 (Closedloop,speed mode), the corresponding value for 100% of dancer is 10V.In tension mode, when Pr.08-21 is set to 2 (Line speed, speed mode), the corresponding valuefor 100% of line speed is max. line speed (Pr.08-38).08-27 Source of Tension/Line Speed PID Feedback4-126 Revision August 2008, 03<strong>VE</strong>, SW V2.04
ControlmodeChapter 4 Parameters|VF VFPG SVC FOCPG TQRPG Factory Setting: 0Settings 0 Analog input (Pr. 03-00~03-02 is set to 11 PID feedback of tension)1 Pulse input (Pr.08-40)08-28 Auto-tuning Tension PIDControlmodeVF VFPG SVC FOCPG TQRPG Factory Setting: 0Settings 0 Disable When Pr.08-28 is set to 1:P.I.D1 Reel diameter (08-29~08-31corresponds to 08-44, 08-32~08-34corresponds to 08-43)2 Frequency (08-29~08-31 corresponds to 01-07, 08-32~08-34corresponds to 01-00)08-2908-3008-3208-330 DminDmax08-44 08-43 When Pr.08-28 is set to 2:P.I.D08-2908-30reeldiameter08-3208-330FminFmax01-07 01-00outputfrequency08-29 Tension PID P1 Unit: 0.1Revision August 2008, 03<strong>VE</strong>, SW V2.04 4-127
Chapter 4 Parameters|ControlmodeVF VFPG SVC FOCPG TQRPG Factory Setting: 50.0Settings 0.0 to 1000.008-30 Tension PID I1 Unit: 0.01ControlmodeVF VFPG SVC FOCPG TQRPG Factory Setting: 1.00Settings0.00 to 500.00 sec08-31 Reserved08-32 Tension PID P2 Unit: 0.1ControlmodeVF VFPG SVC FOCPG TQRPG Factory Setting: 50.0Settings 0.0 to 1000.008-33 Tension PID I2 Unit: 0.01ControlmodeVF VFPG SVC FOCPG TQRPG Factory Setting: 1.00Settings0.00 to 500.00 sec08-34 Reserved08-35 PID Output StatusControlmodeVF VFPG SVC FOCPG TQRPG Factory Setting: 0Settings 0 Positive output1 Negative output08-36 Tension/Line Speed PID Output Limit Unit: 0.01ControlmodeVF VFPG SVC FOCPG TQRPG Factory Setting: 20.00Settings0 to 100.00% (according to Pr.01-00)08-37 Source of Line Speed Input CommandControlmodeVF VFPG SVC FOCPG TQRPG Factory Setting: 0Settings 0 Disable1 Analog input (Pr. 03-00~03-02 is set to 12 line speed)2 RS-485 communication setting (Pr.08-41)4-128 Revision August 2008, 03<strong>VE</strong>, SW V2.04
3 Pulse input (Pr.08-40)4 DFM-DCM pulse input (Pr.02-18)Chapter 4 Parameters|When it is set to 1, 3 or 4, the current line speed will be saved into Pr.08-41 via analog andpulse command. When it is set to 2, it can change the setting of Pr.08-41 (current line speed)via communication.When it is set to 3 or 4, pulse signal needs to be connected to PG2 of the PG card and thenset the PG type by Pr.10-15.When it is set to 3, it needs to use with Pr.08-40.When it is set to 4, Pr.02-18 setting needs to be set to the DFM output value of previous driveras shown in the following before setting Pr.08-38.tractorWindthe setting of Pr,02-18 of motor 2= the setting of Pr.02-18 of motor 1motormotorPr.10-15 of motor 2should be set to 3 or 4Driver 1 Driver 2TPDFMDFM(02-18)DCMA2/A2B2/B2DCMPG 2TPAB208-38 Max. Line Speed Unit: 0.1ControlmodeVF VFPG SVC FOCPG TQRPG Factory Setting: 1000.0Settings0.0 to 3000.0 m/min08-39 Min. Line Speed Unit: 0.1Revision August 2008, 03<strong>VE</strong>, SW V2.04 4-129
Chapter 4 Parameters|ControlmodeVF VFPG SVC FOCPG TQRPG Factory Setting: 0.0Settings0.0 to 3000.0 m/min08-40 Pulse Number for Each Meter Unit: 0.1ControlmodeVF VFPG SVC FOCPG TQRPG Factory Setting: 0.0Settings 0.0 to 6000.008-41 Current Line Speed Unit: 0.1ControlmodeVF VFPG SVC FOCPG TQRPG Factory Setting: 0.0Settings0.0 to 3000.0 m/minWhen Pr.08-37 is set to 1, 3, or 4, the current line speed will be saved into Pr.08-41 via analogand pulse command. At this time, Pr.08-41 will be read only.When Pr.08-37 is set to 2, the setting of Pr.08-41(current line speed) can be changed bycommunication.08-42 Source of Reel DiameterControlmodeVF VFPG SVC FOCPG TQRPG Factory Setting: 0Settings 0 Calculated by line speed1 Calculated by integrating thickness (encoder is on reel shaft)(Pr.08-49~51, Pr.10-15)2 Calculated by integrating thickness (encoder is on motor)(Pr.08-23~08-24, 08-50~08-51, 10-00~10-01)3 Calculated by analog input (Pr.03-00~03-02 is set to 13)When it is set to 1 or 2, it needs to be used with PG card.When it is set to 1, the reel diameter can be got from the encoder on the reel shaft. At this time,the pulse signal needs to be connected to the PG2 of PG card and get the reel diameter fromthe settings of Pr.10-15, Pr.08-49, Pr.08-50 and Pr.08-51.When it is set to 2, the reel diameter can be calculated from the motor encoder and gear ratio.At this time, the pulse signal should be connected to the PG1 of the PG card and get the reeldiameter from the settings of Pr.08-23, Pr.08-24, Pr.10-01, Pr.10-00, Pr.08-50 and Pr.08-51.When it is set to 3, the reel diameter can be calculated by analog input (Pr.03-00~03-02 is setto 13) and the corresponding value of 10V is Pr.08-43.4-130 Revision August 2008, 03<strong>VE</strong>, SW V2.04
the path whenPr.08-42 is set to 1proximityswitch/encoderDriverChapter 4 Parameters|the path whenPr.08-42 is set to 2gear ratioMotorEncoder08-43 Max. Reel Diameter Unit: 0.1ControlmodeVF VFPG SVC FOCPG TQRPG Factory Setting: 6000.0Settings1.0 to 6000.0mm08-44 Empty Reel Diameter Unit: 0.1ControlmodeVF VFPG SVC FOCPG TQRPG Factory Setting: 1.0Settings1 to 6000.0mm08-45 Source of Reel DiameterControlmodeVF VFPG SVC FOCPG TQRPG Factory Setting: 0Settings 0 RS-485 communication setting (Pr.08-46)1 Analog input (Pr.03-00-Pr.03-02 is set to 13)When it is set to 1, the corresponding value of 10V is Pr.08-43.08-46 Initial Reel Diameter Unit: 0.1ControlmodeVF VFPG SVC FOCPG TQRPG Factory Setting: 1.0Settings1.0 to 6000.0mmWhen Pr.08-45 is set to 1, Pr.08-46 will be read-only.08-47 Initial Reel Diameter 1 Unit: 0.108-48 Initial Reel Diameter 2 Unit: 0.1ControlmodeVF VFPG SVC FOCPG TQRPG Factory Setting: 1.0Settings1.0 to 6000.0mmPr.08-46 needs to be used by setting 44~46 to Pr.02-01~02-06, Pr.02-23~Pr.02-30. When you need to have many types of reel diameter, please set Pr.08-46 to 0.08-49 Number of Pulse Per Revolution Unit: 1Revision August 2008, 03<strong>VE</strong>, SW V2.04 4-131
Chapter 4 Parameters|ControlmodeVF VFPG SVC FOCPG TQRPG Factory Setting: 1Settings1 to 10000ppr08-50 Coil Number for Each Layer Unit: 1ControlmodeVF VFPG SVC FOCPG TQRPG Factory Setting: 1Settings 1 to 1000008-51 Material Thickness Unit: 0.001ControlmodeVF VFPG SVC FOCPG TQRPG Factory Setting: 1.000Settings0.001 to 60.000mm08-52 Filter Time of Reel Diameter Unit: 0.01ControlmodeVF VFPG SVC FOCPG TQRPG Factory Setting: 1.00Settings0.00 to 100.00 secThis parameter can be used to improve unstable of the source of reel diameter(Pr.08-42).08-53 Auto Compensation of Reel DiameterControlmodeVF VFPG SVC FOCPG TQRPG Factory Setting: 0Settings 0 Disable1 Enable08-54 Current Reel Diameter Unit: 0.1ControlmodeVF VFPG SVC FOCPG TQRPG Factory Setting: 1.0Settings1.0 to 6000.0 mmWhen the AC motor drive is not at STOP, this parameter is read-only.08-55 Smart StartControlmodeVF VFPG SVC FOCPG TQRPG Factory Setting: 0Settings 0 Disable1 Enable2 In unwind mode, rewind in reverse direction08-56 Switch Level for Smart Start and PID Function Unit: 1ControlVF VFPG SVC FOCPG TQRPG Factory Setting: 15.0mode4-132 Revision August 2008, 03<strong>VE</strong>, SW V2.04
Settings0.0~100.0% (according to Pr.08-26)Chapter 4 Parameters|08-57 Frequency for Smart Start Unit: 1ControlmodeVF VFPG SVC FOCPG TQRPG Factory Setting: 2.00Settings0.00~600.00Hz08-58 Accel. Time for Smart Start Unit: 0.01ControlmodeVF VFPG SVC FOCPG Factory Setting: 3.00Settings0.01~600.00 secWhen the speeds of wider/unwinder and tractor can’t match at start-up, the situation can beimproved by setting Pr.08-57 and Pr.08-58.08-59 Broken Belt DetectionControlmodeVF VFPG SVC FOCPG Factory Setting: 0Settings 0 Disable1 Enable08-60 Min. Line Speed of Broken Belt Detection Unit: 0.1ControlmodeVF VFPG SVC FOCPG Factory Setting: 0.0Settings0.0~3000.0 m/min08-61 Allowance Error of Line Speed of Broken Belt Detection Unit: 0.1ControlmodeVF VFPG SVC FOCPG Factory Setting: 100.0Settings1.0~6000.0 mm08-62 Detection Time of Broken Belt Unit: 0.1ControlmodeVF VFPG SVC FOCPG Factory Setting: 1.00Settings0.00~100.00 secWhen the broken belt detection is enabled, line speed is higher then Pr.08-61, allowance errorof line speed of broken belt detection exceeds Pr.08-61 and detection time of broken beltexceeds Pr.08-62, the broken belt occurs.08-63 Allowance Error Level of Tension/Line Speed PID Feedback Unit: 1Revision August 2008, 03<strong>VE</strong>, SW V2.04 4-133
Chapter 4 Parameters|ControlmodeVF VFPG SVC FOCPG Factory Setting: 100Settings 0~100% The corresponding value for the 100% of dancer is 10V.08-64 Allowance Error Detection Time of Tension PID Feedback Unit: 0.1ControlmodeVF VFPG SVC FOCPG Factory Setting: 0.5Settings0.0~10.0 sec08-65 Error Treatment of Tension PID FeedbackControlmodeVF VFPG SVC FOCPG Factory Setting: 0Settings 0 Warn and keep operation1 Warn and coast to stop2 Warn and ramp to stopWhen the error of tension PID target value and tension PID feedback exceeds Pr.08-63 andthe allowance error detection time of tension PID exceeds Pr.08-64, tension PID feedbackerror occurs. Refer to Pr.08-65 for error treatment of tension PID feedback.08-66 Upper Limit of Tension PID Feedback Unit: 0.1ControlVF VFPG SVC FOCPG TQRPG Factory Setting: 100.0modeSettings 0.0~100.0%08-67 Lower Limit of Tension PID Feedback Unit: 0.1ControlVF VFPG SVC FOCPG TQRPG Factory Setting: 0.0modeSettings 0.0~100.0%08-68 Reserved08-69 DFM SelectionControlmodeVF VFPG SVC FOCPG TQRPG Factory Setting: 0Settings 0 Output frequency1 Frequency command08-70 Low-pass Filter Time of Line Speed Unit: 0.01ControlVF VFPG SVC FOCPG TQRPG Factory Setting: 0.00mode4-134 Revision August 2008, 03<strong>VE</strong>, SW V2.04
Settings0.00~100.00 secChapter 4 Parameters|08-71|08-75Reserved08-76 Source of Tension SettingControlmodeTQRPG Factory Setting: 0Settings 0 Communication RS-485 (Pr.08-78)1 Analog input (Pr. 03-00~03-02 is set to 15 tension setting) (Pr.08-78)08-77 Max. Tension Unit: 1ControlmodeTQRPG Factory Setting: 0Settings0 ~30000 N08-78 Tension Setting Unit: 1ControlmodeTQRPG Factory Setting: 0Settings0 ~30000 N08-79 Source of Zero-speed Tension SettingControlmodeTQRPG Factory Setting: 0Settings 0 Disable1 Communication RS-485 (Pr.08-80)2 Analog input (Pr. 03-00~03-02 is set to 16 zero-speed tension)(Pr.08-80)08-80 Setting of Zero-speed Tension Unit: 1ControlmodeTQRPG Factory Setting: 0Settings 0 ~30000 N08-81 Source of Tension TaperControlmodeTQRPG Factory Setting: 0Settings 0 Communication RS-485 (Pr.08-82)1 Analog input (Pr. 03-00~03-02 is set to 17 tension taper) (Pr.08-82)08-82 Tension Taper Unit: 1Revision August 2008, 03<strong>VE</strong>, SW V2.04 4-135
Chapter 4 Parameters|ControlmodeTQRPG Factory Setting: 0Settings 0~100%08-83 Friction Compensation Unit: 1ControlmodeTQRPG Factory Setting: 0.0Settings 0.0~100.0%08-84 Compensation Coefficient of Material Inertial Unit: 1ControlmodeTQRPG Factory Setting: 0Settings 0~3000008-85 Torque Feed Forward Gain Unit: 0.1ControlmodeTQRPG Factory Setting: 50.0Settings 0.0~100.0%08-86 Low Pass Filter Time of Torque Feed Forward Unit: 0.01ControlmodeTQRPG Factory Setting: 5.00Settings 0.00~100.0008-87|08-99Reserved4-136 Revision August 2008, 03<strong>VE</strong>, SW V2.04
Chapter 4 Parameters|Group 9: Communication ParametersThere is a built-in RS-485 serial interface, marked RJ-11 near to the control terminals. The pins aredefined below:1: EV2: GND3: SG-4: SG+5: Reserved6 1 6: ReservedEach <strong>VFD</strong>-<strong>VE</strong> AC drive has a pre-assigned communication address specified by Pr.09-00. TheRS485 master then controls each AC motor drive according to its communication address.09-00 Communication AddressControlmodeVF VFPG SVC FOCPG TQRPG Factory Setting: 1Settings 1 to 254If the AC motor drive is controlled by RS-485 serial communication, the communicationaddress for this drive must be set via this parameter. And the communication address for eachAC motor drive must be different and unique.09-01 COM1 Transmission SpeedControlmodeVF VFPG SVC FOCPG TQRPG Factory Setting: 9.6Settings4.8 to 115.2kbpsThis parameter is used to set the transmission speed between the RS485 master (PLC, PC,etc.) and AC motor drive.09-02 COM1 Transmission Fault TreatmentControlmodeVF VFPG SVC FOCPG TQRPG Factory Setting: 3Settings 0 Warn and keep operating1 Warn and RAMP to stop2 Warn and COAST to stop3 No warning and keep operatingThis parameter is set to how to react if transmission errors occur.Revision August 2008, 03<strong>VE</strong>, SW V2.04 4-137
Chapter 4 Parameters|09-03 COM1 Time-out Detection Unit: 0.1ControlmodeVF VFPG SVC FOCPG TQRPG Factory Setting: 0.0Settings0.0 ~ 100.0 sec (0.0 disable)If Pr.09-03 is not set to 0.0, Pr.09-02=0~2, and there is no communication on the bus duringthe Time Out detection period (set by Pr.09-03), “cE10” will be shown on the keypad.09-04 COM1 Communication ProtocolControlmodeVF VFPG SVC FOCPG TQRPG Factory Setting: 1Settings 0 Modbus ASCII mode, protocol 1 Modbus ASCII mode, protocol 2 Modbus ASCII mode, protocol 3 Modbus ASCII mode, protocol 4 Modbus ASCII mode, protocol 5 Modbus ASCII mode, protocol 6 Modbus ASCII mode, protocol 7 Modbus ASCII mode, protocol 8 Modbus ASCII mode, protocol 9 Modbus ASCII mode, protocol 10 Modbus ASCII mode, protocol 11 Modbus ASCII mode, protocol 12 Modbus RTU mode, protocol 13 Modbus RTU mode, protocol 14 Modbus RTU mode, protocol 15 Modbus RTU mode, protocol 16 Modbus RTU mode, protocol 17 Modbus RTU mode, protocol 1. Control by PC or PLCA <strong>VFD</strong>-<strong>VE</strong> can be set up to communicate on Modbus networks using one of the following modes:ASCII (American Standard Code for Information Interchange) or RTU (Remote Terminal Unit).Users can select the desired mode along with the serial port communication protocol in Pr.09-04.Code Description:ASCII mode:Each 8-bit data is the combination of two ASCII characters. For example, a 1-byte data:64 Hex, shown as ‘64’ in ASCII, consists of ‘6’ (36Hex) and ‘4’ (34Hex).Character ‘0’ ‘1’ ‘2’ ‘3’ ‘4’ ‘5’ ‘6’ ‘7’ASCII code 30H 31H 32H 33H 34H 35H 36H 37H4-138 Revision August 2008, 03<strong>VE</strong>, SW V2.04
Chapter 4 Parameters|Character ‘8’ ‘9’ ‘A’ ‘B’ ‘C’ ‘D’ ‘E’ ‘F’ASCII code 38H 39H 41H 42H 43H 44H 45H 46HRTU mode:Each 8-bit data is the combination of two 4-bit hexadecimal characters. For example, 64Hex. 2. Data Format10-bit character frame (For ASCII):( 7.N.2)Start0 1 2 3 4 5 6Stop Stopbitbit bit7-bit character10-bit character frame( 7.E.1)Start0 1 2 3 4 5 6Even Stopbitparity bit7-bit character10-bit character frame( 7.O.1)Start0 1 2 3 4 5 6Odd Stopbitparity bit7-bit character10-bit character frame11-bit character frame (For RTU):( 8.N.2 )StartStop Stop0 1 2 3 4 5 6 7bitbit bit8-bit character11-bit character frame( 8.E.1 )StartEven Stop0 1 2 3 4 5 6 7bitparity bit8-bit character11-bit character frame( 8.O.1 )Startbit3. Communication Protocol3.1 Communication Data Frame:ASCII mode:STXAddress HiAddress LoFunction HiFunction Lo0 1 2 3 4 5 68-bit character11-bit character frame7OddparityStopbitStart character ‘:’ (3AH)Communication address:8-bit address consists of 2 ASCII codesCommand code:8-bit command consists of 2 ASCII codesRevision August 2008, 03<strong>VE</strong>, SW V2.04 4-139
Chapter 4 Parameters|DATA (n-1)toDATA 0LRC CHK HiLRC CHK LoEND HiEND LoRTU mode:STARTAddressFunctionDATA (n-1)toDATA 0CRC CHK LowCRC CHK HighENDContents of data:Nx8-bit data consist of 2n ASCII codesn
Chapter 4 Parameters|Command message:Response message:‘0’ ‘1’Content of starting‘2’ ‘7’address‘0’ ‘7’2102HNumber of data ‘0’‘0’(count by word) ‘0’ ‘0’‘2’ Content of address ‘0’LRC Check‘D’ 2103H‘0’‘7’‘0’ENDCR ‘7’LRC CheckLF‘1’ENDCRLFRTU mode:Command message:Response message:Address 01H Address 01HFunction 03H Function 03HStarting data 21HNumber of dataaddress 02H(count by byte)04HNumber of data 00HContent of address 17H(count by word) 02H2102H 70HCRC CHK Low 6FH Content of address 00HCRC CHK High F7H2103H 00HCRC CHK Low FEH(2) 06H: single write, write single data to register.CRC CHK High 5CHExample: writing data 6000(1770H) to register 0100H. AMD address is 01H.ASCII mode:Command message:Response message:STX ‘:’ STX ‘:’Address‘0’ ‘0’Address‘1’‘1’Function‘0’ ‘0’Function‘6’‘6’‘0’ ‘0’Data address‘1’ ‘1’Data address‘0’ ‘0’‘0’‘0’‘1’ ‘1’Data content‘7’ ‘7’Data content‘7’ ‘7’‘0’‘0’LRC Check‘7’ ‘7’LRC Check‘1’‘1’ENDCRCRENDLFLFRTU mode:Command message:Response message:Address 01H Address 01HFunction 06H Function 06HData address 01H Data address 01HRevision August 2008, 03<strong>VE</strong>, SW V2.04 4-141
Chapter 4 Parameters|00H00HData content17H17HData content70H70HCRC CHK Low 86H CRC CHK Low 86HCRC CHK High 22H CRC CHK High 22H(3) 10H: write multiple registers (write multiple data to registers)Example: Set the multi-step speed,Pr.05-00=50.00 (1388H), Pr.05-01=40.00 (0FA0H). AC drive address is 01H.ASCII Mode:RTU mode:Command message:Response message:STX ‘:’ STX ‘:’Address 1 ‘0’ Address 1 ‘0’Address 0 ‘1’ Address 0 ‘1’Function 1 ‘1’ Function 1 ‘1’Function 0 ‘0’ Function 0 ‘0’‘0’ ‘0’Starting data ‘5’ Starting data ‘5’address ‘0’ address ‘0’‘0’‘0’‘0’ ‘0’Number of data ‘0’ Number of data ‘0’(count by word) ‘0’ (count by word) ‘0’‘2’‘2’Number of data ‘0’ ‘E’LRC Check(count by byte) ‘4’‘8’‘1’ CRENDThe first data ‘3’LFcontent ‘8’‘8’‘0’The second datacontent‘F’‘A’‘0’LRC Check‘9’‘A’ENDCRLFCommand message:Response message:Address 01H Address 01HFunction 10H Function 10HStarting data 05HStarting data address 05Haddress 00H00HNumber of data 00H’ Number of data 00H(count by word) 02H(count by word) 02HNumber of data 04 CRC Check Low 41H(count by byte)The first data 13H CRC Check High 04Hcontent 88HThe second data 0FH4-142 Revision August 2008, 03<strong>VE</strong>, SW V2.04
contentA0HCRC Check Low ‘9’Chapter 4 Parameters|CRC Check High‘A’3.4 Check sumASCII mode:LRC (Longitudinal Redundancy Check) is calculated by summing up, module 256, the values of thebytes from ADR1 to last data character then calculating the hexadecimal representation of the 2’scomplementnegation of the sum.For example, reading 1 word from address 0401H of the AC drive with address 01H.STX ‘:’Address 1‘0’Address 0 ‘1’Function 1‘0’Function 0 ‘3’‘0’‘4’Starting data address‘0’‘1’‘0’‘0’Number of data‘0’‘1’LRC Check 1‘F’LRC Check 0 ‘6’END 1CREND 0LF01H+03H+04H+01H+00H+01H=0AH, the 2’s-complement negation of 0AH is F6H.RTU mode:Address01HFunction03HStarting data address 21H02HNumber of data 00H(count by word) 02HCRC CHK Low 6FHCRC CHK High F7HCRC (Cyclical Redundancy Check) is calculated by the following steps:Step 1: Load a 16-bit register (called CRC register) with FFFFH.Step 2: Exclusive OR the first 8-bit byte of the command message with the low order byte of the 16-bit CRC register, putting the result in the CRC register.Step 3: Examine the LSB of CRC register.Step 4: If the LSB of CRC register is 0, shift the CRC register one bit to the right with MSB zerofilling, then repeat step 3. If the LSB of CRC register is 1, shift the CRC register one bit to the rightwith MSB zero filling, Exclusive OR the CRC register with the polynomial value A001H, then repeatstep 3.Step 5: Repeat step 3 and 4 until eight shifts have been performed. When this is done, a complete8-bit byte will have been processed.Step 6: Repeat step 2 to 5 for the next 8-bit byte of the command message. Continue doing this untilall bytes have been processed. The final contents of the CRC register are the CRC value. WhenRevision August 2008, 03<strong>VE</strong>, SW V2.04 4-143
Chapter 4 Parameters|transmitting the CRC value in the message, the upper and lower bytes of the CRC value must beswapped, i.e. the lower order byte will be transmitted first.The following is an example of CRC generation using C language. The function takes two arguments:Unsigned char* data a pointer to the message bufferUnsigned char length the quantity of bytes in the message bufferThe function returns the CRC value as a type of unsigned integer.Unsigned int crc_chk(unsigned char* data, unsigned char length){int j;unsigned int reg_crc=0xFFFF;while(length--){reg_crc ^= *data++;for(j=0;j>1) ^ 0xA001;}else{reg_crc=reg_crc >>1;}}}return reg_crc;}3.5 Address listThe contents of available addresses are shown as below:Content Address FunctionAC driveParametersCommandWrite onlyCommandWrite onlyGG means parameter group, nn means parameter number,for example, the address of Pr 4-01 is 0401H. Referencing toGGnnH chapter 5 for the function of each parameter. When readingparameter by command code 03H, only one parameter canbe read at one time.0: No function2000H Bit 0-31: Stop2: Run3: Jog + Run00B: No functionBit 4-501B: FWD10B: REV11B: Change direction2000H00B: 1st accel/decelBit 6-701B: 2nd accel/decel10B: 3rd accel/decel11B: 4th accel/decelBit 8-11 Represented 16 step speeds.0: No comm. multi step speed or accel/decelBit 12 time1: Comm. multi step speed or accel/decel timeBit 13~14 00B: No function01B: operated by digital keypad02B: operated by Pr.00-21 setting03B: change operation sourceBit 15 Reserved2001H Frequency command4-144 Revision August 2008, 03<strong>VE</strong>, SW V2.04
Chapter 4 Parameters|Content Address FunctionBit 0 1: EF (external fault) on2002HBit 1 1: ResetBit 2 1: B.B. ONBit 3-15 Reserved2100H Error code: refer to Pr.06-17 to Pr.06-22StatusBit 0 1: FWD commandmonitorBit 1 1: Operation status2119HRead onlyBit 2 1: Jog commandBit 3 1: REV commandBit 4 1: REV commandBit 81: Master frequency Controlled by communicationinterfaceBit 9 1: Master frequency controlled by analog signalBit 101: Operation command controlled bycommunication interfaceBit 11 1: Parameters have been lockedBit 12 1: enable to copy parameter from keypadBit 13-15 Reserved2102H Frequency command (F)2103H Output frequency (H)2104H Output current (AXXX.X)2105H DC-BUS Voltage (UXXX.X)2106H Output voltage (EXXX.X)2107H Current step number of Multi-Step Speed Operation2109H Counter value2116H Multi-function display (Pr.00-04)211AH Setting frequency (F)211BH Max. setting frequency211CH Max. output frequency2200H Feedback Signal (XXX.XX %)2203H AVI analog input (XXX.XX %)2204H ACI analog input (XXX.XX %)2205H AUI analog input (XXX.XX %)2206H Display temperature of IGBT ( o C)2207H Display temperature of heatsink ( o C)3.6 Exception response:The AC motor drive is expected to return a normal response after receiving command messagesfrom the master device. The following depicts the conditions when no normal response is replied tothe master device.The AC motor drive does not receive the messages due to a communication error; thus, the ACmotor drive has no response. The master device will eventually process a timeout condition.The AC motor drive receives the messages without a communication error, but cannot handle them.An exception response will be returned to the master device and an error message “CExx” will bedisplayed on the keypad of AC motor drive. The xx of “CExx” is a decimal code equal to theexception code that is described below.In the exception response, the most significant bit of the original command code is set to 1, and anexception code which explains the condition that caused the exception is returned.Example of an exception response of command code 06H and exception code 02H:ASCII mode:RTU mode:Revision August 2008, 03<strong>VE</strong>, SW V2.04 4-145
Chapter 4 Parameters|STX ‘:’ Address 01HAddress Low ‘0’ Function 86HAddress High ‘1’ Exception code 02HFunction Low ‘8’ CRC CHK Low C3HFunction High ‘6’ CRC CHK High A1HException code‘0’‘2’LRC CHK Low ‘7’LRC CHK High ‘7’END 1 CREND 0LFThe explanation of exception codes:Exceptioncode0102030410ExplanationIllegal function code:The function code received in the command message is notavailable for the AC motor drive.Illegal data address:The data address received in the command message is notavailable for the AC motor drive.Illegal data value:The data value received in the command message is not availablefor the AC drive.Slave device failure:The AC motor drive is unable to perform the requested action.Communication time-out:If Pr.09-03 is not equal to 0.0, Pr.09-02=0~2, and there is nocommunication on the bus during the Time Out detection period (setby Pr.09-03), “cE10” will be shown on the keypad.3.7 Communication program of PC:The following is a simple example of how to write a communication program for Modbus ASCII modeon a PC by C language.#include#include#include#include#define PORT 0x03F8 /* the address of COM1 *//* the address offset value relative to COM1 */#define THR 0x0000#define RDR 0x0000#define BRDL 0x0000#define IER 0x0001#define BRDH 0x0001#define LCR 0x0003#define MCR 0x0004#define LSR 0x0005#define MSR 0x0006unsigned char rdat[60];/* read 2 data from address 2102H of AC drive with address 1 */unsigned char tdat[60]={':','0','1','0','3','2','1','0',’2', '0','0','0','2','D','7','\r','\n'};void main(){int i;4-146 Revision August 2008, 03<strong>VE</strong>, SW V2.04
Chapter 4 Parameters|outportb(PORT+MCR,0x08); /* interrupt enable */outportb(PORT+IER,0x01); /* interrupt as data in */outportb(PORT+LCR,(inportb(PORT+LCR) | 0x80));/* the BRDL/BRDH can be access as LCR.b7==1 */outportb(PORT+BRDL,12); /* set baudrate=9600, 12=115200/9600*/outportb(PORT+BRDH,0x00);outportb(PORT+LCR,0x06); /* set protocol, =06H, =1AH, =0AH,=07H, =1BH, =0BH */for(i=0;i
Chapter 4 Parameters|2 Modbus ASCII mode, protocol 3 Modbus ASCII mode, protocol 4 Modbus ASCII mode, protocol 5 Modbus ASCII mode, protocol 6 Modbus ASCII mode, protocol 7 Modbus ASCII mode, protocol 8 Modbus ASCII mode, protocol 9 Modbus ASCII mode, protocol 10 Modbus ASCII mode, protocol 11 Modbus ASCII mode, protocol 12 Modbus RTU mode, protocol 13 Modbus RTU mode, protocol 14 Modbus RTU mode, protocol 15 Modbus RTU mode, protocol 16 Modbus RTU mode, protocol 17 Modbus RTU mode, protocol 09-09 Response Delay Time Unit: 0.1ControlmodeVF VFPG SVC FOCPG TQRPG Factory Setting: 2.0Settings0.0 ~ 200.0 msecThis parameter is the response delay time after AC drive receives communication commandas shown in the following.RS-485 BUSPC or PLC commandHandling timeof the AC driveResponse Delay TimePr.09-09Response Messageof the AC Drive09-10 Transmission Master Frequency Unit: 0.01ControlmodeVF VFPG SVC FOCPG TQRPG Factory Setting: 60.00Settings0.00 ~ 600.00 HzWhen Pr.00-20 is set to 1 (RS485 communication). The AC motor drive will save the lastfrequency command into Pr.09-10 when abnormal turn-off or momentary power loss. After repoweron, it will with the frequency set in Pr.09-10 if there is no new frequency command.09-11 Block Transfer 1 Unit: 109-12 Block Transfer 2 Unit: 109-13 Block Transfer 3 Unit: 14-148 Revision August 2008, 03<strong>VE</strong>, SW V2.04
Chapter 4 Parameters|09-14 Block Transfer 4 Unit: 109-15 Block Transfer 5 Unit: 109-16 Block Transfer 6 Unit: 109-17 Block Transfer 7 Unit: 109-18 Block Transfer 8 Unit: 109-19 Block Transfer 9 Unit: 109-20 Block Transfer 10 Unit: 1ControlmodeVF VFPG SVC FOCPG TQRPG Factory Setting: 0Settings 0 to 65535There is a group of block transfer parameter available in the AC motor drive (Pr.09-11 toPr.09-20). User can use them (Pr.09-11 to Pr.09-20) to save those parameters that you wantto read.09-21 Multi-function Output StatusControlmodeVF VFPG SVC FOCPG TQRPG Factory Setting: Read-onlySettings 0 to 6553509-22 AFM2 StatusControlmodeVF VFPG SVC FOCPG TQRPG Factory Setting: Read-onlySettings 0 to 409509-23 AFM3 StatusControlmodeVF VFPG SVC FOCPG TQRPG Factory Setting: Read-onlySettings 0 to 4095Revision August 2008, 03<strong>VE</strong>, SW V2.04 4-149
Chapter 4 Parameters|Group 10 PID Control10-00 Encoder Pulse Unit: 1ControlmodeVFPG FOCPG TQRPG Factory Setting: 600Settings1 to 20000 (Max=20000 for 2-pole motor)A Pulse Generator (PG) or encoder is used as a sensor that provides a feedback signal of themotor speed. This parameter defines the number of pulses for each cycle of the PG control.10-01 Encoder Input Type SettingControlmodeVFPG FOCPG TQRPG Factory Setting: 0Settings 0 DisablePhase A leads in a forward run command and phase B leads in areverse run command1FWDREVABPhase B leads in a forward run command and phase A leads in areverse run command2FWDREVABPhase A is a pulse input and phase B is a direction input. (lowinput=reverse direction, high input=forward direction)FWD3REVABPhase A is a pulse input and phase B is a direction input. (lowinput=forward direction, high input=reverse direction)4FWDREVABSingle-phase input5AIt is helpful for the stable control by inputting correct pulse type.4-150 Revision August 2008, 03<strong>VE</strong>, SW V2.04
Chapter 4 Parameters|10-02 PG Feedback Fault TreatmentControlmodeVFPG FOCPG TQRPG Factory Setting: 2Settings 0 Warn and keep operating1 Warn and RAMP to stop2 Warn and COAST to stop10-03 Detection Time for PG Feedback Fault Unit: 0.01ControlmodeVFPG FOCPG TQRPG Factory Setting: 1.00Settings 0.00 to 10.00 secWhen PG loss, encoder signal error, pulse signal setting error or signal error, if time exceedsthe detection time for PG feedback fault (Pr.10-03), the PG signal error will occur. Refer to thePr.10-02 for PG feedback fault treatment.10-04 ASR (Auto Speed Regulation) control (P) 1 Unit: 0.1ControlVFPG FOCPG Factory Setting: 10modeSettings 0 to 40 Hz10-05 ASR (Auto Speed Regulation) control (I) 1 Unit: 0.001ControlVFPG FOCPG Factory Setting: 0.100modeSettings 0.000 to 10.000 sec10-06 ASR (Auto Speed Regulation) control (P) 2 Unit: 0.1ControlmodeVFPG FOCPG Factory Setting: 10Settings0 to 40Hz10-07 ASR (Auto Speed Regulation) control (I) 2 Unit: 0.001ControlVFPG FOCPG Factory Setting: 0.100modeSettings 0.000 to 10.000 sec10-08 ASR 1/ASR2 Switch Frequency Unit: 0.01ControlVFPG FOCPG Factory Setting: 7.00modeSettings 5.00 o 600.00HzASR P determines Proportional control and associated gain (P). ASR I determines integralcontrol and associated gain (I).Revision August 2008, 03<strong>VE</strong>, SW V2.04 4-151
Chapter 4 Parameters|When integral time is set to 0, it is disabled. Pr.10-08 defines the switch frequency for theASR1 (Pr.10-04, Pr.10-05) and ASR2 (Pr.10-06, Pr.10-07).PI10-0610-0710-0410-0510-2110-225Hz5Hz0Hz10-08When using multi-function input terminals to switch ASR1/ASR2, the diagram will be shown asfollows.Setting multi-function input terminal to 27(ASR1/ASR2 switch)OFFONHzOFFASR 10.1 secASR 20.1 secASR 110-09 ASR Primary Low Pass Filter Gain Unit: 0.001ControlmodeFOCPG Factory Setting: 0.008Settings0.000 to 0.350 secIt defines the filter time of the ASR command.10-10 PG Stall Level Unit: 1ControlmodeVFPG FOCPG Factory Setting: 115Settings0 to 120% (0: disable)This parameter determines the maximum PG feedback signal allowed before a fault occurs.(max. output frequency Pr.01-00 =100%)10-11 PG Stall Detection Time Unit: 0.1ControlmodeVFPG FOCPG Factory Setting: 0.1Settings0.0 to 2.0 sec10-12 PG Slip Range Unit: 1ControlmodeVFPG FOCPG Factory Setting: 504-152 Revision August 2008, 03<strong>VE</strong>, SW V2.04
Settings0 to 50% (0: disable)Chapter 4 Parameters|10-13 PG Slip Detection Time Unit: 0.1ControlmodeVFPG FOCPG Factory Setting: 0.5Settings0.0 to 10.0 sec10-14 PG Stall and Slip Error TreatmentControlmodeVFPG FOCPG Factory Setting: 2Settings 0 Warn and keep operating1 Warn and RAMP to stop2 Warn and COAST to stopWhen the value of (rotation speed – motor frequency) exceeds Pr.10-12 setting, detection timeexceeds Pr.10-13 or motor frequency exceeds Pr.10-10 setting, it will start to accumulate time.If detection time exceeds Pr.10-11, the PG feedback signal error will occur. Refer to Pr.10-14PG stall and slip error treatment.10-15 Pulse Input Type SettingControlmodeVF VFPG SVC FOCPG TQRPG Factory Setting: 0Settings 0 DisablePhase A leads in a forward run command and phase B leads in areverse run command1ABFWDREVPhase B leads in a forward run command and phase A leads in areverse run command2ABFWDREVPhase A is a pulse input and phase B is a direction input. (lowinput=reverse direction, high input=forward direction)3ABFWDREVRevision August 2008, 03<strong>VE</strong>, SW V2.04 4-153
Chapter 4 Parameters|4Phase A is a pulse input and phase B is a direction input. (lowinput=forward direction, high input=reverse direction)ABFWDREV10-16 Output Setting for Frequency Division (denominator) Unit: 1ControlmodeVFPG FOCPG TQRPG Factory Setting: 1Settings 1 to 255This parameter is used to set the denominator for frequency division. For example, when it isset to 2 with feedback 1024ppr, PG output will be 1024/2=512ppr.10-17 PG Electrical Gear A (Channel 1 of PG card) Unit: 1ControlmodeVFPG FOCPG Factory Setting: 100Settings 1 to 500010-18 PG Electrical Gear B (Channel 2 of PG card) Unit: 1ControlmodeVFPG FOCPG Factory Setting: 100Settings 1 to 5000Rotation speed = pulse frequency/encoder pulse (Pr.10-00) * PG Electrical Gear A / PGElectrical Gear B.10-19 PG Position Control Point (Home) Unit: 1ControlmodeVFPG FOCPG Factory Setting: 0Settings 0 to 20000This parameter determines the home position in the position control.4-154 Revision August 2008, 03<strong>VE</strong>, SW V2.04
Chapter 4 Parameters|10-20 Range for PG Position Attained (Home range) Unit: 1ControlmodeVFPG FOCPG Factory Setting: 10Settings 0 to 20000This parameter determines the Home position attained in the position control mode.10-21 P Gain of Zero Speed Unit: 1ControlmodeVFPG FOCPG Factory Setting: 10Settings0 to 40Hz10-22 I Gain of Zero Speed Unit: 0.001ControlmodeVFPG FOCPG Factory Setting: 0.100Settings0.000 to 10.000 secThis parameter determines zero speed command gain in speed control.10-23 Feed Forward Gain of APR Unit: 1ControlmodeVFPG FOCPG Factory Setting: 30Settings 0 to 10010-24 Decelerate Time of Position Unit: 0.01/0.1ControlmodeVFPG FOCPG Factory Setting: 3.00/3.0Settings0.00 to 600.00 sec/0.0 to 6000.0 sec10-25 Max. Frequency for Resolution Switch Unit: 0.01ControlmodeVF VFPG SVC FOCPG TQRPG Factory Setting: 50.00Settings50.00 to 600.00HzThis function is used to enhance the function of unstable speed/position due to insufficientresolution of analog simulation value. It needs to use with external input terminals (one ofPr.02-01 to Pr.02-06/Pr.02-23 to Pr.02-30 should be set to 43).Revision August 2008, 03<strong>VE</strong>, SW V2.04 4-155
Chapter 4 Parameters|AUI +10VAUI 0VAUI -10VMax. output frequencyPr.01-00Resolution switch frequencyPr.10-25Outputfrequency0HzMax. waiting time forfrequency switchResolution switchPr.02-11~02-14=43Forward runningReverse runningMax. waiting time forfrequency switch10-26 Reserved10-27 PG Mechanical Gear A1 Unit: 110-28 PG Mechanical Gear B1 Unit: 110-29 PG Mechanical Gear A2 Unit: 110-30 PG Mechanical Gear B2 Unit: 1ControlmodeVFPG FOCPG TQRPG Factory Setting: 100Settings 1 to 65535DriverGear ratio A1/A2 1:10Load Gear ratioEncoder is used 10:1at load sideMotorGear ratio B1/B24-156 Revision August 2008, 03<strong>VE</strong>, SW V2.04
00-20+-PI++10-0410-06 and 10-0510-0710-21 10-22Chapter 4 Parameters|++torque limit 10-0907-32~07-35no offsetby analog input (Pr.03-00)TQBias torque offset settingcontrolled by external terminals (Pr.07-29 to Pr.07-31)07-27flux weakening curvecurrentlimitIGBT&PWMM10-0010-0101-0101-0205-01~09actual frequencycurrentmeasurecurrent feedbackControl Diagram for the Vector + Torqueno offsetby analog input (Pr.03-00)tor que co mman d07 -2 107 -2 4 o r 0 0-2 0sp eed l imi t or com mand+-PI++to rq ue offset settin gc ontr ol le d b y e xtern al te rmi na ls ( Pr.0 7- 29 to Pr.07-3 1)+++06-12 07-23tor que l imi t07 -3 2~07- 3510-09sp eed torqu emode switch10-04 10-0510-06 and 10-0710-21 10-2201-0101-0205-01~09flux weakening curveCurrentcontr olIGBT&PWMM10-0010-01ac tu al fre qu enc yCur ren tmeasur eCu rre nt feedb ac kCon trol Diag ram fo r the To rqu e + EncoderRevision August 2008, 03<strong>VE</strong>, SW V2.04 4-157
Chapter 4 Parameters|RUN/STOPRUNSTOPmulti-function inputterminal is set to 26 OFF(torque/speed mode switch)03-00~03=1(AVI/AUI/ACI isfrequency command)speedcommandONspeed limitOFFspeedcommandONspeed limit03-00~03=2(AVI/AUI/ACIis torque command)torquelimittorquecommandtorquelimittorquecommandControl modespeedcontroltorquecommandspeedcontroltorquecommandspeed control(decelerate to stop)Torque Control/Speed Control Switch Timing(00-10=3/4, multi-function input terminal is set to 26)4-158 Revision August 2008, 03<strong>VE</strong>, SW V2.04
Group 11 Advanced ParametersChapter 4 Parameters|11-00 System ControlControlmodeFOCPG Factory Setting: 0Settings Bit 0 ASR Auto tuningBit 1 Inertia estimate (only in FOCPG mode)Bit 2 Zero ServoBit 3 ReservedBit 4 Enable gain adjustment of position loop KPBit 0=1: system will generate an ASR setting and Pr. 10-04~10-07, 10-21~10-22 will be invalid.Bit 1=1: Inertia estimate function is enabled.Bit 2=1: when frequency command is less than Fmin (Pr.01-07), it will use zero servo function.Estimate Jm valueNOYESSetting auto gain adjustmentPr.11-00=1Adjust Pr.11-02, 11-03 and 11-11separately by speed responseAdjust by requirementPr.11-04 (PDFF function)Adjust gain value by <strong>manual</strong>Pr.11-00=0 (factory setting)Adjust Pr.10-04, 10-05, 10-06,10-07, 10-21 and 10-22separatelyby speed responseAdjust by requirementPr.10-09 (for general,no need to adjust)Adjust by requirementPr.10-08(ASR1/ASR2 switch frequency)Adjust by requirementPr.07-32~35 (torque limit)Revision August 2008, 03<strong>VE</strong>, SW V2.04 4-159
Chapter 4 Parameters|PIPI10-0610-0710-0410-0510-2110-225Hz5Hz11-0311-02Pr.11-11use to adjust thestrength of zeroservolock1. Pr. 11-01 value2. set Pr.11-00 to 15Hz5Hz0Hz 10-08Hz0Hz 10-08HzPI adjustment-<strong>manual</strong> gainPI adjustment-auto gain11-01 Per Unit of System Inertia Unit: 1ControlmodeFOCPG Factory Setting: 400Settings1 to 65535 (256=1PU)To get the system inertia from Pr.11-01, <strong>user</strong> needs to set Pr.11-00 to 2 and executecontinuous forward/reverse running.11-02 Low-speed Bandwidth Unit: 1ControlmodeFOCPG Factory Setting: 10Settings0 to 40Hz11-03 High-speed Bandwidth Unit: 1ControlmodeFOCPG Factory Setting: 10Settings0 to 40Hz11-11 Zero-speed Bandwidth Unit: 1ControlmodeVFPG FOCPG TQRPG Factory Setting: 10Settings0 to 40HzAfter estimating inertia and set Pr.11-00 to 1 (auto tuning), <strong>user</strong> can adjust parameters Pr.11-02, 11-03 and 11-11 separately by speed response. The larger number you set, the fasterresponse you will get. Pr.10-08 is the switch frequency for low-speed/high-speed bandwidth.11-04 PDFF Gain Value Unit: 1ControlmodeFOCPG Factory Setting: 30Settings 0 to 200%4-160 Revision August 2008, 03<strong>VE</strong>, SW V2.04
Chapter 4 Parameters|After finishing estimating and set Pr.11-00=1 (auto tuning), using Pr.11-04 to reduce overshoot.Please adjust PDFF gain value by actual situation.Besides traditional PI control, it also provides PDFF function to reduce overshoot for speedcontrol.1. Get Pr.11-01 value2. Set Pr.11-00 to 13. Adjust Pr.11-04 (the larger number is set and the suppressed overshoot function will bebetter. But it needs to be used by the actual condition)PIPDFFIt is recommended to disablethis function (Pr.11-04=0) forY/ connection switch andASR1/ASR2 switch application.11-05 Gain Value of Flux Weakening Curve for Motor 1 Unit: 1ControlmodeFOCPG Factory Setting: 90Settings 0 to 200%It is used to adjust the output voltage of flux weakening curve.For the spindle application, the adjustment method is1. It is used to adjust the output voltage when exceeding rated frequency.2. Monitor the output voltage3. Adjust Pr.11-05 (motor 1) or Pr.11-06 (motor 2) setting to make the output voltage reachmotor rated voltage.4. The larger number it is set, the larger output voltage you will get.Revision August 2008, 03<strong>VE</strong>, SW V2.04 4-161
Chapter 4 Parameters|N-mFlux Weakening Curve11-05/11-06FbaseHz11-06 Gain Value of Flux Weakening Curve for Motor 2 Unit: 1ControlmodeFOCPG Factory Setting: 90Settings 0 to 200%11-07 Detection Time for Phase-loss Unit: 0.01ControlmodeVF VFPG SVC FOCPG TQRPG Factory Setting: 0.20Settings0.01 to 600.00 secWhen the phase-loss occurs and exceeds this detection time, the fault code “PHL” will bedisplayed. The AC motor drive will record the operation time during phase-loss.When phase-loss occurs and Pr.11-07 is set to 0, it won’t display PHL and won’t executePr.06-02.When <strong>user</strong> sets this parameter to 0 or not factory setting, we won’t promise that allcharacteristics will be the same as the 3-phase input.If it is set to 0 or a larger number, it will short the life of rectifier and capacitors in the AC motordrive.11-08 Reserved11-09 Level of Phase-loss Unit: 0.1ControlmodeVF VFPG SVC FOCPG TQRPG Factory Setting: 60.0Settings 0.0 to 320.011-10 Speed Feed Forward Gain Unit: 14-162 Revision August 2008, 03<strong>VE</strong>, SW V2.04
ControlmodeChapter 4 Parameters|FOCPG Factory Setting: 0Settings 0 to 100%11-12 Speed Response of Flux Weakening Area Unit: 1ControlmodeFOCPG Factory Setting: 65Settings0 to 150% (0: disable)It is used to control the response speed for the flux weakening area. The larger number youset, the faster response you will get.11-13 Notch Filter Depth Unit: 1ControlmodeFOCPG Factory Setting: 0Settings0 to 20 db11-14 Notch Filter Frequency Unit: 0.01ControlmodeFOCPG Factory Setting: 0.00Settings 0.00 to 200.00This parameter is used to set resonance frequency of mechanical system. It can be used tosuppress the resonance of mechanical system.The larger number you set Pr.11-13, the better suppression resonance function you will get.The notch filter frequency is the resonance of mechanical frequency.11-15 Gain Value of Slip Compensation Unit: 0.01ControlmodeSVC Factory Setting: 1.00Settings 0.00 to 1.00It is only valid in SVC mode.When the AC motor drive drives the asynchronous motor, slip will increase when the load isadded. This parameter can be used to change frequency, lower slip and make the motor besynchronous when running under rated current. When the output current is higher than no-loadcurrent, the AC motor drive will adjust frequency by this parameter. If the actual speed isslower than expected, please increase the setting or decrease the setting.11-16 Low-pass Filter Time of Keypad Display Unit: 0.001ControlmodeVF VFPG SVC FOCPG TQRPG Factory Setting: 0.100Revision August 2008, 03<strong>VE</strong>, SW V2.04 4-163
Chapter 4 Parameters|Settings0.001 to 65.535 SecIt is used to lower the blinking frequency of LCD display.11-17 Low-pass Filter Time of PG2 Pulse Input Unit: 0.001ControlmodeVF VFPG SVC FOCPG Factory Setting: 0.100Settings0.000 to 65.535 Sec11-18 APR Gain Unit: 0.01ControlmodeFOCPG Factory Setting: 10.00Settings 0.00 to 40.0011-19 APR Curve Time Unit: 0.01ControlmodeFOCPG Factory Setting: 3.00Settings0.00 to 655.35 sec11-20|11-28Reserved11-29 Accumulative Operation Time of Phase-loss Unit: 1ControlmodeVF VFPG SVC FOCPG TQRPG Factory Setting: 0Settings0 to 65535 (hour)11-30|11-40Reserved4-164 Revision August 2008, 03<strong>VE</strong>, SW V2.04
This page intentionally left blankChapter 4 Parameters|Revision August 2008, 03<strong>VE</strong>, SW V2.04 4-165
Chapter 5 Troubleshooting5.1 Over Current (OC)ocA ocd OCOver-current Over-currentOver currentduring acceleration during accelerationRemove short circuitor ground faultYesCheck if there is any short circuits andgrounding between the U, V, W and motorNo No NoReduce the load orincrease the powerof AC motor driveYesIf load is too largeNo No NoNoReduce torquecompensationYesNoSuitable torquecompensationYesReduce torquecompensationNoMaybe AC motor drivehas malfunction or errordue to noise. Pleasecontact DELTA.Check ifacceleration timeNois too short byload inertia.YesCheck ifdeceleration timeis too short byload inertia.YesNoIs load changedsuddenly?YesYesCan accelerationtime be made longer?YesCan decelerationtime be made longer?Increase accel/deceltimeNoNoReduce load or increasethe power of AC motordriveReduce load or increasethe power of AC motordriveCheck brakingmethod. Pleasecontact DELTARevision August 2008, 03<strong>VE</strong>, SW V2.04 5-1
Chapter 5 Troubleshooting|5.2 Ground FaultGFFGround faultIf output circuit(cable ormotor) of AC motor driveis grounded?NoMaybe AC motor drive hasmalfunction or misoperationdue to noise. Pleasecontact DELTA.YesRemove grounding5.3 Over Voltage (OV)Over voltageReduce voltage tobe within spec.NoIf voltage is withinspecificationYesMaybe AC motor drivehas malfunction ormisoperation due tonoise. Please contactDELTA.If over-voltage is occurred without loadNoNoWhen OV occurs, check if thevoltage of DC BUS is greaterthan protection valueYesYesYesNo If OV occurs whensudden accelerationstopsYesIncreasedecelerationtimeNoYesReduce momentof inertiaNoIncreaseaccelerationtimeNoYesReduce moment of load inertiaNoIncrease setting timeNeed to considerate touse brake unit andDC brakeUse brake unit or DC brakeYesNoNeed to check control method. Please contact DELTA.5-2 Revision August 2008, 03<strong>VE</strong>, SW V2.04
Chapter 5 Troubleshooting|5.4 Low Voltage (Lv)Low voltagePower cut, including momentarypower lossNoYesRestart after resetCheck if there is any malfunctioncomponent or disconnection inpower supply circuitNoYesChange defective componentand check connectionCheck if voltage iswithin specificationYesNoChange power supplysystem for requirementCheck if there is heavy loadwith high start current in thesame power systemNoYesUsing the different powersupply for this drive andheavy load systemCheck if Lv occurs whenbreaker and magneticcontactor is ONNoYesSuitable powertransformer capacityYesNoCheck if voltage between +1/+2and - is greater than Pr.06-00NoMaybe AC motor drive has malfunction.Please contact DELTA.YesControl circuit has malfunction ormisoperation due to noise. Pleasecontact DELTA.Revision August 2008, 03<strong>VE</strong>, SW V2.04 5-3
Chapter 5 Troubleshooting|5.5 Over Heat (oH1, oH2, oH3)AC motor drive overheatsHeat sink overheatsCheck if temperature of heat sinkis larger than 90 O CYesNoTemperature detection malfunctions.Please contact DELTA.If load is too largeNoYesReduce loadIf cooling fan functions normallyYesCheck if cooling fan is jammedNoYesChange cooling fanRemove obstructionNoCheck if surrounding temperatureis within specificationNoYesMaybe AC motor drive has malfunction ormisoperation due to noise. Please contactDELTA.Adjust surrounding temperatureto specification5.6 OverloadOLOL1/ OL2Check if the setting of electronicthermal relay is suitableYesNoModify settingIf load is too largeYesNoMaybe AC motor drive has malfunctionor misoperation due to noise.Reduce load or increase the power of AC motor drive5-4 Revision August 2008, 03<strong>VE</strong>, SW V2.04
Chapter 5 Troubleshooting|5.7 Display of KPV-CE01 is AbnormalAbnormal display or no displayYesTurn the power off and poweron again after display is offFix connector and eliminate noiseDisplay normal?YesNoNoCheck if all connectors are connectedwell and if there is no noiseYesAC motor drive works normallyAC motor drive has malfunction.Please contact DELTA.5.8 Phase Loss (PHL)Phase lossCheck if the wiring of terminals R, S and T is OKYesCheck if the screws of terminals are tightenedYesCheck if the input voltage of R, S, T is unbalancedNoCheck if it is 40hp and aboveNoNoNoYesYesConnect all threephase wellTighten all screwsPlease check the wiringand power system forabnormal powerPlease check the fuseat AC sideMaybe AC motor drive has malfunction or misoperationdue to noise. Please contact DELTA.Revision August 2008, 03<strong>VE</strong>, SW V2.04 5-5
Chapter 5 Troubleshooting|5.9 Motor cannot RunMotor cannot runReset after clearingfault and then RUNCheck if CE01displaysnormallyYesNoNoCheck if there is anyfault code displayedCheck if non-fusebreaker and magneticcontactor are ONYesCheck if input Novoltage is normalYesNoSet them to ONCheck if any faultsoccur, such asLv, PHL ordisconnectionIt can run whenno faults occurPress RUN key tocheck if it can runPress UP key toset frequencyYesPress UP tocheck if motorcan runNoModify frequencysettingMotor has malfunctionNoIf load is too largeYesCheck if the settingof torquecompensationis correctNoYesNoNo Check if input FWD Noor REV commandYesNoNoSet frequency or notYesif upper bound freq.and setting freq. islower than the min.output freq.NoYesYesIncrease the setting oftorque compensationInput "RUN"commandby keypadCheck if there is anyoutput voltage fromterminals U, V and WYesCheck if motorconnectionis correctIf jumper or DCreactor is connectedbetween +1 and +2/B1YesNoNoNoUse jumperor DC reactorMaybe AC motor drive has malfunction or misoperationdue to noise. Please contact DELTA.NoCheck if the wiringof terminal FWDand betweenREV-DCM is correctNoCorrect connectionCheck if the parametersetting and wiring ofanalog signal andmulti-step speedare correctYesChange switch or relayMaybe AC motor drive has malfunction.Please contact DELTA.Connect correctlyYesMotor is locked due to large load, please reduce load.For example, if there is a brake, check if it is released.Change defectivepotentiometer andrelay5-6 Revision August 2008, 03<strong>VE</strong>, SW V2.04
Chapter 5 Troubleshooting|5.10 Motor Speed cannot be ChangedMotor can run butcannot change speedModify the settingNoYesCheck if the setting of themax. frequency is too lowNoIf the setting of frequency Yesis out of range(upper/lower)boundNoNoModify the settingPress UP/DOWN keyto see if speed hasany changeYesYesIf the setting ofPr.04-00 to Pr.04-14are the sameNoNoCheck if the wiring betweenM1~M6 to DCM is correctYesCheck if frequency foreach step is differentYesIf accel./decel. timeis very longYesNoNoNoConnectcorrectlyIf there is any changeof the signal that sets Yesfrequency (0-10V and4-20mA)NoCheck if the wiring ofexternal terminal is correctChange frequency settingYesChange defectivepotentiometerPlease set suitableaccel./decel. time byload inertiaMaybe AC motor drive has malfunction or misoperationdue to noise. Please contact DELTA.Revision August 2008, 03<strong>VE</strong>, SW V2.04 5-7
Chapter 5 Troubleshooting|5.11 Motor Stalls during AccelerationMotor stalls duringaccelerationThicken or shorten thewiring between themotor or AC motor driveReduce load orincrease the capacityof AC motor driveYesYesCheck if accelerationtime is too shortNoCheck if the inertiaof motor and loadare very highNoNoNoNoYesYesCheck if the voltage ofterminal is lower thanbeforeCheck if the load torqueis too highCheck if the torquecompensation is suitableIncrease torque compensationYesIncrease setting timeYesUse special motor?NoReduce load orincrease the capacityof AC motor driveMaybe AC motor drive hasmalfunction or misoperationdue to noise. Please contactDELTA5.12 The Motor does not Run as ExpectedMotor does not runas expectedCheck if V/f characteristicand torque compensationis suitableNoAdjust V/f characteristicand lower torque compensationYesYesRun in low speed continuouslyPlease use specific motorNoYesIf load is too largeNoReduce load or increase thecapacity of AC motor driveCheck if output voltage of U, V Wis balancedNoYesMotor has malfunctionMaybe AC motor drive has malfunction or misoperationdue to noise. Please contact DELTA.5-8 Revision August 2008, 03<strong>VE</strong>, SW V2.04
Chapter 5 Troubleshooting|5.13 Electromagnetic/Induction NoiseThere are many noises surround the AC motor drives and invade it by radiation or power circuit. Itmay cause the misoperation of control circuit and even damage the AC motor drive. Of course, thatis a solution to increase the noise tolerance of AC motor drive. But it is not the best one due to thelimit. Therefore, solve it from the outside as following will be the best.1. Add surge killer on the relay or contact to suppress switching surge between ON/OFF.2. Shorten the wiring length of the control circuit or serial circuit and separate from the maincircuit wiring.3. Comply with the wiring regulation for those shielded wire and use isolation amplifier forlong wire.4. The grounding terminal should comply with the local regulation and ground independently,i.e. not to have common ground with electric welding machine and power equipment.5. Connect a noise filter at the input terminal of the AC motor drive to prevent noise frompower circuit.In a word, three-level solutions for electromagnetic noise are “no product”, “no spread” and“no receive”.5.14 Environmental ConditionSince AC motor drive is an electronic device, you should comply with the environmental conditionstated in the appendix A. Following are the remedial measures for necessary.1. To prevent vibration, anti-vibration spacer is the last choice. The vibration tolerance mustbe within the specification. The vibration effect is equal to the mechanical stress and itcannot occur frequently, continuously or repeatedly to prevent damaging AC motor drive.2. Store in a clean and dry location free from corrosive fumes/dust to prevent rustiness, poorcontact. It also may cause short by low insulation in a humid location. The solution is touse both paint and dust-proof. For particular occasion, use the enclosure with whole-sealstructure.3. The surrounding temperature should be within the specification. Too high or lowtemperature will affect the lifetime and reliability. For semiconductor components, damagewill occur once any specification is out of range. Therefore, it is necessary to clean andperiodical check for the air cleaner and cooling fan besides having cooler and sunshade.In additional, the microcomputer may not work in extreme low temperature and needs tohave heater.Revision August 2008, 03<strong>VE</strong>, SW V2.04 5-9
Chapter 5 Troubleshooting|4. Store within a relative humidity range of 0% to 90% and non-condensing environment. Donot turn off the air conditioner and have exsiccator for it.5.15 Affecting Other <strong>Machine</strong>sAC motor drive may affect the operation of other machine due to many reasons. The solutions are asfollows.• High Harmonic at Power SideIf there is high harmonic at power side during running, the improved methods are:1. Separate power system: use transformer for AC motor drive.2. Use reactor at the power input terminal of AC motor drive or decrease high harmonic bymultiple circuit.3. If there is phase lead capacitor, it should use serial reactor to prevent capacitor damagefrom high harmonic.serial reactorphase lead capacitor• Motor Temperature RisesWhen the motor is induction motor with ventilation-cooling-type used in variety speedoperation, bad cooling will happen in the low speed. Therefore, it may overheat. Besides,high harmonic is in output waveform to increase copper loss and iron loss. Followingmeasures should be used by load situation and operation range when necessary.1. Use the motor with independent power ventilation or increase the horsepower.2. Use inverter duty motor.3. Do NOT run in the low speed5-10 Revision August 2008, 03<strong>VE</strong>, SW V2.04
Chapter 6 Fault Code Information and Maintenance6.1 Fault Code InformationThe AC motor drive has a comprehensive fault diagnostic system that includes several differentalarms and fault messages. Once a fault is detected, the corresponding protective functions will beactivated. The following faults are displayed as shown on the AC motor drive digital keypad display.The six most recent faults can be read from the digital keypad or communication.NOTEWait 5 seconds after a fault has been cleared before performing reset via keypad of input terminal.6.1.1 Common Problems and SolutionsFault Name Fault Descriptions Corrective ActionsOver-current duringacceleration(Output currentexceeds triple ratedcurrent duringacceleration.)Over-current duringdeceleration(Output currentexceeds triple ratedcurrent duringdeceleration.)Over-current duringsteady stateoperation(Output currentexceeds triple ratedcurrent duringconstant speed.)1. Short-circuit at motor output: Check forpossible poor insulation at the outputlines.2. Acceleration Time too short: Increase theAcceleration Time.3. AC motor drive output power is too small:Replace the AC motor drive with the nexthigher power model.1. Short-circuit at motor output: Check forpossible poor insulation at the output line.2. Deceleration Time too short: Increase theDeceleration Time.3. AC motor drive output power is too small:Replace the AC motor drive with the nexthigher power model.1. Short-circuit at motor output: Check forpossible poor insulation at the output line.2. Sudden increase in motor loading: Checkfor possible motor stall.3. AC motor drive output power is too small:Replace the AC motor drive with the nexthigher power model.Hardware failure incurrent detectionReturn to the factoryRevision August 2008, 03<strong>VE</strong>, SW V2.04 6-1
Chapter 6 Fault Code Information and Maintenance|Fault Name Fault Descriptions Corrective ActionsWhen (one of) the output terminal(s) isgrounded, short circuit current is more than50% of AC motor drive rated current, the ACmotor drive power module may be damaged.NOTE: The short circuit protection isprovided for AC motor drive protection,Ground faultnot for protection of the <strong>user</strong>.1. Check the wiring connections between theAC motor drive and motor for possibleshort circuits, also to ground.2. Check whether the IGBT power module isdamaged.3. Check for possible poor insulation at theoutput line.Short-circuit isdetected betweenupper bridge and Return to the factorylower bridge of theIGBT moduleDC BUS over-voltageduring acceleration(230V: DC 450V;460V: DC 900V)DC BUS over-voltageduring deceleration(230V: DC 450V;460V: DC 900V)DC BUS over-voltagein constant speed(230V: DC 450V;460V: DC 900V)Hardware failure involtage detectionDC BUS voltage isless than Pr.06-00during accelerationDC BUS voltage isless than Pr.06-00during decelerationDC BUS voltage isless than Pr.06-00 inconstant speedDC BUS voltage isless than Pr.06-00 atstopPhase Loss1. Check if the input voltage falls within therated AC motor drive input voltage range.2. Check for possible voltage transients.3. If DC BUS over-voltage due toregenerative voltage, please increase theDeceleration Time or add an optionalbrake resistor.Check if input voltage is within specificationrange and monitor if there is surge voltage.1. Check if the input voltage is normal2. Check for possible sudden loadCheck Power Source Input if all 3 input phasesare connected without loose contacts.For models 40hp and above, please check ifthe fuse for the AC input circuit is blown.6-2 Revision August 2008, 03<strong>VE</strong>, SW V2.04
Chapter 6 Fault Code Information and Maintenance|Fault Name Fault Descriptions Corrective Actions1. Ensure that the ambient temperature fallswithin the specified temperature range.IGBT overheating 2. Make sure that the ventilation holes areIGBT temperaturenot obstructed.exceeds protection 3. Remove any foreign objects from thelevelheatsinks and check for possible dirty1 to15HP: 90 o Cheat sink fins.20 to 100HP: 100 o C 4. Check the fan and clean it.5. Provide enough spacing for adequateventilation.HeatsinkoverheatingHeat sinktemperature exceeds90 o CMotor overheatingThe AC motor drivedetects that theinternal temperatureexceeds Pr.06-30(PTC level)OH1 hardware failureOH2 hardware failureFan failureOverloadThe AC motor drivedetects excessivedrive output current.NOTE: The AC motordrive can withstandup to 150% of therated current for amaximum of 60seconds.Motor 1 overloadMotor 2 overload1. Ensure that the ambient temperaturefalls within the specified temperaturerange.2. Make sure that the ventilation holes arenot obstructed.3. Remove any foreign objects from theheatsinks and check for possible dirtyheat sink fins.4. Check the fan and clean it.5. Provide enough spacing for adequateventilation.1. Make sure that the motor is notobstructed.2. Ensure that the ambient temperaturefalls within the specified temperaturerange.3. Take the next higher power AC motordrive model.Return to the factoryReturn to the factory1. Make sure that the fan is not obstructed.2. Return to the factory1. Check whether the motor is overloaded.2. Take the next higher power AC motordrive model.1. Check whether the motor 1 isoverloaded.2. Check whether the rated current of motor1 (Pr.05-01) is suitable3. Take the next higher power AC motordrive model.1. Check whether the motor 2 isoverloaded.2. Check whether the rated current of motor2 (Pr.05-13) is suitable3. Take the next higher power AC motordrive model.Revision August 2008, 03<strong>VE</strong>, SW V2.04 6-3
Chapter 6 Fault Code Information and Maintenance|Fault Name Fault Descriptions Corrective ActionsBroken fuse1. Check whether the fuse of the transistorThe fuse at DC side module is functioning wellis broken for 30hp 2. Check whether the loading side is shortcircuitand belowElectronic ThermalRelay 1/2 ProtectionThese two fault codeswill be displayedwhen output currentexceeds the level ofover-torque detection(Pr.06-08 or Pr.06-11) and it is set 2 or 4in Pr.06-06 or Pr.06-09.Internal EEPROMcan not beprogrammed.Internal EEPROMcan not be read.Isum errorU-phase errorV-phase errorW-phase errorCC (current clamp)OC hardware errorOV hardware errorGFF hardware errorAuto tuning errorPID loss (ACI)PG feedback errorPG feedback lossPG feedback stallPG slip errorPulse input errorPulse input lossACI lossExternal Fault1. Check whether the motor is overloaded.2. Check whether motor rated currentsetting (Pr.05-01) is suitable3. Check electronic thermal relay function4. Take the next higher power AC motordrive model.1. Press “RESET” key to the factory setting2. Return to the factory.1. Press “RESET” key to the factory setting2. Return to the factory.Re-power on to try it. If fault code is stilldisplayed on the keypad please return to thefactoryRe-power on to try it. If fault code is stilldisplayed on the keypad please return to thefactory1. Check cabling between drive and motor2. Retry again1. Check the wiring of the PID feedback2. Check the PID parameters settingsCheck if Pr.10-01 is set to 0 when it is PGfeedback controlCheck the wiring of the PG feedback1. Check the wiring of the PG feedback2. Check if the setting of PI gain anddeceleration is suitable3. Return to the factory1. Check the pulse wiring2. Return to the factory1. Check the ACI wiring2. Check if the ACI signal is less than 4mA1. Input EF (N.O.) on external terminal isclosed to GND. Output U, V, W will beturned off.2. Give RESET command after fault hasbeen cleared.6-4 Revision August 2008, 03<strong>VE</strong>, SW V2.04
Chapter 6 Fault Code Information and Maintenance|Fault Name Fault Descriptions Corrective Actions1. When the multi-function input terminalsMI1 to MI6 are set to emergency stop,Emergency stopthe AC motor drive stops output U, V, Wand the motor coasts to stop.2. Press RESET after fault has beencleared.1. When the external input terminal (B.B) isactive, the AC motor drive output will beExternal Base Blockturned off.2. Deactivate the external input terminal(B.B) to operate the AC motor driveagain.Keypad will be locked. Turn the power ONPassword is locked. after power OFF to re-enter the correctpassword. See Pr.00-07 and 00-08.Illegal function codeCheck if the function code is correct (functioncode must be 03, 06, 10, 63)Illegal data address(00H to 254H)Check if the communication address is correctIllegal data valueCheck if the data value exceeds max./min.valueData is written toread-only addressCheck if the communication address is correctCommunicationtime-outCOM1: exceeds Check if the wiring for the communication isPr.09-03 setting, correctCOM2: exceedsPr.09-07 settingKeypad (KPV-CE01)communicationtime-outCOM1: exceedsPr.09-03 setting,COM2: exceedsPr.09-07 settingBrake resistor faultY-connection/ΔconnectionswitcherrorWhen Pr.07-13 is notset to 0 andmomentary power offor power cut, it willdisplay dEb duringaccel./decel. stop.1. Check if the wiring for thecommunication is correct2. Check if there is any wrong with thekeypadIf the fault code is still displayed on the keypadafter pressing “RESET” key, please return tothe factory.1. Check the wiring of the Y-connection/Δconnection2. Check the parameters settings1. Set Pr.07-13 to 02. Check if input power is stableRevision August 2008, 03<strong>VE</strong>, SW V2.04 6-5
Chapter 6 Fault Code Information and Maintenance|Fault Name Fault Descriptions Corrective ActionsIt will be displayedwhen slip exceedsPr.05-26 setting andtime exceeds Pr.05-27 setting.It will be displayedwhen broken beltdetection function isenabled(Pr.08-59),allowance error ishigher than Pr.08-61and detection timeexceeds Pr.08-62.It will be displayedwhen the allowanceerror of tension PIDfeedback exceedsPr.08-63 setting andallowance errordetection timeexceeds Pr.08-64setting.1. Check if motor parameter is correct (pleasedecrease the load if overload2. Check the settings of Pr.05-26 and Pr.05-271. Check if the belt is broken2. Check the settings of Pr.08-60, Pr.08-62and Pr.08-631. Check if the PID feedback is correct2. Check if the material is broken3. Check the settings of Pr.08-63 and Pr.08-646.1.2 ResetThere are three methods to reset the AC motor drive after solving the fault:STOP1. Press RESETkey on KPV-CE01.2. Set external terminal to “RESET” (set one of Pr.02-01~Pr.02-06/ Pr.02-23~Pr.02-30 to 5)and then set to be ON.3. Send “RESET” command by communication.NOTEMake sure that RUN command or signal is OFF before executing RESET to prevent damage orpersonal injury due to immediate operation.6-6 Revision August 2008, 03<strong>VE</strong>, SW V2.04
6.2 Maintenance and InspectionsChapter 6 Fault Code Information and Maintenance|Modern AC motor drives are based on solid state electronics technology. Preventive maintenance isrequired to operate this AC motor drive in its optimal condition, and to ensure a long life. It isrecommended to have a check-up of the AC motor drive performed by a qualified technician.Daily Inspection:Basic check-up items to detect if there were any abnormalities during operation are:1. Whether the motors are operating as expected.2. Whether the installation environment is abnormal.3. Whether the cooling system is operating as expected.4. Whether any irregular vibration or sound occurred during operation.5. Whether the motors are overheating during operation.6. Always check the input voltage of the AC drive with a Voltmeter.Periodic Inspection:Before the check-up, always turn off the AC input power and remove the cover. Wait at least 10minutes after all display lamps have gone out, and then confirm that the capacitors have fullydischarged by measuring the voltage between +1/+2 and -. The voltage between +1/+2 and-shouldbe less than 25VDC.DANGER!1. Disconnect AC power before processing!2. Only qualified personnel can install, wire and maintain AC motor drives. Please take off anymetal objects, such as watches and rings, before operation. And only insulated tools areallowed.3. Never reassemble internal components or wiring.4. Prevent static electricity.Revision August 2008, 03<strong>VE</strong>, SW V2.04 6-7
Chapter 6 Fault Code Information and Maintenance|Periodical Maintenance• Ambient environmentCheck ItemsCheck the ambient temperature,humidity, vibration and see ifthere are any dust, gas, oil orwater dropsIf there are any dangerousobjectsMethods and CriterionVisual inspection and measurementwith equipment with standardspecificationMaintenancePeriodDailyVisual inspection ◦HalfYear◦OneYear• VoltageCheck ItemsCheck if the voltage of maincircuit and control circuit iscorrectMethods and CriterionMeasure with multimeter with standardspecificationMaintenancePeriodDailyHalfYear◦OneYear• KeypadCheck ItemsMethods and CriterionMaintenancePeriodDailyHalfYearOneYearIs the display clear for reading Visual inspection ◦Any missing characters Visual inspection ◦• Mechanical partsCheck ItemsIf there is any abnormal soundor vibrationMethods and CriterionMaintenancePeriodDailyHalfYearVisual and aural inspection ◦OneYearIf there are any loose screws Tighten the screws ◦If any part is deformed ordamagedVisual inspection ◦6-8 Revision August 2008, 03<strong>VE</strong>, SW V2.04
Check ItemsIf there is any color change byoverheatingChapter 6 Fault Code Information and Maintenance|MaintenancePeriodMethods and CriterionDailyHalf OneYear YearVisual inspection ◦If there is any dust or dirt Visual inspection ◦• Main circuitCheck ItemsMethods and CriterionMaintenancePeriodDailyHalfYearOneYearIf there are any loose or missingscrewsTighten or replace the screw ◦If machine or insulator isdeformed, cracked, damaged orwith color change due tooverheating or ageingVisual inspectionNOTE: Please ignore the colorchange of copper plate◦If there is any dust or dirt Visual inspection ◦• Terminals and wiring of main circuitCheck ItemsIf the terminal or the plate iscolor change or deformation dueto overheatIf the insulator of wiring isdamaged or color changeMethods and CriterionMaintenancePeriodDailyHalfYearVisual inspection ◦Visual inspection ◦OneYearIf there is any damage Visual inspection ◦Revision August 2008, 03<strong>VE</strong>, SW V2.04 6-9
Chapter 6 Fault Code Information and Maintenance|• DC capacity of main circuitCheck ItemsIf there is any leak of liquid,color change, crack ordeformationMeasure static capacity whenrequiredMethods and CriterionMaintenancePeriodDailyVisual inspection ◦HalfYearStatic capacity ≥ initial value X 0.85 ◦OneYear• Resistor of main circuitCheck ItemsMethods and CriterionMaintenancePeriodDailyHalfYearOneYearIf there is any peculiar smell orinsulator cracks due to overheatIf there is any disconnectionVisual inspection, smell ◦Visual inspection or measure withmultimeter after removing wiringbetween +1/+2 ~ -Resistor value should be within ± 10%◦• Transformer and reactor of main circuitCheck ItemsMethods and CriterionMaintenancePeriodDailyHalfYearOneYearIf there is any abnormal vibrationor peculiar smellVisual, aural inspection and smell ◦• Magnetic contactor and relay of main circuitCheck ItemsMethods and CriterionMaintenancePeriodDailyHalfYearOneYearIf there are any loose screws Visual and aural inspection ◦If the contact works correctly Visual inspection ◦6-10 Revision August 2008, 03<strong>VE</strong>, SW V2.04
• Printed circuit board and connector of main circuitCheck ItemsChapter 6 Fault Code Information and Maintenance|Methods and CriterionMaintenancePeriodDailyHalfYearOneYearIf there are any loose screws andconnectorsTighten the screws and press theconnectors firmly in place.◦If there is any peculiar smell andcolor changeIf there is any crack, damage,deformation or corrosionIf there is any liquid is leaked ordeformation in capacityVisual inspection ◦Visual inspection ◦Visual inspection ◦• Cooling fan of cooling systemCheck ItemsIf there is any abnormal sound orvibrationMethods and CriterionVisual, aural inspection and turn thefan with hand (turn off the powerbefore operation) to see if it rotatessmoothlyMaintenancePeriodDailyHalfYearOneYear◦If there is any loose screw Tighten the screw ◦If there is any color change due tooverheatChange fan◦• Ventilation channel of cooling systemCheck ItemsMethods and CriterionMaintenancePeriodDailyHalfYearOneYearIf there is any obstruction in theheat sink, air intake or air outletVisual inspection ◦Revision August 2008, 03<strong>VE</strong>, SW V2.04 6-11
Chapter 6 Fault Code Information and Maintenance|This page intentionally left blank6-12 Revision August 2008, 03<strong>VE</strong>, SW V2.04
Appendix A SpecificationsVoltage Class230V ClassModel Number <strong>VFD</strong>-XXXV 007 015 022 037 055 075 110 150 185 220 300 370Max. Applicable Motor Output(kW)0.75 1.5 2.2 3.7 5.5 7.5 11 15 18.5 22 30 37Max. Applicable Motor Output (hp) 1.0 2.0 3.0 5.0 7.5 10 15 20 25 30 40 50Output RatingRated Output Capacity (kVA) 1.9 2.7 4.2 6.5 9.5 13 19 25 29 34 46 55Rated Output Current forConstant Torque (A)5.0 7.5 11 17 25 33 49 65 75 90 120 146Rated Output Current forVariable Torque (A)6.25 9.4 13 21 31 41 61 81 93 112 150 182Maximum Output Voltage (V)3-Phase Proportional to Input VoltageOutput Frequency (Hz)0.00~600.00 HzCarrier Frequency (kHz) 15 9 6Rated Input Current (A) 6.4 9.9 15 21 25 33 52 63 68 79 106 126Rated Voltage/Frequency3-phase200-240V, 50/60HzVoltage Tolerance ± 10%(180~264 V)Frequency Tolerance± 5%(47~63 Hz)Cooling Method Natural Fan CooledWeight (kg) 2.7 3.2 4.5 6.8 8 10 13 13 13 13 36 36Input RatingOutput RatingInput RatingVoltage Class460V ClassModel Number <strong>VFD</strong>-XXXV 007 015 022 037 055 075 110 150 185 220 300 370 450 550 750Max. Applicable Motor Output(kW)Max. Applicable Motor Output(hp)0.75 1.5 2.2 3.7 5.5 7.5 11 15 18.5 22 30 37 45 55 751.0 2.0 3.0 5.0 7.5 10 15 20 25 30 40 50 60 75 100Rated Output Capacity (kVA) 2.3 3.2 4.2 6.3 9.9 14 18 24 29 34 46 56 69 80 100Rated Output Current forConstant Torque (A)3.0 4.2 6.0 8.5 13 18 24 32 38 45 60 73 91 110 150Rated Output Current forVariable Torque (A)3.8 5.3 7.5 10 16 22 30 40 47 56 75 91 113 138 188Maximum Output Voltage (V)3-phase Proportional to Input VoltageOutput Frequency (Hz)0.00~600.00 HzCarrier Frequency (kHz) 15 9 6Rated Input Current (A)Rated Voltage3-phase 380~480V4.0 5.8 7.4 9.9 12 17 25 27 35 42 56 67 87 101 1223-phase 380 to 480 VVoltage Tolerance ± 10%(342~528 V)Frequency Tolerance± 5%(47~63 Hz)Cooling Method Natural Fan CooledWeight (kg) 2.7 3.2 4.5 6.8 8 10 13 13 13 13 36 36 36 50 50A-1Revision August 2008, 03<strong>VE</strong>, SW V2.04
Appendix A Specifications|Control CharacteristicsProtection CharacteristicsEnvironmental ConditionsControl SystemStart TorqueSpeed Control RangeSpeed Control ResolutionSpeed Response AbilityMax. Output FrequencyGeneral Specifications1 V/f curve; 2 V/f+PG; 3 SVC; 4 FOC+PG; 5 TQR+PGStarting torque is 150% at 0.5Hz and 0Hz with FOC + PG control mode1:100 Sensorless vector (up to 1:1000 when using PG card)± 0.5% Sensorless vector (up to ± 0.02% when using PG card)5Hz (up to 30Hz for vector control)0.00 to 600.00HzOutput Frequency Accuracy Digital command ± 0.005%, analog command ± 0.5%Frequency SettingResolutionTorque LimitDigital command ± 0.01Hz, analog command: 1/4096(12-bit) of the max. outputfrequencyMax. is 200% torque currentTorque Accuracy ± 5%Accel/Decel TimeV/f CurveFrequency Setting Signal0.00 to 600.00/0.0 to 6000.0 secondsAdjustable V/f curve using 4 independent points and square curve± 10V, 4~20mA, pulse inputBrake Torque About 20%Motor ProtectionOver-current ProtectionGround Leakage CurrentProtectionOverload AbilityElectronic thermal relay protectionThe current forces 220% of the over-current protection and 300% of the ratedcurrentHigher than 50% X rated currentConstant torque: 150% for 60 seconds, variable torque: 200% for 3 secondsOver-voltage Protection Over-voltage level: Vdc > 400/800V; low-voltage level: Vdc < 200/400VOver-voltage Protection forthe Input PowerOver-temperature ProtectionCompensation for theMomentory Power LossProtection LevelOperation TemperatureStorage TemperatureAmbient HumidityVibrationInstallation LocationVaristor (MOV)Built-in temperature sensorUp to 5 seconds for parameter settingNEMA 1/IP21-10 o C to 40 o C-20 o C to 60 o CBelow 90% RH (non-condensing)9.80665m/s 2 (1G) less than 20Hz, 5.88m/s 2 (0.6G) at 20 to 50HzAltitude 1,000 m or lower, keep from corrosive gasses, liquid and dustApprovalsA-2 Revision August 2008, 03<strong>VE</strong>, SW V2.04
Appendix B AccessoriesB.1 All Brake Resistors & Brake Units Used in AC Motor DrivesNote: Please only use DELTA resistors and recommended values. Other resistors and values willvoid <strong>Delta</strong>’s warranty. Please contact your nearest <strong>Delta</strong> representative for use of special resistors.For instance, in 460V series, 100hp/75kW, the AC motor drive needs 2 brake units with total of 16brake resistors, so each brake unit uses 8 brake resistors. The brake unit should be at least 10 cmaway from AC motor drive to avoid possible interference. Refer to the “Brake Unit Module UserManual” for further details.Voltage230V Series460V SeriesApplicableMotorhpkWFull LoadTorqueNmResistor valuespec for eachAC MotorDriveBrake UnitModel <strong>VFD</strong>BNo. of UnitsUsedBrake ResistorsModel and No. ofUnits UsedBrakeTorque10%EDMin. EquivalentResistor Value foreach AC MotorDrive1 0.75 0.427 80W 200Ω BR080W200 1 125 82Ω2 1.5 0.849 300W 100Ω BR300W100 1 125 82Ω3 2.2 1.262 300W 100Ω BR300W100 1 125 82Ω5 3.7 2.080 400W 40Ω BR400W040 1 125 33Ω7.5 5.5 3.111 500W 30Ω BR500W030 1 125 30Ω10 7.5 4.148 1000W 20Ω BR1K0W020 1 125 20Ω15 11 6.186 2400W 13.6Ω 2015 1 BR1K2W6P8 2 125 13.6Ω20 15 8.248 3000W 10Ω 2015 1 BR1K5W005 2 125 10Ω25 18.5 10.281 4800W 8Ω 2022 1 BR1K2W008 4 125 8Ω30 22 12.338 4800W 6.8Ω 2022 1 BR1K2W6P8 4 125 6.8Ω40 30 16.497 6000W 5Ω 2015 2 BR1K5W005 4 125 5Ω50 37 20.6 9600W 4Ω 2015 2 BR1K2W008 8 125 4Ω1 0.75 0.427 80W 750Ω BR080W750 1 125 160Ω2 1.5 0.849 300W 400Ω BR300W400 1 125 160Ω3 2.2 1.262 300W 250Ω BR300W250 1 125 160Ω5 3.7 2.080 400W 150Ω BR400W150 1 125 130Ω7.5 5.5 3.111 500W 100Ω BR500W100 1 125 91Ω10 7.5 4.148 1000W 75Ω BR1K0W075 1 125 62Ω15 11 6.186 1000W 50Ω 4030 1 BR1K0W050 1 125 39Ω20 15 8.248 1500W 40Ω 4030 1 BR1K5W040 1 125 40Ω25 18.5 10.281 4800W 32Ω 4030 1 BR1K2W008 4 125 32Ω30 22 12.338 4800W 27.2Ω 4030 1 BR1K2W6P8 4 125 27.2Ω40 30 16.497 6000W 20Ω 4030 1 BR1K5W005 4 125 20Ω50 37 20.6 9600W 16Ω 4045 1 BR1K2W008 8 125 16Ω60 45 24.745 9600W 13.6Ω 4045 1 BR1K2W6P8 8 125 13.6Ω75 55 31.11 12000W 10Ω 4030 2 BR1K5W005 8 125 10Ω100 75 42.7 19200W 6.8Ω 4045 2 BR1K2W6P8 16 125 6.8ΩNOTERevision August 2008, 03<strong>VE</strong>, SW V2.04 B-1
Appendix B Accessories|1. Please select the factory setting resistance value (Watt) and the duty-cycle value (ED%).2. If damage to the drive or other equipment are due to the fact that the brake resistors and thebrake modules in use are not provided by <strong>Delta</strong>, the warranty will be void.3. Take into consideration the safety of the environment when installing the brake resistors.4. If the minimum resistance value is to be utilized, consult local dealers for the calculation of theWatt figures.5. Please select thermal relay trip contact to prevent resistor over load. Use the contact to switchpower off to the AC motor drive!6. When using more than 2 brake units, equivalent resistor value of parallel brake unit can’t beless than the value in the column “Minimum Equivalent Resistor Value for Each AC Drive” (theright-most column in the table). An example of 575V 100HP, the min. equivalent resistor valuefor each AC motor drive is 12.5Ω with 2 brake units connection. Therefore, the equivalentresistor value for each brake unit should be 25Ω.7. Please read the wiring information in the <strong>user</strong> <strong>manual</strong> of brake unit thoroughly prior to takinginto operation.8. Definition for Brake Usage ED%Explanation: The definition of the barke usage ED(%) is for assurance of enough time for thebrake unit and brake resistor to dissipate away heat generated by braking. When the brakeresistor heats up, the resistance would increase with temperature, and brake torque woulddecrease accordingly. Suggested cycle time is one minute100%T1Brak e TimeED% = T1/T0x100(%)T0Cycle Time9. For safety consideration, install an overload relay between the brake unit and the brake resistor.In conjunction with the magnetic contactor (MC) prior to the drive, it can perform completeprotection against abnormality. The purpose of installing the thermal overload relay is to protectthe brake resistor from damage due to frequent brake, or due to brake unit keeping operatingresulted from unusual high input voltage. Under such circumstance, just turn off the power toprevent damaging the brake resistor.B-2 Revision August 2008, 03<strong>VE</strong>, SW V2.04
R/L1S/L2T/L3O.L.NFBThermalOverloadRelay ortemperatureswitchMCMCSASurgeAbsorberR/L1 U/T1S/L2 V/T2T/L3 W/T3<strong>VFD</strong> Series+P ( )-N ( )+P ( )-N ( )Appendix B Accessories|IMMOTORBrakeUnitB1B2Thermal OverloadRelayO.L.BrakeBR ResistorTemperatureSwitchNote1: When using the AC drive with DC reactor, please refer to wiring diagram in the AC drive<strong>user</strong> <strong>manual</strong> for the wiring of terminal +(P) of Brake unit.Note2: Do NOT wire terminal -(N) to the neutral point of power system.10. For model <strong>VFD</strong>110V43B, the brake unit is built-in. To increase the brake function, it can addoptional brake unit.Revision August 2008, 03<strong>VE</strong>, SW V2.04 B-3
Appendix B Accessories|B.1.1 Dimensions and Weights for Brake Resistors(Dimensions are in millimeter)Order P/N: BR080W200, BR080W750, BR300W070, BR300W100, BR300W250, BR300W400,BR400W150, BR400W040Model no. L1 L2 H D W Max. Weight (g)BR080W200BR080W750BR300W070BR300W100BR300W250BR300W400BR400W150BR400W040140 125 20 5.3 60 160215 200 30 5.3 60 750265 250 30 5.3 60 930B-4 Revision August 2008, 03<strong>VE</strong>, SW V2.04
Appendix B Accessories|Order P/N: BR500W030, BR500W100, BR1KW020, BR1KW075Model no. L1 L2 H D WMax. Weight(g)BR500W030335 320 30 5.3 60 1100BR500W100BR1KW020400 385 50 5.3 100 2800BR1KW075Revision August 2008, 03<strong>VE</strong>, SW V2.04 B-5
Appendix B Accessories|Order P/N: BR1K0W050, BR1K2W008, BR1K2W6P8, BR1K5W005, BR1K5W040Output RatingB.1.2 Specifications for Brake Unit230V Series460V Series2015 2022 4030 4045 4132Max. Motor Power (kW) 15 22 30 45 132Max. Peak Discharge Current(A) 10%ED40 60 40 60 240Continuous Discharge Current(A)15 20 15 18 75Brake Start-up Voltage (DC)330/345/360/380/400/415±3V660/690/720/760/800/830±6V618/642/667/690/725/750±6VInputRatingDC Voltage 200~400VDC 400~800VDCProtectionEnvironmentHeat Sink Overheat Temperature over +95°C (203 o F)Alarm OutputPower Charge DisplayRelay contact 5A 120VAC/28VDC (RA, RB, RC)Blackout until bus (+~-) voltage is below 50VDCInstallation Location Indoor (no corrosive gases, metallic dust)Operating Temperature -10°C ∼ +50°C (14 o F to 122 o F)Storage Temperature -20°C ∼ +60°C (-4 o F to 140 o F)Humidity90% Non-condensingVibration9.8m/s 2 (1G) under 20Hz2m/s 2 (0.2G) at 20~50HzWall-mounted Enclosed Type IP50 IP10B-6 Revision August 2008, 03<strong>VE</strong>, SW V2.04
B.1.3 Dimensions for Brake Unit(Dimensions are in millimeter[inch])Figure 1: <strong>VFD</strong>B2015, <strong>VFD</strong>B2022, <strong>VFD</strong>B4030, <strong>VFD</strong>B4045Appendix B Accessories|121.0 [4.76]80.0 [3.15]R3.3 [R0.13]130.0 [5.12]CHARGEGREENACT. ERR.YELLOW RED189.5 [7.46]200.0 [7.87]Revision August 2008, 03<strong>VE</strong>, SW V2.04 B-7
Appendix B Accessories|Figure 2: <strong>VFD</strong>B4132CHARGE ACT OC OH<strong>VFD</strong>B4132B-8 Revision August 2008, 03<strong>VE</strong>, SW V2.04
Appendix B Accessories|B.2 No-fuse Circuit Breaker ChartFor 3-phase drives, the current rating of the breaker shall be within 2-4 times maximum input currentrating.(Refer to Appendix A for rated input current)3-phaseRecommended no-fuseRecommended no-fuseModelModelbreaker (A)breaker (A)<strong>VFD</strong>007V23A-2 10 <strong>VFD</strong>110V43B-2 50<strong>VFD</strong>007V43A-2 5 <strong>VFD</strong>150V23A-2 125<strong>VFD</strong>015V23A-2 15 <strong>VFD</strong>150V43A-2 60<strong>VFD</strong>015V43A-2 10 <strong>VFD</strong>185V23A-2 150<strong>VFD</strong>022V23A-2 30 <strong>VFD</strong>185V43A-2 75<strong>VFD</strong>022V43A-2 15 <strong>VFD</strong>220V23A-2 175<strong>VFD</strong>037V23A-2 40 <strong>VFD</strong>220V43A-2 100<strong>VFD</strong>037V43A-2 20 <strong>VFD</strong>300V23A-2 225<strong>VFD</strong>055V23A-2 50 <strong>VFD</strong>300V43A-2 125<strong>VFD</strong>055V43A-2 30 <strong>VFD</strong>370V23A-2 250<strong>VFD</strong>075V23A-2 60 <strong>VFD</strong>370V43A-2 150<strong>VFD</strong>075V43A-2 40 <strong>VFD</strong>450V43A-2 175<strong>VFD</strong>110V23A-2 100 <strong>VFD</strong>550V43C-2 250<strong>VFD</strong>110V43A-2 50 <strong>VFD</strong>750V43C-2 300Revision August 2008, 03<strong>VE</strong>, SW V2.04 B-9
Appendix B Accessories|B.3 Fuse Specification ChartSmaller fuses than those shown in the table are permitted.ModelI (A)InputI (A)Line FuseOutput I (A) Bussmann P/N<strong>VFD</strong>007V23A-2 5.7 5.0 10 JJN-10<strong>VFD</strong>007V43A-2 3.2 2.7 5 JJN-6<strong>VFD</strong>015V23A-2 7.6 7.0 15 JJN-15<strong>VFD</strong>015V43A-2 4.3 4.2 10 JJN-10<strong>VFD</strong>022V23A-2 15.5 11 30 JJN-30<strong>VFD</strong>022V43A-2 5.9 5.5 15 JJN-15<strong>VFD</strong>037V23A-2 20.6 17 40 JJN-40<strong>VFD</strong>037V43A-2 11.2 8.5 20 JJN-20<strong>VFD</strong>055V23A-2 26 25 50 JJN-50<strong>VFD</strong>055V43A-2 14 13 30 JJN-30<strong>VFD</strong>075V23A-2 34 33 60 JJN-60<strong>VFD</strong>075V43A-2 19 18 40 JJN-40<strong>VFD</strong>110V23A-2 50 49 100 JJN-100<strong>VFD</strong>110V43A-2 25 24 50 JJN-50<strong>VFD</strong>110V43B-2 25 24 50 JJN-50<strong>VFD</strong>150V23A-2 60 65 125 JJN-125<strong>VFD</strong>150V43A-2 32 32 60 JJN-60<strong>VFD</strong>185V23A-2 75 75 150 JJN-150<strong>VFD</strong>185V43A-2 39 38 75 JJN-70<strong>VFD</strong>220V23A-2 90 90 175 JJN-175<strong>VFD</strong>220V43A-2 49 45 100 JJN-100<strong>VFD</strong>300V23A-2 110 120 225 JJN-225<strong>VFD</strong>300V43A-2 60 60 125 JJN-125<strong>VFD</strong>370V23A-2 142 145 250 JJN-250<strong>VFD</strong>370V43A-2 63 73 150 JJN-150<strong>VFD</strong>450V43A-2 90 91 175 JJN-175<strong>VFD</strong>550V43C-2 130 110 250 JJN-250<strong>VFD</strong>750V43C-2 160 150 300 JJN-300B-10 Revision August 2008, 03<strong>VE</strong>, SW V2.04
Appendix B Accessories|B.4 AC ReactorB.4.1 AC Input Reactor Recommended Value460V, 50/60Hz, 3-PhasekW HPMax.Inductance (mH)FundamentalcontinuousAmpsAmps 3% impedance 5% impedance0.75 1 4 6 9 121.5 2 4 6 6.5 92.2 3 8 12 5 7.53.7 5 8 12 3 55.5 7.5 12 18 2.5 4.27.5 10 18 27 1.5 2.511 15 25 37.5 1.2 215 20 35 52.5 0.8 1.218.5 25 35 52.5 0.8 1.222 30 45 67.5 0.7 1.230 40 55 82.5 0.5 0.8537 50 80 120 0.4 0.745 60 80 120 0.4 0.755 75 100 150 0.3 0.4575 100 130 195 0.2 0.3B.4.2 AC Output Reactor Recommended Value230V, 50/60Hz, 3-PhasekWHPFundamentalAmpsMax.Inductance (mH)continuousAmps 3% impedance 5% impedance0.75 1 8 12 3 51.5 2 8 12 1.5 32.2 3 12 18 1.25 2.53.7 5 18 27 0.8 1.55.5 7.5 25 37.5 0.5 1.27.5 10 35 52.5 0.4 0.811 15 55 82.5 0.25 0.515 20 80 120 0.2 0.4Revision August 2008, 03<strong>VE</strong>, SW V2.04 B-11
Appendix B Accessories|kWHPFundamentalAmpsMax.Inductance (mH)continuousAmps 3% impedance 5% impedance18.5 25 80 120 0.2 0.422 30 100 150 0.15 0.330 40 130 195 0.1 0.237 50 160 240 0.075 0.15460V, 50/60Hz, 3-PhasekWHPFundamentalAmpsMax.Inductance (mH)continuousAmps 3% impedance 5% impedance0.75 1 4 6 9 121.5 2 4 6 6.5 92.2 3 8 12 5 7.53.7 5 12 18 2.5 4.25.5 7.5 18 27 1.5 2.57.5 10 18 27 1.5 2.511 15 25 37.5 1.2 215 20 35 52.5 0.8 1.218.5 25 45 67.5 0.7 1.222 30 45 67.5 0.7 1.230 40 80 120 0.4 0.737 50 80 120 0.4 0.745 60 100 150 0.3 0.4555 75 130 195 0.2 0.375 100 160 240 0.15 0.23B-12 Revision August 2008, 03<strong>VE</strong>, SW V2.04
B.4.3 Applications for AC ReactorConnected in input circuitApplication 1When more than one AC motor drive isconnected to the same power, one of them isON during operation.Appendix B Accessories|QuestionWhen applying to one of the AC motor drive,the charge current of capacity may causevoltage ripple. The AC motor drive maydamage when over current occurs duringoperation.Correct wiringM1reactorAC motor drivemotorM2AC motor drivemotorMnAC motor drivemotorApplication 2Silicon rectifier and AC motor drive isconnected to the same power.QuestionSurges will be generated at the instant ofsilicon rectifier switching on/off. These surgesmay damage the mains circuit.Revision August 2008, 03<strong>VE</strong>, SW V2.04 B-13
Appendix B Accessories|Correct wiringsilicon rectifierpowerreactorDCAC motor drivereactormotorApplication 3Used to improve the input power factor, toreduce harmonics and provide protectionfrom AC line disturbances. (surges, switchingspikes, short interruptions, etc.). AC linereactor should be installed when the powersupply capacity is 500kVA or more andexceeds 6 times the inverter capacity, or themains wiring distance ≤ 10m.QuestionWhen power capacity is too large, lineimpedance will be small and the chargecurrent will be too large. That may damageAC motor drive due to higher rectifiertemperature.Correct wiringlarge-capacitypowerreactorsmall-capacityAC motor drivemotorB-14 Revision August 2008, 03<strong>VE</strong>, SW V2.04
Appendix B Accessories|B.5 Zero Phase Reactor (RF220X00A)Dimensions are in millimeter and (inch)CabletypeRecommended WireSize(Note) AWG mm2 Nominal(mm 2 )Qty.WiringMethodDiagram BPlease put all wires through 4 cores inseries without winding.Singlecore≦10 ≦5.3 ≦5.5 1≦2 ≦33.6 ≦38 4DiagramADiagramBPower<strong>Supply</strong>R/L1S/L2T/L3U/T1V/T2W/T3Zero Phase ReactorMOTORThreecore≦12 ≦3.3 ≦3.5 1≦1 ≦42.4 ≦50 4Note: 600V Insulated unshielded Cable.Diagram APlease wind each wire 4 times around thecore. The reactor must be put at inverteroutput as close as possible.DiagramADiagramBNote 1: The table above gives approximatewire size for the zero phase reactors but theselection is ultimately governed by the typeand diameter of cable fitted i.e. the cablemust fit through the center hole of zerophase reactors.Note 2: Only the phase conductors shouldpass through, not the earth core or screen.Power<strong>Supply</strong>R/L1S/L2T/L3U/T1V/T2W/T3Zero Phase ReactorMOTORNote 3: When long motor output cables areused an output zero phase reactor may berequired to reduce radiated emissions fromthe cable.Revision August 2008, 03<strong>VE</strong>, SW V2.04 B-15
Appendix B Accessories|B.6 DC Choke Recommended Values230V DC ChokeInput voltage kW HP DC Amps Inductance (mh)0.75 1 9 7.501.5 2 12 4.002.2 3 18 2.753.7 5 25 1.755.5 7.5 32 0.85230Vac50/60Hz7.5 10 40 0.753-Phase11 15 62 Built-in15 20 92 Built-in18.5 25 110 Built-in22 30 125 Built-in30 40 -- Built-in37 50 -- Built-in460V DC ChokeInput voltage kW HP DC Amps Inductance (mh)0.75 1 4 25.001.5 2 9 11.502.2 3 9 11.503.7 5 12 6.005.5 7.5 18 3.757.5 10 25 4.00460Vac 11 15 32 Built-in50/60Hz 15 20 50 Built-in3-Phase 18.5 25 62 Built-in22 30 80 Built-in30 40 92 Built-in37 50 110 Built-in45 60 125 Built-in55 75 200 Built-in75 100 240 Built-inB-16 Revision August 2008, 03<strong>VE</strong>, SW V2.04
Appendix B Accessories|B.7 Remote Controller RC-01Dimensions are in millimeter8 6 5 4 16 15 14 13 11 RC-01 terminal blockWiring connectionsAFMACM AVI +10V DCM MI5 FWD REV JOG<strong>VFD</strong>-<strong>VE</strong>I/O Block<strong>VFD</strong>-<strong>VE</strong> Programming:Pr.00-20 set to 2Pr.00-21 set to 1 (external controls)Pr.02-00 set to 1 (setting Run/Stop and Fwd/Rev controls)Pr.02-05 (MI5) set to 5 (External reset)Revision August 2008, 03<strong>VE</strong>, SW V2.04 B-17
Appendix B Accessories|B.8 PG Card (for Encoder)B.8.1 EMV-PG01XAB2:PG2 signalmode switchABZ1:PG1 signalmode switchPS1:5/12V switchPG1Pulse feedbackPG2Pulse input1. Terminals descriptionsTerminal SymbolsVPDCMA1, A1B1, B1Z1, Z1A2, A2B2, B2DescriptionsPower source of EMV-PG01X (use PS1 to switch 12V/5V)Output Voltage: +5V/+12V±5% 200mAPower source and input signal commonInput signal. Input type is selected by ABZ1. It can be 1-phase or 2-phase input. Maximum 300kP/secInput signal. Input type is selected by AB2. It can be 1-phase or 2-phase input. Maximum 300kP/secGrounding2. Wiring Notesa. Please use a shielded cable to prevent interference. Do not run control wiresparallel to any high voltage AC power line (200 V and above).b. Recommended wire size 0.21 to 0.81mm 2 (AWG24 to AWG18).3. Wire length (wire length and signal frequency are in inverse proportion)B-18 Revision August 2008, 03<strong>VE</strong>, SW V2.04
Appendix B Accessories|Types of PulseGeneratorsOutput VoltageOpen CollectorLine DriverComplementaryMaximum Wire Length50m50m300m70mWire Gauge1.25mm 2 (AWG16) or above4. Basic Wiring Diagramwiring 1FactorysettingNon-fuse breakerNFBRSTFWD/STOPREV/STOPMulti-step 1Multi-step 2Multi-step 3Multi-step 4No functionNo functionDigital Signal Commonjumper- +1 +2/B1 B2R/L1 U/T1S/L2 V/T2T/L3 W/T3+24VFWDREVMI1MI2MI3MI4MI5MI6DCMVPDCMA1A1B1B1Z1Z1Braking resistor (optional)UVWMotorM3~PGLine driverincremental encoderVPA2A2<strong>manual</strong> pulse generatorB2(MPG)B2 10-1710-18DCMLine driverRevision August 2008, 03<strong>VE</strong>, SW V2.04 B-19
Appendix B Accessories|wiring 2FactorysettingNon-fuse breakerNFBRSTFWD/STOPREV/STOPMulti-step 1Multi-step 2Multi-step 3Multi-step 4No functionNo functionDigital Signal Commonjumper- +1 +2/B1 B2R/L1 U/T1S/L2 V/T2T/L3 W/T3+24VFWDREVMI1MI2MI3MI4MI5MI6DCMVPDCMA1A1B1B1Z1Z1Braking resistor (optional)UVWMotorM3~PGLine driverincremental encoderphase difference is 90 o5. Types of Pulse Generators (Encoders)Types of Pulse GeneratorsABZ1+ PS1AB2+PS15V 12V 5V 12VVOLTAGEVCCOC 12VOC 12VOC 12VOC 12VO/PTP5VTP5VTP5VTP5V0VOpen collectorVCCOC 12VOC 12VOC 12VOC 12VO/PTP5VTP5VTP5VTP5V0VB-20 Revision August 2008, 03<strong>VE</strong>, SW V2.04
Types of Pulse GeneratorsAppendix B Accessories|ABZ1+ PS1AB2+PS15V 12V 5V 12VLine driverQOC 12VOC 12VOC 12VOC 12VQTP5VTP5VTP5VTP5VComplementaryVCCOC 12VOC 12VOC 12VOC 12VO/PTP5VTP5VTP5VTP5V0VB.8.2 EMV-PG01OPG OUTPulse outputAB2: PG2 signalmode switchABZ1: PG1 signalmode switchPS1:5/12V switch1. Terminals descriptionsPG1Pulse feedbackPG2Pulse inputVPTerminalSymbolsDescriptionsPower source of EMV-PG01O (use PS1 to switch 12V/5V)Output Voltage: +5V/+12V±5% 200mARevision August 2008, 03<strong>VE</strong>, SW V2.04 B-21
Appendix B Accessories|TerminalSymbolsDCMA1, A1B1, B1Z1, Z1A2, A2B2, B2A/O, B/O, Z/ODescriptionsPower source and input signal commonInput signal from encoder. Input type is selected by ABZ1. It can be1-phase or 2-phase input. Maximum 300kP/secInput signal from encoder. Input type is selected by AB2. It can be 1-phase or 2-phase input. Maximum 300kP/secOutput signal. It has division frequency function (Pr.10-16), opencollector: max. output DC20V 50mAGrounding2. Wiring Notesa. Please use a shielded cable to prevent interference. Do not run control wiresparallel to any high voltage AC power line (200 V and above).b. Recommended wire size 0.21 to 0.81mm 2 (AWG24 to AWG18).3. Wire length: (wire length and signal frequency are in inverse proportion)Types of PulseGeneratorsOutput VoltageOpen CollectorLine DriverComplementaryMaximum Wire Length50m50m300m70mWire Gauge1.25mm 2 (AWG16) or above4. Basic Wiring DiagramB-22 Revision August 2008, 03<strong>VE</strong>, SW V2.04
wiring 1wiring 2FactorysettingNo -fuse bre ake rNFBRSTFWD/STOPREV/STOPMulti- step 1Multi-step 2Multi-step 3Multi- step 4No fu nctionNo fu nctionDigital Signal Common<strong>manual</strong> pulse generator(MPG)10-1710-18Li ne dri verj umpe r- +1 +2/B1 B2R/L 1 U/T1S/L2 V/T2T/L3 W/T3+24VFWDREVMI1MI2MI3MI4MI5MI6DCMVPA2A2B2B2DC MVPDC MA1A1B1B1Z1Z1VPDC MA/OB/OZ/OEMV-PG01OBra ke re sisto r (o ptio na l)Appendix B Accessories|UVWMotorM3~PGLi ne dri verincremental encoderFactorysettingNo -fuse bre ake rNFBRSTFWD/STOPREV/STOPMulti-step 1Mul ti-step 2Multi-step 3Multi- step 4No functionNo functionDigital Signal CommonEH -P LCY0Y0Y1Y1CO Mjumper- +1 +2/B1 B2R/L 1S/L2T/L3U/T1V/T2W/T3+24VFWDREVMI1MI2MI3MI4MI5MI6DCMA2A2B2B2DC MVPDC MA1A1B1B1Z1Z1VPDC MA/OB/OZ/OEMV-PG01OBra ke re sisto r (o ptio na l)UVWY0Y0Y1Y1phase difference is 90oMoto rM3~PGLi ne dri verincremental encoderRevision August 2008, 03<strong>VE</strong>, SW V2.04 B-23
Appendix B Accessories|5. Types of Pulse Generators (Encoders)ABZ1+PS1AB2+PS1Types of Pulse Generators5V 12V 5V 12VVOLTAGEVCCOC 12VOC 12VOC 12VOC 12VO/PTP5VTP5VTP5VTP5V0VOpen collectorVCCOC 12VOC 12VOC 12VOC 12VO/PTP5VTP5VTP5VTP5V0VLine driverQOC 12VOC 12VOC 12VOC 12VQTP5VTP5VTP5VTP5VComplementaryVCCOC 12VOC 12VOC 12VOC 12VO/PTP5VTP5VTP5VTP5V0VB-24 Revision August 2008, 03<strong>VE</strong>, SW V2.04
B.8.3 EMV-PG01LAppendix B Accessories|PG OUTpulse outputAB2: PG2 signalmode switchABZ1: PG1 signalmode switch1. Terminals descriptionsPG1pulse feedbackPG2pulse inputTerminalSymbolsVPDCMA1, A1B1, B1Z1, Z1A2, A2B2, B2A/O, B/O, Z/ODescriptionsPower source of EMV-PG01LOutput Voltage: +5V±5% 200mAPower source and input signal commonInput signal. Input type is selected by ABZ1. It can be 1-phase or 2-phase input. Maximum 300kP/secInput signal. Input type is selected by AB2. It can be 1-phase or 2-phase input. Maximum 300kP/secOutput signal. It has division frequency function (Pr.10-16), Linedriver: max. output DC5V 50mAGrounding2. Wiring Notesa. Please use a shielded cable to prevent interference. Do not run control wiresparallel to any high voltage AC power line (200 V and above).Revision August 2008, 03<strong>VE</strong>, SW V2.04 B-25
Appendix B Accessories|b. Recommended wire size 0.21 to 0.81mm 2 (AWG24 to AWG18).3. Wire length: (wire length and signal frequency are in inverse proportion)Types of PulseGeneratorsOutput VoltageOpen CollectorLine DriverComplementaryMaximum Wire Length50m50m300m70mWire Gauge1.25mm 2 (AWG16) or above4. Basic Wiring Diagramwiring 1FactorysettingNon-fuse breakerNFBRSTFWD/STOPREV/STOPMulti-step 1Multi-step 2Multi-step 3Multi-step 4No functionNo functionDigital Signal Commonjumper- +1 +2/B1 B2R/L1 U/T1S/L2 V/T2T/L3 W/T3+24VFWDREVMI1MI2MI3MI4MI5MI6DCMAOAOBOBOZOZOVPDCMA1A1B1B1Z1Z1Braking resistor (optional)UVWMotorM3~PGLine driverincremental encoderVPA2A2<strong>manual</strong> pulse generatorB2(MPG)B2 10-1710-18DCMLine driverB-26 Revision August 2008, 03<strong>VE</strong>, SW V2.04
wiring 2Appendix B Accessories|FactorysettingNon-fuse breakerNFBRSTFWD/STOPREV/STOPMulti-step 1Multi-step 2Multi-step 3Multi-step 4No functionNo functionDigital Signal Commonjumper- +1 +2/B1 B2R/L1 U/T1S/L2 V/T2T/L3 W/T3+24VFWDREVMI1MI2MI3MI4MI5MI6DCMVPDCMA1A1B1B1Z1Z1AOAOBOBOZOZOBraking resistor (optional)UVWphase difference is 90 oMotorM3~PGLine driverincremental encoder5. Types of Pulse Generators (Encoders)Types of Pulse GeneratorsVOLTAGEVCCO/PABZ15VOCTPAB25VOCTP0VOpen collectorVCCO/POCTPOCTP0VRevision August 2008, 03<strong>VE</strong>, SW V2.04 B-27
Appendix B Accessories|Types of Pulse GeneratorsLine driverQQComplementaryVCCO/PABZ15VOCTPOCTPAB25VOCTPOCTP0VB-28 Revision August 2008, 03<strong>VE</strong>, SW V2.04
Appendix B Accessories|B.9 AMD-EMI Filter Cross ReferenceAC Drives Model Number FootPrint<strong>VFD</strong>007V43A-2, <strong>VFD</strong>015V43A-2, <strong>VFD</strong>022V43A-2 RF022B43AA Y<strong>VFD</strong>037V43A-2 RF037B43BA Y<strong>VFD</strong>055V43A-2, <strong>VFD</strong>075V43A-2, <strong>VFD</strong>110V43A-2,<strong>VFD</strong>110V43B-2RF110B43CAY<strong>VFD</strong>007V23A-2, <strong>VFD</strong>015V23A-2 10TDT1W4C N<strong>VFD</strong>022V23A-2, <strong>VFD</strong>037V23A-2 26TDT1W4C N<strong>VFD</strong>055V23A-2, <strong>VFD</strong>075V23A-2, <strong>VFD</strong>150V43A-2,<strong>VFD</strong>185V43A-2<strong>VFD</strong>110V23A-2, <strong>VFD</strong>150V23A-2, <strong>VFD</strong>220V43A-2,<strong>VFD</strong>300V43A-2, <strong>VFD</strong>370V43A-2<strong>VFD</strong>550V43A-2, <strong>VFD</strong>750V43A-2, <strong>VFD</strong>550V43C-2,<strong>VFD</strong>750V43C-2<strong>VFD</strong>185V23A-2, <strong>VFD</strong>220V23A-2, <strong>VFD</strong>300V23A-2,<strong>VFD</strong>450V43A-250TDS4W4C100TDS84C200TDDS84C150TDS84CNNNN<strong>VFD</strong>370V23A-2 180TDS84C NInstallationAll electrical equipment, including AC motor drives, will generate high-frequency/low-frequency noiseand will interfere with peripheral equipment by radiation or conduction when in operation. By using anEMI filter with correct installation, much interference can be eliminated. It is recommended to useDELTA EMI filter to have the best interference elimination performance.We assure that it can comply with following rules when AC motor drive and EMI filter are installedand wired according to <strong>user</strong> <strong>manual</strong>:• EN61000-6-4• EN61800-3: 1996 + A11: 2000• EN55011 (1991) Class A Group 1 (1 st Environment, restricted distribution)General precaution1. EMI filter and AC motor drive should be installed on the same metal plate.2. Please install AC motor drive on footprint EMI filter or install EMI filter as close as possible tothe AC motor drive.3. Please wire as short as possible.4. Metal plate should be grounded.Revision August 2008, 03<strong>VE</strong>, SW V2.04 B-29
Appendix B Accessories|5. The cover of EMI filter and AC motor drive or grounding should be fixed on the metal plate andthe contact area should be as large as possible.Choose suitable motor cable and precautionsImproper installation and choice of motor cable will affect the performance of EMI filter. Be sure toobserve the following precautions when selecting motor cable.1. Use the cable with shielding (double shielding is the best).2. The shielding on both ends of the motor cable should be grounded with the minimum lengthand maximum contact area.3. Remove any paint on metal saddle for good ground contact with the plate and shielding.Remove any paint on metal saddle for good ground contact withthe plate and shielding.saddlethe plate with groundingSaddle on both endsSaddle on one endB-30 Revision August 2008, 03<strong>VE</strong>, SW V2.04
Appendix B Accessories|The length of motor cableWhen motor is driven by an AC motor drive of PWM type, the motor terminals will experience surgevoltages easily due to components conversion of AC motor drive and cable capacitance. When themotor cable is very long (especially for the 460V series), surge voltages may reduce insulationquality. To prevent this situation, please follow the rules below:• Use a motor with enhanced insulation.• Connect an output reactor (optional) to the output terminals of the AC motor drive• The length of the cable between AC motor drive and motor should be as short as possible(10 to 20 m or less)• For models 7.5hp/5.5kW and above:Insulation level of motor 1000V 1300V 1600V460VAC input voltage 66 ft (20m) 328 ft (100m) 1312 ft (400m)230VAC input voltage 1312 ft (400m) 1312 ft (400m) 1312 ft (400m)• For models 5hp/3.7kW and less:Insulation level of motor 1000V 1300V 1600V460VAC input voltage 66 ft (20m) 165 ft (50m) 165 ft (50m)230VAC input voltage 328 ft (100m) 328 ft (100m) 328 ft (100m)NOTEWhen a thermal O/L relay protected by motor is used between AC motor drive and motor, it maymalfunction (especially for 460V series), even if the length of motor cable is only 165 ft (50m) or less.To prevent it, please use AC reactor and/or lower the carrier frequency (Pr. 00-17 PWM carrierfrequency).NOTENever connect phase lead capacitors or surge absorbers to the output terminals of the AC motordrive.Revision August 2008, 03<strong>VE</strong>, SW V2.04 B-31
Appendix B Accessories|• If the length is too long, the stray capacitance between cables will increase and maycause leakage current. It will activate the protection of over current, increase leakagecurrent or not insure the correction of current display. The worst case is that AC motordrive may damage.• If more than one motor is connected to the AC motor drive, the total wiring length is thesum of the wiring length from AC motor drive to each motor.B-32 Revision August 2008, 03<strong>VE</strong>, SW V2.04
Appendix B Accessories|B.9.1 DimensionsDimensions are in millimeter and (inch)Order P/N: RF015B21AA / RF022B43AA50(1.97)28(1.1)11890(3.54)226(8.9)226(8.9)239(9.4)16(0.63)24(0.94)5.5(3.37)Revision August 2008, 03<strong>VE</strong>, SW V2.04 B-33
Appendix B Accessories|Order P/N: RF022B21BA / RF037B43BA601503011030230231515 305.5B-34 Revision August 2008, 03<strong>VE</strong>, SW V2.04
Order P/N: RF110B43CAAppendix B Accessories|602003312038238239820267.0Revision August 2008, 03<strong>VE</strong>, SW V2.04 B-35
Appendix B Accessories|Order P/N: 10TDT1W4COrder P/N: 26TDT1W4CB-36 Revision August 2008, 03<strong>VE</strong>, SW V2.04
Order P/N: 50TDS4W4CAppendix B Accessories|Order P/N: 100TDS84CRevision August 2008, 03<strong>VE</strong>, SW V2.04 B-37
Appendix B Accessories|Order P/N: 200TDDS84COrder P/N: 150TDS84CB-38 Revision August 2008, 03<strong>VE</strong>, SW V2.04
Order P/N: 180TDS84CAppendix B Accessories|Revision August 2008, 03<strong>VE</strong>, SW V2.04 B-39
Appendix B Accessories|B.10 Multi-function I/O Extension CardB.10.1 FunctionsEMV-APP01 optional multi-function I/O extension card is exclusively designed for <strong>VFD</strong>-<strong>VE</strong>series and used with firmware version 2.04 and above. It communicates with the AC motordrive by RS-485 communication port (COM1). To make sure that the communication isnormal, it needs to set the COM1 communication protocol to RTU mode (8, N, 1), i.e. setPr.09-04 to 12 no matter what the baud rate switch is set.High/Low baud rate switchCommunicationindicator Power indicatorRS485 portAnalog signal commonOutput powerMulti-functioninput terminalsAnalog outputterminalsMulti-functionoutput terminalsMulti-functionoutput common terminalNOTEPlease operate by the following steps for switching the high/low baud rate,1. make sure that RS-485 cable is disconnected before operation2. switch the high/low baud rate3. set Pr.09-01 to the corresponding baud rate to finish settingIf the RS-485 cable is connected before changing the high/low baud rate, thecommunication function will still be invalid even if the communication baud rate (Pr.09-01) ischanged to the corresponding baud rate and the ERROR indicator is normal.TerminalsDescriptionPOWERERRORPower indicator. It will be ON when EMV-APP01 connects to the AC motor drivecorrectly.ERROR indicator. It will be ON when EMV-APP01 can communicate with the ACmotor drive or it will blink.Baud rate switch for extension card:HIGH/LOW HIGH: set the baud rate to 115200LOW: set the baud rate to 9600B-40 Revision August 2008, 03<strong>VE</strong>, SW V2.04
TerminalsDescriptionAppendix B Accessories|5VGNDOutput power 500mA MaxAnalog signal common terminalNOTEThis GND terminal is only used for 5V terminal on EMV-APP01. Please do NOTconfuse with DCM terminal.SO1-MCMSO2-MCMMI7~MIBMulti-function analog voltage output terminal 0~10.0V (output current: 2mA Max.)Analog output is set by Pr.03-21 and Pr.03-24.Multi-function input terminalsPlease refer to Pr.02-23 to Pr.02-27 for MI7-GND~MIB-GND function selection. Taketerminals MI7-GND for example, ON: the activation current is 6.5mA and OFF:leakage current tolerance is 10μA.MO3~MOA Multi-function output terminals (photocoupler)The AC motor drive outputs each monitor signal, such as during operation, frequencyattained and overload, by transistor with open collector. Please refer to Pr.03-35 toPr.03-42 for details.MO3~MOA-MCMMO3~MOAMax: 48Vdc/50mAMCMinternal circuitMCMMulti-function output common terminal. Max: 48Vdc/50mANOTEThis MCM terminal is only used with MO3~MOA on EMV-APP01. Please do NOTconfuse with terminal MCM.Revision August 2008, 03<strong>VE</strong>, SW V2.04 B-41
Appendix B Accessories|B.10.2 DimensionsB.10.3 WiringAnalog signal commonOutput powerrefer to Pr.03-21 to Pr.03-24refer to Pr.02-35 to Pr.02-42refer to Pr.02-23 to Pr.02-27When wiring, please refer to the multi-function input/output function in parameters group 02and group 03 of chapter 4 parameters to set by your applications.B-42 Revision August 2008, 03<strong>VE</strong>, SW V2.04
This page intentionally left blankAppendix B Accessories|Revision August 2008, 03<strong>VE</strong>, SW V2.04 B-43
Appendix C How to Select the Right AC Motor DriveThe choice of the right AC motor drive for the application is very important and has great influenceon its lifetime. If the capacity of AC motor drive is too large, it cannot offer complete protection to themotor and motor maybe damaged. If the capacity of AC motor drive is too small, it cannot offer therequired performance and the AC motor drive maybe damaged due to overloading.But by simply selecting the AC motor drive of the same capacity as the motor, <strong>user</strong> applicationrequirements cannot be met completely. Therefore, a designer should consider all the conditions,including load type, load speed, load characteristic, operation method, rated output, rated speed,power and the change of load capacity. The following table lists the factors you need to consider,depending on your requirements.Load typeLoad speed andtorquecharacteristicsLoadcharacteristicsItemFriction load and weightloadLiquid (viscous) loadInertia loadLoad with powertransmissionConstant torqueConstant outputDecreasing torqueDecreasing outputConstant loadShock loadRepetitive loadHigh starting torqueLow starting torqueSpeed andtorquecharacteristics●●Related SpecificationTimeratings●OverloadcapacityStartingtorque●● ● ● ●Continuous operation, Short-time operationLong-time operation at medium/low speeds● ●Maximum output current (instantaneous)Constant output current (continuous)●●Maximum frequency, Base frequency●Power supply transformer capacity orpercentage impedanceVoltage fluctuations and unbalance● ●Number of phases, single phase protectionFrequencyMechanical friction, losses in wiring ● ●Duty cycle modification●C.1 Capacity FormulasRevision August 2008, 03<strong>VE</strong>, SW V2.04 C-1
Appendix C How to Select the Right AC Motor Drive|1. When one AC motor drive operates one motorThe starting capacity should be less than 1.5x rated capacity of AC motor driveThe starting capacity=2k × N ⎛ GD N ⎞T1.5 the _ capacity _ of _ AC _ motor _ drive(kVA)973 cos⎜ + × ≤L375 t⎟× η × ϕ×⎝A ⎠2. When one AC motor drive operates more than one motor2.1 The starting capacity should be less than the rated capacity of AC motor drive• Acceleration time ≦60 secondsThe starting capacity=k × Nη × cosn⎡⎤s⎢⎥[ nT + ns( ks− 1)] = PC1⎢1+ ( ks− 1) ⎥ ≤ 1.5×the _ capacity _ of _ AC _ motor _ drive(kVA)ϕ⎢ nT⎥• Acceleration time ≧60 seconds⎣⎦The starting capacity=k × Nη × cosnn⎡⎤s⎢⎥[ nT+ ns( ks− 1)] = PC1⎢1+ ( ks− 1) ⎥ ≤ the _ capacity _ of _ AC _ motor _ drive(kVA)ϕ⎢ T ⎥⎣⎦2.2 The current should be less than the rated current of AC motor drive(A)• Acceleration time ≦60 secondsn⎤T + ⎥ ⎦×⎡1n n SIM⎢ + ⎜⎛kS−1⎟⎞⎣ T ⎝ ⎠≤ 1.5 the _ rated _ current _ of _ AC _ motor _ drive(A)• Acceleration time ≧60 secondsn⎤T + ⎥ ⎦⎡1n n SIM⎢ + ⎜⎛kS− 1⎟⎞ ≤ the _ rated _ current _ of _ AC _ motor _ drive(A)⎣ T ⎝ ⎠C-2 Revision August 2008, 03<strong>VE</strong>, SW V2.04
Appendix C How to Select the Right AC Motor Drive|2.3 When it is running continuously• The requirement of load capacity should be less than the capacity of ACmotor drive(kVA)The requirement of load capacity=k × PM≤ the _ capacity_of _ AC _ motor _ drive(kVA)η × cosϕ• The motor capacity should be less than the capacity of AC motor drivek ×3 × VM× IM× 10− 3≤ the_capacity_of _ AC _ motor_drive(kVA)• The current should be less than the rated current of AC motor drive(A)k × IM ≤ the _ rated _ current _ of _ AC _ motor _ drive(A)Symbol explanationP M : Motor shaft output for load (kW)η : Motor efficiency (normally, approx. 0.85)cos ϕ : Motor power factor (normally, approx. 0.75)V M: Motor rated voltage(V)I Mk: Motor rated current(A), for commercial power: Correction factor calculated from current distortion factor (1.05-1.1, depending onPWM method)P C1 : Continuous motor capacity (kVA)k Sn Tn S: Starting current/rated current of motor: Number of motors in parallel: Number of simultaneously started motors2GD : Total inertia (GD 2 ) calculated back to motor shaft (kg m 2 )T Lt AN: Load torque: Motor acceleration time: Motor speedC.2 General PrecautionRevision August 2008, 03<strong>VE</strong>, SW V2.04 C-3
Appendix C How to Select the Right AC Motor Drive|Selection Note1. When the AC Motor Drive is connected directly to a large-capacity power transformer(600kVA or above) or when a phase lead capacitor is switched, excess peak currentsmay occur in the power input circuit and the converter section may be damaged. To avoidthis, use an AC input reactor (optional) before AC Motor Drive mains input to reduce thecurrent and improve the input power efficiency.2. When a special motor is used or more than one motor is driven in parallel with a singleAC Motor Drive, select the AC Motor Drive current ≥1.25x(Sum of the motor ratedcurrents).3. The starting and accel./decel. characteristics of a motor are limited by the rated currentand the overload protection of the AC Motor Drive. Compared to running the motor D.O.L.(Direct On-Line), a lower starting torque output with AC Motor Drive can be expected. Ifhigher starting torque is required (such as for elevators, mixers, tooling machines, etc.)use an AC Motor Drive of higher capacity or increase the capacities for both the motorand the AC Motor Drive.4. When an error occurs on the drive, a protective circuit will be activated and the AC MotorDrive output is turned off. Then the motor will coast to stop. For an emergency stop, anexternal mechanical brake is needed to quickly stop the motor.Parameter Settings Note1. The AC Motor Drive can be driven at an output frequency up to 400Hz (less for somemodels) with the digital keypad. Setting errors may create a dangerous situation. Forsafety, the use of the upper limit frequency function is strongly recommended.2. High DC brake operating voltages and long operation time (at low frequencies) maycause overheating of the motor. In that case, forced external motor cooling isrecommended.3. Motor accel./decel. time is determined by motor rated torque, load torque, and load inertia.4. If the stall prevention function is activated, the accel./decel. time is automatically extendedto a length that the AC Motor Drive can handle. If the motor needs to decelerate within acertain time with high load inertia that can’t be handled by the AC Motor Drive in therequired time, either use an external brake resistor and/or brake unit, depending on themodel, (to shorten deceleration time only) or increase the capacity for both the motor andthe AC Motor Drive.C-4 Revision August 2008, 03<strong>VE</strong>, SW V2.04
C.3 How to Choose a Suitable MotorAppendix C How to Select the Right AC Motor Drive|Standard motorWhen using the AC Motor Drive to operate a standard 3-phase induction motor, take thefollowing precautions:1. The energy loss is greater than for an inverter duty motor.2. Avoid running motor at low speed for a long time. Under this condition, the motortemperature may rise above the motor rating due to limited airflow produced by themotor’s fan. Consider external forced motor cooling.3. When the standard motor operates at low speed for long time, the output load must bedecreased.4. The load tolerance of a standard motor is as follows:torque(%)25%40%10082706050Load duty-cycle60%continuous03 6 20 60Frequency (Hz)5. If 100% continuous torque is required at low speed, it may be necessary to use a specialinverter duty motor.6. Motor dynamic balance and rotor endurance should be considered once the operatingspeed exceeds the rated speed (60Hz) of a standard motor.7. Motor torque characteristics vary when an AC Motor Drive instead of commercial powersupply drives the motor. Check the load torque characteristics of the machine to beconnected.8. Because of the high carrier frequency PWM control of the <strong>VFD</strong> series, pay attention to thefollowing motor vibration problems:Revision August 2008, 03<strong>VE</strong>, SW V2.04 C-5
Appendix C How to Select the Right AC Motor Drive|• Resonant mechanical vibration: anti-vibration (damping) rubbers should beused to mount equipment that runs at varying speed.• Motor imbalance: special care is required for operation at 50 or 60 Hz andhigher frequency.• To avoid resonances, use the Skip frequencies.9. The motor fan will be very noisy when the motor speed exceeds 50 or 60Hz.Special motors:1. Pole-changing (Dahlander) motor:The rated current is differs from that of a standard motor. Please check before operationand select the capacity of the AC motor drive carefully. When changing the pole numberthe motor needs to be stopped first. If over current occurs during operation orregenerative voltage is too high, please let the motor free run to stop (coast).2. Submersible motor:The rated current is higher than that of a standard motor. Please check before operationand choose the capacity of the AC motor drive carefully. With long motor cable betweenAC motor drive and motor, available motor torque is reduced.3. Explosion-proof (Ex) motor:Needs to be installed in a safe place and the wiring should comply with the (Ex)requirements. <strong>Delta</strong> AC Motor Drives are not suitable for (Ex) areas with specialprecautions.4. Gear reduction motor:The lubricating method of reduction gearbox and speed range for continuous operationwill be different and depending on brand. The lubricating function for operating long timeat low speed and for high-speed operation needs to be considered carefully.5. Synchronous motor:The rated current and starting current are higher than for standard motors. Please checkbefore operation and choose the capacity of the AC motor drive carefully. When the ACmotor drive operates more than one motor, please pay attention to starting and changingthe motor.Power Transmission MechanismPay attention to reduced lubrication when operating gear reduction motors, gearboxes, beltsand chains, etc. over longer periods at low speeds. At high speeds of 50/60Hz and above,lifetime reducing noises and vibrations may occur.Motor torqueC-6 Revision August 2008, 03<strong>VE</strong>, SW V2.04
Appendix C How to Select the Right AC Motor Drive|The torque characteristics of a motor operated by an AC motor drive and commercial mainspower are different.Below you’ll find the torque-speed characteristics of a standard motor (4-pole, 15kW):torque (%)180155140100805538AC motor drive60 secondstorque (%)1801551005538Motor60 seconds0 320 60 120Frequency (Hz)Base freq.: 60HzV/F for 220V/60Hz0 320 60 120Frequency (Hz)Base freq.: 60HzV/F for 220V/60Hztorque (%)0 3 20 5003 20 50 12018014060 seconds 15060 seconds13010085681008045354535120Frequency (Hz)Frequency (Hz)Base freq.: 50HzBase freq.: 50HzV/F for 220V/50HzV/F for 220V/50Hztorque (%)Revision August 2008, 03<strong>VE</strong>, SW V2.04 C-7
Appendix C How to Select the Right AC Motor Drive|This page intentionally left blank.C-8 Revision August 2008, 03<strong>VE</strong>, SW V2.04