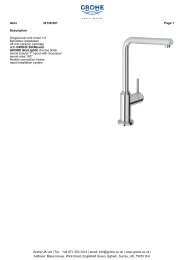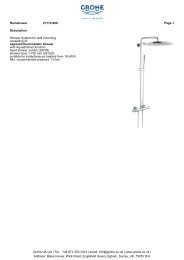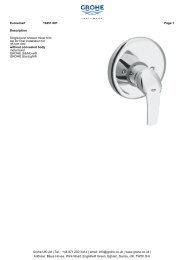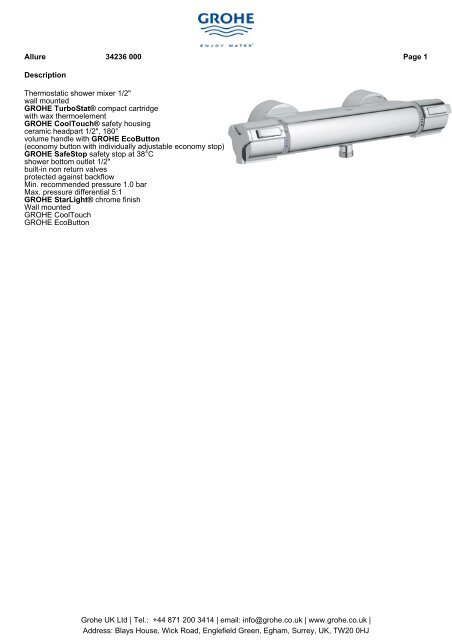
Description Thermostatic shower mixer 1/2" wall mounted GROHE ...
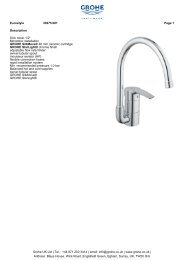
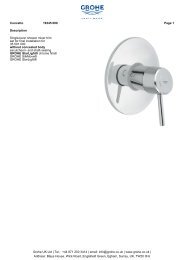
Description Thermostatic shower mixer 1/2" wall mounted GROHE ...
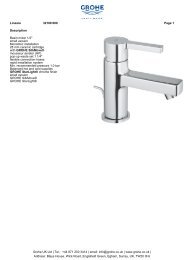
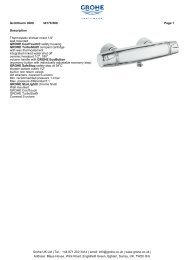
Description Thermostatic shower mixer 1/2" wall mounted GROHE ...

Create successful ePaper yourself
Turn your PDF publications into a flip-book with our unique Google optimized e-Paper software.
Allure 34236 000 Page 2Dimensional drawingGrohe UK Ltd | Tel.: +44 871 200 3414 | email: info@grohe.co.uk | www.grohe.co.uk |Address: Blays House, Wick Road, Englefield Green, Egham, Surrey, UK, TW20 0HJ
Allure 34236 000 Page 3Flow chartGrohe UK Ltd | Tel.: +44 871 200 3414 | email: info@grohe.co.uk | www.grohe.co.uk |Address: Blays House, Wick Road, Englefield Green, Egham, Surrey, UK, TW20 0HJ
Allure 34236 000 Page 4Explosional drawingGrohe UK Ltd | Tel.: +44 871 200 3414 | email: info@grohe.co.uk | www.grohe.co.uk |Address: Blays House, Wick Road, Englefield Green, Egham, Surrey, UK, TW20 0HJ
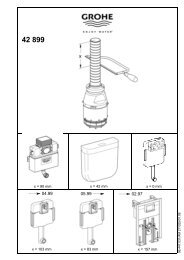
Allure 34236 000 Page 5Part listPos. <strong>Description</strong> Order No Unit1 Handle 47784 000 11.1 Cover Cap 06356 00M 22 Ceramic headpart, 1/2" 45346 000 52.1 O-Ring Ø18,2 x Ø1,7 03924 00M 103 retaining ring 47743 000 14 <strong>Thermostatic</strong> compact cartridge 1/2" 47439 000 15 Non-return valve 47189 000 25.1 Filter 07264 00M 25.2 Non-return valve 08565 000 15.3 O-Ring Ø17 x Ø2 03055 00M 106 S-union 12693 000 1Special accessories:7 Extension 30 46238 000 28 Socket Spanner 19332 000 19 <strong>Thermostatic</strong> compact cartridge 1/2" 47175 000 1Grohe UK Ltd | Tel.: +44 871 200 3414 | email: info@grohe.co.uk | www.grohe.co.uk |Address: Blays House, Wick Road, Englefield Green, Egham, Surrey, UK, TW20 0HJ
Allure 34236 000 Page 6Maintenance instructionsShut off hot and cold water supply!Please perform disassembly in specified order.<strong>Thermostatic</strong> compact cartridge1. Remove O-ring.2. Loosen screw ring using a 34mm tool.3. If necessary, lever out thermostatic compact cartridgevia recess.4. Screw off screw ring.Observe the correct installation position for the thermostaticcompact cartridge and the scale ring.Non-return valveRemove union nipple using a 12mm allen key by turningclockwise (left-hand thread).Ceramic headpart1. Lever out cap and unscrew and remove screw.2. Pull off shut-off handle, splined adapter and economystop.3. Screw off connection nut and pull off scale ring.4. Unscrew and remove ceramic headpart using a 17mmopen-ended spanner.Assemble in reverse order.Readjustment is necessary after every maintenance operation on the thermostatic cartridge.Grohe UK Ltd | Tel.: +44 871 200 3414 | email: info@grohe.co.uk | www.grohe.co.uk |Address: Blays House, Wick Road, Englefield Green, Egham, Surrey, UK, TW20 0HJ
Allure 34236 000 Page 7Temperature adjustment1. Open shut-off valve and measure temperature of thewater using a thermometer.2. Lever out cap.3. Loosen screw.4. Pull off temperature selection handle.5. Turn regulating nut until the water temperature hasreached 38 °C.6. Fit temperature selection handle so that the button facesto the front.7. Replace screw.8. Refit cap.Adjusting the economy stopThe flow rate is limited by a stop adjusted at the factory. If ahigher flow rate is desired, the stop can be overridden bypressing the button. To adjust the stop, proceed as follows:1. Close shut-off valve.2. Lever out cap.3. Loosen screw and pull off shut-off handle.4. Pull off splined adapter and economy stop.5. Fit economy stop in the desired position.6. Fit splined adapter.7. Fit shut-off handle so that the button faces the front.8. Replace screw.9. Refit cap.Grohe UK Ltd | Tel.: +44 871 200 3414 | email: info@grohe.co.uk | www.grohe.co.uk |Address: Blays House, Wick Road, Englefield Green, Egham, Surrey, UK, TW20 0HJ