Download Windmill_tutorial_13B - The SolidWorks Blog
Download Windmill_tutorial_13B - The SolidWorks Blog Download Windmill_tutorial_13B - The SolidWorks Blog
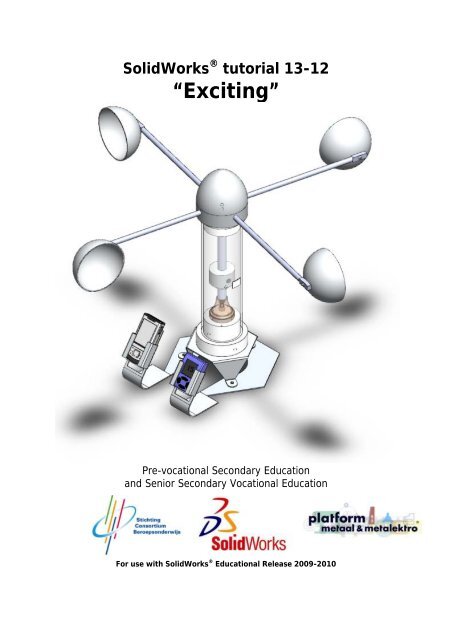
SolidWorks ® tutorial 13-12“Exciting”Pre-vocational Secondary Educationand Senior Secondary Vocational EducationFor use with SolidWorks ® Educational Release 2009-2010
- Page 2 and 3: © 1995-2005, SolidWorks Corporatio
- Page 4 and 5: Assembling a windmillIn this exerci
- Page 6 and 7: 3Go to the folder in whichyou saved
- Page 8 and 9: 71. Click anywhere in thedrawing ar
- Page 10 and 11: 12If necessary, move theupper cap a
- Page 12 and 13: 161. Within the housingelement, sel
- Page 14 and 15: 211. Click:2. Zoom in on th ehousin
- Page 16 and 17: 24 Drag the piece: CapInternal towa
- Page 18 and 19: 28 Now, first Mate bothkeyways toge
- Page 20 and 21: 32now, the:of theshaft and the magn
- Page 22 and 23: 36We will now add anM6x8mm Allen he
- Page 24 and 25: 40With the left mousebutton, drag t
- Page 26 and 27: 44 Drag this screw to thehole.In:Pr
- Page 28 and 29: 48 We will add a bearing.You will u
- Page 30 and 31: 52Then mate: ofthe bearing and thec
- Page 32 and 33: 55 Select the bottom of thehole of
- Page 34 and 35: 59 Complete the mate bylinking the
- Page 36 and 37: 631. Select: theof the shaft, Thens
- Page 38 and 39: 67Choose the following:1. Rivet siz
- Page 40 and 41: 72 Mate the phone holder asin the f
- Page 42 and 43: 76 Insert the phone and thespeed in
<strong>SolidWorks</strong> ® <strong>tutorial</strong> 13-12“Exciting”Pre-vocational Secondary Educationand Senior Secondary Vocational EducationFor use with <strong>SolidWorks</strong> ® Educational Release 2009-2010
© 1995-2005, <strong>SolidWorks</strong> Corporation300 Baker AvenueConcord, Massachusetts 01742 USAAll Rights ReservedU.S. Patents 5,815,154; 6,219,049; 6,219,055<strong>SolidWorks</strong> Corporation is a Dassault Systemes S.A.(Nasdaq:DASTY) company.<strong>The</strong> information and the software discussed in thisdocument are subject to change without notice andshould not be considered commitments by <strong>SolidWorks</strong>Corporation.No material may be reproduced or transmitted in anyform or by any means, electronic or mechanical, forany purpose without the express written permission of<strong>SolidWorks</strong> Corporation.<strong>The</strong> software discussed in this document is furnishedunder a license and may be used or copied only inaccordance with the terms of this license. Allwarranties given by <strong>SolidWorks</strong> Corporation as to thesoftware and documentation are set forth in the<strong>SolidWorks</strong> Corporation License and SubscriptionService Agreement, and nothing stated in, or impliedby, this document or its contents shall be consideredor deemed a modification or amendment of suchwarranties.<strong>SolidWorks</strong>® is a registered trademark of <strong>SolidWorks</strong>Corporation.<strong>SolidWorks</strong> 2005 is a product name of <strong>SolidWorks</strong>Corporation.FeatureManager® is a jointly owned registeredtrademark of <strong>SolidWorks</strong> Corporation.Feature Palette, PhotoWorks, and PDMWorksare trademarks of <strong>SolidWorks</strong> Corporation.ACIS® is a registered trademark of SpatialCorporation.FeatureWorks® is a registered trademark ofGeometric Software Solutions Co. Limited.GLOBEtrotter® and FLEXlm® are registeredtrademarks of Globetrotter Software, Inc.Other brand or product names are trademarks orregistered trademarks of their respective holders.COMMERCIAL COMPUTERSOFTWARE - PROPRIETARYU.S. Government Restricted Rights. Use, duplication,or disclosure by the government is subject torestrictions as set forth in FAR 52.227-19 (CommercialComputer Software - Restricted Rights), DFARS227.7202 (Commercial Computer Software andCommercial Computer Software Documentation), andin the license agreement, as applicable.Contractor/Manufacturer:<strong>SolidWorks</strong> Corporation, 300 Baker Avenue, Concord,Massachusetts 01742 USAPortions of this software are copyrighted by and are theproperty of Electronic Data Systems Corporation or itssubsidiaries, copyright© 2005Portions of this software © 1999, 2002-2005ComponentOnePortions of this software © 1990-2005 D-CubedLimited.Portions of this product are distributed under licensefrom DC Micro Development, Copyright © 1994-2002DC Micro Development, Inc. All rights reservedPortions © eHelp Corporation. All rights reserved.Portions of this software © 1998-2005 GeometricSoftware Solutions Co. Limited.Portions of this software © 1986-2005 mental imagesGmbH & Co. KGPortions of this software © 1996 MicrosoftCorporation. All Rights Reserved.Portions of this software © 2001, SIMULOG.Portions of this software © 1995-2005 SpatialCorporation.Portions of this software © 2005, Structural Research& Analysis Corp.Portions of this software © 1997-2005 Tech SoftAmerica.Portions of this software © 1999-2005 ViewpointCorporation.Portions of this software © 1994-2005, VisualKinematics, Inc.All Rights ReservedThis <strong>tutorial</strong> was developed for <strong>SolidWorks</strong> Benelux and may be used by anyone who needs to learnhow to use the 3D CAD software <strong>SolidWorks</strong>. Any other use of this <strong>tutorial</strong> or any portionthereof is prohibited. If you have questions, please contact your retailer.Intitiative: Jack van den Broek and Nenad RaskovicAdaptation to the educational level: Jack van den Broek (Technical school Dr. Knippenberg).Completed by: Nenad Raskovic<strong>SolidWorks</strong> for Pre-vocational Secondary Education and Senior Secondary Vocational EducationTutorial 13-8: Assembling a windmill2
Tutorial 13-12“Assembling a windmill”<strong>SolidWorks</strong> for Pre-vocational Secondary Education and Senior Secondary Vocational EducationTutorial 13-8: Assembling a windmill3
Assembling a windmillIn this exercise, you will get acquainted with assembled products: Assemblies. Assemblies consist of allpieces you will have made in previous <strong>tutorial</strong>s, together with a couple of pieces you will have to purchase.In this Tutorial, you will learn how to connect one piece to another,Work planYou will assemble a windmill. You will use pieces you have made yourselfand pieces that have to be purchased.• First, you will learn how to bring pieces into the Assembly environment.• Next, you will learn how to assemble the pieces (mate).• You will learn how to use the Toolbox.<strong>SolidWorks</strong> for Pre-vocational Secondary Education and Senior Secondary Vocational EducationTutorial 13-8: Assembling a windmill4
1Launch <strong>SolidWorks</strong>.1. In the menu bar, clickNew.2. In the displayed menu,select: ‘Assembly’.3. Click OK.2A new menu appears.1. In the PropertyManager, click:Using this actionbutton, search for theappropriate piece.We are looking for<strong>The</strong> first piece we made.Attention: This step maywork differently asdescribed here.If so, read the instructionsbelow.<strong>SolidWorks</strong> for Pre-vocational Secondary Education and Senior Secondary Vocational EducationTutorial 13-8: Assembling a windmill5
3Go to the folder in whichyou saved your models.1. Select the modelHousing.SLDPRT2. Next, click Open4<strong>The</strong> piece is now hangingto the cursor.1. Click OK: toplace the piece at theorigin.Placing the piece atthe origin is very importantfor a correct assembly ofthe entire product.<strong>SolidWorks</strong> for Pre-vocational Secondary Education and Senior Secondary Vocational EducationTutorial 13-8: Assembling a windmill6
In the next step, there will be a few things which might not work in thesame way as described above.• If the left column is very different from the example above, thecommand ‘Insert Components’ did not start automatically.In that case, click ‘Insert Components’ in Command Manager.• If the pieces are on the list, you apparently had left it open. In that casetoo, click ‘Browse’ and start searching for the required document.(Housing), Next, you can simply put it in the assembly as we did above.5In the Command Manager,click:to add the next piece tothe Assembly.6We will begin searching forthe new piece in the file.1. Click:2. Next, selec t the pieceCap_Internal.SLDPRT3. Click Open<strong>SolidWorks</strong> for Pre-vocational Secondary Education and Senior Secondary Vocational EducationTutorial 13-8: Assembling a windmill7
71. Click anywhere in thedrawing area to addthe piece.<strong>The</strong> added piece isnow positioned at anarbitrary location in theassembly.8Now, we will connect bothpieces:together.1. In the:Command Manager,click:9You must now select twoelements between which a‘Mate’ will be made.This needs to be done verycarefully.Zoom in on the top sectionof the housing.1. Select the inner edgeof the hole (an ‘Edge’and not a ‘Face’ (Face= flat)).2. In the blue area of theProperty Manager, thefollowing is displayed:<strong>SolidWorks</strong> for Pre-vocational Secondary Education and Senior Secondary Vocational EducationTutorial 13-8: Assembling a windmill8
10Rotate the model so thebottom of the Upper capbecomes visible.To achieve this, press thescroll wheel of the mouseor use the arrows on thekeyboard.1. Select the edge of theUpper cap, asillustrated. Again,make sure you did notselect a face.11Both parts now movetoward each other.1. In the blue area of theProperty Manager, thefollowing is displayed:2. <strong>SolidWorks</strong> has alreadyselected theappropriate ‘Mate’.3. Click OK.You may accidentally choose the wrong face or edge. In that case, do thefollowing:With the right mouse button, click in the blue area Mate Selections<strong>The</strong>n click Delete to remove the selected part (displayed in dark blue in thewindow).Click Clear Selection to remove everything.<strong>SolidWorks</strong> for Pre-vocational Secondary Education and Senior Secondary Vocational EducationTutorial 13-8: Assembling a windmill9
12If necessary, move theupper cap as illustrated.1. Select the face of thehole (a ‘Face’ and notan ‘Edge’).2. In the blue area of theProperty Manager, thefollowing is displayed:<strong>13B</strong>oth parts now move toeach other.1. In the blue area of theProperty Manager, thefollowing is displayed:Face@Housing-1Face@CapInternal-12. For ‘Mate’ ,<strong>SolidWorks</strong> hasselectedthis time3. Click OK to confirm the‘Mate’.<strong>SolidWorks</strong> for Pre-vocational Secondary Education and Senior Secondary Vocational EducationTutorial 13-8: Assembling a windmill10
14<strong>The</strong> selection area in the:Property Manager isemptied, so you canimmediately enter the nextmate.To fasten the cap, we usethe Front Plane standardface. However, it cannot beselected in the model, butonly in the FeatureManager.Since the PropertyManager and not theFeature Manager isdisplayed, you have to usethe Feature Managerdisplayed in the diagramarea .1. Click the plus sign infront of the file name.151. Click the plus signs forboth pieces.Attention! After havingclicked the first +, the listscrolls.<strong>SolidWorks</strong> for Pre-vocational Secondary Education and Senior Secondary Vocational EducationTutorial 13-8: Assembling a windmill11
161. Within the housingelement, select the2. Within upper cap,also select the3. <strong>The</strong> selected pieces aredisplayed in the bluearea of the PropertyManager.4. As ‘Mate’, <strong>SolidWorks</strong>has selected5. Click OK‘Mate’.to confirm the6. Click OK once more toclose the PropertyManager.17Now, add the otherrequired pieces.You can do that byrepeating step 5 through 7.Be sure to do that in thefollowing order.1. Wing Arm2. Shaft3. Base Sheet4. Housing Base5. Phone Holder6. Windblade7. Cap Internal8. Magnet Holder9. Top End<strong>SolidWorks</strong> for Pre-vocational Secondary Education and Senior Secondary Vocational EducationTutorial 13-8: Assembling a windmill12
18 We will now continue thewindmill assembly.1 . Drag the base sheetand the housing bas esomewhat downward.2. Click the arrow belowMove Component toopen the scroll downmenu.3. Select191. Rotate the housingbase as in theadjoined figure.2. Click OK.20 Zoom in at the basesheet to see on which sidethe recessed holes arelocated.If visible, rotate the piecein such a manner that therecessed holes will be onthe bottom side.Not like this!!But like that!!<strong>SolidWorks</strong> for Pre-vocational Secondary Education and Senior Secondary Vocational EducationTutorial 13-8: Assembling a windmill13
211. Click:2. Zoom in on th ehousing base andselect the lower edgeof the hole.3. For the base sheet,select the upper edgeof the hole.<strong>SolidWorks</strong> for Pre-vocational Secondary Education and Senior Secondary Vocational EducationTutorial 13-8: Assembling a windmill14
22 Once you have clicked theupper edge of the hole,parts start moving towardeach other.1. <strong>The</strong> selected pieces aredisplayed in the bluearea of the PropertyManager.2. As ‘Mate’, <strong>SolidWorks</strong>has selected3. Click OK:.231. First, select the loweredge of the hole of thehousing base. <strong>The</strong>nselect the upper edgeof the hole in de basesheet.2. Coincident is theappropriate mate, sowe'll leave it like that.3. Click OK:4. Click OK once more toexit the function.<strong>SolidWorks</strong> for Pre-vocational Secondary Education and Senior Secondary Vocational EducationTutorial 13-8: Assembling a windmill15
24 Drag the piece: CapInternal toward thehousing.See the example opposite.25 Mate! the housing andthe cap internal as insteps 8 through 13.1.Click:2. Within the piece:now select the3. Within the piece:then select theIf necessary, click the plussign to open the list ofbothpieces.<strong>SolidWorks</strong> for Pre-vocational Secondary Education and Senior Secondary Vocational EducationTutorial 13-8: Assembling a windmill16
26<strong>The</strong> Front Plane of thebottom end now turnstowards the Right Plane ofthe housing.1. As ‘Mate’,<strong>SolidWorks</strong> hasselected2. <strong>The</strong> keyway must beon the right side. Ifnot, read theinstructions below.3. Click OK to attach the'Mate'..4. Click OK once more tocorrectly close theProperty Manager.To get the keyway on theright side, you might use27 Zoom in, drag and/orrotate the bearing plateand the base sh eet asillustrated.Both are linked together,which is why they movetogether!<strong>SolidWorks</strong> for Pre-vocational Secondary Education and Senior Secondary Vocational EducationTutorial 13-8: Assembling a windmill17
28 Now, first Mate bothkeyways together.1.2.ClickClick the upper edge ofthe housing base.3. Next, select the loweredge of the bottomend.4. Confirm this by clickingOK.291. Select the upper edgeof the hole of thehousing base.2. Click the lower edge ofthe vent hole of thebottom end.3. Click OK once.4. Finally, click OK toclose the command.<strong>SolidWorks</strong> for Pre-vocational Secondary Education and Senior Secondary Vocational EducationTutorial 13-8: Assembling a windmill18
30 Zoom in, drag and/orro tate the shaft and themagnet holder asillustrated.Next click:to link both pieces.1. Select the outer face ofthe shaft.2. <strong>The</strong>n choose the innerface of the hole.3. Using the function:link both piecestogether.4. Click OK:311. Select the upper faceof the shaft.2. <strong>The</strong>n choose the upperface of the magnetholder.3. For mate, selectdistance .4. For distance, enter5.Check or unchecktomove the magnetholder to the rightplace.6. Click OK.<strong>SolidWorks</strong> for Pre-vocational Secondary Education and Senior Secondary Vocational EducationTutorial 13-8: Assembling a windmill19
32now, the:of theshaft and the magnetholder.If you don't know how todo that, review steps 8through 13 or 25 through26.33 To finalize the piece, youmust position two morepieces.You need a magnet andan M6x8mm Allen headbolt.1. Click:2. Go to the folder whereyou saved the pieces.Click:3. Add the magnet.<strong>SolidWorks</strong> for Pre-vocational Secondary Education and Senior Secondary Vocational EducationTutorial 13-8: Assembling a windmill20
34nowthe outerface of the magnet withthe inner side of the hole.<strong>The</strong>n click OK:351. First, select the outerface of the magnetholder.2. <strong>The</strong>n select the upperside of the magnet.3. In this case,<strong>SolidWorks</strong>hasselected a:mate.4. Click OK to confirm themate.5. Click OK once more.<strong>SolidWorks</strong> for Pre-vocational Secondary Education and Senior Secondary Vocational EducationTutorial 13-8: Assembling a windmill21
36We will now add anM6x8mm Allen head bolt.We will do that using the<strong>SolidWorks</strong> Toolboxfunction. Beforecontinuing, you must firstmake sure Toolbox hasbeen installed andactivated on yourcomputer.1. In the CommandManager, click thearrow ne xt to2. <strong>The</strong>n choose:37Make sure the <strong>SolidWorks</strong>Toolbox and <strong>SolidWorks</strong>Toolbox Browser optionsare both checked in themenu.By adding a check mark tothe right, after bothoptions (<strong>SolidWorks</strong>Toolbox and <strong>SolidWorks</strong>Toolbox Browser), they willbe, from now on,automatically loaded when<strong>SolidWorks</strong> is launched. Soyou don't have to activatethe Toolbox each andevery time.Read the following tip incase these options areunavailable.It may be Toolbox is not available in your version of <strong>SolidWorks</strong>. In thatcase, you will not be able to finish the <strong>tutorial</strong> by following the steps below.If you still want to complete the model, you can also download the requiredattachments (bolts and washers) from www.solidworks.nl. You will not beusing the Toolbox, but will add the bolts and washers to the assembly, asyou would do with any other piece.<strong>SolidWorks</strong> for Pre-vocational Secondary Education and Senior Secondary Vocational EducationTutorial 13-8: Assembling a windmill22
38In the task pane TaskPane: (to the right on thescreen), click the DesignLibrary icon.39<strong>The</strong> Task Pane will openwith the Toolbox.We will now insert an Allenhead bolt into the threadedhole.Successively double-click1.2.3.4.<strong>The</strong> available screws willbe displayed in the lowerpart of the Tas k Pane.5. Search for the screwwith the followingname:<strong>SolidWorks</strong> for Pre-vocational Secondary Education and Senior Secondary Vocational EducationTutorial 13-8: Assembling a windmill23
40With the left mousebutton, drag the screwfrom the Task Pane to yourmodel. As soon as themouse moves above thethreaded hole, the screwjumps to the appropriateposition. Release themouse button.<strong>The</strong> screw may seem muchtoo small or too large. Thatis not important at thispoint.In the:Property Managerchange the size of thescrew to M6x8, and clickOK.41<strong>The</strong> screw is now locked tothe mouse and you couldinsert it into otherthreaded holes.But because we don't haveany other holes, we nolonger need the screw.<strong>The</strong>refore, click: Cancel<strong>SolidWorks</strong> for Pre-vocational Secondary Education and Senior Secondary Vocational EducationTutorial 13-8: Assembling a windmill24
42 Zoom in, drag and/orrotate the housing basea nd the base sheet asillustrated.43 Add the following piece inthe same way as above.Successively double-click1.2.3.4.<strong>The</strong> available screws willbe displayed in the lowerpart of the Task Pane.5. Search for the screwwith the followingname:<strong>SolidWorks</strong> for Pre-vocational Secondary Education and Senior Secondary Vocational EducationTutorial 13-8: Assembling a windmill25
44 Drag this screw to thehole.In:Property Manager,, changethe size of the screw toM3x8, and click OK.45<strong>The</strong> screw is locked to thecursor so you can insert itinto other holes as well.Add two more screws, thenclick:<strong>SolidWorks</strong> for Pre-vocational Secondary Education and Senior Secondary Vocational EducationTutorial 13-8: Assembling a windmill26
46It may be the screws areprotruding. Solve thatproblem as follows.1. Click:2. Select the upper faceof the screw.3. <strong>The</strong>n select the face ofthe base sheet.4. Click OK:5. Click OK once more:Repeat this for both otherscrews.47 Addthe following piece tothe bolt ends in the samemanner. (M3 Bolt)<strong>SolidWorks</strong> for Pre-vocational Secondary Education and Senior Secondary Vocational EducationTutorial 13-8: Assembling a windmill27
48 We will add a bearing.You will use the toolboxonce more.Double-click the followingpieces.1.2.3.4. Choose5. Drag:tothe hole of the capinternal.491. Insert the bearinginto the hole.2. Locate the appropriatebearing3.Click OK:<strong>SolidWorks</strong> for Pre-vocational Secondary Education and Senior Secondary Vocational EducationTutorial 13-8: Assembling a windmill28
50 Press Cancel to close.51 Mate the bearing asillustrated.<strong>SolidWorks</strong> for Pre-vocational Secondary Education and Senior Secondary Vocational EducationTutorial 13-8: Assembling a windmill29
52<strong>The</strong>n mate: ofthe bearing and thecap internal.of theThis is required to fastenthe bearing.Sometimes a piece is in the way during the assembly. For instance, it maynot be possible to select a piece correctly. This can be solved in two ways.You can hide the piece that is in the way by clicking it and then selectingHide components.You can bring it back again by clicking the hidden piece in the FeatureManager and then selecting Show components.Or, you can make the piece transparent. Again, click the piece and thenselect Change Transparency.If you want the piece to be displayed normally again, click it once more andthen click again Change Transparency.<strong>SolidWorks</strong> for Pre-vocational Secondary Education and Senior Secondary Vocational EducationTutorial 13-8: Assembling a windmill30
53 A dd the Dynamo to theassembly.1.2.Click:Change the search to:3. <strong>The</strong>n choose the file:4. Click:541.Click:2. Choose the outer edgeof the shaft.3. <strong>The</strong>n choose theinterior of the bottomend.4. Click OK:5.Click OK once more:<strong>SolidWorks</strong> for Pre-vocational Secondary Education and Senior Secondary Vocational EducationTutorial 13-8: Assembling a windmill31
55 Select the bottom of thehole of the: bottom end.561. Select the bottom ofthe hole of thedynamo.2. <strong>The</strong>n select the mate:3. Enter 4.17mm:4. Click OK:<strong>SolidWorks</strong> for Pre-vocational Secondary Education and Senior Secondary Vocational EducationTutorial 13-8: Assembling a windmill32
57 1.2. Select the faces as inthe figure:3. For mate enter:4. Click OK:5. Click OK once more:58 Now mate the shaft of thedynamo to the hole of theshaft. See the figure!<strong>SolidWorks</strong> for Pre-vocational Secondary Education and Senior Secondary Vocational EducationTutorial 13-8: Assembling a windmill33
59 Complete the mate bylinking the bottom of theshaft and the top of thedynamo.60 Now is the time to put thecap to place.1. Click mate and selectthe upper face of:cap internal and theinner face of top end.Matethese two piecestogether.<strong>SolidWorks</strong> for Pre-vocational Secondary Education and Senior Secondary Vocational EducationTutorial 13-8: Assembling a windmill34
611. Select the threading ofthe shaft and thethreaded screw holeM8 of the cap.62 Click OK once.<strong>SolidWorks</strong> for Pre-vocational Secondary Education and Senior Secondary Vocational EducationTutorial 13-8: Assembling a windmill35
631. Select: theof the shaft, <strong>The</strong>nselect: theof the top end.2. Click OK.3. Click OK once more:64 Mount the wing arm to thetop end.Use the following mates todo that.Concentric for theshaft/hole assembly.Coincident for the endshaft / end hole mount.Finally, use Planes tostraighten the wing arm.See figure.<strong>SolidWorks</strong> for Pre-vocational Secondary Education and Senior Secondary Vocational EducationTutorial 13-8: Assembling a windmill36
65 Now you can mount thewindblade.First, make a connectionbetween the holes(Concentric). Next, link theoutside of the windblade tothe wing arm.1. Finally, choose theFront Plane of the wingarm and the Top planeof the windblade.2. Put them straight toeach other by using:66Get the piece:from the Toolbox.Double-click the followingpieces1.2.3.4. Choose5. Dragto the hole of thetop end.<strong>SolidWorks</strong> for Pre-vocational Secondary Education and Senior Secondary Vocational EducationTutorial 13-8: Assembling a windmill37
67Choose the following:1. Rivet size:2. Rivet length:3. Click OK. In the nextscreen, click Cancel.68Mate the rivet and thewing arm.<strong>SolidWorks</strong> for Pre-vocational Secondary Education and Senior Secondary Vocational EducationTutorial 13-8: Assembling a windmill38
69For the following features,we need a guidelinerunning through the middleof the model. This axisalready exists in the model,but is invisible (in thestandard settings).1. Click Hide/Show Items2. Make sure the buttonView Temporary Axesis activated.70 Choose the function:711. Choose the axis of thecap2.<strong>The</strong> window displayswhich axis you haveselected.3. Enter 360° degrees4.In Property Manager,change the number ofcopies to 45.and check:Select the windblade,the wing arm and therivet.6.Click OK.<strong>SolidWorks</strong> for Pre-vocational Secondary Education and Senior Secondary Vocational EducationTutorial 13-8: Assembling a windmill39
72 Mate the phone holder asin the figure.73 Add the phone holder pieceonce more.1. In:Feature Manager, clicktheomponent Properties2. Click:C<strong>SolidWorks</strong> for Pre-vocational Secondary Education and Senior Secondary Vocational EducationTutorial 13-8: Assembling a windmill40
74 A new menu is displayed.1. Choose:2. <strong>The</strong>n choose:75 Mate it in the same way asthe phone holder.Seethe figure.<strong>SolidWorks</strong> for Pre-vocational Secondary Education and Senior Secondary Vocational EducationTutorial 13-8: Assembling a windmill41
76 Insert the phone and thespeed indicator.Next, connect the phoneand the speed indicator tothe phone holders.77 Finally, add the magnetdetector to the assembly.<strong>The</strong>n, mate the magnetdetector, the housing andthe bottom end.<strong>SolidWorks</strong> for Pre-vocational Secondary Education and Senior Secondary Vocational EducationTutorial 13-8: Assembling a windmill42
78 When the assembly isready, save the file as<strong>Windmill</strong>.sldasm79 List the most important things you have learned during this <strong>tutorial</strong>.<strong>SolidWorks</strong> for Pre-vocational Secondary Education and Senior Secondary Vocational EducationTutorial 13-8: Assembling a windmill43


