Woodturner--Les Roberts The Pen Turners Corner A Terrible Tool ...
Woodturner--Les Roberts The Pen Turners Corner A Terrible Tool ...
Woodturner--Les Roberts The Pen Turners Corner A Terrible Tool ...

Create successful ePaper yourself
Turn your PDF publications into a flip-book with our unique Google optimized e-Paper software.
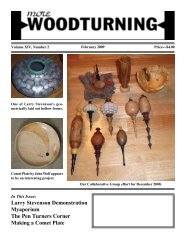
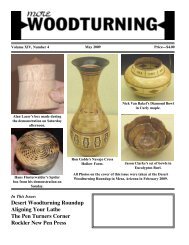
Volume XVII, Number 6 July 2012 Price—$4.00Turned and Pierced pieces by Pat and PeggyBookey of North Pole, Alaska. Pat turns andPeggy pierces. Two beautiful pieces.Piece by Kelly Dunn from Norfolk Island Pine alsoin the Dale Nish Collection on display at the UtahWoodturning Symposium 2012.Pieces from the Dale Nish Collection on display atthe Utah Woodturning Symposium 2012.Tom Wirsing bowl as displayed in hisdemonstration on Saturday of the Symposium.In This Issue:<strong>Woodturner</strong>--<strong>Les</strong> <strong>Roberts</strong><strong>The</strong> <strong>Pen</strong> <strong>Turners</strong> <strong>Corner</strong>A <strong>Terrible</strong> <strong>Tool</strong>Dixie Biggs DemonstrationMore Woodturning July 2012 Page 1
Note: We now offer subscriptioncopies as a Portable DocumentFile (*.PDF) that you can read onyour computer. You can archiveyour copies on your computer andsearch them for subjects of interest.This method provides quickdelivery of the issue. This is also acost savings, because the electronicedition costs only $25.00 per year.This is a significant cost savingsfor foreign subscribers who have topay a great deal extra for postage.It is also in full color.If interested,e-mail me at:fred@morewoodturning.netPage 2 More Woodturning July 2012
ContentsAustrailian One Arm <strong>Woodturner</strong>--<strong>Les</strong> <strong>Roberts</strong>...................................4Letter Concerning Mildred’s Purse.......................................................8Oldfield Western Heritage Show.9Questions and Answers from the Internet...........................................10Alcohol dipping..........................10Thread Chasing.........................10Which <strong>Tool</strong> Steel Should you Buy?.....................................................11Some of Fred and Mildred’s Piecesin the Utah Woodturning SymposiumInstant Gallery..................13<strong>The</strong> <strong>Pen</strong>turner’s <strong>Corner</strong>............14A <strong>Terrible</strong> <strong>Tool</strong>...........................18Grips-All Jaws Orbital Holding System..............................................20Segmented Project Planner News.......................................................21Dixie Biggs Demonstration.......22Craft Supplies Super Wednesday--2012....................................28<strong>The</strong> Utah Woodturning Symposium2012............................................34Rotating Base for your Tormek.38<strong>The</strong> Market Place.......................39Coming Events..........................40Note: All of the photoson the cover are fromthe Utah WoodturningSymposium 2012 inOrem, Utah.EDITORIALWell, the Utah WoodturningSymposium is over for another yearas is the AAW Symposium. We didn’tattend the AAW Symposium becauseof some other commitments, but Idid get Peggy Bookey to promiseto write a story on the symposium.Hopefully, we’ll have that coveragefor the August 2012 issue.Our mailing list continuessto shrink each month, so I urge allof you to become promoters forour magazine. <strong>The</strong> cost of printingand the cost of mailing continuesto climb and the customers to supportcontinues to shrink. <strong>The</strong> goodlist we used to mail to was theAAW, but they have quit rentingtheir mailing list. We could alsouse somemore advertisers sincewe’ve lost two full page advertisersrecently.Fred HolderEditor and PublisherTo Subscribe to More Woodturning:Check the Print Subscription Period Below:United States Canada Other Countries__One Year/$35 __One Year/$48 __One Year/$68__Two Years/$70 __Two Years/$100 __Two Years/$105__Three Years/$105 __Three Years/$145 __Three Years/$205All amounts in US Dollars! We Accept Visa/MC.Electronic Version (PDF): For People receiving Electronic issues,new priceby year only: $25.00/One year. We need an e-mail for the electronic version.Because of the significant postage increase for outside the United States,recommend the Electronic Version for all Foreign Subscribers.Thank You!!Please Enter Your Name and Address Below:Name: _________________________________________________Address: _______________________________________________City: ______________________ State: ______ ZIP: ____________E-Mail for Electronic Subscribers: ____________________________Clip and Mail with Your Check, Cash, or Charge Card Information to:More Woodturning, PO Box 2168, Snohomish, WA 98291More Woodturning July 2012 Page 3
Cabriole legs, which restricted him to between centerwork with very little faceplate turning.<strong>Les</strong> <strong>Roberts</strong> turning with one arm.In 1972 <strong>Les</strong> and his wife Judy started their ownsmall business doing contract woodturning for thetrade. <strong>The</strong>y used Goldie semi-auto and Gennini autolathes and over the years turned their small shop intoa successful furniture manufacturer. <strong>Les</strong> and Judy hadboth developed a passion for power boat racing. In1985 <strong>Les</strong> was involved in a power boat accident andsustained severe spinal injuries and the loss of his leftarm. To make matters even more daunting, he was lefthanded. As a result, they sold the business and movedto the wonderful town of Ballina, two hours south ofBrisbane.He never touched a lathe again until 1999. Whileon a holiday and staying in a caravan park they met upwith a turner named Robyn Henry who just happenedto have a Carba-Tec mini lathe in the boot of his car.Everyone should carry a lathe in the trunk of their car!Robyn convinced <strong>Les</strong> to give one- handed turning ago and though he said it was rather awkward, with thejuices flowing he headed home and bought a Nova 3000and that was it, he was hooked. With a lot of encourage-[Continued on Next Page]Intelligent sensing of turningconditions adjusts latheperformance to meet turningdemands, senses chisel digins and adjusts instantlyNOVA DVR XPNEW! 5 Favourite Speedfunction for even easierspeed selection.Download thepamphlet,view videos atwww.teknatool.com<strong>The</strong> world’s most intelligent lathe combined with the power, capacity & capability of astationary lathe - the DVR XP is revolutionaryNEW! Higher torque motor.Delivering even morepower over the old model.Extendable Bedsadds 20” capacityper section - takeyour lathe as longas you wantDirect Drive (no belts, nopulleys) means ultrasmooth cutting conditionsAvailable in the USA fromWoodcraft Supply Corpwww.woodcraft.comCraft Supplies USAwww.woodturnerscatalog.comWoodworkers Supplywww.woodworker.comPackard Woodworkswww.packardwoodworks.comSwivel Headstocklocks at any positionmakes your turningmore comfortable,saves spaceCapacity, power & capability of amuch larger lathe in a compactfootprint - 1.75HP motor, 16” inboard,29” outboard with easy to useoutrigger accessoryNEW! Updated designsolid cast iron componentsmeans rock solidperformanceMore Woodturning July 2012 Page 5
Continued from Previous Pagement from his friends he started to develop as he calledit “a crude technique with his wrong hand”.and I think the most amazing accomplishment is theJohannes Michelson style hats. His turning techniqueand control puts most two handed turners, includingme, to the test. He’s also blessed with a wonderful eyefor form.Device that Guilo developed for <strong>Les</strong> to help himhold the tool handle.In 2000 he met and befriended the famed GuiloMarcolongo who offered a continuous source of encouragement.<strong>The</strong>n in 2001 <strong>Les</strong> spent three days in Guilo’sworkshop. During that time Guilo developed a verysimple but effective device that fits onto <strong>Les</strong>’ forearmto support the handle of the turning tool. It only takesa minute for Judy to fit the device to his arm. Whenworking with a gouge, he holds it on the tool rest at therequired cutting angle. Using his elbow and the rotatingaction of the body, <strong>Les</strong> can then cut the requiredarc. He says that it has taken a bit of practice, but histechnique and tool control are improving all the time.He now achieves a nice clean cut.<strong>Les</strong> doing hollowing with a stabalized boring bar.<strong>Les</strong> isn’t afraid of working on deep vessels, either.Using the boring bar, he has great control and isas skilled at turning these natural-edge deep vessels aswell as any two handed turners. I’ve always said that ourboring bar system is so easy to use that you can operateit with one hand, and <strong>Les</strong> has proven that point.<strong>Les</strong> turning a large salad bowl with one hand.I’m not only amazed at the fact that <strong>Les</strong> hasachieved the tool control that he has on small turneditems but I was absolutely awed by the fact that he turnsout huge salad bowls, beautiful large natural edge piecesA number of natural edge hollow forms turned by<strong>Les</strong> <strong>Roberts</strong>.Page 6 More Woodturning July 2012
him to be a patient teacher. He’s been doing demosat local clubs and I’d like to convince him to come toNorth America to show us what he’s capable of doingon the lathe. <strong>Les</strong> working on a hat.While I was a guest at <strong>Les</strong> and Judy’s beautifulhome I had the pleasure of watching him in action andwas lucky enough to take quite a number of pieceshome, where my wife and I have them proudly on display.I was also fortunate to have <strong>Les</strong> give me lessonson using a skew, at which he is a master, and foundHere is one of <strong>Les</strong>’s hats that he turned a coupleof year ago.[Continued on Next Page.]More Woodturning July 2012 Page 7
Continued from Previous PageHere are some of the items he turned while wewere playing in his shed.A few scoops.This beautiful Australian Blackwood bowl whichmeasures approximately 5.5” x 15” went homewith the author.<strong>Les</strong> believes the arm support would be a great benefitto anyone with restricted arm movement, arthritis,tendon or muscular problems. For more informationregarding this apparatus, <strong>Les</strong> can be contacted at:judithroberts1@bigpond.com .Letter Concerning Mildred’sPurseA couple of mushrooms.As you can see the mushrooms are boxes.<strong>Les</strong>’s work is of such high caliber that he sometimeshas a difficult time keeping up with the demandfrom some of the finer galleries in Australia. Thisbeautiful Australian Blackwood bowl which measuresapproximately 5.5” x 15” is an example of his outstandingwork, and now graces my dining room table.Fred,I am a digital subscriber to “More Woodturning”.I was reading the article on the Alan Carter demo. I amparticularly interested in Mildred’s purse. My wife sawthe article and wants me to make her one.1. How was Alan’s tops fastened to the top go thepurse?2. Was his versions purely decorative or were theyfunctional as well?3. What did Mildred make her shoulder strap outof?4. How was the strap fastened to the inside of thepurse?I really enjoy the magazine. I especially enjoy thefact that I can take it with me on my iPad.Thanks,Stephen DiCensoHello Stephen,Mildred’s purse is not really functional, althoughshe designed it to be so if she chose. I believe thatAlan’s pieces were strictly artwork and designed to bedisplayed. Alan didn’t make purses. His half spheresPage 8 More Woodturning July 2012
were supported in various ways to sit on a flat surfacefor display.<strong>The</strong> top was permantley attached.Mildred made her shoulder strap out of some fibershe had that she twisted together into a sort of a rope.It is long enough that she can hang it on her shoulderor put it back into the purse to make it just a hand hold.Since she wanted to lock the strap at different lengths,I suggested she put clamps inside the purse. She foundsome plastic clamps at Staples that worked pretty welland she attached them inside the purse with hot meltglue.Good luck with the project. I would like to publisha photo of your wife’s purse when it is done.Glad you enjoy the magazine. I hope I can keep itenjoyable for many years to come.Fred HolderOldfield Western Heritage Show<strong>The</strong> 1st Annual Woodturning Show at the FredOldfield Western Heritage & Art Center was held fromMarch 17th through April 1st. Over 150 pieces of woodwere entered. <strong>The</strong> Opening Reception was a huge successwith over 550 people in attendance throughoutthe day. This was exciting as many of the attendeeswere Western Art patrons who were not familiar withwoodturnings. So not only did the show generate salesit was a tremendous educational venue. <strong>The</strong> JudgesShow Award went to William Bender for his “AbbadonDestroyer of Worlds” and the People’s Choice Awardwent to Paul Crabtree for his piece “Majestic”. <strong>The</strong>rewere numerous Honarable Mention Awards. A ThankYou goes to “Rockler Woodworking & Hardware” forbeing the event sponsor! <strong>The</strong> show dates for 2013 willbe May 11 - May 31st.Judges Show Award went to William Bender forhis “Abbadon Destroyer of Worlds” shown here.Joella Oldfield, DirectorFred Oldfield Western Heritage and Art CenterPO Box 1539 ~ Puyallup, WA 98371Web Site: fredoldfieldcenter.orgTelephone: 253-445-9175Editor’s Note: I had hoped to attend the Opening Receptionand do a story on the show. Unfortunately, Iforgot about the event being involved with other thingsat the time. Here are the two major award winners:<strong>The</strong> Judge’s Choice and the People’s Choice.People’s Choice Award went to Paul Crabtree forhis piece “Majestic”.More Woodturning July 2012 Page 9
Questions and Answers from the InternetAlcohol dippingQuestion: Ok, so I have this giant piece of green(WET!) box elder w/bark inclusion that someonegave me. I cut it in half and discovered the bark goesright down to the center. I began to turn one half, anddunked the other half into DA as recommended. SinceI’ve never done this before, the question is: Should theobject be totally covered, and for what time period?And, is it advisable to do a rough turning, then do thealcohol dipping?—Jim BreedenFred’s Response: I decided to use the AlcoholDrying of Wet Wood technique that Dave Smith developedand highly recommends. In the past I’ve hadexcellent results with it. Because of its size, I turnedan end grain vase out of a piece of the root. <strong>The</strong> roughturned wall thickness was about 5/8”. I soaked it inalcohol that we’ve used several times before for 24hours. I removed it from the alcohol and let it dry offfor a short while and then wrapped it in brown grocerysack on the outside and top rim, leaving the inside openand upright. I weighed it as soon as it was wrapped,here are the results:Date Weight (grams)5-4-06 4505-5-06 4005-6-06 3655-7-06 3205-8-06 3105-9-06 2655-11-06 2405-13-06 2005-14-06 1905-15-06 190After weighing on the 15th, I final turned it. <strong>The</strong>foot was still round so that I could use the chuck tenonoriginally used to turn the piece. <strong>The</strong>re were no cracksor checks. <strong>The</strong> piece has lost 58 percent of its originalweight in ten days sitting in my shop. It was out ofround by less that 1/16 inch. <strong>The</strong> wood was very drywhen turned.—Fred HolderPage 10 More Woodturning July 2012Lyle’s Response: <strong>The</strong> alcohol process Fred describedworks well to speed up the drying time. <strong>The</strong>DA replaces the water and the DA dries out faster thanwater. You must follow the process of double turningand stack pieces if you are doing multiple pieces. Realizethe wood is still going to shrink and warp out ofshape. <strong>The</strong> DA only speeds things up it will not stopthe shape from changing as it dries. I prefer to take theturning down to its final wall thickness and not have todouble turn it.I have never heard about anyone using DA on solidwood blanks. You want the moisture to stay in the woodto store it. To dry any thick solid piece of wood withany drying method will risk cracking. Drying a thinpiece of wood will relieve the stress so the wood canmove/warp without cracking.—Lyle JamiesonThread ChasingQuestion: I have been looking into doing somethread chasing and had a few questions of which youcould possibly help. If I want to get a good quality setof tools for thread chasing what would you recommend?What TPI would you suggest with which to start? Doyou recommend the armrest or is that not necessary?—John DekleFred’s Response: <strong>The</strong> best thread chasers to beginwith are the finer thread simply because the chaserdoesn’t have to moves as fast. I have chasers from about30 tpi (which is not much good for wood) to 3-1/2 tpiwhich works pretty well for fairly soft woods. However,I generally recommend 16 tpi chasers for most of thework the average woodturner will be doing. Of the 16tpi chasers that I own, my favorite it the chasers made byRay Iles in England and imported by <strong>Tool</strong>s for WorkingWood, ww.toolsforworkingwood.com, in New York. Ithink they sell for about $90.00.I personally like to use an arm rest for the internalthreads. It makes it easier to control the cut of thethreads on the inside. However, it is not absolutelynecessary. What is absolutely necessary is good densewood, with English Boxwood being the best, especiallywhen learning to chase threads. If you don’t have really
Continued from Previous PageHeat Treating Makes a DifferenceBesides tool shape, the way the steel is heattreated makes a huge difference in its performance.Heat treating can be a lengthy and complex process,and therefore, a costly part of tool production. That ispart of the reason you will find similar appearing toolsmade from the same M2 steel but one costs 2 times theother. In most situations the more expensive tool willcut longer between sharpening than the less expensivemodel because of its superior heat treatment.Particle Steels<strong>The</strong>n we get to the particle steels such as 2030 and2060. <strong>The</strong>se materials are manufactured in a differentand “high tech” way that allows some benefits in theproperties of the cutting edge. It is possible to make ahard and long wearing cutting edge without making theoverall tool brittle. This metallurgical magic costs morebut may be worth it in some situations. <strong>The</strong> biggest advantageis that it will cut more between sharpenings.I have some 70 year old tools that are made ofsimple high carbon tool steel. <strong>The</strong>y work wonderfully.<strong>The</strong> edge may need to be refreshed more often that oneof my newer tools, but so what. <strong>The</strong>y still let me turnthe spindle or bowl shape I want with little drama.<strong>The</strong> difference between all of these tool steelsand the various heat treating processes is largely just amatter of how long a tool stays sharp (understanding“sharp” is worth another few hundred words that I’llsave for another time). How long a tool stays sharp canbe important if you are a production turner or if youdon’t know how to sharpen your own tools. <strong>The</strong> productionturner probably should buy the most expensive ofthe wear resistant tools for the tasks that are done mostoften. A large bowl gouge for roughing out bowl blankscomes to mind. Those who don’t know how to sharpenor don’t have a proper grinder need to invest in low costM2 tools and a grinder. With a bit of instruction youwill learn to sharpen those tools so they cut perfectly.By the time those affordably priced tools are “used-up”you will know how and when to sharpen. <strong>The</strong>n you candecide what type of tool you want as a replacement. Itmakes no sense to make learning errors in sharpeningon a $150 gouge.Carbide Turning <strong>Tool</strong>sCarbide turning tools are popular. Carbide is brittleso it doesn’t tolerate shock from a catch or from a fallto the floor very well. Consequently, carbide tools aremade of steel and use a simple insert of carbide toactually do the cutting. <strong>The</strong> profile of the insert is relativelylimited, so they don’t replicate all turning toolshapes. That said, you can still turn almost any shapewith them.<strong>The</strong> number of types of carbide is about as greatas the number of types of tool steel. <strong>The</strong> ones chosenfor woodturning are generally different from those thatare used in the machine shop in both shape and carbidecomposition. Sure you can replace the worn cutter onyour Easy Wood <strong>Tool</strong> with one made for turning castiron and save $15, but you will be disappointed unlessyou plan on turning cast iron (yes, you can do that ona wood lathe.)In SummaryMany tool catalogs will provide their sales pitchon why we should buy a particular tool. <strong>The</strong>re are alsoa number of on-line source of information about toolsteels. It is an interesting and relevant topic.My experience is that most turners love or hate atool based upon things that are easily changed like toolsharpness, shape of the grind on the tool, technique ofuse (correct tool for some job but not this job), or theshape and balance of the handle. Blame the steel if ithelps you convince your spouse that you “need” thatnew tool. Otherwise ...Editor’s Note: I believe today that I have tools madefrom all of the tool steels on the market; however, myfirst turning tools were hand forged in my blacksmithshop using coil springs from old retired farming machinery.<strong>The</strong> were just carbon steel, but they cut woodwell and they held an edge better than some of theinexpensive imported tools that I purchased to get anidea of the shape the tool needed to be.However, I don’t like to have to sharpen often, therefore,today I use tools with the best steels available, such asthe Crown Pro-Pm tools with powder metal and alsothe Carbide <strong>Tool</strong>s from Hunter <strong>Tool</strong> Company and theCarbide <strong>Tool</strong>s from Easy Wood <strong>Tool</strong>s.Page 12 More Woodturning July 2012
Some of Fred and Mildred’s Pieces in the Utah WoodturningSymposium Instant GalleryFred’s display pieces: (left) small hollow formmade from Maple (right) bowl of Chinese Balls allhaving seven balls made with Christian Delhon’sChinese Ball tools.Mildred’s Wave Box made after seeing JohnBeaver’s Demonstration of the techniquedescribed in the June 2012 issue of MoreWoodturning.Page 13 More Woodturning July 2012
<strong>The</strong> <strong>Pen</strong>turner’s <strong>Corner</strong>by Don Ward<strong>The</strong> AAW Symposium will be history when thisarticle is published. I was not able to attend but I trustthose who attended found it as awesome this year asit has been in years past. I look forward hearing aboutthe penturning rotations. I know they were quite a hitas the presenters were excellent choices. Maybe nextyear I will be able to attend and maybe even fortunateenough to be selected to demo. I did apply for this yearbut was not selected.<strong>The</strong> symposium here in Texas will be comingup in August. SWAT, as we call it, is second in sizefor regional symposia only to the Utah symposium. Iwill be at SWAT and would like to meet any who arereaders of <strong>The</strong> <strong>Pen</strong>turner’s <strong>Corner</strong>. I can be found inthe penturning hand-on area. Come by and say hi andvisit. I love to talk about making pens. I may even putyou to work.Several months ago I mentioned purchasing a stabilizingsystem for stabilizing pen blanks. I have finallycompleted testing and learning how to use it and wish toreport and review the system and how well it works.MesquitesMan’s Cactus Juice home stabilizingsystem was purchased from Curtis Seebeck of SanMarcos, TX. Mesquiteman’s Cactus Juice StabilizingResin is the name of the product and can be seen athttp://turntex.com . No, the resin is not made from cactusjuice. Curtis was the first to start making pen blanksusing the skeleton from prickly pear cactus plants foundacross the southwest. So, he naturally called the resin“cactus juice” to continue with the cactus theme. Hiscactus skeleton blanks make exquisite pens as does hisWorthless Wood blanks along with his stabilized Texaswoods blanks. Check out Curtis’ stabilizing resin alongwith his pen blanks. You will not be disappointed.<strong>The</strong> system came with everything needed to starthome stabilizing. Two sizes of penmakers vacuumchambers are available. <strong>The</strong> smaller penmaker’s hobbyunit sells for $74.95. <strong>The</strong> vacuum chamber is .madefrom welded 3/8” acrylic to allow easy viewing ofthe stabilizing process. This chamber was designedto maximize the use of MesquiteMan’s Cactus JuiceStabilizing Resin by only requiring a minimum of 10oz. of resin for a batch of 5 pen blanks.<strong>The</strong> hobby kit includes a custom designed stabilizingchamber, a custom designed weight system to holdthe blanks down to keep them from floating, completelid with gasket, air diverters, and port for vacuum gauge(if desired), and a 36” x 3/16” ID clear vacuum hosewith 1/4” NPT fittings on each end, ready to attach toyour vacuum pump. <strong>The</strong> chamber size is 4 5/8’ widex 5 1/2” long x 5 1/4” tall (inside dimensions) and hasa capacity up to 15- 3/4” x 5 1/4” pen blanks (3 layersof 5).<strong>The</strong> larger penmaker’s production kit sells for$114.95. This larger chamber is made from welded1/2” acrylic to allow easy viewing of the stabilizingprocess. This chamber is designed to maximize the useof your Cactus Juice by optimizing the size to reduce theamount of void space that needs to be filled with Juice.<strong>The</strong> actual chamber size is 8” wide by 5-1/2” long and7” tall (inside dimensions). This larger chamber willhold 9, 18, 27, or 36 pen blanks (3/4” x 5 1/4”). A specialknife scale rack is available and the unit will hold 14 or28 individual (7/16” x 1-7/16” x 5-1/4”) knife scales.This larger size also includes the custom designed stabilizingchamber, the custom designed weight system,and comes complete with lid gasket, air diverter, andport for vacuum gauge (if desired) and a 36” x 3/16”ID clear vacuum hose with 1/4” NPT fittings on eachend, ready to attach to your vacuum pump.Figure 1. <strong>The</strong> Complete <strong>Pen</strong>maker’s hobbysystem.Figure 1 shows the complete penmaker’s hobbysystem along with my vacuum pump. <strong>The</strong> cactus juiceis an extra purchase and does not come with the stabilizingsystem. Cactus juice is available in the followingPage 14 More Woodturning July 2012
container sizes: pint ($17.95), quart ($33.95), ½ gallon($61.95), 1 gallon ($99.95) and 5 gallon ($395.95)Complete details and purchasing conditions orrestrictions are available on the TurnTex website.<strong>The</strong> Cactus Juice Stabilizing system uses thevacuum chamber and a vacuum source to remove airfrom the pens blanks allowing the stabilizing resin tototally soak into the fibers of the wood. Now, let’s seethe system in action.First, the blanks must be dry and free of moisture.Curtis recommends the moisture content of wood to bestabilized to 10% or less. Even “dry” blanks will containmoisture due to ambient relative humidity. Blanks willreach equilibrium with the ambient humidity and mayneed to be dried. Those of you who lived in coastal areaswill have higher moisture content in your dry blanksthan those who live in the desert southwest. I driedthe test blanks in a toaster oven at 150 degrees for 12hours. My blanks started out with a moisture contentfrom 5.8% to as high as 12%. Twelve hours at 150degrees reduced the moisture content to 0% measuredwith a moisture meter.Curtis has data on his website reporting how thesystem performed on several Texas woods. Curtis onlyuses native Texas woods. I used several woods commonlyused by pen makers to show how cactus juiceworks on a wider selection of woods. Here are thewoods I used: persimmon, buckeye, unknown spaltedblank, pecan, Afzelia, another unknown spalted blank,X-cut hackberry, mesquite, walnut burl, osage orange,spalted hackberry, boxelder, zebrawood, and cherry.<strong>The</strong> blanks were mostly solid blanks ranging from harddense species like the osage orange to softer woodssuch as the buckeye. Two blanks were spalted but notto the punky stage. I will report my findings on howmuch cactus juice the blanks soaked up later. And,cactus juice stabilizing resin is non flammable. Alsonote that I put some into a styrofoam cup and the cupseemed to get soft and I quickly removed the resin fromthe foam cup.<strong>The</strong> dried blanks were placed in the chamber in3 layers of 5 blanks each. I used about 22 ounces ofresin to cover the blanks with ½ inch depth above thetop layer. Figure 2 shows the blank in the chamber withcactus juice. My vacuum pump is hooked up and to turnon. <strong>The</strong> pump will pull about 27.5 inHg and the vacuumwill be left applied until all air has escaped from theblanks and no more bubbles are escaping and rising.Figure 2. This photo shows the blanks in thechamber with cactus juice.Figure 3. This photo shows the initial rush of airfrom the blanks.Some blanks seemed to reach “airless” stagequickly while others continued to emit air bubbles forover an hour and half or longer. I allowed the pump tocontinue pulling vacuum for over two hours. Figure3 shows the initial rush of air from the blanks. It wasquite impressive to see the air being pulled from thefibers of the wood. Wood fibers are like a box of straws.When the air is removed from the fibers then the cactusjuice resin can fill in as the air is removed. Curtis has avideo on his website showing the level of cactus goingdown quickly once the vacuum is released. I could notreproduce that effect to the extent that the video shows.But, the level of cactus juice did lower after allowingthe blanks to soak for awhile. I used 25 ounces of resinto cover the blanks but only 15 ounces of cactus juicewas left in the chamber once the blanks were removed. I[Continued on Next Page.]More Woodturning July 2012 Page 15
Continued from Previous Pagemust conclude that the missing 10 ounces must be insidethe blanks. <strong>The</strong> ounces I measured were liquid ouncesand not weight. <strong>The</strong> unused resin can be returned to theoriginal container and used again. It is good to note thatresin cleanup is done with soap and warm water and notsome harsh solvent. Figure 4 shows a close up of thevacuum chamber and the amount of air being removed.After close to two hours the bubbles from the blanks hadstopped and I turned off the vacuum pump and releasedthe vacuum from the chamber. I allowed the blanks tosoak for about 20 minutes while I tore off sheets of aluminumfoil and prepared the oven for curing. Figure 5shows the chamber just before I turned off the vacuumpump. Notice the air bubbles have stopped.blanks wrapped and ready for the oven. <strong>The</strong> blankswere next placed in my toaster oven at 200 degreesfor 45 minutes. <strong>The</strong> blanks were then removed fromthe oven, the foil was removed and the blanks were allowedto cool. I would suggest checking toaster oventemperatures with an oven thermometer and not trustthe temperature dial. At 200 degrees on my dial theoven only warmed to 160 degrees. Measure and makea mark for 200 degrees.Figure 4. This photo shows a close up of thevacuum chamber and the amount of air beingremoved.Figure 5. This photo shows the chamber justbefore I turned off the vacuum pump.After soaking the blanks were removed andwrapped tightly in aluminum foil. Figure 6 shows theFigure 6. This photo shows the blanks wrappedand ready for the oven.After the blanks were cool I cut several in half andinspected. <strong>The</strong> cactus juice stabilizing resin appeared tohave totally penetrated the blank. I turned several of theblanks to as small as I could and the shaving had cactusjuice present. I compared the shavings to shavings fromidentical non-stabilized blanks and I could tell that thestabilized blank’s shavings had resin in them. I also puta couple of blanks, one maple burl and one buckeye,in the chamber and added blue dye to the cactus juice.Several colors of dyes are available from TurnTex.com.After stabilizing and curing I cut the blanks in half andthe blue resin was totally soaked into the blank. I turnedthem really small (< ¼ inch diameter) and blue shavingswere covering my lathe and floor. <strong>The</strong> blue resin hadtotally soaked into the wood.Figure 7 is a chart that reports the data I collected.<strong>The</strong> blanks were weighed after drying as I placed theminto the vacuum chamber. <strong>The</strong> first data column reportsthat weight. <strong>The</strong> next column is the weight of the blanksafter curing and removal of the foil wrappings. <strong>The</strong>next column is the amount of weight change due tothe resin soaking into the wood. And the last columnis the percent change in weight of the blanks from theadded resin.More Woodturning July 2012 Page 16
Figure 7. This is a chart that reports the data I collected.Notice that the harder more dense woods (osageorange and pecan) soaked up the least amount of resinwith 5.6 grams but they did intake resin and the resinwas completely inside the blanks upon cutting and inspection.<strong>The</strong> amount of cactus juice resin taken in bythe other blanks went from the 5.6 grams all the wayto 25 and 29 grams for the softer persimmon, spaltedtamarind and the buckeye.I can see the best use of this stabilizing systemwould be for the softer woods, spalted wood and punkypen blanks. <strong>The</strong> resin will make otherwise uselesspieces of wood quite suitable for pen making. Someof the nicest blanks I have used were really soft punkyor spalted wood pen blanks. It is really nice to have asystem to use in my shop that will make these blanksuseful and beautiful without having to send them to acommercial stabilizing company. I will use the CactusJuice Resin for stabilizing many more blanks I havewaiting to become pens.Cactus Juice Stabilizing Resin performed as CurtisSeebeck claimed it would. I have read the customercomments on the Turn Tex website related to cactusjuice and I can honestly say that I concur with all ofthem. I have just added another tool to my pen makingshop that I would be hard pressed to discard. A largervacuum chamber is available that can be used to stabilizesmall turnings. I have seen several bowls that wereturned to 75% complete and then stabilized. <strong>The</strong>y werethen turned to final size and they looked very nice. Acouple of bowls were stabilized with dyed resin and thedye was still in the wood after final turning. Along withmy Drill Doctor, collet chucks, transfer punch set andPaul Huffman drilling vice the Cactus Juice StabilizingResin System will stay if I have to get rid of all othertools other than lathe and turning tools.As always, questions and comments are welcome.Email me at don@RedRiver<strong>Pen</strong>s.com . Also, checkout the cactus juice web site at http://www.TurnTex.com and give Curtis a call or send an email if moreinformation is needed. Curtis will gladly answer questions.So, email or give Curtis a call. All contact infois on his website.Do a good turn daily!More Woodturning July 2012 Page 17
A <strong>Terrible</strong> <strong>Tool</strong>by Bob Heltman, CMW, AAW © 3-2012About 25 years ago, when I had a coal fired forgein my back yard, I fashioned a number of woodturningtools...and other objects. An old railroad spike was usedto make a ring cutting tool. <strong>The</strong> head was cut off first,a slight bend made, and then about 4 inches from theother end I heated and hammered an area 1/4” thick.This I ground flatter and smoother, and then, withfurther grinding, formed a very sharp and narrow tip.See Figure 1.Figure 4 shows a “store bought” ring making tool,compared to my <strong>Terrible</strong> <strong>Tool</strong>. Frankly, my tool makestinier rings with less loss of undercut wood.Figure 1. <strong>The</strong> Author’s home made tool.Figure 2 is a close-up of the metal end. Here youcan see the split handle held together with nylon cordsoaked in glue. I was in a hurry back then, a conditionlittle abated with time. FOGwood was used for thehandle (FOG = Found On Ground).Figure 4. Comparison of the Author’s tool to astore bought captive ring tool.A 1/4” spindle gouge was used to cut the sideslopes to allow clearance for the ring tool, which canbe seen in Figure 5 as cutting in from the right handside.Figure 2. Close up of the metal end.Thus ugly and embarrassing “terrible” tool has hadonly one virtue; it WORKS GREAT! Some day, probablynot soon, I ought to make a proper handle. And,next time I have my side grinder handy, and the weatherallows, I will probably grind a better tip, as shown inFigure 3. <strong>The</strong> red area would be removed.Figure 3. Closer view of tip.Figure 5. Shows the tool cutting the right side ofthe captive ring.Another option would be to heat the tip of the tooland bend the point to a more inward angle. In such acase the initial cutting would require the tool’s handleto start much farther left, and as the tool cut inward thehandle would slowly swing to the right.Page 18 More Woodturning July 2012
As in the commercial ring tool in Figure 4, thecutout in the tool could be round so the inner part, duringinitial cutting inward, would form the ring, withthe tool’s handle then swung to the right to begin undercutting.Figure 6. <strong>The</strong> photo shows the tool cutting the ringloose on the left side.Figure 6 shows the <strong>Terrible</strong> <strong>Tool</strong> having cut in fromthe left and slicing the ring free. For the purpose of thisdemonstration I did not take extra time to shape andsand the outer curvature of the ring; this photo simplyshows that <strong>Terrible</strong> <strong>Tool</strong> really does work. Sharpeningis done with straight and round diamond hones...andnot often needed.And, this tool was ideal for making a series ofdiscreet centering rings on a locust wood base made tohold statuary. <strong>The</strong> sharp point was lightly touched tothe wood, while the base was reverse chucked, makinga series of ever larger circles about 1/4” apart. SeeFigure 7. When not used as a base, and flipped over,this becomes a wide bottomed snack bowl - 2 uses forthe price of one!On a whim I inlet a 1” mirror in the center, aroundwhich I marked in my name, wood type, and date. Mostany art object displayed on this stand would cover thecenter items.Making tools can become a significant part ofwoodturning. I had a lot of fun with my anvil, hammers,tongs, and coal fired forge. Especially on a hot summer’sday one could really appreciate our forefathersworking around their forges, shoeing horses, makingbeam hooks, forming many other tools and artifacts,and building a strong America.<strong>The</strong>se days, on a smaller scale, I can use my benchvise, MappGas+Oxygen torch, various hammers andpliers, and at least form or adjust tool tips. One importantpoint applies. YOU are at your own risk whenmaking and using tools. Use common sense and goforward in steps so you can see results. You are on yourown, and this author assumes no responsibility in yourcase. Such is the legal climate in which we live thesedays. Have safe fun. ??Chinese Ball <strong>Tool</strong>sI am a dealer for the Crown Chinese Ball <strong>Tool</strong>sand have an inventory of sets and extra handles onhand for immediate shipment. A set includes onehandle, four cutters, a tool to make a tapered hole,and a pamphlet written by David Springett. <strong>The</strong>seare priced at $125.00 for each set.<strong>The</strong> handles include a wooden handle and ametal piece to attach the cutters and ride on the ball.<strong>The</strong>se are priced at $40.00 each. I recommend threeadditional handles.Shipping is $5.00 in USA.Figure 7. This tool was excellent for making aseries of rings on a wooden base.Fred HolderPO Box 2168, Snohomish, WA 98291360-668-0976More Woodturning July 2012 Page 19
Grips-All Jaws Orbital Holding Systemby Fred HolderIn the November 2009 issue of More Woodturning,I reported on the Grip-All Jaws System that wehad obtained at the September 2009 meeting of theNorthwest Washington <strong>Woodturner</strong>s. In June 2010, Ireported again on the upgraded system, which we hadfurther purchased at the Woodcarving Show. More recentlyin April of this year at the Quilceda WoodcarvingShow in Monroe, Washington we were introduced to thelatest version of this system. (See Figure 1) We had topurchase the new system, especially since he was givingprevious customers a 20 percent discount at the show.This new system is called the Orbital Hollding Systemand seems to be great for carving and decorating turnedpieces and many other things.of 14 inches. <strong>The</strong> pivot arms and adapter blocks aremade of the same tough material as all of Grip-AllJaws products.Figure 2. <strong>The</strong> new system holding a bowl forcarving or decorating.<strong>The</strong> vise part of the Orbital pivots 360 degrees andtilts to 90 degrees and all the while your work piece isclamped securely. That way you can clamp it once and“reposition it without moving it”Figure 1. <strong>The</strong> new Grip All Jaws Orbital HoldingSystem.<strong>The</strong> Orbital Holding System is based on the Model376 PanaVise. <strong>The</strong> kit comes with the vise head, thetilt-swivel base, the adapter blocks, the pivot arms, andtwo sets of pins.Athough the parts are all prefinished, there is someassembly that is required. Instructions for that are in thekit, of course, but you can download them from theirwebsite. Or, you see how it all goes together on thevideo at the website.<strong>The</strong> Orbital Holding System is designed to holdwork up to 20 pounds. and has an opening capacityLindsay SphereTurning SystemNOW- 3 JIG SIZES5'' SPHERES FOR ALL Lathes9'' Spheres-16'' Swing & Larger12'' Spheres-24'' SwingsORDER ONLINE AT:lindsaylathetools.comE-MAIL f.lindsay@morrisbb.netPHONE 828-699-0694Page 20 More Woodturning July 2012
Figure 3. This photo shows the new systemholding a light bulb, but only to show how it canhold delicate items without breaking them.<strong>The</strong> Orbital shown in Figure 1 has been assembled.It comes with the clamping board and the screws tomount it however clamps are not included. That wayyou can clamp it to a convenient surface and let thecreativity flow.You can contact Grip-All Jaws as follows:Grip-All JawsP. O. Box 55McCleary, WA 98557TEL: 360-708-4677Web Site: http://www.gripalljaws.comNote: Since we purchased the items, Mildred has nothad time to use it. I’m sure we’ll have a more detailedon this system in a future issue. <strong>The</strong> original system wasvery useful and this seems to be even more useful andwell worth the price.Segmented Project Planner NewsIt’s been a while since the last release of the SegmentedProject Planner. We’ve now amassed enoughchanges to make a new release—Version 3.02.0000 -5/10/2012. We’ve added a number of items:Added segment colors to copyable properties inCopy Layers(CopyDown) function.Added capability to set the colors of column itemsin the project report A set of 13 colors are provided for(“Aqua”, “Black”, “Blue”, “Green”, “Lime”, “Orange”,“Puce”, “Red”, “Blue-Green”, “Dark Green”, “Brown”,“Dark Red”, “Dark Blue”). This capability applies toall columns except Layer Number & Sides(alwaysBlack) and GlueUpDiameter(determined by diameterof ring). Capability also applies to the Grid display tothe extent that items displayed are the same as itemsin the project report.Moved Thmbnail folder under current projectfolder so that user may have multiple project folderswith the Gallery remaining fully functional across allproject folders.Added stagger control to Layer Tuner to supportadvanced use of vertical spacers.Completed full program scan for potential errorsand bad programming practices, changing codeto be able to continue with reasonable results insteadof aborts. <strong>The</strong>y can’t be all gone; that only occurs forprograms no longer being used. But I did find a fewpotential problems and they are no longer present.Rewrite of the Project Report to provide for 1)selection of which columns to include, 2) tailoringof column header text, and 3) tailoring of charactersused to separate columns. This means the report canbe tailored to more closely fit the project at hand ANDit may be adjusted to maximize the size of charactersused ( an aid for tiring eyes). <strong>The</strong> content/format ofthe Project Report may easily be adjusted using a newform, Format Report (located in the Print section ofthe File menu), where the user can select columns tobe included, adjust header text, and setup a columnseparator as desired. <strong>The</strong> report definition informationis stored both in the Segcalc.ini file and in the projectfile whenever it is saved. So, effectively, each projecthas its own report definition.Bill KandlerVerified Software Products CompanyMore Woodturning July 2012 Page 21
Dixie Biggs Demonstrationby Fred HolderDixie Biggs did a Power Carving on your Turningsdemonstration for the Seattle Chapter of AAWon May 12, 2012. <strong>The</strong> following Saturday an all daydemonstration was conducted at Rick Terney’s shopfrom 9:00 am to 3:00 pm. Mildred and I attended bothevents to see this lady do her thing. Now a little aboutDixie Biggs.Dixie Biggs lives in Gainesville, Florida, and hasbeen a full-time studio woodturner/artist since1989.Having a degree in agriculture from the Universityof Florida and a love of gardening, much of her workincorporates a botanical theme. She is best known forher meticulously-carved, “leaf wrapped” vessels.She has exhibited her work in such notable venuesas Smithsonian Craft Show, American Craft Exposition,Philadelphia Museum of Art Craft Show anddel Mano Gallery. Her work is in public and privatecollections worldwide. She has shared her techniquesand knowledge at regional and national symposiums,including Australia, the Utah Woodturning Symposium,the American Association of <strong>Woodturner</strong>s and variouswoodturning clubs and craft schools around the country.For more information on Dixie Biggs, visit her websiteat: www.dixiebiggs.com. Here is what Dixie says aboutherself on her website:Dixie Says, “I grew up with a love of carving anda fascination for working with wood. My interest inwoodturning began in 1974 when I taught myself touse a wood lathe so I could duplicate a chess set mygrandfather had made. My work has evolved from thatinitial experience.“Although each piece begins on the lathe, I see thisas a starting point for further development. I create thesurface of my work using various carving tools, bothhand-held and power driven.“Having a degree in Agriculture, much of my workincorporates a botanical theme. I find a great deal ofinspiration in the shapes, textures and simple beautyfound in nature. What I strive to evoke in my piecesis a sense of tranquility that a quiet walk in the woodscan bring.“I get a great deal of excitement watching a piecetake shape from my hands. I never know what I’m goingto find once I get below the bark of a log. Sometimesthere is buried treasure! It is such a thrill when I findPage 22 More Woodturning July 2012unexpected swirls, burls, patterns and colors. I lovefinding wood that others have discarded and breathingnew life into it. I feel I’ve accomplished this whensomeone can’t resist picking up a piece of my workand caressing it.”<strong>The</strong> rest of this story will be done with photosand captions.Figure 1. Dixie About to start her demonstrationat the club meeting.Figure 2. Leaf Pattern to be used on the project.Note: Dixie cuts her leaf patterns from Borco draftingtable cover material that is tough and flexible.
Figure 3. Carving the pattern into a turned androunded disc. Dixie says the curved bowl shapeshe is using is the desireable shape for learning tocarve on turnings.As shown in Figure 3, Dixie places her disc on asand bag coverd with a plastic material which holds thewood securely while carving.Figure 5. One of Dixie’s pieces showing all of theprocesses she demonstrated at the club meetingand at the all day demonstration.Figure 4. One of Dixies Pieces.Figure 6. Dixie said that her grandfather madechess sets and when she started turning shewanted to make a chess set. This was one of theground shapes for making a chess piece. <strong>The</strong>sewere ground from old mower blades, I believe.She said her little lathe couldn’t handle the projectand she was forced into upgrading her lathe.[Continued on Page 24.]More Woodturning July 2012 Page 23
Continued from Previous Page.Figure 7. Dixie burning dots around rim of ahollow form with a ball cutter. She says this makesa nice bit of decoration for a small piece.Figure 9. Hollow form with a top put on it andfinish applied to the piece.Figure 8. <strong>The</strong> little hollow form after burning.Figure 10. Another small hollow form withscribbling and color on it.After burning the dots around the rim of this littlehollow form, Dixie sanded it lightly and applied a finish.<strong>The</strong>n magically she pulled out a nice little blacktop already turned and finished and applied it to thepiece. Figure 10 shows the piece with the finish andthe little black top.Figure 11. Sanding on the carved leaves with aPfingst Micro Sander.Page 24 More Woodturning July 2012
Figure 12. <strong>The</strong> sanded leaf pattern with dye addedin one small area.Figure 14. Lip Service. I believe she said that thispiece was in the AAW competition for tea pots.<strong>The</strong> piece has been sold.Figure 15. Down Home, 2004, Cherry andcocobolo, 4”high x 4 1/2”diameter.To contact Dixie Biggs:Figure 13. A finished and colored leaf piece. Thislady is some artist. Beautiful work.Dixie Biggs10615 S.W. 8th AvenueGainesville, FL 32607(352) 332-3272email: dixie@dixiebiggs.comMore Woodturning July 2012 Page 25
Extra Handles forCrown Chinese Ball<strong>Tool</strong>sHello all, I’ve just refreshedmy supply of extra handles for theCrown Chinese Ball <strong>Tool</strong>s. <strong>The</strong>price has gone up slightly, but stillabout the best price available onthe market.Fred HolderPO Box 2168Snohomish, WA 98291 USATEL: 360-668-0976Where <strong>Turners</strong> Turn First®INFORMATION AND RESOURCES FORWOODTURNERS WORLDWIDEFind articles, projects, new products, vendors, club listings,turner websites, courses and schools, discussion forum,books and videos and much more!WWW.WOODTURNINGONLINE.COMPage 26 More Woodturning July 2012
Mike MahoneyNew VideoTo Orderwww.bowlmakerinc.comPage 27 More Woodturning July 2012WOODWORKERS’SEMPORIUMVICMARC5461 Arville StreetLas Vegas, NV, 89118Toll Free 800-779-7458Fax 702-871-0991Stuart Batty-Trent Bosch-Cindy DrozdaKeith Gotshall-Mike Mahoney-David Nittman-Richard RaffanAll reputed woodturners using Vicmarc lathes.....shouldn't you?www.woodworkersemporium.com
Craft Supplies Super Wednesday--2012by Fred HolderEach year, Craft Supplies USA puts on a SuperWednesday event, which is designed to help their salesand provide essentially an additional day of the UtahWoodturning Symposium. <strong>The</strong>re is always a ClearanceSale, which starts at 8:00 am and runs all day. At9:30 the demonstrations start. This year there were 10demonstration areas, one of which was at Treeline nextdoor to Craft Supplies.Area 1 had three pen turning demonstrations:1-Kurt Hertzog (shop tips, tricks and aids)2-John Johnson (Second Amendment pen)3-Mark Gisi (Advanced <strong>Pen</strong> Making)Not being a pen turner, I passed up all three of thesedemonstrations, but I’m sure they were useful.Area 2 had 2 demonstrations by Nick Agar and one byArt Majerus. I attended Nick Agar’s first demonstration.Nick did a colorful demo looking at the decorating elfand other tools to add interest and a personal designquality to your work. Nick turned a simple bowl formto explore the possibilities of adding turned decorativeareas to the bowl. I took a number of photographs inNicks demonstration and share them with you here:Nick then applied texture to the outside of thebowl in different locations.Here he is blowing on colored stain with a littledevice, which I never did get its name. It seemedto work quite well to spray stain on a rotatingbowl.Here Nick Agar is turning the outside of the bowlthat he will then decorate with texturing andcolors.More Woodturning July 2012 Page 28
More color, I believe it was black, was added tothe surface.Nick then reversed the bowl to start turning theinside or top of the bowl. Here he is applyingtexture to the rim of the bowl.He then applied a white stuff to the surface andbuffed it in a bit to help it dry.<strong>The</strong> bowl rim has been colored.Here he is buffing off the white stuff.Here Nick is hollowing the center after applyingthe white stuff over the stained rim of the bowl.[Continued on Next Page]More Woodturning July 2012 Page 29
Continued from Previous PageArea 3 had Craig Jackson from Easy Wood <strong>Tool</strong>sdemonstrating his line of tools. I first saw Craig withhis new tool line about 2 years ago at the Desert WoodturningRound-Up in Mesa, Arizonia and purchased acouple. I thought it would be interesting to see what hehas going now. <strong>The</strong>se are carbide tipped tools that arevery effective, especially for beginning turners whohave trouble sharpening their tools and learning how torub the bevel. <strong>The</strong>se tools are pushed straight in on thecenter line of rotation. <strong>The</strong>y cut very well. Craig wasturning a bowl when I dropped in to see him.This is the business end of Graeme’s tool. Note theswept back wings on it.Here Craig Jackson is making the shavings flywith one of his Easy Wood <strong>Tool</strong>s.Area 4 had Graeme Priddle for New Zealanddemonstrating and embellishing woodturnings.This is one of Graeme’s pieces. He is very artistic.Graeme Priddle really attacks the wood when hebegins to turn.This is the piece that Graeme was working onwhen I saw him.Page 30 More Woodturning July 2012
Area 9 had Joe Wagner doing an on-going demonstrationon texturing. I had purchased a set of the WagnerTexturing tools a couple of years ago and thoughtit might be worthwhile to see him demonstrate. I tooka number of pictures so here are a few of them.Joe is applying color to a textured area.This is Joe wagner starting his demonstration.This is the slice of textured piece from theprevious photo.Joe laid up two of the tools against the tool rest.I noted he was using a fairly flat rest of thetexturing. That would probably improve theperformance of the tools. Note they are for use onendgrain surfaces. I don’t believe they will workvery well on side grain or on bowls.[Continued on Next Page.]More Woodturning July 2012 Page 31
Continued from Previous Page.Area 5 had Keith Burns doing an ongoing demonstrationwith the Hollow Roller system. Here is a photoof the hollow roller system.This is Joe Wagner’s point tool for doing finegrooves or trimming away portions of texturing.This is the hollow roller system for hollowing. <strong>The</strong>roller assembly is mounted in the lathe’s tool postlocation and another tool rest is used to supportthe tool.Area 7 had Alan Harm doing an ongoing demonstrationof Shear Scraping Techniques. I took a coupleof photos of him using the tool and of the business endof the tool.Joe also introduced the Robert Sorby texturingtool which can be used on both endgrain and sidegrain.Here is another textured piece.This is a close up shot of Alan Harm doing shearscraping on the outside of a bowl. <strong>The</strong> cutter isapplied at a 45 degree angle and there is a flat sideof the tool which rides on the tool rest to assurethe correct angle is applied to shear scrape.Page 32 More Woodturning July 2012
This is a close up view of the cutter on the shearscraper. It was covered with fine dust fromscraping and is not a clear as I had hoped.Stuart Mortimer demonstrating at Treeline.Area 8 was the Robert Sorby ongoing demonstrationby Chris Ponsey. Here is Chris turning.Chris Pousey turning with Robert Sorby tools.Area 10 was at Treeline just down the street andhad Stuart Mortimer doing an all day demonstration.I didn’t attend this, but Mildred did and the followingphotos are hers.This is a rough turned spiral hollow form thatMildred saw Stuart do at Treeline.If you are not familiar with Craft Supplies USA,here is their contact information:Craft Supplies USA1287 East 1120 SouthProvo, Utah 84606TEL: 1-800-551-8876Web Site: http://www.woodturnerscatalog.comMore Woodturning July 2012 Page 33
<strong>The</strong> Utah Woodturning Symposium 2012by Fred Holder<strong>The</strong> Utah Woodturning Symposium was held onMay 17-19th, 2012 at the McKay Events Center inOrem, Utah. <strong>The</strong>re were over 80 demonstrations tochoose from and a full schedule of Special Events.<strong>The</strong>re was something for everyone!<strong>The</strong> 2012 Demonstrators include: Nick Agar, SallyAult, Trent Bosch, Rex Burningham, Kirk Deheer,Douglas Fisher, Brian Gisi, Kurt Hertzog, Allen Jensen,Stuart King, Mike Mahoney, Art Majerus, Guilio Marcolongo,Brian McEvoy, Johannes Michelsen, StuartMortimer, Ken Nelsen, Dale Nish, Binh Pho, RichardRaffan, Malcolm Tibbetts, Joe Wagner, and Tom Wirsing.No matter how one tried, there was no way thatone person could see all of these demonstrators dotheir thing.I was only able to attend 10 of the demonstrations,because we had car trouble (a dead battery). I’mgoing to briefly describe the demonstrations and in thecoming months will have full stories on each of thedemonstrations.<strong>The</strong> first demonstration was with Guilio Marconlongoof Australia. Guilio did a lidded box with an offcenter lid and with an insert in the lid.Guilio’s finished box with an insert in the lid.<strong>The</strong> next demonstration that I saw was Stuart Kingof the UK. Stuart showed several movie segments ofpeople in other countries turning with ancient lathesand techniques.Stuart King during his demonstration. After avideo of a fellow turning a chess piece, he turnedthe following piece.Guilio Marconlongo turning the lidded box withan off center lid and with an insert in the lid.Guilio turned the box and fitted the lid and thenmounted the box and lid in his offset chuck and turned asloped top to the lid. He then inserted a piece of abaloneshell into a hole in the lid and the finished it off.I think this was supposed to be a chess piece thatwas turned completely in one mounting.Page 34 More Woodturning July 2012
<strong>The</strong> next demonstration that I watched was BrianMcEvoy turning a fairly large hollow form using hislarge boring bar.Here Brian McEvoy of Canada is boring a hole inthe hollow form prior to hollowing with his largeboring bar.Richard’s finished box.<strong>The</strong> next session was Johannes Michelsen turninga full size hat. He did start to finish in an hour and ahalf.Brian has finished hollowing and is now finishingthe foot of the vessel.<strong>The</strong> next session I watched was Richard Raffanturning a small endgrain box.Here Johannes is working on a full size woodenhat. Note the light coming through the brim to tellhim the thickness and eveness of the brim.Richard Raffan turning his small end grain box.<strong>The</strong> piece turned out beautifully.[Continued on Page 36]More Woodturning July 2012 Page 35
Continued from Previous Page.Mike Mahoney turned a hollow form with athreaded lid. He did an excellent job as usualMike Mahoney hollowing the little hollow form.Johannes Michelsen’s finished hat.Craig Jackson turned a hollow form using his EasyWood <strong>Tool</strong> to do the job.Craig Jackson turning a hollow form with hisEasy Wood <strong>Tool</strong>s.Mike’s finished hollow form with a black threadedlid, which is almost invisible.Tom Wirsing turning a bowl was next up on mylist. Tom does a beautiful job of turning bowls andplatters.Craig Jackson’s hollow form ready to part off.Page 36 More Woodturning July 2012
Stuart Mortimer demonstrating the cutting of aspiral with power tool.Tom Wirsing turning a bowl.Stuart is final sanding the spiralled stem of hisgoblet.As in the past, this was an excellent symposiumwith something for everyone. I highly recommend theUtah Woodturning Symposium for anyone turningwood or wishing to turn wood. It is a super experience.I’ve attended it every year since 1997 and expect tocontinue for as long as I can turn wood.turned bowl in the demonstration. As shown itwas turned, but not sanded.Stuart Mortimer turning a goblet with a spiral stemwas the last of the demonstrators that I watched.More Woodturning July 2012 Page 37
Rotating Base for your Tormekby Fred HolderJust before the June issue went to press, I receivedinformation on the new Rotating Base RB-180 for theTormek grinder. I didn’t get my base in time to do astory on it in the June issue, but I did include the pressrelease on the item. Mine came in a few days ago andimmediately went under my Tormek.Tormek T-7 and T-3, the 2000 and 1200 Series plus theSA-250 and N-1500. My machine is over 12 years oldand it easily popped onto this new base.Here are a few shots of my machine on its newRotating Base RB-180.Figure 1. <strong>The</strong> Rotating Base RB-180 for theTormek Grinders.With this new base you can rotate the machine180° or to switch between grinding and honing. Sometools are best sharpened with the stone running towardsthe edge and other tools should have the stone runningaway from the edge. This new base for the Tormekallows you to stand in front of the machine and use itone way and then rotate it 180 degrees to grind with thewheel approaching your tool from a different direction.<strong>The</strong> rotating base makes it simple to switch from sharpeningto honing or having the wheel turning towardsyour tool or away from it.Tormek machines are solid and relatively heavy,which is an advantage when sharpening, however, rotatingthe machine was generally difficult. <strong>The</strong> solution isthis new Tormek Rotating Base RB-180 which makeit easy to turn the machine 180° and lock it firmly inposition.Tormek says, a priority during the design processhad been to make the RB-180 as thin as possible in ordernot to affect the working height of your machine. <strong>The</strong>rubber feet ensure it remains steady during sharpening.<strong>The</strong> Tormek policy ensures that new developments canbe fitted to earlier machines so the RB-180 will fit theFigure 2. This photo shows my Tormek setting onits new rotating base. Note the white button on thecenter of the base, which is the release button toallow the base to rotate.Figure 3. This shows my machine set up tosharpen a bowl gouge with the Ellsworth grind.More Woodturning July 2012 Page 38
<strong>The</strong> machine became available in May 2012.(Recomended price by Tormek is $ 55) For details ofyour nearest dealer log onto www.tormek.com or call1 800 586 7635.Figure 4. Grinding with the wheel turning towardthe tool being ground. This is a bit unhandy sinceone has to reach across the grinder to move thetool being ground.<strong>The</strong> Market Place<strong>The</strong> first 10 words of classified advertisements are free to subscribers, additionalwords are 20-cents per word, no minimum. On non-subscriber advertisements,price is 20-cents per word with a minimum billing of $4.00.Beginning and advanced woodturning classes. Call Ed Quesnell at206-406-5766, Tacoma, WA.Teaching beginning to advanced classes in all aspects of woodturning.Call: Ed Szakonyi, Roselle, IL (800) 894-8123.Make pens using your drill press with a Vertilathe. http://vertilathe.freeyellow.comWoodturning on a VB36 Lathe, at Higher Manaton Farm. SW England.Web Site: www.turning-wood.comFree Wet Grind/Hone Instant Change Sharpening System Plans: http://www.DavidReedSmith.com.Maple Turning Blanks. Price $6-8 PBF+S&H cut to size, call 360-942-3468 ore-mail: john@hamptonwoodcraft.com.Easier,Faster Segmented Vessel Desin:W e b S i t e : w w w . s e g m e n t e d t u r n i n g . c o m .TEL: (805) 489-5309.Woodturning classes – Satisfaction guaranteed. Call Larry Miller 360-412-1583, Olympia, Washington”Cabochons for woodturners at www.yoyospin.com/cabWoodturning Instruction:. Basic woodturning instruction or specializedtraining such as the Chinese Ball, 360-668-0976. Fred Holder.New Video--”Relief carved Embellishments for Wood Projects”.DVD--$30.00 plus $3.00 S/H. VHS $20.00 plus $3.00 S/H. Contact: TonyCortese, 20850 NW 13th Street, Dunnellon, FL 34431. Ph 352-489-5652.E-mail: romeowoodturner@msn.com.NEW REDUCED PRICE: Simplified Fluting with Al Caton. Video-$20.00plus S&H $3.00. DVD-$30.00 plus S&H $3.00. Insturctionand inexpensive jigs for fluted works of art. Order from: Al Caton, POBox 2714, Dunnellon, FL 34430. TEL: 352-465-0562. E-Mail: alcat@bellsouth.net.ABC Woodturning Basics with Gary Gardner, DVD, www.abcwoodturning.comIntroduction to Woodturning and <strong>Pen</strong> Turning workshops: Have funlearning to turn in Owen Sound (Ontario, Canada). Registration and moreinfo at www.mapleseedgallery.ca/learn2turnMicheal’s Magic Mojo Wood Conditioner & Finish Wax. http://quartersmith.us/products.htm.Enhance your turnings with hand blown glass cabochons. 800-bbbeads.Mingoandasho.comwww.doctorswoodshop.com: Walnut oil woodturning finishes.Chinese Ball <strong>Tool</strong> Extra Handles. For people with a set of the CrownChinese Ball tools, I stock extra handles to make the task easier. I alsostock the Crown <strong>Tool</strong>s to make the Chinese Ball. Also, instruction onmaking the Chinese Ball. Fred Holder, fred@morewoodturning.net. TEL:360-668-0976.Beginning and Advanced Woodturning Instruction. Call Fred Holder,360-668-0976 to schedule a time.Figure 5. A 180 degree roatation simplifies thisoperation.More Woodturning July 2012 Page 39
Coming Events<strong>The</strong> Hub City <strong>Turners</strong> are presenting a turningsymposium on July 27 through 29, 2012 in Saskatoon,Saskatchewan, Canada. <strong>The</strong>y have an exciting group ofdemonstrators arranged for this 3 day event which willbe held at the Kelsey Campus of SIAST. <strong>The</strong> followingdemonstrators will be at the symposium: Jimmy Cleweswill demonstrate the square winged box, embellishedrimmed platter, ebony and silver inlay box and wetwood end grain vase; Clay Foster’s demonstrationsinclude low cost, low tech surface decoration; multipleaxis vessel; and a two piece hollow form; AndrewGlazebrook will show texturing with vice grips andspring steel, use of simple kitchen tools and projectsfor youth as well as how to understand the tools weuse; Lyonel Grant will demonstrate the application ofsurface techniques to form 3D objects; Michael Hosalukwill demonstrate bending and turning techniques; BethIreland plans to demonstrate Barley Twist, turning outsidethe box and turning with your mind; Deb Mcleodwill demonstrate surface texturing and surface design;Mark Sfirri will demonstrate multi-axis candle sticks,multi-axis baseball bats and basic spindle turning; andTrent Watts will demonstrate general bowl turning aswell as ways to adapt turning for after lathe carving.Being a veterinarian, he will demonstrate making a“cow bowl “. For the complete brochure and registrationinformation visit their website at: * * *<strong>Woodturner</strong>s of Olympia are presenting theirfifth annual symposium, “Creativity in Woodturning”featuring David Ellsworth. <strong>The</strong> date is July 28, 2012from 7:50 a.m. until 5:15 p.m. It will be held at theKomachin Middle School in Lacey, Washington State.Price is $90 until May 31 after which it increases to$100. Youth under the age of 18 attending with anadult can attend for $10. All prices include lunchand several door prizes. <strong>The</strong> day starts with JamesLeary conducting a “primer on spindle turning – basiccuts”. He is followed for the rest of the day by DavidEllsworth who will be demonstrating his bowl makingand hollow form techniques. David will also leadfour hands on workshops limited to 8 participants perday. Workshops scheduled for Sunday, July 29 andTuesday, July 31 will cover cut rim and natural edgebowls. Workshops scheduled for Monday, July 30 andWednesday August 1 will cover hollow forms. Cost foreach of the workshops is $150. For more informationor to register for the symposium you can go to our website: http://www.woodturnersofolympia.org . You canalso register by calling Al Price on 360-791-0396 or e-mail him at aprice44@aol.com. You can also contactAl to register for the classes.* * *August 3-5, 2012, Turn-On! Chicago, Mundelein,IL, Three days with 60 demonstrations, hands-onevents,tradeshow, onsite meals and housing, banquetand auction. Demonstrators include Eli Avisera, StuartBatty, Dixie Biggs, Bob Rosand, John Jordan, and KurtHertzog. For event information including a completelist of demonstrators, visit www.turnonchicago.com.* * *August 24-26, 2012, South West Association of<strong>Turners</strong> Woodturning Symposium will be held inWaco, Texas at the Waco Convention Center. <strong>The</strong> SWATSymposium features an internationally known slate oflead demonstrators as well as talented demonstratorsfrom the Southwest. <strong>The</strong>ir featured lead demonstratorsthis year are Barbara Dill, Cindy Drozda, Michael Hosaluk,Todd Hoyer, Johannes Michelson, Joe Ruminski,Hayley Smith, and Steve Sinner. Regional Demonstratorsare: Andy Chen, Charles Brooks, Craig Timmerman,Dewayne Colwell, James Johnson, Joel Crabb,Kenneth Mays, Marion McDaniel, Marty Kaminsky,Ron Fleming, and WR Hughes. For more informationon the symposium and local housing, see the SWATweb site: http://www.swaturners.org.* * *September 15-16, 2012, Virginia <strong>Woodturner</strong>s’Symposium, Expoland in Fisherville. Featured demonstrator,Jimmy Clewes, will demonstrate both days.Hands-on sessions set this symposium apart from otherswith four rotations of twelve workstations each. Attendeeswill receive in-depth, up-close, hands-on woodturninginstruction from individual mentors. New turnerswelcome. Visit virginiawoodturners.com/12PMW fordeveloping information and on-line registration.Page 40 More Woodturning July 2012