Service manual, Connex ProBP 3400 - Welch Allyn
Service manual, Connex ProBP 3400 - Welch Allyn
Service manual, Connex ProBP 3400 - Welch Allyn
- No tags were found...

You also want an ePaper? Increase the reach of your titles
YUMPU automatically turns print PDFs into web optimized ePapers that Google loves.
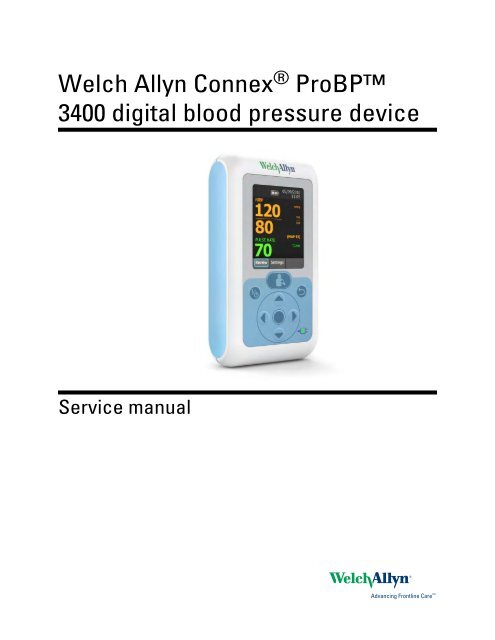
<strong>Welch</strong> <strong>Allyn</strong> <strong>Connex</strong> ® <strong>ProBP</strong><strong>3400</strong> digital blood pressure device<strong>Service</strong> <strong>manual</strong>
© 2011 <strong>Welch</strong> <strong>Allyn</strong>. All rights are reserved. To support the intended use of the product described in this publication,the purchaser of the product is permitted to copy this publication, for internal distribution only, from the mediaprovided by <strong>Welch</strong> <strong>Allyn</strong>. No other use, reproduction, or distribution of this publication, or any part of it, is permittedwithout written permission from <strong>Welch</strong> <strong>Allyn</strong>.<strong>Welch</strong> <strong>Allyn</strong> assumes no responsibility for any injury to anyone, or for any illegal or improper use of the product, thatmay result from failure to use this product in accordance with the instructions, cautions, warnings, or statement ofintended use published in this <strong>manual</strong>.<strong>Welch</strong> <strong>Allyn</strong>, SureBP, <strong>Connex</strong>, and FlexiPort are registered trademarks of <strong>Welch</strong> <strong>Allyn</strong>. <strong>ProBP</strong> is a trademark of<strong>Welch</strong> <strong>Allyn</strong>. The Bluetooth® word mark and logos are registered trademarks owned by Bluetooth SIG, Inc. and anyuse of such marks by <strong>Welch</strong> <strong>Allyn</strong> is under license.Software in this product is Copyright 2011 <strong>Welch</strong> <strong>Allyn</strong> or its vendors. All rights are reserved. The software isprotected by United States of America copyright laws and international treaty provisions applicable worldwide.Under such laws, the licensee is entitled to use the copy of the software incorporated with this instrument asintended in the operation of the product in which it is embedded. The software may not be copied, decompiled,reverse-engineered, disassembled, or otherwise reduced to human-perceivable form. This is not a sale of thesoftware or any copy of the software; all right, title, and ownership of the software remain with <strong>Welch</strong> <strong>Allyn</strong> or itsvendors.For information about any <strong>Welch</strong> <strong>Allyn</strong> product, contact <strong>Welch</strong> <strong>Allyn</strong> Technical Support (www.welchallyn.com/support) or call:USA +1 800 535 6663+1 315 685 4560Canada +1 800 561 8797European Call Center +353 46 90 67790Germany +49 695 098 5132Japan +81 4 2703 6084Malaysia +603 7875 3341Singapore +65 6419 8100Spain +34 917 499 357United Kingdom +44 207 365 6780Australia +61 2 9638 3000China +86 21 6327 9631France +33 155 69 58 49Italy +39 026 968 2425Latin America +1 305 669 9003Netherlands +31 202 061 360South Africa +27 11 777 7555Sweden +46 85 853 6551103701 (CD)DIR 80016499 Ver. B<strong>Welch</strong> <strong>Allyn</strong>, Inc.4341 State Street RoadSkaneateles Falls, NY 13153-0220 USAwww.welchallyn.comRegulatory Affairs Representative<strong>Welch</strong> <strong>Allyn</strong> LimitedNavan Business ParkDublin RoadNavan, County MeathRepublic of Ireland
iiiContentsSymbols ................................................................................................... 1Safety ....................................................................................................... 5Warnings and cautions .................................................................................................................... 5General safety considerations ........................................................................................................ 6Electrostatic discharge (ESD) ........................................................................................................ 7Overview .................................................................................................. 9Purpose and scope ........................................................................................................................... 9Technical support services ............................................................................................................. 9Recommended service intervals .................................................................................................. 12Configuration options ..................................................................................................................... 13The <strong>Welch</strong> <strong>Allyn</strong> <strong>Service</strong> Tool ....................................................................................................... 14Controls and indicators ......................................................................... 17Connections ........................................................................................... 19Power-up sequence ............................................................................... 21Troubleshooting .................................................................................... 23Power ................................................................................................................................................ 23Display .............................................................................................................................................. 24Communication ................................................................................................................................ 24NIBP .................................................................................................................................................. 25System errors .................................................................................................................................. 25Disassembly and repair ........................................................................ 27Required tools and equipment ...................................................................................................... 28Disassemble the external housing ............................................................................................... 28Separate the chassis assembly from the circuit board assembly .......................................... 31Disassemble the chassis assembly ............................................................................................. 33Disassemble the circuit board assembly .................................................................................... 36Reassembly ............................................................................................ 39Functional verification tests ................................................................. 43About the <strong>Welch</strong> <strong>Allyn</strong> <strong>Service</strong> Tool ............................................................................................ 43Required equipment ....................................................................................................................... 44Test Bluetooth radio functionality ................................................................................................ 45
iv Contents <strong>Welch</strong> <strong>Allyn</strong> <strong>Connex</strong> ® <strong>ProBP</strong> <strong>3400</strong> digital blood pressure device<strong>Service</strong> record ................................................................................................................................. 46Upgrades and licenses .......................................................................... 47Available upgrades and licenses ................................................................................................. 47Field-replaceable units .......................................................................... 49External housing .............................................................................................................................. 49Chassis and manifold assemblies ................................................................................................ 50Circuit board assembly .................................................................................................................. 52Miscellaneous parts ....................................................................................................................... 53<strong>Service</strong> tool ...................................................................................................................................... 53Licenses ............................................................................................................................................ 53Partners in Care service and support agreements ................................................................... 53<strong>Service</strong> and repair training ............................................................................................................ 54Appendices ............................................................................................ 55Clean the device .............................................................................................................................. 55Factory defaults ............................................................................................................................... 56Disassembly and repair reference ............................................................................................... 56
1SymbolsDocumentation symbolsWarning: The warning statements in this <strong>manual</strong> identify conditions or practices that couldlead to illness, injury, or death.Caution: The caution statements in this <strong>manual</strong> identify conditions or practices that couldresult in damage to the equipment or other property, or loss of data.Consult operating instructions.Power symbols(green indicator) External power present,battery chargedBattery charging(amber indicator) External power present,battery is chargingRechargeable batteryNo external power presentBattery charge levelButton symbolsPower on/standbyReturn to previous screenBlood Pressure Start/StopSelect
2 Symbols <strong>Welch</strong> <strong>Allyn</strong> <strong>Connex</strong> ® <strong>ProBP</strong> <strong>3400</strong> digital blood pressure deviceNavigation (Up, Down, Left, Right)Shipping, storing, and environment symbolsFragile; handle with careRelative humiditylimitsTemperature limitsLithium-ion batteryRecovery/RecyclableRecycle the productseparate from otherdisposablesThis end upKeep dryIPXØEquipment is not protected against the ingress ofliquidConnectivity symbolsBluetooth® wireless technology enabledUSB connectionDevices are connected via Bluetooth wirelesstechnologyBluetooth radio isdisabled or not pairedMiscellaneous symbolsWireless radio alert in Europe. EuropeanCommunities Class 1 radio equipment.EMC Framework ofAustraliaIntertek ETL listedType BF applied partsClass II equipmentAvailable for sale onlyupon order of a physicianor licensed health careprovider
<strong>Service</strong> <strong>manual</strong> Symbols 3Serial numberManufacturerReorder numberCall for maintenanceNon-ionizing electromagnetic radiationRegulatory AffairsRepresentative
4 Symbols <strong>Welch</strong> <strong>Allyn</strong> <strong>Connex</strong> ® <strong>ProBP</strong> <strong>3400</strong> digital blood pressure device
5SafetyAll users of this device must read and understand all safety information presented in this <strong>manual</strong>before using or repairing the device.United States federal law restricts this device to sale, distribution, or use by or on the order of alicensed medical practitioner.Warnings and cautionsWARNING Fire and explosion hazard. Do not operate the device in the presenceof a flammable anesthetic mixture with air, oxygen, or nitrous oxide; in oxygenenrichedenvironments; or in any other potentially explosive environment.WARNING The device might not function properly if dropped or damaged. Do notuse the device if you notice any signs of damage. Qualified service personnel mustcheck any device that is dropped or damaged for proper operation before puttingthe device back into use.WARNING For proper patient electrical isolation and battery charging, use onlythe provided external power supply to charge the device.WARNING Electric shock hazard. Use the USB connector only to connect todevices complying with IEC 60601-1 or other IEC standards as appropriate to thedevice. The user is responsible for verifying that the system complies with therequirements of the system standard IEC 60601-1-1 if additional devices areconnected to the <strong>ProBP</strong> <strong>3400</strong>.WARNING Inaccurate measurement risk. Dust and particle ingress can affect theaccuracy of blood pressure measurements. Use the device in clean environmentsto ensure measurement accuracy. If you notice dust or lint accumulation on theblood pressure port, have the device inspected and cleaned by a qualified servicetechnician.WARNING Electric shock hazard. Before cleaning the device, disconnect thepower cord from the power source and the device.WARNING Take care to prevent water or other fluid from entering anyconnectors on the device. Should this occur, dry the connectors with warm air.Check the accuracy of all operating functions.WARNING Defective batteries can damage the device. If the battery shows anysigns of damage, leakage, or cracking, it must be replaced immediately, and onlywith a battery recommended for or supplied with the device.
6 Safety <strong>Welch</strong> <strong>Allyn</strong> <strong>Connex</strong> ® <strong>ProBP</strong> <strong>3400</strong> digital blood pressure deviceWARNING Improper disposal of batteries can create an explosion orcontamination hazard. Never dispose of batteries in refuse containers. Do notdispose of the battery in fire. Always recycle batteries according to localregulations.WARNING Improper handling of the battery can lead to heat generation, smoke,bursting, or fire.WARNING Do not remove the label from the battery.WARNING Do not disassemble, modify, or solder the battery.WARNING Do not directly connect or short-circuit the positive (+) and negative(-) battery terminals.WARNING To avoid short circuits, keep battery terminals away from metalobjects.WARNING Do not expose the battery to temperatures higher than 80 °C/176 °F.WARNING Safety risk. When handling and storing lithium batteries, avoidmechanical or electrical abuse. Batteries might explode or cause burns ifdisassembled, crushed or exposed to fire or high temperatures. Do not short.Always install with correct polarity.Caution The device is not heat-resistant. Do not autoclave.General safety considerationsCaution To ensure that the device meets performance specifications, store anduse the device in an environment that maintains the specified temperature andhumidity ranges.Caution Do not operate the device in the presence of magnetic resonanceimaging (MRI) or hyperbaric chambers.• If the device detects an unrecoverable problem, it displays an error message. For moreinformation, see “Troubleshooting.”• To ensure patient safety, use only accessories recommended or supplied by <strong>Welch</strong> <strong>Allyn</strong>.Always use accessories according to your facility’s standards and according to themanufacturer’s recommendations and instructions. Always follow the manufacturer’sdirections for use.• <strong>Welch</strong> <strong>Allyn</strong> recommends that only <strong>Welch</strong> <strong>Allyn</strong> service personnel or an authorized repaircenter perform warranty service, unless otherwise specified in a service agreement.Performing unauthorized service on a device that is within warranty will void the warranty.
8 Safety <strong>Welch</strong> <strong>Allyn</strong> <strong>Connex</strong> ® <strong>ProBP</strong> <strong>3400</strong> digital blood pressure device
<strong>Service</strong> <strong>manual</strong> Overview 13MaintenanceUse the Gold-level <strong>Welch</strong> <strong>Allyn</strong> <strong>Service</strong> Tool to perform a complete functional verification andcalibration of the device whenever any of the following conditions exist:• Based on the calibration check, the device does not meet specifications• The device has been dropped or otherwise damaged• The device is malfunctioning• The case has been opened• A part has been replacedFor details on performing the functional verification, see the section on functional verification.For device maintenance information, see the directions for use. Covered topics include thefollowing:• Changing the battery• Inspecting and cleaning the device and accessoriesConfiguration optionsThe device is available in the configurations shown in the table below. The model-number suffix,denoted by an asterisk (*), indicates the power cord packaged with the device. Available suffixesare listed after the configuration table.NoteFor more configuration options, including approved accessories, see the directionsfor use.Model Standard BP SureBP Bluetooth Mountingconfiguration34BFHT-*34BFWT-*34BFST-*34XFHT-*34XFWT-*34XFST-*34BXHT-*34BXWT-*34BXST-*34XXHT-*HandheldWall mountedMobile standHandheldWall mountedMobile standHandheldWall mountedMobile standHandheld
14 Overview <strong>Welch</strong> <strong>Allyn</strong> <strong>Connex</strong> ® <strong>ProBP</strong> <strong>3400</strong> digital blood pressure deviceModel Standard BP SureBP Bluetooth Mountingconfiguration34XXWT-*34XXST-*Wall mountedMobile standRegion codes, as indicated by the asterisk (*), include the following:CodeRegion6 Australia/New ZealandCChina2 EuropeJBJapan (mobile stand version only)North America7 South Africa4 United KingdomThe <strong>Welch</strong> <strong>Allyn</strong> <strong>Service</strong> ToolThe <strong>Welch</strong> <strong>Allyn</strong> <strong>Service</strong> Tool is available in the following editions:• Silver: Accompanies your device.• Gold: Required to perform functional verification and calibration. This edition requires anadditional license. For more information about acquiring this license, contact <strong>Welch</strong> <strong>Allyn</strong>.NoteTo qualify for the Gold license, you must attend the <strong>Welch</strong> <strong>Allyn</strong>technical training course or complete online training for theproduct.Clinicians and technical service personnel can use the service tool to manage and maintainsupported <strong>Welch</strong> <strong>Allyn</strong> products. You can use the service tool to do the following:• Review device information. When connected to the device, the service tool lists installedmodules, installed firmware and hardware versions, warranty and repair information, status,and usage history.• Receive notifications when periodic maintenance is needed. The service tool canhelp you manage and maintain your entire inventory of supported <strong>Welch</strong> <strong>Allyn</strong> products.Through the remote service function, the service tool can connect to <strong>Welch</strong> <strong>Allyn</strong> Customer<strong>Service</strong>. With this functionality you can automatically receive firmware updates and featureupgrades for your supported products, including software upgrades for the service tool.• Install updates and upgrades. The service tool can read the firmware version for eachmodule and check for available updates or upgrades.• Create a work list. The work list provides information about service actions—referred to aswork orders—that are waiting for you to perform on your maintained devices. Work ordersmay include periodic calibrations, upgrades, or license installations.
17Controls and indicators1. Power on/standby button: controls power to the device.2. Blood Pressure Start/Stop button: initiates a new blood pressure cycle from the Homescreen. Pressing again aborts an active blood pressure measurement. This button returns userto the Home screen from any other screen on the device.3. Up navigation button: highlights the previous option in the Display window or increasesnumeric values.4. Return button: returns the user to the previous screen.5. Right navigation button: highlights the Settings tab in the Display window or highlightsoptions to the right.6. Charging LED: indicates when device is connected to external power and battery chargingstate.7. Down navigation button: highlights the next option in the Display window or decreasesnumeric values.8. Select button: selects list item that has been highlighted.9. Left navigation button: highlights the Review tab in the Display window or highlightsoptions to the left.
18 Controls and indicators <strong>Welch</strong> <strong>Allyn</strong> <strong>Connex</strong> ® <strong>ProBP</strong> <strong>3400</strong> digital blood pressure device
19Connections1. Mounting connection2. Battery door screw3. Blood pressure hose connection port4. USB/external power cord connection port
20 Connections <strong>Welch</strong> <strong>Allyn</strong> <strong>Connex</strong> ® <strong>ProBP</strong> <strong>3400</strong> digital blood pressure device
21Power-up sequenceThe device performs a power-on self-test (POST) each time it is powered on. During power-up, thedevice performs a comprehensive self-test of the software. If software testing is successful, thedevice then tests internal hardware. If all tests are successful, the device completes power-up andthe Home screen appears.To perform the POST:1. Insert a fully charged battery into the device.2. Power on the device.3. Confirm the following:a. The backlight turns on.b. The <strong>Welch</strong> <strong>Allyn</strong> startup screen appears, and the product line logo appears at the bottomof the screen.c. The Home screen appears.If the internal self-test is successful, the device shows its normal functions with all values blank,and the device is ready for operation. If a system error is detected, the device becomes inactiveuntil you press the power button or until the device shuts down automatically. The device displaysa system fault message that contains a wrench icon and a system fault code to aid servicepersonnel and engineers in diagnosing the problem.
22 Power-up sequence <strong>Welch</strong> <strong>Allyn</strong> <strong>Connex</strong> ® <strong>ProBP</strong> <strong>3400</strong> digital blood pressure device
23TroubleshootingThis section lists symptoms that you might observe, possible causes, and suggested actions thatmight eliminate the problem. These tables can help you diagnose and fix a problem. They do notreplace basic troubleshooting skills. You must still trace the source of the problem to the board ormodule level to decide the best course of action. <strong>Welch</strong> <strong>Allyn</strong> does not support component-levelrepair to the board or module. For available replacement parts, see “Field-replaceable units.”The <strong>Welch</strong> <strong>Allyn</strong> <strong>Service</strong> Tool enables you to access the error log for this device. The error logcontains diagnostic information in the form of text string errors. You can find descriptions of thetext string errors in the service tool Help files, along with potential corrective actions that do notrequire device disassembly. If these corrective actions do not solve the problem, reference theobserved behavior in the tables below.NoteNumeric error codes displayed alongside the text string errors are for engineeringevaluation purposes. These codes are not intended for diagnostic use.WARNING Do not perform troubleshooting on a device that is emitting smoke orexhibits other signs of excessive overheating. Disconnect the device from ACpower and call <strong>Welch</strong> <strong>Allyn</strong> Technical Support immediately.PowerCaution Replace parts, components, or accessories only with parts supplied orapproved by <strong>Welch</strong> <strong>Allyn</strong>. The use of any other parts can lead to inferior deviceperformance and will void the product warranty.Symptom Possible cause Suggested actionThe device does not power on The battery is depleted Plug in the device and allowthe battery to fully charge.The battery is defectiveAn internal connection is faultyReplace the battery with afully charged battery.Verify that the battery contactharness is not damaged, isinstalled with the correctpolarity, and is securelyconnected to J2 on the mainboard.Verify that the flex cable issecurely installed in J5 on themain board.
24 Troubleshooting <strong>Welch</strong> <strong>Allyn</strong> <strong>Connex</strong> ® <strong>ProBP</strong> <strong>3400</strong> digital blood pressure deviceSymptom Possible cause Suggested actionThe battery does not charge orrun time is lowThe key panel is defectiveThe main board is defectiveThe battery is defectiveAn internal connection is faultyThe main board is defectiveReplace the front housing.Replace the main board.Verify all external connectionsand allow the battery tocharge for 6 hours. If theproblem persists, replace thebattery.Verify that the battery contactharness is not damaged, isinstalled with the correctpolarity, and is securelyconnected to J2 on the mainboard.Replace the main board.DisplaySymptom Possible cause Suggested actionCommunicationThe display is blank or cracked,or the backlight is not onThe display is faultyReplace the main board.Symptom Possible cause Suggested actionA button does not respondcorrectlyCannot communicate via theUSB connectionAn internal connection is faultyThe key panel is defectiveThe main board is defectiveThe device is offThe USB cable is faultyIncorrect PC configurationThe main board is defectiveVerify that the flex cable issecurely installed in J5 on themain board.Replace the front housing.Replace the main board.Verify that the device ispowered on.Replace the USB cable.Test the connection byconnecting the device to a PCrunning the service tool.Verify that the service tool isconfigured properly tocommunicate with the device.See the service tool help filesfor more information.Replace the main board.
<strong>Service</strong> <strong>manual</strong> Troubleshooting 25Symptom Possible cause Suggested actionCannot communicate via theBluetooth connectionVarious causesThe main board is defectiveSee the device directions foruse for Bluetoothtroubleshooting informationbefore replacing moduleswithin the device.Replace the main board.NIBPSymptom Possible cause Suggested actionSystem errorsThe cuff does not inflate, thedevice displays inaccurate orno blood pressure readings, orthe device displays persistentNIBP errorsThe cuff deflates too slowlyAn external connection or accessory isfaultyAn internal connection is faultyThere is an air leak in the system, or the airfilter is occludedThe pump is defectiveThe blood pressure board is defectiveThe main board is defectiveAn occlusion in the system is blocking thevalvesThe blood pressure board is defectiveThe main board is defectiveVerify all externalconnections.Replace NIBP tubing and cuff.Verify that the manifoldassembly is properlyconnected to the pump,valves, and transducer.Verify that the dump valvecable is securely connectedto J10 on the main board.Verify that the pump cable issecurely connected to J80 onthe blood pressure board.Replace the manifoldassembly.Replace the pump.Replace the blood pressureboard.Replace the main board.Replace the manifoldassembly.Replace the blood pressureboard.Replace the main board.Symptom Possible cause Suggested action#00000001 A system EEPROM error occurred Cycle the device power.
26 Troubleshooting <strong>Welch</strong> <strong>Allyn</strong> <strong>Connex</strong> ® <strong>ProBP</strong> <strong>3400</strong> digital blood pressure deviceSymptom Possible cause Suggested actionReplace the main board.#00000002 A ModF error occurred Cycle the device power.Verify that J22 on the bloodpressure board and J1 on themain board are properlyconnected.Replace the blood pressureboard.Replace the main board.
27Disassembly and repairThese procedures provide instructions for device disassembly and board removal. Except whereotherwise noted, the assembly procedure is the reverse of the disassembly procedure.An exploded view of the assembly precedes disassembly instructions, with callouts referencingthe parts.Each part’s disassembly instructions might include one or both of the following:• Reassembly notes: This contains information specific to reassembly not addressed in thedisassembly instructions.• When replacing the component: This contains information specific to installing areplacement part.For information about screws or connectors used in the device, see “Screws” and “Connectors” inthe appendices.NoteAfter performing any of these procedures and before returning the device toservice, you must use the service tool, Gold edition, to complete the full suite offunctional tests to ensure that all systems are operating within the designspecifications. For more information about these tests and the service tool, see“Functional verification and calibration.”If you do not have the service tool, contact <strong>Welch</strong> <strong>Allyn</strong> Technical Support.WARNING Electrical shock hazard. Disconnect AC power before opening thedevice. Disconnect and remove the battery before proceeding with disassembly.Failure to do this can cause serious personal injury and damage to the device.WARNING Risk of fire, explosion and burns. Do not short-circuit, crush,incinerate, or disassemble the battery.WARNING Safety risk. Do not attempt to service the device when the device isconnected to a patient.Caution Before disassembling the device, disconnect the AC power cord and anyattached accessories.Caution Perform all repair procedures at a static-protected station.Caution When the device case is opened, regard all parts as extremely fragile.Execute all procedure steps with care and precision.Caution Always protect the LCD. When the main board is outside of the devicecase, never rest the board on the LCD.
28 Disassembly and repair <strong>Welch</strong> <strong>Allyn</strong> <strong>Connex</strong> ® <strong>ProBP</strong> <strong>3400</strong> digital blood pressure deviceRequired tools and equipment• #1 Phillips bit• Torx T10 bitCaution Observe screw torque specifications, especially with screws that securedirectly into plastic standoffs.Caution To avoid mismatching screws and holes, keep the screws for each piecewith that piece as you remove modules and circuit assemblies.• Torque driver calibrated for 3.0 in-lb ±0.5 in-lb• Torque driver calibrated for 4.0 in-lb ±0.5 in-lb• Torque driver calibrated for 6.0 in-lb ±0.5 in-lb• Needlenose pliers• Tweezers• Spudger/nylon probeDisassemble the external housingNo. Item No. Item1 Screw, M3 x 0.5 shoulder 6 Side panel2 Battery compartment door 7 Isolation bumper3 Battery 8 Chassis and circuit board assemblies
<strong>Service</strong> <strong>manual</strong> Disassembly and repair 29No. Item No. Item4 Screw, M3 x 0.5 pan head 9 Front housing with key panel5 Rear housingRemove the batteryBefore you begin, ensure that the device is powered off.1. Loosen the screw to remove the battery compartment door.2. Remove the battery.Remove the rear housingBefore you begin, remove the battery as described in this <strong>manual</strong>.1. Remove the two rear-housing screws.2. Lift the rear housing on the side closest to the bottom of the device and pivot it toward the topof the device until it comes free of the front housing.Reassembly notes• Start by orienting the rear housing at an angle of approximately 45 degrees from the fronthousing and then mate the tabs on the rear housing with the slots on the front housing.• Verify that no wires or hoses are crushed or pinched before securing the rear housing withscrews.• After tightening the screws, examine the seams between the rear housing, side panels, andfront housing to verify that there is no bowing. Bowing indicates that something is preventingthe mating surfaces from seating properly.Remove the front housing and side panelsBefore you begin, remove the following as described in this <strong>manual</strong>:• Battery• Rear housing
30 Disassembly and repair <strong>Welch</strong> <strong>Allyn</strong> <strong>Connex</strong> ® <strong>ProBP</strong> <strong>3400</strong> digital blood pressure device1. Unlock the ZIF connector (J5) on the main board by sliding the latching piece of the connectoraway from the connector body.Caution Do not use excessive force when releasing pressure onthe connector. Excessive force may result in breaking the slidingouter piece.2. Remove the flex cable from the ZIF connector.3. Grasp both side panels and lift them and the chassis and circuit board assemblies away fromthe front housing.4. While holding the chassis and circuit board assemblies, remove the side panels.When replacing the front housingReassembly notesCaution Always protect the LCD. When the main board is outside of the devicecase, never rest the board on the LCD.Remove the liner from the inside of the housing window if present. Wipe any dust or fingerprints offof the window with a clean cloth.Before reassembly, do the following to ensure proper installation of the side panels and isolationbumpers:1. Place the front housing and side panels on the antistatic mat as shown in the diagram below,making sure that the arrows on the side panels point away from the front housing.2. Confirm that the isolation bumpers on the side panels are in the first and third holes from thetop, as shown in the diagram below.
<strong>Service</strong> <strong>manual</strong> Disassembly and repair 31Separate the chassis assembly from the circuit boardassemblyBefore you begin, remove the following as described in this <strong>manual</strong>:• Battery• Rear housing• Front housing and side panels1. Disconnect the pump power connector from J80 on the blood pressure board.2. Disconnect the step valve manifold from the step valve on the blood pressure board.3. Disconnect the dump valve cable from J10 on the main board.
32 Disassembly and repair <strong>Welch</strong> <strong>Allyn</strong> <strong>Connex</strong> ® <strong>ProBP</strong> <strong>3400</strong> digital blood pressure device4. Disconnect the dump valve manifold from the pressure transducer on the blood pressureboard.5. Lift the chassis assembly away from the circuit board assembly, and disconnect the batterycontact harness from J2 on the main board.Reassembly notesSee the “Reassembly” section for the recommended procedure to reassemble the device after thechassis and circuit board assemblies have been separated.
<strong>Service</strong> <strong>manual</strong> Disassembly and repair 33Disassemble the chassis assemblyNo. Item No. Item10 Manifold assembly 7 Isolation bumper11 Adhesive pad, dump valve 14 Inner chassis12 Pump 15 Battery contact harnessNo. Item No. Item16 Dump valve 20 Pump manifold
34 Disassembly and repair <strong>Welch</strong> <strong>Allyn</strong> <strong>Connex</strong> ® <strong>ProBP</strong> <strong>3400</strong> digital blood pressure deviceNo. Item No. Item17 Dump valve manifold 21 Blood pressure port18 Dump valve hose 22 Step valve hose19 Air filter 23 Step valve manifoldRemove the blood pressure portBefore you begin, remove the following as described in this <strong>manual</strong>:• Battery• Rear housing1. Lift the blood pressure port to disconnect it from the inner chassis.2. Disconnect the blood pressure port from the pump manifold.Remove the pump and manifold assemblyBefore you begin, remove the following as described in this <strong>manual</strong>:• Battery• Rear housing• Front housing and side panels• Circuit board assembly1. On the underside of the inner chassis, do the following:a. Remove the pump cable from the routing slot and wire clip.b. Remove the air filter from the retaining clip.2. Disconnect the dump valve manifold from the dump valve.3. Remove the step valve and dump valve hoses from the hose clips on the inner chassis.
<strong>Service</strong> <strong>manual</strong> Disassembly and repair 354. Lift the pump and manifold assembly free of the inner chassis.5. If you are replacing the pump or manifold assembly, disconnect the pump from the manifoldassembly.6. If you are replacing the manifold assembly or inner chassis, remove the dump valve cable fromthe wire clip on the inner chassis and detach the dump valve from the inner chassis.NoteRemoval of the dump valve from the inner chassis is notrecommended unless one of these parts is being replaced.When replacing the manifold assembly or inner chassis• After removing the dump valve from the inner chassis, ensure that the adhesive pad is fullyremoved and that no adhesive residue remains on any items that will be installed in the device.• Use a new adhesive pad to install the dump valve onto the inner chassis.Remove the battery contact harnessBefore you begin, remove the following as described in this <strong>manual</strong>:• BatteryReassembly notes• Rear housing• Front housing and side panels• Circuit board assembly• Pump and manifold assembly1. Remove the battery contact harness from the wire clips on the underside of the inner chassis.2. Flex each battery contact away from the inner chassis wall, and slide the battery contact off ofthe inner chassis.• Ensure that the polarity of the battery contact matches the symbol on the inner chassis. (Thecontact on the black wire is negative; the other contact is positive.)• Slide the black wire into the routing slot.
36 Disassembly and repair <strong>Welch</strong> <strong>Allyn</strong> <strong>Connex</strong> ® <strong>ProBP</strong> <strong>3400</strong> digital blood pressure device• On the underside of the inner chassis, route the wires as shown in the diagram below.○ Insert the black wire into the wire clips.○ Place the red wire in the notches.Disassemble the circuit board assemblyNo. Item No. Item24 Screw, #4 x 0.25 Plastite 26 PCBA mount
<strong>Service</strong> <strong>manual</strong> Disassembly and repair 37No. Item No. Item25 Main board 27 Blood pressure boardBefore you begin, remove the following as described in this <strong>manual</strong>:• Battery• Rear housing• Front housing and side panels• Chassis assembly1. Using the Torx T10 bit, remove the four screws from the main board.2. Keeping the main board and the blood pressure board parallel to each other, carefully pullthem apart.Caution The boards are connected by an 8-pin connector.Twisting the boards or pulling them apart at an angle might damagethese pins.3. Flex the PCBA mount to free two corners of the blood pressure board and slide the board clearof the PCBA mount.Reassembly notes• Ensure that the blood pressure board is oriented correctly in the PCBA mount.• Ensure that all pins of the 8-pin connector on the main board, J1, are aligned with J22 on theblood pressure board before connecting the boards.When replacing the main board• After reassembling the device, enter the device serial number in the service tool. The serialnumber can be found on the bottom of the device.• Any licensed features must be restored. Call <strong>Welch</strong> <strong>Allyn</strong> Technical Support to replace thelicense files.
38 Disassembly and repair <strong>Welch</strong> <strong>Allyn</strong> <strong>Connex</strong> ® <strong>ProBP</strong> <strong>3400</strong> digital blood pressure device
39ReassemblyDevice reassembly can be performed by reversing the disassembly instructions. However, thefollowing alternate procedure simplifies device reassembly after the chassis assembly and circuitboard assembly have been separated.Before you begin this procedure:• Reassemble the chassis assembly and reassemble the circuit board assembly by reversing thedisassembly instructions. Keep the assemblies separated.• Ensure that the isolation bumpers are installed on the side panels as described in “Whenreplacing the side panels or isolation bumpers.”1. Orient the chassis and circuit board assemblies as shown below, and connect the dump valvecable to J10 on the main board.2. Place the front housing face down on the antistatic mat, and insert one side panel.3. Place the circuit board assembly into the front housing.a. Turn over the chassis and circuit board assemblies.b. Lower the circuit board assembly into the front housing.
40 Reassembly <strong>Welch</strong> <strong>Allyn</strong> <strong>Connex</strong> ® <strong>ProBP</strong> <strong>3400</strong> digital blood pressure devicec. Align the pegs on the PCBA mount with the isolation bumpers on the side panel.d. Ensure that the flex cable is not under the circuit board assembly.4. Insert the second side panel into the front housing, aligning the isolation bumpers with thePCBA mount pegs.5. Insert the flex cable into the ZIF connector (J5) on the main board and lock the connector.6. Pivot the chassis assembly over the circuit board assembly, and connect the battery contactharness to J2 on the main board.7. Connect the step valve manifold to the step valve on the blood pressure board.8. Connect the pump cable to J80 on the blood pressure board. Ensure that the cable is routed asshown below.
<strong>Service</strong> <strong>manual</strong> Reassembly 419. Align the inner chassis notches with the side panel guides, and align the dump valve manifoldwith the pressure transducer on the blood pressure board.10. Push the dump valve manifold onto the pressure transducer until fully seated.11. Install the rear housing, battery, and battery compartment door by reversing the applicabledisassembly instructions.
42 Reassembly <strong>Welch</strong> <strong>Allyn</strong> <strong>Connex</strong> ® <strong>ProBP</strong> <strong>3400</strong> digital blood pressure device
43Functional verification testsThe functional verification tests help to confirm the proper operation of the device and its options.You do not need to disassemble the device to perform these tests.The tests can also be used as a diagnostic tool to help isolate a malfunction.About the <strong>Welch</strong> <strong>Allyn</strong> <strong>Service</strong> ToolThe service tool is required to complete functional verification and calibration tests.The Silver-level service tool enables a calibration check to satisfy the recommended annualservice. To perform the calibration check, execute each of the Silver-level tests indicated in thetable below. A <strong>Service</strong> Record form is provided at the end of this chapter for documentation of thecalibration check results. If any of the Silver-level testing shows an out-of-specification result, usethe Gold-level service tool to perform a full calibration.The Gold-level service tool checks the functionality and calibration of the device. As it checks thedevice, the Gold tool also performs any needed calibration to bring the device withinspecifications. This full suite of tests is required to complete a repair. Each time you open the case,you must use the Gold tool to test the device before returning the device to normal use.For information about the service tool, see the following:• For instructions on installing and using the service tool, see <strong>Welch</strong> <strong>Allyn</strong> <strong>Service</strong> ToolInstallation and Configuration Guide.• For instructions on performing these tests, see the service tool's help files installed with the<strong>Welch</strong> <strong>Allyn</strong> <strong>Service</strong> Tool CD.Tests performed by the service toolThe service tool tests the following device functionality:Test Silver GoldPOSTLCDBacklightLED
44 Functional verification tests <strong>Welch</strong> <strong>Allyn</strong> <strong>Connex</strong> ® <strong>ProBP</strong> <strong>3400</strong> digital blood pressure deviceTest Silver GoldVoltageLeak testCalibrationAccuracyA/D noisePump inflationDumpValve controlInflation linearityOverpressureValve/pump currentResidual pressureBluetoothRequired equipmentMaterial no. Description Silver Gold Qty407691 <strong>Service</strong> test box 1407672 BP test volume repair fixture 113670 1407841 Adapter, Y tube, PTSS 14500-30 Blood pressure hose, 5 ft 1<strong>3400</strong>-925 USB cable, 2.4 m (8 ft) 1200-2000IN Pressure meter, NETECH 1103521 <strong>Welch</strong> <strong>Allyn</strong> <strong>Service</strong> Tool CD 1
<strong>Service</strong> <strong>manual</strong> Functional verification tests 45Test Bluetooth radio functionalityUse this procedure to verify Bluetooth radio functionality on devices with the Bluetooth featureenabled. The procedure tests whether the device can be detected by a Bluetooth technologyenabledcomputer.Required equipment• Computer with Bluetooth technology enabled and the <strong>Welch</strong> <strong>Allyn</strong> <strong>Service</strong> Tool installed• Device to be tested• USB 2.0/5-pin Mini-B cableBefore you beginIf the device and the computer are already paired, unpair them using the Bluetooth software on thecomputer. Consult the instructions provided by the software manufacturer.To verify Bluetooth radio functionality1. Use the service tool to acquire the serial number of the device.a. Start the service tool on the computer.b. If the <strong>Welch</strong> <strong>Allyn</strong> screen appears, click <strong>Service</strong>.c. If prompted, log on.The Device list page appears.d. If any device tabs are open, close them.e. Use the USB cable to connect the device to the computer.f. If the device is not already on, power it up.The device name and serial number appear on the Device list page.g. Keep the service tool open so that you can access the serial number later in thisprocedure.2. Place the device into Pairing mode.a. On the device, navigate to Settings > Bluetooth radio.b. Confirm that Enable is selected.c. Select Pair.The device indicates that it is in Pairing mode by displaying the message, “Pairing.”3. Verify that the computer detects the device.a. Use the Bluetooth software on the computer to search for discoverable Bluetoothdevices. Consult the instructions provided by the software manufacturer.The software detects the device and displays the device serial number.b. Verify that the serial number displayed by the Bluetooth software matches the serialnumber displayed on the Device list page of the service tool.If the Bluetooth software detects the device, the radio is functioning properly. Completion of thepairing process is not required for this test.
46 Functional verification tests <strong>Welch</strong> <strong>Allyn</strong> <strong>Connex</strong> ® <strong>ProBP</strong> <strong>3400</strong> digital blood pressure device<strong>Service</strong> recordDate:Device name:Technician:Time:Serial number:MODF firmwareversion:Host Controllerversion:Leak testSpecificationActual readingLeakTest: Max: 5Overpressure testSpecificationActual readingOverPressureTest: 280 . . . . 329Accuracy testTarget pressure±5 mmHg Pressure meter <strong>Service</strong> tool Specification Pass/fail0 mmHg mmHg mmHg ±3 mmHg50 mmHg mmHg mmHg ±3 mmHg150 mmHg mmHg mmHg ±3 mmHg250 mmHg mmHg mmHg ±3 mmHg
47Upgrades and licenses<strong>Welch</strong> <strong>Allyn</strong> supports software and license upgrades for this device.Software upgrades, when available, may be purchased or provided at no charge to customerscovered by a <strong>Welch</strong> <strong>Allyn</strong> <strong>Service</strong> Agreement. The upgrades can be installed by either a <strong>Welch</strong><strong>Allyn</strong> service center or by the customer using the service tool, Silver or Gold edition. Customerschoosing to install software upgrades on their own will receive the software via the internet. Whenordering software, provide the serial number of the device you wish to install the software on.Licenses are available for purchase to enable additional software features. Customers who wantto install licenses themselves must have the service tool, Silver or Gold edition, installed on a PCwith internet access. Customers who have purchased a license receive an authorization code toenter in the service tool. The code authorizes the service tool to download the license file from the<strong>Welch</strong> <strong>Allyn</strong> server. The service tool then installs the license on the connected device, enablingthe new feature. A more detailed description of the license process can be found in the servicetool help files.NoteAvailable upgrades and licensesWhen a license authorization code is used to activate the license, the authorizationcode is married to the device serial number. Save the license authorization codewith the serial number for future use. If the main board is replaced, you will needthe authorization code to reactivate the license.The following upgrades and licenses can be added to each model’s base configuration.Supported software upgradesSoftware updates and upgrades are supported for the Host Controller and ModF (Blood Pressure)module. New software upgrades are announced on the product page of the <strong>Welch</strong> <strong>Allyn</strong> websiteas they become available.Licensed featuresModel Bluetooth SureBP34XX34BX
48 Upgrades and licenses <strong>Welch</strong> <strong>Allyn</strong> <strong>Connex</strong> ® <strong>ProBP</strong> <strong>3400</strong> digital blood pressure deviceModel Bluetooth SureBP34XF34BFNot available for this model. Available for this model. Included with this model.
49Field-replaceable unitsExternal housingThis listing includes only field-replaceable service parts. Product accessories are listed separatelyin the directions for use.<strong>Service</strong> kits are shown with the contents listed underneath each kit.<strong>Service</strong> kit, front housing (material number 104097)No. ItemQty9 Front housing 19 Key panel 1Individual partsNo. Material no. Item Qty6 104098 <strong>Service</strong> kit, side panels 2
50 Field-replaceable units <strong>Welch</strong> <strong>Allyn</strong> <strong>Connex</strong> ® <strong>ProBP</strong> <strong>3400</strong> digital blood pressure deviceNo. Material no. Item Qty3 BATT11 Lithium-ion battery, 1 cell 12 <strong>3400</strong>-100 Battery door with screw 1Chassis and manifold assemblies
<strong>Service</strong> <strong>manual</strong> Field-replaceable units 51<strong>Service</strong> kit, inner chassis (material number 104099)No. ItemQty14 Inner chassis 111 Adhesive pad, dump valve 1<strong>Service</strong> kit, manifold assembly (material number 104120)No. Item Qty20 Pump manifold 116 Dump valve 117 Dump valve manifold 123 Step valve manifold 121 Blood pressure port 119 Air filter 1Not shown 1/8” elbow fitting 1Not shown L fitting 422 1/8” tubing 1Not shown 1/16” tubing, short 118 1/16” tubing, long 111 Adhesive pad, dump valve 1Individual partsNo. Material no. Item Qty12 104121 <strong>Service</strong> kit, pump 115 104122 <strong>Service</strong> kit, battery contact assembly 121 104123 <strong>Service</strong> kit, blood pressure port 1
52 Field-replaceable units <strong>Welch</strong> <strong>Allyn</strong> <strong>Connex</strong> ® <strong>ProBP</strong> <strong>3400</strong> digital blood pressure deviceCircuit board assembly<strong>Service</strong> kit, NCE PCBA (material number 104124)NoteRequires the service tool, Gold edition, to program.No. ItemQty25 Main board 1<strong>Service</strong> kit, ModF PCBA (material number 104125)No. ItemQty27 Blood pressure board 1Individual partsNo. Material no. Item Qty26 104126 PCBA mount 1
<strong>Service</strong> <strong>manual</strong> Field-replaceable units 53Miscellaneous parts<strong>Service</strong> kit, fasteners (material number 104127)No. ItemQty<strong>Service</strong> toolLicenses4 Screw, M3 x 0.5 pan head 2024 Screw, #4 x 0.25 Plastite 2013 Isolation bumper 20Material no. Item Qty103521 <strong>Welch</strong> <strong>Allyn</strong> <strong>Service</strong> Tool CD 1103820 <strong>Welch</strong> <strong>Allyn</strong> <strong>Service</strong> Tool Installation guide 1103991 <strong>Welch</strong> <strong>Allyn</strong> <strong>Service</strong> Tool Gold license key (<strong>ProBP</strong>) 1Material no.<strong>3400</strong>-BT<strong>3400</strong>-SUREBPItemBluetooth activation codeSureBP activation codePartners in Care service and support agreementsMaterial no. Item Material no. ItemS1-<strong>3400</strong> Comprehensive PartnershipProgram, 1 yearS1-<strong>3400</strong>-2Comprehensive PartnershipProgram, 2 yearsS2-<strong>3400</strong> Biomed Partnership Program, 1yearS2-<strong>3400</strong>-2 Biomed Partnership Program, 2yearsS3-<strong>3400</strong> Investment ProtectionPartnership Program, 1 yearS3-<strong>3400</strong>-2Investment ProtectionPartnership Program, 2 yearsS4-<strong>3400</strong> Warranty Extension, 1 year S4-<strong>3400</strong>-2 Warranty Extension, 2 years
54 Field-replaceable units <strong>Welch</strong> <strong>Allyn</strong> <strong>Connex</strong> ® <strong>ProBP</strong> <strong>3400</strong> digital blood pressure device<strong>Service</strong> and repair trainingMaterial no.PROBP<strong>3400</strong>REPW-TRNItemRepair web training
55AppendicesClean the deviceWARNING Electric shock hazard. Before cleaning the device, disconnect thepower cord from the power source and the device.WARNING Take care to prevent water or other fluid from entering anyconnectors on the device. Should this occur, dry the connectors with warm air.Check the accuracy of all operating functions.Caution The device is not heat-resistant. Do not autoclave.The following agents are compatible with the device:• CaviWipes • Sani-Cloth ® Plus• 70 percent isopropyl alcohol• 10 percent chlorine bleach/90 percent water solutionNoteClean the device on a routine basis, according to your facility's protocols andstandards or local regulations.CaviWipes or Sani-Cloth PlusFollow the cleaning agent manufacturer's guidelines.1. Using CaviWipes or Sani-Cloth Plus, wipe the surface of the device to remove all debris.2. Allow the device surface to dry for a minimum of 10 minutes before using the device.70 percent isopropyl alcoholWipe the device with a clean cloth slightly dampened with 70 percent isopropyl alcohol.
56 Appendices <strong>Welch</strong> <strong>Allyn</strong> <strong>Connex</strong> ® <strong>ProBP</strong> <strong>3400</strong> digital blood pressure device10 percent chlorine bleach/90 percent water solutionClean the accessories1. Wipe the device with a clean cloth slightly dampened with a 10 percent bleach and 90 percentwater solution.2. Rinse with a clean cloth slightly dampened with clean water.3. Allow the device surface to dry for a minimum of 10 minutes before using the device.Wipe the NIBP hose and any reusable cuffs with a damp cloth moistened in a mild detergentsolution.The same cleaning agents used to clean the device can be used on the stand and mountingaccessories.NoteFactory defaultsClean the device on a routine basis, according to your facility's protocols andstandards or local regulations.SettingBluetoothUnit of measurePressure presetsData managementMAPLanguageDefault valueEnablemmHg160 mmHgAuto overwriteOnEnglishDisassembly and repair referenceScrewsThe following table lists torque specifications for all screws.Qty Location Type Size/length Torque Bit type1 Battery door Shoulder screw M3 x 0.5 3.0 in-lb ±0.5 in-lb #1 Phillips2 Rear housing Pan head machinescrewM3 x 0.5 6.0 in-lb ±0.5 in-lb #1 Phillips4 PCBA mount Plastite #4 x 0.25 4.0 in-lb ±0.5 in-lb Torx T10
<strong>Service</strong> <strong>manual</strong> Appendices 57ConnectorsConnector typesDisassembly and repair procedures require that you disconnect and reconnect the followingconnector types:• Locking (squeeze-release): Locking connectors use a latching mechanism to preventaccidental disconnection during assembly and use. The latch is located on one end of a tab soit may flex and lock into place when coupled with its matching connector. The tab provides alever to release the latch. When disconnecting, squeeze to provide pressure on the tab tounlatch. Some connectors have multiple latches that require you to press multiple tabs torelease.To remove a locking connector, squeeze the release lever and remove the cable.To connect a locking connector, push the mating pieces together until the latch locks in place.• Pressure: Pressure connectors use friction to prevent accidental disconnects.To remove a pressure connector, grasp each connector mating half and pull the halves apart.Caution Do not use excessive force to disconnect the connector.Excessive force may result in pulling the mounted connector off thecircuit board.To connect a pressure connector, grasp each connector mating half and insert one half intothe other.• ZIF (zero insertion force): ZIF connectors use a sliding outer piece that latches andunlatches to secure and release the flex cable. ZIF cables cannot be successfully connectedor disconnected without properly unlatching and latching the sliding outer piece.Caution Do not use excessive force when releasing pressure onthe connector. Excessive force may result in breaking the slidingouter piece.To remove a ZIF connectorCaution Remove a flex cable only after the ZIF latch is open.1. Using a suitable tool (for example, a spudger or needle-nose pliers), slide the latchingpiece of the connector away from the connector body.2. Remove the cable.To connect a ZIF connector1. Slide the latching piece of the connector away from the connector body.2. Insert the flex cable into the connector. This may require using a suitable tool to keep thelatching piece elevated.3. Slide the latching piece toward the connector body until it locks into place.
58 Appendices <strong>Welch</strong> <strong>Allyn</strong> <strong>Connex</strong> ® <strong>ProBP</strong> <strong>3400</strong> digital blood pressure deviceConnector diagramsMain board connectorsID Connects with TypeJ1 J22 on the blood pressure (ModF) board PressureJ2 Battery LockingJ3 External USB USBJ5 Keypad ZIFJ10 Dump valve PressureBlood pressure board connectors
<strong>Service</strong> <strong>manual</strong> Appendices 59ID Connects with TypeJ22 J1 on the main (NCE) board PressureJ80 Pump Pressure