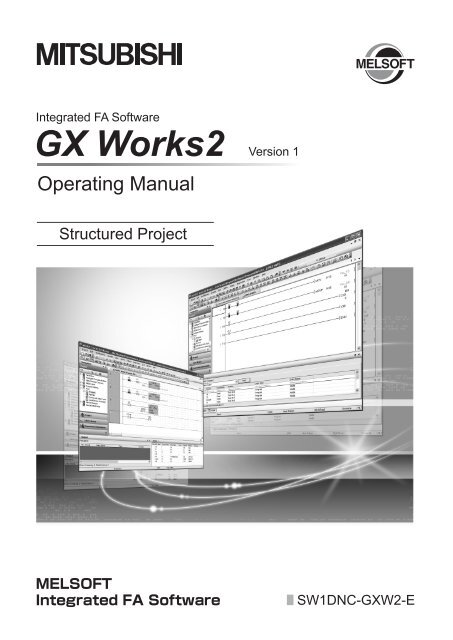
GX Works 2 Operating Manual Structured Project - Automation ...
GX Works 2 Operating Manual Structured Project - Automation ...
GX Works 2 Operating Manual Structured Project - Automation ...

Create successful ePaper yourself
Turn your PDF publications into a flip-book with our unique Google optimized e-Paper software.
CONDITIONS OF USE FOR THE PRODUCT(1) Mitsubishi programmable controller ("the PRODUCT") shall be used in conditions;i) where any problem, fault or failure occurring in the PRODUCT, if any, shall not lead to any major orserious accident; andii) where the backup and fail-safe function are systematically or automatically provided outside of thePRODUCT for the case of any problem, fault or failure occurring in the PRODUCT.(2) The PRODUCT has been designed and manufactured for the purpose of being used in generalindustries.MITSUBISHI SHALL HAVE NO RESPONSIBILITY OR LIABILITY (INCLUDING, BUT NOT LIMITEDTO ANY AND ALL RESPONSIBILITY OR LIABILITY BASED ON CONTRACT, WARRANTY, TORT,PRODUCT LIABILITY) FOR ANY INJURY OR DEATH TO PERSONS OR LOSS OR DAMAGE TOPROPERTY CAUSED BY the PRODUCT THAT ARE OPERATED OR USED IN APPLICATION NOTINTENDED OR EXCLUDED BY INSTRUCTIONS, PRECAUTIONS, OR WARNING CONTAINED INMITSUBISHI'S USER, INSTRUCTION AND/OR SAFETY MANUALS, TECHNICAL BULLETINS ANDGUIDELINES FOR the PRODUCT.("Prohibited Application")Prohibited Applications include, but not limited to, the use of the PRODUCT in;• Nuclear Power Plants and any other power plants operated by Power companies, and/or any othercases in which the public could be affected if any problem or fault occurs in the PRODUCT.• Railway companies or Public service purposes, and/or any other cases in which establishment of aspecial quality assurance system is required by the Purchaser or End User.• Aircraft or Aerospace, Medical applications, Train equipment, transport equipment such as Elevatorand Escalator, Incineration and Fuel devices, Vehicles, Manned transportation, Equipment forRecreation and Amusement, and Safety devices, handling of Nuclear or Hazardous Materials orChemicals, Mining and Drilling, and/or other applications where there is a significant risk of injury tothe public or property.Notwithstanding the above, restrictions Mitsubishi may in its sole discretion, authorize use of thePRODUCT in one or more of the Prohibited Applications, provided that the usage of the PRODUCT islimited only for the specific applications agreed to by Mitsubishi and provided further that no specialquality assurance or fail-safe, redundant or other safety features which exceed the generalspecifications of the PRODUCTs are required. For details, please contact the Mitsubishi representativein your region.A - 2
Print date <strong>Manual</strong> number RevisionApr., 2010Sep., 2010SH(NA)-080781ENG-FSH(NA)-080781ENG-GModel AdditionQ50UDEH, Q100UDEH, LJ72GF15-T2CorrectionMANUALS, GENERIC TERMS AND ABBREVIATIONS IN THIS MANUAL,Section 1.2, Section 1.3.1, Section 2.1, Section 5.2, Section 5.3, Section 5.4,Section 5.5, Section 5.7, Section 8.1, Section 8.2, Section 8.4.3, Section 8.5,Section 11.1, Section 12.2, Appendix 1.1, Appendix 1.2, Appendix 1.6, Appendix 1.8AdditionSection 5.8Jan., 2011SH(NA)-080781ENG-HCorrectionSection 1.2, Section 1.3.1, Section 4.3.2, Section 4.4.1, Section 5.2, Section 5.3,Section 5.4, Section 5.7, Section 6.2.1, Section 6.2.2, Section 6.2.10, Section 6.4.2,Section 6.4.7, Section 8.1, Section 8.2, Section 8.5, Section 9.1, Section 12.1,Section 12.2, Appendix 1.1, Appendix 1.2, Appendix 1.6AdditionTERMS, Section 5.5.1, Section 5.5.2, Section 6.2.5, Chapter 7, Chapter 8,Section 11.2.3CorrectionMANUALS, GENERIC TERMS AND ABBREVIATIONS IN THIS MANUAL,Section 1.2, Section 1.3.1, Section 2.1, Section 4.2.2, Section 4.2.3, Section 5.2,Section 5.3, Section 5.4, Section 5.5, Section 6.1.1, Section 6.2.1, Section 10.5,Section 11.1, Section 12.1, Section 12.2, Section 14.2, Appendix 1Section 5.5.1 to 5.5.2 are changed to Section 5.5.3 to 5.5.4Section 6.2.2 is changed to Section 7.1.4, Section 6.2.3 is changed to Section 6.2.2,Section 6.2.4 is changed to Section 8.8, Section 6.2.5 is changed to Section 6.2.3,Section 6.2.6 is changed to Section 8.8.7, Section 6.2.7 is changed to Section 8.11,Section 6.2.8 is changed to Section 6.2.4Section 6.2.10 to 6.2.12 are changed to Section 6.2.6 to 6.2.8Section 6.3 is changed to Chapter 7, Section 6.4 is changed to Chapter 8,Section 11.2.2 is changed to Section 13.3.1,Section 11.2.3 is changed to Section 13.2.5,Section 11.2.4 is changed to Section 13.3.4,Section 11.2.5 is changed to Section 13.2.2,Section 11.2.6 to Section 11.2.7 are changed to Section 13.3.3,Section 11.2.8 is changed to Section 13.2.6,Section 11.2.9 to Section 11.2.10 are changed to Section 13.2.4,Section 11.2.11 is changed to Section 13.3.5, Section 13.2.7,Chapter 7 to 12 are changed to Chapter 9 to 14A - 4
INTRODUCTIONThank you for purchasing the Mitsubishi integrated FA software, MELSOFT series.Before using this product, thoroughly read this manual to develop full familiarity with the functions andperformance to ensure correct use.CONTENTSSAFETY PRECAUTIONS.......................................................................................................................A - 1CONDITIONS OF USE FOR THE PRODUCT .......................................................................................A - 2REVISIONS ............................................................................................................................................A - 3INTRODUCTION ....................................................................................................................................A - 6CONTENTS ............................................................................................................................................A - 6MANUALS ............................................................................................................................................A - 12GENERIC TERMS AND ABBREVIATIONS IN THIS MANUAL............................................................A - 21TERMS .................................................................................................................................................A - 211 OVERVIEW 1 - 1 to 1 - 201.1 What is <strong>Structured</strong> <strong>Project</strong>? 1 - 21.2 Features of <strong>Structured</strong> <strong>Project</strong> 1 - 21.3 List of Functions 1 - 51.3.1 List of functions common to Simple project and <strong>Structured</strong> project ............................................. 1 - 51.3.2 List of functions for editing in ladder language...........................................................................1 - 161.3.3 List of functions for editing SFC diagrams .................................................................................1- 161.3.4 List of functions for editing SFC block list .................................................................................. 1 - 161.3.5 List of functions for editing in ST language ................................................................................ 1 - 171.3.6 List of functions for editing in structured ladder/FBD language.................................................. 1 - 182 SCREEN CONFIGURATION 2 - 1 to 2 - 22.1 Overview of Screen Configuration 2 - 23 PROGRAMMING PROCEDURE 3 - 1 to 3 - 43.1 Creating Programs 3 - 24 PROGRAM CONFIGURATIONS 4 - 1 to 4 - 164.1 Program Configurations of <strong>Structured</strong> <strong>Project</strong> 4 - 24.2 Creating Program Files and Tasks 4 - 34.2.1 Procedure for creating program files and tasks ........................................................................... 4 - 34.2.2 Registering program blocks to tasks ............................................................................................ 4 - 44.2.3 Setting executing conditions ........................................................................................................ 4 - 74.3 Creating POUs 4 - 104.3.1 Procedure for creating POUs ..................................................................................................... 4 - 10A - 6
4.3.2 Setting properties of functions and function blocks .................................................................... 4 - 114.4 Using POUs 4 - 144.4.1 Using functions and function blocks ........................................................................................... 4 - 155 SETTING LABELS 5 - 1 to 5 - 325.1 Label Setting Screens 5 - 25.2 Setting Global Labels 5 - 35.3 Setting Local Labels for Program Blocks 5 - 95.4 Setting Labels for Functions and Function Blocks 5 - 115.5 Common Operations for Setting Labels 5 - 135.5.1 Classes....................................................................................................................................... 5 - 135.5.2 Data types .................................................................................................................................. 5 - 145.5.3 Selecting data types ................................................................................................................... 5 - 155.5.4 Editing rows................................................................................................................................ 5 - 185.6 Setting <strong>Structured</strong> Data Type Labels 5 - 205.6.1 Setting data type of structure...................................................................................................... 5 - 205.6.2 Setting data type as structure..................................................................................................... 5 - 205.6.3 Assigning devices to structured data type labels........................................................................ 5 - 215.6.4 Assigning devices to structure array type labels ........................................................................ 5 - 235.7 Setting Ranges for Devices Assigned Automatically 5 - 265.7.1 Precautions on automatically assigned devices......................................................................... 5 - 275.8 Writing/Reading Data to/from CSV Files 5 - 296 COMMON OPERATIONS OF PROGRAM EDITORS 6 - 1 to 6 - 166.1 Types of Program Editor 6 - 26.1.1 Available programming languages ............................................................................................... 6 - 36.1.2 Available comment formats .......................................................................................................... 6 - 46.2 Common Operations of Program Editors 6 - 56.2.1 Using POUs (Function Block Selection window) .......................................................................... 6 - 56.2.2 Using labels in the program.......................................................................................................... 6 - 86.2.3 Undo and redo............................................................................................................................ 6 - 116.2.4 Changing display size of editing screen ..................................................................................... 6 - 126.2.5 Splitting editing screen ............................................................................................................... 6 - 136.2.6 Opening label setting screen of program editor being edited..................................................... 6 - 146.2.7 Displaying compilation result in list form..................................................................................... 6 - 146.2.8 Setting display contents of tool hint............................................................................................ 6 - 156.2.9 Opening label setting and program screens for selected POU .................................................. 6 - 167 EDITING ST PROGRAMS 7 - 1 to 7 - 67.1 ST Editor 7 - 27.1.1 Writing ST programs..................................................................................................................... 7 - 37.1.2 Automatic indention...................................................................................................................... 7 - 3A - 7
7.1.3 Setting tab length ......................................................................................................................... 7 - 47.1.4 Using templates ........................................................................................................................... 7 - 58 EDITING STRUCTURED LADDER/FBD PROGRAMS 8 - 1 to 8 - 408.1 Creating Ladder/FBD Programs 8 - 28.1.1 Selecting editing modes ............................................................................................................... 8 - 38.2 Editing in Select Mode 8 - 48.2.1 Entering ladder symbols............................................................................................................... 8 - 48.2.2 Entering instructions..................................................................................................................... 8 - 58.3 Drawing Lines 8 - 78.3.1 Connecting lines automatically when entering ladder symbols.................................................... 8 - 78.3.2 Connecting ladder symbols with lines .......................................................................................... 8 - 88.3.3 Connecting lines automatically..................................................................................................... 8 - 88.3.4 Overwriting input/output variable with lines.................................................................................. 8 - 98.3.5 Rearranging lines automatically ................................................................................................... 8 - 98.3.6 Inserting and deleting rows and columns................................................................................... 8 - 108.4 <strong>Operating</strong> Ladder Symbols 8 - 118.4.1 Moving ladder symbols .............................................................................................................. 8 - 118.4.2 Moving ladder symbols with lines connected ............................................................................. 8 - 118.4.3 Copying ladder symbols............................................................................................................. 8 - 138.5 Changing Type of Contact and Coil 8 - 158.5.1 Setting the type of contact and coil ............................................................................................ 8 - 158.5.2 Changing contact and coil in predetermined order .................................................................... 8 - 178.6 <strong>Operating</strong> Functions and Function Blocks 8 - 188.6.1 Adding variables automatically when entering functions and function blocks............................ 8 - 188.6.2 Editing variable names and instance names.............................................................................. 8 - 198.6.3 Changing the number of arguments for functions and function blocks ...................................... 8 - 208.7 Changing Display Format of Variables 8 - 218.7.1 Displaying variable names in multiple lines................................................................................8 - 218.7.2 Displaying labels and devices simultaneously ........................................................................... 8 - 218.7.3 Displaying instance names in multiple lines............................................................................... 8 - 228.7.4 Specifying the number of displaying characters for variable names .......................................... 8 - 228.7.5 Changing display format of variable........................................................................................... 8 - 238.8 Editing Ladder Blocks 8 - 268.8.1 Inserting ladder blocks ............................................................................................................... 8 - 268.8.2 Deleting ladder blocks................................................................................................................ 8 - 268.8.3 Cutting, copying, pasting, and moving ladder blocks ................................................................. 8 - 278.8.4 Editing ladder block headers...................................................................................................... 8 - 288.8.5 Editing listed ladder blocks......................................................................................................... 8 - 298.8.6 Setting ladder block labels/titles................................................................................................. 8 - 308.8.7 Switching to display/hide left power rail ..................................................................................... 8 - 308.8.8 Displaying grid............................................................................................................................ 8 - 318.9 Editing Comments 8 - 328.9.1 Editing comments....................................................................................................................... 8 - 328.9.2 Changing the size of comment entry field .................................................................................. 8 - 328.9.3 Moving comments ...................................................................................................................... 8 - 33A - 8
8.10 Editing in Guided Mode 8 - 348.10.1 Overwrite mode and insert mode ............................................................................................... 8 - 348.10.2 Entering ladder symbols ............................................................................................................. 8 - 358.10.3 Entering instructions................................................................................................................... 8 - 358.10.4 Connecting ladder symbols with lines ........................................................................................ 8 - 358.10.5 Drawing lines.............................................................................................................................. 8 - 368.10.6 Wrapping ladder ......................................................................................................................... 8 - 378.10.7 Setting Guided mode as the default editing mode...................................................................... 8 - 378.10.8 Entering variable names after contacts and coils ....................................................................... 8 - 378.10.9 Inserting comment entry fields to ladder blocks to be added ..................................................... 8 - 388.11 Checking Wrapping Position for Printing 8 - 399 SEARCHING FOR SPECIFIC POSITION 9 - 1 to 9 - 49.1 Searching for Specific Position in ST Program 9 - 29.1.1 Jumping to specified line .............................................................................................................. 9 - 29.1.2 Using bookmarks.......................................................................................................................... 9 - 29.2 Searching for Specific Position in <strong>Structured</strong> Ladder/FBD Program 9 - 49.2.1 Jumping to specified ladder block number ...................................................................................9 - 410 CONVERTING/COMPILING PROGRAMS 10 - 1 to 10 - 2410.1 Converting/Compiling Created Programs 10 - 210.2 Compiling All Programs 10 - 410.3 Executing Online Program Change Simultaneously with Conversion/Compilation 10 - 610.4 Changing <strong>Operating</strong> Conditions of Compilation 10 - 610.4.1 Changing the number of errors and warnings that stop compilation .......................................... 10 - 610.4.2 Hiding warning messages .......................................................................................................... 10 - 710.4.3 Using same name for global label and local label ...................................................................... 10 - 810.4.4 Using same lower case label name as device............................................................................ 10 - 810.4.5 Connecting PLS, PLF, or ALT outputs directly to other inputs with lines ................................... 10 - 910.4.6 Assigning common devices to outputs of function with EN/ENO ............................................. 10 - 1010.4.7 Retaining bit type outputs of functions...................................................................................... 10 - 1310.5 Compilation 10 - 1410.5.1 Compilation target data when compiling all programs.............................................................. 10 - 1410.5.2 Assigning devices..................................................................................................................... 10 - 1510.5.3 Precautions on Compilation...................................................................................................... 10 - 1810.6 Checking for Errors and Warnings 10 - 2210.6.1 Correcting errors and warnings ................................................................................................ 10 - 2311 WRITING/READING DATA TO/FROM PROGRAMMABLE CONTROLLER CPU 11 - 1 to 11 - 611.1 Writing/Reading Data to/from Programmable Controller CPU 11 - 2A - 9
12 MONITORING 12 - 1 to 12 - 1012.1 Starting and Stopping Monitoring of Program 12 - 212.2 Starting and Stopping Monitoring of Function Blocks 12 - 312.3 Changing <strong>Operating</strong> Conditions of Monitoring 12 - 412.3.1 Changing current value display format (decimal/hexadecimal) of word type variable ............... 12 - 412.3.2 Setting the number of displaying characters for character strings ............................................. 12 - 512.4 Monitoring Programs on ST Editor 12 - 612.5 Monitoring Programs in <strong>Structured</strong> Ladder/FBD Editor 12 - 813 USING USER LIBRARIES 13 - 1 to 13 - 1613.1 User Libraries 13 - 213.2 Procedure for Using User Library 13 - 313.3 Creating User Library 13 - 413.3.1 Creating user libraries ................................................................................................................ 13 - 413.3.2 Changing library name ............................................................................................................... 13 - 513.3.3 Creating data.............................................................................................................................. 13 - 513.3.4 Saving library file........................................................................................................................ 13 - 613.3.5 Deleting user library from project ............................................................................................... 13 - 813.3.6 Setting password to user library................................................................................................. 13 - 913.3.7 Set help file to library................................................................................................................ 13 - 1013.4 Using User Library 13 - 1113.4.1 Installing user library data to project ........................................................................................ 13 - 1113.4.2 Creating programs using user library ....................................................................................... 13 - 1213.4.3 Editing user library ................................................................................................................... 13 - 1313.4.4 Updating user library ................................................................................................................ 13 - 1513.4.5 Displaying user library help ...................................................................................................... 13 - 1614 SETTING OPTIONS 14 - 1 to 14 - 614.1 Basic Operations 14 - 214.2 Option Setting List 14 - 3APPENDIX App - 1 to App - 20Appendix 1 List of Toolbars and Shortcut Keys App - 2Appendix 1.1 Common toolbars and shortcut keys...............................................................................App - 2Appendix 1.2 "Navigation Window" toolbar icons .................................................................................App - 6Appendix 1.3 Toolbar icons and shortcut keys for setting labels ..........................................................App - 7Appendix 1.4 Toolbar icons and shortcut keys for setting device memory ...........................................App - 8Appendix 1.5 Toolbar icons and shortcut keys for verification result ....................................................App - 9Appendix 1.6 Toolbar icons for executing sampling trace.....................................................................App - 9Appendix 1.7 Toolbar icons and shortcut keys for program editors....................................................App - 10Appendix 1.8 Toolbar icons and shortcut keys for I/O system setting function...................................App - 19Appendix 1.9 Shortcut keys for operating intelligent function module.................................................App - 20A - 10
INDEX Index - 1 to Index - 3A - 11
■MANUALSRelated manuals are separately issued according to the purpose of their functions in <strong>GX</strong> <strong>Works</strong>2.● Related manualsThe manuals related to this product are shown below.Refer to the following tables when ordering required manuals.1) Operation of <strong>GX</strong> <strong>Works</strong>2<strong>Manual</strong> name<strong>GX</strong> <strong>Works</strong>2 Version 1 <strong>Operating</strong> <strong>Manual</strong> (Common)Explains the system configuration of <strong>GX</strong> <strong>Works</strong>2 and the functions common to Simple project and<strong>Structured</strong> project such as parameter setting, operation method for the online function.(Sold separately)<strong>GX</strong> <strong>Works</strong>2 Version 1 <strong>Operating</strong> <strong>Manual</strong> (Simple <strong>Project</strong>)Explains operation methods such as creating and monitoring programs in Simple project of <strong>GX</strong> <strong>Works</strong>2.(Sold separately)<strong>GX</strong> <strong>Works</strong>2 Version 1 <strong>Operating</strong> <strong>Manual</strong> (Intelligent Function Module)Explains operation methods of intelligent function module such as parameter setting, monitoringprograms, and predefined protocol support function in <strong>GX</strong> <strong>Works</strong>2.(Sold separately)<strong>GX</strong> <strong>Works</strong>2 Beginner's <strong>Manual</strong> (Simple <strong>Project</strong>)Explains fundamental operation methods such as creating, editing, and monitoring programs in Simpleproject for users inexperienced with <strong>GX</strong> <strong>Works</strong>2(Sold separately)<strong>GX</strong> <strong>Works</strong>2 Beginner's <strong>Manual</strong> (<strong>Structured</strong> <strong>Project</strong>)Explains fundamental operation methods such as creating, editing, and monitoring programs in<strong>Structured</strong> project for users inexperienced with <strong>GX</strong> <strong>Works</strong>2.(Sold separately)<strong>Manual</strong> number(Model code)SH-080779ENG(13JU63)SH-080780ENG(13JU64)SH-080921ENG(13JU69)SH-080787ENG(13JZ22)SH-080788ENG(13JZ23)2) <strong>Structured</strong> Programming<strong>Manual</strong> nameMELSEC-Q/L/F <strong>Structured</strong> Programming <strong>Manual</strong> (Fundamentals)Explains the programming methods, types of programming languages, and other information required tocreate structured programs.(Sold separately)MELSEC-Q/L <strong>Structured</strong> Programming <strong>Manual</strong> (Common Instructions)Explains the specifications and functions of common instructions such as sequence instructions, basicinstructions, and application instructions that can be used in structured programs. (Sold separately)MELSEC-Q/L <strong>Structured</strong> Programming <strong>Manual</strong> (Application Functions)Explains the specifications and functions of application functions that can be used in structuredprograms.(Sold separately)MELSEC-Q/L <strong>Structured</strong> Programming <strong>Manual</strong> (Special Instructions)Explains the specifications and functions of special instructions such as module dedicated instruction,PID control instruction, and built-in I/O function dedicated instruction, that can be used in structuredprograms.(Sold separately)FXCPU <strong>Structured</strong> Programming <strong>Manual</strong> (Device & Common)Explains the devices and parameters provided in <strong>GX</strong> <strong>Works</strong>2 for structured programming.(Sold separately)FXCPU <strong>Structured</strong> Programming <strong>Manual</strong> (Basic & Applied Instruction)Explains the sequence instructions provided in <strong>GX</strong> <strong>Works</strong>2 for structured programming.(Sold separately)FXCPU <strong>Structured</strong> Programming <strong>Manual</strong> (Application Functions)Explains the application functions provided in <strong>GX</strong> <strong>Works</strong>2 for structured programming. (Sold separately)<strong>Manual</strong> number(Model code)SH-080782ENG(13JW06)SH-080783ENG(13JW07)SH-080784ENG(13JW08)SH-080785ENG(13JW09)JY997D26001(09R925)JY997D34701(09R926)JY997D34801(09R927)A - 12
3) Operation of iQ <strong>Works</strong><strong>Manual</strong> nameiQ <strong>Works</strong> Beginner’s <strong>Manual</strong>Explains fundamental operation methods such as managing the system using MELSOFT Navigator andusing system labels for users inexperienced with <strong>GX</strong> <strong>Works</strong>2.(Sold separately)<strong>Manual</strong> number(Model code)SH-080902ENG(13JZ44)The <strong>Operating</strong> <strong>Manual</strong>s are included on the CD-ROM of the software package in a PDF file format.<strong>Manual</strong>s in printed form are sold separately for single purchase. Order a manual by quoting the manualnumber (model code) listed in the table above.A - 13
● Purpose of this manualThis manual explains the operations for creating sequence programs in <strong>Structured</strong> project using thefunctions supported by <strong>GX</strong> <strong>Works</strong>2.<strong>Manual</strong>s for reference are listed in the following table according to their purpose.For information such as the contents and number of each manual, refer to the list of 'Relatedmanuals'.1) Operation of <strong>GX</strong> <strong>Works</strong>2InstallationPurposeLearning the operatingenvironment andinstallation methodLearning a USB driverinstallation method<strong>GX</strong> <strong>Works</strong>2InstallationInstructionsDetails<strong>GX</strong> <strong>Works</strong>2Beginner's <strong>Manual</strong>Simple<strong>Project</strong><strong>Structured</strong><strong>Project</strong>CommonDetails<strong>GX</strong> <strong>Works</strong>2 Version 1<strong>Operating</strong> <strong>Manual</strong>Simple<strong>Project</strong><strong>Structured</strong><strong>Project</strong>IntelligentFunctionModuleLearning all functions of<strong>GX</strong> <strong>Works</strong>2OutlineLearning the projecttypes and availablelanguages in <strong>GX</strong> <strong>Works</strong>2OutlineLearning the basicoperations and operatingprocedures whencreating a simple projectfor the first timeDetailsOperation of<strong>GX</strong> <strong>Works</strong>2Learning the basicoperations and operatingprocedures whencreating a structuredproject for the first timeDetailsLearning the operationsof available functionsregardless of projecttype.DetailsLearning the functionsand operation methodsfor programmingOutlineDetailsDetailsLearning data settingmethods for intelligentfunction moduleDetailsA - 14
2) Operations in each programming languageFor details of instructions used in each programming language, refer to the section 3 on the nextpage.PurposeSimple<strong>Project</strong><strong>GX</strong> <strong>Works</strong>2Beginner's <strong>Manual</strong><strong>Structured</strong><strong>Project</strong>Simple<strong>Project</strong><strong>GX</strong> <strong>Works</strong>2 Version 1<strong>Operating</strong> <strong>Manual</strong><strong>Structured</strong><strong>Project</strong>LadderOutlineDetailsSimple<strong>Project</strong>SFC*1OutlineDetailsSTOutlineDetailsLadderOutlineDetails<strong>Structured</strong><strong>Project</strong>SFC<strong>Structured</strong> ladder/FBD*1OutlineOutlineDetailsDetailsSTOutlineDetails*1: MELSAP3 and FX series SFC onlyA - 15
3) Details of instructions in each programming language (for QCPU (Q mode)/LCPU)AlllanguagesUsingladderlanguageUsing SFClanguageUsingstructuredladder/FBDor STlanguagePurposeLearning details ofprogrammablecontroller CPUerror codes,special relays,and specialregistersLearning thetypes and detailsof commoninstructionsLearning thetypes and detailsof instructions forintelligent functionmodulesLearning thetypes and detailsof instructions fornetwork modulesLearning thetypes and detailsof instructions forthe PID controlfunctionLearning details ofspecifications,functions, andinstructions ofSFC (MELSAP3)Learning thefundamentals forcreating a<strong>Structured</strong>programLearning thetypes and detailsof commoninstructionsLearning thetypes and detailsof instructions forintelligent functionmodulesLearning thetypes and detailsof instructions fornetwork modulesLearning thetypes and detailsof instructions forthe PID controlfunctionLearning thetypes and detailsof applicationfunctionsMELSEC-Q/L/F<strong>Structured</strong>Programming<strong>Manual</strong>FundamentalsDetailsCommonInstructionsDetailsMELSEC-Q/L <strong>Structured</strong>Programming <strong>Manual</strong>SpecialInstructionsOutlineOutlineOutlineApplicationFunctionsDetailsMELSEC-Q/LProgramming<strong>Manual</strong>CommonInstructionsDetailsDetailsMELSEC-Q/L/QnAProgramming <strong>Manual</strong>PID ControlInstructionsDetailsDetails<strong>Manual</strong>formoduleto beusedSFC -DetailsDetailsDetailsDetailsDetailsA - 16
4) Details of instructions in each programming language (for FXCPU)UsingladderlanguageUsing SFClanguageUsingstructuredladder/FBDor STlanguagePurposeLearning thetypes and detailsof basic/applicationinstructions,descriptions ofdevices andparametersLearning details ofspecifications,functions, andinstructions ofSFCLearning thefundamentals forcreating astructuredprogramLearning thedescriptions ofdevices,parameters, anderror codesLearning thetypes and detailsof sequenceinstructionsLearning thetypes and detailsof applicationinstructionsMELSEC-Q/L/F<strong>Structured</strong>Programming<strong>Manual</strong>FundamentalsDetailsFXCPU <strong>Structured</strong> Programming <strong>Manual</strong>Device &CommonDetailsBasic &AppliedInstructionDetailsApplicationFunctionsDetailsFX0, FX0S,FX0N, FX1,FXU, FX2CFXCPU Programming <strong>Manual</strong>FX1S, FX1N,FX2N, FX1NC,FX2NCFX3G, FX3U,FX3UCDetails Details DetailsDetails Details DetailsA - 17
● How to read this manualSupported CPUSupported programmablecontroller CPUs are shown inicons under the section title.Chapter headingIndex on the right of the pagenumber clarifies the chapter ofcurrently open page.Screen displayDescribes the screen displayprocedure.Follow the and select[(menu)] to open the screen.*Screen display may depend onthe CPU.In that case, typical example isdescribed.Display contentsDescribes the display contentsin the screen.<strong>Operating</strong> procedureDescribes the operatingprocedure of the function.Reference locationleads to the referencelocation and reference manual.Screen buttonDescribes the buttons in thescreen.Section titleClarifies the section of currentlyopen page.A - 18
The following table explains the CPU module icons that indicate the function availability.IconQCPU (Q mode) LCPU FXCPUQ CPU L CPU FXDescriptionNormal icons indicate that the corresponding functionis available.*1Q CPU- -Icons with * (asterisk) symbol indicate that thecorresponding function is available with restrictionssuch as CPU types.Q CPU L CPU FXIcons with symbol indicate that the correspondingfunction is not available.This manual also uses the following columns:This explains notes for requiring attention or useful functions relating to the information given on thesame page.RestrictionsThis explains restrictions relating to the information given on the same page.A - 19
● Symbols used in this manualThe following shows the symbols used in this manual with descriptions and examples.123456No. Symbol Description Example123[ ] Menu name on a menu bar [<strong>Project</strong>]Toolbar icon(Underline) Screen name Q Parameter Setting screen4Tab name in a screen56−" " Item name in a screen "Timer Limit Setting"Button on a screen buttonKeyboard keyA - 20
■GENERIC TERMS AND ABBREVIATIONS IN THIS MANUALThis manual uses the generic terms and abbreviations listed in the following table to discuss thesoftware packages and programmable controller CPUs. Corresponding module models are also listed ifneeded.Generic term and abbreviationDescription<strong>GX</strong> <strong>Works</strong>2Generic product name for SWnDNC-<strong>GX</strong>W2-E(n: version)Existing application -<strong>GX</strong> Developer<strong>GX</strong> IEC DeveloperMELSOFT NavigatoriQ <strong>Works</strong>Personal computerBasic model QCPUHigh Performance model QCPUUniversal model QCPUQCPU (Q mode)LCPUFXCPUFXGP(WIN)MELSAP3MELSAP-LSFCGeneric product name for SWnD5C-GPPW-E, SWnD5C-GPPW-EA, SWnD5C-GPPW-EV,and SWnD5C-GPPW-EVA(n: version)Generic product name for SWnD5C-MEDOC3(n: version)Product name for the integrated development environment included in SWnDNC-IQWK (iQPlatform compatible engineering environment MELSOFT iQ <strong>Works</strong>)(n: version)Abbreviation for iQ platform supporting engineering environment MELSOFT iQ <strong>Works</strong>Generic term for personal computer on which Windows ® operatesGeneric term for Q00J, Q00, and Q01Generic term for Q02, Q02H, Q06H, Q12H, and Q25HGeneric term for Q00UJ, Q00U, Q01U, Q02U, Q03UD, Q03UDE, Q04UDH, Q04UDEH,Q06UDH, Q06UDEH, Q10UDH, Q10UDEH, Q13UDH, Q13UDEH, Q20UDH, Q20UDEH,Q26UDH, Q26UDEH, Q50UDEH, and Q100UDEHGeneric term for Basic model QCPU, High Performance model QCPU, and Universalmodel QCPUGeneric term for L02, L02-P, L26-BT, and L26-PBTGeneric term for FX0, FX0S, FX0N, FX1, FXU, FX2C, FX1S, FX1N, FX1NC, FX2N, FX2NC, FX3G,FX3U, and FX3UCAbbreviation for SW0PC-FXGP/WIN-EAbbreviation for the SFC function in MELSAP3 display formatGeneric term for the SFC function in MELSAP-L (instruction format) and MELSAP-L (startconditions format)Generic term for MELSAP3, MELSAP-L, and FX series SFC■TERMSThe following are the terms used in this manual.TermSimple project<strong>Structured</strong> projectCommon instructionSpecial instructionList formatDescriptionGeneric term for projects created by using the ladder/SFC/ST languageGeneric term for projects created by using the ladder/SFC/ST/structured ladder/FBD languageGeneric term for sequence instructions, basic instructions, application instructions, data linkinstructions, multiple CPU dedicated instructions, and multiple CPU high-speed transmissiondedicated instructionsGeneric term for module dedicated instructions, PID control instructions, socket communicationfunction instructions, built-in I/O function instructions, and data logging function instructionsAn input format to input mnemonic language in a ladder programA - 21
MEMOA - 22
11 OVERVIEW2OVERVIEWThis manual explains specific operating procedures using <strong>Structured</strong> project.For the full product features and functions of <strong>GX</strong> <strong>Works</strong>2, refer to the following manual.<strong>GX</strong> <strong>Works</strong>2 Version 1 <strong>Operating</strong> <strong>Manual</strong> (Common)SCREEN 3CONFIGURATION1.1 What is <strong>Structured</strong> <strong>Project</strong>? . . . . . . . . . . . . . . . . . . . . . . . . . . . 1-21.2 Features of <strong>Structured</strong> <strong>Project</strong>. . . . . . . . . . . . . . . . . . . . . . . . . 1-21.3 List of Functions . . . . . . . . . . . . . . . . . . . . . . . . . . . . . . . . . . . . 1-5EDITING STRUCTUREDLADDER PROGRAMSPROGRAMMING 4PROCEDUREPROGRAM 5CONFIGURATIONSEDITING ST 8PROGRAMSCOMMON OPERATIONS7OF PROGRAM EDITORS6SETTING LABELS1 - 1
<strong>GX</strong> <strong>Works</strong>21 OVERVIEW1.1 What is <strong>Structured</strong> <strong>Project</strong>?In <strong>Structured</strong> project, programs can be created using the structured programming.By segmenting the control functions and creating components from commonly used parts of programs, thistype of programming (structured programming) is easy to understand visually, and created components arehighly reusable to other programs.1.2 Features of <strong>Structured</strong> <strong>Project</strong>This section explains the features of <strong>Structured</strong> project.■Various programming languages are availableVarious programming languages are available for structured programs. Users can combine theselanguages by selecting the most appropriate programming language for each purpose to createprograms.Ladder *1STSFC *1<strong>Structured</strong> ladderFBDTable 1.2-1 Programming languages supported by <strong>Structured</strong> projectType Name Description*1: Not supported by FXCPU.Ladder diagram<strong>Structured</strong> textSequential function chartLadder diagramFunction block diagramA graphic language using ladders composed of contacts and coils.Can be operated in a similar way to existing <strong>GX</strong> Developeroperation.A high-level structured text language with grammatical structuresimilar to C language.A graphic language in which executing orders and executingconditions of programs are defined.A graphic language using ladders composed of contacts and coils,which can be inserted flexibly.A graphic language using ladders by connecting functions and/orfunction blocks with lines.■Common program editors for each programmable controller CPUThe program editors of <strong>Structured</strong> project can be used for any type of programmable controller CPUsupported by <strong>GX</strong> <strong>Works</strong>2. Users can select the desired programming languages regardless of thetarget programmable controller CPU.For details of the programmable controller CPUs supported by <strong>GX</strong> <strong>Works</strong>2, refer to the followingmanual.<strong>GX</strong> <strong>Works</strong>2 Version 1 <strong>Operating</strong> <strong>Manual</strong> (Common)1 - 2
1.2 Features of <strong>Structured</strong> <strong>Project</strong>■Creating large programs efficiently with structured programming1In <strong>Structured</strong> project, programs can be easily structured by managing program components in ahierarchy. *1Programs that are easy to maintain and highly reusable can be created efficiently by structuringprograms. This is suitable for developing large programs.<strong>Project</strong>Program file 1 Program file 2Task 1 Task 2 Task 32OVERVIEWSCREEN 3CONFIGURATION■*1 : A program is created in units of POUs (abbreviation for Program Organization Units) such as programblocks (PRGs), functions (FUNs), and function blocks (FBs). Function blocks can be nested in ahierarchy. Created programs are registered to the tasks of program files.Assets of programs are utilized as librariesPROGRAMMING 4PROCEDUREIn <strong>Structured</strong> project, sequence program components can be saved as libraries which can be utilized asassets of programs in multiple projects.Register tolibrariesPROGRAM 5CONFIGURATIONS<strong>GX</strong> <strong>Works</strong>2Library6SETTING LABELSUtilize programsCOMMON OPERATIONS7OF PROGRAM EDITORSEDITING STRUCTUREDLADDER PROGRAMSEDITING ST 8PROGRAMS1 - 3
<strong>GX</strong> <strong>Works</strong>21 OVERVIEW■Assets of past programs can be utilizedIn <strong>GX</strong> <strong>Works</strong>2, sequence programs created with previous versions of <strong>GX</strong> Developer and <strong>GX</strong> IECDeveloper can be imported, which enables efficient utilization of program assets.<strong>GX</strong> <strong>Works</strong>2Utilize the assets ofpast programs<strong>GX</strong> Developer<strong>GX</strong> IEC Developer1 - 4
1.3 List of Functions1.3 List of Functions1This section shows the list of functions of <strong>GX</strong> <strong>Works</strong>2.The functions are divided into common functions available (<strong>Project</strong>, Online, Debug, Diagnostics, Tool,Window, and Help) and functions used for each editing and setting target (Edit, Find/Replace, Compile, andView).For (Common), (Simple), and (Intelligent) indicated in the Reference column, refer to the following manualsrespectively:(Common) .............<strong>GX</strong> <strong>Works</strong>2 Version 1 <strong>Operating</strong> <strong>Manual</strong> (Common)(Simple).................<strong>GX</strong> <strong>Works</strong>2 Version 1 <strong>Operating</strong> <strong>Manual</strong> (Simple <strong>Project</strong>)(Intelligent) ............<strong>GX</strong> <strong>Works</strong>2 Version 1 <strong>Operating</strong> <strong>Manual</strong> (Intelligent Function Module)1.3.1 List of functions common to Simple project and <strong>Structured</strong>projectThis section explains the functions common to Simple project and <strong>Structured</strong> project.■List of common functionsThe following tables show functions that are available regardless of the type of editing or setting target.New<strong>Project</strong> (common function)Create a new project.ReferenceOpenOpen an existing project.CloseClose an open project.SaveSave a project.Save AsName and save a project.Compress/Unpack(Common)CompressCompress and save a project.UnpackUnpack a compressed project.DeleteDelete an existing project.VerifyVerify between two project data.<strong>Project</strong> Revision -Revision EntryRegister the project change history.Revision ListChange PLC TypeDisplay the list of project change history.Change the programmable controller CPU type.(Common)Change the project type from Simple project (without labels)Change <strong>Project</strong> Typeto Simple project (with labels), or from Simple project (withlabels) to <strong>Structured</strong> project.Object -NewAdd data to a project.RenameDeleteCopyPasteSet as Default ConnectionPropertyRename the selected data.Delete the selected data.Copy the selected data.Paste the copied data.Specify data in selected connection target as a connectiontarget for regular use.Display the selected data properties.(Common)2OVERVIEWSCREEN 3CONFIGURATIONPROGRAMMING 4PROCEDUREPROGRAM 5CONFIGURATIONS6SETTING LABELSCOMMON OPERATIONS7OF PROGRAM EDITORSEDITING ST 8PROGRAMSEDITING STRUCTUREDLADDER PROGRAMS1.3.1 List of functions common to Simple project and <strong>Structured</strong> project 1 - 5
<strong>GX</strong> <strong>Works</strong>21 OVERVIEWIntelligent Function Module -New ModuleAdd new intelligent function module data.Delete ModulePropertySave the Positioning Module DataRead from the Positioning ModuleDataIntelligent Function Module ParameterListDelete intelligent function module data.Display properties of an intelligent function module data.Save data of the positioning module selected on the <strong>Project</strong>view to a file.Read data from the positioning module and reflect it to thepositioning module selected on the <strong>Project</strong> view.Display a list of set/unset parameters of an intelligentfunction module.(Intelligent)Open Other Data -Open Other <strong>Project</strong>Open a project created with <strong>GX</strong> Developer.Read ASC Format FileRead an ASC format file.(Common)Import <strong>GX</strong> Configurator-QP Data Read a project created with <strong>GX</strong> Configurator-QP. (Intelligent)Export to <strong>GX</strong> Developer Format File Save an open project in <strong>GX</strong> Developer format. (Common)Library -CreateCreate a new library.InstallImport a created library to the project.DeinstallDelete a library from the project.ReloadUpdate the library imported to the project.RenameRename a library.OpenEnable editing of a library.Chapter 13CloseDisable editing of a library.Change PasswordSet a password for a library.Save AsName and save a project.SaveSave a library file.HelpDisplay help information of the library.Security -Change PasswordChange the password of the current login user.User ManagementData Security SettingPrintPrint PreviewPrint WindowPrint Window PreviewPrinter Setup(Recently used files 1 to 4)Start <strong>GX</strong> DeveloperExit<strong>Project</strong> (common function)Manage user information of the project.Add/delete a user or change the user information.Set the access authorization of each user related toreading/writing data.Batch print multiple data in the project.Display a print preview of data to be batch printed.Print the open screen.Display the print preview of the open screen.Change the printer settings.Display the recently used <strong>GX</strong> <strong>Works</strong>2 project paths and openthe selected project.Start <strong>GX</strong> Developer from <strong>GX</strong> <strong>Works</strong>2.Exit <strong>GX</strong> <strong>Works</strong>2.Reference(Common)UndoRedoCutCopyPasteEdit (common function)Restore the previous processing status.Restore the processing deleted with [Undo].Cut the selected data.Copy the selected data.Paste the cut or copied data at the cursor position.Reference-1 - 6 1.3.1 List of functions common to Simple project and <strong>Structured</strong> project
1.3 List of Functions1Cross ReferenceDevice ListFind DeviceFind InstructionFind Contact or CoilFind StringReplace DeviceReplace InstructionReplace StringChange Open/Close ContactDevice Batch ReplaceRegister to Device Batch ReplaceFind/Replace (common function)Display the usage of selected device or label.Display the usage of devices.Search a device/label in the program.Search an instruction.Search a contact or coil corresponding to the specifieddevice.Search a string.Replace a device/label in the program.Replace an instruction.Replace a string.Change an open contact to a closed contact, or change aclosed contact to an open contact.Batch-replace devices with the specified device.Register selected devices on the Device Batch Replacescreen.Reference(Common)Compile (common function)ReferenceBuild Convert/compile a program being edited. Section 10.1Online Program ChangeWrite sequence programs to a programmable controller CPUafter the conversion/compilation.(Common)Rebuild All Convert/compile all programs in the project. Section 10.2View (common function)ReferenceToolbar -Toolbar nameDisplay/hide each toolbar.StatusbarDisplay/hide the status bar.(Common)Color and FontSet the display color for characters such as labels, devicecomments on the work window.Docking Window -Navigation Window Display/hide the Navigation window. (Common)Function Block Selection WindowOutput WindowCross ReferenceDevice ListDisplay/hide the Function Block Selection window.Select a part such as FB or function on the window forutilizing it to a program.Display/hide the Output window.In the Output window, the conversion (compilation) result isdisplayed.Display/hide the Cross Reference window.In the Cross Reference window, devices/labels used in theproject are displayed.Display/hide the Device List window.In the Device List window, the usage of selected device isdisplayed.Section 6.2.1Section 10.6(Common)Display/hide the Watch window.Watch 1 to 4In the Watch window, the monitoring result is displayed.Intelligent Function Module Monitor -Intelligent Function Module MonitorDisplay/hide the Intelligent Function Module Monitor window.1 to 10Intelligent Function Module GuidanceDisplay/hide the Intelligent Function Module Guidancewindow.(Intelligent)Find/ReplaceDisplay/hide the Find/Replace window.In the Find/Replace window, the search/replace result is (Common)displayed.Debug Window -Break Point WindowDisplay/hide the Break Point window.Break Device WindowDisplay/hide the Break Device window.(Common)Skip Range WindowDisplay/hide the Skip Range window.2OVERVIEWSCREEN 3CONFIGURATIONPROGRAMMING 4PROCEDUREPROGRAM 5CONFIGURATIONS6SETTING LABELSCOMMON OPERATIONS7OF PROGRAM EDITORSEDITING ST 8PROGRAMSEDITING STRUCTUREDLADDER PROGRAMS1.3.1 List of functions common to Simple project and <strong>Structured</strong> project 1 - 7
<strong>GX</strong> <strong>Works</strong>21 OVERVIEWRead from PLCWrite to PLCVerify with PLCOnline (common function)Read data from the programmable controller CPU.Write data to the programmable controller CPU.Verify a project being edited against the data in theprogrammable controller CPU.ReferenceSection 11.1(Common)Remotely control RUN/PAUSE/STOP of the programmableRemote Operationcontroller CPU from <strong>GX</strong> <strong>Works</strong>2.Password/Keyword -NewDeleteSet a password/keyword to the programmable controllerCPU.Cancel the password/keyword set to the programmablecontroller CPU.(Common)DisableTemporarily unlock the password/keyword set to theprogrammable controller CPU.PLC Memory Operation -Format PLC MemoryFormat the programmable controller CPU memory.Clear PLC MemoryClear the programmable controller CPU memory.(Common)Arrange PLC MemoryArrange the programmable controller CPU memory.Delete PLC DataDelete data in the programmable controller CPU.PLC User Data -Read PLC User DataRead the programmable controller CPU user data.Write PLC User DataDelete PLC User DataExport to ROM FormatWrite the programmable controller CPU user data.Delete the programmable controller CPU user data.Copy the program memory data in the programmablecontroller CPU to ROM.(Common)Transfer the content of program cache memory to programProgram Memory Batch Downloadmemory in batch.Latch Data Backup -BackupBack up device memory/file register/error history data to thestandard ROM.(Common)Delete Backup DataDelete the backup data in the programmable controller CPU.PLC Module Change -Set ClockCreate Backup DataRestoreRegister/Cancel Display Module MenuBack up data in the programmable controller CPU to thememory card.Restore the backup data to another programmable controllerCPU.Set the clock in the programmable controller CPU.Register/cancel menus to operate intelligent function moduleusing the LCPU display module menu.(Common)1 - 8 1.3.1 List of functions common to Simple project and <strong>Structured</strong> project
1.3 List of FunctionsOnline (common function)ReferenceMonitor -Monitor ModeMonitor (Write Mode)Start Monitoring (All Windows)Stop Monitoring (All Windows)Start MonitoringStop MonitoringChange Value Format (Decimal)Change Value Format (Hexadecimal)Device/Buffer Memory BatchSwitch the mode of the open window to "Monitor Mode"during monitoring.Switch the mode of the open window to "Monitor (WriteMode)" during monitoring.Start monitoring of all open windows.Stop monitoring of all open windows.Start monitoring of the open window.Stop monitoring of the open window.Display the current device value in decimal in programmonitoring.Display the current device value in hexadecimal in programmonitoring.Monitor device/buffer memory in batch.(Simple)(Common)Section 12.1Section 12.3.1Program ListMonitor the processing time of programs being executed. (Common)Interrupt Program ListMonitor the number executions of interrupt programs.Change Instance (Function Block) Select an instance of the function block to be monitored. Section 12.2SFC All Block Batch Monitoring Batch monitor all blocks in the SFC program.SFC Auto ScrollScroll the screen to display active steps automatically when (Simple)they are out of the screen during monitoring.Watch -Start WatchingStop WatchingRegister WatchLocal Device Batch Read + Save CSVStart monitoring the current values of registered devices/labels and intelligent function module.Stop monitoring the current values of registered devices/labels and intelligent function module.Register the selected devices to the Watch window.Read local device data from the programmable controllerCPU and saves them to a personal computer in CSV format.(Common)Debug (common function)ReferenceStart/Stop SimulationStart/stop simulation.Instructions Unsupported by SimulationDisplay a list of the instructions and devices used in theprogram unsupported by the simulation function.Modify ValueFor ladder and SFC (Zoom) programs, change the ON/OFF (Common)status and values of devices and labels used in the program.Forced Input Output Registration/CancellationRegister/cancel the forced input/output of the device 'X'/'Y'.Device Test with Execution Condition -Register Device Test with ExecutionConditionRegister the device test with execution condition.Check/Disable Register Device Testwith Execution ConditionBatch Disable Device Test withExecution ConditionCheck/disable the registration of device test with executioncondition.Cancel the device test with execution condition in batch.(Common)Sampling Trace -Open Sampling TraceDisplay the Sampling Trace screen.Scan Time MeasurementMeasure the scan time of a desired section.(Common)Step Execution -StopStop the step execution.CancelBreak ExecutionStep ExecutionExecution OptionCancel the step execution.Execute the break execution.Execute the step execution.Display the "Execution Option" screen of the step execution.(Common)2OVERVIEWSCREEN 3CONFIGURATIONPROGRAMMING 4PROCEDUREPROGRAM 5CONFIGURATIONS6SETTING LABELSCOMMON OPERATIONS7OF PROGRAM EDITORSEDITING ST 8PROGRAMS1EDITING STRUCTUREDLADDER PROGRAMS1.3.1 List of functions common to Simple project and <strong>Structured</strong> project 1 - 9
<strong>GX</strong> <strong>Works</strong>21 OVERVIEWDebug (common function)ReferenceBreak Setting -Set/Cancel Break PointSet a break point at the cursor position, or cancel the setbreak point.Enable/Disable Break PointEnable/disable the break point at the cursor position.Cancel All Break PointsCancel all break points.(Common)Break Point WindowDisplay the Break Point window.Cancel All Break DevicesCancel all break devices.Break Device WindowDisplay the Break Device window.Skip Setting -Set/Cancel Skip RangeSet a skip range, or cancel the set skip range.Enable/Disable Skip RangeCancel All Skip RangesSkip Range WindowEnable/disable the skip range at the cursor position.Cancel all skip ranges.Display the Skip Range window.(Common)PLC DiagnosticsEthernet DiagnosticsCC IE Control DiagnosticsCC IE Field DiagnosticsMELSECNET DiagnosticsCC-Link DiagnosticsSystem MonitorOnline Module ChangeDiagnostics (common function)Diagnose the operating status of the programmablecontroller CPU.Diagnose Ethernet.Diagnose CC-Link IE Controller Network.Diagnose CC-Link IE Field Network.Diagnose MELSECNET/10(H).Diagnose CC-Link and CC-Link/LT.Monitor the system status of the programmable controllerCPU.Change modules online.Reference(Common)Tool (common function)ReferenceIC Memory Card -Read IC Memory CardRead data from the IC memory card.Write IC Memory CardWrite data to the IC memory card.(Common)Check ProgramCheck programs of the project without labels and displayerrors.(Simple)Check Parameter Check parameters and display errors. (Common)Options Set various options. Chapter 14Key Customize Change the settings of the shortcut keys. (Common)Device/Label Automatic-Assign Setting Set device range to be automatically assigned to a label. Section 5.7Block PasswordSet a block password to data.(Common)Confirm Memory SizeCalculate the size of files to be written to the programmablecontroller CPU.Set TEL Data/Connect via Modem -Line ConnectionConnect the line.Line DisconnectionAT Command RegistrationPhone BookOptionsLCPU Logging Configuration ToolEthernet Adapter Module Configuration ToolDisconnect the line.Register a modem between a personal computer and aserial communication module, or a personal computer andan FXCPU.Set phone numbers of targets such as remote accesstargets.Set options for TEL data.Start the LCPU logging configuration tool.Start the Ethernet adapter module configuration tool.(Common)1 - 10 1.3.1 List of functions common to Simple project and <strong>Structured</strong> project
1.3 List of Functions1Tool (common function)ReferenceBuilt-in I/O Module Tool -Positioning MonitorDisplay the Positioning Monitor screen.High-Speed Counter MonitorDisplay the High-Speed Counter Monitor screen.(Common)I/O MonitorDisplay the I/O Monitor screen.Check Intelligent Function Module Parameter -Check Auto Refresh DuplicationCheck the duplication of devices set in the Auto refreshfunction and display the result.(Common)Intelligent Function Module Tool -Analog Module−Offset/Gain SettingConfigure the offset/gain setting of the analog module.Q61LD Two-Point CalibrationSettingConfigure the Q61LD two-point calibration setting.Q61LD Default SettingConfigure the Q61LD default setting.Temperature Input Module−Offset/Gain SettingConfigure the offset/gain setting of the temperature inputmodule.Temperature Control Module−Auto TuningExecute the auto tuning function of the temperature controlmodule.Sensor Correction FunctionExecute the sensor correction function of the temperaturecontrol module.(Intelligent)Counter Module−PresetExecute the preset function of the counter module.QD75/LD75 Positioning Module −Positioning MonitorExecute the positioning monitor.Positioning TestExecute the positioning test.Wave TraceExecute the wave trace.Location TraceExecute the location trace.Serial Communication Module −Circuit TraceExecute the circuit trace.Predefined Protocol SupportFunctionStart the predefined protocol support function.Language Selection Select a language used in a project. (Common)CascadeTile VerticallyTile HorizontallyArrange IconsClose All(Switch to other window)WindowWindow (common function)Tile windows in overlapping display.Tile windows vertically.Tile windows horizontally.Arrange the icons at the bottom of the window.Close all open windows.Display the open window.Display a list of open windows.Also open or arrange specified windows.Reference(Common)2OVERVIEWSCREEN 3CONFIGURATIONPROGRAMMING 4PROCEDUREPROGRAM 5CONFIGURATIONS6SETTING LABELSCOMMON OPERATIONS7OF PROGRAM EDITORSEDITING STRUCTUREDLADDER PROGRAMSEDITING ST 8PROGRAMS1.3.1 List of functions common to Simple project and <strong>Structured</strong> project 1 - 11
<strong>GX</strong> <strong>Works</strong>21 OVERVIEWHelp (common function)Reference<strong>GX</strong> <strong>Works</strong>2 Help Display the <strong>GX</strong> <strong>Works</strong>2 Help screen. (Common)<strong>Operating</strong> <strong>Manual</strong> -<strong>GX</strong> <strong>Works</strong>2 Beginner's <strong>Manual</strong> (Simple<strong>Project</strong>)<strong>GX</strong> <strong>Works</strong>2 Beginner's <strong>Manual</strong>(<strong>Structured</strong> <strong>Project</strong>)<strong>Operating</strong> <strong>Manual</strong> Common<strong>Operating</strong> <strong>Manual</strong> (Simple <strong>Project</strong>)<strong>Operating</strong> <strong>Manual</strong> (<strong>Structured</strong> <strong>Project</strong>)<strong>Operating</strong> <strong>Manual</strong> (Intelligent FunctionModule)AboutDisplay the operating manuals.Display product information such as the version.(Common)■List of functions for setting labelsThe following table shows the functions for setting and editing labels.Edit (function for label setting)ReferenceDelete Delete the selected data. -Select AllSelect all items.New Declaration (Before)Add a row above the cursor position.New Declaration (After)Add a row below the cursor position.Section 5.5.4Delete RowDelete a row at the cursor position.Read from CSV FileRead label settings from the CSV file.Write to CSV FileWrite label settings to the CSV file.Section 5.8System Label -Confirm Update of System LabelDatabaseImport System LabelRegister Device Name of SystemLabelDisable System Label RelationExecute Verification Synchronous withSystem LabelReflect system label information changed in another projecton global labels.Import system label information and reflect it on globallabels.Register a selected global label as a system label.Disable the relation between a selected global label and asystem label.Resolve a mismatch when system label information containsit.Section 5.2-1 - 12 1.3.1 List of functions common to Simple project and <strong>Structured</strong> project
1.3 List of Functions■List of functions for editing device comments1The following table shows functions for editing device comments.Edit (function for editing device comments)ReferenceDelete Delete the selected data. -Select AllSelect all data being displayed.Import from Sample CommentSpecial Relay/Special RegisterIntelligent Function ModuleClear AllRead from CSV FileWrite to CSV FileHide Bit Specification InformationShow Bit Specification InformationCut The Range including Hidden BitSpecification InformationCopy The Range including Hidden BitSpecification InformationPaste The Range including Hidden BitSpecification InformationUtilize sample comments of SM/SD.Utilize sample comments of intelligent function moduledevice.Delete all device comment data.Read device comments from the CSV file.Write device comments to the CSV file.Hide the bit-specified word device comment of the selectedrow.Display the bit-specified word device comment of theselected row.Cut data including hidden bit-specified comment.Copy data including hidden bit-specified comment.Paste data including hidden bit-specified comment.(Common)2OVERVIEWSCREEN 3CONFIGURATIONPROGRAMMING 4PROCEDURE■ List of functions for setting device memoryThe following tables show the functions for setting device memory.Edit (function for setting device memory)ReferenceDelete Delete the selected data. -Insert RowInsert a row at the cursor position.Input DeviceEnter a device.Paste TextEnter a character string.(Common)FILLSet the same value to continuous devices simultaneously.Find/Replace (function for setting device memory)ReferenceFind Device Cell Search for a device. (Common)View (function for setting device memory)ReferenceDisplay Mode -BinaryDisplay data in binary.OctalDisplay data in octal.DecimalDisplay data in decimal.HexadecimalDisplay data in hexadecimal.(Common)FloatDisplay data in real number.StringDisplay data in character string.String (ASCII only)Display data in ASCII string.Register -16-bitDisplay data in units of words.32-bitDisplay data in units of double words.64-bitDisplay data in units of 64 bits.(Common)SetupChange the editor size.PROGRAM 5CONFIGURATIONS6SETTING LABELSCOMMON OPERATIONS7OF PROGRAM EDITORSEDITING ST 8PROGRAMSEDITING STRUCTUREDLADDER PROGRAMS1.3.1 List of functions common to Simple project and <strong>Structured</strong> project 1 - 13
<strong>GX</strong> <strong>Works</strong>21 OVERVIEWRead Device Memory from PLCWrite Device Memory to PLCRead from Excel FileWrite to Excel FileTool (function for setting device memory)Read device memory data from the programmable controllerCPU.Write device memory data to the programmable controller CPU.Read data from an Excel file.Write data to an Excel file.Reference(Common)■List of functions for verification resultThe following tables show the functions for verification result.Edit (function for verification result)ReferenceWrite to CSV File Write verification result to a CSV file. (Common)Next UnmatchPrevious UnmatchFind/Replace (function for verification result)Move to the next mismatched data.Move to the previous mismatched data.Reference(Common)Return to Result ListClose Detail ResultClose All Detail ResultView (function for verification result)Return to the tab from the tab.Close the tab being displayed.Close all tabs being displayed.Reference(Common)1 - 14 1.3.1 List of functions common to Simple project and <strong>Structured</strong> project
1.3 List of Functions■List of functions for executing sampling trace1The following tables show the functions for executing sampling trace.View (function for executing sampling trace)ReferenceResult PositionMove to Trigger PointDisplay the trigger position.(Common)Switching Display Items -DeviceAddressCommentData TypesRadixTiming Chart ScaleDisplay/hide the display item titles.(Common)-Narrow ScaleWide ScaleChange the display width of the timing chart scale.(Common)Trend Graph Scale -Narrow ScaleWide ScaleInitial DisplayAdditional InformationChange the display width of the trend graph scale.(Common)-Past TimeProgram NameDisplay/hide the additional information.(Common)Debug (function for executing sampling trace)ReferenceSampling Trace -Open Sampling TraceDisplay the Sampling Trace screen.Trace SettingStart TraceStop TraceExecute <strong>Manual</strong> TriggerRegister TraceForced Execution RegistrationEffectiveDisplay Trace Buffer ConditionExport CSV DataRead from PLCWrite to PLCDelete All DataDisplay the screen on which the sampling trace conditionsare set.Start sampling trace.Suspend sampling trace.Generate a trigger at any given timing.Write trace settings to the programmable controller CPU.Execute this to control the sampling trace start by asequence program.Sampling trace starts when the Trace start command(SM801) is executed after executing "Register Trace".Enable to execute the sampling trace from the peripherals.Display trace data storage status.Save the trace data (trace settings + results) to a personalcomputer in CSV file format.Read the sampling trace data (trace settings + results) fromthe programmable controller CPU.Write the trace data (trace settings + results) to theprogrammable controller CPU.Delete all information including the device data registeredand the sampling trace result displayed on the SamplingTrace screen.(Common)2OVERVIEWSCREEN 3CONFIGURATIONPROGRAMMING 4PROCEDUREPROGRAM 5CONFIGURATIONS6SETTING LABELSCOMMON OPERATIONS7OF PROGRAM EDITORSEDITING ST 8PROGRAMSEDITING STRUCTUREDLADDER PROGRAMS1.3.1 List of functions common to Simple project and <strong>Structured</strong> project 1 - 15
<strong>GX</strong> <strong>Works</strong>21 OVERVIEW1.3.2 List of functions for editing in ladder languageFor the functions for editing in the ladder language, refer to the following manual.<strong>GX</strong> <strong>Works</strong>2 Version 1 <strong>Operating</strong> <strong>Manual</strong> (Simple <strong>Project</strong>)1.3.3 List of functions for editing SFC diagramsFor the functions for editing SFC diagrams, refer to the following manual.<strong>GX</strong> <strong>Works</strong>2 Version 1 <strong>Operating</strong> <strong>Manual</strong> (Simple <strong>Project</strong>)1.3.4 List of functions for editing SFC block listFor the functions for editing SFC block list, refer to the following manual.<strong>GX</strong> <strong>Works</strong>2 Version 1 <strong>Operating</strong> <strong>Manual</strong> (Simple <strong>Project</strong>)1 - 16 1.3.2 List of functions for editing in ladder language
1.3 List of Functions1.3.5 List of functions for editing in ST language1The following tables show the functions for editing with the ST editor.Edit (function for editing in ST language)ReferenceDelete Delete the selected data. -List OperandsDisplay TemplateMark Template (Left)Mark Template (Right)Display the screen for inserting a label by selecting anexisting label.Insert a template corresponds to the instruction, function, orcontrol syntax.Set an argument of the template in the selected status fromthe left by selecting the menu each time.Set an argument of the template in the selected status fromthe right by selecting the menu each time.Section 6.2.2Section 7.1.42OVERVIEWSCREEN 3CONFIGURATIONFind/Replace (function for editing in ST language)ReferenceJump Jump to the specified row. Section 9.1.1Bookmark -Toggle BookmarkBookmark ListNext BookmarkPrevious BookmarkDelete All BookmarksSet a bookmark at the cursor row. The bookmark is deletedwhen one is already set at the cursor row.Jump to the specified bookmark from the bookmark list.Display the next bookmark position.Display the previous bookmark position.Cancels all bookmarks.Section 9.1.2View (function for editing in ST language)ReferenceDisplay Compile Result Display the compilation result in a list form. Section 6.2.7Zoom -Set Zoom FactorIncrease ZoomDecrease ZoomZoom Header/BodyChange the display size of the program. Section 6.2.4-HeaderOpen the label setting screen in the selected POU.BodyOpen the program editor in the selected POU.Section 6.2.9Open Header Open the label setting screen for the program being edited. Section 6.2.6Online (function for editing in ST language)ReferenceMonitor -Start MonitoringStart Monitoring (Bit Type only)Start monitoring with the split window format that displaysmonitor data of numeric value and character strings. Section 12.4Start monitoring only bit type devices/labels.PROGRAMMING 4PROCEDUREPROGRAM 5CONFIGURATIONS6SETTING LABELSCOMMON OPERATIONS7OF PROGRAM EDITORSEDITING STRUCTUREDLADDER PROGRAMSEDITING ST 8PROGRAMS1.3.5 List of functions for editing in ST language 1 - 17
<strong>GX</strong> <strong>Works</strong>21 OVERVIEW1.3.6 List of functions for editing in structured ladder/FBD languageThe following tables show the functions for editing with the structured ladder/FBD editor.Edit (function for editing in structured ladder/FBD language)ReferenceDelete Delete the selected data. -Select Mode Change to the contact and coil input mode. Section 8.4.1Interconnect Mode Change to the line drawing mode. Section 8.3.2Auto Connect Specify and connect the start and end points to draw a line. Section 8.3.3Guided Mode -Guided EditingChange to the keyboard input mode.Overwrite ModeInsert ModeLine ModeOverwrite the ladder symbol entered in Guided editing at thecursor position.Insert the ladder symbol entered in Guided editing at thecursor position.Change the input format to draw lines in Guided editing.Section 8.10Auto CommentAdd a comment entry field at the start of the ladder blockadded in Guided editing.Recalculate Line Arrange a line automatically to redraw it. Section 8.3.5Insert RowInsert a row in a ladder being edited.Insert ColumnInsert a column in a ladder being edited.Section 8.3.6New Ladder Block List -TopInsert a new ladder block at the start of all ladder blocks.BeforeInsert a new ladder block in front of a ladder block beingedited.Section 8.8.1AfterInsert a new ladder block after a ladder block being edited.BottomInsert a new ladder block at the end of all ladder blocks.Input Instruction Open a Input Instruction screen. Section 8.2.2Ladder Symbol -Open Contact Insert at the cursor position.Close Contact Insert at the cursor position.Coil Insert at the cursor position.Jump Insert at the cursor position.Return Insert at the cursor position.Open Branch Insert at the cursor position.Close Branch Insert at the cursor position.Input Label Insert at the cursor position.Output Label Insert at the cursor position.Section 8.2.1Horizontal Line Segment Insert at the cursor position.Vertical Line Segment Insert at the cursor position.Rising Pulse Insert at the cursor position.Falling Pulse Insert at the cursor position.Rising Pulse Close Insert at the cursor position.Falling Pulse Close Insert at the cursor position.CommentInsert a comment entry field at the cursor position.Ladder Block LabelDisplay the Ladder Block screen.Left Power Rail Display/hide the left power rail. Section 8.8.71 - 18 1.3.6 List of functions for editing in structured ladder/FBD language
1.3 List of Functions1Edit (function for editing in structured ladder/FBD language)ReferenceList OperandsDisplay the screen for inserting a label by selecting anexisting label.Section 6.2.2Number of Pins -IncrementIncrease the number of arguments of functions and functionblocks.Section 8.6.3DeleteDecrease the number of arguments of functions and functionblocks.Ladder Block List Display a list of ladder blocks in a program. -Signal Configuration -ConfigureSet the type of a contact and a coil.ToggleChange the contact and coil type per execution in thefollowing order.• Contact: Open Contact → Close Contact• Coil: Normal → Negation → Set → ResetSection 8.52OVERVIEWSCREEN 3CONFIGURATIONFind/Replace (function for editing in structured ladder/FBD language)ReferenceJump Jump to the specified ladder block number. Section 9.2.1View ModeLabelDeviceAddressView (function for editing in structured ladder/FBD language)CommentChange Label-Device-Address ModeChange Label-Comment ModeAll Device DisplayCancel All Device DisplayDisplay a variable by its entered format.Display a device/address in device format. The variable isdisplayed as an assigned device in device format.Display a device/address in address format. The variable isdisplayed as an assigned device in address format.Display a label comment.Switch the display format in order (label, device, address).Switch the display between label and comment.Batch-change all labels on the program editors to the devicedisplay.Cancel the device display on the program editors, anddisplay data in the format at the time of data entry.ReferenceSection 8.7.5GridShow a grid on the screen being edited to display the start/end positions of a line.Section 8.8.8Print Wrap Position Display the wrapping position for printing. Section 8.11Display Compile Result Display the compilation result in a list form. Section 6.2.7Zoom -Set Zoom FactorIncrease ZoomDecrease ZoomZoom Header/BodyChange the display size of the program. Section 6.2.4-HeaderOpen the label setting screen in the selected POU.BodyOpen the program editor in the selected POU.Section 6.2.9Open Header Open the label setting screen for a program being edited. Section 6.2.6PROGRAMMING 4PROCEDUREPROGRAM 5CONFIGURATIONS6SETTING LABELSCOMMON OPERATIONS7OF PROGRAM EDITORSEDITING STRUCTUREDLADDER PROGRAMSEDITING ST 8PROGRAMS1.3.6 List of functions for editing in structured ladder/FBD language 1 - 19
<strong>GX</strong> <strong>Works</strong>21 OVERVIEWMEMO1 - 20 1.3.6 List of functions for editing in structured ladder/FBD language
12 SCREEN CONFIGURATION2OVERVIEWThis chapter explains the screen configuration of <strong>GX</strong> <strong>Works</strong>2.SCREEN 3CONFIGURATION2.1 Overview of Screen Configuration . . . . . . . . . . . . . . . . . . . . . 2-2EDITING STRUCTUREDLADDER PROGRAMSPROGRAMMING 4PROCEDUREEDITING ST 8PROGRAMSCOMMON OPERATIONS7OF PROGRAM EDITORS6SETTING LABELSPROGRAM 5CONFIGURATIONS2 - 1
<strong>GX</strong> <strong>Works</strong>22 SCREEN CONFIGURATION2.1 Overview of Screen ConfigurationThis section explains the main frame (basic screen) of <strong>GX</strong> <strong>Works</strong>2 that is displayed when it is started up.The following screen shows a main frame configuration in which a work window and docking windows aredisplayed.Screen displayQ CPU L CPU FXTitle barMenu barToolbarNavigationwindowFunction BlockSelection windowWorkwindowDocking windowStatus barDisplay contentsName Description ReferenceTitle bar Display a project name. −Menu bar Display menu options for executing each function. −Toolbar Display tool buttons for executing each function. Appendix 1Work windowDocking windowA main screen used for operations such as programming,parameter setting, and monitoring.A sub screen to support operations performed on a workwindow.<strong>GX</strong> <strong>Works</strong>2 Version 1<strong>Operating</strong> <strong>Manual</strong>(Common)Navigation window Display contents of a project in tree format. Section 4.1Function Block Selection windowDisplay a list of functions (such as function blocks) used forprogramming.Section 6.2.1Output window Display compilation and check results (errors and warnings). Section 10.6Cross Reference window Display cross reference results.Device List windowWatch window 1 to 4Intelligent Function ModuleMonitor 1 to 10Find/Replace windowStatus barDisplay the device usage list.A screen used for monitoring and changing current devicevalues.A screen used for monitoring intelligent function modules.A screen used for searching and replacing character stringsin the project.Display information about a project being edited.<strong>GX</strong> <strong>Works</strong>2 Version 1<strong>Operating</strong> <strong>Manual</strong>(Common)2 - 2
13 PROGRAMMINGPROCEDUREThis chapter explains how to create programs in <strong>Structured</strong> project.2OVERVIEWSCREEN 3CONFIGURATION3.1 Creating Programs . . . . . . . . . . . . . . . . . . . . . . . . . . . . . . . . . . 3-2EDITING STRUCTUREDLADDER PROGRAMSPROGRAMMING 4PROCEDUREEDITING ST 8PROGRAMSCOMMON OPERATIONS7OF PROGRAM EDITORS6SETTING LABELSPROGRAM 5CONFIGURATIONS3 - 1
<strong>GX</strong> <strong>Works</strong>23 PROGRAMMING PROCEDURE3.1 Creating ProgramsQ CPU L CPU FXThis section explains the general operating steps from the creation of a program in <strong>Structured</strong> project to theexecution of the created program in the programmable controller CPU.1. Creating a new projectProcedureReferenceStart up <strong>GX</strong> <strong>Works</strong>2. <strong>GX</strong> <strong>Works</strong>2 Version 1Create a new <strong>Structured</strong> project.To reuse an existing <strong>Structured</strong> project, open that <strong>Structured</strong> project.<strong>Operating</strong> <strong>Manual</strong>(Common)2. Setting parametersProcedureReferenceSet parameters. <strong>GX</strong> <strong>Works</strong>2 Version 1<strong>Operating</strong> <strong>Manual</strong>(Common)Check parameters.3. Configuring programsProcedureCreate program files.Create tasks.Create POUs.Register POUs (program blocks) to the tasks.ReferenceChapter 44. Setting labelsDefine global labels.Define local labels.ProcedureReferenceChapter 5(To the next page)3 - 2
3.1 Creating Programs(From the previous page)15. Editing programsEdit programs of each POU.6. Compiling programsProcedureReferenceChapter 6Chapter 7Chapter 82OVERVIEWSCREEN 3CONFIGURATIONProcedureReferenceCompile a program or compile all programs. Chapter 107. Connecting a personal computer to the programmable controller CPUProcedureReferenceConnect a personal computer to the programmable controller CPU. <strong>GX</strong> <strong>Works</strong>2 Version 1Set the connection target.<strong>Operating</strong> <strong>Manual</strong>(Common)PROGRAMMING 4PROCEDUREPROGRAM 5CONFIGURATIONS8. Writing data to the programmable controller CPUProcedureWrite parameters to the programmable controller CPU.Write sequence programs to the programmable controller CPU.ReferenceChapter 116SETTING LABELS9. Confirming the operationProcedureReferenceMonitor the execution status of sequence programs. Chapter 12COMMON OPERATIONS7OF PROGRAM EDITORS10. Ending the projectProcedureReferenceSave the project. <strong>GX</strong> <strong>Works</strong>2 Version 1Exit <strong>GX</strong> <strong>Works</strong>2.<strong>Operating</strong> <strong>Manual</strong>(Common)EDITING ST 8PROGRAMSEDITING STRUCTUREDLADDER PROGRAMS3 - 3
<strong>GX</strong> <strong>Works</strong>23 PROGRAMMING PROCEDUREMEMO3 - 4
14 PROGRAMCONFIGURATIONSIn <strong>Structured</strong> project, sequence programs are configured by using tasks and POUs.This chapter explains the program configurations of <strong>Structured</strong> project.2OVERVIEWSCREEN 3CONFIGURATION4.1 Program Configurations of <strong>Structured</strong> <strong>Project</strong> . . . . . . . . . . . 4-24.2 Creating Program Files and Tasks. . . . . . . . . . . . . . . . . . . . . . 4-34.3 Creating POUs . . . . . . . . . . . . . . . . . . . . . . . . . . . . . . . . . . . . . 4-104.4 Using POUs . . . . . . . . . . . . . . . . . . . . . . . . . . . . . . . . . . . . . . . 4-14EDITING STRUCTUREDLADDER PROGRAMSPROGRAMMING 4PROCEDUREPROGRAM 5CONFIGURATIONSEDITING ST 8PROGRAMSCOMMON OPERATIONS7OF PROGRAM EDITORS6SETTING LABELS4 - 1
<strong>GX</strong> <strong>Works</strong>24 PROGRAM CONFIGURATIONS4.1 Program Configurations of <strong>Structured</strong> <strong>Project</strong>Q CPU L CPU FXThis section explains the configurations of <strong>Structured</strong> project that are displayed in a tree format in the <strong>Project</strong>view.For (Common) and (Intelligent) indicated as the reference, refer to the following manuals respectively:(Common) .............<strong>GX</strong> <strong>Works</strong>2 Version 1 <strong>Operating</strong> <strong>Manual</strong> (Common)(Intelligent) ............<strong>GX</strong> <strong>Works</strong>2 Version 1 <strong>Operating</strong> <strong>Manual</strong> (Intelligent Function Module)*1(Common)(Intelligent)(Common)Define labels shared among POUs.Section 5.2*2Define the program execution order and type.(Common)Register program blocks to the task.Section 4.2Define POUs.Section 4.3Program blockWrite a program in the desired programming language.Define labels. Section 5.3Chapter 6Chapter 7Chapter 8Program configurationFunction block (FB)/Function (FUN)Write a program in the desired programming language.Define labels. Section 5.4Chapter 6Chapter 7Chapter 8Define structured data type.Section 5.6(Common)*1: For FXCPU, this item is not displayed.*2: For FXCPU, no classification for program execution type. Only one item, "Execution Program", isdisplayed.4 - 2
4.2 Creating Program Files and Tasks4.2 Creating Program Files and Tasks1This section explains how to register program blocks executed on the programmable controller CPU, andsetting the executing conditions of programs using program files and tasks.For details of program files and tasks, refer to the following manual.MELSEC-Q/L/F <strong>Structured</strong> Programming <strong>Manual</strong> (Fundamentals)4.2.1 Procedure for creating program files and tasksThe following explains the procedure for creating a program file and task.Q CPU L CPU FX2OVERVIEWSCREEN 3CONFIGURATION1. Creating a program file and taskProcedureReferenceCreate a program file.• Select [<strong>Project</strong>] ⇒ [Object] ⇒ [New]. <strong>GX</strong> <strong>Works</strong>2 Version 1Create a task.<strong>Operating</strong> <strong>Manual</strong>• Select the program file folder and perform the following operation.(Common)Select [<strong>Project</strong>] ⇒ [Object] ⇒ [New].2. Registering program blocks to the taskProcedureReferenceDisplay the Task Setting screen.<strong>GX</strong> <strong>Works</strong>2 Version 1• Select <strong>Project</strong> view ⇒ "Program Setting" ⇒ "(program setting)" ⇒ "(program file)" ⇒<strong>Operating</strong> <strong>Manual</strong>"(task)".(Common)Set program blocks to be registered to the task. Section 4.2.2PROGRAMMING 4PROCEDUREPROGRAM 5CONFIGURATIONS6SETTING LABELS3. Setting the executing conditionProcedureSet the executing condition of the program file on the tab of PLC parameter.Set the executing condition on the Property screen of the task.• Select the task and perform the following operation.Select [<strong>Project</strong>] ⇒ [Object] ⇒ [Property].Reference<strong>GX</strong> <strong>Works</strong>2 Version 1<strong>Operating</strong> <strong>Manual</strong>(Common)Section 4.2.3COMMON OPERATIONS7OF PROGRAM EDITORSEDITING ST 8PROGRAMSEDITING STRUCTUREDLADDER PROGRAMS4.2.1 Procedure for creating program files and tasks 4 - 3
<strong>GX</strong> <strong>Works</strong>24 PROGRAM CONFIGURATIONS4.2.2 Registering program blocks to tasksRegister program blocks to a task and specify the executing order. Only the program blocks that areregistered to the task are compiled. ( Chapter 10)<strong>Operating</strong> procedure1. Select <strong>Project</strong> view ⇒ "Program Setting" ⇒ "(program setting)" ⇒ "(program file)"⇒ "(task)".2. Right-click and select [Open Task Setting] from the shortcut menu.The Task Setting screen is displayed.3. Set the items on the screen.ItemProgram NameCommentDescriptionEnter a program block name.Click to set a program block name on the Program Selectionscreen.Enter comments for the program block.A new line can be inserted in a cell by pressing the +keys.Maximumnumber ofcharacters321024● Program blocks that can be registeredA single program block can be registered to any one of tasks for only once. Only the program blocks that are notregistered to any of the tasks are displayed on the Program Selection screen.● Executing order of program blocks registered to a task<strong>Structured</strong> ladder/FBD or ST programs are executed in the order they are registered to a task.SFC program is executed in the order of block number, regardless of the order they are registered to the task.4 - 4 4.2.2 Registering program blocks to tasks
4.2 Creating Program Files and Tasks■Registering tasks1A maximum number of tasks that can be created in a single project is 124. A maximum number ofprogram blocks that can be registered to tasks is 800.However, the number of tasks that can be registered to a program file, the number of program blocksthat can be registered to a task, and the type of program block that can be registered to a single taskdiffer according to the selected programming language.2OVERVIEW● Maximum number of tasks that can be created in a single program file and the maximum number ofprogram blocks that can be registered to a single taskProgramming language ofprogram block registeredto the first taskLadderMaximum number of tasks that can becreated in a single program file● Program block that can be registered to a single taskMaximum number of program blocksthat can be registered to a single task1SFC1320 *1ST<strong>Structured</strong> ladder/FBD124 320*1: For Basic model QCPU/Q00UJ/Q00U/Q01U/Q02U/L02, the maximum number of SFC blocks is128.: Applicable ×: Not ApplicableProgram block that can be registered to a single taskProgramming language<strong>Structured</strong>Ladder SFC STladder/FBDLadder × × ×SFC × × ×ST × ×<strong>Structured</strong> ladder/FBD × ×SCREEN 3CONFIGURATIONPROGRAMMING 4PROCEDUREPROGRAM 5CONFIGURATIONS6SETTING LABELSEDITING STRUCTUREDLADDER PROGRAMSEDITING ST 8PROGRAMSCOMMON OPERATIONS7OF PROGRAM EDITORS4.2.2 Registering program blocks to tasks 4 - 5
<strong>GX</strong> <strong>Works</strong>24 PROGRAM CONFIGURATIONS■Setting program names on the program selection screenSet a program block on the Task Setting screen using the Program Selection screen.Screen displayOn the Task Setting screen, clicknext to the "Program Name" entry field.<strong>Operating</strong> procedure1. Select the reference source of the program block from the "Libraries" field.Libraries(Library name)DescriptionBrowse all program blocks defined in the project and libraries.Browse program blocks defined in the project.Browse program blocks defined in the specified library.2. Select a program block from the "Programs" field.3. Click the button when the setting is completed.The selected program block is displayed on the Task Setting screen.4 - 6 4.2.2 Registering program blocks to tasks
4.2 Creating Program Files and Tasks4.2.3 Setting executing conditions1Set executing conditions for program files and tasks.■Executing conditions for program files (execution type)2OVERVIEWThe executing conditions for program files are set on the tab of PLC parameter.This function is not supported by FXCPU.Screen displaySelect <strong>Project</strong> view ⇒ "Parameter" ⇒ "PLC Parameter" ⇒ .SCREEN 3CONFIGURATIONEDITING STRUCTUREDLADDER PROGRAMS6SETTING LABELSCOMMON OPERATIONS7OF PROGRAM EDITORSEDITING ST 8PROGRAMSPROGRAM 5CONFIGURATIONSPROGRAMMING 4PROCEDUREFor details of the program executing conditions, refer to the following manual.User's <strong>Manual</strong> (Function Explanation, Program Fundamentals) of the CPU module to be used4.2.3 Setting executing conditions 4 - 7
<strong>GX</strong> <strong>Works</strong>24 PROGRAM CONFIGURATIONS■Task executing conditionsAn executing condition for a program file can be set to a task.A task executing condition is set on the Property screen of the task.Select the task to be set in the <strong>Project</strong> view in advance.Screen displaySelect [<strong>Project</strong>] ⇒ [Object] ⇒ [Property].<strong>Operating</strong> procedure• Set the items on the screen.AttributesTitleEventIntervalPriorityTimer/OutputControlItemDescriptionTask executingconditionTRUE Execute the task in every scan. Scan executionFALSE Execute the task in the cycle specified in the "Interval" field. Fixed scan executionDevice or label name Execute the task when the specified device or label is TRUE. Event executionCheckedNot checkedSet the cycle time to execute the task in a constant cycle.(Enter FALSE in the "Event" field.)Set the cycle time in time type format(Ex.: T#100ms, T#24d20h31m23s647ms).For details of time type format, refer to the following manual.MELSEC-Q/L/F <strong>Structured</strong> Programming <strong>Manual</strong> (Fundamentals)Do not set shorter time than the scan time of sequence program.Set the task execution priority in the range from 0 to 31. Tasks with smaller values areexecuted by priority.Tasks of the same priority are executed in the alphabetical order of task data names.Enter a title of the task.The outputs and the current values of timers in the task are reset when the task is notexecuted.The outputs and the current values of timers in the task are retained when the task is notexecuted.4 - 8 4.2.3 Setting executing conditions
4.2 Creating Program Files and Tasks1● Interruption start for QCPU (Q mode)/LCPUTo enable an interruption start, set an interrupt pointer number (I0 to I31) in the "Event" field. In this case, create aprogram using the basic instruction EI (Enable Interrupt) for the program blocks registered to scan execution tasks.● Interruption start for FXCPUThe following shows the settings for FXCPU.•I01 (rising input interruption), I00 (falling interruption)•I6 to I8 (timer interruption)• I010 to I060 (counter interruption)For details, refer to the following manual.FXCPU <strong>Structured</strong> Programming <strong>Manual</strong> [Device & Common]● When the program block registered to the task is created in the ladderWhen the program block registered to the task is created in the ladder, items of "Attributes" cannot be set.● When the program end instruction is usedWhen the program end instruction such as the FEND or GOEND instruction is used, program blocks and/or tasksfollowing the program end instruction are not executed.The following tables show the task executing order according to the set execution type (scan execution(priority: high/low), fixed scan execution or event execution) in the task property setting.Task nameTask attributesEvent Interval PriorityTask executing conditionTask1 TRUE 0 31 Scan execution (priority: low)Task2 M0 0 31 Event executionTask3 FALSE T#100ms 31 Fixed scan executionTask4 TRUE 0 30 Scan execution (priority: high)2OVERVIEWSCREEN 3CONFIGURATIONPROGRAMMING 4PROCEDUREPROGRAM 5CONFIGURATIONSExecuting order Task name Execution timing1 Task4 Executed in every scan2 Task1 Executed in every scan3 Task2 When M0 turned ON4 Task3 In every 100ms6SETTING LABELSEDITING STRUCTUREDLADDER PROGRAMSEDITING ST 8PROGRAMSCOMMON OPERATIONS7OF PROGRAM EDITORS4.2.3 Setting executing conditions 4 - 9
<strong>GX</strong> <strong>Works</strong>24 PROGRAM CONFIGURATIONS4.3 Creating POUsQ CPU L CPU FXThis section explains how to create POUs.A POU (abbreviation for Program Organization Unit) is a unit of program defined for each function.4.3.1 Procedure for creating POUsThe following explains the procedure for creating a POU.1. Creating a new POUCreate a POU.• Select [<strong>Project</strong>] ⇒ [Object] ⇒ [New].ProcedureReference<strong>GX</strong> <strong>Works</strong>2 Version 1<strong>Operating</strong> <strong>Manual</strong>(Common)2. Setting local labelsProcedureReferenceDisplay the Local Label Setting screen or Function/FB Label Setting screen.• Select <strong>Project</strong> view⇒ "POU" ⇒ "Program" ⇒ "(POU)" ⇒ "Local Label". Chapter 5Set labels that are used only within the POU.3. Editing the programProcedureReferenceDisplay the program editor.• Select <strong>Project</strong> view ⇒ "POU" ⇒ "Program" ⇒ "(POU)" ⇒ "Program". Chapter 6Edit the program in the specified programming language.4 - 10 4.3.1 Procedure for creating POUs
4.3 Creating POUs4.3.2 Setting properties of functions and function blocks1Set properties of a function and function block.Select a function or function block to be set in the <strong>Project</strong> view in advance.Screen displaySelect [<strong>Project</strong>] ⇒ [Object] ⇒ [Property].EDITING STRUCTUREDLADDER PROGRAMS2OVERVIEWSCREEN 3CONFIGURATIONPROGRAMMING 4PROCEDURE<strong>Operating</strong> procedure• Set the items on the screen.Result TypeItemChecked*1, *2Use MacrocodeUse MC/MCR*1, *2, *3Not checkedCheckedNot checkedDescriptionSet the data type of return value of the function.Click and select a data type from the list.Apply function block program codes to each location where instances are used atcompilation.Even if EN of the function block is OFF, the output variable is retained at ON. To turnOFF the output variable when EN is OFF, select the "Use MC/MCR" check box below.Create function block program codes for each function block at compilation. Codes arecreated to call function blocks for each location where instances are used. To callfunction blocks, use automatically assigned devices.( Section 5.7)Apply function block program codes using the MC/MCR instruction to each locationwhere instances are used at compilation.Apply function block program codes using the CJ instruction to each location whereinstances are used at compilation.Use EN/ENO *1, *2 Checked Become a function or function block with EN/ENO.Not checked Become a function or function block without EN/ENO.*1: This item cannot be selected when using ladder function blocks.*2: This item cannot be selected when using ST function blocks in Simple project.*3: This item can be selected only when the check boxes of both "Use Macrocode" and "Use EN/ENO" items arechecked.PROGRAM 5CONFIGURATIONS6SETTING LABELSCOMMON OPERATIONS7OF PROGRAM EDITORSEDITING ST 8PROGRAMS4.3.2 Setting properties of functions and function blocks 4 - 11
<strong>GX</strong> <strong>Works</strong>24 PROGRAM CONFIGURATIONS● "Use MC/MCR"• This check box can be checked only if both of the "Use EN/ENO" and "Use Macrocode" check boxes arechecked.• If the MC/MCR instruction is used and the function block is not executed, the outputs and the current values oftimers in the function block are reset. (If the instruction is not used, the current values are retained).● Return value of functionProgram the function names as labels in a function to set a return value.Setting function names as labels is not needed. Data type set on "Result Type" can be used.Example: Set return value of function name "FUN_01" to 0FUN_01 := 0;● Applying function blocks to locations where instances are usedThe following shows the example of codes when the following programs are compiled.Note that devices are assigned as follows.• Input1: X0• Input2: X11• Output1: D10Use MacrocodeApplied(The check box is checked.)Not applied(The check box is not checked.)Code to be created in the program at thelocation of useLD X0AND X11INCP D10LD X0OUT M4096LD X11OUT M4097LD SM400CALL P2048LD SM400MOV D6144 D10NoneP2048LD M4096AND M4097INCP D6144RETFunction block code4 - 12 4.3.2 Setting properties of functions and function blocks
4.3 Creating POUs1● When the "Use Macrocode" check box is not checkedSince pointers of automatically assigned devices are used, the number of function instances that can be created islimited to the number of pointers or less specified on the Device/Label Automatic-Assign Setting screen.( Section 5.7)Check the "Use Macrocode" check box, if the number of set pointers or more instances are required.● Using the MC/MCR instruction for EN controlThe following shows the example of codes when the following programs are compiled.Note that devices are assigned as follows.• Input1: X0• Input2: X11• Output1: D102OVERVIEWSCREEN 3CONFIGURATIONPROGRAMMING 4PROCEDUREPROGRAM 5CONFIGURATIONSUse MC/MCRMC/MCR is used(The check box is checked.)MC/MCR is not used(The check box is not checked.)LD M40OUT M41MC N0 M4096LD X0AND X11INCP D10MCR N0LD M40OUT M41LDI M40CJ P2050LD X0AND X11INCP D10P2050Code to be created in the program at thelocation of use6SETTING LABELSCOMMON OPERATIONS7OF PROGRAM EDITORSEDITING ST 8PROGRAMSEDITING STRUCTUREDLADDER PROGRAMS4.3.2 Setting properties of functions and function blocks 4 - 13
<strong>GX</strong> <strong>Works</strong>24 PROGRAM CONFIGURATIONS4.4 Using POUsQ CPU L CPU FXThis section explains how to use the created POUs.• Program blocks are used by registering them to tasks. ( Section 4.2.2)• Functions and function blocks are used in program blocks. ( Section 4.4.1)<strong>Project</strong>Program fileTaskPOUProgram blockRegisterPOU folderPOUPOUProgram blockFunctionApplyPOUFunction block4 - 14
4.4 Using POUs4.4.1 Using functions and function blocks1Select a function or function block from the Function Block Selection window and insert it to a program.(Function Block Selection window Section 6.2.1)<strong>Operating</strong> procedure1. In the <strong>Project</strong> view, select ⇒ "POU"⇒ "Program" ⇒ "(program)" ⇒ "Program".The program editor is displayed.2. Select [View] ⇒ [Docking Window] ⇒ [FunctionBlock Selection Window] ( ).The Function Block Selection window is displayed.3. Select "<strong>Project</strong>" from the combo box.The functions and function blocks defined in the project aredisplayed in tree format.4. Select a function or function block and then dragand drop it to the program editor.The selected function or function block is inserted to thespecified position on the editor.On the structured ladder/FBD editor, the cursor position atthe time of the drop operation becomes the position of the input pinat the upper left of the function or function block.5. Set an instance name.For a function block, set an instance name on the LabelRegistration/Selection screen displayed when a function/function block is dropped. For the method for setting theLabel Registration/Selection screen, refer to the followingsection.Section 6.2.2 Using labels in the program6. Set an argument.Enter a device or label name for the argument defined in thefunction or function block.2OVERVIEWSCREEN 3CONFIGURATIONPROGRAMMING 4PROCEDUREPROGRAM 5CONFIGURATIONS6SETTING LABELSCOMMON OPERATIONS7OF PROGRAM EDITORS● Inserting functions and function blocksFunctions and function blocks can be also inserted by the following operation.• Select a function or a function block from the <strong>Project</strong> view, and drag and drop it to the desired position.EDITING ST 8PROGRAMSEDITING STRUCTUREDLADDER PROGRAMS4.4.1 Using functions and function blocks 4 - 15
<strong>GX</strong> <strong>Works</strong>24 PROGRAM CONFIGURATIONS■Using function blocks created in other programming languagesUse function blocks created in other programming languages.The following table shows the function blocks that can be called from the program/function block.Program/function block thatcalls function blocks: Applicable ×: Not applicableFunction blocks to be called<strong>Structured</strong> ladderLadder/FBDLadder *1 ×<strong>Structured</strong> ladder×/FBDSTST*1: Function blocks in the ladder language cannot call function blocks. Only programs can call function blocks.The following explains the precautions for calling function blocks from ladder to ST or from ST toLadder language.1) Check "Enable function block call from ladder to ST and from ST to ladder" under [Tool] ⇒[Options] ⇒ "Compile" ⇒ "Basic Setting". ( Section 14.2)Note that the program becomes in the uncompiled status when the option setting is changed.Compile the program again.2) The following requirements must be satisfied when using function blocks created in the STlanguage in the ladder program.• Data type of the input/output label is any of the following types: bit, word (signed), double word(signed), single-precision real, double-precision real, string• The number of the input/output labels is less than 24• The number of characters of the input/output label is less than 16• The "Use Macrocode" item is checked in the option setting of the function blocks• The "Use EN/ENO" item is not checked in the option setting of the function blocks• Function block created in the structured ladder/FBD language is not used for the function block inthe ST language.4 - 16 4.4.1 Using functions and function blocks
15 SETTING LABELS2OVERVIEWThis chapter explains how to set labels.SCREEN 3CONFIGURATION5.1 Label Setting Screens. . . . . . . . . . . . . . . . . . . . . . . . . . . . . . . . 5-25.2 Setting Global Labels . . . . . . . . . . . . . . . . . . . . . . . . . . . . . . . . 5-35.3 Setting Local Labels for Program Blocks . . . . . . . . . . . . . . . . 5-95.4 Setting Labels for Functions and Function Blocks . . . . . . . 5-115.5 Common Operations for Setting Labels . . . . . . . . . . . . . . . . 5-135.6 Setting <strong>Structured</strong> Data Type Labels. . . . . . . . . . . . . . . . . . . 5-205.7 Setting Ranges for Devices Assigned Automatically . . . . . 5-265.8 Writing/Reading Data to/from CSV Files . . . . . . . . . . . . . . . . 5-29PROGRAMMING 4PROCEDUREPROGRAM 5CONFIGURATIONS6SETTING LABELSEDITING STRUCTUREDLADDER PROGRAMSEDITING ST 8PROGRAMSCOMMON OPERATIONS7OF PROGRAM EDITORS5 - 1
<strong>GX</strong> <strong>Works</strong>25 SETTING LABELS5.1 Label Setting ScreensQ CPU L CPU FXThis section shows label setting screens. Labels are set on each screen below according to the type of label.Global Label Setting screenDefine labels that can be used for all POUs in the project.( Section 5.2)Local Label Setting screenDefine labels that can be used only for each POU (programblock). ( Section 5.3)Function/FB Label Setting screenDefine labels that can be used only for each POU(function/function block). ( Section 5.4)Structure Setting screenDefine structured data types to be used for labels.( Section 5.6.1)5 - 2
5.2 Setting Global Labels5.2 Setting Global Labels1This section explains how to set global labels.Global labels can be used in iQ <strong>Works</strong> supported products (<strong>GX</strong> <strong>Works</strong>2, MT Developer2, GT Designer3) byregistering them as system labels.For details of system labels, refer to the following manual.( iQ <strong>Works</strong> Beginner’s <strong>Manual</strong>)Screen displaySelect <strong>Project</strong> view ⇒ "Global Label" ⇒ "(global label)".Q CPU L CPU FX● System labelsSame label names can be used in programming between <strong>GX</strong> <strong>Works</strong>2, MT Developer2, and GT Designer3 by usingsystem labels.● System label data baseA system label data base is a data base to manage system labels.A system label data base is created in the workspace when the workspace is saved in MELSOFT Navigator.System labels cannot be used in the workspace which does not contain a system label data base.2OVERVIEWSCREEN 3CONFIGURATIONPROGRAMMING 4PROCEDUREPROGRAM 5CONFIGURATIONSEDITING STRUCTUREDLADDER PROGRAMSEDITING ST 8PROGRAMSCOMMON OPERATIONS7OF PROGRAM EDITORS6SETTING LABELS5 - 3
<strong>GX</strong> <strong>Works</strong>25 SETTING LABELS<strong>Operating</strong> procedure• Set the items on the screen.ItemDescriptionMaximum number ofcharactersClassLabel NameData TypeConstantDeviceAddressComment *1,*2Remark *1,*2Relation with SystemLabel *2Select a label class from the list displayed by clicking .( Section 5.5.1)Enter a desired label name.Specify a data type from the Data Type Selection screen displayed byclicking .( Section 5.5.3)It can also be entered directly.Enter a constant value when "VAR_GLOBAL_CONSTANT" is selectedfor "Class" and simple type is selected for "Data Type".Set a specific device to be assigned to the label when"VAR_GLOBAL" is selected for "Class".• When a device name is entered in either column, the other columnis displayed in the respective format automatically.• When the "Device" column is blank, a device is automaticallyassigned.• When the data type is Structure, click the "Detail Setting" cell andset devices on the Structure Device Setting screen.( Section 5.6.3)Enter a label comment.Comments can be displayed on the program editor by switchingdisplay/hide of comments. ( Section 8.7.5)Enter supplementary information for label comments.This item is not displayed on the program editor.Display the relation between the global label and system label.ClassDescriptionDisclose The global label is disclosed as a system label.BrowseBlankThe global label refers the system label which isdisclosed by another project.There is no relation with a system label.-Ladder/ST/SFC/<strong>Structured</strong> ladder/FBD: 32(FB instance name: 16)1281285010241024-System Label Name *2 Display the name of the system label which relates to the global label. -Attribute *2Display the attribute of the system label which relates to the globallabel.-*1: A new line can be inserted in a cell by pressing the + keys.*2: The compilation is not needed after editing.*3: For FXCPU, these items are supported by FX3G, FX3U and FX3UC only.5 - 4
5.2 Setting Global LabelsScreen button1● (For FXCPU, this button is supported by FX3G, FX3U and FX3UC only)Updates the system label information.Operation1. Click the button.The Change Contents of System Label Database screen is displayed.EDITING STRUCTUREDLADDER PROGRAMS2OVERVIEWPROGRAM 5CONFIGURATIONSEDITING ST 8PROGRAMS6SETTING LABELSCOMMON OPERATIONS7OF PROGRAM EDITORSPROGRAMMING 4PROCEDURESCREEN 3CONFIGURATION2. Click the button.The information on the changed system labels are applied to the project.When the button is clicked, these changes will be updated at the next update.3. The following message is displayed.4. Click the button.5 - 5
<strong>GX</strong> <strong>Works</strong>25 SETTING LABELS● (For FXCPU, this button is supported by FX3G, FX3U and FX3UC only)Imports system labels to the project.Operation1. Click the button.The Import System Labels to <strong>Project</strong> screen is displayed.2. Check "Select" of a system label to import to the project.3. Click the button.4. The following message is displayed.5. Click the button.● (For FXCPU, this button is supported by FX3G, FX3U and FX3UC only)Registers a global label as a system label.Operation1. Select a global label to register as a system label.2. Click the button.3. The following message is displayed.4. Click the button.5 - 6
5.2 Setting Global Labels5. The following message is displayed.1EDITING STRUCTUREDLADDER PROGRAMSSCREEN 3CONFIGURATIONPROGRAMMING 4PROCEDUREEDITING ST 8PROGRAMSCOMMON OPERATIONS7OF PROGRAM EDITORS2OVERVIEW6. Click the button.● (For FXCPU, this button is supported by FX3G, FX3U and FX3UC only)Disables the relation between a global label and system label.After the relation with the system label is disabled, the global label becomes a normal global label.Operation1. Select a global label to disable its relation with a system label.2. Click the button.3. The following message is displayed.4. Click the button.5. The following message is displayed.PROGRAM 5CONFIGURATIONS6. Click the button.6SETTING LABELS5 - 7
<strong>GX</strong> <strong>Works</strong>25 SETTING LABELS● Class settingWhen an item other than the class, such as a label name or data type, is set in a blank column, "VAR_GLOBAL" isautomatically set for "Class". Change it if necessary.● Characters that can be used for label namesAny of the following label names causes an error at compilation.• A label name that includes a space.• A label name that begins with a numeral.• A label name which is same as the one used for devices. (Lower case label names can be used by setting theoption. Section 10.4.4)For details, refer to the following manual.<strong>GX</strong> <strong>Works</strong>2 Version 1 <strong>Operating</strong> <strong>Manual</strong> (Common)● Specifying devices/addressesThe digit-specified bit device (K4M0) or bit-specified word device (D0.1) can be specified for devices/addresses.● Specifying timer/counter devicesWhen "Data Type" is a bit type, specified devices are treated as contacts (TS, STS, CS).When "Data Type" is a word type, specified devices are treated as current values (TN, STN, CN).● Assigning devices automaticallyDevices are automatically assigned to labels which are not set devices when compiling a program. The deviceassignment range can be changed on the Device/Label Automatic-Assign Setting screen. ( Section 5.7)The assigned devices can be checked with the cross reference function.( <strong>GX</strong> <strong>Works</strong>2 Version 1 <strong>Operating</strong> <strong>Manual</strong> (Common))● System labelDevices are automatically assigned to labels which are not set devices when compiling a program. The deviceassignment range can be changed on the Device/Label Automatic-Assign Setting screen.( Section 5.7)• System labels whose "Attribute" is set to "Common" are not supported by LCPU.• System labels whose "Attribute" is set to "Common" or "Link" are not supported by FXCPU.• Importing system labels with MELSOFT Navigator may cause an error at compilation with <strong>GX</strong> <strong>Works</strong>2.Check the corresponding error location and correct the error as instructed by the error message displayed on theoutput window.5 - 8
5.3 Setting Local Labels for Program Blocks5.3 Setting Local Labels for Program Blocks1This section explains how to set local labels used for each program block.Screen displayQ CPU L CPU FX2OVERVIEWSelect <strong>Project</strong> view ⇒ "POU" ⇒ "(program)" ⇒ "(program block)" ⇒ "Local Label".SCREEN 3CONFIGURATION<strong>Operating</strong> procedure• Set the items on the screen.ItemDescriptionMaximum number ofcharactersPROGRAMMING 4PROCEDUREClassLabel NameData TypeConstantDeviceAddressComment *1,*2Select a label class from the list displayed by clicking .( Section 5.5.1)Enter a desired label name.Specify a data type from the Data Type Selection screen displayed by clicking .( Section 5.5.3)It can also be entered directly.Enter a constant value when "VAR_CONSTANT" is selected for "Class" and simpletype is selected for "Data Type".This item cannot be set for local labels.When the data type is Structure, click the "Detail Setting" cell and set devices on theStructure Device Setting screen.( Section 5.6.3)Enter a comment.Comments can be displayed on the program editor by switching display/hide ofcomments. ( Section 8.7.5)*1: A new line can be inserted in a cell by pressing the + keys.*2: The compilation is not needed after editing.-Ladder/ST/SFC/<strong>Structured</strong> ladder/FBD: 32(FB instance name: 16)128128-1024PROGRAM 5CONFIGURATIONS6SETTING LABELSCOMMON OPERATIONS7OF PROGRAM EDITORSEDITING STRUCTUREDLADDER PROGRAMSEDITING ST 8PROGRAMS5 - 9
<strong>GX</strong> <strong>Works</strong>25 SETTING LABELS● Class settingWhen an item other than the class, such as a label name or data type, is set in a blank column, "VAR" isautomatically set for the "Class". Change it if necessary.● Characters that can be used for label namesAny of the following label names causes an error at compilation.• A label name that includes a space.• A label name that begins with a numeral.• A label name which is same name as the one used for devices. (Lower case label names can be used by settingthe option. Section 10.4.4)For details, refer to the following manual.<strong>GX</strong> <strong>Works</strong>2 Version 1 <strong>Operating</strong> <strong>Manual</strong> (Common)● Assigning devices automaticallyDevices are automatically assigned to labels when a program is compiled. The device assignment range can bechanged on the Device/Label Automatic-Assign Setting screen. ( Section 5.7)The assigned devices can be checked with the cross reference function.( <strong>GX</strong> <strong>Works</strong>2 Version 1 <strong>Operating</strong> <strong>Manual</strong> (Common))5 - 10
5.4 Setting Labels for Functions and Function Blocks5.4 Setting Labels for Functions and Function Blocks1This section explains how to set local labels for each function or function block.Create a new function or function block in advance.For the method for creating new functions or function blocks, refer to the following manual.<strong>GX</strong> <strong>Works</strong>2 Version 1 <strong>Operating</strong> <strong>Manual</strong> (Common)Screen displaySelect <strong>Project</strong> view ⇒ "POU" ⇒ "FB/FUN" ⇒ "(function/function block)" ⇒ "Local Label".Q CPU L CPU FX2OVERVIEWSCREEN 3CONFIGURATION<strong>Operating</strong> procedure• Set the items on the screen.PROGRAMMING 4PROCEDUREClassItemLabel NameData TypeConstantComment *1,*2DescriptionSelect a label class from the list displayed by clicking .( Section 5.5.1)Enter a desired label name.Specify a data type from the Data Type Selection screen displayed by clicking .( Section 5.5.3)It can also be entered directly.Enter a constant value when "VAR_CONSTANT" is selected for "Class" and simpletype is selected for "Data Type".Enter a comment.Comments can be displayed on the program editor by switching display/hide ofcomments. ( Section 8.7.5)*1: A new line can be inserted in a cell by pressing the + keys.*2: The compilation is not needed after editing.Maximum number ofcharacters-Ladder/ST/SFC/<strong>Structured</strong> ladder/FBD: 32(FB instance name: 16)1281281024PROGRAM 5CONFIGURATIONS6SETTING LABELSCOMMON OPERATIONS7OF PROGRAM EDITORSEDITING STRUCTUREDLADDER PROGRAMSEDITING ST 8PROGRAMS5 - 11
<strong>GX</strong> <strong>Works</strong>25 SETTING LABELS● Class settingWhen an item other than the class, such as a label name or data type, is set in a blank column, "VAR" isautomatically set for the "Class". Change it if necessary.● Characters that can be used for label namesAny of the following label names causes an error at compilation.• A label name that includes a space.• A label name that begins with a numeral.• A label name which is same name as the one used for devices. (Lower case label names can be used by settingthe option. Section 10.4.4)For details, refer to the following manual.<strong>GX</strong> <strong>Works</strong>2 Version 1 <strong>Operating</strong> <strong>Manual</strong> (Common)● Assigning devices automaticallyDevices are automatically assigned to labels when a program is compiled. The device assignment range can bechanged on the Device/Label Automatic-Assign Setting screen. ( Section 5.7)The assigned devices can be checked with the cross reference function.( <strong>GX</strong> <strong>Works</strong>2 Version 1 <strong>Operating</strong> <strong>Manual</strong> (Common))● Return value of functionVAR_OUTPUT cannot be set in a function.Program the function names as labels in a function to set a return value.Setting function names as labels is not needed. Data type set on "Result Type" can be used.Example: Set return value of function name "FUN_01" to 0FUN_01 := 0;■Maximum number of input/output labelsThe maximum number of input/output labels can be used in a function/a function block differsdepending on programming languages.When setting input/output labels with local label setting of function/function block, set within the numberof the input/output labels shown in the following table.ProgramminglanguageLadder language -<strong>Structured</strong> ladder/FBDor ST languageFunctionFunction blockInput Input Output0 to 2531 to 24 *1(Including I/O label)0 to 253(Including I/O label)*1 : The I/O label is counted that each of input /output labels is one label.1 to 24 *1(Including I/O label)5 - 12
5.5 Common Operations for Setting Labels5.5 Common Operations for Setting Labels1This section explains the common operations for each label setting editor.5.5.1 ClassesLabel classes indicate from which POU and how the label can be used.Selectable labels are different according to the type of label setting editor.The following table shows selectable labels for each label setting editor.Q CPU L CPU FX2OVERVIEWSCREEN 3CONFIGURATION: Applicable, ×: Not applicableClassVAR_GLOBALVAR_GLOBAL_CONSTANTDescriptionA common label that can be used for programblocks and function blocks.A common label with a constant value that can beused for program blocks and function blocks.Type of usable label setting editorGlobal label Local label Function Function block× × ×× × ×PROGRAMMING 4PROCEDUREVARVAR_CONSTANTVAR_RETAIN *1A label that can be used for program blocks andfunction/function blocks.A label with a constant value that can be used forprogram blocks and function/function blocks.A latch-type label that is used within the range ofdeclared program block and function block.××× ×PROGRAM 5CONFIGURATIONSVAR_INPUTA label that is used for an input of function/function block.Its value cannot be changed in a POU.× ×VAR_OUTPUT A label that is used for an output of function block. × × ×VAR_IN_OUT*1: Not supported by FXCPUA label that can be used for both input and outputof function block with the same name.Its value can be changed in a POU.× × ×6SETTING LABELSCOMMON OPERATIONS7OF PROGRAM EDITORSEDITING STRUCTUREDLADDER PROGRAMSEDITING ST 8PROGRAMS5.5.1 Classes 5 - 13
<strong>GX</strong> <strong>Works</strong>25 SETTING LABELS5.5.2 Data typesLabel data types are described in the following table.For details such as value ranges of each data type, refer to the following manuals.MELSEC-Q/L/F <strong>Structured</strong> Programming <strong>Manual</strong> (Fundamentals)MELSEC-Q/L Programming <strong>Manual</strong> (Common Instruction)User's <strong>Manual</strong> (Function Explanation, Program Fundamentals) of the CPU module to be used.Note that data types are different according to the programming language (ladder, SFC, ST, structuredladder/FBD).The following table shows data types that can be used for each programming language.BitWord (signed)Double word (signed)Data type: Applicable, ×: Not applicableProgramming languageLadder/SFC ST/<strong>Structured</strong> ladder/FBDWord (unsigned)/16-bit string ×Double word (unsigned)/32-bit string ×Single-precision real *1Double-precision real *2String *3Time ×Timer *5 ×Counter *5 ×Retentive timer *4 *5 ×Pointer *5 ×*1: For FXCPU, this item is supported by FX2N, FX2NC, FX3G, FX3U and FX3UC only.*2: Supported by Universal model QCPU/LCPU only.*3: For FXCPU, this item is supported by FX3U and FX3UC only.*4: For FXCPU, this item is supported by FX1N, FX1NC, FX2N, FX2NC, FX3G, FX3U and FX3UC only.*5: For ladder language, these items cannot be used for inline structured text.5 - 14 5.5.2 Data types
5.5 Common Operations for Setting Labels5.5.3 Selecting data types1Select a data type.Data type can be selected on the Data Type Selection screen other than direct data entry.Screen displayClickin the data type entry field on each label setting screen.EDITING STRUCTUREDLADDER PROGRAMS2OVERVIEWPROGRAMMING 4PROCEDURESCREEN 3CONFIGURATION<strong>Operating</strong> procedure1. Select a type in the "Type Class".ItemSimple Types<strong>Structured</strong> Data TypesFunction BlocksDescriptionSpecify this to select a data type from basic types such as bit and word.Specify this to select a data type from the defined structures.(Not displayed for the structured data settings)2. In the "Libraries" field, select the reference source such as the defined structurethat is used as the data type.Standard Lib.ItemSpecify this to select a data type from the defined function blocks.(Not displayed for the FB label settings/structured data settings)DescriptionBrowse data types and structures/function blocks defined in the project, and all libraries.Browse structures/function blocks defined in the project.(Not displayed when "Simple Types" is selected.)Browse function blocks of the application functions.(Not displayed when "Simple Types" or "<strong>Structured</strong> Data Types" is selected.)3. In the "Data Type" field, select the data type, structure, or function block name.PROGRAM 5CONFIGURATIONS6SETTING LABELSCOMMON OPERATIONS7OF PROGRAM EDITORS4. Click the button when the setting is completed.The settings are displayed in the "Data Type" column on the label setting screen.EDITING ST 8PROGRAMS5.5.3 Selecting data types 5 - 15
<strong>GX</strong> <strong>Works</strong>25 SETTING LABELS● Method for displaying the Data Type Selection screenThe Data Type Selection screen can be opened by any of the following operations whenstatus.• Press the key.• Press the key.• Press the key.is in the selected■Setting arrays for data typeDefine a data type as an array.To define a data type as an array, set the items in the "Array Element" field on the Data Type Selectionscreen.Operation1. Click in the data type entry field on each label settingscreen.2. Check the check box in the "Array Element" field.3. Enter the number of elements in the "Element" field.4. Set the data type of the array element in the samemanner as setting the normal data type.● To change the offsetTo change the offset ([Array start value]..[Array end value]) to a value other than 0, edit the offsetvalue by directly entering the array type declaration in text on each label setting screen.5 - 16 5.5.3 Selecting data types
5.5 Common Operations for Setting Labels● To change the array to a two- or three-dimensional arrayEdit two- or three-dimensional array by directly entering the array type declaration in text on eachlabel setting screen.For details on array type declarations, refer to the following manual.MELSEC-Q/L/F <strong>Structured</strong> Programming <strong>Manual</strong> (Fundamentals)2OVERVIEW1■● When a constant type is set for ClassFor labels whose classes are set as VAR_CONSTANT or VAR_GLOBAL_CONSTANT, arrays cannot be set for thedata type. If they are set, an error occurs at compilation.● Offset valuesMinus values can be set for offset values.Setting data length of the character string data typeTo change the data length of the character string data type, directly edit the data length on each labelsetting screen.The data length of the character string data type is set in the option setting.Operation• Select [Tool] ⇒ [Options] ⇒ "Label Setting Editor" ⇒ "Default Length of String Data Type", andset the data length.SCREEN 3CONFIGURATIONPROGRAMMING 4PROCEDUREPROGRAM 5CONFIGURATIONSEDITING STRUCTUREDLADDER PROGRAMSEDITING ST 8PROGRAMSCOMMON OPERATIONS7OF PROGRAM EDITORS6SETTING LABELS5.5.3 Selecting data types 5 - 17
<strong>GX</strong> <strong>Works</strong>25 SETTING LABELS5.5.4 Editing rowsEdit rows on the label setting screen.■Adding rowsAdd a row on the label setting screen.● New Declaration (Before)Insert a row above the selected row.Operation• Select [Edit] ⇒ [New Declaration (Before)] ( ).● New Declaration (After)Insert a row below the selected row.Operation• Select [Edit] ⇒ [New Declaration (After) ( ).● Adding rowsThe following settings can be set with the New Declaration (After) function.Set whether to leave cells of added row blank.Enter label names or data types automatically.Select [Tool] ⇒ [Options] ⇒ "Label Setting Editor".5 - 18 5.5.4 Editing rows
5.5 Common Operations for Setting Labels■Deleting rows1Delete a row on the label setting screen.Operation• Select [Edit] ⇒ [Delete Row] ( ).2OVERVIEW■Displaying all lines or first line of comments and remarksFor the "Comment" and "Remark" columns, data can be entered in multiple lines. The 'all lines/first linedisplay' function switches the display between all lines and only the first line by double-clicking " + " or" - ".● All lines displayDisplay all lines of information in the "Comment" and "Remark" columns.Operation• Double-click " + " in the row number cell of the table.● First line displayDisplay only the first line of information in the "Comment" and "Remark" columns.Operation• Double-click " - " in the row number cell of the table.SCREEN 3CONFIGURATIONPROGRAMMING 4PROCEDUREPROGRAM 5CONFIGURATIONSOnly the first line is displayed.6SETTING LABELS■ Selecting all rowsAll rows can be selected by the following operation.Operation• Select [Edit] ⇒ [Select All].All lines are displayed.COMMON OPERATIONS7OF PROGRAM EDITORSEDITING STRUCTUREDLADDER PROGRAMSEDITING ST 8PROGRAMS5.5.4 Editing rows 5 - 19
<strong>GX</strong> <strong>Works</strong>25 SETTING LABELS5.6 Setting <strong>Structured</strong> Data Type LabelsQ CPU L CPU FXThis section explains how to set structured data type labels.5.6.1 Setting data type of structureSet the elements of the structure on the Structure Setting screen.Screen displaySelect <strong>Project</strong> view ⇒ "POU" ⇒ "<strong>Structured</strong> Data Types" ⇒ "(structure)".<strong>Operating</strong> procedure• Set the items on the screen.Maximum number ofItemDescriptioncharactersLabel Name Enter a desired label name. 32Enter the data type of label which can be set on the Data Type Selection screenData Type128displayed by clicking . ( Section 5.5.3)Constant Display the constant value of the selected type. 128Enter comments.CommentA new line can be inserted in a cell by pressing the + keys.To display comments on the program editor, select "Device Comment" in "CommentDisplay Item".1024● Creating new structured dataCreate structured data using the <strong>Project</strong> view.( <strong>GX</strong> <strong>Works</strong>2 Version 1 Operation <strong>Manual</strong> (Common))5.6.2 Setting data type as structureTo define the data type of label as a structure, set a structure in the data type entry field on each labelsetting screen. In addition to direct text entry, a structure can be selected on the Data Type Selectionscreen ( Section 5.5.3).5 - 20 5.6.1 Setting data type of structure
5.6 Setting <strong>Structured</strong> Data Type Labels5.6.3 Assigning devices to structured data type labels1Devices of the structured data type global labels are set on the Structure Device Setting screen.If the structure is set for data type on the Global Label Setting screen, "Detail Setting" is displayed in the"Device" and "Address" columns. Click "Detail Setting" to display the Structure Device Setting screen.Screen displayClick "Detail Setting" on the label setting screen.EDITING STRUCTUREDLADDER PROGRAMSEDITING ST 8PROGRAMS2OVERVIEWPROGRAM 5CONFIGURATIONSSCREEN 3CONFIGURATIONPROGRAMMING 4PROCEDURE<strong>Operating</strong> procedure• Set the items on the screen.ItemLabel NameData TypeDevice Devicename AddressAutomatic FillingUse Bit DesignationDescriptionDisplay label names defined as structure.Display data types set to data names.Set device names to be assigned in the "Device" or "Address" column. (When a devicename is entered in either column, it is displayed in the respective format automatically.)Check this to set devices automatically to cells in which devices are not set with the samedata type.Check this to specify a bit device of word device.6SETTING LABELSCOMMON OPERATIONS7OF PROGRAM EDITORS● Display on the Local Label Setting screen• For the Structure Device Setting screen, the read-only screen is displayed.5.6.3 Assigning devices to structured data type labels 5 - 21
<strong>GX</strong> <strong>Works</strong>25 SETTING LABELS■Entering device names automaticallyThe Automatic filling function can be used when setting series of devices for the same data type dataon the Structure Device Setting screen.When using the Automatic filling function, whether to use bit specification of word device can beselected.Operation1. Click "Detail Setting" on the label setting screen.The Structure Device Setting screen is displayed.2. Enter the device name to the Device/Address column.Series of devices are automatically set in the cells following the one entered, skipping thecells where devices are already set.● When using bit specificationEnter "D1".Automaticallyset data● When not using bit specificationEnter "D1".Automaticallyset data● When not using bit specification• When the bit specification is not used, uncheck the "Use Bit Designation" item on the Structure Device Settingscreen.5 - 22 5.6.3 Assigning devices to structured data type labels
5.6 Setting <strong>Structured</strong> Data Type Labels5.6.4 Assigning devices to structure array type labels1Set devices for the structure array type global labels on the Structure Device Setting screen.When VAR_GLOBAL is set for "Class" and the structure array is set for "Data Type" on the Global LabelSetting screen, "Detail Setting" is displayed in the "Device" and "Address" columns. Click "DetailSetting" to display the Structure Device setting screen.Screen displayClick "Detail Setting" on the label setting screen.2OVERVIEWPROGRAM 5CONFIGURATIONSSCREEN 3CONFIGURATIONPROGRAMMING 4PROCEDURE<strong>Operating</strong> procedure• Set the items on the screen.Structure ArrayLabel NameData TypeDeviceAddressStructure Array OffsetValueItemWord Device/BitDeviceUse Bit Designation● Display on the Local Label Setting screen• For the Structure Device Setting screen, the read-only screen is displayed.DescriptionDisplay elements of the structure array in tree format.The device setting of the element selected in the tree is displayed in the rightarea of the screen.Display label names defined as the structure.Display data types set to data names.Set device names to be assigned in the "Device" or "Address" column. (When adevice name is entered in either column, it is displayed in the respective formatautomatically.)Device names can be entered for the start array element only.For the subsequent array elements, device names offset from the device numberset for the start element are automatically set.Specify the device offset value to be set to the same data type cells in the arrayelement.Check this to specify a bit device of word device.6SETTING LABELSCOMMON OPERATIONS7OF PROGRAM EDITORSEDITING ST 8PROGRAMSEDITING STRUCTUREDLADDER PROGRAMS5.6.4 Assigning devices to structure array type labels 5 - 23
<strong>GX</strong> <strong>Works</strong>25 SETTING LABELS■Entering device names automatically by setting offset valuesOn the Structure Device setting screen, device numbers to be entered automatically can be set in fixedspacing for each array element of the structure array. Specify the difference in device numbers betweenthe array elements as an offset value for the start device of the same data type.Operation1. Click "Detail Setting" on the label setting screen.The Structure Device Setting screen is displayed.2. Set the "Structure Array Offset Value".3. Set the device name for the start element data of the array.Devices are set to the same data type of the array elements in the screen.Offset value is not specified.< Array [0] >Enter "D1".< Array [1] >Devices startingfrom "D7" areassigned.Offset value is 10.< Array [0] >Enter "D1".< Array [1] >Devices startingfrom "D11" areassigned.● Using bit specificationDevices can be set by specifying a bit device of word device when entering devices automatically.Operation1. Click "Detail Setting" on the label setting screen.The Structure Device Setting screen is displayed.2. Check the "Use Bit Designation" item.3. Set the device name for the start element data of the array.Devices are set to the same data type or bit device data type.5 - 24 5.6.4 Assigning devices to structure array type labels
5.6 Setting <strong>Structured</strong> Data Type Labels1● Data for which device name can be enteredFor the structure array type, a device name can be entered only for the start element of array.For the subsequent array elements, device names offset from the device number set for the start element areautomatically set.● Offset values• An expression such as '1\2' can be specified for an incremental value of device such as U0\G0.• When '0' is specified for the incremental value, the device number same as the data set to the start of devices isset to all data in the array.EDITING STRUCTUREDLADDER PROGRAMSEDITING ST 8PROGRAMS2OVERVIEWSCREEN 3CONFIGURATIONCOMMON OPERATIONS7OF PROGRAM EDITORS6SETTING LABELSPROGRAM 5CONFIGURATIONSPROGRAMMING 4PROCEDURE5.6.4 Assigning devices to structure array type labels 5 - 25
<strong>GX</strong> <strong>Works</strong>25 SETTING LABELS5.7 Setting Ranges for Devices Assigned AutomaticallyQ CPU L CPU FXThis section explains how to set the ranges for devices that are automatically assigned to labels.The devices set as automatically assigned device are assigned to labels during compilation.( Section 10.5)■QCPU (Q mode)/LCPUScreen displaySelect [Tool] ⇒ [Device/Label Automatic-Assign Setting].Latchselectionfield<strong>Operating</strong> procedure• Set the items on the screen.ItemLatch selection fieldDeviceDigitAssign SelectionAssignmentRangeTotal PointsStartEndPLC ParameterDevice Setting RangeDescriptionSelect latch (1) or latch (2).Select when the range of latch (1), latch (2) is set on the tab of PLCparameters.Display the devices to be assigned automatically.Display whether the range of device assign setting is in decimal or hexadecimal.Check the device to be assigned automatically. Multiple devices can be set.Enter the range of device points to be assigned automatically.Display the total points of each device range for VAR and VAR_RETAIN.Display the device point range set on the tab of PLC parameters.When the latch range is set, display the device point range with the latch range.(Ex) When D: 0 to 12287, latch D: 5000 to 6000 are set on the tab ofPLC parameters, display range of D: 0 to 12287, range of latch D: 5000 to 6000.5 - 26
5.7 Setting Ranges for Devices Assigned Automatically■FXCPU1Screen displaySelect [Tool] ⇒ [Device/Label Automatic-Assign Setting].SCREEN 3CONFIGURATION2OVERVIEW<strong>Operating</strong> procedure• Select the device type, and set the start and end addresses to be assigned automatically.5.7.1 Precautions on automatically assigned devices● Precautions when changing automatically assigned devicesAll programs need to be compiled when the range of automatically assigned device is changed.Compiling all programs changes the device assignment to labels. Therefore, device values set beforethe program change remain on the device-assigned labels.For QCPU (Q mode)/LCPU, reset the programmable controller CPU, clear all device memoriesincluding latches, clear all file registers, then switch the programmable controller to RUN for aprecautionary measure.( <strong>GX</strong> <strong>Works</strong>2 Version 1 <strong>Operating</strong> <strong>Manual</strong> (Common))For precautions on compiling all programs, refer to Section 10.5.3.● Assigning device with Device/Label Automatic-Assign SettingAssign the devices to labels with the Device/Label Automatic-Assign Setting during compilation.For details, refer to Section 10.5.The assigned devices can be checked with the cross reference function.( <strong>GX</strong> <strong>Works</strong>2 Version 1 <strong>Operating</strong> <strong>Manual</strong> (Common))Devices within the range set on the Device/Label Automatic-Assign Setting screen cannot be used ina program.● Precautions when the multiple types of devices are assigned automatically (QCPU (Q mode)/LCPU)Refer to Precautions on compilation. ( Section 10.5.3 )● Device types and setting rangesThe types of automatically assigned devices differ by the type of CPU.The setting ranges depend on the number of device points set in PLC parameter.For details of PLC parameter, refer to the following manual.<strong>GX</strong> <strong>Works</strong>2 Version 1 <strong>Operating</strong> <strong>Manual</strong> (Common)PROGRAMMING 4PROCEDUREPROGRAM 5CONFIGURATIONS6SETTING LABELSCOMMON OPERATIONS7OF PROGRAM EDITORSEDITING ST 8PROGRAMSEDITING STRUCTUREDLADDER PROGRAMS5.7.1 Precautions on automatically assigned devices 5 - 27
<strong>GX</strong> <strong>Works</strong>25 SETTING LABELS● Precautions when displaying the Device/Label Automatic-Assign Setting screenWhen displaying the Device/Label Automatic-Assign Setting screen, an error message may bedisplayed.In this case, terminate <strong>GX</strong> <strong>Works</strong>2, copy "vsflex8n.ocx" stored in the folder of <strong>GX</strong> <strong>Works</strong>2 installationdestination to "C:\WINDOWS\system32" (for Windows XP), and restart <strong>GX</strong> <strong>Works</strong>2.5 - 28 5.7.1 Precautions on automatically assigned devices
5.8 Writing/Reading Data to/from CSV Files5.8 Writing/Reading Data to/from CSV Files1Q CPU L CPU FXThis section explains how to write the label setting data to the CSV file and how to read the label setting datafrom the CSV file.2OVERVIEW■ Writing label setting dataWrite label setting data to CSV files.<strong>Operating</strong> procedure1. Select [Edit] ⇒ [Write to CSV File] ( ).The following message is displayed.SCREEN 3CONFIGURATIONPROGRAMMING 4PROCEDURE2. Click the button.The Write to CSV File screen is displayed.PROGRAM 5CONFIGURATIONSCOMMON OPERATIONS7OF PROGRAM EDITORSEDITING STRUCTUREDLADDER PROGRAMSEDITING ST 8PROGRAMS6SETTING LABELS3. Enter the file name to be saved and click the button.The label setting data is saved in the save destination.5 - 29
<strong>GX</strong> <strong>Works</strong>25 SETTING LABELS■Reading label setting dataRead label setting data from CSV files.<strong>Operating</strong> procedure1. Select [Edit] ⇒ [Read from CSV File] ( ).The Read from CSV File screen is displayed.2. Select the file name to be read and click the button.The following message is displayed.3. Click the button.The label setting data is read to the project.5 - 30
5.8 Writing/Reading Data to/from CSV Files■CSV file format1The title name of Label Setting Editor links with the title name of the CSV file.• Data of column which coincides in the title name of Label Setting Editor in the CSV file is read toLabel Setting Editor.• Data of column which does not coincide in the title name of Label Setting Editor cannot be readto the CSV file.• Columns order of the CSV file can be read even if it does not coincide in the columns order ofLabel Setting Editor.Title name2OVERVIEWSCREEN 3CONFIGURATIONTitle namePROGRAMMING 4PROCEDURERestrictions● When multi-byte characters are used in the label nameDo not use multi-byte characters in a label name when using a CSV file created in Japanese version of <strong>GX</strong> <strong>Works</strong>2in other language version of <strong>GX</strong> <strong>Works</strong>2.For <strong>GX</strong> <strong>Works</strong>2 with the language version other than Japanese, this function supports multi-byte characters,however, the compilation function does not support multi-byte characters. Therefore, the program cannot becompiled properly when multi-byte characters are used in a label name.PROGRAM 5CONFIGURATIONS6SETTING LABELSEDITING STRUCTUREDLADDER PROGRAMSEDITING ST 8PROGRAMSCOMMON OPERATIONS7OF PROGRAM EDITORS5 - 31
<strong>GX</strong> <strong>Works</strong>25 SETTING LABELSMEMO5 - 32
16 COMMON OPERATIONS OFPROGRAM EDITORSThis chapter explains the common operations of program editors used to edit sequence programs.2OVERVIEWSCREEN 3CONFIGURATION6.1 Types of Program Editor. . . . . . . . . . . . . . . . . . . . . . . . . . . . . . 6-26.2 Common Operations of Program Editors . . . . . . . . . . . . . . . . 6-5EDITING STRUCTUREDLADDER PROGRAMSPROGRAMMING 4PROCEDUREPROGRAM 5CONFIGURATIONSEDITING ST 8PROGRAMSCOMMON OPERATIONS7OF PROGRAM EDITORS6SETTING LABELS6 - 1
<strong>GX</strong> <strong>Works</strong>26 COMMON OPERATIONS OF PROGRAM EDITORS6.1 Types of Program EditorQ CPU L CPU FXThis section explains how to edit programs according to the programming language.ST editor( Chapter 7)<strong>Structured</strong> ladder/FBD editor( Chapter 8)Ladder editorFor the operating method of the ladder editor, refer to thefollowing manual.<strong>GX</strong> <strong>Works</strong>2 Version 1 <strong>Operating</strong> <strong>Manual</strong>(Simple <strong>Project</strong>)SFC editorFor the operating method of the SFC editor, refer tothe following manual.<strong>GX</strong> <strong>Works</strong>2 Version 1 <strong>Operating</strong> <strong>Manual</strong>(Simple <strong>Project</strong>)● Creating new program dataProgram data are created in the project view. ( <strong>GX</strong> <strong>Works</strong>2 Version 1 <strong>Operating</strong> <strong>Manual</strong> (Common))Program data are created paired with a label editor when a new POU is created.6 - 2
6.1 Types of Program Editor6.1.1 Available programming languages1The following table shows the programming languages that can be used for each POU.: Available ×: Not availableProgramming languagePOU<strong>Structured</strong>STladder/FBDLadder *1 SFC *1Functions × ×Function blocks ×Program blocks*1: Not supported by FXCPU.2OVERVIEWSCREEN 3CONFIGURATION● Changing programming languages• Select a programming language when creating a new POU.For creating a new data, refer to the following manual.<strong>GX</strong> <strong>Works</strong>2 Version 1 <strong>Operating</strong> <strong>Manual</strong> (Common)• The programming language that is selected when creating a program, cannot be changed later.To change to another programming language, create a new POU.PROGRAMMING 4PROCEDUREEDITING STRUCTUREDLADDER PROGRAMSEDITING ST 8PROGRAMSCOMMON OPERATIONS7OF PROGRAM EDITORS6SETTING LABELSPROGRAM 5CONFIGURATIONS6.1.1 Available programming languages 6 - 3
<strong>GX</strong> <strong>Works</strong>26 COMMON OPERATIONS OF PROGRAM EDITORS6.1.2 Available comment formatsThe following explains a comments that can be used for each program editor.■Comments on the ST editorOn the ST editor, comments are enclosed by'(*' and '*)'.■Comments on the structured ladder/FBD editorOn the structured ladder/FBD editor,comments can be pasted anywhere in thesame manner as ladder symbols.( Section 8.9)In the Guided mode, comments can beadded at the start of a ladder block.( Section 8.10.9)■Label commentsLabel comments and remarks set at labelsetting can be displayed on tool hints.( Section 6.2.8)6 - 4 6.1.2 Available comment formats
6.2 Common Operations of Program Editors6.2 Common Operations of Program Editors1Q CPU L CPU FXThis section explains the common operations of program editors (ST editor and structured ladder/FBD editor).The operating method when using a structured ladder/FBD editor is explained in this section.2OVERVIEW6.2.1 Using POUs (Function Block Selection window)Select POUs such as functions or function blocks from the Function Block Selection window and utilizethem to the program.Screen displaySelect [View] ⇒ [Docking Window] ⇒ [Function Block Selection Window] ( ).POU typePOU listPROGRAM 5CONFIGURATIONSSCREEN 3CONFIGURATIONPROGRAMMING 4PROCEDUREScreen displayItemDescriptionPOU typeDisplay POUs in categories.All PartsDisplay functions/function blocks and operators.Application Instruction Display functions/function blocks of application functions.(Instructions) *1Display common instructions, application instructions, and special instructions.(User library name) Display functions defined in the user library.<strong>Project</strong>Display functions/function blocks defined in FB/FUN.OperatorDisplay operators.POU listDisplay POUs of the type selected for 'POU type'.Function *2Display functions.Function block *2Display function blocks.Operator *2Display operators.*1: For FXCPU, basic instructions and application instructions are displayed.*2: For details of functions/function blocks/operators, refer to the following manual.( MELSEC-Q/L/F <strong>Structured</strong> Programming <strong>Manual</strong> (Fundamentals))6SETTING LABELSCOMMON OPERATIONS7OF PROGRAM EDITORSEDITING ST 8PROGRAMSEDITING STRUCTUREDLADDER PROGRAMS6.2.1 Using POUs (Function Block Selection window) 6 - 5
<strong>GX</strong> <strong>Works</strong>26 COMMON OPERATIONS OF PROGRAM EDITORS<strong>Operating</strong> procedure1. Select a POU to be used from the 'POU list'.2. Drag & drop the selected POU to the program editor.Drag and Drop6 - 6 6.2.1 Using POUs (Function Block Selection window)
6.2 Common Operations of Program Editors■Searching for a POU name by its initial letter1Search for a particular item among those displayed on the POU list tree by its initial letter.<strong>Operating</strong> procedure• In the POU list field, enter the initial letter of the POU to be searched for.The cursor moves to the entered initial letter of the POU.If there is no POU with the entered initial letter, the selection status does not change.2OVERVIEWPress theSkey.COMMON OPERATIONS7OF PROGRAM EDITORSSCREEN 3CONFIGURATIONPROGRAMMING 4PROCEDURE■Displaying label settingsDisplay a label setting screen by right-clicking a function or function block.PROGRAM 5CONFIGURATIONSDisplays a label setting screenof the selected POU by clicking"Open Header" from the shortcut menu.6SETTING LABELS● OperatorsSince label settings are not available for operators, short cut menu is not displayed.EDITING ST 8PROGRAMSEDITING STRUCTUREDLADDER PROGRAMS6.2.1 Using POUs (Function Block Selection window) 6 - 7
<strong>GX</strong> <strong>Works</strong>26 COMMON OPERATIONS OF PROGRAM EDITORS6.2.2 Using labels in the programEnter preset labels to program editor. A new label can also be registered.Screen displaySelect [Edit] ⇒ [List Operands] ( ).Registeredlabel list● Display setting for Label Registration/Selection screenFor a structured ladder/FBD program, the Label Registration/Selection screen can be displayed when inserting anundefined label by setting the option below.Select "Declare new label name" under [Tool] ⇒ [Options] ⇒ "Program Editor" ⇒ "<strong>Structured</strong> Ladder/FBD" ⇒"Label".■Entering registered labelsSelect and enter the registered labels on the Label Registration/Selection screen.Register labels with label setting editor ( Chapter 5) or on the Label Registration/Selection screen( Registering new labels).<strong>Operating</strong> procedure1. Select the argument to which a label is entered on a program editor.2. Select [Edit] ⇒ [List Operands] ( ).The Label Registration/Selection screen is displayed.6 - 8 6.2.2 Using labels in the program
6.2 Common Operations of Program Editors3. Set the items on the screen.1itemDescriptionSelect from Registered Label -Scope to FindSelect a label setting editor’s name of the search destination.Type Classification Select a type classification of data type. ( Section 5.5.3)Data TypeSelect a data type.Registered label listMinimize dialog after applying4. Click the button.The selected label is applied to the program editor.Display a list of labels existing in the label setting editor of the search destination.Select a label to be entered.After clicking thebutton, check this to minimize the LabelRegistration/Selection screen.2OVERVIEWSCREEN 3CONFIGURATION■Registering new labelsSelect and enter the new labels on the Label Registration/Selection screen.<strong>Operating</strong> procedure1. Select the argument to which a label is entered on a program editor.2. Select [Edit] ⇒ [List Operands] ( ).The Label Registration/Selection screen is displayed.3. Set the items on the screen.itemDescriptionLabel NameEnter a label name.Label Setting Information -Scope to RegisterSelect a label setting editor's name of registering destination.ClassData TypeDeviceConstantCommentMinimize dialog after applyingSelect a class name of label from the list displayed by clicking .( Section 5.5.1)Set a data type from the Data Type Selection screen displayed by clicking .( Section 5.5.3)It can also be entered directly.Set a device to be assigned to the label when "VAR_GLOBAL" is selected for"Class".• When the "Device" column is blank, a device is automatically assigned.Enter a constant value when "VAR_GLOBAL_CONSTANT" or "VAR_CONSTANT"is selected for "Class", and simple type is selected for "Data Type".Enter a label comment.Comments can be displayed on the program editor by switching display/hide ofcomments. ( Section 8.7.5)A new line cannot be inserted. Edit a comment with a label setting editor to insert anew line.After clicking theSelection screen.button, check to minimize the Label Registration/PROGRAMMING 4PROCEDUREPROGRAM 5CONFIGURATIONS6SETTING LABELSCOMMON OPERATIONS7OF PROGRAM EDITORSEDITING ST 8PROGRAMSEDITING STRUCTUREDLADDER PROGRAMS6.2.2 Using labels in the program 6 - 9
<strong>GX</strong> <strong>Works</strong>26 COMMON OPERATIONS OF PROGRAM EDITORS4. Click the button.The label is registered and applied to the program editor.■Changing registered label settingsChange the settings of registered labels on the Label Registration/Selection screen.Label setting editor and data type of registered label can be changed.<strong>Operating</strong> procedure1. Select [Edit] ⇒ [List Operands] ( ).The Label Registration/Selection screen is displayed.2. Select the label from "Registered Label List".For items of "Select from Registered Label", refer to "Entering registered labels".3. Change the settings on "Label Setting Information".For items of "Label Setting Information", refer to "Registering new labels"4. For changing the label setting editor, check "Move the selected labels to the Scopeto Register".5. Click the button.The label settings are changed.6 - 10 6.2.2 Using labels in the program
6.2 Common Operations of Program Editors6.2.3 Undo and redo1Undo and redo the previous editing status.■Undo2OVERVIEW<strong>Operating</strong> procedure■ Redo• Select [Edit] ⇒ [Undo] ( ) after editing the ladder.The previous editing status is restored.SCREEN 3CONFIGURATION<strong>Operating</strong> procedure• Select [Edit] ⇒ [Redo] ( ) after performing [Undo].The operation deleted by clicking the [Undo] button is restored.PROGRAMMING 4PROCEDUREEDITING STRUCTUREDLADDER PROGRAMSEDITING ST 8PROGRAMSCOMMON OPERATIONS7OF PROGRAM EDITORS6SETTING LABELSPROGRAM 5CONFIGURATIONS6.2.3 Undo and redo 6 - 11
<strong>GX</strong> <strong>Works</strong>26 COMMON OPERATIONS OF PROGRAM EDITORS6.2.4 Changing display size of editing screenChange the display size of editing screen.Screen displaySelect [View] ⇒ [Zoom] ⇒ [Set Zoom Factor].<strong>Operating</strong> procedure• Set the items on the screen.ItemDescription200%, 150%, 100%, 75%, 50% Change the display size of editing screen with a selected magnification.Specify Set a magnification specified by every 12.5%.6 - 12 6.2.4 Changing display size of editing screen
6.2 Common Operations of Program Editors6.2.5 Splitting editing screen1Split the editing screen one above the other.<strong>Operating</strong> procedure• Drag the split bar on the scroll bar of the editing screen.2OVERVIEWSplit barDrag the split bar.SCREEN 3CONFIGURATIONEDITING STRUCTUREDLADDER PROGRAMSEDITING ST 8PROGRAMSCOMMON OPERATIONS7OF PROGRAM EDITORS6SETTING LABELSPROGRAM 5CONFIGURATIONSPROGRAMMING 4PROCEDURE6.2.5 Splitting editing screen 6 - 13
<strong>GX</strong> <strong>Works</strong>26 COMMON OPERATIONS OF PROGRAM EDITORS6.2.6 Opening label setting screen of program editor being editedDisplay the Local label Setting screen of the program editor being edited.<strong>Operating</strong> procedure• Select [View] ⇒ [Open Header].[View][Open Header]6.2.7 Displaying compilation result in list formDisplay a compiled program in a list format.A selected ladder block for structured ladder/FBD or a whole editor currently opened for ST is thecompilation target.<strong>Operating</strong> procedure1. For structured ladder/FBD, select a ladder block.2. Select [View] ⇒ [Display Compile Result].[View][Display Compile Result]The compilation result is not displayed when the compilationtarget is an assignment command in which the source dataand the target data are the same.Example in ST language) M0 :=M0;● Precautions on FXCPUFor FXCPU, when a block password with the validated setting for "Read-protect the execution program" exists, thecompilation result cannot be displayed.6 - 14 6.2.6 Opening label setting screen of program editor being edited
6.2 Common Operations of Program Editors6.2.8 Setting display contents of tool hint1Content defined on the label setting screen as tool hints is displayed by placing the cursor on a labelname on the program editor.The contents excluding label names displayed on the tool hints can be set by the following operation.<strong>Operating</strong> procedure1. Select [Tool] ⇒ [Options] ⇒ "Program Editor" ⇒ "<strong>Structured</strong> Ladder/FBD/ST" ⇒"Tool Hint".2. Set the following items:Tool Hint Display ItemsTool Hint Display FormatItem Description ExampleDisplay a monitoring result.Monitored Value(Displayed onlyWhen the labels are used for array element, or whenduringthe elements are not specified for array or structuredmonitoring)data type, the monitoring values are not displayed.Class Display a label class. VAR_GLOBALDeviceDisplay a device assigned to the label in the deviceformat.AddressDisplay a device assigned to the label in the addressformat.%IX1Data Type Display a data type of the label. BitConstant Value Display a constant value of the label. FALSECommentRemarkSingle LineMulti LineDisplay label comments.Display a remark of the global label.Display tool tips in a single line.Display tool tips in multiple lines.X1GLOBAL1commentGLOBAL1remark2OVERVIEWSCREEN 3CONFIGURATIONPROGRAMMING 4PROCEDUREPROGRAM 5CONFIGURATIONS6SETTING LABELSCOMMON OPERATIONS7OF PROGRAM EDITORSEDITING STRUCTUREDLADDER PROGRAMSEDITING ST 8PROGRAMS6.2.8 Setting display contents of tool hint 6 - 15
<strong>GX</strong> <strong>Works</strong>26 COMMON OPERATIONS OF PROGRAM EDITORS6.2.9 Opening label setting and program screens for selected POUDisplay label settings or a program of the function or function block selected on the program editor.■Displaying a label setting screenOperation• Select [View] ⇒ [Zoom Header/Body] ⇒ [Header].■Displaying a program editorOperation• Select [View] ⇒ [Zoom Header/Body] ⇒ [Body].[View] [Zoom Header/Body][Header][View] [Zoom Header/Body][Body]● Displaying by double-clicking the function or function blockFor a structured ladder/FBD program, a label editor or program editor can be opened by double-clicking POU.Select [Tool] ⇒ [Options] ⇒ "Program Editor" ⇒ "<strong>Structured</strong> Ladder/FBD" ⇒ "FB/FUN" and set "Double clickingopens header" or "Double clicking opens body".6 - 16 6.2.9 Opening label setting and program screens for selected POU
17 EDITING ST PROGRAMS2OVERVIEWThis chapter explains the functions of ST editor to edit ST programs.SCREEN 3CONFIGURATION7.1 ST Editor . . . . . . . . . . . . . . . . . . . . . . . . . . . . . . . . . . . . . . . . . . 7-2EDITING STRUCTUREDLADDER PROGRAMSPROGRAMMING 4PROCEDUREEDITING ST 8PROGRAMSCOMMON OPERATIONS7OF PROGRAM EDITORS6SETTING LABELSPROGRAM 5CONFIGURATIONS7 - 1
<strong>GX</strong> <strong>Works</strong>27 EDITING ST PROGRAMS7.1 ST EditorThis section explains how to edit programs on the ST editor.The ST editor is a language editor in text format for creating programs in the ST language.The operating method is the same as that of general text editor. Spaces, tabs and line feeds can be enteredbetween keywords and variable names of the ST control syntax.Screen displaySelect <strong>Project</strong> view ⇒ "POU" ⇒ "Program" ⇒ "(program)" ⇒ "Program".Q CPU L CPU FX● Display colorsOn the ST editor, the following display colors can be specified by selecting [View] ⇒ [Color and Font].The colors in the parentheses indicate the default colors.➀ Syntax (Blue)➁ Operator (Black)➂ Comment (Dark green)➃ Constant (Black)➄ String constant (Black)➅ Device (Black)➆ Global label (Magenta)➇ Local label (Magenta)➀ Syntax ➅ Device➁ Operator➆ Global label➇ Local label ➃ Constant ➄ String constant➂ CommentFor details, refer to the following manual.<strong>GX</strong> <strong>Works</strong>2 Version 1 <strong>Operating</strong> <strong>Manual</strong> (Common)7 - 2
7.1 ST Editor7.1.1 Writing ST programs1Write a ST program.For functions/instructions used for ST program, refer to the structured programming manuals.<strong>Operating</strong> procedure• Write a program in the text format using a keyboard.The colors of defined labels, devices, syntaxes, operators,constants, string constants, and comments change when they areentered.Syntaxes entered in lower-case characters are automaticallychanged to upper-case characters.2OVERVIEWSCREEN 3CONFIGURATION● Options of labels displayed while typing a labelLabels match to the entered characters are displayed while typing a label. If only one option is available, it isentered automatically.Global labels and local labels of corresponding POU are displayed.PROGRAMMING 4PROCEDURE● Entering assignment operatorsPress the + + keys to enter an assignment operator (:=).PROGRAM 5CONFIGURATIONS7.1.2 Automatic indentionInsert a tab as the indention at the head of a new line automatically when a line feed is inserted duringprogram editing.The indention can be set in the option setting.<strong>Operating</strong> procedure1. Select [Tool] ⇒ [Options] ⇒ "Program Editor"⇒ "ST".6SETTING LABELSCOMMON OPERATIONS7OF PROGRAM EDITORS2. Select "Auto Indention".3. Enter the ST control statement to the ST editor(such as a FOR statement).When a line feed is inserted, the next line is indented based on the content of the statement.EDITING ST 8PROGRAMSEDITING STRUCTUREDLADDER PROGRAMS7.1.1 Writing ST programs 7 - 3
<strong>GX</strong> <strong>Works</strong>27 EDITING ST PROGRAMS7.1.3 Setting tab lengthSet a tab length in the option setting.<strong>Operating</strong> procedure1. Select [Tool] ⇒ [Options] ⇒ "Program Editor" ⇒ "ST".2. Set the "Tabulator Length".7 - 4 7.1.3 Setting tab length
7.1 ST Editor7.1.4 Using templates1Insert templates correspond to the instructions/functions/control syntaxes on the ST editor.A template of argument is inserted when an instruction or function is entered from the Function BlockSelection window by the drag and drop operation.A template is an argument data type defined for each instruction/function or a format of control syntax.For details of data types and formats displayed in the templates, refer to the following manual.MELSEC-Q/L/F <strong>Structured</strong> Programming <strong>Manual</strong> (Fundamentals)<strong>Operating</strong> procedure1. Move the cursor to the instruction/function/control syntax entered to the ST editor.2. Select [Edit] ⇒ [Display Template] ( ).A template is inserted.3. Enter variables according to the inserted template.Delete the data type name enclosed by "?", and enter a label name or device that is equivalent tothe data type.EDITING STRUCTUREDLADDER PROGRAMS2OVERVIEWEDITING ST 8PROGRAMSPROGRAM 5CONFIGURATIONSSCREEN 3CONFIGURATIONPROGRAMMING 4PROCEDURE● Inserting templatesA template can also be inserted by right-clicking the instruction/function/control syntax entered to the ST editor andselecting [Display Template] ( ) from the shortcut menu.● Editing argumentsSelect [Edit] ⇒ [Mark Template (Left)] ( )/[Mark Template (Right)] ( ), or press + + /keys to set an argument of the template in the selected status one by one.6SETTING LABELSCOMMON OPERATIONS7OF PROGRAM EDITORS7.1.4 Using templates 7 - 5
<strong>GX</strong> <strong>Works</strong>27 EDITING ST PROGRAMSMEMO7 - 6 7.1.4 Using templates
18 EDITING STRUCTUREDLADDER/FBD PROGRAMSThis chapter explains the functions of program editor to edit structured ladder/FBD programs.2OVERVIEWSCREEN 3CONFIGURATION8.1 Creating Ladder/FBD Programs. . . . . . . . . . . . . . . . . . . . . . . . 8-28.2 Editing in Select Mode . . . . . . . . . . . . . . . . . . . . . . . . . . . . . . . 8-48.3 Drawing Lines . . . . . . . . . . . . . . . . . . . . . . . . . . . . . . . . . . . . . . 8-78.4 <strong>Operating</strong> Ladder Symbols . . . . . . . . . . . . . . . . . . . . . . . . . . 8-118.5 Changing Type of Contact and Coil. . . . . . . . . . . . . . . . . . . . 8-158.6 <strong>Operating</strong> Functions and Function Blocks. . . . . . . . . . . . . . 8-188.7 Changing Display Format of Variables . . . . . . . . . . . . . . . . . 8-218.8 Editing Ladder Blocks . . . . . . . . . . . . . . . . . . . . . . . . . . . . . . 8-268.9 Editing Comments. . . . . . . . . . . . . . . . . . . . . . . . . . . . . . . . . . 8-328.10 Editing in Guided Mode . . . . . . . . . . . . . . . . . . . . . . . . . . . . 8-348.11 Checking Wrapping Position for Printing . . . . . . . . . . . . . . 8-39PROGRAMMING 4PROCEDUREPROGRAM 5CONFIGURATIONS6SETTING LABELSEDITING STRUCTUREDLADDER PROGRAMSEDITING ST 8PROGRAMSCOMMON OPERATIONS7OF PROGRAM EDITORS8 - 1
<strong>GX</strong> <strong>Works</strong>28 EDITING STRUCTURED LADDER PROGRAMS8.1 Creating Ladder/FBD ProgramsThis section explains how to create ladder programs and functions for creating ladder programs on thestructured ladder/FBD editor.The structured ladder/FBD editor is a language editor in graphic format for creating programs in the structuredladder/FBD language.Ladder symbols such as contacts, coils, and functions/function blocks are used to create structured ladder/FBD programs. Each ladder symbol is connected with a line.The suitable editing mode can be selected according to the program entry method and editing target. (Section 8.1.1)Screen displaySelect <strong>Project</strong> view ⇒ "POU" ⇒ "Program" ⇒ "(program)" ⇒ "Program".Q CPU L CPU FXLadder block headerProgram editing areaLadder blockCoilContactLeft powerrailFunctionJumpCommentPointerLadder BlockLabelReturnInput labelOutput labelGridDisplay contentsLadder blockName Description ReferenceLadder block headerProgram editing areaLeft power railGridA unit for creating a programA ladder block consists of a ladder block header and a program editing area.Display information such as a title set for each ladder block, and a label name of the jumptarget.An area for creating a program.Ladder symbols can be placed in the grid area.A start position of the structured ladder program.For FBD, the display of left power rail can be switched to hide.Indicate specific positions of tab stop and start/end positions of lines.Section 8.8Section8.8.4Section 8.1Section8.8.7Section8.8.88 - 2
8.1 Creating Ladder/FBD Programs8.1.1 Selecting editing modes1Select a program editing mode. The following table shows the selectable modes.Select mode■Mode Description ReferenceInterconnect modeGuided modeMouse cursor and gridPlace ladder symbols such as contacts and coils in a ladder block.Connect ladder symbols with a line.This mode is used for editing programs mainly with the mouse.Connect placed ladder symbols with a line.Place ladder symbols such as contacts, coils, and instructions within the gridframes.This mode is used for editing programs mainly with the keyboard.The following table shows different appearances of the mouse cursor and grid according to the mode.Table 6.4.1-1 Displays in different editing modes for the structured ladder editorSection 8.2Section8.3.2Section8.10Mode Menu and toolbar Auto connect Mouse cursor Grid displaySelect modeInterconnectmodeGuided mode[Edit] ⇒ [Select Mode][Edit] ⇒ [Interconnect Mode][Edit] ⇒ [Guided Mode]⇒ [Guided Editing]OFFONOFFONOFF2OVERVIEWSCREEN 3CONFIGURATIONPROGRAMMING 4PROCEDUREPROGRAM 5CONFIGURATIONS6SETTING LABELSEDITING STRUCTUREDLADDER PROGRAMSEDITING ST 8PROGRAMSCOMMON OPERATIONS7OF PROGRAM EDITORS8.1.1 Selecting editing modes 8 - 3
<strong>GX</strong> <strong>Works</strong>28 EDITING STRUCTURED LADDER PROGRAMS8.2 Editing in Select ModeQ CPU L CPU FXThis section explains how to enter instructions.8.2.1 Entering ladder symbolsEnter ladder symbols such as contacts, coils, and application instructions.Table 8.2.1-1Ladder symbols Toolbar Shortcut keyOpen Contact *1Close Contact *1Coil *1Jump +Return +Open Branch *1Close Branch *1Input LabelOutput LabelHorizontal LineVertical LineRising Pulse *1,*2−Falling Pulse *1,*2−Rising Pulse Close *1,*3−Falling Pulse Close *1,*3−Comment +*1: These items cannot be used for FBD.*2: Not supported by FX0, FX0S, FX0N, FXU, and FX2C.*3: Supported by Universal model QCPU/LCPU.<strong>Operating</strong> procedure1. Select [Edit] ⇒ [Ladder Symbol] ⇒ [(ladder symbol)].The shape of the mouse cursor changes according to the selected ladder symbol.8 - 4 8.2.1 Entering ladder symbols
8.2 Editing in Select Mode2. Click the position where the ladder symbol is entered in the program editing area.The selected ladder symbol is entered.18.2.2 Entering instructionsEnter an instruction in the Select mode.<strong>Operating</strong> procedure1. Select [Edit] ⇒ [Input Instruction] ( ).The Input Instruction screen is displayed.2OVERVIEWSCREEN 3CONFIGURATIONLadder symbolselection fieldThe following table shows the display contents of the screen.NameLadder symbol selection fieldInstruction device entry field2. Enter an instruction and device, and click the button.The shape of the cursor changes according to the selected instruction.3. Click the desired position.Instruction deviceentry fieldSelect a ladder symbol.The instruction is entered at the cursor position.DescriptionClicking the button displays the list of ladder symbols.Enter an instruction and/or a device.PROGRAMMING 4PROCEDUREPROGRAM 5CONFIGURATIONS6SETTING LABELSEDITING STRUCTUREDLADDER PROGRAMSEDITING ST 8PROGRAMSCOMMON OPERATIONS7OF PROGRAM EDITORS8.2.2 Entering instructions 8 - 5
<strong>GX</strong> <strong>Works</strong>28 EDITING STRUCTURED LADDER PROGRAMS■Changing instructionChange entered operator, function, or function block.<strong>Operating</strong> procedure1. Select an operator, function, or function block to be changed.2. Press the initial letter of the instruction to be changed on the keyboard.A list of instructions is displayed on the Input Instruction screen.3. Select an instruction and click the button.The operator, function, or function block is changed.After changing the instruction, adjust the arguments of the instruction if necessary.● Entering POUsOperators, functions, and function blocks can also be selected from the Function Block Selection window. (Section 6.2.1)● Instruction device entry field• When more than one character of an instruction/label is entered on the Input Instruction screen, options ofinstruction/label whose first characters match are displayed. An instruction/label can be selected by using the/ key.• When nothing is entered in the ladder symbol selection field, 'instruction + space + device/label' can be entered.(For example: ld X0) However, when an instruction exists as a ladder symbol; such as JMP and RET, is entered,it is entered as a ladder symbol. For entering in functional description, select " " on the ladder symbolselection field, and enter an instruction such as JMP.● Entering unregistered labelsBy setting the option, a new label setting can be added on the Label Registration/Selection screen when anunregistered label is entered.Check the "Declare new label name" item under [Tool] ⇒ [Options] ⇒ "Program Editor" ⇒ "<strong>Structured</strong> Ladder/FBD" ⇒"Label". ( Section 14.2)● Browse <strong>Manual</strong> buttonA detail of the instruction can be displayed by clicking thebutton on the Input Instruction screen.( <strong>GX</strong> <strong>Works</strong>2 Version 1 <strong>Operating</strong> <strong>Manual</strong> (Common))8 - 6 8.2.2 Entering instructions
8.3 Drawing Lines8.3 Drawing Lines1This section explains how to create lines in a program.Q CPU L CPU FX2OVERVIEW8.3.1 Connecting lines automatically when entering laddersymbolsWhen entering ladder symbols of contacts/coils/jump/return in the Select mode, the line can beconnected automatically.SCREEN 3CONFIGURATION<strong>Operating</strong> procedure1. Select [Edit] ⇒ [Ladder Symbol] ⇒ [(ladder symbol to be entered)].A graphical image of the selected ladder symbol is appended to the mouse cursor.If a line can be connected to the left-hand horizontal direction, a line is displayed to the left-handdirection.2. Click the position where the ladder symbol is entered.If a lines can be connected to the left-hand horizontal direction, the following message is displayed.6SETTING LABELSPROGRAMMING 4PROCEDUREPROGRAM 5CONFIGURATIONS3. Click the button.The selected ladder symbol is entered and the line is connected automatically to the left-handhorizontal direction.COMMON OPERATIONS7OF PROGRAM EDITORS● Entering position of ladder symbolsWhen entering the ladder symbols, click and drag a ladder symbol moves the entering position of the laddersymbols.This function is useful when creating a ladder in parallel as shown below.EDITING ST 8PROGRAMSClickDrag and dropEDITING STRUCTUREDLADDER PROGRAMS8.3.1 Connecting lines automatically when entering ladder symbols 8 - 7
<strong>GX</strong> <strong>Works</strong>28 EDITING STRUCTURED LADDER PROGRAMS8.3.2 Connecting ladder symbols with linesConnect ladder symbols with a line.<strong>Operating</strong> procedure1. Select [Edit] ⇒ [Select Mode] ( )/[InterconnectMode] ( ).For the interconnect mode, the cursor changes to .Drag2. For the select mode, click the start position of theline.The cursor changes to .3. Drag the line from the start position to the endposition.A line is drawn in a vertical or horizontal straight line.8.3.3 Connecting lines automaticallyConnect lines automatically by specifying the start and end points.<strong>Operating</strong> procedure1. Select [Edit] ⇒ [Auto Connect].ClickFor the interconnect mode, the cursor changes fromto.2. Click the start position.For the interconnect mode, the cursor changes to .Click3. Click the end position.The line is automatically routed.8 - 8 8.3.2 Connecting ladder symbols with lines
8.3 Drawing Lines8.3.4 Overwriting input/output variable with lines1Overwrite an input/output variable of a function or function block with a line.<strong>Operating</strong> procedure1. Select [Tool] ⇒ [Options] ⇒ "Program Editor" ⇒"<strong>Structured</strong> Ladder/FBD" ⇒ "FB/FUN".2. Select "Pin overwrites".3. Select [Edit] ⇒ [Auto Connect].4. Draw a line over the input or output variable.The existing input/output variable is automatically overwritten with the line.8.3.5 Rearranging lines automaticallyRearrange and redraw a line when the Auto connect function is activated.<strong>Operating</strong> procedure1. Select the line to be rearranged.2. Select [Edit] ⇒ [Recalculate Line].Overwrite with a line2OVERVIEWSCREEN 3CONFIGURATIONPROGRAMMING 4PROCEDUREPROGRAM 5CONFIGURATIONSEDITING STRUCTUREDLADDER PROGRAMSCOMMON OPERATIONS7OF PROGRAM EDITORSEDITING ST 8PROGRAMS6SETTING LABELS8.3.4 Overwriting input/output variable with lines 8 - 9
<strong>GX</strong> <strong>Works</strong>28 EDITING STRUCTURED LADDER PROGRAMS8.3.6 Inserting and deleting rows and columnsInsert and delete rows and columns.■Inserting rows and columnsInsert a row or a column.<strong>Operating</strong> procedure1. Select [Edit] ⇒ [Insert Row] ( )/[Insert Column] ( ).The cursor changes to or .2. Click the position where a row or column is inserted.A row or column is inserted by each click.■Deleting rows and columnsInserts a columnby each click.Delete a row or a column.<strong>Operating</strong> procedure1. Select [Edit] ⇒ [Insert Row] ( )/[Insert Column] ( ).The cursor changes to or .2. Hold down the key and click the position where a rowor column is deleted.A row or column is deleted by each click.Shift+ clickDeletes a columnby each click.8 - 10 8.3.6 Inserting and deleting rows and columns
8.4 <strong>Operating</strong> Ladder Symbols8.4 <strong>Operating</strong> Ladder Symbols1Q CPU L CPU FXThis section explains how to operate ladder symbols such as contacts or coils in the select mode.8.4.1 Moving ladder symbolsDisable the Auto connect function and move a ladder symbol.<strong>Operating</strong> procedure2OVERVIEWSCREEN 3CONFIGURATION1. Select [Edit] ⇒ [Select Mode] ( ).The cursor changes to .2. Click a ladder symbol.3. Drag it to the desired position.DragPROGRAMMING 4PROCEDURE8.4.2 Moving ladder symbols with lines connectedPROGRAM 5CONFIGURATIONSEnable the Auto connect function and move a ladder symbol with the lines connected.<strong>Operating</strong> procedure1. Select [Edit] ⇒ [Auto Connect].The cursor changes from to .2. Click a ladder symbol.3. Drag it to the desired position.The ladder symbol moves with the lines connected.Drag6SETTING LABELSCOMMON OPERATIONS7OF PROGRAM EDITORSEDITING STRUCTUREDLADDER PROGRAMSEDITING ST 8PROGRAMS8.4.1 Moving ladder symbols 8 - 11
<strong>GX</strong> <strong>Works</strong>28 EDITING STRUCTURED LADDER PROGRAMS● Bend points of the lineThe bend points of the line when the ladder symbol is moved, are at the adjacent points of ladder symbols.Bend pointA bend point can be changed to any desired point by adding a bend point on the line as shown below.When adding a bend point, select [Edit] ⇒ [Interconnect Mode] ( ).[Interconnect Mode] ( ) [Select Mode] ( )Double clickMove the ladder symbolA bend point is added.Added bend pointNote that when deleting the added bend point, delete not only the line but the bend point as well as shownbelow.Select a range and pressDelete8 - 12 8.4.2 Moving ladder symbols with lines connected
8.4 <strong>Operating</strong> Ladder Symbols8.4.3 Copying ladder symbols1Copy a ladder symbol within the editor or to another structured ladder/FBD editor.● Copying ladder symbols by the drag-and-drop operationLadder symbols can be copied within the editor.Operation1. Hold down the key and click the ladder symbol.2. Drag it to the desired position.+ Ctrl2OVERVIEWSCREEN 3CONFIGURATIONDragCopied ladder symbolPROGRAMMING 4PROCEDURE● Copying ladder symbols using the clipboardLadder symbols can be copied within the same editor or to another structured ladder/FBD editor bythe basic menu options using a clipboard or shortcut keys.Operation1. Select [Edit] ⇒ [Cut] ( )/[Copy] ( ).2. Select [Edit] ⇒ [Paste] ( ).3. Click the desired position. The upper left of the pasted position is the position to be clicked.PROGRAM 5CONFIGURATIONS6SETTING LABELSEDITING STRUCTUREDLADDER PROGRAMSEDITING ST 8PROGRAMSCOMMON OPERATIONS7OF PROGRAM EDITORS8.4.3 Copying ladder symbols 8 - 13
<strong>GX</strong> <strong>Works</strong>28 EDITING STRUCTURED LADDER PROGRAMS● Copying ladder symbols to other ladder blocksLadder symbols cannot be copied or moved to other ladder blocks by the drag-and-drop operation when the Autoconnect function is enabled.In order to copy or move ladder symbols, disable the Auto connect function or use the clipboard.Select [Edit] ⇒ [Auto Connect] to switch the Auto connect function ON/OFF.● Copying ladder symbols by the drag-and-drop operation when the Auto connect function is enabledThe line of the copied ladder symbol is connected automatically when the Auto connect function is activated. If theline is not connected properly, or ladder symbols are overlapped, disable the Auto connect function by selecting[Edit] ⇒ [Auto Connect] (uncheck the item) and correct the line.● Cutting/copying ladder symbols using a clipboardWhen cutting or copying ladder symbols using a clipboard, the selection range differs between left-clicking andright clicking of a mouse.Select the menu by left-clicking on the ladder symbol to delete lines and a ladder symbol. Select the menu by rightclicking on the ladder symbol to leave the lines and delete the ladder symbol only.< For cutting function >Left-click on the laddersymbol and select[Edit] [Cut]A ladder symbol and lines are cut.Right-click on the laddersymbol and select[Edit] [Cut]Only a ladder symbol is cut.8 - 14 8.4.3 Copying ladder symbols
8.5 Changing Type of Contact and Coil8.5 Changing Type of Contact and Coil1This section explains how to change the type of contact and coil.8.5.1 Setting the type of contact and coilThe following table shows the types that can be set for contacts and coils.TypeOpen ContactQ CPU L CPU FXLadder symbol2OVERVIEWSCREEN 3CONFIGURATIONContact *1Close ContactRising Pulse *2Falling Pulse *2Rising Pulse Close *3PROGRAMMING 4PROCEDURECoil *1Falling Pulse Close *3NormalNegationSetResetPROGRAM 5CONFIGURATIONSBit type input/output pinJumpOpen ContactClose ContactOpen ContactClose Contact//6SETTING LABELSOpen ContactReturnClose Contact*1: These items cannot be used for FBD.*2: Not supported by FX0, FX0S, FX0N, FXU, and FX2C.*3: Supported by Universal model QCPU/LCPU.COMMON OPERATIONS7OF PROGRAM EDITORSEDITING STRUCTUREDLADDER PROGRAMSEDITING ST 8PROGRAMS8.5.1 Setting the type of contact and coil 8 - 15
<strong>GX</strong> <strong>Works</strong>28 EDITING STRUCTURED LADDER PROGRAMS<strong>Operating</strong> procedure1. Select a contact or coil whose type is changed.2. Select [Edit] ⇒ [Signal Configuration] ⇒ [Configure].3. Select the type on the Signal Configuration screen.4. Click the button.The selected contact or coil is set.● Setting the type of contact and coilThe type of contact or coil can be set by double-clicking a contact or coil.● Bit type input/output pinFor a bit type input pin and a bit type output pin connected to a POU such as an FB or function, its contact type ofopen/close can be changed.To change the type of a contact, double-click on the position designated in the following figure, or click on theposition designated in the following figure and select [Edit] ⇒ [Signal Configuration] ⇒ [Configure].For an input pin,double-click here.For an output pin,double-click here.8 - 16 8.5.1 Setting the type of contact and coil
8.5 Changing Type of Contact and Coil8.5.2 Changing contact and coil in predetermined order1The following table shows the order when changing the type of contact and coil.TypeContact *1OpenContactCloseContactChange sequenceRising Pulse *2 Falling Pulse *2 Rising PulseClose *3Falling PulseClose *32OVERVIEWCoil *1Normal Negation Set ResetSCREEN 3CONFIGURATIONBit type input/output pinJumpOpen ContactOpen ContactClose ContactClose ContactPROGRAMMING 4PROCEDUREOpen Contact Close ContactReturn*1: These items cannot be used for FBD.*2: Not supported by FX0, FX0S, FX0N, FXU, and FX2C.*3: Supported by Universal model QCPU/LCPU.<strong>Operating</strong> procedure1. Select a contact or coil.2. Select [Edit] ⇒ [Signal Configuration] ⇒ [Toggle].PROGRAM 5CONFIGURATIONS6SETTING LABELSCOMMON OPERATIONS7OF PROGRAM EDITORSEDITING STRUCTUREDLADDER PROGRAMSEDITING ST 8PROGRAMS8.5.2 Changing contact and coil in predetermined order 8 - 17
<strong>GX</strong> <strong>Works</strong>28 EDITING STRUCTURED LADDER PROGRAMS8.6 <strong>Operating</strong> Functions and Function BlocksQ CPU L CPU FXThis section explains how to operate functions and function blocks.8.6.1 Adding variables automatically when entering functions andfunction blocksConfigure the option setting in order to add input/output variables automatically when functions orfunction blocks are entered. (This setting is enabled only when the Auto connect function is activated.)<strong>Operating</strong> procedure1. Select [Tool] ⇒ [Options] ⇒ "Program Editor" ⇒ "<strong>Structured</strong> Ladder/FBD" ⇒ "FB/FUN".2. Select "Automatic input/output labels".To add an output variable to ENO, select "Automatic ENO labels".3. Select [Edit] ⇒ [Auto Connect].8 - 18 8.6.1 Adding variables automatically when entering functions and function blocks
8.6 <strong>Operating</strong> Functions and Function Blocks8.6.2 Editing variable names and instance names1Edit a variable name or function block instance name.<strong>Operating</strong> procedure1. Click the entry field of a ladder symbol such as a contact, coil, or input/output label.The entry field is enabled for editing.2. Edit the variable name or instance name. 2OVERVIEWSCREEN 3CONFIGURATION● Using set label namesRight-click the entry field when it is enabled for editing, and select the label name on the Label Registration/Selection screen.( Section 6.2.2)PROGRAMMING 4PROCEDUREPROGRAM 5CONFIGURATIONSEDITING STRUCTUREDLADDER PROGRAMSEDITING ST 8PROGRAMSCOMMON OPERATIONS7OF PROGRAM EDITORS6SETTING LABELS8.6.2 Editing variable names and instance names 8 - 19
<strong>GX</strong> <strong>Works</strong>28 EDITING STRUCTURED LADDER PROGRAMS8.6.3 Changing the number of arguments for functions andfunction blocksChange the number of arguments of functions and function blocks in the application functions.For details of functions whose number of arguments can be changed, refer to the following manual.MELSEC-Q/L <strong>Structured</strong> Programming <strong>Manual</strong> (Application Functions)FXCPU <strong>Structured</strong> Programming <strong>Manual</strong> (Application Functions)To add or delete an argument, select a function or a function block and proceed the following operation.● Adding an argumentOperation• Select [Edit] ⇒ [Number of Pins] ⇒ [Increment] ( ).● Deleting an argumentOperation• Select [Edit] ⇒ [Number of Pins] ⇒ [Delete] ( ).Increment pinsDecrement pinsAdded arguments● Adding and deleting argumentsArguments can also be added or deleted using the following method.• Using the or key• Changing the height of the ladder symbol using the mouse8 - 20 8.6.3 Changing the number of arguments for functions and function blocks
8.7 Changing Display Format of Variables8.7 Changing Display Format of Variables1This section explains how to change the display format of variables.Q CPU L CPU FX2OVERVIEW8.7.1 Displaying variable names in multiple linesChange the view mode to display variable names of contacts and coils in multiple lines by setting theoption.<strong>Operating</strong> procedure1. Select [Tool] ⇒ [Options] ⇒ "Program Editor" ⇒ "<strong>Structured</strong> Ladder/FBD" ⇒ "Label".2. Select "Display label name/comment of contact or coil in multiline".3. Set the values of "Display Lines" and "Visible Characters per Line".8.7.2 Displaying labels and devices simultaneouslyChange the view mode to display the labels and devices simultaneously by setting the option.<strong>Operating</strong> procedure1. Select [Tool] ⇒ [Options] ⇒ "Program Editor" ⇒ "<strong>Structured</strong> Ladder/FBD" ⇒ "Label".SCREEN 3CONFIGURATIONPROGRAMMING 4PROCEDUREPROGRAM 5CONFIGURATIONS6SETTING LABELS2. Select "Display labels and devices".The assigned devices are displayed.COMMON OPERATIONS7OF PROGRAM EDITORSEDITING STRUCTUREDLADDER PROGRAMSEDITING ST 8PROGRAMS8.7.1 Displaying variable names in multiple lines 8 - 21
<strong>GX</strong> <strong>Works</strong>28 EDITING STRUCTURED LADDER PROGRAMS● Devices not to be displayedThe devices are not displayed in the following cases even the option is set.• When the program is never compiled• When the labels are used for array element• When structured data type labels are used● Edit and find/replace when the labels and devices are displayed simultaneouslyWhen the labels and devices are displayed simultaneously, only labels can be the target of edit and find/replace.8.7.3 Displaying instance names in multiple linesDisplay wrapped function block instance name within the width of function block by setting the option.<strong>Operating</strong> procedure1. Select [Tool] ⇒ [Options] ⇒ "Program Editor" ⇒ "<strong>Structured</strong> Ladder/FBD" ⇒ "FB/FUN".2. Select "Wrap instance name for function block".8.7.4 Specifying the number of displaying characters for variablenamesChange the number of displaying characters for variable names of functions and function blocks bysetting the option.<strong>Operating</strong> procedure1. Select [Tool] ⇒ [Options] ⇒ "Program Editor" ⇒ "<strong>Structured</strong> Ladder/FBD" ⇒ "FB/FUN".2. Select "Specify the number of enable characters for label name/comment".3. Set the number of characters (2 to 255). 8 - 22 8.7.3 Displaying instance names in multiple lines
8.7 Changing Display Format of Variables8.7.5 Changing display format of variable1Change the display format of variable to the device/address/comment format.Entered format displayLabel comment display2OVERVIEWDevice format displayAddress format displaySCREEN 3CONFIGURATION● Displaying in the entered formatOperation• Select [View] ⇒ [View Mode] ⇒ [Label].Variables are displayed in the format as they are entered.● Displaying in the device formatOperation• Select [View] ⇒ [View Mode] ⇒ [Device].Entered format is displayed in the device format.As for labels, the assigned devices are displayed in the device format.● Displaying in the address formatOperation• Select [View] ⇒ [View Mode] ⇒ [Address].Devices are displayed in the address format.As for labels, the assigned devices are displayed in the address format.● Displaying label commentsOperation• Select [View] ⇒ [View Mode] ⇒ [Comment].Label comments are displayed.Device comments are not displayed.● Switching label/device/address displayOperation• Select [View] ⇒ [View Mode] ⇒ [Change Label-Device-Address Mode].The display is switched in order (label, device, address) by selecting the menu each time.Entered format displayFirst operation[Change Label-Device-Address Mode]Device format displayThird operationSecond operationAddress format displayPROGRAMMING 4PROCEDUREPROGRAM 5CONFIGURATIONS6SETTING LABELSCOMMON OPERATIONS7OF PROGRAM EDITORSEDITING ST 8PROGRAMSEDITING STRUCTUREDLADDER PROGRAMS8.7.5 Changing display format of variable 8 - 23
<strong>GX</strong> <strong>Works</strong>28 EDITING STRUCTURED LADDER PROGRAMS● Switching label/comment displayOperation• Select [View] ⇒ [View Mode] ⇒ [Change Label-Comment Mode].The display is switched between label and comment by selecting the menu each time.[Change Label-Comment Mode]Entered format displayComment display● Batch-changing display of all program editors to device format displayOperation• Select [View] ⇒ [All Device Display].The display of all program editors (except for ST) being opened is changed to the deviceformat display.● Batch-canceling device format display on all program editorsOperation• Select [View] ⇒ [Cancel All Device Display].The device format display of all program editors is canceled, and the display returns to theentered format.8 - 24 8.7.5 Changing display format of variable
8.7 Changing Display Format of Variables1● Displaying uncompiled labels and label commentsAn asterisk (*) is prefixed to each label name of uncompiled labels to which devices are not assigned when thedisplay format is changed to the device format or address format.An asterisk (*) is prefixed to each label name of labels to which label comments are not set when the display formatis changed to the comment display.● <strong>Structured</strong> data type/function block labels<strong>Structured</strong> data type/function block labels are displayed as label names even when the display format is changedto the comment display.2OVERVIEWSCREEN 3CONFIGURATIONPROGRAMMING 4PROCEDURE● Constant type labelsWhen the display format is the device format, constant type labels are displayed as constants set in a label settingeditor.PROGRAM 5CONFIGURATIONS● Restrictions on operations when changing the display formatProgram editing and search/replace functions are disabled in the device/address format or comment display. Tooperate these functions, return the setting to [Standard].6SETTING LABELSEDITING STRUCTUREDLADDER PROGRAMSEDITING ST 8PROGRAMSCOMMON OPERATIONS7OF PROGRAM EDITORS8.7.5 Changing display format of variable 8 - 25
<strong>GX</strong> <strong>Works</strong>28 EDITING STRUCTURED LADDER PROGRAMS8.8 Editing Ladder BlocksQ CPU L CPU FXThis section explains how to edit ladder blocks.8.8.1 Inserting ladder blocksAdd or insert a new ladder block.● Inserting a ladder block at the startOperation• Select [Edit] ⇒ [New Ladder Block List] ⇒ [Top].A new ladder block is inserted at the start of all ladder blocks.● Inserting a ladder block in front of the current ladder blockOperation• Select [Edit] ⇒ [New Ladder Block List] ⇒ [Before] ( ).A new ladder block is inserted in front of the ladder block being edited.● Inserting a ladder block in back of the current ladder blockOperation• Select [Edit] ⇒ [New Ladder Block List] ⇒ [After] ( ).A new ladder block is inserted in back of the ladder block being edited.● Inserting a ladder block at the endOperation• Select [Edit] ⇒ [New Ladder Block List] ⇒ [Bottom].A new ladder block is inserted at the end of all ladder blocks.8.8.2 Deleting ladder blocksDelete a selected ladder block.<strong>Operating</strong> procedure• Select [Edit] ⇒ [Delete].8 - 26 8.8.1 Inserting ladder blocks
8.8 Editing Ladder Blocks8.8.3 Cutting, copying, pasting, and moving ladder blocks1Cut/copy/paste/move ladder blocks within the editor or to another program editor on the screen.Ladder blocks can be pasted/moved between program editors with the same programming language.<strong>Operating</strong> procedure1. Select a ladder block by clicking the ladder block header.2. Select [Edit] ⇒ [Cut] ( )/[Copy] ( ).3. Select a ladder block to which cut/copied ladder block is pasted, and select [Edit] ⇒[Paste] ( ).A cut/copied ladder block is inserted above the selected ladder block.■Copying/moving ladder blocks by the drag-and-drop operationLadder blocks can be copied/moved by clicking the ladder block header and the drag-and-dropoperation.• To cancel the copy/move operation, press the key during the drag-and-drop operation.• To switch the copy/move operations, press the key during the drag-and-drop operation.(Different icons are displayed for the copy and move operations.)CopyCtrlMove2OVERVIEWSCREEN 3CONFIGURATIONPROGRAMMING 4PROCEDUREPROGRAM 5CONFIGURATIONSEDITING STRUCTUREDLADDER PROGRAMSEDITING ST 8PROGRAMSCOMMON OPERATIONS7OF PROGRAM EDITORS6SETTING LABELS8.8.3 Cutting, copying, pasting, and moving ladder blocks 8 - 27
<strong>GX</strong> <strong>Works</strong>28 EDITING STRUCTURED LADDER PROGRAMS8.8.4 Editing ladder block headersA ladder block header is an area that displays information set for each ladder block.Create a ladder block label and ladder block title.Screen displayLadder block numberLadder block labelLadder block titleLadder block headerDisplay contentsNameLadder block numberLadder block labelLadder block titleDescriptionA number automatically assigned from the start.Enter a character string to be specified as the jump target when using the jump instruction.A colon (:) needs to be entered at the end of the character string.A maximum number of characters that can be entered is 7.Enter a meaning of the program as a title when necessary.A maximum number of characters that can be entered is 20.<strong>Operating</strong> procedure1. Double-click the ladder block header.The Ladder Block screen is displayed.Double-click(Or press Enter twicewhen the cursor is pointedat the ladder blockheader.)2. Enter the ladder block label andladder block title.8 - 28 8.8.4 Editing ladder block headers
8.8 Editing Ladder Blocks8.8.5 Editing listed ladder blocks1Edit listed ladder blocks in the program. The following information is displayed in the list.• Ladder block number• Ladder block label• Ladder block titleScreen displaySelect [Edit] ⇒ [Ladder Block List].2OVERVIEWSCREEN 3CONFIGURATIONEDITING STRUCTUREDLADDER PROGRAMSPROGRAMMING 4PROCEDUREScreen button●Inserts a new ladder block in front of the selected ladder block.●Inserts a new ladder block at the end of the existing ladder blocks.●Displays an editing screen of the ladder block header.● , , , , ,Same functions as the buttons on program editors.PROGRAM 5CONFIGURATIONS6SETTING LABELSCOMMON OPERATIONS7OF PROGRAM EDITORS●Searches for a ladder block based on the ladder block label.●Closes the Ladder Block List screen.EDITING ST 8PROGRAMS8.8.5 Editing listed ladder blocks 8 - 29
<strong>GX</strong> <strong>Works</strong>28 EDITING STRUCTURED LADDER PROGRAMS8.8.6 Setting ladder block labels/titlesSet a ladder block label/title on the Ladder Block screen.<strong>Operating</strong> procedure1. Select [Edit] ⇒ [Ladder Symbol] ⇒ [Ladder Block Label].2. Set the ladder block label and ladder block title, and click the button.8.8.7 Switching to display/hide left power railSwitch to display/hide left power rail for each ladder block.When using FBD, switch the left power rail to hide.<strong>Operating</strong> procedure• Select a ladder block, and select [Edit] ⇒ [Ladder Symbol] ⇒ [Left Power Rail] ( ).The left power rail of selected ladder block is switched to display/hide.Restrictions● Entering position of line when hiding left power railWhen a vertical line is entered on the position of left power rail, the vertical line is regarded as the left power rail.When entering a vertical line, avoid the left power rail position.Regarded asleft power rail.If a line is entered on the position of left power rail as shown below, a warning message "Multiple ladders in onenetwork. (C2034)" is displayed on the Output window at compilation.● Compilation result when FBD is usedWhen multiple ladder blocks are created for single ladder block, a warning message "Multiple ladders in onenetwork. (C2034)" is displayed on the Output window at compilation.Disabling the warnings is recommended when FBD is used.Set the warning code "C2034" under [Tool] ⇒ [Options] ⇒ "Compile" ⇒ "Output Result" ⇒ "Disable WarningCodes". ( Section 10.4.2)8 - 30 8.8.6 Setting ladder block labels/titles
8.8 Editing Ladder Blocks8.8.8 Displaying grid1A grid indicates specific positions, such as tab stop positions and the start/end position of a line, on aprogram editing area. Switch the grid display on a program editing area.<strong>Operating</strong> procedure• Select [View] ⇒ [Grid].2OVERVIEWSCREEN 3CONFIGURATIONEDITING STRUCTUREDLADDER PROGRAMSEDITING ST 8PROGRAMSCOMMON OPERATIONS7OF PROGRAM EDITORS6SETTING LABELSPROGRAM 5CONFIGURATIONSPROGRAMMING 4PROCEDURE8.8.8 Displaying grid 8 - 31
<strong>GX</strong> <strong>Works</strong>28 EDITING STRUCTURED LADDER PROGRAMS8.9 Editing CommentsQ CPU L CPU FXThis section explains how to edit comments.Comments can be entered in the same manner as ladder symbols. ( Section 8.2.1)<strong>Operating</strong> procedure• Select [Edit] ⇒ [Ladder Symbol] ⇒ [Comment] ( ).8.9.1 Editing commentsEdit a comment.<strong>Operating</strong> procedure1. Click the comment.The comment entry field is enabled.2. Enter a comment.ClickComment entry fieldPress the + keys to insert a line feed.8.9.2 Changing the size of comment entry fieldChange the size of a comment entry field.After changing to the Select Mode, change the size by the following procedure. ( Section 8.1.1)<strong>Operating</strong> procedure1. Click the bottom right corner of the comment.Click2. Drag the corner to adjust the size.Drag8 - 32 8.9.1 Editing comments
8.9 Editing Comments8.9.3 Moving comments1Move a comment.Comments can be moved only within the same ladder block.<strong>Operating</strong> procedure1. Click the head (left end) of the comment.2OVERVIEW2. Drag it to the desired position.Click and dragSCREEN 3CONFIGURATIONEDITING STRUCTUREDLADDER PROGRAMSEDITING ST 8PROGRAMSCOMMON OPERATIONS7OF PROGRAM EDITORS6SETTING LABELSPROGRAM 5CONFIGURATIONSPROGRAMMING 4PROCEDURE8.9.3 Moving comments 8 - 33
<strong>GX</strong> <strong>Works</strong>28 EDITING STRUCTURED LADDER PROGRAMS8.10 Editing in Guided ModeThis section explains how to edit programs in the Guided mode, which is convenient when data is enteredmainly from the keyboard.Screen displaySelect [Edit] ⇒ [Guided Mode] ⇒ [Guided Editing] ( ).Q CPU L CPU FXGrid cursorGrid in Guided mode8.10.1 Overwrite mode and insert modeSelect either overwrite mode or insert mode in the Guided mode.Overwrite ModeInsert ModeEdit Description Grid cursor colorOverwrites the existing ladder symbol at the cursorposition with the entered ladder symbol.Moves the existing ladder symbol at the cursorposition to the right and inserts a ladder symbol.BluePurpleFor switching between overwrite and insert modes, follow the operation below.<strong>Operating</strong> procedure• Select [Edit] ⇒ [Guided Mode] ⇒ [Overwrite Mode]/[Insert Mode].The mode changes between overwrite and insert, and the grid cursor color changes.● Switching "Overwrite Mode" and "Insert Mode"The mode can also be switched by pressing thekey.8 - 34 8.10.1 Overwrite mode and insert mode
8.10 Editing in Guided Mode8.10.2 Entering ladder symbols1The ladder symbol entry method in the Guided mode is the same as that of the Select mode.For entering ladder symbols, refer to the following section.Section 8.2.1 Entering ladder symbols8.10.3 Entering instructionsThe following explains how to enter instructions in the Guided mode.The instruction entry method in the Guided mode is the same as that of the Select mode.For entering instructions, refer to the following section.Section 8.2.2 Entering instructions2OVERVIEWSCREEN 3CONFIGURATION8.10.4 Connecting ladder symbols with linesConnect the entered ladder symbols with a line.<strong>Operating</strong> procedure1. Select [Edit] ⇒ [Guided Mode] ⇒ [Line Mode].The thickness of grid cursor is doubled. The normal grid in the Guidedmode is divided into 4 5 parts of smaller grids to specify a position.PROGRAMMING 4PROCEDUREPROGRAM 5CONFIGURATIONS2. Move the cursor to the position where the line is to beconnected by pressing the / key.3. Press the button (Horizontal line).A horizontal line is drawn by the length of one divided grid.4. Press the button (Vertical line).A vertical line is drawn by the length of one divided grid.6SETTING LABELSCOMMON OPERATIONS7OF PROGRAM EDITORSEDITING STRUCTUREDLADDER PROGRAMSEDITING ST 8PROGRAMS8.10.2 Entering ladder symbols 8 - 35
<strong>GX</strong> <strong>Works</strong>28 EDITING STRUCTURED LADDER PROGRAMS8.10.5 Drawing linesDraw a line.<strong>Operating</strong> procedure1. Select [Tool] ⇒ [Options] ⇒ "Program Editor" ⇒ "<strong>Structured</strong> Ladder/FBD" ⇒"Guided".2. Select "Allow hotkey repeater".Draw a line using the Horizontal Line Segment or Vertical Line Segment screen.<strong>Operating</strong> procedure1. Press the (Horizontal line) or(Vertical line) button.The Horizontal Line Segment or Vertical LineSegment screen is displayed.2. Set the length of the line to be drawn using the grid width/height as the unit oflength.A line of the specified length is displayed.8 - 36 8.10.5 Drawing lines
8.10 Editing in Guided Mode8.10.6 Wrapping ladder1Wrap a ladder if it does not fit in one line.<strong>Operating</strong> procedure1. Select [Tool] ⇒ [Options] ⇒ "Program Editor" ⇒ "<strong>Structured</strong> Ladder/FBD" ⇒"Guided".2OVERVIEWEDITING STRUCTUREDLADDER PROGRAMSSCREEN 3CONFIGURATION2. Select "Ladder Wrapping".● Target of wrapping ladder to be displayedLadders edited after setting the above option are wrapped. (The display of edited ladders before setting the aboveoption is not changed.)8.10.7 Setting Guided mode as the default editing modeSet the Guided mode as the default editing mode of the structured ladder/FBD editor.<strong>Operating</strong> procedure1. Select [Tool] ⇒ [Options] ⇒ "Program Editor" ⇒ "<strong>Structured</strong> Ladder/FBD" ⇒"Guided".2. Select "Open Structure Ladder/FBD Editor in guided mode".8.10.8 Entering variable names after contacts and coilsEnter variable names continuously after a contact or a coil is entered.<strong>Operating</strong> procedure1. Select [Tool] ⇒ [Options] ⇒ "Program Editor" ⇒ "<strong>Structured</strong> Ladder/FBD" ⇒"Guided".2. Select "Enter label names after contacts and coils".PROGRAMMING 4PROCEDUREPROGRAM 5CONFIGURATIONS6SETTING LABELSCOMMON OPERATIONS7OF PROGRAM EDITORSEDITING ST 8PROGRAMS8.10.6 Wrapping ladder 8 - 37
<strong>GX</strong> <strong>Works</strong>28 EDITING STRUCTURED LADDER PROGRAMS8.10.9 Inserting comment entry fields to ladder blocks to be addedInsert a comment entry field at the top of a ladder block in the Guided mode.<strong>Operating</strong> procedure1. Select [Edit] ⇒ [Guided Mode] ⇒ [Auto Comment]( ).2. Select [Edit] ⇒ [New Ladder Block List] ⇒ [Before]( ).A ladder block with a comment entry field is added.Comment entry field● Width of automatically inserted commentThe width of automatically inserted comment can be changed by the following operation.Select [Tool] ⇒ [Options] ⇒ "Program Editor" ⇒ "<strong>Structured</strong> Ladder/FBD" ⇒ "Guided", and set the "Auto CommentBlock Width".● Entering a comment in the desired gridHold down the key and press the key, and a comment can be entered to the grid at the cursor position.Ctrl+M8 - 38 8.10.9 Inserting comment entry fields to ladder blocks to be added
8.11 Checking Wrapping Position for Printing8.11 Checking Wrapping Position for Printing1This section explains how to display the wrapping positions of ladder for printing window.<strong>Operating</strong> procedureQ CPU L CPU FX2OVERVIEW• Select [View] ⇒ [Print Wrap Position].The wrapping position for printing window is displayed.Wrapping positionSCREEN 3CONFIGURATIONEDITING STRUCTUREDLADDER PROGRAMSPROGRAM 5CONFIGURATIONS6SETTING LABELSEDITING ST 8PROGRAMSCOMMON OPERATIONS7OF PROGRAM EDITORSPROGRAMMING 4PROCEDURE● Wrapping positionsWhen the paper size is changed by the print setting, the wrapping positions are adjusted automatically.8 - 39
<strong>GX</strong> <strong>Works</strong>28 EDITING STRUCTURED LADDER PROGRAMSMEMO8 - 40
99 SEARCHING FOR SPECIFICPOSITIONThis chapter explains how to move to a specified position in the program.9.1 Searching for Specific Position in ST Program . . . . . . . . . . . 9-29.2 Searching for Specific Position in <strong>Structured</strong> Ladder/FBD Program . . 9-4SEARCHING FORSPECIFIC POSITION10CONVERTING/COMPILING PROGRAMS11WRITING/READING DATA TO/FROMPROGRAMMABLE CONTROLLER CPU12MONITORING13USING USERLIBRARIES14SETTING OPTIONSAINDEXIAPPENDIX9 - 1
<strong>GX</strong> <strong>Works</strong>29 SEARCHING FOR SPECIFIC POSITION9.1 Searching for Specific Position in ST ProgramThis section explains how to search for a specific position in the ST program.For searching for devices and instructions, refer to the following manual.<strong>GX</strong> <strong>Works</strong>2 Version 1 <strong>Operating</strong> <strong>Manual</strong> (Common)Q CPU L CPU FX9.1.1 Jumping to specified lineA cursor jumps to the specified line.Screen displaySelect [Find/Replace] ⇒ [Jump].<strong>Operating</strong> procedure1. Set the items on the screen.Line No.ItemDescriptionEnter a line number to which a cursor jumps.Click to select a line number from the list of previously searched lines.2. Click the button.The cursor jumps to the specified line.9.1.2 Using bookmarksUse bookmarks that are placed at positions in a program for frequent reference.Bookmarks allow quick reference to specific positions in a program.Bookmark9 - 2 9.1.1 Jumping to specified line
9.1 Searching for Specific Position in ST Program● Setting/canceling a bookmarkOperation• Select [Find/Replace] ⇒ [Bookmark] ⇒ [Toggle Bookmark] ( ).A new bookmark is set at, or the existing bookmark is cleared from, the line where the cursoris placed.● Jumping from bookmark listOperation1. Select [Find/Replace] ⇒ [Bookmark] ⇒ [Bookmark List] ( ).All registered bookmarks are displayed.9SEARCHING FORSPECIFIC POSITION10CONVERTING/COMPILING PROGRAMS112. Select a bookmark to which a cursor jumps.3. Click the button, or double-click the selected line.The cursor moves to the line where the bookmark is set.Click the● Moving to the next bookmarkOperationbutton to cancel all bookmarks.• Select [Find/Replace] ⇒ [Bookmark] ⇒ [Next Bookmark] ( ).The cursor moves to the start of the line where the next bookmark is placed.● Moving to the previous bookmarkOperation• Select [Find/Replace] ⇒ [Bookmark] ⇒ [Previous Bookmark] ( ).The cursor moves to the start of the line where the preceding bookmark is placed.● Deleting all bookmarksOperation• Select [Find/Replace] ⇒ [Bookmark] ⇒ [Delete All Bookmarks] ( ).All bookmarks are deleted.WRITING/READING DATA TO/FROMPROGRAMMABLE CONTROLLER CPU12MONITORING13USING USERLIBRARIES14SETTING OPTIONSAINDEXIAPPENDIX9.1.2 Using bookmarks 9 - 3
<strong>GX</strong> <strong>Works</strong>29 SEARCHING FOR SPECIFIC POSITION9.2 Searching for Specific Position in <strong>Structured</strong> Ladder/FBD ProgramQ CPU L CPU FXThis section explains how to search for a specific position in the structured ladder/FBD program.For searching for devices and instructions, refer to the following manual.<strong>GX</strong> <strong>Works</strong>2 Version 1 <strong>Operating</strong> <strong>Manual</strong> (Common)9.2.1 Jumping to specified ladder block numberA cursor jumps to the specified ladder block.Screen displaySelect [Find/Replace] ⇒ [Jump].<strong>Operating</strong> procedure1. Set the items on the screen.ItemLadder Block No.DescriptionEnter a ladder block number to which a cursor jumps.Click to select a ladder block from the list of previously searched ladderblocks.2. Click the button.The cursor jumps to the specified ladder block.9 - 4 9.2.1 Jumping to specified ladder block number
910 CONVERTING/COMPILINGPROGRAMSThis chapter explains how to convert/compile created programs.Programs are converted/compiled to sequence programs that can be executed on the programmablecontroller CPU.10.1 Converting/Compiling Created Programs. . . . . . . . . . . . . . 10-210.2 Compiling All Programs . . . . . . . . . . . . . . . . . . . . . . . . . . . . 10-410.3 Executing Online Program Change Simultaneously withConversion/Compilation. . . . . . . . . . . . . . . . . . . . . . . . . . . . 10-610.4 Changing <strong>Operating</strong> Conditions of Compilation . . . . . . . . 10-610.5 Compilation . . . . . . . . . . . . . . . . . . . . . . . . . . . . . . . . . . . . . 10-1410.6 Checking for Errors and Warnings . . . . . . . . . . . . . . . . . . 10-22SEARCHING FORSPECIFIC POSITION10CONVERTING/COMPILING PROGRAMS11WRITING/READING DATA TO/FROMPROGRAMMABLE CONTROLLER CPU12MONITORING13USING USERLIBRARIES14SETTING OPTIONSAINDEXIAPPENDIX10 - 1
<strong>GX</strong> <strong>Works</strong>210 CONVERTING/COMPILING PROGRAMS10.1 Converting/Compiling Created ProgramsQ CPU L CPU FXThis section explains how to compile uncompiled program blocks among all program blocks that areregistered to tasks.Since this process compiles only uncompiled programs, the compiling time can be reduced.TaskSequenceprogramCompilation targetProgramblockProgramblockProgramblockConverts/compilesuncompiled programblocks only.BuildThe programblocksbecome onesequenceprogram afterthecompilation.● Conversion and compilationThe following explains the difference between conversion and compilation.Conversion: Confirms edited content of ladder/SFC programs.Compilation: Assigns devices to labels and creates a code to execute the program in a programmable controllerCPU.<strong>Operating</strong> procedure1. Select [Compile] ⇒ [Build] ( ).The Confirm Build Method screen is displayed.10 - 2
10.1 Converting/Compiling Created Programs2. Select the "Execute compile after conversion" item, and click the button.Programs are compiled after the conversion and the result is displayed on the Output window.By double-clicking the result, the corresponding error location in the program is displayed.For checking errors/warnings, refer to Section 10.6.9SEARCHING FORSPECIFIC POSITION10CONVERTING/COMPILING PROGRAMS11Output window● Build functionOnly the program being edited is converted when the "Convert the selected program" is selected on the ConfirmBuild Method screen.When two or more changes are required in a program, and if "Execute compile after conversion" is selected everytime program is changed, processing time is required for each compilation.To reduce compilation processing time, select "Convert the selected program" first, and select "Execute compileafter conversion" after all changes are made in a program.● Compiling programs when adding/changing labelsFor precautions on compiling programs when adding/changing labels, refer to Section 10.5.3.WRITING/READING DATA TO/FROMPROGRAMMABLE CONTROLLER CPU12MONITORING13USING USERLIBRARIES14SETTING OPTIONSAINDEXIAPPENDIX10 - 3
<strong>GX</strong> <strong>Works</strong>210 CONVERTING/COMPILING PROGRAMS10.2 Compiling All ProgramsThis section explains how to batch compile all program blocks that are registered to tasks.Q CPU L CPU FXTask 1ProgramblockProgramblockConverts/compiles allprogram blocks.Rebuild AllCompilation targetSequenceprogram 1ProgramblockTask 2ProgramblockSequenceprogram 2Programblock<strong>Operating</strong> procedure1. Select [Compile] ⇒ [Rebuild All] ( ).The following message is displayed.Uncheck the item if the duplicated coil check, ladder check, and consistency (paring) check are notperformed after the compilation.10 - 4
10.2 Compiling All Programs2. Execute the compilation after reading and understanding the precaution describedon the message.All programs are converted/compiled and the result is displayed on the Output window.By double-clicking the result, the corresponding error location in the program is displayed.For checking errors/warnings, refer to Section 10.6.9SEARCHING FORSPECIFIC POSITION10● Assigning devices to labels when compiling all programsFor assigning devices to labels when compiling all programs, refer to Section 10.5.Output windowCONVERTING/COMPILING PROGRAMS11WRITING/READING DATA TO/FROMPROGRAMMABLE CONTROLLER CPU12MONITORING13USING USERLIBRARIES14SETTING OPTIONSAINDEXIAPPENDIX10 - 5
<strong>GX</strong> <strong>Works</strong>210 CONVERTING/COMPILING PROGRAMS10.3 Executing Online Program Change Simultaneously with Conversion/CompilationQ CPU L CPU FXFor the operation for executing the Online program change simultaneously with the conversion/compilation,refer to the following manual.<strong>GX</strong> <strong>Works</strong>2 Version 1 <strong>Operating</strong> <strong>Manual</strong> (Common)10.4 Changing <strong>Operating</strong> Conditions of CompilationThis section explains how to change the operating conditions of compilation.Q CPU L CPU FX10.4.1 Changing the number of errors and warnings that stopcompilationChange the number of errors and warnings that stop compilation.If the number of errors and warnings that occurred during compilation reaches the specified value, thecompilation is aborted.Screen displaySelect [Tool] ⇒ [Options] ⇒ "Compile" ⇒ "Output Result".Display contents• Set the items on the screen.ItemDescriptionError Set the number of errors that stops compilation (1 to 9999).Warning Set the number of warnings that stops compilation (1 to 9999).10 - 6 10.4.1 Changing the number of errors and warnings that stop compilation
10.4 Changing <strong>Operating</strong> Conditions of Compilation10.4.2 Hiding warning messagesHide messages displayed on the Output window when compiling programs.The registered warnings are not displayed on the Output window.Screen displaySelect [Tool] ⇒ [Options] ⇒ "Compile" ⇒ "Output Result".9SEARCHING FORSPECIFIC POSITION10<strong>Operating</strong> procedure• To register the warnings, enter the warning code and click theThe registered warnings are not displayed on the Output window.button.CONVERTING/COMPILING PROGRAMS11WRITING/READING DATA TO/FROMPROGRAMMABLE CONTROLLER CPU12Enter• To cancel the registration, select the warning code and click theThe unregistered warnings are displayed on the Output window.Selectbutton.MONITORING13USING USERLIBRARIES14● Warning codesWarning codes and their content can be checked in the Output window when compiling programs.( Section 10.6)● Maximum number of warnings to be invalidatedA maximum number of warnings to be invalidated is 100.SETTING OPTIONSAINDEXIAPPENDIX10.4.2 Hiding warning messages 10 - 7
<strong>GX</strong> <strong>Works</strong>210 CONVERTING/COMPILING PROGRAMS10.4.3 Using same name for global label and local labelUse the same name for a global label and a local label.<strong>Operating</strong> procedure1. Select [Tool] ⇒ [Options] ⇒ "Compile" ⇒ "Basic Setting".2. Check the "Use the same label name in global label and local label" check box.• If this check box is not checked, an error occurs when compiling programs.• If this check box is checked, a warning is displayed when compiling programs (Same labelnames can be used).10.4.4 Using same lower case label name as deviceUse a label name (for example: m0, x1F) that contains a lower case of alphabetic part of the device.<strong>Operating</strong> procedure1. Select [Tool] ⇒ [Options] ⇒ "Compile" ⇒ "<strong>Structured</strong> Ladder/FBD/ST" ⇒ "CompileCondition1".2. Check the "Use lower-case device names as labels" check box.• If this check box is not checked, an error occurs when compiling programs.• If this check box is checked, a warning is displayed when compiling programs.(Label names that contain a same lower case as the device can be used.)Example of lower case label namedefined as global label.(m0 is treated as a label name andcompiled as assigned device D10.)● Label names which cannot be usedWhen a device name is written in upper case, and device number contains lower case in alphabetic part, devicewhose device number is hexadecimal (such as W device) may cause a compilation error, even "Options" isenabled.For example, "W0a1", "W1a" are regarded as devices, therefore, a compilation error is caused. "Wa1" can be usedas a label when no numbers exist between device name and device number, even a device name is written inupper case, and device number contains lower case in alphabetic part.● Inline structured textFor inline structured text, the devices within the range set on the tab of PLC parameter cannot beused as labels. Use the devices out of range set on the tab of PLC parameter.10 - 8 10.4.3 Using same name for global label and local label
10.4 Changing <strong>Operating</strong> Conditions of Compilation10.4.5 Connecting PLS, PLF, or ALT outputs directly to other inputswith linesConnect outputs of the selected function(s) (PLS, PLF, or ALT *1 ) directly to other inputs with lines.*1: Supported by FXCPU only.<strong>Operating</strong> procedure1. Select [Tool] ⇒ [Options] ⇒ "Compile" ⇒ "<strong>Structured</strong> Ladder/FBD/ST" ⇒ "CompileCondition1".2. In "Function Output Setting", check the function(s) (PLS and/or PLF) to be set.• If any of these check boxes are not checked, an error occurs when compiling programs.• If any of these check boxes are checked, errors and warnings are not displayed when compilingprograms.Example) Creating a program using the PLS outputThe output is required to be retained at the label or device.9SEARCHING FORSPECIFIC POSITION10CONVERTING/COMPILING PROGRAMS11WRITING/READING DATA TO/FROMPROGRAMMABLE CONTROLLER CPU12The output can be connected directly to another input with a line.MONITORING13USING USERLIBRARIES14SETTING OPTIONSAINDEXIAPPENDIX10.4.5 Connecting PLS, PLF, or ALT outputs directly to other inputs with lines 10 - 9
<strong>GX</strong> <strong>Works</strong>210 CONVERTING/COMPILING PROGRAMS10.4.6 Assigning common devices to outputs of function with EN/ENOAssign common devices to each function, when system devices are automatically assigned to outputsof function with EN/ENO while editing on the structured ladder/FBD/ST editor.<strong>Operating</strong> procedure1. Select [Tool] ⇒ [Options] ⇒ "Compile" ⇒ "<strong>Structured</strong> Ladder/FBD/ST" ⇒ "CompileCondition3".2. Uncheck the "Automatically assign each system device to output of functions thatuse EN/ENO" check box.• If the check box is checked, the individual devices are assigned to each function.• If the check box is not checked, the same device is assigned to the outputs.Example) Devices automatically assigned to outputs of function with EN/ENOThe individual devices are assigned.M4105M4106The same device is assigned.M4105M410510 - 10 10.4.6 Assigning common devices to outputs of function with EN/ENO
10.4 Changing <strong>Operating</strong> Conditions of Compilation■Precautions when the check box is not checkedUncheck the option to save the number of automatically assigned devices to be used.Take precautions when performing this operation.The following are the program examples which require precautions.● Program examples which require precautionsUncheck the option to assign the same devices to 1 and 2 as shown below.However, even M3, M4 are OFF, B9 may be ON since AND instruction without EN/ENO isexecuted without execution condition.M8190 is assigned to 1 , M8188 is assigned to 2 in the following program example. 1219SEARCHING FORSPECIFIC POSITION10CONVERTING/COMPILING PROGRAMS11WRITING/READING DATA TO/FROMPROGRAMMABLE CONTROLLER CPU121212MONITORING13USING USERLIBRARIES142When M3, M4 are OFF,the execution result isnot stored on M8190,M8188.B9 may ON, evenM3, M4 are OFF.SETTING OPTIONSAINDEXIAPPENDIX10.4.6 Assigning common devices to outputs of function with EN/ENO 10 - 11
<strong>GX</strong> <strong>Works</strong>210 CONVERTING/COMPILING PROGRAMS● Example of program which outputs the correct resultCreate a program as indicated below to output the correct operation result to B9.• Use instruction (AND_E) with EN/ENO to output instruction• Regard logical AND of input (AND_E)'s execution result as output's execution condition (EN) . Regard logical ANDof input (AND_E)'sexecution result asoutput's executioncondition.Use instruction(AND_E) withEN/ENO.Store logical ANDof input (AND_E)'sexecution result onM8179.Only when M3, M4are ON, the operationresult is stored on B9.10 - 12 10.4.6 Assigning common devices to outputs of function with EN/ENO
10.4 Changing <strong>Operating</strong> Conditions of Compilation10.4.7 Retaining bit type outputs of functionsRetain bit type outputs of the target function(s).<strong>Operating</strong> procedure1. Select [Tool] ⇒ [Options] ⇒ "Compile" ⇒ "<strong>Structured</strong> Ladder/FBD/ST" ⇒ "CompileCondition2".2. Check the function(s) to be set.• If any of these check boxes are not checked, bit type outputs of function(s) are not retained. (Anoperation equivalent to the OUT instruction).• If the check box(es) is checked, bit type outputs of the function(s) are retained. (An operationequivalent to the SET instruction).9SEARCHING FORSPECIFIC POSITION10CONVERTING/COMPILING PROGRAMS11WRITING/READING DATA TO/FROMPROGRAMMABLE CONTROLLER CPU12Example) Retaining the INT_TO_BOOL_E outputMONITORING13Start-up condition (EN)USING USERLIBRARIESBit type output (Return value)14SETTING OPTIONSAINDEXIAPPENDIX10.4.7 Retaining bit type outputs of functions 10 - 13
<strong>GX</strong> <strong>Works</strong>210 CONVERTING/COMPILING PROGRAMS10.5 CompilationQ CPU L CPU FXBy compilation operation, the labels are assigned to devices, and programs created in project with labels areconverted to executable programs in a programmable controller CPU.● Checking the compilation statusThe compilation status can be checked in the <strong>Project</strong> view. Items are displayed in red as shownbelow if the data are in uncompiled status.Uncompiled data can be displayed on the <strong>Project</strong> view by right-clicking on global label/POU/programfile, and selecting [Open Uncompiled Data] from the shortcut menu.Uncompiled data status is displayed on the <strong>Project</strong> view.Items are displayed inred if the data are inuncompiled status.10.5.1 Compilation target data when compiling all programsWhen compiling all programs, compilation target data are determined according to the registration/usage status of data type.The following table shows the compilation target data.Compilation target data typeGlobal label data -Program (program file)TaskProgramFunction blockFunctionStructureRegistration/usage status ofcompilation target data typeRegistered to any of the followingprograms.. Initial program. Scan program. Wait program. Fixed interval program. No execution typeRegistered in the program file.Registered in the task.Not registered in the task.Declared in the label setting editor.Not declared in the label setting editor.Used in the program.Not used in the program.Declared in the label setting editor.Not declared in the label setting editor.: Compiled, ×: Not compiledCompilation target whencompiling all programsXXXX10 - 14 10.5.1 Compilation target data when compiling all programs
10.5 Compilation10.5.2 Assigning devicesAssign the devices set on the Device/Label Automatic-Assign Setting screen during compilation.In structured ladder/FBD and ST, create actual programs with temporary variable during compilation.Temporary variable is a device to retain the operation result of programs temporarily, and assign thedevice within the range set on the Device/Label Automatic-Assign Setting.Temporary variable is used for such as the following situations.• Ladders are branched in structured ladder/FBD• Over 3 items of four arithmetic operations are used in ST• Other situations which require retaining the operation result temporarilyTemporary variable can be checked by compilation result. (Section 6.2.7)■Assigning devices defined on the label setting editor to the labelsThe following explains the device assignment to the labels defined on the label setting editor.For global labels, only labels whose “Device”/ “Address“ are blank on the label setting editor can beassigned.When both global labels and local labels are assigned, global labels are assigned to devices first, andthen local labels are assigned to devices.● Assigning only one type of device automaticallyAssign the devices in top down order on the label setting editor.Devices are assigned in descending order on the screen (assigned from higher number of a devicenumber) of device range set on the Device/Label Automatic-Assign Setting.For pointer (P), devices are assigned in ascending order (assigned from lower number of a devicenumber).ExampleSet the following device range.• D device: 8000 to 81919SEARCHING FORSPECIFIC POSITION10CONVERTING/COMPILING PROGRAMS11WRITING/READING DATA TO/FROMPROGRAMMABLE CONTROLLER CPU12MONITORING13USING USERLIBRARIES14DefinitionorderLabel nameData type1 Label_A Word (signed) D81912 Label_B Word (signed) D81903 Label_C Double-precision real D81864 Label_D Double-precision real D8182Example of devices to beassignedDescendingorderSETTING OPTIONSIAPPENDIXAINDEX10.5.2 Assigning devices 10 - 15
<strong>GX</strong> <strong>Works</strong>210 CONVERTING/COMPILING PROGRAMS● Assigning multiple types of device automatically (QCPU (Q mode)/LCPU)Assign the devices in top down order on the label setting editor.Devices are assigned in descending order (assigned from higher number of a device number) ofdevice range set on the Device/Label Automatic-Assign Setting.When the number of devices is less than the number of devices required for one label, devices areassigned in descending order of the next device’s device range.When the following label requires the devices which are within the above device range, the previousdevices which are not assigned yet are assigned.Example 1Set the following device range.• D device: 8000 to 8002• ZR device: 0 to 1023DefinitionorderLabel nameData type1 Label_A Word (signed) D80022 Label_B Word (signed) D80013 Label_C Double-precision real ZR1020 *1Example of devices to beassigned4 Label_D Double-precision real ZR1016*1 : Since double-precision real requires four devices, one device of D8000 is not enough.Therefore, the next device ZR is assigned.DescendingorderExample 2Set the following device range.• D device: 8000 to 8002• ZR device: 0 to 1023DefinitionorderLabel nameData type1 Label_A Word (signed) D8002Example of devices to beassigned2 Label_B Double-precision real ZR1020 *13 Label_C Word (signed) D8001 *2Descendingorder4 Label_D Double-precision real ZR1016 *3*1 : Since double-precision real requires four devices, two device of D8000 to D8001 are notenough. Therefore, the next device ZR is assigned.*2 : Since word (signed) requires one device, D8001 can be assigned. Therefore, return tothe previous device (D device), and the device is assigned to the label.*3 : Since double-precision real requires four devices, one device of D8000 is not enough.Therefore, the next device ZR is assigned.10 - 16 10.5.2 Assigning devices
10.5 Compilation■Assigning to temporary variable (automatically assigned device to other thanlabel)Assign a device to temporary variable.● When the type of device to be assigned is one (QCPU (Q mode)/LCPU)Devices are assigned in descending order (assigned from higher number of a device number) of devicerange set on the Device/Label Automatic-Assign Setting in the same manner as the assignment to alabel defined in a label setting editor.● When the multiple types of devices are assigned automaticallySelect one device to be assigned from devices set on the Device/Label Automatic-Assign Setting withthe order of ZR R W D/B M.Multiple device types are not assigned to temporary variable.Example 1Set the following device range.• D device: 8000 to 8191• ZR device: 0 to 1023Assign ZR for temporary variableExample 2Set the following device range.• D device: 8000 to 8191• W device: 0 to 1023Assign W for temporary variable.9SEARCHING FORSPECIFIC POSITION10CONVERTING/COMPILING PROGRAMS11WRITING/READING DATA TO/FROMPROGRAMMABLE CONTROLLER CPU12MONITORING13■Checking points of the empty automatically assigned deviceThe usage of devices within the range set on the Device/Label Automatic-Assign Setting can bechecked by searching devices within the automatically assigned device range with the Device List.ExampleWhen 4000 to 8191 of D device are set on the Device/Label Automatic-Assign Setting, search D4000 toD8191 with the Device List.The range of number of empty device points is the devices before the device numbers being usedamong D4000 to D8191 (*).For example, if D5000 to D8191 are used, D4000 to D4999 are the number of empty device pointswithin the range set on the Device/Label Automatic-Assign Setting.USING USERLIBRARIES14SETTING OPTIONSAFor details of Device List, refer to the following manual.<strong>GX</strong> <strong>Works</strong>2 Version 1 <strong>Operating</strong> <strong>Manual</strong> (Common)IAPPENDIXINDEX10.5.2 Assigning devices 10 - 17
<strong>GX</strong> <strong>Works</strong>210 CONVERTING/COMPILING PROGRAMS10.5.3 Precautions on Compilation● When the multiple types of devices are assigned automatically (QCPU (Q mode)/LCPU)If a program or label is changed and executed “Build” repeatedly, the number of used devices isincreased and that of assignable devices is decreased since the devices assigned once cannot beused. Execute “Rebuild All”.When D, W, R, ZR are selected as automatically assigned device concurrently, devices areassigned from D, W. If the number of D, W is not enough, devices are assigned from R, ZR.Note that the control timing may change depending on the program content since the operationprocessing times of D, W and R differ from that of ZR.For details of operation processing time, refer to the following manual.MELSEC-Q/L <strong>Structured</strong> Programming <strong>Manual</strong> (Common Instructions)● When ZR is added to automatically assigned device after compilation (QCPU (Q mode)/LCPU)Temporary variable assigns only one type of devices, however, when ZR device is added toautomatically assigned device after compilation, ZR device is assigned by recompilation.Operation processing time may differ depending on the program content.Increase the device range other than ZR to avoid the change of operation processing time.● When array type labels are usedWhen devices/labels are used for indexes in array type labels, the compilation result is createdwith the devices shown below.Note that the device values may be overwritten when the following devices are used in userprograms.• Basic model QCPU, High Performance model QCPU: Z0, Z1• Universal model QCPU, LCPU: Z16 to 19• FXCPU: Z0, V0● Compiling programs when adding/changing labelsWhen programs are compiled after adding/changing labels, devices are reassigned to labels inuncompiled POUs only. Since previous device values may remain among the devices reassignedto labels, clear the previous device values by the following procedure when adding/changinglabels.Operation1. Add/change labels only.(Do not edit the programs.)2. Select [Compile] ⇒ [Build], and compile the programs.3. Register added/changed labels to the Watch window and clear the current values to 0.4. Edit the programs and select [Compile] ⇒ [Online Program Change].● Assigning devices to labels when compiling all programsAll programs need to be compiled when the following operations are performed.• Changing the following PLC parameters *1• "Common Pointer No." and "Timer Limit Setting" on the tab• "File Register" and "File for Local Device" on the tab• Settings on the tab• Changing the following option settings• "Default Length of String Data Type" in "Label Setting Editor"• Settings in "Compile"• Changing automatically assigned devices• Updating instructions and application functions when opening <strong>Structured</strong> project.10 - 18 10.5.3 Precautions on Compilation
10.5 Compilation• Changing PLC type• Changing project type• Reading data from programmable controller CPU (except for when reading symbolic informationand parameters at the same time)• Reading data written to the programmable controller CPU by <strong>GX</strong> Developer or <strong>GX</strong> IECDeveloper• Using Open Other <strong>Project</strong> functionWhen all programs are compiled, devices are reassigned to labels in all POUs. If all the compiledprograms are written to the programmable controller CPU and run as they are, the programs maybe processed with the device values set before the program change.After compiling all programs, clear the device values set before the program change by thefollowing procedure.Note that, by setting the following option, device values in the range set in the device/labelautomatic-assign setting can be automatically cleared to 0 after writing programs to theprogrammable controller CPU.•[Tool] ⇒ [Options] ⇒ "When writing to PLC after a Rebuild All operation, clear the device rangesset in the Device/Label Auto-Assign setting to 0."*1 : QCPU (Q mode)/LCPU only9SEARCHING FORSPECIFIC POSITION10CONVERTING/COMPILING PROGRAMS11WRITING/READING DATA TO/FROMPROGRAMMABLE CONTROLLER CPU12MONITORING13USING USERLIBRARIES14SETTING OPTIONSAINDEXIAPPENDIX10.5.3 Precautions on Compilation 10 - 19
<strong>GX</strong> <strong>Works</strong>210 CONVERTING/COMPILING PROGRAMS• QCPU (Q mode)/LCPUOperation1. Switch the programmable controller CPU to STOP.2. Select [Online] ⇒ [Write to PLC], and write programs to the programmable controller CPU.3. Switch the programmable controller CPU to RESET.It can also be reset by selecting [Compile] ⇒ [Remote Operation].4. Select [Online] ⇒ [PLC Memory Operation] ⇒ [Clear PLC Memory] to clear the memories.If VAR_RETAIN is used in the [Device/Label Automatic-Assign Setting], clear all devicememories including latches.If file registers are used in the [Device/Label Automatic-Assign Setting], clear all file registers.• FXCPUOperation1. Switch the programmable controller CPU to STOP.2. Select [Online] ⇒ [Write to PLC], and write programs to the programmable controller CPU.3. Select [Online] ⇒ [PLC Memory Operation] ⇒ [Clear PLC Memory] to clear the devicememories.The remote RUN function when writing data to programmable controller CPU after compiling allprograms can be disabled by setting the following option. Check "Turn PLC to STOP at time ofPLC write after executing Rebuild All and do not execute remote RUN" under [Tool] ⇒ [Options] ⇒[PLC Read/Write].10 - 20 10.5.3 Precautions on Compilation
10.5 Compilation● Modification of global labels and functions/function blocksIf global labels and/or functions/function blocks are modified, multiple program blocks become thecompile targets. Write all program files of the compile targets to the programmable controller CPUto apply the modifications.Example) Compiling programs after modifying Function 1 in the following program configuration.Program blocks 3 and 4 are compiled and the program files MAIN and SUB1 aremodified.9SEARCHING FORSPECIFIC POSITION10Program configuration of the <strong>Structured</strong> projectPOUProgramblock 1Programblock 2Programblock 3Function 1Programblock 4Function 1Function 1Function 1 is modified.Program fileMAINSUB1Function 1 is used in theprogram blocks 3 and 4.● Device/label automatic-assign settingDevices in the range set on the Device/Label Automatic-Assign Setting screen (automaticallyassigned devices) cannot be used in the program.If automatically assigned devices are used in a program, a compilation error occurs.(For the device/label automatic-assign setting Section 5.7)● Input arguments of function/function blockData cannot be written to input arguments (VAR_INPUT) of function/function block.If data are written to input arguments, a compilation error occurs.● Compiling structured ladder/FBD/ST programsThe code is not created when the program as shown below is compiled in the structured ladder/FBD or ST program.Example) The same device is used for a contact and coilCompilation targetProgramblock 1Programblock 3Task 1Programblock 2Programblock 4Task 2The code is not created whenthe program is compiled.SequenceprogramMAINSequenceprogramSUB1CONVERTING/COMPILING PROGRAMS11WRITING/READING DATA TO/FROMPROGRAMMABLE CONTROLLER CPU12MONITORING13USING USERLIBRARIES14SETTING OPTIONSIAPPENDIXAINDEX10.5.3 Precautions on Compilation 10 - 21
<strong>GX</strong> <strong>Works</strong>210 CONVERTING/COMPILING PROGRAMS10.6 Checking for Errors and WarningsWhen the program check or the compilation is executed, the target programs and label settings are checkedand the results are displayed on the Output window.The following explains how to check the errors displayed on the Output window.Screen displayQ CPU L CPU FXFunction typeError/warning listStatusDisplay contentsItemDescriptionFunction typeDisplay the name of the executed function.Error/warning list -ResultData NameClassContentError CodeStatusDisplay the check results.Display "Error" and "Warning".Display "Check Warning" for the duplicated coil check/ladder check/consistencycheck warnings.Display project names with errors and warnings.Display check types such as the compilation and program check.Display descriptions of errors and warnings.Display error code numbers.Display the total number of errors and warnings.10 - 22
10.6 Checking for Errors and Warnings10.6.1 Correcting errors and warningsCheck and correct errors/warnings.<strong>Operating</strong> procedure1. Double-click the error/warning message displayed on the Output window.The corresponding error location in the program is displayed.9SEARCHING FORSPECIFIC POSITION10CONVERTING/COMPILING PROGRAMS11Double clickWRITING/READING DATA TO/FROMPROGRAMMABLE CONTROLLER CPU12MONITORING132. Check the corresponding error location and correct the error as instructed by theerror/warning message.USING USERLIBRARIES14SETTING OPTIONSAINDEXIAPPENDIX10.6.1 Correcting errors and warnings 10 - 23
<strong>GX</strong> <strong>Works</strong>210 CONVERTING/COMPILING PROGRAMSMEMO10 - 24 10.6.1 Correcting errors and warnings
911 WRITING/READING DATA TO/FROM PROGRAMMABLECONTROLLER CPUThis chapter explains how to write/read sequence programs to/from the programmable controller CPU ormemory card.For the overview of the data write/read operation, refer to the following manual.<strong>GX</strong> <strong>Works</strong>2 Version 1 <strong>Operating</strong> <strong>Manual</strong> (Common)11.1 Writing/Reading Data to/from Programmable Controller CPU . . . . . 11-2SEARCHING FORSPECIFIC POSITION10CONVERTING/COMPILING PROGRAMS11WRITING/READING DATA TO/FROMPROGRAMMABLE CONTROLLER CPU12MONITORING13USING USERLIBRARIES14SETTING OPTIONSAINDEXIAPPENDIX11 - 1
<strong>GX</strong> <strong>Works</strong>211 WRITING/READING DATA TO/FROM PROGRAMMABLE CONTROLLER CPU11.1 Writing/Reading Data to/from Programmable Controller CPUThis section explains how to write the <strong>Structured</strong> project data to the programmable controller CPU or memorycard, and how to read the data from the programmable controller CPU or memory card to the project.Symbolic information can be written to/read from a programmable controller CPU for projects with labels ofFX3U/FX3UC version 3.00 or later only.Screen displayQ CPU L CPU FXSelect [Online] ⇒ [Write to PLC] ( )/[Read from PLC] ( ).For QCPU (Q mode)/LCPU/FXCPU (FX3U/FX3UC version 3.00 or later), symbolic information isdisplayed on the file list.Setting targetmodule tabFile listMemory capacity11 - 2
11.1 Writing/Reading Data to/from Programmable Controller CPU<strong>Operating</strong> procedure1. Set the items on the screen.ItemConnection Channel ListSetting target module tabPLC ModuleIntelligent Function Module *1DescriptionDisplay the information on the set connection target.Switch the setting target module.If the target data of write/read exists, the color of the tab name is displayed inblue.Set to write the data to the programmable controller CPU.Set to write the data of the intelligent function module to buffer memory/flashROM of the intelligent function module.<strong>GX</strong> <strong>Works</strong>2 Version 1 <strong>Operating</strong> <strong>Manual</strong> (Common)Title *1 Display the title of the target memory by clicking the button.Option *1 -Display SizeCheck this to display "Size" and memory capacity in the file list.File list -TargetSelect the data to be written/read.Target Memory *1 For details of the memory card application, refer to the following manual.User's <strong>Manual</strong> (Hardware Design, Maintenance and Inspection) of theSelect the memory from the list ( ) by clicking the cell under "Target Memory".CPU module to be usedMemory capacity *2 -Writing SizeDisplay the total size of written data checked in "Target".Free Volume Display the free space volume of the target memory.Use VolumeDisplay the used space volume of the target memory.*1: Not supported by FXCPU.*2: For FXCPU, program size and symbolic information data size are displayed when executing the Write toPLC function. Symbolic information size is displayed on the screen for projects with labels of FX3U/FX3UC version 3.00 or later only.When a program (program file), device comment, or device memory is selected, the range can beset by clicking the / button.When reading data from the programmable controller CPU, and the device memory is selected, thedetailed settings are required.For details, refer to the following manual.<strong>GX</strong> <strong>Works</strong>2 Version 1 <strong>Operating</strong> <strong>Manual</strong> (Common)2. Click the button.When the Write to PLC function is executed, the specified data are written to the target memory.When the Read from PLC function is executed, the specified data are read from the target memory.9SEARCHING FORSPECIFIC POSITION10CONVERTING/COMPILING PROGRAMS11WRITING/READING DATA TO/FROMPROGRAMMABLE CONTROLLER CPU12MONITORING13USING USERLIBRARIES14SETTING OPTIONSAINDEXIAPPENDIX11 - 3
<strong>GX</strong> <strong>Works</strong>211 WRITING/READING DATA TO/FROM PROGRAMMABLE CONTROLLER CPUScreen button●Displays the illustration of the connection channel list.●Selects the parameters and all programs displayed on the list.●Selects all data displayed on the list.●Cancels the selection status of all data displayed on the list.● /Switches display/hide of the Related functions button.For details of the related functions, refer to the following manual.<strong>GX</strong> <strong>Works</strong>2 Version 1 <strong>Operating</strong> <strong>Manual</strong> (Common)● (Read from PLC, Delete PLC Data only)Displays the project name of the symbolic information in the Title/<strong>Project</strong> Name column.●Updates data list on the Online Data Operation screen.For QCPU (Q mode)/LCPU, updates writing size, free space volume, and used space volume.When multiple personal computers are connected to the programmable controller CPU, update thetarget memory before reading data from the programmable controller CPU.11 - 4
11.1 Writing/Reading Data to/from Programmable Controller CPU■Symbolic information9The symbolic information is data that store the program configuration such as structures and labels.To restore these data included in the symbolic information when reading a program from theprogrammable controller CPU, write/read the symbolic information to/from the programmable controllerCPU.Data such as structures and labels included in the symbolic information cannot be restored if onlysequence programs are read. (Data are treated as the ladder in <strong>Structured</strong> projects.)The following table shows the program data included in the symbolic information.ItemSymbolic informationIncluded dataGlobal labelProgram settingTaskPOUProgramLocal labelFunction blockFunctionStructureUser librarySEARCHING FORSPECIFIC POSITION10CONVERTING/COMPILING PROGRAMS11WRITING/READING DATA TO/FROMPROGRAMMABLE CONTROLLER CPU12● Compile status when the symbolic information is read• When the symbolic information and parameters are read simultaneously, and the data in the symbolicinformation match with parameters and programs (program files) in the programmable controller CPU, the readdata are in compiled status. When only the symbolic information is read, the read data are in uncompiled status.• When the symbolic information of <strong>GX</strong> Developer or <strong>GX</strong> IEC Developer is read, the read data are in uncompiledstatus. Compile the program again after executing the Read from PLC function.● Precautions for reading symbolic informationFor the precautions for reading label programs (symbolic information) of the existing application using <strong>GX</strong> <strong>Works</strong>2,or reading label programs (symbolic information) of <strong>GX</strong> <strong>Works</strong>2 using the existing application, refer to the followingmanual.( <strong>GX</strong> <strong>Works</strong>2 Version 1 <strong>Operating</strong> <strong>Manual</strong> (Common))● For FXCPU• The symbolic information data can be read from/written to the programmable controller CPU in FX3U and FX3UCversion 3.00 or later only.• When a memory cassette to which the symbolic information has been written is used on an FXCPU other thanFX3U/FX3UC version 3.00 or later, the symbolic information may be corrupted.● Saving project automatically after writing data to programmable controller CPUA project can be saved automatically after writing data to the programmable controller CPU by setting the option.Check the "Save project after writing to PLC" item under [Tool] ⇒ [Options] ⇒ "<strong>Project</strong>" ⇒ "Automatic Save".MONITORING13USING USERLIBRARIES14SETTING OPTIONSAINDEXIAPPENDIX11 - 5
<strong>GX</strong> <strong>Works</strong>211 WRITING/READING DATA TO/FROM PROGRAMMABLE CONTROLLER CPUMEMO11 - 6
912 MONITORINGThis chapter explains how to monitor the program execution status of the programmable controller CPU usingthe program editor.For the overview of monitoring, refer to the following manual.<strong>GX</strong> <strong>Works</strong>2 Version 1 <strong>Operating</strong> <strong>Manual</strong> (Common)12.1 Starting and Stopping Monitoring of Program . . . . . . . . . . 12-212.2 Starting and Stopping Monitoring of Function Blocks . . . 12-312.3 Changing <strong>Operating</strong> Conditions of Monitoring . . . . . . . . . 12-412.4 Monitoring Programs on ST Editor . . . . . . . . . . . . . . . . . . . 12-612.5 Monitoring Programs in <strong>Structured</strong> Ladder/FBD Editor . . 12-8SEARCHING FORSPECIFIC POSITION10CONVERTING/COMPILING PROGRAMS11WRITING/READING DATA TO/FROMPROGRAMMABLE CONTROLLER CPU12MONITORING13USING USERLIBRARIES14SETTING OPTIONSAINDEXIAPPENDIX12 - 1
<strong>GX</strong> <strong>Works</strong>212 MONITORING12.1 Starting and Stopping Monitoring of ProgramThis section explains how to monitor a program on the program editor.Open the program editor to be monitored in advance.Q CPU L CPU FX■Starting monitoring of programsStart monitoring of the program.<strong>Operating</strong> procedure• Select [Online] ⇒ [Monitor] ⇒ [Start Monitoring] ( ).The monitoring starts.■Stopping monitoring of programsStop monitoring of the program.<strong>Operating</strong> procedure• Select [Online] ⇒ [Monitor] ⇒ [Stop Monitoring] ( ).The monitoring stops.● Changing current valuesDuring monitoring, bit devices can be forced ON/OFF, and the current values of devices, buffer memories, andlabels can be changed.For forcing bit devices ON/OFF and changing current values, refer to the following manual.<strong>GX</strong> <strong>Works</strong>2 Version 1 <strong>Operating</strong> <strong>Manual</strong> (Common)● Monitoring buffer memory and link memoryTo monitor the ON/OFF status of the buffer memory and link memory (example: U0\G0.1), select [Tool]⇒ [Options] ⇒ "Monitor" ⇒ "<strong>Structured</strong> Ladder/FBD/ST" ⇒ "Operational Setting" and check "Monitor buffermemory and link memory".● Monitoring labels whose classes are set as a constant typeFor labels whose classes are set as VAR_GLOBAL_CONSTANT, VAR_CONSTANT, the values are not displayedduring monitoring.To check the values, select "Constant Value" under [Tool] ⇒ [Options] ⇒ "Program Editor" ⇒ "<strong>Structured</strong> Ladder/FBD/ST" ⇒ "Tool Hint" ⇒ "Tool Hint Display Items", and check with tool hint.12 - 2
12.2 Starting and Stopping Monitoring of Function Blocks12.2 Starting and Stopping Monitoring of Function BlocksThis section explains how to monitor function block programs.Open the function block program to be monitored in advance.Q CPU L CPU FX9SEARCHING FORSPECIFIC POSITION10■ Starting monitoring of function blocksStart monitoring of the function block.<strong>Operating</strong> procedure1. Select [Online] ⇒ [Monitor] ⇒ [Change Instance (Function Block)].The Change Instance (Function Block) screen is displayed.CONVERTING/COMPILING PROGRAMS11WRITING/READING DATA TO/FROMPROGRAMMABLE CONTROLLER CPU12MONITORING132. Select the FB instance to be monitored.3. Click the button.4. Select [Online] ⇒ [Monitor] ⇒ [Start Monitoring] ( ).The monitoring starts.The display and executable operations during monitoring are the same as those of the programmonitoring.Screen button●Cancels the selected status of the FB instance and stops monitoring.USING USERLIBRARIES14SETTING OPTIONSA■ Stopping monitoring of function blocksStop monitoring of the function block.<strong>Operating</strong> procedureIAPPENDIX• Select [Online] ⇒ [Monitor] ⇒ [Stop Monitoring] ( ).The monitoring stops.INDEX12 - 3
<strong>GX</strong> <strong>Works</strong>212 MONITORING12.3 Changing <strong>Operating</strong> Conditions of MonitoringThis section explains how to change the operating conditions of monitoring.Q CPU L CPU FX12.3.1 Changing current value display format (decimal/hexadecimal) of word type variableChange the current value display format of word and double word type variable displayed duringmonitoring.■Changing display format during monitoringChange the current value display format of word and double word type variable during monitoring.<strong>Operating</strong> procedure• Select [Online] ⇒ [Monitor] ⇒ [Change Value Format (Decimal)] / [Change Value Format(Hexadecimal)].DecimalHexadecimal■Changing display format before starting monitoringChange the current value display format by setting the option.The monitoring starts with the set display format.<strong>Operating</strong> procedure• Select [Tool] ⇒ [Options] ⇒ "Monitor" ⇒ "<strong>Structured</strong> Ladder/FBD/ST" ⇒ "Display Formatof Monitoring Value" ⇒ "Decimal"/"Hexadecimal".DecimalHexadecimal12 - 4 12.3.1 Changing current value display format (decimal/hexadecimal) of word type variable
12.3 Changing <strong>Operating</strong> Conditions of Monitoring12.3.2 Setting the number of displaying characters for characterstringsSet the number of displaying characters for the monitoring result of character strings by setting theoption on the structured ladder/FBD and ST editors.<strong>Operating</strong> procedure9SEARCHING FORSPECIFIC POSITION101. Select [Tool] ⇒ [Options] ⇒ "Monitor" ⇒ "<strong>Structured</strong> Ladder/FBD/ST"⇒ "Character String Monitor Setting".2. Set the number of displaying characters within the range from 2 to 50.CONVERTING/COMPILING PROGRAMS11WRITING/READING DATA TO/FROMPROGRAMMABLE CONTROLLER CPU12MONITORING13USING USERLIBRARIES14SETTING OPTIONSAINDEXIAPPENDIX12.3.2 Setting the number of displaying characters for character strings 12 - 5
<strong>GX</strong> <strong>Works</strong>212 MONITORING12.4 Monitoring Programs on ST EditorQ CPU L CPU FXThis section explains the display of the ST editor at the monitoring.Screen displaySelect [Online] ⇒ [Monitor] ⇒ [Start Monitoring].Split windowSelect [Online] ⇒ [Monitor] ⇒ [Start Monitoring (Bit Type only)].■Monitoring labels other than bit type labels and word devicesThe monitoring values of labels other than bit type labels and word devices are displayed on the rightside of the split window.Monitoring value of counterMonitoring value of D0■Monitoring bit type labels and bit devicesThe following shows the display of bit type labels and bit devices at the monitoring.12 - 6
12.4 Monitoring Programs on ST Editor9● Displaying monitoring valuesWhen the labels are used for array element, or when the elements are not specified for array or structured datatype, the monitoring values are not displayed correctly. The monitoring values on tool hint are not displayedcorrectly either.Monitoring values of each element for array or structured data type can be checked on the Watch window.SEARCHING FORSPECIFIC POSITION10CONVERTING/COMPILING PROGRAMS11WRITING/READING DATA TO/FROMPROGRAMMABLE CONTROLLER CPU12MONITORING13USING USERLIBRARIES14SETTING OPTIONSAINDEXIAPPENDIX12 - 7
<strong>GX</strong> <strong>Works</strong>212 MONITORING12.5 Monitoring Programs in <strong>Structured</strong> Ladder/FBD EditorQ CPU L CPU FXThis section explains the display of the structured ladder/FBD editor at the monitoring.Screen displaySelect [Online] ⇒ [Monitor] ⇒ [Start Monitoring].■Monitoring contacts and coilsThe following shows the display of contacts and coils at the monitoring.■Monitoring bit type labels and bit devicesThe following shows the display of bit type labels and bit devices at the monitoring.12 - 8
12.5 Monitoring Programs in <strong>Structured</strong> Ladder/FBD Editor■Monitoring labels other than bit type labels and word devicesThe monitoring values of labels other than bit type labels and word devices are displayed to the right ofthe corresponding labels or devices.Monitoring value of RadianAngleMonitoring value of CosVal9SEARCHING FORSPECIFIC POSITION10● Displaying monitoring values• Monitoring values of FB I/O arguments can be checked with the tool hint.For the display method of the tool hint, refer to Section 6.2.8.CONVERTING/COMPILING PROGRAMS11WRITING/READING DATA TO/FROMPROGRAMMABLE CONTROLLER CPU12• When the labels are used for array element, or when the elements are not specified for array or structured datatype, the monitoring values are not displayed. The monitoring values on tool hint are not displayed either.In this case, check monitoring values of array or structured data type on the Watch window.MONITORING13USING USERLIBRARIES14SETTING OPTIONSAINDEXIAPPENDIX12 - 9
<strong>GX</strong> <strong>Works</strong>212 MONITORINGMEMO12 - 10
913 USING USER LIBRARIESIn <strong>Structured</strong> project, user libraries are shared among multiple projects as program assets.This chapter explains the user library operating methods.13.1 User Libraries . . . . . . . . . . . . . . . . . . . . . . . . . . . . . . . . . . . . 13-213.2 Procedure for Using User Library . . . . . . . . . . . . . . . . . . . . 13-313.3 Creating User Library . . . . . . . . . . . . . . . . . . . . . . . . . . . . . . 13-413.4 Using User Library . . . . . . . . . . . . . . . . . . . . . . . . . . . . . . . 13-11SEARCHING FORSPECIFIC POSITION10CONVERTING/COMPILING PROGRAMS11WRITING/READING DATA TO/FROMPROGRAMMABLE CONTROLLER CPU12MONITORING13USING USERLIBRARIES14SETTING OPTIONSAINDEXIAPPENDIX13 - 1
<strong>GX</strong> <strong>Works</strong>213 USING USER LIBRARIES13.1 User LibrariesQ CPU L CPU FXUser libraries are components which can be shared between multiple projects and can be used in<strong>Structured</strong> project only.These libraries are created by the user.Frequently-used components are stored and reused for programming efficiency.< <strong>Project</strong> 1 >< <strong>Project</strong> 2 >LibraryEditLibrary fileLibraryUtilizeProgramGlobal labelStoreProgramGlobal labelReuseProgramGlobal labelFB/FUNFB/FUNFB/FUNStructureStructureStructureGlobal labelProgram settingGlobal labelProgram settingLibrary componentscan be used.TaskTaskPOUPOUProgram blockProgram blockFB/FUNFB/FUNStructureStructureThe following data can be registered to user libraries.• Global labels• <strong>Structured</strong> data• POUs (program blocks, functions, function blocks)13 - 2
13.2 Procedure for Using User Library13.2 Procedure for Using User LibraryThis section explains how to create a user library.POUs created in a user library can be shared among multiple projects.The following explains how to utilize a created user library to other projects.Q CPU L CPU FX9SEARCHING FORSPECIFIC POSITION101. Create a user library.ProcedureReferenceCreate a new user library. Section 13.3.1Create data for user library. Section 13.3.3Save the user library under a specified name. Section 13.3.42. Utilize the library.ProcedureReferenceUtilize the user library to a project. Section 13.4.1Create a program using the user library. Section 13.4.2CONVERTING/COMPILING PROGRAMS11WRITING/READING DATA TO/FROMPROGRAMMABLE CONTROLLER CPU123. Edit the user library and update the library file data.ProcedureReferenceChange the setting to enable or disable editing of the utilized user library data. Section 13.4.3Update the user library data. Section 13.4.4MONITORING13USING USERLIBRARIES14SETTING OPTIONSAINDEXIAPPENDIX13 - 3
<strong>GX</strong> <strong>Works</strong>213 USING USER LIBRARIES13.3 Creating User LibraryQ CPU L CPU FXThis section explains how to create a user library.13.3.1 Creating user librariesCreate a new user library.Select the User Library view of the Navigation window and follow the operation below.Screen displaySelect [<strong>Project</strong>] ⇒ [Library] ⇒ [Create] ( ).<strong>Operating</strong> procedure1. Enter a library name.2. Click the button.A user library is created and displayed on the User Library view.● Maximum number of user libraries• The maximum number of user libraries that can be created in a project is 800.● Number of characters for a library name• The maximum number of characters that can be entered for a library name is 32.● Invalid characters for library names• For invalid characters for library names, refer to the following manual.MELSEC-Q/L/F <strong>Structured</strong> Programming <strong>Manual</strong> (Fundamentals)13 - 4 13.3.1 Creating user libraries
13.3 Creating User Library13.3.2 Changing library nameChange the user library name.<strong>Operating</strong> procedure1. Select a library name to be renamed in the User Library view.9SEARCHING FORSPECIFIC POSITION102. Select [<strong>Project</strong>] ⇒ [Library] ⇒ [Rename].The editing of the library name in the project tree is enabled.3. Set the library name.Press the key to confirm the new library name.13.3.3 Creating dataCreate data for the user library.CONVERTING/COMPILING PROGRAMS11WRITING/READING DATA TO/FROMPROGRAMMABLE CONTROLLER CPU12■Adding dataAdd new data (programs, global labels, functions/function blocks, structures) to the user library.For details of adding new data, refer to the following manual.<strong>GX</strong> <strong>Works</strong>2 Version 1 <strong>Operating</strong> <strong>Manual</strong> (Common)MONITORING13■● Global labelsLabels defined by global labels in the User Library view can be used in programs in the <strong>Project</strong> view.Labels defined by global labels in the <strong>Project</strong> view can also be used in programs in the User Library view.● System labelsGlobal labels in the User Library view cannot be registered to the system label data base.Editing dataEdit data (programs, global labels/local labels, functions/function blocks, structures).For details of editing data, refer to Chapter 5 through Chapter 8.USING USERLIBRARIES14SETTING OPTIONSAINDEXIAPPENDIX13.3.2 Changing library name 13 - 5
<strong>GX</strong> <strong>Works</strong>213 USING USER LIBRARIES13.3.4 Saving library fileSave a user library to a library file.A library file can be also saved with a different library name.■Saving user library under specified nameSave the user library under a specified name.Screen displaySelect [<strong>Project</strong>] ⇒ [Library] ⇒ [Save As].<strong>Operating</strong> procedure1. Select a library name to be saved in the User Library view. (Multiple libraries can beselected.)2. Select [<strong>Project</strong>] ⇒ [Library] ⇒ [Save As].The Save Library as screen is displayed.3. Set a file name.4. Click the button.The user library data are saved to the library file.13 - 6 13.3.4 Saving library file
13.3 Creating User Library■Saving library files9Save the user library in the library file.<strong>Operating</strong> procedure1. Select a library name to be saved in the User Library view. (Multiple libraries can beselected.)2. Select [<strong>Project</strong>] ⇒ [Library] ⇒ [Save].The user library data is saved in the library file.● Identifying the saved library fileA saved library file is identified with the path and file name which are specified when the file was saved with aspecified name previously, or installed to the project.● Applying file changes to other projectsTo apply the changes to library files in other projects, update the user libraries in each project in advance.( Section 13.4.4)SEARCHING FORSPECIFIC POSITION10CONVERTING/COMPILING PROGRAMS11WRITING/READING DATA TO/FROMPROGRAMMABLE CONTROLLER CPU12MONITORING13USING USERLIBRARIES14SETTING OPTIONSAINDEXIAPPENDIX13.3.4 Saving library file 13 - 7
<strong>GX</strong> <strong>Works</strong>213 USING USER LIBRARIES13.3.5 Deleting user library from projectDelete a user library from the project.<strong>Operating</strong> procedure1. Select a library name to be deleted in the User Library view. (Multiple libraries canbe selected.)2. Select [<strong>Project</strong>] ⇒ [Library] ⇒ [Deinstall].The selected data is deleted.● Deleting user library• The saved library file is not deleted even if a user library is deleted.• All POUs using the deleted library file become in the uncompiled status. Compile the program again.13 - 8 13.3.5 Deleting user library from project
13.3 Creating User Library13.3.6 Setting password to user librarySet a password to protect data in the user library.Once the password is set, programs in the POUs are hidden on the screen. Structures, global labels,and local labels are displayed.Screen displaySelect [<strong>Project</strong>] ⇒ [Library] ⇒ [Change Password].9SEARCHING FORSPECIFIC POSITION10CONVERTING/COMPILING PROGRAMS11WRITING/READING DATA TO/FROMPROGRAMMABLE CONTROLLER CPU12<strong>Operating</strong> procedure1. Set the items on the screen.Library NamePassword SetupOld PasswordItemNew PasswordConfirm Password2. Click the buttonDescriptionDisplay a library name to which a password is set.Set a password.Enter a previous password.Leave the field blank when setting a password for the first time.Enter a new password.Re-enter a new password for confirmation.● PasswordSet a password within 14 characters using alphanumeric characters and symbols correspond to the ASCII code20H to 7EH. For details of ASCII code, refer to the following manual.<strong>GX</strong> <strong>Works</strong>2 Version 1 <strong>Operating</strong> <strong>Manual</strong> (Common)● Libraries saved in library filesIf a user library is saved in the library file, the password setting is also saved.Library files must be managed carefully if they are shared with multiple projects.● Editing statusBefore using this function, enable the editing of the user library. ( Section 13.4.3)MONITORING13USING USERLIBRARIES14SETTING OPTIONSIAPPENDIXAINDEX13.3.6 Setting password to user library 13 - 9
<strong>GX</strong> <strong>Works</strong>213 USING USER LIBRARIES13.3.7 Set help file to librarySet a help file to the library.Specified files created in the following formats can be set as help data.• Windows help file (*.hlp)• HTML help file (*chm)• Text file (*txt)<strong>Operating</strong> procedure1. Select a user library to which a property is set, and select [<strong>Project</strong>] ⇒ [Object] ⇒[Property] ( ).The Property screen is displayed.2. Click the button.The Open a help file screen is displayed.3. Select a file to be set.The path and name of the selected help file are displayed on the Property screen.4. Click the button.The specified help file is set as the user library help.13 - 10 13.3.7 Set help file to library
13.4 Using User Library13.4 Using User LibraryThis section explains how to use a created user library.13.4.1 Installing user library data to projectInstall user library data from the existing library file to the project.Screen displaySelect [<strong>Project</strong>] ⇒ [Library] ⇒ [Install].Q CPU L CPU FX9SEARCHING FORSPECIFIC POSITION10CONVERTING/COMPILING PROGRAMS11WRITING/READING DATA TO/FROMPROGRAMMABLE CONTROLLER CPU12<strong>Operating</strong> procedure1. Set the items on the screen.Library FileLibrary NameItem2. Click the button.DescriptionSet a path of the library file to be installed.Click thebutton, and select a folder in the Open Library screen.Enter a library name.The selected library file data are installed and the library name is displayed on the User Libraryview.● Maximum number of user librariesThe maximum number of user libraries that can be created in a project is 800.MONITORING13USING USERLIBRARIES14SETTING OPTIONSAINDEXIAPPENDIX13.4.1 Installing user library data to project 13 - 11
<strong>GX</strong> <strong>Works</strong>213 USING USER LIBRARIES13.4.2 Creating programs using user libraryUse data in a user library to create programs in a project.■Using user library data: programsUse programs in a user library by registering them to a task.For details of registering programs to a task, refer to Section 4.2.■Using user library data: global labelsUse global labels in a user library by selecting them in a program.For details of selecting global labels in a program, refer to Chapter 5.■Using user library data: functions/function blocksUse functions/function blocks in a user library by selecting a user library for POU type in the FunctionBlock Selection window.For details of using functions/function blocks, refer to Section 5.4.■Using user library data: structuresUse structures in a user library by setting them in each label editor.For details of using structures, refer to Section 5.6.13 - 12 13.4.2 Creating programs using user library
13.4 Using User Library13.4.3 Editing user libraryEdit installed user library data.■ Enabling editing of user library data9SEARCHING FORSPECIFIC POSITION10Enable the editing of user library data.To edit user library data, the library needs to be set in the editing status.Screen displayCONVERTING/COMPILING PROGRAMS11WRITING/READING DATA TO/FROMPROGRAMMABLE CONTROLLER CPU12MONITORING13<strong>Operating</strong> procedure1. Select a user library to edit in the User Library view. (Multiple libraries can beselected.)2. Select [<strong>Project</strong>] ⇒ [Library] ⇒ [Open] ( ).The editing of the user library data is enabled.● Library passwordIf the library is protected with a password, the passwordneeds to be entered to open the library for editing.When the password entry screen is displayed, enter thelibrary password.USING USERLIBRARIES14SETTING OPTIONSAINDEXIAPPENDIX● Editing status when opening a projectWhen a project is opened, all libraries are in the editing disabled status.(Even if a project is closed with the editing status, it is set in the editing disabled status when reopening theproject.)13.4.3 Editing user library 13 - 13
<strong>GX</strong> <strong>Works</strong>213 USING USER LIBRARIES■Disabling editing of user library dataDisable the editing of user library data.Screen display<strong>Operating</strong> procedure1. Select a user library to edit in the User Library view. (Multiple libraries can beselected.)2. Select [<strong>Project</strong>] ⇒ [Library] ⇒ [Close] ( ).The editing of the user library data is disabled.13 - 14 13.4.3 Editing user library
13.4 Using User Library13.4.4 Updating user libraryUpdate data in a user library file.<strong>Operating</strong> procedure1. Select a library name to be updated in the User Library view. (Multiple libraries canbe selected.)2. Select [<strong>Project</strong>] ⇒ [Library] ⇒ [Reload].The data in the library file is read and the display contents in the User Library view are refreshed.To apply the library file changes made in another project (➀ in the figure below) to the current project,the user library needs to be updated (➂ and ➃ in the figure below).9SEARCHING FORSPECIFIC POSITION10CONVERTING/COMPILING PROGRAMS11Save/Install2Enable the editing.WRITING/READING DATA TO/FROMPROGRAMMABLE CONTROLLER CPU12UserLib1 file1Content is changedin another project.3Execute "Reload".MONITORING13UserLib1 file4Changed content isupdated.USING USERLIBRARIES14● Compilation status of POUsWhen a user library is updated, all POUs using the updated user library become in the uncompiled status.● Editing status• Before using this function, enable the editing of the user library data. ( Section 13.4.3)• When this function is completed, the editing of the user library data is disabled.SETTING OPTIONSAINDEXIAPPENDIX13.4.4 Updating user library 13 - 15
<strong>GX</strong> <strong>Works</strong>213 USING USER LIBRARIES13.4.5 Displaying user library helpDisplay a help set to a user library.Specified files created in the following formats can be set as help data.• Windows help file (*.hlp)• HTML help file (*chm)• Text file (*txt)For setting a help, refer to Section 13.3.7.Screen displaySelect [<strong>Project</strong>] ⇒ [Library] ⇒ [Help].RWindows help file (*.hlp)HTML help file (*.chm)<strong>Operating</strong> procedure1. Select a library name to be displayed as a library help in the User Library view.2. Select [<strong>Project</strong>] ⇒ [Library] ⇒ [Help].A library help screen is displayed.13 - 16 13.4.5 Displaying user library help
914 SETTING OPTIONSThis chapter explains the functions of options for setting screen display format or detailed operations of eachfunction.14.1 Basic Operations. . . . . . . . . . . . . . . . . . . . . . . . . . . . . . . . . . 14-214.2 Option Setting List . . . . . . . . . . . . . . . . . . . . . . . . . . . . . . . . 14-3SEARCHING FORSPECIFIC POSITION10CONVERTING/COMPILING PROGRAMS11WRITING/READING DATA TO/FROMPROGRAMMABLE CONTROLLER CPU12MONITORING13USING USERLIBRARIES14SETTING OPTIONSAINDEXIAPPENDIX14 - 1
<strong>GX</strong> <strong>Works</strong>214 SETTING OPTIONS14.1 Basic OperationsQ CPU L CPU FXThis section explains how to set options.Screen displaySelect [Tool] ⇒ [Options].<strong>Operating</strong> procedure• Set the items on the screen.When the cursor is placed on a setting item, an explanation of the item is displayed on the"Explanation" field.Details of the setting items Section 14.2Screen button●Restores the initial settings.●Restores the user default settings.●Stores the current settings as the user default and applies them to a new project.14 - 2
14.2 Option Setting List14.2 Option Setting ListLadder *1SFC *1 <strong>GX</strong> <strong>Works</strong>2 Version 1 <strong>Operating</strong> <strong>Manual</strong> (Simple <strong>Project</strong>)Q CPU L CPU FXThe following table shows the option setting items.Option tree item Item Description Reference<strong>Project</strong> <strong>GX</strong> <strong>Works</strong>2 Version 1 <strong>Operating</strong> <strong>Manual</strong> (Common)<strong>Structured</strong>Tool Hint Display Items Select items displayed on tool hint.Ladder/ Tool HintSectionFBD/ST6.2.8Tool Hint Display Format Select display lines on tool hint.Display label name/comment of contact or Set display lines and characters per line.Sectioncoil in multiline8.7Select whether to display labels and devices which areLabel Display labels anddevicesassigned to the labels, when 'Label' is selected fromView Mode. Users can neither edit the displayedSection8.7.2devices nor set them to the Find/Replace target.Declare new label nameSelect whether to display label registration/selectiondialog when entering new labels.Section8.6.2Wrap instance name for Select whether to wrap function block instance namefunction blockat the function block width.SectionSpecify the number of8.7enable characters forSpecify the number of display characters of function orlabel name/commentfunction block label.Automatic input/outputlabelsSelect whether to add input/output label when functionblock or function is pasted.SectionFB/FUN8.6.1<strong>Structured</strong>Automatic ENO labelsSelect whether to add ENO output label when functionblock or function is pasted.Ladder/FBDPin overwritesSelect whether to overwrite I/O label with a grid line Sectionwhen ruling a grid line over function or function block. 8.3.2Double clicking opensheaderSelect whether a label editor is displayed whenfunction or function block is double clicked.SectionDouble clicking opens Select whether a program editor is displayed when 6.2.9Programbodyfunction or function block is double clicked.EditorLadder WrappingSelect whether to wrap ladder. The edited ladder shallbe object after changing the setting.Open Structure Ladder/Set the default at opening structured ladder/FBDFBD Editor in guidededitor as guided mode.modeGuidedSelect whether to display grid line ruling dialog at SectionAllow hotkey repeater8.10drawing lines.Enter label names aftercontacts and coilsSelect whether to input label names or devices afterentering contacts and coils.Auto Comment BlockWidthSet the width of comment to be added in ladder blockwith grid numbers when adding ladder block.Select whether to use the automatic indent whenAuto indentionbeginning a new line after entering ST control syntax Sectionsuch as IF or FOR, and when displaying template of 7.1.2inline structured text.STSelect whether to display listed label names startingInstruction/label name with the input character when a character is input. Sectionprediction(<strong>Structured</strong> text: label name, inline structured text: 7.1.1instruction and label name)Tabulator LengthSet tab length.SectionIt is not available with inline structured text.7.1.3Ladder/SFC *1 <strong>GX</strong> <strong>Works</strong>2 Version 1 <strong>Operating</strong> <strong>Manual</strong> (Common)9SEARCHING FORSPECIFIC POSITION10CONVERTING/COMPILING PROGRAMS11WRITING/READING DATA TO/FROMPROGRAMMABLE CONTROLLER CPU12MONITORING13USING USERLIBRARIES14SETTING OPTIONSIAPPENDIXAINDEX14 - 3
<strong>GX</strong> <strong>Works</strong>214 SETTING OPTIONSOption tree item Item Description ReferenceDevice Comment Editor <strong>GX</strong> <strong>Works</strong>2 Version 1 <strong>Operating</strong> <strong>Manual</strong> (Common)Label Setting EditorAutomatic copy andincrement when insertinga rowCopy data type/commentitemsDefault Length of StringData TypeSelect whether to copy the texts in the upper row afterincrementing it when inserting a row.Select if the data type, comment, and remark shall beobject for auto copy.Set the default string length for string data type.Parameter <strong>GX</strong> <strong>Works</strong>2 Version 1 <strong>Operating</strong> <strong>Manual</strong> (Common)Monitor<strong>Structured</strong> Ladder/FBD/STLadderSFC *1Display Format ofMonitoring ValueMonitor buffer memoryand link memory* Only applies to theQCPU, LCPU, FX3U(C)Significant CharactersSelect whether to display monitored value in Decimalor Hexadecimal.Select whether to monitor buffer memory and linkmemory during monitoring. Scan time of PLC will belengthened depending on the setting.Set the number of displayable characters to monitorcharacter-string data.<strong>GX</strong> <strong>Works</strong>2 Version 1 <strong>Operating</strong> <strong>Manual</strong> (Simple <strong>Project</strong>)PLC Read/Write <strong>GX</strong> <strong>Works</strong>2 Version 1 <strong>Operating</strong> <strong>Manual</strong> (Common)Section5.5.4Section5.5.3Section12.3.1-Section12.3.2Online Change *1 <strong>GX</strong> <strong>Works</strong>2 Version 1 <strong>Operating</strong> <strong>Manual</strong> (Common)Symbolic Information <strong>GX</strong> <strong>Works</strong>2 Version 1 <strong>Operating</strong> <strong>Manual</strong> (Common)CompileBasic SettingOutput ResultFunction Block Call *1Program CheckOperational SettingBuild Cross ReferenceInformationStop BuildDisable Warning CodesEnables the followings: calling function block fromladder to ST and from ST to ladder, using inline ST inladder and reducing steps when using function block.*Value of VAR_IN_OUT type input label alwaysremains equal to the value of output label.Check when program check is not needed after Buildor Online Program Change. It can reduce the compiletime depending on the setting.Select whether to use the same label name in globallabel and local label. When the same label is selected,local label will be given priority.By creating cross reference information aftercompiling, time to search cross reference can bereduced. Also able to search cross referenceinformation even before compiling. In this case, thespecified Find condition will be used as filteringcondition.Set the number of error and warning to stop thecompile.Register warning codes to invalidate. The registeredwarning codes shall not be displayed in outputwindow.Section4.4.1-Section10.414 - 4
14.2 Option Setting ListCompileOption tree item Item Description Reference<strong>Structured</strong>Ladder/FBD/STCompileCondition 1CompileCondition 2CompileCondition 3Use lower-case devicenames as labels *2Function Output Setting(D)INT_TO_BOOL_E,(D)WORD_TO_BOOL_E,TIME_TO_BOOL_ENOT_ELIMITAION_E,MAXIMUM_E,MINIMUM_EEQ_E, NE_E, GT_E,GE_E, LT_E, LE_EAND_E, OR_E, XOR_EUser Defined Functionwith EN/ENOUser Defined FunctionBlock with EN/ENOAutomatically assigneach system device tooutput of functions thatuse EN/ENO.*Please refer toappropriate manual if youwant to uncheck the boxbecause some programsrequire caution.Select whether to use device names typed with lowercase as labels.Only the device name outside device rangeis valid for Inline <strong>Structured</strong> Text.Select whether to connect directly from the objectivefunction output to other input.Select whether to generate a code to keep bit typeoutput of objective function block.Select whether to generate a code which keeps bittype output of the target function. (Codes keeping bittype are generated if output is in bit type array or instructure array, regardless of option setting.)Select whether to generate a code which keeps bittype output of the target function block. (Codeskeeping bit type are generated if output is in bit typearray or in structure array, regardless of optionsetting.)Select whether to assign each system device to outputfunctions of EN/ENO. Only functions enabled.(Function block is disabled.Only checked functions at [Generate Code That Holdsthe Output of the Following] are enabled when theoutput is bit type.Intelligent Function Module *1 <strong>GX</strong> <strong>Works</strong>2 Version 1 <strong>Operating</strong> <strong>Manual</strong> (Intelligent Function Module)IQ <strong>Works</strong> Interaction *1 <strong>GX</strong> <strong>Works</strong>2 Version 1 <strong>Operating</strong> <strong>Manual</strong> (Common)System Label Setting *3Use MELSOFT NavigatorOption InformationSystem Label NameSetting*1: Not supported by FXCPU.*2: Not supported by Simple <strong>Project</strong>.*3: For FXCPU, this item is supported by FX3G, FX3U, and FX3UC only.Checking this option enables use of the option settingof MELSOFT Navigator. The option setting specified inMELSOFT Navigator at the time of opening thisproject is used.Set how to name system labels. When system labelsare entered, system label names are determinedbased on this setting at the time of project save.Section10.4Section5.29SEARCHING FORSPECIFIC POSITION10CONVERTING/COMPILING PROGRAMS11WRITING/READING DATA TO/FROMPROGRAMMABLE CONTROLLER CPU12MONITORING13USING USERLIBRARIES14SETTING OPTIONSAINDEXIAPPENDIX14 - 5
<strong>GX</strong> <strong>Works</strong>214 SETTING OPTIONSMEMO14 - 6
9APPENDIXSEARCHING FORSPECIFIC POSITION10Appendix 1List of Toolbars and Shortcut Keys. . . . . . . . . . . App-2CONVERTING/COMPILING PROGRAMS11WRITING/READING DATA TO/FROMPROGRAMMABLE CONTROLLER CPU12MONITORING13USING USERLIBRARIES14SETTING OPTIONSAINDEXIAPPENDIXApp - 1
<strong>GX</strong> <strong>Works</strong>2APPENDIXAppendix 1List of Toolbars and Shortcut KeysThis section shows the list of toolbars and shortcut keys that can be used in <strong>Structured</strong> project.Q CPU L CPU FXFor (Common), (Simple), and (Intelligent) indicated in the Reference column, refer to the following manualsrespectively:(Common).............<strong>GX</strong> <strong>Works</strong>2 Version 1 <strong>Operating</strong> <strong>Manual</strong> (Common)(Simple)................<strong>GX</strong> <strong>Works</strong>2 Version 1 <strong>Operating</strong> <strong>Manual</strong> (Simple <strong>Project</strong>)(Intelligent)............<strong>GX</strong> <strong>Works</strong>2 Version 1 <strong>Operating</strong> <strong>Manual</strong> (Intelligent Function Module)Appendix 1.1Common toolbars and shortcut keysThe following explains the toolbars that are available regardless of the editing target and thecorresponding shortcut keys.■"Standard" toolbar iconsThe following table shows the "Standard" toolbar icons and the corresponding shortcut keys.ToolbariconShortcut key Corresponding menu Description Reference+ New Create a new project.+ Open Open an existing project.+ Save Save the project.(Common)<strong>GX</strong> <strong>Works</strong>2 Help- - Find Help for <strong>GX</strong> <strong>Works</strong>2Display the <strong>GX</strong> <strong>Works</strong>2 Help screen.Search for help items with an enteredkeyword on the <strong>GX</strong> <strong>Works</strong>2 Help screen.App - 2Appendix 1.1 Common toolbars and shortcut keys
Appendix 1 List of Toolbars and Shortcut Keys■"Program Common" toolbar iconsThe following table shows the "Program Common" toolbar icons and the corresponding shortcut keys.ToolbariconShortcut key Corresponding menu Description Reference+ Cut Cut the selected data.+ Copy Copy the selected data.+ PastePaste the cut/copied data at the cursorposition.+ Undo Cancel the previous operation.+ RedoPerform the operation canceled by[Undo].+ Find Device Search for a device.- Find Instruction Search for an instruction.+ + Find Contact or Coil- Write to PLC- Read from PLC--Start Monitoring (AllWindows)Stop Monitoring (AllWindows)Start Monitoring+ Stop Monitoring-Device/Buffer MemoryBatch Monitor+ Modify ValueBuild+ Online Program ChangeSearch for a contact or coilcorresponding to a specified device.Write data to the programmablecontroller CPU.Read data from the programmablecontroller CPU.Start monitoring all windows beingopened.Stop monitoring all windows beingopened.Start monitoring the window beingoperated.Stop monitoring the window beingoperated.Batch monitor device/buffer memories.For ladder and SFC (Zoom) programs,change the ON/OFF and value of adevice/label used in a program.Convert/compile the program beingedited.Convert/compile a sequence programand write it to the programmablecontroller CPU.-Section6.2.3(Common)Chapter 11--Section 12.1(Common)Section 10.1(Common)Compile/convert all programs in the+ + Rebuild AllSection 10.2project.- Start/Stop Simulation Start/stop simulation. (Common)9SEARCHING FORSPECIFIC POSITION10CONVERTING/COMPILING PROGRAMS11WRITING/READING DATA TO/FROMPROGRAMMABLE CONTROLLER CPU12MONITORING13USING USERLIBRARIES14SETTING OPTIONSAINDEXIAPPENDIXAppendix 1.1 Common toolbars and shortcut keys App - 3
<strong>GX</strong> <strong>Works</strong>2APPENDIX■"Docking Window" toolbar iconsThe following table shows the "Docking Window" toolbar icons.ToolbariconShortcut key Corresponding menu Description Reference- Navigation Window Display/hide the Navigation window. (Common)-Function Block SelectionWindowDisplay/hide the Function BlockSelection window.Section6.2.1- Output Window Display/hide the Output window. Section 10.6- Cross ReferenceDisplay/hide the Cross Referencewindow.- Device List Display/hide the Device List window.- Watch 1 to 4 Display/hide the Watch window.--Intelligent Function ModuleMonitorIntelligent Function ModuleGuidanceDisplay/hide the Intelligent FunctionModule Monitor window.Display/hide the Intelligent FunctionModule Guidance window.(Common)(Intelligent)- Find/Replace Display/hide the Find/Replace window. (Common)■"Intelligent Function Module" toolbar iconsThe following table shows the "Intelligent Function Module" toolbar icons.ToolbariconShortcut key Corresponding menu Description Reference-------QD75/LD75 PositioningModule Wave TraceQD75/LD75 PositioningModule Location TraceSerial CommunicationModule Circuit TraceQD75/LD75 PositioningModule Test MonitorQD75/LD75 PositioningModule Test MonitorOffset/Gain Setting ofTemperature Input ModuleOffset/Gain Setting ofAnalog ModuleExecute a wave trace of the QD75/LD75positioning module.Execute a location trace of the QD75/LD75 positioning module.Execute a circuit trace of the serialcommunication module.Execute a positioning monitor of theQD75/LD75 positioning module.Execute a positioning test of the QD75/LD75 positioning module.Execute offset/gain setting of thetemperature input module.Execute offset/gain setting of the analogmodule.(Intelligent)App - 4Appendix 1.1 Common toolbars and shortcut keys
Appendix 1 List of Toolbars and Shortcut Keys■"Debug Function" toolbar iconsThe following table shows the "Debug Function" toolbar icons.Shortcut key Corresponding menu Description Reference- Stop Stop the step execution.- Cancel Cancel the step execution.- Break Execution Execute the break execution.- Step Execution Execute the step execution.- Execution Option- Set/Cancel Break Point-Enable/Disable BreakPointDisplay the "Execution Option" screen ofthe step execution.Set a break point at the cursor position,or cancel the set break point.Enable/disable the break point at thecursor position.- Cancel All Break Points Cancel all break points.- Break Point Window Display the Break Point window.- Cancel All Break Devices Cancel all break devices.- Break Device Window Display the Break Device window.- Set/Cancel Skip Range-Enable/Disable SkipRangeSet a skip range, or cancel the set skiprange.Enable/disable the skip range at thecursor position.- Cancel All Skip Ranges Cancel all skip ranges.- Skip Range Window Display the Skip Range window.(Common)9SEARCHING FORSPECIFIC POSITION10CONVERTING/COMPILING PROGRAMS11WRITING/READING DATA TO/FROMPROGRAMMABLE CONTROLLER CPU12■Other shortcut keysThe following table shows other shortcut keys that are available regardless of the editing target.ToolbariconShortcut key Corresponding menu Description Reference- RenameChange the name of the selected data orlibrary in the Navigation window.- Delete Delete the selected data.- + + Copy Copy data in the project.- + + Paste Paste the copied data to a folder.- + + E Add New ModuleAdd the intelligent function module datato the project being edited.- + ExitClose the project being edited and exits<strong>GX</strong> <strong>Works</strong>2.- + E Cross Reference Create the cross reference information.- + D Device List Display the device usage list.-+/-Move to the next cross referenceinformation.(Common)MONITORING13USING USERLIBRARIES14SETTING OPTIONSA--+ /+ +/+--Move to the previous cross referenceinformation.Move focus between the CrossReference window and work windows.IAPPENDIXINDEXAppendix 1.1 Common toolbars and shortcut keys App - 5
<strong>GX</strong> <strong>Works</strong>2APPENDIXToolbariconShortcut key Corresponding menu Description Reference- + Find Device Search for a device/label in the program.- + + Find String Search for a string.- + Replace Device Replace a device/label in the program.- + + Replace String Replace a string.- + + -- + + -- + Start Watching- + + Stop Watching- +Register Device Test withExecution Condition- + -Search for an item in the downwarddirection.Search for an item in the upwarddirection.Start monitoring the current values ofregistered devices/labels and intelligentfunction module.Stop monitoring the current values ofregistered devices/labels and intelligentfunction module.Register the device test with executioncondition.Close the window displayed on theuppermost position.(Common)- + - Move to the next uppermost window.Appendix 1.2"Navigation Window" toolbar iconsThe following table shows the "Navigation Window" toolbar icons.ToolbariconShortcut key Corresponding menu Description Reference- Add New Data Add data to the project.- Copy Copy selected data.(Common)- Paste Paste copied data.- Property Display a property of the selected data.- RefreshUpdate the display content of the Navigationwindow.-<strong>Project</strong> PropertyDisplay a property of the open project.-Expand All UncompiledDataExpand all uncompiled data in the tree on the<strong>Project</strong> view and the User Library view.(Common)Collapse AllCollapse all data in the tree on the <strong>Project</strong> viewand the User Library view.App - 6Appendix 1.2 "Navigation Window" toolbar icons
Appendix 1 List of Toolbars and Shortcut KeysAppendix 1.3Toolbar icons and shortcut keys for setting labelsThe following explains the toolbar icons and the corresponding shortcut keys used for setting labels.■"Label" toolbar iconsThe following table shows the "Label" toolbar icons and the corresponding shortcut keys.■ToolbariconOther shortcut keysShortcut key Corresponding menu Description Reference+ New Declaration (Before) Add a row above the cursor position.- New Declaration (After) Add a row below the cursor position.+ Delete Row Delete the row at the cursor position.- Read from CSV File Read label settings from the CSV file.- Write to CSV File Write label settings to the CSV file.-Confirm Update of SystemLabel Database- Import System Label--Register Device Name ofSystem LabelDisable System LabelRelationReflect system label informationchanged in another project on globallabels.Import system label information andreflect it on global labels.Register a selected global label as asystem label.Disable the relation between a selectedglobal label and a system label.Section5.5.4Section 5.8Section 5.29SEARCHING FORSPECIFIC POSITION10CONVERTING/COMPILING PROGRAMS11WRITING/READING DATA TO/FROMPROGRAMMABLE CONTROLLER CPU12MONITORING13The following table shows other shortcut keys for setting labels.ToolbariconShortcut key Corresponding menu Description Reference- + Select All Select all rows.- + -- + -Display all lines of comment and remarkof the selected line.Display only the first line of comment andremark of the selected line.Section5.5.4USING USERLIBRARIES14SETTING OPTIONSAINDEXIAPPENDIXAppendix 1.3 Toolbar icons and shortcut keys for setting labels App - 7
<strong>GX</strong> <strong>Works</strong>2APPENDIXAppendix 1.4Toolbar icons and shortcut keys for setting devicememoryThe following explains the toolbar icons and the corresponding shortcut keys for setting devicememory.■"Device Memory" toolbar iconsThe following table shows the "Device Memory" toolbar icons and the corresponding shortcut keys.ToolbariconShortcut key Corresponding menu Description Reference- Display Mode/Binary Change display format to binary.- Display Mode/Octal Change display format to octal.- Display Mode/Decimal Change display format to decimal.-Display Mode/HexadecimalChange display format to hexadecimal.- Display Mode/Float Change display format to real numbers.- Display Mode/String Change display format to string.-Display Mode/String(ASCII only)Change display format to ASCII.- Register/16-bit Display data in units of words.- Register/32-bit Display data in units of double words.(Common)- Register/64-bit Display data in units of 64 bits.+ Input Device Enter a device.- FILL--Read Device Memory fromPLCWrite Device Memory toPLCSet the same value to continuousdevices.Read data in device memory from aprogrammable controller CPU.Write data in device memory to aprogrammable controller CPU.- Read from Excel File Read data from an Excel file.- Write to Excel File Write data to an Excel file.■Other shortcut keyThe following table shows other shortcut key for setting device memory.ToolbariconShortcut key Corresponding menu Description Reference- Insert Row Insert a row at the cursor position. (Common)App - 8Appendix 1.4 Toolbar icons and shortcut keys for setting device memory
Appendix 1 List of Toolbars and Shortcut KeysAppendix 1.5Toolbar icons and shortcut keys for verification resultThe following table shows the toolbar icons and the corresponding shortcut keys for the verificationresult.ToolbariconShortcut key Corresponding menu Description Reference+ Next Unmatch Move to the next mismatched data.+ Previous Unmatch Move to the previous mismatched data.+ Return to Result List Display the .+ Close Detail Result+ +Close All Detail ResultClose the beingdisplayed.Close all .(Common)9SEARCHING FORSPECIFIC POSITION10CONVERTING/COMPILING PROGRAMS11- Write to CSV File Write verification result to a CSV file.Appendix 1.6 Toolbar icons for executing sampling traceThe following table shows the toolbar icons for executing sampling trace.WRITING/READING DATA TO/FROMPROGRAMMABLE CONTROLLER CPU12ToolbariconShortcut key Corresponding menu Description Reference- Trace Setting Display the Trace Setting screen.- Start TraceStart sampling trace. To start samplingtrace, the trace ready signal (SM800)must be ON.- Stop Trace Stop sampling trace.-Display Trace BufferConditionDisplay the Trace Data Storage Statusscreen.- Monitor Status Display the current sampling trace status- Execution Failed- Before Trigger- After Trigger- Stop- Completion- Error- Buffer Status- Trigger OccurrenceIndicate the sampling trace stop status,or the status sampling trace has notstarted.Indicate the status sampling trace isexecuted but a trigger is not generated.Indicate the status sampling trace isexecuted and a trigger is generated.Indicate the status sampling trace isinterrupted.Indicate the status sampling trace hasended normally by acquiring trace dataup to the specified total number ofsamplings after generation of a trigger.Indicate the status a sampling trace erroroccurred during sampling trace.Displayed when the trace data havebeen acquired up to the specified totalnumber of samplings.Displayed when a trigger is generatedduring sampling trace.(Common)-MONITORING13USING USERLIBRARIES14SETTING OPTIONSIAPPENDIXAINDEXAppendix 1.5 Toolbar icons and shortcut keys for verification result App - 9
<strong>GX</strong> <strong>Works</strong>2APPENDIXToolbariconShortcut key Corresponding menu Description Reference- Zoom Out Timing Chart- Zoom In Timing Chart- Zoom Out Trend Graph- Zoom In Trend Graph- Switch Chart/DetailZoom the scale of timing chartZoom the scale of trend graphSwitch the trace result display on theSampling Trace screen between thetiming chart (graph) and the detaileddata (value).(Common)Appendix 1.7Toolbar icons and shortcut keys for program editorsThe following explains the toolbar icons and the corresponding shortcut keys for program editors.■"Ladder" toolbar icons and shortcut keysThe following table shows the toolbar icons and the corresponding shortcut keys for the ladder editor.ToolbariconShortcut key Corresponding menu Description ReferenceOpen Contact+ Open BranchClose Contact+ Close BranchInsert an open contact at the cursorposition.Insert an open contact branch at thecursor position.Insert a closed contact at the cursorposition.Insert a closed contact branch at thecursor position.CoilApplication InstructionHorizontal Line+ Vertical Line+ Delete Horizontal Line+ Delete Vertical Line+ Rising Pulse+ Falling Pulse+ Rising Pulse Branch+ Falling Pulse Branch+ + Rising Pulse Close+ + Falling Pulse CloseInsert a coil at the cursor position.Insert an application instruction at thecursor position.Insert a horizontal line at the cursorposition.Insert a vertical line at the cursorposition.Delete the horizontal line at the cursorposition.Delete the vertical line at the cursorposition.Insert a rising pulse at the cursorposition.Insert a falling pulse at the cursorposition.Insert a rising pulse branch at the cursorposition.Insert a falling pulse branch at the cursorposition.Insert a rising pulse close at the cursorposition.Insert a falling pulse close at the cursorposition.(Simple)App - 10Appendix 1.7 Toolbar icons and shortcut keys for program editors
Appendix 1 List of Toolbars and Shortcut KeysToolbariconShortcut key Corresponding menu Description Reference+ + Rising Pulse Close Branch+ + Falling Pulse Close Branch++ +Operation Result RisingPulseOperation Result FallingPulse+ + Invert Operation ResultsEdit LineInsert a rising pulse close branch at thecursor position.Insert a falling pulse close branch at thecursor position.Insert an operation result rising pulse atthe cursor position.Insert an operation result falling pulse atthe cursor position.Insert an operation result inversion at thecursor position.Input a line at the cursor position.+ Delete Line Delete the line at the cursor position.+Insert Inline <strong>Structured</strong>Text BoxInsert an inline structured text box.- Device Comment Edit device comments.- Statement Edit statements.- Note Edit notes.- Statement/Note Batch Edit+ Line Statement List+ + Display Template+ Mark Template (Left)+ Mark Template (Right)+ Read ModeWrite ModeMonitor Mode+ Monitor (Write Mode)+ + Device DisplayBatch edit the statements/notes in theprogram.Display the list of line statements used inthe program.Insert a template corresponds to theinstruction/function/control syntax.Set an argument of the template in theselected status from the left by selectingthe menu each time.Set an argument of the template in theselected status from the right byselecting the menu each time.Switch the mode of the open window to"Read Mode".Switch the mode of the open window to"Write Mode".Switch the mode of the open window to"Monitor Mode" during monitoring.Switch the mode of the open window to"Monitor (Write Mode)" duringmonitoring.Display devices assigned bycompilation.- ZoomChange the display magnification ratio ofthe ladder.- + Insert Row Insert a row at the cursor position.- + Delete Row Delete the row at the cursor position.- + Insert Column Insert a column at the cursor position.(Simple)Section7.1.4(Simple)9SEARCHING FORSPECIFIC POSITION10CONVERTING/COMPILING PROGRAMS11WRITING/READING DATA TO/FROMPROGRAMMABLE CONTROLLER CPU12MONITORING13USING USERLIBRARIES14SETTING OPTIONSA- + Delete Column Delete the column at the cursor position.- + +- + +- +- +- +Connect Line to Right-SideSymbolConnect Line to Left-SideSymbolEnter/Delete HLineRightwardEnter/Delete HLineLeftwardEnter/Delete VLineDownwardConnect a horizontal line to the laddersymbol at the right of the cursor position.Connect a horizontal line to the laddersymbol at the left of the cursor position.Enter/delete a line at the right of thecursor position.Enter/delete a line at the left of thecursor position.Enter/delete a line at the downward ofthe cursor position.IAPPENDIXINDEXAppendix 1.7 Toolbar icons and shortcut keys for program editors App - 11
<strong>GX</strong> <strong>Works</strong>2APPENDIXToolbaricon- +- +- +Shortcut key Corresponding menu Description ReferenceEnter/Delete VLineUpwardSwitch Open/CloseContactSwitch Statement/NoteType- + + Instruction Partial Edit- + / -- + / -- + -Enter/delete a line at the upward of thecursor position.Switch a open contact to closed contact,and vice versa.Change the type of a statement/note.Open the Enter Symbol screen in whichthe first argument is in the selectedstatus.Select a device/label on the EnterSymbol screen. Switches the device/label to be selected using the /button.Increment/decrement a device/label onthe Enter Symbol screen.Display options of instruction/label on theEnter Symbol screen.Move the cursor on the editing screen+ / / /--while the Enter Symbol screen isdisplayed.- + Jump Display the specified row.-+ + Jump to Next Ladder BlockStartJump a cursor from the current positionto the start of the next ladder block.-+ + Jump to Previous LadderBlock StartJump a cursor from the current positionto the start of the previous ladder block.(Simple)- + Comment Display device comments.- + Statement Display statements.- + Note Display notes.- + Non-Display Ladder Block Hide a ladder block.- + Display Ladder Block Display a hidden ladder block.- + turn mouse scrollwheel upward- + turn mouse scrollwheel downwardBiggerSmallerChange the display size of text larger onthe editing screen.Change the display size of text smalleron the editing screen.-+ +Tile FB HorizontallyTile the ladder editor and the functionblock program editor horizontally.- + Back to Zoom SFC BlockOpen the SFC diagram corresponds tothe program on the Zoom editor window.-+ + // /Moves up/down/left/rightMove a cursor toward up/down/left/rightof the SFC diagram.- + Open Instruction Help Display the Instruction Help screen.- - Display the Find screen.- Instruction Help Display details of instructions. (Common)- + + -Enter an assignment operator (:=) whenediting the inline structured text program.Section7.1.1App - 12Appendix 1.7 Toolbar icons and shortcut keys for program editors
Appendix 1 List of Toolbars and Shortcut Keys■"ST" toolbar icons and shortcut keysThe following table shows the toolbar icons and the corresponding shortcut keys for the ST editor.ToolbariconShortcut key Corresponding menu Description ReferenceList Operands+ + Display Template+ + Mark Template (Left)+ + Mark Template (Right)+ Toggle Bookmark- Bookmark ListNext BookmarkDisplay the Label Registration/Selectionscreen.Insert a template corresponds to theinstruction/function/control syntax.Set an argument of the template in theselected status from the left by selectingthe menu each time.Set an argument of the template in theselected status from the right byselecting the menu each time.Set a bookmark at the cursor line. If abookmark has already been set, deletethe set bookmark.Jump to the specified bookmark from thebookmark list.Display the next bookmark position.+ Previous Bookmark Display the previous bookmark position.+ + Delete All Bookmarks Delete all bookmarks.+ Num+ Num*1 Increase Zoom Zoom in the screen one level.*1 Decrease Zoom Zoom out the screen one level.- + Jump Jump to the specified line.- +Zoom Header/BodyHeaderOpen the label setting screen of theselected POU.- + Copy Copy the selected data. -Section6.2.2Section7.1.4Section9.1.2Section6.2.4Section9.1.1-9SEARCHING FORSPECIFIC POSITION10CONVERTING/COMPILING PROGRAMS11WRITING/READING DATA TO/FROMPROGRAMMABLE CONTROLLER CPU12MONITORING13- + Cut Cut the selected data. -- + PastePaste the cut/copied data at the cursorposition.-- Instruction Help Display details of instructions. (Common)- + + -*1: ‘Num' indicates keys in the numeric keypad.Enter an assignment operator (:=) whenediting the inline structured text program.Section7.1.1USING USERLIBRARIES14SETTING OPTIONSAINDEXIAPPENDIXAppendix 1.7 Toolbar icons and shortcut keys for program editors App - 13
<strong>GX</strong> <strong>Works</strong>2APPENDIX■"<strong>Structured</strong> Ladder/FBD" toolbar icons and shortcut keysThe following table shows the toolbar icons and the corresponding shortcut keys for the structuredladder/FBD editor.ToolbariconShortcut key Corresponding menu Description Reference+ Select ModeGuided Mode/Guided+ + Editing+ Interconnect Mode+ +Guided Mode/AutoCommentChange the input format for positioningcontacts/coils.Change the input format for entry withkeyboard.Change the input mode for drawinglines.Add a comment entry field at the start ofthe ladder block added in Guided editing.Section 8.4Section 8.10Section8.3.2Section8.10.9+ Insert Row Insert a row in the ladder being edited.+ Insert Column+ + New Ladder Block Before+ + New Ladder Block AfterInsert a column in the ladder beingedited.Insert a new ladder block in front of theladder block being edited.Insert a new ladder block in back of theladder block being edited.- Input Instruction Display the Input Instruction screen.- Left Power Rail Display/hide the left power rail.Open ContactClose ContactOpen BranchClose BranchVertical Line SegmentHorizontal Line SegmentInsert an open contact at the cursorposition.Insert a closed contact at the cursorposition.Insert an open contact branch at thecursor position.Insert a closed contact branch at thecursor position.Insert a vertical line at the cursorposition.Insert a horizontal line at the cursorposition.Section8.3.6Section 8.8Section8.2.2Section8.8.7CoilFunction Block SelectionWindowInput LabelOutput Label- Rising Pulse- Falling Pulse- Rising Pulse Close- Falling Pulse CloseInsert a coil at the cursor position.Display the Function Block Selectionwindow.Insert an input variable at the cursorposition.Insert an output variable at the cursorposition.Insert a rising pulse at the cursorposition.Insert a falling pulse at the cursorposition.Insert a rising pulse close at the cursorposition.Insert a falling pulse close at the cursorposition.Section8.2.1+ Jump Insert a jump at the cursor position.+ Return Insert a return at the cursor position.+ Comment Insert a comment entry field.+ + Ladder Block Label Display the Ladder Block screen.List OperandsDisplay the Label Registration/Selectionscreen.Section6.2.2App - 14Appendix 1.7 Toolbar icons and shortcut keys for program editors
Appendix 1 List of Toolbars and Shortcut KeysToolbariconShortcut key Corresponding menu Description ReferenceIncrement PinsIncrement the number of arguments offunctions and function blocks.Delete PinsDelete the number of arguments offunctions and function blocks.+ Num *1 Increase Zoom Zoom in the screen one level.+ Num- + / -- + +- + +- + Jump- + +- + +- +*1 Decrease Zoom Zoom out the screen one level.Signal Configuration/ConfigureSignal Configuration/ToggleChange Label-Device-Address ModeChange Label-CommentModeZoom Header/Body/HeaderNarrow and widen the width of ladderblock in the guided mode.Set the type of contact and coil.Change the type of contact and coil inthe order shown below:• Contact: Open Contact → CloseContact• Coil: Normal → Negation → Set →ResetJump to the specified ladder blocknumber.Switch the display format in order (label,device address).Switch the display between label andcomment.Open the label setting screen for theselected POU.Section8.6.3Section6.2.4-Section 8.5Section9.2.1Section 8.7- + Copy Copy the selected data. -- + Cut Cut the selected data. -- + Paste- + Auto Connect-Guided Mode/Overwrite, Insert ModePaste the cut/copied data at the cursorposition.Connect the start and end points to drawa line.Switch the input mode betweenOverwrite/Insert in the guided mode.Section6.2.9-Section8.3.2Section 8.10Change the input mode for drawing lines- + Guided Mode/Line Modein Guided editing.- Instruction Help Display details of instructions. (Common)*1: ‘Num' indicates keys in the numeric keypad.9SEARCHING FORSPECIFIC POSITION10CONVERTING/COMPILING PROGRAMS11WRITING/READING DATA TO/FROMPROGRAMMABLE CONTROLLER CPU12MONITORING13USING USERLIBRARIES14SETTING OPTIONSAINDEXIAPPENDIXAppendix 1.7 Toolbar icons and shortcut keys for program editors App - 15
<strong>GX</strong> <strong>Works</strong>2APPENDIX■"SFC" toolbar icons and shortcut keysThe following table shows the toolbar icons and the corresponding shortcut keys for the SFC editor.ToolbariconShortcut key Corresponding menu Description Reference[STEP] New Step Insert at the cursor position.[B] Block Start Step (withEND check)Insertat the cursor position.+[BS] Block Start Step(without END check)Insertat the cursor position.[JUMP] Jump Insert at the cursor position.[END] END Step Insert at the cursor position.+ [DUMMY] Dummy Step Insert at the cursor position.[TR] Transition Insert at the cursor position.[--D] Selection Divergence[==D] SimultaneousDivergence[--C] SelectionConvergence[==C] SimultaneousConvergenceInsert a selection divergence.Insert a simultaneous divergence.Insert a selection convergence.Insert a simultaneous convergence.+ [ | ] Vertical Line Insert a vertical line.+ No Attribute Set the step attribute to no attribute.+ Stored Coil Set the step attribute to Stored Coil.++Stored Operation (withoutTransition Check)Stored Operation (withTransition Check)Set the step attribute to Stored Operation(SE).Set the step attribute to Stored Operation(ST).(Simple)+ Reset Reset the step attribute.+ Vertical Line (Draw Line) Insert at the cursor position.++++Selection Divergence(Draw Line)Simultaneous Divergence(Draw Line)Selection Convergence(Draw Line)SimultaneousConvergence(Draw Line)InsertInsertInsertInsertat the cursor position.at the cursor position.at the cursor position.at the cursor position.+ Delete Line Delete a line at the cursor position.-SFC Step/TransitionCommentEdit the SFC step/transition comments.- Sort SFC Step No. Sort the SFC block step numbers.-SFC All Block BatchMonitoringBatch monitor all blocks in the SFCprogram.App - 16Appendix 1.7 Toolbar icons and shortcut keys for program editors
Appendix 1 List of Toolbars and Shortcut KeysToolbariconShortcut key Corresponding menu Description Reference- SFC Auto Scroll+ Read ModeWrite ModeMonitor Mode+ Monitor (Write Mode)Scroll the screen to display active stepsautomatically when they are out of thescreen during monitoring.Switch the mode of the open window to"Read Mode".Switch the mode of the open window to"Write Mode".Switch the mode of the open window to"Monitor Mode" during monitoring.Switch the mode of the open window to"Monitor (Write Mode)" duringmonitoring.- ZoomChange the display magnification ratio ofthe SFC diagram.- + Insert Row Insert a row at the cursor position.- + Delete Row Delete a row at the cursor position.- + Insert Column Insert a column at the cursor position.- + Delete Column Delete a column at the cursor position.- + Jump- + Find Jump Step- Numeric key -- +- + / +double-clickSFC Step/TransitionCommentOpen Zoom/StartDestination BlockMove a cursor to the SFC step number/transition number in the specified block.Move a cursor to the step of the jumpsource.Move a cursor to the SFC step number/transition number.Display the SFC step/transitioncomments.Display the Zoom editor window or thestart destination block.- - Display the start destination block.(Simple)9SEARCHING FORSPECIFIC POSITION10CONVERTING/COMPILING PROGRAMS11WRITING/READING DATA TO/FROMPROGRAMMABLE CONTROLLER CPU12MONITORING13■- + Back to Start SFC Block Display the start source block.- + + Program DisplaySFC block list shortcut keysThe following table shows the shortcut keys for the SFC block list.ToolbariconDisplay programs on the SFC diagramwhen editing in MELSAP-L.Shortcut key Corresponding menu Description Reference- + JumpJump to the specified block number/dataname.- Numeric key - Jump to the selected block number.- + SFC Block List Comment Display comments of the SFC block list.(Simple)USING USERLIBRARIES14SETTING OPTIONSAINDEXIAPPENDIXAppendix 1.7 Toolbar icons and shortcut keys for program editors App - 17
<strong>GX</strong> <strong>Works</strong>2APPENDIX■Other shortcut keysThe following table shows other shortcut keys for program editors.ToolbariconShortcut key Corresponding menu Description Reference- / / / - Move the cursor in the arrow direction.- - Scroll up the screen.- - Scroll down the screen.- + - Scroll the screen to the left.- + - Scroll the screen to the right.- -- -- + -- + -Move the cursor to its leftmost position inthe row.Move the cursor to its rightmost positionin the row.Move the cursor to the start of theprogram.Move the cursor to the end of theprogram.--+ / //- Set a range.-+ +-Select the range from the currentposition up to the start of the program.-+ +-Select the range from the currentposition down to the end of the program.- - Delete the selected target.App - 18Appendix 1.7 Toolbar icons and shortcut keys for program editors
Appendix 1 List of Toolbars and Shortcut KeysAppendix 1.8Toolbar icons and shortcut keys for I/O system settingfunctionThe following table shows the toolbar icons and the corresponding shortcut keys for the I/O systemsetting function.ToolbariconShortcut key Corresponding menu Description Reference-+ New Create a new I/O system setting.+ Open Open an existing I/O system setting.+ Save Save the I/O system setting.+ Cut Cut the selected data.+ Copy Copy the selected data.+ PasteExecute I/O SystemSetting- Disable I/O System Setting- Start MonitoringPaste the cut/copied data at the cursorposition.Execute the I/O system setting functionand starts simulation.Disable the execution of the I/O systemsetting function.Start monitoring the I/O System Settingscreen.- Stop MonitoringStop monitoring the I/O System Settingscreen.- + Exit I/O System Settings Exit the I/O system setting.(Common)9SEARCHING FORSPECIFIC POSITION10CONVERTING/COMPILING PROGRAMS11WRITING/READING DATA TO/FROMPROGRAMMABLE CONTROLLER CPU12MONITORING13USING USERLIBRARIES14SETTING OPTIONSAINDEXIAPPENDIXAppendix 1.8 Toolbar icons and shortcut keys for I/O system setting function App - 19
<strong>GX</strong> <strong>Works</strong>2APPENDIXAppendix 1.9Shortcut keys for operating intelligent function moduleThe following explains the toolbar icons and the corresponding shortcut keys for editing intelligentfunction module data.■Toolbar icons for positioning monitor functionThe following table shows the toolbar icons for the positioning monitor function.ToolbariconShortcut key Corresponding menu Description Reference- -Monitor the operating status ofpositioning module.- - Monitor the start history.- - Monitor the error history.- - Monitor the warning history.(Intelligent)- Start the positioning monitor.+ - Stop the positioning monitor.■Toolbar icons and shortcut keys for editing predefined protocol support functiondataThe following table shows the toolbar icons and the corresponding shortcut keys for editing predefinedprotocol support function data.ToolbariconShortcut key Corresponding menu Description Reference+ New Create a new protocol setting .+ Open Open an existing protocol setting .+ Save Save the protocol information.+ Copy Copy the selected data.Paste the cut/copied data at the cursor+ Pasteposition.- Print Print the protocol information.(Intelligent)- Write to Module Write data to a module.- Read from Module Read data from a module.App - 20Appendix 1.9 Shortcut keys for operating intelligent function module
9INDEXSEARCHING FORSPECIFIC POSITION10CONVERTING/COMPILING PROGRAMS11WRITING/READING DATA TO/FROMPROGRAMMABLE CONTROLLER CPU12MONITORING13USING USERLIBRARIES14INDEXISETTING OPTIONSIAPPENDIXIndex - 1
<strong>GX</strong> <strong>Works</strong>2INDEX[A]address .................................................................. 5-4, 8-23Application Instruction ............................................ A-21, 6-5array ...............................................................................5-16Auto connect .......................................................... 8-8, 8-11[B]bit specification of word device ......................................5-22[C]Checking for Errors and Warnings ...............................10-22Class ............................................................... 5-4, 5-9, 5-11Close Contact .................................................................8-15Coil ......................................................................... 8-4, 8-15comment ......................................................... 5-4, 5-19, 6-4Compile condition ...........................................................14-5Conditions of Monitoring ................................................12-4Constant .................................................5-4, 5-9, 5-11, 5-20Contact ...........................................................................8-15CSV file ..........................................................................5-29current value display ......................................................12-4current values .................................................................12-2[D]data type ....................................................... 5-4, 5-14, 5-15decimal and hexadecimal ...............................................12-4device ..................................................................... 5-4, 8-23device memory ...............................................................11-3display format .................................................................8-23Docking window ...............................................................2-2[E]editing mode .....................................................................8-3errors ..............................................................................10-6executing conditions .........................................................4-7[F]FBD ..................................................................................1-2function ...................................................4-14, 6-3, 6-5, 8-18function block .........................................4-14, 6-3, 6-5, 8-18Function Block Selection Window ................... 2-2, 4-15, 6-5[G]Global label ......................................................................5-3grid .................................................................................8-31input variable .................................................................. 8-18Instance ....................................................... 8-19, 8-22, 12-3[J]Jump ................................................................. 8-4, 9-2, 9-4[L]Label Name ..................................................... 5-4, 5-9, 5-11label setting .............................................................5-2, 5-13Labels ............................................................................... 5-2Ladder .............................................................................. 1-2ladder block header ........................................................ 8-28ladder block label ........................................................... 8-28ladder block title ............................................................. 8-28ladder symbol ................................................................... 8-4Left power rail ................................................................... 8-2library help .................................................................... 13-16library passwords ........................................................... 13-9line .................................................................................... 8-8List format ............................................................ A-21, 6-14List of Functions ............................................................... 1-5local labels ..............................................................5-9, 5-11[M]menu bar .......................................................................... 2-2[N]Navigation window ........................................................... 2-2Negation ......................................................................... 8-15[O]Open Contact ................................................................. 8-15output variable ................................................................ 8-18Output window ............................................ 2-2, 10-3, 10-22[P]POUs .....................................................................4-10, 4-14Priority .............................................................................. 4-8Program ........................................................................... 6-2Program blocks ............................................... 4-4, 4-14, 6-3Program Configuration ..................................................... 4-2Program Editor ................................................................. 6-2program files .................................................................... 4-3programming language .............................................1-2, 6-3<strong>Project</strong> view ...................................................................... 4-2Property ............................................................................ 4-8[I]indention ...........................................................................7-3Index - 2
[R]reading symbolic information from programmable controllerCPU ................................................................................11-5Reset ..............................................................................8-15Return ...............................................................................8-4[S]Select Mode ......................................................................8-4Set ..................................................................................8-15Setting Ranges for Devices Assigned Automatically ......5-26SFC ..................................................................................6-3Shortcut Keys .............................................................. App-2Simple project ................................................................ A-21Special instruction ..................................................A-21, 6-5ST ............................................................................. 1-2, 7-2ST editor ................................................................... 6-5, 7-2structure ..........................................................................5-20Structure Setting .............................................................5-20structured data type ........................................................5-20structured ladder ...............................................................1-2<strong>Structured</strong> ladder editor ....................................................6-5structured ladder/FBD ......................................................8-2structured ladder/FBD editor .................................... 6-5, 8-2<strong>Structured</strong> project .............................................................1-2Symbolic information ......................................................11-5[T]tabulator ............................................................................7-4tasks .................................................................................4-3templates ..........................................................................7-5tool hint ...........................................................................6-15toolbar ...................................................................2-2, App-2[U]user library ......................................................................13-3User Library view ............................................................13-4[V]variable ................................................................. 8-19, 8-37[W]9SEARCHING FORSPECIFIC POSITION10CONVERTING/COMPILING PROGRAMS11WRITING/READING DATA TO/FROMPROGRAMMABLE CONTROLLER CPU12MONITORING13USING USERLIBRARIES14ISETTING OPTIONSwarning ................................................................. 10-6, 10-7Work window ....................................................................2-2writing symbolic information from programmable controllerCPU ................................................................................11-5IAPPENDIXINDEXIndex - 3
Microsoft, Windows are registered trademarks of Microsoft Corporation in the United States and other countries.Ethernet is a trademark of Xerox Corporation.All other company names and product names used in this manual are trademarks or registered trademarks of theirrespective companies.