English - Winterhalter
English - Winterhalter
English - Winterhalter
- No tags were found...

Create successful ePaper yourself
Turn your PDF publications into a flip-book with our unique Google optimized e-Paper software.
Before working with the machine2.3 Electrical Safety The electrical safety of this machine is guaranteed only if it is connected to a correctly installed protectivecircuit and a residual current circuit breaker. It is very important that this basic safety requirement is testedand in case of doubt the house installation is checked by a qualified electrician.<strong>Winterhalter</strong> cannot be held responsible for damage caused by a missing or broken earthing system (e.g.electrical shock).2.4 Safety Instructions for Maintenance and Repairs Maintenance work and repairs may only be performed service technicians authorized by <strong>Winterhalter</strong>.Improper maintenance or repairs may cause significant danger for the user, for which <strong>Winterhalter</strong> is notliable. When performing maintenance and repair work, unplug the powder dosing device from the power network.Electricity consumers (heating element, frequency inverter, ...) are under voltage until the on-sitemains disconnect switch has been operated. Only original <strong>Winterhalter</strong> replacement parts may be used for maintenance and repairs. If original replacementparts are not used, the warranty is invalidated. A damaged or leaking machine can endanger your safety. In case of defects, switch off the machine immediately.Switch off the on-site mains disconnector (main switch). Only then is the machine withoutpower. Do not operate a damaged machine. In case of defects resulting from an unknown cause, switch off themachine, and switch it on again only when the defect has been rectified. Contact your installer or electrician if the on-site water or electricity supply is the cause of the malfunction. Notify an authorized service technician or your retailer if another fault has occurred. If the mains connecting line of this device is damaged, it must be replaced by the <strong>Winterhalter</strong> or its CustomerService or another qualified person in order to prevent hazards. The power cable must beH07 RN-F type or equivalent.2.5 General safety notes Read through the safety notes and operating instructions in this manual carefully. Retain the operatinginstructions for future reference. <strong>Winterhalter</strong> Gastronom GmbH does not assume liability or warranty incase of non-adherence to these safety and operating instructions. Do not make changes, additions or reconstructions in the dishwasher without the approval of the manufacturer. Use the dishwasher only after you have read and understood the operating manual. Allow the <strong>Winterhalter</strong>Customer Service Department to provide information about the operation and functioning of thedish washer. Always operate the machine as described in this operating manual. Train the operating personnel as regards handling the machine and inform them about the safety notes.Repeat the training sessions at regular intervals to prevent accidents. For your safety, test the local fault current circuit breaker (FI) regularly by pressing the test button. Close the local water shut-off valve after the work is complete. Switch off the local mains disconnector after the work is complete.3 Before working with the machine‣ Have the machine set up by an authorized service technician or your dealer ( 15).‣ Get the machine connected as per the locally applicable standards and the regulations of the authorisedmechanics (water, waste water, electrical system) ( 16 and 17).‣ After connecting the water and the power properly, contact the relevant <strong>Winterhalter</strong> dealer or your dealerfor the commissioning of the machine and for providing training in its operation. Get yourself and your operatingpersonnel trained in the operation of the machine.3
Product description4.4 Display (Touchscreen) and start buttonActivating the display‣ Touch the display with your finger. The display turns on and then off again after a short time. Thissaves energy and prevents accidental switching on of the machine.INFO Switching on the machine, see Section 7.2.On the screen touch-sensitive buttons (keys) are displayed. Operate the screen with your fingers only, notwith sharp objects. Each touch of a button is confirmed by a beep. Events such as the end of the programmeor malfunctions are indicated by a sequence of tones.INFO An authorised service technician can deactivate the beep and the sequence of tones.Operational state(a) On/Off key(b) Self-cleaning programme(c) Change to Info Level 1 Info Level 2 PIN Menu(d) Start buttonStart buttonThe coloured lighting of the start button (d) has the following meanings:Colournot litredgreenbluered and greengreen and blueblue and not litflashing greenflashing green-blueMeaningMachine is switched offMachine is not yet ready for useMachine is ready for useMachine is rinsingMachine is filling and heating upWashing programme is runningSelf-cleaning programme is runningWash programme ended; hood will not be opened yetOnly with EnergyPlus model:Vapours being extracted. The wash programme has not completely finished.Menu levelsThe machine electronic control unit is split into 3 levels: Level for the dishwashing staff ( 4.5) Info level 1 with additional washing programmes and information ( 10) Info level 2 with access to the PIN Menu ( 11)6
Rinse aid and detergent5 Rinse aid and detergentDanger Observe the safety precautions when handling chemicals and the dosage recommendationson the packaging. Wear protective clothing, protective gloves and protective goggles when handling chemicals.Caution Use only products that are suitable for commercial dishwashers. Such products are appropriatelymarked. We recommend <strong>Winterhalter</strong> products. These are especially adapted to<strong>Winterhalter</strong> dishwashers. Do not put rinse aids in the storage container for detergents and vice versa.5.1 Rinse aidA rinse aid is necessary to ensure that water on the dishes drains off after washing and dries off after a shortwhile. Rinse aid is automatically metered from an external container.The dosing level is set by the service engineer when commissioning the machine ( 12.6).5.2 DetergentCaution Do not use acidic cleaners. Do not mix different detergent products in order to prevent crystallisation that could destroythe detergent dosing device ( 5.4) Do not use products that can create foam, e.g. hand soap, soft soap, hand wash liquid. Ensurethat these do not enter the machine even during the pre-treatment of the utensils.A detergent is necessary to ensure that the leftovers and dirt on the dishes is cleaned. Detergents can besupplied as follows: Manually as detergent powder. Automatically from an external container using a detergent dosing device.INFOThe detergent dosing device is not included in the scope of delivery of all machines. When usingan external metering device, a transfer strip is available for connecting the dosing device ( 18).5.2.1 Manual dosing of detergent powderPre-dosing‣ Switch on the machine and wait until the start button is lit green.‣ Adhere to the dosing instructions on the packaging of the detergent. The machine's tank capacity is approx.35 litres.‣ Place approx. 100 g of detergent powder in the machine. This corresponds to a dosing of approx. 3 g/l.‣ Then start the wash cycle immediately to mix the detergent powder with the water.Post-dosingAt each wash cycle approx. 2.0-2.5 litres of fresh water enter the warewasher, which must be mixed withdetergent powder.‣ Fill approx. 30 - 40 g detergent of powder into the machine after 5 wash cycles.5.2.2 Automatic dosing of liquid detergentThe dosing amount is set by the service engineer when commissioning the machine ( 12.6).8
Operation7.3.1 Arranging the dishes in the washing rackDishes and cutlery‣ Place plates with their front side facing forwards.‣ Place cups, bowls and pots rim down.‣ Cutlery should be washed either standing in the cutlery holder or lying in a shallow basket. Make sure thatthey are not too close together. Soak cutlery, before you wash it.‣ Position knives and other sharp objects in the cutlery holder with the handle up in order to prevent injuries.Glasses‣ Pour out drink residue (not in the machine).‣ Remove scraps of paper.‣ Rinse off ash with water.‣ Places glasses rim down.‣ Space the glasses, so they do not rub against each other. This will avoid scratches.‣ For tall glasses choose a basket with appropriate divisions so that the glasses are held in a stableposition.7.3.2 Using automatic hood start‣ Choose a washing programme ( 4.5).INFO The washing programme remains selected until a different washing programme is chosen.‣ Slide the washing rack into the machine.‣ Check that the top and bottom rotary wash arms are free to turn.‣ Close the hood. The washing programme is started.7.3.3 Interrupting automatic hood start‣ Do not close the hood completely, but only as far as the lower detent position.INFOThe automatic hood start can be deactivated by an authorised service technician (P516). Everywashing programme must then be started by pressing the start button.7.3.4 Changing washing programme‣ Choose a different washing programme by tapping the button ( 4.5). The background of the button (4) becomes white.‣ Close the hood. The washing programme is started.7.3.5 Intensive programmeIf the stains are particularly dried in, the washing programme can be intensified‣ Close the hood and press the start button twice in short succession ("double click"). In the info filed, the "Brush" icon flashes.INFOThe intensive program only affects the current washing programme and is thenautomatically deactivated again.7.3.6 End of the programmeThe start button flashes green, as soon as the washing programme has ended and the hood remains unopened.Only with EnergyPlus modelThe start button then flashes blue-green. At the same time, the warm-humid vapour is extracted from thewashing compartment, and the heat energy stored in it is recovered for the next wash cycle. If possible, donot open the hood yet at this time.The Start key flashes green as soon as the warm air is extracted.12
Operation7.3.7 Prematurely ending the washing programmeA washing programme can be interrupted in the following ways: Press the start button Tap on the button of the selected washing programme7.3.8 Periods of disuseDo not switch the machine off during periods of disuse.‣ Close the hood as far as the detent position to prevent it cooling down.7.4 Switching offSwitch the machine off at the end of the working day using the self-cleaning programme ( 8.1.2), so that itis cleaned and emptied every day.INFOIf you use the On/Off switch, the tank stays filled but will no longer be kept at temperature. If thetank temperature has dropped too much before the next washing cycle, the tank will be emptiedautomatically and filled again.13
Servicing and maintenance8 Servicing and maintenanceWarning Do not spray the machine and the surrounding area (panels, base) using a water hose,steam-jet air ejector or high-pressure cleaner. Ensure that the base of the machine is not flooded when washing it in order to prevent anuncontrolled inflow of water.Warning8.1 Daily CleaningWear protective clothing and protective gloves before touching parts in contact with detergentsolution (filters, wash arms, ...)8.1.1 During operationRemove the filter cylinder, clean if necessary and re-insert it.8.1.2 Self-cleaning programme at the end of the working dayThe machine is equipped with a self-cleaning programme that assists you when you are cleaning the insideof the machine. After the first programme step, the self-cleaning programme is interrupted so that you canremove the filter cylinder and the tank cover and clean them. If you do not follow this step, the self-cleaningprogramme will continue automatically after 30 seconds.‣ Proceed in accordance with Figures B1 to B27.14
Servicing and maintenanceTerminating the self-cleaning programme:‣ Press this button. The background of the button becomes blue. The machine is filled again.8.1.3 Cleaning the interiorCautionEnsure that there are no rusty foreign objects in the machine which can also cause the "stainlesssteel rust-free" material to start rusting. Rust particles can come from non-rust-free cleaners,damaged wire racks or non-rust-protected water lines.The following materials must not be used for cleaning: High-pressure cleaner Detergents containing chlorine or acid Sponges and wire brushes containing metal Abrasives or abrasive cleaners‣ Remove dirt with a brush or a cloth.8.1.4 Cleaning the exterior of the machine‣ Clean the display with a damp cloth.‣ Clean the external surfaces using a stainless steel cleaner and stainless steel support.8.2 Weekly CleaningCleaning the rotary wash arms (top and bottom)‣ Proceed in accordance with Figures C1 to C6.Cleaning the wash arms (top and bottom)‣ Proceed in accordance with Figures D1 to D9.15
Servicing and maintenance8.3 Monthly cleaningCleaning the dirt trap‣ Close the shut-off valve for the water supply.‣ Clean the dirt trap.Only with EnergyPlus modelCleaning the Energy Module‣ Slide the ventilation grill upwards and remove it.‣ Clean the space behind the ventilation grill with a cleaning cloth.‣ Wash the ventilation grill in the machine and then refit.‣ Open the hood.‣ Spray the suction channel with warm water. Use a water hose,not a high-pressure cleaner.‣ Clean the suction channel with a cleaning cloth.8.4 DescalerIf the machine is operated with water of high hardness without water treatment, descaling is necessary atregular intervals ( 12).8.5 Maintenance by the Customer ServiceWe recommend that you have an authorised <strong>Winterhalter</strong> service engineer carry out the maintenance of themachine at least twice a year so that vulnerable parts can be checked and replaced accordingly. Originalspare parts must be used for repairs and the replacement of worn parts.Worn parts are, for example: Dosing pipes Shafts of the rotary wash arms Hood seal Water supply hose<strong>Winterhalter</strong> has a maintenance contract that includes these services.In the electronic control unit, the number of hours of operation or washing programmes beforeservicing should be performed can be programmed and at what number of hours of operationremaining the symbol for maintenance/service can be displayed. If necessary, have this functionactivated by a service technician authorised by <strong>Winterhalter</strong>.16
Malfunctions9 MalfunctionsThis chapter explains the remedies for malfunctions. The causes and remedies are specified in the tables.Contact a <strong>Winterhalter</strong> service engineer if you cannot rectify the error yourself.DangerDanger to life. Live components. Do not open any machine covers or machine parts if it requires tools. There is danger ofshock. Only a <strong>Winterhalter</strong> service engineer should carry out work on the electrical system. Themachine must first be disconnected from the mains.Faults are displayed in the information box in the form of pictograms. In addition, every malfunction will berecorded in the hygiene journal ( 12) and can be retrieved in Info Level 2 ( 11). Information is recorded inboth menus when the malfunction is remedied.Pictogram Meaning Possible Cause RemedyHood is open Programme start with open hood Close the hoodDetergent is empty 1Rinse aid is empty 1Lack of waterIntegral water treatmentis exhaustedExternal partial orfull demineralisationunit blockedService interval isrunning outCheck the calcificationWater shut-off valve closedDirt filter in the dirt trap is blockedSolenoid valve defective orblockedLow saltThe number of operating hours /cleaning programmes set in thecontrols has been reached.INFO: This function is not activatedin factory.The number of operating hours setin the control system has beenreached.Change the detergent storagecontainerChange the rinse aid storage containerOpen the water stop valveRemove and clean the dirt filter( 8.3)contact an authorised servicetechnician for the repairFill the salt reservoir with regeneratingsalt ( 6.2)Exchange the partial demineralisationunit; exchange the core of thefull demineralisation unit.contact an authorised servicetechnician for the repairStart the descaling programme( 12.5)1 is now displayed, when a suction tube with level control is used and connected to the machine.17
MalfunctionsPictogram Meaning Possible Cause RemedyRotary wash arm is not correctlyengagedCorrectly engage the rotary washarmRotary wash arm obstructed by,Lower rotating wash e.g. a piece of cutleryRemove the obstructionarm is blocked. Rotary wash arm blocked by pollutionClean the wash arm bearing( 8.2)Defective drive 2Contact an authorised servicetechnician for the repairRotary wash arm obstructed by,e.g. high dishesRemove the obstructionUpper rotating washarm is blocked.Rotary wash arm blocked by pollutionClean the wash arm bearing( 8.2)Defective drive 2Contact an authorised servicetechnician for the repairFilter cylinderRemove, clean and replace theHeavily contaminated filter cylinderblockedfilter cylinderEnergy optimization 3Pump inlet filter notfittedPump inlet filter notfitted despite threepromptsAutomatic hoodopening 2 defectiveTank will be filledMalfunction witherror codeOn-site energy optimisationequipment switches individualelectrical consumers (heating elements).Missing pump inlet filter The machine switches offafter 30 seconds and will notbe filled.missing pump inlet filterIMPORTANT: The circulatingpump and drain pump can bedamaged by drawing in, for example,pieces of cutleryMotor defectiveStart a washing programme duringwhich the machine refills the waterVariousWait until the on-site energy optimisationequipment switches offFit the pump inlet filter and, if necessary,switch the machine onagain.INFO: When the prompt is downgradedthree times, the machinecan be switched onFit pump inlet filterContact an authorised servicetechnician for the repairWait till the machine has beenfilledDisplay the error code ( 9.1) andassign the repair to an authorisedservice technician2 Special equipment3 is displayed only when the machine is connected to an equipment with energy optimisation18
Malfunctions9.1 Error code callIn the display, the following symbol flashes‣ Tap the row next to the following buttons The error codes are displayed in area (a).INFO Malfunctions already resolved are also displayedhere (e.g. ERR 1 OK).‣ Contact an authorised service technician for the repair.‣ Press the button (b) twice to leave the Menu.9.2 Poor cleaning resultThe dishes do not get cleanThere is formation of layers onthe dishesThe dishes do not dry on theirownPossible CauseRemedySet the dosing amount as per the manufacturer’sspecifications ( 12.6)No or excessively low detergentCheck the dosing lines (for kinks, breakage,...)dosingExchange the storage container, if emptyDishes incorrectly sorted Do not stack dishes one over the otherNozzles of the wash arms Remove the wash arms and clean theblockednozzles ( 8.2)Excessively low temperatures Test the temperatures ( 10)In case of grease residues:The water is too hardIn case of starch residues:Temperature of the manual precleaning(brush) is higher than30 °CNo or excessively low rinse aiddosingWater intake pressure too lowCheck the water preparationClean thoroughlyLower the temperature of the manual precleaningCarry out the basic cleaning program( 12.5.2)Set the dosing amount as per the manufacturer’sspecifications ( 12.6)Check the dosing lines (for kinks, breakage,...)Exchange the storage container, if emptyContact an authorised service technicianfor the repairFor machines without integral softener:INFO The water quality affects the washing and drying performance. We therefore recommend from atotal hardness of more than 3° dH (0.53 mmol/l) that the machine is supplied with softened water.19
Info Level 110 Info Level 1Calling Info Level 1‣ Press the following button:(1) Buttons for retrieving information the priming of the dosing device and theselection of additional programmes(2) Back button(3) Start button(4) Switch to Info Level 2 ( 11)(5) Serial number(6) Current tank temperature(7) Current rinse temperature(8) Machine type (PT-M, PT-L or PT-XL)(9) Info field(10) On/Off switch (tank will then not be emptied)(11) Scroll buttons for areas (1)Buttons for the areas (1)Addresses‣ Press the button. The following 2 addresses appear: SERVICE: Address of the service technician CHEMICALS: Address of the chemicals supplier (rinse aid, detergent, ...)INFO If no addresses appear, the authorised service technician can enter thematching addresses.Prime the detergent dosing device and dosing tube‣ Keep the button pressed. The background of the button becomes white. The dosing device is activated(max. 30 seconds)Prime the detergent dosing device and dosing tube‣ Keep the button pressed. The background of the button becomes white. The dosing device is activated(max. 30 seconds)20
Info Level 1Integrated operating instructions ( 13)‣ Press the button. The integrated operating instructions appear.Tips‣ Press the button. Tips appear concerning themes such as hygiene, cleaning of dishes and economy.INFOAccessing the integrated operating instructions and tips is possible at any time, even while a washingprogramme is running.Additional programmesINFO The number of special programmes depends on the programming of the machine.Energy saving programmeWhisper programmefor especially quiet washingShort programmeSpecial programmeThe special programme can be freely programmed by the service technician to yourwishes (time, temperature, mechanics, chemistry).Using the additional programmes‣ Tap on the button of the selected washing programme The background of the button becomes white. In the info field the display of the temperature is replaced by the display of the additional programmes.‣ Press button (3) to start the additional program. The start button (3) lights up in blue. The start button (3) flashes green when the additional programme has ended. The additional programme remains stored until it is disabled or another additional programme is selected.Additional programs with the "Cool" and "effect" special equipmentINFO Button appears only on "Cool" type machines.As long as the button is enabled (white background) rinsing will be with cold water. Todisable the function, the button must be touched. The background becomes dark and in the Info field (9) flashes.INFO Button appears only on "effect" type machines.As long as the button is enabled (white background) rinsing will be at a lower temperature.To disable the function, the button must be touched. The background becomes dark and in the Info field (9) flashes.21
Info Level 211 Info Level 2Calling Info Level 2‣ Tap the row next to the following buttons:(1) Area for displaying events and malfunctions(2) Back button(3) Start button(4) Switch to the PIN Menu ( 12)(5) Current time(6) Current tank temperature(7) Current rinse temperature(8) Current date(9) Info field(10) On/Off switch (tank will then not be emptied)(11) Scroll buttons for areas (1)Events and malfunctionsIn this field all events and malfunctions are displayed. Already resolved malfunctions appear here as well.Examplelast entryolder entryDisplayEvt xxERR xxERR xx OKExplanationEvent (e.g. end of a washing programme)MalfunctionMalfunction resolvedINFO Information with a date cane be found in the Hygiene logbook ( 12.4).22
PIN Menu12 PIN MenuINFO If you switch to the PIN Menu, the machine switches off.Accessing the PIN Menu‣ Tap the row next to the following buttonsType in "1575"INFOIncorrectly entered digitscan be corrected with the button.INFO An incorrectly entered PIN is displayed on the screen as the symbol. If you have entered yourPIN incorrectly five times, the input is locked for 2 minutes.OverviewGeneral settings (time, date, language, contrast) ( 12.1)Automatic programming On/Off switching ( 12.2)Display the operating data ( 12.3)Access the hygiene journal ( 12.4)Start descaling or cleaning programme ( 12.5)Changing the amount of detergent/rinse aid ( 12.6)Set parameters for external dosing devices ( 18.3)Reset water back-flow counter ( 12.7)Leaving the PIN Menu‣ Press the button.12.1 General Settings12.1.1 Date, Time, Temperature unitsHere you can enter the current date and the current time, change the format of the time, and change thetemperature units.INFOThe time must be changed for the summer/ winter time changeover.Retrieving the settings‣ Tap the row next to the following buttons23
PIN Menu‣ Press the back button (3) to exit from the menu.Setting the date‣ Press the button (1).‣ Use the numeric keypad to enter the current date. Format:YYYY-MM-DD (Year-Month-Day)INFODuring entry, the date is checked for whetherit exists. Only plausible dates can be entered.Setting the time‣ Press the button (2).‣ Use the numeric keypad to enter the current time.Setting the time format‣ Switch between 24-Hour-Mode ("24h") or 12-Hours-Mode ("AM/PM") by pressing the appropriate button.Setting the temperature units‣ Switch between Degrees Celsius ("°C") and DegreesFahrenheit ("°F") by pressing the appropriate button.12.1.2 Setting the contrastHere you can change the contrast to match the display of the screen to the lighting conditions in your kitchen.Retrieving the settings‣ Tap the row next to the following buttons‣ Change the setting with the and buttons until all ofthe data on the display is readable.‣ Confirm with the button.‣ Press the back button (1) to exit from the menu.12.1.3 Setting the languageHere you can set the language in which to display texts on the screen.Retrieving the settings‣ Tap the row next to the following buttons‣ Select the required language.‣ Press the back button (1) to exit from the menu.24
PIN Menu12.2 Automatic Switch On / Switch OffHere you can: programme , when the machine should automatically fill and heat up. programme, when the machine should automatically switch off.The automatic switching on/off can be set either per day or for a special date. If the inputs overlap, a specificdate always takes precedence over the weekly programIMPORTANTThe following requirements must be met at the time of the automatic power-on: The hood is closed. The on-site mains disconnector is switched on. The water stop cock is open.Automatic Switch On programming‣ Tap the row next to the following buttonsSetting the weekday‣ Press the button (3).‣ Use the scroll buttons to select the required weekday.‣ Tap on the button of the selected weekday. The background of the button becomes white.‣ Enter the time for the start of automatic activation at thenumeric keypad.‣ Repeat the above step as necessary for the other daysof the week.‣ Check whether the button (3) is activated (white background).Only then is automatic switch-on active.‣ Press the back button (2) to save your input.Setting a special date‣ Press the button (1).‣ Enter the time and the date for the start of automaticactivation at the numeric keypad.‣ Check whether the button (1) is activated (white background).Only then is automatic switch-on active.‣ Press the back button (2) to save your input.INFOThe date and time of the next automatic activation aredisplayed when the machine is switched on. Of coursethe machine can be used before this point of time.25
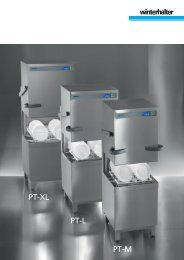
PIN MenuAutomatic Switch Off programming‣ Tap the row next to the following buttonsThe setting of days of the week or special dates is much the same as for automatic switch on. Proceed asdescribed in this section.Expiration of the automatic power-off: Sound 3 short beeps 10 second pause Sound 3 short beeps 10 second pause Sound 3 short beeps The machine is emptied and switched off using the self-cleaning programme.INFOIf the hood is open at the time of the automatic turn-off, the machine is pumped empty andswitched off, but not cleaned internally.12.3 Operating dataHere you can read out all operating data.Retrieving the operating data‣ Press the button.The following operating data is shown on the display.CommissioningNext service in 4Total operation hoursTotal washing cyclesTotal water consumptionFill. Washing cycle EnergyPlus 5Total energy savings 5Days-Operating hoursDays-Washing cyclesDays-Water consumptionRemaining capacity water collectionOperating hours Master old 6Datex hours or washing cyclesx hoursxx Litresxx kWhx hoursxx Litresx Litresx hoursINFOThe display depends on the facilities of the machine.‣ Press the back button (3) to exit from the menu.4 An authorised service technician can activate this function.5 only for EnergyPlus6 when a new display is installed26
PIN Menu12.4 Hygiene logbookIn the hygiene logbook you can: retrieve all operating conditions, actions, and failures for one day in chronological order . retrieve all HACCP and hygiene relevant data.The list starts with the current date and the first event on this day. Then the following events on that day, andthen the events of days before The most important operating data are summarized at the end of each day.INFOWhen the memory capacity is reached, the oldest data is deleted as soon as new data is added.Access the hygiene logbook‣ Press the button. The hygiene logbook display then appears: The list starts with the current date and the first event on this day. This is followed by the events from the days before.‣ Press the back button (3) to exit from the menu.12.4.1 Data transfer to PC (option)Because the hygiene logbook stores only a limited number of entries, there is also the possibility to transferthe records to a PC and archive them there.For more information, see the related documents. .27
PIN Menu12.5 Descaling / cleaning12.5.1 Descaling programmeIf the machine is operated with hard water without the relevant water preparation, the boiler, the machineinterior, all water lines and other components can scale.Grease residues and dirt that remain in the machine can contribute towards an unhygienic interior and canlead to failure of heating elements. Regular removal of these layers is absolutely essential.Using the descaling programme you can descale the inside of the warewasher. The water carrying lines andthe boiler can only be descaled by an authorised service technician.For descaling, you need an acid-based descaler suitable for commercial warewashers. We recommend the<strong>Winterhalter</strong> Descaler A 70 LS.Danger Observe the safety precautions when handling chemicals and the dosage recommendationson the packaging. Wear protective clothing, protective gloves and protective goggles when handling chemicals.Ideally, start the descaling programme when the machine is empty and switched off. If the machine is alreadyprepared for use, it will automatically empty first.Only with external detergent dosing devices:WarningDevelopment of chlorine gasIf you mix active chlorinated detergent and descaler, chlorine gas is produced. Stop the detergentdosing (e.g. remove the suction tube or switch off the dosing device).INFOA detergent dosing device built into the machine will be disabled automatically in the descalingprogramme.Start the descaling programme‣ Tap the row next to the following buttonsThe button flashes while theprogramme is running.WarningDescaler produces chemical burnsThe descaling solution must not remain in the machine. If you switch off the machine when thedescaling programme is in progress or if you interrupt the programme, the machine must beemptied, refilled and again emptied. Use the self-cleaning programme for this.28
PIN MenuEnd of the descaling programme: With a machine ready for use: The tank is emptied and re-filled without detergent. With an empty, switched off machine: The tank is filled without detergent. Once the machine is ready for operation, the text "Add descaler. Press start button." appears on thedisplay.‣ Open the hood and place descaler inside the machine. Follow the recommended dosage.INFO The machine's tank capacity is approx. 35 litres.‣ Close the hood and press the start button. The start button lights up in blue. The start button continues to flash. The descaling solution is circulated in the interior. On the display, the time counts down from 600 seconds. Once the time has expired, the start button should stop flashing.‣ Open the hood and check whether the inside has been sufficiently descaled.INFO If the hood is not opened within the next 600 seconds, the descaling programme continues automaticallyand the machine will be emptied.‣ Place more descaler in the machine if there are still white coatings. Close the hood and press the startbutton.‣ Press the back button if there are no more white deposits inside the machine. The machine empties and is then refilled with cold water. Once the desired level is reached, the coldwater is circulated for 60 seconds and then drained. The machine switches off automatically.‣ Open the hood and check that the machine has been completely emptied.12.5.2 Basic cleaning programmeNew dishes and new glasses generally have a protective coating, which can be removed by using the basiccleaning program. The program can also be used if deposits such as starch have built up on the dishes.Starting the basic cleaning programme‣ Tap the row next to the following buttonsThe button flashes while theprogramme is running.End of the descaling programme: With an empty, switched off machine: The machine is filled and heated up. With a machine ready for use: A little water still flows into the boiler. Once the machine is ready for operation, the text "Add descaler. Press start button." appears on thedisplay.‣ Open the hood and place descaler inside the machine. Follow the recommended dosage.INFO The machine's tank capacity is approx. 35 litres.‣ Slide the basket with the dishes to be cleaned into the machine.‣ Close the hood and press the start button. The start button lights up in blue. The start button continues to flash. The detergent solution is circulated in the interior. On the display, the time counts down from 300 seconds. This is followed by a drying pause and the rinse. Once the time has expired, the start button should stop flashing and it should flash green.‣ Open the hood and remove the basket from the machine.‣ As necessary, wash more racks or press the back button to exit from the menu.29
PIN Menu12.6 Changing the amount of detergent / rinse aidWhen a new detergent or a new rinse aid is used, it may be necessary to change the dosing amount. Pleaseobserve the dosing recommendations on the packing.The dosing amount can be adjusted separately for every standard programme.IMPORTANTIn the next menu, only the dosing amount of the installed dosing devices is changed. Pleaseconsult the corresponding device documents for external dosing devicesOpening the menu‣ Press the button.Changing the detergent dosing mixture‣ Select a washing programme: press one of the three buttons (1).INFO - The display of the three pictograms depends on the type of warewasher.- The dosing quantities for each washing programme can be set separately. The background of the selected button (1) and the button (4) changes to white. The current detergent dosing amount and the internal name (P003) is displayed in field (3).‣ Change the dosing amount with the scroll buttons (2).‣ Press the button (5) in order to save the entry. The button (5) flashes briefly in white.Changing the rinse aid dosing‣ Press the button. The background of the button becomes white.‣ The remaining steps are much the same as the steps for changing the detergent dosing mixture. Therefore,proceed as in the "Change detergent dosing mixture" section.‣ Press the back button (3) to exit from the menu.12.7 Resetting the water back-flow counterThe water back-flow counter must be reset if on machines with an external partial- or full desalinationunit this symbol flashes on the screen.‣ Contact an authorised service technician to exchange the external partial or full demineralisation unit.Resetting the water back-flow counter‣ Tap the row next to the following buttons‣ Press the back button (3) to exit from the menu.30
Integrated operating instructions13 Integrated operating instructionsThe integrated operating instructions has a short description of the operation of the machineRetrieving the integrated operating instructions‣ Tap the row next to the following buttonsRepeat14 Customer-specific modificationsThe machine can be adapted to individual needs within certain limits.Examples The pressure can be reduced if mainly light dishes parts are washed. The sound signal at the touch of a button can be disabled.‣ Contact an authorised service technician for the changes.15 Adjusting the machine and tableThe installation site must be frost-resistant so that the water supply systems do not freeze. If the installationsite is not frost-free: 19.15.1 Installing the machineINFO No gap is required between the wall and rear of machine.‣ Install the machine horizontally with the help of spirit level.‣ Adjust the base unevenness with the help of the height-adjustable machine feet.Installation variantsINFOIf the machine is installed in a corner, the left hood handle must be removed. For plugging holes akit with part no. 30002147 is available.15.2 Building tables‣ Table dismantling.‣ When <strong>Winterhalter</strong> tables are used, attach aluminium strut supports to the machineThe aluminium strut supports are in the machine.‣ Secure the table to the machine.‣ Connect the earthing cable from the table to the machine.31
Adjusting the machine and table15.3 Rack guide conversionINFO If the machine is installed in a corner, the left hood handle must be removed.‣ Unscrew the front guide bar (1) and attach to the left side of the rack guide.With separately available guide bars, the rack guide can be converted to the following rack sizes and walldistances:Rack size Distance between the wall and rear of the rack guide500 x 500 mm 170 mm530 x 530 mm 155 mm500 x 500 mm 140 – 150 mm600 x 400 mm 170 mm600 x 400 mm 235 mm32
16 Water connectionWater connectionThe water-related safety should be as per DIN EN 61770. The machine can be connected to an inlet water supply without an intermediateconnection to other safety equipment.WarningThe machine and any other relevant additional devices must be connected by an electrical company authorised by therelevant electricity supplier in relation to local standards and regulations.16.1 Requirements for the on-site inlet water connectionWater qualityThe inlet water must in microbiological aspects have the quality of drinking waterWater inlet temperature: max. 60 °CWater hardness:Minimum flow pressure:Maximum inlet pressure:Rate of Flowmax. 20 °C for "Cool“ and "EnergyPlus“ version machines.max. 50 °C for "effect" version glass washers 3 °dH (3.8 °e / 5.34 °TH / 0.54 mmol/l ) (recommendation, to prevent scaling of the machine) 30 °dH (37.6 °e / 53.4 °TH / 5.35 mmol/l) with machines with an integral softener.In "EnergyPlus"machine models:Connection to osmosis water only with a stainless steel exhaust heat exchanger100 kPa (1.0 bar)150 kPa (1.5 bar) for the "EnergyPlus“ machine model600 kPa (6.0 bar)at least 4 l/min16.2 Requirements for the local water shut-off valve. easily accessible not behind the machine 3/4" connector16.3 Connecting the supply hoseCautionThe supply hose may not be shortened ordamaged.Old existing hoses may not be re-used.Do not bend the supply hose while routing it.The supply hose and dirt trap are located in the machine.INFO The dirt catcher prevents particles from the water supplyline entering the machine thus preventing extraneousrust on the cutlery and in the machine.16.4 Connecting the drain pipeCautionThe drain pipe may not be shortened or damaged.Do not bend the drain pipe when laying it.The drain pipe is located in the machine.INFO The machine is equipped with a drain pump. The onsitewater drain must have a trap. The maximum heightof the on-site water drain is 650 mm.Left view‣ Connect the supply hose (TWw) to the machine.‣ Connect the dirt trap to the on-site water stop cock.‣ Connect the supply hose to the dirt trap.‣ Open the water stop cock and test whether the connectionsare sealed.Back view‣ Connect the drain pipe (A) to the machine.‣ Connect the dirt trap to the on-site water drain pipe.33
Electrical connection17 Electrical connectionDangerDanger to life. Live components.The machine and the relevant additional devices must be connected by an electrical company authorised by therelevant electricity supplier as per the locally applicable standards and regulations.When performing installation and maintenance work, unplug the powder dosing device from the power network.Check that there is no voltage.The electrical safety of this machine is guaranteed only if itis connected to a correctly installed protective circuit and aresidual current circuit breaker. It is very important that thisbasic safety requirement is tested and in case of doubt thehouse installation is checked by a qualified electrician.The circuit diagram must be observed.The equipment may only be operated at the voltages andfrequencies specified on the rating plate.A fixed connection must as a priority be installed for machinesthat are delivered without a power cord.When the machine must be permanently connected (withouta plug), a mains disconnector with all-pole separationfrom the network must be installed. The mains disconnectorswitch must have a contact opening width of at least 3 mm,and must also be lockable in the neutral position.17.1 Mains cable connectionRequirements for the mains connection cableCable type: Type H07 RN-F or equivalentThe wires must be fitted with wire end ferrules.Cross section and number of cores: suitable for on-site power and protectionfor more information see the sticker in the front panelThe electrical connection must be secured as a separatelyfused circuit with slow fuses or circuit breakers. The protectiondepends on the total power consumption of the machine.The total connected load is specified on the ratingplate of the machineIn the electric supply line, install a universal current sensitiveresidual current circuit breaker class B with a trippingcurrent of 30 mA (DIN VDE 0664) as a frequency inverter islocated in the machine.Machines delivered from the factory equipped with mainsconnection cable and safety plug (single phase), or CEEplug are (triple phase), may only be connected to the mainsnetwork indicated on the nameplate.Connect the mainscable to the rear of themachine.Withdraw the mainscable at the front androute it to the left.Follow the wiring diagram( 17.3).Connect the wires of themains connection cableaccording to the wiringdiagram.Close the quick releaseconnectors.If necessary plug bridges.Firmly press the bridgeswith a screwdriver.Connect the green-yellowwire to the distributor ofthe earth wiresAttach the mains supplycable to the mountingplate with a cable tie forstrain relief.17.2 Establishing an earth connection‣ Connect the machine into the equipotential bonding system.INFO The terminal screw is located behind the right rear leg of the machine. It is identified with the symbol.34
Electrical connection17.3 Wiring diagram35
External dosing devices18 External dosing devicesInstead of the integral dosing device, external dosing devices can also be used, Follow the instructions inthis section. Additional information can be found in German and <strong>English</strong> on the <strong>Winterhalter</strong> web site(Dosiertechnik / Dosing systems).18.1 TerminalsDangerDanger to life. Live components.Get the dosing device installed and commissioned by a service engineer authorised by <strong>Winterhalter</strong>.1 Detergent dosing nipple2 Take-over strip with red plug for the connection of an external dosing device3 Rinse aid dosing device4 Detergent dosing device (special equipment)5 Rinse aid dosing nipple6 Bushings for cables and hoses7 Water supply hose36
External dosing devices18.2 Electrical connectionIMPORTANT maximum current drain at the transfer strip: 0.5 A.‣ Connect the external dosing device to the 5-pin plug.Terminals (arranged from top to bottom)Terminal Voltage is on Condition RestrictionL1continuous voltageNRinse (O18)parallel to solenoid valve (O7)P709 = 0 while the machine is fillinga) during rinsingc)Wash (O20) while the circulating pump is running a) c), d), e)while the machine is fillingP704 = 0a), b)Fill / Water(O17)parallel to solenoid valve (O7) while the machine is filling during rinsinga) Hood / door closedb) minimum water level in the tankc) not in the self-cleaning programmed) not while the machine is fillinge) not in descaling or basic cleaning programmeP704 = 1a), b)The parameters P704 and P709 control when a voltage present at the fill and rinse terminals.Possible settingsP704 Use0 for dosing devices not originating from <strong>Winterhalter</strong>1 for dosing devices not originating from <strong>Winterhalter</strong>2 for <strong>Winterhalter</strong> dosing device SP 166 Z3 for pulse controlled dosing device (e.g. <strong>Winterhalter</strong> Fluidos DT)P709 Use0 for dosing devices not originating from <strong>Winterhalter</strong>1 not used2 for pulse controlled dosing device (e.g. <strong>Winterhalter</strong> Fluidos DB)Recommendations<strong>Winterhalter</strong> dosing device SP 166Z: P704 = 2 Set both potentiometers to zero Connect the black wire to Fill Set the dosing on the display (touchscreen)37
Taking the machine out of service for a long period18.3 Setting parametersRetrieving the settings‣ Tap the row next to the following buttons:Type in "1575"INFOIncorrectly entered digitscan be corrected with the button.‣ Using the scroll buttons (4), set the value of parameterP704.‣ Press the button (3) to save your input.‣ Press the scroll button (1) if parameter P709 must alsobe set. P709 is displayed.‣ Using the scroll buttons (4), set the value of parameterP709.‣ Press the button (3) to save your input.‣ Press the back button (2) to exit from the menu.19 Taking the machine out of service for a long periodFollow the notes if the machine needs to be out of operation for a long duration (holidays, seasonal business).‣ Empty the machine using the self-cleaning programme ( 8.1.2).‣ Clean the machine ( 8.1.3 and 8.1.4).‣ Leave the hood open.‣ Close the outer water shut off valve.‣ Switch off the local mains disconnector.If the machine is in a place that is not frost-free:‣ Instruct an authorised service technician to make the machine frost-free.20 Putting the machine back into service after a long period of disuse‣ Open the water shut-off valve‣ Switch on the local mains disconnector‣ Switch on the machineIf the machine is in a place that is not frost-free:After extended periods of disuse, the machine must be completely climatised (at least 24 hours at 25 °C). Ifthis requirement is met:‣ Contact an authorised service technician to put the machine back into service.38
Technical Information21 Technical InformationVoltageTotal connection valueFuseMinimum flow pressure:Maximum inlet pressure:Water inlet temperature:see rating plate 16.1DimensionsWithout EnergyPlusWith EnergyPlusPT-M PT-L PT-XLA [mm] 635 735 735B [mm] 585 685 685C [mm] 1515 1515 1635D [mm] 750 850 850E [mm] 1995 1995 2235F [mm] 440 440 560G [mm] 2195 2195 2435H [mm] 610 710 710*) Standard working height is 850 mm which can beoptionally increased to 900 mm.The vertical dimensions are increased by 50 mm by this.22 EmissionsNoiseWorkplace-related emission sound pressure level L (pA): max 66 dB (according to the selected program)Measurement uncertainty: K(pA): 4 dBExhaust airAdhere to the VDI Guideline 2052 when designing the ventilation system.23 DisposalContact your dealer so that the materials in the machine can be reused or disposed in accordance with locallegislation.89013234-00; 2013-02; Changes reserved39
<strong>Winterhalter</strong> Gastronom GmbHGewerbliche Spülsysteme<strong>Winterhalter</strong> Gastronom GmbHCommercial Dishwashing SystemsTettnanger Straße 7288074 MeckenbeurenDeutschlandTelefon +49 (0) 75 42 4 02-0Telefax +49 (0) 75 42 4 02-1 87Tettnanger Strasse 7288074 MeckenbeurenGermanyTelephone +49 (0) 75 42 4 02-0Telefax +49 (0) 75 42 4 02-1 8789013495-00/2013-05www.winterhalter.bizinfo@winterhalter.bizwww.winterhalter.bizinfo@winterhalter.biz