OAKTON pH 10 manual 8/00 rev - Oakton Instruments
OAKTON pH 10 manual 8/00 rev - Oakton Instruments
OAKTON pH 10 manual 8/00 rev - Oakton Instruments
You also want an ePaper? Increase the reach of your titles
YUMPU automatically turns print PDFs into web optimized ePapers that Google loves.
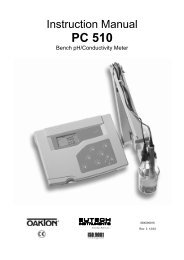
1. IntroductionThank you for selecting an <strong>OAKTON</strong> ® meter. The <strong>OAKTON</strong> ® <strong>pH</strong> <strong>10</strong> seriesmeters are economical, microprocessor-based meters that deliver high ±0.01 <strong>pH</strong>accuracy. They also read millivolts for taking ORP measurements. The <strong>pH</strong> <strong>10</strong> hasmany user-friendly features that are completely accessible through the waterresistantmembrane keypad.Getting started (sections 1 to 8)To perform the basic functions of this meter, read sections 1 through 8 of this<strong>manual</strong>. These sections include basic instructions (about keypad functions,connecting the electrodes, calibration, taking readings, etc.) that will get you upand running quickly.Maintenance, troubleshooting, etc (sections 9 to 15)The remaining sections of the <strong>manual</strong> deal with electrode maintenance, errormessages, and troubleshooting. This part of the <strong>manual</strong> also includes theSpecifications, Accessories, Warranty, and Return of Items sections.2. Display and Keypad functionsThe water-resistant membranekeypad makes the instrument easyMEAS CAL CONto use. Each button, when<strong>pH</strong>pressed, has a correspondingREADYHOLDmVgraphic indicator on the large liquidcrystal display. The LCD has a<strong>pH</strong>primary and secondary display.ERR°CATCThe primary display shows thereadings for <strong>pH</strong> and mV. Thesecondary display shows thetemperature readings<strong>pH</strong> Temp mVsimultaneously with the primary display. Both the primary and secondarydisplays show special indicators such as error messages, measurement units,and modes of operation.Keypad functions (see Figure A).ON/OFF Powers the unit on and shuts the unit off.Meter directly enters measurement mode when youONOFFturn it on.HOLD Freezes the measured readings. To activate,press HOLD while in <strong>pH</strong> or mV mode. To release,press HOLD again.HOLD MODEMODE Selects the parameter of measurement. <strong>pH</strong> isCALMEASthe default mode. Pressing MODE lets you scroll first toCONtemperature mode, then to mV mode, then back to <strong>pH</strong>mode again.NOTE: Temperature mode is used for temperaturecalibration; temperature readings are alwaysdisplayed on the secondary display.ACAL/MEAS Enters CAL mode for the calibrationfunction. You can access CAL only in the <strong>pH</strong> or temperature modes. <strong>pH</strong> buffervalues are 4.01, 7.<strong>00</strong>, and <strong>10</strong>.01. To end calibration and return to measurementmode, press CAL/MEAS again. Press OFF to end all functions. To confirmcalibration, press the CON key.▲ Use to scroll up the buffer calibration values provided by the calibrationprogram. It will scroll one value up from the present calibration value displayedon the LCD with each key press. When the highest calibration value is reached,it will scroll around to the lowest value.▼ Similar to ▲, except with each key press, the value scrolls one step down.CONPress CON to confirm the calibration point. “CON” will flash on the screen.Page 4Page 5


