BT SA-17 Pistol Manual - Paintball Solutions
BT SA-17 Pistol Manual - Paintball Solutions
BT SA-17 Pistol Manual - Paintball Solutions
- No tags were found...

You also want an ePaper? Increase the reach of your titles
YUMPU automatically turns print PDFs into web optimized ePapers that Google loves.
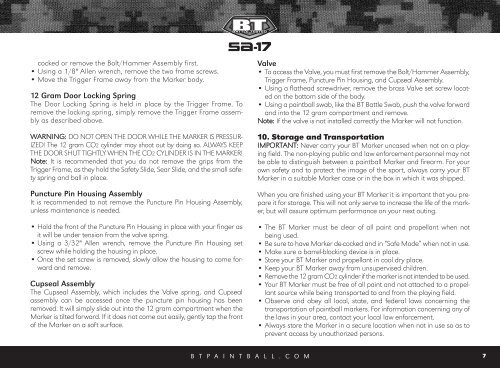
<strong>BT</strong>_<strong>SA</strong>-<strong>17</strong>_<strong>Manual</strong>.qxp 3/11/10 9:54 AM Page 7cocked or remove the Bolt/Hammer Assembly first.• Using a 1/8" Allen wrench, remove the two frame screws.• Move the Trigger Frame away from the Marker body.12 Gram Door Locking SpringThe Door Locking Spring is held in place by the Trigger Frame. Toremove the locking spring, simply remove the Trigger Frame assemblyas described above.WARNING: DO NOT OPEN THE DOOR WHILE THE MARKER IS PRESSUR-IZED! The 12 gram CO2 cylinder may shoot out by doing so. ALWAYS KEEPTHE DOOR SHUT TIGHTLY WHEN THE CO2 CYLINDER IS IN THE MARKER!Note: It is recommended that you do not remove the grips from theTrigger Frame, as they hold the Safety Slide, Sear Slide, and the small safetyspring and ball in place.Puncture Pin Housing AssemblyIt is recommended to not remove the Puncture Pin Housing Assembly,unless maintenance is needed.• Hold the front of the Puncture Pin Housing in place with your finger asit will be under tension from the valve spring.• Using a 3/32" Allen wrench, remove the Puncture Pin Housing setscrew while holding the housing in place.• Once the set screw is removed, slowly allow the housing to come forwardand remove.Cupseal AssemblyThe Cupseal Assembly, which includes the Valve spring, and Cupsealassembly can be accessed once the puncture pin housing has beenremoved. It will simply slide out into the 12 gram compartment when theMarker is tilted forward. If it does not come out easily, gently tap the frontof the Marker on a soft surface.Valve• To access the Valve, you must first remove the Bolt/Hammer Assembly,Trigger Frame, Puncture Pin Housing, and Cupseal Assembly.• Using a flathead screwdriver, remove the brass Valve set screw locatedon the bottom side of the body.• Using a paintball swab, like the <strong>BT</strong> Battle Swab, push the valve forwardand into the 12 gram compartment and remove.Note: If the valve is not installed correctly the Marker will not function.10. Storage and TransportationIMPORTANT: Never carry your <strong>BT</strong> Marker uncased when not on a playingfield. The non-playing public and law enforcement personnel may notbe able to distinguish between a paintball Marker and firearm. For yourown safety and to protect the image of the sport, always carry your <strong>BT</strong>Marker in a suitable Marker case or in the box in which it was shipped.When you are finished using your <strong>BT</strong> Marker it is important that you prepareit for storage. This will not only serve to increase the life of the marker,but will assure optimum performance on your next outing.• The <strong>BT</strong> Marker must be clear of all paint and propellant when notbeing used.• Be sure to have Marker de-cocked and in “Safe Mode” when not in use.• Make sure a barrel-blocking device is in place.• Store your <strong>BT</strong> Marker and propellant in cool dry place.• Keep your <strong>BT</strong> Marker away from unsupervised children.• Remove the 12 gram CO2 cylinder if the marker is not intended to be used.• Your <strong>BT</strong> Marker must be free of all paint and not attached to a propellantsource while being transported to and from the playing field.• Observe and obey all local, state, and federal laws concerning thetransportation of paintball markers. For information concerning any ofthe laws in your area, contact your local law enforcement.• Always store the Marker in a secure location when not in use so as toprevent access by unauthorized persons.B T P A I N T B A L L . C O M 7