BT SA-17 Pistol Manual - Paintball Solutions
BT SA-17 Pistol Manual - Paintball Solutions
BT SA-17 Pistol Manual - Paintball Solutions
- No tags were found...

Create successful ePaper yourself
Turn your PDF publications into a flip-book with our unique Google optimized e-Paper software.
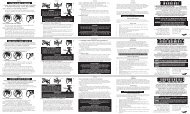
<strong>BT</strong>_<strong>SA</strong>-<strong>17</strong>_<strong>Manual</strong>.qxp 3/11/10 9:54 AM Page 6•Using retaining ring pliers remove the large retaining ring from theback of the housing.•Push the internal components out from the front, take notice of theirposition.•Using retaining ring pliers remove the small retaining ring from theseal housing and remove the old seal.•Replace the damaged seal with the new seal and install the smallretaining ring making sure it is fully seated in the seal housing.•Apply a light coating of paintball grease to the seal housing o-ring.•Install the components into the puncture pin housing; refer to the diagramfor proper alignment.•Using the retaining ring pliers, install the large retaining ring into theback of the housing, making sure the ring is fully seated in the internalgroove.•Apply a light coating of paintball grease to the puncture pin housingo-ring.•Install the puncture pin housing into the markers body and then theretaining screw.9. Disassembly/ReassemblyCAUTION: Before attempting to perform any maintenance operations,make sure that all paintballs and propellant sources have been removedfrom the marker. Install a barrel-blocking device, Marker must beunloaded, degassed and un-cocked before any disassembly or maintenance.Follow the Unloading Your Marker and Removing 12 GramCylinder instructions.Disassembly Tips• Make sure you have a clean area to work on your marker.• When removing parts for the first time, do so carefully, so you do not lose any.• Visit <strong>Paintball</strong><strong>Solutions</strong>.com for additional information.Barrel Tip• The barrel tip is removed by turning it counter-clockwise.• If the barrel tip is difficult to remove, carefully insert a 1/8" Allenwrench into the porting on the front of the barrel, going through bothsides and turn the Allen wrench in a counter-clockwise direction.Breech Insert• To remove the Breech Insert, first remove the barrel tip.• Then using your forefinger, pull the breech insert out of the front of the marker.• You can also use a paintball swab, like the <strong>BT</strong> Battle Swab, to removethe breech insert, by inserting it into the front of the marker’s body andthen pulling the swab out with the insert.Feed Adapter• Push and hold in the latch button on the side of the adapter.• While holding the button in, slide the Feed Adapter off of the marker.• The feed tube and Feed Adapter Plug can be left in place when removingthe Feed Adapter.Ball Detent Assembly• Using a 3/32" Allen wrench, turn the Ball Detent Cover counter-clockwiseto remove the Ball Detent Assembly.• Be careful not to lose the spring and detent.• When re-installing the detent assembly do not over tighten the cover.Bolt/Hammer Assembly (Fig. 9.1)• Make sure the Markeris degassed, unloaded,and un-cocked.• Remove the quickrelease pin.• Pull the Bolt/Hammer Assembly out the back of the marker.Fig. 9.1Trigger Frame Assembly• Before removing the Trigger Frame, make sure the Marker is de-6B T P A I N T B A L L . C O M