SAM4s SPS-2000 Operators Manual.pdf - Parklandbm.com
SAM4s SPS-2000 Operators Manual.pdf - Parklandbm.com
SAM4s SPS-2000 Operators Manual.pdf - Parklandbm.com

You also want an ePaper? Increase the reach of your titles
YUMPU automatically turns print PDFs into web optimized ePapers that Google loves.
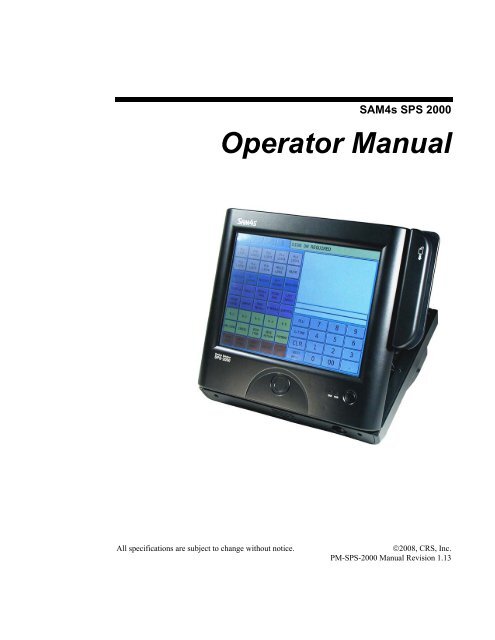
<strong>SAM4s</strong> <strong>SPS</strong> <strong>2000</strong>Operator <strong>Manual</strong>All specifications are subject to change without notice.©2008, CRS, Inc.PM-<strong>SPS</strong>-<strong>2000</strong> <strong>Manual</strong> Revision 1.13
ContentsIntroduction 7<strong>SAM4s</strong> <strong>SPS</strong>-<strong>2000</strong> Overview .....................................................................................................7Hardware .....................................................................................................................7Software ......................................................................................................................7Options ........................................................................................................................7Safe Operation ...........................................................................................................................8ECR Power Requirements .........................................................................................................8About Power Conditioning Equipment .....................................................................................9Surge Protectors and Power Conditioners...................................................................9Ground Guard Conditioners ........................................................................................9Uninterruptible Power Supplies (UPS) .....................................................................10Terminal Controls & Connections...........................................................................................11Front Panel Angle Adjustment ..................................................................................11Rear Display..............................................................................................................12SD Memory Card Slot...............................................................................................12Connection Panel.......................................................................................................13Getting Started 15Default Screen Layout .............................................................................................................15Custom Screen Layouts ...........................................................................................................16Screen Saver ............................................................................................................................17Initialize/Re-boot .....................................................................................................................17Function Key Definitions ........................................................................................................18Keylinks...................................................................................................................................25Passwords ................................................................................................................................26Password Notes .........................................................................................................26Error Messages ........................................................................................................................27Basic Operations 33Signing On/Off ........................................................................................................................33Sign On by the Employee Key ..................................................................................34Sign On by Push Button Key ....................................................................................34Sign On by Employee Card.......................................................................................34Sign On by Fingerprint..............................................................................................34Sign On by Continue Key .........................................................................................34Sign Off.....................................................................................................................34Clerk Interrupt...........................................................................................................35Clocking In/Out .......................................................................................................................35Clock In.....................................................................................................................35Clock Out for Break ..................................................................................................35Clock In from Break..................................................................................................36Clock Out for Day .....................................................................................................36Clock In/Out by Fingerprint......................................................................................36<strong>SAM4s</strong> <strong>SPS</strong>-<strong>2000</strong> Operator <strong>Manual</strong> v1.13 Contents • 3
Time Clock Edit ........................................................................................................37Outside of Sale Functions........................................................................................................38Time Display .............................................................................................................38Received on Account.................................................................................................38Paid Out.....................................................................................................................38Registering PLUs/Items...........................................................................................................39Preset PLUs ...............................................................................................................39Open PLUs ................................................................................................................39Code Entry Preset PLUs............................................................................................39Code Entry Open PLUs.............................................................................................39PLU Price/HALO Override.......................................................................................39PLU Price Change .....................................................................................................39Repeat........................................................................................................................39PLU Price Inquiry......................................................................................................39Registering a Not Found PLU ...................................................................................40Price Level Shift........................................................................................................41Scale Items.................................................................................................................41Print Key....................................................................................................................42Auto Grill Item ..........................................................................................................43Promo ........................................................................................................................43Waste.........................................................................................................................43Price Inquiry ..............................................................................................................43Food Stamp Shift.......................................................................................................44Tax Shift/Tax Exemption ..........................................................................................44Corrections & Voids ................................................................................................................45Clear ..........................................................................................................................45Error Correct..............................................................................................................45Void Item...................................................................................................................45Cancel........................................................................................................................45Transaction Void .......................................................................................................45Merchandise Return...................................................................................................46Discounts/Coupons/Surcharges ...............................................................................................46Sale (Subtotal) Discounts ..........................................................................................46Item Discounts...........................................................................................................47Surcharges .................................................................................................................48Totaling/Tendering ..................................................................................................................48Cash...........................................................................................................................48Check.........................................................................................................................48Check Cashing...........................................................................................................49Miscellaneous (Charge) Tender.................................................................................49Preset Tender.............................................................................................................49Split Tender ...............................................................................................................49Integrated Payment System Operations.....................................................................49Foreign Currency Subtotal & Tender ........................................................................51Food Stamp Subtotal & Tender.................................................................................51Post-Finalization Procedures ...................................................................................................52Paid Order Recall ......................................................................................................52Receipt Issue..............................................................................................................52Validate .....................................................................................................................52Quick Service Operations ........................................................................................................53Typical QSR Keyboard .............................................................................................53Sample Transaction Receipt ......................................................................................54Drive Thru Operations...............................................................................................55Training Mode .........................................................................................................................57<strong>SPS</strong>-<strong>2000</strong> Delivery System......................................................................................................584 • Contents <strong>SAM4s</strong> <strong>SPS</strong>-<strong>2000</strong> Operator <strong>Manual</strong> v1.13
Delivery System Features..........................................................................................58Delivery Related Programs........................................................................................58Delivery Operations ..................................................................................................59Guest Check Operations ..........................................................................................................65Overview ...................................................................................................................65<strong>Manual</strong> Previous Balance..........................................................................................67Hard Check Posting...................................................................................................69Soft Check Posting ....................................................................................................70Seat # Assignment.....................................................................................................75Split Check ................................................................................................................79Hold/Print Hold .........................................................................................................80List Check .................................................................................................................82Repeat........................................................................................................................83Transfer Table ...........................................................................................................84Combine Checks for Payment...................................................................................85Transfer Check ..........................................................................................................86Tip Declare................................................................................................................88Using Graphical Table Management .......................................................................................90Graphic Table Management Operations....................................................................91Reports 95Report Menu............................................................................................................................95Report Table ............................................................................................................................96Printing & Saving Reports ........................................................................................98Cash Declaration......................................................................................................................99X Mode Program ...................................................................................................................100Time Clock Edit ......................................................................................................100Edit Inventory Item .................................................................................................101Date Time Setting....................................................................................................101Drawer Assignment.................................................................................................102FTP Transmission..................................................................................................................102Receipt Reprint ......................................................................................................................102DataTran Operation ...............................................................................................................103Initialize EFT...........................................................................................................104Open Batch..............................................................................................................104Close Current Batch/ Close Current Batch with Debit............................................104Change Batch Number ............................................................................................104Issue Local Total .....................................................................................................105Issue Local Transaction...........................................................................................105Issue Local Batch Status Report..............................................................................106Enable Dial In Load/Enable Dial Out Load ............................................................106Gratuity Entry..........................................................................................................107Initialize Pin Pad .....................................................................................................107Get Gift Card Balance .............................................................................................107Credit Post Authorization........................................................................................108Report Samples......................................................................................................................109Financial Report ......................................................................................................109Sales By Time Period ..............................................................................................111PLU Reports............................................................................................................111Employee Reports ...................................................................................................112Group.......................................................................................................................114Drawer Totals..........................................................................................................114Labor Groups...........................................................................................................115Sales and Labor %...................................................................................................115<strong>SAM4s</strong> <strong>SPS</strong>-<strong>2000</strong> Operator <strong>Manual</strong> v1.13 Contents • 5
Daily Sales...............................................................................................................116Groups By Time Period...........................................................................................116Analysis 1 By Time Periods ....................................................................................117Analysis 2 By Time Periods ....................................................................................117Analysis 3 By Time Periods ....................................................................................118Track By Time Periods............................................................................................118Open Check .............................................................................................................119Product Mix.............................................................................................................119Product Projections..................................................................................................120Station Totals...........................................................................................................120Daily Time Keeping ................................................................................................121Shift Report .............................................................................................................122Inventory .................................................................................................................124PLU Stock ...............................................................................................................126PLU Stock by Group ...............................................................................................126Electronic Journal....................................................................................................127Food Cost ................................................................................................................128Balancing Formulas ...............................................................................................................129Program Maintenance 131PLU Maintenance ..................................................................................................................131Changing Item Prices ..............................................................................................131Employee File Maintenance ..................................................................................................134Employee Field Definitions.....................................................................................137Appendix 139Report Function Key Report Code Structure.........................................................................139Report # Table .........................................................................................................139Report Option Table................................................................................................141<strong>Manual</strong> Revision Record 1436 • Contents <strong>SAM4s</strong> <strong>SPS</strong>-<strong>2000</strong> Operator <strong>Manual</strong> v1.13
Safe Operation• Do not locate your <strong>SAM4s</strong> <strong>SPS</strong>-<strong>2000</strong> in a damp or wet environment. Avoid highhumidity, direct sunlight and temperature extremes.• Always plug your <strong>SPS</strong>-<strong>2000</strong> into a grounded three-prong outlet. Never use two-prongadaptors or ungrounded outlets.• Check to make sure the power outlet provides the correct voltage: (120V +/- 10%).• Immediately disconnect the ECR from the power source in case of spilled liquid in theECR, smoke, or strange smells. Call your authorized dealer for assistance.• Do not operate the ECR with wet hands.• Use a soft dry cloth to clean the ECR cabinet. Do not use wet clothes or solvents.• Do not open the ECR case to attempt repairs. Dangerous voltages can cause shock.Service attempts by untrained personnel can cause unnecessary damage to your ECR.ECR Power Requirements• Be aware that other electrical devices on the same circuit can cause your ECR tomalfunction. Avoid plugging your ECR into outlets where other high-current devices areconnected.• Be aware that power quality issues, including voltage fluctuations, electrical noise,spikes, outages, interruptions, and other power viruses can disrupt or damage modernelectronic equipment, including ECRs and PCs.• When ECRs are interconnected in networks, connected to PCs or where <strong>com</strong>municationscables connect peripherals, particular care must be taken with power sources and<strong>com</strong>munication cable routing. Your authorized dealer can provide detailed powerspecifications for these applications. Failure to implement installation requirements fornetworked systems may cause system failures and/or poor system performance.8 • Introduction <strong>SAM4s</strong> <strong>SPS</strong>-<strong>2000</strong> Operator <strong>Manual</strong> v1.13
About Power Conditioning EquipmentSurge Protectors and Power ConditionersMost people are familiar with surge protectors, which guard against damage due to suddenspikes in the electrical current. A power conditioner provides protection against surges inpower just as a surge suppressor does, but a power conditioner also maintains a continuousvoltage during temporary voltage reductions, such as a brownout. This is referred to asconditioning. Power conditioners also can filter EMI emanating from a power source and cansmooth the rhythmic cycle of alternating current. While surge protectors safeguard equipment,a power conditioner cleans the signal, eliminating interference on the line.CRS re<strong>com</strong>mends the PowerVAR ABC065-11 (CRS P/N 701002), a 0.65 amppower conditioner that is suitable for most ECR applications. POWERVARstandard power conditioners are for use with any microprocessor based electronicequipment. Thanks to their low impedance isolation transformer, you can trustthese conditioners to protect your sensitive equipment from the biggest problems for today's<strong>com</strong>puters.Ground Guard ConditionersPOS systems consisting of workstations connected in an Ethernet network must have thesame point of reference, (i.e. <strong>com</strong>mon ground potential for all equipment in the system.)Unlike electronic loads, traditional electrical loads such as motors, lights, heavy appliances,etc. use the equipment ground for safety purposes only and do not rely on it for properoperation. Computer equipment, on the other hand, introduces the equipment-groundingconductor as an active part of the power supply in referencing digital logic. Thereforenetworked POS systems require isolated/dedicated ground circuits to insure proper operation.CRS re<strong>com</strong>mends POWERVAR ground guard conditioners for networkapplications. Only the “Ground Guard” conditioner from POWERVAR can beused as an alternative to isolated/dedicated ground circuits. Traditional powerconditioners cannot be used as an alternative as they do not address the groundissues over a network. The Ground Guard conditioner must protect every piece of equipmentin the POS system in order to operate properly. POWERVAR Ground Guard powerconditioners are available in sizes from 0.65 to 16 amps, to protect single or multiple POS<strong>com</strong>ponents.<strong>SAM4s</strong> <strong>SPS</strong>-<strong>2000</strong> Operator <strong>Manual</strong> v1.13 Introduction • 9
Uninterruptible Power Supplies (UPS)On sites where there is a known problem with temporary power outages or brownouts, batteryback-up devices should be installed. Most battery back-up devices are known asUninterruptible Power Supplies (UPS). When power to equipment is momentarily lost, theUPS devices draw power from an internal ‘gel cell’ battery to keep the equipment operating.The length of time these devices power the POS system is dependent on the capacity of theinternal batteries. Many sizes are available, but typically the units installed on POSequipment keep the <strong>com</strong>puters powered for about 20 minutes. This will give servers andmanagers time to settle bills, print checks and power down the system in an orderly fashion.CRS re<strong>com</strong>mends POWERVAR Security One Series Uninterruptible PowerSupplies, the most advanced, line-interactive, true sine wave UPM productsavailable for your application. Each model is designed to provide total protectionfor your system from a <strong>com</strong>plete range of power quality problems. Security OneSeries Uninterruptible Power Supplies are available with or without the patented GroundGuard conditioning circuitry.10 • Introduction <strong>SAM4s</strong> <strong>SPS</strong>-<strong>2000</strong> Operator <strong>Manual</strong> v1.13
Terminal Controls & ConnectionsStandardMagnetic CardReader (MCR)The Error lightwill flashduring IRC<strong>com</strong>municationFront Panel Power ButtonPress and hold the Front PanelPower Button to alternately shutdown or activate the touch screen.Note that the main power switch islocated on the bottom of theterminal in the right-rear corner.The front panel power button maybe enabled or disabled in the S-Mode options program.Front Panel Angle AdjustmentSet the position of the frontpanel support to adjust theangle of the front panelfrom 22° to 77°.<strong>SAM4s</strong> <strong>SPS</strong>-<strong>2000</strong> Operator <strong>Manual</strong> v1.13 Introduction • 11
Connection PanelStandard Terminal ports include:• Cash Drawer Port (Supports 2-Drawers)• LAN port• Keyboard/Mouse Ports• 2-USB Ports• LPT Port (Parallel)• 6-RS-232C Comm. Ports (2-DB9 Male/4-RJ45)Terminal PowerOn/OffswitchAC Power CordConnectionSerial Number/IdentificationLabelThe StandardRear Displayuses RS-232CPort #6<strong>SAM4s</strong> <strong>SPS</strong>-<strong>2000</strong> Operator <strong>Manual</strong> v1.13 Introduction • 13
14 • Introduction <strong>SAM4s</strong> <strong>SPS</strong>-<strong>2000</strong> Operator <strong>Manual</strong> v1.13
Getting StartedDefault Screen LayoutMode TabsTouch one of the fourTabs to control the<strong>SPS</strong>-<strong>2000</strong> Mode:REG = RegistrationREP = ReportsPRG = ProgramS = Secure ModeA password may berequired for access toREP, PRG & Smodes.Main ScreenForty keys display onthe main screen.Keys can beitems/categories(PLUs) or functions.A total of 200different screens(Keylinks) can bedisplayed to organizeitems or functions.Message Line:Displays ErrorMessages, ClerkIdentification &Transactiontotals.Transaction Detailis displayed here. Ifover 12 items areregistered, a scrollbar displays.TransactionSummary Line.Status Line:Displays currentPrice level,Receipt on/offstatus & register #.Fixed KeysThe 10-key pad,and eightessential functionkeys are fixed.Fixed keyscannot be movedor changed.<strong>SAM4s</strong> <strong>SPS</strong>-<strong>2000</strong> Operator <strong>Manual</strong> v1.13 Getting Started • 15
Custom Screen LayoutsAfter your authorized dealer prepares your <strong>SPS</strong>-<strong>2000</strong> for installation, your main screen and keylink screenswill look different. Each screen will contain the variety of item and function keys that you require. Yourscreens will be designed using the following capabilities:The Main Screen and each Keylinkscreen provide 40 single size keylocations in a 5 x 8 matrix.Large, wide and vertical keys maybe used and unused locations may beeliminated.Keys colors can be chosen from an18-color palate.Images may be used instead oftext for key identification.Keys may be set to open newscreens (keylinks). In thisexample, the beverage key(above) is set to open a newscreen offering 5-differentbeverage sizes16 • Getting Started <strong>SAM4s</strong> <strong>SPS</strong>-<strong>2000</strong> Operator <strong>Manual</strong> v1.13
Screen SaverA screen saver can be implemented; your authorized dealer can install a custom graphicimage to display. Depending upon the setting, the screen saver will display after 1 to 99minutes of inactivity.When the screen saver is activated, simply touch the screen to restore the normal display.Initialize/Re-bootThe initialize function allows you to exit any register activity and return to a beginning orcleared state. Any transaction that is in progress will be exited and totals for that transactionwill not be updated.Here are some reasons you may want to initialize your ECR:• The register is in an unknown state, and you wish to exit the current program ortransaction without following normal procedures.• You have performed a function that includes a <strong>com</strong>pulsory activity, such asvalidating or printing, and you wish to bypass the <strong>com</strong>pulsory activity.• An initial clear may be necessary as part of servicing, or troubleshooting an <strong>SPS</strong>-<strong>2000</strong> register or system.Perform this procedure only as necessary. Contact your authorized SAM4S dealer first if youhave questions about operating or programming your <strong>SPS</strong>-<strong>2000</strong>.To Initialize the <strong>SPS</strong>-<strong>2000</strong>, turn the main power switch off, then on again. The <strong>SPS</strong>-<strong>2000</strong>will be ready for operation about 30 seconds after re-booting.Warning: If you initialize while a transaction is in progress, the transaction will beaborted and totals/counters will not be updated.<strong>SAM4s</strong> <strong>SPS</strong>-<strong>2000</strong> Operator <strong>Manual</strong> v1.13 Getting Started • 17
Function Key DefinitionsNote that key descriptions are programmable. Key descriptions on your screen may be different than thefunction key name. For example, the “%1” function key may be programmed and labeled to operate as astore coupon key.KeyKey#DescriptionADD CHECK 013 Use to add multiple guest checks (tracking balances or soft checks)for payment together. See “Combine Checks for Payment” on page85. See "TRAY SUBTL" on page 23 to add separate transactionswhen you are not tracking balances.CANCEL 016 Touch CANCEL to abort a transaction in progress. All currentitems are removed (voided).CASH 018 Use CASH to finalize or tender cash sales. Change is <strong>com</strong>putedwhen the amount of cash tendered is greater than the amount of thesale.TIP DECLARE 019 Use to declare employee tips if you are not using the employee timekeeping feature. (If you are using employee time keeping, you areprompted to declare tips when clocking out.)CHECK 021 Use CHECK to finalize or tender check sales. Change is <strong>com</strong>putedwhen the amount of the check tendered is greater than the amountof the sale.CHECK CASH 022 Use the CHECK CASH key to exchange a check for cash outside ofa sale.CHECK ENDORSE 023 If <strong>com</strong>pulsory check endorsement is set with the CHECK key, usethe CHECK ENDORSE key to print the endorsement message aftera check is inserted into the appropriate printer.CLEAR 024 Use the CLEAR function to clear numeric entries or errorconditions.CONTINUE 025 Use to override the pop-up employee function after a transaction.Allows the employee to post an additional transaction withoutsigning on again.CURR. CONV. 1-5 026-030TABLE DSP 033 Feature not currently available.Use to convert and display the value of the transaction in foreigncurrency. Only cash tender is allowed after touching a CURRCONV key. Change is calculated and issued in home currency.NEXT DOLLAR 034 Touch the NEXT DOLLAR key to tender an amount the next wholedollar above the sale total. For example, if the sale total were $2.52,then the NEXT DOLLAR key would automatically tender $3.00.18 • Getting Started <strong>SAM4s</strong> <strong>SPS</strong>-<strong>2000</strong> Operator <strong>Manual</strong> v1.13
REPORT 036 You can print out reports from the REG tab using the REPORT key.Reports are generated by first entering the report code, thentouching the REPORT key, i.e: [Report Code] [REPORT]. See“Report Function Key Report Code Structure” on page 139 in theappendix of this manual. Note: This feature is available on v2.00jor later software.DONE 037 Touch the DONE key to exit a keylink screen and return to the mainscreen.DRIVE THRU 038 DRIVE THRU is a subtotal function. Touch DRIVE THRU torecord the amount of the transaction in the drive thru total on thefinancial report. Tax calculation can be changed to ac<strong>com</strong>modatedifferent tax rules for drive thru sales.EAT-IN 039 EAT-IN is a subtotal function. Touch EAT-IN to record the amountof the transaction in the eat-in total on the financial report. Taxcalculation can be changed to ac<strong>com</strong>modate different tax rules foreat-in sales. Sales cannot be split between eat-in and take-out.EMPLOYEE 040 The EMPLOYEE # key is used to sign on a cashier, clerk, server oremployee.EMPLOYEE (1-10) 041-050The EMPLOYEE (1-10) keys can be programmed to sign on aspecific employee when touched directly, without entering a code.ERR.CORR 052 Touch ERR CORR immediately after an item to void that item.FD/S SHIFT 053 Touch FD STMP SHIFT to shift the pre-programmed food stampstatus of an item prior to its registration.FD/S SUBTL 054 Touch FD STMP SUBTTL to display the total of food stampeligible items registered in the current transaction.FD/S TEND 055 Touch the FD STMP TEND key to tender Food Stamps after thedisplay of the food stamp eligible subtotal. Depending uponfunction key programming, change less than $1 may be applied toany cash balance or issued as cash change.GUEST # 056 Use to record the number of guests served by a transaction. Theentry may be <strong>com</strong>pulsory. The entry appears on receipts and thekitchen printer/KVS.HOLD 057 Use to identify an individual item, or an entire transaction so thatthe designated items will not print/display at the kitchenprinter/KVS at the current finalization. Items designated as "hold"items will display on the screen with an "H".INACTIVE 058 Use to define an inactive key location.LIST CHECK 1-4 064-067Touch LIST CHECK (for the appropriate tracking file) to display alist of all open soft checks in the file.DELIVERY 069 The Delivery function key is used to initiate a delivery transaction.When touched, the Delivery key opens the customer record screen.Here existing accounts can be opened, new accounts created, orexisting accounts deleted.<strong>SAM4s</strong> <strong>SPS</strong>-<strong>2000</strong> Operator <strong>Manual</strong> v1.13 Getting Started • 19
PARK DELIVERY 070 The Park Delivery function key allows you to accept orders andhold them for preparation and delivery at a later time.SERV DELIVERY 071 The Serv Delivery function key releases held parked orders forpreparation.MACRO 1 - 40 077-116Use to execute one of forty possible preprogrammed key sequences.($1, $5, $10, and $20 are the default preset tender keys for macros1-4.)MACRO # 117 Use to execute one of the forty possible macros by entering themacro number and touching the MACRO # key.MDSE RETURN 118 Touch the MDSE RETURN key to adjust items inside or outside ofa transaction.MISC TEND 1-16 119-134Touch a MISC TEND key to finalize or tender sales paid by variouscharges or other media. Tendering may or may not be alloweddepending upon function key programming. (Charge is the defaultdescriptor for MISC TEND #1)MISC TEND # 135 Access any of the 16 possible miscellaneous tender functions byentering the tender number (1-16) and touching the MISC TEND #key.MODIFIER 1-10 136-145Preceding a PLU entry, a modifier key changes a digit of the PLUnumber, causing a different PLU to be registered. Modifier keyscan be set to change any of the 14 PLU digit positions to anyspecified digit (0-9).#/NO SALE 147 Use to enter a non-adding memo number during a transaction (#function) or use to open the cash drawer outside of a sale (no salefunction).P/BAL 148 Enter an amount, and then touch the <strong>Manual</strong> Previous Balance(P/BAL) key to use the simplest form of Charge Posting/TableService. The P/BAL key may be used any time within atransaction. Transactions where the P/BAL key is used must befinalized with one of the STORE CHECK keys.PAID OUT 1-5 151-155Touch a PAID OUT key to remove cash, check or miscellaneousmedia from the drawer.PAID RECALL 156 The PAID RECALL key is used to recall last x number oftransactions, starting with the last transaction finalized. (X isdetermined in memory allocation.) Once recalled, a transactioncould be reviewed (using the cursor keys or PAGE UP/PAGE DN).To exit the paid order view, touch CLEAR.%1 - %10 157-166Ten discount keys (%1 - %10) are available to handle various kindsof discounts, markdowns and adjustments to items or transactions.PLU 167 Enter the PLU code number and touch PLU to register a PLU.PRICE INQ 169 Touch the PRICE INQ to display the PLU price without actuallyregistering the PLU.PRICE LVL 1-20 170-189Touch a LEVEL key prior to a PLU entry to shift the price of aPLU to a different price set in PLU programming.20 • Getting Started <strong>SAM4s</strong> <strong>SPS</strong>-<strong>2000</strong> Operator <strong>Manual</strong> v1.13
PRINT 190 Touch the PRINT function to send items that require specialpreparation to the kitchen printer (or KVS) before the sale isfinalized. An item can be programmed as an auto grill item,requiring the PRINT key to be touched every time the menu item issold. This function does not affect normal kitchen printer/KVSrouting. The PRINT function also sends items in group sequenceusing the “meal order feature” available at version 2.02n or later.Items are given a meal order priority through group programming.Each time the PRINT key is touched, the next priority of items willbe release to the kitchen printer.PRINT CHECK 191 Prints the soft guest check (tracking file) that is currently displayed.The PRINT CHECK key may be programmed to store (service) thecheck automatically.PRINT HOLD 192 Use to remove the "hold" designation from an item or order, so thatthe items and their instructions are now sent to the kitchenprinter/KVS at finalization.PROMO 193 Touch the PROMO key to void the price (the item remains) of anitem. Can be used for 2 for 1 promotions. A PROMO count isavailable for each menu item.QUIT 195 Touch QUIT to automatically sign off the current cashier/clerk.RECEIPT ON/OFF 196 Touch RECEIPT ON/OFF to toggle the receipt function from on tooff (versions before V2.01r) or touch [1] [RECEIPT ON/OFF] toturn receipt on or [2] [RECEIPT ON/OFF] to turn receipt off(versions 2.01r or later.) You must first have a receipt printerconnected, identified to the register, and the print receiptautomatically option (see General Printing Options) turned on. Keyalso controls report printing.RECALL CHECK # 1-4 197-200RECD ACCT 1-5 201-205The check tracking system can maintain only balances (hard check)or entire transactions (soft check) in the register memory. Fourdifferent tracking files can be separated to maintain, for example:restaurant checks, call-in orders, delivery orders, and/or tablebalances. Touch one of the four RECALL CHECK # keys directlyto begin a tracking transaction, or enter the tracking number andtouch the RECALL CHECK # key to access the existing trackingbalance.Touch a RECD ACCT key to add cash, check or miscellaneousmedia to the drawer.RECEIPT 206 Touch the RECEIPT key to issue a transaction receipt at thedesignated receipt printer.REPEAT 207 Touch the REPEAT key to quickly re-order a set of items. When acheck is recalled, simply touch the REPEAT key to automaticallyregister all of the items registered at the previous posting.SCALE 208 Touch the SCALE key to automatically display the weight from ascale connected to the register, or to manually enter a weight forextension.<strong>SAM4s</strong> <strong>SPS</strong>-<strong>2000</strong> Operator <strong>Manual</strong> v1.13 Getting Started • 21
SEAT # 209 Use to identify a specific seat (or person) within a transaction.Facilitates separate payment by seat, and identifies to the foodpreparation staff (through the kitchen printer/KVS) how to assemblemeals. Seat numbers may be assigned at the time of entry or, ifnecessary, later in the transaction.SPLIT ITEM 211 When like items are consolidated in a transaction you can move thecursor to the item and touch the SPLIT ITEM key to display theitems separately, instead of in consolidated form, used normally toassist the items to seat allocation.SPLIT PAY 212 Touch the SPLIT PAY key to divide the amount of a guest checkinto equal segments for payment by more than one person.STOCK INQ 213 Touch the STOCK INQ key, and then enter (or scan) an item toview the stock status of the item. (The item must be a stock item touse this function.)STORE CHECK 1-4 214-217The check tracking system can maintain only balances (hard check)or entire transactions (soft check) in the register memory. Fourdifferent tracking files can be separated to maintain, for example,restaurant checks, call-in orders, delivery orders, and/or tablebalances. Touch one of the four STORE CHECK # keys to finalizea tracking transaction. (This function is equivalent to a SERVICEfunction.)SUBTOTAL 218 Touch SUBTOTAL to display the message “SUBTOTAL” on thedisplay. Although a running total is always displayed on the bottomof the screen, the SUBTOTAL key may be required before somefunctions, such as subtotal discount.TABLE # (1-4) 219-222Use to enter the table number of the check. If a table number isentered, the TABLE # key can also be used to recall the check.TAKE-OUT 223 TAKE-OUT is a subtotal function. Touch TAKE-OUT to recordthe amount of the transaction in the take-out total on the financialreport. Tax calculation can be changed to ac<strong>com</strong>modate differenttax rules for take-out sales. Sales cannot be split between eat-in andtake-out.TAX EXEMPT 224 The TAX EXEMPT can be preprogrammed to exempt specifictaxes from a sale.TAX SHIFT 1-6 225-230Use to shift the preprogrammed tax status of an item. Touch beforean item entry to make taxable.CLK IN/OUT 231 Touch the CLK IN/OUT key to record start and stop work times forthe registered employee. Hours worked are maintained by the timeclock system.TIP (1-3) 232-234Use to enter a tip amount on a check.TRANSFER CHECK (1-4) 235-238Use to transfer one or all open soft checks form one server toanother server. A transfer check receipt will print.22 • Getting Started <strong>SAM4s</strong> <strong>SPS</strong>-<strong>2000</strong> Operator <strong>Manual</strong> v1.13
TRAY SUBTL 239 Touch the TRAY SUBTL key to finalize a transaction that will bepaid later with subsequent transactions. See "ADD CHECK" onpage 18 to add multiple soft checks for payment.VALID 240 Touch VALID to initiate a single line validation. (A printer withvalidation capability must be connected to the system andprogrammed appropriately.)VOID ITEM 241 Touch the VOID ITEM key to remove an item from a transaction.Locate the cursor on the item you wish to remove and touch theVOID ITEM key.WASTE 242 Used to start and end entries of items that are wasted. A wastecount is maintained for each item and inventory is adjusted.FUNC.LIST# 243 Use to manually advance to a specific Key Link. Enter the Key link# (1-200), touch the FUNC.LIST# key.X/TIME 244 Use the X/TIME key to multiply, to register split price items, ordisplay the time in the REG mode.STRING REPORT # 245 Use to execute string report from REG mode. Enter number ofstring report to execute. Manager password may be required.PARK ORDER 246 Used in conjunction with a kitchen video system and the SERVEORDER function key. Enter a number and touch PARK ORDER topark or "suspend" an order on the video monitor until the order is<strong>com</strong>pletely filled. In the case of a drive through order that cannotbe <strong>com</strong>pleted when the customer arrives at the pick-up window, theoperator would park the order until it was <strong>com</strong>pletely filled. Theorder would then be served or bumped by using the SERVEORDER key.SERVE ORDER 247 Used in conjunction with a kitchen video system and the PARKORDER function key. Enter a number and touch SERVE ORDERto serve or bump the order from a video monitor. No video keypadis needed for this function.KP ROUTING 248 The KP ROUTING key is used to override KP Time Period control.For example, a restaurant might normally operate two kitchens atone time and one kitchen at other times. In case the volume ofbusiness changes, the manager might want to control the KP routingmanually. Also, a single item, or large order might be required tobe sent to a different printer than normal. Select STAYDOWN orTRANS. POP UP. To operate, before the transaction, touch [1] [KPROUTING] for period one or [2] [KP ROUTING] for period two.<strong>SAM4s</strong> <strong>SPS</strong>-<strong>2000</strong> Operator <strong>Manual</strong> v1.13 Getting Started • 23
SPLIT CHECK 249 The Split Check function provides another method of breakingdown checks for payment. Note that this method works best whencheck numbers are not automatically assigned. Manyprogrammers/installers will use the table number as the checknumber, and in this situation the feature works quite well.Place a “Split Check” key on the screen. Recall a check (table).Select the item you wish to place on a new check by touching theitem on the display, then touching [Split Check]. Note that anasterisk (*) now displays next to the item. Continue to markadditional items to be assigned to a different check as necessary.Touch [Store Check]. The prompt will ask you to enter the numberof the check you wish the designated items to be assigned to. Enterthe check (table) number and touch OK. The original check with bestored automatically and the new check with the split items is openfor storing or payment.If you wish to use the split check feature in applications wherechecks are automatically assigned, you must first open and store anew check. Make note of the check number. Then open the checkfrom which you wish to split items from. Identify the items usingthe [Split Check] key as described above. Then when prompted toenter the number of the check where the selected items are to beassigned, enter the number of the new check you previously created.ALPHA TEXT 250 Use to type a name or message that will be associated with a softcheck. Touch the ALPHA TEXT key anytime after a check hasbeen opened, then type a message (up to 15 characters) using thealpha keyboard overlay and touch OK. Multiple message lines canbe entered. The message is saved and printed/displayed with theorder. A system option controls whether the message is printed onthe guest check.NEW CHECK1-4 251-254The standard recall check key allows a check to be opened if it doesnot already exist. This is excellent in hospitality tracking, howeverfor account management credit may not so readily be given.Therefore when this button is programmed accounts are not openedautomatically. A warning will indicate an account does not exist ifan attempt is made to open using the recall check key. The newcheck button is used to open new accounts. The programmabilityfor this key is automatically picked up from the status of the Recallcheck key.PRICE CHANGE 256 This allows the pre-programmed price of an item to be changed.There are optionally programmed restrictions.EFT FUNC. 258 When pressed (in REG Mode) a list of EFT functions display:Open Batch, Close Current Batch, Close Batch with Debit, GratuityEntry, Get Gift Card Balance. See Authority Level Programmingto restrict access to open/close batch functions. Note: available onsoftware v2.00g or later.24 • Getting Started <strong>SAM4s</strong> <strong>SPS</strong>-<strong>2000</strong> Operator <strong>Manual</strong> v1.13
KeylinksThe main screen provides 40 programmable locations. In addition to the main screen you candefine 199 additional 40-location screens referred to as “Keylinks”. (Note that the defaultprogram pre-defines the first 12 keylinks for PLU lists and various function lists.)In the example depicted below, the PLU List keys and the Payment key open new KeylinkScreens.More About Keylinks• Keylinks have multiple uses. Typically they will be used as menu screens containing like items suchas entrees, appetizers or drinks or condiments. They may also be used to organize function keys suchas discounts or payment keys.• Keylinks can display any <strong>com</strong>bination of PLU keys (menu items or condiments) or function keyssuch as % keys, media keys, etc.• Keylinks can be opened (displayed) by touching a key on the Main screen or by touching a key onanother Keylink. Keylinks can also be opened automatically after the entry of a PLU item (see PLUProgramming).• Keylinks can be programmed to remain open for unlimited entries, with the DONE key used to closethe Keylink screen, or can be programmed to close automatically after a set number of entries are<strong>com</strong>pleted.<strong>SAM4s</strong> <strong>SPS</strong>-<strong>2000</strong> Operator <strong>Manual</strong> v1.13 Getting Started • 25
PasswordsThe correct password is required to access Report Mode, P-Mode and S-Mode. Also,manager controlled activities can be <strong>com</strong>pleted only after the correct password is entered.Password Notes• Default S-Mode and P-Mode Passwords are: <strong>2000</strong>; the default Report Mode password is:0000 (meaning no password entry is required to access this mode); the default managerpassword is: 9999. You can set your own 4-digit passwords by selecting Passwords in Smode.• Separate passwords for report levels (X and Z1-Z5) can be set in S-Mode System Option#7. Here the default password is also 0000, meaning all report levels can be accessedwithout password entry.• Authority Level option #40 (found in P-Mode/Employee) allows access to Report Mode,P-Mode and S-Mode without password entry. Employees (such as managers) linked toan authority level with this option selected, can conveniently access all modes withoutpassword entry.• If an employee card system is used, and the MANAGER REQUIRED message displays,employees with manager status can swipe their card to <strong>com</strong>plete the transaction.(Available at version 2.00s)26 • Getting Started <strong>SAM4s</strong> <strong>SPS</strong>-<strong>2000</strong> Operator <strong>Manual</strong> v1.13
Error MessagesThe <strong>SPS</strong>-<strong>2000</strong> displays messages on the top line of the screen, immediately to the right of the function tabs.Note that each of the standard messages described below can be customized. Your program may displayslightly different text messages.AMOUNT REQUIREDThis operation requires an amount entry.BAD VALUEThe number entered is incorrect for the task being performed.BUFFER FULLThe buffer for soft check, hard check, or buffered receipt has reached capacity. For hard checks, theoperator must touch the SERVICE key to print the items and clear the buffer. The operator must thenpick up the previous balance again in order to continue with finalization. In a soft check environment,this message will appear when the check has reached capacity (maximum lines stored). The register willrequire the sale to be finalized with the option of printing a bill if requiredBUSYDestination register is busy (pre poll memory is in use). Requires a clear <strong>com</strong>mand from the P.C. orRegister.CASH DECLARATION REQUIREDCash declaration has been programmed as <strong>com</strong>pulsory, and must first be performed before reportsCASH-IN-DRAWER LIMIT EXCEEDEDThe programmed Cash-In-Drawer limit has been exceeded.CHECK KEY POSITIONThe key lock is in the wrong position.CHECK# IS ASSIGNED AUTOMATICALLYThe operator has attempted to open a new guest check by assigning a check number. The register hasbeen programmed to generate its own check numbers.CHECK# REQUIRED!This register has been programmed to force check number entry to begin a transaction. An existing guestcheck must be recalled, or a new one started.CONDIMENT REQUIRED!This PLU has been programmed to require a condiment entry.CRC ERRORAn error has occurred in the block check sum while transferring data in IRC mode.DUPLICATE!This check already exists. May also apply to secret code programming.ANALYSIS 1?/ANALYSIS 2?/ANALYSIS 3?This operation is set for <strong>com</strong>pulsory entry of one of the three analysis keys.<strong>SAM4s</strong> <strong>SPS</strong>-<strong>2000</strong> Operator <strong>Manual</strong> v1.13 Getting Started • 27
ENTER EMPLOYEE CODEThe employee is required to sign on before performing a task.ENTER GUEST COUNTThe operator must enter the number of guests when opening a guest check, or beginning a sale.ENTER SEAT#Seat # entry required before operation can continue.ENTER TABLE#Table number entry is required to open a guest check, or begin sale.ENTRY REQUIREDThe function selected from the WLU requires a numeric entry, i.e. a percentage for an open percentdiscount.ERRORGeneral error message.ERROR JAMReceipt / journal printer jammed message.GALLON AMOUNT REQUIREDThis entry involves a gallonage PLU, and requires an amount entry.HALO OVER!The amount entered exceeds the programmed HALO i.e. the task exceeds the maximum amount allowed.ILLEGAL KEY SEQUENCEThe operator has used an illegal key sequence.IN USE!This guest check or clerk number is already open elsewhere in the system. This is also applicable whenthe floating clerk system is activated and the operator is in use on another terminal.INACTIVE!The key touched is inactive. This message also appears if VOID Mode has been disabled.INPUT QTYQuantity input is required for a condiment WLUKITCHEN PRINTER FAILUREThe kitchen printer has failed to respond. Printing has been re-routed to the designated back-up printer isprogrammed.MANAGER OVERRIDE REQUIREDThe manager password must be input in order to override a HALO amount, or other restriction.MANAGER REQUIREDThe manager password must be input to <strong>com</strong>plete this operation.28 • Getting Started <strong>SAM4s</strong> <strong>SPS</strong>-<strong>2000</strong> Operator <strong>Manual</strong> v1.13
MEMORY FULLMemory is full.NEGATIVEThis sale has gone negative. Negative sales are programmed as not allowed.NO CHECK #This message appears when the system cannot find this guest check number.NO DATAPLU can not be found (does not appear in Register Mode). Usually associated with stock entry on an IRCsystem when the PLU exists in one terminal but not another. On the terminal where the PLU does notexist the message not found will appear.NO DRAWER!The employee currently signed on is not assigned to a drawer, and is not allowed to perform cash sales, orthe drawer is no longer attached and is required in order to continue.NO MANUAL ENTRY<strong>Manual</strong> entry is not allowed (scale function).NO PAPERSlip printer is out of paper, appears when printing to a loose-leaf printer.NO PLU!The number entered is not a valid PLU. This message will also appear if a PLU number “built” usingmodifier keys recalls an invalid PLU number.NONADD# REQUIREDThis operation requires the entry of a Non-Add number to fulfill the <strong>com</strong>pulsory requirements.NOT DISCOUNTABLEThe preceding entry is not discountable, product is not available for discounting.NOT PROGRAMMED!This key has not been programmedNOT READY!Remote printer is not ready for printing tasks.NOT ZERODisplayed when trying to delete a PLU that still has sales counts and stock amounts. The PLU mustfirst be reset and cleared from all Z Mode reports.OFF LINE!IRC <strong>com</strong>munications have gone off line.OPEN DRAWERThe register has been programmed not to operate with the cash drawer open.<strong>SAM4s</strong> <strong>SPS</strong>-<strong>2000</strong> Operator <strong>Manual</strong> v1.13 Getting Started • 29
OVERRIDE NOT ALLOWEDX-Mode override is not allowed for this operation.P/BAL REQUIRED!This register has been programmed to require a previous balance entry.PAPER ENDThe guest check printer has reached the end of the form, or the Receipt/Journal paper is at, or near, theend of its roll.RANGE OVERThe number entered is out of range.REMOVE PAPERValidation is <strong>com</strong>plete and the paper must now be removed.SCALE FAIL!The register is not able to find the scale.SCALE REQUIRED!This item requires a weight this may be entered either manually or automatically.SEQUENCE ERROR!The preceding key sequence is not allowed.SINGLE ITEM!This PLU has been programmed as a single item PLU and cannot be used within a sale.SUBTOTAL REQUIREDThe SUBTOTAL key must be touched before continuing.SYSTEM ERRORNormal Operation error.TARE# REQUIREDThis PLU/scale item requires a tare weight entry.TRAY SUBTOTAL REQUIRED!This prompt appears while in a TRAY SUBTOTAL transaction. The operator must first touch the TRAYSUBTOTAL key before touching any tender keys.VALIDATION REQUIRED!This operation requires validation to <strong>com</strong>plete the <strong>com</strong>pulsory settings.WASTE REQUIRED!The operator is in the middle of a waste operation, and must touch the WASTE key in order to <strong>com</strong>pletethe operation.30 • Getting Started <strong>SAM4s</strong> <strong>SPS</strong>-<strong>2000</strong> Operator <strong>Manual</strong> v1.13
WRONG EMPLOYEEThe employee attempting to open this guest check is not the original person who started the guest check.Also appears when attempting to sign on a new employee without first signing the current employee off,if overlap employee is not programmed.ZERO AMOUNTThe register has been programmed to not allow negative sales, and to consider a zero amount as anegative sale.<strong>SAM4s</strong> <strong>SPS</strong>-<strong>2000</strong> Operator <strong>Manual</strong> v1.13 Getting Started • 31
32 • Getting Started <strong>SAM4s</strong> <strong>SPS</strong>-<strong>2000</strong> Operator <strong>Manual</strong> v1.13
Basic OperationsSigning On/OffNotes for Clerk Operation• Choose between "Push Button", "Operating Code", "Employee Number” or“Fingerprint” for the employee sign on method. Clerks may also be signed on byMCR. (See "System Option Programming/General Function Options" in theProgram <strong>Manual</strong>.)• If you choose "Push Button" sign on, use any of the 10 direct employee keys tosign on by directly touching a key. (See "Keyboard Key Location" in theProgram <strong>Manual</strong> to locate the appropriate functions.) You must also link aspecific employee to each push button key. (To make these links, see "SystemOption Programming/General Function Options" in the Program <strong>Manual</strong>.)• If you choose "Secret Code" sign on, use the EMPLOYEE key to sign on bycode entry. (See "Keyboard Key Location" in the Program <strong>Manual</strong> to locate theappropriate function.) You must also program an operating code for eachemployee. (See "Employee Programming" in the Program <strong>Manual</strong>.)• If you choose "Employee Number" sign on, use the EMPLOYEE key to sign onby employee number entry. (See "Keyboard Key Location" in the Program<strong>Manual</strong> to locate the appropriate function.) The employee number is thesequential number (i.e. 1-10) for each employee in the employee file.• Fingerprint sign-on requires an optional DIGENT IZZEX FD 1000 Fingerprintidentification device. Each employee fingerprint must be recorded in programmode. (Available in version 2.00s or later.)• Employee operation can be stay down or pop up. (See "System OptionProgramming/General Function Options" in the Program <strong>Manual</strong>.)<strong>SAM4s</strong> <strong>SPS</strong>-<strong>2000</strong> Operator <strong>Manual</strong> v1.13 Basic Operations • 33
Sign On by the Employee KeyWhen the register is signed off, the message line displays: SIGN ON REQUIRED.1. Enter the employee number (use the operating code number of the sequentialemployee number, depending upon the program).2. Touch EMPLOYEE. The employee name displays in the message line.Sign On by Push Button KeyIf your system is using individual push button employee keys:Touch the appropriate EMPLOYEE key. The employee name displays in themessage line.Sign On by Employee CardIf your system is using employee cards:Swipe the employee card. The employee name displays in the message line.Sign On by FingerprintYou can sign on by fingerprint if your system is using an optional DIGENT IZZEX FD 1000Fingerprint identification device. (Available with version 2.00s or later.)1. From the REG screen, enter the employee file number and touch EMPLOYEE key.The Fingerprints window displays.2. Touch the employee’s finger to scanner and touch MATCH.3. The Please Wait message displays while the fingerprint is scanned. If the fingerprintmatches, the sign on is <strong>com</strong>pleted; if the fingerprint does not match, an error messagedisplays.Sign On by Continue KeyIf a CONTINUE key is present on your keyboard, you can sign on the same employee for thenext transaction.Sign OffTouch CONTINUE.1. Enter “0”.2. Touch EMPLOYEE. The message line displays: SIGN ON REQUIRED.Or,Touch QUIT (if a QUIT key is present on your keyboard.)34 • Basic Operations <strong>SAM4s</strong> <strong>SPS</strong>-<strong>2000</strong> Operator <strong>Manual</strong> v1.13
Clerk InterruptIf allowed, a new employee can sign on while a transaction being processed by anotheremployee is still in progress. Under the new employee, a new transaction can be entered and<strong>com</strong>pleted. When the employee processing the suspended transaction signs on again, thesuspended transaction can be continued and finalized.Clocking In/OutClock In1. Enter the employee clock in code and touch the CLK IN/OUT function key todisplay the clock in/out window:Job codes that areavailable for theemployee aredisplayed.2. Touch the job code button for the job you are performing to clock in.3. Touch OK to <strong>com</strong>plete the clock in.Note: Depending upon system programming, the employee may sign on with theiremployee number, or their employee clock in code. The employee clock in code may bedifferent than the employee operating code.Clock Out for Break1. Enter the employee clock in code and touch the CLK IN/OUT function key todisplay the clock in/out window:<strong>SAM4s</strong> <strong>SPS</strong>-<strong>2000</strong> Operator <strong>Manual</strong> v1.13 Basic Operations • 35
Clock in and outtimes for the dayare displayed.4. Touch the OUT FOR BRK key.5. Touch OK to <strong>com</strong>plete the clock in.Clock In from Break1. Enter the employee clock in code and touch the CLK IN/OUT function key todisplay the clock in/out window:2. Touch the job code button for the job you are performing to clock in.3. Touch OK to <strong>com</strong>plete the clock in.Clock Out for Day1. Enter the employee clock in code and touch the CLK IN/OUT function key todisplay the clock in/out window:2. Touch the OUT key.3. Touch OK to <strong>com</strong>plete the clock in.Clock In/Out by FingerprintFingerprint clock in/out requires an optional DIGENT IZZEX FD 1000 Fingerprintidentification device. Each employee fingerprint must be recorded in program mode.(Available with version 2.00s or later.)1. From the REG screen, touch the CLOCK IN/OUT key.2. Touch the employee’s finger to scanner and touch MATCH.3. The Please Wait message displays while the fingerprint is scanned. If the fingerprintmatches, the Clock In/Out screen for the employee is displayed; if the fingerprint doesnot match, an error message displays.4. Complete the clock in by selecting a job code and touching OK.36 • Basic Operations <strong>SAM4s</strong> <strong>SPS</strong>-<strong>2000</strong> Operator <strong>Manual</strong> v1.13
Time Clock EditIf an employee forgets to clock in or out, authorized persons can use the time clock editfunction to correct or add time incorrect clock entries.1. Select the REP tab. (Password entry may be required)2. Touch X MODE PGM and then TIME CLOCK EDIT.3. Select the period to be edited, X/Z (DAILY) EDIT, or periodic edits, if they areused.4. Enter the Employee #, touch OK. The Time Clock Edit screen displays:5. Touch the field to be corrected, and then enter the correct time and touch OK. Usethe PAGE UP and/or PAGE DOWN keys as necessary to display all records.6. When corrections are <strong>com</strong>pleted, touch SAVE to exit with changes saved.<strong>SAM4s</strong> <strong>SPS</strong>-<strong>2000</strong> Operator <strong>Manual</strong> v1.13 Basic Operations • 37
Outside of Sale FunctionsTime DisplayTouch the X/TIME key. The date, time, current operator, software version and PLUcapacity display. Touch Close to exit.Received on Account1. Touch the RECD ACCT key.Note: After touching RECD ACCT, you must go directly to media functions, anyother key will cause and error.2. Enter media received:Enter cash received, touch CASHEnter checks received, touch CHECKEnter miscellaneous tenders received, touch the appropriate key3. The transaction detail area of the screen keeps a running total of media received.Touch DONE to finalize.Paid Out1. Touch the PAID OUT key.Note: After touching RECD ACCT, you must go directly to media functions, anyother key will cause and error.2. Enter media paid out:Enter cash paid out, touch CASHEnter checks paid out, touch CHECKEnter miscellaneous tenders paid out, touch the appropriate key3. The transaction detail area of the screen keeps a running total of media paid out.Touch DONE to finalize.38 • Basic Operations <strong>SAM4s</strong> <strong>SPS</strong>-<strong>2000</strong> Operator <strong>Manual</strong> v1.13
Registering PLUs/ItemsPreset PLUsTouch a preset PLU to register an item.Open PLUsEnter the price and touch an open PLU to register an open-priced PLU.Code Entry Preset PLUsEnter the PLU code number and touch the PLU key to register then item.Code Entry Open PLUs1. Enter the PLU code number and touch the PLU key. The Amount Required windowdisplays.2. Enter the price and touch OK.PLU Price/HALO OverridePLU override must be allowed. See individual PLU programming and also see P ModeSystem Options – General Function Options to set the global override option. Both optionsmust be set to perform an override.Enter the override price and touch the PLU to override the preprogrammed price.PLU Price ChangeRepeatAfter an item has been registered, touch the PLU again to repeat the item.In REG mode, the sequence: [PRICE CHANGE] [PLU] [PRICE] [PRICE CHANGE]will change the PLU price. The PLU flag “ALLOW PRICE CHANGE” controls thisfunction.PLU Price InquiryUse the PRICE INQ key to check the price of an item without registering it.1. Touch the PRICE INQ key.2. Enter the PLU number and touch the PLU key. The item displays with the currentprice.3. Touch the PLU key again if you wish to register the item.<strong>SAM4s</strong> <strong>SPS</strong>-<strong>2000</strong> Operator <strong>Manual</strong> v1.13 Basic Operations • 39
Registering a Not Found PLUDesigned to be used in a scanning system, the NOT FOUND PLU key allows the operator toimmediately enter basic PLU information for an item that is not in the PLU file. If the "NotFound PLU" message displays when a PLU is entered (or when an item is scanned) theoperator can touch the NOT FOUND PLU key and will be prompted to enter PLU price, andif programmed, the descriptor and linking information. The item is registered immediately.1. Scan or enter a PLU that is not in the PLU file. The NOT FOUND PLU messagedisplays.2. Touch the NOT FOUND PLU key. The PRICE/HALO entry box displays.3. Enter the price for the item, touch ENTER. The LINK STATUS entry box displays.4. Enter the status link for the PLU, touch ENTER. The LINK GROUP entry boxdisplays.5. Enter the primary group link for the PLU, touch ENTER. The DESCRIPTOR entrybox displays.6. Use the alpha keyboard overlay to type the descriptor for the item, touch OK. Theitem is registered.40 • Basic Operations <strong>SAM4s</strong> <strong>SPS</strong>-<strong>2000</strong> Operator <strong>Manual</strong> v1.13
Price Level ShiftThe current price level can be set by price level key, or automatically by the time of day orday of week. Price levels can be locked into a specific level (stay down) or they can return toa default level after being shifted to another level for a single registration (pop up). Whenprice level keys are used, touch the appropriate price shift key prior to entering the PLU.Scale ItemsThe <strong>SPS</strong> <strong>2000</strong> can be interfaced to an electronic scale, allowing direct entry of the item'sweight by using the SCALE key.Scale Program Notes• See P-Mode Programming, PLU, PLU Status Group. The following options affecteach PLU linked to a PLU status group.⇒ Option # 13: IS PLU SCALEABLE? If yes, the PLU may be registered only bymultiplying a weight by the PLU.⇒ Option #14: AUTO SCALE ON THIS PLU? If yes, the weight on the scale willbe automatically multiplied when the PLU is registered.⇒ Option #15: AUTO TARE# (0-20) If a tare is selected here, thepreprogrammed tare weight will be subtracted from the scale weight when thePLU is registered.• See P-Mode Programming, Function Key to set the SCALE Key attributes:⇒ MANAGER REQUIRED?⇒ ALLOW MANUAL ENTRY OF WEIGHT?⇒ INHIBIT TARE WEIGHT ENTRY?⇒ MANAGER REQUIRED FOR TARE ENTRY?⇒ TARE ENTRY IS COMPULSORY?⇒ WEIGHT SYMBOL : Y=kg/N=lbDirect Sale Entry1. Place the item on the scale.2. Touch the SCALE key to display the weight.3. Register the open or preset PLU.<strong>Manual</strong> Weight Entry1. Enter the weight using the decimal key.2. Touch the SCALE key to display the weight.3. Register the open or preset PLU.<strong>SAM4s</strong> <strong>SPS</strong>-<strong>2000</strong> Operator <strong>Manual</strong> v1.13 Basic Operations • 41
Auto Tare Weight1. Place the item on the scale.2. Touch the SCALE key to display the weight.3. Register the open or preset PLU.<strong>Manual</strong> Tare Weight Entry1. Place the item on the scale.2. Enter the tare # and touch the SCALE key to display the weight less the tare.3. Register the open or preset PLU.Open Tare Weight Entry1. Place the item on the scale.2. Touch 20. This will call for tare 20, which is an open tare.3. Touch the SCALE4. Touch the decimal [.], then the numeric 3. This will enter a tare weight of 0.3 lb.5. Touch the SCALE key.6. Register the open or preset PLU.Print KeyThe PRINT key allows the operator to send items to the kitchen printer. Use the PRINT key(or label the key GRILL) to send items wouldn't normally go to a kitchen printer or senditems that require special attention. All printer output made using the key is in addition toregular output.To use the PRINT key function, touch the PRINT key before the first item and immediatelyafter the last item to want printed for special attention.1. Touch PRINT.2. Enter the item and condiments or instructions.3. Touch the PRINT key again to send the item & instructions to the printer identifiedon the PRINT key.Note: The PLU Status Group flag #28 “Print on KP?” must be set to Y (yes) for itemsthat are to be sent to a printer via the PRINT key.The PRINT key also sends items in group sequence using the “meal order feature” availableat version 2.02n or later. Items are given a meal order priority through group programming.Each time the PRINT key is touched, the next priority of items will be release to the kitchenprinter.42 • Basic Operations <strong>SAM4s</strong> <strong>SPS</strong>-<strong>2000</strong> Operator <strong>Manual</strong> v1.13
Auto Grill ItemSome items may be programmed as "AUTO GRILL" so they will always be sent to thedesignated grill printer. The advantage of using auto grill is the item is sent to the printerimmediately when the next item is registered, or when the PRINT key is touched. Thisallows for speedy service in quick service environments.1. Enter the auto grill item and condiments or instructions.2. Enter the next item or touch the PRINT key to send the item and instructions to thekitchen printer group identified in the PLUs status group at "K-GRILL GROUP #".PromoThe PROMO key allows the operator to account for promotional items (i.e. by two, get onefree). This key will remove the cost of the item from the sale, but not the count. In the caseof by two, get one free the count remains three items, but the customer is only charged fortwo.1. Register the items to be sold.2. Touch PROMO.3. Register the items to be promo'd.Void of Promo ItemsThe promo item must be voided before the charged item. For example, if a hot dog and apromo hot dog are registered, the promo hot dog must be voided before the paid hot dog isvoided. If more than one paid hot dogs are registered, the promo hot dog must be voidedbefore the last paid hot dog is voided.WasteThe WASTE key allows control of inventory by accounting for items that must be removedfrom stock due to spoilage, breakage, or mistakes. The WASTE key may be under managercontrol, requiring the manager code entry. The WASTE key is not allowed within a sale.1. Touch WASTE.2. Register the wasted items.3. Touch WASTE to finalize.Price InquiryUse the PRICE INQ key to check the price of an item without registering it.1. Touch PRICE INQ.2. Touch the PLU item key on the screen or enter the PLU number and touch the PLUkey.3. Touch the PLU key again if you wish to register the item.<strong>SAM4s</strong> <strong>SPS</strong>-<strong>2000</strong> Operator <strong>Manual</strong> v1.13 Basic Operations • 43
Food Stamp ShiftNote: Display (Yes or No) of food stamp eligible indicators is controlled by option #11of System Option Programming – Tax Options.To sell a non-food stamp eligible item with food stamp eligibility, touch theFD/S SHIFT key before the item entry.To sell a food stamp eligible item as non-food stamp eligible, touch the FD/S SHIFTkey before the item entry.Tax Shift/Tax ExemptionNote: Display (Yes or No) of taxable item indicators is controlled by option #5 ofSystem Option Programming – Tax Options.Excepting Tax from a Taxable ItemTo except tax 1, touch TAX SHIFT1 before registering the item; to except tax 2, touch TAXSHIFT2; to except multiple taxes, touch each of the appropriate tax shift keys beforeregistering the item.Adding Tax to a Non-Taxable ItemTo charge tax 1, touch TAX SHIFT1 before registering the item; to charge tax 2, touch TAXSHIFT2; to charge multiple taxes, touch each of the appropriate tax shift keys beforeregistering the item.Adding Tax to a Non-Taxable ItemTo charge tax 1, touch TAX SHIFT1; to charge tax 2, touch TAX SHIFT2; to chargemultiple taxes, touch each of the appropriate tax shift keys,Excepting Tax on an Entire SaleTaxes can be removed from an entire sale by using a pre-programmed TAX EXEMPT keyor by pressing the appropriate tax shift key before tendering the sale.44 • Basic Operations <strong>SAM4s</strong> <strong>SPS</strong>-<strong>2000</strong> Operator <strong>Manual</strong> v1.13
Corrections & VoidsClearTouch the CLEAR key to erase numeric entries or clear an error condition.Error CorrectTouch the ERR. CORR. key to void the last item entered. Note that the VOID ITEM keymay also be used to correct the last item entered.Void ItemUse the VOID ITEM key to void an item previously entered in a transaction. To void aprevious item: Touch CLEAR, touch VOID ITEM, and then touch or enter the item to be voided.Or,Touch the item or condiment where it is displayed – note that the item touched isnow selected and highlighted. Touch VOID ITEM to remove the item or condiment.Note: If an item is voided, condiments associated with the item are also removed.CancelUse the cancel function to <strong>com</strong>pletely abort a transaction in progress. No totals or countersare updated for items registered prior to cancelling a transaction. Cancel cannot be used aftertendering or finalization. Employee authority determines if the Cancel function is allowed.Cancel does not open the cash drawer.Touch CANCEL to abort a transaction in progress.Transaction VoidA VOID MODE key (key code #31) must be placed on the keyboard. Entry of the currenttime may be required before a transaction void sequence. See P Mode SystemOptions/General Function Option #36. If time entry is required, the subsequent voidoperation will adjust the time report for the correct period. If VOID MODE is under managercontrol, entry of the manager password is required.1. Touch the VOID MODE key. If required enter the manager password.2. If required, enter the time of the original transaction, touch X/TIME.3. Enter Items to be voided. Finalize the void sale using the appropriate tender.4. If necessary, void additional transactions.5. Touch the VOID MODE key again to exit void mode.<strong>SAM4s</strong> <strong>SPS</strong>-<strong>2000</strong> Operator <strong>Manual</strong> v1.13 Basic Operations • 45
Merchandise ReturnUse this function to return (credit) merchandise inside or outside of a sale.Touch MDSE RETURN, and then enter the item to be returned.Discounts/Coupons/SurchargesThe % (percentage) key is programmable and may be set up to handle a variety of discounts,surcharges or coupons. Up to 10 keys are available, each can:• Apply to a Sale or an Item,• Accept an amount entry or calculate a percentage,• Be positive (surcharge) or negative (discount),• Be open or preset (preset may be price or percentage, depending upon othersetup),• Calculate taxes before or after the discount is applied,• Allow the discount to reduce the food stamp subtotal,• Allow the “do it” subtotal discount function,• Enforce validation after the % key function,• If the % key is preset at a set percentage, allow override of the percentage, or toallow override of the percentage in ‘X’ mode only,• If the % key is an item discount/surcharge function, net the item total or not,• If the % key is a subtotal amount function (vendor coupon), allow multiplecoupons without pressing subtotal or allow only one coupon.Sale (Subtotal) DiscountsTo deduct an open percentage discount from a sale (or override a preset percentage):1. Register items.2. Touch SUBTOTAL.3. Enter discount percentage. If the discount is fractional, use the decimal key. Forexample, enter 1 5 . 5 for a 15.5% discount.4. Touch the % key.5. Finalize the transaction.To deduct a preset percentage discount from a sale:1. Register items.2. Touch SUBTOTAL.3. Touch the % key.4. Finalize the transaction.46 • Basic Operations <strong>SAM4s</strong> <strong>SPS</strong>-<strong>2000</strong> Operator <strong>Manual</strong> v1.13
To deduct a coupon against a sale:1. Register items.2. Touch SUBTOTAL.3. Enter the amount of the coupon.4. Touch the % key.5. Finalize the transaction.To apply a “Do It” discount:Note: This function allows the operator to accept a short tender as full payment for thesale. The amount short is automatically tracked in the discount key total.1. Register items.2. Touch SUBTOTAL.3. Enter the amount of the tender, touch the % key.4. Touch CASH.Item DiscountsTo deduct an open percentage discount from an item (or override a preset percentage):1. Register item.2. Enter discount percentage. If the discount is fractional, use the decimal key. Forexample, enter 1 5 . 5 for a 15.5% discount.3. Touch the % key.To deduct a preset percentage discount from an item:1. Register the item.2. Touch the % key.To deduct a preset percentage discount from an item entered earlier in the sale:1. Touch the item or condiment where it is displayed – note that the item touched isnow selected and highlighted.2. Touch the % key.To deduct a store coupon against an item:1. Enter the amount of the coupon, touch the % key.2. Enter or touch the PLU the discount is to be applied to.<strong>SAM4s</strong> <strong>SPS</strong>-<strong>2000</strong> Operator <strong>Manual</strong> v1.13 Basic Operations • 47
SurchargesTo add an open percentage surcharge to a sale:1. Register items.2. Touch SUBTOTAL.3. Enter surcharge percentage. If the surcharge is fractional, use the decimal key. Forexample, enter 1 5 . 5 for a 15.5% surcharge.4. Touch the % key.5. Finalize the transaction.To add a preset percentage surcharge to a sale:1. Register items.2. Touch SUBTOTAL.3. Touch the % key.4. Finalize the transaction.To add an open percentage surcharge to an item:1. Register item.2. Enter surcharge percentage. If the surcharge is fractional, use the decimal key. Forexample, enter 1 5 . 5 for a 15.5% surcharge.3. Touch the % key.To add a preset percentage surcharge to an item:1. Register the item.2. Touch the % key.Totaling/TenderingCashCheckTouch the CASH key, or enter the amount of the cash tendered and touch the CASHkey. The register will display the change due.Touch the CHECK key, or enter the amount of the cash tendered and touch theCHECK key. The register will display the change due.48 • Basic Operations <strong>SAM4s</strong> <strong>SPS</strong>-<strong>2000</strong> Operator <strong>Manual</strong> v1.13
Check CashingA separate function key is available for check cashing. Check cashing limits may apply and amanager code may be needed to <strong>com</strong>plete the transaction.Enter the amount of the check to be cashed, touch the CHECK CASH key. Thecash and check-in-drawer totals will be adjusted appropriately.Miscellaneous (Charge) TenderUp to sixteen miscellaneous tender keys are available for accepting various types of charges.Each key can be configured separately with maximum charge limits, tenderingrequirements/rules, tax exemption rules and validation requirements. Operation sequenceswill vary depending upon the situation. (See “Integrated Payment System Operations” belowwhere an integrated electronic payment system is used.)To accept a miscellaneous tender payment:Touch the MISC TENDER key, or (where allowed) enter the amount of the cashtendered and touch the MISC TENDER key. The register will display the changedue.Preset TenderMacro keys can be programmed to execute preprogrammed amount tenders for <strong>com</strong>moncurrencies such as $5, $10 or $20 cash.Split TenderMultiple payments can be recorded for a single transaction. Cash, Check, and/or Misc.tenders can be recorded in any order, as many times as necessary to pay the entire transaction.Integrated Payment System OperationsCredit Transaction1. Enter items.2. Touch or tender into the appropriate MISC TEND key. The message “SLIDECARD” displays.3. Swipe card. The message “WAITING RESP.” displays until the card verification is<strong>com</strong>plete.4. When verification is <strong>com</strong>plete, the draft is printed.<strong>SAM4s</strong> <strong>SPS</strong>-<strong>2000</strong> Operator <strong>Manual</strong> v1.13 Basic Operations • 49
Debit Transaction1. Enter items.2. Touch or tender into the appropriate MISC TEND key (with debit function). Themessage “SLIDE CARD” displays.3. Swipe card. The message “GETTING PIN.” displays. (At the PIN pad, the ENTERPIN message displays.)4. At the PIN pad, enter the PIN and touch the OK key. The terminal now displays“WAITING RESP.” until the card verification is <strong>com</strong>plete.5. When verification is <strong>com</strong>plete, the draft is printed.Gift Card – Sale of Gift Card1. Register the gift card amount into a PLU linked to a unique PLU Status Group withthe gift card activate function.2. Touch or tender into the appropriate tendering key. The message “SLIDE GIFT”displays.3. Swipe the gift card. The terminal displays “WAITING RESP.” until the cardverification is <strong>com</strong>plete.4. When verification is <strong>com</strong>plete, the receipt and the draft are printed.Gift Card – Add to Existing Card1. Register the gift card amount to be added into a PLU linked to a unique PLU StatusGroup with the gift card addition function.2. Touch or tender into the appropriate tendering key. The message “SLIDE GIFT”displays.3. Swipe the gift card. The terminal displays “WAITING RESP.” until the cardverification is <strong>com</strong>plete.4. When verification is <strong>com</strong>plete, the receipt and the draft are printed.Gift Card – Payment with Gift Card1. Register a normal transaction. Touch the Gift Card Tender key (a miscellaneoustender key programmed with the gift card function.)2. Swipe the gift card. The terminal displays “WAITING RESP.” until the cardverification is <strong>com</strong>plete.3. When verification is <strong>com</strong>plete, the receipt and the draft are printed.<strong>Manual</strong> Card Entry1. Enter items.2. Touch or tender into the appropriate MISC TEND key. The message “SLIDECARD” displays.3. If card will not read, touch CLEAR once, the message “Enter Acct No” Displays.50 • Basic Operations <strong>SAM4s</strong> <strong>SPS</strong>-<strong>2000</strong> Operator <strong>Manual</strong> v1.13
4. Enter the account number and touch OK (or touch CLEAR again to abort thetransaction.)5. The “WAITING RESP.” message displays and the transaction <strong>com</strong>pletes normally.Electronic Payment – Merchandise Return1. Complete the merchandise return transaction as you would a normal transaction.Touch MDSE RTRN prior to entering each returned item.2. Touch the appropriate MISC TEND key. The message “SLIDE CARD” displays.3. Swipe card. The message “WAITING RESP.” displays until the card verification is<strong>com</strong>plete.4. When verification is <strong>com</strong>plete, the draft is printed.Electronic Payment – Void TransactionTransaction Void allows a transaction to be voided from the batch and not reported to thecardholder statement.1. Touch the VOID MODE key.2. Enter items.3. Touch or tender into the appropriate MISC TEND key. The message “SLIDECARD” displays.4. Swipe card. The message “ENTER AUTH CODE.” displays.5. Enter the authorization code printed for the transaction to be voided, touch OK.6. The message “ENTER REF CODE” displays. Enter the Reference number from thetransaction to be voided. Touch OK.7. The message “WAITING RESP.” displays until the transaction is found and theoriginal record voided.Foreign Currency Subtotal & Tender1. Enter items2. Touch the appropriate conversion key, which is pre-programmed with the exchangerate (for example, a Canadian Dollar may be worth $0.75 US.)3. Enter amount tendered in foreign currency and touch CASH. Note that change is<strong>com</strong>puted in home currency.Food Stamp Subtotal & TenderFood Stamp options include:• The FD/S TEND key can be programmed to forgive tax on items paid for with foodstamps.• Food Stamp change of less than $1 can be applied toward the sale or given as change.Consult with your installing dealer to verify that food stamp programming is set tocorrespond with food stamp merchant rules in your area.<strong>SAM4s</strong> <strong>SPS</strong>-<strong>2000</strong> Operator <strong>Manual</strong> v1.13 Basic Operations • 51
To <strong>com</strong>plete a food stamp transaction:1. Enter items. (Food stamp eligibility is pre-set for each item.)2. Touch FD/S SUBTL. The total of items eligible for food stamp payment displays:3. Enter food stamp tender amount, touch FD/S TEND.4. Pay remainder due (if any) with CASH, CHECK or by one of the miscellaneoustender functions (charge).Post-Finalization ProceduresPaid Order RecallTouch the PAID RECALL key to view the previous transaction. Touch the PAIDRECALL key again to view the next previous transaction. Up to 10 preceding transactions(depending upon memory allocation) may be viewed by repeatedly pressing the PAIDRECALL key.• Use the scroll bar, if necessary, to view the entire transaction.• Touch RECEIPT if necessary to print a recalled transaction.• Touch CLEAR to exit.Receipt IssueTouch RECEIPT to print a transaction receipt. If the issue of multiple receipts is allowed,touch RECEIPT a second time to print a receipt copy.ValidateWhen a printer supporting single line validation is attached, insert paper into the printer andtouch the VALID key to initiate the single line validation.52 • Basic Operations <strong>SAM4s</strong> <strong>SPS</strong>-<strong>2000</strong> Operator <strong>Manual</strong> v1.13
Quick Service OperationsTypical QSR Keyboard• CHILD, SM, MED, LG and X-LG are modifier keys. When items are sold indifferent sizes, touch a modifier before touching the desired item. For example,touch MED, and then touch FROZEN BEV.• When items are sold in different flavors, or with different options, registration of theitem may trigger a new (keylink) screen. In this example, the frozen beverage isavailable in a variety of flavors. Touch the desired flavor to <strong>com</strong>plete the itemregistration.<strong>SAM4s</strong> <strong>SPS</strong>-<strong>2000</strong> Operator <strong>Manual</strong> v1.13 Basic Operations • 53
• After all options are selected, the <strong>com</strong>pleted item is displayed and the register isready for another entry or finalization.Sample Transaction ReceiptA <strong>SAM4s</strong> Ellix 20S thermal receipt printer generated the receipt shown here (actual size).Programmable preamblemessage (up to 6 lines)Customer logo – stored inthe non-volatile printermemoryDate, time, day of weekTransaction information:consecutive number,register number, employee,Programmable preamblemessage (up to 6 lines)54 • Basic Operations <strong>SAM4s</strong> <strong>SPS</strong>-<strong>2000</strong> Operator <strong>Manual</strong> v1.13
Drive Thru OperationsWhen drive thru operations are implemented,: Drive Thru Store, Drive Thru Recall keys,will appear on the screen. (The Drive Thru Store key is one of the Store Check functionkeys with the “auto check management” feature enabled. The Drive Thru Recall key is oneof the Recall Check function keys with the “Drive Thru” feature enabled.)Park Order and Serve Order keys may also be used in conjunction with a kitchen videosystem option.Drive Thru Store1. Enter items.2. Press the DRIVE THRU STOREkey.Drive Thru Order NumberDrive Thru Recall1. Press the DRIVE THRU RECALLkey2. Add or void items as necessary.3. Finalize the transaction with CASH,CHECK or one of the miscellaneoustender (charge) functions.Note: Items added after recallare shown below the dotted lineDrive ThruOrder Number<strong>SAM4s</strong> <strong>SPS</strong>-<strong>2000</strong> Operator <strong>Manual</strong> v1.13 Basic Operations • 55
Drive Thru ParkEnter a number and press PARK ORDER to park or "suspend" an order on the videomonitor until the order is <strong>com</strong>pletely filled. In the case of a drive through order that cannotbe <strong>com</strong>pleted when the customer arrives at the pick-up window, the operator would park theorder until it was <strong>com</strong>pletely filled. The order would then be served or bumped by using theSERVE ORDER key.Drive Thru ServeEnter a number and press SERVE ORDER to serve or bump the order from a video monitor.No video keypad is needed for this function.Alpha TextThe Alpha Text key can be used to type a name or message that will be associated with astored order (soft check). Press the ALPHA TEXT key anytime after an order has beenopened, then type a message (up to 15 characters) using the alpha keyboard overlay and pressENTER. The message is saved and printed/displayed with the order.56 • Basic Operations <strong>SAM4s</strong> <strong>SPS</strong>-<strong>2000</strong> Operator <strong>Manual</strong> v1.13
Training ModeAn employee file can be created and designated for training purposed. Sign on thedesignated training employee. The message “*****TRAINING*****” display on the screenand print on the receipt (if a receipt printer is attached and programmed).Note that if you are performing training in tracking file operations, training activity willbe added to tracking files. Be sure to designated specific files for training purposes,and/or clear tracking files after training activity.Training Mode Program Notes1. Designate an employee file to be used for training. Set the P Mode Employee Optionfor that employee to “Training Mode” = YES.2. Refer to P Mode System Options/Training Mode Options select printing, drawer andother training related options.<strong>SAM4s</strong> <strong>SPS</strong>-<strong>2000</strong> Operator <strong>Manual</strong> v1.13 Basic Operations • 57
<strong>SPS</strong>-<strong>2000</strong> Delivery SystemDelivery System Features• Customer records (called “Delivery Tables”) are stored in the <strong>SPS</strong>-<strong>2000</strong> memory. Thenumber of Deliver Tables is defined in memory allocation (each requiring 660 bytes),with a maximum of 9999 records.• Eleven customer information fields are stored for each delivery table.• Orders are tracked by assigning one of the four available tracking files to hold deliveryorders• The Delivery function key is used to initiate a delivery transaction. When touched, theDelivery key opens the customer record screen. Here existing accounts can be opened,new accounts created, or existing accounts deleted.• The Last Purchase function is available from the delivery customer record screen.Touch the Last Purchase key to view a record of the last 48 items purchased by thedelivery customer. The items are viewed under three tabs, each listing up to 16 items.Items viewed here can be quickly selected and reordered.• The Park Delivery function key allows you to accept orders and hold them forpreparation and delivery at a later time.• The Serv Delivery function key releases held parked orders for preparation.Delivery Related Programs• Set the number of delivery tables: S/Memory Allocation/Option #33.• Use tracking file #1 for delivery tracking: S/System Options/Option #21.• Set Tracking files as you would any in other tracking system:○ Set the register number that holds check tracking data and the register that hold backupdata (S/System Options/Option s#10 & 11 -- for single register systems, just setthe register number.)○ Set Memory Allocation for number of lines per check and maximum number ofchecks (S/Memory Allocation/Options # 11 & 12). Be certain that the number oftracking files available exceeds the number of delivery tables Allocated• Use the Key Relocation program to assign function keys as necessary: Delivery(function key code #069); Park Delivery (function key code #070); Serv Delivery(function key code #071).• Use the Key Relocation program to assign Store Check 1, Recall Check 1, and ListCheck 1 function keys. Use the default options for the Recall Check 1 key, do notenable drive thru, set “assigned by register” to No, and set the length of Check# inDigits” to 00.58 • Basic Operations <strong>SAM4s</strong> <strong>SPS</strong>-<strong>2000</strong> Operator <strong>Manual</strong> v1.13
Delivery OperationsEntering a Delivery Transaction1. Touch the Delivery key to initiate a delivery order. A blank customer record screendisplays:2. Touch the Open New/Existing key.3. Enter the customer account number (up to 10 digits – in most cases the customertelephone number with area code will be used) and then touch OK.<strong>SAM4s</strong> <strong>SPS</strong>-<strong>2000</strong> Operator <strong>Manual</strong> v1.13 Basic Operations • 59
4. If the number entered is a new account, a blank record screen will display with fieldsopen for entry.Each field will store information as shown below:Field# CharactersAccount No 9Title 12First Name 12Last Name 20Address 40Address 2 30City 30Telephone 15E-mail 30Zip Code 12Birth Date8 (mmddyyyy)Loyalty PointsNot currently usedLast VisitDisplays last dateof activity for thisaccount60 • Basic Operations <strong>SAM4s</strong> <strong>SPS</strong>-<strong>2000</strong> Operator <strong>Manual</strong> v1.13
Touch the field you wish to update.Enter alphanumeric field data (see field size information) and touch OK. Informationentered for the new customer will be stored under the account number.5. If the customer account number is an existing account number, information for thecustomer will display:6. After customer information is recalled or entered, touch OK to begin an order. (A checkwill open a check with the customer account number as the check number.)7. Register the items for the customer.8. Touch Store Check 1.9. Requisitions will be directed to the kitchen printer (if used). Deliver the order when<strong>com</strong>pete. When the delivery person returns with payment, pay the check by using theRecall Check 1 key and entering the appropriate payment.<strong>SAM4s</strong> <strong>SPS</strong>-<strong>2000</strong> Operator <strong>Manual</strong> v1.13 Basic Operations • 61
Parking an Order for Delivery at a Later Time1. Enter a delivery transaction as described in 1-7 of “Entering a Delivery Transaction” onpage 59. Do not touch the Store Check 1 key at this time, instead touch Park Delivery.You will be prompted to enter the order park time.2. Enter the time preparation for the order should begin in 24-hour (HHMM) format andthen touch OK.3. Touch the Store Check function key. Items will automatically be held (H) and notrouted to kitchen printers.“Hold” Status62 • Basic Operations <strong>SAM4s</strong> <strong>SPS</strong>-<strong>2000</strong> Operator <strong>Manual</strong> v1.13
4. When the time set for the parked order is reached, the message: “Order in Park, PressList Check” message will display. The error tone will sound every 15 seconds, providinga prompt for the operator to release the order for preparation.Press the List Check key to display a list of open checks (there may be more than one)with the check status indicated:“Parked” Status5. Touch he “parked” order you wish to release for preparation, touch OPEN.6. The customer record screen will display, allowing the operator to verify the customer.Touch OK.7. The stored customer order will display (note hold status (H) for each item is stilldisplayed.) Touch Serv Delivery.8. Touch Store Check 1.9. Requisitions will be directed to the kitchen printer(s) (if used). Deliver the order when<strong>com</strong>pete. When the delivery person returns with payment, pay the check by using theRecall Check 1 key and entering the appropriate payment.<strong>SAM4s</strong> <strong>SPS</strong>-<strong>2000</strong> Operator <strong>Manual</strong> v1.13 Basic Operations • 63
Viewing/Re-Ordering from the Last Purchase Screen1. Begin or recall a customer account (see “Entering a Delivery Transaction” on page 59and follow steps 1-5).2. Touch the Last Purchase key.3. The last 48 items ordered by this customer will display. If more than 16 items are inthe record, items can be viewed by pressing the Last Purchase 2 or Last Purchase 3tabs. If you wish to re-order an item(s) viewed on the Last Purchase screen, selectthe item(s) (a check mark will display for the item) and touch OK. The item(s) willautomatically register on a new order for the customer.64 • Basic Operations <strong>SAM4s</strong> <strong>SPS</strong>-<strong>2000</strong> Operator <strong>Manual</strong> v1.13
Guest Check OperationsOverviewThe <strong>SPS</strong> <strong>2000</strong> can employ a manual previous balance, hard check, or soft check system. Ifmanual previous balance is selected, the check balance is not saved in memory and is inputmanually by the operator (use the manual previous balance key). If a hard check system isselected, only the previous balance is maintained in memory. If a soft check system isselected, the check detail is kept in memory until the check is paid. (After a check is paid,check detail is available only through the PAID RECALL function, if it is implemented, orthe closed check file, if it is implemented.)For hard or soft check operations, the following tracking options are available:1. Tracking by manually entering the check number. (The number of digits in thecheck number may be set from 0-10, with zero meaning no fixed length.) Tablenumber entry may be required.2. Tracking by automatically assigning a check number. Starting check numberscan be set for each register in the system.3. Tracking by Table Number, where a check number is also assigned. Multiplechecks may be assigned at the same table.In cases 1 & 3 above both a check # and a table # are connected to a balance. The balancecan be recalled either by the check number, or by the table number. (If there are multiplechecks at the same table, an attempt to recall by table number will result in a screen listing theopen checks at the table. The operator may then select one of the checks to open.)Multiple Tracking FilesThe <strong>SPS</strong> <strong>2000</strong> allows up to four separate tracking files. This allows you to set up differentfiles for guest check/table tracking, phone order tracking, drive thru tracking for multiplewindows, delivery order tracking or whatever your application requires. The number oftracking files and the number of checks for each file are defined in memory allocation. Themethod of tracking you select (hard/soft) applies to all tracking files.Because there are four possible tracking files, there are separate sets of keys for each of thefollowing functions:• RECALL CHECK (1-4)• STORE CHECK (1-4)• TABLE (1-4)• LIST CHECK (1-4)• TRANSFER CHECK (1-4)<strong>SAM4s</strong> <strong>SPS</strong>-<strong>2000</strong> Operator <strong>Manual</strong> v1.13 Basic Operations • 65
Note that the tracking file number (1-4) is displayed on the screen in situations when checksare listed (i.e. checks with held items, multiple checks on the same table, the List Checkscreen and the Transfer Check screen.)Tracking File # is indicated# Of GuestsEntry is optional and is controlled by an option on the Recall Check key program. Thenumber of guests may be required on all transactions or only on tracking transactions.Alpha Check NumberTraditionally, check numbers are numeric, either manually entered or assigned by theregister. However, the <strong>SPS</strong>-<strong>2000</strong> has the capability of using an alphanumeric name for acheck. (Alpha check numbers are set with P Mode System Option/Tracking File Option#17.)Alpha check numbers are especially useful for ordering systems where the customer is calledby name when the order is ready. When alpha check numbers are used, the alpha name islimited to nine characters.66 • Basic Operations <strong>SAM4s</strong> <strong>SPS</strong>-<strong>2000</strong> Operator <strong>Manual</strong> v1.13
<strong>Manual</strong> Previous BalanceNOTES:Neither the new balance or transaction items are stored in memory and neither can berecalled when using manual previous balance posting.You must set memory allocation to “Hard” check to post manual balances.Although not <strong>com</strong>monly used, the <strong>SPS</strong> <strong>2000</strong> has the capability of manual previous balanceoperations. <strong>Manual</strong> previous balance means that the balance amount is entered through thenumeric keypad. New items entered are added to the previous balance and the new balance is<strong>com</strong>puted when the transaction is finalized. Any of the four STORE 1-4 keys may be used toservice the transaction.Function Key Notes:• Use the P/BAL key (function key code #148) to enter the previous balance amount.Opening a Check1. Enter zero, touch P/BAL.2. Enter items.3. Touch any one of the four store check functions, i.e. STORE #1.<strong>SAM4s</strong> <strong>SPS</strong>-<strong>2000</strong> Operator <strong>Manual</strong> v1.13 Basic Operations • 67
Adding to a Check1. Enter amount, touch P/BAL.2. Enter items.3. Touch STORE #1.Paying a Check1. Enter amount, touch P/BAL.2. Touch CASH, or enter the amount tendered and touch CASH, orTouch CHECK, or enter the amount tendered and touch CHECK, orTouch one of the miscellaneous tender keys, or enter the amount tendered and touchof the miscellaneous tender keys.Note: If tender is less than balance, touch STORE #1 to finalize.68 • Basic Operations <strong>SAM4s</strong> <strong>SPS</strong>-<strong>2000</strong> Operator <strong>Manual</strong> v1.13
Hard Check PostingWith "hard check" posting, only current balances are stored in memory.Procedures and options relating to beginning, adding to and paying a check are the same on"hard" and "soft" check posting, except it is necessary to print an update to the check at eachposting. Note that when a hard check is recalled, the previous balance is displayed. (In softcheck posting the previously registered items are recalled.)Opening a Hard CheckDepending on the method used:Enter check number, touch CHECK #, orEnter table number, touch TABLE #.Note that the previous balance is displayed.<strong>SAM4s</strong> <strong>SPS</strong>-<strong>2000</strong> Operator <strong>Manual</strong> v1.13 Basic Operations • 69
Soft Check PostingIt is not necessary to print the check at each posting. The PRINT CHECK key will print thecheck at the designated printer. The PRINT CHECK key can be programmed toautomatically service the transaction.Soft Check Tracking Program Notes:Discuss these options with your authorized <strong>SPS</strong>-<strong>2000</strong> dealer or refer to the <strong>SPS</strong>-<strong>2000</strong>Program Reference <strong>Manual</strong>.• You must set the check tracking method to “Soft”. See S Mode Memory Allocationoption #8.• You must set the maximum number of lines per check. See S Mode MemoryAllocation option #11.• You must set the maximum number of check for each tracking file. See S ModeMemory Allocation option #12.• You must set the register number that holds the check tracking file and backup file.See S Mode System options #10 and #11.• You must set the options for the Recall Check key. See P Mode Function Keys#197-200. Options set here include: Enforce Seat Number Table Entry Required Multiple Checks Allowed for each Table Guest Count Entry Required Compulsory for all Sales (Check #) Assigned by Register Opening Employee has Exclusive Access Print Receipt after Store Check Other related options• Set P Mode System Options/Tracking File Options Starting Check Numbers Options to reset check numbers on Z of Financial or Open Check Reports Option to print Barcodes on checks Option to use Alpha Check Numbers70 • Basic Operations <strong>SAM4s</strong> <strong>SPS</strong>-<strong>2000</strong> Operator <strong>Manual</strong> v1.13
Beginning a Check1. Depending on how your system is programming, you can begin a check with either acheck or table:• Enter check number: depending upon programming you may enter the check numberand touch one of the Recall Check functions, i.e. RECALL #1, or touch theRECALL key to automatically assign a check number. (After beginning a checkwith the check number, you may be required to enter a table number, or if table enteris not required, you may optionally enter a table number.)• If Table# is <strong>com</strong>pulsory, if only one check per table is allowed, and if checks areautomatically assigned, you can enter the number of the table and touch TABLE#.The table is opened and the check is automatically assigned.2. If guest entry is required, enter number of guests and touch the GUEST # key.3. Enter the items ordered.4. Touch the appropriate Store Check function, i.e. STORE #1. The message “SERVED”displays momentarily.The check #, table #,guest count andemployee associatedwith the check aredisplayed.<strong>SAM4s</strong> <strong>SPS</strong>-<strong>2000</strong> Operator <strong>Manual</strong> v1.13 Basic Operations • 71
Adding to a Check1. If a table and check are both assigned you may either:• Enter the check number, touch the appropriate recall check function, i.e. RECALL#1• Enter the table number, touch the appropriate Table # function, i.e. TABLE 1.2. If you open a table where more than one check is open, the screen will list the openchecks for the table:3. Touch a check to select it and then touch OPEN.A dotted linedisplays to separateitems postedpreviously fromitems posted at thistime.72 • Basic Operations <strong>SAM4s</strong> <strong>SPS</strong>-<strong>2000</strong> Operator <strong>Manual</strong> v1.13
4. Enter the new items ordered.5. Touch the appropriate Store Check function, i.e. STORE #1. The message “SERVED”displays momentarily.Paying a Check1. If a table and check are both assigned you may either:• Enter the check number, touch the appropriate recall check function, i.e. RECALL#1• Enter the table number and touch the appropriate Table # function, i.e. TABLE 1.2. If you open a table where more than one check is open, the screen will list the openchecks for the table. Touch a check to select it and then touch OPEN.<strong>SAM4s</strong> <strong>SPS</strong>-<strong>2000</strong> Operator <strong>Manual</strong> v1.13 Basic Operations • 73
3. If necessary, additional items can be registered at the time of payment.4. If necessary, enter a tip amount and touch one of the TIP function keys, i.e. TIP1.5. Touch CASH, or enter the amount tendered and touch CASH, orTouch CHECK, or enter the amount tendered and touch CHECK, orTouch one of the miscellaneous tender keys, or enter the amount tendered and touch ofthe miscellaneous tender keys.Note: If tender is less than balance, touch STORE #1 to finalize.Sample Print of Soft CheckGuest Checkbefore SettlementGuest Checkafter Settlement74 • Basic Operations <strong>SAM4s</strong> <strong>SPS</strong>-<strong>2000</strong> Operator <strong>Manual</strong> v1.13
Seat # AssignmentThe seat # system may be employed in a soft check system. Its' purposes are:• To separate orders by individuals so that orders are identified by individual onkitchen requisitions.• To facilitate separate payments.Seat # entry can be enforced, or if optional, seat #'s can be applied to items previouslyentered.Enforced Seat # EntryNotes:• When seat # is enforced, it is enforced for each main item. Seat # is not required forcondiments.• Items are displayed as they are entered.• The seat number is displayed to the right of each main item.Procedure:1. Open a check.2. If you attempt to enter an item without a seat number entry, the "ENTER SEAT#"prompt displays.3. Enter seat # (up to 2 digits).4. Enter main item and condiments.5. Enter the seat number for the next item, touch the SEAT # key.6. Enter the next item and its condiments.The seatnumber “S1”displays afterthe item.<strong>SAM4s</strong> <strong>SPS</strong>-<strong>2000</strong> Operator <strong>Manual</strong> v1.13 Basic Operations • 75
Changing the Seat # on a Previously Entered Item1. Touch the item you wish to change.2. Touch SEAT #.3. Enter a new number and touch SEAT #.Optional Seat # Entry• When seat # is not <strong>com</strong>pulsory, touch the item to which you wish to assign a seatnumber. Touch SEAT # and then enter a seat number and touch SEAT #.76 • Basic Operations <strong>SAM4s</strong> <strong>SPS</strong>-<strong>2000</strong> Operator <strong>Manual</strong> v1.13
Splitting Consolidated Items for Seat Assignment or Split PaymentWhen like items are consolidated, touch the SPLIT ITEM key to separate items for separateseat assignment.1. Touch the consolidated item you wish to split.2. Touch SPLIT ITEM to split the items.<strong>SAM4s</strong> <strong>SPS</strong>-<strong>2000</strong> Operator <strong>Manual</strong> v1.13 Basic Operations • 77
Payment by Seat Number1. Open a check. Identify items by seat number.2. Touch Subtotal and then touch Seat #. Each seat is displayed with the seat total andtax. If there are items without seat assignments, they will be displayed with theidentification: “NO SEAT”.3. Touch the seat you wish to pay and enter the appropriate payment, CASH, CHECKor MISC TENDER.4. Continue to settle each seat until the check is <strong>com</strong>pletely paid, or touch STORECHECK to store the unpaid seats.78 • Basic Operations <strong>SAM4s</strong> <strong>SPS</strong>-<strong>2000</strong> Operator <strong>Manual</strong> v1.13
Split CheckThe Split Check function key (Key #249) allows you to select item or items on a soft checkfor assignment to another check. To split items from one check to another:1. Open an existing guest check.2. Select an item by touching it.3. Touch Split Check. Note that the item designated for assignment to another check ismarked with an asterisk.4. Continue to select additional items.5. Touch the appropriate Store Check key. You will be prompted to enter the checknumber to which the selected items are to be transferred.6. Enter the check number and touch OK.<strong>SAM4s</strong> <strong>SPS</strong>-<strong>2000</strong> Operator <strong>Manual</strong> v1.13 Basic Operations • 79
Hold/Print HoldThis feature is used in a table service restaurant. It prevents kitchen printer /KVS instructionsfrom being sent immediately after items are registered and stored. For example, an employeeregisters a customer order consisting of appetizers and main course entrees. Without thisfeature, both the appetizer and main course items are sent to the kitchen at the same time.With this feature, the employee can "hold" main course items, which prevents them frombeing sent to the kitchen printer (even thought they are programmed to be sent to a printer).Then, later, the employee can recall the check and print the main course items, so they can beprepared and served when the customer is ready to eat them.A held item is indicated on the display with an 'H' to the left of the item.See P Mode System Options/Tracking File Options to set the following related options:• Option #4: Automatically select held items when a check is recalled, Yes or No.(This flag is to facilitate printing of held items.)• Option #5: Display warning to operator that check(s) have held items whenemployee finalizes any check, Yes or No.When using software version 2.02b or later, see PLU/PLU STATUS GROUP option #46“Hold Automatically” to automatically hold items by group. (For example, you may wish toautomatically hold dessert items when they are first entered.)Hold an Item1. Touch the item you wish to hold.2. Touch the HOLD key. Note that when a main item is held, its condiments orinstructions are also held. Note that an ‘H’ displays next to the held items.3. Store the check by touching the appropriate store check key, i.e. STORE CHK1.80 • Basic Operations <strong>SAM4s</strong> <strong>SPS</strong>-<strong>2000</strong> Operator <strong>Manual</strong> v1.13
4. If the system is programmed to warn the operator if items are held when the check isstored, (See P mode System Options/Tracking File Options #5) the held itemmessage displays. The message will list all checks with held items, so that the serveris reminded of other checks/tables where held items may need to be released.5. Touch CLOSE to store the check.Print All Held Items1. Recall an order with held items. (Flag is set to automatically select held items.)Touch any key except PRINT HOLD (or Repeat) to de-select items if you areproceeding with any other operation.2. Touch PRINT HOLD. (Hold status is removed for selected items; items will be sentto appropriate output when the check is serviced.)Note: This operation has been enhanced at software version 2.00x: items are nowselected when the guest check is recalled (visually with a “S”). When a guest check withHELD items is recalled items can be selected using the ENTER function key. This willadd a “S” in front of the item. When [PRINT HOLD] is pressed, the “S” will beremoved and when the guest check is serviced those items will be released to the KP orKVS. Any item with a “H” will continue to be HELD.Print an Individual Item1. Recall an order with held items. (Option to automatically select held items is set to“No”.)2. Touch the item you wish to print.3. Touch PRINT HOLD. (Hold status is removed for selected item; item will be sentto appropriate output when the check is serviced.)<strong>SAM4s</strong> <strong>SPS</strong>-<strong>2000</strong> Operator <strong>Manual</strong> v1.13 Basic Operations • 81
List Check1. Sign on an employee.2. Touch LIST CHECK to display the employee’s open checks. If more than eightchecks are open, use the PREV and/or NEXT keys to scroll through the list.3. Touch a check to select it. Touch OPEN to open the selected check, or touchCLOSE to close the list check window.82 • Basic Operations <strong>SAM4s</strong> <strong>SPS</strong>-<strong>2000</strong> Operator <strong>Manual</strong> v1.13
RepeatYou can repeat the last items posted by using the REPEAT key. This simplifies registrationof another round of drinks.1. Open a check. Enter Items.2. Touch the appropriate store check key, i.e. STORE CHECK 1.3. Recall the Check.4. Touch REPEAT. Note that the items posted previously are repeated.<strong>SAM4s</strong> <strong>SPS</strong>-<strong>2000</strong> Operator <strong>Manual</strong> v1.13 Basic Operations • 83
Transfer TableIf permitted by authority level programming, an employee is allowed to move a check to adifferent table by re-entering a different table number. This can be done multiple times, ifnecessary.1. Recall a check by entering a table or check number.2. Enter a new table number by entering the number and touching the TABLE # key.3. Continue with the transaction by adding items, accepting payment or servicingCurrent Tablenumber isdisplayed.84 • Basic Operations <strong>SAM4s</strong> <strong>SPS</strong>-<strong>2000</strong> Operator <strong>Manual</strong> v1.13
Combine Checks for Payment1. Sign on an employee.2. Touch the ADD CHECK key.3. Enter the table # or check # of the first check to be paid. Touch the appropriateRecall Check or Table # key.4. Enter the table # or check # of the next check to be paid. Touch the appropriateRecall Check or Table # key.5. Pay the checks together using CASH, CHECK, and/or MISC TEND.Checks listed forpayment together<strong>SAM4s</strong> <strong>SPS</strong>-<strong>2000</strong> Operator <strong>Manual</strong> v1.13 Basic Operations • 85
Transfer CheckChecks can be transferred in two ways:• Individually, by signing on a new employee and opening the check. The "Automatictransfer check" system flag must be set to “Yes” to allow this option and Authoritylevel programming must be set to allow the employee to access checks that were notopened by them.• Individually or in groups, using one of the transfer check function keys (TRANSCHECK 1-4).• Note that a system flag determines whether totals are transferred with the check to thenew employee.To transfer check through a transfer check key:1. Sign on an employee.2. Touch the TRANS CHECK key.3. Select the FROM employee from the list.4. Select the TO employee from the list.86 • Basic Operations <strong>SAM4s</strong> <strong>SPS</strong>-<strong>2000</strong> Operator <strong>Manual</strong> v1.13
5. Select “All Checks” or “One Check”.6. If “One Check” is selected, a list will display from which you can select the check totransfer. Touch the check you wish to transfer and touch OPEN. If “All Checks” isselected, the “Check Transferred” message will display.7. The “Check Transferred” message displays.Printed Chit forTransferred Check<strong>SAM4s</strong> <strong>SPS</strong>-<strong>2000</strong> Operator <strong>Manual</strong> v1.13 Basic Operations • 87
Tip DeclareIf the employee time keeping feature is used, the operator may be prompted to enter cash tipswhen clocking out. (Set the employee authority level option #33, “Compulsory Tip Entry” toYes.) Sign on the employee.1. Clock out the employee, the Declare Cash Tips window displays.2. Enter the declared amount and touch OKThe TIP DECLARE key can be used to enter cash tips when the time keeping feature is notused.1. Touch the TIP DECLARE key.2. Enter the declared amount and touch OK88 • Basic Operations <strong>SAM4s</strong> <strong>SPS</strong>-<strong>2000</strong> Operator <strong>Manual</strong> v1.13
Printed Chit forTip Declaration<strong>SAM4s</strong> <strong>SPS</strong>-<strong>2000</strong> Operator <strong>Manual</strong> v1.13 Basic Operations • 89
Using Graphical Table ManagementThe <strong>SPS</strong>-<strong>2000</strong> graphical table management display offers the following features:• You can design a facsimile of the restaurant floor plan placing tables on up to fivefloors – for example a main floor, bar, counter, patio, or other serving locations.• You can place up to 30 tables on each floor.• Tables can be displayed in different shapes and sizes and moved to locations on thescreen that represents their actual locations.Once the tables are designed and located upon the table display screen, the screen can be usedin the operation of the register.• The table display screen can be displayed manually or automatically. If a manualdisplay is used, press the Table Display key to view the table layout. If an automaticsystem is employed, the table layout displays immediately after an employee islogged on to operate the register.• With the table layout displayed, the operator can touch a table to open or recall thecheck for the table. The table number or name will correspond with the checknumber.• Guest counts can be entered from the table display screen.• The color of the table on the display reflects the table’s status:Pink Tables are empty tablesOrange Tables are have open checksGreen Tables have printed checks• <strong>Operators</strong> can move check balances from one table to another.• <strong>Operators</strong> can add check balances from multiple tables to a single table.Table Management Program NotesRefer to the <strong>SPS</strong>-<strong>2000</strong> Program Reference <strong>Manual</strong> for detailed setup instructions.• S Mode System Option #16 determines whether the table display is automatic ormanual. Set “Use Graphic Table Management” to YES for automatic table display;Set to NO for manual display.• When using graphic table management, the table number or name corresponds withthe guest check number (not the table number.) Set options for the appropriate recallcheck key as follows:Set “Table Entry Required” to NOSet “Assigned by Register” to NOSet other Recall Check key options a necessary• S Mode Memory allocation for maximum number of checks (option #12) mustexceed the number of tables in use.• S Mode System Options #10 and #11 must be set to locate the check file in theregister system.90 • Basic Operations <strong>SAM4s</strong> <strong>SPS</strong>-<strong>2000</strong> Operator <strong>Manual</strong> v1.13
Graphic Table Management OperationsIf table management is “manual” touch the Table Display key.or,If table management is “automatic” sign on an employee to display the Table screen.Each Table displayswith basic tableinformation:• Checknumber/name• Guest count• Table balanceTouch Add tomove or addtable balancesTouch Guest toenter the guestcountThe table colorreflects the status ofthe table:• Pink = Empty• Orange = Active• Green = CheckPrintedOpen the Floor list boxto select and displaythe appropriate floorTouch Paymentto close the TablescreenOpening a TableTouch a table to open the check associated with the table.Entering Table Guest CountsTouch Guest and enter the guest count. Then touch the appropriate table. If guestcount is <strong>com</strong>pulsory, you can either enter the guest count from the table screen orthrough the guest count key on the keyboard.Moving a Balance to another TableTouch Add. Select the table you wish to move to, and then touch Add again.Adding Two or More TablesTouch Add. Touch the tables you wish to add, and then touch Add again. All tablebalances are added to the last table selected.<strong>SAM4s</strong> <strong>SPS</strong>-<strong>2000</strong> Operator <strong>Manual</strong> v1.13 Basic Operations • 91
<strong>SPS</strong>-<strong>2000</strong> Table ReservationA basic table reservation feature has been added to the<strong>SPS</strong>-<strong>2000</strong> table management system atsoftware version 2.03i. The feature allows you to mark a table as “reserved” with thecustomer name, number and reservation time. A reserved table will display on the table mapin a yellow. When the customer arrives, the reservation can be canceled to remove the“reserved” status, and the check can be started. .1. If table management is “manual” touch the Table Display key.or,If table management is “automatic” sign on an employee to display the Table screen.2. Note the Reservation and Cancel Reservation touch keys.3. Touch Reservation. Note “Reservation” is displayed in yellow at the bottom of thescreen.4. Touch the table button representing the table you wish to reserve.92 • Basic Operations <strong>SAM4s</strong> <strong>SPS</strong>-<strong>2000</strong> Operator <strong>Manual</strong> v1.13
5. Touch the appropriate fields to enter the Reserved Name, Customer #, and ReservedTime fields. Touch OK to finalize the reservation.6. The Reservation screen displays. Note the <strong>com</strong>plete reservation information for thetable is displayed in yellow on the table icon.7. To cancel the reservation, touch the Cancel Reservation button. Note “CancelReservation” is displayed in yellow at the bottom of the screen.8. Touch the reserved table you wish to cancel.<strong>SAM4s</strong> <strong>SPS</strong>-<strong>2000</strong> Operator <strong>Manual</strong> v1.13 Basic Operations • 93
94 • Basic Operations <strong>SAM4s</strong> <strong>SPS</strong>-<strong>2000</strong> Operator <strong>Manual</strong> v1.13
ReportsReport MenuTouch the REP (report) tab to view the report menu. (Note: An employee must besigned on to active the tab; password entry may be required.)NOTE: Screen layout modified at version 2.00s<strong>SAM4s</strong> <strong>SPS</strong>-<strong>2000</strong> Operator <strong>Manual</strong> v1.13 Reports • 95
Report TableThe following table summarizes all of the <strong>SPS</strong>-<strong>2000</strong> reports, the mode in which they areavailable and whether the report is available from an individual register or from a group ofregisters through IRC.Report Button Report Name Mode Available Individual/IRCFinancial X1/Z1 - X5/Z5 Individual/IRCAll PLUs X1/Z1 - X5/Z5 Individual/IRCFrom/To PLUs X1/Z1 - X5/Z5 Individual/IRCPLUs By Group X1/Z1 - X5/Z5 Individual/IRCPLUs By Selected Group X1/Z1 - X5/Z5 Individual/IRCTop 20 PLUs X1/Z1 - X5/Z5 Individual/IRCPLU Zero Sales X1/Z1 - X5/Z5 Individual/IRCPLU Zero Sales By Group X1/Z1 - X5/Z5 Individual/IRCPLU Sales By Price Level X1/Z1 - X5/Z5 Individual/IRCNot Found PLU XI/Z1 Individual/IRCEmployees X1/Z1 - X5/Z5 Individual/IRCIndividual Employee X1/Z1 - X5/Z5 Individual/IRCEmployee Currently SignedOnX1/Z1 - X5/Z5Individual/(IRC with 2.00xor later)Active Employees X Individual/IRCClocked In EmployeesOutstanding InterruptBalanceX/ZIndividual/IRCGroups by Employee X1/Z1 - X5/Z5 Individual/IRCGroups X1/Z1 - X5/Z5 Individual/IRCFrom/To Groups X1/Z1 - X5/Z5 Individual/IRCSelective Group X1/Z1 - X5/Z5 Individual/IRC96 • Reports <strong>SAM4s</strong> <strong>SPS</strong>-<strong>2000</strong> Operator <strong>Manual</strong> v1.13
Report Button Report Name Mode Available Individual/IRCSales By Time Period X1/Z1 - X5/Z5 Individual/IRCGroups By Time Periods X1/Z1 - X5/Z5 Individual/IRCEat-In By Time Periods X1/Z1 - X5/Z5 Individual/IRCTake Out By Time Periods X1/Z1 - X5/Z5 Individual/IRCDrive Thru By Time Periods X1/Z1 - X5/Z5 Individual/IRCTrack 1 By Time Periods X1/Z1 - X5/Z5 Individual/IRCTrack 2 By Time Periods X1/Z1 - X5/Z5 Individual/IRCTrack 3 By Time Periods X1/Z1 - X5/Z5 Individual/IRCTrack 4 By Time Periods X1/Z1 - X5/Z5 Individual/IRCOpen Check For Track 1 X/Z IRCOpen Check For Track 2 X/Z IRCOpen Check For Track 3 X/Z IRCOpen Check For Track 4 X/Z IRCOpen Check For SelectedEmployeeOpen Check For CurrentEmployeeOpen Check For Track1,2,3,&4X/ZX/ZX/ZIRCIRCIRCProduct Mix X1/Z1 - X2/Z2 Individual/IRCProduct Projections X Individual/IRCPLU Stock X/Z Individual/IRCStock by PLU Range X/Z Individual/IRCStock by Group X/Z Individual/IRCStock by Individual Group X/Z Individual/IRCInventory X/Z IRCPLU Minimum Stock X/Z IRC<strong>SAM4s</strong> <strong>SPS</strong>-<strong>2000</strong> Operator <strong>Manual</strong> v1.13 Reports • 97
Report Button Report Name Mode Available Individual/IRCString Report #1 X1/Z1 - X5/Z5 Individual/IRCString Report #2 X1/Z1 - X5/Z5 Individual/IRCString Report #3 X1/Z1 - X5/Z5 Individual/IRCString Report #4 X1/Z1 - X5/Z5 Individual/IRCLabor Groups X1/Z1-X2/Z2 IRCSales and Labor % X1 - X5 IRCDrawer Totals X1 - X5 Individual/IRCDrawer 1/2/3 X1 - X5 Individual/IRCDaily Sales X/Z Individual/IRCStation Totals X/Z IRCTime Keeping (Individual orall employee)X1/Z1 - X5/Z5IRC*Day Shift X/Z Individual/IRCFood Cost X/Z IRCElectronic Journal X/Z IndividualCustom X1 - X5 Individual/IRCPrepoll X1/Z1 - X5/Z5 Individual/IRCMix and Match* Although Time Keeping reports reside in a designated register, and they are notconsolidated, Time Keeping reports should be available at any from any register though IRC<strong>com</strong>munication.Printing & Saving ReportsAfter a report is selected and displayed, PRINT and SAVE option buttons are displayed.Touch PRINT to print the report at the designated receipt printer. Touch SAVE to save thereport in .txt (text) format on an SD card. The report will be saved on the SD card in thepath:sps<strong>2000</strong>/backup/xxxxxx/REP_mmddyyyywhere “xxxxxx” is the six digit store number and mmddyyyy is the date of the report.98 • Reports <strong>SAM4s</strong> <strong>SPS</strong>-<strong>2000</strong> Operator <strong>Manual</strong> v1.13
Cash DeclarationFrom the REP mode tab, touch CASH DECLARATION to display the CashDeclaration ScreenEnter an amount and press the appropriate tender key. Repeat to enter additionalamounts.After <strong>com</strong>pleting all entries, press OK to accept entries and exit the screen.<strong>SAM4s</strong> <strong>SPS</strong>-<strong>2000</strong> Operator <strong>Manual</strong> v1.13 Reports • 99
X Mode ProgramBeginning at software version 2.00s the REP mode screen was reorganized. The followingfunction are now found on the X MODE PGM menu:Time Clock EditIf an employee forgets to clock in or out, authorized persons can use the time clock editfunction to correct or add time incorrect clock entries.1. Select the REP tab. (Password entry may be required)2. Touch X MODE PGM and then TIME CLOCK EDIT.3. Select the period to be edited, X/Z (DAILY) EDIT, or periodic edits, if they areused.4. Enter the Employee #, touch OK. The Time Clock Edit screen displays:5. Touch the field to be corrected, and then enter the correct time and touch OK. Usethe PAGE UP and/or PAGE DOWN keys as necessary to display all records.6. When corrections are <strong>com</strong>pleted, touch SAVE to exit with changes saved.100 • Reports <strong>SAM4s</strong> <strong>SPS</strong>-<strong>2000</strong> Operator <strong>Manual</strong> v1.13
Edit Inventory Item1. Select the REP tab. (Password entry may be required)2. Touch X MODE PGM and then EDIT INVENTORY ITEM.Date Time Setting1. Select the REP tab. (Password entry may be required)2. Touch X MODE PGM and then touch DATE TIME SETTING. The RTCSETTING (real time clock) screen displays.3. Input the Date/Time in MMDDYYYYHHMMSS format. Touch OK.<strong>SAM4s</strong> <strong>SPS</strong>-<strong>2000</strong> Operator <strong>Manual</strong> v1.13 Reports • 101
Drawer AssignmentNote: This function available at software version 2.01n or later. At version 2.02b or laterdrawer assignment is automatically downloaded to the IRC network.With enhanced drawer assignment, cashiers can now be assigned to specific drawers atspecific registers. If REG#0 is selected the drawer assignment will be valid at all terminals.1. Select the REP tab. (Password entry may be required)2. Touch X MODE PGM and then touch DRAWER ASSIGNMENT. The RTCSETTING (real time clock) screen displays.FTP Transmission3. Set the drawer assignment for each employee (the number is determined by memoryallocation – use the PREV. RECORD/NEXT RECORD key to view additionalemployees.) After making settings, touch CLOSE.Reserved for future use.Receipt ReprintNote: This feature is available at version 2.00t or later.Receipt copies can be printed after the sale provided that the transaction data is resident in theelectronic journal. (You must allocate for electronic journal and set the appropriate electronicjournal system options.) From the REP menu, touch Receipt Reprint. At the prompt enter the consecutivenumber of the transaction you wish to reprint; touch OK. The transaction will beretrieved from the electronic journal and printed at the designated receipt printer.102 • Reports <strong>SAM4s</strong> <strong>SPS</strong>-<strong>2000</strong> Operator <strong>Manual</strong> v1.13
DataTran Operation1. Select the REP tab. (Password entry may be required.)2. Touch DATATRAN. The DATATRAN OPERATION menu screen displays.3. Touch the operation you wish to perform.4. Touch PAGE DOWN to view the <strong>com</strong>plete list.<strong>SAM4s</strong> <strong>SPS</strong>-<strong>2000</strong> Operator <strong>Manual</strong> v1.13 Reports • 103
Initialize EFTSelect Initialize EFT to verify <strong>com</strong>munications, software versions and installed networks.List of Installed NetworksStatus of InstalledDATE 5/24/2004 THU TIME 16:15** LIST INSTALLED NETWORRKS **CHK DEN --- --- VER:3.89OFF ON OFF OFFEMPLOYEE1 NO.000019 REG 01Software VersionOpen Batch<strong>Manual</strong> batch opening and closing may be required by your payment processor. If required,it is re<strong>com</strong>mended to open a new batch right after closing today’s batch, so it is ready to gofor the next day.Touch OPEN BATCH. No printing takes place.Close Current Batch/ Close Current Batch with Debit<strong>Manual</strong> batch opening and closing may be required by your payment processor. TouchCLOSE CURRENT BATCH. or CLOSE BATCH WITH DEBIT if the batch containsdebit transactions. The message “WAITING RESP.” displays. When <strong>com</strong>munication is<strong>com</strong>plete, the Local Batch Status prints and the batch is closed.Change Batch NumberThe change batch number <strong>com</strong>mand is used to assign a new batch number to an existingbatch. It is used with certain credit card processors to rectify settlement problems. It is usedinfrequently. (Attempt to change batch number will be denied if bank does not allow thefeature.)104 • Reports <strong>SAM4s</strong> <strong>SPS</strong>-<strong>2000</strong> Operator <strong>Manual</strong> v1.13
Issue Local TotalThis report is added for ease of customer balancing actual totals in the Datatran to the systemwide reports. A summary of each kind of credit card and a batch total should match the totalswithin the <strong>SPS</strong> <strong>2000</strong> system-wide report before the Settle Batch is attempted.DATE 5/24/2004 TUE****LOCAL TOTAL REPORT ****AMEX .00 0VISA .00 5MASTER .00 0DISCOVER 2.00 1PRIVATE LABEL .00 0DINERS .00 0JCB .00 0DEBIT 12.00 2TOTAL 14.00 3NO.000011 REG01 EMPLOYEE1 TIME 11:07Issue Local TransactionIf “terminal based” processing is used, the Local Transaction Report contains details of eachtransaction in the current batch. When “host based” processing is used, transaction data isstored at the processor.ExampleDATE 5/24/2004 MON****LOCAL TRANSACTION REPORT ****C 93 1 DB6011000990139424 09/12APP: VITAL2REF: 506714501913AMT: 6.00 TIP: *03/08/05 08:37:40===============================C 93 1 DB400300123456781 09/08APP: VITAL2REF: 506715500507AMT: 6.00 TIP: *03/08/05 09:05:58===============================A 54 1 D6011000990139424 09/12APP: VITAL1REF: *AMT: 2.00 TIP: *03/08/05 09:26:51===============================NO.000015 REG01 EMPLOYEE1 TIME 09:32<strong>SAM4s</strong> <strong>SPS</strong>-<strong>2000</strong> Operator <strong>Manual</strong> v1.13 Reports • 105
Issue Local Batch Status ReportThe Local Batch Status Report also prints when a batch is closed.See ExplanationsDATE 5/24/2004 MON**** LOCAL BATCH STATUS ****C 1 2 2 5.00 2 5.00NO.000011 REG01 EMPLOYEE1 TIME 11:07Local Batch Status Explanations:(From Left to Right)C Batch Status C=Closed/O=Open1 Batch Number2 Batch Transaction Count2 Batch Item Count5.00 Batch Balance2 Batch Forwarded Transaction Count5.00 Batch Forwarded BalanceEnable Dial In Load/Enable Dial Out LoadIf instructed by Datacap support, you can use these options to update DataTran software.Choose Enable Dial In Load to allow Datacap to call the DataTran and send updates. ChooseEnable Dial Out Load to call Datacap to connect. You will be required to enter the phonenumber and terminal I.D.106 • Reports <strong>SAM4s</strong> <strong>SPS</strong>-<strong>2000</strong> Operator <strong>Manual</strong> v1.13
Gratuity EntryThe Gratuity Entry <strong>com</strong>mand allows the operator to add a tip to a pre-authorized credit sale.To add a tip,1. Select the Gratuity Entry <strong>com</strong>mand from the Datatran Operation Menu. The GratuityEntry window displays (the form shown below requires software version 2.01b.)2. Fill the form fields:a. The EMPLOYEE drop-down box allows managers to enter a gratuity forother employees.b. The CARD TYPE drop-down box allows tips to be assigned to multipleMISC TEND keys for reporting purposes.c. Enter the Record number from the merchant credit draft (REC NO:).d. Enter the original TRANSACTION AMOUNT (also from the merchantdraft).e. Use the ORIGINAL TIP AMOUNT and NEW TIP AMOUNT fields to fixan incorrect tip and also update the register reports3. Click OK. When <strong>com</strong>plete, the register will print a receipt of the tip entry. The tipamount is automatically added to the employee report (to the employee that enters thetip) and to the financial report.Initialize Pin PadInitializes the Pin Pad.Get Gift Card BalanceSelect Gift Card Balance, the operator will be prompted to slide a gift card. The balance willbe printed on the receipt printer.<strong>SAM4s</strong> <strong>SPS</strong>-<strong>2000</strong> Operator <strong>Manual</strong> v1.13 Reports • 107
Credit Post AuthorizationIf electronic authorization is not approved and the merchant receives voice authorization, thetransaction can be entered into the batch with this function:1. Select CREDIT POST AUTHORIZE from the DATATRAN OPERATION menu. The“SLIDE CARD” message displays.2. If the card is present, slide the card and go to step 6.3. If the card is not present, press CLEAR. The message “ENTER ACCT NO” displays.4. Enter the card account number and press ENTER. The message “ENTER EXP DATE”displays.5. Enter the expiration date (4-digit format: MMYY). The message “ENTER ORIG TRANAMT” displays.6. Enter the original transaction amount and press ENTER. The message “ENTER AUTHCODE” displays.7. Enter the authorization code from the call center and press ENTER. The message“WAITING RESPONSE” displays.8. When the <strong>com</strong>munication is <strong>com</strong>plete, the credit transaction data will print.108 • Reports <strong>SAM4s</strong> <strong>SPS</strong>-<strong>2000</strong> Operator <strong>Manual</strong> v1.13
Report SamplesFinancial ReportFINANCIAL REPORTX1 REPORT 0003DESCRIPTOR COUNT TOTAL+PLU TTL 00.00 000.00-PLU TTL 00.00 000.00ADJUSTED TTL 00.00 000.00---------------------------------------NON-TAX 00.00 000.00TAX1 SALES 00.00 000.00TAX2 SALES 00.00 000.00TAX3 SALES 00.00 000.00TAX4 SALES 00.00 000.00TAX5 SALES 00.00 000.00TAX6 SALES 00.00 000.00TAX1 00.00 000.00TAX2 00.00 000.00TAX3 00.00 000.00TAX4 00.00 000.00TAX5 00.00 000.00TAX6 00.00 000.00EXEMPT TAX1 00.00 000.00EXEMPT TAX2 00.00 000.00EXEMPT TAX3 00.00 000.00EXEMPT TAX4 00.00 000.00EXEMPT TAX5 00.00 000.00EXEMPT TAX6 00.00 000.00---------------------------------------EAT IN SALES 00.00 000.00TAKE OUT SALES 00.00 000.00DRIVE THRU SALES 00.00 000.00---------------------------------------%1 00.00 000.00%2 00.00 000.00%3 00.00 000.00%4 00.00 000.00%5 00.00 000.00%6 00.00 000.00%7 00.00 000.00%8 00.00 000.00%9 00.00 000.00%10 00.00 000.00NET SALES 00.00 000.00---------------------------------------CREDIT TAX1 00.00 000.00CREDIT TAX2 00.00 000.00CREDIT TAX3 00.00 000.00CREDIT TAX4 00.00 000.00CREDIT TAX5 00.00 000.00CREDIT TAX6 00.00 000.00<strong>SAM4s</strong> <strong>SPS</strong>-<strong>2000</strong> Operator <strong>Manual</strong> v1.13 Reports • 109
FOOD STMP CREDIT 00.00 000.00MDSE RETURN 00.00 000.00ERROR CORRECT 00.00 000.00PREVIOUS VOID 00.00 000.00TRANS VOID 00.00 000.00CANCEL 00.00 000.00GROSS SALES 00.00 000.00---------------------------------------CASH SALES 00.00 000.00R/A 1 00.00 000.00R/A 2 00.00 000.00R/A 3 00.00 000.00R/A 4 00.00 000.00R/A 5 00.00 000.00P/O 1 00.00 000.00P/O 2 00.00 000.00P/O 3 00.00 000.00P/O 4 00.00 000.00P/O 5 00.00 000.00AUDACTION 00.00 000.00#/NO SALES 00 000.00--------------------------------------CASH-IN-DRAWER 00.00 000.00CHECK-IN-DRAWER 00.00 000.00F/S-IN-DRAWER 00.00 000.00MISC TEND 1 00.00 000.00MISC TEND 2 00.00 000.00MISC TEND 3 00.00 000.00MISC TEND 4 00.00 000.00……….MISC TEND 16 00.00 000.00DRAWER TOTAL 00.00 000.00---------------------------------------PROMO 00 000.00WASTE 00 000.00TRAINING TOTAL 00.00 000.00PREVIOUS BALANCE 00.00 000.00TIP 1 00.00 000.00TIP 2 00.00 000.00TIP 3 00.00 000.00GUESTS 00---------------------------------------AVERAGE 000.00EMPLOYEE: KELLY #01TIME 09:03NO.000000110 • Reports <strong>SAM4s</strong> <strong>SPS</strong>-<strong>2000</strong> Operator <strong>Manual</strong> v1.13
Sales By Time PeriodSALES BY TIME PERIOD REPORTX1 REPORT 0003TIME PERIOD #/CUSTOMERS TOTAL08:00 - 09:00 3 11.5409:00 - 10:00 15 186.8211:00 - 12:00 6 7.9912:00 - 13:00 1 2.4014:00 - 15:00 13 146.82TOTAL 38 355.07EMPLOYEE: KELLY #01TIME 09:03NO.000000PLU ReportsAll PlusFrom/To PLUsPLUs By GroupPLUs By Group For Selected GroupTop 20 PLUsPLU Zero SalesPLU Zero Sales By GroupPLU Sales By Price LevelNotes:1. Whole unit reporting if there isno decimal activity.2. Total/Counter capacity variesby memory allocation.Counters: 6-8 digitsTotals: 8-10 digitsPLU REPORTX1 REPORT 0003ITEM PROMO WASTE USAGE PLU %PLU# GROUP COUNT TOTAL----------------------------------------HAMBURGER 1 2 6 50.00%00000000000001 01 3 3.00CHEESE BURGER 1 4 8 50.00%00000000000001 01 3 3.00----------------------------------------TOTAL 2 6 146 6.00EMPLOYEE: KELLY #01TIME 09:03NO.000000<strong>SAM4s</strong> <strong>SPS</strong>-<strong>2000</strong> Operator <strong>Manual</strong> v1.13 Reports • 111
Employee ReportsIndividual EmployeeEmployee Currently Signed OnActive EmployeeEMPLOYEE REPORTX1 REPORT 0003EMPLOYEE #0001 KELLYDESCRIPTOR COUNT TOTALNON-TAX 00.00 000.00TAX1 SALES 00.00 000.00TAX2 SALES 00.00 000.00TAX3 SALES 00.00 000.00TAX4 SALES 00.00 000.00TAX5 SALES 00.00 000.00TAX6 SALES 00.00 000.00TAX1 00.00 000.00TAX2 00.00 000.00TAX3 00.00 000.00TAX4 00.00 000.00TAX5 00.00 000.00TAX6 00.00 000.00EXEMPT TAX1 00.00 000.00EXEMPT TAX2 00.00 000.00EXEMPT TAX3 00.00 000.00EXEMPT TAX4 00.00 000.00EXEMPT TAX5 00.00 000.00EXEMPT TAX6 00.00 000.00---------------------------------------ANALYSIS 1SALES 00.00 000.00ANALYSIS 2 SALES 00.00 000.00ANALYSIS 3 SALES 00.00 000.00---------------------------------------%1 00.00 000.00%2 00.00 000.00%3 00.00 000.00%4 00.00 000.00%5 00.00 000.00%6 00.00 000.00%7 00.00 000.00%8 00.00 000.00%9 00.00 000.00%10 00.00 000.00NET SALES 00.00 000.00---------------------------------------CREDIT TAX1 00.00 000.00CREDIT TAX2 00.00 000.00CREDIT TAX3 00.00 000.00CREDIT TAX4 00.00 000.00CREDIT TAX5 00.00 000.00CREDIT TAX6 00.00 000.00112 • Reports <strong>SAM4s</strong> <strong>SPS</strong>-<strong>2000</strong> Operator <strong>Manual</strong> v1.13
FOOD STMP CREDIT 00.00 000.00MDSE RETURN 00.00 000.00ERROR CORRECT 00.00 000.00PREVIOUS VOID 00.00 000.00TRANS VOID 00.00 000.00CANCEL 00.00 000.00GROSS SALES 00.00 000.00---------------------------------------CASH SALES 00.00 000.00R/A 1 00.00 000.00R/A 2 00.00 000.00R/A 3 00.00 000.00R/A 4 00.00 000.00R/A 5 00.00 000.00P/O 1 00.00 000.00P/O 2 00.00 000.00P/O 3 00.00 000.00P/O 4 00.00 000.00P/O 5 00.00 000.00AUDACTION 00.00 000.00#/NO SALES 00 000.00---------------------------------------CASH-IN-DRAWER 00.00 000.00CHECK-IN-DRAWER 00.00 000.00F/S-IN-DRAWER 00.00 000.00MISC TEND 1 00.00 000.00MISC TEND 2 00.00 000.00MISC TEND 16 00.00 000.00DRAWER TOTAL 00.00 000.00---------------------------------------PROMO 00 000.00WASTE 00 000.00TRAINING TOTAL 00.00 000.00PREVIOUS BALANCE 00.00 000.00TIP 1 00.00 000.00TIP 2 00.00 000.00TIP 3 00.00 000.00GUESTS 00---------------------------------------AVERAGE 000.00EMPLOYEE: KELLY #01TIME 09:03NO.000000<strong>SAM4s</strong> <strong>SPS</strong>-<strong>2000</strong> Operator <strong>Manual</strong> v1.13 Reports • 113
GroupGROUP REPORTX1 REPORT X1 0003 X2 0001# GROUP COUNT TOTAL %01 DESCRIPTOR 000000 00000000.00 0.0002 DESCRIPTOR 000000 00000000.00 0.00GROUP TOTAL 000000 00000000.00EMPLOYEE: KELLY #01TIME 09:03NO.000000Drawer TotalsDRAWER TOTALS REPORTX1 REPORT X1 0003 X2 0001CASH-IN-DRAWER 00.00 000.00CHECK-IN-DRAWER 00.00 000.00F/S-IN-DRAWER 00.00 000.00MISC TEND 1 00.00 000.00MISC TEND 2 00.00 000.00MISC TEND 3 00.00 000.00MISC TEND 4 00.00 000.00MISC TEND 5 00.00 000.00MISC TEND 6 00.00 000.00MISC TEND 16 00.00 000.00DRAWER TOTAL 00.00 000.00EMPLOYEE:#01TIME 09:03KELLYNO.000000114 • Reports <strong>SAM4s</strong> <strong>SPS</strong>-<strong>2000</strong> Operator <strong>Manual</strong> v1.13
Labor GroupsLABOUR GROUPS REPORTX1 REPORT X1 0003 X2 0001DESCRIPTORHOURSCOUNTER HELP 0.00KITCHEN STAFF 0.00MANAGER 0.00TOTAL TIME WORKED 0.00AVG. DAILY LABOR COST 00.00EMPLOYEE:#01TIME 09:03KELLYNO.000000Sales and Labor %SALES AND LABOUR % REPORTX1 REPORT X1 0003 X2 000100:00 - 01:0001:00 - 02:00CUST: 0 NET SALES 0000.00AVG/CUST: 00.00HRS LABOR: 0 LABOR COST: 0000.00%/NET SALES: 00.00LABOR/CUST: 00.00SALES/MANHOUR: 000.00---------------------------------------TOTALCUST: 0 NET SALES: 0000.00AVG/CUST: 00.00HRS LABOR: 0 LABOR COST: 0000.00%/NET SALES: 00.00LABOR/CUST: 00.00SALES/MANHOUR: 000.00EMPLOYEE: KELLY #01TIME 09:03NO.000000Notes: The Sales and Labor Report uses data from the Sales by Time Period Reportand the Time Keeping Report. You must clear both reports daily to get meaningful Sales& Labor % Report data.There are eight items per every time unit in Sales and Labor Report. 'CUST' and 'NETSALES' values are from Sales by Time Period Report where 'AVG/CUST' is division ofthese two values. You can calculate 'HRS LBR' and 'LABOR COST' from TimeKeeping Report and Pay Rate Program. 'HRS LBR' is sum of working hours for allemployees who had worked in this time period. LABOR COST' is the sum of theproduct of working hours and pay rate for every employee. '%/NET SALES' is ratio ofNET SALES to LABOR COST. 'LABOR$/CUST' is labor cost for one customer which<strong>SAM4s</strong> <strong>SPS</strong>-<strong>2000</strong> Operator <strong>Manual</strong> v1.13 Reports • 115
can be calculated dividing the LABOR COST by number of customers. Divide NETSALES by 'HRS LBR' to yield 'SALES/MANHOUR'.116 • Reports <strong>SAM4s</strong> <strong>SPS</strong>-<strong>2000</strong> Operator <strong>Manual</strong> v1.13
Daily SalesDAILY SALES REPORTX1 REPORT X1 0003 X2 0001DAY COUNT TOTAL1 3 11.542 15 186.823 6 7.9913 1 2.4017 13 146.82TOTAL 38 355.07EMPLOYEE: KELLY #01TIME 09:03NO.000000Groups By Time PeriodReporting for each time period and each group. (Selected groups and periods shown here.)GROUPS BY TIME PERIOD REPORTX1 REPORT X1 0003 X<strong>2000</strong>1TIME PERIOD CUST TOTAL AVG/TRANS00:00 - 01:00 9999 99999999.99 99.99COUNTTOTALGROUP 1 999999.99 99999999.99GROUP 2 999999.99 99999999.99GROUP 3 999999.99 99999999.99GROUP 4 999999.99 99999999.99GROUP 5 999999.99 99999999.99GROUP 6 999999.99 99999999.99GROUP 7 999999.99 99999999.99GROUP 8 999999.99 99999999.99TIME PERIOD CUST TOTAL AVG/TRANS01:00 - 02:00 9999 99999999.99 99.99COUNTTOTALGROUP 1 999999.99 99999999.99GROUP 2 999999.99 99999999.99GROUP 3 999999.99 99999999.99GROUP 4 999999.99 99999999.99GROUP 5 999999.99 99999999.99GROUP 6 999999.99 99999999.99GROUP 7 999999.99 99999999.99GROUP 8 999999.99 99999999.99EMPLOYEE: KELLY #01TIME 09:03NO.000000<strong>SAM4s</strong> <strong>SPS</strong>-<strong>2000</strong> Operator <strong>Manual</strong> v1.13 Reports • 117
Analysis 1 By Time PeriodsEAT-IN BY TIME PERIOD REPORTX1 REPORT X1 0003 X<strong>2000</strong>1TIME PERIOD COUNT TOTAL00:00 - 01:00 999999.99 99999999.9901:00 - 02:00 999999.99 99999999.9903:00 - 04:00 999999.99 99999999.9904:00 - 05:00 999999.99 99999999.9905:00 - 06:00 999999.99 99999999.99TOTAL 999999.99 99999999.99EMPLOYEE: KELLY #01TIME 09:03NO.000000Analysis 2 By Time PeriodsANALYSIS 2 BY TIME PERIOD REPORTX1 REPORT X1 0003 X2 0001TIME PERIOD COUNT TOTAL00:00 - 01:00 999999.99 99999999.9901:00 - 02:00 999999.99 99999999.9903:00 - 04:00 999999.99 99999999.9904:00 - 05:00 999999.99 99999999.9905:00 - 06:00 999999.99 99999999.99TOTAL 999999.99 99999999.99EMPLOYEE: KELLY #01TIME 09:03NO.000000118 • Reports <strong>SAM4s</strong> <strong>SPS</strong>-<strong>2000</strong> Operator <strong>Manual</strong> v1.13
Analysis 3 By Time PeriodsANALYSIS 3 BY TIME PERIOD REPORTX1 REPORT X1 0003 X<strong>2000</strong>1TIME PERIOD COUNT TOTAL00:00 - 01:00 999999.99 99999999.9901:00 - 02:00 999999.99 99999999.9903:00 - 04:00 999999.99 99999999.9904:00 - 05:00 999999.99 99999999.9905:00 - 06:00 999999.99 99999999.99TOTAL 999999.99 99999999.99EMPLOYEE: KELLY #01TIME 09:03NO.000000Track By Time PeriodsTrack 1 By Time PeriodsTrack 2 By Time PeriodsTrack 3 By Time PeriodsTrack 4 By Time PeriodsTRACK 1 BY TIME PERIODS REPORTX1 REPORT X1 0003 X2 0001TIME PERIOD COUNT TOTAL00:00 - 01:00 999999.99 99999999.9901:00 - 02:00 999999.99 99999999.9903:00 - 04:00 999999.99 99999999.9904:00 - 05:00 999999.99 99999999.9905:00 - 06:00 999999.99 99999999.99TOTAL 999999.99 99999999.99EMPLOYEE: KELLY #01TIME 09:03NO.000000<strong>SAM4s</strong> <strong>SPS</strong>-<strong>2000</strong> Operator <strong>Manual</strong> v1.13 Reports • 119
Open CheckOpen Check For Track 1Open Check For Track 2Open Check For Track 3Open Check For Track 4Open Check For Selected EmployeeOpen Check For Current EmployeeOpen Check For Track 1, 2, 3, & 4OPEN CHECK FOR TRACK 1 REPORTX1 REPORT X1 0003 X2 0001TBL# CHECK# G# EMPLOYEE TIME BAL1 100 2 STEVE 11:11 999.99TOTAL 9999.99EMPLOYEE: KELLY #01TIME 09:03NO.000000Product MixPRODUCT MIX REPORTX1 REPORT X1 0003 X2 0001PRODUCT/TIME UNIT#PC COUNT TOTALBOTTLE BECKS (CASE)00:00-05:59 0001#084 204 222.3600:00-15:59 0001#084 204 222.3600:00-23:59 0001#084 204 222.36TOTAL 0005#012 612 667.08EMPLOYEE: KELLY #01TIME 09:03NO.000000120 • Reports <strong>SAM4s</strong> <strong>SPS</strong>-<strong>2000</strong> Operator <strong>Manual</strong> v1.13
Product ProjectionsPRODUCT PROJECTIONS REPORTX1 REPORT X1 0003 X2 0001PRODUCT PROJECTIONSWEDBOTTLE BECKS (CASE)TIME WEEK1 WEEK2 WEEK3 WEEK4 AVG06:00-07:59 5 5 5 5 508:00-08:29 10 20 30 40 2508:30-08:59 0 0 0 700 17509:30-09:59 0 0 68 1 17TOTAL 15 25 103 746 222EMPLOYEE: KELLY #01TIME 09:03NO.000000Station TotalsPrints for each register in an IRC configuration.STATION REPORTX1 REPORT X1 0003 X2 0001REG# 01: COUNT TOTALNET SALES 999999.99 99999999.99GROSS SALES 999999.99 99999999.99DRAWER 1 999999.99 99999999.99DRAWER 2 999999.99 99999999.99DRAWER 3 999999.99 99999999.99EMPLOYEE: KELLY #01TIME 09:03NO.000000<strong>SAM4s</strong> <strong>SPS</strong>-<strong>2000</strong> Operator <strong>Manual</strong> v1.13 Reports • 121
Daily Time KeepingDAILY TIME KEEPING REPORTX1 REPORT X1 0003 X2 0001EMP# SSN NAME TIPS0001 123456789 ANNIE 00.0012:00 - 13:00 MANAGER13:00 - 14:00 SERVERMANAGER 1.00 REG 0.00 OTSERVER 1.00 REG 0.00 OTTOTAL REG 2.00 HR 14.00 CSTTOTAL LBR 2.00 HR 14.00 CST---------------------------------------MANAGERREG 1.00 HR 8.00 CSTTOTAL LBR 1.00 HR 8.00 CSTSERVERREG 1.00 HR 6.00 CSTTOTAL LBR 1.00 HR 6.00 CST---------------------------------------TOTALREG 2.00 HR 14.00 CSTOT 0.00 HR 0.00 CSTTOTAL LABOR 2.00 HR 14.00 CSTTOTAL TIPS 0.00EMPLOYEE: KELLY #01TIME 09:03NO.000000122 • Reports <strong>SAM4s</strong> <strong>SPS</strong>-<strong>2000</strong> Operator <strong>Manual</strong> v1.13
Shift ReportComplete Financial Reporting is available for each of 4 possible shifts. Shifts can be changedautomatically at a set time or manually.SHIFT REPORTX1 REPORT 0003DESCRIPTOR COUNT TOTAL+PLU TTL 00.00 000.00-PLU TTL 00.00 000.00ADJUSTED TTL 00.00 000.00---------------------------------------NON-TAX 00.00 000.00TAX1 SALES 00.00 000.00TAX2 SALES 00.00 000.00TAX3 SALES 00.00 000.00TAX4 SALES 00.00 000.00TAX5 SALES 00.00 000.00TAX6 SALES 00.00 000.00TAX1 00.00 000.00TAX2 00.00 000.00TAX3 00.00 000.00TAX4 00.00 000.00TAX5 00.00 000.00TAX6 00.00 000.00EXEMPT TAX1 00.00 000.00EXEMPT TAX2 00.00 000.00EXEMPT TAX3 00.00 000.00EXEMPT TAX4 00.00 000.00EXEMPT TAX5 00.00 000.00EXEMPT TAX6 00.00 000.00---------------------------------------ANALYSIS 1 SALES 00.00 000.00ANALYSIS 2 SALES 00.00 000.00ANALYSIS 3 SALES 00.00 000.00---------------------------------------%1 00.00 000.00%2 00.00 000.00%3 00.00 000.00%4 00.00 000.00%5 00.00 000.00%6 00.00 000.00%7 00.00 000.00%8 00.00 000.00%9 00.00 000.00%10 00.00 000.00NET SALES 00.00 000.00---------------------------------------CREDIT TAX1 00.00 000.00CREDIT TAX2 00.00 000.00CREDIT TAX3 00.00 000.00CREDIT TAX4 00.00 000.00CREDIT TAX5 00.00 000.00CREDIT TAX6 00.00 000.00<strong>SAM4s</strong> <strong>SPS</strong>-<strong>2000</strong> Operator <strong>Manual</strong> v1.13 Reports • 123
FOOD STMP CREDIT 00.00 000.00MDSE RETURN 00.00 000.00ERROR CORRECT 00.00 000.00PREVIOUS VOID 00.00 000.00TRANS VOID 00.00 000.00CANCEL 00.00 000.00GROSS SALES 00.00 000.00---------------------------------------CASH SALES 00.00 000.00R/A 1 00.00 000.00R/A 2 00.00 000.00R/A 3 00.00 000.00R/A 4 00.00 000.00R/A 5 00.00 000.00P/O 1 00.00 000.00P/O 2 00.00 000.00P/O 3 00.00 000.00P/O 4 00.00 000.00P/O 5 00.00 000.00AUDACTION 00.00 000.00#/NO SALES 00 000.00--------------------------------------CASH-IN-DRAWER 00.00 000.00CHECK-IN-DRAWER 00.00 000.00F/S-IN-DRAWER 00.00 000.00MISC TEND 1 00.00 000.00MISC TEND 2 00.00 000.00MISC TEND 3 00.00 000.00MISC TEND 4 00.00 000.00MISC TEND 5 00.00 000.00MISC TEND 16 00.00 000.00DRAWER TOTAL 00.00 000.00---------------------------------------PROMO 00 000.00WASTE 00 000.00TRAINING TOTAL 00.00 000.00PREVIOUS BALANCE 00.00 000.00TIP 1 00.00 000.00TIP 2 00.00 000.00TIP 3 00.00 000.00GUESTS 00---------------------------------------AVERAGE 000.00EMPLOYEE: KELLY #01TIME 09:03NO.000000124 • Reports <strong>SAM4s</strong> <strong>SPS</strong>-<strong>2000</strong> Operator <strong>Manual</strong> v1.13
InventoryAn example of the inventory report follows:INVENTORY REPORTX1 REPORT X1 0003 X2 0001CONSOLIDATED 01-02INV #002 BURGERBEGINING INVENTORY 1000.00RECEIPTS 100.00TRANSFER INS 25.00TRANSFER OUTS 10.00RAW WASTE -5.00THEORETICAL USAGE 110.00SHELF COUNT 1000.00ACTUAL USEAGE 112.00ENDING INVENTORY 998.00VALUE OF INVENTORY 2245.50VARIANCE +/- -2.00VARIANCE COST -4.50-------------------------------------NET SALE 1376.15FOOD COST 312.00VALUE OF INVENTORY 2245.50VARIANCE COST -4.50EMPLOYEE: KELLY #01TIME 09:03NO.000000Inventory DefinitionsBeginning InventoryThe Beginning Quantity as entered in (inventory - register begin quantity), for the first report.Additional reports will get the begin quantity from the END value from the last “Z” resetReceiptsReceipt Quantity as entered in X-mode (inventory - edit inventory item-daily edit/periodedit).Transfer InThe Transfer In Quantity as entered in X-mode (inventory - edit inventory item-dailyedit/period)Transfer OutTransfer Out Quantity as entered in X-mode (inventory - edit inventory item -dailyedit/period)Raw Waste<strong>SAM4s</strong> <strong>SPS</strong>-<strong>2000</strong> Operator <strong>Manual</strong> v1.13 Reports • 125
Raw Waste Quantity as entered in X-mode (inventory - edit inventory item -dailyedit/period).Theoretical UsageThe Theoretical Use Quantity. =[(PROMO+WASTE+SOLD (ITEM/PLU Report)] *[COUNT (RECIPE TABLE)]Shelf CountThe Shelf is the Actual Inventory Quantity as entered in X-mode (inventory - edit inventoryitem - daily edit/period edit).Actual UsageThe Actual Use Quantity. =[(BEGIN)+(RECPT)+(TR/IN)-(TR/OUT)-(RAW WASTE)-(SHELF)]Ending InventoryThe Ending Quantity. If no actual inventory quantity is entered in X-mode. END =[(BEGIN)+(RECPT)+(TR/IN)-(TR/OUT)-(RAW WASTE)-(T.USE)]. If an actual inventoryquantity entered. END=[(BEGIN)+(RECPT)+(TR/IN)-(TR/OUT)-(RAW WASTE)-(A.USE)]Value Of InventoryThe Value of inventory items on hand. VALUE=[(END)*(COST)]Variance +/-The Variance +/-. VR+/- =[(T.USE)-(A.USE)]Variance CostThe Variance Cost. V.CST=[(VR+/-)*(COST)]Food CostThe Food Cost. FDCST=[(A.USE)*(COST)]126 • Reports <strong>SAM4s</strong> <strong>SPS</strong>-<strong>2000</strong> Operator <strong>Manual</strong> v1.13
PLU StockPLUs designated as stock PLUs (see PLU Status Group Programming) will appearFINANCIAL REPORTX1 REPORT 0003DESCRIPTORCOUNTBOTTLE BECKS 1234EMPLOYEE: KELLY #01TIME 09:03NO.000000PLU Stock by GroupFurther stock reporting formats are availableFINANCIAL REPORTX1 REPORT 0003DESCRIPTORCOUNTBOTTLE BECKS 1234BOTTLE BEERSTOTAL 1234EMPLOYEE: KELLY #01TIME 09:03NO.000000<strong>SAM4s</strong> <strong>SPS</strong>-<strong>2000</strong> Operator <strong>Manual</strong> v1.13 Reports • 127
Electronic JournalAll information can be selected by individual transaction type to be stored and reportedextracted as required i.e. all Cash Transactions, VOIDs etcCASH TRANSACTIONSAll cash sales made during normal operationCHECK TRANSACTIONSAll check sales made during normal operationMISC TEND TRANSACTIONSAll Miscellaneous tender operations made during normal operationTRANSACTIONS WITH %All sales containing a discount or premium operationRECD ACCT & PAID OUTAll received on account or Paid out sales transactionsRETURN TRANSACTIONSAll Merchandise Return sales transactionsWITH ERROR CORRS & VOIDSAll Transactions containing an error correct or voids.NO SALESAll Transactions containing no sale operations.CANCEL TRANSACTIONSAll Register Mode cancelled transactionsTRANSACTIONS NEGATIVEAll Transactions with negative product sales.REPORTSAll Read & Reset reports which are printedPROGRAM SCANSAll Program scans which are printed.CHECK TRACKINGAll sales registered for open checks.128 • Reports <strong>SAM4s</strong> <strong>SPS</strong>-<strong>2000</strong> Operator <strong>Manual</strong> v1.13
Food CostFOOD COST REPORTX1 REPORT 0003BURGER PRICE 1.95PLU# 01234567890123456USAGE COUNT 28ITEM COST 1.200USAGE COST 33.60SALES COUNT 28NET SALES 54.60----------------------------------------STEAK PRICE 11.95PLU#01234567890123456USAGE COUNT 105ITEM FOOD COST 2.250USAGE COST 236.25SALES COUNT 105NET SALES 1254.75----------------------------------------TOTAL FOOD COST 269.85TOTAL SALES COUNT 133NET SALES TOTAL 1309.35EMPLOYEE: KELLY #01TIME 09:03NO.000000DefinitionsUsage Count(SALES COUNT + PROMO COUNT + WASTE COUNT)Item Food CostCOMBINED COST OF ALL INGREDIENTS\RECIPIES ASSOCIATED WITH THEITEM.Usage Cost(USAGE * ITEM FOOD COST)Sales Count(SALES COUNT)Net Sales(SALES COUNT * PRICE)Shelf CountThe Shelf is the Actual Inventory Quantity as entered in X-mode (inventory - edit inventoryitem - daily edit/period edit).<strong>SAM4s</strong> <strong>SPS</strong>-<strong>2000</strong> Operator <strong>Manual</strong> v1.13 Reports • 129
Balancing Formulas+/- NET SALES= PLU Sales Total+ Tax 1 Amount+ Tax 2 Amount+ Tax 3 Amount+ Tax 4 Amount+ Tax 5 Amount+ Tax 6 Amount+ Item Coupon Total (when NET=N)+ Item Percentage Discount (when NET=N)+ Sale Coupon Amounts+ Sale Percentage Discounts+ Sale Surcharge Amounts= Net Sales+/- GROSS SALES= Net Sales+ Negative PLU Total+ Item Coupon Total (when NET=Y)+ Item Percentage Discount (when NET=Y)+ Sale Coupon Amounts+ Sale Percentage Discounts+ Credit Tax 1+ Credit Tax 2+ Credit Tax 3+ Credit Tax 4+ Credit Tax 5+ Credit Tax 6+ Merchandise Return+ VOID Position Total= Gross Sales130 • Reports <strong>SAM4s</strong> <strong>SPS</strong>-<strong>2000</strong> Operator <strong>Manual</strong> v1.13
Program MaintenancePLU MaintenanceChanging Item Prices1. From the PGM mode PROGRAMMING MENU touch PLU to view the PLUprogram selection window.2. Touch PLU ADD & CHANGE to view the SELECT PLU screen.<strong>SAM4s</strong> <strong>SPS</strong>-<strong>2000</strong> Operator <strong>Manual</strong> v1.13 Program Maintenance • 131
3. Select a PLU to edit in one of two ways:Touch a PLU key located on the keyboard. (If the PLU you wish to edit is notdisplayed on the MAIN SCREEN, touch the key that displays the keylink where thePLU is located, or touch PAGE UP/PAGE DOWN until the appropriate Key Linkwhere you wish to edit a PLU displays.)orEnter the PLU number and touch OK.4. After a PLU is selected, the PLU PROGRAMMING screen displays at the PAGE #1tab:5. Touch the PRICES tab.132 • Program Maintenance <strong>SAM4s</strong> <strong>SPS</strong>-<strong>2000</strong> Operator <strong>Manual</strong> v1.13
6. Depending upon memory allocation, prices or HALOs (high amount lock outs thatapply to open price entry PLUs) will display for one to five price levels. Touch thecurrent price to make a price change.7. Enter a new price and touch OK.8. If you wish to change prices on another PLU, touch the PREV. RECORD or NEXTRECORD keys to display the price screen for the previous or next sequential PLU,or touch CLOSE to return to the PLU Select screen.<strong>SAM4s</strong> <strong>SPS</strong>-<strong>2000</strong> Operator <strong>Manual</strong> v1.13 Program Maintenance • 133
Employee File MaintenanceThe employee file contains information for register operators as well as employees who usethe register only to clock in or out (employee time keeping.) Specific functions that areallowed or disallowed for each employee are determined by assigning the employee to anauthority level.Two 10-digit code numbers may be assigned for each employee. A clock-in code is used toclock in or out and a separate sign on code used to operate the register. The social securitynumber is for reference only and appears only on reports.The total number of employees (up to 999) is set in memory allocation.1. Select EMPLOYEE from the P-Mode menu, and then select EMPLOYEE todisplay the EMPLOYEE selection screen. The program screen for the firstemployee in the file displays with the first of two pages of options in view.2. Select an employee to program or edit by employee number (touch the currentnumber and enter a new one) or by touching the NEXT RECORD or PREV.RECORD keys until the appropriate employee is in view. If you are adding a newemployee, touch the NEXT RECORD key until the next unused employee filedisplays.134 • Program Maintenance <strong>SAM4s</strong> <strong>SPS</strong>-<strong>2000</strong> Operator <strong>Manual</strong> v1.13
3. Touch fields as necessary to set the options on page #1.NAMESet the employee name here.SOCIAL SEC #Enter the employee social security number.CLOCK IN CODEEnter a number (up to 10 digits in length) that will be used by this employee to clock in and/or out.OPERATING CODEEnter the secret code number (up to 10 digits in length) that can be used to sign in/out.LINK TO AUTHORITY LEVELOperations and programs that can be accessed by this employee are determined by selecting a authoritylevel here.JOB CODE#/PAY RATE#An employee might have more than one job, possibly with a different pay rate for each job. For example,in a restaurant, an employee might work as a server one day, and on a different day or shift, work as acashier. Here you can list up to six different job codes and six different pay rates for each employee.By assigning separate job codes and pay rates for each employee, the built in time clock can track andreport hours and wage costs appropriately.Note that the job code you assign for JOB1 is the default job code for clocking in/out.OPEN DRAWER# DIRECT (0-2) VIA (3-9)<strong>SAM4s</strong> <strong>SPS</strong>-<strong>2000</strong> Operator <strong>Manual</strong> v1.13 Program Maintenance • 135
4. Touch the page #2 tab to set the remaining employee file options.TRAINING MODE?If Y, this employee will be in training, regardless of the training mode status of the entire register.DEFAULT PRICE LEVELIf multiple price levels are used, set the default level for this employee.DEFAULT SCREEN LEVEL (0-200)You can set a default screen level (keylink) to display when this employee is signed on to operate.MANAGERYou can assign this employee “manager” status to perform manager controlled functions withoutpassword entry.EDIT JOB CODESNote: An employee with the appropriate authority level must be signed on to perform job codeprogramming.Job codes are used to break down the hours worked for all employees into different categories (See"Labor Groups" report in the Operation <strong>Manual</strong>.) A breakdown of hours by job is also reported for eachemployee (See "Time Keeping" reports in the Operation <strong>Manual</strong>.)The job codes to be used by all employees are set up here. There are 20 possible job codes. Each jobcode you wish to activate must be given a descriptor here.EDIT PAY RATESNote: An employee with the appropriate authority level must be signed on to perform pay rateprogramming.The pay rates set here can be used by all employees. There are up to 50 pay rates.DALLAS KEY LINKThis option is not available.136 • Program Maintenance <strong>SAM4s</strong> <strong>SPS</strong>-<strong>2000</strong> Operator <strong>Manual</strong> v1.13
Employee Field DefinitionsSOCIAL SEC #CLOCK IN CODEEnter a number (up to 10 digits in length) that will be used by this employee to clock in and/or out.OPERATING CODEEnter the secret code number (up to 10 digits in length) that can be used to sign in/out. Note that systemoption # 21 "EMPLOYEE SIGN-ON" must be set to "SECRET CODE" to use this number.LINK TO AUTHORITY LEVELOperations and programs that can be accessed by this employee are determined by selecting a authoritylevel here.OPEN DRAWER# (0-2)If drawer 0 is assigned, the employee can only perform check track postings (not payments).JOB CODE#/PAY RATE#An employee might have more than one job, possibly with a different pay rate for each job. For example,in a restaurant, an employee might work as a server one day, and on a different day or shift, work as acashier. Here you can list up to six different job codes and six different pay rates for each employee.By assigning separate job codes and pay rates for each employee, the built in time clock can track andreport hours and wage costs appropriately.See "Time Clock Procedures" in the <strong>SPS</strong>-<strong>2000</strong> Operation <strong>Manual</strong> for instructions on clocking on/off fordifferent jobs. Note that the job code you assign for JOB1 is the default job code for clocking in/out.OPEN DRAWER# DIRECT (0-2) VIA (3-9)TRAINING MODE?If Y, this employee will be in training, regardless of the training mode status of the entire register.DEFAULT PRICE LEVELDEFAULT SCREEN LEVEL (0-200)MANAGEREDIT JOB CODESNote: An employee with the appropriate authority level must be signed on to perform job codeprogramming.Job codes are used to break down the hours worked for all employees into different categories (See"Labor Groups" report in the Operation <strong>Manual</strong>.) A breakdown of hours by job is also reported for eachemployee (See "Time Keeping" reports in the Operation <strong>Manual</strong>.)<strong>SAM4s</strong> <strong>SPS</strong>-<strong>2000</strong> Operator <strong>Manual</strong> v1.13 Program Maintenance • 137
The job codes to be used by all employees are set up here. There are 20 possible job codes. Each jobcode you wish to activate must be given a descriptor here.EDIT PAY RATESNote: An employee with the appropriate authority level must be signed on to perform pay rateprogramming.The pay rates set here can be used by all employees. There are up to 50 pay rates.DALLAS KEY LINKThis option is not available.138 • Program Maintenance <strong>SAM4s</strong> <strong>SPS</strong>-<strong>2000</strong> Operator <strong>Manual</strong> v1.13
AppendixReport Function Key Report Code StructureYou can print out reports from the REG tab using the REPORT key. Reports are generated by first enteringthe report code, then touching the REPORT key, i.e:[Report Code] [REPORT]The REPORT key code is #36 and is available on software versions 2.00j or later.Report Code Structure0101001. Enter the 2-digit report number. See the “Report Table” below.2. Enter “0” for X reports; enter “1” for Z reports3. Enter the report level: “1” through “5”4. Enter “0” for standalone reports: enter “1” for IRC reports, (or “2’ to viewIRC for all registers without entering the IRC range with v.2.02b or later).5. Enter the option code, 1-4 digits. See the “Report Option Table” below. Ifno option is selected, enter “0”.The report code example above “010100” generates an X1 Standalone Financial Report.Report # TableNO. REPORT NAME X/Z & REPORT LEVEL IRC01 Financial X1 & Z1 also X5 to Z5 INDIVIDUAL & IRC02 Sales by Time Period X1 & Z1 also X5 to Z5 INDIVIDUAL & IRC03 All PLU’s X1 & Z1 also X5 to Z5 INDIVIDUAL & IRC04 Not use this by REPORT key function.05 PLU’s by Group X1 & Z1 also X5 to Z5 INDIVIDUAL & IRC<strong>SAM4s</strong> <strong>SPS</strong>-<strong>2000</strong> Operator <strong>Manual</strong> v1.13 Appendix • 139
06 PLU’s by Group for Selected Group X1 & Z1 also X5 to Z5 INDIVIDUAL & IRC07 Top 20 PLU’s X1 to X5 read only INDIVIDUAL & IRC08 PLU Zero Sales X1 to X5 read only INDIVIDUAL & IRC09 PLU Zero Sales by Group X1 to X5 read only INDIVIDUAL & IRC10 PLU Sales by Price Level X1 & Z1 also X5 to Z5 INDIVIDUAL & IRC11 Mix and Match report X1 & Z1 also X5 to Z5 INDIVIDUAL & IRC12 Not Found X1 & Z1 only INDIVIDUAL13 Employees X1 & Z1 also X5 to Z5 INDIVIDUAL & IRC14 Individual Employees X1 & Z1 also X5 to Z5 INDIVIDUAL & IRC15 Employee Currently Signed on X1 & Z1 also X5 to Z5 INDIVIDUAL & IRC(IRC available at v2.00x)16 Groups by Employee X1 & Z1 also X5 to Z5 INDIVIDUAL & IRC17 Groups X1 & Z1 also X5 to Z5 INDIVIDUAL & IRC18 From/To Groups X1 & Z1 also X5 to Z5 INDIVIDUAL & IRC19 Selective Groups X1 & Z1 also X5 to Z5 INDIVIDUAL & IRC20 Drawer Totals X1 to X5 read only INDIVIDUAL & IRC21 Drawer 1/2/3 X1 to X5 read only INDIVIDUAL & IRC22 Labour Groups X1 & Z1 also X5 to Z5 IRC23 Sales & Labour % X1 & Z1 also X2 & Z2 IRC24 Daily Sales X1 & Z1 INDIVIDUAL & IRC25 Groups By Time Period X1 & Z1 also X5 to Z5 INDIVIDUAL & IRC26 Analysis 1By Time Period X1 & Z1 also X5 to Z5 INDIVIDUAL & IRC27 Analysis 2 By Time Period X1 & Z1 also X5 to Z5 INDIVIDUAL & IRC28 Analysis 3 By Time Period X1 & Z1 also X5 to Z5 INDIVIDUAL & IRC29 Track 1 By Time Period X1 & Z1 also X5 to Z5 INDIVIDUAL & IRC30 Track 2 By Time Period X1 & Z1 also X5 to Z5 INDIVIDUAL & IRC31 Track 3 By Time Period X1 & Z1 also X5 to Z5 INDIVIDUAL & IRC32 Track 4 By Time Period X1 & Z1 also X5 to Z5 INDIVIDUAL & IRC33 Checks for Track 1 X1 & Z1 IRC from REG holding data34 Checks for Track 2 X1 & Z1 IRC from REG holding data35 Checks for Track 3 X1 & Z1 IRC from REG holding data36 Checks for Track 4 X1 & Z1 IRC from REG holding data37 Checks for Selected Employee X1 & Z1 IRC from REG holding data38 Checks for Current Employee X1 & Z1 IRC from REG holding data39 Checks for Track 1,2,3,4 X1 & Z1 IRC from REG holding data40 Product Mix X1 & Z1 also X2 & Z2 INDIVIDUAL & IRC41 Product Projections X1 read only INDIVIDUAL & IRC140 • Appendix <strong>SAM4s</strong> <strong>SPS</strong>-<strong>2000</strong> Operator <strong>Manual</strong> v1.13
42 Station Totals X1 IRC43 Active Employees – time keeping X1 read only IRC44 Daily Time Keeping X1 & Z1 also X5 to Z5 IRC45 Shift Reporting X1 & Z1 INDIVIDUAL & IRC46 Inventory X1 & Z1 IRC47 PLU Stock X1 & Z1 INDIVIDUAL & IRC48 Not use this by REPORT key function.49 Stock by Group X1 & Z1 INDIVIDUAL & IRC50 Stock by Individual Group X1 & Z1 INDIVIDUAL & IRC51 Food Cost X1 & Z1 IRC52 PLU Minimum Stock X1 & Z1 INDIVIDUAL & IRC53 Not use this by REPORT key function.54 String Report 1 – as defined by program X1 & Z1 also X5 to Z5 INDIVIDUAL & IRC55 String Report 2 – as defined by program X1 & Z1 also X5 to Z5 INDIVIDUAL & IRC56 String Report 3 – as defined by program X1 & Z1 also X5 to Z5 INDIVIDUAL & IRC57 String Report 4 – as defined by program X1 & Z1 also X5 to Z5 INDIVIDUAL & IRC58 Custom Report X1 & Z1 INDIVIDUAL59 Pre-Poll Report – Hard Copy Print Out X1 & Z1 INDIVIDUAL & IRC60 Not use this by REPORT key function.61 Clocked in employees X1 read only INDIVIDUAL & IRCReport Option TableNO. REPORT NAME OPTION06 PLU’s by Group for Selected Group Group number (1~2 digit)14 Individual Employees Employee number (1~3 digit)18 From/To Groups Frome/To Group number (4 digits)If from group number is 1 and to group number is 2,option data is 0102.19 Selective Groups Group number (1~2 digit)41 Product Projections Week data (1 digit)45 Shift Reporting Shift number (1 digit)50 Stock by Individual Group Group number (1~2 digit)<strong>SAM4s</strong> <strong>SPS</strong>-<strong>2000</strong> Operator <strong>Manual</strong> v1.13 Appendix • 141
142 • Appendix <strong>SAM4s</strong> <strong>SPS</strong>-<strong>2000</strong> Operator <strong>Manual</strong> v1.13
<strong>Manual</strong> Revision RecordEdition Date published Revision contentsV1.0 6/29/2006 Revision 1.0V1.1 9/05/2006 Added support for V2.00c/d software.V1.2 9/22/2006 Add features associated with software V2.00gV1.3 11/16/2006 Add features associated with software V2.00l.V1.4 12/13/2006 Add Balancing FormulasV1.5 12/19/2006 Add features associated with software V2.00tV1.6 1/26/2007 Improved Add Check Sequence InstructionsV1.7 3/29/2007 Added feature associated with software V2.00x/2.01bV1.8 5/1/2007 Add features associated with software V2.01n;V1.9 6/6/2007 Add features associated with software V2.01r; clarifyfunction of KP Routing key; IRC of “EmployeeSigned On” report available at 2.00x or laterV1.10 6/29/2007 Use CLEAR to exit Paid Recall p20, p52V1.11 10/23/2007 Added features associated with V2.02nV1.12 1/24/2008 Split Check Function Key explanation added.Explanation of Sales and Labor % report, pg 113.V1.13 5/14/2008 Added features associated with V2.03k<strong>SAM4s</strong> <strong>SPS</strong>-<strong>2000</strong> Operator <strong>Manual</strong> v1.13 <strong>Manual</strong> Revision Record • 143