Eaton UltraShift PLUS®, UltraShift® and ... - weller truck parts
Eaton UltraShift PLUS®, UltraShift® and ... - weller truck parts
Eaton UltraShift PLUS®, UltraShift® and ... - weller truck parts

Create successful ePaper yourself
Turn your PDF publications into a flip-book with our unique Google optimized e-Paper software.
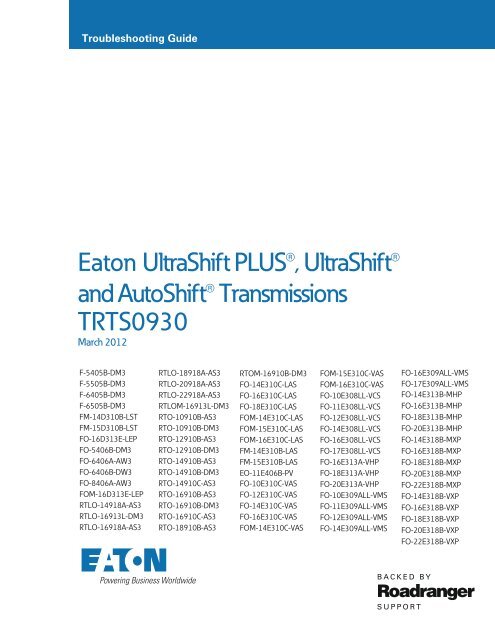
Troubleshooting Guide<strong>Eaton</strong> <strong>UltraShift</strong> PLUS ® , <strong>UltraShift</strong> ®<strong>and</strong> AutoShift ® TransmissionsTRTS0930March 2012F-5405B-DM3F-5505B-DM3F-6405B-DM3F-6505B-DM3FM-14D310B-LSTFM-15D310B-LSTFO-16D313E-LEPFO-5406B-DM3FO-6406A-AW3FO-6406B-DW3FO-8406A-AW3FOM-16D313E-LEPRTLO-14918A-AS3RTLO-16913L-DM3RTLO-16918A-AS3RTLO-18918A-AS3RTLO-20918A-AS3RTLO-22918A-AS3RTLOM-16913L-DM3RTO-10910B-AS3RTO-10910B-DM3RTO-12910B-AS3RTO-12910B-DM3RTO-14910B-AS3RTO-14910B-DM3RTO-14910C-AS3RTO-16910B-AS3RTO-16910B-DM3RTO-16910C-AS3RTO-18910B-AS3RTOM-16910B-DM3FO-14E310C-LASFO-16E310C-LASFO-18E310C-LASFOM-14E310C-LASFOM-15E310C-LASFOM-16E310C-LASFM-14E310B-LASFM-15E310B-LASEO-11E406B-PVFO-10E310C-VASFO-12E310C-VASFO-14E310C-VASFO-16E310C-VASFOM-14E310C-VASFOM-15E310C-VASFOM-16E310C-VASFO-10E308LL-VCSFO-11E308LL-VCSFO-12E308LL-VCSFO-14E308LL-VCSFO-16E308LL-VCSFO-17E308LL-VCSFO-16E313A-VHPFO-18E313A-VHPFO-20E313A-VHPFO-10E309ALL-VMSFO-11E309ALL-VMSFO-12E309ALL-VMSFO-14E309ALL-VMSFO-16E309ALL-VMSFO-17E309ALL-VMSFO-14E313B-MHPFO-16E313B-MHPFO-18E313B-MHPFO-20E313B-MHPFO-14E318B-MXPFO-16E318B-MXPFO-18E318B-MXPFO-20E318B-MXPFO-22E318B-MXPFO-14E318B-VXPFO-16E318B-VXPFO-18E318B-VXPFO-20E318B-VXPFO-22E318B-VXP
Warnings And CautionsWarnings <strong>and</strong> Cautions! WARNINGFollow the specified procedures in the indicated order to avoid personal injuryNote:Additional relevant information not covered in the service procedure.! WARNINGBefore starting a vehicle:• Ensure adequate fuel level.• Sit in the driver's seat• Place shift lever in neutral• Set the parking brakeBefore working on a vehicle or leaving the cab with engine running:• Ensure ignition is off while h<strong>and</strong>s are within the clutch housing area.• Place shift lever in neutral• Set the parking brake• Block the wheelsWhen parking the vehicle or leaving the cab:• Place shift lever in neutral• Set the parking brake! CAUTIONFollow the specified procedures in the indicated order to avoid equipment malfunction ordamage.Do not release the parking brake or attempt to select a gear until the air pressure is at thecorrect level.To avoid damage to the transmission during towing:• Place shift lever in neutral• Lift the drive wheels off of the ground or disconnect the drivelineDo not operate the vehicle if alternator lamp is lit or if gauges indicate low voltage.i
Warnings <strong>and</strong> CautionsWarnings And Cautionsii
Table of ContentsStart Enable Relay Contact TestOverview . . . . . . . . . . . . . . . . . . . . . . . 355System Isolation Procedures . . . . . . . 356J1587 Data Link TestOverview . . . . . . . . . . . . . . . . . . . . . . . 365System Isolation Procedures . . . . . . . 367Front Box Control TestOverview . . . . . . . . . . . . . . . . . . . . . . . 371System Isolation Procedures . . . . . . . . 372AutoShift Will Not Engage a Gear fromNeutral TestOverview . . . . . . . . . . . . . . . . . . . . . . . 379System Isolation Procedure . . . . . . . . 380Heavy-Duty <strong>UltraShift</strong> PLUS WillNot Engage a Gear from Neutral TestOverview . . . . . . . . . . . . . . . . . . . . . . . 389System Isolation Procedures . . . . . . . 390<strong>UltraShift</strong> DM3 Will Not Engage a Gearfrom Neutral TestOverview . . . . . . . . . . . . . . . . . . . . . . . 401Symptom Isolation Procedures . . . . . . 402<strong>UltraShift</strong> AW3 Clutch Engagement TestOverview . . . . . . . . . . . . . . . . . . . . . . . 413Symptom Isolation Procedures . . . . . . 414AutoShift AS3 Shift Complaint TestOverview . . . . . . . . . . . . . . . . . . . . . . . 417Symptom Isolation Procedure . . . . . . . 418Heavy-Duty <strong>UltraShift</strong> Plus ShiftComplaint TestOverview . . . . . . . . . . . . . . . . . . . . . . . 431System Isolation Procedure . . . . . . . . 432<strong>UltraShift</strong> DM3 Shift Complaint TestOverview . . . . . . . . . . . . . . . . . . . . . . . 447Symptom Isolation Procedure . . . . . . . 448<strong>UltraShift</strong> AW3 Shift Complaint TestOverview . . . . . . . . . . . . . . . . . . . . . . . 461Symptom Isolation Procedures . . . . . . 462Shift Lever Back Light TestOverview . . . . . . . . . . . . . . . . . . . . . . . 471Symptom Isolation Procedures . . . . . 472AppendixConnector Pin Descriptions . . . . . . . . 477<strong>UltraShift</strong> DM3 6-Speed WiringDiagram with Analog Shifter . . . . . . . . 482<strong>UltraShift</strong> DM3 6-Speed WiringDiagram with Push Button Shifter . . . 484<strong>UltraShift</strong> AW3 6-Speed WiringDiagram with Analog Shifter . . . . . . . . 486<strong>UltraShift</strong> AW3 6-Speed WiringDiagram with Push Button Shifter . . . 488Medium-Duty <strong>UltraShift</strong> PLUS ModelsWiring Diagram with Analog Shifter . . 490Medium-Duty <strong>UltraShift</strong> PLUS ModelsWiring Diagram w/ Push Button Shifter 492AutoShift 10-Speed Wiring Diagramwith Analog Shifter . . . . . . . . . . . . . . . 494AutoShift 10-Speed Wiring Diagramwith Push Button Shifter . . . . . . . . . . . 496<strong>UltraShift</strong> 10-Speed Wiring Diagramwith Analog Shifter . . . . . . . . . . . . . . . 498<strong>UltraShift</strong> 10-Speed Wiring Diagramwith Push Button Shifter . . . . . . . . . . . 500<strong>UltraShift</strong> 13-Speed Wiring Diagramwith Analog Shifter . . . . . . . . . . . . . . . 502<strong>UltraShift</strong> 13-Speed Wiring Diagramwith Push Button Shifter . . . . . . . . . . . 504AutoShift 18-Speed Wiring Diagramwith Analog Shifter . . . . . . . . . . . . . . . 506AutoShift 18-Speed Wiring Diagramwith Push Button Shifter . . . . . . . . . . . 508Heavy-Duty <strong>UltraShift</strong> PLUS ModelsWiring Diagram with Analog Shifter . . 510Heavy-Duty <strong>UltraShift</strong> PLUS ModelsWiring Diagram w/ Push Button Shifter 512<strong>Eaton</strong> Shift Lever Wiring Diagram . . . 514OEM Shift Lever Wiring Diagram . . . . 515<strong>Eaton</strong> Push Button Wiring Diagram . . 516OEM J1939 Shift Input DeviceWiring Diagram . . . . . . . . . . . . . . . . . . 518Heavy Duty <strong>UltraShift</strong> Plus ModelsECA Wiring Diagram . . . . . . . . . . . . . 519Proper Clutch Operation . . . . . . . . . . . 520Confirm Proper Clutch Adjustment<strong>and</strong> Clutch Brake Contact . . . . . . . . . 521Clutch Grease Interval ServiceProcedure . . . . . . . . . . . . . . . . . . . . . . 522Adapter Test Kit # J-43318 . . . . . . . . . 526iv
Suggested ToolsSuggested ToolsAir Gauges• 2 (0-100) PSI Air GaugesVolt/Ohm Meter• SPX / Kent-Moore 1 (800) 328-6657• P/N 5505027PC-based Service Tool• ServiceRanger 3• Contact <strong>Eaton</strong>: 1 (800) 826-4357Shift Lever Tester• <strong>Eaton</strong> Service Parts 1 (800) 826-4357• P/N 691795<strong>Eaton</strong> Test Adapter Kit• SPX / Kent-Moore 1 (800) 328-6657• P/N J-433186-Pin Deutsch Diagnostic Adapter• SPX / Kent-Moore 1 (800) 328-6657• P/N J-38500-60A9-Pin Deutsch Diagnostic Adapter• SPX / Kent-Moore 1 (800) 328-6657• P/N J-44012Vehicle Link Adapters• RP1210A Compatible USB Adapters recommended for ServiceRanger version 3.Note: These adapters support both J1708/J1587 <strong>and</strong> J1939 product communications• Dearborn: DPA 4+Plus (P/N DG-DPA4PLUS)• NEXIQ: USB-Link (P/N 125032)• Noregon: JPRO USB-Data Link Adapter (P/N 12202)1
Copyright <strong>Eaton</strong> Corporation <strong>and</strong> Dana Limited, 2012. <strong>Eaton</strong> <strong>and</strong> Dana hereby grant their customers,vendors, or distributors permission to freely copy, reproduce <strong>and</strong>/or distribute this document inprinted format. It may be copied only in its entirety without any changes or modifications.THIS INFORMATION IS NOT INTENDED FOR SALE OR RESALE, AND THIS NOTICE MUST REMAINON ALL COPIESNote: Features <strong>and</strong> specifications listed in this document are subject to change without notice <strong>and</strong>represent the maximum capabilities of the software <strong>and</strong> products with all options installed. Althoughevery attempt has been made to ensure the accuracy of information contained within, <strong>Eaton</strong> makesno representation about the completeness, correctness or accuracy <strong>and</strong> assumes no responsibilityfor any errors or omissions. Features <strong>and</strong> functionality may vary depending on selected options.All other trademarks are property of their respective owners.For spec’ing or service assistance, call 1-800-826-HELP (4357) or visit our web site at:www.roadranger.com. In Mexico, call 001-800-826-4357.Roadranger: <strong>Eaton</strong>, Dana <strong>and</strong> other trusted partners providing the bestproducts <strong>and</strong> services in the industry, ensuring more time on the road.©2012 <strong>Eaton</strong> Corporation · All rights reserved.Printed in USA<strong>Eaton</strong> Corporation • Truck Components Operations • P.O. Box 4013 • Kalamazoo, MI 49003 • U.S.A. • www.roadranger.com
Diagnostic ProceduresDiagnostic ProceduresSTEP AProcedure Condition Action1. Key on.2. Observe gear display.Note: An “88” may show up inthe dash at key on. Thisindicates theTransmission ECU hascompleted power-up. Ifthe transmission <strong>and</strong>gear display power-up atthe same time, you maynot see an “88”.If blank Gear DisplayIf “-” (One Dash) on Gear DisplayGo to STEP BGo to STEP DIf “--” (Two Dashes) or “**” (TwoStars) on Gear DisplayGo to STEP D“#” (Gear Number) on GearDisplay“F” (Fault Code) on Gear Displaya. Verify Shift Lever orPush Button is inNeutral.b. Turn key off <strong>and</strong> wait 2minutes.c. Hold clutch half way tothe floor. (If equipped)d. Turn on key.e. If problem continues, call1-800-826-HELP (4357)Go to STEP D“N” (Neutral) on Gear DisplayGo to STEP B5
Diagnostic ProceduresSTEP BProcedure Condition Action1. Attempt to Start Engine No engine crank, lever is inNeutral <strong>and</strong> Gear Display is “N”(Neutral)PerformStart Enable Relay Contact Test.No engine crank, lever is inNeutral <strong>and</strong> Gear Display is blankNo engine crank <strong>and</strong> lever is NOTin NeutralEngine cranks <strong>and</strong> Gear Displayis blankEngine cranks <strong>and</strong> Gear Displayis “N” (Neutral)PerformPower-Up Sequence Test. If no problems found, refer toOEM for Gear Display problem.a. Verify Shift Lever orPush Button is inNeutral.b. Turn key off <strong>and</strong> wait 2minutes.c. Hold clutch half way tothe floor. (If equipped)d. Turn on key.e. If problem continues, call1-800-826-HELP (4357)Refer to OEM for Gear Displayproblem.Go to STEP CSTEP CProcedure Condition Action1. Engage a gear Unable to engage gear (ie.flashing gear display with downarrows, or solid “N”)Solid “#” (gear number) but nodriveGear engaged <strong>and</strong> drivesAutoShift Will Not Engage a Gearfrom Neutral Test <strong>UltraShift</strong> WillNot Engage a Gear from NeutralTest, <strong>UltraShift</strong> PLUS ProductWill Not Engage a Gear FromNeutral Test, or <strong>UltraShift</strong> AW3Clutch Engagement Testdepending on transmission type.Follow Front Box Control Teston page 371.Go to STEP E6
8Diagnostic Procedures
Fault Code Retrieval/ClearingRetrieving Fault Codes ManuallyRetrieve fault codes by enabling the system’s self-diagnostic mode.Note:You can also use a PC- based service tool, such as ServiceRanger to retrieve fault codes.• Place the shift lever in neutral.• Set the parking brake.• Turn the ignition key on but do not start the engine. If the engine is already running, you maystill retrieve codes, however, do not engage the starter if the engine stalls.• To Retrieve Active Codes: Start with the key in the on position. Turn the key off <strong>and</strong> on twotimes within five seconds ending with the key in the on position. After five seconds, the servicelamp begins flashing two-digit fault codes. If no faults are active, the service light will flashcode 25 (no codes). This is also the procedure to enter, see Product Diagnostic Mode(PDM) on page 19 for details.Note: An “88” may show up in the dash at key on, which is a normal power-up test of the display.2 timesoffon• To Retrieve Inactive Codes: Start with the key in the on position. Turn the key off <strong>and</strong> on fourtimes within five seconds ending with the key in the on position. After five seconds, the servicelamp begins flashing two-digit fault codes. If no faults are active, the service light will flashcode 25 (no codes).4 timesoffon• Two digit fault codes will be displayed in the Gear Display. Some vehicle may be equipped witha service light. Observe the sequence of flashes on the service light <strong>and</strong> record the codes. Aone to two second pause separates each stored code, <strong>and</strong> the sequence automaticallyrepeats after all codes have been flashed.1 Flash3 Flashes 2 Flashes1 FlashSERVICE SERVICE SERVICE SERVICESERVICE SERVICEShortpause(1/2 sec)Long Pause(3-4 sec)Shortpause(1/2 sec)SERVICECode 13 Code 219
Clearing Fault Codes ManuallyFault Code Retrieval/ClearingClearing Fault Codes ManuallyThe following procedure clears all inactive fault codes from the ECU’s memory. Active fault codesare automatically cleared when the fault has been corrected.Note:You may use a PC-based Service Tool, such as ServiceRanger, to clear fault codes.• Place the shift lever in neutral.• Set the parking brake.• Turn the ignition key on but do not start the engine.• Start with the key in the on position. Turn the key off <strong>and</strong> on six times within five secondsending with the key in the on position.6 timesoffonNote:If the codes have been successfully cleared, the service lamp will come on <strong>and</strong> stay on forfive seconds. The gear display will show 25 (no codes).• Turn the key off <strong>and</strong> allow the system to power down.10
Fault Code Retrieval/ClearingRetrieving Fault Codes with ServiceRangerRetrieving Fault Codes with ServiceRangerOverviewThis section determines if the transmission ECU is communicating on the vehicle's J1939 data link<strong>and</strong> if the component has set any fault codes. In order for the system to operate properly, thetransmission ECU must be able to communicate with other ECUs on the vehicle's J1939 data link.Note: This procedure requires ServiceRanger 3.0 or later <strong>and</strong> an approved RP1210Acommunications adapter that supports J1939 communications.Detecting ComponentsConnect the service PC to the vehicle's 9-pin J1939 diagnostic port connector with an approvedRP1210A communications adapter. Start the ServiceRanger program <strong>and</strong> verify that a connectionhas been established with the vehicle's J1939 data link.View the Vehicle Components screen in ServiceRanger <strong>and</strong> verify that the transmission ECU(source address 3) is being detected.If the transmission ECU is not being detected by ServiceRanger, proceed to the Electrical Pretestprocedure to check for power to the ECU <strong>and</strong> that all components are properly connected thevehicle's J1939 data link.Viewing Fault CodesView the Vehicle Fault Codes screen in ServiceRanger <strong>and</strong> verify if have set any Active or Inactivecodes.• If an Active code is present, record the vehicle fault information <strong>and</strong> proceed to DiagnosticProcedure in this manual for the Active code for more information. Do not clear any codes atthis time.• If only Inactive (historic) codes are present, record the vehicle fault information <strong>and</strong> clear allhistoric fault codes. Road test the vehicle to verify proper operation.Clearing Fault Codes with ServiceRangerAfter all repairs have been made <strong>and</strong> the system is functioning normally, clear all vehicle codesbefore placing the vehicle back into service. To clear codes, connect the service PC to the vehicle<strong>and</strong> start ServiceRanger. View the Vehicle Fault Codes screen <strong>and</strong> select Clear All. Refresh thescreen to verify all historic codes have been cleared <strong>and</strong> that no Active codes are present.11
Retrieving Fault Codes with ServiceRangerFault Code Retrieval/Clearing12
Fault Code Isolation Procedure IndexFaultCodesSPN PID SID FMI Description11 629 254 12 No ECUOperation12 629 254 13, 14 Improper ECUConfiguration13 751 231 8, 11 J1939 ShiftControl Device14(without ParkPawl)14(with ParkPawl)751 18, 19 2, 3, 4, 5 Invalid ShiftLever Voltage18, 19 2, 3, 4, 5 Invalid ShiftLever Voltage(will show “F” indisplay)15 751 18 9 HIL Shift DeviceCommunication16 625 248 2 High IntegrityLink (HIL)17 1321 237 3, 4, 14 Start EnableRelay Coil18 520200 34 9 ECACommunication19 520273 248 9 CAN ECAMessage21 70 70 14 Auto NeutralPark BrakeSwitch22 563 49 9, 14 ABS CANMessage Fault25 NO CODES26 522 55 10 Clutch Slip27 788 55 7, 13 ClutchDisengagement28 788 52,55 3, 4, 5, 7 Clutch System29 969 372 4, 5 Remote ThrottleEnable31 1485 218 2, 3, 4, 5, 14 MomentaryEngine IgnitionInterrupt Relay(MEIIR)32 158 43 2 Loss of SwitchIgnition PowerTest13
Fault Code Isolation Procedure IndexFaultCodesSPN PID SID FMI Description33 168 168 4 Low BatteryVoltage Supply34 168 168 14 Weak BatteryVoltage Supply35 639 231 2 J1939CommunicationLink36 639 231 14 J1939 EngineMessage37 627 251 5 Power Supply41 768 35 7 Range Failed toEngage41 769 36 7 Range Failed toEngage42 770 37 7 Splitter Failed toEngage42 771 38 7 Splitter Failed toEngage43 768 35 3, 4, 5 Range HighSolenoid Valve43 769 36 3, 4, 5 Range LowSolenoid Valve44 787 54 3, 4, 5 Inertia BrakeSolenoid Coil45 787 54 7 Intertia BrakePerformance46 770 37 3, 4, 5 Splitter DirectSolenoid Valve46 771 38 3, 4, 5 Splitter IndirectSolenoid Valve51 60 60 2, 3, 4, 10 Rail PositionSensor52 59 59 2, 3, 4, 7 Gear PositionSensor56 161 161 2, 3, 4, 5,10 Input ShaftSpeed Sensor57 160 160 2, 3, 4, 5 Main ShaftSpeed Sensor58 191 191 2, 3, 4, 5, 6, 8 Output ShaftSpeed Sensor61 772 39 1, 5, 6, 12 Rail Select Motor63 773 40 1, 5, 6, 12 Gear SelectMotor64 788 34 2, 7, 12 ECA Fault65 5052 192 5, 2 ECA SpeedSensor Fault14
16Fault Code Isolation Procedure Index
Symptom-Driven Diagnostics IndexSymptomUnable to Shift Transmission with Up/Down ButtonEngine Starting System ComplaintNo J1587 CommunicationGear Display Shows a DashAutoShift Will Not Engage a Gear from Neutral<strong>UltraShift</strong> DM Will Not Engage a Gear from Neutral<strong>UltraShift</strong> AW3 Will Not Engage a Gear from NeutralAutoShift AS3 Shift Complaint<strong>UltraShift</strong> DM Shift Complaint<strong>UltraShift</strong> AW3 Shift ComplaintShift Lever Back Light do not work<strong>UltraShift</strong>® PLUS Will Not Engage a Gear from Neutral<strong>UltraShift</strong>® PLUS Shift ComplaintIsolation ProcedureUp/Down Button TestStart Enable Relay Contact TestJ1587 Data Link TestFront Box Control TestAutoShift Will Not Engage a Gear from Neutral Test<strong>UltraShift</strong> DM Will Not Engage a Gear from NeutralTest<strong>UltraShift</strong> AW3 Clutch Engagement TestAutoShift AS3 Shift Complaint Test<strong>UltraShift</strong> DM Shift Complaint Test<strong>UltraShift</strong> AW3 Shift Complaint TestShift Lever Back Light Test<strong>UltraShift</strong>® PLUS Will Not Engage a Gear fromNeutral Test<strong>UltraShift</strong>® PLUS Shift Complaint Test17
18Symptom-Driven Diagnostics Index
Product Diagnostic Mode (PDM)Product Diagnostic Mode (PDM)Product Diagnostic Mode (PDM) is used to help diagnose inactive codes that may have been setduring normal driving. This diagnostic mode increases the sensitivity of the fault sensing capabilityThis procedure tests loose, degraded, <strong>and</strong> intermittent connections. Use the active fault isolationprocedure to guide you to the wiring <strong>and</strong> connectors that are associated with the inactive faultcodes. Flex the wiring harness <strong>and</strong> connectors <strong>and</strong> attempt to recreate the fault after activating(PDM).PDM is only to be used by a trained service technician in an authorized dealer.This procedure is to be used prior to performing fault isolation procedures for component typecodes when there are no active codes present.To enter PDM modeNote:Vehicle will not start in Product Diagnostic Mode (PDM). You must turn vehicle key “OFF”<strong>and</strong> allow the system to power down to exit PDM.• Vehicle must be stationary, engine must not be running, vehicle parking brake must be set.• Perform two key clicks of the ignition switch starting in the “ON” position <strong>and</strong> ending in the“ON” positionNote: An “88” may show up in the dash at key on, which is a normal power-up test of the display.• The gear display will flash a 25 then a solid “PD” (Product Diagnostic Mode) <strong>and</strong> the mode willbe activated.• The service light shall flash code 25 once indicating no codes. The service light shall thenilluminate solid to indicate PDM until such time that an active code is detected or PDM isexited.• Refer to PDM section in Fault isolation procedure for the inactive fault to be diagnosed.• “PD” will remain in gear display until an active fault has been set during the PDM fault isolationprocedure.• If the fault is detected during PDM mode the gear display will display the active fault/s. Thewarning tone will only sound when the fault is active <strong>and</strong> the tone will stop when the fault isinactive. The fault will stay in the gear display until the system is powered down.Active codes set during PDM mode will not be stored as inactive.• If a fault is detected, exit PDM mode <strong>and</strong> perform the corresponding “Fault IsolationProcedure”.• To exit PDM mode, power the system down by turning the key to the “OFF” position.PDM will only work with the following inactive codes11, 13, 14, 15,16, 17, 18, 19, 21, 22, 29, 33, 34, 35, 36, 43, 44, 46, 51, 52, 56, 57, 58, 61, 63, 65,66, 67, 74, <strong>and</strong> 99.19
Product Diagnostic Mode (PDM)Product Diagnostic Mode (PDM)20
Power-Up Sequence OverviewPower-Up SequenceThis test does not relate to any specific fault code, but must be completed if the self check fails atpower up.The Transmission ECU checks the program memory every time the key is turned on.This causes an In Place fallback while moving <strong>and</strong> a self-check failure if it occurs during power-up.• Basic H<strong>and</strong> Tools• Troubleshooting GuideThis fault code can be caused by any of the following:• Vehicle Harness• Shift Control Device• Transmission ECUSide viewof pushbuttonshift controlTransmission controller30-way connectorTop viewof pushbuttonshift controlVOLUMECONTROLSERVICESHIFT<strong>Eaton</strong> FullerTransmissionsRNDHLPushbutton Shift Control<strong>Eaton</strong> Shift Lever21
Power-Up SequencePower-Up Sequence Overview22
––++––++BCPower Up Sequence TestPower-Up Sequence TestSTEP A1. Key off.Procedure Condition Action2. Remove <strong>and</strong> clean all battery<strong>and</strong> battery to frameconnections.3. Remove <strong>and</strong> clean groundsupply to engine ECU.4. Inspect starter/battery <strong>and</strong>inline 30 amp fuse holderconnections for corrosion ordamaged contacts.50 AMP fuse30 Amp Fuse5. Measure voltage acrossbatteries.If voltage is 11 to 13 volts on a 12volt system or 22 to 26 on a 24volt systemProceed with battery load test.Repair or replace batteries asrequired. Go To STEP BIf voltage is outside of rangeRepair or replace batteries <strong>and</strong>charging system as required.Repeat this step.VOLTS–+V COM A–+23
Power Up Sequence TestPower-Up Sequence Test ContinuedSTEP BProcedure Condition Action1. Locate diagnostic port onTransmission Harness.2. Key on.3. Measure voltage betweenpins C <strong>and</strong> the batterynegative post.If voltage between pin C <strong>and</strong> thebattery negative post is 0.70 voltsor lessGo to STEP CIf voltage is outside of rangeRepair battery ground supply toTransmission ECU. Repeat test.Warning! - Do Not Load Test at Diagnostic Port4-Pin Diagnostics PortVOLTSBCADV COM ABattery Negative Post4-way4-Pin Diagnostic Port(Located at the left rearcorner of the transmission.)B - Service Bat. +C - Service Bat. -A - Service Ignition +24
Power Up Sequence TestPower-Up Sequence Test ContinuedSTEP CProcedure Condition Action1. Locate diagnostic port onTransmission Harness.2. Key on.3. Measure voltage betweenpins B <strong>and</strong> pin C.If voltage between pins B <strong>and</strong> Cis within 0.6 volts of batteryvoltageGo to STEP DIf voltage is outside of rangeRepair battery power supply toTransmission ECU. Fuse may beblown. Repeat test.Warning! - Do Not Load Test at Diagnostic Port4-Pin Diagnostics PortVOLTSV COM ABCAD4-way4-Pin Diagnostic Port(Located at the left rearcorner of the transmission.)B - Service Bat. +C - Service Bat. -A - Service Ignition +25
Power Up Sequence TestPower-Up Sequence Test ContinuedSTEP D1. Key on.Procedure Condition Action2. Measure voltage between pinA <strong>and</strong> pin C.If voltage between pins A <strong>and</strong> Cis within 0.6 volts of batteryvoltageGo to STEP EIf voltage is outside of rangeRepair Ignition power supply toECU. Fuse may be blown.Repeat test.Warning! - Do Not Load Test at Diagnostic Port4-Pin Diagnostics PortVOLTSV COM ABCAD4-way4-Pin Diagnostic Port(Located at the left rearcorner of the transmission.)B - Service Bat. +C - Service Bat. -A - Service Ignition +STEP EProcedure Condition Action1. Is vehicle equipped with anShift Lever?If vehicle is not equipped with aShift LeverGo to STEP FIf vehicle is equipped with a ShiftLeverGo to STEP K26
Power Up Sequence TestPower-Up Sequence Test ContinuedSTEP FProcedure Condition Action1. Is it an <strong>Eaton</strong> Push Button or<strong>and</strong> OEM J1939 ShiftDevice?If an <strong>Eaton</strong> Push Button ShiftControlIf an OEM J1939 Shift DeviceGo to STEP GRefer to OEM for troubleshootingprocedures.STEP G1. Key on.Procedure Condition Action2. Observe service lamp.Note: If service lamp is flashinggo to DiagnosticsProcedure.If service lamp lights for onesecond <strong>and</strong> turns offIf service lamp never comes on.Test complete.Go to STEP HIf service lamp is on steadyReplace Shift Control.Go to STEP V27
Power Up Sequence TestPower-Up Sequence Test ContinuedSTEP H1. Key off.Procedure Condition Action2. Disconnect Shift Control30-way connector.3. Key on.4. Measure voltage betweenShift Control 30-way pins C1<strong>and</strong> J3.If voltage is within 1 volt of batteryvoltageIf voltage is outside of rangeReplace Shift Control.Go to STEP VGo to STEP IVOLTSKV COM AJHGFEDCBA3 2 128
Power Up Sequence TestPower-Up Sequence Test ContinuedSTEP I1. Key off.Procedure Condition Action2. Disconnect negative batterycable.3. Disconnect 38-way VehicleHarness from TransmissionECU.4. Measure resistance betweenTransmission ECU pin 25<strong>and</strong> Shift Control connectorpin J3 <strong>and</strong> from then from pinJ3 to ground.If resistance from pin 25 to J3 is0 to 0.3 ohms <strong>and</strong> resistancefrom J3 to ground is OL / OpenGo to STEP JIf resistance is outside of rangeRepair the OEM harness.Go to STEP VOHMS3 2 1K3 2 1V COM AJKJHGFGroundHGFEEDCBDCBA3 2 1OHMSA3 2 1Front View38-Way ConnectorV COM A3729 30 3123 24 2532 3326 2734283813 1415 161718 19202122357 8 910 11 121 2 34 5 63629
Power Up Sequence TestPower-Up Sequence Test ContinuedSTEP JProcedure Condition Action1. Measure resistance betweenTransmission ECU pin 31<strong>and</strong> Shift Control connectorpin C1<strong>and</strong> then from pin C1to ground.If resistance from pin 31 to C1 is0 to 0.3 ohms <strong>and</strong> resistancefrom C1 to ground is 10K or OLIf resistance is outside of rangeReplace the Transmission ECU.Go to STEP VRepair the OEM harness.Go to STEP V3 2 1K3 2 1JKJHGOHMSHGFFV COM AEEDCBGroundDCBA3 2 1OHMSA3 2 1Front View38-Way ConnectorV COM A3729 30 3123 24 2532 3326 2734283813 1415 161718 19202122357 8 910 11 121 2 34 5 636STEP KProcedure Condition Action1. Is vehicle equipped with an<strong>Eaton</strong> supplied Shift Lever oran OEM supplied Shift Lever.If <strong>Eaton</strong> Shift LeverIf OEM Shift LeverGo to STEP MGo to STEP S30
Power Up Sequence TestPower-Up Sequence Test ContinuedSTEP M1. Key on.Procedure Condition Action2. Observe service lamp. If service lamp lights for onesecond <strong>and</strong> turns offTest complete.Note:If service lamp isflashing, go toDiagnosticProcedures.If service lamp never comes onGo to STEP PIf service lamp is on steadyGo to STEP NSTEP NProcedure Condition Action1. Disconnect Shift Lever 8-wayconnector.2. Key on.3. Measure voltage at pin 6 <strong>and</strong>ground.If voltage is within 2 volts ofbattery voltage for one second,then 0 voltsReplace the <strong>Eaton</strong> Shift Lever.Go to STEP VIf voltage is constantGo to STEP OVOLTSV COM A123876Ground4 531
Power Up Sequence TestPower-Up Sequence Test ContinuedSTEP O1. Key off.Procedure Condition Action2. Disconnect negative cable.3. Disconnect 38-way VehicleHarness connector.4. Measure resistance betweenpin 6 <strong>and</strong> pin 4.If resistance between pin 6 <strong>and</strong> 4is OL / OpenReplace the Transmission ECU.Go to STEP VIf resistance is less than 10KRepair the OEM harness. Go toSTEP VOHMSV COM A1827364 5STEP P1. Key off.Procedure Condition Action2. Disconnect Shift Lever 8-wayconnector.3. Key on.4. Measure voltage between pin3 <strong>and</strong> pin 6.If within 1 volt of batteryReplace <strong>Eaton</strong> Shift Lever.Go to STEP VIf voltage is outside of rangeGo to STEP O32
123876Power Up Sequence TestPower-Up Sequence Test ContinuedSTEP Q1. Key offProcedure Condition Action2. Disconnect 38-way VehicleHarness connector onTransmission ECU.Note: On Peterbilt disconnectGear Display3. Measure resistance betweenpin 3 on the 8-way connector<strong>and</strong> pin 25 on the 38-wayconnector <strong>and</strong> from pin 25 toground.If resistance between pin 3 <strong>and</strong>25 is 0 to 0.3 ohms <strong>and</strong>resistance from pin 25 to groundis OL.If resistance is outside of rangeGo to STEP RRepair harness between VehicleHarness 38-way connector pin 25<strong>and</strong> Vehicle Harness 8-wayconnector pin 3. Go to STEP VOHMSV COM AGround3729 30 3123 24 2532 33262734283813 1415 161718 19202122357 8 910 11 1234 51 2 6364 5OHMSV COM AFront View38-Way Connector3729 30 3123 24 2532 33262734283813 1415 161718 19202122357 8 910 11 1234 51 2 636Vehicle Harness 38-way Connector33
Power Up Sequence TestPower-Up Sequence Test ContinuedSTEP R1. Key off.Procedure Condition Action2. Measure resistancebetween:If resistance between pins 31 <strong>and</strong>4 is 0 to 0.3 ohms <strong>and</strong> ifresistance between pin 31 <strong>and</strong>ground is OL.Replace Transmission ECU. Goto STEP V• Vehicle Harness38-way connectorpin 31 <strong>and</strong> VehicleHarness 8-wayconnector pin 4• Vehicle Harness38-way connectorpin 31 <strong>and</strong> groundIf any of the above conditions arenot metRepair harness between VehicleHarness 38-way connector pin 31<strong>and</strong> Vehicle Harness 8-wayconnector pin 4. Go to STEP VOHMSV COM AFront View38-Way Connector123487653713 1429 30 3123 24 2515 16 1732 33 3426 27 2818 19 203821 22357 8 910 11 1234 51 2 636OHMSV COM A3729 30 3123 24 2532 33 3426 27 283813 1415 161718 19202122Ground357 8 910 11 1234 51 2 636Vehicle Harness 38-way Connector34
Power Up Sequence TestPower-Up Sequence Test ContinuedSTEP S1. Key off.Procedure Condition Action2. Locate service lampconnector on OEM harness.3. Key on.4. Measure voltage across pinsA <strong>and</strong> B on the service lampconnectorIf voltage is within 2 volts ofbattery voltage for one second,then 0 voltsTest complete.If no voltage is measuredGo to STEP TIf voltage is within 2 volts ofbattery voltage continuouslyGo to STEP USTEP T1. Key off.Procedure Condition Action2. Disconnect negative batterycable.3. Disconnect 38-wayconnector.4. Measure resistance from pinA of the OEM connector topin 23 of the 38-way <strong>and</strong>from pin 23 to ground.If resistance from pin A to 23 is 0to 0.3 ohms <strong>and</strong> resistance toground is 10K or greaterIf resistance is outside of rangeReplace the Transmission ECU.Go to STEP VRepair the OEM harness. Go toSTEP V35
Power Up Sequence TestPower-Up Sequence Test ContinuedSTEP U1. Key off.Procedure Condition Action2. Disconnect negative batterycable.3. Disconnect TransmissionECU 38-way connector.4. Measure voltage acrossservice lamp connector pinsA <strong>and</strong> B.If no voltage is measuredIf voltage is within 2 volts ofbattery voltageReplace the Transmission ECU.Go to STEP VRepair OEM harness as required.Go to STEP VSTEP V1. Key off.Procedure Condition Action2. Reconnect all connectors<strong>and</strong> the negative batterycable.3. Key on. If Power-Up Sequence TestcompletesTest complete.If Power-Up Sequence Test failsTo find error in testing, return toSTEP A36
Electrical Pretest OverviewThe test does not relate to any specific fault code, but must be completed before performing FaultCode Isolation table procedures. The pretest verifies the batteries are fully charged.There is no detection process specifically for the basic electrical supply. However, failures of thistype are generally detected by the transmission or driver as some other type of fault code orsymptom.Theory of OperationAll Generation 3 products require the OEM to supply power to the transmission controller (TECU)<strong>and</strong> to the optional Electric Clutch Actuator (ECA).There is no fallback for the electrical pretest, however, it may affect other systems.• Basic H<strong>and</strong> Tools• <strong>Eaton</strong> Test Adapter Kit• Digital Volt/Ohm Meter• Troubleshooting Guide• Battery Load Tester• ServiceRanger a PC-based Service ToolThe pretest can be used for any of the following:• Low Batteries• Starter / Battery connections• Main power harness to the Transmission ECU37
The test does not relate to any specific fault code, but must be completed before perform-38
Power HarnessTransmission ECU Power Harness(+) positive side of theMai n Batte r y S o ur ce+OEM responsible forovercurrent protectionon this circuit(-) negative sideof the Main Battery Source-30 AMP FuseNote: Generation 3 is 12-voltor 24-volt compatibleJ1T r a ns mi ss io n ECU Co nn ecto r(Vehicle I n te r face)39
Heavy-Duty Electric Clutch Actuator (ECA) Power HarnessPower HarnessHeavy-Duty Electric Clutch Actuator (ECA) Power Harness(+) positive side of theMain Battery Source(-) Ground side of theMain Battery SourceOEM responsible forovercurrent protectionon this circuit50 AMP FuseNote: ECA products are 12-volt onlyJ140
Power HarnessHeavy-Duty Electric Clutch Actuator (ECA)The Transmission ECU <strong>and</strong> ECA must be wired to a non-switched power source at the battery. IF adisconnect switch is required, the recommended practice is to wait a minimum of three minutesbefore using the disconnect switch.It is the OEM responsibility to provide power <strong>and</strong> ground to the Transmission Controller (TECU) <strong>and</strong> Electric Clutch Actuator(ECA) from a reliable battery source from the battery which supplies the starter. The power (+) connection must includeoverload protection per Federal Motor Carrier Safety Regulations, Section 393.31. The TECU Main Power <strong>and</strong> Ground mustbe a direct connection from the battery posts to the TECU connector. At 120° C, theseconductors must be able to carry 30 amps @ 9 volts with no more than 0.05 ohms per wire (0.1 ohms total) for a totalvoltage drop from the battery posts to the TECU connector not to exceed 3.0 volts. ECA Main Power <strong>and</strong> Ground must beable to carry 50 amps @ 9 volts with no more than 0.025 ohms per wire (.05 ohms total) at 120° C. Duration of the 50 ampcurrent draw will not exceed 20 milliseconds.The Main Power 30 amp fuse connection for the Transmission ECU must be identified with a tag at the battery.The Main Power 50 amp fuse connection for the Electric Clutch Actuator (ECA) must be identified with a tag at the battery.Battery Positive <strong>and</strong> Negative must be disconnected PRIOR to any type of welding on any Fuller Automated transmissionequippedvehicles.Removal of fuses is not recommended as the method of disconnecting power from the ECU. Making <strong>and</strong> breaking a circuitthrough tin plated terminals (e.g. ring terminals, fuses, most connectors) will destroy the plating on the terminal. Opening aswitch contact or the main power link is the recommended method of interrupting power.Application of more than 36 volts to the system (such as jump-starting) will cause system shutdown <strong>and</strong> possible electricalcomponent damage.Battery <strong>and</strong> Ignition power <strong>and</strong> ground to the TECU must not be switched off during the engine start process.41
Preferred +12 Volt ConnectionsPower HarnessPreferred +12 Volt ConnectionsSTARTERBATTERY PLUS 2GEN 3ECU BATTERY PLUS12 VOLT+ -BATTERY12 VOLT+ -BATTERY12 VOLT+ -BATTERY12 VOLT+ -BATTERYSTARTERSTARTERBATTERY PLUS 1GEN 3BATTERY MINUS 1ECU BATTERY MINUSSTARTERBATTERY MINUS 2TWO BATTERY BANKS - TWO BATTERIES PER BANK - DUAL JUMPERS TO STARTERBATTERIES ARE CONNECTED IN PARALLEL BY PAIRS. GEN 3 POWER SUPPLIED BYBATTERY CLOSEST TO STARTER (BOTH PLUS ANDMINUS)CAB BATTERY PLUSGEN 3ECU BATTERY PLUSSTARTERBATTERY PLUS 112 VOLT+ -BATTERY12 VOLT+ -BATTERY12 VOLT+ -BATTERY12 VOLT+ -BATTERYSTARTERGEN 3BATTERY MINUS 1ECU BATTERY MINUSONE BATTERY BANK - FOUR BATTERIESBATTERIES ARE CONNECTED IN PARALLEL. GEN 3 POWER SUPPLIED FROMBATTERY CLOSEST TO STARTER WITH CAB POWER. (BOTH PLUSANDMINUS)CAB BATTERY PLUSMAGRELAYGEN 3ECU BATTERY PLUS12 VOLT+ -BATTERY12 VOLT+ -BATTERY12 VOLT+ -BATTERY12 VOLT+ -BATTERYSTARTERSTARTERBATTERY PLUS 1GEN 3BATTERY MINUS 1ECU BATTERY MINUSTWO BATTERY BANKS - TWO BATTERIES PER BANK WITH DISCONNECTBATTERIES ARE CONNECTED IN PARALLEL BY PAIRS - DISCONNECT FOR CAB AND VEHICLE START -DISCONNECTED PAIR PROVIDES "DEEP DISCHARGE" CAB COMFORT AND ENTERTAINMENT CAPABILITY.GEN 3 POWER SUPPLIED FROM BATTERY SET CLOSEST TO STARTER AND COMMON TO CAB POWER42
Power HarnessPreferred +12 Volt ConnectionsGEN 3ECU BATTERY MINUSGEN 3ECU BATTERY PLUS12 VOLT+ -BATTERY12 VOLT+ -BATTERY12 VOLT+ -BATTERY12 VOLT+ -BATTERYBATTERYMINUSSTARTER BATTERY PLUSSTARTER BATTERY MINUSVEHICLE BATTERY MINUSTWO BATTERY BANKS - BATTERY NEGATIVE DISCONNECT SWITCHBATTERIES ARE DISCONNECTED AT POWER DOWN WHEN VEHICLE STORED INSIDE. GEN 3 POWER SUPPLIED FROM BATTERYCLOSEST TO THE STARTER. NEGATIVE CONNECTION AT POINT OF VEHICLE CABLE CONNECTION TO DISCONNECT SWITCHGEN 3ECU BATTERY PLUSPOWERDISTRIBUTIONMODULE(POWER BUS ANDOVER CURRENTDEVICES)STARTER BATTERY PLUS12 VOLT+ -BATTERY12 VOLT+ -BATTERY12 VOLT+ -BATTERY12 VOLT+ -BATTERYSTARTER BATTERY MINUSGEN 3ECU BATTERY MINUSPOWER DISTRIBUTION MODULEBATTERIES ARE CONNECTED IN PARALLEL, POWER PLUS AND MINUS CONNECTED ON BATTERY CLOSEST TOTHESTARTER.CABLES SIZE AND LENGTH OPTIMIZED FOR LOW VOLTAGE DROPCAB BATTERY PLUSGEN 3 ECU BATTERY PLUSStarter Battery Plus12 VOLT+ -BATTERY12 VOLT+ -BATTERYSTARTERGEN 3 ECU BATTERY MINUSSTARTER BATTERY MINUSSTARTER BATTERY CONNECTIONGEN 3 POWER PLUS AND MINUS CONNECTED ON BATTERY CLOSEST TO THE STARTER.CAB BATTERY PLUSGEN 3 ECU BATTERY PLUSSTARTER BATTERY PLUS 112 VOLT+ -BATTERY12 VOLT+ -BATTERYGEN 3 ECU BATTERY MINUSSTARTER BATTERY MINUS 1ONE BATTERY BANK - TWO BATTERIESBATTERIES ARE CONNECTED IN PARALLEL. GEN 3 POWER SUPPLIED FROMBATTERY CLOSEST TO STARTER WITH CAB POWER. (BOTH PLUS AND MINUS)43
Preferred +12 Volt ConnectionsPower HarnessPreferred +24 Volt ConnectionsSTARTER BATTERY PLUS2STARTER BATTERY PLUS1GEN 3 ECU BATTERYPLUS12 VOLT+ -BATTERY12 VOLT+ -BATTERY12 VOLT+ -BATTERY12 VOLT+ -BATTERYGEN 3 ECU BATTERYMINUSSTARTER BATTERY MINUS1STARTER BATTERY MINUS2TWO BATTERY BANKS - TWO BATTERIES IN SERIES PER BANK - DUAL JUMPERS TOSTARTERBATTERIES ARE CONNECTED IN SERIES/PARALLEL BY PAIRS. GEN 3 POWERSUPPLIED BY BATTERY CLOSEST TO STARTER (BOTH PLUS AND MINUS)CAB BATTERYPLUSGEN 3 ECU BATTERYPLUSSTARTER BATTERY PLUS112 VOLT+ -BATTERY12 VOLT+ -BATTERY12 VOLT+ -BATTERY12 VOLT+ -BATTERYGEN 3 ECU BATTERYMINUSSTARTER BATTERY MINUS1ONE BATTERY BANK - FOUR BATTERIES - ONE CABLE PAIR TO STARTERBATTERIES ARE CONNECTED IN SERIES/PARALLEL BY PAIRS. GEN 3 POWERSUPPLIED FROM BATTERY CLOSEST TO STARTER WITH CAB POWER. (BOTH PLUSAND MINUS)CAB BATTERYPLUSMAGRELAYGEN 3 ECU BATTERYSTARTER BATTERY PLUS PLUS112 VOLT+ -BATTERY12 VOLT+ -BATTERY12 VOLT+ -BATTERY12 VOLT+ -BATTERYGEN 3 ECU BATTERYMINUSSTARTER BATTERY MINUS1TWO BATTERY BANKS - TWO BATTERIES PER BANK WITH DISCONNECTBATTERIES ARE CONNECTED IN SERIES/PARALLEL BY PAIRS - DISCONNECT FOR CAB AND VEHICLESTART - DISCONNECTED PAIR PROVIDES "DEEP DISCHARGE" CAB COMFORT AND ENTERTAINMENTCAPABILITY. GEN 3 POWER SUPPLIED FROM BATTERY SET CLOSEST TO STARTER AND COMMON TOCAB POWER44
Power HarnessPreferred +12 Volt ConnectionsGEN 3 ECU BATTERYMINUSGEN 3 ECU BATTERYPLUS12 VOLT+ -BATTERY12 VOLT+ -BATTERY12 VOLT+ -BATTERY12 VOLT+ -BATTERYSTARTER BATTERYPLUSSTARTER BATTERYMINUSBATTERYVEHICLE BATTERYMINUSMINUSTWO BATTERY BANKS - BATTERY NEGATIVE DISCONNECT SWITCHBATTERIES ARE DISCONNECTED AT POWER DOWN WHEN VEHICLE STORED INSIDE. GEN 3 POWER SUPPLIED FROM BATTERYCLOSEST TO THE STARTER. NEGATIVE CONNECTION AT POINT OF VEHICLE CABLE CONNECTION TO DISCONNECT SWITCHPOWERDISTRIBUTIONMODULE(POWER BUS ANDOVER CURRENTDEVICES)GEN 3 ECU BATTERYPLUSSTARTER BATTERYPLUS12 VOLT+ -BATTERY12 VOLT+ -BATTERY12 VOLT+ -BATTERY12 VOLT+ -BATTERYSTARTER BATTERYMINUSGEN 3 ECU BATTERYMINUSPOWER DISTRIBUTION MODULEBATTERIES ARE CONNECTED IN SERIES/PARALLEL, POWER PLUS AND MINUS CONNECTED ON BATTERY CLOSEST TO THESTARTER. CABLES SIZE AND LENGTH OPTIMIZED FOR LOW VOLTAGE DROPCAB BATTERYPLUSSTARTER BATTERYPLUSGEN 3 ECU BATTERYPLUSGEN 3 ECU BATTERYMINUSSTARTERSTARTER BATTERYMINUSSTARTER BATTERY CONNECTIONGEN 3 POWER PLUS AND MINUS CONNECTED ON BATTERY CLOSEST TO THE STARTER.45
Preferred +12 Volt ConnectionsPower Harness46
Ignition Circuit DetailTransmission ECU Ignition CircuitTransmission ECU Connector(Vehicle Interface)J13510 AMP onlyManual resettingcircuit breakerOr10 AMPfuseIgnition Key SwitchRun to main power lead thatfeeds the ignition bus (OEMresponsible for overcurrentprotection on this line)Front ViewTransmission ECU Connector(Vehicle Interface)3729 30 3123 24 2532 33 3426 27 283813 1415 161718 19202122357 8 91 2 310 11 124 5 636FROMTOJ1-35 VIGNBattery <strong>and</strong> Ignition power <strong>and</strong> ground to the TECU must not be switched off during the enginestart process.47
Transmission ECU Ignition CircuitIgnition Circuit Detail48
J1939 Data LinkFor TransmissionDiagnosticsJ1939 HighJ1939 LowFEADCB+ BatteryGJHJ11011J1587 Data LinkCDBFGA9-wayTransmission ECU Connector(Vehicle Interface)J1939 Troubleshooting• Check the resistance of the J1939 Data Link.• With the Key-OFF, measure resistance between the 9-pin diagnostic connector pins C <strong>and</strong> D<strong>and</strong> record the reading. The reading should be 60 ohms of resistance (between 50 <strong>and</strong> 70.)• Check resistance between pins C <strong>and</strong> A <strong>and</strong> D <strong>and</strong> A. These two readings should be 10Kohms or greater (open circuit).Note: Pin C = J1939+, Pin D = J1939-, Pin A is a chassis ground• If an inactive data link fault code is being reported by the Transmission ECU, ProductDiagnostic Mode (PDM) should be utilized as outlined in this troubleshooting guide before anyfurther steps are taken.49
50J1939 Data Link
––++––++BCElectrical PretestSTEP A1. Key off.Procedure Condition Action2. Remove <strong>and</strong> clean all battery<strong>and</strong> battery to frameconnections.3. Remove <strong>and</strong> clean groundsupply to engine ECU.4. Inspect starter/battery <strong>and</strong>inline 30 amp fuse holderconnections for corrosion ordamaged contacts. Alsoinspect the 50 amp fuseholder on vehicles equippedwith an Electronic ClutchActuator (ECA).50 AMP fuse30 Amp Fuse5. Measure voltage acrossbatteries.If voltage is 11 to 13 volts on a 12volt system or 22 to 26 on a 24volt systemRefer to OEM guidelines forbattery load test. Repair orreplace batteries as required.Go to STEP BIf voltage is outside of rangeRepair or replace batteries <strong>and</strong>charging system as required.Repeat this step.VOLTS–+V COM A–+51
Electrical PretestSTEP BProcedure Condition Action1. Locate diagnostic port onTransmission Harness.2. Key on.3. Measure voltage betweenpins C <strong>and</strong> the batterynegative post.If voltage between pin C <strong>and</strong> thebattery negative post is 0.70 voltsor lessGo to STEP CIf voltage is outside of rangeRepair battery ground supply toTransmission ECU. Repeat test.Warning! - Do Not Load Test at Diagnostic Port4-Pin Diagnostics PortVOLTSBCADV COM ABattery Negative Post4-way4-Pin Diagnostic Port(Located at the left rearcorner of the transmission.)B - Service Bat. +C - Service Bat. -A - Service Ignition +52
Electrical PretestSTEP CProcedure Condition Action1. Locate diagnostic port onTransmission Harness.2. Key on.3. Measure voltage betweenpins B <strong>and</strong> pin C.If voltage between pins B <strong>and</strong> Cis within 0.6 volts of batteryvoltageGo to STEP DIf voltage is outside of rangeRepair battery power supply toTransmission ECU. Fuse may beblown. Repeat test.Warning! - Do Not Load Test at Diagnostic Port4-Pin Diagnostics PortVOLTSV COM ABCAD4-way4-Pin Diagnostic Port(Located at the left rearcorner of the transmission.)B - Service Bat. +C - Service Bat. -A - Service Ignition +53
Electrical PretestSTEP D1. Key on.Procedure Condition Action2. Measure voltage between pinA <strong>and</strong> pin C.If voltage between pins A <strong>and</strong> C iswithin 0.6 volts of battery voltageFor non-ECA products, testcomplete. Return to diagnosticprocedure. For ECA products, goto STEP EIf voltage is outside of rangeRepair Ignition power supply toECU. Fuse may be blown.Repeat test.Warning! - Do Not Load Test at Diagnostic Port4-Pin Diagnostics PortVOLTSV COM ABCAD4-way4-Pin Diagnostic Port(Located at the left rearcorner of the transmission.)B - Service Bat. +C - Service Bat. -A - Service Ignition +54
FFElectrical PretestSTEP E1. Key off.Procedure Condition Action2. Disconnect battery negative.3. Disconnect ECA 3-wayconnector.4. Reconnect battery negative.5. Measure voltage between pinB <strong>and</strong> pin C of 3-wayconnector.If voltage between pin B <strong>and</strong> pinC of 3-way connector is within 0.6volts of battery voltage:Test complete. Return todiagnostic procedure.If voltage is outside of rangeRepair battery power supply toECA. Fuse may be blown.Repeat test.Engine Flywheel Speed SensorG50 AMP fuseG133029ABABBattery power(Non-switched power)run to starter or BatteryBCCBA55
56Electrical Pretest
Component Code 11 Isolation ProceduresMID SPN PID SID FMI Description629 254 12 No ECU OperationOverviewThis fault code indicates an internal failure of the Transmission ECU.DetectionThe Transmission ECU checks the program memory every time the key is turned on <strong>and</strong>throughout operation. If the Transmission ECU is able to detect a failure within its own memory, itsets this fault code.FallbackThis fault causes a vehicle In Place fallback while moving <strong>and</strong> a self-check failure if it occurs duringpower-up.Required Tools• Troubleshooting Guide• ServiceRanger a PC-based Service ToolPossible CausesThis fault code can be caused by the following:• Transmission ECUTransmission ECU57
Fault Isolation ProceduresComponent Code 11 Isolation ProceduresFault Isolation ProceduresSTEP AProcedure Condition Action1. Key on.2. Retrieve Codes. Go to FaultCode Retrieval/Clearing.If code 11 is activeIf code 11 is inactiveReplace Transmission ECU.Test complete.58
Component Code 12 Isolation ProceduresMID SPN PID SID FMI Description629 254 13, 14 Improper ECUConfigurationOverviewThis fault code indicates the ECU is not reading valid information from memory, including thetransmission table <strong>and</strong> calibration values.DetectionThe Transmission ECU checks the Configuration every time the key is turned on. If thetransmission is not able to detect the proper Configuration, it sets this fault code.FallbackThis fault causes a power up no crank.Required Tools• Troubleshooting Guide• ServiceRanger a PC-based Service ToolPossible CausesThis fault code can be caused by the following:59
Fault Isolation ProceduresComponent Code 12 Isolation Procedures• Improper ECU Configuration SoftwareTransmission ECUFault Isolation ProceduresSTEP AProcedure Condition Action1. Key on.2. Retrieve codes. Go to FaultCode Retrieval/Clearing.If code 12 is active Customer - Call <strong>Eaton</strong> at 1-800-826-HELP (4357). CSC - CallTechnician Service.If code 12 is inactiveTest complete.60
Component Code 13 Isolation ProceduresMID SPN PID SID FMI Description751 231 8, 11 J1939 Shift ControlDeviceOverviewThis fault indicates communication has been lost, or does not correspond with the neutral requestinput from the J1939 Shift Device.When troubleshooting an Inactive code Go to Product Diagnostic Mode (PDM) .DetectionStarting at key on <strong>and</strong> throughout operation, the Transmission ECU constantly monitorscommunication with the J1939 Shift Device. If a neutral request from the J1939 Shift Device doesnot match the neutral signal or is not received from the J1939 Shift Device, fault code 13 is set.FallbackThis fault causes a downshift only fallback. Once the transmission re-engages the start gear, therewill be no upshifts as long as the code is active.Required Tools• ServiceRanger a PC-based Service Tool• Basic H<strong>and</strong> Tools• <strong>Eaton</strong> Test Adapter Kit• Digital Volt/Ohm Meter• Troubleshooting GuidePossible CausesThis fault code can be caused by the following:• OEM J1939 Shift Control Device• Vehicle HarnessOEM J1939 Shift DeviceTransmission ECU Connector(Vehicle Interface)J11617Bulkhead connectorlocated at firewallBattery Power (Non-switched powerrun to Battery or Starter)GroundJ1939Switched Power61
V COM AV COM AFault Isolation ProceduresComponent Code 13 Isolation ProceduresFault Isolation ProceduresSTEP AProcedure Condition Action1. Key off.2. Disconnect negative batterycable.3. Disconnect Vehicle Harness38-way connector.4. Measure resistance between38-way connector pin 16 <strong>and</strong>corresponding OEM pin atJ1939 Shift Device <strong>and</strong> pin16 <strong>and</strong> ground (see OEMwiring for correct pin location)If resistance is 0 to 0.3 ohmsbetween pin 16 <strong>and</strong> thecorresponding OEM pin <strong>and</strong>resistance to ground is 10K ohmsor greaterIf resistance is out of rangeGo to STEP BRepair wiring betweenTransmission ECU <strong>and</strong> J1939Shift Device.Go to STEP VFront View38-Way ConnectorOHMS3729 30 3123 24 2532 33 3426 27 283813 1415 161718 19202122357 8 910 11 1234 51 2 636To OEM J1939Shift Device PinOHMS3729 30 3123 24 2532 33 3426 27 283813 1415 161718 19202122Vehicle Harness 38-way Connector357 8 910 11 1234 51 2 636Ground62
V COM AV COM AComponent Code 13 Isolation ProceduresFault Isolation ProceduresSTEP BProcedure Condition Action1. Measure resistance between38-way connector pin 17 <strong>and</strong>corresponding OEM pin atJ1939 Shift Device <strong>and</strong> pin17 <strong>and</strong> ground (see OEMwiring for correct pin location)If resistance is 0 to 0.3 ohmsbetween pin 17 <strong>and</strong> thecorresponding OEM pin <strong>and</strong>resistance to ground is 10K ohmsor greaterIf resistance is out of rangeProblem exists with the J1939Shift Device, or J1939 ShiftDevice power, ground or datalinkwiring. Contact your OEM forrepair strategy. Go to STEP VRepair wiring betweenTransmission ECU <strong>and</strong> J1939Shift Device. Go to STEP VFront View38-Way ConnectorOHMS3729 30 3123 24 2532 33 3426 27 283813 1415 161718 19202122357 8 910 11 1234 51 2 636To OEM J1939Shift Device PinOHMS3729 30 3123 24 2532 33 3426 27 283813 1415 161718 19202122Vehicle Harness 38-way Connector357 8 910 11 1234 51 2 636Ground63
Fault Isolation ProceduresComponent Code 13 Isolation ProceduresSTEP V1. Key off.Procedure Condition Action2. Reconnect all connectors<strong>and</strong> the negative batterycable.3. Key on.4. Clear codes. Go to FaultCode Retrieval/Clearing.5. Drive vehicle <strong>and</strong> attempt toreset the code.6. Check for codes. Go to FaultCode Retrieval/Clearing .If no codesIf code 13 appearsTest complete.To find error in testing, return toSTEP AIf code other than 13 appearsGo to Fault Code IsolationProcedure Index.64
Component Code 14 Isolation Procedures(without Park Pawl)MID SPN PID SID FMI Description751 18, 19 2, 3, 4, 5 Invalid Shift LeverVoltageOverviewThis fault code indicates an electrical failure of the <strong>Eaton</strong> Shift Lever or OEM Shift Lever.When troubleshooting an Inactive code see Product Diagnostic Mode (PDM) on page 19.DetectionStarting at key-on <strong>and</strong> throughout operation, the Transmission ECU (TECU) constantly monitorsthe feedback from the Shift Lever circuit. If the feedback is out of range, the fault is set. This type offailure represents a short to battery, short to ground, or open circuit.FallbackThis fault may cause a downshift only fallback mode. The transmission will re-engage the startgear when returned to a stop, but will not upshift as long as the code is active.Required Tools• Basic H<strong>and</strong> Tools• <strong>Eaton</strong> Test Adapter Kit• Shift Stalk Tester• Troubleshooting Guide• ServiceRanger a PC-based Service Tool• Digital Volt/Ohm MeterPossible CausesThis fault code can be caused by any of the following:• <strong>Eaton</strong> Shift Lever or OEM Shift Lever• OEM Harness• Transmission ECU65
Component Code 14 Isolation Procedures<strong>Eaton</strong> Shift LeverTransmission ECU66
Component Code 14 Isolation Procedures (without Park Pawl)Fault Isolation ProceduresFault Isolation ProceduresSTEP AProcedure Condition Action1. Is vehicle equipped with an<strong>Eaton</strong> supplied Shift Lever oran OEM supplied ShiftLever?If <strong>Eaton</strong> Shift LeverIf OEM Shift LeverGo to STEP BContact OEM for troubleshootingprocedures.STEP B1. Key off.Procedure Condition Action2. Disconnect Shift Lever 8-wayconnector.3. Connect Shift Lever tester tothe 8-way Shift Leverharness.4. Connect ServiceRanger aPC-based Service Tool todiagnostic port.5. Key on.6. Select Monitor Data.7. Observe transmission rangeselected.If transmission range selectedequals neutralReplace Shift Lever (only if FaultCode is Active.) Go to STEP VIf transmission range selecteddoes not equal neutralGo to STEP C67
Fault Isolation ProceduresComponent Code 14 Isolation ProceduresSTEP C1. Key off.Procedure Condition Action2. Disconnect negative batterycable.3. Disconnect TransmissionECU 38-way connector.4. Remove tester from ShiftLever 8-way connector.5. Measure resistancebetween:• ECU 38-way pin 15<strong>and</strong> Shift Lever8-way connectorpin 1• ECU 38-wayconnector pin 15<strong>and</strong> groundIf resistance between pins 15 <strong>and</strong>1 is 0 to 0.3 ohms <strong>and</strong> resistancebetween pin 15 <strong>and</strong> ground is10K ohm or greaterIf any of the above conditions arenot metGo to STEP DRepair Vehicle Harness betweenthe Transmission ECU <strong>and</strong> theShift Lever. Go to STEP VOHMSV COM AFront View38-Way Connector1 82 73 64 53713 1429 30 3123 24 2515 16 1732 33 3426 27 2818 19 20213822357 8 910 11 121 2 34 5 636OHMSV COM A3729 30 3123 24 2532 33 3426 27 283813 1415 161718 19202122Ground357 8 910 11 121 2 34 5 636Vehicle Harness 38-way Connector68
Component Code 14 Isolation Procedures (without Park Pawl)Fault Isolation ProceduresSTEP DProcedure Condition Action1. Key off.2. Measure resistancebetween:• ECU 38-way pin 16<strong>and</strong> Shift Lever8-way connectorpin 8• ECU 38-wayconnector pin 16<strong>and</strong> groundIf resistance between pins 16 <strong>and</strong>8 is 0 to 0.3 ohms <strong>and</strong> resistancebetween pin 16 <strong>and</strong> ground is10K ohm or greaterIf any of the above conditions arenot metGo to STEP ERepair Vehicle Harness betweenthe Shift Lever <strong>and</strong> TransmissionECU. Go to STEP VOHMSFront View38-Way ConnectorV COM A183729 30 3123 24 2532 33 3426 27 28382 73 64 513 143515 16 1718 19 207 8 910 11 121 2 34 5 6213622OHMSV COM A3729 30 3123 24 2532 33 3426 27 283813 1415 161718 19202122Ground357 8 910 11 121 2 34 5 636Vehicle Harness 38-way Connector69
Fault Isolation ProceduresComponent Code 14 Isolation ProceduresSTEP E1. Key off.Procedure Condition Action2. Measure resistancebetween:• ECU 38-way pin 17<strong>and</strong> Shift Lever8-way connectorpin 2• ECU 38-wayconnector pin 17<strong>and</strong> groundIf resistance between pins 17 <strong>and</strong>2 is 0 to 0.3 ohms <strong>and</strong> resistancebetween pin 17 <strong>and</strong> ground is10K ohm or greaterIf any of the above conditions arenot metGo to STEP FRepair Vehicle Harness betweenShift Lever <strong>and</strong> TransmissionECU. Go to STEP VOHMSFront View38-Way ConnectorV COM A183729 30 3123 24 2532 33 3426 27 28382 73 64 513 143515 16 1718 19 207 8 910 11 121 2 34 5 6213622OHMSV COM A3729 30 3123 24 2532 33 3426 27 283813 1415 161718 19202122Ground357 8 910 11 121 2 34 5 636Vehicle Harness 38-way Connector70
Component Code 14 Isolation Procedures (without Park Pawl)Fault Isolation ProceduresSTEP F1. Key off.Procedure Condition Action2. Measure resistancebetween:• Transmission ECU38-way connectorpin 15 <strong>and</strong> 16 <strong>and</strong>15 <strong>and</strong> 17. Thenmeasure resistancefrom pin 16 to 17.• Transmission ECU38-way connectorpin 15 <strong>and</strong> 16 <strong>and</strong>15 <strong>and</strong> 17. Thenmeasure resistancefrom pin 16 to 17.If resistance on all three is10K ohm or greaterIf any of the three readings is lessthan 10K ohmReplace Shift Lever.Go to STEP VRepair Vehicle Harness betweenShift Lever <strong>and</strong> TransmissionECU. Go to STEP VOHMSOHMSV COM AFront View38-Way ConnectorV COM A3729 30 3123 24 2532 33 3426 27 28383729 30 3123 24 2532 33 3426 27 283813 1415 161718 1920212213 1415161718 19202122357 8 910 11 121 2 34 5 636357 8 910 11 121 2 34 5 636OHMSV COM A3729 30 3123 24 2532 33 3426 27 283813 1415 161718 19202122357 8 910 11 121 2 34 5 636Vehicle Harness 38-way Connector71
Fault Isolation ProceduresComponent Code 14 Isolation ProceduresSTEP V1. Key off.Procedure Condition Action2. Reconnect all connectors<strong>and</strong> the negative batterycable.3. Key on.4. Clear codes. Go to FaultCode Retrieval/Clearing.5. Drive vehicle <strong>and</strong> attempt toreset the code.6. Check for codesGo to Fault Code Retrieval/Clearing.If no codesIf code 14 appearsTest complete.To find error, return to STEP AIf code other than 14 appearsGo to Fault Code IsolationProcedure Index.72
Component Code 14 Isolation Procedures(with Park Pawl)Data Bus MID SPN PID SID FMI DescriptionJ1587 130 18, 19 2, 3, 4, 5 Invalid Shift LeverVoltage(will show “F” indisplay)J1939 SA-3 2, 3, 4, 5 Invalid Shift LeverVoltage(will show “F” indisplay)OverviewThis fault code indicates a possible failure of the Park Pawl Position Sensor or OEM circuit. Thesensor is a 4 wire dual hall effect device. When troubleshooting an inactive code see ProductDiagnostic Mode (PDM) on page 19.DetectionStarting at key on <strong>and</strong> throughout operation the TECU constantly monitors the signal from thePark Pawl Position Sensor. The transmission monitors both sensor signals, if one signal to theTECU is out of range the code will set.FallbackThis fault code will cause the transmission to be stuck in the last known selected position. If thecode comes active while in gear, the transmission will go to a down shift only fallback mode. Thetransmission will re-engage the start gear when returned to a stop, but will not upshift as long asthe code is active.Required Tools• Basic H<strong>and</strong> Tools• <strong>Eaton</strong> Test Adapter Kit• Shift Stalk Tester• Troubleshooting Guide• ServiceRanger a PC-based Service Tool• Digital Volt/Ohm MeterPossible CausesThis fault code can be caused by any of the following:• OEM Harness• Park Pawl Position Sensor• Transmission ECU73
Component Code 14 Isolation ProceduresPark PawlPosition SensorVehicle Harness38-way Connector4-Pin Park PawlPosition SensorConnector (DTM06-4S)34DEUTSCHX2 1151617314312F23713 1435Front ViewTransmission ECU Connector(Vehicle Interface)29 3015 1673124 25178 932 33262718 191 2 34 5 61034282011 12213836224-WayPIN#38-WayPIN# Type1 17 Ground2 31 5 Volt Reference3 16 Signal 14 15 Signal 274
Component Code 14 Isolation Procedures (with Park Pawl)Fault Isolation ProceduresFault Isolation ProceduresSTEP AProcedure Condition Action1. Key on.2. Retrieve active fault codes<strong>and</strong> FMIs withServiceRanger using the9-pin diagnostic connector.If Fault Code 14 FMI 2 is activeProceed to STEP BIf Fault Code 14 FMI 3, 4 or 5 isactiveIf Fault Code 14 is inactiveProceed to STEP DProceed to see ProductDiagnostic Mode (PDM) onpage 19.STEP B1. Key off.Procedure Condition Action2. Perform shift cable adjustmentprocedure per OEMguidelines.3. Key on.4. Retrieve active fault codes<strong>and</strong> FMIs withServiceRanger using the9-pin diagnostic connector.If Fault Code 14 FMI 2 is InactiveProceed to STEP VIf Fault Code 14 FMI 2 is ActiveProceed to STEP C75
Fault Isolation ProceduresComponent Code 14 Isolation ProceduresSTEP CProcedure Condition Action1. Perform Park Pawl PositionSensor calibration perTRSM0930.2. Key on.3. Retrieve active fault codes<strong>and</strong> FMIs withServiceRanger using the9-pin diagnostic connector.If Fault Code 14 FMI 2 is InactiveIf Fault Code 14 FMI 2 is ActiveProceed to STEP VReplace Park Pawl Position Sensorper TRSM0930.Proceed to STEP VSTEP D1. Key off.Procedure Condition Action2. Disconnect the Park PawlPosition Sensor 4-wayconnector.3. Key on.4. At the Park Pawl PositionSensor 4-way connector,measure voltage between Pin1 <strong>and</strong> Pin 2.If 4.5 to 5.5 voltsIf less than 4.5 voltsProceed to STEP EProceed to STEP GIf greater than 5.5 voltsRepair or replace OEM harness forshort to power per OEM guidelines.Proceed to STEP V76
Component Code 14 Isolation Procedures (with Park Pawl)Fault Isolation ProceduresSTEP E1. Key off.Procedure Condition Action2. Disconnect Park Pawl PositionSensor 4-way connector.3. Disconnect TECU 38-wayTransmission Harnessconnector.4. Measure resistance betweenPin 15 <strong>and</strong> Pin 4.If resistance is 0.0 to 0.3 ohmsbetween Pin 15 <strong>and</strong> Pin 4 <strong>and</strong> OL(open circuit) between Pin15 <strong>and</strong>GroundProceed to STEP F5. Measure resistance betweenPin 15 <strong>and</strong> Ground.If resistance is greater than 0.3ohms or OL (open circuit) betweenPin 15 <strong>and</strong> Pin 4 or indicatesresistance (short to ground)between Pin 15 <strong>and</strong> GroundRepair or replace OEM harness forexcessive resistance, open or shortto ground per OEM guidelines.Proceed to STEP VSTEP F1. Key off.Procedure Condition Action2. Disconnect Park Pawl PositionSensor 4-way connector.3. Disconnect TECU 38-wayTransmission Harnessconnector.4. Measure resistance betweenPin 16 <strong>and</strong> Pin 3.If resistance is 0.0 to 0.3 ohmsbetween Pin 16 <strong>and</strong> Pin 3 <strong>and</strong> OL(open circuit) between Pin 16 <strong>and</strong>GroundReplace Park Pawl PositionSensor. Proceed to STEP V5. Measure resistance betweenPin 16 <strong>and</strong> Ground.If resistance is greater than 0.3ohms or OL (open circuit) betweenPin 16 <strong>and</strong> Pin 3 or indicatesresistance (short to ground)between Pin 16 <strong>and</strong> GroundRepair or replace OEM harness forexcessive resistance, open or shortto ground per OEM guidelines.Proceed to STEP V77
Fault Isolation ProceduresComponent Code 14 Isolation ProceduresSTEP G1. Key off.Procedure Condition Action2. Disconnect Park Pawl PositionSensor 4-way connector.3. Disconnect TECU 38-wayTransmission Harnessconnector.4. Measure resistance betweenPin 17 <strong>and</strong> Pin 1.If resistance is 0.0 to 0.3 ohmsbetween Pin 17 <strong>and</strong> Pin 1 <strong>and</strong> OL(open circuit) between Pin 17 <strong>and</strong>GroundProceed to STEP H5. Measure resistance betweenPin 17 <strong>and</strong> Ground.If resistance is greater than 0.3ohms or OL (open circuit) betweenPin 17 <strong>and</strong> Pin 1 or indicatesresistance (short to ground)between Pin 17 <strong>and</strong> GroundRepair or replace OEM harness forexcessive resistance, open or shortto ground per OEM guidelines.Proceed to STEP VSTEP H1. Key off.Procedure Condition Action2. Disconnect Park Pawl PositionSensor 4-way connector.3. Disconnect TECU 38-wayTransmission Harnessconnector.4. Measure resistance betweenPin 31 <strong>and</strong> Pin 2.If resistance is 0.0 to 0.3 ohmsbetween Pin 31 <strong>and</strong> Pin 2 <strong>and</strong> OL(open circuit) between Pin 31 <strong>and</strong>Ground)Replace the TECU. Proceed toSTEP V5. Measure resistance betweenPin 31 <strong>and</strong> Ground.If resistance is greater than 0.3ohms or OL (open circuit) betweenPin 31 <strong>and</strong> Pin 2 or indicatesresistance (short to ground)between Pin 31 <strong>and</strong> GroundRepair or replace OEM harness forexcessive resistance, open or shortto ground per OEM guidelines.Proceed to STEP V78
Component Code 14 Isolation Procedures (with Park Pawl)Fault Isolation ProceduresSTEP V1. Key off.Procedure Condition Action2. Reconnect all connectors.3. Key on.4. Clear codes.5. Drive vehicle <strong>and</strong> attempt toreset code.6. Check for codes. If no codes Test completeIf Fault Code 14 setsIf code other than Fault Code 14setsProceed to STEP AFault Code IsolationProcedure Index79
Fault Isolation ProceduresComponent Code 14 Isolation Procedures80
Component Code 15 Isolation ProceduresMID SPN PID SID FMI Description751 18 9 HIL Shift DeviceConfigurationOverviewController Area Network (CAN) is a high-speed twisted pair 500K proprietary datalink with one 120ohm resistor at each end of the link. The Transmission ECU is connected to the CAN datalink atthe 38-way connector. This link is used to transmit information to the ECU as well as communicateor receive data from the other modules on the network like the HIL Shift Device. See ProductDiagnostic Mode (PDM) on page 19 for more information on troubleshooting inactive codes.DetectionFault Code 15 is set when the ECU fails to receive Shift Device data for 5 continuous seconds, <strong>and</strong>it is still communicating with other modules on CAN.FallbackThis fault causes a downshift only fallback while moving. Once the transmission re-engages thestart gear, there will be no upshifts as long as the code is active. If the code is active during powerupa flashing “F” will appear on the gear display <strong>and</strong> the Transmission ECU will not engage a gear.Required Tools• Basic H<strong>and</strong> Tools• <strong>Eaton</strong> Test Adapter Kit• Digital Volt/Ohm Meter• Troubleshooting Guide• ServiceRanger, PC-based service toolPossible Causes• CAN data link• HIL Shift Device81
Component Code 15 Isolation ProceduresTransmission ECUECA 8-WayConnector(J2)ECA 3-WayConnector(J1)Clutch HousingSpeed Sensor(<strong>Eaton</strong> Supplied)(J3)F GHAB C EC BECA133029ABABCETerminatingResistor(J25)FGBattery power(Non-switched power)run to Battery50 AMP fuse38-Pin Front Harness View(TECU - Transmission Harness Connector)ECA 8-Way ConnectorFront Harness ViewOEM SuppliedECA 3-Way Connector3729 30 3123 24 2532 33 3426 27 2838A B C DCBA13 1415 161718 19202122H G FE357 8 910 11 121 2 34 5 636TECU38-WayECA8-WayDescriptionJ1-30 J2-A HIL (+) HighJ1-29 J2-B HIL (-) LowSpeed Sensor2-WayJ2-C Terminator Resistor J25-2(C)J2-D NOT USEDJ2-E Terminator Resistor J25-1(E)J2-F Speed Sensor (+) J3-1(F)J2-G Speed Sensor (-) J3-2(G)J1-13 J2-H IGNTerminatorResistor 2-WayIMPORTANTIf Fault Code 16 is active, follow the Fault Code 16 diagnostic procedure.82
Component Code 15 Isolation ProceduresSTEP A1. Key on.Procedure Condition Action2. Retrieve active fault codes<strong>and</strong> FMIs withServiceRanger using the9-pin diagnostic connector.3. Perform Electrical Pretest. If no issues are found during theElectrical Pretest <strong>and</strong> the fault isstill activeGo to STEP BIf issue was repaired duringElectrical PretestGo to STEP VSTEP B1. Key off.Procedure Condition Action2. Locate <strong>and</strong> remove theterminating resistor that iswired into the ECA 8-wayconnector pins C <strong>and</strong> E.3. Measure resistance betweenthe transmission harnessconnector pins 1 <strong>and</strong> 2.Note:Make sure the volt/ohmmeter is on the properscale (around 200 ohmscale).If resistance between pin 1 <strong>and</strong> 2is between 50-70 ohmsReplace Shift Device.Go to STEP VIf resistance is outside of rangeRepair Shift Device to ECU CANDatalink Harness per OEMguidelines. Go to STEP V83
Component Code 15 Isolation ProceduresSTEP V1. Key off.Procedure Condition Action2. Key on.3. Clear codes. Go to FaultCode Retrieval/Clearing.4. Reconnect all connectors<strong>and</strong> the negative batterycable.5. Driving Vehicle <strong>and</strong> attemptto reset the code.6. Check for codes. Go to FaultCode Retrieval/Clearing.If no codesIf code 15 appearsTest complete.To find error in testing, return toSTEP AIf code other than 15 appearsGo to Fault Code IsolationProcedure Index.84
Component Code 16 Isolation ProceduresMID SPN PID SID FMI Description625 248 2 High Integrity Link (HIL)OverviewThis fault code indicates the Transmission ECU is unable to communication with the Push ButtonShift Control <strong>and</strong> / or the Electronic Clutch Actuator.DetectionStarting at key-on <strong>and</strong> throughout operation, the Transmission ECU constantly monitors thecommunication with the Push Button Shift Control <strong>and</strong> / or Electronic Clutch Actuator. If acommunication fault occurs for more than five seconds, fault code 16 is set.FallbackThis fault causes a downshift only fallback while moving. Once the transmission re-engages thestart gear, there will be no upshifts as long as the code is active. If the code is active during powerupa flashing “F” will appear on the gear display <strong>and</strong> the Transmission ECU will not engage a gear.Required Tools• Basic H<strong>and</strong> Tools• <strong>Eaton</strong> Test Adapter Kit• Digital Volt/Ohm Meter• Troubleshooting Guide• ServiceRanger a PC-based Service ToolPossible CausesThis fault code can be caused by any of the following:• Vehicle Harness• Transmission ECU• Push Button Shift Control• Charging System• Transmission Harness• Electronic Clutch Actuator (ECA)• Low Batteries• Corroded or loose power supply to ECU or ECA85
FFComponent Code 16 Isolation Procedures28HIL Data LinkF1Shift control30-way connectorVehicle Harness 38-way Connector272531Vehicle bulkheadconnectorF2J3C1Transmission ECUShift Control ECU LegendAll OEM responsible wiring shown is "typical". Consult specific application.(31) = +12 volt switched from TECU(28, 27) = Communication from <strong>and</strong> to the TECU(25) = Signal returns, grounds, <strong>and</strong> general OEM wiringEngine Flywheel Speed Sensor(<strong>Eaton</strong> Supplied)G50 AMP fuseECA 8-WayConnectorG133029Terminating CEResistorABCEABECA 3-WayConnectorBattery power(Non-switched power)run to BatteryBCECA86
Component Code 16 Isolation ProceduresFault Isolation ProceduresFault Isolation ProceduresSTEP AProcedure Condition Action1. Key on.2. Retrieve active fault codes<strong>and</strong> FMIs withServiceRanger using the 9-pin diagnostic connector.3. Perform Electrical Pretest. If no issues are found during theElectrical PretestIf issue was repaired duringElectrical PretestIf equipped with a Shift Control,go to STEP BIf equipped with an OEM ShiftDevice or Cobra Lever, go toSTEP JGo to STEP VSTEP B1. Key off.Procedure Condition Action2. Inspect Bulkhead Connectorfor looseness, corrosion, <strong>and</strong>contamination.If Bulkhead Connector is found inserviceable condition.If looseness, corrosion, orcontamination is found at theBulkhead Connector.Go to STEP CRepair or replace connector perOEM instructions. Go to STEP V87
Fault Isolation ProceduresComponent Code 16 Isolation ProceduresSTEP CProcedure Condition Action1. Disconnect Shift Control30-way connector.2. Key on.3. Measure voltage on 30-wayconnector pins J3 <strong>and</strong> C1If voltage is within 1.2 volts ofbattery voltageGo to STEP DIf out of rangeGo to STEP FVoltsV COM A3 2 1KJHGFEDCBA3 2 188
Component Code 16 Isolation ProceduresFault Isolation ProceduresSTEP DProcedure Condition Action1. Disconnect Shift Control30-way connector.2. Key on.3. Measure voltage at ShiftController 30-way connectorpins:- J3 <strong>and</strong> F1- J3 <strong>and</strong> F2If both readings are between 2-3volts.If any of the above requirementsare not met.Go to STEP EGo to STEP HVoltsV COM A3 2 1KJHGFEDCBA3 2 189
Fault Isolation ProceduresComponent Code 16 Isolation ProceduresSTEP EProcedure Condition Action1. Key off.Note: Ensure key is off for aminimum of two minutesbefore proceeding. Ifunsure, disconnectbattery power or removethe 30-amp inline fuse.2. Measure resistance at ShiftController 30-way connectorpins F1 <strong>and</strong> F2.Transmission is equipped with anECA <strong>and</strong> resistance between pinsF1 <strong>and</strong> F2 is between 50-70ohms.Replace Push Button ShiftControl (Only if Fault Code isActive.)Go to STEP VTransmission is not equipped withan ECA <strong>and</strong> resistance betweenpins F1 <strong>and</strong> F2 is between 110-130 ohms.If any of the above requirementsare not met.Go to STEP HOhmsV COM A3 2 1KJHGFEDCBA3 2 190
Component Code 16 Isolation ProceduresFault Isolation ProceduresSTEP F1. Key off.Procedure Condition Action2. Disconnect negative batterycable.3. Disconnect Vehicle Harness38-way connector.Note: On Peterbilt, disconnectGear Display.4. Measure resistance between:• Shift Control 30-wayconnector pin J3 <strong>and</strong>Vehicle Harness38-way connectorpin 25• Shift Control 30-wayconnector pin J3 <strong>and</strong>ground.If resistance between pins J3 <strong>and</strong>25 is 0 to 0.3 ohms <strong>and</strong> ifresistance between pin J3 <strong>and</strong>ground is OLIf any of the above conditions arenot metGo to STEP GRepair harness between the ShiftControl <strong>and</strong> Transmission ECU.Go to STEP VOHMSK3 2 1KV COM AJHGFJHGFGROUNDEEDOHMSDCCBBAV COM AA3 2 13 2 1Vehicle Harness 38-way ConnectorFront View38-Way Connector3729 30 3123 24 2532 33262734283813 1415 161718 19202122357 8 910 11 1234 51 2 63691
V COM AFault Isolation ProceduresComponent Code 16 Isolation ProceduresSTEP G1. Key off.Procedure Condition Action2. Measure resistance between:• Shift Control 30-wayconnector pin C1<strong>and</strong> Vehicle Harness38-way connectorpin 31.• Shift Control 30-wayconnector pin C1<strong>and</strong> ground.If resistance between pins C1<strong>and</strong> 31 is 0 to 0.3 ohms <strong>and</strong>resistance between pin C1 <strong>and</strong>ground is OLIf any of the above conditions arenot metGo to STEP HRepair harness between theTransmission ECU <strong>and</strong> ShiftControl. Go to STEP V3 2 1KJHGFKJHGFOHMSEEV COM ADDCBA3 2 1OHMSCBA3 2 1GROUNDFront View38-Way ConnectorVehicle Harness 38-way Connector3729 30 3123 24 2532 33262734283813 1415 161718 19202122357 8 910 11 1234 51 2 63692
Component Code 16 Isolation ProceduresFault Isolation ProceduresSTEP H1. Key off.Procedure Condition Action2. Disconnect negative batterycable.3. Disconnect Vehicle Harness38-way connector.4. Measure resistance between:• Shift Control 30-wayconnector pin F1<strong>and</strong> Vehicle Harness38-way connectorpin 28.• Shift Control 30-wayconnector pin F1<strong>and</strong> ground.If resistance between pins F1 <strong>and</strong>28 is 0 to 0.3 ohms <strong>and</strong> ifresistance between pin F1 <strong>and</strong>ground is OLIf any of the above conditions arenot metGo to STEP IRepair harness between the ShiftControl <strong>and</strong> Transmission ECU.Go to STEP V93
Fault Isolation ProceduresComponent Code 16 Isolation ProceduresSTEP I1. Key off.Procedure Condition Action2. Measure resistance between:• Shift Control 30-wayconnector pin F2<strong>and</strong> Vehicle Harness38-way connectorpin 27• Shift Control 30-wayconnector pin F2<strong>and</strong> groundIf resistance between pins F2 <strong>and</strong>27 is 0 to 0.3 ohms <strong>and</strong>resistance between pin F2 <strong>and</strong>ground is OLFor transmissions without anECA - Replace TransmissionECU (only if Fault Code is Active).Go to STEP VFor transmissions equipped withan ECA, go to STEP JIf any of the above conditions arenot metRepair harness between the ShiftControl <strong>and</strong> Transmission ECU.Go to STEP V3 2 1OHMSKKJJHHV COM AGGFFGROUNDEEDDCCBBA3 2 1OHMSA3 2 1Front View38-Way ConnectorV COM Aehicle Harness 38-way Connector3729 30 3123 24 2532 33262734283813 1415 161718 19202122357 8 910 11 1234 51 2 63694
Component Code 16 Isolation ProceduresFault Isolation ProceduresSTEP J1. Key off.Procedure Condition Action2. Disconnect the ECA 8-wayharness connector.3. Key on.4. Measure voltage at ECA8-way harness connectorfrom pin H to ground.Voltage is within 1.2 volts ofbattery voltageVoltage is out of rangeGo to STEP LGo to STEP KECA 8-Way ConnectorVoltsA B C DV COM AH G FEGround95
Fault Isolation ProceduresComponent Code 16 Isolation ProceduresSTEP K1. Key off.Procedure Condition Action2. Disconnect the transmission38-way harness connector atECU.3. Inspect for clean <strong>and</strong>serviceable 8-way <strong>and</strong>38-way connectors, <strong>and</strong>measureresistance between:• Transmission38-way harnessconnector pin 13<strong>and</strong> ECA 8-wayharness connectorpin H.• Transmission38-way harnessconnector pin 13<strong>and</strong> ground.If connectors are in good repair,<strong>and</strong> if resistance between pins 13<strong>and</strong> H is 0 to 0.3 ohms, <strong>and</strong> ifresistance between pin 13 <strong>and</strong>ground is OLIf any of the above conditions arenot metReplace ECU (Only if fault codeis Active.) Go to STEP VReplace Transmission Harness.Go to STEP VECA 8-Way ConnectorA B C DH G FEOHMSV COM AGROUNDFront View38-Way ConnectorOHMSV COM A3729 3023Front View38-Way Connector3124 2532 332627342838Transmission Harness38-way Connector3713 1429 30 3123 24 2515 16 1732 3326 2718 1934282021382213 143515 16 1718 19 207 8 910 11 1234 51 2 6213622357 8 910 11 1234 51 2 63696
Component Code 16 Isolation ProceduresFault Isolation ProceduresSTEP L1. Key on.Procedure Condition Action2. Measure voltage at 8-wayconnector pins:• A <strong>and</strong> ground• B <strong>and</strong> groundIf voltage between pin A <strong>and</strong>ground <strong>and</strong> between pins B <strong>and</strong>ground are 2-3 voltsGo to STEP MIf any of the above conditions arenot metGo to STEP NECA 8-Way ConnectorVoltsA B C DV COM AH G FEGround97
Fault Isolation ProceduresComponent Code 16 Isolation ProceduresSTEP M1. Key off.Procedure Condition Action2. Connect 8-way connector.3. Locate <strong>and</strong> remove theterminating resistor that iswired into the ECA 8-wayconnector pins C <strong>and</strong> E.4. Measure resistancebetween transmissionharness connector pins 1<strong>and</strong> 2.Note: Make sure the volt/ohmmeter is on the properscale (around 200 ohmscale).If equipped with a Push ButtonShift Control <strong>and</strong> resistancebetween pins 1 <strong>and</strong> 2 is between50-70 ohmsReplace ECA (Only if fault code isActive). Go to STEP VIf equipped with a lever or J1939shift device <strong>and</strong> resistancebetween pins 1 <strong>and</strong> 2 is between120-130 ohmsIf any of the above conditions arenot metGo to STEP NOhmsV COM A98
Component Code 16 Isolation ProceduresFault Isolation ProceduresSTEP N1. Key off.Procedure Condition Action2. Disconnect the transmission38-way harness connector atECU.3. Disconnect the ECA 8-wayECA connector.4. Inspect for clean <strong>and</strong>serviceable 8-way <strong>and</strong>38-way connectors, <strong>and</strong>measure resistance between:• Transmission38-way harnessconnector pin 29<strong>and</strong> ECA 8-wayharness connectorpin B.• Transmission38-way harnessconnector pin 29<strong>and</strong> ground.If connectors are in good repair,<strong>and</strong> if resistance between pins 29<strong>and</strong> B is 0 to 0.3 ohms, <strong>and</strong> ifresistance between pin 29 <strong>and</strong>ground is OLIf any of the above conditions arenot metGo to STEP OReplace Transmission Harness.Go to STEP VECA 8-Way ConnectorA B C DH G FEOHMSV COM AGROUNDFront View38-Way ConnectorOHMSV COM A3729 3023Front View38-Way Connector3124 2532 332627342838Transmission Harness38-way Connector3713 1429 30 3123 24 2515 16 1732 3326 2718 1934282021382213 143515 16 1718 19 207 8 910 11 1234 51 2 6213622357 8 910 11 1234 51 2 63699
Fault Isolation ProceduresComponent Code 16 Isolation ProceduresSTEP O1. Key off.Procedure Condition Action2. Measure resistance between:• Transmission38-way harnessconnector pin 30<strong>and</strong> ECA 8-wayharness connectorpin A.• Transmission38-way harnessconnector pin 30<strong>and</strong> ground.If resistance between pins 30 <strong>and</strong>A is 0 to 0.3 ohms, <strong>and</strong> ifresistance between pin 30 <strong>and</strong>ground is OLIf any of the aboveconditions are not met.Replace ECU (Only if fault codeis Active). Go to STEP VReplace Transmission Harness.Go to STEP VECA 8-Way ConnectorA B C DH G FEOHMSV COM AGROUNDFront View38-Way ConnectorOHMSV COM A3729 3023Front View38-Way Connector3124 2532 332627342838Transmission Harness38-way Connector3713 1429 30 3123 24 2515 16 1732 3326 2718 1934282021382213 143515 16 1718 19 207 8 910 11 1234 51 2 6213622357 8 910 11 1234 51 2 636100
Component Code 16 Isolation ProceduresFault Isolation ProceduresSTEP V1. Key off.Procedure Condition Action2. Reconnect all connectors<strong>and</strong> negative battery cable.3. Key on.4. Clear codes.5. Drive the vehicle <strong>and</strong> attemptto reset the code.6. Check for codes. If no codes Test complete.If code 16 appearsIf code other than 16 appearsTo find error in testing, return toSTEP AGo to Fault Code IsolationProcedure Index.101
Fault Isolation ProceduresComponent Code 16 Isolation Procedures102
Component Code 17 Isolation ProceduresData Bus MID SA SPN PID SID FMI DescriptionJ1587 130 237 3, 4 Start Enable Relay (SER) circuitJ1939 3 629 3, 4 Start Enable Relay (SER) circuitOverviewThis fault code indicates an electrical failure of the relay that allows the engine to start after startupconditions are met.When troubleshooting an inactive code see Product Diagnostic Mode (PDM) on page 19.DetectionStarting at key-on <strong>and</strong> throughout operation, the Transmission ECU constantly measures thecircuit. A failure mode of short to battery, short to ground, or open circuit is detected.FallbackThe start enable relay has no fallback, however, if the failure occurred before the engine wasstarted, it is possible the engine will not start.Required Tools• Basic H<strong>and</strong> Tools• <strong>Eaton</strong> Test Adapter Kit• Digital Volt/Ohm Meter• Troubleshooting Guide• ServiceRanger a PC-based Service ToolPossible CausesThis fault code can be caused by any of the following:• Start Enable Relay• Vehicle Harness• Transmission ECU103
Fault Isolation ProceduresComponent Code 17 Isolation Procedures26Vehicle Harness 38-way Connector324Run tostarter solenoidTrans ECU LegendAll OEM responsible wiring shown is "typical". Consult specific application.(30, 87) = Switched ignition(26-87) = Latch into the ECU(4-85) = -12 volt relay source(32-86) = +12 volt relay source30878685Run to startsignal fromignition switchStartenable relayFault Isolation ProceduresSTEP AProcedure Condition Action1. Key on.Note: The Start Enable Relaymust be wired accordingto <strong>Eaton</strong> GEN IIIrequirements (shown onprevious page) for teststo work properly. If wireddifferently, consult OEMfor correct wiringschematic.2. Retrieve active fault codes<strong>and</strong> FMIs withServiceRanger using the9-pin diagnostic connector.3. What FMIs are present? FMI 14 is present Go to STEP BFMI 3 or 4 are presentGo to STEP C104
Component Code 17 Isolation ProceduresFault Isolation ProceduresSTEP BProcedure Condition Action1. Inspect OEM Start EnableRelay breakout connector<strong>and</strong> inspect for mis-routed ordefective OEM wiring.Inspect per OEM guidelines.If SER breakout connector is notconnected to SERIf circuit has been bypassedRepair / replace SER per OEMguidelines. Go to STEP VRewire per OEM guidelines. Goto STEP VIf harness is defectiveRepair harness per OEMguidelines. Go to STEP VSTEP C1. Key off.Procedure Condition Action2. Disconnect negative batterycable.3. Disconnect Vehicle Harness38-way connector.4. Measure resistance betweenVehicle Harness 38-wayconnector pins 32 <strong>and</strong> 4 <strong>and</strong>measure resistance betweenVehicle Harness 38-wayconnector pin 32 <strong>and</strong> ground.If resistance between 32 <strong>and</strong> 4 is40 to 120 ohms (12 volt system)or 140 to 480 ohms (24 voltsystem) <strong>and</strong> resistance between32 <strong>and</strong> ground is OLIf resistance is outside of rangeReplace Transmission ECU (Onlyif Fault Code is Active).Go to STEP VGo to STEP BFront View38-Way ConnectorOHMSV COM A3729 30 3123 24 2532 33 3426 27 283813 1415 161718 19202122357 8 910 11 1234 51 2 636GroundFront View38-Way ConnectorOHMSV COM A3729 30 3123 24 2532 33 3426 27 283813 1415 161718 19202122Vehicle Harness 38-way Connector357 8 910 11 1234 51 2 636105
Fault Isolation ProceduresComponent Code 17 Isolation ProceduresSTEP DProcedure Condition Action1. Remove Start Enable Relayfrom vehicle dash harness.2. Measure resistance betweenStart Enable Relay pins 85<strong>and</strong> 86.If resistance is 40 to 120 ohms(12 volt system) or 140 to 480ohms (24 volt system)Repair OEM wiring fromTransmission ECU to StartEnable Relay. Go to STEP VIf resistance is outside of rangeReplace Start Enable Relay.Go to STEP V87OHMS8687a85V COM A303.STEP V1. Key off.Procedure Condition Action2. Reconnect all connectors<strong>and</strong> negative battery cable.3. Key on.4. Clear codes.5. Drive the vehicle <strong>and</strong> attemptto reset the code.6. Check for codes. If no codes Test complete.If code 17 appearsIf code other than 17 appearsTo find error in testing, return toSTEP AGo To Fault Code IsolationProcedure Index.106
Component Code 18 Isolation ProceduresMID SPN PID SID FMI Description520200 254 9 ECA CommunicationFaultOverviewThe Electric Clutch Actuator (ECA) controls the position of the clutch assembly. The ECAcommunicates with the Transmission ECU over the proprietary Controller Area Network (CAN)datalink to change position, show faults or include other operation information. Whentroubleshooting an inactive code see Product Diagnostic Mode (PDM) on page 19 for moreinformation on troubleshooting inactive codes.DetectionFault Code 18 is set when the ECA looses communication on the CAN datalink for 2 seconds.FallbackThe ECA will either maintain current clutch position or move to the last position comm<strong>and</strong>ed by theECU. Upon approaching idle the clutch will open <strong>and</strong> remain in this state. If the fault occurs atpower-up, the vehicle will not crank.Required Tools• Troubleshooting Guide• ServiceRanger, PC-based Service ToolPossible Causes• CAN datalink from the ECA to the link• ECA• Transmission ECUECUECACAN - Low (Vehicle)272BCAN - LowCAN - High (Vehicle)282ACAN - High107
Fault Isolation ProcedureComponent Code 18 Isolation ProceduresFault Isolation ProcedureSTEP AProcedure Condition Action1. Key on.2. Retrieve active fault codes<strong>and</strong> FMIs withServiceRanger using the9-pin diagnostic connector.3. What FARM’s are present? If Fault Code 18 (FMI 9) is active Go to Component Code 19Isolation Procedures.If Fault Code 18 (FMI 9) is notactiveTest complete. Go to STEP VSTEP V1. Key off.Procedure Condition Action2. Key on.3. Clear codes.4. Reconnect all connectors<strong>and</strong> the negative batterycable.5. Driving Vehicle <strong>and</strong> attemptto reset the code.6. Check for codes. If no codes Test complete.If code 18 appearsIf code other than 18 appearsTo find error in testing, return toSTEP AGo to Fault Code IsolationProcedure Index.108
Component Code 19 Isolation ProceduresData Bus MID SA SPN PID SID FMI DescriptionJ1587 130 248 9 CAN ECA Message FaultJ1939 3 520273 248 9 CAN ECA Message FaultOverviewThe High Integrity Link (HIL) is a Controller Area Network (CAN) high speed proprietary data linkto communicated between the Transmission ECU (TECU), Electric Clutch Actuator (ECA), <strong>and</strong> ifequipped, <strong>Eaton</strong> Push Button Shift Control (PBSC). The TECU is connected to the HIL thru thetransmission harness, <strong>and</strong> to the ECA <strong>and</strong> the OEM interface vehicle harness to the PBSC.DetectionActive Fault Code 19 is set when the TECU fails to communicate with the ECA for 2.5 seconds.FallbackIf the code is active during power-up, the engine will crank/start <strong>and</strong> the TECU will not engage agear. If the fault occurs while driving, the ECA will either maintain current clutch position or move tothe last position comm<strong>and</strong>ed by the TECU. An “F” will appear in the gear display <strong>and</strong> the servicelight will blink.Required Tools• Basic H<strong>and</strong> Tools• <strong>Eaton</strong> Test Adapter Kit• Digital Volt/Ohm Meter• Troubleshooting Guide• ServiceRanger a PC-based Service ToolPossible Causes• OEM ECA power/ground supply• Transmission harness• ECA109
Component Code 19 Isolation ProceduresTransmission ECUECA 8-WayConnector(J2)ECA 3-WayConnector(J1)Clutch HousingSpeed Sensor(<strong>Eaton</strong> Supplied)(J3)F GHAB C EC BECA133029ABABCETerminatingResistor(J25)FGBattery power(Non-switched power)run to Battery50 AMP fuse38-Pin Front Harness View(TECU - Transmission Harness Connector)ECA 8-Way ConnectorFront Harness ViewOEM SuppliedECA 3-Way Connector3729 30 3123 24 2532 33 3426 27 2838A B C DCBA13 1415 161718 19202122H G FE357 8 910 11 121 2 34 5 636TECU38-WayECA8-WayDescriptionJ1-30 J2-A HIL (+) HighSpeed Sensor2-WayJ1-29 J2-B HIL (-) LowJ2-C Terminator Resistor J25-2(C)J2-DNOT USEDJ2-E Terminator Resistor J25-1(E)J2-F Speed Sensor (+) J3-1(F)J2-G Speed Sensor (-) J3-2(G)J1-13 J2-H IGNTerminatorResistor 2-Way110
Component Code 19 Isolation ProceduresFault Isolation ProceduresFault Isolation ProceduresIMPORTANTIf Fault Code 16 is active, follow the Fault Code 16 diagnostic procedure.STEP AProcedure Condition Action1. Key on.2. Retrieve active fault codes<strong>and</strong> FMIs withServiceRanger using the9-pin diagnostic connector.3. Perform Electrical Pretest. If no issues found duringElectrical Pretest <strong>and</strong> the fault isstill activeGo to STEP BIf issue was repaired during theElectrical PretestGo to STEP V111
Fault Isolation ProceduresComponent Code 19 Isolation ProceduresSTEP B1. Key off.Procedure Condition Action2. Locate <strong>and</strong> remove theterminating resistor that iswired into the ECA 8-wayconnector pins C <strong>and</strong> E.3. Measure resistance betweentransmission harnessconnector pins 1 <strong>and</strong> 2.Note: Make sure the volt/ohmmeter is on the properscale (around 200 ohmscale).If equipped with a Push ButtonShift Control <strong>and</strong> resistancebetween pin 1 <strong>and</strong> 2 is between50-70 ohmsReplace ECA. Go to STEP VIf equipped with a Lever or J1939Shift Device <strong>and</strong> resistancebetween pin 1 <strong>and</strong> 2 is between110-130 ohmsReplace ECA. Go to STEP VIf resistance is outside of range.Replace Transmission Harness.Go to STEP VSTEP V1. Key off.Procedure Condition Action2. Reconnect all connectors<strong>and</strong> the negative batterycable.3. Key on.4. Clear codes.5. Drive vehicle <strong>and</strong> attempt toreset the code.6. Check for codes. If no codes Test complete.If code 19 appearsIf code other than 19 appearsTo find error in testing, return toSTEP AGo to Fault Code IsolationProcedure Index.112
System Code 21 Isolation ProceduresMID SPN PID SID FMI Description70 254 14 Auto Neutral Park BrakeSwitchOverviewAn auto neutral feature is provided with this transmission which forces the transmission into neutralin all instances when the parking brake is applied. The OEM installs a normally closed “T”pressure switch into the existing air line to the parking brake valve. The pressure switch output <strong>and</strong>return wires are connected to the vehicle interface transmission ECU connector. Consult OEM forswitch location.This fault code indicates a failure of the switch that reports engagement of the park brake. Whentroubleshooting aninactive code see Product Diagnostic Mode (PDM) on page 19 for more information ontroubleshooting inactive codes.DetectionFault Code 21 is set if the switch indicates the park brake is set while the <strong>truck</strong> is moving for morethan 5 seconds, or if the switch state doesn't match the state broadcast on J1939, or if the switchisn't stable for more than 5 seconds.FallbackRemote throttle is disabled, <strong>and</strong> auto neutral may not work.Required Tools• Basic H<strong>and</strong> Tools• <strong>Eaton</strong> Test Adapter Kit• Digital Volt/Ohm Meter• Troubleshooting Guide• ServiceRanger a PC-based Service ToolPossible Causes• Park brake switch• Park brake wiring• Transmission ECU• Park brake hardware not installed• J1939 reporting error113
Fault Isolation ProceduresSystem Code 21 Isolation ProceduresFront ViewTransmission ECU Connector(Vehicle Interface)3729 30 3123 24 2532 333426 27 283813 1415 161718 19202122357 8 910 11 121 2 34 5 636Description From ToPressure Switch Signal Wire Pin 19 Signal WirePressure Switch Return Wire Pin 33 Return WireFault Isolation ProceduresSTEP AProcedure Condition Action1. Key on.2. Retrieve active fault codes<strong>and</strong> FMIs withServiceRanger using the 9-pin diagnostic connector.3. Perform Electrical Pretest If no issues found duringElectrical Pretest <strong>and</strong> the fault isstill activeGo to STEP BIf issue was repaired during theElectrical PretestGo to STEP V114
System Code 21 Isolation ProceduresFault Isolation ProceduresSTEP BProcedure Condition Action1. Ensure vehicle park brake isset <strong>and</strong> vehicle air system isfully charged.2. Using the Data Monitoringfunction in ServiceRanger,note the status of the ParkBrake.Brake is applied.Brake is released.Go to STEP CGo to STEP EBrake is fluctuating betweenapplied <strong>and</strong> released.Go to STEP GSTEP CProcedure Condition ActionNote: If FC 21 goes inactive when Park Brake is released, a J1939 reporting error is highly probable. Seek OEMassistance before proceeding to Step C.1. Key off.2. Disconnect negative batterycable.3. Disconnect the switch.4. Connect power <strong>and</strong> key on. Status changes to Released. Repair or replace switch per OEMinstructions. Go to STEP VStatus remains Applied.Go to STEP D115
Fault Isolation ProceduresSystem Code 21 Isolation ProceduresSTEP D1. Key off.Procedure Condition Action2. Disconnect negative batterycable.3. Disconnect the VehicleHarness ECU 38-wayconnector.4. Measure resistance betweenthe Vehicle Harness 38-wayconnector pin 19 <strong>and</strong> ground.If resistance between pin 19 <strong>and</strong>ground is less than 10K ohm.If resistance between pin 19 <strong>and</strong>ground is greater than 10K ohmor open.Repair harness per OEMguidelines. Go to STEP VReplace ECU (only if fault code isactive.) Go to STEP VSTEP E1. Key off.Procedure Condition Action2. Disconnect negative batterycable.3. Bypass the switch by placinga jumper at the switchconnections.4. Connect power <strong>and</strong> key on. Status changed to Applied Repair or replace switch per OEMinstructions. Go to STEP VNote: The requirement is for a“normally closed” switch.If the park brake statusconsistently reportscontrary values, a“normally open switch”was possibly installed inerror.Status remains ReleasedGo to STEP F116
System Code 21 Isolation ProceduresFault Isolation ProceduresSTEP FProcedure Condition Action1. Key off.2. Disconnect negative batterycable.3. Disconnect the VehicleHarness ECU 38-wayconnector.4. Measure resistance betweenthe Vehicle Harness 38-wayconnector pins 33 <strong>and</strong> 19.If resistance is greater than 0.3ohms.If resistance is 0 to 0.3 ohms.Repair harness per OEMguidelines. Go to STEP VReplace ECU (only if fault code isactive.) Go to STEP VSTEP G1. Key off.Procedure Condition Action2. Disconnect negative batterycable.3. Disconnect the switch.4. Connect power <strong>and</strong> key on. Status changed to Released. Repair or replace switch per OEMinstructions. Go to STEP VStatus continues changing states.Go to STEP H117
Fault Isolation ProceduresSystem Code 21 Isolation ProceduresSTEP H1. Key off.Procedure Condition Action2. Disconnect negative batterycable.3. Disconnect the VehicleHarness 38-way connector.4. Measure resistance betweenthe Vehicle Harness 38-wayconnector pins 33 <strong>and</strong> 19<strong>and</strong> measure the resistancebetween pin 19 <strong>and</strong> ground.If resistance between pins 33 <strong>and</strong>ground or between pins 33 <strong>and</strong>19 are less than 10K ohm.If resistance between pins 33 <strong>and</strong>ground <strong>and</strong> between pins 33 <strong>and</strong>19 are OLRepair harness per OEMguidelines. Go to STEP VReplace ECU (only if fault code isactive.) Go to STEP VSTEP V1. Key off.Procedure Condition Action2. Reconnect all connectors<strong>and</strong> the negative batterycable.3. Key on.4. Clear codes.5. Drive vehicle <strong>and</strong> attempt toreset the code.6. Check for codes. If no codes Test complete.If code 21 appearsIf code other than 21 appearsTo find error in testing, return toSTEP AGo to Fault Code IsolationProcedure Index.118
System Code 22 Isolation ProceduresMID SPN PID SID FMI Description563 254 9, 14 ABS CAN MessageFaultOverviewJ1939 is a high-speed twisted pair 250K baud datalink with one 120 ohm resistor at each end ofthe link. The transmission ECU is connected to the J1939 datalink at the 38-way vehicle connector.This link is used to transmit information to the ECU as well as communicate or receive data fromthe other modules on the network like the ABS module. When troubleshooting an inactive codesee Product Diagnostic Mode (PDM) on page 19 for more information on troubleshootinginactive codes.DetectionFault Code 22 is detected if J1939 communication from the ABS is lost for five seconds <strong>and</strong> otherdevices are present on J1939.FallbackNo Fallback mode. However, Hill Start Aid will not function, <strong>and</strong> the system may attempt a shiftduring wheel slip events.Required Tools• Basic H<strong>and</strong> Tools• <strong>Eaton</strong> Test Adapter Kit• Digital Volt/Ohm Meter• Troubleshooting Guide• ServiceRanger a PC-based Service ToolPossible Causes• J1939 datalink• ABS module• ABS module does not support HSA or is notconfigured with HSA119
Fault Isolation ProcedureSystem Code 22 Isolation ProceduresTransmission ECUABS ECMVehicle Harness 38-way Connector+J1939 –J1939A BCShieldTypical J1939/11 data link harness(OEM supplied)Fault Isolation ProcedureSTEP AProcedure Condition Action1. Key on.2. Retrieve active fault codes<strong>and</strong> FMIs withServiceRanger using the9-pin diagnostic connector.If fault code 22 is activeIf fault code 22 is inactiveRepair ABS module or datalinkper OEM guidelines.Test complete.120
Component Code 26 Isolation ProceduresMID SPN PID SID FMI Description522 55 10 Clutch SlipOverviewThis fault code indicates the clutch is not performing as expected. The transmission controllerdetected excessive clutch slip. This fault can occur with both Datalink Mechanical (DM) <strong>and</strong>Electronic Clutch Actuator (ECA) clutch models.DetectionWhen the transmission is in gear <strong>and</strong> the clutch is fully engaged, engine speed <strong>and</strong> input shaftspeed are compared. If the engine speed is significantly different from the input shaft speed for aperiod of one to two seconds, the fault code is set.FallbackECA Clutch FallbackThere is no fallback mode. However, if the clutch is slipping the transmission ECU will request adecrease of engine torque for the duration of the slip event.DM Clutch FallbackThis fault causes a downshift only fallback. Once the vehicle is stopped, starting gear <strong>and</strong> reversegear can be engaged. However, the fault will clear at power down <strong>and</strong> upshifts will be allowed untilthe fault is detected again.Required Tools• Basic H<strong>and</strong> Tools• Troubleshooting Guide• Clutch Jack• ServiceRanger a PC-based Service ToolPossible CausesThis fault code can be caused by any of the following:• Worn or Damaged Clutch• Cams Won’t Adjust• Clutch Abuse• Low Clutch Torque• Contaminated Clutch Disks121
Clutch Slip TestingComponent Code 26 Isolation ProceduresDriven DiscClutch AssemblyDM ClutchDriven Disc <strong>and</strong>Intermediate PlateHeavy-Duty ECA ClutchMedium-Duty ECA ClutchClutch Slip TestingNote:Note:Note:Note:Note:Note:If slip is occurring shortly after clutch greasing, disk contamination is likely. This is atemporary condition <strong>and</strong> should subside within a few days.If Fault Code 64 or Fault code 65 is active, follow the associated fault procedure prior toFault Code 26 procedure.It is recommended that the pilot bearing <strong>and</strong> LCIB be replaced whenever the clutch isreplaced.Refer to Installation Guide TRIG1110 for a list of recommended pilot bearings.Secondary clutch failures resulting from conditions such as pilot bearing failures,excessive torsional vibration, or clutch abuse, are not covered under warranty.Record Vehicle Performance Analysis every time a clutch is replaced.If troubleshooting a DM Clutch or medium-duty ECA Clutch, go to STEP A. Iftroubleshooting a heavy-duty ECA Clutch, go to STEP B.122
Component Code 26 Isolation ProceduresClutch Slip TestingSTEP A1. Key on.Procedure Condition Action2. Start engine.3. Drive vehicle under load inhighest gear possible withengine speed above1500 rpm. At a steady speed,quickly <strong>and</strong> fully press <strong>and</strong>hold the throttle.If code 26 is activeIf code 26 is not activeReplace Clutch. Go to STEP VTest complete. Go to STEP VSTEP B1. Key on.Procedure Condition Action2. Using ServiceRanger DataMonitor, view Inertia BrakeTouch Point Delta.If the Inertia BrakeTouch Point Delta is greater than27 degrees (0.700")Go to STEP CIf less than 27 degrees <strong>and</strong> aslipping compliant is confirmedPull VPA <strong>and</strong> replace Clutch.Go to STEP VIf less than 27 degrees <strong>and</strong> theclutch release bearing <strong>and</strong> crossshaft were recently lubricatedPull VPA, clear codes <strong>and</strong> roadtest.• If no slip compliant <strong>and</strong> nofault code resets, Go toSTEP V• If a slip compliant <strong>and</strong> faultcode reset, replace clutch.Go to STEP V123
Clutch Slip TestingComponent Code 26 Isolation ProceduresSTEP C1. Key off.Procedure Condition Action2. Check the position wearindicator tab located in clutchcover assembly.If tab is in the “worn”positionPull VPA <strong>and</strong> replace Clutch.(Only if slipping complaint isconfirmed.) Go to STEP VIf tab is not in the “worn”positionGo to STEP DSTEP D1. Key off.Procedure Condition Action2. Perform the ECA ClutchReset Procedure. Seepublication CLSM0200.Note: The Open Clutchcomm<strong>and</strong> can only beperformed while theengine is running.3. Ensure ignition is off beforeplacing h<strong>and</strong>s within theclutch access opening, <strong>and</strong>ensure h<strong>and</strong>s are removedfrom the clutch accessopening while ignition iscycled on. The clutch willautomatically close when theignition is cycled to “ON”.WARNINGThe reset procedure wassuccessfulGo to STEP VThe reset procedure was notsuccessfulPull VPA <strong>and</strong> Replace Clutch.(Only if slipping complaint isconfirmed) Go to STEP V124
Component Code 26 Isolation ProceduresClutch Slip TestingSTEP V1. Key off.Procedure Condition Action2. Reconnect all connectors<strong>and</strong> the negative batterycable.3. Key on.4. Clear codes.5. Drive vehicle <strong>and</strong> attempt toreset the code.6. Check for codes. If no codes Test complete.If code 26 appearsIf code other than 26 appearsTo find error in testing, return toSTEP AGo to Fault Code IsolationProcedure Index.125
Clutch Slip TestingComponent Code 26 Isolation Procedures126
Component Code 27 Isolation ProceduresMID SPN PID SID FMI Description788 55 7, 13 Clutch DisengagementOverviewThe fault code indicates that the clutch has not disengaged as expected. This fault can occur withboth Data-link Mechanical (DM) <strong>and</strong> Electronic Clutch Actuator (ECA) clutch models.DM Clutch Fault DetectionStarting at key-on <strong>and</strong> throughout operation, the Transmission ECU constantly measures enginerpm <strong>and</strong> idle torque from the engine. When engaging a start gear, if the engine speed fallssignificantly below idle or engine torque rises significantly above idle torque the fault is set. If ingear <strong>and</strong> the vehicle is brought to a stop <strong>and</strong> engine speed falls significantly below idle, the fault isset.Heavy-Duty ECA Clutch Fault Detection• Clutch is comm<strong>and</strong>ed open <strong>and</strong> after the Low Capacity Inertia Brake (LCIB) is applied with thespeed separation of less than 50 RPM between engine speed <strong>and</strong> input shaft speed for onesecond.• When transmission is in gear <strong>and</strong> clutch is comm<strong>and</strong>ed to open, engine torque is larger than296 lb-ft (400 N•m) (but engine torque comm<strong>and</strong> is less than 0 lb-ft (0 N•m), <strong>and</strong> engine speedis below idle speed 100 RPM, <strong>and</strong> speed separation of less than 50 RPM between enginespeed <strong>and</strong> input shaft speed for one second.• Release bearing travel is below allowable limit.IMPORTANTIn <strong>UltraShift</strong> PLUS transmissions, Fault Code 27 will be active after a new ECU is installed. Pressthe service brake <strong>and</strong> start the engine to initiate clutch calibration. The calibration will takeapproximately 50 seconds <strong>and</strong> Fault Code 27 will go inactive upon completion.FallbackNo gear engagement from neutral if the <strong>truck</strong> is stationary. However, if the ECU determines thevehicle is moving, it will allow a gear engagement from neutral.Required Tools• Basic H<strong>and</strong> Tools• Clutch Jack• Troubleshooting Guide• ServiceRanger a PC-based Service Tool127
Component Code 27 Isolation ProceduresPossible CausesThis fault code can be caused by any of the following:• Failed Clutch• Clutch Over-Adjusted• Clutch Thermal Abuse• Drive Disc Assembly Over-speed• Pilot Bearing Failure• Input Shaft Wear• Lack of Lube in Release Bearing <strong>and</strong> Bushing128
Component Code 27 Isolation ProceduresClutch Disengagement TestDriven DiscClutch AssemblyDM ClutchDriven Disc <strong>and</strong>Intermediate PlateHeavy-Duty ECA ClutchClutch Disengagement TestMedium-Duty ECA ClutchNote: If Fault Code 64 is active, follow Fault Code 64 procedure prior to Fault Code 27procedure.Note:Note:Note:Note:It is recommended that the pilot bearing <strong>and</strong> LCIB be replaced whenever the clutch isreplaced.Refer to Installation Guide TRIG1110 for a list of recommended pilot bearings.Secondary clutch failures resulting from conditions such as pilot bearing failures,excessive torsional vibration, or clutch abuse, are not covered under warranty.Record Vehicle Performance Analysis every time a clutch is replacedGo to Step A when troubleshooting a DM Clutch. Go to Step B when troubleshooting aheavy-duty ECA Clutch. Go to Step G when troubleshooting a medium-duty ECA Clutch.129
Clutch Disengagement TestComponent Code 27 Isolation ProceduresSTEP A1. Key on.Procedure Condition Action2. Start engine.3. Confirm transmission is inneutral.4. Raise engine speed above1500 RPM <strong>and</strong> allow engineto return to idle.5. Compare engine rpm to inputshaft rpm withServiceRanger a PC-basedService Tool.Note: Engine idle rpm must be700rpm or lower.If the speeds match at idle <strong>and</strong>code 27 is activeIf they do not matchReplace the clutch.Test complete.STEP B1. Key on.Procedure Condition Action2. Using ServiceRanger DataMonitor, view Inertia BrakeTouch Point Delta.If the Inertia Brake TouchPoint Delta is less than16 degrees (0.415").Go to STEP CIf greater than 16 degrees.Go to STEP DWARNINGThe Open Clutch comm<strong>and</strong> can only be performed while the engine is running. Ensure ignition is off before placingh<strong>and</strong>s within the clutch access opening, <strong>and</strong> ensure h<strong>and</strong>s are removed from the clutch access opening whileignition is cycled on. The clutch will automatically close when the ignition is cycled to “ON.”130
Component Code 27 Isolation ProceduresClutch Disengagement TestSTEP C1. Key off.Procedure Condition Action2. Perform the Fuller ECAClutch Reset Procedure. Seepublication CLSM0200.The reset was unsuccessful.Pull VPA data <strong>and</strong> ReplaceClutch. (Only if FC27 is Active).Go to STEP VThe reset was successful.Go to STEP VSTEP D1. Key off.Procedure Condition Action2. Check the position wearindicator tab located in clutchcover assembly.If the tab is in the “worn”positionPull VPA <strong>and</strong> Replace Clutch.(Only if FC27 is active).Go to STEP VIf the tab is not in the “worn”positionGo to STEP ESTEP E1. Key on.Procedure Condition Action2. Using ServiceRanger’sAdvanced ProductFunctions, Pull VPA, RecordMaximum Input Shaft Speed.Maximum input shaft speedis 3500 RPM (367 rad/sec) orhigherMaximum input shaft speedis less than 3500 RPM(367 rad/sec)Pull VPA <strong>and</strong> Replace Clutch.(Only if FC27 is Active).Go to STEP VGo to STEP F131
Clutch Disengagement TestComponent Code 27 Isolation ProceduresSTEP F1. Key off.Procedure Condition Action2. Visually inspect for signs ofdamage or failure.Not sure if release bearing is fullylubedGrease in accordance withCLSM0200. Go to STEP VPhysical signs of failed ordamaged clutch or releasebearing foundPull VPA <strong>and</strong> Replace Clutch.(Only if FC27 is Active.) Go toSTEP VSigns of thermal abuse,such as blued or warped discs,are foundPull VPA <strong>and</strong> Replace Clutch. Goto STEP VNote:Evidence of a failed or seizedpilot bearing foundRefer to Installation Guide, TRIG1110, for a list of recommended pilot bearings.Found excessive input shaftspline or bushing wearReplace pilot bearing per OEMinstructions <strong>and</strong> any otherdamaged <strong>parts</strong>. Go to STEP VReplace Input Shaft <strong>and</strong> anyother damaged <strong>parts</strong>. Go toSTEP VSTEP G1. Key off.Procedure Condition Action2. Remove Electric ClutchActuator from clutch housing.3. Verify release bearingassembly is attached toclutch assembly <strong>and</strong>functional.If the release bearing is notattached to the clutch assemblyReplace Clutch. Go to STEP VIf the release bearing is attachedto the clutch assembly <strong>and</strong>functionalGo to STEP H132
Component Code 27 Isolation ProceduresClutch Disengagement TestSTEP H1. Key off.Procedure Condition Action2. Attempt to rotate the crossshaft<strong>and</strong> yoke assembly byh<strong>and</strong>.If the cross-shaft assemblyrotates by h<strong>and</strong> from the releasebearing to the transmission caseReinstall ECA. Go to STEP IIf the cross-shaft assembly doesnot rotate by h<strong>and</strong>Replace the cross-shaft,bushings, <strong>and</strong> grease. RepeatSTEP HSTEP I1. Key on.Procedure Condition Action2. Start engine.3. Launch vehicle <strong>and</strong> driveuntil 6th gear is obtained.Then slow down to a stop.4. Repeat the launch five times. If FC 27 is active Replace the Clutch.Go to STEP VIf FC 27 is not activeTest is complete. Go to STEP V133
Clutch Disengagement TestComponent Code 27 Isolation ProceduresSTEP V1. Key off.Procedure Condition Action2. Reconnect all connectors<strong>and</strong> the negative batterycable.3. Key on.4. Clear codes.If code 27 appearsTo find error in testing, return toSTEP AIf code other than 27 appearsGo to Fault Code IsolationProcedure Index.134
Component Code 28 Isolation ProceduresMID SPN PID SID FMI Description788 52, 55 3, 4, 5, 7 Clutch SystemOverviewThis fault code indicates either an electrical or mechanical failure in the WetClutch system.DetectionStarting at key-on <strong>and</strong> throughout operation, the Transmission ECU constantly monitors thiscircuit. A failure mode of short to battery, short to ground, or open circuit is detected.When the WetClutch is locked after urge to move, engine speed <strong>and</strong> input shaft speeds arecompared. If the engine speed is significantly higher than the input shaft speed for a period of fiveseconds, the WetClutch is slipping.FallbackThere is no fallback mode. However, if the failure mode is open circuit, the engine will bedisengaged from the input shaft.Required Tools• Basic H<strong>and</strong> Tools• Digital Volt/Ohm Meter• Troubleshooting Guide• <strong>Eaton</strong> Test Adapter Kit• ServiceRanger a PC-based Service ToolPossible CausesThis fault code can be caused by any of the following:• Transmission ECU• Transmission Harness• Low Fluid Level• WetClutch System135
Fault Isolation ProceduresComponent Code 28 Isolation ProceduresTransmission HarnessTransmission ECUWetClutch SystemWetClutch FluidFault Isolation ProceduresSTEP AProcedure Condition Action1. Key on.2. Place the transmission inneutral.3. Allow engine to idle at 700 to800 RPM for a minimum oftwo minutes.Note: Ensure transmissionfluid temperature is 60 to120 degrees F (16 to 49degrees C).4. Check WetClutch fluid level. If fluid level is at or above theCOLD-FULL markGo to STEP BIf fluid level is below the COLD-ADD markCorrect fluid level.Go to STEP V136
Component Code 28 Isolation ProceduresFault Isolation ProceduresSTEP B1. Key off.Procedure Condition Action2. Disconnect the negativebattery cable.3. Disconnect the TransmissionECU 30-way connector.4. Measure resistance betweenthe Transmission Harness38-way connector pins 2 <strong>and</strong>3 <strong>and</strong> 2 to ground.If the resistance between 2 <strong>and</strong> 3is 6.5 to 9.5 ohms <strong>and</strong> isresistance from pin 2 to ground isOLGo to STEP CIf resistance is outside of rangeGo to STEP DOHMSV COM A3729 30 3123 24 2532 33 3426 27 283813 1415 161718 19202122357 8 910 11 121 2 34 5 636OHMSV COM AGround3729 30 3123 24 2532 33 3426 27 283813 1415 161718 19202122Transmission Harness 38-way Connector357 8 910 11 121 2 34 5 636137
Fault Isolation ProceduresComponent Code 28 Isolation ProceduresSTEP CProcedure Condition Action1. Measure resistance betweenthe Transmission Harness38-way connector pins 13<strong>and</strong> 14 <strong>and</strong> 13 to ground.If resistance between 13 <strong>and</strong> 14is 8.5 to 12 ohms <strong>and</strong> resistancefrom pin 13 to ground is OLIf resistance is less than 10K ohmReplace Transmission (Only ifFault Code is Active).Go to STEP VGo to STEP DOHMSV COM A3729 30 3123 24 2532 33 3426 27 283813 1415 161718 19202122357 8 910 11 121 2 34 5 636OHMSV COM AGround3729 30 3123 24 2532 33 3426 27 283813 1415 161718 19202122Transmission Harness 38-way Connector357 8 910 11 121 2 34 5 636138
Component Code 28 Isolation ProceduresFault Isolation ProceduresSTEP DProcedure Condition Action1. Disconnect TransmissionHarness located on left sideof WetClutch housing.2. Measure resistance betweenWetClutch housingconnector pins:• 3 <strong>and</strong> 4• 1 <strong>and</strong> 2If the resistance between pins 1<strong>and</strong> 2 is 8.5 to 12 ohms <strong>and</strong> theresistance between 3 <strong>and</strong> 4 is 6.5to 9.5 ohmsGo to STEP EIf resistance is outside of rangeReplace Transmission.Go to STEP VOHMSOHMSV COM AV COM A4 1 4 13 23 2139
Fault Isolation ProceduresComponent Code 28 Isolation ProceduresSTEP EProcedure Condition Action1. Measure resistance betweenWetClutch housingconnector pins:• 3 <strong>and</strong> ground• 1 <strong>and</strong> groundIf resistance from pin 3 to ground<strong>and</strong> pin 1 to ground is 10K ohm orgreaterReplace Transmission Harness.Go to STEP VIf resistance is less than 10K ohmReplace Transmission.Go to STEP VOHMSOHMSV COM AV COM A4 1 4 13 23 2GROUNDGROUNDSTEP V1. Key off.Procedure Condition Action2. Reconnect all connectors.3. Key on.4. Clear codes. Go to FaultCode Retrieval/Clearing.5. Drive the vehicle <strong>and</strong> attemptto reset the code.6. Check for codes Go to FaultCode Retrieval/Clearing.If no codesIf code 28 appearsTest complete.To find error in testing, return toSTEP AIf code other than 28 appearsGo to Fault Code IsolationProcedure Index.140
System Code 29 Isolation ProceduresMID SPN PID SID FMI Description969 254 4, 5 Remote Throttle EnableOverviewThis fault indicates an electrical failure of the relay that allows the remote throttle to operate. Therelay <strong>and</strong> wiring are installed by the OEM. When troubleshooting an inactive code see ProductDiagnostic Mode (PDM) on page 19 for more information on troubleshooting inactive codes.DetectionStarting at key-on <strong>and</strong> throughout operation, the Transmission ECU constantly measures thecircuit. The fault is set if the ECU detects a bad (open/short) connection for 2 seconds in the wiringfrom the ECU to the Relay.FallbackThere is no fallback mode associated with this fault, but the remote throttle will either not work oralways work when this fault is active.Required Tools• Basic H<strong>and</strong> Tools• <strong>Eaton</strong> Test Adapter Kit• Digital Volt/Ohm Meter• Troubleshooting Guide• ServiceRanger a PC-based Service ToolPossible Causes• Remote Throttle Relay• Harness• Transmission ECU• Software Misconfiguration141
Fault Isolation ProceduresSystem Code 29 Isolation ProceduresTypical Relay Switch38-Pin Front Harness View(TECU - Vehicle Interface Connector)3729 303124 2532 33 3426 27 283813 143515 1618 19 207 8 910 11 121 2 34 5 621362230868587TECURemote ThrottleRelayRemote Throttle Plus24 8685Remote ThrottleGroundFault Isolation ProceduresSTEP AProcedure Condition Action1. Follow OEM troubleshootingguidelines to ensure theRemote Throttle EnableRelay has not failed.If relay is functionalIf relay is faultedGo to STEP BTest complete.142
System Code 29 Isolation ProceduresFault Isolation ProceduresSTEP BProcedure Condition Action1. Key on.Note: The Remote Throttle Enable Relay must be wired according to <strong>Eaton</strong> Gen 3 requirements (shown onprevious page) for tests to work properly. If wired differently, consult OEM for correct wiring schematic.2. Retrieve active fault codes<strong>and</strong> FMIs withServiceRanger using the9-pin diagnostic connector.3. What FMIs are present? FMI 4 is present Go to STEP CFMI 5 is presentGo to STEP DSTEP C1. Key off.Procedure Condition Action2. Disconnect battery cable.3. Disconnect the vehicleharness 38-way connector.4. Measure the resistancebetween vehicle harness38-way connector pins 24<strong>and</strong> ground.If the resistance between24 <strong>and</strong> ground is OLIf resistance is out of range.Replace the TECU (if fault codeactive). Go to STEP VRepair the vehicle harness.Go to STEP V143
Fault Isolation ProceduresSystem Code 29 Isolation ProceduresSTEP D1. Key off.Procedure Condition Action2. Disconnect battery cable.3. Disconnect the vehicleharness 38-way connector.4. Disconnect the OEM harnessfrom the Throttle EnableRelay.5. Measure resistance betweenvehicle harness 38-wayconnector pin 24 <strong>and</strong> pin 86of the Throttle Enable Relayconnector.If resistance between pins24 <strong>and</strong> 86 is 0 to 0.3 ohms.If resistance is out of range.Replace the TECU (if fault code isactive). Go to STEP VRepair the vehicle harness.Go to STEP VSTEP V1. Key off.Procedure Condition Action2. Reconnect all connectors.3. Key on.4. Clear codes.5. Drive the vehicle <strong>and</strong> attemptto reset the code.6. Check for codes. If no codes Test complete.If code 29 appearsIf code other than 29 appearsTo find error in testing, return toSTEP AGo to Fault Code IsolationProcedure Index.144
Component Code 31 Isolation ProceduresMID SPN PID SID FMI DescriptionOverviewThis fault code indicates an electrical failure of the MEIIR circuit.DetectionThe fault is detected during power-up. The Transmission ECU checks the MEIIR circuit every timethe system is powered up. If the electrical characteristics of the circuit are incorrect, the fault codeis set.FallbackThere is no fallback associated with this failure. However, if the engine speed flares uncontrollablywhile the transmission is in a gear, the transmission may not be able to achieve neutral if it isselected due to a torque lock condition.Required Tools• Basic H<strong>and</strong> Tools• <strong>Eaton</strong> Test Adapter Kit• ServiceRanger a PC-based Service Tool• Troubleshooting Guide• Digital Volt/Ohm MeterPossible Causes1485 218 2, 3, 4, 5,14This fault code can be caused by any of the following:• OEM wiring• Mechanical failure in the MEIIR relay• Transmission ECUMomentary EngineInterruption Relay(MEIR)145
Component Code 31 Isolation ProceduresTransmission ECUVehicle Harness 38-way Connector222120Engine Power RelayFused 10 AMP 12 voltmanual resettingcircuit breakeror10 AMPfuse3086858787aIgnitionInterruptRelayRun toIgnitionEngine ECMIgnition Interrupt LegendAll OEM responsible wiring shown is "typical". Consult specific application.(30, 87a) = +12 volt switched(20-87)= Signal(21-85) = -12 volt relay source(22-86) = +12 volt relay source146
Component Code 31 Isolation ProceduresFault Isolation ProceduresFault Isolation ProceduresSTEP AProcedure Condition Action1. Key off.2. Disconnect negative batterycable.3. Disconnect TransmissionECU Vehicle Harness38-way connector.4. Measure resistance betweenVehicle Harness 38-wayconnector pins 21 <strong>and</strong> 22<strong>and</strong> from pin 21 to ground.If resistance between pins 21 <strong>and</strong>22 is 40 to 120 ohms (12 voltsystem) or 140 to 480 ohms(24 volt system) <strong>and</strong> resistancefrom pin 21 to ground is OLGo to STEP BIf resistance is outside of rangeGo to STEP DOHMSFront View38-Way ConnectorV COM A3729 30 3123 24 2532 33 3426 27 283813 1415 161718 19202122Vehicle Harness 38-way Connector357 8 910 11 121 2 34 5 636OHMSV COM A3729 30 3123 24 2532 33 3426 27 283813 1415 161718 19202122357 8 910 11 121 2 34 5 636Ground147
Fault Isolation ProceduresComponent Code 31 Isolation ProceduresSTEP BProcedure Condition Action1. Measure resistance betweenTransmission VehicleHarness 38-way connectorpin 20 <strong>and</strong> MEIIR relayconnector pin 87 <strong>and</strong> fromMEIIR relay connector pin 87to ground.If resistance between pin 20 <strong>and</strong>87 is 0 to 0.3 ohms <strong>and</strong> ifresistance between pin 87 <strong>and</strong>ground is OLIf resistance is outside of therangeGo to STEP CRepair OEM harness betweenthe Transmission ECU <strong>and</strong> theMEIIR relay connector.Go to STEP VOHMS3086 87a 8587V COM AFront ViewRelay connectorOHMSGround30V COM A86 87a 85Front View38-Way Connector873729 30 3123 24 2532 33 3426 27 283813 1415 161718 19202122357 8 910 11 121 2 34 5 636Vehicle Harness 38-way Connector148
Component Code 31 Isolation ProceduresFault Isolation ProceduresSTEP CProcedure Condition Action1. Disconnect MEIIR relay fromconnector.2. Key on.3. Measure voltage from pin 30of the MEIIR relay connectorto ground.If voltage is within 0.6 volts ofbattery voltageIf voltage is outside of rangeReplace MEIIR relay.Go to STEP ERepair OEM harness.Go to STEP VVOLTSV COM AGround3086 87a 8587Front ViewRelay connector149
Fault Isolation ProceduresComponent Code 31 Isolation ProceduresSTEP DProcedure Condition Action1. Remove MEIIR relay fromOEM dash harness.2. Measure resistance betweenMEIIR relay pins 85 <strong>and</strong> 86.If resistance is 40 to 120 ohms(12 volt system) or 140 to 480ohms (24 volt system)Repair OEM wiring from theTransmission ECU to the MEIIRrelay. Go to STEP VIf resistance is outside of rangeReplace MEIIR relay.Go to STEP VOHMSV COM A3086 87a 8587Front ViewRelay connectorSTEP E1. Key on.Procedure Condition Action2. Retrieve codes. If code 31 is inactive Go to STEP VIf code 31 is activeReplace Transmission ECU.Go to STEP V150
Component Code 31 Isolation ProceduresFault Isolation ProceduresSTEP V1. Key off.Procedure Condition Action2. Reconnect all connectors<strong>and</strong> negative battery cable ifremoved.3. Key on.4. Clear codes. Go to FaultCode Retrieval/Clearing.5. Drive the vehicle <strong>and</strong> attemptto reset the code.6. Check for codes. Go to FaultCode Retrieval/Clearing.If no codesIf code 31 appearsTest complete.To find error in testing, return toSTEP AIf code other than 31 appearsGo to Fault Code IsolationProcedure Index.151
Fault Isolation ProceduresComponent Code 31 Isolation Procedures152
Component Code 32 Isolation ProceduresMID SPN PID SID FMI Description158 43 2 Loss of Switch IgnitionPower TestOverviewThis fault code indicates a loss of Switched Ignition Power to the Transmission ECU.When troubleshooting an inactive code see Product Diagnostic Mode (PDM) on page 19.DetectionThe Transmission ECU monitors Ignition Power during normal operation. If Ignition power is lost tothe Transmission ECU during operation a fault is logged.FallbackThis fault causes an In Place fallback while moving.Required Tools• Basic H<strong>and</strong> Tools• Troubleshooting Guide• ServiceRanger a PC-based Service ToolPossible CausesThis fault code can be caused by the following:• Ignition Switch is turned off during operation• Ignition Power is lost during operationVehicle Harness 38-way Connector3510 AMP 12 volt onlyManual resettingcircuit breakerOr10 AMPfuseIgnition power (switched power)run to main power lead thatfeeds the ignition bus153
Fault Isolation ProceduresComponent Code 32 Isolation ProceduresFault Isolation ProceduresSTEP AProcedure Condition Action1. Key off.2. Inspect starter/battery <strong>and</strong>inline fuse holderconnections for integrity.3. Measure voltage acrossbatteries.If voltage is 11 to 13 volts on a 12volt system or 22 to 26 on a 24volt systemProceed with battery load test.Repair or replace batteries asrequired. Go to STEP BIf voltage is outside of rangeRepair or replace batteries <strong>and</strong>charging system as required.Repeat this step.VOLTS–+V COM A–+154
Component Code 32 Isolation ProceduresFault Isolation ProceduresSTEP BProcedure Condition Action1. Locate diagnostic port onTransmission Harness.2. Key on.3. Measure voltage betweenpins C <strong>and</strong> the batterynegative post.If voltage between pin C <strong>and</strong> thebattery negative post is 0.70 voltsor lessGo to STEP CIf voltage is outside of rangeRepair battery ground supply toTransmission ECU. Repeat test.Warning! - Do Not Load Test at Diagnostic Port4-Pin Diagnostics PortVOLTSBCADV COM ABattery Negative Post4-way4-Pin Diagnostic Port(Located at the left rearcorner of the transmission.)B - Service Bat. +C - Service Bat. -A - Service Ignition +155
Fault Isolation ProceduresComponent Code 32 Isolation ProceduresSTEP CProcedure Condition Action1. Locate diagnostic port onTransmission Harness.2. Key on.3. Measure voltage betweenpins B <strong>and</strong> pin C.If voltage between pins B <strong>and</strong> Cis within 0.6 volts of batteryvoltageGo to STEP DIf voltage is outside of rangeRepair battery power supply toTransmission ECU. Fuse may beblown. Repeat test.Warning! - Do Not Load Test at Diagnostic Port4-Pin Diagnostics PortVOLTSV COM ABCAD4-way4-Pin Diagnostic Port(Located at the left rearcorner of the transmission.)B - Service Bat. +C - Service Bat. -A - Service Ignition +156
Component Code 32 Isolation ProceduresFault Isolation ProceduresSTEP D1. Key on.Procedure Condition Action2. Measure voltage between pinA <strong>and</strong> pin C.If voltage between pins A <strong>and</strong> Cis within 0.6 volts of batteryvoltageGo to STEP VIf voltage is outside of rangeRepair Ignition power supply toECU. Fuse may be blown.Repeat test.Warning! - Do Not Load Test at Diagnostic Port4-Pin Diagnostics PortVOLTSV COM ABCAD4-way4-Pin Diagnostic Port(Located at the left rearcorner of the transmission.)B - Service Bat. +C - Service Bat. -A - Service Ignition +STEP VProcedure Condition Action1. Drive vehicle <strong>and</strong> attempt toreset codes.2. Retrieve Codes. Go to FaultCode Retrieval/Clearing.If code 32 is inactiveThis code indicates a loss ofignition switched power to theTransmission ECU duringoperation. Verify the key was notturned off during operation.Inspect ignition circuit forintermittent open.157
Fault Isolation ProceduresComponent Code 32 Isolation Procedures158
Component Code 33 Isolation ProceduresMID SPN PID SID FMI Description168 168 4 Low Battery VoltageSupplyOverviewThis fault code indicates that the vehicle battery power supply to the Transmission ECU is below 7volts.When troubleshooting an inactive code see Product Diagnostic Mode (PDM) on page 19.DetectionStarting at key-on <strong>and</strong> throughout operation, the Transmission ECU constantly measures vehiclevoltage. If voltage is below 7 volts for more than one second, fault code 33 will be set, <strong>and</strong> theservice light will flash.FallbackIf this fault occures while moving, it causes a 1-speed fallback. Once the vehicle is stopped, thestarting gear <strong>and</strong> reverse can be engagedRequired Tools• Basic H<strong>and</strong> Tools• <strong>Eaton</strong> Test Adapter Kit• Digital Volt/Ohm Meter• Troubleshooting Guide• ServiceRanger a PC-based Service ToolPossible CausesThis fault code can be caused by any of the following:• Corroded or loose power supply to Transmission ECU• Low Batteries• Damaged OEM Harness• Transmission ECU159
Component Code 33 Isolation Procedures• Charging systemVehicleChargingSystemBatteries–+–+160
Component Code 33 Isolation ProceduresFault Isolation ProceduresFault Isolation ProceduresSTEP AProcedure Condition Action1. Key off.2. Inspect starter/battery <strong>and</strong>in-line fuse holderconnections for integrity.3. Measure voltage acrossbatteries.If voltage is 11 to 13 volts on a 12volt system or 22 to 26 on a 24volt systemProceed with battery load test.Repair or replace batteries asrequired. Go to STEP BIf voltage is outside of rangeRepair or replace batteries <strong>and</strong>charging system as required.Repeat this step.VOLTS–+V COM A–+161
Fault Isolation ProceduresComponent Code 33 Isolation ProceduresSTEP BProcedure Condition Action1. Locate diagnostic port onTransmission Harness.2. Key on.3. Measure voltage betweenpins C <strong>and</strong> the batterynegative post.If voltage between pin C <strong>and</strong>battery negative post is 0.70 voltsor lessGo to STEP CIf voltage is outside of rangeRepair battery ground supply toTransmission ECU. Repeat test.Warning! - Do Not Load Test at Diagnostic Port4-Pin Diagnostics PortVOLTSBCADV COM ABattery Negative Post4-way4-Pin Diagnostic Port(Located at the left rearcorner of the transmission.)B - Service Bat. +C - Service Bat. -A - Service Ignition +162
Component Code 33 Isolation ProceduresFault Isolation ProceduresSTEP CProcedure Condition Action1. Locate diagnostic port onTransmission Harness.2. Key on.3. Measure voltage betweenpins B <strong>and</strong> pin C.If voltage between pins B <strong>and</strong> Cis within 0.6 volts of batteryvoltageGo to STEP DIf voltage is outside of rangeRepair battery power supply toTransmission ECU. Fuse may beblown. Repeat test.Warning! - Do Not Load Test at Diagnostic Port4-Pin Diagnostics PortVOLTSV COM ABCAD4-way4-Pin Diagnostic Port(Located at the left rearcorner of the transmission.)B - Service Bat. +C - Service Bat. -A - Service Ignition +163
Fault Isolation ProceduresComponent Code 33 Isolation ProceduresSTEP D1. Key on.Procedure Condition Action2. Measure voltage between pinA <strong>and</strong> pin C.If voltage between pins A <strong>and</strong> Cis within 0.6 volts of batteryvoltageGo to STEP EIf voltage is outside of rangeRepair Ignition power supply toECU. Fuse may be blown.Repeat test.Warning! - Do Not Load Test at Diagnostic Port4-Pin Diagnostics PortVOLTSV COM ABCAD4-way4-Pin Diagnostic Port(Located at the left rearcorner of the transmission.)B - Service Bat. +C - Service Bat. -A - Service Ignition +164
Component Code 33 Isolation ProceduresFault Isolation ProceduresSTEP E1. Key on.Procedure Condition Action2. Retrieve codes. Go to FaultCode Retrieval/Clearing.If code 33 is activeReplace Transmission ECU (onlyif Fault Code is active).Go to STEP VIf code 33 is inactiveClear codes. Go to STEP VSTEP V1. Key off.Procedure Condition Action2. Key on.3. Clear codes. Go to FaultCode Retrieval/Clearing.4. Reconnect all connectors<strong>and</strong> the negative batterycable.5. Driving Vehicle <strong>and</strong> attemptto reset the code.6. Check for codes. Go to FaultCode Retrieval/Clearing.If no codesIf code 33 appearsTest complete.To find error in testing, return toSTEP AIf code other than 33 appearsGo to Fault Code IsolationProcedure Index.165
Fault Isolation ProceduresComponent Code 33 Isolation Procedures166
Component Code 34 Isolation ProceduresMID SPN PID SID FMI Description168 168 14 Weak Battery VoltageSupplyOverviewThis fault indicates the vehicle is supplying weak battery voltage to the transmission for tenseconds.When troubleshooting an inactive code see Product Diagnostic Mode (PDM) on page 19.DetectionStarting at key-on <strong>and</strong> throughout operation, the Transmission ECU constantly measures vehiclevoltage. If voltage is below 9 volts for more than ten seconds, fault code 34 will be set. The servicelight will not flash.FallbackIf this fault occures while moving, it causes a 1-speed fallback. Once the vehicle is stopped, thestarting gear <strong>and</strong> reverse can be engagedRequired Tools• Basic H<strong>and</strong> Tools• <strong>Eaton</strong> Test Adapter Kit• Digital Volt/Ohm Meter• Troubleshooting Guide• ServiceRanger a PC-based Service ToolPossible CausesThis fault code can be caused by any of the following:• Corroded or loose power supply to Transmission ECU• Low Batteries• Damaged OEM Harness• Transmission ECU• Charging system167
Fault Isolation ProceduresComponent Code 34 Isolation ProceduresVehicleChargingSystemBatteries–+–+Fault Isolation ProceduresSTEP AProcedure Condition Action1. Key off.2. Inspect starter/battery <strong>and</strong>in-line fuse holderconnections for integrity.3. Measure voltage acrossbatteries.If voltage is 11 to 13 volts on a 12volt system or 22 to 26 on a 24volt systemProceed with battery load test.Repair or replace batteries asrequired. Go to STEP BIf voltage is outside of rangeRepair or replace batteries <strong>and</strong>charging system as required.Repeat this step.VOLTS–+V COM A–+168
Component Code 34 Isolation ProceduresFault Isolation ProceduresSTEP BProcedure Condition Action1. Locate diagnostic port onTransmission Harness.2. Key on.3. Measure voltage betweenpins C <strong>and</strong> the batterynegative post.If voltage between pin C <strong>and</strong>battery negative post is 0.70 voltsor lessIf voltage is outside of rangeGo to STEP CRepair battery ground supply toTransmission ECU. Repeat test.Warning! - Do Not Load Test at Diagnostic Port4-Pin Diagnostics PortVOLTSBCADV COM ABattery Negative Post4-way4-Pin Diagnostic Port(Located at the left rearcorner of the transmission.)B - Service Bat. +C - Service Bat. -A - Service Ignition +169
Fault Isolation ProceduresComponent Code 34 Isolation ProceduresSTEP CProcedure Condition Action1. Locate diagnostic port onTransmission Harness.2. Key on.3. Measure voltage betweenpins B <strong>and</strong> pin C.If voltage between pins B <strong>and</strong> Cis within 0.6 volts of batteryvoltageGo to STEP DIf voltage is outside of rangeRepair battery power supply toTransmission ECU. Fuse may beblown. Repeat test.Warning! - Do Not Load Test at Diagnostic Port4-Pin Diagnostics PortVOLTSV COM ABCAD4-way4-Pin Diagnostic Port(Located at the left rearcorner of the transmission.)B - Service Bat. +C - Service Bat. -A - Service Ignition +170
Component Code 34 Isolation ProceduresFault Isolation ProceduresSTEP D1. Key on.Procedure Condition Action2. Measure voltage between pinA <strong>and</strong> pin C.If voltage between pins A <strong>and</strong> Cis within 0.6 volts of batteryvoltageGo to STEP EIf voltage is outside of rangeRepair Ignition power supply toECU. Fuse may be blown.Repeat test.Warning! - Do Not Load Test at Diagnostic Port4-Pin Diagnostics PortVOLTSV COM ABCAD4-way4-Pin Diagnostic Port(Located at the left rearcorner of the transmission.)B - Service Bat. +C - Service Bat. -A - Service Ignition +STEP E1. Key on.Procedure Condition Action2. Retrieve codes. Go to FaultCode Retrieval/Clearing.If code 34 is activeReplace Transmission ECU (onlyif Fault Code is active).Go to STEP VIf code 34 is inactiveClear codes. Go to STEP V171
Fault Isolation ProceduresComponent Code 34 Isolation ProceduresSTEP V1. Key off.Procedure Condition Action2. Key on.3. Clear codes. Go to FaultCode Retrieval/Clearing.4. Reconnect all connectors<strong>and</strong> the negative batterycable.5. Driving Vehicle <strong>and</strong> attemptto reset the code6. Check for codes. Go to FaultCode Retrieval/Clearing.If no codesIf code 34 appearsTest complete.To find error in testing, return toSTEP AIf code other than 34 appearsGo to Fault Code IsolationProcedure Index.172
System Code 35 Isolation ProceduresMID SPN PID SID FMI Description639 231 2 J1939 CommunicationLinkOverviewThis fault code indicates the Transmission ECU failed to communicate with the engine over theJ1939 data link.If you have an active fault code 35 with an <strong>UltraShift</strong> DM transmission <strong>and</strong> the engine will crank butnot start, please check the OEM supplied MEIIR (Momentary Engine Ignition Interrupt Relay)circuit <strong>and</strong> see that the engine has proper ignition voltage.When troubleshooting an inactive code see Product Diagnostic Mode (PDM) on page 19.Detection75 seconds after key-on <strong>and</strong> throughout the operation, the Transmission ECU constantly monitorsthe communication with the engine ECM. If a communication fault occurs for more than fiveseconds, <strong>and</strong> no other devices are present, fault code 35 is set.FallbackIf the fault occurs during power up the transmission will go into AutoSelect mode. If the fault occurswhile moving, it causes an in place fallback <strong>and</strong> the transmission will remain in whatever gear thefailure occurred. Once the vehicle stops, start <strong>and</strong> reverse gears can be selected <strong>and</strong> thetransmission will operate in AutoSelect mode.Required Tools• Basic H<strong>and</strong> Tools• <strong>Eaton</strong> Test Adapter Kit• Digital Volt/Ohm Meter• Troubleshooting Guide• ServiceRanger a PC-based Service ToolPossible CausesThis fault can be caused by any of the following:• J1939 Data Link• Engine ECM• Vehicle Harness or Connections• Engine Harness or Connections• Excessive Radio Interference• Transmission ECU173
System Code 35 Isolation ProceduresTransmission ECUEngine ECMVehicle Harness 38-way Connector+J1939ACB–J1939ShieldTypical J1939/11 data link harness(OEM supplied)174
System Code 35 Isolation ProceduresFault Isolation ProceduresFault Isolation ProceduresSTEP AProcedure Condition Action1. Key off.2. Disconnect negative batterycable.3. Disconnect Vehicle Harness38-way connector.4. Disconnect engine ECMconnector which contains theJ1939 Data Link.5. Measure resistancebetween:• Vehicle Harness38-way connectorpin 2 <strong>and</strong> engineECM pin # (seeOEM wiring for(-) J1939).• Vehicle harness38-way pin 2 <strong>and</strong>ground.If resistance between pin 2 <strong>and</strong>engine ECM pin # (see OEMwiring for (-)J1939) is 0 to 0.3ohms <strong>and</strong> if resistance betweenpin 2 <strong>and</strong> ground is OLIf resistance is outside of rangeGo to STEP BRepair J1939 Data Link Harnessbetween engine ECM <strong>and</strong>Transmission ECU.Go to STEP VFront View38-Way ConnectorOHMS3729 30 3123 24 2532 33 3426 27 283813 1415 161718 19202122V COM A357 8 910 11 1234 51 2 636See OEM J1939 Wiringfor correct pin on ECMOHMS3729 30 3123 24 2532 33 3426 27 2838V COM A13 1415 161718 19202122357 8 910 11 1234 51 2 636Vehicle Harness 38-way ConnectorGROUND175
Fault Isolation ProceduresSystem Code 35 Isolation ProceduresSTEP B1. Key off.Procedure Condition Action2. Measure resistancebetween:• Vehicle Harness38-way connectorpin 3 <strong>and</strong> engineECM pin # (seeOEM J1939 wiringfor (+) J1939)• Vehicle Harness38-way pin 3 <strong>and</strong>groundIf resistance between pin 3 <strong>and</strong>engine ECM pin # (see OEMJ1939 wiring for (+)J1939) is 0 to0.3 ohms <strong>and</strong> if resistancebetween pin 3 <strong>and</strong> ground is OLIf resistance is outside of rangeIf equipped with J1939 Lite, go toSTEP DIf not equipped with J1939 Lite,go to STEP CRepair J1939 Data Link Harnessbetween engine ECM <strong>and</strong>Transmission ECU.Go to STEP VFront View38-Way ConnectorOHMS3729 30 3123 24 2532 33 3426 27 2838V COM A13 1415 161718 19202122357 8 910 11 1234 51 2 636See OEM J1939 Wiringfor correct pin on ECMOHMS3713 1429 30 3123 24 2515 16 1732 33 3426 27 2818 19 20213822V COM A357 8 910 11 1234 51 2 636Vehicle Harness 38-way ConnectorGROUND176
System Code 35 Isolation ProceduresFault Isolation ProceduresSTEP C1. Key off.Procedure Condition Action2. Measure resistancebetween:• Vehicle Harness38-way connectorpin 1 <strong>and</strong> engineECM pin # (seeOEM J1939 wiringfor J1939 shield).If resistance between pin 1 <strong>and</strong>engine ECM pin # (see OEMJ1939 wiring for J1939 shield) is0 to 0.3 ohmsIf resistance is outside of rangeGo to STEP DRepair J1939 Data Link Harnessbetween engine ECM <strong>and</strong>Transmission ECU.Go to STEP VFront View38-Way ConnectorOHMS3713 1429 30 3123 24 2515 16 1732 33 3426 27 2818 19 20213822V COM AVehicle Harness 38-way Connector357 8 910 11 1234 51 2 636See OEM J1939 Wiringfor correct pin on ECM177
Fault Isolation ProceduresSystem Code 35 Isolation ProceduresSTEP DProcedure Condition Action1. Key off.2. Measure resistance between• Vehicle Harness38-way connectorpin 2 <strong>and</strong> 3.Note: Make sure the volt/ohmmeter is on the properscale (around 200 ohmscale)If resistance between pin 2 <strong>and</strong> 3is between 50 to 70 ohmsIf resistance is more than 70ohmsIf resistance is less than 50 ohmsGo to STEP VOne or more of the terminatingresistors on the J1939 data linkharness is either missing or out ofrange. Repair OEM J1939 DataLink Harness. Go to STEP VRepair the J1939 Data Linkbetween the engine ECM <strong>and</strong> theTransmission ECU.Go to STEP VFront View38-Way ConnectorOHMS3713 1429 30 3123 24 2515 16 1732 33 3426 27 2818 19 20213822V COM A357 8 910 11 121 2 34 5 636Vehicle Harness 38-way Connector178
System Code 35 Isolation ProceduresFault Isolation ProceduresSTEP V1. Key off.Procedure Condition Action2. Key on.3. Clear codes. Go to FaultCode Retrieval/Clearing.4. Reconnect all connectors<strong>and</strong> the negative batterycable.5. Driving Vehicle <strong>and</strong> attemptto reset the code6. Check for codes. Go to FaultCode Retrieval/Clearing.If no codesIf code 35 appearsTest complete.To find error in testing, return toSTEP AIf code other than 35 appearsGo to Fault Code IsolationProcedure Index.179
Fault Isolation ProceduresSystem Code 35 Isolation Procedures180
System Code 36 Isolation ProceduresMID SPN PID SID FMI Description639 231 14 J1939 Engine MessageOverviewThis fault code indicates the Transmission ECU has communicated with another ECU, but isunable to communicate with the engine ECU over the J1939 data link.If you have an active fault code 36 with an <strong>UltraShift</strong> DM transmission <strong>and</strong> the engine will crank butnot start, please check the OEM supplied MEIIR (Momentary Engine Ignition Interrupt Relay)circuit <strong>and</strong> see that the engine has proper ignition voltage.When troubleshooting an inactive code see Product Diagnostic Mode (PDM) on page 19.DetectionThe fault is detected if J1939 communication from the engine is lost for 5 seconds <strong>and</strong> otherdevices are present on J1939.FallbackIf the fault occurs during power up the transmission will go into AutoSelect mode. If the fault occurswhile moving, it causes an in place fallback <strong>and</strong> the transmission will remain in whatever gear thefailure occurred. Once the vehicle stops, start <strong>and</strong> reverse gears can be selected <strong>and</strong> thetransmission will operate in AutoSelect mode.Required Tools• Basic H<strong>and</strong> Tools• <strong>Eaton</strong> Test Adapter Kit• Digital Volt/Ohm Meter• Troubleshooting Guide• ServiceRanger a PC-based Service ToolPossible CausesThis fault can be caused by any of the following:• J1939 Data Link• Engine ECM• Vehicle Harness or Connections• Engine Harness or Connections• Excessive Radio Interference• Transmission ECU181
System Code 36 Isolation ProceduresTransmission ECU+J1939–J1939Engine ECMVehicle Harness 38-way ConnectorACBShieldTypical J1939/11 data link harness(OEM supplied)182
System Code 36 Isolation ProceduresFault Isolation ProceduresFault Isolation ProceduresSTEP AProcedure Condition Action1. Key off.2. Disconnect negative batterycable.3. Disconnect Vehicle Harness38-way connector.4. Disconnect engine ECMconnector which contains theJ1939 Data Link.5. Measure resistance between:• Vehicle Harness38-way connectorpin 2 <strong>and</strong> engineECM pin # (seeOEM wiring for (-)J1939).• Vehicle Harness38-way connectorpin 2 <strong>and</strong> ground.If resistance between pin 2 <strong>and</strong>engine ECM pin # (see OEMwiring for (-)J1939) is 0 to 0.3ohms <strong>and</strong> if resistance betweenpin 2 <strong>and</strong> ground is OLIf resistance is outside of rangeGo to STEP BRepair J1939 Data Link Harnessbetween engine ECM <strong>and</strong>Transmission ECU.Go to STEP VFront View38-Way ConnectorOHMS3729 30 3123 24 2532 33 3426 27 283813 1415 161718 19202122V COM A357 8 910 11 1234 51 2 636See OEM J1939 Wiringfor correct pin on ECMOHMS3729 30 3123 24 2532 33 3426 27 2838V COM A13 1415 161718 19202122Vehicle Harness 38-way Connector357 8 910 11 1234 51 2 636GROUND183
Fault Isolation ProceduresSystem Code 36 Isolation ProceduresSTEP B1. Key off.Procedure Condition Action2. Measure resistancebetween:• Vehicle Harness38-way connectorpin 3 <strong>and</strong> engineECM pin # (seeOEM wiring for(+)J1939)• Vehicle Harness38-way connectorpin 3 <strong>and</strong> groundIf resistance between pin 3 <strong>and</strong>engine ECM pin # (see OEMwiring for (+)J1939) is 0 to 0.3ohms <strong>and</strong> if resistance betweenpin 3 <strong>and</strong> ground is OLIf resistance is outside of rangeIf equipped with J1939 Lite, go toSTEP D.If not equipped with J1939 Lite,go to STEP CRepair J1939 Data Link Harnessbetween Engine ECM <strong>and</strong>Transmission ECU. Go to STEP VFront View38-Way ConnectorOHMS3729 30 3123 24 2532 33 3426 27 2838V COM A13 1415 161718 19202122357 8 910 11 1234 51 2 636See OEM J1939 Wiringfor correct pin on ECMOHMS3713 1429 30 3123 24 2515 16 1732 33 3426 27 2818 19 20213822V COM A357 8 910 11 1234 51 2 636Vehicle Harness 38-way ConnectorGROUND184
System Code 36 Isolation ProceduresFault Isolation ProceduresSTEP C1. Key off.Procedure Condition Action2. Measure resistance betweenVehicle Harness 38-wayconnector pin 1 <strong>and</strong> engineECM pin # (see OEM wiringfor J1939 shield).If resistance between pin 1 <strong>and</strong>engine ECM pin # (see OEMwiring for J1939 shield) is 0 to 0.3ohmsIf resistance is outside of rangeGo to STEP DRepair J1939 Data Link Harnessbetween engine ECM <strong>and</strong>Transmission ECU.Go to STEP VFront View38-Way ConnectorOHMS3713 1429 30 3123 24 2515 16 1732 33 3426 27 2818 19 20213822V COM AVehicle Harness 38-way Connector357 8 910 11 1234 51 2 636See OEM J1939 Wiringfor correct pin on ECM185
Fault Isolation ProceduresSystem Code 36 Isolation ProceduresSTEP D1. Key off.Procedure Condition Action2. Measure resistance betweenVehicle Harness 38-wayconnector pin 2 <strong>and</strong> 3.Note: Make sure the volt/ohmmeter is on the properscale (around 200 ohmscale).If resistance between pin 2 <strong>and</strong> 3is between 50 to 70 ohmsIf resistance is more than 70ohmsGo to STEP VOne or more of the terminatingresistors on the J1939 data linkharness is either missing or out ofrange. Repair J1939 Data LinkHarness. Go to STEP VIf resistance is less than 50 ohmsRepair the J1939 Data Linkbetween the Engine ECM <strong>and</strong> theTransmission ECU.Go to STEP VFront View38-Way ConnectorOHMS3713 1429 30 3123 24 2515 16 1732 33 3426 27 2818 19 20213822V COM A357 8 910 11 121 2 34 5 636Vehicle Harness 38-way Connector186
System Code 36 Isolation ProceduresFault Isolation ProceduresSTEP V1. Key off.Procedure Condition Action2. Reconnect all connectors<strong>and</strong> the negative batterycable.3. Key on.4. Clear codes. Go to FaultCode Retrieval/Clearing.5. Driving Vehicle <strong>and</strong> attemptto reset the code.6. Check for codes. Go to FaultCode Retrieval/Clearing.If no codesIf code 36 appearsTest complete.To find error in testing, return toSTEP AIf code other than 36 appearsGo to Fault Code IsolationProcedure Index.187
Fault Isolation ProceduresSystem Code 36 Isolation Procedures188
Component Code 37 Isolation ProceduresMID SPN PID SID FMI Description627 251 5 Power SupplyOverviewThis fault code indicates an excessive resistance has been detected between the power supplysource (battery or starter) <strong>and</strong> the Transmission ECU.DetectionThe resistance on the Transmission ECU power supply circuit is measured during each shift. If theresistance is greater than 0.4 ohms this fault will set.FallbackNo fallback mode.Required Tools• Basic H<strong>and</strong> Tools• Troubleshooting Guide• ServiceRanger a PC-based Service ToolPossible CausesThis fault code can be caused by the following:• Corrosion on power or ground supply connections/wires to the Transmission ECU• Corrosion in fuse holder for Transmission ECU power supply.Transmission ECU30 AMP fuseBattery power(non-switched power)run to starteror batteries189
Fault Isolation ProceduresComponent Code 37 Isolation ProceduresFault Isolation ProceduresSTEP AProcedure Condition Action1. Key off.2. Inspect starter/battery <strong>and</strong> inlinefuse holder connectionsfor integrity.3. Measure voltage acrossbatteries.If voltage is 11 to 13 volts on a 12volt system or 22 to 26 on a 24volt systemProceed with battery load test.Repair or replace batteries asrequired. Go to STEP BIf voltage is outside of rangeRepair or replace batteries <strong>and</strong>charging system as required.Repeat this step.VOLTS–+V COM A–+190
Component Code 37 Isolation ProceduresFault Isolation ProceduresSTEP BProcedure Condition Action1. Locate diagnostic port onTransmission Harness.2. Key on.3. Measure voltage betweenpins C <strong>and</strong> the batterynegative post.If voltage between pin C <strong>and</strong>battery negative post is 0.70 voltsor lessGo to STEP CIf voltage is outside of rangeRepair battery ground supply toTransmission ECU. Repeat test.Warning! - Do Not Load Test at Diagnostic Port4-Pin Diagnostics PortVOLTSBCADV COM ABattery Negative Post4-way4-Pin Diagnostic Port(Located at the left rearcorner of the transmission.)B - Service Bat. +C - Service Bat. -A - Service Ignition +191
Fault Isolation ProceduresComponent Code 37 Isolation ProceduresSTEP CProcedure Condition Action1. Locate diagnostic port onTransmission Harness.2. Key on.3. Measure voltage betweenpins B <strong>and</strong> pin C.If voltage between pins B <strong>and</strong> Cis within 0.6 volts of batteryvoltageGo to STEP DIf voltage is outside of rangeRepair battery power supply toTransmission ECU. Fuse may beblown. Repeat test.Warning! - Do Not Load Test at Diagnostic Port4-Pin Diagnostics PortVOLTSV COM ABCAD4-way4-Pin Diagnostic Port(Located at the left rearcorner of the transmission.)B - Service Bat. +C - Service Bat. -A - Service Ignition +192
Component Code 37 Isolation ProceduresFault Isolation ProceduresSTEP D1. Key on.Procedure Condition Action2. Measure voltage between pinA <strong>and</strong> pin C.If voltage between pins A <strong>and</strong> Cis within 0.6 volts of batteryvoltageGo to STEP EIf voltage is outside of rangeRepair Ignition power supply toECU. Fuse may be blown.Repeat test.Warning! - Do Not Load Test at Diagnostic Port4-Pin Diagnostics PortVOLTSV COM ABCAD4-way4-Pin Diagnostic Port(Located at the left rearcorner of the transmission.)B - Service Bat. +C - Service Bat. -A - Service Ignition +193
Fault Isolation ProceduresComponent Code 37 Isolation ProceduresSTEP E1. Key off.Procedure Condition Action2. Disconnect negative batterycable.3. Disconnect the VehicleHarness 38-way.4. Inspect main power 38-wayconnector terminals pin 36<strong>and</strong> 38, in-line fuse holder,<strong>and</strong> power supplyconnections for integrity <strong>and</strong>corrosion.If no problem foundIf problem is foundGo to STEP VRepair power/ground path for themain power supply. Go to STEP VTransmission ECUBatteries–+30 AMP fuse–+Vehicle Harness 38-way Connector3729 30 3123 24 2532 33 3426 27 283813 1415 161718 19202122357 8 910 11 121 2 34 5 636Front View38-Way Connector194
Component Code 37 Isolation ProceduresFault Isolation ProceduresSTEP V1. Key off.Procedure Condition Action2. Clean <strong>and</strong> reconnect allconnectors.3. Key on.4. Clear codes. Go to FaultCode Retrieval/Clearing.5. Drive vehicle <strong>and</strong> attempt toreset the code6. Check for codes Go to FaultCode Retrieval/Clearing.If no codesIf code 37 appearsTest complete.To find error in testing, return toSTEP AIf code other than 37 appearsGo to Fault Code IsolationProcedure Index.195
Fault Isolation ProceduresComponent Code 37 Isolation Procedures196
System Code 41 Isolation ProceduresMID SPN PID SID FMI Description768 35 7 Range Failed to Engage769 36 7 Range Failed to EngageOverviewThis fault code indicates the transmission is unable to complete a shift across the range. Therange is either stuck in HIGH or LOW, or cannot complete engagement into HIGH or LOW.DetectionThe transmission attempts the same range shift five consecutive times <strong>and</strong> determines the shiftcannot be completed based on the speeds across the back box.FallbackThis fault causes a current range fallback <strong>and</strong> the transmission stays in either LOW range or HIGHrange. When the vehicle comes to a stop, an attempt to shift into LOW range is made.Required Tools• Basic H<strong>and</strong> Tools• (2) 0-100 PSI Air Pressure Gauges• Troubleshooting Guide• ServiceRanger a PC-based Service ToolPossible CausesThis fault code can be caused by any of the following:• Low Air Pressure• Contaminated Air Supply• Air Leak• Range Solenoid Valve• Range Synchronizer• Range Actuator / Cylinder / Piston / Yoke• Range Cover197
System Code 41 Isolation ProceduresRange system198
System Code 41 Isolation ProceduresFault Isolation ProceduresFault Isolation ProceduresSTEP AProcedure Condition Action1. Key off.2. Install a 0-100 PSI airpressure gauge in theregulated test port of the airfilter / regulator.3. Start engine <strong>and</strong> allow airpressure to build to governorcut-off.4. Monitor the vehicle airpressure gauge on the dash.If air pressure cuts off at 90 to120 PSIGo to STEP BIf air pressure is outside of rangeRepair vehicle air system asrequired. Repeat this step.0-100 PSIRegulated test portSTEP B1. Key off.Procedure Condition Action2. Monitor the vehicle airpressure gauge on the dash.If vehicle maintains air pressureIf vehicle looses air pressureGo to STEP CRepair vehicle air system asrequired. Repeat this step.199
Fault Isolation ProceduresSystem Code 41 Isolation ProceduresSTEP CProcedure Condition Action1. Read air pressure gaugeinstalled at the regulatedport.If air pressure is in range:• 55 to 65 PSI• 75 to 80 PSI for <strong>UltraShift</strong>PLUS LAS ModelsGo to STEP EIf air pressure is outside of rangeGo to STEP DSTEP DProcedure Condition Action1. Remove air supply line to theair filter /regulator <strong>and</strong> checkairflow.If air flows from the supply lineIf air does not flow from thesupply lineRepair Air Filter/Regulator.Go to STEP CRepair vehicle air supply to theregulator. Go to STEP C200
System Code 41 Isolation ProceduresFault Isolation ProceduresSTEP E1. Key off.Procedure Condition Action2. Install (2) 0-100 PSI airpressure gauges into therange cover diagnostic ports.3. Start vehicle <strong>and</strong> allow airpressure to build to governorcut-off.4. Turn off engine, but leavekey in “ON” position.5. With Shift Control, selectreverse, then select neutral.Important: Monitor geardisplay after selectingreverse, then neutral <strong>and</strong>confirm gear position haschanged in the display. Agear change is required toenergize the range solenoid.If LOW range gauge =• 55 to 65 PSI for Non-LASModels• 75 to 80 PSI for <strong>UltraShift</strong>PLUS LAS ModelsAnd if HIGH range gauge = 0 PSINote: Five minutes is allowedfor checking the airpressure after shiftingthe transmission toneutral.If air pressure gauges do not readas shown aboveGo to STEP FReplace Range Solenoid Valve<strong>and</strong> Range Cylinder Cover asrequired. Go to STEP VHIGH range0-100 PSI gaugeLOW range0-100 PSI gauge201
Fault Isolation ProceduresSystem Code 41 Isolation ProceduresSTEP F1. Key on.Procedure Condition Action2. With Shift Control, select thehighest reverse gearavailable by pressing theupshift button/arrow, thenselect neutral.Important: Monitor geardisplay after selecting thehighest reverse gearavailable <strong>and</strong> confirm gearposition has changed in thedisplay. A gear change isrequired to energize therange solenoid.If HIGH range gauge =• 55 to 65 PSI for Non-LASModels• 75 to 80 PSI for <strong>UltraShift</strong>PLUS LAS ModelsAnd if LOW range gauge = 0 PSIIf air pressure gauges do not readas shown aboveRepair mechanical range systemas required. Go to STEP VReplace Range Solenoid Valve<strong>and</strong> Range Cylinder Cover asrequired. Go to STEP VHIGH range0-100 PSI gaugeLOW range0-100 PSI gauge3.202
System Code 41 Isolation ProceduresFault Isolation ProceduresSTEP V1. Key off.Procedure Condition Action2. Remove all gauges.3. Key on.4. Clear codes. Go to FaultCode Retrieval/Clearing.5. Drive Vehicle <strong>and</strong> attempt toreset the code6. Check for codes. Go to FaultCode Retrieval/Clearing.If no codesIf code 41 appearsTest complete.To find error in testing, return toSTEP AIf code other than 41 appearsGo to Fault Code IsolationProcedure Index.203
Fault Isolation ProceduresSystem Code 41 Isolation Procedures204
System Code 42 Isolation ProceduresMID SPN PID SID FMI Description770 37 7 Splitter Failed to Engage771 38 7 Splitter Failed to EngageOverviewThis fault code indicates the transmission is unable to complete a shift across the Splitter. TheSplitter is either stuck in HIGH or LOW, or cannot complete engagement into HIGH or LOW.DetectionThe transmission attempts the same splitter shift 3 consecutive times <strong>and</strong> determines the shiftcannot be completed based on the speeds across the back box.FallbackThis fault causes a current splitter fallback <strong>and</strong> the transmission stays in either LOW split or HIGHsplit.Required Tools• Basic H<strong>and</strong> Tools• (2) 0-100 PSI Air Pressure Gauges• Troubleshooting Guide• ServiceRanger a PC-based Service ToolPossible CausesThis fault code can be caused by any of the following:• Low Air Pressure• Contaminated Air Supply• Air Leak• Splitter Solenoid Valve• Splitter Actuator / Cylinder / Piston / Yoke• Splitter Clutch205
System Code 42 Isolation ProceduresSplitter systemReductionAlternate View - CombinationCylinder Models206
System Code 42 Isolation ProceduresFault Isolation ProceduresFault Isolation ProceduresSTEP AProcedure Condition Action1. Key off.2. Install a 0-100 PSI airpressure gauge in theregulated test port of the airfilter / regulator.3. Start engine <strong>and</strong> allow airpressure to build to governorcut-off.4. Monitor the vehicle airpressure gauge on the dash.If air pressure cuts off at 90 to120 PSIGo to STEP BIf air pressure is outside of rangeRepair vehicle air system asrequired. Repeat this step.0-100 PSIRegulated test portSTEP B1. Key off.Procedure Condition Action2. Monitor the vehicle airpressure gauge on the dash.If vehicle maintains air pressureIf vehicle looses air pressureGo to STEP CRepair vehicle air system asrequired. Repeat this step.207
Fault Isolation ProceduresSystem Code 42 Isolation ProceduresSTEP CProcedure Condition Action1. Read air pressure gaugeinstalled at the regulatedport.If air pressure is 55 to 65 PSIIf air pressure is outside of rangeGo to STEP EGo to STEP DSTEP DProcedure Condition Action1. Remove air supply line to theair filter /regulator <strong>and</strong> checkairflow.If air flows from the supply lineIf air does not flow from thesupply lineRepair Air Filter/Regulator.Go to STEP CRepair vehicle air supply to theregulator. Go to STEP C208
System Code 42 Isolation ProceduresFault Isolation ProceduresSTEP E1. Key off.Procedure Condition Action2. Start vehicle <strong>and</strong> allow airpressure to build to governorcut-off.3. Turn off engine, but leavekey in “ON” position.4. With Shift Control, selectreverse (R1 in gear displayfor 13/18-speed), then selectneutral.If LOW Splitter gauge =55 to 65PSI <strong>and</strong> if HIGH Splitter gauge =0 PSINote: Five minutes is allowedfor checking thepressure after shiftingthe transmissions toneutral.If air pressure gauges do not readas shown aboveGo to STEP FReplace Splitter Solenoid Valve<strong>and</strong> Splitter Cylinder Cover asrequired. Go to STEP VLO split0-100 PSI gaugeHI split0-100 PSI gauge209
Fault Isolation ProceduresSystem Code 42 Isolation ProceduresSTEP F1. Key on.Procedure Condition Action2. With Shift Control, selectreverse (R2 in the geardisplay 13/18-speed).Note: If R2 isn’t displayed theup arrow button needs tobe pressed.If HIGH Splitter gauge = 55 to 65PSI <strong>and</strong> if LOW Splitter gauge = 0PSIIf air pressure gauges do not readas shown aboveRepair Mechanical Splittersystem as required.Go to STEP VReplace Splitter Solenoid Valve<strong>and</strong> Splitter Cylinder Cover asrequired. Go to STEP VLO split0-100 PSI gaugeHI split0-100 PSI gauge210
System Code 42 Isolation ProceduresFault Isolation ProceduresSTEP V1. Key off.Procedure Condition Action2. Remove all pressure gauges.3. Key on.4. Clear codes. Go to FaultCode Retrieval/Clearing.5. Drive Vehicle <strong>and</strong> attempt toreset the code6. Check for codes. Go to FaultCode Retrieval/Clearing.If no codesIf code 42 appearsTest complete.To find error in testing, return toSTEP AIf code other than 42 appearsGo to Fault Code IsolationProcedure Index.211
Fault Isolation ProceduresSystem Code 42 Isolation Procedures212
Component Code 43 Isolation ProceduresMID SPN PID SID FMI Description768 35 3, 4, 5 Range High SolenoidValve769 36 3, 4, 5 Range Low SolenoidValveOverviewThis fault code indicates an electrical failure of the solenoids that control the Range SolenoidValve.When troubleshooting an inactive code see Product Diagnostic Mode (PDM) on page 19.DetectionStarting at key-on <strong>and</strong> throughout operation, the Transmission ECU constantly measures thiscircuit. A failure mode of short to battery, short to ground, or open circuit is detected.FallbackThis fault causes a current range fallback <strong>and</strong> the transmission stays in either LOW range or HIGHrange. When the vehicle comes to a stop, an attempt to shift into LOW range is made.Required Tools• Basic H<strong>and</strong> Tools• <strong>Eaton</strong> Test Adapter Kit• Digital Volt/Ohm Meter• Troubleshooting Guide• ServiceRanger a PC-based Service ToolPossible CausesThis fault code can be caused by any of the following:• Range Solenoid Valve• Transmission Harness• Transmission ECU213
Component Code 43 Isolation ProceduresRange valveTransmission controllerTransmission harnessRangeAlternate View - CombinationCylinder Models214
Component Code 43 Isolation ProceduresFault Isolation ProceduresFault Isolation ProceduresSTEP AProcedure Condition Action1. Key off.2. Disconnect negative batterycable.3. Disconnect the TransmissionECU 38-way connector.4. Measure resistance betweenthe Transmission Harness38-way connector pins:• 28 <strong>and</strong> 6• 34 <strong>and</strong> 6• Observe polarity onVolt\Ohm Meter.If resistance is 9 to 16 ohmsIf resistance is outside of rangeGo to STEP BGo to STEP CFront View38-Way ConnectorOHMS3729 30 3123 24 2532 33 3426 27 2838V COM A13 1415 161718 19202122357 8 910 11 121 2 34 5 636OHMSV COM A3729 30 3123 24 2532 33 3426 27 283813 1415 161718 19202122Transmission Harness 38-way Connector357 8 910 11 121 2 34 5 636215
Fault Isolation ProceduresComponent Code 43 Isolation ProceduresSTEP BProcedure Condition Action1. Measure resistance betweenthe Transmission Harness38-way connector pin 6 <strong>and</strong>ground.If resistance is OLIf resistance is less than 10K ohm Go to STEP CReplace Transmission ECU (Onlyif Fault Code is Active).Go to STEP VFront ViewTransmission ECU Connector3729 30 3123 24 2532 33 3426 27 2838OHMS13 1415 161718 19202122V COM ATransmission Harness 38-way Connector357 8 910 11 121 2 34 5 636GROUND216
Component Code 43 Isolation ProceduresFault Isolation ProceduresSTEP CProcedure Condition Action1. Disconnect the TransmissionHarness from RangeSolenoid Valve.2. Measure resistance betweenRange Solenoid Valve pins:• A <strong>and</strong> C• B <strong>and</strong> CIf resistance is 9 to 16 ohmsIf resistance is outside of rangeGo to STEP DReplace Range Solenoid Valve.Go to STEP VC B A OHMSC B AOHMSV COM AV COM ASTEP DProcedure Condition Action1. Measure resistance betweenRange Solenoid Valve pin C<strong>and</strong> ground.If resistance is OLIf resistance is less than 10K ohmReplace Transmission Harness.Go to STEP VReplace Range Solenoid Valve.Go to STEP VCBAOHMSV COM AGROUND217
Fault Isolation ProceduresComponent Code 43 Isolation ProceduresSTEP V1. Key off.Procedure Condition Action2. Reconnect all connectors<strong>and</strong> the negative batterycable.3. Key on.4. Clear codes. Go to FaultCode Retrieval/Clearing.5. Drive vehicle <strong>and</strong> attempt toreset the code.6. Check for codes. Go to FaultCode Retrieval/Clearing.If no codesIf code 43 appearsTest complete.To find error in testing, return toSTEP AIf code other than 43 appearsGo to Fault Code IsolationProcedure Index.218
Component Code 44 Isolation ProceduresMID SPN PID SID FMI Description787 54 3, 4, 5 Inertia Brake SolenoidCoilOverviewThis fault code indicates an electrical failure of the solenoid that controls the Inertia Brake.When troubleshooting an inactive code see Product Diagnostic Mode (PDM) on page 19.DetectionStarting at key-on <strong>and</strong> throughout operation, the Transmission ECU constantly measures thiscircuit. A failure mode of a short to battery, short to ground, or open circuit is detected.FallbackNo Fallback Mode. However, if it is the Inertia Brake system that failed, it may be difficult to engagea gear from a stop if the Inertia Brake was providing assistance (due to a dragging clutch). Also,hill shifting performance may be reduced.Required Tools• Basic H<strong>and</strong> Tools• <strong>Eaton</strong> Test Adapter Kit• Digital Volt/Ohm Meter• Troubleshooting Guide• ServiceRanger a PC-based Service ToolPossible CausesThis fault code can be caused by any of the following:• Inertia Brake Solenoid• Transmission Harness• Transmission ECU219
Component Code 44 Isolation ProceduresTransmissioncontrollerTransmissionharnessInertia brakesolenoid coil220
Component Code 44 Isolation ProceduresFault Isolation ProceduresFault Isolation ProceduresSTEP AProcedure Condition Action1. Key off.2. Disconnect negative batterycable.3. Disconnect the TransmissionHarness 38-way connector.4. Measure resistance betweenthe Transmission Harness38-way connector pins 33<strong>and</strong> 5.If resistance is 2 to 6 ohmsIf resistance is outside of rangeGo to STEP BGo to STEP CFront View38-Way ConnectorOHMSV COM A3729 30 3123 24 2532 33 3426 27 283813 1415 161718 19202122Transmission Harness 38-way Connector357 8 910 11 121 2 34 5 636221
Fault Isolation ProceduresComponent Code 44 Isolation ProceduresSTEP BProcedure Condition Action1. Measure resistance betweenthe Transmission Harness38-way connector pin 33 <strong>and</strong>ground.If resistance is OLIf resistance is less than 10K ohmReplace Transmission ECU (onlyif Fault Code is Active).Go to STEP VGo to STEP CFront View38-Way ConnectorOHMSV COM A3729 30 3123 24 2532 33 3426 27 283813 1415 161718 19202122Transmission Harness 38-way Connector357 8 910 11 121 2 34 5 636GroundSTEP CProcedure Condition Action1. Disconnect the TransmissionHarness from Inertia Brakecoil.2. Measure resistance betweenInertia Brake coil pins A <strong>and</strong>B.If resistance is 2 to 6 ohmsIf resistance is outside of rangeGo to STEP DReplace Inertia Brake. Go toSTEP VOHMSABV COM A222
Component Code 44 Isolation ProceduresFault Isolation ProceduresSTEP DProcedure Condition Action1. Measure resistance betweenInertia Brake coil pin A <strong>and</strong>ground.If resistance is OLIf resistance is less than 10K ohmReplace Transmission Harness.Go to STEP VReplace Inertia Brake.Go to STEP VOHMSABV COM AGROUNDSTEP V1. Key off.Procedure Condition Action2. Reconnect all connectors<strong>and</strong> the negative batterycable.3. Key on.4. Clear codes. Go to FaultCode Retrieval/Clearing.5. Drive the vehicle <strong>and</strong> attemptto reset the code.6. Check for codes. Go to FaultCode Retrieval/Clearing.If no codesIf code 44 appearsTest complete.To find error in testing, return toSTEP AIf code other than 44 appearsGo to Fault Code IsolationProcedure Index.223
Fault Isolation ProceduresComponent Code 44 Isolation Procedures224
System Code 45 Isolation ProceduresMID SPN PID SID FMI Description787 54 7 High Capacity (HCIB) orLow Capacity (LCIB)Inertia Brake FailureOverviewThe fault code indicates that the Low or High Capacity Inertia Brake is not performing as expected.A transmission will have either an LCIB or HCIB, it will not have both. The LCIB is used only onheavy-duty products with an Electronic Clutch Actuator (ECA).DetectionThe HCIB fault sets if the Inertia Brake is unable to synchronize the transmission during an upshift.The LCIB fault sets if the LCIB is applied <strong>and</strong> the transmission input shaft deceleration is less than1000 rpm/sec for 15 cumulative times in 1 power cycle with greater than 32 amps applied to theECA with a non-neutral mode selected.FallbackNo Fallback Mode. However, if it is the Inertia Brake system has failed, it may be difficult to engagea gear from a neutral <strong>and</strong> shifting performance may be reduced.Required Tools• Basic H<strong>and</strong> Tools• ServiceRanger a PC based service tool.• Troubleshooting GuidePossible CausesThis fault code can be caused by any of the following:• LCIB material worn• Failed LCIB• Failed HCIB225
System Code 45 Isolation ProceduresLow Capacity Inertia BrakeEngineECMEngine control systemAHigh Capacity Inertia brakeB226
System Code 45 Isolation ProceduresFault Isolation ProceduresFault Isolation ProceduresInertia Brake Performance TestNote:Go to Step A for HCIB troubleshooting. Go to Step B for LCIB troubleshooting.STEP A1. Key on.Procedure Condition Action2. Connect ServiceRanger,select “Advanced ProductFunctions”.3. Start Engine, PTO must bedisengaged.4. Select “Inertia Brake Test”.5. Run test <strong>and</strong> followinstructions.Test passesTest FailsGo to STEP VReplace Inertia Brake.Go to STEP VTest AbortsCorrect displayed test failurecondition <strong>and</strong> retest.STEP BProcedure Condition ActionNote: If fault code 27 or fault code 64 is active, follow these procedures first.1. Key off.2. Open clutch housing h<strong>and</strong>holecover <strong>and</strong> inspect LCIBfor worn material. Refer toLCIB Inspection Procedure inCLSM0200.If wear is excessive.If wear is not excessive.Replace LCIB. Go to STEP VGo to STEP C227
Fault Isolation ProceduresSystem Code 45 Isolation ProceduresSTEP C1. Key on.Procedure Condition Action2. Connect ServiceRanger <strong>and</strong>select “Advanced ProductFunctions”.3. Start engine. PTO must bedisengaged.4. Select “Inertia Brake Test”<strong>and</strong> run test five consecutivetimes.If all five tests pass (above1000 RPM/sec)If all five tests fail (below1000 RPM/sec)Go to STEP VNote: Always perform ECA Clutch Reset Procedure CLMT1310 after replacing an LCIB.Replace LCIB. Perform ECAClutch Reset Procedure. Seepublication CLMT1310.Go to STEP VSTEP V1. Key on.Procedure Condition Action2. Clear codes.3. Drive the vehicle <strong>and</strong> attemptto reset the code.4. Check for codes. If no codes Test complete.If code 45 appearsIf code other than 45 appearsTo find error in testing, return toSTEP AGo to Fault Code IsolationProcedure Index.228
Component Code 46 Isolation ProceduresMID SPN PID SID FMI Description770 37 3, 4, 5 Splitter Direct SolenoidValve771 38 3, 4, 5 Splitter Indirect SolenoidValveOverviewThis fault code indicates an electrical failure of the solenoids that control the Splitter SolenoidValve.When troubleshooting an inactive code see Product Diagnostic Mode (PDM) on page 19.DetectionStarting at key-on <strong>and</strong> throughout operation, the Transmission ECU constantly measures thiscircuit. Depending on the reading, a failure mode of short to battery, short to ground, or open circuitis detected.FallbackThis fault causes a current splitter fallback <strong>and</strong> the transmission stays in either LOW split or HIGHsplit.Required Tools• Basic H<strong>and</strong> Tools• <strong>Eaton</strong> Test Adapter Kit• Digital Volt/Ohm Meter• Troubleshooting Guide• ServiceRanger a PC-based Service ToolPossible CausesThis fault code can be caused by any of the following:• Splitter Solenoid Valve• Transmission Harness• Transmission ECU229
Component Code 46 Isolation ProceduresTransmission controllerTransmission harnessSplitter valveReductionAlternate View - CombinationCylinder Models230
Component Code 46 Isolation ProceduresFault Isolation ProceduresFault Isolation ProceduresSTEP AProcedure Condition Action1. Key off.2. Disconnect negative batterycable.3. Disconnect the TransmissionHarness 38-way connector.4. Measure resistance betweenthe Transmission Harness38-way connector pins:• 32 <strong>and</strong> 4• 26 <strong>and</strong> 4If resistance is 9 to 16 ohmsIf resistance is outside of rangeGo to STEP BGo to STEP CFront View38-Way ConnectorOHMSV COM A3729 30 3123 24 2532 33 3426 27 283813 1415 161718 19202122357 8 910 11 121 2 34 5 636OHMSV COM A3729 30 3123 24 2532 33 3426 27 283813 1415 161718 19202122Transmission Harness 38-way Connector357 8 910 11 121 2 34 5 636231
Fault Isolation ProceduresComponent Code 46 Isolation ProceduresSTEP BProcedure Condition Action1. Measure resistance betweenthe Transmission Harness38-way connector pin 4 <strong>and</strong>ground.If resistance is OLIf resistance is less than 10K ohmReplace Transmission ECU (Onlyif Fault Code is Active).Go to STEP VGo to STEP CFront View38-Way Connector3729 30 3123 24 2532 33 3426 27 2838OHMS13 1415 161718 19202122V COM A357 8 910 11 121 2 34 5 636Transmission Harness 38-way ConnectorGROUND232
Component Code 46 Isolation ProceduresFault Isolation ProceduresSTEP CProcedure Condition Action1. Disconnect the TransmissionHarness from SplitterSolenoid Valve.2. Measure resistance betweenSplitter Solenoid Valve pins:• A <strong>and</strong> C• B <strong>and</strong> CIf resistance is 9 to 16 ohmsIf resistance is outside of rangeGo to STEP DReplace Splitter Solenoid Valve.Go to STEP VC B A OHMSC B AOHMSV COM AV COM ASTEP DProcedure Condition Action1. Measure resistance betweenSplitter Solenoid Valve pin C<strong>and</strong> ground.If resistance is OLIf resistance is less than 10K ohmReplace Transmission Harness.Go to STEP VReplace Splitter Solenoid Valve.Go to STEP VCBAOHMSV COM AGROUND233
Fault Isolation ProceduresComponent Code 46 Isolation ProceduresSTEP V1. Key off.Procedure Condition Action2. Reconnect all connectors<strong>and</strong> the negative batterycable.3. Key on.4. Clear codes. Go to FaultCode Retrieval/Clearing.5. Drive the vehicle <strong>and</strong> attemptto reset the code.6. Check for codes. Go to FaultCode Retrieval/Clearing.If no codesIf code 46 appearsTest complete.To find error in testing, return toSTEP AIf code other than 46 appearsGo to Fault Code IsolationProcedure Index.234
Component Code 51 Isolation ProceduresMID SPN PID SID FMI Description130 60 60 2, 3, 4, 10 Rail Position SensorOverviewThis fault code indicates an electrical failure of the Rail Select Sensor or mechanical failure on theElectric Shifter.Theory of OperationThe transmission controller supplies sensor power to the XY shifter position sensors <strong>and</strong> uses thereported sensor position to determine gear finger location. There are four fault conditions definedby the reported FMI via ServiceRanger software.This fault will not be set if a System Battery Voltage Low fault (FC 33) is active.DetectionStarting at key-on <strong>and</strong> throughout operation, the transmission controller constantly monitors theposition of the sensor. If a failure condition is detected, the fault code is set.Conditions to Set the Fault Code Active• FMI 2 - The transmission controller detects the rail sensor voltage is outside the 10-90% rangefor 1 second or longer.• FMI 3 - The transmission controller detects the rail sensor supply voltage is 5% above theexpected supply voltage for 1 second or longer.• FMI 4 - The transmission controller detects the rail sensor supply voltage is 5% below theexpected supply voltage for 1 second or longer.• FMI 10 - The transmission controller detects the rail sensor signal moving more than+ / - 0.093" (2%) when the rail motor is turned off in gear.Fallback mode During Power-Up• The transmission will power-up <strong>and</strong> may not be able to confirm neutral, no start gears can beselected.• Unit may not crank “=” in the display.Fallback Mode During Operation• The transmission remains in its current gear. An “F” may appear in the gear display.• The service light will blink.• Until the fault is cleared, driver may have to shut off engine in gear.• Will not upshift. Will not downshift. Will not shift to neutral.Conditions to Set the Fault Inactive• FMI 2 - The fault becomes inactive when the transmission controller detects the rail sensoroutput voltage is within 10% - 90% for 1 second or longer.235
Component Code 51 Isolation Procedures• FMI 3, 4 - The fault becomes inactive when the transmission controller detects the rail sensorsupply is within + / - 5% of the expected voltage.• FMI 10 - The rail position is within + / - 0.093" (2%) of when the shift state went idle.Required Tools• Basic H<strong>and</strong> Tools• <strong>Eaton</strong> Test Adapter Kit• Digital Volt / Ohm Meter• Troubleshooting Guide• ServiceRanger, a PC-based Service ToolPossible Causes for FaultFMI 2, 4, 10:• Transmission Harness - Connections <strong>and</strong> wires between the transmission controller <strong>and</strong> therail sensor may be loose or damaged, terminals <strong>and</strong> wires may be bent, burnt or wires may begrounded, open, or shorted.• XY Shifter - The rail sensor may have been damaged or malfunctioned.FMI 3:• Transmission Controller - The transmission controller may have been damaged ormalfunctioned.236
ABCComponent Code 51 Isolation ProceduresTransmission ControllerFront of TransmissionOEM181920101112ABCGear selectsensor3638FrontGen 3 TransmissionHarness AssyK-3681BlueConnectorRail selectsensorXY ShifterAssy K-37843537BlackConnectorFor TransmissionDiagnostics(Located at the left rearcorner of the transmission)2324151678ABABABOutput shaft speedsensor K-3231Input shaftspeed sensor K-3231Main shaftspeed sensor K-3231BACD63428CBARangevalve K-3682BCA17312543226CBASplitter valve(13 & 18 speedonly) K-36824-wayB - Service Bat. +C - Service Bat. -A - Service Ignition +335ABInertia brake (Optional)237
Fault Isolation ProcedureComponent Code 51 Isolation ProceduresFault Isolation ProcedureSTEP AProcedure Condition Action1. If the fault code is inactive putunit in PDM mode <strong>and</strong>perform the wire wiggle test.Check the overall harnessconnections to sensor.If a tone is heard <strong>and</strong>/or afault code appears in thegear display, go to the FaultCode Isolation ProcedureIndex.2. Key off.3. Disconnect negative batterycable.4. Disconnect the TransmissionHarness 38-way connector.5. Measure resistance betweenthe Transmission Harness38-way connector pins:- 18- 19Note: An Auto Ranging DigitalVolt/Ohm Meter must beused.If pin 18 <strong>and</strong> 19 resistance is 100to 200 ohms <strong>and</strong> if pin 18 <strong>and</strong> 20resistance is 5K to 7K ohmGo to STEP BIf any of the above conditions arenot metGo to STEP CFront View38-Way ConnectorOHMS3729 30 3123 24 2532 33 3426 27 2838V COM A13 1415 161718 19202122357 8 910 11 1234 51 2 636OHMS3729 30 3123 24 2532 33 3426 27 2838V COM A13 1415 161718 19202122Transmission Harness 38-way Connector357 8 910 11 1234 51 2 636238
Component Code 51 Isolation ProceduresFault Isolation ProcedureSTEP BProcedure Condition Action1. Measure resistance betweenTransmission Harness 38-way connector pin 18 toground.If resistance is OLIf FMI 2, 3, 4, or 10 is present withan inactive codeReconnect 38-way connector,replace Transmission Controller(only if fault code is active.)Replace the XY shifter <strong>and</strong>Transmission Harness.If resistance is less than 10K ohmGo to STEP CFront View38-Way ConnectorOHMS3729 30 3123 24 2532 33 3426 27 2838V COM A13 1415 161718 19202122Transmission Harness 38-way Connector357 8 910 11 121 2 34 5 636GROUND239
Fault Isolation ProcedureComponent Code 51 Isolation ProceduresSTEP CProcedure Condition Action1. Disconnect TransmissionHarness from Rail SelectSensor.2. Measure resistance betweenRail Select Sensor pins:- A <strong>and</strong> C- A <strong>and</strong> BNote: An Auto Ranging DigitalVolt/Ohm Meter must beused.If pin A <strong>and</strong> C resistance is 5K to7K <strong>and</strong> if pin A <strong>and</strong> B resistanceis 100 to 200 ohmsGo to STEP DIf any of the above conditions arenot metReplace XY Shifter.Go to STEP VOHMSOHMSV COM AV COM ACBACBA240
Component Code 51 Isolation ProceduresFault Isolation ProcedureSTEP DProcedure Condition Action1. Measure resistance betweenRail Select Sensor pin A <strong>and</strong>ground.If resistance is OLIf resistance is less than 10K ohmReplace Transmission Harness.Go to STEP VReplace XY Shifter.Go to STEP VOHMSV COM ACBAGroundSTEP V1. Key off.Procedure Condition Action2. Reconnect all connectors.3. Key on.4. Clear codes.5. Drive the vehicle <strong>and</strong> attemptto reset the code.6. Check for codes. If no codes Test complete.If code 51 appearsIf code other than 51 appearsTo find error in testing, return toSTEP AGo to Fault Code IsolationProcedure Index.241
Fault Isolation ProcedureComponent Code 51 Isolation Procedures242
Component Code 52 Isolation ProceduresMID SPN PID SID FMI Description130 59 59 2, 3, 4, 7 Gear Position SensorOverviewThis fault code indicates an electrical failure of the Rail Select Sensor or mechanical failure on theElectric Shifter.Theory of OperationThe transmission controller supplies sensor power to the XY shifter position sensors <strong>and</strong> uses thereported sensor position to determine gear finger location. There are four fault conditions definedby the reported FMI via ServiceRanger software.This fault will not be set if a System Battery Voltage Low fault (FC 33) is active.DetectionStarting at key-on <strong>and</strong> throughout operation, the transmission controller constantly monitors theposition of the sensor. If a failure condition is detected, the fault code is set.Conditions to Set the Fault Code Active• FMI 2 - The transmission controller detects the gear sensor voltage is outside the 10-90%range for 1 second or longer.• FMI 3 - The transmission controller detects the gear sensor supply voltage is 5% above theexpected supply voltage for 1 second or longer.• FMI 4 - The transmission controller detects the gear sensor supply voltage is 5% below theexpected supply voltage for 1 second or longer.Fallback mode During Power-Up• The transmission will power-up <strong>and</strong> may not be able to confirm neutral, no start gears can beselected.• Unit may not crank “=” in the display.Fallback Mode During Operation• The transmission remains in its current gear. An “F” may appear in the gear display.• The service light will blink.• Until the fault is cleared, driver may have to shut off engine in gear.• Will not upshift. Will not downshift. Will not shift to neutral.243
Component Code 52 Isolation ProceduresConditions to Set the Fault Inactive• FMI 2 - The fault becomes inactive when the transmission controller detects the gear sensoroutput voltage is within 10% - 90% for 1 second or longer.• FMI 3, 4 - The fault becomes inactive when the transmission controller detects the gear sensorsupply is within + / - 5% of the expected voltage.• FMI 7 - Shift finger is beyond maximum engagement.Required Tools• Basic H<strong>and</strong> Tools• <strong>Eaton</strong> Test Adapter Kit• Digital Volt / Ohm Meter• Troubleshooting Guide• ServiceRanger, a PC-based Service ToolPossible Causes for FaultFMI 2, 4:• Transmission Harness - Connections <strong>and</strong> wires between the transmission controller <strong>and</strong> therail sensor may be loose or damaged, terminals <strong>and</strong> wires may be bent, burnt or wires may begrounded, open, or shorted.• XY Shifter - The rail sensor may have been damaged or malfunctioned.FMI 3:• Transmission Controller - The transmission controller may have been damaged ormalfunctioned.FMI 7:• XY Shifter - Possible broken shift finger.244
ABCComponent Code 52 Isolation ProceduresTransmission ControllerFront of TransmissionOEM181920101112ABCGear selectsensor3638FrontGen 3 TransmissionHarness AssyK-3681BlueConnectorRail selectsensorXY ShifterAssy K-37843537BlackConnectorFor TransmissionDiagnostics(Located at the left rearcorner of the transmission)2324151678ABABABOutput shaft speedsensor K-3231Input shaftspeed sensor K-3231Main shaftspeed sensor K-3231BACD63428CBARangevalve K-3682BCA17312543226CBASplitter valve(13 & 18 speedonly) K-36824-wayB - Service Bat. +C - Service Bat. -A - Service Ignition +335ABInertia brake (Optional)245
Fault Isolation ProceduresComponent Code 52 Isolation ProceduresFault Isolation ProceduresSTEP AProcedure Condition Action1. If the fault code is inactiveput unit in PDM mode <strong>and</strong>perform the wire wiggle test.Check the overall harnessconnections to sensor.If a tone is heard <strong>and</strong>/or afault code appears in thegear display, go to the FaultCode Isolation ProcedureIndex.2. Key off.3. Disconnect negative batterycable.4. Disconnect the TransmissionHarness 38-way connector.5. Measure resistance betweenthe Transmission Harness38-way connector pins:- 10 <strong>and</strong> 11- 10 <strong>and</strong> 12Note: An Auto Ranging DigitalVolt/Ohm Meter must beused.If pin 10 <strong>and</strong> 11 resistance is 100to 200 ohms <strong>and</strong> if pin 10 <strong>and</strong> 12resistance is 5K to 7K ohmGo to STEP BIf any of the above conditions arenot metGo to STEP CFront View38-Way ConnectorOHMS3729 30 3123 24 2532 33 3426 27 2838V COM A13 1415 161718 19202122357 8 910 11 1234 51 2 636OHMS3729 30 3123 24 2532 33 3426 27 2838V COM A13 1415 161718 19202122Transmission Harness 38-way Connector357 8 910 11 1234 51 2 636246
Component Code 52 Isolation ProceduresFault Isolation ProceduresSTEP BProcedure Condition Action1. Measure resistance betweenTransmission Harness38-way connector pin 10 toground.If resistance is OLIf FMI 2, 3, or 4 is present with aninactive codeReconnect 38-way connector,replace Transmission Controller(only if fault code is active.)Replace the XY Shifter <strong>and</strong>Transmission Harness.If FMI 7 is present, remove XYShifter to inspect for a brokenshift finger. If the shift finger isbrokenReplace the XY Shifter.If resistance is less than 10K ohmGo to STEP CFront View38-Way ConnectorOHMS3729 30 3123 24 2532 33 3426 27 2838V COM A13 1415 161718 19202122Transmission Harness 38-way Connector357 8 910 11 121 2 34 5 636GROUND247
Fault Isolation ProceduresComponent Code 52 Isolation ProceduresSTEP CProcedure Condition Action1. Disconnect TransmissionHarness from Gear SelectSensor.2. Measure resistance betweenGear Select Sensor pins:- A <strong>and</strong> C- A <strong>and</strong> BNote: An Auto Ranging DigitalVolt/Ohm Meter must beused.If pin A <strong>and</strong> C resistance is 5K to7K ohm <strong>and</strong> if pin A <strong>and</strong> Bresistance is 100 to 200 ohmsGo to STEP DIf any of the above conditions arenot metReplace XY Shifter.Go to STEP VOHMSOHMSV COM AV COM ACBACBA248
Component Code 52 Isolation ProceduresFault Isolation ProceduresSTEP DProcedure Condition Action1. Measure resistance betweenGear Select Sensor pin A<strong>and</strong> ground.If resistance is OLIf resistance is less than 10K ohmReplace Transmission Harness.Go to STEP VReplace XY Shifter.Go to STEP VOHMSV COM ACBAGroundSTEP V1. Key off.Procedure Condition Action2. Reconnect all connectors.3. Key on.4. Clear codes.5. Drive the vehicle <strong>and</strong> attemptto reset the code.6. Check for codes. If no codes Test complete.If code 52 appearsIf code other than 52 appearsTo find error in testing, return toSTEP AGo to Fault Code IsolationProcedure Index.249
Fault Isolation ProceduresComponent Code 52 Isolation Procedures250
Component Code 56 Isolation ProceduresMID SPN PID SID FMI DescriptionOverviewThis fault code indicates an electrical problem in the Input Shaft Speed Sensor circuit. The signalfrom the sensor did not match the current operating conditions.When troubleshooting an inactive code see Product Diagnostic Mode (PDM) on page 19.DetectionA speed sensor is determined faulty when all the speed sensor readings are compared <strong>and</strong> onesensor is inconsistent, or the sensor is shorted to power or ground.FallbackThis fault causes an In Place fallback. If the Input Shaft Speed Sensor fails before power-up, thetransmission is unable to engage a gear.Required Tools• Basic H<strong>and</strong> Tools• <strong>Eaton</strong> Test Adapter Kit• Digital Volt/Ohm Meter• Troubleshooting Guide• ServiceRanger a PC-based Service ToolPossible Causes161 161 2, 3, 4, 5,10This fault code can be caused by any of the following:• Transmission Harness• Input Shaft Speed Sensor• Various Transmission Components• Transmission ECUInput Shaft SpeedSensor251
Component Code 56 Isolation ProceduresInput shaftspeed sensorTransmissioncontrollerTransmissionharness252
Component Code 56 Isolation ProceduresFault Isolation ProceduresFault Isolation ProceduresSTEP AProcedure Condition Action1. Drive vehicle <strong>and</strong> monitorengine rpm <strong>and</strong> input shaftrpm with ServiceRanger.If engine rpm <strong>and</strong> input shaft rpmmatch <strong>and</strong> code is not activeduring test driveTest Complete.If input shaft rpm is erratic orvaries from engine RPMGo to STEP BSTEP B1. Key off.Procedure Condition Action2. Disconnect negative batterycable.3. Disconnect the TransmissionHarness 38-way connector.4. Measure resistance betweenthe Transmission Harness38-way connector pins 7 <strong>and</strong>8 <strong>and</strong> pin 7 <strong>and</strong> ground.If resistance is 2K to 4.5K ohm<strong>and</strong> pin 7 to ground is OLIf resistance is outside of therangeGo to STEP CGo to STEP DOHMSFront View38-Way ConnectorV COM A3729 30 3123 24 2532 33 3426 27 283813 1415 161718 19202122357 8 910 11 121 2 34 5 636OHMS3729 30 3123 24 2532 33 3426 27 2838V COM A13 1415 161718 19202122Transmission Harness 38-way Connector357 8 910 11 121 2 34 5 636Grou253
Fault Isolation ProceduresComponent Code 56 Isolation ProceduresSTEP CProcedure Condition Action1. Inspect Input Shaft SpeedSensor for contamination ordamage.If no problem foundReplace Transmission ECU (Onlyif Fault Code is Active).Go to STEP VIf problem found or you were senthere from Step D or EReplace Input Shaft SpeedSensor <strong>and</strong> inspect the uppercountershaft PTO gear fordamage. Go to STEP VSTEP DProcedure Condition Action1. Disconnect the TransmissionHarness from Input ShaftSpeed Sensor.2. Measure resistance betweenInput Shaft Speed Sensorpins A <strong>and</strong> B.If resistance is 2K to 4.5K ohmIf resistance is outside of rangeGo to STEP EGo to STEP COHMSABV COM A254
Component Code 56 Isolation ProceduresFault Isolation ProceduresSTEP EProcedure Condition Action1. Measure resistance betweenInput Shaft Speed Sensor pinA <strong>and</strong> ground.If resistance is OLIf resistance is less than 10K ohmReplace Transmission Harness.Go to STEP VGo to STEP COHMSABV COM AGROUNDSTEP V1. Key off.Procedure Condition Action2. Reconnect all connectors<strong>and</strong> the negative batterycable.3. Verify proper installation ofspeed sensor.4. Key on.5. Clear codes. Go to FaultCode Retrieval/Clearing.6. Drive the vehicle <strong>and</strong> attemptto reset the code.7. Check for codes. Go to FaultCode Retrieval/Clearing.If no codesIf code 56 appearsTest complete.To find error in testing, return toSTEP AIf code other than 56 appearsGo to Fault Code IsolationProcedure Index.255
Fault Isolation ProceduresComponent Code 56 Isolation Procedures256
Component Code 57 Isolation ProceduresMID SPN PID SID FMI Description160 160 2, 3, 4, 5 Main Shaft SpeedSensorOverviewThis fault code indicates an electrical problem in the Main Shaft Speed Sensor circuit. The signalfrom the sensor did not match the current operating conditionsWhen troubleshooting an inactive code see Product Diagnostic Mode (PDM) on page 19.DetectionA speed sensor is determined faulty when all the speed sensor readings are compared <strong>and</strong> onesensor is inconsistent, or the sensor is shorted to power or ground.FallbackThis fault causes an In Place fallback mode.Required Tools• Basic H<strong>and</strong> Tools• <strong>Eaton</strong> Test Adapter Kit• Digital Volt/Ohm Meter• Troubleshooting Guide• ServiceRanger a PC-based Service ToolPossible CausesThis fault code can be caused by any of the following:• Transmission Harness• Main Shaft Speed Sensor• Various Transmission Components• Transmission ECU257
Component Code 57 Isolation ProceduresTransmission controllerMain shaftspeed sensorTransmission harness258
Component Code 57 Isolation ProceduresFault Isolation ProceduresFault Isolation ProceduresSTEP AProcedure Condition Action1. Key off.2. Disconnect negative batterycable.3. Disconnect the TransmissionHarness 38-way connector.4. Measure resistance betweenthe Transmission Harness38-way connector pins 15<strong>and</strong> 16 <strong>and</strong> 15 <strong>and</strong> ground.If resistance is 2k to 4.5K ohm<strong>and</strong> pin 15 to ground is OLIf resistance is outside of therangeGo to STEP BGo to STEP COHMSFront View38-Way ConnectorV COM A3729 30 3123 24 2532 33 3426 27 283813 1415 161718 19202122357 8 910 11 121 2 34 5 636OHMSV COM A3729 30 3123 24 2532 33 3426 27 2838Ground13 1415161718 19202122Transmission Harness 38-way Connector357 8 910 11 121 2 34 5 636259
Fault Isolation ProceduresComponent Code 57 Isolation ProceduresSTEP BProcedure Condition Action1. Inspect Main Shaft SpeedSensor for contamination ordamage.If no problem foundReplace Transmission ECU (Onlyif Fault Code is Active).Go to STEP VIf problem is found or you weresent here from Step C or DReplace Main Shaft SpeedSensor<strong>and</strong> inspect the upper reverseidler gear for damage.Go to STEP VSTEP CProcedure Condition Action1. Disconnect the TransmissionHarness from the Main ShaftSpeed Sensor.2. Measure resistance betweenthe Main Shaft Speed Sensorpins A <strong>and</strong> B.If resistance is 2K to 4.5K ohmIf resistance is outside of rangeGo to STEP DGo to STEP BOHMSABV COM A260
Component Code 57 Isolation ProceduresFault Isolation ProceduresSTEP DProcedure Condition Action1. Measure resistance betweenMain Shaft Speed Sensor pinA <strong>and</strong> ground.If resistance is OLIf resistance is less than 10K ohmReplace Transmission Harness.Go to STEP VGo to STEP BOHMSABV COM AGROUNDSTEP V1. Key off.Procedure Condition Action2. Reconnect all connectors<strong>and</strong> the negative batterycable.3. Verify proper installation ofspeed sensor.4. Key on.5. Clear codes. Go to FaultCode Retrieval/Clearing.6. Drive the vehicle <strong>and</strong> attemptto reset the code.7. Check for codes. Go to FaultCode Retrieval/Clearing.If no codesIf code 57 appearsTest complete.To find error in testing, return toSTEP AIf code other than 57 appearsGo to Fault Code IsolationProcedure Index.261
Fault Isolation ProceduresComponent Code 57 Isolation Procedures262
Component Code 58 Isolation ProceduresMID SPN PID SID FMI DescriptionOverviewThis fault code indicates an electrical problem in the Output Shaft Speed Sensor circuit. The signalfrom the sensor did not match the current operating conditionsWhen troubleshooting an inactive code see Product Diagnostic Mode (PDM) on page 19.DetectionA speed sensor is determined faulty when all the speed sensor readings are compared <strong>and</strong> onesensor is inconsistent, the sensor is shorted to power or ground, a grounded circuit is detected, orif an abnormal frequency is detected.FallbackThis fault causes an In Place fallback.Required Tools• Basic H<strong>and</strong> Tools• <strong>Eaton</strong> Test Adapter Kit• Digital Volt/Ohm Meter• Troubleshooting Guide• ServiceRanger a PC-based Service ToolPossible Causes191 191 2, 3, 4, 5, 6,8This fault code can be caused by any of the following:• Transmission Harness• Output Shaft Speed Sensor• Various Transmission Components• Transmission ECU• Failed or Loose Tone WheelOutput Shaft SpeedSensor263
Component Code 58 Isolation ProceduresTransmissioncontrollerTransmission harnessOutput shaftspeed sensor264
Component Code 58 Isolation ProceduresFault Isolation ProceduresFault Isolation ProceduresNote:If troubleshooting an <strong>UltraShift</strong>® PLUS model transmission’s output shaft speed sensor,which is a directional sensor, go to Step E. Otherwise start at Step A.STEP A1. Key off.Procedure Condition Action2. Disconnect negative batterycable.3. Disconnect the TransmissionHarness 38-way connector.4. Measure resistance betweenthe Transmission Harness38-way connector pins 23<strong>and</strong> 24 <strong>and</strong> 23 <strong>and</strong> ground.If resistance is 2K to 4.5K ohm<strong>and</strong> pin 23 to ground is OLIf resistance is outside of therangeGo to STEP BGo to STEP COHMSFront View38-Way ConnectorV COM A3729 30 3123 24 2532 33 3426 27 283813 1415 161718 19202122357 8 910 11 121 2 34 5 636OHMSV COM A3713 1429 30 3132 33 343824 2526 27 2823Ground15 16 1718 19 20 21 22357 8 910 11 121 2 34 5 636Transmission Harness 38-way Connector265
Fault Isolation ProceduresComponent Code 58 Isolation ProceduresSTEP BProcedure Condition Action1. Inspect Output Shaft SpeedSensor for contamination ordamage.If no problem foundReplace Transmission ECU (Onlyif Fault Code is Active).Go to STEP VIf problem is found or you weresent here from Step C or DReplaceOutput Shaft Speed Sensor<strong>and</strong> inspect the tone wheel fordamage, looseness or corrosion.Go to STEP VSTEP CProcedure Condition Action1. Disconnect the TransmissionHarness from the OutputShaft Speed Sensor.2. Measure resistance betweenOutput Shaft Speed Sensorpins A <strong>and</strong> B.If resistance is 2K to 4.5K ohmIf resistance is outside of rangeGo to STEP DGo to STEP BOHMSABV COM A266
Component Code 58 Isolation ProceduresFault Isolation ProceduresSTEP DProcedure Condition Action1. Measure resistance betweenOutput Shaft Speed Sensorpin A <strong>and</strong> ground.If resistance is OLIf resistance is less than 10K ohmReplace Transmission Harness.Go to STEP VGo to STEP BOHMSABV COM AGROUNDSTEP E1. Key off.Procedure Condition Action2. Disconnect the TransmissionHarness from the OutputShaft Speed Sensor.3. With key on, measurevoltage from TransmissionHarness connector 1 <strong>and</strong> 2.If voltage is within 4.9 - 5.1voltsIf voltage is out of rangeReplace the Output Shaft Sensor.Go to STEP VGo to STEP FVOLTSV COM A267
Fault Isolation ProceduresComponent Code 58 Isolation ProceduresSTEP F1. Key off.Procedure Condition Action2. Disconnect negative batterycable.3. Disconnect the TransmissionHarness 38-way connector.4. Check for connector damage<strong>and</strong> measure resistancebetween:- Transmission Harness38-way connector pins 22<strong>and</strong> Transmission Harnessconnector 1.- Transmission Harness38-way connector pins 21<strong>and</strong> Transmission Harnessconnector 2.If harness connections arein good condition <strong>and</strong>resistance of both circuitsmeasure between 0 to 0.3 ohmsIf damaged or failed harnessconnectors are found, or if eitheror both circuits are out of rangeReplace the ECU (Only if FaultCode is Active.) Go to STEP VReplace the TransmissionHarness. Go to STEP VOHMSV COM A3713 143529 30 3132 33 342324 2526 27 2815 16 1718 19 207 8 910 11 121 2 34 5 638212236Front View38-Way Connector268
Component Code 58 Isolation ProceduresFault Isolation ProceduresSTEP V1. Key off.Procedure Condition Action2. Reconnect all connectors<strong>and</strong> the negative batterycable.3. Verify proper installation ofspeed sensor.4. Key on.5. Clear codes.6. Drive the vehicle <strong>and</strong> attemptto reset the code.7. Check for codes. If no codes Test complete.If code 58 appearsIf code other than 58 appearsTo find error in testing, return toSTEP AGo to Fault Code IsolationProcedure Index.269
Fault Isolation ProceduresComponent Code 58 Isolation Procedures270
Component Code 61 Isolation ProceduresMID SPN PID SID FMI Description130 772 39 1, 5, 6, 12 Rail Select MotorOverviewThis fault indicates the XY shifter Rail Motor system is not working properly.Theory of OperationThe TECU checks the rail motor for open or shorted connections. There are four fault conditionsdefined by the reported FMI via ServiceRanger software.DetectionStarting at key-on <strong>and</strong> throughout operation, the TECU constantly monitors the motor circuit. If afailure mode of short to battery, short to ground, open circuit, or low current is detected the fault isset.Conditions to Set the Fault Code Active• FMI 1 - The TECU detects a high resistance in the motor circuit (5 ohms or greater) resultingin slow or no movement of the XY shift finger. This fault will set when the XY shifter fails toselect the proper rail.• FMI 5, 6 - This fault is set when the condition is detected for at least 0.5 seconds <strong>and</strong> theTECU attempts to move the XY shift finger. FMI 5 is open or shorted to ground, FMI 6 isshorted to power.• FMI 12 - The TECU detects a fault condition within the TECU XY control circuit, resulting inslow or no movement of the XY shift finger. This fault is set when the XY shifter fails to selectthe proper rail.Fallback Mode During Power-Up• The transmission will power-up <strong>and</strong> may not be able to confirm neutral, no start gear can beselected.• The Engine will not crank <strong>and</strong> a dash “-” will be shown in the gear display.Fallback Mode During Operation• The transmission remains in its current gear. An “F” may appear in the gear display.• The service light will blink.• Until the fault is cleared, driver may have to shut off engine in gear.Conditions to Set the Fault Inactive• FMI 1, 12 - The fault becomes inactive when the shift is completed.• FMI 5, 6 - The fault becomes inactive when the open or short circuit conditions are notdetected for 0.5 seconds.Required Tools• Basic H<strong>and</strong> Tools271
Component Code 61 Isolation Procedures• <strong>Eaton</strong> Test Adapter Kit• Digital Volt / Ohm Meter• Troubleshooting Guide• ServiceRanger, a PC-based Service ToolPossible Causes for FaultFMI 1, 5:• The XY shifter rail motor may be damaged, failed, or has developed a low resistance toground.• Connections <strong>and</strong> wires between the rail motor <strong>and</strong> the TECU may be loose or damaged,terminals <strong>and</strong> wires may be bent, or terminals may be burnt.• TECU may have an internal short to ground or open circuit <strong>and</strong> has failed.FMI 6:• The wires between the rail motor <strong>and</strong> the TECU may be grounded or shorted.• TECU may have internal short to power <strong>and</strong> has failed.FMI 12:• Poor chassis power or ground.• The wires between the rail motor <strong>and</strong> the TECU may be grounded or shorted.• TECU internal failure.272
ABCComponent Code 61 Isolation ProceduresTransmission ControllerFront of TransmissionOEM181920101112ABCGear selectsensor3638FrontTransmissionHarness AssyBlueConnectorRail selectsensorXY ShifterAssy3537BlackConnectorFor TransmissionDiagnostics(Located at the left rearcorner of the transmission)2324151678ABABABOutput shaftspeed sensorInput shaftspeed sensorMain shaftspeed sensorBACD63428CBARangevalveBCA17312543226CBASplitter valve(13 & 18 speed only)4-wayB - Service Bat. +C - Service Bat. -A - Service Ignition +335ABInertia brake (Optional)273
Fault Isolation ProceduresComponent Code 61 Isolation ProceduresFault Isolation ProceduresSTEP AProcedure Condition Action1. Use ServiceRanger toretrieve <strong>and</strong> record fault code61 FMI information.Issue found with TECU powersupply harness or vehiclebatteriesRepair or replace items foundduring Electrical Pretest.Go to STEP V2. Perform Electrical Pretest,inspect TECU power supplyharness <strong>and</strong> fuse holder.Electrical Pretest passed, noissues foundGo to STEP BSTEP BProcedure Condition Action1. Key off. Measured resistance is 2 ohms orlessGo to STEP C2. Disconnect the negativebattery cable.Measured resistance is greaterthan 2 ohmsGo to STEP D3. Disconnect the TransmissionHarness 38-way connectorfrom the TECU.4. Measure resistance betweenpins 35 <strong>and</strong> 37.OHMSV COM AFront View38-Way Connector3729 30 3123 24 2532 33 3426 27 283813 1415 161718 19202122357 8 910 11 121 2 34 5 636Transmission Harness 38-way Connector274
Component Code 61 Isolation ProceduresFault Isolation ProceduresSTEP CProcedure Condition Action1. Measure the resistancebetween pin 35 <strong>and</strong> ground.Measured resistance is 1M ohmor greaterGo to STEP EMeasured resistance is less than1M ohmGo to STEP DOHMSV COM AFront View38-Way ConnectorGROUND3713 1429 30 3123 24 2515 16 1732 33 3426 27 2818 19 20213822357 8 910 11 121 2 34 5 636Transmission Harness 38-way ConnectorSTEP DProcedure Condition Action1. Disconnect the black 2-wayrail motor connector from thetransmission harness.Measured resistance is:• Pin A to B – 2 ohms or less• Pin A to Ground – 1M ohm orgreaterReplace the TransmissionHarness.Go to STEP V2. Measure the resistance ofthe Rail Motor at the 2-wayconnector.Measured resistance is out ofrangeReplace the XY shifter.Go to STEP VBAOHMSBAOHMSV COM AV COM AGROUND275
Fault Isolation ProceduresComponent Code 61 Isolation ProceduresSTEP EProcedure Condition Action1. FMI information recordedfrom Step A.FMI 1 or 5 is activeReplace the TECU <strong>and</strong>transmission harness.Go to STEP VFMI 1 or 5 is inactive <strong>and</strong> theTECU serial number is betweenETC2000000 <strong>and</strong> ETC2029918FMI 1 or 5 is inactive <strong>and</strong> theTECU serial number is aboveETC2029918FMI 6 or 12 is active or inactiveReplace the TECU <strong>and</strong>transmission harness.Go to STEP VReplace the XY shifter <strong>and</strong>transmission harness.Go to STEP VReplace the TECU.Go to STEP VModel:Hardware Rev:Serialno:Date Code:TECU Serial Number276
Component Code 61 Isolation ProceduresFault Isolation ProceduresSTEP V1. Key off.Procedure Condition Action2. Reconnect all connectors<strong>and</strong> the negative batterycable.3. Key on.4. Clear codes.5. Drive the vehicle <strong>and</strong> attemptto reset the code.6. Check for codes. If no codes Test complete.If code 61 appearsTo find error in testing, return toSTEP A277
Fault Isolation ProceduresComponent Code 61 Isolation Procedures278
Component Code 63 Isolation ProceduresMID SPN PID SID FMI Description130 773 40 1, 5, 6, 12 Gear Select MotorOverviewThis fault indicates the XY shifter Gear Motor system is not working properly.Theory of OperationThe TECU checks the gear motor <strong>and</strong> controller for open or shorted connections. There are fourfault conditions defined by the reported FMI via ServiceRanger software.DetectionStarting at key-on <strong>and</strong> throughout operation, the TECU constantly monitors the motor circuit. If afailure mode of short to battery, short to ground, open circuit, or low current is detected the fault isset.Conditions to Set the Fault Code Active• FMI 1 - The TECU detects a high resistance in the motor circuit (5 ohms or greater) resulting inslow or no movement of the XY shift finger. This fault will set when the XY shifter fails toengage or disengage a gear.• FMI 5, 6 - This fault is set when the condition is detected for at least 0.5 seconds <strong>and</strong> theTECU attempts to move the XY shift finger. FMI 5 is open or shorted to ground, FMI 6 isshorted to power.• FMI 12 - The TECU detects a fault condition within the TECU XY control circuit, resulting inslow or no movement of the XY shift finger. This fault is set when the XY shifter fails to engageor disengage a gear.Fallback Mode During Power-Up• The transmission will power-up <strong>and</strong> may not be able to confirm neutral, no start gear can beselected.• The Engine will not crank <strong>and</strong> a dash “-” will be shown in the gear display.Fallback Mode During Operation• The transmission remains in its current gear. An “F” may appear in the gear display.• The service light will blink.• Until the fault is cleared, driver may have to shut off engine in gear.Conditions to Set the Fault Inactive• FMI 1, 12 - The fault becomes inactive when the shift is completed.• FMI 5, 6 - The fault becomes inactive when the open or short circuit conditions are notdetected for 0.5 seconds.279
Component Code 63 Isolation ProceduresRequired Tools• Basic H<strong>and</strong> Tools• <strong>Eaton</strong> Test Adapter Kit• Digital Volt / Ohm Meter• Troubleshooting Guide• ServiceRanger, a PC-based Service ToolPossible Causes for FaultFMI 1, 5:• The XY shifter gear motor may be damaged, failed, or has developed a low resistance toground.• Connections <strong>and</strong> wires between the gear motor <strong>and</strong> the TECU may be loose or damaged,terminals <strong>and</strong> wires may be bent, or terminals may be burnt.• TECU may have an internal short to ground or open circuit <strong>and</strong> has failed.FMI 6:• The wires between the gear motor <strong>and</strong> TECU may be shorted to power.• TECU may have internal short to power <strong>and</strong> has failed.FMI 12:• Poor chassis power or ground.• The wires between the gear motor <strong>and</strong> TECU may be shorted to ground.• TECU internal failure.280
ABCComponent Code 63 Isolation ProceduresTransmission ControllerFront of TransmissionOEM181920101112ABCGear selectsensor3638FrontTransmissionHarness AssyBlueConnectorRail selectsensorXY ShifterAssy3537BlackConnectorFor TransmissionDiagnostics(Located at the left rearcorner of the transmission)2324151678ABABABOutput shaftspeed sensorInput shaftspeed sensorMain shaftspeed sensorBACD63428CBARangevalveBCA17312543226CBASplitter valve(13 & 18 speed only)4-wayB - Service Bat. +C - Service Bat. -A - Service Ignition +335ABInertia brake (Optional)281
Fault Isolation ProceduresComponent Code 63 Isolation ProceduresFault Isolation ProceduresSTEP AProcedure Condition Action1. Use ServiceRanger toretrieve <strong>and</strong> record fault code63 FMI information.Issue found with TECU powersupply harness or vehiclebatteriesRepair or replace items foundduring Electrical Pretest.Go to STEP V2. Perform Electrical Pretest,inspect TECU power supplyharness <strong>and</strong> fuse holder.Electrical Pretest passed, noissues foundGo to STEP BSTEP BProcedure Condition Action1. Key off. Measured resistance is 2 ohms orlessGo to STEP C2. Disconnect the negativebattery cable.Measured resistance is greaterthan 2 ohmsGo to STEP D3. Disconnect the TransmissionHarness 38-way connectorfrom the TECU.4. Measure resistance betweenpins 36 <strong>and</strong> 38.OHMSFront View38-Way ConnectorV COM A3729 30 3123 24 2532 33 3426 27 283813 1415 161718 19202122Transmission Harness 38-way Connector357 8 910 11 121 2 34 5 636282
Component Code 63 Isolation ProceduresFault Isolation ProceduresSTEP CProcedure Condition Action1. Measure the resistancebetween pin 36 <strong>and</strong> ground.Measured resistance is 1M ohmor greaterGo to STEP EMeasured resistance is less than1M ohmGo to STEP DOHMSFront View38-Way ConnectorV COM A3713 1429 30 3123 24 2515 16 1732 33 3426 27 2818 19 20213822GROUNDTransmission Harness 38-way Connector357 8 910 11 121 2 34 5 636STEP DProcedure Condition Action1. Disconnect the blue 2-waygear motor connector fromthe transmission harness.Measured resistance is:• Pin A to B – 2 ohms or less• Pin A to Ground – 1M ohm orgreaterReplace the TransmissionHarness.Go to STEP V2. Measure the resistance ofthe gear motor at the 2-wayconnector.Measured resistance is out ofrangeReplace the XY shifter.Go to STEP VBAOHMSBAOHMSV COM AV COM AGROUND283
Fault Isolation ProceduresComponent Code 63 Isolation ProceduresSTEP EProcedure Condition Action1. FMI information recordedfrom Step A.FMI 1 or 5 is activeReplace the TECU <strong>and</strong>transmission harness.Go to STEP VFMI 1 or 5 is inactive <strong>and</strong> theTECU serial number is betweenETC2000000 <strong>and</strong> ETC2029918FMI 1 or 5 is inactive <strong>and</strong> theTECU serial number is aboveETC2029918FMI 6 or 12 is active or inactiveReplace the TECU <strong>and</strong>transmission Harness.Go to STEP VReplace the XY shifter <strong>and</strong>transmission harness.Go to STEP VReplace the TECU.Go to STEP VModel:Hardware Rev:Serialno:Date Code:TECU Serial Number284
Component Code 63 Isolation ProceduresFault Isolation ProceduresSTEP V1. Key off.Procedure Condition Action2. Reconnect all connectors<strong>and</strong> the negative batterycable.3. Key on.4. Clear codes.5. Drive the vehicle <strong>and</strong> attemptto reset the code.6. Check for codes. If no codes Test complete.If code 63 appearsIf code other than 63appearsTo find error in testing, return toSTEP AGo to Fault Code IsolationProcedure Index.285
Fault Isolation ProceduresComponent Code 63 Isolation Procedures286
System Code 64 Isolation ProceduresMID SPN PID SID FMI Description788 34 2, 7, 12 ECA FaultOverviewThe Electric Clutch Actuator (ECA) controls the position of the clutch assembly. The ECA has amain power 3-way connector that is directly connected to the 12-volt battery <strong>and</strong> an 8-wayconnector that is connected to the Transmission ECU <strong>and</strong> the Engine Speed Sensor. The ECAcommunicates with the ECU over the proprietary Controller Area Network (CAN) datalink tochange position, show faults, or include other operation information.DetectionStarting at key-on <strong>and</strong> throughout operation, the Transmission ECU constantly monitors the ECAfor excessive motor current, excessive motor temperature, incorrect motor position, improperbattery or ignition voltage to the ECA, or various internal ECA failures.FallbackIf the fault occurs while driving, the ECA will either maintain current clutch position or move to thelast position comm<strong>and</strong>ed by the ECU. If the fault occurs at power-up, the vehicle will not crank.Required Tools• Basic H<strong>and</strong> Tools• <strong>Eaton</strong> Test Adapter Kit• Digital Volt/Ohm Meter• Troubleshooting Guide• ServiceRanger a PC-based Service ToolPossible Causes• ECA• Cross-shaft• Exhaust• Release yoke• Lack of Lube in Release Bearing• ECA Power Supply Harness, Connections, <strong>and</strong> Fuse Holder• Charging System• Transmission Harness• Transmission ECU• Low Batteries or Bad Main Power Connection287
Fault Isolation ProceduresSystem Code 64 Isolation ProceduresECAFault Isolation ProceduresSTEP AProcedure Condition Action1. Retrieve active fault codes<strong>and</strong> FMIs withServiceRanger using the 9-pin diagnostic connector.2. Key off.3. Disconnect negative batterycable.4. What FMIs are present? FMI 2 is present Follow Fault Code 66 diagnosticprocedure. If no fault found,proceed to Fault Code 67diagnostic procedure.FMI 12 is presentFMI 7 is presentReplace the ECA. Go to STEP VGo to STEP B288
System Code 64 Isolation ProceduresFault Isolation ProceduresSTEP BProcedure Condition Action1. Check for signs of a failedrelease bearing or bushingfailure.STEP CThere is no evidence of a failedrelease bearing or bushingRelease bearing or bushingshows signs of damage due tolow lubeGrease bearing in accordancewith CLSM0200. Go to STEP CReplace the Clutch.Go to STEP VProcedure Condition Action1. Check the ECA for any debrisbuild-up, damaged exhaust,or missing exhaust heatshields near the ECA.STEP DECA has no debris build-up orexhaust damage next to the unitECA has debris build-up orexhaust damage next to the unitGo to STEP DRemove the debris build-up, orrepair the exhaust damage.Go to STEP VProcedure Condition Action1. Disconnect the ECA 8-way<strong>and</strong> 3-way connectors.2. Remove the ECA.Note: For additional information on ECA or Cross-Shaft removal, see publication TRSM0930, Fuller AutomatedTransmission Service Manual.3. Rotate the cross-shafts bygrabbing the exposed lowercross-shafts <strong>and</strong> rotating it.If the cross-shafts rotate withoutany bindingReplace the ECA. Go to STEP VIf the cross-shafts bind whenrotated.Replace the cross-shafts <strong>and</strong>bushings. Go to STEP V289
Fault Isolation ProceduresSystem Code 64 Isolation ProceduresSTEP V1. Key off.Procedure Condition Action2. Reconnect all connectors.3. Key on.4. Clear codes.5. Drive the vehicle <strong>and</strong> attemptto reset the code.6. Check for codes. If no codes Test complete.If code 64 appearsIf code other than 64 appearsTo find error in testing, return toSTEP AGo to Fault Code IsolationProcedure Index.290
Component Code 65 Isolation ProceduresMID SPN PID SID FMI Description5052 192 5, 2 ECA Speed Sensor FaultOverviewThe Electric Clutch Actuator (ECA) controls the position of the clutch assembly. The ECA has amain power 3-way connector that is directly connected to the 12-volt battery <strong>and</strong> an 8-wayconnector that is connected to the transmission ECU <strong>and</strong> the Engine Speed Sensor. The EngineSpeed Sensor is installed in Transmission Clutch Housing. (Early models had the sensor installedin the Engine Flywheel Housing.) Location may vary, contact OEM for exact location. The ECAcommunicates with the ECU over the proprietary Controller Area Network (CAN) datalink tochange position, show faults, or include other operation information. When troubleshooting aninactive code see Product Diagnostic Mode (PDM) on page 19 for more information ontroubleshooting inactive codes.DetectionThe speed sensor is determined to be faulty when the ECU detects J1939 engine speed at idle,but does not detect ECA engine speed, or when the ECA detects an open on the ECA speedsensor signal circuit at key on.FallbackThere is no fallback mode associated with this fault. The Transmission ECU also detects enginespeed over the J1939 datalink. Given engine speed detection is redundant; this fault will not likelyaffect transmission operation.Required Tools• Basic H<strong>and</strong> Tools• <strong>Eaton</strong> Test Adapter Kit• Digital Volt/Ohm Meter• Troubleshooting Guide• ServiceRanger a PC-based Service ToolPossible Causes• ECA Speed Sensor• ECA Speed Sensor Harness• ECA• Flywheel• Improper Installation• Damaged Clutch Speed Lug291
Fault Isolation ProceduresComponent Code 65 Isolation ProceduresECA 3-Way ConnectorECA Speed Sensor(Connect View)ECA 8-Way ConnectorCBAABA B C DH G FESpeed SensorABECA2G2FEng Speed Sensor (-)Eng Speed Sensor (+)Fault Isolation ProceduresImportant: On early models, the sensor is installed in the engine flywheel housing, <strong>and</strong> the speedis picked up from the flywheel. On later models, the sensor is installed in the clutch housing, <strong>and</strong>the speed is picked up from (4) lugs cast into the clutch cover. The sensor resistance value differsper location.STEP AProcedure Condition Action1. Retrieve active fault codes<strong>and</strong> FMIs withServiceRanger using the 9-pin diagnostic connector.2. What FMIs are present? FMI 5 is present Go to STEP BFMI 2 is presentGo to STEP G292
Component Code 65 Isolation ProceduresFault Isolation ProceduresSTEP B1. Key off.Procedure Condition Action2. Check resistance betweenECA 8-way harnessconnector pins F <strong>and</strong> G.If resistance is 140 - 180 ohms inflywheel housing mountedsensor, or 2K to 4.5K ohm inclutch housing mounted sensorGo to STEP DIf resistance is out of rangeGo to STEP CSTEP C1. Key off.Procedure Condition Action2. Check resistance betweenECA Speed Sensorconnector pins A <strong>and</strong> B.If resistance is 140 - 180 ohms inflywheel housing mountedsensor, or 2K to 4.5K ohm inclutch housing mounted sensorReplace Transmission Harness.Go to STEP VIf resistance is out of rangeReplace the ECA Speed Sensor.Go to STEP VSTEP D1. Key off.Procedure Condition Action2. Check resistance betweenECA 8-way connector pins F<strong>and</strong> ground.If resistance is 10K orgreater.If resistance is out of range.Go to STEP FGo to STEP E293
Fault Isolation ProceduresComponent Code 65 Isolation ProceduresSTEP E1. Key off.Procedure Condition Action2. Check resistance betweenECA Speed Sensorconnector pins A <strong>and</strong> ground.If resistance is 10K ohm orgreaterIf resistance is out of rangeReplace Transmission Harness.Go to STEP VReplace the ECA Speed Sensor.Go to STEP VSTEP F1. Key on.Procedure Condition Action2. Measure voltage from theECA 8-way harnessconnector pin G <strong>and</strong> ground.If voltage is 0 volts at key on <strong>and</strong>FMI 5 is activeIf voltage is greater than 0 volts atkey onReplace the ECA (only if faultcode is active). Go to STEP VIndicates short to power. Replacethe Transmission Harness.Go to STEP VSTEP G1. Key off.Procedure Condition ActionNote:Reference publication TRSM0930, Fuller Automated Transmission Service Manual, for ECA Speed Sensorremoval <strong>and</strong> installation.2. Remove the ECA speedsensor <strong>and</strong> examine thesensor end for signs ofdamage or debris buildup.If the sensor shows no signs ofcracks, misaligned connections,or metallic debris buildupIf the sensor is damaged or hasdebris buildupGo to STEP HReplace or clean the ECA SpeedSensor as needed. Go to STEP V294
Component Code 65 Isolation ProceduresFault Isolation ProceduresSTEP H1. Key off.Procedure Condition Action2. Depending on where thesensor is mounted, inspectthe engine flywheel to ensurethere are no missing ordamaged teeth, or inspectthe clutch cover to ensurethere are no missing ordamaged speed lugs.If flywheel teeth or clutch coverspeed lugs are all intact <strong>and</strong> ingood conditionIf flywheel teeth or clutch coverspeed lugs are damaged ormissingReinstall ECA Speed Sensor <strong>and</strong>drive vehicle. If fault returnsreplace the sensor.Go to STEP VReplace or repair the flywheel perOEM instructions.STEP V1. Key off.Procedure Condition Action2. Reconnect all connectors.3. Key on.4. Clear codes.5. Drive the vehicle <strong>and</strong> attemptto reset the code.6. Check for codes. If no codes Test complete.If code 65 appearsIf code other than 65 appearsTo find error in testing, return toSTEP AGo to Fault Code IsolationProcedure Index.295
Fault Isolation ProceduresComponent Code 65 Isolation Procedures296
Component Code 66 Isolation ProceduresMID SPN PID SID FMI Description520271 34 3, 4 ECA Battery Voltage FaultOverviewThe Electric Clutch Actuator (ECA) controls the position of the clutch assembly. The ECA has amain power 3-way connector that is directly connected to the 12-volt battery positive <strong>and</strong> negativeterminals. When troubleshooting an inactive code see Product Diagnostic Mode (PDM) onpage 19 for more information on troubleshooting inactive codes.DetectionStarting at key-on <strong>and</strong> throughout operation, the Transmission ECU constantly measures ECAvoltage. Fault Code 66 will set if the ECA battery voltage is above 17 volts for 10 ms or greater, orif the ECA battery voltage is below 8.5 volts for 10 ms or greater.FallbackIf the fault occurs while driving, the ECA will either maintain current clutch position or move to thelast position comm<strong>and</strong>ed by the ECU, then the ECA holding device will engage. If the fault occursat power-up, the vehicle will not crank.Required Tools• Basic H<strong>and</strong> Tools• <strong>Eaton</strong> Test Adapter Kit• Digital Volt/Ohm Meter• Troubleshooting Guide• ServiceRanger a PC-based Service ToolPossible Causes• ECA power supply harness, connections, <strong>and</strong> fuse holder• Low batteries or bad main power connection• Charging system• ECA297
Component Code 66 Isolation ProceduresECA 3-Way ConnectorCBAECAGround1B1CECA GroundECA PowerPlus(+)Battery298
Component Code 66 Isolation ProceduresFault Isolation ProceduresFault Isolation ProceduresSTEP AProcedure Condition Action1. Key on.2. Retrieve active fault codes<strong>and</strong> FMIs withServiceRanger using the9-pin diagnostic connector.3. Perform Electrical Pretest. If FC 66 / FMI 3 is active afterperforming the Electrical PretestIf FC 66 / FMI 4 or FC 64 / FMI 2is active after performing theElectrical PretestReplace the ECA (only if FaultCode is Active). Go to STEP VGo to STEP BSTEP BProcedure Condition Action1. Check ECA power harnessfor excessive resistance orpoor/loose connections, perOEM guidelines.If connection or wiring problemfoundRepair power harness per OEMguidelines. Go to STEP VIf no problem found with harnessor connections, <strong>and</strong> FC 66 / FMI4 is still activeReplace the ECA. Go to STEP VIf no problem found with harnessor connections, <strong>and</strong> FC 64 / FMI2 is still activeProceed to STEP B of Fault Code67 Diagnostic Procedure.299
Fault Isolation ProceduresComponent Code 66 Isolation ProceduresSTEP V1. Key off.Procedure Condition Action2. Reconnect all connectors.3. Key on.4. Clear codes.5. Drive the vehicle <strong>and</strong> attemptto reset the code.6. Check for codes. If no codes Test complete.If FC 66 or FC 64 / FMI 2 appearsIf code other than FC 66 or FC 64/ FMI 2 appearsTo find error in testing, return toSTEP AGo to Fault Code IsolationProcedure Index.300
Component Code 67 Isolation ProceduresMID SPN PID SID FMI Description520274 158 3, 4, 5 ECA Ignition Voltage FaultOverviewThe Electric Clutch Actuator (ECA) controls the position of the clutch assembly. The ECA has an8-way connector that supplies ignition power to the ECA from the transmission ECU. Whentroubleshooting an inactive code see Product Diagnostic Mode (PDM) on page 19 for moreinformation on troubleshooting inactive codes.DetectionThe Transmission ECU monitors ECA ignition voltage during normal operation. Fault Code 67 isset if the ECA ignition voltage is shorted to the 12-volt system prior to powering the ignition supplyfor the ECA, or when the ECA ignition voltage is shorted to ground during key on operation.FallbackIf the fault occurs while driving, the ECA will either maintain current clutch position or move to thelast position comm<strong>and</strong>ed by the ECU, then the ECA holding device will engage. If the fault occursat power-up, the vehicle will not crank.Required Tools• Basic H<strong>and</strong> Tools• <strong>Eaton</strong> Test Adapter Kit• Digital Volt/Ohm Meter• Troubleshooting Guide• ServiceRanger a PC-based Service ToolPossible Causes• Transmission Harness• Transmission ECU• ECA301
Fault Isolation ProceduresComponent Code 67 Isolation Procedures38-Pin Front Harness View(ECU - Transmission Interface Connector)29 30 313724 2513 14 15 16 1732 33 3426 27 2818 19 20213822ECA 8-Way Connector357 8 910 11 121 2 34 5 636A B C DH G FEECUECAECA Ignition (System) 13 H ECA IgnitionFault Isolation ProceduresSTEP AProcedure Condition Action1. Key on.2. Retrieve active fault codes<strong>and</strong> FMIs withServiceRanger using the9-pin diagnostic connector.3. Perform Electrical Pretest. If FC 67 is active after performingthe Electrical Pretest.Go to STEP B302
Component Code 67 Isolation ProceduresFault Isolation ProceduresSTEP B1. Key off.Procedure Condition Action2. Disconnect the ECA 8-wayharness connector.3. Measure voltage at ECA8-way harness connectorfrom pin H to ground:- With key on.- With key off.Voltage is within 11-13 volts atkey-on <strong>and</strong> 0 volts at key-offIf any of the above conditions arenot metGo to STEP CGo to STEP DSTEP C1. Key off.Procedure Condition Action2. Disconnect the Transmission38-way harness connector atECU.3. Inspect the ECU 38-way <strong>and</strong>ECA 8-way harnessconnectors for signs ofdamage or misalignedconnections.No signs of damaged ormisaligned harness connectionsIf evidence is found of damagedor misaligned harnessconnectionsReplace ECA (only if fault code67 or fault code 64 / FMI 2 isactive). Go to STEP VReplace the TransmissionHarness. Go to STEP V303
Fault Isolation ProceduresComponent Code 67 Isolation ProceduresSTEP D1. Key off.Procedure Condition Action2. Disconnect the transmission38-way harness connector atECU.3. Measure resistancebetween:- Transmission 38-wayharness connector pin 13<strong>and</strong> ECA 8-way connectorpin 2H.- Transmission 38-wayharness connector pin 13<strong>and</strong> ground.If resistance between pins 13 <strong>and</strong>2H is 0 to 0.3 ohms <strong>and</strong> ifresistance between pin 13 <strong>and</strong>ground is OLIf any of the above conditions arenot metGo to STEP EReplace the transmissionharness. Go to STEP VSTEP E1. Key off.Procedure Condition Action2. Inspect the ECU 38-way <strong>and</strong>ECA 8-way harnessconnectors for signs ofdamage or misalignedconnections.No signs of damaged ormisaligned harness connectionsIf evidence is found of damagedor misaligned harnessconnectionsReplace ECU (only if fault code67 or fault code 64 / FMI 2 isactive). Go to STEP VReplace the transmissionharness. Go to STEP V304
Component Code 67 Isolation ProceduresFault Isolation ProceduresSTEP V1. Key off.Procedure Condition Action2. Reconnect all connectors.3. Key on.4. Clear codes.5. Drive the vehicle <strong>and</strong> attemptto reset the code.6. Check for codes. If no codes Test complete.If fault code 67 or fault code 64 /FMI 2 appearsIf code other than fault code 67 orfault code 64 / FMI 2 appearsTo find error in testing, return toSTEP AGo to Fault Code IsolationProcedure Index.305
Fault Isolation ProceduresComponent Code 67 Isolation Procedures306
Component Code 68 Isolation ProceduresMID SPN PID SID FMI Description520274 227 14 Grade Sensor520321 227 13, 14 Grade SensorOverviewThe Grade Sensor is mounted inside the transmission ECU <strong>and</strong> is essential for Hill-Start-Aid. TheGrade Sensor also provides information to the ECU to assist in smooth vehicle launch <strong>and</strong> shifting.DetectionA fault will be set if the grade sensor reports an illogical grade to the ECU.FallbackHill-Start-Aid is enabled all the time.Required Tools• Basic H<strong>and</strong> Tools• Troubleshooting Guide• ServiceRanger a PC-based Service ToolPossible Causes• Improperly mounted ECU• Uncalibrated ECU• ECU failure307
Fault Isolation ProceduresComponent Code 68 Isolation ProceduresTransmission ECUFault Isolation ProceduresSTEP AProcedure Condition Action1. Key on.2. Retrieve active fault codes<strong>and</strong> FMIs withServiceRanger using the9-pin diagnostic connector.3. Perform Electrical Pretest. If FMI 13 is active afterperforming the Electrical PretestGo to STEP BIf FMI 14 is active afterperforming the Electrical PretestGo to STEP CIf issue was repair during theElectrical PretestGo to STEP V308
Component Code 68 Isolation ProceduresFault Isolation ProceduresSTEP B1. Key on.Procedure Condition Action2. Calibrate the ECU usingServiceRanger. (Stepsbelow)Before Grade Sensor Calibration, verify the vehicle is on level ground, the suspension is fully aired <strong>and</strong> the vehicle isat the appropriate ride height.3. Open the Advanced ProductFunctions menu <strong>and</strong> click onthe transmission model.4. Open the Grade SensorCalibration <strong>and</strong> follow theinstructions.5. Click on Calibrate GradeSensor.6. Verify Fault Code 68 hasgone inactive.If FMI 13 is not activeClose ServiceRanger <strong>and</strong> turn offignition switch to save calibration.Go to STEP VIf FMI 13 is still activeCall Roadranger Tech Support at1-800-826-4357 for assistance.The Grade Sensor can be calibrated via ServiceRanger or Operator Triggered Special Function.Detailed instructions on both methods can be found in Service Manual TRSM0930.STEP C1. Key on.Procedure Condition Action2. Ensure that the transmissionECU is properly mounted<strong>and</strong> secured.If ECU found insecure or notproperly mountedIf ECU was found properlymounted <strong>and</strong> secureProperly secure the ECU. Go toSTEP VReplace the TECU (if fault code isactive.) Go to STEP V309
Fault Isolation ProceduresComponent Code 68 Isolation ProceduresSTEP V1. Key off.Procedure Condition Action2. Reconnect all connectors.3. Key on.4. Clear codes.5. Drive the vehicle <strong>and</strong> attemptto reset the code.6. Check for codes. If no codes Test complete.If code 68 appearsIf code other than 68 appearsTo find error in testing, return toSTEP AGo to Fault Code IsolationProcedure Index.310
Component Code 71 Isolation ProceduresMID SPN PID SID FMI Description130 560 60 7 Unable to Disengage GearOverviewThis fault indicates the system cannot disengage from the current gear. The system will continueattempting to disengage the current gear after the fault is set.Theory of OperationVehicle must be moving <strong>and</strong> attempting to change gear position <strong>and</strong> no electrical faults are active.DetectionThe system is unable to select the neutral position after 3 consecutive attempts.Conditions to Set the Fault Code Active• FMI 7 - The system is unable to select the neutral position after 3 consecutive attempts.Fallback mode During Power-Up• None, this fault can not be set at power-up.Fallback Mode During Operation• When this fault is active, the transmission will continue to attempt to select neutral.• The system will alternate the engine speed up <strong>and</strong> down in an attempt to achievedisengagement.• The gear display may blink the destination gear.• The service light will not flash, nor will an “F” be displayed on the dash.• The diagnostic code will not be transmitted on the J1587 bus until fault codes have beenrequested by a service tool.Conditions to Set the Fault Inactive• FMI 7 - The fault becomes inactive when neutral is achieved.Required Tools• Basic H<strong>and</strong> Tools• <strong>Eaton</strong> Test Adapter Kit• Digital Volt / Ohm Meter• Troubleshooting Guide• ServiceRanger, a PC-based Service ToolPossible Causes for FaultFMI 7:Shift Bar Housing311
Component Code 71 Isolation Procedures• Mechanical issue with the shift bar housing.• Damaged shift bar housing interlock <strong>parts</strong>.XY Shifter• New XY shifter installed <strong>and</strong> not recalibrated per the L-Letter (L-2003-30)• Mechanical issue with the XY shifter.• Badly contaminated / gummed up / soiled XY shifter ball screw due to oil cooler leak.• Worn center shaft bushing (TAIB-0814.)Base Transmission• Main box mechanical failure.• Sliding clutch / shift yoke wear.Transmission ECU• New ECU installed <strong>and</strong> not recalibrated per the L-Letter (L-2005-04.)Engine• Inaccurately reporting engine torque value.312
Component Code 71 Isolation ProceduresShift bar housingElectric shifterTransmissioncontrollerBase TransmissionEngineECMEngine Torque Value313
Fault Isolation ProceduresComponent Code 71 Isolation ProceduresFault Isolation ProceduresActive or Inactive Fault Code 71 - Go to Step A.STEP AProcedure Condition Action1. Key off.2. Was a new XY Shifter orTransmission ECU justinstalled without recalibratingthe transmission?YesPerform transmission calibration.Turn the ignition switch to ON <strong>and</strong>allow the transmission to powerup. Turn the ignition to OFF <strong>and</strong>wait two minutes. Go to STEP VSTEP BNoGo to STEP B3. Key off.Procedure Condition Action4. Inspect starter / battery <strong>and</strong>in-line fuse holderconnections for integrity.5. Measure voltage acrossbatteries.If voltage is 11 to 13 volts on a12-volt system or 22 to 26 on a24-volt systemProceed with battery load test.Repair or replace batteries asrequired. Go to STEP CIf voltage is outside of rangeRepair or replace batteries <strong>and</strong>charge system as required.Repeat test.Front of TransmissionTransmission ECUVOLTS–+V COM A–+OEM HarnessTransmission Harness36 38Battery power(Non-switched power)run to starter or Battery30 AMP fuse–+–+314
Component Code 71 Isolation ProceduresFault Isolation ProceduresSTEP CProcedure Condition Action1. Locate the diagnostic port onthe Transmission Harness -located at the left rear cornerof the transmission.2. Key on.3. Measure voltage betweenpins C <strong>and</strong> the batterynegative post.If voltage between pin C <strong>and</strong>battery negative post is 0.70 voltsor lessGo to STEP DIf voltage is outside of rangeRepair battery ground supply toTransmission ECU. Repeat test.4-Pin Diagnostics PortVOLTSBCADV COM ABattery Negative Post4-way4-Pin Diagnostic Port(Located at the left rearcorner of the transmission.)B - Service Bat. +C - Service Bat. -A - Service Ignition +315
Fault Isolation ProceduresComponent Code 71 Isolation ProceduresSTEP D1. Key on.Procedure Condition Action2. Measure voltage between pinB <strong>and</strong> pin C.If voltage between pins B <strong>and</strong> Cis within 0.6 volts of batteryvoltageGo to STEP EIf voltage is outside of rangeRepair battery power supply toTransmission ECU. Fuse may beblown. Repeat test.4-Pin Diagnostics PortVOLTSV COM ABCAD4-way4-Pin Diagnostic Port(Located at the left rearcorner of the transmission.)B - Service Bat. +C - Service Bat. -A - Service Ignition +316
Component Code 71 Isolation ProceduresFault Isolation ProceduresSTEP E1. Key on.Procedure Condition Action2. Measure voltage between pinA <strong>and</strong> pin C.If voltage between pin A <strong>and</strong> C iswithin 0.6 volts of battery voltageGo to STEP FIf voltage is outside of rangeRepair Ignition power supply toECU. Fuse may be blown.Repeat test.4-Pin Diagnostics PortVOLTSV COM ABCAD4-way4-Pin Diagnostic Port(Located at the left rearcorner of the transmission.)B - Service Bat. +C - Service Bat. -A - Service Ignition +317
Fault Isolation ProceduresComponent Code 71 Isolation ProceduresSTEP F1. Key off.Procedure Condition Action2. Remove Electric Shifter fromShift Bar Housing.3. Inspect the Shift BarHousing:- Visually inspect shift rails<strong>and</strong> blocks.- Verify shift bar housingoperation by confirming shiftrails can physically engageeach gear individually.- Confirm the shift barhousing can not engage twogears at the same time.4. Inspect XY Shifter:- Check for mechanicalissues with the XY Shifter.- Visually inspect for badlycontaminated / gummed up /soiled XY shifter ball screwdue to oil cooler leaks.- Check for a worn centershaft bushing (see TAIB-0814).5. Inspect Base Transmission:- Drain <strong>and</strong> inspect oil fordebris.- Remove I-brake or PTOcover <strong>and</strong> inspect for mainbox mechanical failure.- Inspect sliding clutches <strong>and</strong>shift yokes for wear.If no problem foundIf problem foundReplace Electric Shifter <strong>and</strong>Transmission Harness. Go toSTEP VRepair as required. Go to STEP V318
Component Code 71 Isolation ProceduresFault Isolation ProceduresSTEP V1. Key off.Procedure Condition Action2. Reconnect all connectors<strong>and</strong> the negative batterycable.3. Key on.4. Clear codes.5. Drive the vehicle <strong>and</strong> attemptto reset the code.6. Check for codes. If no codes Test complete.If code 71 appearsIf code other than 71appearsTo find error in testing, return toSTEP AGo to Fault Code IsolationProcedure Index.319
Fault Isolation ProceduresComponent Code 71 Isolation ProceduresShift bar housingElectric shifterTransmissioncontrollerBase TransmissionEngineECMEngine Torque Value320
Component Code 72 Isolation ProceduresMID SPN PID SID FMI Description130 772 59 7 Failed to Select RailOverviewThis fault indicates the system is unable to position the XY shift finger on the desired shift rail. Thesystem will continue attempting to select the desired rail position after the fault is set.Theory of OperationVehicle must be moving <strong>and</strong> attempting to select a rail <strong>and</strong> no electrical faults are active.DetectionThe system is unable to select the desired rail position after five consecutive attempts.Conditions to Set the Fault Code Active• FMI 7 - The system is unable to select the desired rail position after five consecutive attempts.Fallback mode During Power-Up• Vehicle may not crank (-) in the gear display.Fallback Mode During Operation• When this fault is active, the transmission will continue to attempt to select the desired railposition.• The system will alternate the engine speed up <strong>and</strong> down during a shift.• The gear display may blink the destination gear.• The service light will not flash, nor will an “F” be displayed on the dash.• The diagnostic code will not be transmitted on the J1587 bus until fault codes have beenrequested by a service tool.Conditions to Set the Fault Inactive• FMI 7 - The fault becomes inactive when the desired rail position is achieved.Required Tools• Basic H<strong>and</strong> Tools• <strong>Eaton</strong> Test Adapter Kit• Digital Volt / Ohm Meter• Troubleshooting Guide• ServiceRanger, a PC-based Service ToolPossible Causes for FaultFMI 7:Shift Bar Housing321
Component Code 72 Isolation Procedures• Mechanical issue with the shift bar housing.• Damaged shift bar housing interlock <strong>parts</strong>.XY Shifter• New XY shifter installed <strong>and</strong> not recalibrated per the L-Letter (L-2003-30)• Mechanical issue with the XY shifter.• Badly contaminated / gummed up / soiled XY shifter ball screw due to oil cooler leak.• Worn center shaft bushing (TAIB-0814.)Base Transmission• Main box mechanical failure.• Sliding clutch / shift yoke wear.Transmission ECU• New ECU installed <strong>and</strong> not recalibrated per the L-Letter (L-2005-04.)Shift bar housingElectric shifterTransmissioncontrollerBase Transmission322
Component Code 72 Isolation ProceduresFault Isolation ProceduresFault Isolation ProceduresActive or Inactive Fault Code 72 - Go to Step A.STEP AProcedure Condition Action1. Key off.2. Was a new XY Shifter orTransmission ECU justinstalled without recalibratingthe transmission?YesPerform transmission calibration.Turn the ignition switch to ON <strong>and</strong>allow the transmission to powerup. Turn the ignition to OFF <strong>and</strong>wait two minutes. Go to STEP VSTEP BNoGo to STEP B3. Key off.Procedure Condition Action4. Inspect starter / battery <strong>and</strong>inline fuse holderconnections for integrity.5. Measure voltage acrossbatteries.If voltage is 11 to 13 volts on a12-volt system or 22 to 26 on a24-volt systemProceed with battery load test.Repair or replace batteries asrequired. Go to STEP CIf voltage is outside of rangeRepair or replace batteries <strong>and</strong>charge system as required.Repeat test.Front of TransmissionTransmission ECUVOLTS–+V COM A–+OEM HarnessTransmission Harness36 38Battery power(Non-switched power)run to starter or Battery30 AMP fuse–+–+323
Fault Isolation ProceduresComponent Code 72 Isolation ProceduresSTEP CProcedure Condition Action1. Locate the diagnostic port onthe Transmission Harness -located at the left rear cornerof the transmission.2. Key on.3. Measure voltage betweenpins C <strong>and</strong> the batterynegative post.If voltage between pin C <strong>and</strong>battery negative post is 0.70 voltsor less.Go to STEP DIf voltage is outside of rangeRepair battery ground supply toTransmission ECU. Repeat test.4-Pin Diagnostics PortVOLTSBCADV COM ABattery Negative Post4-way4-Pin Diagnostic Port(Located at the left rearcorner of the transmission.)B - Service Bat. +C - Service Bat. -A - Service Ignition +324
Component Code 72 Isolation ProceduresFault Isolation ProceduresSTEP D1. Key on.Procedure Condition Action2. Measure voltage between pinB <strong>and</strong> pin C.If voltage between pins B <strong>and</strong> Cis within 0.6 volts of batteryvoltageGo to STEP EIf voltage is outside of rangeRepair battery power supply toTransmission ECU. Fuse may beblown. Repeat test.4-Pin Diagnostics PortVOLTSV COM ABCAD4-way4-Pin Diagnostic Port(Located at the left rearcorner of the transmission.)B - Service Bat. +C - Service Bat. -A - Service Ignition +325
Fault Isolation ProceduresComponent Code 72 Isolation ProceduresSTEP E1. Key on.Procedure Condition Action2. Measure voltage between pinA <strong>and</strong> pin C.If voltage between pin A <strong>and</strong> C iswithin 0.6 volts of battery voltageGo to STEP FIf voltage is outside of rangeRepair Ignition power supply toECU. Fuse may be blown.Repeat test.4-Pin Diagnostics PortVOLTSV COM ABCAD4-way4-Pin Diagnostic Port(Located at the left rearcorner of the transmission.)B - Service Bat. +C - Service Bat. -A - Service Ignition +326
Component Code 72 Isolation ProceduresFault Isolation ProceduresSTEP F1. Key off.Procedure Condition Action2. Remove Electric Shifter fromShift Bar Housing.3. Inspect the Shift BarHousing:- Visually inspect shift rails<strong>and</strong> blocks.- Verify shift bar housingoperation by confirming shiftrails can physically engageeach gear individually.- Confirm the shift barhousing can not engage twogears at the same time.4. Inspect XY Shifter:- Check for mechanicalissues with the XY Shifter.- Visually inspect for badlycontaminated / gummed up /soiled XY shifter ball screwdue to oil cooler leaks.- Check for a worn centershaft bushing (see TAIB-0814).5. Inspect Base Transmission:- Drain <strong>and</strong> inspect oil fordebris.- Remove I-brake or PTOcover <strong>and</strong> inspect for mainbox mechanical failure.- Inspect sliding clutches <strong>and</strong>shift yokes for wear.If no problem foundIf problem foundReplace Electric Shifter <strong>and</strong>Transmission Harness. Go toSTEP VRepair as required. Go to STEP V327
Fault Isolation ProceduresComponent Code 72 Isolation ProceduresSTEP V1. Key off.Procedure Condition Action2. Reconnect all connectors<strong>and</strong> the negative batterycable.3. Key on.4. Clear codes.5. Drive the vehicle <strong>and</strong> attemptto reset the code.6. Check for codes. If no codes Test complete.If code 72 appearsIf code other than 72appearsTo find error in testing, return toSTEP AGo to Fault Code IsolationProcedure Index.328
Component Code 73 Isolation ProceduresMID SPN PID SID FMI Description130 781 58 7 Failed to Engage GearOverviewThis fault indicates the system cannot engage the desired gear. The system will continueattempting to engaged the desired gear after the fault is set.Theory of OperationVehicle must be moving <strong>and</strong> attempting to engage a gear <strong>and</strong> no electrical faults can be active.DetectionThe system unsuccessfully attempts to engage a gear five times with no battery voltage faults.Conditions to Set the Fault Code Active• FMI 7 - The system is unable to engage a gear five times with no battery voltage faults.Fallback mode During Power-Up• None. This fault can not be set at power-up.Fallback Mode During Operation• When this fault is active, the transmission will continue to attempt to engage the gear.• The system will alternate the engine speed up <strong>and</strong> down in an attempt to achieveengagement.• The gear display may blink the destination gear.• The service light will not flash, nor will an “F” be displayed on the dash.• The diagnostic code will not be transmitted on the J1587 bus until fault codes have beenrequested by a service tool.Conditions to Set the Fault Inactive• FMI 7 - The fault becomes inactive when neutral is achieved.Required Tools• Basic H<strong>and</strong> Tools• <strong>Eaton</strong> Test Adapter Kit• Digital Volt / Ohm Meter• Troubleshooting Guide• ServiceRanger, a PC-based Service ToolPossible Causes for FaultFMI 7:Shift Bar Housing329
Component Code 73 Isolation Procedures• Mechanical issue with the shift bar housing.• Damaged shift bar housing interlock <strong>parts</strong>.XY Shifter• New XY shifter installed <strong>and</strong> not recalibrated per the L-Letter (L-2003-30)• Mechanical issue with the XY shifter.• Badly contaminated / gummed up / soiled XY shifter ball screw due to oil cooler leak.• Worn center shaft bushing (TAIB-0814.)Base Transmission• Main box mechanical failure.• Sliding clutch / shift yoke wear.Transmission ECU• New ECU installed <strong>and</strong> not recalibrated per the L-Letter (L-2005-04.)Engine• Inaccurately or not responding to the transmission speed control comm<strong>and</strong>.330
Component Code 73 Isolation ProceduresShift bar housingElectric shifterTransmissioncontrollerBase TransmissionEngineECM331
Fault Isolation ProceduresComponent Code 73 Isolation ProceduresFault Isolation ProceduresActive or Inactive Fault Code 73 - Go to Step A.STEP AProcedure Condition Action1. Key off.2. Was a new XY Shifter orTransmission ECU justinstalled without recalibratingthe transmission?YesPerform transmission calibration.Turn the ignition switch to ON <strong>and</strong>allow the transmission to powerup. Turn the ignition to OFF <strong>and</strong>wait two minutes. Go to STEP VSTEP BNoGo to STEP B3. Key off.Procedure Condition Action4. Inspect starter / battery <strong>and</strong>inline fuse holderconnections for integrity.5. Measure voltage acrossbatteries.If voltage is 11 to 13 volts on a12-volt system or 22 to 26 on a24-volt systemProceed with battery load test.Repair or replace batteries asrequired. Go to STEP CIf voltage is outside of rangeRepair or replace batteries <strong>and</strong>charge system as required.Repeat test.Front of TransmissionTransmission ECUVOLTS–+V COM A–+OEM HarnessTransmission Harness36 38Battery power(Non-switched power)run to starter or Battery30 AMP fuse–+–+332
Component Code 73 Isolation ProceduresFault Isolation ProceduresSTEP CProcedure Condition Action1. Locate the diagnostic port onthe Transmission Harness -located at the left rear cornerof the transmission.2. Key on.3. Measure voltage betweenpins C <strong>and</strong> the batterynegative post.If voltage between pin C <strong>and</strong>battery negative post is 0.70 voltsor lessGo to STEP DIf voltage is outside of rangeRepair battery ground supply toTransmission ECU. Repeat test.4-Pin Diagnostics PortVOLTSBCADV COM ABattery Negative Post4-way4-Pin Diagnostic Port(Located at the left rearcorner of the transmission.)B - Service Bat. +C - Service Bat. -A - Service Ignition +333
Fault Isolation ProceduresComponent Code 73 Isolation ProceduresSTEP D1. Key on.Procedure Condition Action2. Measure voltage between pinB <strong>and</strong> pin C.If voltage between pins B <strong>and</strong> Cis within 0.6 volts of batteryvoltageGo to STEP EIf voltage is outside of rangeRepair battery power supply toTransmission ECU. Fuse may beblown. Repeat test.4-Pin Diagnostics PortVOLTSV COM ABCAD4-way4-Pin Diagnostic Port(Located at the left rearcorner of the transmission.)B - Service Bat. +C - Service Bat. -A - Service Ignition +334
Component Code 73 Isolation ProceduresFault Isolation ProceduresSTEP E1. Key on.Procedure Condition Action2. Measure voltage between pinA <strong>and</strong> pin C.If voltage between pin A <strong>and</strong> C iswithin 0.6 volts of battery voltageGo to STEP FIf voltage is outside of rangeRepair Ignition power supply toECU. Fuse may be blown Repeattest.4-Pin Diagnostics PortVOLTSV COM ABCAD4-way4-Pin Diagnostic Port(Located at the left rearcorner of the transmission.)B - Service Bat. +C - Service Bat. -A - Service Ignition +335
Fault Isolation ProceduresComponent Code 73 Isolation ProceduresSTEP F1. Key off.Procedure Condition Action2. Remove Electric Shifter fromShift Bar Housing.3. Inspect the Shift BarHousing:- Visually inspect shift rails<strong>and</strong> blocks.- Verify shift bar housingoperation by confirming shiftrails can physically engageeach gear individually.- Confirm the shift barhousing can not engage twogears at the same time.4. Inspect XY Shifter:- Check for mechanicalissues with the XY Shifter.- Visually inspect for badlycontaminated / gummed up /soiled XY shifter ball screwdue to oil cooler leaks.- Check for a worn centershaft bushing (see TAIB-0814).5. Inspect Base Transmission:- Drain <strong>and</strong> inspect oil fordebris.- Remove I-brake or PTOcover <strong>and</strong> inspect for mainbox mechanical failure.- Inspect sliding clutches <strong>and</strong>shift yokes for wear.If no problem foundIf problem foundReplace Electric Shifter <strong>and</strong>Transmission Harness. Go toSTEP VRepair as required. Go to STEP V336
Component Code 73 Isolation ProceduresFault Isolation ProceduresSTEP V1. Key off.Procedure Condition Action2. Reconnect all connectors<strong>and</strong> the negative batterycable.3. Key on.4. Clear codes.5. Drive the vehicle <strong>and</strong> attemptto reset the code.6. Check for codes. If no codes Test complete.If code 73 appearsIf code other than 73appearsTo find error in testing, return toSTEP AGo to Fault Code IsolationProcedure Index.337
Fault Isolation ProceduresComponent Code 73 Isolation Procedures338
System Code 74 Isolation ProceduresMID SPN PID SID FMI Description518 93 7 Engine Speed Response Fault898 190 7 Engine Torque Response FaultOverviewThis fault code indicates the transmission is unable to use system controls to synchronize during ashift.DetectionIf there is engine communication on the J1939 Link <strong>and</strong> the engine does not respond totransmission speed <strong>and</strong> torque comm<strong>and</strong>s, the code will set.FallbackIf the failure occurs while moving, it could cause a 1-speed fallback. Once the vehicle is stopped,starting gear <strong>and</strong> reverse gear can be engaged.Required Tools• Basic H<strong>and</strong> Tools• <strong>Eaton</strong> Test Adapter Kit• ServiceRanger a PC-based Service Tool• Troubleshooting GuidePossible CausesThis fault code can be caused by any of the following:• Engine Control SystemEngineECMEngine Torque Value339
Fault Isolation ProceduresSystem Code 74 Isolation ProceduresFault Isolation ProceduresSTEP AProcedure Condition Action1. Key on.2. Retrieve codes. Go to FaultCode Retrieval/Clearing.If code 74 is activeContact the OEM because theengine is failing to respond to thetransmissions comm<strong>and</strong> during ashift.If code is not activeTest complete.340
System Code 75 Isolation ProceduresMID SPN PID SID FMI Description560 60 14 Power Down In GearNote:This code will only be set inactiveOverviewThis fault is detected when the vehicle is powered down in any gear position other than neutral.DetectionThe Transmission ECU monitors shift device position <strong>and</strong> electric shifter position during vehicleshut down. If a non-neutral shift device position <strong>and</strong> in gear position are detected during vehicleshut down, this code will be set.FallbackNo Fallback Mode. This is a non driving power down fault, it may cause a “-” dash during power upif the transmission is torque locked after shutting down in gear.Required Tools• ServiceRanger a PC-based Service Tool• Troubleshooting Guide• Driver Instruction BookPossible CausesThis fault code can be caused by any of the following:341
System Code 75 Isolation Procedures• Improper Shut Down ProcedureVOLUMECONTROLSERVICESHIFT<strong>Eaton</strong> FullerTransmissionsRNDHLPushbutton Shift Control<strong>Eaton</strong> Shift LeverSTEP AProcedure Condition Action1. Key on.2. Retrieve Codes. Go to FaultCode Retrieval/Clearing.If code 75 is inactiveNo action necessary, this codeindicates the driver powereddown the system prior toselecting neutral.Explain to driver, shift selectormust be in neutral beforepowering down to prevent a stuckin gear situation <strong>and</strong> or a powerup no crank situation.342
Component Code 81 Isolation ProceduresMID SPN PID SID FMI Description780 47 7 Gear Engagement DetectedOverviewThe transmission controller has detected that the shift finger position indicates neutral <strong>and</strong> acomparison of input <strong>and</strong> main shaft speeds indicate the transmission is in gear. The comparison ofshaft speeds is only performed when the vehicle is moving <strong>and</strong> a shift is in process.Detection• The fault is detected after the transmission ECU powers up <strong>and</strong> a non-neutral condition isdetected during a shift.• FMI 7 - The transmission controller detected an inaccurate finger position.FallbackThis fault causes an in-place fallback. The transmission will remain in current gear.Required Tools• Basic H<strong>and</strong> Tools• ServiceRanger version 2.5 or newerPossible CausesThis fault code can be caused by any of the following:• Worn internal transmission components.Conditions to Recreate Fault• Only set during a shift.Conditions to Clear Fault• The fault becomes inactive after power down.343
Fault Isolation ProceduresComponent Code 81 Isolation ProceduresTransmissionFault Isolation ProceduresSTEP AProcedure Condition Action1. Key on.2. Retrieve codes. Go to FaultCode Retrieval/Clearing.If code 81 is active or inactive Customer - Call <strong>Eaton</strong> at 1-800-826-HELP (4357). CSC - CallTechnician Service.344
System Code 83 Isolation ProceduresMID SPN PID SID FMI Description751 18 14 Shift Lever Missing752 19 7, 12 Shift Lever MissingOverviewThis fault code indicates the <strong>Eaton</strong> Shift Lever or the OEM Shift Lever is not sensing any leverpositions.DetectionStarting at key-on <strong>and</strong> throughout operation, the Transmission ECU constantly measures thefeedback from the Shift Lever circuit. If the Shift Lever reports no lever positions are sensed, thefault code is set.FallbackThis fault causes a downshift only fallback <strong>and</strong> shifts to neutral when the vehicle stops.Required Tools• Basic H<strong>and</strong> Tools• Troubleshooting Guide• ServiceRanger a PC-based Service ToolPossible CausesThis fault code can be caused by any of the following:345
Fault Isolation ProceduresSystem Code 83 Isolation Procedures• <strong>Eaton</strong> Shift Lever or OEM Shift Lever<strong>Eaton</strong> Shift LeverFault Isolation ProceduresSTEP AProcedure Condition Action1. Key on.2. Retrieve Codes. Go to FaultCode Retrieval/Clearing.If code 83 is activeReplace <strong>Eaton</strong> Shift Leveror OEM Shift Lever.If 83 is inactiveTest complete.346
System Code 84 Isolation ProceduresMID SPN PID SID FMI Description751 18 13 Shift Control Device NotConfigured752 19 13 Park Mechanism Not CalibratedOverviewThis fault indicates a new Transmission ECU has not detected a shift control device.DetectionThe fault is detected the first time the system is powered up. The Transmission ECU looks for ashift control device if none are detected the system will set this code.Note:The fault will only be set active.FallbackPower up no crank.Required Tools• Basic H<strong>and</strong> Tools• ServiceRanger a PC-based Service Tool• Troubleshooting GuidePossible CausesThis fault code can be caused by any of the following:• Damaged OEM Wiring Harness between Transmission ECU <strong>and</strong> shift control device after newECU is installed.347
Fault Isolation ProceduresSystem Code 84 Isolation Procedures• Disconnected shift control device after new ECU is installed.Fault Isolation ProceduresSTEP AProcedure Condition Action1. Verify shift control device isconnected to the OEMwiring.Vehicle Harness 38-way Connector2. Key on.3. Retrieve codes. Go to FaultCode Retrieval/Clearing.If code 84 is activeRepair OEM wiring betweenTransmission ECU <strong>and</strong> shiftcontrol device.348
Component Code 85 Isolation ProceduresMID SPN PID SID FMI Description751 18 12 Shift Control Device IncompatibleOverviewThis fault indicates the Transmission ECU has detected a non compatible shift control device.DetectionThe Transmission ECU looks for a shift control device every time the system is powered up. If anon compatible shift control device is detected the system will set this code.FallbackThis fault causes an In Place FallbackRequired Tools• Basic H<strong>and</strong> Tools• ServiceRanger a PC-based Service Tool• Troubleshooting GuidePossible CausesThis fault code can be caused by any of the following:• Non compatible shift control deviceVOLUMECONTROLSERVICESHIFT<strong>Eaton</strong> FullerTransmissionsRNDHLPushbutton Shift Control<strong>Eaton</strong> Shift Lever349
Fault Isolation ProceduresComponent Code 85 Isolation ProceduresFault Isolation ProceduresSTEP AProcedure Condition Action1. Verify shift control device isconnected to the OEMwiring.2. Key on.3. Retrieve codes. Go to FaultCode Retrieval/Clearing.If code 85 is activeVerify correct shift control deviceis installed on vehicle.350
Component Code 99 Isolation ProceduresMID SPN PID SID FMI Description781 58 14 Direction MismatchOverviewThe transmission controller is monitoring the gear position sensor <strong>and</strong> has determined the XYshifter is moving in the opposite intended direction.Detection• The fault can be detected any time after the transmission ECU powers up <strong>and</strong> a non-neutralmode is selected.• FMI 14 - The transmission controller detected an incorrect XY shifter position.FallbackThis fault causes an in-place fallback. The transmission will remain in current gear.Required Tools• Basic H<strong>and</strong> Tools• <strong>Eaton</strong> Test Adapter Kit• ServiceRanger version 2.5 or newerPossible CausesThis fault code can be caused by the following:• Internal transmission controller fault.• Transmission wire harness shorted.• XY shifter failure.Conditions to Recreate Fault• NoneConditions to Clear Fault• The fault becomes inactive after power down.351
Fault Isolation ProceduresComponent Code 99 Isolation ProceduresFault Isolation ProceduresSTEP AProcedure Condition Action1. Key on.Transmission Controller XY Shifter Transmission Harness2. Retrieve codes. Go to FaultCode Retrieval/Clearing.If code 99 is active or inactive. Customer - Call <strong>Eaton</strong> at 1-800-826-HELP (4357). CSC - CallTechnician Service.352
Up/Down Button TestOverviewThis symptom-driven test is performed if unable to shift the transmission with the Up/DownButtons, <strong>and</strong> there are no active or inactive codes.DetectionThe shift control has no fault detection capability for this failure. The failure is observed by thedriver when operating the vehicle.FallbackThere is no fallback for this symptom.Required Tools• Basic H<strong>and</strong> Tools• Digital Volt/Ohm Meter• Troubleshooting GuidePossible CausesThis symptom can be caused by any of the following:• Pushbutton Shift Control• Shift LeverSide viewof pushbuttonshift controlVOLUMECONTROLSERVICESHIFT<strong>Eaton</strong> FullerTransmissionsRNDHLPushbutton Shift Control<strong>Eaton</strong> Shift Lever353
System Isolation ProceduresUp/Down Button TestSystem Isolation ProceduresSTEP AProcedure Condition Action1. Start engine.2. Place Shift Device in“Manual”.3. Drive the vehicle <strong>and</strong> use thebuttons to initiate upshifts<strong>and</strong> downshifts, when shiftconditions permit.If the up <strong>and</strong> down buttons areworking properly, thetransmission will make upshifts<strong>and</strong> downshiftsTest complete.If the transmission does not makeupshifts <strong>and</strong>/or downshiftsReplace Shift Control. Repeattest.354
Start Enable Relay Contact TestOverviewThis symptom-driven test is performed if the engine does not crank with the Shift Lever in neutral,<strong>and</strong> there are no active or inactive codes.DetectionThe Transmission ECU has no fault detection capability for this failure. The failure is observed bythe driver when operating the vehicle. To observe this failure, attempt to start the vehicle.FallbackThis symptom has no affect on vehicle operation, however, if the failure occurred before the enginewas started, it is possible the engine will not start.Required Tools• Basic H<strong>and</strong> Tools• <strong>Eaton</strong> Test Adapter Kit• Digital Volt/Ohm Meter• Troubleshooting GuidePossible CausesThis symptom can be caused by any of the following:• Start Enable Relay• Starter Solenoid Wiring• Vehicle Harness26Vehicle Harness 38-way Connector324Run tostarter solenoidTrans ECU LegendAll OEM responsible wiring shown is "typical". Consult specific application.(30, 87) = Switched ignition(26-87) = Latch into the ECU(4-85) = -12 volt relay source(32-86) = +12 volt relay source30878685Run to startsignal fromignition switchStartenable relay355
System Isolation ProceduresStart Enable Relay Contact TestSystem Isolation ProceduresSTEP A1. Key off.Procedure Condition Action2. Inspect starter/battery <strong>and</strong>in-line fuse holderconnections for integrity.3. Measure voltage acrossbatteries.If voltage is 11 to 13 volts on a 12volt system or 22 to 26 on a 24volt systemProceed with battery load test.Repair or replace batteries asrequired. Go to STEP BIf voltage is outside of rangeRepair or replace batteries <strong>and</strong>charging system as required.Repeat test.VOLTS–+V COM A–+356
Start Enable Relay Contact TestSystem Isolation ProceduresSTEP BProcedure Condition Action1. Locate diagnostic port onTransmission Harness.2. Key on.3. Measure voltage betweenpins C <strong>and</strong> the batterynegative post.If voltage between pin C <strong>and</strong>battery negative post is 0.70 voltsor lessGo to STEP CIf voltage is outside of rangeRepair battery ground supply toTransmission ECU. Repeat test.Warning! - Do Not Load Test at Diagnostic Port4-Pin Diagnostics PortVOLTSBCADV COM ABattery Negative Post4-way4-Pin Diagnostic Port(Located at the left rearB - Service Bat. +C - Service Bat. -357
System Isolation ProceduresStart Enable Relay Contact TestSTEP CProcedure Condition Action1. Locate diagnostic port onTransmission Harness.2. Key on.3. Measure voltage betweenpins B <strong>and</strong> pin C.If voltage between pins B <strong>and</strong> Cis within 0.6 volts of batteryvoltageGo to STEP DIf voltage is outside of rangeRepair battery power supply toTransmission ECU. Fuse may beblown. Repeat test.Warning! - Do Not Load Test at Diagnostic Port4-Pin Diagnostics PortVOLTSV COM ABCAD4-way4-Pin Diagnostic Port(Located at the left rearcorner of the transmission.)B - Service Bat. +C - Service Bat. -A - Service Ignition +358
Start Enable Relay Contact TestSystem Isolation ProceduresSTEP D1. Key on.Procedure Condition Action2. Measure voltage between pinA <strong>and</strong> pin C.If voltage between pins A <strong>and</strong> Cis within 0.6 volts of batteryvoltageGo to STEP EIf voltage is outside of rangeRepair Ignition power supply toECU. Fuse may be blown.Repeat test.Warning! - Do Not Load Test at Diagnostic Port4-Pin Diagnostics PortVOLTSV COM ABCAD4-way4-Pin Diagnostic Port(Located at the left rearcorner of the transmission.)B - Service Bat. +C - Service Bat. -A - Service Ignition +359
System Isolation ProceduresStart Enable Relay Contact TestSTEP EProcedure Condition Action1. Key off.Note: The Start Enable Relaymust be wired accordingto <strong>Eaton</strong> GEN IIIrequirements (shown onprevious page) for thistest to work properly. Ifwired differently, consultOEM for correct wiringschematic.2. Disconnect negative batterycable.3. Disconnect Vehicle Harness38-way connector.4. Reconnect negative batterycable.5. Key on.6. Engage Starter. If engine cranks Go to STEP FIf engine does not crankGo to STEP GSTEP F1. Key off.Procedure Condition Action2. Remove the Start EnableRelay.3. Key on.4. Engage starter. If vehicle cranks Repair short to power on VehicleHarness. Go to STEP VIf vehicle does not crankReplace Start Enable Relay.Go to STEP V360
Start Enable Relay Contact TestSystem Isolation ProceduresSTEP G1. Key on.Procedure Condition Action2. Disconnect negative batterycable.3. Reconnect Vehicle Harness38-way connector.4. Reconnect negative batterycable.5. Place a jumper wire acrossconnector contacts 30 <strong>and</strong>87.! WARNING6. Make sure the parking brakeis set before jumping theStart Enable Relay.7. Key on. Verify neutral onGear Display.8. Engage starter. If engine cranks Replace the Start Enable Relay.Go to STEP HIf engine does not crankRefer to OEM for repair ofharness or starter.30868587361
System Isolation ProceduresStart Enable Relay Contact TestSTEP H1. Key off.Procedure Condition Action2. Disconnect negative batterycable.3. Disconnect Vehicle Harness38-way connector.4. Disconnect the Start EnableRelay.5. Measure resistance betweenpin 87 of the start enablerelay connector <strong>and</strong> pin 26 ofthe Vehicle Harness 38-Wayconnector.If resistance is 0 to 0.3 ohmsIf resistance is greater than 10KohmGo to STEP VRepair wiring. Go to STEP VOHMSV COM A878687a85303729 30 3123 24 2532 33 3426 27 283813 141718 1915 16 202122357 8 910 11 1234 51 2 636Front View38-Way Connector362
Start Enable Relay Contact TestSystem Isolation ProceduresSTEP V1. Key off.Procedure Condition Action2. Reconnect all connectors.3. Key on.4. Start the engine to determinewhether the Start EnableRelay contact complaint hasbeen repaired.If engine startsIf engine does not startTest complete.To find error in testing, return toSTEP A363
System Isolation ProceduresStart Enable Relay Contact Test364
J1587 Data Link TestOverviewThis symptom-driven test is performed if the ServiceRanger a PC-based Service Tool does notwork.Symptom Isolation ProceduresDetectionThe service technician observes the failure when operating the PC-based Service Tool. Toobserve this failure, simply connect the PC-based Service Tool to the transmission via the J1587diagnostic connector located in the cab.FallbackThere is no fallback mode for the J1587 Data Link. The PC-Base Service Tool will not workcorrectly.Required Tools• Basic H<strong>and</strong> Tools• <strong>Eaton</strong> Test Adapter Kit• Digital Volt/Ohm Meter• Troubleshooting Guide• ServiceRanger a PC-based Service ToolPossible CausesThis symptom can be caused by any of the following:• J1587 Data Link Harness• ServiceRanger a PC-based Service Tool365
OverviewJ1587 Data Link Test• Transmission ECUTransmission ECUOEM1011J1587 data link+12voltsbatteryA ATA+B ATA–C + BatteryDE GroundF6-waydiagnostic connectorFBAEDC9-wayGROUNDdiagnostic connectorA GroundE DB + BatteryC CFA BDGJ EHF ATA+G ATA-HJ366
J1587 Data Link TestSystem Isolation ProceduresSystem Isolation ProceduresSTEP AProcedure Condition Action1. Key off.2. Measure voltage eitherbetween 6-way diagnosticconnector pins C <strong>and</strong> E or9-way diagnostic connectorpins B <strong>and</strong> A.If voltage is within 0.6 volts ofbattery voltageIf voltage is outside of rangeGo to STEP BRepair battery or ground wire tovehicle diagnostic connector.Go to STEP VFEABCVOLTSFEADCBVOLTSDV COM AGHJV COM A367
System Isolation ProceduresJ1587 Data Link TestSTEP B1. Key off.Procedure Condition Action2. Disconnect negative batterycable.3. Disconnect Vehicle Harness38-way connector.4. Measure resistance fromVehicle Harness 38-wayconnector pin 10 <strong>and</strong> either6-way diagnostic connectorpin A or 9-way diagnosticconnector pin F.If resistance is 0 to 0.3 ohmsIf resistance is outside of rangeGo to STEP CRepair vehicle interface harness.Repeat this step.Front View38-Way ConnectorOHMSFABEC3729 30 3123 24 2532 33 3426 27 2838V COM AD13 1415 161718 19202122357 8 910 11 1234 51 2 636OHMSFEADCB3729 30 3123 24 2532 33 3426 27 2838V COM AGHJ13 1415 161718 19202122357 8 910 11 1234 51 2 636Vehicle Harness 38-way Connector368
J1587 Data Link TestSystem Isolation ProceduresSTEP CProcedure Condition Action1. Measure resistance betweeneither 6-way diagnosticconnector pin A or 9-waydiagnostic connector pin F<strong>and</strong> ground.If resistance is OLIf resistance is less than 10K ohmGo to STEP DRepair vehicle interface harness.Go to STEP VOHMSFABOHMSFEADCBV COM AEDCV COM AGHJGroundGroundSTEP DProcedure Condition Action1. Measure resistance betweenVehicle Harness 38-wayconnector pin 11 <strong>and</strong> either6-way diagnostic connectorpin B or 9-way diagnosticconnector pin G.If resistance is 0 to 0.3 ohmsIf resistance is outside of rangeGo to STEP ERepair vehicle interface harness.Go to STEP VFront View38-Way ConnectorOHMSFABEC3729 30 3123 24 2532 33 3426 27 2838V COM AD13 1415 161718 19202122357 8 910 11 1234 51 2 636OHMSFEADCB3729 30 3123 24 2532 33 3426 27 2838V COM AGHJ13 1415 161718 19202122Vehicle Harness 38-way Connector357 8 910 11 1234 51 2 636369
System Isolation ProceduresJ1587 Data Link TestSTEP EProcedure Condition Action1. Measure resistance betweeneither 6-way diagnosticconnector pin B or 9-waydiagnostic connector pin G<strong>and</strong> ground.If resistance is OLIf resistance is less than 10K ohmGo to STEP VRepair vehicle interface harness.Go to STEP VOHMSFABOHMSFEADCBEDCGHJV COM AV COM AGROUNDGROUNDSTEP V1. Key on.Procedure Condition Action2. Connect ServiceRanger aPC-based Service Tool.If ServiceRanger a PC-basedService Tool functions correctlyTest complete.If ServiceRanger a PC-basedService Tool does not functioncorrectlyTo find error in testing, return toSTEP A370
Front Box Control TestOverviewThis symptom-driven test is performed if a “-” is displayed on the Gear Display, <strong>and</strong> there are noactive or inactive codes.DetectionTurn the key on <strong>and</strong> watch the Gear Display. If the Gear Display shows “-” constantly, theTransmission ECU was not able to confirm front box control.Any time the service lamp is flashing, go to Diagnostics Procedure.FallbackThis fault causes an In Place fallback while moving, <strong>and</strong> it causes a failure during systeminitialization. A “-” will appear on the Gear Display.Required Tools• Basic H<strong>and</strong> Tools• <strong>Eaton</strong> Test Adapter Kit• Digital Volt/Ohm Meter• Troubleshooting GuideThis symptom can be caused by any of the following:• Low Power to Gear Select Motor• Electric Shifter• Gear Select Sensor• Yoke / Clutch / Main Shaft• Shift Bar Housing• Dragging Clutch• Torque Locked in GearShift bar housingElectric shifterTransmissioncontrollerBase Transmission371
Front Box Control TestSTEP A1. Key on.Procedure Condition Action2. Depress clutch pedal (ifequipped) half way to thefloor.3. Place Shift Device in Neutral.4. Observe Gear Display. If Gear Display shows: “N” Go to STEP BNote:If service lamp isflashing, go toDiagnostics Procedure(page 1-2).If Gear Display shows: “-” or aflashing gear with no arrowsGo to STEP C372
Front Box Control TestSTEP B1. Key on.Procedure Condition Action2. Place Shift Device in Neutral.3. Depress clutch pedal (ifequipped) half way to thefloor. If it’s a two pedaldesign apply the servicebrake.4. Select Drive5. Observe Gear Display. If Gear Display shows a solidgearTest complete.Note:If service lamp isflashing, go toDiagnostics Procedure(page 1-2).If Gear Display shows a flashinggear with no arrowsGo to STEP C373
Front Box Control TestSTEP C1. Key off.Procedure Condition Action2. Inspect starter/battery <strong>and</strong>inline fuse holderconnections for integrity.3. Measure voltage acrossbatteries.If voltage is 11 to 13 volts on a 12volt system or 22 to 26 on a 24volt systemProceed with battery load test.Repair or replace batteries asrequired. Go to STEP DIf voltage is outside of rangeRepair or replace batteries <strong>and</strong>charging system as required.Repeat test.VOLTS–+V COM A–+374
Front Box Control TestSTEP DProcedure Condition Action1. Locate diagnostic port onTransmission Harness.2. Key on.3. Measure voltage betweenpins C <strong>and</strong> the batterynegative post.If voltage between pin C <strong>and</strong>battery negative post is 0.70 voltsor lessGo to STEP EIf voltage is outside of rangeRepair battery ground supply toTransmission ECU. Repeat test.Warning! - Do Not Load Test at Diagnostic Port4-Pin Diagnostics PortVOLTSBCADV COM ABattery Negative Post4-way4-Pin Diagnostic Port(Located at the left rearcorner of the transmission.)B - Service Bat. +C - Service Bat. -A - Service Ignition +375
Front Box Control TestSTEP EProcedure Condition Action1. Locate diagnostic port onTransmission Harness.2. Key on.3. Measure voltage betweenpins B <strong>and</strong> pin C.If voltage between pins B <strong>and</strong> Cis within 0.6 volts of batteryvoltageGo to STEP FIf voltage is outside of rangeRepair battery power supply toTransmission ECU. Fuse may beblown. Repeat test.Warning! - Do Not Load Test at Diagnostic Port4-Pin Diagnostics PortVOLTSV COM ABCAD4-way4-Pin Diagnostic Port(Located at the left rearcorner of the transmission.)B - Service Bat. +C - Service Bat. -A - Service Ignition +376
Front Box Control TestSTEP F1. Key on.Procedure Condition Action2. Measure voltage between pinA <strong>and</strong> pin C.If voltage between pins A <strong>and</strong> Cis within 0.6 volts of batteryvoltageIf voltage is outside of rangeGo to STEP GRepair Ignition power supply toECU. Fuse may be blown.Repeat test.Warning! - Do Not Load Test at Diagnostic Port4-Pin Diagnostics PortVOLTSV COM ABCAD4-way4-Pin Diagnostic Port(Located at the left rearcorner of the transmission.)B - Service Bat. +C - Service Bat. -A - Service Ignition +377
Front Box Control TestSTEP G1. Key off.Procedure Condition Action2. Remove Electric Shifter fromShift Bar Housing.3. Inspect the Shift BarHousing:• Shift Blocks• Shift Rails• Inspect electricshifter for evidenceof lubecontamination.Note: See if the Shift BarHousing can engage twogears at the same timeto verify interlockoperation.If no problem foundIf problem foundReplace Electric Shifter.Go to STEP VRepair as required. Go to STEP VSTEP V1. Key off.Procedure Condition Action2. Reconnect all connectors.3. Place Shift Control intoneutral.4. Key on. If Gear Display displays a solid“N”Test complete.If Gear Display does not display asolid “N”To find error in testing, return toSTEP A378
ABOverviewAutoShift Will Not Engage a Gear fromNeutral TestThis symptom-driven test is performed if the transmission does not engage a gear, <strong>and</strong> there areno active or inactive codes.DetectionIf the Transmission ECU is unable to provide a fault code, the driver may observe this failure as thetransmission not initiating or completing a shift. The driver may observe this failure as thetransmission neutralizes.FallbackThere is no fallback mode for this symptom.Required Tools• Basic H<strong>and</strong> Tools• <strong>Eaton</strong> Test Adapter Kit• Digital Volt/Ohm Meter• Troubleshooting Guide• ServiceRanger a PC-based Service ToolPossible CausesThis symptom can be caused by any of the following:• Input Shaft Speed Sensor• Transmission• Clutch Brake/Clutch• Transmission Harness• Transmission ECUTransmission Harness 38-way ConnectorShift Bar HousingMain ShaftTransmission Harness 38-way ConnectorD1D2Input shaftspeed sensor379
System Isolation ProcedureAutoShift Will Not Engage a Gear from Neu-System Isolation ProcedureSTEP AProcedure Condition Action1. Key off.2. Inspect starter/battery <strong>and</strong>in-line fuse holderconnections for integrity.3. Measure voltage acrossbatteries.If voltage is 11 to 13 volts on a 12volt system or 22 to 26 on a 24volt systemProceed with battery load test.Repair or replace batteries asrequired. Go to STEP BIf voltage is outside of rangeRepair or replace batteries <strong>and</strong>charging system as required.Repeat test.VOLTS–+V COM A–+380
AutoShift Will Not Engage a Gear from Neutral TestSystem Isolation ProcedureSTEP BProcedure Condition Action1. Locate diagnostic port onTransmission Harness.2. Key on.3. Measure voltage betweenpins C <strong>and</strong> the batterynegative post.If voltage between pin C <strong>and</strong>battery negative post is 0.70 voltsor lessGo to STEP CIf voltage is outside of rangeRepair battery ground supply toTransmission ECU. Repeat test.Warning! - Do Not Load Test at Diagnostic Port4-Pin Diagnostics PortVOLTSBCADV COM ABattery Negative Post4-way4-Pin Diagnostic Port(Located at the left rearcorner of the transmission.)B - Service Bat. +C - Service Bat. -A - Service Ignition +381
System Isolation ProcedureAutoShift Will Not Engage a Gear from Neu-STEP CProcedure Condition Action1. Locate diagnostic port onTransmission Harness.2. Key on.3. Measure voltage betweenpins B <strong>and</strong> pin C.If voltage between pins B <strong>and</strong> Cis within 0.6 volts of batteryvoltageGo to STEP DIf voltage is outside of rangeRepair battery power supply toTransmission ECU. Fuse may beblown. Repeat test.Warning! - Do Not Load Test at Diagnostic Port4-Pin Diagnostics PortVOLTSV COM ABCAD4-way4-Pin Diagnostic Port(Located at the left rearcorner of the transmission.)B - Service Bat. +C - Service Bat. -A - Service Ignition +382
AutoShift Will Not Engage a Gear from Neutral TestSystem Isolation ProcedureSTEP D1. Key on.Procedure Condition Action2. Measure voltage between pinA <strong>and</strong> pin C.If voltage between pins A <strong>and</strong> Cis within 0.6 volts of batteryvoltageIf voltage is outside of rangeGo to STEP ERepair Ignition power supply toECU. Fuse may be blown.Repeat test.Warning! - Do Not Load Test at Diagnostic Port4-Pin Diagnostics PortVOLTSV COM ABCAD4-way4-Pin Diagnostic Port(Located at the left rearcorner of the transmission.)B - Service Bat. +C - Service Bat. -A - Service Ignition +383
System Isolation ProcedureAutoShift Will Not Engage a Gear from Neu-STEP E1. Key on.Procedure Condition Action2. Depress clutch pedal.3. Start engine.4. Release clutch pedal to verifyInput Shaft speed.5. Depress clutch pedal.6. Place Shift Lever in “D”.7. Observe Gear Display. If Gear Display shows a solid “N”<strong>and</strong> the warning tone soundsGo to STEP FIf Gear Display shows a flashinggear with arrowsGo to STEP MIf Gear Display shows a flashinggear with no arrowsGo to Front Box Control Test.If Gear Display shows a solidgear but the vehicle will not moveContact your local <strong>Eaton</strong>Representative or call 1-800-826-HELP (4357).STEP F1. Key off.Procedure Condition Action2. Connect ServiceRanger aPC-based Service Tool.3. Start engine. Release clutchpedal.4. View Input Shaft speed. If Input Shaft speed exists Contact your local <strong>Eaton</strong>Representative or call 1-800-826-HELP (4357).If Input Shaft speed does notexistGo to STEP G384
AutoShift Will Not Engage a Gear from Neutral TestSystem Isolation ProcedureSTEP G1. Key off.Procedure Condition Action2. Disconnect negative batterycable.3. Disconnect the TransmissionHarness 38-way connector.4. Measure the resistancebetween the TransmissionHarness 38-way connectorpins 7 <strong>and</strong> 8.If resistance is 2K to 4.5K ohmIf resistance is outside of rangeGo to STEP HGo to STEP JOHMSFront ViewTransmission ECU ConnectorV COM A3729 30 3123 24 2532 33 3426 27 283813 1415 161718 19202122Transmission Harness 38-way Connector357 8 910 11 1234 51 2 636STEP HProcedure Condition Action1. Measure resistance betweenthe Transmission Harness38-way connector pin 7 <strong>and</strong>ground.If resistance is OL Go to STEP IIf resistance is less than 10K ohmGo to STEP JFront ViewTransmission ECU ConnectorOHMS3729 30 3123 24 2532 33 3426 27 2838V COM A13 1415 161718 19202122Transmission Harness 38-way Connector357 8 910 11 1234 51 2 636GROUND385
System Isolation ProcedureAutoShift Will Not Engage a Gear from Neu-STEP IProcedure Condition Action1. Inspect Input Shaft SpeedSensor for contamination ordamage.If no problem foundIf problem found or you were senthere from Step J or KGo to STEP LReplace Input Shaft SpeedSensor <strong>and</strong> inspect the uppercountershaft PTO gear fordamage. Go to STEP VSTEP JProcedure Condition Action1. Disconnect the TransmissionHarness from the Input ShaftSpeed Sensor.2. Measure resistance betweenInput Shaft Speed Sensorpins A <strong>and</strong> B.If resistance is 2K to 4.5K ohmIf resistance is outside of rangeGo to STEP KGo to STEP IOHMSABV COM A386
AutoShift Will Not Engage a Gear from Neutral TestSystem Isolation ProcedureSTEP KProcedure Condition Action1. Measure resistance betweenInput Shaft Speed Sensor pinA <strong>and</strong> ground.If resistance is OLReplace Transmission Harness.Go to STEP VIf resistance is less than 10K ohmGo to STEP IOHMSABV COM AGROUNDSTEP L1. Key off.Procedure Condition Action2. Verify the UpperCountershaft is turning.3. Turn the Input Shaft <strong>and</strong>verify the Upper Countershaftis rotating.If Upper Countershaft is turningIf Upper Countershaft is notturningReplace Transmission ECU.Go to STEP VContact your <strong>Eaton</strong>Representative or call <strong>Eaton</strong> at 1-800-826-HELP (4357).387
System Isolation ProcedureAutoShift Will Not Engage a Gear from Neu-STEP MProcedure Condition Action1. Connect PC-based servicetool.2. Start engine.3. Depress clutch pedal.4. View input shaft speed. If input shaft speed does not dropbelow 150 rpmIf input shaft speed drops below150Clutch is out of adjustment <strong>and</strong>/orInput Shaft Brake (Clutch Brake)is malfunctioning. Adjust clutchper manufacturer’s specifications.Go to STEP VTest complete. Go to STEP VSTEP V1. Key off.Procedure Condition Action2. Reconnect all connectors.3. Key on.4. Drive the vehicle todetermine whether thecomplaint has been repaired.If the transmission engages agearIf the transmission does notengage a gearTest complete.To find error in testing, return toSTEP A388
ABOverviewHeavy-Duty <strong>UltraShift</strong> PLUS Will NotEngage a Gear from Neutral TestThis symptom-driven test is performed if the transmission does not engage a gear, <strong>and</strong> there areno active or inactive codes.DetectionIf the Transmission ECU is unable to provide a fault code, the driver may observe this failure as thetransmission not initiating or completing a shift. The driver may observe this failure as thetransmission neutralizes.FallbackThere is no fallback mode for this symptom.Required Tools• Basic H<strong>and</strong> Tools• <strong>Eaton</strong> Test Adapter Kit• Digital Volt/Ohm Meter• Troubleshooting Guide• ServiceRanger a PC-based Service ToolPossible CausesThis symptom can be caused by any of the following:• Input Shaft Speed Sensor• Transmission• LCIB / Clutch• Transmission Harness• Transmission ECUTransmission Harness 38-way ConnectorShift Bar HousingMain ShaftTransmission Harness 38-way ConnectorD1D2Input shaftspeed sensor389
––++––++System Isolation ProceduresHeavy-Duty <strong>UltraShift</strong> PLUS Will Not EngageSystem Isolation ProceduresSTEP AProcedure Condition Action1. Key off.2. Remove <strong>and</strong> clean all battery<strong>and</strong> battery to frameconnections.3. Remove <strong>and</strong> clean groundsupply to engine ECU.4. Inspect starter/battery <strong>and</strong>inline 30 amp fuse holderconnections for corrosion ordamaged contacts. Alsoinspect 50 amp fuse holderon vehicles equipped with anElectronic Clutch Actuator(ECA.)50 AMP fuseBC30 Amp Fuse5. Measure voltage acrossbatteries.If voltage is 11 to 13 volts on a 12volt system or 22 to 26 on a 24volt systemRefer to OEM guidelines forbattery load test. Repair orreplace batteries as required.Go to STEP BIf voltage is outside of rangeRepair or replace batteries <strong>and</strong>charging system as required.Repeat this step.VOLTS–+V COM A–+390
Heavy-Duty <strong>UltraShift</strong> PLUS Will Not Engage a Gear from Neutral TestSystem IsolationSTEP BProcedure Condition Action1. Locate diagnostic port onTransmission Harness.2. Key on.3. Measure voltage betweenpins C <strong>and</strong> the batterynegative post.If voltage between pin C <strong>and</strong>battery negative post is 0.70 voltsor lessGo to STEP CIf voltage is outside of rangeRepair battery ground supply toTransmission ECU. Repeat test.Warning! - Do Not Load Test at Diagnostic Port4-Pin Diagnostics PortVOLTSBCADV COM ABattery Negative Post4-way4-Pin Diagnostic Port(Located at the left rearcorner of the transmission.)B - Service Bat. +C - Service Bat. -A - Service Ignition +391
System Isolation ProceduresHeavy-Duty <strong>UltraShift</strong> PLUS Will Not EngageSTEP CProcedure Condition Action1. Locate diagnostic port onTransmission Harness.2. Key on.3. Measure voltage betweenpins B <strong>and</strong> pin C.If voltage between pins B <strong>and</strong> Cis within 0.6 volts of batteryvoltageGo to STEP DIf voltage is outside of rangeRepair battery power supply toTransmission ECU. Fuse may beblown. Repeat test.Warning! - Do Not Load Test at Diagnostic Port4-Pin Diagnostics PortVOLTSV COM ABCAD4-way4-Pin Diagnostic Port(Located at the left rearcorner of the transmission.)B - Service Bat. +C - Service Bat. -A - Service Ignition +392
Heavy-Duty <strong>UltraShift</strong> PLUS Will Not Engage a Gear from Neutral TestSystem IsolationSTEP D1. Key on.Procedure Condition Action2. Measure voltage between pinA <strong>and</strong> pin C.If voltage between pins A <strong>and</strong> Cis within 0.6 volts of batteryvoltageGo to STEP EIf voltage is outside of rangeRepair Ignition power supply toECU. Fuse may be blown.Repeat test.Warning! - Do Not Load Test at Diagnostic Port4-Pin Diagnostics PortVOLTSV COM ABCAD4-way4-Pin Diagnostic Port(Located at the left rearcorner of the transmission.)B - Service Bat. +C - Service Bat. -A - Service Ignition +393
FFSystem Isolation ProceduresHeavy-Duty <strong>UltraShift</strong> PLUS Will Not EngageSTEP E1. Key off.Procedure Condition Action2. Disconnect battery negative.3. Disconnect ECA 3-wayconnector.4. Reconnect battery negative.5. Measure voltage between pinB <strong>and</strong> pin C of 3-wayconnector.If voltage between pin B <strong>and</strong> pinC of 3-way connector is within 0.6volts of battery voltageGo to STEP FIf voltage is outside of rangeRepair battery power supply toECA. Fuse may be blown.Repeat test.Transmission ECUEngine Flywheel Speed SensorG50 AMP fuseG133029ABABBattery power(Non-switched power)run to starter or BatteryBCCBA394
Heavy-Duty <strong>UltraShift</strong> PLUS Will Not Engage a Gear from Neutral TestSystem IsolationSTEP F1. Key on.Procedure Condition Action2. Depress service brake.3. Start engine.4. Place Shift Lever in “D.”5. Observe Gear Display. If Gear Display shows a solid “N”<strong>and</strong> the warning tone sounds.Go to STEP GIf Gear Display shows a flashinggear.Go to STEP NIf Gear Display shows a solidgear but the vehicle will not move.Contact your local <strong>Eaton</strong>Representative or call 1-800-826-HELP (4357).STEP G1. Key off.Procedure Condition Action2. Connect ServiceRanger aPC-based Service Tool.3. Start engine. Let idle withfoot off brake for more thanthree seconds.4. View Input Shaft speed. If Input Shaft speed exists Contact your local <strong>Eaton</strong>Representative or call 1-800-826-HELP (4357).If Input Shaft speed does notexistGo to STEP H395
System Isolation ProceduresHeavy-Duty <strong>UltraShift</strong> PLUS Will Not EngageSTEP H1. Key off.Procedure Condition Action2. Disconnect negative batterycable.3. Disconnect the TransmissionHarness 38-way connector.4. Measure the resistancebetween the TransmissionHarness 38-way connectorpins 7 <strong>and</strong> 8.If resistance is 2K to 4.5K ohmIf resistance is outside of rangeGo to STEP IGo to STEP KOHMSFront ViewTransmission ECU ConnectorV COM A3729 30 3123 24 2532 33 3426 27 283813 1415 161718 19202122Transmission Harness 38-way Connector357 8 910 11 1234 51 2 636STEP IProcedure Condition Action1. Measure resistance betweenthe Transmission Harness38-way connector pin 7 <strong>and</strong>ground.If resistance is OL Go to STEP JIf resistance is less than 10K ohmGo to STEP KFront ViewTransmission ECU ConnectorOHMS3729 30 3123 24 2532 33 3426 27 2838V COM A13 1415 161718 19202122Transmission Harness 38-way Connector357 8 910 11 1234 51 2 636GROUND396
Heavy-Duty <strong>UltraShift</strong> PLUS Will Not Engage a Gear from Neutral TestSystem IsolationSTEP JProcedure Condition Action1. Inspect Input Shaft SpeedSensor for contamination ordamage.If no problem foundIf problem found or you were senthere from Step L or KGo to STEP MReplace Input Shaft SpeedSensor <strong>and</strong> inspect the uppercountershaft PTO gear fordamage. Go to STEP VSTEP KProcedure Condition Action1. Disconnect the TransmissionHarness from the Input ShaftSpeed Sensor.2. Measure resistance betweenInput Shaft Speed Sensorpins A <strong>and</strong> B.If resistance is 2K to 4.5K ohmIf resistance is outside of rangeGo to STEP LGo to STEP JOHMSABV COM ASTEP LProcedure Condition Action1. Measure resistance betweenInput Shaft Speed Sensor pinA <strong>and</strong> ground.If resistance is OLIf resistance is less than 10K ohmReplace Transmission Harness.Go to STEP VGo to STEP JOHMSABV COM AGROUND397
System Isolation ProceduresHeavy-Duty <strong>UltraShift</strong> PLUS Will Not EngageSTEP M1. Key off.Procedure Condition Action2. Verify the UpperCountershaft is turning.3. Turn the Input Shaft <strong>and</strong>verify the Upper Countershaftis rotating.If Upper Countershaft is turningIf Upper Countershaft is notturningReplace Transmission ECU.Go to STEP VContact your <strong>Eaton</strong>Representative or call <strong>Eaton</strong> at1-800-826-HELP (4357).STEP NProcedure Condition Action1. Connect PC-based servicetool.2. Start engine3. Depress service brake.4. Place shift lever in “D.”5. View input shaft speed. If input shaft speed does not dropbelow 150 rpmIf input shaft speed dropsbelow 150 rpmECA Clutch is out of adjustmentor Low Capacity Inertia Brake(LCIB) is malfunctioning.Troubleshoot per ECA ProductFault Code 27 <strong>and</strong> ECA ProductFault Code 45 diagnosticprocedures in this manual.Go to STEP VGo to Front Box Control Test.398
Heavy-Duty <strong>UltraShift</strong> PLUS Will Not Engage a Gear from Neutral TestSystem IsolationSTEP V1. Key off.Procedure Condition Action2. Reconnect all connectors.3. Key on.4. Drive the vehicle todetermine whether thecomplaint has been repaired.If the transmission engages agearIf the transmission does notengage a gearTest complete.To find error in testing, return toSTEP A399
System Isolation ProceduresHeavy-Duty <strong>UltraShift</strong> PLUS Will Not Engage400
ABAB<strong>UltraShift</strong> DM3 Will Not Engage a Gear fromOverviewNeutral TestThis symptom-driven test is performed if the transmission does not engage a gear, <strong>and</strong> there areno active or inactive codes.DetectionIf the Transmission ECU is unable to provide a fault code, the driver may observe this failure as thetransmission not initiating or completing a shift. The driver may observe this failure as thetransmission neutralizes.FallbackThere is no fallback mode for this symptom.Required Tools• Basic H<strong>and</strong> Tools• <strong>Eaton</strong> Test Adapter Kit• Digital Volt/Ohm Meter• Troubleshooting Guide• ServiceRanger a PC-based Service ToolPossible CausesThis symptom can be caused by any of the following:• Input Shaft Speed Sensor• Transmission• Inertia Brake• Clutch/Clutch Brake• OEM Service Brake Switch Operation• Transmission ECU• Transmission HarnessTransmission Harness 38-way ConnectorShift Bar HousingMain ShaftTransmission Harness 38-way ConnectorD1D2Input shaftspeed sensorH1H2Inertia brake401
Symptom Isolation Procedures<strong>UltraShift</strong> DM3 Will Not Engage a Gear fromSymptom Isolation ProceduresSTEP AProcedure Condition Action1. Key off.2. Inspect starter/battery <strong>and</strong>inline fuse holderconnections for integrity.3. Measure voltage acrossbatteries.If voltage is 11 to 13 volts on a 12volt system or 22 to 26 on a 24volt systemProceed with battery load test.Repair or replace batteries asrequired. Go to STEP BIf voltage is outside of rangeRepair or replace batteries <strong>and</strong>charging system as required.Repeat test.VOLTS–+V COM A–+402
<strong>UltraShift</strong> DM3 Will Not Engage a Gear from Neutral Test Symptom Isolation ProceduresSTEP BProcedure Condition Action1. Locate diagnostic port onTransmission Harness.2. Key on.3. Measure voltage betweenpins C <strong>and</strong> the batterynegative post.If voltage between pin C <strong>and</strong>battery negative post is 0.70 voltsor lessGo to STEP CIf voltage is outside of rangeRepair battery ground supply toTransmission ECU. Repeat test.Warning! - Do Not Load Test at Diagnostic Port4-Pin Diagnostics PortVOLTSBCADV COM ABattery Negative Post4-way4-Pin Diagnostic Port(Located at the left rearcorner of the transmission.)B - Service Bat. +C - Service Bat. -A - Service Ignition +403
Symptom Isolation Procedures<strong>UltraShift</strong> DM3 Will Not Engage a Gear fromSTEP CProcedure Condition Action1. Locate diagnostic port onTransmission Harness.2. Key on.3. Measure voltage betweenpins B <strong>and</strong> pin C.If voltage between pins B <strong>and</strong> Cis within 0.6 volts of batteryvoltageGo to STEP DIf voltage is outside of rangeRepair battery power supply toTransmission ECU. Fuse may beblown. Repeat test.Warning! - Do Not Load Test at Diagnostic Port4-Pin Diagnostics PortVOLTSV COM ABCAD4-way4-Pin Diagnostic Port(Located at the left rearcorner of the transmission.)B - Service Bat. +C - Service Bat. -A - Service Ignition +404
<strong>UltraShift</strong> DM3 Will Not Engage a Gear from Neutral Test Symptom Isolation ProceduresSTEP D1. Key on.Procedure Condition Action2. Measure voltage between pinA <strong>and</strong> pin C.If voltage between pins A <strong>and</strong> Cis within 0.6 volts of batteryvoltageGo to STEP EIf voltage is outside of rangeRepair Ignition power supply toECU. Fuse may be blown.Repeat test.Warning! - Do Not Load Test at Diagnostic Port4-Pin Diagnostics PortVOLTSV COM ABCAD4-way4-Pin Diagnostic Port(Located at the left rearcorner of the transmission.)B - Service Bat. +C - Service Bat. -A - Service Ignition +405
Symptom Isolation Procedures<strong>UltraShift</strong> DM3 Will Not Engage a Gear fromSTEP E1. Key on.Procedure Condition Action2. Start engine.3. Apply service brake whileselecting “D”.Note: Using a ServiceRanger aPC-based Service Toolverify OEM service brakeoperation.4. Observe Gear Display. If Gear Display shows a solid “N”<strong>and</strong> the warning tone soundsGo to STEP FIf Gear Display shows a flashinggear with arrowsGo to STEP MIf Gear Display shows a flashinggear with no arrowsGo to Front Box Control Test.If Gear Display shows a solidgear but the vehicle will not moveContact your <strong>Eaton</strong>Representative or call <strong>Eaton</strong> at 1-800-826-HELP (4357).STEP F1. Key off.Procedure Condition Action2. Connect PC-based ServiceTool.3. Start engine. Increase rpm<strong>and</strong> hold above 1000 rpm.4. View Input Shaft speed. If Input Shaft speed exists Contact your <strong>Eaton</strong>Representative or call <strong>Eaton</strong> at 1-800-826-HELP (4357).If Input Shaft speed does notexistGo to STEP G406
<strong>UltraShift</strong> DM3 Will Not Engage a Gear from Neutral Test Symptom Isolation ProceduresSTEP G1. Key off.Procedure Condition Action2. Disconnect negative batterycable.3. Disconnect the TransmissionHarness 38-way connector.4. Measure the resistancebetween the TransmissionHarness 38-way connectorpins 7 <strong>and</strong> 8.If resistance is 2K to 4.5K ohmIf resistance is outside of rangeGo to STEP HGo to STEP JOHMSFront ViewTransmission ECU ConnectorV COM A3729 30 3123 24 2532 33 3426 27 283813 1415 161718 19202122357 8 910 11 121 2 34 5 636Transmission Harness 38-way Connector407
Symptom Isolation Procedures<strong>UltraShift</strong> DM3 Will Not Engage a Gear fromSTEP HProcedure Condition Action1. Measure resistance betweenthe Transmission Harness38-way connector pin 7 <strong>and</strong>ground.If resistance is OLIf resistance is less than 10K ohmGo to STEP IGo to STEP JFront ViewTransmission ECU ConnectorOHMS3729 30 3123 24 2532 33 3426 27 2838V COM A13 1415 161718 19202122Transmission Harness 38-way Connector357 8 910 11 121 2 34 5 636GROUNDSTEP IProcedure Condition Action1. Inspect Input Shaft SpeedSensor for contamination ordamage.If no problem foundIf problem foundGo to STEP LReplace Input Shaft SpeedSensor <strong>and</strong> inspect the uppercountershaft PTO gear fordamage. Go to STEP V408
<strong>UltraShift</strong> DM3 Will Not Engage a Gear from Neutral Test Symptom Isolation ProceduresSTEP JProcedure Condition Action1. Disconnect the TransmissionHarness from the Input ShaftSpeed Sensor.2. Measure resistance betweenInput Shaft Speed Sensorpins A <strong>and</strong> B.If resistance is 2K to 4.5K ohmIf resistance is outside of rangeGo to STEP KReplace Input Shaft SpeedSensor. Go to STEP VOHMSABV COM A3.STEP KProcedure Condition Action1. Measure resistance betweenInput Shaft Speed Sensor pinA <strong>and</strong> ground.If resistance is OLIf resistance is less than 10K ohmReplace Transmission Harness.Go to STEP VReplace Input Shaft SpeedSensor. Go to STEP VOHMSABV COM AGROUND409
Symptom Isolation Procedures<strong>UltraShift</strong> DM3 Will Not Engage a Gear fromSTEP L1. Key off.Procedure Condition Action2. Turn the Input Shaft <strong>and</strong>verify the Upper Countershaftis rotating.If Upper Countershaft is turningIf Upper Countershaft is notturningReplace transmission ECU.Go to STEP VContact your <strong>Eaton</strong>Representative or call <strong>Eaton</strong> at 1-800-826- HELP (4357) for arepair strategy.STEP MProcedure Condition Action1. Connect PC-based servicetool.2. Start engine3. View input shaft speed. If input shaft speed does not dropbelow 150 rpm.Clutch is dragging. Go to STEP NIf input shaft speed drops below150Test complete. Go to STEP V410
<strong>UltraShift</strong> DM3 Will Not Engage a Gear from Neutral Test Symptom Isolation ProceduresSTEP N1. Key on.Procedure Condition Action2. Make sure the PTO is off.3. Connect ServiceRanger aPC-based Service Tool <strong>and</strong>select “Advanced ProductFunctions”.4. Start engine.5. Select “Inertia Brake Test”.6. Run test <strong>and</strong> followinstructions.Test passesTest failsreplace Clutch. Go to STEP VReplace Inertia brake.Go to STEP VTest abortsCorrect displayed test failurecondition <strong>and</strong> retest.STEP V1. Key off.Procedure Condition Action2. Reconnect all connectors.3. Key on.4. Drive the vehicle todetermine whether thecomplaint has been repaired.If the transmission engages agearIf the transmission does notengage a gearTest complete.To find error in testing, return toSTEP A411
Symptom Isolation Procedures<strong>UltraShift</strong> DM3 Will Not Engage a Gear from412
<strong>UltraShift</strong> AW3 Clutch Engagement TestOverviewThis symptom-driven test is performed if a clutch engagement complaint exists, <strong>and</strong> there are noActive or Inactive codes.DetectionThere is no detection other than a driver complaint.FallbackThere is no fallback mode for clutch engagement complaint, however, it may effect vehicleperformance.Required Tools• Basic H<strong>and</strong> Tools• ServiceRanger a PC-based Service Tool• Troubleshooting GuidePossible CausesThis symptom can be caused by any of the following:• Low Fluid Level• Inertia Brake• Clutch Calibration• TransmissionWetClutch FluidInertia Brake413
Symptom Isolation Procedures<strong>UltraShift</strong> AW3 Clutch Engagement TestSymptom Isolation ProceduresSTEP AProcedure Condition Action1. Place transmission in neutral.2. Allow engine to idle at 600 to700 RPM for a minimum of 2minutes. Ensuretransmission fluidtemperature is 60 to 120degrees F (16 to 49 degreesC)3. Check transmission fluidlevel.If fluid level is at COLD-FULLmarkGo to STEP BIf fluid level is below the COLD-ADD markCorrect fluid level, check forleaks. Drive Vehicle, if ClutchEngagement Complaint exists,repeat STEP ASTEP BProcedure Condition Action1. Remove the flywheelinspection cover <strong>and</strong> inspectthe rubber coupler fordamage or shear.If no damage is observedIf damage is observedGo to STEP CReplace the Torsional Coupler.Go to STEP V414
<strong>UltraShift</strong> AW3 Clutch Engagement TestSymptom Isolation ProceduresSTEP C1. Key on.Procedure Condition Action2. Engine running, allow engineto reach operatingtemperature.3. Key off.4. Start vehicle.5. Allow vehicle to Idle inNeutral for a minimum of 2(two) minutes.6. Drive vehicle. If Clutch Engagement Complaintdoes not changeGo to STEP DIf Clutch Engagement Complaintis correctedTest complete.STEP D1. Key off.Procedure Condition Action2. Disconnect TransmissionHarness from the I-Brake.3. Key on.4. Drive vehicle (FlashingService Light will exist).If Clutch Engagement Complaintdoes not changeContact your <strong>Eaton</strong>Representative or call <strong>Eaton</strong> at1-800-826-HELP (4357).If Clutch Engagement Complaintis correctedReplace Inertia Brake.Go to STEP V415
Symptom Isolation Procedures<strong>UltraShift</strong> AW3 Clutch Engagement TestSTEP V1. Key Off.Procedure Condition Action2. Reconnect TransmissionHarness to I-Brake.3. Key on.4. Drive the vehicle todetermine whether thecomplaint has been repaired.If shift complaint has not beenrepairedContact your <strong>Eaton</strong>Representative or call <strong>Eaton</strong> at1-800-826-HELP (4357).If the shift complaint has beenrepairedTest complete.416
AutoShift AS3 Shift Complaint TestOverviewThis symptom driven test is performed if a shift complaint exists, <strong>and</strong> there are no active or inactivecodes.DetectionThere is no detection other than a driver complaint.FallbackThere is no fallback mode for a shift complaint, however, it may affect vehicle performance.Required Tools• Basic H<strong>and</strong> Tools• Troubleshooting Guide• 0-100 PSI Air Pressure Gauge (2)• <strong>Eaton</strong> Test Adapter KitPossible CausesThis fault code can be caused by any of the following:• Electric Shifter• Range system• Splitter system• Input Shaft Speed Sensor• Transmission Harness• Shift Bar Housing• Transmission ECUInput ShaftSpeed SensorRange SystemSplitter SystemTransmission HarnessTransmission ECU417
Symptom Isolation ProcedureAutoShift AS3 Shift Complaint TestSymptom Isolation ProcedureSTEP AProcedure Condition Action1. Key off.2. Inspect starter/battery <strong>and</strong>inline fuse holderconnections for integrity.3. Measure voltage acrossbatteries.If voltage is 11 to 13 volts on a 12volt system or 22 to 26 on a 24volt systemProceed with battery load test.Repair or replace batteries asrequired. Go to STEP BIf voltage is outside of rangeRepair or replace batteries <strong>and</strong>charging system as required.Repeat this step.VOLTS–+V COM A–+418
AutoShift AS3 Shift Complaint TestSymptom Isolation ProcedureSTEP BProcedure Condition Action1. Locate diagnostic port onTransmission Harness.2. Key on.3. Measure voltage betweenpins C <strong>and</strong> the batterynegative post.If voltage between pin C <strong>and</strong>battery negative post is 0.70 voltsor lessGo to STEP CIf voltage is outside of rangeRepair battery ground supply toTransmission ECU. Repeat test.Warning! - Do Not Load Test at Diagnostic Port4-Pin Diagnostics PortVOLTSBCADV COM ABattery Negative Post4-way4-Pin Diagnostic Port(Located at the left rearcorner of the transmission.)B - Service Bat. +C - Service Bat. -A - Service Ignition +419
Symptom Isolation ProcedureAutoShift AS3 Shift Complaint TestSTEP CProcedure Condition Action1. Locate diagnostic port onTransmission Harness.2. Key on.3. Measure voltage betweenpins B <strong>and</strong> pin C.If voltage between pins B <strong>and</strong> Cis within 0.6 volts of batteryvoltageIf voltage is outside of rangeGo to STEP DRepair battery power supply toTransmission ECU. Fuse may beblown. Repeat test.Warning! - Do Not Load Test at Diagnostic Port4-Pin Diagnostics PortVOLTSV COM ABCAD4-way4-Pin Diagnostic Port(Located at the left rearcorner of the transmission.)B - Service Bat. +C - Service Bat. -A - Service Ignition +420
AutoShift AS3 Shift Complaint TestSymptom Isolation ProcedureSTEP D1. Key on.Procedure Condition Action2. Measure voltage between pinA <strong>and</strong> pin C.If voltage between pins A <strong>and</strong> Cis within 0.6 volts of batteryvoltageIf voltage is outside of rangeGo to STEP ERepair Ignition power supply toECU. Fuse may be blown.Repeat test.Warning! - Do Not Load Test at Diagnostic Port4-Pin Diagnostics PortVOLTSV COM ABCAD4-way4-Pin Diagnostic Port(Located at the left rearcorner of the transmission.)B - Service Bat. +C - Service Bat. -A - Service Ignition +STEP EProcedure Condition Action1. Connect PC based servicetool <strong>and</strong> monitor input shaftspeed with clutch pedalreleased.If input shaft speed matchesengine rpmIf Input shaft speed reads 0Go to STEP KGo to STEP F421
Symptom Isolation ProcedureAutoShift AS3 Shift Complaint TestSTEP F1. Key off.Procedure Condition Action2. Disconnect negative batterycable.3. Disconnect the TransmissionHarness 38-way connector.4. Measure the resistancebetween the TransmissionHarness 38-way connectorpins 7 <strong>and</strong> 8.If resistance is 2K to 4.5K ohmIf resistance is outside of rangeGo to STEP GGo to STEP IOHMSFront ViewTransmission ECU ConnectorV COM A3729 30 3123 24 2532 33 3426 27 283813 1415 161718 19202122357 8 910 11 121 2 34 5 636Transmission Harness 38-way Connector422
AutoShift AS3 Shift Complaint TestSymptom Isolation ProcedureSTEP GProcedure Condition Action1. Measure resistance betweenthe Transmission Harness38-way connector pin 7 <strong>and</strong>ground.If resistance is OLIf resistance is less than 10K ohmGo to STEP HGo to STEP IFront ViewTransmission ECU ConnectorOHMS3729 30 3123 24 2532 33 3426 27 2838V COM A13 1415 161718 19202122Transmission Harness 38-way Connector357 8 910 11 1234 51 2 636GROUNDSTEP HProcedure Condition Action1. Inspect Input Shaft SpeedSensor for contamination ordamage.If no problem foundIf problem found or you were senthere from Step H or IReplace Transmission ECU.Go to STEP VReplace Input Shaft SpeedSensor <strong>and</strong> inspect the uppercountershaft PTO gear fordamage. Go to STEP V423
Symptom Isolation ProcedureAutoShift AS3 Shift Complaint TestSTEP IProcedure Condition Action1. Disconnect the TransmissionHarness from the Input ShaftSpeed Sensor.2. Measure resistance betweenInput Shaft Speed Sensorpins A <strong>and</strong> B.If resistance is 2K to 4.5K ohmIf resistance is outside of rangeGo to STEP JGo to STEP HOHMSABV COM A3.STEP JProcedure Condition Action1. Measure resistance betweenInput Shaft Speed Sensor pinA <strong>and</strong> ground.If resistance is OLIf resistance is less than 10K ohmReplace Transmission Harness.Go to STEP VGo to STEP HOHMSABV COM AGROUND424
AutoShift AS3 Shift Complaint TestSymptom Isolation ProcedureSTEP K1. Key off.Procedure Condition Action2. Install a 0-100 PSI airpressure gauge in theregulated test port of the airfilter / regulator.3. Start engine <strong>and</strong> allow airpressure to build to governorcut-off.4. Monitor the vehicle airpressure gauge on the dash.If air pressure cuts off at 90 to120 PSIGo to STEP LIf air pressure is outside of rangeRepair vehicle air system asrequired. Repeat test.0-100 PSIRegulated test portSTEP L1. Key off.Procedure Condition Action2. Monitor the vehicle airpressure gauge on the dash.If vehicle maintains air pressureIf vehicle loses air pressureGo to STEP MRepair vehicle air system asrequired. Repeat test.425
Symptom Isolation ProcedureAutoShift AS3 Shift Complaint TestSTEP MProcedure Condition Action1. Read air pressure gaugeinstalled at the regulatedport.If air pressure is 55 to 65 PSIIf air pressure is outside of rangeGo to STEP OGo to STEP NSTEP NProcedure Condition Action1. Remove air supply line to theair filter /regulator <strong>and</strong> checkairflow.If air flows from the supply lineIf air does not flow from thesupply lineRepair Air Filter/Regulator.Go to STEP KRepair vehicle air supply to theregulator. Go to STEP K426
AutoShift AS3 Shift Complaint TestSymptom Isolation ProcedureSTEP O1. Key off.Procedure Condition Action2. Install both 0-100 PSI airpressure gauges into therange cover diagnostic ports.3. Start vehicle <strong>and</strong> allow airpressure to build to governorcut-off.4. Turn off engine, but leavekey in “ON” position.5. With Shift Control, selectreverse, then select neutral.If LOW range gauge = 55 to 65PSI <strong>and</strong>If HIGH range gauge = 0 PSINote: Five minutes is allowedfor checking the airpressure after shiftingthe transmission toneutral.If both air pressure gauges do notread as listed aboveGo to STEP PReplace Range Solenoid Valve<strong>and</strong> Range Cylinder Cover asrequired. Go to STEP VHI range0-100 PSI gaugeLO range0-100 PSI gauge427
Symptom Isolation ProcedureAutoShift AS3 Shift Complaint TestSTEP P1. Key on.Procedure Condition Action2. With the Shift Control, selectthe highest reverse gearavailable by pressing theupshift button/arrow, thenselect neutral.If HIGH range gauge = 55 to 65PSI <strong>and</strong>If LOW range gauge = 0 PSIIf both air pressure gauges do notread as listed aboveGo to STEP QReplace Range SOlenoid Valve<strong>and</strong> Range CYlinder Cover asrequired.Go to STEP VHI range0-100 PSI gaugeLO range0-100 PSI gauge3.STEP QProcedure Condition Action1. Is the transmission equippedwith a splitter system? (i.e.18-Speed)If the transmission is equippedwith a splitter systemIf the transmission is notequipped with a splitter systemGo to STEP RGo to STEP V428
AutoShift AS3 Shift Complaint TestSymptom Isolation ProcedureSTEP R1. Key off.Procedure Condition Action2. Start vehicle <strong>and</strong> allow airpressure to build to governorcut-off.3. Turn off engine, but leavekey in “ON” position.4. With Shift Control, selectreverse (R1 in gear displayfor 13/18-speed), then selectneutralIf HIGH Splitter gauge = 55 to 65PSI <strong>and</strong> if LOW Splitter gauge = 0PSINote: Five minutes is allowedfor checking thepressure after movingthe Shift Lever to neutral.If air pressure gauges do not readas shown aboveGo to STEP SReplace SPlitter Solenoid Valve<strong>and</strong> Splitter Cylinder Cover asrequired. Go to STEP VLO split0-100 PSI gaugeHI split0-100 PSI gauge429
Symptom Isolation ProcedureAutoShift AS3 Shift Complaint TestSTEP S1. Key on.Procedure Condition Action2. With Shift Control, selectreverse (R2 in the geardisplay 13/18-speed).Note: If R2 isn’t displayed theup arrow button needs tobe pressed.If LOW Splitter gauge =55 to 65PSI <strong>and</strong> if HIGH Splitter gauge =0 PSIIf air pressure gauges do not readas shown aboveGo to STEP VReplace Splitter Solenoid Valve<strong>and</strong> Splitter Cylinder Cover asrequired. Go to STEP VHIGH split0-100 PSI gaugeLOW split0-100 PSI gaugeSTEP V1. Key off.Procedure Condition Action2. Remove all pressure gauges.3. Reconnect all connectors.4. Key on.5. Drive the vehicle todetermine whether thecomplaint has been repaired.If the transmission shifts normalIf the transmission still has ashifting complaintTest complete.To find error in testing, return toSTEP A430
Heavy-Duty <strong>UltraShift</strong> Plus Shift ComplaintOverviewTestThis symptom-driven test is performed if a shift complaint exists, <strong>and</strong> there are no Active orInactive codes.DetectionThere is no detection other than a driver complaint.FallbackThere is no fallback mode for shift complaint, however, it may effect vehicle performance.Required Tools• Basic H<strong>and</strong> Tools• <strong>Eaton</strong> Test Adapter Kit• ServiceRanger a PC-based Service Tool• Troubleshooting GuidePossible CausesThis symptom can be caused by any of the following:• Inertia Brake• Input Shaft Speed Sensor• Transmission ECU• Transmission Harness• Range System• Splitter SystemInput ShaftSpeed SensorRange SystemSplitter SystemTransmission HarnessTransmission ECU431
––++––++BCSystem Isolation ProcedureHeavy-Duty <strong>UltraShift</strong> Plus Shift ComplaintSystem Isolation ProcedureSTEP AProcedure Condition Action1. Key off.2. Remove <strong>and</strong> clean all battery<strong>and</strong> battery to frameconnections.3. Remove <strong>and</strong> clean groundsupply to engine ECU.4. Inspect starter/battery <strong>and</strong>in-line 30 amp fuse holderconnections for corrosion ordamaged contacts. Alsoinspect the 50 amp fuseholder on vehicles equippedwith an Electronic ClutchActuator (ECA.)50 AMP fuse30 Amp Fuse5. Measure voltage acrossbatteries.If voltage is 11 to 13 volts on a 12volt system or 22 to 26 on a 24volt systemProceed with battery load test.Repair or replace batteries asrequired. Go to STEP BIf voltage is outside of rangeRepair or replace batteries <strong>and</strong>charging system as required.Repeat this step.VOLTS–+V COM A–+432
Heavy-Duty <strong>UltraShift</strong> Plus Shift Complaint TestSystem Isolation ProcedureSTEP BProcedure Condition Action1. Locate diagnostic port onTransmission Harness.2. Key on.3. Measure voltage betweenpins C <strong>and</strong> the batterynegative post.If voltage between pin C <strong>and</strong>battery negative post is 0.70 voltsor lessGo to STEP CIf voltage is outside of rangeRepair battery ground supply toTransmission ECU. Repeat test.Warning! - Do Not Load Test at Diagnostic Port4-Pin Diagnostics PortVOLTSBCADV COM ABattery Negative Post4-way4-Pin Diagnostic Port(Located at the left rearcorner of the transmission.)B - Service Bat. +C - Service Bat. -A - Service Ignition +433
System Isolation ProcedureHeavy-Duty <strong>UltraShift</strong> Plus Shift ComplaintSTEP CProcedure Condition Action1. Locate diagnostic port onTransmission Harness.2. Key on.3. Measure voltage betweenpins B <strong>and</strong> pin C.If voltage between pins B <strong>and</strong> Cis within 0.6 volts of batteryvoltageIf voltage is outside of rangeGo to STEP DRepair battery power supply toTransmission ECU. Fuse may beblown. Repeat test.Warning! - Do Not Load Test at Diagnostic Port4-Pin Diagnostics PortVOLTSV COM ABCAD4-way4-Pin Diagnostic Port(Located at the left rearcorner of the transmission.)B - Service Bat. +C - Service Bat. -A - Service Ignition +434
Heavy-Duty <strong>UltraShift</strong> Plus Shift Complaint TestSystem Isolation ProcedureSTEP D1. Key on.Procedure Condition Action2. Measure voltage between pinA <strong>and</strong> pin C.If voltage between pins A <strong>and</strong> Cis within 0.6 volts of batteryvoltageGo to STEP EIf voltage is outside of rangeRepair Ignition power supply toECU. Fuse may be blown.Repeat test.Warning! - Do Not Load Test at Diagnostic Port4-Pin Diagnostics PortVOLTSV COM ABCAD4-way4-Pin Diagnostic Port(Located at the left rearcorner of the transmission.)B - Service Bat. +C - Service Bat. -A - Service Ignition +435
FFBCSystem Isolation ProcedureHeavy-Duty <strong>UltraShift</strong> Plus Shift ComplaintSTEP E1. Key off.Procedure Condition Action2. Disconnect battery negative.3. Disconnect ECA 3-wayconnector.4. Reconnect battery negative.5. Measure voltage between pinB <strong>and</strong> pin C of 3-wayconnector.If voltage between pin B <strong>and</strong> pinC of 3-way connector is within 0.6volts of battery voltageGo to STEP FIf voltage is outside of rangeRepair battery power supply toECA. Fuse may be blown.Repeat test.Transmission ECUEngine Flywheel Speed SensorG50 AMP fuseG133029ABABBattery power(Non-switched power)run to starter or BatteryCBA436
Heavy-Duty <strong>UltraShift</strong> Plus Shift Complaint TestSystem Isolation ProcedureSTEP F1. Key on.Procedure Condition Action2. Connect ServiceRanger,select “Advanced ProductFunction”.3. Start Engine.4. Select “LCIB DecelerationTest”.5. Run test <strong>and</strong> followinstructions.Test passes (5 consecutive testspass)Go to STEP GTest Fails (5 consecutive testsfail)Follow the System Code 45Isolation ProceduresSTEP GProcedure Condition Action1. At idle, compare engine rpmto input shaft rpm withServiceRanger.If input shaft speed matchesengine rpmIf Input shaft speed reads 0Go to STEP MGo to STEP H437
System Isolation ProcedureHeavy-Duty <strong>UltraShift</strong> Plus Shift ComplaintSTEP H1. Key off.Procedure Condition Action2. Disconnect negative batterycable.3. Disconnect the TransmissionHarness 38-way connector.4. Measure the resistancebetween the TransmissionHarness 38-way connectorpins 7 <strong>and</strong> 8.If resistance is 2K to 4.5K ohmIf resistance is outside of rangeGo to STEP IGo to STEP KFront ViewTransmission ECU ConnectorOHMSV COM A3729 30 3123 24 2532 33 3426 27 283813 1415 161718 19202122Transmission Harness 38-way Connector357 8 910 11 121 2 34 5 636438
Heavy-Duty <strong>UltraShift</strong> Plus Shift Complaint TestSystem Isolation ProcedureSTEP IProcedure Condition ActionMeasure resistance between theTransmission Harness 38-wayconnector pin 7 <strong>and</strong> ground.If resistance is OLIf resistance is less than 10K ohmGo to STEP JGo to STEP KFront ViewTransmission ECU ConnectorOHMS3729 30 3123 24 2532 33 3426 27 2838V COM A13 1415 161718 19202122Transmission Harness 38-way Connector357 8 910 11 121 2 34 5 636GROUNDSTEP JProcedure Condition Action1. Inspect Input Shaft SpeedSensor for contamination ordamage.If no problem foundIf problem found or you were senthere from Step K or LGo to STEP MReplace Input Shaft SpeedSensor <strong>and</strong> inspect the uppercountershaft PTO gear fordamage. Go to STEP V439
System Isolation ProcedureHeavy-Duty <strong>UltraShift</strong> Plus Shift ComplaintSTEP KProcedure Condition Action1. Disconnect the TransmissionHarness from the Input ShaftSpeed Sensor.2. Measure resistance betweenInput Shaft Speed Sensorpins A <strong>and</strong> B.If resistance is 2K to 4.5K ohmIf resistance is outside of rangeGo to STEP LGo to STEP JOHMSABV COM ASTEP LProcedure Condition Action1. Measure resistance betweenInput Shaft Speed Sensor pinA <strong>and</strong> ground.If resistance is OLIf resistance is less than 10K ohmReplace Transmission Harness.Go to STEP VGo to STEP JOHMSABV COM AGROUND440
Heavy-Duty <strong>UltraShift</strong> Plus Shift Complaint TestSystem Isolation ProcedureSTEP M1. Key off.Procedure Condition Action2. Install a 0-100 PSI airpressure gauge in theregulated test port of the airfilter / regulator.3. Start engine <strong>and</strong> allow airpressure to build to governorcut-off.4. Monitor the vehicle airpressure gauge on the dash.If air pressure cuts off at 90 to120 PSIGo to STEP NIf air pressure is outside of rangeRepair vehicle air system asrequired. Repeat test.0-100 PSIRegulated test portSTEP N1. Key off.Procedure Condition Action2. Monitor the vehicle airpressure gauge on the dash.If vehicle maintains air pressureIf vehicle loses air pressureGo to STEP ORepair vehicle air system asrequired. Repeat test.441
System Isolation ProcedureHeavy-Duty <strong>UltraShift</strong> Plus Shift ComplaintSTEP OProcedure Condition Action1. Read air pressure gaugeinstalled at the regulatedport.If air pressure is 55 to 65 PSIIf air pressure is outside of rangeGo to STEP QGo to STEP PSTEP PProcedure Condition Action1. Remove air supply line to theair filter /regulator <strong>and</strong> checkairflow.If air flows from the supply lineIf air does not flow from thesupply lineRepair Filter/Regulator.Go to STEP LRepair vehicle air supply to theregulator.Go to STEP L442
Heavy-Duty <strong>UltraShift</strong> Plus Shift Complaint TestSystem Isolation ProcedureSTEP Q1. Key off.Procedure Condition Action2. Install both 0-100 PSI airpressure gauges into therange cover diagnostic ports.3. Start vehicle <strong>and</strong> allow airpressure to build to governorcut-off.4. Turn off engine, but leavekey in “ON” position.5. With Shift Control, selectreverse, then select neutral.If LOW range gauge = 55 to 65PSI <strong>and</strong>If HIGH range gauge = 0 PSINote: Five minutes is allowedfor checking the airpressure after shiftingthe transmission toneutral.If both air pressure gauges do notread as listed aboveGo to STEP RReplace Range Solenoid Valve<strong>and</strong> Range Cylinder Cover asrequired. Go to STEP VHI range0-100 PSI gaugeLO range0-100 PSI gauge443
System Isolation ProcedureHeavy-Duty <strong>UltraShift</strong> Plus Shift ComplaintSTEP RProcedure Condition Action1. Key on.2. With the Shift Control, selectthe highest reverse gearavailable by pressing theupshift button/arrow, thenselect neutral.If HIGH range gauge = 55 to 65PSI <strong>and</strong>If LOW range gauge = 0 PSIIf both air pressure gauges do notread as listed aboveGo to STEP SReplace Range Solenoid Valve<strong>and</strong> Range Cylinder Cover asrequired. Go to STEP VHI range0-100 PSI gaugeLO range0-100 PSI gaugeSTEP SProcedure Condition Action1. Is the transmission equippedwith a splitter system? (i.e.13-Speed)If the transmission is equippedwith a splitter systemIf the transmission is notequipped with a splitter systemGo to STEP TGo to STEP V444
Heavy-Duty <strong>UltraShift</strong> Plus Shift Complaint TestSystem Isolation ProcedureSTEP T1. Key off.Procedure Condition Action2. Start vehicle <strong>and</strong> allow airpressure to build to governorcut-off.3. Turn off engine, but leavekey in “ON” position.4. With Shift Control, selectreverse (R1 in gear displayfor 13/18-speed), then selectneutralIf HIGH Splitter gauge = 55 to 65PSI <strong>and</strong> if LOW Splitter gauge = 0PSINote: Five minutes is allowedfor checking thepressure after movingthe Shift Lever to neutral.If air pressure gauges do not readas shown aboveGo to STEP UReplace Splitter Solenoid Valve<strong>and</strong> Splitter Cylinder Cover asrequired. Go to STEP VLO split0-100 PSI gaugeHI split0-100 PSI gauge445
System Isolation ProcedureHeavy-Duty <strong>UltraShift</strong> Plus Shift ComplaintSTEP U1. Key on.Procedure Condition Action2. With Shift Control, selectreverse (R2 in the geardisplay 13/18-speed).Note: If R2 isn’t displayed theup arrow button needs tobe pressed.If LOW Splitter gauge =55 to 65PSI <strong>and</strong> if HIGH Splitter gauge =0 PSIIf air pressure gauges do not readas shown aboveGo to STEP VReplace Splitter Solenoid Valve<strong>and</strong> Splitter Cylinder Cover asrequired. Go to STEP VHIGH split0-100 PSI gaugeLOW split0-100 PSI gaugeSTEP V1. Key off.Procedure Condition Action2. Remove all pressure gauges.3. Reconnect all connectors.4. Key on.5. Drive the vehicle todetermine whether thecomplaint has been repaired.If the transmission shifts normalIf the transmission still has ashifting complaintTest complete.To find error in testing, return toSTEP A446
<strong>UltraShift</strong> DM3 Shift Complaint TestOverviewThis symptom-driven test is performed if a shift complaint exists, <strong>and</strong> there are no Active orInactive codes.DetectionThere is no detection other than a driver complaint.FallbackThere is no fallback mode for shift complaint, however, it may effect vehicle performance.Required Tools• Basic H<strong>and</strong> Tools• <strong>Eaton</strong> Test Adapter Kit• ServiceRanger a PC-based Service Tool• Troubleshooting GuidePossible CausesThis symptom can be caused by any of the following:• Inertia Brake• Input Shaft Speed Sensor• Transmission ECU• Transmission Harness• Range System• Splitter SystemInput ShaftSpeed SensorRange SystemSplitter SystemTransmission HarnessTransmission ECU447
Symptom Isolation Procedure<strong>UltraShift</strong> DM3 Shift Complaint TestSymptom Isolation ProcedureSTEP AProcedure Condition Action1. Key off.2. Inspect starter/battery <strong>and</strong>in-line fuse holderconnections for integrity.3. Measure voltage acrossbatteries.If voltage is 11 to 13 volts on a 12volt system or 22 to 26 on a 24volt systemProceed with battery load test.Repair or replace batteries asrequired. Go to STEP BIf voltage is outside of rangeRepair or replace batteries <strong>and</strong>charging system as required.Repeat test.VOLTS–+V COM A–+448
<strong>UltraShift</strong> DM3 Shift Complaint TestSymptom Isolation ProcedureSTEP BProcedure Condition Action1. Locate diagnostic port onTransmission Harness.2. Key on.3. Measure voltage betweenpins C <strong>and</strong> the batterynegative post.If voltage between pin C <strong>and</strong>battery negative post is 0.70 voltsor lessGo to STEP CIf voltage is outside of rangeRepair battery ground supply toTransmission ECU. Repeat test.Warning! - Do Not Load Test at Diagnostic Port4-Pin Diagnostics PortVOLTSBCADV COM ABattery Negative Post4-way4-Pin Diagnostic Port(Located at the left rearcorner of the transmission.)B - Service Bat. +C - Service Bat. -A - Service Ignition +449
Symptom Isolation Procedure<strong>UltraShift</strong> DM3 Shift Complaint TestSTEP CProcedure Condition Action1. Locate diagnostic port onTransmission Harness.2. Key on.3. Measure voltage betweenpins B <strong>and</strong> pin C.If voltage between pins B <strong>and</strong> Cis within 0.6 volts of batteryvoltageGo to STEP DIf voltage is outside of rangeRepair battery power supply toTransmission ECU. Fuse may beblown. Repeat test.Warning! - Do Not Load Test at Diagnostic Port4-Pin Diagnostics PortVOLTSV COM ABCAD4-way4-Pin Diagnostic Port(Located at the left rearcorner of the transmission.)B - Service Bat. +C - Service Bat. -A - Service Ignition +450
<strong>UltraShift</strong> DM3 Shift Complaint TestSymptom Isolation ProcedureSTEP D1. Key on.Procedure Condition Action2. Measure voltage between pinA <strong>and</strong> pin C.If voltage between pins A <strong>and</strong> Cis within 0.6 volts of batteryvoltageIf voltage is outside of rangeGo to STEP ERepair Ignition power supply toECU. Fuse may be blown.Repeat test.Warning! - Do Not Load Test at Diagnostic Port4-Pin Diagnostics PortVOLTSV COM ABCAD4-way4-Pin Diagnostic Port(Located at the left rearcorner of the transmission.)B - Service Bat. +C - Service Bat. -A - Service Ignition +451
Symptom Isolation Procedure<strong>UltraShift</strong> DM3 Shift Complaint TestSTEP EProcedure Condition ActionNote: Engine rpm must remainabove 1000 rpm duringthe following test.1. Compare engine rpm to inputshaft rpm withServiceRanger.If input shaft speed matchesengine rpmIf Input shaft speed reads 0Go to STEP KGo to STEP FSTEP F1. Key off.Procedure Condition Action2. Disconnect negative batterycable.3. Disconnect the TransmissionHarness 38-way connector.4. Measure the resistancebetween the TransmissionHarness 38-way connectorpins 7 <strong>and</strong> 8.If resistance is 2K to 4.5K ohmIf resistance is outside of rangeGo to STEP GGo to STEP IFront ViewTransmission ECU ConnectorOHMSV COM A3729 30 3123 24 2532 33 3426 27 283813 1415 161718 19202122Transmission Harness 38-way Connector357 8 910 11 121 2 34 5 636452
<strong>UltraShift</strong> DM3 Shift Complaint TestSymptom Isolation ProcedureSTEP GProcedure Condition Action1. Measure resistance betweenthe Transmission Harness38-way connector pin 7 <strong>and</strong>ground.If resistance is OLIf resistance is less than 10K ohmGo to STEP HGo to STEP IFront ViewTransmission ECU ConnectorOHMS3729 30 3123 24 2532 33 3426 27 2838V COM A13 1415 161718 19202122Transmission Harness 38-way Connector357 8 910 11 121 2 34 5 636GROUNDSTEP HProcedure Condition Action1. Inspect Input Shaft SpeedSensor for contamination ordamage.If no problem foundIf problem found or you were senthere from STEP I or STEP JReplace Transmission ECUGo to STEP VReplace Input Shaft SpeedSensor <strong>and</strong> inspect the uppercountershaft PTO gear fordamage. Go to STEP V453
Symptom Isolation Procedure<strong>UltraShift</strong> DM3 Shift Complaint TestSTEP IProcedure Condition Action1. Disconnect the TransmissionHarness from the Input ShaftSpeed Sensor.2. Measure resistance betweenInput Shaft Speed Sensorpins A <strong>and</strong> B.If resistance is 2K to 4.5K ohmIf resistance is outside of rangeGo to STEP JGo to STEP HOHMSABV COM ASTEP JProcedure Condition Action1. Measure resistance betweenInput Shaft Speed Sensor pinA <strong>and</strong> ground.If resistance is OLIf resistance is less than 10K ohmReplace Transmission HarnessGo to STEP VGo to STEP HOHMSABV COM AGROUND454
<strong>UltraShift</strong> DM3 Shift Complaint TestSymptom Isolation ProcedureSTEP K1. Key off.Procedure Condition Action2. Install a 0-100 PSI airpressure gauge in theregulated test port of the airfilter / regulator.3. Start engine <strong>and</strong> allow airpressure to build to governorcut-off.4. Monitor the vehicle airpressure gauge on the dash.If air pressure cuts off at 90 to120 PSIGo to STEP LIf air pressure is outside of rangeRepair vehicle air system asrequired. Repeat test.0-100 PSIRegulated test portSTEP L1. Key off.Procedure Condition Action2. Monitor the vehicle airpressure gauge on the dash.If vehicle maintains air pressureIf vehicle loses air pressureGo to STEP MRepair vehicle air system asrequired. Repeat test.455
Symptom Isolation Procedure<strong>UltraShift</strong> DM3 Shift Complaint TestSTEP MProcedure Condition Action1. Read air pressure gaugeinstalled at the regulatedport.If air pressure is 55 to 65 PSIIf air pressure is outside of rangeGo to STEP OGo to STEP NSTEP NProcedure Condition Action1. Remove air supply line to theair filter /regulator <strong>and</strong> checkairflow.If air flows from the supply lineIf air does not flow from thesupply lineRepair Air Filer / RegulatorRepair vehicle air supply to theregulator. Go to STEP J456
<strong>UltraShift</strong> DM3 Shift Complaint TestSymptom Isolation ProcedureSTEP O1. Key off.Procedure Condition Action2. Install both 0-100 PSI airpressure gauges into therange cover diagnostic ports.3. Start vehicle <strong>and</strong> allow airpressure to build to governorcut-off.4. Turn off engine, but leave keyin “ON” position.5. With Shift Control, selectreverse, then select neutral.If LOW range gauge = 55 to 65PSI <strong>and</strong>If HIGH range gauge = 0 PSINote: Five minutes is allowedfor checking the airpressure after shiftingthe transmission toneutral.If both air pressure gauges do notread as listed aboveGo to STEP CReplace Solenoid Valve <strong>and</strong>Range Cylinder Cover asrequired. Go to STEP VHI range0-100 PSI gaugeLO range0-100 PSI gauge457
Symptom Isolation Procedure<strong>UltraShift</strong> DM3 Shift Complaint TestSTEP P1. Key on.Procedure Condition Action2. With the Shift Control, selectthe highest reverse gearavailable by pressing theupshift button/arrow, thenselect neutral.If HIGH range gauge = 55 to 65PSI <strong>and</strong>If LOW range gauge = 0 PSIIf both air pressure gauges do notread as listed aboveGo to STEP QReplace Range Solenoid Valve<strong>and</strong> Range Cylinder cover asrequired. Go to STEP VHI range0-100 PSI gaugeLO range0-100 PSI gauge3.STEP QProcedure Condition Action1. Is the transmission equippedwith a splitter system? (i.e.13-Speed)If the transmission is equippedwith a splitter systemIf the transmission is notequipped with a splitter systemGo to STEP RGo to STEP V458
<strong>UltraShift</strong> DM3 Shift Complaint TestSymptom Isolation ProcedureSTEP R1. Key off.Procedure Condition Action2. Start vehicle <strong>and</strong> allow airpressure to build to governorcut-off.3. Turn off engine, but leave keyin “ON” position.4. With Shift Control, selectreverse (R1 in gear displayfor 13/18-speed), then selectneutral.If HIGH Splitter gauge = 55 to 65PSI <strong>and</strong> if LOW Splitter gauge = 0PSINote: Five minutes is allowedfor checking thepressure after movingthe Shift Lever to neutral.If air pressure gauges do not readas shown aboveGo to STEP SReplace Splitter Solenoid Valve<strong>and</strong> Splitter Cylinder Cover asrequired. Go to STEP VLO split0-100 PSI gaugeHI split0-100 PSI gauge459
Symptom Isolation Procedure<strong>UltraShift</strong> DM3 Shift Complaint TestSTEP S1. Key on.Procedure Condition Action2. With Shift Control, selectreverse (R2 in the geardisplay 13/18-speed).Note: If R2 isn’t displayed theup arrow button needs tobe pressed.If LOW Splitter gauge =55 to 65PSI <strong>and</strong> if HIGH Splitter gauge =0 PSIIf air pressure gauges do not readas shown aboveGo to STEP VReplace Splitter Solenoid Valve<strong>and</strong> Splitter Cylinder Cover asrequired. Go to STEP VHIGH split0-100 PSI gaugeLOW split0-100 PSI gaugeSTEP V1. Key off.Procedure Condition Action2. Remove all pressure gauges.3. Reconnect all connectors.4. Key on.5. Drive the vehicle todetermine whether thecomplaint has been repaired.If the transmission shifts normalIf the transmission still has ashifting complaintTest complete.To find error in testing, return toSTEP A460
<strong>UltraShift</strong> AW3 Shift Complaint TestOverviewThis symptom-driven test is performed if a shift complaint exists, <strong>and</strong> there are no Active orInactive codes.DetectionThere is no detection other than a driver complaint.FallbackThere is no fallback mode for shift complaint, however, it may effect vehicle performance.Possible CausesThis symptom can be caused by any of the following:• Basic H<strong>and</strong> Tools• <strong>Eaton</strong> Test Adapter Kit• ServiceRanger a PC-based Service Tool• Troubleshooting Guide• Low Fluid Level• Inertia Brake• Input Shaft Speed Sensor• Transmission ECU• Transmission HarnessTransmission ECUTransmission HarnessInertia Brake461
Symptom Isolation Procedures<strong>UltraShift</strong> AW3 Shift Complaint TestSymptom Isolation ProceduresSTEP AProcedure Condition Action1. Place transmission in neutral.2. Allow engine to idle at 600 to700 RPM for a minimum of 2minutes. Ensuretransmission fluidtemperature is 60 to 120degrees F (16 to 49 degreesC)3. Check transmission fluidlevel.If fluid level is at COLD-FULLmarkGo to STEP BIf fluid level is below the COLD-ADD markCorrect fluid level, check forleaks. Go to STEP VSTEP B1. Key off.Procedure Condition Action2. Inspect starter/battery <strong>and</strong>inline fuse holderconnections for integrity.3. Measure voltage acrossbatteries.If voltage is 11 to 13 volts on a 12volt system or 22 to 26 on a 24volt systemProceed with battery load test.Repair or replace batteries asrequired. Go to STEP CIf voltage is outside of rangeRepair or replace batteries <strong>and</strong>charging system as required.Repeat test.VOLTS–+V COM A–+462
<strong>UltraShift</strong> AW3 Shift Complaint TestSymptom Isolation ProceduresSTEP CProcedure Condition Action1. Locate diagnostic port onTransmission Harness.2. Key on.3. Measure voltage betweenpins C <strong>and</strong> the batterynegative post.If voltage between pin C <strong>and</strong>battery negative post is 0.70 voltsor lessGo to STEP DIf voltage is outside of rangeRepair battery ground supply toTransmission ECU. Repeat test.Warning! - Do Not Load Test at Diagnostic Port4-Pin Diagnostics PortVOLTSBCADV COM ABattery Negative Post4-way4-Pin Diagnostic Port(Located at the left rearcorner of the transmission.)B - Service Bat. +C - Service Bat. -A - Service Ignition +463
Symptom Isolation Procedures<strong>UltraShift</strong> AW3 Shift Complaint TestSTEP DProcedure Condition Action1. Locate diagnostic port onTransmission Harness.2. Key on.3. Measure voltage betweenpins B <strong>and</strong> pin C.If voltage between pins B <strong>and</strong> Cis within 0.6 volts of batteryvoltageGo to STEP EIf voltage is outside of rangeRepair battery power supply toTransmission ECU. Fuse may beblown. Repeat test.Warning! - Do Not Load Test at Diagnostic Port4-Pin Diagnostics PortVOLTSV COM ABCAD4-way4-Pin Diagnostic Port(Located at the left rearcorner of the transmission.)B - Service Bat. +C - Service Bat. -A - Service Ignition +464
<strong>UltraShift</strong> AW3 Shift Complaint TestSymptom Isolation ProceduresSTEP E1. Key on.Procedure Condition Action2. Measure voltage between pinA <strong>and</strong> pin C.If voltage between pins A <strong>and</strong> Cis within 0.6 volts of batteryvoltageGo to STEP FIf voltage is outside of rangeRepair Ignition power supply toECU. Fuse may be blown.Repeat test.Warning! - Do Not Load Test at Diagnostic Port4-Pin Diagnostics PortVOLTSV COM ABCAD4-way4-Pin Diagnostic Port(Located at the left rearcorner of the transmission.)B - Service Bat. +C - Service Bat. -A - Service Ignition +465
Symptom Isolation Procedures<strong>UltraShift</strong> AW3 Shift Complaint TestSTEP F1. Key on.Procedure Condition Action2. Connect ServiceRanger,select “Advanced ProductFunction”.3. Start Engine, PTO must bedisengaged.4. Select “Inertia Brake Test”.5. Run test <strong>and</strong> followinstructions.Test PassesTest FailsGo to STEP GReplace Inertia BrakeGo to STEP VTest AbortsCorrect displayed test failurecondition <strong>and</strong> retest.STEP GProcedure Condition Action1. Drive vehicle <strong>and</strong> monitorengine rpm <strong>and</strong> input shaftrpm with ServiceRangerIf engine rpm <strong>and</strong> input shaft rpmmatch during the test driveIf input shaft rpm is erratic orreads zeroTest complete.Go to STEP H466
<strong>UltraShift</strong> AW3 Shift Complaint TestSymptom Isolation ProceduresSTEP H1. Key off.Procedure Condition Action2. Disconnect negative batterycable.3. Disconnect the TransmissionHarness 38-way connector.4. Measure the resistancebetween the TransmissionHarness 38-way connectorpins 7 <strong>and</strong> 8.If resistance is 2K to 4.5K ohmIf resistance is outside of rangeGo to STEP IGo to STEP JFront ViewTransmission ECU ConnectorOHMSV COM A3729 30 3123 24 2532 33 3426 27 283813 1415 161718 19202122Transmission Harness 38-way Connector357 8 910 11 1234 51 2 636STEP IProcedure Condition Action1. Measure resistance betweenthe Transmission Harness38-way connector pin 7 <strong>and</strong>ground.If resistance is OLIf resistance is less than 10K ohmGo to STEP JGo to STEP KFront ViewTransmission ECU ConnectorOHMS3729 30 3123 24 2532 33 3426 27 2838V COM A13 1415 161718 19202122Transmission Harness 38-way Connector357 8 910 11 1234 51 2 636GROUND467
Symptom Isolation Procedures<strong>UltraShift</strong> AW3 Shift Complaint TestSTEP JProcedure Condition Action1. Inspect Input Shaft SpeedSensor for contamination ordamage.If no problem foundIf problem found or you were senthere from Step J or KReplace Transmission ECUGo to STEP VReplace Input Shaft SpeedSensor <strong>and</strong> inspect the uppercountershaft PTO gear fordamage. Go to STEP VSTEP KProcedure Condition Action1. Disconnect the TransmissionHarness from the Input ShaftSpeed Sensor.2. Measure resistance betweenInput Shaft Speed Sensorpins A <strong>and</strong> B.If resistance is 2K to 4.5K ohmIf resistance is outside of rangeGo to STEP LGo to STEP JOHMSABV COM ASTEP LProcedure Condition Action1. Measure resistance betweenInput Shaft Speed Sensor pinA <strong>and</strong> ground.If resistance is OLIf resistance is less than 10K ohmReplace Transmission harnessGo to STEP VGo to STEP JOHMSABV COM AGROUND468
<strong>UltraShift</strong> AW3 Shift Complaint TestSymptom Isolation ProceduresSTEP V1. Key off.Procedure Condition Action2. Remove all pressure gauges.3. Reconnect all connectors.4. Key on.5. Drive the vehicle todetermine whether thecomplaint has been repaired.If the transmission shifts normalIf the transmission still has ashifting complaintTest complete.To Find error in testing, return toSTEP A469
Symptom Isolation Procedures<strong>UltraShift</strong> AW3 Shift Complaint Test470
Shift Lever Back Light TestOverviewThis symptom-driven test is performed if the Shift Lever or Shift Control back lighting is notfunctioning.DetectionThere is no detection other than a driver complaint.FallbackThere is no fallback mode for this symptom.Required Tools• Basic H<strong>and</strong> Tools• <strong>Eaton</strong> Test Adapter Kit• Digital Volt/Ohm Meter• Troubleshooting GuidePossible CausesThis symptom can be caused by any of the following:• OEM Wiring• Shift Control• Shift LeverPush Button Shift Control3 4 1 8 2 6 5 73 4 1 8 2 6 5 7Dimmer control inputBack sideof gaugesDash lightsPush Button Control30-way connectorF2 F1 J3 C1 B3253115161723Back side Dimmer control inputof gaugesDash lightsShift Control ECU LegendAll OEM responsible wiring shown is "typical". Consult specific application.(4-31, C1) = +12 volt switched from TECU(1-15, 8-16, 2-17, F2, F1) = Communication from <strong>and</strong> to the ECU15.8.2(3-25, 5, J3, B3) = Signal returns, grounds, <strong>and</strong> general OEM wiring(6-23) = Signal from ECU471
Symptom Isolation ProceduresShift Lever Back Light TestSymptom Isolation ProceduresSTEP AProcedure Condition Action1. Verify Shift Lever. If vehicle is equipped with anOEM Shift LeverRefer to OEM for repair strategy.If vehicle is equipped with a PushButton Shift ControlGo to STEP BIf vehicle is equipped with CobraLeverGo to STEP CSTEP B1. Key off.Procedure Condition Action2. Disconnect Shift Control30-way connector.3. Key on.4. Turn dimmer switch to max.5. Measure voltage between pinB3 <strong>and</strong> J3.If voltage is within 0.6 volts ofbattery voltageReplace Shift Control. Go toSTEP VIf voltage is outside of rangeRepair OEM wire between pin B3<strong>and</strong> the dash lights.Go to STEP VVOLTSV COM AK3 2 1JHGFEDCBA3 2 1472
Shift Lever Back Light TestSymptom Isolation ProceduresSTEP C1. Key on.Procedure Condition Action2. Turn vehicle lights on.3. Turn dimmer switch to max. Cobra Lever lights on, but do notdim when vehicle lights are onGo to STEP DCobra Lever lights do not comeonGo to STEP ESTEP D1. Key off.Procedure Condition Action2. Disconnect Cobra Lever8-way connector.3. Key on.4. Turn dimmer switch to max.5. Measure voltage between pin5 <strong>and</strong> pin 3 on the 8-wayOEM harness.If voltage is within 2 volts ofbattery voltageReplace Cobra Lever. Go toSTEP VIf voltage is outside of range Repair OEM wire between pin 5<strong>and</strong> dash lights. Go to STEP VVOLTSV COM A1827364 5473
Symptom Isolation ProceduresShift Lever Back Light TestSTEP E1. Key off.Procedure Condition Action2. Disconnect Cobra Lever8-way connector.3. Key on.4. Measure voltage between pin3 <strong>and</strong> pin 4 on the 8-wayvehicle harness connector.If voltage is within 0.6 volts ofbattery voltageIf voltage is out of rangeReplace Cobra Lever.Go to STEP VGo to STEP FVOLTSV COM A1827364 5474
Shift Lever Back Light TestSymptom Isolation ProceduresSTEP F1. Key off.Procedure Condition Action2. Disconnect Negative batterycable.3. Disconnect Vehicle Harness38-way connector.4. Measure resistancebetween:• Vehicle Harness38-way connectorpin 31 <strong>and</strong> VehicleHarness 8-wayconnector pin 4.• Vehicle Harness38-way connectorpin 31 <strong>and</strong> ground.If resistance between pins 31 <strong>and</strong>4 is 0 to 0.3 ohms <strong>and</strong> ifresistance between pin 31 <strong>and</strong>ground is OLIf any of the above conditions arenot metGo to STEP GRepair harness between VehicleHarness 38-way connector pin 31<strong>and</strong> Vehicle Harness 8-wayconnector pin 4. Go to STEP VOHMSV COM AFront View38-Way Connector123487653713 1429 30 3123 24 2515 16 1732 33 3426 27 2818 19 203821 22357 8 910 11 1234 51 2 636OHMSV COM A3729 30 3123 24 2532 33 3426 27 283813 1415 161718 19202122Ground357 8 910 11 1234 51 2 636Vehicle Harness 38-way Connector475
Symptom Isolation ProceduresShift Lever Back Light TestSTEP GProcedure Condition Action1. Key off.2. Measure resistancebetween:• Vehicle Harness38-way connectorpin 25 <strong>and</strong> VehicleHarness 8-wayconnector pin 3• Vehicle Harness38-way connectorpin 25 <strong>and</strong> groundIf resistance between pins 25 <strong>and</strong>3 is 0 to 0.3 ohms <strong>and</strong> ifresistance between 25 <strong>and</strong>ground is OLPerform Electrical Pre-test. If testpasses replace transmissionECU. Go to STEP VOHMSV COM AFront View38-Way Connector123487653713 1429 30 3123 24 2515 16 1732 33 3426 27 2818 19 203821 22357 8 910 11 1234 51 2 636OHMSV COM A3729 30 3123 24 2532 33 3426 27 283813 1415 161718 19202122Ground357 8 910 11 1234 51 2 636Vehicle Harness 38-way ConnectorSTEP V1. Key off.Procedure Condition Action2. Reconnect all connectors.3. Key on.4. Turn on the dash lights fully. If back light works correctly Test complete.If back lights do not work correctlyReturn to STEP A to finderror in testing.476
AppendixConnector Pin Descriptions(Non-ECA Products) Transmission Controller 38-Way(Vehicle Interface Connector)38-Way Description Wire 38-Way Description Wire1 J1939 Shield (CAN) 18 TXL 20 MEIIR Contact 18 TXL2 J1939 Low (CAN) 18 TXL 21 MEIIR Minus 18 TXL3 J1939 High (CAN) 18 TXL 22 MEIIR Plus 18 TXL4 Start Enable Relay Minus 18 TXL 23 Service Light Output 18 TXL5 Not Used Plug 24 Not Used 18 TXL6 Not Used Plug 25 Shift Control Power Minus 18 TXL7 Not Used Plug 26 Start Enable Latch 18 TXL8 Not Used Plug 27 HIL Low (Proprietary CAN) 18 TXL9 Not Used Plug 28 HIL High (Proprietary CAN) 18 TXL10 J1587 Plus 18 TXL 29 Not Used Plug11 J1587 Minus 18 TXL 30 Not Used Plug12 ISO9141-K Communications 18 TXL 31 Shift Control Power Plus 18 TXL13 Not Used Plug 32 Start Enable Relay Plus 18 TXL14 Not Used Plug 33 Not Used Plug15 Shift Control Input (Mode Auto) 18 TXL 34 Not Used Plug16 Shift Control Input (Mode Manual/Neutral Signal)17 Shift Control Input (Mode Common/Neutral Return)Push button Shift Control 30-Way Connector18 TXL 35 Ignition 12 GXLor 14SXL18 TXL 36 Battery Minus 12 GXL18 PTO 18 TXL 37 Not Used Plug19 Auto Neutral AW3 18 TXL 38 Battery Plus 12 GXL30-Way DESCRIPTION WireC1 Shift Control Power Plus 16 TXLB3 V dash 16 TXLF1 HIL(+) HI 16 TXLF2 HIL(-) LO 16 TXLJ3 Shift Control Power Minus 16 TXL477
Cobra Lever 8-Way ConnectorAppendixCobra Lever 8-Way Connector8-Way DESCRIPTION Wire1 Shift Control Input (Mode Auto) 16 TXL2 Shift Control Input (Mode Common) 16 TXL3 Shift Control Power Minus 16 TXL4 Shift Control Lever Power Plus 16 TXL5 Dash Lights 16 TXL6 Service Light Output 16 TXL8 Shift Control Input (Mode Manual) 16 TXL7 No Connection 16 TXL(Non-ECA Products) Transmission Controller 38-Way(<strong>Eaton</strong> Supplied Assembly)38-Way DESCRIPTION Wire 38-Way Description Wire1 Not Used Plug 20 Rail Position Sensor Minus 18 TXL2 Clutch Lube Solenoid Plus 18 TXL 21 Not Used Plug3 Clutch Lube Solenoid Minus 18 TXL 22 Not Used Plug4 Splitter Solenoid CommonMinus18 TXL 23 Output Shaft Speed SensorHigh18 TXL5 Inertia Brake Solenoid Minus 18 TXL 24 Output Shaft Speed Sensor Low 18 TXL6 Range Solenoid CommonMinus18 TXL 25 Service Ignition 18 TXL7 Input Shaft Speed Sensor High 18 TXL 26 Splitter Indirect Solenoid Plus 18 TXL8 Input Shaft Speed Sensor Low 18 TXL 27 Not Used Plug9 Not Used Plug 28 Range High Solenoid Plus 18 TXL10 Gear Position Sensor Plus 18 TXL 29 Not Used 18 TXL11 Gear Position Sensor Signal 18 TXL 30 Not Used 18 TXL12 Gear Position Sensor Minus 18 TXL 31 Service Battery Minus 18 TXL13 Clutch Solenoid Plus 18 TXL 32 Splitter Direct Solenoid Plus 18 TXL14 Clutch Solenoid Minus 18 TXL 33 Inertia Brake Solenoid Plus 18 TXL15 Main Shaft Speed Sensor High 18 TXL 34 Range Low Solenoid Plus 18 TXL16 Main Shaft Speed Sensor Low 18 TXL 35 Rail Motor Plus 14SXL17 Service Battery Plus 18 TXL 36 Gear Motor Plus 14SXL18 Rail Position Sensor Plus 18 TXL 37 Rail Motor Minus 14SXL19 Rail Position Sensor Signal 18 TXL 38 Gear Motor Minus 14SXL478
Appendix(Heavy-Duty & Medium-Duty <strong>UltraShift</strong> Plus)(Heavy-Duty & Medium-Duty <strong>UltraShift</strong> Plus) Transmission Controller38-Way (Vehicle Interface Connector)38-Way DESCRIPTION Wire 38-Way Description Wire1 Comm CAN Shield - J1939_S 18 TXL 20 Analog Switch Input 3 (MEIIRContact)2 Comm CAN Low - J1939_L 18 TXL 21 Driver Out Negative - MEIIR(CLUTCH1)3 Comm CAN High - J1939_H 18 TXL 22 Driver Out Positive - MEIIR(CLUTCH1)18 TXL18 TXL18 TXL4 Driver Out Negative - StartEnable Relay18 TXL 23 Driver Out Positive - ServiceLight5 Not Used Plug 24 Driver Out Positive - BodyOption18 TXL18 TXL6 Analog Return 25 Service - Ignition Positive 18 TXL7 Comm CAN Shield - J1939_S(Pass Through)8 Comm CAN Low - J1939_L(Pass Through)9 Comm CAN High - J1939_H(Pass Through)18 TXL 26 Driver Out Positive - SplitterIndirect18 TXL18 TXL 27 Not Used PlugPlug 28 Driver Out Positive - RangeHigh10 Comm Serial A - J1587_A 18 TXL 29 COMM CAN Low - PNL_L(Proprietary CAN)11 Comm Serial B - J1587_B 18 TXL 30 COMM CAN High - PNL_H(Proprietary CAN)12 Comm Serial K - ISO9141-KLine18 TXL 31 Driver Out Positive - ConsolePower13 Not Used Plug 32 Driver Out Positive - SplitterDirect14 Analog Switch Return (Gen3.7)15 Analog In - Resistive Ladder 1(Mode Auto)16 Analog In - Resistive Ladder 2(Mode Manual)17 Analog Return - ResistiveLadder (Common)18 TXL 33 Driver Out Positive - InertiaBrake18 TXL18 TXL18 TXL18 TXL18 TXL 34 Driver Out Positive - Range Low 18 TXL18 TXL 35 Motor Positive - X (Rail) 14 SXL18 TXL 36 Motor Positive - Y (Gear) 12 GXL18 Analog / Switch Input 1 18 TXL 37 Motor Negative - X (Rail) 14 SXL19 Analog / Switch Input 2 18 TXL 38 Motor Negative - Y (Gear) 12 GXL479
Appendix(Heavy-Duty <strong>UltraShift</strong> Plus) Transmission Controller 38-Way(<strong>Eaton</strong> Supplied Assembly)38-Way DESCRIPTION Wire 38-Way Description Wire1 Analog Switch Signal Return(Gen 3.7)18 TXL 20 Sensor Supply, Hall - Negative[X (Rail)]2 Driver Out Positive - Clutch2 18 TXL 21 Sensor Hall Speed Negative(Gen 3.7)3 Driver Out Negative - Clutch2 18 TXL 22 Sensor Hall Speed Positive 5V(Gen 3.7)4 Driver Out Negative - SplitterCommon18 TXL 23 Sensor VR Speed High - OutputShaft5 Not Used Plug 24 Sensor VR Speed Low - OutputShaft6 Driver Out Negative - RangeCommon7 Sensor VR Speed High - InputShaft8 Sensor VR Speed Low - InputShaft9 Analog Switch Input 0 5 VDC(Gen 3.7)10 Sensor Supply, Hall - Positive[Y (Gear)]11 Sensor Signal, Hall Position [Y(Gear)]12 Sensor Supply, Hall - Negative[Y (Gear)]13 Driver Out Positive - CLUTCH1(MEIIR)14 Driver Out Negative -CLUTCH1 (MEIIR)15 Sensor VR Speed High - MainShaft16 Sensor VR Speed Low - MainShaft18 TXL18 TXL18 TXL18 TXL18 TXL25 Service - Ignition Positive 18 TXL18 TXL 26 Driver Out Positive - SplitterIndirect18 TXL18 TXL 27 Not Used PlugPlug 28 Driver Out Positive - RangeHigh18 TXL 29 COMM CAN Low - PNL_L(Proprietary CAN)18 TXL 30 COMM CAN High - PNL_H(Proprietary CAN)18 TXL18 TXL 31 Service - Battery Negative 18 TXL32 Driver Out Positive - SplitterDirect18 TXL18 TXL 33 Not Used Plug18 TXL 34 Driver Out Positive - Range Low 18 TXL18 TXL 35 Motor Positive - X (Rail) 14 SXL17 Service - Battery Positive 18 TXL 36 Motor Positive - Y (Gear) 12 GXL18 Sensor Supply, Hall - Positive[X (Rail)]19 Sensor Signal, Hall Position [X(Rail)]18 TXL 37 Motor Negative - X (Rail) 14 SXL18 TXL 38 Motor Negative - Y (Gear) 12 GXL480
Appendix(Medium-Duty <strong>UltraShift</strong> Plus) Transmission Controller 38-Way(<strong>Eaton</strong> Supplied Assembly)38-Way DESCRIPTION Wire 38-Way Description Wire1 Analog Switch Signal Return(Gen 3.7)18 TXL 20 Sensor Supply, Hall - Negative[X (Rail)]2 Driver Out Positive - Clutch2 18 TXL 21 Sensor Hall Speed Negative(Gen 3.7)3 Driver Out Negative - Clutch2 18 TXL 22 Sensor Hall Speed Positive 5V(Gen 3.7)4 Driver Out Negative - SplitterCommon5 Driver Out Negative - InertiaBrake6 Driver Out Negative - RangeCommon7 Sensor VR Speed High - InputShaft8 Sensor VR Speed Low - InputShaft9 Analog Switch Input 0 5 VDC(Gen 3.7)10 Sensor Supply, Hall - Positive[Y (Gear)]11 Sensor Signal, Hall Position [Y(Gear)]12 Sensor Supply, Hall - Negative[Y (Gear)]13 Driver Out Positive - CLUTCH1(MEIIR)14 Driver Out Negative -CLUTCH1 (MEIIR)18 TXL 23 Sensor VR Speed High - OutputShaft24 Sensor VR Speed Low - OutputShaft18 TXL18 TXL18 TXL18 TXL18 TXL25 Service - Ignition Positive 18 TXL18 TXL 26 Driver Out Positive - SplitterIndirect18 TXL18 TXL 27 DO NOT CONNECT WIRE 18 TXLPlug 28 Driver Out Positive - RangeHigh18 TXL 29 COMM CAN Low - PNL_L(Proprietary CAN)18 TXL 30 COMM CAN High - PNL_H(Proprietary CAN)18 TXL18 TXL 31 Service - Battery Negative 18 TXL32 Driver Out Positive - SplitterDirect18 TXL 33 Driver Out Positive - InertiaBrake18 TXL18 TXL15 Not Used Plug 34 Driver Out Positive - Range Low 18 TXL16 Not Used Plug 35 Motor Positive - X (Rail) 14 SXL17 Service - Battery Positive 18 TXL 36 Motor Positive - Y (Gear) 12 GXL18 Sensor Supply, Hall - Positive[X (Rail)]19 Sensor Signal, Hall Position [X(Rail)]18 TXL 37 Motor Negative - X (Rail) 14 SXL18 TXL 38 Motor Negative - Y (Gear) 12 GXL481
ABCABABABCAB<strong>UltraShift</strong> DM3 6-Speed Wiring Diagram with Analog ShifterAppendix<strong>UltraShift</strong> DM3 6-Speed Wiring Diagram with Analog ShifterTransmission ECU30 AMP fuseBattery power(Non-switched power)run to starter or BatteryOEM383625311516172335101126324222120321For TransmissionDiagnosticsBC4-wayADBCAB - Service Bat. +C - Service Bat. -A - Service Ignition +173125181920101112782324335Output shaftspeed sensorInertia brakeGear selectsensorRail selectsensorInput shaftspeed sensorTerminatingresistorVehicle Interface LegendAll OEM responsible wiring shown is "typical". Consult specific application.(38) = +12 volt non-switched from battery(35) = +12 volt switched from ignition switch(26) = Latch into the ECU(15, 16, 17, 10, 11, 3, 2, 1) = Communication from <strong>and</strong> to the TECU(36, 25) = Signal returns, grounds, <strong>and</strong> general OEM wiring(4, 21) = -12 volt relay source(22, 32) = +12 volt relay source(31) = +12 volt switched from TECU(23) = Signal from TECU(20) = Signal into the TECU35373638Gear selectmotorRail selectmotorElectricshifter482
Appendix<strong>UltraShift</strong> DM3 6-Speed Wiring Diagram with25311516172335101126324222120Bulkhead connectorlocated at firewall3 4 1 8 2 6 5 73 4 1 8 2 6 5 7Dimmer control inputBack sideof gaugesDash lightsor10 AMP 12 volt onlymanual resettingcircuit breaker10 AMP fuse3086858787a* Run to ignitioninput on EngineECMIgnition Key SwitchRuns to main power lead thatfeeds the ignition bus (OEMresponsible for overcurrentprotection on this line)IgnitionInterruptrelay+12 voltsbatteryJ-1587 data linkJ-1939 HighJ-1939 Low9-wayRun tostarter solenoidRun to startsignal fromigntion switch30878685For TransmissionDiagnostics perSAE St<strong>and</strong>ardE DFGACBJHCDBFGAStartenablerelayEngine Power RelayFused 10 AMP 12 voltmanual resettingcircuit breakeror10 AMPfuseJ-1939/11 data link(OEM supplied)Engine ECMVehicle Interface LegendAll OEM responsible wiring shown is "typical". Consult specific application.(35, 30, 87, 87a) = +12 volt switched from ignition switch(26-87) = Latch into the ECU(15-1, 16-8, 17-2, 10-F, 11-G) = Communication from <strong>and</strong> to the TECU(25-3) = Signal returns, grounds, <strong>and</strong> general OEM wiring(4-85, 21-85) = -12 volt relay source(22-86, 32-86) = +12 volt relay source(31-4) = +12 volt switched from TECU(23-6) = Signal from TECU(20-87) = Signal into TECUShieldtermination+ _GNDTerminatingresistor483
ABCABABABCAB<strong>UltraShift</strong> DM3 6-Speed Wiring Diagram with Push Button ShifterAppendix<strong>UltraShift</strong> DM3 6-Speed Wiring Diagram with Push Button Shifter30 AMP fuseTransmission ECUBattery power(Non-switched power)run to starter or BatteryOEM38362728253135101126324222120321For TransmissionDiagnosticsBC4-wayADBCAB - Service Bat. +C - Service Bat. -A - Service Ignition +173125181920101112782324335Output shaftspeed sensorInertia brakeGear selectsensorRail selectsensorTerminatingresistorInput shaftspeed sensorVehcile Interface LegendAll OEM responsible wiring shown is "typical". Consult specific application.(38) = +12 volt non-switched from battery(35) = +12 volt switched from ignition switch(26) = Latch into the ECU(27, 28, 10, 11, 3, 2, 1) = Communication from <strong>and</strong> to the TECU(36, 25) = Signal returns, grounds, <strong>and</strong> general OEM wiring(4, 21) = -12 volt relay source(22, 32) = +12 volt relay source(31) = +12 volt switched from TECU(20) = Signal into the TECU3638Gear selectmotor3537Rail selectmotorElectricshifter484
Appendix<strong>UltraShift</strong> DM3 6-Speed Wiring Diagram withPush Button Shift ControlPush Button Control30-way connectorF2 F1 J3 C1 B3Dimmer control inputBack sideof gaugesDash lightsFor TransmissionDiagnostics perSAE St<strong>and</strong>ard2728253135101126324222120Bulkhead connectorlocated at firewallor10 AMP 12 volt onlymanual resettingcircuit breaker10 AMP fuse3086858787a* Run to ignitioninput on EngineECMIgnition Key SwitchRuns to main power lead thatfeeds the ignition bus (OEMresponsible for overcurrentprotection on this line)IgnitionInterruptrelay+12 voltsbatteryJ-1587 data linkJ-1939 HighJ-1939 Low9-wayRun tostarter solenoidRun to startsignal fromigntion switch30878685FGCDBFGAEADCBJHStartenablerelayEngine Power RelayFused 10 AMP 12 voltmanual resettingcircuit breakeror10 AMPfuseJ-1939/11 data link(OEM supplied)Engine ECMVehicle Interface LegendAll OEM responsible wiring shown is "typical". Consult specific application.(35, 30, 87, 87a) = +12 volt switched from ignition switch(26-87) = Latch into the ECU(27-F2, 28-F1, 10-F, 11-G) = Communication from <strong>and</strong> to the TECU(25-J3) = Signal returns, grounds, <strong>and</strong> general OEM wiring(4-85, 21-85) = -12 volt relay source(22-86, 32-86) = +12 volt relay source(31-C1) = +12 volt switched from TECU(20-87) = Signal into TECUShieldtermination+ _GNDTerminatingresistor485
ABCABABABCAB<strong>UltraShift</strong> AW3 6-Speed Wiring Diagram with Analog ShifterAppendix<strong>UltraShift</strong> AW3 6-Speed Wiring Diagram with Analog Shifter30 AMP fuseTransmission ECUBattery power(Non-switched power)run to starter or BatteryOEM383625311516172335101126324321For TransmissionDiagnosticsBC4-wayADBCAB - Service Bat. +C - Service Bat. -A - Service Ignition +173125181920101112782324335231314Output shaftspeed sensorInertia brakeGear selectsensorRail selectsensorInput shaftspeed sensorTerminatingresistorVehicle Interface LegendAll OEM responsible wiring shown is "typical". Consult specific application.(38) = +12 volt non-switched from battery(35) = +12 volt switched from ignition switch(26) = Latch into the ECU(15, 16, 17, 10, 11, 3, 2, 1) = Communication from <strong>and</strong> to the TECU(36, 25) = Signal returns, grounds, <strong>and</strong> general OEM wiring(4) = -12 volt relay source(32) = +12 volt relay source(31) = +12 volt switched from TECU(23) = Signal from TECUHydraulic manifoldAssembly35373638Gear selectmotorRail selectmotorElectricshifter486
Appendix<strong>UltraShift</strong> AW3 6-Speed Wiring Diagram with25311516172335101126324TransmissionECU Connector PinsBulkhead connectorlocated at firewall3 4 1 8 2 6 5 73 4 1 8 2 6 5 7Dimmer control inputBack sideof gaugesDash lights10 AMP 12 volt onlymanual resettingcircuit breakeror10 AMPfuseIgnition Key SwitchRuns to main power lead thatfeeds the ignition bus (OEMresponsible for overcurrentprotection on this line)+12 voltsBatteryJ-1587 data linkJ-1939 HighJ-1939 LowFor transmissionDiagnostics perSAE St<strong>and</strong>ardCDBFGAEA9-wayRun tostarter solenoidRun to startsignal fromigntion switchFGDCBJH30878685StartenablerelayJ-1939/11 data link(OEM supplied)Shieldtermination+ _GNDEngine ECMTerminatingresistorVehicle Interface LegendAll OEM responsible wiring shown is "typical". Consult specific application.(35, 30, 87) = +12 volt switched from ignition switch(26-87) = Latch into the ECU(15-1, 16-8, 17-2, 10-F, 11-G) = Communication from <strong>and</strong> to the TECU(25-3) = Signal returns, grounds, <strong>and</strong> general OEM wiring(4-85) = -12 volt relay source(32-86) = +12 volt relay source(31-4) = +12 volt switched from TECU(23-6) = Signal from TECU487
ABCABABABCAB<strong>UltraShift</strong> AW3 6-Speed Wiring Diagram with Push Button ShifterAppendix<strong>UltraShift</strong> AW3 6-Speed Wiring Diagram with Push Button ShifterTransmission ECU30 AMP fuseBattery power(Non-switched power)run to starter or BatteryBulkhead connectorlocated at firewallOEM38362728253135101126324321181920101112Gear selectsensorRail selectsensorFor TransmissionDiagnosticsBA782324Output shaftspeed sensorInput shaftspeed sensorTerminatingresistorC4-wayDBCAB - Service Bat. +C - Service Bat. -A - Service Ignition +173125335231314Inertia brakeVehicle Interface LegendAll OEM responsible wiring shown is "typical". Consult specific application.(38) = +12 volt non-switched from battery(35) = +12 volt switched from ignition switch(26) = Latch into the ECU(27, 28, 10, 11, 3, 2, 1) = Communication from <strong>and</strong> to the TECU(36, 25) = Signal returns, grounds, <strong>and</strong> general OEM wiring(4) = -12 volt relay source(32) = +12 volt relay source(31) = +12 volt switched from TECUHydraulic manifoldAssembly35373638Gear selectmotorRail selectmotorElectricshifter488
Appendix<strong>UltraShift</strong> AW3 6-Speed Wiring Diagram withPush Button Shift ControlPush Button Control30-way connectorTransmissionECU Connector Pins2728253135101126324Bulkhead connectorlocated at firewallF2 F1 J3 C1 B3Dimmer control inputBack sideof gauges10 AMP 12 volt onlymanual resettingcircuit breakeror10 AMPfuseIgnition Key SwitchRuns to main power lead thatfeeds the ignition bus (OEMresponsible for overcurrentprotection on this line)+12 voltsBatteryJ-1587 data linkJ-1939 HighJ-1939 Low9-wayRun tostarter solenoidRun to startsignal fromigntion switch30878685For transmissionDiagnostics perSAE St<strong>and</strong>ardFGFCDBFGAE DCA BJHStartenablerelayJ-1939/11 data link(OEM supplied)Shieldtermination+ _GNDEngine ECMTerminatingresistorVehicle Interface LegendAll OEM responsible wiring shown is "typical". Consult specific application.(35, 30, 87) = +12 volt switched from ignition switch(26-87) = Latch into the ECU(27-F2, 28-F1, 10-F, 11-G) = Communication from <strong>and</strong> to the TECU(25-J3) = Signal returns, grounds, <strong>and</strong> general OEM wiring(4-85) = -12 volt relay source(32-86) = +12 volt relay source(31-C1) = +12 volt switched from TECU489
ABCCBACBAABCFFBCMedium-Duty <strong>UltraShift</strong> PLUS Models Wiring Diagram with Analog ShifterAppendixMedium-Duty <strong>UltraShift</strong> PLUS Models Wiring Diagram with Analog Shifter30 AMP fuseTransmission ECUBattery power(Non-switched power)run to Battery181920101112Gear select sensorRail select sensorOEM383625311516172314351011263241834193324321781516Input shaft speed sensorMain shaft speed sensor2122Directional output shaft speed sensorFor TransmissionDiagnosticsTerminatingresistorBA63428RangevalveCDGEngine Flywheel Speed Sensor(<strong>Eaton</strong> Supplied)43226Splittervalve50 AMP fuse4-wayB - Service Bat. +C - Service Bat. -A - Service Ignition +B17C3113A 2530293233Terminating CCEEResistorW-027 W27-OS_SPEED_MEGW-028 W28-OS_SPEED_POSW-029 W29-OS_SPEED_SIGAB142ABGBattery power(Non-switched power)run to Battery3537Rail selectmotor3638Gear selectmotorElectricshifter490
AppendixMedium-Duty <strong>UltraShift</strong> PLUS Models Wiring25311516172314351011263241834193324TransmissionECU Connector PinsBulkhead connectorlocated at firewall3 4 1 8 2 6 5 73 4 1 8 2 6 5 710 AMP onlymanual resettingcircuit breakerAuto NeutralAuto Neutral ReturnRemote ThrottleDimmer control inputBack sideof gaugesDash lightsor10 AMPfuseReturnIgnition Key Switch+ BatteryRuns to main power lead thatfeeds the ignition bus (OEMresponsible for overcurrentprotection on this line)J1587 data linkTerminate PTO control lineinto connector forbody builder applicationJ1939 HighJ1939 Low9-wayRun tostarter solenoidRun to startsignal fromigntion switch30878685For transmissionDiagnostics perSAE St<strong>and</strong>ardFGCDBFGAEADCBJHStartenablerelayEngine ECMJ1939/11 data link(OEM supplied)Shieldtermination+ _GNDTerminatingresistor491
ABCABABCFFBCMedium-Duty <strong>UltraShift</strong> PLUS Models Wiring Diagram with Push Button ShifterAppendixMedium-Duty <strong>UltraShift</strong> PLUS Models Wiring Diagram with Push ButtonShifter30 AMP fuseTransmission ECUBattery power(Non-switched power)run to Battery181920101112Gear select sensorRail select sensorOEM383625311516172314351011263241834193324321781516Input shaft speed sensorMain shaft speed sensor2122 Directional output shaft speed sensorFor TransmissionDiagnosticsTerminatingresistorBAEngine Flywheel Speed Sensor(<strong>Eaton</strong> Supplied)CD335G50 AMP fuseIntertia Brake4-wayB - Service Bat. +C - Service Bat. -A - Service Ignition +B17C3113A 2530293233Terminating CCEEResistorW-027 W27-OS_SPEED_MEGW-028 W28-OS_SPEED_POSW-029 W29-OS_SPEED_SIGAB142ABGBattery power(Non-switched power)run to Battery3537Rail selectmotor3638Gear selectmotorElectricshifter492
AppendixMedium-Duty <strong>UltraShift</strong> PLUS Models WiringTransmissionECU Connector Pins25312728351011263241834193324Bulkhead connectorlocated at firewallJ3 C1 F2 F1J3 C1 F2 F1B3B3Auto NeutralAuto Neutral ReturnRemote ThrottleDimmer control input10 AMP onlymanual resettingcircuit breakerBack sideof gaugedash lightsor10 AMPfuseReturnIgnition Key Switch+ BatteryRuns to main power lead thatfeeds the ignition bus (OEMresponsible for overcurrentprotection on this line)J-1587 data linkTerminate PTO control lineinto connector forbody builder applicationJ1939 HighJ1939 Low9-wayRun tostarter solenoidRun to startsignal fromigntion switch30878685For transmissionDiagnostics perSAE St<strong>and</strong>ardFGCDBFGAEADCBJHStartenablerelayEngine ECMJ1939/11 data link(OEM supplied)Shieldtermination+ _GNDTerminatingresistor493
ABCABABCBAABCABAutoShift 10-Speed Wiring Diagram with Analog ShifterAppendixAutoShift 10-Speed Wiring Diagram with Analog ShifterTransmission ECU30 AMP fuseBattery power(Non-switched power)run to starter or BatteryOEM383625311516172335101126324321181920101112Gear selectsensorRail selectsensorTerminatingresistorFor TransmissionDiagnosticsBCADBCA173125781516232463428Output shaftspeed sensorMain shaftspeed sensorInput shaftspeed sensorRangevalveVehicle Interface LegendAll OEM responsible wiring shown is "typical". Consult specific application.(38) = +12 volt non-switched from battery(35) = +12 volt switched from ignition switch(26) = Latch into the ECU(15, 16, 17, 10, 11, 3, 2, 1) = Communication from <strong>and</strong> to the TECU(36, 25) = Signal returns, grounds, <strong>and</strong> general OEM wiring(4) = -12 volt relay source(32) = +12 volt relay source(31) = +12 volt switched from TECU(23) = Signal from TECU4-wayB - Service Bat. +C - Service Bat. -A - Service Ignition +35373638Gear selectmotorRail selectmotorElectricshifter494
AppendixAutoShift 10-Speed Wiring Diagram with An-25311516172335101126324TransmissionECU Connector PinsBulkhead connectorlocated at firewall3 4 1 8 2 6 5 73 4 1 8 2 6 5 7Dimmer control inputBack sideof gaugesDash lights10 AMP 12 volt onlymanual resettingcircuit breakeror10 AMPfuseIgnition Key SwitchRuns to main power lead thatfeeds the ignition bus (OEMresponsible for overcurrentprotection on this line)+12 voltsBatteryJ-1587 data linkJ-1939 HighJ-1939 Low9-wayRun tostarter solenoidRun to startsignal fromigntion switch30878685For transmissionDiagnostics perSAE St<strong>and</strong>ardCDBFGAFGE DCA BJHStartenablerelayJ-1939/11 data link(OEM supplied)Shieldtermination+ _GNDEngine ECMTerminatingresistorVehicle Interface LegendAll OEM responsible wiring shown is "typical". Consult specific application.(35, 30, 87) = +12 volt switched from ignition switch(26-87) = Latch into the ECU(15-1, 16-8, 17-2, 10-F, 11-G) = Communication from <strong>and</strong> to the TECU(25-3) = Signal returns, grounds, <strong>and</strong> general OEM wiring(4-85) = -12 volt relay source(32-86) = +12 volt relay source(31-4) = +12 volt switched from TECU(23-6) = Signal from TECU495
ABCABABCBAABCABAutoShift 10-Speed Wiring Diagram with Push Button ShifterAppendixAutoShift 10-Speed Wiring Diagram with Push Button ShifterTransmission ECU30 AMP fuseBattery power(Non-switched power)run to starter or BatteryOEM38362728253135101126324321For TransmissionDiagnosticsBCADBCA173125181920101112781516232463428Output shaftspeed sensorGear selectsensorMain shaftspeed sensorRangevalveRail selectsensorInput shaftspeed sensorTerminatingresistorVehicle Interface LegendAll OEM responsible wiring shown is "typical". Consult specific application.(38) = +12 volt non-switched from battery(35) = +12 volt switched from ignition switch(26) = Latch into the ECU(27, 28, 10, 11, 3, 2, 1) = Communication from <strong>and</strong> to the TECU(36, 25) = Signal returns, grounds, <strong>and</strong> general OEM wiring(4) = -12 volt relay source(32) = +12 volt relay source(31) = +12 volt switched from TECU4-wayB - Service Bat. +C - Service Bat. -A - Service Ignition +35373638Gear selectmotorRail selectmotorElectricshifter496
AppendixAutoShift 10-Speed Wiring Diagram withPush Button Shift ControlPush Button Control30-way connectorTransmissionECU Connector Pins2728253135101126324Bulkhead connectorlocated at firewallF2 F1 J3 C1 B3Dimmer control inputBack sideof gauges10 AMP 12 volt onlymanual resettingcircuit breakeror10 AMPfuseIgnition Key SwitchRuns to main power lead thatfeeds the ignition bus (OEMresponsible for overcurrentprotection on this line)+12 voltsBatteryJ-1587 data linkJ-1939 HighJ-1939 LowFor transmissionDiagnostics perSAE St<strong>and</strong>ardFCDBFGAE DCA B9-wayRun tostarter solenoidRun to startsignal fromigntion switchFGJH30878685StartenablerelayJ-1939/11 data link(OEM supplied)Shieldtermination+ _GNDEngine ECMTerminatingresistorVehicle Interface LegendAll OEM responsible wiring shown is "typical". Consult specific application.(35, 30, 87) = +12 volt switched from ignition switch(26-87) = Latch into the ECU(27-F2, 28-F1, 10-F, 11-G) = Communication from <strong>and</strong> to the TECU(25-J3) = Signal returns, grounds, <strong>and</strong> general OEM wiring(4-85) = -12 volt relay source(32-86) = +12 volt relay source(31-C1) = +12 volt switched from TECU497
ABCABABABCBAABCAB<strong>UltraShift</strong> 10-Speed Wiring Diagram with Analog ShifterAppendix<strong>UltraShift</strong> 10-Speed Wiring Diagram with Analog ShifterTransmission ECU30 AMP fuseBattery power(Non-switched power)run to starter or BatteryOEM383625311516172335101126324222120321181920101112Gear selectsensorRail selectsensorFor TransmissionDiagnosticsBC4-wayADBCAB - Service Bat. +C - Service Bat. -A - Service Ignition +173125781516232463428335Output shaftspeed sensorMain shaftspeed sensorInput shaftspeed sensorRangevalveInertia brake (Optional)TerminatingresistorVehicle Interface LegendAll OEM responsible wiring shown is "typical". Consult specific application.(38) = +12 volt non-switched from battery(35)= +12 volt switched from ignition switch(26) = Latch into the ECU(15, 16, 17, 10, 11, 3, 2, 1) = Communication from <strong>and</strong> to the TECU(36, 25) = Signal returns, grounds, <strong>and</strong> general OEM wiring(4, 21) = -12 volt relay source(22, 32) = +12 volt relay source(31) = +12 volt switched from TECU(23) = Signal from TECU(20) = Signal into the TECU35373638Gear selectmotorRail selectmotorElectricshifter498
Appendix<strong>UltraShift</strong> 10-Speed Wiring Diagram with An-25311516172335101126324222120Bulkhead connectorlocated at firewall3 4 1 8 2 6 5 73 4 1 8 2 6 5 7Dimmer control inputBack sideof gaugesDash lights10 AMP 12 volt onlymanual resettingcircuit breakeror 10 AMP fuse3086858787a* Run to ignitioninput on EngineECMIgnition Key SwitchRuns to main power lead thatfeeds the ignition bus (OEMresponsible for overcurrentprotection on this line)IgnitionInterruptrelay+12 voltsbatteryJ-1587 data linkJ-1939 HighJ-1939 Low9-wayRun tostarter solenoidRun to startsignal fromigntion switch30878685For TransmissionDiagnostics perSAE St<strong>and</strong>ardFGCDBFGAEADCBJHStartenablerelayEngine Power RelayFused 10 AMP 12 voltmanual resettingcircuit breakeror10 AMPfuseJ-1939/11 data link(OEM supplied)Engine ECMVehicle Interface LegendAll OEM responsible wiring shown is "typical". Consult specific application.(35, 30, 87, 87a) = +12 volt switched from ignition switch(26-87) = Latch into the ECU(15-1, 16-8, 17-2, 10-F, 11-G) = Communication from <strong>and</strong> to the TECU(25-3) = Signal returns, grounds, <strong>and</strong> general OEM wiring(4-85, 21-85) = -12 volt relay source(22-86, 32-86) = +12 volt relay source(31-4) = +12 volt switched from TECU(23-6) = Signal from TECU(20-87) = Signal into TECUShieldtermination+ _GNDTerminatingresistor499
ABCABABABCBAABCAB<strong>UltraShift</strong> 10-Speed Wiring Diagram with Push Button ShifterAppendix<strong>UltraShift</strong> 10-Speed Wiring Diagram with Push Button Shifter30 AMP fuseTransmission ECUBattery power(Non-switched power)run to starter or BatteryOEM38362728253135101126324222120321181920101112Gear selectsensorRail selectsensorFor TransmissionDiagnostics7815162324Input shaftspeed sensorBAOutput shaftspeed sensorMain shaftspeed sensorTerminatingresistorC4-wayDBCAB - Service Bat. +C - Service Bat. -A - Service Ignition +17312563428335RangevalveInertia brake (Optional)Vehicle Interface LegendAll OEM responsible wiring shown is "typical". Consult specific application.(38) = +12 volt non-switched from battery(35) = +12 volt switched from ignition switch(26) = Latch into the ECU(27, 28, 10, 11, 3, 2, 1) = Communication from <strong>and</strong> to the TECU(36, 25) = Signal returns, grounds, <strong>and</strong> general OEM wiring(4, 21) = -12 volt relay source(22, 32) = +12 volt relay source(31) = +12 volt switched from TECU(20) = Signal into the TECU3537Rail selectmotor3638Gear selectmotorElectricshifter500
Appendix<strong>UltraShift</strong> 10-Speed Wiring Diagram withPush Button Shift ControlPush Button Control30-way connectorF2 F1 J3 C1 B3Dimmer control inputBack sideof gaugesDash lightsFor TransmissionDiagnostics perSAE St<strong>and</strong>ard2728253135101126324222120Bulkhead connectorlocated at firewallor10 AMP 12 volt onlymanual resettingcircuit breaker10 AMP fuse3086858787a* Run to ignitioninput on EngineECMIgnition Key SwitchRuns to main power lead thatfeeds the ignition bus (OEMresponsible for overcurrentprotection on this line)IgnitionInterruptrelay+12 voltsbatteryJ-1587 data linkJ-1939 HighJ-1939 Low9-wayRun tostarter solenoidRun to startsignal fromigntion switch30878685FGCDBFGAEADCBJHStartenablerelayEngine Power RelayFused 10 AMP 12 voltmanual resettingcircuit breakeror10 AMPfuseJ-1939/11 data link(OEM supplied)Engine ECMVehicle Interface LegendAll OEM responsible wiring shown is "typical". Consult specific application.(35, 30, 87, 87a) = +12 volt switched from ignition switch(26-87) = Latch into the ECU(27-F2, 28-F1, 10-F, 11-G) = Communication from <strong>and</strong> to the TECU(25-J3) = Signal returns, grounds, <strong>and</strong> general OEM wiring(4-85, 21-85) = -12 volt relay source(22-86, 32-86) = +12 volt relay source(31-C1) = +12 volt switched from TECU(20-87) = Signal into TECUShieldtermination+ _GNDTerminatingresistor501
ABCABABABCBACBAABCAB<strong>UltraShift</strong> 13-Speed Wiring Diagram with Analog ShifterAppendix<strong>UltraShift</strong> 13-Speed Wiring Diagram with Analog ShifterTransmission ECU30 AMP fuseBattery power(Non-switched power)run to starter or BatteryOEM383625311516172335101126324222120321181920101112Gear selectsensorRail selectsensorFor TransmissionDiagnosticsBC4-wayADBCA17312578151623246342843226335Output shaftspeed sensorMain shaftspeed sensorInput shaftspeed sensorRangevalveSplittervalveInertia brakeTerminatingresistorVehicle Interface LegendAll OEM responsible wiring shown is "typical". Consult specific application.(38) = +12 volt non-switched from battery(35) = +12 volt switched from ignition switch(26) = Latch into the ECU(15, 16, 17, 10, 11, 3, 2, 1) = Communication from <strong>and</strong> to the TECU(36, 25) = Signal returns, grounds, <strong>and</strong> general OEM wiring(4, 21) = -12 volt relay source(22, 32) = +12 volt relay source(31) = +12 volt switched from TECU(23) = Signal from TECU(20) = Signal into the TECUB - Service Bat. +C - Service Bat. -A - Service Ignition +35373638Gear selectmotorRail selectmotorElectricshifter502
Appendix<strong>UltraShift</strong> 13-Speed Wiring Diagram with An-25311516172335101126324222120Bulkhead connectorlocated at firewall3 4 1 8 2 6 5 73 4 1 8 2 6 5 7Dimmer control inputBack sideof gaugesDash lightsEngine Power RelayFused 10 AMP 12 voltmanual resettingcircuit breakeror10 AMPfuse10 AMP 12 volt onlymanual resettingcircuit breakeror 10 AMP fuse3086858787a* Run to ignitioninput on EngineECMEngine ECMIgnition Key SwitchRuns to main power lead thatfeeds the ignition bus (OEMresponsible for overcurrentprotection on this line)IgnitionInterruptrelay+12 voltsbatteryJ-1587 data linkJ-1939 HighJ-1939 Low9-wayRun tostarter solenoidRun to startsignal fromigntion switch30878685For TransmissionDiagnostics perSAE St<strong>and</strong>ardVehicle Interface LegendAll OEM responsible wiring shown is "typical". Consult specific application.(35, 30, 87, 87a)= +12 volt switched from ignition switch(26-87) = Latch into the ECU(15-1, 16-8, 17-2, 10-F, 11-G) = Communication from <strong>and</strong> to the TECU(25-3) = Signal returns, grounds, <strong>and</strong> general OEM wiring(4-85, 21-85) = -12 volt relay source(22-86, 32-86) = +12 volt relay source(31-4) = +12 volt switched from TECU(23-6) = Signal from TECU(20-87) = Signal into TECUFGFCDBFGAEADCBJHStartenablerelayJ-1939/11 data link(OEM supplied)Shieldtermination+ _GNDTerminatingresistor503
ABCABABABCBACBAABCAB<strong>UltraShift</strong> 13-Speed Wiring Diagram with Push Button ShifterAppendix<strong>UltraShift</strong> 13-Speed Wiring Diagram with Push Button Shifter30 AMP fuseTransmission ECUBattery power(Non-switched power)run to starter or BatteryOEM38362728253135101126324222120321181920101112Gear selectsensorRail selectsensorFor TransmissionDiagnostics7815162324Output shaftspeed sensorMain shaftspeed sensorInput shaftspeed sensorTerminatingresistorB AC D4-wayBCA1731256342843226335RangevalveSplittervalveVehicle Interface LegendAll OEM responsible wiring shown is "typical". Consult specific application.(38) = +12 volt non-switched from battery(35) = +12 volt switched from ignition switch(26) = Latch into the ECU(27, 28, 10, 11, 3, 2, 1) = Communication from <strong>and</strong> to the TECU(36, 25) = Signal returns, grounds, <strong>and</strong> general OEM wiring(4, 21) = -12 volt relay source(22, 32) = +12 volt relay source(31) = +12 volt switched from TECU(20) = Signal into the TECUB - Service Bat. +C - Service Bat. -A - Service Ignition +Inertia brake (Optional)35373638Gear selectmotorRail selectmotorElectricshifter504
Appendix<strong>UltraShift</strong> 13-Speed Wiring Diagram withPush Button Shift ControlPush Button Control30-way connectorF2 F1 J3 C1 B3Dimmer control inputBack sideof gaugesDash lightsFor TransmissionDiagnostics perSAE St<strong>and</strong>ard2728253135101126324222120Bulkhead connectorlocated at firewallor10 AMP 12 volt onlymanual resettingcircuit breaker10 AMP fuse3086858787a* Run to ignitioninput on EngineECMIgnition Key SwitchRuns to main power lead thatfeeds the ignition bus (OEMresponsible for overcurrentprotection on this line)IgnitionInterruptrelay+12 voltsbatteryJ-1587 data linkJ-1939 HighJ-1939 Low9-wayRun tostarter solenoidRun to startsignal fromigntion switch30878685FGCDBFGAEADCBJHStartenablerelayEngine Power RelayFused 10 AMP 12 voltmanual resettingcircuit breakeror10 AMPfuseEngine ECMVehicle Interface LegendAll OEM responsible wiring shown is "typical". Consult specific application.(35, 30, 87, 87a) = +12 volt switched from ignition switch(26-87) = Latch into the ECU(27-F2, 28-F1, 10-F, 11-G) = Communication from <strong>and</strong> to the TECU(25-J3) = Signal returns, grounds, <strong>and</strong> general OEM wiring(4-85, 21-85) = -12 volt relay source(22-86, 32-86) = +12 volt relay source(31-C1) = +12 volt switched from TECU(20-87) = Signal into TECUJ-1939/11 data link(OEM supplied)Shieldtermination+ _GNDTerminatingresistor505
ABCABABCBACBAABCABAutoShift 18-Speed Wiring Diagram with Analog ShifterAppendixAutoShift 18-Speed Wiring Diagram with Analog Shifter30 AMP fuseTransmission ECUBattery power(Non-switched power)run to starter or BatteryOEM383625311516172335101126324321181920101112Gear selectsensorRail selectsensorFor TransmissionDiagnosticsBCADBCA17312578151623246342843226Output shaftspeed sensorMain shaftspeed sensorInput shaftspeed sensorRangevalveSplittervalveTerminatingresistorVehicle Interface LegendAll OEM responsible wiring shown is "typical". Consult specific application.(38) = +12 volt non-switched from battery(35) = +12 volt switched from ignition switch(26) = Latch into the ECU(15, 16, 17, 10, 11, 3, 2, 1) = Communication from <strong>and</strong> to the TECU(36, 25) = Signal returns, grounds, <strong>and</strong> general OEM wiring(4) = -12 volt relay source(32) = +12 volt relay source(31) = +12 volt switched from TECU(23) = Signal from TECU4-wayB - Service Bat. +C - Service Bat. -A - Service Ignition +35373638Gear selectmotorRail selectmotorElectricshifter506
AppendixAutoShift 18-Speed Wiring Diagram with An-25311516172335101126324TransmissionECU Connector PinsBulkhead connectorlocated at firewall3 4 1 8 2 6 5 73 4 1 8 2 6 5 7Dimmer control inputBack sideof gaugesDash lights10 AMP 12 volt onlymanual resettingcircuit breakeror10 AMPfuseIgnition Key SwitchRuns to main power lead thatfeeds the ignition bus (OEMresponsible for overcurrentprotection on this line)+12 voltsBatteryJ-1587 data linkJ-1939 HighJ-1939 LowFor transmissionDiagnostics perSAE St<strong>and</strong>ardCDBFGAE DCA B9-wayRun tostarter solenoidRun to startsignal fromigntion switchFGJH30878685StartenablerelayJ-1939/11 data link(OEM supplied)Shieldtermination+ _GNDEngine ECMTerminatingresistorVehicle Interface LegendAll OEM responsible wiring shown is "typical". Consult specific application.(35, 30, 87) = +12 volt switched from ignition switch(26-87) = Latch into the ECU(15-1, 16-8, 17-2, 10-F, 11-G) = Communication from <strong>and</strong> to the TECU(25-3) = Signal returns, grounds, <strong>and</strong> general OEM wiring(4-85) = -12 volt relay source(32-86) = +12 volt relay source(31-4) = +12 volt switched from TECU(23-6) = Signal from TECU507
ABCABABCBACBAABCABAutoShift 18-Speed Wiring Diagram with Push Button ShifterAppendixAutoShift 18-Speed Wiring Diagram with Push Button ShifterTransmission ECU30 AMP fuseBattery power(Non-switched power)run to starter or BatteryOEM38362728253135101126324321181920101112Gear selectsensorRail selectsensorFor TransmissionDiagnostics7815162324Output shaftspeed sensorMain shaftspeed sensorInput shaftspeed sensorTerminatingresistorBCADBCA1731256342843226RangevalveSplittervalveVehicle Interface LegendAll OEM responsible wiring shown is "typical". Consult specific application.(38) = +12 volt non-switched from battery(35) = +12 volt switched from ignition switch(26) = Latch into the ECU(27, 28, 10, 11, 3, 2, 1) = Communication from <strong>and</strong> to the TECU(36, 25) = Signal returns, grounds, <strong>and</strong> general OEM wiring(4) = -12 volt relay source(32) = +12 volt relay source(31) = +12 volt switched from TECU4-wayB - Service Bat. +C - Service Bat. -A - Service Ignition +35373638Gear selectmotorRail selectmotorElectricshifter508
AppendixAutoShift 18-Speed Wiring Diagram withPush Button Shift ControlPush Button Control30-way connectorTransmissionECU Connector Pins2728253135101126324Bulkhead connectorlocated at firewallF2 F1 J3 C1 B3Dimmer control inputBack sideof gauges10 AMP 12 volt onlymanual resettingcircuit breakeror10 AMPfuseIgnition Key SwitchRuns to main power lead thatfeeds the ignition bus (OEMresponsible for overcurrentprotection on this line)+12 voltsBatteryJ-1587 data linkJ-1939 HighJ-1939 LowFor transmissionDiagnostics perSAE St<strong>and</strong>ardCDBFGAE DCA B9-wayRun tostarter solenoidRun to startsignal fromigntion switchFGJH30878685StartenablerelayJ-1939/11 data link(OEM supplied)Shieldtermination+ _GNDEngine ECMTerminatingresistorVehicle InterfaceLegendAll OEM responsible wiring shown is "typical". Consult specific application.(35, 30, 87) = +12 volt switched from ignition switch(26-87) = Latch into the ECU(27-F2, 28-F1, 10-F, 11-G) = Communication from <strong>and</strong> to the TECU(25-J3) = Signal returns, grounds, <strong>and</strong> general OEM wiring(4-85) = -12 volt relay source(32-86) = +12 volt relay source(31-C1) = +12 volt switched from TECU509
ABCCBACBAABCFFBCHeavy-Duty <strong>UltraShift</strong> PLUS Models Wiring Diagram with Analog ShifterAppendixHeavy-Duty <strong>UltraShift</strong> PLUS Models Wiring Diagram with Analog Shifter30 AMP fuseTransmission ECUBattery power(Non-switched power)run to Battery181920101112Gear select sensorRail select sensorOEM383625311516172314351011263241834193324321781516Input shaft speed sensorMain shaft speed sensor2122Directional output shaft speed sensorFor TransmissionDiagnosticsTerminatingresistorBA63428RangevalveCDGEngine Flywheel Speed Sensor(<strong>Eaton</strong> Supplied)43226Splittervalve50 AMP fuse4-wayB - Service Bat. +C - Service Bat. -A - Service Ignition +B17C3113A 2530293233Terminating CCEEResistorW-027 W27-OS_SPEED_MEGW-028 W28-OS_SPEED_POSW-029 W29-OS_SPEED_SIGAB142ABGBattery power(Non-switched power)run to Battery3537Rail selectmotor3638Gear selectmotorElectricshifter510
AppendixHeavy-Duty <strong>UltraShift</strong> PLUS Models Wiring25311516172314351011263241834193324TransmissionECU Connector PinsBulkhead connectorlocated at firewall3 4 1 8 2 6 5 73 4 1 8 2 6 5 710 AMP onlymanual resettingcircuit breakerAuto NeutralAuto Neutral ReturnRemote ThrottleDimmer control inputBack sideof gaugesDash lightsor10 AMPfuseReturnIgnition Key Switch+ BatteryRuns to main power lead thatfeeds the ignition bus (OEMresponsible for overcurrentprotection on this line)J1587 data linkTerminate PTO control lineinto connector forbody builder applicationJ1939 HighJ1939 Low9-wayRun tostarter solenoidRun to startsignal fromigntion switch30878685For transmissionDiagnostics perSAE St<strong>and</strong>ardFGCDBFGAEADCBJHStartenablerelayEngine ECMJ1939/11 data link(OEM supplied)Shieldtermination+ _GNDTerminatingresistor511
ABCCBACBAABCFFHeavy-Duty <strong>UltraShift</strong> PLUS Models Wiring Diagram with Push Button ShifterAppendixHeavy-Duty <strong>UltraShift</strong> PLUS Models Wiring Diagram with Push ButtonShifter30 AMP fuseTransmission ECUBattery power(Non-switched power)run to Battery181920Rail select sensorOEM383625312728351011263241834193324321101112Gear select sensor781516Input shaft speed sensorMain shaft speed sensor2122 Directional output shaft speed sensorTerminatingresistorFor TransmissionDiagnosticsBCAD63428Rangevalve43226SplittervalveGEngine Flywheel Speed Sensor(<strong>Eaton</strong> Supplied)50 AMP fuse4-wayB - Service Bat. +C - Service Bat. -A - Service Ignition +B17C3113A 2530293233Terminating CCEEResistorW-027 W27-OS_SPEED_MEGW-028 W28-OS_SPEED_POSW-029 W29-OS_SPEED_SIGAB142ABGBCBattery power(Non-switched power)run to Battery3537Rail selectmotor3638Gear selectmotorElectricshifter512
AppendixHeavy-Duty <strong>UltraShift</strong> PLUS Models WiringTransmissionECU Connector Pins25312728351011263241834193324Bulkhead connectorlocated at firewallJ3 C1 F2 F1J3 C1 F2 F1B3B3Auto NeutralAuto Neutral ReturnRemote ThrottleDimmer control input10 AMP onlymanual resettingcircuit breakerBack sideof gaugedash lightsor10 AMPfuseReturnIgnition Key Switch+ BatteryRuns to main power lead thatfeeds the ignition bus (OEMresponsible for overcurrentprotection on this line)J-1587 data linkTerminate PTO control lineinto connector forbody builder applicationJ1939 HighJ1939 Low9-wayRun tostarter solenoidRun to startsignal fromigntion switch30878685For transmissionDiagnostics perSAE St<strong>and</strong>ardFGCDBFGAEADCBJHStartenablerelayEngine ECMJ1939/11 data link(OEM supplied)Shieldtermination+ _GNDTerminatingresistor513
<strong>Eaton</strong> Shift Lever Wiring DiagramAppendix<strong>Eaton</strong> Shift Lever Wiring Diagram3 4 1 8 2 6 5 73 4 1 8 2 6 5 7C2Transmission ECU Connector(Vehicle Interface)J1253115161723Dimmer control inputBack sideof gaugesDash lightsTrans Control ECU LegendAll OEM responsible wiring shown is "typical". Consult specific application.(31-4) = +12 volt switched from TECU(15-1, 16-8, 17-2) = Communication from <strong>and</strong> to the TECU(25-3, 5) = Signal returns, grounds, <strong>and</strong> general OEM wiring(23-6) = Signal from TECUBulkhead connectorlocated at firewallFront ViewTransmission ECU Connector3729 30 3123 24 2532 33 3426 27 283813 1415 161718 19202122357 8 910 11 121 2 34 5 636FROM TO DESCRIPTIONJ1-15 C2-1 Shift Control Input (Mode Auto)J1-17 C2-2 Shift Control Input (ModeCommon)J1-25 C2-3 Shift Control Power MinusJ1-31 C2-4 Shift Control Power PlusC2-5 Dash LightsJ1-23 C2-6 Service Light OutputJ1-16 C2-8 Shift Control Input (Mode Manual)C2-7 No Connection514
AppendixOEM Shift Lever Wiring DiagramOEM Shift Lever Wiring DiagramOEM Shift LeverTransmission ECU Connector(Vehicle Interface)J115161723B A CB A CService LampConnectorVehicle Interface LegendAll OEM responsible wiring shown is "typical". Consult specific application.(15-B, 16-A, 17-C) = Communication to <strong>and</strong> from the TECU(23) = Signal from TECUFront ViewTransmission ECU Connector3729 30 3123 24 2532 33 3426 27 283813 1415 161718 19202122357 8 910 11 121 2 34 5 636FROM TO DESCRIPTIONJ1-15 F2-B Shift Control Input (Mode Auto)J1-16 F2-A Shift Control Input (Mode Manual)J1-17 F2-C Shift Control Input (ModeCommon)J1-23 F3-A Service Lamp OutputF3-BGround515
<strong>Eaton</strong> Push Button Wiring DiagramAppendix<strong>Eaton</strong> Push Button Wiring DiagramPush Button Shift ControlTransmission ECU Connector(Vehicle Interface)Push Button Control30-way connectorC2F 2 F 1 J 3 C 1 B 3Dimmer control inputJ127282531Bulkhead connectorlocated at firewallFront ViewTransmission ECU Connector(Vehicle Interface)Front ViewShift Control (30-Way Connector)3729 30 3123 24 2532 33 3426 27 2838K1J1H1G1F1E1D1C1B1A113 1415 161718 19202122K2J2H2G2F2E2D2C2B2A2357 8 910 11 121 2 34 5 636K3J3H3G3F3E3D3C3B3A3Vehicle Interface LegendAll OEM responsible wiring shown is "typical". Consult specific application.(31-C1) = +12 volt switched from TECU(27-F2, 28-F1) = Communication from <strong>and</strong> to the TECU(25-J3) = Signal returns, grounds, <strong>and</strong> general OEM wiringFROM TO DESCRIPTIONJ1-27 C2-F2 HIL(-) LOJ1-28 C2-F1 HIL(+) HIJ1-25 C2-J3 Shift Control Power MinusJ1-31 C2-C1 Shift Control Power PlusC2-B3Dimmer Control InputFROM TO DESCRIPTIONJ1-D1 C2-1 RNDHLJ1-D3 C2-2 COMMON--------- C2-3 GROUNDJ1-J2 C2-4 SPLICE into TRANS BATT 1J1-B3 C2-5 DIMMER CONTROL516
Appendix<strong>Eaton</strong> Push Button Wiring DiagramFROM TO DESCRIPTIONJ1-H2 C2-6 SERVICE LAMPJ1-D2 C2-8 MANUAL MODEFROM TO DESCRIPTIONJ1-27 C2-F2 EPL- LOJ1-28 C2-F1 EPL+ HIJ1-25 C2-J3 Ground 1J1-31 C2-C1 IgnitionC2-B3Dimmer Control Input517
OEM J1939 Shift Input Device Wiring DiagramAppendixOEM J1939 Shift Input Device Wiring DiagramOEM J1939 Shift DeviceTransmission ECU Connector(Vehicle Interface)J11617Bulkhead connectorlocated at firewallJ1939Battery Power (Non-switched powerrun to Battery or Starter)GroundFront ViewTransmission ECU Connector(Vehicle Interface)Switched Power3729 30 3123 24 2532 33 3426 27 283813 1415 161718 19202122357 8 91 2 310 11 124 5 636FROM TO DESCRIPTIONJ1-16 Connector C2 Shift Control Input (Neutral Request Signal)J1-17 Connector C2 Shift Control Input (Neutral Request Return)OEM Connector C2 Shift Control Power Minus (Ground)OEM Connector C2 Shift Control Power Plus (Ignition)OEM Connector C2 Shift Control Power Plus (Battery)Connector C2 OEM J1939 HighOEM Connector C2 J1939 LowOEM Connector C2 J1939 Shield518
AppendixHeavy Duty <strong>UltraShift</strong> Plus Models ECA Wir-Heavy Duty <strong>UltraShift</strong> Plus Models ECA Wiring DiagramTransmission ECUECA 8-WayConnector(J2)ECA 3-WayConnector(J1)Clutch HousingSpeed Sensor(<strong>Eaton</strong> Supplied)(J3)F GHAB C EC BECA133029ABABCETerminatingResistor(J25)FGBattery power(Non-switched power)run to Battery50 AMP fuse38-Pin Front Harness View(TECU - Transmission Harness Connector)ECA 8-Way ConnectorFront Harness ViewOEM SuppliedECA 3-Way Connector3729 30 3123 24 2532 33 3426 27 2838A B C DCBA13 1415 161718 19202122H G FE357 8 910 11 121 2 34 5 636TECU38-WayECA8-WayDescriptionJ1-30 J2-A HIL (+) HighSpeed Sensor2-WayJ1-29 J2-B HIL (-) LowJ2-C Terminator Resistor J25-2(C)J2-DNOT USEDJ2-E Terminator Resistor J25-1(E)J2-F Speed Sensor (+) J3-1(F)J2-G Speed Sensor (-) J3-2(G)J1-13 J2-H IGNTerminatorResistor 2-Way519
Proper Clutch OperationAppendixProper Clutch OperationWhen performing the test for Proper Clutch Operation, the vehicle should be in the same conditionas when the problem occurred. For instance, if the problem only occurs when the vehicle is hot,drive the vehicle to warm it up before conducting the test.When the operator depresses the clutch pedal <strong>and</strong> shifts from neutral to drive or reverse, theTransmission ECU waits for the transmission input shaft speed to decrease to less than 150 RPMbefore shifting the transmission into gear. If the clutch is not disengaging completely or the clutchbrake is not functioning properly, the input shift will not slow down <strong>and</strong> the transmission will notshift into gear.Check For Proper Clutch OperationNote:Please refer to publication CLSM0200 for installation, adjustment, <strong>and</strong> general serviceguidelines for the ECA clutch.With PC-Base Service Tool• Connect ServiceRanger a PC-based Service Tool.• Make sure the transmission is in neutral• Start Engine.• Set ServiceRanger a PC-based Service Tool to monitor input shaft speed.• With Clutch pedal up (clutch engaged), compare input shaft speed <strong>and</strong> engine speed (RPM).They should be the same.Note: If engine speed <strong>and</strong> input shaft speeds are not the same, then perform input shaft speedsensor test <strong>and</strong> confirm proper clutch adjustment.• Check clutch for slippage, <strong>and</strong> repair or replace as needed.• Depress clutch pedal to active clutch brake. Within 2 seconds, input shaft speed should beless than 25 RPM (0 RPM is desired). If input shaft does not stop turning, the clutch is notdisengaging completely or the clutch brake is not functioning properly.• Check for proper clutch adjustment, adjust as necessary.• Inspect clutch brake for excessive friction material wear or internal damage. Replace asnecessary.Note: The clutch brake may have to be removed to inspect properly.• If clutch adjustment is correct <strong>and</strong> clutch brake appears satisfactory, the problem may be adefective clutch. The clutch may require repair or replacement. Refer to the clutchmanufacturer’s service information to verify a dragging clutch.Without ServiceRanger a PC-based Service Tool• Place transmission in neutral.• Start Engine.• Let up on the clutch pedal (clutch engaged).• Depress clutch pedal fully to activate clutch brake <strong>and</strong> hold for 2 seconds.• Place transmission in starting gear.• If starting gear display shows a solid gear (engaged), the procedure is complete. If the geardisplay shows a flashing gear (not yet engaged) continue on to number 7.• If flashing gear is displayed, slowly release the clutch pedal.• If flashing gear does not become solid or gear does not engage, check clutch brake for properfunction <strong>and</strong> check clutch adjustment.• If gear does not engage <strong>and</strong> clutch is adjusted properly, troubleshooting for a dragging clutchaccording to clutch manufacturer.520
AppendixConfirm Proper Clutch Adjustment <strong>and</strong>Confirm Proper Clutch Adjustment <strong>and</strong> Clutch Brake ContactConfirm Release Bearing Travel GapUse a 1/2” gauge to verify the release bearing travel gap. This gap (distance between the rear ofthe release bearing <strong>and</strong> the clutch brake) must be between 1/2” <strong>and</strong> 9/16”.If this dimension is incorrect, adjust the clutch per the clutch manufacturer’s instructions.Confirm the Free-Play gap**For mechanical clutch release systems with free-play.Use a 1/8” gauge to verify proper free-play gap on Easy Pedal.If this dimension is incorrect, adjust the clutch per the clutch manufacturer’s instructions.Confirm Proper Clutch Brake ContactInsert a 0.010” feeler gauge between the release bearing <strong>and</strong> the clutch brake. have an assistantfully depress the clutch pedal. The 0.010” feeler gauge should be squeezed between the rear ofthe release bearing <strong>and</strong> the clutch brake. Have the assistant slowly let up the clutch pedal. The0.010” feeler gauge should slide out when the clutch pedal is 1/2” to 1” above the cab floor or lowerpedal stop.If the 0.010” feeler gauge is not adequately squeezed to prevent removal, or can be removed withthe pedal less than1/2” or greater than 1”, Check <strong>and</strong> adjust the clutch pedal height <strong>and</strong> travel perthe chassis manufacturer’s instructions. In addition, check the external clutch linkage for excessivewear or obstruction preventing complete travel.ReleaseyokeClutchbrake1/8"521
Clutch Grease Interval Service ProcedureAppendixClutch Grease Interval Service ProcedureClutch Greasing GuidelinesIMPORTANTIt is highly important to follow proper clutch lube intervals as specified in Lubrication Manual,TCMT0021. Failure to do so may result in clutch failure <strong>and</strong> unnecessary repairs.The heavy-duty ECA clutch housing has two grease fittings on the lower right side. The upper portis marked “CS” for the upper cross-shaft assembly, while the lower port is marked “RB” for therelease bearing.For more detailed cross-shaft greasing information refer to the “Release Yoke <strong>and</strong> Cross-shaft(s)Installation” section of this manual. Refer to Clutch Service Manual, CLSM0200, for releasebearing greasing information.Grease Interval Count ResetThe Heavy-Duty <strong>UltraShift</strong> PLUS has an optional prognostic feature that notifies the operator whenthe Clutch Release Bearing needs greasing. This feature can be enabled or disabled viaServiceRanger.At the appropriate grease interval <strong>and</strong> shortly after each engine start, “GI” will momentarily appearin the gear display, along with an audible tone. This will continue to occur at each engine start untilclutch service has been completed.Note: “GI” st<strong>and</strong>s for grease interval <strong>and</strong> may be misread as “G1” on gear display.The operator can choose to follow this Automated Lube Schedule or the published lube guidelinesin the Lubrication Manual TCMT0021. When enabled, it is highly important to reset the GreaseInterval Count every time the release bearing is greased.The Grease Interval Count can be reset via ServiceRanger or Operator Triggered SpecialFunction.522
AppendixClutch Grease Interval Service ProcedureServiceRanger ProcedureCAUTIONEnsure that h<strong>and</strong>s are not inside the clutchhousing while opening or closing the clutch.ATurn ignitionswitch to on.OFFONB Plug 9-pin connectorinto dash port.START2C3 Click on ServiceRanger iconto launch program.523
Clutch Grease Interval Service ProcedureAppendix4 6 Click on ECAOpen <strong>and</strong> exp<strong>and</strong> theAdvanced ProductFunctions tree.5 Click on transmission.Note: Advanced ProductFunctions appear.Clutch Service.7 Choose Grease 8 Click on Clear GreaseInterval Reset tab. Interval Counter.9 Confirm Positiveresults.10 Turn ignition switch524
AppendixClutch Grease Interval Service ProcedureOperator Triggered Procedure1 From the off position, turn 2 Select low mode on3ignition to on withoutthe shift device.cranking the engine.Press the manual up-shiftbutton until the geardisplay shows “3”.OFFSTARTONSHIFTRNDMANUALLOW43Press Accelerator to thefloor. Gear display willshow a down arrow.Hold25Release the accelerator. Geardisplay will show a “0”.0Release6Select neutral <strong>and</strong> turnignition to off in order to savethe reset.OFFRONNDSTARTMANUALSHIFTLOW525
Adapter Test Kit # J-43318AppendixAdapter Test Kit # J-43318Note:Use extreme caution when inserting adapters into the connectors to avoid spreading ordistorting of the terminals.Gray AdaptersGray adapter are to only be used for the following connectors:• Shift Control 30-way connector• Speed Sensors• Position Sensors• Range Solenoid Valve• Splitter Solenoid ValveGreen <strong>and</strong> Brown AdaptersGreen <strong>and</strong> brown adapters are to only be used for the following connectors:• Vehicle interface 38-way connector• Transmission ECU 38-way connectorPurple AdaptersPurple adapter are to only be used for the following connectors:• Motors• Main Power• Inertia BrakeAdapter PinsUse the male adapter to test the harness pins.Use the female adapter to test the component pins.HarnessMale adaptersFemale adaptersComponent526
Copyright <strong>Eaton</strong> Corporation, 2012.<strong>Eaton</strong> hereby grant their customers,vendors, or distributors permissionto freely copy, reproduce <strong>and</strong>/ordistribute this document in printedformat. It may be copied only inits entirety without any changes ormodifications. THIS INFORMATIONIS NOT INTENDED FOR SALE ORRESALE, AND THIS NOTICE MUSTREMAIN ON ALL COPIES.Note: Features <strong>and</strong> specificationslisted in this document are subject tochange without notice <strong>and</strong> representthe maximum capabilities of thesoftware <strong>and</strong> products with all optionsinstalled. Although every attempt hasbeen made to ensure the accuracy ofinformation contained within, <strong>Eaton</strong>makes no representation about thecompleteness, correctness or accuracy<strong>and</strong> assumes no responsibility forany errors or omissions. Features <strong>and</strong>functionality may vary depending onselected options.For spec’ing or service assistance,call 1-800-826-HELP (4357) or visitour web site at:www.roadranger.com.In Mexico, call 001-800-826-4357.<strong>Eaton</strong> Corporation1111 Superior Ave.Clevel<strong>and</strong>, OH 44114