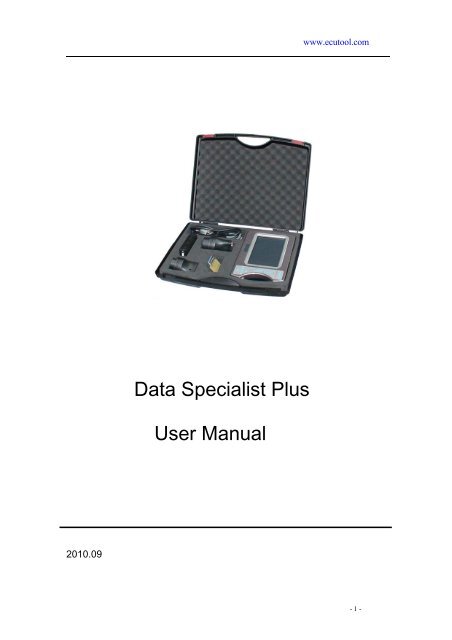
Data Specialist Plus User Manual
Data Specialist Plus User Manual
Data Specialist Plus User Manual
Create successful ePaper yourself
Turn your PDF publications into a flip-book with our unique Google optimized e-Paper software.
www.ecutool.com<strong>Data</strong> <strong>Specialist</strong> <strong>Plus</strong><strong>User</strong> <strong>Manual</strong>2010.09- 1 -
1. PREFACEThe <strong>Data</strong> <strong>Specialist</strong> <strong>Plus</strong> is the most complete programming device fordigital odometers, airbag modules, car radios, car immobilizers. It is ahigh quality embedded system, which offers a maximum of flexibility andworking comfort.Outstanding characteristics of the system are:- Based on ARM920 TDI, high frequency up to 400 MHz.- 800×480 TFT LCD and touch screen (7.0 inch.16:9).- Convenient keyset.- USB host and USB device.- SD card interface.- 128MB NandFlash, 128MB SDRAM.- Self-check function integrated in system.- Automatic calculation of mileage or km for al cars.- Automatic reset of airbag module.- Automatic read code of IMMO or reset of IMMO ECU.- Automatic read code or reset of car radio.- Intuitive operability by full menu and picture guidance.- Color connection picture is on the screen whenever you need.- All data can be edited, stored and loaded.- The stored data can be transferred to a PC by USB port or SD card, andalso can be transfer to wherever you want directly by internet.- EEPROM, EPROM and FLASH programming of MCU is supported.- Strong ability for OBD functions, including CAN, J1850, ISO9141,and Keyword 2000 protocols.- Upgrade directly from internet.- 2 -
2. MAIN MACHINEUSB-host: for connection with PC.USB-device: for connection of other USB device such as mouse, etc.SD card interface: for connection with SD card.Adapter interface: for connection with adapters.Power socket: for connection with 12V DC regulator.3. ADAPTERS AND ACCESSORIESSocket should plug into the adapter correctly, do not plug in the oppositeside, otherwise will damage this machine or target board.Eeprom Adapter is used to program eeprom memories, chips supportedas follows:SPI: X25043, X25045, 25C010, 25C020, 25C040, 25C080,25C160,25C320, 25C640, 25C128, 25C256, 3132, 68343,ST14771, ST95010,ST95020, ST95040, ST95080, ST95160, ST95320,ST95640, X5043,X5045 and M35080(erase) included.- 3 -
I2C: 24C01, 24C01A, 24C02, 24C04, 24C08, 24C16, 24C17, 24C32,24C64,24C128, 24C256, 85C72, 85C82, 85C92, BAW574252 etc.MICROWIRE: 93C06, 93C14, 93C46, 93C56, 93C57, 93C66, 93C76,93C86,93S46, 93S56, 93S57, 93S66, 93LC46, 93LC56, 93LC57,93LC66,93LC86, DY6N, LC46, L56R, S130, S220, etc.OTHERS: such as PDH001, TC97101, TC89101, TC89102, TC89112,B59, D6253, D6254, S-24H30, S-24H45, S-24S30,S-2445, 16911G,59C11, etc.Fig3.1. EEPROM adapterNDM457 Adapter supports the following chips:NDM457C, DELCO51006A etc.Fig3.2. NDM457 AdapterMotorola Adapter is used to program Motorola MCUs(without security), chips supported as follows:MC68HC05B16, MC68HC05B32, MC68HC05B6,MCHC05B8, MC68HC05BE6, MC68HC05H12, MC68HC05L28,MC68HC05P3, MC68HC05X16, MC68HC05X32,MC68HC705B16,MC68HC705B32, MC68HC705E6, etc.2).HC08 series:MC68HC08AZ32,MC68HC08AZ60, MC68HC08AS32,M68HC08AS60, MC68HC08AB32, MC68HC08AS20, etc.3).HC11 series:MC68HC11A8, MC68HC11E20, MC68HC11E9,MC68HC11EA9, MC68HC11F1, MC68HC11K1, MC68HC11K4,MC68HC11KS2, MC68HC11KS8, MC68HC11KA4, MC68HC11KG,MC68HC11L6, MC68HC11P2, MC68HC11PA8,MC68HC11PH8, etc.- 4 -
4).HC12 series:MC68HC912B32, MC68HC912BE32,MC68HC912BD32,MC68HC912D60,MC68HC912D60A,MC68HC912DG128,MC68HC912DG128A, MC68HC912DT128A, MC68HC912DT128A,MC9S12A64, MC9S12D64, MC9S12DG128, MC9S12DG256,MC9S12DP128, MC9S12DP256, MC9S12DT128, MC9S12H128,MC9S12H256(including all flash) etc.Fig3.3. Motorola AdapterNEC Adapter is used to program upd78k0 series MCU’s,chips supported as follows:uPD780973,uPD780949, uPD78F0974,uPD78F0949, uPD78F0826,uPD78F0828, uPD78F0828A M1 etc.Fig3.4. NEC AdapterTMS Adapter is used to program TMS370 series MCU’s, chipssupported as follows:TMS370C758A, TMS370C742A, TMS370C702, TMS370C058A,TMS370C042A, TMS370C002A, TMS370C756A, TMS370C056A etcFig3.5. TMS AdapterHC08 Adapter is used to program Motorola HC08 series MCU’s (with- 5 -
security passed).Fig3.6. HC08 AdapterHCS12 in-circuit Adapter support mileage correction for BMW CAS/MBEZS/DASHBOARDS/MODULES/ with 912/9s12/9s12x MCU, in circuitprogramming ( no need removing mcu), can read/edit/write eeprom ofMCU, mileage calculation integrated in soft.Fig3.16.9(s)12 in-circuit AdapterEWS Adapter is used to program EWS of E38 / E39 / E46 / E53 byK-line.Fig3.8. EWS AdapterST624X Adapter is used to program ST624X series MCU’s.- 6 -
Fig3.10. ST624X AdapterOBD adapter is used for ordinary and advanced diagnosis operations,such as programming of all BMW CAS / LCM / EWS and mileagecorrection of all VW series and AUDI series.Fig3.9. OBD AdapterHC05 Adapter is used to program MC68HC705B16/32,MC68HC705X16/32, MC68HC05B6/8/16 /32, MC68HC05X16/32seriesMCU’s (with security passed).Fig3.11. HC05 AdapterHC(7)11 Adapter is used to program MC68HC(7)11 series MCU’s (withsecurity passed).Fig3.12. HC11 AdapterTMS374 Adapter is used to program TMS374 MCU’s and support immofunction of DAEWOO, FIAT, KIA, PEUGEOT, RENAULT, etc.- 7 -
Fig3.13. TMS374 AdapterCMM Adapter support odometer correction of E36, E38, FORD FOCUS,HONDA ACCORD V6, and HONDA CRV over the plug.Fig3.14. CMM AdapterTest Connector is used for the dsp+ self testing.and when you do thefirmware update you sTOUCH HOLDERT-01/02:Plug the touch holder to EEPROM adapter ,then connect it to thechip on the cluster as the picture .T-01support NISSAN CEFIRO A33,INFINITY, SUV4800,TEANA,TIIDA,XTRAIL, etc.T-03/04:Plug the touch holder to MOTOROLA adapter ,then connect it tothe chip on the cluster as the picture .T-03support NISSAN PATHFINDER2005/2007,etc. T-04 support NISSAN NAVARO 2006,PATRFINDER 2004,ARMADA,etc.Fig3.15.Touch HolderCLIP :Plug the clip to EEPROM adapter ,then connect it to the chip on the- 8 -
cluster as the picture shows .Support 93C46,93C56,93C66,93C76,93C86,24C04, 24C02,24C08,25010,24c16,24c32,M35080,M95040,M95080,etc.Fig3.16. Clip4. POWER ONThere are two ways to power on the system, the first is to connect adapterto the adapter interface then plug the power regulator to the Power-Socketof the machine; the second way is to connect OBD adapter to the adapterinterface over the main line, then plug the OBD adapter into the diagnosissocket of the car. Either way can power on the machine, and wait aboutsome seconds, you will see the password window, the password is the last6 number of your id, you will find your id at the back of the machine, forexample if your id is “0D100519434E0001”, the password will be“4E0001”, after enter the password you will see the main window of thesoftware.5.ODOMETER CORRECTIONFig 5.1. Main Window- 9 -
Fig 5.3. BMW ListFig 5.4. 3 SERIES 2001-2003Fig 5.5. Connection Picture- 11 -
Fig 5.6. Load program and Load OKFig 5.7. Save <strong>Data</strong> and Save OKFig 5.8. Read KM and Read OK- 12 -
Fig 5.9. Write KM and Write OKNotes: BSI correction. Before correction of some odometers, you have toreset BSI module first, such as ‘peugeot 307’, you should select ‘BSI’ andreset the km to zero, then adjust the km of odometer. See Figure5.10.- 13 -
Fig 5.10.Peugeot 307_ Reset BSILCM/ EWS/ CAS unit correction. Before correction of some BMWodometers you have to reset the km in LCM/ EWS/ CAS module first, thisoperation is similar to odometer adjustment. See Figure 5.11 .- 14 -
Fig 5.11.BMW CAS ResetEZS correction. Before correction of some BENZ odometers you have toreset the km in EZS module first, this operation is similar to odometeradjustment. See Figure5.12.- 15 -
Fig 5.12. BENZ EZS Reset6.AIRBAG RESETClick the ‘AIRBAG’ button on the main window, you will see the airbagreset window, select make and model, then repair. See Figure6.1.- 16 -
7. IMMO CODE READERFig 6.1. Airbag ResetClick the ‘IMMO’ button on the main window, you will see the immocode reading window, select make and model, then read immo code. SeeFigure.Notes:Some IMMO code can be read by odometer adjustment OBD operations.See Figure.Some IMMO can not be read, what you can only do is to disable the immofunction by writing eeprom of engine ECU. See Figure.- 17 -
Fig 7.1. IMMO CODE READER8. RADIO CODE READERClick the ‘RADIO’ button on the main window, you can see the radio codereader window,select make and model, then read radio code. See Figure.- 18 -
Fig 8.1. RADIO CODE READER IFig 8.2. RADIO CODE READER II9. PROGRAMMERThe programmer function of <strong>Data</strong>specialist PLUS is powerful; you can useit to do what you want. Click the ‘PROG.’ button on the main window, youwill enter the programmer window. Establish a new file or open an old file,select adapter and chip device, then you can fulfill all the operations of‘edit’, ‘erase’, ‘read’, ‘write’, ‘copy’, and ‘save’ etc. See Figure9.1 and 9.2.- 19 -
Fig.9.1 Main window and Program main windowFig 9.2. Adapter Select and Chip SelectFig 9.3. Check connection and Load Program- 20 -
Fig 9.4. Operation window and Operate buttonFig 9.5. READ process and <strong>Data</strong> show window10. CONNECTIONG TO INTERNETConnect the machine to PC over the USB cable, install USB driver at first(see the video help file: CD: \ dsp3\ drivesoft.rmvb) then setupvideo help file: CD: \ dsp3\ ActiveSync.rmvb).After that you can see the Microsoft Active Sync window as Figure show .Select ‘NO’ then click ‘next step’. Till now, connect your pc to internet,you can go to internet by the machine.- 21 -
Fig 10.1. Microsoft Active Sync11. UPDATE- 22 -
Fig 11.1. “ Update ”Software update interfaceCondition of software update is connecting internet .Connect the testconnector to the host at first, then power on the system,input thepassword(original the last 6 digits of your ID) , the software will beopened. click Update → software update, you can see Recognizing IDauthorization , Download file… details see Figures followed.Video helpfile: CD:\ dsp3\ update.rmvb.Fig 11.2. Software update interfaceFirmware update interfaceFirmware update is similar to the software update ,just click the firmwareupdate with connecting the test conector.- 23 -
Fig 11.3. Firmware update interfaceActive Function interfaceAlso Activate function,it is samilar too , this option is use for thecustomers adding new functions.And every month customers need do this job for once, when it is timeneed do it ,software will show you the message “Your programmer willneed to be re-activated within X days time. Please use the activatefunction procedure before the time expires. Press anykey to continue”Fig 11.4. Active Function interface- 24 -


