RG+ Polymeric Jointing Sand - Techniseal
RG+ Polymeric Jointing Sand - Techniseal
RG+ Polymeric Jointing Sand - Techniseal
You also want an ePaper? Increase the reach of your titles
YUMPU automatically turns print PDFs into web optimized ePapers that Google loves.
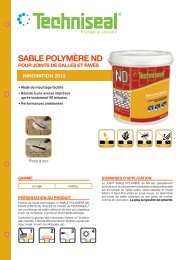
TECHNISEAL ® – TECHNICAL DATA SHEET – <strong>RG+</strong> POLYMERIC JOINTING SAND for pavers 2DIRECTIONSTest: On large residential and commercial projects, test the product on approximately 50 sq. ft. (4.6 m 2 ) and have itapproved by a specificator or the customer.Weather conditions: Check the weather forecast: Ideally, there should be no precipitation for the next 24 hours.Although the product can resist unforeseen rainfall, it could be affected by a storm. Temperature should remainabove 0 o C during the 48-hour drying period.Surface conditions: Surface must be dry to prevent moisture from activating the polymer, which could make sandstick to the surface and stain it.Before you begin: Wear adequate protective clothing. In case of uncertainty regarding the installation of thisproduct or for any further assistance, please contact technical support at 1 (800) 465-7325.1. Spreading <strong>Sand</strong> over the pavers:Surface must be dry. Spread sand uniformly over the surface. Using a pushbroom, sweep the product so as to fill the joints completely, down to their fulldepth. Avoid sweeping the product over long distances, so that the integrityof polymeric joint is preserved.Fill up to the bottom of the pavers chamfer2. Compacting the <strong>Sand</strong>:This step is critical to obtain solid, durable joints. Without mechanicalcompaction, joints will remain weak and fail quickly.Run a plate vibrator over the entire surface to fully firm up the joints.Note: Check with the paver supplier about the suitability of using a platevibrator. On textured pavers, use a rubber mat to prevent scuffing the pavers.Repeat steps 1 & 2 until joints are completely packed. Joints must be filledup to the bottom of the pavers chamfer, or at least up to 1/8” (3 mm) belowthe top of the pavers.3. Wetting the joints:This step must be followed closely in order to ensure optimal results.Important! Before wetting the surface: Remove all sand residue witha leaf blower. Keep the leaf blower at a good distance, so as to not empty thejoints. This will avoid having product residue activated with water and stickto the surface of the pavers or slabs. Surfaces must be free of the product.Since <strong>RG+</strong> starts repelling water only a few minutes after it gets wet, itis essential to wet 200 sq. ft. (20 m 2 ) of surface at a time. Ensure that thewetting of one section is finished before another section is started. Wettingof the entire project should be done without interruptions.1. Set the spray nozzle to “shower”.2. Start showering from the bottom of the slope.3. Wet the section for approximately 30 seconds without displacing the sand.4. Wait a few seconds and wet the same section again for approximately 30more seconds to wet the joints completely.5. Using a small screwdriver, verify the progress of the wetness in thesection. The objective is to get joints wet 1 ½” (4 cm) deep.6. Immediately move on to an adjacent 200 sq. ft. (20 m 2 ) section. Avoidexcess flooding of the surface, which could cause unwanted run-off.Tip: On textured pavers, after wetting the joints, use a leaf blower to blowexcess water off the surface. This will remove any remaining sand andpolymer residue, which will prevent hazing


