
You also want an ePaper? Increase the reach of your titles
YUMPU automatically turns print PDFs into web optimized ePapers that Google loves.
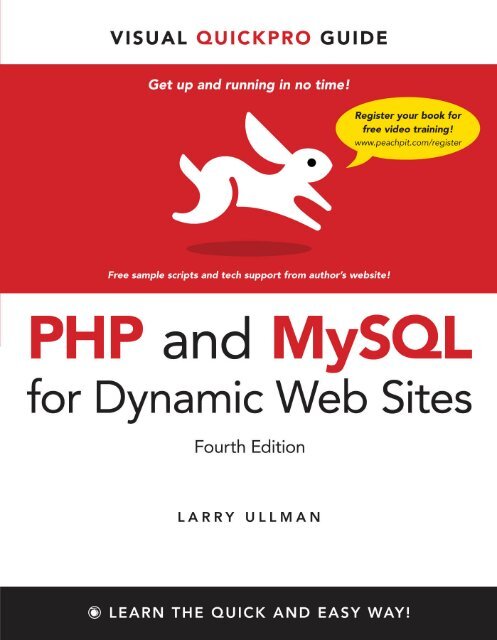
VISUAL QUICKpro GUIDE<strong>PHP</strong> <strong>and</strong> <strong>MySQL</strong><strong>for</strong> <strong>Dynamic</strong> <strong>Web</strong> <strong>Sites</strong>Fourth EditionLarry ULLmanPeachpit Press
Visual QuickPro Guide<strong>PHP</strong> <strong>and</strong> <strong>MySQL</strong> <strong>for</strong> <strong>Dynamic</strong> <strong>Web</strong> <strong>Sites</strong>, Fourth EditionLarry UllmanPeachpit Press1249 Eighth StreetBerkeley, CA 94710510/524-2178510/524-2221 (fax)Find us on the <strong>Web</strong> at: www.peachpit.comTo report errors, please send a note to: errata@peachpit.comPeachpit Press is a division of Pearson Education.Copyright © 2012 by Larry UllmanEditor: Rebecca GulickCopy Editor: Patricia PaneTechnical Reviewer: Anselm Brad<strong>for</strong>dProduction Coordinator: Myrna VladicCompositor: Debbie RobertiProofreader: Bethany StoughIndexer: Valerie Haynes-PerryCover Design: RHDG / Riezebos Holzbaur Design Group, Peachpit PressInterior Design: Peachpit PressLogo Design: MINE www.minesf.comNotice of RightsAll rights reserved. No part of this book may be reproduced or transmitted in any <strong>for</strong>m by any means,electronic, mechanical, photocopying, recording, or otherwise, without the prior written permission of thepublisher. For in<strong>for</strong>mation on getting permission <strong>for</strong> reprints <strong>and</strong> excerpts, contact permissions@peachpit.com.Notice of LiabilityThe in<strong>for</strong>mation in this book is distributed on an “As Is” basis, without warranty. While every precaution hasbeen taken in the preparation of the book, neither the author nor Peachpit Press shall have any liability to anyperson or entity with respect to any loss or damage caused or alleged to be caused directly or indirectly by theinstructions contained in this book or by the computer software <strong>and</strong> hardware products described in it.TrademarksVisual QuickPro Guide is a registered trademark of Peachpit Press, a division of Pearson Education. <strong>MySQL</strong> isa registered trademark of <strong>MySQL</strong> AB in the United States <strong>and</strong> in other countries. Macintosh <strong>and</strong> Mac OS X areregistered trademarks of Apple, Inc. Microsoft <strong>and</strong> Windows are registered trademarks of Microsoft Corp. Otherproduct names used in this book may be trademarks of their own respective owners. Images of <strong>Web</strong> sites inthis book are copyrighted by the original holders <strong>and</strong> are used with their kind permission. This book is notofficially endorsed by nor affiliated with any of the above companies, including <strong>MySQL</strong> AB.Many of the designations used by manufacturers <strong>and</strong> sellers to distinguish their products are claimed astrademarks. Where those designations appear in this book, <strong>and</strong> Peachpit was aware of a trademark claim,the designations appear as requested by the owner of the trademark. All other product names <strong>and</strong> servicesidentified throughout this book are used in editorial fashion only <strong>and</strong> <strong>for</strong> the benefit of such companies with nointention of infringement of the trademark. No such use, or the use of any trade name, is intended to conveyendorsement or other affiliation with this book.ISBN-13: 978-0-321-78407-0ISBN-10: 0-321-78407-39 8 7 6 5 4 3 2 1Printed <strong>and</strong> bound in the United States of America
Table of ContentsIntroduction . . . . . . . . . . . . . . . . . . . . . . . . . . . ixChapter 1 Introduction to <strong>PHP</strong>. . . . . . . . . . . . . . . . . . . . . 1Basic Syntax . . . . . . . . . . . . . . . . . . . . . . . . . 2Sending Data to the <strong>Web</strong> Browser. . . . . . . . . . . . . 6Writing Comments. . . . . . . . . . . . . . . . . . . . . . 10What Are Variables?. . . . . . . . . . . . . . . . . . . . . 14Introducing Strings . . . . . . . . . . . . . . . . . . . . . 18Concatenating Strings . . . . . . . . . . . . . . . . . . . 21Introducing Numbers . . . . . . . . . . . . . . . . . . . . 23Introducing Constants . . . . . . . . . . . . . . . . . . . 26Single vs. Double Quotation Marks . . . . . . . . . . . . 29Basic Debugging Steps . . . . . . . . . . . . . . . . . . . 32Review <strong>and</strong> Pursue . . . . . . . . . . . . . . . . . . . . . 34Chapter 2 Programming with <strong>PHP</strong> . . . . . . . . . . . . . . . . . 35Creating an HTML Form . . . . . . . . . . . . . . . . . . 36H<strong>and</strong>ling an HTML Form . . . . . . . . . . . . . . . . . . 41Conditionals <strong>and</strong> Operators . . . . . . . . . . . . . . . . 45Validating Form Data . . . . . . . . . . . . . . . . . . . . 49Introducing Arrays. . . . . . . . . . . . . . . . . . . . . . 54For <strong>and</strong> While Loops . . . . . . . . . . . . . . . . . . . . 69Review <strong>and</strong> Pursue . . . . . . . . . . . . . . . . . . . . . 72Chapter 3 Creating <strong>Dynamic</strong> <strong>Web</strong> <strong>Sites</strong>. . . . . . . . . . . . . . 75Including Multiple Files . . . . . . . . . . . . . . . . . . . 76H<strong>and</strong>ling HTML Forms, Revisited . . . . . . . . . . . . . 85Making Sticky Forms . . . . . . . . . . . . . . . . . . . . 91Creating Your Own Functions . . . . . . . . . . . . . . . 95Review <strong>and</strong> Pursue . . . . . . . . . . . . . . . . . . . . . 110iv Table of Contents
Chapter 4 Introduction to <strong>MySQL</strong> . . . . . . . . . . . . . . . . . 111Naming Database Elements . . . . . . . . . . . . . . . 112Choosing Your Column Types . . . . . . . . . . . . . . 1 1 4Choosing Other Column Properties. . . . . . . . . . . 118Accessing <strong>MySQL</strong> . . . . . . . . . . . . . . . . . . . . . 1 2 1Review <strong>and</strong> Pursue . . . . . . . . . . . . . . . . . . . . 128Chapter 5 Introduction to SQL. . . . . . . . . . . . . . . . . . . . 129Creating Databases <strong>and</strong> Tables . . . . . . . . . . . . . 130Inserting Records . . . . . . . . . . . . . . . . . . . . . 133Selecting Data . . . . . . . . . . . . . . . . . . . . . . . 138Using Conditionals . . . . . . . . . . . . . . . . . . . . 140Using LIKE <strong>and</strong> NOT LIKE. . . . . . . . . . . . . . . . . 143Sorting Query Results. . . . . . . . . . . . . . . . . . . 145Limiting Query Results . . . . . . . . . . . . . . . . . . 147Updating Data . . . . . . . . . . . . . . . . . . . . . . . 149Deleting Data . . . . . . . . . . . . . . . . . . . . . . . 1 51Using Functions . . . . . . . . . . . . . . . . . . . . . . 153Review <strong>and</strong> Pursue . . . . . . . . . . . . . . . . . . . . 164Chapter 6 Database Design . . . . . . . . . . . . . . . . . . . . .165Normalization . . . . . . . . . . . . . . . . . . . . . . . 166Creating Indexes . . . . . . . . . . . . . . . . . . . . . 179Using Different Table Types . . . . . . . . . . . . . . . 182Languages <strong>and</strong> <strong>MySQL</strong> . . . . . . . . . . . . . . . . . . 184Time Zones <strong>and</strong> <strong>MySQL</strong> . . . . . . . . . . . . . . . . . 189Foreign Key Constraints . . . . . . . . . . . . . . . . . 195Review <strong>and</strong> Pursue . . . . . . . . . . . . . . . . . . . . 202Chapter 7 Advanced SQL <strong>and</strong> <strong>MySQL</strong>. . . . . . . . . . . . . . . 203Per<strong>for</strong>ming Joins. . . . . . . . . . . . . . . . . . . . . . 204Grouping Selected Results . . . . . . . . . . . . . . . 214Advanced Selections . . . . . . . . . . . . . . . . . . . 218Per<strong>for</strong>ming FULLTEXT Searches . . . . . . . . . . . . 222Optimizing Queries . . . . . . . . . . . . . . . . . . . . 230Per<strong>for</strong>ming Transactions . . . . . . . . . . . . . . . . . 234Database Encryption . . . . . . . . . . . . . . . . . . . 237Review <strong>and</strong> Pursue . . . . . . . . . . . . . . . . . . . . 240Table of Contents v
Chapter 8 Error H<strong>and</strong>ling <strong>and</strong> Debugging . . . . . . . . . . . . 241Error Types <strong>and</strong> Basic Debugging . . . . . . . . . . . . 242Displaying <strong>PHP</strong> Errors. . . . . . . . . . . . . . . . . . . 248Adjusting Error Reporting in <strong>PHP</strong> . . . . . . . . . . . . 250Creating Custom Error H<strong>and</strong>lers. . . . . . . . . . . . . 253<strong>PHP</strong> Debugging Techniques . . . . . . . . . . . . . . . 258SQL <strong>and</strong> <strong>MySQL</strong> Debugging Techniques. . . . . . . . 262Review <strong>and</strong> Pursue . . . . . . . . . . . . . . . . . . . . 264Chapter 9 Using <strong>PHP</strong> with <strong>MySQL</strong> . . . . . . . . . . . . . . . . . 265Modifying the Template. . . . . . . . . . . . . . . . . . 266Connecting to <strong>MySQL</strong>. . . . . . . . . . . . . . . . . . . 268Executing Simple Queries . . . . . . . . . . . . . . . . 273Retrieving Query Results . . . . . . . . . . . . . . . . 281Ensuring Secure SQL . . . . . . . . . . . . . . . . . . . 285Counting Returned Records . . . . . . . . . . . . . . . 290Updating Records with <strong>PHP</strong> . . . . . . . . . . . . . . . 292Review <strong>and</strong> Pursue . . . . . . . . . . . . . . . . . . . . 298Chapter 10 Common Programming Techniques . . . . . . . . . 299Sending Values to a Script . . . . . . . . . . . . . . . . 300Using Hidden Form Inputs . . . . . . . . . . . . . . . . 304Editing Existing Records . . . . . . . . . . . . . . . . . 309Paginating Query Results. . . . . . . . . . . . . . . . . .316Making Sortable Displays . . . . . . . . . . . . . . . . 323Review <strong>and</strong> Pursue . . . . . . . . . . . . . . . . . . . . 328Chapter 11 <strong>Web</strong> Application Development . . . . . . . . . . . . 329Sending Email . . . . . . . . . . . . . . . . . . . . . . . 330H<strong>and</strong>ling File Uploads . . . . . . . . . . . . . . . . . . 336<strong>PHP</strong> <strong>and</strong> JavaScript . . . . . . . . . . . . . . . . . . . . 348Underst<strong>and</strong>ing HTTP Headers. . . . . . . . . . . . . . 355Date <strong>and</strong> Time Functions . . . . . . . . . . . . . . . . . 362Review <strong>and</strong> Pursue . . . . . . . . . . . . . . . . . . . . 366vi Table of Contents
Chapter 12 Cookies <strong>and</strong> Sessions . . . . . . . . . . . . . . . . . .367Making a Login Page . . . . . . . . . . . . . . . . . . . 368Making the Login Functions . . . . . . . . . . . . . . . 371Using Cookies . . . . . . . . . . . . . . . . . . . . . . . 376Using Sessions. . . . . . . . . . . . . . . . . . . . . . . 388Improving Session Security . . . . . . . . . . . . . . . 396Review <strong>and</strong> Pursue . . . . . . . . . . . . . . . . . . . . 400Chapter 13 Security Methods . . . . . . . . . . . . . . . . . . . . . 401Preventing Spam . . . . . . . . . . . . . . . . . . . . . 402Validating Data by Type. . . . . . . . . . . . . . . . . . 409Validating Files by Type. . . . . . . . . . . . . . . . . . 414Preventing XSS Attacks. . . . . . . . . . . . . . . . . . 418Using the Filter Extension . . . . . . . . . . . . . . . . 421Preventing SQL Injection Attacks . . . . . . . . . . . . 425Review <strong>and</strong> Pursue . . . . . . . . . . . . . . . . . . . . 432Chapter 14 Perl-Compatible Regular Expressions. . . . . . . . 433Creating a Test Script . . . . . . . . . . . . . . . . . . . 434Defining Simple Patterns . . . . . . . . . . . . . . . . . 438Using Quantifiers . . . . . . . . . . . . . . . . . . . . . 4 41Using Character Classes . . . . . . . . . . . . . . . . . 443Finding All Matches . . . . . . . . . . . . . . . . . . . . 446Using Modifiers . . . . . . . . . . . . . . . . . . . . . . 450Matching <strong>and</strong> Replacing Patterns . . . . . . . . . . . . 452Review <strong>and</strong> Pursue . . . . . . . . . . . . . . . . . . . . 456Chapter 15 Introducing jQuery . . . . . . . . . . . . . . . . . . . . 457What is jQuery? . . . . . . . . . . . . . . . . . . . . . . 458Incorporating jQuery . . . . . . . . . . . . . . . . . . . 460Using jQuery . . . . . . . . . . . . . . . . . . . . . . . . 463Selecting Page Elements . . . . . . . . . . . . . . . . . 466Event H<strong>and</strong>ling. . . . . . . . . . . . . . . . . . . . . . . 469DOM Manipulation . . . . . . . . . . . . . . . . . . . . 473Using Ajax . . . . . . . . . . . . . . . . . . . . . . . . . 479Review <strong>and</strong> Pursue . . . . . . . . . . . . . . . . . . . . 492Table of Contents vii
Chapter 16 An OOP Primer . . . . . . . . . . . . . . . . . . . . . . . . 493Fundamentals <strong>and</strong> Syntax . . . . . . . . . . . . . . . . 494Working with <strong>MySQL</strong> . . . . . . . . . . . . . . . . . . . 497The DateTime Class . . . . . . . . . . . . . . . . . . . . 511Review <strong>and</strong> Pursue . . . . . . . . . . . . . . . . . . . . 518Chapter 17 Example—Message Board . . . . . . . . . . . . . . . 519Making the Database . . . . . . . . . . . . . . . . . . . 520Creating the Index Page . . . . . . . . . . . . . . . . . 537Creating the Forum Page . . . . . . . . . . . . . . . . . 538Creating the Thread Page . . . . . . . . . . . . . . . . 543Posting Messages . . . . . . . . . . . . . . . . . . . . . 548Review <strong>and</strong> Pursue . . . . . . . . . . . . . . . . . . . . 558Chapter 18 Example —User Registration. . . . . . . . . . . . . . 559Creating the Templates . . . . . . . . . . . . . . . . . . 560Writing the Configuration Scripts . . . . . . . . . . . . 566Creating the Home Page . . . . . . . . . . . . . . . . . 574Registration . . . . . . . . . . . . . . . . . . . . . . . . 576Activating an Account. . . . . . . . . . . . . . . . . . . 586Logging In <strong>and</strong> Logging Out . . . . . . . . . . . . . . . 589Password Management. . . . . . . . . . . . . . . . . . 594Review <strong>and</strong> Pursue . . . . . . . . . . . . . . . . . . . . 604Chapter 19 Example —E-Commerce. . . . . . . . . . . . . . . . . 605Creating the Database . . . . . . . . . . . . . . . . . . 606The Administrative Side . . . . . . . . . . . . . . . . . 612Creating the Public Template . . . . . . . . . . . . . . 629The Product Catalog . . . . . . . . . . . . . . . . . . . 633The Shopping Cart . . . . . . . . . . . . . . . . . . . . 645Recording the Orders . . . . . . . . . . . . . . . . . . . 654Review <strong>and</strong> Pursue . . . . . . . . . . . . . . . . . . . . 659Index . . . . . . . . . . . . . . . . . . . . . . . . . . . . . 661BonuS AppenDixAppendix A Installation . . . . . . . . . . . . . . . . . . . . . . . . . . . . A1viii Table of Contents
IntroductionToday’s <strong>Web</strong> users expect exciting pagesthat are updated frequently <strong>and</strong> providea customized experience. For them, <strong>Web</strong>sites are more like communities, to whichthey’ll return time <strong>and</strong> again. At the sametime, <strong>Web</strong>-site administrators want sitesthat are easier to update <strong>and</strong> maintain,underst<strong>and</strong>ing that’s the only reasonableway to keep up with visitors’ expectations.For these reasons <strong>and</strong> more, <strong>PHP</strong><strong>and</strong> <strong>MySQL</strong> have become the de factost<strong>and</strong>ards <strong>for</strong> creating dynamic, databasedriven<strong>Web</strong> sites.This book represents the culmination of mymany years of <strong>Web</strong> development experiencecoupled with the value of havingwritten several previous books on the technologiesdiscussed herein. The focus ofthis book is on covering the most importantknowledge in the most efficient manner.It will teach you how to begin developingdynamic <strong>Web</strong> sites <strong>and</strong> give you plenty ofexample code to get you started. All youneed to provide is an eagerness to learn.Well, that <strong>and</strong> a computer.What Are <strong>Dynamic</strong><strong>Web</strong> <strong>Sites</strong>?<strong>Dynamic</strong> <strong>Web</strong> sites are flexible <strong>and</strong> potentcreatures, more accurately described asapplications than merely sites. <strong>Dynamic</strong><strong>Web</strong> sitesnnnnnRespond to different parameters (<strong>for</strong>example, the time of day or the versionof the visitor’s <strong>Web</strong> browser)Have a “memory,” allowing <strong>for</strong> userregistration <strong>and</strong> login, e-commerce,<strong>and</strong> similar processesAlmost always integrate HTML <strong>for</strong>ms,allowing visitors to per<strong>for</strong>m searches,provide feedback, <strong>and</strong> so <strong>for</strong>thOften have interfaces whereadministrators can manage thesite’s contentAre easier to maintain, upgrade, <strong>and</strong>build upon than statically made sitesIntroduction ix
There are many technologies available<strong>for</strong> creating dynamic <strong>Web</strong> sites. The mostcommon are ASP.NET (Active ServerPages, a Microsoft construct), JSP (JavaServer Pages), ColdFusion, Ruby on Rails (a<strong>Web</strong> development framework <strong>for</strong> the Rubyprogramming language), <strong>and</strong> <strong>PHP</strong>. <strong>Dynamic</strong><strong>Web</strong> sites don’t always rely on a database,but more <strong>and</strong> more of them do, particularlyas excellent database applications like<strong>MySQL</strong> are available at little to no cost.What is pHp?<strong>PHP</strong> originally stood <strong>for</strong> “Personal HomePage” as it was created in 1994 by RasmusLerdorf to track the visitors to his onlinerésumé. As its usefulness <strong>and</strong> capabilitiesgrew (<strong>and</strong> as it started being used in moreprofessional situations), it came to mean“<strong>PHP</strong>: Hypertext Preprocessor.”According to the official <strong>PHP</strong> <strong>Web</strong> site,found at www.php.net A, <strong>PHP</strong> is a“widely used general-purpose scriptinglanguage that is especially suited <strong>for</strong> <strong>Web</strong>development <strong>and</strong> can be embedded intoHTML.” It’s a long but descriptive definition,whose meaning I’ll explain.Starting at the end of that statement, tosay that <strong>PHP</strong> can be embedded intoHTML means that you can take a st<strong>and</strong>ardHTML page, drop in some <strong>PHP</strong> whereveryou need it, <strong>and</strong> end up with a dynamicresult. This attribute makes <strong>PHP</strong> veryapproachable <strong>for</strong> anyone that’s done evena little bit of HTML work.Also, <strong>PHP</strong> is a scripting language, asopposed to a compiled language: <strong>PHP</strong>was designed to write <strong>Web</strong> scripts, notst<strong>and</strong>-alone applications (although, withsome extra ef<strong>for</strong>t, you can now createapplications in <strong>PHP</strong>). <strong>PHP</strong> scripts run onlyafter an event occurs—<strong>for</strong> example, whena user submits a <strong>for</strong>m or goes to a URL(Uni<strong>for</strong>m Resource Locator, the technicalterm <strong>for</strong> a <strong>Web</strong> address).I should add to this definition that <strong>PHP</strong> isa server-side, cross-plat<strong>for</strong>m technology,both descriptions being important. Serversiderefers to the fact that everything <strong>PHP</strong>does occurs on the server. A <strong>Web</strong> serverapplication, like Apache or Microsoft’s IIS(Internet In<strong>for</strong>mation Services), is required<strong>and</strong> all <strong>PHP</strong> scripts must be accessedthrough a URL (http://something). ItsA The home page <strong>for</strong> <strong>PHP</strong>.x Introduction
What Happened to pHp 6?When I wrote the previous version ofthis book, <strong>PHP</strong> 6 <strong>and</strong> <strong>MySQL</strong> 5 <strong>for</strong><strong>Dynamic</strong> <strong>Web</strong> <strong>Sites</strong>: Visual QuickProGuide, the next major release of <strong>PHP</strong>—<strong>PHP</strong> 6—was approximately 50 percentcomplete. Thinking that <strong>PHP</strong> 6 wouldthere<strong>for</strong>e be released sometime afterthe book was published, I relied upona beta version of <strong>PHP</strong> 6 <strong>for</strong> a bit of thatedition’s material. And then…<strong>PHP</strong> 6 died.One of the key features planned <strong>for</strong> <strong>PHP</strong>6 was support <strong>for</strong> Unicode, meaning that<strong>PHP</strong> 6 would be able to work nativelywith any language. This would be agreat addition to an already popularprogramming tool. Un<strong>for</strong>tunately,implementing Unicode support wentfrom being complicated to quite difficult,<strong>and</strong> the developers behind the languagetabled development of <strong>PHP</strong> 6. Not allwas lost, however: Some of the otherfeatures planned <strong>for</strong> <strong>PHP</strong> 6, such assupport <strong>for</strong> namespaces (an Object-Oriented Programming concept), wereadded to <strong>PHP</strong> 5.3.At the time of this writing, it’s not clearwhen Unicode support might be completedor what will happen with <strong>PHP</strong> 6.My hunch is that <strong>PHP</strong> will be makingincremental developments along theversion 5 trunk <strong>for</strong> some time to come.cross-plat<strong>for</strong>m nature means that <strong>PHP</strong>runs on most operating systems, includingWindows, Unix (<strong>and</strong> its many variants), <strong>and</strong>Macintosh. More important, the <strong>PHP</strong> scriptswritten on one server will normally work onanother with little or no modification.At the time this book was written, <strong>PHP</strong> wasat version 5.3.6 <strong>and</strong> this book does assumeyou’re using at least version 5.0. Some functions<strong>and</strong> features covered will require morespecific or current versions, like <strong>PHP</strong> 5.2 orgreater. In those cases, I will make it clearwhen the functionality was added to <strong>PHP</strong>,<strong>and</strong> provide alternative solutions if you havea slightly older version of the language.If you’re still using version 4 of <strong>PHP</strong>, youreally should upgrade. If that’s not in yourplans, then please grab the second editionof this book instead.More in<strong>for</strong>mation about <strong>PHP</strong> can always befound at <strong>PHP</strong>.net or at Zend (www.zend.com),the minds behind the core of <strong>PHP</strong>.Why use pHp?Put simply, when it comes to developingdynamic <strong>Web</strong> sites, <strong>PHP</strong> is better, faster,<strong>and</strong> easier to learn than the alternatives.What you get with <strong>PHP</strong> is excellentper<strong>for</strong>mance, a tight integration withnearly every database available, stability,portability, <strong>and</strong> a nearly limitless featureset due to its extendibility. All of this comesat no cost (<strong>PHP</strong> is open source) <strong>and</strong> witha very manageable learning curve. <strong>PHP</strong> isone of the best marriages I’ve ever seenbetween the ease with which beginningprogrammers can start using it <strong>and</strong> theability <strong>for</strong> more advanced programmers todo everything they require.Finally, the proof is in the pudding: <strong>PHP</strong>has seen an exponential growth in usesince its inception, <strong>and</strong> is the server-sideIntroduction xi
technology of choice on over 76 percentof all <strong>Web</strong> sites B. In terms of all programminglanguages, <strong>PHP</strong> is the fifthmost popular C.Of course, you might assume that I, as theauthor of a book on <strong>PHP</strong> (several, actually),have a biased opinion. Although notnearly to the same extent as <strong>PHP</strong>, I’ve alsodeveloped sites using Java Server Pages(JSP), Ruby on Rails (RoR), <strong>and</strong> ASP.NET.Each has its pluses <strong>and</strong> minuses, but <strong>PHP</strong>is the technology I always return to. Youmight hear that it doesn’t per<strong>for</strong>m or scaleas well as other technologies, but Yahoo!,Wikipedia, <strong>and</strong> Facebook all use <strong>PHP</strong>, <strong>and</strong>you can’t find many sites more visited ordem<strong>and</strong>ing than those.You might also wonder how secure <strong>PHP</strong>is. But security isn’t in the language; it’s inhow that language is used. Rest assuredthat a complete <strong>and</strong> up-to-date discussionof all the relevant security concerns isprovided by this book.How pHp worksAs previously stated, <strong>PHP</strong> is a server-sidelanguage. This means that the code youwrite in <strong>PHP</strong> sits on a host computer calleda server. The server sends <strong>Web</strong> pages tothe requesting visitors (you, the client, withyour <strong>Web</strong> browser).When a visitor goes to a <strong>Web</strong> site writtenin <strong>PHP</strong>, the server reads the <strong>PHP</strong> code <strong>and</strong>then processes it according to its scripteddirections. In the example shown in D,the <strong>PHP</strong> code tells the server to send theappropriate data—HTML code—to the <strong>Web</strong>browser, which treats the received code asit would a st<strong>and</strong>ard HTML page.This differs from a static HTML site where,when a request is made, the server merelysends the HTML data to the <strong>Web</strong> browser<strong>and</strong> there is no server-side interpretationB The <strong>Web</strong> Technology Surveys site providesthis graphic regarding server-side technologies(www.w3techs.com/technologies/overview/programming_language/all).C The Tiobe Index (http://www.tiobe.com/index.php/content/paperinfo/tpci/index.html)uses a combination of factors to rank thepopularity of programming languages.D How <strong>PHP</strong> fits into theclient/server model when auser requests a <strong>Web</strong> page.xii Introduction
By incorporating a database into a <strong>Web</strong>application, some of the data generated by<strong>PHP</strong> can be retrieved from <strong>MySQL</strong> G. Thisfurther moves the site’s content from a static(hard-coded) basis to a flexible one, flexibilitybeing the key to a dynamic <strong>Web</strong> site.<strong>MySQL</strong> is an open-source application,like <strong>PHP</strong>, meaning that it is free to useor even modify (the source code itself isdownloadable). There are occasions inwhich you should pay <strong>for</strong> a <strong>MySQL</strong> license,especially if you are making money fromthe sales or incorporation of the <strong>MySQL</strong>product. Check <strong>MySQL</strong>’s licensing policy<strong>for</strong> more in<strong>for</strong>mation on this.The <strong>MySQL</strong> software consists of severalpieces, including the <strong>MySQL</strong> server (mysqld,which runs <strong>and</strong> manages the databases),the <strong>MySQL</strong> client (mysql, which gives youan interface to the server), <strong>and</strong> numerousutilities <strong>for</strong> maintenance <strong>and</strong> other purposes.<strong>PHP</strong> has always had good support<strong>for</strong> <strong>MySQL</strong>, <strong>and</strong> that is even more true in themost recent versions of the language.<strong>MySQL</strong> has been known to h<strong>and</strong>le databasesas large as 60,000 tables withmore than 5 billion rows. <strong>MySQL</strong> can workwith tables as large as 8 million terabyteson some operating systems, generally ahealthy 4 GB otherwise. <strong>MySQL</strong> is usedby NASA <strong>and</strong> the United States CensusBureau, among many others.At the time of this writing, <strong>MySQL</strong> is onversion 5.5.13, with versions 5.6 <strong>and</strong> 6.0 indevelopment. The version of <strong>MySQL</strong> youhave affects what features you can use, soit’s important that you know what you’reworking with. For this book, <strong>MySQL</strong> 5.1.44<strong>and</strong> 5.5.8 were used, although you shouldbe able to do everything in this book aslong as you’re using a version of <strong>MySQL</strong>greater than 5.0.pronunciation GuideTrivial as it may be, I should clarifyup front that <strong>MySQL</strong> is technicallypronounced “My Ess Que Ell,” just asSQL should be said “Ess Que Ell.” This isa question many people have when firstworking with these technologies. Whilenot a critical issue, it’s always best topronounce acronyms correctly.G How most of the dynamic <strong>Web</strong> applications in this book will work,using both <strong>PHP</strong> <strong>and</strong> <strong>MySQL</strong>.xiv Introduction
What You’ll needTo follow the examples in this book, you’llneed the following tools:nnnnnnA <strong>Web</strong> server application (<strong>for</strong> example,Apache, Abyss, or IIS)<strong>PHP</strong><strong>MySQL</strong>A <strong>Web</strong> browser (Microsoft’s InternetExplorer, Mozilla’s Firefox, Apple’sSafari, Google’s Chrome, etc.)A text editor, <strong>PHP</strong>-capable WYSIWYGapplication (Adobe’s Dreamweaverqualifies), or IDE (integrateddevelopment environment)An FTP application, if using a remoteserverOne of the great things about developingdynamic <strong>Web</strong> sites with <strong>PHP</strong> <strong>and</strong> <strong>MySQL</strong>is that all of the requirements can bemet at no cost whatsoever, regardless ofyour operating system! Apache, <strong>PHP</strong>, <strong>and</strong><strong>MySQL</strong> are each free; <strong>Web</strong> browsers canbe had without cost; <strong>and</strong> many good texteditors are available <strong>for</strong> nothing.The appendix, which you can downloadfrom http://www.peachpit.com, discusses theinstallation process on the Windows <strong>and</strong> MacOS X operating systems. If you have a computer,you are only a couple of downloadsaway from being able to create dynamic<strong>Web</strong> sites (in that case, your computer wouldrepresent both the client <strong>and</strong> the server inD <strong>and</strong> E). Conversely, you could purchase<strong>Web</strong> hosting <strong>for</strong> only dollars per month thatwill provide you with a <strong>PHP</strong>- <strong>and</strong> <strong>MySQL</strong>enabledenvironment already online.To download this book's appendix frompeachpit.com, create a free account at http://peachpit.com, <strong>and</strong> then register this bookusing ISBN number 0321784073. Once registered,you'll have access to the bonus content.About This BookThis book teaches how to develop dynamic<strong>Web</strong> sites with <strong>PHP</strong> <strong>and</strong> <strong>MySQL</strong>, coveringthe knowledge that most developersmight require. In keeping with the <strong>for</strong>matof the Visual QuickPro series, the in<strong>for</strong>mationis discussed using a step-by-stepapproach with corresponding images. Thefocus has been kept on real-world, practicalexamples, avoiding “here’s somethingyou could do but never would” scenarios.As a practicing <strong>Web</strong> developer myself, Iwrote about the in<strong>for</strong>mation that I use <strong>and</strong>avoided those topics immaterial to the taskat h<strong>and</strong>. As a practicing writer, I made certainto include topics <strong>and</strong> techniques that Iknow readers are asking about.The structure of the book is linear, <strong>and</strong>the intention is that you’ll read it in order.It begins with three chapters coveringthe fundamentals of <strong>PHP</strong> (by the secondchapter, you will have already developedyour first dynamic <strong>Web</strong> page). Afterthat, there are four chapters on SQL(Structured Query Language, which isused to interact with all databases) <strong>and</strong><strong>MySQL</strong>. Those chapters teach the basicsof SQL, database design, <strong>and</strong> the <strong>MySQL</strong>application in particular. Then there’sone chapter on debugging <strong>and</strong> errormanagement, in<strong>for</strong>mation everyone needs.This is followed by a chapter introducinghow to use <strong>PHP</strong> <strong>and</strong> <strong>MySQL</strong> together, aremarkably easy thing to do.The following five chapters teach moreapplication techniques to round out yourknowledge. Security, in particular, is repeatedlyaddressed in those pages. Two newchapters, to be discussed momentarily,exp<strong>and</strong> your newfound knowledge. Finally,I’ve included three example chapters, inwhich the heart of different <strong>Web</strong> applicationsare developed, with instructions.Introduction xv
is this book <strong>for</strong> you?This book was written <strong>for</strong> a wide range ofpeople within the beginner-to-intermediaterange. The book makes use of XHTML, sosolid experience with XHTML or HTML isa must. Although this book covers manythings, it does not <strong>for</strong>mally teach HTML or<strong>Web</strong>-page design. Some CSS is sprinkledabout these pages but also not taught.Second, this book expects that you haveone of the following:nnnThe drive <strong>and</strong> ability to learn withoutmuch h<strong>and</strong> holding, or…Familiarity with another programminglanguage (even solid JavaScript skillswould qualify), or…A cursory knowledge of <strong>PHP</strong>Make no mistake: This book covers<strong>PHP</strong> <strong>and</strong> <strong>MySQL</strong> from A to Z, teachingeverything you’ll need to know to developreal-world <strong>Web</strong> sites, but particularly theearly chapters cover <strong>PHP</strong> at a quick pace.For this reason I recommend either someprogramming experience or a curious<strong>and</strong> independent spirit when it comes tolearning new things. If you find that thematerial goes too quickly, you shouldprobably start off with the latest editionof my book <strong>PHP</strong> <strong>for</strong> the World Wide <strong>Web</strong>:Visual QuickStart Guide, which goes ata much more tempered pace.No database experience is required, sinceSQL <strong>and</strong> <strong>MySQL</strong> are discussed starting at amore basic level.What’s new in this editionThe first three editions of this book havebeen very popular, <strong>and</strong> I’ve received a lotof positive feedback on them (thanks!).In writing this new edition, I wanted todo more than just update the material <strong>for</strong>the latest versions of <strong>PHP</strong> <strong>and</strong> <strong>MySQL</strong>,although that is an overriding considerationthroughout the book. Other new featuresyou’ll find are:nnnnnnnnNew examples demonstratingtechniques frequently requestedby readersEven more advanced <strong>MySQL</strong> <strong>and</strong> SQLinstruction <strong>and</strong> examplesA tutorial on using the jQueryJavaScript frameworkAn introduction to the fundamentals<strong>and</strong> basic usage of Object-OrientedProgrammingEven more in<strong>for</strong>mation <strong>and</strong> examples<strong>for</strong> improving the security of yourscripts <strong>and</strong> sitesExp<strong>and</strong>ed <strong>and</strong> updated installation <strong>and</strong>configuration instructionsRemoval of outdated content (e.g.,things used in older versions of <strong>PHP</strong>or no longer applicable)A “Review <strong>and</strong> Pursue” section atthe end of each chapter, with reviewquestions <strong>and</strong> prompts <strong>for</strong> ways inwhich you can further exp<strong>and</strong> yourknowledge based upon the in<strong>for</strong>mationjust coveredFor those of you that also own a previousedition (thanks, thanks, thanks!), I believethat these new features will also make thisedition a required fixture on your desk orbookshelf.xvi Introduction
How this book comparesto my other booksThis is my fourth <strong>PHP</strong> <strong>and</strong>/or <strong>MySQL</strong> title,after (in order)nnn<strong>PHP</strong> <strong>for</strong> the World Wide <strong>Web</strong>: VisualQuickStart Guide<strong>PHP</strong> 5 Advanced <strong>for</strong> the World Wide<strong>Web</strong>: Visual QuickPro Guide<strong>MySQL</strong>: Visual QuickStart GuideI hope this résumé implies a certain level ofqualification to write this book, but how doyou, as a reader st<strong>and</strong>ing in a bookstore,decide which title is <strong>for</strong> you? Of course,you are more than welcome to splurge<strong>and</strong> buy the whole set, earning my eternalgratitude, but…The <strong>PHP</strong> <strong>for</strong> the World Wide <strong>Web</strong>: VisualQuickStart Guide book is very much abeginner’s guide to <strong>PHP</strong>. This title overlapsit some, mostly in the first three chapters,but uses new examples so as not to beredundant. For novices, this book acts as afollow-up to that one. The advanced bookis really a sequel to this one, as it assumesa fair amount of knowledge <strong>and</strong> buildsupon many things taught here. The <strong>MySQL</strong>book focuses almost exclusively on <strong>MySQL</strong>(there are but two chapters that use <strong>PHP</strong>).With that in mind, read the section “Is thisbook <strong>for</strong> you?” <strong>and</strong> see if the requirementsapply. If you have no programming experienceat all <strong>and</strong> would prefer to be taught<strong>PHP</strong> more gingerly, my first book wouldbe better. If you are already very com<strong>for</strong>tablewith <strong>PHP</strong> <strong>and</strong> want to learn more of itsadvanced capabilities, pick up the second.If you are most interested in <strong>MySQL</strong> <strong>and</strong>are not concerned with learning muchabout <strong>PHP</strong>, check out the third.That being said, if you want to learneverything you need to know to begindeveloping dynamic <strong>Web</strong> sites with <strong>PHP</strong><strong>and</strong> <strong>MySQL</strong> today, then this is the book <strong>for</strong>you! It references the most current versionsof both technologies, uses techniques notpreviously discussed in other books, <strong>and</strong>contains its own unique examples.And whatever book you do choose, makesure you’re getting the most recent editionor, barring that, the edition that bestmatches the versions of the technologiesyou’ll be using.Introduction xvii
1Introductionto <strong>PHP</strong>Although this book focuses on using <strong>MySQL</strong><strong>and</strong> <strong>PHP</strong> in combination, you’ll do a vastmajority of your legwork using <strong>PHP</strong> alone.In this <strong>and</strong> the following chapter, you’ll learnits basics, from syntax to variables, operators,<strong>and</strong> language constructs (conditionals,loops, <strong>and</strong> whatnot). At the same time youare picking up these fundamentals, you’llalso begin developing usable code thatyou’ll integrate into larger applications laterin the book.This introductory chapter will cruise throughmost of the basics of the <strong>PHP</strong> language.You’ll learn the syntax <strong>for</strong> coding <strong>PHP</strong>,how to send data to the <strong>Web</strong> browser, <strong>and</strong>how to use two kinds of variables (strings<strong>and</strong> numbers) plus constants. Some of theexamples may seem inconsequential, butthey’ll demonstrate ideas you’ll have tomaster in order to write more advancedscripts further down the line. The chapterconcludes with some quick debuggingtips…you know…just in case!in This ChapterBasic Syntax 2Sending Data to the <strong>Web</strong> Browser 6Writing Comments 10What Are Variables? 14Introducing Strings 18Concatenating Strings 21Introducing Numbers 23Introducing Constants 26Single vs. Double Quotation Marks 29Basic Debugging Steps 33Review <strong>and</strong> Pursue 34
Basic SyntaxAs stated in the book’s introduction, <strong>PHP</strong>is an HTML-embedded scripting language,meaning that you can intermingle <strong>PHP</strong><strong>and</strong> HTML code within the same file. Soto begin programming with <strong>PHP</strong>, startwith a simple <strong>Web</strong> page. Script 1.1 is anexample of a no-frills, no-content XHTMLTransitional document, which will be usedas the foundation <strong>for</strong> most <strong>Web</strong> pagesin the book (this book does not <strong>for</strong>mallydiscuss [X]HTML; see a resource dedicatedto the topic <strong>for</strong> more in<strong>for</strong>mation). Pleasealso note that the template uses UTF-8encoding, a topic discussed in the sidebar.To add <strong>PHP</strong> code to a page, place it within<strong>PHP</strong> tags:Script 1.1 A basic XHTML 1.0 Transitional <strong>Web</strong> page.1 2 3 4 5 Page Title6 7 8 9 10 underst<strong>and</strong>ing encodingEncoding is a huge subject, but what you most need to underst<strong>and</strong> is this: the encoding youuse in a file dictates what characters can be represented (<strong>and</strong> there<strong>for</strong>e, what languagescan be used). To select an encoding, you must first confirm that your text editor or IntegratedDevelopment Environment (IDE)—whatever application you’re using to create the HTML <strong>and</strong> <strong>PHP</strong>scripts—can save documents using that encoding. Some applications let you set the encoding inthe preferences or options area; others set the encoding when you save the file.To indicate the encoding to the <strong>Web</strong> browser, there’s the corresponding meta tag:The charset=utf-8 part says that UTF-8 encoding is being used, short <strong>for</strong> 8-bit UnicodeTrans<strong>for</strong>mation Format. Unicode is a way of reliably representing every symbol in everyalphabet. Version 6 of Unicode—the current version at the time of this writing—supportsover 99,000 characters!If you want to create a multilingual <strong>Web</strong> page, UTF-8 is the way to go, <strong>and</strong> I’ll be using it in thisbook’s examples. You don’t have to, of course. But whatever encoding you do use, make sure thatthe encoding indicated by the XHTML page matches the actual encoding set in your text editor orIDE. If you don’t, you’ll likely see odd characters when you view the page in a <strong>Web</strong> browser.2 Chapter 1
Script 1.2 This first <strong>PHP</strong> script doesn’t do anything,but does demonstrate how a <strong>PHP</strong> script is written.It’ll also be used as a test script, prior to gettinginto elaborate <strong>PHP</strong> code.1 2 3 4 5 Basic <strong>PHP</strong> Page6 7 8 9 This is st<strong>and</strong>ard HTML.10 12 13 HTML5At the time of this writing, the next majorrelease of HTML—HTML5—is beingactively developed <strong>and</strong> discussed, butis not production ready, which is why Ichose not to use it in the book. In fact,I wouldn’t be surprised if HTML5 is stillnot released by the time I start the fifthedition of this book, <strong>and</strong> it will take evenlonger <strong>for</strong> broad browser adoption of thelanguage. Still, as HTML5 is an excitingfuture development, this book willoccasionally mention features you canexpect to see introduced <strong>and</strong> supportedover time.Anything written within these tags willbe treated by the <strong>Web</strong> server as <strong>PHP</strong>,meaning the <strong>PHP</strong> interpreter will processthe code. Any text outside of the <strong>PHP</strong> tagsis immediately sent to the <strong>Web</strong> browser asregular HTML. (Because <strong>PHP</strong> is most oftenused to create content displayed in the<strong>Web</strong> browser, the <strong>PHP</strong> tags are normallyput somewhere within the page’s body.)Along with placing <strong>PHP</strong> code within <strong>PHP</strong>tags, your <strong>PHP</strong> files must have a properextension. The extension tells the serverto treat the script in a special way, namely,as a <strong>PHP</strong> page. Most <strong>Web</strong> servers use.html <strong>for</strong> st<strong>and</strong>ard HTML pages <strong>and</strong> .php<strong>for</strong> <strong>PHP</strong> files.Be<strong>for</strong>e getting into the steps, underst<strong>and</strong>that you must already have a working <strong>PHP</strong>installation! This could be on a hosted siteor your own computer, after following theinstructions in Appendix A, “Installation,”which is a free download from peachpit.com.To make a basic pHp script:1. Create a new document in your texteditor or IDE, to be named first.php(Script 1.2).It generally does not matter whatapplication you use, be it AdobeDreamweaver (a fancy IDE), TextMate(a great <strong>and</strong> popular Macintosh plaintexteditor), or vi (a plain-text Unixeditor, lacking a graphical interface).Still, some text editors <strong>and</strong> IDEs maketyping <strong>and</strong> debugging HTML <strong>and</strong><strong>PHP</strong> easier (conversely, Notepad onWindows does some things that makescoding harder: don’t use Notepad!). Ifyou don’t already have an applicationyou’re attached to, search the <strong>Web</strong> oruse the book’s corresponding <strong>for</strong>um(www.LarryUllman.com/<strong>for</strong>ums/) tofind one.continues on next pageIntroduction to <strong>PHP</strong> 3
2. Create a basic HTML document:Basic <strong>PHP</strong> PageThis is st<strong>and</strong>ard HTML.Although this is the syntax being usedthroughout the book, you can changethe HTML to match whichever st<strong>and</strong>ardyou intend to use (e.g., HTML 4.0Strict). Again, see a dedicated (X)HTMLresource if you’re unfamiliar with any ofthis HTML code.3. Be<strong>for</strong>e the closing body tag, insert the<strong>PHP</strong> tags:These are the <strong>for</strong>mal <strong>PHP</strong> tags, alsoknown as XML-style tags. Although <strong>PHP</strong>supports other tag types, I recommendthat you use the <strong>for</strong>mal type, <strong>and</strong> I willdo so throughout this book.4. Save the file as first.php.Remember that if you don’t save the fileusing an appropriate <strong>PHP</strong> extension,the script will not execute properly.(Just one of the reasons not to useNotepad is that it will secretly add the.txt extension to <strong>PHP</strong> files, therebycausing many headaches.)5. Place the file in the proper directory ofyour <strong>Web</strong> server.If you are running <strong>PHP</strong> on your owncomputer (presumably after followingthe installation directions in Appendix A),you just need to move, copy, or save thefile to a specific folder on your computer.Check Appendix A or the documentation<strong>for</strong> your particular <strong>Web</strong> server to identifythe correct directory, if you don’t alreadyknow what it is.If you are running <strong>PHP</strong> on a hostedserver (i.e., on a remote computer),you’ll need to use a File TransferProtocol (FTP) application to upload thefile to the proper directory. Your hostingcompany will provide you with access<strong>and</strong> the other necessary in<strong>for</strong>mation.6. Run first.php in your <strong>Web</strong> browser A.Because <strong>PHP</strong> scripts need to be parsedby the server, you absolutely mustaccess them via a URL (i.e., the addressin the browser must begin with http://).You cannot simply open them in your<strong>Web</strong> browser as you would a file in otherapplications (in which case the addresswould start with file:// or C:\ or the like).A While it seems like any other (simple)HTML page, this is in fact a <strong>PHP</strong> script<strong>and</strong> the basis <strong>for</strong> the rest of the examplesin the book.4 Chapter 1
If you are running <strong>PHP</strong> on your owncomputer, you’ll need to use a URLlike http://localhost/first.php,http://127.0.0.1/first.php, or http://localhost/~/first.php (on MacOS X, using your actual username <strong>for</strong>). If you are using a <strong>Web</strong> host, you’llneed to use http://your-domain-name/first.php (e. g., http://www.example.com/first.php).7. If you don’t see results like those in A,start debugging!Part of learning any programminglanguage is mastering debugging.It’s a sometimes-painful but absolutelynecessary process. With this firstexample, if you don’t see a simple,but perfectly valid, <strong>Web</strong> page, followthese steps:1. Confirm that you have a working<strong>PHP</strong> installation (see Appendix A <strong>for</strong>testing instructions).2. Make sure that you are running thescript through a URL. The address in the<strong>Web</strong> browser must begin with http://. Ifit starts with file://, that’s a problem B.3. If you get a file not found (or similar)error, you’ve likely put the file in thewrong directory or mistyped the file’sname (either when saving it or in your<strong>Web</strong> browser).If you’ve gone through all this <strong>and</strong>are still having problems, turn tothe book’s corresponding <strong>for</strong>um(www.LarryUllman.com/<strong>for</strong>ums/).To find more in<strong>for</strong>mation about HTML<strong>and</strong> XHTML, check out Elizabeth Castro’sexcellent book HTML, XHTML, <strong>and</strong> CSS, SixthEdition: Visual QuickStart Guide, (PeachpitPress, 2006) or search the <strong>Web</strong>.You can embed multiple sections of <strong>PHP</strong>code within a single HTML document (i.e., youcan go in <strong>and</strong> out of the two languages). You’llsee examples of this throughout the book.Prior to UTF-8, ISO-8859-1 was one ofthe more commonly used encodings. It representsmost Western European languages. It’sstill the default encoding <strong>for</strong> many <strong>Web</strong> browsers<strong>and</strong> other applications.You can declare the encoding of an externalCSS file by adding @charset "utf-8"; asthe first line in the file. If you’re not using UTF-8,change the line accordingly.B <strong>PHP</strong> code will only be executed when run through http: //(not that this particular script is affected either way).Introduction to <strong>PHP</strong> 5
Sending Data tothe <strong>Web</strong> BrowserTo create dynamic <strong>Web</strong> sites with <strong>PHP</strong>,you must know how to send data to the<strong>Web</strong> browser. <strong>PHP</strong> has a number of built-infunctions <strong>for</strong> this purpose, the most commonbeing echo <strong>and</strong> print. I personally tend tofavor echo:echo 'Hello, world!';echo "What's new?";You could use print instead, if you prefer(the name more obviously indicates whatit does):print 'Hello, world!';print "What's new?";As you can see from these examples, youcan use either single or double quotationmarks (but there is a distinction betweenthe two types of quotation marks, whichwill be made clear by the chapter’s end).The first quotation mark after the functionname indicates the start of the message tobe printed. The next matching quotationmark (i.e., the next quotation mark of thesame kind as the opening mark) indicatesthe end of the message to be printed.Along with learning how to send data tothe <strong>Web</strong> browser, you should also noticethat in <strong>PHP</strong> all statements—a line ofexecuted code, in layman’s terms—mustend with a semicolon. Also, <strong>PHP</strong> is caseinsensitivewhen it comes to functionnames, so ECHO, echo, eCHo, <strong>and</strong> so <strong>for</strong>thwill all work. The all-lowercase version iseasiest to type, of course.needing an escapeAs you might discover, one of thecomplications with sending data to the<strong>Web</strong> involves printing single <strong>and</strong> doublequotation marks. Either of the followingwill cause errors:echo "She said, "How are you?"";echo 'I'm just ducky.';There are two solutions to this problem.First, use single quotation marks whenprinting a double quotation mark <strong>and</strong>vice versa:echo 'She said, "How are you?"';echo "I'm just ducky.";Or, you can escape the problematiccharacter by preceding it with abackslash:echo "She said, \"How are you?\"";echo 'I\'m just ducky.';An escaped quotation mark will merelybe printed like any other character.Underst<strong>and</strong>ing how to use the backslashto escape a character is an importantconcept, <strong>and</strong> one that will be covered inmore depth at the end of the chapter.6 Chapter 1
Script 1.3 Using print or echo, <strong>PHP</strong> can send datato the <strong>Web</strong> browser.1 2 3 4 5 Using Echo6 7 8 9 This is st<strong>and</strong>ard HTML.10 13 14 A The results still aren’t glamorous,but this page was in part dynamicallygenerated by <strong>PHP</strong>.To send data to the <strong>Web</strong> browser:1. Open first.php (refer to Script 1.2) inyour text editor or IDE.2. Between the <strong>PHP</strong> tags (lines 10 <strong>and</strong> 11),add a simple message (Script 1.3):echo 'This was generated using➝ <strong>PHP</strong>!';It truly doesn’t matter what messageyou type here, which function you use(echo or print), or which quotationmarks, <strong>for</strong> that matter—just be carefulif you are printing a single or doublequotation mark as part of your message(see the sidebar “Needing an Escape”).3. If you want, change the page title tobetter describe this script (line 5):Using EchoThis change only affects the browserwindow’s title bar.4. Save the file as second.php, place it inyour <strong>Web</strong> directory, <strong>and</strong> test it in your<strong>Web</strong> browser A.Remember that all <strong>PHP</strong> scripts must berun through a URL (http://something)!continues on next pageIntroduction to <strong>PHP</strong> 7
5. If necessary, debug the script.If you see a parse error instead of yourmessage B, check that you have bothopened <strong>and</strong> closed your quotationmarks <strong>and</strong> escaped any problematiccharacters (see the sidebar). Also becertain to conclude each statementwith a semicolon.If you see an entirely blank page, this isprobably <strong>for</strong> one of two reasons:> There is a problem with your HTML.Test this by viewing the source ofyour page <strong>and</strong> looking <strong>for</strong> HTMLproblems there C.> An error occurred, but display_errorsis turned off in your <strong>PHP</strong> configuration,so nothing is shown. In this case,see the section in Appendix A onhow to configure <strong>PHP</strong> so that youcan turn display_errors back on.B This may be the first of many parse errors yousee as a <strong>PHP</strong> programmer (this one is caused bythe omission of the terminating quotation mark).C One possible cause of a blank <strong>PHP</strong> page is asimple HTML error, like the closing title tag here(it’s missing the slash).Technically, echo <strong>and</strong> print arelanguage constructs, not functions. That beingsaid, don’t be flummoxed as I continue tocall them “functions” <strong>for</strong> convenience. Also,as you’ll see later in the book, I include theparentheses when referring to functions—say number_<strong>for</strong>mat( ), not just number_<strong>for</strong>mat—to help distinguish them fromvariables <strong>and</strong> other parts of <strong>PHP</strong>. This isjust my own little convention.D <strong>PHP</strong> can send HTML code (likethe <strong>for</strong>matting here) as well as simpletext A to the <strong>Web</strong> browser.You can, <strong>and</strong> often will, use echo<strong>and</strong> print to send HTML code to the<strong>Web</strong> browser, like so D:echo 'Hello, world!';8 Chapter 1
Echo <strong>and</strong> print can both be used overmultiple lines:echo 'This sentence isprinted over two lines.';E Printing text <strong>and</strong> HTML over multiple <strong>PHP</strong> lineswill generate HTML source code that also extendsover multiple lines. Note that extraneous whitespacing in the HTML source will not affect the look ofa page F but can make the source easier to review.What happens in this case is that thereturn (created by pressing Enter or Return)becomes part of the printed message, whichisn’t terminated until the closing quotationmark. The net result will be the “printing”of the return in the HTML source code E.This will not have an effect on the generatedpage F. For more on this, see the sidebar“Underst<strong>and</strong>ing White Space.”F The return in the HTML source E hasno effect on the rendered result. The onlyway to alter the spacing of a displayed <strong>Web</strong>page is to use HTML tags (like <strong>and</strong> ).underst<strong>and</strong>ing White SpaceWith <strong>PHP</strong> you send data (like HTML tags <strong>and</strong> text) to the <strong>Web</strong> browser, which will, in turn, render thatdata as the <strong>Web</strong> page the end user sees. Thus, what you are often doing with <strong>PHP</strong> is creating theHTML source of a <strong>Web</strong> page. With this in mind, there are three areas of notable white space (extraspaces, tabs, <strong>and</strong> blank lines): in your <strong>PHP</strong> scripts, in your HTML source, <strong>and</strong> in the rendered <strong>Web</strong> page.<strong>PHP</strong> is generally white space insensitive, meaning that you can space out your code however youwant to make your scripts more legible. HTML is also generally white space insensitive. Specifically,the only white space in HTML that affects the rendered page is a single space (multiplespaces still get rendered as one). If your HTML source has text on multiple lines, that doesn’t meanit’ll appear on multiple lines in the rendered page (E <strong>and</strong> F).To alter the spacing in a rendered <strong>Web</strong> page, use the HTML tags (line break, in older HTMLst<strong>and</strong>ards) <strong>and</strong> (paragraph). To alter the spacing of the HTML source created with <strong>PHP</strong>, you can.Use echo or print over the course of several lines.or.Print the newline character (\n) within double quotation marks, which is equivalent to Enteror Return.Introduction to <strong>PHP</strong> 9
Writing CommentsCreating executable <strong>PHP</strong> code is onlya part of the programming process(admittedly, it’s the most important part).A secondary but still crucial aspect toany programming endeavor involvesdocumenting your code. In fact, whenI’m asked what qualities distinguish thebeginning programmer from the moreexperienced one, a good <strong>and</strong> thorough useof comments is my unwavering response.In HTML you can add comments usingspecial tags:HTML comments are viewable in the sourcebut do not appear in the rendered page(see E <strong>and</strong> F in the previous section).<strong>PHP</strong> comments are different in that theyaren’t sent to the <strong>Web</strong> browser at all,meaning they won’t be viewable to the enduser, even when looking at the HTML source.<strong>PHP</strong> supports three comment syntaxes. Thefirst uses the pound or number symbol (#):# This is a comment.The second uses two slashes:// This is also a com ment.Both of these cause <strong>PHP</strong> to ignoreeverything that follows until the end ofthe line (when you press Return or Enter).Thus, these two comments are <strong>for</strong> singlelines only. They are also often used toplace a comment on the same line assome <strong>PHP</strong> code:print 'Hello!'; // Say hello.A third style allows comments to run overmultiple lines:/* This is a longer commentthat spans two lines. */10 Chapter 1
Script 1.4 These basic comments demonstrate thethree comment syntaxes you can use in <strong>PHP</strong>.1 2 3 4 5 Comments6 7 8 Comments2. Add the initial <strong>PHP</strong> tag <strong>and</strong> write yourfirst comments:
3. Send some HTML to the <strong>Web</strong> browser:echo 'This is a line of➝ text.This is another line➝ of text.';It doesn’t matter what you do here, justmake something <strong>for</strong> the <strong>Web</strong> browser todisplay. For the sake of variety, the echostatement will print some HTML tags,including a line break () to add somespacing to the generated HTML page.4. Use the multiline comments to commentout a second echo statement:/*echo 'This line will not be➝ executed.';*/By surrounding any block of <strong>PHP</strong> codewith /* <strong>and</strong> */, you can render that codeinert without having to delete it from yourscript. By later removing the commenttags, you can reactivate that section of<strong>PHP</strong> code.5. Add a final comment after a third echostatement:echo "Now I'm done.";➝ // End of <strong>PHP</strong> code.This last (superfluous) comment showshow to place a comment at the end ofa line, a common practice. Note thatdouble quotation marks surround thismessage, as single quotation markswould conflict with the apostrophe(see the “Needing an Escape” sidebar,earlier in the chapter).6. Close the <strong>PHP</strong> section <strong>and</strong> completethe HTML page:?>7. Save the file as comments.php, place itin your <strong>Web</strong> directory, <strong>and</strong> test it in your<strong>Web</strong> browser A.A The <strong>PHP</strong> comments in Script 1.4don’t appear in the <strong>Web</strong> page orthe HTML source B .12 Chapter 1
8. If you’re the curious type, check thesource code in your <strong>Web</strong> browser toconfirm that the <strong>PHP</strong> comments do notappear there B.You shouldn’t nest (place one insideanother) multiline comments (/* */). Doingso will cause problems.Any of the <strong>PHP</strong> comments can be usedat the end of a line (say, after a function call):echo 'Howdy'; /* Say 'Howdy' */Although this is allowed, it’s far less common.It’s nearly impossible to over-commentyour scripts. Always err on the side of writingtoo many comments as you code. That beingsaid, in the interest of saving space, the scriptsin this book will not be as well documented asI would suggest they should be.It’s also important that as you change ascript you keep the comments up-to-date <strong>and</strong>accurate. There’s nothing more confusing thana comment that says one thing when the codereally does something else.B The <strong>PHP</strong> comments from Script 1.4 are nowhere to be seen in the client’s browser.Introduction to <strong>PHP</strong> 13
What Are Variables?Variables are containers used totemporarily store values. These valuescan be numbers, text, or much morecomplex data. <strong>PHP</strong> supports eight typesof variables. These include four scalar(single-valued) types—Boolean (TRUE orFALSE), integer, floating point (decimals),<strong>and</strong> strings (characters); two nonscalar(multivalued)—arrays <strong>and</strong> objects;plus resources (which you’ll see wheninteracting with databases) <strong>and</strong> NULL(which is a special type that has no value).Regardless of what type you are creating,all variable names in <strong>PHP</strong> follow certainsyntactical rules:nnnnA variable’s name must start with adollar sign ($), <strong>for</strong> example, $name.The variable’s name can containa combination of letters, numbers,<strong>and</strong> the underscore, <strong>for</strong> example,$my_report1.The first character after the dollar signmust be either a letter or an underscore(it cannot be a number).Variable names in <strong>PHP</strong> are casesensitive!This is a very important rule.It means that $name <strong>and</strong> $Name areentirely different variables.To begin working with variables, this nextscript will print out the value of threepredefined variables. Whereas a st<strong>and</strong>ardvariable is assigned a value during theexecution of a script, a predefined variablewill already have a value when the scriptbegins its execution. Most of thesepredefined variables reflect propertiesof the server as a whole, such as theoperating system in use.Be<strong>for</strong>e getting into this script, there aretwo more things you should know. First,variables can be assigned values using theequals sign (=), also called the assignmentoperator. Second, to display the value of avariable, you can print the variable withoutquotation marks:print $some_var;Or variables can be printed within doublequotation marks:print "Hello, $name";You cannot print variables within singlequotation marks:print 'Hello, $name'; // Won't work!14 Chapter 1
Script 1.5 This script prints three of <strong>PHP</strong>’s manypredefined variables.1 2 3 4 5 Predefined Variables6 7 8 25 26 To use variables:1. Begin a new <strong>PHP</strong> document inyour text editor or IDE, to be namedpredefined.php, starting with theinitial HTML (Script 1.5):Predefined Variables➝ 2. Add the opening <strong>PHP</strong> tag <strong>and</strong> thefirst comment:
3. Create a shorth<strong>and</strong> version of the firstvariable to be used in this script:$file = $_SERVER['SCRIPT_FILENAME'];This script will use three variables,each of which comes from the largerpredefined $_SERVER variable. $_SERVERrefers to a mass of server-relatedin<strong>for</strong>mation. The first variable the scriptuses is $_SERVER['SCRIPT_FILENAME'].This variable stores the full path <strong>and</strong>name of the script being run (<strong>for</strong>example, C:\Program Files\Apache\htdocs\predefined.php).The value stored in $_SERVER['SCRIPT_FILENAME'] will be assigned to the newvariable $file. Creating new variableswith shorter names <strong>and</strong> then assigningthem values from $_SERVER will makeit easier to refer to the variables whenprinting them. (It also gets around anotherissue you’ll learn about in due time.)4. Create a shorth<strong>and</strong> version of twomore variables:$user = $_SERVER['HTTP_USER_AGENT'];$server = $_SERVER➝ ['SERVER_SOFTWARE'];$_SERVER['HTTP_USER_AGENT'] representsthe <strong>Web</strong> browser <strong>and</strong> operating systemof the user accessing the script. Thisvalue is assigned to $user.$_SERVER['SERVER_SOFTWARE'] representsthe <strong>Web</strong> application on the server that’srunning <strong>PHP</strong> (e.g., Apache, Abyss, Xitami,IIS). This is the program that must beinstalled (see Appendix A) in order to run<strong>PHP</strong> scripts on that computer.5. Print out the name of the script being run:echo "You are running the➝ file:$file.\n";The first variable to be printed is $file.Notice that this variable must be usedwithin double quotation marks <strong>and</strong>that the statement also makes use ofthe <strong>PHP</strong> newline character (\n), whichwill add a line break in the generatedHTML source. Some basic HTML tags—paragraph <strong>and</strong> bold—are added to givethe generated page a bit of flair.6. Print out the in<strong>for</strong>mation of the useraccessing the script:echo "You are viewing this page➝ using:$user\n";This line prints the second variable,$user. To repeat what’s said in thefourth step, $user correlates to $_SERVER['HTTP_USER_AGENT'] <strong>and</strong> refersto the operating system, browser type,<strong>and</strong> browser version being used toaccess the <strong>Web</strong> page.7. Print out the server in<strong>for</strong>mation:echo "This server is running:➝ $server.\n";8. Complete the <strong>PHP</strong> block <strong>and</strong> theHTML page:?>16 Chapter 1
9. Save the file as predefined.php, placeit in your <strong>Web</strong> directory, <strong>and</strong> test it inyour <strong>Web</strong> browser A.If you have problems with this, or anyother script, turn to the book’s corresponding<strong>Web</strong> <strong>for</strong>um (www.LarryUllman.com/<strong>for</strong>ums/) <strong>for</strong> assistance.If possible, run this script using a different<strong>Web</strong> browser <strong>and</strong>/or on another server B.Variable names cannot contain spaces.The underscore is commonly used in lieu ofa space.The most important considerationwhen creating variables is to use a consistentnaming scheme. In this book you’ll see thatI use all-lowercase letters <strong>for</strong> my variablenames, with underscores separating words($first_name). Some programmers preferto use capitalization instead: $FirstName(known as “camel-case” style).<strong>PHP</strong> is very casual in how it treats variables,meaning that you don’t need to initializethem (set an immediate value) or declare them(set a specific type), <strong>and</strong> you can convert a variableamong the many types without problem.A The predefined.php script reportsback to the viewer in<strong>for</strong>mation about thescript, the <strong>Web</strong> browser being used toview it, <strong>and</strong> the server itself.B This is the book’s first truly dynamicscript, in that the <strong>Web</strong> page changesdepending upon the server running it<strong>and</strong> the <strong>Web</strong> browser viewing it (comparewith A ).Introduction to <strong>PHP</strong> 17
introducing StringsNow that you’ve been introduced to thegeneral concept of variables, let’s look atvariables in detail. The first variable type todelve into is the string. A string is merelya quoted chunk of characters: letters,numbers, spaces, punctuation, <strong>and</strong> so<strong>for</strong>th. These are all strings:nn‘Tobias’“In watermelon sugar”n ‘100’n ‘August 2, 2011’To make a string variable, assign a stringvalue to a valid variable name:$first_name = 'Tobias';$today = 'August 2, 2011';When creating strings, you can use eithersingle or double quotation marks toencapsulate the characters, just as youwould when printing text. Likewise, youmust use the same type of quotation mark<strong>for</strong> the beginning <strong>and</strong> the end of the string.If that same mark appears within the string,it must be escaped:$var = "Define \"platitude\", please.";Or you can also use the other quotationmark type:$var = 'Define "platitude", please.';To print out the value of a string, use eitherecho or print:echo $first_name;To print the value of string within a context,you must use double quotation marks:echo "Hello, $first_name";You’ve already worked with strings once—when using the predefined variables inthe preceding section (the values of thosevariables happened to be strings). In thisnext example, you’ll create <strong>and</strong> use yourown strings.18 Chapter 1
Script 1.6 String variables are created <strong>and</strong> theirvalues are sent to the <strong>Web</strong> browser in this script.1 2 3 4 5 Strings6 7 8 19 20 To use strings:1. Begin a new <strong>PHP</strong> document in your texteditor or IDE, to be named strings.php,starting with the initial HTML <strong>and</strong> includingthe opening <strong>PHP</strong> tag (Script 1.6):Strings
3. Add an echo statement:echo "The book $book➝ was written by $first_name➝ $last_name.";All this script does is print a statementof authorship based upon threeestablished variables. A little HTML<strong>for</strong>matting (the emphasis on the book’stitle) is thrown in to make it moreattractive. Remember to use doublequotation marks here <strong>for</strong> the variablevalues to be printed out appropriately(more on the importance of doublequotation marks at the chapter’s end).4. Complete the <strong>PHP</strong> block <strong>and</strong> the HTMLpage:?>5. Save the file as strings.php, place it inyour <strong>Web</strong> directory, <strong>and</strong> test it in your<strong>Web</strong> browser A.6. If desired, change the values of thethree variables, save the file, <strong>and</strong> runthe script again B.A The resulting <strong>Web</strong> page is based upon printingout the values of three variables.B The output of the script is changed by alteringthe variables in it.If you assign another value to an existingvariable (say $book), the new value willoverwrite the old one. For example:$book = 'High Fidelity';$book = 'The Corrections';/* $book now has a value of'The Corrections'. */<strong>PHP</strong> has no set limits on how big a stringcan be. It’s theoretically possible that you’ll belimited by the resources of the server, but it’sdoubtful that you’ll ever encounter sucha problem.20 Chapter 1
Script 1.7 Concatenation gives you the ability toappend more characters onto a string.1 2 3 4 5 Concatenation6 7 8 21 22 Concatenating StringsConcatenation is like addition <strong>for</strong> strings,whereby characters are added to theend of the string. It is per<strong>for</strong>med usingthe concatenation operator, which is theperiod (.):$city= 'Seattle';$state = 'Washington';$address = $city . $state;The $address variable now has the valueSeattleWashington, which almost achievesthe desired result (Seattle, Washington).To improve upon this, you could write$address = $city . ', ' . $state;so that a comma <strong>and</strong> a space areconcatenated to the variables as well.Because of how liberally <strong>PHP</strong> treatsvariables, concatenation is possible withstrings <strong>and</strong> numbers. Either of thesestatements will produce the same result(Seattle, Washington 98101):$address = $city . ', ' . $state .' 98101';$address = $city . ', ' . $state .' ' . 98101;Let’s modify strings.php to use thisnew operator.To use concatenation:1. Open strings.php (refer to Script 1.6) inyour text editor or IDE.2. After you’ve established the $first_name <strong>and</strong> $last_name variables (lines 11<strong>and</strong> 12), add this line (Script 1.7):$author = $first_name . ' ' .➝ $last_name;As a demonstration of concatenation, anew variable—$author—will be createdas the concatenation of two existingstrings <strong>and</strong> a space in between.continues on next pageIntroduction to <strong>PHP</strong> 21
3. Change the echo statement to use thisnew variable:echo "The book $book➝ was written by $author.";Since the two variables have beenturned into one, the echo statementshould be altered accordingly.4. If desired, change the HTML page title<strong>and</strong> the values of the first name, lastname, <strong>and</strong> book variables.5. Save the file as concat.php, place it inyour <strong>Web</strong> directory, <strong>and</strong> test it in your<strong>Web</strong> browser A.<strong>PHP</strong> has a slew of useful string-specificfunctions, which you’ll see over the course ofthis book. For example, to calculate how longa string is (how many characters it contains),use strlen( ):$num = strlen('some string'); // 11You can have <strong>PHP</strong> convert the case ofstrings with: strtolower( ), which makesit entirely lowercase; strtoupper( ), whichmakes it entirely uppercase; ucfirst( ),which capitalizes the first character; <strong>and</strong>ucwords( ), which capitalizes the first characterof every word.If you are merely concatenating onevalue to another, you can use the concatenationassignment operator (.=). The followingare equivalent:$title = $title . $subtitle;$title .= $subtitle;The initial example in this section couldbe rewritten using either$address = "$city, $state";or$address = $city;$address .= ', ';$address .= $state;A In this revised script, the end result ofconcatenation is not apparent to the user.using the pHp ManualThe <strong>PHP</strong> manual—accessible onlineat www.php.net/manual—lists everyfunction <strong>and</strong> feature of the language.The manual is organized with generalconcepts (installation, syntax, variables)discussed first <strong>and</strong> ends with thefunctions by topic (<strong>MySQL</strong>, stringfunctions, <strong>and</strong> so on).To quickly look up any function in the<strong>PHP</strong> manual, go to www.php.net/functionname in your <strong>Web</strong> browser(<strong>for</strong> example, www.php.net/print). Foreach function, the manual indicates:.The versions of <strong>PHP</strong> the function isavailable in..How many <strong>and</strong> what types ofarguments the function takes(optional arguments are wrappedin square brackets)..What type of value the functionreturns.The manual also contains a descriptionof the function.You should be in the habit of checkingout the <strong>PHP</strong> manual wheneveryou’re confused by a function, how it’sproperly used, or need to learn moreabout any feature of the language. It’salso critically important that you knowwhat version of <strong>PHP</strong> you’re running, asfunctions <strong>and</strong> other particulars of <strong>PHP</strong>do change over time.22 Chapter 1
introducing numbersIn introducing variables, I stated that<strong>PHP</strong> has both integer <strong>and</strong> floating-point(decimal) number types. In my experience,though, these two types can be classifiedunder the generic title numbers withoutlosing any valuable distinction (<strong>for</strong> the mostpart). Valid number-type variables in <strong>PHP</strong>can be anything liken 8n 3.14n 10980843985n -4.2398508n 4.4e2Notice that these values are neverquoted—quoted numbers are stringswith numeric values—nor do they includecommas to indicate thous<strong>and</strong>s. Also, anumber is assumed to be positive unless itis preceded by the minus sign (-).Along with the st<strong>and</strong>ard arithmetic operatorsyou can use on numbers (Table 1.1), thereare dozens of functions built into <strong>PHP</strong>. Twocommon ones are round( ) <strong>and</strong> number_<strong>for</strong>mat( ). The <strong>for</strong>mer rounds a decimal tothe nearest integer:$n = 3.14;$n = round ($n); // 3It can also round to a specified number ofdecimal places:$n = 3.142857;$n = round ($n, 3); // 3.143The number_<strong>for</strong>mat( ) function turns anumber into the more commonly writtenversion, grouped into thous<strong>and</strong>s usingcommas:$n = 20943;$n = number_<strong>for</strong>mat ($n); // 20,943This function can also set a specifiednumber of decimal points:$n = 20943;$n = number_<strong>for</strong>mat ($n, 2); //20,943.00To practice with numbers, let’s writea mock-up script that per<strong>for</strong>ms thecalculations one might use in ane-commerce shopping cart.TABLe 1.1 Arithmetic OperatorsOperatorMeaning+ Addition- Subtraction* Multiplication/ Division% Modulus+ + Increment-- DecrementIntroduction to <strong>PHP</strong> 23
To use numbers:1. Begin a new <strong>PHP</strong> document in your texteditor or IDE, to be named numbers.php(Script 1.8):Numbers3 4 5 Numbers6 7 8 26 27 24 Chapter 1
4. Format the total:$total = number_<strong>for</strong>mat ($total, 2);The number_<strong>for</strong>mat( ) function willgroup the total into thous<strong>and</strong>s <strong>and</strong>round it to two decimal places. Applyingthis function will properly <strong>for</strong>mat thecalculated value.5. Print the results:echo 'You are purchasing ' .➝ $quantity . ' widget(s) at➝ a cost of $' . $price . '➝ each. With tax, the total comes➝ to $' . $total . '.';The last step in the script is to print outthe results. The echo statement usesboth single-quoted text <strong>and</strong> concatenatedvariables in order to print out thefull combination of HTML, dollar signs,<strong>and</strong> variable values. You’ll see an alternativeapproach in the last example ofthis chapter.6. Complete the <strong>PHP</strong> code <strong>and</strong> theHTML page:?>7. Save the file as numbers.php, place it inyour <strong>Web</strong> directory, <strong>and</strong> test it in your<strong>Web</strong> browser A.8. If desired, change the initial threevariables <strong>and</strong> rerun the script B.<strong>PHP</strong> supports a maximum integerof around two billion on most plat<strong>for</strong>ms.With numbers larger than that, <strong>PHP</strong> willautomatically use a floating-point type.When dealing with arithmetic, the issueof precedence arises (the order in which complexcalculations are made). While the <strong>PHP</strong>manual <strong>and</strong> other sources tend to list out thehierarchy of precedence, I find programmingto be safer <strong>and</strong> more legible when I groupclauses in parentheses to <strong>for</strong>ce the executionorder (see line 17 of Script 1.8).Computers are notoriously poor atdealing with decimals. For example, the number2.0 may actually be stored as 1.99999.Most of the time this won’t be a problem,but in cases where mathematical precision isparamount, rely on integers, not decimals. The<strong>PHP</strong> manual has in<strong>for</strong>mation on this subject,as well as alternative functions <strong>for</strong> improvingcomputational accuracy.Many of the mathematical operators alsohave a corresponding assignment operator,letting you create a shorth<strong>and</strong> <strong>for</strong> assigningvalues. This line,$total = $total + ($total * $taxrate);could be rewritten as$total += ($total * $taxrate);If you set a $price value without usingtwo decimals (e.g., 119.9 or 34), you wouldwant to apply number_<strong>for</strong>mat( ) to $pricebe<strong>for</strong>e printing it.A The numbers <strong>PHP</strong> page (Script 1.8) per<strong>for</strong>mscalculations based upon set values.B To change the generated <strong>Web</strong> page, alter anyor all of the three variables (compare with A ).Introduction to <strong>PHP</strong> 25
introducing ConstantsConstants, like variables, are used totemporarily store a value, but otherwise,constants <strong>and</strong> variables differ in manyways. For starters, to create a constant,you use the define( ) function insteadof the assignment operator (=):define ('NAME', value);Notice that, as a rule of thumb, constantsare named using all capitals, although thisis not required. Most importantly, constantsdo not use the initial dollar sign as variablesdo (because constants are not variables).A constant can only be assigned a scalarvalue, like a string or a number:define ('USERNAME', 'troutocity');define ('PI', 3.14);And unlike variables, a constant’s valuecannot be changed.To access a constant’s value, like when youwant to print it, you cannot put the constantwithin quotation marks:echo "Hello, USERNAME"; // Won't work!With that code, <strong>PHP</strong> literally prints Hello,USERNAME A <strong>and</strong> not the value of theUSERNAME constant (because there’s noindication that USERNAME is anything otherthan literal text). Instead, either print theconstant by itself:echo 'Hello, ';echo USERNAME;or use the concatenation operator:echo 'Hello, ' . USERNAME;<strong>PHP</strong> runs with several predefinedconstants, much like the predefinedvariables used earlier in the chapter. Theseinclude <strong>PHP</strong>_VERSION (the version of <strong>PHP</strong>running) <strong>and</strong> <strong>PHP</strong>_OS (the operating systemof the server). This next script will printthose two values, along with the value ofa user-defined constant.A Constants cannot be placedwithin quoted strings.26 Chapter 1
Script 1.9 Constants are another temporarystorage tool you can use in <strong>PHP</strong>, distinctfrom variables.1 2 3 4 5 Constants6 7 8
4. Complete the <strong>PHP</strong> code <strong>and</strong> theHTML page:?>5. Save the file as constants.php, place itin your <strong>Web</strong> directory, <strong>and</strong> test it in your<strong>Web</strong> browser B.B By making use of <strong>PHP</strong>’s constants, you canlearn more about your <strong>PHP</strong> setup.If possible, run this script on another<strong>PHP</strong>-enabled server C.The operating system called Darwin Bis the technical term <strong>for</strong> Mac OS X.In Chapter 12, “Cookies <strong>and</strong> Sessions,”you’ll learn about another constant, SID(which st<strong>and</strong>s <strong>for</strong> session ID).C Running the same script (refer toScript 1.9) on different servers garnersdifferent results.28 Chapter 1
Single vs. DoubleQuotation MarksIn <strong>PHP</strong> it’s important to underst<strong>and</strong> howsingle quotation marks differ from doublequotation marks. With echo <strong>and</strong> print, orwhen assigning values to strings, you canuse either, as in the examples used so far.But there is a key difference between thetwo types of quotation marks <strong>and</strong> whenyou should use which. You’ve seen thisdifference already, but it’s an importantenough concept to merit more discussion.In <strong>PHP</strong>, values enclosed within singlequotation marks will be treated literally,whereas those within double quotationmarks will be interpreted. In other words,placing variables <strong>and</strong> special characters(Table 1.2) within double quotes will resultin their represented values printed, nottheir literal values. For example, assumethat you have$var = 'test';The code echo "var is equal to $var";will print out var is equal to test, but thecode echo 'var is equal to $var'; willprint out var is equal to $var. Using anescaped dollar sign, the code echo "\$varis equal to $var"; will print out $varis equal to test, whereas the code echo'\$var is equal to $var'; will print out\$var is equal to $var A.As these examples should illustrate,double quotation marks will replace avariable’s name ($var) with its value (test)<strong>and</strong> a special character’s code (\$) withits represented value ($). Single quoteswill always display exactly what you type,except <strong>for</strong> the escaped single quote (\')<strong>and</strong> the escaped backslash (\\), which areprinted as a single quotation mark <strong>and</strong> asingle backslash, respectively.As another example of how the twoquotation marks differ, let’s modify thenumbers.php script as an experiment.TABLe 1.2 Escape SequencesCodeMeaning\" Double quotation mark\'Single quotation mark\\ Backslash\n Newline\r Carriage return\t Tab\$ Dollar signA How single <strong>and</strong> double quotation marks affectwhat gets printed by <strong>PHP</strong>.Introduction to <strong>PHP</strong> 29
To use single <strong>and</strong> doublequotation marks:1. Open numbers.php (refer to Script 1.8)in your text editor or IDE.2. Delete the existing echo statement(Script 1.10).3. Print a caption <strong>and</strong> then rewrite theoriginal echo statement using doublequotation marks:echo "Using double quotation➝ marks:";echo "You are purchasing➝ $quantity widget(s) at➝ a cost of \$$price each.➝ With tax, the total comes to➝ \$$total.\n";In the original script, the results wereprinted using single quotation marks<strong>and</strong> concatenation. The same result canbe achieved using double quotationmarks. When using double quotationmarks, the variables can be placedwithin the string.There is one catch, though: trying toprint a dollar amount as $12.34 (where12.34 comes from a variable) wouldsuggest that you would code $$var.That will not work (<strong>for</strong> complicatedreasons). Instead, escape the initialdollar sign, resulting in \$$var, as yousee twice in this code. The first dollarsign will be printed, <strong>and</strong> the secondbecomes the start of the variable name.Script 1.10 This, the final script in the chapter,demonstrates the differences between usingsingle <strong>and</strong> double quotation marks.1 2 3 4 5 Quotation Marks6 7 8 31 32 30 Chapter 1
4. Repeat the echo statements, this timeusing single quotation marks:echo 'Using single quotation➝ marks:';echo 'You are purchasing➝ $quantity widget(s) at➝ a cost of \$$price each.➝ With tax, the total comes to➝ \$$total.\n';This echo statement is used to highlightthe difference between using single ordouble quotation marks. It will not workas desired, <strong>and</strong> the resulting page willshow you exactly what does happeninstead.5. If you want, change the page’s title.6. Save the file as quotes.php, place it inyour <strong>Web</strong> directory, <strong>and</strong> test it in your<strong>Web</strong> browser B.7. View the source of the <strong>Web</strong> page tosee how using the newline character(\n) within each quotation mark typealso differs.You should see that when you placethe newline character within doublequotation marks it creates a newlinein the HTML source. When placedwithin single quotation marks, the literalcharacters \ <strong>and</strong> n are printed instead.Because <strong>PHP</strong> will attempt to findvariables within double quotation marks, usingsingle quotation marks is theoretically faster.If you need to print the value of a variable,though, you must use double quotation marks.As valid HTML often includes a lot ofdouble-quoted attributes, it’s often easiestto use single quotation marks when printingHTML with <strong>PHP</strong>:echo '';If you were to print out this HTML usingdouble quotation marks, you would have toescape all of the double quotation marks inthe string:echo "";In newer versions of <strong>PHP</strong>, you can actuallyuse $$price <strong>and</strong> $$total without precedingthem with a backslash (thanks to someinternal magic). In older versions of <strong>PHP</strong>, youcannot. To guarantee reliable results, regardlessof <strong>PHP</strong> version, I recommend using the\$$var syntax when you need to print a dollarsign immediatelyfollowed by the value of a variable.If you’re still unclear as to the differencebetween the types, use double quotationmarks <strong>and</strong> you’re less likely to have problems.B These results demonstratewhen <strong>and</strong> how you’d use onetype of quotation mark asopposed to the other.Introduction to <strong>PHP</strong> 31
Basic Debugging StepsDebugging is by no means a simpleconcept to grasp, <strong>and</strong> un<strong>for</strong>tunately, it’sone that is only truly mastered by doing.The next 50 pages could be dedicated tothe subject <strong>and</strong> you’d still only be able topick up a fraction of the debugging skillsthat you’ll eventually acquire <strong>and</strong> need.The reason I introduce debugging inthis somewhat harrowing way is that it’simportant not to enter into programmingwith delusions. Sometimes code won’twork as expected, you’ll inevitably createcareless errors, <strong>and</strong> some days you’ll wantto pull your hair out, even when using acomparatively user-friendly language suchas <strong>PHP</strong>. In short, prepare to be perplexed<strong>and</strong> frustrated at times. I’ve been codingin <strong>PHP</strong> since 1999, <strong>and</strong> occasionally I stillget stuck in the programming muck. Butdebugging is a very important skill to have,<strong>and</strong> one that you will eventually pick upout of necessity <strong>and</strong> experience. As youbegin your <strong>PHP</strong> programming adventure, Ican offer the following basic but concretedebugging tips.Note that these are just some generaldebugging techniques, specificallytailored to the beginning <strong>PHP</strong> programmer.Chapter 8, “Error H<strong>and</strong>ling <strong>and</strong>Debugging,” goes into other techniquesin more detail.32 Chapter 1
To debug a pHp script:nnnMake sure you’re always running <strong>PHP</strong>scripts through a URL!This is perhaps the most commonbeginner’s mistake. <strong>PHP</strong> code must berun through the <strong>Web</strong> server application,which means it must be requested viahttp://something. When you see actual<strong>PHP</strong> code instead of the result of thatcode’s execution, most likely you’re notrunning the <strong>PHP</strong> script through a URL.Know what version of <strong>PHP</strong> you’rerunning.Some problems will arise from theversion of <strong>PHP</strong> in use. Be<strong>for</strong>e you everuse any <strong>PHP</strong>-enabled server, run aphpinfo.php script (see Appendix A) orreference the <strong>PHP</strong>_VERSION constant toconfirm the version of <strong>PHP</strong> in use.Make sure display_errors is on.This is a basic <strong>PHP</strong> configuration setting(also discussed in Appendix A). Youcan confirm this setting by executingthe phpinfo( ) function (just use yourbrowser to search <strong>for</strong> display_errorsin the resulting page). For securityreasons, <strong>PHP</strong> may not be set to displaythe errors that occur. If that’s the case,you’ll end up seeing blank pageswhen problems occur. To debug mostproblems, you’ll need to see the errors,so turn this setting on while you’relearning. You’ll find instructions <strong>for</strong>doing so in Appendix A.nnnCheck the HTML source code.Sometimes the problem is hidden inthe HTML source of the page. In fact,sometimes the <strong>PHP</strong> error message canbe hidden there!Trust the error message.Another very common beginner’smistake is to not fully read or trust theerror that <strong>PHP</strong> reports. Although an errormessage can often be cryptic <strong>and</strong> mayseem meaningless, it can’t be ignored.At the very least, <strong>PHP</strong> is normally correctas to the line on which the problem canbe found. And if you need to relay thaterror message to someone else (likewhen you’re asking me <strong>for</strong> help), doinclude the entire error message!Take a break!So many of the programming problemsI’ve encountered over the years, <strong>and</strong> thevast majority of the toughest ones, havebeen solved by stepping away from thecomputer <strong>for</strong> a while. It’s easy to getfrustrated <strong>and</strong> confused, <strong>and</strong> in suchsituations, any further steps you take arelikely to only make matters worse.Introduction to <strong>PHP</strong> 33
Review <strong>and</strong> pursueNew in this edition of the book, eachchapter ends with a “Review <strong>and</strong>Pursue” section. In these sections you’llfind questions regarding the materialjust covered <strong>and</strong> prompts <strong>for</strong> ways toexp<strong>and</strong> your knowledge <strong>and</strong> experienceon your own. If you have any problemswith these sections, either in answeringthe questions or pursuing your ownendeavors, turn to the book’s supporting<strong>for</strong>um (www.LarryUllman.com/<strong>for</strong>ums/).ReviewnnnnnnnnnWhat tags are used to surround<strong>PHP</strong> code?What extension should a <strong>PHP</strong> file have?What does a page’s encoding refer to?What impact does the encoding haveon the page?What <strong>PHP</strong> functions, or languageconstructs, can you use to send data tothe <strong>Web</strong> browser?How does using single versus doublequotation marks differ in creating orprinting strings?What does it mean to escape acharacter in a string?What are the three comment syntaxesin <strong>PHP</strong>? Which one can be used overmultiple lines?What character do all variable namesbegin with? What characters can comenext? What other characters can beused in a variable’s name?Are variable names case-sensitive orcase-insensitive?nnnnWhat is the assignment operator?How do you create a string variable?What is the concatenation operator?What is the concatenation assignmentoperator?How are constants defined <strong>and</strong> used?pursuennnnnnIf you don’t already know—<strong>for</strong> certain—what version of <strong>PHP</strong> you’re running,check now.Look up one of the mentioned stringfunctions in the <strong>PHP</strong> manual. Thencheck out some of the other availablestring functions listed therein.Look up one of the mentioned numberfunctions in the <strong>PHP</strong> manual. Thencheck out some of the other availablenumber functions listed therein.Search the <strong>PHP</strong> manual <strong>for</strong> the$_SERVER variable to see what otherin<strong>for</strong>mation it contains.Create a new script, from scratch,that defines <strong>and</strong> displays the valuesof some string variables. Use doublequotation marks in the echo or printstatement that outputs the values. Foradded complexity include some HTMLin the output. Then rewrite the scriptso that it uses single quotation marks<strong>and</strong> concatenation instead of doublequotation marks.Create a new script, from scratch, thatdefines, manipulates, <strong>and</strong> displays thevalues of some numeric variables.34 Chapter 1
2Programmingwith <strong>PHP</strong>Now that you have the fundamentals ofthe <strong>PHP</strong> scripting language down, it’s timeto build on those basics <strong>and</strong> start trulyprogramming. In this chapter you’ll begincreating more elaborate scripts while stilllearning some of the st<strong>and</strong>ard constructs,functions, <strong>and</strong> syntax of the language.You’ll start by creating an HTML <strong>for</strong>m,<strong>and</strong> then learn how you can use <strong>PHP</strong> toh<strong>and</strong>le the submitted values. From there,the chapter covers conditionals <strong>and</strong> theremaining operators (Chapter 1, “Introductionto <strong>PHP</strong>,” presented the assignment,concatenation, <strong>and</strong> mathematical operators),arrays (another variable type), <strong>and</strong>one last language construct, loops.in This ChapterCreating an HTML Form 36H<strong>and</strong>ling an HTML Form 41Conditionals <strong>and</strong> Operators 45Validating Form Data 49Introducing Arrays 54For <strong>and</strong> While Loops 69Review <strong>and</strong> Pursue 72
Creating anHTML FormH<strong>and</strong>ling an HTML <strong>for</strong>m with <strong>PHP</strong> isperhaps the most important process in anydynamic <strong>Web</strong> site. Two steps are involved:first you create the HTML <strong>for</strong>m itself, <strong>and</strong>then you create the corresponding <strong>PHP</strong>script that will receive <strong>and</strong> process the<strong>for</strong>m data.It is outside the realm of this book to gointo HTML <strong>for</strong>ms in any detail, but I willlead you through one quick example sothat it may be used throughout the chapter.If you’re unfamiliar with the basics of anHTML <strong>for</strong>m, including the various types ofelements, see an HTML resource <strong>for</strong> morein<strong>for</strong>mation.An HTML <strong>for</strong>m is created using the <strong>for</strong>mtags <strong>and</strong> various elements <strong>for</strong> taking input.The <strong>for</strong>m tags look likeIn terms of <strong>PHP</strong>, the most importantattribute of your <strong>for</strong>m tag is action, whichdictates to which page the <strong>for</strong>m data willbe sent. The second attribute—method—has its own issues (see the “Choosing aMethod” sidebar), but post is the valueyou’ll use most frequently.The different inputs—be they text boxes,radio buttons, select menus, check boxes,etc.—are placed within the opening <strong>and</strong>closing <strong>for</strong>m tags. As you’ll see in the nextsection, what kinds of inputs your <strong>for</strong>m hasmakes little difference to the <strong>PHP</strong> scripth<strong>and</strong>ling it. You should, however, payattention to the names you give your <strong>for</strong>minputs, as they’ll be of critical importancewhen it comes to your <strong>PHP</strong> code.Choosing a MethodThe method attribute of a <strong>for</strong>m dictateshow the data is sent to the h<strong>and</strong>lingpage. The two options—get <strong>and</strong> post—refer to the HTTP (HyperText TransferProtocol) method to be used. The GETmethod sends the submitted data to thereceiving page as a series of name-valuepairs appended to the URL. For example,http://www.example.com/script.php?➝ name=Homer&gender=M&age=35The benefit of using the GET methodis that the resulting page can bebookmarked in the user’s <strong>Web</strong> browser(since it’s a complete URL). For thatmatter, you can also click Back in your<strong>Web</strong> browser to return to a GET page,or reload it without problems (none ofwhich is true <strong>for</strong> POST). But there is a limitin how much data can be transmitted viaGET, <strong>and</strong> this method is less secure (sincethe data is visible).Generally speaking, GET is used <strong>for</strong>requesting in<strong>for</strong>mation, like a particularrecord from a database or the results ofa search (searches almost always useGET). The POST method is used whenan action is expected: the updating ofa database record or the sending of anemail. For these reasons I will primarilyuse POST throughout this book, withnoted exceptions.36 Chapter 2
Script 2.1 This simple HTML <strong>for</strong>m will be used <strong>for</strong>several of the examples in this chapter.1 2 3 4 5 Simple HTML Form6 7 label {8 font-weight: bold;9 color: #300ACC;10 }11 12 13 14 1516 1718 Enter yourin<strong>for</strong>mation in the <strong>for</strong>m below:1920 Name: 2122 Email Address: 2324 Gender: Male Female2526 Age:27 28 Under 3029 Between 30<strong>and</strong> 60code continues on next pageTo create an HTML <strong>for</strong>m:1. Begin a new HTML document inyour text editor or IDE, to be named<strong>for</strong>m.html (Script 2.1):Simple HTML Formlabel {font-weight: bold;color: #300ACC;}The document uses the same basicsyntax <strong>for</strong> an HTML page as in theprevious chapter. I have added someinline CSS (Cascading Style Sheets)in order to style the <strong>for</strong>m slightly(specifically, making label elementsbold <strong>and</strong> blue).CSS is the preferred way to h<strong>and</strong>lemany <strong>for</strong>matting <strong>and</strong> layout issues in anHTML page. You’ll see a little bit of CSShere <strong>and</strong> there in this book; if you’re notfamiliar with the subject, check out adedicated CSS reference.Finally, an HTML comment indicates thefile’s name <strong>and</strong> number.continues on next pageProgramming with <strong>PHP</strong> 37
2. Add the initial <strong>for</strong>m tag:Since the action attribute dictatesto which script the <strong>for</strong>m data will go,you should give it an appropriatename (h<strong>and</strong>le_<strong>for</strong>m to correspondwith this page: <strong>for</strong>m.html) <strong>and</strong> the.php extension (since a <strong>PHP</strong> scriptwill h<strong>and</strong>le this <strong>for</strong>m’s data).3. Begin the HTML <strong>for</strong>m:Enter your➝ in<strong>for</strong>mation in the <strong>for</strong>m below:➝ I’m using the fieldset <strong>and</strong> legendHTML tags because I like the way theymake the HTML <strong>for</strong>m look (they add abox around the <strong>for</strong>m with a title at thetop). This isn’t pertinent to the <strong>for</strong>mitself, though.4. Add two text inputs:Name: Email Address: ➝ These are just simple text inputs,allowing the user to enter their name<strong>and</strong> email address A. In case youare wondering, the extra space <strong>and</strong>slash at the end of each input’s tag arerequired <strong>for</strong> valid XHTML. With st<strong>and</strong>ardHTML, these tags would conclude withmaxlength="40"> instead. The labeltags just tie each textual label to theassociated element.Script 2.1 continued30 Over 6031 3233 Comments: 3435 3637 3839 4041 42 A Two text inputs.38 Chapter 2
B If multiple radio buttonshave the same name value,only one can be selectedby the user.C The pull-down menuoffers three options, ofwhich only one can beselected (in this example).D The textarea <strong>for</strong>m element type allows <strong>for</strong> lots<strong>and</strong> lots of text.5. Add a pair of radio buttons:Gender:➝ Male➝ FemaleThe radio buttons B both have thesame name, meaning that only one ofthe two can be selected. They havedifferent values, though.6. Add a pull-down menu:Age:Under 30➝ Between➝ 30 <strong>and</strong> 60Over 60➝ The select tag starts the pull-downmenu, <strong>and</strong> then each option tagwill create another line in the list ofchoices C.7. Add a text box <strong>for</strong> comments:Comments: Textareas are different from text inputs;they are presented as a box D, not asa single line. They allow <strong>for</strong> much morein<strong>for</strong>mation to be typed <strong>and</strong> are useful<strong>for</strong> taking user comments.continues on next pageProgramming with <strong>PHP</strong> 39
8. Complete the <strong>for</strong>m:The first tag closes the fieldset thatwas opened in Step 3. Then a submitbutton is created <strong>and</strong> centered usinga p tag. Finally, the <strong>for</strong>m is closed.9. Complete the HTML page:10. Save the file as <strong>for</strong>m.html, place it inyour <strong>Web</strong> directory, <strong>and</strong> view it in your<strong>Web</strong> browser E.E The complete <strong>for</strong>m, which requests some basicin<strong>for</strong>mation from the user.Since this page contains just HTML, ituses an .html extension. It could instead usea .php extension without harm (since codeoutside of the <strong>PHP</strong> tags is treated as HTML).You can specify the encoding to acceptin an HTML <strong>for</strong>m tag, too:By default, a <strong>Web</strong> page will use the sameencoding as the page itself <strong>for</strong> any submitteddata.40 Chapter 2
H<strong>and</strong>ling anHTML FormNow that the HTML <strong>for</strong>m has been created,it’s time to write a bare-bones <strong>PHP</strong> scriptto h<strong>and</strong>le it. To say that this script will beh<strong>and</strong>ling the <strong>for</strong>m means that the <strong>PHP</strong>page will do something with the datait receives (which is the data the userentered into the <strong>for</strong>m). In this chapter, thescripts will simply print the data back tothe <strong>Web</strong> browser. In later examples, <strong>for</strong>mdata will be stored in a <strong>MySQL</strong> database,compared against previously storedvalues, sent in emails, <strong>and</strong> more.The beauty of <strong>PHP</strong>—<strong>and</strong> what makes itso easy to learn <strong>and</strong> use—is how well itinteracts with HTML <strong>for</strong>ms. <strong>PHP</strong> scriptsstore the received in<strong>for</strong>mation in specialvariables. For example, say you have a<strong>for</strong>m with an input defined like so:Whatever the user types into that input willbe accessible via a <strong>PHP</strong> variable named$_REQUEST['city']. It is very importantthat the spelling <strong>and</strong> capitalizationmatch exactly! <strong>PHP</strong> is case-sensitivewhen it comes to variable names, so$_REQUEST['city'] will work, but $_Request['city'] <strong>and</strong> $_REQUEST['City']will have no value.This next example will be a <strong>PHP</strong> scriptthat h<strong>and</strong>les the already-created HTML<strong>for</strong>m (Script 2.1). This script will assignthe <strong>for</strong>m data to new variables (to beused as shorth<strong>and</strong>, just like in Script 1.5,predefined.php). The script will then printthe received values.Programming with <strong>PHP</strong> 41
To h<strong>and</strong>le an HTML <strong>for</strong>m:1. Begin a new <strong>PHP</strong> document in yourtext editor or IDE, to be namedh<strong>and</strong>le_<strong>for</strong>m.php starting with theHTML (Script 2.2):Form Feedback2. Add the opening <strong>PHP</strong> tag <strong>and</strong> createa shorth<strong>and</strong> version of the <strong>for</strong>m datavariables:3 4 5 Form Feedback6 7 8 26 27 TABLe 2.1 Form Elements to <strong>PHP</strong> VariablesElement NamenameemailcommentsagegendersubmitVariable Name$_REQUEST['name']$_REQUEST['email']$_REQUEST['comments']$_REQUEST['age']$_REQUEST['gender']$_REQUEST['submit']42 Chapter 2
A To test h<strong>and</strong>le_<strong>for</strong>m.php, you must load the<strong>for</strong>m through a URL, then fill it out <strong>and</strong> submit it.B The script should display results like this.At this point, you won’t make use of theage, gender, <strong>and</strong> submit <strong>for</strong>m elements.3. Print out the received name, email, <strong>and</strong>comments values:echo "Thank you, $name,➝ <strong>for</strong> the following comments:$commentsWe will reply to you at➝ $email.\n";The submitted values are simply printedout using the echo statement, doublequotation marks, <strong>and</strong> a wee bit of HTML<strong>for</strong>matting.4. Complete the page:?>5. Save the file as h<strong>and</strong>le_<strong>for</strong>m.php <strong>and</strong>place it in the same <strong>Web</strong> directory as<strong>for</strong>m.html.6. Test both documents in your <strong>Web</strong>browser by loading <strong>for</strong>m.html througha URL (http://something) <strong>and</strong> then fillingout A <strong>and</strong> submitting the <strong>for</strong>m B.Because the <strong>PHP</strong> script must be runthrough a URL (see Chapter 1), the<strong>for</strong>m must also be run through a URL.Otherwise, when you go to submit the<strong>for</strong>m, you’ll see <strong>PHP</strong> code C insteadof the proper result B.C If you see the <strong>PHP</strong> code after submitting the<strong>for</strong>m, the problem is likely that you did not accessthe <strong>for</strong>m through a URL.Programming with <strong>PHP</strong> 43
$_REQUEST is a special variable type,known as a superglobal. It stores all of thedata sent to a <strong>PHP</strong> page through eitherthe GET or POST method, as well as dataaccessible in cookies. Superglobals will bediscussed later in the chapter.If you have any problems with this script,apply the debugging techniques suggested inChapter 1. If you still can’t solve the problem,check out the extended debugging techniqueslisted in Chapter 8, “Error H<strong>and</strong>ling <strong>and</strong>Debugging.” If you’re still stymied, turn tothe book’s supporting <strong>for</strong>um <strong>for</strong> assistance(www.LarryUllman.com/<strong>for</strong>ums/).If the <strong>PHP</strong> script shows blank spaceswhere a variable’s value should have beenprinted, it means that the variable has novalue. The two most likely causes are: youfailed to enter a value in the <strong>for</strong>m; or you misspelledor mis-capitalized the variable’s name.If you see any Undefined variable: variablenameerrors, this is because the variablesyou refer to have no value <strong>and</strong> <strong>PHP</strong> is seton the highest level of error reporting. Theprevious tip provides suggestions as to whya variable wouldn’t have a value. Chapter 8discusses error reporting in detail.To see how <strong>PHP</strong> h<strong>and</strong>les the different <strong>for</strong>minput types, print out the $_REQUEST['age']<strong>and</strong> $_REQUEST['gender'] values D.D The values of gender <strong>and</strong> age correspond tothose defined in the <strong>for</strong>m’s HTML.Magic QuotesEarlier versions of <strong>PHP</strong> had a featurecalled Magic Quotes, which has sincebeen deprecated <strong>and</strong> will eventually beremoved entirely. Magic Quotes—whenenabled—automatically escapes single<strong>and</strong> double quotation marks found insubmitted <strong>for</strong>m data (there were actuallythree kinds of Magic Quotes, but thisone kind is most important here). As anexample, Magic Quotes would turn thestring I’m going out into I\’m going out.The escaping of potentially problematiccharacters can be useful <strong>and</strong> even necessaryin some situations. But if MagicQuotes are enabled on your <strong>PHP</strong> installation,you’ll see these backslashes whenthe <strong>PHP</strong> script prints out the <strong>for</strong>m data.You can undo the effect of Magic Quotesusing the stripslashes( ) function:$var = stripslashes($var);This function will remove any backslashesfound in $var. This will have the result ofturning an escaped submitted string backto its original, non-escaped value.To use this in h<strong>and</strong>le_<strong>for</strong>m.php(Script 2.2), you would write:$name = stripslashes($_REQUEST➝ ['name']);If you’re not seeing backslashes addedto your <strong>for</strong>m data, then you don’t need toworry about Magic Quotes.44 Chapter 2
Conditionals <strong>and</strong>operators<strong>PHP</strong>’s three primary terms <strong>for</strong> creatingconditionals are if, else, <strong>and</strong> elseif (whichcan also be written as two words, else if).Every conditional begins with an if clause:if (condition) {// Do something!}An if can also have an else clause:if (condition) {// Do something!} else {// Do something else!}TABLe 2.2 Comparative <strong>and</strong> Logical OperatorsSymbol Meaning Type Example= = is equal to comparison $x = = $y!= is notequal tocomparison $x != $y< less than comparison $x < $y> greaterthan< = less thanor equal to> = greaterthan orequal tocomparison $x > $ycomparison $x = $y! not logical !$x&& <strong>and</strong> logical $x && $yAND <strong>and</strong> logical $x <strong>and</strong> $y|| or logical $x || $yOR or logical $x or $yXOR <strong>and</strong> not logical $x XOR $yAn elseif clause allows you to add moreconditions:if (condition1) {// Do something!} elseif (condition2) {// Do something else!} else {// Do something different!}If a condition is true, the code in thefollowing curly braces ({}) will beexecuted. If not, <strong>PHP</strong> will continue on.If there is a second condition (after anelseif), that will be checked <strong>for</strong> truth.The process will continue—you can useas many elseif clauses as you want—until <strong>PHP</strong> hits an else, which will beautomatically executed at that point, oruntil the conditional terminates without anelse. For this reason, it’s important that theelse always come last <strong>and</strong> be treated asthe default action unless specific criteria—the conditions—are met.A condition can be true in <strong>PHP</strong> <strong>for</strong> anynumber of reasons. To start, these aretrue conditions:n $var, if $var has a value other than 0,an empty string, FALSE, or NULLnnisset($var), if $var has any valueother than NULL, including 0, FALSE,or an empty stringTRUE, true, True, etc.In the second example, a new function,isset( ), is introduced. This functionchecks if a variable is “set,” meaning thatit has a value other than NULL (as areminder, NULL is a special type in <strong>PHP</strong>,representing no set value). You can alsouse the comparative <strong>and</strong> logical operators(Table 2.2) in conjunction with parenthesesto make more complicated expressions.Programming with <strong>PHP</strong> 45
To use conditionals:1. Open h<strong>and</strong>le_<strong>for</strong>m.php (refer toScript 2.2) in your text editor or IDE,if it is not already.2. Be<strong>for</strong>e the echo statement, add a conditionalthat creates a $gender variable(Script 2.3):if (isset($_REQUEST['gender'])) {$gender = $_REQUEST['gender'];} else {$gender = NULL;}This is a simple <strong>and</strong> effective way tovalidate a <strong>for</strong>m input (particularly a radiobutton, check box, or select). If the userchecks either gender radio button,then $_REQUEST['gender'] will havea value, meaning that the conditionisset($_REQUEST['gender']) is true.In such a case, the shorth<strong>and</strong> versionof this variable—$gender—is assignedthe value of $_REQUEST['gender'],repeating the technique used with$name, $email, <strong>and</strong> $comments. If theuser does not click one of the radiobuttons, then this condition is not true,<strong>and</strong> $gender is assigned the value ofNULL, indicating that it has no value.Notice that NULL is not in quotes.Script 2.3 In this remade version of h<strong>and</strong>le_<strong>for</strong>m.php, two conditionals are used to validate thegender radio buttons.1 2 3 4 5 Form Feedback6 7 8 37 38 46 Chapter 2
A The gender-based conditional prints a differentmessage <strong>for</strong> each choice in the <strong>for</strong>m.B The same script will produce different salutations(compare with A ) when the gender value changes.C If no gender was selected, a message isprinted indicating the oversight to the user.3. After the echo statement, add anotherconditional that prints a message basedupon $gender’s value:if ($gender = = 'M') {echo 'Good day, Sir!➝ ';} elseif ($gender = = 'F') {echo 'Good day, Madam!➝ ';} else {echo 'You <strong>for</strong>got to enter➝ your gender!';}This if-elseif-else conditional looksat the value of the $gender variable<strong>and</strong> prints a different message <strong>for</strong>each possibility. It’s very important toremember that the double equals sign(= =) means equals, whereas a singleequals sign (=) assigns a value. Thedistinction is important because thecondition $gender = = 'M' may or maynot be true, but $gender = 'M' willalways be true.Also, the values used here—M <strong>and</strong>F—must be exactly the same as thosein the HTML <strong>for</strong>m (the values <strong>for</strong>each radio button). Equality is a casesensitivecomparison with strings,so m will not equal M.4. Save the file, place it in your <strong>Web</strong> directory,<strong>and</strong> test it in your <strong>Web</strong> browser A,B, <strong>and</strong> C.Programming with <strong>PHP</strong> 47
Although <strong>PHP</strong> has no strict <strong>for</strong>mattingrules, it’s st<strong>and</strong>ard procedure <strong>and</strong> goodprogramming <strong>for</strong>m to make it clear when oneblock of code is a subset of a conditional.Indenting the block is the norm.You can—<strong>and</strong> frequently will—nestconditionals (place one inside another).The first conditional in this script (theisset( )) is a perfect example of how to usea default value. The assumption (the else) isthat $gender has a NULL value unless the onecondition is met: that $_REQUEST['gender']is set.The curly braces used to indicate thebeginning <strong>and</strong> end of a conditional are notrequired if you are executing only one statement.I would recommend that you almostalways use them, though, as a matter ofclarity.Both <strong>and</strong> <strong>and</strong> or have two representativeoperators, with slight, technical differencesbetween them. For no particular reason, I tendto use && <strong>and</strong> || instead of AND <strong>and</strong> OR.XOR is called the exclusive or operator.The conditional $x XOR $y is true if $x is trueor if $y is true, but not both.Switch<strong>PHP</strong> has another type of conditional,called the switch, best used in place ofa long if-elseif-else conditional. Thesyntax of switch isswitch ($variable) {case 'value1':// Do this.break;case 'value2':// Do this instead.break;default:// Do this then.break;}The switch conditional compares thevalue of $variable to the differentcases. When it finds a match, the followingcode is executed, up until the break.If no match is found, the default is executed,assuming it exists (it’s optional).The switch conditional is limited in itsusage in that it can only check a variable’svalue <strong>for</strong> equality against certaincases; more complex conditions cannotbe easily checked.48 Chapter 2
Validating Form DataA critical concept related to h<strong>and</strong>lingHTML <strong>for</strong>ms is that of validating <strong>for</strong>m data.In terms of both error management <strong>and</strong>security, you should absolutely never trustthe data being submitted by an HTML <strong>for</strong>m.Whether erroneous data is purposefullymalicious or just unintentionally inappropriate,it’s up to you—the <strong>Web</strong> architect—to test it against expectations.Validating <strong>for</strong>m data requires the use ofconditionals <strong>and</strong> any number of functions,operators, <strong>and</strong> expressions. One st<strong>and</strong>ardfunction to be used is isset( ), which testsif a variable has a value (including 0, FALSE,or an empty string, but not NULL). You sawan example of this in the preceding script.One issue with the isset( ) function is thatan empty string tests as true, meaning thatisset( ) is not an effective way to validatetext inputs <strong>and</strong> text boxes from an HTML <strong>for</strong>m.To check that a user typed something intotextual elements, you can use the empty( )function. It checks if a variable has an emptyvalue: an empty string, 0, NULL, or FALSE.The first aim of <strong>for</strong>m validation is seeing ifsomething was entered or selected in <strong>for</strong>melements. The second goal is to ensure thatsubmitted data is of the right type (numeric,string, etc.), of the right <strong>for</strong>mat (like an emailaddress), or a specific acceptable value (like$gender being equal to either M or F ).As h<strong>and</strong>ling <strong>for</strong>ms is a main use of <strong>PHP</strong>,validating <strong>for</strong>m data is a point that will bere-emphasized time <strong>and</strong> again in subsequentchapters. But first, let’s create a new h<strong>and</strong>le_<strong>for</strong>m.php to make sure variables have valuesbe<strong>for</strong>e they’re referenced (there will beenough changes in this version that simplyupdating Script 2.3 doesn’t make sense).To validate your <strong>for</strong>ms:1. Begin a new <strong>PHP</strong> script in yourtext editor or IDE, to be namedh<strong>and</strong>le_<strong>for</strong>m.php starting withthe initial HTML (Script 2.4):continues on page 50Script 2.4 Validating HTML <strong>for</strong>m data be<strong>for</strong>e you use it is critical to <strong>Web</strong> security <strong>and</strong> achieving professionalresults. Here, conditionals check that every referenced <strong>for</strong>m element has a value.1 2 3 4 5 Form Feedback6 7 .error {8 font-weight: bold;9 color: #C00;10 }11 12 13 14
Script 2.4 continued16 // Validate the name:17 if (!empty($_REQUEST['name'])) {18 $name = $_REQUEST['name'];19 } else {20 $name = NULL;21 echo 'You <strong>for</strong>got to enter your name!';22 }2324 // Validate the email:25 if (!empty($_REQUEST['email'])) {26 $email = $_REQUEST['email'];27 } else {28 $email = NULL;29 echo 'You <strong>for</strong>got to enter your email address!';30 }3132 // Validate the comments:33 if (!empty($_REQUEST['comments'])) {34 $comments = $_REQUEST['comments'];35 } else {36 $comments = NULL;37 echo 'You <strong>for</strong>got to enter your comments!';38 }3940 // Validate the gender:41 if (isset($_REQUEST['gender'])) {4243 $gender = $_REQUEST['gender'];4445 if ($gender = = 'M') {46 echo 'Good day, Sir!';47 } elseif ($gender = = 'F') {48 echo 'Good day, Madam!';49 } else { // Unacceptable value.50 $gender = NULL;51 echo 'Gender should be either "M" or "F"!';52 }5354 } else { // $_REQUEST['gender'] is not set.55 $gender = NULL;56 echo 'You <strong>for</strong>got to select your gender!';57 }5859 // If everything is OK, print the message:60 if ($name && $email && $gender && $comments) {6162 echo "Thank you, $name, <strong>for</strong> the following comments:63 $comments64 We will reply to you at $email.\n";6566 } else { // Missing <strong>for</strong>m value.67 echo 'Please go back <strong>and</strong> fill out the <strong>for</strong>m again.';68 }6970 ?>71 72 50 Chapter 2
Form Feedback2. Within the HTML head, add someCSS code:.error {font-weight: bold;color: #C00;}This code defines one CSS class, callederror. Any HTML element that has thisclass name will be <strong>for</strong>matted in a bold,red color (which will be more apparentin your <strong>Web</strong> browser than in this black<strong>and</strong>-whitebook).3. In <strong>PHP</strong> block, check if the name wasentered:if (!empty($_REQUEST['name'])) {$name = $_REQUEST['name'];} else {$name = NULL;echo 'You➝ <strong>for</strong>got to enter your name!';}A simple way to check that a <strong>for</strong>m textinput was filled out is to use the empty( )function. If $_REQUEST['name'] has avalue other than an empty string, 0,NULL, or FALSE, assume that their namewas entered <strong>and</strong> a shorth<strong>and</strong> variable isassigned that value. If $_REQUEST['name']is empty, the $name variable is set to NULL<strong>and</strong> an error message is printed. Thiserror message uses the CSS class.4. Repeat the same process <strong>for</strong> the emailaddress <strong>and</strong> comments:if (!empty($_REQUEST['email'])) {$email = $_REQUEST['email'];} else {$email = NULL;echo 'You➝ <strong>for</strong>got to enter your email➝ address!';}if (!empty($_REQUEST['comments'])) {$comments = $_REQUEST['comments'];} else {$comments = NULL;echo 'You➝ <strong>for</strong>got to enter your➝ comments!';}Both variables receive the sametreatment as $_REQUEST['name'] inStep 3.5. Begin validating the gender variable:if (isset($_REQUEST['gender'])) {$gender = $_REQUEST['gender'];The validation of the gender is a twostepprocess. First, check if it has avalue or not, using isset( ). This startsthe main if-else conditional, whichotherwise behaves like those <strong>for</strong> thename, email address, <strong>and</strong> comments.continues on next pageProgramming with <strong>PHP</strong> 51
6. Check $gender against specific values:if ($gender = = 'M') {$greeting = 'Good day,➝ Sir!';} elseif ($gender = = 'F') {$greeting = 'Good day,➝ Madam!';} else {$gender = NULL;echo 'Gender➝ should be either "M" or➝ "F"!';}Within the gender if clause is a nestedif-elseif-else conditional that teststhe variable’s value against what’sacceptable. This is the second part ofthe two-step gender validation.The conditions themselves are thesame as those in the last script. Ifgender does not end up being equalto either M or F, a problem occurred<strong>and</strong> an error message is printed. The$gender variable is also set to NULLin such cases, because it has anunacceptable value.If $gender does have a valid value, agender-specific message is assigned toa new variable, so that the message canbe printed later in the script.7. Complete the main gender if-elseconditional:} else {$gender = NULL;echo 'You<strong>for</strong>got to select your➝ gender!';}This else clause applies if $_REQUEST['gender'] is not set. The complete,nested conditionals (see lines 41–57of Script 2.4) successfully checkevery possibility:> $_REQUEST['gender'] is not set> $_REQUEST['gender'] has a valueof M> $_REQUEST['gender'] has a valueof F> $_REQUEST['gender'] has someother valueYou may wonder how this last case maybe possible, considering the valuesare set in the HTML <strong>for</strong>m. If a malicioususer creates their own <strong>for</strong>m that getssubmitted to your h<strong>and</strong>le_<strong>for</strong>m.phpscript (which is very easy to do), theycould give $_REQUEST['gender'] anyvalue they want.8. Print messages indicating the validationresults:if ($name && $email && $gender➝ && $comments) {echo "Thank you, $name➝ , <strong>for</strong> the following➝ comments:$commentsWe will reply to you at➝ $email.\n";echo $greeting;} else {echo 'Please➝ go back <strong>and</strong> fill out the <strong>for</strong>m➝ again.';}52 Chapter 2
A The script now checks that every <strong>for</strong>m elementwas filled out (except the age) <strong>and</strong> reports onthose that weren’t.B If even one or two fields wereskipped, the Thank you message isnot printed.The main condition is true if every listedvariable has a true value. Each variablewill have a value if it passed its testbut have a value of NULL if it didn’t. Ifevery variable has a value, the <strong>for</strong>m wascompleted, so the Thank you messagewill be printed, as will the genderspecificgreeting. If any of the variablesare NULL, the second message will beprinted (A <strong>and</strong> B).9. Close the <strong>PHP</strong> section <strong>and</strong> completethe HTML page:?>10. Save the file as h<strong>and</strong>le_<strong>for</strong>m.php, placeit in the same <strong>Web</strong> directory as <strong>for</strong>m.html, <strong>and</strong> test it in your <strong>Web</strong> browser.Fill out the <strong>for</strong>m to different levels ofcompleteness to test the new script C.To test if a submitted value is a number,use the is_numeric( ) function.In Chapter 14, “Perl-Compatible RegularExpressions,” you’ll see how to validate <strong>for</strong>mdata using regular expressions.It’s considered good <strong>for</strong>m (pun intended)to let a user know which fields are requiredwhen they’re filling out the <strong>for</strong>m, <strong>and</strong> whereapplicable, the <strong>for</strong>mat of that field (like a dateor a phone number).C If the <strong>for</strong>m was completed properly, the script behaves as itpreviously had.Programming with <strong>PHP</strong> 53
introducing ArraysChapter 1 introduced two scalar (singlevalued) variable types: strings <strong>and</strong> numbers.Now it’s time to learn about another type,the array. Unlike strings <strong>and</strong> numbers, anarray can hold multiple, separate piecesof in<strong>for</strong>mation. An array is there<strong>for</strong>e likea list of values, each value being a stringor a number or even another array.Arrays are structured as a series of keyvaluepairs, where one pair is an item orelement of that array. For each item in thelist, there is a key (or index) associatedwith it (Table 2.3).<strong>PHP</strong> supports two kinds of arrays: indexed,which use numbers as the keys (as inTable 2.3), <strong>and</strong> associative, which usestrings as keys (Table 2.4). As in mostprogramming languages, with indexedarrays, arrays will begin with the first indexat 0, unless you specify the keys explicitly.An array follows the same naming rulesas any other variable. This means that,offh<strong>and</strong>, you might not be able to tell that$var is an array as opposed to a stringor number. The important syntacticaldifference arises when accessing individualarray elements.To refer to a specific value in an array, startwith the array variable name, followed bythe key within square brackets:$b<strong>and</strong> = $artists[0]; // The Mynabirdsecho $states['MD']; // Maryl<strong>and</strong>You can see that the array keys are usedlike other values in <strong>PHP</strong>: numbers (e.g., 0)are never quoted, whereas strings (MD)must be.TABLe 2.3 Array Example 1: $artistsKeyValue0 The Mynabirds1 Jeremy Messersmith2 The Shins3 Iron <strong>and</strong> Wine4 Alexi MurdochTABLe 2.4 Array Example 2: $statesKeyValueMDMaryl<strong>and</strong>PAPennsylvaniaILIllinoisMOMissouriIAIowa54 Chapter 2
Superglobal Arrays<strong>PHP</strong> includes several predefined arrayscalled the superglobal variables. Theyare: $_GET, $_POST, $_REQUEST, $_SERVER,$_ENV, $_SESSION, <strong>and</strong> $_COOKIE.The $_GET variable is where <strong>PHP</strong> storesall of the values sent to a <strong>PHP</strong> scriptvia the GET method (possibly but notnecessarily from an HTML <strong>for</strong>m). $_POSTstores all of the data sent to a <strong>PHP</strong> scriptfrom an HTML <strong>for</strong>m that uses the POSTmethod. Both of these—along with$_COOKIE—are subsets of $_REQUEST,which you’ve been using.$_SERVER, which was used in Chapter 1,stores in<strong>for</strong>mation about the server <strong>PHP</strong>is running on, as does $_ENV. $_SESSION<strong>and</strong> $_COOKIE will both be discussed inChapter 12, “Cookies <strong>and</strong> Sessions.”One aspect of good security <strong>and</strong> programmingis to be precise when referringto a variable. This means that, althoughyou can use $_REQUEST to access<strong>for</strong>m data submitted through the POSTmethod, $_POST would be more accurate.Because arrays use a different syntax thanother variables, <strong>and</strong> can contain multiplevalues, printing them can be trickier. Thiswill not work A:echo "My list of states: $states";However, printing an individual element’svalue is simple if it uses indexed (numeric)keys:echo "The first artist is➝ $artists[0].";But if the array uses strings <strong>for</strong> the keys,the quotes used to surround the key willmuddle the syntax. The following code willcause a parse error B:echo "IL is $states['IL']."; // BAD!To fix this, wrap the array name <strong>and</strong> key incurly braces when an array uses strings <strong>for</strong>its keys C:echo "IL is {$states['IL']}.";If arrays seem slightly familiar to youalready, that’s because you’ve alreadyworked with two: $_SERVER (in Chapter1) <strong>and</strong> $_REQUEST (in this chapter). Toacquaint you with another array <strong>and</strong> topractice printing array values directly, onefinal, but basic, version of the h<strong>and</strong>le_<strong>for</strong>m.php page will be created usingthe more specific $_POST array (see thesidebar on “Superglobal Arrays”).A Attempting to print an array using only the variable’sname results in the word Array being printed.B Attempting to print an element in an associative array without using curly braces resultsin a parse error.C Attempting to print an element in an associativearray while using curly braces works as desired.Programming with <strong>PHP</strong> 55
To use arrays:1. Begin a new <strong>PHP</strong> script in your text editoror IDE, to be named h<strong>and</strong>le_<strong>for</strong>m.phpstarting with the initial HTML (Script 2.5):Form Feedback3 4 5 Form Feedback6 7 8 19 20 56 Chapter 2
string <strong>for</strong> its key, use the curly braces(as in {$_POST['name']} here) to avoidparse errors.4. Complete the conditional begun inStep 2:} else {echo 'Please go back <strong>and</strong>➝ fill out the <strong>for</strong>m again.';}If any of the three subconditionals inStep 2 is not true (which is to say, if anyof the variables has an empty value),then this else clause applies <strong>and</strong> anerror message is printed D.5. Complete the <strong>PHP</strong> <strong>and</strong> HTML code:?>6. Save the file as h<strong>and</strong>le_<strong>for</strong>m.php,place it in the same <strong>Web</strong> directoryas <strong>for</strong>m.html, <strong>and</strong> test it in your<strong>Web</strong> browser E.Because <strong>PHP</strong> is lax with its variablestructures, an array can even use a combinationof numbers <strong>and</strong> strings as its keys. Theonly important rule is that the keys of an arraymust each be unique.If you find the syntax of accessing superglobalarrays directly to be confusing (e.g.,$_POST['name']), you can continue to use theshorth<strong>and</strong> technique at the top of your scriptsas you have been:$name = $_POST['name'];In this script, you would then need to changethe conditional <strong>and</strong> the echo statement torefer to $name et al.You only need to use the curly bracketsto surround an associated array used withinquotation marks. All of these array referencesare fine:echo $_POST['name'];echo "The first item is $item[0].";$total = number_<strong>for</strong>mat($cart['total']);D If any of the threetested <strong>for</strong>m inputs isempty, this generic errormessage is printed.E The fact that the script now uses the $_POST array has noeffect on the visible result.Programming with <strong>PHP</strong> 57
Creating arraysThe preceding example uses a <strong>PHP</strong>generatedarray, but there will frequentlybe times when you want to create yourown. There are two primary ways to defineyour own array. First, you could add anelement at a time to build one:$b<strong>and</strong>[ ] = 'Jemaine';$b<strong>and</strong>[ ] = 'Bret';$b<strong>and</strong>[ ] = 'Murray';As arrays are indexed starting at 0, $b<strong>and</strong>[0]has a value of Jemaine; $b<strong>and</strong>[1], Bret,<strong>and</strong> $b<strong>and</strong>[2], Murray.Alternatively, you can specify the key whenadding an element. But it’s important tounderst<strong>and</strong> that if you specify a key <strong>and</strong>a value already exists indexed with thatsame key, the new value will overwrite theexisting one:$b<strong>and</strong>['fan'] = 'Mel';$b<strong>and</strong>['fan'] = 'Dave'; // New value$fruit[2] = 'apple';$fruit[2] = 'orange'; // New valueInstead of adding one element at a time,you can use the array( ) function to buildan entire array in one step:$states = array ('IA' => 'Iowa','MD' => 'Maryl<strong>and</strong>');(As <strong>PHP</strong> is generally insensitive to whitespace, you can use this function overmultiple lines <strong>for</strong> added clarity.)The array( ) function can be used whetheror not you explicitly set the key:$artists = array ('Clem Snide',➝'Shins', 'Eels');Or, if you set the first numeric keyvalue, the added values will be keyedincrementally thereafter:$days = array (1 => 'Sun', 'Mon',➝'Tue');echo $days[3]; // TueThe array( ) function is also used toinitialize an array, prior to referencing it:$tv = array( );$tv[ ] = 'Flight of the Conchords';Initializing an array (or any variable) in <strong>PHP</strong>isn’t required, but it makes <strong>for</strong> clearer code<strong>and</strong> can help avoid errors.Finally, if you want to create an array ofsequential numbers, you can use therange( ) function:$ten = range (1, 10);Accessing entire arraysYou’ve already seen how to accessindividual array elements using its keys(e.g., $_POST['email']). This works whenyou know exactly what the keys are or ifyou want to refer to only a single element.To access every array element, use the<strong>for</strong>each loop:<strong>for</strong>each ($array as $value) {// Do something with $value.}The <strong>for</strong>each loop will iterate throughevery element in $array, assigning eachelement’s value to the $value variable. Toaccess both the keys <strong>and</strong> values, use<strong>for</strong>each ($array as $key => $value) {echo "The value at $key is➝ $value.";}58 Chapter 2
(You can use any valid variable name inplace of $key <strong>and</strong> $value, like just $k <strong>and</strong>$v, if you’d prefer.)Using arrays, this next script will demonstratehow easy it is to make a set of <strong>for</strong>m pulldownmenus <strong>for</strong> selecting a date F.F These pull-down menus will be created usingarrays <strong>and</strong> the <strong>for</strong>each loop.Script 2.6 This <strong>for</strong>m uses arrays to dynamicallycreate three pull-down menus.1 2 3 4 5 Calendar6 7 8 9 Calendar
2. Create an array <strong>for</strong> the months:$months = array (1 => 'January',➝'February', 'March', 'April',➝'May', 'June', 'July', 'August',➝'September', 'October',➝'November', 'December');This first array will use numbers <strong>for</strong> thekeys, from 1 to 12. Since the value ofthe first key is specified, the followingvalues will be indexed incrementally (inother words, the 1 => code creates anarray indexed from 1 to 12, instead offrom 0 to 11).3. Create the arrays <strong>for</strong> the days of themonth <strong>and</strong> the years:$days = range (1, 31);$years = range (2011, 2021);Using the range( ) function, you caneasily make an array of numbers.4. Generate the month pull-down menu:echo '';<strong>for</strong>each ($months as $key =>➝ $value) {echo "➝ $value\n";}echo '';The <strong>for</strong>each loop can quickly generateall of the HTML code <strong>for</strong> the month pulldownmenu. Each execution of the loopwill create a line of code like January G.5. Generate the day <strong>and</strong> year pull-downmenus:echo '';<strong>for</strong>each ($days as $value) {echo "➝ $value\n";}Script 2.6 continued2021 // Make the months pull-down menu:22 echo '';23 <strong>for</strong>each ($months as $key =>$value) {24 echo "$value\n";25 }26 echo '';2728 // Make the days pull-down menu:29 echo '';30 <strong>for</strong>each ($days as $value) {31 echo "$value\n";32 }33 echo '';3435 // Make the years pull-down menu:36 echo '';37 <strong>for</strong>each ($years as $value) {38 echo "$value\n";39 }40 echo '';4142 ?>43 44 45 G Most of the HTML source was generated byjust a few lines of <strong>PHP</strong>.60 Chapter 2
echo '';echo '';<strong>for</strong>each ($years as $value) {echo "➝ $value\n";}echo '';Unlike the month example, both the day<strong>and</strong> year pull-down menus will use thesame data <strong>for</strong> the option’s value <strong>and</strong>label (a number, G). For that reason,there’s no need to also fetch the array’skey with each loop iteration.6. Close the <strong>PHP</strong>, the <strong>for</strong>m tag, <strong>and</strong> theHTML page:?>7. Save the file as calendar.php, place itin your <strong>Web</strong> directory, <strong>and</strong> test it in your<strong>Web</strong> browser.To determine the number of elements inan array, use count( ):$num = count($array);The range( ) function can also create anarray of sequential letters:$alphabet = range ('a', 'z');An array’s key can be multiple-wordedstrings, such as first name or phone number.The is_array( ) function confirms thata variable is of the array type.Multidimensional arraysWhen introducing arrays, I mentioned thatan array’s values could be any combinationof numbers, strings, <strong>and</strong> even other arrays.This last option—an array consisting of otherarrays—creates a multidimensional array.Multidimensional arrays are much morecommon than you might expect but remarkablyeasy to work with. As an example,start with an array of prime numbers:$primes = array(2, 3, 5, 7, …);Then create an array of sphenic numbers(don’t worry: I had no idea what a sphenicnumber was either; I had to look it up):$sphenic = array(30, 42, 66, 70, …);These two arrays could be combined intoone multidimensional array like so:$numbers = array ('Primes' =>➝ $primes, 'Sphenic' => $sphenic);Now, $numbers is a multidimensional array.To access the prime numbers sub-array,refer to $numbers['Primes']. To access theprime number 5, use $numbers['Primes'][2](it’s the third element in the array, but thearray starts indexing at 0). To print outone of these values, surround the wholeconstruct in curly braces:echo "The first sphenic number is➝ {$numbers['Sphenic'][0]}.";Of course, you can also access multidimensionalarrays using the <strong>for</strong>each loop,nesting one inside another if necessary.This next example will do just that.If you see an Invalid argument supplied<strong>for</strong> <strong>for</strong>each( ) error message, that means youare trying to use a <strong>for</strong>each loop on a variablethat is not an array.Programming with <strong>PHP</strong> 61
To use multidimensional arrays:1. Begin a new <strong>PHP</strong> document in your texteditor or IDE, to be named multi.phpbeginning with the initial HTML(Script 2.7):Multidimensional➝ ArraysSome North American States,➝ Provinces, <strong>and</strong> Territories:3 4 5 Multidimensional Arrays6 7 8 Some North American States,Provinces, <strong>and</strong> Territories:9
Script 2.7 continued11 // Create one array:12 $mexico = array(13 'YU' => 'Yucatan',14 'BC' => 'Baja Cali<strong>for</strong>nia',15 'OA' => 'Oaxaca'16 );1718 // Create another array:19 $us = array (20 'MD' => 'Maryl<strong>and</strong>',21 'IL' => 'Illinois',22 'PA' => 'Pennsylvania',23 'IA' => 'Iowa'24 );2526 // Create a third array:27 $canada = array (28 'QC' => 'Quebec',29 'AB' => 'Alberta',30 'NT' => 'Northwest Territories',31 'YT' => 'Yukon',32 'PE' => 'Prince Edward Isl<strong>and</strong>'33 );3435 // Combine the arrays:36 $n_america = array(37 'Mexico' => $mexico,38 'United States' => $us,39 'Canada' => $canada40 );4142 // Loop through the countries:43 <strong>for</strong>each ($n_america as $country =>$list) {4445 // Print a heading:46 echo "$country";4748 // Print each state, province, orterritory:49 <strong>for</strong>each ($list as $k => $v) {50 echo "$k - $v\n";51 }5253 // Close the list:54 echo '';5556 } // End of main FOREACH.5758 ?>59 60 3. Create the second <strong>and</strong> third arrays:$us = array ('MD' => 'Maryl<strong>and</strong>','IL' => 'Illinois','PA' => 'Pennsylvania','IA' => 'Iowa');$canada = array ('QC' => 'Quebec','AB' => 'Alberta','NT' => 'Northwest Territories','YT' => 'Yukon','PE' => 'Prince Edward Isl<strong>and</strong>');4. Combine all of the arrays into one:$n_america = array('Mexico' => $mexico,'United States' => $us,'Canada' => $canada);You don’t have to create threearrays <strong>and</strong> then assign them to afourth in order to make the desiredmultidimensional array, but I think it’seasier to read <strong>and</strong> underst<strong>and</strong> this way(defining a multidimensional array inone step makes <strong>for</strong> some ugly code).The $n_america array now containsthree elements. The key <strong>for</strong> eachelement is a string, which is the country’sname. The value <strong>for</strong> each element is thearray of states, provinces, <strong>and</strong> territoriesfound within that country.5. Begin the primary <strong>for</strong>each loop:<strong>for</strong>each ($n_america as $country➝ => $list) {echo "$country";continues on next pageProgramming with <strong>PHP</strong> 63
Following the syntax outlined earlier,this loop will access every elementof $n_america. This means that thisloop will run three times. Within eachiteration of the loop, the $countryvariable will store the $n_americaarray’s key (Mexico, Canada, or UnitedStates). Also within each iteration ofthe loop, the $list variable will storethe element’s value (the equivalent of$mexico, $us, <strong>and</strong> $canada).To print out the results, the loop beginsby printing the country’s name within H2tags. Because the states <strong>and</strong> so <strong>for</strong>thshould be displayed as an HTML list,the initial unordered list tag () isprinted as well.6. Create a second <strong>for</strong>each loop:<strong>for</strong>each ($list as $k => $v) {echo "$k - $v\n";}This loop will run through each subarray(first $mexico, then $us, <strong>and</strong> then$canada). With each iteration of thisloop, $k will store the abbreviation<strong>and</strong> $v the full name. Both are printedout within HTML list tags. The newlinecharacter is also used, to better <strong>for</strong>matthe HTML source code.7. Complete the outer <strong>for</strong>each loop:echo '';} // End of main FOREACH.After the inner <strong>for</strong>each loop is done,the outer <strong>for</strong>each loop has to close theunordered list begun in Step 5.8. Complete the <strong>PHP</strong> <strong>and</strong> HTML:?>9. Save the file as multi.php, place it inyour <strong>Web</strong> directory, <strong>and</strong> test it in your<strong>Web</strong> browser H.10. If you want, check out the HTML sourcecode to see what <strong>PHP</strong> created.Multidimensional arrays can also comefrom an HTML <strong>for</strong>m. For example, if a <strong>for</strong>mhas a series of checkboxes with the nameinterests[ ] — Music Movies Books—the $_POST variable in the receiving<strong>PHP</strong> page will be multidimensional.$_POST['interests'] will be an array,with $_POST['interests'][0] storing thevalue of the first checked box (e.g., Movies),$_POST['interests'][1] storing the second(Books), etc. Note that only the checked boxeswill get passed to the <strong>PHP</strong> page.You can also end up with a multidimensionalarray if an HTML <strong>for</strong>m’s select menuallows <strong>for</strong> multiple selections:Music➝ Movies➝ Books➝ Napping➝ Again, only the selected values will be passedto the <strong>PHP</strong> page.64 Chapter 2
Arrays <strong>and</strong> StringsBecause arrays <strong>and</strong> strings are socommonly used together, <strong>PHP</strong> has twofunctions <strong>for</strong> converting between them:$array = explode (separator,➝ $string);$string = implode (glue, $array);The key to using <strong>and</strong> underst<strong>and</strong>ingthese two functions is the separator <strong>and</strong>glue relationships. When turning an arrayinto a string, you establish the glue—thecharacters or code that will be insertedbetween the array values in the generatedstring. Conversely, when turning astring into an array, you specify the separator,which is the token that marks whatshould become separate array elements.For example, start with a string:$s1 = 'Mon-Tue-Wed-Thu-Fri';$days_array = explode ('-', $s1);The $days_array variable is now a fiveelementarray, with Mon indexed at 0,Tue indexed at 1, etc.$s2 = implode (', ', $days_array);The $s2 variable is now a commaseparatedlist of days: Mon, Tue, Wed,Thu, Fri.Sorting arraysOne of the many advantages arrayshave over the other variable types is theability to sort them. <strong>PHP</strong> includes severalfunctions you can use <strong>for</strong> sorting arrays,all simple in syntax:$names = array ('Moe', 'Larry',➝'Curly');sort($names);The sorting functions per<strong>for</strong>m three kinds ofsorts. First, you can sort an array by value,discarding the original keys, using sort( ).It’s important to underst<strong>and</strong> that the array’skeys will be reset after the sorting process,so if the key-value relationship is important,you should not use sort( ).Second, you can sort an array by valuewhile maintaining the keys, using asort( ).Third, you can sort an array by key, usingksort( ). Each of these can sort in reverseorder if you change them to rsort( ),arsort( ), <strong>and</strong> krsort( ) respectively.To demonstrate the effect sorting arrayswill have, this next script will create anarray of movie titles <strong>and</strong> ratings (how muchI liked them on a scale of 1 to 10) <strong>and</strong> thendisplay this list in different ways.Programming with <strong>PHP</strong> 65
To sort arrays:1. Begin a new <strong>PHP</strong> document in your texteditor or IDE, to be named sorting.phpstarting with the initial HTML (Script 2.8):Sorting Arrays2. Create an HTML table:RatingTitleTo make the ordered list easier to read,it’ll be printed within an HTML table.The table is begun here.3. Add the opening <strong>PHP</strong> tag <strong>and</strong> createa new array:3 4 5 Sorting Arrays6 7 8 9 10 Rating11 Title12 13
Script 2.8 continued35 <strong>for</strong>each ($movies as $title =>$rating) {36 echo "$rating37 $title\n";38 }3940 // Display the movies sorted byrating:41 arsort($movies);42 echo 'Sorted byrating:';43 <strong>for</strong>each ($movies as $title =>$rating) {44 echo "$rating45 $title\n";46 }4748 ?>49 50 51 This array uses movie titles as the keys<strong>and</strong> their respective ratings as their values.This structure will open up severalpossibilities <strong>for</strong> sorting the whole list.Feel free to change the movie listings<strong>and</strong> rankings as you see fit (just don’tchastise me <strong>for</strong> my taste in films).4. Print out the array as is:echo 'In➝ their original order:➝ ';<strong>for</strong>each ($movies as $title =>➝ $rating) {echo "$rating$title\n";}At this point in the script, the array isin the same order as it was defined.To verify this, print it out. A caption isfirst printed across both table columns.Then, within the <strong>for</strong>each loop, the keyis printed in the first column <strong>and</strong> thevalue in the second. A newline is alsoprinted to improve the readability of theHTML source code.5. Sort the array alphabetically by title <strong>and</strong>print it again:ksort($movies);echo '➝ Sorted by title:';<strong>for</strong>each ($movies as $title =>➝ $rating) {echo "$rating$title\n";}The ksort( ) function will sort anarray by key, in ascending order, whilemaintaining the key-value relationship.The rest of the code is a repetition ofStep 4.continues on next pageProgramming with <strong>PHP</strong> 67
6. Sort the array numerically by descendingrating <strong>and</strong> print again:arsort($movies);echo '➝ Sorted by rating:';<strong>for</strong>each ($movies as $title =>➝ $rating) {echo "$rating$title\n";}To sort by values (the ratings), whilemaintaining the keys, one would usethe asort( ) function. But since thehighest-ranking films should be listedfirst, the order must be reversed,using arsort( ).7. Complete the <strong>PHP</strong>, the table, <strong>and</strong> theHTML:?>8. Save the file as sorting.php, place it inyour <strong>Web</strong> directory, <strong>and</strong> test it in your<strong>Web</strong> browser I.To r<strong>and</strong>omize the order of an array,use shuffle( ).I This page demonstrates different ways arrayscan be sorted.<strong>PHP</strong>’s natsort( ) function can be usedto sort arrays in a more natural order (primarilyh<strong>and</strong>ling numbers in strings better).Multidimensional arrays can be sorted in<strong>PHP</strong> with a little ef<strong>for</strong>t. See the <strong>PHP</strong> manual<strong>for</strong> more in<strong>for</strong>mation on the usort( ) functionor check out my <strong>PHP</strong> 5 Advanced: VisualQuickPro Guide book.68 Chapter 2
A A flowchart representation of how <strong>PHP</strong>h<strong>and</strong>les a while loop.B A flowchart representation of how <strong>PHP</strong> h<strong>and</strong>lesthe more complex <strong>for</strong> loop.For <strong>and</strong> While LoopsThe last language construct to discuss inthis chapter is the loop. You’ve alreadyused one, <strong>for</strong>each, to access everyelement in an array. The other two typesof loops you’ll use are <strong>for</strong> <strong>and</strong> while.The while loop looks like this:while (condition) {// Do something.}As long as the condition part of the loopis true, the loop will be executed. Once itbecomes false, the loop is stopped A. Ifthe condition is never true, the loop willnever be executed. The while loop willmost frequently be used when retrievingresults from a database, as you’ll see inChapter 9, “Using <strong>PHP</strong> with <strong>MySQL</strong>.”The <strong>for</strong> loop has a more complicated syntax:<strong>for</strong> (initial expression; condition;closing expression) {// Do something.}Upon first executing the loop, the initialexpression is run. Then the condition ischecked <strong>and</strong>, if true, the contents of the loopare executed. After execution, the closingexpression is run <strong>and</strong> the condition ischecked again. This process continues untilthe condition is false B. As an example,<strong>for</strong> ($i = 1; $i
The functionality of both loops is similarenough that <strong>for</strong> <strong>and</strong> while can often beused interchangeably. Still, experience willreveal that the <strong>for</strong> loop is a better choice <strong>for</strong>doing something a known number of times,whereas while is used when a condition willbe true an unknown number of times.In this chapter’s last example, the calendarscript created earlier will be rewrittenusing <strong>for</strong> loops in place of two of the<strong>for</strong>each loops.To use loops:1. Open calendar.php (refer to Script 2.6)in your text editor or IDE.2. Delete the creation of the $days <strong>and</strong>$years arrays (lines 18–19).Using loops, the same result of thetwo pull-down menus can be achievedwithout the extra code <strong>and</strong> memoryoverhead involved with creating actualarrays. So these two arrays shouldbe deleted, while still keeping the$months array.3. Rewrite the $days <strong>for</strong>each loop as a<strong>for</strong> loop (Script 2.9):<strong>for</strong> ($day = 1; $day
Script 2.9 continued31 // Make the years pull-down menu:32 echo '';33 <strong>for</strong> ($year = 2011; $year 39 40 41 4. Rewrite the $years <strong>for</strong>each loop as a<strong>for</strong> loop:<strong>for</strong> ($year = 2011; $year
Review <strong>and</strong> pursueIf you have any problems with the reviewquestions or the pursue prompts, turnto the book’s supporting <strong>for</strong>um (www.LarryUllman.com/<strong>for</strong>ums/).Note: Some of these questions <strong>and</strong> promptsrehash in<strong>for</strong>mation covered in Chapter 1, inorder to rein<strong>for</strong>ce some of the most importantpoints.ReviewnnnnnnnnWhat is the significance of a <strong>for</strong>m’smethod attribute? Of its action attribute?Why must an HTML <strong>for</strong>m that getssubmitted to a <strong>PHP</strong> script be loadedthrough a URL? What would happenupon submitting the <strong>for</strong>m if it were notloaded through a URL?What are the differences between usingsingle <strong>and</strong> double quotation marks todelineate strings?What control structures wereintroduced in this chapter?What new variable type was introducedin this chapter?What operator tests <strong>for</strong> equality? Whatis the assignment operator?Why are textual <strong>for</strong>m elementsvalidated using empty( ) but other <strong>for</strong>melements are validated using isset( )?What is the difference between anindexed array <strong>and</strong> an associative array?nnnnnnnWith what value do indexed arraysbegin (by default)? If an indexed arrayhas ten elements in it, what would theexpected index be of the last elementin the array?What are the superglobal arrays? Fromwhere do the following superglobalsget their values?> $_GET> $_POST> $_COOKIE> $_REQUEST> $_SESSION> $_SERVER> $_ENVHow can you print an individualindexed array item? How can you printan individual associative array item?Note: there is more than one answer toboth questions.What does the count( ) function do?What impact does printing \n have onthe <strong>Web</strong> browser?Generally speaking, when would youuse a while loop? When would youuse a <strong>for</strong> loop? When would you usea <strong>for</strong>each loop? What is the syntax ofeach loop type?What is the + + operator? What does it do?72 Chapter 2
pursuennnnWhat version of <strong>PHP</strong> are you using? Ifyou don’t know, find out now!Create a new <strong>for</strong>m that takes someinput from the user (perhaps base it ona <strong>for</strong>m you know you’ll need <strong>for</strong> oneof your projects). Then create the <strong>PHP</strong>script that validates the <strong>for</strong>m data <strong>and</strong>reports upon the results.Rewrite the gender conditional inh<strong>and</strong>le_<strong>for</strong>m.php (Script 2.4) as oneconditional instead of two nested ones.Hint: You’ll need to use theAND operator.Rewrite h<strong>and</strong>le_<strong>for</strong>m.php (Script 2.4) touse $_POST instead of $_REQUEST.n Rewrite h<strong>and</strong>le_<strong>for</strong>m.php (Script 2.4)so that it validates the age element.Hint: Use the $gender validation as atemplate, this time checking against thecorresponding pull-down option values(0-29, 30-60, 60+).nRewrite the echo statement in the finalversion of h<strong>and</strong>le_<strong>for</strong>m.php (Script 2.5)so that it uses single quotation marks<strong>and</strong> concatenation instead of doublequotation marks.nnnnLook up in the <strong>PHP</strong> manual one ofthe array functions introduced in thisbook. Then check out some of theother array-related functions builtinto the language.Create a new array <strong>and</strong> then displayits elements. Sort the array in differentways <strong>and</strong> then display the array’s contentsagain.Create a <strong>for</strong>m that contains a selectmenu or series of check boxes thatallow <strong>for</strong> multiple sections. Then, inthe h<strong>and</strong>ling <strong>PHP</strong> script, display theselected items along with a count ofhow many the user selected.For added complexity, take the suggested<strong>PHP</strong> script you just created(that h<strong>and</strong>les multiple selections), <strong>and</strong>have it display the selections in alphabeticalorder.Programming with <strong>PHP</strong> 73
This page intentionally left blank
3Creating <strong>Dynamic</strong><strong>Web</strong> <strong>Sites</strong>With the fundamentals of <strong>PHP</strong> under yourbelt, it’s time to begin building truly dynamic<strong>Web</strong> sites. <strong>Dynamic</strong> <strong>Web</strong> sites, as opposedto the static ones on which the <strong>Web</strong> wasfirst built, are easier to maintain, are moreresponsive to users, <strong>and</strong> can alter theircontent in response to differing situations.This chapter introduces three new ideas,all commonly used to create more sophisticated<strong>Web</strong> applications (Chapter 11, “<strong>Web</strong>Application Development,” covers anotherh<strong>and</strong>ful of topics along these same lines).The first subject involves using externalfiles. This is an important concept, as morecomplex sites often dem<strong>and</strong> compartmentalizingsome HTML or <strong>PHP</strong> code. Then thechapter returns to the subject of h<strong>and</strong>lingHTML <strong>for</strong>ms. You’ll learn some new variationson this important <strong>and</strong> st<strong>and</strong>ard featureof dynamic <strong>Web</strong> sites. Finally, you’ll learnhow to define <strong>and</strong> use your own functions.in This ChapterIncluding Multiple Files 76H<strong>and</strong>ling HTML Forms, Revisited 85Making Sticky Forms 91Creating Your Own Functions 95Review <strong>and</strong> Pursue 110
includingMultiple FilesTo this point, every script in the book hasconsisted of a single file that contains allof the required HTML <strong>and</strong> <strong>PHP</strong> code. Butas you develop more complex <strong>Web</strong> sites,you’ll see that this approach is not oftenpractical. A better way to create dynamic<strong>Web</strong> applications is to divide your scripts<strong>and</strong> <strong>Web</strong> sites into distinct parts, each partbeing stored in its own file. Frequently, youwill use multiple files to extract the HTMLfrom the <strong>PHP</strong> or to separate out commonlyused processes.<strong>PHP</strong> has four functions <strong>for</strong> incorporatingexternal files: include( ), include_once( ),require( ), <strong>and</strong> require_once( ). To usethem, your <strong>PHP</strong> script would have a line likeinclude_once('filename.php');require('/path/to/filename.html');Using any one of these functions has theend result of taking all the content of theincluded file <strong>and</strong> dropping it in the parentscript (the one calling the function) at thatjuncture. An important consideration withincluded files is that <strong>PHP</strong> will treat theincluded code as HTML (i.e., send it directlyto the browser) unless the file containscode within the <strong>PHP</strong> tags.In terms of functionality, it also doesn’tmatter what extension the included fileuses, be it .php or .html. However, givingthe file a symbolic name <strong>and</strong> extensionhelps to convey its purpose (e.g., anincluded file of HTML might use .inc.html).Also note that you can use either absoluteor relative paths to the included file (seethe sidebar <strong>for</strong> more).Absolute vs. Relative pathsWhen referencing any external item,be it an included file in <strong>PHP</strong>, a CSSdocument in HTML, or an image, youhave the choice of using either anabsolute or a relative path. An absolutepath references a file starting from theroot directory of the computer:include ('C:/php/includes/➝ file.php');include('/usr/xyz/includes/➝ file.php');Assuming file.php exists in the namedlocation, the inclusion will work, nomatter the location of the referencing(parent) file (barring any permissionsissues). The second example, in caseyou’re not familiar with the syntax,would be a Unix (<strong>and</strong> Mac OS X)absolute path. Absolute paths alwaysstart with something like C:/ or /.A relative path uses the referencing(parent) file as the starting point. Tomove up one folder, use two periodstogether. To move into a folder, use itsname followed by a slash. So assumingthe current script is in the www/ex1 folder<strong>and</strong> you want to include something inwww/ex2, the code would be:include('../ex2/file.php');A relative path will remain accurate,even if the site is moved to anotherserver, as long as the files maintaintheir current relationship to each other.76 Chapter 3
The include( ) <strong>and</strong> require( ) functionsare exactly the same when workingproperly but behave differently when theyfail. If an include( ) function doesn’t work(it cannot include the file <strong>for</strong> some reason),a warning will be printed to the <strong>Web</strong>browser A, but the script will continue torun. If require( ) fails, an error is printed<strong>and</strong> the script is halted B.Both functions also have a *_once( )version, which guarantees that the file inquestion is included only once regardless ofhow many times a script may (presumablyinadvertently) attempt to include it.require_once('filename.php');include_once('filename.php');Because require_once( ) <strong>and</strong> include_once( ) require extra work from the <strong>PHP</strong>module (i.e., <strong>PHP</strong> must first check that thefile has not already been included), it’s bestnot to use these two functions unless aredundant include is likely to occur (whichcan happen on complex sites).In this next example, included files willseparate the primary HTML <strong>for</strong>mattingfrom any <strong>PHP</strong> code. Then, the rest of theexamples in this chapter will be able tohave the same appearance—as if they areall part of the same <strong>Web</strong> site—without theneed to rewrite the common HTML everytime. This technique creates a templatesystem, an easy way to make largeapplications consistent <strong>and</strong> manageable.The focus in these examples is on the <strong>PHP</strong>code itself; you should also read the “SiteStructure” sidebar so that you underst<strong>and</strong>the organizational scheme on the server.If you have any questions about the CSS(Cascading Style Sheets) or (X)HTML usedin the example, see a dedicated resourceon those topics.A One failedinclude( ) callgenerates thesetwo error messages(assuming that <strong>PHP</strong>is configured todisplay errors), butthe rest of the pagecontinues to execute.B The failure of a require( ) function call will print an error <strong>and</strong> terminatethe execution of the script. If <strong>PHP</strong> is not configured to display errors, then thescript will terminate without printing the problem first (i.e., it’d be a blank page).Creating <strong>Dynamic</strong> <strong>Web</strong> <strong>Sites</strong> 77
To include multiple files:1. Design an HTML page in your text orWYSIWYG editor (Script 3.1 <strong>and</strong> C).To start creating a template <strong>for</strong> a <strong>Web</strong>site, design the layout like a st<strong>and</strong>ardHTML page, independent of any <strong>PHP</strong>code. For this chapter’s example, I’musing a slightly modified version of the“Plain <strong>and</strong> Simple” template created byChristopher Robinson (www.edg3.co.uk)<strong>and</strong> used with his kind permission.2. Mark where any page-specificcontent goes.Almost every <strong>Web</strong> site has severalcommon elements on each page—header, navigation, advertising, footer,etc.—<strong>and</strong> one or more page-specificsections. In the HTML page (Script 3.1),enclose the section of the layout thatwill change from page to page withinHTML comments to indicate its status.Site StructureWhen you begin using multiple files inyour <strong>Web</strong> applications, the overall sitestructure becomes more important.When laying out your site, there are twoprimary considerations:.Ease of maintenance.SecurityUsing external files <strong>for</strong> holding st<strong>and</strong>ardprocedures (i.e., <strong>PHP</strong> code), CSS,JavaScript, <strong>and</strong> the HTML design willgreatly improve the ease of maintainingyour site because commonly editedcode is placed in one central location.I’ll frequently make an includes ortemplates directory to store these filesapart from the main scripts (the ones thatare accessed directly in the <strong>Web</strong> browser).I recommend using the .inc or .html fileextension <strong>for</strong> documents where securityis not an issue (such as HTML templates)<strong>and</strong> .php <strong>for</strong> files that contain moresensitive data (such as database accessin<strong>for</strong>mation). You can also use both .inc<strong>and</strong> .html or .php so that a file is clearlyindicated as an include of a certain type:db.inc.php or header.inc.html.C The HTML <strong>and</strong>CSS design as itappears in the <strong>Web</strong>browser (withoutusing any <strong>PHP</strong>).78 Chapter 3
Script 3.1 The HTML template <strong>for</strong> this chapter’s <strong>Web</strong> pages. Download the style.css file it uses from thebook’s supporting <strong>Web</strong> site (www.LarryUllman.com).1 2 3 4 Page Title5 6 7 8 9 10 Your <strong>Web</strong>site11 catchy slogan...12 13 14 15 Home Page16 Calculator17 link three18 link four19 link five20 21 22 23 Content Header2425 This is where the page-specific content goes. This section, <strong>and</strong> thecorresponding header, will change from one page to the next.2627 Volutpat at varius sed sollicitudin et, arcu. Vivamus viverra. Nullam turpis.Vestibulum sed etiam. Lorem ipsum sit amet dolore. Nulla facilisi. Sed tortor. Aenean felis.Quisque eros. Cras lobortis commodo metus. Vestibulum vel purus. In eget odio in sapienadipiscing bl<strong>and</strong>it. Quisque augue tortor, facilisis sit amet, aliquam, suscipit vitae, cursussed, arcu lorem ipsum dolor sit amet.2829 3031 32 Copyright © Plain <strong>and</strong> Simple 2007 | Designed byedg3.co.uk | Sponsored by Open Designs | Valid CSS & XHTML33 34 35 Creating <strong>Dynamic</strong> <strong>Web</strong> <strong>Sites</strong> 79
3. Copy everything from the first line ofthe layout’s HTML source to just be<strong>for</strong>ethe page-specific content <strong>and</strong> pasteit in a new document, to be namedheader.html (Script 3.2):Page TitleYour <strong>Web</strong>sitecatchy slogan...➝ Home PageCalculatorlink three➝ link four➝ link five➝ Script 3.2 The initial HTML <strong>for</strong> each <strong>Web</strong> page is stored in a header file.1 2 3 4 5 6 7 8 9 10 Your <strong>Web</strong>site11 catchy slogan...12 13 14 15 Home Page16 Calculator17 link three18 link four19 link five20 21 22 23 80 Chapter 3
This first file will contain the initial HTMLtags (from DOCTYPE through the head<strong>and</strong> into the beginning of the pagebody). It also has the code that makesthe <strong>Web</strong> site name <strong>and</strong> slogan, plus thehorizontal bar of links across the top C.Finally, as each page’s content goeswithin a DIV whose id value is content,this file includes that code as well.4. Change the page’s title line to read:The page title (which appears at thetop of the <strong>Web</strong> browser C) should bechangeable on a page-by-page basis.For that to be possible, this value will bebased upon a <strong>PHP</strong> variable, which willthen be printed out. You’ll see how thisplays out shortly.5. Save the file as header.html.As stated already, included files canuse just about any extension <strong>for</strong> thefilename. This file is called header.html, indicating that it is the template’sheader file <strong>and</strong> that it contains(primarily) HTML.6. Copy everything in the original templatefrom the end of the page-specific contentto the end of the page <strong>and</strong> paste itin a new file, to be named footer.html(Script 3.3):Copyright © Plain <strong>and</strong> Simple➝ 2007 | Designed➝ by edg3.co.uk |➝ Sponsored by Open Designs |➝ Valid ➝ CSS & ➝ XHTMLThe footer file starts by closing thecontent DIV opened in the header file(see Step 3). Then the footer is added,which will be the same <strong>for</strong> every pageon the site, <strong>and</strong> the HTML documentitself is completed.continues on next pageScript 3.3 The concluding HTML <strong>for</strong> each <strong>Web</strong> page is stored in this footer file.1 2 34 5 Copyright © Plain <strong>and</strong> Simple 2007 | Designed by edg3.co.uk | Sponsored by Open Designs | Valid CSS& XHTML6 7 8 Creating <strong>Dynamic</strong> <strong>Web</strong> <strong>Sites</strong> 81
7. Save the file as footer.html.8. Begin a new <strong>PHP</strong> document in your texteditor or IDE, to be named index.php(Script 3.4):Content HeaderThis is where the page-➝ specific content goes. This➝ section, <strong>and</strong> the corresponding➝ header, will change from one➝ page to the next.For most pages, <strong>PHP</strong> will generate thiscontent, instead of having static text.This in<strong>for</strong>mation could be sent to thebrowser using echo, but since there’sno dynamic content here, it’s easier<strong>and</strong> more efficient to exit the <strong>PHP</strong> tagstemporarily. (The script <strong>and</strong> the imageshave a bit of extra Latin than is shownhere, just to fatten up the page.)Script 3.4 This script generates a complete <strong>Web</strong> page by including a template stored in two external files.1 56 Content Header78 This is where the page-specific content goes. This section, <strong>and</strong> thecorresponding header, will change from one page to the next.910 Volutpat at varius sed sollicitudin et, arcu. Vivamus viverra. Nullam turpis.Vestibulum sed etiam. Lorem ipsum sit amet dolore. Nulla facilisi. Sed tortor.Aenean felis. Quisque eros. Cras lobortis commodo metus. Vestibulum vel purus.In eget odio in sapien adipiscing bl<strong>and</strong>it. Quisque augue tortor, facilisis sitamet, aliquam, suscipit vitae, cursus sed, arcu lorem ipsum dolor sit amet.1112 82 Chapter 3
11. Create a final <strong>PHP</strong> section <strong>and</strong> includethe footer file:12. Save the file as index.php, <strong>and</strong> place itin your <strong>Web</strong> directory.13. Create an includes directory inthe same folder as index.php. Thenplace header.html, footer.html, <strong>and</strong>style.css (part of the downloadablecode at www.LarryUllman.com), intothis includes directory.Note: In order to save space, the CSSfile <strong>for</strong> this example (which controlsthe layout) is not included in the book.You can download the file throughthe book’s supporting <strong>Web</strong> site or dowithout it (the template will still work, itjust won’t look as nice).14. Test the template system by goingto the index.php page in your <strong>Web</strong>browser D.The index.php page is the key scriptin the template system. You do notneed to access any of the included filesdirectly, as index.php will take care ofincorporating their contents. As this isa <strong>PHP</strong> page, you still need to access itthrough a URL.continues on next pageD Now the same layout C has been created using external files in <strong>PHP</strong>.Creating <strong>Dynamic</strong> <strong>Web</strong> <strong>Sites</strong> 83
15. If desired, view the HTML source ofthe page E.In the php.ini configuration file, youcan adjust the include_path setting, whichdictates where <strong>PHP</strong> is <strong>and</strong> is not allowed toretrieve included files.As you’ll see in Chapter 9, “Using <strong>PHP</strong>with <strong>MySQL</strong>,” any included file that containssensitive in<strong>for</strong>mation (like database access)should ideally be stored outside of the <strong>Web</strong>directory so it can’t be viewed within a<strong>Web</strong> browser.Since require( ) has more impact ona script when it fails, it’s recommended <strong>for</strong>mission-critical includes (like those that connectto a database). The include( ) functionwould be used <strong>for</strong> less important inclusions.If a block of <strong>PHP</strong> code contains only asingle executable, it’s common to place bothit <strong>and</strong> the <strong>PHP</strong> tags on a single line:Because of the way CSS works, if youdon’t use the CSS file or if the browser doesn’tread the CSS, the generated result is still functional,just not aesthetically as pleasing.E The generated HTML source of the <strong>Web</strong> page should replicate the code in the originaltemplate (refer to Script 3.1).84 Chapter 3
H<strong>and</strong>ling HTMLForms, RevisitedA good portion of Chapter 2, “Programmingwith <strong>PHP</strong>,” involves h<strong>and</strong>ling HTML <strong>for</strong>mswith <strong>PHP</strong> (which makes sense, as a goodportion of <strong>Web</strong> programming with <strong>PHP</strong> isexactly that). All of those examples use twoseparate files: one that displays the <strong>for</strong>m<strong>and</strong> another that receives its submitteddata. While there’s certainly nothing wrongwith this approach, there are advantages toputting the entire process into one script.To have one page both display <strong>and</strong> h<strong>and</strong>lea <strong>for</strong>m, a conditional must check whichaction (display or h<strong>and</strong>le) should be taken:if (/* <strong>for</strong>m has been submitted */) {// H<strong>and</strong>le the <strong>for</strong>m.} else {// Display the <strong>for</strong>m.}The question, then, is how to determine ifthe <strong>for</strong>m has been submitted. The answeris simple, after a bit of explanation.When you have a <strong>for</strong>m that uses the POSTmethod <strong>and</strong> gets submitted back to thesame page, two different types of requestswill be made of that script A. The firstrequest, which loads the <strong>for</strong>m, will be aGET request. This is the st<strong>and</strong>ard requestmade of most <strong>Web</strong> pages. When the <strong>for</strong>mis submitted, a second request of the scriptwill be made, this time a POST request (solong as the <strong>for</strong>m uses the POST method).With this in mind, you can test <strong>for</strong> a <strong>for</strong>m’ssubmission by checking the requestmethod, found in the $_SERVER array:if ($_SERVER['REQUEST_METHOD'] = =➝'POST') {// H<strong>and</strong>le the <strong>for</strong>m.} else {// Display the <strong>for</strong>m.}continues on next pageA The interactions between the user <strong>and</strong> this <strong>PHP</strong> script on the server involves theuser making two requests of this script.Creating <strong>Dynamic</strong> <strong>Web</strong> <strong>Sites</strong> 85
If you want a page to h<strong>and</strong>le a <strong>for</strong>m <strong>and</strong>then display it again (e.g., to add a recordto a database <strong>and</strong> then give an option toadd another), drop the else clause:if ($_SERVER['REQUEST_METHOD'] = =➝'POST') {// H<strong>and</strong>le the <strong>for</strong>m.}// Display the <strong>for</strong>m.Using that code, a script will h<strong>and</strong>le a <strong>for</strong>mif it has been submitted <strong>and</strong> display the<strong>for</strong>m every time the page is loaded.To demonstrate this important technique(of having the same page both display <strong>and</strong>h<strong>and</strong>le a <strong>for</strong>m), let’s create a calculator thatestimates the cost <strong>and</strong> time required to takea car trip, based upon user-entered values B.B The HTML <strong>for</strong>m, completed by the user.To h<strong>and</strong>le HTML <strong>for</strong>ms:1. Begin a new <strong>PHP</strong> document in yourtext editor or IDE, to be namedcalculator.php (Script 3.5):
Script 3.5 The calculator.php script both displays a simple <strong>for</strong>m <strong>and</strong> h<strong>and</strong>les the <strong>for</strong>m data: per<strong>for</strong>mingsome calculations <strong>and</strong> reporting upon the results.1 3132 Trip Cost Calculator33 34 Distance (in miles): 35 Ave. Price Per Gallon: 36 3.0037 3.5038 4.0039 40 Fuel Efficiency: 41 Terrible42 Decent43 Very Good44 Outst<strong>and</strong>ing45 46 47 4849 Creating <strong>Dynamic</strong> <strong>Web</strong> <strong>Sites</strong> 87
3. Validate the <strong>for</strong>m:if (isset($_POST['distance'],➝ $_POST['gallon_price'],➝ $_POST['efficiency']) &&is_numeric($_POST['distance'])➝ && is_numeric($_POST['gallon_➝ price']) && is_numeric($_POST➝ ['efficiency']) ) {The validation here is very simple: itmerely checks that three submittedvariables are set <strong>and</strong> are all numerictypes. You can certainly elaborateon this, perhaps checking that allvalues are positive (in fact, Chapter 13,“Security Methods,” has a variation onthis script that does just that).If the validation passes all of the tests,the calculations will be made; otherwise,the user will be asked to try again.4. Per<strong>for</strong>m the calculations:$gallons = $_POST['distance'] /➝ $_POST['efficiency'];$dollars = $gallons *➝ $_POST['gallon_price'];$hours = $_POST['distance']/65;The first line calculates the number ofgallons of gasoline the trip will take,determined by dividing the distanceby the fuel efficiency. The secondline calculates the cost of the fuel <strong>for</strong>the trip, determined by multiplyingthe number of gallons times theaverage price per gallon. The third linecalculates how long the trip will take,determined by dividing the distance by65 (representing 65 miles per hour).5. Print the results:echo 'Total Estimated CostThe total cost of driving '➝ . $_POST['distance'] . ' miles,➝ averaging ' . $_POST➝ ['efficiency'] . ' miles per➝ gallon, <strong>and</strong> paying an average➝ of $' . $_POST['gallon_price']➝ . ' per gallon, is $' .➝ number_<strong>for</strong>mat ($dollars, 2) .➝'. If you drive at an average➝ of 65 miles per hour, the➝ trip will take approximately➝' . number_<strong>for</strong>mat($hours, 2)➝ . ' hours.';All of the values are printed out, while<strong>for</strong>matting the cost <strong>and</strong> hours with thenumber_<strong>for</strong>mat( ) function. Using theconcatenation operator (the period)allows the <strong>for</strong>matted numeric values tobe appended to the printed message.6. Complete the conditionals <strong>and</strong> closethe <strong>PHP</strong> tag:} else { // Invalid submitted➝ values.echo 'Error!Please enter➝ a valid distance, price➝ per gallon, <strong>and</strong> fuel➝ efficiency.';}} // End of main submission IF.?>88 Chapter 3
The else clause completes the validationconditional (Step 3), printing an error if thethree submitted values aren’t all set <strong>and</strong>numeric C. The final closing curly bracecloses the isset($_SERVER['REQUEST_METHOD'] = = 'POST') conditional. Finally,the <strong>PHP</strong> section is closed so that the <strong>for</strong>mcan be created without using echo (seeStep 7).7. Begin the HTML <strong>for</strong>m:Trip Cost CalculatorDistance (in miles): ➝ The <strong>for</strong>m itself is fairly obvious,containing only one new trick: theaction attribute uses this script’s name,so that the <strong>for</strong>m submits back to thispage instead of to another. The firstelement within the <strong>for</strong>m is a text input,where the user can enter the distanceof the trip.8. Complete the <strong>for</strong>m:Ave. Price Per Gallon: 3.00 3.50 4.00Fuel Efficiency: Terrible➝ Decent➝ Very➝ Good➝ Outst<strong>and</strong>ingcontinues on next pageC If any of the submitted values is not both set <strong>and</strong> numeric, anerror message is displayed.Creating <strong>Dynamic</strong> <strong>Web</strong> <strong>Sites</strong> 89
The <strong>for</strong>m uses radio buttons as a wayto select the average price per gallon(the buttons are wrapped within spantags in order to <strong>for</strong>mat them similarlyto the other <strong>for</strong>m elements). For thefuel efficiency, the user can select froma drop-down menu of four options. Asubmit button completes the <strong>for</strong>m.9. Include the footer file:10. Save the file as calculator.php, placeit in your <strong>Web</strong> directory, <strong>and</strong> test it inyour <strong>Web</strong> browser D.You can also have a <strong>for</strong>m submit backto itself by using no value <strong>for</strong> the actionattribute:By doing so, the <strong>for</strong>m will always submit backto this same page, even if you later change thename of the script.D The page per<strong>for</strong>ms the calculations, reports on the results, <strong>and</strong> then redisplays the <strong>for</strong>m.90 Chapter 3
Making Sticky FormsA sticky <strong>for</strong>m is simply a st<strong>and</strong>ard HTML<strong>for</strong>m that remembers how you filled itout. This is a particularly nice feature <strong>for</strong>end users, especially if you are requiringthem to resubmit a <strong>for</strong>m after filling it outincorrectly in the first place (as in C in theprevious section).To preset what’s entered in a text input,use its value attribute:To have <strong>PHP</strong> preset that value, print theappropriate variable (this assumes that thereferenced variable exists):
To make a sticky <strong>for</strong>m:1. Open calculator.php (refer to Script3.5) in your text editor or IDE, if it isnot already.2. Change the distance input to read(Script 3.6):
3. Change the radio buttons to:/> 3.50 For each button, the comparison value(XXX) gets changed accordingly.continues on next pageScript 3.6 continued2829 // Leave the <strong>PHP</strong> section <strong>and</strong> create the HTML <strong>for</strong>m:30 ?>3132 Trip Cost Calculator33 34 Distance (in miles):
4. Change the select menu options to:>Decent>Outst<strong>and</strong>ingFor each option, within the openingoption tag, the following code is added:Again, just the specific comparisonvalue (XX) must be changed to matcheach option.5. Save the file as calculator.php, placeit in your <strong>Web</strong> directory, <strong>and</strong> test it inyour <strong>Web</strong> browser A <strong>and</strong> B.Because the price per gallon <strong>and</strong> fuelefficiency values are numeric, you can quoteor not quote the comparison values withinthe added conditionals. I choose to quotethem, because they’re technically stringswith numeric values.Because the added <strong>PHP</strong> code in thisexample exists inside of the HTML <strong>for</strong>melement tags, error messages may not beobvious. If problems occur, check the HTMLsource of the page to see if <strong>PHP</strong> errors areprinted within the value attributes <strong>and</strong> thetags themselves.You should always double-quote HTMLattributes, particularly the value attribute ofa text input. If you don’t, multiword values likeElliott Smith will appear as just Elliott in the<strong>Web</strong> browser.Some <strong>Web</strong> browsers will also remembervalues entered into <strong>for</strong>ms <strong>for</strong> you; this isa separate but potentially overlapping issuefrom using <strong>PHP</strong> to accomplish this.A The <strong>for</strong>m nowrecalls the previouslysubmitted values…B …whetheror not the <strong>for</strong>mwas completelyfilled out.94 Chapter 3
Creating Yourown Functions<strong>PHP</strong> has a lot of built-in functions,addressing almost every need you mighthave. More importantly, though, <strong>PHP</strong> hasthe capability <strong>for</strong> you to define <strong>and</strong> useyour own functions <strong>for</strong> whatever purpose.The syntax <strong>for</strong> making your own function isfunction function_name ( ) {// Function code.}The name of your function can be anycombination of letters, numbers, <strong>and</strong> theunderscore, but it must begin with eithera letter or the underscore. You also cannotuse an existing function name <strong>for</strong> yourfunction (print, echo, isset, <strong>and</strong> so on).One perfectly valid function definition isfunction do_nothing( ) {// Do nothing.}In <strong>PHP</strong>, as mentioned in the first chapter,function names are case-insensitive(unlike variable names), so you could callthat function using do_Nothing( ) or DO_NOTHING( ) or Do_Nothing( ), etc., but notdonothing( ) or DoNothing( ).The code within the function can donearly anything, from generating HTMLto per<strong>for</strong>ming calculations to calling otherfunctions.The most common reasons to create yourown functions are:nnnTo associate repeated code with onefunction call.To separate out sensitive orcomplicated processes from othercode.To make common code bits easierto reuse.This chapter runs through a couple ofexamples <strong>and</strong> you’ll see some othersthroughout the rest of the book. For thisfirst example, a function will be definedthat outputs the HTML code <strong>for</strong> generatingtheoretical ads. This function will then becalled twice on the home page A.A The two “ads” are generated by calling the same user-defined function.Creating <strong>Dynamic</strong> <strong>Web</strong> <strong>Sites</strong> 95
To create your own function:1. Open index.php (Script 3.4) in your texteditor or IDE.2. After the opening <strong>PHP</strong> tag, begin defininga new function (Script 3.7):function create_ad( ) {The function to be written here would, intheory, generate the HTML required toadd ads to a <strong>Web</strong> page. The function’sname clearly states its purpose.Although not required, it’s conventionalto place a function definition near thevery top of a script or in a separate file.3. Generate the HTML:echo 'This is an➝ annoying ad! This is an annoying➝ ad! This is an annoying ad! This➝ is an annoying ad!';In a real function, the code would outputactual HTML instead of a paragraphof text. (The actual HTML would beScript 3.7 This version of the home page has a user-defined function that outputs a theoretical ad. The functionis called twice in the script, creating two ads.1 1516 Content Header1718 This is where the page-specific content goes. This section, <strong>and</strong> thecorresponding header, will change from one page to the next.1920 Volutpat at varius sed sollicitudin et, arcu. Vivamus viverra. Nullam turpis.Vestibulum sed etiam. Lorem ipsum sit amet dolore. Nulla facilisi. Sed tortor.Aenean felis. Quisque eros. Cras lobortis commodo metus. Vestibulum vel purus.In eget odio in sapien adipiscing bl<strong>and</strong>it. Quisque augue tortor, facilisis sitamet, aliquam, suscipit vitae, cursus sed, arcu lorem ipsum dolor sit amet.2122 96 Chapter 3
provided by the service you’re using togenerate <strong>and</strong> tracks ads.)4. Close the function definition:} // End of the functiondefinition.It’s helpful to place a comment at theend of a function definition so that youknow where a definition starts <strong>and</strong>stops (it’s helpful on longer functiondefinitions, at least).5. After including the header <strong>and</strong> be<strong>for</strong>eexiting the <strong>PHP</strong> block, call the function:create_ad( );The call to the create_ad( ) functionwill have the end result of inserting thefunction’s output at this point in the script.6. Just be<strong>for</strong>e including the footer, call thefunction again:create_ad( );7. Save the file <strong>and</strong> test it in your <strong>Web</strong>browser A.If you ever see a call to undefinedfunction function_name error, this meansthat you are calling a function that hasn’tbeen defined. This can happen if you misspellthe function’s name (either when defining orcalling it) or if you fail to include the file wherethe function is defined.Because a user-defined function takesup some memory, you should be prudentabout when to use one. As a general rule,functions are best used <strong>for</strong> chunks of codethat may be executed in several places ina script or <strong>Web</strong> site.Creating a function thattakes argumentsJust like <strong>PHP</strong>’s built-in functions, thoseyou write can take arguments (also calledparameters). For example, the strlen( )function takes as an argument the stringwhose character length will be determined.A function can take any number ofarguments, but the order in which you listthem is critical. To allow <strong>for</strong> arguments, addvariables to a function’s definition:function print_hello ($first, $last) {// Function code.}The variable names you use <strong>for</strong> yourarguments are irrelevant to the rest of thescript (more on this in the “Variable Scope”sidebar toward the end of this chapter), buttry to use valid, meaningful names.Once the function is defined, you can thencall it as you would any other function in<strong>PHP</strong>, sending literal values or variablesto it:print_hello ('Jimmy', 'Stewart');$surname = 'Stewart';print_hello ('Jimmy', $surname);As with any function in <strong>PHP</strong>, failure to sendthe right number of arguments results inan error B.To demonstrate this concept, let’s rewritethe calculator <strong>for</strong>m so that a user-definedfunction creates the price-per-gallon radiobuttons. Doing so will help to clean up themessy <strong>for</strong>m code.B Failure to send a function the proper number (<strong>and</strong> sometimes type) of arguments creates an error.Creating <strong>Dynamic</strong> <strong>Web</strong> <strong>Sites</strong> 97
To define functions thattake arguments:1. Open calculator.php (Script 3.6) inyour text editor or IDE.2. After the initial <strong>PHP</strong> tag, start definingthe create_gallon_radio( ) function(Script 3.8):function create_gallon_radio➝ ($value) {The function will create code like this: XXXor: XXXIn order to be able to dynamically setthe value of each radio button, thatvalue must be passed to the functionwith each call. There<strong>for</strong>e, that’s the oneargument the function takes.Notice that the variable used as anargument is not $_POST['gallon_price'].The function’s argument variable isparticular to this function <strong>and</strong> has itsown name.continues on page 100Script 3.8 The calculator.php <strong>for</strong>m now uses a function to create the radio buttons. Unlike the create_ad( )user-defined function, this one takes an argument.1
Script 3.8 continued29 is_numeric($_POST['distance']) && is_numeric($_POST['gallon_price']) &&is_numeric($_POST['efficiency']) ) {3031 // Calculate the results:32 $gallons = $_POST['distance'] / $_POST['efficiency'];33 $dollars = $gallons * $_POST['gallon_price'];34 $hours = $_POST['distance']/65;3536 // Print the results:37 echo 'Total Estimated Cost38 The total cost of driving ' . $_POST['distance'] . ' miles, averaging' . $_POST['efficiency'] . ' miles per gallon, <strong>and</strong> paying an average of $' .$_POST['gallon_price'] . ' per gallon, is $' . number_<strong>for</strong>mat ($dollars, 2) . '.If you drive at an average of 65 miles per hour, the trip will takeapproximately ' . number_<strong>for</strong>mat($hours, 2) . ' hours.';3940 } else { // Invalid submitted values.41 echo 'Error!42 Please enter a valid distance, price per gallon, <strong>and</strong> fuelefficiency.';43 }4445 } // End of main submission IF.4647 // Leave the <strong>PHP</strong> section <strong>and</strong> create the HTML <strong>for</strong>m:48 ?>4950 Trip Cost Calculator51 52 Distance (in miles):
3. Begin creating the radio button element:echo '
Setting default argument valuesAnother variant on defining your ownfunctions is to preset an argument’s value.To do so, assign the argument a value inthe function’s definition:function greet ($name, $msg =➝'Hello') {echo "$msg, $name!";}The end result of setting a defaultargument value is that that particularargument becomes optional when callingthe function. If a value is passed to it,the passed value is used; otherwise, thedefault value is used.You can set default values <strong>for</strong> as many ofthe arguments as you want, as long asthose arguments come last in the functiondefinition. In other words, the requiredarguments must always be listed first.With the example function just defined, anyof these will work:greet ($surname, $message);greet ('Zoe');greet ('Sam', 'Good evening');However, just greet( ) will not work.Also, there’s no way to pass $msg a valuewithout passing one to $name as well(argument values must be passed in order,<strong>and</strong> you can’t skip a required argument).To take advantage of default argumentvalues, let’s make a better version of thecreate_gallon_radio( ) function. Asoriginally written, the function only createsradio buttons with a name of gallon_price.It’d be better if the function could be usedmultiple times in a <strong>for</strong>m, <strong>for</strong> multiple radiobutton groupings (although the functionwon’t be used like that in this script).To set default argument values:1. Open calculator.php (refer to Script3.8) in your text editor or IDE, if it isnot already.2. Change the function definition line(line 6) so that it takes a second,optional argument (Script 3.9):function create_radio($value,➝ $name = 'gallon_price') {continues on page 103Script 3.9 The redefined function now assumes a set radio button name unless one is specified when thefunction is called.1
Script 3.9 continued1516 // Complete the element:17 echo " /> $value ";1819 } // End of create_radio( ) function.2021 $page_title = 'Trip Cost Calculator';22 include ('includes/header.html');2324 // Check <strong>for</strong> <strong>for</strong>m submission:25 if ($_SERVER['REQUEST_METHOD'] = = 'POST') {2627 // Minimal <strong>for</strong>m validation:28 if (isset($_POST['distance'], $_POST['gallon_price'], $_POST['efficiency']) &&29 is_numeric($_POST['distance']) && is_numeric($_POST['gallon_price'])&& is_numeric($_POST['efficiency']) ) {3031 // Calculate the results:32 $gallons = $_POST['distance'] / $_POST['efficiency'];33 $dollars = $gallons * $_POST['gallon_price'];34 $hours = $_POST['distance']/65;3536 // Print the results:37 echo 'Total Estimated Cost38 The total cost of driving ' . $_POST['distance'] . ' miles, averaging ' . $_POST['efficiency'] . ' miles per gallon, <strong>and</strong> paying an average of $' . $_POST['gallon_price']. ' per gallon, is $' . number_<strong>for</strong>mat ($dollars, 2) . '. If you drive at an average of65 miles per hour, the trip will take approximately ' . number_<strong>for</strong>mat($hours, 2) . 'hours.';3940 } else { // Invalid submitted values.41 echo 'Error!42 Please enter a valid distance, price per gallon, <strong>and</strong> fuelefficiency.';43 }4445 } // End of main submission IF.4647 // Leave the <strong>PHP</strong> section <strong>and</strong> create the HTML <strong>for</strong>m:48 ?>4950 Trip Cost Calculator51 52 Distance (in miles):
There are two changes here. First, thename of the function is changed to bereflective of its more generic nature.Second, the function now takes asecond argument, $name, although thatargument has a default value, whichmakes that argument optional when thefunction is called.3. Change the function definition so thatit uses the $name argument in lieu ofgallon_price:echo '
4. Change the function call lines:create_radio('3.00');create_radio('3.50');create_radio('4.00');The function calls must be changedto use the new function name. Butbecause the second argument has adefault value, it can be omitted in thesecalls. The end result is the same asexecuting this call—create_radio('4.00', 'gallon_price');—but now the function could be used tocreate other radio buttons as well.5. Save the file, place it in your <strong>Web</strong> directory,<strong>and</strong> test it in your <strong>Web</strong> browser D.To pass a function no value <strong>for</strong> anargument, use either an empty string (''),NULL, or FALSE.In the <strong>PHP</strong> manual, square brackets( [ ] ) are used to indicate a function’s optionalparameters E.D The addition ofthe second, optionalargument, has notaffected the functionalityof the function.E The <strong>PHP</strong> manual’s descriptionof the number_<strong>for</strong>mat( ) functionshows that only the first argumentis required.104 Chapter 3
Returning values from a functionThe final attribute of a user-definedfunction to discuss is that of returningvalues. Some, but not all, functions do this.For example, print will return either a 1 ora 0 indicating its success, whereas echowill not. As another example, the number_<strong>for</strong>mat( ) function returns a string, which isthe <strong>for</strong>matted version of a number (see Ein the previous section).To have a function return a value, use thereturn statement. This function mightreturn the astrological sign <strong>for</strong> a given birthmonth <strong>and</strong> day:function find_sign ($month, $day) {// Function code.return $sign;}A function can return a literal value (saya string or a number) or the value of avariable that has been determined withinthe function.When calling a function that returns avalue, you can assign the function resultto a variable:$my_sign = find_sign ('October', 23);or use it as an argument when callinganother function:echo find_sign ('October', 23);Let’s update the calculator.php script sothat it uses a function to determine the costof the trip.To have a function return a value:1. Open calculator.php (refer toScript 3.9) in your text editor or IDE,if it is not already.2. After the first function definition, begindefining a second function (Script 3.10):function calculate_trip_cost➝ ($miles, $mpg, $ppg) {The calculate_trip_cost( ) functiontakes three arguments: the distanceto be travelled, the average miles pergallon, <strong>and</strong> the average price per gallon.continues on page 107Script 3.10 Another user-defined function is added to the script. It per<strong>for</strong>ms the main calculation <strong>and</strong> returnsthe result.1
Script 3.10 continued1516 // Complete the element:17 echo " /> $value ";1819 } // End of create_radio( ) function.2021 // This function calculates the cost of the trip.22 // The function takes three arguments: the distance, the fuel efficiency, <strong>and</strong> the priceper gallon.23 // The function returns the total cost.24 function calculate_trip_cost($miles, $mpg, $ppg) {2526 // Get the number of gallons:27 $gallons = $miles/$mpg;2829 // Get the cost of those gallons:30 $dollars = $gallons/$ppg;3132 // Return the <strong>for</strong>matted cost:33 return number_<strong>for</strong>mat($dollars, 2);3435 } // End of calculate_trip_cost( ) function.3637 $page_title = 'Trip Cost Calculator';38 include ('includes/header.html');3940 // Check <strong>for</strong> <strong>for</strong>m submission:41 if ($_SERVER['REQUEST_METHOD'] = = 'POST') {4243 // Minimal <strong>for</strong>m validation:44 if (isset($_POST['distance'], $_POST['gallon_price'], $_POST['efficiency']) &&45 is_numeric($_POST['distance']) && is_numeric($_POST['gallon_price'])&& is_numeric($_POST['efficiency']) ) {4647 // Calculate the results:48 $cost = calculate_trip_cost($_POST['distance'], $_POST['efficiency'],$_POST['gallon_price']);49 $hours = $_POST['distance']/65;5051 // Print the results:52 echo 'Total Estimated Cost53 The total cost of driving ' . $_POST['distance'] . ' miles, averaging ' .$_POST['efficiency'] . ' miles per gallon, <strong>and</strong> paying an average of $' . $_POST['gallon_price'] . ' per gallon, is $' . $cost . '. If you drive at an average of65 miles per hour, the trip will take approximately ' . number_<strong>for</strong>mat($hours, 2). ' hours.';5455 } else { // Invalid submitted values.56 echo 'Error!57 Please enter a valid distance, price per gallon, <strong>and</strong> fuelefficiency.';58 }code continues on next page106 Chapter 3
3. Per<strong>for</strong>m the calculations <strong>and</strong> return the<strong>for</strong>matted cost:$gallons = $miles/$mpg;$dollars = $gallons/$ppg;return number_<strong>for</strong>mat($dollars, 2);} // End of calculate_trip_cost( )➝ function.The first two lines are the samecalculations as the script used be<strong>for</strong>e,but now they use function variables.The last thing the function does isreturn a <strong>for</strong>matted version of thecalculated cost.4. Replace the two lines that calculate thecost (lines 32-33 of Script 3.9) with afunction call:$cost = calculate_trip_cost➝ ($_POST['distance'],➝ $_POST['efficiency'],➝ $_POST['gallon_price']);Invoking the function, while passingit the three required values, will per<strong>for</strong>mthe calculation. Since the functionreturns a value, the results of thefunction call—the returned value—can be assigned to a variable.continues on next pageScript 3.10 continued5960 } // End of main submission IF.6162 // Leave the <strong>PHP</strong> section <strong>and</strong> create the HTML <strong>for</strong>m:63 ?>6465 Trip Cost Calculator66 67 Distance (in miles):
5. Change the echo statement to use thenew variable:echo 'Total Estimated CostThe total cost of driving➝' . $_POST['distance'] .➝' miles, averaging ' .➝ $_POST['efficiency'] . ' miles➝ per gallon, <strong>and</strong> paying an➝ average of $' . $_POST➝ ['gallon_price'] . ' per➝ gallon, is $' . $cost . '.➝ If you drive at an average of➝ 65 miles per hour, the trip➝ will take approximately '➝ . number_<strong>for</strong>mat($hours, 2) . '➝ hours.';The echo statement uses the $costvariable here, instead of $dollars (as inthe previous version of the script). Also,since the $cost variable is <strong>for</strong>mattedwithin the function, the number_<strong>for</strong>mat( )function does not need to be appliedwithin the echo statement to this variable.6. Save the file, place it in your <strong>Web</strong> directory,<strong>and</strong> test it in your <strong>Web</strong> browser F.The return statement terminates thecode execution at that point, so any codewithin a function after an executed returnwill never run.A function can have multiple returnstatements (e.g., in a switch statement orconditional) but only one, at most, will ever beinvoked. For example, functions commonly dosomething like this:function some_function ( ) {if (/* condition */) {return TRUE;} else {return FALSE;}}To have a function return multiple values,use the array( ) function to return an arrayof values:return array ($var1, $var2);When calling a function that returns anarray, use the list( ) function to assign thearray elements to individual variables:list($v1, $v2) = some_function( );F The calculator now uses a user-defined function to calculate <strong>and</strong> return the trip’s cost.But this change has no impact on what the user sees.108 Chapter 3
Variable ScopeEvery variable in <strong>PHP</strong> has a scope to it, which is to say a realm in which the variable (<strong>and</strong>there<strong>for</strong>e its value) can be accessed. For starters, variables have the scope of the page in whichthey reside. If you define $var, the rest of the page can access $var, but other pages generallycannot (unless you use special variables).Since included files act as if they were part of the original (including) script, variables defined be<strong>for</strong>ean include( ) line are available to the included file (as you’ve already seen with $page_title<strong>and</strong> header.html). Further, variables defined within the included file are available to the parent(including) script after the include( ) line.User-defined functions have their own scope: variables defined within a function are notavailable outside of it, <strong>and</strong> variables defined outside of a function are not available within it.For this reason, a variable inside of a function can have the same name as one outside of it butstill be an entirely different variable with a different value. This is a confusing concept <strong>for</strong> manybeginning programmers.To alter the variable scope within a function, you can use the global statement.function function_name( ) {global $var;}$var = 20;function_name( ); // Function call.In this example, $var inside of the function is now the same as $var outside of it. This means thatthe function $var already has a value of 20, <strong>and</strong> if that value changes inside of the function, theexternal $var’s value will also change.Another option <strong>for</strong> circumventing variable scope is to make use of the superglobals: $_GET,$_POST, $_REQUEST, etc. These variables are automatically accessible within your functions(hence, they are superglobal). You can also add elements to the $GLOBALS array to make themavailable within a function.All of that being said, it’s almost always best not to use global variables within a function. Functionsshould be designed so that they receive every value they need as arguments <strong>and</strong> return whatevervalue (or values) need to be returned. Relying upon global variables within a function makes themmore context-dependent, <strong>and</strong> consequently less useful.Creating <strong>Dynamic</strong> <strong>Web</strong> <strong>Sites</strong> 109
Review <strong>and</strong> pursueIf you have any problems with thereview questions or the pursue prompts,turn to the book’s supporting <strong>for</strong>um(www.LarryUllman.com/<strong>for</strong>ums/).nnWhat is the syntax <strong>for</strong> defining afunction that takes arguments withdefault values? How do default valuesimpact how the function can be called?How do you define <strong>and</strong> call a functionthat returns a value?ReviewnnnnnnnnnWhat is an absolute path? What is arelative path?What is the difference betweeninclude( ) <strong>and</strong> require( )?What is the difference betweeninclude( ) <strong>and</strong> include_once( )?Which function should you generallyavoid using <strong>and</strong> why?Why does it not matter what extensionis used <strong>for</strong> an included file?What is the significance of the$_SERVER['REQUEST_METHOD'] value?How do you make the following <strong>for</strong>melements sticky?> Text input> Select menu> Radio button> Check box> TextareaIf you have a <strong>PHP</strong> error caused by codeplaced within an HTML tag, where mustyou look to find the error message?What is the syntax <strong>for</strong> defining yourown function?What is the syntax <strong>for</strong> defining afunction that takes arguments?pursuennnnnnCreate a new HTML template <strong>for</strong> thepages in this chapter. Use that newtemplate as the basis <strong>for</strong> new header<strong>and</strong> footer files. By doing so, you shouldbe able to change the look of the entiresite without modifying any of the<strong>PHP</strong> scripts.Create a new <strong>for</strong>m <strong>and</strong> give it the abilityto be “sticky”. Have the <strong>for</strong>m use a textarea<strong>and</strong> a check box (neither of whichis demonstrated in this chapter).Change calculator.php so that it usesa constant in lieu of the hard-coded averagespeed of 65. (As written, the averagespeed is a “magic number”: a valueused in a script without explanation.)Better yet, modify calculator.php sothat the user can enter the averagespeed or select it from a list of options.Update the output of calculator.phpso that it displays the number of days<strong>and</strong> hours the trip will take, when thenumber of hours is greater than 24.As a more advanced trick, rewritecalculator.php so that the create_radio( ) function call is only in thescript once, but still creates three radiobuttons. Hint: Use a loop.110 Chapter 3
4Introductionto <strong>MySQL</strong>Because this book discusses how to integrateseveral technologies (primarily <strong>PHP</strong>,SQL, <strong>and</strong> <strong>MySQL</strong>), a solid underst<strong>and</strong>ingof each individually is important be<strong>for</strong>eyou begin writing <strong>PHP</strong> scripts that use SQLto interact with <strong>MySQL</strong>. This chapter is adeparture from its predecessors in that ittemporarily leaves <strong>PHP</strong> behind to delveinto <strong>MySQL</strong>.<strong>MySQL</strong> is the world’s most popular opensourcedatabase application (accordingto <strong>MySQL</strong>’s <strong>Web</strong> site, www.mysql.com) <strong>and</strong>is commonly used with <strong>PHP</strong>. The <strong>MySQL</strong>software comes with the database server(which stores the actual data), differentclient applications (<strong>for</strong> interacting with thedatabase server), <strong>and</strong> several utilities. Inthis chapter you’ll see how to define a simpletable using <strong>MySQL</strong>’s allowed data types<strong>and</strong> other properties. Then you’ll learn howto interact with the <strong>MySQL</strong> server usingtwo different client applications. All of thisin<strong>for</strong>mation will be the foundation <strong>for</strong> theSQL taught in the next chapter.in This ChapterNaming Database Elements 112Choosing Your Column Types 114Choosing Other Column Properties 118Accessing <strong>MySQL</strong> 121Review <strong>and</strong> Pursue 128
naming DatabaseelementsBe<strong>for</strong>e you start working with databases,you have to identify your needs. Thepurpose of the application (or <strong>Web</strong> site,in this case) dictates how the databaseshould be designed. With that in mind,the examples in this chapter <strong>and</strong> the nextwill use a database that stores some userregistration in<strong>for</strong>mation.When creating databases <strong>and</strong> tables, youshould come up with names (<strong>for</strong>mally calledidentifiers) that are clear, meaningful, <strong>and</strong>easy to type. Also, identifiersnnnnnShould only contain letters, numbers,<strong>and</strong> the underscore (no spaces)Should not be the same as an existingkeyword (like an SQL term or a functionname)Should be treated as case-sensitiveCannot be longer than 64 characters(approximately)Must be unique within its realmThis last rule means that a table cannothave two columns with the same name <strong>and</strong>a database cannot have two tables withthe same name. You can, however, use thesame column name in two different tablesin the same database (in fact, you often willdo this). As <strong>for</strong> the first three rules, I use theword should, as these are good policiesmore than exact requirements. Exceptionscan be made to these rules, but the syntax<strong>for</strong> doing so can be complicated. Abidingby these suggestions is a reasonablelimitation <strong>and</strong> will help avoid complications.To name a database’s elements:1. Determine the database’s name.This is the easiest <strong>and</strong>, arguably, leastimportant step. Just make sure thatthe database name is unique <strong>for</strong> that<strong>MySQL</strong> server. If you’re using a hostedserver, your <strong>Web</strong> host will likely providea database name that may or may notinclude your account or domain name.For this first example, the database willbe called sitename, as the in<strong>for</strong>mation<strong>and</strong> techniques could apply to anygeneric site.2. Determine the table names.The table names just need to be uniquewithin this database, which shouldn’tbe a problem. For this example, whichstores user registration in<strong>for</strong>mation, theonly table will be called users.112 Chapter 4
TABLe 4.1 users TableColumn NameExampleuser_id 834first_nameLarrylast_nameDavidemailld@example.compassemily07registration_date 2011-03-31 19:21:033. Determine the column names <strong>for</strong>each table.The users table will have columnsto store a user ID, a first name, a lastname, an email address, a password,<strong>and</strong> the registration date. Table 4.1shows these columns, with sample data,using proper identifiers. As <strong>MySQL</strong>has a function called password, I’vechanged the name of that column tojust pass. This isn’t strictly necessarybut is really a good idea.Chapter 6, “Database Design,” discussesdatabase design in more detail, using morecomplex examples.To be precise, the length limit <strong>for</strong> thenames of databases, tables, <strong>and</strong> columns isactually 64 bytes, not characters. While mostcharacters in many languages require 1 byteapiece, it’s possible to use a multi byte characterin an identifier. But 64 bytes is still a lotof space, so this probably won’t be an issue<strong>for</strong> you.Whether or not an identifier in <strong>MySQL</strong>is case-sensitive actually depends upon manythings (because each database is actually afolder on the server <strong>and</strong> each table is actuallyone or more files). On Windows <strong>and</strong> normallyon Mac OS X, database <strong>and</strong> table names aregenerally case-insensitive. On Unix <strong>and</strong> someMac OS X setups, they are case-sensitive.Column names are always case-insensitive.It’s really best, in my opinion, to always useall lowercase letters <strong>and</strong> work as if casesensitivityapplied.Introduction to <strong>MySQL</strong> 113
Choosing YourColumn TypesOnce you have identified all of the tables<strong>and</strong> columns that the database will need,you should determine each column’sdata type. When creating a table, <strong>MySQL</strong>requires that you explicitly state what sortof in<strong>for</strong>mation each column will contain.There are three primary types, which istrue <strong>for</strong> almost every database application:nnnText (aka strings)NumbersDates <strong>and</strong> timesWithin each of these, there are manyvariants—some of which are <strong>MySQL</strong> specific—you can use. Choosing your column typescorrectly not only dictates what in<strong>for</strong>mationcan be stored <strong>and</strong> how but also affects thedatabase’s overall per<strong>for</strong>mance. Table 4.2lists most of the available types <strong>for</strong> <strong>MySQL</strong>,how much space they take up, <strong>and</strong> briefdescriptions of each type. Note that someof these limits may change in differentversions of <strong>MySQL</strong>, <strong>and</strong> the character set(to be discussed in Chapter 6) may alsoimpact the size of the text types.Many of the types can take an optionalLength attribute, limiting their size. (Thesquare brackets, [ ], indicate an optionalparameter to be put in parentheses.) Forper<strong>for</strong>mance purposes, you should placesome restrictions on how much data canbe stored in any column. But underst<strong>and</strong>that attempting to insert a string fivecharacters long into a CHAR(2) columnwill result in truncation of the final threecharacters (only the first two characterswould be stored; the rest would belost <strong>for</strong>ever). This is true <strong>for</strong> any field inwhich the size is set (CHAR, VARCHAR, INT,etc.). Thus, your length should alwayscorrespond to the maximum possible value(as a number) or longest possible string (astext) that might be stored.The various date types have all sorts ofunique behaviors, the most important ofwhich you’ll learn in this book (all of thebehaviors are documented in the <strong>MySQL</strong>manual). You’ll use the DATE <strong>and</strong> TIME fieldsprimarily without modification, so you neednot worry too much about their intricacies.There are also two special types—ENUM<strong>and</strong> SET—that allow you to define a seriesof acceptable values <strong>for</strong> that column. AnENUM column can store only one value of apossible several thous<strong>and</strong>, while SET allows<strong>for</strong> several of up to 64 possible values.These are available in <strong>MySQL</strong> but aren’tpresent in every database application.114 Chapter 4
TABLe 4.2 <strong>MySQL</strong> Data TypesType Size DescriptionCHAR[Length] Length bytes A fixed-length field from 0 to 255characters longVARCHAR[Length] String length + 1 or 2 bytes A variable-length field from 0 to 65,535characters longTINYTEXT String length + 1 bytes A string with a maximum length of255 charactersTEXT String length + 2 bytes A string with a maximum length of65,535 charactersMEDIUMTEXT String length + 3 bytes A string with a maximum length of16,777,215 charactersLONGTEXT String length + 4 bytes A string with a maximum length of4,294,967,295 charactersTINYINT[Length] 1 byte Range of –128 to 127 or 0 to255 unsignedSMALLINT[Length] 2 bytes Range of –32,768 to 32,767 or 0 to65,535 unsignedMEDIUMINT[Length] 3 bytes Range of –8,388,608 to 8,388,607or 0 to 16,777,215 unsignedINT[Length] 4 bytes Range of –2,147,483,648 to 2,147,483,647or 0 to 4,294,967,295BIGINT[Length] 8 bytes Range of –9,223,372,036,854,775,808to 9,223,372,036,854,775,807 or 0 to18,446,744,073,709,551,615 unsignedFLOAT[Length, Decimals] 4 bytes A small number with a floatingdecimal pointDOUBLE[Length, Decimals] 8 bytes A large number with a floatingdecimal pointDECIMAL[Length, Decimals] Length + 1 or 2 bytes A DOUBLE stored as a string, allowing <strong>for</strong>a fixed decimal pointDATE 3 bytes In the <strong>for</strong>mat of YYYY-MM-DDDATETIME 8 bytes In the <strong>for</strong>mat of YYYY-MM-DD HH:MM:SSTIMESTAMP 4 bytes In the <strong>for</strong>mat of YYYYMMDDHHMMSS;acceptable range starts in 1970 <strong>and</strong>ends in the year 2038TIME 3 bytes In the <strong>for</strong>mat of HH:MM:SSENUM 1 or 2 bytes Short <strong>for</strong> enumeration, which means thateach column can have one of severalpossible valuesSET 1, 2, 3, 4, or 8 bytes Like ENUM except that each columncan have more than one of severalpossible valuesIntroduction to <strong>MySQL</strong> 115
To select the column types:1. Identify whether a column shouldbe a text, number, or date/time type(Table 4.3).This is normally an easy <strong>and</strong> obviousstep, but you want to be as specific aspossible. For example, the date 2006-08-02 (<strong>MySQL</strong> <strong>for</strong>mat) could be storedas a string—August 2, 2006. But if youuse the proper date <strong>for</strong>mat, you’ll havea more useful database (<strong>and</strong>, as you’llsee, there are functions that can turn2006-08-02 into August 2, 2006).2. Choose the most appropriate subtype<strong>for</strong> each column (Table 4.4).For this example, the user_id is set asa MEDIUMINT, allowing <strong>for</strong> up to nearly17 million values (as an unsigned,or non-negative, number). Theregistration_date will be a DATETIME.It can store both the date <strong>and</strong> thespecific time a user registered. Whendeciding among the date types, considerwhether or not you’ll want toaccess just the date, the time, or possiblyboth. If unsure, err on the side ofstoring too much in<strong>for</strong>mation.The other fields will be mostly VARCHAR,since their lengths will differ fromrecord to record. The only exception isthe password column, which will be afixed-length CHAR (you’ll see why wheninserting records in the next chapter).See the sidebar “CHAR vs. VARCHAR” <strong>for</strong>more in<strong>for</strong>mation on these two types.TABLe 4.3 users TableColumn Nameuser_idfirst_namelast_nameemailpassregistration_dateTABLe 4.4 users TableColumn Nameuser_idfirst_namelast_nameemailpassregistration_dateTABLe 4.5 users TableColumn Nameuser_idfirst_namelast_nameemailpassregistration_dateTypenumbertexttexttexttextdate/timeTypeMEDIUMINTVARCHARVARCHARVARCHARCHARDATETIMETypeMEDIUMINTVARCHAR(20)VARCHAR(40)VARCHAR(60)CHAR(40)DATETIME116 Chapter 4
CHAR vs. VARCHARBoth of these types store strings <strong>and</strong>can be set with a maximum length. Theprimary difference between the twois that anything stored as a CHAR willalways be stored as a string the lengthof the column (using spaces to pad it;these spaces will be removed whenyou retrieve the stored value from thedatabase). Conversely, strings storedin a VARCHAR column will require onlyas much space as the string itself. Sothe word cat in a VARCHAR(10) columnrequires 4 bytes of space (the lengthof the string plus 1), but in a CHAR(10)column, that same word requires 10 bytesof space. Hence, generally speaking,VARCHAR columns tend to require lessdisk space than CHAR columns.However, databases are normally fasterwhen working with fixed-size columns,which is an argument in favor of CHAR.And that same three-letter word—cat—in a CHAR(3) only uses 3 bytes but in aVARCHAR(10) requires 4. So how do youdecide which to use?If a string field will always be of aset length (e.g., a state abbreviation),use CHAR; otherwise, use VARCHAR.You may notice, though, that in somecases <strong>MySQL</strong> defines a column as theone type (like CHAR) even though youcreated it as the other (VARCHAR). This isperfectly normal <strong>and</strong> is <strong>MySQL</strong>’s way ofimproving per<strong>for</strong>mance.3. Set the maximum length <strong>for</strong> textcolumns (Table 4.5).The size of any field should berestricted to the smallest possible value,based upon the largest possible input.For example, if a column stores a stateabbreviation, it would be defined as aCHAR(2). Other times you might haveto guess somewhat: I can’t think ofany first names longer than about 10characters, but just to be safe I’ll allow<strong>for</strong> up to 20.The length attribute <strong>for</strong> numeric typesdoes not affect the range of values that canbe stored in the column. Columns defined asTINYINT(1) or TINYINT(20) can store theexact same values. Instead, <strong>for</strong> integers, thelength dictates the display width; <strong>for</strong> decimals,the length is the total number of digits thatcan be stored.If you need absolute precision whenusing non-integers, DECIMAL is preferredover FLOAT or DOUBLE.<strong>MySQL</strong> has a BOOLEAN type, which isjust a TINYINT(1), with 0 meaning FALSE<strong>and</strong> 1 meaning TRUE.Many of the data types have synonymousnames: INT <strong>and</strong> INTEGER, DEC<strong>and</strong> DECIMAL, etc.Depending upon the version of <strong>MySQL</strong>in use, the TIMESTAMP field type is automaticallyset as the current date <strong>and</strong> time when anINSERT or UPDATE occurs, even if no value isspecified <strong>for</strong> that particular field. If a table hasmultiple TIMESTAMP columns, only the first onewill be updated when an INSERT or UPDATEis per<strong>for</strong>med.<strong>MySQL</strong> also has several variants onthe text types that allow <strong>for</strong> storing binarydata. These types are BINARY, VARBINARY,TINYBLOB, MEDIUMBLOB, <strong>and</strong> LONGBLOB.Such types can be used <strong>for</strong> storing files orencrypted data.Introduction to <strong>MySQL</strong> 117
Choosing otherColumn propertiesBesides deciding what data types <strong>and</strong> sizesyou should use <strong>for</strong> your columns, you shouldconsider a h<strong>and</strong>ful of other properties.First, every column, regardless of type, canbe defined as NOT NULL. The NULL value, indatabases <strong>and</strong> programming, is equivalentto saying that the field has no known value.Ideally, in a properly designed database,every column of every row in every tableshould have a value, but that isn’t alwaysthe case. To <strong>for</strong>ce a field to have a value,add the NOT NULL description to its columntype. For example, a required dollaramount can be described ascost DECIMAL(5,2) NOT NULLindexes, Keys, <strong>and</strong> AuTo_inCReMenTTwo concepts closely related to database design are indexes <strong>and</strong> keys. An index in a database isa way of requesting that the database keep an eye on the values of a specific column or combinationof columns (loosely stated). The end result of this is improved per<strong>for</strong>mance when retrievingrecords but marginally hindered per<strong>for</strong>mance when inserting records or updating them.A key in a database table is integral to the “normalization” process used <strong>for</strong> designing morecomplicated databases (see Chapter 6). There are two types of keys: primary <strong>and</strong> <strong>for</strong>eign. Eachtable should have exactly one primary key, <strong>and</strong> the primary key in one table is often linked as a<strong>for</strong>eign key in another.A table’s primary key is an artificial way to refer to a record <strong>and</strong> has to abide by three rules:1. It must always have a value.2. That value must never change.3. That value must be unique <strong>for</strong> each record in the table.In the users table, the user_id will be designated as a PRIMARY KEY, which is both a descriptionof the column <strong>and</strong> a directive to <strong>MySQL</strong> to index it. Since the user_id is a number (which primarykeys almost always will be), the AUTO_INCREMENT description is also added to the column, whichtells <strong>MySQL</strong> to use the next-highest number as the user_id value <strong>for</strong> each added record. You’llsee what this means in practice when you begin inserting records.118 Chapter 4
When creating a table, you can also specifya default value <strong>for</strong> any column, regardlessof type. In cases where a majority of therecords will have the same value <strong>for</strong> acolumn, presetting a default will saveyou from having to specify a value wheninserting new rows (unless that row’s value<strong>for</strong> that column is different from the norm).gender ENUM('M', 'F') default 'F'With the gender column, if no value isspecified when adding a record, thedefault will be used.If a column does not have a default value<strong>and</strong> one is not specified <strong>for</strong> a new record,that field will be given a default valuebased upon its type. For numeric types,the default value is 0. For most date <strong>and</strong>time types, the type’s version of “zero”will be the default (e.g., 0000-00-00).The first TIMESTAMP column in a table willhave a default value of the current date<strong>and</strong> time. String types use an empty string('') as the default value, except <strong>for</strong> ENUM,whose default value (again, if not otherwisespecified) is the first possible enumeratedvalue (M in the above example).The number types can be marked asUNSIGNED, which limits the stored datato positive numbers <strong>and</strong> zero. This alsoeffectively doubles the range of positivenumbers that can be stored (because nonegative numbers will be kept, see Table 4.2).You can also flag the number types asZEROFILL, which means that any extra roomwill be padded with zeros (ZEROFILLs arealso automatically UNSIGNED).Finally, when designing a database, you’llneed to consider creating indexes, addingkeys, <strong>and</strong> using the AUTO_INCREMENT property.Chapter 6 discusses these conceptsin greater detail, but in the meantime,check out the sidebar “Indexes, Keys, <strong>and</strong>AUTO_INCREMENT” to learn how they affectthe users table.To finish defining your columns:1. Identify your primary key.The primary key is quixotically botharbitrary <strong>and</strong> critically important. Almostalways a number value, the primary keyis a unique way to refer to a particularrecord. For example, your phone numberhas no inherent value but is unique toyou (your home or mobile phone).In the users table, the user_id will bethe primary key: an arbitrary numberused to refer to a row of data. Again,Chapter 6 will go into the concept ofprimary keys in more detail.2. Identify which columns cannot havea NULL value.In this example, every field is required(cannot be NULL). As an example of acolumn that could have NULL values,if you stored peoples’ addresses,you might have address_line1 <strong>and</strong>address_line2, with the latter onebeing optional. In general, tables thathave a lot of NULL values suggesta poor design (more on this in…youguessed it…Chapter 6).continues on next pageIntroduction to <strong>MySQL</strong> 119
3. Make any numeric type UNSIGNED if itwon’t ever store negative numbers.The user_id, which will be a number,should be UNSIGNED so that it’s alwayspositive (primary keys should beunsigned). Other examples of UNSIGNEDnumbers would be the price of items inan e-commerce example, a telephoneextension <strong>for</strong> a business, or a zip code.4. Establish the default value <strong>for</strong> any column.None of the columns here logicallyimplies a default value.5. Confirm the final column definitions(Table 4.6).Be<strong>for</strong>e creating the tables, you shouldrevisit the type <strong>and</strong> range of data you’llstore to make sure that your databaseeffectively accounts <strong>for</strong> everything.TABLe 4.6 users TableColumn Nameuser_idfirst_namelast_nameemailpassregistration_dateTypeMEDIUMINT UNSIGNEDNOT NULLVARCHAR(20) NOT NULLVARCHAR(40) NOT NULLVARCHAR(60) NOT NULLCHAR(40) NOT NULLDATETIME NOT NULLText columns can also have definedcharacter sets <strong>and</strong> collations. This will meanmore…in Chapter 6.Default values must always be a staticvalue, not the result of executing a function,with one exception: the default value<strong>for</strong> a TIMESTAMP column can be assigned asCURRENT_TIMESTAMP.TEXT columns cannot be assigneddefault values.120 Chapter 4
Accessing <strong>MySQL</strong>In order to create tables, add records, <strong>and</strong>request in<strong>for</strong>mation from a database, somesort of client is necessary to communicatewith the <strong>MySQL</strong> server. Later in thebook, <strong>PHP</strong> scripts will act in this role, butbeing able to use another interface isnecessary. Although there are oodles ofclient applications available, I’ll focus ontwo: the mysql client <strong>and</strong> the <strong>Web</strong>-basedphpMyAdmin. A third option, the <strong>MySQL</strong>Query Browser, is not discussed in thisbook but can be found at the <strong>MySQL</strong> <strong>Web</strong>site (www.mysql.com), should you not besatisfied with these two choices.The rest of this chapter assumes you haveaccess to a running <strong>MySQL</strong> server. If youare working on your own computer, seeAppendix A, “Installation,” <strong>for</strong> instructionson installing <strong>MySQL</strong>, starting <strong>MySQL</strong>, <strong>and</strong>creating <strong>MySQL</strong> users (all of which mustalready be done in order to finish thischapter). If you are using a hosted server,your <strong>Web</strong> host should provide you withthe database access. Depending uponthe hosting, you may be provided withphpMyAdmin, but not be able to use thecomm<strong>and</strong>-line mysql client.using the mysql ClientThe mysql client is normally installed with therest of the <strong>MySQL</strong> software. Although themysql client does not have a pretty graphicalinterface, it’s a reliable, st<strong>and</strong>ard tool that’seasy to use <strong>and</strong> behaves consistently onmany different operating systems.The mysql client is accessed from acomm<strong>and</strong>-line interface, be it the Terminalapplication in Linux or Mac OS X A, ora DOS prompt in Windows B. If you’renot com<strong>for</strong>table with comm<strong>and</strong>-line interactions,you might find this interface to bechallenging, but it becomes easy to use inno time.To start the application from the comm<strong>and</strong>line, type its name <strong>and</strong> press Return or Enter:mysqlDepending upon the server (or yourcomputer), you may need to enter the full pathin order to start the application. For example:/Applications/MAMP/Library/bin/mysql(Mac OS X, using MAMP)C:\xampp\mysql\bin\mysql (Windows,using XAMPP)When invoking this application, you can addarguments to affect how it runs. The mostcommon arguments are the username,continues on next pageA A Terminalwindow inMac OS X.B A WindowsDOS prompt orconsole (althoughthe default is <strong>for</strong>white text on ablack background).Introduction to <strong>MySQL</strong> 121
password, <strong>and</strong> hostname (computer name,URL, or IP address) you want to connectusing. You establish these arguments like so:mysql -u username -h hostname –pThe -p option will cause the client to promptyou <strong>for</strong> the password. You can also specifythe password on this line if you prefer—by typing it directly after the -p prompt—but it will be visible, which is insecure. The-h hostname argument is optional, <strong>and</strong>you can leave it off unless you cannot connectto the <strong>MySQL</strong> server without it.Within the mysql client, every statement(SQL comm<strong>and</strong>) needs to be terminatedby a semicolon. These semicolons are anindication to the client that the query iscomplete <strong>and</strong> should be run. The semicolonsare not part of the SQL itself (this is acommon point of confusion). What this alsomeans is that you can continue the sameSQL statement over several lines within themysql client, which makes it easier to read<strong>and</strong> to edit, should that be necessary.As a quick demonstration of accessing <strong>and</strong>using the mysql client, these next stepswill show you how to start the mysql client,select a database to use, <strong>and</strong> quit theclient. Be<strong>for</strong>e following these steps,nnThe <strong>MySQL</strong> server must be running.You must have a username <strong>and</strong>password with proper access.Both of these ideas are explained inAppendix A.As a side note, in the following steps <strong>and</strong>throughout the rest of the book, I willcontinue to provide images using the mysqlclient on both Windows <strong>and</strong> Mac OS X.While the appearance differs, the steps <strong>and</strong>results will be identical. So in short, don’t beconcerned about why one image shows theDOS prompt <strong>and</strong> the next a Terminal.To use the mysql client:1. Access your system from a comm<strong>and</strong>lineinterface.On Unix systems <strong>and</strong> Mac OS X, this isjust a matter of bringing up the Terminalor a similar application.If you are using Windows <strong>and</strong> installed<strong>MySQL</strong> on your computer, choose Runfrom the Start menu (or press WindowsKey+R), type cmd in the window C, <strong>and</strong>press Enter (or click OK) to bring up aDOS prompt.2. Invoke the mysql client, using theappropriate comm<strong>and</strong> D./path/to/mysql/bin/mysql -u➝ username -pThe /path/to/mysql part of this stepwill be largely dictated by the operatingsystem you are running <strong>and</strong> where<strong>MySQL</strong> was installed. I’ve alreadyC Executing cmd within the Run prompt in Windowsis one way to access a DOS prompt interface.D Access the mysql client by entering the fullpath to the utility, along with the proper arguments.122 Chapter 4
provided two options, based uponinstallations of MAMP on Mac OS X orXAMPP on Windows (both are installedin Appendix A).The basic premise is that you arerunning the mysql client, connectingas username, <strong>and</strong> requesting to beprompted <strong>for</strong> the password. Not tooverstate the point, but the username<strong>and</strong> password values that you use mustalready be established in <strong>MySQL</strong> as avalid user (see Appendix A).3. Enter the password at the prompt <strong>and</strong>press Return/Enter.The password you use here shouldbe <strong>for</strong> the user you specified in thepreceding step. If you used the properusername/password combination (i.e.,someone with valid access), you shouldbe greeted as shown in E. If accessis denied, you’re probably not usingthe correct values (see Appendix A <strong>for</strong>instructions on creating users).4. Select the database you want to use F.USE test;The USE comm<strong>and</strong> selects the databaseto be used <strong>for</strong> every subsequentcomm<strong>and</strong>. The test database isone that <strong>MySQL</strong> installs by default.Assuming it exists on your server, allusers should be able to access it.continues on next pageE If you are successfully able to log in, you’ll see a welcome message like this.F After getting into the mysql client, run a USE comm<strong>and</strong> to choose thedatabase with which you want to work.Introduction to <strong>MySQL</strong> 123
5. Quit out of mysql G.exitYou can also use the comm<strong>and</strong> quit toleave the client. This step—unlike mostother comm<strong>and</strong>s you enter in the mysqlclient—does not require a semicolon atthe end.6. Quit the Terminal or DOS console session.exitThe comm<strong>and</strong> exit will terminate thecurrent session. On Windows, it will alsoclose the DOS prompt window.If you know in advance which databaseyou will want to use, you can simplify mattersby starting mysql with/path/to/mysql/bin/mysql -u username-p databasenameTo see what else you can do with themysql client, type/path/to/mysql/bin/mysql --helpThe mysql client on most systems allowsyou to use the up <strong>and</strong> down arrows to scrollthrough previously entered comm<strong>and</strong>s. If youmake a mistake in typing a query, you canscroll up to find it, <strong>and</strong> then correct the error.In the mysql client, you can also terminateSQL comm<strong>and</strong>s using \G instead of thesemicolon. For queries that return results,using \G displays those results as a verticallist, as opposed to a horizontal table, which issometimes easier to peruse.If you are in a long statement <strong>and</strong> makea mistake, cancel the current operation bytyping c <strong>and</strong> pressing Return or Enter. If mysqlthinks a closing single or double quotationmark is missing (as indicated by the '> <strong>and</strong> ">prompts), you’ll need to enter the appropriatequotation mark first.using phpMyAdminphpMyAdmin (www.phpmyadmin.net) is oneof the best <strong>and</strong> most popular applicationswritten in <strong>PHP</strong>. Its sole purpose is toprovide an interface to a <strong>MySQL</strong> server. It’ssomewhat easier <strong>and</strong> more natural to usethan the mysql client but requires a <strong>PHP</strong>installation <strong>and</strong> must be accessed througha <strong>Web</strong> browser. If you’re running <strong>MySQL</strong>on your own computer, you might find thatusing the mysql client makes more sense,as installing <strong>and</strong> configuring phpMyAdminconstitutes unnecessary extra work(although all-in-one <strong>PHP</strong> <strong>and</strong> <strong>MySQL</strong>installers may do this <strong>for</strong> you). If using ahosted server, your <strong>Web</strong> host is virtuallyguaranteed to provide phpMyAdmin as theprimary way to work with <strong>MySQL</strong> <strong>and</strong> themysql client may not be an option.Using phpMyAdmin isn’t hard, but the nextsteps run through the basics so that you’llknow what to do in the following chapters.G Type either exit or quit to terminate your <strong>MySQL</strong> session <strong>and</strong>leave the mysql client.124 Chapter 4
To use phpMyAdmin:1. Access phpMyAdmin through your<strong>Web</strong> browser H.The URL you use will depend uponyour situation. If running on yourown computer, this might be http://localhost/phpMyAdmin/. If runningon a hosted site, your <strong>Web</strong> host willprovide you with the proper URL. Inall likelihood, phpMyAdmin would beavailable through the site’s controlpanel (should one exist).Note that phpMyAdmin will only work ifit’s been properly configured to connectto <strong>MySQL</strong> with a valid username/password/hostname combination. Ifyou see a message like the one in I,you’re probably not using the correctvalues (see Appendix A <strong>for</strong> instructionson creating users).continues on next pageH The first phpMyAdmin page (when connected as a <strong>MySQL</strong> user that can accessmultiple databases).I Every client applicationrequires a proper username/password/hostname combinationin order to interact with the<strong>MySQL</strong> server.Introduction to <strong>MySQL</strong> 125
2. If possible <strong>and</strong> necessary, use the list onthe left to select a database to use J.What options you have here willvary depending upon what <strong>MySQL</strong>user phpMyAdmin is connecting as.That user might have access to onedatabase, several databases, or everydatabase. On a hosted site where youhave just one database, that databasewill probably already be selected<strong>for</strong> you. On your own computer, withphpMyAdmin connecting as the <strong>MySQL</strong>root user, you would see a pull-downmenu or a simple list of availabledatabases J.3. Click on a table name in the left columnto select that table K.You don’t always have to select atable—in fact you never will if you justuse the SQL comm<strong>and</strong>s in this book, butdoing so can often simplify some tasks.4. Use the tabs <strong>and</strong> links (on the right sideof the page) to per<strong>for</strong>m common tasks.For the most part, the tabs <strong>and</strong> links areshortcuts to common SQL comm<strong>and</strong>s.For example, the Browse tab per<strong>for</strong>ms aSELECT query <strong>and</strong> the Insert tab createsa <strong>for</strong>m <strong>for</strong> adding new records.J Use the listof databases onthe left side ofthe window tochoose with whichdatabase youwant to work. Thisis the equivalentof running a USEdatabasenamequery within themysql client.K Selecting a tablefrom the left columnchanges the optionson the right side ofthe page.126 Chapter 4
5. Use the SQL tab L or the SQL querywindow M to enter SQL comm<strong>and</strong>s.The next three chapters, <strong>and</strong> a couplemore later in the book, will provide SQLcomm<strong>and</strong>s that must be run to create,populate, <strong>and</strong> manipulate tables. Thesemight look likeINSERT INTO tablename (col1, col2)➝ VALUES (x, y)These comm<strong>and</strong>s can be run usingthe mysql client, phpMyAdmin, or anyother interface. To run them withinphpMyAdmin, just enter them into oneof the SQL prompts <strong>and</strong> click Go.There’s a lot more that can be done withphpMyAdmin, but full coverage would requirea chapter in its own right (<strong>and</strong> a long chapterat that). The in<strong>for</strong>mation presented here will beenough <strong>for</strong> you to follow any of the examplesin the book, should you not want to use themysql client.phpMyAdmin can be configured to use aspecial database that will record your query history,allow you to bookmark queries, <strong>and</strong> more.See the phpMyAdmin documentation <strong>for</strong> details.One of the best reasons to use php-MyAdmin is to transfer a database from onecomputer to another. Use the Export tabin phpMyAdmin connected to the sourcecomputer to create a file of data. Then, onthe destination computer, use the Import tabin phpMyAdmin (connected to that <strong>MySQL</strong>server) to complete the transfer.L The SQL tab, in themain part of the window,can be used to run anySQL comm<strong>and</strong>.M The SQL window can also beused to run comm<strong>and</strong>s. It popsup after clicking the SQL iconat the top of the left side of thebrowser (see the second iconfrom the left in K ).Introduction to <strong>MySQL</strong> 127
Review <strong>and</strong> pursueIf you have any problems with thereview questions or the pursue prompts,turn to the book’s supporting <strong>for</strong>um(www.LarryUllman.com/<strong>for</strong>ums/).ReviewnnnnnnnnnWhat version of <strong>MySQL</strong> are you using?If you don’t know, find out now!What characters can be used indatabase, table, <strong>and</strong> column names?Should you treat database, table, <strong>and</strong>column names as case-sensitive orcase-insensitive?What are the three general columntypes?What are the differences betweenCHAR <strong>and</strong> VARCHAR?How do you determine what size (interms of subtype or length) a columnshould be?What are some of the other propertiesthat can be assigned to columns?What is a primary key?If you’re using the comm<strong>and</strong>-line mysqlclient to connect to <strong>MySQL</strong>, whatusername <strong>and</strong> password combinationis required?pursuennnFind the online <strong>MySQL</strong> manual <strong>for</strong> yourversion of <strong>MySQL</strong>. Bookmark it!Start thinking about what databasesyou may need <strong>for</strong> your projects.If you haven’t yet changed the <strong>MySQL</strong>root user password (assuming you’veinstalled <strong>MySQL</strong> on your own computer),use the instructions inAppendix A to do so now.128 Chapter 4
5Introductionto SQLThe preceding chapter provides a quickintroduction to <strong>MySQL</strong>. The focus thereis on two topics: using <strong>MySQL</strong>’s rules <strong>and</strong>data types to define a database, <strong>and</strong> howto interact with the <strong>MySQL</strong> server. Thischapter moves on to the lingua franca ofdatabases: SQL.SQL, short <strong>for</strong> Structured Query Language,is a group of special words used exclusively<strong>for</strong> interacting with databases. SQL issurprisingly easy to learn <strong>and</strong> use, <strong>and</strong> yet,amazingly powerful. In fact, the hardest thingto do in SQL is use it to its full potential!In this chapter you’ll learn all the SQL youneed to know to create tables, populatethem, <strong>and</strong> run other basic queries. Theexamples will all use the users tablediscussed in the preceding chapter. Also,as with that other chapter, this chapterassumes you have access to a running<strong>MySQL</strong> server <strong>and</strong> know how to use aclient application to interact with it.in This ChapterCreating Databases <strong>and</strong> Tables 130Inserting Records 133Selecting Data 138Using Conditionals 140Using LIKE <strong>and</strong> NOT LIKE 143Sorting Query Results 145Limiting Query Results 147Updating Data 149Deleting Data 151Using Functions 153Review <strong>and</strong> Pursue 164
Creating Databases<strong>and</strong> TablesThe first logical use of SQL will be to createa database. The syntax <strong>for</strong> creating a newdatabase is simplyCREATE DATABASE databasenameThat’s all there is to it (as I said, SQL is easyto learn)!The CREATE term is also used <strong>for</strong> makingtables:CREATE TABLE tablename (column1name description,column2name description…)As you can see from this syntax, after namingthe table, you define each column withinparentheses. Each column-descriptionpair should be separated from the next bya comma. Should you choose to createindexes at this time, you can add those atthe end of the creation statement, but youcan add indexes at a later time as well.(Indexes are more <strong>for</strong>mally discussed inChapter 6, “Database Design,” but Chapter 4,“Introduction to <strong>MySQL</strong>,” introduced the topic.)In case you were wondering, SQL is caseinsensitive.However, I make it a habitto capitalize the SQL keywords as in thepreceding example syntax <strong>and</strong> the followingsteps. Doing so helps to contrast theSQL terms from the database, table, <strong>and</strong>column names.To create databases <strong>and</strong> tables:1. Access <strong>MySQL</strong> using whichever clientyou prefer.Chapter 4 shows how to use two ofthe most common interfaces—themysql comm<strong>and</strong>-line client <strong>and</strong>phpMyAdmin—to communicate with a<strong>MySQL</strong> server. Using the steps in thelast chapter, you should now connectto <strong>MySQL</strong>.Throughout the rest of this chapter,most of the SQL examples will beentered using the mysql client, but theywill work just the same in phpMyAdminor most other client tools.2. Create <strong>and</strong> select the new database A:CREATE DATABASE sitename;USE sitename;This first line creates the database(assuming that you are connected to<strong>MySQL</strong> as a user with permission tocreate new databases). The secondline tells <strong>MySQL</strong> that you want to workwithin this database from here onout. Remember that within the mysqlclient, you must terminate every SQLcomm<strong>and</strong> with a semicolon, althoughthese semicolons aren’t technicallypart of SQL itself. If executing multiplequeries at once within phpMyAdmin,they should also be separated bysemicolons B. If running only asingle query within phpMyAdmin,no semicolons are necessary.A A new database,called sitename, iscreated in <strong>MySQL</strong>.It is then selected<strong>for</strong> future queries.130 Chapter 5
If you are using a hosting company’s<strong>MySQL</strong>, they will probably create thedatabase <strong>for</strong> you. In that case, just connectto <strong>MySQL</strong> <strong>and</strong> select the database.3. Create the users table C:CREATE TABLE users (user_id MEDIUMINT UNSIGNED NOT NULLAUTO_INCREMENT,first_name VARCHAR(20) NOT NULL,last_name VARCHAR(40) NOT NULL,email VARCHAR(60) NOT NULL,pass CHAR(40) NOT NULL,registration_date DATETIME NOT NULL,PRIMARY KEY (user_id));The design <strong>for</strong> the users table wasdeveloped in Chapter 4. There, thenames, types, <strong>and</strong> attributes of eachcolumn in the table are determinedbased upon a number of criteria (seethat chapter <strong>for</strong> more in<strong>for</strong>mation).Here, that in<strong>for</strong>mation is placed withinthe CREATE table syntax to actuallymake the table in the database.Because the mysql client will not run aquery until it encounters a semicolon(or \G or \g), you can enter statementsover multiple lines as in C (by pressingReturn or Enter at the end of each line).This often makes a query easier to read<strong>and</strong> debug. In phpMyAdmin, you canalso run queries over multiple lines,although they will not be executed untilyou click Go.continues on next pageB The same comm<strong>and</strong>s<strong>for</strong> creating <strong>and</strong> selectinga database can be runwithin phpMyAdmin’sSQL window.C This CREATE SQLcomm<strong>and</strong> will makethe users table.Introduction to SQL 131
4. Confirm the existence of the table D:SHOW TABLES;SHOW COLUMNS FROM users;The SHOW comm<strong>and</strong> reveals the tablesin a database or the column names <strong>and</strong>types in a table.Also, you might notice in D that thedefault value <strong>for</strong> user_id is NULL,even though this column was definedas NOT NULL. This is actually correct<strong>and</strong> has to do with user_id being anautomatically incremented primary key.<strong>MySQL</strong> will often make minor changesto a column’s definition <strong>for</strong> betterper<strong>for</strong>mance or other reasons.In phpMyAdmin, a database’s tablesare listed on the left side of the browserwindow, under the database’s name E.Click a table’s name to view itscolumns F.The rest of this chapter assumes thatyou are using the mysql client or comparabletool <strong>and</strong> have already selected the sitenamedatabase with USE.The order you list the columns when creatinga table has no functional impact, but there arestylistic suggestions <strong>for</strong> how to order them. I normallylist the primary-key column first, followedby any <strong>for</strong>eign-key columns (more on this subjectin the next chapter), followed by the rest of thecolumns, concluding with any date columns.When creating a table, you have theoption of specifying its type. <strong>MySQL</strong> supportsmany table types, each with its own strengths<strong>and</strong> weaknesses. If you do not specify a tabletype, <strong>MySQL</strong> will automatically create the tableusing the default type <strong>for</strong> that <strong>MySQL</strong> installation.Chapter 6 discusses this in more detail.When creating tables <strong>and</strong> text columns,you have the option to specify its collation <strong>and</strong>character set. Both come into play when usingmultiple languages or languages other thanthe default <strong>for</strong> the <strong>MySQL</strong> server. Chapter 6also covers these subjects.DESCRIBE tablename is the same statementas SHOW COLUMNS FROM tablename.D Confirm theexistence of, <strong>and</strong>columns in, atable using theSHOW comm<strong>and</strong>.E phpMyAdmin showsthat the sitenamedatabase contains onetable, named users.F phpMyAdmin shows a table’s definition on this screen(accessed by clicking the table’s name in the left-h<strong>and</strong> column).132 Chapter 5
inserting RecordsAfter a database <strong>and</strong> its table(s) have beencreated, you can start populating themusing the INSERT comm<strong>and</strong>. There are twoways that an INSERT query can be written.With the first method, you name thecolumns to be populated:INSERT INTO tablename (column1,➝ column2…) VALUES (value1, value2 …)INSERT INTO tablename (column4,➝ column8) VALUES (valueX, valueY)Using this structure, you can add rowsof records, populating only the columnsthat matter. The result will be that anycolumns not given a value will be treatedas NULL (or given a default value, if onewas defined). Note that if a column cannothave a NULL value (it was defined as NOTNULL) <strong>and</strong> does not have a default value,not specifying a value will cause an erroror warning A.The second <strong>for</strong>mat <strong>for</strong> inserting recordsis not to specify any columns at all but toinclude values <strong>for</strong> every one:INSERT INTO tablename VALUES (value1,➝ NULL, value2, value3, …)If you use this second method, you mustspecify a value, even if it’s NULL, <strong>for</strong> everycolumn. If there are six columns in thetable, you must list six values. Failure tomatch the number of values to the numberof columns will cause an error B. Forthis <strong>and</strong> other reasons, the first <strong>for</strong>mat ofinserting records is generally preferable.<strong>MySQL</strong> also allows you to insert multiplerows at one time, separating each recordby a comma.INSERT INTO tablename (column1,➝ column4) VALUES (valueA, valueB),(valueC, valueD),(valueE, valueF)continues on next pageA Failure to provide, or predefine, a value <strong>for</strong> a NOT NULL columnresults in errors or warnings.B Not providing a value <strong>for</strong> every column in a table, or named inan INSERT query, also causes an error.Introduction to SQL 133
While you can do this with <strong>MySQL</strong>, it isnot acceptable within the SQL st<strong>and</strong>ard<strong>and</strong> is there<strong>for</strong>e not supported by alldatabase applications. In <strong>MySQL</strong>, however,this syntax is faster than using individualINSERT queries.Note that in all of these examples,placeholders are used <strong>for</strong> the actualtable names, column names, <strong>and</strong> values.Furthermore, the examples <strong>for</strong>go quotationmarks. In real queries, you must abideby certain rules to avoid errors (see the“Quotes in Queries” sidebar).To insert data into a table:1. Insert one row of data into the userstable, naming the columns to be populatedC:INSERT INTO users(first_name, last_name, email,➝ pass, registration_date)VALUES ('Larry', 'Ullman', 'email@➝ example.com', SHA1('mypass'),➝ NOW( ));Again, this syntax (where the specificcolumns are named) is more foolproof butnot always the most convenient. For thefirst name, last name, <strong>and</strong> email columns,simple strings are used <strong>for</strong> the values(<strong>and</strong> strings must always be quoted).Quotes in QueriesIn every SQL comm<strong>and</strong>:.Numeric values shouldn’t be quoted..String values (<strong>for</strong> CHAR, VARCHAR, <strong>and</strong>TEXT column types) must always bequoted..Date <strong>and</strong> time values must alwaysbe quoted..Functions cannot be quoted..The word NULL must not be quoted.Unnecessarily quoting a numeric valuenormally won’t cause problems (althoughyou still shouldn’t do it), but misusingquotation marks in the other situationswill almost always mess things up. Also,it does not matter if you use single ordouble quotation marks, so long as youconsistently pair them (an opening markwith a matching closing one).And, as with <strong>PHP</strong>, if you need to usea quotation mark in a value, eitheruse the other quotation mark type toencapsulate it or escape the mark bypreceding it with a backslash:INSERT INTO tablename (last_name)➝ VALUES ('O\'Toole')C This query inserts a single record into the users table. The 1 row affected messageindicates the success of the insertion.134 Chapter 5
Two <strong>MySQL</strong> FunctionsAlthough functions are discussed inmore detail later in this chapter, twoneed to be introduced at this time:SHA1( ) <strong>and</strong> NOW( ).The SHA1( ) function is one way toencrypt data. This function creates anencrypted string that is always exactly40 characters long (which is why theusers table’s pass column is definedas CHAR(40)). SHA1( ) is a one-wayencryption technique, meaning that itcannot be reversed (technically it’s ahashing function). It’s useful when youneed to store sensitive data that neednot be viewed in an unencrypted <strong>for</strong>magain. Because the output from SHA1( )cannot be decrypted, it’s obviously nota good choice <strong>for</strong> sensitive data thatshould be protected but later seen (likecredit card numbers). SHA1( ) is availableas of <strong>MySQL</strong> 5.0.2; if you are using anearlier version, you can use the MD5( )function instead. This function does thesame task, using a different algorithm,<strong>and</strong> returns a 32-character long string (ifusing MD5( ), your pass column could bedefined as a CHAR(32) instead).The NOW( ) function is h<strong>and</strong>y <strong>for</strong>populating date, time, <strong>and</strong> timestampcolumns. It returns the current date <strong>and</strong>time (on the server).For the password <strong>and</strong> registration datecolumns, two functions are being usedto generate the values (see the sidebar“Two <strong>MySQL</strong> Functions”). The SHA1( )function will encrypt the password(mypass in this example). The NOW( )function will set the registration_dateas this moment.When using any function in an SQLstatement, do not place it withinquotation marks. You also must nothave any spaces between the function’sname <strong>and</strong> the following parenthesis (soNOW( ) not NOW ( )).2. Insert one row of data into the userstable, without naming the columns D:INSERT INTO users VALUES(NULL, 'Zoe', 'Isabella',➝'email2@example.com',➝ SHA1('mojito'), NOW( ));In this second syntactical example,every column must be provided witha value. The user_id column is givena NULL value, which will cause <strong>MySQL</strong>to use the next logical number, per itsAUTO_INCREMENT description. In otherwords, the first record will be assigneda user_id of 1, the second, 2, <strong>and</strong> so on.continues on next pageD Another record is inserted into the table, this time by providing a value <strong>for</strong> every columnin the table.Introduction to SQL 135
3. Insert several values into the userstable E:INSERT INTO users (first_name,➝ last_name, email, pass,➝ registration_date) VALUES('John', 'Lennon', 'john@beatles.com',➝ SHA1('Happin3ss'), NOW( )),('Paul', 'McCartney',➝'paul@beatles.com',➝ SHA1('letITbe'), NOW( )),('George', 'Harrison',➝'george@beatles.com ',➝ SHA1('something'), NOW( )),('Ringo', 'Starr', 'ringo@beatles.com',➝ SHA1('thisboy'), NOW( ));Since <strong>MySQL</strong> allows you to insert multiplevalues at once, you can take advantageof this <strong>and</strong> fill up the table with records.4. Continue Steps 1 <strong>and</strong> 2 until you’vethoroughly populated the users table.Throughout the rest of this chapterI will be per<strong>for</strong>ming queries basedupon the records I entered into mydatabase. Should your database nothave the same specific records as mine,change the particulars accordingly.The fundamental thinking behind thefollowing queries should still applyregardless of the data, since thesitename database has a set column<strong>and</strong> table structure.E This one query—which <strong>MySQL</strong> allows but other database applications will not—inserts several records intothe table at once.136 Chapter 5
On the downloads page of the book’ssupporting <strong>Web</strong> site (www.LarryUllman.com),you can download all of the SQL comm<strong>and</strong>s<strong>for</strong> the book. Using some of those comm<strong>and</strong>s,you can populate your users table exactly asI have.The term INTO in INSERT statements isoptional in <strong>MySQL</strong>.phpMyAdmin’s INSERT tab allows you toinsert records using an HTML <strong>for</strong>m F.Depending upon the version of <strong>MySQL</strong>in use, failure to provide a value <strong>for</strong> a columnthat cannot be NULL may issue warnings withthe INSERT still working A, or issue errors,with the INSERT failing.You’ll occasionally see uses of thebacktick (`) in SQL comm<strong>and</strong>s. This character,found on the same key as the tilde (~), is differentthan a single quotation mark. The backtickis used to safely reference a table or columnname that might be the same as an existingkeyword.If <strong>MySQL</strong> warns you about the previousquery, the SHOW WARNINGS comm<strong>and</strong> willdisplay the problem A.An interesting variation on INSERT isREPLACE. If the value used <strong>for</strong> the table’sprimary key, or a UNIQUE index, alreadyexists, then REPLACE updates that row. Ifnot, REPLACE inserts a new row.F phpMyAdmin’s INSERT <strong>for</strong>m shows a table’s columns <strong>and</strong> provides text boxes <strong>for</strong> entering values.The pull-down menu lists functions that can be used, like SHA1( ) <strong>for</strong> the password or NOW( ) <strong>for</strong> theregistration date.Introduction to SQL 137
Selecting DataNow that the database has somerecords in it, you can retrieve the storedin<strong>for</strong>mation with the most used of all SQLterms, SELECT. A SELECT query returns rowsof records using the syntaxSELECT which_columns FROM which_tableThe simplest SELECT query isSELECT * FROM tablenameThe asterisk means that you want toretrieve every column. The alternativewould be to specify the columns to bereturned, with each separated from thenext by a comma:SELECT column1, column3 FROM tablenameThere are a few benefits to being explicitabout which columns are selected. The firstis per<strong>for</strong>mance: There’s no reason to fetchcolumns you will not be using. The secondis order: You can return columns in an orderother than their layout in the table. Third—<strong>and</strong>you’ll see this later in the chapter—namingthe columns allows you to manipulate thevalues in those columns using functions.A The SELECT * FROM tablename query returns every column <strong>for</strong> every record stored in the table.138 Chapter 5
B Only two ofthe columns <strong>for</strong>every recordin the table arereturned bythis query.C Many queries can berun without specifying adatabase or table. This queryselects the result of callingthe NOW( ) function, whichreturns the current date <strong>and</strong>time (according to <strong>MySQL</strong>).To select data from a table:1. Retrieve all the data from the userstable A:SELECT * FROM users;This very basic SQL comm<strong>and</strong> willretrieve every column of every rowstored within that table.2. Retrieve just the first <strong>and</strong> last namesfrom users B:SELECT first_name, last_nameFROM users;Instead of showing the data from everycolumn in the users table, you can usethe SELECT statement to limit the resultsto only the fields you need.In phpMyAdmin, the Browse tab runsa simple SELECT query.You can actually use SELECT withoutnaming tables or columns. For example,SELECT NOW( ) C.The order in which you list columnsin your SELECT statement dictates the orderin which the values are presented (compareB with D).With SELECT queries, you can evenretrieve the same column multiple times,a feature that enables you to manipulatethe column’s data in many different ways.D If aSELECT queryspecifies thecolumns tobe returned,they’ll bereturned inthat order.Introduction to SQL 139
using ConditionalsThe SELECT query as used thus far willalways retrieve every record from atable. But often you’ll want to limit whatrows are returned, based upon certaincriteria. This can be accomplished byadding conditionals to SELECT queries.Conditionals use the SQL term WHERE<strong>and</strong> are written much as you’d write aconditional in <strong>PHP</strong>:SELECT which_columns FROM which_table➝ WHERE condition(s)Table 5.1 lists the most common operatorsyou would use within a conditional. Forexample, a simple equality check:SELECT name FROM peopleWHERE birth_date = '2011-01-26'The operators can be used together, alongwith parentheses, to create more complexexpressions:SELECT * FROM items WHERE(price BETWEEN 10.00 AND 20.00) AND(quantity > 0)SELECT * FROM cities WHERE(zip_code = 90210) OR (zip_code =➝ 90211)This last example could also be written as:SELECT * FROM cities WHEREzip_code IN (90210, 90211)To demonstrate using conditionals, let’srun some more SELECT queries on thesitename database. The examples thatfollow will be just a few of the nearlylimitless possibilities. Over the course ofthis chapter <strong>and</strong> the entire book you willsee how conditionals are used in all typesof queries.TABLe 5.1 <strong>MySQL</strong> OperatorsOperatorMeaning= Equals< Less than> Greater than= Greater than or equal to!= (also < >) Not equal toIS NOT NULLIS NULLIS TRUEIS FALSEBETWEENNOT BETWEENINNOT INOR (also ||)AND (also &&)NOT (also !)XORHas a valueDoes not have a valueHas a true valueHas a false valueWithin a rangeOutside of a rangeFound within a list of valuesNot found within a listof valuesWhere at least one of twoconditionals is trueWhere both conditionalsare trueWhere the condition isnot trueWhere only one of twoconditionals is true140 Chapter 5
To use conditionals:1. Select all of the users whose last nameis Simpson A:SELECT * FROM usersWHERE last_name = 'Simpson';This simple query returns every columnof every row whose last_name valueis Simpson. (Again, if the data in yourtable differs, you can change any ofthese queries accordingly.)2. Select just the first names of userswhose last name is Simpson B:SELECT first_name FROM usersWHERE last_name = 'Simpson';Here only one column (first_name) isbeing returned <strong>for</strong> each row. Althoughit may seem strange, you do not haveto select a column on which you areper<strong>for</strong>ming a WHERE. The reason <strong>for</strong> thisis that the columns listed after SELECTdictate only what columns to return <strong>and</strong>the columns listed in a WHERE dictatewhich rows to return.3. Select every column from every recordin the users table that does not have anemail address C:SELECT * FROM usersWHERE email IS NULL;The IS NULL conditional is the same assaying does not have a value. Keep inmind that an empty string is differentthan NULL <strong>and</strong> there<strong>for</strong>e would notmatch this condition. An empty stringwould, however, matchSELECT * FROM users WHERE email='';continues on next pageA All of the Simpsons who have registered.B Just the first names of all of theSimpsons who have registered.C No records are returned bythis query because the emailcolumn cannot have a NULLvalue. So this query did work; itjust had no matching records.Introduction to SQL 141
4. Select the user ID, first name, <strong>and</strong> lastname of all records in which the passwordis mypass D:SELECT user_id, first_name,➝ last_nameFROM usersWHERE pass = SHA1('mypass');Since the stored passwords wereencrypted with the SHA1( ) function,you can match a password by usingthat same encryption function in aconditional. SHA1( ) is case-sensitive, sothis query will work only if the passwords(stored vs. queried) match exactly.5. Select the user names whose user ID isless than 10 or greater than 20 E:SELECT first_name, last_nameFROM users WHERE(user_id < 10) OR (user_id > 20);This same query could also be written asSELECT first_name, last_name FROMusers WHERE user_idNOT BETWEEN 10 <strong>and</strong> 20;or evenSELECT first_name, last_name FROMusers WHERE user_id NOT IN(10, 11, 12, 13, 14, 15, 16, 17, 18,➝ 19, 20);D Conditionals can make use of functions, likeSHA1( ) here.E This query uses two conditions <strong>and</strong> theOR operator.You can per<strong>for</strong>m mathematicalcalculations within your queries using themathematic addition (+), subtraction (-),multiplication (*), <strong>and</strong> division (/) characters.<strong>MySQL</strong> supports the keywords TRUE<strong>and</strong> FALSE, case-insensitive. Internally, TRUEevaluates to 1 <strong>and</strong> FALSE evaluates to 0. So,in <strong>MySQL</strong>, TRUE + TRUE equals 2.142 Chapter 5
Esing LiKe <strong>and</strong>noT LiKeUsing numbers, dates, <strong>and</strong> NULLs inconditionals is a straight<strong>for</strong>ward process,but strings can be trickier. You can check<strong>for</strong> string equality with a query such asSELECT * FROM usersWHERE last_name = 'Simpson'However, comparing strings in a moreliberal manner requires extra operators<strong>and</strong> characters. If, <strong>for</strong> example, you wantedto match a person’s last name that couldbe Smith or Smiths or Smithson, youwould need a more flexible conditional.This is where the LIKE <strong>and</strong> NOT LIKEterms come in. These are used—primarilywith strings—in conjunction with twowildcard characters: the underscore ( _ ),which matches a single character, <strong>and</strong>the percentage sign (%), which matcheszero or more characters. In the last-nameexample, the query would beSELECT * FROM usersWHERE last_name LIKE 'Smith%'This query will return all rows whoselast_name value begins with Smith.Because it’s a case-insensitive search bydefault, it would also apply to names thatbegin with smith.To use LiKe:1. Select all of the records in which thelast name starts with Bank A:SELECT * FROM usersWHERE last_name LIKE 'Bank%';continues on next pageA The LIKE SQL term adds flexibility to your conditionals. This query matches any record where the lastname value begins with Bank.Introduction to SQL 143
2. Select the name <strong>for</strong> every recordwhose email address is not of the<strong>for</strong>m something@authors.com B:SELECT first_name, last_nameFROM users WHEREemail NOT LIKE '%@authors.com';To rule out the presence of values in astring, use NOT LIKE with the wildcard.Queries with a LIKE conditional aregenerally slower because they can’t takeadvantage of indexes. Use LIKE <strong>and</strong> NOTLIKE only if you absolutely have to.The wildcard characters can be usedat the front <strong>and</strong>/or back of a string in yourqueries.B A NOT LIKE conditional returns recordsbased upon what a value does not contain.SELECT * FROM usersWHERE last_name LIKE ' _smith%'Although LIKE <strong>and</strong> NOT LIKE arenormally used with strings, they can alsobe applied to numeric columns.To use either the literal underscore or thepercentage sign in a LIKE or NOT LIKE query,you will need to escape it (by preceding thecharacter with a backslash) so that it is notconfused with a wildcard.The underscore can be used in combinationwith itself; as an example, LIKE ' __ 'would find any two-letter combination.In Chapter 7, “Advanced SQL <strong>and</strong> <strong>MySQL</strong>,”you’ll learn about FULLTEXT searches, whichcan be more useful than LIKE searches.144 Chapter 5
Sorting Query ResultsBy default, a SELECT query’s results will bereturned in a meaningless order (<strong>for</strong> manynew to databases, this is an odd concept).To give a meaningful order to a query’sresults, use an ORDER BY clause:SELECT * FROM tablename ORDER BY columnSELECT * FROM orders ORDER BY totalThe default order when using ORDER BYis ascending (abbreviated ASC), meaningthat numbers increase from small to large,dates go from oldest to most recent,<strong>and</strong> text is sorted alphabetically. You canreverse this by specifying a descendingorder (abbreviated DESC):SELECT * FROM tablenameORDER BY column DESCYou can even order the returned values bymultiple columns:SELECT * FROM tablenameORDER BY column1, column2You can, <strong>and</strong> frequently will, use ORDER BYwith WHERE or other clauses. When doingso, place the ORDER BY after the conditions:SELECT * FROM tablename WHERE conditionsORDER BY columnTo sort data:1. Select all of the users in alphabeticalorder by last name A:SELECT first_name, last_name FROMusers ORDER BY last_name;If you compare these results with thosein B in the “Selecting Data” section,you’ll see the benefits of using ORDER BY.2. Display all of the users in alphabeticalorder by last name <strong>and</strong> then first name B:SELECT first_name, last_name FROMusers ORDER BY last_name ASC,first_name ASC;continues on next pageA Therecords inalphabeticalorder bylast name.B Therecords inalphabeticalorder, first bylast name,<strong>and</strong> then byfirst namewithin that.Introduction to SQL 145
In this query, the effect would be thatevery row is returned, first ordered bythe last_name, <strong>and</strong> then by first_namewithin the last_names. The effect ismost evident among the Simpsons.3. Show all of the non-Simpson users bydate registered C:SELECT * FROM usersWHERE last_name != 'Simpson'ORDER BY registration_date DESC;You can use an ORDER BY on anycolumn type, including numbers <strong>and</strong>dates. The clause can also be used ina query with a conditional, placing theORDER BY after the WHERE.Because <strong>MySQL</strong> works naturally withany number of languages, the ORDER BY willbe based upon the collation being used (seeChapter 6).If the column that you choose to sorton is an ENUM type, the sort will be basedupon the order of the possible ENUM valueswhen the column was created. For example,if you have the column gender, defined asENUM('M', 'F'), the clause ORDER BY genderreturns the results with the M records first.C All of the users not named Simpson, displayed by date registered, with the most recent listed first.146 Chapter 5
A Using the LIMIT clause, a query can return aspecific number of records.Limiting Query ResultsAnother SQL clause that can be added tomost queries is LIMIT. In a SELECT query,WHERE dictates which records to return, <strong>and</strong>ORDER BY decides how those records aresorted, but LIMIT states how many recordsto return. It is used like so:SELECT * FROM tablename LIMIT xIn such queries, only the initial x recordsfrom the query result will be returned. Toreturn only three matching records, use:SELECT * FROM tablename LIMIT 3Using this <strong>for</strong>matSELECT * FROM tablename LIMIT x, yyou can have y records returned, startingat x. To have records 11 through 20returned, you would writeSELECT * FROM tablename LIMIT 10, 10Like arrays in <strong>PHP</strong>, result sets begin at 0 whenit comes to LIMITs, so 10 is the 11th record.Because SELECT does not return results in anymeaningful order, you almost always want toapply an ORDER BY clause when using LIMIT.You can use LIMIT with WHERE <strong>and</strong>/or ORDERBY clauses, always placing LIMIT last:SELECT which_columns FROM tablename➝ WHEREconditions ORDER BY column LIMIT xTo limit the amount ofdata returned:1. Select the last five registered users A:SELECT first_name, last_nameFROM users ORDER BYregistration_date DESC LIMIT 5;To return the latest of anything, sortthe data by date, in descending order.Then, to see just the most recent five,add LIMIT 5 to the query.continues on next pageIntroduction to SQL 147
2. Select the second person to register B:SELECT first_name, last_nameFROM users ORDER BYregistration_date ASC LIMIT 1, 1;This may look strange, but it’s just agood application of the in<strong>for</strong>mationlearned so far. First, order all ofthe records by registration_dateascending, so the first people toregister would be returned first. Then,limit the returned results to start at 1(which is the second row) <strong>and</strong> to returnjust one record.B Thanks to the LIMIT clause, a query can evenreturn records from the middle of a group, usingthe LIMIT x, y <strong>for</strong>mat.The LIMIT x, y clause is most frequentlyused when paginating query results (showingthem in blocks over multiple pages). You’ll seethis in Chapter 10, “Common ProgrammingTechniques.”A LIMIT clause does not improve theexecution speed of a query, since <strong>MySQL</strong>still has to assemble the entire result <strong>and</strong>then truncate the list. But a LIMIT clause willminimize the amount of data to h<strong>and</strong>le when itcomes to the mysql client or your <strong>PHP</strong> scripts.The LIMIT term is not part of the SQLst<strong>and</strong>ard <strong>and</strong> is there<strong>for</strong>e (sadly) not availableon all databases.The LIMIT clause can be used with mosttypes of queries, not just SELECTs.148 Chapter 5
updating DataOnce tables contain some data, you havethe potential need to edit those existingrecords. This might be necessary ifin<strong>for</strong>mation was entered incorrectly or ifthe data changes (such as a last name oremail address). The syntax <strong>for</strong> updatingrecords is:UPDATE tablename SET column=valueYou can alter multiple columns at a singletime, separating each from the next bya comma.UPDATE tablename SET column1=valueA,column5=valueB…You will almost always want to use a WHEREclause to specify what rows should beupdated:UPDATE tablename SET column2=valueWHERE column5=valueIf you don’t use a WHERE clause, thechanges would be applied to every record.Updates, along with deletions, are oneof the most important reasons to use aprimary key. This value—which shouldnever change—can be a reference pointin WHERE clauses, even if every other fieldneeds to be altered.To update a record:1. Find the primary key <strong>for</strong> the record tobe updated A:SELECT user_id FROM usersWHERE first_name = 'Michael'AND last_name='Chabon';In this example, I’ll change the email<strong>for</strong> this author’s record. To do so, Imust first find that record’s primary key,which this query accomplishes.2. Update the record B:UPDATE usersSET email='mike@authors.com'WHERE user_id = 18;To change the email address, use anUPDATE query, using the primary key(user_id) to specify to which record theupdate should apply. <strong>MySQL</strong> will reportupon the success of the query <strong>and</strong> howmany rows were affected.continues on next pageA Be<strong>for</strong>e updating a record, determinewhich primary key to use in the UPDATE’sWHERE clause.B This query altered the value of onecolumn in just one row.Introduction to SQL 149
3. Confirm that the change was made C:SELECT * FROM usersWHERE user_id=18;Although <strong>MySQL</strong> already indicated theupdate was successful B, it can’t hurtto select the record again to confirmthat the proper changes occurred.Be extra certain to use a WHEREconditional whenever you use UPDATE unlessyou want the changes to affect every row.If you run an update query thatdoesn’t actually change any values (likeUPDATE users SET first_name='mike'WHERE first_name='mike'), you won’tsee any errors but no rows will be affected.More recent versions of <strong>MySQL</strong> would showthat X rows matched the query but that 0 rowswere changed D.To protect yourself against accidentallyupdating too many rows, apply a LIMIT clauseto your UPDATEs:UPDATE users SET email='mike@authors.com' WHERE user_id = 18 LIMIT 1You should never per<strong>for</strong>m an UPDATE ona primary-key column, because the primarykey value should never change. Altering thevalue of a primary key could have seriousrepercussions.To update a record in phpMyAdmin, youcan run an UPDATE query using the SQL windowor tab. Alternatively, run a SELECT queryto find the record you want to update, <strong>and</strong>then click the pencil next to the record. Thiswill bring up a <strong>for</strong>m similar to the insert <strong>for</strong>m,where you can edit the record’s current values.C As a final step, you can confirm the update by selecting the record again.D Recent versions of <strong>MySQL</strong> will report upon both matching<strong>and</strong> changed records <strong>for</strong> UPDATE queries.150 Chapter 5
Deleting DataAlong with updating existing records,another step you might need to takeis to entirely remove a record from thedatabase. To do this, you use the DELETEcomm<strong>and</strong>:DELETE FROM tablenameThat comm<strong>and</strong> as written will delete everyrecord in a table, making it empty again.Once you have deleted a record, there isno way of retrieving it.In most cases you’ll want to deleteindividual rows, not all of them. To do so,apply a WHERE clause:DELETE FROM tablename WHERE conditionTo delete a record:1. Find the primary key <strong>for</strong> the record tobe deleted A:SELECT user_id FROM usersWHERE first_name='Peter'AND last_name='Tork';Just as in the UPDATE example, I firstneed to determine which primary keyto use <strong>for</strong> the delete.2. Preview what will happen when thedelete is made B:SELECT * FROM usersWHERE user_id = 8;A really good trick <strong>for</strong> safeguardingagainst errant deletions is to first runthe query using SELECT * instead ofDELETE. The results of this query willrepresent which row(s) will be affectedby the deletion.continues on next pageA The user_id value willbe used to refer to thisrecord in a DELETE query.B To preview the effect of a DELETE query, first run a syntactically similar SELECT query.Introduction to SQL 151
3. Delete the record C:DELETE FROM usersWHERE user_id = 8 LIMIT 1;As with the update, <strong>MySQL</strong> will reporton the successful execution of the query<strong>and</strong> how many rows were affected. Atthis point, there is no way of reinstatingthe deleted records unless you backedup the database be<strong>for</strong>eh<strong>and</strong>.Even though the SELECT query (Step 2<strong>and</strong> B) only returned the one row, justto be extra careful, a LIMIT 1 clause isadded to the DELETE query.4. Confirm that the change was made D:SELECT user_id FROM usersWHERE first_name='Peter'AND last_name='Tork';C Deleting one record from the table.D The record is no longer part ofthis table.The preferred way to empty a table is touse TRUNCATE:TRUNCATE TABLE tablenameTo delete all of the data in a table, as wellas the table itself, use DROP TABLE:DROP TABLE tablenameTo delete an entire database, includingevery table therein <strong>and</strong> all of its data, useDROP DATABASE databasename152 Chapter 5
AliasesAn alias is merely a symbolic renamingof an item used in a query, normallyapplied to tables, columns, or functioncalls. Aliases are created using theterm AS:SELECT registration_date AS regFROM usersAliases are case-sensitive stringscomposed of numbers, letters, <strong>and</strong> theunderscore but are normally kept to avery short length. As you’ll see in thefollowing examples, aliases are alsoreflected in the captions <strong>for</strong> the returnedresults. For the preceding example,the query results returned will containone column of data, named reg (notregistration_date).In <strong>MySQL</strong>, if you’ve defined an alias <strong>for</strong>a table or a column used in a query, theentire query should consistently use thatsame alias rather than the original name.For example,SELECT first_name AS name FROMusers WHERE name='Sam'This differs from st<strong>and</strong>ard SQL, whichdoesn’t support the use of aliases inWHERE conditionals.using FunctionsTo wrap up this chapter, you’ll learn abouta number of functions that you can usein your <strong>MySQL</strong> queries. You have alreadyseen two—NOW( ) <strong>and</strong> SHA1( )—but thoseare just the tip of the iceberg. Most of thefunctions you’ll see here are used withSELECT queries to <strong>for</strong>mat <strong>and</strong> alter thereturned data, but you may use <strong>MySQL</strong>functions in other types of queries as well.To apply a function to a column’s values,the query would look like:SELECT FUNCTION(column) FROM tablenameTo apply a function to one column’s valueswhile also selecting some other columns,you can write a query like either of these:nnSELECT *, FUNCTION(column) FROMtablenameSELECT column1, FUNCTION(column2),column3 FROM tablenameGenerally speaking, the latter syntax ispreferred, as it only returns the columnsyou need (as opposed to all of them).Be<strong>for</strong>e getting to the actual functions,make note of a couple more things. First,functions are often applied to stored data(i.e., columns) but can also be applied toliteral values. Either of these applicationsof the UPPER( ) function (which capitalizesa string) is valid:SELECT UPPER(first_name) FROM usersSELECT UPPER('this string')continues on next pageIntroduction to SQL 153
Second, while the function namesthemselves are case-insensitive, I willcontinue to write them in an all-capitalized<strong>for</strong>mat, to help distinguish them from table<strong>and</strong> column names (as I also capitalizeSQL terms). Third, an important rulewith functions is that you cannot havespaces between the function name<strong>and</strong> the opening parenthesis in <strong>MySQL</strong>,although spaces within the parenthesesare acceptable. And finally, when usingfunctions to <strong>for</strong>mat returned data, you’lloften want to make uses of aliases, aconcept discussed in the sidebar.Just as there are different st<strong>and</strong>ards ofSQL <strong>and</strong> different database applications havetheir own slight variations on the language,some functions are common to all databaseapplications <strong>and</strong> others are particular to<strong>MySQL</strong>. This chapter, <strong>and</strong> book, only concernsitself with the <strong>MySQL</strong> functions.Chapter 7 discusses two more categoriesof <strong>MySQL</strong> functions: grouping <strong>and</strong> encryption.Text functionsThe first group of functions to demonstrateare those meant <strong>for</strong> manipulating text. Themost common of the functions in this categoryare listed in Table 5.2. As with mostfunctions, these can be applied to eithercolumns or literal values (both representedby t, t1, t2, etc).CONCAT( ), perhaps the most useful of thetext functions, deserves special attention.The CONCAT( ) function accomplishesconcatenation, <strong>for</strong> which <strong>PHP</strong> uses theperiod (see Chapter 1, “Introduction to<strong>PHP</strong>”). The syntax <strong>for</strong> concatenationrequires you to place, within parentheses,the various values you want assembled, inorder <strong>and</strong> separated by commas:SELECT CONCAT(t1, t2) FROM tablenameWhile you can—<strong>and</strong> normally will—apply CONCAT( ) to columns, you canalso incorporate strings, entered withinquotation marks. For example, to <strong>for</strong>matTABLe 5.2 Text FunctionsFunction Usage ReturnsCONCAT( ) CONCAT(t1, t2, ...) A new string of the <strong>for</strong>m t1t2.CONCAT_WS( ) CONCAT_WS(S, t1, t2, ...) A new string of the <strong>for</strong>m t1St2S…LENGTH( ) LENGTH(t) The number of characters in t.LEFT( ) LEFT(t, y) The leftmost y characters from t.RIGHT( ) RIGHT(t, x) The rightmost x characters from t.TRIM( ) TRIM(t) t with excess spaces from the beginning <strong>and</strong> endremoved.UPPER( ) UPPER(t) t capitalized.LOWER( ) LOWER(t) t in all-lowercase <strong>for</strong>mat.REPLACE( ) REPLACE(t1, t2, t3) The string t1 with instances of t2 replaced with t3.SUBSTRING( ) SUBSTRING(t, x, y) y characters from t beginning with x (indexed from 1).154 Chapter 5
a person’s name as FirstLast, youwould useSELECT CONCAT(first_name, ' ',➝ last_name)FROM usersBecause concatenation normally returnsvalues in a new <strong>for</strong>mat, it’s an excellenttime to use an alias (see the sidebar):SELECT CONCAT(first_name, ' ',➝ last_name)AS Name FROM usersTo <strong>for</strong>mat text:1. Concatenate the names without usingan alias A:SELECT CONCAT(last_name, ', ',➝ first_name)FROM users;This query will demonstrate two things.First, the users’ last names, a comma<strong>and</strong> a space, plus their first namesare concatenated together to makeone string (in the <strong>for</strong>mat of Last, First).Second, as the figure shows, if you don’tuse an alias, the returned data’s columnheading will be the function call. In themysql client or phpMyAdmin, this is justunsightly; when using <strong>PHP</strong> to connect to<strong>MySQL</strong>, this will likely be a problem.2. Concatenate the names while using analias B:SELECT CONCAT(last_name, ', ',➝ first_name)AS Name FROM users ORDER BY Name;To use an alias, just add AS aliasnameafter the item to be renamed. The aliaswill be the new title <strong>for</strong> the returneddata. To make the query a little moreinteresting, the same alias is also usedin the ORDER BY clause.continues on next pageA This simple concatenation returns everyregistered user’s full name. Notice how the columnheading is the use of the CONCAT( ) function.B By using an alias, the returned data is underthe column heading of Name (compare with A ).Introduction to SQL 155
3. Find the longest last name C:SELECT LENGTH(last_name) AS L,last_name FROM usersORDER BY L DESC LIMIT 1;To determine which registered user’slast name is the longest (has the mostcharacters in it), use the LENGTH( )function. To find the name, select boththe last name value <strong>and</strong> the calculatedlength, which is given an alias of L. Tothen find the longest name, order all ofthe results by L, in descending order,but only return the first record.C By using the LENGTH( ) function, an alias, anORDER BY clause, <strong>and</strong> a LIMIT clause, this queryreturns the length <strong>and</strong> value of the longeststored name.A query like that in Step 3 (also C) maybe useful <strong>for</strong> helping to fine-tune your columnlengths once your database has some recordsin it.<strong>MySQL</strong> has two functions <strong>for</strong> per<strong>for</strong>mingregular expression searches on text:REGEXP( ) <strong>and</strong> NOT REGEXP( ). Chapter 14,“Perl-Compatible Regular Expressions,”introduces regular expressions using <strong>PHP</strong>.CONCAT( ) has a corollary function calledCONCAT_WS( ), which st<strong>and</strong>s <strong>for</strong> with separator.The syntax is CONCAT_WS(separator,t1, t2, …). The separator will be insertedbetween each of the listed columns or values.For example, to <strong>for</strong>mat a person’s full nameas First_Middle_Last, youwould writeSELECT CONCAT_WS(' ', first, middle,last) AS Name FROM tablenameCONCAT_WS( ) has an added advantage overCONCAT( ) in that it will ignore columns withNULL values. So that query might return JoeBanks from one record but Jane SojournerAdams from another.156 Chapter 5
TABLe 5.3 Numeric FunctionsFunction Usage ReturnsABS( ) ABS(n) The absolutevalue of n.CEILING( ) CEILING(n) The next-highestinteger basedupon the valueof n.FLOOR( ) FLOOR(n) The integer valueof n.FORMAT( ) FORMAT(n1, n2) n1 <strong>for</strong>matted as anumber with n2decimal places<strong>and</strong> commasinserted everythree spaces.MOD( ) MOD(n1, n2) The remainder ofdividing n1 by n2.POW( ) POW(n1, n2) n1 to the n2power.RAND( ) RAND( ) A r<strong>and</strong>om numberbetween 0 <strong>and</strong> 1.0.ROUND( ) ROUND(n1, n2) n1 rounded to n2decimal places.SQRT( ) SQRT(n) The square rootof n.D The RAND( ) function returns ar<strong>and</strong>om number between 0 <strong>and</strong> 1.0.numeric functionsBesides the st<strong>and</strong>ard math operators that<strong>MySQL</strong> uses (<strong>for</strong> addition, subtraction,multiplication, <strong>and</strong> division), there are acouple dozen functions <strong>for</strong> <strong>for</strong>matting<strong>and</strong> per<strong>for</strong>ming calculations on numericvalues. Table 5.3 lists the most common ofthese, some of which will be demonstratedshortly. As with most functions, these canbe applied to either columns or literalvalues (both represented by n, n1, n2, etc.).I want to specifically highlight three ofthese functions: FORMAT( ), ROUND( ), <strong>and</strong>RAND( ). The first—which is not technicallynumber-specific—turns any number into amore conventionally <strong>for</strong>matted layout. Forexample, if you stored the cost of a caras 20198.20, FORMAT(car_cost, 2) wouldturn that number into the more common20,198.20.ROUND( ) will take one value, presumablyfrom a column, <strong>and</strong> round that to aspecified number of decimal places. If nodecimal places are indicated, it will roundthe number to the nearest integer. If moredecimal places are indicated than exist inthe original number, the remaining spacesare padded with zeros (to the right of thedecimal point).The RAND( ) function, as you might infer, isused <strong>for</strong> returning r<strong>and</strong>om numbers D:SELECT RAND( )A further benefit to the RAND( ) functionis that it can be used with your queries toreturn the results in a r<strong>and</strong>om order:SELECT * FROM tablename ORDER BY➝ RAND( )Introduction to SQL 157
To use numeric functions:1. Display a number, <strong>for</strong>matting theamount as dollars E:SELECT CONCAT('$', FORMAT(5639.6, 2))AS cost;Using the FORMAT( ) function, as justdescribed, with CONCAT( ), you can turnany number into a currency <strong>for</strong>mat asyou might display it in a <strong>Web</strong> page.2. Retrieve a r<strong>and</strong>om email address fromthe table F:SELECT email FROM usersORDER BY RAND( ) LIMIT 1;What happens with this query is: Allof the email addresses are selected;the order they are in is shuffled (ORDERBY RAND( )); <strong>and</strong> then the first one isreturned. Running this same querymultiple times will produce differentr<strong>and</strong>om results. Notice that you do notspecify a column to which RAND( ) isapplied.E Using an arbitrary example, this queryshows how the FORMAT( ) function works.F This query uses the RAND( )function to select a r<strong>and</strong>om record.Subsequent executions of thesame query would return differentr<strong>and</strong>om results.Along with the mathematical functionslisted here, there are several trigonometric,exponential, <strong>and</strong> other types of numericfunctions available.The MOD( ) function is the same as usingthe percent sign:SELECT MOD(9,2)SELECT 9%2It returns the remainder of a division (1 inthese examples).158 Chapter 5
Date <strong>and</strong> time functionsThe date <strong>and</strong> time column types in <strong>MySQL</strong>are particularly flexible <strong>and</strong> useful. Butbecause many database users are notfamiliar with all of the available date <strong>and</strong>time functions, these options are frequentlyunderused. Whether you want to makecalculations based upon a date or returnonly the month name from a value, <strong>MySQL</strong>has a function <strong>for</strong> that purpose. Table 5.4lists most of these; see the <strong>MySQL</strong> manual<strong>for</strong> a complete list. As with most functions,these can be applied to either columns orliteral values (both represented by dt, short<strong>for</strong> datetime).<strong>MySQL</strong> supports two data types that storeboth a date <strong>and</strong> a time (DATETIME <strong>and</strong>TIMESTAMP), one type that stores just thedate (DATE), one that stores just the time(TIME), <strong>and</strong> one that stores just a year(YEAR). Besides allowing <strong>for</strong> different typesof values, each data type also has its ownunique behaviors (again, I’d recommendreading the <strong>MySQL</strong> manual’s pages onthis <strong>for</strong> all of the details). But <strong>MySQL</strong> isvery flexible as to which functions youcan use with which type. You can apply adate function to any value that contains adate (i.e., DATETIME, TIMESTAMP, <strong>and</strong> DATE),or you can apply an hour function to anyvalue that contains the time (i.e., DATETIME,TIMESTAMP, <strong>and</strong> TIME). <strong>MySQL</strong> will use thepart of the value that it needs <strong>and</strong> ignorethe rest. What you cannot do, however, isapply a date function to a TIME value ora time function to a DATE or YEAR value.TABLe 5.4 Date <strong>and</strong> Time FunctionsFunction Usage ReturnsDATE( ) DATE(dt) The date value of dt.HOUR( ) HOUR(dt) The hour value of dt.MINUTE( ) MINUTE(dt) The minute value of dt.SECOND( ) SECOND(dt) The second value of dt.DAYNAME( ) DAYNAME(dt) The name of the day <strong>for</strong> dt.DAYOFMONTH( ) DAYOFMONTH(dt) The numerical day value of dt.MONTHNAME( ) MONTHNAME(dt) The name of the month of dt.MONTH( ) MONTH(dt) The numerical month value of dt.YEAR( ) YEAR(column) The year value of dt.CURDATE( ) CURDATE( ) The current date.CURTIME( ) CURTIME( ) The current time.NOW( ) NOW( ) The current date <strong>and</strong> time.UNIX_TIMESTAMP( ) UNIX_TIMESTAMP(dt) The number of seconds since the epoch until thecurrent moment or until the date specified.UTC_TIMESTAMP( ) UTC_TIMESTAMP(dt) The number of seconds since the epoch untilthe current moment or until the date specified,in Coordinated Universal Time (UTC).Introduction to SQL 159
To use date <strong>and</strong> time functions:1. Display the date that the last userregistered G:SELECT DATE(registration_date) ASDate FROM users ORDER BYregistration_date DESC LIMIT 1;The DATE( ) function returns the datepart of a value. To see the date that thelast person registered, an ORDER BYclause lists the users starting with themost recently registered <strong>and</strong> this resultis limited to just one record.2. Display the day of the week that thefirst user registered H:SELECT DAYNAME(registration_date) ASWeekday FROM users ORDER BYregistration_date ASC LIMIT 1;This is similar to the query in Step 1, butthe results are returned in ascendingorder <strong>and</strong> the DAYNAME( ) functionis applied to the registration_datecolumn. This function returns Sunday,Monday, Tuesday, etc., <strong>for</strong> a given date.3. Show the current date <strong>and</strong> time, accordingto <strong>MySQL</strong> I:SELECT CURDATE( ), CURTIME( );To show what date <strong>and</strong> time <strong>MySQL</strong>currently thinks it is, you can select theCURDATE( ) <strong>and</strong> CURTIME( ) functions,which return these values. This isanother example of a query that can berun without referring to a particular table.G The date functions can be used to extractin<strong>for</strong>mation from stored values.H This query returns the name of the day thata given date represents.160 Chapter 5
I This query, not run on any particulartable, returns the current date <strong>and</strong> timeon the <strong>MySQL</strong> server.4. Show the last day of the current month J:SELECT LAST_DAY(CURDATE( )),MONTHNAME(CURDATE( ));As the last query showed, CURDATE( )returns the current date on the server.This value can be used as an argumentto the LAST_DAY( ) function, whichreturns the last date in the month <strong>for</strong> agiven date. The MONTHNAME( ) functionreturns the name of the current month.The date <strong>and</strong> time returned by <strong>MySQL</strong>’sdate <strong>and</strong> time functions correspond to thoseon the server, not on the client accessingthe database.J Among the many things <strong>MySQL</strong> can do withdate <strong>and</strong> time types is determine the last date ina month or the name value of a given date.Not mentioned in this section or in Table5.4 are ADDDATE( ), SUBDATE( ), ADDTIME( ),SUBTIME( ), <strong>and</strong> DATEDIFF( ). Each can be usedto per<strong>for</strong>m arithmetic on date <strong>and</strong> time values.These can be very useful (<strong>for</strong> example, to findeveryone registered within the past week), buttheir syntax is cumbersome. As always, see the<strong>MySQL</strong> manual <strong>for</strong> more in<strong>for</strong>mation.Chapter 6 discusses the concept of timezones in <strong>MySQL</strong>.As of <strong>MySQL</strong> 5.0.2, the server will alsoprevent invalid dates (e.g., February 31, 2011)from being inserted into a date or date/timecolumn.Introduction to SQL 161
Formatting the date <strong>and</strong> timeThere are two additional date <strong>and</strong> timefunctions that you might find yourselfusing more than all of the others combined:DATE_FORMAT( ) <strong>and</strong> TIME_FORMAT( ).There is some overlap between the two<strong>and</strong> when you would use one or the other.DATE_FORMAT( ) can be used to <strong>for</strong>matboth the date <strong>and</strong> time if a value con -tains both (e.g., YYYY-MM-DD HH:MM:SS).Comparatively, TIME_FORMAT( ) can <strong>for</strong>matonly the time value <strong>and</strong> must be used ifonly the time value is being stored (e.g.,HH:MM:SS). The syntax isSELECT DATE_FORMAT(datetime, <strong>for</strong>matting)The <strong>for</strong>matting relies upon combinations ofkey codes <strong>and</strong> the percent sign to indicatewhat values you want returned. Table 5.5lists the available date- <strong>and</strong> time-<strong>for</strong>mattingparameters. You can use these in anycombination, along with literal characters,such as punctuation, to return a date <strong>and</strong>time in a more presentable <strong>for</strong>m.Assuming that a column called the_datehas the date <strong>and</strong> time of 1996-04-2011:07:45 stored in it, common <strong>for</strong>mattingtasks <strong>and</strong> results would bennTime (11:07:45 AM)TIME_FORMAT(the_date, '%r')Time without seconds (11:07 AM)TIME_FORMAT(the_date, '%l:%i %p')n Date (April 20th, 1996)TABLe 5.5 *_FORMAT( ) ParametersTerm Usage Example%e Day of themonth%d Day of themonth, twodigit1-3101-31%D Day with suffix 1st-31st%W Weekday name Sunday-Saturday%a Abbreviatedweekday name%c Month number 1-12%m Month number,two digitSun-Sat01-12%M Month name January-December%b Month name,abbreviatedJan-Dec%Y Year 2002%y Year 02%l (lowercase L) Hour 1-12%h Hour, two digit 01-12%k Hour, 24-hourclock%H Hour, 24-hourclock, two digit0-2300-23%i Minutes 00-59%S Seconds 00-59%r Time 8:17:02 PM%T Time, 24-hourclock20:17:02%p AM or PM AM or PMDATE_FORMAT(the_date, '%M %D, %Y')162 Chapter 5
K The current date <strong>and</strong> time, <strong>for</strong>matted.L The current time, in a 24-hour <strong>for</strong>mat.M The DATE_FORMAT( ) function is used topre-<strong>for</strong>mat the registration date when selectingrecords from the users table.To <strong>for</strong>mat the date <strong>and</strong> time:1. Return the current date <strong>and</strong> time asMonth DD, YYYY - HH:MM K:SELECT DATE_FORMAT(NOW( ),'%M %e, %Y➝ %l:%i');Using the NOW( ) function, which returnsthe current date <strong>and</strong> time, you canpractice <strong>for</strong>matting to see what resultsare returned.2. Display the current time, using 24-hournotation L:SELECT TIME_FORMAT(CURTIME( ),'%T');3. Select the email address <strong>and</strong> dateregistered, ordered by date registered,<strong>for</strong>matting the date as Weekday (abbreviated)Month (abbreviated) Day Year,<strong>for</strong> the last five registered users M:SELECT email, DATE_FORMAT➝ (registration_date, '%a %b %e %Y')AS Date FROM usersORDER BY registration_date DESCLIMIT 5;This is just one more example of howyou can use these <strong>for</strong>matting functionsto alter the output of an SQL query.In your <strong>Web</strong> applications, you shouldalmost always use <strong>MySQL</strong> functions to <strong>for</strong>matany dates coming from the database (asopposed to <strong>for</strong>matting the dates within <strong>PHP</strong>after retrieving them from the database).The only way to access the date ortime on the client (the user’s machine) is touse JavaScript. It cannot be done with <strong>PHP</strong>or <strong>MySQL</strong>.Introduction to SQL 163
Review <strong>and</strong> pursueIf you have any problems with thereview questions or the pursue prompts,turn to the book’s supporting <strong>for</strong>um(www.LarryUllman.com/<strong>for</strong>ums/).ReviewnnnnnWhat version of <strong>MySQL</strong> are you using?If you don’t know, find out now!What SQL comm<strong>and</strong> is used to make anew database? What comm<strong>and</strong> is usedto make a new table in a database?What SQL comm<strong>and</strong> is used to selectthe database with which you wantto work?What SQL comm<strong>and</strong>s are used <strong>for</strong>adding records to a table? Hint: Thereare multiple options.What types of values must be quoted inqueries? What types of values shouldn’tbe quoted?n What does the asterisk in SELECT *FROM tablename mean? How do yourestrict which columns are returned bya query?nnnnWhat does the NOW( ) function do?How do you restrict which rows arereturned by a query?How do LIKE <strong>and</strong> NOT LIKE differ fromsimple equality comparisons? Whichtype of comparison will be faster? Whatare the two LIKE <strong>and</strong> NOT LIKE wildcardcharacters?How do you affect the sorting of thereturned records? What is the defaultsorting method? How do you inversethe sort? What is the syntax <strong>for</strong> sortingby multiple columns?nnnnWhat does the LIMIT clause do? Howdoes LIMIT x differ from LIMIT x, y?What SQL comm<strong>and</strong> is used to changethe values already stored in a table?How do you change multiple columnsat once? How do you restrict to whichrows the changes are applied?What SQL comm<strong>and</strong> is used to deleterows stored in a table? How do yourestrict to which rows the deletionsare applied?What is an SQL alias? How do youcreate one? Why is an alias useful?pursuennnnnnnIf you haven’t done so already, bookmarkthe version of the <strong>MySQL</strong> manualthat matches the version of <strong>MySQL</strong> youare running.Go through each of the step sequencesin this chapter again, coming up withyour own queries to execute (that demonstratesimilar concepts as those inthe steps).Check out the <strong>MySQL</strong> manual pages <strong>for</strong>operators used in conditionals.Check out the <strong>MySQL</strong> manual pages <strong>for</strong>some of <strong>MySQL</strong>’s functions.Create, populate, <strong>and</strong> manipulate yourown table of data.Do some more practice using functions<strong>and</strong> aliases.Check out the <strong>MySQL</strong> manual pages <strong>for</strong>the various date <strong>and</strong> time types. Alsocheck out ADDDATE( ) <strong>and</strong> other daterelatedfunctions.164 Chapter 5
6DatabaseDesignNow that you have a basic underst<strong>and</strong>ingof databases, SQL, <strong>and</strong> <strong>MySQL</strong>, this chapterbegins the process of taking that knowledgedeeper. The focus on this chapter,as the title states, is real-world databasedesign. Like the work done in Chapter 4,“Introduction to <strong>MySQL</strong>,” much of the ef<strong>for</strong>therein requires paper <strong>and</strong> pen, <strong>and</strong> seriousthinking about what your applications willneed to do.The chapter begins with thorough coverageof database normalization: a vitalapproach to the design process. Afterthat, the chapter turns to design-relatedconcepts specific to <strong>MySQL</strong>: indexes, tabletypes, language support, working withtimes, <strong>and</strong> <strong>for</strong>eign key constraints.By the end of this chapter, you’ll know thesteps involved in proper database design,underst<strong>and</strong> how to make the most of<strong>MySQL</strong>, <strong>and</strong> plan a couple of multi-tabledatabases. In the next chapter, you’ll learnmore advanced SQL <strong>and</strong> <strong>MySQL</strong>, usingthese new databases as examples.in This ChapterNormalization 166Creating Indexes 179Using Different Table Types 182Languages <strong>and</strong> <strong>MySQL</strong> 184Time Zones <strong>and</strong> <strong>MySQL</strong> 189Foreign Key Constraints 195Review <strong>and</strong> Pursue 202
normalizationWhenever you are working with arelational database management systemsuch as <strong>MySQL</strong>, the first step in creating<strong>and</strong> using a database is to establish thedatabase’s structure (also called thedatabase schema). Database design, akadata modeling, is crucial <strong>for</strong> successfullong-term management of in<strong>for</strong>mation.Using a process called normalization,you carefully eliminate redundancies <strong>and</strong>other problems that would undermine theintegrity of your database.The techniques you will learn over thenext few pages will help to ensure theviability, usefulness, <strong>and</strong> reliability of yourdatabases. The primary example to bediscussed—a <strong>for</strong>um where users can postmessages—will be more explicitly used inChapter 17, “Example—Message Board,” butthe principles of normalization apply to anydatabase you might create. (The sitenameexample as created <strong>and</strong> used in the pasttwo chapters was properly normalized, eventhough normalization was never discussed.)Normalization was developed by an IBMresearcher named E.F. Codd in the early1970s (he also invented the relationaldatabase). A relational database is merely acollection of data, organized in a particularmanner, <strong>and</strong> Dr. Codd created a series ofrules called normal <strong>for</strong>ms that help definethat organization. This chapter discussesthe first three of the normal <strong>for</strong>ms, whichare sufficient <strong>for</strong> most database designs.Be<strong>for</strong>e you begin normalizing yourdatabase, you must define the role of theapplication being developed. Whether itmeans that you thoroughly discuss thesubject with a client or figure it out <strong>for</strong>yourself, underst<strong>and</strong>ing how the in<strong>for</strong>mationwill be accessed dictates the modeling.Thus, this process will require paper <strong>and</strong>pen rather than the <strong>MySQL</strong> software itself(although database design is applicable toany relational database, not just <strong>MySQL</strong>).In this example, I want to create a messageboard where users can post messages <strong>and</strong>other users can reply. I imagine that userswill need to register, then log in with an emailaddress/password combination, in order topost messages. I also expect that there couldbe multiple <strong>for</strong>ums <strong>for</strong> different subjects. Ihave listed a sample row of data in Table 6.1.The database itself will be called <strong>for</strong>um.One of the best ways to determine whatin<strong>for</strong>mation should be stored in a database isto think about what questions will be asked ofthe database <strong>and</strong> what data would be includedin the answers.Always err on the side of storing morein<strong>for</strong>mation than you might need. It’s easy toignore unnecessary data but impossible tolater manufacture data that was never storedin the first place.Normalization can be hard to learn if youfixate on the little things. Each of the normal<strong>for</strong>ms is defined in a very cryptic way; even whenput into layman’s terms, they can still be confounding.My best advice is to focus on the bigpicture as you follow along. Once you’ve gonethrough normalization <strong>and</strong> seen the end result,the overall process should be clear enough.TABLe 6.1 Sample Forum DataItemusernamepasswordactual nameuser email<strong>for</strong>ummessage subjectmessage bodymessage dateExampletroutstermypassLarry Ullmanemail@example.com<strong>MySQL</strong>Question about normalization.I have a question about…November 2, 2011 12:20 AM166 Chapter 6
KeysAs briefly mentioned in Chapter 4, keys areintegral to normalized databases. Thereare two types of keys: primary <strong>and</strong> <strong>for</strong>eign.A primary key is a unique identifier that hasto abide by certain rules. They mustnnnAlways have a value (they cannot be NULL)Have a value that remains the same(never changes)Have a unique value <strong>for</strong> each recordin a tableA good real-world example of a primarykey is the U.S. Social Security number:each individual has a unique SocialSecurity number, <strong>and</strong> that number neverchanges. Just as the Social Securitynumber is an artificial construct usedto identify people, you’ll frequently findcreating an arbitrary primary key <strong>for</strong> eachtable to be the best design practice.The second type of key is a <strong>for</strong>eign key.Foreign keys are the representation in TableB of the primary key from Table A. If youhave a cinema database with a movies table<strong>and</strong> a directors table, the primary key fromdirectors would be linked as a <strong>for</strong>eign key inmovies. You’ll see better how this works asthe normalization process continues.TABLe 6.2 Sample Forum DataItemmessage ID 325usernamepasswordactual nameuser email<strong>for</strong>ummessage subjectmessage bodymessage dateExampletroutstermypassLarry Ullmanemail@example.com<strong>MySQL</strong>Question about normalization.I have a question about…November 2, 2011 12:20 AMThe <strong>for</strong>um database is just a simpletable as it st<strong>and</strong>s (Table 6.1), but be<strong>for</strong>ebeginning the normalization process,identify at least one primary key (the<strong>for</strong>eign keys will come in later steps).To assign a primary key:1. Look <strong>for</strong> any fields that meet the threetests <strong>for</strong> a primary key.In this example (Table 6.1), no column reallyfits all of the criteria <strong>for</strong> a primary key.The username <strong>and</strong> email address will beunique <strong>for</strong> each <strong>for</strong>um user but will not beunique <strong>for</strong> each record in the database(because the same user could postmultiple messages). The same subjectcould be used multiple times as well. Themessage body will likely be unique <strong>for</strong>each message but could change (if edited),violating one of the rules of primary keys.2. If no logical primary key exists, inventone (Table 6.2).Frequently, you will need to create aprimary key because no good solutionpresents itself. In this example, amessage ID is manufactured. Whenyou create a primary key that has noother meaning or purpose, it’s calleda surrogate primary key.As a rule of thumb, I name my primarykeys using at least part of the table’sname (e.g., message) <strong>and</strong> the word id.Some database developers like to add theabbreviation pk to the name as well. Somedevelopers just use id.<strong>MySQL</strong> allows <strong>for</strong> only one primary keyper table, although you can base a primary keyon multiple columns (this means the combinationof those columns must be unique <strong>and</strong>never change).Ideally, your primary key should alwaysbe an integer, which results in better <strong>MySQL</strong>per<strong>for</strong>mance.Database Design 167
RelationshipsDatabase relationships refer to howthe data in one table relates to the datain another. There are three types ofrelationships between any two tables:one-to-one, one-to-many, or many-tomany.(Two tables in a database mayalso be unrelated.)A relationship is one-to-one if one <strong>and</strong>only one item in Table A applies to one<strong>and</strong> only one item in Table B. For example,each U.S. citizen has only one SocialSecurity number, <strong>and</strong> each Social Securitynumber applies to only one U.S. citizen;no citizen can have two Social Securitynumbers, <strong>and</strong> no Social Security numbercan refer to two citizens.A relationship is one-to-many if one item inTable A can apply to multiple items in TableB. The terms female <strong>and</strong> male will applyto many people, but each person can beonly one or the other (in theory). A one-tomanyrelationship is the most common onebetween tables in normalized databases.Finally, a relationship is many-to-manyif multiple items in Table A can apply tomultiple items in Table B. A book can bewritten by multiple authors, <strong>and</strong> authorscan write multiple books. Although manyto-manyrelationships are common inthe real word, you should avoid manyto-manyrelationships in your designbecause they lead to data redundancy <strong>and</strong>integrity problems. Instead of having manyto-manyrelationships, properly designeddatabases use intermediary tables thatbreak down one many-to-many relationshipinto two one-to-many relationships A.Relationships <strong>and</strong> keys work together inthat a key in one table will normally relateto a key in another, as mentioned earlier.A A many-to-many relationship between two tables will be betterrepresented as two one-to-many relationships those tables have withan intermediary table.168 Chapter 6
Database modeling uses certainconventions to represent the structure of thedatabase, which I’ll follow through a series ofimages in this chapter. The symbols <strong>for</strong> thethree types of relationships are shown in B.The process of database design resultsin an ERD (entity-relationship diagram) or ERM(entity-relationship model). This graphicalrepresentation of a database uses shapes <strong>for</strong>tables <strong>and</strong> columns <strong>and</strong> the symbols from Bto represent the relationships.There are many programs available tohelp create a database schema, including<strong>MySQL</strong> Workbench (http://wb.mysql.com).Many of the images in this chapter will comefrom <strong>MySQL</strong> Workbench.The term “relational” in RDBMS actuallystems from the tables, which are technicallycalled relations.B These symbols, or variations on them, arecommonly used to represent relationships indatabase modeling schemes.First normal FormAs already stated, normalizing a databaseis the process of changing the database’sstructure according to several rules, called<strong>for</strong>ms. Your database should adhere toeach rule exactly, <strong>and</strong> the <strong>for</strong>ms must befollowed in order.Every table in a database must have thefollowing two qualities in order to be inFirst Normal Form (1NF):nnEach column must contain only onevalue (this is sometimes described asbeing atomic or indivisible).No table can have repeating groups ofrelated data.A table containing one field <strong>for</strong> a person’sentire address (street, city, state, zip code,country) would not be 1NF compliant,because it has multiple values in onecolumn, violating the first property above.As <strong>for</strong> the second, a movies table that hadcolumns such as actor1, actor2, actor3,<strong>and</strong> so on would fail to be 1NF compliantbecause of the repeating columns all listingthe exact same kind of in<strong>for</strong>mation.To begin the normalization process, checkthe existing structure (Table 6.2) <strong>for</strong> 1NFcompliance. Any columns that are notatomic should be broken into multiplecolumns. If a table has repeating similarcolumns, then those should be turned intotheir own, separate table.Database Design 169
To make a database 1nF compliant:1. Identify any field that contains multiplepieces of in<strong>for</strong>mation.Looking at Table 6.2, one field is not 1NFcompliant: actual name. The examplerecord contained both the first name<strong>and</strong> the last name in this one column.The message date field contains a day,a month, <strong>and</strong> a year, plus a time, butsubdividing past that level of specificityis really not warranted. And, as the endof the last chapter shows, <strong>MySQL</strong> canh<strong>and</strong>le dates <strong>and</strong> times quite nicelyusing the DATETIME type.Other examples of problems wouldbe if a table used just one column <strong>for</strong>multiple phone numbers (mobile, home,work), or stored a person’s multipleinterests (cooking, dancing, skiing, etc.)in a single column.2. Break up any fields found in Step 1 intodistinct fields (Table 6.3).To fix this problem <strong>for</strong> the currentexample, create separate first name<strong>and</strong> last name fields, each of whichcontains only one value.3. Turn any repeating column groups intotheir own table.The <strong>for</strong>um database doesn’t have thisproblem currently, so to demonstratewhat would be a violation, considerTable 6.4. The repeating columns (themultiple actor fields) introduce twoproblems. First of all, there’s no gettingaround the fact that each movie will belimited to a certain number of actorswhen stored this way. Even if you addcolumns actor 1 through actor 100,there will still be that limit (of a hundred).TABLe 6.3 Forum Database, AtomicItemExamplemessage ID 325username troutsterpassword mypassfirst name Larrylast name Ullmanuser email email@example.com<strong>for</strong>um<strong>MySQL</strong>message subject Question about normalization.message body I have a question about…message date November 2, 2011 12:20 AMTABLe 6.4 Movies TableColumnValuemovie ID 976movie title Casablancayear released 1943directorMichael Curtizactor 1Humphrey Bogartactor 2Ingrid Bergmanactor 3Peter Lorre170 Chapter 6
TABLe 6.5 Movies-Actors TableIDMovieActor FirstNameActor LastName1 Casablanca Humphrey Bogart2 Casablanca Ingrid Bergman3 Casablanca Peter Lorre4 The MalteseFalcon5 The MalteseFalconHumphreyPeterBogartLorreSecond, any record that doesn’t havethe maximum number of actors will haveNULL values in those extra columns. Youshould generally avoid columns withNULL values in your database schema.As another concern, the actor <strong>and</strong>director columns are not atomic.To fix the problems in the moviestable, a second table would be created(Table 6.5). This table uses one row<strong>for</strong> each actor in a movie, which solvesthe problems mentioned in the lastparagraph. The actor names are alsobroken up to be atomic. Notice as wellthat a primary-key column should beadded to the new table. The notion thateach table has a primary key is implicitin the First Normal Form.4. Double-check that all new columns <strong>and</strong>tables created in Steps 2 <strong>and</strong> 3 passthe 1NF test.The simplest way to think about 1NF isthat this rule analyzes a table horizontally:inspect all of the columns within a single rowto guarantee specificity <strong>and</strong> avoid repetitionof similar data.Various resources will describe the normal<strong>for</strong>ms in somewhat different ways, likelywith much more technical jargon. What is mostimportant is the spirit—<strong>and</strong> end result—of thenormalization process, not the technical wordingof the rules.Database Design 171
Second normal FormFor a database to be in Second NormalForm (2NF), the database must first alreadybe in 1NF (you must normalize in order).Then, every column in the table that is not akey (i.e., a <strong>for</strong>eign key) must be dependentupon the primary key. You can normallyidentify a column that violates this rulewhen it has non-key values that are thesame in multiple rows. Such values shouldbe stored in their own table <strong>and</strong> relatedback to the original table through a key.Going back to the cinema example, amovies table (Table 6.4) would have thedirector Martin Scorsese listed 20+ times.This violates the 2NF rule as the column(s)that store the directors’ names would notbe keys <strong>and</strong> would not be dependentupon the primary key (the movie ID). Thefix is to create a separate directors tablethat stores the directors’ in<strong>for</strong>mation <strong>and</strong>assigns each director a primary key. Totie the director back to the movies, thedirector’s primary key would also be a<strong>for</strong>eign key in the movies table.Looking at Table 6.5 (<strong>for</strong> actors in movies),both the movie name <strong>and</strong> the actor namesare also in violation of the 2NF rule (theyaren’t keys <strong>and</strong> they aren’t dependenton the table’s primary key). In the end,the cinema database in this minimal <strong>for</strong>mrequires four tables C. Each director’sname, movie name, <strong>and</strong> actor’s name will bestored only once, <strong>and</strong> any non-key columnin a table is dependent upon that table’sprimary key. In fact, normalization couldbe summarized as the process of creatingmore <strong>and</strong> more tables until potentialredundancies have been eliminated.C To make the cinema database 2NF compliant (given the in<strong>for</strong>mation being represented), four tables arenecessary. The directors are represented in the movies table through the director ID key; the movies arerepresented in the movies-actors table through the movie ID key; <strong>and</strong> the actors are represented in themovies-actors table through the actor ID key.172 Chapter 6
To make a database 2nF compliant:1. Identify any non-key columns that aren’tdependent upon the table’s primary key.Looking at Table 6.3, the username,first name, last name, email, <strong>and</strong> <strong>for</strong>umvalues are all non-keys (message IDis the only key column currently), <strong>and</strong>none are dependent upon the messageID. Conversely, the message subject,body, <strong>and</strong> date are also non-keys, butthese do depend upon the message ID.2. Create new tables accordingly D.The most logical modification <strong>for</strong> the<strong>for</strong>um database is to make three tables:users, <strong>for</strong>ums, <strong>and</strong> messages.In a visual representation of thedatabase, create a box <strong>for</strong> each table,with the table name as a header <strong>and</strong>all of its columns (also called itsattributes) underneath.3. Assign or create new primary keys E.Using the techniques described earlierin the chapter, ensure that each newtable has a primary key. Here I’veadded a user ID field to the userstable <strong>and</strong> a <strong>for</strong>um ID field to <strong>for</strong>ums.These are both surrogate primary keys.Because the username field in theusers table <strong>and</strong> the name field in the<strong>for</strong>ums table must be unique <strong>for</strong> eachrecord <strong>and</strong> must always have a value,you could have them act as the primarykeys <strong>for</strong> their tables. However, thiswould mean that these values couldnever change (per the rules of primarykeys) <strong>and</strong> the database will be a littleslower, using text-based keys insteadof numeric ones.continues on next pageD To make the <strong>for</strong>um database 2NF compliant, three tables are necessary.E Each table needs its own primary key.Database Design 173
4. Create the requisite <strong>for</strong>eign keys <strong>and</strong>indicate the relationships F.The final step in achieving 2NFcompliance is to incorporate <strong>for</strong>eign keysto link associated tables. Remember thata primary key in one table will often be a<strong>for</strong>eign key in another.With this example, the user ID fromthe users table links to the user IDcolumn in the messages table. There<strong>for</strong>e,users has a one-to-many relationship withmessages (because each user can postmultiple messages, but each messagecan only be posted by one user).Also, the two <strong>for</strong>um ID columnsare linked, creating a one-to-manyrelationship between messages <strong>and</strong><strong>for</strong>ums (each message can only be inone <strong>for</strong>um, but each <strong>for</strong>um can havemultiple messages).There is no direct relationship betweenthe users <strong>and</strong> <strong>for</strong>ums tables.Another way to test <strong>for</strong> 2NF is to lookat the relationships between tables. Theideal is to create one-to-one or one-to-manysituations. Tables that have a many-to-manyrelationship may need to be restructured.Looking back at C, the movies-actorstable is an intermediary table, which turns themany-to-many relationship between movies<strong>and</strong> actors into two one-to-many relationships.You can often tell a table is acting as an intermediarywhen all of its columns are keys. Infact, in that table, the primary key could be thecombination of the movie ID <strong>and</strong> the actor ID.A properly normalized database shouldnever have duplicate rows in the same table(two or more rows in which the values in everynon–primary key column match).To simplify how you conceive of thenormalization process, remember that 1NFis a matter of inspecting a table horizontally,<strong>and</strong> 2NF is a vertical analysis (hunting <strong>for</strong>repeating values over multiple rows).F To relate the three tables, two <strong>for</strong>eign keys are added to themessages table, each key representing one of the other two tables.174 Chapter 6
Third normal FormA database is in Third Normal Form (3NF)if it is in 2NF <strong>and</strong> every non-key columnis mutually independent. If you followedthe normalization process properly to thispoint, you may not have 3NF issues. Youwould know that you have a 3NF violationif changing the value in one column wouldrequire changing the value in another.In the <strong>for</strong>um example thus far, therearen’t any 3NF problems, but I’ll explain ahypothetical situation where this rule wouldcome into play.Take, as an example, a database aboutbooks. After applying the first twonormal <strong>for</strong>ms, you might end up withone table listing the books, anotherlisting the authors, <strong>and</strong> a third acting asan intermediary table between books<strong>and</strong> authors, as there’s a many-to-manyrelationship there. If the books table listedthe publisher’s name <strong>and</strong> address, thattable would be in violation of 3NF G. Thepublisher’s address isn’t related to thebook, but rather to the publisher itself. Inother words, that version of the bookstable has a column that’s dependent upona non-key column (the publisher’s name).As I said, the <strong>for</strong>um example is fine as is,but I’ll outline the 3NF steps just the same,showing how to fix the books examplejust mentioned.To make a database 3nF compliant:1. Identify any fields in any tables thatare interdependent.As just stated, what to look <strong>for</strong> arecolumns that depend more upon eachother than they do on the record as awhole. In the <strong>for</strong>um database, this isn’tan issue. Just looking at the messagestable, each subject will be specific to amessage ID, each body will be specificto that message ID, <strong>and</strong> so <strong>for</strong>th.With a books example, the problematicfields are those in the books table thatpertain to the publisher.2. Create new tables accordingly.If you found any problematic columnsin Step 1, like address1, address2, city,state, <strong>and</strong> zip in a books example, youwould create a separate publisherstable. (Addresses would be morecomplex once you factor internationalpublishers in.)continues on next pageG This database as currently designed fails the 3NF test.Database Design 175
3. Assign or create new primary keys.Every table must have a primary key, soadd publisher ID to the new tables.4. Create the requisite <strong>for</strong>eign keys thatlink any of the relationships H.Finally, add a publisher ID to the bookstable. This effectively links each book toits publisher.Despite there being set rules <strong>for</strong> how tonormalize a database, two different peoplecould normalize the same example in slightlydifferent ways. Database design does allow <strong>for</strong>personal preference <strong>and</strong> interpretations. Theimportant thing is that a database has no clear<strong>and</strong> obvious NF violations. Any NF violationwill likely lead to problems down the road.H Going with a minimal version of a hypothetical books database, one new table is created <strong>for</strong> storing thepublisher’s in<strong>for</strong>mation.overruling normalizationAs much as ensuring that a database is in 3NF will help guarantee reliability <strong>and</strong> viability, you won’tfully normalize every database with which you work. Be<strong>for</strong>e undermining the proper methods,though, underst<strong>and</strong> that doing so may have devastating long-term consequences.The two primary reasons to overrule normalization are convenience <strong>and</strong> per<strong>for</strong>mance. Fewertables are easier to manipulate <strong>and</strong> comprehend than more. Further, because of their moreintricate nature, normalized databases will most likely be slower <strong>for</strong> updating, retrieving datafrom, <strong>and</strong> modifying. Normalization, in short, is a trade-off between data integrity/scalability <strong>and</strong>simplicity/speed. On the other h<strong>and</strong>, there are ways to improve your database’s per<strong>for</strong>mance butfew to remedy corrupted data that can result from poor design.This chapter includes an example where normalization is ignored: a message’s post date <strong>and</strong> timeis stored in one field. As mentioned, because <strong>MySQL</strong> is so good with dates, there are no dangersto this approach. Another situation where you would overrule normalization is a table that stored aperson’s gender, among other in<strong>for</strong>mation. If stored as just M/F or Male/Female (instead of linkingto a genders table), there would be many repeating values. But that is fine in this case, as thoselabels are stable values, not likely to change over time (i.e., it’s unlikely that a third option will beinvented, or that “Female” will be renamed, <strong>for</strong>cing a mass update of half the records in the table).Practice <strong>and</strong> experience will teach you how best to model your database, but do try to err on theside of abiding by the normal <strong>for</strong>ms, particularly as you are still mastering the concept.176 Chapter 6
Reviewing the DesignAfter walking through the normalizationprocess, it’s best to review the design onemore time. You want to make sure that thedatabase stores all of the data you mayever need. Often the creation of new tables,thanks to normalization, implies additionalin<strong>for</strong>mation to record. For example, althoughthe original focus of the cinema databasewas on the movies, now that there areseparate actors <strong>and</strong> directors tables,additional facts about those people couldbe reflected in those tables.With that in mind, although there area number of additional columns thatcould be added to the <strong>for</strong>um database,particularly regarding the user, one morefield should be added to the messagestable. Because one message mightbe a reply to another, some method ofindicating that relationship is required. Onesolution is to add a parent_id column tomessages I. If a message is a reply, itsparent_id value will be the message_idof the original message (so message_id isacting as a <strong>for</strong>eign key to this same table).If a message has a parent_id of 0, then it’sa new thread, not a reply J.continues on next pageI To reflect a message hierarchy, the parent_id column is addedto messages.J How the parent_id field isused to track message threads.Database Design 177
After making any changes to the tables,you must run through the normal <strong>for</strong>ms onemore time to ensure that the database is stillnormalized. Finally, choose the column types<strong>and</strong> names, per the steps in Chapter 4 K.Note that every integer column is UNSIGNED,the three primary key columns are alsodesignated as AUTO_INCREMENT, <strong>and</strong> everycolumn is set as NOT NULL.Once the schema is fully developed, it canbe created in <strong>MySQL</strong>, using the comm<strong>and</strong>sshown in Chapter 5, “Introduction to SQL.”You’ll do that later in the chapter, afterlearning a few more things.When you have a primary key–<strong>for</strong>eignkey link (like <strong>for</strong>um_id in <strong>for</strong>ums to <strong>for</strong>um_idin messages), both columns should be of thesame type (in this case, TINYINT UNSIGNEDNOT NULL).K The final ERD <strong>for</strong> the <strong>for</strong>ums database.178 Chapter 6
Creating indexesIndexes are a special system that databasesuse to improve the per<strong>for</strong>mance of SELECTqueries. Indexes can be placed on one ormore columns, of any data type, effectivelytelling <strong>MySQL</strong> to pay particular attention tothose values.While the maximum number of indexesthat a table can have varies, <strong>MySQL</strong> alwaysguarantees that you can create at least16 indexes <strong>for</strong> each table, <strong>and</strong> each indexcan incorporate up to 15 columns. Whilethe need <strong>for</strong> a multicolumn index maynot seem obvious, it will come in h<strong>and</strong>y<strong>for</strong> searches frequently per<strong>for</strong>med on thesame combinations of columns (e.g., first<strong>and</strong> last name, city <strong>and</strong> state, etc.).Although indexes are an integral part ofany table, not everything needs to beindexed. While an index does improve thespeed of reading from databases, it slowsdown queries that alter data in a database(because the changes need to be recordedin the index).Indexes are best used on columnsnnnThat are frequently used in the WHEREpart of a queryThat are frequently used in an ORDER BYpart of a queryThat are frequently used as the focalpoint of a JOIN (joins are discussed inthe next chapter)Generally speaking, you should not indexcolumns that:nnAllow <strong>for</strong> NULL valuesHave a very limited range of values(such as just Y/N or 1/0)<strong>MySQL</strong> has four types of indexes: INDEX(the st<strong>and</strong>ard), UNIQUE (which requireseach row to have a unique value <strong>for</strong> thatcolumn), FULLTEXT (<strong>for</strong> per<strong>for</strong>ming FULLTEXTsearches, also discussed in Chapter 7,“Advanced SQL <strong>and</strong> <strong>MySQL</strong>”), <strong>and</strong> PRIMARYKEY (which is just a particular UNIQUE index<strong>and</strong> one you’ve already been using). Notethat a column should only ever have asingle index on it, so choose the index typethat’s most appropriate.With this in mind, let’s continue designingthe <strong>for</strong>um database by identifyingappropriate indexes. Later in this chapter,the indexes will be defined when the tablesare created in the database. To establishan index when creating a table, this clauseis added to the CREATE TABLE comm<strong>and</strong>:INDEX_TYPE index_name (columns)The index name is optional. If no nameis provided, the index will take the nameof the column, or columns, to which it isapplied. When indexing multiple columns,separate them by commas, <strong>and</strong> put them inthe order from most to least important:INDEX full_name (last_name,➝ first_name)You’ve already seen the syntax <strong>for</strong> creatingindexes in Chapter 5. This comm<strong>and</strong>creates a table with a PRIMARY KEY indexon the user_id field:CREATE TABLE users (user_id MEDIUMINT UNSIGNED NOT NULL➝ AUTO_INCREMENT,first_name VARCHAR(20) NOT NULL,last_name VARCHAR(40) NOT NULL,email VARCHAR(40) NOT NULL,pass CHAR(40) NOT NULL,registration_date DATETIME NOT NULL,PRIMARY KEY (user_id));continues on next pageDatabase Design 179
The last thing you should know aboutindexes are the implications of indexingmultiple columns. If you add an index oncol1, col2, <strong>and</strong> col3 (in that order), thiseffectively creates an index <strong>for</strong> uses ofcol1, col1 <strong>and</strong> col2 together, or on all threecolumns together. It does not provide anindex <strong>for</strong> referencing just col2 or col3 orthose two together.To create indexes:1. Add a PRIMARY KEY index on allprimary keys.Each table should always have aprimary key <strong>and</strong> there<strong>for</strong>e a PRIMARYKEY index. With the <strong>for</strong>ums database,the specific columns to be indexed asprimary keys are: <strong>for</strong>ums.<strong>for</strong>um_id,messages.message_id, <strong>and</strong> users.user_id. (The syntax table_name.column_name is a way to refer to aspecific column within a specific table.)2. Add UNIQUE indexes to any columnswhose values cannot be duplicatedwithin the table.The <strong>for</strong>ums database has three columnsthat should always be unique or elsethere will be problems: <strong>for</strong>ums.name,users.username, <strong>and</strong> users.email.3. Add FULLTEXT indexes, if appropriate.FULLTEXT indexes <strong>and</strong> FULLTEXTsearching are discussed in the nextchapter, so I won’t discuss this topicany more here, but as you’ll discover,there is one FULLTEXT index to be usedin this database.4. Add st<strong>and</strong>ard indexes to columnsfrequently used in a WHERE clause.It requires some experience to know inadvance which columns will often beused in WHERE clauses (<strong>and</strong> there<strong>for</strong>eought to be indexed). With the <strong>for</strong>umsdatabase, one common WHERE st<strong>and</strong>sout: when a user logs in, they’ll providetheir email address <strong>and</strong> password to login. The query to confirm the user hasprovided the correct in<strong>for</strong>mation will besomething like:SELECT * FROM users WHERE pass=➝ SHA1('provided_password') AND➝ email='provided_email_address'From this query, one can deduce thatindexing the combination of the emailaddress <strong>and</strong> password would bebeneficial.5. Add st<strong>and</strong>ard indexes to columns frequentlyused in ORDER BY clauses.Again, in time such columns will st<strong>and</strong>out while designing the database. In the<strong>for</strong>ums example, there’s one columnleft that would be used in ORDER BYclauses that isn’t already indexed:messages.date_entered. This columnwill frequently be used in ORDER BYclauses as the site will, by default,show all messages in the order theywere entered.180 Chapter 6
TABLe 6.6 The <strong>for</strong>um Database IndexesColumn Name Table Index Type<strong>for</strong>um_id <strong>for</strong>ums PRIMARYname <strong>for</strong>ums UNIQUEmessage_id messages PRIMARY<strong>for</strong>um_id messages INDEXparent_id messages INDEXuser_id messages INDEXdate_entered messages INDEXuser_id users PRIMARYusername users UNIQUEpass/email users INDEXemail users UNIQUE6. Add st<strong>and</strong>ard indexes to columns frequentlyused in JOINs.You may not know what a JOIN is now,<strong>and</strong> the topic is thoroughly coveredin Chapter 7, but the most obviousc<strong>and</strong>idates are the <strong>for</strong>eign key columns.Remember that a <strong>for</strong>eign key in Table Brelates to the primary key in Table A.When selecting data from the database,a JOIN will be written based upon thisrelationship. For that JOIN to be efficient,the <strong>for</strong>eign key must be indexed (theprimary key will already have beenindexed). In the <strong>for</strong>ums example, three<strong>for</strong>eign key fields in the messagestable ought to be indexed: <strong>for</strong>um_id,parent_id, <strong>and</strong> user_id.Table 6.6 lists all the indexes identifiedthrough these steps.Indexes can be created after you alreadyhave a populated table. However, you’ll get anerror <strong>and</strong> the index will not be created if youattempt to add a UNIQUE index to a columnthat has duplicate values.<strong>MySQL</strong> uses the term KEY as synonymous<strong>for</strong> INDEX:KEY full_name (last_name, first_name)You can limit the length of an index toa certain number of characters, such as thefirst 10:INDEX index_name (column_name(10))You might do so in situations where the firstX characters will be sufficiently useful in anORDER BY clause.Database Design 181
using DifferentTable TypesA <strong>MySQL</strong> feature uncommon in otherdatabase applications is the ability to usedifferent types of tables (a table’s typeis also called its storage engine). Eachtable type supports different features, hasits own limits (in terms of how much datait can store), <strong>and</strong> even per<strong>for</strong>ms better orworse under certain situations. Still, howyou interact with any table type—in termsof running queries—is consistent acrossthem all.Historically, the most important table typewas MyISAM. Until version 5.5.5 of <strong>MySQL</strong>,MyISAM was the default table type on alloperating systems (on Windows, the switchto a different default was made in anearlier version of <strong>MySQL</strong>). MyISAM tablesare great <strong>for</strong> most applications, h<strong>and</strong>lingSELECTs <strong>and</strong> INSERTs very quickly. TheMyISAM storage engine cannot h<strong>and</strong>letransactions, though, which is its maindrawback (transactions are covered in thenext chapter). Between that feature <strong>and</strong> itslack of row-level locking (the entire tablemust be locked instead), MyISAM tablesare more vulnerable to corruption <strong>and</strong> dataloss should a crash occur.As of <strong>MySQL</strong> version 5.5.5, <strong>MySQL</strong>’s newdefault storage engine, on all operatingsystems, is InnoDB. InnoDB tables can beused <strong>for</strong> transactions <strong>and</strong> they per<strong>for</strong>mUPDATEs nicely. InnoDB tables also support<strong>for</strong>eign key constraints (discussed at theend of the chapter) <strong>and</strong> row-level locking.But the InnoDB storage engine is generallyslower than MyISAM <strong>and</strong> requires moredisk space on the server. Also, an InnoDBtable does not support FULLTEXT indexes(covered in Chapter 7).To specify the storage engine when youdefine a table, add a clause to the end ofthe creation statement:CREATE TABLE tablename (column1name COLUMNTYPE,column2name COLUMNTYPE…) ENGINE = typeIf you don’t specify a storage engine whencreating tables, <strong>MySQL</strong> will use the defaulttype <strong>for</strong> that <strong>MySQL</strong> server.This feature of <strong>MySQL</strong> is even moresignificant because you can mix the tabletypes within the same database. This wayyou can best customize each table <strong>for</strong>optimum features <strong>and</strong> per<strong>for</strong>mance. Tocontinue designing the <strong>for</strong>ums database,the next step is to identify the storageengine to be used by each table.182 Chapter 6
To establish a table’s type:1. Find your <strong>MySQL</strong> server’s availabletable types A:SHOW ENGINES;The SHOW ENGINES comm<strong>and</strong>, whenexecuted on the <strong>MySQL</strong> server, willreveal not only the available storageengines but also the default storageengine. It will help to know thisin<strong>for</strong>mation when it’s time to choosea table type <strong>for</strong> your database.2. If any of your tables requires a FULLTEXTindex, make it a MyISAM table.Again, FULLTEXT indexes <strong>and</strong> searchesare discussed in the next chapter, but I’llsay now that the messages table in the<strong>for</strong>ums example will require a FULLTEXTindex. There<strong>for</strong>e, this table must beMyISAM.3. If any of your tables requires support <strong>for</strong>transactions, make it an InnoDB table.Yes, again, transactions are discussedin the next chapter, but the storageengines ought to be determined now.Neither the <strong>for</strong>ums nor users tablesin the <strong>for</strong>ums database will requiretransactions.4. If neither of the above applies to atable, use the default storage engine.Table 6.7 identifies the storage enginesto be used by the tables in the <strong>for</strong>umsdatabase.<strong>MySQL</strong> has several other table types,but MyISAM <strong>and</strong> InnoDB are the two mostimportant, by far. The MEMORY type createsthe table in memory, making it an extremelyfast table but with absolutely no permanence.At the time of this writing, the <strong>MySQL</strong>documentation claims that the InnoDB tabletype is overall faster than MyISAM. There aresome politics involved with the table types, soI take this claim with a grain of salt.TABLe 6.7 The <strong>for</strong>um Database Table TypesTable<strong>for</strong>umsmessagesusersTable TypeInnoDBMyISAMInnoDBA To confirm what table types your <strong>MySQL</strong> installation supports, run this comm<strong>and</strong> (in the mysql client, here,or phpMyAdmin).Database Design 183
Languages <strong>and</strong> <strong>MySQL</strong>Chapter 1, “Introduction to <strong>PHP</strong>,” quicklyintroduced the concept of encodings. AnHTML page or <strong>PHP</strong> script can specify itsencoding, which dictates what characters,<strong>and</strong> there<strong>for</strong>e languages, are supported.The same is true <strong>for</strong> a <strong>MySQL</strong> database:by setting your database’s encoding,you can impact what characters can bestored in it. To see a list of encodingssupported by your version of <strong>MySQL</strong>, runa SHOW CHARACTER SET comm<strong>and</strong> A. Notethat the phrase character set is beingused in <strong>MySQL</strong> to mean encoding (whichI’ll generally follow in this section to beconsistent with <strong>MySQL</strong>).Each character set in <strong>MySQL</strong> has one ormore collations. Collation refers to therules used <strong>for</strong> comparing characters ina set. It’s like alphabetization, but takesinto account numbers, spaces, <strong>and</strong> othercharacters as well. Collation is tied to thecharacter set being used, reflecting boththe kinds of characters present in thatlanguage <strong>and</strong> the cultural habits of peoplewho generally use the language. Forexample, how text is sorted in English isnot the same as it is in Traditional Spanishor in Arabic. Other considerations include:Are upper- <strong>and</strong> lowercase versions of acharacter considered to be the same ordifferent (i.e., is it a case-sensitive comparison)?Or, how do accented characters getsorted? Is a space counted or ignored?A The list of charactersets supported by this<strong>MySQL</strong> installation.184 Chapter 6
To view <strong>MySQL</strong>’s available collations, run thisquery B, replacing charset with the propervalue from the result in the last query A:SHOW COLLATION LIKE 'charset%'The results of this query will also indicatethe default collation <strong>for</strong> that character set.The names of collations use a concludingci to indicate case-insensitivity, cs <strong>for</strong> casesensitivity,<strong>and</strong> bin <strong>for</strong> binary.Generally speaking, I recommend usingthe UTF-8 character set, with its defaultcollation. More importantly, the characterset in use by the database should matchthat of your <strong>PHP</strong> scripts. If you’re notusing UTF-8 in your <strong>PHP</strong> scripts, use thematching encoding in the database. If thedefault collation doesn’t adhere to theconventions of the language primarily inuse, then adjust the collation accordingly.In <strong>MySQL</strong>, the server as a whole, eachdatabase, each table, <strong>and</strong> even everystring column can have a defined characterset <strong>and</strong> collation. To set these values whenyou create a database, useCREATE DATABASE name CHARACTER SET➝ charset COLLATE collationTo set these values when you create atable, useCREATE TABLE name (column definitions) CHARACTER SET charset COLLATE➝ collationcontinues on next pageB The list of collationsavailable in the UTF-8character set. The first one,utf_general_ci, is the default.Database Design 185
To establish the character set <strong>and</strong> collation<strong>for</strong> a column, add the right clause to thecolumn’s definition (you’d only use this <strong>for</strong>text types):CREATE TABLE name (something TEXT CHARACTER SET charset➝ COLLATE collation…)In each of these cases, both clauses areoptional. If omitted, a default character setor collation will be used.Establishing the character set <strong>and</strong> collationwhen you define a database affects whatdata can be stored (e.g., you can’t storea character in a column if its encodingdoesn’t support that character). A secondissue is the encoding used to communicatewith <strong>MySQL</strong>. If you want to store Chinesecharacters in a table with a Chineseencoding, those characters will need tobe transferred using the same encoding.To do so within the mysql client, set theencoding using justCHARSET charsetWith phpMyAdmin, the encoding to beused is established in the application itself(i.e., written in the configuration file).At this point in time, every aspect of thedatabase design <strong>for</strong> the <strong>for</strong>ums examplehas been covered, so let’s create that databasein <strong>MySQL</strong>, including its indexes, storageengines, character sets, <strong>and</strong> collations.To assign character sets<strong>and</strong> collations:1. Access <strong>MySQL</strong> using whatever clientyou prefer.Like the preceding chapter, this onewill also use the mysql client <strong>for</strong> allof its examples. You are welcome touse phpMyAdmin or other tools as theinterface to <strong>MySQL</strong>.2. Create the <strong>for</strong>um database C:CREATE DATABASE <strong>for</strong>umCHARACTER SET utf8COLLATE utf8_general_ci;USE <strong>for</strong>um;Depending upon your setup, you maynot be allowed to create your owndatabases. If not, just use the databaseprovided to you <strong>and</strong> add the followingtables to it. Note that in the CREATEDATABASE comm<strong>and</strong>, the character set<strong>and</strong> collation are also defined. By doingso at this point, every table will usethose settings.3. Create the <strong>for</strong>ums table D:CREATE TABLE <strong>for</strong>ums (<strong>for</strong>um_id TINYINT UNSIGNED NOT➝ NULL AUTO_INCREMENT,name VARCHAR(60) NOT NULL,PRIMARY KEY (<strong>for</strong>um_id),UNIQUE (name)) ENGINE = INNODB;C The first steps are to create <strong>and</strong>select the database.D Creating the first table.186 Chapter 6
It does not matter in what order youcreate your tables, but I’ll make the<strong>for</strong>ums table first. Remember thatyou can enter your SQL queries overmultiple lines <strong>for</strong> convenience.This table only contains two columns(which will happen frequently in anormalized database). Because I don’texpect there to be many <strong>for</strong>ums,the primary key is a really small type(TINYINT). If you wanted to add descriptionsof each <strong>for</strong>um, a VARCHAR(255) orTINYTEXT column could be added tothis table. This table uses the InnoDBstorage engine.4. Create the messages table E:CREATE TABLE messages (message_id INT UNSIGNED NOT NULL➝ AUTO_INCREMENT,parent_id INT UNSIGNED NOT NULL➝ DEFAULT 0,<strong>for</strong>um_id TINYINT UNSIGNED NOT NULL,user_id MEDIUMINT UNSIGNED NOT➝ NULL,subject VARCHAR(100) NOT NULL,body LONGTEXT NOT NULL,date_entered DATETIME NOT NULL,PRIMARY KEY (message_id),INDEX (parent_id),INDEX (<strong>for</strong>um_id),INDEX (user_id),INDEX (date_entered)) ENGINE = MYISAM;The primary key <strong>for</strong> this table has tobe big, as it could have lots <strong>and</strong> lotsof records. The three <strong>for</strong>eign keycolumns—<strong>for</strong>um_id, parent_id, <strong>and</strong>user_id—will all be the same size <strong>and</strong>type as their primary key counterparts.The subject is limited to 100 characters<strong>and</strong> the body of each message can bea lot of text. The date_entered field isa DATETIME type.Unlike the other two tables, this one isof the MyISAM type.5. Create the users table F:CREATE TABLE users (user_id MEDIUMINT UNSIGNED NOTNULL AUTO_INCREMENT,username VARCHAR(30) NOT NULL,pass CHAR(40) NOT NULL,first_name VARCHAR(20) NOT NULL,last_name VARCHAR(40) NOT NULL,email VARCHAR(60) NOT NULL,PRIMARY KEY (user_id),UNIQUE (username),UNIQUE (email),INDEX login (pass, email)) ENGINE = INNODB;continues on next pageE Creating the second table.F The database’s third <strong>and</strong> final table.Database Design 187
Most of the columns here mimic thosein the sitename database’s users table,created in the preceding two chapters.The pass column is defined as CHAR(40),because the SHA1( ) function will beused <strong>and</strong> it always returns a string 40characters long (see Chapter 5).This table uses the InnoDB engine.6. If desired, confirm the database’sstructure G:SHOW TABLES;SHOW COLUMNS FROM <strong>for</strong>ums;SHOW COLUMNS FROM messages;SHOW COLUMNS FROM users;The SHOW comm<strong>and</strong> reveals in<strong>for</strong>mationabout a database or a table. This step isoptional because <strong>MySQL</strong> reports on thesuccess of each query as it is entered.Still, it’s always nice to remind yourselfof a database’s structure.Collations in <strong>MySQL</strong> can also bespecified within a query, to affect the results:SELECT … ORDER BY column COLLATE➝ collationSELECT … WHERE column LIKE 'value'➝ COLLATE collationThe CONVERT( ) function can convert textfrom one character set to another.You can change the default character setor collation <strong>for</strong> a database or table using anALTER comm<strong>and</strong>, discussed in Chapter 7.Because different character sets requiremore space to represent a string, you willlikely need to increase the size of a column <strong>for</strong>UTF-8 characters. Do this be<strong>for</strong>e changing acolumn’s encoding so that no data is lost.G Check the structure of anydatabase or table using SHOW.188 Chapter 6
TABLe 6.8 UTC OffsetsCityNew York City, U.S.Cape Town, South AfricaMumbai, IndiaAuckl<strong>and</strong>, New Zeal<strong>and</strong>Kathm<strong>and</strong>u, NepalSantiago, ChileDublin, Irel<strong>and</strong>TimeUTC–4UTC+2UTC+5:30UTC+13UTC+5:45UTC–3UTC+1Time Zones <strong>and</strong> <strong>MySQL</strong>Chapter 5 discussed how to use NOW( )<strong>and</strong> other date- <strong>and</strong> time-related functions.That chapter explained that these functionsreflect the time on the server. There<strong>for</strong>e,values stored in a database using thesefunctions are also storing the server’s time.That may not sound like a problem, butsay you move your site from one serverto another: you export all the data, importit into the other, <strong>and</strong> everything’s fine…unless the two servers are in different timezones, in which case all of the dates arenow technically off. For some sites, such analteration wouldn’t be a big deal, but whatif your site features paid memberships?That means some people’s membershipmight expire several hours early <strong>and</strong> <strong>for</strong>others, several hours late! At the end of theday, the goal of a database is to reliablystore in<strong>for</strong>mation.The solution to this particular problem isto store dates <strong>and</strong> times in a time zone–neutral way. Doing so requires somethingcalled UTC (Coordinated Universal Time,<strong>and</strong>, yes, the abbreviation doesn’t exactlymatch the term). UTC, like Greenwich MeanTime (GMT), provides a common point o<strong>for</strong>igin, from which all times in the world canbe expressed as UTC plus or minus somehours <strong>and</strong> minutes (Table 6.8).Fortunately, you don’t have to know thesevalues or per<strong>for</strong>m any calculations in orderto determine UTC <strong>for</strong> your server. Instead,the UTC_DATE( ) function returns the UTCdate; UTC_TIME( ) returns the current UTCtime; <strong>and</strong> UTC_TIMESTAMP( ) returns thecurrent date <strong>and</strong> time.continues on next pageDatabase Design 189
Once you have stored a UTC time, you canretrieve the time adjusted to reflect theserver’s or the user’s location. To changea date <strong>and</strong> time from any one time zone toanother, use CONVERT_TZ( ) A:CONVERT_TZ(dt, from, to)The first argument is a date <strong>and</strong> timevalue, like the result of a function or what’sstored in a column. The second <strong>and</strong> thirdarguments are named time zones. Inorder to use this function, the list of timezones must already be stored in <strong>MySQL</strong>,which may or may not be the case <strong>for</strong>your installation (see the sidebar). If yousee NULL results B, check out the <strong>MySQL</strong>manual <strong>for</strong> how to install the time zones onyour server.To use this in<strong>for</strong>mation, let’s start populatingthe <strong>for</strong>ums database, recording the messageposted date <strong>and</strong> time using UTC.using Time Zones in <strong>MySQL</strong><strong>MySQL</strong> does not necessarily installsupport <strong>for</strong> time zones by default. Inorder to use named time zones, there arefive tables in the mysql database thathave to be populated. While <strong>MySQL</strong> maynot automatically do this <strong>for</strong> you, it doesprovide the tools to do this yourself.This process is just complicated enoughthat there’s not room to discuss itin this book (not <strong>for</strong> every possiblecontingency, operating system, etc.).But you can find the instructions bylooking up “server time zone support”in the <strong>MySQL</strong> manual.If you continue to use time zones in<strong>MySQL</strong>, you also need to keep this in<strong>for</strong>mationin the mysql database updated.The rules <strong>for</strong> time zones, in particular,when <strong>and</strong> how they observe daylightsaving time, change often enough.Again, the <strong>MySQL</strong> manual has instructions<strong>for</strong> updating your time zones.A A conversion of the current UTC date <strong>and</strong> time to the American EasternDaylight Time (EDT).B The CONVERT_TZ( )function will returnNULL if it references aninvalid time zone or ifthe time zones haven’tbeen installed in <strong>MySQL</strong>(which is the case here).190 Chapter 6
To work with uTC:1. Access the <strong>for</strong>ums database usingwhatever client you prefer.Like the preceding chapter, this onewill also use the mysql client <strong>for</strong> allof its examples. You are welcome touse phpMyAdmin or other tools as theinterface to <strong>MySQL</strong>.2. If necessary, change the encoding toUTF-8 C:CHARSET utf8;Because the database uses UTF-8 asits character set, the communicationwith the database should use the same.This line, explained in the previoussection of the chapter, does exactlythat. Note that you only need to dothis when using the mysql client. Also,if you’re not using UTF-8, change thecomm<strong>and</strong> accordingly.3. Add some new records to the <strong>for</strong>umstable D:INSERT INTO <strong>for</strong>ums (name) VALUES('<strong>MySQL</strong>'), ('<strong>PHP</strong>'), ('Sports'),('HTML'), ('CSS'), ('Kindling');Since the messages table relies onvalues retrieved from both the <strong>for</strong>ums<strong>and</strong> users tables, those two tables needto be populated first. With this INSERTcomm<strong>and</strong>, only the name column mustbe provided a value (the table’s <strong>for</strong>um_id column will be given an automaticallyincremented integer by <strong>MySQL</strong>).4. Add some records to the users table E:INSERT INTO users (username, pass,first_name, last_name, email) VALUES('troutster', SHA1('mypass'),'Larry', 'Ullman', 'lu@example.com'),('funny man', SHA1('monkey'),'David', 'Brent', 'db@example.com'),('Gareth', SHA1('asstmgr'), 'Gareth','Keenan', 'gk@example.com');If you have any questions on the INSERTsyntax or use of the SHA1( ) functionhere, see Chapter 5.continues on next pageC The characterset used tocommunicate with<strong>MySQL</strong> shouldmatch that used inthe database.D Adding records to the <strong>for</strong>ums table.E Addingrecords to theusers table.Database Design 191
5. Add new records to the messagestable F:SELECT * FROM <strong>for</strong>ums;SELECT user_id, username FROM➝ users;INSERT INTO messages (parent_id,➝ <strong>for</strong>um_id, user_id, subject,➝ body, date_entered) VALUES(0, 1, 1, 'Question about➝ normalization.', 'I''m confused➝ about normalization. For the➝ second normal <strong>for</strong>m (2NF), I➝ read...', UTC_TIMESTAMP( )),(0, 1, 2, 'Database Design', 'I''m➝ creating a new database <strong>and</strong> am➝ having problems with the➝ structure. How many➝ tables should I have?...',➝ UTC_TIMESTAMP( )),(2, 1, 2, 'Database Design', 'The➝ number of tables your database➝ includes...', UTC_TIMESTAMP( )),(0, 1, 3, 'Database Design', 'Okay,➝ thanks!', UTC_TIMESTAMP( )),(0, 2, 3, '<strong>PHP</strong> Errors', 'I''m using➝ the scripts from Chapter 3 <strong>and</strong>➝ I can''t get the first calculator➝ example to work. When I submit➝ the <strong>for</strong>m...', UTC_TIMESTAMP( ));Because two of the fields in themessages table (<strong>for</strong>um_id <strong>and</strong> user_id)relate to values in other tables, youneed to know those values be<strong>for</strong>einserting new records into this table.For example, when the troutster usercreates a new message in the <strong>MySQL</strong><strong>for</strong>um, the INSERT will have a <strong>for</strong>um_idof 1 <strong>and</strong> a user_id of 1.This is further complicated by theparent_id column, which shouldstore the message_id to which thenew message is a reply. The secondmessage added to the database willhave a message_id of 2, so replies tothat message need a parent_id of 2.F Populating themessages table requiresknowing <strong>for</strong>eign key valuesfrom users <strong>and</strong> <strong>for</strong>ums.192 Chapter 6
With your <strong>PHP</strong> scripts—once you’vecreated an interface <strong>for</strong> this database,this process will be much easier, but it’simportant to comprehend the theory inSQL terms first.For the date_entered field, the valuereturned by the UTC_TIMESTAMP( )function will be used. Using the UTC_TIMESTAMP( ) function, the record willstore the UTC date <strong>and</strong> time, not thedate <strong>and</strong> time on the server.6. Repeat Steps 1 through 3 to populatethe database.The rest of the examples in this chapter<strong>and</strong> the next will use the populateddatabase. You’ll probably want todownload the SQL comm<strong>and</strong>s fromthe book’s corresponding <strong>Web</strong> site,although you can populate the tableswith your own examples <strong>and</strong> then justchange the queries in the rest of thechapter accordingly.7. View the most recent record in the messagestable, using the stored date <strong>and</strong>time G:SELECT message_id, subject,➝ date_entered FROM messagesORDER BY date_entered DESC LIMIT 1;As you can see in the figure <strong>and</strong> thetable definition, UTC times are storedjust the same as non-UTC times. What’snot obvious in the figure is that therecord just inserted reflects a time fourhours ahead of the server (because myparticular server is in a time zone fourhours behind UTC).continues on next pageG The record that was just inserted, which reflects a time four hoursahead (the server is UTC-4).Database Design 193
8. Retrieve the same record convertingthe date_entered to your time zone H:SELECT message_id, subject,CONVERT_TZ(date_entered, 'UTC',➝'America/New_York') AS localFROM messages ORDER BY➝ date_entered DESC LIMIT 1;Using the CONVERT_TZ( ) function, youcan convert any date <strong>and</strong> time to adifferent time zone. For the from timezone, use UTC. For the to time zone,use yours.If you get a NULL result B, either thename of one of your time zones iswrong or <strong>MySQL</strong> hasn’t had its timezones loaded yet (see the sidebar).However you decide to h<strong>and</strong>le dates,the key is to be consistent. If you decide touse UTC, then always use UTC.UTC is also known as Zulu time, representedby the letter Z.Besides being time zone <strong>and</strong> daylightsaving time agnostic, UTC is also more accurate.It factors in irregular leap seconds thatcompensate <strong>for</strong> the inexact movement ofthe planet.H The UTC-stored date <strong>and</strong> time converted to my local time.194 Chapter 6
Foreign Key ConstraintsA feature of the InnoDB table type, notsupported in other storage engines, is theability to apply <strong>for</strong>eign key constraints.When you have related tables, the <strong>for</strong>eignkey in Table B relates to the primary keyin Table A (<strong>for</strong> ease of underst<strong>and</strong>ing, itmay help to think of Table B as the childto Table A’s parent). For example, in the<strong>for</strong>ums database, the messages.user_idis tied to users.user_id. If the administratorwere to delete a user account, therelationship between those tables wouldbe broken (because the messages tablewould have records with a user_id valuethat doesn’t exist in users). Foreign keyconstraints set rules as to what shouldhappen when a break would occur,including preventing that break.The syntax <strong>for</strong> creating a <strong>for</strong>eign keyconstraint is:FOREIGN KEY (item_name) REFERENCES➝ table (column)(This goes within a CREATE TABLE or ALTERTABLE statement.)The item name is the <strong>for</strong>eign key columnin the current table. The table(column)clause is a reference to the parent tablecolumn to which this <strong>for</strong>eign key shouldbe constrained. If you just use the above,thereby only identifying the relationship,without stating what should happen whenthe constraint would be broken, <strong>MySQL</strong>will throw an error if you attempt to deletethe parent record while child records existA. <strong>MySQL</strong> will also throw an error if youattempt to create a child record using aparent ID that doesn’t exist B.You can dictate what alternative actionsshould occur by following the above syntaxwith one or both of these:ON DELETE actionON UPDATE actionThere are five action options, but two—RESTRICT <strong>and</strong> NO ACTION—are synonymous<strong>and</strong> also the default (i.e., the same as ifyou don’t specify the action at all). A thirdaction option—SET DEFAULT—doesn’t work(don’t ask me, ask the <strong>MySQL</strong> manual!).That leaves CASCADE <strong>and</strong> SET NULL. Ifthe action set is SET NULL, the removalof a parent record will result in settingthe corresponding <strong>for</strong>eign keys in thechild table to NULL. If that table definesthat column as NOT NULL (which it almostalways should), deletion of the parentrecord will trigger an error.continues on next pageA This error indicatesthat <strong>MySQL</strong> is preventing aquery from deleting a parentrecord because the record isconstrained to one or moreexisting children records.B Foreign keyconstraints alsoaffect INSERT queries.Database Design 195
The CASCADE action is the most usefuloption. It tells the database to apply thesame changes to the related table. With thisinstruction, if you delete the parent record,<strong>MySQL</strong> will also delete the child recordswith that parent ID as its <strong>for</strong>eign key.As only the InnoDB table type supports<strong>for</strong>eign key constraints, both tables inthe relationship must be of the InnoDBtype. Also, in order <strong>for</strong> <strong>MySQL</strong> to be ableto compare the <strong>for</strong>eign key-primary keyvalues, the related columns must be ofequitable types. This means that numericcolumns must be the same type <strong>and</strong> size;text columns must use the same characterset <strong>and</strong> collation.With the <strong>for</strong>ums example, it’s not possibleto use <strong>for</strong>eign key constraints as the soletable related to another—messages relatesto both <strong>for</strong>ums <strong>and</strong> users—must use theMyISAM table type (to support FULLTEXTsearches). Instead, let’s take a look at anew hypothetical example <strong>for</strong> banking C.The customers table stores all of thein<strong>for</strong>mation particular to a customer.It would logically also store contactin<strong>for</strong>mation <strong>and</strong> so <strong>for</strong>th. The accountstable stores the accounts <strong>for</strong> eachcustomer, including the type (Checkingor Savings) <strong>and</strong> balance. Each customermay have more than one account, buteach account is associated with only onecustomer (<strong>for</strong> a bit of simplicity). In the realworld, the table might also store the datethe account was opened <strong>and</strong> use a BIGINTas the balance (thereby representing alltransactions in cents instead of dollarswith decimals). Finally, the transactionstable stores every movement of moneyfrom one account to another. Again, tomake the example a bit easier to follow,the example assumes that only accountswithin this same system will interact. Notethat the transactions table has two oneto-manyrelationships with accounts (notone many-to-many). Each transaction’sto_account_id value will be associatedwith a single account, but each accountcould be the “to” account multiple times.The same applies to the “from” account.Finally, <strong>for</strong>eign key constraints are appliedto preserve the integrity of the data.In this next series of steps, you’ll create<strong>and</strong> populate this database, payingattention to the constraints. In the nextchapter, this same database will be used todemonstrate transactions <strong>and</strong> encryption.C The banking database could be used <strong>for</strong> virtual banking.196 Chapter 6
To create <strong>for</strong>eign key constraints:1. Access <strong>MySQL</strong> using whatever clientyou prefer.Like the preceding chapter, this onewill also use the mysql client <strong>for</strong> allof its examples. You are welcome touse phpMyAdmin or other tools as theinterface to <strong>MySQL</strong>.2. Create the banking database D:CREATE DATABASE bankingCHARACTER SET utf8COLLATE utf8_general_ci;USE banking;As always, depending upon your setup,you may not be allowed to create yourown databases. If not, just use thedatabase provided to you <strong>and</strong> add thefollowing tables to it.3. If necessary, change the communicationencoding to UTF-8:CHARSET utf8;4. Create the customers table E:CREATE TABLE customers (customer_id INT UNSIGNED NOT NULL➝ AUTO_INCREMENT,first_name VARCHAR(20) NOT NULL,last_name VARCHAR(40) NOT NULL,PRIMARY KEY (customer_id),INDEX full_name (last_name,➝ first_name)) ENGINE = INNODB;The customers table just stores thecustomer’s ID—the primary key—<strong>and</strong>name (in two columns). An index is alsoplaced on the full name, in case thatmight be used in ORDER BY <strong>and</strong> otherquery clauses. So that the database canuse <strong>for</strong>eign key constraints, every tablewill use the InnoDB storage engine.continues on next pageD A new databaseis being created <strong>for</strong>this example.E Creating the customers table.Database Design 197
5. Create the accounts table F:CREATE TABLE accounts (account_id INT UNSIGNED NOT NULL➝ AUTO_INCREMENT,customer_id INT UNSIGNED NOT NULL,type ENUM('Checking', 'Savings')➝ NOT NULL,balance DECIMAL(10,2) UNSIGNED NOT➝ NULL DEFAULT 0.0,PRIMARY KEY (account_id),INDEX (customer_id),FOREIGN KEY (customer_id) REFERENCES➝ customers (customer_id)ON DELETE NO ACTION ON UPDATE NO➝ ACTION) ENGINE = INNODB;The accounts table stores the accountID, customer ID, account type, <strong>and</strong>balance. The customer_id column hasan index on it, as it will be used in JOINs(in Chapter 7). More importantly, thecolumn is constrained to customers.customer_id, thereby protecting bothtables. Even though NO ACTION is thedefault constraint, I’ve included it in thedefinition <strong>for</strong> added clarity.F Creating the accounts table.198 Chapter 6
6. Create the transactions table G:CREATE TABLE transactions (transaction_id INT UNSIGNED NOT➝ NULL AUTO_INCREMENT,to_account_id INT UNSIGNED NOT➝ NULL,from_account_id INT UNSIGNED NOT➝ NULL,amount DECIMAL(5,2) UNSIGNED NOT➝ NULL,date_entered TIMESTAMP NOT NULL,PRIMARY KEY (transaction_id),INDEX (to_account_id),INDEX (from_account_id),INDEX (date_entered),FOREIGN KEY (to_account_id)➝ REFERENCES accounts (account_id)ON DELETE NO ACTION ON UPDATE NO➝ ACTION,FOREIGN KEY (from_account_id)➝ REFERENCES accounts (account_id)ON DELETE NO ACTION ON UPDATE NO➝ ACTION) ENGINE = INNODB;The final table will be used to recordall movements of monies among theaccounts. To do so, it stores bothaccount IDs—the “to” <strong>and</strong> “from,” theamount, <strong>and</strong> the date/time. Indexes areadded accordingly, <strong>and</strong> both account IDsare constrained to the accounts table.continues on next pageG Creating the third, <strong>and</strong> final, table: transactions.Database Design 199
7. Populate the customers <strong>and</strong> accountstables H:INSERT INTO customers (first_name,➝ last_name)VALUES ('Sarah', 'Vowell'),➝ ('David', 'Sedaris'), ('Kojo',➝'Nnamdi');INSERT INTO accounts (customer_id,➝ balance)VALUES (1, 5460.23), (2, 909325.24),➝ (3, 892.00);First, sample data is entered into thefirst two tables (the third will be usedin the next chapter). Note that becausethe accounts.type column is definedas an ENUM NOT NULL, if no value isprovided <strong>for</strong> that column, the first itemin the ENUM definition—Checking—willbe used.8. Attempt to put data into the accountstable <strong>for</strong> which there is no customer I:INSERT INTO accounts (customer_id,➝ type, balance)VALUES (10, 'Savings', 200.00);The <strong>for</strong>eign key constraint presentin the accounts table will prevent anaccount being created without a validcustomer ID (a pretty useful check inthe real world).H Three records are added to both the customers <strong>and</strong> accounts tables.I Again, as in B, the constraint denies the INSERT query due to aninvalid value from the parent table.200 Chapter 6
9. Attempt to delete a record from thecustomers table <strong>for</strong> which there is anaccounts record J:DELETE FROM customersWHERE customer_id=2;The constraint will also prevent thedeletion of customer records whenthat customer still has an account.Despite the constraint, you couldstill delete a customer record if thecustomer does not have any recordsin the accounts table.To actually delete constrained records,you must first delete all the children records,<strong>and</strong> then the parent record.Foreign key constraints require that allcolumns in the constraint be indexed. Normaldatabase design would suggest this is thecase, but if the correct indexes do not exist,<strong>MySQL</strong> will create them when the constraintis defined.Similar to constraints are triggers. Simplyput, a trigger is a way of telling the database“when X happens to this table, do Y.” For example,when inserting a record in Table A, anotherrecord might be created or updated in Table B.See the <strong>MySQL</strong> manual <strong>for</strong> more on triggers.J Because the customer with an ID of 2 has one or more records in the accounts table, thecustomers record cannot be deleted.Database Design 201
Review <strong>and</strong> pursueIf you have any problems with thereview questions or the pursue prompts,turn to the book’s supporting <strong>for</strong>um(www.LarryUllman.com/<strong>for</strong>ums/).ReviewnnnnnnnnnWhy is normalization important?What are the two types of keys?What are the three types of tablerelationships?How do you fix the problem of amany-to-many relationship betweentwo tables?What are the four types of indexes?What general types of columns shouldbe indexed? What general types ofcolumns should not be indexed?What are the two most common <strong>MySQL</strong>table types? What is the default tabletype <strong>for</strong> your <strong>MySQL</strong> installation?What is a character set? What isa collation? What impact does thecharacter set have on the database?What impact does the collation have?What character set <strong>and</strong> collation areyou using?What is UTC? How do you find the UTCtime in <strong>MySQL</strong>? How do you convertfrom UTC to another time zone’s time?What are <strong>for</strong>eign key constraints?What table type supports <strong>for</strong>eign keyconstraints?pursuennnYou may want to consider downloading,installing, <strong>and</strong> learning to use the<strong>MySQL</strong> Workbench application. It canbe quite useful.If you don’t fully grasp the process ofnormalization—<strong>and</strong> that’s perfectlyunderst<strong>and</strong>able—search <strong>for</strong> additionaltutorials online or ask a question in mysupport <strong>for</strong>ums.Design your own database using thein<strong>for</strong>mation presented here.202 Chapter 6
7Advanced SQL<strong>and</strong> <strong>MySQL</strong>This, the last chapter dedicated to SQL <strong>and</strong><strong>MySQL</strong> (although most of the rest of thebook will use these technologies in some<strong>for</strong>m or another), discusses the higher-endconcepts often needed to work with morecomplicated databases, like those createdin the previous chapter. The first such topicis the JOIN, a critical SQL term <strong>for</strong> queryingnormalized databases with multiple tables.From there, the chapter introduces a categoryof functions that are specifically usedwhen grouping query results, followed bymore complex ways to select values froma table.In the middle of the chapter, you’ll learnhow to per<strong>for</strong>m FULLTEXT searches, whichcan add search engine-like functionality toany site. Next up is the EXPLAIN comm<strong>and</strong>:it provides a way to test the efficiency ofyour database schema <strong>and</strong> your queries.The chapter concludes with coverage oftransactions <strong>and</strong> database encryption.in This ChapterPer<strong>for</strong>ming Joins 204Grouping Selected Results 214Advanced Selections 218Per<strong>for</strong>ming FULLTEXT Searches 222Optimizing Queries 230Per<strong>for</strong>ming Transactions 234Database Encryption 237Review <strong>and</strong> Pursue 240
per<strong>for</strong>ming JoinsBecause relational databases are morecomplexly structured, they sometimesrequire special query statements toretrieve the in<strong>for</strong>mation you need most.For example, if you wanted to know whatmessages are in the <strong>MySQL</strong> <strong>for</strong>um (usingthe <strong>for</strong>um database created in the previouschapter), you would need to first find the<strong>for</strong>um_id <strong>for</strong> <strong>MySQL</strong>:SELECT <strong>for</strong>um_id FROM <strong>for</strong>ums WHERE➝ name='<strong>MySQL</strong>'Then you would use that number toretrieve all the records from the messagestable that have that <strong>for</strong>um_id:SELECT * FROM messages WHERE➝ <strong>for</strong>um_id=1This one simple (<strong>and</strong>, in a <strong>for</strong>um, oftennecessary) task would require twoseparate queries. By using a join, you canaccomplish all of that in one fell swoop.A join is an SQL query that uses twoor more tables, <strong>and</strong> produces a virtualtable of results. Any time you need tosimultaneously retrieve in<strong>for</strong>mation frommore than one table, a join is what you’llprobably use.Joins can be written in many differentways, but the basic syntax is:SELECT what_columns FROM tableA➝ JOIN_TYPE tableB JOIN_CLAUSEBecause joins involve multiple tables, thewhat_columns can include columns inany named table. And as joins often returnso much in<strong>for</strong>mation, it’s normally best tospecify exactly what columns you wantreturned, instead of selecting them all.When selecting from multiple tables, youmust use the dot syntax (table.column)if the tables named in the query havecolumns with the same name. This is oftenthe case when dealing with relationaldatabases because a primary key fromone table may have the same name asa <strong>for</strong>eign key in another. If you are notexplicit when referencing your columns,you’ll get an error A:SELECT <strong>for</strong>um_id FROM messages INNER➝ JOIN<strong>for</strong>ums ON messages.<strong>for</strong>um_id=<strong>for</strong>ums.➝ <strong>for</strong>um_idThe two main types of joins are inner <strong>and</strong>outer (there are subtypes within both).As you’ll see with outer joins, the order inwhich you reference the tables does matter.The join clause is where you indicate therelationship between the joined tables. Forexample, <strong>for</strong>ums.<strong>for</strong>um_id should equalmessages.<strong>for</strong>um_id (as in the above).You can also use WHERE <strong>and</strong> ORDER BYclauses with a join, as you would with anySELECT query.As a last note, be<strong>for</strong>e getting into joinsmore specifically, the SQL conceptof an alias—introduced in Chapter 5,“Introduction to SQL”—will come in h<strong>and</strong>ywhen writing joins. Often an alias will justbe used as a shorth<strong>and</strong> way of referencingthe same table multiple times within thesame query. If you don’t recall the syntax<strong>for</strong> creating aliases, or how they’re used,revisit that part of Chapter 5.A Generically referring toa column name present inmultiple tables will causean ambiguity error.204 Chapter 7
(As in the previous two chapters, thischapter will use the comm<strong>and</strong>-line mysqlclient to execute queries, but you canalso use phpMyAdmin or another tool.The chapter assumes you know how toconnect to the <strong>MySQL</strong> server <strong>and</strong> declarethe character set to use, if necessary.)B This join returns three columns from two tableswhere the <strong>for</strong>um_id value—1—represents the<strong>MySQL</strong> <strong>for</strong>um.inner JoinsAn inner join returns all of the records fromthe named tables wherever a match ismade. For example, to find every messageposted in the <strong>MySQL</strong> <strong>for</strong>um, the inner joinwould be written as BSELECT m.message_id, m.subject, f.nameFROM messages AS m INNER JOIN <strong>for</strong>ums➝ AS fON m.<strong>for</strong>um_id = f.<strong>for</strong>um_idWHERE f.name = '<strong>MySQL</strong>'This join is selecting three columns fromthe messages table (aliased as m) <strong>and</strong> onecolumn from the <strong>for</strong>ums table (aliased asf) under two conditions. First, the f.namecolumn must have a value of <strong>MySQL</strong> (thiswill return the <strong>for</strong>um_id of 1). Second, the<strong>for</strong>um_id value in the <strong>for</strong>ums table mustmatch the <strong>for</strong>um_id value in the messagestable. Because of the equality comparisonbeing made across both tables (m.<strong>for</strong>um_id= f.<strong>for</strong>um_id), this is known as an equijoin.As an alternative syntax, if the columnin both tables being used in the equalitycomparison has the same name, you cansimplify your query with USING:SELECT m.message_id, m.subject, f.nameFROM messages AS m INNER JOIN <strong>for</strong>ums➝ AS fUSING (<strong>for</strong>um_id)WHERE f.name = '<strong>MySQL</strong>'Advanced SQL <strong>and</strong> <strong>MySQL</strong> 205
To use inner joins:1. Connect to <strong>MySQL</strong> <strong>and</strong> select the<strong>for</strong>um database.2. Retrieve the <strong>for</strong>um name <strong>and</strong> messagesubject <strong>for</strong> every record in the messagestable C:SELECT f.name, m.subject FROM <strong>for</strong>umsAS f INNER JOIN messages AS mUSING (<strong>for</strong>um_id) ORDER BY f.name;This query will effectively replace the<strong>for</strong>um_id value in the messages tablewith the corresponding name valuefrom the <strong>for</strong>ums table <strong>for</strong> each of therecords in the messages table. Theend result is that it displays the textualversion of the <strong>for</strong>um name <strong>for</strong> eachmessage subject.Notice that you can still use ORDER BYclauses in joins.3. Retrieve the subject <strong>and</strong> date entered<strong>for</strong> every message posted by the userfunny man D:SELECT m.subject,DATE_FORMAT(m.date_entered,➝'%M %D, %Y') AS DateFROM users AS uINNER JOIN messages AS mUSING (user_id)WHERE u.username = 'funny man';This join also uses two tables: users<strong>and</strong> messages. The linking column<strong>for</strong> the two tables is user_id, so that’splaced in the USING clause. The WHEREconditional identifies the user beingtargeted, <strong>and</strong> the DATE_FORMAT( )function will help <strong>for</strong>mat the date_entered value.C A basic inner join that returns only two columnsof values.D A slightly more complicated version of an innerjoin, based upon the users <strong>and</strong> messages tables.206 Chapter 7
E An ORDER BY clause <strong>and</strong> a LIMIT clause areapplied to this join, which returns the <strong>for</strong>ums withthe five most recent messages.4. Find the <strong>for</strong>ums that have had the fivemost recent postings E:SELECT f.name FROM <strong>for</strong>ums AS fINNER JOIN messages AS mUSING (<strong>for</strong>um_id)ORDER BY m.date_entered DESC➝ LIMIT 5;Since the only in<strong>for</strong>mation that needsto be returned is the <strong>for</strong>um name, that’sthe sole column selected by this query.The join is then across the <strong>for</strong>ums <strong>and</strong>messages table, linked via the <strong>for</strong>um_id. The query to that point would returnevery message matched with the <strong>for</strong>umit’s in. That result is then ordered by thedate_entered column, in descendingorder, <strong>and</strong> restricted to just the firstfive records.Inner joins can also be written without<strong>for</strong>mally using the phrase INNER JOIN. To doso, place a comma between the table names<strong>and</strong> turn the ON, or USING, clause into anotherWHERE condition:SELECT m.message_id, m.subject,➝ f.name FROM messages AS m, <strong>for</strong>ums➝ AS f WHERE m.<strong>for</strong>um_id = f.<strong>for</strong>um_idAND f.name = '<strong>MySQL</strong>'Joins that do not include a join clause (ONor USING) or a WHERE clause (e.g., SELECT *FROM urls INNER JOIN url_associations)are called full joins <strong>and</strong> will return every recordfrom both tables. This construct can haveunwieldy results with larger tables.A NULL value in a column referenced inan inner join will never be returned, becauseNULL matches no other value, including NULL.<strong>MySQL</strong>’s supported join types differslightly from the SQL st<strong>and</strong>ard. For example,SQL supports a CROSS JOIN <strong>and</strong> an INNERJOIN as two separate things, but in <strong>MySQL</strong>they are syntactically the same.Advanced SQL <strong>and</strong> <strong>MySQL</strong> 207
outer JoinsWhereas an inner join returns recordsbased upon making matches between twotables, an outer join will return records thatare matched by both tables, <strong>and</strong> will returnrecords that don’t match. In other words,an inner join is exclusive but an outer joinis inclusive. There are three outer joinsubtypes: left, right, <strong>and</strong> full, with left beingthe most important by far. An example of aleft join is:SELECT f.*, m.subject FROM <strong>for</strong>ums AS fLEFT JOIN messages AS mON f.<strong>for</strong>um_id = m.<strong>for</strong>um_idThe most important consideration with leftjoins is which table gets named first. In thisexample, all of the <strong>for</strong>ums records will bereturned along with all of the messagesin<strong>for</strong>mation, if a match is made. If nomessages records match a <strong>for</strong>ums row,then NULL values will be returned <strong>for</strong> theselected messages columns instead F.As with an inner join, if the column inboth tables being used in the equalitycomparison has the same name, you cansimplify your query with USING:SELECT f.*, m.subject FROM <strong>for</strong>ums AS fLEFT JOIN messages AS mUSING (<strong>for</strong>um_id)A right outer join does the opposite of aleft outer join: it returns all of the applicablerecords from the right-h<strong>and</strong> table, alongwith matches from the left-h<strong>and</strong> table. Thisquery is equivalent to the above:SELECT f.*, m.subject FROM messages➝ AS mRIGHT JOIN <strong>for</strong>ums AS fUSING (<strong>for</strong>um_id)Generally speaking, the left join ispreferred over the right (<strong>and</strong>, arguably,there’s no need to have both).A full outer join is like a combination of aleft outer join <strong>and</strong> a right outer join. In otherwords, all of the matching records fromF An outer join returns all the records from the first table listed, withnon-matching records from the second table replaced with NULL values.208 Chapter 7
oth tables will be returned, along withall of the records from the left-h<strong>and</strong> tablethat do not have matches in the right-h<strong>and</strong>table, along with all of the records from theright-h<strong>and</strong> table that do not have matchesin the left-h<strong>and</strong> table. <strong>MySQL</strong> does notdirectly support the full outer join, but youcan replicate that functionality using a leftjoin, a right join, <strong>and</strong> a UNION statement. Afull outer join is not often needed, but seethe <strong>MySQL</strong> manual if you’re curious aboutit or unions.G This left join returns <strong>for</strong> every user,every posted message ID. If a user hasn’tposted a message (like finchy at the top),the message ID value will be NULL.To use outer joins:1. Connect to <strong>MySQL</strong> <strong>and</strong> select the<strong>for</strong>um database, if you have not already.2. Retrieve every username <strong>and</strong> everymessage ID posted by that user G:SELECT u.username, m.message_idFROM users AS uLEFT JOIN messages AS mUSING (user_id);If you were to run an inner join similarto this, a user who had not yet posted amessage would not be listed H. Hence,an outer join is required to be inclusiveof all users. Note that the fully includedtable (here, users), must be the firsttable listed in a left join.continues on next pageH This inner join will not return any userswho haven’t yet posted messages (seefinchy at the top of G ).Advanced SQL <strong>and</strong> <strong>MySQL</strong> 209
3. Retrieve every <strong>for</strong>um name <strong>and</strong> everymessage submission date in that <strong>for</strong>umin order of submission date I:SELECT f.name,DATE_FORMAT(m.date_entered,➝'%M %D, Y') AS DateFROM <strong>for</strong>ums AS fLEFT JOIN messages AS mUSING (<strong>for</strong>um_id)ORDER BY date_entered DESC;This is really just a variation on thejoin in Step 2, this time swapping the<strong>for</strong>ums table <strong>for</strong> the users table.I This left outer join returns every <strong>for</strong>um name<strong>and</strong> the date of every message posted in that <strong>for</strong>um.per<strong>for</strong>ming Self-JoinsIt’s possible with SQL to per<strong>for</strong>m a self-join: join a table with itself. For example, with the messagestable, the parent_id column is a way of indicating which postings are replies to other postings. Toretrieve a single hierarchy of postings, a SELECT query must join the messages table with itself,equating parent_id with message_id in the process.This may sound confusing or impossible, but it’s really not. The trick with self-joins is to treat thetwo references to the same table as if they were single references to two different tables. To pullthat off, assign a different alias to each table reference. The already described example wouldbe written like so:SELECT m1.subject, m2.subject AS Reply FROM messages AS m1 LEFT JOIN➝ messages AS m2 ON m1.message_id=m2.parent_id WHERE m1.parent_id=0That query first selects every root-level message—those with a 0 parent_id value—in the firstmessages table instance, m1. Those records are then outer joined with the second messages tableinstance, m2. If you run this query yourself, you’ll see that the root message’s subject is selected,along with the subject of that message’s reply, if applicable.Self-joins aren’t the most popular join type, but can sometimes solve a problem better than mostother solutions.210 Chapter 7
Joins can be created using conditionalsinvolving any columns, not just the primary<strong>and</strong> <strong>for</strong>eign keys, although that’s the mostcommon basis <strong>for</strong> comparison.You can per<strong>for</strong>m joins across multipledatabases using the database.table.columnsyntax, as long as every database is on thesame server (you cannot do this across anetwork) <strong>and</strong> you’re connected as a user withpermission to access every database involved.The word OUTER in a left outer join isoptional <strong>and</strong> often omitted. To be <strong>for</strong>mal, youcould write:SELECT f.name, DATE_FORMAT➝ (m.date_entered, '%M %D, Y') AS➝ Date FROM <strong>for</strong>ums AS f LEFT OUTER➝ JOIN messages AS m USING (<strong>for</strong>um_id)➝ ORDER BY date_entered DESC;Joining Three or More TablesJoins are a somewhat complicated butimportant concept, so hopefully you’refollowing along well enough thus far. Thereare two more ways joins can be used withwhich you ought to be familiar: self-joins,discussed in the sidebar, <strong>and</strong> joins on threeor more tables.When joining three or more tables, it helpsto remember that a join between twotables creates a virtual table of results.When you add a third table, the join isbetween this initial virtual table <strong>and</strong> thethird referenced table J. The syntax <strong>for</strong>a three-table join is of the <strong>for</strong>matSELECT what_columns FROM tableA➝ JOIN_TYPE tableB JOIN_CLAUSE➝ JOIN_TYPE tableC JOIN_CLAUSEcontinues on next pageJ How a join acrossthree tables works: byfirst creating a virtualtable of results, <strong>and</strong> thenby joining the third tableto that.Advanced SQL <strong>and</strong> <strong>MySQL</strong> 211
The join types do not have to be the samein both cases—one could be an inner <strong>and</strong>the other an outer—<strong>and</strong> the join clausesare almost certain to be different. You caneven add WHERE, ORDER BY, <strong>and</strong> LIMITclauses to the end of this. Simply put, toper<strong>for</strong>m a join on more than two tables,just continue to add JOIN_TYPE tableXJOIN_CLAUSE sections as needed.There are three likely problems you’ll havewith joins that span three or more tables.The first is a simple syntax error, especiallywhen you use parentheses to separate outthe clauses. The second is an ambiguouscolumn error, which is common enoughamong any join type. The third likelyproblem will be a lack of results returned.Should that happen to you, simplify thejoin down to just two tables to confirmthe result, <strong>and</strong> then try to reapply theadditional join clauses to find where theproblem is.K An inner join across all three tables.To use joins on three tables or more:1. Connect to <strong>MySQL</strong> <strong>and</strong> select the<strong>for</strong>um database, if you have not already.2. Retrieve the message ID, subject, <strong>and</strong><strong>for</strong>um name <strong>for</strong> every message postedby the user troutster K:SELECT m.message_id, m.subject,➝ f.nameFROM users AS uINNER JOIN messages AS mUSING (user_id)INNER JOIN <strong>for</strong>ums AS fUSING (<strong>for</strong>um_id)WHERE u.username = 'troutster';This join is similar to one earlier in thechapter, but takes things a step furtherby incorporating a third table.212 Chapter 7
L This left join returns <strong>for</strong> every user, everyposted message subject, <strong>and</strong> every <strong>for</strong>um name. Ifa user hasn’t posted a message (like finchy at thetop), his or her subject <strong>and</strong> <strong>for</strong>um name values willbe NULL.M This inner join returns values from all threetables, with applied ORDER BY <strong>and</strong> LIMIT clauses.3. Retrieve the username, message subject,<strong>and</strong> <strong>for</strong>um name <strong>for</strong> every user L:SELECT u.username, m.subject, f.nameFROM users AS uLEFT JOIN messages AS mUSING (user_id)LEFT JOIN <strong>for</strong>ums AS fUSING (<strong>for</strong>um_id);Whereas the query in Step 2 per<strong>for</strong>mstwo inner joins, this one per<strong>for</strong>ms twoouter joins. The process behind thisquery is visually represented by thediagram in J.4. Find the users that have had the fivemost recent postings, while also selectingthe message subject, <strong>and</strong> the <strong>for</strong>umname M:SELECT u.username, m.subject, f.nameFROM users AS uINNER JOIN messages AS mUSING (user_id)INNER JOIN <strong>for</strong>ums AS fUSING (<strong>for</strong>um_id)ORDER BY m.date_entered DESCLIMIT 5;In order to retrieve the username,the message subject, <strong>and</strong> the <strong>for</strong>umname, a join across all three tables isrequired. As the query is only looking<strong>for</strong> users that have posted, an inner joinis appropriate. The result of the twojoins will be every username, with everymessage they posted, in every <strong>for</strong>um.That result is then ordered by themessage’s date_entered column, <strong>and</strong>limited to just the first five records.Advanced SQL <strong>and</strong> <strong>MySQL</strong> 213
Grouping SelectedResultsChapter 5 discussed <strong>and</strong> demonstratedseveral different categories of functionsone can use in <strong>MySQL</strong>. Another category,used <strong>for</strong> more complex queries, are thegrouping or aggregate functions (Table 7.1).Whereas most of the functions coveredin Chapter 5 manipulate a single value ina single row at a time (e.g., <strong>for</strong>matting thevalue in a date column), what the groupingfunctions return is based upon a valuepresent in a single column over a set ofrows. For example, to find the averageaccount balance in the banking database,you would run this query A:SELECT AVG(balance) FROM accountsTo find the smallest <strong>and</strong> largest accountbalances, use B:SELECT MAX(balance), MIN(balance)➝ FROM accountsTo simply count the number of records ina table (or result set), apply COUNT( ) toeither every column or every column that’sguaranteed to have a value:SELECT COUNT(*) FROM accountsTABLe 7.1 Grouping FunctionsFunctionAVG( )COUNT( )GROUP_CONCAT( )MAX( )MIN( )SUM( )ReturnsThe average of the valuesin a column.The number of values ina column.The concatenation of acolumn’s values.The largest value ina column.The smallest value ina column.The sum of all the values ina column.A The AVG( ) function is used to find the averageof all the account balances.B The MAX( ) <strong>and</strong> MIN( ) functions return thelargest <strong>and</strong> smallest account values found inthe table.214 Chapter 7
C The COUNT( ) function, with or without theDISTINCT keyword, simply counts the numberof records in a record set.D Use the GROUP BY clause with an aggregatingfunction to group the aggregate results.The AVG( ), COUNT( ), <strong>and</strong> SUM( ) functionscan also use the DISTINCT keyword sothat the aggregation only applies todistinct values. For example, SELECTCOUNT(customer_id) FROM accountswill return the number of accounts, butSELECT COUNT(DISTINCT customer_ID)FROM accounts will return the number ofcustomers that have accounts C.The aggregate functions as used on theirown return individual values (as in A, B,<strong>and</strong> C). When the aggregate functionsare used with a GROUP BY clause, a singleaggregate value will be returned <strong>for</strong> eachrow in the result set D:SELECT AVG(balance), customer_id FROM➝ accounts GROUP BY customer_idYou can apply combinations of WHERE,ORDER BY, <strong>and</strong> LIMIT conditions to a GROUPBY, structuring your query like this:SELECT what_columns FROM tableWHERE condition GROUP BY columnORDER BY column LIMIT x, yA GROUP BY clause can also be used in ajoin. Remember that a join returns a new,virtual table of data, so any grouping wouldthen apply to that virtual table.Advanced SQL <strong>and</strong> <strong>MySQL</strong> 215
To group data:1. Connect to <strong>MySQL</strong> <strong>and</strong> select thebanking database.2. Count the number of registeredcustomers E:SELECT COUNT(*) FROM customers;COUNT( ) is perhaps the most populargrouping function. With it, you canquickly count records, like the numberof records in the customers table here.The COUNT( ) function can be appliedto any column that’s certain to have avalue, such as * (i.e., every column) orcustomer_id, the primary key.Notice that not all queries using theaggregate functions necessarily haveGROUP BY clauses.3. Find the total balance of all accountsby customer, counting the number ofaccounts in the process F:SELECT SUM(balance) AS Total,COUNT(account_id) AS Number,➝ customer_idFROM accountsGROUP BY (customer_id);This query is an extension of that inStep 2, but instead of counting just thecustomers, it counts the number ofaccounts associated with each customer<strong>and</strong> totals the account balances, too.4. Repeat the query from Step 3, selectingthe customer’s name instead of theirID G:SELECT SUM(balance) AS Total,COUNT(account_id) AS Number,CONCAT(c.last_name, ', ',➝ c.first_name) AS NameFROM accounts AS aINNER JOIN customers AS cUSING (customer_id)GROUP BY (a.customer_id)ORDER BY Name;To retrieve the customer’s name,instead of his or her ID, a join isrequired: INNER JOIN customersUSING (customer_id). Next, aliases areadded <strong>for</strong> easier references, <strong>and</strong> theGROUP BY clause is modified to specifyto which customer_id field the groupingshould be applied. Thanks to the join,the customer’s name can be selectedas the concatenation of the customer’sfirst <strong>and</strong> last names, a comma, <strong>and</strong> aspace. And finally, the results can besorted by the customer’s name (notethat another reference to the alias isused in the ORDER BY clause).E This aggregating query counts the number ofrecords in the customers table.F This GROUP BY query aggregates all of theaccounts by customer_id, returning the sum ofeach customer’s accounts <strong>and</strong> the total numberof accounts the customer has, in the process.216 Chapter 7
Remember that if you used an outer joininstead of an inner join, you could thenretrieve customers who did not haveaccount balances.5. Concatenate each customer’s balanceinto a single string H:SELECT GROUP_CONCAT(balance),CONCAT(c.last_name, ', ',➝ c.first_name) AS NameFROM accounts AS aINNER JOIN customers AS cUSING (customer_id)GROUP BY (a.customer_id)ORDER BY Name;The GROUP_CONCAT( ) function is a useful<strong>and</strong> often overlooked aggregating tool.As you can see in the figure, by defaultthis function concatenates values,separating each with a comma.NULL is a peculiar value, <strong>and</strong> it’sinteresting to know that GROUP BY willgroup NULL values together, since theyhave the same nonvalue.You have to be careful how you apply theCOUNT( ) function, as it only counts non-NULLvalues. Be certain to use it on either every column(*) or on columns that will never containNULL values (like the primary key).The GROUP BY clause, <strong>and</strong> the functionslisted here, take some time to figure out, <strong>and</strong><strong>MySQL</strong> will report an error whenever yoursyntax is inapplicable. Experiment within themysql client or phpMyAdmin to determine theexact wording of any query you might want torun from a <strong>PHP</strong> script.A related clause is HAVING, which is likea WHERE condition applied to a group.You cannot apply SUM( ) <strong>and</strong> AVG( )to date or time values. Instead, you’ll needto convert date <strong>and</strong> time values to seconds,per<strong>for</strong>m the SUM( ) or AVG( ), <strong>and</strong> then convertthat value back to a date <strong>and</strong> time.G This GROUP BY queryis like that in F, but alsoreturns the customer’s name,<strong>and</strong> sorts the results byname (which requires a join).H A variation onthe query in G, thisquery retrieves theconcatenation of allaccount balances <strong>for</strong>each customer.Advanced SQL <strong>and</strong> <strong>MySQL</strong> 217
Advanced SelectionsThe previous two sections of the chapterpresent more advanced ways to selectdata from complex structures. But evenwith the use of the aggregate functions,the data being selected is comparativelystraight<strong>for</strong>ward. Sometimes, though, you’llneed to select data conditionally, as ifyou were using an if-else clause withinthe query itself. This is possible in SQLthanks to the control flow <strong>and</strong> advancedcomparison functions.To start, GREATEST( ) returns the largestvalue in a list A:SELECT GREATEST(col1, col2) FROM tableSELECT GREATEST(235, 1209, 59)LEAST( ) returns the smallest value in a list:SELECT LEAST(col1, col2) FROM tableSELECT LEAST(235, 1209, 59)Note that unlike the aggregate functions,which apply to a list of values found inthe same column over multiple rows, thecomparison <strong>and</strong> control flow functionsapply to multiple columns within the samerow (or list of values).Another useful comparison function isCOALESCE( ). It returns the first non-NULLvalue in a list:SELECT COALESCE(col1, col2) FROM tableIf none of the listed items has a value,the function returns NULL (you’ll see anexample in the step sequence to follow).Whereas COALESCE( ) simply returns thefirst non-NULL value, you can use IF( ) toreturn any value, based upon a condition:SELECT IF (condition, return_if _true,➝ return_if _false)If the condition is true, the secondargument to the function is returned,otherwise the third argument is returned.As an example, assuming a table stored thevalues M or F in a gender column, a querycould select Male or Female instead B:SELECT IF(gender='M', 'Male', 'Female')➝ FROM people;As these functions return values, theycould even be used in other query types:INSERT INTO people (gender) VALUES➝ (IF(something='Male', 'M', 'F'))A The GREATEST( ) function returns thebiggest value in a given list.B The IF( ) function can dictate the returnedvalue based upon a conditional.218 Chapter 7
C CASE( ) can be used like IF( ) tocustomize the returned value.The CASE( ) function is a more complicatedtool that can be used in different ways. Thefirst approach is to treat CASE( ) like <strong>PHP</strong>’sswitch conditional:SELECT CASE col1 WHEN value1 THEN➝ return_this ELSE return_that END➝ FROM tableThe gender example could be rewritten as:SELECT CASE gender WHEN 'M' THEN➝'Male' ELSE 'Female' END FROM peopleThe CASE( ) function can have additionalWHEN clauses. The ELSE is also alwaysoptional:SELECT CASE gender WHEN 'M' THEN➝'Male' WHEN 'F' THEN 'FEMALE' END➝ FROM peopleIf you’re not looking to per<strong>for</strong>m a simpleequality test, you can write conditions intoa CASE( ) C:SELECT message_id, CASE WHEN➝ date_entered > NOW( ) THEN 'Future'➝ ELSE 'PAST' END AS Posted FROM➝ messagesAgain, you can add multiple WHEN…THENclauses as needed, <strong>and</strong> omit the ELSE, ifthat’s not necessary.To practice using these functions, let’s runa few more queries on the <strong>for</strong>um database(as a heads up, they’re going to get a littlecomplicated).Advanced SQL <strong>and</strong> <strong>MySQL</strong> 219
To per<strong>for</strong>m advanced selections:1. Connect to <strong>MySQL</strong> <strong>and</strong> select the<strong>for</strong>um database.2. For each <strong>for</strong>um, find the date <strong>and</strong> timeof the most recent post, or return N/A ifthe <strong>for</strong>um has no posts D:SELECT f.name,COALESCE(MAX(m.date_entered),➝'N/A') AS last_postFROM <strong>for</strong>ums AS fLEFT JOIN messages AS mUSING (<strong>for</strong>um_id)GROUP BY (m.<strong>for</strong>um_id)ORDER BY m.date_entered DESC;To start, in order to find both the <strong>for</strong>umname <strong>and</strong> the date of the latest postingin that <strong>for</strong>um, a join is necessary.Specifically, an outer join, as there maybe <strong>for</strong>ums without postings. To find themost recent posting in each <strong>for</strong>um, theaggregating MAX( ) function is applied tothe date_entered column, <strong>and</strong> the resultshave to be grouped by the <strong>for</strong>um_id (sothat MAX( ) is applied to each subset ofpostings within each <strong>for</strong>um).The results at that point, withoutthe COALESCE( ) function call, wouldreturn NULL <strong>for</strong> any <strong>for</strong>um without anymessages in it. The final step is to applyCOALESCE( ) so that the string N/A isreturned should MAX(m.date_entered)have a NULL value.3. For each message, append the string(REPLY) to the subject if the message isa reply to another message E:SELECT message_id,CASE parent_id WHEN 0 THEN subjectELSE CONCAT(subject, ' (Reply)')➝ END AS subjectFROM messages;D The COALESCE( ) function is used to turn NULLvalues into the string N/A (see the last record).E Here, the string (Reply) is appended to thesubject of any message that is a reply to anothermessage.220 Chapter 7
The records in the messages tablesthat have a parent_id other than 0are replies to existing messages. Forthese messages, let’s append (REPLY)to the subject value to indicate such.To accomplish that, a CASE statementreturns just the subject, unadulterated,if the parent_id value equals 0. If theparent_id value does not equal 0, thestring (REPLY) is concatenated to thesubject, again thanks to CASE. Thiswhole construct is assigned the alias ofsubject, so it’s still returned under theoriginal “subject” heading.4. For each user, find the number of messagesthey’ve posted, converting zerosto the string None F:SELECT u.username,IF(COUNT(message_id) > 0,➝ COUNT(message_id), 'None') AS➝ PostsFROM users AS uLEFT JOIN messages AS mUSING (user_id)GROUP BY (u.user_id);This is somewhat of a variation onthe query in Step 2. A left join bridgesusers <strong>and</strong> messages, in order to grabboth the username <strong>and</strong> the count ofmessages posted. To per<strong>for</strong>m thecount, the results are grouped by users.user_id. The query to this point wouldreturn 0 <strong>for</strong> every user that has not yetposted G. To convert those zeros tothe string None, while maintaining thenon-zero counts, the IF( ) function isapplied. That function’s first argumentestablishes the condition: if the countis greater than zero. The secondargument says that the count shouldbe returned when that condition is true.The third argument says that the stringNone should be returned when thatcondition is false.The IFNULL( ) function can sometimesbe used instead of COALESCE( ). Its syntax is:IFNULL(value, return_if_null)If the first argument, such as a named column,has a NULL value, then the second argumentis returned. If argument does not have a NULLvalue, the value of that argument is returned.F Thanks to an IF( ) call, the count of postedmessages is displayed as None <strong>for</strong> any user thathas not yet posted a message.G What the query results would look like(compare with F ) without using IF( ).Advanced SQL <strong>and</strong> <strong>MySQL</strong> 221
per<strong>for</strong>ming FuLLTexTSearchesIn Chapter 5, the LIKE keyword wasintroduced as a way to per<strong>for</strong>m somewhatsimple string matches likeSELECT * FROM usersWHERE last_name LIKE 'Smith%'This type of conditional is effective enoughbut is still very limiting. For example, itwould not allow you to do Google-likesearches using multiple words. For thosekinds of situations, you need FULLTEXTsearches. Over the next several pages,Altering TablesThe ALTER SQL term is primarily used to modify the structure of an existing table. Commonlythis means adding, deleting, or changing the columns therein, but it also includes the additionof indexes. An ALTER statement can even be used <strong>for</strong> renaming the table as a whole. The basicsyntax of ALTER isALTER TABLE tablename CLAUSEThere are many possible clauses; Table 7.2 lists the most common ones, where t represents thetable’s name, c a column’s name, <strong>and</strong> i an index’s name. As always, the <strong>MySQL</strong> manual covers thetopic in exhaustive detail.TABLe 7.2 ALTER TABLE ClausesClause Usage MeaningADD COLUMN ALTER TABLE t ADD COLUMN c TYPE Adds a new column to the table.CHANGE COLUMN ALTER TABLE t CHANGE COLUMN c c TYPE Changes the data type <strong>and</strong> propertiesof a column.DROP COLUMN ALTER TABLE t DROP COLUMN c Removes a column from a table,including all of its data.ADD INDEX ALTER TABLE t ADD INDEX i (c) Adds a new index on c.DROP INDEX ALTER TABLE t DROP INDEX i Removes an existing index.RENAME TO ALTER TABLE t RENAME TO new_t Changes the name of a table.You can also change a table’s character set <strong>and</strong> collation using ALTER t CONVERT TO CHARACTERSET x COLLATE y.222 Chapter 7
you’ll learn everything you need to knowabout FULLTEXT searches (<strong>and</strong> you’ll learnsome more SQL tricks in the process).Creating a FuLLTexT indexTo start, FULLTEXT searches requirea FULLTEXT index. This index type, aspreviewed in Chapter 6, “Database Design,”can only be created on a MyISAM table.These next examples will use the messagestable in the <strong>for</strong>um database. The first step,then, is to add a FULLTEXT index on thebody <strong>and</strong> subject columns. Adding indexesto existing tables requires use of the ALTERcomm<strong>and</strong>, as described in the sidebar.A To confirm a table’s type, use the SHOW TABLESTATUS comm<strong>and</strong>.To add a FuLLTexT index:1. Connect to <strong>MySQL</strong> <strong>and</strong> select the<strong>for</strong>um database, if you have not already.2. Confirm the messages table’s type A:SHOW TABLE STATUS\GThe SHOW TABLE STATUS query returnsa fair amount of in<strong>for</strong>mation abouteach table in the database, includingthe table’s storage engine. Becauseso much in<strong>for</strong>mation is returned by thequery, the comm<strong>and</strong> concludes with\G instead of a semicolon. This tellsthe mysql client to return the results asa vertical list instead of a table (whichis sometimes easier to read). If you’reusing phpMyAdmin or another interface,you can omit the \G (just as you canomit concluding semicolons).To just find the in<strong>for</strong>mation <strong>for</strong> themessages table, you can use the querySHOW TABLE STATUS LIKE 'messages'.continues on next pageAdvanced SQL <strong>and</strong> <strong>MySQL</strong> 223
3. If the messages table is not of theMyISAM type, change the storage engine:ALTER TABLE messages ENGINE =➝ MyISAM;Again, this is only necessary if the tableisn’t currently of the correct type.4. Add the FULLTEXT index to the messagestable B:ALTER TABLE messages ADD FULLTEXT➝ (body, subject);The syntax <strong>for</strong> adding any index,regardless of type, is ALTER TABLEtablename ADD INDEX_TYPE index_name (columns). The index nameis optional.Here, the body <strong>and</strong> subject columnsget a FULLTEXT index, to be used inFULLTEXT searches later in this chapter.Inserting records into tables withFULLTEXT indexes can be much slowerbecause of the complex index that’s required.FULLTEXT searches can successfully beused in a simple search engine. But a FULLTEXTindex can only be applied to a single table at atime, so more elaborate <strong>Web</strong> sites, with contentstored in multiple tables, would benefit fromusing a more <strong>for</strong>mal search engine.per<strong>for</strong>ming Basic FuLLTexT SearchesOnce you’ve established a FULLTEXT indexon a column or columns, you can startquerying against it, using MATCH…AGAINSTin a WHERE conditional:SELECT * FROM tablename WHERE MATCH(columns) AGAINST (terms)<strong>MySQL</strong> will return matching rows in orderof a mathematically calculated relevance,just like a search engine. When doing so,certain rules apply:nnnnStrings are broken down into theirindividual keywords.Keywords less than four characters longare ignored.Very popular words, called stopwords,are ignored.If more than 50 percent of the recordsmatch the keywords, no records arereturned.This last fact is problematic to many usersas they begin with FULLTEXT searches <strong>and</strong>wonder why no results are returned. Whenyou have a sparsely populated table, therejust won’t be sufficient records <strong>for</strong> <strong>MySQL</strong>to return relevant results.B The FULLTEXT index is added to the messages table.224 Chapter 7
To per<strong>for</strong>m FuLLTexT searches:1. Connect to <strong>MySQL</strong> <strong>and</strong> select the<strong>for</strong>um database, if you have not already.2. Thoroughly populate the messagestable, focusing on adding lengthy bodies.Once again, SQL INSERT comm<strong>and</strong>scan be downloaded from this book’scorresponding <strong>Web</strong> site.3. Run a simple FULLTEXT search on theword database C:SELECT subject, body FROM messagesWHERE MATCH (body, subject)AGAINST('database');This is a very simple example that willreturn some results as long as at leastone <strong>and</strong> less than 50 percent of therecords in the messages table havethe word “database” in their bodyor subject. Note that the columnsreferenced in MATCH must be the sameas those on which the FULLTEXT indexwas made. In this case, you could useeither body, subject or subject,body, but you could not use just bodyor just subject D.continues on next pageC A basic FULLTEXT search.D A FULLTEXT query can only be run on the same column or combination of columns thatthe FULLTEXT index was created on. With this query, even though the combination of body<strong>and</strong> subject has a FULLTEXT index, attempting to run the match on just subject will fail.Advanced SQL <strong>and</strong> <strong>MySQL</strong> 225
4. Run the same FULLTEXT search whilealso showing the relevance E:SELECT subject, body, MATCH (body,subject) AGAINST('database') AS RFROM messages WHERE MATCH (body,➝ subject) AGAINST('database')\GIf you use the same MATCH…AGAINSTexpression as a selected value, theactual relevance will be returned. As inthe previous section of the chapter, tomake the results easier to view in themysql client, the query is terminatedusing \G, thereby returning the resultsas a vertical list.5. Run a FULLTEXT search using multiplekeywords F:SELECT subject, body FROM messagesWHERE MATCH (body, subject)AGAINST('html xhtml');With this query, a match will be madeif the subject or body contains eitherword. Any record that contains bothwords will be ranked higher.Remember that if a FULLTEXT searchreturns no records, this means that either nomatches were made or that over half of therecords match.For sake of simplicity, all of the queries inthis section are simple SELECT statements. Youcan certainly use FULLTEXT searches withinjoins or more complex queries.<strong>MySQL</strong> comes with several hundredstopwords already defined. These are partof the application’s source code.The minimum keyword length—fourcharacters by default—is a configurationsetting you can change in <strong>MySQL</strong>.FULLTEXT searches are case-insensitiveby default.E The relevance of a FULLTEXTsearch can be selected, too. Inthis case, you’ll see that the tworecords with the word “database”in both the subject <strong>and</strong> bodyhave higher relevance than therecord that contains the word injust the subject.F Using the FULLTEXT search, you can easily find messages that contain multiple keywords.226 Chapter 7
per<strong>for</strong>ming BooleanFuLLTexT SearchesThe basic FULLTEXT search is nice, but amore sophisticated FULLTEXT search canbe accomplished using its Boolean mode.To do so, add the phrase IN BOOLEAN MODEto the AGAINST clause:SELECT * FROM tablename WHEREMATCH(columns) AGAINST('terms' IN➝ BOOLEANMODE)Boolean mode has a number of operators(Table 7.3) to tweak how each keywordis treated:SELECT * FROM tablename WHEREMATCH(columns) AGAINST('+database-mysql' IN BOOLEAN MODE)In that example, a match will be made ifthe word database is found <strong>and</strong> mysql isnot present. Alternatively, the tilde (~) isused as a milder <strong>for</strong>m of the minus sign,meaning that the keyword can be presentin a match, but such matches should beconsidered less relevant.TABLe 7.3 Boolean Mode OperatorsOperatorMeaning+ Must be present in every match- Must not be present in any match~ Lowers a ranking if present* Wildcard< Decrease a word’s importance> Increase a word’s importance" " Must match the exact phrase( ) Create subexpressionsThe wildcard character (*) matchesvariations on a word, so cata* matchescatalog, catalina, <strong>and</strong> so on. Twooperators explicitly state what keywordsare more (>) or less (
To per<strong>for</strong>m FuLLTexTBoolean searches:1. Connect to <strong>MySQL</strong> <strong>and</strong> select the<strong>for</strong>um database, if you have not already.2. Run a simple FULLTEXT search thatfinds HTML, XHTML, or (X)HTML G:SELECT subject, body FROMmessages WHERE MATCH(body, subject)AGAINST('*HTML' IN BOOLEAN MODE)\GThe term HTML may appear in messagesin many <strong>for</strong>mats, including HTML,XHTML, or (X)HTML. This Booleanmode query will find all of those, thanksto the wildcard character (*).To make the results easier to view,I’m using the \G trick mentioned earlierin the chapter, which tells the mysqlclient to return the results vertically,not horizontally.3. Find matches involving databases,with an emphasis on normal <strong>for</strong>ms H:SELECT subject, body FROM messagesWHERE MATCH (body, subject)AGAINST('>"normal <strong>for</strong>m"* +database*'IN BOOLEAN MODE)\GG A simple Boolean-mode FULLTEXT search.H This search looks <strong>for</strong> variations on two different keywords, ranking the one higher thanthe other.228 Chapter 7
This query first finds all records thathave database, databases, etc. <strong>and</strong>normal <strong>for</strong>m, normal <strong>for</strong>ms, etc. inthem. The database* term is required(as indicated by the plus sign), butemphasis is given to the normal <strong>for</strong>mclause (which is preceded by thegreater-than sign).4. Repeat the query from Step 2, with agreater importance on XHTML, returningthe results in order of relevance I:SELECT subject, body, MATCH(body,➝ subject)AGAINST('*HTML >XHTML' IN BOOLEAN➝ MODE) AS R FROMmessages WHERE MATCH(body, subject)AGAINST('*HTML >XHTML' IN BOOLEAN➝ MODE) ORDER BY R DESC\GThis is similar to the earlier query, butnow XHTML is specifically given extraweight. This query additionally selectsthe calculated relevance, <strong>and</strong> theresults are returned in that order.<strong>MySQL</strong> 5.1.7 added another FULLTEXTsearch mode: natural language. This is thedefault mode, if no other mode (like Boolean)is specified.The WITH QUERY EXPANSION modifiercan increase the number of returned results.Such queries per<strong>for</strong>m two searches <strong>and</strong> returnone result set. It bases a second search onterms found in the most relevant results of theinitial search. While a WITH QUERY EXPANSIONsearch can find results that would not otherwisehave been returned, it can also returnresults that aren’t at all relevant to the originalsearch terms.I This modified version of an earlier query selects, <strong>and</strong> then sorts the results by,the relevance.Advanced SQL <strong>and</strong> <strong>MySQL</strong> 229
optimizing QueriesOnce you have a complete <strong>and</strong> populateddatabase, <strong>and</strong> have a sense as to whatqueries will commonly be run on it, it’s agood idea to take some steps to optimizeyour queries <strong>and</strong> your database as awhole. Doing so will ensure you’re gettingthe best possible per<strong>for</strong>mance out of<strong>MySQL</strong> (<strong>and</strong> there<strong>for</strong>e, your <strong>Web</strong> site)To start, the sidebar reemphasizes keydesign ideas that have already beensuggested in this book. Along with thesetips, there are two simple techniques <strong>for</strong>optimizing existing tables. One way toimprove <strong>MySQL</strong>’s per<strong>for</strong>mance is to runan OPTIMIZE comm<strong>and</strong> on occasion. Thisquery will rid a table of any unnecessaryoverhead, thereby improving the speedof any interactions with it:OPTIMIZE TABLE tablenameRunning this comm<strong>and</strong> is particularlybeneficial after changing a table via anALTER comm<strong>and</strong>, or after a table has hadlots of DELETE queries run on it, leavingvirtual gaps among the records.Second, you can occasionally use theANALYZE comm<strong>and</strong>:ANALYZE TABLE tablenameExecuting this comm<strong>and</strong> updates theindexes on the table, thereby improvingtheir usage in queries. You could execute itwhenever massive amounts of data storedin the table changes (e.g., via UPDATE orINSERT comm<strong>and</strong>s).Speaking of queries, as you’re probablyrealizing by now, there are often manydifferent ways of accomplishing thesame goal. To find out the most efficientapproach, it helps to underst<strong>and</strong> howexactly <strong>MySQL</strong> will run that query. Thiscan be accomplished using the EXPLAINSQL keyword. Explaining queries is avery advanced topic, but I’ll introduce thefundamentals here, <strong>and</strong> you can alwayssee the <strong>MySQL</strong> manual or search the <strong>Web</strong><strong>for</strong> more in<strong>for</strong>mation.Database optimizationThe per<strong>for</strong>mance of your database is primarily dependent upon its structure <strong>and</strong> indexes. Whencreating databases, try to.Choose the best storage engine.Use the smallest data type possible <strong>for</strong> each column.Define columns as NOT NULL whenever possible.Use integers as primary keys.Judiciously define indexes, selecting the correct type <strong>and</strong> applying them to the right columnor columns.Limit indexes to a certain number of characters, if possible.Avoid creating too many indexes.Make sure that columns to be used as the basis of joins are of the same type <strong>and</strong>, in the caseof strings, use the same character set <strong>and</strong> collation230 Chapter 7
To explain a query:1. Find a query that may beresource-intensive.Good c<strong>and</strong>idates are queries that doany of the following:> Join two or more tables> Use groupings <strong>and</strong> aggregatefunctions> Have WHERE clauses.For example, this query from earlier inthe chapter meets two of these criteria:SELECT SUM(balance) AS Total,COUNT(account_id) AS Number,➝ CONCAT(c.last_name, ', ',➝ c.first_name) AS NameFROM accounts AS a INNER➝ JOIN customers AS c USING➝ (customer_id)GROUP BY (a.customer_id) ORDER BY➝ Name;2. Connect to <strong>MySQL</strong> <strong>and</strong> select the applicabledatabase, if you have not already.3. Execute the query on the database,prefacing it with EXPLAIN A:EXPLAIN SELECT SUM(balance) AS➝ Total,COUNT(account_id) AS Number,➝ CONCAT(c.last_name, ', ',➝ c.first_name) AS NameFROM accounts AS a INNER JOIN➝ customers AS c USING (customer_id)GROUP BY (a.customer_id) ORDER BY➝ Name\GIf you’re using the mysql client, you’ll findit also helps to use the concluding \Gtrick (instead of the semicolon), to makethe output more legible. The output itselfwill be one row of in<strong>for</strong>mation <strong>for</strong> everytable used in the query. The tables arelisted in the same order that <strong>MySQL</strong>must access them to execute the query.I’ll walk through the key parts of theoutput, but to begin, the select_typevalue should be SIMPLE <strong>for</strong> mostSELECT queries, <strong>and</strong> would be differentif the query involves a UNION or subquery(see the <strong>MySQL</strong> manual <strong>for</strong> moreon either UNIONs or subqueries).continues on next pageA This EXPLAINoutput reveals how<strong>MySQL</strong> will go aboutprocessing the query.Advanced SQL <strong>and</strong> <strong>MySQL</strong> 231
4. Check out the type value.Table 7.4 lists the different type values,from best to worst. The <strong>MySQL</strong> manualdiscusses what each means in detailbut underst<strong>and</strong> first that eq_ref is thebest you’ll commonly see <strong>and</strong> ALL isthe worst. A type of eq_ref means thatan index is being properly used <strong>and</strong> anequality comparison is being made.Note that you’ll sometimes see ALLbecause the table has very few recordsin it, in which case it’s more efficient <strong>for</strong><strong>MySQL</strong> to scan the table rather thanuse an index. This is presumably thecase with A, as the accounts table onlyhas four records.5. Check out the possible_keys value.The possible_keys value indicateswhich indexes exist that <strong>MySQL</strong>might be able to use to find thecorresponding rows in this table. If youhave a NULL value here, there are noindexes that <strong>MySQL</strong> thinks would beuseful. There<strong>for</strong>e, you might benefitfrom creating an index on that table’sapplicable columns.6. Check out the key, key_len, <strong>and</strong>ref values.Whereas possible_keys indicates whatindexes might be usable, key says whatindex <strong>MySQL</strong> will actually use <strong>for</strong> thatquery. Occasionally, you’ll find a valuehere that’s not listed in possible_keys,which is okay. If no key is being used,that almost always indicates a problemthat can be remedied by adding anindex or modifying the query.The key_len value indicates the length(i.e., the size) of the key that <strong>MySQL</strong>used. Generally, shorter is better here,but don’t worry about it too much.TABLe 7.4 Join TypesTypesystemconsteq _refreffulltextref_or_nullindex_mergeunique_subqueryindex_subqueryrangeindexALLThe ref column indicates which columns<strong>MySQL</strong> compared to the index namedin the key column.7. Check out the rows value.This column provides an estimate of howmany rows in the table <strong>MySQL</strong> thinks itwill need to examine. Once again, lower isbetter. In fact, on a join, a rough estimateof the efficiency can be determined bymultiplying all the rows values together.Often in a join, the number of rows tobe examined should go from more toless, as in B.8. Check out the Extra value.Finally, this column reports any additionalin<strong>for</strong>mation about how <strong>MySQL</strong>will execute the query that may beuseful. Two phrases you don’t want tofind here are: Using filesort <strong>and</strong> Usingtemporary. Both mean that extra stepsare required to complete the query(e.g., a GROUP BY clause often requires<strong>MySQL</strong> creates a temporary table).232 Chapter 7
B Another explanation of a query, this one a joinacross three tables.If Extra says anything along the lines ofImpossible X or No matching Y, thatmeans your query has clauses that arealways false <strong>and</strong> can be removed.9. Modify your table or queries <strong>and</strong> repeat!If the output suggests problems withhow the query is being executed, youcan consider doing any of the following:> Changing the particulars of the query> Changing the properties of a table’scolumns> Adding or modifying a table’s indexesRemember that the validity of theexplanation will depend, in part, onhow many rows are in the involvedtables (as explained in Step 4, <strong>MySQL</strong>may skip indexes <strong>for</strong> small tables).Also underst<strong>and</strong> that not all queriesare fixable. Simple SELECT queries <strong>and</strong>even joins can sometimes be improved,but there’s little one can do to improvethe efficiency of a GROUP BY query,considering everything <strong>MySQL</strong> mustdo to aggregate data.The EXPLAIN EXTENDED comm<strong>and</strong>provides a few more details about a query:EXPLAIN EXTENDED SELECT…Problematic queries can also be found byenabling certain <strong>MySQL</strong> logging features, butthat requires administrative control over the<strong>MySQL</strong> server.In terms of per<strong>for</strong>mance, <strong>MySQL</strong> dealswith more, smaller tables better than it doesfewer, larger tables. That being said, a normalizeddatabase structure should always be theprimary goal.In <strong>MySQL</strong> terms, a “big” database hasthous<strong>and</strong>s of tables <strong>and</strong> millions of rows.Advanced SQL <strong>and</strong> <strong>MySQL</strong> 233
per<strong>for</strong>mingTransactionsA database transaction is a sequenceof queries run during a single session.For example, you might insert a recordinto one table, insert another record intoanother table, <strong>and</strong> maybe run an update.Without using transactions, each individualquery takes effect immediately<strong>and</strong> cannot be undone (the queries, bydefault, are automatically committed). Withtransactions, you can set start <strong>and</strong> stoppoints <strong>and</strong> then enact or retract all of thequeries between those points as needed(<strong>for</strong> example, if one query failed, all of thequeries can be undone).Commercial interactions commonly requiretransactions, even something as basic astransferring $100 from my bank account toyours. What seems like a simple process isactually several steps:nConfirm that I have $100 in my account.n Decrease my account by $100.nnnVerify the decrease.Increase the amount of money in youraccount by $100.Verify that the increase worked.If any of the steps failed, all of them shouldbe undone. For example, if the moneycouldn’t be deposited in your account, itshould be returned to mine until the entiretransaction can go through.The ability to execute transactionsdepends upon the features of the storageengine in use. To per<strong>for</strong>m transactions with<strong>MySQL</strong>, you must use the InnoDB tabletype (or storage engine).To begin a new transaction in the mysqlclient, typeSTART TRANSACTION;Once your transaction has begun, youcan now run your queries. Once you havefinished, you can either enter COMMIT toenact all of the queries or ROLLBACK toundo the effect of all of the queries.After you have either committed or rolledback the queries, the transaction isconsidered complete, <strong>and</strong> <strong>MySQL</strong> returnsto an autocommit mode. This means thatany queries you execute take immediateeffect. To start another transaction, justtype START TRANSACTION.It is important to know that certain types ofqueries cannot be rolled back. Specifically,those that create, alter, truncate (empty),or delete tables or that create or deletedatabases cannot be undone. Furthermore,using such a query has the effect of committing<strong>and</strong> ending the current transaction.Second, you should underst<strong>and</strong> that transactionsare particular to each connection.So one user connected through the mysqlclient has a different transaction thananother mysql client user, both of whichare different than a connected <strong>PHP</strong> script.Finally, you cannot per<strong>for</strong>m transactionsusing phpMyAdmin. Each submission of aquery through phpMyAdmin’s SQL windowor tab is an individual <strong>and</strong> completetransaction, which cannot be undone withsubsequent submissions.With this in mind, let’s use transactionswith the banking database to per<strong>for</strong>m thealready mentioned task. In Chapter 19,“Example— E-Commerce,” transactions willbe run through a <strong>PHP</strong> script.234 Chapter 7
To per<strong>for</strong>m transactions:1. Connect to <strong>MySQL</strong> <strong>and</strong> select thebanking database.2. Begin a transaction <strong>and</strong> show thetable’s current values A:START TRANSACTION;SELECT * FROM accounts;3. Subtract $100 from David Sedaris’(or any user’s) checking account.UPDATE accountsSET balance = (balance-100)WHERE account_id=2;Using an UPDATE query, a little math, <strong>and</strong>a WHERE conditional, you can subtract100 from a balance. Although <strong>MySQL</strong>will indicate that one row was affected,the effect is not permanent until thetransaction is committed.4. Add $100 to Sarah Vowell’s checkingaccount:UPDATE accountsSET balance = (balance+100)WHERE account_id=1;This is the opposite of Step 3, as if $100were being transferred from the oneperson to the other.5. Confirm the results B:SELECT * FROM accounts;As you can see in the figure, the onebalance is 100 more <strong>and</strong> the other is100 less than they originally were A.6. Roll back the transaction:ROLLBACK;To demonstrate how transactions can beundone, let’s undo the effects of thesequeries. The ROLLBACK comm<strong>and</strong> returnsthe database to how it was prior to startingthe transaction. The comm<strong>and</strong> alsoterminates the transaction, returning<strong>MySQL</strong> to its autocommit mode.continues on next pageA A transaction is begun <strong>and</strong> the existing tablerecords are shown.B Two UPDATE queries are executed <strong>and</strong> theresults are viewed.Advanced SQL <strong>and</strong> <strong>MySQL</strong> 235
7. Confirm the results C:SELECT * FROM accounts;The query should reveal the contents ofthe table as they originally were.8. Repeat Steps 2 through 4.To see what happens when the transactionis committed, the two UPDATEqueries will be run again. Be certain tostart the transaction first, though, or thequeries will automatically take effect!9. Commit the transaction <strong>and</strong> confirmthe results:COMMIT;SELECT * FROM accounts;Once you enter COMMIT, the entire transactionis permanent, meaning that anychanges are now in place. COMMIT alsoends the transaction, returning <strong>MySQL</strong>to autocommit mode.C Because the ROLLBACK comm<strong>and</strong> was used, thepotential effects of the UPDATE queries were ignored.One of the great features of transactionsis that they offer protection should a r<strong>and</strong>omevent occur, such as a server crash. Either atransaction is executed in its entirety or all ofthe changes are ignored.To alter <strong>MySQL</strong>’s autocommit nature, typeSET AUTOCOMMIT=0;Then you do not need to type STARTTRANSACTION <strong>and</strong> no queries will be permanentuntil you type COMMIT (or use anALTER, CREATE, etc., query).You can create savepoints intransactions:D Invoking the COMMIT comm<strong>and</strong> makes thetransaction’s effects permanent.SAVEPOINT savepoint_name;Then you can roll back to that point:ROLLBACK TO SAVEPOINT savepoint_name;236 Chapter 7
Database encryptionUp to this point, pseudo-encryption hasbeen accomplished in the database usingthe SHA1( ) function. In the sitename <strong>and</strong><strong>for</strong>um databases, the user’s passwordhas been stored after running it throughSHA1( ). Although using this function in thisway is perfectly fine (<strong>and</strong> quite common),the function doesn’t provide real encryption:the SHA1( ) function returns a representationof a value (called a hash), not anencrypted version of the value. By storingthe hashed version of some data, comparisonscan still be made later (such asupon login), but the original data cannot beretrieved from the database. If you needto store data in a protected way while stillbeing able to view the data in its original<strong>for</strong>m at some later point, other <strong>MySQL</strong>functions are necessary.<strong>MySQL</strong> has several encryption <strong>and</strong>decryption functions built into the software.If you require data to be stored in anencrypted <strong>for</strong>m that can be decrypted,you’ll want to use AES_ENCRYPT( ) <strong>and</strong> AES_DECRYPT( ). The AES_ENCRYPT( ) functionis considered to be the most secureencryption option.These functions take two arguments: thedata being encrypted or decrypted <strong>and</strong> asalt argument. The salt argument is a stringthat helps to r<strong>and</strong>omize the encryption.Let’s look at the encryption <strong>and</strong> decryptionfunctions first, <strong>and</strong> then I’ll return to the salt.To add a record to a table while encryptingthe data, the query might look likeINSERT INTO users (username, pass)VALUES ('troutster', AES_ENCRYPT➝ ('mypass', 'nacl19874salt!'))The encrypted data returned by theAES_ENCRYPT( ) function will be in binary<strong>for</strong>mat. To store that data in a table, thecolumn must be defined as one of thebinary types (e.g., VARBINARY or BLOB).To run a login query <strong>for</strong> the record justinserted (matching a submitted username<strong>and</strong> password against those in thedatabase), you would writeSELECT * FROM users WHEREusername='troutster' ANDAES_DECRYPT(pass, 'nacl19874salt!') =➝'mypass'This is equivalent to:SELECT * FROM users WHEREusername = 'troutster' ANDAES_ENCRYPT('mypass', 'nacl19874salt!')➝ = passReturning to the issue of the salt, the exactsame salt must be used <strong>for</strong> both encryption<strong>and</strong> decryption, which means that the saltmust be stored somewhere as well. Contraryto what you might think, it’s actuallysafe to store the salt in the database, evenin the same row as the salted data. This isbecause the purpose of the salt is to makethe encryption process harder to crack(specifically, by a “rainbow” attack). Suchattacks are done remotely, using brute<strong>for</strong>ce. Conversely, if someone can seeeverything stored in your database, youhave bigger problems to worry about (i.e.,all of your data has been breached).Finally, to get the maximum benefit from“salting” the stored data, each piece ofstored data should use a unique salt, <strong>and</strong>the longer the salt the better.To put all this together, let’s add PIN <strong>and</strong>salt columns to the banking.customerstable, <strong>and</strong> then store an encrypted versionof each customer’s PIN.Advanced SQL <strong>and</strong> <strong>MySQL</strong> 237
To encrypt <strong>and</strong> decrypt data:1. Access <strong>MySQL</strong> <strong>and</strong> select thebanking database:2. Add the two new columns to thecustomers table A:ALTER TABLE customers ADD COLUMN➝ pin VARBINARY(16) NOT NULL;ALTER TABLE customers ADD COLUMN➝ nacl CHAR(20) NOT NULL;The first column, pin, will store anencrypted version of the user’s PIN. AsAES_ENCRYPT( ) returns a binary value16 characters long, the pin column isdefined as VARBINARY(16). The secondcolumn stores the salt, which will be astring 20 characters long.3. Update the first customer’s PIN B:UPDATE customersSET nacl = SUBSTRING(MD5(RAND( )),➝ -20)WHERE customer_id=1;UPDATE customersSET pin=AES_ENCRYPT(1234, nacl)WHERE customer_id=1;The first query updates the customer’srecord, adding a salt value to thenacl column. That r<strong>and</strong>om valueis obtained by applying the MD5( )function to the output from theRAND( ) function. This will create astring 32 characters long, such as4b8bb06aea7f3d162ad5b4d83687e3ac.Then the last 20 characters are takenfrom this string, using SUBSTRING( ).The second query stores the customer’sPIN—1234, using the already-storednacl value as the salt.A Two columns are added to the customers table.B A record is updated, using an encryption function toprotect the PIN.238 Chapter 7
4. Retrieve the PIN in an unencrypted<strong>for</strong>m C:SELECT customer_id, AES_DECRYPT(pin,nacl) AS pin FROM customersWHERE customer_id=1;This query returns the decrypted PIN <strong>for</strong>the customer with a customer_id of 1.Any value stored using AES_ENCRYPT( )can be retrieved (<strong>and</strong> matched) usingAES_DECRYPT( ), as long as the samesalt is used.5. Check out the customer’s record withoutusing decryption D:SELECT * FROM customersWHERE customer_id=1;As you can see in the figure, theencrypted version of the PIN isunreadable.As a rule of thumb, use SHA1( ) <strong>for</strong>in<strong>for</strong>mation that will never need to beviewable, such as passwords <strong>and</strong> perhapsusernames. Use AES_ENCRYPT( ) <strong>for</strong>in<strong>for</strong>mation that needs to be protected butmay need to be viewable at a later date, suchas credit card in<strong>for</strong>mation, Social Securitynumbers, addresses (perhaps), <strong>and</strong> so <strong>for</strong>th.As a reminder, never storing credit cardnumbers <strong>and</strong> other high-risk data is always thesafest option.The SHA2( ) function is an improvementover SHA1( ) <strong>and</strong> should be preferred <strong>for</strong> hashingdata. I only chose not to use it in this bookbecause SHA2( ) requires <strong>MySQL</strong> 5.5.5 or later.The same salting technique can beapplied to SHA1( ), SHA2( ), <strong>and</strong> other functions.Be aware that data sent to the <strong>MySQL</strong>server, or received from it, could be intercepted<strong>and</strong> viewed. Better security can be had by usingan SSL connection to the <strong>MySQL</strong> database.C The record has been retrieved, decrypting thePIN in the process.D Encrypted data is stored in an unreadable <strong>for</strong>mat (here, as a binary string of data).Advanced SQL <strong>and</strong> <strong>MySQL</strong> 239
Review <strong>and</strong> pursueIf you have any problems with thereview questions or the pursue prompts,turn to the book’s supporting <strong>for</strong>um(www.LarryUllman.com/<strong>for</strong>ums/).ReviewnnnnnnnnnnnnWhat are the two primary types of joins?Why are aliases often used with joins?Why is it considered often necessary<strong>and</strong> at least a best practice to use thetable.column syntax in joins?What impact does the order of tablesused have on an outer join?How do you create a self-join?What are the aggregate functions?What impact does the DISTINCTkeyword have on an aggregatefunction? What impact does GROUP BYhave on an aggregate function?What kind of index is required in orderto per<strong>for</strong>m FULLTEXT searches? Whattype of storage engine?What impact does it have when youconclude a SELECT query with \Ginstead of a semicolon in the mysqlclient?How do IN BOOLEAN MODE FULLTEXTsearches differ from st<strong>and</strong>ard FULLTEXTsearches?What comm<strong>and</strong>s can you use toimprove a table’s per<strong>for</strong>mance?How do you examine the efficiency ofa query?nnnnWhy doesn’t the <strong>for</strong>um databasesupport transactions?How do you begin a transaction? Howdo you undo the effects of a transactionin progress? How do you make theeffects of the current transactionpermanent?What kind of column type is requiredto store the output from the AES_ENCRYPT( ) function?What are the important criteria <strong>for</strong> thesalt used in the encryption process?pursuennnnnnnnCome up with more join examples <strong>for</strong>the <strong>for</strong>um <strong>and</strong> banking databases. Per<strong>for</strong>minner joins, outer joins, <strong>and</strong> joinsacross all three tables.Check out the <strong>MySQL</strong> manual pagesif you’re curious about the UNION SQLcomm<strong>and</strong> or about subqueries.Per<strong>for</strong>m some more grouping exerciseson the banking or <strong>for</strong>um databases.Practice running FULLTEXT searches onthe <strong>for</strong>um database.Examine other queries to see theresults.Read the <strong>MySQL</strong> manual pages, <strong>and</strong>other online tutorials, on explainingqueries <strong>and</strong> optimizing tables.Play with transactions some more.Research the subjects of salting passwords<strong>and</strong> rainbow attacks to learnmore.240 Chapter 7
8Error H<strong>and</strong>ling <strong>and</strong>DebuggingIf you’re working through this book sequentially(which would be <strong>for</strong> the best), the nextsubject to learn is how to use <strong>PHP</strong> <strong>and</strong><strong>MySQL</strong> together. However, that process willundoubtedly generate errors, errors thatcan be tricky to debug. So be<strong>for</strong>e movingon to new concepts, these next few pagesaddress the bane of the programmer:errors. As you gain experience, you’ll makefewer errors <strong>and</strong> learn your own debuggingmethods, but there are plenty of tools <strong>and</strong>techniques the beginner can use to helpease the learning process.This chapter has three main threads. Onefocus is on learning about the various kindsof errors that can occur when developingdynamic <strong>Web</strong> sites <strong>and</strong> what their likelycauses are. Second, a multitude of debuggingtechniques are taught, in a step-bystep<strong>for</strong>mat. Finally, you’ll see differenttechniques <strong>for</strong> h<strong>and</strong>ling the errors that dooccur in the most graceful manner possible.in This ChapterError Types <strong>and</strong> Basic Debugging 242Displaying <strong>PHP</strong> Errors 248Adjusting Error Reporting in <strong>PHP</strong> 250Creating Custom Error H<strong>and</strong>lers 253<strong>PHP</strong> Debugging Techniques 258SQL <strong>and</strong> <strong>MySQL</strong> DebuggingTechniques 262Review <strong>and</strong> Pursue 264
error Types <strong>and</strong>Basic DebuggingWhen developing <strong>Web</strong> applications with<strong>PHP</strong> <strong>and</strong> <strong>MySQL</strong>, you end up with potentialbugs in one of four or more technologies.You could have HTML issues, <strong>PHP</strong> problems,SQL errors, or <strong>MySQL</strong> mistakes. The firststep in fixing any bug is finding its source.HTML problems are often the least disruptive<strong>and</strong> the easiest to catch. You normallyknow there’s a problem when your layout isall messed up. Some steps <strong>for</strong> catching <strong>and</strong>fixing these, as well as general debugginghints, are discussed in the next section.<strong>PHP</strong> errors are the ones you’ll see mostoften, as this language will be at the heartof your applications. <strong>PHP</strong> errors fall intothree general areas:nnnSyntacticalRun-timeLogicalSyntactical errors are the most common<strong>and</strong> the easiest to fix. You’ll see them if youmerely omit a semicolon. Such errors stopthe script from executing, <strong>and</strong> if display_errors is on in your <strong>PHP</strong> configuration, <strong>PHP</strong>will show an error, including the line <strong>PHP</strong>thinks it’s on A. If display_errors is off,you’ll see a blank page. (You’ll learn moreabout display_errors later in this chapter.)Run-time errors include those things thatdon’t stop a <strong>PHP</strong> script from executing (likeparse errors do) but do stop the script fromdoing everything it was supposed to do.Examples include calling a function usingthe wrong number or types of parameters.With these errors, <strong>PHP</strong> will normally displaya message indicating the exact problem B(again, assuming that display_errors is on).A Parse errors—which you’ve probably seen manytimes over by now—are the most common sort of<strong>PHP</strong> error, particularly <strong>for</strong> beginning programmers.B Misusing a function (calling it with improperparameters) will create errors during the executionof the script.The Right MentalityBe<strong>for</strong>e getting much further, a wordregarding errors: they happen to thebest of us. Even the author of this herebook sees more than enough errors inhis <strong>Web</strong> development duties (but restassured that the code in this book shouldbe bug-free). Thinking that you’ll get toa skill level where errors never occur isa fool’s dream, but there are techniques<strong>for</strong> minimizing errors, <strong>and</strong> knowing howto quickly catch, h<strong>and</strong>le, <strong>and</strong> fix errors isa major skill in its own right. So try not tobecome frustrated as you make errors;instead, bask in the knowledge thatyou’re becoming a better debugger!242 Chapter 8
The final category of error—logical—isactually the worst, because <strong>PHP</strong> won’tnecessarily report it to you. These are out<strong>and</strong>-outbugs: problems that aren’t obvious<strong>and</strong> don’t stop the execution of a script.Tricks <strong>for</strong> solving all of these <strong>PHP</strong> errorswill be demonstrated in just a few pages.SQL errors are normally a matter of syntax,<strong>and</strong> they’ll be reported when you try torun the query in <strong>MySQL</strong>. For example, I’vedone this too many times C:DELETE * FROM tablenameThe syntax is just wrong, a confusionwith the SELECT syntax (SELECT * FROMtablename). The correct syntax isDELETE FROM tablenameAgain, <strong>MySQL</strong> will raise a red flag whenyou have SQL errors, so these aren’t thatdifficult to find <strong>and</strong> fix. With modern <strong>Web</strong>sites, the catch is that you don’t alwayshave static queries, but often ones dynamicallygenerated by <strong>PHP</strong>. In such cases, ifthere’s an SQL syntax problem, the issue isprobably in your <strong>PHP</strong> code.Besides reporting on SQL errors, <strong>MySQL</strong>has its own errors to consider. An inabilityto access the database is a common one<strong>and</strong> a showstopper at that D. You’ll also seeerrors when you misuse a <strong>MySQL</strong> functionor ambiguously refer to a column in a join.Again, <strong>MySQL</strong> will report any such error inspecific detail. Keep in mind that when aquery doesn’t return the records or otherwisehave the result you expect, that’s not a<strong>MySQL</strong> or SQL error, but rather a logical one.Toward the end of this chapter you’ll seehow to solve SQL <strong>and</strong> <strong>MySQL</strong> problems.But as you have to walk be<strong>for</strong>e you canrun, the next section covers the fundamentalsof debugging dynamic <strong>Web</strong> sites,starting with the basic checks you shouldmake <strong>and</strong> how to fix HTML problems.Basic debugging stepsThis first sequence of steps may seemobvious, but when it comes to debugging,missing one of these steps leads to anunproductive <strong>and</strong> extremely frustratingdebugging experience. And while I’m atit, I should mention that the best piece ofgeneral debugging advice is this:When you get frustrated, step away fromthe computer!continues on next pageC <strong>MySQL</strong> will report any errors found in the syntax of anSQL comm<strong>and</strong>.D An inability to connect to a <strong>MySQL</strong> server or a specific database is a common <strong>MySQL</strong> error.Error H<strong>and</strong>ling <strong>and</strong> Debugging 243
I have solved almost all of the mostperplexing issues I’ve come across bytaking a break, clearing my head, <strong>and</strong>coming back to the code with fresh eyes.Readers in the book’s supporting <strong>for</strong>um(www.LarryUllman.com/<strong>for</strong>ums/) havefrequently found this to be true as well.Trying to <strong>for</strong>ge ahead when you’re frustratedtends to make things worse. Much worse.To begin debugging any problem:nnMake sure that you are running theright page.It’s altogether too common that you try tofix a problem <strong>and</strong> no matter what you do,it never goes away. The reason: you’veactually been editing a different pagethan you thought. So verify that the name<strong>and</strong> location of the file being executedmatches that of the file you’re editing. Inthis regard, using an all-in-one IDE, suchas Adobe Dreamweaver (www.adobe.com/go/dreamweaver), is an advantage.Make sure that you have saved yourlatest changes.nAn unsaved document will continueto have the same problems it hadbe<strong>for</strong>e you edited it (because the editshaven’t been enacted). One of themany reasons I like the TextMate (www.macromates.com) text editor is that itautomatically saves every documentwhen the application loses focus.Make sure that you run all <strong>PHP</strong> pagesthrough the URL.Because <strong>PHP</strong> works through a <strong>Web</strong>server (Apache, IIS, etc.), runningany <strong>PHP</strong> code requires that youaccess the page through a URL(http://www.example.com/page.phpor http://localhost/page.php). Ifyou double-click a <strong>PHP</strong> page to openit in a browser (or use the browser’sFile > Open option), you’ll see the <strong>PHP</strong>code, not the executed result. Thisalso occurs if you load an HTML pagewithout going through a URL (which willwork on its own) but then submit the<strong>for</strong>m to a <strong>PHP</strong> page E.E <strong>PHP</strong> code will only beexecuted if run througha URL. This means that<strong>for</strong>ms that submit to a<strong>PHP</strong> page must also beloaded through http://.244 Chapter 8
nKnow what versions of <strong>PHP</strong> <strong>and</strong> <strong>MySQL</strong>you are running.Some problems are specific to a certainversion of <strong>PHP</strong> or <strong>MySQL</strong>. For example,some functions are added in laterversions of <strong>PHP</strong>, <strong>and</strong> <strong>MySQL</strong> addedsignificant new features in versions 4,4.1, <strong>and</strong> 5. Run a phpinfo( ) script F,(see Appendix A, “Installation,” <strong>for</strong> ascript example) <strong>and</strong> open a mysql clientsession G to determine this in<strong>for</strong>mation.phpMyAdmin will often report onthe versions involved as well (but don’tconfuse the version of phpMyAdmin,which will likely be 3.something, withthe versions of <strong>PHP</strong> or <strong>MySQL</strong>).nnI consider the versions being used to besuch an important, fundamental pieceof in<strong>for</strong>mation that I won’t normallyassist people looking <strong>for</strong> help until theyprovide this in<strong>for</strong>mation!Know what <strong>Web</strong> server you are running.Similarly, some problems <strong>and</strong> featuresare unique to your <strong>Web</strong> serving application—Apache,IIS, or Abyss. You shouldknow which one you are using, <strong>and</strong>which version, from when you installedthe application. If you’re using a <strong>Web</strong>host, the hosting company can provideyou with this in<strong>for</strong>mation.Try executing pages in a different<strong>Web</strong> browser.Every <strong>Web</strong> developer should have<strong>and</strong> use at least two <strong>Web</strong> browsers. Ifyou test your pages in different ones,you’ll be able to see if the problem hasto do with your script or a particularbrowser. Normally, only HTML <strong>and</strong> CSSproblems can arise (or disappear) whenyou switch browsers; rarely will <strong>PHP</strong>, letalone <strong>MySQL</strong> or SQL, errors be browserspecific.continues on next pageF A phpinfo( ) script is one of your best tools <strong>for</strong>debugging, in<strong>for</strong>ming you of the <strong>PHP</strong> version <strong>and</strong>how it’s configured.G When you connect to a <strong>MySQL</strong> server, it will let you know the version number in use.Error H<strong>and</strong>ling <strong>and</strong> Debugging 245
nIf possible, try executing the page usinga different <strong>Web</strong> server, version of <strong>PHP</strong>,<strong>and</strong>/or version of <strong>MySQL</strong>.<strong>PHP</strong> <strong>and</strong> <strong>MySQL</strong> errors sometimes stemfrom particular configurations <strong>and</strong> versionson one server. If something workson one server but not another, thenyou’ll know that the script isn’t inherentlyat fault. From there it’s a matterof using phpinfo( ) scripts to see whatserver settings may be different.If taking a break is one thing you shoulddo when you become frustrated, here’s whatyou shouldn’t do: send off one or multiplepanicky <strong>and</strong> persnickety emails to a writer, toa newsgroup or mailing list, or to anyone else.When it comes to asking <strong>for</strong> free help fromstrangers, patience <strong>and</strong> pleasantries garnermuch better <strong>and</strong> faster results.For that matter, I would strongly adviseagainst r<strong>and</strong>omly guessing at solutions. I’veseen far too many people only complicate mattersfurther by taking stabs at solutions, withouta full underst<strong>and</strong>ing of what the attemptedchanges should or should not do.There’s another different realm of errorsthat you could classify as usage errors: whatgoes wrong when the site’s user doesn’t dowhat you thought they would. As a goldenrule, write your code so that it doesn’t breakeven if the user doesn’t do anything right ordoes everything wrong! In other words, makeno assumptions. There’s a quote from DougLinder that applies here: “A good programmeris someone who looks both ways be<strong>for</strong>e crossinga one-way street.”Debugging HTMLDebugging HTML is relatively easy. Thesource code is very accessible, most problemsare overt, <strong>and</strong> attempts at fixing theHTML don’t normally make things worse(as can happen with <strong>PHP</strong>). Still, there aresome basic steps you should follow to find<strong>and</strong> fix an HTML problem.To debug an HTML error:nCheck the source code.If you have an HTML problem, you’llalmost always need to check the sourcecode of the page to find it. How youview the source code depends uponthe browser being used, but normallyit’s a matter of using something likeView > Page Source or View > Source.n Use a validation tool H.nValidation tools, like the one at http://validator.w3.org, are great <strong>for</strong> findingmismatched tags, broken tables, <strong>and</strong>other problems.Use Firefox.I’m not trying to start a discussion onwhich is the best <strong>Web</strong> browser, <strong>and</strong>as Internet Explorer is (still!) the mostused one, you’ll need to eventually testusing it, but I personally find that Firefox(available <strong>for</strong> free from www.mozilla.com) is the best <strong>Web</strong> browser <strong>for</strong> <strong>Web</strong>developers. Firefox offers reliability <strong>and</strong>debugging features not available inother browsers. If you want to stick withIE or Safari <strong>for</strong> your day-to-day browsing,that’s up to you, but when doing<strong>Web</strong> development, turn to Firefox.n Use Firefox’s add-on widgets I.Besides being just a great <strong>Web</strong> browser,the very popular Firefox browser has aton of features that the <strong>Web</strong> developerwill appreciate. Furthermore, you canexp<strong>and</strong> Firefox’s functionality by installingany of the free widgets that areavailable. The <strong>Web</strong> Developer widgetin particular provides quick access togreat tools, such as showing a table’sborders, revealing the CSS, validatinga page, <strong>and</strong> more. I also frequently usethese add-ons: Firebug, DOM Inspector,<strong>and</strong> HTML Validator, among others.246 Chapter 8
nTest the page in another browser.<strong>PHP</strong> code is generally browser-independent,meaning you’ll get consistent resultsregardless of the client. Not so withHTML. Sometimes a particular browserhas a quirk that affects the renderedpage. Running the same page in anotherbrowser is the easiest way to know if it’san HTML problem or a browser quirk.H Validation tools like the one provided by theW3C (World Wide <strong>Web</strong> Consortium) are good <strong>for</strong>finding problems <strong>and</strong> making sure your HTMLcon<strong>for</strong>ms to st<strong>and</strong>ards.The first step toward fixing any kind ofproblem is underst<strong>and</strong>ing what’s causing it.Remember the role each technology—HTML,<strong>PHP</strong>, SQL, <strong>and</strong> <strong>MySQL</strong>—plays as you debug. Ifyour page doesn’t look right, that’s an HTMLproblem. If your HTML is dynamically generatedby <strong>PHP</strong>, it’s still an HTML problem, but you’llneed to work with the <strong>PHP</strong> code to make it right.I Firefox’s <strong>Web</strong> Developer widget provides quickaccess to lots of useful tools.Book errorsIf you’ve followed an example in this book <strong>and</strong> something’s not working right, what should you do?1. Double-check your code or steps against those in the book.2. Use the index at the back of the book to see if I reference a script or function in an earlier page(you may have missed an important usage rule or tip).3. View the <strong>PHP</strong> manual <strong>for</strong> a specific function to see if it’s available in your version of <strong>PHP</strong> <strong>and</strong> toverify how the function is used.4. Check out the book’s errata page (through the supporting <strong>Web</strong> site, www.LarryUllman.com) tosee if an error in the code does exist <strong>and</strong> has been reported. Don’t post your particular problemthere yet, though!5. Triple-check your code <strong>and</strong> use all the debugging techniques outlined in this chapter.6. Search the book’s supporting <strong>for</strong>um to see if others have had this problem <strong>and</strong> if a solution hasalready been determined.7. If all else fails, use the book’s supporting <strong>for</strong>um to ask <strong>for</strong> assistance. When you do, make sureyou include all the pertinent in<strong>for</strong>mation (version of <strong>PHP</strong>, version of <strong>MySQL</strong>, the debuggingsteps you took <strong>and</strong> what the results were, etc.).Error H<strong>and</strong>ling <strong>and</strong> Debugging 247
Displaying pHp errors<strong>PHP</strong> provides remarkably useful <strong>and</strong>descriptive error messages when thingsgo awry. Un<strong>for</strong>tunately, <strong>PHP</strong> doesn’t showthese errors when running using its defaultconfiguration. This policy makes sense <strong>for</strong>live servers, where you don’t want the endusers seeing <strong>PHP</strong>-specific error messages,but it also makes everything that muchmore confusing <strong>for</strong> the beginning <strong>PHP</strong>developer. To be able to see <strong>PHP</strong>’s errors,you must turn on the display_ errors directive,either in an individual script or <strong>for</strong> the<strong>PHP</strong> configuration as a whole.To turn on display_errors in a script, usethe ini_set( ) function. As its arguments,this function takes a directive name <strong>and</strong>what setting that directive should have:ini_set('display_errors', 1);Including this line in a script will turn ondisplay_errors <strong>for</strong> that script. The onlydownside is that if your script has a syntaxerror that prevents it from running at all,then you’ll still see a blank page. To have<strong>PHP</strong> display errors <strong>for</strong> the entire server,you’ll need to edit its configuration, as isdiscussed in the “Configuring <strong>PHP</strong>” sectionof Appendix A.Script 8.1 The ini_set( ) function can be used to tella <strong>PHP</strong> script to reveal any errors that might occur.1 3 4 5 6 Displaying Errors7 8 9 Testing Display Errors10 20 21 To turn on display_errors:1. Create a new <strong>PHP</strong> document inyour text editor or IDE, to be nameddisplay_errors.php (Script 8.1):248 Chapter 8
Displaying ErrorsTesting Display Errors5. Save the file as display_errors.php,place it in your <strong>Web</strong> directory, <strong>and</strong> test itin your <strong>Web</strong> browser A.6. If you want, change the first line of <strong>PHP</strong>code to read:ini_set('display_errors', 0);Then save <strong>and</strong> retest the script B.There are limits as to what <strong>PHP</strong> settingsthe ini_set( ) function can be used toadjust. See the <strong>PHP</strong> manual <strong>for</strong> specifics asto what can <strong>and</strong> cannot be changed using it.As a reminder, changing the display_errors setting in a script only works so longas that script runs (i.e., it cannot have anyparse errors). To be able to always see anyerrors that occur, you’ll need to enabledisplay_errors in <strong>PHP</strong>’s configuration file(again, see the appendix).A With display_errors turned on (<strong>for</strong> this script),the page reports the errors when they occur.B With display_errors turned off (<strong>for</strong> thispage), the same errors are no longer reported.Un<strong>for</strong>tunately, they still exist.Error H<strong>and</strong>ling <strong>and</strong> Debugging 249
Adjusting errorReporting in pHpOnce you have <strong>PHP</strong> set to display the errorsthat occur, you might want to adjust thelevel of error reporting. Your <strong>PHP</strong> installationas a whole, or individual scripts, can be setto report or ignore different types of errors.Table 8.1 lists most of the levels, but theycan generally be one of these three kinds:nnnNotices, which do not stop the executionof a script <strong>and</strong> may not necessarilybe a problem.Warnings, which indicate a problem butdon’t stop a script’s execution.Errors, which stop a script from continuing(including the ever-common parse error,which prevents scripts from running at all).As a rule of thumb, you’ll want <strong>PHP</strong> to reporton any kind of error while you’re developinga site but report no specific errors oncethe site goes live. For security <strong>and</strong> aestheticpurposes, it’s generally unwise <strong>for</strong> a publicuser to see <strong>PHP</strong>’s detailed error messages.Suppressing errors with @Individual errors can be suppressed in<strong>PHP</strong> using the error suppression operator,@. For example, if you don’t want <strong>PHP</strong>to report if it couldn’t include a file, youwould code@include ('config.inc.php');Or if you don’t want to see a “division byzero” error:$x = 8;$y = 0;$num = @($x/$y);The @ symbol will work only on expressions,like function calls or mathematicaloperations. You cannot use @ be<strong>for</strong>econditionals, loops, function definitions,<strong>and</strong> so <strong>for</strong>th.As a rule of thumb, I recommend that @be used on functions whose execution,should they fail, will not affect the functionalityof the script as a whole. Or youcan choose not to display <strong>PHP</strong>’s errors byh<strong>and</strong>ling them more gracefully yourself(a topic discussed later in this chapter).TABLe 8.1 Error-Reporting LevelsNumber Constant Report On1 E_ERROR Fatal run-time errors (that stop execution of the script)2 E_WARNING Run-time warnings (non-fatal errors)4 E_PARSE Parse errors8 E_NOTICE Notices (things that could or could not be a problem)256 E_USER_ERROR User-generated error messages, generated by the trigger_error( ) function512 E_USER_WARNING User-generated warnings, generated by the trigger_error( ) function1024 E_USER_NOTICE User-generated notices, generated by the trigger_error( ) function2048 E_STRICT Recommendations <strong>for</strong> compatibility <strong>and</strong> interoperability8192 E_DEPRECATED Warnings about code that won’t work in future versions of <strong>PHP</strong>30719 E_ALL All errors, warnings, <strong>and</strong> recommendations250 Chapter 8
Script 8.2 This script will demonstrate how errorreporting can be manipulated in <strong>PHP</strong>.1 3 4 5 6 Reporting Errors7 8 9 Testing Error Reporting10 23 24 Frequently, error messages—particularlythose dealing with the database—will revealcertain behind-the-scenes aspects of your<strong>Web</strong> application that are best not shown.While you hope all of these will be workedout during the development stage, that maynot be the case.You can universally adjust the level oferror reporting following the instructions inAppendix A. Or you can adjust this behavioron a script-by-script basis using theerror_reporting( ) function. This functionis used to establish what type of errors<strong>PHP</strong> should report on within a specificpage. The function takes either a numberor a constant, using the values in Table 8.1(the <strong>PHP</strong> manual lists a few others, relatedto the core of <strong>PHP</strong> itself).error_reporting(0); // Show no errors.A setting of 0 turns error reporting offentirely (errors will still occur; you just won’tsee them anymore). Conversely, error_reporting (E_ALL) will tell <strong>PHP</strong> to reporton every error that occurs. The numberscan be added up to customize the level oferror reporting, or you could use the bitwiseoperators—| (or), ~ (not), & (<strong>and</strong>)—withthe constants. With this following setting,any non-notice error will be shown:error_reporting (E_ALL & ~E_NOTICE);To adjust error reporting:1. Open display_errors.php (Script 8.1) inyour text editor or IDE, if it is not already.To play around with error reporting levels,use display_errors.php as an example.2. After adjusting the display_errors setting,add (Script 8.2):error_reporting(E_ALL | E_STRICT);continues on next pageError H<strong>and</strong>ling <strong>and</strong> Debugging 251
For development purposes, have <strong>PHP</strong>notify you of all errors, notices, warnings,<strong>and</strong> recommendations. Settingthe level of error reporting to E_ALL willaccomplish that. But E_ALL does notinclude E_STRICT, so another clause—| (or) E_STRICT—is added.In short, now <strong>PHP</strong> will let you knowabout anything that is, or just may be,a problem.Because E_ALL <strong>and</strong> E_STRICT areconstants, they are not enclosed inquotation marks.3. Save the file as report_errors.php,place it in your <strong>Web</strong> directory, <strong>and</strong> runit in your <strong>Web</strong> browser A.I also altered the page’s title <strong>and</strong> theheading, but both are immaterial tothe point of this exercise.4. Change the level of error reporting tosomething different <strong>and</strong> retest B <strong>and</strong> C.A On the highest level of error reporting, <strong>PHP</strong> hastwo warnings <strong>and</strong> one notice <strong>for</strong> this page (Script 8.2).B The same page (Script 8.2) after disabling thereporting of notices.The numeric value of E_ALL in Table 8.1can differ from one version of <strong>PHP</strong> to the next.Because you’ll often want to adjust thedisplay_errors <strong>and</strong> error_reporting <strong>for</strong> everypage in a <strong>Web</strong> site, you might want to placethose lines of code in a separate <strong>PHP</strong> file thatcan then be included by other <strong>PHP</strong> scripts.The scripts in this book were all writtenwith <strong>PHP</strong>’s error reporting on the highest level(with the intention of catching every possibleproblem).The trigger_error( ) function is away to programmatically generate an errorin a <strong>PHP</strong> script. Its first argument is an errormessage; its second, optional, argument isa numeric error type, corresponding to thevalues in Table 8.1. By default the type willbe E_USER.if (/* some condition */) {trigger_error('Something Bad➝ Happened!');}C The same page again (Script 8.2) witherror reporting turned off (set to 0). Theresult is the same as if display_errors wasdisabled. Of course, the errors still occur;they’re just not being reported.252 Chapter 8
Creating Customerror H<strong>and</strong>lersAnother option <strong>for</strong> error management withyour sites is to alter how <strong>PHP</strong> h<strong>and</strong>leserrors. By default, if display_errors isenabled <strong>and</strong> an error is caught (that fallsunder the level of error reporting), <strong>PHP</strong> willprint the error, in a somewhat simplistic<strong>for</strong>m, within some minimal HTML tags A.You can override how errors are h<strong>and</strong>ledby creating your own function that will becalled when errors occur. For example,function report_errors (arguments) {// Do whatever here.}set_error_h<strong>and</strong>ler ('report_errors');The <strong>PHP</strong> set_error_h<strong>and</strong>ler( ) function isused to name the user-defined function tobe called when an error occurs. The h<strong>and</strong>lingfunction (report_errors, in this case)will, at that time, receive several values thatcan be used in any possible manner.This function can be written to take up tofive arguments. In order, these argumentsare: an error number (corresponding toTable 8.1), a textual error message, the nameof the file where the error was found, thespecific line number on which it occurred,<strong>and</strong> the variables that existed at the time ofthe error. Defining a function that accepts allthese arguments might look likefunction report_errors ($num, $msg,➝ $file, $line, $vars) {…To make use of this concept, the report_errors.php file (Script 8.2) will be rewrittenone last time.To create your own error h<strong>and</strong>ler:1. Open report_errors.php (Script 8.2) inyour text editor or IDE, if it is not already.2. Remove the ini_set( ) <strong>and</strong> error_reporting( ) lines (Script 8.3).When you establish your own errorh<strong>and</strong>lingfunction, the error reportinglevels no longer have any meaning,so the line that adjusts them can beremoved. Adjusting the display_errorssetting is also meaningless, as theerror-h<strong>and</strong>ling function will controlwhether errors are displayed or not.continues on page 255A The HTMLsource code showshow <strong>PHP</strong> <strong>for</strong>matserrors by default.Error H<strong>and</strong>ling <strong>and</strong> Debugging 253
Script 8.3 By defining your own error-h<strong>and</strong>ling function, you can customize how errors are treated in your<strong>PHP</strong> scripts.1 3 4 5 6 H<strong>and</strong>ling Errors7 8 910 Testing Error H<strong>and</strong>ling11
3. Be<strong>for</strong>e the script creates the errors, add:define ('LIVE', FALSE);This constant will be a flag used toindicate whether or not the site is currentlylive. It’s an important distinction,as how you h<strong>and</strong>le errors <strong>and</strong> whatyou reveal in the browser should differgreatly when you’re developing a site<strong>and</strong> when a site is live.This constant is being set outside of thefunction <strong>for</strong> two reasons. First, I wantto treat the function as a black box thatdoes what I need it to do without havingto go in <strong>and</strong> tinker with it. Second,in many sites, there might be othersettings (like the database connectivityin<strong>for</strong>mation) that are also live versusdevelopment-specific. Conditionalscould, there<strong>for</strong>e, also refer to this constantto adjust those settings.4. Begin defining the error-h<strong>and</strong>ling function:function my_error_h<strong>and</strong>ler➝ ($e_number, $e_message, $e_file,➝ $e_line, $e_vars) {The my_error_h<strong>and</strong>ler( ) function isset to receive the full five argumentsthat a custom error h<strong>and</strong>ler can.5. Create the error message using thereceived values.$message = "An error occurred➝ in script '$e_file' on line➝ $e_line: $e_message\n";The error message will begin by referencingthe filename <strong>and</strong> line numberwhere the error occurred. Added to thisis the actual error message. All of thesevalues are passed to the function whenit is called (when an error occurs).6. Add any existing variables to theerror message:$message .= print_r ($e_vars, 1);The $e_vars variable will receive all ofthe variables that exist, <strong>and</strong> their values,when the error happens. Because thismight contain useful debugging in<strong>for</strong>mation,it’s added to the message.The print_r( ) function is normallyused to print out a variable’s structure<strong>and</strong> value; it is particularly useful witharrays. If you call the function with asecond argument (1 or TRUE), the resultis returned instead of printed. So thisline adds all of the variable in<strong>for</strong>mationto $message.7. Print a message that will vary, dependingupon whether or not the site is live:if (!LIVE) {echo '' . $message . "\n";debug_print_backtrace( );echo '';} else {echo '➝ A system error occurred.➝ We apologize <strong>for</strong> the➝ inconvenience.';}continues on next pageError H<strong>and</strong>ling <strong>and</strong> Debugging 255
If the site is not live (if LIVE is FALSE),which would be the case while the siteis being developed, a detailed errormessage should be printed B. Forease of viewing, the error message isprinted within HTML PRE tags. Furthermore,a useful debugging function,debug_print_backtrace( ), is alsocalled. This function returns a slewof in<strong>for</strong>mation about what functionshave been called, what files have beenincluded, <strong>and</strong> so <strong>for</strong>th.If the site is live, a simple mea culpa willbe printed, letting the user know that anerror occurred but not what the specificproblem is C. Under this situation, youcould also use the error_log( ) function(see the sidebar) to have the detailederror message emailed or written to a log.B During the development phase, detailed error messages are printed in the <strong>Web</strong> browser. (In a more realworldscript, with more code, the messages would be more useful.)C Once a site has gonelive, more user-friendly (<strong>and</strong>less revealing) errors areprinted. Here, one messageis printed <strong>for</strong> each of thethree errors in the script.256 Chapter 8
Logging pHp errorsIn Script 8.3, errors are h<strong>and</strong>led bysimply printing them out in detail or not.Another option is to log the errors: makea permanent note of them somehow. Forthis purpose, the error_log( ) functioninstructs <strong>PHP</strong> how to file an error. Itssyntax iserror_log (message, type,➝ destination, extra headers);The message value should be the textof the logged error (i.e., $message inScript 8.3). The type dictates how theerror is logged. The options are the numbers0, 1, 3, <strong>and</strong> 4: use the computer’sdefault logging method (0), send it in anemail (1), write it to a text file (3), or sendit to the <strong>Web</strong> server’s logging h<strong>and</strong>ler (4).The destination parameter can be eitherthe name of a file (<strong>for</strong> log type 3) or anemail address (<strong>for</strong> log type 1). The extraheaders argument is used only whensending emails (log type 1). Both the destination<strong>and</strong> extra headers are optional.8. Complete the function <strong>and</strong> tell <strong>PHP</strong> touse it:}set_error_h<strong>and</strong>ler('my_error_➝ h<strong>and</strong>ler');This second line is the important one,telling <strong>PHP</strong> to use the custom error h<strong>and</strong>lerinstead of <strong>PHP</strong>’s default h<strong>and</strong>ler.9. Save the file as h<strong>and</strong>le_errors.php,place it in your <strong>Web</strong> directory, <strong>and</strong> testit in your <strong>Web</strong> browser B.10. Change the value of LIVE to TRUE,save, <strong>and</strong> retest the script C.To see how the error h<strong>and</strong>ler behaveswith a live site, just change this one value.If your <strong>PHP</strong> page uses special HTML <strong>for</strong>matting—likeCSS tags to affect the layout <strong>and</strong>font treatment—add this in<strong>for</strong>mation to yourerror reporting function.Obviously in a live site you’ll probablyneed to do more than apologize <strong>for</strong> the inconvenience(particularly if the error significantlyaffects the page’s functionality). Still, thisexample demonstrates how you can easilyadjust error h<strong>and</strong>ling to suit the situation.If you don’t want the error-h<strong>and</strong>lingfunction to report on every notice, error, orwarning, you could check the error numbervalue (the first argument sent to the function).For example, to ignore notices when the site islive, you would change the main conditional toif (!LIVE) {echo '' . $message . "\n";debug_print_backtrace( );echo '';} elseif ($e_number != E_NOTICE) {echo 'A system➝ error occurred. We apologize➝ <strong>for</strong> the inconvenience.➝ ';}Error H<strong>and</strong>ling <strong>and</strong> Debugging 257
pHp DebuggingTechniquesWhen it comes to debugging, what you’llbest learn from experience are the causesof certain types of errors. Underst<strong>and</strong>ingthe common causes will shorten the time ittakes to fix errors. To expedite the learningprocess, Table 8.2 lists the likely reasons<strong>for</strong> the most common <strong>PHP</strong> errors.The first, <strong>and</strong> most common, type of errorthat you’ll run across is syntactical <strong>and</strong> willprevent your scripts from executing. An errorlike this will result in messages like the onein A, which every <strong>PHP</strong> developer has seentoo many times. To avoid making this sort ofmistake when you program, be sure to:nnEnd every statement (but not languageconstructs like loops <strong>and</strong> conditionals)with a semicolon.Balance all quotation marks, parentheses,curly braces, <strong>and</strong> square brackets(each opening character must be closed).A The parse error prevents a script from runningbecause of invalid <strong>PHP</strong> syntax. This one wascaused by failing to enclose $array['key'] withincurly braces when printing its value.TABLe 8.2 Common <strong>PHP</strong> ErrorsErrorBlank PageParse errorEmpty variable valueUndefined variableCall to undefined functionCannot redeclare functionHeaders already sentLikely CauseHTML problem, or <strong>PHP</strong> error <strong>and</strong> display_errors or error_reporting is off.Missing semicolon; unbalanced curly braces, parentheses, or quotationmarks; or use of an unescaped quotation mark in a string.Forgot the initial $, misspelled or miscapitalized the variable name, orinappropriate variable scope (with functions).Reference made to a variable be<strong>for</strong>e it is given a value or an empty variablevalue (see those potential causes).Misspelled function name, <strong>PHP</strong> is not configured to use that function (like a<strong>MySQL</strong> function), or document that contains the function definition was notincluded.Two definitions of your own function exist; check within included files.White space exists in the script be<strong>for</strong>e the <strong>PHP</strong> tags, data has already beenprinted, or a file has been included.258 Chapter 8
nnBe consistent with your quotation marks(single quotes can be closed only withsingle quotes <strong>and</strong> double quotes withdouble quotes).Escape, using the backslash, all single<strong>and</strong>double-quotation marks withinstrings, as appropriate.One thing you should also underst<strong>and</strong>about syntactical errors is that just becausethe <strong>PHP</strong> error message says the error isoccurring on line 12, that doesn’t mean thatthe mistake is actually on that line. At thevery least, it is not uncommon <strong>for</strong> there tobe a difference between what <strong>PHP</strong> thinksis line 12 <strong>and</strong> what your text editor indicatesis line 12. So while <strong>PHP</strong>’s directionis useful in tracking down a problem, treatthe line number referenced as more of astarting point than an absolute.If <strong>PHP</strong> reports an error on the last lineof your document, this is almost alwaysbecause a mismatched parenthesis, curlybrace, or quotation mark was not caughtuntil that moment.The second type of error you’ll encounterresults from misusing a function. This erroroccurs, <strong>for</strong> example, when a function iscalled without the proper arguments. Thiserror is discovered by <strong>PHP</strong> when attemptingto execute the code. In later chapters you’llprobably see such errors when using theheader( ) function, cookies, or sessions.To fix errors, you’ll need to do a little detectivework to see what mistakes were made<strong>and</strong> where. For starters, though, alwaysthoroughly read <strong>and</strong> trust the error message<strong>PHP</strong> offers. Although the referencedline number may not always be correct, a<strong>PHP</strong> error is very descriptive, normally helpful,<strong>and</strong> almost always 100 percent correct.To debug your scripts:nnTurn on display_errors.Use the earlier steps to enable display_errors <strong>for</strong> a script, or, if possible, the entireserver, as you develop your applications.Use comments.Just as you can use comments todocument your scripts, you can alsouse them to rule out problematic lines.If <strong>PHP</strong> is giving you an error on line 12,then commenting out that line shouldget rid of the error. If not, then you knowthe error is elsewhere. Just be carefulthat you don’t introduce more errors byimproperly commenting out only a portionof a code block: the syntax of yourscripts must be maintained.continues on next pageError H<strong>and</strong>ling <strong>and</strong> Debugging 259
nnUse the print <strong>and</strong> echo functions.In more complicated scripts, I frequentlyuse echo statements to leave me notesas to what is happening as the script isexecuted B. When a script has severalsteps, it may not be easy to know if theproblem is occurring in step 2 or step 5.By using an echo statement, you cannarrow the problem down to the specificjuncture.Check what quotation marks are beingused <strong>for</strong> printing variables.It’s not uncommon <strong>for</strong> programmers tomistakenly use single quotation marks<strong>and</strong> then wonder why their variablesare not printed properly. Rememberthat single quotation marks treat textliterally <strong>and</strong> that you must use doublequotation marks to print out the valuesof variables.n Track variables C.It is pretty easy <strong>for</strong> a script not to workbecause you referred to the wrong variableor the right variable by the wrongname or because the variable doesnot have the value you would expect.To check <strong>for</strong> these possibilities, usethe print or echo statements to printout the values of variables at importantpoints in your scripts. This is simply amatter ofecho "\$var = $var\n";orecho "\$var is $var\n";The first dollar sign is escaped so thatthe variable’s name is printed. The secondreference of the variable will printits value.B More complex debugging can be accomplishedby leaving yourself notes as to what thescript is doing.C Printing the names <strong>and</strong> values of variables isthe easiest way to track them over the course ofa script.260 Chapter 8
using die( ) <strong>and</strong> exit( )Two functions that are often used witherror management are die( ) <strong>and</strong>exit( ), (they’re technically languageconstructs, not functions, but whocares?). When a die( ) or exit( ) iscalled in your script, the entire script isterminated. Both are useful <strong>for</strong> stoppinga script from continuing shouldsomething important—like establishinga database connection— fail to happen.You can also pass to die( ) <strong>and</strong> exit( )a string that will be printed out in thebrowser.You’ll commonly see die( ) or exit( )used in an OR conditional. For example:include('config.inc.php') OR die➝ ('Could not open the file. ');With a line like that, if <strong>PHP</strong> could notinclude the configuration file, the die( )statement will be executed <strong>and</strong> the“Could not open the file.” message willbe printed. You’ll see variations on thisthroughout this book <strong>and</strong> in the <strong>PHP</strong>manual, as it’s a quick, but potentiallyexcessive, way to h<strong>and</strong>le errors withoutusing a custom error h<strong>and</strong>ler.nPrint array values.For more complicated variable types(arrays <strong>and</strong> objects), the print_r( ) <strong>and</strong>var_dump( ) functions will print out theirvalues without the need <strong>for</strong> loops. Bothfunctions accomplish the same task,although var_dump( ) is more detailedin its reporting than print_r( ).Many text editors include utilities tocheck <strong>for</strong> balanced parentheses, brackets,<strong>and</strong> quotation marks.If you cannot find the parse error in acomplex script, begin by using the /* */comments to render the entire <strong>PHP</strong> code inert.Then continue to uncomment sections at atime (by moving the opening or closingcomment characters) <strong>and</strong> rerun the scriptuntil you deduce what lines are causing theerror. Watch how you comment out controlstructures, though, as the curly braces mustcontinue to be matched in order to avoidparse errors. For example:if (condition) {/* Start comment.Inert code.End comment. */}To make the results of print_r( ) morereadable in the <strong>Web</strong> browser, wrap it withinHTML (pre<strong>for</strong>matted) tags. This one lineis one of my favorite debugging tools:echo '' . print_r ($var, 1) .➝'';Error H<strong>and</strong>ling <strong>and</strong> Debugging 261
SQL <strong>and</strong> <strong>MySQL</strong>Debugging TechniquesThe most common SQL errors are causedby the following issues:nnnnnUnbalanced use of quotation marksor parenthesesUnescaped apostrophes in columnvaluesMisspelling a column name, table name,or functionAmbiguously referring to a column ina joinPlacing a query’s clauses (WHERE, GROUPBY, ORDER BY, LIMIT) in the wrong orderFurthermore, when using <strong>MySQL</strong> you canalso run across the following:nnUnpredictable or inappropriate queryresultsInability to access the databaseSince you’ll be running the queries <strong>for</strong> yourdynamic <strong>Web</strong> sites from <strong>PHP</strong>, you needa methodology <strong>for</strong> debugging SQL <strong>and</strong><strong>MySQL</strong> errors within that context (<strong>PHP</strong> willnot report a problem with your SQL).Debugging SQL problemsTo decide if you are experiencing a <strong>MySQL</strong>(or SQL) problem rather than a <strong>PHP</strong> one,you need a system <strong>for</strong> finding <strong>and</strong> fixingthe issue. Fortunately, the steps you shouldtake to debug <strong>MySQL</strong> <strong>and</strong> SQL problemsare easy to define <strong>and</strong> should be followedwithout thinking. If you ever have any<strong>MySQL</strong> or SQL errors to debug, just abideby this sequence of steps.To hammer the point home, this nextsequence of steps is probably the mostuseful debugging technique in this chapter<strong>and</strong> the entire book. You’ll likely needto follow these steps in any <strong>PHP</strong>-<strong>MySQL</strong><strong>Web</strong> application when you’re not gettingthe results you expected.To debug your SQL queries:1. Print out any applicable queries in your<strong>PHP</strong> script A.As you’ll see in the next chapter, SQLqueries will often be assigned to a variable,particularly when you use <strong>PHP</strong> todynamically create them. Using the codeecho $query (or whatever the queryvariable is called) in your <strong>PHP</strong> scripts, youcan send to the browser the exact querybeing run. Sometimes this step alone willhelp you see what the real problem is.2. Run the query in the mysql client orother tool B.The most foolproof method of debuggingan SQL or <strong>MySQL</strong> problem is torun the query used in your <strong>PHP</strong> scriptsthrough an independent application: themysql client, phpMyAdmin, or the like.Doing so will give you the same result asthe original <strong>PHP</strong> script receives but withoutthe overhead, hassle, or mystery.A Knowing exactly what query a <strong>PHP</strong> script is attempting to execute is the most useful first step <strong>for</strong> solvingSQL <strong>and</strong> <strong>MySQL</strong> problems.262 Chapter 8
If the independent application returnsthe expected result but you are still notgetting the proper behavior in your <strong>PHP</strong>script, then you will know that the problemlies within the script itself, not yourSQL comm<strong>and</strong> or the <strong>MySQL</strong> database.3. If the problem still isn’t evident, rewritethe query in its most basic <strong>for</strong>m, <strong>and</strong>then keep adding dimensions backin until you discover which clause iscausing the problem. Continue to use athird-party interface to <strong>MySQL</strong> to do this(i.e., put away the <strong>PHP</strong> script until you’vegot the SQL query working properly).Sometimes it’s difficult to debug a querybecause there’s too much going on.Like commenting out most of a <strong>PHP</strong>script, taking a query down to its bareminimum structure <strong>and</strong> slowly buildingit back up can be the easiest way todebug complex SQL comm<strong>and</strong>s.Debugging access problemsAccess-denied error messages are themost common problem beginning developersencounter when using <strong>PHP</strong> to interactwith <strong>MySQL</strong>. These are among the commonsolutions:nReload <strong>MySQL</strong> after altering the privilegesso that the changes take effect.Either use the mysqladmin tool or runnnFLUSH PRIVILEGES in the mysql client.You must be logged in as a user withthe appropriate permissions to do this(see Appendix A <strong>for</strong> more).Double-check the password used. Theerror message Access denied <strong>for</strong> user:‘user@localhost’ (Using password:YES) frequently indicates that the passwordis wrong or mistyped. (This is notalways the cause but is the first thingto check.)The error message Can’t connect to…(error number 2002) indicates that<strong>MySQL</strong> either is not running or is notrunning on the socket or TCP/IP porttried by the client.<strong>MySQL</strong> keeps its own error logs, whichare very useful in solving <strong>MySQL</strong> problems(like why <strong>MySQL</strong> won’t even start). <strong>MySQL</strong>’serror log will be located in the <strong>MySQL</strong> datadirectory <strong>and</strong> titled hostname.err.The <strong>MySQL</strong> manual is very detailed,containing SQL examples, function references,<strong>and</strong> the meanings of error codes. Make themanual your friend <strong>and</strong> turn to it when confusingerrors pop up.B To underst<strong>and</strong> what result a <strong>PHP</strong> script is receiving, run the same query through a separate interface. Inthis case the problem is the reference to the password column, when the table’s column is actually calledjust pass.Error H<strong>and</strong>ling <strong>and</strong> Debugging 263
Review <strong>and</strong> pursueIf you have any problems with thereview questions or the pursue prompts,turn to the book’s supporting <strong>for</strong>um(www.LarryUllman.com/<strong>for</strong>ums/).ReviewnnnnnnnnnWhy must <strong>PHP</strong> scripts be run througha URL?What version of <strong>PHP</strong> are you using?What version of <strong>MySQL</strong>? What versionof what <strong>Web</strong> server application are youusing? On what operating system?What debugging steps should you takeif the rendered <strong>Web</strong> page doesn’t lookright in your <strong>Web</strong> browser?Do you have display_errors enabled onyour server? Why is enabling display_errors useful on development servers?Why is revealing errors a bad thing onproduction servers?How does the level of error_reportingaffect <strong>PHP</strong> scripts? To what level oferror_reporting is your <strong>PHP</strong> server set?What does the @ operator do?What are the benefits of using yourown error-h<strong>and</strong>ling function? Whatimpact does the error reporting levelhave when using your own errorh<strong>and</strong>lingfunction?How can print or echo be used asdebugging tools? Hint: There are manycorrect answers.What is the method <strong>for</strong> fixing <strong>PHP</strong>-SQL-<strong>MySQL</strong> bugs?pursuennnnnInstall the Firebug <strong>and</strong> <strong>Web</strong> Developerextensions <strong>for</strong> Firefox, if you have notalready. Install Firefox if you haven’talready installed it!Enable display_errors on your developmentserver, if you can.If you can, set <strong>PHP</strong>’s level of errorreporting to E_ALL | E_STRICT onyour development server.Check out the <strong>PHP</strong> manual’s page<strong>for</strong> the debug_print_backtrace( )function to learn more about it.Consider using a professional-gradeIDE that provides built-in debuggingtools.264 Chapter 8
9Using <strong>PHP</strong> with<strong>MySQL</strong>Now that you have a sufficient amount of<strong>PHP</strong>, SQL, <strong>and</strong> <strong>MySQL</strong> experience underyour belt, it’s time to put all of the technologiestogether. <strong>PHP</strong>’s strong integration with<strong>MySQL</strong> is just one reason so many programmershave embraced it; it’s impressivehow easily you can use the two together.This chapter will use the existing sitenamedatabase—created in Chapter 5, “Introductionto SQL”—to build a <strong>PHP</strong> interface <strong>for</strong>interacting with the users table. The knowledgetaught <strong>and</strong> the examples used here willbe the basis <strong>for</strong> all of your <strong>PHP</strong>-<strong>MySQL</strong> <strong>Web</strong>applications, as the principles involved arethe same <strong>for</strong> any <strong>PHP</strong>-<strong>MySQL</strong> interaction.Be<strong>for</strong>e heading into this chapter, youshould be com<strong>for</strong>table with everythingcovered in the first eight chapters, includingthe error debugging <strong>and</strong> h<strong>and</strong>lingtechniques just taught in the previouschapter. Finally, remember that you needa <strong>PHP</strong>-enabled <strong>Web</strong> server <strong>and</strong> accessto a running <strong>MySQL</strong> server in order toexecute the following examples.in This ChapterModifying the Template 266Connecting to <strong>MySQL</strong> 268Executing Simple Queries 273Retrieving Query Results 281Ensuring Secure SQL 285Counting Returned Records 290Updating Records with <strong>PHP</strong> 292Review <strong>and</strong> Pursue 298
Modifying the TemplateSince all of the pages in this chapter <strong>and</strong>the next will be part of the same <strong>Web</strong> application,it’ll be worthwhile to use a commontemplate system. Instead of creating anew template from scratch, the layout fromChapter 3, “Creating <strong>Dynamic</strong> <strong>Web</strong> <strong>Sites</strong>,”will be used again, with only a minor modificationto the header file’s navigation links.To make the header file:1. Open header.html (Script 3.2) in yourtext editor or IDE.2. Change the list of links to read (Script 9.1):Home➝ Page➝ RegisterView➝ UsersChange➝ Passwordlink fiveAll of the examples in this chapter willinvolve the registration, view users, <strong>and</strong>change password pages. The date <strong>for</strong>m<strong>and</strong> calculator links from Chapter 3 canbe deleted.3. Save the file as header.html.4. Place the new header file in your <strong>Web</strong>directory, within the includes folderalong with footer.html (Script 3.3)<strong>and</strong> style.css (available <strong>for</strong> downloadfrom the book’s supporting <strong>Web</strong> site,www.LarryUllman.com).Script 9.1 The site’s header file, used <strong>for</strong> the pages’ template, modified with new navigation links.1 2 3 4 5 6 7 8 9 10 Your <strong>Web</strong>site11 catchy slogan...12 13 14 15 Home Page16 Register17 View Users18 Change Password19 link five20 21 22 23 266 Chapter 9
5. Test the new header file by runningindex.php in your <strong>Web</strong> browser A.For a preview of this site’s structure, seethe sidebar “Organizing Your Documents” inthe next section.Remember that you can use any fileextension <strong>for</strong> your template files, including.inc or .php.A The dynamicallygenerated home pagewith new navigation links.WARninG: ReAD THiS!<strong>PHP</strong> <strong>and</strong> <strong>MySQL</strong> have gone through many changes over the past decade. Of these, the mostimportant <strong>for</strong> this chapter, <strong>and</strong> one of the most important <strong>for</strong> the rest of the book, involves what<strong>PHP</strong> functions you use to communicate with <strong>MySQL</strong>. For years, <strong>PHP</strong> developers used the st<strong>and</strong>ard<strong>MySQL</strong> functions (called the mysql extension). As of <strong>PHP</strong> 5 <strong>and</strong> <strong>MySQL</strong> 4.1, you can use the newerImproved <strong>MySQL</strong> functions (called the mysqli extension). These functions provide improved per<strong>for</strong>mance<strong>and</strong> take advantage of added features (among other benefits).As this book assumes you’re using at least <strong>PHP</strong> 5 <strong>and</strong> <strong>MySQL</strong> 5, all of the examples will only usethe Improved <strong>MySQL</strong> functions. If your server does not support this extension, you will not beable to run these examples as they are written! Most of the examples in the rest of the book willalso not work <strong>for</strong> you.If the server or home computer you’re using does not support the Improved <strong>MySQL</strong> functions,you have three options: upgrade <strong>PHP</strong> <strong>and</strong> <strong>MySQL</strong>, read the second edition of this book (whichteaches <strong>and</strong> primarily uses the older functions), or learn how to use the older functions <strong>and</strong>modify all the examples accordingly. For questions or problems, see the book’s corresponding<strong>for</strong>um (www.LarryUllman.com/<strong>for</strong>ums/).Using <strong>PHP</strong> with <strong>MySQL</strong> 267
Connecting to <strong>MySQL</strong>The first step <strong>for</strong> interacting with <strong>MySQL</strong>—connecting to the server—requires theappropriately named mysqli_connect( )function:$dbc = mysqli_connect (hostname,➝ username, password, db_name);The first three arguments sent to thefunction (hostname, username, <strong>and</strong>password) are based upon the users<strong>and</strong> privileges established within <strong>MySQL</strong>(see Appendix A, “Installation,” <strong>for</strong> morein<strong>for</strong>mation). Commonly (but not always),the host value will be localhost.The fourth argument is the name of thedatabase to use. This is the equivalentof saying USE databasename within themysql client.If the connection was made, the $dbcvariable, short <strong>for</strong> database connection(but you can use any name you want, ofcourse), will become a reference point<strong>for</strong> all of your subsequent databaseinteractions. Most of the <strong>PHP</strong> functions <strong>for</strong>working with <strong>MySQL</strong> will take this variableas its first argument.If a connection problem occurred, youcan call mysqli_connect_error( ), whichreturns the connection error message. Ittakes no arguments, so would be calledusing justmysqli_connect_error( );Once you’ve connected to the database,you should set the encoding <strong>for</strong> theinteraction. You can do so (as of <strong>PHP</strong> 5.0.5)with the mysqli_set_charset( ) function:mysqli_set_charset($dbc, 'utf8');The value used as the encoding—thesecond argument—should match thatof your <strong>PHP</strong> scripts <strong>and</strong> the collation ofyour database (see Chapter 6, “DatabaseDesign,” <strong>for</strong> more on <strong>MySQL</strong> collations).If you fail to do this, all data will betransferred using the default character set,which could cause problems.To start using <strong>PHP</strong> with <strong>MySQL</strong>, let’s createa special script that makes the connection.Other <strong>PHP</strong> scripts that require a <strong>MySQL</strong>connection can then include this file.To connect to <strong>and</strong> select a database:1. Create a new <strong>PHP</strong> document inyour text editor or IDE, to be namedmysqli_connect.php (Script 9.2):
isn’t required. In general, setting thesevalues as some sort of variable orconstant makes sense so that you canseparate the configuration parametersfrom the functions that use them, butagain, this is not obligatory.When writing your script, change thesevalues to ones that will work on yoursetup. If you have been provided with a<strong>MySQL</strong> username/password combination<strong>and</strong> a database (like <strong>for</strong> a hostedsite), use that in<strong>for</strong>mation here. Or, ifpossible, follow the steps in Appendix Ato create a user that has access to thesitename database, <strong>and</strong> insert thosevalues here. Whatever you do, don’tjust use the values written in this book’scode unless you know <strong>for</strong> certain theywill work on your server.3. Connect to <strong>MySQL</strong>:$dbc = @mysqli_connect (DB_HOST,➝ DB_USER, DB_PASSWORD, DB_NAME)➝ OR die ('Could not connect to➝ <strong>MySQL</strong>: ' . mysqli_connect_➝ error( ) );The mysqli_connect( ) function, if itsuccessfully connects to <strong>MySQL</strong>, willreturn a resource link that correspondsto the open connection. This link willbe assigned to the $dbc variable, sothat other functions can make use ofthis connection.The function call is preceded by theerror suppression operator (@). Thisprevents the <strong>PHP</strong> error from beingdisplayed in the <strong>Web</strong> browser. This ispreferable, as the error will be h<strong>and</strong>ledby the OR die( ) clause.continues on next pageScript 9.2 The mysqli_connect.php script will be used by every other script in this chapter. It establishesa connection to <strong>MySQL</strong>, selects the database, <strong>and</strong> sets the encoding.1
If the mysqli_connect( ) functioncannot return a valid resource link, thenthe OR die( ) part of the statement isexecuted (because the first part of theOR will be false, so the second part mustbe true). As discussed in the precedingchapter, the die( ) function terminatesthe execution of the script. The functioncan also take as an argument a stringthat will be printed to the <strong>Web</strong> browser.In this case, the string is a combinationof Could not connect to <strong>MySQL</strong>: <strong>and</strong>the specific <strong>MySQL</strong> error A. Using thisblunt error management system makesdebugging much easier as you developyour sites.4. Save the file as mysqli_connect.php.Since this file contains in<strong>for</strong>mation—the database access data—that mustbe kept private, it will use a .phpextension. With a .php extension, evenif malicious users ran this script in their<strong>Web</strong> browser, they would not see thepage’s actual content.You may also note that I did not includea terminating <strong>PHP</strong> tag: ?>. This isallowed in <strong>PHP</strong> (when the script endswith <strong>PHP</strong> code), <strong>and</strong> has a benefit to beexplained in subsequent chapters.5. Ideally, place the file outside of the <strong>Web</strong>document directory B.A If there wereproblems connecting to<strong>MySQL</strong>, an in<strong>for</strong>mativemessage is displayed<strong>and</strong> the script is halted.B A visual representationof a server’s <strong>Web</strong>documents, wheremysqli_connect.phpis not stored within themain directory (htdocs).270 Chapter 9
C If the <strong>MySQL</strong> connection script works properly,the end result will be a blank page (no HTML isgenerated by the script).Because the file contains sensitive<strong>MySQL</strong> access in<strong>for</strong>mation, it ought tobe stored securely. If you can, place itin the directory immediately above orotherwise outside of the <strong>Web</strong> directory.This way the file will not be accessiblefrom a <strong>Web</strong> browser. See the “OrganizingYour Documents” sidebar <strong>for</strong> more.6. Temporarily place a copy of the scriptwithin the <strong>Web</strong> directory <strong>and</strong> run it inyour <strong>Web</strong> browser C.In order to test the script, you’ll wantto place a copy on the server so thatit’s accessible from the <strong>Web</strong> browser(which means it must be in the <strong>Web</strong>directory). If the script works properly,the result should be a blank page C. Ifyou see an Access denied… or similarmessage A, it means that the combinationof username, password, <strong>and</strong> hostdoes not have permission to access theparticular database.continues on next pageorganizing Your DocumentsChapter 3 introduced the concept of site structure while developing the first <strong>Web</strong> application. Nowthat pages will begin using a database connection script, the topic is more important.Should the database connectivity in<strong>for</strong>mation (username, password, host, <strong>and</strong> database) fall intomalicious h<strong>and</strong>s, it could be used to steal your in<strong>for</strong>mation or wreak havoc upon the database asa whole. There<strong>for</strong>e, you cannot keep a script like mysqli_connect.php too secure.The best recommendation <strong>for</strong> securing such a file is to store it outside of the <strong>Web</strong> documents directory.If, <strong>for</strong> example, the htdocs folder in B is the root of the <strong>Web</strong> directory (in other words, the URLwww.example.com leads there), then not storing mysqli_connect.php anywhere within the htdocsdirectory means it will never be accessible via the <strong>Web</strong> browser. Granted, the source code of <strong>PHP</strong>scripts is not viewable from the <strong>Web</strong> browser (only the data sent to the browser by the script is), butyou can never be too careful. If you aren’t allowed to place documents outside of the <strong>Web</strong> directory,placing mysqli_connect.php in the <strong>Web</strong> directory is less secure, but not the end of the world.Secondarily, I recommend using a .php extension <strong>for</strong> your connection scripts. A properly configured<strong>and</strong> working server will execute rather than display code in such a file. Conversely, if youuse just .inc as your extension, that page’s contents would be displayed in the <strong>Web</strong> browser ifaccessed directly.Using <strong>PHP</strong> with <strong>MySQL</strong> 271
7. Remove the temporary copy from the<strong>Web</strong> directory.If you’re using a version of <strong>PHP</strong> that doesnot support the mysqli_set_charset( )function, you’ll need to execute a SET NAMESencoding query instead:mysqli_query($dbc, 'SET NAMES utf8');The same values used in Chapter 5 tolog in to the mysql client should work fromyour <strong>PHP</strong> scripts.D Another reason why <strong>PHP</strong> might not be ableto connect to <strong>MySQL</strong> (besides using invalidusername/password/hostname/databasein<strong>for</strong>mation) is if <strong>MySQL</strong> isn’t currently running.If you receive an error that claimsmysqli_connect( ) is an “undefined function”,it means that <strong>PHP</strong> has not been compiledwith support <strong>for</strong> the Improved <strong>MySQL</strong>Extension. See the appendix <strong>for</strong> installationin<strong>for</strong>mation.If you see a Could not connect… errormessage when running the script D, it likelymeans that <strong>MySQL</strong> isn’t running.In case you are curious, E shows whatwould happen if you didn’t use @ be<strong>for</strong>emysqli_connect( ) <strong>and</strong> an error occurred.E If you don’t use the error suppression operator(@), you’ll see both the <strong>PHP</strong> error <strong>and</strong> the customOR die( ) error.If you don’t need to select the databasewhen establishing a connection to <strong>MySQL</strong>,omit that argument from the mysqli_connect( ) function:$dbc = mysqli_connect (hostname,➝ username, password);Then, when appropriate, you can select thedatabase using:mysqli_select_db($dbc, db_name);272 Chapter 9
executing SimpleQueriesOnce you have successfully connectedto <strong>and</strong> selected a database, you can startexecuting queries. The queries can be asbasic as inserts, updates, <strong>and</strong> deletionsor as involved as complex joins returningnumerous rows. Regardless of the SQLcomm<strong>and</strong> type, the <strong>PHP</strong> function <strong>for</strong>executing a query is mysqli_query( ):result = mysqli_query(dbc, query);The function takes the databaseconnection as its first argument <strong>and</strong>the query itself as the second. Withinthe context of a complete <strong>PHP</strong> script,I normally assign the query to anothervariable, called $query or just $q, sorunning a query might look like$r = mysqli_query($dbc, $q);For simple queries like INSERT, UPDATE,DELETE, etc. (which do not return records),the $r variable—short <strong>for</strong> result—will beeither TRUE or FALSE, depending uponwhether the query executed successfully.Keep in mind that “executed successfully”means that it ran without error; itdoesn’t mean that the query’s executionnecessarily had the desired result; you’llneed to test <strong>for</strong> that.For complex queries that return records(SELECT being the most important of these),$r will be a resource link to the resultsof the query if it worked or be FALSE ifit did not. Thus, you can use this line ofcode in a conditional to test if the querysuccessfully ran:$r = mysqli_query ($dbc, $q);if ($r) { // Worked!If the query did not successfully run, somesort of <strong>MySQL</strong> error must have occurred.To find out what that error was, call themysqli_error( ) function:echo mysqli_error($dbc);The function’s lone argument is thedatabase connection.One final, albeit optional, step in your scriptwould be to close the existing <strong>MySQL</strong>connection once you’re finished with it:mysqli_close($dbc);This function call is not required, because<strong>PHP</strong> will automatically close the connectionat the end of a script, but it does make <strong>for</strong>good programming <strong>for</strong>m to incorporate it.To demonstrate this process, let’s createa registration script. It will show the <strong>for</strong>mwhen first accessed A, h<strong>and</strong>le the <strong>for</strong>msubmission, <strong>and</strong>, after validating all thedata, insert the registration in<strong>for</strong>mation intothe users table of the sitename database.As a <strong>for</strong>ewarning, this script knowingly hasa security hole in it (depending upon theversion of <strong>PHP</strong> in use, <strong>and</strong> its settings), tobe remedied later in the chapter.A The registration <strong>for</strong>m.Using <strong>PHP</strong> with <strong>MySQL</strong> 273
To execute simple queries:1. Begin a new <strong>PHP</strong> script in yourtext editor or IDE, to be namedregister.php (Script 9.3):
Script 9.3 The registration script adds a record to the database by running an INSERT query.1
Script 9.3 continued52 $r = @mysqli_query ($dbc, $q); // Run the query.53 if ($r) { // If it ran OK.5455 // Print a message:56 echo 'Thank you!57 You are now registered. In Chapter 12 you will actually be able to log in!';5859 } else { // If it did not run OK.6061 // Public message:62 echo 'System Error63 You could not be registered due to a system error. We apologize <strong>for</strong>any inconvenience.';6465 // Debugging message:66 echo '' . mysqli_error($dbc) . 'Query: ' . $q . '';6768 } // End of if ($r) IF.6970 mysqli_close($dbc); // Close the database connection.7172 // Include the footer <strong>and</strong> quit the script:73 include ('includes/footer.html');74 exit( );7576 } else { // Report the errors.7778 echo 'Error!79 The following error(s) occurred:';80 <strong>for</strong>each ($errors as $msg) { // Print each error.81 echo " - $msg\n";82 }83 echo 'Please try again.';8485 } // End of if (empty($errors)) IF.8687 } // End of the main Submit conditional.88 ?>89 Register90 91 First Name:
To validate the password, the scriptneeds to check the pass1 input <strong>for</strong>a value <strong>and</strong> then confirm that thepass1 value matches the pass2 value(meaning the password <strong>and</strong> confirmedpassword are the same).6. Check if it’s OK to register the user:if (empty($errors)) {If the submitted data passed all of theconditions, the $errors array will haveno values in it (it will be empty), so thiscondition will be true <strong>and</strong> it’s safe toadd the record to the database. If the$errors array is not empty, then theappropriate error messages should beprinted (see Step 11) <strong>and</strong> the user givenanother opportunity to register.7. Include the database connection:require ('../mysqli_connect.php');This line of code will insert the contentsof the mysqli_connect.php file into thisscript, thereby creating a connectionto <strong>MySQL</strong> <strong>and</strong> selecting the database.You may need to change the referenceto the location of the file as it is on yourserver (as written, this line assumes thatmysqli_connect.php is in the parentfolder of the current folder).8. Add the user to the database:$q = "INSERT INTO users (first_➝ name, last_name, email, pass,➝ registration_date) VALUES ('$fn',➝'$ln', '$e', SHA1('$p'), NOW( ) );$r = @mysqli_query ($dbc, $q);The query itself is similar to thosedemonstrated in Chapter 5. TheSHA1( ) function is used to encrypt thepassword, <strong>and</strong> NOW( ) is used to set theregistration date as this moment.After assigning the query to a variable,it is run through the mysqli_query( )function, which sends the SQLcomm<strong>and</strong> to the <strong>MySQL</strong> database. Asin the mysqli_connect.php script, themysqli_query( ) call is preceded by@ in order to suppress any ugly errors.If a problem occurs, the error will beh<strong>and</strong>led more directly in the next step.9. Report on the success of theregistration:if ($r) {echo 'Thank you!You are now registered. In➝ Chapter 12 you will actually be➝ able to log in!';} else {echo 'System ErrorYou could➝ not be registered due to a➝ system error. We apologize➝ <strong>for</strong> any inconvenience.';echo '' . mysqli_error($dbc)➝ . 'Query: ' . $q .➝'';} // End of if ($r) IF.The $r variable, which is assigned thevalue returned by mysqli_query( ), canbe used in a conditional to test <strong>for</strong> thesuccessful operation of the query.continues on next pageUsing <strong>PHP</strong> with <strong>MySQL</strong> 277
If $r has a TRUE value, then a Thankyou! message is displayed B. If $rhas a FALSE value, error messagesare printed. For debugging purposes,the error messages will include boththe error spit out by <strong>MySQL</strong> (thanks tothe mysqli_error( ) function) <strong>and</strong> thequery that was run C. This in<strong>for</strong>mationis critical to debugging the problem.You would not want to display this kindof in<strong>for</strong>mation on a live site, however.10. Close the database connection <strong>and</strong>complete the HTML template:mysqli_close($dbc);include ('includes/footer.html');exit( );Closing the connection isn’t requiredbut is a good policy. Then the footer isincluded <strong>and</strong> the script terminated (thanksto the exit( ) function). If those two linesweren’t here, the registration <strong>for</strong>m wouldbe displayed again (which isn’t necessaryafter a successful registration).11. Print out any error messages <strong>and</strong> closethe submit conditional:} else { // Report the errors.echo 'Error!The following➝ error(s) occurred:';<strong>for</strong>each ($errors as $msg) {➝ // Print each error.echo " - $msg\n";}echo 'Please try➝ again.';} // End of if (empty($errors))➝ IF.} // End of the main Submit➝ conditional.The else clause is invoked if therewere any errors. In that case, all of theerrors are displayed using a <strong>for</strong>eachloop D.The final closing curly brace closesthe main submit conditional. Themain conditional is a simple if, not anif-else, so that the <strong>for</strong>m can be madesticky (again, see Chapter 3).B If the user could be registered in the database, thismessage is displayed.C Any <strong>MySQL</strong> errors caused by the query will be printed, as will the query that was being run.278 Chapter 9
12. Close the <strong>PHP</strong> section <strong>and</strong> begin theHTML <strong>for</strong>m:?>RegisterFirst Name:
This is all much like that in Step 12, withthe addition of a submit button.As a side note, I don’t need to followmy maxlength recommendation (fromStep 12) with the password inputs,because they will be encrypted withSHA1( ), which always creates a string 40characters long. And since there are twoof them, they can’t both use the samename as the column in the database.14. Complete the template:15. Save the file as register.php, place itin your <strong>Web</strong> directory, <strong>and</strong> test it in your<strong>Web</strong> browser.Note that if you use an apostrophein one of the <strong>for</strong>m values, it will likelybreak the query E. The section“Ensuring Secure SQL” later in thischapter will show how to protectagainst this.After running the script, you can alwaysensure that it worked by using the mysql clientor phpMyAdmin to view the records in theusers table.You should not end your queries witha semicolon in <strong>PHP</strong>, as you do when usingthe mysql client. When working with <strong>MySQL</strong>,this is a common, albeit harmless, mistaketo make. When working with other databaseapplications (Oracle, <strong>for</strong> one), doing so willmake your queries unusable.As a reminder, the mysqli_query( )function returns a TRUE value if the querycould be executed on the database withouterror. This does not necessarily mean that theresult of the query is what you were expecting.Later scripts will demonstrate how to moreaccurately gauge the success of a query.You are not obligated to create a $qvariable as I tend to do (you could directlyinsert your query text into mysqli_query( )).However, as the construction of your queriesbecomes more complex, using a variable willbe the only option.Practically any query you would run inthe mysql client can also be executed usingmysqli_query( ).Another benefit of the Improved <strong>MySQL</strong>Extension over the st<strong>and</strong>ard extension is thatthe mysqli_multi_query( ) function letsyou execute multiple queries at one time. Thesyntax <strong>for</strong> doing so, particularly if the queriesreturn results, is a bit more complicated, sosee the <strong>PHP</strong> manual if you have this need.E Apostrophes in <strong>for</strong>m values (like the last name here) will conflict with the apostrophes used to delineatevalues in the query.280 Chapter 9
Retrieving QueryResultsThe preceding section of this chapterdemonstrates how to execute simplequeries on a <strong>MySQL</strong> database. A simplequery, as I’m calling it, could be definedas one that begins with INSERT, UPDATE,DELETE, or ALTER. What all four of these havein common is that they return no data, justan indication of their success. Conversely,a SELECT query generates in<strong>for</strong>mation (i.e.,it will return rows of records) that has to beh<strong>and</strong>led by other <strong>PHP</strong> functions.The primary tool <strong>for</strong> h<strong>and</strong>ling SELECT queryresults is mysqli_fetch_array( ), whichuses the query result variable (that I’vebeen calling $r) <strong>and</strong> returns one row ofdata at a time, in an array <strong>for</strong>mat. You’llwant to use this function within a loop thatwill continue to access every returned rowas long as there are more to be read. Thebasic construction <strong>for</strong> reading every recordfrom a query iswhile ($row = mysqli_fetch_array($r)){// Do something with $row.}You will almost always want to usea while loop to fetch the results froma SELECT query.The mysqli_fetch_array( ) function takesan optional second parameter specifyingwhat type of array is returned: associative,indexed, or both. An associative arrayallows you to refer to column values byname, whereas an indexed array requiresyou to use only numbers (starting at 0 <strong>for</strong>the first column returned). Each parameteris defined by a constant listed in Table 9.1,with MYSQLI_BOTH being the default. TheMYSQLI_NUM setting is marginally faster(<strong>and</strong> uses less memory) than the otheroptions. Conversely, MYSQLI_ASSOC is moreovert ($row['column'] rather than $row[3])<strong>and</strong> may continue to work even if thequery changes.An optional step you can take when usingmysqli_fetch_array( ) would be to freeup the query result resources once you aredone using them:mysqli_free_result ($r);This line removes the overhead (memory)taken by $r. It’s an optional step, since <strong>PHP</strong>will automatically free up the resourcesat the end of a script, but—like usingmysqli_close( )—it does make <strong>for</strong> goodprogramming <strong>for</strong>m.To demonstrate how to h<strong>and</strong>le resultsreturned by a query, let’s create a script <strong>for</strong>viewing all of the currently registered users.TABLe 9.1 mysqli_fetch_array( ) ConstantsConstantMYSQLI_ASSOCMYSQLI_NUMMYSQLI_BOTHExample$row['column']$row[0]$row[0] or $row['column']Using <strong>PHP</strong> with <strong>MySQL</strong> 281
To retrieve query results:1. Begin a new <strong>PHP</strong> document in yourtext editor or IDE, to be namedview_users.php (Script 9.4):
Script 9.4 The view_users.php script runs a static query on the database <strong>and</strong> prints all of the returned rows.1
5. Close the HTML table <strong>and</strong> free up thequery resources:echo '';mysqli_free_result ($r);Again, this is an optional step buta good one to take.6. Complete the main conditional:} else {echo 'The➝ current users could not be➝ retrieved. We apologize <strong>for</strong>➝ any inconvenience.';echo '' . mysqli_error($dbc)➝ . 'Query: ' . $q .➝'';} // End of if ($r) IF.As in the register.php example, thereare two kinds of error messages here.The first is a generic message, the typeyou’d show in a live site. The second ismuch more detailed, printing both the<strong>MySQL</strong> error <strong>and</strong> the query, both beingcritical <strong>for</strong> debugging purposes.7. Close the database connection <strong>and</strong> finishthe page:mysqli_close($dbc);include ('includes/footer.html');?>8. Save the file as view_users.php, placeit in your <strong>Web</strong> directory, <strong>and</strong> test it inyour browser B.As with any associative array, when youretrieve records from the database, you mustrefer to the selected columns or aliases exactlyas they are in the database or query. This is tosay that the keys are case-sensitive.If you are in a situation where you needto run a second query inside of your whileloop, be certain to use different variablenames <strong>for</strong> that query. For example, the innerquery would use $r2 <strong>and</strong> $row2 instead of $r<strong>and</strong> $row. If you don’t do this, you’ll encounterlogical errors.I sometimes see beginning <strong>PHP</strong> developersmuddle the process of fetching queryresults. Remember that you must execute thequery using mysqli_query( ), <strong>and</strong> then usemysqli_fetch_array( ) to retrieve a singlerow of in<strong>for</strong>mation. If you have multiple rowsto retrieve, use a while loop.The function mysqli_fetch_row( )is the equivalent of mysqli_fetch_array($r, MYSQLI_NUM);The function mysqli_fetch_assoc( )is the equivalent of mysqli_fetch_array($r, MYSQLI_ASSOC);B All of the user records are retrieved from thedatabase <strong>and</strong> displayed in the <strong>Web</strong> browser.284 Chapter 9
ensuring Secure SQLDatabase security with respect to <strong>PHP</strong>comes down to three broad issues:1. Protecting the <strong>MySQL</strong> accessin<strong>for</strong>mation2. Not revealing too much about thedatabase3. Being cautious when running queries,particularly those involving usersubmitteddataYou can accomplish the first objective bysecuring the <strong>MySQL</strong> connection script outsideof the <strong>Web</strong> directory so that it is neverviewable through a <strong>Web</strong> browser (see Cin “Connecting to <strong>MySQL</strong>”). I discuss thisin some detail earlier in the chapter. Thesecond objective is attained by not lettingthe user see <strong>PHP</strong>’s error messages or yourqueries (in these scripts, that in<strong>for</strong>mation isprinted out <strong>for</strong> your debugging purposes;you’d never want to do that on a live site).For the third objective, there are numeroussteps you can <strong>and</strong> should take, allbased upon the premise of never trustinguser-supplied data. First, validate thatsome value has been submitted, or that itis of the proper type (number, string, etc.).Second, use regular expressions to makesure that submitted data matches what youwould expect it to be (this topic is coveredin Chapter 14, “Perl-Compatible RegularExpressions”). Third, you can typecastsome values to guarantee that they’renumbers (discussed in Chapter 13, “SecurityMethods”). A fourth recommendationis to run user-submitted data through themysqli_real_escape_string( ) function.This function makes data safe to use in aquery by escaping what could be problematiccharacters. It’s used like so:$safe = mysqli_real_escape_string➝ ($dbc, data);To underst<strong>and</strong> why this is necessary, see Ein “Executing Simple Queries.” The useof the apostrophe in the user’s last namemade the query syntactically invalid:INSERT INTO users (first_name,➝ last_name, email, pass,➝ registration_date) VALUES ('Peter',➝'O'Toole', 'pete@example.net',➝ SHA1('aPass8'), NOW( ) )In that particular example, valid user databroke the query, which is not good. But ifyour <strong>PHP</strong> script allows <strong>for</strong> this possibility,a malicious user can purposefully submitproblematic characters (the apostrophebeing one example) in order to hack into,or damage, your database. For securitypurposes, mysqli_real_escape_string( )should be used on every text input in a<strong>for</strong>m. To demonstrate this, let’s revampregister.php (Script 9.3).Using <strong>PHP</strong> with <strong>MySQL</strong> 285
To use mysqli_real_escape_string( ):1. Open register.php (Script 9.3) in yourtext editor or IDE, if it is not already.2. Move the inclusion of the mysqli_connect.php file (line 48 in Script 9.3)to just after the main conditional(Script 9.5).Because the mysqli_real_escape_string( ) function requires a databaseconnection, the mysqli_connect.phpscript must be required earlier inthe script.continues on page 288Script 9.5 The register.php script now uses the mysqli_real_escape_string( ) function to makesubmitted data safe to use in a query.1
Script 9.5 continued30 $errors[ ] = 'You <strong>for</strong>got to enter your email address.';31 } else {32 $e = mysqli_real_escape_string($dbc, trim($_POST['email']));33 }3435 // Check <strong>for</strong> a password <strong>and</strong> match against the confirmed password:36 if (!empty($_POST['pass1'])) {37 if ($_POST['pass1'] != $_POST['pass2']) {38 $errors[ ] = 'Your password did not match the confirmed password.';39 } else {40 $p = mysqli_real_escape_string($dbc, trim($_POST['pass1']));41 }42 } else {43 $errors[ ] = 'You <strong>for</strong>got to enter your password.';44 }4546 if (empty($errors)) { // If everything's OK.4748 // Register the user in the database...4950 // Make the query:51 $q = "INSERT INTO users (first_name, last_name, email, pass, registration_date) VALUES('$fn', '$ln', '$e', SHA1('$p'), NOW( ) )";52 $r = @mysqli_query ($dbc, $q); // Run the query.53 if ($r) { // If it ran OK.5455 // Print a message:56 echo 'Thank you!57 You are now registered. In Chapter 12 you will actually be able to log in!';5859 } else { // If it did not run OK.6061 // Public message:62 echo 'System Error63 You could not be registered due to a system error. We apologize <strong>for</strong>any inconvenience.';6465 // Debugging message:66 echo '' . mysqli_error($dbc) . 'Query: ' . $q . '';6768 } // End of if ($r) IF.6970 mysqli_close($dbc); // Close the database connection.7172 // Include the footer <strong>and</strong> quit the script:73 include ('includes/footer.html');74 exit( );7576 } else { // Report the errors.code continues on next pageUsing <strong>PHP</strong> with <strong>MySQL</strong> 287
3. Change the validation routines to usethe mysqli_real_escape_string( )function, replacing each occurrenceof $var = trim($_POST['var'])with $var = mysqli_real_escape_string($dbc, trim($_POST['var'])):$fn = mysqli_real_escape_string➝ ($dbc, trim($_POST['first_name']));$ln = mysqli_real_escape_string➝ ($dbc, trim($_POST['last_name']));$e = mysqli_real_escape_string➝ ($dbc, trim($_POST['email']));$p = mysqli_real_escape_string➝ ($dbc, trim($_POST['pass1']));Instead of just assigning the submittedvalue to each variable ($fn, $ln, etc.), thevalues will be run through the mysqli_real_escape_string( ) function first.The trim( ) function is still used to getrid of any unnecessary spaces.4. Add a second call to mysqli_close( )be<strong>for</strong>e the end of the main conditional:mysqli_close($dbc);To be consistent, since the databaseconnection is opened as the first step ofthe main conditional, it should be closedas the last step of this same conditional.It still needs to be closed be<strong>for</strong>eincluding the footer <strong>and</strong> terminating thescript (lines 73 <strong>and</strong> 74), though.Script 9.5 continued7778 echo 'Error!79 The following error(s) occurred:';80 <strong>for</strong>each ($errors as $msg) { // Print each error.81 echo " - $msg\n";82 }83 echo 'Please try again.';8485 } // End of if (empty($errors)) IF.8687 mysqli_close($dbc); // Close the database connection.8889 } // End of the main Submit conditional.90 ?>91 Register92 93 First Name:
5. Save the file as register.php, place itin your <strong>Web</strong> directory, <strong>and</strong> test it in your<strong>Web</strong> browser A <strong>and</strong> B.The mysqli_real_escape_string( )function escapes a string in accordance withthe language being used (i.e., the collation),which is an advantage using this function hasover alternative solutions.If you see results like those in C, itmeans that the mysqli_real_escape_string( ) function cannot access the database(because it has no connection, like $dbc).A Values with apostrophes in them,like a person’s last name, will no longerbreak the INSERT query, thanks tothe mysqli_real_ escape_string( )function.If Magic Quotes is enabled on yourserver, you’ll need to remove any slashesadded by Magic Quotes, prior to using themysqli_real_escape_string( ) function.The code (cumbersome as it is) would look like:$fn = mysqli_real_escape_string➝ ($dbc, trim(stripslashes($_POST➝ ['first_name'])));If you don’t use stripslashes( ) <strong>and</strong> MagicQuotes is enabled, the <strong>for</strong>m values will bedoubly escaped.If you look at the values stored in thedatabase (using the mysql client, phpMyAdmin,or the like), you will not see the apostrophes<strong>and</strong> other problematic characters stored withpreceding backslashes. This is correct. Thebackslashes keep the problematic charactersfrom breaking the query but the backslashesare not themselves stored.B Now the registrationprocess will h<strong>and</strong>leproblematic characters<strong>and</strong> be more secure.C Since the mysqli_real_escape_string( ) requires a database connection, using it without thatconnection (e.g., be<strong>for</strong>e including the connection script) can lead to other errors.Using <strong>PHP</strong> with <strong>MySQL</strong> 289
Counting ReturnedRecordsThe next logical function to discuss ismysqli_num_rows( ). This function returnsthe number of rows retrieved by a SELECTquery. It takes one argument, the queryresult variable:$num = mysqli_num_rows($r);Although simple in purpose, this functionis very useful. It’s necessary if you want topaginate your query results (an exampleof this can be found in the next chapter).It’s also a good idea to use this functionbe<strong>for</strong>e you attempt to fetch any resultsusing a while loop (because there’s noneed to fetch the results if there aren’t any,<strong>and</strong> attempting to do so may cause errors).In this next sequence of steps, let’s modifyview_users.php to list the total number ofregistered users.To modify view_users.php:1. Open view_users.php (refer to Script9.4) in your text editor or IDE, if it is notalready.2. Be<strong>for</strong>e the if ($r) conditional, add thisline (Script 9.6):$num = mysqli_num_rows ($r);This line will assign the number ofrows returned by the query to the$num variable.3. Change the original $r conditional to:if ($num > 0) {The conditional as it was written be<strong>for</strong>ewas based upon whether the query didor did not successfully run, not whetheror not any records were returned. Nowit will be more accurate.Script 9.6 Now the view_users.php script willdisplay the total number of registered users,thanks to the mysqli_num_rows( ) function.1
Script 9.6 continued3435 echo ''; // Close the table.3637 mysqli_free_result ($r); // Free upthe resources.3839 } else { // If no records were returned.4041 echo 'There arecurrently no registered users.';4243 }4445 mysqli_close($dbc); // Close the databaseconnection.4647 include ('includes/footer.html');48 ?>4. Be<strong>for</strong>e creating the HTML table, printthe number of registered users:echo "There are currently $num➝ registered users.\n";5. Change the else part of the mainconditional to read:echo 'There are➝ currently no registered users.';The original conditional was based uponwhether or not the query worked. Hopefully,you’ve successfully debuggedthe query so that it is working <strong>and</strong> theoriginal error messages are no longerneeded. Now the error message justindicates if no records were returned.6. Save the file as view_users.php, placeit in your <strong>Web</strong> directory, <strong>and</strong> test it inyour <strong>Web</strong> browser A.A The number of registered users is nowdisplayed at the top of the page.Modifying register.phpThe mysqli_num_rows( ) function could be applied to register.php to prevent someonefrom registering with the same email address multiple times. Although the UNIQUE index on thatcolumn in the database will prevent that from happening, such attempts will create a <strong>MySQL</strong> error.To prevent this using <strong>PHP</strong>, run a SELECT query to confirm that the email address isn’t currentlyregistered. That query would be simplySELECT user_id FROM users WHERE ➝ email='$e'You would run this query (using the mysqli_query( ) function) <strong>and</strong> then call mysqli_num_rows( ).If mysqli_num_rows( ) returns 0, you know that the email address hasn’t already been registered<strong>and</strong> it’s safe to run the INSERT.Using <strong>PHP</strong> with <strong>MySQL</strong> 291
Ppdating Recordswith pHpThe last technique in this chapter showshow to update database records througha <strong>PHP</strong> script. Doing so requires an UPDATEquery, <strong>and</strong> its successful execution canbe verified with <strong>PHP</strong>’s mysqli_affected_rows( ) function.While the mysqli_num_rows( ) function willreturn the number of rows generated by aSELECT query, mysqli_affected_rows( )returns the number of rows affected by anINSERT, UPDATE, or DELETE query. It’s usedlike so:$num = mysqli_affected_rows($dbc);Unlike mysqli_num_rows( ), the one argumentthe function takes is the databaseconnection ($dbc), not the results of theprevious query ($r).The following example will be a scriptthat allows registered users to changetheir password. It demonstrates twoimportant ideas:nnChecking a submitted username <strong>and</strong>password against registered values(the key to a login system as well)Updating database records using theprimary key as a referenceAs with the registration example, this one<strong>PHP</strong> script will both display the <strong>for</strong>m A<strong>and</strong> h<strong>and</strong>le it.To update records with pHp:1. Begin a new <strong>PHP</strong> script in your text editoror IDE, to be named password.php(Script 9.7):
Script 9.7 continued30 if (!empty($_POST['pass1'])) {31 if ($_POST['pass1'] != $_POST['pass2']) {32 $errors[ ] = 'Your new password did not match the confirmed password.';33 } else {34 $np = mysqli_real_escape_string($dbc, trim($_POST['pass1']));35 }36 } else {37 $errors[ ] = 'You <strong>for</strong>got to enter your new password.';38 }3940 if (empty($errors)) { // If everything's OK.4142 // Check that they've entered the right email address/password combination:43 $q = "SELECT user_id FROM users WHERE (email='$e' AND pass=SHA1('$p') )";44 $r = @mysqli_query($dbc, $q);45 $num = @mysqli_num_rows($r);46 if ($num = = 1) { // Match was made.4748 // Get the user_id:49 $row = mysqli_fetch_array($r, MYSQLI_NUM);5051 // Make the UPDATE query:52 $q = "UPDATE users SET pass=SHA1('$np') WHERE user_id=$row[0]";53 $r = @mysqli_query($dbc, $q);5455 if (mysqli_affected_rows($dbc) = = 1) { // If it ran OK.5657 // Print a message.58 echo 'Thank you!59 Your password has been updated. In Chapter 12 you will actually be able to login!';6061 } else { // If it did not run OK.6263 // Public message:64 echo 'System Error65 Your password could not be changed due to a system error. Weapologize <strong>for</strong> any inconvenience.';6667 // Debugging message:68 echo '' . mysqli_error($dbc) . 'Query: ' . $q . '';6970 }7172 mysqli_close($dbc); // Close the database connection.7374 // Include the footer <strong>and</strong> quit the script (to not show the <strong>for</strong>m).75 include ('includes/footer.html');76 exit( );7778 } else { // Invalid email address/password combination.79 echo 'Error!code continues on next pageUsing <strong>PHP</strong> with <strong>MySQL</strong> 293
2. Start the main conditional:if ($_SERVER['REQUEST_METHOD'] = =➝'POST') {Since this page both displays <strong>and</strong> h<strong>and</strong>lesthe <strong>for</strong>m, it’ll use the st<strong>and</strong>ard conditionalto check <strong>for</strong> the <strong>for</strong>m’s submission.3. Include the database connection <strong>and</strong>create an array <strong>for</strong> storing errors:require ('../mysqli_connect.php');$errors = array( );The initial part of this script mimics theregistration <strong>for</strong>m.4. Validate the email address <strong>and</strong> currentpassword fields:if (empty($_POST['email'])) {$errors[ ] = 'You <strong>for</strong>got to➝ enter your email address.';} else {$e = mysqli_real_escape_string➝ ($dbc, trim($_POST['email']));}if (empty($_POST['pass'])) {$errors[ ] = 'You <strong>for</strong>got to➝ enter your current password.';} else {$p = mysqli_real_escape_string➝ ($dbc, trim($_POST['pass']));}The <strong>for</strong>m A has four inputs: the emailaddress, the current password, <strong>and</strong>two <strong>for</strong> the new password. The process<strong>for</strong> validating each of these is thesame as it is in register.php. Any datathat passes the validation test will betrimmed <strong>and</strong> run through the mysqli_real_escape_string( ) function, sothat it is safe to use in a query.Script 9.7 continued80 The emailaddress <strong>and</strong> password do notmatch those on file.';81 }8283 } else { // Report the errors.8485 echo 'Error!86 The followingerror(s) occurred:';87 <strong>for</strong>each ($errors as $msg) { //Print each error.88 echo " - $msg\n";89 }90 echo 'Please try again.';9192 } // End of if (empty($errors)) IF.9394 mysqli_close($dbc); // Close thedatabase connection.9596 } // End of the main Submit conditional.97 ?>98 Change Your Password99 100 Email Address:
5. Validate the new password:if (!empty($_POST['pass1'])) {if ($_POST['pass1'] != $_POST➝ ['pass2']) {$errors[ ] = 'Your new➝ password did not match the➝ confirmed password.';} else {$np = mysqli_real_escape_➝ string($dbc, trim➝ ($_POST['pass1']));}} else {$errors[ ] = 'You <strong>for</strong>got to➝ enter your new password.';}This code is also exactly like that in theregistration script, except that a validnew password is assigned to a variablecalled $np (because $p represents thecurrent password).6. If all the tests are passed, retrieve theuser’s ID:if (empty($errors)) {$q = "SELECT user_id FROM➝ users WHERE (email='$e' AND➝ pass=SHA1('$p') )";$r = @mysqli_query($dbc, $q);$num = @mysqli_num_rows($r);if ($num = = 1) {$row = mysqli_fetch_array($r,➝ MYSQLI_NUM);This first query will return just theuser_id field <strong>for</strong> the record thatmatches the submitted email address<strong>and</strong> password B. To compare thesubmitted password against the storedone, encrypt it again with the SHA1( )function. If the user is registered <strong>and</strong>has correctly entered both the emailaddress <strong>and</strong> password, exactly onecolumn from one row will be selected(since the email value must be uniqueacross all rows). Finally, this one recordis assigned as an array (of one element)to the $row variable.If this part of the script doesn’t work<strong>for</strong> you, apply the st<strong>and</strong>ard debuggingmethods: remove the error suppressionoperators (@) so that you can see whaterrors, if any, occur; use the mysqli_error( ) function to report any <strong>MySQL</strong>errors; <strong>and</strong> print, then run the queryusing another interface B.7. Update the database <strong>for</strong> the newpassword:$q = "UPDATE users SET pass=➝ SHA1('$np') WHERE user_id=$row[0]";$r = @mysqli_query($dbc, $q);This query will change the password—using the new submitted value—wherethe user_id column is equal to thenumber retrieved from the previous query.continues on next pageB The result whenrunning the SELECT queryfrom the script (the first oftwo queries it has) withinthe mysql client.Using <strong>PHP</strong> with <strong>MySQL</strong> 295
8. Check the results of the query:if (mysqli_affected_rows($dbc)➝ = = 1) {echo 'Thank you!Your password has been➝ updated. In Chapter 12 you➝ will actually be able to log➝ in!';} else {echo 'System ErrorYour password➝ could not be changed due to➝ a system error. We apologize<strong>for</strong> any inconvenience.';echo '' . mysqli_error($dbc) .➝'Quer y: ' . $q .➝'';}This part of the script again workssimilar to register.php. In this case, ifmysqli_affected_rows( ) returns thenumber 1, the record has been updated,<strong>and</strong> a success message will be printed.If not, both a public, generic message<strong>and</strong> a more useful debugging messagewill be printed.9. Close the database connection, includethe footer, <strong>and</strong> terminate the script:mysqli_close($dbc);include ('includes/footer.html');exit( );At this point in the script, the UPDATEquery has been run. It either worked orit did not (because of a system error).In both cases, there’s no need to showthe <strong>for</strong>m again, so the footer is included(to complete the page) <strong>and</strong> the script isterminated, using the exit( ) function.Prior to that, just to be thorough, thedatabase connection is closed.10. Complete the if ($num = = 1) conditional:} else {echo 'Error!The email➝ address <strong>and</strong> password do not➝ match those on file.';}If mysqli_num_rows( ) does not returna value of 1, then the submitted emailaddress <strong>and</strong> password do not matchthose in the database <strong>and</strong> this error isprinted. In this case, the <strong>for</strong>m will bedisplayed again so that the user canenter the correct in<strong>for</strong>mation.11. Print any validation error messages:} else {echo 'Error!The following➝ error(s) occurred:';<strong>for</strong>each ($errors as $msg) {➝ // Print each error.echo " - $msg\n";}echo 'Please try again.➝ ';}This else clause applies if the $errorsarray is not empty (which means thatthe <strong>for</strong>m data did not pass all thevalidation tests). As in the registrationpage, the errors will be printed.12. Close the database connection <strong>and</strong>complete the <strong>PHP</strong> code:mysqli_close($dbc);}?>13. Display the <strong>for</strong>m:Change Your Password296 Chapter 9
Email Address:
Review <strong>and</strong> pursueIf you have any problems with thereview questions or the pursue prompts,turn to the book’s supporting <strong>for</strong>um(www.LarryUllman.com/<strong>for</strong>ums/).ReviewnnnnnnnWhat version of <strong>PHP</strong> are you using?What version of <strong>MySQL</strong>? Does your<strong>PHP</strong>-<strong>MySQL</strong> combination support the<strong>MySQL</strong> Improved extension?What is the most important sequenceof steps <strong>for</strong> debugging <strong>PHP</strong>-<strong>MySQL</strong>problems (explicitly covered at theend of Chapter 8, “Error H<strong>and</strong>ling <strong>and</strong>Debugging”?What hostname, username, <strong>and</strong>password combination do you,specifically, use to connect to <strong>MySQL</strong>?What <strong>PHP</strong> code is used to connect to a<strong>MySQL</strong> server, select the database, <strong>and</strong>establish the encoding?What encoding are you using? Why is itnecessary <strong>for</strong> the <strong>PHP</strong> scripts to use thesame encoding that is used to interactwith <strong>MySQL</strong> that is used <strong>for</strong> storing thetext in the database?Why is it preferable to store themysqli_connect.php script outside ofthe <strong>Web</strong> root directory? And what is the<strong>Web</strong> root directory?Why shouldn’t live sites show <strong>MySQL</strong>errors <strong>and</strong> the queries being run?nnnnWhat syntax will you almost always useto h<strong>and</strong>le the results of a SELECT query?What syntax could you use if the SELECTquery returns only a single row?Why is it important to use the mysqli_real_escape_string( ) function?After what kind of queries would youuse the mysqli_num_rows( ) function?After what types of queries would youuse the mysqli_affected_rows( )function?pursuennIf you don’t remember how the templatesystem works, or how to use theinclude( ) function, revisit Chapter 3.Use the in<strong>for</strong>mation covered in Chapter8 to apply your own custom error h<strong>and</strong>lerto this site’s examples.n Change the use of mysqli_num_rows( )in view_users.php so that it’s onlycalled if the query had a TRUE result.nApply the mysqli_num_rows( ) functionto register.php, as suggested in anearlier sidebar.n Apply the mysqli_affected_rows( )function to register.php to confirmthat the INSERT worked.nIf you want, create scripts that interactwith the banking database. Easyprojects to begin with include: viewingall customers, viewing all accounts (doa JOIN to also show the customer’sname), <strong>and</strong> adding to or subtractingfrom an account’s balance.298 Chapter 9
10CommonProgrammingTechniquesNow that you have a little <strong>PHP</strong> <strong>and</strong> <strong>MySQL</strong>interaction under your belt, it’s time to takethings up a notch. This chapter is similar toChapter 3, “Creating <strong>Dynamic</strong> <strong>Web</strong> <strong>Sites</strong>,”in that it covers myriad independent topics.But what all of these have in common is thatthey demonstrate common <strong>PHP</strong>-<strong>MySQL</strong>programming techniques. You won’t learnany new functions here; instead, you’ll seehow to use the knowledge you already possessto create st<strong>and</strong>ard <strong>Web</strong> functionality.The examples themselves will broaden the<strong>Web</strong> application started in the precedingchapter by adding new, popular features.You’ll see several tricks <strong>for</strong> managing databasein<strong>for</strong>mation, in particular editing <strong>and</strong>deleting records using <strong>PHP</strong>. At the sametime, a couple of new ways of passing datato your <strong>PHP</strong> pages will be introduced. Thefinal sections of the chapter add featuresto the view_users.php page.in This ChapterSending Values to a Script 300Using Hidden Form Inputs 304Editing Existing Records 309Paginating Query Results 316Making Sortable Displays 323Review <strong>and</strong> Pursue 328
Sending Valuesto a ScriptIn the examples so far, all of the data receivedin the <strong>PHP</strong> script came from what the userentered in a <strong>for</strong>m. There are, however, twodifferent ways you can pass variables <strong>and</strong>values to a <strong>PHP</strong> script, both worth knowing.The first method is to make use of HTML’shidden input type:As long as this code is anywhere betweenthe <strong>for</strong>m tags, the variable $_POST['do']will have a value of this in the h<strong>and</strong>ling <strong>PHP</strong>script, assuming that the <strong>for</strong>m uses the POSTmethod. If the <strong>for</strong>m uses the GET method,then $_GET['do'] would have that value.With that in mind, you can actually skip thecreation of the <strong>for</strong>m, <strong>and</strong> just directly appenda name=value pair to the URL:www.example.com/page.php?do=thisAgain, with this specific example, page.phpreceives a variable called $_GET['do'] witha value of this.To demonstrate this GET method trick, anew version of the view_users.php script,first created in the last chapter, will bewritten. This one will provide links to pagesthat will allow you to edit or delete anexisting user’s record. The links will passthe user’s ID to the h<strong>and</strong>ling pages, both ofwhich will also be written in this chapter.To manually send valuesto a pHp script:1. Open view_users.php (Script 9.6) inyour text editor or IDE.2. Change the SQL query to read (Script 10.1):$q = "SELECT last_name,➝ first_name, DATE_FORMAT➝ (registration_date, '%M %d, %Y')➝ AS dr, user_id FROM users ORDER➝ BY registration_date ASC";Script 10.1 The view_users.php script, started in Chapter 9, “Using <strong>PHP</strong> with <strong>MySQL</strong>,” now modified so that itpresents Edit <strong>and</strong> Delete links, passing the user’s ID number along in each URL.1
The query has been changed in acouple of ways. First, the first <strong>and</strong> lastnames are selected separately, not concatenatedtogether. Second, the user_idis also now being selected, as that valuewill be necessary in creating the links.3. Add three more columns to themain table:echo 'EditDelete➝ Last Name➝ First Name➝ Date➝ Registered';continues on next pageScript 1.10 continued1920 // Print how many users there are:21 echo "There are currently $num registered users.\n";2223 // Table header:24 echo '25 26 Edit27 Delete28 Last Name29 First Name30 Date Registered31 32 ';3334 // Fetch <strong>and</strong> print all the records:35 while ($row = mysqli_fetch_array($r, MYSQLI_ASSOC)) {36 echo '37 Edit38 Delete39 ' . $row['last_name'] . '40 ' . $row['first_name'] . '41 ' . $row['dr'] . '42 43 ';44 }4546 echo '';47 mysqli_free_result ($r);4849 } else { // If no records were returned.50 echo 'There are currently no registered users.';51 }5253 mysqli_close($dbc);5455 include ('includes/footer.html');56 ?>Common Programming Techniques 301
In the previous version of the script,there were only two columns: one <strong>for</strong>the name <strong>and</strong> another <strong>for</strong> the date theuser registered. The name column hasbeen separated into its two parts <strong>and</strong>two new columns added: one <strong>for</strong> theEdit link <strong>and</strong> another <strong>for</strong> the Delete link.4. Change the echo statement within thewhile loop to match the table’s newstructure:echo 'EditDelete' .➝ $row['last_name'] . '' .➝ $row['first_name'] . '' . $row['dr'] .➝'';For each record returned from thedatabase, this line will print out arow with five columns. The last threecolumns are obvious <strong>and</strong> easy to create:just refer to the returned column name.For the first two columns, which providelinks to edit or delete the user, thesyntax is slightly more complicated. Thedesired end result is HTML code likeEdit, where X is the user’s ID. Knowingthis, all the <strong>PHP</strong> code has to do is print$row['user_id'] <strong>for</strong> X, being mindful ofthe quotation marks to avoid parse errors.Because the HTML attributes use alot of double quotation marks <strong>and</strong>this echo statement requires a lot ofvariables to be printed, I find it easiestto use single quotes <strong>for</strong> the HTML <strong>and</strong>then to concatenate the variables to theprinted text.5. Save the file as view_users.php, placeit in your <strong>Web</strong> directory, <strong>and</strong> run it inyour <strong>Web</strong> browser A.There’s no point in clicking the newlinks, though, as those scripts havenot yet been created.A The revised version of the view_users.php page, with newcolumns <strong>and</strong> links.302 Chapter 10
6. If you want, view the HTML source ofthe page to see each dynamically generatedlink B.To append multiple variables to a URL,use this syntax: page.php?name1=value1&name2=value2&name3=value3. It’s simply amatter of using the ampers<strong>and</strong>, plus anothername=value pair.One trick to adding variables to URLs isthat strings should be encoded to ensure thatthe value is h<strong>and</strong>led properly. For example,the space in the string Elliott Smith would beproblematic. The solution then is to use theurlencode( ) function:$url = 'page.php?name=' . urlencode➝ ('Elliott Smith');You only need to do this when programmaticallyadding values to a URL. When a <strong>for</strong>muses the GET method, it automatically encodesthe data.B Part of the HTML source of the page (see A ) shows how the user’s ID is added toeach link’s URL.Common Programming Techniques 303
using HiddenForm inputsIn the preceding example, a new versionof the view_users.php script was written.This one now includes links to the edit_user.php <strong>and</strong> delete_user.php pages,passing each a user’s ID through the URL.This next example, delete_user.php, willtake the passed user ID <strong>and</strong> allow theadministrator to delete that user. Althoughyou could have this page simply executea DELETE query as soon as the page isaccessed, <strong>for</strong> security purposes (<strong>and</strong> toprevent an inadvertent deletion), thereshould be multiple steps A:1. The page must check that it receiveda numeric user ID.2. A message will confirm that this usershould be deleted.3. The user ID will be stored in a hidden<strong>for</strong>m input.4. Upon submission of this <strong>for</strong>m, the userwill actually be deleted.To use hidden <strong>for</strong>m inputs:1. Begin a new <strong>PHP</strong> document in yourtext editor or IDE, to be nameddelete_user.php (Script 10.2):
Script 10.2 This script expects a user ID to be passedto it through the URL. It then presents a confirmation<strong>for</strong>m <strong>and</strong> deletes the user upon submission.1
This script relies upon having a validuser ID, to be used in a DELETE query’sWHERE clause. The first time this page isaccessed, the user ID should be passedin the URL (the page’s URL will end withdelete_user.php?id=X), after clicking theDelete link in the view_users.php page.The first if condition checks <strong>for</strong> such avalue <strong>and</strong> that the value is numeric.As you will see, the script will then storethe user ID value in a hidden <strong>for</strong>m input.When the <strong>for</strong>m is submitted (back tothis same page), the script will receivethe ID through $_POST. The secondcondition checks this <strong>and</strong>, again, thatthe ID value is numeric.If neither of these conditions is TRUE,then the page cannot proceed, so anerror message is displayed <strong>and</strong> thescript’s execution is terminated B.4. Include the <strong>MySQL</strong> connection script:require_once ('../mysqli_➝ connect.php');Both of this script’s processes—showingthe <strong>for</strong>m <strong>and</strong> h<strong>and</strong>ling the <strong>for</strong>m—require adatabase connection, so this line is outsideof the main submit conditional (Step 5).5. Begin the main submit conditional:if ($_SERVER['REQUEST_METHOD'] = =➝'POST') {To test <strong>for</strong> a <strong>for</strong>m submission, the scriptuses the same conditional first explainedin Chapter 3, <strong>and</strong> also used in Chapter 9.6. Delete the user, if appropriate:if ($_POST['sure'] = = 'Yes') {$q = "DELETE FROM users WHERE➝ user_id=$id LIMIT 1";$r = @mysqli_query ($dbc, $q);The <strong>for</strong>m C will <strong>for</strong>ce the user to clicka radio button to confirm the deletion.This little requirement prevents anyaccidents. Thus, the h<strong>and</strong>ling processfirst checks that the correct radio buttonwas selected. If so, a basic DELETE queryis defined, using the user’s ID in theWHERE clause. A LIMIT clause is addedto the query as an extra precaution.7. Check if the deletion worked <strong>and</strong>respond accordingly:if (mysqli_affected_rows($dbc)➝ = = 1) {echo 'The user has been➝ deleted.';C The page confirms the user deletionusing this simple <strong>for</strong>m.B If the page does not receive a number ID value,this error is shown.D If you select Yes in the <strong>for</strong>m(see C ) <strong>and</strong> click Submit, thisshould be the result.306 Chapter 10
} else {echo 'The user➝ could not be deleted due to a➝ system error.';echo '' . mysqli_error($dbc) .➝'Quer y: ' . $q . '';}The mysqli_affected_rows( ) functionchecks that exactly one row wasaffected by the DELETE query. If so, ahappy message is displayed D. If not,an error message is sent out.Keep in mind that it’s possible that norows were affected without a <strong>MySQL</strong>error occurring. For example, if the querytries to delete the record where the userID is equal to 42000 (<strong>and</strong> if that doesn’texist), no rows will be deleted but no<strong>MySQL</strong> error will occur. Still, because ofthe checks made when the <strong>for</strong>m is firstloaded, it would take a fair amount ofhacking by the user to get to that point.8. Complete the $_POST['sure'] conditional:} else {echo 'The user has NOT been➝ deleted.';}If the user did not explicitly check theYes button, the user will not be deleted<strong>and</strong> this message is displayed E.9. Begin the else clause of the mainsubmit conditional:} else {The page will either h<strong>and</strong>le the <strong>for</strong>mor display it. Most of the code prior tothis takes effect if the <strong>for</strong>m has beensubmitted (if $_SERVER['REQUEST_METHOD'] equals POST). The code fromhere on takes effect if the <strong>for</strong>m has notyet been submitted, in which case the<strong>for</strong>m should be displayed.10. Retrieve the in<strong>for</strong>mation <strong>for</strong> the userbeing deleted:$q = "SELECT CONCAT(last_name, ',➝', first_na m e) FROM users WHERE➝ user_id=$id";$r = @mysqli_query ($dbc, $q);if (mysqli_num_rows($r) = = 1) {$row = mysqli_fetch_array ($r,➝ MYSQLI_NUM);To confirm that the script received avalid user ID <strong>and</strong> to state exactly whois being deleted (refer back to C), theto-be-deleted user’s name is retrievedfrom the database F.The conditional—checking that a singlerow was returned—ensures that a validuser ID was provided to the script. Ifso, that one record is fetched into the$row variable.11. Display the record being deleted:echo "Name: $row[0]Are you sure you want to delete➝ this user?";continues on next pageE If you do not select Yes in the <strong>for</strong>m,no database changes are made.F Running the same SELECT query in the mysql client.Common Programming Techniques 307
To help prevent accidental deletions ofthe wrong record, the name of the userto be deleted is first displayed. Thatvalue is available in $row[0], becausethe mysqli_fetch_array( ) function (inStep 10), uses the MYSQLI_NUM constant,thereby assigning the returned recordto $row as an indexed array. The user’sname is the first, <strong>and</strong> only, column in thereturned record, so it’s indexed at 0 (asarrays normally begin indexing at 0).12. Create the <strong>for</strong>m:echo ' Yes No';The <strong>for</strong>m posts back to this same page. Itcontains two radio buttons, with the samename but different values, a submit button,<strong>and</strong> a hidden input. The most importantstep here is that the user ID ($id) is storedas a hidden <strong>for</strong>m input so that the h<strong>and</strong>lingprocess can also access this value G.13. Complete the mysqli_num_rows( )conditional:} else {echo 'This page➝ has been accessed in error.';}If no record was returned by the SELECTquery (because an invalid user ID wassubmitted), this message is displayed.If you see this message when you testthis script but don’t underst<strong>and</strong> why,apply the st<strong>and</strong>ard debugging stepsoutlined at the end of Chapter 8,“Error H<strong>and</strong>ling <strong>and</strong> Debugging.”14. Complete the <strong>PHP</strong> page:}mysqli_close($dbc);include ('includes/footer.html');?>The closing brace finishes the mainsubmission conditional. Then the<strong>MySQL</strong> connection is closed <strong>and</strong> thefooter is included.15. Save the file as delete_user.php <strong>and</strong>place it in your <strong>Web</strong> directory (it shouldbe in the same directory as view_users.php).16. Run the page by first clicking a Deletelink in the view_users.php page.Hidden <strong>for</strong>m elements don’t displayin the <strong>Web</strong> browser but are still present inthe HTML source code G. For this reason,never store anything there that must be kepttruly secure.Using hidden <strong>for</strong>m inputs <strong>and</strong> appendingvalues to a URL are just two ways to makedata available to other <strong>PHP</strong> pages. Two moremethods—cookies <strong>and</strong> sessions—are thoroughlycovered in Chapter 12, “Cookies<strong>and</strong> Sessions.”G The user ID is stored as a hidden input so that it’s available when the <strong>for</strong>m is submitted.308 Chapter 10
A The <strong>for</strong>m <strong>for</strong> editing a user’s record.Script 10.3 The edit_user.php page first displaysthe user’s current in<strong>for</strong>mation in a <strong>for</strong>m. Uponsubmission of the <strong>for</strong>m, the record will be updatedin the database.1
Script 10.3 continued2627 // Check <strong>for</strong> a first name:28 if (empty($_POST['first_name'])) {29 $errors[ ] = 'You <strong>for</strong>got to enteryour first name.';30 } else {31 $fn = mysqli_real_escape_string($dbc,trim($_POST['first_name']));32 }3334 // Check <strong>for</strong> a last name:35 if (empty($_POST['last_name'])) {36 $errors[ ] = 'You <strong>for</strong>got to enteryour last name.';37 } else {38 $ln = mysqli_real_escape_string($dbc,trim($_POST['last_name']));39 }4041 // Check <strong>for</strong> an email address:42 if (empty($_POST['email'])) {43 $errors[ ] = 'You <strong>for</strong>got to enteryour email address.';44 } else {45 $e = mysqli_real_escape_string($dbc, trim($_POST['email']));46 }4748 if (empty($errors)) { // Ifeverything's OK.4950 // Test <strong>for</strong> unique email address:51 $q = "SELECT user_id FROM usersWHERE email='$e' AND user_id != $id";52 $r = @mysqli_query($dbc, $q);53 if (mysqli_num_rows($r) = = 0) {5455 // Make the query:56 $q = "UPDATE users SET first_name='$fn', last_name='$ln',email='$e' WHERE user_id=$idLIMIT 1";57 $r = @mysqli_query ($dbc, $q);58 if (mysqli_affected_rows($dbc)= = 1) { // If it ran OK.5960 // Print a message:61 echo 'The user has beenedited.';62Script 10.3 continued63 } else { // If it did not run OK.64 echo 'The usercould not be edited due to asystem error. We apologize <strong>for</strong>any inconvenience.';// Public message.65 echo '' . mysqli_error($dbc). 'Query: ' . $q . ''; // Debugging message.66 }6768 } else { // Already registered.69 echo 'Theemail address has already beenregistered.';70 }7172 } else { // Report the errors.7374 echo 'Thefollowing error(s) occurred:';75 <strong>for</strong>each ($errors as $msg) {// Print each error.76 echo " - $msg\n";77 }78 echo 'Please try again.';7980 } // End of if (empty($errors)) IF.8182 } // End of submit conditional.8384 // Always show the <strong>for</strong>m...8586 // Retrieve the user's in<strong>for</strong>mation:87 $q = "SELECT first_name, last_name,email FROM users WHERE user_id=$id";88 $r = @mysqli_query ($dbc, $q);8990 if (mysqli_num_rows($r) = = 1) { // Validuser ID, show the <strong>for</strong>m.9192 // Get the user's in<strong>for</strong>mation:93 $row = mysqli_fetch_array ($r,MYSQLI_NUM);9495 // Create the <strong>for</strong>m:96 echo '97 First Name: code continues on next page310 Chapter 10
Script 10.3 continued98 Last Name: 99 Email Address: 100 101 102 ';103104 } else { // Not a valid user ID.105 echo 'This page hasbeen accessed in error.';106 }107108 mysqli_close($dbc);109110 include ('includes/footer.html');111 ?>2. Check <strong>for</strong> a valid user ID value:if ( (isset($_GET['id'])) &&➝ (is_numeric($_GET['id'])) ) {$id = $_GET['id'];} elseif ( (isset($_POST['id'])) &&➝ (is_numeric($_POST['id'])) ) {$id = $_POST['id'];} else {echo 'This page➝ has been accessed in error.';include ('includes/footer.html');exit( );}This validation routine is exactly the sameas that in delete_user.php, confirmingthat a numeric user ID has been received,whether the page has first been accessedfrom view_users.php (the first condition)or upon submission of the <strong>for</strong>m (thesecond condition).3. Include the <strong>MySQL</strong> connection script<strong>and</strong> begin the main submit conditional:require_once ('../mysqli_connect.➝ php');if ($_SERVER['REQUEST_METHOD'] = =➝'POST') {$errors = array( );Like the registration examples you havealready done, this script makes use ofan array to track errors.continues on next pageCommon Programming Techniques 311
4. Validate the first name:if (empty($_POST['first_name'])) {$errors[ ] = 'You <strong>for</strong>got to➝ enter your first name.';} else {$fn = mysqli_real_escape_string➝ ($dbc, trim($_POST➝ ['first_name']));}The <strong>for</strong>m A is like a registration pagebut without the password fields (seethe second tip). The <strong>for</strong>m data canthere<strong>for</strong>e be validated by applying thesame techniques used in a registrationscript. As with a registration example,the validated data is trimmed <strong>and</strong> thenrun through mysqli_real_escape_string( ) <strong>for</strong> security.5. Validate the last name <strong>and</strong> emailaddress:if (empty($_POST['last_name'])) {$errors[ ] = 'You <strong>for</strong>got to➝ enter your last name.';} else {$ln = mysqli_real_escape_string➝ ($dbc, trim($_POST➝ ['last_name']));}if (empty($_POST['email'])) {$errors[ ] = 'You <strong>for</strong>got to➝ enter your email address.';} else {$e = mysqli_real_escape_string➝ ($dbc, trim($_POST['email']));}6. If there were no errors, check that thesubmitted email address is not alreadyin use:if (empty($errors)) {$q = "SELECT user_id FROM users➝ WHERE email='$e' AND user_id➝ != $id";$r = @mysqli_query($dbc, $q);if (mysqli_num_rows($r) = = 0) {The integrity of the database <strong>and</strong> ofthe application as a whole partiallydepends upon having unique emailaddress values in the users table. Thatrequirement guarantees that the loginsystem, which uses a combination ofthe email address <strong>and</strong> password (tobe developed in Chapter 12), works.Because the <strong>for</strong>m allows <strong>for</strong> altering theuser’s email address (see A), specialsteps have to be taken to ensureuniqueness of that value across everydatabase record. To underst<strong>and</strong> thisquery, consider two possibilities....In the first, the user’s email addressis being changed. In this case youjust need to run a query making surethat that particular email address isn’talready registered: SELECT user_idFROM users WHERE email='$e'.In the second possibility, the user’semail address will remain the same. Inthis case, it’s okay if the email addressis already in use, because it’s already inuse <strong>for</strong> this user.312 Chapter 10
To write one query that will work <strong>for</strong>both possibilities, don’t check to seeif the email address is being used, butrather see if it’s being used by anyoneelse, hence:SELECT user_id FROM users WHEREemail='$e' AND user_id != $idIf this query returns no records, it’s safeto run the UPDATE query.7. Update the database:$q = "UPDATE users SET➝ first_name='$fn', last_name=➝'$ln', email='$e' WHERE user_id=➝ $id LIMIT 1";$r = @mysqli_query ($dbc, $q);The UPDATE query is similar to examplesyou could have seen in Chapter 5,“Introduction to SQL.” The queryupdates three fields—first name, lastname, <strong>and</strong> email address—using thevalues submitted by the <strong>for</strong>m. Thissystem works because the <strong>for</strong>m ispreset with the existing values. So,if you edit the first name in the <strong>for</strong>mbut nothing else, the first name valuein the database is updated using thisnew value, but the last name <strong>and</strong> emailaddress values are “updated” usingtheir current values. This system ismuch easier than trying to determinewhich <strong>for</strong>m values have changed <strong>and</strong>updating just those in the database.8. Report on the results of the update:if (mysqli_affected_rows($dbc) = =➝ 1) {echo 'The user has been➝ edited.';} else {echo 'The user➝ could not be edited due to a➝ system error. We apologize➝ <strong>for</strong> any inconvenience.';echo '' . mysqli_error($dbc) .➝'Quer y: ' . $q . '';}The mysqli_affected_rows( ) functionwill return the number of rows in thedatabase affected by the most recentquery. If any of the three <strong>for</strong>m valueswas altered, then this function willreturn the value 1. This conditional tests<strong>for</strong> that <strong>and</strong> prints a message indicatingsuccess or failure.Keep in mind that the mysqli_affected_rows( ) function will returna value of 0 if an UPDATE comm<strong>and</strong>successfully ran but didn’t actuallyaffect any records. There<strong>for</strong>e, if yousubmit this <strong>for</strong>m without changing anyof the <strong>for</strong>m values, a system error isdisplayed, which may not technicallybe correct. Once you have this scripteffectively working, you could changethe error message to indicate thatno alterations were made if mysqli_affected_rows( ) returns 0.continues on next pageCommon Programming Techniques 313
9. Complete the email conditional:} else {echo 'The➝ email address has already➝ been registered.';}This else completes the conditionalthat checked if an email address wasalready being used by another user.If so, that message is printed.10. Complete the $errors conditional:} else {echo 'The following➝ error(s) occurred:';<strong>for</strong>each ($errors as $msg) {echo " - $msg\n";}echo 'Please try again.';}The else is used to report any errors inthe <strong>for</strong>m (namely, a lack of a first name,last name, or email address), just like inthe registration script.11. Complete the submission conditional:} // End of submit conditional.The final closing brace completes themain submit conditional. In this example,the <strong>for</strong>m will be displayed wheneverthe page is accessed. After submittingthe <strong>for</strong>m, the database will be updated,<strong>and</strong> the <strong>for</strong>m will be shown again, nowdisplaying the latest in<strong>for</strong>mation.12. Retrieve the in<strong>for</strong>mation <strong>for</strong> the userbeing edited:$q = "SELECT first_name,➝ last_name, email FROM users➝ WHERE user_id=$id";$r = @mysqli_query ($dbc, $q);if (mysqli_num_rows($r) = = 1) {$row = mysqli_fetch_array ($r,➝ MYSQLI_NUM);In order to populate the <strong>for</strong>m elements,the current in<strong>for</strong>mation <strong>for</strong> the user mustbe retrieved from the database. Thisquery is similar to the one in delete_user.php. The conditional—checkingthat a single row was returned—ensuresthat a valid user ID was provided.13. Display the <strong>for</strong>m:echo 'First Name: Last Name: Email Address: ';The <strong>for</strong>m has but three text inputs, eachof which is made sticky using the dataretrieved from the database. Again, theuser ID ($id) is stored as a hidden <strong>for</strong>minput so that the h<strong>and</strong>ling process canalso access this value.14. Complete the mysqli_num_rows( )conditional:} else {echo 'This page➝ has been accessed in error.';}If no record was returned from thedatabase, because an invalid user ID wassubmitted, this message is displayed.314 Chapter 10
15. Complete the <strong>PHP</strong> page:mysqli_close($dbc);include ('includes/footer.html');?>16. Save the file as edit_user.php <strong>and</strong>place it in your <strong>Web</strong> directory (in thesame folder as view_users.php).17. Run the page by first clicking an Editlink in the view_users.php page B<strong>and</strong> C.B The new values are displayed in the<strong>for</strong>m after successfully updating thedatabase (compare with the <strong>for</strong>m valuesin A ).C If you try to change a record to an existingemail address or if you omit an input, errors arereported.As written, the sticky <strong>for</strong>m always showsthe values retrieved from the database. Thismeans that if an error occurs, the databasevalues will be used, not the ones the user justentered (if those are different). To change thisbehavior, the sticky <strong>for</strong>m would have to check<strong>for</strong> the presence of $_POST variables, usingthose if they exist, or the database values if not.This edit page does not include the functionalityto change the password. That conceptwas already demonstrated in password.php (Script 9.7). If you would like to incorporatethat functionality here, keep in mind thatyou cannot display the current password, asit is stored in a hashed <strong>for</strong>mat (i.e., it’s notdecryptable). Instead, just present two boxes<strong>for</strong> changing the password (the new passwordinput <strong>and</strong> a confirmation). If these values aresubmitted, update the password in the databaseas well. If these inputs are left blank, donot update the password in the database.Common Programming Techniques 315
paginatingQuery ResultsPagination is a concept you’re familiar witheven if you don’t know the term. When youuse a search engine like Google, it displaysthe results as a series of pages <strong>and</strong> not asone long list. The view_users.php scriptcould benefit from this feature.Paginating query results makes extensiveuse of the LIMIT SQL clause introduced inChapter 5. LIMIT restricts which subset ofthe matched records is actually returned.To paginate the returned results of a query,each iteration of the page will run the samequery using different LIMIT parameters.The first page viewing will request the firstX records; the second page viewing, thesecond group of X records; <strong>and</strong> so <strong>for</strong>th. Tomake this work, two values must be passedfrom page to page in the URL, like theuser IDs passed from the view_users.phppage. The first value is the total number ofpages to be displayed. The second valueis an indicator of which records the pageshould display with this iteration (i.e., whereto begin fetching records).Another, more cosmetic technique will bedemonstrated here: displaying each rowof the table—each returned record—usingan alternating background color A. Thiseffect will be achieved with ease, usingthe ternary operator (see the sidebar“The Ternary Operator”).There’s a lot of good, new in<strong>for</strong>mation to becovered here, so to make it easier to followalong, let’s write this version from scratchinstead of trying to modify Script 10.1.To paginate view_users.php:1. Begin a new <strong>PHP</strong> document in yourtext editor or IDE, to be namedview_users.php (Script 10.4):
Script 10.4 This new version of view_users.phpincorporates pagination so that the users arelisted over multiple <strong>Web</strong> browser pages.1
Script 10.4 continued21 // Count the number of records:22 $q = "SELECT COUNT(user_id) FROMusers";23 $r = @mysqli_query ($dbc, $q);24 $row = @mysqli_fetch_array ($r,MYSQLI_NUM);25 $records = $row[0];2627 // Calculate the number of pages...28 if ($records > $display) { // Morethan 1 page.29 $pages = ceil ($records/$display);30 } else {31 $pages = 1;32 }3334 } // End of p IF.3536 // Determine where in the database tostart returning results...37 if (isset($_GET['s']) && is_numeric($_GET['s'])) {38 $start = $_GET['s'];39 } else {40 $start = 0;41 }4243 // Define the query:44 $q = "SELECT last_name, first_name,DATE_FORMAT(registration_date, '%M%d, %Y') AS dr, user_id FROM usersORDER BY registration_date ASC LIMIT$start, $display";45 $r = @mysqli_query ($dbc, $q);4647 // Table header:48 echo '49 50 Edit51 Delete52 Last Name53 First Name54 Date Registered55 56 ';5758 // Fetch <strong>and</strong> print all the records....59Script 10.4 continued60 $bg = '#eeeeee'; // Set the initialbackground color.6162 while ($row = mysqli_fetch_array($r,MYSQLI_ASSOC)) {6364 $bg = ($bg= ='#eeeeee' ? '#ffffff' :'#eeeeee'); // Switch thebackground color.6566 echo '67 Edit68 Delete69 ' . $row['last_name'] . '70 ' . $row['first_name'] . '71 ' . $row['dr'] .'72 73 ';7475 } // End of WHILE loop.7677 echo '';78 mysqli_free_result ($r);79 mysqli_close($dbc);8081 // Make the links to other pages, ifnecessary.82 if ($pages > 1) {8384 // Add some spacing <strong>and</strong> start aparagraph:85 echo '';8687 // Determine what page the script ison:88 $current_page = ($start/$display)+ 1;8990 // If it's not the first page, make aPrevious link:91 if ($current_page != 1) {92 echo 'Previous ';93 }code continues on next page318 Chapter 10
Script 10.4 continued9495 // Make all the numbered pages:96 <strong>for</strong> ($i = 1; $i
The second parameter the script willreceive—on subsequent viewings of thepage—will be the starting record. Thiscorresponds to the first number in aLIMIT x, y clause. Upon initially callingthe script, the first ten records—0 through10—should be retrieved (because$display has a value of 10). The secondpage would show records 10 through 19;the third, 20 through 29; <strong>and</strong> so <strong>for</strong>th.The first time this page is accessed,the $_GET['s'] variable will not be set,<strong>and</strong> so $start should be 0 (the firstrecord in a LIMIT clause is indexed at0). Subsequent pages will receive the$_GET['s'] variable from the URL, <strong>and</strong>it will be assigned to $start.8. Write the SELECT query with a LIMITclause:$q = "SELECT last_name,➝ first_name, DATE_FORMAT➝ (registration_date, '%M %d, %Y')➝ AS dr, user_id FROM users ORDER➝ BY registration_date ASC LIMIT➝ $start, $display";$r = @mysqli_query ($dbc, $q);The LIMIT clause dictates with whichrecord to begin retrieving ($start) <strong>and</strong>how many to return ($display) fromthat point. The first time the page is run,the query will be SELECT last_name,first_name … LIMIT 0, 10. Clicking tothe next page will result in SELECT last_name, first_name … LIMIT 10, 10.9. Create the HTML table header:echo 'EditDelete➝ Last Name➝ First Name➝ Date➝ Registered';In order to simplify this script a little bit,I’m assuming that there are recordsto be displayed. To be more <strong>for</strong>mal,this script, prior to creating the table,would invoke the mysqli_num_rows( )function <strong>and</strong> have a conditional thatconfirms that some records werereturned.10. Initialize the background color variable:$bg = '#eeeeee';To make each row have its ownbackground color, a variable will beused to store that color. To start, the$bg variable is assigned a value of#eeeeee, a light gray. This color willalternate with white (#ffffff ).11. Begin the while loop that retrievesevery record, <strong>and</strong> then swap the backgroundcolor:while ($row = mysqli_fetch_array➝ ($r, MYSQLI_ASSOC)) {$bg = ($bg= ='#eeeeee' ?➝'#ffffff' : '#eeeeee');The background color used by eachrow in the table is assigned to the $bgvariable. Because the background colorshould alternate, this one line of codewill, upon each iteration of the loop,assign the opposite color to $bg. If $bgis equal to #eeeeee, then it will beassigned the value of #ffffff <strong>and</strong> viceversa (again, see the sidebar <strong>for</strong> thesyntax <strong>and</strong> explanation of the ternaryoperator). For the first row fetched,$bg is initially equal to #eeeeee (seeStep 10) <strong>and</strong> will there<strong>for</strong>e be assigned#ffffff, making a white background.320 Chapter 10
For the second row, $bg is not equalto #eeeeee, so it will be assigned thatvalue, making a gray background.12. Print the records in a table row:echo 'EditDelete' . $row['last_➝ name'] . '' . $row➝ ['first_name'] . '' . $row['dr'] .➝'';This code only differs in one way fromthat in the previous version of thisscript: the initial TR tag now includesthe bgcolor attribute, whose value willbe the $bg variable (so #eeeeee <strong>and</strong>#ffffff, alternating).13. Complete the while loop <strong>and</strong> the table,free up the query result resources, <strong>and</strong>close the database connection:} // End of WHILE loop.echo '';mysqli_free_result ($r);mysqli_close($dbc);14. Begin a section <strong>for</strong> displaying links toother pages, if necessary:if ($pages > 1) {echo '';If the script requires multiple pages todisplay all of the records, it needs theappropriate links at the bottom of thepage A.15. Determine the current page being viewed:$current_page = ($start/$display)➝ + 1;To make the links, the script must firstdetermine the current page. This canbe calculated as the starting numberdivided by the display number, plus 1. Forexample, on the second viewing of thispage, $start will be 10 (because on thefirst instance, $start is 0), making the$current_page value 2: (10/10) + 1 = 2.16. Create a link to the previous page,if necessary:if ($current_page != 1) {echo 'Previous➝ ';}If the current page is not the first page,it should also have a Previous link tothe earlier result set C. This isn’t strictlynecessary, but is nice.Each link will be made up of the scriptname, plus the starting point <strong>and</strong> thenumber of pages. The starting point <strong>for</strong>the previous page will be the currentstarting point minus the number beingdisplayed. These values must be passedin every link, or else the pagination will fail.continues on next pageC The Previous link willappear only if the currentpage is not the first one(compare with A ).Common Programming Techniques 321
17. Make the numeric links:<strong>for</strong> ($i = 1; $i 20. Save the file as view_users.php, placeit in your <strong>Web</strong> directory, <strong>and</strong> test it inyour <strong>Web</strong> browser.This example paginates a simple query,but if you want to paginate a more complexquery, like the results of a search, it’s not thatmuch more complicated. The main differenceis that whatever terms are used in the querymust be passed from page to page in thelinks. If the main query is not exactly the samefrom one viewing of the page to the next, thepagination will fail.If you run this example <strong>and</strong> the paginationdoesn’t match the number of results thatshould be returned (<strong>for</strong> example, the countingquery indicates there are 150 records butthe pagination only creates 3 pages, with 10records on each), it’s most likely because themain query <strong>and</strong> the COUNT( ) query are toodifferent. These two queries will never be thesame, but they must per<strong>for</strong>m the same join (ifapplicable) <strong>and</strong> have the same WHERE <strong>and</strong>/orGROUP BY clauses to be accurate.No error h<strong>and</strong>ling has been included inthis script, as I know the queries function aswritten. If you have problems, remember your<strong>MySQL</strong>/SQL debugging steps: print the query,run it using the mysql client or phpMyAdmin toconfirm the results, <strong>and</strong> invoke the mysqli_error( ) function as needed.D The final resultspage will not displaya Next link (comparewith A <strong>and</strong> C ).322 Chapter 10
Script 10.5 This latest version of the view_users.php script creates clickable links out of the table’scolumn headings.1
Script 10.5 continued38 // Determine the sort...39 // Default is by registration date.40 $sort = (isset($_GET['sort'])) ?$_GET['sort'] : 'rd';4142 // Determine the sorting order:43 switch ($sort) {44 case 'ln':45 $order_by = 'last_name ASC';46 break;47 case 'fn':48 $order_by = 'first_name ASC';49 break;50 case 'rd':51 $order_by = 'registration_dateASC';52 break;53 default:54 $order_by = 'registration_dateASC';55 $sort = 'rd';56 break;57 }5859 // Define the query:60 $q = "SELECT last_name, first_name,DATE_FORMAT(registration_date, '%M %d,%Y') AS dr, user_id FROM users ORDERBY $order_by LIMIT $start, $display";61 $r = @mysqli_query ($dbc, $q); // Run thequery.6263 // Table header:64 echo '65 66 Edit67 Delete68 Last Name69 First Name70 Date Registered71 72 ';73Script 10.5 continued74 // Fetch <strong>and</strong> print all the records....75 $bg = '#eeeeee';76 while ($row = mysqli_fetch_array($r,MYSQLI_ASSOC)) {77 $bg = ($bg= ='#eeeeee' ? '#ffffff' :'#eeeeee');78 echo '79 Edit80 Delete81 ' . $row['last_name'] . '82 ' . $row['first_name'] . '83 ' . $row['dr'] .'84 85 ';86 } // End of WHILE loop.8788 echo '';89 mysqli_free_result ($r);90 mysqli_close($dbc);9192 // Make the links to other pages, ifnecessary.93 if ($pages > 1) {9495 echo '';96 $current_page = ($start/$display) +1;9798 // If it's not the first page, make aPrevious button:99 if ($current_page != 1) {100 echo 'Previous ';101 }102103 // Make all the numbered pages:104 <strong>for</strong> ($i = 1; $i
Script 10.5 continued106 echo '' .$i . ' ';107 } else {108 echo $i . ' ';109 }110 } // End of FOR loop.111112 // If it's not the last page, make aNext button:113 if ($current_page != $pages) {114 echo 'Next';115 }116117 echo ''; // Close the paragraph.118119 } // End of links section.120121 include ('includes/footer.html');122 ?>3. Determine how the results should beordered:switch ($sort) {case 'ln':$order_by = 'last_name ASC';break;case 'fn':$order_by = 'first_name ASC';break;case 'rd':$order_by = 'registration_➝ date ASC';break;default:$order_by = 'registration_➝ date ASC';$sort = 'rd';break;}The switch checks $sort againstseveral expected values. If, <strong>for</strong> example,it is equal to ln, then the resultsshould be ordered by the last namein ascending order. The assigned$order_by variable will be used in theSQL query.If $sort has a value of fn, then theresults should be in ascending orderby first name. If the value is rd, thenthe results will be in ascending orderof registration date. This is also thedefault case. Having this default casehere protects against a malicious userchanging the value of $_GET['sort'] tosomething that could break the query.continues on next pageCommon Programming Techniques 325
4. Modify the query to use the new$order_by variable:$q = "SELECT last_name, first_➝ name, DATE_FORMAT(registration_➝ date, '%M %d, %Y') AS dr, user_➝ id FROM users ORDER BY $order_by➝ LIMIT $start, $display";By this point, the $order_by variablehas a value indicating how the returnedresults should be ordered (<strong>for</strong> example,registration_date ASC), so it can beeasily added to the query. Rememberthat the ORDER BY clause comes be<strong>for</strong>ethe LIMIT clause. If the resulting querydoesn’t run properly <strong>for</strong> you, print it out<strong>and</strong> inspect its syntax.5. Modify the table header echo statementto create links out of the columnheadings:echo 'EditDeleteLast➝ NameFirst➝ NameDate➝ Registered';To turn the column headings into clickablelinks, just surround them with theA tag. The value of the href attribute <strong>for</strong>each link corresponds to the acceptablevalues <strong>for</strong> $_GET['sort'] (see theswitch in Step 3).6. Modify the echo statement that createsthe Previous link so that the sort valueis also passed:echo '➝ Previous ';Add another name=value pair to thePrevious link so that the sort order isalso sent to each page of results. If youdon’t, then the pagination will fail, asthe ORDER BY clause will differ from onepage to the next.7. Repeat Step 6 <strong>for</strong> the numbered pages<strong>and</strong> the Next link:echo '' .➝ $i . ' ';echo '➝ Next';326 Chapter 10
8. Save the file as view_users.php, placeit in your <strong>Web</strong> directory, <strong>and</strong> run it inyour <strong>Web</strong> browser A <strong>and</strong> B.A very important security conceptwas also demonstrated in this example.Instead of using the value of $_GET['sort']directly in the query, it’s checked againstassumed values in a switch. If, <strong>for</strong> somereason, $_GET['sort'] has a value other thanwould be expected, the query uses a defaultsorting order. The point is this: don’t makeassumptions about received data, <strong>and</strong> don’tuse unvalidated data in an SQL query.A After clicking the firstname column, the results areshown in ascending order byfirst name.B After clicking the LastName column, <strong>and</strong> thenclicking to the secondpaginated display, the pageshows the second group ofresults in ascending orderby last name.Common Programming Techniques 327
Review <strong>and</strong> pursueIf you have any problems with thereview questions or the pursue prompts,turn to the book’s supporting <strong>for</strong>um(www.LarryUllman.com/<strong>for</strong>ums/).ReviewnnnnnnnnWhat is the st<strong>and</strong>ard sequence of steps<strong>for</strong> debugging <strong>PHP</strong>-<strong>MySQL</strong> problems(explicitly conveyed at the end ofChapter 8)?What are the two ways of passingvalues to a <strong>PHP</strong> script (aside fromuser input)?What security measures do the delete_user.php <strong>and</strong> edit_user.php scriptstake to prevent malicious or accidentaldeletions?Why is it safe to use the $id valuein queries without running it throughmysqli_real_escape_string( ) first?In what situation will the mysqli_affected_rows( ) function return a falsenegative (i.e., report that no recordswere affected despite the fact that thequery ran without error)?What is the ternary operator? How isit used?What two values are required to properlypaginate query results?How do you alter a query so that itsresults are paginated?nnnIf a paginated query is based uponadditional criteria (beyond those used ina LIMIT clause), what would happen ifthose criteria are not also passed alongin every pagination link?Why is it important not to directly usethe value of $_GET['sort'] in a query?Why is it important to pass the sortingvalue along in each pagination link?pursuennnnnnChange the delete_user.php <strong>and</strong>edit_user.php pages so that they bothdisplay the user being affected in thebrowser window’s title bar.Modify edit_user.php so that you canalso change a user’s password.If you’re up <strong>for</strong> a challenge, modifyedit_user.php so that the <strong>for</strong>m elements’values come from $_POST, if set,<strong>and</strong> the database if not.Change the value of the $displayvariable in view_users.php to alterthe pagination.Paginate another query result, such asa list of accounts or customers found inthe banking database.Create delete <strong>and</strong> edit scripts <strong>for</strong> thebanking database. You’ll have to factorin the <strong>for</strong>eign key constraints in place,which limit, <strong>for</strong> example, the deletion ofcustomers that still have accounts.328 Chapter 10
11<strong>Web</strong> ApplicationDevelopmentThe preceding two chapters focus on using<strong>PHP</strong> <strong>and</strong> <strong>MySQL</strong> together (which is, afterall, the primary point of this book). Butthere’s still a lot of <strong>PHP</strong>-centric materialto be covered. Taking a quick break fromusing <strong>PHP</strong> with <strong>MySQL</strong>, this chapter coversa h<strong>and</strong>ful of techniques that are often usedin more complex <strong>Web</strong> applications.The first topic covered in this chapter issending email using <strong>PHP</strong>. It’s a very commonthing to do <strong>and</strong> is surprisingly simple(assuming that the server is properlyset up). After that, the chapter has usesrelatedexamples to cover three new ideas:h<strong>and</strong>ling file uploads through an HTML<strong>for</strong>m, using <strong>PHP</strong> <strong>and</strong> JavaScript together,<strong>and</strong> how to use the header( ) function tomanipulate the <strong>Web</strong> browser. The chapterconcludes by touching upon some of thedate <strong>and</strong> time functions present in <strong>PHP</strong>.in This ChapterSending Email 330H<strong>and</strong>ling File Uploads 336<strong>PHP</strong> <strong>and</strong> JavaScript 348Underst<strong>and</strong>ing HTTP Headers 355Date <strong>and</strong> Time Functions 362Review <strong>and</strong> Pursue 366
Sending emailOne of my absolute favorite things about<strong>PHP</strong> is how easy it is to send an email. Ona properly configured server, the process isas simple as using the mail( ) function:mail (to, subject, body, [headers]);The to value should be an email addressor a series of addresses, separated bycommas. Any of these are allowed:nnnnemail@example.comemail1@example.com,email2@example.comActual Name Actual Name ,This Name The subject value will create the email’ssubject line, <strong>and</strong> body is where you put thecontents of the email. To make things morelegible, variables are often assigned values<strong>and</strong> then used in the mail( ) function call:$to = 'email@example.com';$subject = 'This is the subject';$body = 'This is the body.It goes over multiple lines.';mail ($to, $subject, $body);As you can see in the assignment to the$body variable, you can create an emailmessage that goes over multiple linesby having the text do exactly that withinthe quotation marks. You can also usethe newline character (\n) within doublequotation marks to accomplish this:$body = "This is the body.\nIt goes➝ over multiple lines.";This is all very straight<strong>for</strong>ward, <strong>and</strong> thereare only a couple of caveats. First, thesubject line cannot contain the newlinecharacter (\n). Second, each line of thepHp mail( ) Dependencies<strong>PHP</strong>’s mail( ) function doesn’t actually send the email itself. Instead, it tells the mail server runningon the computer to do so. What this means is that the computer on which <strong>PHP</strong> is running musthave a working mail server in order <strong>for</strong> this function to work.If you have a computer running a Unix variant or if you are running your <strong>Web</strong> site through aprofessional host, this should not be a problem. But if you are running <strong>PHP</strong> on your own desktopor laptop computer, you’ll probably need to make adjustments.If you are running Windows <strong>and</strong> have an Internet service provider (ISP) that provides you with anSMTP server (like smtp.comcast.net), this in<strong>for</strong>mation can be set in the php.ini file (downloadAppendix A, “Installation,” from peachpit.com to see how to edit this file). Un<strong>for</strong>tunately, this willonly work if your ISP does not require authentication—a username <strong>and</strong> password combination—to use the SMTP server. Otherwise, you’ll need to install an SMTP server on your computer. Thereare plenty available: just search the Internet <strong>for</strong> free windows smtp server <strong>and</strong> you’ll see someoptions. The XAMPP application, which Appendix A recommends you use, includes the Mercurymail server.If you are running Mac OS X, you’ll need to enable the built-in SMTP server (either sendmailor postfix, depending upon the specific version of Mac OS X you are running). You can findinstructions online <strong>for</strong> doing so (search with enable sendmail “Mac OS X”). If you’re usingMAMP, per the recommendation in Appendix A, search online <strong>for</strong> sending email with MAMP.330 Chapter 11
ody should be no longer than 70 charactersin length (this is more of a recommendationthan a requirement). You canaccomplish this using the wordwrap( )function. It will insert a newline into a stringevery X number of characters. To wrap textto 70 characters, use$body = wordwrap($body, 70);The mail( ) function takes a fourth, optionalparameter <strong>for</strong> additional headers. This iswhere you could set the From, Reply-To, Cc,Bcc, <strong>and</strong> similar settings. For example,mail ($to, $subject, $body, 'From:➝ reader@example.com');To use multiple headers of different typesin your email, separate each with \r\n:$headers = "From: John@example.com\➝ r\n";$headers .= "Cc: Jane@example.com,➝ Joe@example.com\r\n";mail ($to, $subject, $body, $headers);Although this fourth argument is optional,it is advised that you always include aFrom value (although that can also beestablished in <strong>PHP</strong>’s configuration file).To use the mail( ) function, let’s create apage that shows a contact <strong>for</strong>m A <strong>and</strong> thenh<strong>and</strong>les the <strong>for</strong>m submission, validating thedata <strong>and</strong> sending it along in an email. Thisexample will also provide a nice tip you’llsometimes use on pages with sticky <strong>for</strong>ms.Note two things be<strong>for</strong>e running thisscript: First, <strong>for</strong> this example to work, thecomputer on which <strong>PHP</strong> is running musthave a working mail server. If you’re usinga hosted site, this shouldn’t be an issue;on your own computer, you’ll likely need totake preparatory steps (see the sidebar). Iwill say in advance that these steps can bedaunting <strong>for</strong> the beginner; it will likely beeasiest <strong>and</strong> most gratifying to use a hostedsite <strong>for</strong> this particular script.Second, this example, while functional,could be manipulated by bad people,allowing them to send spam through yourcontact <strong>for</strong>m (not just to you but to anyone).The steps <strong>for</strong> preventing such attacks areprovided in Chapter 13, “Security Methods.”Following along <strong>and</strong> testing this example isjust fine; relying upon it as your long-termcontact <strong>for</strong>m solution is a bad idea.A A st<strong>and</strong>ard contact <strong>for</strong>m.<strong>Web</strong> Application Development 331
To send email:1. Begin a new <strong>PHP</strong> script in your texteditor or IDE, to be named email.php(Script 11.1):Contact MeContact Me3 4 5 Contact Me6 7 8 Contact Me9
Script 11.1 continued3536 } // End of main isset( ) IF.3738 // Create the HTML <strong>for</strong>m:39 ?>40 Please fill out this <strong>for</strong>m to contactme.41 42 Name:
6. Complete the conditionals:} else {echo 'Please➝ fill out the <strong>for</strong>m➝ completely.';}} // End of main isset( ) IF.The error message contains some inlineCSS, so that it’s in red <strong>and</strong> made bold.7. Begin the <strong>for</strong>m:Please fill out this <strong>for</strong>m to➝ contact me.Name: The comments input is a textarea,which does not use a value attribute.Instead, to be made sticky, the valueis printed between the opening <strong>and</strong>closing textarea tags.9. Complete the HTML page:334 Chapter 11
C Successful completion <strong>and</strong> submission ofthe <strong>for</strong>m.10. Save the file as email.php, place it inyour <strong>Web</strong> directory, <strong>and</strong> test it in your<strong>Web</strong> browser C.11. Check your email to confirm that youreceived the message D.If you don’t actually get the email, you’llneed to do some debugging work.With this example, you should confirmwith your host (if using a hosted site) oryourself (if running <strong>PHP</strong> on your server),that there’s a working mail serverinstalled. You should also test this usingdifferent email addresses (<strong>for</strong> both the to<strong>and</strong> from values). Also, watch that yourspam filter isn’t eating up the message.The mail( ) function takes an optionalfifth argument, <strong>for</strong> additional parameters to besent to the mail-sending application.The mail( ) function returns a 1 or a 0indicating the success of the function call. Thisis not the same thing as the email successfullybeing sent or received. Again, you cannot easilytest <strong>for</strong> either using <strong>PHP</strong>.D The resulting email (from the data in A ).While it’s easy to send a simple messagewith the mail( ) function, sending HTMLemails or emails with attachments involvesmore work. I discuss how you can do both inmy book <strong>PHP</strong> 5 Advanced: Visual QuickProGuide (Peachpit Press, 2007).Using a contact <strong>for</strong>m that has <strong>PHP</strong> sendan email is a great way to minimize the spamyou receive. With this system, your actualemail address is not visible in the <strong>Web</strong> browser,meaning it can’t be harvested by spambots.<strong>Web</strong> Application Development 335
H<strong>and</strong>ling File uploadsChapters 2, “Programming with <strong>PHP</strong>,”<strong>and</strong> 3, “Creating <strong>Dynamic</strong> <strong>Web</strong> <strong>Sites</strong>,” goover the basics of h<strong>and</strong>ling HTML <strong>for</strong>mswith <strong>PHP</strong>. For the most part, every type of<strong>for</strong>m element can be h<strong>and</strong>led the samein <strong>PHP</strong>, with one exception: file uploads.The process of uploading a file has twodimensions. First the HTML <strong>for</strong>m must bedisplayed, with the proper code to allow <strong>for</strong>file uploads. Upon submission of the <strong>for</strong>m,the server will first store the uploaded filein a temporary directory, so the next step is<strong>for</strong> the <strong>PHP</strong> script to copy the uploaded fileto its final destination.For this process to work, several thingsmust be in place:nnn<strong>PHP</strong> must run with the correct settings.A temporary storage directory mustexist with the correct permissions.The final storage directory must existwith the correct permissions.With this in mind, this next section willcover the server setup to allow <strong>for</strong> fileuploads; then a <strong>PHP</strong> script will be createdthat actually does the uploading.Allowing <strong>for</strong> file uploadsAs I said, certain settings must be establishedin order <strong>for</strong> <strong>PHP</strong> to be able to h<strong>and</strong>le fileuploads. I’ll first discuss why or when you’dneed to make these adjustments be<strong>for</strong>ewalking you through the steps.The first issue is <strong>PHP</strong> itself. There areseveral settings in <strong>PHP</strong>’s configuration file(php.ini) that dictate how <strong>PHP</strong> h<strong>and</strong>lesuploads, specifically stating how large of afile can be uploaded <strong>and</strong> where the uploadshould temporarily be stored (Table 11.1).Generally speaking, you’ll need to edit thisfile if any of these conditions apply:nnnfile_uploads is disabled.<strong>PHP</strong> has no temporary directory to use.You will be uploading very large files(larger than 2MB).If you don’t have access to your php.inifile—like if you’re using a hosted site—presumably the host has already configured<strong>PHP</strong> to allow <strong>for</strong> file uploads.The second issue is the location of, <strong>and</strong>permissions on, the temporary directory.This is where <strong>PHP</strong> will store the uploadedfile until your <strong>PHP</strong> script moves it to its finalTABLe 11.1 File Upload ConfigurationsSetting Value Type Importancefile_uploads Boolean Enables <strong>PHP</strong> support <strong>for</strong> file uploadsmax_input_time integer Indicates how long, in seconds, a <strong>PHP</strong> script is allowed to runpost_max_size integer Size, in bytes, of the total allowed POST dataupload_max_filesize integer Size, in bytes, of the largest possible file upload allowedupload_tmp_dir string Indicates where uploaded files should be temporarily stored336 Chapter 11
destination. If you installed <strong>PHP</strong> on yourown Windows computer, you might need totake steps here. Mac OS X <strong>and</strong> Unix usersneed not worry about this, as a temporarydirectory already exists <strong>for</strong> such purposes(namely, a special directory called /tmp).Finally, the destination folder must becreated <strong>and</strong> have the proper permissionsestablished on it. This is a step that everyonemust take <strong>for</strong> every application that h<strong>and</strong>lesfile uploads. Because there are importantsecurity issues involved in this step, pleasealso make sure that you read <strong>and</strong> underst<strong>and</strong>the sidebar, “Secure Folder Permissions.”With all of this in mind, let’s go throughthe steps.Secure Folder permissionsThere’s normally a trade-off between security <strong>and</strong> convenience. With this example, it’d be moreconvenient to place the uploads folder within the <strong>Web</strong> document directory (the conveniencearises with respect to how easily the uploaded images can be viewed in the <strong>Web</strong> browser), butdoing that is less secure.For <strong>PHP</strong> to be able to place files in the uploads folder, it needs to have write permissions onthat directory. On most servers, <strong>PHP</strong> is running as the same user as the <strong>Web</strong> server itself. On ahosted server, this means that all X number of sites being hosted are running as the same user.Creating a folder that <strong>PHP</strong> can write to means creating a folder that everyone can write to. Literallyanyone with a site hosted on the server can now move, copy, or write files to your uploadsfolder (assuming that they know it exists). This even means that a malicious user could copy atroublesome <strong>PHP</strong> script to your uploads directory. However, since the uploads directory in thisexample is not within the <strong>Web</strong> directory, such a <strong>PHP</strong> script cannot be run in a <strong>Web</strong> browser. It’s lessconvenient to do things this way, but more secure.If you must keep the uploads folder publicly accessible, <strong>and</strong> if you’re using the Apache <strong>Web</strong>server, you could limit access to the uploads folder using an .htaccess file. Basically, you wouldstate that only image files in the folder be publicly viewable, meaning that even if a <strong>PHP</strong> scriptwere to be placed there, it could not be executed. Or, because you’ll learn how to use proxyscripts later in this chapter, you could deny all external access to that folder. In<strong>for</strong>mation on howto use .htaccess files can be found in Appendix A, a free download from peachpit.com.Sometimes even the most conservative programmer will make security concessions. Theimportant point is that you’re aware of the potential concerns <strong>and</strong> that you do the most youcan to minimize the danger.<strong>Web</strong> Application Development 337
To prepare the server:1. Run the phpinfo( ) function to confirmyour server settings A.The phpinfo( ) function prints out aslew of in<strong>for</strong>mation about your <strong>PHP</strong>setup. It’s one of the most importantfunctions in <strong>PHP</strong>, if not the most (in myopinion). Search <strong>for</strong> the settings listed inTable 11.1 <strong>and</strong> confirm their values. Makesure that file_uploads has a value ofOn <strong>and</strong> that the limit <strong>for</strong> upload_max_filesize (2MB, by default) <strong>and</strong> post_max_size (8MB) won’t be a restriction<strong>for</strong> you. If running <strong>PHP</strong> on Windows,see if upload_tmp_dir has a value. If itdoesn’t, that might be a problem (you’llknow <strong>for</strong> certain after running the <strong>PHP</strong>script that h<strong>and</strong>les the file upload). Fornon-Windows users, if this value saysno value, that’s perfectly fine.By the way, another advantage of usingan all-in-one installer, such as XAMPP<strong>for</strong> Windows or MAMP <strong>for</strong> Mac OS X,is that the installer should properlyconfigure these settings, too.2. If necessary, open php.ini in yourtext editor.If there’s anything you saw in Step 1that needs to be changed, or if somethinghappens when you actually go toh<strong>and</strong>le a file upload using <strong>PHP</strong>, you’llneed to edit the php.ini file. To findthis file, see the Configuration File(php.ini) path value in the phpinfo( )output. This indicates exactly wherethis file is on your computer (alsodownload Appendix A <strong>for</strong> more).If you are not allowed to edit your php.ini file (if, <strong>for</strong> instance, you’re using ahosted server), then presumably anynecessary edits would have alreadybeen made to allow <strong>for</strong> file uploads. Ifnot, you’ll need to request these changesfrom your hosting company (which mayor may not agree to make them).A A phpinfo( ) script returns all the in<strong>for</strong>mation regarding your <strong>PHP</strong> setup,including all the file-upload h<strong>and</strong>ling stuff.338 Chapter 11
3. Search the php.ini file <strong>for</strong> the configurationto be changed <strong>and</strong> make anyedits B.For example, in the File Uploadssection, you’ll see these three lines:file_uploads = On;upload_tmp_dir =upload_max_filesize = 2MThe first line dictates whether or notuploads are allowed. The second stateswhere the uploaded files should betemporarily stored. On most operatingsystems, including Mac OS X <strong>and</strong> Unix,this setting can be left commented out(preceded by a semicolon) without anyproblem.If you are running Windows <strong>and</strong> needto create a temporary directory, set thisvalue to C:\tmp, making sure that theline is not preceded by a semicolon.Again, using XAMPP on Windows 7,I did not need to create a temporarydirectory, so you may be able to getaway without one too.Finally, a maximum upload file size isset (the M is shorth<strong>and</strong> <strong>for</strong> megabytesin configuration settings).4. Save the php.ini file <strong>and</strong> restart your<strong>Web</strong> server.How you restart your <strong>Web</strong> serverdepends upon the operating system<strong>and</strong> <strong>Web</strong>-serving application beingused. See Appendix A <strong>for</strong> instructions.5. Confirm the changes by rerunning thephpinfo( ) script.Be<strong>for</strong>e going any further, confirm thatthe necessary changes have beenenacted by repeating Step 1.continues on next pageB The File Uploads subsection of the php.ini file.<strong>Web</strong> Application Development 339
6. If you are running Windows <strong>and</strong> need tocreate a temporary directory, add a tmpfolder within C:\ <strong>and</strong> make sure thateveryone can write to that directory C.<strong>PHP</strong>, through your <strong>Web</strong> server, willtemporarily store the uploaded file inthe upload_tmp_dir. For this to work,the <strong>Web</strong> user (if your <strong>Web</strong> serverruns as a particular user) must havepermission to write to the folder.In all likelihood, you may not actuallyhave to change the permissions, but todo so, depending upon what versionof Windows you are running, you cannormally adjust the permissions byright-clicking the folder <strong>and</strong> selectingProperties. With the Properties window,there should be a Security tab wherepermissions are set. It may also beunder Sharing. Windows uses a morelax permissions system, so you probablywon’t have to change anything unlessthe folder is deliberately restricted.Mac OS X <strong>and</strong> Unix users can skip thisstep as the temporary directory—/tmp—has open permissions already.C Windows users need to make sure that theC:\tmp (or whatever directory is used) is writableby <strong>PHP</strong>.D Assuming that htdocsis the <strong>Web</strong> root directory(http://www.example.comor http://localhost pointsthere), then the uploadsdirectory needs to beplaced outside of it.340 Chapter 11
7. Create a new directory, called uploads,in a directory outside of the <strong>Web</strong> rootdirectory.All of the uploaded files will be permanentlystored in the uploads directory.If you’ll be placing your <strong>PHP</strong> script inthe C:\xampp\htdocs\ch11 directory,then create a C:\xampp\uploadsdirectory. Or if the files are going in/Users/~/<strong>Sites</strong>/ch11,make a /Users/~/uploadsfolder. Figure D shows the structureyou should establish, <strong>and</strong> the sidebardiscusses why this step is necessary.8. Set the permissions on the uploadsdirectory so that the <strong>Web</strong> server canwrite to it.Again, Windows users can use theProperties window to make thesechanges, although it may not benecessary. Mac OS X users can…A. Select the folder in the Finder.B. Press Comm<strong>and</strong>+I.C. Allow everyone to Read & Write, underthe Ownership & Permissions panel E.If you’re using a hosted site, the hostlikely provides a control panel throughwhich you can tweak a folder’s settingsor you might be able to do this withinyour FTP application.Depending upon your operatingsystem, you may be able to upload fileswithout first taking this step. You cantry the following script be<strong>for</strong>e alteringthe permissions, just to see. If you seemessages like those in F, then you willneed to make some adjustments.Unix users can use the chmod comm<strong>and</strong>to adjust a folder’s permissions. The properpermissions in Unix terms can be either 755or 777.Because of the time it can take to uploada large file, you may also need to change themax_input_time value in the php.ini file ortemporarily bypass it using the set_time_limit( ) function in your script.E Adjusting the properties on theuploads folder in Mac OS X.File <strong>and</strong> directory permissions can becomplicated stuff, particularly if you’ve neverdealt with them be<strong>for</strong>e. If you have problemswith these steps or the next script, searchthe <strong>Web</strong> or turn to the book’s corresponding<strong>for</strong>um (www.LarryUllman.com/<strong>for</strong>ums/).F If <strong>PHP</strong> could notmove the uploadedimage over to theuploads folder becauseof a permissions issue,you’ll see an errormessage like this one.Fix the permissions onuploads to correct this.<strong>Web</strong> Application Development 341
uploading files with pHpNow that the server has (hopefully) been setup to properly allow <strong>for</strong> file uploads, you cancreate the <strong>PHP</strong> script that does the actualfile h<strong>and</strong>ling. There are two parts to such ascript: the HTML <strong>for</strong>m <strong>and</strong> the <strong>PHP</strong> code.The required syntax <strong>for</strong> a <strong>for</strong>m to h<strong>and</strong>lea file upload has three parts:File The enctype part of the initial <strong>for</strong>m tagindicates that the <strong>for</strong>m should be able toh<strong>and</strong>le multiple types of data, includingfiles. If you want to accept file uploads,you must include this enctype! Also notethat the <strong>for</strong>m must use the POST method.The MAX_FILE_SIZE hidden input is a <strong>for</strong>mrestriction on how large the chosen filecan be, in bytes, <strong>and</strong> must come be<strong>for</strong>ethe file input. While it’s easy <strong>for</strong> a user tocircumvent this restriction, it should still beused. Finally, the file input type will createthe proper button in the <strong>for</strong>m (G <strong>and</strong> H).Upon <strong>for</strong>m submission, the uploadedfile can be accessed using the $_FILESsuperglobal. The variable will be an arrayof values, listed in Table 11.2.Once the file has been received by the<strong>PHP</strong> script, the move_uploaded_file( )function can transfer it from the temporarydirectory to its permanent location.move_uploaded_file➝ (temporary _filename,/path/to/destination/filename);G The file input as it appears in IE 9 on Windows.H The file input as it appears inGoogle Chrome on Mac OS X.TABLe 11.2 The $_FILES ArrayIndexnametypesizetmp_nameerrorMeaningThe original name of thefile (as it was on the user’scomputer).The MIME type of the file, asprovided by the browser.The size of the uploaded filein bytes.The temporary filename ofthe uploaded file as it wasstored on the server.The error code associatedwith any problem.342 Chapter 11
Script 11.2 This script allows the user to upload animage file from their computer to the server.1 2 3 4 5 Upload an Image6 7 .error {8 font-weight: bold;9 color: #C00;10 }11 12 13 14 Upload an Image.error {font-weight: bold;color: #C00;}
2. Check if the <strong>for</strong>m has been submitted<strong>and</strong> that a file was selected:if ($_SERVER['REQUEST_METHOD'] = =➝'POST') {if (isset($_FILES['upload'])) {Since this <strong>for</strong>m will have no other fieldsto be validated I, this is the onlyconditional required. You could alsovalidate the size of the uploaded file todetermine if it fits within the acceptablerange (refer to the $_FILES['upload']['size'] value).3. Check that the uploaded file is of theproper type:$allowed = array ('image/pjpeg',➝'image/jpeg', 'image/JPG',➝'image/X-PNG', 'image/PNG',➝'image/png', 'image/x-png');if (in_array($_FILES['upload']➝ ['type'], $allowed)) {The file’s type is its MIME type,indicating what kind of file it is. Thebrowser can determine <strong>and</strong> mayprovide this in<strong>for</strong>mation, dependingupon the properties of the selected file.To validate the file’s type, first createan array of allowed options. The list ofallowed types is based upon acceptingJPEGs <strong>and</strong> PNGs. Some browsershave variations on the MIME types, sothose are included here as well. If theuploaded file’s type is in this array, thefile is valid <strong>and</strong> should be h<strong>and</strong>led.Script 11.2 continued3637 // Check <strong>for</strong> an error:38 if ($_FILES['upload']['error'] > 0) {39 echo 'The file couldnot be uploaded because: ';4041 // Print a message based upon theerror.42 switch ($_FILES['upload']['error']) {43 case 1:44 print 'The file exceeds theupload_max_filesize settingin php.ini.';45 break;46 case 2:47 print 'The file exceeds theMAX_FILE_SIZE setting in theHTML <strong>for</strong>m.';48 break;49 case 3:50 print 'The file was onlypartially uploaded.';51 break;52 case 4:53 print 'No file was uploaded.';54 break;55 case 6:56 print 'No temporary folderwas available.';57 break;58 case 7:59 print 'Unable to write tothe disk.';60 break;61 case 8:62 print 'File upload stopped.';63 break;code continues on next pageI This very basicHTML <strong>for</strong>m only takesone input: a file.344 Chapter 11
Script 11.2 continued64 default:65 print 'A system erroroccurred.';66 break;67 } // End of switch.6869 print '';7071 } // End of error IF.7273 // Delete the file if it still exists:74 if (file_exists ($_FILES['upload']['tmp_name']) && is_file($_FILES['upload']['tmp_name']) ) {75 unlink ($_FILES['upload']['tmp_name']);76 }7778 } // End of the submitted conditional.79 ?>8081 8283 8485 Select a JPEG orPNG image of 512KB or smaller to beuploaded:8687 File: 8889 90 9192 93 94 J If the user uploads a file that’s not a JPEGor PNG, this is the result.4. Copy the file to its new location onthe server:if (move_uploaded_file ($_FILES➝ ['upload']['tmp_name'],➝ "../uploads/{$_FILES['upload']➝ ['name']}")) {echo 'The file has been➝ uploaded!';} // End of move... IF.The move_uploaded_file( ) functionwill move the file from its temporary toits permanent location (in the uploadsfolder). The file will retain its original name.In Chapter 18, “Example—E-Commerce,”you’ll see how to give the file a new name,which is generally a good idea.As a rule, you should always use aconditional to confirm that a file wassuccessfully moved, instead of justassuming that the move worked.5. Complete the image type <strong>and</strong> isset($_FILES['upload']) conditionals:} else { // Invalid type.echo 'Please➝ upload a JPEG or PNG➝ image.';}} // End of isset($_FILES➝ ['upload']) IF.The first else clause completes the ifbegun in Step 3. It applies if a file wasuploaded but it wasn’t of the right MIMEtype J.6. Check <strong>for</strong>, <strong>and</strong> report on, any errors:if ($_FILES['upload']['error'] > 0) {echo 'The file➝ could not be uploaded➝ because: ';If an error occurred, then $_FILES['upload']['error'] will have a valuegreater than 0. In such cases, this scriptwill report what the error was.continues on next page<strong>Web</strong> Application Development 345
7. Begin a switch that prints a moredetailed error:switch ($_FILES['upload']['error']) {case 1:print 'The file exceeds the➝ upload_max_filesize setting➝ in php.ini.';break;case 2:print 'The file exceeds the➝ MAX_FILE_SIZE setting in➝ the HTML <strong>for</strong>m.';break;case 3:print 'The file was only➝ partially uploaded.';break;case 4:print 'No file was uploaded.';break;There are several possible reasons afile could not be uploaded <strong>and</strong> moved.The first <strong>and</strong> most obvious one is if thepermissions are not set properly on thedestination directory. In such a case,you’ll see an appropriate error message(see F in the previous section of thechapter). <strong>PHP</strong> will often also store anerror number in the $_FILES['upload']['error'] variable. The numbers correspondto specific problems, from 0 to 4,plus 6 through 8 (oddly enough, there isno 5). The switch conditional here printsout the problem according to the errornumber. The default case is added <strong>for</strong>future support (if different numbers areadded in later versions of <strong>PHP</strong>).For the most part, these errors are usefulto you, the developer, <strong>and</strong> not thingsyou’d indicate to the average user.8. Complete the switch:case 6:print 'No temporary folder➝ was available.';break;case 7:print 'Unable to write to the➝ disk.';break;case 8:print 'File upload stopped.';break;default:print 'A system error➝ occurred.';break;} // End of switch.9. Complete the error if conditional:print '';} // End of error IF.10. Delete the temporary file if it still exists:if (file_exists ($_FILES['upload']➝ ['tmp_name']) && is_file($_FILES➝ ['upload']['tmp_name']) ) {unlink ($_FILES['upload']➝ ['tmp_name']);}If the file was uploaded but it couldnot be moved to its final destinationor some other error occurred, thenthat file is still sitting on the server inits temporary location. To remove it,apply the unlink( ) function. Just tobe safe, prior to applying unlink( ), aconditional checks that the file exists<strong>and</strong> that it is a file (because the file_exists( ) function will return TRUE ifthe named item is a directory).346 Chapter 11
11. Complete the <strong>PHP</strong> section:} // End of the submitted➝ conditional.?>12. Create the HTML <strong>for</strong>m:Select a JPEG➝ or PNG image of 512KB or➝ smaller to be uploaded:➝ File: This <strong>for</strong>m is very simple C, but it containsthe three necessary parts <strong>for</strong> fileuploads: the <strong>for</strong>m’s enctype attribute,the MAX_FILE_SIZE hidden input, <strong>and</strong>the file input.13. Complete the HTML page:14. Save the file as upload_image.php,place it in your <strong>Web</strong> directory, <strong>and</strong> testit in your <strong>Web</strong> browser (K <strong>and</strong> L).If you want, you can confirm that thescript works by checking the contentsof the uploads directory.Omitting the enctype <strong>for</strong>m attributeis a common reason <strong>for</strong> file uploads tomysteriously fail.The existence of an uploaded file canalso be validated with the is_uploaded_file( ) function.Windows users must use either <strong>for</strong>wardslashes or double backslashes to refer todirectories (so C:\\ or C:/ but not C:\). This isbecause the backslash is the escape characterin <strong>PHP</strong>.The move_uploaded_file( ) functionwill overwrite an existing file without warningif the new <strong>and</strong> existing files both have thesame name.The MAX_FILE_SIZE is a restriction in thebrowser as to how large a file can be, althoughnot all browsers abide by this restriction. The<strong>PHP</strong> configuration file has its own restrictions.You can also validate the uploaded file sizewithin the receiving <strong>PHP</strong> script.In Chapter 13, you’ll learn a method <strong>for</strong>improving the security of this script by validatingthe uploaded file’s type more reliably.K The result upon successfullyuploading <strong>and</strong> moving a file.L The result upon attempting to upload a file thatis too large.<strong>Web</strong> Application Development 347
pHp <strong>and</strong> JavaScriptAlthough <strong>PHP</strong> <strong>and</strong> JavaScript arefundamentally different technologies,they can be used together to make better<strong>Web</strong> sites. The most significant differencebetween the two languages is thatJavaScript is primarily client-side (meaningit runs in the <strong>Web</strong> browser) <strong>and</strong> <strong>PHP</strong> isalways server-side. There<strong>for</strong>e, JavaScriptcan do such things as detect the size of thebrowser window, create pop-up windows,make image mouseovers, whereas<strong>PHP</strong> can do nothing like these things.Conversely, <strong>PHP</strong> can interact with <strong>MySQL</strong>on the server, but JavaScript cannot.Although <strong>PHP</strong> cannot do certain things thatJavaScript can, <strong>PHP</strong> can be used to createJavaScript, just as <strong>PHP</strong> can create HTML.To be clear, in a <strong>Web</strong> browser, JavaScriptis incorporated by, <strong>and</strong> interacts withHTML, but <strong>PHP</strong> can dynamically generateJavaScript code, just as you’ve been using<strong>PHP</strong> to dynamically generate HTML.To demonstrate this, one <strong>PHP</strong> script will becreated that lists all the images uploaded bythe upload_image.php script A. The <strong>PHP</strong>script will also create each image name asa clickable link. The links themselves willcall a JavaScript function B that createsa pop-up window. The pop-up windowwill actually show the clicked image. Thisexample will in no way be a thoroughdiscussion of JavaScript, but it doesadequately demonstrate how the varioustechnologies—<strong>PHP</strong>, HTML, <strong>and</strong> JavaScript—can be used together. In Chapter 15,“Introducing jQuery,” you’ll learn how to usethe jQuery JavaScript framework to add allsorts of functionality to <strong>PHP</strong>-based scripts.A This <strong>PHP</strong> pagedynamically createsa list of all theuploaded images.B Each image’s name is linked as a call to a JavaScript function. The function call’s parameters are createdby <strong>PHP</strong>.348 Chapter 11
Creating the JavaScript FileEven though JavaScript <strong>and</strong> <strong>PHP</strong> are twodifferent languages, they are similar enoughthat it’s possible to dabble with JavaScriptwithout any <strong>for</strong>mal training. Be<strong>for</strong>e creatingthe JavaScript code <strong>for</strong> this example, I’llexplain a few of the fundamentals.First, JavaScript code can be added toan HTML page in one of two ways: inlineor through an external file. To add inlineJavaScript, place the JavaScript codebetween HTML script tags:// Actual JavaScript code.To use an external JavaScript file, add asrc attribute to the script tag:Your HTML pages can have multiple usesof the script tag, but each can onlyinclude an external file or have someJavaScript code, but not both.As you can see in the above, JavaScriptfiles use a .js extension. The file shoulduse the same encoding (as set in your texteditor or IDE) as the HTML script that willinclude the file. You can indicate the file’sencoding in the script tag:➝ Whether you place your JavaScript codewithin script tags or in an externalfile, there are no opening <strong>and</strong> closingJavaScript tags, like the opening <strong>and</strong>closing <strong>PHP</strong> tags.Next, know that variables in JavaScript arecase-sensitive, just like <strong>PHP</strong>, but variablesin JavaScript do not begin with dollar signs.Finally, one of the main differences betweenJavaScript <strong>and</strong> <strong>PHP</strong> is that JavaScript isan Object-Oriented Programming (OOP)language. Whereas <strong>PHP</strong> can be used inboth a procedural approach, as most of thisbook demonstrates, <strong>and</strong> an object-orientedapproach (introduced in Chapter 16, “An OOPPrimer”), JavaScript is only ever an objectorientedlanguage. This means you’ll see the“dot” syntax like something.something( ) orsomething.something.something.That’s enough of the basics; in thefollowing script I’ll explain the particularsof each bit of code in sufficient detail. Inthis next sequence of steps, you’ll create aseparate JavaScript file that will define oneJavaScript function. The function itself willtake three arguments—an image’s name,width, <strong>and</strong> height. The function will usethese values to create a pop-up windowspecifically <strong>for</strong> that image.<strong>Web</strong> Application Development 349
To create JavaScript with pHp:1. Begin a new JavaScript document inyour text editor or IDE, to be namedfunction.js (Script 11.3):// Script 11.3 - function.jsAgain, there are no opening JavaScripttags here, you can just start writingJavaScript code. Comments inJavaScript can use either the singleline (//) or multiline (/* */) syntax.2. Begin the JavaScript function:function create_window (image,➝ width, height) {The JavaScript create_window( )function will accept three parameters: theimage’s name, its width, <strong>and</strong> its height.Each of these will be passed to thisfunction when the user clicks a link. Theexact values of the image name, width,<strong>and</strong> height will be determined by <strong>PHP</strong>.The syntax <strong>for</strong> creating a function inJavaScript is very similar to a userdefinedfunction in <strong>PHP</strong>, except that thevariables do not have initial dollar signs.3. Add ten pixels to the received width<strong>and</strong> height values:width = width + 10;height = height + 10;Some pixels will be added to the width<strong>and</strong> height values to create a windowslightly larger than the image itself. Mathin JavaScript uses the same operatorsas in pretty much every language.4. Resize the pop-up window if it isalready open:if (window.popup && !window.popup.➝ closed) {window.popup.resizeTo(width,➝ height);}Later in the function, a window will becreated, associated with the popupScript 11.3 The function.js script defines aJavaScript function <strong>for</strong> creating the pop-upwindow that will show an individual image.1 // Script 11.3 - function.js23 // Make a pop-up window function:4 function create_window (image, width,height) {56 // Add some pixels to the width <strong>and</strong>height:7 width = width + 10;8 height = height + 10;910 // If the window is already open,11 // resize it to the new dimensions:12 if (window.popup && !window.popup.closed) {13 window.popup.resizeTo(width, height);14 }1516 // Set the window properties:17 var specs = "location=no,scrollbars=no, menubars=no,toolbars=no, resizable=yes,left=0, top=0, width=" + width + ",height=" + height;1819 // Set the URL:20 var url = "show_image.php?image=" +image;2122 // Create the pop-up window:23 popup = window.open(url, "ImageWindow",specs);24 popup.focus( );2526 } // End of function.350 Chapter 11
variable. If the user clicks one imagename, creating the pop-up window,<strong>and</strong> then clicks another image’s namewithout having closed the first pop-upwindow, the new image will be displayedin a mis-sized window. To prevent that, abit of code here first checks if the pop-upwindow exists <strong>and</strong> if it is not closed. Ifboth conditions are TRUE (which is tosay that the window is already open),the window will be resized accordingto the new image dimensions. This isaccomplished by calling the resizeTo( )method of the popup object (a method isthe OOP term <strong>for</strong> a function).5. Determine the properties of thepop-up window:var specs = "location=no,➝ scrollbars=no, menubars=no,➝ toolbars=no, resizable=yes,➝ left=0, top=0, width=" +➝ width + ", height=" + height;This line creates a new JavaScriptvariable with a name of specs. The varkeyword be<strong>for</strong>e the variable name isthe preferred way to create variableswithin a function (specifically, it creates avariable local to the function). Note thatthe image, width, <strong>and</strong> height variablesdidn’t use this keyword, as they werecreated as the arguments to a function.This variable will be used to establish theproperties of the pop-up window. Thewindow will have no location bar, scrollbars, menus, or toolbars; it should beresizable; it will be located in the upperleftcorner of the screen; <strong>and</strong> it will have awidth of width <strong>and</strong> a height of height C.With strings in JavaScript, the plussign is used to per<strong>for</strong>m concatenation(whereas <strong>PHP</strong> uses the period).6. Define the URL:var url = "show_image.php?image="➝ + image;This code sets the URL of the pop-upwindow, which is to say what pagethe window should load. That page isshow_image.php, to be created laterin this chapter. The show_image.phpscript expects to receive an image’sname in the URL, so the value ofthe url variable is show_image.php?image= plus the name of theimage concatenated to the end D.7. Create the pop-up window:popup = window.open(url,➝ "ImageWindow", specs);popup.focus( );Finally, the pop-up window is createdusing the open( ) method of the windowobject. The window object is a globalJavaScript object created by thebrowser to refer to the open windows.The open( ) method’s first argument isthe page to load, the second is the titleto be given to the window, <strong>and</strong> thecontinues on next pageC The pop-upwindow, createdby JavaScript.D The address of the pop-up window shows howthe image value is passed in the URL.<strong>Web</strong> Application Development 351
third is a list of properties. Note thatthe creation of this window is assignedto the popup variable. Because thisvariable’s creation does not begin withthe keyword var, popup will be a globalvariable. This is necessary in order<strong>for</strong> multiple calls of this function toreference that same variable.Finally, focus is given to the newwindow, meaning it should appearabove the current window.8. Save the script as function.js.9. Place the script, or a copy, in the jsfolder of your <strong>Web</strong> directory.JavaScript, like CSS, ought to beseparated out when organizing your<strong>Web</strong> directory. Normally, externalJavaScript files are placed in a foldernamed js, javascript, or scripts.Creating the pHp ScriptNow that the JavaScript code required bythe page has been created, it’s time to createthe <strong>PHP</strong> script itself (which will output theHTML that calls the JavaScript function). Thepurpose of this script is to list all of the imagesalready uploaded by upload_image.php. Todo this, <strong>PHP</strong> needs to dynamically retrievethe contents of the uploads directory. Thatcan be done via the sc<strong>and</strong>ir( ) function. Itreturns an array listing the files in a givendirectory (it was added in <strong>PHP</strong> 5).The <strong>PHP</strong> script must link each displayedimage name as a call to the just-definedJavaScript function. That function expects toreceive three arguments: the image’s name,its width, <strong>and</strong> its height. For <strong>PHP</strong> to findthese last two values, the script will use thegetimagesize( ) function. It returns an arrayof in<strong>for</strong>mation <strong>for</strong> a given image (Table 11.3).To create JavaScript with pHp:1. Begin a new <strong>PHP</strong> document in your texteditor or IDE, to be named images.php(Script 11.4):Images2. Include the JavaScript file:You can use the script tags anywherein an HTML page, but inclusions ofexternal files are commonly per<strong>for</strong>medTABLe 11.3 The getimagesize( ) ArrayElement Value Example0 image’s width in pixels 4231 image’s height in pixels 3682 image’s type 2 (representing JPG)3 appropriate HTML img tag data height=”368” width=”423”mime image’s MIME type image/png352 Chapter 11
Script 11.4 The images.php script uses JavaScript<strong>and</strong> <strong>PHP</strong> to create links to images stored onthe server. The images will be viewable throughshow_image.php (Script 11.5).1 2 3 4 5 Images6 7 8 9 Click on an image to view it in aseparate window.10 11
file’s name is a period. On non-Windowssystems, hidden files start with a period,the current directory is referred to usingjust a single period, <strong>and</strong> two periodsrefers to the parent directory. Since allof these might be included in $files,they need to be weeded out.7. Get the image in<strong>for</strong>mation <strong>and</strong> encodeits name:$image_size = getimagesize➝ ("$dir/$image");$image_name = urlencode($image);The getimagesize( ) function returnsan array of in<strong>for</strong>mation about an image(Table 11.3). The values returned bythis function will be used to set thewidth <strong>and</strong> height sent to the create_window( ) JavaScript function.Next, the urlencode( ) function makes astring safe to pass in a URL. Because theimage name may contain characters notallowed in a URL (<strong>and</strong> it will be passedin the URL when invoking show_image.php), the name should be encoded.8. Print the list item:echo "➝ $image\n";Finally, the loop creates the HTML listitem, consisting of the linked imagename. The link itself is a call to theJavaScript create_window( ) function.In order to execute the JavaScriptfunction from within HTML, preface itwith javascript:. (There’s much moreto calling JavaScript from within HTML,but just use this syntax <strong>for</strong> now.)The function’s three arguments are:the image’s name, the image’s width,<strong>and</strong> the image’s height. Because theimage’s name will be a string, it mustbe wrapped in quotation marks.9. Complete the if conditional, the<strong>for</strong>each loop, <strong>and</strong> the <strong>PHP</strong> section:} // End of the IF.} // End of the <strong>for</strong>each loop.?>10. Complete the unordered list <strong>and</strong> theHTML page:11. Save the file as images.php, place it inyour <strong>Web</strong> directory (in the same directoryas upload_image.php), <strong>and</strong> test itin your <strong>Web</strong> browser A.Note that clicking the links will not workyet, as show_image.php—the pagethe pop-up window attempts to load—hasn’t been created.12. View the source code to see thedynamically generated links B.Notice how the parameters to eachfunction call are appropriate to thespecific image.Different browsers will h<strong>and</strong>le the sizingof the window differently. In my tests, <strong>for</strong>example, Google Chrome always required thatthe window be at least a certain width <strong>and</strong>Internet Explorer 9 would pad the displayedimage on all four sides.Some versions of Windows create aThumbs.db file in a folder of images. Youmight want to check <strong>for</strong> this value in theconditional in Step 6 that weeds out somereturned items. That code would beif ( (substr($image, 0, 1) != '.') &&➝ ($image != 'Thumbs.db') ) {Not to belabor the point, but most everything<strong>Web</strong> developers do with JavaScript (<strong>for</strong>example, resize or move the browser window)cannot be done using the server-side <strong>PHP</strong>.There is a little overlap between the <strong>PHP</strong><strong>and</strong> JavaScript. Both can set <strong>and</strong> read cookies,create HTML, <strong>and</strong> do some browser detection.354 Chapter 11
underst<strong>and</strong>ingHTTp HeadersThe images.php script, just created, displaysa list of image names, each of which is linkedto a JavaScript function call. That JavaScriptfunction creates a pop-up window whichloads a <strong>PHP</strong> script that will actually revealthe image. This may sound like a lot of work<strong>for</strong> little ef<strong>for</strong>t, but there’s a method to mymadness. A trivial reason <strong>for</strong> this approach isthat JavaScript is required in order to createa window sized to fit the image (as opposedto creating a pop-up window of any size,with the image in it). More importantly,because the images are being stored in theuploads directory, ideally stored outside ofthe <strong>Web</strong> root directory, the images cannotbe viewed directly in the <strong>Web</strong> browser usingeither of the following:http://www.example.com/uploads/➝ image.pngorThe reason why neither of the abovewill work is that files <strong>and</strong> folders locatedoutside of the <strong>Web</strong> root directory are, bydefinition, unavailable via a <strong>Web</strong> browser.This is actually a good thing, because itallows you to safeguard content, providingit only when appropriate. To make thatcontent available through a <strong>Web</strong> browser,you need to create a proxy script in <strong>PHP</strong>.A proxy script just fulfills a role, such asproviding a file (displaying an image isactually the same thing as providing afile to the browser). Thus, given the proxyscript proxy.php, the above examplescould be made to work using either A:http://www.example.com/proxy.php?➝ image=image.pngorThis, of course, is exactly what’s beingdone with show_image.php, linked in thecreate_window( ) JavaScript function. Buthow does proxy.php, or show_image.php,work? The answer lies in an underst<strong>and</strong>ingof HTTP headers.continues on next pageA A proxy script is able to provide access to content on the server that would otherwise be unavailable.<strong>Web</strong> Application Development 355
HTTP (Hypertext Transfer Protocol) is thetechnology at the heart of the World Wide<strong>Web</strong> <strong>and</strong> defines the way clients <strong>and</strong>servers communicate (in layman’s terms).When a browser requests a <strong>Web</strong> page,it receives a series of HTTP headers inreturn. This happens behind the scenes;most users aren’t aware of this at all.<strong>PHP</strong>’s built-in header( ) function can beused to take advantage of this protocol.The most common example of this will bedemonstrated in the next chapter, whenthe header( ) function will be used toredirect the <strong>Web</strong> browser from the currentpage to another. Here, you’ll use it to sendfiles to the <strong>Web</strong> browser.In theory, the header( ) function is easy touse. Its syntax isheader(header string);The list of possible header strings isquite long, as headers are used <strong>for</strong> everythingfrom redirecting the <strong>Web</strong> browser,to sending files, to creating cookies, tocontrolling page caching, <strong>and</strong> much, muchmore. Starting with something simple, touse header( ) to redirect the <strong>Web</strong>browser, typeheader ('Location: http://www.➝ example.com/page.php');That line will send the <strong>Web</strong> browser fromthe page it’s on over to that other URL. You’llsee examples of this in the next chapter.In this next example, which will send animage file to the <strong>Web</strong> browser, three headercalls are used. The first is Content-Type.This is an indication to the <strong>Web</strong> browserof what kind of data is about to follow. TheContent-Type value matches the data’sMIME type. This line lets the browser knowit’s about to receive a PDF file:header("Content-Type:application/➝ pdf\n");Next, you can use Content-Disposition,which tells the browser how to treat the data:header ("Content-Disposition:➝ attachment; filename=\➝ "somefile.pdf\"\n");The attachment value will prompt thebrowser to download the file B. AnB Firefox prompts the userto download the file becauseof the attachment Content-Disposition value.356 Chapter 11
alternative is to use inline, which tells thebrowser to display the data, assuming thatthe browser can. The filename attributeis just that: it tells the browser the nameassociated with the data. Some browsersabide by this instruction, others do not.A third header to use <strong>for</strong> downloading filesis Content-Length. This is a value, in bytes,corresponding to the amount of data tobe sent.header ("Content-Length: 4096\n");That’s the basics with respect to using theheader( ) function. Be<strong>for</strong>e getting to theexample, note that if a script uses multipleheader( ) calls, each should be terminatedby a newline (\n) as in the precedingcode snippets. More importantly, theabsolutely critical thing to remember aboutthe header( ) function is that it must becalled be<strong>for</strong>e anything is sent to the <strong>Web</strong>browser. This includes HTML or even blankspaces. If your code has any echo or printstatements, has blank lines outside of <strong>PHP</strong>tags, or includes files that do any of thesethings be<strong>for</strong>e calling header( ), you’ll seean error message like that in C.C The headers already sent error means that the <strong>Web</strong> browser was sent something—HTML,plain text, even a space—prior to using the header( ) function.<strong>Web</strong> Application Development 357
To use the header( ) function:1. Begin a new <strong>PHP</strong> document in yourtext editor or IDE, to be namedshow_image.php (Script 11.5):
accomplishes this). The extension is alsorun through the strtolower( ) functionso that .PNG <strong>and</strong> .png are treatedthe same. Then a conditional checks tosee if $ext is equal to any of the threeallowed values.4. Check that the image is a file onthe server:$image = "../uploads/➝ {$_GET['image']}";if (file_exists ($image) &&➝ (is_file($image))) {Be<strong>for</strong>e attempting to send the imageto the <strong>Web</strong> browser, make sure that itexists <strong>and</strong> that it is a file (as opposedto a directory). As a security measure,the image’s full path is defined as acombination of ../uploads <strong>and</strong> thereceived image name.5. Set the value of the flag variable to theimage’s name:$name = $_GET['image'];Once the image has passed all of thesetests, the $name variable is assigned thevalue of the image.6. Complete the conditionals begun inSteps 2, 3, <strong>and</strong> 4:} // End of file_exists( ) IF.} // End of $ext IF.} // End of isset($_GET['image']) IF.There are no else clauses <strong>for</strong> anyof these three conditions. If all threeconditions aren’t TRUE, then theflag variable $name will still have aFALSE value.7. If no valid image was received by thispage, use a default image:if (!$name) {$image = 'images/unavailable.png';$name = 'unavailable.png';}If the image doesn’t exist, if it isn’t a file,or if it doesn’t have the proper extension,then the $name variable will still have avalue of FALSE. In such cases, a defaultimage will be used instead D. Theimage itself can be downloaded fromthe book’s corresponding <strong>Web</strong> site(www.LarryUllman.com, found with allthe downloadable code) <strong>and</strong> should beplaced in an images folder. The imagesfolder should be in the same directory asthis script, not in the same directory asthe uploads folder.8. Retrieve the image’s in<strong>for</strong>mation:$info = getimagesize($image);$fs = filesize($image);continues on next pageD This image will beshown any time there’sa problem with showingthe requested image.<strong>Web</strong> Application Development 359
To send a file to the <strong>Web</strong> browser, thescript needs to know the file’s MIME type<strong>and</strong> size. An image file’s type can befound using getimagesize( ). The file’ssize, in bytes, is found using filesize( ).Because the $image variable representseither ../uploads/{$_GET['image']} orimages/unavailable.png, these lineswill work on both the correct <strong>and</strong> theunavailable image.9. Send the file:header ("Content-Type:➝ {$info['mime']}\n");header ("Content-Disposition:➝ inline; filename=\"$name\"\n");header ("Content-Length: $fs\n");These header( ) calls will send thefile data to the <strong>Web</strong> browser. The firstline uses the image’s MIME type <strong>for</strong>the value of the Content-Type header.The second line tells the browser thename of the file <strong>and</strong> that it should bedisplayed in the browser (inline). Thelast header( ) function indicates howmuch data is to be expected.The file data itself is sent using thereadfile( ) function, which reads in afile <strong>and</strong> immediately sends the contentto the <strong>Web</strong> browser.10. Save the file as show_image.php, placeit in your <strong>Web</strong> directory, in the samefolder as images.php, <strong>and</strong> test it inyour <strong>Web</strong> browser by clicking a link inimages.php E.Notice that this page contains no HTML.It only sends an image file to the <strong>Web</strong>browser. Also note that I omitted theterminating <strong>PHP</strong> tag. This is acceptable,<strong>and</strong> in certain situations like this,preferred. If you included the closing<strong>PHP</strong> tag, <strong>and</strong> you inadvertently hadan extra space or blank line after thattag, the browser could have problemsdisplaying the image (because thebrowser will have received the imagedata of X length, matching the Content-Length header, plus a bit of extra data).E This image is displayed by having <strong>PHP</strong> sendthe file to the <strong>Web</strong> browser.360 Chapter 11
I cannot stress strongly enough thatnothing can be sent to the <strong>Web</strong> browserbe<strong>for</strong>e using the header( ) function. Evenan included file that has a blank line afterthe closing <strong>PHP</strong> tag will make the header( )function unusable.To avoid problems when usingheader( ), you can call the headers_sent( )function first. It returns a Boolean value indicatingif something has already been sent tothe <strong>Web</strong> browser:if (!headers_sent( )) {// Use the header( ) function.} else {// Do something else.}Output buffering, demonstrated in Chapter 17,“Example—User Registration,” can also preventproblems when using header( ).Debugging scripts like this, where <strong>PHP</strong>sends data, not text, to the <strong>Web</strong> browser, canbe challenging. For help, use one of the manydeveloper plug-ins <strong>for</strong> the Firefox browser F.You can also indicate to the <strong>Web</strong> browserthe page’s encoding using <strong>PHP</strong> <strong>and</strong> theheader( ) function:This can be more effective than using a METAtag, but it does require the page to be a <strong>PHP</strong>script. If using this, it must be the first line inthe page, be<strong>for</strong>e any HTML.A proxy script can only ever send to thebrowser a single file (or image) at a time.F The <strong>Web</strong> Developer Toolbar extension <strong>for</strong> Firefox includes the ability to see what headers were sent bya page <strong>and</strong>/or server. This can be useful debugging in<strong>for</strong>mation.<strong>Web</strong> Application Development 361
Date <strong>and</strong> Time FunctionsChapter 5, “Introduction to SQL,”demonstrates a h<strong>and</strong>ful of great date<strong>and</strong> time functions that <strong>MySQL</strong> supports.Naturally, <strong>PHP</strong> has its own date <strong>and</strong> timefunctions. To start, there’s date_default_timezone_set( ). This function is used toestablish the default time zone (which canalso be set in <strong>PHP</strong>’s configuration file).date_default_timezone_set(tz);The tz value is a string like America/New_York or Pacific/Auckl<strong>and</strong>. There are too manyto list here (Africa alone has over 50), but seethe <strong>PHP</strong> manual <strong>for</strong> them all. Note that as of<strong>PHP</strong> 5.1, the default time zone must be set,either in a script or in <strong>PHP</strong>’s configurationfile, prior to calling any of the date <strong>and</strong> timefunctions, or else you’ll see an error.Next up, the checkdate( ) function takesa month, a day, <strong>and</strong> a year <strong>and</strong> returns aBoolean value indicating whether that dateactually exists (or existed). It even takesinto account leap years. This function canbe used to ensure that a user supplied avalid date (birth date or other):if (checkdate(month, day, year)) { // OK!Perhaps the most frequently used functionis the aptly named date( ). It returns thedate <strong>and</strong>/or time as a <strong>for</strong>matted string. Ittakes two arguments:date (<strong>for</strong>mat, [timestamp]);The timestamp is an optional argumentrepresenting the number of seconds sincethe Unix Epoch (midnight on January 1,1970) <strong>for</strong> the date in question. It allows youto get in<strong>for</strong>mation, like the day of the week,<strong>for</strong> a particular date. If a timestamp is notspecified, <strong>PHP</strong> will just use the current timeon the server.TABLe 11.4 Date( ) Function FormattingCharacter Meaning ExampleY Year as 4 digits 2011y Year as 2 digits 11L Is it a leap year? 1 (<strong>for</strong> yes)n Month as 1 or 2 digits 2m Month as 2 digits 02F Month FebruaryM Month as 3 letters Febjdl (lowercaseL)DwDay of the monthas 1 or 2 digitsDay of the monthas 2 digitsDay of the weekDay of the weekas 3 lettersDay of the weekas a single digitz Day of the year: 0to 365tSgGhHNumber of days inthe monthEnglish ordinalsuffix <strong>for</strong> a day,as 2 charactersHour; 12-hour <strong>for</strong>matas 1 or 2 digitsHour; 24-hour <strong>for</strong>matas 1 or 2 digitsHour; 12-hour <strong>for</strong>matas 2 digitsHour; 24-hour <strong>for</strong>matas 2 digits808MondayMon0 (Sunday)18931rd6180618i Minutes 45s Seconds 18u Microseconds 1234a am or pm amA AM or PM PMUSeconds since theepoche Timezone UTC1048623008I (capital i) Is it daylight savings? 1 (<strong>for</strong> yes)O Difference from GMT +0600362 Chapter 11
TABLe 11.5 The getdate( ) ArrayKey Value Exampleyear year 2011mon month 11month month name Novembermday day of the month 24weekday day of the week Thursdayhours hours 11minutes minutes 56seconds seconds 47There are myriad <strong>for</strong>matting parametersavailable (Table 11.4), <strong>and</strong> these can be usedin conjunction with literal text. For example,echo date('F j, Y'); // January 26, 2011echo date('H:i'); // 23:14echo date('D'); // SatYou can find the timestamp <strong>for</strong> a particulardate using the mktime( ) function:$stamp = mktime (hour, minute,➝ second, month, day, year);If called with no arguments, mktime( )returns the current timestamp, which is thesame as calling the time( ) function.Finally, the getdate( ) function can beused to return an array of values (Table 11.5)<strong>for</strong> a date <strong>and</strong> time. For example,$today = getdate( );echo $today['month']; // OctoberThis function also takes an optionaltimestamp argument. If that argument isnot used, getdate( ) returns in<strong>for</strong>mation<strong>for</strong> the current date <strong>and</strong> time.These are just a h<strong>and</strong>ful of the many date<strong>and</strong> time functions <strong>PHP</strong> has. For more, seethe <strong>PHP</strong> manual. To practice working withthese functions, let’s modify images.php(Script 11.4) in a couple of ways. First, thescript will show each image’s uploadeddate <strong>and</strong> time. Second, while a change isbeing made to the layout, the script willshow each image’s file size, too A.A The revisedimages.php showstwo more pieces ofin<strong>for</strong>mation abouteach image.<strong>Web</strong> Application Development 363
To use the date <strong>and</strong> time functions:1. Open images.php (Script 11.4) in yourtext editor or IDE, if it is not already.2. As the first line of code after the opening<strong>PHP</strong> tag, establish the time zone(Script 11.6):date_default_timezone_set➝ ('America/New_York');Be<strong>for</strong>e calling any of the date <strong>and</strong> timefunctions, the time zone has to beestablished. To find your time zone, seewww.php.net/timezones.3. Within the <strong>for</strong>each loop, after gettingthe image’s dimensions, calculate itsfile size:$file_size = round ( (filesize➝ ("$dir/$image")) / 1024) . "kb";The filesize( ) function was first usedin the show_image.php script. It returnsthe size of a file in bytes. To calculatethe kilobytes of a file, divide thisnumber by 1,024 (there are that manybytes in a kilobyte) <strong>and</strong> round it off.4. On the next line, determine the image’smodification date <strong>and</strong> time:$image_date = date("F d, Y H:i:s",➝ filemtime("$dir/$image"));To find a file’s modification date <strong>and</strong>time, call the filemtime( ) function,providing the function with the file, ordirectory, to be examined. This functionreturns a timestamp, which can thenbe used as the second argumentto the date( ), which will <strong>for</strong>mat thetimestamp accordingly.If you’re perplexed by what’s happeninghere, you can break the code into twosteps:$filemtime = filemtime➝ ("$dir/$image");$image_date = date("F d, Y H:i:s ",➝ $filemtime);5. Change the echo statement so that italso prints the file size <strong>and</strong> modificationdate:echo "➝ $image $file_size➝ ($image_date)\n";Both are printed outside of the A tag, sothey aren’t part of the links.6. Save the file as images.php, place it inyour <strong>Web</strong> directory, <strong>and</strong> test it in your<strong>Web</strong> browser.The date( ) function has some parametersthat are used <strong>for</strong> in<strong>for</strong>mative purposes,not <strong>for</strong>matting. For example, date('L')returns 1 or 0 indicating if it’s a leap year;date('t') returns the number of days in thecurrent month; <strong>and</strong> date('I') returns a 1 ifit’s currently daylight saving time.<strong>PHP</strong>’s date functions reflect the time onthe server (because <strong>PHP</strong> runs on the server);you’ll need to use JavaScript if you want todetermine the date <strong>and</strong> time on the user’scomputer.In Chapter 16, you’ll learn how to use thenew DateTime class to work with dates <strong>and</strong>times in <strong>PHP</strong>.364 Chapter 11
Script 11.6 This modified version of images.php (Script 11.4) uses <strong>PHP</strong>’s date <strong>and</strong> time functions in order toreport some in<strong>for</strong>mation to the user.1 2 3 4 5 Images6 7 8 9 Click on an image to view it in a separate window.10 11
Review <strong>and</strong> pursueIf you have any problems with thereview questions or the pursue prompts,turn to the book’s supporting <strong>for</strong>um(www.LarryUllman.com/<strong>for</strong>ums/).ReviewnnnnnnnnnnWhat function is used to send email?What are the function’s arguments?What does the server need in order tosend email?Does it make a difference whether \n isused within single or double quotationmarks?Can you easily know <strong>for</strong> certain if, orwhen, a recipient received an emailsent by <strong>PHP</strong>?What debugging steps can you takeif you aren’t receiving any email thatshould be sent from a <strong>PHP</strong> script?How do folder permissions come intoplay <strong>for</strong> h<strong>and</strong>ling uploaded files?What two directories are used inh<strong>and</strong>ling file uploads?What additional attribute must be madeto the opening <strong>for</strong>m tag in order toh<strong>and</strong>le a file upload?What is a MIME type?In what ways are <strong>PHP</strong> <strong>and</strong> JavaScriptalike? How are they different?What tag is used to add JavaScript toan HTML page?nnnnnnWhat does the var keyword mean inJavaScript?What is the concatenation operator inJavaScript?What does the <strong>PHP</strong> header( ) function do?What do headers already sent errormessages mean?What is a proxy script? When might aproxy script be necessary?What does the readfile( ) function do?pursuennnnnCreate a more custom contact <strong>for</strong>m.Have the <strong>PHP</strong> script also send a morecustom email, including any other datarequested by the <strong>for</strong>m.Search online using the keywords phpemail spam filters to learn techniques<strong>for</strong> improving the successful deliveryof <strong>PHP</strong>-sent email (i.e., to minimize thechances of spam filters eating legitimateemails).Make a variation on upload_image.phpthat supports the uploading of differentfile types. Create a correspondingversion of show_image.php. Note: You’llneed to do some research on MIMEtypes to complete these challenges.Check out the <strong>PHP</strong> manual page <strong>for</strong> theglob( ) function.A lot of in<strong>for</strong>mation <strong>and</strong> new functionswere introduced in this chapter. Checkout the <strong>PHP</strong> manual <strong>for</strong> some of them tolearn more.366 Chapter 11
12Cookies <strong>and</strong>SessionsThe Hypertext Transfer Protocol (HTTP)is a stateless technology, meaning thateach individual HTML page is an unrelatedentity. HTTP has no method <strong>for</strong> trackingusers or retaining variables as a persontraverses a site. Without the server beingable to track a user, there can be no shoppingcarts or custom <strong>Web</strong>-site personalization.Using a server-side technology like<strong>PHP</strong>, you can overcome the statelessnessof the <strong>Web</strong>. The two best <strong>PHP</strong> tools <strong>for</strong> thispurpose are cookies <strong>and</strong> sessions.The key difference between cookies <strong>and</strong>sessions is that cookies store data in theuser’s <strong>Web</strong> browser <strong>and</strong> sessions storedata on the server itself. Sessions aregenerally more secure than cookies <strong>and</strong>can store much more in<strong>for</strong>mation. As bothtechnologies are easy to use with <strong>PHP</strong> <strong>and</strong>are worth knowing, this chapter coversboth cookies <strong>and</strong> sessions. The examples<strong>for</strong> demonstrating this in<strong>for</strong>mation will bea login system, based upon the existingsitename database.in This ChapterMaking a Login Page 368Making the Login Functions 371Using Cookies 376Using Sessions 388Improving Session Security 396Review <strong>and</strong> Pursue 400
Making a Login pageA login process involves just a fewcomponents A:nnnnA <strong>for</strong>m <strong>for</strong> submitting the loginin<strong>for</strong>mationA validation routine that confirms thenecessary in<strong>for</strong>mation was submittedA database query that compares thesubmitted in<strong>for</strong>mation against thestored in<strong>for</strong>mationCookies or sessions to store data thatreflects a successful loginSubsequent pages can then have checksto confirm that the user is logged in (to limitaccess to that page or add features). There isalso, of course, a logging-out process, whichinvolves clearing out the cookies or sessiondata that represent a logged-in status.To start all this, let’s take some of thesecommon elements <strong>and</strong> place them intoseparate files. Then, the pages that requirethis functionality can include the necessaryfiles. Breaking up the logic this way willmake some of the following scripts easierto read <strong>and</strong> write, plus cut down on theirredundancies. You’ll define two includablefiles. This first script will contain the bulkof a login page, including the header, theerror reporting, the <strong>for</strong>m, <strong>and</strong> the footer B.A The login process.B The login<strong>for</strong>m <strong>and</strong> page.368 Chapter 12
Script 12.1 The login_page.inc.php script createsthe complete login page, including the <strong>for</strong>m, <strong>and</strong>reports any errors. It will be included by otherpages that need to show the login page.1 Login21 22 Email Address: 23 Password: 24 25 2627 To make a login page:1. Begin a new <strong>PHP</strong> page in yourtext editor or IDE, to be namedlogin_page.inc.php (Script 12.1):
This code was also developed backin Chapter 9, although an additionalisset( ) clause has been added as anextra precaution. If any errors exist (inthe $errors array variable), they’ll beprinted as an unordered list C.4. Display the <strong>for</strong>m:?>LoginEmail Address: Password: The HTML <strong>for</strong>m only needs two textinputs: one <strong>for</strong> an email address <strong>and</strong> asecond <strong>for</strong> the password. The namesof the inputs match those in the userstable of the sitename database (whichthis login system is based upon).To make it easier to create the HTML<strong>for</strong>m, the <strong>PHP</strong> section is closed first.The <strong>for</strong>m is not sticky, but you couldeasily add code to accomplish that.5. Complete the page:6. Save the file as login_page.inc.php<strong>and</strong> place it in your <strong>Web</strong> directory (inthe includes folder, along with the filesfrom Chapter 3 <strong>and</strong> Chapter 9: header.html, footer.html, <strong>and</strong> style.css).The page will use a .inc.php extensionto indicate both that it’s an includablefile <strong>and</strong> that it contains <strong>PHP</strong> code.It may seem illogical that this scriptincludes the header <strong>and</strong> footer file from withinthe includes directory when this script willalso be within that same directory. This codeworks because this script will be includedby pages within the main directory; thus theinclude references are with respect to theparent file, not this one.C As with other scripts in this book, <strong>for</strong>m errorsare displayed above the <strong>for</strong>m itself.370 Chapter 12
Making the LoginFunctionsAlong with the login page that was storedin login_page.inc.php, there’s a littlebit of functionality that will be common toseveral scripts in this chapter. In this nextscript, also to be included by other pagesin the login/logout system, two functionswill be defined.First, many pages will end up redirectingthe user from one page to another. Forexample, upon successfully logging in, theuser will be taken to loggedin.php. If a useraccesses loggedin.php <strong>and</strong> they aren’tlogged in, they should be taken to index.php. Redirection uses the header( ) function,introduced in Chapter 11, “<strong>Web</strong> ApplicationDevelopment.” The syntax <strong>for</strong> redirection isheader ('Location: http://www.➝ example.com/page.php');Because this function will send the browserto page.php, the current script should beterminated using exit( ) immediatelyafter this:header ('Location: http://www.➝ example.com/page.php');exit( );If you don’t call exit( ), the currentscript will continue to run (just not inthe <strong>Web</strong> browser).The location value in the header( ) callshould be an absolute URL (www.example.com/page.php instead of just page.php).You can hard-code this value into everyheader( ) call or, better yet, have <strong>PHP</strong>dynamically determine it. The first functionin this next script will do just that, <strong>and</strong> thenredirect the user to that absolute URL.The other bit of code that will be used bymultiple scripts in this chapter validates thelogin <strong>for</strong>m. This is a three-step process:1. Confirm that an email address wasprovided.2. Confirm that a password was provided.3. Confirm that the provided emailaddress <strong>and</strong> password match thosestored in the database (during theregistration process).This next script will define two differentfunctions. The details of how each functionworks will be explained in the stepsthat follow.Cookies <strong>and</strong> Sessions 371
To create the login functions:1. Begin a new <strong>PHP</strong> document in yourtext editor or IDE, to be namedlogin_functions.inc.php (Script 12.2):
Script 12.2 continued3738 // Validate the email address:39 if (empty($email)) {40 $errors[ ] = 'You <strong>for</strong>got to enteryour email address.';41 } else {42 $e = mysqli_real_escape_string($dbc, trim($email));43 }4445 // Validate the password:46 if (empty($pass)) {47 $errors[ ] = 'You <strong>for</strong>got to enteryour password.';48 } else {49 $p = mysqli_real_escape_string($dbc, trim($pass));50 }5152 if (empty($errors)) { // Ifeverything's OK.5354 // Retrieve the user_id <strong>and</strong>first_name <strong>for</strong> that email/passwordcombination:55 $q = "SELECT user_id, first_nameFROM users WHERE email='$e' ANDpass=SHA1('$p')";56 $r = @mysqli_query ($dbc, $q);// Run the query.5758 // Check the result:59 if (mysqli_num_rows($r) = = 1) {6061 // Fetch the record:62 $row = mysqli_fetch_array ($r,MYSQLI_ASSOC);6364 // Return true <strong>and</strong> the record:65 return array(true, $row);6667 } else { // Not a match!68 $errors[ ] = 'The email address<strong>and</strong> password entered do notmatch those on file.';69 }7071 } // End of empty($errors) IF.7273 // Return false <strong>and</strong> the errors:74 return array(false, $errors);7576 } // End of check_login( ) function.directory name. That whole value mightbe /somedir/page.php. The dirname( )function will return just the directorypart from that value (i.e., /somedir/).4. Remove any ending slashes fromthe URL:$url = rtrim($url, '/\\');Because the existence of a subfoldermight add an extra slash (/) orbackslash (\, <strong>for</strong> Windows), the functionneeds to remove that. To do so, applythe rtrim( ) function. By default, thisfunction removes spaces from theright side of a string. If provided witha list of characters to remove as thesecond argument, it’ll chop those offinstead. The characters to be removedare / <strong>and</strong> \. But since the backslashis the escape character in <strong>PHP</strong>, youneed to use \\ to refer to a singlebackslash. With this one line of code,if $url concludes with either of thesecharacters, the rtrim( ) function willremove them.5. Append the specific page to the URL:$url .= '/' . $page;Next, the specific page name isconcatenated to the $url. It’s precededby a slash because any trailing slasheswere removed in Step 4 <strong>and</strong> you can’thave www.example.compage.php asthe URL.This may all seem to be quitecomplicated, but it’s a very effectiveway to ensure that the redirectionworks no matter on what server, orfrom what directory, the script is beingrun (as long as the redirection is takingplace within that directory).continues on next pageCookies <strong>and</strong> Sessions 373
6. Redirect the user <strong>and</strong> completethe function:header("Location: $url");exit( ); // Quit the script.} // End of redirect_user( )➝ function.The final steps are to send a Locationheader <strong>and</strong> terminate the execution ofthe script.7. Begin a new function:function check_login($dbc,➝ $email = '', $pass = '') {This function will validate the loginin<strong>for</strong>mation. It takes three arguments:the database connection, which isrequired; the email address, which isoptional; <strong>and</strong> the password, which isalso optional.Although this function could access$_POST['email'] <strong>and</strong> $_POST['pass']directly, it’s better if the function ispassed these values, making thefunction more independent.8. Validate the email address <strong>and</strong> password:$errors = array( );if (empty($email)) {$errors[ ] = 'You <strong>for</strong>got to➝ enter your email address.';} else {$e = mysqli_real_escape_string➝ ($dbc, trim($email));}if (empty($pass)) {$errors[ ] = 'You <strong>for</strong>got to➝ enter your password.';} else {$p = mysqli_real_escape_string➝ ($dbc, trim($pass));}This validation routine is similar to thatused in the registration page. If anyproblems occur, they’ll be added to the$errors array, which will eventually beused on the login page (see C under“Making a Login Page”). Note that this$errors array is local to the function.Even though it has the same name, thisis not the same $errors variable thatis used in the login page. Code laterin the function will return this $errorsvariable’s value, <strong>and</strong> code in the scriptsthat call this function will then assignthis returned value to the proper, global$errors array, usable on the login page.9. If no errors occurred, run the databasequery:if (empty($errors)) {$q = "SELECT user_id, first_name➝ FROM users WHERE email='$e'➝ AND pass=SHA1('$p')";$r = @mysqli_query ($dbc, $q);The query selects the user_id <strong>and</strong> first_name values from the database wherethe submitted email address (fromthe <strong>for</strong>m) matches the stored emailaddress <strong>and</strong> the SHA1( ) version ofthe submitted password matches thestored password A.A The results of the login query, shown in themysql client, if the user submitted the proper emailaddress/password combination.374 Chapter 12
10. Check the results of the query:if (mysqli_num_rows($r) = = 1) {$row = mysqli_fetch_array ($r,➝ MYSQLI_ASSOC);return array(true, $row);If the query returned one row, thenthe login in<strong>for</strong>mation was correct. Theresults are then fetched into $row. Thefinal step in a successful login is toreturn two pieces of in<strong>for</strong>mation back tothe requesting script: the Boolean true,indicating that the login was a success;<strong>and</strong> the data fetched from <strong>MySQL</strong>.Using the array( ) function, both theBoolean value <strong>and</strong> the $row array canbe returned by this function.11. If no record was selected by the query,create an error:} else { // Not a match!$errors[ ] = 'The email address➝ <strong>and</strong> password entered do not➝ match those on file.';}If the query did not return one row, thenan error message is added to the array.It will end up being displayed on thelogin page B.12. Complete the conditional begun inStep 9 <strong>and</strong> complete the function:} // End of empty($errors) IF.return array(false, $errors);} // End of check_login( ) function.The final step is <strong>for</strong> the function to returna value of false, indicating that loginfailed, <strong>and</strong> to return the $errors array,which stores the reason(s) <strong>for</strong> failure.This return statement can be placedhere—at the end of the function insteadof within a conditional—because thefunction will only get to this point if thelogin failed. If the login succeeded, thereturn line in Step 10 will stop the functionfrom continuing (a function stops assoon as it executes a return).13. Save the file as login_functions.inc.php <strong>and</strong> place it in your <strong>Web</strong>directory (in the includes folder, alongwith header.html, footer.html, <strong>and</strong>style.css).This page will also use a .inc.php extensionto indicate both that it’s an includablefile <strong>and</strong> that it contains <strong>PHP</strong> code.As with some other includable filescreated in this book (although notlogin_page.inc.php), the closing <strong>PHP</strong>tag—?>—is omitted. Doing so preventspotential complications that can ariseshould an includable file have an errantblank space or line after the closing tag.B If the user entered an email address <strong>and</strong>password, but they don’t match the values stored inthe database, this is the result in the <strong>Web</strong> browser.The scripts in this chapter include nodebugging code (like the <strong>MySQL</strong> error orquery). If you have problems with these scripts,apply the debugging techniques outlined inChapter 8, “Error H<strong>and</strong>ling <strong>and</strong> Debugging.”You can add name=value pairs to theURL in a header( ) call to pass values to thetarget page:$url .= '?name=' . urlencode(value);Cookies <strong>and</strong> Sessions 375
using CookiesCookies are a way <strong>for</strong> a server to storein<strong>for</strong>mation on the user’s machine. This isone way that a site can remember or tracka user over the course of a visit. Think ofa cookie as being like a name tag: you tellthe server your name <strong>and</strong> it gives you asticker to wear. Then it can know who youare by referring back to that name tag A.In this section, you will learn how to set acookie, retrieve in<strong>for</strong>mation from a storedcookie, alter a cookie’s settings, <strong>and</strong> thendelete a cookie.A How cookies aresent back <strong>and</strong> <strong>for</strong>thbetween the server<strong>and</strong> the client.Testing <strong>for</strong> CookiesTo effectively program using cookies, you need to be able to accurately test <strong>for</strong> their presence.The best way to do so is to have your <strong>Web</strong> browser ask what to do when receiving a cookie. Insuch a case, the browser will prompt you with the cookie in<strong>for</strong>mation each time <strong>PHP</strong> attemptsto send a cookie.Different versions of different browsers on different plat<strong>for</strong>ms all define their cookie-h<strong>and</strong>lingpolicies in different places. I’ll quickly run through a couple of options <strong>for</strong> popular <strong>Web</strong> browsers.To set this up using Internet Explorer on Windows, choose Tools > Internet Options. Then click thePrivacy tab, followed by the Advanced button under Settings. Click “Override automatic cookieh<strong>and</strong>ling” <strong>and</strong> then choose “Prompt” <strong>for</strong> First-party Cookies.Using Firefox, you’ll want to select “ask me every time” in the “Keep until” drop-down menu. To getto that point on Windows, choose Tools > Options > Privacy. If you are using Firefox on Mac OS X,start by choosing Firefox > Preferences. Then, on the Privacy tab, select “Use custom settings <strong>for</strong>history” <strong>and</strong> you’ll see the “Keep until” selector.Un<strong>for</strong>tunately, Safari <strong>and</strong> Google Chrome do not have options to prompt you when cookies aresent (not so far as I can see, that is, without installing extensions or plug-ins). Both do allow youto view existing cookies, which is still a useful debugging tool.376 Chapter 12
Setting cookiesThe most important thing to underst<strong>and</strong>about cookies is that they must be sentfrom the server to the client prior to anyother in<strong>for</strong>mation. Should the serverattempt to send a cookie after the <strong>Web</strong>browser has already received HTML—evenan extraneous white space—an errormessage will result <strong>and</strong> the cookie will notbe sent B. This is by far the most commoncookie-related error but is easily fixed. Ifyou see such a message:1. Note the script <strong>and</strong> line number followingoutput started at.2. Open that script <strong>and</strong> head to that linenumber.3. Remove the blank space, line, text,HTML, or whatever that is outputtedby that line.Cookies are sent via the setcookie( )function:setcookie (name, value);setcookie ('name', 'Nicole');The second line of code will send a cookieto the browser with a name of name <strong>and</strong> avalue of Nicole C.You can continue to send more cookies tothe browser with subsequent uses of thesetcookie( ) function:setcookie ('ID', 263);setcookie ('email', 'email@example.com');As <strong>for</strong> the cookies name, it’s best not touse white spaces or punctuation, <strong>and</strong> payattention to the exact case used.B The headers already sent… error message is all too common when creating cookies.Pay attention to what the error message says in order to find <strong>and</strong> fix the problem.C If the browser is set toask <strong>for</strong> permission whenreceiving cookies, you’ll seea message like this when asite attempts to send one(this is Firefox’s version ofthe prompt).Cookies <strong>and</strong> Sessions 377
To send a cookie:1. Begin a new <strong>PHP</strong> document in your texteditor or IDE, to be named login.php(Script 12.3):378 Chapter 12
3. Validate the <strong>for</strong>m data:list ($check, $data) = check_login➝ ($dbc, $_POST['email'],➝ $_POST['pass']);After including both files, the check_login( ) function can be called. It’spassed the database connection (whichcomes from mysqli_connect.php), alongwith the email address <strong>and</strong> the password(both of which come from the <strong>for</strong>m). Asan added precaution, the script couldconfirm that both variables are set <strong>and</strong>not empty prior to invoking the function.This function returns an array of twoelements: a Boolean value <strong>and</strong> an array(of user data or errors). To assign thosereturned values to variables, apply thelist( ) function. The first value returnedby the function (the Boolean) will beassigned to $check. The second valuereturned (either the $row or $errorsarray) will be assigned to $data.4. If the user entered the correct in<strong>for</strong>mation,log them in:if ($check) { // OK!setcookie ('user_id',➝ $data['user_id']);setcookie ('first_name',➝ $data['first_name']);The $check variable indicates thesuccess of the login attempt. If it has aTRUE value, then $data contains theuser’s ID <strong>and</strong> first name. These twovalues can be used in cookies.Generally speaking, you should neverstore a database table’s primary keyvalue, such as $data['user_id'], ina cookie, because cookies can bemanipulated easily. In this situation, it’snot going to be a problem as the user_id value isn’t actually used anywhere inthe site (it’s being stored in the cookie<strong>for</strong> demonstration purposes).5. Redirect the user to another page:redirect_user('loggedin.php');Using the function defined earlier in thechapter, the user will be redirected toanother script upon a successful login.The specific page to be redirected to isloggedin.php.6. Complete the $check conditional(started in Step 4) <strong>and</strong> then closethe database connection:} else {$errors = $data;}mysqli_close($dbc);If $check has a FALSE value, then the$data variable is storing the errorsgenerated within the check_login( )function. If so, the errors should beassigned to the $errors variable,because that’s what the code in thescript that displays the login page—login_page.inc.php—is expecting.7. Complete the main submit conditional<strong>and</strong> include the login page:}include ('includes/➝ login_page.inc.php');?>This login.php script itself primarilyper<strong>for</strong>ms validation, by calling thecheck_login( ) function, <strong>and</strong> h<strong>and</strong>lesthe cookies <strong>and</strong> redirection. The login_page.inc.php file contains the login pageitself, so it just needs to be included.continues on next pageCookies <strong>and</strong> Sessions 379
8. Save the file as login.php, place it inyour <strong>Web</strong> directory (in the same folderas the files from Chapter 9), <strong>and</strong> loadthis page in your <strong>Web</strong> browser (see Bunder “Making a Login Page”).If you want, you can submit the <strong>for</strong>merroneously, but you cannot correctlylog in yet, as the final destination—loggedin.php—hasn’t been written.Cookies are limited to about 4 KB of totaldata, <strong>and</strong> each <strong>Web</strong> browser can remember alimited number of cookies from any one site.This limit is 50 cookies <strong>for</strong> most of the current<strong>Web</strong> browsers (but if you’re sending out 50different cookies, you may want to rethinkhow you do things).The setcookie( ) function is one of thefew functions in <strong>PHP</strong> that could have differentresults in different browsers, since eachbrowser treats cookies in its own way. Be sureto test your <strong>Web</strong> sites in multiple browsers ondifferent plat<strong>for</strong>ms to ensure consistency.If the first two included files send anythingto the <strong>Web</strong> browser or even have blanklines or spaces after the closing <strong>PHP</strong> tag, you’llsee a headers already sent error. This is whyneither includes the terminating <strong>PHP</strong> tag.Accessing cookiesTo retrieve a value from a cookie, you onlyneed to refer to the $_COOKIE superglobal,using the appropriate cookie name asthe key (as you would with any array).For example, to retrieve the value of thecookie established with the linesetcookie ('username', 'Trout');you would refer to $_COOKIE['username'].In the following example, the cookies setby the login.php script will be accessedin two ways. First, a check will be madethat the user is logged in (otherwise, theyshouldn’t be accessing this page). Second,the user will be greeted by their first name,which was stored in a cookie.To access a cookie:1. Begin a new <strong>PHP</strong> document in your texteditor or IDE, to be named loggedin.php(Script 12.4):
Script 12.4 The loggedin.php script prints agreeting to a user thanks to a stored cookie.1
8. To see the cookies being set E <strong>and</strong> F,change the cookie settings <strong>for</strong> yourbrowser <strong>and</strong> test again.Some browsers (e.g., Internet Explorer)will not adhere to your cookie-promptingpreferences <strong>for</strong> cookies sent over localhost.A cookie is not accessible until the settingpage (e.g., login.php) has been reloadedor another page has been accessed (in otherwords, you cannot set <strong>and</strong> access a cookie inthe same page).If users decline a cookie or have their<strong>Web</strong> browser set not to accept them, theywill automatically be redirected to the homepage in this example, even if they successfullylogged in. For this reason, you may want to letthe user know that cookies are required.Setting cookie parametersAlthough passing just the name <strong>and</strong> valuearguments to the setcookie( ) function willsuffice, you ought to be aware of the otherarguments available. The function can takeup to five more parameters, each of whichwill alter the definition of the cookie.setcookie (name, value, expiration,➝ path, host, secure, httponly);The expiration argument is used to set adefinitive length of time <strong>for</strong> a cookie toexist, specified in seconds since the epoch(the epoch is midnight on January 1, 1970).If it is not set or if it’s set to a value of 0, thecookie will continue to be functional untilthe user closes their browser. These cookiesare said to last <strong>for</strong> the browser session(also indicated in E <strong>and</strong> F).To set a specific expiration time, add anumber of minutes or hours to the currentmoment, retrieved using the time( )function. The following line will set theexpiration time of the cookie to be 30minutes (60 seconds times 30 minutes)from the current moment:setcookie (name, value, time( )+1800);The path <strong>and</strong> host arguments are used tolimit a cookie to a specific folder within a<strong>Web</strong> site (the path) or to a specific host (www.example.com or 192.168.0.1). For example,you could restrict a cookie to exist only whilea user is within the admin folder of a domain(<strong>and</strong> the admin folder’s subfolders):setcookie (name, value, expire,➝'/ad min/');Setting the path to / will make the cookievisible within an entire domain (<strong>Web</strong> site).Setting the domain to .example.com willmake the cookie visible within an entiredomain <strong>and</strong> every subdomain (www.example.com, admin.example.com,➝ pages.example.com, etc.).E The user_id cookie with a value of 1.F The first_name cookie with a value of Larry(yours will probably be different).382 Chapter 12
Script 12.5 The login.php script now uses everyargument the setcookie( ) function can take.1 The secure value dictates that a cookieshould only be sent over a secure HTTPSconnection. A 1 indicates that a secureconnection must be used, <strong>and</strong> a 0 saysthat a st<strong>and</strong>ard connection is fine.setcookie (name, value, expire,➝ path, host, 1);If your site is using a secure connection,you ought to restrict any cookies to HTTPSas well.Finally, added in <strong>PHP</strong> 5.2 is the httponlyargument. A Boolean value is used to makethe cookie only accessible through HTTP(<strong>and</strong> HTTPS). En<strong>for</strong>cing this restriction willmake the cookie more secure (preventingsome hack attempts) but is not supportedby all browsers at the time of this writing.setcookie (name, value, expire,➝ path, host, secure, TRUE);As with all functions that take arguments,you must pass the setcookie( ) values inorder. To skip any parameter, use NULL, 0,or an empty string (don’t use FALSE). Theexpiration <strong>and</strong> secure values are bothintegers <strong>and</strong> are there<strong>for</strong>e not quoted.To demonstrate this in<strong>for</strong>mation, let’s addan expiration setting to the login cookiesso that they last <strong>for</strong> only one hour.To set a cookie’s parameters:1. Open login.php in your text editor(refer to Script 12.3), if it is not already.2. Change the two setcookie( ) lines toinclude an expiration date that’s 60minutes away (Script 12.5):setcookie ('user_id', $data['user_➝ id'], time( )+3600, '/', '', 0, 0);setcookie ('first_name',➝ $data['first_name'],➝ time( )+3600, '/', '', 0, 0);continues on next pageCookies <strong>and</strong> Sessions 383
With the expiration date set to time( )+ 3600 (60 minutes times 60 seconds),the cookie will continue to exist <strong>for</strong>an hour after it is set. While makingthis change, every other parameter isexplicitly addressed.For the final parameter, which acceptsa Boolean value, you can also use 0 torepresent FALSE (<strong>PHP</strong> will h<strong>and</strong>le theconversion <strong>for</strong> you). Doing so is a goodidea, as using false in any of the cookiearguments can cause problems.3. Save the script, place it in your <strong>Web</strong>directory, <strong>and</strong> test it in your <strong>Web</strong>browser by logging in G.Some browsers have difficulties withcookies that do not list every argument.Explicitly stating every parameter—even asan empty string—will achieve more reliableresults across all browsers.Here are some general guidelines <strong>for</strong>cookie expirations: If the cookie should lastas long as the user’s session, do not set anexpiration time; if the cookie should continueto exist after the user has closed <strong>and</strong>reopened his or her browser, set an expirationtime weeks or months ahead; <strong>and</strong> if the cookiecan constitute a security risk, set an expirationtime of an hour or fraction thereof so thatthe cookie does not continue to exist too longafter a user has left his or her browser.For security purposes, you could set a5- or 10-minute expiration time on a cookie <strong>and</strong>have the cookie resent with every new pagethe user visits (assuming that the cookie exists).This way, the cookie will continue to persist aslong as the user is active but will automaticallydie 5 or 10 minutes after the user’s last action.E-commerce <strong>and</strong> other privacy-related<strong>Web</strong> applications should use an SSL (SecureSockets Layer) connection <strong>for</strong> all transactions,including the cookie.Be careful with cookies created by scriptswithin a directory. If the path isn’t specified,then that cookie will only be available to otherscripts within that same directory.Deleting cookiesThe final thing to underst<strong>and</strong> about usingcookies is how to delete one. While acookie will automatically expire whenthe user’s browser is closed or whenthe expiration date/time is met, oftenyou’ll want to manually delete the cookieinstead. For example, in <strong>Web</strong> sites thathave login capabilities, you will want todelete any cookies when the user logs out.Although the setcookie( ) function cantake up to seven arguments, only oneis actually required—the cookie name. Ifyou send a cookie that consists of a namewithout a value, it will have the same effectas deleting the existing cookie of the samename. For example, to create the cookiefirst_name, you use this line:setcookie('first_name', 'Tyler');To delete the first_name cookie, youwould code:setcookie('first_name');As an added precaution, you can also setan expiration date that’s in the past:setcookie('first_name', '',➝ time( )-3600);To demonstrate all of this, let’s add alogout capability to the site. The link tothe logout page appears on loggedin.php.G Changes to the setcookie( ) parameters, likean expiration date <strong>and</strong> time, will be reflected in thecookie sent to the <strong>Web</strong> browser (compare with F ).384 Chapter 12
As an added feature, the header file willbe altered so that a Logout link appearswhen the user is logged in <strong>and</strong> a Loginlink appears when the user is logged out.To delete a cookie:1. Begin a new <strong>PHP</strong> document in your texteditor or IDE, to be named logout.php(Script 12.6):
Thus, in short, the original first_namecookie data is available to this scriptwhen it first runs. The set of cookiessent by this page (the delete cookies)aren’t available to this page, so theoriginal values are still usable.5. Save the file as logout.php <strong>and</strong> placeit in your <strong>Web</strong> directory (in the samefolder as login.php).To create the logout link:1. Open header.html (refer to Script 9.1) inyour text editor or IDE.2. Change the fifth <strong>and</strong> final link to(Script 12.7):Instead of having a permanent login linkin the navigation area, it should display aLogin link if the user is not logged in H ora Logout link if the user is I. The precedingconditional will accomplish just that,depending upon the presence of a cookie.For that condition, if the cookie is set,the user is logged in <strong>and</strong> can be shownthe logout link. If the cookie is not set,the user should be shown the login link.There is one catch, however: Because thelogout.php script would ordinarily displaya logout link (because the cookie existswhen the page is first being viewed), theconditional has to also check that thecurrent page is not the logout.php script.An easy way to dynamically determine theScript 12.7 The header.html file now displayseither a Login or a Logout link, depending uponthe user’s current status.1 2 3
current page is to apply the basename( )function to $_SERVER['<strong>PHP</strong>_SELF'].3. Save the file, place it in your <strong>Web</strong> directory(within the includes folder), <strong>and</strong>test the login/logout process in your<strong>Web</strong> browser J.To see the result of the setcookie( )calls in the logout.php script, turn on cookieprompting in your browser K.Due to a bug in how Internet Exploreron Windows h<strong>and</strong>les cookies, you may needto set the host parameter to false (withoutquotes) in order to get the logout process towork when developing on your own computer(i.e., through localhost).When deleting a cookie, you shouldalways use the same parameters that set thecookie (aside from the value <strong>and</strong> expiration,naturally). If you set the host <strong>and</strong> path in thecreation cookie, use them again in the deletioncookie.To hammer the point home, rememberthat the deletion of a cookie does not takeeffect until the page has been reloaded oranother page has been accessed. In otherwords, the cookie will still be available toa page after that page has deleted it.H The homepage with aLogin link.I After theuser logs in, thepage now has aLogout link.J The result afterlogging out.K This is how thedeletion cookieappears in a Firefoxprompt (comparewith G ).Cookies <strong>and</strong> Sessions 387
using SessionsAnother method of making data availableto multiple pages of a <strong>Web</strong> site is to usesessions. The premise of a session is thatdata is stored on the server, not in the<strong>Web</strong> browser, <strong>and</strong> a session identifier isused to locate a particular user’s record(the session data). This session identifier isnormally stored in the user’s <strong>Web</strong> browservia a cookie, but the sensitive data itself—like the user’s ID, name, <strong>and</strong> so on—alwaysremains on the server.The question may arise: why use sessionsat all when cookies work just fine? First ofall, sessions are likely more secure in thatall of the recorded in<strong>for</strong>mation is storedon the server <strong>and</strong> not continually sentback <strong>and</strong> <strong>for</strong>th between the server <strong>and</strong> theclient. Second, you can store more data ina session. Third, some users reject cookiesor turn them off completely. Sessions,while designed to work with a cookie,can function without them, too.To demonstrate sessions—<strong>and</strong> to comparethem with cookies—let’s rewrite theprevious set of scripts.Setting session variablesThe most important rule with respect tosessions is that each page that will usethem must begin by calling the session_start( ) function. This function tells <strong>PHP</strong>to either begin a new session or access anexisting one. This function must be calledbe<strong>for</strong>e anything is sent to the <strong>Web</strong> browser!The first time this function is used, session_start( ) will attempt to send a cookiewith a name of <strong>PHP</strong>SESSID (the defaultsession name) <strong>and</strong> a value of something likea61f8670baa8e90a30c878df89a2074b(32 hexadecimal letters, the session ID).Because of this attempt to send a cookie,session_start( ) must be called be<strong>for</strong>eany data is sent to the <strong>Web</strong> browser, as isthe case when using the setcookie( ) <strong>and</strong>header( ) functions.Sessions vs. CookiesThis chapter has examples accomplishing the same tasks—logging in <strong>and</strong> logging out—using bothcookies <strong>and</strong> sessions. Obviously, both are easy to use in <strong>PHP</strong>, but the true question is when to useone or the other.Sessions have the following advantages over cookies:.They are generally more secure (because the data is being retained on the server)..They allow <strong>for</strong> more data to be stored..They can be used without cookies.Whereas cookies have the following advantages over sessions:.They are easier to program..They require less of the server..They can be made to last far longer.In general, to store <strong>and</strong> retrieve just a couple of small pieces of in<strong>for</strong>mation, or to store in<strong>for</strong>mation<strong>for</strong> a longer duration, use cookies. For most of your <strong>Web</strong> applications, though, you’ll use sessions.388 Chapter 12
Script 12.8 This version of the login.php scriptuses sessions instead of cookies.1 Once the session has been started, valuescan be registered to the session using thenormal array syntax, using the $_SESSIONsuperglobal:$_SESSION['key'] = value;$_SESSION['name'] = 'Roxanne';$_SESSION['id'] = 48;Let’s update the login.php script with thisin mind.To begin a session:1. Open login.php (refer to Script 12.5) inyour text editor or IDE.2. Replace the setcookie( ) lines (18–19)with these lines (Script 12.8):session_start( );$_SESSION['user_id'] =$data['user_id'];$_SESSION['first_name'] =$data['first_name'];The first step is to begin the session.Since there are no echo statements,inclusions of HTML files, or even blankspaces prior to this point in the script,it will be safe to use session_start( )at this point in the script (although thefunction call could be placed at the topof the script as well). Then, two keyvaluepairs are added to the $_SESSIONsuperglobal array to register the user’sfirst name <strong>and</strong> user ID to the session.continues on next pageCookies <strong>and</strong> Sessions 389
3. Save the page as login.php, place it inyour <strong>Web</strong> directory, <strong>and</strong> test it in your<strong>Web</strong> browser A.Although loggedin.php <strong>and</strong> the header<strong>and</strong> script will need to be rewritten, youcan still test the login script <strong>and</strong> see theresulting cookie B. The loggedin.phppage should redirect you back to thehome page, though, as it’s still checking<strong>for</strong> the presence of a $_COOKIE variable.Because sessions will normally send<strong>and</strong> read cookies, you should always try tobegin them as early in the script as possible.Doing so will help you avoid the problem ofattempting to send a cookie after the headers(HTML or white space) have already been sent.If you want, you can set session.auto_start in the php.ini file to 1, making it unnecessaryto use session_start( ) on eachpage. This does put a greater toll on the server<strong>and</strong>, <strong>for</strong> that reason, shouldn’t be used withoutsome consideration of the circumstances.You can store arrays in sessions (making$_SESSION a multidimensional array), just asyou can store strings or numbers.Accessing session variablesOnce a session has been started <strong>and</strong>variables have been registered to it, youcan create other scripts that will accessthose variables. To do so, each scriptmust first enable sessions, again usingsession_start( ).This function will give the current scriptaccess to the previously started session(if it can read the <strong>PHP</strong>SESSID value storedin the cookie) or create a new session ifit cannot. Underst<strong>and</strong> that if the currentsession ID cannot be found <strong>and</strong> a newsession ID is generated, none of the datastored under the old session ID will beavailable. I mention this here <strong>and</strong> nowbecause if you’re having problems withsessions, checking the session ID value tosee if it changes from one page to the nextis the first debugging step.Assuming that there was no problemaccessing the current session, to then referto a session variable, use $_SESSION['var'],as you would refer to any other array.A The login <strong>for</strong>m remains unchanged to theend user, but the underlying functionality nowuses sessions.B This cookie, created by <strong>PHP</strong>’s session_start( )function, stores the session ID in the user’s browser.390 Chapter 12
Script 12.9 The loggedin.php script is updatedso that it refers to $_SESSION <strong>and</strong> not $_COOKIE(changes are required on two lines).1
5. Replace the reference to $_COOKIEwith $_SESSION in header.html (fromScript 12.7 to Script 12.10):if (isset($_SESSION['user_id'])) {For the Login/Logout links to functionproperly (notice the incorrect link in C),the reference to the cookie variable withinthe header file must be switched over tosessions. The header file does not needto call the session_start( ) function, asit’ll be included by pages that do.Note that this conditional does not needto check if the current page is the logoutpage, as session data behaves differentlythan cookie data (I’ll explain this further inthe next section of the chapter).6. Save the header file, place it in your<strong>Web</strong> directory (in the includes folder),<strong>and</strong> test it in your browser D.For the Login/Logout links to work on theother pages (register.php, index.php, etc.),you’ll need to add the session_start( )comm<strong>and</strong> to each of those.As a reminder of what I already said, ifyou have an application where the sessiondata does not seem to be accessible from onepage to the next, it could be because a newsession is being created on each page. Tocheck <strong>for</strong> this, compare the session ID (the lastfew characters of the value will suffice) to seeif it is the same. You can see the session’s IDby viewing the session cookie as it is sent orby invoking the session_id( ) function:echo session_id( );Session variables are available assoon as you’ve established them. So, unlikewhen using cookies, you can assign a valueto $_SESSION['var'] <strong>and</strong> then refer to$_SESSION['var'] later in that same script.Script 12.10 The header.html file now alsoreferences $_SESSION instead of $_COOKIE.1 2 3
Script 12.11 Destroying a session, as you would ina logout page, requires special syntax to deletethe session cookie <strong>and</strong> the session data on theserver, as well as to clear out the $_SESSION array.1 Deleting session variablesWhen using sessions, you ought to createa method of deleting the session data.In the current example, this would benecessary when the user logs out.Whereas a cookie system only requires thatanother cookie be sent to destroy the existingcookie, sessions are slightly more dem<strong>and</strong>ing,since there are both the cookie on the client<strong>and</strong> the data on the server to consider.To delete an individual session variable,you can use the unset( ) function (whichworks with any variable in <strong>PHP</strong>):unset($_SESSION['var']);But to delete every session variable, youshouldn’t use unset( ), instead, reset the$_SESSION array:$_SESSION = array( );Finally, to remove all of the session datafrom the server, call session_destroy( ):session_destroy( );Note that prior to using any of these methods,the page must begin with session_start( )so that the existing session is accessed. Let’supdate the logout.php script to clean out thesession data.To delete a session:1. Open logout.php (Script 12.6) in yourtext editor or IDE.2. Immediately after the opening <strong>PHP</strong> line,start the session (Script 12.11):session_start( );Anytime you are using sessions, you mustcall the session_start( ) function, preferablyat the very beginning of a page. Thisis true even if you are deleting a session.continues on next pageCookies <strong>and</strong> Sessions 393
3. Change the conditional so that it checks<strong>for</strong> the presence of a session variable:if (!isset($_SESSION['user_id'])) {As with the logout.php script in thecookie examples, if the user is not currentlylogged in, they will be redirected.4. Replace the setcookie( ) lines (thatdelete the cookies) with:$_SESSION = array( );session_destroy( );setcookie ('<strong>PHP</strong>SESSID', '',➝ time( )-3600, '/', '', 0, 0);The first line here will reset the entire$_SESSION variable as a new array,erasing its existing values. The secondline removes the data from the server,<strong>and</strong> the third sends a cookie to delete theexisting session cookie in the browser.Garbage CollectionGarbage collection with respect to sessionsis the process of the server automaticallydeleting the session files (where theactual data is stored). Creating a logoutsystem that destroys a session is ideal, butthere’s no guarantee all users will <strong>for</strong>mallylog out as they should. For this reason,<strong>PHP</strong> includes a cleanup process.Whenever the session_start( ) functionis called, <strong>PHP</strong>’s garbage collectionkicks in, checking the last modificationdate of each session (a session ismodified whenever variables are set orretrieved). Two settings dictate garbagecollection: session.gc_maxlifetime <strong>and</strong>session.gc_probability. The first statesafter how many seconds of inactivitya session is considered idle <strong>and</strong> willthere<strong>for</strong>e be deleted. The second settingdetermines the probability that garbagecollection is per<strong>for</strong>med, on a scale of1 to 100. With the default settings, eachcall to session_start( ) has a 1 percentchance of invoking garbage collection. If<strong>PHP</strong> does start the cleanup, any sessionsthat have not been used in more than1,440 seconds will be deleted.You can change these settings using theini_set( ) function, although be carefulin doing so. Too frequent or too probablegarbage collection can bog down theserver <strong>and</strong> inadvertently end the sessionsof slower users.394 Chapter 12
5. Remove the reference to $_COOKIE inthe message:echo "Logged Out!You are now logged out!";Unlike when using the cookie version ofthe logout.php script, you cannot referto the user by their first name anymore,as all of that data has been deleted.6. Save the file as logout.php, place it inyour <strong>Web</strong> directory, <strong>and</strong> test it in yourbrowser E.The header.html file only needs tocheck if $_SESSION['user_id'] is set, <strong>and</strong> notif the page is the logout page, because by thetime the header file is included by logout.php, all of the session data will have alreadybeen destroyed. The destruction of sessiondata applies immediately, unlike with cookies.Never set $_SESSION equal to NULL <strong>and</strong>never use unset($_SESSION). Either couldcause problems on some servers.In case it’s not absolutely clear what’sgoing on, there exists three kinds of in<strong>for</strong>mationwith a session: the session identifier(which is stored in a cookie by default), thesession data (which is stored in a text file onthe server), <strong>and</strong> the $_SESSION array (whichis how a script accesses the session data inthe text file). Just deleting the cookie doesn’tremove the data file <strong>and</strong> vice versa. Clearingout the $_SESSION array would erase thedata from the text file, but the file itself wouldstill exist, as would the cookie. The threesteps outlined in this logout script effectivelyremove all traces of the session.E The logout page (now featuring sessions).Cookies <strong>and</strong> Sessions 395
improving SessionSecurityBecause important in<strong>for</strong>mation is normallystored in a session (you should neverstore sensitive data in a cookie), securitybecomes more of an issue. With sessionsthere are two things to pay attention to:the session ID, which is a reference pointto the session data, <strong>and</strong> the session dataitself, stored on the server. A maliciousperson is far more likely to hack into asession through the session ID than thedata on the server, so I’ll focus on that sideof things here (in the tips at the end of thissection I mention two ways to protect thesession data itself).The session ID is the key to the sessiondata. By default, <strong>PHP</strong> will store this in acookie, which is preferable from a securityst<strong>and</strong>point. It is possible in <strong>PHP</strong> to usesessions without cookies, but that leavesChanging the Session BehaviorAs part of <strong>PHP</strong>’s support <strong>for</strong> sessions, there are over 20 different configuration options you can set<strong>for</strong> how <strong>PHP</strong> h<strong>and</strong>les sessions. For the full list, see the <strong>PHP</strong> manual, but I’ll highlight a few of themost important ones here. Note two rules about changing the session settings:1. All changes must be made be<strong>for</strong>e calling session_start( ).2. The same changes must be made on every page that uses sessions.Most of the settings can be set within a <strong>PHP</strong> script using the ini_set( ) function (discussed inChapter 8):ini_set (parameter, new_setting);For example, to require the use of a session cookie (as mentioned, sessions can work withoutcookies but it’s less secure), useini_set ('session.use_only_cookies', 1);Another change you can make is to the name of the session (perhaps to use a more user-friendlyone). To do so, call the session_name( ) function:session_name('YourSession');The benefits of creating your own session name are twofold: it’s marginally more secure <strong>and</strong> it maybe better received by the end user (since the session name is the cookie name the end user willsee). The session_name( ) function can also be used when deleting the session cookie:setcookie (session_name( ), '', time( )-3600);If not provided with an argument, this function instead returns the current session name.Finally, there’s also the session_set_cookie_params( ) function. It’s used to tweak the settingsof the session cookie:session_set_cookie_params(expire, path, host, secure, httponly);Note that the expiration time of the cookie refers only to the longevity of the cookie in the <strong>Web</strong>browser, not to how long the session data will be stored on the server.396 Chapter 12
Script 12.12 This final version of the login.phpscript also stores an encrypted <strong>for</strong>m of the user’sHTTP_USER_AGENT (the browser <strong>and</strong> operatingsystem of the client) in a session.1 the application vulnerable to sessionhijacking: If malicious user Alice can learnuser Bob’s session ID, Alice can easily tricka server into thinking that Bob’s sessionID is also Alice’s session ID. At that point,Alice would be riding coattails on Bob’ssession <strong>and</strong> would have access to Bob’sdata. Storing the session ID in a cookiemakes it somewhat harder to steal.One method of preventing hijacking is tostore some sort of user identifier in thesession, <strong>and</strong> then to repeatedly doublecheckthis value. The HTTP_USER_AGENT—a combination of the browser <strong>and</strong>operating system being used—is a likelyc<strong>and</strong>idate <strong>for</strong> this purpose. This adds a layerof security in that one person could onlyhijack another user’s session if they areboth running the exact same browser <strong>and</strong>operating system. As a demonstration ofthis, let’s modify the examples one last time.To use sessions more securely:1. Open login.php (refer to Script 12.8) inyour text editor or IDE.2. After assigning the other sessionvariables, also store the HTTP_USER_AGENT value (Script 12.12):$_SESSION['agent'] =➝ md5($_SERVER['HTTP_USER_AGENT']);The HTTP_USER_AGENT is part of the$_SERVER array (you may recall usingit way back in Chapter 1, “Introductionto <strong>PHP</strong>”). It will have a value likeMozilla/4.0 (compatible; MSIE 8.0;Windows NT 6.1…).continues on next pageCookies <strong>and</strong> Sessions 397
Instead of storing this value in thesession as is, it’ll be run through themd5( ) function <strong>for</strong> added security.That function returns a 32-characterhexadecimal string (called a hash)based upon a value. In theory, no twostrings will have the same md5( ) result.3. Save the file <strong>and</strong> place it in your<strong>Web</strong> directory.4. Open loggedin.php (Script 12.9) in yourtext editor or IDE.5. Change the !isset($_SESSION['user_id']) conditional to (Script 12.13):if (!isset($_SESSION['agent']) OR➝ ($_SESSION['agent'] != md5($_SERVER➝ ['HTTP_USER_AGENT']) )) {This conditional checks two things.First, it sees if the $_SESSION['agent']variable is not set (this part is just as itwas be<strong>for</strong>e, although agent is beingused instead of user_id). The secondpart of the conditional checks if themd5( ) version of $_SERVER['HTTP_USER_AGENT'] does not equal the valuestored in $_SESSION['agent']. If eitherof these conditions is true, the user willbe redirected.6. Save this file, place in your <strong>Web</strong> directory,<strong>and</strong> test in your <strong>Web</strong> browser bylogging in.Script 12.13 This loggedin.php script now confirmsthat the user accessing this page has the sameHTTP_USER_AGENT as they did when theylogged in.1
preventing Session FixationAnother specific kind of session attackis known as session fixation. Thisapproach is the opposite of sessionhijacking. Instead of malicious userAlice finding <strong>and</strong> using Bob’s sessionID, she instead creates her own sessionID (perhaps by logging in legitimately),<strong>and</strong> then gets Bob to access the siteusing that session. The hope is that Bobwould then do something that wouldunknowingly benefit Alice.You can help protect against thesetypes of attacks by changing the sessionID after a user logs in. The session_regenerate_id( ) does just that, providinga new session ID to refer to thecurrent session data. You can use thisfunction on sites <strong>for</strong> which security isparamount (like e-commerce or onlinebanking) or in situations when it’d be particularlybad if certain users (i.e., administrators)had their sessions manipulated.For critical uses of sessions, requirethe use of cookies <strong>and</strong> transmit them over asecure connection, if at all possible. You caneven set <strong>PHP</strong> to only use cookies by settingsession.use_only_cookies to 1.By default, a server stores every sessionfile <strong>for</strong> every site within the same temporarydirectory, meaning any site could theoreticallyread any other site’s session data. If you areusing a server shared with other domains,changing the session.save_path from its defaultsetting will be more secure. For example, it’d bebetter if you stored your site’s session data in adedicated directory particular to your site.The session data itself can also be storedin a database rather than a text file. This is amore secure, but more programming-intensive,option. I teach how to do this in my book <strong>PHP</strong> 5Advanced: Visual QuickPro Guide.The user’s IP address (the networkaddress from which the user is connecting) isnot a good unique identifier, <strong>for</strong> two reasons.First, a user’s IP address can, <strong>and</strong> normallydoes, change frequently (ISPs dynamicallyassign them <strong>for</strong> short periods of time). Second,many users accessing a site from the samenetwork (like a home network or an office)could all have the same IP address.Cookies <strong>and</strong> Sessions 399
Review <strong>and</strong> pursueIf you have any problems with thereview questions or the pursue prompts,turn to the book’s supporting <strong>for</strong>um(www.LarryUllman.com/<strong>for</strong>ums/).ReviewnnnnnnWhat code is used to redirect the user’sbrowser from one page to the next?What does the headers already senterror message mean?What value does $_SERVER['HTTP_HOST']store? What value does $_SERVER['<strong>PHP</strong>_SELF'] store?What does the dirname( ) function do?What does the rtrim( ) function do?What arguments can it take?How do you write a function that returnsmultiple values? How do you call such afunction?n What arguments can the setcookie( )function take?nnnnnnnnHow do you reference values previouslystored in a cookie?How do you delete an existing cookie?Are cookies available immediately afterbeing sent (on the same page)? Whycan you still refer to a cookie (on thesame page) after it is deleted?What debugging steps can you takewhen you have problems with cookies?What does the basename( ) function do?How do you begin a session?How do you reference values previouslystored in a session?Is session data available immediatelyafter being assigned (on the same page)?nnHow do you terminate a session?What debugging steps can you takewhen you have problems with sessions?pursuennnnnnnnnIf you have not already done so, learnhow to view cookie data in your <strong>Web</strong>browser. When developing sites thatuse cookies, enable the option so thatthe browser prompts you when cookiesare received.Make the login <strong>for</strong>m sticky.Add code to the h<strong>and</strong>ling of the $errorsvariable on the login page that uses a<strong>for</strong>each loop if $errors is an array, orjust prints the value of $errors otherwise.Modify the redirect_user( ) functionso that it can be used to redirect theuser to a page within another directory.Implement another cookie example,such as storing a user’s preference inthe cookie, then base a look or featureof a page upon the stored value (whenpresent).Change the code in logout.php (Script12.11) so that it uses the session_name( )function to dynamically set the namevalue of the session cookie being deleted.Implement another session example, ifyou’d like more practice with sessions(you’ll get more practice later in thebook, too).Check out the <strong>PHP</strong> manual pages<strong>for</strong> any new function introduced inthis chapter with which you’re notcom<strong>for</strong>table.Check out the <strong>PHP</strong> manual pages oncookies <strong>and</strong> sessions (two separatesections) to learn more. Also read someof the user-submitted comments <strong>for</strong>additional tips.400 Chapter 12
13SecurityMethodsThe security of your <strong>Web</strong> applications issuch an important topic that it really cannotbe overstressed. Although security-relatedissues have been mentioned throughoutthis book, this chapter will help to fill in certaingaps, finalize other points, <strong>and</strong> teachseveral new things.The topics discussed here include: preventingspam; typecasting variables; preventingcross-site scripting (XSS) <strong>and</strong> SQL injectionattacks; the new Filter extension; <strong>and</strong> validatinguploaded files by type. This chapterwill use five discrete examples to bestdemonstrate these concepts. Some othercommon security issues <strong>and</strong> best practiceswill be mentioned in sidebars as well.in This ChapterPreventing Spam 402Validating Data by Type 409Validating Files by Type 414Preventing XSS Attacks 418Using the Filter Extension 421Preventing SQL Injection Attacks 425Review <strong>and</strong> Pursue 432
preventing SpamSpam is nothing short of a plague, clutteringup the Internet <strong>and</strong> email inboxes.There are steps you can take to avoidreceiving spam at your email accounts,but in this book the focus is on preventingspam being sent through your <strong>PHP</strong> scripts.Chapter 11, “<strong>Web</strong> Application Development,”shows how easy it is to send email using<strong>PHP</strong>’s mail( ) function. The example there,a contact <strong>for</strong>m, took some in<strong>for</strong>mation fromthe user A <strong>and</strong> sent it to an email address.Although it may seem like there’s no harmin this system, there’s actually a big securityhole. But first, some background on whatan email actually is.Regardless of how an email is sent, howit’s <strong>for</strong>matted, <strong>and</strong> what it looks like whenit’s received, an email contains two parts:a header <strong>and</strong> a body. The header includessuch in<strong>for</strong>mation as the to <strong>and</strong> fromaddresses, the subject, the date, <strong>and</strong> moreB. Each item in the header is on its ownline, in the <strong>for</strong>mat Name: value. The bodyof the email is exactly what you think it is:the body of the email.A A simple, st<strong>and</strong>ard HTML contact <strong>for</strong>m.B The raw source version of the email sent by the contact <strong>for</strong>m A.402 Chapter 13
In looking at <strong>PHP</strong>’s mail( ) function—mail (to, subject, body [,headers]);—you can see that one of the argumentsgoes straight to the email’s body <strong>and</strong> therest appear in its header. To send spam toyour address (as in Chapter 11’s example),all a person would have to do is enter thespam message into the comments sectionof the <strong>for</strong>m A. That’s bad enough, but tosend spam to anyone else at the sametime, all the user would have to do is addBcc: poorsap@example.org, followedby some sort of line terminator (like anewline or carriage return), to the email’sheader. With the example as is, this justmeans entering this into the from valueof the contact <strong>for</strong>m: me@example.com\nBcc:poorsap@example.org.You might think that safeguarding everythingthat goes into an email’s headerwould be sufficiently safe, but as an emailis just one document, bad input in a bodycan impact the header, too.TABLe 13.1 Spam Tip-offsStringscontent-type:mime-version:multipart-mixed:content-transfer-encoding:bcc:cc:to:\r\n%0a%0dThere are a couple of preventive techniquesthat can be applied to this contact <strong>for</strong>m.First, validate any email addresses usingregular expressions, covered in Chapter 13,“Perl-Compatible Regular Expressions,” orthe Filter extension, discussed in just a fewpages. Second, now that you know what anevildoer must enter to send spam (Table 13.1),watch <strong>for</strong> those characters <strong>and</strong> strings in<strong>for</strong>m values. If a value contains anything fromthat list, don’t use that value in a sent email.(The last four values in Table 13.1 are all differentways of creating newlines.)In this next example, a modification of theemail script from Chapter 11, I’ll define afunction that scrubs all potentially dangerouscharacters from provided data. Two new <strong>PHP</strong>functions will be used as well: str_replace( )<strong>and</strong> array_map( ). Both will be explained indetail in the steps that follow.A Security ApproachThe most important concept tounderst<strong>and</strong> about security is that it’s nota binary state: don’t think of a <strong>Web</strong> siteor script as being either secure or notsecure. Security isn’t a switch that youturn on <strong>and</strong> off; it’s a scale that you canmove up <strong>and</strong> down. When you program,think about what you can do to makeyour site more secure <strong>and</strong> what you’vedone that makes it less secure. Also,keep in mind that improved securitynormally comes at a cost of convenience(both to you, the programmer, <strong>and</strong> to theend user) <strong>and</strong> per<strong>for</strong>mance. Increasedsecurity normally means more code, morechecks, <strong>and</strong> more required of the server.When developing <strong>Web</strong> applications, thegoal is to achieve a level of security that’sappropriate <strong>for</strong> the particular situation.And then err on the side of being a tadtoo secure, just to be prudent.Security Methods 403
To prevent spam:1. Open email.php (Script 11.1) in your texteditor or IDE.To complete this spam-purification, theemail script needs to be modified.2. After checking <strong>for</strong> the <strong>for</strong>m submission,begin defining a function (Script 13.1):function spam_scrubber($value) {This function will take one argument:a string. Normally, I would definefunctions at the top of the script, orin a separate file, but to make thingssimpler, it’ll be defined within thesubmission-h<strong>and</strong>ling block of code.3. Create a list of really bad things thatwouldn’t be in a legitimate contact<strong>for</strong>m submission:$very_bad = array('to:', 'cc:',➝'bcc:', 'content-type:',➝'mime-version:',➝'multipart-mixed:',➝'content-transfer-encoding:');Any of these strings should not bepresent in an honest contact <strong>for</strong>msubmission (it’s possible someonemight legitimately use to: in theircomments, but unlikely). If any of thesestrings are present, then this is a spamattempt. To make it easier to test <strong>for</strong>all these, they’re placed in an array,which will be looped through (Step 4).The comparison in Step 4 will be caseinsensitive,so each of the dangerousstrings is written in all lowercase letters.4. Loop through the array. If a very badthing is found, return an empty stringinstead:<strong>for</strong>each ($very_bad as $v) {if (stripos($value, $v) != =➝ false) return '';}Script 13.1 This version of the script can nowsafely send emails without concern <strong>for</strong> spam.Any problematic characters will be caught bythe spam_scrubber( ) function.1 2 3 4 5 Contact Me6 7 8 Contact Me9
Script 13.1 continued31 // Replace any newline characterswith spaces:32 $value = str_replace(array( "\r","\n", "%0a", "%0d"), ' ', $value);3334 // Return the value:35 return trim($value);3637 } // End of spam_scrubber( )function.3839 // Clean the <strong>for</strong>m data:40 $scrubbed = array_map('spam_scrubber', $_POST);4142 // Minimal <strong>for</strong>m validation:43 if (!empty($scrubbed['name']) &&!empty($scrubbed['email']) &&!empty($scrubbed['comments']) ) {4445 // Create the body:46 $body = "Name: {$scrubbed['name']}\n\nComments:{$scrubbed['comments']}";4748 // Make it no longer than 70characters long:49 $body = wordwrap($body, 70);5051 // Send the email:52 mail('your_email@example.com','Contact Form Submission', $body,"From: {$scrubbed['email']}");5354 // Print a message:55 echo 'Thank you <strong>for</strong>contacting me. I will reply someday.';5657 // Clear $_POST (so that the <strong>for</strong>m'snot sticky):58 $_POST = array( );5960 } else {61 echo 'Please fill out the<strong>for</strong>m completely.';62 }6364 } // End of main isset( ) IF.The <strong>for</strong>each loop will access eachitem in the $very_bad array one at atime, assigning each item to $v. Withinthe loop, the stripos( ) functionwill check if the item is in the stringprovided to this function as $value. Thestripos( ) function per<strong>for</strong>ms a caseinsensitivesearch (so it would matchbcc:, Bcc:, bCC:, etc.). The functionreturns a Boolean TRUE if the needleis found in the haystack (e.g., looking<strong>for</strong> occurrences of $v in $value). Theconditional there<strong>for</strong>e says that if thatfunction’s results do not equal FALSE(i.e., $v was not found in $value), returnan empty string.There<strong>for</strong>e, <strong>for</strong> each of the dangerouscharacter strings, the first time that anyof them is found in the submitted value,the function will return an empty string<strong>and</strong> terminate (functions automaticallystop executing once they hit a return).5. Replace any newline characterswith spaces:$value = str_replace(array( "\r",➝ "\n", "%0a", "%0d"), ' ', $value);Newline characters, which arerepresented by \r, \n , %0a, <strong>and</strong> %0d,may or may not be problematic. Anewline character is required to sendspam (or else you can’t create theproper header) but will also appear ifa user just hits Enter or Return whiletyping in a textarea box. For this reason,any found newlines will just be replacedby a space. This means that thesubmitted value could lose some of its<strong>for</strong>matting, but that’s a reasonable priceto pay to stop spam.continues on next pagecode continues on next pageSecurity Methods 405
The str_replace( ) function looksthrough the value in the third argument<strong>and</strong> replaces any occurrences of thecharacters in the first argument with thecharacter or characters in the second.Or as the <strong>PHP</strong> manual puts it:mixed str_replace (mixed $search,➝ mixed $replace, mixed $subject)This function is very flexible in that itcan take strings or arrays <strong>for</strong> its threearguments (the mixed means it accepts amix of argument types). Hence, this line ofcode in the script assigns to the $valuevariable its original value, with any newlinecharacters replaced by a single space.There is a case-insensitive version ofthis function, but it’s not necessary here,as, <strong>for</strong> example, \r is a carriage returnbut \R is not.6. Return the value <strong>and</strong> complete thefunction:return trim($value);} // End of spam_scrubber( )➝ function.Finally, this function returns the value,trimmed of any leading <strong>and</strong> endingspaces. Keep in mind that the functionwill only get to this point if none of thevery bad things was found.7. After the function definition, invoke thespam_scrubber( ) function:$scrubbed = array_map➝ ('spam_scrubber', $_POST);This approach is beautiful in itssimplicity! The array_map( ) functionhas two required arguments. The firstis the name of the function to call.In this case, that’s spam_scrubber(without the parentheses, becauseyou’re providing the function’s name,not calling the function). The secondargument is an array.What array_map( ) does is apply thenamed function once <strong>for</strong> each arrayelement, sending each array element’svalue to that function call. In this script,$_POST has four elements—name,email, comments, <strong>and</strong> submit, meaningthat the spam_scrubber( ) functionwill be called four times, thanks toarray_map( ). After this line of code,the $scrubbed array will end up withfour elements: $scrubbed['name'] willScript 13.1 continued6566 // Create the HTML <strong>for</strong>m:67 ?>68 Please fill out this <strong>for</strong>m to contact me.69 70 Name:
C The presence of cc: in the email address fieldwill prevent this submission from being sent in anemail D.D The email was not sent because of the verybad characters used in the email address, whichgets turned into an empty string by the spamprevention function.have the value of $_POST['name'] afterrunning it through spam_scrubber( );$scrubbed['email'] will have the samevalue as $_POST['email'] after running itthrough spam_scrubber( ); <strong>and</strong> so <strong>for</strong>th.This one line of code then takes anentire array of potentially tainteddata ($_POST), cleans it using spam_scrubber( ), <strong>and</strong> assigns the result to anew variable. Here’s the most importantthing about this technique: from here onout, the script must use the $scrubbedarray, which is clean, not $_POST, whichis still potentially dirty.8. Change the <strong>for</strong>m validation to use thisnew array:if (!empty($scrubbed['name']) &&➝ !empty($scrubbed['email']) &&➝ !empty($scrubbed['comments']) ) {Each of these elements could have anempty value <strong>for</strong> two reasons. First, if theuser left them empty. Second, if the userentered one of the bad strings in thefield C, which would be turned into anempty string by the spam_scrubber( )function D.9. Change the creation of the $body variableso that it uses the clean values:$body = "Name: {$scrubbed➝ ['name']}\n\nComments:➝ {$scrubbed['comments']}";10. Change the invocation of the mail( )function to use the clean email address:mail('your_email@example.com',➝'Contact Form Submission', $body,➝ "From: {$scrubbed['email']}");Remember to use your own emailaddress in the mail( ) call, or you’llnever get the message!continues on next pageSecurity Methods 407
11. Change the <strong>for</strong>m so that it uses the$scrubbed version of the values:Name:
TABLe 13.2 Type Validation FunctionsFunctionis_array( )is_bool( )is_float( )is_int( )is_null( )is_numeric( )is_resource( )is_scalar( )is_string( )Checks ForArraysBooleans (TRUE, FALSE)Floating-point numbersIntegersNULLsNumeric values, even as astring (e.g., '20')Resources, like a databaseconnectionScalar (single-valued)variablesStringsValidating Databy TypeFor the most part, the <strong>for</strong>m validationused in this book thus far has been ratherminimal, often just checking if a variablehas any value at all. In many situations, thisreally is the best you can do. For example,there’s no perfect test <strong>for</strong> what a validstreet address is or what a user mightenter into a comments field. Still, much ofthe data you’ll work with can be validatedin stricter ways. In the next chapter,the sophisticated concept of regularexpressions will demonstrate just that. Buthere I’ll cover the more approachable waysyou can validate some data by type.<strong>PHP</strong> supports many types of data: strings,numbers (integers <strong>and</strong> floats), arrays, <strong>and</strong>so on. For each of these, there’s a specificfunction that checks if a variable is of thattype (Table 13.2). You’ve already seen theis_numeric( ) function in action in earlierchapters, <strong>and</strong> is_array( ) is great <strong>for</strong>continues on next pageTwo Validation ApproachesA large part of security is based upon validation: if data comes from outside of the server—fromHTML <strong>for</strong>ms, the URL, cookies, it can’t be trusted. (A higher level of security also validates anydata coming from outside of the script, including sessions <strong>and</strong> databases.) There are two typesof validation: whitelist <strong>and</strong> blacklist. In the calculator example, we know that all values must bepositive, that they must all be numbers, <strong>and</strong> that the quantity must be an integer (the other twonumbers could be integers or floats, it makes no difference). Typecasting <strong>for</strong>ces the inputs to benumbers, <strong>and</strong> a check confirms that they are positive. At this point, the assumption is that the inputis valid. This is a whitelist approach: these values are good; anything else is bad.The preventing spam example uses a blacklist approach. That script knows exactly which charactersare bad <strong>and</strong> invalidates input that contains them. All other input is considered to be good.Many security experts prefer the whitelist approach, but it can’t always be used. Each example willdictate which approach will work best, but it’s important to use one or the other. Don’t just assumethat data is safe without some sort of validation.Security Methods 409
confirming a variable is acceptable to usein a <strong>for</strong>each loop. Each function returnsTRUE if the submitted variable is of acertain type <strong>and</strong> FALSE otherwise.In <strong>PHP</strong>, you can even change a variable’stype, after it’s been assigned a value. Doingso is called typecasting <strong>and</strong> is accomplishedby preceding a variable’s name by thedestination type in parentheses:$var = 20.2;echo (int) $var; // 20Depending upon the original <strong>and</strong> destinationtypes, <strong>PHP</strong> will convert the variable’svalue accordingly:$var = 20;echo (float) $var; // 20.0With numeric values, the conversion isstraight<strong>for</strong>ward, but with other variabletypes, more complex rules apply:$var = 'trout';echo (int) $var; // 0In most circumstances you don’t need tocast a variable from one type to another,as <strong>PHP</strong> will often automatically do so asneeded. But <strong>for</strong>cibly casting a variable’stype can be a good security measurein your <strong>Web</strong> applications. To show howyou might use this notion, let’s create acalculator script <strong>for</strong> determining the totalpurchase price of an item A.To use typecasting:1. Begin a new <strong>PHP</strong> document in yourtext editor or IDE, to be namedcalculator.php (Script 13.2):A The HTML <strong>for</strong>m takes three inputs:a quantity, a price, <strong>and</strong> a tax rate.Script 13.2 By typecasting variables, this scriptmore definitively validates that data is of thecorrect <strong>for</strong>mat.1 2 3 4 5 Widget Cost Calculator6 7 8
Script 13.2 continued2122 // Calculate the total:23 $total = $quantity * $price;24 $total += $total * ($tax/100);2526 // Print the result:27 echo 'The total cost of purchasing' . $quantity . ' widget(s) at $' .number_<strong>for</strong>mat ($price, 2) . ' each,plus tax, is $' . number_<strong>for</strong>mat($total, 2) . '.';2829 } else { // Invalid submitted values.30 echo 'Please enter a validquantity, price, <strong>and</strong> tax rate.';31 }3233 } // End of main isset( ) IF.3435 // Leave the <strong>PHP</strong> section <strong>and</strong> create theHTML <strong>for</strong>m.36 ?>37 Widget Cost Calculator38 39 Quantity:
5. Calculate <strong>and</strong> print the results:$total = $quantity * $price;$total += $total * ($tax/100);echo 'The total cost of➝ purchasing ' . $quantity . '➝ widget(s) at $' . number_<strong>for</strong>mat➝ ($price, 2) . ' each, plus tax,➝ is $' . number_<strong>for</strong>mat➝ ($total, 2) . '.';To calculate the total, first the quantityis multiplied by the price. To apply thetax to the total, the value of the totaltimes the tax divided by 100 (e.g., 6.5%becomes .065) is then added, using theaddition assignment shortcut operator.The number_<strong>for</strong>mat( ) function is usedto print both the price <strong>and</strong> total valuesin the proper <strong>for</strong>mat B.6. Complete the conditionals:} else {echo 'Please➝ enter a valid quantity,➝ price, <strong>and</strong> tax rate.';}} // End of main isset( ) IF.A little CSS is used to create a bold,red error message, should there bea problem C.7. Begin the HTML <strong>for</strong>m:?>Widget Cost CalculatorQuantity:
entered. By referring to $quantity etc.instead of $_POST['quantity'] etc., the<strong>for</strong>m will reflect the value <strong>for</strong> each inputas it was typecast.8. Complete the HTML <strong>for</strong>m:Price:
Validating Filesby TypeChapter 11 includes an example of h<strong>and</strong>lingfile uploads in <strong>PHP</strong>. As uploading filesallows users to place a more potent typeof content on your server (compared withjust the text sent via a <strong>for</strong>m), one cannotbe too mindful of security when it comes toh<strong>and</strong>ling them. In that particular example,the uploaded file was validated bychecking its MIME type. Specifically, with anuploaded file, $_FILES['upload']['type']refers to the MIME type provided by theuploading browser. This is a good start, butit’s easy <strong>for</strong> a malicious user to trick thebrowser into providing a false MIME type. Amore reliable way of confirming a file’s typeis to use the Fileinfo extension.Added in <strong>PHP</strong> 5.3, the Fileinfo extensiondetermines a file’s type (<strong>and</strong> encoding)by hunting <strong>for</strong> “magic bytes” or “magicnumbers” within the file. For example,the data that makes up a GIF image mustbegin with the ASCII code that representseither GIF89a or GIF87a; the data thatmakes up a PDF file starts with %PDF.To use Fileinfo, start by creating a Filein<strong>for</strong>esource:$fileinfo = finfo_open(kind);The kind value will be one of severalconstants, indicating the type of resourceyou want to create. To determine a file’stype, the constant is FILEINFO_MIME_TYPE:$fileinfo = finfo_open➝ (FILEINFO_MIME_TYPE);Next, call the finfo_file( ) function,providing the Fileinfo resource <strong>and</strong> areference to the file you want to examine:finfo_file($fileinfo, $filename);This function returns the file’s MIME type(given the already created resource), basedupon the file’s actual magic bytes.Finally, once you’re done, you should closethe Fileinfo resource:finfo_close($fileinfo);This next script will use this in<strong>for</strong>mation toconfirm that an uploaded file is an RTF (RichText Format). Note that you’ll only be able totest this example if you are using version 5.3of <strong>PHP</strong> or later A. If you are using an earlierversion, you’ll need to install the Fileinfoextension through PECL (<strong>PHP</strong> ExtensionCommunity Library, http://pecl.php.net).On Windows, if you are using <strong>PHP</strong> 5.3 orlater, the Fileinfo DLL file should be includedwith your installation, but you may need toenable it in your php.ini configuration file(download Appendix A, “Installation” frompeachpit.com).A If your <strong>PHP</strong> installation does not support theFileinfo extension, you’ll see an error messagelike this one.414 Chapter 13
Script 13.3 Using the Fileinfo extension, thisscript does a good job of confirming an uploadedfile’s type.1 2 3 4 5 Upload a RTF Document6 7 8
4. Create the Fileinfo resource:$fileinfo = finfo_open➝ (FILEINFO_MIME_TYPE);This line, as already explained, createsa Fileinfo resource whose specificpurpose is to retrieve a file’s MIME type.5. Check the file’s type:if (finfo_file($fileinfo,➝ $_FILES['upload']['tmp_name']) = =➝'text/rtf') {echo 'The file would be➝ acceptable!';If the finfo_file( ) function returnsa value of text/rtf <strong>for</strong> the uploaded file,then the file has the proper type <strong>for</strong> thepurposes of this script. In that case,a message is printed B.6. Delete the uploaded file:unlink($_FILES['upload']➝ ['tmp_name']);In a real-world example, the scriptwould now move the file over to its finaldestination on the server. As this script issimply <strong>for</strong> the purpose of validating a file’stype, the file can be removed instead.7. Complete the type conditional:} else { // Invalid type.echo 'Please➝ upload an RTF document.';}Script 13.3 continued33 // Close the resource:34 finfo_close($fileinfo);3536 } // End of isset($_FILES['upload'])IF.3738 // Add file upload error h<strong>and</strong>ling, ifdesired.3940 } // End of the submitted conditional.41 ?>4243 44 45 Select an RTFdocument of 512KB or smaller to beuploaded:46 File: 47 48 49 50 51 B If the selected <strong>and</strong> uploaded document has avalid RTF MIME type, the user will see this result.416 Chapter 13
If the uploaded file’s MIME type is nottext/rtf, the script will print an errormessage C.8. Close the Fileinfo resource:finfo_close($fileinfo);The final step is to close the open Filein<strong>for</strong>esource, once it’s no longer needed.9. Complete the remaining conditionals:} // End of isset($_FILES➝ ['upload']) IF.} // End of the submitted➝ conditional.?>You could also add debugging in<strong>for</strong>mation,such as the related uploaded errormessage, if an error occurs.10. Create the <strong>for</strong>m:Select an RTF➝ document of 512KB or smaller➝ to be uploaded:File: The <strong>for</strong>m uses the proper enctype attribute,has a MAX_FILE_SIZE recommendationin a hidden <strong>for</strong>m input, <strong>and</strong> uses afile input type: the three requirements <strong>for</strong>accepting file uploads. That’s all there isto this example (as in B <strong>and</strong> C).11. Complete the page:12. Save the file as upload_rtf.php, placeit in your <strong>Web</strong> directory, <strong>and</strong> test it inyour <strong>Web</strong> browser.The same Fileinfo resource can be appliedto multiple files. Just close the resource afterthe script is done with the resource.C Uploaded files without the proper MIME typeare rejected.Security Methods 417
preventing xSS AttacksHTML is simply plain text, like , which isgiven special meaning by <strong>Web</strong> browsers(as by making text bold). Because of thisfact, your <strong>Web</strong>-site’s user could easilyput HTML in their <strong>for</strong>m data, like in thecomments field in the email example.What’s wrong with that, you might ask?Many dynamically driven <strong>Web</strong> applicationstake the in<strong>for</strong>mation submitted by a user,store it in a database, <strong>and</strong> then redisplaythat in<strong>for</strong>mation on another page. Think ofa <strong>for</strong>um, as just one example. At the veryleast, if a user enters HTML code in theirdata, such code could throw off the layout<strong>and</strong> aesthetic of your site. Taking this a stepfurther, JavaScript is also just plain text,but text that has special meaning—executablemeaning—within a <strong>Web</strong> browser. Ifmalicious code entered into a <strong>for</strong>m werere-displayed in a <strong>Web</strong> browser A, it couldcreate pop-up windows B, steal cookies,or redirect the browser to other sites. Suchattacks are referred to as cross-site scripting(XSS). As in the email example, whereyou need to look <strong>for</strong> <strong>and</strong> nullify bad stringsfound in data, prevention of XSS attacks isaccomplished by addressing any potentiallydangerous <strong>PHP</strong>, HTML, or JavaScript.<strong>PHP</strong> includes a h<strong>and</strong>ful of functions <strong>for</strong>h<strong>and</strong>ling HTML <strong>and</strong> other code foundwithin strings. These include:nnnhtmlspecialchars( ), which turns&, ‘, “, into an HTML entity<strong>for</strong>mat (&, ", etc.)htmlentities( ), which turns allapplicable characters into their HTMLentity <strong>for</strong>matstrip_tags( ), which removes all HTML<strong>and</strong> <strong>PHP</strong> tagsThese three functions are roughly listed inorder from least disruptive to most. WhichA The malicious <strong>and</strong> savvy user can enter HTML,CSS, <strong>and</strong> JavaScript into textual <strong>for</strong>m fields.B The JavaScriptentered into thecomments field Awould create thisalert window whenthe comments weredisplayed in the<strong>Web</strong> browser.C Thanks to the htmlentities( ) <strong>and</strong> strip_tags( ) functions, malicious code entered into a<strong>for</strong>m field A can be rendered inert.418 Chapter 13
Script 13.4 Applying the htmlentities( ) <strong>and</strong>strip_tags( ) functions to submitted text canprevent XSS attacks.1 2 3 4 5 XSS Attacks6 7 8 20 21 Do your worst! 22 23 24 25 function you’ll want to use depends uponthe application at h<strong>and</strong>. To demonstratehow these functions work <strong>and</strong> differ,let’s just create a simple <strong>PHP</strong> page thattakes some text <strong>and</strong> runs it through thesefunctions, printing the results C.To prevent xSS attacks:1. Begin a new <strong>PHP</strong> document in yourtext editor or IDE, to be named xss.php(Script 13.4):XSS Attacks
To keep submitted in<strong>for</strong>mation frommessing up a page or hacking the<strong>Web</strong> browser, it’s run through thehtmlentities( ) function. With thisfunction, any HTML entity will betranslated; <strong>for</strong> instance, < <strong>and</strong> > willbecome < <strong>and</strong> > respectively.4. Apply the strip_tags( ) function,printing the results:echo 'After strip_tags( )➝ ' . strip_tags($_POST➝ ['data']). '';The strip_tags( ) function completelytakes out any HTML, JavaScript, or <strong>PHP</strong>tags. It’s there<strong>for</strong>e the most foolprooffunction to use on submitted data.5. Complete the <strong>PHP</strong> section:}?>6. Display the HTML <strong>for</strong>m:Do your worst! The <strong>for</strong>m A has only one field <strong>for</strong> theuser to complete: a textarea.7. Complete the page:8. Save the page as xss.php, place it inyour <strong>Web</strong> directory, <strong>and</strong> test it in your<strong>Web</strong> browser.9. View the source code of the page tosee the full effect of these functions D.Both htmlspecialchars( ) <strong>and</strong>htmlentities( ) take an optional parameterindicating how quotation marks should beh<strong>and</strong>led. See the <strong>PHP</strong> manual <strong>for</strong> specifics.The strip_tags( ) function takesan optional parameter indicating what tagsshould not be stripped.$var = strip_tags ($var, '');The strip_tags( ) function will removeeven invalid HTML tags, which may causeproblems. For example, strip_tags( ) willyank out all of the code it thinks is an HTMLtag, even if it’s improperly <strong>for</strong>med, like
using the FilterextensionEarlier, this chapter introduced the conceptof typecasting, which is a good way to <strong>for</strong>cea variable to be of the right type. In the nextchapter, you’ll learn about regular expressions,which can validate both the type ofdata <strong>and</strong> its specific contents or <strong>for</strong>mat.Introduced in <strong>PHP</strong> 5.2 is the Filter extension(www.php.net/filter), an important tool thatbridges the gap between the relatively simpleapproach of typecasting <strong>and</strong> the morecomplex concept of regular expressions.The Filter extension can be used <strong>for</strong> one oftwo purposes: validating data or sanitizingit. A validation process, as you know well bynow, confirms that data matches expectations.Sanitization, by comparison, alters databy removing inappropriate characters inorder to make the data meet expectations.The most important function in the Filterextension is filter_var( ):filter_var(variable, filter➝ [,options]);The function’s first argument is the variableto be filtered; the second is the filter toapply; <strong>and</strong>, the optional third argument is<strong>for</strong> adding additional criteria. Table 13.3lists the validation filters, each of which isrepresented as a constant.For example, to confirm that a variable hasa decimal value, you would use:if (filter_var($var, FILTER_VALIDATE_➝ FLOAT)) {A couple of filters take an optionalparameter, the most common being theFILTER_VALIDATE_INT filter, which hasmin_range <strong>and</strong> max_range options<strong>for</strong> controlling the smallest <strong>and</strong> largestacceptable values. For example, this nextbit of code confirms that the $age variableis an integer between 1 <strong>and</strong> 120 (inclusive):if (filter_var($var, FILTER_VALIDATE_➝ INT, array('min_range' => 1,➝'max_range' => 120))) {To sanitize data, you’ll still use thefilter_var( ) function, but use one of thesanitation filters as listed in Table 13.4.continues on next pageTABLe 13.3 Validation FiltersConstantFILTER_VALIDATE_BOOLEANFILTER_VALIDATE_EMAILFILTER_VALIDATE_FLOATFILTER_VALIDATE_INTFILTER_VALIDATE_IPFILTER_VALIDATE_REGEXPFILTER_VALIDATE_URLTABLe 13.4 Sanitization FiltersConstantFILTER_SANITIZE_EMAILFILTER_SANITIZE_ENCODEDFILTER_SANITIZE_MAGIC_QUOTESFILTER_SANITIZE_NUMBER_FLOATFILTER_SANITIZE_NUMBER_INTFILTER_SANITIZE_SPECIAL_CHARSFILTER_SANITIZE_STRINGFILTER_SANITIZE_STRIPPEDFILTER_SANITIZE_URLFILTER_UNSAFE_RAWSecurity Methods 421
Many of the filters duplicate other<strong>PHP</strong> functions. For example, FILTER_SANITIZE_MAGIC_QUOTES is the sameas applying addslashes( ); FILTER_SANITIZE_SPECIAL_CHARS can be usedin lieu of htmlspecialchars( ), <strong>and</strong>FILTER_SANITIZE_STRING( ) can be usedas a replacement <strong>for</strong> strip_tags( ). The<strong>PHP</strong> manual lists several additional flags,as constants, that can be used as theoptional third argument to affect how eachfilter behaves. As an example of applyinga sanitizing filter, this code is equivalentto how strip_tags( ) is used in xss.php(Script 13.4):echo 'After strip_tags( )➝ ' . filter_var($_POST['data'],➝ FILTER_SANITIZE_STRING) . '';If you get hooked on using the Filterextension, you may appreciate theconsistency of being able to use it <strong>for</strong> alldata sanitization, even when functionssuch as strip_tags( ) exist.To practice this, the next example willupdate calculator.php (Script 13.2) sothat it sanitizes all of the incoming data.Remember that you need <strong>PHP</strong> 5.2 or laterto use the Filter extension. If you’re usingan earlier version of <strong>PHP</strong>, you can installthe Filter extension using PECL.To use the Filter extension:1. Open calculator.php (Script 13.2) inyour text editor or IDE.2. Change the assignment of the$quantity variable to (Script 13.5):$quantity = (isset($_POST➝ ['quantity'])) ? filter_var➝ ($_POST['quantity'], FILTER_➝ VALIDATE_INT, array('min_range'➝ => 1)) : NULL;Script 13.5 Using the Filter extension, this scriptsanitizes incoming data rather than typecasting it,as in the earlier version of the script.1 2 3 4 5 Widget Cost Calculator6 7 8
Script 13.5 continued29 } else { // Invalid submitted values.30 echo 'Please enter a validquantity, price, <strong>and</strong> tax rate.';31 }3233 } // End of main isset( ) IF.3435 // Leave the <strong>PHP</strong> section <strong>and</strong> create theHTML <strong>for</strong>m.36 ?>37 Widget Cost Calculator38 39 Quantity:
4. Change the assignment of the $taxvariable to:$tax = (isset($_POST['tax'])) ?➝ filter_var($_POST['tax'],➝ FILTER_SANITIZE_NUMBER_FLOAT,➝ FILTER_FLAG_ALLOW_FRACTION) :➝ NULL;This is a repetition of the code in Step 3.5. Save the page, place it in your <strong>Web</strong>directory, <strong>and</strong> test it in your <strong>Web</strong>browser A <strong>and</strong> B.A Invalid values in submitted<strong>for</strong>m data…The filter_has_var( ) functionconfirms if a variable with a given name exists.The filter_input_array( ) functionallows you to apply an array of filters to an arrayof variables in one step. For details (<strong>and</strong> perhapsto be blown away), see the <strong>PHP</strong> manual.B …will be nullified by the Filter extension (asopposed to typecasting, which, <strong>for</strong> example,converted the string cat to the number 0).424 Chapter 13
preventing SQLinjection AttacksAnother type of attack that malicious userscan attempt is SQL injection attacks. Asthe name implies, these are endeavors toinsert bad code into a site’s SQL queries.One aim of such attacks is that they wouldcreate a syntactically invalid query, therebyrevealing something about the script ordatabase in the resulting error messageA. An even bigger aspiration is that theinjection attack could alter, destroy, orexpose the stored data.Fortunately, SQL injection attacks arerather easy to prevent. Start by validatingall data to be used in queries (<strong>and</strong> per<strong>for</strong>mtypecasting, or apply the Filter extension,whenever possible). Second, use a functionlike mysqli_real_escape_string( ),which makes data safe to use in queries.This function was introduced in Chapter 9,“Using <strong>PHP</strong> <strong>and</strong> <strong>MySQL</strong>.” Third, don’t showdetailed errors on live sites.An alternative to using mysqli_real_escape_string( ) is to use preparedstatements. Prepared statements wereadded to <strong>MySQL</strong> in version 4.1, <strong>and</strong> <strong>PHP</strong>continues on next pageA If a site reveals a detailed error message <strong>and</strong> doesn’t properly h<strong>and</strong>le problematic characters in submittedvalues, hackers can learn a lot about your server.prepared Statement per<strong>for</strong>mancePrepared statements can be more secure than running queries in the old-fashioned way, but theymay also be faster. If a <strong>PHP</strong> script sends the same query to <strong>MySQL</strong> multiple times, using differentvalues each time, prepared statements can really speed things up. In such cases, the query itselfis only sent to <strong>MySQL</strong> <strong>and</strong> parsed once. Then, the values are sent to <strong>MySQL</strong> separately.As a trivial example, the following code would run 100 queries in <strong>MySQL</strong>:$q = 'INSERT INTO counter (num) VALUES (?)';$stmt = mysqli_prepare($dbc, $q);mysqli_stmt_bind_param($stmt, 'i', $n);<strong>for</strong> ($n = 1; $n
can use them as of version 5 (thanks tothe Improved <strong>MySQL</strong> extension). When notusing prepared statements, the entire query,including the SQL syntax <strong>and</strong> the specificvalues, is sent to <strong>MySQL</strong> as one long string.<strong>MySQL</strong> then parses <strong>and</strong> executes it. With aprepared query, the SQL syntax is sent to<strong>MySQL</strong> first, where it is parsed, making sureit’s syntactically valid (e.g., confirming thatthe query does not refer to tables or columnsthat don’t exist). Then the specific valuesare sent separately; <strong>MySQL</strong> assemblesthe query using those values, then executesit. The benefits of prepared statements areimportant: greater security <strong>and</strong> potentiallybetter per<strong>for</strong>mance. I’ll focus on the securityaspect here, but see the sidebar <strong>for</strong> a discussionof per<strong>for</strong>mance.Prepared statements can be created outof any INSERT, UPDATE, DELETE, or SELECTquery. Begin by defining your query,marking placeholders using questionmarks. As an example, take the SELECTquery from edit_user.php (Script 10.3):$q = "SELECT first_name, last_name,➝ email FROM users WHERE user_id=$id";As a prepared statement, this query becomes$q = "SELECT first_name, last_name,➝ email FROM users WHERE user_id=?";Next, prepare the statement in <strong>MySQL</strong>,assigning the results to a <strong>PHP</strong> variable:$stmt = mysqli_prepare($dbc, $q);At this point, <strong>MySQL</strong> will parse the query,but it won’t execute it.Next, you bind <strong>PHP</strong> variables to the query’splaceholders. In other words, you statethat one variable should be used <strong>for</strong> thefirst question mark, another variable <strong>for</strong> thenext question mark, <strong>and</strong> so on. Continuingwith the same example, you would codemysqli_stmt_bind_param($stmt, 'i', $id);The i part of the comm<strong>and</strong> indicates whatkind of value should be expected, usingthe characters listed in Table 13.5. In thiscase, the query expects to receive oneinteger. As another example, here’s howthe login query from Chapter 12, “Cookies<strong>and</strong> Sessions,” would be h<strong>and</strong>led:$q = "SELECT user_id, first_name➝ FROM users WHERE email=? AND➝ pass=SHA1(?)";$stmt = mysqli_prepare($dbc, $q);mysqli_stmt_bind_param($stmt, 'ss',➝ $e, $p);In this example, something interesting isalso revealed: even though both the emailaddress <strong>and</strong> password values are strings,they are not placed within quotes in thequery. This is another difference between aprepared statement <strong>and</strong> a st<strong>and</strong>ard query.Once the statement has been bound, youcan assign values to the <strong>PHP</strong> variables (if thathasn’t happened already) <strong>and</strong> then executethe statement. Using the login example,that’d be:$e = 'email@example.com';$p = 'mypass';mysqli_stmt_execute($stmt);The values of $e <strong>and</strong> $p will be used whenthe prepared statement is executed.To see this process in action, let’s write ascript that adds a post to the messages tablein the <strong>for</strong>um database (created in Chapter 6,“Database Design”). I’ll also use the opportunityto demonstrate a couple of the otherprepared statement-related functions.TABLe 13.5 Bound Value TypesLetterdibsRepresentsDecimalIntegerBlob (binary data)All other types426 Chapter 13
Script 13.6 This script, which represents asimplified version of a message posting page,uses prepared statements as a way of preventingSQL injection attacks.1 2 3 4 5 Post a Message6 7 8 Post a Message
3. Define <strong>and</strong> prepare the query:$q = 'INSERT INTO messages➝ (<strong>for</strong>um_id, parent_id, user_id,➝ subject, body, date_entered)➝ VALUES (?, ?, ?, ?, ?, NOW( ))';$stmt = mysqli_prepare($dbc, $q);This syntax has already been explained.The query is defined, using placeholders<strong>for</strong> values to be assigned later. Then themysqli_prepare( ) function sends thisto <strong>MySQL</strong>, assigning the result to $stmt.The query itself was first used in Chapter6. It populates six fields in the messagestable. The value <strong>for</strong> the date_enteredcolumn will be the result of the NOW( )function, not a bound value.4. Bind the appropriate variables <strong>and</strong>create a list of values to be inserted:mysqli_stmt_bind_param($stmt,➝'iiiss', $<strong>for</strong>um_id, $parent_id,➝ $user_id, $subject, $body);$<strong>for</strong>um_id = (int)➝ $_POST['<strong>for</strong>um_id'];$parent_id = (int)➝ $_POST['parent_id'];$user_id = 3;$subject = strip_tags($_POST➝ ['subject']);$body = strip_tags($_POST['body']);The first line says that three integers<strong>and</strong> two strings will be used in theprepared statement. The values will befound in the variables to follow.For those variables, the subject <strong>and</strong>body values come straight from the<strong>for</strong>m B, after running them throughstrip_tags( ) to remove any potentiallydangerous code. The <strong>for</strong>um ID <strong>and</strong>parent ID (which indicates if the messageis a reply to an existing message or not)also come from the <strong>for</strong>m. They’ll betypecast to integers (<strong>for</strong> added security,you would confirm that they’re positiveScript 13.6 continued36 // Print a message based upon the result:37 if (mysqli_stmt_affected_rows($stmt)= = 1) {38 echo 'Your message has beenposted.';39 } else {40 echo 'Your message couldnot be posted.';41 echo '' . mysqli_stmt_error($stmt) . '';42 }4344 // Close the statement:45 mysqli_stmt_close($stmt);4647 // Close the connection:48 mysqli_close($dbc);4950 } // End of submission IF.5152 // Display the <strong>for</strong>m:53 ?>54 5556 Post a message:5758 Subject: 5960 Body: 6162 63 64 65 6667 68 69 428 Chapter 13
numbers after typecasting them, or youcould use the Filter extension).The user ID value, in a real script, wouldcome from the session, where it wouldbe stored when the user logged in.5. Execute the query:mysqli_stmt_execute($stmt);Finally, the prepared statementis executed.6. Print the results of the execution <strong>and</strong>complete the loop:if (mysqli_stmt_affected_rows➝ ($stmt) = = 1) {echo 'Your message has been➝ posted.';} else {echo 'Your message➝ could not be posted.';echo '' . mysqli_stmt_error➝ ($stmt) . '';}The successful insertion of arecord can be confirmed using themysqli_stmt_affected_rows( ) function,which works as you expect it would(returning the number of affected rows). Inthat case, a simple message is printed C.If a problem occurred, the mysqli_stmt_error( ) function returns the specific<strong>MySQL</strong> error message. This is <strong>for</strong> yourdebugging purposes, not to be used in alive site. That being said, often the <strong>PHP</strong>error message is more useful than thatreturned by mysqli_stmt_error( ) D.7. Close the statement <strong>and</strong> the databaseconnection:mysqli_stmt_close($stmt);mysqli_close($dbc);The first function closes the preparedstatement, freeing up the resources.At this point, $stmt no longer has avalue. The second function closes thedatabase connection.8. Complete the <strong>PHP</strong> section:} // End of submission IF.?>continues on next pageB The simple HTML <strong>for</strong>m.C If one record in the database was affected bythe query, this will be the result.D Error reporting withprepared statementscan be confoundingsometimes!Security Methods 429
9. Begin the <strong>for</strong>m:Post a➝ message:Subject: Body: The <strong>for</strong>m begins with just a subjecttext input <strong>and</strong> a textarea <strong>for</strong> themessage’s body.More Security RecommendationsThis chapter covers many specific techniques <strong>for</strong> improving your <strong>Web</strong> security. Here are a h<strong>and</strong>fulof other recommendations:.Do your best to limit what in<strong>for</strong>mation is requested from the user, <strong>and</strong> what the site stores. The lessin<strong>for</strong>mation h<strong>and</strong>led by the site in any way means there’s less data to worry about being stolen..Make it your job to study, follow, <strong>and</strong> abide by security recommendations. Don’t just rely uponthe advice of one chapter, one book, or one author..Don’t retain user-supplied names <strong>for</strong> uploaded files. You’ll see an alternative solution inChapter 19, “Example—E-Commerce.”.Watch how database references are used. For example, if a person’s user ID is their primarykey from the database <strong>and</strong> this is stored in a cookie (as in Chapter 12), a malicious user justneeds to change that cookie value to access another user’s account..Don’t show detailed error messages (this point was repeated in Chapter 8, “Error H<strong>and</strong>ling<strong>and</strong> Debugging”)..Use cryptography (this is discussed in Chapter 7, “Advanced SQL <strong>and</strong> <strong>MySQL</strong>,” with respect tothe database, <strong>and</strong> in my book <strong>PHP</strong> 5 Advanced: Visual QuickPro Guide (Peachpit Press, 2007)with respect to the server)..Don’t store credit card numbers, social security numbers, banking in<strong>for</strong>mation, <strong>and</strong> the like. Theonly exception to this would be if you have deep enough pockets to pay <strong>for</strong> the best security <strong>and</strong>to cover the lawsuits that arise when this data is stolen from your site (which will inevitably happen)..Use SSL, when appropriate. A secure connection is one of the best protections a server canoffer a user..Reliably <strong>and</strong> consistently protect every page <strong>and</strong> directory that needs it. Never assume thatpeople won’t find sensitive areas just because there’s no link to them. If access to a page ordirectory should be limited, make sure it is.My final recommendation is to be aware of your own limitations. As the programmer, you probablyapproach a script thinking how it should be used. This is not the same as to how it will be used,either accidentally or on purpose. Try to break your site to see what happens. Do bad things, dothe wrong thing. Have other people try to break it, too (it’s normally easy to find such volunteers).When you code, if you assume that no one will ever use a page properly, it’ll be much more securethan if you assume people always will.430 Chapter 13
10. Complete the <strong>for</strong>m:The <strong>for</strong>m contains two fields the userwould fill out <strong>and</strong> two hidden inputsthat store values the query needs. In areal version of this script, the <strong>for</strong>um_id<strong>and</strong> parent_id values would bedetermined dynamically.11. Complete the page:12. Save the file as post_message.php,place it in your <strong>Web</strong> directory, <strong>and</strong> testit in your <strong>Web</strong> browser E.There are two kinds of prepared statements.Here I have demonstrated bound parameters,where <strong>PHP</strong> variables are bound to a query.The other type is bound results, where theresults of a query are bound to <strong>PHP</strong> variables.E Selecting the most recent entry inthe messages table confirms that theprepared statement (Script 13.6) worked.Notice that the HTML was stripped out ofthe post but the quotes are still present.preventing Brute Force AttacksA brute <strong>for</strong>ce attack is an attempt to log in to a secure system by making lots of attempts in thehopes of eventual success. It’s not a sophisticated type of attack, hence the name “brute <strong>for</strong>ce.”For example, if you have a login process that requires a username <strong>and</strong> password, there is a limitas to the possible number of username/password combinations. That limit may be in the billionsor trillions, but still, it’s a finite number. Using algorithms <strong>and</strong> automated processes, a brute <strong>for</strong>ceattack repeatedly tries combinations until they succeed.The best way to prevent brute <strong>for</strong>ce attacks from succeeding is requiring users to register with good,hard-to-guess passwords: containing letters, numbers, <strong>and</strong> punctuation; both upper <strong>and</strong> lowercase;words not in the dictionary; at least eight characters long, etc. Also, don’t give indications as to why alogin failed: saying that a username <strong>and</strong> password combination isn’t correct gives away nothing, butsaying that a username isn’t right or that the password isn’t right <strong>for</strong> that username says too much.To stop a brute <strong>for</strong>ce attack in its tracks, you could also limit the number of incorrect login attemptsby a given IP address. IP addresses do change frequently, but in a brute <strong>for</strong>ce attack, the same IPaddress would be trying to log in multiple times in a matter of minutes. You would have to trackincorrect logins by IP address, <strong>and</strong> then, after X number of invalid attempts, block that IP address<strong>for</strong> 24 hours (or something). Or, if you didn’t want to go that far, you could use an “incrementaldelay” defense: each incorrect login from the same IP address creates an added delay in theresponse (use <strong>PHP</strong>’s sleep( ) function to create the delay). Humans might not notice or be botheredby such delays, but automated attacks most certainly would.Security Methods 431
Review <strong>and</strong> pursueIf you have any problems with thereview questions or the pursue prompts,turn to the book’s supporting <strong>for</strong>um(www.LarryUllman.com/<strong>for</strong>ums/).ReviewnnnnnnnWhat are some of the inappropriatestrings <strong>and</strong> characters that could beindicators of potential spam attempts?What does the stripos( ) function do?What is its syntax?What does the str_replace( ) functiondo? What is its syntax?What does the array_map( ) functiondo? What is its syntax?What is typecasting? How do you typecasta variable in <strong>PHP</strong>?What function is used to move anuploaded file to its final destination onthe server?What is the Fileinfo extension? How isit used?n What does the htmlspecialchars( )function do?n What does the htmlentities( )function do?nnnnnWhat does the strip_tags( ) function do?What function converts newline charactersinto HTML break tags?What is the most important function inthe Filter extension? How is it used?What are prepared statements? Whatbenefits might prepared statementshave over the st<strong>and</strong>ard method of queryinga database?What is the syntax <strong>for</strong> using preparedstatements?pursuennIf you haven’t applied the Filter function,<strong>for</strong> email validation, <strong>and</strong> the spam_scrubber( ) function to a contact <strong>for</strong>mused on one of your sites, do so now!Change calculator.php to allow <strong>for</strong> notax rate.n Update calculator.php, from Chapter 3,“Creating <strong>Dynamic</strong> <strong>Web</strong> <strong>Sites</strong>,” so that italso uses typecasting or the Filter extension.(As a reminder, that calculator determinedthe cost of a car trip, based uponthe distance, average miles per gallon,<strong>and</strong> average price paid per gallon.)nnnnnnModify upload_rtf.php so that itreports the actual MIME type <strong>for</strong> theuploaded file, should it not be text/rtf.Create a <strong>PHP</strong> script that reports theMIME type of any uploaded file.Apply the strip_tags( ) function toa previous script in the book, such asthe registration example, to preventinappropriate code from being storedin the database.Apply the Filter function to the loginprocess in Chapter 12 to guarantee thatthe submitted email address meets theemail address <strong>for</strong>mat, prior to using it ina query.Apply the Filter function, or typecasting,to the delete_user.php <strong>and</strong> edit_user.php scripts from Chapter 10.Apply the Fileinfo extension to theshow_image.php script from Chapter 11.432 Chapter 13
14Perl-CompatibleRegular ExpressionsRegular expressions are an amazinglypowerful (but tedious) tool available inmost of today’s programming languages<strong>and</strong> even in many applications. Think ofregular expressions as an elaborate systemof matching patterns. You first write thepattern <strong>and</strong> then use one of <strong>PHP</strong>’s built-infunctions to apply the pattern to a value(regular expressions are applied to strings,even if that means a string with a numericvalue). Whereas a string function could seeif the name John is in some text, a regularexpression could just as easily find John,Jon, <strong>and</strong> Jonathon.Because the regular expression syntax isso complex, while the functions that usethem are simple, the focus in this chapterwill be on mastering the syntax in littlebites. The <strong>PHP</strong> code will be very simple;later chapters will better incorporate regularexpressions into real-world scripts.in This ChapterCreating a Test Script 434Defining Simple Patterns 438Using Quantifiers 441Using Character Classes 443Finding All Matches 446Using Modifiers 450Matching <strong>and</strong> Replacing Patterns 452Review <strong>and</strong> Pursue 456
Creating a Test ScriptAs already stated, regular expressions area matter of applying patterns to values.The application of the pattern to a valueis accomplished using one of a h<strong>and</strong>fulof functions, the most important beingpreg_match( ). This function returns a 0or 1, indicating whether or not the patternmatched the string. Its basic syntax ispreg_match(pattern, subject);The preg_match( ) function will stop onceit finds a single match. If you need to findall the matches, use preg_match_all( ).That function will be discussed toward theend of the chapter.When providing the pattern to preg_match( ), it needs to be placed withinquotation marks, as it’ll be a string.Because many escaped characters withindouble quotation marks have specialmeaning (like \n), I advocate using singlequotation marks to define your patterns.Secondarily, within the quotation marks,the pattern needs to be encased withindelimiters. The delimiter can be anycharacter that’s not alphanumeric or thebackslash, <strong>and</strong> the same character mustbe used to mark the beginning <strong>and</strong> endof the pattern. Commonly, you’ll see<strong>for</strong>ward slashes used. To see if the wordcat contains the letter a, you would code(spoiler alert: it does):if (preg_match('/a/', 'cat')) {If you need to match a <strong>for</strong>ward slash in thepattern, use a different delimiter, like thepipe (|) or an exclamation mark (!).The bulk of this chapter covers all the rules<strong>for</strong> defining patterns. In order to best learn byexample, let’s start by creating a simple <strong>PHP</strong>script that takes a pattern <strong>and</strong> a string A <strong>and</strong>returns the regular expression result B.A The HTML <strong>for</strong>m, which will be used <strong>for</strong>practicing regular expressions.B The script will print what values were used inthe regular expression <strong>and</strong> what the result was.The <strong>for</strong>m will also be made sticky to rememberpreviously submitted values.434 Chapter 14
Script 14.1 The complex regular expression syntaxwill be best taught <strong>and</strong> demonstrated using this<strong>PHP</strong> script.1 2 3 4 5 Testing PCRE6 7 8 30 31 Regular Expression Pattern:Testing PCRE
Note that if Magic Quotes is enabledon your server, you’ll see extraslashes added to the <strong>for</strong>m data C.To combat this, you’ll need to applystripslashes( ) here as well:$pattern = stripslashes(trim➝ ($_POST['pattern']));$subject = stripslashes(trim➝ ($_POST['subject']));4. Print a caption:echo "The result of checking➝ $patternagainst$subjectis ";As you can see B, the <strong>for</strong>m-h<strong>and</strong>lingpart of this script will start by printingthe values submitted.5. Run the regular expression:if (preg_match ($pattern,➝ $subject) ) {echo 'TRUE!';} else {echo 'FALSE!';}To test the pattern against the string,feed both to the preg_match( ) function.If this function returns 1, that meansa match was made, this condition willbe TRUE, <strong>and</strong> the word TRUE will beprinted. If no match was made, thecondition will be FALSE <strong>and</strong> that willbe stated D.C With Magic Quotes enabled on your server, thescript will add slashes to certain characters, mostlikely making the regular expressions fail.D If the pattern does not match the string, thiswill be the result. This submission <strong>and</strong> responsealso conveys that regular expressions are casesensitiveby default.436 Chapter 14
6. Complete the submission conditional<strong>and</strong> the <strong>PHP</strong> block:} // End of submission IF.?>7. Create the HTML <strong>for</strong>m:Regular Expression Pattern:➝
Defining SimplepatternsUsing one of <strong>PHP</strong>’s regular expressionfunctions is really easy, defining patternsto use is hard. There are lots of rules <strong>for</strong>creating a pattern. You can use theserules separately or in combination, makingyour pattern either quite simple or verycomplex. To start, then, you’ll see whatcharacters are used to define a simplepattern. As a <strong>for</strong>matting rule, I’ll definepatterns in bold <strong>and</strong> will indicate what thepattern matches in italics. The patterns inthese explanations won’t be placed withindelimiters or quotes (both being neededwhen used within preg_match( )), just tokeep things cleaner.The first type of character you will use<strong>for</strong> defining patterns is a literal. A literalis a value that is written exactly as it isinterpreted. For example, the pattern awill match the letter a, ab will match ab,<strong>and</strong> so <strong>for</strong>th. There<strong>for</strong>e, assuming a caseinsensitivesearch is per<strong>for</strong>med, rom willmatch any of the following strings, sincethey all contain rom:nnnCD-ROMRommel crossed the desert.I’m writing a roman à clef.Along with literals, your patterns willuse meta-characters. These are specialsymbols that have a meaning beyond theirliteral value (Table 14.1). While a simplymeans a, the period (.) will match anysingle character except <strong>for</strong> a newline (.matches a, b, c, the underscore, a space,etc., just not \n). To match any metacharacter,you will need to escape it, muchas you escape a quotation mark to printit. Hence \. will match the period itself.So 1.99 matches 1.99 or 1B99 or 1299(a 1 followed by any character followedby 99) but 1\.99 only matches 1.99.Two meta-characters specify where certaincharacters must be found. There is thecaret (^), which marks the beginning ofa pattern. There is also the dollar sign($), which marks the conclusion of apattern. Accordingly, ^a will match anystring beginning with an a, while a$ willcorrespond to any string ending with an a.There<strong>for</strong>e, ^a$ will only match a (a stringthat both begins <strong>and</strong> ends with a).These two meta-characters—the caret <strong>and</strong>the dollar sign—are crucial to validation,as validation normally requires checkingthe value of an entire string, not just thepresence of one string in another. Forexample, using an email-matching patternwithout those two characters will matchany string containing an email address.Using an email-matching pattern thatbegins with a caret <strong>and</strong> ends with a dollarsign will match a string that contains onlya valid email address.TABLe 14.1 Meta-CharactersCharacterMeaning\ Escape character^Indicates the beginningof a string$ Indicates the end of a string. Any single characterexcept newline| Alternatives (or)[ Start of a class] End of a class( Start of a subpattern) End of a subpattern{ Start of a quantifier} End of a quantifier438 Chapter 14
A Looking <strong>for</strong> a cat in a string.B PCRE per<strong>for</strong>ms a case-sensitive comparisonby default.Regular expressions also make use of thepipe (|) as the equivalent of or: a|b willmatch strings containing either a or b.(Using the pipe within patterns is calledalternation or branching). So yes|noaccepts either of those two words in theirentirety (the alternation is not just betweenthe two letters surrounding it: s <strong>and</strong> n).Once you comprehend the basic symbols,then you can begin to use parenthesesto group characters into more involvedpatterns. Grouping works as you mightexpect: (abc) will match abc, (trout) willmatch trout. Think of parentheses as beingused to establish a new literal of a largersize. Because of precedence rules inPCRE, yes|no <strong>and</strong> (yes)|(no) are equivalent.But (even|heavy) h<strong>and</strong>ed will match eithereven h<strong>and</strong>ed or heavy h<strong>and</strong>ed.To use simple patterns:1. Load pcre.php in your <strong>Web</strong> browser,if it is not already.2. Check if a string contains the letterscat A.To do so, use the literal cat as thepattern <strong>and</strong> any number of strings as thesubject. Any of the following would be amatch: catalog, catastrophe, my cat left,etc. For the time being, use all lowercaseletters, as cat will not match Cat B.Remember to use delimiters around thepattern, as well (see the figures).continues on next pagePerl-Compatible Regular Expressions 439
3. Check if a string starts with cat C.To have a pattern apply to the startof a string, use the caret as the firstcharacter (^cat). The sentence my catleft will not be a match now.4. Check if a string contains the wordcolor or colour D.The pattern to look <strong>for</strong> the American orBritish spelling of this word is col(o|ou)r.The first three letters—col—must bepresent. This needs to be followed byeither an o or ou. Finally, an r is required.C The caret in a pattern means that the matchhas to be found at the start of the string.If you are looking to match an exactstring within another string, use the strstr( )function, which is faster than regularexpressions. In fact, as a rule of thumb, youshould use regular expressions only if the taskat h<strong>and</strong> cannot be accomplished using anyother function or technique.You can escape a bunch of charactersin a pattern using \Q <strong>and</strong> \E. Every characterwithin those will be treated literally (so\Q$2.99?\E matches $2.99?).To match a single backslash, you haveto use \\\\. The reason is that matching abackslash in a regular expression requires youto escape the backslash, resulting in \\. Thento use a backslash in a <strong>PHP</strong> string, it also hasto be escaped, so escaping both backslashesmeans a total of four.D By using the pipe meta-character, the per<strong>for</strong>medsearch can be more flexible.440 Chapter 14
using QuantifiersYou’ve just seen <strong>and</strong> practiced with acouple of the meta-characters, the mostimportant of which are the caret <strong>and</strong> theTABLe 14.2 QuantifiersCharacterMeaning? 0 or 1* 0 or more+ 1 or more{x}{x,y}{x,}Exactly x occurrencesBetween x <strong>and</strong> y (inclusive)At least x occurrencesA The plus sign, when used as a quantifier,requires that one or more of a thing be present.B You can check <strong>for</strong> the plural <strong>for</strong>m of manywords by adding s? to the pattern.dollar sign. Next, there are three metacharactersthat allow <strong>for</strong> multiple occurrences:a* will match zero or more a’s (noa’s, a, aa, aaa, etc.); a+ matches one ormore a’s (a, aa, aaa, etc., but there mustbe at least one); <strong>and</strong> a? will match up toone a (a or no a’s match). These metacharactersall act as quantifiers in yourpatterns, as do the curly braces.Table 14.2 lists all of the quantifiers.To match a certain quantity of a thing, putthe quantity between curly braces ( {}),stating a specific number, just a minimum,or both a minimum <strong>and</strong> a maximum. Thus,a{3} will match aaa; a{3,} will match aaa,aaaa, etc. (three or more a’s); <strong>and</strong> a{3,5}will match just aaa, aaaa, <strong>and</strong> aaaaa(between three <strong>and</strong> five).Note that quantifiers apply to the thing thatcame be<strong>for</strong>e it, so a? matches zero or onea’s, ab? matches an a followed by zeroor one b’s, but (ab)? matches zero or oneab’s. There<strong>for</strong>e, to match color or colour,you could also use colou?r as the pattern.To use quantifiers:1. Load pcre.php in your <strong>Web</strong> browser, if itis not already.2. Check if a string contains the letters c <strong>and</strong>t, with one or more letters in between A.To do so, use c.+t as the pattern <strong>and</strong>any number of strings as the subject.Remember that the period matches anycharacter (except <strong>for</strong> the newline). Eachof the following would be a match: cat,count, coefficient, etc. The word doctorwould not match, as there are no lettersbetween the c <strong>and</strong> the t (althoughdoctor would match c.*t).3. Check if a string matches either cator cats B.continues on next pagePerl-Compatible Regular Expressions 441
To start, if you want to make an exactmatch, use both the caret <strong>and</strong> the dollarsign. Then you’d have the literal textcat, followed by an s, followed by aquestion mark (representing 0 or 1 s’s).The final pattern—^cats?$—matches cator cats but not my cat left or I like cats.4. Check if a string ends with .33, .333,or .3333 C.To find a period, escape it with abackslash: \.. To find a three, use aliteral 3. To find a range of 3’s, use thecurly brackets ({}). Putting this together,the pattern is \.3{2,4}. Because thestring should end with this (nothing elsecan follow), conclude the pattern with adollar sign: \.3{2,4}$.Admittedly, this is kind of a stupidexample (not sure when you’d need todo exactly this), but it does demonstrateseveral things. This pattern will matchlots of things—12.333, varmit.3333, .33,look .33—but not 12.3 or 12.334.5. Match a five-digit number D.A number can be any one of thenumbers 0 through 9, so the heartof the pattern is (0|1|2|3|4|5|6|7|8|9).Plainly said, this means: a number isa 0 or a 1 or a 2 or a 3…. To make ita five-digit number, follow this with aquantifier: (0|1|2|3|4|5|6|7|8|9){5}. Finally,to match this exactly (as opposed tomatching a five-digit number within astring), use the caret <strong>and</strong> the dollar sign:^(0|1|2|3|4|5|6|7|8|9){5}$.This, of course, is one way to matcha United States zip code, a veryuseful pattern.When using curly braces to specifya number of characters, you must alwaysinclude the minimum number. The maximumis optional: a{3} <strong>and</strong> a{3,} are acceptable,but a{,3} is not.Although it demonstrates good dedicationto programming to learn how to write <strong>and</strong>execute your own regular expressions, numerousworking examples are available already bysearching the Internet.C The curly braces let you dictate the acceptablerange of quantities present.D The proper test <strong>for</strong> confirming that a numbercontains five digits.442 Chapter 14
using Character ClassesAs the last example demonstrated (D in theprevious section), relying solely upon literalsin a pattern can be tiresome. Having to writeout all those digits to match any number issilly. Imagine if you wanted to match anyfour-letter word: ^(a|b|c|d…){4}$ (<strong>and</strong> thatdoesn’t even take into account uppercaseletters)! To make these common referenceseasier, you can use character classes.Classes are created by placing characterswithin square brackets ( [ ] ). For example,you can match any one vowel with [aeiou].This is equivalent to (a|e|i|o|u). Or you canuse the hyphen to indicate a range ofcharacters: [a-z] is any single lowercaseletter <strong>and</strong> [A-Z] is any uppercase, [A-Za-z]is any letter in general, <strong>and</strong> [0-9] matchesany digit. As an example, [a-z]{3} wouldmatch abc, def, oiw, etc.Within classes, most of the meta-charactersare treated literally, except <strong>for</strong> four. Thebackslash is still the escape, but the caret(^) is a negation operator when used as thefirst character in the class. So [^aeiou] willmatch any non-vowel. The only other metacharacterwithin a class is the dash, whichindicates a range. (If the dash is used as thelast character in a class, it’s a literal dash.)And, of course, the closing bracket (]) stillhas meaning as the terminator of the class.Naturally, a class can have both ranges<strong>and</strong> literal characters. A person’s firstname, which can contain letters, spaces,apostrophes, <strong>and</strong> periods, could berepresented by [A-z ‘.] (again, the perioddoesn’t need to be escaped within theclass, as it loses its meta-meaning there).Along with creating your own classes, thereare six already-defined classes that havetheir own shortcuts (Table 14.3). The digit <strong>and</strong>space classes are easy to underst<strong>and</strong>. Theword character class doesn’t mean “word” inthe language sense but rather as in a stringunbroken by spaces or punctuation.Using this in<strong>for</strong>mation, the five-digit number(aka, zip code) pattern could more easily bewritten as ^[0-9]{5}$ or ^\d{5}$. As anotherexample, can\s?not will match both can not<strong>and</strong> cannot (the word can, followed by zeroor one space characters, followed by not).TABLe 14.3 Character ClassesClass Shortcut Meaning[0-9] \d Any digit[\f\r\t\n\v] \s Any white space[A-Za-z0-9_] \w Any word character[^0-9] \D Not a digit[^\f\r\t\n\v] \S Not white space[^A-Za-z0-9_] \W Not a word characterPerl-Compatible Regular Expressions 443
To use character classes:1. Load pcre.php in your <strong>Web</strong> browser,if it is not already.2. Check if a string is <strong>for</strong>matted as a validUnited States zip code A.A United States zip code always startswith five digits (^\d{5}). But a valid zipcode could also have a dash followedby another four digits (-\d{4}$). Tomake this last part optional, use thequestion mark (the 0 or 1 quantifier).This complete pattern is then ^(\d{5})(-\d{4})?$. To make it all clearer, the firstpart of the pattern (matching the fivedigits) is also grouped in parentheses,although this isn’t required in this case.3. Check if a string contains no spaces B.The \S character class shortcut will matchnon-space characters. To make sure thatthe entire string contains no spaces, usethe caret <strong>and</strong> the dollar sign: ^\S$. If youdon’t use those, then all the pattern isconfirming is that the subject contains atleast one non-space character.A The pattern to match a United States zip code,in either the five-digit or five plus four <strong>for</strong>mat.B The no-white-space shortcut can be used toensure that a submitting string is contiguous.using BoundariesBoundaries are shortcuts <strong>for</strong> helping to find, um, boundaries. In a way, you’ve already seen this:using the caret <strong>and</strong> the dollar sign to match the beginning or end of a value. But what if you wantedto match boundaries within a value?The clearest boundary is between a word <strong>and</strong> a non-word. A “word” in this case is not cat, month,or zeitgeist, but in the \w shortcut sense: the letters A through Z (both upper- <strong>and</strong> lowercase), plusthe numbers 0 through 9, <strong>and</strong> the underscore. To use words as boundaries, there’s the \b shortcut.To use non-word characters as boundaries, there’s \B. So the pattern \b<strong>for</strong>\b matches they’vecome <strong>for</strong> you but doesn’t match <strong>for</strong>ce or <strong>for</strong>ebode. There<strong>for</strong>e \b<strong>for</strong>\B would match <strong>for</strong>ce but notthey’ve come <strong>for</strong> you or in<strong>for</strong>mal.444 Chapter 14
4. Validate an email address C.The pattern ^[\w.-]+@[\w.-]+\.[A-Za-z]{2,6}$ provides <strong>for</strong> reasonably goodemail validation. It’s wrapped in thecaret <strong>and</strong> the dollar sign, so thestring must be a valid email address<strong>and</strong> nothing more. An email addressstarts with letters, numbers, <strong>and</strong> theunderscore (represented by \w), plus aperiod (.) <strong>and</strong> a dash. This first block willmatch larryullman, larry77, larry.ullman,larry-ullman, <strong>and</strong> so on. Next, all emailaddresses include one <strong>and</strong> only one @.After that, there can be any number ofletters, numbers, periods, <strong>and</strong> dashes.This is the domain name: larryullman,smith-jones, amazon.co (as in amazon.co.uk), etc. Finally, all email addressesconclude with one period <strong>and</strong> betweentwo <strong>and</strong> six letters. This accounts <strong>for</strong>.com, .edu, .info, .travel, etc.I think that the zip code example is agreat demonstration as to how complex <strong>and</strong>useful regular expressions are. One patternaccurately tests <strong>for</strong> both <strong>for</strong>mats of the zipcode, which is fantastic. But when you putthis into your <strong>PHP</strong> code, with quotes <strong>and</strong>delimiters, it’s not easily understood:if (preg_match ('/^(\d{5})(-\d{4})?$/',➝ $zip)) {That certainly looks like gibberish, right?This email address validation pattern ispretty good, although not perfect. It will allowsome invalid addresses to pass through (likeones starting with a period or containing multipleperiods together). However, a 100 percentfoolproof validation pattern is ridiculouslylong, <strong>and</strong> frequently using regular expressionsis really a matter of trying to exclude the bulkof invalid entries without inadvertently excludingany valid ones.Regular expressions, particularly PCREones, can be extremely complex. When startingout, it’s just as likely that your use of themwill break the validation routines instead ofimproving them. That’s why practicing like thisis important.C A pretty good <strong>and</strong> reliable validation <strong>for</strong> email addresses.Perl-Compatible Regular Expressions 445
Finding All MatchesGoing back to the <strong>PHP</strong> functions usedwith Perl-Compatible regular expressions,preg_match( ) has been used just to seeif a pattern matches a value or not. But thescript hasn’t been reporting what, exactly,in the value did match the pattern. Youcan find out this in<strong>for</strong>mation by providing avariable as a third argument to the function:preg_match(pattern, subject, $match);The $match variable will contain the firstmatch found (because this function onlyreturns the first match in a value). To findevery match, use preg_match_all( ). Itssyntax is the same:preg_match_all(pattern, subject,➝ $matches);This function will return the number ofmatches made, or FALSE if none werefound. It will also assign to $matches everymatch made. Let’s update the <strong>PHP</strong> script toprint the returned matches, <strong>and</strong> then run acouple more tests.To report all matches:1. Open pcre.php (Script 14.1) in your texteditor or IDE, if it is not already.2. Change the invocation of preg_match( )to (Script 14.2):if (preg_match_all ($pattern,➝ $subject, $matches) ) {There are two changes here. First, theactual function being called is different.Second, the third argument is provideda variable name that will be assignedevery match.Script 14.2 To reveal exactly what values in astring match which patterns, this revised versionof the script will print out each match. You canretrieve the matches by naming a variableas the third argument in preg_match( ) orpreg_match_all( ).1 2 3 4 5 Testing PCRE6 7 8
Script 14.2 continued33 // Display the HTML <strong>for</strong>m.34 ?>35 36 Regular Expression Pattern:➝ continues on next pageBeing Less GreedyA key component to Perl-Compatible regular expressions is the concept of greediness. Bydefault, PCRE will attempt to match as much as possible. For example, the pattern matchesany HTML tag. When tested on a string like Link, it will actuallymatch that entire string, from the opening < to the closing one. This string contains three possiblematches, though: the entire string, the opening tag (from ), <strong>and</strong> the closing tag ().To overrule greediness, make the match lazy. A lazy match will contain as little data as possible.Any quantifier can be made lazy by following it with the question mark. For example, the pattern would return two matches in the preceding string: the opening tag <strong>and</strong> the closing tag. Itwould not return the whole string as a match. (This is one of the confusing aspects of the regularexpression syntax: the same character—here, the question mark—can have different meaningsdepending on its context.)Another way to make patterns less greedy is to use negative classes. The pattern ]+> matcheseverything between the opening <strong>and</strong> closing except <strong>for</strong> a closing >. So using this pattern wouldhave the same result as using . This pattern would also match strings that contain newlinecharacters, which the period excludes.Perl-Compatible Regular Expressions 447
In order to be able to enter in moretext <strong>for</strong> the subject, this element willbecome a textarea.6. Save the file as matches.php, place it inyour <strong>Web</strong> directory, <strong>and</strong> test it in your<strong>Web</strong> browser.For the first test, use <strong>for</strong> as the pattern<strong>and</strong> This is a <strong>for</strong>mulaic test <strong>for</strong> in<strong>for</strong>malmatches. as the subject A. It maynot be proper English, but it’s a goodtest subject.For the second test, change the patternto <strong>for</strong>.* B. The result may surprise you,the cause of which is discussed in thesidebar, “Being Less Greedy.” To makethis search less greedy, the pattern couldbe changed to <strong>for</strong>.*?, whose resultswould be the same as those in A.A This first test returns three matches, as theliteral text <strong>for</strong> was found three times.B Because regular expressions are “greedy” by default (see thesidebar), this pattern only finds one match in the string. That matchhappens to start with the first instance of <strong>for</strong> <strong>and</strong> continues until theend of the string.448 Chapter 14
For the third test, use <strong>for</strong>[\S]*, or, moresimply <strong>for</strong>\S* C. This has the effectof making the match stop as soonas a white space character is found(because the pattern wants to match <strong>for</strong>followed by any number of non–whitespace characters).For the final test, use \b[a-z]*<strong>for</strong>[a-z]*\bas the pattern D. This pattern makesuse of boundaries, discussed in thesidebar “Using Boundaries,” earlier inthe chapter.The preg_split( ) function will takea string <strong>and</strong> break it into an array using aregular expression pattern.C This revised pattern matches strings that beginwith <strong>for</strong> <strong>and</strong> end on a word.D Unlike the pattern in C, this one matchesentire words that contain <strong>for</strong> (in<strong>for</strong>mal here,<strong>for</strong>mal in C ).Perl-Compatible Regular Expressions 449
using ModifiersThe majority of the special charactersyou can use in regular expression patternsare introduced in this chapter. One finaltype of special character is the patternmodifier. Table 14.4 lists these. Patternmodifiers are different than the other metacharactersin that they are placed after theclosing delimiter.Of these delimiters, the most important is i,which enables case-insensitive searches.All of the examples using variations on<strong>for</strong> (in the previous sequence of steps)would not match the word For. However,/<strong>for</strong>.*/i would be a match. Note that I amincluding the delimiters in that pattern, asthe modifier goes after the closing one.Similarly, the last step in the previoussequence referenced the sidebar “BeingLess Greedy” <strong>and</strong> stated how <strong>for</strong>.*? wouldper<strong>for</strong>m a lazy search. So would /<strong>for</strong>.*/U.The multiline mode is interesting in thatyou can make the caret <strong>and</strong> the dollar signbehave differently. By default, each appliesto the entire value. In multiline mode, thecaret matches the beginning of any line <strong>and</strong>the dollar sign matches the end of any line.To use modifiers:1. Load matches.php in your <strong>Web</strong> browser,if it is not already.2. Validate a list of email addresses A.To do so, use /^[\w.-]+@[\w.-]+\.[A-Za-z]{2,6}\r?$/m as the pattern. You’ll seethat I’ve added an optional carriagereturn (\r?) be<strong>for</strong>e the dollar sign. Thisis necessary because some of the lineswill contain returns <strong>and</strong> others won’t.And in multiline mode, the dollar signmatches the end of a line. (To be moreflexible, you could use \s? instead.)TABLe 14.4 Pattern ModifiersCharacterAimsxUResultAnchors the pattern to thebeginning of the stringEnables case-insensitive modeEnables multiline matchingHas the period match everycharacter, including newlineIgnores most white spacePer<strong>for</strong>ms a non-greedy matchA A list of email addresses, one per line, can bevalidated using the multiline mode. Each validaddress is stored in $matches.450 Chapter 14
3. Validate a list of United States zipcodes B.Very similar to the example in Step 2,the pattern is now /^(\d{5})(-\d{4})?\s?$/m. You’ll see that I’m using themore flexible \s? instead of \r?.You’ll also notice when you try thisyourself (or in B) that the $matchesvariable contains a lot more in<strong>for</strong>mationnow. This will be explained in the nextsection of the chapter.To always match the start or end of apattern, regardless of the multiline setting,there are shortcuts you can use. Within thepattern, the shortcut \A will match only thevery beginning of the value, \z matches thevery end, <strong>and</strong> \Z matches any line end, like$ in single-line mode.B Validating a list of zip codes, one per line.If your version of <strong>PHP</strong> supports it, it’sprobably best to use the Filter extension tovalidate an email address or a URL. But if youhave to validate a list of either, the Filter extensionwon’t cut it, <strong>and</strong> regular expressions willbe required.Perl-Compatible Regular Expressions 451
Matching <strong>and</strong>Replacing patternsThe last subject to discuss in this chapteris how to match <strong>and</strong> replace patterns ina value. While preg_match( ) <strong>and</strong> preg_match_all( ) will find things <strong>for</strong> you, if youwant to do a search <strong>and</strong> replace, you’llneed to use preg_replace( ). Its syntax ispreg_replace(pattern, replacement,➝ subject);This function takes an optional fourthargument limiting the number ofreplacements made.To replace all instances of cat with dog,you would use$str = preg_replace('/cat/', 'dog',➝'I like my cat.');This function returns the altered value(or unaltered value if no matches weremade), so you’ll likely want to assign itto a variable or use it as an argument toanother function (like printing it by callingecho). Also, as a reminder, the above is justan example: you’d never want to replaceone literal string with another using regularexpressions, use str_replace( ) instead.There is a related concept to discussthat is involved with this function: backreferencing. In a zip code matchingpattern—^(\d{5})(-\d{4})?$—there are twogroups within parentheses: the first fivedigits <strong>and</strong> the optional dash plus four-digitextension. Within a regular expressionpattern, <strong>PHP</strong> will automatically numberparenthetical groupings beginning at 1.Back referencing allows you to refer toeach individual section by using $ plus thecorresponding number. For example, if youmatch the zip code 94710-0001 with thispattern, referring back to $2 will give you-0001. The code $0 refers to the wholeinitial string. This is why B in the previoussection shows entire zip code matches in$matches[0], the matching first five digitsin $matches[1], <strong>and</strong> any matching dashplus four digits in $matches[2].To practice with this, let’s modify Script 14.2to also take a replacement input A.To match <strong>and</strong> replace patterns:1. Open matches.php (Script 14.2) in yourtext editor or IDE, if it is not already.2. Add a reference to a third incomingvariable (Script 14.3):$replace = trim($_POST['replace']);As you can see in A, the third <strong>for</strong>minput (added between the existing two)takes the replacement value. That valueis also trimmed to get rid of any extraneousspaces.If your server has Magic Quotesenabled, you’ll again need to applystripslashes( ) here.continues on page 454A One use of preg_replace( ) would be toreplace variations on inappropriate words withsymbols representing their omission.452 Chapter 14
Script 14.3 To test the preg_replace( ) function, which replaces a matched pattern in a string with anothervalue, you can use this third version of the PCRE test script1 2 3 4 5 Testing PCRE Replace6 7 8 32 33 Regular Expression Pattern:
3. Change the caption:echo "The result of replacing➝ $pattern➝ with$replacein➝ $subject";The caption will print out all of theincoming values, prior to applyingpreg_replace( ).4. Change the regular expressionconditional so that it only callspreg_replace( ) if a match is made:if (preg_match ($pattern,➝ $subject) ) {echo preg_replace($pattern,➝ $replace, $subject) . '';} else {echo 'The pattern was not➝ found!';}You can call preg_replace( ) withoutrunning preg_match( ) first. If no matchwas made, then no replacement will occur.But to make it clear when a match is or isnot being made (which is always good toconfirm, considering how tricky regularexpressions are), the preg_match( )function will be applied first. If it returnsa TRUE value, then preg_replace( ) iscalled, printing the results B. Otherwise,a message is printed indicating that nomatch was made C.5. Change the <strong>for</strong>m’s action attribute toreplace.php:This file will be renamed, so this valueneeds to be changed accordingly.B The resulting text has uses of bleep, bleeps,bleeped, bleeper, <strong>and</strong> bleeping replaced with *****.C If the pattern is not found within the subject,the subject will not be changed.454 Chapter 14
6. Add a text input <strong>for</strong> the replacementstring:Replacement:
Review <strong>and</strong> pursueIf you have any problems with thereview questions or the pursue prompts,turn to the book’s supporting <strong>for</strong>um(www.LarryUllman.com/<strong>for</strong>ums/).ReviewnnnnnnWhat function is used to match a regularexpression? What function is usedto find all matches of a regular expression?What function is used to replacematches of a regular expression?What characters can you use <strong>and</strong> notuse to delineate a regular expression?How do you match a literal character orstring of characters?What are meta-characters? How do youescape a meta-character?What meta-character do you use to binda pattern to the beginning of a string?To the end?How do you create subpatterns(aka groupings)?nnnnnnnnWhat are the quantifiers? How do yourequire 0 or 1 of a character or string?0 or more? 1 or more? Precisely Xoccurrences? A range of occurrences?A minimum of occurrences?What are character classes?What meta-characters still have meaningwithin character classes?What shortcut represents the “any digit”character class? The “any white space”class? “Any word”? What shortcuts representthe opposite of these?What are boundaries? How do youcreate boundaries in patterns?How do you make matches “lazy”?And what does that mean anyway?What are the pattern modifiers?What is back referencing? How doesit work?pursuennSearch online <strong>for</strong> a PCRE “cheat sheet”(<strong>PHP</strong> or otherwise) that lists all themeaningful characters <strong>and</strong> classes.Print out the cheat sheet <strong>and</strong> keep itbeside your computer.Practice, practice, practice!456 Chapter 14
15IntroducingjQueryNew in this edition of the book is thischapter, introducing the jQuery JavaScriptframework. As JavaScript has developedinto a more valuable language over thepast decade, its meaningful usage hasbecome commonplace in today’s <strong>Web</strong>sites. Accordingly, many <strong>PHP</strong> developersare expected to know a bit of JavaScriptas well.Although this chapter cannot present fullcoverage of JavaScript or jQuery, you’lllearn more than enough to be able to addto your <strong>PHP</strong>-based projects the featuresthat users have come to expect. In theprocess, you’ll also learn some basics ofprogramming in JavaScript in general, <strong>and</strong>get a sense of into what areas of jQueryyou may want to further delve.in This ChapterWhat is jQuery? 458Incorporating jQuery 460Using jQuery 463Selecting Page Elements 466Event H<strong>and</strong>ling 469DOM Manipulation 473Using Ajax 479Review <strong>and</strong> Pursue 492
What is jQuery?In order to grasp jQuery, you must havea solid sense of what JavaScript is. Asdiscussed in Chapter 11, “<strong>Web</strong> ApplicationDevelopment,” JavaScript is a programminglanguage that’s primarily used to adddynamic features to <strong>Web</strong> pages. Unlike<strong>PHP</strong>, which always runs on the server,JavaScript generally runs on the client(JavaScript is starting to be used as aserver-side tool, too, although that’s stillmore on the fringe). <strong>PHP</strong>, precisely becauseit is server-side, is browser-agnostic <strong>for</strong> themost part: very few things you’ll do in <strong>PHP</strong>will have different results from one browserto the next. Conversely, precisely becauseit’s running in the <strong>Web</strong> browser, JavaScriptcode often has to be customized <strong>for</strong> thevariations in browsers. For many years, thiswas the bane of the <strong>Web</strong> developer: creatingreliable cross-browser code. Overcomingthis particular hurdle is one of the manystrengths of jQuery (www.jquery.com A).jQuery is a JavaScript framework, a frameworkjust being a library of code whose usecan expedite <strong>and</strong> simplify development.The core of the jQuery framework is ableto h<strong>and</strong>le all key JavaScript functionality, asyou’ll see in this chapter. But the frameworkis extendable via plug-ins to provide otherfeatures, such as the ability to create adynamic, paginated, sortable table of data.In fact, a number of useful user interfaceA The homepage <strong>for</strong> thejQuery JavaScriptframework.B The home page<strong>for</strong> the jQuery UserInterface library( jQuery UI), whichworks in conjunctionwith jQuery.458 Chapter 15
tools have been wrapped inside their ownbundle, jQuery UI (www.jqueryui.com B).There are many JavaScript frameworks outthere, <strong>and</strong> in no way am I claiming jQuery isthe best. I do prefer jQuery, however, <strong>and</strong> it’squickly earned a place as one of the premierJavaScript frameworks. As you’ll soon see,jQuery has a simple, albeit cryptic, syntax,<strong>and</strong> by using it, you can manipulate theDocument Object Model (DOM) with aplomb.This is to say that you can easily referenceelements within an HTML page, therebygrabbing the values of <strong>for</strong>m inputs, adding orremoving any kind of HTML element, changingelement properties, <strong>and</strong> so <strong>for</strong>th.Be<strong>for</strong>e getting into the particulars of usingjQuery, do underst<strong>and</strong> that jQuery is just aJavaScript framework, meaning that whatyou’ll actually be doing over the next severalpages is JavaScript programming. JavaScriptas a language, while similar in someways to <strong>PHP</strong>, differs in other ways, such ashow variables are created, what character isused to per<strong>for</strong>m concatenation, <strong>and</strong> so <strong>for</strong>th.Moreover, JavaScript is an object-orientedlanguage, meaning the syntax you’ll sometimessee will be that much different than theprocedural <strong>PHP</strong> programming you’ve doneto this point (the next chapter introducesObject-Oriented Programming—OOP—in<strong>PHP</strong>). Because you’ll inevitably have problems—likesimply omitting a semicolon, you’llneed to know a bit about how to debugJavaScript. For a quick introduction to thatsubject, see the sidebar.For examples of server-side JavaScript,check out Node (www.nodejs.org) or Jaxer(www.jaxer.org).I’ve written a several-part series onjQuery, covering many of the same topics asthis chapter. You can find the series on my<strong>Web</strong> site (www.LarryUllman.com).Debugging JavaScriptTo this point, you may not have thought it so wonderful that <strong>PHP</strong> dumped all its errors into your<strong>Web</strong> browser, shoving your mistakes in your face. Until now. When <strong>Web</strong> pages have JavaScripterrors, you rarely are notified. In order to debug problematic JavaScript code, the first thing you’llneed to do is see what actual errors exist.The first tool you’ll need when programming in JavaScript is a good <strong>Web</strong> browser. Not a good<strong>Web</strong> browser <strong>for</strong> users, but a good one <strong>for</strong> developers. Firefox (www.mozilla.com) is the clearchampion in this regard, although Opera (www.opera.com) <strong>and</strong> Google Chrome (www.google.com/chrome/) may be close seconds. By opening Firefox’s built-in error console (found under the Toolsmenu), you’ll be able to see any JavaScript errors as they occur.An added advantage that Firefox has over the other browsers is a long history of excellent thirdpartyextensions. In particular, Firebug <strong>and</strong> <strong>Web</strong> Developer are fantastic assets <strong>for</strong> underst<strong>and</strong>ingwhat’s happening within the <strong>Web</strong> page. There are also extensions such as FireQuery, which addjQuery-aware development tools to Firefox.Be<strong>for</strong>e beginning this chapter, I would recommend that you download <strong>and</strong> install the latest versionof Firefox, <strong>and</strong> the a<strong>for</strong>ementioned extensions (if you have not already). Running your JavaScriptenabled<strong>Web</strong> pages in Firefox will make it easier <strong>for</strong> you to see the errors as they happen, therebymaking it that much easier to debug.Introducing jQuery 459
incorporating jQueryJavaScript is built into all graphical <strong>Web</strong>browsers by default, meaning no specialsteps must be taken to include JavaScriptin a <strong>Web</strong> page (users have the option ofdisabling JavaScript, although statisticallyfew do). jQuery is a framework of code,though; in order to use it, a <strong>Web</strong> pagemust first incorporate the jQuery library.To include any external JavaScript file in a<strong>Web</strong> page involves the HTML script tag,providing the name of the external file asthe value of its src attribute:The jQuery framework file will have a namelike jquery-X.Y.Z.min.js, where X.Y.Z isthe version number (1.6.1 at the time of thiswriting). The min part of the file’s nameindicates that the JavaScript file has beenminified. Minification is the removal ofspaces, newlines, <strong>and</strong> comments fromcode. The result is code that’s barelylegible A, but still completely functional.The benefit of minified code is that it willload in the browser slightly faster becauseit will be a marginally smaller file size.A What the minified jQuery code looks like.460 Chapter 15
The following set of steps will walk youthrough installing the jQuery library onyour <strong>Web</strong> server <strong>and</strong> incorporating it intoa <strong>Web</strong> page; see the sidebar <strong>for</strong> an alternativeapproach.B The <strong>for</strong>m <strong>for</strong> downloading the current versionof jQuery.To incorporate jQuery:1. Load www.jquery.com in your <strong>Web</strong>browser.2. At the top of the page, selectPRODUCTION (it’s the default option),<strong>and</strong> click Download(jQuery); B.Because the resulting file is justJavaScript, it will load directly in your<strong>Web</strong> browser A.3. Save the page on your computer.Most browsers offer a Save Page, SaveAs, or Save Page As option. Save thefile as jquery-X.Y.Z.min.js, whereX.Y.Z is the actual version number.continues on next pageusing Hosted jQueryThis chapter recommends that you download a copy of jQuery <strong>and</strong> place it in your <strong>Web</strong> directory.Upon doing so, you just need to update the script tag to point to the location of the jQueryfile on your <strong>Web</strong> site. I want to mention an alternative solution, though: using a hosted version ofjQuery. By this, I mean that instead of using a version of the jQuery library stored on your own <strong>Web</strong>server, you could use a version stored elsewhere online. For example, Google provides copies ofmany JavaScript frameworks <strong>for</strong> public use (http://code.google.com/apis/libraries/). To useGoogle’s copy of the jQuery library, the code would be:By using Google’s hosted version of jQuery, your site (i.e., your site’s visitors) will likely see a per<strong>for</strong>manceboost, due to Google’s Content Delivery Network (CDN) <strong>and</strong> the way browsers cachemedia. I’ve only chosen not to use the Google-provided version of jQuery in this chapter becausenot all readers will have constant Internet connections <strong>and</strong> because knowing how to use localJavaScript files is a critical skill.Introducing jQuery 461
4. Move the downloaded file to a js folderwithin your <strong>Web</strong> server directory.All of the JavaScript files to be used bythis chapter’s examples will be placedwithin a subdirectory named js.5. Begin a new HTML document in yourtext editor or IDE, to be named test.html (Script 15.1):Testing jQueryThis very first example will simply testthe incorporation <strong>and</strong> basic use of thejQuery library.6. Within the HTML head, include jQuery:The script tag is used to include aJavaScript file. Conventionally, scripttags are placed within the HTML page’shead, although that’s not required (oralways the case). The value of the srcattribute needs to match the name <strong>and</strong>location of your jQuery library. In thiscase, the assumption is that this HTMLpage is in the same directory as the jsfolder, created as part of Step 4.7. Save the file as test.html.Because this script won’t be executingany <strong>PHP</strong>, it uses the .html extension.8. If you want, load the page in your <strong>Web</strong>browser <strong>and</strong> check <strong>for</strong> errors.As this is just an HTML page, youcan load it directly in a <strong>Web</strong> browser,without going through a URL. You canthen use your browser’s error consoleor other development tools (see the“Debugging JavaScript” sidebar) tocheck that no errors occurred in loadingthe JavaScript file.Script 15.1 This blank HTML page shows how the jQuery library can be included.1 2 3 4 5 Testing jQuery6 7 8 9 10 11 462 Chapter 15
using jQueryOnce you successfully have jQuery incorporatedinto a <strong>Web</strong> page, you can beginusing it. jQuery, or any JavaScript code,can be written between opening <strong>and</strong> closingscript tags:// JavaScript goes here.(Note that in JavaScript, the double slashescreate comments, just as in <strong>PHP</strong>.)Alternatively, you can place jQuery <strong>and</strong>JavaScript code within a separate file, <strong>and</strong>then include that file using the script tags,just as you included the jQuery library. Thisis the route to be used in this chapter, inorder to further separate the JavaScriptfrom the HTML.To be clear, a <strong>Web</strong> page can have multipleuses of the script tags, <strong>and</strong> the samescript tag cannot both include an externalfile <strong>and</strong> contain JavaScript code.The code placed within a script tagwill be executed as soon as the browserencounters it. This is often problematic,though, as JavaScript is frequently usedto interact with the DOM: if immediatelyexecuted JavaScript code references aDOM element, the code will fail, as thatDOM element will not have been encounteredby the browser at that point A. Theonly reliable way to reference DOM elementsis after the browser has knowledgeof the entire DOM.In st<strong>and</strong>ard JavaScript, you can have codebe executed after the page is completelyloaded by referencing window.onLoad. InjQuery, the preferred method is to confirmthat the <strong>Web</strong> document is ready:$(document).ready(some_function);As mentioned already, the jQuery syntaxcan seem especially strange <strong>for</strong> theuninitiated, so I’ll explain this in detail.First of all, the code $(something) is howelements <strong>and</strong> such within the <strong>Web</strong> browserare selected in jQuery. In this particularcase, the item being selected is the entire<strong>Web</strong> document. To this selection, theready( ) function is applied. It takes oneargument: a function to be called. Notethat the argument is a reference to thefunction: its name, without quotation marks.Separately, some_function( ) wouldhave to be defined, wherein the actualwork—that which should be done whenthe document is loaded—takes place.continues on next pageA A browser reads a<strong>Web</strong> page as the HTMLis loaded, meaning thatJavaScript code cannotreference DOM elementsuntil the browser hasseen them all.Introducing jQuery 463
An alternative syntax is to use ananonymous function, which is a functiondefinition without a name. Anonymousfunctions are common to JavaScript(anonymous functions are possible in<strong>PHP</strong>, too, but not common). To createan anonymous function, the function’sdefinition is placed inline, in lieu of thefunction’s name:$(document).ready(function( ) {// Function code.});Because the need to execute code whenthe browser is ready is so common, thiswhole construct is often simplified injQuery to just:$(function( ) {// Function code.});The syntax is unusual, especially the}); at the end, so be mindful of this asyou program. As with any programminglanguage, incorrect JavaScript syntax willmake the code inoperable.To test jQuery, this next sequence of stepswill create a JavaScript alert once thedocument is ready B. After you have thissimple test working, you can safely beginusing jQuery more practically.B This JavaScript alert is created once jQueryrecognizes that the <strong>Web</strong> document is ready inthe browser.Script 15.2 This simple JavaScript file creates analert to test successful incorporation <strong>and</strong> use ofthe jQuery library.1 // Script 15.2 - test.js2 // This script is included by test.html.3 // This script just creates an alert totest jQuery.45 // Do something when the document isready:6 $(function( ) {78 // Alert!9 alert('Ready!');1011 });To use jQuery:1. Create a new JavaScript document inyour text editor or IDE, to be namedtest.js (Script 15.2):// Script 15.2 - test.jsA JavaScript file has no script tags—those are in the HTML document—orother opening tags. You can just beginentering JavaScript code. Again, adouble slash creates a comment.464 Chapter 15
2. Create an alert when the documentis ready:$(function( ) {alert('Ready!');});This is just the syntax already explained,with a call to alert( ) in place of theFunction code. comment shown earlier.The alert( ) function takes a string asits argument, which will be used in thepresented alert box B.3. Save the file as test.js, in your <strong>Web</strong>server’s js directory.4. Open test.html (Script 15.1), in yourtext editor or IDE.The next step is to update the HTMLpage so that it includes the newJavaScript file.5. After including the jQuery library, includethe new JavaScript file (Script 15.3):➝ Assuming that the test.js JavaScriptfile is placed in the same directoryas the jQuery library, with the samerelative location to test.html, this codewill successfully incorporate it.6. Save the HTML page <strong>and</strong> test it in your<strong>Web</strong> browser B.If you do not see the alert window, you’llneed to debug the JavaScript code.Technically, in OOP, a function is calleda method. For the duration of this chapter,I’ll continue to use the term “function” as it’slikely to be more familiar to you.The code $( ) is shorth<strong>and</strong> <strong>for</strong> calling thejQuery( ) function.jQuery’s “ready” status is slightly differentthan JavaScript’s onLoad: the latteralso waits <strong>for</strong> the loading of images <strong>and</strong> othermedia, whereas jQuery’s ready status is triggeredby the full loading of the DOM.Script 15.3 The updated test HTML page loads a new JavaScript file.1 2 3 4 5 Testing jQuery6 7 8 9 10 11 12 Introducing jQuery 465
Selecting pageelementsOnce you’ve got basic jQuery functionalityworking, the next thing to learn is how toselect page elements. Being able to do sowill allow you to hide <strong>and</strong> show images orblocks of text, manipulate <strong>for</strong>ms, <strong>and</strong> more.You’ve already seen how to select the <strong>Web</strong>document itself: $(document). To selectother page elements, use CSS selectors inplace of document:nnn#something selects the element with anid value of something.something selects every element witha class value of somethingsomething selects every element ofsomething type (e.g., p selects everyparagraph)Those three rules are more than enoughto get you started, but know that unlikedocument, each of these gets placedwithin quotation marks. For example,the code $('a') selects every link <strong>and</strong>$('#caption') selects the element withan id value of caption. By definition, notwo elements in a single <strong>Web</strong> page shouldhave the same identifying value, thus toreference individual elements on the page,#something is the easiest solution.These rules can be combined as well:nn$('img.l<strong>and</strong>scape') selects everyimage with a class of l<strong>and</strong>scape$('#register input') selects everyinput element found within an elementthat has an id of registerFor the next jQuery example, aJavaScript-driven version of the WidgetCost Calculator <strong>for</strong>m, similar to the onedeveloped in Chapter 13, “SecurityMethods,” will be developed. In these nextfew steps, the HTML page will be created,with the appropriate elements, classes, <strong>and</strong>unique identifiers to be easily manipulatedby jQuery A.A The Widget Cost Calculator as an HTML <strong>for</strong>m.466 Chapter 15
To create the HTML <strong>for</strong>m:1. Open test.html (Script 15.3) in yourtext editor or IDE, if it is not already.Since this file is already jQuery-enhanced,it’ll be easiest to just update it.2. Change the page’s title (Script 15.4):Widget Cost Calculator➝ 3. After the page title, incorporate a CSS file:To make the <strong>for</strong>m a bit more attractive,some CSS code will style it. You can findthe CSS file in the book’s correspondingdownloads at www.LarryUllman.com.The CSS file also defines two significantclasses—error <strong>and</strong> errorMessage, to bemanipulated by jQuery later in the chapter.The first turns everything red; thesecond italicizes text (but the class will bemore meaningful as a way of identifyinga group of similar items). In time, you’llsee how these classes are used.4. Change the second script tag so that itreferences calculator.js, not test.js:The JavaScript <strong>for</strong> this example will goin calculator.js, to be written subsequently.It will be stored in the same jsfolder as the other JavaScript documents.continues on next pageScript 15.4 In this HTML page is a <strong>for</strong>m with three textual inputs <strong>for</strong> per<strong>for</strong>ming a calculation.1 2 3 4 5 Widget Cost Calculator6 7 8 9 10 11 12 Widget Cost Calculator13 14 15 Quantity: 16 Price: 17 Tax (%): 18 19 20 21 Introducing jQuery 467
5. Within the HTML body, create an emptyparagraph <strong>and</strong> begin a <strong>for</strong>m:Widget Cost CalculatorThe paragraph with the id of resultsbut no content will be used later in thechapter to present the results of thecalculations. It has a unique id value,<strong>for</strong> easy reference. The <strong>for</strong>m, too, hasa unique id value. The <strong>for</strong>m, in theory,would be submitted to calculator.php(a separate script, not actually written inthis chapter), but that submission will beinterrupted by JavaScript.6. Create the first <strong>for</strong>m element:Quantity: Each <strong>for</strong>m input, as originally written inChapter 13, involved the textual prompt,the element itself, <strong>and</strong> a paragraphsurrounding both. To the paragraph <strong>and</strong><strong>for</strong>m input, unique id values are added.Note that I tend to use “camel-case”style names—quantityP—in objectorientedlanguages such as JavaScript.This approach just better follows OOPconventions (conversely, I would usequantity_p in procedural <strong>PHP</strong> code).7. Create the remaining two <strong>for</strong>m elements:Price: Tax (%): 8. Complete the <strong>for</strong>m <strong>and</strong> the HTML page:The submit button also has a uniqueid, but that’s <strong>for</strong> the benefit of the CSS;it won’t actually be referenced in theJavaScript.9. Save the page as calculator.html <strong>and</strong>load it in your <strong>Web</strong> browser A.Even though the second JavaScriptfile, calculator.js, has not yet beenwritten, the <strong>for</strong>m is still loadable.jQuery has its own additional, customselectors, allowing you to select pageelements in more sophisticated ways. Forexamples, see the jQuery manual.468 Chapter 15
event H<strong>and</strong>lingJavaScript, like <strong>PHP</strong>, is often used to respondto events. Differently, though, events inJavaScript terms are primarily user actionswithin the <strong>Web</strong> browser, such as:nnnnMoving the cursor over an image orpiece of textClicking a linkChanging the value of a <strong>for</strong>m elementSubmitting a <strong>for</strong>mTo h<strong>and</strong>le events in JavaScript, you applyan event listener (also called an eventh<strong>and</strong>ler) to an element, which is to say, youtell JavaScript that when A event happensto B element, the C function should becalled. In jQuery, event listeners areassigned using the syntaxselection.eventType(function);The selection part would be like$('.something') or $('a'): whateverelement or elements to which the eventlistener should be applied. The eventTypevalue will differ based upon the selection.Common values are change, focus,mouseover, click, submit, <strong>and</strong> select:different events can be triggered by differentHTML elements. In jQuery, these areall actually the names of functions beingcalled on the selection. These functionstake one argument: a function to be calledwhen the event occurs on that selection.Commonly, the function to be invoked iswritten inline, anonymously. For example,to h<strong>and</strong>le the event of any image beingmoused-over, you would code:$('img').mouseover(function( ) {// Do this!});This construct should look familiar, astest.js assigns an event h<strong>and</strong>ler thatlistens <strong>for</strong> the ready event occurring on the<strong>Web</strong> document.Let’s take this new in<strong>for</strong>mation <strong>and</strong> applyit to the HTML page already begun. Atthis point, an event listener can be addedto the <strong>for</strong>m so that its submission can beh<strong>and</strong>led. In this particular case, the <strong>for</strong>m’sthree inputs will be minimally validated,the total calculation will be per<strong>for</strong>med, <strong>and</strong>the results of the calculation displayedin an alert A. In order to do all this, youneed to know one more thing: to fetch thevalues entered into the textual <strong>for</strong>m inputsrequires the val( ) function. It returns thevalue <strong>for</strong> the selection, as you’ll see inthese next steps.A The calculations are displayed using an alertbox (<strong>for</strong> now).Introducing jQuery 469
To h<strong>and</strong>le the <strong>for</strong>m submission:1. Open test.js in your text editor or IDE:Since the test.js file already has theproper syntax <strong>for</strong> executing code whenthe browser is ready, it’ll be easiest <strong>and</strong>most foolproof to start with it.2. Remove the existing alert( ) call(Script 15.5).All of the following code will go in placeof the original alert( ).3. In place of the alert( ) call, add anevent h<strong>and</strong>ler to the <strong>for</strong>m’s submission:$('#calculator').submit(function( ) {}); // End of <strong>for</strong>m submission.The selector grabs a reference to the<strong>for</strong>m, which has an id value of calculator.To this selection the submit( ) functionis applied, so that when the <strong>for</strong>m issubmitted, the inline anonymous functionwill be called. Because the syntaxcan be so tricky, my recommendationis to add this block of code, <strong>and</strong> thenwrite the contents of the anonymousfunction—found in the following steps—secondarily. Note that this <strong>and</strong> thefollowing code goes within the existing$(document).ready( ) { } block.4. Within the new anonymous function,initialize four variables:var quantity, price, tax, total;In JavaScript, the var keyword is usedto declare a variable. It can also declaremultiple variables at once, if separatedby commas. Note that variables inJavaScript do not have an initial dollarsign, like those in <strong>PHP</strong>.Script 15.5 This JavaScript file is included bycalculator.html (Script 15.4). Upon submissionof the <strong>for</strong>m, the <strong>for</strong>m’s values are validated <strong>and</strong>a calculation per<strong>for</strong>med.1 // Script 15.5 - calculator.js2 // This script is included bycalculator.html.3 // This script h<strong>and</strong>les <strong>and</strong> validates the<strong>for</strong>m submission.45 // Do something when the document isready:6 $(function( ) {78 // Assign an event h<strong>and</strong>ler to the <strong>for</strong>m:9 $('#calculator').submit(function( ) {1011 // Initialize some variables:12 var quantity, price, tax, total;1314 // Validate the quantity:15 if ($('#quantity').val( ) > 0) {1617 // Get the quantity:18 quantity = $('#quantity').val( );1920 } else { // Invalid quantity!2122 // Alert the user:23 alert('Please enter a validquantity!');2425 }2627 // Validate the price:28 if ($('#price').val( ) > 0) {29 price = $('#price').val( );30 } else {31 alert('Please enter a validprice!');32 }3334 // Validate the tax:35 if ($('#tax').val( ) > 0) {36 tax = $('#tax').val( );37 } else {38 alert('Please enter a validtax!');39 }40code continues on next page470 Chapter 15
Script 15.5 continued41 // If appropriate, per<strong>for</strong>m thecalculations:42 if (quantity && price && tax) {4344 total = quantity * price;45 total += total * (tax/100);4647 // Display the results:48 alert('The total is $' + total);4950 }5152 // Return false to prevent anactual <strong>for</strong>m submission:53 return false;5455 }); // End of <strong>for</strong>m submission.5657 }); // End of document ready.B If a <strong>for</strong>m element does not have a positivenumeric value, an alert box indicates the error.5. Validate the quantity:if ($('#quantity').val( ) > 0) {quantity = $('#quantity').val( );} else {alert('Please enter a valid➝ quantity!');}For each of the three <strong>for</strong>m inputs, thevalue needs to be a number greaterthan zero. The value entered can befound by calling the val( ) function onthe selected element. If the returnedvalue is greater than zero, then thevalue is assigned to the local variablequantity. Otherwise, an alert boxindicates the problem to the user B.This is admittedly a tedious use ofalerts; you’ll learn a smoother approachin the next section of the chapter.6. Repeat the validation <strong>for</strong> the other two<strong>for</strong>m inputs:if ($('#price').val( ) > 0) {price = $('#price').val( );} else {alert('Please enter a valid➝ price!');}if ($('#tax').val( ) > 0) {tax = $('#tax').val( );} else {alert('Please enter a valid➝ tax!');}continues on next pageIntroducing jQuery 471
7. If all three variables have valid values,per<strong>for</strong>m the calculations:if (quantity && price && tax) {total = quantity * price;total += total * (tax/100);This code should be fairly obvious bynow: it looks almost exactly as it wouldin <strong>PHP</strong>, save <strong>for</strong> the lack of dollar signsin front of each variable’s name.8. Report the total:alert('The total is $' + total);Again, a crude alert window will beused to display the results of thecalculation A. As you can see inthis code, the plus sign per<strong>for</strong>msconcatenation in JavaScript.9. Complete the conditional begun inStep 7 <strong>and</strong> return the value false:}return false;Having the function return falseprevents the <strong>for</strong>m from actually beingsubmitted to the script that’s identifiedas the <strong>for</strong>m’s action.10. Save the page as calculator.js (in thejs folder) <strong>and</strong> test the calculator in your<strong>Web</strong> browser.Note that if you already hadcalculator.html loaded in your <strong>Web</strong>browser, you’ll need to refresh thebrowser to load the updated JavaScript.There are many jQuery plug-insspecifically <strong>for</strong> validating <strong>for</strong>ms, but Iwanted to keep this simple (<strong>and</strong> explaincore JavaScript concepts in the process).It is possible to <strong>for</strong>mat numbers inJavaScript, <strong>for</strong> example, so they alwayscontain two decimals, but it’s not easily done.For this reason, <strong>and</strong> because I didn’t want todetract from the more important in<strong>for</strong>mationbeing covered, the results of the calculationmay not always look as good as they should.With jQuery, if the browser supports it,the JavaScript code will per<strong>for</strong>m the calculations.If the user has JavaScript disabled, orif she or he is using a really old browser, theJavaScript will not take effect <strong>and</strong> the <strong>for</strong>mwill be submitted as per usual (here, to thenon-existent calculator.php).472 Chapter 15
DoM ManipulationOne of the most critical uses of JavaScriptin general, <strong>and</strong> jQuery in particular, ismanipulation of the DOM: changing, in anyway, the contents of the <strong>Web</strong> browser. Normally,DOM manipulation is manifested byaltering what the user sees; how easily youcan do this in jQuery is one of its strengths.Once you’ve selected the element orelements to be manipulated, applyingany number of jQuery functions to theselection will change its properties. Forstarters, the hide( ) <strong>and</strong> show( ) functions…um…hide <strong>and</strong> show the selection. Thus,to hide a <strong>for</strong>m (perhaps after the user hassuccessfully completed it), you would use:$('#actualFormId').hide( );The toggle( ) function, when called, willhide a visible element <strong>and</strong> show a hiddenone (i.e., it toggles between those twostates). Note that these functions neithercreate nor destroy the selection (i.e., theselection will remain part of the DOM,whether it’s visible or not).Similar to show( ) <strong>and</strong> hide( ) arefadeIn( ) <strong>and</strong> fadeOut( ). These functionsalso reveal or hide the selection, but do sowith a bit of effect added in.Another way to impact the DOM is tochange the CSS classes that apply toa selection. The addClass( ) functionapplies a CSS class <strong>and</strong> removeClass( )removes one. The following code adds theemphasis class to a specific blockquote<strong>and</strong> removes it from all paragraphs:$('#blockquoteID').addClass➝ ('emphasis');$('p').removeClass('emphasis');The toggleClass( ) function can be usedto toggle the application of a class toa selection.The already mentioned functions generallychange the properties of the page’selements, but you can also change thecontents of those elements. In the previoussection, you used the val( ) function, whichreturns the value of a <strong>for</strong>m element. Butwhen provided with an argument, val( )assigns a new value to that <strong>for</strong>m element:$('#something').val('cat');Similarly, the html( ) function returns theHTML contents of an element <strong>and</strong> text( )returns the textual contents. Both functionscan also take arguments used to assignnew HTML <strong>and</strong> text, accordingly.continues on next pageIntroducing jQuery 473
Let’s use all this in<strong>for</strong>mation to finish off thewidget cost calculator. A few key changeswill be made:nnnnErrors will be indicated by applying theerror classErrors will also be indicated by hidingor showing error messages AThe final total will be written to thepage BAlerts will not be usedThere are a couple of ways of showing <strong>and</strong>hiding error messages. The simplest, to beimplemented here, is to manually add themessages to the <strong>for</strong>m, <strong>and</strong> then toggle theirvisibility using JavaScript. Accordingly, thesesteps begin by updating the HTML page.A Error messages are now displayed next to theproblematic <strong>for</strong>m inputs.To manipulate the DoM:1. Open calculator.html in your text editoror IDE, if it is not already.2. Between the quantity <strong>for</strong>m element <strong>and</strong>its closing paragraph tag, add an errormessage (Script 15.6):Quantity:➝ ➝ Please enter➝ a valid quantity!Now following the input is a textualerror, which also has a unique id. Thespan containing the error also uses theerrorMessage class. This impacts themessage’s <strong>for</strong>matting, thanks to theexternal CSS document, <strong>and</strong> makes iteasier <strong>for</strong> jQuery to globally hide all errormessages upon first loading the page.B The results of the calculationsare now displayed abovethe <strong>for</strong>m.474 Chapter 15
3. Repeat Step 2 <strong>for</strong> the other two<strong>for</strong>m inputs:Price: ➝ Please enter a valid price!➝ Tax (%): ➝ Please enter a valid tax!➝ 4. Save the file.5. Open calculator.js in your text editoror IDE, if it is not already.continues on next pageScript 15.6 The updated HTML page has hardcoded error messages beside the key <strong>for</strong>m inputs.1 2 3 4 5 Widget Cost Calculator6 7 8 9 10 11 12 Widget Cost Calculator13 14 15 Quantity: Please enter a valid quantity!16 Price: Please enter a valid price!17 Tax (%): Please enter a valid tax!18 19 20 21 Introducing jQuery 475
6. Remove all existing alert( ) calls(Script 15.7).7. Be<strong>for</strong>e the submit event h<strong>and</strong>ler, hideevery element with the errorMessageclass:$('.errorMessage').hide( );The selector grabs a reference to anyelement of any type that has a class oferrorMessage. In the HTML <strong>for</strong>m, thisapplies only to the three span tags.8. In the if clause code after assigninga value to the local quantity variable,remove the error class <strong>and</strong> hide theerror message:$('#quantityP').removeClass➝ ('error');$('#quantityError').hide( );As you’ll see in Step 9, when theuser enters an invalid quantity, thequantity paragraph (with an id value ofquantityP) will be assigned the errorclass <strong>and</strong> the quantity error message(i.e., #quantityError) will be shown. If theuser entered an invalid quantity, but thenentered a valid one, those two effectsmust be undone, using this code here.In the case that an invalid quantity wasnever submitted, the quantity paragraphwill not have the error class <strong>and</strong> thequantity error message will still be hidden.In situations where jQuery is askedto do something that’s not possible,such as hiding an already hidden element,jQuery just ignores the request.9. If the quantity is not valid, add the errorclass <strong>and</strong> show the error message:$('#quantityP').addClass('error');$('#quantityError').show( );This is the converse of the code in Step 8.Note that it goes within the else clause.Script 15.7 Using jQuery, the JavaScript code nowmanipulates the DOM instead of using alert( ) calls.1 // Script 15.7 - calculator.js #22 // This script is included by calculator.html.3 // This script h<strong>and</strong>les <strong>and</strong> validates the<strong>for</strong>m submission.45 // Do something when the document isready:6 $(function( ) {78 // Hide all error messages:9 $('.errorMessage').hide( );1011 // Assign an event h<strong>and</strong>ler to the<strong>for</strong>m:12 $('#calculator').submit(function( ) {1314 // Initialize some variables:15 var quantity, price, tax, total;1617 // Validate the quantity:18 if ($('#quantity').val( ) > 0) {1920 // Get the quantity:21 quantity = $('#quantity').val( );2223 // Clear an error, if oneexisted:24 $('#quantityP').removeClass('error');2526 // Hide the error message, ifit was visible:27 $('#quantityError').hide( );2829 } else { // Invalid quantity!3031 // Add an error class:32 $('#quantityP').addClass('error');3334 // Show the error message:35 $('#quantityError').show( );3637 }38code continues on next page476 Chapter 15
Script 15.7 continued39 // Validate the price:40 if ($('#price').val( ) > 0) {41 price = $('#price').val( );42 $('#priceP').removeClass('error');43 $('#priceError').hide( );44 } else {45 $('#priceP').addClass('error');46 $('#priceError').show( );47 }4849 // Validate the tax:50 if ($('#tax').val( ) > 0) {51 tax = $('#tax').val( );52 $('#taxP').removeClass('error');53 $('#taxError').hide( );54 } else {55 $('#taxP').addClass('error');56 $('#taxError').show( );57 }5859 // If appropriate, per<strong>for</strong>m thecalculations:60 if (quantity && price && tax) {6162 total = quantity * price;63 total += total * (tax/100);6465 // Display the results:66 $('#results').html('The totalis $' + total + '.');6768 }6970 // Return false to prevent anactual <strong>for</strong>m submission:71 return false;7273 }); // End of <strong>for</strong>m submission.7475 }); // End of document ready.10. Repeat Steps 8 <strong>and</strong> 9 <strong>for</strong> the price,making that if-else read:if ($('#price').val( ) > 0) {price = $('#price').val( );$('#priceP').removeClass➝ ('error');$('#priceError').hide( );} else {$('#priceP').addClass('error');$('#priceError').show( );}11. Repeat Steps 8 <strong>and</strong> 9 <strong>for</strong> the tax,making that if-else read:if ($('#tax').val( ) > 0) {tax = $('#tax').val( );$('#taxP').removeClass('error');$('#taxError').hide( );} else {$('#taxP').addClass('error');$('#taxError').show( );}12. After calculating the total, within thesame if clause, update the resultsparagraph:$('#results').html('The total is➝ $' + total + '.');Instead of using an alert box, the totalmessage can just be written to the HTMLpage dynamically. One way of doingso is by changing the text or HTMLof an element on the page. The pagealready has an empty paragraph <strong>for</strong> thispurpose, with an id value of results. Tochange the text found within the paragraph,one would apply the text( ) function.To change the HTML found withinthe paragraph, use html( ) instead.continues on next pageIntroducing jQuery 477
13. Save the page as calculator.js (in thejs folder) <strong>and</strong> test the calculator in your<strong>Web</strong> browser.Again, remember that you must reloadthe HTML page (because both the HTML<strong>and</strong> the JavaScript have been updated).jQuery will not throw an error if youattempt to select page elements that don’texist. jQuery will also not throw an error ifyou call a function on non-existent elements.In JavaScript, as in other OOP languages,you can “chain” function callstogether, per<strong>for</strong>ming multiple actions at onetime. This code reveals a previously hiddenparagraph, adds a new class, <strong>and</strong> changesits textual content, all in one line:$('#pId').show( ).addClass('thisClass').➝ text('Hello, world!');You can change the attributes of aselection using the attr( ) function. Its firstargument is the attribute to be impacted; thesecond, the new value. For example, the followingcode will disable a submit button byadding the property disabled="disabled":$('#submitButtonId').attr('disabled',➝'disabled');You can add, move, or remove elementsusing the prepend( ), append( ), remove( ),<strong>and</strong> other functions. See the jQuery manual<strong>for</strong> specifics.478 Chapter 15
using AjaxAlong with DOM manipulation, anotherkey use of JavaScript <strong>and</strong> jQuery is Ajax.The term Ajax was first coined in 2005,although browser support was mixed<strong>for</strong> years. Come 2011, Ajax is a st<strong>and</strong>ardfeature of many dynamic <strong>Web</strong> sites, <strong>and</strong> itsstraight<strong>for</strong>ward use is supported by all themajor browsers. But what is Ajax?Ajax can mean many things, involving severaldifferent technologies <strong>and</strong> approaches, but atthe end of the day, Ajax is simply the use ofJavaScript to per<strong>for</strong>m a server-side requestunbeknownst to the user. In a st<strong>and</strong>ardrequest model, which is to say pretty muchevery other example in this book, the usermay begin on, say, login.html. Upon submissionof the <strong>for</strong>m, the browser will be takento perhaps login.php, where the actual<strong>for</strong>m validation is done, the registration in thedatabase takes place, <strong>and</strong> the results are displayedA. (Even if the same <strong>PHP</strong> script bothdisplays <strong>and</strong> h<strong>and</strong>les a <strong>for</strong>m, the st<strong>and</strong>ardrequest model requires two separate <strong>and</strong>overt requests of that same page.)continues on next pageA A st<strong>and</strong>ard client-server request model, with the browser constantly reloadingentire <strong>Web</strong> pages.Introducing jQuery 479
With the Ajax model, the <strong>for</strong>m submissionwill be hijacked by JavaScript, which willin turn send the <strong>for</strong>m data to a server-side<strong>PHP</strong> script. That <strong>PHP</strong> script does whatevervalidation <strong>and</strong> other tasks necessary, <strong>and</strong>then returns only data to the client-sideJavaScript, indicating the results of theoperation. The client-side JavaScript thenuses the returned data to update the <strong>Web</strong>page B. Although there are more steps,the user will be unaware of most of them,<strong>and</strong> be able to continue interacting with the<strong>Web</strong> page while this process takes place.Incorporating Ajax into a <strong>Web</strong> site resultsin an improved user experience, more similarto how desktop applications behave.Secondarily, there can be better per<strong>for</strong>mance,with less data being transmittedback <strong>and</strong> <strong>for</strong>th (e.g., an entire second pageof HTML, like login.php, does not need tobe transmitted).You already know much of the in<strong>for</strong>mationrequired <strong>for</strong> per<strong>for</strong>ming Ajax transactions:<strong>for</strong>m validation with JavaScript, <strong>for</strong>m validationwith <strong>PHP</strong>, <strong>and</strong> using JavaScript toupdate the DOM. The last bit of knowledgeyou need is how to per<strong>for</strong>m the actualAjax request using jQuery. Over the nextseveral pages, you’ll create the HTML <strong>for</strong>m,the server-side <strong>PHP</strong> script, <strong>and</strong> the intermediaryJavaScript, all <strong>for</strong> the sake of h<strong>and</strong>linga login <strong>for</strong>m. In order to shorten <strong>and</strong>simplify the code a bit, I’ve cut a coupleof corners, but I’ll indicate exactly when Ido so, <strong>and</strong> every cut will be in an area youcould easily flesh out on your own.B With Ajax, server requests are made behind the scenes, <strong>and</strong> the <strong>Web</strong> browser can beupdated without reloading.480 Chapter 15
Creating the FormThe login <strong>for</strong>m simply needs two inputs:one <strong>for</strong> an email address <strong>and</strong> another<strong>for</strong> a password C. The <strong>for</strong>m will use thesame techniques <strong>for</strong> displaying errors <strong>and</strong>indicating results as calculator.html D.C The login <strong>for</strong>m.D Error messages are revealed beside each<strong>for</strong>m element.To create the <strong>for</strong>m:1. Begin a new <strong>PHP</strong> document in your texteditor or IDE, to be named login.php(Script 15.8):continues on next pageScript 15.8 The login <strong>for</strong>m has one text input <strong>for</strong> the email address, a password input, <strong>and</strong> a submit button.Other elements exist to be manipulated by jQuery.1 2 3 4 5 Login6 7 8 9 10 11 12 Login13 14 15 Email Address: Please enter your email address!16 Password: Please enter your password!17 18 19 20 Introducing jQuery 481
LoginThis will actually be a <strong>PHP</strong> script, not justan HTML file. The page uses the sameexternal CSS file as calculator.html.2. Incorporate the jQuery library <strong>and</strong> asecond JavaScript file:The page will use the same jQuerylibrary as calculator.html. The pagespecificJavaScript will go in login.js.Both will be stored in the js folder, foundin the same directory as this script.3. Complete the HTML head <strong>and</strong> beginthe body:LoginWithin the body, be<strong>for</strong>e the <strong>for</strong>m, is anempty paragraph with an id of results,to be dynamically populated withjQuery later E.4. Create the <strong>for</strong>m:Email Address:➝ Please enter➝ your email address!Password:➝ Please➝ enter your password!This <strong>for</strong>m is quite similar to that incalculator.html. Both <strong>for</strong>m elementsare wrapped within paragraphs thathave unique id values, making it easy<strong>for</strong> jQuery to apply the error class whenneeded. Both elements are followed bythe default error message, to be hidden<strong>and</strong> shown by jQuery as warranted.5. Complete the HTML page:6. Save the page as login.php <strong>and</strong> loadin your <strong>Web</strong> browser.Remember that this is a <strong>PHP</strong> script,so it must be accessed through a URL(http://something).E Upon successfully loggingin, the <strong>for</strong>m will disappear <strong>and</strong>a message will appear justunder the header.482 Chapter 15
Creating the Server-Side ScriptThe previous sequence of steps goesthrough creating the client side of theprocess: the HTML <strong>for</strong>m. Next, I’m going toskip ahead <strong>and</strong> look at the server side: the<strong>PHP</strong> script that h<strong>and</strong>les the <strong>for</strong>m data. Thisscript has to do two things:1. Validate the submitted data.2. Return a string indicating the results.For simplicity’s sake, the <strong>PHP</strong> script willmerely compare the submitted valuesagainst hardcoded ones, but you couldeasily modify this code to per<strong>for</strong>m adatabase query instead.In terms of the Ajax process, the importantthing is that this <strong>PHP</strong> script only everreturns a single string F, without any HTMLor other markup G. This is m<strong>and</strong>atory, asthe entire output of the <strong>PHP</strong> script is whatthe JavaScript per<strong>for</strong>ming the Ajax requestwill receive. And, as you’ll see in the Java-Script <strong>for</strong> this example, the <strong>PHP</strong> script’s outputwill be the basis <strong>for</strong> the error reporting<strong>and</strong> DOM manipulation to be per<strong>for</strong>med.F The results of the server-side <strong>PHP</strong> script when a proper request is made.G The HTML source of the server-side <strong>PHP</strong> script shows that the only output isa simple string, without any HTML at all.Introducing jQuery 483
To h<strong>and</strong>le the Ajax request:1. Begin a new <strong>PHP</strong> document in yourtext editor or IDE, to be namedlogin_ajax.php (Script 15.9):484 Chapter 15
or begin a session (although see thefollowing tip <strong>for</strong> the “gotchas” involvedwith doing so).Most importantly, the script simplyechoes the word CORRECT, withoutany other HTML (F <strong>and</strong> G).5. Complete the three conditionals:} else {echo 'INCORRECT';}} else {echo 'INVALID_EMAIL';}} else {echo 'INCOMPLETE';}These three else clauses complete theconditionals begun in Steps 2, 3, <strong>and</strong>4. Each simply prints a string indicatinga certain status. The JavaScript associatedwith the login <strong>for</strong>m, to be writtennext, will take different actions basedupon each of the possible results.6. Complete the <strong>PHP</strong> page:?>7. Save the file as login_ajax.php, <strong>and</strong>place it in the same folder of your <strong>Web</strong>directory as login.php.It’s important that the two files are inthe same directory in order <strong>for</strong> the Ajaxrequest to work.It’s perfectly acceptable <strong>for</strong> the serverside<strong>PHP</strong> script in an Ajax process to setcookies or begin a session. Keep in mind,however, that the page in the <strong>Web</strong> browserhas already been loaded, meaning that pagecannot access cookies or sessions createdafter the fact. You’ll need to use JavaScriptto update the page after creating a cookieor starting a session, but subsequent pagesloaded in the browser will have full access tocookie or session data.Creating the JavaScriptThe final step is to create the JavaScript thatinterrupts the <strong>for</strong>m submission, sends thedata to the server-side <strong>PHP</strong> script, reads the<strong>PHP</strong> script’s results, <strong>and</strong> updates the DOMaccordingly. This is the “glue” between theclient-side HTML <strong>for</strong>m <strong>and</strong> the server-side<strong>PHP</strong>. All of the JavaScript <strong>for</strong>m validation <strong>and</strong>DOM manipulation will be quite similar towhat you’ve already seen in this chapter. Twonew concepts will be introduced, though.First, you’ll need to know how to createa generic object in JavaScript. In thisparticular case, one object will representthe data to be sent to the <strong>PHP</strong> script <strong>and</strong>another will represent the options <strong>for</strong> theAjax request. Here is how you create anew object in JavaScript:var objectName = new Object( );The next chapter gets into OOP in moredetail, but underst<strong>and</strong> now that this justcreates a new variable of type Object.The capital letter “O” Object is a blanktemplate in JavaScript (being an objectorientedlanguage, most variables inJavaScript are objects of some type).Once you’ve created the object, youcan add values to it using the syntax:objectName.property = value;If you’re new to JavaScript or OOP, it mayhelp to think of the generic object as beinglike an indexed array, with a name <strong>and</strong> acorresponding value.The second new piece of in<strong>for</strong>mation is theusage of jQuery’s ajax( ) function. This functionper<strong>for</strong>ms an Ajax request. It takes as itslone argument the request’s settings. Beingpart of the jQuery library, it’s invoked like so:$.ajax(settings);That’s the basic premise; the particulars willbe discussed in detail in the following code.Introducing jQuery 485
To per<strong>for</strong>m an Ajax request:1. Begin a new JavaScript file in your texteditor or IDE, to be named login.js(Script 15.10):// Script 15.10 - login.js2. Add the jQuery code <strong>for</strong> h<strong>and</strong>ling the“ready” state of the document:$(function( ) {});The JavaScript needs to start with thiscode, in order to set the table once the<strong>Web</strong> browser is ready. Because of thecomplicated syntax, I think it’s best toadd this entire block of code first <strong>and</strong>then place all of the subsequent codewithin the curly braces.3. Hide every element that has theerrorMessage class:$('.errorMessage').hide( );The selector grabs a reference to anyelement of any type that has a classof errorMessage. In the HTML <strong>for</strong>m,this applies only to the three span tags.Those will be hidden by this code assoon as the DOM is loaded.4. Create an event listener <strong>for</strong> the <strong>for</strong>m’ssubmission:$('#login').submit(function( ) {});This code is virtually the same as that inthe calculator <strong>for</strong>m. All of the remainingcode will go within these curly brackets.5. Initialize two variables:var email, password;These two variables will act as localrepresentations of the <strong>for</strong>m data.Script 15.10 The JavaScript code in this file per<strong>for</strong>msan Ajax request of a server-side script <strong>and</strong> updatesthe DOM based upon the returned response.1 // Script 15.10 - login.js2 // This script is included by login.php.3 // This script h<strong>and</strong>les <strong>and</strong> validates the<strong>for</strong>m submission.4 // This script then makes an Ajaxrequest of login_ajax.php.56 // Do something when the document isready:7 $(function( ) {89 // Hide all error messages:10 $('.errorMessage').hide( );1112 // Assign an event h<strong>and</strong>ler to the <strong>for</strong>m:13 $('#login').submit(function( ) {1415 // Initialize some variables:16 var email, password;1718 // Validate the email address:19 if ($('#email').val( ).length >= 6) {2021 // Get the email address:22 email = $('#email').val( );2324 // Clear an error, if one existed:25 $('#emailP').removeClass('error');2627 // Hide the error message, ifit was visible:28 $('#emailError').hide( );2930 } else { // Invalid email address!3132 // Add an error class:33 $('#emailP').addClass('error');3435 // Show the error message:36 $('#emailError').show( );3738 }39code continues on next page486 Chapter 15
Script 15.10 continued40 // Validate the password:41 if ($('#password').val( ).length > 0) {42 password = $('#password').val( );43 $('#passwordP').removeClass('error');44 $('#passwordError').hide( );45 } else {46 $('#passwordP').addClass('error');47 $('#passwordError').show( );48 }4950 // If appropriate, per<strong>for</strong>m theAjax request:51 if (email && password) {5253 // Create an object <strong>for</strong> the<strong>for</strong>m data:54 var data = new Object( );55 data.email = email;56 data.password = password;5758 // Create an object of Ajaxoptions:59 var options = new Object( );6061 // Establish each setting:62 options.data = data;63 options.dataType = 'text';64 options.type = 'get';65 options.success = function(response) {6667 // Worked:68 if (response = = 'CORRECT') {6970 // Hide the <strong>for</strong>m:71 $('#login').hide( );72code continues on next page6. Validate the email address:if ($('#email').val( ).length >= 6) {email = $('#email').val( );$('#emailP').removeClass➝ ('error');$('#emailError').hide( );The calculator <strong>for</strong>m validated that all ofthe numbers were greater than zero,which isn’t an appropriate validation <strong>for</strong>the login <strong>for</strong>m. Instead, the conditionalconfirms that the string length of thevalue of the email input is greater thanor equal to 6 (six characters being theabsolute minimum required <strong>for</strong> a validemail address, such as a@b.cc). Youcould also use regular expressions inJavaScript to per<strong>for</strong>m more stringentvalidation, but I’m trying to keep thissimple (<strong>and</strong> the server-side <strong>PHP</strong> scriptwill validate the email address as well,as you’ve already seen).If the email address value passes theminimal validation, it’s assigned to thelocal variable. Next, the error class isremoved from the paragraph, in case itwas added previously, <strong>and</strong> the emailspecificerror is hidden, in case it wasshown previously.7. Complete the email addressconditional:} else {$('#emailP').addClass('error');$('#emailError').show( );}This code completes the conditionalbegun in Step 6. The code is the sameas that used in calculator.html, addingthe error class to the entire paragraph<strong>and</strong> showing the error message D.continues on next pageIntroducing jQuery 487
8. Validate the password:if ($('#password').val( ).length >➝ 0) {password = $('#password').val( );$('#passwordP').removeClass➝ ('error');$('#passwordError').hide( );} else {$('#passwordP').addClass➝ ('error');$('#passwordError').show( );}For the password, the minimum lengthwould likely be determined by theregistration process. As a placeholder,this code just confirms a positivestring length. Otherwise, this codeis essentially the same as that in theprevious two steps.9. If both values were received, storethem in a new object:if (email && password) {var data = new Object( );data.email = email;data.password = password;Script 15.10 continued73 // Show a message:74 $('#results').removeClass('error');75 $('#results').text('You are now logged in!');7677 } else if (response = = 'INCORRECT') {78 $('#results').text('The submitted credentials do not match those on file!');79 $('#results').addClass('error');80 } else if (response = = 'INCOMPLETE') {81 $('#results').text('Please provide an email address <strong>and</strong> a password!');82 $('#results').addClass('error');83 } else if (response = = 'INVALID_EMAIL') {84 $('#results').text('Please provide your email address!');85 $('#results').addClass('error');86 }8788 }; // End of success.89 options.url = 'login_ajax.php';9091 // Per<strong>for</strong>m the request:92 $.ajax(options);9394 } // End of email && password IF.9596 // Return false to prevent an actual <strong>for</strong>m submission:97 return false;9899 }); // End of <strong>for</strong>m submission.100101 }); // End of document ready.488 Chapter 15
The premise behind this code wasexplained be<strong>for</strong>e these steps. First anew, generic object is created. Thena property of that object named emailis created, <strong>and</strong> assigned the valueof the email address. Finally, a propertynamed password is created, <strong>and</strong>assigned the value of the entered password.If it helps to imagine this code in<strong>PHP</strong> terms, the equivalent would be:$data = array( );$data['email'] = $email;$data['password'] = $password;10. Create a new object <strong>for</strong> the Ajax options,<strong>and</strong> establish the first three settings:var options = new Object( );options.data = data;options.dataType = 'text';options.type = 'get';Here, another generic object is created.Next, a property named data is assignedthe value of the data object. Thisproperty of the options object storesthe data being passed to the <strong>PHP</strong> scriptas part of the Ajax request.The second setting is the data typeexpected back from the server-siderequest. As the <strong>PHP</strong> script login_ajax.php returns (i.e., prints) a simple string,the value here is text. The dataTypesetting impacts how the JavaScriptwill attempt to work with the returnedresponse: it needs to match what theactual server response will be.The type setting is the type of requestbeing made, with get <strong>and</strong> post beingthe two most common. A GET requestis the default, so it does not need to beassigned here, but the code is beingexplicit anyway.To be clear, because of the name of theproperties in the data object—email<strong>and</strong> password—<strong>and</strong> because of thetype value of get, the login_ajax.phpscript will receive $_GET['email'] <strong>and</strong>$_GET['password']. If you were to changethe names of the properties in data, orthe value of options.type, the serverside<strong>PHP</strong> script would receive the Ajaxdata in different superglobal variables.11. Begin defining what should happenupon a successful Ajax request:options.success = function➝ (response) {}; // End of success.The success property defines what theJavaScript should do when the Ajaxquery works. By “work,” I mean that theJavaScript is able to per<strong>for</strong>m a requestof the server-side page <strong>and</strong> receivea result. For what should actuallyhappen, an anonymous function isassigned to this property. In this step,the anonymous function is defined<strong>and</strong> the assignment line is completed.The code in subsequent steps will gobetween these curly brackets.As you can see, the anonymous functiontakes one argument: the responsefrom the server-side script, assignedto the response variable. As alreadyexplained, the response received bythe JavaScript will be the entirety ofwhatever is outputted by the <strong>PHP</strong> script.continues on next pageIntroducing jQuery 489
12. Within the anonymous function createdin Step 11, if the server response equalsCORRECT, hide the <strong>for</strong>m <strong>and</strong> updatethe page:if (response = = 'CORRECT') {$('#login').hide( );$('#results').removeClass➝ ('error');$('#results').text('You are now➝ logged in!');When the user submits the correctcredentials—email@example.com <strong>and</strong>testpass, login_ajax.php will returnthe string CORRECT. In that case, theJavaScript will hide the entire login<strong>for</strong>m <strong>and</strong> assign a string to the resultsparagraph, indicating such E. Becauseincorrect submissions may have addedthe error class to this paragraph (seeStep 13), that class is also removed here.13. If the server response equalsINCORRECT, indicate an error:} else if (response = =➝'INCORRECT') {$('#results').text('The submitted➝ credentials do not match➝ those on file!');$('#results').addClass('error');When the user submits a password <strong>and</strong>a syntactically valid email address, butdoes not provide the correct specificvalues, the server-side <strong>PHP</strong> script willreturn the string INCORRECT. In thatcase, a different string is assigned to theresults paragraph <strong>and</strong> the error class isapplied to the paragraph as well H.H The results upon providing invalid login credentials.490 Chapter 15
14. Add clauses <strong>for</strong> the other two possibleserver responses:} else if (response = =➝'INCOMPLETE') {$('#results').text('Please➝ provide an email address <strong>and</strong>➝ a password!');$('#results').addClass('error');} else if (response = =➝'INVALID_EMAIL') {$('#results').text('Please➝ provide your email address!');$('#results').addClass('error');}These are repetitions of the code inStep 13, with different messages. This isthe end of the code that goes within thesuccess property’s anonymous function.15. Add the url property <strong>and</strong> make therequest:options.url = 'login_ajax.php';$.ajax(options);The url property of the Ajax objectnames the actual server-side script towhich the request should be sent. Aslong as login.php <strong>and</strong> login_ajax.phpare in the same directory, this referencewill work.Finally, after establishing all of the requestoptions, the request is per<strong>for</strong>med.16. Complete the conditional begun in Step9 <strong>and</strong> return false:} // End of email && password IF.return false;If the email <strong>and</strong> password variables donot have TRUE values, no Ajax requestis made (i.e., that conditional has noelse clause). Finally, the value falseis returned here to prevent the actualsubmission of the <strong>for</strong>m.17. Save the page as login.js (in the jsfolder) <strong>and</strong> test the login <strong>for</strong>m in your<strong>Web</strong> browser.As a debugging tip, it often helps to runthe server-side script directly F, to confirmthat it works (e.g., that it doesn’t contain aparse or other error).The Firefox Firebug extension can revealthe details about Ajax requests made by a<strong>Web</strong> page I.The Opera <strong>Web</strong> browser has a built-intool named Dragonfly, which is also an excellentdevelopment resource.Because JavaScript can be disabled byusers, you can never rely strictly upon Java-Script <strong>for</strong>m validation. You must always alsouse server-side <strong>PHP</strong> validation in order toprotect your <strong>Web</strong> site.I Thanks to the Firebug extension, you can see what transpires in a behindthe-scenesAjax request.Introducing jQuery 491
Review <strong>and</strong> pursueIf you have any problems with thereview questions or the pursue prompts,turn to the book’s supporting <strong>for</strong>um(www.LarryUllman.com/<strong>for</strong>ums/).ReviewnnnnnnnnnnnnnWhat is JavaScript? How doesJavaScript compare to <strong>PHP</strong>?What is jQuery? What is the relationshipbetween jQuery <strong>and</strong> JavaScript?How is an external JavaScript fileincorporated into an HTML page? Howis JavaScript code placed within theHTML page itself?Why is it important to wait until theentire DOM has been loaded in orderto execute JavaScript code thatreferences DOM elements?Why are unique identifiers in theDOM necessary?In jQuery, how do you select elementsof a given tag type? How do you selectelements that have a certain class? Howdo you select a specific element?In jQuery, how do you add an eventlistener to a page element (or elements)?What is an event listener?Why must you reload HTML pages afteraltering its JavaScript?What are some of the jQuery functionsone can use to manipulate the DOM?What is Ajax? Why is Ajax a “good thing”?Why must an HTML page that per<strong>for</strong>msa server-side request be loaded througha URL?How do you create a generic objectin JavaScript?What impact does the Ajax request’s typeproperty have? What impact do the namesof the properties in the data object have?pursuennnnnnnnnHead to the jQuery <strong>Web</strong> site <strong>and</strong> startperusing the jQuery documentation.Check out jQuery UI <strong>and</strong> what it can do<strong>for</strong> your <strong>Web</strong> pages.Use the jQuery documentation, or simplysearch online, <strong>for</strong> some of jQuery’splug-ins. Attempt to use one or more ofthem in a <strong>Web</strong> page.Once you feel com<strong>for</strong>table with the Ajaxprocess, search online <strong>for</strong> in<strong>for</strong>mationabout per<strong>for</strong>ming Ajax requests usingJSON (JavaScript Object Notation) orXML (eXtensible Markup Language)to represent the data transmitted backto the JavaScript.See what happens when you referencea DOM element in JavaScript be<strong>for</strong>e theentire DOM has been loaded. Witnessingthis should help you recognize what’shappening when you inevitably <strong>and</strong>accidentally fail to wait until the browseris ready be<strong>for</strong>e referencing the DOM.Update calculator.js so that theresults paragraph is initially clearedupon each <strong>for</strong>m submission. By doingso, the results of previous submissionswon’t be shown upon subsequentinvalid submissions.Modify login_ajax.php so that it usesa database to confirm successful login.Modify login_ajax.php so that it sendsa cookie or begins a session. Create asecondary <strong>PHP</strong> script that accesses thecreated cookie or session.Modify login.php so that it also per<strong>for</strong>msthe login validation, should the user haveJavaScript disabled. Hint: This is simplerthan you might think—just use <strong>PHP</strong> toh<strong>and</strong>le the <strong>for</strong>m submission (in the samefile) as if JavaScript were not present at all.492 Chapter 15
16An OOP Primer<strong>PHP</strong> is somewhat unusual as a languagein that it can be used both procedurally,as most of this book demonstrates, <strong>and</strong>as an Object-Oriented Programming(OOP) language. There are merits to bothapproaches, <strong>and</strong> one ought to be familiarwith each as well (eventually).Un<strong>for</strong>tunately, mastery of OOP requires lots oftime <strong>and</strong> in<strong>for</strong>mation: my <strong>PHP</strong> 5 Advanced:Visual QuickPro Guide (Peachpit Press)spends 150 pages on the subject! Still, oneof the great things about OOP is that youcan use it without fully knowing it. You’llsee what this means shortly.In this chapter, which is new to this editionof the book, is a primer <strong>for</strong> OOP in <strong>PHP</strong>.Some of the examples will replicate proceduralones already shown in the book, inorder to best compare <strong>and</strong> contrast the twoapproaches. Various sidebars <strong>and</strong> tips willmention other uses of OOP in <strong>PHP</strong>, many ofwhich will not have procedural equivalents.in This ChapterFundamentals <strong>and</strong> Syntax 494Working with <strong>MySQL</strong> 497The DateTime Class 511Review <strong>and</strong> Pursue 518
Fundamentals<strong>and</strong> SyntaxIf you’ve never done any Object-OrientedProgramming be<strong>for</strong>e, both the concept<strong>and</strong> the syntax can be quite <strong>for</strong>eign. Simplyput, all applications, or scripts, involvetaking actions with in<strong>for</strong>mation: validatingit, manipulating it, storing it in a database,<strong>and</strong> so <strong>for</strong>th. Philosophically, proceduralprogramming is written with a focus on theactions: do this, then this, then this; OOP isdata-centric, focusing more on the kinds ofin<strong>for</strong>mation being used.oop FundamentalsOOP begins with the definition of a class,which is a template <strong>for</strong> a particular typeof data: an employee, a user, a page ofcontent, <strong>and</strong> so <strong>for</strong>th. A class definitioncontains both variables <strong>and</strong> functions.Syntactically, a variable in a class definitionis called an attribute or property, <strong>and</strong>a function in a class definition is calledoop vs. proceduralDiscussions as to the merits of OOP vs. procedural programming can quickly escalate to verbalwars, with each side fiercely advocating <strong>for</strong> their approach. <strong>PHP</strong> is somewhat unique in that youhave a choice (by comparison, C is strictly a procedural language <strong>and</strong> Java object-oriented). Inmy opinion, each programming style has its strengths <strong>and</strong> weaknesses, but neither is “better”than the other.Procedural programming is arguably faster to learn <strong>and</strong> use, particularly <strong>for</strong> smaller projects. Butprocedural code can be harder to maintain <strong>and</strong> exp<strong>and</strong>, especially in more complicated sites, <strong>and</strong>has the potential to be buggier.Code written using OOP, on the other h<strong>and</strong>, may be easier to maintain, specifically on larger projects,<strong>and</strong> may be more appropriate in team environments. But OOP is harder to master, <strong>and</strong> whennot done well, is that much more challenging to remedy.In time, you’ll naturally come up with your own opinions <strong>and</strong> preferences. The real lesson, to me, isto take advantage of the fact that <strong>PHP</strong> allows <strong>for</strong> both syntaxes, <strong>and</strong> not to limit yourself to just onestyle regardless of the situation.494 Chapter 16
a method. Combined, the attributes <strong>and</strong>methods are the members of the class.As a theoretical example, you might havea class called Car. Note that class namesconventionally begin with an uppercaseletter. The properties of a Car wouldinclude make, model, year, odometer, <strong>and</strong>so <strong>for</strong>th: all in<strong>for</strong>mation that can be knownabout a car. A Car’s properties can be set,changed, <strong>and</strong> retrieved, <strong>and</strong> the valuesof the properties distinguish this Car fromthat Car. A Car’s methods—the things thatthe car can do—would include: start( ),drive( ), park( ), <strong>and</strong> turnOff( ). Theseactions are common to all Cars.In the introduction to this chapter, I statedthat you can use OOP without reallyknowing it. By that I mean that it’s veryeasy, <strong>and</strong> common enough, to use anexisting class definition <strong>for</strong> your ownneeds. In fact, the reusability of code—particularly code created by others—isone of the key benefits of OOP. Whatactually takes a lot of ef<strong>for</strong>t, at least to doit right, is to master the design process:underst<strong>and</strong>ing what members to define<strong>and</strong>, more importantly, how to implementsophisticated OOP concepts such as:nnnnnnInheritanceAccess controlOverriding methodsScope resolutionAbstractionAnd so onWhen you’re interested in learning howto properly create your own classes, youcan look into these subjects in my <strong>PHP</strong> 5Advanced: Visual QuickPro Guide, amongother resources, but in this chapter, let’sfocus on using existing classes instead ofcreating your own custom ones.oop Syntax in pHpSo let’s say someone has gone throughthe process of designing <strong>and</strong> defininga Car class. Most classes are not useddirectly; rather, you create an instance ofthat class—a specific variable of the class’stype. That instance is called an object. In<strong>PHP</strong>, an instance is created using the newkeyword:$obj = new ClassName( );$mine = new Car( );Whereas the code $name = 'Larry'creates a variable of type string, theabove code creates a variable of type Car.Everything that’s part of Car’s definition—every property (i.e., variable) <strong>and</strong> method(i.e., function)—is now embedded in $mine.Behind the scenes (i.e., in the class definition),a special method called the constructoris automatically invoked when anew object of that type is generated. Theconstructor normally provides whateverinitial setup would be required by the subsequentusage of that object. For example,the <strong>MySQL</strong>i class’s constructor establishesa connection to the database <strong>and</strong> theDateTime class’s constructor creates areference to an exact date <strong>and</strong> time (boththe <strong>MySQL</strong>i <strong>and</strong> DateTime classes will beexplicitly used in this chapter).If the constructor takes arguments, like anyfunction can, those may be provided whenthe object is created:$mine = new Car('Honda', 'Fit', 2008);Once you have an object, you referenceits properties (i.e., variables) <strong>and</strong> call itsmethods (i.e., functions) using the syntax$object_name->member_name:$mine->color = 'Purple';$mine->start( );continues on next pageAn OOP Primer 495
The first line (theoretically) assigns thevalue Purple to the object’s color property.The second line invokes the object’sstart( ) method. As with any functioncall, the parentheses are required. If themethod takes arguments, those can beprovided, too:$mine->drive('Forward');Sometimes you’ll use an object’sproperties as you would any other variable:$mine->odometer += 20;echo "My car currently has $mine->➝ odometer miles on it.";If an object’s method returns a value, themethod can be invoked in the same manneras any function that returns a value:// The fill( ) method takes a number of// gallons being added <strong>and</strong> returns// how full the tank is:$tank = $mine->fill(8.5);And that’s really enough to know aboutOOP in order to start using it. As you’llsee, the examples over the next fewpages will replicate functionality explainedearlier in the book, so that the contrastingapproaches to the same end result shouldhelp you better underst<strong>and</strong> what’s going on.In documentation, you’ll see theClassName::method_name( ) syntax.This is a way of specifying to which classa method belongs.One of the major changes in <strong>PHP</strong> 5.3is support <strong>for</strong> namespaces. Namespaces,in layman’s terms, provide a way to groupmultiple class definitions under a single title.Namespaces are useful <strong>for</strong> organizing code, aswell as preventing conflicts (e.g., differentiatingbetween my Car class <strong>and</strong> your Car class).Classes can also have their own constants,just as they have their own variables<strong>and</strong> functions. Class constants are normallyused without an instance of that class, as in:echo ClassName::CONSTANT_NAME;OOP in <strong>PHP</strong> has changed dramaticallyfrom <strong>PHP</strong> 3 to <strong>PHP</strong> 4 to <strong>PHP</strong> 5. The syntaxdiscussed in this chapter will only work with<strong>PHP</strong> 5 <strong>and</strong> above.More oop ClassesThere are more OOP classes defined in <strong>PHP</strong> than just those illustrated in this chapter, althoughI think the <strong>MySQL</strong>i <strong>and</strong> DateTime classes are the two most obviously accessible <strong>and</strong> usable. Thelargest body of classes can be found in the St<strong>and</strong>ard <strong>PHP</strong> Library (SPL), built into <strong>PHP</strong> as of version5.0, <strong>and</strong> greatly exp<strong>and</strong>ed in version 5.3.The SPL provides high-end classes in several categories: exception h<strong>and</strong>ling, iterators (loops that canwork on any collection of data), custom data types, <strong>and</strong> more. The SPL is definitely <strong>for</strong> more advanced<strong>PHP</strong> programmers <strong>and</strong> is most beneficial <strong>for</strong> otherwise strongly or entirely OOP-based code.There are several good classes defined <strong>for</strong> internationalization purposes, too (www.php.net/intl).These classes define some of the functionality originally intended as part of the now-defunct <strong>PHP</strong> 6,including the ability to sort words, <strong>for</strong>mat numbers, <strong>and</strong> so <strong>for</strong>th, in a manner customized to thegiven locale (a locale is a combination of the language, cultural habits, <strong>and</strong> other unique choices<strong>for</strong> a region).496 Chapter 16
Working with <strong>MySQL</strong>Just as you can write <strong>PHP</strong> code in bothprocedural <strong>and</strong> object-oriented styles,the <strong>MySQL</strong> Improved extension cansimilarly be used either way to interactwith a database. Chapter 9, “Using <strong>PHP</strong>with <strong>MySQL</strong>,” introduced the basics of theprocedural approach. As a comparison,this chapter will run through the samefunctionality using OOP.There are three defined classes that youwill use herein:nnn<strong>MySQL</strong>i, the primary class, providesa database connection, a queryingmethod, <strong>and</strong> more.<strong>MySQL</strong>i_Result, is used to h<strong>and</strong>lethe results of SELECT queries (amongothers).<strong>MySQL</strong>i_STMT is <strong>for</strong> per<strong>for</strong>ming preparedstatements (introduced in Chapter 13,“Security Methods”).For each, I’ll explain the basic usage <strong>and</strong>walk you through an example script. Fora full listing of all the possibilities—all theproperties <strong>and</strong> methods of each class—seethe <strong>PHP</strong> manual.Creating a ConnectionAs with the procedural approach, creatinga connection is the first step in interactingwith <strong>MySQL</strong> when using object notation.With the <strong>MySQL</strong>i class, a connection isestablished when the object is instantiated(i.e., when the object is created), by passingthe appropriate connection values tothe constructor:$mysqli = new <strong>MySQL</strong>i(hostname,➝ username, password, database);Even though this is OOP, you would usethe same <strong>MySQL</strong> values as you wouldwhen programming procedurally, or whenconnecting to <strong>MySQL</strong> using the comm<strong>and</strong>lineclient or other interface.If a connection could not be made, theconnect_error property will store thereason why A:if ($mysqli->connect_error) {echo $mysqli->connect_error;}Un<strong>for</strong>tunately, that approach was buggy(or just plain broken) in versions of <strong>PHP</strong>prior to 5.2.9, so you’ll see this kludge (anunseemly fix) in the <strong>PHP</strong> manual instead:if (mysqli_connect_error( )) {echo mysqli_connect_error( );}continues on next pageA A <strong>MySQL</strong> connection error.An OOP Primer 497
If you are not using <strong>PHP</strong> 5.2.9 or later,you’ll have to use this last bit of code inyour own scripts.Next, you should establish the character set:$mysqli->set_charset(charset);$mysqli->set_charset('utf8');At this point, you’re ready to execute yourqueries, to be covered next.After executing the queries, call the close( )method to close the database connection:$mysqli->close( );To be extra tidy, you can delete theobject, too:unset($mysqli);To practice this, let’s write a <strong>PHP</strong> script thatconnects to <strong>MySQL</strong>. As the subsequenttwo scripts will be updates of scripts fromChapter 9, <strong>and</strong> will use the same templateas Chapter 9, you’ll want to place thesenext three scripts in the same <strong>Web</strong> directoriesyou used <strong>for</strong> Chapter 9.To make an oop <strong>MySQL</strong> connection:1. Begin a new <strong>PHP</strong> script in your text editoror IDE, to be named mysqli_oop_connect.php (Script 16.1):
2. Set the database connection parametersas constants:DEFINE ('DB_USER', 'username');DEFINE ('DB_PASSWORD', 'password');DEFINE ('DB_HOST', 'localhost');DEFINE ('DB_NAME', 'sitename');As always, you’ll need to changethe particulars to be correct <strong>for</strong>your server. As with Chapter 9, thischapter’s examples will make useof the sitename database.3. Create a <strong>MySQL</strong>i object:$mysqli = new <strong>MySQL</strong>i(DB_HOST,➝ DB_USER, DB_PASSWORD, DB_NAME);This is the syntax already explained,using the constants as the values tobe passed to the constructor.4. If an error occurred, show it:if ($mysqli->connect_error) {echo $mysqli->connect_error;unset($mysqli);If the <strong>MySQL</strong>i object’s connect_errorproperty has a value, it means that thescript could not establish a connection tothe database. In that case, the connectionerror is displayed A, <strong>and</strong> the objectvariable is unset, since it’s useless.Remember that if you’re using a versionof <strong>PHP</strong> prior to 5.2.9 (<strong>and</strong> you do knowwhat, exact, version you’re using, correct?),you’ll need to change this code to:if (mysqli_connect_error( )) {echo mysqli_connect_error( );unset($mysqli);5. If a connection was made, establishthe encoding:} else {$mysqli->set_charset('utf8');}Remember that the encoding used tocommunicate with <strong>MySQL</strong> needs tomatch the encoding set by the HTMLpages <strong>and</strong> by the database.6. Save the script as mysqli_oop_connect.php.As with most files in this book that aremeant to be included by other scripts,this one omits the closing <strong>PHP</strong> tag.7. Ideally, place the file outside of the <strong>Web</strong>document directory.Because the file contains sensitive<strong>MySQL</strong> access in<strong>for</strong>mation, it ought tobe stored securely. If you can, place itin the directory immediately above orotherwise outside of the <strong>Web</strong> directory(see Chapter 9 <strong>for</strong> particulars).Again, the following two scripts willuse the template that Chapter 9 used,so you should store this connectionscript in the same directory as mysqli_connect.php from Chapter 9.continues on next pageAn OOP Primer 499
8. Temporarily place a copy of the scriptwithin the <strong>Web</strong> directory <strong>and</strong> run it inyour <strong>Web</strong> browser.In order to test the script, you’ll wantto place a copy on the server so thatit’s accessible from the <strong>Web</strong> browser(which means it must be in the <strong>Web</strong>directory). If the script works properly,the result should be a blank page.If you see an Access denied… orsimilar message A, it means that thecombination of username, password,<strong>and</strong> host does not have permission toaccess the particular database.9. Remove the temporary copy from the<strong>Web</strong> directory.You can use print_r( ) to learn about,<strong>and</strong> debug, objects in <strong>PHP</strong> code B:echo '' . print_r($mysqli, 1) .➝'';Since the $mysqli object is unset if noconnection is made, any script that needs itcan be written to test <strong>for</strong> a successful connectionby just using:if (isset($mysqli)) { // Do whatever.For brevity sake, this test is omitted in subsequentscripts, but know it’s possible.The <strong>MySQL</strong>i constructor takes two morearguments: the port to use <strong>and</strong> the socket.When running MAMP or XAMPP (see AppendixA, “Installation” which you can downloadfrom peachpit.com), you may need to providethe port.The <strong>MySQL</strong>i::character_set_name( )method returns the current character set. The<strong>MySQL</strong>i::get_charset( ) method returns thecharacter set, collation, <strong>and</strong> more.You can change the database used bythe current connection via the select_db( )method:$mysqli->select_db(dbname);B Using print_r( ) on an object, perhaps wrapped within pre<strong>for</strong>matted tagsto make its output easier to read, reveals the object’s many property names<strong>and</strong> values.500 Chapter 16
executing Simple QueriesOnce you’ve successfully established aconnection to the <strong>MySQL</strong> server, you canbegin using the <strong>MySQL</strong>i object to query thedatabase. For that, call the appropriatelynamed query( ) method:$mysqli->query(query);Its lone argument is the SQL comm<strong>and</strong> tobe executed, which I normally assign to aseparate variable be<strong>for</strong>eh<strong>and</strong>:$q = 'SELECT * FROM tablename';$mysqli->query($q);You can test <strong>for</strong> the query’s error-freeexecution by using the method call asa condition:if ($mysqli->query($q)) { // Worked!Alternatively, you can check the errorproperty C:if ($mysqli->error) { // Did not➝ work!echo $mysqli->error;}If the query just executed was an INSERT,you can retrieve the automaticallygenerated primary key value via theinsert_id property:$id = $mysqli->insert_id;If the query just executed was an UPDATE,INSERT, or DELETE, you can retrieve thenumber of affected rows—how many rowswere updated, inserted, or deleted—fromthe affected_rows property:echo "$mysqli->affected_rows rows➝ were affected by the query.";The last thing to know, be<strong>for</strong>e executingany queries, is how to sanctify data usedin the query. To do so, apply the real_escape_method( ) to a string variablebe<strong>for</strong>eh<strong>and</strong>:$var = $mysqli->real_escape_➝ string($var);This is equivalent to invoking mysqli_real_escape_string( ), <strong>and</strong> preventsapostrophes <strong>and</strong> other problematiccharacters from breaking the syntax of theSQL comm<strong>and</strong>.Using all this in<strong>for</strong>mation, the next set ofsteps will rewrite register.php (Script 9.5)from Chapter 9, using OOP.C A problem with a query results in a <strong>MySQL</strong> error.An OOP Primer 501
To execute simple queries:1. Open register.php (Script 9.5) in yourtext editor or IDE.2. Change the inclusion of the <strong>MySQL</strong>connection script to (Script 16.2):require ('../mysqli_oop_connect.php');Assuming that mysqli_oop_connect.php is in the directory above this one,this code will work. If your directorystructure differs, change the referenceto the file accordingly.3. Change each use of mysqli_real_escape_string( ) to:$mysqli->real_escape_string( ):$fn = $mysqli->real_escape_string➝ (trim($_POST['first_name']));$ln = $mysqli->real_escape_string➝ (trim($_POST['last_name']));$e = $mysqli->real_escape_string➝ (trim($_POST['email']));$p = $mysqli->real_escape_string➝ (trim($_POST['pass1']));Four pieces of data—all strings,naturally—are escaped <strong>for</strong> addedprotection in the query. Because thescript now uses the <strong>MySQL</strong> Improvedextension using an object-orientedapproach, these four lines shouldbe changed.4. Update how the query is executed(line 52 of the original script):$mysqli->query($q);To execute a query on the databaseusing OOP, call the object’s query( )method, providing it with the query tobe run.Script 16.2 This updated version of the registrationscript uses the <strong>MySQL</strong> Improved extension via OOP.1
Script 16.2 continued38 if ($_POST['pass1'] != $_POST['pass2']) {39 $errors[ ] = 'Your passworddid not match the confirmedpassword.';40 } else {41 $p = $mysqli->real_escape_string(trim($_POST['pass1']));42 }43 } else {44 $errors[ ] = 'You <strong>for</strong>got to enteryour password.';45 }4647 if (empty($errors)) { // Ifeverything's OK.4849 // Register the user in thedatabase...5051 // Make the query:52 $q = "INSERT INTO users(first_name, last_name, email,pass, registration_date) VALUES('$fn', '$ln', '$e', SHA1('$p'),NOW( ) )";5354 // Execute the query:55 $mysqli->query($q);5657 if ($mysqli->affected_rows = =1) { // If it ran OK.5859 // Print a message:60 echo 'Thank you!61 You are now registered. InChapter 12 you will actually beable to log in!';6263 } else { // If it did not run OK.6465 // Public message:66 echo 'System Error67 You could notbe registered due to a systemerror. We apologize <strong>for</strong> anyinconvenience.';6869 // Debugging message:70 echo '' . $mysqli->error .'Quer y: ' . $q .'';5. Change the confirmation of the query’sexecution to read (originally line 53):if ($mysqli->affected_rows = = 1) {The previous version of the script usedthe result variable to confirm that thequery worked:if ($r) {Here, the conditional more <strong>for</strong>mallyasserts that the number of affectedrows equals 1.Script 16.2 continuedcontinues on next page7172 } // End of if ($r) IF.7374 $mysqli->close( ); // Close thedatabase connection.75 unset($mysqli);7677 // Include the footer <strong>and</strong> quit thescript:78 include ('includes/footer.html');79 exit( );8081 } else { // Report the errors.8283 echo 'Error!84 The followingerror(s) occurred:';85 <strong>for</strong>each ($errors as $msg) {// Print each error.86 echo " - $msg\n";87 }88 echo 'Please try again.';8990 } // End of if (empty($errors)) IF.9192 $mysqli->close( ); // Close thedatabase connection.93 unset($mysqli);9495 } // End of the main Submit conditional.96 ?>code continues on next pageAn OOP Primer 503
6. Update the debugging error messageto use the object (line 66 of theoriginal script):echo '' . $mysqli->error .➝'Quer y: ' . $q .➝'';Instead of invoking the mysqli_error( ) function, the error propertyof the object will store the databasereported problem C.7. Finally, change both instances wherethe database connection is closed to:$mysqli->close( );unset($mysqli);The first line closes the connection. Thesecond line removes the variable fromexistence. This step frees up the usedmemory <strong>and</strong> while not obligatory, is aprofessional touch.The original script closed the databaseconnection in two places; make sureyou update both.8. Save the script, place it in your <strong>Web</strong>directory, <strong>and</strong> test it in your <strong>Web</strong>browser D.D If all of the code was updated as appropriate,the registration script should work as it did be<strong>for</strong>e.Script 16.2 continued97 Register98 99 First Name:
Fetching ResultsThe previous section demonstrated howto execute “simple” queries, which is howI categorize queries that don’t return rowsof results. When executing SELECT queries,the code is a bit different, as you haveto h<strong>and</strong>le the query’s results. First, afterestablishing the <strong>MySQL</strong>i object, you run thequery on the database using the query( )method. If the query is expected to return aresult set, assign the results of the methodinvocation to another variable:$q = 'SELECT * FROM tablename';$result = $mysqli->query($q);The $result variable will be an objectof type <strong>MySQL</strong>i_Result: just as somefunctions return a string or an integer,<strong>MySQL</strong>i::query( ) will return a <strong>MySQL</strong>i_Result object. Its num_rows property willreflect the number of records in the queryresult:if ($result->num_rows > 0) {➝ // H<strong>and</strong>le the results.If you have only one row returned by thequery, you can just call the fetch_array( )method to get it:$row = $result->fetch_array( );This method, like the procedural mysqli_fetch_array( ) counterpart, takes aconstant as an optional argument toindicate whether the returned row shouldbe treated as an associative array (MYSQLI_ASSOC), an indexed array (MYSQLI_NUM), orboth (MYSQLI_BOTH). MYSQLI_BOTH is thedefault value.When you have multiple records to fetch,you can do so using a loop:while ($row = $result->fetch_array➝ (MYSQLI_NUM)) {// Use $row.}With that code, $row within the loopwill be an array, meaning you accessindividual columns using either $row[0]or $row['column'] (assuming you’re usingthe appropriate constant). If you’re reallyenjoying the OOP syntax, you can use thefetch_object( ) method instead, therebycreating an object instead of an array:$q = 'SELECT user_id, first_name➝ FROM users';$result = $mysqli->query($q);while ($row = $result->fetch_➝ object( )) {// Use $row->user_id// Use $row->first_name}Once you’re done with the results, youshould free the resources they required:$result->free( );Let’s take this in<strong>for</strong>mation to updateview_users.php (Script 9.6).An OOP Primer 505
To retrieve query results:1. Open view_users.php (Script 9.6) inyour text editor or IDE.2. Change the inclusion of the <strong>MySQL</strong>connection script to (Script 16.3):require ('../mysqli_oop_connect.php');Again, the path needs to be correct <strong>for</strong>your setup.3. Change the execution of the query to(originally line 14):$r = $mysqli->query($q);Regardless of the type of query beingexecuted, the same <strong>MySQL</strong>i::query( )method is called. Here, though, theresults of executing the query areassigned to a new variable, which willbe an object of type <strong>MySQL</strong>i_Result.For brevity, I’m calling this variable just$r, but you can use the more <strong>for</strong>mal$result, if you’d prefer.4. Alter how the number of returned rowsis determined to (line 17 of the originalscript):$num = $r->num_rows;The result object’s num_rows propertyreflects the number of records returnedby the query. This value is assigned tothe variable $num, as be<strong>for</strong>e.Note that this is a property, nota method (it’s $r->num_rows, not$r->num_rows( )).5. Change the while loop to read:while ($row = $r->fetch_object( )) {The change here is that the <strong>MySQL</strong>i_Result object’s fetch_object( )function is called instead of invokingmysqli_fetch_array( ).Script 16.3 The <strong>MySQL</strong>i <strong>and</strong> <strong>MySQL</strong>i_Resultclasses are used in this script to fetch recordsfrom the database.1
Script 16.3 continued3536 echo ''; // Close the table.3738 $r->free( ); // Free up theresources.39 unset($r);4041 } else { // If no records were returned.4243 echo 'There arecurrently no registered users.';4445 }4647 // Close the database connection.48 $mysqli->close( );49 unset($mysqli);5051 include ('includes/footer.html');52 ?>E The object-oriented version of view_users.php(Script 16.3) looks the same as the original proceduralversion.6. Within the while loop, change howeach column’s value is printed:echo '' .➝ $row->name . '' . $row->dr . '';Since the $row variable is now anobject, object notation, instead of arraynotation, must be used to refer to thecolumns in each row: $row->name <strong>and</strong>$row->dr instead of $row['name'] <strong>and</strong>$row['dr'].7. Change how the resources are freed:$r->free( );unset($r);To free the memory taken by thereturned results, call the <strong>MySQL</strong>i_Resultobject’s free( ) method. Furthermore,since that object won’t be usedanymore in the script, it can be unset.8. Update how the database connectionis closed:$mysqli->close( );unset($mysqli);9. Save the script, place it in your <strong>Web</strong>directory, <strong>and</strong> test it in your <strong>Web</strong>browser E.The real benefit of using the fetch_object( ) method is that you can have theresults fetched as a particular type of object.For example, say you have defined a Car classin <strong>PHP</strong> <strong>and</strong> a script fetches all of the storedin<strong>for</strong>mation about cars from the database. Inthe <strong>PHP</strong> script, each record can be fetched asan object of Car class type. By doing so, you’llhave created a <strong>PHP</strong> Car object, whose data ispopulated from the database record, but canstill invoke the methods of the Car class.An OOP Primer 507
prepared StatementsChapter 13 introduced another way of executingqueries: using prepared statements. Preparedstatements can offer improved security,<strong>and</strong> possibly even better per<strong>for</strong>mance, overthe st<strong>and</strong>ard approach to running queries.Naturally, you can execute prepared statementsusing the <strong>MySQL</strong> Improved extensionas objects. The steps are the same: aftercreating a <strong>MySQL</strong>i object (<strong>and</strong> there<strong>for</strong>e aconnection to the database), younnnPrepare the queryBind the parametersExecute the queryIn actual code that looks like:$q = 'INSERT INTO tablename (this,➝ that) VALUES (?, ?)';$stmt = $mysqli->prepare($q);$stmt->bind_param('si', $this, $that);$this = 'Larry';$that = 234;$stmt->execute( );The <strong>MySQL</strong>i::prepare( ) method returnsan object of type <strong>MySQL</strong>i_STMT. That objecthas a few key properties:nnnnaffected_rows stores how many rowswere affected by the statement, normallyapplicable to INSERT, UPDATE, <strong>and</strong>DELETE queries.num_rows reflects the number of recordsin the result set <strong>for</strong> a SELECT query.insert_id stores the automaticallygenerated ID value <strong>for</strong> the previousINSERT query.error represents any error that mighthave occurred.Once you’re done executing the preparedstatement, you should close the statement:$stmt->close( );Let’s apply this in<strong>for</strong>mation by updatingpost_message.php (Script 13.6). This isa st<strong>and</strong>-alone script that uses the <strong>for</strong>umdatabase <strong>and</strong> isn’t, in Chapter 13 or thischapter, tied to any other scripts.To execute prepared statements:1. Open post_message.php (Script 13.6) inyour text editor or IDE.2. Change the creation of the databaseconnection to (Script 16.4):$mysqli = new <strong>MySQL</strong>i('localhost',➝'username', 'password', '<strong>for</strong>um');$mysqli->set_charset('utf8');The previous version of the script didnot use a separate connection script,<strong>and</strong> neither will this one. Make sureyour values are correct <strong>for</strong> connectingto the <strong>for</strong>um database on your server.3. Alter the preparation of the query toread (line 21 of the original script):$stmt = $mysqli->prepare($q);The <strong>MySQL</strong>i::prepare( ) method preparesa statement, taking the query as itslone argument. It returns an object of type<strong>MySQL</strong>i_STMT, assigned to $stmt here.4. Change the binding of parameters to:$stmt->bind_param('iiiss',➝ $<strong>for</strong>um_id, $parent_id, $user_id,➝ $subject, $body);This code change is simply frommysqli_stmt_bind_param($stmt… to$stmt->bind_param(… The method’s firstargument is an indicator of the data typesto follow. The subsequent arguments arethe <strong>PHP</strong> variables to which the query’splaceholders are bound.5. Update the execution of the statement to:$stmt->execute( );continues on page 510508 Chapter 16
Script 16.4 In this version of a script from Chapter13, the <strong>MySQL</strong>i_STMT class is used to execute aprepared statement.1 2 3 4 5 Post a Message6 7 8 58 5960 Post a message:6162 Subject: 6364 Body: 6566 67 68 69 7071 72 73 An OOP Primer 509
6. Change the conditional that tests thesuccess to:if ($stmt->affected_rows = = 1) {To confirm the success of an INSERTquery, check the number of affectedoutbound parametersAs in Chapter 13, the post_message.phpscript is a demonstration of using inboundparameters: associating placeholders ina query with <strong>PHP</strong> variables. You can alsouse outbound parameters: binding thevalues returned by a query to <strong>PHP</strong> variables.To start, you prepare the query:$q = 'SELECT this, that FROM➝ tablename';$stmt = $mysqli->prepare($q);Then you bind the returned rows tovariables:$stmt->bind_result($this, $that);Next, you call the <strong>MySQL</strong>i_STMT::fetch( )method, most likely as part of a while loop:while ($stmt->fetch( )) {}Within the while loop, $this <strong>and</strong> $thatwill store each record’s returned columns.Outbound parameters don’t offer addedsecurity, like inbound parameters, ornecessarily better per<strong>for</strong>mance, but ifyou have a query that uses preparedstatements, it would make sense to useboth inbound <strong>and</strong> outbound parameters.For example, take a login query:SELECT user_id, first_name➝ FROM users WHERE email='?' AND➝ pass=SHA1('?')You would use inbound parameters torepresent the submitted email address<strong>and</strong> password but use outbound parameters<strong>for</strong> the retrieved user ID <strong>and</strong> firstname from that same query.rows, here referencing the affected_rows property of the <strong>MySQL</strong>i_STMT object.7. Change the error reporting to use:echo '' . $stmt->error . '';At this point in the script, an error wouldmost likely be because of something likeusing a duplicate value <strong>for</strong> a column thatmust be unique. If there was a syntacticalerror in the query, that would be in$mysqli->error after preparing the query.8. Update how the statement is closed:$stmt->close( );unset($stmt);9. Alter how the database connectionis closed:$mysqli->close( );unset($mysqli);10. Save the script, place it in your <strong>Web</strong>directory, <strong>and</strong> test it in your <strong>Web</strong>browser F <strong>and</strong> G.F The HTML <strong>for</strong>m <strong>for</strong> posting a new message.G The new message has been successfullystored in the database.510 Chapter 16
The DateTime ClassAdded in version 5.2 of the language is theDateTime class. An alternative to the date<strong>and</strong>time-related functions introduced inChapter 11, “<strong>Web</strong> Application Development,”the DateTime class packages together all thefunctionality you might need <strong>for</strong> manipulatingdates <strong>and</strong> times. It’s especially useful <strong>for</strong>converting <strong>and</strong> comparing dates <strong>and</strong> times.To begin, create a new DateTime object:$dt = new DateTime( );If created without providing any arguments tothe constructor, the generated DateTime argumentwill represent the current date <strong>and</strong> time.To create a representation of a specific date<strong>and</strong> time, provide that as the first argument:$dt = new DateTime('2011-04-20');$dt = new DateTime('2011-04-20 11:15');There are many acceptable <strong>for</strong>mats <strong>for</strong>specifying the date <strong>and</strong> time, detailed inthe <strong>PHP</strong> manual. You can also establish thedate or time after creating the object usingthe setDate( ) <strong>and</strong> setTime( ) methods.The setDate( ) method expects to receive,in order, the desired year, month, <strong>and</strong> day.The setTime( ) method takes the hour, minute,<strong>and</strong> optional seconds, as its arguments:$dt = new DateTime( );$dt->setDate(2001, 4, 20);$dt->setTime(11, 15);The DateTime object will only allow you toestablish valid dates <strong>and</strong> times, throwingan exception <strong>for</strong> invalid ones A:$dt = new DateTime('2011-13-42');Exceptions are a topic not previouslyintroduced. Whereas procedural code maygenerate errors, objects throw exceptions(yes, it’s said that they’re thrown). Whenyou get further along with OOP, you’ll learnhow to use try…catch blocks to “catch”<strong>and</strong> h<strong>and</strong>le thrown exceptions.The DateTime constructor takes anoptional second argument, which is thetime zone to use. If not provided, thedefault time zone <strong>for</strong> that <strong>PHP</strong> installationapplies. You can also change the time zoneafter the fact, using setTimezone( ). Notethat both the setTimezone( ) method, <strong>and</strong>the constructor, take DateTimeZone objectsas arguments, not strings:$tz = new DateTimeZone('America/➝ New_York');$dt->setTimezone($tz);Once you have a DateTime object, youcan manipulate its value by adding <strong>and</strong>subtracting time periods. One way to doso is the modify( ) method:$dt->modify('+1 day');$dt->modify('-1 month');$dt->modify('next Thursday');The values you can provide to the methodare quite flexible, <strong>and</strong> correspond tothose that are usable in the strtotime( )function (which converts a string to atimestamp; see the <strong>PHP</strong> manual <strong>for</strong> details).The add( ) method is used to add a timeperiod to the represented date <strong>and</strong> time.continues on next pageA Attempting tocreate a DateTimeobject with an invaliddate or time results inan exception.An OOP Primer 511
It takes as its lone argument an object oftype DateInterval:$di = new DateInterval(interval);$dt->add($di);There’s a specific notation used to set theinterval, always starting with the letter P,<strong>for</strong> “period.” After that, add an integer <strong>and</strong>a period designator: Y, <strong>for</strong> years; M, <strong>for</strong>months; D, <strong>for</strong> days; W, <strong>for</strong> weeks; H, <strong>for</strong>hours; M, <strong>for</strong> minutes; <strong>and</strong> S, <strong>for</strong> seconds.You may wonder how the letter M canrepresent both months <strong>and</strong> minutes: thisis possible because hours, minutes, <strong>and</strong>seconds should also be preceded by a T, <strong>for</strong>time. These characters should be combinedin order from largest to smallest (i.e., fromyears to seconds). Here are some examples:nnnP3W represents three weeksP2Y3M represents two years <strong>and</strong>three monthsP2M3DT4H18M43S representstwo months, three days, four hours,18 minutes, <strong>and</strong> 43 secondsThe sub( ) method functions just the sameas add( ), but subtracts the time periodfrom the object:$di = new DateInterval('P2W');➝ // 2 weeks$dt->sub($di);The diff( ) method returns a DateIntervalobject that reflects the amount of timebetween two DateTime objects:$diff = $dt->diff($dt2);The DateInterval class defines severalproperties <strong>for</strong> representing the calculatedinterval: y <strong>for</strong> years, m <strong>for</strong> months, d <strong>for</strong> days,h <strong>for</strong> hours, i <strong>for</strong> minutes, s <strong>for</strong> seconds,<strong>and</strong> days, which also represents days.The last DateTime class method you shouldbe familiar with is <strong>for</strong>mat( ), which returns therepresented date <strong>for</strong>matted as you want it:echo $dt-><strong>for</strong>mat(<strong>for</strong>mat);For the <strong>for</strong>matting, you can use the samecharacters as the date( ) function, coveredin Chapter 11.To demonstrate all of this in<strong>for</strong>mation, thisnext script will per<strong>for</strong>m a task needed bymany <strong>Web</strong> sites: allow the user to entertwo dates to create a range B. This scriptwill per<strong>for</strong>m top-quality validation of thesubmitted dates, <strong>and</strong> calculate the numberof days between them C. The in<strong>for</strong>mationpresented could easily be applied to, say,a hotel registration system or the like. Thescript will use much of the in<strong>for</strong>mationjust presented, <strong>and</strong> even do a straightcomparison of two DateTime objects, afeature possible since <strong>PHP</strong> 5.2.2.B A simple <strong>for</strong>m <strong>for</strong> entering two dates, with the<strong>for</strong>mat specified.C If two valid dates are submitted, with the endingdate being after the starting date, the dates aredisplayed again, along with the calculated interval.512 Chapter 16
Script 16.5 Emulating common date selectionfunctionality, this script accepts <strong>and</strong> validatestwo dates.1 2 3 4 5 DateTime Usage6 7 body {8 font-family: Verdana, Arial,Helvetica, sans-serif;9 font-size: 12px;10 margin: 10px;11 }12 label { font-weight: bold; }13 .error { color: #F00; }14 15 16 17
Script 16.5 continued37 // Return FALSE if it's not a valid date:38 if (!checkdate($date_array[0], $date_array[1], $date_array[2])) return false;3940 // Return the array:41 return $date_array;4243 } // End of validate_date( ) function.4445 // Check <strong>for</strong> a <strong>for</strong>m submission:46 if (isset($_POST['start'], $_POST['end'])) {4748 // Call the validation function on both dates:49 if ( (list($sm, $sd, $sy) = validate_date($_POST['start'])) && (list($em, $ed, $ey) =validate_date($_POST['end'])) ) {5051 // If it's okay, adjust the DateTime objects:52 $start->setDate($sy, $sm, $sd);53 $end->setDate($ey, $em, $ed);5455 // The start date must come first:56 if ($start < $end) {5758 // Determine the interval:59 $interval = $start->diff($end);6061 // Print the results:62 echo "The event has been planned starting on {$start-><strong>for</strong>mat($<strong>for</strong>mat)} <strong>and</strong> endingon {$end-><strong>for</strong>mat($<strong>for</strong>mat)}, which is a period of $interval->days day(s).";6364 } else { // End date must be later!65 echo 'The starting date must precede the ending date.';66 }6768 } else { // An invalid date!69 echo 'One or both of the submitted dates was invalid.';70 }7172 } // End of <strong>for</strong>m submission.7374 // Show the <strong>for</strong>m:75 ?>76 Set the Start <strong>and</strong> End Dates <strong>for</strong> the Thing77 7879 Start Date:
4. Create two DateTime objects:$start = new DateTime( );$end = new DateTime( );Whether the <strong>for</strong>m has been submittedor not, two DateTime objects arefirst created, both of which will beinstantiated using the current date <strong>and</strong>time. Subsequently, one or both objectswill be assigned new values.5. Add one day to the end date:$end->modify('+1 day');By default, when the page is firstloaded, the <strong>for</strong>m will be preset withtoday as the starting date <strong>and</strong> tomorrowas the ending date. To determine theending date, simply modify the object’scurrent value, adding one day.Using the DateInterval object <strong>and</strong> theDateTime::add( ) method, the samething can be done like so:$day = new DateInterval('P1D');$end->add($day);6. Establish the default <strong>for</strong>mat <strong>for</strong> displayeddates:$<strong>for</strong>mat = 'm/d/Y';The script will display a <strong>for</strong>mattedversion of the date in four places.Assigning the preferred <strong>for</strong>mat—MM/DD/YYYY—to a variable makesit easier to change later, if desired.7. Begin defining a function:function validate_date($date) {$array = explode('/', $date);Both submitted dates will need to bevalidated in a couple of ways, <strong>and</strong>whenever you have repeating code in ascript or application, defining a functionto execute that code may make sense.This function takes a date string (not aDateTime object) as its lone argument.The string will be the user-submittedvalue, something like 08/02/2011. Thefirst thing the function does is breakup the string into its three separateparts—month, day, <strong>and</strong> year—using theexplode( ) function. The resulting arrayis assigned to the $array variable.8. If the array does not contain threeelements, return false:if (count($array) != 3) return➝ false;The first thing the function does is confirmthat it has exactly three discrete valuesto work with, representing a month, day,<strong>and</strong> year. If the array does not containthree elements, the function returns thevalue false to indicate an invalid date.The explode( ) line in Step 7 <strong>and</strong> thisline invalidates any submitted value thatdoesn’t fit the pattern X/Y/Z (althoughthat could still be cat/dog/zebra).Note that normally I would recommendalways using curly brackets inconditionals, but I’ve made this code asshort as possible by omitting them, <strong>and</strong>keeping the entire construct on a singleline. Also remember that as soon as afunction executes a return statement,the function is exited.9. If the provided date isn’t a valid date,return false:if (!checkdate($array[0],➝ $array[1], $array[2])) return➝ false;Similar to Step 8, this code invokes <strong>PHP</strong>’scheckdate( ) function to confirm that theprovided date actually exists. If the datedoes not exist, such as 13/43/2011, thefunction again returns false.continues on next pageAn OOP Primer 515
10. Return the date array <strong>and</strong> completethe function:return $array;} // End of validate_date( )➝ function.If the provided date is of the correct<strong>for</strong>mat <strong>and</strong> corresponds to an existingdate, the array of date elements isreturned by the function.11. If the <strong>for</strong>m has been submitted, validatethe user-submitted values:if (isset($_POST['start'],➝ $_POST['end'])) {if ( (list($sm, $sd, $sy) =➝ validate_date($_POST['start']))➝ && (list($em, $ed, $ey) =➝ validate_date($_POST['end'])) ) {If the two variables are set, meaning the<strong>for</strong>m has been submitted, both are runthrough the validate_date( ) function.If that function returns FALSE <strong>for</strong> eitherdate, this conditional will be FALSE. If thefunction returns an array <strong>for</strong> both dates,assigned to corresponding month, day,<strong>and</strong> year variables, then the results canbe determined <strong>and</strong> displayed.12. Reset the dates to the user-submitteddates:$start->setDate($sy, $sm, $sd);$end->setDate($ey, $em, $ed);Because the provided dates are valid atthis point, both objects can be updatedto represent the user-entered dates. Todo so, the setDate( ) method is invoked,providing it with the individual values.13. If the end date comes after the start date,calculate the interval between them:if ($start < $end) {$interval = $start->diff($end);Just as you can compare two numbersto see if one is greater than orless than the other, you can comparetwo DateTime objects. If the end datedoes come later, then the differencebetween the two dates is calculated byinvoking the diff( ) method on oneobject <strong>and</strong> providing the other as itsargument. The result is assigned to the$interval variable, which will be anobject of type DateInterval.14. Print the results:echo "The event has been➝ planned starting on {$start->➝ <strong>for</strong>mat($<strong>for</strong>mat)} <strong>and</strong> ending on➝ {$end-><strong>for</strong>mat($<strong>for</strong>mat)}, which➝ is a period of $interval->days➝ day(s).";Finally, the results are displayed C.As you can see, it’s possible to invokeobject methods within quotation marks,thereby printing the output of thatfunction call, but you have to wrapthe whole construct in curly brackets.Referencing attributes, such as$interval->days, does not requirethe curly brackets.15. Complete the conditionals begun inSteps 11 <strong>and</strong> 13:} else { // End date must be➝ later!echo 'The➝ starting date must precede➝ the ending date.';}} else { // An invalid date!echo 'One or➝ both of the submitted dates➝ was invalid.';}The first else clause applies if bothdates are valid, but the end date does516 Chapter 16
not follow the start date D. The secondelse clause applies if either of the submitteddates does not pass the validate_date() test. In this case, bothdates will retain the default settings E.16. Complete the <strong>for</strong>m submission conditional,close the <strong>PHP</strong> block, <strong>and</strong> beginthe HTML <strong>for</strong>m:} // End of <strong>for</strong>m submission.?>Set the Start <strong>and</strong> End Dates➝ <strong>for</strong> the Thing17. Create the two inputs <strong>for</strong> the dates:Start➝ Date:
Review <strong>and</strong> pursueIf you have any problems with thereview questions or the pursue prompts,turn to the book’s supporting <strong>for</strong>um(www.LarryUllman.com/<strong>for</strong>ums/).ReviewnnnnnnnnnnnWhat is a class? What is a method?What are variables defined withinclasses called?What is an object? How do you createan object in <strong>PHP</strong>? How do you call anobject’s methods?What is a constructor?What is the syntax <strong>for</strong> creating a<strong>MySQL</strong>i object?How do you execute any kind of queryusing <strong>MySQL</strong>i?How do you make string data safe touse in a query, when using <strong>MySQL</strong>i?Hint: there are two answers.How do you check <strong>for</strong>, <strong>and</strong> display, a<strong>MySQL</strong>i error?How do you fetch the results of SELECTqueries using the <strong>MySQL</strong>i (<strong>and</strong> other)objects? What is the difference betweenusing <strong>MySQL</strong>i_Result::fetch_array( )<strong>and</strong> <strong>MySQL</strong>i_Result::fetch_object( )?How do you execute a preparedstatement using the <strong>MySQL</strong>i <strong>and</strong><strong>MySQL</strong>i_STMT classes?What syntax is used to create a newDateTime object? What are the twoways you can set the object’s date<strong>and</strong>/or time?What is an exception?pursuennnnnWhen you’re interested in learningmore about OOP, consider reading abook or tutorial on the generic subjectof OOP, without respect to any givenprogramming language.Check out the <strong>PHP</strong> manual’s documentationon OOP in <strong>PHP</strong> (www.php.net/oop).Revisit Chapter 9 if you’re unclear asto the need to apply real_escape_string( ) to string data used in queries.Rewrite some of the other scripts fromChapter 9, “Using <strong>PHP</strong> with <strong>MySQL</strong>,”<strong>and</strong> Chapter 10, “Common ProgrammingTechniques,” using <strong>MySQL</strong>i.Read through the full documentation <strong>for</strong>the DateTime class in the <strong>PHP</strong> manual(www.php.net/datetime).n Learn about the strtotime( )function in the <strong>PHP</strong> manual(www.php.net/strtotime).nIf you want a big challenge, apply thein<strong>for</strong>mation presented in the previouschapter, along with the jQuery UIDatepicker tool, to create two nice,JavaScript date selectors <strong>for</strong> thedatetime.php script.518 Chapter 16
17Example—Message BoardThe functionality of a message board (akaa <strong>for</strong>um) is really rather simple: a post caneither start a new topic or be in responseto an existing one; posts are added to adatabase <strong>and</strong> then displayed on a page.That’s really about it. Of course, sometimesimplementing simple concepts can bequite hard!To make this example even more exciting<strong>and</strong> useful, it’s not going to be just amessage board but rather a multilingualmessage board. Each language will haveits own <strong>for</strong>um, <strong>and</strong> the key elements—navigation, prompts, introductory text,etc.—will be language-specific.In order to focus on the most importantaspects of this <strong>Web</strong> application, this chapteromits some others. The three glaringomissions will be: user management, errorh<strong>and</strong>ling, <strong>and</strong> administration. This shouldn’tbe a problem <strong>for</strong> you, though, as the nextchapter goes over user management <strong>and</strong>error h<strong>and</strong>ling in great detail. As <strong>for</strong> theadministration, you’ll find some recommendationsat the chapter’s end.in This ChapterMaking the Database 520Creating the Index Page 537Creating the Forum Page 538Creating the Thread Page 543Posting Messages 548Review <strong>and</strong> Pursue 558
Making the DatabaseThe first step, naturally, is to create thedatabase. A sample message boarddatabase A is developed in Chapter 6,“Database Design.” Although that databaseis perfectly fine, a variation on it will be usedhere instead B. I’ll compare <strong>and</strong> contrastthe two to better explain the changes.To start, the <strong>for</strong>ums table is replaced with alanguages table. Both serve the same purpose:allowing <strong>for</strong> multiple <strong>for</strong>ums. In thisnew database, the topic—<strong>PHP</strong> <strong>and</strong> <strong>MySQL</strong><strong>for</strong> <strong>Dynamic</strong> <strong>Web</strong> <strong>Sites</strong>—will be the samein every <strong>for</strong>um, but each <strong>for</strong>um will use adifferent language. The posts will differin each <strong>for</strong>um (this won’t be a translationof the same <strong>for</strong>um in multiple languages).The languages table stores the nameof a language in its own alphabet <strong>and</strong> inEnglish, <strong>for</strong> the administrator’s benefit (thisassumes, of course, that English is theadministrator’s primary language).The threads table in the new databaseacts like the messages table in the oldone, with one major difference. Just asthe old messages table relates to <strong>for</strong>ums,threads relates to the languages <strong>and</strong> userstables (each message can only be in one<strong>for</strong>um <strong>and</strong> by one user; each <strong>for</strong>um canhave multiple messages, <strong>and</strong> each usercan post multiple messages). However, thisthreads table will only store the subject, notthe message itself. There are a couple ofA The model <strong>for</strong> the <strong>for</strong>um database developed in Chapter 6.B The revised model <strong>for</strong> the <strong>for</strong>um database to be used in this chapter.520 Chapter 17
easons <strong>for</strong> this change. First, having a subjectrepeat multiple times with each reply(replies, in my experience, almost alwayshave the same subject anyway) is unnecessary.Second, the same goes <strong>for</strong> the lang_idassociation (it doesn’t need to be in eachreply as long as each reply is associatedwith a single thread). Third, I’m changingthe way a thread’s hierarchy will be indicatedin this database (you’ll see how in thenext paragraph), <strong>and</strong> changing the tablestructures helps in that regard. Finally, thethreads table will be used every time a userlooks at the posts in a <strong>for</strong>um. Removing themessage bodies from that table will improvethe per<strong>for</strong>mance of those queries.Moving on to the posts table, its solepurpose is to store the actual bodies ofthe messages associated with a thread. InChapter 6’s database, the messages tablehad a parent_id column, used to indicatethe message to which a new message wasa response. It was hierarchical: message 3might be the starting post; message 18 mightbe a response to 3, message 20 a responseto 18, <strong>and</strong> so on C. That version of the databasemore directly indicated the responses;this version will only store the thread that amessage goes under: messages 18 <strong>and</strong> 20both use a thread_id of 3. This alteration willmake showing a thread much more efficient(in terms of the <strong>PHP</strong> <strong>and</strong> <strong>MySQL</strong> required),<strong>and</strong> the date/time that each message wasposted can be used to order them.Those three tables provide the bulk of the<strong>for</strong>um functionality. The database also needsa users table. In this version of the <strong>for</strong>um,only registered users can post messages,which I think is a really, really, really goodpolicy (it cuts way down on spam <strong>and</strong> hackattempts). Registered users can also havetheir default language (from the languagestable) <strong>and</strong> time zone recorded along withtheir account in<strong>for</strong>mation, in order to givethem a more personalized experience. Acombination of their username <strong>and</strong> passwordwould be used to log in.The final table, words, is necessary tomake the site multilingual. This table willstore translations of common elements:navigation links, <strong>for</strong>m prompts, headers,<strong>and</strong> so <strong>for</strong>th. Each language in the site willhave one record in this table. It’ll be a nice<strong>and</strong> surprisingly easy feature to use. Arguably,the words listed in this table couldalso go in the languages table, but thenthe implication would be that the wordsare also related to the threads table, whichwould not be the case.That’s the thinking behind this new databasedesign. You’ll learn more as you createthe tables in the following steps. As withthe other examples in this book, you canalso download the SQL necessary <strong>for</strong> thischapter—the comm<strong>and</strong>s suggested in thesesteps, plus more—from the book’s corresponding<strong>Web</strong> site (www.LarryUllman.com).C How the relationshipamong messages wasindicated using the olderdatabase schema.Example—Message Board 521
To make the database:1. Access your <strong>MySQL</strong> server <strong>and</strong> set thecharacter set to be used <strong>for</strong> communicatingD:CHARSET utf8;I’ll be using the mysql client in thefigures, but you can use whateverinterface you’d like. The first step,though, has to be changing thecharacter set to UTF-8 <strong>for</strong> the queriesto come. If you don’t do this, some ofthe characters in the queries will bestored as gibberish in the database(see the sidebar “Strange Characters”).Note that if you’re using phpMyAdmin,you’ll need to establish the characterset in its configuration file.Strange CharactersIf, when you’re implementing thischapter’s example, you see strangecharacters—boxes, numeric codes,or question marks instead of actuallanguage characters—there might beseveral reasons why. When this happens,the underlying issue is one ofmismatching encodings (or, in databaseterms, character sets).A computer’s ability to display a characterdepends on both the file’s encoding<strong>and</strong> the characters (i.e., fonts) supportedby the operating system. This meansthat every <strong>PHP</strong> or HTML page must usethe proper encoding. Secondarily, thedatabase in <strong>MySQL</strong> must use the properencoding (as indicated in the steps <strong>for</strong>creating the database). Third, <strong>and</strong> thiscan be a common cause of problems,the communication between <strong>PHP</strong><strong>and</strong> <strong>MySQL</strong> must also use the properencoding. I address this issue in themysqli_connect.php script (see the firsttip). Finally, if you use the mysql client,phpMyAdmin, or another tool to populatethe database, that interaction must usethe proper encoding, too.D In order to use Unicode data in queries, you need to change the character set used tocommunicate with <strong>MySQL</strong>.522 Chapter 17
2. Create a new database E:CREATE DATABASE <strong>for</strong>um2 CHARACTER➝ SET utf8;USE <strong>for</strong>um2;So as not to muddle things with thetables created in the original <strong>for</strong>umdatabase (from Chapter 6), a newdatabase will be created.If you’re using a hosted site <strong>and</strong> cannotcreate your own databases, use thedatabase provided <strong>for</strong> you <strong>and</strong> selectthat. If your existing database hastables with these same names—words,languages, threads, users, <strong>and</strong> posts,rename the tables (either the existing orthe new ones) <strong>and</strong> change the code inthe rest of the chapter accordingly.Whether you create this database fromscratch or use a new one, it’s veryimportant that the tables use the UTF-8encoding, in order to be able to supportmultiple languages (see Chapter6 <strong>for</strong> more). If you’re using an existingdatabase <strong>and</strong> don’t want to potentiallycause problems by changing the characterset <strong>for</strong> all of your tables, just addthe CHARACTER SET utf8 clause to eachtable definition (Steps 3 through 7).3. Create the languages table F:CREATE TABLE languages (lang_id TINYINT UNSIGNED NOT NULL➝ AUTO_INCREMENT,lang VARCHAR(60) NOT NULL,lang_eng VARCHAR(20) NOT NULL,PRIMARY KEY (lang_id),UNIQUE (lang));This is the simplest table of the bunch.There won’t be many languages represented,so the primary key (lang_id ) canbe a TINYINT. The lang column is defineda bit larger, as it’ll store characters inother languages, which may requiremore space. This column must also beunique. Note that I don’t call this column“language,” as that’s a reserved keywordin <strong>MySQL</strong> (actually, I could still call it that,<strong>and</strong> you’ll see what would be required todo that in Step 7). The lang_eng columnis the English equivalent of the languageso that the administrator can easily seewhich languages are which.continues on next pageE Creating <strong>and</strong>selecting the database<strong>for</strong> this example. Thisdatabase uses theUTF-8 character set,so that it can supportmultiple languages.F Creating thelanguages table.Example—Message Board 523
4. Create the threads table G:CREATE TABLE threads (thread_id INT UNSIGNED NOT NULL➝ AUTO_INCREMENT,lang_id TINYINT(3) UNSIGNED NOT➝ NULL,user_id INT UNSIGNED NOT NULL,subject VARCHAR(150) NOT NULL,PRIMARY KEY (thread_id),INDEX (lang_id),INDEX (user_id));The threads table contains fourcolumns <strong>and</strong> relates to both thelanguages <strong>and</strong> users tables (throughthe lang_id <strong>and</strong> user_id <strong>for</strong>eign keys,respectively). The subject here needsto be long enough to store subjects inmultiple languages (characters take upmore bytes in non-Western languages).The columns that will be used in joins<strong>and</strong> WHERE clauses—lang_id <strong>and</strong>user_id—are indexed, as is thread_id(as a primary key, it’ll be indexed).5. Create the posts table H:CREATE TABLE posts (post_id INT UNSIGNED NOT NULL➝ AUTO_INCREMENT,thread_id INT UNSIGNED NOT NULL,user_id INT UNSIGNED NOT NULL,message TEXT NOT NULL,posted_on DATETIME NOT NULL,PRIMARY KEY (post_id),INDEX (thread_id),INDEX (user_id));The main column in this table is message,which stores each post’s body.Two columns are <strong>for</strong>eign keys, tyinginto the threads <strong>and</strong> users tables. TheG Creating the threads table. This table stores the topic subjects<strong>and</strong> associates them with a language (i.e., a <strong>for</strong>um).H Creating the posts table, which links to both threads <strong>and</strong> users.524 Chapter 17
posted_on column is of type DATETIME,but will use UTC (Coordinated UniversalTime, see Chapter 6). Nothing specialneeds to be done here <strong>for</strong> that, though.6. Create the users table I:CREATE TABLE users (user_id MEDIUMINT UNSIGNED NOT➝ NULL AUTO_INCREMENT,lang_id TINYINT UNSIGNED NOT NULL,time_zone VARCHAR(30) NOT NULL,username VARCHAR(30) NOT NULL,pass CHAR(40) NOT NULL,email VARCHAR(60) NOT NULL,PRIMARY KEY (user_id),UNIQUE (username),UNIQUE (email),INDEX login (username, pass));For the sake of brevity, I’m omittingsome of the other columns you’d putin this table, such as registration date,first name, <strong>and</strong> last name. For more oncreating <strong>and</strong> using a table like this, seethe next chapter.In my thinking about this site, I expectusers will select their preferred language<strong>and</strong> time zone when theyregister, so that they can have a morepersonalized experience. They can alsohave a username, which will be displayedin posts (instead of their emailaddress). Both the username <strong>and</strong> theemail address must be unique, which issomething you’d need to address in theregistration process.continues on next pageI Creating a bare-bones version of the users table.Example—Message Board 525
7. Create the words table J:CREATE TABLE words (word_id TINYINT UNSIGNED NOT NULL➝ AUTO_INCREMENT,lang_id TINYINT UNSIGNED NOT NULL,title VARCHAR(80) NOT NULL,intro TINYTEXT NOT NULL,home VARCHAR(30) NOT NULL,<strong>for</strong>um_home VARCHAR(40) NOT NULL,`language` VARCHAR(40) NOT NULL,register VARCHAR(30) NOT NULL,login VARCHAR(30) NOT NULL,logout VARCHAR(30) NOT NULL,new_thread VARCHAR(40) NOT NULL,subject VARCHAR(30) NOT NULL,body VARCHAR(30) NOT NULL,submit VARCHAR(30) NOT NULL,posted_on VARCHAR(30) NOT NULL,posted_by VARCHAR(30) NOT NULL,replies VARCHAR(30) NOT NULL,latest_reply VARCHAR(40) NOT NULL,post_a_reply VARCHAR(40) NOT NULL,PRIMARY KEY (word_id),UNIQUE (lang_id));This table will store differenttranslations of common elements usedon the site. Some elements—home,<strong>for</strong>um_home, language, register,login, logout, <strong>and</strong> new_thread—will bethe names of links. Other elements—subject, body, submit—are used on thepage <strong>for</strong> posting messages. Anothercategory of elements are those usedon the <strong>for</strong>um’s main page: posted_on,posted_by, replies, <strong>and</strong> latest_reply.Some of these will be used multipletimes in the site, <strong>and</strong> yet, this is still anincomplete list. As you implement thesite yourself, you’ll see other placeswhere word definitions could be added.Each column is of VARCHAR type, except<strong>for</strong> intro, which is a body of text to beused on the main page. Most of thecolumns have a limit of 30, allowing<strong>for</strong> characters in other languages thatrequire more bytes, except <strong>for</strong> a h<strong>and</strong>fulof columns that might need to be bigger.For each column, its name implies thevalue to be stored in that column. Forone—language—I’ve used a <strong>MySQL</strong>J Creating the wordstable, which storesrepresentations ofkey words in differentlanguages.526 Chapter 17
keyword, simply to demonstrate howthat can be done. The fix is to surroundthe column’s name in backticks so that<strong>MySQL</strong> doesn’t confuse this column’sname with the keyword “language.”8. Populate the languages table:INSERT INTO languages (lang,➝ lang_eng) VALUES('English', 'English'),('Português', 'Portuguese'),('Français', 'French'),('Norsk', 'Norwegian'),('Romanian', 'Romanian'),(' ', 'Greek'),('Deutsch', 'German'),('Srpski', 'Serbian'),(' ', 'Japanese'),('Nederl<strong>and</strong>s', 'Dutch');This is just a h<strong>and</strong>ful of the languagesthe site will represent thanks to someassistance provided me (see thesidebar “A Note on Translations”).For each, the native <strong>and</strong> English word<strong>for</strong> that language is stored K.9. Populate the users table L:INSERT INTO users (lang_id,➝ time_zone, username, pass,➝ email) VALUES(1, 'America/New_York',➝'troutster', SHA1('password'),➝'email@example.com'),(7, 'Europe/Berlin', 'Ute',➝ SHA1('pa24word'),➝'email1@example.com'),(4, 'Europe/Oslo', 'Silje',➝ SHA1('2kll13'),➝'email2@example.com'),(2, 'America/Sao_Paulo', 'João',➝ SHA1('fJDLN34'),➝'email3@example.com'),(1, 'Pacific/Auckl<strong>and</strong>', 'kiwi',➝ SHA1('conchord'),➝'kiwi@example.org');continues on next pageK The populated languagestable, with each languagewritten in its own alphabet.L A few users areadded manually,as there is noregistration processin this site (butsee Chapter 18,“Example—UserRegistration,”<strong>for</strong> that).Example—Message Board 527
Because the <strong>PHP</strong> scripts will show theusers associated with posts, a coupleof users are necessary. A language <strong>and</strong>a time zone are associated with each(see Chapter 6 <strong>for</strong> more on time zonesin <strong>MySQL</strong>). Each user’s password will beencrypted with the SHA1( ) function.10. Populate the words table:INSERT INTO words VALUES(NULL, 1, '<strong>PHP</strong> <strong>and</strong> <strong>MySQL</strong> <strong>for</strong>➝ <strong>Dynamic</strong> <strong>Web</strong> <strong>Sites</strong>: The Forum!',➝'Welco m e to our site....➝ please use the links above...➝ blah, blah, blah.\r\n➝ Welcome to our site....please➝ use the links above...blah,➝ blah, blah.', 'Home',➝'Forum Home', 'Language',➝'Register', 'Login', 'Logout',➝'New Thread', 'Subject', 'Body',➝'Submit', 'Posted on', 'Posted➝ by', 'Replies', 'Latest Reply',➝'Post a Reply');These are the words associated witheach term in English. The record has alang_id of 1, which matches the lang_id<strong>for</strong> English in the languages table. TheSQL to insert words <strong>for</strong> other languagesinto this table is available from thebook’s supporting <strong>Web</strong> site.A note on TranslationsSeveral readers around the world werekind enough to provide me with translationsof key words, names, messagesubjects, <strong>and</strong> message bodies. For theirhelp, I’d like to extend my sincerestthanks to (in no particular order): Angelo(Portuguese); Iris (German); Johan(Norwegian); Gabi (Romanian); Darko(Serbian); Emmanuel <strong>and</strong> Jean-François(French); Andreas <strong>and</strong> Simeon (Greek);Darius (Filipino/Tagalog); Olaf (Dutch);<strong>and</strong> Tsutomu (Japanese).If you know one of these languages, youmay see linguistic mistakes made in thistext or in the corresponding images. Ifso, it’s almost certainly my fault, havingmiscommunicated the words I neededtranslated or improperly entered theresponses into the database. I apologizein advance <strong>for</strong> any such mistakes buthope you’ll focus more on the database,the code, <strong>and</strong> the functionality. Mythanks, again, to those who helped!This chapter doesn’t go through thesteps <strong>for</strong> creating the mysqli_connect.php page, which connects to the database.Instead, just copy the one from Chapter9, “Using <strong>PHP</strong> with <strong>MySQL</strong>.” Then changethe parameters in the script to use a validusername/password/hostname combinationto connect to the <strong>for</strong>um2 database.As a reminder, the <strong>for</strong>eign key in onetable should be of the exact same type <strong>and</strong> sizeas the matching primary key in another table.528 Chapter 17
Writing the TemplatesThis example, like any site containing lotsof pages, will make use of a template toseparate out the bulk of the presentationfrom the logic. Following the instructionslaid out in Chapter 3, “Creating <strong>Dynamic</strong><strong>Web</strong> <strong>Sites</strong>,” a header file <strong>and</strong> a footer filewill store most of the HTML code. Each<strong>PHP</strong> script will then include these files tomake a complete HTML page A. But thisexample is a little more complicated.One of the goals of this site is to serveusers in many different languages. Accomplishingthat involves not just letting thempost messages in their native language butmaking sure they can use the whole site intheir native language as well. This meansthat the page title, the navigation links, thecaptions, the prompts, <strong>and</strong> even the menusneed to appear in their language B.The instructions <strong>for</strong> making the databaseshow how this is accomplished: by storingtranslations of all key words in a table. Theheader file, there<strong>for</strong>e, needs to pull outall these key words so that they can beused as needed. Secondarily, this headerfile will also show different links basedupon whether the user is logged in or not.Adding just one more little twist: if theuser is on the <strong>for</strong>um page, viewing all thethreads in a language, the user will also begiven the option to post a new thread C.The template itself uses CSS <strong>for</strong> some<strong>for</strong>matting (there’s not much to it, really).You can download all these files fromthe book’s supporting <strong>Web</strong> site (www.LarryUllman.com).A The basic layout <strong>and</strong>appearance of the site.B The home pageviewed in French(compare with A ).C The same home page as in A,but with an added link allowing theuser to start a new thread.Example—Message Board 529
To make the template:1. Begin a new document in your texteditor or IDE, to be named header.html(Script 17.1):
Script 17.1 continued42 $q = "SELECT * FROM words WHERElang_id = {$_SESSION['lid']}";43 $r = mysqli_query($dbc, $q);4445 }4647 // Fetch the results into a variable:48 $words = mysqli_fetch_array($r,MYSQLI_ASSOC);4950 // Free the results:51 mysqli_free_result($r);52 ?>53 55 56 57 58 59 60 body { background-color: #ffffff; }6162 .content {63 background-color: #f5f5f5;64 padding-top: 10px; padding-right:10px; padding-bottom: 10px;padding-left: 10px;65 margin-top: 10px; margin-right:10px; margin-bottom: 10px;margin-left: 10px;66 }6768 a.navlink:link { color: #003366;text-decoration: none; }69 a.navlink:visited { color: #003366;text-decoration: none; }70 a.navlink:hover { color: #cccccc;text-decoration: none; }7172 .title {73 font-size: 24px; font-weight:normal; color: #ffffff;74 margin-top: 5px; margin-bottom:5px; margin-left: 20px;code continues on next page4. Determine the language ID:if ( isset($_GET['lid']) &&filter_var($_GET['lid'],➝ FILTER_VALIDATE_INT,➝ array('min_range' => 1))) {$_SESSION['lid'] = $_GET['lid'];} elseif (!isset($_SESSION['lid'])) {$_SESSION['lid'] = 1; // Default.}Next, the language ID value (abbreviatedlid) needs to be established. Thelanguage ID controls what language isused <strong>for</strong> all of the site elements, <strong>and</strong> italso dictates the <strong>for</strong>um to be viewed.The language ID could be found in thesession, after retrieving that in<strong>for</strong>mationupon a successful login (becausethe user’s language ID is stored in theusers table). Alternatively, any user canchange the displayed language on thefly by submitting the language <strong>for</strong>min the navigation links (see A). In thatcase, the submitted language ID needsto be validated as an integer greaterthan 1: easily accomplished using theFilter extension (see Chapter 13, “SecurityApproaches”). If you’re not using aversion of <strong>PHP</strong> that supports the Filterextension, you’ll need to use typecastinghere instead (again, see Chapter 13).The second clause applies if thepage did not receive a language IDin the URL <strong>and</strong> the language ID hasnot already been established in thesession. In that case, a default languageis selected. This value corresponds toEnglish in the languages table in thedatabase. You can change it to anyID that matches the default languageyou’d like to use.continues on next pageExample—Message Board 531
5. Get the keywords <strong>for</strong> this language:$q = "SELECT * FROM words WHERE➝ lang_id = {$_SESSION['lid']}";$r = mysqli_query($dbc, $q);The next step in the header file is toretrieve from the database all of thekey words <strong>for</strong> the given language.6. If the query returned no records, get thedefault words:if (mysqli_num_rows($r) = = 0) {$_SESSION['lid'] = 1;$q = "SELECT * FROM words WHERE➝ lang_id = {$_SESSION['lid']}";$r = mysqli_query($dbc, $q);}It’s possible, albeit unlikely, that$_SESSION['lid'] does not equate toa record from the words table. In thatcase the query would return no records(but run without error). Consequently,the default language words mustnow be retrieved. Notice that neitherthis block of code, nor that in Step 5,actually fetches the returned record.That will happen, <strong>for</strong> both potentialqueries, in Step 7.7. Fetch the retrieved words into an array,free the resources, <strong>and</strong> close the <strong>PHP</strong>section:$words = mysqli_fetch_array($r,➝ MYSQLI_ASSOC);mysqli_free_result($r);?>After this point, the $words array representsall of the navigation <strong>and</strong> commonelements in the user’s selected language(or the default language).Calling mysqli_free_result( )isn’t necessary, but makes <strong>for</strong> tidyprogramming.Script 17.1 continued75 padding-top: 5px; padding-bottom:5px; padding-left: 20px;76 }77 78 79 8081 8283 84 85 8687 88 89
Script 17.1 continued108 // Register <strong>and</strong> login links:109 echo '' . $words['register']. '110 '. $words['login'] . '';111112 }113114 // For choosing a <strong>for</strong>um/language:115 echo '116 117 ' . $words['language']. '118 ';119120 // Retrieve all the languages...121 $q = "SELECT lang_id, lang FROMlanguages ORDER BY lang_eng ASC";122 $r = mysqli_query($dbc, $q);123 if (mysqli_num_rows($r) > 0) {124 while ($menu_row = mysqli_fetch_array($r, MYSQLI_NUM)) {125 echo "$menu_row[1]\n";126 }127 }128 mysqli_free_result($r);129130 echo '131 132 133 134135 ';136 ?>8. Start the HTML page:Note that the encoding is also indicatedin a META tag, even though the <strong>PHP</strong>header( ) call already identifies theencoding. This is just a matter of beingthorough.The header file as written uses asthe title of every page a value in the$words array (i.e., the page title willalways be the same <strong>for</strong> every page ina chosen language). You could easilymodify this code so that the page’s titleis a combination of the language word<strong>and</strong> a page-specific variable, such as$page_title used in Chapter 3 <strong>and</strong>subsequent examples.9. Add the CSS:body { background-color: #ffffff; }.content {background-color: #f5f5f5;padding-top: 10px; padding-right:➝ 10px; padding-bottom: 10px;➝ padding-left: 10px;margin-top: 10px; margin-right:➝ 10px; margin-bottom: 10px;➝ margin-left: 10px;}continues on next pageExample—Message Board 533
a.navlink:link { color: #003366;➝ text-decoration: none; }a.navlink:visited { color:➝ #003366; text-decoration:➝ none; }a.navlink:hover { color: #cccccc;➝ text-decoration: none; }.title {font-size: 24px; font-weight:➝ normal; color: #ffffff;margin-top: 5px; margin-bottom:➝ 5px; margin-left: 20px;padding-top: 5px; padding-bottom:➝ 5px; padding-left: 20px;}This is all taken from a template I foundsomewhere some time ago. It adds alittle decoration to the site.10. Complete the HTML head <strong>and</strong> beginthe page:➝ The page itself uses a table <strong>for</strong> thelayout, with one row showing thepage title, the next row containing thenavigation links on the left <strong>and</strong> the pagespecificcontent on the right, <strong>and</strong> thefinal row containing the copyright D.You’ll see in this code that the page titlewill also be language-specific.11. Start displaying the links:
The first two links will always appear,whether the user is logged in ornot, <strong>and</strong> regardless of the pagethey’re currently viewing. For eachlink, the text of the link itself will belanguage-specific.12. If the user is logged in, show “newthread” <strong>and</strong> logout links:if (isset($_SESSION['user_id'])) {if (basename($_SERVER['<strong>PHP</strong>_➝ SELF']) = = '<strong>for</strong>um.php') {echo '' .➝ $words['new_thread'] .➝'';}echo '' .➝ $words['logout'] . '';Confirmation of the user’s logged-instatus is achieved by checking <strong>for</strong> thepresence of a $_SESSION['user_id']variable. If it’s set, then the logout linkcan be created. Be<strong>for</strong>e that, a checkis made to see if this is the <strong>for</strong>um.phppage. If so, then a link to start a newthread is created (users can only createnew threads if they’re on the <strong>for</strong>um page;you wouldn’t want them to create a newthread on some of the other pages, likethe home page, because it wouldn’t beclear to which <strong>for</strong>um the thread shouldbe posted). The code <strong>for</strong> checking whatpage it is, using the basename( ) function,was first introduced in Chapter 12,“Cookies <strong>and</strong> Sessions.”13. Display the links <strong>for</strong> users not logged in:} else {echo '' .➝ $words['register'] . '' . $words['login'] .➝'';}If the user isn’t logged in, links areprovided <strong>for</strong> registering <strong>and</strong> logging in.14. Start a <strong>for</strong>m <strong>for</strong> choosing a language:echo '' . $words➝ ['language'] . '';The user can choose a language (whichis also a <strong>for</strong>um), via a pull-down menu E.The first value in the menu will be theword “language,” in the user’s defaultlanguage. The select menu’s name is lid,short <strong>for</strong> language ID, <strong>and</strong> its actionattribute points to <strong>for</strong>um.php. When theuser submits this simple <strong>for</strong>m, they’ll betaken to the <strong>for</strong>um of their choice.continues on next pageE The language pull-downmenu, with each option in itsnative language.Example—Message Board 535
15. Retrieve every language from the database,<strong>and</strong> add each to the menu:$q = "SELECT lang_id, lang FROM➝ languages ORDER BY lang_eng ASC";$r = mysqli_query($dbc, $q);if (mysqli_num_rows($r) > 0) {while ($menu_row = mysqli_➝ fetch_array($r, MYSQLI_NUM)) {echo "$menu_row[1]➝ \n";}}mysqli_free_result($r);This query retrieves the languages <strong>and</strong>the language ID from the languagestable. Each is added as an option to theselect menu.Again, calling mysqli_free_result( )isn’t required, but doing so can helplimit bugs <strong>and</strong> improve per<strong>for</strong>mance. Inparticular, when you have pages thatrun multiple SELECT queries, mysqli_free_result( ) can help avoid confusionissues between <strong>PHP</strong> <strong>and</strong> <strong>MySQL</strong>.16. Complete the <strong>for</strong>m <strong>and</strong> the <strong>PHP</strong> page:echo '';?>17. Save the file as header.html.Even though it contains a fair amountof <strong>PHP</strong>, this script will still use the .htmlextension (which I prefer to use <strong>for</strong>template files). Make sure that the fileis saved using UTF-8 encoding.18. Create a new document in your texteditor or IDE, to be named footer.html(Script 17.2):19. Complete the HTML page:© 2011 Larry➝ Ullman20. Save the file as footer.html.Again, make sure that the file is savedusing UTF-8 encoding.21. Place both files in your <strong>Web</strong> directory,within a folder named includes.Script 17.2 The footer file completes the HTML page.1 2 3 45 6 ©2011 Larry Ullman7 89 10 11 536 Chapter 17
Creating theindex pageThe index page in this example won’t dothat much. It’ll provide some introductorytext <strong>and</strong> the links <strong>for</strong> the user to register,log in, choose the preferred language/<strong>for</strong>um, <strong>and</strong> so <strong>for</strong>th. From a programmingperspective, it’ll show how the templatefiles are to be used.To make the home page:1. Begin a new <strong>PHP</strong> document in your texteditor or IDE, to be named index.php(Script 17.3):That’s it <strong>for</strong> the home page!5. Save the file as index.php, place it inyour <strong>Web</strong> directory, <strong>and</strong> test it in your<strong>Web</strong> browser (see A <strong>and</strong> B in theprevious section).Once again, make sure that the file issaved using UTF-8 encoding. This willbe the last time I remind you!Script 17.3 The home page includes the header <strong>and</strong> footerfiles to make a complete HTML document. It also prints someintroductory text in the chosen language.1 Example—Message Board 537
Creating theForum pageThe next page in the <strong>Web</strong> site is the <strong>for</strong>umpage, which displays the threads in a <strong>for</strong>um(each language being its own <strong>for</strong>um). Thepage will use the language ID, passedto this page in a URL <strong>and</strong>/or stored in asession, to know what threads to display.The basic functionality of this page—running a query, displaying the results—is simple A. The query this page usesis perhaps the most complex one in thebook. It’s complicated <strong>for</strong> three reasons:1. It per<strong>for</strong>ms a JOIN across three tables.2. It uses three aggregate functions <strong>and</strong>a GROUP BY clause.3. It converts the dates to the user’s timezone, but only if the person viewing thepage is logged in.So, again, the query is intricate, but I’ll gothrough it in detail in the following steps.Script 17.4 This script per<strong>for</strong>ms one rather complicatedquery to display five pieces of in<strong>for</strong>mation—the subject, the original poster, the date the threadwas started, the number of replies, <strong>and</strong> the date ofthe latest reply—<strong>for</strong> each thread in a <strong>for</strong>um.1
Script 17.4 continued17 // The query <strong>for</strong> retrieving all the threads in this <strong>for</strong>um, along with the original user,18 // when the thread was first posted, when it was last replied to, <strong>and</strong> how many replies it's had:19 $q = "SELECT t.thread_id, t.subject, username, COUNT(post_id) - 1 AS responses, MAX(DATE_FORMAT($last, '%e-%b-%y %l:%i %p')) AS last, MIN(DATE_FORMAT($first, '%e-%b-%y %l:%i %p')) AS firstFROM threads AS t INNER JOIN posts AS p USING (thread_id) INNER JOIN users AS u ON t.user_id =u.user_id WHERE t.lang_id = {$_SESSION['lid']} GROUP BY (p.thread_id) ORDER BY last DESC";20 $r = mysqli_query($dbc, $q);21 if (mysqli_num_rows($r) > 0) {2223 // Create a table:24 echo '25 26 ' . $words['subject'] . ':27 ' . $words['posted_by'] . ':28 ' . $words['posted_on'] . ':29 ' . $words['replies'] . ':30 ' . $words['latest_reply'] . ':31 ';3233 // Fetch each thread:34 while ($row = mysqli_fetch_array($r, MYSQLI_ASSOC)) {3536 echo '37 ' . $row['subject']. '38 ' . $row['username'] . '39 ' . $row['first'] . '40 ' . $row['responses'] . '41 ' . $row['last'] . '42 ';4344 }4546 echo ''; // Complete the table.4748 } else {49 echo 'There are currently no messages in this <strong>for</strong>um.';50 }5152 // Include the HTML footer file:53 include ('includes/footer.html');54 ?>Example—Message Board 539
2. Determine what dates <strong>and</strong> times to use:if (isset($_SESSION['user_tz'])) {$first = "CONVERT_TZ➝ (p.posted_on, 'UTC',➝'{$_SESSION['user_tz']}')";$last = "CONVERT_TZ(p.posted_on,➝'UTC', '{$_SESSION['user_tz']}')";} else {$first = 'p.posted_on';$last = 'p.posted_on';}As already stated, the query will <strong>for</strong>matthe date <strong>and</strong> time to the user’s time zone(presumably selected during the registrationprocess), but only if the viewer islogged in. Presumably, this in<strong>for</strong>mationwould be retrieved from the database<strong>and</strong> stored in the session upon login.To make the query dynamic, what exactdate/time value should be selectedwill be stored in a variable to be usedin the query later in the script. If theuser is not logged in, which means that$_SESSION['user_tz'] is not set, thetwo dates—when a thread was started<strong>and</strong> when the most recent reply wasposted—will be unadulterated valuesfrom the table. In both cases, the tablecolumn being referenced is posted_onin the posts table ( p will be an alias toposts in the query).If the user is logged in, the CONVERT_TZ( )function will be used to convert the valuestored in posted_on from UTC to theuser’s chosen time zone. See Chapter 6<strong>for</strong> more on this function. Note that usingthis function requires that your <strong>MySQL</strong>installation includes the list of time zones(see Chapter 6 <strong>for</strong> more).3. Define <strong>and</strong> execute the query:$q = "SELECT t.thread_id,➝ t.subject, username, COUNT➝ (post_id) - 1 AS responses,➝ MAX(DATE_FORMAT($last,➝'%e-%b-%y %l:%i %p')) AS last,➝ MIN(DATE_FORMAT($first, '%e-%b-%y➝ %l:%i %p')) AS first FROM➝ threads AS t INNER JOIN posts➝ AS p USING (thread_id) INNER➝ JOIN users AS u ON t.user_id =➝ u.user_id WHERE t.lang_id =➝ {$_SESSION['lid']} GROUP BY➝ (p.thread_id) ORDER BY last DESC";$r = mysqli_query($dbc, $q);if (mysqli_num_rows($r) > 0) {The query needs to return six things:the ID <strong>and</strong> subject of each thread (whichcomes from the threads table), thename of the user who posted the threadin the first place (from users), the numberof replies to each thread, the datethe thread was started, <strong>and</strong> the date thethread last had a reply (all from posts).The overarching structure of this queryis a join between threads <strong>and</strong> postsusing the thread_id column (which isthe same in both tables). This result isthen joined with the users table usingthe user_id column.As <strong>for</strong> the selected values, threeaggregate functions are used (seeChapter 7): COUNT( ), MIN( ), <strong>and</strong> MAX( ).Each is applied to a column in theposts table, so the query has a GROUPBY (p.thread_id) clause. MIN( ) <strong>and</strong>MAX( ) are used to return the earliest(<strong>for</strong> the original post) <strong>and</strong> latest dates.540 Chapter 17
Both will be shown on the <strong>for</strong>um page(see A). The latest date is also usedto order the results so that the mostrecent activity always gets returnedfirst. The COUNT( ) function is used tocount the number of posts in a giventhread. Because the original post is alsoin the posts table, it’ll be factored intoCOUNT( ) as well, so 1 is subtracted fromthat value.Finally, aliases are used to make thequery shorter to write <strong>and</strong> to make iteasier to use the results in the <strong>PHP</strong>script. If you’re confused by what thisquery returns, execute it using themysql client B or phpMyAdmin.4. Create a table <strong>for</strong> the results:echo '➝ ' . $words['subject'] .➝':' . $words➝ ['posted_by'] . ':' . $words['posted_➝ on'] . ':' . $words['replies']➝ . ':➝ ' . $words['latest_➝ reply'] . ':';As with some items in the header file,the captions <strong>for</strong> the columns in thisHTML page will use language-specificterminology.continues on next pageB The results of running the complex query in the mysql client.Example—Message Board 541
5. Fetch <strong>and</strong> print each returned record:while ($row = mysqli_fetch_array➝ ($r, MYSQLI_ASSOC)) {echo '' .➝ $row['subject'] . '' .➝ $row['username'] . '' .➝ $row['first'] . '' .➝ $row['responses'] . '' .➝ $row['last'] . '';}This code is fairly simple, <strong>and</strong> there aresimilar examples many times over in thebook. The thread’s subject is linked toread.php, passing that page the threadID in the URL.6. Complete the page:echo '';} else {echo 'There are currently no➝ messages in this <strong>for</strong>um.';}include ('includes/footer.html');?>This else clause applies if the queryreturned no results. In actuality, thismessage should also be in the user’schosen language. I’ve omitted that <strong>for</strong>the sake of brevity. To fully implementthis feature, create another column inthe words table <strong>and</strong> store <strong>for</strong> each languagethe translated version of this text.7. Save the file as <strong>for</strong>um.php, place it inyour <strong>Web</strong> directory, <strong>and</strong> test it in your<strong>Web</strong> browser C.If you see no values <strong>for</strong> the dates <strong>and</strong>times when you run this script, it is probablybecause your <strong>MySQL</strong> installation hasn’t beenupdated with the full list of time zones.As noted in the chapter’s introduction,I’ve omitted all error h<strong>and</strong>ling in this example. Ifyou have problems with the queries, apply thedebugging techniques outlined in Chapter 8,“Error H<strong>and</strong>ling <strong>and</strong> Debugging.”C The <strong>for</strong>um.php page, viewed in another language (compare with A ).542 Chapter 17
Creating theThread pageNext up is the page <strong>for</strong> viewing all of themessages in a thread A. This page isaccessed by clicking a link in <strong>for</strong>um.php B.Thanks to a simplified database structure,the query used by this script is not thatcomplicated (with the database design fromChapter 6, this page would have been muchmore complex). All this page has to do thenis make sure it receives a valid thread ID,display every message, <strong>and</strong> display the<strong>for</strong>m <strong>for</strong> users to add their own replies.A The read.php page showsevery messagein a thread.B Part of thesource code from<strong>for</strong>um.php showshow the thread ID ispassed to read.phpin the URL.Example—Message Board 543
To make read.php:1. Begin a new <strong>PHP</strong> document in your texteditor or IDE, to be named read.php(Script 17.5):
3. Determine if the dates <strong>and</strong> times shouldbe adjusted:if (isset($_SESSION['user_tz'])) {$posted = "CONVERT_TZ➝ (p.posted_on, 'UTC',➝'{$_SESSION['user_tz']}')";} else {$posted = 'p.posted_on';}As in the <strong>for</strong>um.php page (Script 17.4),the query will <strong>for</strong>mat all of the dates <strong>and</strong>times in the user’s time zone, if the useris logged in. To be able to adjust thequery accordingly, this variable storeseither the column’s name (posted_on,from the posts table) or the invocationof <strong>MySQL</strong>’s CONVERT_TZ( ) function.4. Run the query:$q = "SELECT t.subject, p.message,➝ username, DATE_FORMAT($posted,➝'%e-%b-%y %l:%i %p') AS posted➝ FROM threads AS t LEFT JOIN➝ posts AS p USING (thread_id)➝ INNER JOIN users AS u ON➝ p.user_id = u.user_id WHERE➝ t.thread_id = $tid ORDER BY➝ p.posted_on ASC";$r = mysqli_query($dbc, $q);if (!(mysqli_num_rows($r) > 0)) {$tid = FALSE;}continues on next pageScript 17.5 continued2728 if ($tid) { // Get the messages in this thread...2930 $printed = FALSE; // Flag variable.3132 // Fetch each:33 while ($messages = mysqli_fetch_array($r, MYSQLI_ASSOC)) {3435 // Only need to print the subject once!36 if (!$printed) {37 echo "{$messages['subject']}\n";38 $printed = TRUE;39 }4041 // Print the message:42 echo "{$messages['username']} ({$messages['posted']}){$messages['message']}\n";4344 } // End of WHILE loop.4546 // Show the <strong>for</strong>m to post a message:47 include ('includes/post_<strong>for</strong>m.php');4849 } else { // Invalid thread ID!50 echo 'This page has been accessed in error.';51 }5253 include ('includes/footer.html');54 ?>Example—Message Board 545
This query is like the query on the<strong>for</strong>um page, but it’s been simplified intwo ways. First, it doesn’t use any ofthe aggregate functions or a GROUP BYclause. Second, it only returns one date<strong>and</strong> time. The query is still a JOIN acrossthree tables, in order to get the subject,message bodies, <strong>and</strong> usernames. Therecords are ordered by their posteddates in ascending order (i.e., from thefirst post to the most recent).If the query doesn’t return any rows,then the thread ID isn’t valid <strong>and</strong> theflag variable is made false again.5. Complete the $_GET['tid'] conditional<strong>and</strong> check, again, <strong>for</strong> a valid thread ID:} // End of isset($_GET['tid']) IF.if ($tid) {Be<strong>for</strong>e printing the messages in thethread, one last conditional is used.This conditional would be false if:> No $_GET['tid'] value was passed tothis page.> A $_GET['tid'] value was passed tothe page, but it was not an integergreater than 0.> A $_GET['tid'] value was passedto the page <strong>and</strong> it was an integergreater than 0, but it matched nothread records in the database.6. Print each message:$printed = FALSE;while ($messages = mysqli_fetch_➝ array($r, MYSQLI_ASSOC)) {if (!$printed) {echo"{$messages['subject']}\n";$printed = TRUE;}echo "{$messages['username']}➝ ({$messages['posted']})➝ {$messages['message']}➝ \n";} // End of WHILE loop.As you can see in A, the threadsubject needs to be printed only once.However, the query will return thesubject <strong>for</strong> each returned message C.C The results of the read.phpquery when run in the mysqlclient. This version of thequery converts the dates tothe logged-in user’s preferredtime zone.546 Chapter 17
To achieve this effect, a flag variable iscreated. If $printed is FALSE, then thesubject needs to be printed. This wouldbe the case <strong>for</strong> the first row fetchedfrom the database. Once that’s beendisplayed, $printed is set to TRUE sothat the subject is not printed again.Then the username, posted date, <strong>and</strong>message are displayed.7. Include the <strong>for</strong>m <strong>for</strong> posting a message:include ('includes/post_<strong>for</strong>m.php');As users could post messages in twoways—as a reply to an existing thread<strong>and</strong> as the first post in a new thread, the<strong>for</strong>m <strong>for</strong> posting messages is definedwithin a separate file (to be created next),stored within the includes directory.8. Complete the page:} else { // Invalid thread ID!echo 'This page has been➝ accessed in error.';}include ('includes/footer.html');?>Again, in a complete site, this errormessage would also be stored in thewords table in each language. Thenyou would write here:echo "{$words['access_error']}➝ ";9. Save the file as read.php, place it inyour <strong>Web</strong> directory, <strong>and</strong> test it in your<strong>Web</strong> browser D.D The read.php page, viewed in Japanese.Example—Message Board 547
posting MessagesThe final two pages in this application arethe most important, because you won’thave threads to read without them. Twofiles <strong>for</strong> posting messages are required:One will make the <strong>for</strong>m, <strong>and</strong> the other willh<strong>and</strong>le the <strong>for</strong>m.Creating the <strong>for</strong>mThe first page required <strong>for</strong> postingmessages is post_<strong>for</strong>m.php. It hassome contingencies:1. It can only be included by other files,never accessed directly.2. It should only be displayed if the user islogged in (which is to say only logged-inusers can post messages).3. If it’s being used to add a reply to anexisting message, it only needs a messagebody input A.4. If it’s being used to create a new thread,it needs both subject <strong>and</strong> body inputs B.5. It needs to be sticky C.Still, all of this can be accomplished in 60lines of code <strong>and</strong> some smart conditionals.To create post_<strong>for</strong>m.php:1. Begin a new <strong>PHP</strong> document inyour text editor or IDE, to be namedpost_<strong>for</strong>m.php (Script 17.6):
Script 17.6 This script will be included by otherpages (notably, read.php <strong>and</strong> post.php). It displaysa <strong>for</strong>m <strong>for</strong> posting messages that is also sticky.1
This is where things get a little bittricky. As mentioned earlier, <strong>and</strong> asshown in A <strong>and</strong> B, the <strong>for</strong>m will differslightly depending upon how it’s beingused. When included on read.php, the<strong>for</strong>m will be used to provide a reply toan existing thread. To check <strong>for</strong> thisscenario, the script sees if $tid (short<strong>for</strong> thread ID) is set <strong>and</strong> if it has a TRUEvalue. That will be the case when thispage is included by read.php. Whenthis script is included by post.php, $tidwill be set but have a FALSE value.If this conditional is true, the languagespecificversion of “Post a Reply” will beprinted <strong>and</strong> the thread ID will be storedin a hidden <strong>for</strong>m input.5. Complete the conditional begun in Step4:} else { // New threadecho '' . $words['new_➝ thread'] . '';echo '' . $words['subject']➝ . ': ';} // End of $tid IF.If this is not a reply, then the captionshould be the language-specific versionof “New Thread” <strong>and</strong> a subject inputshould be created. That input needs tobe sticky. To check <strong>for</strong> that, look <strong>for</strong> theexistence of a $subject variable. Thisvariable will be created in post.php,<strong>and</strong> that file will then include this page.Script 17.6 continued34 // Check <strong>for</strong> existing value:35 if (isset($subject)) {36 echo "value=\"$subject\" ";37 }3839 echo '/>';4041 } // End of $tid IF.4243 // Create the body textarea:44 echo '' . $words['body'] .': ';4546 if (isset($body)) {47 echo $body;48 }4950 echo '';5152 // Finish the <strong>for</strong>m:53 echo '54 ';5556 } else {57 echo 'You must be logged in topost messages.';58 }5960 ?>550 Chapter 17
D The <strong>for</strong>m prompts <strong>and</strong> even the submit buttonwill be in the user’s chosen language (comparewith the other figures in this section of the chapter).E The result of the post_<strong>for</strong>m.php page if theuser is not logged in (remember that you canemulate not being logged in by using the$_SESSION = array( ); line in the header file).6. Create the textarea <strong>for</strong> the messagebody:echo '' . $words['body'] .➝': ';if (isset($body)) {echo $body;}echo '';Both uses of this page will have thistextarea. Like the subject, it will bemade sticky if a $body variable (definedin post.php) exists. For both inputs, theprompts will be language-specific.7. Complete the <strong>for</strong>m:echo '';All that’s left is a language-specificsubmit button D.8. Complete the page:} else {echo 'You must be logged in➝ to post messages.';}?>Once again, you could store thismessage in the words table <strong>and</strong> usethe translated version here. I didn’t only<strong>for</strong> the sake of simplicity.9. Save the file as post_<strong>for</strong>m.php, placeit in the includes folder of your <strong>Web</strong>directory, <strong>and</strong> test it in your <strong>Web</strong>browser by accessing read.php E.Example—Message Board 551
H<strong>and</strong>ling the <strong>for</strong>mThis file, post.php, will primarily be usedto h<strong>and</strong>le the <strong>for</strong>m submission from post_<strong>for</strong>m.php. That sounds simple enough,but there’s a bit more to it. This page willactually be called in three different ways:1. To h<strong>and</strong>le the <strong>for</strong>m <strong>for</strong> a thread reply2. To display the <strong>for</strong>m <strong>for</strong> a new threadsubmission3. To h<strong>and</strong>le the <strong>for</strong>m <strong>for</strong> a new threadsubmissionThis means that the page will be accessedusing either POST (modes 1 <strong>and</strong> 3) or GET(mode 2). Also, the data that will be sentto the page, <strong>and</strong> there<strong>for</strong>e needs to bevalidated, will differ between modes 1<strong>and</strong> 3 F.Adding to the complications, if a new threadis being created, two queries must be run:one to add the thread to the threads table<strong>and</strong> a second to add the new thread body tothe posts table. If the submission is a replyto an existing thread, then only one query isrequired, inserting a record into posts.Of course, successfully pulling this off isjust a matter of using the right conditionals,as you’ll see. In terms of validation, thesubject <strong>and</strong> body, as text types, will just bechecked <strong>for</strong> a non-empty value. All tags willbe stripped from the subject (because whyshould it have any?) <strong>and</strong> turned into entitiesin the body. This will allow <strong>for</strong> HTML,JavaScript, <strong>and</strong> <strong>PHP</strong> code to be written ina post but still not be executed when thethread is shown (because in a <strong>for</strong>um about<strong>Web</strong> development, you’ll need to showsome code).F The various uses of the post.php page.552 Chapter 17
Script 17.7 The post.php page will process the<strong>for</strong>m submissions when a message is posted. Thispage will be used to both create new threads <strong>and</strong>h<strong>and</strong>le replies to existing threads.1
3. Validate the message subject:if (!$tid && empty($_POST➝ ['subject'])) {$subject = FALSE;echo 'Please enter a subject➝ <strong>for</strong> this post.';} elseif (!$tid && !empty($_POST➝ ['subject'])) {$subject = htmlspecialchars➝ (strip_tags($_POST['subject']));} else { // Thread ID, no need➝ <strong>for</strong> subject.$subject = TRUE;}Script 17.7 continued31 echo 'Please enter a body <strong>for</strong> this post.';32 }3334 if ($subject && $body) { // OK!3536 // Add the message to the database...3738 if (!$tid) { // Create a new thread.39 $q = "INSERT INTO threads (lang_id, user_id, subject) VALUES ({$_SESSION['lid']},{$_SESSION['user_id']}, '" . mysqli_real_escape_string($dbc, $subject) . "')";40 $r = mysqli_query($dbc, $q);41 if (mysqli_affected_rows($dbc) = = 1) {42 $tid = mysqli_insert_id($dbc);43 } else {44 echo 'Your post could not be h<strong>and</strong>led due to a system error.';45 }46 } // No $tid.4748 if ($tid) { // Add this to the replies table:49 $q = "INSERT INTO posts (thread_id, user_id, message, posted_on) VALUES ($tid,{$_SESSION['user_id']}, '" . mysqli_real_escape_string($dbc, $body) . "', UTC_TIMESTAMP( ))";50 $r = mysqli_query($dbc, $q);51 if (mysqli_affected_rows($dbc) = = 1) {52 echo 'Your post has been entered.';53 } else {54 echo 'Your post could not be h<strong>and</strong>led due to a system error.';55 }56 } // Valid $tid.5758 } else { // Include the <strong>for</strong>m:59 include ('includes/post_<strong>for</strong>m.php');60 }6162 } else { // Display the <strong>for</strong>m:6364 include ('includes/post_<strong>for</strong>m.php');6566 }6768 include ('includes/footer.html');69 ?>554 Chapter 17
The tricky part about validating thesubject is that three scenarios exist.First, if there’s no valid thread ID, thenthis should be a new thread <strong>and</strong> thesubject can’t be empty. If the subjectelement is empty, then an erroroccurred <strong>and</strong> a message is printed.In the second scenario, there’s no validthread ID <strong>and</strong> the subject isn’t empty,meaning this is a new thread <strong>and</strong> thesubject was entered, so it should beh<strong>and</strong>led. In this case, any tags areremoved, using the strip_tags( )function, <strong>and</strong> htmlspecialchars( ) willturn any remaining quotation marksinto their entity <strong>for</strong>mat. Calling thissecond function will prevent problemsshould the <strong>for</strong>m be displayed again<strong>and</strong> the subject placed in the input tomake it sticky. To be more explicit, if thesubmitted subject contains a doublequotation mark but the body wasn’tcompleted, the <strong>for</strong>m will be shownagain with the subject placed withinvalue="", <strong>and</strong> the double quotationmark in the subject will cause problems.The third scenario is when the <strong>for</strong>m hasbeen submitted as a reply to an existingthread. In that case, $tid will be valid<strong>and</strong> no subject is required.4. Validate the body:if (!empty($_POST['body'])) {$body = htmlentities($_POST➝ ['body']);} else {$body = FALSE;echo 'Please enter a body➝ <strong>for</strong> this post.';}This is a much easier validation, as thebody is always required. If present, it’llbe run through htmlentities( ).5. Check if the <strong>for</strong>m was properly filledout:if ($subject && $body) {6. Create a new thread, when appropriate:if (!$tid) {$q = "INSERT INTO threads➝ (lang_id, user_id, subject)➝ VALUES ({$_SESSION['lid']},➝ {$_SESSION['user_id']}, '" .➝ mysqli_real_escape_string➝ ($dbc, $subject) . "')";$r = mysqli_query($dbc, $q);if (mysqli_affected_rows($dbc)➝ = = 1) {$tid = mysqli_insert_id➝ ($dbc);} else {echo 'Your post could➝ not be h<strong>and</strong>led due to a➝ system error.';}}If there’s no thread ID, then this is anew thread <strong>and</strong> a query must be run onthe threads table. That query is simple,populating the three columns. Two ofthese values come from the session(after the user has logged in). The otheris the subject, which is run throughmysqli_real_escape_string( ).Because the subject already had strip_tags( ) <strong>and</strong> htmlspecialchars( )applied to it, you could probably getaway with not using this function, butthere’s no need to take that risk.If the query worked, meaning it affectedone row, then the new thread ID isretrieved.continues on next pageExample—Message Board 555
7. Add the record to the posts table:if ($tid) {$q = "INSERT INTO posts➝ (thread_id, user_id,➝ message, posted_on) VALUES➝ ($tid, {$_SESSION['user_➝ id']}, '" . mysqli_real_➝ escape_string($dbc, $body) .➝ "', UTC_TIMESTAMP( ))";$r = mysqli_query($dbc, $q);if (mysqli_affected_rows➝ ($dbc) = = 1) {echo 'Your post hasbeen entered.';} else {echo 'Your post could➝ not be h<strong>and</strong>led due to a➝ system error.';}}This query should only be run if thethread ID exists. That will be the case ifthis is a reply to an existing thread or ifthe new thread was just created in thedatabase (Step 6). If that query failed,then this query won’t be run.The query populates four columns inthe table, using the thread ID, the userID (from the session), the messagebody, run through mysqli_real_escape_string( ) <strong>for</strong> security, <strong>and</strong> theposted date. For this last value, theUTC_TIMESTAMP( ) column is used sothat it’s not tied to any one time zone(see Chapter 6).Note that <strong>for</strong> all of the printedmessages in this page, I’ve just usedhard-coded English. To finish roundingout the examples, each of thesemessages should be stored in thewords table <strong>and</strong> printed here instead.How This example is ComplicatedIn the introduction to this chapter, I statethat the example is fundamentally simple,but that sometimes the simple thingstake some extra ef<strong>for</strong>t to do. So how isthis example complicated, in my opinion?First, supporting multiple languagesdoes add a couple of issues. If theencoding isn’t h<strong>and</strong>led properlyeverywhere—when creating the pages inyour text editor or IDE, in communicatingwith <strong>MySQL</strong>, in the <strong>Web</strong> browser, etc.—things can go awry. Also, you have tohave the proper translations <strong>for</strong> everylanguage <strong>for</strong> every bit of text that thesite might need. This includes errormessages (ones the user should actuallysee), the bodies of emails, <strong>and</strong> so <strong>for</strong>th.How the <strong>PHP</strong> files are organized <strong>and</strong>what they do also complicates things. Inparticular, some variables are created inone file but used in another. Doing thiscan lead to confusion at best <strong>and</strong> bugs atthe worst. To overcome those problems,I recommend adding lots of commentsindicating where variables come fromor where else they might be used. Also,try to use unique variable names withinpages so that they are less likely toconflict with variables in included files.Finally, this example was complicated bythe way only one page is used to displaythe posting <strong>for</strong>m <strong>and</strong> only one page isused to h<strong>and</strong>le it, despite the fact thatmessages can be posted in two differentways, with different expectations.556 Chapter 17
H The result if no subject was provided whileattempting to post a new thread.I The reply has been successfully added tothe thread.8. Complete the page:} else { // Include the <strong>for</strong>m:include ('includes/➝ post_<strong>for</strong>m.php');}} else { // Display the <strong>for</strong>m:include ('includes/post_<strong>for</strong>m.php');}include ('includes/footer.html');?>The first else clause applies if the <strong>for</strong>mwas submitted but not completed. Inthat case, the <strong>for</strong>m will be includedagain <strong>and</strong> can be sticky, as it’ll haveaccess to the $subject <strong>and</strong> $bodyvariables created by this script. Thesecond else clause applies if this pagewas accessed directly (by clicking alink in the navigation), thereby creatinga GET request (i.e., without a <strong>for</strong>msubmission).9. Save the file as post.php, place it inyour <strong>Web</strong> directory, <strong>and</strong> test it in your<strong>Web</strong> browser (H <strong>and</strong> I).Administering the ForumMuch of the administration of the <strong>for</strong>um would involve user management, discussed in thenext chapter. Depending upon who is administering the <strong>for</strong>um, you might also create <strong>for</strong>ms<strong>for</strong> managing the languages <strong>and</strong> lists of translated words.Administrators would also likely have the authority to edit <strong>and</strong> delete posts or threads. Toaccomplish this, store a user level in the session as well (the next chapter shows you how). If thelogged-in user is an administrator, add links to edit <strong>and</strong> delete threads on <strong>for</strong>um.php. Each linkwould pass the thread ID to a new page (like edit_user.php <strong>and</strong> delete_user.php from Chapter10, “Common Programming Techniques”). When deleting a thread, you have to make sure youdelete all the records in the posts table that also have that thread ID. A <strong>for</strong>eign key constraint(see Chapter 6) can help in this regard.Finally, an administrator could edit or delete individual posts (the replies to a thread). Again, check<strong>for</strong> the user level <strong>and</strong> then add links to read.php (a pair of links after each message). The linkswould pass the post ID to edit <strong>and</strong> delete pages (different ones than are used on threads).Example—Message Board 557
Review <strong>and</strong> pursueIf you have any problems with thereview questions or the pursue prompts,turn to the book’s supporting <strong>for</strong>um(www.LarryUllman.com/<strong>for</strong>ums/).Note: Most of these questions <strong>and</strong> some ofthe prompts rehash in<strong>for</strong>mation covered inearlier chapters, in order to rein<strong>for</strong>ce someof the most important points.ReviewnnnnnnnWhat impact does a database’s characterset, or a <strong>PHP</strong> or HTML page’sencoding, have?Why does the encoding <strong>and</strong> characterset have to be the same everywhere?What happens if there are differences?What is a primary key? What is a<strong>for</strong>eign key?What is the benefit of using UTC <strong>for</strong>stored dates <strong>and</strong> times?Why is the pass column in the userstable set as a CHAR instead of a VARCHAR,when each user’s password could be ofa variable length?How do you begin a session in <strong>PHP</strong>?How do you store a value in a session?How do you retrieve a previouslystored value?How do you create an alias in a SQLcomm<strong>and</strong>? What are the benefits ofusing an alias?pursuennnnnnnnnReview Chapter 6 if you need arefresher on database design.Review Chapter 6 to remind yourselfas to what kinds of columns in a tableshould be indexed.Review Chapter 6’s section on timezones if your <strong>MySQL</strong> installation isnot properly converting the dates<strong>and</strong> times from the UTC time zone toanother (i.e., if the returned converteddate value is NULL).Review Chapter 7, “Advanced SQL <strong>and</strong><strong>MySQL</strong>,” <strong>for</strong> a refresher on joins <strong>and</strong> theaggregating functions.Modify the header <strong>and</strong> other files so thateach page’s title uses both the defaultlanguage page title <strong>and</strong> a subtitle basedupon the page being viewed (e.g., thename of the thread currently shown).Add pagination—see Chapter 10—to the<strong>for</strong>um.php script.If you want, add the necessary columnsto the words table, <strong>and</strong> the appropriatecode to the <strong>PHP</strong> scripts, so that everynavigational, error, <strong>and</strong> other element islanguage-specific. Use a <strong>Web</strong> site suchas Yahoo! Babel Fish (http://babelfish.yahoo.com) <strong>for</strong> the translations.Apply the redirect_user( ) functionfrom Chapter 12 to post_<strong>for</strong>m.php here.Create a search page <strong>for</strong> this <strong>for</strong>um. Ifyou need some help, see the search.php basic example available in thedownloadable code.558 Chapter 17
18Example —User RegistrationThe second example in the book—a userregistration system—has already beentouched upon in several other chapters,as the registration, login, <strong>and</strong> logout processesmake <strong>for</strong> good examples of manyconcepts. But this chapter will place all ofthose ideas within the same context, usinga consistent programming approach.Users will be able to register, log in, logout, <strong>and</strong> change their password. Thischapter includes three features not shownelsewhere: the ability to reset a password,should it be <strong>for</strong>gotten; the requirement thatusers activate their account be<strong>for</strong>e theycan log in; <strong>and</strong> support <strong>for</strong> different userlevels, allowing you to control the availablecontent according to the type of userlogged in.As in the preceding chapter, the focus herewill be on the public side of things, butalong the way you’ll see recommendationsas to how this application could easily beexp<strong>and</strong>ed or modified, including how toadd administrative features.in This ChapterCreating the Templates 560Writing the Configuration Scripts 566Creating the Home Page 574Registration 576Activating an Account 586Logging In <strong>and</strong> Logging Out 589Password Management 594Review <strong>and</strong> Pursue 604
Creating theTemplatesThe application in this chapter will usea new template design A. This templatemakes extensive use of Cascading StyleSheets (CSS), creating a clean look withoutthe need <strong>for</strong> images. It has tested well onall current browsers <strong>and</strong> will appear asun<strong>for</strong>matted text on browsers that don’tsupport CSS2. The layout <strong>for</strong> this siteis derived from one freely provided byBlueRobot (www.bluerobot.com).Creating this chapter’s example beginswith two template files: header.html<strong>and</strong> footer.html. As in the Chapter 12,“Cookies <strong>and</strong> Sessions,” examples,the footer file will display certain linksdepending upon whether or not the useris logged in, determined by checking <strong>for</strong>the existence of a session variable. Takingthis concept one step further, additionallinks will be displayed if the logged-in useris also an administrator (a session valuewill indicate such).The header file will begin sessions <strong>and</strong>output buffering, while the footer filewill terminate output buffering. Outputbuffering hasn’t been <strong>for</strong>mally covered inthe book, but it’s introduced sufficientlyin the sidebar.To make header.html:1. Begin a new document in your texteditor or IDE, to be named header.html(Script 18.1):15 17 18 19 20 21 @import "includes/layout.css";22 23 24 User Registration25 26 560 Chapter 18
2. Begin output buffering <strong>and</strong> start asession:ob_start( );session_start( );This <strong>Web</strong> site will use output buffering,eliminating any error messages thatcould occur when using HTTP headers,redirecting the user, or sending cookies.Every page will make use of sessionsas well. It’s safe to place the session_start( ) call after ob_start( ), sincenothing has been sent to the <strong>Web</strong>browser yet.Since every public page will use bothoutput buffering <strong>and</strong> sessions, placingthese lines in the header.html filesaves the hassle of placing them inevery single page. Secondarily, ifyou later want to change the sessionsettings (<strong>for</strong> example), you only needto edit this one file.3. Check <strong>for</strong> a $page_title variable <strong>and</strong>close the <strong>PHP</strong> section:if (!isset($page_title)) {$page_title = 'User➝ Registration';}?>As in the other times this book has useda template system, the page’s title—which appears at the top of the browserwindow—will be set on a page-by-pagebasis. This conditional checks if the$page_title variable has a value <strong>and</strong>,if it doesn’t, sets it to a default string.This is a nice, but optional, check toinclude in the header.continues on next pageusing output BufferingBy default, anything that a <strong>PHP</strong> script prints or any HTML outside of the <strong>PHP</strong> tags (even in includedfiles) is immediately sent to the <strong>Web</strong> browser. Output buffering (or output control, as the <strong>PHP</strong>manual calls it) is a <strong>PHP</strong> feature that overrides this behavior. Instead of immediately sending HTMLto the <strong>Web</strong> browser, that output will be placed in a buffer—temporary memory. Then, when thebuffer is flushed, it’s sent to the <strong>Web</strong> browser. There can be a per<strong>for</strong>mance improvement withoutput buffering, but the main benefit is that it eradicates those pesky headers already sent errormessages. Some functions—header( ), setcookie( ), <strong>and</strong> session_start( )—can only be calledif nothing has been sent to the <strong>Web</strong> browser. With output buffering, nothing will be sent to the <strong>Web</strong>browser until the end of the page, so you are free to call these functions at any point in a script.To begin output buffering, invoke the ob_start( ) function. Once you call it, the output from everyecho, print, <strong>and</strong> similar function call will be sent to a memory buffer rather than the <strong>Web</strong> browser.Conversely, HTTP calls (like header( ) <strong>and</strong> setcookie( )) will not be buffered <strong>and</strong> will operateas usual.At the conclusion of the script, call the ob_end_flush( ) function to send the accumulated bufferto the <strong>Web</strong> browser. Or, use the ob_end_clean( ) function to delete the buffered data withoutsending it. Both functions have the secondary effect of turning off output buffering.Example —User Registration 561
4. Create the HTML head:@import➝ "includes/layout.css";The <strong>PHP</strong> $page_title variable isprinted out between the title tagshere. Then, the CSS document isincluded. It will be called layout.css<strong>and</strong> stored in a folder called includes.You can find the CSS file in the downloadablecode found at the book’s supporting<strong>Web</strong> site (www.LarryUllman.com).5. Begin the HTML body:User➝ RegistrationThe body creates the banner acrossthe top of the page <strong>and</strong> then starts thecontent part of the <strong>Web</strong> page (up untilWelcome! in A).6. Save the file as header.html.Script 18.2 The footer file concludes the HTML,displaying links based upon the user status(logged in or not, administrator or not), <strong>and</strong>flushes the output to the <strong>Web</strong> browser.1 2 34 5 Home6 30 Some Pagecode continues on next page562 Chapter 18
Script 18.2 continued31 Another Page32 3334 35 36 paste code hereB The user will see these navigation linkswhile she or he is logged in.C A logged-in administrator will see extralinks (compare with B ) .To make footer.html:1. Begin a new document in your texteditor or IDE, to be named footer.html(Script 18.2):Home
4. Show the links <strong>for</strong> non-logged-in users<strong>and</strong> complete the <strong>PHP</strong> block:} else { // Not logged in.echo 'RegisterLoginRetrieve Password';}?>If the user isn’t logged in, they will seelinks to register, log in, <strong>and</strong> reset a<strong>for</strong>gotten password D.5. Complete the HTML:Some PageAnother PageTwo dummy links are included <strong>for</strong> otherpages you could add.6. Flush the buffer:The footer file will send the accumulatedbuffer to the <strong>Web</strong> browser,completing the output buffering begunin the header script (again, see thesidebar).D The user will see these links if she or heis not logged in.564 Chapter 18
7. Save the file as footer.html <strong>and</strong>place it, along with header.html <strong>and</strong>layout.css (from the book’s supporting<strong>Web</strong> site), in your <strong>Web</strong> directory, puttingall three in an includes folder E.If this site has any page that does notmake use of the header file but does needto work with sessions, that script must callsession_start( ) on its own. If you fail todo so, that page won’t be able to access thesession data.In more recent versions of <strong>PHP</strong>, outputbuffering is enabled by default. The buffersize—the maximum number of bytes stored inmemory—is 4,096, but this can be changedin <strong>PHP</strong>’s configuration file.The ob_get_contents( ) function willreturn the current buffer so that it may beassigned to a variable, should the need arise.The ob_flush( ) function will send thecurrent contents of the buffer to the <strong>Web</strong>browser <strong>and</strong> then discard them, allowing anew buffer to be started. This function allowsyour scripts to maintain more moderate buffersizes. Conversely, ob_end_flush( ) turns offoutput buffering after sending the buffer tothe <strong>Web</strong> browser.The ob_clean( ) function deletes thecurrent contents of the buffer without stoppingthe buffer process.<strong>PHP</strong> will automatically run ob_end_flush( ) at the conclusion of a script if itis not otherwise done.E The directory structure of the site on the <strong>Web</strong> server, assuming htdocs is the documentroot (where www.example.com points).Example —User Registration 565
Writing theConfiguration ScriptsThis <strong>Web</strong> site will make use of twoconfiguration-type scripts. One, config.inc.php, will really be the most importantscript in the entire application. It willnnnnnHave comments about the siteas a wholeDefine constantsEstablish site settingsDictate how errors are h<strong>and</strong>ledDefine any necessary functionsBecause it does all this, the configurationscript will be included by every other pagein the application.The second configuration-type script,mysqli_connect.php, will store all of thedatabase-related in<strong>for</strong>mation. It will beincluded only by those pages that need tointeract with the database.Making a configuration fileThe configuration file is going to servemany important purposes. It’ll be like across between the site’s owner’s manual<strong>and</strong> its preferences file. The first purposeof this file will be to document the siteoverall: who created it, when, why, <strong>for</strong>whom, etc., etc. The version in the bookwill omit all that, but you should put it inyour script. The second role will be todefine all sorts of constants <strong>and</strong> settingsthat the various pages will use.Third, the configuration file will establishthe error-management policy <strong>for</strong> thesite. The technique involved—creatingyour own error-h<strong>and</strong>ling function—wascovered in Chapter 8, “Error H<strong>and</strong>ling <strong>and</strong>Debugging.” As in that chapter, duringthe development stages, every error willbe reported in the most detailed way A.A During the development stages of the <strong>Web</strong> site, all errors should be asobvious <strong>and</strong> as in<strong>for</strong>mative as possible.566 Chapter 18
B If errors occur when the site is live, the user willonly see a message like this (but a detailed errormessage will be emailed to the administrator).Script 18.3 This configuration script dictates howerrors are h<strong>and</strong>led, defines site-wide settings <strong>and</strong>constants, <strong>and</strong> could (but doesn’t) declare anynecessary functions.1
3. Establish two constants <strong>for</strong> site-widesettings:define ('BASE_URL', 'http://www.➝ example.com/');define ('MYSQL', '/path/to/mysqli_➝ connect.php');These two constants are defined justto make it easier to do certain thingsin the other scripts. The first, BASE_URL,refers to the root domain (http://www.example.com/), with an ending slash.If developing on your own computer,this might be http://localhost/ or http://localhost/ch18/. When a script redirectsthe browser, the code can simply besomething likeheader('Location: ' . BASE_URL .➝'page.php');The second constant, MYSQL, is anabsolute path to the <strong>MySQL</strong> connectionscript (to be written next). By setting thisas an absolute path, any file can includethe connection script by referring to thisconstant:require (MYSQL);Change both of these values to correspondto your environment. When usingXAMPP on Windows, <strong>for</strong> example, theproper value <strong>for</strong> the MYSQL constant maybe C:\\xampp\mysqli_connect.php.If you move the site from one server ordomain to another, just change thesetwo constants <strong>and</strong> the application willstill work.Script 18.3 continued313233 // ****************************************** //34 // ************ ERROR MANAGEMENT************ //3536 // Create the error h<strong>and</strong>ler:37 function my_error_h<strong>and</strong>ler ($e_number,$e_message, $e_file, $e_line, $e_vars) {3839 // Build the error message:40 $message = "An error occurred inscript '$e_file' on line $e_line:$e_message\n";4142 // Add the date <strong>and</strong> time:43 $message .= "Date/Time: " . date('nj-YH:i:s') . "\n";4445 if (!LIVE) { // Development (print theerror).4647 // Show the error message:48 echo '' .nl2br($message);4950 // Add the variables <strong>and</strong> abacktrace:51 echo '' . print_r ($e_vars, 1). "\n";52 debug_print_backtrace( );53 echo '';5455 } else { // Don't show the error:5657 // Send an email to the admin:58 $body = $message . "\n" . print_r($e_vars, 1);59 mail(EMAIL, 'Site Error!', $body,'From: email@example.com');6061 // Only print an error message ifthe error isn't a notice:62 if ($e_number != E_NOTICE) {63 echo 'Asystem error occurred.We apologize <strong>for</strong> theinconvenience.';code continues on next page568 Chapter 18
Script 18.3 continued64 }65 } // End of !LIVE IF.6667 } // End of my_error_h<strong>and</strong>ler( )definition.6869 // Use my error h<strong>and</strong>ler:70 set_error_h<strong>and</strong>ler ('my_error_h<strong>and</strong>ler');7172 // ************ ERROR MANAGEMENT************ //73 // ****************************************** //4. Establish any other site-wide settings:date_default_timezone_set ('US/➝ Eastern');As mentioned in Chapter 11, “<strong>Web</strong>Application Development,” any useof a <strong>PHP</strong> date or time function (as of<strong>PHP</strong> 5.1) requires that the time zone beset. Change this value to match yourtime zone (see the <strong>PHP</strong> manual <strong>for</strong> thelist of zones).5. Begin defining the error-h<strong>and</strong>lingfunction:function my_error_h<strong>and</strong>ler ($e_➝ number, $e_message, $e_file,➝ $e_line, $e_vars) {$message = "An error occurred➝ in script '$e_file' on line➝ $e_line: $e_message\n";The function definition will be verysimilar to the one explained inChapter 8. The function expects toreceive five arguments: the errornumber, the error message, the scriptin which the error occurred, the linenumber on which <strong>PHP</strong> thinks the erroroccurred, <strong>and</strong> an array of variables thatexisted at the time of the error. Then thefunction begins defining the $messagevariable, starting with the in<strong>for</strong>mationprovided to this function.6. Add the current date <strong>and</strong> time:$message .= "Date/Time: " .➝ date('n-j-Y H:i:s') . "\n";To make the error reporting moreuseful, it will include the current date<strong>and</strong> time in the message. A newlinecharacter terminates the string to makethe resulting display more legible.continues on next pageExample —User Registration 569
7. If the site is not live, show the errormessage in detail:if (!LIVE) {echo '' .➝ nl2br($message);echo '' . print_r➝ ($e_vars, 1) . "\n";debug_print_backtrace( );echo '';As mentioned earlier, if the site isn’tlive, the entire error message is printed,<strong>for</strong> any type of error. The message isplaced within ,which will <strong>for</strong>mat the message per therules defined in the site’s CSS file. Thefirst part of the error message is thestring already defined, with the addedtouch of converting newlines to HTMLbreak tags. Then, within pre<strong>for</strong>mattedtags, all of the variables that exist at thetime of the error are shown, along witha backtrace (a history of function calls<strong>and</strong> such). See Chapter 8 <strong>for</strong> more ofan explanation on any of this.8. If the site is live, email the details tothe administrator <strong>and</strong> print a genericmessage <strong>for</strong> the visitor:} else { // Don't show the error:$body = $message . "\n" .➝ print_r ($e_vars, 1);mail(EMAIL, 'Site Error!', $body,➝'From: email@example.com');if ($e_number != E_NOTICE) {echo 'A➝ system error occurred. We➝ apologize <strong>for</strong> the➝ inconvenience.';}} // End of !LIVE IF.If the site is live, the detailed messageshould be sent in an email <strong>and</strong> the<strong>Web</strong> user should only see a genericmessage. To take this one step further,the generic message will not beprinted if the error is of a specific type:E_NOTICE. Such errors occur <strong>for</strong> thingslike referring to a variable that doesnot exist, which may or may not be aproblem. To avoid potentially inundatingthe user with error messages, only printthe error message if $e_number is notequal to E_NOTICE, which is a constantdefined in <strong>PHP</strong> (see the <strong>PHP</strong> manual).9. Complete the function definition <strong>and</strong> tell<strong>PHP</strong> to use your error h<strong>and</strong>ler:}set_error_h<strong>and</strong>ler➝ ('my_error_h<strong>and</strong>ler');You have to use the set_error_h<strong>and</strong>ler( ) function to tell <strong>PHP</strong> touse your own function <strong>for</strong> errors.10. Save the file as config.inc.php, <strong>and</strong>place it in your <strong>Web</strong> directory, withinthe includes folder.Note that in keeping with many otherexamples in this book, as this scriptwill be included by other <strong>PHP</strong> scripts,it omits the terminating <strong>PHP</strong> tag.Making the database scriptThe second configuration-type script willbe mysqli_connect.php, the databaseconnection file used multiple times in thebook already. Its purpose is to connect to<strong>MySQL</strong>, select the database, <strong>and</strong> establishthe character set in use. If a problemoccurs, this script will make use of theerror-h<strong>and</strong>ling tools established in config.inc.php. To do so, this script will call thetrigger_error( ) function when appropriate.The trigger_error( ) function letsyou tell <strong>PHP</strong> that an error occurred. Ofcourse <strong>PHP</strong> will h<strong>and</strong>le that error using themy_error_h<strong>and</strong>ler( ) function, as establishedin the configuration script.570 Chapter 18
Script 18.4 This script connects to the ch18database. If it can’t, then the error h<strong>and</strong>ler will betriggered, passing it the <strong>MySQL</strong> connection error.1
If the script could not connect to thedatabase, the error message shouldbe sent to the my_error_h<strong>and</strong>ler( )function. By doing so, the error willbe h<strong>and</strong>led according to the currentlyset management technique (livestage versus development). Instead ofcalling my_error_h<strong>and</strong>ler( ) directly,use trigger_error( ), whose firstargument is the error message C.5. Establish the encoding:} else {mysqli_set_charset($dbc, 'utf8');}If a database connection could be made,the encoding used to communicate withthe database is then established. SeeChapter 9, “Using <strong>PHP</strong> with <strong>MySQL</strong>,”<strong>for</strong> details.6. Save the file as mysqli_connect.php,<strong>and</strong> place it in the directory above the<strong>Web</strong> document root.This script, as an includable file, alsoomits the terminating <strong>PHP</strong> tag. As withother examples in this book, ideallythe file should not be within the <strong>Web</strong>directory, but wherever you put it, makesure the value of the MYSQL constant(in config.inc.php) matches.7. Create the database D.See the sidebar “Database Scheme”<strong>for</strong> a discussion of the database <strong>and</strong>the comm<strong>and</strong> required to make theone table. If you cannot create yourown database, just add the table towhatever database you have accessto. Also make sure that you edit themysqli_connect.php file so that ituses the proper username/password/hostname combination to connect tothis database.C A database connection error occurring during the development of the site.572 Chapter 18
On the one h<strong>and</strong>, it might make sense toplace the contents of both configuration files inone script <strong>for</strong> ease of reference. Un<strong>for</strong>tunately,doing so would add unnecessary overhead(namely, connecting to <strong>and</strong> selecting the database)to scripts that don’t require a databaseconnection (e.g., index.php).D Creating the database <strong>for</strong> this chapter.In general, define common functions inthe configuration file or a separate functionsfile. One exception would be any function thatrequires a database connection. If you knowthat a function will only be used on pages thatalso connect to <strong>MySQL</strong>, then defining thatfunction within the mysqli_connect.phpscript is only logical.Database SchemeThe database being used by this application is called ch18. The database currently consists of onlyone table, users. To create the table, use this SQL comm<strong>and</strong>:CREATE TABLE users (user_id INT UNSIGNED NOT NULL AUTO_INCREMENT,first_name VARCHAR(20) NOT NULL,last_name VARCHAR(40) NOT NULL,email VARCHAR(60) NOT NULL,pass CHAR(40) NOT NULL,user_level TINYINT(1) UNSIGNED NOT NULL DEFAULT 0,active CHAR(32),registration_date DATETIME NOT NULL,PRIMARY KEY (user_id),UNIQUE KEY (email),INDEX login (email, pass));Most of the table’s structure should be familiar to you by now; it’s quite similar to the users tablein the sitename database, used in several examples in this book. One new addition is the activecolumn, which will indicate whether a user has activated their account (by clicking a link in theregistration email) or not. This column will either store the 32-character-long activation code orhave a NULL value. Because the active column may have a NULL value, it cannot be defined as NOTNULL. If you do define active as NOT NULL, no one will ever be able to log in (you’ll see why later inthe chapter). The other new addition is the user_level column, which will differentiate the kinds ofusers the site has.A unique index is placed on the email field, <strong>and</strong> another index is placed on the combination of theemail <strong>and</strong> pass fields. These two fields will be used together during the login query, so indexingthem as one, creating an index called login, makes sense.Example —User Registration 573
Creating theHome pageThe home page <strong>for</strong> the site, called index.php, will be a model <strong>for</strong> the other pageson the public side. It will require theconfiguration file (<strong>for</strong> error management)<strong>and</strong> the header <strong>and</strong> footer files to createthe HTML design. This page will alsowelcome the user by name, assumingthe user is logged in A.To write index.php:1. Begin a new <strong>PHP</strong> document in your texteditor or IDE, to be named index.php(Script 18.5):18 Spam spam spam spam spam spam19 spam spam spam spam spam spam20 spam spam spam spam spam spam21 spam spam spam spam spam spam.22 Spam spam spam spam spam spam23 spam spam spam spam spam spam24 spam spam spam spam spam spam25 spam spam spam spam spam spam.2627 574 Chapter 18
A If the user is logged in, the index page willgreet them by name.B If the user is not logged in, this is the homepage they will see.3. Greet the user <strong>and</strong> complete the<strong>PHP</strong> code:echo 'Welcome';if (isset($_SESSION['first_name'])){echo ",{$_SESSION['first_name']}";}echo '!';?>The Welcome message will be printedto all users. If a $_SESSION['first_name'] variable is set, the user’s firstname will also be printed. So the endresult will be either just Welcome! Bor Welcome, ! A.4. Create the content <strong>for</strong> the page:Spam spam…You might want to consider puttingsomething more useful on the homepage of a real site. Just a suggestion….5. Include the HTML footer:The footer file will complete the HTMLlayout (primarily the menu bar on theright side of the page) <strong>and</strong> concludethe output buffering.6. Save the file as index.php, place itin your <strong>Web</strong> directory, <strong>and</strong> test it ina <strong>Web</strong> browser.Example —User Registration 575
RegistrationThe registration script was first startedin Chapter 9. It has since been improvedupon in many ways. This version ofregister.php will do the following:nnnnnnBoth display <strong>and</strong> h<strong>and</strong>le the <strong>for</strong>mValidate the submitted data usingregular expressions <strong>and</strong> the FilterextensionRedisplay the <strong>for</strong>m with the valuesremembered if a problem occurs(the <strong>for</strong>m will be sticky)Process the submitted data usingthe mysqli_real_escape_string( )function <strong>for</strong> securityEnsure a unique email addressSend an email containing an activationlink (users will have to activate theiraccount prior to logging in—see the“Activation Process” sidebar)To write register.php:1. Begin a new <strong>PHP</strong> document in your texteditor or IDE, to be named register.php (Script 18.6):
Script 18.6 continued37 }3839 // Check <strong>for</strong> a password <strong>and</strong> match against the confirmed password:40 if (preg_match ('/^\w{4,20}$/', $trimmed['password1']) ) {41 if ($trimmed['password1'] = = $trimmed['password2']) {42 $p = mysqli_real_escape_string ($dbc, $trimmed['password1']);43 } else {44 echo 'Your password did not match the confirmed password!';45 }46 } else {47 echo 'Please enter a valid password!';48 }4950 if ($fn && $ln && $e && $p) { // If everything's OK...5152 // Make sure the email address is available:53 $q = "SELECT user_id FROM users WHERE email='$e'";54 $r = mysqli_query ($dbc, $q) or trigger_error("Query: $q\n<strong>MySQL</strong> Error: " .mysqli_error($dbc));5556 if (mysqli_num_rows($r) = = 0) { // Available.5758 // Create the activation code:59 $a = md5(uniqid(r<strong>and</strong>( ), true));6061 // Add the user to the database:62 $q = "INSERT INTO users (email, pass, first_name, last_name, active, registration_date) VALUES ('$e', SHA1('$p'), '$fn', '$ln', '$a', NOW( ) )";63 $r = mysqli_query ($dbc, $q) or trigger_error("Query: $q\n<strong>MySQL</strong> Error: " .mysqli_error($dbc));6465 if (mysqli_affected_rows($dbc) = = 1) { // If it ran OK.6667 // Send the email:68 $body = "Thank you <strong>for</strong> registering at . To activate your account,please click on this link:\n\n";69 $body .= BASE_URL . 'activate.php?x=' . urlencode($e) . "&y=$a";70 mail($trimmed['email'], 'Registration Confirmation', $body, 'From: admin@sitename.com');7172 // Finish the page:73 echo 'Thank you <strong>for</strong> registering! A confirmation email has been sent toyour address. Please click on the link in that email in order to activate youraccount.';74 include ('includes/footer.html'); // Include the HTML footer.75 exit( ); // Stop the page.7677 } else { // If it did not run OK.code continues on next pageExample —User Registration 577
Script 18.6 continued78 echo 'You could not be registered due to a system error. Weapologize <strong>for</strong> any inconvenience.';79 }8081 } else { // The email address is not available.82 echo 'That email address has already been registered. If you have<strong>for</strong>gotten your password, use the link at right to have your password sent to you.';83 }8485 } else { // If one of the data tests failed.86 echo 'Please try again.';87 }8889 mysqli_close($dbc);9091 } // End of the main Submit conditional.92 ?>9394 Register95 96 9798 First Name:
3. Create the conditional that checks <strong>for</strong>the <strong>for</strong>m submission <strong>and</strong> then includethe database connection script:if ($_SERVER['REQUEST_METHOD'] = =➝'POST') {require (MYSQL);As the full path to the mysqli_connect.php script is defined as a constant inthe configuration file, the constant canbe used as the argument to require( ).The benefit to this approach is that anyfile stored anywhere in the site, evenwithin a subdirectory, can use this samecode to successfully include theconnection script.4. Trim the incoming data <strong>and</strong> establishsome flag variables:$trimmed = array_map('trim',➝ $_POST);$fn = $ln = $e = $p = FALSE;The first line runs every element in$_POST through the trim( ) function,assigning the returned result to thenew $trimmed array. The explanation<strong>for</strong> this line can be found in Chapter 13,“Security Methods,” when array_map( )was used with data to be sent in anemail. In short, the trim( ) function willbe applied to every value in $_POST,saving the hassle of applying trim( )to each individually.The second line initializes four variablesas FALSE. This one line is just a shortcutin lieu of$fn = FALSE;$ln = FALSE;$e = FALSE;$p = FALSE;5. Validate the first <strong>and</strong> last names:if (preg_match ('/^[A-Z \'.-]{2,20}➝ $/i', $trimmed['first_name'])) {$fn = mysqli_real_escape_string➝ ($dbc, $trimmed['first_name']);} else {echo 'Please➝ enter your first name!';}if (preg_match ('/^[A-Z \'.-]➝ {2,40}$/i', $trimmed['last_➝ name'])) {$ln = mysqli_real_escape_string➝ ($dbc, $trimmed['last_name']);} else {echo 'Please➝ enter your last name!';}Much of the <strong>for</strong>m will be validatedusing regular expressions, covered inChapter 14, “Perl-Compatible RegularExpressions.” For the first name value,the assumption is that it will containonly letters, a period (as in an initial),an apostrophe, a space, <strong>and</strong> the dash.Further, the value should be withinthe range of 2 to 20 characters long.To guarantee that the value containsonly these characters, the caret <strong>and</strong>the dollar sign are used to match boththe beginning <strong>and</strong> end of the string.While using Perl-Compatible RegularExpressions, the entire pattern must beplaced within delimiters (the <strong>for</strong>wardslashes).continues on next pageExample —User Registration 579
If this condition is met, the $fn variableis assigned the value of the mysqli_real_escape_string( ) version of thesubmitted value; otherwise, $fn willstill be FALSE <strong>and</strong> an error messageis printed A.The same process is used to validatethe last name, although that regularexpression allows <strong>for</strong> a longer length.Both patterns are also case-insensitive,thanks to the i modifier.6. Validate the email address B:if (filter_var($trimmed['email'],➝ FILTER_VALIDATE_EMAIL)) {$e = mysqli_real_escape_string➝ ($dbc, $trimmed['email']);} else {echo 'Please➝ enter a valid email address!➝ ';}An email address can easily be validatedusing the Filter extension, discussed inChapter 13. If your version of <strong>PHP</strong> doesnot support the Filter extension, you’llneed to use a regular expression hereinstead (the pattern <strong>for</strong> an email addresswas described in Chapter 14).7. Validate the passwords:if (preg_match ('/^\w{4,20}$/',➝ $trimmed['password1']) ) {if ($trimmed['password1'] = =➝ $trimmed['password2']) {$p = mysqli_real_escape_➝ string ($dbc, $trimmed➝ ['password1']);} else {echo 'Your➝ password did not match the➝ confirmed password!';}A If the first name value does not pass the regularexpression test, an error message is printed.B The submitted email address must be of theproper <strong>for</strong>mat.C The passwords are checked <strong>for</strong> the proper<strong>for</strong>mat, length, <strong>and</strong>…580 Chapter 18
D …that the password value matches theconfirmed password value.E If a <strong>MySQL</strong> query error occurs, it should beeasier to debug thanks to this in<strong>for</strong>mative errormessage.} else {echo 'Please➝ enter a valid password!';}The password must be between 4 <strong>and</strong>20 characters long <strong>and</strong> contain onlyletters, numbers, <strong>and</strong> the underscore C.That exact combination is representedby \w in Perl-Compatible RegularExpressions. Furthermore, the firstpassword (password1) must match theconfirmed password (password2) D.8. If every test was passed, check <strong>for</strong> aunique email address:if ($fn && $ln && $e && $p) {$q = "SELECT user_id FROM users➝ WHERE email='$e'";$r = mysqli_query ($dbc, $q)➝ or trigger_error("Query: $q\n<strong>MySQL</strong> Error: " .➝ mysqli_error($dbc));If the <strong>for</strong>m passed every test, thisconditional will be TRUE. Then thescript must search the database tosee if the submitted email addressis currently being used, since thatcolumn’s value must be unique acrosseach record. As with the <strong>MySQL</strong>connection script, if a query doesn’t run,call the trigger_error( ) function toinvoke the self-defined error reportingfunction. The specific error messagewill include both the query being run<strong>and</strong> the <strong>MySQL</strong> error E, so that theproblem can easily be debugged.continues on next pageExample —User Registration 581
9. If the email address is unused, registerthe user:if (mysqli_num_rows($r) = = 0) {$a = md5(uniqid(r<strong>and</strong>( ), true));$q = "INSERT INTO users (email,➝ pass, first_name, last_name,➝ active, registration_date)➝ VALUES ('$e', SHA1('$p'), '$fn',➝'$ln', '$a', NOW( ) )";$r = mysqli_query ($dbc, $q)➝ or trigger_error("Query:➝ $q\n<strong>MySQL</strong> Error: " .➝ mysqli_error($dbc));The query itself is rather simple, but itdoes require the creation of a uniqueactivation code. Generating thatrequires the r<strong>and</strong>( ), uniqid( ), <strong>and</strong>md5( ) functions. Of these, uniqid( ) isthe most important; it creates a uniqueidentifier. It’s fed the r<strong>and</strong>( ) functionto help generate a more r<strong>and</strong>omvalue. Finally, the returned result ishashed using md5( ), which createsa string exactly 32 characters long (ahash is a mathematically calculatedrepresentation of a piece of data). Youdo not need to fully comprehend thesethree functions, just note that the resultwill be a unique 32-character string.As <strong>for</strong> the query itself, it should befamiliar enough to you. Most of thevalues come from variables in the<strong>PHP</strong> script, after applying trim( ) <strong>and</strong>mysqli_real_escape_string( ) tothem. The <strong>MySQL</strong> SHA1( ) functionis used to encrypt the password <strong>and</strong>NOW( ) is used to set the registrationdate as the current moment.Because the user_level columnhas a default value of 0 (i.e., not anadministrator), that column does nothave to be provided a value in thisquery. Presumably the site’s mainadministrator would edit a user’srecord to give him or her administrativepower after the user has registered.10. Send an email if the query worked:if (mysqli_affected_rows($dbc) = =➝ 1) {$body = "Thank you <strong>for</strong>➝ registering at . To activate your➝ account, please click on this➝ link:\n\n";$body .= BASE_URL . 'activate.➝ php?x=' . urlencode($e) .➝ "&y=$a";mail($trimmed['email'],➝'Registration Confirmation',➝ $body, 'From: admin@sitename.➝ com');With this registration process, theimportant thing is that the confirmationmail gets sent to the user, becausethey will not be able to log in untilafter they’ve activated their account.This email should contain a link to theactivation page, activate.php. The linkto that page starts with BASE_URL, whichis defined in config.inc.php. The linkalso passes two values along in theURL. The first, generically called x, willbe the user’s email address, encodedso that it’s safe to have in a URL. Thesecond, y, is the activation code.The URL, then, will be something likehttp://www.example.com/activate.php?x=email%40example.com&y=901e09ef25bf6e3ef95c93088450b008.582 Chapter 18
F The resulting page after a user has successfullyregistered.Activation processNew in this chapter is an activation process,where users have to click a link inan email to confirm their accounts, priorto being able to log in. Using a systemlike this prevents bogus registrationsfrom being usable. If an invalid emailaddress is entered, that account cannever be activated. And if someoneregistered another person’s address,hopefully the maligned person wouldnot activate this undesired account.From a programming perspective, thisprocess requires the creation of a uniqueactivation code <strong>for</strong> each registered user,to be stored in the users table. The codeis then sent in a confirmation email tothe user (as part of a link). When the userclicks the link, he or she will be takento a page on the site that activates theaccount (by removing that code fromtheir record). The end result is that noone can register <strong>and</strong> activate an accountwithout receiving the confirmation email(i.e., without having a valid email addressthat the registrant controls).11. Tell the user what to expect <strong>and</strong> completethe page:echo 'Thank you <strong>for</strong>➝ registering! A confirmation➝ email has been sent to your➝ address. Please click on the➝ link in that email in order to➝ activate your account.';include ('includes/footer.html');exit( );A thank-you message is printed outupon successful registration, alongwith the activation instructions F.Then the footer is included <strong>and</strong> thepage is terminated.12. Print errors if the query failed:} else { // If it did not run OK.echo 'You could➝ not be registered due to a➝ system error. We apologize➝ <strong>for</strong> any inconvenience.';}If the query failed <strong>for</strong> some reason,meaning that mysqli_affected_rows( ) did not return 1, an errormessage is printed to the browser.Because of the security methodsimplemented in this script, the liveversion of the site should neverhave a problem at this juncture.continues on next pageExample —User Registration 583
13. Complete the conditionals <strong>and</strong> the<strong>PHP</strong> code:} else {echo 'That➝ email address has already➝ been registered. If you➝ have <strong>for</strong>gotten your➝ password, use the link➝ at right to have your➝ password sent to you.➝ ';}} else {echo 'Please➝ try again.';}mysqli_close($dbc);}?>The first else is executed if a personattempts to register with an emailaddress that has already been used G.The second else applies when the submitteddata fails one of the validationroutines (see A through D).G If an email address has already beenregistered, the user is told as much.H The registration <strong>for</strong>m as it looks when the user first arrives.584 Chapter 18
14. Begin the HTML <strong>for</strong>m H:RegisterFirst Name:
Activating an AccountAs described in the “Activation Process”sidebar earlier in the chapter, each userwill have to activate her or his account priorto being able to log in. Upon successfullyregistering, the user will receive an emailcontaining a link to activate.php A. Thislink also passes two values to this page:the user’s registered email address <strong>and</strong>a unique activation code. To completethe registration process—to activate theaccount, the user will need to click thatlink, taking her or him to the activate.phpscript on the <strong>Web</strong> site.The activate.php script needs to firstconfirm that those two values werereceived in the URL. Then, if the receivedtwo values match those stored in thedatabase, the activation code will beremoved from the record, indicatingan active account.To create the activation page:1. Begin a new <strong>PHP</strong> script in your text editoror IDE, to be named activate.php(Script 18.7):
As already mentioned, when theuser clicks the link in the registrationconfirmation email, two values will bepassed to this page: the email address<strong>and</strong> the activation code. Both valuesmust be present <strong>and</strong> validated, be<strong>for</strong>eattempting to use them in a queryactivating the user’s account.The first step is to ensure that bothvalues are set. Since the isset( )function can simultaneously check <strong>for</strong>the presence of multiple variables, thefirst part of the validation condition isisset($_GET['x'], $_GET['y']).Second, $_GET['x'] must be in the <strong>for</strong>matof a valid email address. The samecode as in the registration script can beused <strong>for</strong> that purpose (either the Filterextension or a regular expression).Third, <strong>for</strong> y (the activation code), thelast clause in the conditional checksthat this string’s length (how manycharacters are in it) is exactly 32. TheScript 18.7 continued22 echo 'Your accountcould not be activated. Pleasere-check the link or contact thesystem administrator.';23 }2425 mysqli_close($dbc);2627 } else { // Redirect.2829 $url = BASE_URL . 'index.php'; //Define the URL.30 ob_end_clean( ); // Delete the buffer.31 header("Location: $url");32 exit( ); // Quit the script.3334 } // End of main IF-ELSE.3536 include ('includes/footer.html');37 ?>md5( ) function, which created theactivation code, always returns a string32 characters long.3. Attempt to activate the user’s account:require (MYSQL);$q = "UPDATE users SET active=NULL➝ WHERE (email='" . mysqli_real_➝ escape_string($dbc, $_GET['x'])➝ . "' AND active='" . mysqli_➝ real_escape_string($dbc, $_➝ GET['y']) . "') LIMIT 1";$r = mysqli_query ($dbc, $q)➝ or trigger_error("Query:➝ $q\n<strong>MySQL</strong> Error: " .➝ mysqli_error($dbc));If all three conditions (in Step 2) areTRUE, an UPDATE query is run. This queryremoves the activation code from theuser’s record by setting the activecolumn to NULL. Be<strong>for</strong>e using the valuesin the query, both are run throughmysqli_real_escape_string( ) <strong>for</strong>extra security.4. Report upon the success of the query:if (mysqli_affected_rows($dbc) = =➝ 1) {echo "Your account is now➝ active. You may now log in.";} else {echo 'Your➝ account could not be➝ activated. Please re-check➝ the link or contact the➝ system administrator.';}continues on next pageExample —User Registration 587
If one row was affected by the query,then the user’s account is now active<strong>and</strong> a message says as much B. If norows are affected, the user is notifiedof the problem C. This would mostlikely happen if someone tried tofake the x <strong>and</strong> y values or if there’s aproblem in following the link from theemail to the <strong>Web</strong> browser.5. Complete the main conditional:mysqli_close($dbc);} else { // Redirect.$url = BASE_URL . 'index.php';ob_end_clean( );header("Location: $url");exit( );} // End of main IF-ELSE.The else clause takes effect if $_GET['x'] <strong>and</strong> $_GET['y'] are not of theproper value <strong>and</strong> length. In such a case,the user is just redirected to the indexpage. The ob_end_clean( ) line heredeletes the buffer (whatever was tobe sent to the <strong>Web</strong> browser up to thispoint, stored in memory), as it won’tbe used.6. Complete the page:include ('includes/footer.html');?>7. Save the file as activate.php, placeit in your <strong>Web</strong> directory, <strong>and</strong> test it byclicking the link in the registration email.If you wanted to be a little more<strong>for</strong>giving, you could have this page print anerror message if the correct values are notreceived, rather than redirect them to theindex page (as if they were attempting tohack the site).I specifically use the vague x <strong>and</strong> y asthe names in the URL <strong>for</strong> security purposes.While someone may figure out that the oneis an email address <strong>and</strong> the other is a code,it’s sometimes best not to be explicit aboutsuch things.An alternative method, which I used inthe second edition of this book, was to placethe activation code <strong>and</strong> the user’s ID (fromthe database) in the link. That also works, butfrom a security perspective, it’s really best thatusers never see, or are even aware of, a userID that’s otherwise not meant to be public.B If the database could be updatedusing the provided email address <strong>and</strong>activation code, the user is notifiedthat their account is now active.C If an account is notactivated by the query, theuser is told of the problem.588 Chapter 18
Script 18.8 The login page will redirect the user tothe home page after registering the user ID, firstname, <strong>and</strong> access level in a session.1
3. Validate the submitted data:if (!empty($_POST['email'])) {$e = mysqli_real_escape_string➝ ($dbc, $_POST['email']);} else {$e = FALSE;echo 'You➝ <strong>for</strong>got to enter your email➝ address!';}if (!empty($_POST['pass'])) {$p = mysqli_real_escape_string➝ ($dbc, $_POST['pass']);} else {$p = FALSE;echo 'You <strong>for</strong>got➝ to enter your password!';}There are two ways of thinking aboutthe validation. On the one h<strong>and</strong>, youcould use regular expressions <strong>and</strong> theFilter extension, copying the same codefrom register.php, to validate thesevalues. On the other h<strong>and</strong>, the true testof the values will be whether the loginquery returns a record or not, so onecould arguably skip more stringent <strong>PHP</strong>validation. This script uses the latterthinking.If the user does not enter any valuesinto the <strong>for</strong>m, error messages will beprinted A.A The login <strong>for</strong>m checks only if values wereentered, without using regular expressions.Script 18.8 continued35 $_SESSION = mysqli_fetch_array($r, MYSQLI_ASSOC);36 mysqli_free_result($r);37 mysqli_close($dbc);3839 // Redirect the user:40 $url = BASE_URL . 'index.php';// Define the URL.41 ob_end_clean( ); // Delete thebuffer.42 header("Location: $url");43 exit( ); // Quit the script.4445 } else { // No match was made.46 echo 'Eitherthe email address <strong>and</strong> passwordentered do not match thoseon file or you have not yetactivated your account.';47 }4849 } else { // If everything wasn't OK.50 echo 'Please tryagain.';51 }5253 mysqli_close($dbc);5455 } // End of SUBMIT conditional.56 ?>5758 Login59 Your browser must allow cookies inorder to log in.60 61 62 Email Address: 63 Password: 64 65 66 6768 590 Chapter 18
4. If both validation routines were passed,retrieve the user in<strong>for</strong>mation:if ($e && $p) {$q = "SELECT user_id, first_➝ name, user_level FROM users➝ WHERE (email='$e' AND pass=SHA1➝ ('$p')) AND active IS NULL";$r = mysqli_query ($dbc, $q)➝ or trigger_error("Query:➝ $q\n<strong>MySQL</strong> Error: " .➝ mysqli_error($dbc));The query will attempt to retrieve theuser ID, first name, <strong>and</strong> user level <strong>for</strong>the record whose email address <strong>and</strong>password match those submitted. The<strong>MySQL</strong> query uses the SHA1( ) functionon the pass column, as the password isencrypted using that function in duringthe registration process. The query alsochecks that the active column has aNULL value, meaning that the user hassuccessfully accessed the activate.php page.If you know an account has beenactivated but you still can’t log in usingthe proper values, it’s likely becauseyour active column was erroneouslydefined as NOT NULL.5. If a match was made in the database,log the user in:if (@mysqli_num_rows($r) = = 1) {$_SESSION = mysqli_fetch_array➝ ($r, MYSQLI_ASSOC);mysqli_free_result($r);mysqli_close($dbc);The login process consists of storingthe retrieved values in the session(which was already started in header.html) <strong>and</strong> then redirecting the user tothe home page. Because the query willreturn an array with three elements—one indexed at user_id, one atfirst_name, <strong>and</strong> the third at user_level,all three can be fetched right into $_SESSION, resulting in $_SESSION['user_id'], $_SESSION['first_name'], <strong>and</strong>$_SESSION['user_level']. If $_SESSIONhad other values in it already, youwould not want to take this shortcut, asyou’d wipe out those other elements.6. Redirect the user:$url = BASE_URL . 'index.php';➝ ob_end_clean( );header("Location: $url");exit( );The ob_end_clean( ) function willdelete the existing buffer (the outputbuffering is also begun in header.html),since it will not be used.7. Complete the conditionals <strong>and</strong> closethe database connection:} else {echo '➝ Either the email address➝ <strong>and</strong> password entered do➝ not match those on file➝ or you have not yet➝ activated your account.➝ ';}} else {echo 'Please➝ try again.';}mysqli_close($dbc);} // End of SUBMIT conditional.?>continues on next pageExample —User Registration 591
The error message B indicates that thelogin process could fail <strong>for</strong> two possiblereasons. One is that the submittedemail address <strong>and</strong> password do notmatch those on file. The other reason isthat the user has not yet activated theiraccount.8. Display the HTML login <strong>for</strong>m C:LoginYour browser must allow cookiesin order to log in.Email Address: Password: The login <strong>for</strong>m, like the registration<strong>for</strong>m, will submit the data back to itself.This one is not sticky, though, but youcould add that functionality.Notice that the page includes amessage in<strong>for</strong>ming the user thatcookies must be enabled to use thesite (if a user does not allow cookies,she or he will never get access to thelogged-in user pages).9. Include the HTML footer:10. Save the file as login.php, place it inyour <strong>Web</strong> directory, <strong>and</strong> test it in your<strong>Web</strong> browser D.B An error message is displayed if the loginquery does not return a single record.C The login <strong>for</strong>m.D Upon successfully logging in, the user willbe redirected to the home page, where theywill be greeted by name.E The results of successfully logging out.592 Chapter 18
To write logout.php:1. Begin a new <strong>PHP</strong> document in your texteditor or IDE, to be named logout.php(Script 18.9):2. Redirect the user if she or he is notlogged in:if (!isset($_SESSION['first_name']))➝ {$url = BASE_URL . 'index.php';ob_end_clean( );header("Location: $url");exit( );If the user is not currently logged in(determined by checking <strong>for</strong> a$_SESSION['first_name'] variable),the user will be redirected to the homepage (because there’s no point in tryingto log the user out).3. Log out the user if they are currentlylogged in:} else { // Log out the user.$_SESSION = array( );session_destroy( );setcookie (session_name( ), '',➝ time( )-3600);}To log the user out, the session valueswill be reset, the session data willbe destroyed on the server, <strong>and</strong> thesession cookie will be deleted. Theselines of code were first used <strong>and</strong>described in Chapter 12. The cookiename will be the value returned by thesession_name( ) function. If you decideto change the session name later, thiscode will still be accurate.4. Print a logged-out message <strong>and</strong> completethe <strong>PHP</strong> page:echo 'You are now loggedout.';include ('includes/footer.html');?>5. Save the file as logout.php, place it inyour <strong>Web</strong> directory, <strong>and</strong> test it in your<strong>Web</strong> browser E (on the previous page).Example —User Registration 593
passwordManagementThe final aspect of the public side of thissite is the management of passwords.There are two processes to consider:resetting a <strong>for</strong>gotten password <strong>and</strong>changing an existing one.Resetting a passwordIt inevitably happens that people <strong>for</strong>gettheir login passwords <strong>for</strong> <strong>Web</strong> sites, sohaving a contingency plan <strong>for</strong> theseoccasions is important. One option wouldbe to have the user email the administratorwhen this occurs, but administering a siteis difficult enough without that extra hassle.Instead, this site will have a script whosepurpose is to reset a <strong>for</strong>gotten password.Because the passwords stored in the databaseare encrypted using <strong>MySQL</strong>’s SHA1( )function, there’s no way to retrieve anunencrypted version (the database actuallystores a hashed version of the password,not an encrypted version). The alternativeis to create a new, r<strong>and</strong>om password <strong>and</strong>change the existing password to this value.Rather than just display the new passwordin the <strong>Web</strong> browser (that would be terriblyinsecure), the new password will beemailed to the address with which theuser registered.To write <strong>for</strong>got_password.php:1. Begin a new <strong>PHP</strong> document in yourtext editor or IDE, to be named<strong>for</strong>got_password.php (Script 18.10):
Script 18.10 The <strong>for</strong>got_password.php scriptallows users to reset their password withoutadministrative assistance.1
4. Retrieve the selected user ID:if (mysqli_num_rows($r) = = 1) {list($uid) = mysqli_fetch_array➝ ($r, MYSQLI_NUM);} else { // No database match made.echo 'The➝ submitted email address does➝ not match those on file!';}If the query returns one row, it’ll befetched <strong>and</strong> assigned to $uid (short<strong>for</strong> user ID). This value will be neededto update the database with the newpassword, <strong>and</strong> it’ll also be used as aflag variable.The list( ) function has not been<strong>for</strong>mally discussed in the book, but youmay have run across it. It’s a shortcutfunction that allows you to assign arrayelements to other variables. Sincemysqli_fetch_array( ) will alwaysreturn an array, even if it’s an array ofjust one element, using list( ) cansave having to write:$row = mysqli_fetch_array($r,MYSQLI_NUM);$uid = $row[0];If no matching record could be found<strong>for</strong> the submitted email address, anerror message is displayed A.5. Report upon no submitted emailaddress:} else { // No email!echo 'You➝ <strong>for</strong>got to enter your email➝ address!';} // End of empty($_POST['email'])➝ IF.If no email address was provided, that isalso reported B.Script 18.10 continued55 } else { // Failed the validationtest.56 echo 'Please tryagain.';57 }5859 mysqli_close($dbc);6061 } // End of the main Submit conditional.62 ?>6364 Reset Your Password65 Enter your email address below <strong>and</strong>your password will be reset.66 67 68 Email Address:
6. Create a new, r<strong>and</strong>om password:if ($uid) {$p = substr ( md5(uniqid(r<strong>and</strong>( ),➝ true)), 3, 10);Creating a new, r<strong>and</strong>om password willmake use of four <strong>PHP</strong> functions. Thefirst is uniqid( ), which will return aunique identifier. It is fed the argumentsr<strong>and</strong>( ) <strong>and</strong> true, which makes thereturned string more r<strong>and</strong>om. Thisreturned value is then sent throughthe md5( ) function, which calculatesthe MD5 hash of a string. At this stage,a hashed version of the unique ID isreturned, which ends up being a string32 characters long. This part of thecode is similar to that used to createthe activation code in activate.php(Script 18.7).From this string, the password iscreated by pulling out ten charactersstarting with the third one, usingthe substr( ) function. All in all, thiscode will return a very r<strong>and</strong>om <strong>and</strong>meaningless ten-character string(containing both letters <strong>and</strong> numbers)to be used as the temporary password.Note that the creation of a new, r<strong>and</strong>ompassword is only necessary if $uid hasa TRUE value by this point.7. Update the password in the database:$q = "UPDATE users SET➝ pass=SHA1('$p') WHERE user_➝ id=$uid LIMIT 1";$r = mysqli_query ($dbc, $q)➝ or trigger_error("Query: $q\n<strong>MySQL</strong> Error: " .➝ mysqli_error($dbc));if (mysqli_affected_rows($dbc) = =➝ 1) {Using the user ID (the primary key <strong>for</strong>the table) that was retrieved earlier,the password <strong>for</strong> this particular user isupdated to the SHA1( ) version of $p,the r<strong>and</strong>om password.8. Email the password to the user:$body = "Your password to log➝ into has been➝ temporarily changed to '$p'.➝ Please log in using this➝ password <strong>and</strong> this email address.➝ Then you may change your password➝ to something more familiar.";mail ($_POST['email'], 'Your➝ temporary password.', $body,➝'From: admin@sitename.com');Next, the user needs to be emailedthe new password so that she orhe may log in C. It’s safe to use$_POST['email'] in the mail( ) code,because to get to this point, $_POST['email'] must match an addressalready stored in the database. Thataddress would have already been validatedvia the Filter extension (or a regularexpression), in the registration script.continues on next pageC The email message receivedafter resetting a password.Example —User Registration 597
9. Complete the page:echo 'Your password has been➝ changed. You will receive the➝ new, temporary password at the➝ email address with which you➝ registered. Once you have logged➝ in with this password, you may➝ change it by clicking on the➝ "Change Password" link.';mysqli_close($dbc);include ('includes/footer.html');exit( );Next, a message is printed <strong>and</strong> thepage is completed so as not to showthe <strong>for</strong>m again D.10. Complete the conditionals <strong>and</strong> the<strong>PHP</strong> code:} else {echo 'Your➝ password could not be➝ changed due to a system➝ error. We apologize <strong>for</strong>➝ any inconvenience.';}} else {echo 'Please➝ try again.';}mysqli_close($dbc);} // End of the main Submit➝ conditional.?>The first else clause applies only ifthe UPDATE query did not work, whichhopefully shouldn’t happen on a livesite. The second else applies if the userdidn’t submit an email address or if thesubmitted email address didn’t matchany in the database.11. Make the HTML <strong>for</strong>m E:Reset Your PasswordEnter your email address➝ below <strong>and</strong> your password will➝ be reset.Email Address:
Script 18.11 With this page, users can change anexisting password (if they are logged in).1
2. Redirect the user if she or he is notlogged in:if (!isset($_SESSION['user_id'])) {$url = BASE_URL . 'index.php';ob_end_clean( );header("Location: $url");exit( );}The assumption is that this page is onlyto be accessed by logged-in users. Toen<strong>for</strong>ce this idea, the script checks <strong>for</strong>the existence of the $_SESSION['user_id'] variable (which would be requiredby the UPDATE query). If this variable isnot set, then the user will be redirected.3. Check if the <strong>for</strong>m has been submitted<strong>and</strong> include the <strong>MySQL</strong> connection:if ($_SERVER['REQUEST_METHOD'] = =➝'POST') {require (MYSQL);The key to underst<strong>and</strong>ing how thisscript per<strong>for</strong>ms is remembering thatthere are three possible scenarios:the user is not logged in (<strong>and</strong> there<strong>for</strong>eredirected), the user is logged in <strong>and</strong>viewing the <strong>for</strong>m, <strong>and</strong> the user islogged in <strong>and</strong> has submitted the <strong>for</strong>m.The user will only get to this point inthe script if she or he is logged in.Otherwise, the user would have beenredirected by now. So the script justneeds to determine if the <strong>for</strong>m hasbeen submitted or not.Script 18.11 continued36 $r = mysqli_query ($dbc, $q)or trigger_error("Query: $q\n<strong>MySQL</strong> Error: " .mysqli_error($dbc));37 if (mysqli_affected_rows($dbc) = =1) { // If it ran OK.3839 // Send an email, if desired.40 echo 'Your password hasbeen changed.';41 mysqli_close($dbc); // Closethe database connection.42 include ('includes/footer.html'); // Include the HTMLfooter.43 exit( );4445 } else { // If it did not run OK.4647 echo 'Yourpassword was not changed.Make sure your new passwordis different than the currentpassword. Contact the systemadministrator if you think anerror occurred.';4849 }5051 } else { // Failed the validationtest.52 echo 'Please tryagain.';53 }5455 mysqli_close($dbc); // Close thedatabase connection.5657 } // End of the main Submit conditional.58 ?>5960 Change Your Password61 62 code continues on next page600 Chapter 18
Script 18.11 continued63 New Password: Useonly letters, numbers, <strong>and</strong> theunderscore. Must be between 4 <strong>and</strong> 20characters long.64 Confirm New Password: 65 66 67 6869 F As in the registration process, the user’s newpassword must pass the validation routines;otherwise, they will see error messages.4. Validate the submitted password:$p = FALSE;if (preg_match ('/^(\w){4,20}$/',➝ $_POST['password1']) ) {if ($_POST['password1'] = = $_➝ POST['password2']) {$p = mysqli_real_escape_➝0string ($dbc,$_POST['password1']);} else {echo 'Your➝ password did not match the➝ confirmed password!';}} else {echo 'Please➝ enter a valid password!';}The new password should be validatedusing the same tests as those in theregistration process. Error messages willbe displayed if problems are found F.5. Update the password in the database:if ($p) {$q = "UPDATE users SET➝ pass=SHA1('$p') WHERE user_➝ id={$_SESSION['user_id']}➝ LIMIT 1";$r = mysqli_query ($dbc,➝ $q) or trigger_error("Query:➝ $q\n<strong>MySQL</strong> Error: " .mysqli_error($dbc));Using the user’s ID—stored in thesession when the user logged in—the password field can be updatedin the database. The LIMIT 1 clauseisn’t strictly necessary but adds extrainsurance.continues on next pageExample —User Registration 601
6. If the query worked, complete the page:if (mysqli_affected_rows($dbc) = =➝ 1) {echo 'Your password has been➝ changed.';mysqli_close($dbc);include ('includes/footer.html');➝ exit( );If the update worked, a confirmationmessage is printed to the <strong>Web</strong>browser G.7. Complete the conditionals <strong>and</strong> the<strong>PHP</strong> code:} else {echo 'Your➝ password was not changed.➝ Make sure your new➝ password is different➝ than the current➝ password. Contact the➝ system administrator if➝ you think an error➝ occurred.';}} else {echo 'Please➝ try again.';}mysqli_close($dbc);} // End of the main Submit➝ conditional.?>The first else clause applies if themysqli_affected_rows( ) function didnot return a value of 1. This could occur<strong>for</strong> two reasons. The first is that a queryor database error happened. Hopefully,that’s not likely on a live site, afteryou’ve already worked out all the bugs.The second reason is that the user triedto “change” their password but enteredthe same password again. In that case,G The script has successfully changed the user’spassword.Site AdministrationFor this application, how the siteadministration works depends uponwhat you want it to do. One additionalpage you would probably want <strong>for</strong> anadministrator would be a view_users.php script, like the one created inChapter 9 <strong>and</strong> modified in Chapter 10,“Common Programming Techniques.”It’s already listed in the administrator’slinks. You could use such a script to linkto an edit_user.php page, which wouldallow the administrator to manuallyactivate an account, declare that a useris an administrator, or change a person’spassword. An administrator could alsodelete a user using such a page.While the footer file creates links toadministrative pages only if the loggedinuser is an administrator, every administrationpage should also include sucha check.602 Chapter 18
the UPDATE query wouldn’t affect anyrows because the password column inthe database wouldn’t be changed. Amessage implying such is printed.8. Create the HTML <strong>for</strong>m H:Change Your PasswordNew Password: Use➝ only letters, numbers, <strong>and</strong>➝ the underscore. Must be➝ between 4 <strong>and</strong> 20 characters➝ long.Confirm New Password: This <strong>for</strong>m takes two inputs: the newpassword <strong>and</strong> a confirmation of it. Adescription of the proper <strong>for</strong>mat is givenas well. Because the <strong>for</strong>m is so simpleit’s not sticky, but that’s a feature youcould add.9. Complete the HTML page:10. Save the file as change_password.php,place it in your <strong>Web</strong> directory, <strong>and</strong> test itin your <strong>Web</strong> browser.Once this script has been completed,users can reset their password with theprevious script <strong>and</strong> then log in using thetemporary, r<strong>and</strong>om password. After loggingin, users can change their password back tosomething more memorable with this page.Because the site’s authentication doesnot rely upon the user’s password from pageto page (in other words, the password is notchecked on each subsequent page after loggingin), changing a password will not requirethe user to log back in.H The Change Your Password <strong>for</strong>m.Example —User Registration 603
Review <strong>and</strong> pursueIf you have any problems with thereview questions or the pursue prompts,turn to the book’s supporting <strong>for</strong>um(www.LarryUllman.com/<strong>for</strong>ums/).Note: Most of these questions <strong>and</strong> some ofthe prompts rehash in<strong>for</strong>mation covered inearlier chapters, in order to rein<strong>for</strong>ce someof the most important points.ReviewnnnnWhat is output buffering? What are thebenefits of using it?Why shouldn’t detailed error in<strong>for</strong>mationbe displayed on live sites?Why must the active column in theusers table allow <strong>for</strong> NULL values?What is the result if active is definedas NOT NULL?What are the three steps in terminatinga session?n What does the session_name( )function do?nWhat are the differences between trulyencrypting data <strong>and</strong> creating a hashrepresentation of some data?pursuennnnnnnnnnCheck out the <strong>PHP</strong> manual’s pages <strong>for</strong>output buffering (or output control).Check out the <strong>PHP</strong> manual’s pages<strong>for</strong> the r<strong>and</strong>( ), uniqid( ), <strong>and</strong> md5( )functions.Check out the <strong>PHP</strong> manual’s page <strong>for</strong>the trigger_error( ) function.Apply the same validation techniques tologin.php as used in register.php.Make the login <strong>for</strong>m sticky.Add a last_login DATETIME field to theusers table <strong>and</strong> update its value whena user logs in. Use this in<strong>for</strong>mation toindicate to the user how long it hasbeen since the last time she or heaccessed the site.If you’ve added the last_login field, useit to print a message on the home pageas to how many users have logged in inthe past, say, hour or day.Validate the submitted email address in<strong>for</strong>got_password.php using the Filterextension or a regular expression.Check out the <strong>PHP</strong> manual’s page <strong>for</strong>the list( ) function.Create view_users.php <strong>and</strong> edit_user.php scripts as recommendedin the final sidebar. Restrict access tothese scripts to administrators (thoseusers whose access level is 1).604 Chapter 18
19Example —E-CommerceIn this, the final chapter of the book, you’lldevelop one last <strong>Web</strong> application: ane-commerce site that sells prints of art.Un<strong>for</strong>tunately, to write <strong>and</strong> explain a completeapplication would require a book initself, <strong>and</strong> some aspects of e-commerce—like how you h<strong>and</strong>le the money—are particularto each individual site. With theselimitations in mind, the focus in this chapteris on the core e-commerce functionality:designing the database, populating a catalogas an administrator, displaying productsto the public, creating a shopping cart, <strong>and</strong>storing orders in a database.This example includes many conceptsthat have already been covered: using<strong>PHP</strong> with <strong>MySQL</strong> (of course), h<strong>and</strong>ling fileuploads, using <strong>PHP</strong> to send images to the<strong>Web</strong> browser, prepared statements, sessions,etc. This chapter also has one newtopic: how to per<strong>for</strong>m <strong>MySQL</strong> transactionsfrom a <strong>PHP</strong> script. Along the way you’llfind tons of suggestions <strong>for</strong> extendingthe project.in This ChapterCreating the Database 606The Administrative Side 612Creating the Public Template 629The Product Catalog 633The Shopping Cart 645Recording the Orders 654Review <strong>and</strong> Pursue 659
Creating the DatabaseThe e-commerce site in this example willuse the simply named ecommerce database.I’ll explain each table’s role prior tocreating the database in <strong>MySQL</strong>.With any type of e-commerce applicationthere are three kinds of data to be stored:the product in<strong>for</strong>mation (what is beingsold), the customer in<strong>for</strong>mation (whois making purchases), <strong>and</strong> the orderin<strong>for</strong>mation (what was purchased <strong>and</strong> bywhom). Going through the normalizationprocess (see Chapter 6, “DatabaseDesign”), I’ve come up with five tables A.The first two tables store all of the productsbeing sold. As already stated, the site willbe selling artistic prints. The artists table(Table 19.1) stores the in<strong>for</strong>mation <strong>for</strong> theartists whose work is being sold. This tablecontains just a minimum of in<strong>for</strong>mation (theartists’ first, middle, <strong>and</strong> last names), butyou could easily add the artists’ birth <strong>and</strong>death dates, other biographical data, <strong>and</strong>so <strong>for</strong>th. The prints table (Table 19.2) is themain products table <strong>for</strong> the site. It storesTABLe 19.1 The artists TableColumnartist_idfirst_namemiddle_namelast_nameTABLe 19.2 The prints TableColumnprint_idartist_idprint_namepricesizedescriptionimage_nameTypeINT UNSIGNED NOT NULLVARCHAR(20) DEFAULT NULLVARCHAR(20) DEFAULT NULLVARCHAR(40) NOT NULLTypeINT UNSIGNED NOT NULLINT UNSIGNED NOT NULLVARCHAR(60) NOT NULLDECIMAL(6,2) UNSIGNED NOTNULLVARCHAR(60) DEFAULT NULLVARCHAR(255) DEFAULT NULLVARCHAR(60) NOT NULLA This entity-relationship diagram (ERD) shows how the five tables in theecommerce database relate to one another.606 Chapter 19
TABLe 19.3 The customers TableColumncustomer_idemailpassTypeINT UNSIGNED NOT NULLVARCHAR(60) NOT NULLCHAR(40) NOT NULLTABLe 19.4 The orders TableColumnorder_idcustomer_idtotalorder_dateTypeINT UNSIGNED NOT NULLINT UNSIGNED NOT NULLDECIMAL(10,2) UNSIGNED NOTNULLTIMESTAMPTABLe 19.5 The order_contents TableColumnoc_idorder_idprint_idquantitypriceship_dateTypeINT UNSIGNED NOT NULLINT UNSIGNED NOT NULLINT UNSIGNED NOT NULLTINYINT UNSIGNED NOT NULLDEFAULT 1DECIMAL(6,2) UNSIGNED NOT NULLDATETIME DEFAULT NULLthe print names, prices, <strong>and</strong> other relevantdetails. It is linked to the artists table usingthe artist_id. The prints table is arguablythe most important, as it provides a uniqueidentifier <strong>for</strong> each product being sold. Thatconcept is key to any e-commerce site(without unique identifiers, how would youknow what a person bought?).The customers table (Table 19.3) doesexactly what you’d expect: it records thepersonal in<strong>for</strong>mation <strong>for</strong> each client. At theleast, it reflects the customer’s first name,last name, email address, password, <strong>and</strong>shipping address, as well as the date theyregistered. Presumably the combinationof the email address <strong>and</strong> password wouldallow the user to log in, shop, <strong>and</strong> accesstheir account. Since it’s fairly obviouswhat in<strong>for</strong>mation this table would store,I’ll define it with only the three essentialcolumns <strong>for</strong> now.The final two tables store all of the orderin<strong>for</strong>mation. There are any number ofways you could do this, but I’ve chosen tostore general order in<strong>for</strong>mation—the total,the date, <strong>and</strong> the customer’s ID—in anorders table (Table 19.4). This table couldalso have separate columns reflecting theshipping cost, the amount of sales tax,any discounts that applied, <strong>and</strong> so on. Theorder_contents table (Table 19.5) will storethe actual items that were sold, includingthe quantity <strong>and</strong> price. The order_contentstable is essentially a middleman, used tointercept the many-to-many relationshipbetween prints <strong>and</strong> orders (each print canbe in multiple orders, <strong>and</strong> each order canhave multiple prints).In order to be able to use transactions(in the final script), the two order tableswill use the InnoDB storage engine. Theothers will use MyISAM. See Chapter 6 <strong>for</strong>more in<strong>for</strong>mation on the available storageengines (i.e., table types).Example —E-Commerce 607
To create the database:1. Log in to the mysql client <strong>and</strong> createthe ecommerce database, if it doesn’talready exist.CREATE DATABASE ecommerce;USE ecommerce;For these steps, you can use eitherthe mysql client or another tool likephpMyAdmin. Depending uponyour situation, you may also need toestablish the character set at this point,in terms of the communications withthe database application. You can alsoestablish the default character set <strong>and</strong>encoding when creating the database(again, see Chapter 6).If you’re using a hosted site, the hostingcompany will likely provide a database<strong>for</strong> you already.2. Create the artists table B:CREATE TABLE artists (artist_id INT UNSIGNED NOT NULL➝ AUTO_INCREMENT,first_name VARCHAR(20) DEFAULT NULL,middle_name VARCHAR(20) DEFAULT➝ NULL,last_name VARCHAR(40) NOT NULL,PRIMARY KEY (artist_id),UNIQUE full_name (last_name,➝ first_name, middle_name)) ENGINE=MyISAM;This table stores just four piecesof in<strong>for</strong>mation <strong>for</strong> each artist. Ofthese, only last_name is required (isdefined as NOT NULL), as there areartists who go by a single name (e.g.,Christo). I’ve added definitions <strong>for</strong> theindexes as well. The primary key is theartist_id, <strong>and</strong> an index is placed onthe combination of the last name, firstname, <strong>and</strong> middle name, which may beused in an ORDER BY clause. This indexis more specifically a unique index,so that the same artist’s name is notentered multiple times.3. Create the prints table C:CREATE TABLE prints (print_id INT UNSIGNED NOT NULL➝ AUTO_INCREMENT,artist_id INT UNSIGNED NOT NULL,print_name VARCHAR(60) NOT NULL,price DECIMAL(6,2) UNSIGNED NOT➝ NULL,size VARCHAR(60) DEFAULT NULL,description VARCHAR(255) DEFAULT➝ NULL,image_name VARCHAR(60) NOT NULL,PRIMARY KEY (print_id),INDEX (artist_id),INDEX (print_name),INDEX (price)) ENGINE=MyISAM;B Making the first table.C Making the second table.608 Chapter 19
All of the columns in the prints tableare required except <strong>for</strong> the size <strong>and</strong>description. There are indexes on theartist_id, print_name, <strong>and</strong> price fields,each of which may be used in queries.Each print will be associated with oneimage. The image will be stored onthe server using the same name as theprint_id. When displaying the image inthe <strong>Web</strong> browser, its original name willbe used, so that needs to be stored inthis table.You could add to this table an in_stockor qty_on_h<strong>and</strong> field, to indicate theavailability of products.4. Create the customers table D:CREATE TABLE customers (customer_id INT UNSIGNED NOT NULL➝ AUTO_INCREMENT,email VARCHAR(60) NOT NULL,pass CHAR(40) NOT NULL,PRIMARY KEY (customer_id),UNIQUE (email),INDEX login (email, pass)) ENGINE=MyISAM;This is the code used to create thecustomers table. You could throw in theother appropriate fields (name, address,phone number, the registration date,etc.). As this chapter won’t be usingthose values—or user management atall—they are being omitted.5. Create the orders table E:CREATE TABLE orders (order_id INT UNSIGNED NOT NULL➝ AUTO_INCREMENT,customer_id INT UNSIGNED NOT NULL,total DECIMAL(10,2) UNSIGNED NOT➝ NULL,order_date TIMESTAMP,PRIMARY KEY (order_id),INDEX (customer_id),INDEX (order_date)) ENGINE=InnoDB;All of the orders fields are required,<strong>and</strong> three indexes have been created.Notice that a <strong>for</strong>eign key column here,like customer_id, is of the same exacttype as its corresponding primary key(customer_id in the customers table).The order_date field will store thedate <strong>and</strong> time an order was entered.Being defined as a TIMESTAMP, it willautomatically be given the currentvalue when a record is inserted (<strong>for</strong> thisreason it does not <strong>for</strong>mally need to bedeclared as NOT NULL).Finally, because transactions will beused with the orders <strong>and</strong> order_contents tables, both must use theInnoDB storage engine.continues on next pageD Creating a basic version of the customerstable. In a real e-commerce site, you’d need toexp<strong>and</strong> this table to store more in<strong>for</strong>mation.E Making the orders table.Example —E-Commerce 609
6. Create the order_contents table F:CREATE TABLE order_contents (oc_id INT UNSIGNED NOT NULL➝ AUTO_INCREMENT,order_id INT UNSIGNED NOT NULL,print_id INT UNSIGNED NOT NULL,quantity TINYINT UNSIGNED NOT NULL➝ DEFAULT 1,price DECIMAL(6,2) UNSIGNED NOT➝ NULL,ship_date DATETIME DEFAULT NULL,PRIMARY KEY (oc_id),INDEX (order_id),INDEX (print_id),INDEX (ship_date)) ENGINE=InnoDB;In order to have a normalized databasestructure, each order is separated into itsgeneral in<strong>for</strong>mation—the customer, theorder date, <strong>and</strong> the total amount—<strong>and</strong>its specific in<strong>for</strong>mation—the actual itemsordered <strong>and</strong> in what quantity. This tablehas <strong>for</strong>eign keys to the orders <strong>and</strong> printstables. The quantity has a set defaultvalue of 1. The ship_date is defined asa DATETIME, so that it can have a NULLvalue, indicating that the item has notyet shipped. Again, this table must usethe InnoDB storage engine in order tobe part of a transaction.You may be curious why this tablestores the price of an item when thatin<strong>for</strong>mation is already present in theprints table. The reason is simply this:the price of a product may change. Theprints table indicates the current priceof an item; the order_contents tableindicates the price at which an itemwas purchased.F Making the final table <strong>for</strong> the ecommercedatabase.610 Chapter 19
Depending upon what a site is selling,the underlying database would have differenttables in place of artists <strong>and</strong> prints. Themost important attribute of any e-commercedatabase is that there is a “products” tablethat lists the individual items being sold witha product ID associated with each. So a large,red polo shirt would have one ID, which isdifferent than a large, blue polo shirt’s ID,which is different than a medium, blue poloshirt’s ID. Without unique, individual productidentifiers, it would be impossible to trackorders <strong>and</strong> product quantities.If you wanted to store multiple addresses<strong>for</strong> users—home, billing, friends, etc.—create aseparate addresses table. In this table store allof that in<strong>for</strong>mation, including the address type,<strong>and</strong> link those records back to the customerstable using the customer ID as a primary<strong>for</strong>eignkey.SecurityWith respect to an e-commerce site, there are four broad security considerations. The first ishow the data is stored on the server. You need to protect the <strong>MySQL</strong> database itself (by settingappropriate access permissions) <strong>and</strong> the directory where session in<strong>for</strong>mation is stored (seeChapter 12, “Cookies <strong>and</strong> Sessions,” <strong>for</strong> what settings could be changed). With respect tothese issues, using a non-shared hosting would definitely improve the security of your site.The second security consideration has to do with protecting access to sensitive in<strong>for</strong>mation. Theadministrative side of the site, which would have the ability to view orders <strong>and</strong> customer records,must be safeguarded to the highest level. This means requiring authentication to access it, limitingwho knows the access in<strong>for</strong>mation, using a secure connection, <strong>and</strong> so <strong>for</strong>th.The third factor is protecting the data during transmission. By the time the customer gets to thecheckout process (where credit card <strong>and</strong> shipping in<strong>for</strong>mation comes in), secure transactionsmust be used. To do so entails establishing a Secure Sockets Layer (SSL) on your server with avalid certificate <strong>and</strong> then changing to an https:// URL. Also be aware of what in<strong>for</strong>mation is beingsent via email, since those messages are normally not transmitted through secure avenues.The fourth issue has to do with the h<strong>and</strong>ling of the payment in<strong>for</strong>mation. You really, really, really,really (really!) don’t want to keep this in<strong>for</strong>mation in any way. Ideally, let a third-party resourceh<strong>and</strong>le the payment <strong>and</strong> keep your site’s figurative h<strong>and</strong>s clean. I discuss this a little bit in a sidebartitled “The Checkout Process,” found at the end of the chapter.This broad topic of e-commerce, with lots of specific details <strong>and</strong> tons of real-world code, isthoroughly covered in my book Ef<strong>for</strong>tless E-Commerce with <strong>PHP</strong> <strong>and</strong> <strong>MySQL</strong> (New Riders, 2011).Example —E-Commerce 611
The Administrative SideThe administration side of an e-commerceapplication is primarily <strong>for</strong> the managementof the three main components:n Products (the items being sold)n Customersn OrdersIn this chapter, you’ll create two scripts<strong>for</strong> adding products to the catalog. As theproducts being sold are works of art, onescript will be <strong>for</strong> populating the artiststable <strong>and</strong> a second will be <strong>for</strong> populatingthe prints table (which has a <strong>for</strong>eign keyto artists).Due to space constraints, <strong>and</strong> the fact thatwithout a payment system, this will not bea complete e-commerce example anyway,the customers <strong>and</strong> orders aspects cannotbe detailed in this chapter. However,customer management is just the sameas user management, covered in theprevious chapter, <strong>and</strong> you’ll see manyrecommendations <strong>for</strong> administration ofthe orders.The first two scripts—<strong>and</strong> pretty muchevery script in this chapter—will requirea connection to the <strong>MySQL</strong> database.Instead of writing a new one from scratch,just copy mysqli_connect.php (Script 9.2)from Chapter 9, “Using <strong>PHP</strong> with <strong>MySQL</strong>,”to the appropriate directory <strong>for</strong> this site’sfiles. Then edit the in<strong>for</strong>mation so that itconnects to a database called ecommerce,using a username/password/hostnamecombination that has the proper privileges.Also, the two administration scripts willuse prepared statements, introduced inChapter 13, “Security Methods,” in orderto provide you with more experienceusing them. If you’re confused about theprepared statements syntax or functions,review that chapter.Adding ArtistsThe first script to be written simply addsartist records to the artists table. The scriptpresents a <strong>for</strong>m with three inputs A; uponsubmission, the inputs are validated—buttwo are optional—<strong>and</strong> the record is addedto the database.A The HTML <strong>for</strong>m <strong>for</strong> adding artists to thecatalog.612 Chapter 19
Script 19.1 This administration page adds newartist names to the database.1 3 4 5 6 Add an Artist7 8 9 Add an Artist
Script 19.1 continued34 } else { // Error!35 $error = 'The new artist could not be added to the database!';36 }3738 // Close this prepared statement:39 mysqli_stmt_close($stmt);40 mysqli_close($dbc); // Close the database connection.4142 } else { // No last name value.43 $error = 'Please enter the artist\'s name!';44 }4546 } // End of the submission IF.4748 // Check <strong>for</strong> an error <strong>and</strong> print it:49 if (isset($error)) {50 echo 'Error!51 ' . $error . ' Please try again.';52 }5354 // Display the <strong>for</strong>m...55 ?>56 Add a Print57 5859 Fill out the <strong>for</strong>m to add an artist:6061 First Name:
The artist’s first <strong>and</strong> middle names areoptional fields, whereas the last nameis not (since there are artists referredto by only one name). To validate thefirst two name inputs, I’ve reduced theamount of code by using the ternaryoperator (introduced in Chapter 10,“Common Programming Techniques”).The code here is the same asif (!empty($_POST['first_name'])) {$fn = trim($_POST['first_name']);} else {$fn = NULL;}Because this script will rely uponprepared statements, the values tobe used in the query don’t need to berun through mysqli_real_escape_string( ). See Chapter 13 <strong>for</strong> more onthis subject.4. Validate the artist’s last name:if (!empty($_POST['last_name'])) {$ln = trim($_POST['last_name']);The last name value is required. Formore stringent validation, you could useregular expressions. For added security,you could apply the strip_tags( )function.5. Include the database connection:require ('../../mysqli_connect.php');The administration folder will be locatedinside of the main (htdocs) folder <strong>and</strong>is there<strong>for</strong>e two directories above theconnection script. Keep your directorystructure B in mind when including files.continues on next pageB The site structure <strong>for</strong> this <strong>Web</strong> application. The <strong>MySQL</strong> connection script <strong>and</strong> theuploads directory (where images will be stored) are not within the <strong>Web</strong> directory(they aren’t available via http://).Example —E-Commerce 615
6. Add the artist to the database:$q = 'INSERT INTO artists (first_➝ name, middle_name, last_name)➝ VALUES (?, ?, ?)';$stmt = mysqli_prepare($dbc, $q);mysqli_stmt_bind_param($stmt,➝'sss', $fn, $mn, $ln);mysqli_stmt_execute($stmt);To add the artist to the database, thequery will be something like INSERTINTO artists (first_name, middle_name, last_name) VALUES ('John','Singer', 'Sargent') or INSERT INTOartists (first_name, middle_name,last_name) VALUES (NULL, NULL,'Christo'). The query is run usingprepared statements, covered inChapter 13.The mysqli_stmt_bind_param( ) functionindicates that the query needs threeinputs (one <strong>for</strong> each question mark) ofthe type: string, string, <strong>and</strong> string. Forquestions on any of this, see Chapter 13.7. Report on the results:if (mysqli_stmt_affected_➝ rows($stmt) = = 1) {echo 'The artist has been➝ added.';$_POST = array( );} else {$error = 'The new artist could➝ not be added to the database!';}If executing the prepared statementaffected one row, which is to say onerow was created, a positive messageis displayed C. In this case, the $_POSTarray is also reset, so that the sticky<strong>for</strong>m does not redisplay the artist’sin<strong>for</strong>mation.If the prepared statement failed, amessage is added to the $errorvariable, to be outputted later in thescript. For debugging purposes, youcould add other details here, such asthe <strong>MySQL</strong> error.8. Close the prepared statement <strong>and</strong> thedatabase connection:mysqli_stmt_close($stmt);mysqli_close($dbc);9. Complete the artist’s last name <strong>and</strong>submission conditionals:} else { // No last name value.$error = 'Please enter the➝ artist\'s name!';}} // End of the submission IF.If no last name value was submitted,then an error message is assigned tothe $error variable.C An artist has successfully beenadded to the database.616 Chapter 19
10. Print the error, if one occurred, <strong>and</strong>close the <strong>PHP</strong> block:if (isset($error)) {echo 'Error!' . $error . '➝ Please try again.';}?>Either of the two errors that could haveoccurred would be represented by the$error variable. If this variable is set, itcan be printed out at this point D. Theerror will be written within some CSS tomake it bold <strong>and</strong> red.11. Begin creating the HTML <strong>for</strong>m:Add a PrintFill out the➝ <strong>for</strong>m to add an artist:D If the artist’s last name is not provided,an error message is displayed.The <strong>for</strong>m is sticky, however, rememberingvalues entered into the other two<strong>for</strong>m inputs.12. Create the inputs <strong>for</strong> adding a new artist:First Name:
Although I did not do so here <strong>for</strong> thesake of brevity, I would recommend thatseparate <strong>MySQL</strong> users be created <strong>for</strong> theadministrative <strong>and</strong> the public sides. Theadmin user would need SELECT, INSERT,UPDATE, <strong>and</strong> DELETE privileges, while thepublic one would need only SELECT,INSERT <strong>and</strong> UPDATE.The administrative pages should beprotected in the most secure way possible.This could entail HTTP authentication usingApache, a login system using sessions orcookies, or even placing the admin pages onanother, possibly offline, server (so the sitecould be managed from just one location).Adding printsThe second script to be written is <strong>for</strong> addinga new product (specifically a print) to thedatabase. The page will allow the administratorto select the artist from the database,upload an image, <strong>and</strong> enter the details <strong>for</strong>the print E. The image will be stored on theserver <strong>and</strong> the print’s record inserted intothe database. This will be one of the morecomplicated scripts in this chapter, but all ofthe technology involved has already beencovered elsewhere in the book.To create add_print.php:1. Begin a new <strong>PHP</strong> document, startingwith the HTML head, to be namedadd_print.php (Script 19.2):continues on page 622E The HTML <strong>for</strong>m <strong>for</strong> adding prints to the catalog.Script 19.2 This administration page addsproducts to the database. It h<strong>and</strong>les a file upload<strong>and</strong> inserts the new print into the prints table.1 3 4 5 6 Add a Print7 8 9
Script 19.2 continued22 } else {23 $errors[ ] = 'Please enter the print\'s name!';24 }2526 // Check <strong>for</strong> an image:27 if (is_uploaded_file ($_FILES['image']['tmp_name'])) {2829 // Create a temporary file name:30 $temp = '../../uploads/' . md5($_FILES['image']['name']);3132 // Move the file over:33 if (move_uploaded_file($_FILES['image']['tmp_name'], $temp)) {3435 echo 'The file has been uploaded!';3637 // Set the $i variable to the image's name:38 $i = $_FILES['image']['name'];3940 } else { // Couldn't move the file over.41 $errors[ ] = 'The file could not be moved.';42 $temp = $_FILES['image']['tmp_name'];43 }4445 } else { // No uploaded file.46 $errors[ ] = 'No file was uploaded.';47 $temp = NULL;48 }4950 // Check <strong>for</strong> a size (not required):51 $s = (!empty($_POST['size'])) ? trim($_POST['size']) : NULL;5253 // Check <strong>for</strong> a price:54 if (is_numeric($_POST['price']) && ($_POST['price'] > 0)) {55 $p = (float) $_POST['price'];56 } else {57 $errors[ ] = 'Please enter the print\'s price!';58 }5960 // Check <strong>for</strong> a description (not required):61 $d = (!empty($_POST['description'])) ? trim($_POST['description']) : NULL;6263 // Validate the artist...64 if ( isset($_POST['artist']) && filter_var($_POST['artist'], FILTER_VALIDATE_INT, array('min_range' => 1)) ) {65 $a = $_POST['artist'];66 } else { // No artist selected.67 $errors[ ] = 'Please select the print\'s artist!';68 }6970 if (empty($errors)) { // If everything's OK.code continues on next pageExample —E-Commerce 619
Script 19.2 continued7172 // Add the print to the database:73 $q = 'INSERT INTO prints (artist_id, print_name, price, size, description, image_name)VALUES (?, ?, ?, ?, ?, ?)';74 $stmt = mysqli_prepare($dbc, $q);75 mysqli_stmt_bind_param($stmt, 'isdsss', $a, $pn, $p, $s, $d, $i);76 mysqli_stmt_execute($stmt);7778 // Check the results...79 if (mysqli_stmt_affected_rows($stmt) = = 1) {8081 // Print a message:82 echo 'The print has been added.';8384 // Rename the image:85 $id = mysqli_stmt_insert_id($stmt); // Get the print ID.86 rename ($temp, "../../uploads/$id");8788 // Clear $_POST:89 $_POST = array( );9091 } else { // Error!92 echo 'Your submission could not be processeddue to a system error.';93 }9495 mysqli_stmt_close($stmt);9697 } // End of $errors IF.9899 // Delete the uploaded file if it still exists:100 if ( isset($temp) && file_exists ($temp) && is_file($temp) ) {101 unlink ($temp);102 }103104 } // End of the submission IF.105106 // Check <strong>for</strong> any errors <strong>and</strong> print them:107 if ( !empty($errors) && is_array($errors) ) {108 echo 'Error!109 The following error(s) occurred:';110 <strong>for</strong>each ($errors as $msg) {111 echo " - $msg\n";112 }113 echo 'Please reselect the print image <strong>and</strong> try again.';114 }115116 // Display the <strong>for</strong>m...117 ?>118 Add a Printcode continues on next page620 Chapter 19
Script 19.2 continued119 120121 122123 Fill out the <strong>for</strong>m to add a print to the catalog:124125 Print Name:
Add a Print
5. Move the file to its more permanentdestination:if (move_uploaded_file($_➝ FILES['image']['tmp_name'],➝ $temp)) {echo 'The file has been➝ uploaded!';$i = $_FILES['image']['name'];At this point in the script, the printimage will have been moved to itspermanent location (the uploadsdirectory) but given a temporary name(to be renamed later). A message isprinted F indicating the success indoing so. Finally, the $i variable will beassigned the original name of the file(<strong>for</strong> use later on in the script).F The result if a file was selected <strong>for</strong> the print’simage <strong>and</strong> it was successfully uploaded.6. Complete the image-h<strong>and</strong>ling section:} else {$errors[ ] = 'The file could➝ not be moved.';$temp = $_FILES['image']➝ ['tmp_name'];}} else {$errors[ ] = 'No file was➝ uploaded.';$temp = NULL;}The first else clause applies if the filecould not be moved to the destinationdirectory. This should only happen ifthe path to that directory is not corrector if the proper permissions haven’tbeen set on the directory G. In eithercase, the $temp variable is assignedthe value of the original upload, whichis still residing in its temporary location.This is necessary, as unused files will beremoved later in the script.The second else clause applies if nofile was uploaded. As the purposeof this site is to sell prints, it’s ratherimportant to actually display what’sbeing sold. If you wanted, you couldadd to this error message more detailsor recommendations as to what type<strong>and</strong> size of file should be uploaded.continues on next pageG If the uploads directory is not writable by <strong>PHP</strong>,you’ll see errors like these.Example —E-Commerce 623
7. Validate the size, price, <strong>and</strong> descriptioninputs:$s = (!empty($_POST['size'])) ?➝ trim($_POST['size']) : NULL;if (is_numeric($_POST['price']) &&➝ ($_POST['price'] > 0)) {$p = (float) $_POST['price'];} else {$errors[ ] = 'Please enter the➝ print\'s price!';}$d = (!empty($_➝ POST['description'])) ? trim($_➝ POST['description']) : NULL;The size <strong>and</strong> description values areoptional, but the price is not. As abasic validity test, ensure that thesubmitted price is a number (it shouldbe a decimal) using the is_numeric( )function, <strong>and</strong> that the price is greaterthan 0 (it’d be bad to sell productsat negative prices). If the value isappropriate, it’s typecast as a floatingpointnumber just to be safe. An errormessage will be added to the array ifno price or an invalid price is entered.8. Validate the artist:if ( isset($_POST['artist']) &&➝ filter_var($_POST['artist'],➝ FILTER_VALIDATE_INT, array('min_➝ range' => 1)) ) {$a = $_POST['artist'];} else { // No artist selected.$errors[ ] = 'Please select the➝ print\'s artist!';}To enter the print’s artist, the administratorwill use a pull-down menu H. Theresult will be a $_POST['artist'] valuethat’s a positive integer. Rememberthat if you’re using an older version of<strong>PHP</strong>, that does not support the Filterextension, you’ll need to use the is_numeric( ) function, typecasting, <strong>and</strong>a conditional that checks <strong>for</strong> a valuegreater than 0 instead. See Chapter 13<strong>for</strong> details.9. Insert the record into the database:if (empty($errors)) {$q = 'INSERT INTO prints➝ (artist_id, print_name, price,➝ size, description, image_➝ name) VALUES (?, ?, ?, ?, ?,➝ ?)';$stmt = mysqli_prepare($dbc, $q);mysqli_stmt_bind_param($stmt,➝'isdsss', $a, $pn, $p, $s, $d,➝ $i);mysqli_stmt_execute($stmt);H The administrator can selectan existing artist using this dropdownmenu.624 Chapter 19
If the $errors array is still empty, thenall of the validation tests were passed<strong>and</strong> the print can be added. Usingprepared statements again, the queryis something like INSERT INTO prints(artist_id, print_name, price,size, description, image_name)VALUES (34, 'The Scream', 25.99,NULL, 'This classic…', 'scream.jpg').The mysqli_stmt_bind_param( )function indicates that the query needssix inputs (one <strong>for</strong> each question mark)of the type: integer, string, double (akafloat), string, string, <strong>and</strong> string. Forquestions on any of this, see Chapter 13.10. Confirm the results of the query:if (mysqli_stmt_affected_➝ rows($stmt) = = 1) {echo 'The print has been➝ added.';$id = mysqli_stmt_insert_➝ id($stmt);rename ($temp, "../../➝ uploads/$id");$_POST = array( );} else {echo 'Your➝ submission could not be➝ processed due to a system➝ error.';}If the query affected one row, then amessage of success is printed in the<strong>Web</strong> browser F. Next, the print ID hasto be retrieved so that the associatedimage can be renamed (it currentlyis in the uploads folder but under atemporary name), using the rename( )function. That function takes the file’scurrent name as its first argument <strong>and</strong>the file’s new name as its second.The value <strong>for</strong> the first argument waspreviously assigned to $temp. The value<strong>for</strong> the second argument is the path tothe uploads directory, plus the print’sID value, just determined. Note that thefile’s new name will not contain a fileextension. This may look strange whenviewing the actual files on the server,but is not a problem when the files—theimages—are served by the public sideof the site, as you’ll soon see.Finally, the $_POST array is cleared sothat its values are displayed in thesticky <strong>for</strong>m.If the query did not affect one row,there’s probably some <strong>MySQL</strong> errorhappening <strong>and</strong> you’ll need to applythe st<strong>and</strong>ard debugging techniquesto figure out why.11. Complete the conditionals:mysqli_stmt_close($stmt);} // End of $errors IF.if ( isset($temp) && file_exists➝ ($temp) && is_file($temp) ) {unlink ($temp);}} // End of the submission IF.The first closing brace terminates thecheck <strong>for</strong> $errors being empty. Inthis case, the file on the server shouldbe deleted because it hasn’t beenpermanently moved <strong>and</strong> renamed.continues on next pageExample —E-Commerce 625
12. Print any errors:if ( !empty($errors) && is_➝ array($errors) ) {echo 'Error!The following➝ error(s) occurred:';<strong>for</strong>each ($errors as $msg) {echo " - $msg\n";}echo 'Please reselect the print➝ image <strong>and</strong> try again.';}?>All of the errors that occurred wouldbe in the $errors array. These can beprinted using a <strong>for</strong>each loop I. Theerrors are printed within some CSS tomake them bold <strong>and</strong> red. Also, sincea sticky <strong>for</strong>m cannot recall a selectedfile, the user is reminded to reselectthe print image. (My book Ef<strong>for</strong>tlessE-Commerce with <strong>PHP</strong> <strong>and</strong> <strong>MySQL</strong>has an example script that does recalla previously uploaded file, but thecode is somewhat tricky.)13. Begin creating the HTML <strong>for</strong>m:Add a PrintFill out➝ the <strong>for</strong>m to add a print to➝ the catalog:Print Name:
In case the print’s name, size, ordescription uses potentiallyproblematic characters, each is runthrough htmlspecialchars( ), so asnot to mess up the value (e.g., theuse of quotation marks in the print’ssize <strong>and</strong> description in E).14. Begin the artist pull-down menu:Artist:Select OneThe artist pull-down menu will bedynamically generated from therecords stored in the artists tableusing this <strong>PHP</strong> code H.15. Retrieve every artist:
Description:➝ (optional)Particulars about each <strong>for</strong>m element,such as the description being optionalor that the price should not contain adollar sign E, help the administratorcomplete the <strong>for</strong>m correctly.17. Complete the HTML page:18. Save the file as add_print.php.19. Create the necessary directories onyour server, if you have not already.This administrative page will requirethe creation of two new directories.One, which I’ll call admin (see B),will house the administrative filesthemselves. On a real site, it’d bebetter to name your administrativedirectory something less obvious.The second, uploads, should be placedbelow the <strong>Web</strong> document directory <strong>and</strong>have its privileges changed so that <strong>PHP</strong>can move files into it. See Chapter 10<strong>for</strong> more in<strong>for</strong>mation on this.20. Place add_print.php in your <strong>Web</strong>directory (in the administration folder)<strong>and</strong> test it in your <strong>Web</strong> browser.628 Chapter 19
Script 19.3 The header file creates the initial HTML<strong>and</strong> begins the <strong>PHP</strong> session.1 7 8 9 10 11 12 13 14 15 16 17 18 19 20 21 22 23 Creating thepublic TemplateBe<strong>for</strong>e getting to the heart of the publicside, the requisite HTML header <strong>and</strong> footerfiles should be created. I’ll whip throughthese quickly, since the techniques involvedshould be familiar territory by this point inthe book.To make header.html:1. Begin a new <strong>PHP</strong> document in your texteditor or IDE, to be named header.html(Script 19.3):continues on next pageExample —E-Commerce 629
As with all the other versions of thisscript, the page’s title will be set as a<strong>PHP</strong> variable <strong>and</strong> printed out within thetitle tags. In case it’s not set be<strong>for</strong>ethis page is included, a default title isalso provided.4. Create the top row of the table:➝ This layout will use images to createthe links <strong>for</strong> the public pages A.5. Start the middle row:All of each individual page’s contentwill go in the middle row; the headerfile begins this row <strong>and</strong> the footer filewill close it.6. Save the file as header.html <strong>and</strong> placeit in your <strong>Web</strong> directory (create anincludes folder in which to store it).A The banner createdby the header file.630 Chapter 19
Script 19.5 A minimal script <strong>for</strong> the site’s homepage.1 89 Welcome to our site....please use thelinks above...blah, blah, blah.10 Welcome to our site....please use thelinks above...blah, blah, blah.1112 Script 19.4 The footer file closes the HTML,creating a copyright message in the process.1 2 3 4 5 ©➝ Copyright...6 7 8 9 To make footer.html:1. Create a new HTML document in yourtext editor or IDE, to be named footer.html (Script 19.4):2. Complete the middle row:This completes the table row begun inthe header file.3. Create the bottom row, complete thetable, <strong>and</strong> complete the HTML B:©➝ Copyright...4. Save the file as footer.html <strong>and</strong> placeit in your <strong>Web</strong> directory (also in theincludes folder).To make index.php:1. Begin a new <strong>PHP</strong> document in your texteditor or IDE, to be named index.php(Script 19.5).continues on next pageB The copyright row created by the footer file.Example —E-Commerce 631
2. Add the page’s content:Welcome to our site....please➝ use the links above...blah,➝ blah, blah.Welcome to our site....please➝ use the links above...blah,➝ blah, blah.Obviously a real e-commerce site wouldhave some actual content on the mainpage. For example, you could easilydisplay the most recently added printshere (see the second tip).3. Complete the HTML page:4. Save the file as index.php, place it inyour <strong>Web</strong> directory, <strong>and</strong> test it in your<strong>Web</strong> browser C.The images used in this example areavailable <strong>for</strong> download through the book’scompanion <strong>Web</strong> site (www.LarryUllman.com). You’ll find them among all of the filesin the complete set of downloadable scripts<strong>and</strong> SQL comm<strong>and</strong>s.You could easily show recently addeditems on the index page by adding a date_entered column to the prints table <strong>and</strong> thenretrieving a h<strong>and</strong>ful of products in descendingorder of date_entered.C The public home page <strong>for</strong> the e-commerce site.632 Chapter 19
A The current product listing, created bybrowse_prints.php.The product CatalogFor customers to be able to purchase products,they’ll need to view them first. To thisend, two scripts will present the productcatalog. The first, browse_prints.php, willdisplay a list of the available prints A. If aparticular artist has been selected, only thatartist’s work will be shown B; otherwise,every print will be listed.The second script, view_print.php, willbe used to display the in<strong>for</strong>mation <strong>for</strong> asingle print, including the image C. On thispage customers will find an Add to Cartlink, so that the print may be added to theshopping cart. Because the print’s imageis stored outside of the <strong>Web</strong> root directory,view_print.php will use a separatescript—nearly identical to show_image.php from Chapter 11—<strong>for</strong> the purpose ofdisplaying the image.B If a particular artist is selected (by clicking onthe artist’s name), the page displays works onlyby that artist.C The page that displays an individual product.Example —E-Commerce 633
To make browse_prints.php:1. Begin a new <strong>PHP</strong> document in your texteditor or IDE, to be named browse_prints.php (Script 19.6):
Script 19.6 The browse_prints.php script displays every print in the catalog or every print <strong>for</strong> a particularartist, depending upon the presence of $_GET['aid'].1
3. Overwrite the query if an artist ID waspassed in the URL:if (isset($_GET['aid']) && filter_➝ var($_GET['aid'], FILTER_VALIDATE_➝ INT, array('min_range' => 1)) ) {$q = "SELECT artists.artist_id,➝ CONCAT_WS(' ', first_name,➝ middle_name, last_name) AS➝ artist, print_name, price,➝ description, print_id FROM➝ artists, prints WHERE artists.➝ artist_id=prints.artist_id➝ AND prints.artist_id={$_➝ GET['aid']} ORDER BY prints.➝ print_name";}If a user clicks an artist’s name in theonline catalog, the user will be returnedback to this page, but now the URLwill be, <strong>for</strong> example, browse_prints.php?aid=6 B. In that case, the queryis redefined, adding the clause ANDprints.artist_id=X, so just that artist’sworks are displayed (<strong>and</strong> the ORDERBY is slightly modified). Hence, the twodifferent roles of this script—showingevery print or just those <strong>for</strong> an individualartist—are h<strong>and</strong>led by variations on thesame query, while the rest of the scriptworks the same in either case.For security purposes, the Filterextension is used to validate the artistID. If your version of <strong>PHP</strong> does notsupport the Filter extension, you’ll needto use typecasting <strong>and</strong> make sure thatthe value is a positive integer prior tousing it in a query.4. Create the table head:echo '➝ Artist➝ Print Name➝ Description➝ Price';5. Display every returned record:$r = mysqli_query ($dbc, $q);while ($row = mysqli_fetch_array➝ ($r, MYSQLI_ASSOC)) {echo "\t➝ {$row['artist']}{$row['print_➝ name']}{$row➝ ['description']}\${$row➝ ['price']}\n";} // End of while loop.636 Chapter 19
The page should display the artist’sfull name, the print name, thedescription, <strong>and</strong> the price <strong>for</strong> eachreturned record. Further, the artist’sname should be linked back to thispage (with the artist’s ID appended tothe URL), <strong>and</strong> the print name shouldbe linked to view_print.php (with theprint ID appended to the URL E).This code doesn’t include a call tomysqli_num_rows( ), to confirm thatsome results were returned prior tofetching them, but you could add that ina live version, just to be safe.6. Close the table, the database connection,<strong>and</strong> the HTML page:echo '';mysqli_close($dbc);include ('includes/footer.html');?>7. Save the file as browse_prints.php,place it in your <strong>Web</strong> directory, <strong>and</strong> test itin your <strong>Web</strong> browser (A <strong>and</strong> B).See the “Review <strong>and</strong> Pursue” sectionat the end of the chapter <strong>for</strong> many ways youcould exp<strong>and</strong> this particular script.E The source code <strong>for</strong> the page reveals how the artist <strong>and</strong> print IDs are appended to the links.Example —E-Commerce 637
To make view_print.php:1. Begin a new <strong>PHP</strong> document in your texteditor or IDE, to be named view_print.php (Script 19.7):
The query is a join like the one inbrowse_prints.php, but it selects onlythe in<strong>for</strong>mation <strong>for</strong> a particular print F.continues on next pageF The result of running the view_print.php query in the mysql client.Script 19.7 continued32 Add to Cart33 ";3435 // Get the image in<strong>for</strong>mation <strong>and</strong> display the image:36 if ($image = @getimagesize ("../uploads/$pid")) {37 echo "\n";38 } else {39 echo "No image available.\n";40 }4142 // Add the description or a default message:43 echo '' . ((is_null($row['description'])) ? '(No description available)' :$row['description']) . '';4445 } // End of the mysqli_num_rows( ) IF.4647 mysqli_close($dbc);4849 } // End of $_GET['pid'] IF.5051 if (!$row) { // Show an error message.52 $page_title = 'Error';53 include ('includes/header.html');54 echo 'This page has been accessed in error!';55 }5657 // Complete the page:58 include ('includes/footer.html');59 ?>Example —E-Commerce 639
5. If a record was returned, retrieve thein<strong>for</strong>mation, set the page title, <strong>and</strong>include the HTML header:if (mysqli_num_rows($r) = = 1) {$row = mysqli_fetch_array ($r,➝ MYSQLI_ASSOC);$page_title = $row['print_name'];include ('includes/header.html');The browser window’s title will be thename of the print C.6. Begin displaying the print in<strong>for</strong>mation:echo "{$row['print_name']} by{$row['artist']}";echo (is_null($row['size'])) ? '(No➝ size in<strong>for</strong>mation available)' :➝ $row['size'];echo "\${$row['price']}Add to Cart";The header <strong>for</strong> the print will be theprint’s name (in bold), followed by theartist’s name, the size of the print, <strong>and</strong>its price. Finally, a link is displayed givingthe customer the option of addingthis print to the shopping cart G. Theshopping cart link is to the add_cart.php script, passing it the print ID.G The print in<strong>for</strong>mation <strong>and</strong> a link to buy it aredisplayed at the top of the page.Because the print’s size can have aNULL value, the ternary operator is usedto print out either the size or a defaultmessage.7. Display the image:if ($image = @getimagesize ("../➝ uploads/$pid")) {echo "➝ \n";} else {echo "No➝ image available.\n";}Because the images are being safelystored outside of the <strong>Web</strong> rootdirectory, another <strong>PHP</strong> script is requiredto provide the image to the browser(the show_image.php script is beingused as a proxy script). The nameof the image itself is just the print ID,which was already passed to thispage in the URL.This section of the script will firstattempt to retrieve the image’s dimensionsby using the getimagesize( )function. If it is successful in doing so,the image itself will be displayed. Thatprocess is a little unusual in that thesource <strong>for</strong> the image calls the show_image.php page H. The show_image.php script, to be written next, expectsthe print ID to be passed in the URL,H The HTML source of the view_print.php page shows how the src attribute of the img tag calls theshow_image.php script, passing it the values it needs.640 Chapter 19
along with the image’s filename (storedin the database when the print isadded). This use of a <strong>PHP</strong> script todisplay an image is exactly like the useof show_image.php in Chapter 11, onlynow it’s occurring within another page,not in its own window.If the script could not retrieve theimage in<strong>for</strong>mation (because the imageis not on the server or no image wasuploaded), a message is displayedinstead.8. Display the description:echo '' .➝ ((is_null($row['description']))➝ ? '(No description available)' :➝ $row['description']) . '';Finally, the print’s description isadded I. A default message willbe created if no print description wasstored in the database.9. Complete the two main conditionals:} // End of the mysqli_num_➝ rows( ) IF.mysqli_close($dbc);} // End of $_GET['pid'] IF.10. If a problem occurred, display an errormessage:if (!$row) {$page_title = 'Error';include ('includes/header.html');echo 'This➝ page has been accessed in➝ error!';}If the print’s in<strong>for</strong>mation could not beretrieved from the database <strong>for</strong> whateverreason, then $row is still false<strong>and</strong> an error should be displayed J.Because the HTML header wouldnot have already been included if aproblem occurred, it must be includedhere first.11. Complete the page:include ('includes/footer.html');?>12. Save the file as view_print.php <strong>and</strong>place it in your <strong>Web</strong> directory.If you were to run this page in thebrowser at this point, no print imagewould be displayed as show_image.phphas not yet been written.continues on next pageI The print’s image followed by its description.J The view_print.php page, should it notreceive a valid print ID in the URL.Example —E-Commerce 641
Many e-commerce sites use an image <strong>for</strong>the Add to Cart link. To do so in this example,replace the text Add to Cart (within the link tag) with the code <strong>for</strong> the image to beused. The important consideration is that theadd_cart.php page still gets passed theproduct ID number.If you wanted to add Add to Cart linkson a page that displays multiple products (likebrowse_prints.php), do exactly what’s donehere <strong>for</strong> individual products. Just make surethat each link passes the right print ID to theadd_cart.php page.If you want to show the availability ofa product, add an in_stock field to the printstable. Then display an Add to Cart link orProduct Currently Out of Stock messageaccording to the value from this column <strong>for</strong>that print.To write show_image.php:1. Begin a new <strong>PHP</strong> document in your texteditor or IDE, to be named show_image.php (Script 19.8):
proven otherwise. The $name variable,which will be the name of the fileprovided to the <strong>Web</strong> browser, shouldcome from the URL. If not, a defaultvalue is assigned.2. Check <strong>for</strong> an image value in the URL:if (isset($_GET['image']) &&➝ filter_var($_GET['image'], FILTER_➝ VALIDATE_INT, array('min_range'➝ => 1)) ) {Be<strong>for</strong>e continuing, ensure that the scriptreceived an image value, which shouldbe part of the HTML src attribute <strong>for</strong>each print in view_print.php H.3. Check that the image exists as a file onthe server:$image = '../uploads/' .➝ $_GET['image'];if (!file_exists ($image) ||➝ (!is_file($image))) {$image = FALSE;}As a security measure, the image’s fullpath is hard-coded as a combinationof ../uploads <strong>and</strong> the received imagename. You could also validate the MIMEtype (image/jpg, image/gif ) of the filehere, <strong>for</strong> extra security.Next, the script checks that the imageexists on the server <strong>and</strong> that it is a file(as opposed to a directory). If eithercondition is FALSE, then $image is setto FALSE, indicating a problem.4. Complete the validation conditional <strong>and</strong>check <strong>for</strong> a problem:} // End of $_GET['image'] IF.if (!$image) {$image = 'images/unavailable.➝ png';$name = 'unavailable.png';}If the image doesn’t exist, isn’t a file,or if no image name was passed tothis script, this condition will be TRUE.In such cases, a default image will beused. For that to happen, however, afair amount of hacking on the user’spart will have had to take place: theview_print.php script does somepreliminary verification of the image,only calling show_image.php if it canaccess the image.5. Retrieve the image in<strong>for</strong>mation:$info = getimagesize($image);$fs = filesize($image);To send the file to the <strong>Web</strong> browser,the script needs to know the file’s type<strong>and</strong> size. This code is the same as inChapter 11.6. Send the file:header ("Content-Type:➝ {$info['mime']}\n");header ("Content-Disposition:➝ inline; filename=\"$name\"\n");header ("Content-Length: $fs\n");readfile ($image);These header( ) calls will send to the<strong>Web</strong> browser in<strong>for</strong>mation about the fileto follow, exactly as in Chapter 11. Torevisit the overall syntax, the first lineprepares the browser to receive the file,based upon the MIME type. The secondline sets the name of the file being sent.The last header( ) function indicateshow much data is to be expected.The file data itself is sent using thereadfile( ) function, which reads in afile <strong>and</strong> immediately sends the contentto the <strong>Web</strong> browser.continues on next pageExample —E-Commerce 643
7. Save the file as show_image.php, placeit in your <strong>Web</strong> directory, <strong>and</strong> test it inyour <strong>Web</strong> browser by viewing any print.Notice that this page contains no HTML.It only sends an image file to the <strong>Web</strong>browser. As in Chapter 11, the closing<strong>PHP</strong> tag is omitted, to avoid potentialproblems.If the view_print.php page does notshow the image <strong>for</strong> some reason, you’ll needto debug the problem by running the show_image.php directly in your <strong>Web</strong> browser. Viewthe HTML source of view_print.php <strong>and</strong>find the value of the img tag’s src attribute.Then use this as your URL (in other words, goto http://www.example.com/show_image.php?image=23&name=BirthOfVenus.jpeg).If an error occurred, running show_image.phpdirectly is the best way to find it.Searching the product CatalogThe structure of this database makes<strong>for</strong> a fairly easy search capability, shouldyou desire to add it. As it st<strong>and</strong>s, thereare only three logical fields to use <strong>for</strong>search purposes: the print’s name, itsdescription, <strong>and</strong> the artist’s last name.A LIKE query could be run on thesefields using the following syntax:SELECT…WHERE prints.description➝ LIKE'%keyword%' OR prints.print_➝ name LIKE '%keyword%' …Another option would be to create anadvanced search, wherein the userselects whether to search the artist’sname or the print’s name (similar towhat the Internet Movie Database,www.imdb.com, does with peopleversus movie titles).644 Chapter 19
Table 19.6 Sample $_SESSION['cart'] Values(index) Quantity Price2 1 54.00568 2 22.9537 1 33.50Script 19.9 This script adds products to theshopping cart by referencing the product(or print) ID <strong>and</strong> manipulating the session data.1
2. Check that a print ID was passed tothis script:if (isset ($_GET['pid']) &&➝ filter_var($_GET['pid'], FILTER_➝ VALIDATE_INT, array('min_range'➝ => 1)) ) {$pid = $_GET['pid'];As with the view_print.php script,the script should not proceed if no,or a non-numeric, print ID has beenreceived. If one has been received,then its value is assigned to $pid, tobe used later in the script.3. Determine if a copy of this print hadalready been added to the cart:if (isset($_SESSION['cart'][$pid])) {$_SESSION['cart'][$pid]➝ ['quantity']++;echo 'Another copy of the➝ print has been added to your➝ shopping cart.';Be<strong>for</strong>e adding the current print to theshopping cart (by setting its quantityto 1), check if a copy is already in thecart. For example, if the customerselected print #519 <strong>and</strong> then decidedto add another, the cart should nowcontain two copies of the print. Thescript there<strong>for</strong>e first checks if thecart has a value <strong>for</strong> the current printID. If so, the quantity is incremented.The code $_SESSION['cart'][$pid]['quantity']++ is the same as$_SESSION['cart'][$pid]['quantity']➝ = $_SESSION['cart'][$pid]➝ ['quantity'] + 1.Finally, a message is displayed A.Script 19.9 continued26 if (mysqli_num_rows($r) = = 1) { //Valid print ID.2728 // Fetch the in<strong>for</strong>mation.29 list($price) = mysqli_fetch_array ($r, MYSQLI_NUM);3031 // Add to the cart:32 $_SESSION['cart'][$pid] = array('quantity' => 1, 'price' =>$price);3334 // Display a message:35 echo 'The print has beenadded to your shopping cart.';3637 } else { // Not a valid print ID.38 echo 'Thispage has been accessed inerror!';39 }4041 mysqli_close($dbc);4243 } // End of isset($_SESSION['cart'][$pid] conditional.4445 } else { // No print ID.46 echo 'This pagehas been accessed in error!';47 }4849 include ('includes/footer.html');50 ?>A The result after clicking an Add to Cart link <strong>for</strong>an item that was already present in the shoppingcart.646 Chapter 19
4. If the product is not already in the cart,retrieve its price from the database:} else { // New product to the➝ cart.require ('../mysqli_connect.php');$q = "SELECT price FROM prints➝ WHERE print_id=$pid";$r = mysqli_query ($dbc, $q);if (mysqli_num_rows($r) = = 1) {list($price) = mysqli_fetch_➝ array ($r, MYSQLI_NUM);If the product is not currently in the cart,this else clause comes into play. Here,the print’s price is retrieved from thedatabase using the print ID.5. Add the new product to the cart:$_SESSION['cart'][$pid] = array➝ ('quantity' => 1, 'price' =>➝ $price);echo 'The print has been added➝ to your shopping cart.';After retrieving the item’s price, anew element is added to the $_SESSION['cart'] multidimensionalarray. Since each element in $_SESSION['cart'] is itself an array,use the array( ) function to setthe quantity <strong>and</strong> price. A simplemessage is then displayed B.6. Complete the conditionals:} else { // Not a valid print➝ ID.echo '➝ This page has been➝ accessed in error!';}mysqli_close($dbc);} // End of isset($_SESSION➝ ['cart'][$pid] conditional.} else { // No print ID.echo 'This➝ page has been accessed in➝ error!';}The first else applies if no price couldbe retrieved from the database, meaningthat the submitted print ID is invalid.The second else applies if no print ID,or a non-numeric one, is received bythis page. In both cases, an error messagewill be displayed C.7. Include the HTML footer <strong>and</strong> completethe <strong>PHP</strong> page:include ('includes/footer.html');?>8. Save the file as add_cart.php, place itin your <strong>Web</strong> directory, <strong>and</strong> test it in your<strong>Web</strong> browser (by clicking an Add toCart link).continues on next pageB The result after adding a new item to theshopping cart.C The add_cart.php page will only add an itemto the shopping cart if the page received a validprint ID in the URL.Example —E-Commerce 647
The most important thing to store in thecart is the unique product ID <strong>and</strong> the quantityof that item. Everything else, including theprice, can be retrieved from the database.Alternatively, you could retrieve the price, printname, <strong>and</strong> artist name from the database, <strong>and</strong>store all that in the session so that it’s easilydisplayed anywhere on the site.The shopping cart is stored in $_SESSION['cart'], not just $_SESSION.Presumably other in<strong>for</strong>mation, like the user’sID from the database, would also be storedin $_SESSION.Viewing the shopping cartThe view_cart.php script will be morecomplicated than add_cart.php becauseit serves two purposes. First, it will displaythe contents of the cart in detail D.Second, it will give the customer the optionof updating the cart by changing the quantitiesof the items therein (or deleting anitem by making its quantity 0). To fulfill bothroles, the cart’s contents will be displayedin a <strong>for</strong>m that gets submitted back to thissame page.Finally, this page will link to a checkout.php script, intended as the first step in thecheckout process.To create view_cart.php:1. Begin a new <strong>PHP</strong> document in your texteditor or IDE, to be named view_cart.php (Script 19.10):
Script 19.10 continued23 }2425 } // End of FOREACH.2627 } // End of SUBMITTED IF.2829 // Display the cart if it's not empty...30 if (!empty($_SESSION['cart'])) {3132 // Retrieve all of the in<strong>for</strong>mation <strong>for</strong> the prints in the cart:33 require ('../mysqli_connect.php'); // Connect to the database.34 $q = "SELECT print_id, CONCAT_WS(' ', first_name, middle_name, last_name) AS artist, print_nameFROM artists, prints WHERE artists.artist_id = prints.artist_id AND prints.print_id IN (";35 <strong>for</strong>each ($_SESSION['cart'] as $pid => $value) {36 $q .= $pid . ',';37 }38 $q = substr($q, 0, -1) . ') ORDER BY artists.last_name ASC';39 $r = mysqli_query ($dbc, $q);4041 // Create a <strong>for</strong>m <strong>and</strong> a table:42 echo '43 44 45 Artist46 Print Name47 Price48 Qty49 Total Price50 51 ';5253 // Print each item...54 $total = 0; // Total cost of the order.55 while ($row = mysqli_fetch_array ($r, MYSQLI_ASSOC)) {5657 // Calculate the total <strong>and</strong> sub-totals.58 $subtotal = $_SESSION['cart'][$row['print_id']]['quantity'] * $_SESSION['cart'][$row['print_id']]['price'];59 $total += $subtotal;6061 // Print the row:62 echo "\t63 {$row['artist']}64 {$row['print_name']}65 \${$_SESSION['cart'][$row['print_id']]['price']}66 67 $" . number_<strong>for</strong>mat ($subtotal, 2) . "68 \n";code continues on next pageExample —E-Commerce 649
2. Update the cart if the <strong>for</strong>m has beensubmitted:if ($_SERVER['REQUEST_METHOD'] = =➝'POST') {<strong>for</strong>each ($_POST['qty'] as $k =>➝ $v) {$pid = (int) $k;$qty = (int) $v;if ( $qty = = 0 ) {unset ($_SESSION['cart']➝ [$pid]);} elseif ( $qty > 0 ) {$_SESSION['cart'][$pid]➝ ['quantity'] = $qty;}} // End of FOREACH.} // End of SUBMITTED IF.If the <strong>for</strong>m has been submitted, then thescript needs to update the shoppingcart to reflect the entered quantities.These quantities will come in the $_POST['qty'] array, whose index is theprint ID <strong>and</strong> whose value is the newquantity (see E <strong>for</strong> the HTML sourcecode of the <strong>for</strong>m). If the new quantityis 0, then that item should be removedScript 19.10 continued6970 } // End of the WHILE loop.7172 mysqli_close($dbc); // Close thedatabase connection.7374 // Print the total, close the table,<strong>and</strong> the <strong>for</strong>m:75 echo '76 Total:77 $' . number_<strong>for</strong>mat ($total, 2) . '78 79 80 81 Enter aquantity of 0 to remove an item.82 Checkout';8384 } else {85 echo 'Your cart is currentlyempty.';86 }8788 include ('includes/footer.html');89 ?>E The HTML source code of the view shopping cart <strong>for</strong>m shows how the quantity fieldsreflect both the product ID <strong>and</strong> the quantity of that print in the cart.650 Chapter 19
from the cart by unsetting it. If thenew quantity is not 0 but is a positivenumber, then the cart is updated toreflect this.If the quantity is not a number greaterthan or equal to 0, then no change willbe made to the cart. This will prevent auser from entering a negative number,creating a negative balance due, <strong>and</strong>getting a refund!Alternatively, you could use the Filterextension to validate the print ID <strong>and</strong>the quantity.3. If the cart is not empty, create the queryto display its contents:if (!empty($_SESSION['cart'])) {require ('../mysqli_connect.php');$q = "SELECT print_id, CONCAT_➝ WS(' ', first_name, middle_➝ name, last_name) AS artist,➝ print_name FROM artists,➝ prints WHERE artists.artist_➝ id = prints.artist_id AND➝ prints.print_id IN (";<strong>for</strong>each ($_SESSION['cart'] as➝ $pid => $value) {$q .= $pid . ',';}$q = substr($q, 0, -1) . ')➝ ORDER BY artists.last_name➝ ASC';$r = mysqli_query ($dbc, $q);The query is a JOIN similar to one usedalready in this chapter. It retrieves allthe artist <strong>and</strong> print in<strong>for</strong>mation <strong>for</strong> eachprint in the cart. One addition is the useof the IN SQL clause. Instead of justretrieving the in<strong>for</strong>mation <strong>for</strong> one print(as in the view_print.php example),retrieve all the in<strong>for</strong>mation <strong>for</strong> everyprint in the shopping cart. To do so, usea list of print IDs in a query like SELECT…print_id IN (519,42,427)…. You canalso use SELECT… WHERE print_id=519OR print_id=42 or print_id=427…, butthat’s unnecessarily long-winded.To generate the IN (519,42,427) partof the query, a <strong>for</strong> loop adds each printID plus a comma to $q. To remove thelast comma, the substr( ) function isapplied, chopping off the last character.4. Begin the HTML <strong>for</strong>m <strong>and</strong> create a table:echo '➝ Artist➝ Print Name➝ Price➝ Qty➝ Total Price';5. Retrieve the returned records:$total = 0;while ($row = mysqli_fetch_array➝ ($r, MYSQLI_ASSOC)) {$subtotal = $_SESSION['cart']➝ [$row['print_id']]['quantity'] *➝ $_SESSION['cart'][$row['print_➝ id']]['price'];$total += $subtotal;continues on next pageExample —E-Commerce 651
When displaying the cart, the pageshould also calculate the order total,so a $total variable is initialized at 0first. Then <strong>for</strong> each returned row (whichrepresents one print), the price of thatitem is multiplied by the quantity todetermine the subtotal (the syntax ofthis is a bit complex because of themultidimensional $_SESSION['cart']array). This subtotal is added to the$total variable.6. Print the returned records:echo "\t{$row['artist']}➝ {$row['print_➝ name']}\${$_SESSION➝ ['cart'][$row['print_id']]➝ ['price']}$" . number_➝ <strong>for</strong>mat ($subtotal, 2) . "\n";Each record is printed out as a row inthe table, with the quantity displayedas a text input type whose value ispreset (based upon the quantity valuein the session). The subtotal amount(the quantity times the price) <strong>for</strong> eachitem is also <strong>for</strong>matted <strong>and</strong> printed.7. Complete the while loop <strong>and</strong> close thedatabase connection:} // End of the WHILE loop.mysqli_close($dbc);8. Complete the table <strong>and</strong> the <strong>for</strong>m:echo '➝ Total:$' . number_➝ <strong>for</strong>mat ($total, 2) . 'Enter a➝ quantity of 0 to remove an item.Checkout';The order total is displayed in the finalrow of the table, using the number_<strong>for</strong>mat( ) function <strong>for</strong> <strong>for</strong>matting. The<strong>for</strong>m also provides instructions to theuser on how to remove an item, <strong>and</strong> alink to the checkout page is included.9. Finish the main conditional <strong>and</strong> the<strong>PHP</strong> page:} else {echo 'Your cart is currently➝ empty.';}include ('includes/footer.html');?>This else clause completes theif (!empty($_SESSION['cart'])) {conditional.652 Chapter 19
10. Save the file as view_cart.php, place itin your <strong>Web</strong> directory, <strong>and</strong> test it in your<strong>Web</strong> browser (F <strong>and</strong> G).On more complex <strong>Web</strong> applications, Iwould be inclined to write a <strong>PHP</strong> page strictly<strong>for</strong> the purpose of displaying a cart’s contents.Since several pages might want to displaythat, having that functionality in an includablefile would make sense.One aspect of a secure e-commerceapplication is watching how data is being sent<strong>and</strong> used. For example, it would be far lesssecure to place a product’s price in the URL,where it could easily be changed.F Changes made to any quantitiesupdate the shopping cart <strong>and</strong> ordertotal after clicking Update My Cart(compare with D ).G Remove everything in theshopping cart by setting thequantities to 0.Example —E-Commerce 653
Recording the ordersAfter displaying all the products as acatalog, <strong>and</strong> after the user has filled theshopping cart, there are three final steps:nnnChecking the user outRecording the order in the databaseFulfilling the orderIronically, the most important part—checking out (i.e., taking the customer’smoney)—could not be adequatelydemonstrated in a book, as it’s so particularto each individual site. So what I’ve doneinstead is given an overview of thatprocess in the sidebar. My book Ef<strong>for</strong>tlessE-Commerce with <strong>PHP</strong> <strong>and</strong> <strong>MySQL</strong>, bycontrast, specifically shows how to use twodifferent payment gateways, but doing sorequires two full chapters on their own.Similarly, the act of fulfilling the order isbeyond the scope of the book. For physicalproducts, this means that the order willneed to be packaged <strong>and</strong> shipped. Thenthe order in the database would be markedas shipped by indicating the shipping date.This concept shouldn’t be too hard <strong>for</strong> youto implement, but you do also have to payattention to managing the store’s inventory.For virtual products, order fulfillment is amatter of providing the user with the digitalcontent.So those are some of the issues thatcannot be well covered in this chapter;what I can properly demonstrate in thischapter is how the order in<strong>for</strong>mationwould be stored in the database. Toensure that the order is completely <strong>and</strong>correctly entered into both the orders <strong>and</strong>order_contents tables, the script will usetransactions. This subject was introducedin Chapter 7, “Advanced <strong>MySQL</strong>,” using themysql client. Here the transactions will beThe Checkout processThe checkout process involves threesteps:1. Confirmation of the order.2. Confirmation <strong>and</strong> submission of thebilling <strong>and</strong> shipping in<strong>for</strong>mation.3. Processing of the billing in<strong>for</strong>mation.Steps 1 <strong>and</strong> 2 should be easy enough <strong>for</strong>intermediate programmers to completeon their own by now. In all likelihood,most of the data in Step 2 would comefrom the customers table, after the userhas registered <strong>and</strong> logged in.Step 3 is the trickiest one <strong>and</strong> couldnot be adequately addressed in thisbook. The particulars of this step varygreatly, depending upon how the billingis being h<strong>and</strong>led <strong>and</strong> by whom. To makeit more complex, the laws are differentdepending upon whether the productbeing sold is to be shipped later or isimmediately delivered (like access toa <strong>Web</strong> site or a downloadable file).Most small- to medium-sized e-commercesites use a third party to h<strong>and</strong>le thefinancial transactions. Normally thisinvolves sending the billing in<strong>for</strong>mation,the order total, <strong>and</strong> a store number (areference to the e-commerce site itself)to another <strong>Web</strong> site. That site will h<strong>and</strong>lethe actual billing process, debitingthe customer <strong>and</strong> crediting the store.Then a result code will be sent back tothe e-commerce site, which would beprogrammed to react accordingly. Insuch cases, the third party h<strong>and</strong>ling thebilling will provide the developer withthe appropriate code <strong>and</strong> instructionsto interface with their system.For more in<strong>for</strong>mation, or assistancewith, any of this, see my book Ef<strong>for</strong>tlessE-Commerce with <strong>PHP</strong> <strong>and</strong> <strong>MySQL</strong>or turn to the supporting <strong>for</strong>ums(www.LarryUllman.com/<strong>for</strong>ums/).654 Chapter 19
Script 19.11 The final script in the e-commerceapplication records the order in<strong>for</strong>mation in thedatabase. It uses transactions to ensure that thewhole order gets submitted properly.1
3. Include the database connection <strong>and</strong>turn off <strong>MySQL</strong>’s autocommit mode:require ('../mysqli_connect.php');mysqli_autocommit($dbc, FALSE);The mysqli_autocommit( ) functioncan turn <strong>MySQL</strong>’s autocommit featureon or off. Since transactions will beused to ensure that the entire orderis entered properly, the autocommitbehavior should be disabled first. If youhave any questions about transactions,see Chapter 7 or the <strong>MySQL</strong> manual.4. Add the order to the orders table:$q = "INSERT INTO orders➝ (customer_id, total) VALUES($cid, $total)";$r = mysqli_query($dbc, $q);if (mysqli_affected_rows($dbc) = =➝ 1) {This query is very simple, entering onlythe customer’s ID number <strong>and</strong> the totalamount of the order into the orderstable. The order_date field in the tablewill automatically be set to the currentdate <strong>and</strong> time, as it’s a TIMESTAMPcolumn.5. Retrieve the order ID:$oid = mysqli_insert_id($dbc);The order_id value from the orderstable is needed in the order_contentstable to relate the two.6. Prepare the query that inserts the ordercontents into the database:$q = "INSERT INTO order_contents➝ (order_id, print_id, quantity,➝ price) VALUES (?, ?, ?, ?)";$stmt = mysqli_prepare($dbc, $q);mysqli_stmt_bind_param($stmt,➝'iiid', $oid, $pid, $qty, $price);The query itself inserts four valuesinto the order_contents table, whereScript 19.11 continued33 $stmt = mysqli_prepare($dbc, $q);34 mysqli_stmt_bind_param($stmt, 'iiid',$oid, $pid, $qty, $price);3536 // Execute each query; count thetotal affected:37 $affected = 0;38 <strong>for</strong>each ($_SESSION['cart'] as $pid =>$item) {39 $qty = $item['quantity'];40 $price = $item['price'];41 mysqli_stmt_execute($stmt);42 $affected += mysqli_stmt_affected_rows($stmt);43 }4445 // Close this prepared statement:46 mysqli_stmt_close($stmt);4748 // Report on the success....49 if ($affected = = count($_SESSION['cart'])) { // Whohoo!5051 // Commit the transaction:52 mysqli_commit($dbc);5354 // Clear the cart:55 unset($_SESSION['cart']);5657 // Message to the customer:58 echo 'Thank you <strong>for</strong> your order.You will be notified when theitems ship.';5960 // Send emails <strong>and</strong> do whateverelse.6162 } else { // Rollback <strong>and</strong> report theproblem.6364 mysqli_rollback($dbc);6566 echo 'Your order could not beprocessed due to a system error.You will be contacted in orderto have the problem fixed. Weapologize <strong>for</strong> the inconvenience.';67 // Send the order in<strong>for</strong>mation tocode continues on next page656 Chapter 19
there will be one record <strong>for</strong> each printpurchased in this order. The query isdefined, using placeholders <strong>for</strong> the values,<strong>and</strong> prepared. The mysqli_stmt_bind_param( ) function associates fourvariables to the placeholders. Theirtypes, in order, are: integer, integer,integer, double (aka float).7. Run through the cart, inserting eachprint into the database:$affected = 0;<strong>for</strong>each ($_SESSION['cart'] as $pid➝ => $item) {$qty = $item['quantity'];$price = $item['price'];mysqli_stmt_execute($stmt);$affected += mysqli_stmt_➝ affected_rows($stmt);}mysqli_stmt_close($stmt);Script 19.11 continuedthe administrator.6869 }7071 } else { // Rollback <strong>and</strong> report theproblem.7273 mysqli_rollback($dbc);7475 echo 'Your order could not beprocessed due to a system error. Youwill be contacted in order to havethe problem fixed. We apologize <strong>for</strong>the inconvenience.';7677 // Send the order in<strong>for</strong>mation to theadministrator.7879 }8081 mysqli_close($dbc);8283 include ('includes/footer.html');84 ?>By looping through the shopping cart,as done in view_cart.php, the scriptcan access each item, one at a time.To be clear about what’s happening inthis step: the query has already beenprepared—sent to <strong>MySQL</strong> <strong>and</strong> parsed—<strong>and</strong> variables have been assigned tothe placeholders. Within the loop, twonew variables are assigned valuesthat come from the session. Then, themysqli_stmt_execute( ) function iscalled, which executes the preparedstatement, using the variable values atthat moment. The $oid value will notchange from iteration to iteration, but$pid, $qty, <strong>and</strong> $price will.To confirm the success of all thequeries, the number of affected rowsmust be tracked. A variable, $affected,is initialized to 0 outside of the loop.Within the loop, the number of affectedrows is added to this variable after eachexecution of the prepared statement.8. Report on the success of thetransaction:if ($affected = = count($_SESSION➝ ['cart'])) {mysqli_commit($dbc);unset($_SESSION['cart']);echo 'Thank you <strong>for</strong> your➝ order. You will be notified➝ when the items ship.';The conditional checks to see if asmany records were entered into thedatabase as exist in the shopping cart.In short: did each product get insertedinto the order_contents table? If so,then the transaction is complete <strong>and</strong>can be committed. Next, the shoppingcart is emptied <strong>and</strong> the user is thanked.Logically you’d want to send a confirmationemail to the customer here as well.continues on next pageExample —E-Commerce 657
9. H<strong>and</strong>le any <strong>MySQL</strong> problems:} else {mysqli_rollback($dbc);echo 'Your order could➝ not be processed due to a➝ system error. You will be➝ contacted in order to have➝ the problem fixed. We➝ apologize <strong>for</strong> the➝ inconvenience.';}} else {mysqli_rollback($dbc);echo 'Your order could not be➝ processed due to a➝ system error. You will be➝ contacted in order to have➝ the problem fixed. We➝ apologize <strong>for</strong> the➝ inconvenience.';}The first else clause applies if thecorrect number of records were notinserted into the order_contents table.The second else clause applies ifthe original orders table query fails.In either case, the entire transactionshould be undone, so the mysqli_rollback( ) function is called.If a problem occurs at this point of theprocess, it’s rather serious becausethe customer has been charged butno record of the order has made it intothe database. This shouldn’t happen,but just in case, you should write all thedata to a text file <strong>and</strong>/or email all of it tothe site’s administrator or do somethingthat will create a record of this order. Ifyou don’t, you’ll have some very iratecustomers on your h<strong>and</strong>s.10. Complete the page:mysqli_close($dbc);include ('includes/footer.html');?>11. Save the file as checkout.php, place itin your <strong>Web</strong> directory, <strong>and</strong> test it in your<strong>Web</strong> browser A.You can access this page by clickingthe link in view_cart.php.12. Confirm that the order was properlystored by looking at the database usinganother interface B.On a live, working site, you should assignthe $customer <strong>and</strong> $total variables realvalues <strong>for</strong> this script to work. You would alsolikely want to make sure that the cart isn’tempty prior to trying to store the order inthe database.If you’d like to learn more aboute-commerce or see variations on this process,a quick search on the <strong>Web</strong> will turn upvarious examples <strong>and</strong> tutorials <strong>for</strong> makinge-commerce applications with <strong>PHP</strong>, or checkout my book Ef<strong>for</strong>tless E-Commerce with<strong>PHP</strong> <strong>and</strong> <strong>MySQL</strong>.A The customer’s order is now complete, afterentering all of the data into the database.B The order in the <strong>MySQL</strong> database, as viewedusing the mysql client.658 Chapter 19
Review <strong>and</strong> pursueIf you have any problems with the reviewquestions or the pursue prompts, turnto the book’s supporting <strong>for</strong>um (www.LarryUllman.com/<strong>for</strong>ums/).Note: Some of these questions <strong>and</strong>prompts rehash in<strong>for</strong>mation covered earlierin the book, in order to rein<strong>for</strong>ce some ofthe most important points.ReviewnnnnnnnWhat kind of storage engine in <strong>MySQL</strong>supports transactions?What types of indexes does <strong>MySQL</strong>support? What criteria go into decidingwhat columns should be indexed <strong>and</strong>what type of index is most appropriate?What is a Secure Sockets Layer (SSL)?Why is it important <strong>for</strong> e-commercesites? Do you have SSL enabled <strong>for</strong>your <strong>Web</strong> site?Why isn’t it problematic that the images<strong>for</strong> the prints are stored without fileextensions?What steps should you take to debugproblems in <strong>PHP</strong> scripts that interactwith a <strong>MySQL</strong> database?What is a multidimensional array?What is meant by <strong>MySQL</strong>’s autocommitfeature?n What does the mysqli_insert_id( )function do?nWhat does it mean to commit orrollback a transaction?pursuennnnnnnnnExp<strong>and</strong> the definition of the artists tableto record other in<strong>for</strong>mation about eachartist. Also display this other in<strong>for</strong>mationon the public side of the site.Add a quantity_on_h<strong>and</strong> column tothe prints table. Add a <strong>for</strong>m element toadd_print.php so that the administratorcan indicate how many copies ofthe product are initially in stock. On thepublic side, only offer an “Add to Cart”option <strong>for</strong> products that are available.When an item is sold (i.e., in checkout.php), reduce each product’s quantityon h<strong>and</strong> by the number of copies sold.Exp<strong>and</strong> the definition of the customerstable to include other pertinentin<strong>for</strong>mation.Create registration, login, <strong>and</strong> logoutfunctionality <strong>for</strong> customers, using thein<strong>for</strong>mation from Chapter 18, “Example—UserRegistration,” as your basis.Create the ability <strong>for</strong> customers to viewtheir accounts, change their passwords,view previous orders, etc.Create <strong>and</strong> use a template <strong>for</strong> theadministrative side of the site.Using sessions, restrict access to theadministrative side of the site to verifiedusers.Apply the code from Chapter 11 toimprove the security of add_print.php, so that it properly validates theuploaded file’s type <strong>and</strong> size.Take the dynamically generated artistspull-down menu from add_print.php<strong>and</strong> use it as a navigational tool on thepublic side. To do so, set the <strong>for</strong>m’saction attribute to browse_print.php,change the name of the pull-down menucontinues on next pageExample —E-Commerce 659
nnnnnnto aid, use the GET method, <strong>and</strong> whenusers select an artist <strong>and</strong> click Submit,he or she will be taken to, <strong>for</strong> example,browse_print.php?aid=5.Apply pagination to browse_prints.php. See Chapter 10 <strong>for</strong> more onpagination.On browse_prints.php, add theoption to affect how the prints aredisplayed by adding links to the columnheadings (e.g., to browse_prints.php?order=price). Then change theORDER BY in the queries based upon thepresence, <strong>and</strong> value, of $_GET['order'].Again, this idea was demonstrated inChapter 9.Combine some of the functionality ofview_print.php <strong>and</strong> add_cart.phpso that the details of the print justadded to the cart are also shown onadd_cart.php.To show the contents of the cart onadd_cart.php, add the applicable codefrom view_cart.php to the end of add_cart.php.Create the ability <strong>for</strong> the administrator toview the list of orders. Hint: the first pagewould function like browse_prints.php, except that it would per<strong>for</strong>m a joinacross orders <strong>and</strong> customers. This pagecould display the order total, the orderID, the order date, <strong>and</strong> the customer’sname. You could link the order ID toa view_order.php script, passing theorder ID in the URL. That script woulduse the order ID to retrieve the detailsof the order from the order_contentstable (joining prints <strong>and</strong> artists in theprocess).Add the ability to calculate tax <strong>and</strong> shipping<strong>for</strong> orders. Store these values inthe orders table, too.660 Chapter 19
Indexnumbers1NF (First Normal Form), 169–1712NF (Second Normal Form), 172–1743NF (Third Normal Form), 175–1768-bit Unicode Trans<strong>for</strong>mation Format, 2Symbols-- operator, 23, 45− operator, 23! operator, 45!= operator, 140\$ escape sequence, 29% operator, 23* operator, 23. operator, 21, 26–27/ operator, 23@ error suppression operator, 250, 270\' escape sequence, 29\\ escape sequence, 29\" escape sequence, 29| operator, 140|| operator, 45, 48, 140+ operator, 23++ operator, 23< operator, 45- operator, 45>= operator, 140!- operator, 45&& (<strong>and</strong>) operator, 45, 48, 56, 140* (asterisk), using with SELECT queries, 138`(backticks), use in SQL comm<strong>and</strong>s, 137{ } (curly braces)using with arrays, 55, 57using with conditionals, 45, 48$ (dollar sign), using with variables, 14= = (double equals sign) vs. = (equals sign), 47" (double) quotation marks, using, 29–31\ (escape), using, 6( ) (parentheses)using with clauses, 25using with functions, 8# (pound) symbol, using in comments, 10–11; (semicolon)avoiding, 280using with statements, 6' (single) quotation marks, using, 29–31// (slashes), using in comments, 10–11[ ] (square brackets)using with databases, 114using with functions, 104_ (underscore), using with variables, 17AABS( ) function, 157absolute vs. relative paths, 76access problems, debugging, 263addition operator, symbol <strong>for</strong>, 23AES_DECRYPT( ) function, 237AES_ENCRYPT( ) function, 237, 239Ajax. See also jQuerycreating JavaScript, 485<strong>for</strong>m, 481–482h<strong>and</strong>ling request, 484login_ajax.php script, 484login.php script, 481–482overview, 479–480per<strong>for</strong>ming request, 486–491server-side script, 483aliases, 153, 155ALTER comm<strong>and</strong>, 230ALTER TABLE clauses, 222ANALYZE comm<strong>and</strong>, 230<strong>and</strong> (&&) operator, 45, 48, 56<strong>and</strong> not (XOR) logical operator, 45, 48AND operator, 45, 48, 156, 140Index 661
argument values, setting defaults, 101–104argumentsempty strings, 104FALSE value, 104$name, 103NULL value, 104using with user-defined functions, 97–100values, 104arithmetic, precedence issue, 25arithmetic operatorsaddition, 23decrement, 23division, 23increment, 23modulus, 23multiplication, 23subtraction, 23array( ) function, using, 58array values, printing during debugging, 261array_map( ) function, 408arrays&& (<strong>and</strong>) operator, 56{ } (curly braces), 55, 57accessing, 58–59arsort( ) function, 65, 68$artists, 54asort( ) function, 65, 68associative, 54, 62calendar.php document, 59–61combining, 63<strong>and</strong> conditionals, 56–57$_COOKIE superglobal, 55creating, 58creating <strong>and</strong> accessing, 59–60defined, 54$_ENV superglobal, 55examples, 54<strong>for</strong>each loop, 58–61, 63–64$_GET superglobal, 55$GLOBALS, 109HTML table <strong>for</strong> sorting, 66indexed, 54indexing, 58keys, 54, 57key-value pairs, 54ksort( ) function, 65, 67of Mexican states, 62–64multidimensional, 61–64naming rules, 54natsort( ) function, 68$_POST superglobal, 55–56printing, 55printing after sorting, 67r<strong>and</strong>omizing order of, 68referring to values in, 54$_REQUEST superglobal, 55–56returning from functions, 108$_SERVER superglobal, 55$_SESSION superglobal, 55shuffle( ) function, 68sort( ) function, 65sorting, 65–68of sphenic numbers, 61$states, 54<strong>and</strong> strings, 65superglobals, 55–56using, 56–57using <strong>for</strong> pull-down menus, 59–60using with loops, 70usort( ) function, 68arsort( ) function, using with arrays, 65, 68asort( ) function, using with arrays, 65, 68assignment operator (=), 140example, 25using <strong>for</strong> concatenation, 22using with variables, 14asterisk (*), using with SELECT queries, 138AUTO_INCREMENT example, 135autocommit nature, altering, 236AVG( ) grouping function, 214–215, 217Bbackslash code, 29backticks (`), use in SQL comm<strong>and</strong>s, 137banking databaseaccounts table, 198average account balance, 214customers table, 197transactions table, 199BETWEEN operator, 140blacklist validation, 409blank pagedisplaying in error, 8error, 258books database, 176Boolean FULLTEXT searches, per<strong>for</strong>ming, 227–229Boolean mode operators, 227boundaries, using with regular expressions, 444browsersending data to, 7–9sending HTML to, 12brute <strong>for</strong>ce attacks, preventing, 431662 Index
Ccalculator.html pageDOM manipulation, 474–478saving, 468calculator.js page, saving, 472calculator.php documentchanging echo statement, 107create_gallon_radio( ) function, 98creating, 86default argument values, 101–104Filter extension, 422–424<strong>for</strong>matting costs, 107$name argument, 103radio buttons, 98–103return statement, 108returning costs, 107rewriting <strong>for</strong> sticky <strong>for</strong>m, 90–94saving, 90, 100saving <strong>for</strong> sticky <strong>for</strong>m, 94script, 87, 92–93typecasting, 410–413user-defined function, 98–100calendar.php documentcreating, 59loop examples, 70–71saving, 61call to undefined function error, 97, 258cannot redeclare function error, 258CAPTCHA test, 408carriage return code, 29CASCADE action, using with <strong>for</strong>eign keyconstraints, 196Cascading Style Sheets (CSS). See CSS(Cascading Style Sheets)CASE( ) function, 219ceil( ) function, 319CEILING( ) function, 157CHAR( ) function, 135CHAR vs. VARCHAR, 117character classes, using with regular expressions,443–445character codes, replacing with values, 29character setsassigning, 186–188collations, 184establishing <strong>for</strong> columns, 186explained, 184UTF-8, 188UTF-8 encoding, 185characters, printing, 31CHARSET comm<strong>and</strong>, 186@charset "utf-8", using with CSS files, 5cinema database, 172clauses, grouping in parentheses, 25COALESCE( ) function, 218Codd, E.F., 166collationsassigning, 186–188establishing <strong>for</strong> columns, 186explained, 184specifying in queries, 188viewing, 185column types, choosing <strong>for</strong> databases, 114–117column values, applying functions to, 153columns, using indexes on, 179comma, concatenating to variables, 21commentsavoiding nesting, 13example, 15guidelines <strong>for</strong>, 13HTML, 10keeping up to date, 13multiline, 10, 12<strong>PHP</strong>, 10using at end of line, 13using to debug scripts, 259writing, 10–13comments.php documentcreating, 11saving, 12COMMIT comm<strong>and</strong>, using with queries, 233, 236comparative operators-- (is equal to), 45< (less than), 45 (greater than), 45>- (greater than or equal to), 45!- (is not equal to), 45comparison functions, 218CONCAT( ) functions, 154–156concatenating values, 22concatenationassignment operator (=), 22defined, 21operator (.), 21using, 21–22using with numbers, 21using with strings, 21concatenation operator (.)using, 21using with constants, 26–27concat.php file, saving, 22Index 663
conditionals{ } (curly braces), 45, 48adding to print message, 47default values, 48else, 45elseif, 45$gender variable, 46if, 45if-elseif-else, 47indicating subsets of, 48switch, 48using, 46–48using with arrays, 56–57connection scripts .php with, 271constantsaccessing values of, 26assigning scalar values, 26concatenation (.) operator, 26–27creating, 26date, 27define( ) function, 26mysqli_fetch_array( ), 281naming, 26omitting quotation marks, 26<strong>PHP</strong>_OS, 26<strong>PHP</strong>_VERSION, 26predefined, 26using, 27–28vs. variables, 26constants.php documentcreating, 27saving, 28constraints vs. triggers, 201CONVERT( ) function, 188CONVERT_TZ function, 190cookiesaccessing, 380–382creating logout link, 386–387deleting, 384–385expirations, 384explained, 376sending, 378–380vs. sessions, 388setting, 377setting parameters, 382–384size limit, 380testing <strong>for</strong>, 376Coordinated Universal Time (UTC)explained, 189using, 189COUNT( ) grouping function, 214–215, 319applying, 217create_ad( ) function, calling, 97create_gallon_radio( ) function, 98CSS (Cascading Style Sheets)error class, 51using with HTML <strong>for</strong>ms, 37CSS file, declaring encoding <strong>for</strong>, 5CUR( ) functions, 159–160curly braces ({ })using with arrays, 55, 57using with conditionals, 45, 48Ddata, validating by type, 409–413database designERD (entity-relationship diagram), 169<strong>for</strong>eign key constraints, 195–201<strong>for</strong>um data, 166–167indexes, 179–181process, 169reviewing, 177–178database elements, naming, 112–113database schemaexplained, 166<strong>MySQL</strong> Workbench program, 169database structure, confirming, 188database tablesaltering, 222deleting data in, 152emptying, 152joining three or more, 211–213databasesAUTO_INCREMENT, 118–119banking, 196–197“big,” 233books, 176choosing column types, 114–117connecting to, 268–272data types, 115default values <strong>for</strong> columns, 119–120deleting, 152encrypting, 237–239<strong>for</strong>um, 175, 181–182indexes, 118keys, 118, 167Length attribute, 114message board, 520–528modeling, 169movies table, 170optimizing, 230planning contents of, 166PRIMARY KEY, 118–119relationships, 168–169664 Index
selecting, 268–272square brackets ([ ]), 114TEXT columns, 120TIMESTAMP column, 119UNSIGNED number types, 119–120USE comm<strong>and</strong>, 123, 126users table, 116, 120ZEROFILL number types, 119date <strong>and</strong> timeaccessing on client, 163*_FORMAT parameters, 162functions, 159–161, 362–365NOW( ) function, 163returning current, 163date constant, creating, 27DATE( ) function, 159date( ) function <strong>for</strong>matting<strong>for</strong>matting, 362parameters, 364dates, h<strong>and</strong>ling consistently, 194DateTime class, 511–517datetime.php script, 513–514DAY( ) functions, 159–160debugging. See also error messagesaccess problems, 263basics, 242–243beginning, 244–246with Firefox, 246FLUSH PRIVILEGES, 263HTML errors, 246–247JavaScript, 459<strong>MySQL</strong> techniques, 262–263<strong>PHP</strong> scripts, 5, 8, 33, 259–261with phpinfo( ) script, 245SQL techniques, 262–263steps, 243–244using display_errors, 33validation tools, 246decimals vs. integers, 25decrement operator, symbol <strong>for</strong>, 23define( ) function, using with constants, 26DELETE comm<strong>and</strong>, 151delete_user.php script, 303–305deletingconstrained records, 201cookies, 384–385data, 151–152records, 297session variables, 393sessions, 393–395die( ) function, using in debugging, 261, 270display_errors, 248–249confirming, 33turned off, 8using in debugging, 33using to debug scripts, 259display_errors.php, opening, 251division operator, symbol <strong>for</strong>, 23do...while, 70documents, organizing, 271dollar sign ($)code, 29–31using with variables, 14DOM manipulation, 473–478double (") quotation marks, 29–31double equals sign (= =) vs. equals sign (=), 47DROP comm<strong>and</strong>, 152dynamic <strong>Web</strong> sites. See also external files; HTML<strong>for</strong>ms; <strong>Web</strong> sitesease of maintenance, 78h<strong>and</strong>ling HTML <strong>for</strong>ms, 85–90.html file extension, 78.inc file extension, 78including multiple files, 78–84$page_title variable, 82security, 78sticky <strong>for</strong>ms, 91–94structure, 78eecho language constructsending HTML code to browser, 8using, 6–7using over multiple lines, 9using to debug scripts, 260echo statementconcatenation example, 21in HTML <strong>for</strong>ms, 43using with strings, 20e-commerceadd_artist.php document, 613–618add_cart.php script, 645–648add_print.php document, 618–628artists table, 606, 608browse_prints.php document, 634–637checkout process, 654checkout.php script, 655–658customers table, 607, 609database, 606–611footer.html document, 631header.html document, 629–630index.php document, 631–632Index 665
e-commerce (continued)order_contents table, 607, 610orders table, 607, 609prints table, 606, 608–609product catalog, 633–644public template, 629–632recording orders, 654–658security, 611shopping cart, 645–653show_image.php document, 642–644view_cart.php script, 648–653view_print.php document, 638–642, 644edit_user.php script, 309–311else conditional, 45elseif conditional, 45email, sending, 330–335email.php script, 332–333array_map( ) function, 408preventing spam, 404empty( ) function, using with <strong>for</strong>ms, 49empty variable value error, 258encodingdeclaring <strong>for</strong> external CSS file, 5explained, 2indicating to <strong>Web</strong> browser, 2listing, 184encrypting databases, 237–239. See also securitymethodsenctype, including with <strong>for</strong>m tag, 342, 347ENUM types, sorting on, 146equals sign (=) vs. double equals sign (= =), 47ERD (entity-relationship diagram)example, 178explained, 169error CSS class, defining, 51error h<strong>and</strong>lers, customizing, 253–257error managementdie( ) function, 261exit( ) function, 261error messages. See also debuggingaccess-denied, 263call to undefined function error, 97column values in <strong>MySQL</strong>, 137deleting parent records, 195SHOW WARNINGS comm<strong>and</strong>, 137trusting, 33Undefined variable: variablename, 44error reportingadjusting in <strong>PHP</strong>, 250–252levels, 250notices, 250warnings, 250errorsin book, 247display_errors, 248–249<strong>PHP</strong>, 248–249suppressing with @, 250syntactical, 242types of, 242–243escape (\), 6escape sequences, 29exit( ) function, using in debugging, 261EXPLAIN comm<strong>and</strong>, 231, 233extensions, 4external files. See also <strong>Web</strong> sitesabsolute paths, 76include( ) function, 76–77, 82referencing, 76relative paths, 76require( ) function, 76–77using, 78Ffetch_object( ) method, 507file extensions, 4file not found error, receiving, 5file uploadsallowing <strong>for</strong>, 336–337configurations, 336$_FILES array, 342with <strong>PHP</strong>, 342–347preparing server, 338–341secure folder permissions, 337Unix chmod comm<strong>and</strong>, 341Fileinfo extension, 415–416filesincluding multiple, 76–84validating by type, 414–417$_FILES array, using with uploads, 342filters, 421–424sanitation, 421validation, 421Firefox, using <strong>for</strong> debugging, 246First Normal Form (1NF), 169–171first.php documentcreating, 3running in browser, 4saving, 4sending data to <strong>Web</strong> browser, 7FLOOR( ) function, 157FLUSH PRIVILEGES, using in debugging, 263folder permissions, securing, 337footer file, including in HTML <strong>for</strong>m, 90666 Index
footer.html filecreating, 81saving, 82<strong>for</strong> loop. See also loopsexample, 69functionality, 70rewriting <strong>for</strong>each loop as, 70–71<strong>for</strong>each loop. See also loopsrewriting as <strong>for</strong> loop, 70–71using with arrays, 58–61, 63–64<strong>for</strong>eign key constraintsaccounts table, 198action options, 195banking database, 197CASCADE action, 196creating, 197–201customers table, 197ON DELETE action, 195explained, 195–196impact on INSERT queries, 195populating tables, 200syntax, 195transactions table, 199ON UPDATE action, 195<strong>for</strong>m dataadding CSS to HTML head, 51empty( ) function, 49, 51error CSS class, 51if-else conditional, 52is_numeric( ) function, 53isset( ) function, 49, 51validating, 49–53validating gender variable, 51–52<strong>for</strong>m tagaction attribute, 36enctype part of, 342, 347method attribute, 36specifying encoding, 40using in HTML <strong>for</strong>ms, 36, 38FORMAT( ) function, 157*_FORMAT parameters, date <strong>and</strong> time, 162<strong>for</strong>m.html documentcreating, 37saving, 40testing, 43<strong>for</strong>ms. See also HTML <strong>for</strong>mspreventing automated submissions, 408validating, 56validation errors, 279<strong>for</strong>um database, 175. See also message boardatomic, 170creating, 186ERD (entity-relationship diagram),explained, 178indexes, 181items, 166–167table types, 182time zones, 190–194<strong>for</strong>um page, creating <strong>for</strong> message board,538–542<strong>for</strong>ums table, creating, 186FULLTEXT indexes, adding, 180, 223–224FULLTEXT searchesBoolean, 227–229per<strong>for</strong>ming, 222–226function.js documentcreating, 350saving, 352functions. See also <strong>MySQL</strong> functions; <strong>PHP</strong>functions; user-defined functions[ ] (square brackets), 104applying to column values, 153avoiding global variables in, 109calling <strong>and</strong> returning arrays, 108date <strong>and</strong> time, 159errors, 258grouping, 214<strong>for</strong> numbers, 23numeric, 157–158optional parameters, 104returning multiple values, 108searching in <strong>PHP</strong> manual, 22<strong>for</strong> strings, 22text, 154–156type validation, 409Ggarbage collection, 394gender radio buttons, validating, 46gender variable, validating, 51–52GET request, using with HTML <strong>for</strong>ms, 85$_GET variable vs. variable scope, 109getdate( ) array, 363getimagesize( ) array, 352$GLOBALS array, adding elements to, 109greater than (>) operator, 45greater than or equal to (>-) operator, 45GREATEST( ) function, 218GROUP BY clauses, using with joins, 215GROUP_CONCAT( ) grouping function, 214groupingfunctions, 214–215data, 216–217Index 667
Hh<strong>and</strong>le_<strong>for</strong>m.php document<strong>for</strong> arrays, 56–57conditionals example, 46–48creating, 42saving, 43, 53using stripslashes( ) function in, 44validating <strong>for</strong>m data, 49–53HAVING clause, explained, 217header( ) function, 356–361header.html file<strong>for</strong> logout link, 386modifying, 266–267saving, 81, 266<strong>for</strong> session variables, 392headers already sent error, 258hidden <strong>for</strong>m inputs, 304–308home page, creating <strong>for</strong> message board, 537HOUR( ) function, 159.htaccess file, 337HTMLprinting with <strong>PHP</strong>, 31resource <strong>for</strong>, 5sending to <strong>Web</strong> browser, 12HTML attributes, double quoting, 94HTML code, sending, 8HTML errors, debugging, 246–247.html extension, 3, 78HTML <strong>for</strong> <strong>Web</strong> page script, 80HTML <strong>for</strong>ms. See also dynamic <strong>Web</strong> sites; <strong>for</strong>ms;sticky <strong>for</strong>msage element, 42beginning, 89comments element, 42completing, 89creating, 37–40CSS (Cascading Style Sheets), 37echo statement, 43email element, 42encoding <strong>for</strong> <strong>for</strong>m tag, 39footer file, 90<strong>for</strong>m data variables, 42<strong>for</strong>m tag, 36, 38gender element, 42gender radio button, 46GET method, 36GET request, 85h<strong>and</strong>ling, 42–44, 86–90.html extension, 39input types, 44method attribute, 36multidimensional arrays from, 64name element, 42number_<strong>for</strong>mat( ) function, 88per<strong>for</strong>ming calculations, 88POST method, 36, 85printing, 42printing results, 88printing values in, 42pull-down menu, 39, 59–60radio buttons, 39, 90$_REQUEST[ ] variables, 42–43sample script, 37–38starting, 38submit element, 42submitting back to itself, 90testing, 43testing submission of, 85–86text box <strong>for</strong> comments, 39text inputs, 38textarea element, 39validating, 88variables <strong>for</strong> <strong>for</strong>m elements, 42HTML source codealtering spacing of, 9checking, 33HTML table, creating to sort arrays, 66HTML template script, 79HTML5, development of, 3HTML-embedded language, <strong>PHP</strong> as, 2htmlentities( ) function, 418–420.html extension, 39htmlspecialchars( ) function, 418, 420HTTP headers, 355–357iif conditional, 45if-else conditional, 52if-elseif-else conditional, 47IFNULL( ) function, 221images.php document. See also show_image.phpscriptcreating, 352date <strong>and</strong> time functions, 363–365script, 353–355IN operator, 140.inc file extension, 78include( ) functionvs. require( ) function, 84using, 76–77, 82increment operator, symbol <strong>for</strong>, 23index page, creating <strong>for</strong> message board, 537indexescreating, 179–181FULLTEXT, 180PRIMARY KEY, 180668 Index
UNIQUE, 180using on columns, 179using with JOINs, 181index.php filesaving, 83using to create function, 95ini_set( ) function, 248–249inner joins, 205–207, 212InnoDB storage enginefeatures, 182<strong>for</strong>eign key constraints, 195vs. MyISAM, 182integersvs. decimals, 25maximum, 25is equal to (--) operator, 45IS FALSE operator, 140is not equal to (!-) operator, 45IS NOT NULL operator, 140IS NULL operator, 140–141IS TRUE operator, 140is_* type validation functions, 409is_numeric( ) function, using with <strong>for</strong>ms, 53is_uploaded_file( ) function, 347ISO-8859-1 encoding, use of, 5isset( ) functionusing with conditionals, 45validating <strong>for</strong>m data, 49, 51JJavaScriptalert( ) call, 470debugging, 459event h<strong>and</strong>ling, 469–472<strong>for</strong>m submission, 470–472<strong>for</strong>m validation, 491<strong>for</strong>matting numbers, 472test.js file, 470JavaScript filecreating, 349–354creating with <strong>PHP</strong>, 352–354join types, 232joining tables, 211–213joinscreating, 211GROUP BY clauses in, 215inner, 205–207, 212outer, 208–211per<strong>for</strong>ming, 204–205self-, 210JOINs, using indexes with, 181jQuery. See also Ajax$(document), 466DOM manipulation, 473–478hosted, 461HTML <strong>for</strong>m, 467–468incorporating, 460–462overview, 458–459selecting page elements, 466–468selecting <strong>Web</strong> documents, 466test.html script, 462, 467using, 463–465jQuery( ) function, calling, 465Kkeysassigning, 167<strong>for</strong>eign, 167primary, 167ksort( ) function, using with arrays, 65, 67LLEFT( ) function, 154LENGTH( ) function, 154, 156less than (< ) operator, 45less than or equal to (
logout.php script, 385, 393loops. See also <strong>for</strong> loop; <strong>for</strong>each loop;while loopconditions, 70do...while, 70infinite, 70parameters, 70using, 70–71using with arrays, 70LOWER( ) function, 154MMagic Quotes. See also quotation marksstripslashes( ) function, 44undoing effect of, 44mail( ) function, 330–335many-to-many relationship, 168matches.php document, 450, 452mathematical calculationsassignment operators, 25per<strong>for</strong>ming, 24MAX( ) grouping function, 214MAX_FILE_SIZE, 347MD5( ) function, 135message board. See also <strong>for</strong>um databaseadministering, 557database, 520–528footer file, 536<strong>for</strong>um page, 538–542header.html template, 530–536home page, 537index page, 537languages table, 527post_<strong>for</strong>m.php page, 548–551posting messages, 548–557post.php file, 552–557read.php file <strong>for</strong> thread page, 544–546templates, 529–537thread page, 543–547threads table, 524users table, 525, 527words table, 526, 528messages table, creating, 187meta tag, using in encoding, 2meta-characters, using in regularexpressions, 438method attribute, using with HTML <strong>for</strong>ms, 36MIN( ) grouping function, 214MINUTE( ) function, 159MOD( ) function, 157–158modulus operator, symbol <strong>for</strong>, 23MONTH( ) functions, 159movies table, 170movies-actors table, 171, 174multi.php document, creating, 62multiplication operator, symbol <strong>for</strong>, 23MyISAM table type, 182<strong>MySQL</strong>. See also SQL (Structured QueryLanguage)accessing, 121–127case sensitivity of identifiers, 113CHAR( ) function, 135column properties, 118–120column types, 114–117connecting to, 268–272connection <strong>for</strong> OOP, 497–500debugging techniques, 262–263described, 111errors related to column values, 137FALSE keyword, 142INTO in INSERT, 137inserting rows, 133length limits <strong>for</strong> element names, 113MD5( ) function, 135naming database elements, 112–113NOT NULL value <strong>for</strong> columns, 118NOW( ) function, 135, 137NULL value <strong>for</strong> columns, 119Query Browser, 121selecting column types, 116–117SHA1( ) function, 135, 137, 142SHOW CHARACTER SET comm<strong>and</strong>, 184SHOW comm<strong>and</strong>, 188time zones, 189–194TRUE keyword, 142users table, 113mysql client, 121–124<strong>MySQL</strong> data typesBIGINT, 115BINARY, 117BOOLEAN, 117CHAR, 115, 117DATE, 115DATETIME, 115DECIMAL, 115DECIMAL vs. FLOAT or DOUBLE, 117DOUBLE, 115ENUM, 114–115FLOAT, 115INSERT, 117INT, 115LONGBLOB, 117LONGTEXT, 115MEDIUMBLOB, 117MEDIUMINT, 115MEDIUMTEXT, 115670 Index
SET, 114–115SHOW ENGINES comm<strong>and</strong>, 183SMALLINT, 115TEXT, 115TIME, 115TIMESTAMP, 115, 117TINYBLOB, 117TINYINT, 115, 117TINYTEXT, 115UPDATE, 117VARBINARY, 117VARCHAR, 115, 117<strong>MySQL</strong> functions, support <strong>for</strong>, 267. See alsofunctions<strong>MySQL</strong> Workbench program, 169mysqli_connect.php documentcreating, 268saving, 270script, 269security, 271mysqli_fetch_array( ) constants, 281mysqli_num_rows( ) function, 290–291mysqli_real_escape_string( ) function,286–289, 425n\n (newline) characterescape sequence, meaning, 29, 31printing, 9namespaces, support <strong>for</strong>, 496natsort( ) function, using with arrays, 68newline (\n) character, printing, 9newline code, 29, 31nl2br( ) function, 420normalization1NF (First Normal Form), 169–1712NF (Second Normal Form), 172–1743NF (Third Normal Form), 175–176defined, 165development, 166<strong>for</strong>ms, 169overruling, 176process, 166, 169not (!) operator, 45NOT BETWEEN operator, 140NOT IN operator, 140NOT LIKE keywordliteral underscore, 144percentage, 144using, 143–144NOT operator, 140Notepad, avoiding use of, 3–4notices, error reporting, 250NOW( ) function, 135, 159NULL type, explained, 45NULL values vs. empty strings, 141number_<strong>for</strong>mat( ) function, 23, 25, 88numbersarithmetic operators, 23functions <strong>for</strong>, 23quoting, 23sphenic, 61using, 24–25using typecasting with, 413using variables with, 24numbers.php documentcreating, 24quotation marks examples, 29–31saving, 25number-type variables, examples, 23numeric functions, 157–158oone-to-many relationship, 168one-to-one relationship, 168OOP (Object-Oriented Programming). See alsoprogramming techniquesclasses, 496DateTime class, 511–517executing queries, 501–504fetch_object( ) method, 507fetching results, 505–507fundamentals, 494–495<strong>MySQL</strong> connection, 497–500outbound parameters, 510prepared statements, 508–510vs. procedural, 494syntax in <strong>PHP</strong>, 495–496operating system (OS) constant, 26operatorscomparative, 45exclusive or, 48logical, 45ternary, 317OPTIMIZE comm<strong>and</strong>, 230or (||) operator, 45, 48OR operator, 45, 48, 140ORDER BY clausealias in, 155using with indexes, 180ORDER BY clause, using with queries, 145–146OS (operating system) constant, 26outbound parameters, 510outer joins, 208–211output buffering, 561Index 671
ppagination, explained, 316parameters. See argumentsparentheses (( ))using with clauses, 25using with functions, 8parse error, 258<strong>for</strong> arrays, 55receiving, 8password, validating, 277password.php script, 292–297paths, absolute vs. relative, 76patternsback references, 455defining <strong>for</strong> regular expressions, 438–440matching, 452–455meta-characters, 438modifiers, 450replacing, 452–455pcre.php scriptcharacter classes, 444–445matching patterns, 435quantifiers, 441–442reporting matches, 446–449using patterns, 439–440<strong>PHP</strong>adjusting error reporting, 250–252debugging technique, 258–261namespaces, 496OOP syntax in, 495–496updating records with, 292–297<strong>PHP</strong> <strong>and</strong> JavaScript, 348<strong>PHP</strong> codeexecuting, 5objects in, 500placing in <strong>PHP</strong> tags, 3<strong>PHP</strong> errorsblank page, 258call to undefined function, 258cannot redeclare function, 258displaying, 248–249empty variable value, 258headers already sent, 258logging, 257parse error, 258undefined variable, 258.php extensionusing, 3, 78using with connection scripts, 271<strong>PHP</strong> files, including extensions with, 3<strong>PHP</strong> functions, using with <strong>MySQL</strong>, 267. Seealso functions<strong>PHP</strong> mail( ) dependencies, 330<strong>PHP</strong> manual, accessing, 22<strong>PHP</strong> pages, storing data sent to, 44<strong>PHP</strong> scripts. See also scriptsdebugging, 5, 8, 33, 259–261<strong>for</strong> JavaScript, 352–354making, 3–5running through URLs, 7, 33sending values to, 300–303writing, 3<strong>PHP</strong> tags, 4<strong>PHP</strong>_OS constantexplained, 26using, 27<strong>PHP</strong>_VERSION constantexplained, 26using, 27, 33phpinfo( ) functionusing, 33using <strong>for</strong> debugging, 245php.ini configuration file, include_pathsetting, 84phpMyAdminINSERT <strong>for</strong>m, 137INSERT tab, 137SELECT queries, 139sitename database, 132updating records, 150using, 124–127“Plain <strong>and</strong> Simple” template, 78POST method, using with HTML <strong>for</strong>ms, 85$_POST variable vs. variable scope, 109post_message.php script, 427–431, 508–510pound (#) symbol, using in comments, 10–11POW( ) function, 157precedence, explained, 25predefined.php documentcreating, 15saving, 17preg_match( ) function, using with regularexpressions, 446–447preg_replace( ) function, 452–454prepared statementsin OOP, 508–510per<strong>for</strong>mance, 425using, 427–431primary key, assigning, 167PRIMARY KEY index, adding, 180–181print language constructsending HTML code to browser, 8using, 6–7using over multiple lines, 9using to debug scripts, 260print_r( ) function, 500672 Index
printingarrays, 55arrays after sorting, 67backslashes, 29characters, 31date, 27dollar signs, 30–31HTML <strong>for</strong>ms, 42HTML with <strong>PHP</strong>, 31names of scripts, 16operating system in<strong>for</strong>mation, 27parse error, receiving, 55<strong>PHP</strong> version, 27quotation marks, 29results of HTML <strong>for</strong>ms, 88server in<strong>for</strong>mation, 16user in<strong>for</strong>mation <strong>for</strong> scripts, 16validation results <strong>for</strong> <strong>for</strong>m data, 52values in HTML <strong>for</strong>ms, 43values of strings, 18values of variables, 31programming techniques. See also OOP (Object-Oriented Programming)editing records, 309–315hidden <strong>for</strong>m inputs, 304–308paginating query results, 316–322sending values to scripts, 300–303sortable displays, 323–327proxy.php script, using with HTTP headers, 355pull-down menuadding to HTML <strong>for</strong>m, 39preselecting in sticky <strong>for</strong>ms, 91using arrays <strong>for</strong>, 59–60Qquantifiers, using with regular expressions,441–442queriesexecuting, 273–280executing in OOP, 501–504explaining, 231–233identifying problems with, 233limiting results, 147–148optimizing, 230–233ORDER BY clause, 145–146per<strong>for</strong>ming calculations in, 142quotes in, 134sorting results, 145–146specifying collations in, 188query resultsfetching, 284paginating, 316–322retrieving, 281–284quotation marks. See also Magic Quoteschecking during debugging, 260escape sequences, 29printing, 29single vs. double, 29–31using in queries, 134using with functions, 6–7using with HTML attributes, 94using with strings, 18using with variables, 14quotes.php file, saving, 31R\r escape sequence, meaning, 29radio buttonsadding to HTML <strong>for</strong>ms, 39changing in sticky <strong>for</strong>ms, 93presetting in sticky <strong>for</strong>ms, 91using in HTML <strong>for</strong>ms, 90RAND( ) function, 157–158RDBMS, “relational” aspect, 169read.php, creating <strong>for</strong> thread page, 544–546recordscounting returned, 290–291deleting, 151–152, 297deleting constrained, 201editing, 309–315fetching, 506finding in users table, 319updating, 149–150updating with <strong>PHP</strong>, 292–297register.php script, 274–276modifying, 291mysqli_real_escape_string( ), 286–288OOP example, 502–504regular expressionsboundaries, 444character classes, 443–446finding matches, 446–449matching patterns, 452–455modifiers, 450–451patterns, 438–440preg_match( ) function, 446quantifiers, 441–442reducing greediness, 447–448replacing patterns, 452–455searching, 156strstr( ) function, 440test script, 434–437using, 403, 409, 413Index 673
elationshipsmany-to-many, 168one-to-many, 168one-to-one, 168relative vs. absolute paths, 76REPLACE comm<strong>and</strong>, 137REPLACE( ) function, 154$_REQUEST variable vs. variable scope, 109require( ) function, vs. include( ) function, 84return, including in messages, 9return statement, using with functions, 105–108RIGHT( ) function, 154ROLLBACK comm<strong>and</strong>, with queries, 233, 236round( ) function, 23ROUND( ) function, 157rows, inserting in <strong>MySQL</strong>, 133Ssanitation filters, 421savepoints, creating in transactions, 236sc<strong>and</strong>ir( ) function, 352schema, defined, 166script files, 352scripts. See also <strong>PHP</strong> scriptsdynamic, 17printing names of, 16searches, per<strong>for</strong>ming FULLTEXT, 222–226SECOND( ) function, 159Second Normal Form (2NF), 172–174second.php file, saving, 7secure SQL, ensuring, 285–289securitye-commerce, 611of sortable displays, 327security methods. See also encrypting databasesapproaching, 403CAPTCHA test, 408Filter extension, 421–424preventing brute <strong>for</strong>ce attacks, 431preventing spam, 402–408preventing SQL injection attacks, 425–431preventing XSS attacks, 418–420recommendations, 430validating data by type, 409–413validating files by type, 414–417SELECT queries* (asterisk) used with, 138adding conditionals to, 140–143listing columns in, 139retrieving columns, 139using with column values, 153selections, advanced, 218–221self-joins, per<strong>for</strong>ming, 210semicolon (;)avoiding, 280using with statements, 6server, preparing <strong>for</strong> file uploads, 338–341server in<strong>for</strong>mation, printing, 16session behavior, changing, 396session fixation, preventing, 399session variablesaccessing, 390–392deleting, 393setting, 388–389session_start( ) function, calling, 394sessionsbeginning, 389–390vs. cookies, 388deleting, 393–395destroying, 393improving security, 396–399using, 388setcookie( ) function, 377, 380arguments, 384result of, 387SHA1( ) function, 135, 236, 239SHOW CHARACTER SET comm<strong>and</strong>, 184SHOW comm<strong>and</strong>, 188SHOW ENGINES comm<strong>and</strong>, 183SHOW WARNINGS comm<strong>and</strong>, 137show_image.php script. See also images.phpdocumentcreating, 358saving, 360shuffle( ) function, using with arrays, 68single (') quotation marks, 29–31sitename databasecreating, 130SELECT queries, 140–142users table, 131slashes (//), using in comments, 10–11sort( ) function, using with arrays, 65sortable displays, making, 323–327sortingarrays, 65–68on ENUM types, 146query results, 145–146sorting.php documentcreating, 66saving, 68space, concatenating to variables, 21spacing, altering in <strong>Web</strong> pages, 9spam, preventing, 402–408spam_scrubber( ) function, 404–406special characters, printing, 31sphenic numbers, creating array of, 61674 Index
SQL (Structured Query Language). Seealso <strong>MySQL</strong>aliases, 153, 155AUTO_INCREMENT, 135character set, 132collation, 132conditionals, 140–142confirming tables, 132CREATE DATABASE syntax, 130creating databases, 130–132creating tables, 130–132date <strong>and</strong> time functions, 159–161debugging techniques, 262–263DELETE comm<strong>and</strong>, 151deleting data, 151–152DESCRIBE tablename syntax, 132DROP comm<strong>and</strong>, 152<strong>for</strong>matting date <strong>and</strong> time, 162–163<strong>for</strong>matting text, 155–156functions, 153–156INSERT comm<strong>and</strong>, 133–137inserting records, 133–137LIKE, 143–144LIMIT clause, 147–148limiting query results, 147–148listing columns, 132NOT LIKE, 143–144NULL values, 133numeric functions, 157–158quotes in queries, 134securing, 285–289SELECT query, 138–139SHOW COLUMNS FROM tablename, 132SHOW TABLES syntax, 132sorting query results, 145–146specifying collation, 132table types, 132text columns, 132text functions, 154–155TRUNCATE TABLE comm<strong>and</strong>, 151UPDATE syntax, 149–150updating data, 149–150users table, 131WHERE term, 140–141SQL comm<strong>and</strong>sbackticks (`) in, 137entering, 127REPLACE, 137SELECT, 138–139SQL injection attacksbound value types, 426prepared statements, 427–431preventing, 425–431SQRT( ) function, 157square brackets ([ ])using with databases, 114using with functions, 104sticky <strong>for</strong>ms. See also HTML <strong>for</strong>mschanging distance input, 92changing radio buttons, 93described, 91making, 92–94preselecting pull-down menu, 91presetting status of radio buttons, 91presetting value of textarea, 91select menu options, 94using, 309, 314–315value attribute, 91storage engine, defined, 182string equality, checking <strong>for</strong>, 143strings. See also variables<strong>and</strong> arrays, 65assigning values to variables, 18calculating length of, 22comparing, 143concatenating, 21–22converting case of, 22creating, 18defined, 18echo statement, 20functions, 22matching, 222printing values of, 18size consideration, 20using, 19–20using quotation marks with, 18using variables with, 19strings.php documentconcatenation example, 21–22creating, 19saving, 20strip_tags( ) function, 418, 420stripslashes( ) function, 44strlen( ) function, 22strstr( ) function 440strtolower( ) function, 22strtoupper( ) function, 22Structured Query Language (SQL). See SQL(Structured Query Language)style.css file, downloading, 79SUBSTRING( ) function, 154subtraction operator, symbol <strong>for</strong>, 23SUM( ) grouping function, 214, 217superglobal variable, $_REQUEST, 44switch conditional, 48syntax, errors in, 242Index 675
T\t escape sequence, meaning, 29tab code, 29table typesconfirming, 223establishing, 183finding, 183MyISAM, 182storage engine, 182using, 182tables. See database tablestemplate systemcreating, 77–78header file, 266–267index.php page, 83ternary operator, structure of, 317textconverting, 188<strong>for</strong>matting, 155–156text box <strong>for</strong> comments, adding to HTML <strong>for</strong>m, 39text editor, 3text functions, 154–156textarea elementadding to HTML <strong>for</strong>m, 39presetting value in sticky <strong>for</strong>ms, 91Third Normal Form (3NF), 175–176thread page, creating <strong>for</strong> message board,543–547Thumbs.db file, 354time. See date <strong>and</strong> timetime zones, changing, 190transactionscreating savepoints in, 236per<strong>for</strong>ming, 234–236triggers vs. constraints, 201TRIM( ) function, 154TRUNCATE comm<strong>and</strong>, 297TRUNCATE TABLE comm<strong>and</strong>, 151.txt extension, avoiding use of, 4type validation functions, 409typecasting, 410–413uucfirst( ) function, 22ucwords( ) function, 22undefined variable error, 258Undefined variable: variablename error, 44underscore ( _ ), using with variables, 17UNIQUE indexes, adding, 180Unix chmod comm<strong>and</strong>, using <strong>for</strong> file uploads, 341UNIX_TIMESTAMP( ) functions, 159UPDATE query, running, 292–297UPDATE syntax, 149–150upload_image.php document, 343–345upload_rtf.php script, 415–417UPPER( ) function, 153–154URLsappending variables to, 303using with <strong>PHP</strong> scripts, 5, 7, 33user in<strong>for</strong>mation, printing, 16user registrationaccount activation, 586–588activation page, 586–588activation process, 583change_password.php script, 599–603configuration scripts, 566–573database connection, 571–573database scheme, 573database script, 570footer.html file, 563–565<strong>for</strong>got_password.php script, 594–599header.html file, 560–562home page, 574–575index.php script, 574–575login.php script, 589–592logout.php script, 593output buffering, 561password management, 594–603register.php script, 576–585site administration, 602templates, 560–565user-defined functions. See also functionscalculation script, 105–107calling after creating, 97case insensitivity, 95create_ad( ), 97creating, 95–97default argument values, 101–104memory usage, 97naming, 95return statement, 105returning values from, 105–108taking arguments, 97–100variable scope, 109users tablecreating, 187finding records in, 319usort( ) function, using with arrays, 68UTC (Coordinated Universal Time)explained, 189using, 191–194UTC Offsets table, 189UTC_TIMESTAMP( ) functions, 159UTF-8 characters, increasing column size <strong>for</strong>, 188UTF-8 encoding, 2, 185, 191676 Index
Vvalidating files by type, 414–417validationblacklist, 409typecasting, 410–413whitelist, 409validation errors, reporting <strong>for</strong>ms, 279validation filters, 421validation tools, using <strong>for</strong> debugging, 246$var, removing backslashes from, 44VARCHAR vs. CHAR, 117variable names, replacing, 29variable scopealtering, 109circumventing, 109global statement, 109superglobal alternative, 109variables. See also stringsadding to function definitions, 97appending to URLs, 303arrays, 14assigning values to, 14, 20assignment operator (=), 14Boolean, 14case sensitivity, 14confirming values of, 44vs. constants, 26defined, 14floating point, 14including underscore, 17integer, 14naming, 14, 17nonscalar, 14NULL, 14objects, 14omitting spaces, 17preceding with $ (dollar sign), 14predefined, 14printing, 14–15printing values of, 31scalar, 14shorth<strong>and</strong> version, 16strings, 14superglobal, 44syntactical rules, 14tracking during debugging, 260treatment of, 17typecasting, 410using, 15–17using with numbers, 24using with strings, 19version of <strong>PHP</strong> constant, 26, 33view_users.php script, 282–283, 300–302modifying, 290–291OOP example, 506–507paginating, 316–322sortable displays, 323–325Wwarnings, error reporting, 250<strong>Web</strong> applicationsdate <strong>and</strong> time functions, 362–365file uploads, 336–338file uploads with <strong>PHP</strong>, 342–347HTTP headers, 355–361<strong>PHP</strong> <strong>and</strong> JavaScript, 348–354preparing servers <strong>for</strong> uploads, 338–341sending email, 330–335<strong>Web</strong> browsersending data to, 7–9sending HTML to, 12<strong>Web</strong> pages, altering spacing in, 9<strong>Web</strong> sites, dynamic vs. static, 75. See alsodynamic <strong>Web</strong> sitesWHEN...THEN clauses, 219WHERE clause, 140–141using with indexes, 180using with UPDATE, 150while loop. See also loopsexample, 69functionality, 70white space, areas of, 9whitelist validation, 409wildcards, using with LIKE <strong>and</strong> NOT LIKE, 144WITH QUERY EXPANSION modifier, 229wordwrap( ) function, 333www.query.com, loading, 461xXHTML, resource <strong>for</strong>, 5XHTML 1.0 Transitional document, 2XML-style tags, 4XOR (<strong>and</strong> not) operator, 45, 48, 140XSS attacks, preventing, 418–420xss.php script, 419YYEAR( ) function, 159ZZ (Zulu) timeexplained, 189using, 191–194Index 677
Unlimited online access to all Peachpit, AdobePress, Apple Training <strong>and</strong> New Riders videos<strong>and</strong> books, as well as content from otherleading publishers including: O’Reilly Media,Focal Press, Sams, Que, Total Training, JohnWiley & Sons, Course Technology PTR, Classon Dem<strong>and</strong>, VTC <strong>and</strong> more.no time commitment or contract required!Sign up <strong>for</strong> one month or a year.all <strong>for</strong> $19.99 a monthSign up todaypeachpit.com/creativeedge
AThanks <strong>for</strong> downloading thisbonus appendix to <strong>PHP</strong> <strong>and</strong><strong>MySQL</strong> <strong>for</strong> <strong>Dynamic</strong> <strong>Web</strong><strong>Sites</strong>: Visual QuickPro Guide,Fourth Edition, by Larry Ullman(Peachpit Press, 2011).InstallationThere are three technical requirements<strong>for</strong> executing all of this book’s examples:<strong>MySQL</strong> (the database application), <strong>PHP</strong>(the scripting language), <strong>and</strong> the <strong>Web</strong>server application (that <strong>PHP</strong> runs through).This appendix describes the installation ofthese tools on two different plat<strong>for</strong>ms—Windows 7 <strong>and</strong> Mac OS X. If you are usinga hosted <strong>Web</strong> site, all of this will alreadybe provided <strong>for</strong> you, but these productsare all free <strong>and</strong> easy enough to install, soputting them on your own computer stillmakes sense.After covering installation, the appendixdiscusses related issues that will be ofimportance to almost every user. First, Iintroduce how to create users in <strong>MySQL</strong>.Next, I demonstrate how to test your <strong>PHP</strong><strong>and</strong> <strong>MySQL</strong> installation, showing techniquesyou’ll want to use when you beginworking on any server <strong>for</strong> the first time.Then, you’ll learn how to configure <strong>PHP</strong>to change how it runs. Finally, <strong>and</strong> new inthis edition of this book, I introduce how tochange the Apache <strong>Web</strong> server’s behavior,in order to address common needs.installation on WindowsAlthough you can certainly install a <strong>Web</strong>server (like Apache, Abyss, or IIS), <strong>PHP</strong>,<strong>and</strong> <strong>MySQL</strong> individually on a Windowscomputer, I strongly recommend you usean all-in-one installer instead. It’s simplyeasier <strong>and</strong> more reliable to do so.There are several all-in-one installersout there <strong>for</strong> Windows. The two mentionedmost frequently are XAMPP(www.apachefriends.org) <strong>and</strong> WAMP(www.wampserver.com). For this appendix,I’ll use XAMPP, which runs on most versionsof Windows.Along with Apache, <strong>PHP</strong>, <strong>and</strong> <strong>MySQL</strong>,XAMPP also installs:nnnnnPEAR (<strong>PHP</strong> Extension <strong>and</strong> ApplicationRepository), a library of <strong>PHP</strong> codePerl, a very popular programminglanguagephpMyAdmin, the <strong>Web</strong>-based interfaceto a <strong>MySQL</strong> serverA mail server (<strong>for</strong> sending email)Several useful extensions
At the time of this writing XAMPP (Version1.7.4) installs <strong>PHP</strong> 5.3.5, <strong>MySQL</strong> 5.5.8,Apache 2.2.17, <strong>and</strong> phpMyAdmin 3.3.9.I’ll run through the installation process inthese next steps. Note that if you have anyproblems, you can use the book’s supporting<strong>for</strong>um (www.LarryUllman.com/<strong>for</strong>ums/),but you’ll probably have more luck turningto the XAMPP site (it is their product, afterall). Also, the installer works really well <strong>and</strong>isn’t that hard to use, so rather than detailevery single step in the process, I’ll highlightthe most important considerations.To install xAMpp on Windows:1. Download the latest release of XAMPP <strong>for</strong>Windows from www.apachefriends.org.You’ll need to click around a bit to findthe download section, but eventuallyyou’ll come to an area where you canfind the download A. Then click EXE,which is the specific item you want.2. On your computer, double-click thedownloaded file in order to begin theinstallation process.3. If prompted, install XAMPP somewhereother than in the Program Files directory.A From the ApacheFriends <strong>Web</strong> site, grab thelatest installer <strong>for</strong> Windows.on FirewallsA firewall prevents communication over ports (a port is an access point to a computer). Versionsof Windows starting with Service Pack 2 of XP include a built-in firewall. You can also download<strong>and</strong> install third-party firewalls. Firewalls improve the security of your computer, but they may alsointerfere with your ability to run Apache, <strong>MySQL</strong>, <strong>and</strong> some of the other tools used by XAMPPbecause they all use ports.When running XAMPP, if you see a security prompt indicating that the firewall is blocking Apache,<strong>MySQL</strong>, or the like, choose Unblock or Allow, depending upon the version of Windows in use.Otherwise, you can configure your firewall manually (<strong>for</strong> example, on Windows 7, it’s done throughControl Panel > System <strong>and</strong> Security). The ports that need to be open are as follows: 80 (<strong>for</strong>Apache), 3306 (<strong>for</strong> <strong>MySQL</strong>), <strong>and</strong> 25 (<strong>for</strong> the Mercury mail server). If you have any problems startingor accessing one of these, disable your firewall <strong>and</strong> see if it works then. If so, you’ll know thefirewall is the problem <strong>and</strong> that it needs to be reconfigured.Just to be clear, firewalls aren’t found just on Windows, but in terms of the instructions in thisappendix, the presence of a firewall will more likely trip up a Windows user than any other.A2 Appendix A
B Select what additional installation optionsyou want.You shouldn’t install it in the ProgramFiles directory because of a permissionsissue on some versions of Windows. Irecommend installing XAMPP in yourroot directory (e.g., C:\).Wherever you decide to install theprogram, make note of that location,as you’ll need to know it severalother times as you work through thisappendix.4. If you want, create Desktop <strong>and</strong> StartMenu shortcuts B.5. Continue through the remainingprompts, reading them <strong>and</strong> pressingEnter/Return to continue.6. After the installation process has doneits thing C, click Yes to start the controlpanel.continues on next pageC The installation of XAMPP is complete!InstallationA3
7. To start, stop, <strong>and</strong> configure XAMPP,use the XAMPP control panel D.8. As needed, using the control panel,start Apache, <strong>MySQL</strong>, <strong>and</strong> Mercury.Apache has to be running <strong>for</strong> everychapter in this book. <strong>MySQL</strong> must berunning <strong>for</strong> about half of the chapters.Mercury is the mail server that XAMPPinstalls. It needs to be running in orderto send email using <strong>PHP</strong> (see Chapter 11,“<strong>Web</strong> Application Development”).9. Immediately set a password <strong>for</strong> the root<strong>MySQL</strong> user.How you do this is explained later inthe appendix.D The XAMPP control panel, used to managethe software.The XAMPP control panel’s variousadmin links will take you to different <strong>Web</strong>pages (on your server) <strong>and</strong> other resources E.See the “<strong>PHP</strong> Configuration” sectionto learn how to configure <strong>PHP</strong> by editing thephp.ini file.Your <strong>Web</strong> root directory—where your<strong>PHP</strong> scripts should be placed in order to testthem—is the htdocs folder in the directorywhere XAMPP was installed. Followingthese installation instructions, this wouldbe C:\xampp\htdocs.E The <strong>Web</strong>-based splash page <strong>for</strong> XAMPP, linkedfrom the control panel.When starting the XAMPP Control Panelusing XAMPP 1.7.4 on a 64-bit version of Windows7, I consistently saw an error messageabout a “Status Check Failure.” I never figuredout the cause, but the error didn’t preventXAMPP from being completely usable.A4 Appendix A
Xnstallation on Mac oS xAlthough Mac OS X comes with Apachebuilt in, <strong>and</strong> installing <strong>MySQL</strong> is not thathard, I recommend that beginners takea more universally foolproof route <strong>and</strong>use the all-in-one MAMP installer (www.mamp.info). It’s available in both free <strong>and</strong>commercial versions, is very easy to use,<strong>and</strong> won’t affect the Apache server builtinto the operating system.Along with Apache, <strong>PHP</strong>, <strong>and</strong> <strong>MySQL</strong>,MAMP also installs phpMyAdmin, the <strong>Web</strong>basedinterface to a <strong>MySQL</strong> server, alongwith lots of useful <strong>PHP</strong> extensions. As ofthis writing, MAMP (Version 1.9.6.1) installsboth <strong>PHP</strong> 5.2.13 <strong>and</strong> 5.3.2, in additionto <strong>MySQL</strong> 5.1.44, Apache 2.0.63, <strong>and</strong>phpMyAdmin 3.2.5.I’ll run through the installation process inthese next steps. If you have any problems,you can use the book’s supporting <strong>for</strong>um(www.LarryUllman.com/<strong>for</strong>ums/), butyou’ll probably have more luck turning tothe MAMP site (it is their product, after all).Also, the installer works really well <strong>and</strong> isn’tthat hard to use, so rather than detail everysingle step in the process, I’ll highlight themost important considerations.To install MAMp on Mac oS x:1. Download the latest release of MAMPfrom www.mamp.info.On the front page, click Downloads, <strong>and</strong>then click Download: MAMP & MAMPPRO 1.9.6.1 A. (As new releases ofMAMP come out, the link <strong>and</strong> filenamewill obviously change accordingly.)The same downloaded file is used <strong>for</strong>both products. In fact, MAMP Pro isjust a nicer interface <strong>for</strong> controlling <strong>and</strong>customizing the same MAMP software.continues on next pageA Download MAMP from this page at www.mamp.info.InstallationA5
2. On your computer, double-click thedownloaded file in order to mount thedisk image B.3. Copy the MAMP folder from the diskimage to your Applications folder.If you think you might prefer thecommercial MAMP PRO, copy thatfolder as well (again, it’s an interface toMAMP, so both folders are required).MAMP PRO comes with a free 14-daytrial period.Whichever folder you choose, notethat you must place it within theApplications folder. It cannot go in asubfolder or another directory on yourcomputer.4. Open the /Applications/MAMP (or /Applications/MAMP PRO) folder.5. Double-click the MAMP (or MAMP PRO)application to start the program C.It may take just a brief moment to startthe servers, but then you’ll see a resultlike that in C <strong>for</strong> MAMP or D <strong>for</strong>MAMP PRO.When starting MAMP, a start pageshould also open in your default <strong>Web</strong>browser E. Through this page you canview the version of <strong>PHP</strong> that’s running,as well as how it’s configured, <strong>and</strong>interface with the <strong>MySQL</strong> databaseusing phpMyAdmin.With MAMP PRO, you can access thatsame page by clicking the <strong>Web</strong>Startbutton D.B The contents of the downloaded MAMPdisk image.C The simple MAMP application, used to control<strong>and</strong> configure Apache, <strong>PHP</strong>, <strong>and</strong> <strong>MySQL</strong>.D The MAMP PRO application, used to control<strong>and</strong> configure Apache, <strong>PHP</strong>, <strong>MySQL</strong>, <strong>and</strong> more.A6 Appendix A
E The MAMP <strong>Web</strong> start page.6. To start, stop, <strong>and</strong> configure MAMP, usethe MAMP or MAMP PRO application Cor D.There’s not much to the MAMPapplication itself (which is a good thing),but if you click Preferences, you cantweak the application’s behavior F, setthe version of <strong>PHP</strong> to run, <strong>and</strong> more.MAMP PRO also makes it easy to createdifferent virtual hosts (i.e., differentsites; discussed separately later inthis appendix), adjust how Apache isconfigured <strong>and</strong> runs, use dynamic DNS,change how email is sent, <strong>and</strong> more.7. Immediately change the password <strong>for</strong>the root <strong>MySQL</strong> user.How you do this is explained later inthe appendix.Personally, I appreciate how great MAMPalone is, <strong>and</strong> that it’s free. I also don’t likespending money, but I’ve found the purchaseof MAMP PRO to be worth the relatively littlemoney it costs.F These options dictate what happens when youstart <strong>and</strong> stop the MAMP application.See the “<strong>PHP</strong> Configuration” sectionto learn how to configure <strong>PHP</strong> by editing thephp.ini file.MAMP also comes with a Dashboardwidget you can use to control the Apache<strong>and</strong> <strong>MySQL</strong> servers.Your <strong>Web</strong> root directory—where your<strong>PHP</strong> scripts should be placed in order to testthem—is the htdocs folder in the directorywhere MAMP was installed. For a st<strong>and</strong>ardMAMP installation without alteration, thiswould be Applications/MAMP/htdocs.G MAMP allows you to change where the <strong>Web</strong>documents are placed.You may want to change the ApacheDocument Root G to the <strong>Sites</strong> directory inyour home folder. By doing so, you assure thatyour <strong>Web</strong> documents will be backed up alongwith your other files (<strong>and</strong> you are per<strong>for</strong>mingregular backups, right?).InstallationA7
Managing <strong>MySQL</strong> usersOnce you’ve successfully installed <strong>MySQL</strong>,you can begin creating <strong>MySQL</strong> users. A<strong>MySQL</strong> user is a fundamental securityconcept, limiting access to, <strong>and</strong> influenceover, stored data. Just to clarify, yourdatabases can have several different users,just as your operating system might. But<strong>MySQL</strong> users are different from operatingsystem users. While learning <strong>PHP</strong> <strong>and</strong><strong>MySQL</strong> on your own computer, you don’tnecessarily need to create new users,but live production sites need to havededicated <strong>MySQL</strong> users with appropriatepermissions.The initial <strong>MySQL</strong> installation comes withone user (named root) with no passwordset (except when using MAMP, which sets adefault password of root). At the very least,you should create a new, secure password<strong>for</strong> the root user after installing <strong>MySQL</strong>.After that, you can create other users withmore limited permissions. As a rule, youshouldn’t use the root user <strong>for</strong> normal, dayto-dayoperations.I’ll walk you through both of theseprocesses over the next couple of pages.Note that if you’re using a hosted server,they’ll likely create the <strong>MySQL</strong> users <strong>for</strong>you. These instructions require use ofeither the comm<strong>and</strong>-line mysql client orphpMyAdmin. If you don’t know how toaccess either of these on your computer,quickly read the Accessing <strong>MySQL</strong> sectionof Chapter 4, “Introduction to <strong>MySQL</strong>.”Setting the root user passwordWhen you install <strong>MySQL</strong>, no value—or nosecure password—is established <strong>for</strong> theroot user. This is certainly a security riskthat should be remedied be<strong>for</strong>e you beginto use the server (as the root user hasunlimited powers).You can set any user’s password using eitherphpMyAdmin or the mysql client, so long asthe <strong>MySQL</strong> server is running. If <strong>MySQL</strong> isn’tcurrently running, start it now using the stepsoutlined earlier in the appendix.Second, you must be connected to <strong>MySQL</strong>as the root user in order to be able tochange the root user’s password.To assign a password to the rootuser via the <strong>MySQL</strong> client:1. Connect to the <strong>MySQL</strong> client.See Chapter 4 <strong>for</strong> detailed instructions,if needed.2. Enter the following comm<strong>and</strong>, replacingthepassword with the password youwant to use A:SET PASSWORD FOR 'root'@'➝ localhost' = PASSWORD➝ ('thepassword');Keep in mind that passwords in<strong>MySQL</strong> are case-sensitive, so Kazan<strong>and</strong> kazan aren’t interchangeable.The term PASSWORD that precedes theactual quoted password tells <strong>MySQL</strong> toencrypt that string. And there cannotbe a space between PASSWORD <strong>and</strong>the opening parenthesis.A Updating the root user’spassword using SQL withinthe <strong>MySQL</strong> client.A8 Appendix A
3. Exit the <strong>MySQL</strong> client:exit4. Test the new password by logging in tothe <strong>MySQL</strong> client again.Now that a password has been established,you need to add the -p flag tothe connection comm<strong>and</strong>. You’ll see anEnter password: prompt, where youenter the just-created password.To assign a password to theroot user via phpMyAdmin:1. Open phpMyAdmin in your <strong>Web</strong> browser.See the preceding set of steps <strong>for</strong>detailed instructions.2. On the home page, click the Privileges tab.You can always click the home icon, in theupper-left corner, to get to the home page.3. In the list of users, click the Edit Privilegesicon on the root user’s row B.4. Use the Change Password <strong>for</strong>m C,found farther down the resulting page,to change the password.5. Change the root user’s password inphpMyAdmin’s configuration file,if necessary.The result of changing the rootuser’s password will likely be thatphpMyAdmin is denied access tothe <strong>MySQL</strong> server. This is becausephpMyAdmin, on a local server, normallyconnects to <strong>MySQL</strong> as the rootuser, with the root user’s passwordhard-coded into a configuration file.After following Steps 1–4, find theconfig.inc.php file in the phpMyAdmindirectory—likely /Applications/MAMP/bin/phpMyAdmin (Mac OS Xwith MAMP) or C:\xampp\phpMyAdmin(Windows with XAMPP). Open that filein any text editor or IDE <strong>and</strong> change thisnext line to use the new password:$cfg['Servers'][$i]['password']➝ = 'the_new_password';Then save the file <strong>and</strong> reloadphpMyAdmin in your <strong>Web</strong> browser.B The list of <strong>MySQL</strong> users, as shown in phpMyAdmin.C The <strong>for</strong>m <strong>for</strong> updatinga <strong>MySQL</strong> user’s passwordwithin phpMyAdmin.InstallationA9
Creating users <strong>and</strong> privilegesAfter you have <strong>MySQL</strong> successfully up<strong>and</strong> running, <strong>and</strong> after you’ve establisheda password <strong>for</strong> the root user, you can addother users. To improve the security of yourdatabases, you should always create newusers to access your databases rather thanusing the root user at all times.The <strong>MySQL</strong> privileges system wasdesigned to ensure proper authority <strong>for</strong>certain comm<strong>and</strong>s on specific databases.This technology is how a <strong>Web</strong> host, <strong>for</strong>example, can let several users access severaldatabases without concern. Each userin the <strong>MySQL</strong> system can have specificcapabilities on specific databases fromspecific hosts (computers). The root user—the <strong>MySQL</strong> root user, not the system’s—hasthe most power <strong>and</strong> is used to createsubusers, although subusers can be givenrootlike powers (inadvisably so).When a user attempts to do somethingwith the <strong>MySQL</strong> server, <strong>MySQL</strong> firstchecks to see if the user has permissionto connect to the server at all (based onthe username, the user’s host, the user’spassword, <strong>and</strong> the in<strong>for</strong>mation in the mysqldatabase’s user table). Second, <strong>MySQL</strong>checks to see if the user has permissionto run the specific SQL statement on thespecific databases—<strong>for</strong> example, to selectdata, insert data, or create a new table.Table A.1 lists most of the various privilegesyou can set on a user-by-user basis.There are a h<strong>and</strong>ful of ways to set users<strong>and</strong> privileges in <strong>MySQL</strong>, but I’ll start bydiscussing the GRANT comm<strong>and</strong>. Thesyntax goes like this:GRANT privileges ON database.* TO➝'username'@'hostname' IDENTIFIED BY➝'password';For the privileges aspect of this statement,you can list specific privileges fromTable A.1, or you can allow <strong>for</strong> all of themby using ALL (which isn’t prudent). Thedatabase.* part of the statement specifieswhich database <strong>and</strong> tables the user canwork on. You can name specific tablesusing the database.tablename syntax orallow <strong>for</strong> every database with *.* (again,not prudent). Finally, you can specify theusername, hostname, <strong>and</strong> a password.The username has a maximum length of16 characters. When creating a username,be sure to avoid spaces (use the underscoreinstead), <strong>and</strong> note that usernamesare case-sensitive.TABLe A.1 <strong>MySQL</strong> PrivilegesPRIVILEGESELECTINSERTUPDATEDELETEINDEXALTERCREATEDROPRELOADSHUTDOWNPROCESSFILEGRANTREVOKEALLOWSRead rows from tables.Add new rows of data to tables.Alter existing data in tables.Remove existing data from tables.Create <strong>and</strong> drop indexes intables.Modify the structure of a table.Create new tables or databases.Delete existing tables ordatabases.Reload the grant tables (<strong>and</strong>there<strong>for</strong>e enact user changes).Stop the <strong>MySQL</strong> server.View <strong>and</strong> stop existing <strong>MySQL</strong>processes.Import data into tables fromtext files.Create new users.Remove users’ permissions.A10 Appendix A
The hostname is the computer from whichthe user is allowed to connect. This couldbe a domain name, such as www.example.com, or an IP address. Normally, localhost isspecified as the hostname, meaning that the<strong>MySQL</strong> user must be connecting from thesame computer that the <strong>MySQL</strong> databaseis running on. To allow <strong>for</strong> any host, use thehostname wildcard character (%):GRANT privileges ON database.*➝ TO 'username'@'%' IDENTIFIED BY➝'password';But that is also not recommended. Whenit comes to creating users, it’s best to beexplicit <strong>and</strong> confining.The password has no length limit butis also case-sensitive. The passwordsare encrypted in the <strong>MySQL</strong> database,meaning they can’t be recovered in a plaintext <strong>for</strong>mat. Omitting the IDENTIFIED BY'password' clause results in that user notbeing required to enter a password (which,once again, should be avoided).As an example of this process, you’ll createtwo new users with specific privileges on anew database named temp. Keep in mindthat you can only grant permissions to userson existing databases. This next sequencewill also show how to create a database.To create new users:1. Log in to the <strong>MySQL</strong> client as a root user.Use the steps explained in Chapter 4 todo this, if you don’t already know. Youmust be logged in as a user capable ofcreating databases <strong>and</strong> other users.2. Create the temp database:CREATE DATABASE temp;Creating a database is quite easy, usingthe preceding syntax. This comm<strong>and</strong>will work as long as you’re connectedas a user with the proper privileges.3. Create a user that has basic-levelprivileges on the temp database D:GRANT SELECT, INSERT, UPDATE,➝ DELETEON temp.* TO'webuser'@'localhost'IDENTIFIED BY 'BroWs1ng';The generic webuser user can browsethrough records (SELECT from tables)<strong>and</strong> add (INSERT), modify (UPDATE),or DELETE them. The user can onlyconnect from localhost (from the samecomputer) <strong>and</strong> can only access thetemp database.continues on next pageD Creating a user that can per<strong>for</strong>m basic tasks on one database.InstallationA11
4. Apply the changes E:FLUSH PRIVILEGES;The changes just made won’t takeeffect until you’ve told <strong>MySQL</strong> toreset the list of acceptable users <strong>and</strong>privileges, which is what this comm<strong>and</strong>does. Forgetting this step <strong>and</strong> thenbeing unable to access the databaseusing the newly created users is acommon mistake.Any database whose name begins withtest_ can be modified by any user who haspermission to connect to <strong>MySQL</strong>. There<strong>for</strong>e,be careful not to create a database named thisway unless it truly is experimental.The REVOKE comm<strong>and</strong> removes users<strong>and</strong> permissions.E Don’t <strong>for</strong>get this step be<strong>for</strong>e youtry to access <strong>MySQL</strong> using the newlycreated users.Creating users in phpMyAdminTo create users in phpMyAdmin, startby clicking the Privileges tab on thephpMyAdmin home page. On thePrivileges page, click Add A New User.Complete the Add A New User <strong>for</strong>m todefine the user’s name, host, password,<strong>and</strong> privileges. Then click Go. Thiscreates the user with general privilegesbut no database-specific privileges.On the resulting page, select thedatabase to apply the user’s privilegesto <strong>and</strong> then click Go. On the next page,select the privileges this user shouldhave on that database, <strong>and</strong> then clickGo again. This completes the processof creating rights <strong>for</strong> that user on thatdatabase. Note that this process allowsyou to easily assign a user differentrights on different databases.Finally, click your way back to thePrivileges tab on the home page <strong>and</strong>then click the reload the privileges link.A12 Appendix A
Testing Your installationNow that you’ve installed everything <strong>and</strong>created the necessary <strong>MySQL</strong> users, youshould test the installation. Two quick <strong>PHP</strong>scripts can be used <strong>for</strong> this purpose. In alllikelihood, if an error occurred, you wouldalready know it by now, but these steps willallow you to per<strong>for</strong>m tests on your (or anyother) server be<strong>for</strong>e getting into complicated<strong>PHP</strong>, or <strong>PHP</strong> <strong>and</strong> <strong>MySQL</strong>, programming.The first script being run is phpinfo.php. Itboth tests if <strong>PHP</strong> is enabled <strong>and</strong> shows aton of in<strong>for</strong>mation about the <strong>PHP</strong> installation.As simple as this script is, it is one ofthe most important scripts <strong>PHP</strong> developersever write, in my opinion, because it providesso much valuable knowledge.The second script will serve two purposes.It will first see if support <strong>for</strong> <strong>MySQL</strong> hasbeen enabled. If not, you’ll need to see thenext section of this chapter to change that.The script will also test if the <strong>MySQL</strong> userhas permission to connect to a specific<strong>MySQL</strong> database.Script A.1 The phpinfo.php script tests <strong>and</strong>reports upon the <strong>PHP</strong> installation.1 A The in<strong>for</strong>mation <strong>for</strong> this server’s <strong>PHP</strong> configuration.To test pHp:1. Create the following <strong>PHP</strong> documentin a text editor or IDE (Script A.1):The phpinfo( ) function returns theconfiguration in<strong>for</strong>mation <strong>for</strong> a <strong>PHP</strong>installation in a table. It’s the perfecttool to test that <strong>PHP</strong> is working properly.You can use almost any application tocreate your <strong>PHP</strong> script as long as it cansave the file in a plain text <strong>for</strong>mat.2. Save the file as phpinfo.php.You need to be certain that the file’sextension is just .php. Be careful whenusing Notepad on Windows, as it willsecretly append .txt. Similarly, TextEditon Mac OS X wants to save everythingas .rtf.3. Place the file in the proper directory onyour server.What the proper directory is dependsupon your operating system <strong>and</strong> your<strong>Web</strong> server. If you are using a hostedsite, check with the hosting company.For Windows users who installedXAMPP, the directory is called htdocs<strong>and</strong> is within the XAMPP directory. ForMac OS X users who installed MAMP,the default directory is called htdocs,found within the MAMP folder.4. Test the <strong>PHP</strong> script by accessing it inyour <strong>Web</strong> browser A.Run this script in your <strong>Web</strong> browserby going to http://your.url.here/phpinfo.php. On your own computer,this may be something like http://localhost/phpinfo.php (Windows withXAMPP) or http://localhost:8888/phpinfo.php (Mac OS X with MAMP).InstallationA13
To test pHp <strong>and</strong> <strong>MySQL</strong>:1. Create a new <strong>PHP</strong> document in yourtext editor or IDE (Script A.2):This script will attempt to connect tothe <strong>MySQL</strong> server using the username<strong>and</strong> password just established in thisappendix.2. Save the file as mysqli_test.php, placeit in the proper directory <strong>for</strong> your <strong>Web</strong>server, <strong>and</strong> test it in your <strong>Web</strong> browser.If the script was able to connect, theresult will be a blank page. If it could notconnect, you should see an error messagelike B. Most likely this indicates aproblem with the <strong>MySQL</strong> user’s privilegesor the provided in<strong>for</strong>mation (seethe preceding section of this chapter).If you see an error like in C, this meansthat <strong>PHP</strong> does not have <strong>MySQL</strong> supportenabled. See the next section of thischapter <strong>for</strong> the solution.For security reasons, you should notleave the phpinfo.php script on a live serverbecause it gives away too much in<strong>for</strong>mation.Script A.2 The mysqli_test.php script tests <strong>for</strong><strong>MySQL</strong> support in <strong>PHP</strong> <strong>and</strong> if the proper <strong>MySQL</strong>user privileges have been set.1 B The script was not able to connect to the<strong>MySQL</strong> server.C The script was not able to connect to the<strong>MySQL</strong> server because <strong>PHP</strong> does not have <strong>MySQL</strong>support enabled.If you run a <strong>PHP</strong> script in your <strong>Web</strong>browser <strong>and</strong> it attempts to download the file,then your <strong>Web</strong> server is not recognizing thatfile extension as <strong>PHP</strong>. Check your Apache (orother <strong>Web</strong> server) configuration to correct this.<strong>PHP</strong> scripts must always be run from aURL starting with http://. They cannot be rundirectly off a hard drive (as if you had openedit in your browser).If a <strong>PHP</strong> script cannot connect to a <strong>MySQL</strong>server, it is normally because of a permissionsissue. Double-check the username, password,<strong>and</strong> host being used, <strong>and</strong> be absolutely certainto flush the <strong>MySQL</strong> privileges.A14 Appendix A
Configuring pHpOne of the benefits of installing <strong>PHP</strong> onyour own computer is that you can configureit however you prefer. How <strong>PHP</strong> runsis determined by the php.ini configurationfile, which is normally created when<strong>PHP</strong> is installed.Changing <strong>PHP</strong>’s behavior is very simple<strong>and</strong> will most likely be required at somepoint in time. Just a few of the things you’llwant to consider adjusting arennnWhether or not display_errors is onThe default level of error reportingSupport <strong>for</strong> the Improved <strong>MySQL</strong>Extension functionsnSMTP values <strong>for</strong> sending emailsWhat each of these means—if you don’talready know—is covered in the book’schapters <strong>and</strong> in the <strong>PHP</strong> manual. But <strong>for</strong>starters, I would highly recommend that youmake sure that display_errors is on <strong>and</strong> thatyou set error reporting to its highest level.Changing <strong>PHP</strong>’s configuration is reallysimple. The short version is: edit thephp.ini file <strong>and</strong> then restart the <strong>Web</strong>server. But because many different problemscan arise, I’ll cover configuration inmore detail. If you are looking to enablesupport <strong>for</strong> an extension, like the <strong>MySQL</strong>functions, the configuration is more complicated(see the sidebar).enabling extension SupportMany <strong>PHP</strong> configuration options can be altered by just editing the php.ini file. But enabling(or disabling) an extension—in other words, adding support <strong>for</strong> extended functionality—requiresmore ef<strong>for</strong>t. To enable support <strong>for</strong> an extension <strong>for</strong> just a single <strong>PHP</strong> page, you can use thedl( ) function. To enable support <strong>for</strong> an extension <strong>for</strong> all <strong>PHP</strong> scripts requires a bit of work.Un<strong>for</strong>tunately, <strong>for</strong> Unix <strong>and</strong> Mac OS X users, you’ll need to rebuild <strong>PHP</strong> with support <strong>for</strong> thisnew extension (a process that’s not <strong>for</strong> the faint of heart). Windows users have it easier:First, edit the php.ini file (see the steps in this section), removing the semicolon be<strong>for</strong>e theextension you want to enable. For example, to enable Improved <strong>MySQL</strong> Extension support,you’ll need to find the line that says;extension=php_mysqli.dll<strong>and</strong> remove that semicolon.Next, find the line that sets the extension__dir <strong>and</strong> adjust this <strong>for</strong> your <strong>PHP</strong> installation. Assumingyou installed <strong>PHP</strong> using XAMPP into C:\xampp, then your php.ini file should sayextension_dir = "C:/xampp/php/ext"This tells <strong>PHP</strong> where to find the extension.Next, make sure that the actual extension file, php_mysqli.dll in this example, exists in theextension directory.Save the php.ini file <strong>and</strong> restart your <strong>Web</strong> server. If the restart process indicates an error findingthe extension, double-check to make sure that the extension exists in the extension_dir <strong>and</strong> thatyour pathnames are correct. If you continue to have problems, search the <strong>Web</strong> or use the book’scorresponding <strong>for</strong>um <strong>for</strong> assistance.InstallationA15
To alter pHp’s configuration:1. In your <strong>Web</strong> browser, execute a scriptthat invokes the phpinfo( ) function.The phpinfo( ) function, discussed inthe previous section of the appendix(see A), reveals oodles of in<strong>for</strong>mationabout the <strong>PHP</strong> installation.2. In the browser’s output, search <strong>for</strong>Loaded Configuration File A.The value next to this text is thelocation of the active configuration file.This will be something like C:\xampp\php\php.ini or / /Applications/MAMP/conf/php5.3/php.ini. Your servermay have multiple php.ini files on it,but this is the one that counts.If there is no value <strong>for</strong> the LoadedConfiguration File, your server has noactive php.ini file. In that case, you’llneed to download the <strong>PHP</strong> sourcecode, from www.php.net, to find asample configuration file.3. Open the php.ini file in any text editor.If you go to the directory listed <strong>and</strong>there’s no php.ini file there, you’ll needto download this file from the <strong>PHP</strong> <strong>Web</strong>site (it’s part of the <strong>PHP</strong> source code).4. Make any changes you want, keepingin mind the following:> Comments are marked using a semicolon.Anything after the semicolonis ignored.> Instructions on what most of the settingsmean are included in the file.> The top of the file lists general in<strong>for</strong>mationwith examples. Do not changethese values! Change the settingswhere they appear later in the file.A Use a phpinfo( ) scriptto confirm the active <strong>PHP</strong>configuration file to be edited.A16 Appendix A
enabling MailThe <strong>PHP</strong> mail( ) function works only ifthe computer running <strong>PHP</strong> has accessto sendmail or another mail server. Oneway to enable the mail( ) function isto set the smtp value in the php.inifile (<strong>for</strong> Windows only). This approachworks, <strong>for</strong> example, if your Internetprovider has an SMTP address you canuse. Un<strong>for</strong>tunately, you can’t use thisvalue if your ISP’s SMTP server requiresauthentication.For Windows, there are also a numberof free SMTP servers, like Mercury. It’sinstalled along with XAMPP, or youcan install it yourself if you’re not usingXAMPP.Mac OS X comes with a mail serverinstalled—postfix <strong>and</strong>/or sendmail—thatneeds to be enabled. Search Google <strong>for</strong>instructions on manually enabling yourmail server on Mac OS X.Alternatively, you can search some ofthe <strong>PHP</strong> code libraries to learn howto use an SMTP server that requiresauthentication.> For safety purposes, don’t changeany original settings. Just commentthem out (by preceding the line witha semicolon) <strong>and</strong> then add the new,modified line afterward.> Add a comment (using the semicolon)to mark what changes you made <strong>and</strong>when. For example:; display_errors = Off; Next line added by LEU08/28/2011display_errors = On5. Save the php.ini file.6. Restart your <strong>Web</strong> server.You do not have to restart the entirecomputer, just the <strong>Web</strong> servingapplication (Apache, IIS, etc.). How youdo this depends upon the applicationbeing used, the operating system, <strong>and</strong>the installation method. Windows userscan use the XAMPP Control Panel.Mac OS X users can use the MAMPControl Panel. Unix users can normallyjust enter apachectl graceful in aTerminal window.7. Rerun the phpinfo.php script to makesure the changes took effect.If you edit the php.ini file <strong>and</strong> restartthe <strong>Web</strong> server but your changes don’t takeeffect, make sure you’re editing the properphp.ini file (you may have more than oneon your computer).MAMP PRO on Mac OS X uses a template<strong>for</strong> the php.ini file that must be editedwithin MAMP PRO itself. To change the <strong>PHP</strong>settings when using MAMP PRO, select File >Edit Template > <strong>PHP</strong> X.X.X php.ini.InstallationA17
Configuring ApacheNew in this edition of this book is thissection, providing an introduction toconfiguring the Apache <strong>Web</strong> server.Like <strong>PHP</strong>, Apache is an open-sourcetechnology, <strong>and</strong> has become a dominant<strong>for</strong>ce in <strong>Web</strong> technologies. If you installedeither XAMPP or MAMP on your computer,you now have a functional version ofApache. If you’re using a hosted <strong>Web</strong> site,more than likely you’re being provided withApache there as well.Once Apache with support <strong>for</strong> <strong>PHP</strong> hassuccessfully been installed, many <strong>PHP</strong>programmers never think twice about the<strong>Web</strong> server. But as you continue to learnabout <strong>Web</strong> development, picking up a bitmore knowledge of Apache is a logicalnext step.The most common reasons you’ll need toknow more about Apache include beingable to do the following:nnnnCreate virtual hostsAdd Secure Sockets Layer (SSL)supportProtect directoriesEnable URL rewritesThese, <strong>and</strong> other changes to Apache’sbehavior, can be made in two ways: byediting the primary configuration file or bycreating directory-specific files. The primaryconfiguration file is httpd.conf, foundwithin a conf directory, <strong>and</strong> it dictates howthe entire Apache <strong>Web</strong> server runs. An.htaccess file (pronounced “H-T access”)is placed within the <strong>Web</strong> directories <strong>and</strong> isused to affect how Apache behaves withinjust that folder <strong>and</strong> subfolders.Generally speaking, it’s preferred to makechanges in the httpd.conf file, as this fileonly needs to be read by the <strong>Web</strong> servereach time the server is started. Conversely,.htaccess files must be read by the <strong>Web</strong>server once <strong>for</strong> every request to thatwhich an.htaccess file might apply. Forexample, if you have www.example.com/somedir/.htaccess, any request to www.example.com/somedir/whatever requiresreading the .htaccess file, as well asreading an .htaccess file that might existin www.example.com/. On the other h<strong>and</strong>,in shared hosting environments, individualusers are not allowed to customize theentire Apache configuration, but maybe allowed to use .htaccess to makechanges that only affect their sites.Over the next few pages, I’ll explain someof the fundamentals <strong>for</strong> working withthese two types of files. In the process,you’ll learn how to per<strong>for</strong>m some st<strong>and</strong>ardApache customizations.To be safe, I’d recommend makinga backup copy of your original Apacheconfiguration file, be<strong>for</strong>e pursuing any ofthe subsequent edits.In this book, I cannot adequately explainhow to enable HTTPS (HTTP over an SSL) asthe key component—obtaining <strong>and</strong> installingan SSL certificate varies too much from oneperson <strong>and</strong> server to the next. Look online<strong>for</strong> specific details, or post a message in mysupport <strong>for</strong>ums (www.LarryUllman.com/<strong>for</strong>ums/), if you need assistance. If you havea hosted account wherein you want to enableSSL, speak with your hosting company.A18 Appendix A
Creating Virtual HostsWhen you install Apache on a computer,Apache is set up to serve one <strong>Web</strong> site,such as www.example.com. For the <strong>Web</strong> sitebeing served, Apache associates a hostname(<strong>and</strong>/or an IP address) with a directoryon the server, called the <strong>Web</strong> documentroot. When a user visits www.example.com,Apache provides files from that site’sdirectory A.But Apache can easily be configured toserve several different sites, all hosted onthe same computer, by creating virtual hosts.After establishing one or more virtual hosts,Apache will know that when a user makesa request of www.example.com, documentsfrom X directory should be served, butrequests of www.example.net should bepointed to the documents from Y directory B.Underst<strong>and</strong> that setting up virtual hostsdoes not, in fact, make www.example.com or www.example.net a valid domainname, accessible over the Internet.Accomplishing that requires use of DNS(Domain Name System), a much morecomplicated subject. You can, however,use virtual hosts to create different hosts<strong>for</strong> your own development projects onyour home computer, as explained in thefollowing sequence.A The <strong>Web</strong> server associates a URL or hostname with a directoryor file on the computer.B Thanks to virtual hosts, different directories on the computer can beassociated with different hostnames.InstallationA19
To create a virtual host:1. Open httpd.conf in any text editoror IDE.If you’re using XAMPP on Windows,the file to open is C:\xampp\apache\conf\httpd.conf (assuming XAMPPis installed in the root of the C drive). Ifyou’re using MAMP on Mac OS X, thefile to open is /Applications/MAMP/conf/apache/httpd.conf. Note that ifyou’re using MAMP Pro, virtual hostsare created within that application’scontrol panel.2. At the very end of the configurationfile, add:NameVirtualHost 127.0.0.1Virtual hosts are conventionally definedat the end of the configuration file (or in aseparate configuration file, to be includedby this one). This line says that Apacheshould watch <strong>for</strong> named virtual hosts(as opposed to IP address-based virtualhosts) on the 127.0.0.1 IP address. This isa special IP address, always equating tolocalhost (i.e., this same computer).Depending upon your server, this linemay already be present in the configurationfile, but prefaced by a #, whichmakes it a comment (i.e., renders it ineffectual).In that case, just remove the #.3. On the next line, add:The VirtualHost tags are used tocreate a new virtual host. For eachopening tag, there needs to be aclosing one. Within the opening tag,the IP address or hostname to watch<strong>for</strong> is identified, here: 127.0.0.1. Thisvalue needs to match that used on theNameVirtualHost line.The rest of the virtual host definitionwill go between these opening <strong>and</strong>closing tags.4. Within the virtual host tags, add:DocumentRoot /path/to/folderServerName servernameThe DocumentRoot directive indicatesthe <strong>Web</strong> root directory <strong>for</strong> the virtualhost: in other words, where the actualfiles <strong>for</strong> this site can be found. OnXAMPP on Windows, this value mightbe C:/xampp/htdocs/something. OnMAMP on Mac OS X, this value mightbe /Applications/MAMP/htdocs/something.The ServerName is where you put thehostname: what you’ll enter into thebrowser to access this site.As an example, if you wanted to createa virtual host <strong>for</strong> the <strong>for</strong>ums site fromChapter 17, “Example—Message Board,”you could create a new folder withinhtdocs, called <strong>for</strong>ums, <strong>and</strong> copy all ofthe applicable scripts there. Then youwould use C:/xampp/htdocs/<strong>for</strong>umsor /Applications/MAMP/htdocs/<strong>for</strong>ums as the DocumentRoot value.For the ServerName value, I would usesomething meaningful, such as <strong>for</strong>ums.local: a local version of a <strong>for</strong>ums site.A20 Appendix A
5. Add a second virtual host <strong>for</strong> localhost C:DocumentRoot "C:/xampp/htdocs"ServerName localhostThe previous set of steps created a newvirtual host, but in the process, the oneoriginal <strong>Web</strong> site (localhost, the default<strong>for</strong> your own computer) will becomeunusable. The fix is to create anothervirtual host <strong>for</strong> that site.6. Save the configuration file.7. Restart Apache.Any changes to the configuration file willnot take effect until the <strong>Web</strong> server isrestarted. You can restart Apache usingthe XAMPP or MAMP control panel.If there is an error in the configurationfile, Apache will not be able to start <strong>and</strong>you’ll need to check the error logs tofind out why.Note that you can’t access the virtualhost using your browser yet, as you stillneed to update your computer’s listof hosts.The default Apache configuration file,httpd.conf, has comments in it indicatingwhat each section of code does. You canbrowse through it to learn some things aboutconfiguring Apache.The DocumentRoot value, or any valuein the httpd.conf file, must be quoted if itcontains spaces.The definition of a virtual host can containother directives, but I’m trying to introducethese fundamental Apache concepts assimply as possible.It’s actually preferable to have Apacheonly listen <strong>for</strong> activity on a specific port,commonly 80. In that case, the virtual hostsconfiguration would startNameVirtualHost 127.0.0.1:80But as MAMP on Mac OS X, <strong>and</strong> XAMPP,depending upon possible conflicts, don’talways use port 80, I’m using code that’smost foolproof.On a full-scale <strong>Web</strong> server, it’s preferableto create multiple configuration files, whichwill then be read <strong>and</strong> used by the primaryconfiguration file. On your own personalcomputer, without too much customization,a single configuration file is fine.C The new directives added to the end of theApache configuration file.InstallationA21
updating Your Computer’s HostsThe previous sequence of steps createda virtual host in Apache, allowing you toaccess, in this example, the <strong>for</strong>ums <strong>Web</strong> siteby going to http://<strong>for</strong>ums.local in your<strong>Web</strong> browser. There is a catch, however:if you were to enter that URL into yourbrowser, the browser would attempt to find<strong>for</strong>ums.local on the Internet, <strong>and</strong> would beunable to do so D. To solve this dilemma,you need to tell your browser(s) that <strong>for</strong>ums.local can be found on your computer.This is done by modifying your operatingsystem’s hosts file, per these directions.To update your computer’s hosts:1. Open your computer’s hosts file in anytext editor or IDE.This is the only tricky part of this process:finding <strong>and</strong> opening the hostsfile. On Mac OS X <strong>and</strong> Unix, the hostsfile is /etc/hosts (there’s no file extension),where / refers to the computer’sroot directory. On Mac OS X, /etc is ahidden directory, making hosts a hiddenfile. There are three easy ways offinding this file:> Use your editing application to openit directly, if the application is capableof opening hidden files.> In the Finder, select Go > Go ToFolder, <strong>and</strong> enter /etc in the prompt Eto open the /etc directory in theFinder. Then drag the hosts file ontothe editing application in the Dock.> Use the Terminal to find <strong>and</strong> openthe file.D The error that Internet Explorer displays whenit can’t find the local virtual host.E The Finder’s Go > Go to Folder option can beused to access hidden directories.A22 Appendix A
F You can open Notepad in administrator modein order to edit system files.G The <strong>for</strong>ums site, available locally through theURL http://<strong>for</strong>ums.local.On Windows, baring a nonst<strong>and</strong>ardinstallation, the file in question is C:\Windows\System32\drivers\etc\hosts. Un<strong>for</strong>tunately, you may havepermissions issues in trying to editthis file. I had good luck by openingNotepad in administrator mode (rightclickon Notepad in the Start Menuto be given this option F), <strong>and</strong> thenopening the file within Notepad.2. At the very end of the file, add:127.0.0.1 <strong>for</strong>ums.localThis associates the name <strong>for</strong>ums.localwith the IP address 127.0.0.1, which is tosay the same computer.3. Save the file.4. Load http://<strong>for</strong>ums.local in your <strong>Web</strong>browser G.Repeat these two sequences of steps—creating the virtual host in Apache <strong>and</strong> addingthe host to your hosts file—any time you wantto create a new <strong>Web</strong> site project with its ownassociated hostname.using .htaccess FilesAs already stated, all Apache configurationcan actually be accomplished withinthe httpd.conf file. In fact, doing so ispreferred. But the configuration file is notalways available <strong>for</strong> you to edit, so it’sworth also knowing how to use .htaccessfiles to change how a site functions.An .htaccess file is just a plain-text file,with the name .htaccess (again, no fileextension, <strong>and</strong> the initial period makesthis a hidden file). When placed within a<strong>Web</strong> directory, the directives defined in the.htaccess file will apply to that directory<strong>and</strong> its subdirectories.continues on next pageInstallationA23
A common hang-up when using .htaccessfiles is that permission has to be granted toallow .htaccess to make server behaviorchanges. Depending upon the installation<strong>and</strong> configuration, Apache, on the strictestlevel of security, will not allow .htaccessfiles to change Apache behavior. This isaccomplished with code like the following,in httpd.conf:AllowOverride NoneThe Directory directive is used withinhttpd.conf to modify Apache’s behaviorwithin a specific directory. In the abovecode, the root directory (/) is the target,meaning that Apache will not allowoverrides—changes—made within anydirectories on the computer at all. Prior tocreating .htaccess files, then, the mainconfiguration file must be set to allowoverrides in the applicable <strong>Web</strong> directory(or directories).The AllowOverride directive takes one ormore flags indicating what, specifically, canbe overridden:nnnnnnnAuthConfig, <strong>for</strong> using authorization <strong>and</strong>authenticationFileInfo, <strong>for</strong> per<strong>for</strong>ming redirects <strong>and</strong>URL rewritingIndexes, <strong>for</strong> listing directory contentsLimit, <strong>for</strong> restricting access to thedirectoryOptions, <strong>for</strong> setting directory behavior,such as the ability to execute CGIscripts or to index folder contentsAllNoneSetting the Default Directory pageCommonly, <strong>Web</strong> browsers make requests without specifying a file, such as www.example.com/or www.example.com/folder/. In these cases, Apache must make a decision as to what to do.Historically, Apache provides an index.htm or index.html file, if one exists in the directory. If noindex file exists, <strong>and</strong> if directory browsing is allowed by the server, Apache will instead reveal a listof files in the directory (this is not secure, but you’ve no doubt seen this online be<strong>for</strong>e).The applicable directive to tell Apache what to do in these situations is DirectoryIndex.Following it, you list the file to use as the folder’s index, with multiple options placed in orderof preference. For example, the following will attempt to load index.htm, then index.html,if index.htm does not exist, then index.php, if index.html does not exist:DirectoryIndex index.htm index.html index.phpSimilarly, the ErrorDocument directive tells Apache what file to provide when a server erroroccurs. Its syntax isErrorDocument error_code /page.htmlThe error code value comes from the server status codes, such as 401 (Unauthorized),403 (Forbidden), <strong>and</strong> 500 (Internal Server Error). For each code you can dictate what pageshould be served. Note that you’ll want to provide an absolute path to the error files(i.e., start them with /, which is the <strong>Web</strong> root directory).A24 Appendix A
For example, to allow AuthConfig <strong>and</strong>FileInfo to be overridden within the <strong>for</strong>umsdirectory (just created), the httpd.conf fileshould include:AllowOverride AuthConfig FileInfoAs long as this code comes after anyAllowOverride None block, an .htaccessfile in the <strong>for</strong>ums directory will be able tomake some changes to Apache’s behaviorwhen serving files from that directory (<strong>and</strong>its subdirectories).To allow .htaccess overrides:1. Open httpd.conf in any text editoror IDE.2. Within the VirtualHost tag <strong>for</strong> the sitein question, add:The Directory tag is how youcustomize Apache behavior within aspecific directory or its subdirectories.Within the opening tag, provide anabsolute path to the directory inquestion, such as C:\xampp\htdocs\somedir or /Applications/MAMP/htdocs/somedir.3. Within the Directory tags, add H:AllowOverride AllThis is a heavy-h<strong>and</strong>ed solution, butwill do the trick. On a live, publiclyavailable server, you’d want to be morespecific about what exact settingscan be overridden, but on your homecomputer, this won’t be a problem.4. Save the configuration file.5. Restart Apache.The Directory directive does not haveto go within the VirtualHost tag <strong>for</strong> theinvolved site, but it makes sense to place itthere.If a directory is not allowed to overridea setting, the .htaccess file will justbe ignored.Anything accomplished within an.htaccess file can also be achieved usinga Directory tag within httpd.conf.H The updated virtual hosts configuration,now allowing <strong>for</strong> overrides within the <strong>for</strong>ums<strong>Web</strong> directory.InstallationA25
protected DirectoriesA common use of an .htaccess file is toprotect the contents of a directory. Thereare two possible scenarios:n Denying all accessn Restricting access to authorized usersStrange as it may initially sound, thereare plenty of situations in which files <strong>and</strong>folders placed in the <strong>Web</strong> directory shouldbe made unavailable. For example, youcould create an includes directory thathas sensitive <strong>PHP</strong> scripts or an uploadsdirectory <strong>for</strong> storing uploaded files. In bothcases, the contents of the directory wouldnot be meant <strong>for</strong> direct access, but rather<strong>PHP</strong> scripts in other directories wouldreference that content as needed. To denyall access to a directory, place the code inScript A.3 in an .htaccess file in that folder(comments indicate what each line does).Again, this code just prevents directaccess to that directory’s contents via a<strong>Web</strong> browser. A <strong>PHP</strong> script could still useinclude( ), require( ), readfile( ), <strong>and</strong>other functions to access that content.In fact, the show_image.php script fromChapter 11 does exactly that: acting as aproxy script to display an image storedoutside of the <strong>Web</strong> document root (i.e.,otherwise unavailable in the <strong>Web</strong> browser).There are a couple of ways of restrictingaccess to authorized users, with the mod_auth module being the most basic <strong>and</strong>common. This module creates prompts inthe browser wherein the user can enter heror his credentials I. Apache will comparethose credentials to those stored in a fileon the server, allowing or denying accessaccordingly. It’s not hard to use mod_auth,but you have to invoke a secondaryApache tool to create the credentials file.If you want to pursue this route, just do asearch online <strong>for</strong> Apache mod_auth.Apache will not display .htaccess filesin the <strong>Web</strong> browser, by default, which is asmart security approach.When creating .htaccess files, makesure your text editor or IDE is not secretlyadding a .txt extension. Notepad, <strong>for</strong>example, will do this. You can confirm thishas happened if you can load www.example.com/.htaccess.txt in your <strong>Web</strong> browser. InNotepad, you can prevent the added extensionby quoting the file name <strong>and</strong> saving it astype “All files”.Script A.3 This code, in an .htaccess file, willdeny all access to the contents of a directory,<strong>and</strong> its subdirectories.1 # Disable directory browsing:2 Options All -Indexes34 # Prevent folder listing:5 IndexIgnore *67 # Prevent access to any file:8 9 Order Allow,Deny10 Deny from all11 I This prompt, as displayed in Internet Exploreron Windows, is generated by Apache to limitaccess to authenticated users.A26 Appendix A
enabling uRL RewritingThe final topic to be discussed in thisappendix is how to per<strong>for</strong>m URL rewriting.URL rewriting has gained attention aspart of the overbearing focus on SearchEngine Optimization (SEO), but URLrewriting has been a useful tool <strong>for</strong> years.With a dynamically driven site, like ane-commerce store, a value will often bepassed to a page in the URL to indicatewhat category of products to display,resulting in URLs such as www.example.com/category.php?id=23. The <strong>PHP</strong> script,category.php, would then use the value of$_GET['id'] to know what products to pullfrom the database <strong>and</strong> display. (There areoodles of similar examples in this book.)With URL rewriting applied, the URLshown in the browser, visible to the enduser, <strong>and</strong> referenced in search engineresults, can be trans<strong>for</strong>med into somethingmore obviously meaningful, such aswww.example.com/category/23/ or,better yet, www.example.com/category/garden+gnomes/. Apache, via URLrewriting, takes the more user-friendly URL<strong>and</strong> parses it into something usable by the<strong>PHP</strong> scripts. This is made possible by theApache mod_rewrite module. To use it,the .htaccess file must first check <strong>for</strong> themodule <strong>and</strong> turn on the rewrite engine:RewriteEngine onAfter enabling the engine, <strong>and</strong> be<strong>for</strong>ethe closing IfModule tag, you add rulesdictating the rewrites. The syntax is:RewriteRule match rewriteFor example, you could do the following(although it’s not a good use of mod_rewrite):RewriteRule somepage.php otherpage.phpPart of the complication with per<strong>for</strong>mingURL rewrites is that Perl-CompatibleRegular Expressions (PCRE) are neededto most flexibly find matches. If you’renot already com<strong>for</strong>table with regularexpressions, you’ll need to read Chapter14, “Perl-Compatible Regular Expressions,”to follow the rest of this material.For example, to treat www.example.com/category/23 as if it were www.example.com/category.php?id=23, you would havethe following rule:RewriteRule ^category/([0-9]+)/?$➝ category.php?id=$1The initial caret (^) says that the expressionmust match the beginning of the string.After that should be the word category,followed by a slash. Then, any quantity ofdigits follows, concluding with an optionalslash (allowing <strong>for</strong> both category/23 <strong>and</strong>category/23/). The dollar sign closes thematch, meaning that nothing can follow theoptional slash. That’s the pattern <strong>for</strong> theexample match (<strong>and</strong> it’s a simple pattern atthat, really).The rewrite part is what will actuallybe executed, unbeknownst to the <strong>Web</strong>browser <strong>and</strong> the end user. In this line,that’s category.php?id=$1. The $1 is abackreference to the first parentheticalgrouping in the match (e.g., 23). Thus,www.example.com/category/23 is treatedby the server as if the URL was actuallywww.example.com/category.php?id=23.continues on next pageInstallationA27
This is the underlying premise withmod_rewrite. Un<strong>for</strong>tunately, masteringmod_rewrite requires mastery, or nearmastery, of PCRE, which can be daunting.If you want to practice this, you can takethe simple example just explained <strong>and</strong>apply it to any of the examples in the bookin which a value is passed in the URL.For example, in Chapter 10, “CommonProgramming Techniques,” a user ID ispassed in the URL to delete_user.php <strong>and</strong>edit_user.php. Both could be trans<strong>for</strong>medinto “prettier” URLs, such as www.example.com/delete/45/ or www.example.com/edit/895/.As always, search online <strong>for</strong> morein<strong>for</strong>mation on this subject, should yoube interested, <strong>and</strong> post a question in thesupporting <strong>for</strong>ums (www.LarryUllman.com/<strong>for</strong>ums/) if you run into problems.Changing pHp’s ConfigurationIf <strong>PHP</strong> is running as an Apache module,you can also change how <strong>PHP</strong> runswithin specific directories using anApache .htaccess file. The directivesto use are php_flag <strong>and</strong> php_value:php_flag item valuephp_value item valueThe php_flag directive is <strong>for</strong> any settingthat has an on or off value; php_value is<strong>for</strong> any other setting. For example:php_flag display_errors onphp_value error_reporting 30719Note that you cannot use <strong>PHP</strong> constants,such as E_ALL <strong>for</strong> the highest level oferror reporting, as this code is withinApache configuration files, not within<strong>PHP</strong> scripts.(You can also change how <strong>PHP</strong> runs byediting the httpd.conf file, but if you’regoing to make a global server changethat requires a restart of Apache anyway,you might as well just edit the <strong>PHP</strong>configuration file instead).A28 Appendix A
Join thePeachPitAffiliAte teAm!You love our books <strong>and</strong> youlove to share them with your colleagues <strong>and</strong>friends...why not earn some $$ doing it!If you have a website, blog or even a Facebook page,you can start earning money by putting a Peachpitlink on your page.If a visitor clicks on that link <strong>and</strong> purchases somethingon peachpit.com, you earn commissions* on all sales!Every sale you bring to our site will earn you acommission. All you have to do is post an ad <strong>and</strong>we’ll take care of the rest.ApplY And get stArted!It’s quick <strong>and</strong> easy to apply.To learn more go to:http://www.peachpit.com/affiliates/*Valid <strong>for</strong> all books, eBooks <strong>and</strong> video sales at www.Peachpit.com