Final Cut Pro 7 Level One - Training and Certification - Apple
Final Cut Pro 7 Level One - Training and Certification - Apple
Final Cut Pro 7 Level One - Training and Certification - Apple

Create successful ePaper yourself
Turn your PDF publications into a flip-book with our unique Google optimized e-Paper software.
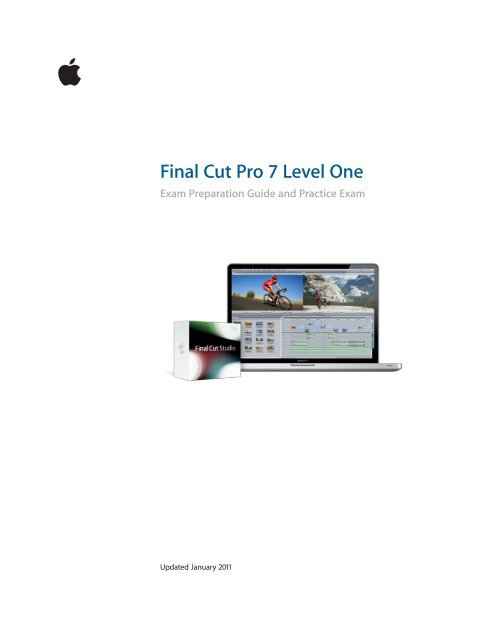
<strong>Final</strong> <strong>Cut</strong> <strong>Pro</strong> 7 <strong>Level</strong> <strong>One</strong> Exam Preparation Guide <strong>and</strong> Practice Exam<br />
<strong>Final</strong> <strong>Cut</strong> <strong>Pro</strong> 7 <strong>Level</strong> <strong>One</strong><br />
Exam Preparation Guide <strong>and</strong> Practice Exam<br />
Updated January 2011<br />
1
<strong>Final</strong> <strong>Cut</strong> <strong>Pro</strong> 7 <strong>Level</strong> <strong>One</strong> Exam Preparation Guide <strong>and</strong> Practice Exam<br />
Contents<br />
About this Guide ............................................................................................................... 3<br />
About the <strong>Final</strong> <strong>Cut</strong> <strong>Pro</strong> 7 <strong>Level</strong> <strong>One</strong> Practice Exam .......................................... 3<br />
Becoming an <strong>Apple</strong> Certified <strong>Pro</strong> ............................................................................... 4<br />
Exam Details ....................................................................................................................... 5<br />
Recommended Exam Preparation ............................................................................. 5<br />
Lesson <strong>One</strong> objectives .................................................................................................... 7<br />
Lesson Two objectives .................................................................................................... 9<br />
Lesson Three objectives ................................................................................................. 10<br />
Lesson Four objectives ................................................................................................... 12<br />
Lesson Five objectives .................................................................................................... 13<br />
Lesson Six objectives ....................................................................................................... 15<br />
Lesson Seven objectives ................................................................................................ 16<br />
Lesson Eight objectives ................................................................................................. 18<br />
Lesson Nine objectives .................................................................................................. 19<br />
Lesson Ten objectives ..................................................................................................... 21<br />
Lesson Eleven objectives ............................................................................................... 22<br />
Lesson Twelve objectives .............................................................................................. 24<br />
Lesson Thirteen objectives ........................................................................................... 25<br />
Lesson Fourteen objectives ......................................................................................... 27<br />
Taking the <strong>Final</strong> <strong>Cut</strong> <strong>Pro</strong> 7 Practice exam ............................................................... 28<br />
Taking the <strong>Final</strong> <strong>Cut</strong> <strong>Pro</strong> 7 certification exam ....................................................... 30<br />
<strong>Pro</strong>metric Exam FAQs ...................................................................................................... 30<br />
TM <strong>and</strong> © 2011 <strong>Apple</strong> Inc. All rights reserved. Other product <strong>and</strong> company names mentioned herein may be trademarks of<br />
their respective companies. Mention of third-party products is for information purposes only <strong>and</strong> constitutes neither an<br />
endorsement nor a warranty. <strong>Apple</strong> assumes no responsibility with regard to the selection, performance or use of these<br />
vendors or products.<br />
2
<strong>Final</strong> <strong>Cut</strong> <strong>Pro</strong> 7 <strong>Level</strong> <strong>One</strong> Exam Preparation Guide <strong>and</strong> Practice Exam<br />
About this Guide<br />
This guide provides all the information that you need to prepare for the<br />
<strong>Final</strong> <strong>Cut</strong> <strong>Pro</strong> 7 exam to earn <strong>Apple</strong> Certified <strong>Pro</strong> <strong>Level</strong> <strong>One</strong> certification.<br />
From this guide you can:<br />
• Learn about <strong>Apple</strong> <strong>Certification</strong>.<br />
• Find out how to take the exam or practice exam.<br />
• Locate resources to help you prepare for the exam.<br />
• Review the range of objectives that the exam may cover.<br />
• Get a feel for the type of questions that appear on the exam.<br />
About the <strong>Final</strong> <strong>Cut</strong> <strong>Pro</strong> 7 <strong>Level</strong> <strong>One</strong> Practice Exam<br />
The practice exam is based on the objectives of the <strong>Level</strong> <strong>One</strong> <strong>Final</strong> <strong>Cut</strong> <strong>Pro</strong><br />
End User certification exam. The content is similar to the actual exam <strong>and</strong><br />
covers the exam objectives. However, the practice exam is about half the<br />
length of the real exam. While the actual certification exam includes 66<br />
questions, the practice exam only includes 37 questions.<br />
Both exams are timed. You are allowed one hour to complete the practice<br />
exam. When you finish, you will see the correct answers so that you can<br />
identify the areas that you need to review. However, the actual <strong>Level</strong> <strong>One</strong><br />
<strong>Final</strong> <strong>Cut</strong> <strong>Pro</strong> End User exam is an hour-<strong>and</strong> a-half exam <strong>and</strong> you won’t see<br />
answers <strong>and</strong> explanations when you finish. Only your final score will be<br />
visible. Both exams display your results immediately after completing the<br />
exam. A score of 80% is considered passing (please note that passing the<br />
practice exam does not earn certification).<br />
The practice exam does not necessarily predict how well you will perform<br />
on the actual exam, although it’s a good indicator of areas that you need<br />
to review. Although the certification exam uses a r<strong>and</strong>om pool of<br />
questions, the types of questions in the practice exam mirror those found<br />
in the certification exam. Both exams include multiple-choice, fill-in-theblank<br />
<strong>and</strong> interactive-media questions. Some practice exam questions are<br />
similar in content, but worded differently. Some multiple-choice questions<br />
come from the actual exam, but include different distracters (wrong<br />
answers).<br />
The practice exam is a pre-certification exam. Passing the practice exam<br />
doesn’t mean that you’re certified; no certificate is awarded. You must pass<br />
the <strong>Level</strong> <strong>One</strong> <strong>Final</strong> <strong>Cut</strong> <strong>Pro</strong> 7 End User exam to earn your <strong>Level</strong> <strong>One</strong><br />
certification.<br />
Because the practice exam doesn’t count towards certification, you can<br />
make it an open-book test if you like. However, you won’t be allowed to<br />
consult your book when taking the actual certification exam. To more<br />
accurately simulate the certification exam experience, you may want to<br />
take the practice exam without referring to your book or other resources.<br />
3
<strong>Final</strong> <strong>Cut</strong> <strong>Pro</strong> 7 <strong>Level</strong> <strong>One</strong> Exam Preparation Guide <strong>and</strong> Practice Exam<br />
Becoming an <strong>Apple</strong> Certified <strong>Pro</strong><br />
The <strong>Apple</strong> <strong>Training</strong> & <strong>Certification</strong> program is designed to keep you at the<br />
forefront of <strong>Apple</strong> technology. <strong>Certification</strong> creates a benchmark to<br />
demonstrate your proficiency in specific <strong>Apple</strong> technologies <strong>and</strong> gives you<br />
a competitive edge in today’s evolving job market.<br />
What is an <strong>Apple</strong> Certified <strong>Pro</strong>?<br />
An <strong>Apple</strong> Certified <strong>Pro</strong> is a user who has reached the highest skill level in<br />
the use <strong>and</strong> operation of <strong>Apple</strong>’s <strong>Pro</strong> Applications as attested to by <strong>Apple</strong>.<br />
How do I become an <strong>Apple</strong> Certified <strong>Pro</strong>?<br />
To become an <strong>Apple</strong> Certified <strong>Pro</strong>, you must pass an online exam<br />
administered at an <strong>Apple</strong> Authorized <strong>Training</strong> Center (AATC). Some exams,<br />
including Aperture, may be taken online by individuals with a promotional<br />
code. <strong>Level</strong> <strong>One</strong> exams are administered at the end of specific courses at<br />
the centers. If you prefer to learn on your own or believe you already have<br />
the necessary skills, you may take the Aperture exam online for a fee.<br />
<strong>Level</strong> <strong>One</strong> certification attests to basic operational knowledge. <strong>Level</strong> Two<br />
certification attests to a deeper underst<strong>and</strong>ing of the application. <strong>Level</strong><br />
Two exams can be taken only after <strong>Level</strong> <strong>One</strong> certification is earned. Class<br />
attendance is recommended, but not required. <strong>Final</strong> <strong>Cut</strong> <strong>Pro</strong> offers both<br />
<strong>Level</strong> <strong>One</strong> <strong>and</strong> <strong>Level</strong> Two certification.<br />
<strong>Final</strong> <strong>Cut</strong> <strong>Pro</strong> 7 <strong>Level</strong> <strong>One</strong> certification also counts towards <strong>Final</strong> <strong>Cut</strong> Studio<br />
Master <strong>Pro</strong> certification. Master <strong>Certification</strong> recognizes your skills with the<br />
entire product suite. Since workflow is such a significant component of<br />
<strong>Final</strong> <strong>Cut</strong> Studio, the curriculum requires you to earn certification in<br />
multiple applications<br />
What are the benefits of being an <strong>Apple</strong> Certified <strong>Pro</strong>?<br />
Beside differentiating you as a skilled user of an <strong>Apple</strong> application,<br />
becoming an <strong>Apple</strong> Certified <strong>Pro</strong> allows you to leverage the power of the<br />
<strong>Apple</strong> br<strong>and</strong>. When you pass a <strong>Certification</strong> exam, you receive an email<br />
with a PDF copy of your <strong>Apple</strong> certificate, along with instructions on how<br />
to order a printed or a printed <strong>and</strong> framed certificate. The email includes<br />
LinkedIn, Facebook, <strong>and</strong> Twitter icons to make it easy for you to share your<br />
certification news with your networks on these sites.<br />
You also receive a login for the <strong>Apple</strong> <strong>Certification</strong> Records System, where<br />
you can:<br />
• Update your profile information <strong>and</strong> opt in to display your <strong>Apple</strong><br />
<strong>Certification</strong>(s) on the <strong>Apple</strong> Certified <strong>Pro</strong>fessionals Registry.<br />
• Review your certification progress.<br />
• Download your certification logo(s) to use on business cards, resumes,<br />
websites, <strong>and</strong> more.<br />
• <strong>Pro</strong>vide access to employers to verify your certifications.<br />
4
<strong>Final</strong> <strong>Cut</strong> <strong>Pro</strong> 7 <strong>Level</strong> <strong>One</strong> Exam Preparation Guide <strong>and</strong> Practice Exam<br />
Exam Details<br />
The <strong>Final</strong> <strong>Cut</strong> <strong>Pro</strong> 7 <strong>Level</strong> <strong>One</strong> exam is a computer-based test offered at<br />
AATCs <strong>and</strong> <strong>Pro</strong>metric Testing Centers. To find the closest AATC, please visit<br />
training.apple.com/locations. To find a <strong>Pro</strong>metric Testing Center, visit<br />
www.prometric.com/apple.<br />
Many AATCs schedule <strong>Certification</strong> Exam sessions at training.apple.com/<br />
schedule. If you don't see a session scheduled at your nearest AATC,<br />
contact the AATC <strong>and</strong> they will often schedule a session. Please note<br />
that all AATCs offer all Mac OS X <strong>and</strong> <strong>Pro</strong> Apps exams, even if they<br />
don’t offer the corresponding course.<br />
The <strong>Final</strong> <strong>Cut</strong> <strong>Pro</strong> 7 <strong>Level</strong> <strong>One</strong> exam details:<br />
• Exam number: 9L0-827<br />
• Number of test questions: approximately 66 technical, five<br />
demographic (unscored).<br />
• The exam uses a r<strong>and</strong>om pool of multiple-choice, fill-in-the-blank <strong>and</strong><br />
interactive-media questions.<br />
• Passing score: 80% (scores are not rounded; you must earn a score of<br />
80% or higher to pass the exam).<br />
• Details on exam scoring appear at training.apple.com/certification/faq.<br />
• Exam duration: <strong>One</strong> hour thirty minutes.<br />
• This exam is also available in other languages. For details, please visit<br />
training.apple.com/certification/localized.<br />
The exam timer does not start until you view the first technical question.<br />
You may not access any resources or references during the exam.<br />
Recommended Exam Preparation<br />
We recommend the following exam preparation strategies:<br />
• Gain experience with the application.<br />
• Learn from experts: FCP 101: Introduction to <strong>Final</strong> <strong>Cut</strong> <strong>Pro</strong> or FCP 102:<br />
Introduction to <strong>Final</strong> <strong>Cut</strong> <strong>Pro</strong>, Prime Time.<br />
• Study the <strong>Apple</strong> <strong>Pro</strong> <strong>Training</strong> Series book “<strong>Final</strong> <strong>Cut</strong> <strong>Pro</strong> 7” by Diana<br />
Weyn<strong>and</strong> (ISBN 0-321-63527-3).<br />
• Review the optional study materials.<br />
• Review the objectives <strong>and</strong> sample questions in this guide.<br />
Gain Experience with the Application<br />
Nothing can substitute for time spent learning the technology first h<strong>and</strong>.<br />
After you read the book <strong>and</strong>/or take the class, spend time increasing your<br />
familiarity with the software on your own to ensure your success on the<br />
certification exam.<br />
5
<strong>Final</strong> <strong>Cut</strong> <strong>Pro</strong> 7 <strong>Level</strong> <strong>One</strong> Exam Preparation Guide <strong>and</strong> Practice Exam<br />
Learn from Experts<br />
<strong>Apple</strong> Authorized <strong>Training</strong> Centers (AATCs) offer classes where you can<br />
learn h<strong>and</strong>s-on with the technology <strong>and</strong> benefit from the expertise of<br />
<strong>Apple</strong> Certified Trainers <strong>and</strong> your peers. Visit the <strong>Apple</strong> <strong>Training</strong> &<br />
<strong>Certification</strong> website to find course offerings at nearby AATCs.<br />
Study the <strong>Apple</strong> <strong>Pro</strong> <strong>Training</strong> Series Book<br />
<strong>Apple</strong> <strong>Pro</strong> <strong>Training</strong> Series books are the basis for the related <strong>Apple</strong><br />
<strong>Certification</strong> exams. The book for this exam is <strong>Apple</strong> <strong>Pro</strong> <strong>Training</strong> Series “<strong>Final</strong><br />
<strong>Cut</strong> <strong>Pro</strong> 7” by Diana Weyn<strong>and</strong> (ISBN 0-321-63527-3). You can purchase the<br />
book at peachpit.com (click here for a 30% discount code). Creative Edge,<br />
an on-dem<strong>and</strong> digital library, offers subscription access to the <strong>Apple</strong><br />
<strong>Training</strong> <strong>and</strong> <strong>Apple</strong> <strong>Pro</strong> <strong>Training</strong> Series, as well as thous<strong>and</strong>s of other<br />
reference videos <strong>and</strong> books. If you are an iPad user, an electronic version is<br />
available on the iBookstore. This book is also available in other languages.<br />
Click here for details.<br />
Review the Optional Study Materials<br />
The following resources may also help you to prepare for your certification<br />
exam, as well as to exp<strong>and</strong> your general knowledge:<br />
• Review the tutorials at www.apple.com/finalcutstudio/resources/. Over<br />
five hours <strong>and</strong> 150 topics of free online tutorials are provided by<br />
leading video training developers, including some lessons from the<br />
<strong>Apple</strong> <strong>Pro</strong> <strong>Training</strong> Series book.<br />
• Review the appropriate sections of the <strong>Final</strong> <strong>Cut</strong> <strong>Pro</strong> User Manuals. The<br />
complete documentation for the entire studio is available at:<br />
documentation.apple.com. You can also launch the <strong>Final</strong> <strong>Cut</strong> <strong>Pro</strong><br />
documentation by choosing Help > <strong>Final</strong> <strong>Cut</strong> <strong>Pro</strong> User Manual when<br />
<strong>Final</strong> <strong>Cut</strong> <strong>Pro</strong> is launched. Information on new features is available by<br />
choosing Help > New Features when <strong>Final</strong> <strong>Cut</strong> <strong>Pro</strong> is launched.<br />
• Review the <strong>Apple</strong> <strong>Pro</strong> <strong>Training</strong> Series book “<strong>Final</strong> <strong>Cut</strong> <strong>Pro</strong> 7 Quick-<br />
Reference Guide” by Brendan Boykin (ISBN 0-321-69468-6). You can<br />
order this book with a 30% discount at Peachpit Press by entering<br />
coupon PP-APL-DISC at checkout.<br />
• Many online resources allow you to ask questions <strong>and</strong> learn tips <strong>and</strong><br />
tricks. To access white papers, discussion forums, <strong>and</strong> learn about the<br />
many other online materials, visit <strong>Apple</strong>’s training resources<br />
www.apple.com/finalcutstudio/resources/<br />
• Although the end user exam does not cover this material, you may<br />
want to review the <strong>Apple</strong> <strong>Pro</strong>Res white paper: www.apple.com/<br />
finalcutstudio/finalcutpro/apple-prores.html.<br />
• For information on the <strong>Apple</strong> <strong>Pro</strong> <strong>Training</strong> <strong>Pro</strong>gram, visit<br />
training.apple.com/.<br />
• To provide comments <strong>and</strong> feedback to <strong>Apple</strong> about <strong>Final</strong> <strong>Cut</strong> <strong>Pro</strong>, visit<br />
www.apple.com/feedback/finalcutpro.html<br />
• Take the <strong>Final</strong> <strong>Cut</strong> <strong>Pro</strong> tour at www.apple.com/finalcutstudio/<br />
finalcutpro/.<br />
6
<strong>Final</strong> <strong>Cut</strong> <strong>Pro</strong> 7 <strong>Level</strong> <strong>One</strong> Exam Preparation Guide <strong>and</strong> Practice Exam<br />
• Read the late breaking news at www.apple.com/support/manuals/.<br />
• Read the <strong>Final</strong> <strong>Cut</strong> <strong>Pro</strong> News for information about <strong>Apple</strong> <strong>Pro</strong> Apps <strong>and</strong><br />
everything related to them.<br />
• Many third-party manufacturers create reference, troubleshooting <strong>and</strong><br />
tutorial DVDs for the novice to power user. A quick Internet search will<br />
provide you with dozens of options.<br />
• If you have any questions, you can post them to the <strong>Final</strong> <strong>Cut</strong> <strong>Pro</strong><br />
Discussion Forum, which is hosted by <strong>Apple</strong>. You can also post<br />
questions to the Yahoo group <strong>Final</strong><strong>Cut</strong><strong>Pro</strong>-L. You can join at the<br />
following link: movies.groups.yahoo.com/group/<strong>Final</strong><strong>Cut</strong><strong>Pro</strong>-L/.<br />
Review the Objectives <strong>and</strong> Review Questions<br />
Even if you’re self-taught or have taken courses that do not use the <strong>Apple</strong><br />
<strong>Pro</strong> <strong>Training</strong> Series curriculum, you can still prepare yourself for the<br />
certification exam by making sure that you can complete all the tasks <strong>and</strong><br />
answer all the review questions in the following sections.<br />
The Exam Objectives describe the knowledge domains assessed by the<br />
exam. The Review Questions summarize what you should have learned in<br />
each chapter. Please note that although this guide divides the objectives<br />
into lessons or knowledge areas, questions are presented r<strong>and</strong>omly during<br />
the exam.<br />
Lesson <strong>One</strong> objectives<br />
Upon completion of Lesson <strong>One</strong>, “Creating a Rough <strong>Cut</strong>” in “<strong>Final</strong> <strong>Cut</strong> <strong>Pro</strong> 7,”<br />
you should be able to complete the following tasks. Items from this lesson<br />
are included in the pool of exam questions, drawn r<strong>and</strong>omly from the<br />
following objectives:<br />
• Import clips into a project<br />
• Play <strong>and</strong> navigate through clips in the Viewer<br />
• Mark clips in the Viewer<br />
• Edit clips into the Timeline<br />
• Play a sequence in the Timeline <strong>and</strong> Canvas<br />
• Organize project elements in the Browser<br />
• Save, hide, <strong>and</strong> quit <strong>Final</strong> <strong>Cut</strong> <strong>Pro</strong><br />
Lesson <strong>One</strong> review questions<br />
After completing Lesson <strong>One</strong>, you should be able to answer the following<br />
questions.<br />
1. Name three ways to open <strong>Final</strong> <strong>Cut</strong> <strong>Pro</strong>.<br />
2. What four modifier keys are often used in conjunction with<br />
keyboard shortcuts to initiate functions or comm<strong>and</strong>s?<br />
3. How do you access a shortcut menu?<br />
7
<strong>Final</strong> <strong>Cut</strong> <strong>Pro</strong> 7 <strong>Level</strong> <strong>One</strong> Exam Preparation Guide <strong>and</strong> Practice Exam<br />
4. In what main menu can you find the Import comm<strong>and</strong>?<br />
5. Identify three ways to open a clip in the Viewer.<br />
6. Besides clicking the Play button, what keys on your keyboard<br />
can you press to play a clip or sequence forward?<br />
7. Which keys move the playhead forward or backward in oneframe<br />
increments in the Viewer, Canvas, <strong>and</strong> Timeline?<br />
8. How do you mark an In point or Out point on a clip?<br />
9. What button in the Canvas window do you click to edit a clip?<br />
10. What visual indicator in the Viewer lets you know you are on<br />
the first or last frame of the entire clip?<br />
11. What visual indicator in the Canvas window lets you know<br />
the playhead is on the first or last frame of an edited clip in<br />
the Timeline?<br />
12. When viewing the audio portion of a clip, what do you see<br />
instead of a video image?<br />
13. Identify three ways to create a bin.<br />
14. What are the keyboard shortcuts to save, hide, <strong>and</strong> quit <strong>Final</strong><br />
<strong>Cut</strong> <strong>Pro</strong>?<br />
Answers<br />
1. Double-click the application in the Applications folder, click<br />
the icon in the Dock, or double-click a <strong>Final</strong> <strong>Cut</strong> <strong>Pro</strong> project<br />
file.<br />
2. Shift, Control, Option, <strong>and</strong> Comm<strong>and</strong><br />
3. Control-click (or right-click) an item.<br />
4. In the File menu.<br />
5. Double-click the clip in the Browser, drag it to the Viewer, or<br />
select it <strong>and</strong> press Return.<br />
6. The Spacebar <strong>and</strong> the L key.<br />
7. The Left Arrow <strong>and</strong> Right Arrow keys.<br />
8. Click the Mark In or Mark Out button in the Viewer, or press<br />
the keyboard shortcut, I or O.<br />
9. The red Overwrite button.<br />
10. Filmstrip sprocket holes appear on the left side of the image<br />
in the Viewer to indicate the first available frame of media,<br />
<strong>and</strong> appear on the right side to indicate the last frame.<br />
11. An L in the lower left means you’re on the first frame of the<br />
edited clip, <strong>and</strong> a reverse L in the lower right means you’re on<br />
the last frame.<br />
12. A waveform display.<br />
8
<strong>Final</strong> <strong>Cut</strong> <strong>Pro</strong> 7 <strong>Level</strong> <strong>One</strong> Exam Preparation Guide <strong>and</strong> Practice Exam<br />
13. Choose File > New Bin, press Comm<strong>and</strong>-B, or Control-click in<br />
the gray area of the Browser <strong>and</strong> choose New Bin.<br />
14. Press Comm<strong>and</strong>-S to save current changes, press Comm<strong>and</strong>-H<br />
to hide the application, <strong>and</strong> press Comm<strong>and</strong>-Q to quit the<br />
application.<br />
Lesson Two objectives<br />
Upon completion of Lesson Two, “Building the Rough <strong>Cut</strong>” in <strong>Final</strong> <strong>Cut</strong> <strong>Pro</strong><br />
7 , you should be able to complete the following tasks. Items from this<br />
lesson are included in the pool of exam questions, drawn r<strong>and</strong>omly from<br />
the following objectives:<br />
• Manage project elements<br />
• Make overwrite <strong>and</strong> insert edits<br />
• Manage Timeline tracks<br />
• Edit audio clips<br />
• Move clips in the Timeline<br />
• Use drag-<strong>and</strong>-drop editing<br />
• Change the volume of sequence clips<br />
Lesson Two review questions<br />
After completing Lesson Two, you should be able to answer the following<br />
questions.<br />
1. How do you create a bin inside another bin?<br />
2. What are the four methods you can use to create an<br />
overwrite or insert edit?<br />
3. What do you use to drag an audio clip from the Viewer’s<br />
Audio tab to the Canvas Edit Overlay or to the Timeline?<br />
4. What are the keyboard shortcuts to zoom in to or out of an<br />
area of the Timeline?<br />
5. How do you change the track heights in the Timeline?<br />
6. How do you target a track in the Timeline?<br />
7. What controls in the Timeline patch panel turn off or on the<br />
video <strong>and</strong> sound of individual tracks?<br />
8. To select a clip in the Timeline, you click it once. Name two<br />
ways to deselect it.<br />
9. How do you change a clip’s location in the Timeline?<br />
10. What are two ways to turn snapping off or on?<br />
11. When dragging clips from the Viewer to the Timeline, your<br />
pointer changes as you position the clip depending on the<br />
type of edit you’re making. When you’re making an overwrite<br />
9
<strong>Final</strong> <strong>Cut</strong> <strong>Pro</strong> 7 <strong>Level</strong> <strong>One</strong> Exam Preparation Guide <strong>and</strong> Practice Exam<br />
edit, what type of arrow does your pointer change into? What<br />
is it for an insert edit?<br />
12. When you open a clip in the Viewer, what do you see in the<br />
Timeline patch panel?<br />
Answers<br />
1. Control-click (or right-click) a bin <strong>and</strong> choose New Bin from<br />
the shortcut menu.<br />
2. Click an edit button; use a keyboard shortcut; drag a clip from<br />
the Viewer to the Canvas Edit Overlay; or drag the clip directly<br />
to a track in the Timeline.<br />
3. The drag h<strong>and</strong>.<br />
4. Press Option-+ (plus sign) to zoom in, <strong>and</strong> press Option-–<br />
(minus sign) to zoom out.<br />
5. In the Timeline display controls, click a track height in the<br />
Track Height control, or cycle through the options by pressing<br />
Shift-T.<br />
6. Drag a Source control to the target destination track.<br />
7. The Track Visibility controls.<br />
8. Click in the empty gray space above the track, or press<br />
Comm<strong>and</strong>-Shift-A.<br />
9. Drag the clip, or select it <strong>and</strong> enter a move amount.<br />
10. Press N, or click the Snapping button in the Timeline.<br />
11. The down arrow is for an overwrite edit; the right arrow is for<br />
an insert edit.<br />
12. The representative source tracks from the clip appear as<br />
Source controls in the Timeline patch panel.<br />
Lesson Three objectives<br />
Upon completion of Lesson Three, “Finishing the Rough <strong>Cut</strong>” in “<strong>Final</strong> <strong>Cut</strong><br />
<strong>Pro</strong> 7,” you should be able to complete the following tasks. Items from this<br />
lesson are included in the pool of exam questions, drawn r<strong>and</strong>omly from<br />
the following objectives:<br />
• Set edit points in the Timeline<br />
• Add cutaways<br />
• Edit narration <strong>and</strong> music tracks<br />
• Backtime clips<br />
• Edit sound effects to video clips<br />
• Copy <strong>and</strong> paste clips<br />
• Edit using markers<br />
10
<strong>Final</strong> <strong>Cut</strong> <strong>Pro</strong> 7 <strong>Level</strong> <strong>One</strong> Exam Preparation Guide <strong>and</strong> Practice Exam<br />
• Play a sequence full screen <strong>and</strong> via iChat<br />
Lesson Three review questions<br />
After completing Lesson Three, you should be able to answer the following<br />
questions.<br />
1. What are the keyboard shortcuts for setting In <strong>and</strong> Out points<br />
in the Timeline?<br />
2. What are two ways for marking the duration of a clip in the<br />
Timeline?<br />
3. What does the Auto Select control in the Timeline patch<br />
panel determine?<br />
4. When you mark an area of the Timeline <strong>and</strong> press Delete, will<br />
you leave a gap?<br />
5. What happens to the marked area of the Timeline when you<br />
press Shift-Delete or the Forward Delete key?<br />
6. In what menu do Lift <strong>and</strong> Ripple Delete appear?<br />
7. What mark is necessary in the Viewer when backtiming a<br />
source clip into a marked area in the Timeline?<br />
8. How do you patch Source controls to Timeline tracks?<br />
9. Which video track will you see when there is more than one<br />
video clip at the same location in the Timeline?<br />
10. What is a three-point edit?<br />
11. What marks are left behind after cutting with the Razor Blade<br />
tool?<br />
12. What key do you press to add a marker at the playhead<br />
location?<br />
13. How do you create In <strong>and</strong> Out points from Timeline markers?<br />
14. In what menu can you find the Digital Cinema Desktop<br />
Preview?<br />
15. With what <strong>Apple</strong> application can you screen your sequence<br />
long-distance in real time?<br />
Answers<br />
1. Press I to set an In point; press O to set an Out point.<br />
2. Position the playhead over the clip in the Timeline <strong>and</strong> press<br />
X to mark the duration of that clip. You can also click the Mark<br />
Clip button in the Canvas.<br />
3. If the Auto Select control is turned on for a track, the clips<br />
between the edit points on that track will be highlighted <strong>and</strong><br />
included in the next action.<br />
4. Yes, pressing Delete alone leaves a gap where the material<br />
was edited. This type of delete is referred to as a lift.<br />
11
<strong>Final</strong> <strong>Cut</strong> <strong>Pro</strong> 7 <strong>Level</strong> <strong>One</strong> Exam Preparation Guide <strong>and</strong> Practice Exam<br />
5. Pressing Shift-Delete or Forward Delete removes both clip<br />
<strong>and</strong> gap within the marked area. This type of delete is<br />
referred to as a ripple delete.<br />
6. The lift <strong>and</strong> ripple delete appear in the Sequence menu.<br />
7. You should have no In point <strong>and</strong> only an Out point in the<br />
Viewer to backtime the clip into the Timeline edit points.<br />
8. Drag a Source control to the desired Destination control, or<br />
Control-click either the Source or the Destination control <strong>and</strong><br />
choose the appropriate option from the shortcut menu.<br />
9. You see the clip in the uppermost video track.<br />
10. Using just three edit points to determine location, duration,<br />
<strong>and</strong> content.<br />
11. Red through edit indicators.<br />
12. The M key. Press M again to open the Edit Marker dialog.<br />
13. Choose Mark > Mark to Markers, or press the shortcut,<br />
Control-A.<br />
14. In the View menu.<br />
15. iChat.<br />
Lesson Four objectives<br />
Upon completion of Lesson Four, “Trimming Clip Duration” in “<strong>Final</strong> <strong>Cut</strong> <strong>Pro</strong><br />
7,” you should be able to complete the following tasks. Items from this<br />
lesson are included in the pool of exam questions, drawn r<strong>and</strong>omly from<br />
the following objectives:<br />
• Underst<strong>and</strong> trimming<br />
• Trim using the Ripple tool<br />
• Trim clips in the Viewer<br />
• Trim an edit point by dragging<br />
• Trim clips in the V2 track<br />
• Extend an edit point<br />
• Trim one track of a linked clip<br />
Lesson Four review questions<br />
After completing Lesson Four, you should be able to answer the following<br />
questions.<br />
1. What does turning off linked selection in the Timeline do?<br />
2. What does the Ripple tool do when you use it for trimming?<br />
3. What is the keyboard shortcut to select the Ripple tool?<br />
4. What keys can you use as shortcuts to ripple a clip’s edit point<br />
by a few frames?<br />
12
<strong>Final</strong> <strong>Cut</strong> <strong>Pro</strong> 7 <strong>Level</strong> <strong>One</strong> Exam Preparation Guide <strong>and</strong> Practice Exam<br />
5. What is one advantage of trimming a clip in the Viewer?<br />
6. How can you disable a single clip in the sequence?<br />
7. What tools can you use to drag an edit point in the Timeline?<br />
8. What is the keyboard shortcut for extending an edit?<br />
9. How do you reposition a clip to an upper Timeline track<br />
without moving it horizontally?<br />
10. What is the advantage of editing on the V2 track?<br />
Answers<br />
1. It allows you to select <strong>and</strong> trim one track of a linked clip.<br />
2. It ripples the trim amount through the unlocked tracks in the<br />
sequence.<br />
3. Pressing RR selects the Ripple tool.<br />
4. Press [ <strong>and</strong> ] (bracket keys) or < <strong>and</strong> > (angle bracket keys).<br />
5. You can view material outside the marked area.<br />
6. Control-click the clip in the sequence <strong>and</strong> deselect Clip<br />
Enable in the shortcut menu.<br />
7. Use the default Selection tool <strong>and</strong> the Ripple tool.<br />
8. The E key extends an edit.<br />
9. Hold down the Shift key as you drag, or select the clip <strong>and</strong><br />
press Option–Up Arrow. To move a clip down, you press<br />
Option–Down Arrow.<br />
10. It allows you to lengthen a clip without bumping into a<br />
bordering clip on either side.<br />
Lesson Five objectives<br />
Upon completion of Lesson Five, “Refining Edit Points” in “<strong>Final</strong> <strong>Cut</strong> <strong>Pro</strong> 7,”<br />
you should be able to complete the following tasks. Items from this lesson<br />
are included in the pool of exam questions, drawn r<strong>and</strong>omly from the<br />
following objectives:<br />
• Trim two edit points at the same time<br />
• Slip In <strong>and</strong> Out points<br />
• Roll edit points<br />
• Extend edit points<br />
• Slide a clip<br />
• Reposition a clip<br />
• Keep clips in sync<br />
13
<strong>Final</strong> <strong>Cut</strong> <strong>Pro</strong> 7 <strong>Level</strong> <strong>One</strong> Exam Preparation Guide <strong>and</strong> Practice Exam<br />
Lesson Five review questions<br />
After completing Lesson Five, you should be able to answer the following<br />
questions.<br />
1. How can you display a list of markers that are in a sequence?<br />
2. Where can you change the Timeline settings of the active<br />
sequence?<br />
3. Which two edit points does the Slip tool adjust?<br />
4. Which two sets of shortcut keys allow you to adjust edit<br />
points one frame at a time?<br />
5. Which two edit points does the Roll tool adjust?<br />
6. How do you adjust one track of a linked clip?<br />
7. How many clips are affected when you apply the Slide tool?<br />
8. Is extending two edit points most similar to rolling, slipping,<br />
or sliding edit points?<br />
9. What modifier key is essential to reposition a clip in a<br />
sequence without overwriting any other material?<br />
10. What does Option-dragging a clip do?<br />
11. If one track of a clip has gotten out of sync with the other<br />
tracks, by being either slipped or moved, how do you resync<br />
those tracks?<br />
Answers<br />
1. Control-click in the Timeline ruler. The markers appear at the<br />
bottom of the shortcut menu.<br />
2. In the Sequence Settings window (Sequence > Settings).<br />
3. The Slip tool adjusts the In <strong>and</strong> Out points of one clip.<br />
4. The < <strong>and</strong> > (angle bracket) keys, <strong>and</strong> the [ <strong>and</strong> ] (bracket)<br />
keys.<br />
5. The Roll tool adjusts one clip’s Out point <strong>and</strong> the adjacent<br />
clip’s In point.<br />
6. Turn off linked selection, or hold down Option before clicking<br />
the track.<br />
7. The Slide tool affects three clips: the position of the middle<br />
clip, <strong>and</strong> the durations of the adjacent clips.<br />
8. Extending changes an edit point in the same way rolling<br />
does.<br />
9. The Option key is used to shuffle a clip <strong>and</strong> ripple all other<br />
clips in the sequence.<br />
10. Option-dragging creates a copy of a sequence clip <strong>and</strong><br />
repositions the copy in a different location, leaving the<br />
original sequence clip in place.<br />
14
<strong>Final</strong> <strong>Cut</strong> <strong>Pro</strong> 7 <strong>Level</strong> <strong>One</strong> Exam Preparation Guide <strong>and</strong> Practice Exam<br />
11. Press Comm<strong>and</strong>-Z, or Control-click the red out-of-sync<br />
indicators on the tracks you want to adjust <strong>and</strong> choose “Slip<br />
into Sync” or “Move into Sync.”<br />
Lesson Six objectives<br />
Upon completion of Lesson Six, “Refining the Editing <strong>Pro</strong>cess” in “<strong>Final</strong> <strong>Cut</strong><br />
<strong>Pro</strong> 7,” you should be able to complete the following tasks. Items from this<br />
lesson are included in the pool of exam questions, drawn r<strong>and</strong>omly from<br />
the following objectives:<br />
• Label <strong>and</strong> rename project elements<br />
• Create subclips using In <strong>and</strong> Out points<br />
• Create subclips using markers<br />
• Use markers to sync clips<br />
• Change poster frames<br />
• Create a storyboard<br />
• Work with replace edits<br />
• Edit multicam footage<br />
Lesson Six review questions<br />
After completing Lesson Six, you should be able to answer the following<br />
questions.<br />
1. How do you add a color label to a clip, bin, or sequence?<br />
2. How do you create a subclip from another clip?<br />
3. Where can you place markers?<br />
4. Does snapping affect markers?<br />
5. What modifier key is used to create a new poster frame?<br />
6. What does the replace edit do?<br />
7. How should clips be organized in a bin before making a<br />
storyboard-type edit?<br />
8. What does it mean when a production is shot multicam?<br />
9. How do you create a multiclip?<br />
10. When creating a multiclip, what are the three ways you can<br />
sync clips or angles?<br />
11. What modifier key do you use to modify the arrangement of<br />
multiclip angles in the Viewer?<br />
Answers<br />
1. In the Browser, Control-click the item <strong>and</strong> choose Label, then<br />
select a color.<br />
15
<strong>Final</strong> <strong>Cut</strong> <strong>Pro</strong> 7 <strong>Level</strong> <strong>One</strong> Exam Preparation Guide <strong>and</strong> Practice Exam<br />
2. Set In <strong>and</strong> Out points in the clip, then choose Modify > Make<br />
Subclip.<br />
3. Place markers in the Timeline ruler or on a selected clip in the<br />
Timeline. You can also add markers to a clip in the Viewer.<br />
4. Yes. When snapping is on, you can snap the playhead to<br />
markers <strong>and</strong> snap a clip marker to a sequence marker or to<br />
another clip marker.<br />
5. The Control key creates a new poster frame (Control-P).<br />
6. It replaces a sequence clip with a source clip, aligning the<br />
Viewer <strong>and</strong> Timeline playhead positions.<br />
7. Clips should be placed in rows, with each clip in a row<br />
appearing slightly lower than the previous clip.<br />
8. Multiple cameras were used to shoot the same action at the<br />
same time but from different angles.<br />
9. In the Browser, select the clips you want to include in the<br />
multiclip <strong>and</strong> choose Modify > Make Multiclip, or Control-click<br />
a selected clip or bin <strong>and</strong> choose Make Multiclip from the<br />
shortcut menu.<br />
10. You can sync clips or angles by In points, Out points, or<br />
timecode.<br />
11. The Comm<strong>and</strong> key.<br />
Lesson Seven objectives<br />
Upon completion of Lesson Seven, “Customizing <strong>Final</strong> <strong>Cut</strong> <strong>Pro</strong>” in “<strong>Final</strong> <strong>Cut</strong><br />
<strong>Pro</strong> 7,” you should be able to complete the following tasks. Items from this<br />
lesson are included in the pool of exam questions, drawn r<strong>and</strong>omly from<br />
the following objectives:<br />
• Reconnect unlinked media files<br />
• Play sequences with multiple formats<br />
• Work with master clips <strong>and</strong> match frames<br />
• Log notes in Browser columns<br />
• Find project items<br />
• Customize shortcut keys <strong>and</strong> button bars<br />
• Save <strong>and</strong> reload customized layouts<br />
• Optimize user preferences<br />
Lesson Seven review questions<br />
After completing Lesson Seven, you should be able to answer the<br />
following questions.<br />
1. How do you sort by a column other than the Name column?<br />
16
<strong>Final</strong> <strong>Cut</strong> <strong>Pro</strong> 7 <strong>Level</strong> <strong>One</strong> Exam Preparation Guide <strong>and</strong> Practice Exam<br />
2. How do you show a column that you don’t currently see in<br />
the Browser?<br />
3. How do you search for a clip in the Browser using specific<br />
criteria?<br />
4. What determines whether a clip is a master clip in <strong>Final</strong> <strong>Cut</strong><br />
<strong>Pro</strong>?<br />
5. What does it mean when a clip has a red slash through the<br />
clip icon?<br />
6. How can you look at the detailed information about a single<br />
clip or item?<br />
7. Where can you choose new interface buttons?<br />
8. Where are all customized layouts saved on your computer?<br />
9. In what menu can you choose User Preferences?<br />
10. How do you make changes to an existing sequence?<br />
11. How do you find a matching frame to a sequence clip?<br />
12. What is saved in the Autosave Vault?<br />
Answers<br />
1. Click a column heading.<br />
2. Control-click a column heading <strong>and</strong> choose Show [column]<br />
from the shortcut menu.<br />
3. Select the Browser window <strong>and</strong> press Comm<strong>and</strong>-F to open<br />
the Find window, <strong>and</strong> choose specific search criteria.<br />
4. A clip is a master clip if it represents the first use of that clip in<br />
the project.<br />
5. The clip is offline <strong>and</strong> disconnected from its media file.<br />
6. Select the clip, <strong>and</strong> press Comm<strong>and</strong>-9 to open the Item<br />
<strong>Pro</strong>perties window. You can also Control-click the clip <strong>and</strong><br />
choose Item <strong>Pro</strong>perties from the shortcut menu, or choose<br />
Edit > Item <strong>Pro</strong>perties.<br />
7. From the Button List window or the Keyboard Layout<br />
window.<br />
8. They are saved at Users/[user name]/Library/Preferences/<strong>Final</strong><br />
<strong>Cut</strong> <strong>Pro</strong> User Data.<br />
9. From the <strong>Final</strong> <strong>Cut</strong> <strong>Pro</strong> menu.<br />
10. Make the sequence active in the Timeline, or select it in the<br />
Browser, <strong>and</strong> press Comm<strong>and</strong>-0 to open the Sequence<br />
Settings window. You can also choose Sequence > Sequence<br />
Settings.<br />
11. Position the playhead over the frame of the sequence clip,<br />
<strong>and</strong> press F.<br />
17
<strong>Final</strong> <strong>Cut</strong> <strong>Pro</strong> 7 <strong>Level</strong> <strong>One</strong> Exam Preparation Guide <strong>and</strong> Practice Exam<br />
12. Backup copies of your project file.<br />
Lesson Eight objectives<br />
Upon completion of Lesson Eight, “Capturing <strong>and</strong> Transferring Footage” in<br />
“<strong>Final</strong> <strong>Cut</strong> <strong>Pro</strong> 7,” you should be able to complete the following tasks. Items<br />
from this lesson are included in the pool of exam questions, drawn<br />
r<strong>and</strong>omly from the following objectives:<br />
• Connect video sources for capture<br />
• Preview <strong>and</strong> mark source material<br />
• Log clips<br />
• Choose clip settings<br />
• Choose capture presets<br />
• Choose capture options<br />
• Batch capture clips<br />
• Ingest from nontape sources<br />
Lesson Eight review questions<br />
After completing Lesson Eight, you should be able to answer the following<br />
questions.<br />
1. Before you can capture footage, what is the first thing you<br />
must do?<br />
2. Marking clips for capture is similar to marking clips while<br />
editing. True or false?<br />
3. You can enter a variety of clip information in the Logging tab.<br />
Give an example of logging information that appears in the<br />
Browser columns.<br />
4. When you choose a capture preset, what settings do you<br />
want it to match?<br />
5. What are the three capture modes you can use to capture<br />
footage?<br />
6. What is a scratch disk?<br />
7. How can you save time using the Batch Capture mode?<br />
8. You can choose only your computer hard drive as a scratch<br />
disk. True or false?<br />
9. What other settings window contains the scratch disk<br />
information like that on the Capture Settings tab?<br />
10. What other settings window contains the device-control<br />
information like that on the Capture Settings tab?<br />
11. What menu comm<strong>and</strong> do you choose to ingest from nontape<br />
sources?<br />
18
<strong>Final</strong> <strong>Cut</strong> <strong>Pro</strong> 7 <strong>Level</strong> <strong>One</strong> Exam Preparation Guide <strong>and</strong> Practice Exam<br />
Answers<br />
1. You must connect your source device via a FireWire cable or<br />
third-party capture card <strong>and</strong> turn it on.<br />
2. True.<br />
3. Log note, good take, scene number, take number, angle<br />
number, clip name.<br />
4. Your source footage settings. If you have a variety of footage,<br />
it should match whatever format represents the majority of<br />
clips or the highest quality, depending on the project <strong>and</strong><br />
your hardware.<br />
5. Capture Clip, Capture Now, <strong>and</strong> Batch Capture.<br />
6. The target destination for your captured media files.<br />
7. You can log individual clips <strong>and</strong> then capture them together<br />
at the same time.<br />
8. False. You can set your computer hard drive or an external<br />
FireWire drive as your scratch disk.<br />
9. The System Settings window.<br />
10. The Audio/Video Settings window.<br />
11. Choose File > Log <strong>and</strong> Transfer.<br />
Lesson Nine objectives<br />
Upon completion of Lesson Nine, “Applying Transitions” in “<strong>Final</strong> <strong>Cut</strong> <strong>Pro</strong> 7,”<br />
you should be able to complete the following tasks. Items from this lesson<br />
are included in the pool of exam questions, drawn r<strong>and</strong>omly from the<br />
following objectives:<br />
• Evaluate project needs<br />
• Underst<strong>and</strong> transitions<br />
• Apply video <strong>and</strong> audio transitions<br />
• Apply global transitions<br />
• Copy <strong>and</strong> change transitions<br />
• Use the Transition Editor<br />
• Adjust edit points under a transition<br />
• Save favorite transitions<br />
• Change transition parameters<br />
• Preview <strong>and</strong> render transitions<br />
Lesson Nine review questions<br />
After completing Lesson Nine, you should be able to answer the following<br />
questions.<br />
19
<strong>Final</strong> <strong>Cut</strong> <strong>Pro</strong> 7 <strong>Level</strong> <strong>One</strong> Exam Preparation Guide <strong>and</strong> Practice Exam<br />
1. From what two places can you choose a transition effect?<br />
2. When you use the automatic approach to applying a<br />
transition, what must you do first?<br />
3. In what ways can you target a clip or clips when you want to<br />
apply multiple transitions?<br />
4. What are three ways to change the duration of a transition in<br />
the Timeline?<br />
5. What are the three ways a transition can be aligned to an edit<br />
point?<br />
6. How can Comm<strong>and</strong>-C <strong>and</strong> Comm<strong>and</strong>-V be used on<br />
transitions?<br />
7. How do you open the Transition Editor?<br />
8. How are more complex transitions different from dissolves?<br />
9. What RT setting should you choose when you want to<br />
preview as many effects in your sequence as possible?<br />
10. In what three ways can you save a favorite transition?<br />
11. How do you set a new default transition?<br />
Answers<br />
1. Choose transition effects from the Effects tab in the Browser<br />
<strong>and</strong> from the Effects menu.<br />
2. Before applying a transition from the Effects menu, you must<br />
target the edit point.<br />
3. Select a clip, select a group of clips, set In <strong>and</strong> Out points, or<br />
select all the clips in the sequence.<br />
4. Drag the edge of the transition icon; Control-click the<br />
transition icon, choose Duration from the shortcut menu, <strong>and</strong><br />
enter an amount in the Duration window; or open the<br />
Transition Editor <strong>and</strong> change it in the Duration field.<br />
5. Use Center On Edit, Start On Edit, <strong>and</strong> End On Edit.<br />
6. Selecting a transition <strong>and</strong> pressing Comm<strong>and</strong>-C copies the<br />
transition. Deselecting the transition, moving the playhead to<br />
the target edit point, <strong>and</strong> pressing Comm<strong>and</strong>-V pastes the<br />
copied transition.<br />
7. Either Control-click one side of the transition icon <strong>and</strong> choose<br />
Open [transition] from the shortcut menu, or double-click one<br />
side of the icon in a sequence clip.<br />
8. They have additional parameters, such as border width <strong>and</strong><br />
color, that can be adjusted in the Transition Editor.<br />
9. Choose Unlimited RT <strong>and</strong> Dynamic.<br />
20
<strong>Final</strong> <strong>Cut</strong> <strong>Pro</strong> 7 <strong>Level</strong> <strong>One</strong> Exam Preparation Guide <strong>and</strong> Practice Exam<br />
10. From the Transition Editor, drag the drag h<strong>and</strong> icon to the<br />
Effects tab <strong>and</strong> release it in the Favorites bin; choose Effects ><br />
Make Favorite; or press Option-F.<br />
11. Control-click the transition in the Effects tab <strong>and</strong> choose Set<br />
Default Transition from the shortcut menu.<br />
Lesson Ten objectives<br />
Upon completion of Lesson Ten, “Mixing Audio Tracks” in “<strong>Final</strong> <strong>Cut</strong> <strong>Pro</strong> 7,”<br />
you should be able to complete the following tasks. Items from this lesson<br />
are included in the pool of exam questions, drawn r<strong>and</strong>omly from the<br />
following objectives:<br />
• Edit <strong>and</strong> organize audio effects<br />
• Monitor <strong>and</strong> adjust audio levels in the Timeline<br />
• Use the razor blade to add edits <strong>and</strong> create audio fades<br />
• Create audio fades using keyframes<br />
• Use the Audio Mixer<br />
• Record a voiceover<br />
Lesson Ten review questions<br />
After completing Lesson Ten, you should be able to answer the following<br />
questions.<br />
1. What button do you click in the Timeline to display the Mute<br />
<strong>and</strong> Solo buttons?<br />
2. What result do you get when you click the Solo button on a<br />
track?<br />
3. How can you add several tracks to the Timeline at one time?<br />
4. How do you make the audio level overlay appear on clips in<br />
the Timeline?<br />
5. When would you turn on audio waveforms in the Timeline?<br />
6. What tool do you use to set a keyframe on the audio level<br />
overlay?<br />
7. How can the Pen tool be accessed without selecting it from<br />
the Tool palette?<br />
8. How do you reposition a keyframe or change its volume<br />
level?<br />
9. How can you paste just the audio level from one clip to<br />
another?<br />
10. In what menu do you find the Audio Mixer?<br />
11. To mix tracks in real time <strong>and</strong> automatically create keyframes<br />
on a clip, what must you do in the Audio Mixer?<br />
21
<strong>Final</strong> <strong>Cut</strong> <strong>Pro</strong> 7 <strong>Level</strong> <strong>One</strong> Exam Preparation Guide <strong>and</strong> Practice Exam<br />
12. What tool do you use to record your own voiceover, <strong>and</strong><br />
where do you access it?<br />
13. What two comm<strong>and</strong>s in the Modify menu help to change<br />
audio levels, <strong>and</strong> in what way?<br />
Answers<br />
1. The Audio Controls button in the lower left of the Timeline.<br />
2. That track becomes the only audible track as you play the<br />
sequence.<br />
3. Choose Sequence > Insert Tracks.<br />
4. Press Option-W, or click the Clip Overlays control in the lower<br />
left of the Timeline, to the left of the Track Height control.<br />
5. When you want a visual representation of a clip’s audio<br />
signals to evaluate or to edit audio clips.<br />
6. The Pen tool.<br />
7. Press Option <strong>and</strong> move the pointer over the audio level<br />
overlay on a Timeline clip. The Pen tool appears on the<br />
overlay line.<br />
8. Drag left <strong>and</strong> right to change its position <strong>and</strong> up <strong>and</strong> down to<br />
change its volume level.<br />
9. Copy the clip that has the desired audio level <strong>and</strong> paste just<br />
the audio levels using the Paste Attributes comm<strong>and</strong>.<br />
10. The Tools menu.<br />
11. In the Audio Mixer button bar, click the Record Audio<br />
Keyframes button to turn it on. Then play the sequence <strong>and</strong><br />
adjust the clip volume by dragging its track fader.<br />
12. The Voice Over tool, found in the Tools menu.<br />
13. Modify > <strong>Level</strong>s brings up the Gain Adjust dialog, where you<br />
can raise or lower volume for all selected clips. Modify ><br />
Audio > Apply Normalization Gain resets the peak decibel<br />
level of the clip.<br />
Lesson Eleven objectives<br />
Upon completion of Lesson Eleven, “Creating Titles” in “<strong>Final</strong> <strong>Cut</strong> <strong>Pro</strong> 7,” you<br />
should be able to complete the following tasks. Items from this lesson are<br />
included in the pool of exam questions, drawn r<strong>and</strong>omly from the<br />
following objectives:<br />
• Add color bars <strong>and</strong> slugs<br />
• Create <strong>and</strong> edit text clips<br />
• Superimpose a title<br />
• Create a lower third<br />
22
<strong>Final</strong> <strong>Cut</strong> <strong>Pro</strong> 7 <strong>Level</strong> <strong>One</strong> Exam Preparation Guide <strong>and</strong> Practice Exam<br />
• Work with Boris text<br />
• Add color mattes <strong>and</strong> render effects<br />
• Import still images<br />
• Create a multilayer effect<br />
• Prepare graphic images for editing<br />
• Add Motion templates<br />
Lesson Eleven review questions<br />
After completing Lesson Eleven, you should be able to answer the<br />
following questions.<br />
1. From what two places can you choose a generated item such<br />
as text?<br />
2. What tab in the Viewer do you select to make changes to text<br />
clips?<br />
3. When you superimpose an edit over a V1 clip, to what track<br />
should the Source control be patched for the superimposed<br />
clip to be placed on V2?<br />
4. What type of generated text identifies a person, place, or<br />
thing?<br />
5. In what menu can you find the Show Title Safe option?<br />
6. What generated item is used as a color <strong>and</strong> sound reference<br />
at the head of a sequence?<br />
7. Where can you find the Drop Shadow attribute?<br />
8. In what text generator does a separate window appear for<br />
making text changes?<br />
9. What automated text generator is often used for credit rolls?<br />
10. How can you adjust a clip’s opacity?<br />
11. When you choose a color for a color matte, you can pick a<br />
color only from the Colors window. True or false?<br />
12. What is it called when you edit one sequence inside another?<br />
13. What category of generated items can you use to apply a<br />
Motion template?<br />
Answers<br />
1. Choose from the Browser Effects tab or from the Generator<br />
pop-up menu in the Video tab in the Viewer.<br />
2. The Controls tab.<br />
3. The V1 track.<br />
4. A lower third.<br />
23
<strong>Final</strong> <strong>Cut</strong> <strong>Pro</strong> 7 <strong>Level</strong> <strong>One</strong> Exam Preparation Guide <strong>and</strong> Practice Exam<br />
5. The View menu, <strong>and</strong> the View pop-up in the Viewer <strong>and</strong><br />
Canvas.<br />
6. Bars <strong>and</strong> tone.<br />
7. In the Motion tab in the Viewer.<br />
8. The Boris text generator.<br />
9. The Scrolling Text generator.<br />
10. Drag the opacity overlay on a video clip in the Timeline, or<br />
open a clip in the Viewer <strong>and</strong> change the Opacity parameter<br />
in the Motion tab.<br />
11. False. You can use the Select Color eyedropper to pick a color<br />
from any clip in any open sequence.<br />
12. Nesting.<br />
13. Master templates.<br />
Lesson Twelve objectives<br />
Upon completion of Lesson Twelve, “Changing Motion <strong>Pro</strong>perties” in “<strong>Final</strong><br />
<strong>Cut</strong> <strong>Pro</strong> 7,” you should be able to complete the following tasks. Items from<br />
this lesson are included in the pool of exam questions, drawn r<strong>and</strong>omly<br />
from the following objectives:<br />
• Change clip speed<br />
• Use the Speed tool<br />
• Create fit to fill edits<br />
• Create freeze frames<br />
• Change image size <strong>and</strong> position<br />
• Crop <strong>and</strong> rotate images<br />
• Copy <strong>and</strong> paste motion attributes<br />
• Animate motion effects<br />
• Create a motion path<br />
Lesson Twelve review questions<br />
After completing Lesson Twelve, you should be able to answer the<br />
following questions.<br />
1. In what menu do you choose Speed?<br />
2. How can you tell if the speed of a sequence clip has been<br />
changed?<br />
3. What type of edit can change clip speed automatically as you<br />
edit it into the Timeline?<br />
4. Where does the Speed tool appear in the Tool palette?<br />
24
<strong>Final</strong> <strong>Cut</strong> <strong>Pro</strong> 7 <strong>Level</strong> <strong>One</strong> Exam Preparation Guide <strong>and</strong> Practice Exam<br />
5. When you create a freeze frame, does a new freeze frame clip<br />
appear in the Browser automatically?<br />
6. How do you reveal the speed indicator area in the Timeline?<br />
7. How can you create a speed segment in a clip?<br />
8. Where do you access motion parameters?<br />
9. How can you change motion parameters directly in the<br />
Canvas?<br />
10. How can motion attributes be copied <strong>and</strong> pasted?<br />
11. Where are motion keyframes set <strong>and</strong> adjusted?<br />
12. What is a motion path?<br />
13. What tool do you use to hide unnecessary portions of an<br />
image?<br />
14. How is rotation measured in the Motion tab?<br />
Answers<br />
1. In the Modify menu.<br />
2. A speed percentage will appear next to the sequence clip<br />
name.<br />
3. A Fit to Fill edit.<br />
4. Under the Slip tool.<br />
5. No, but you can drag the freeze frame image from the Viewer<br />
to the Browser if you like.<br />
6. Click the Clip Keyframes control.<br />
7. Click in the speed indicator area with the Speed tool or the<br />
Selection tool to create a speed keyframe.<br />
8. In the Motion tab.<br />
9. Choose Image+Wireframe from the Canvas View pop-up<br />
menu.<br />
10. Copy the clip <strong>and</strong> use the Paste Attributes window to paste<br />
specific attributes.<br />
11. In the Motion tab keyframe graph area.<br />
12. The path a clip moves along between two or more keyframes.<br />
13. The Crop tool.<br />
14. In degrees.<br />
Lesson Thirteen objectives<br />
Upon completion of Lesson Thirteen, “Applying Filters” in “<strong>Final</strong> <strong>Cut</strong> <strong>Pro</strong> 7,”<br />
you should be able to complete the following tasks. Items from this lesson<br />
25
<strong>Final</strong> <strong>Cut</strong> <strong>Pro</strong> 7 <strong>Level</strong> <strong>One</strong> Exam Preparation Guide <strong>and</strong> Practice Exam<br />
are included in the pool of exam questions, drawn r<strong>and</strong>omly from the<br />
following objectives:<br />
• Apply audio <strong>and</strong> video filters<br />
• View <strong>and</strong> modify filters<br />
• Apply filters for image correction<br />
• Apply filters to multiple clips<br />
• Use tools to adjust filters<br />
• Animate filters using keyframes<br />
Lesson Thirteen review questions<br />
After completing Lesson Thirteen, you should be able to answer the<br />
following questions.<br />
1. Describe two ways to apply a video or audio filter.<br />
2. How do you view, modify the priority of, <strong>and</strong> disable filters<br />
applied to sequence clips?<br />
3. How do you delete one or all filters in the Filters tab?<br />
4. What real-time filter can you use to change the hue,<br />
saturation, <strong>and</strong> brightness of an image?<br />
5. What tool provides a split-screen before-<strong>and</strong>-after<br />
comparison of a filter?<br />
6. Where do you modify filter parameters?<br />
7. How do you apply a filter from one clip to another clip? to<br />
several clips?<br />
8. How do you save an adjusted filter as a favorite effect?<br />
9. How do you add filter keyframes in the Viewer?<br />
10. If a filter appears first in the Filters tab, does it affect all the<br />
filters below it?<br />
Answers<br />
1. Drag a filter from the Effects tab to the clip in the Timeline, or<br />
select the clip (or move the playhead over it) <strong>and</strong> choose a<br />
filter from the Effects menu.<br />
2. To view the filter’s effect, position the playhead over the clip<br />
in the Timeline. Open the clip in the Viewer, <strong>and</strong> click the<br />
Filters tab. To change the priority of a filter, drag the filter<br />
name above or below another filter. To disable the filter, click<br />
the Enable/Disable checkbox to deselect it.<br />
3. Click the filter name, <strong>and</strong> press Delete. To delete all video<br />
filters, click Video Filters, <strong>and</strong> press Delete.<br />
4. The Color Corrector 3-way filter.<br />
5. The Frame Viewer.<br />
26
<strong>Final</strong> <strong>Cut</strong> <strong>Pro</strong> 7 <strong>Level</strong> <strong>One</strong> Exam Preparation Guide <strong>and</strong> Practice Exam<br />
6. In the Filters tab.<br />
7. Drag the filter name from the Filters tab to another clip in the<br />
Timeline. To copy a filter to several clips at once, select those<br />
clips before dragging the filter. You can also use the Paste<br />
Attributes comm<strong>and</strong>.<br />
8. Drag the filter name from the Viewer window to the Favorites<br />
bin, press Option-F, or choose Effects > Make Favorite Effect.<br />
9. Position the playhead where you want to start or end a filter<br />
change, <strong>and</strong> click a parameter Keyframe button. Reposition<br />
the playhead, <strong>and</strong> change that parameter.<br />
10. No, filters that appear last in the Filters tab affect all the filters<br />
above it.<br />
Lesson Fourteen objectives<br />
Upon completion of Lesson Fourteen, “Finishing <strong>and</strong> Outputting” in “<strong>Final</strong><br />
<strong>Cut</strong> <strong>Pro</strong> 7,” you should be able to complete the following tasks. Items from<br />
this lesson are included in the pool of exam questions, drawn r<strong>and</strong>omly<br />
from the following objectives:<br />
• Detect audio peaks<br />
• Adjust video levels for broadcast<br />
• Share clips <strong>and</strong> sequences<br />
• Export a QuickTime movie<br />
• Export using QuickTime conversion<br />
• Export a still image<br />
• Output a sequence to tape<br />
• Create a timecode window burn<br />
• Back up a project<br />
Lesson Fourteen review questions<br />
After completing Lesson Fourteen, you should be able to answer the<br />
following questions.<br />
1. What is the most efficient way to find the audio peaks in a<br />
sequence?<br />
2. How are audio peaks indicated in the Timeline?<br />
3. What can you do to determine whether an image falls within<br />
the broadcast safe range?<br />
4. How can you correct an out-of-range clip so that its range is<br />
acceptable for broadcast?<br />
5. What two tools can you use to help prepare the audio <strong>and</strong><br />
video of your sequence for output?<br />
27
<strong>Final</strong> <strong>Cut</strong> <strong>Pro</strong> 7 <strong>Level</strong> <strong>One</strong> Exam Preparation Guide <strong>and</strong> Practice Exam<br />
6. What export function can you use to quickly post your<br />
sequence on YouTube?<br />
7. What is a self-contained QuickTime movie?<br />
8. When might you use QuickTime Conversion?<br />
9. What are the three ways you can output a sequence to tape?<br />
10. What Export comm<strong>and</strong> do you choose to create a list of clip<br />
information?<br />
Answers<br />
1. Using the Audio Peaks > Mark comm<strong>and</strong>, located in the Mark<br />
menu.<br />
2. By markers in the Timeline ruler where each audio peak<br />
occurs.<br />
3. Choose View > Range Check > Luma, <strong>and</strong> move through the<br />
sequence to see where the out-of-range clips are.<br />
4. Apply the Broadcast Safe filter to the clip.<br />
5. The Audio Mixer <strong>and</strong> Video Scopes.<br />
6. From the File menu, use the Share comm<strong>and</strong>.<br />
7. A movie that uses <strong>Final</strong> <strong>Cut</strong> <strong>Pro</strong> sequence presets <strong>and</strong> that<br />
can be played on any computer without having the original<br />
media files present.<br />
8. When you want to export a still image, an audio file in a<br />
particular format, an AVI file, <strong>and</strong> so on.<br />
9. Recording manually, or using the Print to Video or Edit to<br />
Tape options.<br />
10. Batch List<br />
Taking the <strong>Final</strong> <strong>Cut</strong> <strong>Pro</strong> 7 Practice exam<br />
You must pay $25 USD if you choose to take the practice exam online.<br />
1. Go to http://ibt.prometric.com/apple on a system that meets<br />
the following requirements:<br />
• Mac OS X 10.5 or higher<br />
• Safari 3.2.2 or above; other browsers are not fully supported<br />
• Cable / DSL / broadb<strong>and</strong> connection<br />
2. Click Secure Sign-in <strong>and</strong> log in with your PRIME username<br />
<strong>and</strong> password. If you don’t have a username <strong>and</strong> password,<br />
click First Time Registration <strong>and</strong> follow the instructions to<br />
create a PRIME profile.<br />
28
<strong>Final</strong> <strong>Cut</strong> <strong>Pro</strong> 7 <strong>Level</strong> <strong>One</strong> Exam Preparation Guide <strong>and</strong> Practice Exam<br />
3. On the Main Menu page, click Change Domain <strong>and</strong> select IT<br />
& <strong>Pro</strong> Apps. If you do not do this option, skip to the next<br />
step.<br />
4. In the C<strong>and</strong>idate Menu page, click Take Test.<br />
5. Enter FCP7Practice in the Private Tests box <strong>and</strong> click<br />
Submit. The code is case sensitive <strong>and</strong> only valid for one use.<br />
29
<strong>Final</strong> <strong>Cut</strong> <strong>Pro</strong> 7 <strong>Level</strong> <strong>One</strong> Exam Preparation Guide <strong>and</strong> Practice Exam<br />
6. Click Take This Test.<br />
7. Read <strong>and</strong> Agree/Accept the <strong>Certification</strong> <strong>Pro</strong>gram Agreement.<br />
8. Click Continue to skip the voucher then enter your credit card<br />
information to pay the $25 USD fee.<br />
9. Click Begin Test at the bottom of the page.<br />
10. When you finish all the questions, click End Test.<br />
Taking the <strong>Final</strong> <strong>Cut</strong> <strong>Pro</strong> 7 certification exam<br />
After you take the practice exam <strong>and</strong> review your results, you can take the<br />
certification exam at any time. Unlike the practice exam, which you can<br />
take from home, the certification exam must be taken at an <strong>Apple</strong><br />
Authorized <strong>Training</strong> Center (AATC) in a proctored setting or at a <strong>Pro</strong>metric<br />
Testing Center. To find the closest AATC, please visit training.apple.com/<br />
aatc. To find a <strong>Pro</strong>metric Testing Center, visit www.prometric.com/apple.<br />
Many AATCs schedule "<strong>Certification</strong> Exam Sessions" at training.apple.com/<br />
schedule. However, if you don't see a session scheduled, you can contact<br />
the AATC <strong>and</strong> they will often schedule one for you. Please note that all<br />
AATCS can offer all Mac OS X <strong>and</strong> <strong>Pro</strong> Apps exams, even if they don’t offer<br />
the corresponding course. The <strong>Final</strong> <strong>Cut</strong> <strong>Pro</strong> 7 exam is also available at<br />
<strong>Pro</strong>metric Testing Centers (1-888-275-3926). Since <strong>Pro</strong>metric has more than<br />
3000 locations worldwide, this provides the greatest exam access possible,<br />
especially in remote locations.<br />
<strong>Pro</strong>metric Exam FAQs<br />
Please visit training.apple.com/certification/faq for a list of Frequently<br />
Asked Questions. If you do not find the answer to your question, then<br />
email us. Please allow at least two business days for a response.<br />
30