Create successful ePaper yourself
Turn your PDF publications into a flip-book with our unique Google optimized e-Paper software.
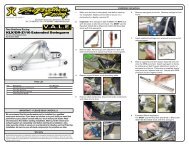
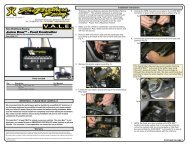
Installation <strong>Instructions</strong>1. Make sure the bike is completely cool before starting theinstallation. Make sure the bike is secure on center standor ideally a service lift.6. Remove the OEM muffler:2. Remove the seat and handle:2006-10 TriumphSprint st 1050V.A.L.E. <strong>Slip</strong>-on Exhaust System with M-5 CanisterPart # 005-1540419V, 005-1540420VV.A.L.E. TMV a r i a b l e A x i s L o c k i n g E x h a u s t7. To install the <strong>Two</strong> <strong>Brothers</strong> <strong>Racing</strong> <strong>Slip</strong>-on ExhaustSystem: Attach the slip-tube with the X-Lite Ring tothe muffler using the 4 (four) 6x14mm socket head capscrews and split lock washers provided. Leave loose fornow.3. Remove the rear cowling:8. Attach the rubber lined muffler clamps and platebrackets as shown to the muffler assembly using the2 (two) 8x20mm socket head cap screws and nutsprovided. Leave loose for now.4. Remove the fender assembly:Parts ListQty. Description Part Number1 M-5 Muffler Canister Varies1 Stainless Steel S-Bend <strong>Slip</strong>-<strong>On</strong> Tube 005-15501S1 HARDWARE KIT 005-154-31 X-Lite V.A.L.E.Retaining Ring 005-7-2-21 Licence Plate Bracket 005-17304B1 Rear LED Tail Light /Plate Lights 005-17504LK1 Turn Signal Marker Lights (Set of 2) 005-88T21 C-5/M-5 Oval Muffler Clamp Halves (set 2) 005-5C-6A2 8x20mm Socket Head Cap Screw 005-SH8204 M6 Split Lock Washer 005-WL61 Muffler Hanger Bracket LEFT 005-154-13L1 Muffler Hanger Bracket RIGHT 005-154-13R4 6x14mm Socket Head Cap Screw 005-SH6142 8mm Nylon Insert Lock Nut 005-NN81 5mm Long Handle Ball end hex key 005-9-186105. Remove the plastic cover on fender assembly to exposethe brake and turn signal wires. Disconnect the brakelight wires:9. Install muffler assembly using the OEM mounting boltsand joint clamp.IMPORTANT - PLEASE READ CAREFULLYWe recommend that this performance part be installed by a qualifiedmotorcycle technician. If you have any doubts as to your ability to install thisperformance part, please consult with your local motorcycle dealer. Read allinstructions first before starting installation. Make sure the motorcycle andexhaust system are completely cool before starting the installation. Also,make sure the bike is secure on a centerstand or ideally a service lift duringinstallation. Be sure to save all stock components for possible use later.
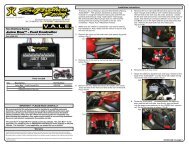
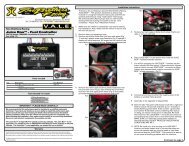
10. Make sure muffler is aligned when the bike is centered.Then tighten the four V.A.L.E. assembly bolts andclamp bolts. Make sure there is clearance between wiringand all body parts.Installation <strong>Instructions</strong>2006-10 TriumphSprint st 1050V.A.L.E. <strong>Slip</strong>-on Exhaust System with M-5 CanisterPart # 005-1540419V, 005-1540420VV.A.L.E. TMV a r i a b l e A x i s L o c k i n g E x h a u s tWIRING DIAGRAMLeft Turn Signal(Green/Red & Black)Wiring HarnessRight Turn Signal(Green/White & Black)11. Attach the turn signals/taillights and plate lights asshown in Wiring Diagram. Join wires to main wireharness using the supplied splice connectors and bluescotch locks. You can either cut the OEM modularconnectors off of the wiring harness or splice new wire tothem. The supplied lighting devices will need to have themodular connectors removed. Run all wiring to the leftside of the rear frame, away from the muffler assemblymaking sure there is adequate clearance from all bodyparts. Make sure all lights work correctly.12. Re-install the fender assembly, rear cowling, seat andhandle from steps 2-4.13. Double check your work for alignment and fitment.Green/RedRedBlackBlackBrake LightsPlate LightsBlackBlackGreen/WhiteRed14. Before you run the bike, clean off all fingerprints anddirt, as any oily residue will etch the metal and becomesomewhat permanent when the system gets hot.Remove any plastic film from name badge(s) and/orcanister clamp(s). Run the bike and enjoy. It is normalfor some white smoke to appear the first time you startthe bike. This is packing/manufacturing oil from insidethe pipe burning off. Check for gaps or leaks. If you find aleak, a little high temperature silicon sealant should fix it.After 50 to 100 miles, recheck all fasteners for tightness.Left Turn SignalRight Turn SignalLight BoltsYellow Black GreenRed Black GreenLED Brake Light
005-1540419VQty. Description Part Number1 M-5 Carbon Fiber Muffler Canister 005-120419M1 Stainless Steel S-Bend <strong>Slip</strong>-<strong>On</strong> Tube 005-15501S1 HARDWARE KIT 005-154-31 X-Lite V.A.L.E.Retaining Ring 005-7-2-21 Licence Plate Bracket 005-17304B1 Rear LED Tail Light /Plate Lights 005-17504LK1 Turn Signal Marker Lights (Set of 2) 005-88T21 C-5/M-5 Oval Muffler Clamp Halves (set 2) 005-5C-6A2 8x20mm Socket Head Cap Screw 005-SH8204 M6 Split Lock Washer 005-WL61 Muffler Hanger Bracket LEFT 005-154-13L1 Muffler Hanger Bracket RIGHT 005-154-13R4 6x14mm Socket Head Cap Screw 005-SH6142 8mm Nylon Insert Lock Nut 005-NN81 5mm Long Handle Ball end hex key 005-9-18610005-1540420VQty. Description Part Number1 M-5 Titanium Muffler Canister 005-120420M1 Stainless Steel S-Bend <strong>Slip</strong>-<strong>On</strong> Tube 005-15501S1 HARDWARE KIT 005-154-31 X-Lite V.A.L.E.Retaining Ring 005-7-2-21 Licence Plate Bracket 005-17304B1 Rear LED Tail Light /Plate Lights 005-17504LK1 Turn Signal Marker Lights (Set of 2) 005-88T21 C-5/M-5 Oval Muffler Clamp Halves (set 2) 005-5C-6A2 8x20mm Socket Head Cap Screw 005-SH8204 M6 Split Lock Washer 005-WL61 Muffler Hanger Bracket LEFT 005-154-13L1 Muffler Hanger Bracket RIGHT 005-154-13R4 6x14mm Socket Head Cap Screw 005-SH6142 8mm Nylon Insert Lock Nut 005-NN81 5mm Long Handle Ball end hex key 005-9-18610Care & CleaningCare & CleaningKeep system free of dirt and moisture. Store in a cool, dry place. Make sure vehicle iscompletely cool before maintenance.Stainless Header System: Polished stainless steel pipes will turn a light golden hueafter a few heat cycles, this is a normal characteristic of high quality stainless steel.Clean using a mild water based spray cleaner. Always apply cleaner or polish with a soft,clean cloth.Titanium Header System: Polished titanium pipes will experience color shift rangingfrom deep blue/purple through amber after a few heat cycles. This is a normalcharacteristic of high quality titanium. Clean using a mild water based spray cleaner.Always apply cleaner or polish with a soft, clean cloth.Polished Aluminum Canisters: Use an aluminum or mag wheel polish to restore thebright finish to factory spec.Brushed Aluminum Canisters: Clean using a mild water based spray cleaner. Alwaysapply cleaner or polish with a soft, clean cloth.Carbon Fiber Canisters: Clean using a mild water based spray cleaner. Always applycleaner or polish with a soft, clean cloth. Always make sure the fiberglass packing insideis in good condition and not burned out, as exhaust heat inside an empty canister willdeteriorate the carbon fiber sleeve.TBR sells repack kits (Road - #005-10038, Offroad - #005-10038MX) that includeeverything you need to easily do it yourself.Titanium Mufflers: For cleaning use a mild water based spray cleaner. Always applycleaner or polish with a soft, clean cloth. Always make sure the fiberglass packing insideis in good condition and not burned out, as exhaust heat inside an empty canister willdeteriorate the carbon fiber sleeve.TBR sells repack kits (Road - #005-10038, Offroad - #005-10038MX) that includeeverything you need to easily do it yourself.Repack all road canisters at the first signs of packing material deterioration. Part #005-10038Repack all offroad canisters after every 10 hours of use. Part #005-10038MXNEVER dyno test your bike with carbon fiber or titanium canisters installed - theintense heat and lack of cooling air can quickly burn through the canister material. <strong>Two</strong><strong>Brothers</strong> <strong>Racing</strong> does not provide a warranty for burned canisters.Warranty<strong>Two</strong> <strong>Brothers</strong> <strong>Racing</strong> products are intended for closed course competition purposes only, andtherefore are sold “as is” without warranty. <strong>Two</strong> <strong>Brothers</strong> <strong>Racing</strong> specifically disclaims anywarranties of merchantability or fitness for a particular purpose and disclaims all responsibilityfor consequential and incidental damages or any other losses arising from the use of theseproducts or parts.


