WARNING: ELECTRICAL GROUNDING INSTRUCTIONS This ...
WARNING: ELECTRICAL GROUNDING INSTRUCTIONS This ...
WARNING: ELECTRICAL GROUNDING INSTRUCTIONS This ...

Create successful ePaper yourself
Turn your PDF publications into a flip-book with our unique Google optimized e-Paper software.
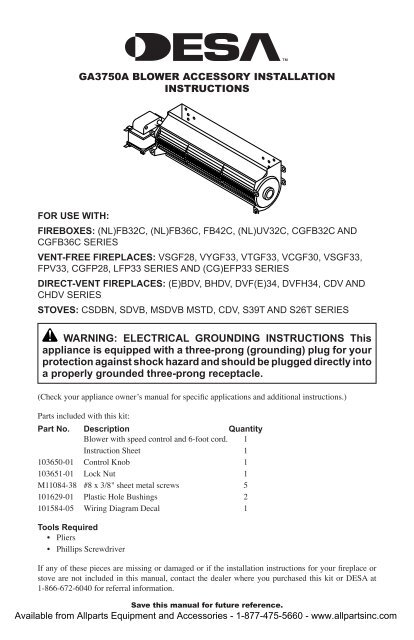
GA3750A Blower Accessory InstallationInstructionsFor Use With:Fireboxes: (NL)FB32C, (NL)FB36C, FB42C, (NL)UV32C, CGFB32C andCGFB36C SeriesVent-Free Fireplaces: VSGF28, VYGF33, VTGF33, VCGF30, VSGF33,FPV33, CGFP28, LFP33 Series and (CG)EFP33 SeriesDirect-Vent Fireplaces: (E)BDV, BHDV, DVF(E)34, DVFH34, CDV andCHDV SeriesStoves: CSDBN, SDVB, MSDVB MSTD, CDV, S39T and S26T Series<strong>WARNING</strong>: <strong>ELECTRICAL</strong> <strong>GROUNDING</strong> <strong>INSTRUCTIONS</strong> <strong>This</strong>appliance is equipped with a three-prong (grounding) plug for yourprotection against shock hazard and should be plugged directly intoa properly grounded three-prong receptacle.(Check your appliance owner’s manual for specific applications and additional instructions.)Parts included with this kit:Part No. Description QuantityBlower with speed control and 6-foot cord. 1Instruction Sheet 1103650-01 Control Knob 1103651-01 Lock Nut 1M11084-38 #8 x 3/8" sheet metal screws 5101629-01 Plastic Hole Bushings 2101584-05 Wiring Diagram Decal 1Tools Required• Pliers• Phillips ScrewdriverIf any of these pieces are missing or damaged or if the installation instructions for your fireplace orstove are not included in this manual, contact the dealer where you purchased this kit or DESA at1-866-672-6040 for referral information.Save this manual for future reference.
Installing BlowerAccessory in a 32"FireboxNotice: If a log set is currently installedin the firebox, disconnectlog set from gas supply and removefrom firebox. Contact a qualifiedservice person to do this.Notice: Not all 24" vent free gaslogs can be installed in a 32" fireboxwith a blower. Please referto your gas log owner’s manualfor log sizing requirements.Note: Appearance of firebox may vary slightlydepending on model.1. Remove the firebox bottom:a. Remove the 4 screws that secure the bottomof the firebox (see Figure 1).b. Carefully raise and remove the fireboxbottom from the firebox.<strong>WARNING</strong>: If there is a duplexelectrical outlet installed in theright side of the bottom of thefireplace base area, be sure thatthe electrical power to the outlet isturned off before proceeding withblower installation. Failure to dothis may result in serious injury.2. Attach the power cord to the blower motorby firmly pushing the two female terminals atthe end of the power cord onto the two spadeterminals on the blower motor.3. Attach green ground wire from power cordto blower housing using screw provided (seeFigure 2). Tighten screws securely.4. Place the blower against lower rear wall offirebox wrapper with the exhaust port directedupward. Align the holes in top mounting tabsof blower with holes in wall of wrapper (seeFigure 2). Using 2 screws provided, mountblower and tighten screws securely.5. Be certain that all wire terminals are securely attachedto terminals on blower motor and that thescrew retaining the green ground wire is tight.6. Locate the plastic hole plug installed in the3/8" diameter opening in the lower rightside of the firebox front panel (see Figure 2).Remove the plastic plug and discard.7. Place speed control against inner wall offront panel, pushing the plastic control shaftforward through the opening (see Figure 3).8. While supporting speed control, secure controlshaft with lock nut by pushing and turninglock nut with pliers clockwise until it is tightagainst front panel. Place control knob providedon shaft (see Figure 3).ScrewsFigure 1 - Removing Screws fromFirebox BottomScrewExhaust PortTopMountingTabLowerRear Wallof FireboxWrapperScrewsBlowerFloorSupportsPlastic Hole PlugFigure 2 - Mounting Blower to FireboxNote: Appearance of fireplace may vary by model.SpeedControlControlShaftLockNutControl KnobFigure 3 - Attaching Speed Control108319-01D
Installing BlowerAccessory in a 32"Firebox Continued9. Plug in blower power cord.a. If your firebox is installed as a freestandingunit, determine whether the power cordwill exit the left side or the right side of thefirebox. Install 1 plastic bushing providedinto the 1 1 /2" hole in the floor support onthe exit side. Install the second plasticbushing provided into the 1 1 /2" hole in theouter casing through which the power cordwill exit (see Figure 4). Route power cordthrough both plastic bushings and plug thepower cord into a 3-prong grounded wallreceptacle near the firebox.b. If your firebox installation is recessedand/or pre-wired, plug the power cord intothe duplex outlet provided. Refer to yourfirebox owner’s manual for instructions onwiring the duplex outlet.CAUTION: Never touch theblower wheel while in operation.10. Turn on power to duplex outlet if previouslyturned off per the warning in step 1, page 2.11. Check to make sure that the power cord is completelyclear of the blower wheel and that thereare no other foreign objects in blower wheel.Turn blower on and check for operation.12. Peel off the backing paper and stick the suppliedwiring diagram decal on the fireboxbottom approximately 12" in front of theblower.13. Replace bottom of firebox. Note: Make surethe back of the firebox bottom slides underthe rear of the firebrick (lift the firebrick up ifnecessary.)14. Reattach firebox bottom using 4 screws removedin step 1, page 2. Note: Discard theremaining hardware items.15. Install the log set heater according to the installationinstructions supplied with the heater.operating the blowerLight your gas appliance with the blower off. Afterabout 15 minutes, turn the blower on to deliverheated air at the top louvers. The blower featuresa variable control which allows you to select thespeed you desire.Note: Periodically check the louvers of the fireboxand remove any dust, dirt or other obstructions.INSTALLING BLOWERACCESSORY IN 36" OR42" FIREBOXNOTICE: If a log set is installedin the firebox, disconnect logset from gas supply and removefrom firebox. Contact a qualifiedservice person to do this.Note: Appearance of firebox may vary dependingon model.1. If firebrick is installed, carefully lift andremove the concrete firebrick floor from thefirebox (see Figure 5). Some model fireboxesrequire that you remove the side and rearpanels first. Follow the directions below toremove the side and rear firebrick panels forthose fireboxes.PlasticBushingFigure 4 - Installing Plastic Bushing forPower CordFirebrick FloorFigure 5 - Removing Firebrick Floor fromFirebox108319-01D
INSTALLING BLOWERACCESSORY IN 36" OR42" FIREBOXContinueda. Using a Phillips screwdriver, remove the screwand retainer bracket at the top of the brick linerpanel on the left side. Carefully remove the leftpanel from the firebox (see Figure 6).b. Repeat the removal steps for the brick linerpanel on the right side.c. Remove the screw and retainer bracket atthe top of the brick liner panel at the rearof the firebox. IMPORTANT: Do not letpanel fall after bracket has bee removed.Carefully remove the rear panel from thefirebox (see Figure 7).d. Carefully lift and remove the concretefirebrick floor from the firebox if installed(see Figure 5, page 3).2. Remove the firebox bottom.a. Remove the 4 screws that secure the bottomof the firebox (see Figure 8).b. Carefully raise and remove the fireboxbottom from the firebox.<strong>WARNING</strong>: If there is a duplexelectrical outlet installed in theright side of the bottom of thefireplace base area, be sure thatthe electrical power to the outletis turned off before proceedingwith the blower installation.Failure to do this may result inserious injury.RetainerBracketScrew3. Attach the power cord to the blower motorby firmly pushing the two female terminals atthe end of the power cord onto the two spadeterminals on the blower motor.4. Attach green ground wire from power cordto blower housing using screw provided (seeFigure 9). Tighten screws securely.RetainerBracketScrewBack PanelFigure 7 - Removing Back Panel from FireboxScrewsFigure 8 - Removing Firebox BottomScrewExhaust PortTopMountingTabBlowerLeft PanelFigure 6 - Removing Left Panel fromFireboxScrewsLower Rear Wallof Firebox WrapperFigure 9 - Mounting Blower to FireboxD
10/ 15V.A.C.BlackWhiteGr enVariableFan SwitchO f OnBlackWhiteBlackBlackBlowerMotorINSTALLING BLOWERACCESSORY IN 36" OR42" FIREBOXContinued5. Place the blower against the lower rear wallof the firebox outer wrapper with the exhaustport directed upward. Align the holes in topmounting tabs of blower with holes in wallof wrapper (see Figure 9, page 4). Using 2screws provided, mount blower and tightenscrews securely.6. Be certain that all wire terminals are securely attachedto terminals on blower motor and that thescrew retaining the green ground wire is tight.7. Locate the plastic hole plug installed in the3/8" diameter opening in the lower right sideof the firebox front panel (see Figure 10).Remove the plastic plug and discard.8. Place speed control against inner wall offront panel, pushing the plastic control shaftforward through the opening.9. While supporting speed control, secure controlshaft with lock nut by pushing and turninglock nut with pliers clockwise until it is tightagainst front panel. Place control knob providedon shaft (see Figure 11).10. Turn on power to duplex outlet if previouslyturned off per the warning in column 1, page 4.11. Plug in blower power cord.a. If your firebox is installed as a freestandingunit with an accessory mantel,determine whether the power cord will exitthe left side or the right side of the firebox.Install 1 plastic bushing provided into the1 1 /2" hole in the floor support on the exitside. Install the second plastic bushingprovided into the 1 1 /2" hole in the outercasing through which the power cord willexit (see Figures 10 and 12). Route powercord through both plastic bushings and plugthe power cord into a wall receptacle nearthe firebox.b. If your firebox installation is recessedand/or pre-wired, plug the power cord intothe duplex outlet provided. Refer to yourfirebox owner’s manual for instructions onwiring the duplex outlet.12. Check to make sure that the power cord iscompletely clear of the blower wheel and thatthere are no other foreign objects in blowerwheel. Turn blower on and check for operation.Turn blower off by turning knob fully counterclockwisebefore continuing.DCAUTION: Never touch theblower wheel while in operation.13. Peel off the backing paper and stick the suppliedwiring diagram decal on the firebox bottomapproximately 12" in front of the blower(see Figure 12).PlasticHole Plug1 1 /2" HolePlasticBushingFigure 10 - Installing Plastic Bushing forPower CordLocknutSpeed ControlControl ShaftControlKnobFigure 11 - Attaching Speed Control toFireboxFloorSupportsWiring Diagram Decal12” in Front of Blower1 1 /2"HoleFigure 12 - Location of Wiring Diagram Decal
14. Replace and reattach firebox bottom using4 screws removed in step 2 (see Figure 8,page 4).15. If previously removed, carefully replace the firebrickside panels and/or floor in the firebox (seeFigure 5, page 3 and Figures 6 and 7, page 4).16. Install the log set heater according to the installationinstructions supplied with the heater.INSTALLING BLOWERACCESSORY IN 36" OR42" FIREBOXContinued<strong>WARNING</strong>: A qualified serviceperson must install heater.Follow all local codes.Note: Discard the remaining hardware items.Operating the BlowerLight your gas appliance with the blower off. Afterabout 15 minutes, turn the blower on to deliverheated air at the top louvers. The blower featuresa variable control which allows you to select thespeed you desire.Note: Periodically check the louvers of the fireboxand remove any dust, dirt or other obstructions.Installing BlowerAccessory in ModelSVFBC FreestandingStoveNotice: Shut off gas heaterduring the following blowerinstallation.1. Remove top panel of stove by removing threescrews from under top lip on each side of stove(see Figure 13).2. Facing front of stove, carefully slide top panelforward until it is completely removed fromstove (see Figure 13).3. Disconnect power cord wires from blowermotor (if connected) (see Figure 14).4. Disconnect green ground wire from blowerhousing (if connected) by removing screwholding wire terminal (see Figure 14).5. Install one plastic bushing provided in blowerkit into the 1 1 /2" hole in the left rear of fireboxfloor. Access hole through the rectangularopening in the rear panel (see Figure 15).6. Remove the two blower mounting bracketsfrom the rear panel by removing two screwseach (see Figure 16, page 7).7. Attach the two mounting brackets to blowerhousing using four screws provided inblower kit (2 for each bracket) (see Figure16, page 7). Tighten screws securely. Placeblower assembly temporarily on top offirebox.8. Working from the rear of the stove, place entirepower cord, including speed control housing,in lower control compartment.9. Route ends of 3-wire power cord up from thelower control compartment through the plasticbushing, then up to the upper cavity of stove(see Figure 17, page 7).10. Attach the terminal ends of the white andblack power cord wires to the terminals on theblower motor (see Figure 14). Push firmly.Figure 13 - Removing Stove Top PanelWhitePowercordWireScrewGreen Ground WireFigure 14 - Removing Wires from BlowerBushingBlack Powercord WireFigure 15 - Installing BushingD
Installing BlowerAccessory in ModelSVFBC FreestandingStoveContinued11. Attach the terminal end of the green power cordwire to the front tab of the blower housing usingscrew provided (see Figure 14, page 6).12. Using the four screws previously removed,mount blower assembly to stove by reattachingblower brackets to rear panel (seeFigure 16). Tighten screws securely.13. Install plastic control knob onto output shaft ofspeed control housing (see Figure 17). Placespeed control housing just inside control compartmentdoor in front of stove (see Figure 17).14. Using two screws provided in blower kit,mount blower speed control housing to mountingtab in left side of lower control compartment(see Figure 18).15. Check to make sure that the power cord iscompletely clear of blower wheel and thereare no foreign objects in blower wheel.16. Carefully replace stove top panel. Align holesand replace six screws removed in step 1,page 6.17. Peel off the backing paper and stick the suppliedwiring diagram decal on the stove flooras shown in Figure 18.18. Plug power cord into a convenient 3-pronggrounded wall receptacle near the stove.<strong>WARNING</strong>: Electrical GroundingInstructions: <strong>This</strong> applianceis equipped with a three-prong(grounding) plug for your protectionagainst shock hazard andshould be plugged directly intoa properly grounded three-prongreceptacle.BlowerBlower BracketFireboxTopSpeedControlHousingPowerCordControlKnobFigure 16 - Removing Blower Bracketsfrom Stove and Attaching to BlowerFigure 17 - Installing Blower ControlHousingDBlower SpeedControl Housing<strong>WARNING</strong>: Never attempt to service heater while itis plugged in, operating or hot. Burns and electricalshock could result. Only a qualified service personshould service or repair heater.If any of the original wire as supplied with the appliancemust be replaced, it must be replaced with 105°C wire orit’s equivalent.<strong>WARNING</strong>: Label all wires prior to disconnectionwhen servicing controls. Wiring errors cancause improper and dangerous operation. Verifyproper operation after servicing.120 Vac.60 Hz. .78 Amps110/115V.A.C.BlackGreenWhiteVariableFan SwitchOffBlackBlackBlackWhiteWiring Diagram DecalFigure 18 - Routing Power CordOnDESA Heating Products, Bowling Green, KYBlowerMotor
Installing BlowerAccessory in ModelSVFBC FreestandingStoveContinued19. Using speed control knob, turn blower on andcheck for operation.20. All remaining parts from blower kit may bediscarded.Operating the BlowerLight your gas appliance with the blower off. Afterabout 15 minutes, turn the blower on to deliverheated air at the top louvers. The blower featuresa variable control which allows you to select thespeed you desire.Installing BlowerAccessory in 32”Fireplace systemsNotice: Shut off gas supply anddisconnect heater from gas supply.Contact a qualified serviceperson to do this.Notice: Not all 24" vent free gaslogs can be installed in a 32" fireboxwith a blower. Please referto your gas log owner’s manualfor log sizing requirements.Note: Appearance of firebox or burner system mayvary depending on model.1. Remove fireplace screen per the instructionsin operation manual supplied with fireplace.2. If logs are installed, carefully remove the logsand set aside, noting the properly mountedlocation of each.3. Remove screws that attach log base assemblyto fireplace. Carefully lift up log base assemblyand remove from fireplace, taking care topull flexible gas line through the access holes(see Figure 19).CAUTION: Do not pick up logbase assembly by burners. <strong>This</strong>could damage burners. Onlyhandle base by grates.4. Attach the power cord to the blower motorby firmly pushing the two female terminals atthe end of the power cord onto the two spadeterminals on the blower motor.5. Attach green ground wire from power cordto blower housing using screw provided (seeFigure 18). Tighten screws securely.6. Place the blower against lower rear wall offirebox outer wrapper with the exhaust portdirected upward. Align the holes in top mountingtabs of blower with holes in wall of wrapper(see Figure 20). Using 2 screws provided,mount blower and tighten screws securely.7. Be certain that all wire terminals are securely attachedto terminals on blower motor and that thescrew retaining the green ground wire is tight.8. Place control knob provided on plastic controlshaft of speed control.ScrewsScrewGreenGroundWireScrewsLog BaseFlexibleGas LineFigure 19 - Removing Log Base fromFireplaceExhaust PortTop MountingTabBlower Lower RearWall of FireboxFigure 20 - Mounting Blower to FireboxD
Installing BlowerAccessory in 32" FireplacesystemsContinued9. Mount the speed control on the front leg ofthe left floor support bracket using 2 screwsprovided (see Figure 21). Note: Some remoteready fireplace models have the gas controllocated near the left floor support bracket. Forthese models, mount the blower speed controlonto the right floor support bracket.10. Plug in blower power cord.a. If your fireplace system is installed as afreestanding unit with an accessory mantel,determine whether the power cord willexit the left side or the right side of the firebox.Install 1 plastic bushing provided intothe 1.5" hole in the floor support bracketon the exit side (see Figure 22). Install thesecond plastic bushing provided into the1.5" hole in the outer casing through whichthe power cord will exit. Route power cordthrough both plastic bushings and plugthe power cord into a properly grounded3-prong wall receptacle near the firebox.b. If your fireplace system installation isrecessed and if an outlet is not installed inyour fireplace, you must install the GA3555Outlet kit with cover in your fireplace whichwill supply a convenient 3-prong groundedelectrical outlet for your blower. Refer to theinstallation manual provided with the modelGA3555 accessory for instructions on wiringthe duplex outlet. Note: A qualified installermust make all electrical connections.Left FloorSupportBracket11. Check to make sure that the power cord iscompletely clear of the blower wheel and thatthere are no other foreign objects in blowerwheel. Turn blower on and check for operation.Turn blower off by rotating knob fullycounterclockwise before continuing.CAUTION: Never touch theblower wheel while in operation.12. Peel off the backing paper and stick the suppliedwiring diagram decal on the fireboxbottom approximately 3" to the right of theblower speed control (Figure 23, page 10).13. Replace log base assembly in fireplace. Feed flexiblegas supply line into fireplace base area whilereplacing log base assembly. Make sure the entireflexible gas line is in fireplace base area. Note: Iffirebrick is installed, make sure the back of thefirebox bottom slides under the rear panel of thefirebrick (lift the firebrick up if necessary).IMPORTANT: Do not pick up log base assemblyby burners. <strong>This</strong> could damage burners.Only handle base by grates.14. Reattach log base assembly to fireplace withscrews removed in step 3, page 8. Note: Discardthe remaining hardware items.15. Install logs and fireplace screen per instructionsin operating manual provided withfireplace.<strong>WARNING</strong>: Failure to positionthe parts in accordance with supplieddiagrams or failure to useonly parts specifically approvedwith this heater may result indamage or personal injury.ScrewsControlKnobSpeedControlControl ShaftFigure 21 - Attaching Speed Control toFireboxRight FloorSupport BracketPlasticBushingFigure 22 - Installing Plastic Bushing forPower CordD
Installing BlowerAccessory in 32" FireplacesystemsContinued16. Connect gas supply to fireplace per instructionsin operating manual provided withfireplace.<strong>WARNING</strong>: A qualifiedservice person must connectfireplace to gas supply. Followall local codes.<strong>WARNING</strong>: Never attempt to service heaterwhile it is plugged in, operating or hot. Burnsand electrical shock could result. Only a qualifiedservice person should service or repair heater.If any of the original wire as supplied with the appliancemust be replaced, it must be replaced with 105°Cwire or it’s equivalent.<strong>WARNING</strong>: Label all wires prior to disconnectionwhen servicing controls. Wiring errorscan cause improper and dangerous operation.Verify proper operation after servicing.110/115V.A.C.BlackGreenWhite120 Vac. 60 Hz. . 78 AmpsDESA, Bowling Green, KYVariableFan SwitchOffBlackBlackOnWiringDiagramBlackWhiteBlowerMotor101584-05Installing bloweraccessory INfreestanding stoveseries SDV, MSD, MSTD,CDV OR CSDBNIMPORTANT: Read all installationinstructions before installingblower.NOTICE: Shut off gas supply anddisconnect heater from gas supply.Contact a qualified serviceperson to do this.Installing the Blower1. Remove 4 hex bolts securing rear cover toback of stove body (see Figure 24).2. Separate bottom cover from rear cover by looseningthe 8 mounting screws (see Figure 24).3. Align the holes in the top mounting tabs ofblower with the holes in wall of rear cover(see Figure 25, page 11). Using the 4 screwsprovided, mount blower and tighten screwssecurely.4. Attach the power cord to the blower motorby firmly pushing the two female terminals atthe end of the power cord onto the two spadeterminals on the blower motor.5. Attach green ground wire from power cordto blower housing using screw provided (seeFigure 25, page 11). Tighten screw securely.6. Make sure all wire connections to terminals onblower motor are securely attached and that thescrew retaining the green ground wire is tight.ScrewRear CoverFigure 23 - Location of Wiring DiagramDecal 3" from BlowerOperating the BlowerLight your gas appliance with the blower off. Afterabout 15 minutes, turn the blower on to deliverheated air at the top louvers. The blower featuresa variable control which allows you to select thespeed you desire. Note: Periodically check thelouvers of the firebox and remove any dust, dirtor other obstructions.(Note: Stove BodyMay Vary by Model)Figure 24 - Removing/Installing RearCover10D
Installing bloweraccessory INfreestanding stoveseries SDV, MSD, MSTD,CDV OR CSDBNContinued7. Place speed control on left inside of rear coverand push the plastic control shaft throughopening (see Figure 25).8. While supporting speed control, secure controlshaft with lock nut by pushing and turning locknut with pliers clockwise until tight against theside of rear cover. Place control knob providedonto shaft (see Figure 25).9. Plug in blower power cord.10. Check to make sure that the power cord iscompletely clear of the blower wheel and thatthere are no other foreign objects in blowerwheel. Turn blower on and check for operation.Turn blower off by rotating knob fullycounterclockwise before continuing.CAUTION: Never touch theblower wheel while in operation.11. Peel off the backing paper and stick the suppliedwiring diagram decal on the inside of rear coveras shown (see Figure 25).12. Connect or reconnect gas supply followinginstructions given in the owner’s manualsupplied with your fireplace.<strong>WARNING</strong>: A qualifiedservice person must connectfireplace to gas supply. Followall local codes.13. Reattach bottom cover to rear cover with 8screws (see Figure 25). Make sure that youdon’t pinch any wires during reassembly.14. Secure rear cover to back of stove chassis (seeFigure 25).15. Plug in the power cord when ready to use.<strong>WARNING</strong>: Failure to positionthe parts in accordance with supplieddiagrams or failure to useonly parts specifically approvedwith this heater may result indamage or personal injury.BlowerControlKnobLock NutBlowerAssemblyControlShaftGreenGround WireSpeedControlRear CoverPowerCordMountingScrews(Included inHardwarePack)WiringDiagramDecalScrewExhaust PortFigure 25 - Installing Optional BlowerAccessoryOperating the BlowerLight your gas appliance with the blower off. Afterabout 15 minutes, turn the blower on to deliverheated air through the openings in the top of thestove body. The blower features a variable controlwhich allows you to select the speed you desire.The blower helps distribute heated air from thefireplace. Periodically check the openings of thestove top and remove any dust, dirt or other obstructionsthat will hinder the flow of air.D 11
Installing bloweraccessory in directventFIREPLACE seriesbhdv, (E)bdv, ddv, hdv,CDV, CHDV, DVF(E) or DVFHIMPORTANT: Read all installationinstructions before installingblower.NOTICE: Shut off gas supply anddisconnect heater from gas supply.Contact a qualified serviceperson to do this.IMPORTANT: For clarity, gas valve assembly andgrate/burner assembly are not shown in Figures 24and 25. They will, however, be in your fireplacewhen you are installing the blower. Also for claritythe firebox is shown with dotted lines.1. Open lower louver panel as shown in Figure 26.2. Attach the power cord to the blower motorby firmly pushing the two female terminals atthe end of the power cord onto the two spadeterminals on the blower motor.LowerRear Wallof FireboxWrapperBlowerAssembly12Exhaust PortScrewGreen GroundWireScrewsLower LouverPanelFigure 26 - Mounting Blower to Firebox3. Attach green ground wire from power cordto blower housing using screw provided (seeFigure 26). Tighten screw securely.4. Place the blower under the firebox and againstthe lower rear wall of firebox outer wrapperwith the exhaust port directed upward. Alignthe holes in the top mounting tabs of blowerwith holes in wall of wrapper (see Figure 26).Using the two screws provided, mount blowerand tighten screws securely.5. Be sure all wire terminals on blower are attachedsecurely. Make sure the screw retainingthe green wire is tight.6. Remove screws securing the plate containingthe ON/OFF switch to the bottom of thefirebox and set aside.7. Place speed control against the back of thisplate and push the plastic control shaft throughopening (see Figure 27).8. While supporting speed control, secure controlshaft with lock nut by pushing and turning locknut with pliers clockwise until tight againstthe plate. Place control knob (provided) ontoshaft (see Figure 27).9. Replace plate containing switches and tightenscrews securely.10. Plug in blower power cord.a. If your fireplace system is installed as afreestanding unit with an accessory mantel,determine whether the power cord willexit the left side or the right side of the firebox.Install one plastic bushing (provided)into the 1 1 /2" hole in the outer casing throughwhich the power cord will exit. Install thesecond plastic bushing (provided) into thefloor support bracket if exiting through theright side (see Figure 28, page 14). Routepower cord through (both) plastic bushing(s)and plug the power cord into a properlygrounded 3-prong wall receptacle near thefirebox.SpeedControlControlShaftControlKnobLocknutSwitchPlateFigure 27 - Attaching Speed Control toFireboxD
Installing bloweraccessory in directventFIREPLACE seriesbhdv, (E)bdv, ddv, hdv,CDV, CHDV, DVF(E) orDVFHContinuedb. If your fireplace system installation isrecessed and/or pre-wired, a qualifiedinstaller must make all electrical connectionsfor the outlet kit included with thefireplace.11. Check to make sure that the power cord iscompletely clear of the blower wheel and thatthere are no other foreign objects in blowerwheel. Turn blower on and check for operation.Turn blower off by rotating knob fullycounterclockwise before continuing.WiringDiagram DecalPlasticBushingCAUTION: Never touch theblower wheel while in operation.12. Peel off the backing paper and stick the suppliedwiring diagram decal on the outer casingbottom approximately 3" to the right of theblower speed control (Figure 28).Figure 28 - Installing Plastic Bushingfor Power Cord and Locating WiringDiagram Decal<strong>WARNING</strong>: Failure to positionthe parts in accordance with supplieddiagrams or failure to useonly parts specifically approvedwith this heater may result indamage or personal injury.13. Connect or reconnect gas supply followinginstructions given in the owner’s manualsupplied with your fireplace.<strong>WARNING</strong>: A qualifiedservice person must connectfireplace to gas supply. Followall local codes.D 13