
You also want an ePaper? Increase the reach of your titles
YUMPU automatically turns print PDFs into web optimized ePapers that Google loves.
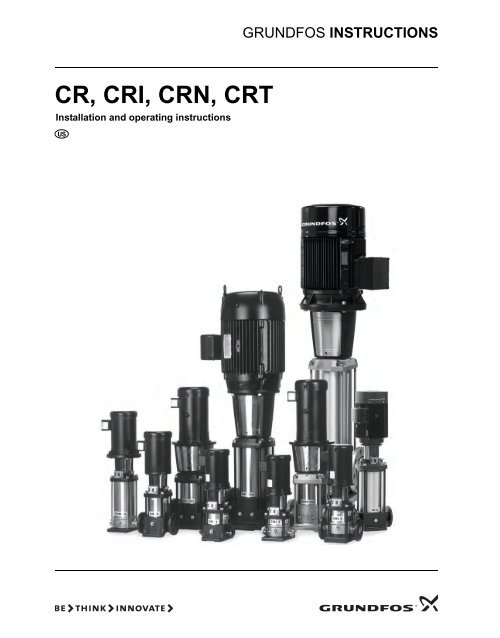
CONTENTSPageShipment inspection 5Understanding nameplate data 6Understanding codes 7Confirming proper application 8Checking operating conditions 8Installing the pump 10Pump location 10Foundation 10Pump mounting 11Check valves 13Electrical 14Motor 14Starting the pump the first time 14Preventative pump maintenance 16Maintaining the pump’s motor 16Motor Lubrication 16Lubrication Procedure 17Replacing the motor 17Parts List 19Spare Parts 19Preliminary electrical tests 20Startup for Cool-Top® 21Diagnosing specific problems 22Worksheet for three-phase motors 24WarningElectrical Work: All electrical work should beperformed by a qualified electrician inaccordance with the latest edition of the NationalElectrical Code, local codes and regulations.WarningShock Hazard: A faulty motor or wiring can causeelectrical shock that could be fatal, whethertouched directly or conducted through standingwater. For this reason, proper grounding of thepump to the power supply’s grounding terminalis required for safe installation and operation.In all installations, the above-ground metalplumbing should be connected to the powersupply ground as described in Article 250-80 ofthe National Electrical Code.1. GeneralThe <strong>CR</strong> range is based on the inline multistage centrifugal pumpfirst pioneered by <strong>Grundfos</strong>. <strong>CR</strong> is available in four basicmaterials and over one million configurations. <strong>CR</strong> is suitable forpumping water and water-like liquids in industry, petrochemical,water treatment, commercial buildings, and many otherapplications. Some of <strong>CR</strong>’s outstanding characteristics are:• superior efficiency• reliability• ease of maintenance• compact size and small footprint• quiet operation.2. Shipment inspectionExamine the components carefully to make sure no damage hasoccurred to the pump during shipment. Care should be taken toensure the pump is NOT dropped or mishandled.2.1 Ensure you have the right pumpRead the pump nameplate to make sure that it is the one youordered.• <strong>CR</strong>Centrifugal pump with standard cast iron and 304 stainlesssteel construction• <strong>CR</strong>ICentrifugal pump; all parts in contact with water are 304stainless steel construction• <strong>CR</strong>NCentrifugal pump; all parts in contact with water are 316stainless steel construction• <strong>CR</strong>TCentrifugal pump; all parts in contact with water are titaniumconstruction• <strong>CR</strong>ECentrifugal pump with a <strong>Grundfos</strong> MLE VFD motor attached.2.2 Checking the condition of the pumpThe shipping carton in which your pump arrived is speciallydesigned around your pump during production to prevent damageduring shipment. As a precaution, the pump should remain in thecarton until you are ready to install it. Examine the pump for anydamage that may have occurred during shipping. Examine anyother parts of the shipment as well for any visible damage.Note: If the pump is shipped as a complete unit (motor attachedto pump end), the position of the coupling (that connects thepump shaft to the motor shaft) is set at factory specifications. Noadjustment is required. If the unit is delivered as a pump end only,follow the adjustment procedures in the section on replacing themotor.Pump without Motor (<strong>CR</strong>(I)(N) 1s, 1, 3, 5, 10, 15, and 20 Only):If you purchased a pump without a motor, the shaft seal has beenset by the factory. Do not loosen the three set screws on the shaftseal when attaching the motor.Pump without Motor (<strong>CR</strong>(N) 32, 45, 64, 90, 120, and 150 Only):If you purchased a pump without a motor, you must install theseal. The seal is protected in its own sub boxing within the pumppackaging crate. To protect the shaft and bearings duringshipment, a shaft holder protective device is used. This devicemust be removed prior to installation of the seal. Read the sealinstallation instructions which are included in the pump package.2.3 Verifying electrical requirementsVerification of the electrical supply should be made to be certainthe voltage, phase and frequency match that of the pump motor.The proper operating voltage and other electrical information canbe found on the motor nameplate. These motors are designed torun on –10 % / + 10 % of the nameplate-rated voltage. For dualvoltagemotors, the motor should be internally connected tooperate on the voltage closest to the 10% rating, i.e., a 208voltage motor wired per the 208 volt connection diagram. Thewiring connection diagram can be found on either a plateattached to the motor or on a diagram inside the terminal boxcover. If voltage variations are larger than –10 % / + 10 %, do notoperate the pump.5
3. Understanding nameplate dataType key<strong>CR</strong>, <strong>CR</strong>I, <strong>CR</strong>N 1s, 1, 3, 5, 10, 15, and 20ExampleType range: <strong>CR</strong> 3 -10 A FG A E HQQE<strong>CR</strong>, <strong>CR</strong>I,Rated flow rate in [m 3 /h] (x 5gpm)Number of impellersCode for pump versionCode for pipe connectionCode for materialsCode for rubber partsCode for shaft seal<strong>CR</strong>T 2, 4, 8, and 16ExampleType range: <strong>CR</strong>T 16 -30 /2 U G A AUUE<strong>CR</strong>TRated flow rate in [m 3 /h] (x 5gpm)Number of stages x 10Code for impellers (used only if the pumphas fewer impellers than stages)Code for pump versionCode for pipe connectionCode for materialsCode for shaft seal and rubber parts11357Fig. 1QP124689 10NameplateGPMHFEETTM04 3895 03091. Type designation2. Model, materialnumber, productionnumber3. Head in feet atnominal flow4. Nominal motor hp5. Head at zero flow6. Rated rpm7. Nominal flow8. Rated frequency9. Maximum pressureand maximum fluidtemperature10. Direction of rotation11. Production countryRPMHP NPSI °F maxTM04 3894 0309<strong>CR</strong>, <strong>CR</strong>N 32, 45, 64, 90, 120, and 150ExampleType C 32 -2 -1 U G A E KUBE<strong>CR</strong>, <strong>CR</strong>NRated flow rate in [m 3 /h] (x 5gpm)Number of impellersNumber of reduced diameter impellersCode for pump versionCode for pipe connectionCode for materialsCode for rubber pump partsCode for shaft sealFig. 2DesignatedModel(eg.ABCD)Fig. 3NameplateA 12345678 P1 01 41MaterialNumberModel keyProductionCompanyLast two digitsof production yearProduction week number(01 52)TM04 3904 04096
5.4 Maximum operating pressuresat +250 °F (194 °F for <strong>CR</strong>N-SF)Pump type/connection50 Hzstages60 HzstagesMax.psi/bar<strong>CR</strong>, <strong>CR</strong>I, <strong>CR</strong>N 1sOval flange 1 to 23 1 to 17 232 / 16FGJ, PJE 1 to 36 1 to 27 362 / 25<strong>CR</strong>, <strong>CR</strong>I, <strong>CR</strong>N 1Oval flange 1 to 23 1 to 17 232 / 16FGJ, PJE 1 to 36 1 to 27 362 / 25<strong>CR</strong>, <strong>CR</strong>I, <strong>CR</strong>N 3Oval flange 1 to 23 1 to 17 232 / 16FGJ, PJE 1 to 36 1 to 27 362 / 25<strong>CR</strong>, <strong>CR</strong>I, <strong>CR</strong>N 5Oval flange 1 to 22 1 to 16 232 / 16FGJ, PJE 1 to 36 1 to 24 362 / 25<strong>CR</strong>, <strong>CR</strong>I 10Oval flange <strong>CR</strong> 1 to 6 145 / 10Oval flange, <strong>CR</strong>I 1 to 16 1 to 10 232 / 16FGJ, GJ, PJE 1 to 16 1 to 10 232 / 16FGJ, GJ, PJE 17 to 22 12 to 17 362 / 25<strong>CR</strong>N 10All 1 to 22 1 to 17 362 / 25<strong>CR</strong>, <strong>CR</strong>I 15Oval flange 1 to 7 1 to 5 145 / 10FGJ, GJ, PJE 1 to 10 1 to 8 232 / 16FGJ, GJ, PJE 12 to 17 9 to 12 362 / 25<strong>CR</strong>N 15All 1 to 17 1 to 12 362 / 25<strong>CR</strong>, <strong>CR</strong>I 20Oval flange 1 to 7 1 to 5 145 / 10FGJ, GJ, PJE 1 to 10 1 to 7 232 / 16FGJ, GJ, PJE 12 to 17 8 to 10 362 / 25<strong>CR</strong>N 20All 1 to 17 1 to 10 362 / 25<strong>CR</strong>, <strong>CR</strong>N 32<strong>CR</strong>, <strong>CR</strong>N 45<strong>CR</strong>, <strong>CR</strong>N 64<strong>CR</strong>, <strong>CR</strong>N 90<strong>CR</strong>, <strong>CR</strong>N 120<strong>CR</strong>, <strong>CR</strong>N 1501-1 to 7 1-1 to 5 232 / 168-2 to 14 6-2 to 11-2 435 / 301-1 to 5 1-1 to 4-2 232 / 166-2 to 13-2 4-2 to 8-1 435 / 301-1 to 5 1-1 to 3 232 / 166-2 to 8-1 4-2 to 5-2 435 / 301-1 to 4 1-1 to 3 232 / 165-2 to 6 4-2 to 4-1 435 / 301-1 to 3 232 / 161-1 to 5-2 4-2 to 5-2 435 / 301-1 to 3 232 / 161-1 to 4-2 4-1 to 4-2 435 / 30<strong>CR</strong>T 2 2 to 26 2 to 18 305 / 21<strong>CR</strong>T 4 1 to 22 1 to 16 305 / 21<strong>CR</strong>T 8 1 to 12 1 to 8 232 / 1614 to 20 10 to 16 362 / 25<strong>CR</strong>T 16 1 to 8 1 to 8 232 / 1610 to 16 10 to 12 362 / 25Consult <strong>Grundfos</strong> for other working conditions.9
6. Installing the pumpWarningDo not energize pump until properly installed.6.1 Pump locationThe pump should be located in a dry, well-ventilated area which isnot subject to freezing or extreme variation in temperature.Care must be taken to ensure the pump is mounted at least6 inches (150 mm) clear of any obstruction or hot surfaces.The motor requires an adequate air supply to prevent overheatingand adequate vertical space to remove the motor for repair.For open systems requiring suction lift the pump should belocated as close to the water source as possible to reduce pipinglosses.6.2 FoundationConcrete or similar foundation material should be used to providea secure, stable mounting base for the pump.See table of bolt hole center line dimensions for the various pumptypes.Secure the pump to the foundation using all four bolts and shimpump base to assure the pump is vertical and all four pads on thebase are properly supported (uneven surfaces can result in pumpbase breakage when mounting bolts are tightened).Fig. 4Pump positionThe pump can be installed vertically or horizontally; see fig. 4.Ensure that an adequate supply of cool air reaches the motorcooling fan. The motor must never fall below the horizontal plane.Arrows on the pump base show the direction of flow of liquidthrough the pump.To minimize possible noise from the pump, it is advisable to fitexpansion joints on either side of the pump and anti-vibrationmountings between the foundation and the pump.Note: Care should be taken to ensure that the vent plug islocated in the uppermost position.Isolating valves should be fitted either side of the pump to avoiddraining the system if the pump needs to be cleaned, repaired orreplaced.TM04 3906 04094 x øLL12BB12TM00 2256Pump typeL1 L2 B1 B2 øin mm in mm in mm in mm in mm<strong>CR</strong> 1s, 1, 3, 5 3 15/16 100 5 11/16 145 7 1/16 180 8 11/16 220 1/2 13<strong>CR</strong>I, <strong>CR</strong>N 1s 1, 3, 5 3 15/16 100 5 7/8 150 7 1/16 180 8 11/16 220 1/2 13<strong>CR</strong> 10, 15, 20 5 1/8 130 6 15/16 176 8 7/16 215 10 1/16 256 9/16 13.5<strong>CR</strong>N 10, 15, 20 5 1/8 130 7 7/8 200 8 7/16 215 9 3/4 248 1/2 13<strong>CR</strong> 32 6 11/16 170 8 3/4 223 9 7/16 240 11 3/4 298 9/16 14<strong>CR</strong>N 32 6 11/16 170 8 7/8 226 9 7/16 240 11 3/4 298 9/16 14<strong>CR</strong> 45,64 7 1/2 190 9 3/4 248 10 1/2 266 13 1/16 331 9/16 14<strong>CR</strong>N 45,64 7 1/2 190 9 7/8 251 10 1/2 266 13 1/16 331 9/16 14<strong>CR</strong>(N) 90 7 13/16 199 10 1/4 261 11 280 13 11/16 348 9/16 14<strong>CR</strong>(N) 120, 150 10 13/16 275 13 9/16 344 14 15/16 380 18 9/16 472 11/16 1810
6.3 Pump mounting6.3.1 Recommended installation torquesModel<strong>CR</strong>, <strong>CR</strong>I, <strong>CR</strong>N1s/1/3/5, and<strong>CR</strong>T 2/4<strong>CR</strong>, <strong>CR</strong>I,<strong>CR</strong>N 10/15/20, and<strong>CR</strong>T 8/16<strong>CR</strong>, <strong>CR</strong>N32/45/64/90/120/1506.4 Suction pipeWarning<strong>CR</strong>, <strong>CR</strong>I, <strong>CR</strong>N pumps are shipped with coveredsuction and discharge. The covers must beremoved before the final pipe flange to pumpconnections are made.Recommendedfoundation torque(ft - lbs)Recommendedflange torque(ft - lbs)30 37 - 4437 44 - 5252 52 - 59The suction pipe should be adequately sized and run as straight andshort as possible to keep friction losses to a minimum (minimum offour pipe diameters straight run prior to the suction flange). Avoidusing unnecessary fittings, valves or accessory items. Butterfly orgate valves should only be used in the suction line when it isnecessary to isolate a pump because of a flooded suction condition.This would occur if the water source is above the pump; see fig. 5and fig. 6. Flush piping prior to pump installation to remove loosedebris.Reservoir6.5 Minimum suction pipe sizesThe following recommended suction pipe sizes are the smallestsizes which should be used with any specific <strong>CR</strong> pump type.The suction pipe size should be verified with each installation toensure good pipe practices are being observed and excessfriction losses are not encountered.High temperatures may require larger diameter pipes to reducefriction and improve NPHSA.Model<strong>CR</strong>(I)(N) 1s, 1, 3; <strong>CR</strong>T 2 1"<strong>CR</strong>(I)(N) 5;<strong>CR</strong>T 4<strong>CR</strong>(I)(N) 10, 15, 20;<strong>CR</strong>T 8, 161-1/4"2"<strong>CR</strong>(N) 32 2-1/2"<strong>CR</strong>(N) 45 3"<strong>CR</strong>(N) 64, 90 4"<strong>CR</strong>(N) 120, 150 5"Min. suction pipe sizeNominal diametersch 40 pipeNominal diametersch 40 pipeNominal diametersch 40 pipeNominal diametersch 40 pipeNominal diametersch 40 pipeNominal diametersch 40 pipeNominal diametersch 40 pipe6.6 Discharge pipingIt is suggested that a check valve and isolation valve be installedin the discharge pipe.Pipe, valves and fittings should be at least the same diameter asthe discharge pipe or sized in accordance with good pipingpractices to reduce excessive fluid velocities and pipe frictionlosses.Note: Pipe, valves and fittings must have a pressure rating equalto or greater than the maximum system pressure.ButterflyValveFig. 5CheckValveFlooded suctionButterflyValveExpansion JointCheckValveEccentricReducerButterflyValveStrainerTM04 3925 0409Before the pump is installed it is recommended that the dischargepiping be pressure checked to at least the maximum pressure thepump is capable of generating or as required by codes or localregulations.Whenever possible, avoid high pressure loss fittings, such aselbows or branch tees directly on either side of the pump. Thepiping should be adequately supported to reduce thermal andmechanical stresses on the pump.Good installation practice recommends the system be thoroughlycleaned and flushed of all foreign materials and sediment prior topump installation. Furthermore, the pump should never beinstalled at the lowest point of the system due to the naturalaccumulation of dirt and sediment. If there is excessive sedimentor suspended particles present, it is advised a strainer or filter beused. <strong>Grundfos</strong> recommends that pressure gauges be installedon inlet and discharge flanges or in pipes to check pump andsystem performance.SuctionPipeReserviorFootValveTM04 3910 0409WarningTo avoid problems with waterhammer, fastclosing valves must not be used in <strong>CR</strong>N-SFapplications.Fig. 6Suction lift**The suction pipe should have a fitting on it for priming.<strong>CR</strong>N-SF pumps cannot be used for suction lift.11
6.7 Bypass orificeA bypass should be installed in the discharge pipe if there is anypossibility the pump may operate against a closed valve in thedischarge line. Flow through the pump is required to ensureadequate cooling and lubrication of the pump is maintained. See6.9 Minimum continuous duty flow rates for minimum flow rates.Elbows should be a minimum of 12” from the orifice discharge toprevent erosion.6.8 Nozzle loadsIf not all loads reach the maximum permissible value stated in theforces and moments tables included here with fig. 10, one ofthese values may exceed the normal limit. Contact <strong>Grundfos</strong> forfurther information.TM04 3926 0409Fig. 7Recommended bypass arrangementY-direction:Z-direction:X-direction:Direction of chamber stack90 ° from inlet/outletInlet/outletTM04 0346Fig. 10 Nozzle forces and momentsFig. 8Optional bypass arrangementTM04 3909 0409Flange<strong>CR</strong>, <strong>CR</strong>I,<strong>CR</strong>NY-direction[lb]ForcesZ-direction[lb]X-direction[lb]1-1/4" 1s to 5 171 263 1752"10, 15and 20303 371 3372-1/2" 32 382 466 4223" 45 461 562 5064" 64 and 90 607 753 6745" & 6"120 and150607 753 674NippleOrificeBy Pass LineFig. 9 Optional bypass arrangement for <strong>CR</strong>(N) 32, 45, 64,and <strong>CR</strong> 90, 120, and 150 onlyTM04 3924 0409Flange<strong>CR</strong>, <strong>CR</strong>I,<strong>CR</strong>NY-direction[ft-lb]MomentsZ-direction[ft-lb]X-direction[ft-lb]1-1/4" 1s to 5 605 715 9002"10, 15and 20738 848 1,0332-1/2" 32 793 904 1,1063" 45 848 959 1,1804" 64 and 90 922 1,069 1,2915" & 6"120 and150922 1,069 1,29112
6.9 Minimum continuous duty flow ratesPump Typemin °F to 176 °F(min °C to 80 °C)* <strong>Grundfos</strong> Cool-Top® is only available in the following pump types.at 210°F(at 99°C)at 248°F(at 120°C)at 356°F(at 180°C)<strong>CR</strong>, <strong>CR</strong>I, <strong>CR</strong>N 1s 0.5 0.7 1.2 1.2*<strong>CR</strong>, <strong>CR</strong>I, <strong>CR</strong>N 1 0.9 1.3 2.3 2.3*<strong>CR</strong>, <strong>CR</strong>I, <strong>CR</strong>N 3 1.6 2.4 4.0 4.0*<strong>CR</strong>, <strong>CR</strong>I, <strong>CR</strong>N 5 3.0 4.5 7.5 7.5*<strong>CR</strong>, <strong>CR</strong>I, <strong>CR</strong>N 10 5.5 8.3 14 14*<strong>CR</strong>, <strong>CR</strong>I, <strong>CR</strong>N 15 9.5 14 24 24*<strong>CR</strong>, <strong>CR</strong>I, <strong>CR</strong>N 20 11 17 28 28*<strong>CR</strong>, <strong>CR</strong>N 32 14 21 35 35*<strong>CR</strong>, <strong>CR</strong>N 45 22 33 55 55*<strong>CR</strong>, <strong>CR</strong>N 64 34 51 85 85*<strong>CR</strong>, <strong>CR</strong>N 90 44 66 110 110*<strong>CR</strong>, <strong>CR</strong>N 120 60 90 N/A N/A<strong>CR</strong>, <strong>CR</strong>N 150 75 115 N/A N/A<strong>CR</strong>T 2 1.3 2.0 3.3 N/A<strong>CR</strong>T 4 3.0 4.5 7.5 N/A<strong>CR</strong>T 8 4.0 6.0 10 N/A<strong>CR</strong>T 16 8.0 0.7 20 N/APump Type <strong>CR</strong> 1s <strong>CR</strong> 1 <strong>CR</strong> 3 <strong>CR</strong> 5 <strong>CR</strong> 10 <strong>CR</strong> 15 <strong>CR</strong> 20 <strong>CR</strong> 32 <strong>CR</strong> 45 <strong>CR</strong> 64 <strong>CR</strong> 90Standard (<strong>CR</strong>) • • • •I Version (<strong>CR</strong>I) • • • • • • •N Version (<strong>CR</strong>N) • • • • • • • • • • •6.10 Check valvesA check valve may be required on the discharge side of the pumpto prevent the pump’s inlet pressure from being exceeded.For example, if a pump with no check valve is stopped becausethere is no demand on the system (all valves are closed), the highsystem pressure on the discharge side of the pump will “find” itsway back to the inlet of the pump.If the system pressure is greater than the pump’s maximum inletpressure rating, the limits of the pump will be exceeded and acheck valve needs to be fitted on the discharge side of the pumpto prevent this condition. This is especially critical for <strong>CR</strong>N-SFapplications because of the very high discharge pressuresinvolved. As a result, most <strong>CR</strong>N-SF installations require a checkvalve on the discharge piping.6.11 Temperature riseIt may sometimes be necessary to stop the flow through a pumpduring operation.At shut-off, the power to the pump is transferred to the pumpedliquid as head, causing a temperature rise in the liquid.The result is risk of excess heating of and consequent damage tothe pump. The risk depends on the temperature of the pumpedliquid and for how long the pump is operating without flow; seethe following temperature rise chart.Pump typeTime for temperature riseof 18 °F (10 °C)SecondsMinutes<strong>CR</strong> 1s, 1, 3 210 3.5<strong>CR</strong> 5 240 4.0<strong>CR</strong> 10 210 3.5<strong>CR</strong> 15 150 2.5<strong>CR</strong> 20 120 2.0<strong>CR</strong> 32, 45, 64, 90,120, 15060 1.06.12 Conditions/ReservationsThe listed times are subject to the following conditions/reservations:• No exchange of heat with the surrounding.• The pumped liquid is water with a specific heat of 1.0 Btu / lb. °F(4.18 kJ / kg °C).• Pump parts (chambers, impellers and shaft) have the samethermal capacity as water.• The water in the base and the pump head is not included.These reservations should give sufficient safety margin againstexcessive temperature rise.The maximum temperature must not exceed the pump maximumrating.13
6.13 Electrical6.14 MotorWarningThe safe operation of this pump requires that itbe grounded in accordance with the nationalelectrical code and local governing codes orregulations. Connect the ground wire to thegrounding screw in the terminal box and then tothe ACCEPTABLE grounding point. All electricalwork should be performed by a qualifiedelectrician in accordance with the latest editionof the National Electrical Code, local codes andregulations.<strong>Grundfos</strong> <strong>CR</strong> pumps are supplied with heavy-duty 2-pole (3600rpm nominal), ODP or TEFC, NEMA C frame motors selected toour rigid specifications.Motors with other enclosure types and for other voltages andfrequencies are available on a special-order basis.<strong>CR</strong>N-SF pumps are supplied with an IEC (metric) type motor witha reverse thrust bearing.If you are replacing the pumping unit, but are using a motorpreviously used on another <strong>CR</strong> pump, be sure to read10. Replacing the motor for proper adjustment of the couplingheight.6.15 Position of Terminal BoxThe motor terminal box can be turned to any of four positions insteps of 90°.To rotate the terminal box, remove the four bolts securing themotor to the pump but do not remove the shaft coupling. Turn themotor to the desired location; replace and securely tighten thefour bolts; see fig. 11.6.17 Motor protection6.17.1 Single-Phase MotorsWith the exception of 10 HP motors which require externalprotection, single-phase <strong>CR</strong> pumps are equipped with multivoltage,squirrel-cage induction motors with built-in thermalprotection.6.17.2 Three-Phase Motors<strong>CR</strong> pumps with three-phase motors must be used with the propersize and type of motor-starter to ensure the motor is protectedagainst damage from low voltage, phase failure, currentimbalance and overloads.A properly sized starter with manual reset and ambientcompensatedextra quick trip in all three legs should be used. Theoverload should be sized and adjusted to the full-load currentrating of the motor. Under no circumstances should the overloadsbe set to a higher value than the full load current shown on themotor nameplate. This will void the warranty.Overloads for auto transformers and resistant starters should besized in accordance with the recommendations of themanufacturer.Three phase MLE motors (<strong>CR</strong>E-Pumps) require only fuses as acircuit breaker. They do not require a motor starter. Check forphase imbalance (worksheet is provided; see p. 23).Note: Standard allowable phase imbalance difference is 5%.6.17.3 <strong>CR</strong>N-SFThe <strong>CR</strong>N-SF is typically operated in series with a feed pump.Because the maximum allowable inlet pressure of the <strong>CR</strong>N-SFincreases from 73 psi (when pump is off and during start-up) to365 psi (during operation), a control device must be used to startthe <strong>CR</strong>N-SF pump one second before the feed pump starts.Similarly, the <strong>CR</strong>N-SF must stop one second after the feed pumpstops. See <strong>CR</strong>N-SF startup timeline below.Terminal Box12:00 PositionDischargeTIME<strong>CR</strong>N-SFstarts1 or moresecondsFeed pumpstartsFig. 12 <strong>CR</strong>N-SF startupBoth pumps operatingFeed pumpstops1 or moreseconds<strong>CR</strong>N-SFstopsTM04 3921 0409Terminal Box9:00 PositionSuctionStandardTerminal Box6:00 PositionTerminal Box3:00 PositionTM04 3923 04097. Starting the pump the first time7.1 PrimingTo prime the pump in a closed system or an open system wherethe water source is above the pump, close the pump isolationvalve(s) and open the priming plug on the pump head; see fig. 13and fig. 14.Fig. 11 Motor terminal box positions (top view)6.16 Field WiringWire sizes should be based on the current carrying properties ofa conductor as required by the latest edition of the NationalElectrical Code or local regulations. Direct on line (D.O.L.)starting is approved due to the extremely fast run-up time of themotor and the low moment of inertia of the pump and motor. IfD.O.L. starting is not acceptable and reduced starting current isrequired, an auto transformer, resistant starter or soft start shouldbe used. It is suggested that a fused disconnect be used for eachpump where service and standby pumps are installed.SuctionDrain PlugPriming Vent Plug<strong>CR</strong>(I)(N) 1s, 1, 3, 5,10, 15, 20<strong>CR</strong>T 2, 4, 8, 16DischargeTTM04 3922 0409Fig. 13 Plug and valve locations14
8. Switch on the power and again check for proper motorrotation. Once rotation has been verified, switch off poweragain. Do not attempt to reinstall the coupling guards with themotor energized. Replace the coupling guard if the rotation iscorrect. After guards are in place the power can be reapplied.Note: <strong>CR</strong>, <strong>CR</strong>I, <strong>CR</strong>N 1s to 5: For these pumps, it is advisableto open the bypass valve during start-up; see fig. 13. Thebypass valve connects the suction and discharge sides of thepump, thus making the filling procedure easier. When theoperation is stable, the bypass valve must be closed.Priming Plug(Opposite side)SuctionFig. 14 Plug/valve locations <strong>CR</strong>(N) 32, 45, 64, 90, 120, 150Fig. 15 Vent plugVent PlugDischargeDrain Plugs (G 1 / 2 )with 1/4" NPT gauge/sensor tapsLoosencenterplug toventpumpVentPlugGradually open the isolation valve in the suction line until asteady stream of airless water runs out the priming port. Closethe plug and securely tighten. Completely open the isolationvalves.In open systems where the water level is below the pump inlet,the suction pipe and pump must be filled and vented of air beforestarting the pump. Close the discharge isolation valve andremove the priming plug. Pour water through the priming holeuntil the suction pipe and pump are completely filled with water. Ifthe suction pipe does not slope downward from the pump towardthe water level, the air must be purged while being filled. Replacethe priming plug and securely tighten. For pumps with Cool-Top®,see 14. Startup for Cool-Top®.Follow these steps:1. Switch power off.2. Check to make sure the pump has been filled and vented.3. Remove the coupling guard and rotate the pump shaft by handto be certain it turns freely.4. Verify that the electrical connections are in accordance withthe wiring diagram on the motor.5. Switch the power on and observe the direction of rotation.When viewed from the top, the pump should rotate counterclockwise(clockwise for <strong>CR</strong>N-SF).6. To reverse the direction of rotation, first switch OFF the supplypower.7. On three-phase motors, interchange any two power leads atthe load side of the starter. On single-phase motors, seeconnection diagram on nameplate. Change wiring as required.TM04 4036 0609TM04 3920 0409CautionMotors should not be run unloaded or uncoupledfrom the pump at any time; damage to the motorbearings will occur.Do not start the pump before priming or ventingthe pump; see fig. 15. Never operate the pumpdry.7.2 Operating Parameters<strong>CR</strong> multi-stage centrifugal pumps installed in accordance withthese instructions and sized for correct performance will operateefficiently and provide years of service. The pumps are waterlubricatedand do not require any external lubrication orinspection. The motors may require periodic lubrication as notedin 9. Maintaining the pump’s motor.Under no circumstances should the pump be operated for anyprolonged periods of time without flow through the pump. Thiscan result in motor and pump damage due to overheating. Aproperly sized relief valve should be installed to allow sufficientwater to circulate through the pump to provide adequate coolingand lubrication of the pump bearings and seals.7.3 Pump CyclingPump cycling should be checked to ensure the pump is notstarting more than the following.<strong>Grundfos</strong> ML motors:• 200 times per hour on 1/3 to 5 hp models• 100 times per hour on 7 1/2 to 15 hp models• 40 times per hour on 20 to 30 hp models.Baldor motors:• 20 times per hour on 1/3 to 5 hp models• 15 times per hour on 7 1/2 to 15 hp models• 10 times per hour on 20 to 100 hp models.Rapid cycling is a major cause of premature motor failure due toincreased heat build-up in the motor. If necessary, adjust controlsto reduce the frequency of starts and stops.7.4 Boiler-feed installationsIf the pump is being used as a boiler-feed pump, make sure thepump is capable of supplying sufficient water throughout its entireevaporation and pressure ranges. Where modulating controlvalves are used, a bypass around the pump must be installed toensure pump lubrication (see “Minimum Continuous Duty FlowRates”).7.5 Freeze ProtectionIf the pump is installed in an area where freezing could occur,the pump and system should be drained during freezingtemperatures to avoid damage. To drain the pump, close theisolation valves, remove the priming plug and drain plug at thebase of the pump. Do not replace the plugs until the pump is to beused again. Always replace the drain plug with the original orexact replacement. Do not replace with a standard plug. Internalrecirculation will occur, reducing the output pressure and flow.15
8. Preventative pump maintenanceAt regular intervals depending on the conditions and time ofoperation, the following checks should be made:1. Pump meets required performance and is operating smoothlyand quietly.2. There are no leaks, particularly at the shaft seal.3. The motor is not overheating.4. Remove and clean all strainers or filters in the system.5. Verify the tripping of the motor overload protection.6. Check the operation of all controls. Check unit control cyclingtwice and adjust, if necessary.7. If the pump is not operated for unusually long periods, the unitshould be maintained in accordance with these instructions. Inaddition, if the pump is not drained, the pump shaft should bemanually rotated or run for short periods of time at monthlyintervals.8. To extend the pump life in severe duty applications, considerperforming one of the following actions:– Drain the pump after each use.– Flush the pump, through system, with water or other fluidthat is compatible with the pump materials and processliquid.– Disassemble the pump liquid components and thoroughlyrinse or wash them with water or other fluid that iscompatible with the pump materials and process liquid.If the pump fails to operate or there is a loss of performance, referto Section 15. Diagnosing specific problems.9. Maintaining the pump’s motorWarningDo not touch electrical connections before youfirst ensure that power has been disconnected.Electrical shock can cause serious or fatal injury.Only qualified personnel should attemptinstallation, operation, and maintenance of thisequipment.9.1 Motor InspectionInspect the motor at regular intervals, approximately every 500hours of operation or every three months, whichever occurs first.Keep the motor clean and the ventilation openings clear.The following steps should be performed at each inspection:1. Check that the motor is clean. Check that the interior andexterior of the motor is free of dirt, oil, grease, water, etc. Oilyvapor, paper, pulp, textile lint, etc. can accumulate and blockmotor ventilation. If the motor is not properly ventilated,overheating can occur and cause early motor failure.2. Use an Ohmmeter (“Megger”) periodically to ensure that theintegrity of the winding insulation has been maintained.Record the Ohmmeter readings. Immediately investigate anysignificant drop in insulation resistance.3. Check all electrical connectors to be sure that they are tight.9.2 Motor LubricationElectric motors are pre-lubricated at the factory and do notrequire additional lubrication at start-up. Motors without externalgrease fittings have sealed bearings that cannot be re-lubricated.Motors with grease fittings should only be lubricated withapproved types of grease. Do not over-grease the bearings.Over-greasing will cause increased bearing heat and can result inbearing/motor failure. Do not mix petroleum grease and silicongrease in motor bearings.Bearing grease will lose its lubricating ability over time, notsuddenly. The lubricating ability of a grease (over time) dependsprimarily on the type of grease, the size of the bearings, thespeed at which the bearings operate and the severity of theoperating conditions.Good results can be obtained if the following recommendationsare used in your maintenance program. It should also be notedthat pumps with more stages, pumps running to the left of theperformance curve, and certain pump ranges may have higherthrust loads. Pumps with high thrust loads should be greasedaccording to the next service interval level.9.3 Recommended lubricantSeverity of service Ambient temp. (max.) Environment Approved types of greaseStandard +104 °F (+40 °C) Clean, little corrosion <strong>Grundfos</strong> ML motors are greasedSevere +122 °F (+50 °C) Moderate dirt, corrosion for life or will have the grease typeon the nameplate. Baldor motors>122 °F (+50°C)Severe dirt, abrasive dust,Extremeare greased with Polyrex EMor Class H insulationcorrosion(Exxon Mobile).Note: If pump is fitted with a bearing flange that requires grease, see the stickers on either the bearing flange or coupling guards forproper grease type and greasing schedule.16
9.4 Motor lubrication schedule(for motors with grease nipples)New motors that have been stored for a year or more should beregreased according to the following:NEMA (IEC)Frame SizeStandard ServiceIntervalSevereService IntervalExtremeService IntervalWeight of greaseto add[oz (grams)]Volume of greaseto add[in 3 (teaspoons)]Up through 210(132)Over 210 through 280(180)Over 280 up through 360(225)Over 360(225)5500 hrs 2750 hrs 550 hrs 0.30 (8.4) 0.6 (2)3600 hrs 1800 hrs 360 hrs 0.61 (17.4)* 1.2 (3.9)2200 hrs 1100 hrs 220 hrs 0.81 (23.1)* 1.5 (5.2)2200 hrs 1100 hrs 220 hrs 2.12 (60.0)* 4.1 (13.4)WarningThe grease outlet plug MUST be removed before adding new grease.9.5 Lubrication ProcedureCaution1. Clean all grease fittings. If the motor does not have greasefittings, the bearing is sealed and cannot be greasedexternally.2. If the motor is equipped with a grease outlet plug, remove it.This will allow the old grease to be displaced by the newgrease. If the motor is stopped, add the recommended amountof grease. If the motor is to be greased while running, aslightly greater quantity of grease will have to be added.Note: If new grease does not appear at the shaft hole orgrease outlet plug, the outlet passage may be blocked. At thenext service interval the bearings must be repacked.3. Add grease SLOWLY taking approximately one minute untilnew grease appears at the shaft hole in the endplate or greaseoutlet plug. Never add more than 1-1/2 times the amount ofgrease shown in the lubrication schedule.4. For motors equipped with a grease outlet plug, let the motorrun for 20 minutes before replacing the plug.10. Replacing the motorIf the motor is damaged due to bearing failure, burning orelectrical failure, the following instructions detail how to removethe motor for replacement.CautionTo avoid damage to motor bearings, grease mustbe kept free of dirt. For an extremely dirtyenvironment, contact <strong>Grundfos</strong>, the motormanufacturer, or an authorized service center foradditional information.Mixing dissimilar grease is not recommended.It must be emphasized that motors used on <strong>CR</strong>pumps are specifically selected to our rigidspecifications. Replacement motors must be ofthe same frame size, should be equipped withthe same or better bearings and have the sameservice factor. Failure to follow theserecommendations may result in premature motorfailure.10.1 DisassemblyFor disassembly, proceed as follows:1. Turn off and lock out power supply. The power supply wiringcan now be safely disconnected from the motor wires.Remove the coupling guards. Note: <strong>CR</strong> 1s, 1, 3, 5, 10, 15, and20: do not loosen the three shaft seal securing allen screws.2. Using the proper metric Allen wrench, loosen the four capscrews in the coupling. Completely remove coupling halves.On <strong>CR</strong>1s-<strong>CR</strong>20, the shaft pin can be left in the pump shaft.<strong>CR</strong>(N)32, 45, 64, 90, 120, and 150 do not have a shaft pin.3. With the correct size wrench, loosen and remove the four boltswhich hold the motor to the pump end.4. Lift the motor straight up until the shaft has cleared the motorstool.10.2 AssemblyFor assembly, proceed as follows:1. Remove key from motor shaft, if present, and discard.2. Thoroughly clean the surfaces of the motor and pump endmounting flange. The motor and shaft must be clean of all oil/grease and other contaminants where the coupling attaches.Set the motor on the pump end.3. Place the terminal box in the desired position by rotating themotor.4. Insert the mounting bolts, then diagonally and evenly tighten:– for 3/8” bolts (1/2 to 2 hp), torque to 17 ft-lb– for 1/2” bolts (3 to 40 hp) torque to 30 ft-lb– for 5/8” bolts (50 - 100 hp) torque to 59 ft-lb– follow instructions for particular pump model in sections10.2.1 Torque specifications for <strong>CR</strong> 1s, 1, 3, and 5 through10.2.4 <strong>CR</strong>(N) 32, 45, 64, 90, 120, and 150.17
10.2.1 Torque specifications for <strong>CR</strong> 1s, 1, 3, and 5Insert shaft pin into shaft hole. Reinstall the coupling halves ontoshaft and shaft pin. Reinstall the coupling screws and leaveloose. Check that the gaps on either side of the coupling areeven, and that the motor shaft keyway is centered in the couplinghalf, as shown in fig. 16.Tighten the screws to the correct torque; see torquespecifications table below.Torque specifications<strong>CR</strong>(I)(N) 1s, 1, 3, 5, 10, 15, and 20<strong>CR</strong>T 2, 4, 8, and 16Coupling bolt sizeM6M8M1010.2.2 <strong>CR</strong> 10, 15 and 20Insert shaft pin into shaft hole. Insert plastic shaft seal spacerbeneath shaft seal collar. Reinstall the coupling halves onto shaftand shaft pin. Reinstall the coupling screws and leave loose.Check that the gaps on either side of the coupling are even andthat the motor shaft key way is centered in the coupling half, asshown in fig. 16. Tighten the screws to the correct torque.Remove plastic shaft seal spacer and hang it on inside ofcoupling guard.KeywayMin. torque10 ft-lb23 ft-lb46 ft-lbKeywayNote: The shaft can only be raised approximately 0.20 in (5mm).Now lower the shaft halfway back down the distance you justraised it and tighten the coupling screws (finger tight) whilekeeping the coupling separation equal on both sides. When thescrews are tight enough to keep the couplings in place, thentorque the screws evenly in a criss-cross pattern.• Note theclearancebelow thecoupling• Raise thecoupling highas far as it wi• Lower it halfwback down(1/2 the distayou just raise• Tighten screw(see torquespecificationsbelow)Fig. 18 Coupling adjustment clearance <strong>CR</strong>T 2, 4, 8, and 1610.2.4 <strong>CR</strong>(N) 32, 45, 64, 90, 120, and 1501. Make sure shaft is all the way down. TIghten the set screws onthe mechanical seal.2. Place the plastic adjustment fork under the cartridge sealcollar; see fig. 19.TM02 1051 0501CORRECTTOPViewGap between couplingCORRECTNOT CORRECTTM04 3919 0409Fig. 16 Coupling adjustment all <strong>CR</strong>(I)(N)(X)(T)10.2.3 <strong>CR</strong>T 2, 4, 8 and 16Reinstall coupling halves. Make sure the shaft pin is located inthe pump shaft. Put the cap screws loosely back into the couplinghalves.Using a large screwdriver, raise the pump shaft by placing the tipof the screwdriver under the coupling and carefully elevatingcoupling to its highest point; see fig. 17.Fig. 19 Coupling adjustment<strong>CR</strong>(N) 32, 45, 64, 90, 120, and 1503. Fit the coupling on the shaft so that the top of the pump shaftis flush with the bottom of the clearance chamber in thecoupling; see fig. 20.Note: To avoid damaging the coupling halves, ensure that noportion of the keyway on the motor shaft lies within the gapbetween the two coupling halves.TM04 3913 0409M6 - 13 NmM8 - 31 NmM10 - 62 NmFig. 17 Coupling adjustment <strong>CR</strong>T 2, 4, 8, and 160.5xxTM02 1051 0501Fig. 20 Coupling adjustment clearance<strong>CR</strong>(N) 32, 45, 64, 90, 120, and 150TM04 3914 040918
4. Lubricate the coupling screws with an anti-seize andlubricating compound. Tighten the coupling screws (fingertight) while keeping the coupling separation equal on bothsides and the motor shaft keyway centered in the coupling halfas shown in fig. 16.5. When the screws are tight enough to keep the couplings inplace, then torque the screws evenly in a crisscross pattern.6. Torque coupling screws to 62 ft.-lbs (75 and 100 hp motors to74 ft-lbs). Remove the adjustment fork from under thecartridge seal collar and replace it to the storage location; seefig. 21.11. Parts ListFor each <strong>CR</strong> pump model <strong>Grundfos</strong> offers an extensive Parts Listand diagram of part used in that pump and is recommended tohave on hand for future maintenance. In addition, the listings alsoprovide information about prepackaged Service Kits for thosepump components most likely to exhibit wear over time, as wellas the complete Impeller Stack needed to replace the “guts” ofeach model. These Parts Lists are available separately from the<strong>Grundfos</strong> literature warehouse or as a set with extensive serviceinstructions in the <strong>Grundfos</strong> <strong>CR</strong> Service Manuals (for a smallcharge).TM04 3915 0409Fig. 22 Prepackaged impeller stack kitsTM04 3917 0409Fig. 21 Adjustment fork storage<strong>CR</strong>(N) 32, 45, 64, 90, 120, and 1507. Check to see that the gaps between the coupling halves areequal. Loosen and readjust, if necessary.8. Be certain the pump shaft can be rotated by hand. If the shaftcannot be rotated or it binds, disassemble and check formisalignment.9. Prime the pump.10.Follow the wiring diagram on the motor label for the correctmotor wiring combination which matches your supply voltage.Once this has been confirmed, reconnect the power supplywiring to the motor.11.Check the direction of rotation, by bump-starting the motor.Rotation must be left to right (counter-clockwise) when lookingdirectly at the coupling.12.Shut off the power, then re-install the coupling guards. Afterthe coupling guards have been installed the power can beturned back on.Fig. 23 Prepackaged flange kits12. Spare Parts<strong>Grundfos</strong> offers an extensive list of spare parts. For a current listof these parts, refer to: “All Product Spare Parts/Service Kits”Price List, Form #L-SK-SL-002.TM04 3916 040919
13. Preliminary electrical testsWarningWhen working with electrical circuits, use cautionto avoid electrical shock. It is recommended thatrubber gloves and boots be worn, and metalterminal boxes and motors are grounded beforeany work is done. For your protection, alwaysdisconnect the pump from its power sourcebefore handling.13.1 Supply voltage13.1.1 How to measure the supply voltageUse a voltmeter, (set to the proper scale) measure the voltage atthe pump terminal box or starter.On single-phase units, measure between power leads L1 and L2(or L1 and N for 115 volt units).On three-phase units, measure between:– Power leads L1 and L2– Power leads L2 and L3– Power leads L3 and L1Fig. 25 Measuring current13.2.2 What the current measurement meansIf the amp draw exceeds the listed service factor amps (SFA) or ifthe current imbalance is greater than 5% between each leg onthree-phase units, check the following:– Burned contacts on motor starter.– Loose terminals in starter or terminal box or possible wiredefect.– Too high or too low supply voltage.– Motor windings are shorted or grounded. Check winding andinsulation resistances.– Pump is damaged causing a motor overload.TM04 3908 0409Fig. 24 Measuring supply voltageTM04 3911 040913.3 Insulation resistance13.3.1 How to measure the insulation resistanceTurn off power and disconnect the supply power leads in thepump terminal box. Using an ohm or mega ohm meter, set thescale selector to Rx 100K and zero adjust the meter.Measure and record the resistance between each of the terminalsand ground.13.1.2 What the supply voltage measurement meansWhen the motor is under load, the voltage should be within ±10%of the nameplate voltage. Larger voltage variation may causewinding damage.Large variations in the voltage indicate a poor electrical supplyand the pump should not be operated until these variations havebeen corrected.If the voltage constantly remains high or low, the motor should bechanged to the correct supply voltage.13.2 Current measurement13.2.1 How to measure the currentUse an ammeter (set on the proper scale) to measure the currenton each power lead at the terminal box or starter. See the motornameplate for amp draw information.Current should be measured when the pump is operating atconstant discharge pressure.Fig. 26 Measuring insulation resistance13.3.2 What the insulation resistance meansMotors of all hp, voltage, phase and cycle duties have the samevalue of insulation resistance. Resistance values for new motorsmust exceed 1,000,000 ohms. If they do not, motor should berepaired or replaced.TM04 3907 040920
14. Startup for Cool-Top®CautionDo not start the pump until it has been filled with liquid and vented.WarningPay attention to the direction of the vent hole and take care to ensure that the escaping liquid does not cause injuryto persons or damage to the motor or other components. In hot-liquid installations, special attention should bepaid to the risk of injury caused by scalding hot liquid. It is recommended to connect a drain pipe to the 1/2" airvent in order to lead the hot water/steam to a safe place.StepAction1TM02 4151 5001Note: The air-cooled top should only be started up with coldliquid. Close the isolation valve on the discharge side and openthe isolation valve on the suction side of the pump.2Remove the priming plug from the air-cooled chamber (2) andslowly fill the chamber with liquid.TM02 4153 1503When the chamber is completely filled with liquid, replace thepriming plug and tighten securely.3TM02 5907 4002Open the isolation valve on the discharge side of the pump.Valve may have to be partially closed when pump is started ifno back pressure is present (i.e. boiler not up to pressure).4Start the pump and check the direction of rotation.See the correct rotation of the pump on the motor fan cover.TM01 41406 3702TM01 1405 4497If the direction of rotation is wrong, interchange any two of theincoming supply wires.After 3 to 5 minutes, the air vent has been filled with liquid.Note: During startup of a cold pump with hot liquid, it is normalthat a few drops of liquid are leaking from the sleeve.21
15. Diagnosing specific problemsProblem Possible cause RemedyThe pump does not run. 1. No power at motor.Check voltage at motor terminal box. If no voltage at motor, checkfeeder panel for tripped circuits and reset circuit.2.3.Fuses are blown or circuitbreakers are tripped.Motor starter overloads are burnedor have tripped out.Turn off power and remove fuses. Check for continuity withohmmeter. Replace blown fuses or reset circuit breaker. If newfuses blow or circuit breaker trips, the electrical installation, motorand wires must be checked.Check for voltage on line and load side of starter. Replace burnedheaters or reset. Inspect starter for other damage. If heater tripsagain, check the supply voltage and starter holding coil.4. Starter does not energize.5. Defective controls.6. Motor is defective.Energize control circuit and check for voltage at the holding coil. Ifno voltage, check control circuit fuses. If voltage, check holdingcoil for shorts. Replace bad coil.Check all safety and pressure switches for operation. Inspectcontacts in control devices. Replace worn or defective parts orcontrols.Turn off power and disconnect wiring. Measure the lead to leadresistances with ohmmeter (RX-1). Measure lead to ground valueswith ohmmeter (RX-100K). Record measured values. If an open orgrounded winding is found, remove motor and repair or replace.7.Defective capacitor(single-phase motors).Turn off power and discharge capacitor. Check with ohmmeter(RX-100K). When the meter is connected to the capacitor,the needle should jump towards 0 ohms and slowly driftback to infinity (h). Replace if defective.8. Pump is bound.Turn off power and manually rotate pump shaft. If shaft does notrotate easily, check coupling setting and adjust as necessary. Ifshaft rotation is still tight, remove pump and inspect. Disassembleand repair.The pump runs but at reducedcapacity or does not deliver water.1. Wrong rotation. Check wiring for proper connections. Correct wiring.2. Pump is not primed or is airbound.Turn pump off, close isolation valve(s), remove priming plug.Check fluid level. Refill the pump, replace plug and start the pump.Long suction lines must be filled before starting the pump.3.Strainers, check or foot valves areclogged.Remove strainer, screen or valve and inspect. Clean and replace.Reprime pump.4. Suction lift too large.Install compound pressure gauge at the suction side of the pump.Start pump and compare reading to performance data. Reducesuction lift by lowering pump, increase suction line size orremoving high friction loss devices.5.Suction and/or discharge pipingleaks.Pump spins backwards when turned off. Air in suction pipe.Suction pipe, valves and fittings must be airtight. Repair any leaksand retighten all loose fittings.6. Pump worn.Install pressure gauge, start pump, gradually close the dischargevalve and read pressure at shutoff. Convert measured pressure (inpsi) to head (in feet): (Measured psi x 2.31 ft/psi = ___ ft). Refer tothe specific pump curve for shutoff head for that pump model. Ifhead is close to curve, pump is probably OK. If not, remove pumpand inspect.7.Pump impeller or guide vane isclogged.Disassemble and inspect pump passageways. Remove anyforeign materials found.8. Incorrect drain plug is installed.If the proper drain plug is replaced with a standard plug, water willrecirculate internally. Replace with proper plug.9. Improper coupling setting. Check/reset the coupling; see page 18.22
Problem Possible cause RemedyPump cycles too much 1.2.3.Pressure switch is notproperly adjusted or isdefective.Level control is not properlyadjusted or is defective.Insufficient air charging orleaking tank or piping.Check pressure setting on switch and operation. Check voltageacross closed contacts. Readjust switch or replace if defective.Check setting and operation. Readjust setting (refer to level controlmanufacturer’s data). Replace if defective.Pump air into tank or diaphragm chamber. Check diaphragm forleak. Check tank and piping for leaks with soap and water solution.Check air to water volume. Repair as necessary.Fuses blow or circuit breakers oroverload relays trip4. Tank is too small.5. Pump is oversized.1. Tank is too small.2. Motor overloads are set too low.Check tank size and air volume in tank. Tank volume should beapproximately 10 gallons for each gpm of pump capacity. Thenormal air volume is 2/3 of the total tank volume at the pump cut-inpressure. Replace tank with one of correct size.Install pressure gauges on or near pump suction and dischargeports. Start and run pump under normal conditions, record gaugereadings. Convert psi to feet (Measured psi x 2.31 ft/psi = ____ ft)Refer to the specific pump curve for that model, ensure that totalhead is sufficient to limit pump delivery within its design flow range.Throttle pump discharge flow if necessary.Check voltage at starter panel and motor. If voltage varies morethan –10 % / + 10 %, contact power company. Check wire sizing.Cycle pump and measure amperage. Increase heater size oradjust trip setting to a maximum of motor nameplate (full load)current.3.Three-phased current isimbalanced.Check current draw on each lead to the motor. Must be within–5 % / + 5 %. If not, check motor and wiring. Rotating all leads mayeliminate this problem.4. Motor is shorted or grounded.5. Wiring or connections are faulty.6. Pump is bound.Turn off power and disconnect wiring. Measure the lead-to-leadresistance with an ohmmeter (RX-1). Measure lead-to-groundvalues with an ohmmeter (RX-100K) or a megaohm meter. Recordvalues. If an open or grounded winding is found, remove the motor,repair and/or replace.Check proper wiring and loose terminals. Tighten loose terminals.Replace damaged wire.Turn off power and manually rotate pump shaft. If shaft does notrotate easily, check coupling setting and adjust as necessary. Ifshaft rotation is still tight, remove pump and inspect. Disassembleand repair.7.8.Defective capacitor(single-phase motors).Motor overloads at higher ambienttemperature than motor.Turn off power and discharge capacitor. Check with ohmmeter(RX-100K). When the meter is connected to the capacitor, theneedle should jump towards 0 ohms and slowly drift back to infinity(h). Replace if defective.Use a thermometer to check the ambient temperature near theoverloads and motor. Record these values. If ambient temperatureat motor is lower than at overloads, especially where temperatureat overloads is above +104 °F (+40 °C), ambient-compensatedheaters should replace standard heaters.23
16. Worksheet for three-phase motorsBelow is a worksheet for calculating current unbalance on athree-phase hookup. Use the calculations below as a guide.Note: Current unbalance should not exceed 5% at service factorload or 10% at rated input load. If the unbalance cannot becorrected by rolling leads, the source of the unbalance must belocated and corrected. If, on the three possible hookups, the legfarthest from the average stays on the same power lead, most ofthe unbalance is coming from the power source. However, if thereading farthest from the averages moves with the same motorlead, the primary source of unbalance is on the “motor side” ofthe starter. In this instance, consider a damaged cable, leakingsplice, poor connection, or faulty motor winding.Explanation and examplesHere is an example of current readings at maximum pump loads on each leg of a three-wire hookup. Youmust make calculations for all three hookups. To begin, add up all three readings for hookup numbers 1, 2,and 3.Divide the total by three to obtain the average.Calculate the greatest current difference from the average.Divide this difference by the average to obtain the percentage of the unbalance.In this case, the current unbalance for Hookup 1 is 8%.Hookup 1T1 = 51 ampsT2 = 46 ampsT3 = 53 ampsTOTAL = 150Hookup 150 amps3 150 ampsHookup 150 amps— 46 amps4 ampsHookup 1.08 or 8%50 4.00 ampsFigure hereHookup 1 Hookup 2 Hookup 3L 1 to T 1 = ___ amps L 1 to T 3 = ___ amps L 1 to T 2 = ___ ampsL 2 to T 2 = ___ amps L 2 to T 1 = ___ amps L 2 to T 3 = ___ ampsL 3 to T 3 = ___ amps L 3 to T 2 = ___ amps L 3 to T 1 = ___ ampsTOTAL = ___ amps TOTAL = ___ amps TOTAL = ___ ampsHookup 1 Hookup 2 Hookup 3___ amps ___ amps ___ amps3 ___ amps 3 ___ amps 3 ___ ampsHookup 1 Hookup 2 Hookup 3___ amps ___ amps ___ amps___ amps ___ amps ___ amps___ amps ___ amps ___ ampsHookup 1 Hookup 2 Hookup 3___ or ___ % ___ or ___ % ___ or ___ %___ ___ amps ___ ___ amps ___ ___ amps24
U.S.A.GRUNDFOS Pumps Corporation17100 West 118th TerraceOlathe, Kansas 66061Phone: +1-913-227-3400Telefax: +1-913-227-3500CanadaGRUNDFOS Canada Inc.2941 Brighton RoadOakville, OntarioL6H 6C9Phone: +1-905 829 9533Telefax: +1-905 829 9512MéxicoBombas GRUNDFOS de México S.A. de C.V.Boulevard TLC No. 15Parque Industrial StivaAeropuertoApodaca, N.L.C.P. 66600Phone: +52-81-8144 4000Telefax: +52-81-8144 4010Addresses revised 22.09.2005
Being responsible is our foundationThinking ahead makes it possibleInnovation is the essenceL-<strong>CR</strong>-TL-001 0309Repl. L-CP-TL-003 1205USwww.grundfos.com