


You also want an ePaper? Increase the reach of your titles
YUMPU automatically turns print PDFs into web optimized ePapers that Google loves.
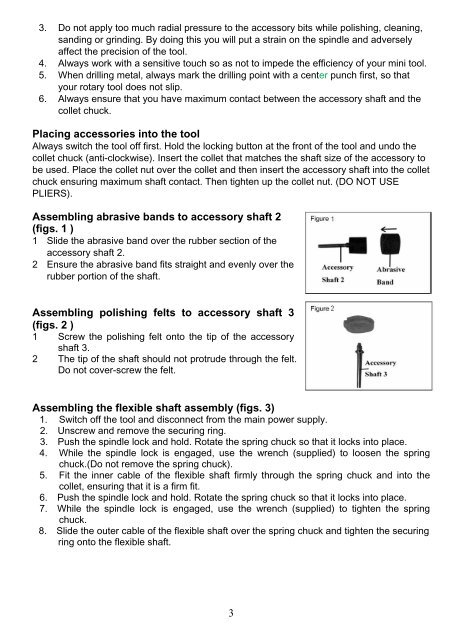
3. Do not apply too much radial pressure to the accessory bits while polishing, cleaning,sanding or grinding. By doing this you will put a strain on the spindle and adverselyaffect the precision of the tool.4. Always work with a sensitive touch so as not to impede the efficiency of your mini tool.5. When drilling metal, always mark the drilling point with a center punch first, so thatyour rotary tool does not slip.6. Always ensure that you have maximum contact between the accessory shaft and thecollet chuck.Placing accessories into the toolAlways switch the tool off first. Hold the locking button at the front of the tool and undo thecollet chuck (anti-clockwise). Insert the collet that matches the shaft size of the accessory tobe used. Place the collet nut over the collet and then insert the accessory shaft into the colletchuck ensuring maximum shaft contact. Then tighten up the collet nut. (DO NOT USEPLIERS).Assembling abrasive bands to accessory shaft 2(figs. 1 )1 Slide the abrasive band over the rubber section of theaccessory shaft 2.2 Ensure the abrasive band fits straight and evenly over therubber portion of the shaft.Assembling polishing felts to accessory shaft 3(figs. 2 )1 Screw the polishing felt onto the tip of the accessoryshaft 3.2 The tip of the shaft should not protrude through the felt.Do not cover-screw the felt.Assembling the flexible shaft assembly (figs. 3)1. Switch off the tool and disconnect from the main power supply.2. Unscrew and remove the securing ring.3. Push the spindle lock and hold. Rotate the spring chuck so that it locks into place.4. While the spindle lock is engaged, use the wrench (supplied) to loosen the springchuck.(Do not remove the spring chuck).5. Fit the inner cable of the flexible shaft firmly through the spring chuck and into thecollet, ensuring that it is a firm fit.6. Push the spindle lock and hold. Rotate the spring chuck so that it locks into place.7. While the spindle lock is engaged, use the wrench (supplied) to tighten the springchuck.8. Slide the outer cable of the flexible shaft over the spring chuck and tighten the securingring onto the flexible shaft.3


