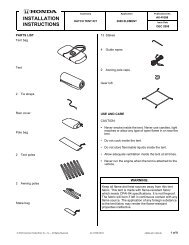
Engine Block Heater Installation Instructions - Bernardi Acura Parts ...
Engine Block Heater Installation Instructions - Bernardi Acura Parts ...
Engine Block Heater Installation Instructions - Bernardi Acura Parts ...

You also want an ePaper? Increase the reach of your titles
YUMPU automatically turns print PDFs into web optimized ePapers that Google loves.
RETAINING TABthe two battery holder nuts and remove the batteryholder, then remove the battery.Open.CLIP5 CLIPS(LONG)CLIP(SHORT)POSITIVE (+)BATTERYCABLECLIPBATTERYFUSE BOXCOVER2 BATTERYHOLDERNUTSBATTERYHOLDERBATTERYGRILLECOVER2 CLIPS701602BSBATTERYFUSE BOXFRONT6. Open the battery fuse box cover and disconnect thepositive (+) battery cable from the battery. Unfasten701603AS7. Remove the two self-tapping screws, four screws,four bolts, and two clips.8. Unplug the three vehicle connectors. Remove thefront bumper.• Have an assistant help you when removing thebumper.• To prevent damage to the bumper, set it on ablanket or cardboard.© 2009 American Honda Motor Co., Inc. – All Rights Reserved. BII 41771 (0906) 3 of 8
3 VEHICLECONNECTORSENGINE COVER2 CLIPSFRONTBUMPER4 SCREWS4 BOLTS2 SELF-TAPPINGSCREWS701604BS9. Place a clean drain pan under the radiator drainplug, then remove the drain plug from the bottom ofthe radiator to drain the coolant. Remove the radiatorcap to increase the flow.701606AS11. On the front side of the engine, locate and removethe drain bolt and washer using a 19 mm socket.Coolant remaining in the engine jackets will flow outof the bolt hole when the bolt is removed. (Retain thedrain bolt in case the engine block heater isremoved.)Radiator coolant will damage paint. Quickly rinse anyspilled coolant from painted surfaces.RADIATORCAPDRAIN PANDRAINPLUG10. Remove the engine cover.4 of 8 BII 41771 (0906) © 2009 American Honda Motor Co., Inc. – All Rights Reserved.
HEATERHARNESSWIRE TIE WITH CLIP(Installed in step 14.)VEHICLE FRAMEVEHICLEBRACKETHEATERHARNESSCONNECTORENGINEBLOCKHEATERVEHICLEHARNESSWHITEWIRE TIE701610AS17. Route the heater harness as shown.18. Using three white wire ties, secure the heaterharness to the fan frame and vehicle harness asshown.WIRE TIE WITH CLIP(Installed in step 14.)20. Secure the heater harness to the vehicle harnesswith five black wire ties.VEHICLE HARNESSINTAKE DUCTHEATERHARNESS701613BSVEHICLEHARNESSHEATERHARNESSWHITEWIRE TIEFANFRAMEMARK A3 WHITEWIRE TIESVEHICLEHARNESS701612CS19. Using one wire tie with clip installed in step 14,secure the heater harness to the vehicle frame asshown.5 BLACKWIRE TIESHEATERHARNESSNEGATIVE (-)BATTERY CABLEDo not secure withthe heater harness.701616BS21. Using three black wire ties, secure the heaterharness to the vehicle frame and vehicle harness.6 of 8 BII 41771 (0906) © 2009 American Honda Motor Co., Inc. – All Rights Reserved.
VEHICLEFRAME3 BLACKWIRE TIESVEHICLE HARNESSHEATERHARNESS701614AS22. Using one wire tie with clip installed in step 14,secure the heater harness to the vehicle frame.23. Using one black wire tie, secure the heater harnessto the vehicle frame.VEHICLEFRAMEBLACKWIRE TIEWIRE TIE WITH CLIP(Installed in step 14.)VEHICLEFRAME2 BLACKWIRE TIESHEATERHARNESSFRONT BUMPERBEAM701615AS24. Using two black wire ties, secure the heater harnessto the front bumper as shown.© 2009 American Honda Motor Co., Inc. – All Rights Reserved. BII 41771 (0906) 7 of 8
2 BLACKWIRE TIESMARK B30. Check that the heater harness is routed properly andall connectors are plugged in.31. Put the drain bolt (removed in step 11) in the glovebox.32. Reinstall the battery and reconnect the positive andnegative cable to the battery. Reinstall the grillecover and the battery cover.33. Enter the client’s radio anti-theft code, and reset theradio station presets.34. Reset the clock.FRONTBUMPERHEATERHARNESS701618AS25. Attach the protective cap to the front bumper lowergrille, and plug the heater harness connector into theprotective cap.HEATER HARNESSCONNECTORPROTECTIVECAPFRONTBUMPERFRONT BUMPERLOWER GRILLE701619AS26. Reinstall all removed parts except for the battery, thebattery cover, and the grille cover. Check that allclips and fasteners are installed securely.27. Check that the radiator drain plug is installedsecurely.28. Fill the system with the recommended coolant.Follow the instructions described in the servicemanual to fill and bleed the cooling system.29. Check the coolant reservoir for correct level andcheck the cooling system for signs of leakage.Repair as necessary.8 of 8 BII 41771 (0906) © 2009 American Honda Motor Co., Inc. – All Rights Reserved.