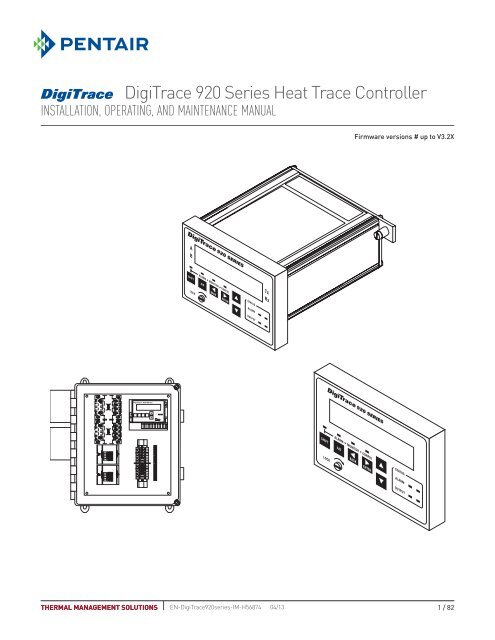
DigiTrace 920 Series Heat Trace Controller - Pentair Thermal ...
DigiTrace 920 Series Heat Trace Controller - Pentair Thermal ...
DigiTrace 920 Series Heat Trace Controller - Pentair Thermal ...

Create successful ePaper yourself
Turn your PDF publications into a flip-book with our unique Google optimized e-Paper software.
Section I – Overview1.1 <strong>Controller</strong>s Covered by this Manual1.2 Product OverviewThis document covers the <strong>920</strong> <strong>Series</strong> of heat trace controllers and available options. Theinformation coincides with the specific releases of firmware for the <strong>920</strong> product which are listedon the cover. As <strong>Pentair</strong> <strong>Thermal</strong> Managament releases new firmware to modify or enhancethe product significantly, new documentation will accompany these releases. To ensure thatyou are using the correct documentation for your particular version of controller, please checkthe firmware version number of the <strong>920</strong> against the version number listed on the front of thismanual. This can be displayed using the optional <strong>920</strong> Operator Console or a communicatingdevice. As subsequent changes are made, supplements to this document will be included inmanuals shipped after the firmware is released. Supplements will make specific reference to theoperational or functional changes.1.2.1 DESCRIPTIONThe <strong>920</strong> <strong>Series</strong> <strong>Heat</strong>-Tracing <strong>Controller</strong> controls, monitors, and communicates alarms and datafor one or two heating circuits. As a dual-point device, it offers a complete range of control andmonitoring features, as well as superior reliability compared to multipoint systems. Its modular,scalable architecture yields cost-effective multipoint assemblies without the expense of additionalcontrol points that are not required. Available for use with external solid-state relays (SSRs) orcontactors in either one-, two-, or three-pole configurations and the ability to switch loads up to600 Vac makes the <strong>920</strong> the most versatile product on the market.1.2.2 FEATURESA detailed description of available features can be found in Section III of this manual. Highlights ofspecific features are included in the following text.Front DisplayThe control module includes LED status indicators to show output and alarm conditions. Usingthe optional <strong>920</strong> Operator Console, the setpoint temperature, actual control temperature, and loadcurrent are immediately accessible to plant operators and maintenance staff. The display units arefield selectable for °F or °C.–40°F to 140°F (–40°C to 60°C) OperationExtended temperature operation permits installation in all but the harshest environments. SSRoutput modules are limited to operating ambient temperatures of 104°F (40°C) without derating.Single or Dual Temperature Sensor InputsThe ability to use one or two temperature sensor (TS) inputs for each control point allows theselection of one of eleven control modes and programming of all temperature parameters.High and Low Temperature AlarmsHigh and low temperature alarms are offered for both inputs of each control point.High and Low Current AlarmsLow current alarm is more than just a continuity level alarm. The <strong>920</strong> offers full adjustment overthe entire current measurement range for both high and low current alarm limits.Solid State or Contactor OutputThe <strong>920</strong> is available with externally-mounted solid-state relay (SSR) output switches or contactors.With the SSR option, the user may select a time-proportional control algorithm, a simpledeadband mode, or one of two ambient control algorithms. The contactor versions always useeither the deadband mode or the proportional ambient contactor mode. Switching device failurealarms are supported for both types of output devices.THERMAL MANAGEMENT SOLUTIONS EN-<strong>Digi<strong>Trace</strong></strong><strong>920</strong>series-IM-H56874 04/13 6 / 82
Ground-Fault Alarm and TripGround-fault (GF) current levels are monitored and displayed in milliamps. The availability of theactual ground-fault level gives the user the choice of both alarm and trip levels suitable for theparticular installation. Using multiple SSRs or a multipole contactor allows all powered legs ofnon-neutral circuits to be switched off under GF conditions.Overcurrent ProtectionA unique overcurrent protection algorithm greatly reduces the possibility of damage to the circuitor the controller in the event of a temporary overload while allowing for initially high in-rushcurrents (SSR options only).Soft StartingGiven the circuit breaker size, the <strong>920</strong> will limit the energy let-through to help prevent nuisancebreaker trips due to cable in-rush. This feature makes the controller particularly attractive for usewith self-regulating cables (SSR options only).Minimum/Maximum Temperature TrackingThe controller maintains the minimum and maximum temperature values seen by the controllersince the last reset of these values. This is helpful in determining causes of temperature alarms.Latching/Non-Latching Temperature AlarmsUser-selectable, non-latching temperature alarms allow the controller to automatically clear thealarm when the condition no longer exists.High and Low Voltage AlarmsOperating at voltages less than design can cause serious loss of heater output. The alarming ofpreset voltage deviations ensures availability of sufficient wattage output.Power LimitingThe <strong>920</strong> will control the maximum output wattage if the full load power exceeds the specifiedmaximum power setpoint. This feature eliminates the need for low voltage transformers in manyapplications and can assist in standardization of heating cable types (SSR options only).AutocyclingThe controller will energize the circuit for 10 seconds at a programmable interval. Circuit alarmswill be generated at the time of autocycle instead of when the heat is required. This featureeliminates the need for a preventive maintenance program as these tests are performed at regularintervals by the controller.Temperature Sensor Failure AlarmBoth open and shorted sensors are detected and alarmed by the controller.Random StartA startup delay between 0 and 9 seconds ensures that all units do not come on line at the sametime.Full Digital CommunicationsAn optional internal communications interface allows the communication of alarms and analogdata to a monitoring system. Industry-standard RS-232 or RS-485 serial communications areavailable for applications requiring direct interfacing to other devices. The modem versionmaintains compatibility with legacy products including the GCC-9000/780 <strong>Series</strong> (GroupCommunications <strong>Controller</strong>). With the availability of the heat trace data at the user’s fingertips,historical trending of temperatures, power consumption, or other parameters are available foranalysis and system optimization.THERMAL MANAGEMENT SOLUTIONS EN-<strong>Digi<strong>Trace</strong></strong><strong>920</strong>series-IM-H56874 04/137 / 82
CSA C/US and c-ETL-us ApprovedThe <strong>920</strong> series of controllers is approved for Class I, Division 2, Groups A,B,C,D and Zone 2hazardous locations, making it ideal for direct installation in the field. This can save the significantexpense of wiring back to a central-ly-located electrical distribution center.1.3 Modular ComponentsThe <strong>920</strong> series controller is made up of a number of building blocks, allowing the ultimate indesign flexibility. Each component’s primary function is described below.1.3.1 CONTROL MODULEThe <strong>920</strong> control module forms the heart of a single- or dual-point heat trace control solution. Eachplug-in module provides all of the intel-ligence required to control and monitor two independentheat trace circuits. It includes indicators for alarm and output status and a connector for use witha <strong>920</strong> Operator Console. An internal connector is provided to plug into an optional communicationsinterface.The control module packaging provides a rugged, vibration-proof design. Once it is plugged into aterminal board, the module is fastened using the two captive screws included as part of the rearcover. It is important that these two screws be securely fastened whenever the module is powered.1.3.2 TERMINAL BOARDThe terminal board eases maintenance and troubleshooting by providing a termination point for allof the low-voltage signals. The <strong>920</strong> control module may be installed or removed without disturbingthe field wiring. Temperature sensor, communications, and alarm control wiring are connected tothe lever-operated spring terminals, providing gas-tight, vibration-resistant connections.1.3.3 OPERATOR CONSOLEA large, easy-to-read alphanumeric display and menu-driven interface ease controllerconfiguration and eliminate the need for an external programmer. The console may be leftinstalled permanently or may be installed temporarily for display/setup during maintenance andtrou-bleshooting. Access is available for all monitored parameters, programmed values, andalarm information. Enhanced security is provided by password protection.The unique design of the operator console allows it to be installed or removed under power, evenin hazardous areas.1.3.4 SWITCH INTERFACEUniversal single-phase current monitoring, single- or 3-phase ground-fault detection, and voltagemonitoring are provided by the Switch Interface (SIS/SIC) module. One device is required for eachcontrol point, and two versions are available: SIS for use with SSRs, and SIC for use with thecontactor. Both units also incorporate a universal power supply, allowing operation directly from100 Vac to 277 Vac. Use with higher trace voltages is also possible, using a separate power sourceor a small step-down transformer.Redundant operation is supported, allowing a control module to automatically power itself fromeither of two switch interface modules or both. This permits one heat-trace circuit to be turned offfor maintenance without affecting the operation of the other circuit.1.3.5 COMMUNICATIONS INTERFACEIn applications where the user wishes remote configuration capability or wants to communicatetrace information and/or alarms to another device such as the GCC (Group Communications<strong>Controller</strong>), an optional communications interface may be installed in the control module.A modem version that maintains compatibility with legacy products is available, or other industrystandardinterfaces such as RS-232 and RS-485 may be specified.THERMAL MANAGEMENT SOLUTIONS EN-<strong>Digi<strong>Trace</strong></strong><strong>920</strong>series-IM-H56874 04/13 8 / 82
ALARMSHIFT A/BLOCKTxRxSTATUSALARMOUTPUTSHIFTALARMSTATUSALARMOUTPUT1.3.6 SOLID-STATE RELAY OUTPUT MODULEIn applications where the benefits of solid-state control are desired, a modular solid-state relay(SSR) is available. This component is easily installed on the outside of an enclosure using a single3/4 NPT knockout and locknut providing a weatherproof seal. This allows the heat generated bythe SSR to be dissipated directly to the ambient air, without increasing the internal temperature ofthe enclosure. When appli-cations require two-pole or 3-phase switching, multiple SSR modulesmay be ganged together, allowing the same component to be used.1.4 <strong>Controller</strong> Assemblies1.5 Ordering and Configuration GuideDue to its modular packaging, the <strong>920</strong> easily supports single-, dual-, or multi-point configurations.Factory standard assemblies are available in a variety of enclosure types, and panels made upof multiple points are also available. Refer to the Ordering Guide in section 1.5 on page 10 fora sample listing of available configurations. If your application requires a customized solution,please contact your <strong>Pentair</strong> <strong>Thermal</strong> Managament representative for help in specifying anassembly suited to your particular requirements.<strong>920</strong> series control assemblies are ordered as three separate items:PROGRAMMABLE DUAL POINTHEAT TRACING CONTROLLER<strong>Digi<strong>Trace</strong></strong> <strong>920</strong> SERIESMONITOR CONFIGAA/BBLOCKBACK ENTERPROGRAMMABLE DUAL POINTHEAT TRACING CONTRO LERMONITOR CONFIGBACK ENTEREnclosure assemblyControl module(s)(One for every two circuits)Fig. 1.6 <strong>920</strong> series control assembliesOptional operatorconsole(s)<strong>Pentair</strong> <strong>Thermal</strong> Managament maintains a shelf stock of enclosure assemblies, control modules,and consoles. All other enclosure assemblies are built to order. Not all options may be listed.Contact your local representative for any special applications you may have.THERMAL MANAGEMENT SOLUTIONS EN-<strong>Digi<strong>Trace</strong></strong><strong>920</strong>series-IM-H56874 04/139 / 82
1.5.1 ENCLOSURE ASSEMBLYEnclosure AssembliesDescription Catalog number Part number Weight/lbs<strong>Digi<strong>Trace</strong></strong> <strong>920</strong> controller–2 Pt in a 14" x 12" x 8" <strong>920</strong>*E4FWL*SIS302*SS3102*HTC*CON 10160-010 27FRP enclosure with window and quick-releaselatches, control module, and operator console. 1P30 A 277 V SSR/pt. Controls two circuits, each witha 1-polesolid-state relay. (Approved for Class 1, Div. 2 areas)<strong>Digi<strong>Trace</strong></strong> <strong>920</strong> controller–2 Pt in a 14" x 12" x 8" <strong>920</strong>*E4FWL*SIS302*SS3102*HTC485*CON 10160-011 27FRP enclosure with window and quick-releaselatches, control module, and operator console.Includes an isolated 2-wire RS-485 communicationoption. 1P 30 A 277 V SSR/pt. Controls two circuits,each with a 1-pole solid-state relay. (Approved forClass 1, Div. 2 areas)<strong>Digi<strong>Trace</strong></strong> <strong>920</strong> controller–2 Pt in a 14" x 12" x 8" <strong>920</strong>*E4FWL*SIS302*SS3202*HTC*CON 10160-012 32FRP enclosure with window and quick-releaselatches, control module, and operator console. 2P30 A 277 V SSR/pt. Controls two circuits, each witha 2-polesolid-state relay. (Approved for Class 1, Div. 2 areas)<strong>Digi<strong>Trace</strong></strong> <strong>920</strong> controller–2 Pt in a 14" x 12" x 8" <strong>920</strong>*E4FWL*SIS302*SS3202*HTC485*CON 10160-013 32FRP enclosure with window and quick-releaselatches, control module, and operator console.Includes an isolated 2-wire RS-485 communicationoption. 2P 30 A 277 V SSR/pt. Controls two circuits,each with a 2-pole solid-state relay. (Approved forClass 1, Div. 2, areas)<strong>Digi<strong>Trace</strong></strong>–<strong>Digi<strong>Trace</strong></strong> Supervisory Software <strong>Digi<strong>Trace</strong></strong> Supervisor 10391-002 1IMPORTANT: The NEC (and CEC) rules specify that all ungrounded—i.e., hot—legs of a circuit, must be switched in the event of aground fault. This means for 207 V single-phase applications, you must specify a 2-pole (2P) version if you are not using external GFIbreakers.Control Modules<strong>Digi<strong>Trace</strong></strong> <strong>920</strong> controller–Control module only(No communications options installed)<strong>Digi<strong>Trace</strong></strong> <strong>920</strong> controller–Control modulewith an isolated2-wire RS-485 communication option installed<strong>Digi<strong>Trace</strong></strong> <strong>920</strong> controller–Control modulewith modemcommunications option installed<strong>920</strong>HTC 10260-001 1<strong>920</strong>HTC*485 10260-004 1<strong>920</strong>HTC*MDM 10260-002 1Operator Console<strong>Digi<strong>Trace</strong></strong> <strong>920</strong> controller–Operator console <strong>920</strong>CON 10260-005 1Contact your local representative for other available configurations that are notlisted above.THERMAL MANAGEMENT SOLUTIONS EN-<strong>Digi<strong>Trace</strong></strong><strong>920</strong>series-IM-H56874 04/13 10 / 82
Section 2 – Installation and Wiring2.1 Introduction2.2 Initial InspectionCAUTION:2.3 Operator Safety Considerations2.4 Operating Environment2.5 Installation Location2.6 Mounting ProceduresBe sure all personnel involved in installation, servicing, and programming are qualified andfamiliar with electrical equipment, their ratings and proper practices and codes. Multiple voltagesand signal levels may be present during the installation, operation, and servicing of this product.Do not power the product until the safety provisions outlined in this section have been observed.This section includes information on the initial inspection, preparation for use, and storageinstructions for the <strong>920</strong> series heat trace controller.CAUTION:Solid-state relay (SSR) modules may be extremely hot immediately after power is removed.Exercise care when handling SSRs.Inspect the shipping container for damage. If the shipping container or cushioning material isdamaged, it should be kept until the contents of the shipment have been verified for completenessand the equipment has been checked mechanically and electrically. Procedures for configuringand operating the heat trace controller are given in Section 3 on page 18. If the shipment isincomplete there is mechanical damage, a defect, or the controller does not pass the electricalperformance tests, notify your <strong>Pentair</strong> <strong>Thermal</strong> Managament representative. If the shippingcontainer is damaged, or the cushioning material shows signs of stress, notify the carrier aswell as your <strong>Pentair</strong> <strong>Thermal</strong> Managament representative. Keep the shipping materials for thecarrier’s inspection.The standard <strong>920</strong> controller using solid-state relays is suitable for Class I, Division 2, Groups A,B, C, D and Zone 2 hazardous areas. Haz-ardous areas are defined by Article 500 of the NationalElectrical Code and Section 18 of the Canadian Electrical Code. Contactor-based assemblies aresuitable for use in ordinary (non-hazardous) areas only.CAUTION:Many wiring configurations will use more than one power source and all must be de-energizedprior to performing any maintenance on a controller circuit.The operating environment should be within the limitations described in the <strong>920</strong> heat tracecontroller specifications outlined in Appendix A on page 61.The wide ambient operating temperature range of the controller permits installation in anyconvenient location. Considerations should include expected atmospheric conditions, accessibilityfor maintenance and testing, the location of existing conduits, and hazardous area rating. Ambienttemperature conditions may affect load current ratings.CAUTION:Always be sure that the intended location is classified as an area that the product is approved foras defined by Article 500 of the National Electrical Code and/or Part I, Section 18 of the CanadianElectrical Code.Mounting hole dimensions for the standard enclosures are shown in Appendix B on page 63. Ifpossible, conduit entries should be made in the bottom of the enclosure to reduce the possibilityof water entry or leakage. Conduit entries must be drilled/punched following the enclosuremanufacturer’s recommendations. Use bushings suitable for the enclosure type and installsuch that the completed installation remains waterproof. Grounding hubs and conductors mustbe installed in accordance with Article 501-4(b) of the National Electrical Code and Part I of theCanadian Electrical Code.THERMAL MANAGEMENT SOLUTIONS EN-<strong>Digi<strong>Trace</strong></strong><strong>920</strong>series-IM-H56874 04/1311 / 82
The user may want to consider enclosure drain holes in applications where moisture is a problem;drill 0.125" holes in the bottom of the enclosure on both the left and right sides. Two holes reducethe possibility that one will plug and ensures drainage if the enclosure is not perfectly level.Note that drilling holes in the enclosure compromises the NEMA 4 rating. <strong>Controller</strong>s should beremoved from the enclosure before any holes are drilled or cut to prevent damage due to flyingdebris.2.6.1 CONTROL MODULE INSTALLATION AND REMOVALCAUTION:Always ensure that the power to the unit is turned off during installation or removal to avoid therisk of injury and damage to the controllers.WARNING:Explosion Hazard! Do not install or remove the control module while the unit is powered.Fig 2.1 Control module installationThe <strong>920</strong> series controller is designed to be mounted to a flat back plate/panel using a terminalboard. This plug-in design simplifies installation and maintenance by allowing all of the lowvoltagefield wiring to remain undisturbed while a control module is installed or removed.Installation of the control module is easily accomplished by plugging it into the connector on theterminal board.• The module is fully inserted once its rear cover is flush to the top surface of the terminal board.The connectors are designed to be self-aligning, so no undue force should be required.• Next, secure the module using the two captive screws provided (one located on each side ofthe rear cover). These should thread easily into the terminal board. Be sure to align the screwsproperly to avoid cross-threading them.To remove the control module, loosen the two captive screws. Once they have been completelyloosened, they will float freely in their re-spective retaining collars without falling out. The modulemay now simply be pulled straight out of its connection.2.6.2 OPERATOR CONSOLE INSTALLATION AND REMOVALThe operator console is designed to be easily installed or removed while the controller ispowered—even in Class I Division 2 and Zone 2 hazardous areas. It may be temporarily orpermanently installed.The console is installed in three steps:Step “Hook” the lip provided on the rear cover of the console over the top edge of the controlmodule front plate.Fig. 2.2 Console installation – Step 1THERMAL MANAGEMENT SOLUTIONS EN-<strong>Digi<strong>Trace</strong></strong><strong>920</strong>series-IM-H56874 04/13 12 / 82
Step “Hinge” the bottom of the console downwards until it is flush with the front of the controlmodule.Fig. 2.3 Console installation – Step 2Step If the console is to be permanently installed, secure it to the control module using thecaptive screw provided. It should be finger tight only. Do not over-tighten the screw or damage tothe console housing may occur.Fig. 2.4 Console installation – Step 3To remove the console, follow the three steps outlined above in reverse order.2.7 WiringWiring diagrams for typical configurations are included in Appendix C on page 68.CAUTION:Always verify wiring connections before applying power to the controller or connected circuits. Toavoid injury or equipment damage, do not install or remove wiring while controller power is on.To minimize the chance of loose connections, the terminal board uses lever-operated, springloadedterminals. See Appendix A on page 61 for allowable wire sizes and recommendedinsulation strip lengths.2.7.1 TEMPERATURE SENSOR CONNECTIONSUse shielded, twisted, three-conductor wire for the extension of RTD leads. The wire size shouldensure that the maximum allowable lead resistance is not exceeded. Shields on RTD wiring shouldbe grounded at the controller end only, using the terminals provided.THERMAL MANAGEMENT SOLUTIONS EN-<strong>Digi<strong>Trace</strong></strong><strong>920</strong>series-IM-H56874 04/1313 / 82
Temperature SensorsTerminal No.Point A – Shield 25Point A TS 1 Source (WHT) 26Point A TS 1 Sense (WHT) 27Point A TS 1 Common (RED) 28Point A – Shield 9Point A TS 2 Source (WHT) 10Point A TS 2 Sense (WHT) 11Point A TS 2 Common (RED) 12Point B – Shield 29Point B TS 1 Source (WHT) 30Point B TS 1 Sense (WHT) 31Point B TS 1 Common (RED) 32Point B – Shield 13Point B TS 2 Source (WHT) 14Point B TS 2 Sense (WHT) 15Point B TS 2 Common (RED) 16IMPORTANT: Some RTDs may be constructed with the Sense wire color-coded as Black.2.7.2 ALARM RELAY CONNECTIONSThe alarm output relay is a programmable dry contact output. It may be programmed for N.O.,N.C., steady or flashing operation, and is typically used to annunciate an alarm to an externaldevice such as a DCS, PLC, etc.IMPORTANT: The alarm relay is intended to be used for switching low-voltage, low-currentsignals. Do not use this relay to directly switch line voltages. Ensure that your application stayswithin the ratings of the relay contacts as defined in Appendix A on page 61.The alarm relay may also be used in conjunction with the +9 Vdc source to switch an external,line-voltage relay to drive a local pilot light, etc. Refer to the wiring diagrams in Appendix C onpage 68 for example connection details.Alarm and Control SignalsTerminal No.Alarm relay dry contact output 17Alarm relay dry contact output 18Ground 19+9 Vdc nominal Out (100 mAmps maximum) 1Common 2Common 32.7.3 EXTERNAL INPUT/OUTPUTThese input and output terminals are used to implement the Override and Ambient TemperatureControl Mode features. Refer to Section 3 on page 18 for programming details, and Appendix C onpage 68 for example wiring diagrams.Miscellaneous SignalsTerminal No.External input (+) 20External input (-) 21External output (+) 4External output(-) 52.7.4 COMMUNICATION SIGNAL CONNECTIONSThe communications terminal assignments change based on the type of option installed. If presentin a control module, the type of communications interface will be identified by a label located nextto the module’s rating label.THERMAL MANAGEMENT SOLUTIONS EN-<strong>Digi<strong>Trace</strong></strong><strong>920</strong>series-IM-H56874 04/13 14 / 82
Communications wiring should use twisted conductor, shielded cable. Shields on communicationswiring should be grounded at one end only, using the terminals provided.The following tables define the appropriate signal connections for the various types of interfaces:RS-485 (2-Wire) ConnectionsCommunication SignalTerminal No.Receive/transmit data (+) 6Receive/transmit data (-) 22Shield 8Shield 24RS-232 ConnectionsCommunication SignalTerminal No.Receive data 6Data carrier detect 7Clear to send 8Transmit data 22Request to send 23Common 24Modem Interface Connections(Note that these particular signals are not polarity sensitive)Communication SignalTerminal No.Modem 6Modem 22Shield 8Shield 242.7.5 POWER CONNECTIONSAll of the power terminals are numbered for easy identification. Do not attempt to use wire sizesthat exceed the marked terminal ratings and avoid terminating two wires on the same terminalwhenever possible.Always be sure that all terminals are adequately tightened according to the terminal anufacturer’sspecification. See Appendix A on page 61 for allowable wire sizes, recommended insulation striplengths, and tightening torque. A loose terminal can cause arcing and damage to the terminal orincorrect operation of the controller.IMPORTANT: Make sure that power terminals are re-tightened several days after installation.Stranded wire will tend to compress when initially installed; therefore, these terminals should bechecked for tightness several times after the system is installed to ensure that a good con-nectionis maintained. Be certain to use the proper size screwdriver for the terminal blocks to minimizethe chance of damage to the termi-nals.If the controllers are installed in either a metallic or non-metallic enclosure, follow the enclosuremanufacturer’s recommendations for proper grounding. Do not rely on conduit connections toprovide a suitable ground.Grounding terminals/screws are provided for connection of system ground leads. Proper systemgrounding is required for safe and correct operation of the controller’s protection features.THERMAL MANAGEMENT SOLUTIONS EN-<strong>Digi<strong>Trace</strong></strong><strong>920</strong>series-IM-H56874 04/1315 / 82
2.7.6 INPUT POWERThe <strong>920</strong> controller may be powered directly from the trace voltage (120 Vac to 277 Vac), through astep-down transformer, or from a sepa-rate circuit. The same wiring terminal assignments areused in all configurations, as defined below:Power ConnectionsTerminal No.Line/L1 power input 1Line/L1 Control Power Input 2Neutral/L2 Power Input 3Neutral/L2 Control Power Input 4L3 Power Input (3Ph only) 5Line/L1 Output to <strong>Trace</strong> 6Neutral/L2 Output to <strong>Trace</strong> 7L3 Output to <strong>Trace</strong> (3Ph only) 8IMPORTANT: that terminals 5 and 8 are only used for implementing 3-phase switching (this is truefor both SSR and contactor configurations).When powering the controller directly from the incoming trace power (120 Vac to 277 Vac), jumpersare installed between terminals 1 and 2 and 3 and 4. This is the standard factory configuration.When the controller is to be powered from another voltage source, the jumpers between terminals1 and 2 and 3 and 4 should be removed, and the controller power connected to terminals 2 and 4.In applications where a neutral-based 4-wire 3-phase source is available, the controller may bepowered from one line to neutral connec-tion, while the trace is operated from the line-to-lineconnection, eliminating the need for step-down transformers or separate power sources. This canbe accomplished by removing the jumper between terminals 3 and 4 only. <strong>Controller</strong> power canthen be derived from the L1 trace power on terminals 1 and 2 and the incoming neutral connectionfor controller power would be connected to terminal 4.Wiring diagrams for typical 1- and 2-pole configurations are included in Appendix C on page 68.IMPORTANT: The contactor version Switch Interface modules provide a switched line voltagesignal to drive the contactor coil. This is derived from the control power and, as such, requires thatthe contactor coil voltage be specified to match the control voltage present on terminals 2 and 4.CAUTION:Many wiring configurations will use more than one power source and all must be de-energizedprior to performing any maintenance on a controller circuit. When servicing one control point,remember that power may also be present on the second control point.2.8 Initial Power-upCAUTION:Before applying power to the controller, ensure that powering the circuit will not damage it if powerlimiting or the setpoint temperature have not been set correctly. If there is any doubt, the loadshould be disconnected until the <strong>920</strong> has been suitably programmed for correct and safe operation.2.8.1 INITIAL CABLE TESTTo minimize the risk of damage to the controller due to a cable fault, the integrity of the heatingcable should be verified by:1. Using a megger to perform a high-voltage insulation test2. Using an ohmmeter to ensure that the heating cable is not shortedThese tests must be performed with the controller output disconnected. Once the cable has beenchecked, it may be reconnected to the controller and power applied.2.8.2 RANDOM START DELAYAll <strong>920</strong> series control modules incorporate a RANDOM START-UP DELAY feature, ensuring thatall units do not power on at the same time. When power is first applied to a controller, it willhold its output off for a random time (0 to 9 seconds), equal to the last digit of the HTCBUScommunications address (see section 3.9.2 on page 43). Once the start-up delay has timed out, thecontroller will begin normal operation.THERMAL MANAGEMENT SOLUTIONS EN-<strong>Digi<strong>Trace</strong></strong><strong>920</strong>series-IM-H56874 04/13 16 / 82
2.9 Setup for the <strong>920</strong>The <strong>920</strong> may be programmed using the optional <strong>920</strong> Operator Console, or a GroupCommunications <strong>Controller</strong> (GCC) if the modem commu-nications option is installed. Forinstructions on the operation of these devices, refer to the corresponding operating manuals.For complete instructions on programming the <strong>920</strong>, see the Section 3 on page 18.2.9.1 VOLTAGE READING SETUPThe <strong>920</strong> series control module is tested, calibrated, and ordered separately from the switchinterface modules which contain the voltage sensing circuitry. This prevents <strong>Pentair</strong> <strong>Thermal</strong>Management from calibrating the control modules to specific switch interfaces and removingany component inaccuracies. Generally, the voltage readings will be within 3 Vac to 5 Vac whenshipped from <strong>Pentair</strong> <strong>Thermal</strong> Managament. If more accurate voltage readings are desired, theymay be adjusted as part of the initial setup of the controller. This requires measurement of thetrace voltage using a multimeter and adjusting the VOLTAGE TURNS RATIO setting to arrive atmore accurate voltage readings. See section 3.5.21 on page 26.2.9.2 SWITCH RATING SETUP (SSR ONLY)The <strong>920</strong> series control module is ordered and shipped as a separate item from the enclosureassembly. This prevents <strong>Pentair</strong> <strong>Thermal</strong> Managament from predetermining the SWITCHCURRENT RATING settings since various types of output switches are available.The user should verify that the switch current ratings are set properly for the rating of the solidstaterelays that are included as part of the enclosure assembly. Refer to section 3.5.7 on page 22for more information on the SWITCH CURRENT RATING setting. <strong>Pentair</strong> <strong>Thermal</strong> Managamentdefault setting is defined in Appendix F on page 76.THERMAL MANAGEMENT SOLUTIONS EN-<strong>Digi<strong>Trace</strong></strong><strong>920</strong>series-IM-H56874 04/1317 / 82
Section 3 – Programming and Configuration3.1 IntroductionThis section provides complete operating and setup instructions for the <strong>920</strong> <strong>Series</strong> <strong>Heat</strong>-Tracing<strong>Controller</strong>. The text describes each available function in detail, its purpose, valid range settings,the procedure for use, and some operational tips and suggestions.While configuring the controller, it is important to remember that the <strong>920</strong> series controller is atwo control point device. Both control points allow completely independent operation and, as such,have their own individual settings that must be configured. Throughout the text, the first controlpoint is referred to “Point A” and the second as “Point B.”“Power On” LEDCommunications statusindicatorsAlarm statusindicatorsALARMOUTPUTA<strong>920</strong> SERIESBPOWERTRANSMITRECEIVEADDRESSA - 20910B - 20911PROGRAMMABLE DUAL POINTHEAT TRACING CONTROLLERCONSOLE INTERFACEOperatorconsoleconnectionOutput statusindicatorsCommunications addressesfor Control Point A andControl Point BFig 3.1 <strong>Digi<strong>Trace</strong></strong> <strong>920</strong> front panel3.2 Front Panel FeaturesFront panel features of the heat trace controller are shown in Figure 3.1. The remainder of thisSection describes the front panel status and display LEDs.3.2.1 <strong>920</strong> FRONT PANEL DISPLAYThe basic <strong>920</strong> series control module front panel includes seven LED indicators. Four of these areused to indicate the “Output” and “Alarm” status of control points A and B.Status LEDsOUTPUT The OUTPUT LED, when illuminated steadily, indicates that the output of the controlleris turned on and is allowing current to flow in the trace circuit. For SSR versions, a flashing LEDindicates that the controller is pulsing its output on and off to maintain the setpoint temperatureand/or control the average amount of current/power the tracer uses. A separate LED is providedfor Point A and Point B.ALARM The ALARM LEDs will flash (approximately once per second) when the controller hasdetected an alarm condition. A separate LED is provided for Point A and Point B.TRANSMIT The TRANSMIT LED (“Tx”) flashes when the controller is sending information over itscommunications port to another device. This LED is only used when an optional communicationsinterface is installed.RECEIVE The “RECEIVE” LED (“Rx”) flashes when the controller is receiving informationover its communications port from another device. This LED is only used when an optionalcommunications interface is installed.POWER Indicates the module is powered on.IMPORTANT: Older versions of the controller may not have this LED.THERMAL MANAGEMENT SOLUTIONS EN-<strong>Digi<strong>Trace</strong></strong><strong>920</strong>series-IM-H56874 04/13 18 / 82
3.3 <strong>920</strong> Operator Console Display3.4 <strong>920</strong> Functions3.5 Control Point SetupThe optional <strong>920</strong> Operator Console provides a menu-driven, alphanumeric interface toease configuration and troubleshooting. The following features are part of the controller’sprogramming, but are only used in conjunction with the <strong>920</strong> Operator Console. For a detaileddescription of each of the console features and operating instructions, refer to the separate<strong>Digi<strong>Trace</strong></strong> <strong>920</strong> <strong>Series</strong> HTC Operator Console—Installation and Operating Instructions (<strong>Pentair</strong><strong>Thermal</strong> Managament reference H56903).The sections that follow explain the various functions of the <strong>920</strong> controller and how they can beaccessed. The first line of each section identifies the function to be described. Each section goeson to explain the Purpose of the function, the Range over which it may be set, the Procedure forsetting or enabling the feature, and finally any Notes or Cautions that pertain to the particularfunction.Setting and using the alarming functions of the <strong>920</strong> controller is a two step procedure:1. The alarm must be enabled or disabled accordingly. When using the <strong>920</strong> Operator Console,access to all alarming functions is available using the CONFIGURE mode sub-menus. Whenusing the Model 780/GCC-9000 Group Communications <strong>Controller</strong>, the alarm masks may befound in the HTC SETUP Section. Please see the appropriate operating manual for instructionson accessing these parameters.2. The corresponding alarm point value may be modified appropriately for the application.When using the <strong>920</strong> Operator Console, access to the alarm points is also available using theCONFIGURE mode sub-menus. Modification of the alarm setpoint values is found in the HTCSETPOINTS Section of the Model 780/GCC-9000 Group Communications <strong>Controller</strong>. Please seethe appropriate operating manual for in-structions on accessing this feature.IMPORTANT: The <strong>920</strong> Operator Console or the Model 780/GCC-9000 will not allow modificationof an alarm point value if the alarm has been disabled (DIS) with the exception of the HIGH TSALARM temperature settings. These may still be modified if the corresponding HIGH LIMITCUTOUT has been enabled (ENA).This Section describes the setup parameters that relate to a specific control point—either Point Aor Point B. These parameters must be configured for each of the two control points that are used.3.5.1 CONTROL SETPOINT TEMPERATUREPurpose: The CONTROL SETPOINT temperature is the value at which the heat trace controllermaintains the circuit temperature through either proportional, proportional ambient SSR,proportional ambient contactor, or deadband control, depending on the controllers’ configuration.The CONTROL SETPOINT temperature is compared to the temperature measured by the controltemperature sensor (TS). A decision is then made to turn on or turn off the output to control powerto the tracer.Range: –76°F to 1058°F (–60°C to 570°C)Procedure: Adjust the CONTROL SETPOINT temperature value to the desired maintaintemperature. The HTC will switch the output ON and OFF in an attempt to maintain thistemperature.IMPORTANT:• See section 5.2 on page 50 of this manual for an explanation of Proportional, ProportionalAmbient SSR, Proportional Ambient Contactor and Deadband Control algorithms.• When using an optional <strong>920</strong> Operator Console (for V3.11 and up) the CONTROL SETPOINTtemperature range may be limited to the CON-SOLE SETPOINT MAXIMUM and MINIMUMvalues (see sections 3.5.29 on page 29 and 3.5.30 on page 29). This is a safety feature to preventusers in the field from modifying the CONTROL SETPOINT temperature setting to adangerous level.THERMAL MANAGEMENT SOLUTIONS EN-<strong>Digi<strong>Trace</strong></strong><strong>920</strong>series-IM-H56874 04/1319 / 82
3.5.2 ALPHANUMERIC TAG ASSIGNMENTPurpose: A 19-character alphanumeric TAG may be assigned to a control point to allow it to beeasily associated with a pipe, vessel, process, circuit, drawing name or number.Setting: Any combination of 19 characters from A-Z, 0-9, /, -, ., (,) or #.Procedure: Using the <strong>920</strong> Operator Console, enter the desired text. Refer to the separate<strong>Digi<strong>Trace</strong></strong> <strong>920</strong> <strong>Series</strong> HTC Operator Console—Installation and Operating Instructions (<strong>Pentair</strong><strong>Thermal</strong> Managament reference H56903) for TAG entry information.3.5.3 SWITCH CONTROL MODEPurpose: This allows selection of the type of algorithm to be used by the HTC to maintain theCONTROL SETPOINT temperature. There are four different control algorithms available in the HTC—proportional, proportional ambient SSR, proportional ambient contactor, and deadband. See section5.2 on page 50 for a complete explanation of these controlling techniques as implemented in the HTC.Setting: PROPORTIONAL, PROPORTIONAL AMBIENT SSR (V3.11+), PROPORTIONAL AMBIENTCONTACTOR (V3.11+), or DEADBANDProcedure: Select the desired control technique. Note that deadband control and proportionalambient contactor should be selected when using contactors or when precise control andadvanced current handling functions are not required.IMPORTANT: If deadband is selected, a DEADBAND setting will be available in the HTCconfiguration menu, else a PROPORTIONAL BAND setting will be available. No MAXIMUM POWER,SWITCH CURRENT RATING or CIRCUIT BREAKER CURRENT RATING settings are available whenthe controller is set to operate in either contactor mode. If proportional ambient contactor isselected, the CYCLE TIME setting will also be available.3.5.4 PROPORTIONAL BAND SETTING(For use with the three proportional control modes only)Purpose: When an HTC equipped with SSRs is used to control a heating circuit, proportional orproportional ambient SSR modes are normally used, allowing for more precise temperature control.When using contactors, the proportional ambient contactor mode should be selected.This programmable proportional band acts to vary the on to off time of the output based on thedifference between the measured control temperature and the desired CONTROL SETPOINTtemperature.Range: 2°F to 90°F (1°C to 50°C)2°F to 630°F (1°C to 350°C) V3.2x and upProcedure: Adjust the PROPORTIONAL BAND setting to the desired differential from theCONTROL SETPOINT temperature.IMPORTANT:• See section 5.2 on page 50 for an explanation of how the three proportional modes use thePROPORTIONAL BAND setting.• When using series-type, constant wattage, or self-regulating tracers in an ambienttemperature control application, significant energy savings may be realized by setting thePROPORTIONAL BAND to match the expected range of operating ambient temperatures.<strong>Trace</strong>r design is normally done assuming worst-case conditions, where 100% of the designoutput power is required to maintain the desired minimum temperature. When the ambienttemperature is above the design minimum but some heat is still required, adjusting thePROPORTIONAL BAND width accordingly will allow only the amount of power required by theapplication to be consumed, while maintaining the minimum required temperature.Example: A water line must be protected from freezing when the ambient temperature falls below10°C. Either the proportional ambient SSR or proportional ambient contactor mode is selectedas the control method (depending on the type of switch being used). The heater and insulationare chosen to impart enough heat to the line to keep it from freezing at a worst-case ambienttemperature of –40°C. At 10°C, the heater should be completely off, since no heat is required atthis temperature to guarantee that the product will not freeze. It follows that the amount of heatrequired by the water line decreases as the ambient temperature increases from –40°C to 10°C(theoretically, at –15°C the heater output should be approximately 50%). Setting the CONTROLSETPOINT temperature to 10°C, and the PROPORTIONAL BAND to 50°C, will force the controller’soutput to be 100% on at –40°C, 50% on at –15°C, and off at 10°C.THERMAL MANAGEMENT SOLUTIONS EN-<strong>Digi<strong>Trace</strong></strong><strong>920</strong>series-IM-H56874 04/13 20 / 82
3.5.5 DEADBAND SETTING(Deadband control mode only or if a point controls an INHIBIT output signal)Purpose: When an HTC equipped with a contactor is used to control a trace circuit, it is necessaryto use deadband rather than proportional control. This is done to prevent the contactor fromswitching on and off rapidly and being worn out prematurely. This deadband acts as an on/off control where the decision to turn the output off or on is based upon a window of differencebetween the measured control temperature and the desired CONTROL SETPOINT temperature.Range: 2°F to 90°F (1°C to 50°C)Procedure: Adjust the DEADBAND setting to the desired differential from the desired CONTROLSETPOINT temperature. When the control tem-perature is above the setpoint + deadband value,the controller will turn off the output to the tracer. If the control temperature drops down belowthe setpoint, the output will be turned back on. Note that the smaller the DEADBAND setting, themore often the contactor will cycle on and off, decreasing its operational life.IMPORTANT:• See section 5.2 on page 50 for an explanation of deadband control. Note that the MAXIMUMPOWER, SWITCH CURRENT RATING, and CIR-CUIT BREAKER CURRENT RATING settings arenot available when the HTC is set to deadband mode (typically when switching a contactor).• The DEADBAND parameter is also available for Point A when the EXTERNAL OUTPUT isconfigured for use as an INHIBIT output. See section 3.6.4 on page 30 for additional details.3.5.6 CYCLE TIME SETTING (V3.11 AND UP)(For proportional ambient contactor control mode only)Purpose: This parameter determines the minimum amount of time it will take for a completecontactor ON-OFF-ON cycle.Range: 10 to 255 minutesProcedure: Adjust the CYCLE TIME setting to yield the desired contactor ON+OFF time for aparticular duty cycle. For instance, if the contactor should remain on for five minutes with a 50%duty cycle, then the CYCLE TIME should be 10 minutes. A new duty cycle (based on measuredcontrol temperature, PROPORTIONAL BAND and CONTROL SETPOINT) is calculated every timethe contactor is required to change state.IMPORTANT:• If the calculated duty cycle is 0% or 100%, then the contactor will not change state and the dutycycle will not be calculated again for a time period = CYCLE TIME/30.• The minimum cycle time setting is 10 minutes, and the minimum controller output duty cycle is3%. This results in a minimum contactor ON time of 18 seconds.3.5.7 SWITCH CURRENT RATING SETTING (SSR ONLY)Purpose: The SWITCH CURRENT RATING setting defines the current rating of the output switch.It is used by the controller to limit the maximum average current that will be allowed to flowto the load before it begins to adjust the output duty cycle, limiting the amount of current to anacceptable level.Range: 0.3 to 100.0 amps(CURRENT TURNS RATIO = 1.00)Procedure: Adjust the SWITCH CURRENT RATING setting to match the current rating of theoutput device (i.e. 30.0 amps). Note that the SWITCH CURRENT RATING setting is affected bythe CURRENT TURNS RATIO setting. The absolute maximum adjusted SWITCH CURRENT RATINGsetting is 300.0 amps. The absolute minimum adjusted SWITCH CURRENT RATING setting is 0.1amps. See section 3.5.22 on page 26 for more information regarding the CURRENT TURNS RATIOfunction.3.5.8 CIRCUIT BREAKER CURRENT RATING SETTING (SSR ONLY)Purpose: The CIRCUIT BREAKER CURRENT RATING setting helps prevent in-rush inducednuisance tripping of the circuit breaker immediately upstream of the controller. The HTC evaluatesthe square of the current related to time (I2T) and adjusts the output duty cycle accordingly,limiting the amount of current to an acceptable level.THERMAL MANAGEMENT SOLUTIONS EN-<strong>Digi<strong>Trace</strong></strong><strong>920</strong>series-IM-H56874 04/1321 / 82
Range: 0.3 to 100.0 amps(CURRENT TURNS RATIO = 1.00)Procedure: Adjust the CIRCUIT BREAKER CURRENT RATING setting to the heating circuit breakersize (i.e. 30.0 amps). Note that the CIRCUIT BREAKER CURRENT RATING setting is affected by theCURRENT TURNS RATIO setting. The absolute maximum adjusted CIRCUIT BREAKER CURRENTRATING setting is 300.0 amps. The absolute minimum adjusted CIRCUIT BREAKER CURRENTRATING setting is 0.1 amps. See section 3.5.22 on page 26 for more information regarding theCURRENT TURNS RATIO function.IMPORTANT: This feature should not be used to reduce the size of a circuit breaker or increasethe maximum heating cable length. It can be quite effective in preventing nuisance trips due toincorrect design or factors outside those considered by the design.3.5.9 MAXIMUM POWER SETTING (SSR ONLY)Purpose: This user-selectable level limits the maximum amount of power applied to a heattrace circuit. This is an average power calculated by the controller using the average currentand applied voltage. The HTC switches the output on and off rapidly to limit the average currentto an appropriate level. The MAXIMUM POWER level may be adjusted to eliminate step-downtransformers, lower the effective output wattage of a cable, or implement energy management ofthe heat trace circuit.Range: 3 to 33,000 Watts(VOLTAGE and CURRENT TURNS RATIOS = 1.00)Procedure: Adjust the MAXIMUM POWER level to the desired value (watts). Use the TEST TRACINGfunction to observe the power limiting oper-ation.IMPORTANT:• This function may be set within reasonable limits for the particular tracer being powered. Theeffective resolution of the setting is limited to 1/30th of the calculated full on power.• Do not set the MAXIMUM POWER below full output for applications that do not require controlof power.• This feature is affected by the VOLTAGE and CURRENT TURNS RATIO settings. The maximumrange using adjusted values of voltage and current is 65,535 watts. See sections 3.5.21 on page26 and 3.5.22 on page 26 for more information regarding the turns ratio functions.3.5.10 3-PHASE POWER CALCULATION (V3.11 AND UP)Purpose: This parameter selects the type of power calculation that the HTC is to perform.Setting: NO or YESProcedure: If an automatic 3-phase power calculation is desired, select YES. If a normal powercalculation is desired, select NO.IMPORTANT: For the total 3-phase power calculation to be accurate the following conditions mustbe met:• All three phases must be balanced and star (“Y”) connected• The measured corrected current is one of the phase currents• The measured corrected voltage is the line to line voltageThe formula used to calculate this total power is: P total = √3 x I phase x V line-line3.5.11 TS FAIL MODE (V3.11 AND UP)Purpose: This parameter determines whether the HTC turns the output switch ON or OFF if allselected temperature sensors fail to provide a control temperature.Setting: OFF or ONProcedure: If the HTC should turn the output switch off when it cannot read a valid controltemperature, then select OFF; otherwise, if the output switch should turn on, then select ON.IMPORTANT: This parameter is part of the TS CONTROL MODE.THERMAL MANAGEMENT SOLUTIONS EN-<strong>Digi<strong>Trace</strong></strong><strong>920</strong>series-IM-H56874 04/13 22 / 82
3.5.12 TEMPERATURE SENSOR CONTROL MODEPurpose: The TS CONTROL MODE allows the selection of one of eleven possible temperaturecontrol modes for the controller. The different modes allow redundant fail-safe temperaturesensing, averaging, or minimum maintain temperature control.Setting: Select one of the following eleven possible modes:Control TS and DescriptionCONTROL USING TS 1, FAIL OFF/ONCONTROL USING TS 1, FAIL TO TS 2CONTROL USING TS 2, FAIL OFF/ONCONTROL USING TS 2, FAIL TO TS 1CONTROL ON AVERAGE, FAIL OFF/ONCONTROL ON AVERAGE, FAIL TO GOODCONTROL ON LOWEST, FAIL OFF/ONCONTROL ON LOWEST, FAIL TO GOODThe following are only available in V3.11+:CONTROL USING EXT. INPUT, FAIL OFF/ONCONTROL USING EXT. INPUT, FAIL TO TS 1CONTROL USING EXT. INPUT, FAIL TO TS 2Where OFF/ON = <strong>Controller</strong>’s output switch turned OFF or ON as determined by the TS FAIL MODE.Example: With a TS CONTROL MODE of CONTROL ON AVERAGE, FAIL TO GOOD, the controllerwill measure both sensors (TS 1 and TS 2), averaging the two temperature value;, display theresults; and cycle the heater ON or OFF to maintain the CONTROL SETPOINT temperature. Thisis the primary control mode. If either sensor should fail, the controller will transfer control to theremaining “good” sensor and generate the appropriate TS 1 or TS 2 FAILURE ALARM (assumingthat the alarm is enabled). The temperature will now be maintained based on this measured value.If the remaining good sensor fails, the controller will turn the heater OFF or ON as determinedby the TS FAIL MODE setting. The appropriate TS 1 or TS 2 FAILURE ALARM will be also begenerated.Procedure: Select the control mode that best suits the application.IMPORTANT:• Ensure that TS FAILURE ALARMS are enabled. See sections 3.7.1 on page 32, 3.7.4 on page 32,and 3.7.10 on page 34 for a complete explanation of RTD failure detection in the HTC.• If the selected TS CONTROL MODE uses the EXTERNAL INPUT then the EXTERNAL INPUTmust be set to TEMPBUS (see Section 3.6.3). Also, the CONTROL TS FAILURE ALARM is nonlatchingin this mode.• Fail safe mode is always disabled if the TS CONTROL MODE = EXT. INPUT, FAIL OFF/ON.3.5.13 TS 1 TYPE (V3.11 AND UP)Purpose: This parameter specifies the type of RTD that is connected to the HTC’s TS 1 input.Setting: 3-wire 100 Ω platinum or 2-(or 3-) wire 100 Ω nickel-iron (Ni-Fe)Procedure: Select the type of RTD that is connected to the TS 1 input.IMPORTANT: If a 2-wire 100 Ω nickel-iron (Ni-Fe) RTD is selected then the TS 1 LEAD RESISTANCEmust be entered manually (see section 3.5.14 on page 24).3.5.14 TS 1 LEAD RESISTANCE (V3.11 AND UP)(For Ni-Fe RTDs only)Purpose: This parameter specifies the lead resistance of a 2-wire nickel-iron RTD connected tothe HTC’s TS 1 input.Range: 0 to 20.00 ΩProcedure: Measure the resistance of one of the nickel-iron RTD leads (from the RTD to the HTC’sTS 1 input) and use this value as the TS 1 LEAD RESISTANCE.THERMAL MANAGEMENT SOLUTIONS EN-<strong>Digi<strong>Trace</strong></strong><strong>920</strong>series-IM-H56874 04/1323 / 82
3.5.15 TS 1 HIGH LIMIT CUTOUTPurpose: When enabled, the TS 1 HIGH LIMIT CUTOUT feature will override the CONTROLSETPOINT temperature and force the controller output off if the TS 1 reading exceeds the HIGHTS 1 ALARM temperature setting. This is a non-latching condition, so once the TS 1 reading dropsbelow the HIGH TS 1 ALARM temperature setting, the controller will resume normal operation.Setting: ENABLE or DISABLEProcedure: Enable or disable the cutout feature as desired.IMPORTANT:• The TS 1 HIGH LIMIT CUTOUT feature overrides an autocycle test. A pending autocycle willbe initiated immediately after the TS 1 tempera-ture drops below the HIGH TS 1 ALARMtemperature setting.• If a TS 1 failure occurs and the TS 1 HIGH LIMIT CUTOUT feature is enabled, the switch outputwill latch off regardless of the TS CONTROL MODE setting or the TS FAIL MODE setting.• If the TS 1 HIGH LIMIT CUTOUT feature is enabled, then the HIGH TS 1 ALARM temperaturesetting can be set, regardless of whether the HIGH TS 1 ALARM is enabled.3.5.16 TS 2 TYPE (V3.11 AND UP)Purpose: This parameter specifies the type of RTD that is connected to the HTC’s TS 2 input.Setting: 3-wire 100 Ω platinum or 2- (or 3-) wire 100 Ω nickel-iron (Ni-Fe)Procedure: Select the type of RTD that is connected to the TS 2 input.IMPORTANT: If a 2-wire 100 Ω nickel-iron (Ni-Fe) RTD is selected then the TS 2 LEAD RESISTANCEmust be entered (see section 3.5.17 on page 25).3.5.17 TS 2 LEAD RESISTANCE (V3.11 AND UP)(For Ni-Fe RTDs only)Purpose: This parameter specifies the lead resistance of a 2-wire nickel-iron RTD connected tothe HTC’s TS 2 input.Range: 0 to 20.00 ΩProcedure: Measure the resistance of one of the nickel-iron RTD leads (from the RTD to the HTC’sTS 2 input) and use this value as the TS 2 LEAD RESISTANCE.3.5.18 TS 2 HIGH LIMIT CUTOUTPurpose: When enabled, the TS 2 HIGH LIMIT CUTOUT feature will override the CONTROLSETPOINT temperature and force the controller output off if the TS 2 reading exceeds the HIGHTS 2 ALARM temperature setting. This is a non-latching condition, so once the TS 2 reading dropsbelow the HIGH TS 2 ALARM temperature setting, the controller will resume normal operation.Setting: ENABLE or DISABLEProcedure: Enable or disable the cutout feature as desired.IMPORTANT:• The TS 2 HIGH LIMIT CUTOUT feature overrides an autocycle test. A pending autocycle willbe initiated immediately after the TS 2 tempera-ture drops below the HIGH TS 2 ALARMtemperature setting.• If a TS 2 failure occurs and the TS 2 HIGH LIMIT CUTOUT feature is enabled, the switch outputwill latch off regardless of the TS CONTROL MODE setting or the TS FAIL MODE setting.• If the TS 2 HIGH LIMIT CUTOUT feature is enabled, then the HIGH TS 2 ALARM temperaturesetting can be set, regardless of whether the HIGH TS 2 ALARM is enabled.3.5.19 VOLTAGE SOURCE (V3.11 AND UP)Purpose: This parameter specifies which voltage source the HTC should use for its voltagemeasurements.Setting: POINT A or POINT B or FIXEDProcedure: If the HTC is not powered from a dedicated switch interface an alternate voltage sourcecan be selected. If a fixed constant voltage value is to be used then that FIXED VOLTAGE SETTINGmust also be entered (see section 3.5.20 on page 26).THERMAL MANAGEMENT SOLUTIONS EN-<strong>Digi<strong>Trace</strong></strong><strong>920</strong>series-IM-H56874 04/13 24 / 82
IMPORTANT:• If an alternate voltage source is selected, then all voltage alarming features are disabled forthis HTC and the VOLTAGE TURNS RATIO is not used.• It is not possible to set both points to use the others’ voltage source.3.5.20 FIXED VOLTAGE SETTING (V3.11 AND UP)(Only if VOLTAGE SOURCE = FIXED)Purpose: This parameter specifies the voltage value that the HTC should use when the VOLTAGESOURCE = FIXED.Range: 0 to 1000 VoltsProcedure: Adjust the FIXED VOLTAGE setting to the desired level.IMPORTANT: All voltage alarming features are disabled for this HTC and the VOLTAGE TURNSRATIO is not used when the VOLTAGE SOURCE is set to FIXED.3.5.21 VOLTAGE TURNS RATIO ADJUSTMENTPurpose: The VOLTAGE TURNS RATIO adjusts voltage readings for applications where a controlleris switching a load through a step-up or step-down transformer, or is being powered from a sourcewith a different voltage level than the trace voltage.Range: 0.10 to 9.90 (TO 1)Procedure: Adjust the VOLTAGE TURNS RATIO to equal the ratio of the circuit voltage to thecontroller input voltage. Compare the indicated voltage to the measured voltage after setting theturns ratio and adjust until the two readings are as close as possible.e.g.: <strong>Heat</strong>ing Circuit Voltage: 480 VoltsModule Input Voltage:120 VoltsVOLTAGE TURNS RATIO Setting: 4.00IMPORTANT:• When the VOLTAGE TURNS RATIO has been set appropriately, the HTC will calculate the circuitpower using the adjusted current and voltage readings. Voltage alarms also use the adjustedcircuit voltages.• The VOLTAGE TURNS RATIO is not used if the selected VOLTAGE SOURCE is not from thededicated switch interface.3.5.22 CURRENT TURNS RATIO ADJUSTMENTPurpose: The CURRENT TURNS RATIO adjusts current readings for applications where acontroller is monitoring a load through an external step-up or step-down current transformer.Range: 0.10 to 60.00 (TO 1)Procedure: Adjust the CURRENT TURNS RATIO to equal the ratio of the primary to secondarywindings of the external current transformer. Compare the indicated current to the measuredcurrent after setting of the CURRENT TURNS RATIO and adjust until the two readings are as closeas possible.IMPORTANT: When the CURRENT TURNS RATIO has been set appropriately, the HTC will calculatethe circuit power using the adjusted current and voltage readings. Current alarms, as well as theswitch and circuit breaker limiting functions, also use the adjusted circuit currents.3.5.23 AUTOCYCLE ENABLINGPurpose: The autocycle function momentarily (approximately 10 seconds) applies power to theheating circuit at the selected interval. It is used to test the integrity of the heating circuit. Alarmspresent at the time of autocycle then become latched and remain active after the completion ofthe autocycle function. Auto-cycling effectively eliminates the need for preventive maintenance byautomatically verifying the heating circuit integrity.Setting: ENABLE or DISABLEProcedure: Enable or disable the auto-cycling feature as desired. If the feature is disabled, you willnot be prompted to enter the AUTOCYCLE INTERVAL or AUTOCYCLE UNITS.THERMAL MANAGEMENT SOLUTIONS EN-<strong>Digi<strong>Trace</strong></strong><strong>920</strong>series-IM-H56874 04/1325 / 82
IMPORTANT:• Auto-cycling should always be enabled for normal operation. Disabling this feature should onlybe required where the HTC system is monitoring a circuit exercised by some other device ormeans. Although this function defeats temperature control and forces output on, the controllerwill continue to adjust the output for protection purposes or power limiting (SSR option only).• Auto-cycling is inhibited if the controller is in the load shedding mode. See section 5.3on page 52.• If auto-cycling is enabled, the HTC will always autocycle for 10 seconds when power is initiallyapplied.• If auto-cycling is enabled, TS FAIL MODE = OFF and all the control temperature sensors havefailed, the HTC will still perform an autocycle.• If an alarm condition, with an alarm filter time greater than 0, appears during the auto-cycling,then the autocycle may be extended (past the 10 seconds) until the alarm filter time hasexpired.3.5.24 AUTOCYCLE TIME INTERVALPurpose: AUTOCYCLE INTERVAL is the number of hours/minutes between successive heatingcircuit integrity tests depending on the AUTOCYCLE UNITS specified.Range: 1 to 240Procedure: Set the AUTOCYCLE INTERVAL to the desired time period.IMPORTANT:• When using proportional ambient contactor mode, the CYCLE TIME setting should be less thanthe AUTOCYCLE INTERVAL otherwise au-to-cycling could affect the duty cycle.• If an AC ALARM becomes active during an autocycle, but the AUTOCYCLE INTERVAL expiresprior to the corresponding ALARM FILTER time, then auto-cycling will continue until theALARM FILTER time has elapsed.• For the earliest possible alarming of heating circuit problems the AUTOCYCLE INTERVALshould be set to a small value.3.5.25 AUTOCYCLE TIME UNITSPurpose: The autocycle time units parameter allows selection of minutes or hours for theAUTOCYCLE INTERVAL setting.Setting: HOURS or MINUTESProcedure: Set the AUTOCYCLE UNITS to the desired time units.3.5.26 INHIBIT CONTROL (V3.00 ONLY)Purpose: This feature allows the HTC’s EXTERNAL INPUT to override the controller’s temperaturecontrol and force the output switch off. This is especially useful when the user wishes to turn acontroller or a group of controllers off over the summer months, during maintenance, or when aline is flowing and does not require heating.Setting: ENABLE or DISABLEProcedure: Enable or disable the INHIBIT CONTROL for the control point being programmed.IMPORTANT:• The EXTERNAL INPUT must also be programmed as INHIBIT before this parameter can be set.See section 3.6.3 on page 29 for further details.• If the autocycle feature is enabled, it will continue to function even when the INHIBIT mode isactive.• Fail-safe mode is inactive if the INHIBIT mode is active.• Both of the LOW TS ALARMS are inactive if the INHIBIT mode is active.3.5.27 OVERRIDE SOURCE (V3.11 AND UP)Purpose: An override signal can be sent to the HTC from one of two sources. This override signalcan be used to override the controller’s temperature control and force the output switch off or on.This is especially useful when the user wishes to turn a controller or a group of controllers off overthe summer months, during maintenance, or when a line is flowing and does not require heating.THERMAL MANAGEMENT SOLUTIONS EN-<strong>Digi<strong>Trace</strong></strong><strong>920</strong>series-IM-H56874 04/13 26 / 82
Setting: REMOTE or EXT. INPUTProcedure: If the override signal will be generated remotely and received by the HTC via theoptional communications interface, select REMOTE as the OVERRIDE SOURCE. If the overridesignal will be received by the HTC via the external input terminals on the <strong>920</strong> terminal board,select EXTERNAL INPUT as the OVERRIDE SOURCE.IMPORTANT:• If the EXTERNAL INPUT is not configured as either INHIBIT or FORCE ON then OVERRIDESOURCE will always automatically be set to REMOTE. See section 3.6.3 on page 29 for furtherdetails.• If the autocycle feature is enabled, it will continue to function even when an INHIBIT overridesignal is being received as long as load shedding is not active.• Fail-safe mode is inactive if an INHIBIT override signal is being received.• Load shedding and fail-safe mode are inactive if a FORCE ON override signal is being received.• Only the LOW TS ALARMS for temperature sensors used by the TS CONTROL MODE are inactiveif an INHIBIT override signal is being re-ceived.3.5.28 LOAD SHEDDING ENABLINGPurpose: The load shedding function allows the controller output to be forced OFF by way of aremote contact input on the 780 Group Com-munications <strong>Controller</strong> or using the communicationsport and an upstream device. It may be used to turn OFF the output of one or more con-trollersin order to reduce energy consumption to avoid peak demand surcharges, remove power fromunused circuits, or remove power from circuits that may be subjected to steam cleaning.Setting: ENABLE or DISABLEProcedure: Enable or disable the load shedding control mode as desired.IMPORTANT:• To completely configure the HTC for load shedding operation, the following additionalparameters must be set up if using the Model 780/GCC-9000:– Fail-safe mode– Load shedding GCC contact association• These additional parameters may only be accessed using the Group Communications<strong>Controller</strong>. See the appropriate section of the GCC manual for further details.• Fail-safe mode is not supported when using proportional ambient SSR mode or proportionalambient contactor mode.• Fail-safe mode is not supported if the TS CONTROL MODE = EXT. INPUT, FAIL OFF/ON.• For fail-safe mode to function, at least one LOW TS ALARM of the controlling temperaturesensor(s) must be enabled and the corresponding LOW TS ALARM temperature setting must beless than the CONTROL SETPOINT temperature.3.5.29 CONSOLE SETPOINT MAXIMUM (V3.11 AND UP)IMPORTANT: The CONSOLE SETPOINT MAXIMUM is not displayed on the optional <strong>920</strong> OperatorConsole.Purpose: When using an optional <strong>920</strong> Operator Console (for V3.11 and up) the maximum setting ofthe CONTROL SETPOINT temperature may be limited to the CONSOLE SETPOINT MAXIMUM value.This is a safety feature to prevent users in the field from modifying the CONTROL SET-POINTtemperature setting to a dangerous level.Range: –76°F to 1058°F (–60°C to 570°C)Procedure: Adjust the CONSOLE SETPOINT MAXIMUM temperature value to limit the maximumallowable CONTROL SETPOINT TEMPERATURE that may be set using the optional <strong>920</strong> OperatorConsole. The CONSOLE SETPOINT MAXIMUM may only be set using a communicating device suchas the Model 780/GCC-9000. See the 780/GCC-9000 manual for the proper procedure.3.5.30 CONSOLE SETPOINT MINIMUM (V3.11 AND UP)IMPORTANT: The CONSOLE SETPOINT MINIMUM is not displayed on the optional <strong>920</strong> OperatorConsole.Purpose: When using an optional <strong>920</strong> Operator Console (for V3.11 and up) the minimum setting ofthe CONTROL SETPOINT temperature may be limited to the CONSOLE SETPOINT MINIMUM value.THERMAL MANAGEMENT SOLUTIONS EN-<strong>Digi<strong>Trace</strong></strong><strong>920</strong>series-IM-H56874 04/1327 / 82
3.6 Common <strong>Controller</strong> SetupThis is a safety feature to prevent users in the field from modifying the CONTROL SET-POINTtemperature setting to a dangerous level.Range: –76°F to 1058°F (–60°C to 570°C)Procedure: Adjust the CONSOLE SETPOINT MINIMUM temperature value to limit the minimumallowable CONTROL SETPOINT TEMPERATURE that may be set using the optional <strong>920</strong> OperatorConsole. The CONSOLE SETPOINT MINIMUM may only be set using a communicating device suchas the Model 780/GCC-9000. See the 780/GCC-9000 manual for the proper procedure.The following section describes the setup parameters that are common for both of the two controlpoints—Point A and Point B. These pa-rameters need only be configured once to define theiroperation for both control points.3.6.1 TEMPERATURE DISPLAY UNITSPurpose: This allows selection of the type of temperature units to display when using the <strong>920</strong>Operator Console. All temperature-related values will be displayed in the selected units.IMPORTANT: This setting will not affect the temperature units displayed at a 780/GCC-9000 GroupCommunications <strong>Controller</strong>. The GCC may be set independently.Setting: DEGREES C or DEGREES FProcedure: Adjust the setting to the desired temperature units (°F or °C).IMPORTANT: To minimize possible confusion, temperature units should be set the same on theHTC and any other communicating devices.3.6.2 VERSION OF FIRMWARE AND HARDWAREPurpose: The first three digits of the version number indicate the revision level of the firmwareprogrammed into the controller. As new fea-tures are added to the HTC, the firmware revisionlevel is incremented to allow the user to determine which features are available for the particularunit being used. The fourth digit (V3.11 and up only) indicates the type of <strong>920</strong> hardware. A “0”indicates that an EPROM is being used, which means the firmware cannot be upgraded withoutreplacing the EPROM. A “1” indicates that the firmware is stored in a FLASH memory device andcan be upgraded via the optional communications interface.3.6.3 EXTERNAL INPUT PORTPurpose: This input port may be used as an OVERRIDE SOURCE or a TEMPBUS temperaturesource for either point. As an OVERRIDE SOURCE, it can sense a remote dry contact closureand override the controller’s temperature control and force its output switch off or on. As aTEMPBUS temperature source, either controller can control its output switch using theTEMPBUS temperature rather than temperatures from TS 1 or TS 2.Setting: NOT USED, TEMPBUS (V3.11+), INHIBIT or FORCE ON (V3.11+)Procedure: If the EXTERNAL INPUT is not being used by either point, select NOT USED. Ifeither point requires a TEMPBUS temperature signal, select TEMPBUS and set the pointTS CONTROL MODE to a mode using the EXTERNAL INPUT (see section 3.5.12 on page 24). ForTEMPBUS operation description see section 5.4 on page 53.If a remote dry contact closure should force either point’s output switch off, select INHIBIT. If aremote dry contact closure should force either point’s output switch on, select FORCE ON.If the EXTERNAL INPUT is set to INHIBIT or FORCE ON, the point’s OVERRIDE SOURCE (for V3.11+)must be set to EXT. INPUT or its INHIBIT CONTROL (for V3.00) must be enabled.IMPORTANT:• When used with the INHIBIT/FORCE ON feature, a contact closure sensed by the EXTERNALINPUT will initiate the INHIBIT/FORCE ON mode. An open input will cause the controller torevert to normal temperature control operation. One possible use of the INHIBIT feature is touse an external device (such as a flow meter) to provide a contact closure if there is flow in aline. As long as the line has adequate flow, the heating will be off (INHIBITed from operating).See Appendix C on page 68 for typical connection diagrams when using this input.• EXTERNAL INPUT must be set to INHIBIT or FORCE ON before OVERRIDE SOURCE (for V3.11+)can be set to EXT. INPUT; or INHIBIT CONTROL (for V3.00) can be edited. For V3.11 and up,THERMAL MANAGEMENT SOLUTIONS EN-<strong>Digi<strong>Trace</strong></strong><strong>920</strong>series-IM-H56874 04/13 28 / 82
user for input and/or displaying messages and status.Setting: ENGLISH or FRANCAISProcedure: Select the language of choice—ENGLISH for English prompts and messages, orFRANCAIS for French prompts and messages.3.6.8 POINT B USEDPurpose: Allows the second control point (Point B) to be disabled when it is not being used. This isan easy method of disabling all ALARMS, etc. without having to set each parameter.Setting: YES or NOProcedure: Select NO to disable Point B, choose YES to use Point B.IMPORTANT:• Selecting NO has the following effect on Point B parameters:– All relevant ALARMS are masked– The control output is held off– No programming, configuration, or messages are available using the optional<strong>920</strong> Operator Console• Complete Point B access remains available using the optional communications interface.3.6.9 PASSCODESee section 3.10.1 on page 45.3.6.10 SCROLL DELAY SETTING (V3.11 AND UP)Purpose: For ease of viewing, allows the user to modify the speed at which information is scrolledon the optional Operator Console.Range: 0.07 to 0.25 secondsProcedure: Decreasing the scroll delay value will cause the information on the display to scrollfaster. Increasing the scroll delay value will cause the information on the display to scroll slower.3.7 Temperature AlarmsThis section defines the temperature-related alarming functions of the <strong>920</strong> controller. Theseparameters must be set up individually for both Point A and Point B.3.7.1 TEMPERATURE SENSOR 1 FAILURE ALARMPurpose: Enabling TS 1 FAILURE will provide indication of an open or shorted failure of TS 1.Alarm Mask: ENABLE or DISABLEProcedure: Enable or disable alarming of a failed first temperature sensor (TS 1) as required.IMPORTANT:• This failure alarm should be enabled if a temperature sensor is connected to the TS 1 input.• This alarm is always latched and must be reset by the user.3.7.2 LOW TEMPERATURE SENSOR 1 ALARMPurpose: If enabled, the LOW TS 1 ALARM allows for alarming of low temperature conditions assensed by the first temperature sensor (TS 1).Alarm Mask: ENABLE or DISABLERange: –76°F to 1058°F (–60°C to 570°C)Procedure: Adjust the LOW TS 1 ALARM temperature setpoint to the desired value. Note that theLOW TS 1 ALARM must be enabled in order to adjust the LOW TS 1 ALARM temperature setpoint.IMPORTANT:• This alarm should normally be enabled and the setpoint should be appropriate for the heatingapplication. Maintaining a minimum 5°C differential between low temperature alarming andthe CONTROL SETPOINT temperature will minimize nuisance alarming due to momen-tarydips in temperature. Another alternative to this is to configure the controller for non-latchingtemperature alarms.THERMAL MANAGEMENT SOLUTIONS EN-<strong>Digi<strong>Trace</strong></strong><strong>920</strong>series-IM-H56874 04/13 30 / 82
• This alarm must be enabled and its setpoint must be below the CONTROL SETPOINTtemperature if fail-safe mode uses the temperature from TS 1.3.7.3 HIGH TEMPERATURE SENSOR 1 ALARMPurpose: If enabled, the HIGH TS 1 ALARM allows for alarming of high temperature conditions assensed by the first temperature sensor (TS 1).Alarm Mask: ENABLE or DISABLERange: –76°F to 1058°F (–60°C to 570°CF)Procedure: Adjust the HIGH TS 1 ALARM temperature setpoint to the desired value. Note that theHIGH TS 1 ALARM must be enabled in order to adjust the HIGH TS 1 ALARM temperature setpointunless the TS 1 HIGH LIMIT CUTOUT feature is enabled.IMPORTANT: This alarm should only be used for applications involving a product that is sensitiveto over temperature. General use may result in nuisance alarms due to the outflow of hot productor steam. This may be a case where the alarm should be enabled and nonlatching temperaturealarming used. A high temperature condition resulting from a forced on failure of the heatingcircuit should first be alarmed by the SWITCH FAILURE ALARM. See section 3.8.18 on page 40 formore information.3.7.4 TEMPERATURE SENSOR 2 FAILURE ALARMPurpose: Enabling TS 2 FAILURE provides indication of an open or shorted failure of TS 2.Alarm Mask: ENABLE or DISABLEProcedure: Enable or disable alarming of a failed second temperature sensor (TS 2) as required.IMPORTANT:• If no second sensor is installed, disable this alarm. This failure alarm should be enabled if asecond temperature sensor is connected to the TS 2 input.• This alarm is always latched and must be reset by the user.3.7.5 LOW TEMPERATURE SENSOR 2 ALARMPurpose: If enabled, the LOW TS 2 ALARM allows for alarming of low temperature conditions assensed by the second temperature sensor (TS 2).Alarm Mask: ENABLE or DISABLERange: –76°F to 1058°F (–60°C to 570°C)Procedure: Adjust LOW TS 2 ALARM temperature setpoint to the desired value. Note that the LOWTS 2 ALARM must be enabled in order to adjust the LOW TS 2 ALARM temperature setpoint.IMPORTANT:• If no second sensor is installed, this alarm should be disabled. This alarm should be enabledand the setpoint should be appropriate for the heating application. Maintaining a minimum5°C differential between low temperature alarming and the CONTROL SETPOINT temperatureminimizes nuisance alarming due to momentary dips in temperature. Another alternative tothis is to configure the controller for non-latching temperature alarms.• This alarm must be enabled and its setpoint must be below the CONTROL SETPOINTtemperature if fail-safe mode uses the temperature from TS 2.3.7.6 HIGH TEMPERATURE SENSOR 2 ALARMPurpose: If enabled, the HIGH TS 2 ALARM allows for alarming of high temperature conditions assensed by the second temperature sensor (TS 2).Alarm Mask: ENABLE or DISABLERange: –76°F to 1058°F (–60°C to 570°C)Procedure: Adjust the HIGH TS 2 ALARM temperature setpoint to the desired value. Note that theHIGH TS 2 ALARM must be enabled in order to adjust the HIGH TS 2 ALARM temperature setpointunless the TS 2 HIGH LIMIT CUTOUT feature is enabled.IMPORTANT: If no second sensor is installed, disable this alarm. This alarm may be used forapplications where a product that is sensitive to over temperature is involved. General usage couldresult in nuisance alarms due to the flow of hot product or steam out. This may be a case wherethe alarm could be enabled and non-latching temperature alarming used. A high temperatureTHERMAL MANAGEMENT SOLUTIONS EN-<strong>Digi<strong>Trace</strong></strong><strong>920</strong>series-IM-H56874 04/1331 / 82
condition resulting from a forced on failure of the heating circuit should first be alarmed by theSWITCH FAILURE ALARM. See section 3.8.18 on page 40 for more information.3.7.7 LOW TEMPERATURE SENSOR ALARM FILTER TIME SETTING (V3.11 AND UP)Purpose: The LOW TS ALARM FILTER will prevent LOW TS 1 and/or LOW TS 2 ALARMS from beingindicated until their corresponding alarm condition has existed for the duration of the LOW TSALARM FILTER time.Range: 0 to 999 MinutesProcedure: Adjust the LOW TS ALARM FILTER time to the desired value. Note that either the LOWTS 1 ALARM and/or the LOW TS 2 ALARM must be enabled in order to adjust the LOW TS ALARMFILTER time.IMPORTANT:• If an alarm condition appears and then disappears before the alarm filter time has expired, thefilter timer is reset and the alarm condition must exist again for the entire alarm filter timebefore the corresponding alarm will be indicated.• If the user resets an alarm while the alarm condition is still exists, then the alarm will not beindicated again until the entire alarm filter time has expired.3.7.8 HIGH TEMPERATURE SENSOR ALARM FILTER TIME SETTING (V3.11 AND UP)Purpose: The HIGH TS ALARM FILTER will prevent HIGH TS 1 and/or HIGH TS 2 ALARMS frombeing indicated until their corresponding alarm condition has existed for the duration of the HIGHTS ALARM FILTER time.Range: 0 to 999 minutesProcedure: Adjust the HIGH TS ALARM FILTER time to the desired value. Note that either theHIGH TS 1 ALARM and/or the HIGH TS 2 ALARM must be enabled in order to adjust the HIGH TSALARM FILTER time.IMPORTANT:• If an alarm condition appears and then disappears before the alarm filter time has expired, thefilter timer is reset and the alarm condition must exist again for the entire alarm filter timebefore the corresponding alarm will be indicated.• If the user resets an alarm while the alarm condition is still exists, the alarm will not beindicated again until the entire alarm filter time has expired.• The HIGH TS ALARM FILTER time setting does not affect the cutout time when the HIGH LIMITCUTOUT feature is enabled.3.7.9 LATCH TEMPERATURE SENSOR ALARMS SETTINGPurpose: This allows for the selection of automatic clearing of all HIGH and LOW TS ALARMS(non-latching) when a temperature alarm condi-tion no longer exists or permanent alarming ofsuch a condition (latching) until the alarm is manually reset.Setting: YES (LATCHING) or NO (NONLATCHING)Procedure: Adjust the LATCH TS ALARMS setting to the desired mode (latching or nonlatching).IMPORTANT:• If your application is subject to periodic situations where cold or hot product is part of theprocess, it may be appropriate to configure the HTC for nonlatching temperature alarms toavoid nuisance alarms. If it is important to be aware of any temperature alarm conditions thatmay have existed in a pipe, the HTC should be configured for latching temperature alarms.• This setting does not affect the TS FAILURE ALARMS; these are always latching.3.7.10 CONTROL TEMPERATURE SENSOR FAILURE ALARMPurpose: CONTROL TS FAILURE ALARM indicates a failure of the temperature sensor designatedas the control sensor.One of eleven TS CONTROL MODES may be selected. These modes determine which TS INPUTand/or EXT. INPUT is designated to provide the control temperature. See section 3.5.12 on page 24for a full description of the temperature sensor control designations.Alarm Mask: ENABLE or DISABLETHERMAL MANAGEMENT SOLUTIONS EN-<strong>Digi<strong>Trace</strong></strong><strong>920</strong>series-IM-H56874 04/13 32 / 82
Procedure: Enable or disable the alarming of a failure of the designated control temperaturesensor as required.IMPORTANT: This alarm should always be enabled. If the controller experiences a CONTROLTS FAILURE it will turn the output off or on (as spec-ified by TS FAIL MODE) until this alarm iscleared. If the TS CONTROL MODE uses the EXTERNAL INPUT, a CONTROL TS FAILURE is selfclearing(i.e., is nonlatching).3.8 Other AlarmsThis Section defines the nontemperature-related alarming functions of the <strong>920</strong> controller: current,ground fault, voltage and resistance. These parameters must be set up individually for both PointA and Point B.3.8.1 LOW LOAD CURRENT ALARMPurpose: Alarms current levels that are lower than a preset limit for the application. Monitoringfor lower-than-expected current levels may be an effective means of continuity monitoring. Seealso HIGH RESISTANCE ALARM in section 3.8.14 on page 39.Alarm Mask: ENABLE or DISABLERange: 0.3 to 100.0 amps(CURRENT TURNS RATIO = 1.00)Procedure: Adjust the LOW CURRENT ALARM level to the desired value. Note that the LOWCURRENT ALARM must be enabled in order to adjust the LOW CURRENT ALARM level. Also notethat the LOW CURRENT ALARM level is affected by the CURRENT TURNS RATIO setting. Theabsolute maximum adjusted LOW CURRENT ALARM level is 300.0 amps. The absolute minimumadjusted LOW CURRENT ALARM level is 0.1 amps. See section 3.5.22 on page 26 for moreinformation regarding the CURRENT TURNS RATIO function.Notes (V3.00 only):• To minimize nuisance LOW CURRENT ALARMS, the HTC must detect a current level less thanthe LOW CURRENT ALARM setpoint for a period longer than approximately 20 consecutiveseconds.• For series-type heating cables, adjusting the LOW CURRENT ALARM to 50% of full load currentwill properly alarm a problem and reduce nuisance alarms due to voltage dips. Parallel heatersshould be adjusted to a level as close as possible to full load current but lower than the currentat worst-case voltage. The low current setting as a percentage of full load current will varydepending on the facility and its power system.• A LOW CURRENT ALARM may also result from a switch failed open. The controller cannotdetect a switch failure due to no current. A no current condition would be identified by a LOWCURRENT ALARM (if enabled) and the analog value reported with the alarm will be 0.0 A.• It may be advantageous to consider using the HIGH RESISTANCE ALARM to indicate a cablefault when using certain types of heaters. See sections 3.8.12 on page 38 and 3.8.14 on page 39for an explanation of the resistance alarming feature.3.8.2 LOW LOAD CURRENT ALARM FILTER TIME SETTING (V3.11 AND UP)Purpose: The LOW CURRENT ALARM FILTER will prevent LOW LOAD CURRENT ALARMS frombeing indicated until a low current condition has existed for the duration of the LOW CURRENTALARM FILTER time.Range: 0 to 12 secondsProcedure: Adjust the LOW CURRENT ALARM FILTER time to the desired value. Note that the LOWCURRENT ALARM must be enabled in order to adjust the LOW CURRENT ALARM FILTER time.IMPORTANT:• If an alarm condition appears and then disappears before the alarm filter time has expired, thefilter timer is reset and the alarm condition must exist again for the entire alarm filter timebefore the corresponding alarm will be indicated.THERMAL MANAGEMENT SOLUTIONS EN-<strong>Digi<strong>Trace</strong></strong><strong>920</strong>series-IM-H56874 04/1333 / 82
• If the user resets an alarm while the alarm condition is still exists, the alarm will not beindicated again until the entire alarm filter time has expired.3.8.3 HIGH LOAD CURRENT ALARMPurpose: Alarms current levels that are higher than a preset limit for the application.Alarm Mask: ENABLE or DISABLERange: 0.3 to 100.0 amps(CURRENT TURNS RATIO = 1.00)Procedure: Adjust the HIGH CURRENT ALARM level to the desired value. Note that the HIGHCURRENT ALARM must be enabled in order to adjust the HIGH CURRENT ALARM level. Also notethat the HIGH CURRENT ALARM level is affected by the CURRENT TURNS RATIO setting. Theabsolute maximum adjusted HIGH CURRENT ALARM level is 300.0 amps. The absolute minimumadjusted HIGH CURRENT ALARM level is 0.1 amps. See section 3.5.22 on page 26 for moreinformation regarding the CURRENT TURNS RATIO function.IMPORTANT: As the HTC automatically protects itself from overload, it would not normally benecessary to enable this alarm. This automatic protection can be used effectively to guard againstaccidental paralleling of heating circuits. In-rush or cold start currents typically associated withself- regulating cables may cause nuisance HIGH CURRENT ALARMS. If this is undesirable thealarm should be disabled.3.8.4 HIGH LOAD CURRENT ALARM FILTER TIME SETTING (V3.11 AND UP)Purpose: The HIGH CURRENT ALARM FILTER will prevent HIGH LOAD CURRENT ALARMS frombeing indicated until a high current condition has existed for the duration of the HIGH CURRENTALARM FILTER time.Range: 0 to 12 secondsProcedure: Adjust the HIGH CURRENT ALARM FILTER time to the desired value. Note that theHIGH CURRENT ALARM must be enabled in order to adjust the HIGH CURRENT ALARM FILTERtime.IMPORTANT:• If an alarm condition appears and then disappears before the alarm filter time has expired, thefilter timer is reset and the alarm condition must exist again for the entire alarm filter timebefore the corresponding alarm will be indicated.• If the user resets an alarm while the alarm condition is still exists, the alarm will not beindicated again until the entire alarm filter time has expired.3.8.5 HIGH GROUND-FAULT CURRENT ALARMPurpose: Alarms ground-fault current levels which are higher than a preset limit for theapplication.Alarm Mask: ENABLE or DISABLERange: 20 to 250 mAmpsProcedure: Adjust the HIGH GFI ALARM level to the desired value. Note that the HIGH GFI ALARMmust be enabled in order to adjust the HIGH GFI level.3.8.6 HIGH GROUND-FAULT CURRENT ALARM FILTER TIME SETTING (V3.11 AND UP)Purpose: The HIGH GFI ALARM FILTER will prevent HIGH GFI ALARMS from being indicated until ahigh GFI condition has existed for the duration of the HIGH GFI ALARM FILTER time.Range: 0 to 12 secondsProcedure: Adjust the HIGH GFI ALARM FILTER time to the desired value. Note that the HIGH GFIALARM must be enabled in order to adjust the HIGH GFI ALARM FILTER time.IMPORTANT:• If an alarm condition appears and then disappears before the alarm filter time has expired, thefilter timer is reset and the alarm condition must exist again for the entire alarm filter timebefore the corresponding alarm will be indicated.THERMAL MANAGEMENT SOLUTIONS EN-<strong>Digi<strong>Trace</strong></strong><strong>920</strong>series-IM-H56874 04/13 34 / 82
• If the user resets an alarm while the alarm condition is still exists, the alarm will not beindicated again until the entire alarm filter time has expired.3.8.7 GROUND-FAULT TRIP ALARMPurpose: This value sets the upper limit of allowable ground-fault leakage current. Exceeding thislimit will result in the output switch being latched off and the GFI TRIP ALARM activated to indicatea ground fault condition.Alarm Mask: ENABLE or DISABLERange: 20 to 250 mAmpsProcedure: If ground-fault tripping is desired, enable the GFI TRIP ALARM and adjust the GF TRIPCURRENT to the desired value. To disable ground-fault tripping, disable the alarm. Note that theGFI TRIP ALARM must be enabled in order to adjust the G.F. TRIP CURRENT level.Caution: In order to implement a ground-fault trip function, all nongrounded power conductorsmust be opened upon detec-tion of a ground-fault condition.IMPORTANT: National Electrical Codes require that all legs of non-neutral based power sourcesbe opened upon detection of a ground fault. Multipole switch configurations should be used onnon-neutral based power systems. Check the requirements with your local electrical au-thority.3.8.8 LOW VOLTAGE ALARMPurpose: Alarms voltage levels that are lower than a preset limit for the application.Alarm Mask: ENABLE or DISABLERange: 10 to 330 volts (VOLTAGE TURNS RATIO = 1.00)Procedure: Adjust the LOW VOLTAGE ALARM level to the desired value. The LOW VOLTAGE ALARMmust be enabled to adjust the LOW VOLTAGE ALARM level. Also, the LOW VOLTAGE ALARM levelis affected by the VOLTAGE TURNS RATIO setting. The absolute maximum adjusted LOW VOLTAGEALARM level is 1000 volts. The absolute minimum adjusted LOW VOLTAGE ALARM level is 1 volt.See section 3.5.21 on page 26 for more information regarding the VOLTAGE TURNS RATIO.IMPORTANT:• The LOW VOLTAGE ALARM is only available if VOLTAGE SOURCE is set to the Point being used.• The LOW VOLTAGE ALARM should always be enabled. Since the HTC may be powered fromeither of two switch interface modules (assum-ing a dual-point installation), the loss of power onone circuit will not necessarily be indicated at the alarm output or as a communications failure.3.8.9 LOW VOLTAGE ALARM FILTER TIME SETTING (V3.11 AND UP)Purpose: The LOW VOLTAGE ALARM FILTER will prevent LOW VOLTAGE ALARMS from being indicateduntil a low voltage condition has existed for the duration of the LOW VOLTAGE ALARM FILTER time.Range: 0 to 12 secondsProcedure: Adjust the LOW VOLTAGE ALARM FILTER time to the desired value. The LOW VOLTAGEALARM must be enabled to adjust the LOW VOLTAGE ALARM FILTER time. Also, the LOW VOLTAGEALARM FILTER is only available if VOLTAGE SOURCE is set to the Point being used.IMPORTANT:• If an alarm condition appears and then disappears before the alarm filter time has expired, thefilter timer is reset and the alarm condition must exist again for the entire alarm filter timebefore the corresponding alarm will be indicated.• If the user resets an alarm while the alarm condition is still exists, the alarm will not beindicated again until the entire alarm filter time has expired.3.8.10 HIGH VOLTAGE ALARMPurpose: Alarms voltage levels that are higher than a preset limit for the application. Serves as amonitor of the voltage used to power the trace circuit.Alarm Mask: ENABLE or DISABLERange: 10 to 330 volts (VOLTAGE TURNS RATIO = 1.00)Procedure: Adjust the HIGH VOLTAGE ALARM level to the desired value. The HIGH VOLTAGEALARM must be enabled in order to adjust the HIGH VOLTAGE ALARM level. Also, the HIGHVOLTAGE ALARM level is affected by the VOLTAGE TURNS RATIO setting. The absolute maximumTHERMAL MANAGEMENT SOLUTIONS EN-<strong>Digi<strong>Trace</strong></strong><strong>920</strong>series-IM-H56874 04/1335 / 82
adjusted HIGH VOLTAGE ALARM level is 1000 volts. The absolute minimum adjusted HIGHVOLTAGE ALARM level is 1 volt. See section 3.5.21 on page 26 for more information regarding theVOLTAGE TURNS RATIO function.IMPORTANT: The HIGH VOLTAGE ALARM is only available if VOLTAGE SOURCE is set to the Pointbeing used.3.8.11 HIGH VOLTAGE ALARM FILTER TIME SETTING (V3.11 AND UP)Purpose: The HIGH VOLTAGE ALARM FILTER will prevent HIGH VOLTAGE ALARMS from beingindicated until a high voltage condition has existed for the duration of the HIGH VOLTAGE ALARMFILTER time.Range: 0 to 12 secondsProcedure: Adjust the HIGH VOLTAGE ALARM FILTER time to the desired value. The HIGHVOLTAGE ALARM must be enabled to adjust the HIGH VOLTAGE ALARM FILTER time. Also, theHIGH VOLTAGE ALARM FILTER is only available if VOLTAGE SOURCE is set to the Point being used.IMPORTANT:• If an alarm condition appears and then disappears before the alarm filter time has expired, thefilter timer is reset and the alarm condition must exist again for the entire alarm filter timebefore the corresponding alarm will be indicated.• If the user resets an alarm while the alarm condition is still exists, the alarm will not beindicated again until the entire alarm filter time has expired.3.8.12 LOW RESISTANCE ALARMPurpose: Alarms heater resistance levels that have decreased from the NOMINAL RESISTANCEsetting by more than the selected amount.Alarm Mask: ENABLE or DISABLERange: 1 to 100% (deviation from NOMINAL RESISTANCE)Procedure: Adjust the LOW RESISTANCE ALARM deviation to the desired value. The LOWRESISTANCE ALARM must be enabled in order to adjust the LOW RESISTANCE deviation.IMPORTANT:• This feature is not normally enabled. It can be used effectively to guard against accidentalparalleling of heating circuits. Be careful when using this alarm feature with heating cablesthat exhibit a variable resistance with temperature. Low resistance alarming may not bepractical when the load has an increasing resistance with temperature (such as self-regulatingcables).• Use of the LOW RESISTANCE ALARM assumes that the controller power is derived fromthe same circuit as the tracing power (either by direct connection or through a step-downtransformer). Disable this alarm if the controller is powered from a separate circuit.• No LOW RESISTANCE ALARMS will be generated if the measured voltage is below the LOWVOLTAGE ALARM setpoint, regardless of whether the LOW VOLTAGE ALARM is enabled. Thisstops an alarm from being generated when the circuit power is turned off. If the LOW VOLTAGEALARM is disabled ensure that the LOW VOLTAGE setpoint is set to a relevant level otherwiseno LOW RESISTANCE ALARMS will occur.• LOW RESISTANCE ALARMS will only be generated if the output switch is on.3.8.13 LOW RESISTANCE ALARM FILTER TIME SETTING (V3.11 AND UP)Purpose: The LOW RESISTANCE ALARM FILTER will prevent LOW RESISTANCE ALARMSfrom being indicated until a low resistance condition has existed for the duration of the LOWRESISTANCE ALARM FILTER time.Range: 0 to 12 secondsProcedure: Adjust the LOW RESISTANCE ALARM FILTER time to the desired value. The LOWRESISTANCE ALARM must be enabled to adjust the LOW RESISTANCE ALARM FILTER time.IMPORTANT:• If an alarm condition appears and then disappears before the alarm filter time has expired, thefilter timer is reset and the alarm condition must exist again for the entire alarm filter timeTHERMAL MANAGEMENT SOLUTIONS EN-<strong>Digi<strong>Trace</strong></strong><strong>920</strong>series-IM-H56874 04/13 36 / 82
efore the corresponding alarm will be indicated.• If the user resets an alarm while the alarm condition is still exists, the alarm will not beindicated again until the entire alarm filter time has expired.3.8.14 HIGH RESISTANCE ALARMPurpose: Alarms heater resistance levels that have increased from the NOMINAL RESISTANCEsetting by more than the selected amount. The HIGH RESISTANCE ALARM may be used to indicatean open or a high resistance connection or, when using constant-wattage parallel cables, mayindicate the failure of one or more heating zones. It may also be used to monitor a failed seriestypecable or connection in 3-phase applications while minimizing nuisance alarms created byvoltage fluctuations.Alarm Mask: ENABLE or DISABLERange: 1 to 250% (deviation from NOMINAL RESISTANCE)Procedure: Adjust the HIGH RESISTANCE ALARM level to the desired value. The HIGHRESISTANCE ALARM must be enabled to adjust the HIGH RESISTANCE deviation.IMPORTANT:• Using the LOW CURRENT ALARM feature to ensure that unexpected decreases in currentconsumption by the heating cable are alarmed is a reliable method of monitoring the integrityof series-type heating cables. When using parallel-type heaters (zoned constant-wattage orself-regulating) or in 3-phase installations, the LOW CURRENT ALARM setting must be chosenas close as possible to the lowest expected current to detect failed zones, cable degradation,or a lost phase. The problem with such a close setting is that it inevitably leads to nui-sancealarms, particularly when voltage fluctuations are present. By using the HIGH RESISTANCEALARM, nuisance alarms due to voltage dips may be minimized.• Use of the HIGH RESISTANCE ALARM assumes that the controller power is derived fromthe same circuit as the tracing power (either by direct connection or through a step-downtransformer). Disable this alarm if the controller is powered from a separate circuit.• Be careful when using this alarm feature with heating cables that exhibit a variable resistancewith temperature. High resistance alarming may not be as effective if the load has a decreasingresistance with temperature.• No HIGH RESISTANCE ALARMS will be generated if the measured voltage is below the LOWVOLTAGE ALARM setpoint, regardless of whether the LOW VOLTAGE ALARM is enabled. Thisstops an alarm from being generated when the circuit power is turned off. If the LOW VOLTAGEALARM is disabled ensure that the LOW VOLTAGE setpoint is set to a relevant level, otherwiseno HIGH RESISTANCE ALARMS will occur.• HIGH RESISTANCE ALARMS will only be generated if the output switch is on.3.8.15 HIGH RESISTANCE ALARM FILTER TIME SETTING (V3.11 AND UP)Purpose: The HIGH RESISTANCE ALARM FILTER will prevent HIGH RESISTANCE ALARMSfrom being indicated until a high resistance condition has existed for the duration of the HIGHRESISTANCE ALARM FILTER time.Range: 0 to 12 secondsProcedure: Adjust the HIGH RESISTANCE ALARM FILTER time to the desired value. The HIGHRESISTANCE ALARM must be enabled to adjust the HIGH RESISTANCE ALARM FILTER time.IMPORTANT:• If an alarm condition appears and then disappears before the alarm filter time has expired, thefilter timer is reset and the alarm condition must exist again for the entire alarm filter timeTHERMAL MANAGEMENT SOLUTIONS EN-<strong>Digi<strong>Trace</strong></strong><strong>920</strong>series-IM-H56874 04/1337 / 82
efore the corresponding alarm will be indicated.• If the user resets an alarm while the alarm condition is still exists, the alarm will not beindicated again until the entire alarm filter time has expired.3.8.16 NOMINAL RESISTANCE SETTINGPurpose: This parameter defines the nominal expected heater resistance. A value must beentered by the user to allow the HIGH and LOW RESISTANCE ALARMS to be used. In installationswhere the power source may experience periodic fluctuations (surges and/or brown-out conditions),alarming on resistance deviation offers an improved method of monitoring tracer integrityover simple LOW and HIGH CURRENT ALARMS. Since the ratio of voltage to current is monitored,the HIGH and LOW RESISTANCE ALARMS offer cable monitoring that is relatively immune tovoltage fluctuations.Range: 2.00 to 2000.00 ΩProcedure: The NOMINAL RESISTANCE value can only be set if either the LOW RESISTANCE and/or the HIGH RESISTANCE ALARMS are enabled. Once the controller and the heating cable havebeen installed, the following procedure should be used to determine the NOMINAL RESISTANCEsetting:• Adjust the CONTROL SETPOINT temperature to turn on the output switch.• Allow the load to come up to design temperature and its power consumption to stabilize.• Using the <strong>920</strong> Operator Console, access the RESISTANCE reading and record its value. Returnthe CONTROL SETPOINT temperature to its proper setting.• Enter the recorded resistance value as the NOMINAL RESISTANCE setting.IMPORTANT: The setup procedure outlined above may have to be repeated a number of timesto arrive at a correct nominal resistance setting. This value will be affected by the heating cabletemperature, which in turn is affected by ambient temperature, insulation level, a full or emptypipe or vessel, etc.3.8.17 OVERCURRENT TRIP ALARM (SSR ONLY)Purpose: The overcurrent trip feature is always enabled when using an SSR output switch and isused to provide protection for the output switch. Enabling this alarm will only inform the user of anexcessively high current condition and that the output switch has been latched off. During a highcurrent condition, the controller attempts to soft start a heating cable by a technique involvingmeasured in-rush current and the SWITCH CURRENT RATING. If the controller is unable to startthe cable, it will eventually trip its output switch off and will not retry or pulse its output switchagain. At this point the OVERCURRENT TRIP ALARM is latched on.IMPORTANT:• The controller is not a safety cutout or an overcurrent protective device as defined by theNational and Canadian Electrical Codes (NEC and CEC). A protective device such as a circuitbreaker or fuse must be included as part of a proper design and be selected in accordance withthe requirements defined in the National Electrical Code (NEC) and/or the Canadian ElectricalCode (CEC).• The controller cannot protect the SSR from short circuits or excessive overcurrent conditions.Always ensure that the power is off prior to performing any maintenance or troubleshooting ofthe heating circuit. Verify that no damage has occurred to the cable or the controller prior tore-energizing the circuit.Alarm Mask: ENABLE or DISABLEProcedure: Adjust the SWITCH CURRENT RATING setting to the actual current rating of the SSR.Enable or disable the alarm as required. Note that the OVERCURRENT TRIP ALARM does not haveto be enabled in order to adjust the SWITCH CURRENT RATING setting.IMPORTANT: This alarm should be left enabled since an overcurrent trip condition wouldnormally represent a serious problem. This is a fac-tory-set alarm value and disabling the alarmdoes not disable the overcurrent trip function. In some applications the use of self-regulatingcables will produce very high in-rush currents during cold startup. These currents may exceedTHERMAL MANAGEMENT SOLUTIONS EN-<strong>Digi<strong>Trace</strong></strong><strong>920</strong>series-IM-H56874 04/13 38 / 82
the overcurrent trip limit and the controller will not be able to soft start the trace circuit. If thiscondition persists, please contact your nearest sales office for recommendations and solutions tothis problem.3.8.18 SWITCH FAILURE ALARMPurpose: The purpose of the SWITCH FAILURE ALARM is to indicate that an output switch failurehas occurred. The controller determines that if the output switch is turned off and there is loadcurrent present, then the output switch has failed closed and the alarm is latched on.Alarm Mask: ENABLE or DISABLEProcedure: Enable or disable the alarming of an output switch that has failed in the closedposition.IMPORTANT: The SWITCH FAILURE ALARM should always be enabled. A high temperaturecondition as a result of a failed circuit can only be caused if the output switch fails closed. When anoutput switch fails closed, the controller cannot turn the tracer power off, therefore no protectionfeatures are available (ground-fault trip, power limiting, etc.). If a SWITCH FAILURE ALARM isdetected, the unit should be serviced immediately.3.8.19 HTC RESET ALARMPurpose: The HTC RESET ALARM is used to indicate:1. Power to the HTC has been interrupted and subsequently restored.2. A transient has caused the HTC’s microprocessor to restart.3. An internal condition has caused the HTC’s microprocessor to restart its program.Alarm Mask: ENABLE or DISABLEProcedure: Enable or disable alarming on reset as desired.IMPORTANT: Normally the HTC RESET ALARM is left disabled since powering the controller offand on for maintenance or troubleshooting would require the user to reset this alarm every time.If the particular installation includes a Model 780/GCC-9000, this alarm may be left enabledsince resets are not considered normal occurrences and the Model 780/GCC-9000 provides thecapability to easily log and reset alarms such as these. The difference in time between when aCOMMUNICATIONS FAIL ALARM and an HTC RESET ALARM are logged provide an indication ofhow long the circuit has been “OFF.”3.8.20 CIRCUIT BREAKER LIMITING STATUS (SSR ONLY)Purpose: The circuit breaker limiting feature is always enabled when using an SSR output switchand is intended to prevent the circuit breaker immediately upstream of the controller from trippingduring a temporary overcurrent condition. Enabling this alarm will only inform the user that circuitbreaker limiting is currently active.Alarm Mask: ENABLE or DISABLEProcedure: Adjust the CIRCUIT BREAKER CURRENT RATING setting to the heating circuit breakersize (i.e. 15.0 or 20.0 amps). Enable or disable the alarm as required. The CIRCUIT BREAKERLIMITING ALARM need not be enabled in order to adjust the CIRCUIT BREAKER CURRENT RATINGsetting.IMPORTANT:• This is a non-latching alarm.• This alarm is advisory. If the measured current exceeds the level that would cause theupstream circuit breaker to release, the HTC will begin to switch the SSR ON and OFF rapidly tolimit the average current to an acceptable level.3.8.21 POWER-LIMITING STATUS (SSR ONLY)Purpose: The power-limiting feature is always enabled when using an SSR output switch and isintended to limit the average amount of power that is applied to the trace circuit. The controllermeasures the voltage and current of the trace circuit and will vary its output switch to limit theamount of power applied to the trace to the value set by the MAXIMUM POWER setting. Enablingthis alarm will only inform the user that power limiting is currently active.Alarm Mask: ENABLE or DISABLETHERMAL MANAGEMENT SOLUTIONS EN-<strong>Digi<strong>Trace</strong></strong><strong>920</strong>series-IM-H56874 04/1339 / 82
Procedure: Adjust the MAXIMUM POWER setting to the desired value. Enable or disable the alarmas required. The POWER LIMITING ALARM need not be enabled to adjust the MAXIMUM POWERsetting.IMPORTANT:• This is a non-latching alarm.• This alarm is advisory and is normally disabled. It will be active if the MAXIMUM POWER settingis set below the power output level required for temperature maintenance. In other words, ifthe circuit demands the maximum power allowed and the alarm is enabled, then this alarm willbe indicated and the output switch will pulse ON and OFF to limit the average power output to avalue approximately equal to the MAXIMUM POWER setting3.8.22 SWITCH LIMITING STATUS (SSR ONLY)Purpose: The switch limiting feature is always enabled when using an SSR output switch andprovides protection for the output switch. Enabling this alarm will only inform the user that switchlimiting is currently active and an excessively high current condition is present. The controllerpulses its output switch for a small number of cycles and reads the resulting current. If themeasured current exceeds the SWITCH RATING setting, the duty cycle of its output switch will bevaried so that an average current not exceeding the SWITCH RATING setting is maintained.Alarm Mask: ENABLE or DISABLEProcedure: Adjust the SWITCH CURRENT RATING setting to the actual current rating of the SSR.Enable or disable the alarm as required. The SWITCH LIMITING ALARM need not be enabled toadjust the SWITCH CURRENT rating setting.IMPORTANT:• This is a non-latching alarm.• This alarm is normally enabled. Currents in this range cannot be considered normal and shouldbe investigated.3.8.23 CONTACTOR COUNT ALARM (V3.11 AND UP)Purpose: Generates an alarm if the number of off-to-on transitions of a contactor reaches orexceeds the CONTACTOR COUNT ALARM setting. This serves as a method to perform preventativemaintenance on the contactor before a failure is likely to occur.Alarm Mask: ENABLE or DISABLERange: 0 to 999999 off-to-on transitionsProcedure: Adjust the CONTACTOR ALARM setting to the desired value. The CONTACTOR ALARMmust be enabled to adjust the CONTACTOR ALARM setting.IMPORTANT: The CONTACTOR ALARM is only available if the SWITCH CONTROL MODE is set toeither DEADBAND or PROPORTIONAL AMBIENT CONTACTOR.3.8.24 EEROM DATA FAILURE ALARMPurpose: The EEROM DATA FAILURE ALARM indicates that the controller has detected a failure inits nonvolatile memory.Alarm Mask: ENABLE or DISABLEProcedure: Enable or disable alarming of a nonvolatile memory failure as desired.IMPORTANT: The EEROM DATA FAILURE ALARM should always be enabled. This memorystores all of the controller’s configuration and calibra-tion settings and the alarm will only begenerated if the microprocessor cannot bypass the failed area of its memory. This indicates aninternal problem, and the control module should be replaced and returned to <strong>Pentair</strong> <strong>Thermal</strong>Managament for repair.3.9 Communications SetupThe following section describes the setup parameters that relate to the way the controllercommunicates with another device. If the optional communications interface is not installed inTHERMAL MANAGEMENT SOLUTIONS EN-<strong>Digi<strong>Trace</strong></strong><strong>920</strong>series-IM-H56874 04/13 40 / 82
the <strong>920</strong> control module, these parameters need not be configured. All these parameters arecommon for both of the two control points—Point A and Point B, except the HTCBUS ADDRESS,MODBUS ADDRESS, and MODBUS SUB ADDRESS settings, as applicable.3.9.1 PROTOCOLPurpose: Defines the communications language used by the controller to communicate with otherdevices.Setting: HTCBUS or MODBUS ASCII (V3.11+) or MODBUS RTU (V3.11+)Procedure: Select the HTCBUS protocol when communicating with existing <strong>Pentair</strong><strong>Thermal</strong> Managament <strong>Heat</strong> <strong>Trace</strong> Control products, including the Model 780/GCC-9000 GroupCommunications <strong>Controller</strong>.If you are communicating directly with the controller using a different device, select the MODBUSprotocol. For a detailed description of the controller’s MODBUS mapping, please refer to theseparate <strong>Digi<strong>Trace</strong></strong> <strong>920</strong> <strong>Series</strong> <strong>Heat</strong> <strong>Trace</strong> <strong>Controller</strong>—Modbus Protocol Interface Mappingdocument (<strong>Pentair</strong> <strong>Thermal</strong> Managament reference H57366 ).3.9.2 HTCBUS ADDRESSPurpose: Defines the communications address to be used by the controller when usingthe HTCBUS protocol to communicate with a Model 780/GCC-9000. When in the Point Aconfiguration menu, this sets the Point A HTCBUS ADDRESS; when in the Point B configurationmenu, this sets the Point B HTCBUS ADDRESS. Either may be set independently of the other.Range: 1 to 16,777,215Procedure: Set the communications address as desired. This must be an address unique to theentire communications network to avoid messaging conflicts. The HTCBUS protocol must beselected in order to set the HTCBUS ADDRESS.IMPORTANT: A unique HTCBUS communications address is always assigned by <strong>Pentair</strong> <strong>Thermal</strong>Managament and identified by the label on the front of the <strong>920</strong> control module (see Figure 3.1).Use the preassigned address whenever possible to minimize the chances of an address beingduplicated in the user’s system.3.9.3 MODBUS ADDRESS (V3.11 AND UP)Purpose: The MODBUS ADDRESS, along with the MODBUS SUB ADDRESS, defines thecommunications address to be used by the controller when using either MODBUS protocol tocommunicate with a MODBUS compatible device. When in the Point A configuration menu, thissets the Point A MODBUS ADDRESS; when in the Point B configuration menu, this sets the PointB MODBUS ADDRESS. Either may be set independently of the other.Range: 1 to 247Procedure: Set the communications address as desired. Together with the MODBUS SUBADDRESS, this combination must be unique to the entire communications network to avoidmessaging conflicts. Either MODBUS protocol must be selected in order to set the MODBUSAD-DRESS.3.9.4 MODBUS SUB ADDRESS (V3.11 AND UP)Purpose: The MODBUS SUB ADDRESS, along with the MODBUS ADDRESS, defines thecommunications address to be used by the controller when using either MODBUS protocol tocommunicate with a MODBUS compatible device. When in the Point A configuration menu, thissets the Point A MODBUS SUB ADDRESS; when in the Point B configuration menu, this sets thePoint B MODBUS SUB ADDRESS. Either may be set independently of the other.Range: 0 to 31Procedure: Set the communications sub address as desired. Together with the MODBUSADDRESS, this combination must be unique to the entire communications network to avoidmessaging conflicts. Either MODBUS protocol must be selected in order to set the MODBUSSUB ADDRESS.IMPORTANT: Since a <strong>920</strong> HTC does not use all 65,535 data addresses available for eachMODBUS ADDRESS, this data address range is subdi-vided to allow up to 32 HTCs to share theTHERMAL MANAGEMENT SOLUTIONS EN-<strong>Digi<strong>Trace</strong></strong><strong>920</strong>series-IM-H56874 04/1341 / 82
same MODBUS ADDRESS. This increases the number of HTCs allowed on a single MODBUSport from 247 to 7,904 (=247 x 32). This requires that any HTC sharing the same MODBUSADDRESS as another HTC must have its own unique MODBUS SUB ADDRESS.3.9.5 BAUD RATEPurpose: Defines the data rate at which communications occur.Setting: AUTO or 9600 or 4800 or 2400 or 1200 or 600 or 300Procedure: Select the data rate to be compatible with other devices that will be connected to thecontroller for communications purposes.IMPORTANT: Not all communications interfaces support the various data rates, so the data rateshould be set to AUTO. The controller will au-tomatically select a BAUD RATE that is compatiblewith the communications interface installed. If BAUD RATE = AUTO and a MODEM communi-cationinterface is used, a data rate of 300 is selected. Otherwise, if BAUD RATE = AUTO and a non-MODEM communications interface is used, a data rate of 9600 is used.3.9.6 PARITY (MODBUS) (V3.11 AND UP)Purpose: Defines the type of parity bit used with MODBUS communications.Setting: NONE or ODD or EVENProcedure: Select the desired type of parity. Note that PARITY can only be selected when usingeither MODBUS protocol.3.9.7 HARDWAREPurpose: Identifies the type of communications interface installed in the <strong>920</strong> control module.The controller automatically determines and displays which communications interface type isavailable.Values: NONE, MODEM or RS-232 or RS-4853.9.8 DRIVERPurpose: Defines the way the controller’s program communicates with the communicationsinterface.Setting: AUTO or RS-232 or RS-485 or MODEMProcedure: Select AUTO to enable the controller to choose the setting that matches thecommunications interface installed.3.9.9 PROFILEPurpose: Defines the way the controller’s program supports communications handshaking andcommunication interface signals.Setting: AUTO orFLOW CONTROL RS-232 orSTANDARD RS-232 or3-WIRE RS-232 orRS-485 orEXTERNAL MODEM or1200 BAUD MODEM or300 BAUD MODEMProcedure: Select the PROFILE to be compatible with other devices connected to the controller forcommunications purposes. The setting should be AUTO. The controller will automatically select aprofile based on the type of communications interface installed in the <strong>920</strong> control module.IMPORTANT:• AUTO: Selects a communications profile based on the data rate and the type of communicationsinterface installed in the control module.• FLOW CONTROL RS-232: Continuously asserts RTS (Request To Send), CTS (Clear To Send) isrequired to enable any data transmitted, uses DCD (Data Carrier Detect) to qualify receive data.• STANDARD RS-232: Continuously asserts RTS, CTS is required to initiate a transmit sequence,THERMAL MANAGEMENT SOLUTIONS EN-<strong>Digi<strong>Trace</strong></strong><strong>920</strong>series-IM-H56874 04/13 42 / 82
3.10 Operator Console Functionsbut is ignored once transmitting has begun, uses DCD to qualify receive data. This is the profileused when PROFILE = AUTO and an RS-232 communication interface is used with <strong>920</strong> V3.00.• 3-WIRE RS-232: Continuously asserts RTS, CTS and DCD are ignored. This is the profile usedwhen PROFILE = AUTO and an RS-232 commu-nication interface is used with <strong>920</strong> V3.11+.• RS-485: Uses RTS and the Tx Delay timer, CTS and DCD are ignored. This is the profile usedwhen PROFILE = AUTO and an RS-485 commu-nication interface is used.• EXTERNAL MODEM: Uses RTS and the Tx Delay timer, ignores CTS, uses DCD to qualify eachreceive data character and to sense an idle channel condition.• 1200 BAUD MODEM: Uses RTS with a fixed 10 msec Tx Delay time, ignores CTS, uses DCD toqualify each receive data character. This is the profile used when PROFILE = AUTO,BAUD RATE = 1200 and a MODEM communication interface is used.• 300 BAUD MODEM: Uses RTS with a fixed 30 msec Tx Delay time, ignores CTS, uses DCD toqualify each receive data character. This is the profile used when PROFILE = AUTO,BAUD RATE ¦ 1200 and a MODEM communication interface is used.3.9.10 TX DELAYPurpose: Allows a programmable delay between the receipt of a communications message andthe controller’s reply. In some applications, it may be necessary to delay the controller’s responseto an inquiry for a short period of time to allow external devices to start up, stabilize, and/orsynchronize.Range: 0.00 to 2.50 secondsProcedure: Set the amount of delay between the receipt of a message and the controller’sresponse as required.IMPORTANT: This selectable TX DELAY is only used if the PROFILE is set to either RS-485 or AUTOand an RS-485 interface is installed.The following features are part of the controller’s programming, but are only used in conjunctionwith the optional <strong>920</strong> Operator Console. For a detailed description of each of the console featuresand operating instructions, refer to the separate document <strong>Digi<strong>Trace</strong></strong> <strong>920</strong> <strong>Series</strong> HTC OperatorConsole—Installation and Operating Instructions (<strong>Pentair</strong> <strong>Thermal</strong> Managament referenceH56903) for the particular version of controller firmware that you are using.3.10.1 PASSCODEPurpose: The four-digit PASSCODE feature prevents unauthorized users from modifying thecontroller’s configuration parameters via a <strong>920</strong> Operator Console.Range: 0000 to 9999Procedure: Enter the desired PASSCODE (in the “Common Setup” sub-menu) using the optional<strong>920</strong> Operator Console keypad. A PASSCODE of 0000 disables the lockout feature and allows allconfiguration parameters to be modified using the <strong>920</strong> Operator Console without requiring aPASSCODE. Setting the PASSCODE to any other value will require the database to be unlocked,by entering the correct PASSCODE, prior to modifying any of the controller’s configurationparameters using the optional <strong>920</strong> Operator Console.IMPORTANT: The PASSCODE can only be edited if it is set to 0 or the database has been unlockedby entering the proper PASSCODE.3.10.2 LOCK DATABASEPurpose: If the PASSCODE has been enabled (PASSCODE is not set to 0) and the user hasunlocked console modification access to the control-ler’s configuration parameters, the LOCKDATABASE feature allows the user to re-lock this modification access once programming has beencompleted.Procedure: Select the LOCK DATABASE function (at the end of the “Configuration Mode MainMenu”) to lock out <strong>920</strong> Operator Console config-uration modification access. The display willTHERMAL MANAGEMENT SOLUTIONS EN-<strong>Digi<strong>Trace</strong></strong><strong>920</strong>series-IM-H56874 04/1343 / 82
confirm the operation by displaying a “DATABASE LOCKED” message.IMPORTANT: <strong>920</strong> Operator Console configuration modification access will automatically re-lockafter approximately 5 minutes of keypad inactivity.3.10.3 UNLOCK DATABASEPurpose: If a PASSCODE has been enabled (PASSCODE is not set to 0) and the user wants tomodify any of the controller’s configuration pa-rameters using a <strong>920</strong> Operator Console, thedatabase must first be unlocked.Procedure: Try modifying any configuration parameter, or select the UNLOCK DATABASE function(at the end of the “Configuration Mode Main Menu” for V3.11 and up), and a prompt for thePASSCODE will appear. If the correct PASSCODE is entered, the display will confirm the opera-tionby displaying a DATABASE UNLOCKED message.3.10.4 TEST TRACINGPurpose: The TEST TRACING feature provides an easy method of temporarily overriding thetemperature control, without having to modify the CONTROL SETPOINT temperature or any otherconfiguration parameter.Procedure: Select the TEST TRACING function to force the output switch on for approximately 30seconds. After the test time has expired, the unit will automatically revert to normal operation.IMPORTANT:• This feature only overrides temperature control; it does not override other control parameterssuch as power limiting.• This feature is inhibited if the point is in load-shedding mode.3.10.5 DISPLAY TEST (V3.11 AND UP)3.11 Copy Configuration Functions (V3.11 and up)Purpose: The DISPLAY TEST feature provides an easy method of illuminating each displaysegment and all the LEDs of the <strong>920</strong> Operator Con-sole to ensure that they are functioningproperly.Procedure: Select the DISPLAY TEST and watch the <strong>920</strong> console to verify that each displaysegment and each LED is illuminated during the test sequence.IMPORTANT: Pressing any key on the <strong>920</strong> Operator Console keypad during the DISPLAY TESTcauses the DISPLAY TEST to abort.The following functions provide a quick method of setting all of the controller’s configurationparameters to a predefined state.3.11.1 COPY DEFAULTS TO COMMON (V3.11 AND UP)Purpose: Loads <strong>Pentair</strong> <strong>Thermal</strong> Managament’ default configuration parameters that are commonto both Point A and Point B as defined in Appendix G.Procedure: Enter the “Copy Configuration Sub-Menu” and select DEFAULTS TO COMMON.IMPORTANT:• This function overwrites the communication configuration parameters, which could affectexisting communications to the controller.• This function causes the OVERRIDE SOURCE for each point to be set to REMOTE. This isbecause the EXTERNAL INPUT setting is set to NOT USED.3.11.2 COPY DEFAULTS TO POINT A (V3.11 AND UP)Purpose: Loads the point-specific <strong>Pentair</strong> <strong>Thermal</strong> Managament default configurationparameters, as defined in Appendix G, for Point A. As well, all of Point A’s maintenance data areTHERMAL MANAGEMENT SOLUTIONS EN-<strong>Digi<strong>Trace</strong></strong><strong>920</strong>series-IM-H56874 04/13 44 / 82
eset. All load-shedding parameters (including fail-safe) are configured with default values. TheCONSOLE SETPOINT MAXIMUM and MINIMUM are also configured with default values.Procedure: Enter the “Copy Configuration Sub-Menu” and select DEFAULTS TO A.3.11.3 COPY DEFAULTS TO POINT B (V3.11 AND UP)Purpose: Loads the point-specific <strong>Pentair</strong> <strong>Thermal</strong> Managament default configurationparameters, as defined in Appendix G, for Point B. As well, all of Point B’s maintenance data arereset. All load-shedding parameters (including fail safe) are configured with default values. TheCONSOLE SETPOINT MAXIMUM and MINIMUM are also configured with default values.Procedure: Enter the “Copy Configuration Sub-Menu” and select DEFAULTS TO B.3.11.4 COPY POINT A TO POINT B (V3.11 AND UP)Purpose: Copies the point-specific configuration parameters of Point A to Point B. Point A’sconfiguration parameters are not changed.Procedure: Enter the “Copy Configuration Sub-Menu” and select A TO B.IMPORTANT:• To ensure that the TAGs for both points are not the same, Point A’s TAG is copied, the lastcharacter incremented by one, and then written to Point B’s TAG.• None of the communications addresses or the maintenance data values are copied.3.11.5 COPY POINT B TO POINT A (V3.11 AND UP)Purpose: Copies the point-specific configuration parameters of Point B to Point A. Point B’sconfiguration parameters are not changed.Procedure: Enter the “Copy Configuration Sub-Menu” and select B TO A.IMPORTANT:• To ensure that the TAGs for both points are not the same, Point B’s TAG is copied, the lastcharacter incremented by one, and then written to Point A’s TAG.• None of the communications addresses or the maintenance data values are copied.THERMAL MANAGEMENT SOLUTIONS EN-<strong>Digi<strong>Trace</strong></strong><strong>920</strong>series-IM-H56874 04/1345 / 82
Section 4 – Monitored Parameters4.1 Introduction4.2 Analog ReadingsThe following is a brief summary of each of the measured and calculated parameters the <strong>920</strong>series control module provides to the user. Detailed information regarding settings, alarms limits,etc. may be found in Section 3 on page 18. For detailed information regarding the display of thesevariables using the <strong>920</strong> Operator Console, Model 780/GCC-9000, <strong>Digi<strong>Trace</strong></strong> Supervisor or otherinterface, refer to the ap-propriate user manuals.4.2.1 CONTROL TEMPERATUREPurpose: This is the temperature the controller uses to determine whether its output switchshould be on or off. Depending on the TS CONTROL MODE setting, whether one or two RTDs areinstalled, and TEMPBUS is being used, the CONTROL TEMPERATURE may be derived from TS1, TS 2, TEMPBUS or a combination of the three temperatures. See section 3.5.12 on page 24 ofthis manual for further details regarding the TS CONTROL MODE settings.4.2.2 TS 1 TEMPERATUREPurpose: This temperature is the value the controller reads from the RTD connected to itsTS 1 input. Depending on the TS CONTROL MODE, it may be used to determine the CONTROLTEMPERATURE (see section 4.2.1 on page 47).IMPORTANT: (V3.11 and up): If the TS 1 input is not being used by the controller, the TS 1TEMPERATURE is not displayed.IMPORTANT: Changing the TS Type will affect the temperature reading.4.2.3 TS 2 TEMPERATUREPurpose: This temperature is the value that the controller is reading from the RTD connected toits TS 2 input. Depending on the TS CONTROL MODE, it may be used to determine the CONTROLTEMPERATURE (see section 4.2.1 on page 47).IMPORTANT: (V3.11 and up): If the TS 2 input is not being used by the controller, the TS 2TEMPERATURE is not displayed.IMPORTANT: Changing the TS Type will affect the temperature reading.4.2.4 LOAD CURRENTPurpose: The LOAD CURRENT reading indicates the average current being drawn by the heatingcable.IMPORTANT: The controller calculates the LOAD CURRENT using the current sensed by the switchinterface module multiplied by the CURRENT TURNS RATIO to yield an adjusted current value.4.2.5 RESISTANCEPurpose: Resistance is calculated using the average adjusted voltage reading divided by theaverage adjusted current reading to yield a load resistance in ohms. If the controller’s outputswitch is on but no current is present, the RESISTANCE will read “open circuit.”IMPORTANT: If the controller’s output switch is off, the RESISTANCE will display the lastresistance which was calculated while the output switch was on.4.2.6 GROUND FAULT CURRENTPurpose: If the controller detects any leakage current in the output circuit, it will indicate the levelin milliamps.IMPORTANT: To minimize nuisance alarms, the controller will not report a leakage current of lessthan 20 mAmps.4.2.7 VOLTAGEPurpose: The voltage reading indicates the average circuit voltage being measured by the switchTHERMAL MANAGEMENT SOLUTIONS EN-<strong>Digi<strong>Trace</strong></strong><strong>920</strong>series-IM-H56874 04/13 46 / 82
interface.IMPORTANT: The controller calculates this parameter using the voltage sensed by the switchinterface module and multiplying it by the VOLTAGE TURNS RATIO to yield an adjusted voltagevalue.4.2.8 POWERPurpose: Load power provides an indication of the average power being consumed by theheat trace cable or the total 3-phase power being consumed by a balanced 3-phase star (“Y”)connected load.IMPORTANT:• The controller calculates load power by multiplying the average adjusted voltage reading by theaverage adjusted current reading.• The controller may be set up to calculate total 3-phase power for a balanced star (“Y”)connected load if the 3-PHASE POWER CALCULATION parameter is enabled. In this case, total3-phase power is calculated using the following equation:Ptotal = √3 x I phase x V line-lineWhere I phase = the adjusted phase current being measured, and V line-line = the adjustedvoltage reading being measured. The VOLTAGE and CURRENT TURNS RATIOS affect bothcalculations.4.3 Maintenance Data4.3.1 MAX / MIN TEMPERATURE VALUESMAX CONTROL TEMPMIN CONTROL TEMPTS 1 MAX TEMPTS 1 MIN TEMPTS 2 MAX TEMPTS 2 MIN TEMPPurpose: This feature indicates the maximum and minimum temperatures ever recorded by theHTC since the last time the values were reset. It may be useful to log the maximum/minimumtemperatures ever experienced on a particular trace circuit for the purposes of troubleshootingor gathering data for future design criteria. The temperature values are written to the controller’snonvolatile memory once every 24 hours or whenever any maintenance data is reset by the user.maximum/minimum temperatures are recorded for TS 1, TS 2 and the CONTROL TS.Range: Can only be reset (cleared) by the operator.Procedure: The maximum/minimum temperatures can be reset using the optional <strong>920</strong> OperatorConsole (V3.11+) or a communicating device. Resetting any one of the temperatures will reset allof them.4.3.2 POWER ACCUMULATORPurpose: This feature indicates the total power consumption of the trace circuit since the last timethe POWER ACCUMULATOR was reset. It may be useful to log the amount of power consumed on aparticular trace circuit for the purposes of energy management or gathering data for future designcriteria. The value of this accumulator is written to the controller’s nonvolatile memory once every24 hours or whenever any maintenance data is reset by the user.Procedure: The POWER ACCUMULATOR may be reset to zero using the optional <strong>920</strong> OperatorConsole (V3.11+) or a communicating device.IMPORTANT: The POWER ACCUMULATOR value will roll over to zero when the upper limit of thePOWER ACCUMULATOR has been exceeded. This upper limit is 429,496,729.5 kW-hours for V3.00,and 214,748,364.7 kW-hours for V3.11 and up.4.3.3 CONTACTOR CYCLE COUNTER (V3.11 AND UP)Purpose: This feature indicates the total number of off-to-on transitions a contactor hascompleted since the last time the CONTACTOR CYCLE COUNTER was reset. This serves asTHERMAL MANAGEMENT SOLUTIONS EN-<strong>Digi<strong>Trace</strong></strong><strong>920</strong>series-IM-H56874 04/1347 / 82
a method to do preventative maintenance on the contactor according to the manufacturer’sspecifications. The count value is written to the controller’s nonvolatile memory once every 24hours or whenever any maintenance data is reset by the user.Procedure: The CONTACTOR CYCLE COUNTER may be reset to zero using the optional <strong>920</strong>Operator Console or a communicating device.IMPORTANT:• Once the CONTACTOR CYCLE COUNTER reaches 999,999,999 it stops counting.• The CONTACTOR CYCLE COUNTER is only indicated if the SWITCH CONTROL MODE is set toeither DEADBAND or PROPORTIONAL AMBIENT CONTACTOR.4.3.4 TIME IN USEPurpose: The purpose of this feature is to indicate the total hours of controller use since its initialoperation. It may be useful to log the amount of time a controller has been in service for thepurposes of maintenance planning or reliability testing. The value of this accumulator is writtento the controller’s nonvolatile memory once every 24 hours or whenever any maintenance data isreset by the user.Procedure: The IN USE hours accumulator can be reset to zero using the optional <strong>920</strong> OperatorConsole (V3.11+) or a communicating device.IMPORTANT: The IN USE hours accumulator value will roll over to zero when the upper limit of theaccumulator has been exceeded. This limit is 4,294,967,295 hours for V3.00, and 999,999,999 hoursfor V3.11 and up.4.3.5 TIME SINCE LAST RESETPurpose: This feature indicates the total hours of controller use since the last reset. It may beuseful to log the amount of time a particular controller has been in service since the last time thecontroller’s power was cycled for troubleshooting purposes.Procedure: The TIME SINCE LAST RESET hours accumulator can only be reset by cycling thecontroller’s power.IMPORTANT: The TIME SINCE LAST RESET will roll over to zero when the upper limit of 65,535hours has been exceeded.4.3.6 PEAK LOAD CURRENT (V3.11 AND UP)IMPORTANT: The PEAK LOAD CURRENT is not displayed on the optional <strong>920</strong> Operator Console.Purpose: This feature indicates the highest instantaneous load current measured since the lasttime the PEAK LOAD CURRENT was reset. This value is written to the controller’s nonvolatilememory once every 24 hours or whenever any maintenance data is reset by the user.Procedure: The PEAK LOAD CURRENT may only be reset to zero using a communicating device.4.3.7 PEAK GROUND-FAULT CURRENT (V3.11 AND UP)IMPORTANT: The PEAK GROUND-FAULT CURRENT is not displayed on the optional <strong>920</strong> OperatorConsole.Purpose: This feature indicates the highest instantaneous ground-fault current measured sincethe last time the PEAK GROUND-FAULT CUR-RENT was reset. This current value is written to thecontroller’s nonvolatile memory once every 24 hours or whenever any maintenance data is resetby the user.Procedure: The PEAK LOAD CURRENT may only be reset to zero using a communicating device.4.3.8 EXTERNAL INPUT STATUS (V3.11 AND UP)IMPORTANT: The EXTERNAL INPUT STATUS is not displayed on the optional <strong>920</strong> OperatorConsole.Purpose: This feature indicates the actual status of the external input regardless of the controller’sconfiguration. This can assist the operator who wishes to use the controller’s external input tomonitor the status of an external dry contact and pass this on to another device.Procedure: The EXTERNAL INPUT STATUS may only be viewed using a MODBUS-capablesoftware package.THERMAL MANAGEMENT SOLUTIONS EN-<strong>Digi<strong>Trace</strong></strong><strong>920</strong>series-IM-H56874 04/13 48 / 82
Section 5 – Control Modes5.1 IntroductionThere are several types of control modes in the controller. Some of these modes require furtherexplanation in order to fully understand and implement their operation.This section describes the control modes available in the HTC and how to set their associatedparameters.5.2 Switch Control ModesThere are four SWITCH CONTROL modes associated with the HTC. The following is an explanationof their implementation in the controller and the differences between them.5.2.1 PROPORTIONAL CONTROL (FOR USE WITH SSRS ONLY)Proportional control on the HTC is implemented as follows:When using SSRs to directly control the power applied to a trace circuit, the output may beswitched on/off very rapidly. The controller im-plements proportional temperature control on acycle-by-cycle basis (50 or 60 Hz power line cycle). This algorithm monitors the temperature of theheating circuit and compares it to the CONTROL SETPOINT temperature. If the temperature of thecontrol sensor is at or below the CONTROL SETPOINT temperature, power is applied to the tracewith a duty cycle of 100%—the controller output is full on. If the temperature sensed by the controlsensor is equal to or greater than the CONTROL SETPOINT temperature + the PROPORTIONALBAND setting, the controller output will have a duty cycle of 0%—the output will be off. Thetemperature of the control sensor is constantly monitored and the output duty cycle is adjustedproportionally according to where the temperature falls within the 0%–100% band.Proportional Control Temperature BandControl Sensor Temperatureduty CycleSetpoint + proportional band 0%Setpoint + proportional band/2 50%Setpoint 100%5.2.2 DEADBAND CONTROL (FOR USE WITH EXTERNAL CONTACTORS)Deadband control on the HTC is implemented as follows:When using the HTC in an application where the controller is used to open and close a contactor,proportional control cannot be used. In these cases a deadband control algorithm is used. Theoutput duty cycle is not controlled; instead, the output is either fully on or completely off. The usercan set the DEADBAND value. The controller monitors the temperature of the trace circuit andcompares it to the CONTROL SETPOINT temperature as in the proportional control. If the controlsensor temperature is above the CONTROL SETPOINT temperature by more than the DEADBANDvalue, the output is turned off. If the control sensor temperature falls below the CONTROLSETPOINT temperature the output is turned on. This is a simple control algorithm but it worksvery effectively in heat trace applications where the temperature of a traced system changesrelatively slowly.Deadband Control Temperature BandControl Sensor TemperatureOutput StateSetpoint + deadbandOffSetpointOnWhen the control sensor temperature is within the deadband, the output does not change itsstate. Also, when using deadband control a contactor is not allowed to toggle faster than every twoseconds. If an AC alarm with an alarm filter time greater than 0 is detected, the contactor will nottoggle until the alarm filter time has expired.THERMAL MANAGEMENT SOLUTIONS EN-<strong>Digi<strong>Trace</strong></strong><strong>920</strong>series-IM-H56874 04/1349 / 82
5.2.3 PROPORTIONAL AMBIENT SSR CONTROL (FOR USE WITH SSRS ONLY)When an HTC using an SSR is used to control the output using the ambient temperature, thiscontrol mode should be used.Proportional ambient SSR control on the HTC is implemented as follows:• When using SSRs to directly control the power applied to a heating circuit, the output may beswitched on/off very rapidly. The controller implements proportional temperature control on acycle-by-cycle basis (50 or 60 Hz power line cycle).• This algorithm monitors ambient temperature and compares it to the CONTROL SETPOINTtemperature. If the temperature of the control sensor is at or below the CONTROL SETPOINTtemperature minus the PROPORTIONAL BAND setting, power is applied to the trace with a dutycycle of 100%—the controller output is fully on.• If the temperature sensed by the control sensor is equal to or greater than the CONTROLSETPOINT temperature, the output will have a duty cycle of 0%—the controller output will beoff.• The temperature of the control sensor is constantly monitored and the output duty cycle isadjusted proportionally according to where the temperature falls within the 0%–100% band.Proportional Ambient SSR Control Temperature BandControl Sensor Temperatureduty CycleSetpoint 0%Setpoint - proportional band/2 50%Setpoint - proportional band 100%IMPORTANT: The load shedding fail-safe mode is not supported when using proportional ambientSSR control, since ambient temperature is being monitored rather than pipe temperature.\5.2.4 PROPORTIONAL AMBIENT CONTACTOR CONTROL(FOR USE WITH EXTERNAL CONTACTORS)When an HTC using a contactor is used to control the output based on the ambient temperaturethis control mode should be used.Proportional ambient contactor control on the HTC is implemented as follows:• The output may not be switched on/off rapidly when using a contactor, so proportionaltemperature control is implemented by applying the required duty cycle over the selectedCYCLE TIME.• The output is fully on for a portion of the CYCLE TIME as determined by the calculated dutycycle, and it will be completely off for the re-mainder of the CYCLE TIME.• The duty cycle is calculated each time the output toggles, based on the ambient temperature,PROPORTIONAL BAND setting, and the CON-TROL SETPOINT temperature setting.• The controller monitors the ambient temperature and compares it to the CONTROL SETPOINTtemperature as in proportional ambient SSR control. If the temperature of the control sensoris at or below the CONTROL SETPOINT temperature minus the PROPORTIONAL BAND setting,power is applied to the trace with a duty cycle of 100%. The controller output will be fully on for1/30th of the CYCLE TIME setting before the duty cycle is calculated again.• If the temperature sensed by the control sensor is equal to or greater than the CONTROLSETPOINT temperature, the output will have a duty cycle of 0%. The controller output will be offfor 1/30th of the CYCLE TIME setting before the duty cycle is calculated again.Proportional Ambient Contactor Control Temperature BandControl Sensor Temperatureduty CycleSetpoint 0%Setpoint - proportional band/2 50%Setpoint - proportional band 100%IMPORTANT: The load shedding fail-safe mode is not supported when using proportional ambientcontactor control, since ambient temperature is being monitored rather than pipe temperature.If an AC alarm with an alarm filter time greater than 0 is detected, the contactor will not toggleuntil the alarm filter time has expired.THERMAL MANAGEMENT SOLUTIONS EN-<strong>Digi<strong>Trace</strong></strong><strong>920</strong>series-IM-H56874 04/13 50 / 82
5.3 Load Shedding Control ModeLoad shedding is a control mode that can be programmed and initiated only by an externalcommunicating device, or by the Model 780/GCC-9000 Group Communications <strong>Controller</strong>, whichoverrides temperature control and forces the output of the controller OFF until reset by the 780/GCC. When using a GCC, load shedding is initiated by a contact closure (or opening) on one ofthe four contact inputs. Each contact input initiates a load shedding command for the group ofcontrollers associated with that contact input. Each controller may be associated with one or moregroups. Refer to the Load Shedding Section in the GCC manual for details on setting up the loadshedding features of the HTC when using a GCC.When power is applied to the controller, it determines if load shedding mode has been enabled.If enabled, the controller immediately enters load shedding operation (holding its output off)and waits to see if the GCC or an external communicating device has initiated a load sheddingcommand. If no command is present the controller resumes normal operation. If a load sheddingcommand is present, the controller will continue to hold the output OFF, until one of threeconditions occurs:1. The GCC contact input or zone definition bits of an external communicating device whichinitiated load shedding clears and the command to terminate load shedding mode is issued.2. Communications are interrupted between the controller and its communicating device, as inthe case of a damaged communications wire. Approximately 30 seconds after communicationsceases the controller will return to normal operation.3. Communications between the controllers and the external communicating device goes off-linefor approximately two minutes, as occurs when the 760 Hand Held Programmer is used tocommunicate with the controller.IMPORTANT: The controller will return to normal operation if communications between the 780or external communicating device and the controller are disrupted in any way. This will returntemperature control to the HTC. Also, the HTC does not perform a periodic autocycle test whileoperating in load shed mode. When using a GCC, it must be configured for load shedding operationbefore the controller can be set up for load shedding control.Three parameters must be set in the controller to configure it for load shedding operation:1. The load shedding feature must be enabled.2. The FAIL SAFE MODE parameter must be enabled or disabled depending on the applicationrequirements. If FAIL SAFE MODE is enabled, then at least one LOW TS ALARM (of a TS usedin the TS CONTROL MODE) must be enabled. If the alarm temperature exceeds the CONTROLSETPOINT temperature, fail-safe mode will be disabled.3. The GCC contact input(s) or zone definition bits of an external communicating device that are tobe associated with the load shedding action for the controller must be defined.These parameters can only be configured using an external communicating device or theModel 780/GCC-9000 Group Communications Con-troller. Refer to the Model 780/GCC-9000user manual for details on how to set up these options. The optional <strong>920</strong> Operator Console canbe used to enable or disable the load shedding feature, but not to set any other load-sheddingparameters.IMPORTANT:• Fail-safe mode is always disabled if the SWITCH CONTROL MODE is set to either of the twoproportional ambient control modes, or the TS CONTROL MODE = EXT INPUT, FAIL OFF/ON• Fail-safe mode is disabled if the TS CONTROL MODE is set to either EXT INPUT, FAIL TS 1 orEXT INPUT, FAIL TS 2 and a control temperature failure occurs.• The HTC will turn on its output switch when the control temperature becomes less than thehighest LOW TS ALARM temperature if the fol-lowing conditions are met:– Fail-safe mode is enabled– Load shedding is active– The TS CONTROL MODE uses both TS 1 and TS 2– Both TS 1 and TS 2 have their LOW TS ALARMS enabled• A FORCE ON override signal has higher priority than a load shedding signal. An INHIBIT signalhas higher priority than fail safe mode.THERMAL MANAGEMENT SOLUTIONS EN-<strong>Digi<strong>Trace</strong></strong><strong>920</strong>series-IM-H56874 04/1351 / 82
5.4 TEMPBUS Control ModeTEMPBUS is short for Temperature Bus. This refers to a connection that allows one “master”HTC to share its control temperature with a number of “slave” HTCs. Up to 25 “slave” HTCs can beconnected to this bus. Refer to the wiring diagrams in Appendix C for example con-nection details.5.4.1 TEMPBUS MASTEROnly Point A of a <strong>920</strong> HTC can be configured as a TEMPBUS “master.” A TS CONTROL MODEusing either TS 1 and/or TS 2 should be selected and the EXTERNAL OUTPUT should be set toTEMPBUS. This will cause the measured control temperature of Point A to be sent out theEX-TERNAL OUTPUT port.IMPORTANT:• If a TEMPBUS “master” has its temperature control overridden by an INHIBIT override or aFORCE ON override signal, it will pass this override signal over the TEMPBUS to its “slaves.”• Load shedding, fail-safe, or auto-cycling conditions are not passed over the TEMPBUS from a“master” to its “slaves.”5.4.2 TEMPBUS SLAVEBoth Point A and/or Point B of a <strong>920</strong> HTC can be configured as a TEMPBUS “slave.” TheEXTERNAL INPUT should be set to TEMPBUS, then the point’s TS CONTROL MODE must be setto a mode using the EXTERNAL INPUT. The “slave” controller will perform its own temperaturecon-trol using the control temperature of the “master.”If a TEMPBUS “slave” does not receive a control temperature from a TEMPBUS “master” atleast once every 15 seconds, then a CONTROL TS FAILURE ALARM will occur. This alarm is nonlatchingfor TEMPBUS “slaves” and will be cleared automatically once a control temperature isreceived again. Point B can be a “slave” to Point A of the same controller.IMPORTANT: Other features that require the use of the EXTERNAL INPUT (INHIBIT or OVERRIDE)may not be used at the same time as the TEMPBUS “slave” feature.THERMAL MANAGEMENT SOLUTIONS EN-<strong>Digi<strong>Trace</strong></strong><strong>920</strong>series-IM-H56874 04/13 52 / 82
Section 6 – Troubleshooting6.1 Operator Checks6.2 Common Problem AreasUpon receipt of the controller, or to check the controller for an indication of normal operation,follow the operational procedures shown below. These procedures are designed to familiarize theoperator with the controller and to provide an understanding of its operation.To determine if a fault is associated with the heat tracing, wiring or the controller, it is necessary totroubleshoot the wiring and tracer circuit. If the fault remains, remove power from the controllerand exchange it with another controller. This may require some reprogramming of the new HTC.If the fault clears, exchange the controller on another circuit to determine if the fault moveswith the controller. If the fault moves with the controller, verify that the HTC has been configuredcorrectly for the application. If the configuration is correct, return the controller to <strong>Pentair</strong><strong>Thermal</strong> Managament for evaluation.IMPORTANT: If the controller does not operate properly and is being returned to <strong>Pentair</strong><strong>Thermal</strong> Managament for service, information must be provided as to why the unit was removedfrom service. Contact the <strong>Pentair</strong> <strong>Thermal</strong> Managament customer service department for anauthorization form and number prior to returning any units for repair.6.1.1 GETTING STARTEDTo access the functions of the <strong>920</strong> <strong>Series</strong> HTC, use the optional <strong>920</strong> Operator Console. If themodem communications option is installed in the <strong>920</strong> control module, the Model 780/GCC-9000Group Communications <strong>Controller</strong> may also be used to access controller parameters. Refer to theoperating manual for the particular device that you are using for operational details.The HTC can be used as an effective troubleshooting tool to pinpoint problem areas of heat tracecircuits. Described below are a few of the more common problem areas, their symptoms, andparameters to check to determine the actual faulty portion of the heat trace circuit.6.2.1 CONTROL POINT A VERSUS CONTROL POINT BRemember that the <strong>920</strong> series controller is a two-point device!One of the most common errors is to confuse settings, displays, or alarms for one control pointwith the second control point. When pro-gramming or troubleshooting, always confirm that youare referencing the control point of interest—either Point A or Point B.6.2.2 RTDSRTD failures after installation can generally be attributed to incorrect wiring or improperinstallation of the sensor. Some specific RTD problems and troubleshooting methods follow.1. TS Failure Alarm(s)If the HTC controller indicates a failure of an RTD:• Ensure that the RTD is a 3-wire 100 Ω Platinum Type (for V3.00). For V3.11 and up ensure thatthe TS TYPE setting matches the RTD being used.• Turn off the power to the controller before proceeding!• Disconnect the RTD wiring from the input terminals.• Measure the RTD’s resistance between the source (WHT) and sense (WHT) leads at thecontroller. It should not exceed 40 Ω. Excessive lead resistance will cause a TS FAILURE ALARMand must be corrected. Look for loose terminals, excessive lead length, or insufficient wiregauge and correct as necessary.• Measure the RTD’s resistance between the source (WHT) or sense (WHT) lead and the common(RED) lead of the RTD at the controller. This should be between 60 Ω and 330 Ω depending onthe temperature and the lead resistance. See Appendix D on page 74 or Appendix E on page 75.THERMAL MANAGEMENT SOLUTIONS EN-<strong>Digi<strong>Trace</strong></strong><strong>920</strong>series-IM-H56874 04/1353 / 82
• Verify that the RTD is wired correctly. The heat-tracing controllers will always be terminated inthe order: source (WHT), sense (WHT), common (RED). When using the terminal board, theseterminals are marked as follows:Terminal No.description25 Point A, Shield26 Point A, TS 1 Source (WHT)27 Point A, TS 1 Sense (WHT)28 Point A, TS 1 Common (RED)9 Point A, Shield10 Point A, TS 2 Source (WHT)11 Point A, TS 2 Sense (WHT)12 Point A, TS 2 Common (RED)29 Point B, Shield30 Point B, TS 1 Source (WHT)31 Point B, TS 1 Sense (WHT)32 Point B, TS 1 Common (RED)13 Point B, Shield14 Point B, TS 2 Source (WHT)15 Point B, TS 2 Sense (WHT)16 Point B, TS 2 Common (RED)The RTD manufacturer will typically color code the leads with the source and sense being thesame color, and the common a different color. Ensure that the RTD extension wire shield isterminated at one end only, normally using the terminal block provided at the terminal board.IMPORTANT: Some RTDs may have the Sense wire color coded as Black.2. Questionable TemperatureIf you feel that the indicated or displayed temperature is not correct, the controller and the RTDcan be quickly checked for correct operation.To verify the RTD:Turn off the power to the controller before proceeding!• Disconnect the RTD wiring from the input terminals.• To calculate the temperature indicated by the RTD, measure the resistance from source(white wire) or sense (white wire) to common (red wire) and subtract the resistance measuredbetween source and sense. This will give a compensated resistance value that can be crossreferencedto the RTD table, DIN Standard 43760 found in Appendix D on page 74 or AppendixE on page 75. Compare the meas-ured resistance and cross-referenced temperature valueobtained from the RTD table to the indicated or displayed value. These should agree to withinthe accuracy standards of the HTC and the RTD.To verify the <strong>Controller</strong>:Turn off the power to the controller before proceeding!• Disconnect the RTD wiring from the input terminals.• Connect a 100 Ω resistor across the source or sense terminal and common. Insert a jumperbetween the source and sense terminals.• Apply power to the controller. The indicated or displayed temperature should be about 0°C(32°F) depending on the actual resistance of the test resistor if TS TYPE is set to 100 ΩPlatinum.3. Unstable or Bouncing TemperatureAn erratic indication of temperature can be caused by several factors external to the controller;however, a bouncing temperature of a few degrees should not be confused with incorrectoperation. The controller’s accuracy and resolution will result in an indicated temperaturechange of a couple of degrees if the measured resistance temperature falls between twodiscrete values. This is sometimes referred to as quantization error.THERMAL MANAGEMENT SOLUTIONS EN-<strong>Digi<strong>Trace</strong></strong><strong>920</strong>series-IM-H56874 04/13 54 / 82
If the bounce or instability is excessive, check:• Wire used for extension of the RTD should be three-wire, twisted and shielded with the shieldgrounded at the controller only. Each of the three lead wires must be of the same gauge.• The ideal installation has a separate conduit for the RTD leads (if they have been extended). Itis not usually a problem to run low signal levels in the same conduit as the power leads even inhigh-power applications, as long as the RTD wire is a twisted, shielded type with an insulationrating equal to or greater than the highest voltage in the conduit. Follow the proper ElectricalCode for your particular in-stallation.• Terminal connections that are not tight can add resistance to an RTD circuit. Check thetightness of all screw terminal connections at time of installation and during subsequentmaintenance checks.• Check the specifications for the particular cable being used to ensure that it does not haveexcessive capacitance when used in long lengths. This can cause a temperature offset betweenwhat the controller reads and what the RTD actually measures. This again is normally not aproblem since the controller compensates for all but the worst cases of this.• Lastly, it is possible for the RTD itself to fail on an intermittent basis but this failure modeshould be considered unusual. This kind of failure is probably the most difficult to find butfortunately it is also the least likely as a failure mechanism.6.2.3 GROUND FAULTGround-fault alarms can be due to incorrect installation as well as leakage resulting from wetsystem components or faulted cables.The <strong>920</strong> series switch interface detects ground faults by summing the outgoing and return tracecurrents through an internal current trans-former. Under normal operating conditions (no groundfault condition) this current will be zero. When there is a flow of current from one of the tracesupply wires to ground, a ground-fault condition occurs.If a ground-fault alarm is present on start-up of a new installation, it is likely due to a wiring erroror damaged cable. To verify this condition:• Check that the heating circuit neutrals return to the controller and are not connected directly tothe distribution panel. This can be a common problem if the installation is a retrofit situation.• On paralleled circuits, be certain that ALL neutrals return. The late addition of a circuit may notbe obvious.Use the monitoring feature available at the <strong>920</strong> Operator Console or the Model 780/GCC-9000Group Communications <strong>Controller</strong> to view the measured ground-fault current at the heattracecontroller. If this value is at the maximum that the controller can measure, it is usually anindication that the wiring is incorrect. If the value is less than 250 mAmps, an actual ground-faultcondition may exist in the cable.IMPORTANT: The controller monitors the integrity of the ground-fault (GF) detection transformerand associated wiring. If a fault is detected, the controller will report a GF value of 300 mAmps.THERMAL MANAGEMENT SOLUTIONS EN-<strong>Digi<strong>Trace</strong></strong><strong>920</strong>series-IM-H56874 04/1355 / 82
6.3 Common Alarms—What to look forAlarm Description Cause of AlarmHigh TS 1/TS 2TemperatureLow TS 1/TS 2TemperatureTS 1/TS 2 FailureControl TS FailureHigh CurrentLow CurrentHigh GFIGFI TripAppears when the temperature exceeds theHIGH TS ALARMAppears when the temperature decreasesbelow the LOW TS ALARM temperature.Indicates that a sensor is operatingimproperly.Alarms a failure of the temperature-sensingelement designated as the control element bythe TS CONTROL MODE setting. Dependingon the chosen TS FAIL MODE and TSCONTROL MODE, the output switch may belatched off or on until this failure is corrected.Alarms current levels that are greater thanthe HIGH CURRENT ALARM setting for theapplication.Alarms current levels that are less than theLOW CURRENT ALARM settingAlarms ground-fault current levels that aregreater than the HIGH GFI ALARM settingThis value sets the upper limit of allowableground-fault leakage. Exceeding this linkresults in the output switch being latched offand the alarm activated to indicate a groundfaultcondition.• Alarm temperature setting too close to maintaintemperature• Flow of hot product• Steaming out lines• Incorrect tracer wiring• Incorrect RTD TYPE selected• Alarm temperature setting too close to maintaintemperature• Flow of cold product• Empty pipe• Damaged, wet, or missing insulation• <strong>Heat</strong>ing cable not sized properly for the application• <strong>Heat</strong>ing cable damaged• Incorrect RTD TYPE selected• Incorrect or damaged field wiring—open leads or excessresistance, either intermittent or continuous, may bedue to broken or damaged wires or loose terminals• Damaged or inoperative temperature sensors• Incorrect or damaged field wiring—open leads orexcess resistance, either intermittent or continuous,may be due to broken or damaged wires or looseterminals• Damaged or inoperative temperature sensors• Alarm setting too close to normal operating• High in-rush current from cold start ofself-regulating cable• Damaged or partially shorted heating cable• “As built” cable length is greater than design value• Incorrect CURRENT TURNS RATIO setting• Alarm setting too close to normal operating current• Low source voltage• Damaged or inoperative heating cable• Open connection—wiring problem, SSR or contactorfailed open• Incorrect CURRENT TURNS RATIO setting• Alarm setting too close to normal leakage current• Damaged cable insulation and/or moisture present• Moisture in junction box• Poor splice or termination• Moisture provides conductive ground path that allowsground-fault current• Trip setting too normal leakage current• Damaged cable insulation and/or moisture present• Moisture in junction box• Poor splice or termination• Moisture provides conductive ground path that allowsground-fault currentTHERMAL MANAGEMENT SOLUTIONS EN-<strong>Digi<strong>Trace</strong></strong><strong>920</strong>series-IM-H56874 04/13 56 / 82
6.3 Common Alarms—What to look for (Continued)Alarm Description Cause of AlarmHigh VoltageAlarms voltage levels that are greater thanthe HIGH VOLTAGE ALARM setting• Alarm setting too close to normal operating voltage• Incorrect wiring• Incorrect VOLTAGE TURNS RATIO• Power surgeLow VoltageThis alarms voltage levels which are lessthan the LOW VOLTAGE ALARM setting.• Alarm setting too close to normal operating voltage• Damaged power cable• Incorrect VOLTAGE TURNS RATIO• Brown-out conditions• Loss of power to the circuitOvercurrent TripIf the controller is unable to start the cable • Excessive in-rush currentdue to high current or after attempting to • Incorrect wiringsoft start it, the controller trips off its output• Damaged cableswitch.• Switch rating set too low• Incorrect CURRENT TURNS RATIO settingSwitch FailureThis alarm will indicate that the controllersenses current flow when the output switchshould be off.• Some other device has energized the heat trace cable• Output switch has failedHTC ResetThis alarm is latched when power is restoredafter an interruption. Used to identifyintermittent power losses.• Circuit breaker tripped• Power line transientPower LimitingThis alarm indicates that the solid-staterelay is limiting the average amount of power• Power applied to trace circuit is being limited to theMAXIMUM POWER settingthat is applied to the trace circuit as defined • Incorrect VOLTAGE and/or CURRENT TURNS RATIOby the MAXIMUM POWER setting.settingC B LimitingSwitch LimitingHigh ResistanceLow ResistanceThis alarm indicates that the controller islimiting the average current to the CIRCUITBREAKER CURRENT RATING setting.This alarm indicates that the controller islimiting the average current that is appliedto the trace circuit based on the SWITCHRATING setting to protect the solid-staterelay from excess current.This alarm indicates that the heating cableresistance has deviated from the NOMINALRESISTANCE setting by more than the HIGHRESISTANCE ALARM setting.This alarm indicates that the heating cableresistance has deviated from the NOMINALRESISTANCE setting by more than the LOWRESISTANCE ALARM setting.• Excessive current caused by in-rush current• C.B. CURRENT RATING setting too low for normalheater current draw or not matched to actual circuitbreaker size• Incorrect CURRENT TURNS RATIO setting• Excessive current caused by in-rush current• Incorrect CURRENT TURNS RATIO setting• Alarm setting too close to actual operating resistance• NOMINAL RESISTANCE not set properly• Open connection—wiring problem• Damaged cable• Incorrect VOLTAGE and/or CURRENT TURNS RATIOsetting• Alarm setting too close to actual operating resistance• NOMINAL RESISTANCE not set properly• Partial short—wiring problem• Damaged cable• Incorrect VOLTAGE and/or CURRENT TURNS RATIOsettingTHERMAL MANAGEMENT SOLUTIONS EN-<strong>Digi<strong>Trace</strong></strong><strong>920</strong>series-IM-H56874 04/1357 / 82
6.3 Common Alarms—What to look for (Continued)Alarm Description Cause of AlarmEEROM Data FailureContactor Count(V3.11 and up)This alarm indicates that the controllerhas detected a failure in its nonvolatilememory (this is where all of the controller’sconfiguration and calibration settings arestored). This indicates an internal problemand the HTC should be replaced andreturned to <strong>Pentair</strong> <strong>Thermal</strong> Managamentfor repair.This alarm indicates that the number of offto-ontransitions of a contactor has exceededthe CONTACTOR COUNT ALARM setting andneeds to be replaced.• The HTC cannot bypass the failed area of its memoryand has loaded factory defaults into this failed area.• Contactor may be worn.• Some configuration parameter (i.e. DEADBAND, AUTOCYCLE INTERVAL, load shedding etc.) is causing thecontactor to toggle more than usual.THERMAL MANAGEMENT SOLUTIONS EN-<strong>Digi<strong>Trace</strong></strong><strong>920</strong>series-IM-H56874 04/13 58 / 82
Section 7 – Maintenance7.1 Operator MaintenanceThe <strong>920</strong> series controller is designed to be a maintenance-free product. Once installed properly,the only maintenance required is retightening of the terminal connections approximately one weekafter installation and inspection periodically thereafter. Also, alarm pilot lamps (if installed) andcontactors may need periodic replacement.CAUTION:Make sure that the power to the controller is OFF when replacing the pilot lamps! Also, be certainpower to the controller is OFF before attempting to test or service the heat tracing. Do not rely onthe controller as a disconnect device!7.2 Replaceable PartsThere are no user-serviceable parts in the <strong>920</strong> series controller or accessories, except lamps inoptional alarm pilot lights. The unit is designed to be modular and easily changed out in the field.Modules appearing inoperative should be returned to the nearest <strong>Pentair</strong> <strong>Thermal</strong> ManagamentService Center for service.WARNING:Tampering with the <strong>920</strong> components without approval from <strong>Pentair</strong> <strong>Thermal</strong> Managament couldresult in the product’s warranty being void.THERMAL MANAGEMENT SOLUTIONS EN-<strong>Digi<strong>Trace</strong></strong><strong>920</strong>series-IM-H56874 04/1359 / 82
Appendix A SpecificationsSpecifications are @ 25°C unless otherwise noted and are subject to change without notice.System RatingsStorage ambientApprovals–40°F to 185°F (–40°C to 85°C)CSA C/US, c-ETL-usIMPORTANT: Approval Agency mark will varybased on panel manufacturing facilityClassification • Cl I, Div 2, Grp A,B,C,D and Ex nA IIA, IIB, IIC (Zone 2)• SSR Version T-code: T4 (T3A with optional pilot light)• Ordinary locations (SSR and contactor versions)<strong>920</strong> <strong>Series</strong> Wiring Terminal RatingsTerminal board 28-12 AWG, strip length: 0.22"Switch interface 28-14 AWG, strip length: 0.33"Power terminals<strong>920</strong> <strong>Series</strong> Control Module (per control point)Operating temperaturePower requirementControl modes30 A: 22-8 AWG, strip length: 0.47", torque: 16.0 lb-in60 A: 14-6 AWG, strip length: 0.47", torque: 26.5 lb-in–40°F to 140°F (–40°C to 60°C)9 Vdc nominal, 600 ma maximumProportional, deadband, proportional ambient (SSR),proportional ambient (contactor) modes, adjustable2°F to 90°F (1°C to 50°C) above setpointTemperature inputs (2) RTD inputs: 3-wire 100 Ω Platinum (DIN 43760,Ω=0.00385 Ω/Ω/°C) or 2/3-wire 100 Ω Ni-Fe, open/shorted sensor detection/protection, lead resistancecompensated 0 to 20Ω per lead.Temperature measurement range–76°F to 1058°F (–60°C to 570°C), accuracy: ± 0.5% ofspan ± 1LSDVoltage measurement range 50 to 295 Vac (with voltage turns ratio @ 1:1),accuracy: ± 1% of span ± 2LSD, repeatability:± 1.5% of spanCurrent measurement rangeGF current measurement rangeAlarm relay output<strong>920</strong> <strong>Series</strong> SSR Switch Interface ModuleOperating temperature0.3 to 100 A (with current turns ratio @ 1:1), resolution:0.1 A (0.3 to 11 A range), 0.3 A (11 to 40 A range), 0.7 A(40 to 100 A range), accuracy: ± 2.5% of reading ±resolution, repeatability: ± 3% of reading ± resolution20 to 250 ma, accuracy: ± 2.5% of span ± 2 LSD atnominal load, repeatability: ± 4% of spanDry contact, 48 Vac/dc, 500 ma, 10 VA switchingmaximum–40°F to 140°F (–40°C to 60°C)Power requirements 100 to 277 Vac nominal, 1 PH, 60 Hz ±3 Hz or 50 Hz ±2Hz, 100 ma. maximumOutput powerSSR driveCurrent sense rangeGF current sense range+9 Vdc nominal, 650 ma maximum+9 Vdc nominal, 75 ma maximum1000:1, 0.3 to 60 A, 50/60 Hz, 1 PH1000:1, 20 to 250 ma, 50/60 Hz, 1 or 3 PHWiring terminals 28-14 AWG, strip length: 0.33"THERMAL MANAGEMENT SOLUTIONS EN-<strong>Digi<strong>Trace</strong></strong><strong>920</strong>series-IM-H56874 04/13 60 / 82
Appendix B Typical Enclosure DimensionsB.1 Single-Point Assemblies #10160-003 and #10160-0091 Point FRP1- or 2-pole 30 A SSR assembly1 Pole Model: <strong>920</strong>*E2FWL*SIS301*SS31012 Pole Model: <strong>920</strong>*E2FWL*SIS301*SS3201The following drawings provide the user with enclosure size and mounting dimensions forthe stock enclosure assemblies. Please contact your local <strong>Pentair</strong> <strong>Thermal</strong> Managamentrepresentative for information regarding other available sizes and configurations.6.2533.6810.5012.5013.087.95Mounting holes 0.3" diameter,4 places<strong>Digi<strong>Trace</strong></strong> ® -AB123467THERMAL MANAGEMENT SOLUTIONS EN-<strong>Digi<strong>Trace</strong></strong><strong>920</strong>series-IM-H56874 04/13 62 / 82
B.2 Dual-Point Assemblies #10160-120 and #10160-1212 Point FRP1- or 2-pole 30 A SSR assembly1 Pole Model: <strong>920</strong>*E4FWL*SIS302*SS31022 Pole Model: <strong>920</strong>*E4FWL*SIS302*SS32028.3118.0012.5514.5514.9410.00Mounting holes 0.3" diameter,4 places123467123467THERMAL MANAGEMENT SOLUTIONS EN-<strong>Digi<strong>Trace</strong></strong><strong>920</strong>series-IM-H56874 04/1363 / 82
B.3 Four-Point Assembly #10160-1254 Point FRP1-pole 30 A SSR assemblyModel: <strong>920</strong>*E6FWL*SIS304*SS31048.31 17.2716.5517.1312.00Mounting holes 0.3" diameter,4 placesTHERMAL MANAGEMENT SOLUTIONS EN-<strong>Digi<strong>Trace</strong></strong><strong>920</strong>series-IM-H56874 04/13 64 / 82
B.4 Eight-Point Assembly #10160-0358-Point FRP1-pole 30 A SSR assemblyModel: <strong>920</strong>*E10FWQ1*SIS308*SS310812.9530.1124.1130.5131.3221.86Mounting holes 0.375" diameter,4 placesTHERMAL MANAGEMENT SOLUTIONS EN-<strong>Digi<strong>Trace</strong></strong><strong>920</strong>series-IM-H56874 04/1365 / 82
B.5 Twenty-Point Assembly #10160-04520-Point FRP1-pole 30 A SSR assemblyModel: <strong>920</strong>*E14FWQ1*SIS320*SS312012.9538.4832.4840.3541.1730.24Mounting holes0.375" diameter,4 placesTHERMAL MANAGEMENT SOLUTIONS EN-<strong>Digi<strong>Trace</strong></strong><strong>920</strong>series-IM-H56874 04/13 66 / 82
Appendix C Wiring DiagramsC.1 TS WiringThe following drawings provide sample wiring diagrams for the <strong>920</strong> <strong>Series</strong> control products andoptional accessories. Please contact your local <strong>Pentair</strong> <strong>Thermal</strong> Managament representative forinformation regarding other available optionsC.1.1 100 Ω PLATINUM RTD WIRINGTerminal boardShield 25 DrainControlPoint ASourceSense2627WhtWhtRTD 1 100Common 28 RedPt RTDControlPoint ARTD 2ShieldSourceSenseCommon9101112DrainWhtWhtRed100Pt RTDControl Point ATS1 and TS2 Wiring DiagramTerminal boardShield 29 DrainControl Source 30 WhtPoint BSense 31 WhtRTD 1 100Common 32 RedPt RTDControlPoint BRTD 2ShieldSourceSenseCommon13141516DrainWhtWhtRed100Pt RTDControl Point BTS1 and TS2 Wiring DiagramIMPORTANT: Temperature sensor manufacturers may use different lead wire colors than thoseshown in the diagram above. Some common color combinations are shown in the table below, butothers may also be available. See sections 3.7.1 on page 32 and 6.2.2 on page 55 for additionaldetails.Signal Description Lead WireColor Scheme #1Lead WireColor Scheme #2IEC 751Color Scheme #3Source White White RedSense White Black RedTHERMAL MANAGEMENT SOLUTIONS EN-<strong>Digi<strong>Trace</strong></strong><strong>920</strong>series-IM-H56874 04/1367 / 82
C.1.2 100Ω NICKEL IRON RTD WIRINGCommon Red Red WhiteTerminal boardControl Point ARTD 1Shield 25Source 26Sense 27Common 28DrainJumper100Ni-Fe RTDControl Point ARTD 2Shield 9Source 10Sense 11Common 12DrainJumper100Ni-Fe RTDTerminal boardControl Point BRTD 1Shield 29Source 30Sense 31Common 32DrainJumper100Ni-Fe RTDControl Point BRTD 2Shield 13Source 14Sense 15Common 16DrainJumper100Ni-Fe RTDControl Point BTS1 and TS2 wiring diagramTHERMAL MANAGEMENT SOLUTIONS EN-<strong>Digi<strong>Trace</strong></strong><strong>920</strong>series-IM-H56874 04/13 68 / 82
C.2 Power WiringC.2.1 CONTROLLER POWERED DIRECTLY FROM 1 PH OR 3-WIRE 3 PH SOURCE<strong>Trace</strong> power in (L1/line)Control power in (L1/line)<strong>Trace</strong> power in (L2/neutral)Control power in (L2/neutral)<strong>Trace</strong> power in (L3)<strong>Trace</strong> power out (L1/line)<strong>Trace</strong> power out (L2/neutral)<strong>Trace</strong> power out (L3)J1J212345678L1/lineL2/neutralL3L1/lineL2/neutralL31PH or 3-wire 3PHInput power(Max. 277 Vac line-line)<strong>Trace</strong>r(s)Notes:1. Jumpers J1 and J2 are normally supplied by the Factory2. Terminals 5 and 8 are only supplied when 3 phase versions areordered from the FactoryC.2.2 CONTROLLER POWERED DIRECTLY FROM 4-WIRE 3 PH SOURCE<strong>Trace</strong> power in (L1/line)Control power in (L1/line)<strong>Trace</strong> power in (L2/neutral)Control power in (L2/neutral)<strong>Trace</strong> power in (L3)<strong>Trace</strong> power out (L1/line)<strong>Trace</strong> power out (L2/neutral)<strong>Trace</strong> power out (L3)J112345678L1L2NeutralL3L1L2L3<strong>Trace</strong>r(s)4 wire 3PHInput power(Max. 277 Vac line-neutral)Notes:1. Jumpers J1 and J2 are normally supplied by the Factory2. Terminals 5 and 8 are only supplied when 3 phase versions areordered from the Factory3. Remove jumper J2C.2.3 CONTROLLER POWERED FROM A SEPARATE CIRCUIT<strong>Trace</strong> power in (L1/line)Control power in (L1/line)<strong>Trace</strong> power in (L2/neutral)Control power in (L2/neutral)<strong>Trace</strong> power in (L3)<strong>Trace</strong> power out (L1/line)<strong>Trace</strong> power out (L2/neutral)<strong>Trace</strong> power out (L3)1 L1/line2 L1/line3 L2/neutral4 L2/neutral5 L36 L1/line7 L2/neutral8 L31PH120–277 VacControl power input1PH or 3PH<strong>Trace</strong> power input<strong>Trace</strong>r(s)Notes:1. Jumpers J1 and J2 are normally supplied by the Factory2. Terminals 5 and 8 are only supplied when 3 phase versions areordered from the Factory3. Remove jumpers J1 and J2THERMAL MANAGEMENT SOLUTIONS EN-<strong>Digi<strong>Trace</strong></strong><strong>920</strong>series-IM-H56874 04/1369 / 82
C.3 Communication Wiring C.3 Communication WiringC.3.1 2-WIRE MODEM OPTIONTerminal boardComm 1Comm 2Comm 3Comm 4Comm 5Ground678222324 DrainModemModemC.3.2 2-WIRE RS-485 OPTIONTerminal boardComm 1Comm 2Comm 3Comm 4Comm 5Ground678222324 DrainRXD/TXD +RXD/TXD –C.3.3 RS-232 OPTIONTerminal boardComm 1Comm 2Comm 3Comm 4Comm 5Ground678222324RXDDCDCTSTXDRTSCommonC.4 Alarm Output WiringC.4.1 USED AS A DRY CONTACTTerminal board+9Vdc Nom 117AlarmRelay182CommonDry contactOutputTHERMAL MANAGEMENT SOLUTIONS EN-<strong>Digi<strong>Trace</strong></strong><strong>920</strong>series-IM-H56874 04/13 70 / 82
C.4.2 USED AS A SWITCHED DC CONTACTTerminal board+ 9Vdc NomAlarmRelayCommon117182+ 9VDC (Switched– on alarm)C.4.3 USED TO DRIVE AN OPTIONAL EXTERNAL RELAYTerminal board+9Vdc Nom 117Alarm relay18Common 234+Control–InputCrydom MS11-CX240D5AC alarmRelay out~121A 277Vac max switchedAlarm outputC.4.4 USED TO DRIVE AN OPTIONAL EXTERNAL PILOT LIGHTPower terminals<strong>Trace</strong> power in (L1/line)Control power on (L1/line)<strong>Trace</strong> power in (L2/neutral)Control power on (L2/neutral)J1J21234Optional linevoltage alarm lightTerminal board+9Vdc nom 117AlarmRelay 18Common 2Crydom MS11-CX240D53 +Control AC alarm4 –Input Relay out1~ 2Switched line/L1THERMAL MANAGEMENT SOLUTIONS EN-<strong>Digi<strong>Trace</strong></strong><strong>920</strong>series-IM-H56874 04/1371 / 82
C.5 External Input/Output Port WiringC.5.1 EXTERNAL INHIBIT/OVERRIDE USING A DRY CONTACTTerminal board+9Vdc nomExt. contactInputCommon1+20– 21 2External dry contact(Close to activiate inhibit or override mode)(2k max total loop resistance)C.5.2 EXTERNAL INHIBIT/OVERRIDE USING A DC SIGNALTerminal board+9Vdc nomExt. contactInputCommon1+20– 212+–+–+5VDC to 24VDC nominal, 10ma. maxC.5.3 TEMPBUS AND INHIBIT MASTER/SLAVE CONNECTIONSTerminal boardTerminal boardExt. contactOutput+–4520 +21 –Ext. contactInput“Slave” <strong>920</strong> controller #1Ext. contactInput+ 20– 21Ambient sensing “master” <strong>920</strong> controllerTerminal boardUp to 25 “slave” <strong>920</strong> controllers (50 points)may be tied to one “master” <strong>920</strong> controller.Note that the “master” and “slave”controllers must be installed within thesame enclosure.20 +21 –Ext. contactInput“Slave” <strong>920</strong> controller #2Terminal board20 +21 –Ext. contactInput“Slave” <strong>920</strong> controller #25THERMAL MANAGEMENT SOLUTIONS EN-<strong>Digi<strong>Trace</strong></strong><strong>920</strong>series-IM-H56874 04/13 72 / 82
Appendix D HTC Load Shedding SequenceLoadsheddingcommandreceived?NNormal controlmodeYHTCload shedenabled?NYAll othercontact inputsactive?[1]NYHTC holds its outputOFF for 30 secondsIscommunicationsactive?[2]NYHas HTCpower beenreset?YControl at lowtemp. alarm setpointNYFail safe modeenabled?YHTC temp. atlow temp.alarm SP?[3]NAll matching HTCs set theiroutputs to OFFHTC display indicates loadshedding mode [4]N1. If an HTC is associated with more than one contact input, all inputs must be activated beforethe HTC will go into a Load Shedding mode.2. If communications between an HTC and an upstream device such as a GCC or supervisorysoftware are interrupted, or if the power has been reset to the HTC, the HTC will hold itsoutput OFF, waiting for a Load Shedding command3. Only if the Low Temperature Alarm is ENABLED.4. For <strong>920</strong> <strong>Series</strong> controllers, a “” message will displayed after the loadcurrent reading.THERMAL MANAGEMENT SOLUTIONS EN-<strong>Digi<strong>Trace</strong></strong><strong>920</strong>series-IM-H56874 04/1373 / 82
Appendix E 100 Ω Platinum RTD TableIEC751 (1983)—100 W Platinum Resistance Temperature (RTD)—0.00385 Ohms/Ohm/°COhms °F °C Ohms °F °C Ohms °F °C62.28 –139 –95 159.18 311 155 248.76 761 40564.30 –130 –90 161.04 320 160 250.48 770 41066.31 –121 –85 162.90 329 165 252.19 779 41568.33 –112 –80 164.76 338 170 253.90 788 42070.33 –103 –75 166.61 347 175 255.61 797 42572.33 –94 –70 168.46 356 180 257.32 806 43074.33 –85 –65 170.31 365 185 259.02 815 43576.33 –76 –60 172.16 374 190 260.72 824 44078.32 –67 –55 174.00 383 195 262.42 833 44580.31 –58 –50 175.84 392 200 264.11 842 45082.29 –49 –45 177.68 401 205 265.80 851 45584.27 –40 –40 179.51 410 210 267.49 860 46086.25 –31 –35 181.34 419 215 269.18 869 46588.22 –22 –30 183.17 428 220 270.86 878 47090.19 –13 –25 184.99 437 225 272.54 887 47592.16 –4 –20 186.82 446 230 274.22 896 48094.12 5 –15 188.63 455 235 275.89 905 48596.09 14 –10 190.45 464 240 277.56 914 49098.04 23 –5 192.26 473 245 279.23 923 495100.0 32 0 194.07 482 250 280.90 932 500101.95 41 5 195.88 491 255 282.56 941 505103.90 50 10 197.69 500 260 284.22 950 510105.85 59 15 199.49 509 265 285.87 959 515107.79 68 20 201.29 518 270 287.53 968 520109.73 77 25 203.08 527 275 289.18 977 525111.67 86 30 204.88 536 280 290.83 986 530113.61 95 35 206.67 545 285 292.47 995 535115.54 104 40 208.45 554 290 294.11 1004 540117.47 113 45 210.24 563 295 295.75 1013 545119.40 122 50 212.02 572 300 297.39 1022 550121.32 131 55 213.80 581 305 299.02 1031 555123.24 140 60 215.57 590 310 300.65 1040 560125.16 149 65 217.35 599 315 302.28 1049 565127.07 158 70 219.12 608 320 303.91 1058 570128.98 167 75 220.88 617 325 305.53 1067 575130.89 176 80 222.65 626 330 307.15 1076 580132.80 185 85 224.41 635 335 308.76 1085 585134.70 194 90 226.17 644 340 310.38 1094 590136.60 203 95 227.92 653 345 311.99 1103 595138.50 212 100 229.67 662 350 313.59 1112 600140.39 221 105 231.42 671 355 315.20 1121 605142.29 230 110 233.17 680 360 316.80 1130 610144.17 239 115 234.91 689 365 318.40 1139 615146.06 248 120 236.65 698 370 319.99 1148 620147.94 257 125 238.39 707 375 321.59 1157 625149.82 266 130 240.13 716 380 323.18 1166 630151.70 275 135 241.86 725 385 324.76 1175 635153.58 284 140 243.59 734 390 326.35 1184 640155.45 293 145 245.31 743 395 327.93 1193 645THERMAL MANAGEMENT SOLUTIONS EN-<strong>Digi<strong>Trace</strong></strong><strong>920</strong>series-IM-H56874 04/13 74 / 82
Appendix F 100 Ω Nickel-Iron RTD TableOhms °F °C Ohms °F °C Ohms °F °C69.8 –100 –73 133.4 155 68 218.2 410 21071.1 –95 –70 134.8 160 71 220.1 415 21272.3 –90 –67 136.3 165 73 222.0 420 21573.1 –85 –65 137.8 170 76 223.9 425 21874.3 –80 –62 139.3 175 79 225.8 430 22175.5 –75 –59 140.8 180 82 227.7 435 22376.7 –70 –56 142.3 185 85 229.6 440 22678.0 –65 –53 143.8 190 87 231.5 445 22978.8 –60 –51 145.3 195 90 233.5 450 23280.0 –55 –48 146.8 200 93 235.4 455 23581.2 –50 –45 148.4 205 96 237.4 460 23782.2 –45 –42 149.9 210 98 239.3 465 24082.9 –40 –40 151.5 215 101 241.3 470 24384.2 –35 –37 153.0 220 104 243.3 475 24685.7 –30 –34 154.6 225 107 245.3 480 24886.9 –25 –31 156.2 230 110 247.2 485 25188.1 –20 –28 157.7 235 112 249.3 490 25488.9 –15 –26 159.3 240 115 251.2 495 25790.1 –10 –23 160.9 245 118 253.3 500 26091.4 –5 –20 162.5 250 121 255.2 505 26292.2 0 –17 164.2 255 123 257.3 510 26593.4 5 –15 165.8 260 126 259.3 515 26894.5 10 –12 167.4 265 129 261.4 520 27195.8 15 –9 169.0 270 132 263.4 525 27397.1 20 –6 170.7 275 135 265.5 530 27698.3 25 –3 172.3 280 137 267.6 535 27999.5 30 –1 174.0 285 140 269.6 540 282100.8 35 1 157.7 290 143 271.7 545 285102.0 40 4 177.4 295 146 273.8 550 287103.3 45 7 179.1 300 148 275.9 555 290104.5 50 10 180.8 305 515 278.0 560 293105.9 55 12 182.5 310 154 280.1 565 296107.2 60 15 184.2 315 157 282.3 570 298108.5 65 18 185.9 320 160 284.4 575 301109.8 70 21 187.6 325 162 286.5 580 304111.1 75 23 189. 330 165 288.6 585 307112.5 80 26 191.1 335 168 290.8 590 310113.8 85 29 192.9 340 171 293.1 595 312115.2 90 32 194.5 345 173 295.2 600 315116.5 95 35 196.4 350 176 297.5 605 318117.9 100 37 198.2 355 179 299.8 610 321119.2 105 40 199.9 360 182 301.4 615 323120.6 110 43 201.7 365 185 303.7 620 326122.0 115 46 203.5 370 187 306.0 625 329123.4 120 48 205.3 375 190 308.3 630 332124.8 125 51 207.2 380 193 310.6 635 335126.2 130 54 109.0 385 196 312.2 640 337127.6 135 57 210.8 390 198 314.5 645 340129.0 140 60 212.7 395 201 316.8 650 343130.5 145 62 214.5 400 204 319.1 655 346131.9 150 65 216.4 405 207 320.6 660 348THERMAL MANAGEMENT SOLUTIONS EN-<strong>Digi<strong>Trace</strong></strong><strong>920</strong>series-IM-H56874 04/1375 / 82
Appendix G Factory Default/Configuration SheetsG.1 Configuration Sheet V3.00The following defines the default <strong>920</strong> <strong>Series</strong> control module configuration as set by <strong>Pentair</strong><strong>Thermal</strong> Managament for firmware V3.00. These settings are subject to change without notice. Itis the user’s responsibility to verify that all configuration parameters are chosen appropriately forthe intended application. IMPORTANT: It is recommended that all parameters common to bothControl Points A and B be programmed first.Common Setup Sub-MenuParameter factory UserTemp. Units °FFirmware Version V3.0 n/aExt. Contact InputNot usedExt. Contact OutputNot usedFlash Alarm OutputYesAlarm Output StateN.C.LanguageEnglishPoint B UsedYesPasscode 0Communication Setup Sub-MenuParameter factory UserHTCBUS Addr(factory ID)ProtocolHTCBUSBaud RateAUTOHardwareNone, modem,RS-232 (if installed)DriverAutoProfileAutoTx Delay0.02 secsPoint Setup Sub-MenuParameter factory UserTagTAG-32768Switch Control ModeProportionalProp Band4°F (2°C)Deadbandn/aSwitch Rating30.0 ACircuit Breaker30.0 AMax Power7200 WTS CTL ModeTS1-Fail OffTS1 – High LimitDisableTS2 – High LimitDisableVolt Turns Ratio 1.00 to 1THERMAL MANAGEMENT SOLUTIONS EN-<strong>Digi<strong>Trace</strong></strong><strong>920</strong>series-IM-H56874 04/13 76 / 82
Point Setup Sub-Menu (Continued)Current Turns Ratio 1.00 to 1AutocycleEnableAutocycle Interval 8Autocycle UnitsHoursInhibit CtlDisableLoad SheddingDisableConfiguration Mode Main MenuParameter factory UserControl Setpoint68°F (20°C)TS Alarms Configuration Sub-MenuParameter factory UserTS 1 FailEnableLo TS 1 AlarmEnableLo TS 114°F (–10°C)Hi TS 1 AlarmEnableHi TS 1212°F (100°C)TS 2 FailDisableLo TS 2 AlarmDisableLo TS 2 —Hi TS 2 AlarmDisableHi TS 2 —Latch TS AlarmsYesTS CTL Fail AlarmEnableTHERMAL MANAGEMENT SOLUTIONS EN-<strong>Digi<strong>Trace</strong></strong><strong>920</strong>series-IM-H56874 04/1377 / 82
Other Alarms Configuration Sub-MenuParameter factory UserLo Load AlarmEnableLo Load1.00 AHi Load AlarmDisableHi Load —Hi GFI AlarmEnableHi GFI50 maGFI Trip AlarmEnableGFI Trip75 maLo Volt AlarmEnableLo Volt90 VHigh Volt Alarm EnableHi Volt 270 VNominal Resist 6.00 ΩLo Resist AlarmDisableLo Resist —Hi Resist AlarmDisableHi Resist —Overcurrent TripEnableSwitch Fail AlarmEnableHTC Reset AlarmDisableC.B. Limit AlarmDisablePower Limit AlarmDisableSwitch Limit AlarmDisableEEROM Data FailDisableTHERMAL MANAGEMENT SOLUTIONS EN-<strong>Digi<strong>Trace</strong></strong><strong>920</strong>series-IM-H56874 04/13 78 / 82
G.2 <strong>920</strong> <strong>Series</strong> HTC Configuration Sheet V3.1X and V3.2X= Most commonly changed settingIMPORTANT: Select temperature units before any other settings are entered.Configuration Mode Main MenuParameter factory UserControl Setpoint68°F (20°C)Lo TS 114°F (–10°C)Lo Load1.0 AHi GFI50 mAGFI Trip75 mATS Alarms Configuration Sub-MenuParameter factory UserTS 1 FailEnableLo TS 1EnableLo TS 114°F (–10°C)Hi TS 1DisableHi TS 1*n/a (212°F (100°C))TS 2 FailDisableLo TS 2DisableLo TS 2*n/a (14°F (–10°C))Hi TS 2DisableHi TS 2*n/a (212°F (100°C))Lo TS Filter0 minHi TS Filter*n/a (0 min)Latch TS AlarmsYesCTL TS FailEnableOther Alarms Configuration Sub-MenuParameter factory UserLo LoadEnableLo Load1.0 ALo Load Filter0 secHi LoadDisableHi Load *n/a (30.0 A)Hi Load Filter*n/a (0 sec)Hi GFIEnableHi GFI50 mAHi GFI Filter0 secTHERMAL MANAGEMENT SOLUTIONS EN-<strong>Digi<strong>Trace</strong></strong><strong>920</strong>series-IM-H56874 04/1379 / 82
Other Alarms Configuration Sub-Menu (Continued)GFI TripEnableGFI Trip75 mALo VoltEnableLo Volt90 VLo Volt Filter0 secHi VoltDisableHi Volt *n/a (270 V)Hi Volt Filter*n/a (0 sec)Lo ResistDisableLo Resist *n/a (50%)Lo Resist Filter*n/a (0 sec)Hi ResistDisableHi Resist *n/a (50%)Hi Resist Filter*n/a (0 sec)Nominal Resist *n/a (6.00 Ω)Overcurrent TripEnableSwitch FailEnableHTC ResetDisableC.B. LimitingDisablePower LimitingDisableSwitch LimitingDisableContactor Count*n/a (Enable)Countactor Count *n/a (200,000)EEROM Data FailEnablePoint Setup Sub-MenuParameter factory UserTagTAG-(factory ID)Switch Control ModeProportionalProp Band4°F (2°C)Deadband*n/a (5°F(3°C))Cycle Time*n/a (10 min)Switch Rating30.0 ACircuit Breaker30.0 AMax Power7200 W3 Ph Pwr Calc NoTS Fail ModeOffTS CTL ModeTS1-Fail OffTS 1 Type100 Ω PlatTS 1 Lead Resist *n/a (0 Ω)TS 1 Hi LimitDisableTS 2 Type100 Ω PlatTS 2 Lead Resist *n/a (0 Ω)TS 2 Hi LimitDisableVolt Source Pt A (or Pt B)Fixed Volt*n/a (120V)Volt Turns Ratio 1.00 to 1THERMAL MANAGEMENT SOLUTIONS EN-<strong>Digi<strong>Trace</strong></strong><strong>920</strong>series-IM-H56874 04/13 80 / 82
Parameter factory UserCurrent Turns Ratio 1.00 to 1AutocycleEnableAutocycle Interval 8Autocycle UnitsHoursOverride SourceRemoteLoad SheddingDisableCommon Setup Sub-MenuParameter factory UserTemperature Units °FVersion V3.2x.xx n/aExt. InputNot usedExt. OutputNot usedFlash Alarm OutputYesAlarm OutputN.C.LanguageEnglishPoint B UsedYesPasscode 0Scroll Delay0.15 secsCopy Config…(see user manual)Communication Setup Sub-MenuParameter factory UserProtocol HTCBUSHTCBUS Addr (factory ID)Modbus Addr *n/a (1)Modbus Sub Addr *n/a (0)Baud Rate AutoParity *n/a (None)Hardware None, modem, RS-232, RS-485 n/aDriver AutoProfile AutoTx Delay 0.06 secs*n/a Parameter may only appear if certain features are enabled. Values shown in brackets are<strong>Pentair</strong> <strong>Thermal</strong> Managament defaults if the settings are enabled.This information defines the default <strong>920</strong> <strong>Series</strong> control module configuration as set by <strong>Pentair</strong><strong>Thermal</strong> Managament for firmware up to V3.2x. These settings are subject to change withoutnotice.It is the user’s responsibility to verify that all configuration parameters are chosen appropriatelyfor the intended application.THERMAL MANAGEMENT SOLUTIONS EN-<strong>Digi<strong>Trace</strong></strong><strong>920</strong>series-IM-H56874 04/1381 / 82
WWW.THERMAL.PENTAIR.COMNORTH AMERICATel: +1.800.545.6258Fax: +1.800.527.5703Tel: +1.650.216.1526Fax: +1.650.474.7215thermal.info@pentair.comEurope, Middle East, AfricaTel: +32.16.213.511Fax: +32.16.213.603thermal.info@pentair.comAsia PacificTel: +86.21.2412.1688Fax: +86.21.5426.2917cn.thermal.info@pentair.comLatin AmericaTel: +55.11.2588.1400Fax: +55.11.2588.1410thermal.info@pentair.com<strong>Pentair</strong> and <strong>Digi<strong>Trace</strong></strong> are owned by <strong>Pentair</strong> or its global affiliates. All other trademarks are the property of their respective owners. <strong>Pentair</strong> reserves theright to change specifications without prior notice.© 2002-2013 <strong>Pentair</strong>.THERMAL MANAGEMENT SOLUTIONS EN-<strong>Digi<strong>Trace</strong></strong><strong>920</strong>series-IM-H56874 04/1382 / 82