operator's manual and parts list petrol log splitter - thpls7tp - Toolbox
operator's manual and parts list petrol log splitter - thpls7tp - Toolbox
operator's manual and parts list petrol log splitter - thpls7tp - Toolbox
Create successful ePaper yourself
Turn your PDF publications into a flip-book with our unique Google optimized e-Paper software.
SAFETY INSTRUCTIONSRead <strong>and</strong> underst<strong>and</strong> the owner’s <strong>manual</strong> <strong>and</strong> labels affixedto the <strong>log</strong><strong>splitter</strong>. Learn its application <strong>and</strong> limitations as wellas the specific potential hazards. Retain these instructions forreference.• Use sturdy footwear <strong>and</strong> a helmet with eye <strong>and</strong> ear protection.Protect exposed <strong>parts</strong> of your body. Wear heavy duty gloves,preferably made of leather.• Do not wear loose clothing or jewellery. Keep hair, clothing <strong>and</strong>gloves away from moving <strong>parts</strong>.• Do not operate the <strong>log</strong><strong>splitter</strong> if you are tired, ill or under theinfluence of alcohol or drugs.• Do not smoke when using the <strong>log</strong><strong>splitter</strong> <strong>and</strong> ensure caution whenh<strong>and</strong>ling fuel. We recommend you fuel the machine at least 3maway from where you wish to work in case any spilt fuel igniteswhen starting the engine.• Ensure that byst<strong>and</strong>ers, children <strong>and</strong> pets keep well away whenstarting or trimming - at least 15m.• Do not operate the machine on a steep slope.• Inspect the machine <strong>and</strong> all attachments before use for any worn ordamaged <strong>parts</strong>. Do not use until the <strong>parts</strong> are repaired or replaced.• Before starting the engine make sure you have a clear work area<strong>and</strong> secure footing.• The <strong>log</strong><strong>splitter</strong> should not be exposed to direct sunlight, hightemperatures or damp <strong>and</strong> wet conditions. In addition, do not usein a confined space but in a well ventilated, outdoor area.• Ensure that the engine is turned off before transporting or carryingout any maintenance. Allow to cool down to avoid accidentallytouching the hot exhaust.• Clean the <strong>log</strong><strong>splitter</strong> after each use <strong>and</strong>, if storing for a prolongedperiod, drain down the fuel in the tank. Remove the spark plug<strong>and</strong> put a few drops of oil into the cylinder before pulling thestarter a couple of times to distribute the oil evenly. Replace thespark plug.Page 3
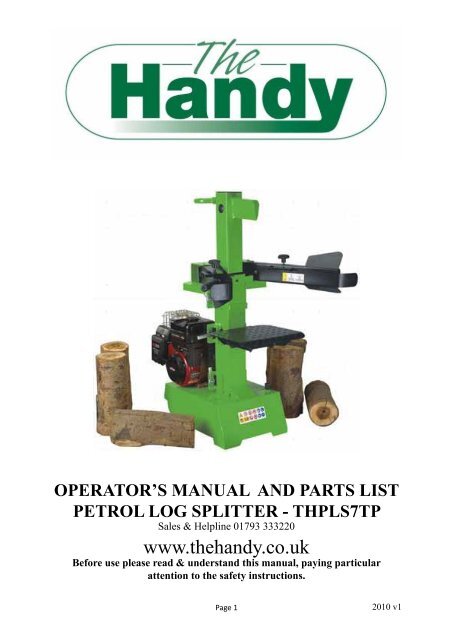
MAJOR PARTS1 Transport H<strong>and</strong>le 2 Ram Travel Adjusting Rod3 Split Wedge 4 Ram5 Control Levers Connection Bracket 6 Top Motor Shield7 Fuel Tank 8 Wheels9 Base 10 Oil Tank Cover / Air Bleeder11 Table Lock Down Hook 12 Support Table13 Side Bracket, Support Table 14 Front Bracket, Support Table15 Control Lever 16 Control Lever Guard17 Adjustable Log Holder 18 Log Holder Adjusting KnobPage 4
Work safely <strong>and</strong> save effort by planning your work beforeh<strong>and</strong>.Position your <strong>log</strong>s so that they can be easily lifted onto the <strong>log</strong><strong>splitter</strong> <strong>and</strong>, either stack close by or load onto a truck/trolley assoon as they are split.Inspect your <strong>log</strong>s <strong>and</strong> do not attempt to split <strong>log</strong>s containingnails, wire or debris which could damage the <strong>log</strong> <strong>splitter</strong>.The <strong>splitter</strong> can accomodate <strong>log</strong>s up to 104cm in length.When cutting up limbs or large sections do not cut longer than100cm. Place the support table into the position nearest to the<strong>log</strong> length - 52cm, 78cm or 104cm, <strong>and</strong> secure.Before operation, apply a thin coat of grease to the surfacesof the ram.• Loosen the oil tank cover a few turns to allow air to movefreely as described above. Re-tighten when you havefinished splitting.• Fill engine with SAE30 oil to the ‘full’ mark on the dipstick.Check the level of the oil.• Fill fuel tank with unleaded <strong>petrol</strong>.• Start the engine - the wedge ram should rise to the highestposition automatically.• If operating in low temperatures, allow the engine to run for15mins to preheat the oil.• Check the operation of both control levers by lowering sothat the splitting ram lowers to approx 5cm above thehighest table position. Release either lever <strong>and</strong> the splittingwedge will stay in the same postion. Release both levers atthe same time <strong>and</strong> the splitting wedge will return to thehighest position.To set the wedge ram stroke:• Move splitting wedge to desired position. The upper positionof the ram wedge travel should be about 3-5cm over the<strong>log</strong>s to be split.• Turn off the engine.• Release the Setscrew (A) with L key.Raise Adjusting Rod(B) until resistance is felt by the spring inside. Tighten theSetscrew.• Release both control levers <strong>and</strong> start engine.• Check the upper position of the splitting wedge.Page 8
OPERATION, cont’dTo operate:• Place <strong>log</strong> on support table vertically <strong>and</strong> sitting flat. Donot attempt to split a <strong>log</strong> at an angle <strong>and</strong> do not place the<strong>log</strong> across the <strong>splitter</strong> - always split in the direction of thegrain.• Adjust the Log Holders (A) to suit the diameter of the <strong>log</strong>.• Hold the <strong>log</strong> with the clamping brackets closely in thecontrol lever guards.• Lower levers to start splitting.• Releasing either of the levers stops the motion. Releasingboth levers returns the splitting wedge to the upperposition.Hints <strong>and</strong> Tips:• Never attempt to load the <strong>log</strong> <strong>splitter</strong> whilst the ram is inmotion.• Never try to split two <strong>log</strong>s at once.• Keep your h<strong>and</strong>s away from the splits <strong>and</strong> cracks whichappear whilst the <strong>log</strong> is being split.• Do not remove jammed <strong>log</strong>s with your h<strong>and</strong>s - stop theengine <strong>and</strong> loosen the <strong>log</strong> by a downward stroke on the <strong>log</strong>with a hammer.• Do not force the tool <strong>and</strong> do not make alterations to the<strong>log</strong> <strong>splitter</strong> as this could be dangerous <strong>and</strong> invalidate yourwarranty.• Do not try to split <strong>log</strong>s larger than recommended in thespecifications table.• After long periods of operation the splitting wedge mayneed sharpening. Use a fine toothed file to remove burrs,or flat spots on the edge.• Check the level of the hydraulic oil regularly using thedipstick. In addition the oil should be changed once ayear.Recommended oils are:SHELL Tellus 22MOBIL DTE 11ARAL Vitam GF22BP Energol HLP-HM 22Page 9
PARTS DIAGRAMWIRING DIAGRAMPage 10
PARTS LISTNo Part No Description Qty No Part No Description Qty1 TH107-1 Upright Tube Weld B&S 1 41 TH107-41 CCQ Cylinder 12 TH107-2 Pump Guard 1 42 TH107-42 Hex Bolt 23 TH107-3 Spring Washer 6 1 43 TH107-43 Lever H<strong>and</strong>le 24 TH107-4 Screw M6x12 1 44 TH107-44 Locknut M8 25 TH107-5 O Ring 23.6x3.55G 1 45 TH107-45 Pin D 16 TH107-6 Cap 1 46 TH107-46 Operating H<strong>and</strong>le 27 TH107-7 Washer 10 26 47 TH107-47 Thin Nut 68 TH107-8 Lockout Lever 6 48 TH107-48 Washer 8 149 TH107-9 Bolt M10x35 8 49 TH107-49 Control Link Plate 110 TH107-10 Clamping Fork (Right) 1 50 TH107-50 Nut 111 TH107-11 Right Guard Assy 1 51 TH107-51 Draw Rod Lock Cover 112 TH107-42 Knob M8x20 2 52 TH107-52 Supporting Ring 113 TH107-13 Fork 2 53 TH107-53 Draw Rod 114 TH107-14 Control Lever Shaft 2 54 TH107-54 Draw Sleeve Nut 115 TH107-15 Work Table 2 1 55 TH107-55 Thin Nut M16 116 TH107-16 Plastic Insert 4 1 56 TH107-56 Draw Sleeve 117 TH107-17 Plastic Insert 2 1 57 TH107-57 Hose Clamp 22-28 418 TH107-18 Plastic Insert 1 1 58 TH107-58 Bolt M6x30 119 TH107-19 Plastic Insert 3 1 59 TH107-59 CA Valve 120 TH107-20 Clamping Fork 1 (Left) 1 60 TH107-60 Wedge Bracket Weld B 121 TH107-21 Left Guard Assy 1 61 TH107-61 T Connector, Tape 122 TH107-22 Screw M6x10 6 62 TH107-62 Washer Groupware 20 1223 TH107-23 Washer 6 6 63 TH107-63 Valve Tube Nozzle 124 TH107-24 Locknut M10 6 64 TH107-64 High Pressure Oil Hose 24 125 TH107-25 Wheel A 2 65 TH107-65 Valve Injection Nozzle 126 TH107-26 Circlip 16 2 66 TH107-66 Oil Return Pipe 127 TH107-27 Bolt M16x15 1 67 TH107-67 High Pressure Oil Hose 128 TH107-28 Washer Groupware 16 1 68 TH107-68 Nozzle 9/16-18-UNF- 12BXM20x1.529 TH107-29 Sliding Plate 4 69 TH107-69 Gear Pump 130 TH107-30 Knob 1 70 TH107-70 Orientation Ring 131 TH107-31 Wedge Bracket Round 2 71 TH107-71 Joining 1Cover32 TH107-32 Round Cover 1 72 TH107-72 Engine (B&S) 133 TH107-33 Square Cover 1 73 TH107-73 Bolt M8x35 434 TH107-34 Nut M20 3 74 TH107-74 Rubber Washer (UR) 135 TH107-35 High Pressure Oil Hose 24 1 75 TH107-75 Bolt M8x30 436 TH107-36 Spring Washer 8 6 76 TH107-76 Same Rev Joint CL090 112.7-2037 TH107-37 Locknut M6 1 77 TH107-77 Orientation Screw 238 TH107-38 Bolt M8x25 2 78 TH107-78 Intake House 139 TH107-39 Circlip 22 4 79 TH107-79 Tie-in 20 140 TH107-40 Lock Shaft 1 80 TH107-80 Nozzle 3/4-16-UNF-2BXM20x1.51Page 11
EC DECLARATION OF CONFORMITYDeclaration of ConformityPursuant to the regulations of the following EC Directives:- Machinery Directive 98/37/ECH<strong>and</strong>y Distribution Ltd hereby declares that the product:Machine Type: Log SplitterMachine Model: THPLS7TPConforms to the main safety requirements of the EC Directives <strong>list</strong>ed above.This conformity is based on the following st<strong>and</strong>ards <strong>and</strong> normative documents:- 98/37/EC - ANNEX I- EN609-1:1999+A1The responsible person, based within the EC, is identified belowName: Mr Simon BelcherTitle: Managing DirectorCompany: H<strong>and</strong>y Distribution LtdAddress: Hobley Drive, Stratton St Margaret, SWINDON, SN3 4NSSignature: Date: 15th Nov 2008Page 12
To order spare <strong>parts</strong> <strong>and</strong> see the complete range of gardenmachinery <strong>and</strong> garden equipment from H<strong>and</strong>y, visit:www.theh<strong>and</strong>y.co.ukPage 13


