
You also want an ePaper? Increase the reach of your titles
YUMPU automatically turns print PDFs into web optimized ePapers that Google loves.
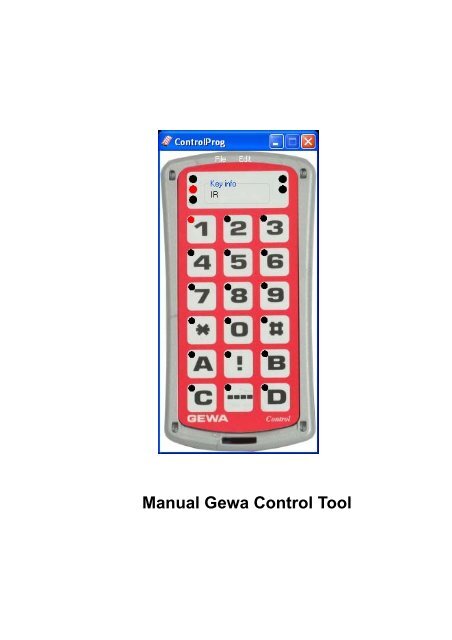
<strong>Manual</strong> <strong>Gewa</strong> <strong>Control</strong> <strong>Tool</strong>
Innehåll/ContentsSE MANUAL GEWA CONTROL TOOL ............................................................... 3INLEDNING ...................................................................................................................... 3KOMPATIBLA PRODUKTER............................................................................................... 3INSTALLERA GEWA CONTROL PROG ............................................................................... 4INKOPPLING AV IR-SÄNDARE TILL DATOR....................................................................... 5BESKRIVNING.................................................................................................................. 6REDIGERA IR-SÄNDARE .................................................................................................. 7Kopiera IR-kanal från en tangent till en annan tangent ............................................ 7Kopiera IR-kanal från backup-fil till en annan IR-sändare....................................... 8Spara tangentinformation........................................................................................... 9Lägga in tangentbordskommandon .......................................................................... 10GB MANUAL GEWA CONTROL TOOL ............................................................. 12INTRODUCTION.............................................................................................................. 12COMPATIBLE PRODUCTS................................................................................................ 12INSTALLING GEWA CONTROL PROG.............................................................................. 13CONNECTING AN IR TRANSMITTER TO A COMPUTER...................................................... 14DESCRIPTION................................................................................................................. 15EDITING IR TRANSMITTER............................................................................................. 16Copying IR code from one key to another key.......................................................... 16Copying IR code from a backup file to another IR transmitter................................ 17Saving key information ............................................................................................. 18Adding keyboard commands..................................................................................... 192
SE<strong>Manual</strong> <strong>Gewa</strong> <strong>Control</strong> <strong>Tool</strong>Inledning<strong>Gewa</strong> <strong>Control</strong> <strong>Tool</strong> är ett verktyg för att kunna göra backup och redigera IR-kanaler påprogrammerbara IR-sändare.Kompatibla produkterFöljande IR-sändare är kompatibla med <strong>Gewa</strong> <strong>Control</strong> <strong>Tool</strong>:425700 <strong>Control</strong> Prog425718 <strong>Control</strong> 18425710 <strong>Control</strong> 104256 <strong>Gewa</strong> Prog III(backup-fil från GP-III ver. 2.x och 3.x kan konverteras till <strong>Control</strong> Prog, GP-III Mod)422900 IR-17SP(backup-fil från IR-17SP ver. 2.x, och 3.x kan konverteras till <strong>Control</strong> 18)422400 IR-9SP(backup-fil från IR-9SP ver. 2.x och 3.x kan konverteras till <strong>Control</strong> 10)4069 IR-5SP425613 GP-III Module6610 Access Medi Scan6600 Access Maxi425615 <strong>Control</strong> Star USB425638 <strong>Control</strong> Micro USB425315 Progress Star USB425346 Progress Micro USB3
Installera <strong>Gewa</strong> <strong>Control</strong> ProgFör att undvika problem vid igångkörning av programvara och hårdvara är det viktigt attman följer installationsanvisningen. OBS! Börja med att installera mjukvaran innannågon IR-sändare kopplas in. <strong>Gewa</strong> <strong>Control</strong> <strong>Tool</strong> är kompatibel med Win 98 andrautgåvan, Win 2000 och Win XP.Gör enligt följande för att installera programvara och hårdvara:1. Sätt i CD-skivan <strong>Gewa</strong> <strong>Control</strong> <strong>Tool</strong> i datorns CD-enhet. Vänta tills eninstallationsguide visas på skärmen. Detta kan ta några sekunder. Ominstallationsguiden inte visas: Gå till Start-menyn, Välj Kör och skriv D:\setup (bytut D om din CD-enhet har en annan beteckning). Klicka på OK. Följinstallationsguiden.2. Anslut en IR-sändare till datorns USB-port eller Serie-port (se "Inkoppling av IRsändaretill datorn"). Om IR-sändare kopplas till en USB-port startas installation avDrivrutiner. USB Serial Converter installeras först och sedan drivrutin för USBSerial Port. Välj automatisk installation. Vid installation i Win 98 måste man ävenange att drivrutiner skall hämtas från CD, sökvägen, D:\Drivers\w98_w2k_wxp.Om drivrutiner redan finns installerade kommer denna del att hoppas över.3. Ta ur CD-skivan ur CD-enheten.4
Inkoppling av IR-sändare till datorFör att kunna koppla in en IR-sändare till datorn erfordras en kabel. Denna kabel ärolika för olika sändare och olika om det är Serie-port eller USB-port. Följande tabellvisar vilka kablar som kan användas:Typ av IR-sändare Kabel till Serie-port Kabel till USB-port425700 <strong>Control</strong> Prog 425618 Datakabel8-pol Mini DIN/D-Sub 9425620 AdapterUSB/Seriell4256 <strong>Gewa</strong> Prog III - " - - " -425613 GP-III Module - " - - " -6610 Access Medi - " - - " -6600 Access Maxi - " - - " -425718 <strong>Control</strong> 18 425618 Datakabel8-pol Mini DIN/D-Sub 9425636 Adapter 8-pol MiniDIN/7-pol Slits425620 AdapterUSB/Seriell425636 Adapter 8-pol MiniDIN/7-pol Slits425710 <strong>Control</strong> 10 - " - - " -422900 IR-17SP 406918 Datakabel 3-pol Kan ej kopplas inJST D-Sub 9422400 IR-9SP - " - Kan ej kopplas in4069 IR-5SP - " - Kan ej kopplas in425346 ProgressMicro USBKan ej kopplas inKopplas direkt till USBport425615 <strong>Control</strong> Star- " - - " -USB425638 <strong>Control</strong> Micro- " - - " -USB425315 Progress StarUSB- " - - " -425618 Datakabel8-pol Mini DIN/D-Sub 9425620 Adapter USB/Seriell406918 Datakabel3-pol JST D-Sub 9425636 Adapter 8-polMini DIN/7-pol Slits5
BeskrivningSöker efter anslutenIR-sändareVisar vilken IR-sändare ochversion som är ansluten tilldatornÖppna/Stänga anslutenIR-sändareVisar vilken IR-sändare ochversion som hämtats ner tilldatorns arbetsminneHämta från/Spara tillansluten IR-sändareRedigera funktionerSe "Redigera IR-sändare"Hämta från filSpara ner till filRensar datorns arbetsminneVisar hur mycketinformation som finnsi datorns arbetsminne6
Redigera IR-sändareOm man klickar på knappen "Visual editor" så kommer man till en nytt fönster där mankan:• kopiera IR-kanal från en tangent till en annan tangent oavsett nivå• kopiera IR-kanal från backup-fil till en annan tangent på en annan IR-sändare• namnge varje tangent• lägga till tangentbordskommandonKopiera IR-kanal från en tangent till en annan tangent1. Klicka på knappen "Visual Editor".2. Välj tangent och nivå som skall kopieras. Fönstret kan se annorlundaut beroende på IR-sändare som ligger i datorns arbetsminne.3. Klicka på "Edit" och klicka sedan på "Copy".4. Välj tangent och nivå där IR-kanal skall klistrasin.5. Klicka på "Edit" och klicka sedan på "Paste".7
Kopiera IR-kanal från backup-fil till en annan IR-sändare1. Klicka på knappen "Visual Editor".2. Klicka på "File" och "Open backup file".OBS! Fönstret kan se annorlunda ut beroende på vilkenIR-sändare som ligger i datorns arbetsminne.3. Välj fil som IR-kanaler skall kopieras ifrån. Klicka på"OK". En ny IR-sändare kommer nu upp på skärmen.4. Välj tangent och nivå som skall kopieras.5. Klicka på "Edit" och klicka sedan på "Copy".6. Gå tillbaka till ursprunglig IR-sändare7. Välj tangent och nivå där IRkanalskall klistras in.8. Klicka på "Edit" och klickasedan på "Paste".8
Spara tangentinformationPå varje tangent finns det möjlighet att lägga in information som sparas i en fil. Det kanvara typ av funktion, kanalnummer eller annan information. OBS! Informationen kanbara sparas på datorn, kan ej sparas ner till en IR-sändare.1. Klicka på knappen "Visual Editor".2. Välj nivå och tangent där tangentinformation skall läggas in. Fönstret kan seannorlunda ut beroende på IR-sändare som ligger i datorns arbetsminne.3. Klicka på "Edit" och klicka sedan på "Rename".Skriv in lämplig information.9
Lägga in tangentbordskommandonIR-sändaren <strong>Control</strong> Prog har möjlighet att simulera tangentbordkommandon. Med<strong>Gewa</strong> <strong>Control</strong> <strong>Tool</strong> är det möjligt att lägga in tangentbordskommandon på valfriatangenter. Alla tangentbordskommandon som finns på ett datortangentbord kansimuleras. För att med IR-sändaren kunna sända tangentbordskommandon erfordras att6632 Access USB interface är inkopplat till en dator. Se manual för Access USBinterface hur detta kopplas in.1. Klicka på knappen "Visual Editor".2. Välj nivå och tangent där tangentbordskommandon skall läggas in.3. Klicka på "Edit" och klicka sedan på "AddKeyboard simulation". Ett nytt fönster kommer nuupp på skärmen.4. Ställ in "Interface ID". Detskall vara samma ID som finnsinställd på Access USB interface.0 = standardinställning5. Ställ in "Scan multiple".1 innebär att tecken repeteraslika fort somscanningshastigheten i <strong>Control</strong>Prog. Om 2 ställs in blirrepetitionen hälften så snabb.1 = standardinställning.8. Avsluta genom att tryckapå "Create and Exit".7. Ställ in "Simulation type".Om man vill att en tangentskall hållas nedtryck medanman trycker ner nästa tangentmarkerar man "One hold", t.exsom i kommandot Alt + Tab.6. Ställ in "Scancodes". Setabell för respektive funktion.På bilden är Alt+Tab inställt.10
KeyScancodes[dec]KeyScancodes[dec]KeyScancodes[dec]KeyScancodes[dec]NotUsed 0 S 32 R Ctrl 64 8 num 96∼ ` 1 D 33 NotUsed 65 5 num 97! 1 2 F 34 NotUsed 66 2 num 982 @ 3 G 35 Japanese 67 0 num 993 # 4 H 36 Japanese 68 * num 1004 $ 5 J 37 Japanese 69 9 num 1015 % 6 K 38 L Win 70 6 num 1026 ^ 7 L 39 R Win 71 3 num 1037 & 8 ; : 40 Win Appl 72 . num 1048 * 9 ‘ ” 41 NotUsed 73 - num 1059 ( 10 NotUsed 42 NotUsed 74 + num 1060 ) 11 Enter 43 Insert 75 NotUsed 107- _ 12 L shift 44 Delete 76 Entr num 108+ = 13 NotUsed 45 NotUsed 77 NotUsed 109Japanese 14 Z 46 NotUsed 78 Esc 110BS 15 X 47 ⇐ 79 NotUsed 111Tab 16 C 48 Home 80 F1 112Q 17 V 49 End 81 F2 113W 18 B 50 NotUsed 82 F3 114E 19 N 51 ⇑ 83 F4 115R 20 M 52 ⇓ 84 F5 116T 21 , < 53 Pg Up 85 F6 117Y 22 > . 54 Pg Dn 86 F7 118U 23 / ? 55 NotUsed 87 F8 119I 24 Japanese 56 NotUsed 88 F9 120O 25 R shift 57 ⇒ 89 F10 121P 26 L Ctrl 58 num lk 90 F11 122[ { 27 NotUsed 59 7 num 91 F12 123] } 28 L Alt 60 4 num 92 PrtScr 124| \ 29 Space 61 1 num 93 ScrlLk 125Caps 30 R Alt 62 NotUsed 94 Pause 126A 31 NotUsed 63 / num 95 NotUsed 12711
GB<strong>Manual</strong> <strong>Gewa</strong> <strong>Control</strong> <strong>Tool</strong>Introduction<strong>Gewa</strong> <strong>Control</strong> <strong>Tool</strong> is a tool used to make backup and edit IR channels onprogrammable IR transmitters.Compatible productsThe following IR transmitters are compatible with <strong>Gewa</strong> <strong>Control</strong> <strong>Tool</strong>:425700 <strong>Control</strong> Prog425718 <strong>Control</strong> 18425710 <strong>Control</strong> 104256 <strong>Gewa</strong> Prog III(backup-file from GP-III ver. 2.x and 3.x can be converted to <strong>Control</strong> Prog, GP-IIIMod)422900 IR-17SP(backup-file fom IR-17SP ver. 2.x, and 3.x can be converted to <strong>Control</strong> 18)422400 IR-9SP(backup-file from IR-9SP ver. 2.x and 3.x can be converted to <strong>Control</strong> 10)4069 IR-5SP425613 GP-III Module6610 Access Medi Scan6600 Access Maxi425615 <strong>Control</strong> Star USB425638 <strong>Control</strong> Micro USB425315 Progress Star USB425346 Progress Micro USB12
Installing <strong>Gewa</strong> <strong>Control</strong> ProgTo avoid problems when starting up software and hardware, it is important to follow theinstallation guide. Note! Start by installing the software before connecting any IRtransmitter. <strong>Gewa</strong> <strong>Control</strong> <strong>Tool</strong> is compatible with Win98 second edition, Win 2000and Win XP.Install software and hardware by the following procedure:1. Insert the CD <strong>Gewa</strong> <strong>Control</strong> <strong>Tool</strong> in the CD unit on the computer. Wait until aninstallation quide is shown on the screen. It might take a few seconds. If theinstallation guide is not shown: Go to Start-menu, Select Drive and writeD:\setup (exchange D if the CD unit has another designation). Click on OK.Follow the installation guide.2. Connect an IR-transmitter to the USB-port on the computer or the Serial port (see"Connecting IR transmitter to the computer"). If the IR-transmitter is conncted tothe USB port an installation of drivers will start. Begin by installing the Driverfor the USB Serial Converter and then the driver for the USB Serial Port. Selectautomatic installation. When installing in Win98 it must be specified that youmust pick up drivers from the CD, path D:\Drivers\w98_w2k_wxp. If drivers arealready installed this section will be neglected.3. Remove the CD from the CD-unit.13
Connecting an IR transmitter to a computerTo be able to connect an IR transmitter to the computer a cable is required. Differenttransmitters require different cables and differs also if it is a serial port or a USB-port.The table below shows the cables that can be used:Type of IRCable for serial port Cable for USB-porttransmitter425700 <strong>Control</strong> Prog 425618 Data cable8-pole Mini DIN/D-Sub 9425620 AdapterUSB/Serial4256 <strong>Gewa</strong> Prog III - " - - " -425613 GP-III Module - " - - " -6610 Access Medi - " - - " -6600 Access Maxi - " - - " -425718 <strong>Control</strong> 18 425618 Data cable8 pole Mini DIN/D-Sub 9425636 Adapter 8-poleMini DIN/7-Pole Slits425620 Adapter USB/serial425636 Adapter 8 poleMini DIN/7-Pole Slits425710 <strong>Control</strong> 10 - " - - " -422900 IR-17SP 406918 Data cable 3-Pole Cannot be connectedJST D-Sub 9422400 IR-9SP - " - Cannot be connected4069 IR-5SP - " - Cannot be connected425346 ProgressMicro USBCannot be connected Conntected directly to theUSB port425615 <strong>Control</strong> Star- " - - " -USB425638 <strong>Control</strong> Micro- " - - " -USB425315 Progress StarUSB- " - - " -425618 Data cable8 pole Mini DIN/D-Sub425620 Adapter USB/Serial406918 Data cable3 Pole JST D-Sub 9425636 Adapter 8-poleMini DIN/7 pole Slits14
DescriptionSearches for the connectedIR transmitterShows which IR transmitterand version that is connectedto the computerOpen/Close connectedIR transmitterShows which IR transmitterand version that have beenloaded to the workingmemory on the computerLoad from/Save toconnected IR transmitterLoad from fileSave to fileClear the working memoryon the computerEdit functionsSee "Edit IR transmitter”Shows availableinformation in the workingmemory on the computer15
Editing IR transmitterIf you click on the button "Visual editor" you enter a new window where you can see:• copy IR code from one key to another key irrespective of level• copy IR code from the backup file to another key on another IR transmitter• name every key• add keyboard commandsCopying IR code from one key to another key1. Click on the button "Visual Editor".2. Select key and level that are to be copied. The window might lookdifferent depending on which IR transmitter has been loaded in theki th t3. Click on "Edit" and then click on "Copy".4. Select key and level to which the copied part shallbe pasted.5. Click on "Edit" and then on "Paste".16
Copying IR code from a backup file to another IR transmitter1. Click on the button "Visual Editor".2. Click on "File" and "Open backup file".Note! The window might look different depending onwhich IR transmitter has been loaden in the workingmemory on the computer.3. Select file from which IR codes shall be copied. Click on"OK". A new IR transmitter will now be shown on thescreen.4. Select key and level that are to be copied.5. Click on "Edit" and then click on "Copy".6. Return to the original IR transmitter7. Select key and level to whichthe IR code shall be pasted.8. Click on "Edit" and then clickon "Paste".17
Saving key informationOn each key it is possible to add information saved in a file. It can be type of function,code number or other information. Note! The information can only be saved in thecomputer and cannot be saved on an IR transmitter.1. Click on the button "Visual Editor".2. Select level and key to which the key information shall be added. The windowmight look different depending on which IR transmitter has been loaded in theworking memory on the computer.3. Click on "Edit" and then click on "Rename".Write the adequate information.18
Adding keyboard commandsThe IR transmitter <strong>Control</strong> Prog has the possibility to simulate keyboard commands. By<strong>Gewa</strong> <strong>Control</strong> <strong>Tool</strong> it is possible to add keyboard commands on any key. All keyboardcommands available on a computer keyboard can be simulated. To be able to sendkeyboard commands by the IR transmitter, 6632 Access USB interface must beconnected to a computer. See Access USB interface manual how to connect.1. Click on the button "Visual Editor".2. Select level key to which the keyboard command is to be added.3. Click on "Edit" and then on "Add Keyboardsimulation". A new window is now shown on thedisplay.4. Set "Interface ID". It must bethe same ID as the one set onAcess USB interface.0 = default setting5. Set "Scan multiple".1 means that a character isrepeated with the same speedas the scanning speed in<strong>Control</strong> Prog. If 2 is set therepetition is made at half thespeed.1= default setting.8. Complete by pressing"Create and Exit".7. Set the "Simulation type". Ifyou want to keep a key pressedwhile pressing next key "Onehold" shall be marked like inthe command Alt+Tab.6. Set "Scancodes". See tablefor each function. On thepicture Alt+Tab is set.19
KeyScancodes[dec]KeyScancodes[dec]KeyScancodes[dec]KeyScancodes[dec]NotUsed 0 S 32 R Ctrl 64 8 num 96∼ ` 1 D 33 NotUsed 65 5 num 97! 1 2 F 34 NotUsed 66 2 num 982 @ 3 G 35 Japanese 67 0 num 993 # 4 H 36 Japanese 68 * num 1004 $ 5 J 37 Japanese 69 9 num 1015 % 6 K 38 L Win 70 6 num 1026 ^ 7 L 39 R Win 71 3 num 1037 & 8 ; : 40 Win Appl 72 . num 1048 * 9 ‘ ” 41 NotUsed 73 - num 1059 ( 10 NotUsed 42 NotUsed 74 + num 1060 ) 11 Enter 43 Insert 75 NotUsed 107- _ 12 L shift 44 Delete 76 Entr num 108+ = 13 NotUsed 45 NotUsed 77 NotUsed 109Japanese 14 Z 46 NotUsed 78 Esc 110BS 15 X 47 ⇐ 79 NotUsed 111Tab 16 C 48 Home 80 F1 112Q 17 V 49 End 81 F2 113W 18 B 50 NotUsed 82 F3 114E 19 N 51 ⇑ 83 F4 115R 20 M 52 ⇓ 84 F5 116T 21 , < 53 Pg Up 85 F6 117Y 22 > . 54 Pg Dn 86 F7 118U 23 / ? 55 NotUsed 87 F8 119I 24 Japanese 56 NotUsed 88 F9 120O 25 R shift 57 ⇒ 89 F10 121P 26 L Ctrl 58 num lk 90 F11 122[ { 27 NotUsed 59 7 num 91 F12 123] } 28 L Alt 60 4 num 92 PrtScr 124| \ 29 Space 61 1 num 93 ScrlLk 125Caps 30 R Alt 62 NotUsed 94 Pause 126A 31 NotUsed 63 / num 95 NotUsed 127<strong>Gewa</strong> ABBOX 92, SE-191 22 SOLLENTUNA, SWEDENTEL: +46 (0)8-594 694 00 • TEXTTEL: +46 (0)8-594 694 18 • FAX: +46 (0)8-594 694 19E-MAIL: info@gewa.se • WEB: www.gewa.seDoc.no: 060821-1010. Doc: <strong>Manual</strong> <strong>Gewa</strong> <strong>Control</strong> <strong>Tool</strong> SE, GB Ver: B. Date: 2007-01-18.20