Coil-Over - Front End Suspension - Total Cost Involved
Coil-Over - Front End Suspension - Total Cost Involved
Coil-Over - Front End Suspension - Total Cost Involved
- No tags were found...

Create successful ePaper yourself
Turn your PDF publications into a flip-book with our unique Google optimized e-Paper software.
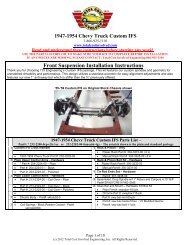
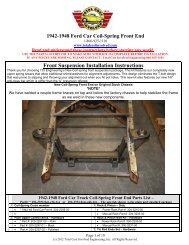
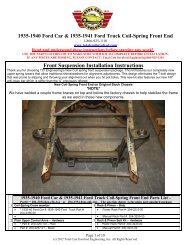
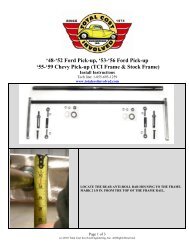
Use a C-clamp from the inside and pull the bracket down snug to the top of theframe rail.When everything is tight, tack weld all the way around then finish weld. Next,remove the tab with the bolt hole in the shock clearance relief and finish weld.Weld up the four 3/8 inch locating holes and finish grind for a cleanappearance.The sway bar bracket is mounted 12 inch’s from the front edge of the crossmember to the center of the bracket.Clamp securely to the bottom of the frame with the wings flush against theinside of the frame and weld.Completely welded.The lower a-arms are installed with the sway bar bung facing forward. The 5/8inch shaft is installed with the acorn nut facing forward with a thin stainlesswasher on both sides of the urethane bushings on the a-arm.(c) 2011 <strong>Total</strong> <strong>Cost</strong> <strong>Involved</strong> Engineering, Inc. All Rights Reserved10