J2 Virtual Customer Display Software Manual ver 1.0.pdf - Size
J2 Virtual Customer Display Software Manual ver 1.0.pdf - Size
J2 Virtual Customer Display Software Manual ver 1.0.pdf - Size

You also want an ePaper? Increase the reach of your titles
YUMPU automatically turns print PDFs into web optimized ePapers that Google loves.
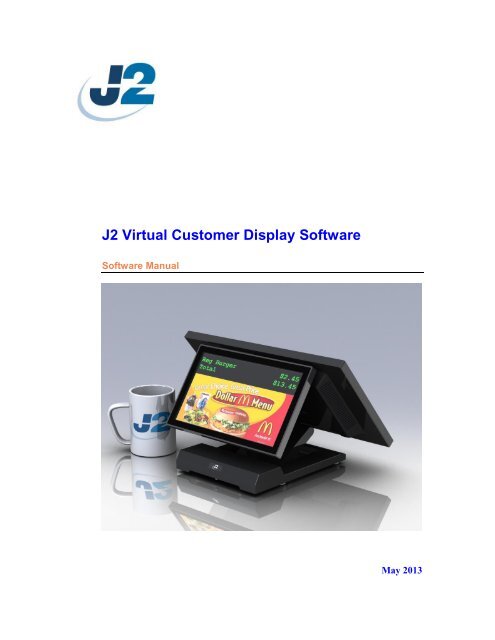
<strong>J2</strong> <strong>Virtual</strong> <strong>Customer</strong> <strong>Display</strong> <strong>Software</strong><strong>Software</strong> <strong>Manual</strong>May 2013
Copyright © 2013 <strong>J2</strong> Retail Systems LtdAll other trademarks are the property of their respective owners.All rights reserved.Change historyVersion 1.0 Released May 19, 2013<strong>Software</strong> <strong>Manual</strong> <strong>J2</strong> <strong>Virtual</strong> <strong>Customer</strong> <strong>Display</strong>Version 1.0 May 20132
ContentsO<strong>ver</strong>view ............................................................................................................................ 4<strong>Software</strong> Design ................................................................................................................. 5Installation ......................................................................................................................... 5<strong>J2</strong> <strong>Virtual</strong> Port Setup ....................................................................................................... 5<strong>J2</strong> <strong>Virtual</strong> <strong>Customer</strong> Setup ............................................................................................ 10<strong>J2</strong> <strong>Virtual</strong> <strong>Customer</strong> <strong>Display</strong> Configuration ................................................................. 11VCD Testing ................................................................................................................. 12VCD Operation ............................................................................................................... 14<strong>Software</strong> Commands ..................................................................................................... 15EPSON ESC/POS Mode Commands ........................................................................... 16UTC STD Mode Commands ........................................................................................ 18Contact Information ....................................................................................................... 20<strong>Software</strong> <strong>Manual</strong> <strong>J2</strong> <strong>Virtual</strong> <strong>Customer</strong> <strong>Display</strong>Version 1.0 May 20133
O<strong>ver</strong>viewThe <strong>J2</strong> <strong>Virtual</strong> <strong>Customer</strong> <strong>Display</strong> (VCD) program was written for customers that want touse their current POS software that only supports character customer displays but stillwish use a large secondary screen for ad<strong>ver</strong>tising as well a large format customer display.This software provides this function.The software emulates a standard serial port 2x20 line VFD/LCM customer display.<strong>Customer</strong> display data is written to a serial port just as it would be when using a normalVFD or LCD customer display. The display information is then written to a display boxon the LCD customer display. The data may be written directly to the VCD virtual serialport or the standard <strong>J2</strong> OPOS dri<strong>ver</strong> can be used.The display can be used in a pop up mode or always on display mode. In the always ondisplay mode the software displays a box on the customer display with the rest of thedisplay available for ad<strong>ver</strong>tising or upselling content. In the pop up mode if the customerdisplay data is blank (no displayable characters) the display windows will disappearmaking the whole display available for ad<strong>ver</strong>tising or upselling content. Once anyinformation is sent to the customer display the display windows will pop up displayingthe customer display information from the software application.The ad<strong>ver</strong>tising or upselling content can be as simple as a Windows picture slide showfile, PowerPoint created slide show, video file or third party ad<strong>ver</strong>tising software. Thekey is the ad<strong>ver</strong>tising software runs in the background to POS application so the two aretotally independent of each other.This is a way to add ad<strong>ver</strong>tising content without any modification to existing POSapplications as long as it supports a standard 2X20 display. Other display sizes can besupported as well such as 4x20 or most any other size. Contact <strong>J2</strong> if other options areneeded.Of course the best way to support ad<strong>ver</strong>tising or upselling content is to have it integratedinto the POS application software but the <strong>J2</strong> <strong>Virtual</strong> <strong>Customer</strong> <strong>Display</strong> software canprovide and alternative method at no additional cost to <strong>J2</strong> customers.<strong>Software</strong> <strong>Manual</strong> <strong>J2</strong> <strong>Virtual</strong> <strong>Customer</strong> <strong>Display</strong>Version 1.0 May 20134
<strong>Software</strong> DesignThe <strong>J2</strong> <strong>Virtual</strong> <strong>Customer</strong> <strong>Display</strong> (VCD) software is broken up into three modules. Thefirst module is the <strong>J2</strong> <strong>Virtual</strong> Serial Port program that installs the virtual serial port dri<strong>ver</strong>VCD will use. The second is the <strong>J2</strong> <strong>Virtual</strong> <strong>Customer</strong> <strong>Display</strong> Configuration program thatallows for setting of the options for the VCD and installs the VCD dri<strong>ver</strong>. The third is the<strong>J2</strong> VCD dri<strong>ver</strong> itself.InstallationTo install the <strong>J2</strong> VCD please download the <strong>J2</strong> <strong>Virtual</strong> Port Setup the <strong>J2</strong> <strong>Virtual</strong> <strong>Customer</strong>Setup software from the <strong>J2</strong> Support web site.The web sites address is: http://support.j2rs.com/Once the software is downloaded run <strong>J2</strong> <strong>Virtual</strong> Port Setup then <strong>J2</strong> <strong>Virtual</strong> <strong>Customer</strong>Setup to install the software as described in the next sections.<strong>J2</strong> <strong>Virtual</strong> Port SetupAfter downloading the setup file run it on the system you wish to install the software on.The setup can be run from the zip file without extracting.Just select next<strong>Software</strong> <strong>Manual</strong> <strong>J2</strong> <strong>Virtual</strong> <strong>Customer</strong> <strong>Display</strong>Version 1.0 May 20135
The software now installs, this can take a minuteOnce complete just select close<strong>Software</strong> <strong>Manual</strong> <strong>J2</strong> <strong>Virtual</strong> <strong>Customer</strong> <strong>Display</strong>Version 1.0 May 20136
This screen may pop up after closing the setup screen. Just select OK to close it.If the launch <strong>Virtual</strong> Port check box was left check the configuration program will notrun. When un-configured it will look like this.<strong>Software</strong> <strong>Manual</strong> <strong>J2</strong> <strong>Virtual</strong> <strong>Customer</strong> <strong>Display</strong>Version 1.0 May 20137
You can now select the COM port to use for the <strong>Virtual</strong> <strong>Customer</strong> <strong>Display</strong> by selectingthe Change button. A key pad will pop up then just enter the COM port you wish to use.Be sure the COM port you select is not currently used. Most <strong>J2</strong> POS computers use COM1-6 so 7 or 8 is normally a good choice.<strong>Software</strong> <strong>Manual</strong> <strong>J2</strong> <strong>Virtual</strong> <strong>Customer</strong> <strong>Display</strong>Version 1.0 May 20138
Some POS software is limited to what COM ports it can select for peripherals, some limitthe user to COM1-4 and some COM 1-8. There is a way around this problem. In devicemanager you can move an unused lower COM port assignment to a higher number thenassign the VCD virtual port to that number. As an example reassign COM4 to COM10and then assign the VCD virtual port to COM4.After reassignment, COM 4 now available for the VCDNote: <strong>J2</strong> <strong>Virtual</strong> ports do not show in device manager, they will show in applications.<strong>Software</strong> <strong>Manual</strong> <strong>J2</strong> <strong>Virtual</strong> <strong>Customer</strong> <strong>Display</strong>Version 1.0 May 20139
<strong>J2</strong> <strong>Virtual</strong> <strong>Customer</strong> SetupAfter downloading the setup file run it on the system you wish to install the software on.The setup can be run from the zip file without extracting.Just click Next for this screen and the next and the software will installOne this screen appears just close the configuration screen will pop up.<strong>Software</strong> <strong>Manual</strong> <strong>J2</strong> <strong>Virtual</strong> <strong>Customer</strong> <strong>Display</strong>Version 1.0 May 201310
<strong>J2</strong> <strong>Virtual</strong> <strong>Customer</strong> <strong>Display</strong> ConfigurationThe configuration program can be run at any time to change the VCD settings. As can beseen below it allows for a number of settings to be changed. The changes are all stored inthe systems registry. You can use the Load Default button to reset these settings at anytime.Configuration screenThe most common setting to change would be the VCD display Fixed Width setting tomatch the screen size, 1024 for the <strong>J2</strong> 10.1 display and 1366 for the 14 inch display arethe most commonly used. The slide bars can also be used for custom width and bordersize. Clicking the 800/1024/1366 setting after adjusting the border size will adjust thedisplay box to that size. Setting for text color, background color and text font areavailable. The position of the VCD display box can be located in different position on thescreens as well. These settings can be saved and loaded from a file for easy field updates.The Hide VCD when blank check box is used to cause the VCD display box to disappearwhen the VCD is cleared either with a clear command or have all space in the textmessage. This is a way when no customer display data is need the whole customer sidedisplay can be used for ad<strong>ver</strong>tising content.The VCD support to types of emulation EPSON ESC/POS and Ultimate modes. TheEPSON ESC/POS mode is required for the <strong>J2</strong> OPOS dri<strong>ver</strong> to be used.<strong>Software</strong> <strong>Manual</strong> <strong>J2</strong> <strong>Virtual</strong> <strong>Customer</strong> <strong>Display</strong>Version 1.0 May 201311
VCD TestingThe VCD can be tested using the <strong>J2</strong> LCM <strong>Customer</strong> <strong>Display</strong> Utility. This utility isnormally used to configure and test the <strong>J2</strong> LCM customer display but can also be used totest the <strong>J2</strong> VCD. Also a program that can output to a serial port can be used. The baudrate setting does not matter with the virtual serial port.You can download from here: http://support.j2rs.com/225_625/<strong>Customer</strong>_<strong>Display</strong>/Just run the program, set the COM to match the VCD, select the Output Test tab andoutput button to test. The Clear <strong>Customer</strong> <strong>Display</strong> will do just that.Test meesage displayed on 14” 1366 screen with VCD set to 1024<strong>Software</strong> <strong>Manual</strong> <strong>J2</strong> <strong>Virtual</strong> <strong>Customer</strong> <strong>Display</strong>Version 1.0 May 201312
OPOS Dri<strong>ver</strong>The <strong>J2</strong> VCD can use the normal <strong>J2</strong> OPOS dri<strong>ver</strong>. Just install as normal and select theCOM port used by the VCD. The OPOS Test LD will work as normal. If the VCD is setto hide when blank the display will hid once the Test LCD button is touch then willdisplay again once the Continue button is touched.<strong>J2</strong> OPOS Setup screenOPOS test message, VCD text box centered<strong>Software</strong> <strong>Manual</strong> <strong>J2</strong> <strong>Virtual</strong> <strong>Customer</strong> <strong>Display</strong>Version 1.0 May 201313
VCD OperationThe software emulates a standard serial port 2x20 line VFD/LCM customer display.<strong>Customer</strong> display data is written to a serial port just as it would be when using a normalVFD or LCD customer display. The display information is then written to a display boxon the LCD customer display. The data may be written directly to the VCD virtual serialport or the standard <strong>J2</strong> OPOS dri<strong>ver</strong> can be used.The display can be used in a pop up mode or always on display mode.In the always on display mode the software displays a box on the customer display withthe rest of the display available for ad<strong>ver</strong>tising or upselling content.In the pop up mode if the customer display data is blank (no displayable characters) thedisplay windows will disappear making the whole display available for ad<strong>ver</strong>tising orupselling content. Once any information is sent to the customer display the displaywindows will pop up displaying the customer display information from the softwareapplication.The VCD responds to serial port commands the same as a hardware VFD/LCD 2x20character display would. Normally the EPSON mode is used but if the POS software doesnot support EPSON mode try CD5220 or CD7200 setting with the VCD set to EPSON. Ifthat does not work try the Ultimate (UTC) mode if you software supports that. If yousoftware support OPOS then use the <strong>J2</strong> OPOS dri<strong>ver</strong> with the VCD set to the EPSONmode.For displaying the ad<strong>ver</strong>tising or upselling content there are a number of differentmethods that can be used. Some examples:1: Web sites2: Video player3: Slide show player4: Flash viewer5: PDF files6: Third party software<strong>J2</strong> does not supply any of the above but most are free of charge. <strong>J2</strong> can help with utilitiesor small programs to launch programs on start-up if not supported directly. One issue thatcomes up is most programs like to start on the main screen and not the extended desktop.<strong>J2</strong> can help with these issues once the software to be used is decided.<strong>Software</strong> <strong>Manual</strong> <strong>J2</strong> <strong>Virtual</strong> <strong>Customer</strong> <strong>Display</strong>Version 1.0 May 201314
<strong>Software</strong> CommandsEPSON modeASCII Hex FunctionHT 0x09 move cursor rightBS 0x08 move cursor leftLF 0x0A move cursor down one lineCR 0x0D move cursor left most positionVT 0x0B move cursor to home positionCLR 0x0C clear display, home cursorCAN 0x18 clear current line, cursor to position oneUS LF 0x1F 0x0A move cursor up one lineUS CR 0x1F 0x0D move cursor right most positionUS B 0x1F 0x42 move cursor to bottom positionUS $ x y 0x1F 0x24 0x01~200x01~02ESC R n 0x1B 0x52 0x00~0f set ASCII character set (see table)US SOH 0x1F 0x01 set o<strong>ver</strong>write mode (default)US STX 0x1F 0x02 set <strong>ver</strong>tical modemove cursor to specified position x = 1-20 in hex ,y= 1 or 2 in hexUTC STD modeASCII Hex FunctionHT 0x09 move cursor rightBS 0x08 move cursor leftLF 0x0A move cursor down one lineCR 0x0D move cursor left most positionVT 0x0B move cursor to home positionRS 0x1E clear display, home cursorEM 0x19 clear to end of displayUS 0x1F reset display, display configuration infoTAB x 0x10 0x00~0x27 move cursor to specified position x = 0~39DC1 0x11 set o<strong>ver</strong>write mode (default)DC2 0x12 set <strong>ver</strong>tical modeNote: Commands shaded in green are common to EPSON and CD7220 Mode.<strong>Software</strong> <strong>Manual</strong> <strong>J2</strong> <strong>Virtual</strong> <strong>Customer</strong> <strong>Display</strong>Version 1.0 May 201315
EPSON ESC/POS Mode CommandsCursor Right, , 0x09 (EPSON, UTC STD)(O<strong>ver</strong>write <strong>Display</strong> Mode)The cursor position is shifted to the right one position. When the cursor is in the lastposition of the first row; the cursor moves to the first position of the second row. Whenthe cursor is in the last position of the second row, the cursor moves to the first positionof the first row.(Vertical Scroll Mode)When the cursor is in the last position of the second row, the characters displayed in thesecond row are shifted up to the first row and the cursor moves to the first position of thesecond row. This action clears the second row.Cursor Left, , 0x08 (EPSON, UTC STD)When the backspace command is executed, the cursor position is shifted to the left oneposition, erasing the character, if any, in that position. When the cursor position is in thefirst (read from left to right) position of the first row, the cursor moves to the last positionof the second row. When the cursor is in the first position of the second row, the cursormoves to the last position of the first row.Line Feed, , 0x0A (EPSON, UTC STD)(O<strong>ver</strong>write <strong>Display</strong> Mode)The cursor moves up or down to another row, staying in the same horizontal position.(Vertical Scroll Mode)When the cursor is in the second row, the characters displayed there are shifted up to thefirst row, leaving the cursor at its present position. This action clears the second row.When the cursor is in the first row; the cursor moves down to the second row in the same<strong>ver</strong>tical position.Home and Clear <strong>Display</strong>, , 0x0CThis command will clear the display and move the cursor position to the first position ofthe first row.Clear Line, , 0x18This command will clear the line the cursor is on and place the cursor in position one ofthat line.Reset, , 0x1B 0x40All characters displayed are erased, and the cursor position (cursor position) is set in thefirst position of the first row. The display mode returns to the o<strong>ver</strong>write mode.<strong>Software</strong> <strong>Manual</strong> <strong>J2</strong> <strong>Virtual</strong> <strong>Customer</strong> <strong>Display</strong>Version 1.0 May 201316
Cursor UP, , 0x1F 0x0A(O<strong>ver</strong>write mode)Move the cursor up one line to the same column as on the lower line.(Vertical Scroll Mode)The characters displayed on the upper line are scrolled to the lower line and the upperline is cleared. The cursor will remain in the same position.End of Line, , 0x1F 0x0DMove the cursor to the end of the current line. No characters are o<strong>ver</strong>written.End of <strong>Display</strong>, , 0x1F 0x42Move the cursor to the last position of the second row of the display. No characters areo<strong>ver</strong>written.Cursor Positioning,
UTC STD Mode CommandsCursor Right, , 0x09 (EPSON, UTC STD)(O<strong>ver</strong>write <strong>Display</strong> Mode)The cursor position is shifted to the right one position. When the cursor is in the lastposition of the first row; the cursor moves to the first position of the second row. Whenthe cursor is in the last position of the second row, the cursor moves to the first positionof the first row.(Vertical Scroll Mode)When the cursor is in the last position of the second row, the characters displayed in thesecond row are shifted up to the first row and the cursor moves to the first position of thesecond row. This action clears the second row.Cursor Left, , 0x08 (EPSON, UTC STD)When the backspace command is executed, the cursor position is shifted to the left oneposition, erasing the character, if any, in that position. When the cursor position is in thefirst (read from left to right) position of the first row, the cursor moves to the last positionof the second row. When the cursor is in the first position of the second row, the cursormoves to the last position of the first row.Line Feed, , 0x0A (EPSON, UTC STD)(O<strong>ver</strong>write <strong>Display</strong> Mode)The cursor moves up or down to another row, staying in the same horizontal position.(Vertical Scroll Mode)When the cursor is in the second row, the characters displayed there are shifted up to thefirst row, leaving the cursor at its present position. This action clears the second row.When the cursor is in the first row; the cursor moves down to the second row in the same<strong>ver</strong>tical position.<strong>Display</strong> Position, , 0x10 0x00~27After writing the character to the display, write a position byte. Valid values are0-39 DEC with zero being the first row left most position and 39 DEC being the secondrow most right position.O<strong>ver</strong>write <strong>Display</strong> Mode, , 0x11After writing a character, the cursor is shifted automatically to the right one position.When the cursor is in the last position of the first row; the cursor moves to the firstposition of the second row. When the cursor is in the last position of the second row; thecursor moves to the first position of the first row.Vertical Scroll Mode, , 0x12<strong>Software</strong> <strong>Manual</strong> <strong>J2</strong> <strong>Virtual</strong> <strong>Customer</strong> <strong>Display</strong>Version 1.0 May 201318
After writing the characters up to the last position of the second row, all charactersdisplayed in the second row are shifted to the upper row (first row), clearing the secondrow.Reset , 0x1FAll characters displayed are erased, and the cursor position (cursor position) is set in thefirst position of the first row. The display mode returns to the power-on default set-up,o<strong>ver</strong>write mode.Clear to End of Line, , 0x18This command will clear out the display from the current cursor position to the end of thecurrent line. The current cursor position will not change.Clear to End of <strong>Display</strong>, , 0x19This command will clear out the display from the current cursor position to the end ofthe second line. The current cursor position will not change.Home and Clear <strong>Display</strong>, , 0x1EThis command will clear the display and move the cursor position to the first position ofthe first row.<strong>Software</strong> <strong>Manual</strong> <strong>J2</strong> <strong>Virtual</strong> <strong>Customer</strong> <strong>Display</strong>Version 1.0 May 201319
Contact InformationEuropean Office<strong>J2</strong> Retail Systems Ltd.<strong>J2</strong> HouseClayton Road, BirchwoodWarrington WA3 6RPUnited Kingdom44 (0) 1925 817003 Phone44 (0) 1925 811989 FaxUSA Office<strong>J2</strong> Retail Systems Inc.9251 Irvine BoulevardIrvineCA 92618USA(714) 669-3111 Phone(714) 669-3133 FaxAustralian Office<strong>J2</strong> Retail Systems Pty LtdUnit 6 83/85 Boundary RoadMortdale NSW 2223Australia02 9584 5222 Phone02 9584 1500 FaxWeb sitehttp://www.j2retailsystems.com<strong>Software</strong> <strong>Manual</strong> <strong>J2</strong> <strong>Virtual</strong> <strong>Customer</strong> <strong>Display</strong>Version 1.0 May 201320