Picture Frame Moldings - Woodsmith Woodworking Seminars
Picture Frame Moldings - Woodsmith Woodworking Seminars
Picture Frame Moldings - Woodsmith Woodworking Seminars

You also want an ePaper? Increase the reach of your titles
YUMPU automatically turns print PDFs into web optimized ePapers that Google loves.
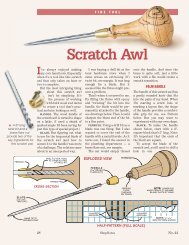
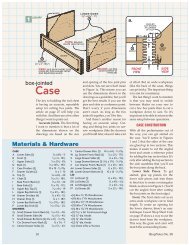
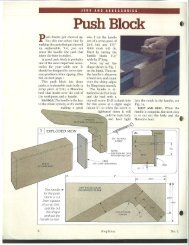
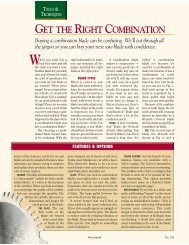
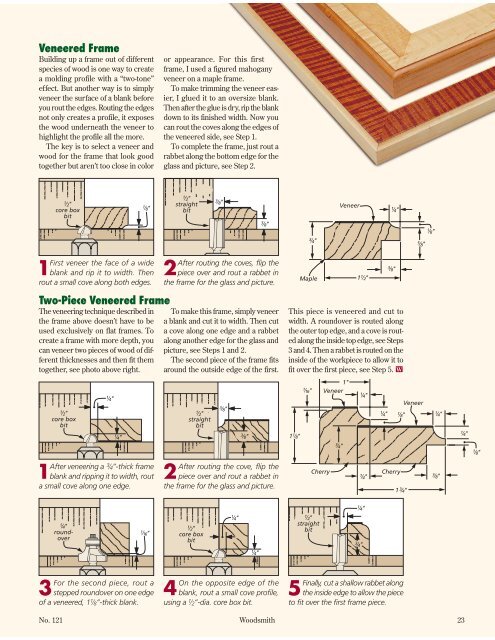
Veneered <strong>Frame</strong>Building up a frame out of differentspecies of wood is one way to createa molding profile with a “two-tone”effect. But another way is to simplyveneer the surface of a blank beforeyou rout the edges. Routing the edgesnot only creates a profile, it exposesthe wood underneath the veneer tohighlight the profile all the more.The key is to select a veneer andwood for the frame that look goodtogether but aren’t too close in coloror appearance. For this firstframe, I used a figured mahoganyveneer on a maple frame.To make trimming the veneer easier,I glued it to an oversize blank.Then after the glue is dry, rip the blankdown to its finished width. Now youcan rout the coves along the edges ofthe veneered side, see Step 1.To complete the frame, just rout arabbet along the bottom edge for theglass and picture, see Step 2.1First veneer the face of a wideblank and rip it to width. Thenrout a small cove along both edges.Two-Piece Veneered <strong>Frame</strong>The veneering technique described inthe frame above doesn’t have to beused exclusively on flat frames. Tocreate a frame with more depth, youcan veneer two pieces of wood of differentthicknesses and then fit themtogether, see photo above right.2After routing the coves, flip thepiece over and rout a rabbet inthe frame for the glass and picture.To make this frame, simply veneera blank and cut it to width. Then cuta cove along one edge and a rabbetalong another edge for the glass andpicture, see Steps 1 and 2.The second piece of the frame fitsaround the outside edge of the first.This piece is veneered and cut towidth. A roundover is routed alongthe outer top edge, and a cove is routedalong the inside top edge, see Steps3 and 4. Then a rabbet is routed on theinside of the workpiece to allow it tofit over the first piece, see Step 5. W1After veneering a #/4”-thick frameblank and ripping it to width, routa small cove along one edge.2After routing the cove, flip thepiece over and rout a rabbet inthe frame for the glass and picture.3For the second piece, rout astepped roundover on one edgeof a veneered, 1!/8”-thick blank.4On the opposite edge of theblank, rout a small cove profile,using a !/2”-dia. core box bit.5Finally, cut a shallow rabbet alongthe inside edge to allow the pieceto fit over the first frame piece.No. 121 <strong>Woodsmith</strong> 23