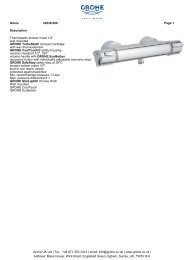
Description Single-lever shower mixer trim set for final ... - GROHE
Description Single-lever shower mixer trim set for final ... - GROHE
Description Single-lever shower mixer trim set for final ... - GROHE

You also want an ePaper? Increase the reach of your titles
YUMPU automatically turns print PDFs into web optimized ePapers that Google loves.
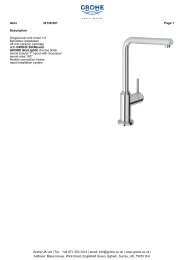
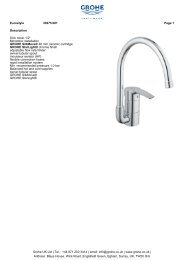
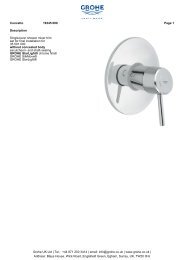
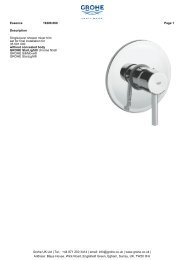
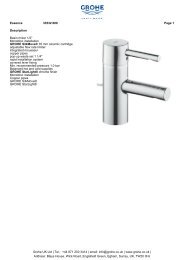
Eurosmart 19451 001 Page 1<strong>Description</strong><strong>Single</strong>-<strong>lever</strong> <strong>shower</strong> <strong>mixer</strong> <strong>trim</strong><strong>set</strong> <strong>for</strong> <strong>final</strong> installation <strong>for</strong>35 501 000without concealed bodymetal <strong>lever</strong><strong>GROHE</strong> SilkMove®<strong>GROHE</strong> StarLight®Grohe UK Ltd | Tel.: +44 871 200 3414 | email: info@grohe.co.uk | www.grohe.co.uk |Address: Blays House, Wick Road, Englefield Green, Egham, Surrey, UK, TW20 0HJ
Eurosmart 19451 001 Page 2Dimensional drawingGrohe UK Ltd | Tel.: +44 871 200 3414 | email: info@grohe.co.uk | www.grohe.co.uk |Address: Blays House, Wick Road, Englefield Green, Egham, Surrey, UK, TW20 0HJ
Eurosmart 19451 001 Page 3Explosional drawingGrohe UK Ltd | Tel.: +44 871 200 3414 | email: info@grohe.co.uk | www.grohe.co.uk |Address: Blays House, Wick Road, Englefield Green, Egham, Surrey, UK, TW20 0HJ
Eurosmart 19451 001 Page 4Part listPos. <strong>Description</strong> Order No Unit1 Lever 46561 000 12 Escutcheon 46469 000 12.1 <strong>set</strong> of screws 46088 000 23 Shield <strong>for</strong> cross handle 02693 000 1Special accessories:4 Temperature limiter 46308 000 15 Extension <strong>set</strong> 25 mm 46191 000 16 Extension <strong>set</strong> 50 mm 46343 000 1Grohe UK Ltd | Tel.: +44 871 200 3414 | email: info@grohe.co.uk | www.grohe.co.uk |Address: Blays House, Wick Road, Englefield Green, Egham, Surrey, UK, TW20 0HJ
Eurosmart 19451 001 Page 5Maintenance instructionsShut off hot and cold water supply!Please per<strong>for</strong>m disassembly in specified order.Lever1. Lever out plug.2. Unscrew and remove <strong>set</strong> screw using a 3mm allen key.3. Pull off <strong>lever</strong>.Escutcheon1. Unscrew and remove screws.2. Remove escutcheon as illustrated.3. Screw off cap.Cartridge1. Loosen screws and remove cartridge.2. Replace complete cartridge.Observe the correct installation position!Installation instruction:Ensure that the cartridge seals engage in the grooves onthe housing.Replace screws and tighten evenly and alternately.Assemble in reverse order.Grohe UK Ltd | Tel.: +44 871 200 3414 | email: info@grohe.co.uk | www.grohe.co.uk |Address: Blays House, Wick Road, Englefield Green, Egham, Surrey, UK, TW20 0HJ