PPC-R0*.2 - Bosch Rexroth
PPC-R0*.2 - Bosch Rexroth
PPC-R0*.2 - Bosch Rexroth

You also want an ePaper? Increase the reach of your titles
YUMPU automatically turns print PDFs into web optimized ePapers that Google loves.
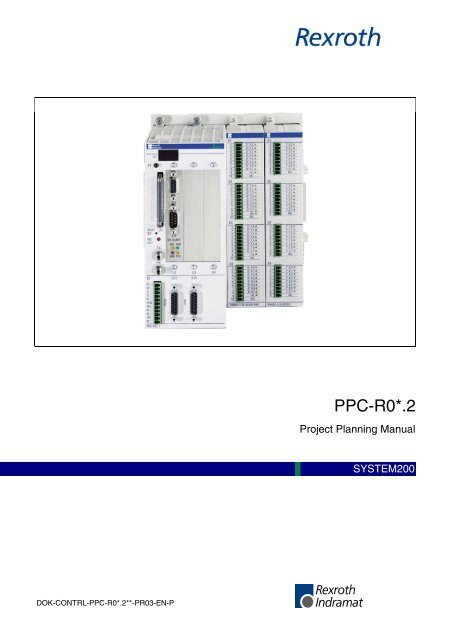
<strong>PPC</strong>-<strong>R0*.2</strong>Project Planning ManualSYSTEM200DOK-CONTRL-<strong>PPC</strong>-<strong>R0*.2</strong>**-PR03-EN-P
About this Documentation<strong>PPC</strong>-RTitleType of Documentation<strong>PPC</strong>-<strong>R0*.2</strong>Project Planning ManualDocument TypecodeDOK-CONTRL-<strong>PPC</strong>-<strong>R0*.2</strong>**-PR03-EN-PInternal File ReferenceDocument Number, 120-0400-B329-03/ENPurpose of DocumentationThis documentation describes …• to describe the hardware functions of the <strong>PPC</strong>-R• to specify the technical data• to specify the external dimensionsRecord of RevisionsDescriptionReleaseDateNotes120-0400-B329-01/EN 04/00 First edition120-0400-B329-02/EN 05/00 Revision120-0400-B329-03/EN 02/02 RevisionCopyright© 2002 <strong>Rexroth</strong> Indramat GmbHCopying this document, giving it to others and the use or communicationof the contents thereof without express authority, are forbidden. Offendersare liable for the payment of damages. All rights are reserved in the eventof the grant of a patent or the registration of a utility model or design(DIN 34-1).ValidityThe specified data is for product description purposes only and may notbe deemed to be guaranteed unless expressly confirmed in the contract.All rights are reserved with respect to the content of this documentationand the availability of the product.Published by<strong>Rexroth</strong> Indramat GmbHBgm.-Dr.-Nebel-Str. 2 • D-97816 Lohr a. MainTelephone +49 (0)93 52/40-0 • Tx 68 94 21 • Fax +49 (0)93 52/40-48 85http://www.boschrexroth.de/Dept. BRC/EP6 (WB/CV)NoteThis document has been printed on chlorine-free bleached paper.DOK-CONTRL-<strong>PPC</strong>-<strong>R0*.2</strong>**-PR03-EN-P
<strong>PPC</strong>-RContents IContents1 General Information 1-11.1 Brief Description............................................................................................................................. 1-11.2 Installation Dimensions .................................................................................................................. 1-3<strong>PPC</strong>-R01.2 and <strong>PPC</strong>-R02.2..................................................................................................... 1-3Installation dimensions of module carrier RMB02.2-02 ........................................................... 1-4Installation dimensions of module carrier RMB02.2-04 ........................................................... 1-51.3 Installation Instructions................................................................................................................... 1-6Installing the module carriers................................................................................................... 1-6Arrangement of the module carriers ........................................................................................ 1-6Installing the modules .............................................................................................................. 1-7Grounding ................................................................................................................................ 1-81.4 Slot Addressing of the Module Carriers ......................................................................................... 1-91.5 Combination Options Module Carrier - <strong>PPC</strong> - I/O Module ........................................................... 1-101.6 Specifications ............................................................................................................................... 1-11General Information ............................................................................................................... 1-11Power supply.......................................................................................................................... 1-11I/O Bus supply by control .......................................................................................................1-11Digital inputs and outputs....................................................................................................... 1-12EMC ....................................................................................................................................... 1-12DERATING I/O Bus supply.................................................................................................... 1-12Interfaces ............................................................................................................................... 1-121.7 Connecting the Power Supply...................................................................................................... 1-131.8 Connecting Inputs and Outputs ................................................................................................... 1-141.9 Connector Pin Assignments......................................................................................................... 1-14X1 (11-way Phoenix connector)............................................................................................. 1-14PROG / COM interface (X10, X16)........................................................................................ 1-15BT bus (X15).......................................................................................................................... 1-152 Important directions for use 2-12.1 Appropriate use.............................................................................................................................. 2-1Introduction .............................................................................................................................. 2-1Areas of use and application....................................................................................................2-22.2 Inappropriate use ........................................................................................................................... 2-23 Safety Instructions for Electric Drives and Controls 3-13.1 Introduction..................................................................................................................................... 3-13.2 Explanations................................................................................................................................... 3-13.3 Hazards by Improper Use .............................................................................................................. 3-2DOK-CONTRL-<strong>PPC</strong>-<strong>R0*.2</strong>**-PR03-EN-P
II Contents<strong>PPC</strong>-R3.4 General Information ....................................................................................................................... 3-33.5 Protection Against Contact with Electrical Parts............................................................................ 3-53.6 Protection Against Electric Shock by Protective Low Voltage (PELV)........................................... 3-73.7 Protection Against Dangerous Movements.................................................................................... 3-73.8 Protection Against Magnetic and Electromagnetic Fields During Operation and Mounting .......... 3-93.9 Protection Against Contact with Hot Parts ................................................................................... 3-103.10 Protection During Handling and Mounting ................................................................................... 3-103.11 Battery Safety............................................................................................................................... 3-113.12 Protection Against Pressurized Systems..................................................................................... 3-114 <strong>PPC</strong>-R Configuration Features 4-14.1 Hardware Configuration ................................................................................................................. 4-1<strong>PPC</strong>-R ...................................................................................................................................... 4-1PSM PC card compatible firmware module ............................................................................. 4-1Options..................................................................................................................................... 4-15 Ordering Information 5-15.1 Type Code <strong>PPC</strong>-R01.2 .................................................................................................................. 5-15.2 Type Code <strong>PPC</strong>-R02.2 .................................................................................................................. 5-26 List of Figures 6-17 Index 7-18 Service & Support 8-18.1 Helpdesk ........................................................................................................................................ 8-18.2 Service-Hotline............................................................................................................................... 8-18.3 Internet ........................................................................................................................................... 8-18.4 Vor der Kontaktaufnahme... - Before contacting us....................................................................... 8-18.5 Kundenbetreuungsstellen - Sales & Service Facilities .................................................................. 8-2DOK-CONTRL-<strong>PPC</strong>-<strong>R0*.2</strong>**-PR03-EN-P
<strong>PPC</strong>-R General Information 1-11 General Information1.1 Brief Description<strong>PPC</strong>-R01.2<strong>PPC</strong>-R02.212S1H18888RECO812S1H18888RECO81 Key for display switchoveror other usage2 Slot for the PC card-compatiblefirmware module3 Reset key S234567RESET U1S2H2DISTTXRXX1Q1Q2I1I2I324Ve0VeBbBb24V0V<strong>PPC</strong>-R01.2PROGCOMX16U2X109101134567RESET U1S2H2DISTX1Q1Q2I1I2I324Ve0VeBbBb24V0VTXRX<strong>PPC</strong>-R02.2PROGU2X10COMU3X16U49101145678910111213Distortion display H2for SERCOS interfaceFibre-optic emitterfor SERCOS interfaceFibre-optic receiverfor SERCOS interfaceX1 voltage supply andwatchdogStatus display H1Optional slotX16 Programming interface (COM)X10 Serial interface (PROG)Earthing boltX15 BT bus for connectingup to 6 devices (PLC only)13 121312Vorstellung.FH7Fig. 1-1: <strong>PPC</strong>-R01.2 and <strong>PPC</strong>-R02.2The <strong>PPC</strong>-R unit is a powerful controller in a small size in IP 20 rating. It isa general-purpose platform that works as a PLC or as an NC controller,depending on the application and the loaded software.The <strong>PPC</strong>-R unit exists with two enclosure versions of different width. Asingle-width version and a double-width version.The two interfaces that are available on the controller are fully connectedaccording to the Indramat standard (SIS = Serial Indramat Interface). Thedata transfer type (function) is only selected by the related application(RS232/RS422/RS485). With <strong>PPC</strong>-R01, the COM interface is brought outvia a separate slot plate if this has not yet been assigned for a differentpurpose (by the PC/104 Field bus, for example).Furthermore, the <strong>PPC</strong>-R unit has a BT bus (operator input terminal bus)that permits application-related operator input terminals (BTM15/16,BTA20, etc.) to be used. This is possible with a cable length of up to50 m.DOK-CONTRL-<strong>PPC</strong>-<strong>R0*.2</strong>**-PR03-EN-P
1-2 General Information <strong>PPC</strong>-RTo install the <strong>PPC</strong>-R unit, a module carrier system is used that consists ofone or more RMB02.2-04 units. The double carrier RMB02.2-02 can onlybe used as an installation carrier. It is merely used for fixing the <strong>PPC</strong>-Runits; RECO modules cannot be controlled. Interconnecting several <strong>PPC</strong>-R units via a backplane is not possible either.The <strong>PPC</strong>-R01.2 unit occupies one slot in the module carrier; the <strong>PPC</strong>-R02.2 occupies two units. In this carrier system, the <strong>PPC</strong>-R unit canhandle up to 15 further I/O modules (RME02.2..., RMA02.2... orRMC02.2...).Depending on the application, the <strong>PPC</strong>-R has PC/104 modules fitted that,for example, can be used for open field bus interfaces, such as Interbus,Profibus, etc.DOK-CONTRL-<strong>PPC</strong>-<strong>R0*.2</strong>**-PR03-EN-P
<strong>PPC</strong>-R General Information 1-31.2 Installation Dimensions<strong>PPC</strong>-R01.2 and <strong>PPC</strong>-R02.2<strong>PPC</strong>-R01.2<strong>PPC</strong>-R02.216541.5 83.7 4,522 126.5H1S18888RECOS1H18888RECO214192RESETS2H2DISTU1RESETS2H2DISTU1TXTXRXRXX1U2X10X1U2X10U3X16U4Q1Q2I1I2I324Ve0VeBbBb24V0VPROG<strong>PPC</strong>-R01.211Q1Q2I1I2I324Ve0VeBbBb24V0VPROGCOM<strong>PPC</strong>-R02.2Bemaßung.FH7Fig. 1-2: Dimensioned drawing <strong>PPC</strong>-R01.2 and <strong>PPC</strong>-R02.2DOK-CONTRL-<strong>PPC</strong>-<strong>R0*.2</strong>**-PR03-EN-P
1-4 General Information <strong>PPC</strong>-R56,5ca. 183240,55247,5515Mounting railTS 35 x 27 x 15RMB54,5ca. 235ca. 300Fig. 1-3: Installation dimensions of <strong>PPC</strong>-R01.2 and <strong>PPC</strong>-R02.2Installation dimensions of module carrier RMB02.2-02Bemaßung_Einbau.FH729875654.5Screw for lockingthe subrack onthe tophat rail77217Tophat railTS35 x27 x15RMB02.2_Maß.FH7Fig. 1-4: Module carrier RMB02.2-02DOK-CONTRL-<strong>PPC</strong>-<strong>R0*.2</strong>**-PR03-EN-P
<strong>PPC</strong>-R General Information 1-5Installation dimensions of module carrier RMB02.2-04Screw for lockingthe subrack on thetophat rail2 18275654,577217S1Tophat railTS 35 x 27 x15RMB02.2-04_Maß.FH7Fig. 1-5: Module carrier RMB02.2-04S1S1217182RMB02.2-04+02-04_Maß.FH7Fig. 1-6: Side-by-side installation of several RMB02.2-04 module carriersDOK-CONTRL-<strong>PPC</strong>-<strong>R0*.2</strong>**-PR03-EN-P
1-6 General Information <strong>PPC</strong>-R1.3 Installation InstructionsInstalling the module carriersArrangement of the module carriersThe module carriers must first be installed before the <strong>PPC</strong>-R units can beinstalled. These module carriers are equipped with the <strong>PPC</strong>-R unit and,according to the requirements, with the related I/O modules (RECO02modules).To install the RMB02.2-04 module carrier, you must latch it onto a DIN railTS 35x27x15 and secure it with a retaining screw.Up to four RMB02.2-04 module carriers can be installed side by side. The<strong>PPC</strong>-R must be in slot 0 if it shall be able to control the RECO bus. Slotaddressing requires the DIP switches on the bus boards of the RMB02.2-04 module carriers to be configured (Fig. 1-9: Setting the slot address).The dual carrier RMB02.2-02 is used if the PCR-R shall be used on itsown without RECO bus.4x RMB02.2-04with a total of 16 module slots foraccommodating <strong>PPC</strong>-R and up to 15different I/O modulesRMB02.2-04_Anord.FH7Fig. 1-7: Maximum configuration RMB02.2-04DOK-CONTRL-<strong>PPC</strong>-<strong>R0*.2</strong>**-PR03-EN-P
<strong>PPC</strong>-R General Information 1-7Installing the modulesWARNINGModules can be damaged.⇒ Connector and modules may only be inserted orremoved when the power is switched off.Starting with a <strong>PPC</strong>-R in slot 0 (left-hand side), the modules are pluggedinto the RMB02.2-04 module carrier. Each module is secured with twofixing screws. The I/O modules (RECO02.2) are added in the slots 1-15or 2-15 (with <strong>PPC</strong>-R02.2) to the right-hand side of the <strong>PPC</strong>-R. You mayleave gaps to be able to install additional modules later.Note:Prior to commissioning, you must tighten the fixing screws ofthe module carriers in order to avoid lateral movements thatmay lead to a disconnection of the connectors. (The locationof the screws is shown in Fig. 1-5: Module carrier RMB02.2-04). The modules must be screwed to the module carrier.DOK-CONTRL-<strong>PPC</strong>-<strong>R0*.2</strong>**-PR03-EN-P
1-8 General Information <strong>PPC</strong>-RGroundingGrounding the controller and screening the electronic componentsrequires a grounding cable of at least 6mm² to be laid between thegrounding stud of the controller to the central grounding point of themachine. The other devices of the machine must be grounded in a starshapedconfiguration (see Fig. 1-8: System grounding with <strong>PPC</strong>-R). Thepower supply must be grounded in the same way.VisualizationMachine op.terminalDevices MUST be connectedto the earthing bolt!<strong>PPC</strong>-RMTS-RE/AE/A<strong>PPC</strong>-RE/AE/AE/AAntriebAntriebAntriebCentralgrounding pointof the machine<strong>PPC</strong>-R_Erdung.FH7Fig. 1-8: System grounding with <strong>PPC</strong>-RDOK-CONTRL-<strong>PPC</strong>-<strong>R0*.2</strong>**-PR03-EN-P
<strong>PPC</strong>-R General Information 1-91.4 Slot Addressing of the Module CarriersA maximum of 4 module carriers RMB02.2-04 can be installed side byside. To be able to address the module carriers, there is a DIP switch onthe bus board of the module carriers. Depending on the module carrier,the switch must be set to the corresponding module carrier number(module carrier address 00-03, see diagram below). Each module carriernumber may only be set once.Slot00 01 02 03 04 05 06 07 08 09 10 11 12 13 14 15S1S1S1S1S1 Setting for basic S1 Setting for basic S1 Setting for basic S1carrier No. 1carrier No. 2carrier No. 3Setting for basiccarrier No. 4RMB02.2_Adress.FH7Fig. 1-9: Setting the slot addressDOK-CONTRL-<strong>PPC</strong>-<strong>R0*.2</strong>**-PR03-EN-P
RESETDISTQ1Q2I1I2I324Ve0VeBbBb24V0VRESETQ1Q2I1I2I324Ve0VeBbBb24V0V<strong>PPC</strong>-R01.2H1S1RESET U1S2H2DISTX1Q1Q2I1I2I324Ve0VeBbBb24V0VTXRX<strong>PPC</strong>-R02.2U2X10RECORECOU3X16123456789123456789123456789I*.3.0I*.3.1I*.3.2I*.3.3I*.3.4I*.3.5I*.3.6I*.3.70VI*.2.0I*.2.1I*.2.2I*.2.3I*.2.4I*.2.5I*.2.6I*.2.70VI*.1.0I*.1.1I*.1.2I*.1.3I*.1.4I*.1.5I*.1.6I*.1.70VU4RECOX1 I*.1.02 I*.1.13 I*.1.24 I*.1.35 I*.1.46 I*.1.57 I*.1.68 I*.1.79 0V1 0VX1 I*.0.02 I*.0.13 I*.0.24 I*.0.35 I*.0.46 I*.0.57 I*.0.68 I*.0.79 0V1 0V1 I*.1.02 I*.1.13 I*.1.24 I*.1.35 I*.1.46 I*.1.57 I*.1.68 I*.1.79 0V1 0V1 I*.0.02 I*.0.13 I*.0.24 I*.0.35 I*.0.46 I*.0.57 I*.0.68 I*.0.79 0V1 0VX1234567891111111X1234567891111111Q*.1.0Q*.1.1Q*.1.2Q*.1.3Q*.1.4Q*.1.5Q*.1.6Q*.1.7Q*.0.0Q*.0.1Q*.0.2Q*.0.3Q*.0.4Q*.0.5Q*.0.6Q*.0.712345678911111111234567891111111Q*.1.0Q*.1.1Q*.1.2Q*.1.3Q*.1.4Q*.1.5Q*.1.6Q*.1.7Q*.0.0Q*.0.1Q*.0.2Q*.0.3Q*.0.4Q*.0.5Q*.0.6Q*.0.7XXRESETDISTQ1Q2I1I2I324Ve0VeBbBb24V0V<strong>PPC</strong>-R02.21 I*.1.02 I*.1.13 I*.1.24 I*.1.35 I*.1.46 I*.1.57 I*.1.68 I*.1.79 0V1 0V1 I*.0.02 I*.0.13 I*.0.24 I*.0.35 I*.0.46 I*.0.57 I*.0.68 I*.0.79 0V1 0VX1234567891111111X1234567891111111Q*.1.0Q*.1.1Q*.1.2Q*.1.3Q*.1.4Q*.1.5Q*.1.6Q*.1.7Q*.0.0Q*.0.1Q*.0.2Q*.0.3Q*.0.4Q*.0.5Q*.0.6Q*.0.7X1 I*.1.02 I*.1.13 I*.1.24 I*.1.35 I*.1.46 I*.1.57 I*.1.68 I*.1.79 0V1 0VX1 I*.0.02 I*.0.13 I*.0.24 I*.0.35 I*.0.46 I*.0.57 I*.0.68 I*.0.79 0V1 0VRECORESETQ1Q2I1I2I324Ve0VeBbBb24V0V<strong>PPC</strong>-R02.2X1234567891111111X1234567891111111Q*.1.0Q*.1.1Q*.1.2Q*.1.3Q*.1.4Q*.1.5Q*.1.6Q*.1.7Q*.0.0Q*.0.1Q*.0.2Q*.0.3Q*.0.4Q*.0.5Q*.0.6Q*.0.7X1 I*.1.02 I*.1.13 I*.1.24 I*.1.35 I*.1.46 I*.1.57 I*.1.68 I*.1.79 0V1 0VX1 I*.0.02 I*.0.13 I*.0.24 I*.0.35 I*.0.46 I*.0.57 I*.0.68 I*.0.79 0V1 0VRESETDISTQ1Q2I1I2I324Ve0VeBbBb24V0V<strong>PPC</strong>-R01.2RECORECO1 I*.1.02 I*.1.13 I*.1.24 I*.1.35 I*.1.46 I*.1.57 I*.1.68 I*.1.79 0V1 0V1 I*.0.02 I*.0.13 I*.0.24 I*.0.35 I*.0.46 I*.0.57 I*.0.68 I*.0.79 0V1 0VX1234567891111111X1234567891111111Q*.1.0Q*.1.1Q*.1.2Q*.1.3Q*.1.4Q*.1.5Q*.1.6Q*.1.7Q*.0.0Q*.0.1Q*.0.2Q*.0.3Q*.0.4Q*.0.5Q*.0.6Q*.0.7RESETDISTQ1Q2I1I2I324Ve0VeBbBb24V0V<strong>PPC</strong>-R01.2X12345678911111111234567891111111RECOQ*.1.0Q*.1.1Q*.1.2Q*.1.3Q*.1.4Q*.1.5Q*.1.6Q*.1.7Q*.0.0Q*.0.1Q*.0.2Q*.0.3Q*.0.4Q*.0.5Q*.0.6Q*.0.71 I*.1.02 I*.1.13 I*.1.24 I*.1.35 I*.1.46 I*.1.57 I*.1.68 I*.1.79 0V1 0VX1 I*.0.02 I*.0.13 I*.0.24 I*.0.35 I*.0.46 I*.0.57 I*.0.68 I*.0.79 0V1 0VX1234567891111111X1234567891111111Q*.1.0Q*.1.1Q*.1.2Q*.1.3Q*.1.4Q*.1.5Q*.1.6Q*.1.7Q*.0.0Q*.0.1Q*.0.2Q*.0.3Q*.0.4Q*.0.5Q*.0.6Q*.0.71 I*.0.02 I*.0.13 I*.0.24 I*.0.35 I*.0.46 I*.0.57 I*.0.68 I*.0.790VRME02.2-32-RME02.2-16-RMA02.2-16-RE230-RME02.2-16-RMA02.2-16-RE230-RME02.2-16-RMA02.2-16-RE230-RME02.2-16-RMA02.2-16-RE230-RME02.2-16-RMA02.2-16-RE230-RME02.2-16-RMA02.2-16-RE230-RME02.2-16-RMA02.2-16-RE230-1-10 General Information <strong>PPC</strong>-R1.5 Combination Options Module Carrier - <strong>PPC</strong> - I/O ModuleStructure <strong>PPC</strong> I/O Remarkone module carrier RMB02.2-021 x <strong>PPC</strong>-R01.2 without I/OH1S18888H1S18888H1S18888H1S188881 x <strong>PPC</strong>-R02.2 without I/O2 x <strong>PPC</strong>-R01.2 without I/OS2H2U1TXS2H2U1TXS2H2U1TXS2H2U1TXRXRXRXRXX1U2X10X1U2X10U3X16U4X1U2X10X1U2X10PROGPROGCOMPROGPROG<strong>PPC</strong>-R01.2SY7PR119.FH7SY7PR120.FH7SY7PR121.FH7one module carrier RMB02.2-04H1S1U1S2H2DISTX1TXRX8888PROGU2X10XXXXXS1XXXH1S1U1S2H2DISTX1TXRX8888PROGU2X10COMU3X16U4XS1XXX1 x <strong>PPC</strong>-R01.2 with I/O1 x <strong>PPC</strong>-R02.2 with I/O<strong>PPC</strong> must be at slot0 of an fourfoldmodule carrier (seeFig. 1-9 , modulecarrier no. 1 left slot).SY7PR122.FH7SY7PR123.FH7several module carrier follows the others8888PROGCOMS1 S1 S1...1 x <strong>PPC</strong>-R01.2 with I/O1 x <strong>PPC</strong>-R02.2 with I/Oseveral <strong>PPC</strong>-R without I/Osveral <strong>PPC</strong>-R with I/OOnly <strong>PPC</strong> at slot 0operates I/O, theremaining <strong>PPC</strong>-Rhave no access onI/O! (slot 0: see Fig.1-9 , module carrierno. 1 left slot)a maximum of 4 module carrierSY7PR124.FH7Fig. 1-10: Combination options module carrier - <strong>PPC</strong> - I/O moduleDOK-CONTRL-<strong>PPC</strong>-<strong>R0*.2</strong>**-PR03-EN-P
<strong>PPC</strong>-R General Information 1-111.6 SpecificationsGeneral InformationAttachment in the control cabinetHousing dimensions (B x H x D):Weight:Protection category:Module carrier RMB02.2-02/RMB02.2-04<strong>PPC</strong>-R01.2 = 41.5 x 192 x 150 mm<strong>PPC</strong>-R02.2 = 83.7 x 192 x 150 mm<strong>PPC</strong>-R01.2 = 1.1 kg<strong>PPC</strong>-R02.2 = 1.3 kgIP20, EN60529Ambient temperature: 0...+45 °C (operation)-25...+70 °C (transport, storage)Relative humidity :Air pressure:Battery backup (only included if the optionalPMM memory module and the real-time clockare used)Battery typePower supply10...95 %, no condensation (operation)5...95 %, no condensation (transport, storage)86...106 kPa (operation)70...106 kPa (transport, storage)To be replaced every yearOrder name: Batterie Lithium 3,5V Konfektioniert(Mat. Nr. 226423)Fig. 1-11: General specificationsRated value24 V DCTolerance -15 % / +20 % (according to EN61131-2 1994)RipplesPermissible rangeMax. current consumption on 24 V DC(<strong>PPC</strong>-R01)(<strong>PPC</strong>-R02)required fuse in the supply cableCable cross section for supply:I/O Bus supply by controlFig. 1-12: Power supply5 % max.19.2...30 V DC (ripple factor included)0.7 A1.2 A(+2.3 A max. I/O BUS supply)max. 4 A time-lag for 24Vmax. 2 A time-lag for 24Ve0.75...1.5 mm 2 (depending on the power demand)Module supply 24 VModule supply 5 VTotal powermax 2.3 Amax 3.0 Amax 52 W (heed the Derating)Fig. 1-13: I/O Bus supply by controlDOK-CONTRL-<strong>PPC</strong>-<strong>R0*.2</strong>**-PR03-EN-P
1-12 General Information <strong>PPC</strong>-RDigital inputs and outputs3 digital Inputs(potential-free)2 digital Outputs(potential-free)1 Bb – relay (ready for operation)(system monitoring)Current-sinking to groundV i,Low = 0...5 V DC; V i,High = 15...30 V DCI min = 10 mAI max = 0.5 A; V OH, min = U EXT -3 V DCdelay = 400 µs max. (short-circuit-proof)NO contactV n = 24 V DC, I max = 150 mAmin. 500 000 switch cycles (overcurrent protected)Fig. 1-14: Inputs and outputsEMCEmitted interference to EN 55022Noise immunity to EN 61000-4-2 (ESD)Noise immunity to EN 61000-4-4 (Burst)Noise immunity to EN 61000-5-5 (Surge)Class A (industrial environment)Rating criterion BRating criterion BRating criterion BDERATING I/O Bus supplyFig. 1-15: EMC data0 – 35 °C 100 % (52 W)35 – 45°C 85 % (44 W)Fig. 1-16: DERATING I/O Bus supplyInterfacesProgramming interface (PROG)General serial interface (COM)BT busRS232/RS422/RS485 (D-SUB, 15-way female connector), isolatedRS232/RS422/RS485 (D-SUB, 15-way female connector)Indramat BT bus (D-SUB, 9-way female connector)Fig. 1-17: Interface specificationsDOK-CONTRL-<strong>PPC</strong>-<strong>R0*.2</strong>**-PR03-EN-P
<strong>PPC</strong>-R General Information 1-131.7 Connecting the Power SupplyWARNINGModules can be damaged.⇒ Connector and modules may only be inserted orremoved when the power is switched off.Power Supply Unit+24VDC0VX1<strong>PPC</strong>-R1Dig. output 12Dig. output 23Dig. input 14Dig. input 25Dig. input 3624V external70V external8 Bb9 Bb2x0,75 mm 2 10+24VDC -15 /+20%110VEarthingbolt<strong>PPC</strong>-R_AnX1.FH7Fig. 1-18: Connecting the power supply:DOK-CONTRL-<strong>PPC</strong>-<strong>R0*.2</strong>**-PR03-EN-P
1-14 General Information <strong>PPC</strong>-R1.8 Connecting Inputs and OutputsPower supply unit+24VDC0VX1<strong>PPC</strong>-R12Dig. output 1Dig. output 23Dig. input 14Dig. input 25Dig. input 3624V external70V external2x0.75 mm 2 8 Bb9Bb1011+24VDC -15 /+20%0VEarthing bolt<strong>PPC</strong>-R_AnX1_EA.FH7Fig. 1-19: Connecting inputs and outputs1.9 Connector Pin AssignmentsX1 (11-way Phoenix connector)Pin Signal name1 Digital output 1 (Q1)2 Digital output 2 (Q2)3 Digital input 1 (I1)4 Digital input 2 (I1)5 Digital input 3 (I1)6 24V external voltage7 External GND8 BB relay (watchdog)9 BB relay (watchdog)10 24V11 GNDFig. 1-20: Connector pin assignments X1DOK-CONTRL-<strong>PPC</strong>-<strong>R0*.2</strong>**-PR03-EN-P
<strong>PPC</strong>-R General Information 1-15PROG / COM interface (X10, X16)BT bus (X15)Serial interface to Indramat standard (SIS – 15-way DSUB femaleconnectors).Both interfaces have full modem capability. The PROG interface isisolated.Pin Signal name1 (Protected ground) NC2 RS232 TxD3 RS232 RxD4 RS422 RxD+ or RS485+5 RS422 RxD- or RS485-6 DSR7 Signal ground8 DCD9 RS422 TxD+10 GND11 RS422 TxD-12 +5V13 RTS14 CTS15 DTRFig. 1-21: Interface pin assignments of X10 and X16PIN Signal name PIN Signal name1 TxD+ 2 RxD+3 GND 4 NC5 +5V 6 TxD-7 RxD- 8 NC9 NCFig. 1-22: Connector pin assignments BT-BUS X15DOK-CONTRL-<strong>PPC</strong>-<strong>R0*.2</strong>**-PR03-EN-P
1-16 General Information <strong>PPC</strong>-RDOK-CONTRL-<strong>PPC</strong>-<strong>R0*.2</strong>**-PR03-EN-P
<strong>PPC</strong>-R Important directions for use 2-12 Important directions for use2.1 Appropriate useIntroduction<strong>Rexroth</strong> Indramat products represent state-of-the-art developments andmanufacturing. They are tested prior to delivery to ensure operating safetyand reliability.The products may only be used in the manner that is defined asappropriate. If they are used in an inappropriate manner, then situationscan develop that may lead to property damage or injury to personnel.Note:<strong>Rexroth</strong> Indramat, as manufacturer, is not liable for anydamages resulting from inappropriate use. In such cases, theguarantee and the right to payment of damages resulting frominappropriate use are forfeited. The user alone carries allresponsibility of the risks.Before using <strong>Rexroth</strong> Indramat products, make sure that all the prerequisitesfor appropriate use of the products are satisfied:• Personnel that in any way, shape or form uses our products must firstread and understand the relevant safety instructions and be familiarwith appropriate use.• If the product takes the form of hardware, then they must remain intheir original state, in other words, no structural changes are permitted.It is not permitted to decompile software products or alter sourcecodes.• Do not mount damaged or faulty products or use them in operation.• Make sure that the products have been installed in the mannerdescribed in the relevant documentation.DOK-CONTRL-<strong>PPC</strong>-<strong>R0*.2</strong>**-PR03-EN-P
2-2 Important directions for use <strong>PPC</strong>-RAreas of use and applicationThe <strong>PPC</strong>-R01.2 and <strong>PPC</strong>-R02.2 units made by <strong>Rexroth</strong> Indramat aredesigned for installation in the RECO02 module carrier system. The<strong>PPC</strong>-R unit is designed for use in the following cases:• as control for Motion- and PLC applicationsNote:The <strong>PPC</strong>-R unit may only be used with the accessories andparts specified in this document. If a component has not beenspecifically named, then it may not be either mounted orconnected. The same applies to cables and lines.Operation is only permitted in the specified configurations andcombinations of components using the software and firmwareas specified in the relevant function descriptions.2.2 Inappropriate useAvailable for an application-specific use of the <strong>PPC</strong>-R unit areconfigurations with different field buses and different serial interfaces.Typical areas of application of a <strong>PPC</strong>-R unit are:• Printing and Paper• Packaging• Machine tools• Machining centerThe <strong>PPC</strong>-R unit may only be operated under the assembly, installationand ambient conditions as described here (temperature, system ofprotection, humidity, EMC requirements, etc.) and in the positionspecified.Using the motors outside of the above-referenced areas of application orunder operating conditions other than described in the document and thetechnical data specified is defined as “inappropriate use".The terminals may not be used if• they are subject to operating conditions that do not meet the abovespecified ambient conditions. This includes, for example, operationunder water, in the case of extreme temperature fluctuations orextreme maximum temperatures or if• <strong>Rexroth</strong> Indramat has not specifically released them for that intendedpurpose. Please note the specifications outlined in the general SafetyInstructions!DOK-CONTRL-<strong>PPC</strong>-<strong>R0*.2</strong>**-PR03-EN-P
<strong>PPC</strong>-R Safety Instructions for Electric Drives and Controls 3-13 Safety Instructions for Electric Drives and Controls3.1 IntroductionRead these instructions before the initial startup of the equipment inorder to eliminate the risk of bodily harm or material damage. Followthese safety instructions at all times.Do not attempt to install or start up this equipment without first reading alldocumentation provided with the product. Read and understand thesesafety instructions and all user documentation of the equipment prior toworking with the equipment at any time. If you do not have the userdocumentation for your equipment, contact your local <strong>Rexroth</strong> Indramatrepresentative to send this documentation immediately to the person orpersons responsible for the safe operation of this equipment.If the equipment is resold, rented or transferred or passed on to others,then these safety instructions must be delivered with the equipment.WARNINGImproper use of this equipment, failure to followthe safety instructions in this document ortampering with the product, including disablingof safety devices, may result in materialdamage, bodily harm, electric shock or evendeath!3.2 ExplanationsThe safety instructions describe the following degrees of hazardseriousness in compliance with ANSI Z535. The degree of hazardseriousness informs about the consequences resulting from noncompliancewith the safety instructions.Warning symbol with signalwordDegree of hazard seriousness accordingto ANSIDeath or severe bodily harm will occur.DANGERDeath or severe bodily harm may occur.WARNINGBodily harm or material damage may occur.CAUTIONFig. 3-1: Hazard classification (according to ANSI Z535)DOK-CONTRL-<strong>PPC</strong>-<strong>R0*.2</strong>**-PR03-EN-P
3-2 Safety Instructions for Electric Drives and Controls <strong>PPC</strong>-R3.3 Hazards by Improper UseDANGERHigh voltage and high discharge current!Danger to life or severe bodily harm by electricshock !DANGERDangerous movements! Danger to life, severebodily harm or material damage byunintentional motor movements!WARNINGHigh electrical voltage due to wrongconnections! Danger to life or bodily harm byelectric shock!WARNINGHealth hazard for persons with heartpacemakers, metal implants and hearing aids inproximity to electrical equipment!Surface of machine housing could be extremelyhot! Danger of injury! Danger of burns!CAUTIONCAUTIONRisk of injury due to improper handling! Bodilyharm caused by crushing, shearing, cutting andmechanical shock or incorrect handling ofpressurized systems!Risk of injury due to incorrect handling ofbatteries!CAUTIONDOK-CONTRL-<strong>PPC</strong>-<strong>R0*.2</strong>**-PR03-EN-P
<strong>PPC</strong>-R Safety Instructions for Electric Drives and Controls 3-33.4 General Information• <strong>Rexroth</strong> Indramat GmbH is not liable for damages resulting fromfailure to observe the warnings provided in this documentation.• Read the operating, maintenance and safety instructions in yourlanguage before starting up the machine. If you find that you can notcompletely understand the documentation for your product, please askyour supplier to clarify.• Proper and correct transport, storage, assembly and installation aswell as care in operation and maintenance are prerequisites foroptimal and safe operation of this equipment.• Only persons who are trained and qualified for the use operation of theequipment may work on this equipment or within its proximity. Thepersons are qualified if they have sufficient knowledge of theassembly, installation and operation of the equipment as well as anunderstanding of all warnings and precautionary measures noted inthese instructions.Furthermore, they must be trained, instructed and qualified to switchelectrical circuits and equipment on and off in accordance withtechnical safety regulations, to ground them and to mark themaccording to the requirements of safe work practices. They must haveadequate safety equipment and be trained in first aid.• Only use spare parts and accessories approved by the manufacturer.• Follow all safety regulations and requirements for the specificapplication as practiced in the country of use.• The equipment is designed for installation in industrial machinery.• The ambient conditions given in the product documentation must beobserved.• Use only safety features and applications that are clearly and explicitlyapproved in the Project Planning Manual.For example, the following areas of use are not permitted: constructioncranes, elevators used for people or freight, devices and vehicles totransport people, medical applications, refinery plants, transport ofhazardous goods, nuclear applications, applications sensitive to highfrequency, mining, food processing, control of protection equipment(also in a machine).• The information given in this documentation with regard to the use ofthe delivered components contains only examples of applications andsuggestions.The machine and installation manufacturer must- make sure that the delivered components are suited for hisindividual application and check the information given in thisdocumentation with regard to the use of the components,- make sure that his application complies with the applicable safetyregulations and standards and carry out the required measures,modifications and complements.• Startup of the delivered components is only permitted once it is surethat the machine or installation in which they are installed complieswith the national regulations, safety specifications and standards ofthe application.• Operation is only permitted if the national EMC regulations for theapplication are met.The instructions for installation in accordance with EMC requirementsDOK-CONTRL-<strong>PPC</strong>-<strong>R0*.2</strong>**-PR03-EN-P
3-4 Safety Instructions for Electric Drives and Controls <strong>PPC</strong>-Rcan be found in the documentation "EMC in Drive and ControlSystems.”The machine or installation manufacturer is responsible forcompliance with the limiting values as prescribed in the nationalregulations.• Technical data, connections and operational conditions are specified inthe product documentation and must be followed at all times.DOK-CONTRL-<strong>PPC</strong>-<strong>R0*.2</strong>**-PR03-EN-P
<strong>PPC</strong>-R Safety Instructions for Electric Drives and Controls 3-53.5 Protection Against Contact with Electrical PartsNote:This section refers to equipment and drive components withvoltages above 50 Volts.Touching live parts with voltages of 50 Volts and more with bare hands orconductive tools or touching ungrounded housings can be dangerous andcause electric shock . In order to operate electrical equipment, certainparts must unavoidably have dangerous voltages applied to them.DANGERHigh electrical voltage! Danger to life, severebodily harm by electric shock!⇒ Only those trained and qualified to work with or onelectrical equipment are permitted to operate, maintainor repair this equipment.⇒ Follow general construction and safety regulationswhen working on high voltage installations.⇒ Before switching on power the ground wire must bepermanently connected to all electrical units accordingto the connection diagram.⇒ Do not operate electrical equipment at any time , evenfor brief measurements or tests,if the ground wire isnot permanently connected to the points of thecomponents provided for this purpose.⇒ Before working with electrical parts with voltage higherthan 50 V, the equipment must be disconnected fromthe mains voltage or power supply. Make sure theequipment cannot be switched on again unintended.⇒ The following should be observed with electrical driveand filter components:Wait five (5) minutes after switching off power to allowcapacitors to discharge before beginning to work.Measure the voltage on the capacitors beforebeginning to work to make sure that the equipment issafe to touch.⇒ Never touch the electrical connection points of acomponent while power is turned on.⇒ Install the covers and guards provided with theequipment properly before switching the equipment on.Prevent contact with live parts at any time.⇒ A residual-current-operated protective device (RCD)must not be used on electric drives! Indirect contactmust be prevented by other means, for example, by anovercurrent protective device.⇒ Electrical Components with exposed live parts anduncovered high voltage terminals must be installed ina protective housing, for example in a control cabinet.DOK-CONTRL-<strong>PPC</strong>-<strong>R0*.2</strong>**-PR03-EN-P
3-6 Safety Instructions for Electric Drives and Controls <strong>PPC</strong>-RTo be observed with electrical drive and filter components:DANGERHigh electrical voltage on the housing!High leakage current! Danger to life, danger ofinjury by electric shock!⇒ Connect the electrical equipment, the housings of allelectrical units and motors permanently with thesafety conductor at the ground points before poweris switched on. Look at the connection diagram. Thisis even necessary for brief tests.⇒ Connect the safety conductor of the electricalequipment always permanently and firmly to thesupply mains. Leakage current exceeds 3.5 mA innormal operation.⇒ Use a copper conductor with at least 10 mm² crosssection over its entire course for this safetyconductor connection!⇒ Prior to startups, even for brief tests, always connectthe protective conductor or connect with ground wire.Otherwise, high voltages can occur on the housingthat lead to electric shock.DOK-CONTRL-<strong>PPC</strong>-<strong>R0*.2</strong>**-PR03-EN-P
<strong>PPC</strong>-R Safety Instructions for Electric Drives and Controls 3-73.6 Protection Against Electric Shock by Protective LowVoltage (PELV)All connections and terminals with voltages between 0 and 50 Volts on<strong>Rexroth</strong> Indramat products are protective low voltages designed inaccordance with international standards on electrical safety.WARNINGHigh electrical voltage due to wrongconnections! Danger to life, bodily harm byelectric shock !⇒ Only connect equipment, electrical components andcables of the protective low voltage type (PELV =Protective Extra Low Voltage) to all terminals andclamps with voltages of 0 to 50 Volts.⇒ Only electrical circuits may be connected which aresafely isolated against high voltage circuits. Safeisolation is achieved, for example, with an isolatingtransformer, an opto-electronic coupler or whenbattery-operated.3.7 Protection Against Dangerous MovementsDangerous movements can be caused by faulty control of the connectedmotors. Some common examples are:• improper or wrong wiring of cable connections• incorrect operation of the equipment components• wrong input of parameters before operation• malfunction of sensors, encoders and monitoring device• defective components• software or firmware errorsDangerous movements can occur immediately after equipment isswitched on or even after an unspecified time of trouble-free operation.The monitoring in the drive components will normally be sufficient to avoidfaulty operation in the connected drives. Regarding personal safety,especially the danger of bodily injury and material damage, this alonecannot be relied upon to ensure complete safety. Until the integratedmonitoring functions become effective, it must be assumed in any casethat faulty drive movements will occur. The extent of faulty drivemovements depends upon the type of control and the state of operation.DOK-CONTRL-<strong>PPC</strong>-<strong>R0*.2</strong>**-PR03-EN-P
3-8 Safety Instructions for Electric Drives and Controls <strong>PPC</strong>-RDANGERDangerous movements! Danger to life, risk ofinjury, severe bodily harm or material damage!⇒ Ensure personal safety by means of qualified andtested higher-level monitoring device or measuresintegrated in the installation. Unintended machinemotion is possible if monitoring device are disabled,bypassed or not activated.⇒ Pay attention to unintended machine motion or othermalfunction in any mode of operation.⇒ Keep free and clear of the machine’s range ofmotion and moving parts. Possible measures toprevent people from accidentally entering themachine’s range of movement:- use safety fences- use safety guards- use protective coverings- install light curtains or light barriers⇒ Fences and coverings must be strong enough toresist maximum possible momentum, especially ifbreak off parts can fly into the environment.⇒ Mount the emergency stop switch in the immediatereach of the operator. Verify that the emergency stopworks before startup. Don’t operate the machine ifthe emergency stop is not working.⇒ Isolate the drive power connection by means of anemergency stop circuit or use a starting lockout toprevent unintentional start.⇒ Make sure that the drives are brought to a safestandstill before accessing or entering the dangerzone. Safe standstill can be achieved by switchingoff the power supply contactor or by safe mechanicallocking of moving parts.⇒ Secure vertical axes against falling or dropping afterswitching off the motor power by, for example:- mechanically securing the vertical axes- adding an external braking/ arrester/ clampingmechanism- ensuring sufficient equilibration of the vertical axesThe standard equipment motor brake or an externalbrake controlled directly by the drive controller arenot sufficient to guarantee personal safety!DOK-CONTRL-<strong>PPC</strong>-<strong>R0*.2</strong>**-PR03-EN-P
<strong>PPC</strong>-R Safety Instructions for Electric Drives and Controls 3-9⇒ Disconnect electrical power to the equipment using amaster switch and secure the switch againstreconnection for:- maintenance and repair work- cleaning of equipment- long periods of discontinued equipment use⇒ Prevent the operation of high-frequency, remotecontrol and radio equipment near electronics circuitsand supply leads. If the use of such equipmentcannot be avoided, verify the system and theinstallation for possible malfunctions in all possiblepositions of normal use before initial startup. Ifnecessary, perform a special electromagneticcompatibility (EMC) test on the installation.3.8 Protection Against Magnetic and Electromagnetic FieldsDuring Operation and MountingMagnetic and electromagnetic fields generated near current-carryingconductors and permanent magnets in motors represent a serious healthhazard to persons with heart pacemakers, metal implants and hearingaids.WARNINGHealth hazard for persons with heartpacemakers, metal implants and hearing aids inproximity to electrical equipment!⇒ Persons with heart pacemakers, hearing aids andmetal implants are not permitted to enter followingareas:- Areas in which electrical equipment and parts aremounted, being operated or started up.- Areas in which parts of motors with permanentmagnets are being stored, operated, repaired ormounted.⇒ If it is necessary for a person with a heart pacemakerto enter such an area, then a doctor must beconsulted prior to doing so. Heart pacemakers thatare already implanted or will be implanted in thefuture, have a considerable varation in their electricalnoise immunity. Therefore there are no rules withgeneral validity.⇒ Persons with hearing aids, metal implants or metalpieces must consult a doctor before they enter theareas described above. Otherwise, health hazardswill occur.DOK-CONTRL-<strong>PPC</strong>-<strong>R0*.2</strong>**-PR03-EN-P
3-10 Safety Instructions for Electric Drives and Controls <strong>PPC</strong>-R3.9 Protection Against Contact with Hot PartsCAUTIONHousing surfaces could be extremely hot!Danger of injury! Danger of burns!⇒ Do not touch housing surfaces near sources of heat!Danger of burns!⇒ After switching the equipment off, wait at least ten(10) minutes to allow it to cool down before touchingit.⇒ Do not touch hot parts of the equipment, such ashousings with integrated heat sinks and resistors.Danger of burns!3.10 Protection During Handling and MountingUnder certain conditions, incorrect handling and mounting of parts andcomponents may cause injuries.CAUTIONRisk of injury by incorrect handling! Bodilyharm caused by crushing, shearing, cutting andmechanical shock!⇒ Observe general installation and safety instructionswith regard to handling and mounting.⇒ Use appropriate mounting and transport equipment.⇒ Take precautions to avoid pinching and crushing.⇒ Use only appropriate tools. If specified by the productdocumentation, special tools must be used.⇒ Use lifting devices and tools correctly and safely.⇒ For safe protection wear appropriate protectiveclothing, e.g. safety glasses, safety shoes and safetygloves.⇒ Never stand under suspended loads.⇒ Clean up liquids from the floor immediately toprevent slipping.DOK-CONTRL-<strong>PPC</strong>-<strong>R0*.2</strong>**-PR03-EN-P
<strong>PPC</strong>-R Safety Instructions for Electric Drives and Controls 3-113.11 Battery SafetyBatteries contain reactive chemicals in a solid housing. Inappropriatehandling may result in injuries or material damage.CAUTIONRisk of injury by incorrect handling!⇒ Do not attempt to reactivate discharged batteries byheating or other methods (danger of explosion andcauterization).⇒ Never charge non chargable batteries (danger ofleakage and explosion).⇒ Never throw batteries into a fire.⇒ Do not dismantle batteries.⇒ Do not damage electrical components installed in theequipment.Note:Be aware of environmental protection and disposal! Thebatteries contained in the product should be considered ashazardous material for land, air and sea transport in the senseof the legal requirements (danger of explosion). Disposebatteries separately from other waste. Observe the legalrequirements in the country of installation.3.12 Protection Against Pressurized SystemsCertain motors and drive controllers, corresponding to the information inthe respective Project Planning Manual, must be provided withpressurized media, such as compressed air, hydraulic oil, cooling fluidand cooling lubricant supplied by external systems. Incorrect handling ofthe supply and connections of pressurized systems can lead to injuries oraccidents. In these cases, improper handling of external supply systems,supply lines or connections can cause injuries or material damage.CAUTIONDanger of injury by incorrect handling ofpressurized systems !⇒ Do not attempt to disassemble, to open or to cut apressurized system (danger of explosion).⇒ Observe the operation instructions of the respectivemanufacturer.⇒ Before disassembling pressurized systems, releasepressure and drain off the fluid or gas.⇒ Use suitable protective clothing (for example safetyglasses, safety shoes and safety gloves)⇒ Remove any fluid that has leaked out onto the floorimmediately.Note:Environmental protection and disposal! The media used in theoperation of the pressurized system equipment may not beenvironmentally compatible. Media that are damaging theenvironment must be disposed separately from normal waste.Observe the legal requirements in the country of installation.DOK-CONTRL-<strong>PPC</strong>-<strong>R0*.2</strong>**-PR03-EN-P
3-12 Safety Instructions for Electric Drives and Controls <strong>PPC</strong>-RDOK-CONTRL-<strong>PPC</strong>-<strong>R0*.2</strong>**-PR03-EN-P
<strong>PPC</strong>-R <strong>PPC</strong>-R Configuration Features 4-14 <strong>PPC</strong>-R Configuration Features4.1 Hardware Configuration<strong>PPC</strong>-RPSM PC card compatible firmware moduleOptions• Power PC - processor• 8 MB SDRAM• 256 bytes ser. E²-PROM• Four-digit display• Digital inputs/outputs (3 In / 2 Out)• 2 serial interfaces to Indramat standard (SIS), X10 isolated• Real-time clock (as a clock with an optional battery backup and/orelapsed time meter)• SERCOS interface (SERCON 410 baud)• RECO/SPS interface• PC/104 interfaceThis module contains the complete firmware and user software• 4 MB FLASH memory• 64 KB nvRAM• Battery backup for RTC and PMM (option)• PMM - Memory module- 4 MB SRAM (battery backup)DOK-CONTRL-<strong>PPC</strong>-<strong>R0*.2</strong>**-PR03-EN-P
4-2 <strong>PPC</strong>-R Configuration Features <strong>PPC</strong>-RDOK-CONTRL-<strong>PPC</strong>-<strong>R0*.2</strong>**-PR03-EN-P
<strong>PPC</strong>-R Ordering Information 5-15 Ordering Information5.1 Type Code <strong>PPC</strong>-R01.2Short textcolumnExample:1 2 3 4 516 7 8 9 0 1 2 3 4 526 7 8 9 0 1 2 3 4 536 7 8 9 0 1 2 3 4 546 7 8 9 0<strong>PPC</strong> - R01 . 2N - N - S1 - FW1. Product group1.1 <strong>PPC</strong> . . . . . . . . . . = <strong>PPC</strong>2. Housing version2.1 for RECO unit . . . . . . . . = R3. Series3.1 1 . . . . . . . . . . . . . . . . . . . . . . . = 014. Version4.1 2 . . . . . . . . . . . . . . . . . . . . . . . . . . . . . = 25. Memory expansion module5.1 4 MB module . . . . . . . . . . . . . . . . . . . . . = A5.2 Not fitted . . . . . . . . . . . . . . . . . . . . = N6. Other version6.1 None . . . . . . . . . . . . . . . . . . . . . . . . . . . . . . . . = N7. Configuration7.1 Serial <strong>Rexroth</strong> Indramat interface (SIS). . . . . . . = S18. Firmware8.1 Indication to the effect that firmware must be ordered as a separate sub-item = FW<strong>PPC</strong>_R01_Type.FH7Fig. 5-1: Type code <strong>PPC</strong>-R01.2DOK-CONTRL-<strong>PPC</strong>-<strong>R0*.2</strong>**-PR03-EN-P
5-2 Ordering Information <strong>PPC</strong>-R5.2 Type Code <strong>PPC</strong>-R02.2Short textcolumnExample:1 2 3 4 516 7 8 9 0 1 2 3 4 526 7 8 9 0 1 2 3 4 536 7 8 9 0 1 2 3 4 546 7 8 9 0P P C - R 0 2 . 2 N - N - N N - N N - N N - F W1. Product group1.1 <strong>PPC</strong> . . . . . . . . . . . = <strong>PPC</strong>2. Housing version2.1 for RECO unit . . . . . . . . = R3. Series3.1 2 . . . . . . . . . . . . . . . . . . . . . . . = 024. Version4.1 2 . . . . . . . . . . . . . . . . . . . . . . . . . . . . = 25. Memory expansion module5.1 4 MB module . . . . . . . . . . . . . . . . . . . . . = A5.2 Not fitted . . . . . . . . . . . . . . . . . . . . = N6. Other version6.1 None . . . . . . . . . . . . . . . . . . . . . . . . . . . . . . . .= N7. Configuration7.1 NN-NN-NN7.2 NN-P2-NN7.3 V2-NN-NN18. Firmware8.1 Indication to the effect that firmware must be ordered as a separate sub-item = FWRemark:1 ConfigurationNN = not fittedP2 = PROFIBUS-DP slave moduleV2 = DeviceNet slave module<strong>PPC</strong>_R02_Type.FH7Fig. 5-2: Type code <strong>PPC</strong>-R02.2DOK-CONTRL-<strong>PPC</strong>-<strong>R0*.2</strong>**-PR03-EN-P
<strong>PPC</strong>-R List of Figures 6-16 List of FiguresFig. 1-1: <strong>PPC</strong>-R01.2 and <strong>PPC</strong>-R02.2 1-1Fig. 1-2: Dimensioned drawing <strong>PPC</strong>-R01.2 and <strong>PPC</strong>-R02.2 1-3Fig. 1-3: Installation dimensions of <strong>PPC</strong>-R01.2 and <strong>PPC</strong>-R02.2 1-4Fig. 1-4: Module carrier RMB02.2-02 1-4Fig. 1-5: Module carrier RMB02.2-04 1-5Fig. 1-6: Side-by-side installation of several RMB02.2-04 module carriers1-5Fig. 1-7: Maximum configuration RMB02.2-04 1-6Fig. 1-8: System grounding with <strong>PPC</strong>-R 1-8Fig. 1-9: Setting the slot address 1-9Fig. 1-10: Combination options module carrier - <strong>PPC</strong> - I/O module 1-10Fig. 1-11: General specifications 1-11Fig. 1-12: Power supply 1-11Fig. 1-13: I/O Bus supply by control 1-11Fig. 1-14: Inputs and outputs 1-12Fig. 1-15: EMC data 1-12Fig. 1-16: DERATING I/O Bus supply 1-12Fig. 1-17: Interface specifications 1-12Fig. 1-18: Connecting the power supply: 1-13Fig. 1-19: Connecting inputs and outputs 1-14Fig. 1-20: Connector pin assignments X1 1-14Fig. 1-21: Interface pin assignments of X10 and X16 1-15Fig. 1-22: Connector pin assignments BT-BUS X15 1-15Fig. 3-1: Hazard classification (according to ANSI Z535) 3-1Fig. 5-1: Type code <strong>PPC</strong>-R01.2 5-1Fig. 5-2: Type code <strong>PPC</strong>-R02.2 5-2DOK-CONTRL-<strong>PPC</strong>-<strong>R0*.2</strong>**-PR03-EN-P
6-2 List of Figures <strong>PPC</strong>-RDOK-CONTRL-<strong>PPC</strong>-<strong>R0*.2</strong>**-PR03-EN-P
<strong>PPC</strong>-R Index 7-17 IndexAAir pressure 1-11Ambient temperature 1-11Appropriate useArea of application 2-2Introduction 2-1Uses 2-2Attachment 1-11BBattery backup 4-1BT bus 1-1, 1-12, 1-15Bus board 1-9CCOM interface 1-1, 1-15Connector pin assignments 1-14Current consumption 1-11DData transfer 1-1Digital I/O 4-1Dimensioned drawing 1-3DIN rail 1-6DIP-Switch 1-9Display 4-1EEMC 1-12FField bus interfaces 1-2Firmware 4-1GGrounding 1-8Grounding point 1-8Grounding stud 1-8HHousing dimensions 1-11II/O Bus supply 1-11I/O modules 1-2, 1-6Inappropriate use 2-2Consequences, Discharge of liability 2-1Indramat standard 4-1Inputs and outputs 1-12Inputs and Outputs 1-14Installation 1-6Installation Dimensions 1-4Interface pin assignments 1-15Interfaces 1-1, 1-12DOK-CONTRL-<strong>PPC</strong>-<strong>R0*.2</strong>**-PR03-EN-P
7-2 Index <strong>PPC</strong>-RMMaximum configuration 1-6Module carrier 1-9Module carrier address 1-9Module carrier RMB02.2-02 1-4Module carrier RMB02.2-04 1-5Module carrier system 1-2OOperator input terminal 1-1<strong>PPC</strong>/104 interface 4-1PC/104 modules 1-2PMM 4-1Power supply 1-8, 1-11, 1-13<strong>PPC</strong>-R01.2 1-1<strong>PPC</strong>-R02.2 1-1PROG interface 1-15Programming interface (PROG) 1-12Protection category 1-11PSM 4-1RReal-time clock 4-1RECO bus 1-6RECO/SPS interface 4-1RECO02 modules 1-6Relative humidity 1-11Retaining screw 1-6RMB02.2-02 1-2RMB02.2-04 1-2SSafety Instructions for Electric Drives and Controls 3-1Screening 1-8SERCOS interface 4-1Serial Indramat Interface 1-1Serial interface 1-12Slot address 1-9Specifications 1-11System grounding 1-8TType code 5-1, 5-2UUse See appropriate use and inappropriate useUser software 4-1WWeight 1-11DOK-CONTRL-<strong>PPC</strong>-<strong>R0*.2</strong>**-PR03-EN-P
<strong>PPC</strong>-R Index 7-3XX1 1-14X10 1-15X15 1-15X16 1-15DOK-CONTRL-<strong>PPC</strong>-<strong>R0*.2</strong>**-PR03-EN-P
7-4 Index <strong>PPC</strong>-RDOK-CONTRL-<strong>PPC</strong>-<strong>R0*.2</strong>**-PR03-EN-P
<strong>PPC</strong>-R Service & Support 8-18 Service & Support8.1 HelpdeskUnser Kundendienst-Helpdesk im Hauptwerk Lohram Main steht Ihnen mit Rat und Tat zur Seite.Sie erreichen uns- telefonisch: +49 (0) 9352 40 50 60über Service Call Entry Center Mo-Fr 07:00-18:00- per Fax: +49 (0) 9352 40 49 41- per e-Mail: service@indramat.deOur service helpdesk at our headquarters in Lohr amMain, Germany can assist you in all kinds of inquiries.Contact us- by phone: +49 (0) 9352 40 50 60via Service Call Entry Center Mo-Fr 7:00 am - 6:00 pm- by fax: +49 (0) 9352 40 49 41- by e-mail: service@indramat.de8.2 Service-HotlineAußerhalb der Helpdesk-Zeiten ist der Servicedirekt ansprechbar unter+49 (0) 171 333 88 26oder +49 (0) 172 660 04 06After helpdesk hours, contact our servicedepartment directly at+49 (0) 171 333 88 26or +49 (0) 172 660 04 068.3 InternetErgänzende Hinweise zu Service, Reparatur undTraining sowie die aktuellen Adressen unsererService- und Vertriebsbüros finden Sie unterwww.indramat.de – einige Angaben in dieserDokumentation können inzwischen überholt sein.Außerhalb Deutschlands nehmen Sie bitte zuerstKontakt mit Ihrem lokalen Ansprechpartner auf.VerkaufsniederlassungenNiederlassungen mit KundendienstAdditional notes about service, repairs and trainingas well as the actual addresses of our sales- andservice facilities are available on the Internet atwww.indramat.de – some information in thisdocumentation may meanwhile be obsolete.Please contact the sales & service offices in yourarea first.sales agenciesoffices providing service8.4 Vor der Kontaktaufnahme... - Before contacting us...Wir können Ihnen schnell und effizient helfen wennSie folgende Informationen bereithalten:1. detaillierte Beschreibung der Störung und derUmstände.2. Angaben auf dem Typenschild derbetreffenden Produkte, insbesondereTypenschlüssel und Seriennummern.3. Tel.-/Faxnummern und e-Mail-Adresse, unterdenen Sie für Rückfragen zu erreichen sind.For quick and efficient help, please have thefollowing information ready:1. Detailed description of the failure andcircumstances.2. Information on the type plate of the affectedproducts, especially type codes and serialnumbers.3. Your phone/fax numbers and e-mail address,so we can contact you in case of questions.DOK-CONTRL-<strong>PPC</strong>-<strong>R0*.2</strong>**-PR03-EN-P
8-2 Service & Support <strong>PPC</strong>-R8.5 Kundenbetreuungsstellen - Sales & Service FacilitiesDeutschland – Germany vom Ausland: (0) nach Landeskennziffer weglassen!from abroad: don’t dial (0) after country code!Vertriebsgebiet MitteGermany CentreSERVICESERVICESERVICE<strong>Rexroth</strong> Indramat GmbHBgm.-Dr.-Nebel-Str. 297816 Lohr am MainKompetenz-Zentrum EuropaTel.: +49 (0)9352 40-0Fax: +49 (0)9352 40-4885CALL ENTRY CENTERMO – FRvon 07:00 - 18:00 Uhrfrom 7 am – 6 pmTel. +49 (0) 9352 40 50 60service@indramat.deHOTLINEMO – FRvon 17:00 - 07:00 Uhrfrom 5 pm - 7 am+ SA / SOTel.: +49 (0)172 660 04 06oder / orTel.: +49 (0)171 333 88 26ERSATZTEILE / SPARESverlängerte Ansprechzeit- extended office time -♦ nur an Werktagen- only on working days -♦ von 07:00 - 18:00 Uhr- from 7 am - 6 pm -Tel. +49 (0) 9352 40 42 22Vertriebsgebiet SüdGermany SouthGebiet SüdwestGermany South-WestVertriebsgebiet OstGermany EastVertriebsgebiet OstGermany East<strong>Rexroth</strong> Indramat GmbHLandshuter Allee 8-1080637 MünchenTel.: +49 (0)89 127 14-0Fax: +49 (0)89 127 14-490<strong>Bosch</strong> <strong>Rexroth</strong> AGVertrieb Deutschland – VD-BIGeschäftsbereich <strong>Rexroth</strong> IndramatRegionalzentrum SüdwestRingstrasse 70 / Postfach 114470736 Fellbach / 70701 FellbachTel.: +49 (0)711 57 61–100Fax: +49 (0)711 57 61–125<strong>Bosch</strong> <strong>Rexroth</strong> AGBeckerstraße 3109120 ChemnitzTel.: +49 (0)371 35 55-0Fax: +49 (0)371 35 55-333<strong>Bosch</strong> <strong>Rexroth</strong> AGRegionalzentrum OstWalter-Köhn-Str. 4d04356 LeipzigTel.: +49 (0)341 25 61-0Fax: +49 (0)341 25 61-111Vertriebsgebiet WestGermany WestVertriebsgebiet MitteGermany CentreVertriebsgebiet NordGermany NorthVertriebsgebiet NordGermany North<strong>Bosch</strong> <strong>Rexroth</strong> AGVertrieb DeutschlandRegionalzentrum WestBorsigstrasse 1540880 RatingenTel.: +49 (0)2102 409-0Fax: +49 (0)2102 409-406<strong>Bosch</strong> <strong>Rexroth</strong> AGRegionalzentrum MitteWaldecker Straße 1364546 Mörfelden-WalldorfTel.: +49 (0) 61 05 702-3Fax: +49 (0) 61 05 702-444<strong>Bosch</strong> <strong>Rexroth</strong> AGWalsroder Str. 9330853 LangenhagenTel.: +49 (0) 511 72 66 57-0Fax: +49 (0) 511 72 66 57-95<strong>Bosch</strong> <strong>Rexroth</strong> AGKieler Straße 21222525 HamburgTel.: +49 (0) 40 81 955 966Fax: +49 (0) 40 85 418 978DOK-CONTRL-<strong>PPC</strong>-<strong>R0*.2</strong>**-PR03-EN-P
<strong>PPC</strong>-R Service & Support 8-3Europa (West) - Europe (West)vom Ausland: (0) nach Landeskennziffer weglassen, Italien: 0 nach Landeskennziffer mitwählenfrom abroad: don’t dial (0) after country code, Italy: dial 0 after country codeAustria - ÖsterreichAustria – ÖsterreichBelgium - BelgienDenmark - Dänemark<strong>Bosch</strong> <strong>Rexroth</strong> GmbHBereich IndramatStachegasse 131120 WienTel.: +43 (0)1 985 25 40Fax: +43 (0)1 985 25 40-93<strong>Bosch</strong> <strong>Rexroth</strong> G.m.b.H.Gesch.ber. <strong>Rexroth</strong> IndramatIndustriepark 184061 PaschingTel.: +43 (0)7221 605-0Fax: +43 (0)7221 605-21<strong>Bosch</strong> <strong>Rexroth</strong> nvGesch.ber. <strong>Rexroth</strong> IndramatIndustrielaan 81740 TernatTel.: +32 (0)2 5830719Fax: +32 (0)2 5830731indramat@rexroth.be<strong>Bosch</strong> <strong>Rexroth</strong> A/SZinkvej 68900 RandersTel.: +45 (0)87 11 90 60Fax: +45 (0)87 11 90 61Great Britain – GroßbritannienFinland - FinnlandFrance - FrankreichFrance - Frankreich<strong>Bosch</strong> <strong>Rexroth</strong> Ltd.<strong>Rexroth</strong> Indramat DivisionBroadway Lane, South CerneyCirencester, Glos GL7 5UHTel.: +44 (0)1285 863000Fax: +44 (0)1285 863030sales@indramat.co.ukservice@indramat.co.uk<strong>Rexroth</strong> Mecman Oy<strong>Rexroth</strong> Indramat divisionAnsatie 6017 40 VantaaTel.: +358 (0)9 84 91-11Fax: +358 (0)9 84 91-13 60<strong>Bosch</strong> <strong>Rexroth</strong> S.A.Division <strong>Rexroth</strong> IndramatAvenue de la TrentaineBP. 7477503 CHELLES CEDEXTel.: +33 (0)164 72-70 00Fax: +33 (0)164 72-63 00Hotline: +33 (0)608 33 43 28<strong>Bosch</strong> <strong>Rexroth</strong> S.A.Division <strong>Rexroth</strong> Indramat1270, Avenue de Lardenne31100 ToulouseTel.: +33 (0)5 61 49 95 19Fax: +33 (0)5 61 31 00 41France - FrankreichItaly - ItalienItaly - ItalienItaly - Italien<strong>Bosch</strong> <strong>Rexroth</strong> S.A.Division <strong>Rexroth</strong> Indramat91, Bd. Irène Joliot-Curie69634 Vénissieux – CedexTel.: +33 (0)4 78 78 53 65Fax: +33 (0)4 78 78 53 62<strong>Bosch</strong> <strong>Rexroth</strong> S.p.A.Via G. Di Vittoria, 120063 Cernusco S/N.MITel.: +39 02 2 365 270Fax: +39 02 700 408 252378<strong>Bosch</strong> <strong>Rexroth</strong> S.p.A.Via Paolo Veronesi, 25010148 TorinoTel.: +39 011 224 88 11Fax: +39 011 220 48 04<strong>Bosch</strong> <strong>Rexroth</strong> S.p.A.Via del Progresso, 16 (Zona Ind.)35020 PadovaTel.: +39 049 8 70 13 70Fax: +39 049 8 70 13 77Italy - ItalienItaly - ItalienNetherlands - Niederlande/HollandNetherlands - Niederlande/Holland<strong>Bosch</strong> <strong>Rexroth</strong> S.p.A.Via Mascia, 180053 Castellamare di Stabia NATel.: +39 081 8 71 57 00Fax: +39 081 8 71 68 85<strong>Bosch</strong> <strong>Rexroth</strong> S.p.A.Viale Oriani, 38/A40137 BolognaTel.: +39 051 34 14 14Fax: +39 051 34 14 22<strong>Bosch</strong> <strong>Rexroth</strong> B.V.Kruisbroeksestraat 1(P.O. Box 32)5281 RV BoxtelTel.: +31 (0)411 65 19 51Fax: +31 (0)411 65 14 83indramat@hydraudyne.nl<strong>Bosch</strong> <strong>Rexroth</strong> Services B.V.Kruisbroeksestraat 1(P.O. Box 32)5281 RV BoxtelTel.: +31 (0)411 65 19 51Fax: +31 (0)411 67 78 14Norway - NorwegenSpain - SpanienSpain - SpanienSweden - Schweden<strong>Bosch</strong> <strong>Rexroth</strong> AS<strong>Rexroth</strong> Indramat DivisionBerghagan 1 or: Box 30071405 Ski-Langhus 1402 SkiTel.: +47 (0)64 86 41 00Fax: +47 (0)64 86 90 62jul.ruud@rexroth.no<strong>Bosch</strong> <strong>Rexroth</strong> S.A.Divisiòn <strong>Rexroth</strong> IndramatCentro Industrial SantigaObradors s/n08130 Santa Perpetua de MogodaBarcelonaTel.: +34 9 37 47 94 00Fax: +34 9 37 47 94 01Goimendi S.A.División <strong>Rexroth</strong> IndramatParque Empresarial ZuatzuC/ Francisco Grandmontagne no.220018 San SebastianTel.: +34 9 43 31 84 21- service: +34 9 43 31 84 56Fax: +34 9 43 31 84 27- service: +34 9 43 31 84 60satindramat-goimendi@adegi.es<strong>Rexroth</strong> Mecman Svenska AB<strong>Rexroth</strong> Indramat DivisionVaruvägen 7125 81 StockholmTel.: +46 (0)8 727 92 00Fax: +46 (0)8 647 32 77Sweden - SchwedenSwitzerland West - Schweiz WestSwitzerland East - Schweiz Ost<strong>Rexroth</strong> Mecman Svenska ABIndramat SupportEkvändan 7254 67 HelsingborgTel.: +46 (0) 42 38 88 -50Fax: +46 (0) 42 38 88 -74<strong>Bosch</strong> <strong>Rexroth</strong> Suisse SADépartement <strong>Rexroth</strong> IndramatRue du village 11020 RenensTel.: +41 (0)21 632 84 20Fax: +41 (0)21 632 84 21<strong>Bosch</strong> <strong>Rexroth</strong> Schweiz AGGeschäftsbereich IndramatHemrietstrasse 28863 ButtikonTel. +41 (0) 55 46 46 205Fax +41 (0) 55 46 46 222DOK-CONTRL-<strong>PPC</strong>-<strong>R0*.2</strong>**-PR03-EN-P
8-4 Service & Support <strong>PPC</strong>-REuropa (Ost) - Europe (East)vom Ausland: (0) nach Landeskennziffer weglassenfrom abroad: don’t dial (0) after country codeCzech Republic - TschechienCzech Republic - TschechienHungary - UngarnPoland – Polen<strong>Bosch</strong> -<strong>Rexroth</strong>, spol.s.r.o.Hviezdoslavova 5627 00 BrnoTel.: +420 (0)5 48 126 358Fax: +420 (0)5 48 126 112DEL a.s.Strojírenská 38Zdar nad Sázavou591 01 Czech republicTel.: +420 616 64 3144Fax: +420 616 216 57<strong>Bosch</strong> <strong>Rexroth</strong> Kft.Angol utca 341149 BudapestTel.: +36 (1) 364 00 02Fax: +36 (1) 383 19 80<strong>Bosch</strong> <strong>Rexroth</strong> Sp.zo.o.Biuro Poznanul. Dabrowskiego 81/8560-529 PoznanTel.: +48 061 847 64 62 /-63Fax: +48 061 847 64 02Rumania - RumänienRussia - RusslandRussia - RusslandTurkey - Türkei<strong>Bosch</strong> <strong>Rexroth</strong> Sp.zo.o.Str. Drobety nr. 4-10, app. 1470258 Bucuresti, Sector 2Tel.: +40 (0)1 210 48 25+40 (0)1 210 29 50Fax: +40 (0)1 210 29 52<strong>Bosch</strong> <strong>Rexroth</strong>Wolokolamskoje Chaussee 73Zimmer 406, 408RUS – 123424 MoskauTel.: +7 095/ 232 08 34+7 095/ 232 08 35Fax: +7 095/ 232 08 36info.rex@rexroth.ruELMIS10, Internationalnaya Str.246640 Gomel, BelarusTel.: +375/ 232 53 42 70Fax: +375/ 232 53 37 69elmis_ltd@yahoo.com<strong>Bosch</strong> <strong>Rexroth</strong> OtomasyonSan & Tic. A..S.Fevzi Cakmak Cad No. 334630 Sefaköy IstanbulTel.: +90 212 541 60 70Fax: +90 212 599 34 07Slowenia - SlowenienDOMELOtoki 2164 228 ZeleznikiTel.: +386 5 5117 152Fax: +386 5 5117 225brane.ozebek@domel.siDOK-CONTRL-<strong>PPC</strong>-<strong>R0*.2</strong>**-PR03-EN-P
<strong>PPC</strong>-R Service & Support 8-5Africa, Asia, Australia – incl. Pacific Rimvom Ausland:from abroad:(0) nach Landeskennziffer weglassen!don’t dial (0) after country code!Australia - AustralienAustralia - AustralienChinaChinaAIMS - Australian IndustrialMachinery Services Pty. Ltd.Unit 3/45 Horne STCampbellfield , VIC 3061MelbourneTel.: +61 (0) 393 590 228Fax: +61 (0) 393 590 286Hotline: +61 (0) 419 369 195terryobrien@aimservices.com.au<strong>Bosch</strong> <strong>Rexroth</strong> Pty. Ltd.No. 7, Endeavour WayBraeside Victoria, 31 95MelbourneTel.: +61 (0)3 95 80 39 33Fax: +61 (0)3 95 80 17 33mel@rexroth.com.au<strong>Bosch</strong> <strong>Rexroth</strong> Ltd.Wai Gaoqiao Free Trade ZoneNo.122, Fu Te Dong Yi RoadShanghai 200131 - P.R.ChinaTel.: +86 21 58 66 30 30Fax: +86 21 58 66 55 23roger.shi_sh@boschrexroth.com.cn<strong>Bosch</strong> <strong>Rexroth</strong> (China) Ltd.15/F China World Trade Center1, Jianguomenwai AvenueBeijing 100004, P.R.ChinaTel.: +86 10 65 05 03 80Fax: +86 10 65 05 03 79China<strong>Bosch</strong> <strong>Rexroth</strong> (China) Ltd.A-5F., 123 Lian Shan StreetSha He Kou DistrictDalian 116 023, P.R.ChinaTel.: +86 411 46 78 930Fax: +86 411 46 78 932China<strong>Bosch</strong> <strong>Rexroth</strong> (Changzhou) Co.Ltd.Guangzhou Repres. OfficeRoom 1014-1016, Metro Plaza,Tian He District, 183 Tian He Bei RdGuangzhou 510075, P.R.ChinaTel.: +86 20 8755-0030+86 20 8755-0011Fax: +86 20 8755-2387Hongkong<strong>Bosch</strong> <strong>Rexroth</strong> (China) Ltd.6 th Floor,Yeung Yiu Chung No.6 Ind Bldg.19 Cheung Shun StreetCheung Sha Wan,Kowloon, HongkongTel.: +852 22 62 51 00Fax: +852 27 41 33 44alexis.siu@boschrexroth.com.hkIndia - Indien<strong>Bosch</strong> <strong>Rexroth</strong> (India) Ltd.<strong>Rexroth</strong> Indramat DivisionPlot. A-58, TTC Industrial AreaThane Turbhe Midc RoadMahape VillageNavi Mumbai - 400 701Tel.: +91 (0)22 7 61 46 22Fax: +91 (0)22 7 68 15 31India - IndienIndonesia - IndonesienJapanJapan<strong>Bosch</strong> <strong>Rexroth</strong> (India) Ltd.<strong>Rexroth</strong> Indramat DivisionPlot. 96, Phase IIIPeenya Industrial AreaBangalore - 560058Tel.: +91 (0)80 8 39 73 74Fax: +91 (0)80 8 39 43 45PT. <strong>Rexroth</strong> WijayakusumaBuilding # 202, CilandakCommercial EstateJl. Cilandak KKO, Jakarta 12560Tel.: +62 21 7891169 (5 lines)Fax: +62 21 7891170 - 71<strong>Bosch</strong> <strong>Rexroth</strong> Automation Corp.Service Center JapanYutakagaoka 1810, Meito-ku,NAGOYA 465-0035, JapanTel.: +81 (0)52 777 88 41+81 (0)52 777 88 53+81 (0)52 777 88 79Fax: +81 (0)52 777 89 01<strong>Bosch</strong> <strong>Rexroth</strong> Automation Corp.<strong>Rexroth</strong> Indramat Division1F, I.R. BuildingNakamachidai 4-26-44, Tsuzuki-kuYOKOHAMA 224-0041, JapanTel.: +81 (0)45 942 72 10Fax: +81 (0)45 942 03 41Korea<strong>Bosch</strong> <strong>Rexroth</strong>-Korea Ltd.1515-14 Dadae-Dong, Saha-Ku<strong>Rexroth</strong> Indramat DivisionPusan Metropolitan City, 604-050Republic of South KoreaMalaysiaSingapore - SingapurSouth Africa - SüdafrikaTel.: +82 (0)51 26 00 741Fax: +82 (0)51 26 00 747gyhan@rexrothkorea.co.kr<strong>Bosch</strong> <strong>Rexroth</strong> Sdn.Bhd.Head OfficeNo. 3, Block B, Jalan SS 13/5Subang Jaya Industrial Estate47500 Petaling Jaya - SelangorTel.: +60 (0) 3 73 44 870Fax: +60 (0) 3 73 44 864hockhwa@hotmail.comRobert <strong>Bosch</strong> (SEA) Pte Ltd.Dept. RBSI-R/SAT38-C Jalan PemimpinSingapore 577180Tel.: +65 35 05 470Fax: +65 35 05 313kenton.peh@sg.bosch.comTECTRA Automation (Pty) Ltd.28 Banfield Road,Industria NorthRSA - Maraisburg 1700Tel.: +27 (0)11 673 20 80Fax: +27 (0)11 673 72 69Hotline: +27 (0)82 903 29 23georgv@tectra.co.zaTaiwanThailand<strong>Rexroth</strong> Uchida Co., Ltd.No.17, Lane 136, Cheng Bei 1 Rd.,Yungkang, Tainan HsienTaiwan, R.O.C.Tel.: +886 (0)6 25 36 565Fax: +886 (0)6 25 34 754indramat@mail.net.twNC Advance Technology Co. Ltd.59/76 Moo 9Ramintra road 34Tharang, Bangkhen,Bangkok 10230Tel.: +66 2 943 70 62+66 2 943 71 21Fax: +66 2 509 23 62sonkawin@hotmail.comDOK-CONTRL-<strong>PPC</strong>-<strong>R0*.2</strong>**-PR03-EN-P
8-6 Service & Support <strong>PPC</strong>-RNordamerika – North AmericaUSAHauptniederlassung - Headquarters<strong>Bosch</strong> <strong>Rexroth</strong> Corporation<strong>Rexroth</strong> Indramat Division5150 Prairie Stone ParkwayHoffman Estates, IL 60192-3707Tel.: +1 847 6 45 36 00Fax: +1 847 6 45 62 01service@indramat.comUSA Central Region - Mitte<strong>Bosch</strong> <strong>Rexroth</strong> Corporation<strong>Rexroth</strong> Indramat DivisionCentral Region Technical CenterAuburn Hills, MI 48326Tel.: +1 248 3 93 33 30Fax: +1 248 3 93 29 06USA Southeast Region - Südwest<strong>Bosch</strong> <strong>Rexroth</strong> Corporation<strong>Rexroth</strong> Indramat DivisionSoutheastern Technical Center3625 Swiftwater Park DriveSuwanee, Georgia 30174Tel.: +1 770 9 32 32 00Fax: +1 770 9 32 19 03USA SERVICE-HOTLINE- 7 days x 24hrs -+1-800-860-1055USA East Region –OstUSA Northeast Region – NordostUSA West Region – West<strong>Bosch</strong> <strong>Rexroth</strong> Corporation<strong>Rexroth</strong> Indramat DivisionCharlotte Regional Sales Office14001 South Lakes DriveCharlotte, North Carolina 28273Tel.: +1 704 5 83 97 62+1 704 5 83 14 86<strong>Bosch</strong> <strong>Rexroth</strong> Corporation<strong>Rexroth</strong> Indramat DivisionNortheastern Technical Center99 Rainbow RoadEast Granby, Connecticut 06026Tel.: +1 860 8 44 83 77Fax: +1 860 8 44 85 95<strong>Bosch</strong> <strong>Rexroth</strong> Corporation7901 Stoneridge Drive, Suite 220Pleasant Hill, California 94588Tel.: +1 925 227 10 84Fax: +1 925 227 10 81Canada East - Kanada OstCanada West - Kanada West<strong>Bosch</strong> <strong>Rexroth</strong> Canada CorporationBurlington Division3426 Mainway DriveBurlington, OntarioCanada L7M 1A8Tel.: +1 905 335 55 11Fax: +1 905 335-41 84michael.moro@boschrexroth.ca<strong>Bosch</strong> <strong>Rexroth</strong> Canada Corporation5345 Goring St.Burnaby, British ColumbiaCanada V7J 1R1Tel. +1 604 205-5777Fax +1 604 205-6944david.gunby@boschrexroth.caSüdamerika – South AmericaArgentina - ArgentinienArgentina - ArgentinienBrazil - BrasilienBrazil - Brasilien<strong>Bosch</strong> <strong>Rexroth</strong> S.A.I.C."The Drive & Control Company"Acassusso 48 41/471605 MunroProv. Buenos AiresTel.: +54 (0)11 4756 01 40Fax: +54 (0)11 4756 01 36mannesmann@mannesmannsaic.com.arNAKASEServicio Tecnico CNCCalle 49, No. 5764/661653 Villa BalesterProv. - Buenos AiresTel.: +54 (0) 11 4768 36 43Fax: +54 (0) 11 4768 24 13nakase@usa.netnakase@nakase.com<strong>Bosch</strong> <strong>Rexroth</strong> Ltda.Av. Tégula, 888Ponte Alta, Atibaia SPCEP 12942-440Tel.: +55 (0)11 4414 56 92+55 (0)11 4414 56 84Fax sales: +55 (0)11 4414 57 07Fax serv.: +55 (0)11 4414 56 86alexandre.wittwer@rexroth.com.br<strong>Bosch</strong> <strong>Rexroth</strong> Ltda.R. Dr.Humberto Pinheiro Vieira, 100Distrito Industrial [Caixa Postal 1273]BR - 89220-390 Joinville - SCTel./Fax: +55 (0)47 473 58 33Mobil: +55 (0)47 9974 6645prochnow@zaz.com.brMexicoColumbia - Kolumbien<strong>Bosch</strong> <strong>Rexroth</strong> S.A. de C.V.Calle Neptuno 72Unidad Ind. VallejoMEX - 07700 Mexico, D.F.Reflutec de Colombia Ltda.Calle 37 No. 22-31Santafé de Bogotá, D.C.ColombiaTel.: +52 5 754 17 11+52 5 754 36 84+52 5 754 12 60Fax: +52 5 754 50 73+52 5 752 59 43Tel.: +57 1 368 82 67+57 1 368 02 59Fax: +57 1 268 97 37reflutec@inter.net. coDOK-CONTRL-<strong>PPC</strong>-<strong>R0*.2</strong>**-PR03-EN-P
2 8 7 5 4 3Printed in Germany