SIMATIC Programmable Logic Controllers S7-300 Module Data
SIMATIC Programmable Logic Controllers S7-300 Module Data
SIMATIC Programmable Logic Controllers S7-300 Module Data

Create successful ePaper yourself
Turn your PDF publications into a flip-book with our unique Google optimized e-Paper software.
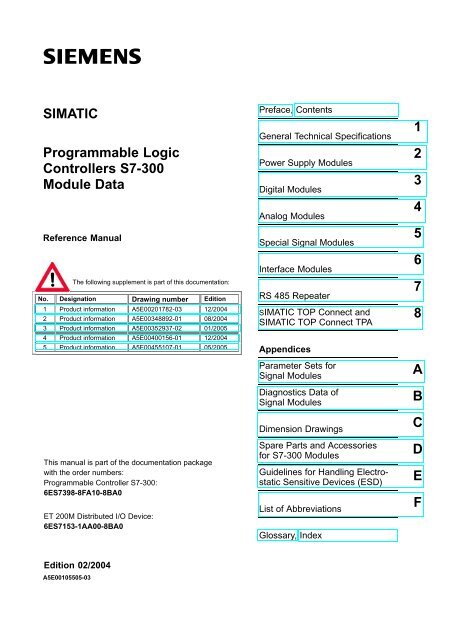
<strong>SIMATIC</strong><strong>Programmable</strong> <strong>Logic</strong><strong>Controllers</strong> <strong>S7</strong>-<strong>300</strong><strong>Module</strong> <strong>Data</strong>Reference ManualThe following supplement is part of this documentation:No. Designation Drawing number Edition1 Product information A5E00201782-03 12/20042 Product information A5E00348892-01 08/20043 Product information A5E00352937-02 01/20054 Product information A5E00400156-01 12/20045 Product information A5E00455107-01 05/2005This manual is part of the documentation packagewith the order numbers:<strong>Programmable</strong> Controller <strong>S7</strong>-<strong>300</strong>:6E<strong>S7</strong>398-8FA10-8BA0ET 200M Distributed I/O Device:6E<strong>S7</strong>153-1AA00-8BA0Preface, ContentsGeneral Technical SpecificationsPower Supply <strong>Module</strong>sDigital <strong>Module</strong>sAnalog <strong>Module</strong>sSpecial Signal <strong>Module</strong>sInterface <strong>Module</strong>sRS 485 Repeater<strong>SIMATIC</strong> TOP Connect and<strong>SIMATIC</strong> TOP Connect TPAAppendicesParameter Sets forSignal <strong>Module</strong>sDiagnostics <strong>Data</strong> ofSignal <strong>Module</strong>sDimension DrawingsSpare Parts and Accessoriesfor <strong>S7</strong>-<strong>300</strong> <strong>Module</strong>sGuidelines for Handling ElectrostaticSensitive Devices (ESD)List of AbbreviationsGlossary, Index12345678ABCDEFEdition 02/2004A5E00105505-03
Safety GuidelinesThis manual contains notices intended to ensure personal safety, as well as to protect the products andconnected equipment against damage. These notices are highlighted by the symbols shown below andgraded according to severity by the following texts:!Dangerindicates that death, severe personal injury or substantial property damage will result if proper precautionsare not taken.!Warningindicates that death, severe personal injury or substantial property damage can result if properprecautions are not taken.!Cautionindicates that minor personal injury can result if proper precautions are not taken.Cautionindicates that property damage can result if proper precautions are not taken.Noticedraws your attention to particularly important information on the product, handling the product, or to aparticular part of the documentation.Qualified PersonnelOnly qualified personnel should be allowed to install and work on this equipment. Qualified persons aredefined as persons who are authorized to commission, to ground and to tag circuits, equipment, andsystems in accordance with established safety practices and standards.Correct UsageNote the following:!TrademarksWarningThis device and its components may only be used for the applications described in the catalog or thetechnical description, and only in connection with devices or components from other manufacturers whichhave been approved or recommended by Siemens.This product can only function correctly and safely if it is transported, stored, set up, and installedcorrectly, and operated and maintained as recommended.<strong>SIMATIC</strong>®, <strong>SIMATIC</strong> HMI® and <strong>SIMATIC</strong> NET® are registered trademarks of SIEMENS AG.Third parties using for their own purposes any other names in this document which refer to trademarksmight infringe upon the rights of the trademark owners.Copyright Siemens AG 2004 All rights reservedThe reproduction, transmission or use of this document or itscontents is not permitted without express written authority.Offenders will be liable for damages. All rights, including rightscreated by patent grant or registration of a utility model ordesign, are reserved.Siemens AGBereich Automation and DrivesGeschaeftsgebiet Industrial Automation SystemsPostfach 4848, D- 90327 NuernbergSiemens AktiengesellschaftDisclaim of LiabilityWe have checked the contents of this manual for agreementwith the hardware and software described. Since deviationscannot be precluded entirely, we cannot guarantee fullagreement. However, the data in this manual are reviewedregularly and any necessary corrections included insubsequent editions. Suggestions for improvement arewelcomed.© Siemens AG 2004Technical data subject to change.A5E00105505-03
PrefacePurpose of the manualThe information contained in this manual will enable you to look up operatoractions, function descriptions and the technical specifications of the signalmodules, power supply modules and interface modules of the <strong>S7</strong>-<strong>300</strong>.How to configure, assemble and wire these modules in an <strong>S7</strong>-<strong>300</strong> or ET 200Msystem is described in the installation manuals for each system.Required basic knowledgeTo understand this manual, it is necessary to have a general knowledge ofautomation and programmable logic controllers.Scope of this manualThe present documentation package contains reference manuals for all themodules current at the time the manuals were published.We reserve the right to enclose a product information leaflet containing up-to-dateinformation on the module with new modules and modules with a new productversion.Changes compared with the previous versionCompared to the previous version, of the “<strong>Module</strong> <strong>Data</strong>” reference manual, thefollowing chapters and appendices have been thoroughly revised and new modulesadded, as necessary:• Preface• Chapter 1 “General Technical Specifications”• Chapter 3 “Digital <strong>Module</strong>s”,• Chapter 4 “Analog <strong>Module</strong>s”• Appendix A “Signal <strong>Module</strong> Parameter Sets”• GlossaryNote: The previous version of this “<strong>Module</strong> <strong>Data</strong>” reference manual can berecognized by the number in the footer: A5E00105505-02.The current number is: A5E00105505-03.<strong>Programmable</strong> <strong>Logic</strong> <strong>Controllers</strong> <strong>S7</strong>-<strong>300</strong> <strong>Module</strong> <strong>Data</strong>A5E00105505-03iii
PrefaceApprobationsRefer to Section 1.1 Standards and approvals.CE ApprovalRefer to Section 1.1 Standards and approvals.Identification for Australia (C-Tick-Mark)Refer to Section 1.1 Standards and approvals.StandardsRefer to Section 1.1 Standards and approvals.iv<strong>Programmable</strong> <strong>Logic</strong> <strong>Controllers</strong> <strong>S7</strong>-<strong>300</strong> <strong>Module</strong> <strong>Data</strong>A5E00105505-03
PrefaceHow the manual fits in<strong>S7</strong>-<strong>300</strong>Manual• CPU 31xC and CPU 31x, Technical <strong>Data</strong>Reference Manual• CPU <strong>Data</strong>: CPU 312 IFM – 318-2 DPOperating Manual• <strong>S7</strong>-<strong>300</strong>, CPU 31xC and CPU 31x: InstallationInstallation manual• Automation system <strong>S7</strong>-<strong>300</strong>, installation: CPU 312IFM – 318-2 DPManual• CPU 31xC: Technological Functions• ExamplesYou are reading this manual<strong>Module</strong> data reference manual→• Reference ManualDescription of operation, functions andtechnical specifications of the CPU.Description of operation, functions andtechnical specifications of the CPU.Description of configuration, installation,wiring, networking and commissioning of an<strong>S7</strong>-<strong>300</strong>.Description of configuration, installation,wiring, networking and commissioning of an<strong>S7</strong>-<strong>300</strong>.Description of the individual technologicalfunctions: Positioning, counting, point–to–pointcoupling, control.The CD contains examples for thetechnological functions.Descriptions of functions and technicalspecifications of signal modules, powersupply modules and interface modules.Instruction List• CPU 312 IFM – 318-2 DP• CPU 31xC and CPU 31xGetting Started• CPU 31x: Commissioning• CPU 31xC: Commissioning• CPU 31xC: Positioning with analog output• CPU 314C: Positioning with digital output• CPU 31xC: Counting• CPU 31xC: Rules• CPU 31xC: Point-to-point connection• CPU 317-2 PN/DP: Configuration of the PROFInetinterface X2The instruction set lists of the CPUs and theirexecution times.A list of executable blocks (OBs/SFCs/SFBs)and their execution times.Getting Started documents use a concreteexample to guide you through the individualcommissioning steps until you have afunctioning application.<strong>Programmable</strong> <strong>Logic</strong> <strong>Controllers</strong> <strong>S7</strong>-<strong>300</strong> <strong>Module</strong> <strong>Data</strong>A5E00105505-03v
PrefaceET 200MDistributed Peripheral manual• Manual Description of configuration, assembly,wiring.Signal modules for process automation referencemanual• Reference ManualYou are reading this manual<strong>Module</strong> data reference manual→• Reference ManualDescription of use in process automation,parameterization with <strong>SIMATIC</strong> PDM, digitalinput modules, digital output modules.Descriptions of functions and technicalspecifications of signal modules, powersupply modules and interfacemodules.NavigationTo help you find special information quickly, the manual contains the followingaccess aids:• At the start of the manual you will find a complete table of contents and a list ofthe diagrams and tables that appear in the manual.• An overview of the contents of each section is provided in the left column oneach page of each chapter.• You will find a glossary in the appendix at the end of the manual. The glossarycontains definitions of the main technical terms used in the manual.• At the end of the manual you will find a comprehensive index which gives youfast access to the information you need.Recycling and disposalBecause of its low-emission equipment, it is possible to recycle the <strong>S7</strong>-<strong>300</strong>. Forecologically harmless recycling and disposal of your old device, contact acertificated disposal service for electronic scrap.vi<strong>Programmable</strong> <strong>Logic</strong> <strong>Controllers</strong> <strong>S7</strong>-<strong>300</strong> <strong>Module</strong> <strong>Data</strong>A5E00105505-03
PrefaceAdditional supportPlease contact your local Siemens representative if you have any queries aboutthe products described in this manual.http://www.ad.siemens.com/automation/partnerTraining centerWe offer a range of relevant courses to help you to get started with the <strong>SIMATIC</strong><strong>S7</strong> programmable controller. Please contact your local training center or the centraltraining center in Nuremberg, D 90327 Germany.Phone: +49 (911) 895-3200.Internet:http://www.sitrain.com<strong>Programmable</strong> <strong>Logic</strong> <strong>Controllers</strong> <strong>S7</strong>-<strong>300</strong> <strong>Module</strong> <strong>Data</strong>A5E00105505-03vii
PrefaceA&D Technical SupportWorldwide, available 24 hours a day:NuernbergJohnson CityBeijingTechnical SupportWorldwide (Nuernberg)Technical Support24 hours a day, 365 days a yearPhone: +49 (180) 5050-222Fax: +49 (180) 5050-223E-Mail: adsupport@siemens.comGMT: +1:00Europe / Africa (Nuernberg)AuthorizationLocal time: Mon.-Fri.8:00 AM to 5:00 PMPhone: +49 (180) 5050–222Fax: +49 (180) 5050-223E-Mail: adsupport@siemens.comGMT: +1:00United States (Johnson City)Technical Support andAuthorizationLocal time: Mon.-Fri.8:00 AM to 500 PMPhone: +1 (423) 262 2522Fax: +1 (423) 262 2289E-Mail: simatic.hotline@sea.siemens.comGMT: –5:00Asia / Australia (Beijing)Technical Support andAuthorizationLocal time: Mon.-Fri.8:00 AM to 5:00 PMPhone: +86 10 64 75 75 75Fax: +86 10 64 74 74 74E-Mail: adsupport.asia@siemens.comGMT: +8:00The languages of the <strong>SIMATIC</strong> Hotlines and the authorization hotline are generally German and English.viii<strong>Programmable</strong> <strong>Logic</strong> <strong>Controllers</strong> <strong>S7</strong>-<strong>300</strong> <strong>Module</strong> <strong>Data</strong>A5E00105505-03
PrefaceService & Support on the InternetIn addition to our documentation, we offer our Know-how online on the internet at:http://www.siemens.com/automation/service&supportwhere you will find the following:• The newsletter, which constantly provides you with up–to–date information onyour products.• The right documents via our Search function in Service & Support.• A forum, where users and experts from all over the world exchange theirexperiences.• Your local representative for Automation & Drives.• Information on field service, repairs, spare parts and more under “Services”.<strong>Programmable</strong> <strong>Logic</strong> <strong>Controllers</strong> <strong>S7</strong>-<strong>300</strong> <strong>Module</strong> <strong>Data</strong>A5E00105505-03ix
Prefacex<strong>Programmable</strong> <strong>Logic</strong> <strong>Controllers</strong> <strong>S7</strong>-<strong>300</strong> <strong>Module</strong> <strong>Data</strong>A5E00105505-03
Contents1 General Technical Specifications . . . . . . . . . . . . . . . . . . . . . . . . . . . . . . . . . . . . . . . . 1-11.1 Standards and Approvals . . . . . . . . . . . . . . . . . . . . . . . . . . . . . . . . . . . . . . . . . 1-21.2 Electromagnetic Compatibility . . . . . . . . . . . . . . . . . . . . . . . . . . . . . . . . . . . . . 1-61.3 Shipping and Storage Conditions for <strong>Module</strong>s and Backup Batteries . . . . 1-81.4 Mechanical and Climatic Environmental Conditionsfor Operating <strong>S7</strong>-<strong>300</strong>s . . . . . . . . . . . . . . . . . . . . . . . . . . . . . . . . . . . . . . . . . . . 1-91.5 Information on Insulation Tests, Protection Classand Degree of Protection . . . . . . . . . . . . . . . . . . . . . . . . . . . . . . . . . . . . . . . . . 1-121.6 Rated Voltages of the <strong>S7</strong>-<strong>300</strong> . . . . . . . . . . . . . . . . . . . . . . . . . . . . . . . . . . . . . 1-131.7 SIPLUS <strong>S7</strong>-<strong>300</strong> modules . . . . . . . . . . . . . . . . . . . . . . . . . . . . . . . . . . . . . . . . . 1-141.8 Mechanical and Climatic Ambient Conditionsfor the Operation of SIPLUS <strong>S7</strong>-<strong>300</strong> <strong>Module</strong>s . . . . . . . . . . . . . . . . . . . . . . . 1-161.9 Use of the ET 200M / <strong>S7</strong>-<strong>300</strong> in a Zone 2 potentially explosive area . . . . 1-172 Power Supply <strong>Module</strong>s . . . . . . . . . . . . . . . . . . . . . . . . . . . . . . . . . . . . . . . . . . . . . . . . . 2-12.1 Power Supply <strong>Module</strong> PS 305; 2 A;(6E<strong>S7</strong>305-1BA80-0AA0) . . . . . . . . . . . . . . . . . . . . . . . . . . . . . . . . . . . . . . . . . 2-22.2 Power Supply <strong>Module</strong> PS 307; 2 A;(6E<strong>S7</strong>307-1BA00-0AA0) . . . . . . . . . . . . . . . . . . . . . . . . . . . . . . . . . . . . . . . . . 2-62.3 Power Supply <strong>Module</strong> PS 307; 5 A;(6E<strong>S7</strong>307-1EAx0-0AA0) . . . . . . . . . . . . . . . . . . . . . . . . . . . . . . . . . . . . . . . . . 2-92.4 Power Supply <strong>Module</strong> PS 307; 10 A;(6E<strong>S7</strong>307-1KA00-0AA0) . . . . . . . . . . . . . . . . . . . . . . . . . . . . . . . . . . . . . . . . . 2-143 Digital <strong>Module</strong>s . . . . . . . . . . . . . . . . . . . . . . . . . . . . . . . . . . . . . . . . . . . . . . . . . . . . . . . . . 3-13.1 <strong>Module</strong> Overview . . . . . . . . . . . . . . . . . . . . . . . . . . . . . . . . . . . . . . . . . . . . . . . . 3-43.2 Sequence of Steps from Choosing to Commissioning the Digital <strong>Module</strong> 3-103.3 Digital <strong>Module</strong> Parameter Assignment . . . . . . . . . . . . . . . . . . . . . . . . . . . . . . 3-113.4 Diagnostics of the Digital <strong>Module</strong>s . . . . . . . . . . . . . . . . . . . . . . . . . . . . . . . . . 3-123.5 Digital Input <strong>Module</strong> SM 321; DI 32 x VDC 24;(6E<strong>S7</strong>321-1BL00-0AA0) . . . . . . . . . . . . . . . . . . . . . . . . . . . . . . . . . . . . . . . . . . 3-133.6 Digital Input <strong>Module</strong> SM 321; DI 32 x 120 VAC;(6E<strong>S7</strong>321-1EL00-0AA0) . . . . . . . . . . . . . . . . . . . . . . . . . . . . . . . . . . . . . . . . . . 3-163.7 Digital Input <strong>Module</strong> SM 321; DI 16 x VDC 24;(6E<strong>S7</strong>321-1BH02-0AA0) . . . . . . . . . . . . . . . . . . . . . . . . . . . . . . . . . . . . . . . . . 3-183.8 Digital Input <strong>Module</strong> SM 321;DI 16 x 24 VDC High Speed; (6E<strong>S7</strong>321-1BH10-0AA0) . . . . . . . . . . . . . . . 3-20<strong>Programmable</strong> <strong>Logic</strong> <strong>Controllers</strong> <strong>S7</strong>-<strong>300</strong> <strong>Module</strong> <strong>Data</strong>A5E00105505-03xi
Contents3.9 Digital Input <strong>Module</strong> SM 321; DI 16 x DC 24 V;with Hardware and Diagnostic Interrupts, clocked;(6E<strong>S7</strong>321-7BH01-0AB0) . . . . . . . . . . . . . . . . . . . . . . . . . . . . . . . . . . . . . . . . . 3-223.9.1 Synchronicity . . . . . . . . . . . . . . . . . . . . . . . . . . . . . . . . . . . . . . . . . . . . . . . . . . . 3-263.9.2 Assigning Parameters to SM 321; DI 16 x VDC 24 . . . . . . . . . . . . . . . . . . . 3-273.9.3 Behavior and Diagnostics of the SM 321; DI 16 x 24 VDC . . . . . . . . . . . . 3-293.9.4 Interrupts of the SM 321; DI 16 x 24 VDC . . . . . . . . . . . . . . . . . . . . . . . . . . . 3-323.10 Digital Input <strong>Module</strong> SM 321; DI 16 x DC 24 V; Source Input;(6E<strong>S7</strong>321-1BH50-0AA0) . . . . . . . . . . . . . . . . . . . . . . . . . . . . . . . . . . . . . . . . . 3-343.11 Digital Input <strong>Module</strong> SM 321; DI 16 x UC 24/48 V(6E<strong>S7</strong>321-1CH00-0AA0) . . . . . . . . . . . . . . . . . . . . . . . . . . . . . . . . . . . . . . . . . 3-363.12 Digital Input <strong>Module</strong> SM 321; DI 16 x VDC 48-125;(6E<strong>S7</strong>321-1CH20-0AA0) . . . . . . . . . . . . . . . . . . . . . . . . . . . . . . . . . . . . . . . . . 3-383.13 Digital Input <strong>Module</strong> SM 321; DI 16 x AC 120/230 V(6E<strong>S7</strong>321-1FH00-0AA0) . . . . . . . . . . . . . . . . . . . . . . . . . . . . . . . . . . . . . . . . . 3-403.14 Digital Input <strong>Module</strong> SM 321; DI 8 x VAC 120/230;(6E<strong>S7</strong>321-1FF01-0AA0) . . . . . . . . . . . . . . . . . . . . . . . . . . . . . . . . . . . . . . . . . . 3-423.15 Digital Input <strong>Module</strong> SM 321;DI 8 x 120/230 VAC ISOL (6E<strong>S7</strong>321-1FF10-0AA0) . . . . . . . . . . . . . . . . . . 3-443.16 Digital Output <strong>Module</strong> SM 322;DO 32 x 24 VDC/ 0.5 A; (6E<strong>S7</strong>322-1BL00-0AA0) . . . . . . . . . . . . . . . . . . . . 3-463.17 Digital Output <strong>Module</strong> SM 322;DO 32 x VAC 120/230/1 A; (6E<strong>S7</strong>322-1FL00-0AA0) . . . . . . . . . . . . . . . . . 3-493.18 Digital Output <strong>Module</strong> SM 322;DO 16 x DC 24 V/ 0.5 A; (6E<strong>S7</strong>322-1BH01-0AA0) . . . . . . . . . . . . . . . . . . . 3-533.19 Digital Output <strong>Module</strong> SM 322; DO 16 x 24 VDC/0.5 A High Speed;(6E<strong>S7</strong>322-1BH10-0AA0) . . . . . . . . . . . . . . . . . . . . . . . . . . . . . . . . . . . . . . . . . 3-563.20 Digital Output <strong>Module</strong> SM 322; DO 16 x 24/48 VUC;(6E<strong>S7</strong>322-5GH00-0AB0) . . . . . . . . . . . . . . . . . . . . . . . . . . . . . . . . . . . . . . . . . 3-593.20.1 Parameters of digital output module SM 322 DO 16 x UC24/48 V . . . . . . 3-633.21 Digital Output <strong>Module</strong> SM 322;DO 16 x VAC 120/230/1 A; (6E<strong>S7</strong>322-1FH00-0AA0) . . . . . . . . . . . . . . . . . 3-663.22 Digital Output <strong>Module</strong> SM 322; DO 8 x 24 VDC/2 A;(6E<strong>S7</strong>322-1BF01-0AA0) . . . . . . . . . . . . . . . . . . . . . . . . . . . . . . . . . . . . . . . . . 3-693.23 Digital Output <strong>Module</strong> SM 322; DO 8 x DC 24 V/ 0.5 A;with diagnostic interrupt; (6E<strong>S7</strong>322-8BF00-0AB0) . . . . . . . . . . . . . . . . . . . 3-723.23.1 Assigning Parameters to the SM 322; DO 8 x 24 VDC/0.5 A . . . . . . . . . . 3-763.23.2 Behavior and Diagnostics of the SM 322; DO 8 x 24 VDC/0.5 A . . . . . . . 3-773.23.3 Interrupts of the SM 322; DO 8 x VDC 24/0.5 A . . . . . . . . . . . . . . . . . . . . . 3-803.24 Digital Output <strong>Module</strong> SM 322; DO 8 x VDC 48-125/1,5 A;(6E<strong>S7</strong>322-1CF00-0AA0) . . . . . . . . . . . . . . . . . . . . . . . . . . . . . . . . . . . . . . . . . 3-813.25 Digital Output <strong>Module</strong> SM 322;DO 8 x VAC 120/230/2 A; (6E<strong>S7</strong>322-1FF01-0AA0) . . . . . . . . . . . . . . . . . . 3-843.26 Digital Output <strong>Module</strong> SM 322;DO 8 x 120/230 VAC/2 A ISOL (6E<strong>S7</strong>322-5FF00-0AB0) . . . . . . . . . . . . . . 3-87xii<strong>Programmable</strong> <strong>Logic</strong> <strong>Controllers</strong> <strong>S7</strong>-<strong>300</strong> <strong>Module</strong> <strong>Data</strong>A5E00105505-03
Contents3.27 Relay Output <strong>Module</strong> SM 322;DO 16 x Rel. 120/230 VAC; (6E<strong>S7</strong>322-1HH01-0AA0) . . . . . . . . . . . . . . . . 3-933.28 Relay Output <strong>Module</strong> SM 322; DO 8 x Rel. 230 VAC;(6E<strong>S7</strong>322-1HF01-0AA0) . . . . . . . . . . . . . . . . . . . . . . . . . . . . . . . . . . . . . . . . . 3-963.29 Relay Output <strong>Module</strong> SM 322;DO 8 x Rel. 230 VAC/5A; (6E<strong>S7</strong>322-5HF00-0AB0) . . . . . . . . . . . . . . . . . . 3-1003.29.1 SM 322; DO 8 x Rel. 230 VAC/5A parameterization . . . . . . . . . . . . . . . . . . 3-1043.29.2 Behavior and Diagnostics of the SM 322; DO 8 x 230 VDC/0.5 A . . . . . . 3-1043.29.3 Interrupts of the SM 322; DO 8 x Rel. 230 VAC/5A . . . . . . . . . . . . . . . . . . . 3-1053.30 Relay Output <strong>Module</strong> SM 322; DO 8 x Rel. VAC 230/5 A;(6E<strong>S7</strong>322-1HF10-0AA0) . . . . . . . . . . . . . . . . . . . . . . . . . . . . . . . . . . . . . . . . . 3-1063.31 Digital Input/Output <strong>Module</strong> SM 323;DI 16/DO 16 x 24 VDC/0.5 A; (6E<strong>S7</strong>323-1BL00-0AA0) . . . . . . . . . . . . . . . 3-1103.32 Digital Input/Output <strong>Module</strong> SM 323;DI 8/DO 8 x VDC 24/0.5 A; (6E<strong>S7</strong>323-1BH01-0AA0) . . . . . . . . . . . . . . . . . 3-1133.33 Digital Input/Output <strong>Module</strong> SM 327;DI 8/DX 8 x DC 24 V/0.5 A; parameterizable (6E<strong>S7</strong>327-1BH00-0AB0) . . 3-1163.33.1 Assigning Parameters to the SM 327; DI 8/DX 8 x VDC 24/0.5 A . . . . . . 3-1194 Analog <strong>Module</strong>s . . . . . . . . . . . . . . . . . . . . . . . . . . . . . . . . . . . . . . . . . . . . . . . . . . . . . . . . 4-14.1 <strong>Module</strong> Overview . . . . . . . . . . . . . . . . . . . . . . . . . . . . . . . . . . . . . . . . . . . . . . . . 4-34.2 Sequence of Steps from Choosing to Commissioning the <strong>Module</strong> . . . . . . 4-84.3 Analog Value Representation . . . . . . . . . . . . . . . . . . . . . . . . . . . . . . . . . . . . . 4-94.3.1 Analog Value Representation for Analog Input Channels . . . . . . . . . . . . . . 4-104.3.2 Analog Value Representation for Analog Output Channels . . . . . . . . . . . . 4-244.4 Setting the Measuring Method and Measuring Ranges of Analog InputChannels . . . . . . . . . . . . . . . . . . . . . . . . . . . . . . . . . . . . . . . . . . . . . . . . . . . . . . . 4-284.5 Behavior of the Analog <strong>Module</strong>s . . . . . . . . . . . . . . . . . . . . . . . . . . . . . . . . . . . 4-314.5.1 Effect of Supply Voltage and Operating Mode . . . . . . . . . . . . . . . . . . . . . . . 4-314.5.2 Effect of Range of Values of the Analog Values . . . . . . . . . . . . . . . . . . . . . . 4-324.5.3 Effect of Operational Limit and Basic Error Limit . . . . . . . . . . . . . . . . . . . . . 4-344.6 Conversion, Cycle, Setting and Response Time of Analog <strong>Module</strong>s . . . . 4-354.7 Analog <strong>Module</strong> Parameter Assignment . . . . . . . . . . . . . . . . . . . . . . . . . . . . . 4-394.7.1 Parameters of the Analog Input <strong>Module</strong>s . . . . . . . . . . . . . . . . . . . . . . . . . . . 4-404.7.2 Parameters of the Analog Output <strong>Module</strong>s . . . . . . . . . . . . . . . . . . . . . . . . . . 4-434.7.3 Parameters of the analog input/output modules . . . . . . . . . . . . . . . . . . . . . . 4-444.8 Connecting Sensors to Analog Inputs . . . . . . . . . . . . . . . . . . . . . . . . . . . . . . 4-454.9 Connecting Voltage Sensors . . . . . . . . . . . . . . . . . . . . . . . . . . . . . . . . . . . . . . 4-504.10 Connecting Current Sensors . . . . . . . . . . . . . . . . . . . . . . . . . . . . . . . . . . . . . . 4-514.11 Connecting Resistance Thermometers and Resistors . . . . . . . . . . . . . . . . 4-534.11.1 Connecting resistance thermometers to the SM 331; AI 8 x 13 bits . . . . . 4-564.12 Connecting Thermocouples . . . . . . . . . . . . . . . . . . . . . . . . . . . . . . . . . . . . . . . 4-584.13 Connecting Loads/Actuators to Analog Output . . . . . . . . . . . . . . . . . . . . . . 4-664.14 Connecting Loads/Actuators to Voltage Outputs . . . . . . . . . . . . . . . . . . . . . 4-674.15 Connecting Loads/Actuators to Current Outputs . . . . . . . . . . . . . . . . . . . . . 4-70<strong>Programmable</strong> <strong>Logic</strong> <strong>Controllers</strong> <strong>S7</strong>-<strong>300</strong> <strong>Module</strong> <strong>Data</strong>A5E00105505-03xiii
Contents4.16 Diagnostics of the Analog <strong>Module</strong>s . . . . . . . . . . . . . . . . . . . . . . . . . . . . . . . . 4-714.17 Interrupts of the Analog <strong>Module</strong>s . . . . . . . . . . . . . . . . . . . . . . . . . . . . . . . . . . 4-754.18 Analog Input <strong>Module</strong> SM 331; AI 8 x 16 bits;(6E<strong>S7</strong>331-7NF00-0AB0) . . . . . . . . . . . . . . . . . . . . . . . . . . . . . . . . . . . . . . . . . 4-774.18.1 Commissioning the SM 331; AI 8 x 16 bits . . . . . . . . . . . . . . . . . . . . . . . . . . 4-814.18.2 Measuring Methods and Measuring Ranges of the SM 331;AI 8 x 16 bits . . . . . . . . . . . . . . . . . . . . . . . . . . . . . . . . . . . . . . . . . . . . . . . . . . . 4-834.19 Analog Input <strong>Module</strong> SM 331; AI 8 x 16 bits(6E<strong>S7</strong>331-7NF10-0AB0) . . . . . . . . . . . . . . . . . . . . . . . . . . . . . . . . . . . . . . . . . 4-864.19.1 Commissioning the SM 331; AI 8 x 16 bits . . . . . . . . . . . . . . . . . . . . . . . . . . 4-894.19.2 8-channel mode . . . . . . . . . . . . . . . . . . . . . . . . . . . . . . . . . . . . . . . . . . . . . . . . . 4-924.19.3 4-channel mode . . . . . . . . . . . . . . . . . . . . . . . . . . . . . . . . . . . . . . . . . . . . . . . . . 4-934.19.4 Measuring Methods and Measuring Ranges of the SM 331; AI 8 x16 bits 4-944.20 Analog input module SM 331; AI 8 x 14 bits High Speed; synchronous;(6E<strong>S7</strong>331-7HF0x-0AB0) . . . . . . . . . . . . . . . . . . . . . . . . . . . . . . . . . . . . . . . . . 4-974.20.1 Synchronicity . . . . . . . . . . . . . . . . . . . . . . . . . . . . . . . . . . . . . . . . . . . . . . . . . . . 4-1004.20.2 Commissioning the SM 331; AI 8 x 14 bits High Speed . . . . . . . . . . . . . . . 4-1034.20.3 Measuring Methods and Measuring Ranges of the SM 331;AI 8 x 14 bits High Speed . . . . . . . . . . . . . . . . . . . . . . . . . . . . . . . . . . . . . . . . 4-1054.21 Analog Input <strong>Module</strong> SM 331; AI 8 x 13 bits;(6E<strong>S7</strong>331-1KF01-0AB0) . . . . . . . . . . . . . . . . . . . . . . . . . . . . . . . . . . . . . . . . . 4-1084.21.1 Parameters of the SM 331; AI 8 x 13 bits . . . . . . . . . . . . . . . . . . . . . . . . . . . 4-1134.21.2 Measuring Methods of the SM 331; AI 8 x 13 bits . . . . . . . . . . . . . . . . . . . . 4-1144.22 Analog Input <strong>Module</strong> SM 331; AI 8 x 12 bits;(6E<strong>S7</strong>331-7KF02-0AB0) . . . . . . . . . . . . . . . . . . . . . . . . . . . . . . . . . . . . . . . . . 4-1154.22.1 Commissioning the SM 331; AI 8 x 12 bits . . . . . . . . . . . . . . . . . . . . . . . . . . 4-1194.22.2 Measuring Methods and Measuring Ranges of the SM 331;AI 8 x 12 bits . . . . . . . . . . . . . . . . . . . . . . . . . . . . . . . . . . . . . . . . . . . . . . . . . . . 4-1224.23 Analog Input <strong>Module</strong> SM 331; AI 8 x RTD (6E<strong>S7</strong>331-7PF00-0AB0) . . . . 4-1254.23.1 Commissioning the SM 331; AI 8 x RTD . . . . . . . . . . . . . . . . . . . . . . . . . . . . 4-1294.23.2 Measuring Methods and Measuring Ranges of the SM 331; AI 8 x RTD . 4-1354.24 Analog Input <strong>Module</strong> SM 331; AI 8 x TC (6E<strong>S7</strong>331-7PF10-0AB0) . . . . . . 4-1384.24.1 Commissioning the SM 331; AI 8 x TC . . . . . . . . . . . . . . . . . . . . . . . . . . . . . 4-1434.24.2 Measuring Methods and Measuring Ranges of the SM 331; AI 8 x TC . . 4-1504.25 Analog Input <strong>Module</strong> SM 331; AI 2 x 12 bits;(6E<strong>S7</strong>331-7KB02-0AB0) . . . . . . . . . . . . . . . . . . . . . . . . . . . . . . . . . . . . . . . . . 4-1534.25.1 Commissioning the SM 331; AI 2 x 12 bits . . . . . . . . . . . . . . . . . . . . . . . . . . 4-1574.25.2 Measuring Methods and Measuring Ranges of the SM 331;AI 2 x 12 bits . . . . . . . . . . . . . . . . . . . . . . . . . . . . . . . . . . . . . . . . . . . . . . . . . . . 4-1604.26 Analog Output <strong>Module</strong> SM 332; AO 8 x 12 bits;(6E<strong>S7</strong>332-5HF00-0AB0) . . . . . . . . . . . . . . . . . . . . . . . . . . . . . . . . . . . . . . . . . 4-1634.26.1 Commissioning the SM 332; AO 8 x 12 bits . . . . . . . . . . . . . . . . . . . . . . . . . 4-1664.26.2 Output Ranges of the Analog Output <strong>Module</strong> SM 332;AO 8 x 12 bits . . . . . . . . . . . . . . . . . . . . . . . . . . . . . . . . . . . . . . . . . . . . . . . . . . 4-1674.27 Analog output module SM 332; AO 4 x 16 bit; synchronous;(6E<strong>S7</strong>332-7ND01-0AB0) . . . . . . . . . . . . . . . . . . . . . . . . . . . . . . . . . . . . . . . . . 4-1694.27.1 Synchronicity . . . . . . . . . . . . . . . . . . . . . . . . . . . . . . . . . . . . . . . . . . . . . . . . . . . 4-1724.27.2 Commissioning the SM 332; AO 4 x 16 bit . . . . . . . . . . . . . . . . . . . . . . . . . . 4-1744.27.3 Output Ranges of the Analog Output <strong>Module</strong> SM 332; AO 4 x 16 bits . . . 4-175xiv<strong>Programmable</strong> <strong>Logic</strong> <strong>Controllers</strong> <strong>S7</strong>-<strong>300</strong> <strong>Module</strong> <strong>Data</strong>A5E00105505-03
Contents4.28 Analog Output <strong>Module</strong> SM 332; AO 4 x 12 bits;(6E<strong>S7</strong>332-5HD01-0AB0) . . . . . . . . . . . . . . . . . . . . . . . . . . . . . . . . . . . . . . . . . 4-1764.28.1 Commissioning the SM 332; AO 4 x 12 bits . . . . . . . . . . . . . . . . . . . . . . . . . 4-1794.28.2 Output Ranges of the Analog Output <strong>Module</strong> SM 332;AO 4 x 12 bits . . . . . . . . . . . . . . . . . . . . . . . . . . . . . . . . . . . . . . . . . . . . . . . . . . 4-1804.29 Analog Output <strong>Module</strong> SM 332; AO 2 x 12 bits;(6E<strong>S7</strong>332-5HB01-0AB0) . . . . . . . . . . . . . . . . . . . . . . . . . . . . . . . . . . . . . . . . . 4-1824.29.1 Commissioning the SM 332; AO 2 x 12 bits . . . . . . . . . . . . . . . . . . . . . . . . . 4-1854.29.2 Output Ranges of the Analog Output <strong>Module</strong> SM 332;AO 2 x 12 bits . . . . . . . . . . . . . . . . . . . . . . . . . . . . . . . . . . . . . . . . . . . . . . . . . . 4-1864.30 Analog Input/Output <strong>Module</strong> SM334;AI 4/AO 2 x 8/8 bits; (6E<strong>S7</strong>334-0CE01-0AA0) . . . . . . . . . . . . . . . . . . . . . . . 4-1884.30.1 Commissioning the SM 334; AI 4/AO 2 x 8/8 bits . . . . . . . . . . . . . . . . . . . . 4-1924.30.2 Measuring/output Method and Measuring/output Range of the SM 334;AI 4/AO 2 x 8/8 bits . . . . . . . . . . . . . . . . . . . . . . . . . . . . . . . . . . . . . . . . . . . . . . 4-1934.31 Analog Input/Output <strong>Module</strong> SM 334; AI 4/AO 2 x 12 bits;(6E<strong>S7</strong>334-0KE00-0AB0) . . . . . . . . . . . . . . . . . . . . . . . . . . . . . . . . . . . . . . . . . 4-1944.31.1 Commissioning the SM 334; AI 4/AO 2 x 12 bits . . . . . . . . . . . . . . . . . . . . . 4-1984.31.2 Measuring/output Method and Measuring/output Range of the SM 334;AI 4/AO 2 x 12 bits . . . . . . . . . . . . . . . . . . . . . . . . . . . . . . . . . . . . . . . . . . . . . . 4-1985 Special Signal <strong>Module</strong>s . . . . . . . . . . . . . . . . . . . . . . . . . . . . . . . . . . . . . . . . . . . . . . . . . 5-15.1 <strong>Module</strong> Overview . . . . . . . . . . . . . . . . . . . . . . . . . . . . . . . . . . . . . . . . . . . . . . . . 5-25.2 Simulator <strong>Module</strong> SM 374; IN/OUT 16;(6E<strong>S7</strong>374-2XH01-0AA0) . . . . . . . . . . . . . . . . . . . . . . . . . . . . . . . . . . . . . . . . . 5-35.3 Dummy <strong>Module</strong> DM 370; (6E<strong>S7</strong>370-0AA01-0AA0) . . . . . . . . . . . . . . . . . . . 5-55.4 Position Decoder <strong>Module</strong> SM 338; POS-INPUT;(6E<strong>S7</strong>338-4BC01-0AB0) . . . . . . . . . . . . . . . . . . . . . . . . . . . . . . . . . . . . . . . . . 5-75.4.1 Synchronous Operation . . . . . . . . . . . . . . . . . . . . . . . . . . . . . . . . . . . . . . . . . . 5-85.4.2 Terminal Connection Diagram and Block Diagram . . . . . . . . . . . . . . . . . . . . 5-95.4.3 Functions of the SM 338; POS INPUT . . . . . . . . . . . . . . . . . . . . . . . . . . . . . 5-105.4.4 Encoder Value Acquisition . . . . . . . . . . . . . . . . . . . . . . . . . . . . . . . . . . . . . . . . 5-105.4.5 Gray/Dual Converter . . . . . . . . . . . . . . . . . . . . . . . . . . . . . . . . . . . . . . . . . . . . . 5-115.4.6 Transferred Encoder Value and Normalization . . . . . . . . . . . . . . . . . . . . . . . 5-115.4.7 Freeze Function . . . . . . . . . . . . . . . . . . . . . . . . . . . . . . . . . . . . . . . . . . . . . . . . . 5-125.4.8 SM 338; POS-INPUT Parameterization . . . . . . . . . . . . . . . . . . . . . . . . . . . . 5-135.4.9 SM 338; POS-INPUT Addressing . . . . . . . . . . . . . . . . . . . . . . . . . . . . . . . . . . 5-155.4.10 Diagnosis of the SM 338; POS-INPUT . . . . . . . . . . . . . . . . . . . . . . . . . . . . . 5-175.4.11 Interrupts of the SM 338; POS INPUT . . . . . . . . . . . . . . . . . . . . . . . . . . . . . . 5-205.4.12 Technical Specifications of the 338; POS-INPUT . . . . . . . . . . . . . . . . . . . . 5-21<strong>Programmable</strong> <strong>Logic</strong> <strong>Controllers</strong> <strong>S7</strong>-<strong>300</strong> <strong>Module</strong> <strong>Data</strong>A5E00105505-03xv
Contents6 Interface <strong>Module</strong>s . . . . . . . . . . . . . . . . . . . . . . . . . . . . . . . . . . . . . . . . . . . . . . . . . . . . . . 6-16.1 <strong>Module</strong> Overview . . . . . . . . . . . . . . . . . . . . . . . . . . . . . . . . . . . . . . . . . . . . . . . . 6-26.2 Interface <strong>Module</strong> IM 360; (6E<strong>S7</strong>360-3AA01-0AA0) . . . . . . . . . . . . . . . . . . . 6-36.3 Interface <strong>Module</strong> IM 361; (6E<strong>S7</strong>361-3CA01-0AA0) . . . . . . . . . . . . . . . . . . . 6-56.4 Interface <strong>Module</strong> IM 365; (6E<strong>S7</strong>365-0BA01-0AA0) . . . . . . . . . . . . . . . . . . . 6-77 RS 485 Repeater . . . . . . . . . . . . . . . . . . . . . . . . . . . . . . . . . . . . . . . . . . . . . . . . . . . . . . . . 7-17.1 Application and Characteristics; (6E<strong>S7</strong>972-0AA01-0XA0) . . . . . . . . . . . . . 7-27.2 Appearance of the RS 485 Repeater; (6E<strong>S7</strong>972-0AA01-0XA0) . . . . . . . . 7-37.3 RS 485 Repeater in Ungrounded and Grounded Operation . . . . . . . . . . . . 7-47.4 Technical Specifications . . . . . . . . . . . . . . . . . . . . . . . . . . . . . . . . . . . . . . . . . . 7-68 <strong>SIMATIC</strong> TOP Connect and <strong>SIMATIC</strong> TOP Connect TPA . . . . . . . . . . . . . . . . . . . . 8-18.1 <strong>Module</strong> Overview . . . . . . . . . . . . . . . . . . . . . . . . . . . . . . . . . . . . . . . . . . . . . . . . 8-28.2 Wiring Components . . . . . . . . . . . . . . . . . . . . . . . . . . . . . . . . . . . . . . . . . . . . . . 8-48.2.1 Cut the Connecting Cable to Length and Terminate . . . . . . . . . . . . . . . . . . 8-48.2.2 Wiring the Front Connector <strong>Module</strong> . . . . . . . . . . . . . . . . . . . . . . . . . . . . . . . . 8-68.2.3 Connecting the Connecting Cable to the Terminal Block . . . . . . . . . . . . . . 8-108.2.4 Wiring Actuators/Sensors to the Terminal Block . . . . . . . . . . . . . . . . . . . . . 8-108.3 Wiring <strong>SIMATIC</strong> TOP Connect with Digital <strong>Module</strong>s . . . . . . . . . . . . . . . . . . 8-128.3.1 <strong>SIMATIC</strong> TOP connect Components and Selection Aid . . . . . . . . . . . . . . . 8-128.3.2 Wiring the <strong>Module</strong> with Terminal Block for One-Conductor Connection . . 8-148.3.3 Wiring the <strong>Module</strong> with Terminal Block for Three-Conductor Connection 8-168.3.4 Wiring the <strong>Module</strong> with Terminal Block for 2A <strong>Module</strong>s . . . . . . . . . . . . . . . 8-188.4 Wiring <strong>SIMATIC</strong> TOP Connect TPA with Analog <strong>Module</strong>s . . . . . . . . . . . . . 8-208.4.1 <strong>SIMATIC</strong> TOP Connect TPA Components and Selection Aid . . . . . . . . . . 8-208.4.2 <strong>SIMATIC</strong> TOP Connect TPA Terminal Assignmentand Terminal Allocation . . . . . . . . . . . . . . . . . . . . . . . . . . . . . . . . . . . . . . . . . . 8-218.4.3 Connecting the Signal-Line Shield . . . . . . . . . . . . . . . . . . . . . . . . . . . . . . . . . 8-238.4.4 Connection Example . . . . . . . . . . . . . . . . . . . . . . . . . . . . . . . . . . . . . . . . . . . . . 8-24A Parameter Sets for Signal <strong>Module</strong>s . . . . . . . . . . . . . . . . . . . . . . . . . . . . . . . . . . . . . . A-1A.1 How to Assign the Parameters for Signal <strong>Module</strong>s in the User Program . A-1A.2 Parameters of the Digital Input <strong>Module</strong>s . . . . . . . . . . . . . . . . . . . . . . . . . . . . A-3A.3 Parameters of the Digital Output <strong>Module</strong>s . . . . . . . . . . . . . . . . . . . . . . . . . . A-5A.4 Parameters of the Analog Input <strong>Module</strong>s . . . . . . . . . . . . . . . . . . . . . . . . . . . A-7A.5 Parameters of the SM 331; AI 8 x RTD . . . . . . . . . . . . . . . . . . . . . . . . . . . . . A-11A.6 Parameters of the SM 331; AI 8 x TC . . . . . . . . . . . . . . . . . . . . . . . . . . . . . . A-19A.7 Parameters of the SM 331; AI 8 x 13 bits . . . . . . . . . . . . . . . . . . . . . . . . . . . A-27A.8 Parameters of the SM 331; AI 8 x 16 bits . . . . . . . . . . . . . . . . . . . . . . . . . . . A-30A.9 Parameters of the Analog Output <strong>Module</strong>s . . . . . . . . . . . . . . . . . . . . . . . . . . A-36A.10 Parameters of the SM 332; AO 8 x 12 bits . . . . . . . . . . . . . . . . . . . . . . . . . . A-39A.11 Parameters of the Analog Input/Output <strong>Module</strong>s . . . . . . . . . . . . . . . . . . . . . A-41xvi<strong>Programmable</strong> <strong>Logic</strong> <strong>Controllers</strong> <strong>S7</strong>-<strong>300</strong> <strong>Module</strong> <strong>Data</strong>A5E00105505-03
ContentsB Diagnostics <strong>Data</strong> of Signal <strong>Module</strong>s . . . . . . . . . . . . . . . . . . . . . . . . . . . . . . . . . . . . . B-1B.1 Evaluating Diagnostic <strong>Data</strong> of the Signal <strong>Module</strong>s in the User Program . B-1B.2 Structure and Content of Diagnostic <strong>Data</strong> Bytes 0 to 7 . . . . . . . . . . . . . . . . B-2B.3 Channel-Specific Diagnostic <strong>Data</strong> from Byte 8 . . . . . . . . . . . . . . . . . . . . . . . B-5B.4 Diagnostic <strong>Data</strong> of the SM 338; POS-INPUT . . . . . . . . . . . . . . . . . . . . . . . . B-7C Dimension Drawings . . . . . . . . . . . . . . . . . . . . . . . . . . . . . . . . . . . . . . . . . . . . . . . . . . . . C-1C.1 Dimension Drawings of the Rails . . . . . . . . . . . . . . . . . . . . . . . . . . . . . . . . . . C-2C.2 Dimension Drawings of the Power Supply <strong>Module</strong>s . . . . . . . . . . . . . . . . . . C-8C.3 Dimension Drawings of the Interface <strong>Module</strong>s . . . . . . . . . . . . . . . . . . . . . . . C-13C.4 Dimension Drawings of the Signal <strong>Module</strong>s . . . . . . . . . . . . . . . . . . . . . . . . . C-15C.5 Dimension Drawings for Accessories . . . . . . . . . . . . . . . . . . . . . . . . . . . . . . . C-16D Spare Parts and Accessories for <strong>S7</strong>-<strong>300</strong> <strong>Module</strong>s . . . . . . . . . . . . . . . . . . . . . . . . . D-1E Guidelines for Handling Electrostatic Sensitive Devices (ESD) . . . . . . . . . . . . . E-1E.1 What is ESD? . . . . . . . . . . . . . . . . . . . . . . . . . . . . . . . . . . . . . . . . . . . . . . . . . . . E-2E.2 Electrostatic Charging of Persons . . . . . . . . . . . . . . . . . . . . . . . . . . . . . . . . . E-3E.3 General Protective Measures Against Electrostatic Discharge Damage . E-4F List of Abbreviations . . . . . . . . . . . . . . . . . . . . . . . . . . . . . . . . . . . . . . . . . . . . . . . . . . . F-1Glossary . . . . . . . . . . . . . . . . . . . . . . . . . . . . . . . . . . . . . . . . . . . . . . . . . . . . . . . . . . Glossary-1Index . . . . . . . . . . . . . . . . . . . . . . . . . . . . . . . . . . . . . . . . . . . . . . . . . . . . . . . . . . . . .Index-1<strong>Programmable</strong> <strong>Logic</strong> <strong>Controllers</strong> <strong>S7</strong>-<strong>300</strong> <strong>Module</strong> <strong>Data</strong>A5E00105505-03xvii
ContentsFigures2-1 Wiring Schematic of the PS 305 Power Supply <strong>Module</strong> (2 A) . . . . . . . . . . 2-32-2 Basic Circuit Diagram of the PS 305 Power Supply <strong>Module</strong> (2 A) . . . . . . 2-52-3 Wiring Schematic of the PS 307 Power Supply <strong>Module</strong> (2 A) . . . . . . . . . . 2-62-4 Basic Circuit Diagram of the PS 307 Power Supply <strong>Module</strong> (2 A) . . . . . . 2-72-5 Wiring Schematic of the PS 307 Power Supply <strong>Module</strong> (5 A) . . . . . . . . . . 2-102-6 Basic Circuit Diagram of the PS 307 Power Supply <strong>Module</strong> (5 A) . . . . . . 2-102-7 Wiring Schematic of the PS 307 Power Supply <strong>Module</strong> (10 A) . . . . . . . . . 2-142-8 Basic Circuit Diagram of the PS 307 Power Supply <strong>Module</strong> (10 A) . . . . . 2-153-1 <strong>Module</strong> View and Block Diagram of the Digital Input <strong>Module</strong> SM 321;DI 32 x 24 VDC . . . . . . . . . . . . . . . . . . . . . . . . . . . . . . . . . . . . . . . . . . . . . . . . . 3-143-2 Terminal assignment of the SM 321; DI 32 x 24 VDC . . . . . . . . . . . . . . . . . 3-143-3 <strong>Module</strong>View and Block Diagram of Digital Input <strong>Module</strong> SM 321;DI 32 x 20 VAC . . . . . . . . . . . . . . . . . . . . . . . . . . . . . . . . . . . . . . . . . . . . . . . . . 3-163-4 <strong>Module</strong> View and Block Diagram of Digital Input <strong>Module</strong> SM 321;DI 16 x 24VDC . . . . . . . . . . . . . . . . . . . . . . . . . . . . . . . . . . . . . . . . . . . . . . . . . . 3-183-5 <strong>Module</strong> view and block diagram of the SM 321;DI 16 x 24VDC High Speed . . . . . . . . . . . . . . . . . . . . . . . . . . . . . . . . . . . . . . . 3-203-6 <strong>Module</strong> View and Block Diagram of Digital Input <strong>Module</strong> SM 321;DI 16 x 24 VDC . . . . . . . . . . . . . . . . . . . . . . . . . . . . . . . . . . . . . . . . . . . . . . . . . 3-233-7 Terminal assignment for redundant supply of encoders of SM 321;DI 16 x VDC 24 . . . . . . . . . . . . . . . . . . . . . . . . . . . . . . . . . . . . . . . . . . . . . . . . . 3-243-8 Terminal assignment for resistive circuit of the encoder of the SM 321;DI 16 x 24 VDC . . . . . . . . . . . . . . . . . . . . . . . . . . . . . . . . . . . . . . . . . . . . . . . . . 3-243-9 Start Information of OB 40: Which Event Has Triggeredthe Hardware Interrupt at the Limit Value . . . . . . . . . . . . . . . . . . . . . . . . . . . 3-333-10 <strong>Module</strong> View and Block Diagram of Digital Input <strong>Module</strong> SM 321;DI 16 x 24 VDC (Source Input) . . . . . . . . . . . . . . . . . . . . . . . . . . . . . . . . . . . . 3-343-11 <strong>Module</strong> View and Block Diagram of Digital Input <strong>Module</strong> SM 321;DI 16 x 24/48VUC . . . . . . . . . . . . . . . . . . . . . . . . . . . . . . . . . . . . . . . . . . . . . . . 3-363-12 <strong>Module</strong> View and Block Diagram of SM 321; DI 16 x 48-125 VDC . . . . . . 3-383-13 <strong>Module</strong> View and Block Diagram of the SM 321; DI 16 x 120/230VAC . . 3-403-14 <strong>Module</strong> View and Block Diagram of the SM 321; DI 8 x 120/230 VAC . . . 3-423-15 <strong>Module</strong> View and Block Diagram of the SM 321;DI 8 x 120/230 VAC ISOL . . . . . . . . . . . . . . . . . . . . . . . . . . . . . . . . . . . . . . . . 3-443-16 <strong>Module</strong> View and Block Diagram of Digital Output <strong>Module</strong> SM 322;DO 32 x 24 VDC/0.5 A . . . . . . . . . . . . . . . . . . . . . . . . . . . . . . . . . . . . . . . . . . . 3-473-17 Terminal Assignment of the SM 322; DO 32 x 24 VDC . . . . . . . . . . . . . . . . 3-473-18 Terminal assignment and block diagram of the SM 322;D0 32 x VAC 120/230 /1 A . . . . . . . . . . . . . . . . . . . . . . . . . . . . . . . . . . . . . . . . 3-503-19 Terminal assignment of the SM 322; DO 32 x AC 120/230 V/1 A . . . . . . 3-513-20 <strong>Module</strong> View and Block Diagram of the SM 322; DO 16 x 24 VDC/0.5 A 3-543-21 <strong>Module</strong> View and Block Diagram of the SM 322;DO 16 x 24 VDC/0.5 A High Speed . . . . . . . . . . . . . . . . . . . . . . . . . . . . . . . . 3-573-22 <strong>Module</strong> View and Block Diagram of SM 322; DO 16 x 24/48 VUC . . . . . . 3-603-23 <strong>Module</strong> View and Block Diagram of the SM 322;DO 16 x 120/230 VAC/1 A . . . . . . . . . . . . . . . . . . . . . . . . . . . . . . . . . . . . . . . . 3-673-24 <strong>Module</strong> View and Block Diagram of Digital Output <strong>Module</strong> SM 322;DO 8 x 24 VDC/2 A . . . . . . . . . . . . . . . . . . . . . . . . . . . . . . . . . . . . . . . . . . . . . . 3-703-25 <strong>Module</strong> view of the SM 322; DO 8 x 24 V DC/0.5 A . . . . . . . . . . . . . . . . . . 3-733-26 Block Diagram of the SM 322; DO 8 x DC 24 V/0.5 A . . . . . . . . . . . . . . . . 3-743-27 <strong>Module</strong> View and Block Diagram of the SM 322;DO 8 x 48-125 VDC/1.5 A . . . . . . . . . . . . . . . . . . . . . . . . . . . . . . . . . . . . . . . . 3-823-28 <strong>Module</strong> View and Block Diagram of the SM 322;DO 8 x 120/230 VAC/2 A . . . . . . . . . . . . . . . . . . . . . . . . . . . . . . . . . . . . . . . . . 3-85xviii<strong>Programmable</strong> <strong>Logic</strong> <strong>Controllers</strong> <strong>S7</strong>-<strong>300</strong> <strong>Module</strong> <strong>Data</strong>A5E00105505-03
Contents3-29 <strong>Module</strong> View and Block Diagram of the SM 322;DO 8 x 120/230 VAC/2 A ISOL . . . . . . . . . . . . . . . . . . . . . . . . . . . . . . . . . . . . 3-883-30 <strong>Module</strong> View and Block Diagram of SM 322;DO 16 x Rel. 120/230 VAC . . . . . . . . . . . . . . . . . . . . . . . . . . . . . . . . . . . . . . . 3-943-31 <strong>Module</strong> View and Block Diagram of the SM322; DO 8 x REL. 230 VAC . . . . . . . . . . . . . . . . . . . . . . . . . . . . . . . . . . . . . . . 3-973-32 <strong>Module</strong> View and Block Diagram of the SM 322;DO 8 x Rel. 230 VAC/5A . . . . . . . . . . . . . . . . . . . . . . . . . . . . . . . . . . . . . . . . . 3-1013-33 Special Characteristic for Operationwith a Safe Electrical Extra-Low Voltage . . . . . . . . . . . . . . . . . . . . . . . . . . . . 3-1023-34 <strong>Module</strong> View and Block Diagram of the SM 322;DO 8 x Rel. 230 VAC/5 A . . . . . . . . . . . . . . . . . . . . . . . . . . . . . . . . . . . . . . . . . 3-1073-35 Special Characteristic for Operation with aSafe Electrical Extra-Low Voltage . . . . . . . . . . . . . . . . . . . . . . . . . . . . . . . . . . 3-1073-36 <strong>Module</strong> View and Block Diagram of the SM 323;DI 16/DO 16 x 24 VDC/0.5 A . . . . . . . . . . . . . . . . . . . . . . . . . . . . . . . . . . . . . . 3-1113-37 Terminal assignment of the SM 323; DI 16/DO 16 x 24 VDC/0.5 A . . . . . 3-1113-38 <strong>Module</strong> View and Block Diagram of Digital Input/Output <strong>Module</strong> SM 323;DI 8/DO 8 x 24 VDC/0.5 A . . . . . . . . . . . . . . . . . . . . . . . . . . . . . . . . . . . . . . . . 3-1143-39 Terminal assignment and block diagram of the SM 327;DI 8/DX 8 x DC 24 V/0.5 A, parameterizable . . . . . . . . . . . . . . . . . . . . . . . . 3-1173-40 <strong>Data</strong> record 1 of the SM 327; DI 8/DX 8 x VDC 24/0.5 A . . . . . . . . . . . . . . 3-1203-41 Re-readability of the outputs of the SM 327; DI 8/DX 8 x DC 24 V/0.5 A 3-1214-1 Easing Measuring Range <strong>Module</strong>s from the Analog Input <strong>Module</strong> . . . . . . 4-294-2 Inserting Measuring Range <strong>Module</strong>s into the Analog Input <strong>Module</strong> . . . . . 4-304-3 Example of the Relative Error of an Analog Output <strong>Module</strong> . . . . . . . . . . . . 4-344-4 Scan time of an analog input or output module . . . . . . . . . . . . . . . . . . . . . . 4-354-5 Example of the Influence of Smoothing on the Step Response . . . . . . . . . 4-374-6 Settling and Response times of the Analog Output Channels . . . . . . . . . . 4-384-7 Connecting Isolated Sensors to an Isolated AI . . . . . . . . . . . . . . . . . . . . . . . 4-474-8 Connecting Isolated Sensors to a Non-Isolated AI . . . . . . . . . . . . . . . . . . . 4-474-9 Connecting Non-Isolated Sensors to an Isolated AI . . . . . . . . . . . . . . . . . . 4-484-10 Connecting non-isolated sensors to a non-isolated AI . . . . . . . . . . . . . . . . 4-494-11 Connecting Voltage Sensors to an Isolated AI . . . . . . . . . . . . . . . . . . . . . . . 4-504-12 Connecting two-wire transmitters to an isolated AI . . . . . . . . . . . . . . . . . . . 4-524-13 Connecting two-wire transmitters supplied from L+ to anisolated AI . . . . . . . . . . . . . . . . . . . . . . . . . . . . . . . . . . . . . . . . . . . . . . . . . . . . . . 4-524-14 Connecting four-wire transmitters to an isolated AI . . . . . . . . . . . . . . . . . . . 4-524-15 Four-conductor connection of resistance thermometers to an isolated AI 4-544-16 Three-Conductor Connection of Resistance Thermometersto an Isolated AI . . . . . . . . . . . . . . . . . . . . . . . . . . . . . . . . . . . . . . . . . . . . . . . . . 4-544-17 Two-Conductor Connection of Resistance Thermometersto an Isolated AI . . . . . . . . . . . . . . . . . . . . . . . . . . . . . . . . . . . . . . . . . . . . . . . . . 4-554-18 Three-Conductor Connection of Resistance Thermometersto the SM 331; AI 8 x RTD . . . . . . . . . . . . . . . . . . . . . . . . . . . . . . . . . . . . . . . . 4-554-19 Two-conductor connection of resistance thermometersto the SM 331; AI 8x 13 bits . . . . . . . . . . . . . . . . . . . . . . . . . . . . . . . . . . . . . . 4-564-20 Three-conductor connection of resistance thermometersto the SM 331; AI 8 x 13 bits . . . . . . . . . . . . . . . . . . . . . . . . . . . . . . . . . . . . . . 4-564-21 Four-Conductor Connection of Resistance Thermometersto the SM 331; AI 8 x 13 bits . . . . . . . . . . . . . . . . . . . . . . . . . . . . . . . . . . . . . . 4-574-22 Design of Thermocouples . . . . . . . . . . . . . . . . . . . . . . . . . . . . . . . . . . . . . . . . 4-584-23 Connection of Thermocouples with Internal Compensation toan Isolated AI . . . . . . . . . . . . . . . . . . . . . . . . . . . . . . . . . . . . . . . . . . . . . . . . . . . 4-614-24 Connection of Thermocouples with Compensation Box to an Isolated AI 4-62<strong>Programmable</strong> <strong>Logic</strong> <strong>Controllers</strong> <strong>S7</strong>-<strong>300</strong> <strong>Module</strong> <strong>Data</strong>A5E00105505-03xix
Contents4-25 Connection of Thermocouples with Comparison Point (Order No.M72166-xxx00) to an Isolated AI . . . . . . . . . . . . . . . . . . . . . . . . . . . . . . . . . . 4-634-26 Connecting thermocouples via a reference junction to theSM 331; AI 8 x TC . . . . . . . . . . . . . . . . . . . . . . . . . . . . . . . . . . . . . . . . . . . . . . . 4-644-27 Connecting thermocouples with external compensation via resistancethermometers to the SM 331; AI 8 x TC . . . . . . . . . . . . . . . . . . . . . . . . . . . . 4-654-28 Connecting Loads to a Voltage Output of an Isolated AO overa Four-Conductor Connection . . . . . . . . . . . . . . . . . . . . . . . . . . . . . . . . . . . . . 4-684-29 Connecting Loads to a Voltage Output of a Non-Isolated AO over aTwo-Conductor Connection . . . . . . . . . . . . . . . . . . . . . . . . . . . . . . . . . . . . . . . 4-694-30 Connecting Loads to a Current Output of an Isolated AO . . . . . . . . . . . . . 4-704-31 Connecting Loads to a Current Output of a Non-Isolated AO . . . . . . . . . . 4-714-32 Start Information of OB 40: Which Event Has Triggeredthe Hardware Interrupt at the Limit Value . . . . . . . . . . . . . . . . . . . . . . . . . . . 4-764-33 <strong>Module</strong> view and block diagram of the analog input module SM 331;AI 8 x 16 bits . . . . . . . . . . . . . . . . . . . . . . . . . . . . . . . . . . . . . . . . . . . . . . . . . . . 4-784-34 <strong>Module</strong> View and Block Diagram of the SM 331; AI 8 x 16 bits . . . . . . . . . 4-874-35 8-channel mode cycle . . . . . . . . . . . . . . . . . . . . . . . . . . . . . . . . . . . . . . . . . . . . 4-924-36 4-channel mode cycle . . . . . . . . . . . . . . . . . . . . . . . . . . . . . . . . . . . . . . . . . . . . 4-934-37 Terminal assignment and block diagram of the SM 331;AI 8 x 14 bits High Speed . . . . . . . . . . . . . . . . . . . . . . . . . . . . . . . . . . . . . . . . 4-984-38 Calculation of the filter and processing time . . . . . . . . . . . . . . . . . . . . . . . . . 4-1024-39 <strong>Module</strong> View and Block Diagram of the Analog Input <strong>Module</strong> SM 331;AI 8 x 13 bits . . . . . . . . . . . . . . . . . . . . . . . . . . . . . . . . . . . . . . . . . . . . . . . . . . . 4-1094-40 <strong>Module</strong> View and Block Diagram of the Analog Input <strong>Module</strong> SM 331;AI 8 x 12 bits . . . . . . . . . . . . . . . . . . . . . . . . . . . . . . . . . . . . . . . . . . . . . . . . . . . 4-1164-41 <strong>Module</strong> View and Block Diagram of the SM 331; AI 8 x RTD . . . . . . . . . . 4-1264-42 Hardware filter 8 channels scan time . . . . . . . . . . . . . . . . . . . . . . . . . . . . . . . 4-1324-43 Software filter 8 channels scan time . . . . . . . . . . . . . . . . . . . . . . . . . . . . . . . . 4-1334-44 Hardware filter 4 channels scan time . . . . . . . . . . . . . . . . . . . . . . . . . . . . . . . 4-1344-45 <strong>Module</strong> View and Block Diagram of the SM 331; AI 8 x TC . . . . . . . . . . . . 4-1394-46 Hardware filter 8 channels scan time . . . . . . . . . . . . . . . . . . . . . . . . . . . . . . . 4-1464-47 Software filter 8 channels scan time . . . . . . . . . . . . . . . . . . . . . . . . . . . . . . . . 4-1474-48 Hardware filter 4 channels scan time . . . . . . . . . . . . . . . . . . . . . . . . . . . . . . . 4-1484-49 <strong>Module</strong> View and Block Diagram of the Analog Input <strong>Module</strong> SM 331;AI 2 x 12 bits . . . . . . . . . . . . . . . . . . . . . . . . . . . . . . . . . . . . . . . . . . . . . . . . . . . 4-1544-50 <strong>Module</strong> View and Block Diagram of the Analog Output <strong>Module</strong> SM 332;AO 8 x 12 bits . . . . . . . . . . . . . . . . . . . . . . . . . . . . . . . . . . . . . . . . . . . . . . . . . . 4-1644-51 <strong>Module</strong> View and Block Diagram of the SM 332; AO 4 x 16 bits . . . . . . . . 4-1704-52 Calculation of the processing time and the time for updating the output . 4-1734-53 <strong>Module</strong> View and Block Diagram of the Analog Output <strong>Module</strong> SM 332;AO 4 x 12 bits . . . . . . . . . . . . . . . . . . . . . . . . . . . . . . . . . . . . . . . . . . . . . . . . . . 4-1774-54 <strong>Module</strong> View and Block Diagram of the Analog Output <strong>Module</strong> SM 332;AO 2 12 bits . . . . . . . . . . . . . . . . . . . . . . . . . . . . . . . . . . . . . . . . . . . . . . . . . . . . 4-1834-55 <strong>Module</strong> View and Block Diagram of the Analog Input/Output <strong>Module</strong> SM 334;AI 4/AO 2 x 8/8 bits . . . . . . . . . . . . . . . . . . . . . . . . . . . . . . . . . . . . . . . . . . . . . . 4-1894-56 <strong>Module</strong> View and Block Diagram of the SM 334; AI 4/AO 2 x 12 bits . . . 4-1955-1 <strong>Module</strong> view of the simulator module SM 374; IN/OUT 16 . . . . . . . . . . . . . 5-45-2 <strong>Module</strong> view of the dummy module DM 370 . . . . . . . . . . . . . . . . . . . . . . . . . 5-65-3 <strong>Module</strong> View and Block Diagram of the SM 338; POS-INPUT . . . . . . . . . 5-96-1 Front View of the Interface <strong>Module</strong> IM 360 . . . . . . . . . . . . . . . . . . . . . . . . . . 6-46-2 Front View of the Interface <strong>Module</strong> IM 361 . . . . . . . . . . . . . . . . . . . . . . . . . . 6-66-3 Front View of the Interface <strong>Module</strong> IM 365 . . . . . . . . . . . . . . . . . . . . . . . . . . 6-87-1 RC Network with 10 MW for Configuration withUngrounded Reference Potential . . . . . . . . . . . . . . . . . . . . . . . . . . . . . . . . . . 7-4xx<strong>Programmable</strong> <strong>Logic</strong> <strong>Controllers</strong> <strong>S7</strong>-<strong>300</strong> <strong>Module</strong> <strong>Data</strong>A5E00105505-03
Contents7-2 Isolation between the Bus Segments . . . . . . . . . . . . . . . . . . . . . . . . . . . . . . . 7-57-3 Block diagram of the RS 485 repeater . . . . . . . . . . . . . . . . . . . . . . . . . . . . . . 7-78-1 <strong>SIMATIC</strong> TOP connect on a <strong>S7</strong>-<strong>300</strong> . . . . . . . . . . . . . . . . . . . . . . . . . . . . . . . 8-28-2 Threading the Round-Sheath Ribbon Cable into the Connector . . . . . . . . 8-58-3 Inserting the Connecting Cable into the Front Connector <strong>Module</strong> . . . . . . . 8-88-4 Front connector module for 32-channel digital modules . . . . . . . . . . . . . . . 8-98-5 Insert the connecting cable into the terminal block . . . . . . . . . . . . . . . . . . . 8-108-6 Spring-loaded terminal block . . . . . . . . . . . . . . . . . . . . . . . . . . . . . . . . . . . . . . 8-118-7 Principle of Spring-Loaded Connections . . . . . . . . . . . . . . . . . . . . . . . . . . . . 8-118-8 Wiring a Digital <strong>Module</strong> with Terminal Block for aOne-Conductor Connection . . . . . . . . . . . . . . . . . . . . . . . . . . . . . . . . . . . . . . . 8-158-9 Wiring a Digital <strong>Module</strong> with Terminal Block for aThree-Conductor Connection . . . . . . . . . . . . . . . . . . . . . . . . . . . . . . . . . . . . . 8-178-10 Wiring with Terminal Block for 2A <strong>Module</strong> . . . . . . . . . . . . . . . . . . . . . . . . . . . 8-198-11 Terminal Assignment of Analog <strong>Module</strong> to <strong>SIMATIC</strong> TOP connect TPA . 8-228-12 <strong>SIMATIC</strong> TOP connect TPA Terminal Block with Shielding Plate . . . . . . . 8-238-13 Example of Connecting <strong>SIMATIC</strong> TOP connect TPA to SM 321;AI 8 x 12 bits . . . . . . . . . . . . . . . . . . . . . . . . . . . . . . . . . . . . . . . . . . . . . . . . . . . 8-24A-1 <strong>Data</strong> Record 1 for Parameters of the Digital Input <strong>Module</strong>s . . . . . . . . . . . . A-4A-2 <strong>Data</strong> Record 1 for Parameters of the Digital Output <strong>Module</strong>s . . . . . . . . . . A-6A-3 <strong>Data</strong> Record 1 for Parameters of the Analog Input <strong>Module</strong>s . . . . . . . . . . . A-8A-4 <strong>Data</strong> Record 1 of the Parameters for SM 331; AI 8 x RTD . . . . . . . . . . . . A-12A-5 <strong>Data</strong> Record 128 of the Parameters for SM 331; AI 8 RTD . . . . . . . . . . . . A-13A-6 <strong>Data</strong> Record 128 of the SM 331; AI 8 x RTD (Continued) . . . . . . . . . . . . . A-14A-7 <strong>Data</strong> Record 128 of the SM 331; AI 8 x RTD (Continued) . . . . . . . . . . . . . A-15A-8 <strong>Data</strong> Record 1 of the Parameters for SM 331; AI 8 x TC . . . . . . . . . . . . . . A-20A-9 <strong>Data</strong> Record 128 of the SM 331; AI 8 x TC . . . . . . . . . . . . . . . . . . . . . . . . . . A-21A-10 <strong>Data</strong> Record 128 of the SM 331; AI 8 x TC (Continued) . . . . . . . . . . . . . . . A-22A-11 <strong>Data</strong> Record 128 of the SM 331; AI 8 x TC (Continued) . . . . . . . . . . . . . . . A-23A-12 <strong>Data</strong> Record 1 for Parameters of the Analog Input <strong>Module</strong>s . . . . . . . . . . . A-27A-13 <strong>Data</strong> Record 1 of the Parameters for SM 331; AI 8 x 16 bits . . . . . . . . . . . A-31A-14 <strong>Data</strong> record 128 for parameters of the SM 331; AI 8 x 16 bits . . . . . . . . . . A-32A-17 <strong>Data</strong> Record 1 for Parameters of the Analog Output <strong>Module</strong>s . . . . . . . . . A-37A-18 <strong>Data</strong> Record 1 for Parameters of the Analog Output <strong>Module</strong>s . . . . . . . . . A-40A-19 <strong>Data</strong> Record 1 for Parameters of the Analog Input/Output <strong>Module</strong>s . . . . A-42B-1 Bytes 0 and 1 of the Diagnostic <strong>Data</strong> . . . . . . . . . . . . . . . . . . . . . . . . . . . . . . . B-2B-2 Bytes 2 and 3 of the Diagnostics <strong>Data</strong> . . . . . . . . . . . . . . . . . . . . . . . . . . . . . . B-3B-3 Bytes 4 to 7 of the Diagnostics <strong>Data</strong> . . . . . . . . . . . . . . . . . . . . . . . . . . . . . . . B-4B-4 Diagnostic Byte for a Digital Input Channel of the SM 321;DI 16 x 24 VDC . . . . . . . . . . . . . . . . . . . . . . . . . . . . . . . . . . . . . . . . . . . . . . . . . B-5B-5 Diagnostic Byte for a Digital Output Channel of the SM 322;DO 8 x 24 VDC/0.5 A . . . . . . . . . . . . . . . . . . . . . . . . . . . . . . . . . . . . . . . . . . . . B-5B-6 Diagnostic Byte for an Analog Input Channel of a SM 331with Diagnostics Capability . . . . . . . . . . . . . . . . . . . . . . . . . . . . . . . . . . . . . . . B-6B-7 Diagnostic Byte for an Analog Output Channel of a SM 332with Diagnostics Capability . . . . . . . . . . . . . . . . . . . . . . . . . . . . . . . . . . . . . . . B-6B-8 Bytes 0 and 1 of the Diagnostic <strong>Data</strong> for the SM 338; POS-INPUT . . . . . B-7B-9 Bytes 2 and 7 of the Diagnostic <strong>Data</strong> for the SM 338; POS-INPUT . . . . . B-8B-10 Diagnostic Byte for a Channel of the SM 338; POS-INPUT . . . . . . . . . . . . B-8C-1 Dimension Drawing of the 483 mm Standard Rail . . . . . . . . . . . . . . . . . . . . C-2C-2 Dimension Drawing of the 530 mm Standard Rail . . . . . . . . . . . . . . . . . . . . C-2C-3 Dimension Drawing of the 830 mm Standard Rail . . . . . . . . . . . . . . . . . . . . C-3C-4 Dimension Drawing of the 2000 mm Standard Rail . . . . . . . . . . . . . . . . . . . C-3C-5 Dimension Drawing of the Rail with 160 mm Standard Width . . . . . . . . . . C-4C-6 Dimension Drawing of the Rail with 482.6 mm Standard Width . . . . . . . . C-4<strong>Programmable</strong> <strong>Logic</strong> <strong>Controllers</strong> <strong>S7</strong>-<strong>300</strong> <strong>Module</strong> <strong>Data</strong>A5E00105505-03xxi
ContentsC-7 Dimension Drawing of the Rail with 530 mm Standard Width . . . . . . . . . . C-5C-8 Dimension Drawing of the Rail with 830 mm Standard Width . . . . . . . . . . C-5C-9 Dimension Drawing of the 2000 mm Rail . . . . . . . . . . . . . . . . . . . . . . . . . . . C-6C-10 Complete Dimension Drawing of a Rail for “Insert and Remove” Functionwith Active Bus <strong>Module</strong>, <strong>S7</strong>-<strong>300</strong> <strong>Module</strong> and Explosion-proof Partition . . C-7C-11 Dimension Drawing of the Active Bus <strong>Module</strong>s . . . . . . . . . . . . . . . . . . . . . . C-8C-12 Power Supply <strong>Module</strong> PS 307; 2 A . . . . . . . . . . . . . . . . . . . . . . . . . . . . . . . . C-8C-13 Power Supply <strong>Module</strong> PS 307; 5 A . . . . . . . . . . . . . . . . . . . . . . . . . . . . . . . . C-9C-14 Power Supply <strong>Module</strong> PS 307; 10 A . . . . . . . . . . . . . . . . . . . . . . . . . . . . . . . C-10C-15 Dimension Drawing of the Power Supply <strong>Module</strong> PS 307; 5 Awith CPUs 313/314/315/315-2 DP. Front View . . . . . . . . . . . . . . . . . . . . . . . C-11C-16 Dimension Drawing of the Power Supply <strong>Module</strong> PS 307; 5 Awith CPUs 313/314/315/315-2 DP. Side View . . . . . . . . . . . . . . . . . . . . . . . C-12C-17 Interface <strong>Module</strong> IM 360 . . . . . . . . . . . . . . . . . . . . . . . . . . . . . . . . . . . . . . . . . C-13C-18 Interface <strong>Module</strong> IM 361 . . . . . . . . . . . . . . . . . . . . . . . . . . . . . . . . . . . . . . . . . C-13C-19 Interface <strong>Module</strong> IM 365 . . . . . . . . . . . . . . . . . . . . . . . . . . . . . . . . . . . . . . . . . C-14C-20 Signal <strong>Module</strong> . . . . . . . . . . . . . . . . . . . . . . . . . . . . . . . . . . . . . . . . . . . . . . . . . . C-15C-21 2 Signal <strong>Module</strong>s with Shield Connecting Element . . . . . . . . . . . . . . . . . . . C-16C-22 <strong>SIMATIC</strong> TOP connect, 3-tier . . . . . . . . . . . . . . . . . . . . . . . . . . . . . . . . . . . . . C-17C-23 <strong>SIMATIC</strong> TOP connect, 2-tier . . . . . . . . . . . . . . . . . . . . . . . . . . . . . . . . . . . . . C-17C-24 <strong>SIMATIC</strong> TOP connect, 1-tier . . . . . . . . . . . . . . . . . . . . . . . . . . . . . . . . . . . . . C-18C-25 RS 485 Repeater on Standard Rail . . . . . . . . . . . . . . . . . . . . . . . . . . . . . . . . C-18C-26 RS 485 repeater on <strong>S7</strong>-<strong>300</strong> rail . . . . . . . . . . . . . . . . . . . . . . . . . . . . . . . . . . . C-19E-1 Electrostatic Voltages which Can Build up on a Person . . . . . . . . . . . . . . . E-3xxii<strong>Programmable</strong> <strong>Logic</strong> <strong>Controllers</strong> <strong>S7</strong>-<strong>300</strong> <strong>Module</strong> <strong>Data</strong>A5E00105505-03
ContentsTables1-1 Use in an Industrial Environment . . . . . . . . . . . . . . . . . . . . . . . . . . . . . . . . . . 1-51-2 Pulse-Shaped Interference . . . . . . . . . . . . . . . . . . . . . . . . . . . . . . . . . . . . . . . 1-61-3 Sinusoidal Interference . . . . . . . . . . . . . . . . . . . . . . . . . . . . . . . . . . . . . . . . . . . 1-71-4 Shipping and Storage Conditions for <strong>Module</strong>s . . . . . . . . . . . . . . . . . . . . . . . 1-81-5 Mechanical Conditions . . . . . . . . . . . . . . . . . . . . . . . . . . . . . . . . . . . . . . . . . . . 1-101-6 Ambient Mechanical Conditions Test . . . . . . . . . . . . . . . . . . . . . . . . . . . . . . . 1-101-7 Climatic Conditions . . . . . . . . . . . . . . . . . . . . . . . . . . . . . . . . . . . . . . . . . . . . . . 1-111-8 Test Voltages . . . . . . . . . . . . . . . . . . . . . . . . . . . . . . . . . . . . . . . . . . . . . . . . . . . 1-121-9 Rated Voltages . . . . . . . . . . . . . . . . . . . . . . . . . . . . . . . . . . . . . . . . . . . . . . . . . 1-131-10 SIPLUS <strong>S7</strong>-<strong>300</strong> <strong>Module</strong>s . . . . . . . . . . . . . . . . . . . . . . . . . . . . . . . . . . . . . . . . 1-151-11 SIPLUS <strong>S7</strong>-<strong>300</strong> <strong>Module</strong>s Ambient Mechanical Conditions Test . . . . . . . . 1-161-12 SIPLUS <strong>S7</strong>-<strong>300</strong> <strong>Module</strong>s Climatic Conditions . . . . . . . . . . . . . . . . . . . . . . . 1-172-1 Reaction of the PS 305 Power Supply <strong>Module</strong> (2 A)to Atypical Operating Conditions . . . . . . . . . . . . . . . . . . . . . . . . . . . . . . . . . . . 2-52-2 Reaction of the PS 307 Power Supply <strong>Module</strong> (2 A)to Atypical Operating Conditions . . . . . . . . . . . . . . . . . . . . . . . . . . . . . . . . . . . 2-72-3 Reaction of the PS 307 Power Supply <strong>Module</strong> (5 A)to Atypical Operating Conditions . . . . . . . . . . . . . . . . . . . . . . . . . . . . . . . . . . . 2-112-4 Reaction of the PS 307 Power Supply <strong>Module</strong> (10 A)to Atypical Operating Conditions . . . . . . . . . . . . . . . . . . . . . . . . . . . . . . . . . . . 2-153-1 Digital Input <strong>Module</strong>s: Characteristics at a Glance . . . . . . . . . . . . . . . . . . . 3-43-2 Digital Input <strong>Module</strong>s: Characteristics at a glance (continued) . . . . . . . . . 3-53-3 Digital Output <strong>Module</strong>s: Characteristics at a Glance . . . . . . . . . . . . . . . . . . 3-63-4 Digital Output <strong>Module</strong>s: Characteristics at a glance (continued) . . . . . . . . 3-73-5 Relay Output <strong>Module</strong>s: Characteristics at a Glance . . . . . . . . . . . . . . . . . . 3-83-6 Digital Input/Output <strong>Module</strong>s: Characteristics at a Glance . . . . . . . . . . . . . 3-93-7 Sequence of Steps from Choosing to Commissioning the Digital <strong>Module</strong> 3-103-8 Parameters of the SM 321; DI 16 x VDC 24 . . . . . . . . . . . . . . . . . . . . . . . . . 3-273-9 Assigning Interrupt Parameters to the Inputs of the SM 321;DI 16 x VDC 24 . . . . . . . . . . . . . . . . . . . . . . . . . . . . . . . . . . . . . . . . . . . . . . . . . 3-283-10 Tolerances of the Input Delays of SM 321; DI 16 x VDC 24 . . . . . . . . . . . . 3-283-11 Dependencies of Input Values on the Operating Modeof the CPU and Supply Voltage L+ of the SM 321; DI 16 x VDC 24 . . . . . 3-293-12 Diagnostic Messages of the SM 321; DI 16 x VDC 24 . . . . . . . . . . . . . . . . 3-293-13 Diagnostic Messages of the SM 321; DI 16 x DC 24 V,Causes of Error and Remedial Action . . . . . . . . . . . . . . . . . . . . . . . . . . . . . . 3-313-14 <strong>Data</strong> record no. 0 (static parameters): . . . . . . . . . . . . . . . . . . . . . . . . . . . . . . 3-633-15 <strong>Data</strong> record no. 1 (dynamic parameters): . . . . . . . . . . . . . . . . . . . . . . . . . . . 3-633-16 Structure of the data record for SM 322 DO 16 x UC 24/48 V . . . . . . . . . . 3-643-17 System diagnostics for SM 322 DO 16 x UC 24/48 V . . . . . . . . . . . . . . . . . 3-643-18 Parameters of the SM 322; DO 8 x 24 VDC/0.5 A . . . . . . . . . . . . . . . . . . . . 3-763-19 Dependence of the output values on the operating mode of theCPU and on the supply voltage L+ of the SM 322; DO 8 x 24 VDC/0.5 A. 3-773-20 Diagnostic Messages of the SM 322; DO 8 x 24 VDC/0.5 A . . . . . . . . . . . 3-783-21 Diagnostic Messages of the SM 322; DO 8 x 24 VDC/0.5 A,Causes of Error and Remedial Action . . . . . . . . . . . . . . . . . . . . . . . . . . . . . . 3-793-22 Parameters of the SM 322; DO 8 x 120/230 VAC/2 A ISOL . . . . . . . . . . . 3-903-23 Diagnostic Messages of the SM 322; DO 8 x 120/230 VAC/2 A ISOL . . 3-913-24 Diagnostic messages of the SM 322; DO 8 x 120/230 VAC/2 A ISOL,error causes and remedies . . . . . . . . . . . . . . . . . . . . . . . . . . . . . . . . . . . . . . . 3-913-25 Parameters of the SM 322; DO 8 x Rel. 230 VAC/5A . . . . . . . . . . . . . . . . . 3-1043-26 Diagnostic Messages of the SM 322; DO 8 x Rel. AC 230 VDC/0.5 A . . 3-1043-27 Diagnostic messages of the SM 322; DO 8 x Rel. 230 VAC/5A,error causes and remedies . . . . . . . . . . . . . . . . . . . . . . . . . . . . . . . . . . . . . . . 3-105<strong>Programmable</strong> <strong>Logic</strong> <strong>Controllers</strong> <strong>S7</strong>-<strong>300</strong> <strong>Module</strong> <strong>Data</strong>A5E00105505-03xxiii
Contents3-28 Parameters of the SM 327; DI 8/DX 8 VDC 24/0.5 A . . . . . . . . . . . . . . . . 3-1194-1 Analog Input <strong>Module</strong>s: Characteristics at a Glance . . . . . . . . . . . . . . . . . . 4-44-2 Analog Input <strong>Module</strong>s: Characteristics at a glance (continued) . . . . . . . . . 4-54-3 Analog Output <strong>Module</strong>s: Characteristics at a Glance . . . . . . . . . . . . . . . . . 4-64-4 Analog Input/Output <strong>Module</strong>s: Characteristics at a Glance . . . . . . . . . . . . 4-74-5 Sequence of Steps from Choosing to Commissioning the Analog <strong>Module</strong> 4-84-6 Example: Bit pattern of a 16-bit and a 13-bit analog value . . . . . . . . . . . . . 4-104-7 Possible analog value resolutions . . . . . . . . . . . . . . . . . . . . . . . . . . . . . . . . . . 4-114-8 Bipolar Input Ranges . . . . . . . . . . . . . . . . . . . . . . . . . . . . . . . . . . . . . . . . . . . . 4-124-9 Unipolar Input Ranges . . . . . . . . . . . . . . . . . . . . . . . . . . . . . . . . . . . . . . . . . . . 4-124-10 Analog Value Representation inVoltage Measuring Ranges + 10 V to + 1 V . . . . . . . . . . . . . . . . . . . . . . . . . 4-134-11 Analog Value Representation inVoltage Measuring Ranges + 500 mV to + 80 mV . . . . . . . . . . . . . . . . . . . . 4-134-12 Analog Value Representation inVoltage Measuring Ranges 1 to 5 V and 0 to 10 V . . . . . . . . . . . . . . . . . . . 4-144-13 Analog Value Representation inCurrent Measuring Ranges + 20 mA to + 3.2 mA . . . . . . . . . . . . . . . . . . . . 4-144-14 Analog Value Representation inCurrent Measuring Ranges 0 to 20 mA and 4 to 20 mA . . . . . . . . . . . . . . . 4-154-15 Analog Value Representation for Resistance Type Transmittersfrom 10 kWand from 150 W to 600 W . . . . . . . . . . . . . . . . . . . . . . . . . . . . . . . . . . . . . . . . 4-154-16 Analog value representation for RTD Resistance Temperature DetectorsPT 100, 200, 500, 1000 . . . . . . . . . . . . . . . . . . . . . . . . . . . . . . . . . . . . . . . . . . 4-164-17 Analog value representation for RTD Resistance Temperature DetectorsPT 100, 200, 500, 1000 . . . . . . . . . . . . . . . . . . . . . . . . . . . . . . . . . . . . . . . . . . 4-164-18 Analog value representation for RTD Resistance Temperature DetectorsNi100, 120, 200, 500, 1000, LG-Ni 1000 . . . . . . . . . . . . . . . . . . . . . . . . . . . . 4-174-19 Analog value representation for RTD Resistance Temperature DetectorsNi 100, 120, 200, 500, 1000, LG-Ni 1000 . . . . . . . . . . . . . . . . . . . . . . . . . . . 4-174-20 Analog Value Representation forRTD Resistance Temperature Detectors Cu 10 . . . . . . . . . . . . . . . . . . . . . . 4-184-21 Analog Value Representation forRTD Resistance Temperature Detectors Cu 10 . . . . . . . . . . . . . . . . . . . . . . 4-184-22 Analog value representation for thermocouples type B . . . . . . . . . . . . . . . . 4-194-23 Analog value representation for thermocouples type C . . . . . . . . . . . . . . . 4-194-24 Analog value representation for thermocouples type E . . . . . . . . . . . . . . . . 4-204-25 Analog value representation for thermocouples type J . . . . . . . . . . . . . . . . 4-204-26 Analog value representation for thermocouples type K . . . . . . . . . . . . . . . . 4-214-27 Analog value representation for thermocouples type L . . . . . . . . . . . . . . . . 4-214-28 Analog value representation for thermocouples type N . . . . . . . . . . . . . . . 4-224-29 Analog value representation for thermocouples type R, S . . . . . . . . . . . . . 4-224-30 Analog value representation for thermocouples type T . . . . . . . . . . . . . . . . 4-234-31 Analog value representation for thermocouples type U . . . . . . . . . . . . . . . 4-234-32 Bipolar Output Ranges . . . . . . . . . . . . . . . . . . . . . . . . . . . . . . . . . . . . . . . . . . 4-254-33 Unipolar Output Ranges . . . . . . . . . . . . . . . . . . . . . . . . . . . . . . . . . . . . . . . . . 4-254-34 Analog Value Representation in Output Range +10 V . . . . . . . . . . . . . . . . 4-264-35 Analog Value Representation in Output Ranges 0 to 10 V and 1 to 5 V . 4-264-36 Analog Value Representation in Output Range +20 mA . . . . . . . . . . . . . . . 4-274-37 Analog Value Representation in Output Ranges 0 and 20 mAand 4 to 20 mA . . . . . . . . . . . . . . . . . . . . . . . . . . . . . . . . . . . . . . . . . . . . . . . . . 4-274-38 Dependencies of the Analog Input/Output Values on the Operating Stateof the CPU and the Supply Voltage L+ . . . . . . . . . . . . . . . . . . . . . . . . . . . . . 4-314-39 Behavior of the Analog Input <strong>Module</strong>s as a Function of the Positionxxiv<strong>Programmable</strong> <strong>Logic</strong> <strong>Controllers</strong> <strong>S7</strong>-<strong>300</strong> <strong>Module</strong> <strong>Data</strong>A5E00105505-03
Contentsof the Analog Value within the Range of Values . . . . . . . . . . . . . . . . . . . . . . 4-324-40 Behavior of the Analog Output <strong>Module</strong>s as a Function of the Positionof the Analog Value within the Range of Values . . . . . . . . . . . . . . . . . . . . . . 4-334-41 Parameters of the Analog Input <strong>Module</strong>s . . . . . . . . . . . . . . . . . . . . . . . . . . . 4-404-42 Parameters of the Analog Output <strong>Module</strong>s . . . . . . . . . . . . . . . . . . . . . . . . . . 4-434-43 Parameters of the Analog Input/Output <strong>Module</strong>s . . . . . . . . . . . . . . . . . . . . . 4-444-44 Options for Compensation of the Reference Junction Temperature . . . . . 4-594-45 Ordering <strong>Data</strong> of the Comparison Point . . . . . . . . . . . . . . . . . . . . . . . . . . . . 4-634-46 Diagnostic Messages of the Analog Input <strong>Module</strong>s . . . . . . . . . . . . . . . . . . . 4-724-47 Diagnostics Messages of the Analog Output <strong>Module</strong>s . . . . . . . . . . . . . . . . 4-734-48 Diagnostics Messages of the Analog Input <strong>Module</strong>s, Causes of Errorsand Remedial Measures . . . . . . . . . . . . . . . . . . . . . . . . . . . . . . . . . . . . . . . . . 4-734-49 Diagnostics Messages of the Analog Output <strong>Module</strong>s, Causes of Errorsand Remedial Measures . . . . . . . . . . . . . . . . . . . . . . . . . . . . . . . . . . . . . . . . . 4-744-50 Parameters of the SM 331; AI 8 x 16 bits . . . . . . . . . . . . . . . . . . . . . . . . . . . 4-814-51 Assignment of Channels of the SM 331; AI 8 x 16 bitsto Channel Groups . . . . . . . . . . . . . . . . . . . . . . . . . . . . . . . . . . . . . . . . . . . . . . 4-824-52 Measuring Ranges of the SM 331; AI 8 x 16 bits . . . . . . . . . . . . . . . . . . . . . 4-834-53 Minimum Possible Upper and Lower Limit Values of SM 331;AI 8 x 16 bits . . . . . . . . . . . . . . . . . . . . . . . . . . . . . . . . . . . . . . . . . . . . . . . . . . . 4-854-54 Parameters of the SM 331; AI 8 x 16 bits . . . . . . . . . . . . . . . . . . . . . . . . . . . 4-904-55 Assignment of the channels of the isolated analog input module SM 331;AI 8 x 16 bits to channel groups . . . . . . . . . . . . . . . . . . . . . . . . . . . . . . . . . . . 4-914-56 Scan times in 8-channel mode . . . . . . . . . . . . . . . . . . . . . . . . . . . . . . . . . . . . 4-934-57 Measuring ranges of the SM 331; AI 8 x 16 bits . . . . . . . . . . . . . . . . . . . . . 4-954-58 Content of the 4 bytes with additional information fromOB40 during a hardware interrupt or an end-of-scan-cycle interrupt . . . . 4-964-59 Default Settings of the SM 331; AI 8 x 14 bitsHigh Speed using Measuring Range <strong>Module</strong>s . . . . . . . . . . . . . . . . . . . . . . . 4-1034-60 Parameters of the SM 331; AI 8 x 14 bits High Speed . . . . . . . . . . . . . . . 4-1044-61 Assignment of the channels of the SM 331; AI 8 x 14 bits High Speed tochannel groups . . . . . . . . . . . . . . . . . . . . . . . . . . . . . . . . . . . . . . . . . . . . . . . . . 4-1054-62 Measuring Ranges of the SM 331; AI 8 x 14 bits High Speed . . . . . . . . . . 4-1064-63 Parameters of the SM 331; AI 8 x 13 bits . . . . . . . . . . . . . . . . . . . . . . . . . . . 4-1134-64 Default Settings of the SM 331; AI 8 x 12 bitsUsing Measuring Range <strong>Module</strong>s . . . . . . . . . . . . . . . . . . . . . . . . . . . . . . . . . . 4-1204-65 Parameters of the SM 331; AI 8 x 12 bits . . . . . . . . . . . . . . . . . . . . . . . . . . 4-1204-66 Assignment of Channels of the SM 331; AI 8 x 12 bitsto Channel Groups . . . . . . . . . . . . . . . . . . . . . . . . . . . . . . . . . . . . . . . . . . . . . . 4-1214-67 Measuring Ranges of the SM 331; AI 8 x 12 bits . . . . . . . . . . . . . . . . . . . . 4-1234-68 Parameters of the SM 331; AI 8 x RTD . . . . . . . . . . . . . . . . . . . . . . . . . . . . 4-1294-69 Assignment of Channels of the SM 331; AI 8 x RTD to Channel Groups 4-1314-70 Scan Times in “Software Filter, 8 Channels” Mode . . . . . . . . . . . . . . . . . . . 4-1344-71 Measuring ranges of the SM331; AI 8 x RTD . . . . . . . . . . . . . . . . . . . . . . . . 4-1364-72 Content of the 4 bytes with additional information from OB40during a hardware interrupt or an end-of-scan-cycle interrupt . . . . . . . . . . 4-1374-73 Parameters of the SM 331; AI 8 x TC . . . . . . . . . . . . . . . . . . . . . . . . . . . . . . 4-1434-74 Assignment of Channels of the SM 331; AI 8 x TC to Channel Groups . . 4-1454-75 Scan Times in “Software Filter, 8 Channels” Mode . . . . . . . . . . . . . . . . . . . 4-1484-76 Measuring Ranges of the SM331; AI 8 x TC . . . . . . . . . . . . . . . . . . . . . . . . 4-1504-77 Minimum Possible Upper and Lower Limit Values of SM 331;AI 8 x TC in 5C . . . . . . . . . . . . . . . . . . . . . . . . . . . . . . . . . . . . . . . . . . . . . . . . . 4-1514-78 Minimum Possible Upper and Lower Limit Values of SM 331;AI 8 x TC in 5F . . . . . . . . . . . . . . . . . . . . . . . . . . . . . . . . . . . . . . . . . . . . . . . . . . 4-152<strong>Programmable</strong> <strong>Logic</strong> <strong>Controllers</strong> <strong>S7</strong>-<strong>300</strong> <strong>Module</strong> <strong>Data</strong>A5E00105505-03xxv
Contents4-79 Content of the 4 bytes with additional information fromOB40 during a hardware interrupt or an end-of-scan-cycle interrupt . . . . 4-1524-80 Default Settings of the SM 331; AI 2 x 12 bitsUsing Measuring Range <strong>Module</strong> . . . . . . . . . . . . . . . . . . . . . . . . . . . . . . . . . . . 4-1584-81 Parameters of the SM 331; AI 2 x 12 bits . . . . . . . . . . . . . . . . . . . . . . . . . . 4-1584-82 Measuring Ranges of the SM 331; AI 2 x 12 bits . . . . . . . . . . . . . . . . . . . . . 4-1614-83 Output Ranges of the Analog Output <strong>Module</strong> SM 332; AO 8 x 12 bits . . . 4-1684-84 Output Ranges of the Analog Output <strong>Module</strong> SM 332; AO 4 x 16 bits . . 4-1754-85 Output Ranges of the Analog Output <strong>Module</strong> SM 332; AO 4 x 12 bits . . . 4-1814-86 Output Ranges of the Analog Output <strong>Module</strong> SM 332; AO 2 x 12 bits . . . 4-1874-87 Measuring ranges of the SM 334;AI 4/AO 2 x 12 bits . . . . . . . . . . . . . . . . . 4-1994-88 Output ranges of the SM 334;AI 4/AO 2 x 12 bits . . . . . . . . . . . . . . . . . . . 4-2005-1 Special signal modules: Characteristics at a Glance . . . . . . . . . . . . . . . . . . 5-25-2 Meaning of the switch settings of the dummy module DM 370 . . . . . . . . 5-65-3 Parameters of the SM 338; POS-INPUT . . . . . . . . . . . . . . . . . . . . . . . . . . . 5-145-4 SM 338; POS-INPUT: Input Addresses . . . . . . . . . . . . . . . . . . . . . . . . . . . . 5-155-5 Diagnostic messages of the SM 338; POS INPUT . . . . . . . . . . . . . . . . . . . 5-185-6 Diagnostics Messages of the SM 338, Causes of Errors and RemedialMeasures . . . . . . . . . . . . . . . . . . . . . . . . . . . . . . . . . . . . . . . . . . . . . . . . . . . . . . 5-196-1 Interface <strong>Module</strong>s: Characteristics at a Glance . . . . . . . . . . . . . . . . . . . . . . 6-27-1 Maximum Cable Length of a Segment . . . . . . . . . . . . . . . . . . . . . . . . . . . . . . 7-27-2 Maximum Cable Length between Two RS 485 Repeaters . . . . . . . . . . . . . 7-27-3 Description and Functions of the RS 485 Repeater . . . . . . . . . . . . . . . . . . . 7-38-1 <strong>SIMATIC</strong> TOP connect/... TPA: Connec<strong>Module</strong>s . . . . . . . . . . . . . . . . . . . . . 8-38-2 Sequence of Steps for Wiring <strong>SIMATIC</strong> TOP connect/... TPA . . . . . . . . . 8-48-3 Wiring Rules for Connecting the Supply Voltage . . . . . . . . . . . . . . . . . . . . 8-78-4 Assignment of Connecting Cable Terminals to Address Bytesof 32-Channel Digital <strong>Module</strong>s . . . . . . . . . . . . . . . . . . . . . . . . . . . . . . . . . . . . 8-98-5 Components of <strong>SIMATIC</strong> TOP connect . . . . . . . . . . . . . . . . . . . . . . . . . . . . 8-128-6 Selection for <strong>SIMATIC</strong> TOP connect Components . . . . . . . . . . . . . . . . . . . 8-138-7 Connection Notes for <strong>SIMATIC</strong> TOP connectwith One-Conductor Connection . . . . . . . . . . . . . . . . . . . . . . . . . . . . . . . . . . . 8-148-8 Terminal Assignments of the Terminal Blockfor One-Conductor Connection . . . . . . . . . . . . . . . . . . . . . . . . . . . . . . . . . . . . 8-148-9 Connection Notes for <strong>SIMATIC</strong> TOP connectwith Three-Conductor Connection . . . . . . . . . . . . . . . . . . . . . . . . . . . . . . . . . 8-168-10 Terminal Assignments of the Terminal Blockfor Three-Conductor Connection . . . . . . . . . . . . . . . . . . . . . . . . . . . . . . . . . . 8-168-11 Connection Notes for <strong>SIMATIC</strong> TOP connect with 2A <strong>Module</strong> Connection 8-188-12 Terminal Assignments of the Terminal Block for 2A <strong>Module</strong>s . . . . . . . . . . . 8-188-13 Components for <strong>SIMATIC</strong> TOP connect TPA . . . . . . . . . . . . . . . . . . . . . . . 8-208-14 Terminal Assignment of the Terminal Blockof <strong>SIMATIC</strong> TOP connect TPA . . . . . . . . . . . . . . . . . . . . . . . . . . . . . . . . . . . . 8-21A-1 SFCs for assigning Parameters to Signal <strong>Module</strong>s . . . . . . . . . . . . . . . . . . A-2A-2 Parameters of the Digital Input <strong>Module</strong>s . . . . . . . . . . . . . . . . . . . . . . . . . . . A-3A-3 Parameters of the Digital Output <strong>Module</strong>s . . . . . . . . . . . . . . . . . . . . . . . . . . A-5A-4 Parameters of the Analog Input <strong>Module</strong>s . . . . . . . . . . . . . . . . . . . . . . . . . . . A-7A-5 Codes for Interference Suppression of the Analog Input <strong>Module</strong>s . . . . . . A-9A-6 Codes for the Measuring Ranges of the Analog Input <strong>Module</strong>s . . . . . . . . A-9A-7 Parameters of the SM 331; AI 8 x RTD . . . . . . . . . . . . . . . . . . . . . . . . . . . . A-11A-8 Codes of Operating Modes of the SM 331; AI 8 x RTD . . . . . . . . . . . . . . . A-16A-9 Interference Frequency Suppression Codes for SM 331; AI 8 x RTD . . . A-16A-10 Codes for the Measuring Ranges of the SM 331; AI 8 x RTD . . . . . . . . . A-16A-11 Codes of Temperature Coefficients of the SM 331; AI 8 x RTD . . . . . . . . A-18A-12 Codes Smoothing of the SM 331; AI 8 x RTD . . . . . . . . . . . . . . . . . . . . . . . A-18xxvi<strong>Programmable</strong> <strong>Logic</strong> <strong>Controllers</strong> <strong>S7</strong>-<strong>300</strong> <strong>Module</strong> <strong>Data</strong>A5E00105505-03
ContentsA-13 Parameters of the SM 331; AI 8 x TC . . . . . . . . . . . . . . . . . . . . . . . . . . . . . . A-19A-14 Codes of Operating Modes of the SM 331; AI 8 x TC . . . . . . . . . . . . . . . . . A-24A-15 Interference Frequency Suppression Codes for SM 331; AI 8 x TC . . . . . A-24A-16 Codes for the Measuring Ranges of the SM 331; AI 8 x TC . . . . . . . . . . . A-25A-17 Codes of Reaction to Open Thermocouple of the SM 331; AI 8 x TC . . . A-26A-18 Codes Smoothing of the SM 331; AI 8 x TC . . . . . . . . . . . . . . . . . . . . . . . . . A-26A-19 Codes for temperature measurement of the analog input module . . . . . . A-28A-20 Codes for Interference Suppression of the Analog Input <strong>Module</strong> . . . . . . . A-28A-21 Codes for the Measuring Ranges of the Analog Input <strong>Module</strong> . . . . . . . . . A-28A-22 Codes for temperature measurement of the analog input module . . . . . . A-29A-23 Parameters for the isolated analog input module SM 331; AI 8 x 16 bits . A-30A-24 Codes for the modes of SM 331; AI 8 x 16 bits . . . . . . . . . . . . . . . . . . . . . . A-35A-25 Codes for interference frequency suppression of the SM 331;AI 8 x 16 bits . . . . . . . . . . . . . . . . . . . . . . . . . . . . . . . . . . . . . . . . . . . . . . . . . . . A-35A-26 Codes for the measuring ranges of the SM 331; AI 8 x16 bits . . . . . . . . . A-35A-27 Codes for the smoothing mode settings of the SM 331; AI 8 x 16 bits . . A-36A-28 Parameters of the Analog Output <strong>Module</strong>s . . . . . . . . . . . . . . . . . . . . . . . . . A-36A-29 Codes for the Output Ranges of the Analog Output <strong>Module</strong>s . . . . . . . . . . A-38A-30 Parameters of the SM 332; AO 8 x 12 bits. . . . . . . . . . . . . . . . . . . . . . . . . . A-39A-31 Codes for the output ranges of the analog output module SM332;AO 8 x 12 bits . . . . . . . . . . . . . . . . . . . . . . . . . . . . . . . . . . . . . . . . . . . . . . . . . . A-41A-32 Parameters of the Analog Input/Output <strong>Module</strong>s . . . . . . . . . . . . . . . . . . . . A-41A-33 Codes for the Measuring Ranges of the Analog Input/Output <strong>Module</strong>s . . A-43A-34 Codes for the Output Ranges of the Analog Input/Output <strong>Module</strong>s . . . . . A-43B-1 Codes of the <strong>Module</strong> Types . . . . . . . . . . . . . . . . . . . . . . . . . . . . . . . . . . . . . . B-2D-1 Accessories and Spare Parts . . . . . . . . . . . . . . . . . . . . . . . . . . . . . . . . . . . . . D-1<strong>Programmable</strong> <strong>Logic</strong> <strong>Controllers</strong> <strong>S7</strong>-<strong>300</strong> <strong>Module</strong> <strong>Data</strong>A5E00105505-03xxvii
Contentsxxviii<strong>Programmable</strong> <strong>Logic</strong> <strong>Controllers</strong> <strong>S7</strong>-<strong>300</strong> <strong>Module</strong> <strong>Data</strong>A5E00105505-03
General Technical Specifications1What are general technical specifications?General technical specifications include the following:• the standards and test values which the modules of the <strong>S7</strong>-<strong>300</strong> programmablelogic controller maintain and satisfy• the test criteria to which the <strong>S7</strong>-<strong>300</strong> modules were tested.In this chapterSection Contents Page1.1 Standards and Approvals 1-21.2 Electromagnetic Compatibility 1-61.3 Shipping and Storage Conditions for <strong>Module</strong>s and BackupBatteries1.4 Mechanical and Climatic Environmental Conditions for Operating<strong>S7</strong>-<strong>300</strong>s1.5 Information on Insulation Tests, Protection Class and Degree ofProtection1-81-91-121.6 Rated Voltages of the <strong>S7</strong>-<strong>300</strong> 1-131.7 SIPLUS <strong>S7</strong>-<strong>300</strong> <strong>Module</strong>s 1-141.8 Mechanical and Climatic Ambient Conditions for the Operation ofSIPLUS <strong>S7</strong>-<strong>300</strong> <strong>Module</strong>s1.9 Use of the ET 200M / <strong>S7</strong>-<strong>300</strong> in a Zone 2 Potentially ExplosiveArea1-161-17<strong>Programmable</strong> <strong>Logic</strong> <strong>Controllers</strong> <strong>S7</strong>-<strong>300</strong> <strong>Module</strong> <strong>Data</strong>A5E00105505-031-1
General Technical Specifications1.1 Standards and ApprovalsCE approvalThe <strong>S7</strong>-<strong>300</strong> programmable logic controller meets the requirements andsafety-related requirements of the following EU directives and conforms with theharmonized European standards (EN) for programmable controllers announced inthe Official Journals of the European Community:• 73/23/EEC “Electrical Equipment Designed for Use between Certain VoltageLimits” (Low-Voltage Directive)• 89/336/EEC “Electromagnetic Compatibility” (EMC Directive)• 94/9/EU “Devices and protection systems for use as prescribed in potentiallyexplosive areas” (Guidelines for Explosion Protection)The declarations of conformity are heldat the disposal of the competent authorities at the address below:Siemens AktiengesellschaftBereich Automatisierungs- und AntriebstechnikA&D AS RD4Postfach 1963D-92209 Amberg1-2<strong>Programmable</strong> <strong>Logic</strong> <strong>Controllers</strong> <strong>S7</strong>-<strong>300</strong> <strong>Module</strong> <strong>Data</strong>A5E00105505-03
General Technical SpecificationsUL approvalUnderwriters Laboratories Inc. in accordance with• UL 508 (Industrial Control Equipment)CSA approvalCanadian Standards Association in accordance with• C22.2 No. 142 (Process Control Equipment)orUnderwriters Laboratories Inc. in accordance with UL 508 (Industrial Control Equipment) CSA C22.2 No. 142 (Process Control Equipment)orUnderwriters Laboratories Inc. in accordance with UL 508 (Industrial Control Equipment)HAZ. LOC. CSA C22.2 No. 142 (Process Control Equipment) UL 1604 (Hazardous Location) CSA-213 (Hazardous Location)APPROVED for use inClass I, Division 2, Group A, B, C, D Tx;Class I, Zone 2, Group IIC TxNoteThe currently applicable approvals can be found on the nameplate of the particularmodule.<strong>Programmable</strong> <strong>Logic</strong> <strong>Controllers</strong> <strong>S7</strong>-<strong>300</strong> <strong>Module</strong> <strong>Data</strong>A5E00105505-031-3
General Technical SpecificationsFM approvalFactory Mutual Research (FM) in accordance withApproval Standard Class Number 3611, 3600, 3810APPROVED for use inClass I, Division 2, Group A, B, C, D Tx;Class I, Zone 2, Group IIC Txin accordance with EN 50021 (Electrical apparatus for potentially explosiveatmospheres; Type of protection “n”)II 3 G EEx nA II T4..T5Identification for AustraliaThe <strong>S7</strong>-<strong>300</strong> programmable logic controller meets the requirements of standardAS/NZS 2064 (Class A).IEC 61131The <strong>S7</strong>-<strong>300</strong> programmable logic controller meets the requirements and criteria ofstandard IEC 61131-2 (<strong>Programmable</strong> <strong>Controllers</strong>, Part 2: EquipmentRequirements and Tests).Shipbuilding approvalClassification Societies:• ABS (American Bureau of Shipping)• BV (Bureau Veritas)• DNV (Det Norske Veritas)• GL (Germanischer Lloyd)• LRS (Lloyds Register of Shipping)• Class NK (Nippon Kaiji Kyokai)1-4<strong>Programmable</strong> <strong>Logic</strong> <strong>Controllers</strong> <strong>S7</strong>-<strong>300</strong> <strong>Module</strong> <strong>Data</strong>A5E00105505-03
General Technical SpecificationsUse in an industrial environment<strong>SIMATIC</strong> products have been designed for use in an industrial environment.Table 1-1Use in an Industrial EnvironmentEMC DirectiveRequirements in respect of:Emitted interference ImmunityIndustry EN 61000-6-4: 2001 EN 61000-6-2: 2001Use in residential environmentsIf you operate an <strong>S7</strong>-<strong>300</strong> in a residential area, you must ensure Limit Value ClassB in accordance with EN 55011 to guard against radio interference emissions.Suitable measures to achieve interference suppression according to Limit ValueClass B:• installation of the <strong>S7</strong>-<strong>300</strong> in grounded cabinets and control boxes• use of filters in supply lines!WarningPersonal injury or property damage can result.In areas subject to danger of explosion, personal injury or property damage canresult if you withdraw connectors while an <strong>S7</strong>-<strong>300</strong> is in operation.Always isolate the <strong>S7</strong>-<strong>300</strong> in areas subject to danger of explosion beforewithdrawing connectors.<strong>Programmable</strong> <strong>Logic</strong> <strong>Controllers</strong> <strong>S7</strong>-<strong>300</strong> <strong>Module</strong> <strong>Data</strong>A5E00105505-031-5
General Technical Specifications1.2 Electromagnetic CompatibilityIntroductionIn this section you will find details of the noise immunity of <strong>S7</strong>-<strong>300</strong> modules anddetails of radio interference suppression.The <strong>S7</strong>-<strong>300</strong> modules satisfy, among other things, the requirements of the lawapplicable to EMC on the European domestic market.Definition of “EMC”Electromagnetic compatibility (EMC) is the ability of an electrical installation tofunction satisfactorily in its electromagnetic environment without interfering withthat environment.Pulse-shaped interferenceThe following table shows the electromagnetic compatibility of modules comparedto pulse-shaped disturbance variables. A requirement for this is that the <strong>S7</strong>-<strong>300</strong>system complies with the specifications and directives on electric design.Table 1-2Pulse-Shaped InterferencePulse-Shaped Interference Tested with Satisfiesdegree ofseverityElectrostatic dischargeaccording to IEC 61000-4-2Bursts (fast transient bursts) toIEC 61000-4-4Discharge in air:8 kVContact discharge: 4 kV2 kV (supply cable)2 kV (signal cable > 3 m)1 kV (signal cable < 3 m)Energy-rich single impulse (surge) according to IEC 61000-4-5External protective circuit required (refer to the manual<strong>S7</strong>-<strong>300</strong> <strong>Programmable</strong> <strong>Logic</strong> Controller, Hardware and Installation,Chapter “Lightning Protection and Overvoltage Protection”)• Asymmetrical coupling 2 kV (supply cable)Direct voltage with protectiveelements2 kV (signal/data cable only > 3 m) possiblywith protection elements• Symmetrical coupling 1 kV (supply cable)Direct voltage with protectionelements1 kV (signal line only > 3 m)possibly with protection elements3331-6<strong>Programmable</strong> <strong>Logic</strong> <strong>Controllers</strong> <strong>S7</strong>-<strong>300</strong> <strong>Module</strong> <strong>Data</strong>A5E00105505-03
General Technical SpecificationsAdditional measuresIf you want to connect an <strong>S7</strong>-<strong>300</strong> system to the public network, you must ensureLimit Value Class B in accordance with EN 55022.Sinusoidal interferenceThe table below shows the EMC behavior of the <strong>S7</strong>-<strong>300</strong> modules with regard tosinusoidal disturbance variables.Table 1-3Sinusoidal InterferenceSinusoidal Interference Test values Satisfiesdegree ofseverityHF irradiation (electromagnetic fields)according to IEC 61000-4-3according to IEC 61000-4-3HF conductance on cables and cableshields according to IEC 61000-4-610 V/m with 80% amplitude modulation of 1 kHzover the range from 80 MHz to 1000 MHz10 V/m with 50% pulse modulation at 900 MHzTest voltage 10 V with 80% amplitude modulationof 1 kHz over the range from 9 MHz to80 MHz33Emission of radio interferenceInterference emission of electromagnetic fields in accordance with EN 55011: Limitvalue class A, Group 1.From 30 to 230 MHzFrom 230 to 1000 MHzMeasured at a distance of 10 m (98.4 ft.)< 40 dB (V/m)Q< 47 dB (V/m)QInterference emission via the mains AC power supply in accordance withEN 55011: Limit value class A, Group 1.From 0.15 to 0.5 MHzFrom 0.5 to 5 MHzFrom 5 to 30 MHz< 79 dB (V)Q< 66 dB (V)M< 73 dB (V)Q< 60 dB (V)M< 73 dB (V)Q< 60 dB (V)M<strong>Programmable</strong> <strong>Logic</strong> <strong>Controllers</strong> <strong>S7</strong>-<strong>300</strong> <strong>Module</strong> <strong>Data</strong>A5E00105505-031-7
General Technical Specifications1.3 Shipping and Storage Conditions for <strong>Module</strong>s and BackupBatteriesShipping and storage of modules<strong>S7</strong>-<strong>300</strong> modules surpass the requirements of IEC 61131-2, in respect of shippingand storage requirements. The following details apply to modules shipped and/orstored in their original packing.Climatic conditions correspond to IEC 60721-3-3, Class 3K7 for storage and IEC60721-3-2, Class 2K4 for transportation.Mechanical conditions correspond to IEC 60721-3-2, Class 2M2.Table 1-4Shipping and Storage Conditions for <strong>Module</strong>sConditionFree fall (in shipping packing)TemperatureAtmospheric pressureRelative humiditySinusoidal oscillationsto IEC 60068-2-6Shock according to IEC 60068-2-29Permitted range 1mfrom – 40 C to + 70C1080 to 660 hPa (corresponding to analtitude of –1000 to 3500 m)10 to 95 %, no condensation5 – 9 Hz: 3.5 mm9 – 150 Hz: 9.8 m/s 2250 m/s 2 , 6 ms, 1000 shocksTransporting backup batteriesWherever possible, transport backup batteries in their original packing. Specialapproval does not have to be obtained for transporting backup batteries for <strong>S7</strong>-<strong>300</strong>systems. The lithium content of the backup battery is approximately 0.25 g.1-8<strong>Programmable</strong> <strong>Logic</strong> <strong>Controllers</strong> <strong>S7</strong>-<strong>300</strong> <strong>Module</strong> <strong>Data</strong>A5E00105505-03
General Technical SpecificationsStoring backup batteriesBackup batteries must be stored in a cool and dry place. The maximum shelf life is5 years.!WarningImproper handling of backup batteries can result in injury and damage to property.If backup batteries are not treated properly, they can explode and cause severeburning.Observe the following rules when handling backup batteries used in the <strong>S7</strong>-<strong>300</strong>programmable logic controller:• never charge them• never heat them• never throw them in the fire• never damage them mechanically (drill, squeeze, etc.)1.4 Mechanical and Climatic Environmental Conditions forOperating <strong>S7</strong>-<strong>300</strong>sOperating conditions<strong>S7</strong>-<strong>300</strong> systems are intended for stationary use in locations protected against theweather. The operating conditions surpass the requirements of DIN IEC 60721-3-3.• Class 3M3 (mechanical requirements)• Class 3K3 (climatic requirements)Use with additional measuresThe <strong>S7</strong>-<strong>300</strong>, for example, must not be used without taking additional measures:• in locations exposed to a high degree of ionizing radiation• in hostile environments caused, for instance, by– dust accumulation– corrosive vapors or gases– strong electric or magnetic fields• in installations requiring special monitoring, for example– elevators– electrical installations in particularly hazardous areasAn additional measure might be, for instance, installation of the <strong>S7</strong>-<strong>300</strong> in a cabinetor in a housing.<strong>Programmable</strong> <strong>Logic</strong> <strong>Controllers</strong> <strong>S7</strong>-<strong>300</strong> <strong>Module</strong> <strong>Data</strong>A5E00105505-031-9
General Technical SpecificationsAmbient mechanical conditionsThe ambient mechanical conditions for <strong>S7</strong>-<strong>300</strong> modules are listed in the followingtable in the form of sinusoidal oscillations.Table 1-5Mechanical ConditionsFrequency Rangein HzContinuousOccasional10 f 58 0.0375 mm amplitude 0.075 mm amplitude58 f 150 0.5 g constant acceleration 1 g constant accelerationReducing vibrationsIf your <strong>S7</strong>-<strong>300</strong> modules are exposed to severe shock and/or vibrations, you musttake the appropriate measures to reduce the acceleration and/or amplitude,respectively.We recommend that you install the <strong>S7</strong>-<strong>300</strong> on vibration-damping materials(for example, rubber-metal antivibration mountings).Ambient mechanical conditions testThe following table contains important information on the type and scope of testsfor ambient mechanical conditions.Table 1-6Ambient Mechanical Conditions TestTest ... Test Standard RemarksVibrationsShockVibration test accordingto IEC 60068Part 2-6 (sinusoidal)Shock test toIEC 60068, Part 2-29Type of oscillation: frequency sweeps with a rate ofchange of 1 octave/minute.10 Hz f 58 Hz, constant amplitude of0.075 mm58 Hz f 150 Hz, constant acceleration of 1 gDuration of oscillation: 10 frequency sweeps peraxis in each of three axes perpendicular to eachotherType of shock: half-sineSeverity of shock: 15 g peak value, 11 ms durationDirection of shock: 3 shocks each in the +/– directionin each of three axes perpendicular to eachother1-10<strong>Programmable</strong> <strong>Logic</strong> <strong>Controllers</strong> <strong>S7</strong>-<strong>300</strong> <strong>Module</strong> <strong>Data</strong>A5E00105505-03
General Technical SpecificationsClimatic conditionsYou can use <strong>S7</strong>-<strong>300</strong>s under the following climatic conditions:Table 1-7Climatic ConditionsClimatic Conditions Permitted range RemarksTemperature:horizontal installation:vertical installation:from 0 to 60Cfrom 0 to 40CRelative humidity 10 to 95 % Non-condensing, correspondsto relative humidity(RH) Class 2 accordingto IEC 61131, Part 2Atmospheric pressure 1080 to 795 hPa Corresponding to an altitudeof –1000 to 2000 mConcentration of contaminantsSO 2 : < 0.5 ppm;RH < 60 %, non-condensingH 2 S: < 0.1 ppm;RH < 60 %, non-condensing–Test: 10 ppm; 4 daysTest: 1 ppm; 4 days<strong>Programmable</strong> <strong>Logic</strong> <strong>Controllers</strong> <strong>S7</strong>-<strong>300</strong> <strong>Module</strong> <strong>Data</strong>A5E00105505-031-11
General Technical Specifications1.5 Information on Insulation Tests, Protection Class and Degree ofProtectionTest voltagesInsulation stability must be demonstrated in the type test with the following testvoltages in accordance with IEC 61131-2:Table 1-8Test VoltagesCircuits with rated voltage U e to othercircuits or to groundTest Voltage< 50 V 500 VDC< 150 V 2500 VDC< 250 V DC 4000 VProtection classProtection Class I according to IEC 60536 – in other words, protective conductorconnection to rail necessaryProtection against ingress of foreign bodies and waterDegree of protection IP 20 according to IEC 60529, that is, protection againstcontact with standard probes.There is no special protection against the ingress of water.1-12<strong>Programmable</strong> <strong>Logic</strong> <strong>Controllers</strong> <strong>S7</strong>-<strong>300</strong> <strong>Module</strong> <strong>Data</strong>A5E00105505-03
General Technical Specifications1.6 Rated Voltages of the <strong>S7</strong>-<strong>300</strong>Rated operating voltagesThe modules of the <strong>S7</strong>-<strong>300</strong> operate with different rated voltages. The followingtable contains the rated voltages and the corresponding tolerances.Table 1-9Rated VoltagesRated voltageTolerance Range24 VDC 20.4 to 28.8 VDC120 VAC 93 to 132 VAC230 VAC 187 to 264 VAC<strong>Programmable</strong> <strong>Logic</strong> <strong>Controllers</strong> <strong>S7</strong>-<strong>300</strong> <strong>Module</strong> <strong>Data</strong>A5E00105505-031-13
General Technical Specifications1.7 SIPLUS <strong>S7</strong>-<strong>300</strong> modulesDefinitionSIPLUS <strong>S7</strong>-<strong>300</strong> modules are modules that can be used under extendedenvironmental conditions. Extended environmental conditions mean:• operation possible at temperatures from –25°C to +60°C• occasional, brief condensation permitted• increased mechanical stress permissibleComparison with “standard” modulesThe functional scope and technical specifications for the SIPLUS <strong>S7</strong>-<strong>300</strong> modulesare the same as those of the “standard” modules.The mechanical and climatic environmental conditions as well as their test methodhave changed.The SIPLUS <strong>S7</strong>-<strong>300</strong> modules have their own order numbers (see table 1-10)Project engineering in STEP 7The SIPLUS <strong>S7</strong>-<strong>300</strong> modules are not included in the hardware catalog. Pleasedesign your installation with the corresponding “standard” modules according to thetable 1-10.1-14<strong>Programmable</strong> <strong>Logic</strong> <strong>Controllers</strong> <strong>S7</strong>-<strong>300</strong> <strong>Module</strong> <strong>Data</strong>A5E00105505-03
General Technical SpecificationsSIPLUS <strong>S7</strong>-<strong>300</strong> <strong>Module</strong>sThe following table contains all SIPLUS <strong>S7</strong>-<strong>300</strong> modules.The order numbers of the corresponding “standard” modules have been includedas an aid to configuration. You can refer to the description and technicalspecifications in the special section on the “standard” module.Table 1-10 SIPLUS <strong>S7</strong>-<strong>300</strong> <strong>Module</strong>s<strong>Module</strong>SIPLUS <strong>S7</strong>-<strong>300</strong>-<strong>SIMATIC</strong>module for use underextended environmentalconditionsas of order no.”Standard” modulesIM 153-1 6AG1153-1AA03-2XB0 6E<strong>S7</strong>153-1AA03-0XB0CPU 312CCPU 313CCPU 314CPU 315-2 DP6AG1312-5BD00-2AB06AG1313-5BE00-2AB06AG1314-1AF10-2AB06AG1315-2AG10-2AB06E<strong>S7</strong>312-5BD00-0AB06E<strong>S7</strong>313-5BE00-0AB06E<strong>S7</strong>314-1AF10-0AB06E<strong>S7</strong>315-2AG10-0AB0IM 365 6AG1365-0BA01-2AA0 6E<strong>S7</strong>365-0BA01-0AA0SM 321 digital input module;SM 321; DI 16 x 24VDCSM 321; DI 32 x 24 VDCSM 321; DI 16 x 24 VDCSM 321; DI 16 x 24 V-125 VDCSM 321; DI 8 x 120/230 VACSM 322 digital output module;SM 322; DO 16 x 24 VDC/0.5 ASM 322; DO 8 x Rel. 230 VAC/5 ASM 322, DO 8 x 48-125 VDC/1.5 ASM 322; DO 8 x 120/230 VAC/2 ASM 322; DO 8 x 24 VDC/0.5 A6AG1321-1BH02-2AA06AG1321-1BL00-2AA06AG1321-7BH01-2AB06AG1321-1CH20-2AA06AG1321-1FF01-2AA06AG1322-1BH01-2AA06AG1322-1HF10-2AA06AG1322-1CF00-2AA06AG1322-1FF01-2AA06AG1322-8BF00-2AB06E<strong>S7</strong>321-1BH02-0AA06E<strong>S7</strong>321-1BL00-0AA06E<strong>S7</strong>321-7BH01-0AB06E<strong>S7</strong>321-1CH20-0AA06E<strong>S7</strong>321-1FF01-0AA06E<strong>S7</strong>322-1BH01-0AA06E<strong>S7</strong>322-1HF10-0AA06E<strong>S7</strong>322-1CF00-0AA06E<strong>S7</strong>322-1FF01-0AA06E<strong>S7</strong>322-8BF00-0AB0Digital Input/Output <strong>Module</strong>SM 323; DI8/DO8 x DC 24V/0.5A 6AG1323-1BH01-2AA0 6E<strong>S7</strong>323-1BH01-0AA0Analog input moduleSM 331 analog input module; AI 2 x 12 bits 6AG1331-7KB02-2AB0 6E<strong>S7</strong>331-7KB02-0AB0Analog output moduleSM 332 analog output module; AO 2 x 12bits6AG1332-5HB01-2AB0 6E<strong>S7</strong>332-5HB01-0AB0SM 334 analog I/O module;SM 334; AI4/AO 2 x 12 bits 6AG1334-0KE00-2AB0 6E<strong>S7</strong>334-0KE00-0AB0<strong>Programmable</strong> <strong>Logic</strong> <strong>Controllers</strong> <strong>S7</strong>-<strong>300</strong> <strong>Module</strong> <strong>Data</strong>A5E00105505-031-15
General Technical Specifications1.8 Mechanical and Climatic Ambient Conditions for the Operationof SIPLUS <strong>S7</strong>-<strong>300</strong> <strong>Module</strong>sAmbient mechanical conditionsOperating category: according to IEC 721 3-3, Class 3M4.Ambient mechanical conditions testThe following table contains important information on the type and scope of testsfor ambient mechanical conditions of SIPLUS <strong>S7</strong>-<strong>300</strong> modules.Table 1-11SIPLUS <strong>S7</strong>-<strong>300</strong> <strong>Module</strong>s Ambient Mechanical Conditions TestTest ... Test Standard RemarksVibrationsVibration test according toIEC 6008 Part 2-6 (sinusoidal)Shock Shock test according to IEC 6008Part 2-27Type of oscillation: frequency sweeps with a rate ofchange of1 octave/minute.5 Hz f 9 Hz, constant amplitude of 3.5 mm9 Hz f 150 Hz, constant acceleration of 1 goscillation period: 10 frequency sweeps per axis ineach of three axes perpendicular to each otherType of shock: half-sineseverity of shock: 15 g peak value, 11 ms durationDirection of shock: 3 shocks each in the +/–direction in each of three axes perpendicular toeach other1-16<strong>Programmable</strong> <strong>Logic</strong> <strong>Controllers</strong> <strong>S7</strong>-<strong>300</strong> <strong>Module</strong> <strong>Data</strong>A5E00105505-03
General Technical SpecificationsClimatic conditionsYou can use SIPLUS <strong>S7</strong>-<strong>300</strong> modules under the following climatic conditions:Operating category: according to IEC 721 3-3, Class 3K5.Table 1-12 SIPLUS <strong>S7</strong>-<strong>300</strong> <strong>Module</strong>s Climatic ConditionsAmbient Condition Permitted range RemarksTemperature:horizontal installationvertical installation–25 °C to 60 °C–25 °C to 40 °CRelative humidity From 5 to 95 % Occasional, brief condensation,corresponds to relative humidity (RH) Class2 according to IEC 61131, Part 2Pollutant concentration(according to IEC 721 3-3;class 3C3)SO 2 : < 0.5 ppm;Relative humidity < 60%H 2 S: < 0.1 ppm;Relative humidity < 60%–Test:10 ppm; 4 days1 ppm; 4 days1.9 Use of the ET 200M / <strong>S7</strong>-<strong>300</strong> in a Zone 2 Potentially ExplosiveAreaThe following sections contain important information in the following languages.In this chapterSectionTopic1.9.1 Using the ET 200M / <strong>S7</strong>-<strong>300</strong> in a Zone 2 potentially explosive area1.9.2 Use of the ET 200M / <strong>S7</strong>-<strong>300</strong> in a Zone 2 Hazardous Area1.9.3 Utilisation de l’ET 200M / <strong>S7</strong>-<strong>300</strong> dans un environnement à risque d’explosionen zone 21.9.4 Aplicación del ET 200M / <strong>S7</strong>-<strong>300</strong> en áreas con peligro de explosión, zona 21.9.5 Impiego dell’ET 200M / <strong>S7</strong>-<strong>300</strong> nell’area a pericolo di esplosione zona 21.9.6 Gebruik van de ET 200M / <strong>S7</strong>-<strong>300</strong> in het explosieve gebied zone 21.9.7 Brug af ET 200M / <strong>S7</strong>-<strong>300</strong> i det eksplosionsfarlige område zone 21.9.8 ET 200M / <strong>S7</strong>-<strong>300</strong>:n käyttö räjähdysvaarannetuilla alueilla, vyöhyke 21.9.9 Användning av ET 200M / <strong>S7</strong>-<strong>300</strong> i explosionsriskområde zon 21.9.10 Uso do ET 200M / <strong>S7</strong>-<strong>300</strong> em área exposta ao perigo de explosão, zona 21.9.11 p ET 200M / S <strong>Programmable</strong> <strong>Logic</strong> <strong>Controllers</strong> <strong>S7</strong>-<strong>300</strong> <strong>Module</strong> <strong>Data</strong>A5E00105505-031-17
General Technical Specifications1.9.1 Einsatz der ET 200M / <strong>S7</strong>-<strong>300</strong> im explosionsgefährdeten BereichZone 2Zone 2Explosionsgefährdete Bereiche werden in Zonen eingeteilt. Die Zonen werdennach der Wahrscheinlichkeit des Vorhandenseins einer explosionsfähigenAtmosphäre unterschieden.Zone Explosionsgefahr Beispiel2 explosive Gasatmosphäre trittnur selten und kurzzeitig aufsichererBereichBereiche um Flanschverbindungen mitFlachdichtungen bei Rohrleitungen ingeschlossenen Räumennein • außerhalb der Zone 2• Standardanwendungen von dezentralerPeripherieNachfolgend finden Sie wichtige Hinweise für die Installation des DezentralenPeripheriegerätes ET 200M und der <strong>SIMATIC</strong> <strong>S7</strong>-<strong>300</strong> im explosionsgefährdetenBereich.Weitere InformationenWeitere Informationen zum ET 200M und zu den verschiedenen <strong>S7</strong>-<strong>300</strong>-Baugruppen finden Sie im Handbuch.FertigungsortSiemens AG, Bereich A&DWerner-von-Siemens-Straße 5092224 AmbergGermanyZulassungII 3 G EEx nA II T3 .. T6 nach EN 50021 : 1999Prüfnummer:KEMA 02ATEX1096 XHinweisBaugruppen mit der Zulassung II 3 G EEx nA II T3 .. T6 dürfen nur inAutomatisierungssysteme <strong>SIMATIC</strong> <strong>S7</strong>-<strong>300</strong> / ET 200M der Gerätekategorie 3eingesetzt werden.<strong>Programmable</strong> <strong>Logic</strong> <strong>Controllers</strong> <strong>S7</strong>-<strong>300</strong> <strong>Module</strong> <strong>Data</strong>A5E00105505-03 18
General Technical SpecificationsInstandhaltungFür eine Reparatur muss die betroffene Baugruppe an den Fertigungsort geschicktwerden. Nur dort darf die Reparatur durchgeführt werden.Besondere Bedingungen1. Das Dezentrale Peripheriegerät ET 200M und die <strong>SIMATIC</strong> <strong>S7</strong>-<strong>300</strong> müssen ineinen Schaltschrank oder ein metallisches Gehäuse eingebaut werden. Diesemüssen mindestens die Schutzart IP 54 (nach EN 60529) gewährleisten. Dabeisind die Umgebungsbedingungen zu berücksichtigen, in denen das Gerätinstalliert wird. Für das Gehäuse muss eine Herstellererklärung für Zone 2vorliegen (gemäß EN 50021).2. Wenn am Kabel bzw. an der Kabeleinführung dieses Gehäuses unter Betriebsbedingungeneine Temperatur > 70 °C erreicht wird oder wenn unter Betriebsbedingungendie Temperatur an der Aderverzweigung > 80 °C sein kann,müssen die Temperatureigenschaften der Kabel mit den tatsächlichgemessenen Temperaturen übereinstimmen.3. Die eingesetzten Kabeleinführungen müssen der geforderten IP-Schutzart unddem Abschnitt 7.2 (gemäß EN 50021) entsprechen.4. Alle Geräte, einschließlich Schalter etc., die an den Ein- und Ausgängen vonET 200M- und <strong>S7</strong>-<strong>300</strong>-Systemen angeschlossen werden, müssen für denExplosionsschutz Typ EEx nA oder EEx nC genehmigt sein.5. Es müssen Maßnahmen getroffen werden, dass die Nennspannung durchTransienten um nicht mehr als 40 % überschritten werden kann.6. Umgebungstemperaturbereich: 0° C bis 60° C7. Innerhalb des Gehäuses ist an einem nach dem Öffnen gut sichtbaren Platz einSchild mit folgender Warnung anzubringen:WarnungDas Gehäuse darf nur kurze Zeit geöffnet werden, z. B. für visuelle Diagnose.Betätigen Sie dabei keine Schalter, ziehen oder stecken keine Baugruppen undtrennen keine elektrischen Leitungen (Steckverbindungen).Diese Warnung kann unberücksichtigt bleiben, wenn bekannt ist, dass keineexplosionsgefährdete Atmosphäre herrscht.Liste der zugelassenen BaugruppenDie Liste mit den zugelassenen Baugruppen finden Sie im Internet:http://www4.ad.siemens.de/view/cs/unter der Beitrags-ID 13702947<strong>Programmable</strong> <strong>Logic</strong> <strong>Controllers</strong> <strong>S7</strong>-<strong>300</strong> <strong>Module</strong> <strong>Data</strong>A5E00105505-03 1-19
General Technical Specifications1.9.2 Use of the ET 200M / <strong>S7</strong>-<strong>300</strong> in a Zone 2 Hazardous AreaZone 2Hazardous areas are divided up into zones. The zones are distinguished accordingto the probability of the existence of an explosive atmosphere.Zone Explosion Hazard Example2 Explosive gas atmosphereoccurs only seldom and for ashort timeAreas around flange joints with flatgaskets in pipes in enclosed spacesSafe area No • Outside zone 2• Standard distributed I/O applicationsBelow you will find important information on the installation of the ET 200Mdistributed I/O device and the <strong>SIMATIC</strong> <strong>S7</strong>-<strong>300</strong> in a hazardous area.Further InformationYou will find further information on the ET 200M and the various <strong>S7</strong>-<strong>300</strong> modulesin the manual.Production LocationSiemens AG, Bereich A&DWerner-von-Siemens-Straße 5092224 AmbergGermanyCertificationII 3 G EEx nA II T3 .. T6 to EN 50021 : 1999Test number:KEMA 02ATEX1096 XNote<strong>Module</strong>s with II 3 G EEx nA II T3 .. T6 certification can only be used in<strong>SIMATIC</strong> <strong>S7</strong>-<strong>300</strong>/ET 200M automation systems belonging to equipmentcategory 3.<strong>Programmable</strong> <strong>Logic</strong> <strong>Controllers</strong> <strong>S7</strong>-<strong>300</strong> <strong>Module</strong> <strong>Data</strong>1-20 A5E00105505-03
General Technical SpecificationsMaintenanceIf repair is necessary, the affected module must be sent to the production location.Repairs can only be carried there.Special Conditions1. The ET 200M distributed I/O device and the <strong>SIMATIC</strong> <strong>S7</strong>-<strong>300</strong> must be installedin a cabinet or metal housing. These must comply with the IP 54 degree ofprotection as a minimum. The environmental conditions under which theequipment is installed must be taken into account. There must be amanufacturer's declaration for zone 2 available for the housing (in accordancewith EN 50021).2. If a temperature of > 70 °C is reached in the cable or at the cable entry of thishousing under operating conditions, or if a temperature of > 80 °C can bereached at the junction of the conductors under operating conditions, thetemperature-related properties of the cables must correspond to thetemperatures actually measured.3. The cable entries used must comply with the required IP degree of protectionand Section 7.2 (in accordance with EN 50021).4. All devices (including switches, etc.) that are connected to the inputs andoutputs of fail-safe signal modules must be approved for EEx nA or EEx nCexplosion protection.5. Steps must be taken to ensure that the rated voltage through transients cannotbe exceeded by more than 40 %.6. Ambient temperature range: 0° C to 60° C7. A sign containing the following warning must be put up inside the housing in aneasily visible position when the housing is opened:WarningThe housing can only be opened for a short time (e.g. for visual diagnostics). Ifyou do this, do not operate any switches, remove or install any modules ordisconnect any electrical cables (plug-in connections).You can disregard this warning if you know that the atmosphere is nothazardous (i.e. there is no risk of explosion).List of Approved <strong>Module</strong>sYou will find the list of approved modules under the ID 13702947 on the Internet:http://www4.ad.siemens.de/view/cs/.<strong>Programmable</strong> <strong>Logic</strong> <strong>Controllers</strong> <strong>S7</strong>-<strong>300</strong> <strong>Module</strong> <strong>Data</strong>A5E00105505-03 1-21
General Technical Specifications1.9.3 Utilisation de l'ET 200M / <strong>S7</strong>-<strong>300</strong> dans un environnement àrisque d'explosion en zone 2Zone 2Les environnements à risque d'explosion sont répartis en zones. Les zones sedistinguent par la probabilité de présence d'une atmosphère explosive.Zone Risque d'explosion Exemple2 Formation rare et brève d'uneatmosphère gazeuse explosiveEnvironnement de raccords à joints platsdans le cas de conduites dans des locauxfermésZone sûre Non • A l'extérieur de la zone 2• Utilisation standard de périphériedécentraliséeVous trouverez ci-après des remarques importantes pour l'installation de la stationde périphérie décentralisée ET 200M et du <strong>SIMATIC</strong> <strong>S7</strong>-<strong>300</strong> dans unenvironnement présentant un risque d'explosion.Informations complémentairesDes informations complémentaires sur l'ET 200M et les divers modules <strong>S7</strong>-<strong>300</strong> setrouvent dans le manuel.Lieu de productionSiemens AG, Bereich A&DWerner-von-Siemens-Straße 5092224 AmbergGermanyHomologationII 3 G EEx nA II T3 .. T6 selon EN 50021 : 1999Numéro de contrôle :KEMA 02ATEX1096 XNotaLes modules homologués II 3 G EEx nA II T3 .. T6 ne peuvent être utilisésque dans des automates <strong>SIMATIC</strong> <strong>S7</strong>-<strong>300</strong> / ET 200M de catégorie 3.<strong>Programmable</strong> <strong>Logic</strong> <strong>Controllers</strong> <strong>S7</strong>-<strong>300</strong> <strong>Module</strong> <strong>Data</strong>1-22 A5E00105505-03
General Technical SpecificationsEntretienSi une réparation est nécessaire, le module concerné doit être expédié au lieu deproduction. La réparation ne doit être effectuée qu'en ce lieu.Conditions particulières1. La station de périphérie décentralisée ET 200M et le <strong>SIMATIC</strong> <strong>S7</strong>-<strong>300</strong> doiventêtre installés dans une armoire ou un boîtier métallique. Ceux-ci doivent assurerau moins l'indice de protection IP 54. Il faut alors tenir compte des conditionsd'environnement dans lesquelles l'appareil est installé. Le boîtier doit fairel’objet d’une déclaration de conformité du fabricant pour la zone 2 (selonEN 50021).2. Si dans les conditions d’exploitation, une température > 70 °C est atteinte auniveau du câble ou de l’entrée du câble dans ce boîtier, ou bien si latempérature au niveau de la dérivation des conducteurs peut être > 80 °C, lescapacités de résistance thermique des câbles doivent corespondre auxtempératures effectivement mesurées.3. Les entrées de câbles utilisées doivent avoir le niveau de protection IP exigé etêtre conformes au paragraphe 7.2 (selon EN 50021).4. Tous les appareillages (y compris les interrupteurs, etc.) raccordés aux entréeset sorties de modules de signaux à sécurité intrinsèque doivent êtrehomologués pour la protection antidéflagrante type EEx nA ou EEx nC.5. Il faut prendre des mesures pour que la tension nominale ne puisse pas êtredépassée de plus de 40% sous l’influence de transitoires.6. Plage de température ambiante : 0° C à 60° C7. A l’intérieur du boîtier, il faut placer, à un endroit bien visible après ouverture,une plaquette comportant l’avertissement suivant :AvertissementOuvir le boîtier le moins longtemps possible, par exemple pour effectuer undiagnostic visuel. Ce faisant, n’actionnez aucun commutateur, ne déconnectezaucun module et ne débanchez pas de câbles électriques (connexions).Le respect de cet avertissement n’est pas impératif s’il est certain quel’environnement ne présente pas de risque d’explosion.Liste des modules homologuésVous trouverez sur Internet la liste des modules homologués :http://www4.ad.siemens.de/view/cs/référence ID 13702947<strong>Programmable</strong> <strong>Logic</strong> <strong>Controllers</strong> <strong>S7</strong>-<strong>300</strong> <strong>Module</strong> <strong>Data</strong>A5E00105505-03 1-23
General Technical Specifications1.9.4 Aplicación de la ET 200M / <strong>S7</strong>-<strong>300</strong> en áreas con peligro deexplosión, zona 2Zona 2Las áreas con peligro de explosión se clasifican en zonas. Las zonas sediferencian según la probabilidad de la existencia de una atmósfera capaz de sufriruna explosión.Zona Peligro de explosión Ejemplo2 La atmósfera explosiva de gassólo se presenta rara vez y muybrevementeÁreas alrededor de uniones abridadas conjuntas planas en tuberías en localescerradosÁrea segura No • fuera de la zona 2• Aplicaciones estándar de la periferiadescentralizadaA continuación encontrará importantes informaciones para la instalación de launidad periférica descentralizada ET 200M y del <strong>SIMATIC</strong> <strong>S7</strong>-<strong>300</strong> en áreas conpeligro de explosión.Otras informacionesEncontrará otras informaciones relativas a la ET 200S y a los distintos módulos<strong>S7</strong>-<strong>300</strong> en el Manual.Lugar de fabricaciónSiemens AG, Bereich A&DWerner-von-Siemens-Straße 5092224 AmbergGermanyHomologaciónII 3 G EEx nA II T3 .. T6 según norma EN 50021 : 1999Número de comprobación: KEMA 02ATEX1096 XNotaLos módulos con la homologación II 3 G EEx nA II T3 .. T6 puedenutilizarse únicamente en los autómatas programables <strong>SIMATIC</strong> <strong>S7</strong>-<strong>300</strong> / ET 200Mde la categoría de equipo 3.<strong>Programmable</strong> <strong>Logic</strong> <strong>Controllers</strong> <strong>S7</strong>-<strong>300</strong> <strong>Module</strong> <strong>Data</strong>1-24 A5E00105505-03
General Technical SpecificationsMantenimientoPara una reparación se ha de remitir el módulo afectado al lugar de fabricación.Sólo allí se puede realizar la reparación.Condiciones especiales1. La unidad periférica descentralizada ET 200M y el <strong>SIMATIC</strong> <strong>S7</strong>-<strong>300</strong> se han demontar en un armario eléctrico de distribución o en una carcasa metálica. Éstosdeben garantizar como mínimo el grado de protección IP 54. Para ello se hande tener en cuenta las condiciones ambientales, en las cuales se instala elequipo. La caja deberá contar con una declaración del fabricante para la zona 2(conforme a EN 50021).2. Si durante la operación se alcanzara una temperatura > 70° C en el cable o laentrada de cables de esta caja o bien una temperatura > 80° C en labifurcación de hilos, deberán adaptarse las propiedades térmicas de los cablesa las temperaturas medidas efectivamente.3. Las entradas de cable utilizadas deben cumplir el grado de protección IPexigido y lo expuesto en el apartado 7.2 (conforme a EN 50021).4. Todos los dispositivos –inclusive interruptores, etc.– conectados a las entradasy salidas de módulos de señales de alta disponibilidad deben estarhomologados para la protección contra explosiones del tipo EEx nA o EEx nC.5. Es necesario adoptar las medidas necesarias para evitar que la tensiónnominal pueda rebasar en más del 40 % debido a efectos transitorios.6. Margen de temperatura ambiente: 0° C hasta 60° C7. Dentro de la caja deberá colocarse en un lugar perfectamente visible tras suapertura un rótulo con la siguiente advertencia:PrecauciónAbrir la caja sólo brevemente, p.ej. para el diagnóstico visual. Durante estetiempo Ud. no deberá activar ningún interruptor, desenchufar o enchufarmódulos ni separar conductores eléctricos (conexiones enchufables).Esta advertencia puede ignorarse si Ud. sabe que en la atmósfera existente nohay peligro de explosión.Lista de los módulos homologadosEn la internet hallará Ud. una lista con los módulos homologados:http://www4.ad.siemens.de/view/cs/bajo el ID de asignación 13702947<strong>Programmable</strong> <strong>Logic</strong> <strong>Controllers</strong> <strong>S7</strong>-<strong>300</strong> <strong>Module</strong> <strong>Data</strong>A5E00105505-03 1-25
General Technical Specifications1.9.5 Impiego dell'ET 200M / <strong>S7</strong>-<strong>300</strong> nell'area a pericolo di esplosionezona 2Zona 2Le aree a pericolo di esplosione vengono suddivise in zone. Le zone vengonodistinte secondo la probabilità della presenza di un'atmosfera esplosiva.Zona Pericolo di esplosione Esempio2 L'atmosfera esplosiva sipresente solo raramente ebrevementeAree intorno a collegamenti a flange conguarnizioni piatte nelle condotte inambienti chiusiArea sicura No • Al di fuori della zona 2• Applicazioni standard di periferiadecentrataQui di seguito sono riportate delle avvertenze importanti per l'installazione dell'unitàdi periferia decentrata ET 200M e del <strong>SIMATIC</strong> <strong>S7</strong>-<strong>300</strong> nell'area a pericolo diesplosione.Ulteriori informazioniUlteriori informazioni sull'ET 200M e sulle diverse unità <strong>S7</strong>-<strong>300</strong> si trovano nelmanuale.Luogo di produzioneSiemens AG, Bereich A&DWerner-von-Siemens-Straße 5092224 AmbergGermanyAutorizzazioneII 3 G EEx nA II T3 .. T6 secondo EN 50021 : 1999Numero di controllo:KEMA 02ATEX1096 XAvvertenzaLe unità con l'autorizzazione II 3 G EEx nA II T3 .. T6 possono essereimpiegate solo nei sistemi di controllori programmabili <strong>SIMATIC</strong> <strong>S7</strong>-<strong>300</strong> /ET 200M della categoria di apparecchiature 3.<strong>Programmable</strong> <strong>Logic</strong> <strong>Controllers</strong> <strong>S7</strong>-<strong>300</strong> <strong>Module</strong> <strong>Data</strong>1-26 A5E00105505-03
General Technical SpecificationsManutenzionePer una riparazione, l'unità interessata deve essere inviata al luogo di produzione.La riparazione può essere effettuata solo lì.Condizioni particolari1. L'unità di periferia decentrata ET 200M e il <strong>SIMATIC</strong> <strong>S7</strong>-<strong>300</strong> devono esseremontati in un armadio elettrico o in un contenitore metallico. Questi devonoassicurare almeno il tipo di protezione IP 54. In questo caso bisogna tenereconto delle condizioni ambientali nelle quali l'apparecchiatura viene installata.Per il contenitore deve essere presente una dichiarazione del costruttore per lazona 2 (secondo EN 50021).2. Se nei cavi o nel loro punto di ingresso in questo contenitore viene raggiunta incondizioni di esercizio una temperatura > 70 °C o se in condizioni di esercizio latemperatura nella derivazione dei fili può essere > 80 °C, le caratteristiche ditemperatura dei cavi devono essere conformi alla temperatura effettivamentemisurata.3. Gli ingressi dei cavi usati devono essere conformi al tipo di protezione richiestoe alla sezione 7.2 (secondo EN 50021).4. Tutte le apparecchiature, inclusi interruttori, ecc. che vengono collegati agliingressi/uscite di unità di segnale ad elevata sicurezza, devono essere statiomologati per la protezione da esplosione tipo EEx nA o EEx nC.5. Devono essere prese delle misure per evitare che la tensione nominale possaessere superata per più del 40% da parte di transienti.6. Campo termico ambientale: da 0° C a 60° C7. All’interno del contenitore va apportata, in un luogo ben visibile dopo l’apertura,una targhetta con il seguente avvertimento:AttenzioneIl contenitore può rimanere aperto solo per breve tempo, ad esempio per unadiagnostica a vista. In tal caso non azionare alcun interruttore, non disinnestareo innestare unità e non staccare connessioni elettriche (connettori).Non è necessario tenere conto di questo avvertimento se è noto che non c’èun’atmosfera a rischio di esplosione.Elenco delle unità abilitateLa lista con le unità omologate si trova in Internet al sito:http://www4.ad.siemens.de/view/cs/all’ID di voce 13702947<strong>Programmable</strong> <strong>Logic</strong> <strong>Controllers</strong> <strong>S7</strong>-<strong>300</strong> <strong>Module</strong> <strong>Data</strong>A5E00105505-03 1-27
General Technical Specifications1.9.6 Gebruik van de ET 200M / <strong>S7</strong>-<strong>300</strong> in het explosief gebied zone 2Zone 2Explosieve gebieden worden ingedeeld in zones. Bij de zones wordtonderscheiden volgens de waarschijnlijkheid van de aanwezigheid van eenexplosieve atmosfeer.Zone Explosiegevaar Voorbeeld2 Een explosieve gasatmosfeertreedt maar zelden op en voorkorte duurVeiliggebiedGebieden rond flensverbindingen metpakkingen bij buisleidingen in geslotenvertrekkenNeen • Buiten de zone 2• Standaardtoepassingen van decentraleperiferieHierna vindt u belangrijke aanwijzingen voor de installatie van het decentraleperiferieapparaat ET 200M en van de <strong>SIMATIC</strong> <strong>S7</strong>-<strong>300</strong> in het explosief gebied.Verdere informatieIn het handboek vindt u verdere informatie over de ET 200M en over deverschillende<strong>S7</strong>-<strong>300</strong>-modulen.ProductieplaatsSiemens AG, Bereich A&DWerner-von-Siemens-Strasse 5092224 AmbergGermanyVergunningII 3 G EEx nA II T3 .. T6 conform EN 50021 : 1999Keuringsnummer: KEMA 02ATEX1096 XOpmerking<strong>Module</strong>n met de vergunning II 3 G EEx nA II T3 .. T6 mogen slechts wordengebruikt in automatiseringssystemen <strong>SIMATIC</strong> <strong>S7</strong>-<strong>300</strong> / ET 200M van deapparaatcategorie 3.<strong>Programmable</strong> <strong>Logic</strong> <strong>Controllers</strong> <strong>S7</strong>-<strong>300</strong> <strong>Module</strong> <strong>Data</strong>1-28 A5E00105505-03
General Technical SpecificationsInstandhoudingVoor een reparatie moet de betreffende module naar de plaats van vervaardigingworden gestuurd. Alleen daar mag de reparatie worden uitgevoerd.Speciale voorwaarden1. Het decentrale periferieapparaat ET 200M en de <strong>SIMATIC</strong> <strong>S7</strong>-<strong>300</strong> moetenworden ingebouwd in een schakelkast of in een behuizing van metaal. Dezemoeten minstens de veiligheidsgraad IP 54 waarborgen. Hierbij dient rekeningte worden gehouden met de omgevingsvoorwaarden waarin het apparaat wordtgeïnstalleerd. Voor de behuizing dient een verklaring van de fabrikant voorzone 2 te worden ingediend (volgens EN 50021).2. Als aan de kabel of aan de kabelinvoering van deze behuizing onderbedrijfsomstandigheden een temperatuur wordt bereikt > 70 °C of als onderbedrijfsomstandigheden de temperatuur aan de adervertakking > 80 °C kanzijn, moeten de temperatuureigenschappen van de kabel overeenstemmen metde werkelijk gemeten temperaturen.3. De aangebrachte kabelinvoeringen moeten de vereiste IP-veiligheidsgraadhebben en in overeenstemming zijn met alinea 7.2 (volgens EN 50021).4. Alle apparaten, schakelaars enz. inbegrepen, die worden aangesloten op de inenuitgangen van tegen fouten beveiligde signaalmodulen, moeten zijngoedgekeurd voor de explosiebeveiliging type EEx nA of EEx nC.5. Er dienen maatregelen te worden getroffen, zodat de nominale spanning doortransiënten met niet meer dan 40 % kan worden overschreden.6. Omgevingstemperatuurbereik: 0° C tot 60° C7. Binnen de behuizing dient op een na het openen goed zichtbare plaats eenbord te worden aangebracht met de volgende waarschuwing:WaarschuwingDe behuizing mag slechts voor korte tijd worden geopend, bijv. voor een visuelediagnose. Bedien hierbij geen schakelaar, trek of steek geen modulen enontkoppel geen elektrische leidingen (steekverbindingen).Deze waarschuwing kan buiten beschouwing blijven, indien bekend is dat ergeen explosieve atmosfeer heerst.Lijst van de toegelaten modulenDe lijst met de toegelaten modulen vindt u in het internet:http://www4.ad.siemens.de/view/cs/onder de bijdrage-ID 13702947<strong>Programmable</strong> <strong>Logic</strong> <strong>Controllers</strong> <strong>S7</strong>-<strong>300</strong> <strong>Module</strong> <strong>Data</strong>A5E00105505-03 1-29
General Technical Specifications1.9.7 Brug af ET 200M / <strong>S7</strong>-<strong>300</strong> i det eksplosionfarlige område zone 2Zone 2Eksplosionsfarlige områder inddeles i zoner. Zonerne adskiller sig indbyrdes efterhvor sandsynligt det er, at der er en eksplosiv atmosfære.Zone Eksplosionsfare Eksempel2 Eksplosiv gasatmosfæreoptræder kun sjældent og varerkortSikkertområdeOmråder rundt om flangeforbindelser medflade pakninger ved rørledninger i lukkederumNej • Uden for zone 2• Standardanvendelser decentral periferiI det følgende findes vigtige henvisninger vedr. installation af det decentraleperiferiudstyr ET 200M og <strong>SIMATIC</strong> <strong>S7</strong>-<strong>300</strong> i det eksplosionfarlige område.Yderligere informationerYderligere informationer om ET 200M og de forskellige <strong>S7</strong>-<strong>300</strong>-komponenterfindes i manualen.ProduktionsstedSiemens AG, Bereich A&DWerner-von-Siemens-Straße 5092224 AmbergGermanyGodkendelseII 3 G EEx nA II T3 .. T6 efter EN 50021 : 1999Kontrolnummer:KEMA 02ATEX1096 XBemærkKomponenter med godkendelsen II 3 G EEx nA II T3 .. T6 må kun monteresi automatiseringssystemer <strong>SIMATIC</strong> <strong>S7</strong>-<strong>300</strong> / ET 200M - udstyrskategori 3.<strong>Programmable</strong> <strong>Logic</strong> <strong>Controllers</strong> <strong>S7</strong>-<strong>300</strong> <strong>Module</strong> <strong>Data</strong>1-30 A5E00105505-03
General Technical SpecificationsVedligeholdelseSkal den pågældende komponent repareres, bedes De sende den tilproduktionsstedet. Reparation må kun udføres der.Særlige betingelser1. Det decentrale periferiudstyr ET 200M og <strong>SIMATIC</strong> <strong>S7</strong>-<strong>300</strong> skal monteres i etkontrolskab eller et metalkabinet. Disse skal mindst kunne sikrebeskyttelsesklasse IP 54. I denne forbindelse skal der tages højde for deomgivelsestemperaturer, i hvilke udstyret er installeret. Der skal væreudarbejdet en erklæring fra fabrikanten for kabinettet for zone 2 (iht. EN 50021).2. Hvis kablet eller kabelindføringen på dette hus når op på en temperatur på> 70 °C under driftsbetingelser eller hvis temperaturen på åreforegreningen kanvære > 80 °C under driftsbetingelser, skal kablernes temperaturegenskaberstemme overens med de temperaturer, der rent faktisk måles.3. De benyttede kabelindføringer skal være i overensstemmelse med denkrævede IP-beskyttelsestype og afsnittet 7.2 (iht. EN 50021).4. Alle apparater, inkl. kontakter osv., der forbindes med ind- og udgangene tilfejlsikre signalkomponenter, skal være godkendt til eksplosionsbeskyttelse aftype EEx nA eller EEx nC.5. Der skal træffes foranstaltninger, der sørger for, at den nominelle spænding viatransienter ikke kan overskrides mere end 40 %.6. Omgivelsestemperaturområde: 0° C til 60° C7. I kabinettet skal der anbringes et skilt, der skal kunne ses, når kabinettet åbnes.Dette skilt skal have følgende advarsel:AdvarselKabinettet må kun åbnes i kort tid, f.eks. til visuel diagnose. Tryk i denneforbindelse ikke på kontakter, træk eller isæt ikke komponenter og afbryd ikkeelektriske ledninger (stikforbindelser).Denne advarsel skal der ikke tages højde for, hvis man ved, at der ikke ernogen eksplosionsfarlig atmosfære.Liste over godkendte komponenterListen med de godkendte komponenter findes på internettet:http://www4.ad.siemens.de/view/cs/under bidrags-ID 13702947<strong>Programmable</strong> <strong>Logic</strong> <strong>Controllers</strong> <strong>S7</strong>-<strong>300</strong> <strong>Module</strong> <strong>Data</strong>A5E00105505-03 1-31
General Technical Specifications1.9.8 ET 200M / <strong>S7</strong>-<strong>300</strong>:n käyttö räjähdysvaarannetuilla alueilla,vyöhyke 2Vyöhyke 2Räjähdysvaarannetut alueet jaetaan vyöhykkeisiin. Vyöhykkeet erotellaanräjähdyskelpoisen ilmakehän olemassa olon todennäköisyyden mukaan.Vyöhyke Räjähdysvaara Esimerkki2 Räjähtävä kaasuilmakehäilmaantuu vain harvoin jalyhytaikaisestiturvallinen EialueAlueet putkistojen lattatiivisteillä varustuillalaippaliitoksilla suljetuissa tiloissa• vyöhykkeen 2 ulkopuolella• Hajautetun ulkopiirin vakiosovelluksetSeuraavasta löydätte tärkeitä ohjeita hajautetun ulkopiirilaitteen ET 200M ja<strong>SIMATIC</strong> <strong>S7</strong>-<strong>300</strong> asennukseen räjähdysvaarannetuilla alueilla.LisätietojaLisätietoja ET 200M:ään ja erilaisiin <strong>S7</strong>-<strong>300</strong>-rakenneryhmiin löydätte ohjekirjasta.ValmistuspaikkaSiemens AG, Bereich A&DWerner-von-Siemens-Straße 5092224 AmbergGermanyHyväksyntäII 3 G EEx nA II T3 .. T6 EN 50021 mukaan: 1999Tarkastusnumero: KEMA 02ATEX1096 XOhjeRakenneryhmät hyväksynnän II 3 G EEx nA II T3 .. T6 kanssa saadaankäyttää ainoastaan laitekategorian 3 automatisointijärjestelmissä<strong>SIMATIC</strong> <strong>S7</strong>-<strong>300</strong> / ET 200M.<strong>Programmable</strong> <strong>Logic</strong> <strong>Controllers</strong> <strong>S7</strong>-<strong>300</strong> <strong>Module</strong> <strong>Data</strong>1-32 A5E00105505-03
General Technical SpecificationsKunnossapitoKorjausta varten täytyy kyseinen rakenneryhmä lähettää valmistuspaikkaan.Korjaus voidaan suorittaa ainoastaan siellä.Erityiset vaatimukset1. Hajautettu ulkopiirilaite ET 200M ja <strong>SIMATIC</strong> <strong>S7</strong>-<strong>300</strong> täytyy asentaakytkentäkaappiin tai metalliseen koteloon. Näiden täytyy olla vähintäänkotelointiluokan IP 54 mukaisia. Tällöin on huomioitava ympäristöolosuhteet,johon laite asennetaan. Kotelolle täytyy olla valmistajaselvitys vyöhykettä 2varten (EN 50021 mukaan).2. Kun johdolla tai tämän kotelon johdon sisäänviennillä saavutetaan > 70 °Clämpötila tai kun käyttöolosuhteissa lämpötila voi piuhajaotuksella olla > 80 °C,täytyy johdon lämpötilaominaisuuksien vastata todellisesti mitattuja lämpötiloja.3. Käytettyjen johtojen sisäänohjauksien täytyy olla vaaditun IP-kotelointiluokan jakohdan 7.2 (EN 50021 mukaan) mukaisia.4. Kaikkien laitteiden, kytkimet jne. mukaan lukien, jotka liitetään virheiltäsuojattujen signaalirakenneryhmien tuloille ja lähdöille, täytyy olla hyväksyttyjätyypin EEx nA tai EEx nC räjähdyssuojausta varten.5. Toimenpiteet täytyy suorittaa, ettei nimellisjännite voi transienttien kautta ylittyäenemmän kuin 40 %.6. Ympäristölämpötila-alue: 0° C ... 60° C7. Kotelon sisälle, avauksen jälkeen näkyvälle paikalle, on kiinnitettävä kilpi, jossaon seuraava varoitus:VaroitusKotelo saadaan avata ainoastaan lyhyeksi ajaksi, esim. visuaalista diagnoosiavarten. Älä tällöin käytä mitään kytkimiä, vedä tai liitä mitään rakenneryhmiä,äläkä erota mitään sähköjohtoja (pistoliittimiä).Tätä varoitusta ei tarvitse huomioida, kun on tiedossa, että minkäänlaistaräjähdysvaarannettua ilmakehää ei ole olemassa.Hyväksyttyjen rakenneryhmien listaLista hyväksiytyistä rakennesarjoista löytyy internetistä osoitteesta:http://www4.ad.siemens.de/view/cs/käyttäjätunnuksella 13702947<strong>Programmable</strong> <strong>Logic</strong> <strong>Controllers</strong> <strong>S7</strong>-<strong>300</strong> <strong>Module</strong> <strong>Data</strong>A5E00105505-03 1-33
General Technical Specifications1.9.9 Användning av ET 200M / <strong>S7</strong>-<strong>300</strong> i explosionsriskområde zon 2Zon 2Explosionsriskområden delas in i zoner. Zonerna delas in enligt sannolikheten atten atmosfär med explosionsfara föreligger.Zon Explosionsfara Exempel2 Explosiv gasatmosfär uppstårendast sällan eller kortvarigtSäkertområdeOmråden kring flänsförbindelser medpackningar vid rörledningar i slutnautrymmenNej • Utanför zon 2• Standardanvändning av decentralperiferiNedan följer viktiga anvisningar om installationen av den decentralaperiferienheten ET 200M och <strong>SIMATIC</strong>°<strong>S7</strong>-<strong>300</strong> i ett explosionsriskområde.Ytterligare informationYtterligare information om ET 200M och de olika <strong>S7</strong>-<strong>300</strong>-komponentgruppernafinner du i handboken.TillverkningsortSiemens AG, Bereich A&DWerner-von-Siemens-Straße 5092224 AmbergGermanyGodkännandeII 3 G EEx nA II T3 .. T6 enligt EN 50021 : 1999Kontrollnummer:KEMA 02ATEX1096 XAnvisningKomponentgrupper med godkännande II 3 G EEx nA II T3 .. T6 får endastanvändas i automatiseringssystemen <strong>SIMATIC</strong> <strong>S7</strong>-<strong>300</strong> / ET°200M frånapparatgrupp 3.<strong>Programmable</strong> <strong>Logic</strong> <strong>Controllers</strong> <strong>S7</strong>-<strong>300</strong> <strong>Module</strong> <strong>Data</strong>1-34 A5E00105505-03
General Technical SpecificationsUnderhållVid reparation måste den aktuella komponentgruppen insändas till tillverkaren.Reparationer får endast genomföras där.Särskilda villkor1. Den decentrala periferienheten ET 200M och <strong>SIMATIC</strong>°<strong>S7</strong>-<strong>300</strong> måste monterasi ett kopplingsskåp eller metallhus. Dessa måste minst vara av skyddsklassIP 54. Därvid ska omgivningsvillkoren där enheten installeras beaktas. Förkåpan måste en tillverkardeklaration för zon 2 föreligga (enligt EN 50021).2. Om en temperatur på > 70°C uppnås vid husets kabel resp kabelinföring underdriftvillkor eller om temperaturen vid trådförgreningen kan vara > 80°C underdriftvillkor, måste kabelns temperaturegenskaper överensstämma med denverkligen uppmätta temperaturen.3. De använda kabelinföringarna måste uppfylla kraven i det krävda IPskyddsutförandetoch i avsnitt 7.2 (enligt EN 50021).4. Alla apparater, inklusive brytare osv, som ansluts till felsäkrade signalenhetersin- och utgångar, måste vara godkända för explosionsskydd av typ EEx nA ellerEEx nC.5. Åtgärder måste vidtas så, att märkspänningen ej kan överskridas med mer än40°% genom transienter.6. Omgivningstemperatur: 0° C till 60° C7. När huset öppnats ska en skylt med följande varning monteras på ett tydligtsynligt ställe huset:VarningHuset får endast öppnas under kort tid, t ex för visuell diagnos. Använd därvidinga brytare, lossa eller anslut inga enheter och frånskilj inga elektriskaledningar (insticksanslutningar).Ingen hänsyn måste tas till denna varning om det är säkert att det inte rådernågon explosionsfarlig atmosfär.Lista över godkända komponentgrupperLista över godkända enheter återfinns i Internet:http://www4.ad.siemens.de/view/cs/under bidrags-ID 13702947<strong>Programmable</strong> <strong>Logic</strong> <strong>Controllers</strong> <strong>S7</strong>-<strong>300</strong> <strong>Module</strong> <strong>Data</strong>A5E00105505-03 1-35
General Technical Specifications1.9.10 Uso do ET 200M / <strong>S7</strong>-<strong>300</strong> em área exposta ao perigo deexplosão 2Zona 2As áreas expostas ao perigo de explosão são divididas em zonas. As zonas sãodiferenciadas de acordo com a probabilidade da existência de uma atmosferaexplosiva.Zona Perigo de explosão Exemplo2 Só raramente e por um breveperíodo de tempo surgematmosferas explosivasÁreas em torno de ligações flangeadascom vedações chatas em tubulações emrecintos fechadosÁrea segura Não • fora da zona 2• Aplicações descentralizadas deperiferia descentralizadaA seguir, o encontrará avisos importantes para a instalação do aparelho periféricodescentralizado ET 200M e da <strong>SIMATIC</strong> <strong>S7</strong>-<strong>300</strong> em área exposta ao perigo deexplosão.Mais informaçõesPara obter mais informações sobre o ET 200M e os diversos grupos construtivos<strong>S7</strong>-<strong>300</strong>, consulte o manual.Local de produçãoSiemens AG, Bereich A&DWerner-von-Siemens-Straße 5092224 AmbergGermanyLicençaII 3 G EEx nA II T3 .. T6 seg. EN 50021 : 1999Número de ensaio:KEMA 02ATEX1096 XAvisoComponentes com a licença II 3 G EEx nA II T3 .. T6 só podem seraplicados em sistemas de automação <strong>SIMATIC</strong> <strong>S7</strong>-<strong>300</strong> / ET 200M da categoriade aparelho 3.<strong>Programmable</strong> <strong>Logic</strong> <strong>Controllers</strong> <strong>S7</strong>-<strong>300</strong> <strong>Module</strong> <strong>Data</strong>1-36 A5E00105505-03
General Technical SpecificationsReparoOs grupos construtivos em questão devem ser remetidos para o local de produçãoa fim de que seja realizado o reparo. Apenas lá deve ser efetuado o reparo.Condições especiais1. O aparelho periférico ET 200M e a <strong>SIMATIC</strong> <strong>S7</strong>-<strong>300</strong> devem ser montados emum armário de distribuição ou em uma caixa metálica. Estes devem garantir nomínimo o tipo de proteção IP 54. Durante este trabalho deverão ser levados emconsideração as condições locais, nas quais o aparelho será instalado. Para acaixa deverá ser apresentada uma declaração do fabricante para a zona 2 (deacordo com EN 50021).2. Caso no cabo ou na entrada do cabo desta carcaça sob as condiçõesoperacionais seja atingida uma temperatura de > 70 °C, ou caso sob condiçõesoperacionais a temperatura na ramificação do fio poderá atingir > 80 °C, ascaraterísticas de temperatura deverão corresponder às temperaturas realmentemedidas.3. As entradas de cabo utilizadas devem corresponder ao tipo exigido deproteção IP e à seção 7.2 (de acordo com o EN 50021).4. Todos os aparelhos, inclusive as chaves, etc., que estejam conectadas ementradas e saídas de módulos de sinais protegidos contra erro, devem possuira licença para a proteção de explosão do tipo EEx nA ou EEx nC.5. Precisam ser tomadas medidas para que a tensão nominal através detransitórios não possa ser ultrapassada em mais que 40 %.6. Área de temperatura ambiente: 0° C até 60° C7. No âmbito da carcaça deve ser colocada, após a abertura, em um ponto bemvisível uma placa com a seguinte advertência:AdvertênciaA carcaça deve ser aberta apenas por um breve período de tempo, por ex. paradiagnóstico visual. Não acione nenhum interruptor, não retire ou conectenenhum módulo e não separe nenhum fio elétrico (ligações de tomada).Esta advertência poderá ser ignorada caso se saiba que não há nenhumaatmosfera sujeita ao perigo de explosão.Lista dos componentes autorizadosA lista com os módulos autorizados encontram-se na Internet:http://www4.ad.siemens.de/view/cs/sob o número de ID 13702947<strong>Programmable</strong> <strong>Logic</strong> <strong>Controllers</strong> <strong>S7</strong>-<strong>300</strong> <strong>Module</strong> <strong>Data</strong>A5E00105505-03 1-37
General Technical Specifications1.9.11 Χρήση της συσκευής ET 200M / <strong>S7</strong>-<strong>300</strong> σε επικίνδυνη για έκρηξηπεριοχή, ζώνη 2Ζώνη 2Οι επικίνδυνες για έκρηξη περιοχές χωρίζονται σε ζώνες. Οι ζώνες διαφέρουνσύµφωνα µε την πιθανότητα ύπαρξης ενός ικανού για έκρηξη περιβάλλοντος.Ζώνη Κίνδυνος έκρηξης Παράδειγµα2 Εκρηκτικό περιβάλλον αερίουπαρουσιάζεται µόνο σπάνια καιγια σύντοµο χρονικό διάστηµαΑσφαλήςπεριοχήΌχι • Εκτός της ζώνης 2Περιοχές γύρω από φλαντζωτέςσυνδέσεις µε τσιµούχες σε σωληνώσεις σεκλειστούς χώρους• Τυπικές εφαρµογές αποκεντρωµένηςπεριφέρειαςΣτη συνέχεια θα βρείτε σηµαντικές υποδείξεις για την εγκατάσταση τηςαποκεντρωµένης περιφερειακής συσκευής ET 200M και του δοµικούσυγκροτήµατος <strong>SIMATIC</strong> <strong>S7</strong>-<strong>300</strong> σε επικίνδυνη για έκρηξη περιοχή.Επιπλέον πληροφορίεςΕπιπλέον πληροφορίες για τη συσκευή ET 200M και για τα διάφορα δοµικάσυγκροτήµατα (ενότητες) <strong>S7</strong>-<strong>300</strong> θα βρείτε στο εγχειρίδιο.Τόπος κατασκευήςSiemens AG, Bereich A&DWerner-von-Siemens-Straße 5092224 AmbergGermanyΆδειαII 3 G EEx nA II T3 .. T6 σύµφωνα µε το πρότυποEN 50021 : 1999Αριθµός ελέγχου: KEMA 02ATEX1096 XΥπόδειξηΤα δοµικά συγκροτήµατα µε την άδεια II 3 G EEx nA II T3 .. T6 επιτρέπεταινα τοποθετηθούν µόνο σε συστήµατα αυτοµατισµού <strong>SIMATIC</strong> <strong>S7</strong>-<strong>300</strong> / ET 200Mτης κατηγορίας συσκευής 3.<strong>Programmable</strong> <strong>Logic</strong> <strong>Controllers</strong> <strong>S7</strong>-<strong>300</strong> <strong>Module</strong> <strong>Data</strong>1-38 A5E00105505-03
General Technical SpecificationsΣυντήρησηΓια µια επισκευή πρέπει να σταλθεί το αντίστοιχο δοµικό συγκρότηµα στον τόποκατασκευής. Μόνο εκεί επιτρέπεται να γίνει η επισκευή.Ιδιαίτερες προϋποθέσεις1. Η αποκεντρωµένη περιφερειακή συσκευή ET 200M και το δοµικό συγκρότηµα<strong>SIMATIC</strong> <strong>S7</strong>-<strong>300</strong> πρέπει να ενσωµατωθούν σε ένα ερµάριο ζεύξης ή σε έναµεταλλικό περίβληµα. Αυτά πρέπει να εξασφαλίζουν το λιγότερο το βαθµόπροστασίας IP 54. Σε αυτήν την περίπτωση πρέπει να ληφθούν υπόψη οιπεριβαλλοντικές συνθήκες, στις οποίες θα εγκατασταθεί η συσκευή. Για τοπερίβληµα πρέπει να προβλέπεται δήλωση του κατασκευαστή για τη ζώνη 2(σύµφωνα µε το πρότυπο EN 50021).2. Εάν στο καλώδιο ή στην είσοδο του καλωδίου αυτού του περιβλήµατος κάτωαπό συνθήκες λειτουργίας η θερµοκρασία ξεπεράσει τους 70 °C ή όταν κάτωαπό συνθήκες λειτουργίας η θερµοκρασία στη διακλάδωση του σύρµατοςµπορεί να είναι µεγαλύτερη από 80 °C, πρέπει οι θερµοκρασιακές ιδιότητες τωνκαλωδίων να ταυτίζονται µε τις πραγµατικά µετρηµένες θερµοκρασίες.3. Οι χρησιµοποιούµενες εισόδοι καλωδίων πρέπει να συµµορφώνονται µε τοβαθµό προστασίας IP 54 στην ενότητα 7.2 (σύµφωνα µε το πρότυποEN 50021).4. Όλες οι συσκευές, συµπεριλαµβανοµένων διακοπτών κ.α., που συνδέονται στιςεισόδους και εξόδους δοµικών συγκροτηµάτων ασφαλών σηµάτων, πρέπει ναφέρουν εγκριµένη προστασία κατά έκρηξης τύπου EEx nA ή EEx nC.5. Πρέπει να ληφθούν µέτρα, να µην µπορεί να γίνει υπέρβαση της ονοµαστικήςτάσης µέσω αιφνίδιας µεταβολής της τάσης πάνω από 40 %.6. Περιοχή θερµοκρασίας περιβάλλοντος: 0° C έως 60° C7. Πρέπει να τοποθετηθεί µέσα στο περίβληµα σε ευδιάκριτο σηµείο µετά τοάνοιγµα µία πινακίδα µε την ακόλουθη προειδοποίηση:ΠροειδοποίησηΤο περίβληµα επιτρέπεται να ανοίγει µόνο για µικρό χρονικό διάστηµα, π.χ. γιατη διενέργεια οπτικής διάγνωσης. Μην κάνετε χρήση διακοπτών, µην τραβάτε ήεµβυσµατώνετε δοµικά συγκροτήµατα και µη διαχωρίζετε ηλεκτροφόρουςαγωγούς (εµβσυµατώσιµες συνδέσεις).Η προειδοποίηση αυτή δε χρειάζεται να ληφθεί υπ’ όψιν, εάν είναι γνωστό ότιδεν υφίσταται ατµόσφαιρα παρουσιάζουσα κίνδυνο έκρηξης.Κατάλογος των εγκεκριµένων δοµικών συγκροτηµάτωνΗ λίστα µε τα εγκριµένα δοµικά συγκροτήµατα υπάρχει στο διαδίκτυο:http://www4.ad.siemens.de/view/cs/µε τον κωδικό συνδροµής 13702947<strong>Programmable</strong> <strong>Logic</strong> <strong>Controllers</strong> <strong>S7</strong>-<strong>300</strong> <strong>Module</strong> <strong>Data</strong>A5E00105505-03 1-39
General Technical Specifications<strong>Programmable</strong> <strong>Logic</strong> <strong>Controllers</strong> <strong>S7</strong>-<strong>300</strong> <strong>Module</strong> <strong>Data</strong>1-40 A5E00105505-03
Power Supply <strong>Module</strong>s2IntroductionVarious power supply modules are available to supply your <strong>S7</strong>-<strong>300</strong> programmablecontroller and the sensors/actuators with 24 VDC.Power supply modulesThis chapter describes the technical specifications of the power supply modules ofthe <strong>S7</strong>-<strong>300</strong> programmable controller.In addition to the technical specifications, this chapter describes the following:• The characteristics• Connection Diagram• Block Diagram• Line protection• Reaction to atypical operating conditionsIn this chapterSection Contents Page2.1 Power Supply <strong>Module</strong> PS 305; 2 A2-2(6E<strong>S7</strong>305-1BA80-0AA0)2.2 Power Supply <strong>Module</strong> PS 307; 2 A;(6E<strong>S7</strong>307-1BA00-0AA0)2.3 Power Supply <strong>Module</strong> PS 307; 5 A;(6E<strong>S7</strong>307-1EAx0-0AA0)2.4 Power Supply <strong>Module</strong> PS 307; 10 A;(6E<strong>S7</strong>307-1KA00-0AA0)2-62-92-14<strong>Programmable</strong> <strong>Logic</strong> <strong>Controllers</strong> <strong>S7</strong>-<strong>300</strong> <strong>Module</strong> <strong>Data</strong>A5E00105505-032-1
Power Supply <strong>Module</strong>s2.1 Power Supply <strong>Module</strong> PS 305; 2 A;(6E<strong>S7</strong>305-1BA80-0AA0)Order number “<strong>SIMATIC</strong> Outdoor module”6E<strong>S7</strong>305-1BA80-0AA0CharacteristicsThe PS 305 power supply module (2 A) has the following salient features:• Output current 2 A• Output voltage 24 VDC; proof against short-circuit and open circuit• Connection to DC power supply(rated input voltage 24/48/72/96/110 VDC)• Reliable isolation to EN 60 950• Can be used as load power supply2-2<strong>Programmable</strong> <strong>Logic</strong> <strong>Controllers</strong> <strong>S7</strong>-<strong>300</strong> <strong>Module</strong> <strong>Data</strong>A5E00105505-03
Power Supply <strong>Module</strong>sTerminal assignment of the PS 305; 2 ALED for “24 VDCoutput voltageavailable”24 VDCOn/Off switchfor 24 VDCTerminals for systemvoltage and protectivegrounding conductorIL+1M1L+2M2L+2M2L+2M2Terminals for24 VDC outputvoltageStrain-relief assemblyFigure 2-1 Wiring Schematic of the PS 305 Power Supply <strong>Module</strong> (2 A)<strong>Programmable</strong> <strong>Logic</strong> <strong>Controllers</strong> <strong>S7</strong>-<strong>300</strong> <strong>Module</strong> <strong>Data</strong>A5E00105505-032-3
Power Supply <strong>Module</strong>sTechnical specifications of the PS 305; 2 A (6E<strong>S7</strong>305-1BA80-0AA0)Other Parametersmax. 150 mV ssDimensions and WeightResidual rippleDimensions W H D 80 125 120 Protection class according to I, with protective(in millimeters)IEC 536 (DIN VDE 0106, Part grounding conductorWeightApprox. 740 g1)Input RatingInsulation• Isolation voltage rating 150 VACInput voltage• Rated value24/48/72/96/110 VDC• Voltage range16.8 to 138 VDC•(24 V to input)Tested with 2800 VDCRated input currentReliable isolationSELV circuit• At 24 V2.7 ABuffering of supply failures (at > 10 ms24/48/72/96/110 V)• At 48 V1.3 A• At 72 V0.9 A• Repeat rate min. 1 s• At 96 V0.65 AEfficiency 75%• At 110 V0.6 APower input64 WInrush current (at 25 C) 20 APower loss16 WI 2 t (at inrush current)5 A 2 sDiagnosticsOutput RatingLED for output voltage available Yes, green LEDOutput voltage• Rated value24 VDC• Permitted range24 V 3 %, stable atno load1) With limited input voltage range > 24 V (24 to 138 VDC)the PS 305 can be loaded with 3 A.• Ramp-up time max. 3 sOutput current• Rated value 2 A; 1)Can be connected inparallelShort-circuit protectionElectronic, nonlatching,from 1.65 to 1.95 x I N2-4<strong>Programmable</strong> <strong>Logic</strong> <strong>Controllers</strong> <strong>S7</strong>-<strong>300</strong> <strong>Module</strong> <strong>Data</strong>A5E00105505-03
Power Supply <strong>Module</strong>sBasic circuit diagram of the PS 305; 2 AL+1M1L+2M2U24 VDCI/Figure 2-2 Basic Circuit Diagram of the PS 305 Power Supply <strong>Module</strong> (2 A)Line protectionWe recommend that you install a miniature circuit-breaker (MCB) (for exampleSiemens 5SN1 series) with the following rating to protect the incoming supplycable of the PS 305 power supply module (2 A):• Rated current at 110 VDC: 10 A• Tripping characteristic (type): C.Reaction to atypical operating conditionsTable 2-1Reaction of the PS 305 Power Supply <strong>Module</strong> (2 A) to Atypical OperatingConditionsIf ... ... Then ... 24 VDCLED... the output circuit is overloaded:• I > 3.9 A (dynamic)Voltage dip, autom. volt. recoveryFlashes• 3 A < I 3.9 A (static)Voltage drop, shortening of service life... the output is short-circuited Output voltage 0 V; automatic voltagerecovery after short circuit has beeneliminatedDarkAn overvoltage occurs on the primary side Possible destruction -There is an undervoltage on the primarysideAutomatic disconnection; automatic voltagerecoveryDark<strong>Programmable</strong> <strong>Logic</strong> <strong>Controllers</strong> <strong>S7</strong>-<strong>300</strong> <strong>Module</strong> <strong>Data</strong>A5E00105505-032-5
Power Supply <strong>Module</strong>s2.2 Power Supply <strong>Module</strong> PS 307; 2 A;(6E<strong>S7</strong>307-1BA00-0AA0)Order number6E<strong>S7</strong>307-1BA00-0AA0CharacteristicsThe PS 307 power supply module (2 A) has the following salient features:• Output current 2 A• Output voltage 24 VDC; proof against short-circuit and open circuit• Connection to single-phase AC system(input voltage 120/230 VAC, 50/60 Hz)• Reliable isolation to EN 60 950• Can be used as load power supplyWiring schematic of the PS 307; 2 A24 VDCLED for “24 VDC outputvoltage available”230VVoltage SelectorIOn/Off switch for24 VDCL1NTerminals for systemvoltage and protectivegrounding conductorL+ML+MTerminals for 24 VDCoutput voltageStrain-relief assemblyFigure 2-3 Wiring Schematic of the PS 307 Power Supply <strong>Module</strong> (2 A)2-6<strong>Programmable</strong> <strong>Logic</strong> <strong>Controllers</strong> <strong>S7</strong>-<strong>300</strong> <strong>Module</strong> <strong>Data</strong>A5E00105505-03
Power Supply <strong>Module</strong>sBasic circuit diagram of the PS 307; 2 AL1NL+MU24 VDCI/Figure 2-4 Basic Circuit Diagram of the PS 307 Power Supply <strong>Module</strong> (2 A)Line protectionWe recommend that you install a miniature circuit-breaker (MCB) (for exampleSiemens 5SN1 series) with the following rating to protect the incoming supplycable of the PS 307 power supply module (2 A):• Rated current at 230 VAC: 6 A• Tripping characteristic (type): C.Reaction to atypical operating conditionsTable 2-2Reaction of the PS 307 Power Supply <strong>Module</strong> (2 A) to Atypical OperatingConditionsIf ... ... Then ... 24 VDCLED... the output circuit is overloaded:• I > 2.6 A (dynamic)Voltage dip, autom. volt. recoveryFlashes• 2 A < I 2.6 A (static)Voltage drop, shortening of service life... the output is short-circuited Output voltage 0 V; automatic voltagerecovery after short circuit has beeneliminatedDarkAn overvoltage occurs on the primary side Possible destruction -There is an undervoltage on the primarysideAutomatic disconnection; automatic voltagerecoveryDark<strong>Programmable</strong> <strong>Logic</strong> <strong>Controllers</strong> <strong>S7</strong>-<strong>300</strong> <strong>Module</strong> <strong>Data</strong>A5E00105505-032-7
Power Supply <strong>Module</strong>sTechnical specifications of the PS 307; 2 A (6E<strong>S7</strong>307-1BA00-0AA0)Other Parametersmax. 150 mV ssDimensions and WeightResidual rippleDimensions W H D 50 125 120 Protection class according to I, with protective(in millimeters)IEC 536 (DIN VDE 0106, Part grounding conductorWeightApprox. 420 g1)Input RatingInsulation• Rated insulation level 250 VACInput voltage(24 V to L1)• Rated value120 / 230 VAC • Tested with2800 VDCSystem frequency• Rated value50 Hz or 60 HzReliable isolationSELV circuit• Permitted range47 Hz to 63 HzBridging of power failures (at 93 min. 20 msand/or 187 V)Rated input current• At 230 V0.5 A• Repeat ratemin 1 s• At 120 V0.8 AEfficiency 83 %Inrush current (at 25°C) 20 APower input58 WI 2 t (at inrush current)1 A 2 sPower losstyp. 10 WOutput RatingDiagnosticsOutput voltageLED for output voltage available Yes, green LED• Rated value24 VDC• Permitted range24 V 5 %, stable at• Ramp-up timeno loadmax. 2.5 sOutput current• Rated value 2 A,Cannot be connected inparallelShort-circuit protectionElectronic, nonlatching,1.1 to 1.3 x I N2-8<strong>Programmable</strong> <strong>Logic</strong> <strong>Controllers</strong> <strong>S7</strong>-<strong>300</strong> <strong>Module</strong> <strong>Data</strong>A5E00105505-03
Power Supply <strong>Module</strong>s2.3 Power Supply <strong>Module</strong> PS 307; 5 A;(6E<strong>S7</strong>307-1EAx0-0AA0)Order number: “Standard module6E<strong>S7</strong>307-1EA00-0AA0Order number “<strong>SIMATIC</strong> Outdoor module”6E<strong>S7</strong>307-1EA80-0AA0CharacteristicsThe PS 307 power supply module (5 A) has the following salient features:• Output current 5 A• Output voltage 24 VDC; proof against short-circuit and open circuit• Connection to single-phase AC system(input voltage 120/230 VAC, 50/60 Hz)• Reliable isolation to EN 60 950• Can be used as load power supply<strong>Programmable</strong> <strong>Logic</strong> <strong>Controllers</strong> <strong>S7</strong>-<strong>300</strong> <strong>Module</strong> <strong>Data</strong>A5E00105505-032-9
Power Supply <strong>Module</strong>sWiring schematic of the PS 307; 5 ALED for “24 VDCoutput voltageavailable”24 VDCVoltage Selector230VOn/Off switchfor 24 VDCITerminals for systemvoltage and protectivegrounding conductorL1NL+ML+ML+MTerminals for24 VDC outputvoltageStrain-relief assemblyFigure 2-5 Wiring Schematic of the PS 307 Power Supply <strong>Module</strong> (5 A)Basic circuit diagram of the PS 307; 5 AL1NL+MU24 VDCI/Figure 2-6 Basic Circuit Diagram of the PS 307 Power Supply <strong>Module</strong> (5 A)2-10<strong>Programmable</strong> <strong>Logic</strong> <strong>Controllers</strong> <strong>S7</strong>-<strong>300</strong> <strong>Module</strong> <strong>Data</strong>A5E00105505-03
Power Supply <strong>Module</strong>sLine protectionWe recommend that you install a miniature circuit-breaker (MCB) (for exampleSiemens 5SN1 series) with the following rating to protect the incoming supplycable of the PS 307 power supply module (5 A):• Rated current at 230 VAC: 10 A• Tripping characteristic (type): C.Reaction to atypical operating conditionsTable 2-3Reaction of the PS 307 Power Supply <strong>Module</strong> (5 A) to Atypical OperatingConditionsIf ... ... Then ... 24 VDCLED... the output circuit is overloaded:• I > 6.5 A (dynamic)Voltage dip, autom. volt. recoveryFlashes• 5 A < I 6.5 A (static)Voltage drop, shortening of service life... the output is short-circuited Output voltage 0 V; automatic voltage recoveryafter short circuit has been eliminatedDarkAn overvoltage occurs on the primarysideThere is an undervoltage on theprimary sidePossible destruction –Automatic disconnection; automatic voltagerecoveryDark<strong>Programmable</strong> <strong>Logic</strong> <strong>Controllers</strong> <strong>S7</strong>-<strong>300</strong> <strong>Module</strong> <strong>Data</strong>A5E00105505-032-11
Power Supply <strong>Module</strong>sTechnical specifications of the PS 307; 5 A (6E<strong>S7</strong>307-1EA00-0AA0)Other Parametersmax. 150 mV ssDimensions and WeightResidual rippleDimensions W x H x D 80 x 125 x 120Protection class according to I, with protective(in millimeters)IEC 536 (DIN VDE 0106, Part grounding conductorWeightApprox. 740 g1)Input RatingInsulation• Rated insulation level 250 VACInput voltage(24 V to L1)• Rated value 120 / 230 VAC• Tested with 2800 VDCSystem frequency• Rated value50 Hz or 60 HzReliable isolationSELV circuit• Permitted range47 Hz to 63 HzBridging of power failures (at 93 min. 20 msand/or 187 V)Rated input current• At 120 V2 A• Repeat ratemin 1 s• At 230 V1 AEfficiency 87 %Inrush current (at 25 C) 45 APower input138 WI 2 t (at inrush current)1.2 A 2 sPower losstyp. 18 WOutput RatingDiagnosticsOutput voltageLED for output voltage available Yes, green LED• Rated value24 VDC• Permitted range24 V 5 %,stable at no load• Ramp-up time max. 2.5 sOutput current• Rated value 5 ACannot be connected inparallelShort-circuit protectionElectronic, nonlatching,from 1.1 to 1.3 x I N2-12<strong>Programmable</strong> <strong>Logic</strong> <strong>Controllers</strong> <strong>S7</strong>-<strong>300</strong> <strong>Module</strong> <strong>Data</strong>A5E00105505-03
Power Supply <strong>Module</strong>sTechnical specifications of the PS 307; 5 A (6E<strong>S7</strong>307-1EA80-0AA0)Other Parametersmax. 150 mV ssDimensions and WeightResidual rippleDimensions W x H x D 80 x 125 x 120Protection class according to I, with protective(in millimeters)IEC 536 (DIN VDE 0106, Part grounding conductorWeightApprox. 570 g1)Input RatingInsulation• Rated insulation level 250 VACInput voltage(24 V to L1)• Rated value 120/230 VDC • Tested with2800 VDCSystem frequencyReliable isolationSELV circuit• Rated value50 Hz or 60 HzBridging of power failures (at 93• Permitted range47 Hz to 63 Hzand/or 187 V)min. 20 msRated input current• Repeat ratemin. 1 s• At 120 V2.1 AEfficiency 84%• At 230 V1.2 APower input143 WInrush current (at 25 C) 45 APower loss23 WI 2 t (at inrush current)1.8 A 2 sDiagnosticsOutput RatingLED for output voltage available Yes, green LEDOutput voltage• Rated value24 VDC• Permitted range24 V 3 %• Ramp-up timemax. 3 sOutput current• Rated value 5 A; cannot beconnected in parallelShort-circuit protectionElectronic,nonlatching,from 1.1 to 1.3 x I N<strong>Programmable</strong> <strong>Logic</strong> <strong>Controllers</strong> <strong>S7</strong>-<strong>300</strong> <strong>Module</strong> <strong>Data</strong>A5E00105505-032-13
Power Supply <strong>Module</strong>s2.4 Power Supply <strong>Module</strong> PS 307; 10 A;(6E<strong>S7</strong>307-1KA00-0AA0)Order number6E<strong>S7</strong>307-1KA00-0AA0CharacteristicsThe PS 307 power supply module (10 A) has the following salient features:• Output current 10 A• Output voltage 24 VDC; proof against short-circuit and open circuit• Connection to single-phase AC system(input voltage 120/230 VAC, 50/60 Hz)• Reliable isolation to EN 60 950• Can be used as load power supplyWiring schematic of the PS 307; 10 ALED for “24 VDCoutput voltageavailable”Voltage SelectorOn/Off switch for24 VDC230V24 VDCIL1NL+ML+ML+ML+MTerminals for24 VDCoutputvoltageStrain-relief assemblyTerminals for systemvoltage and protectivegrounding conductorFigure 2-7 Wiring Schematic of the PS 307 Power Supply <strong>Module</strong> (10 A)2-14<strong>Programmable</strong> <strong>Logic</strong> <strong>Controllers</strong> <strong>S7</strong>-<strong>300</strong> <strong>Module</strong> <strong>Data</strong>A5E00105505-03
Power Supply <strong>Module</strong>sBasic circuit diagram of the PS 307; 10 AL1NL+MU24 VDCI/Figure 2-8 Basic Circuit Diagram of the PS 307 Power Supply <strong>Module</strong> (10 A)Line protectionWe recommend that you install a miniature circuit-breaker (MCB) (for example,Siemens 5SN1 series) with the following rating to protect the incoming supplycable of the PS 307 power supply module (10 A):• Rated current at 230 VAC: 16 A• Tripping characteristic (type): C.Reaction to atypical operating conditionsTable 2-4Reaction of the PS 307 Power Supply <strong>Module</strong> (10 A) to Atypical OperatingConditionsIf ... Reaction of the module 24 VDCLED... the output circuit is overloaded:• I > 13 A (dynamic)Voltage dip, autom. volt. recoveryFlashes• 10 A < I 13 A (static)Voltage drop, shortening of service life... the output is short-circuited Output voltage 0 V; automatic voltagerecovery after short circuit has beeneliminatedDarkAn overvoltage occurs on the primary side Possible destruction –There is an undervoltage on the primarysideAutomatic disconnection; automatic voltagerecoveryDark<strong>Programmable</strong> <strong>Logic</strong> <strong>Controllers</strong> <strong>S7</strong>-<strong>300</strong> <strong>Module</strong> <strong>Data</strong>A5E00105505-032-15
Power Supply <strong>Module</strong>sTechnical specifications of the PS 307; 10 A (6E<strong>S7</strong>307-1KA00-0AA0)Other Parametersmax. 150 mV ssDimensions and WeightResidual rippleDimensions W x H x D 200 x 125 x 120Protection class according to I, with protective(in millimeters)IEC 536 (DIN VDE 0106, Part grounding conductorWeight1.2 kg1)Input RatingInput voltageInsulation• Rated insulation level 250 VAC(24 V to L1)• Rated value 120 / 230 VAC • Tested with2800 VDCSystem frequencyReliable isolationSELV circuit• Rated value50 Hz or 60 HzBridging of power failures (at 93 min. 20 ms• Permitted range47 Hz to 63 Hzand/or 187 V)Rated input current• Repeat ratemin 1 s• At 230 V1.7 AEfficiency 89 %• At 120 V3.5 AInrush current (at 25 °C) 55 APower input270 WI 2 t (at inrush current)9 A 2 sPower losstyp. 30 WOutput RatingDiagnosticsOutput voltageLED for output voltage available Yes, green LED• Rated value24 VDC• Permitted range24 V 5 %, stable at• Ramp-up timeno loadmax. 2.5 sOutput current• Rated value 10 A,Cannot be connected inparallelShort-circuit protectionElectronic, nonlatching,from 1.1 to 1.3 x I N2-16<strong>Programmable</strong> <strong>Logic</strong> <strong>Controllers</strong> <strong>S7</strong>-<strong>300</strong> <strong>Module</strong> <strong>Data</strong>A5E00105505-03
Digital <strong>Module</strong>s3Structure of the chapterThe present chapter is broken down into the following subjects:1. Chapter overview of which modules are available and described here2. <strong>Module</strong> overview on the most important properties of the modules3. Sequence of steps from choosing to commissioning the digital module4. Information that is generally valid – in other words, relating to all digital modules(for example, parameter assignment and diagnostics)5. Information that refers to specific modules (for example, characteristics,diagram of connections and block diagram, technical specifications and specialcharacteristics of the module):a) for digital input modulesb) for digital output modulesc) for relay output modulesd) for digital input/output modulesAdditional informationAppendix A describes the structure of the parameter sets (data records 0, 1 and128) in the system data. You must be familiar with this configuration if you want tomodify the parameters of the modules in the STEP 7 user program.Appendix B describes the structure of the diagnostic data (data records 0 and 1) inthe system data. You must be familiar with this configuration if you want toevaluate the diagnostic data of the modules in the STEP 7 user program.<strong>Programmable</strong> <strong>Logic</strong> <strong>Controllers</strong> <strong>S7</strong>-<strong>300</strong> <strong>Module</strong> <strong>Data</strong>A5E00105505-033-1
Digital <strong>Module</strong>sIn this chapterSection Contents Page3.1 <strong>Module</strong> Overview 3-43.2 Sequence of Steps from Choosing to Commissioning the Digital<strong>Module</strong>3-103.3 Digital <strong>Module</strong> Parameter Assignment 3-113.4 Diagnostics of the Digital <strong>Module</strong>s 3-123.5 Digital Input <strong>Module</strong> SM 321; DI 32 x VDC 24;(6E<strong>S7</strong>321-1BL00-0AA0)3.6 Digital Input <strong>Module</strong> SM 321; DI 32 x 120 VAC;(6E<strong>S7</strong>321-1EL00-0AA0)3.7 Digital Input <strong>Module</strong> SM 321; DI 16 x VDC 24;(6E<strong>S7</strong>321-1BH02-0AA0)3.8 Digital Input <strong>Module</strong> SM 321; DI 16 x 24 VDC High Speed;(6E<strong>S7</strong>321-1BH10-0AA0)3.9 Digital Input <strong>Module</strong> SM 321; DI 16 x DC 24 V; with Hardware andDiagnostic Interrupts, clocked; (6E<strong>S7</strong>321-7BH01-0AB0)3.10 Digital Input <strong>Module</strong> SM 321; DI 16 x 24 VDC; Source Input;(6E<strong>S7</strong>321-1BH50-0AA0)3.11 Digital Input <strong>Module</strong> SM 321; DI 16 x UC 24/48 V(6E<strong>S7</strong>321-1CH00-0AA0)3.12 Digital Input <strong>Module</strong> SM 321; DI 16 x VDC 48-125;(6E<strong>S7</strong>321-1CH20-0AA0)3.13 Digital Input <strong>Module</strong> SM 321; DI 16 x 120/230 VAC(6E<strong>S7</strong>321-1FH00-0AA0)3.14 Digital Input <strong>Module</strong> SM 321; DI 8 x VAC 120/230;(6E<strong>S7</strong>321-1FF01-0AA0)3.15 Digital Input <strong>Module</strong> SM 321;DI 8 x 120/230 VAC ISOL (6E<strong>S7</strong>321-1FF10-0AA0)3.16 Digital Input <strong>Module</strong> SM 322; DO 32 x 24 VDC/0.5 A;(6E<strong>S7</strong>322-1BL00-0AA0)3.17 Digital Input <strong>Module</strong> SM 322; DO 32 x VAC 120/230/1 A;(6E<strong>S7</strong>322-1FL00-0AA0)3.18 Digital Input <strong>Module</strong> SM 322; DO 16 x VDC 24/0.5 A;(6E<strong>S7</strong>322-1BH01-0AA0)3.19 Digital Output <strong>Module</strong> SM 322; DO 16 x 24 VDC/0.5 AHigh Speed; (6E<strong>S7</strong>322-1BH10-0AA0)3.20 Digital Output <strong>Module</strong> SM 322; DO 16 x 24/48 VUC(6E<strong>S7</strong>322-5GH00-0AB0)3.21 Digital Output <strong>Module</strong> SM 322; DO 16 x 120/230 VAC/1 A(6E<strong>S7</strong>322-1FH00-0AA0)3.22 Digital Output <strong>Module</strong> SM 322; DO 8 x 24 VDC/2 A;(6E<strong>S7</strong>322-1BF01-0AA0)3.23 Digital Output <strong>Module</strong> SM 322; DO 8 x VDC 24/0.5 A;with Diagnostic Interrupt; (6E<strong>S7</strong>322-8BF00-0AB0)3.24 Digital Input <strong>Module</strong> SM 322; DO 8 x VDC 48-125/1,5 A;(6E<strong>S7</strong>322-1CF00-0AA0)3-133-163-183-203-223-343-363-383-403-423-443-463-493-533-563-593-663-693-723-813-2<strong>Programmable</strong> <strong>Logic</strong> <strong>Controllers</strong> <strong>S7</strong>-<strong>300</strong> <strong>Module</strong> <strong>Data</strong>A5E00105505-03
Digital <strong>Module</strong>sSectionContents3.25 Digital Input module SM 322; DO 8 x VAC 120/230/2 A;(6E<strong>S7</strong>322-1FF01-0AA0)3.26 Digital Output <strong>Module</strong> SM 322;DO 8 x 120/230 VAC/2 A ISOL (6E<strong>S7</strong>322-5FF00-0AB0)3.27 Relay Output <strong>Module</strong> SM 322;DO 16 x Rel. 120/230 VAC; (6E<strong>S7</strong>322-1HH01-0AA0)3.28 Relay Output <strong>Module</strong> SM 322; DO 8 x Rel. 230 VAC;(6E<strong>S7</strong>322-1HF01-0AA0)3.29 Relay Output <strong>Module</strong> SM 322;DO 8 x Rel. 230 VAC/5A; (6E<strong>S7</strong>322-5HF00-0AB0)3.30 Relay Output <strong>Module</strong> SM 322; DO 8 x Rel. VAC 230/5 A;(6E<strong>S7</strong>322-1HF10-0AA0)3.31 Digital Input/Output <strong>Module</strong> SM 323;DI 16/DO16 x 24 VDC/0.5 A; (6E<strong>S7</strong>323-1BL00-0AA0)3.32 Digital Input/Output <strong>Module</strong> SM 323;DI 8/DO 8 x VDC 24/0.5 A; (6E<strong>S7</strong> 323-1BH01-0AA0)3.33 Digital Input/Output <strong>Module</strong> SM 327;DI 8/DX 8 x VDC 24/0.5 A; (6E<strong>S7</strong>327-1BH00-0AB0)Page3-843-873-933-963-1003-1063-1103-1133-116<strong>Programmable</strong> <strong>Logic</strong> <strong>Controllers</strong> <strong>S7</strong>-<strong>300</strong> <strong>Module</strong> <strong>Data</strong>A5E00105505-033-3
Digital <strong>Module</strong>s3.1 <strong>Module</strong> OverviewIntroductionThe following tables summarize the most important characteristics of the digitalmodules. This overview is intended to make it easy to choose the suitable modulefor your task.Table 3-1Digital Input <strong>Module</strong>s: Characteristics at a GlanceCharacteristics<strong>Module</strong>SM 321;DI 32 x24 VDC(-1BL00-)SM 321;DI 32 x120 VAC(-1EL00-)SM 321;DI 16 x24 VDC(-1BH02-)SM 321;DI 16 x24 VDC HighSpeed(-1BH10-)SM 321;DI 16 x24 VDC withhardware anddiagnosticinterrupts(-7BH01-)SM 321;DI 16 x24 VDC;source input(-1BH50-)Number of inputs32 DI;isolated ingroups of 1632 DI;isolated ingroups of 816 DI;isolated ingroups of 1616 DI; isolatedin groups of 1616 DI; isolated ingroups of 1616 DI,source input,isolated ingroups of 16Rated inputvoltageSuitable for...Supportsclocked operation<strong>Programmable</strong>diagnosticsDiagnosticinterruptHardware interruptupon edge changeSettableinput delays24 VDC 120 VAC 24 VDC 24 VDC 24 VDC 24 VDCSwitches;two, three, and four-wire proximity switches (BEROs)No No No Yes Yes NoNo No No No Yes NoNo No No No Yes NoNo No No No Yes NoNo No No No Yes NoSpecial Features – – – - 2short-circuit-proof sensorsupplies for 8channels eachExternalredundant powersupply possibleto supplysensors–3-4<strong>Programmable</strong> <strong>Logic</strong> <strong>Controllers</strong> <strong>S7</strong>-<strong>300</strong> <strong>Module</strong> <strong>Data</strong>A5E00105505-03
Digital <strong>Module</strong>sTable 3-2Digital Input <strong>Module</strong>s: Characteristics at a glance (continued)Characteristics<strong>Module</strong>Number of inputsRated inputvoltageSM 321;DI 16 xUC 24/48V(-1CH00-)16 DI; isolated ingroups of 124 to 48 VDC, 24to 48 VACSM 321;DI 16 x48-125 VDC(-1CH20-)16 DI; isolated ingroups of 8SM 321;DI 16 x120/230 VAC(-1FH00-)16 DI; isolated ingroups of 4SM 321;DI 8 x120/230 VAC(-1FF01-)8 DI, isolated ingroups of 2SM 321;DI 8 x120/230 VACISOL(-1FF10-)8 DI; isolated ingroups of 148 to 125 VDC 120/230 VAC 120/230 VAC 120/230 VACSuitable for...Supportsclocked operation<strong>Programmable</strong>diagnosticsDiagnosticinterruptHardware interruptupon edge changeSettableinput delaysSwitches;two, three, and four-wire proximityswitches (BEROs)Switches;two and three-wire AC proximity switchesNo No No No NoNo No No No NoNo No No No NoNo No No No NoNo No No No NoSpecial Features – –<strong>Programmable</strong> <strong>Logic</strong> <strong>Controllers</strong> <strong>S7</strong>-<strong>300</strong> <strong>Module</strong> <strong>Data</strong>A5E00105505-033-5
Digital <strong>Module</strong>sTable 3-3Digital Output <strong>Module</strong>s: Characteristics at a GlanceCharacteristics<strong>Module</strong>SM 322;DO 32 x24 VDC0.5 A(-1BL00-)SM 322;DO 32 xVAC 120/230/1 A(-1FL00-)SM 322;DO 16 x24 VDC/0.5 A(-1BH01-)SM 322;DO 16 x24 VDC/0.5 A HighSpeed(-1BH10-)SM 322;DO 16 x24/48 VUC(-5GH00-)SM 322;DO 16 x120/230 VDC/1 A(-1FH00-)Number of outputs32 DO;isolated ingroups of 832 DO;isolated ingroups of 816 DO;isolated ingroups of 816 DO;isolated ingroups of 816 DO;isolated ingroups of 1Output current 0.5 A 1.0 A 0.5 A 0.5 A 0.5 A 0.5 ARated load voltage 24 VDC 120 VAC 24 VDC 24 VDC 24 to 48 VDC,24 to 48 VACSuitable for...Supportsclocked operation<strong>Programmable</strong>diagnosticsDiagnosticinterruptSubstitute valueoutputSpecial Features –Solenoid valves, DC contactors and indicator lightsNo No No Yes No NoNo No No No Yes NoNo No No No Yes NoNo No No No Yes No16 DO;isolated ingroups of 8120/230 VAC3-6<strong>Programmable</strong> <strong>Logic</strong> <strong>Controllers</strong> <strong>S7</strong>-<strong>300</strong> <strong>Module</strong> <strong>Data</strong>A5E00105505-03
Digital <strong>Module</strong>sTable 3-4Digital Output <strong>Module</strong>s: Characteristics at a glance (continued)Characteristics<strong>Module</strong>Number of outputsSM 322;DO 8 x 24VDC/2 A(-1BF01-)8 DO; isolated ingroups of 4SM 322;DO 8 x24 VDC/0.5 Awith diagnosticinterrupt(-8BF00-)8 DO; isolated ingroups of 8SM 322;DO 8 x 48-125VDC/ 1.5 A(-1CF00-)8 DO; isolatedand reversepolarityprotection, ingroups of 4SM 322;DO8 x120/ 230 VAC/2A(-1FF01-)8 DO; isolated ingroups of 4Output current 2 A 0.5 A 1.5 A 2 A 2 ASM 322;DO8 x120/ 230 VAC/2A ISOL(-5FF00-)8 DO; isolated ingroups of 1Rated load voltage 24 VDC 24 VDC 48 to 125 VDC 120/230 VAC 120/230 VACSuitable for... Solenoid valves, DC contactors and indicator lights AC solenoid valves, contactors, motorstarters, fractional h.p. motors andindicator lights.Supportsclocked operation<strong>Programmable</strong>diagnosticsDiagnosticinterruptSubstitute valueoutputNo No No No NoNo Yes No No YesNo Yes No No YesNo Yes No No YesSpecial Features – Redundantdriving of a loadpossible– Fuse blowndisplay.Replaceable fusefor each group-<strong>Programmable</strong> <strong>Logic</strong> <strong>Controllers</strong> <strong>S7</strong>-<strong>300</strong> <strong>Module</strong> <strong>Data</strong>A5E00105505-033-7
Digital <strong>Module</strong>sTable 3-5Relay Output <strong>Module</strong>s: Characteristics at a GlanceCharacteristics<strong>Module</strong>Number of outputsRated load voltageSuitable for...Supportsclocked operation<strong>Programmable</strong>diagnosticsSM 322; DO 16 xRel. 120 VAC(-1HH01-)16 outputs, isolated ingroups of 824 to 120 VDC,48 to 230 VACSM 322; DO 8 xRel. 230 VAC(-1HF01-)8 outputs, isolated ingroups of 224 to 120 VDC,48 to 230 VACSM 322; DO 8 xRel. 230 VAC/ 5 A(-5HF00-)8 outputs, isolated ingroups of 124 to 120 VDC,24 to 230 VACSM 322; DO 8 xRel. 230 VAC/ 5 A(-1HF10-)8 outputs, isolated ingroups of 124 to 120 VDC,48 to 230 VACAC/DC solenoid valves, contactors, motor starters, fractional horsepower motors andindicator lightsNo No No NoNo No Yes NoDiagnostic interrupt No No Yes NoSubstitute value output No No Yes NoSpecial Features –3-8<strong>Programmable</strong> <strong>Logic</strong> <strong>Controllers</strong> <strong>S7</strong>-<strong>300</strong> <strong>Module</strong> <strong>Data</strong>A5E00105505-03
Digital <strong>Module</strong>sTable 3-6Digital Input/Output <strong>Module</strong>s: Characteristics at a GlanceCharacteristics<strong>Module</strong>SM 323;DI 16/DO 16x24 VDC/0.5 A(-1BL00-)SM 323;DI 8/DO 8x24 VDC/0.5 A(-1BH01-)SM 327;DI 8/DX 8xDC 24 V/0.5 A,parameterizable(-1BH00-)Number of inputsNumber of outputs16 inputs, isolated ingroups of 1616 outputs, isolated ingroups of 88 inputs, isolated ingroups of 88 outputs, isolated ingroups of 8Rated input voltage 24 VDC 24 VDC 24 VDCOutput current 0.5 A 0.5 A 0.5 ARated load voltage 24 VDC 24 VDC 24 VDCInputs suitable for...Outputs suitable for...Supportsclocked operation<strong>Programmable</strong>diagnostics8 digital inputs and 8individuallyparameterizable inputsor outputs, isolated ingroups of 16Switches and two, three and four-wire proximity switches (BEROs).Solenoid valves, DC contactors and indicator lightsNo No NoNo No NoDiagnostic interrupt No No NoHardware interrupt uponedge changeNo No NoSettable input delay No No NoSubstitute value output No No NoSpecial Features –<strong>Programmable</strong> <strong>Logic</strong> <strong>Controllers</strong> <strong>S7</strong>-<strong>300</strong> <strong>Module</strong> <strong>Data</strong>A5E00105505-033-9
Digital <strong>Module</strong>s3.2 Sequence of Steps from Choosing to Commissioning theDigital <strong>Module</strong>IntroductionThe following table contains the tasks that you have to perform one after the otherto commission digital modules successfully.The sequence of steps is a suggestion, but you can perform individual steps eitherearlier or later (for example, assign parameters to the module) or install othermodules or install, commission etc. other modules in between times.Sequence of stepsTable 3-7Sequence of Steps from Choosing to Commissioning the Digital <strong>Module</strong>Step Procedure Refer To...1. Select the module Section 3.1 and specific module section fromSection 3.52. Install the module in the<strong>SIMATIC</strong> <strong>S7</strong> network“Mounting” section in the Installation Manual forthe programmable logic controller being used:• <strong>S7</strong>-<strong>300</strong> <strong>Programmable</strong> <strong>Controllers</strong>, Hardwareand Installation or <strong>S7</strong>-400, M7-400<strong>Programmable</strong> <strong>Controllers</strong>, Hardware andInstallationor• ET 200M Distributed I/O Device3. Assign parameters to module Section 3.34. Commission configuration “Commissioning” section in the InstallationManual for the programmable controller beingused:• <strong>S7</strong>-<strong>300</strong> <strong>Programmable</strong> <strong>Controllers</strong>, Hardwareand Installation or <strong>S7</strong>-400, M7-400<strong>Programmable</strong> <strong>Controllers</strong>, Hardware andInstallationor• ET 200M Distributed I/O Device5. If commissioning was notsuccessful, diagnoseconfigurationSection 3.43-10<strong>Programmable</strong> <strong>Logic</strong> <strong>Controllers</strong> <strong>S7</strong>-<strong>300</strong> <strong>Module</strong> <strong>Data</strong>A5E00105505-03
Digital <strong>Module</strong>s3.3 Digital <strong>Module</strong> Parameter AssignmentIntroductionDigital modules can have different characteristics. You can set the characteristicsof dome modules by means of parameter assignment.The information contained in this section refers only to the programmable digitalmodules:• Digital input module SM 321; DI 16 x DC 24 V with process and diagnosisalarm, synchronous; (6E<strong>S7</strong>321-7BH01-0AB0)• Digital input module SM 322; DO 8 x VDC 24/0.5 A with diagnostic interrupt(6E<strong>S7</strong>322-8BF00-0AB0)• Digital output module SM 322; DO 8 x 120/230 VAC /2A ISOL(6E<strong>S7</strong>322-5FF00-0AB0)• Relay output module SM 322; DO 8 x Rel. 230 VAC /5A(6E<strong>S7</strong>322-5HF00-0AB0)• Digital Input/Output <strong>Module</strong> SM 327; DI 8/DX 8 x VDC 24/0.5 A(6E<strong>S7</strong>327-1BH00-0AB0)Tools for parameter assignmentYou assign parameters to digital modules in STEP 7. You must perform parameterassignment in STOP mode of the CPU.When you have set all the parameters, download the parameters from theprogramming device to the CPU. On a transition from STOP to RUN mode, theCPU then transfers the parameters to the individual digital modules.Static and dynamic parametersThe parameters are divided into static and dynamic parameters.Set the static parameters in STOP mode of the CPU, as described above.You can also change the dynamic parameters in the running user program in an <strong>S7</strong>logic control using SFC. Note, however, that after a change from RUN STOP,STOP RUN of the CPU, the parameters set in STEP 7 apply again. You will finda description of the parameter assignment of modules in the user program inAppendix A.Parameter Settable with CPU Operating StateStatic PG (STEP 7 HW CONFIG) STOPDynamic PG (STEP 7 HW CONFIG) STOPSFC 55 in the user program RUN<strong>Programmable</strong> <strong>Logic</strong> <strong>Controllers</strong> <strong>S7</strong>-<strong>300</strong> <strong>Module</strong> <strong>Data</strong>A5E00105505-033-11
Digital <strong>Module</strong>sParameters of the digital modulesThe settable parameters are listed in the special section on the module.3.4 Diagnostics of the Digital <strong>Module</strong>sIntroductionThe information contained in this section refers only to the digital modules withdiagnostics capability. For the <strong>S7</strong>-<strong>300</strong>, these modules are as follows:• Digital input module SM 321; DI 16 x DC 24 V with hardware and diagnosticinterrupts, clocked; (6E<strong>S7</strong>321-7BH01-0AB0)• Digital Output <strong>Module</strong> SM 322; DO 16 x 24/48 VUC(6E<strong>S7</strong>322-5GH00-0AB0)• Digital Output <strong>Module</strong> SM 322; DO 8 x DC 24 V/0.5 A with diagnostic interrupt(6E<strong>S7</strong>322-8BF00-0AB0)• Digital output module SM 322; DO 8 x 120/230 VAC /2A ISOL(6E<strong>S7</strong>322-5FF00-0AB0)• Relay output module SM 322; DO 8 x Rel. 230 VAC /5A(6E<strong>S7</strong>322-5HF00-0AB0)<strong>Programmable</strong> and non-programmable diagnostic messagesIn diagnostics, we make a distinction between programmable andnon-programmable diagnostic messages.You obtain programmable diagnostic messages only if you have enableddiagnostics by parameter assignment. You perform parameter assignment in the“Diagnostics” parameter field in STEP 7.Non-programmable diagnostic messages are always made available by the digitalmodule irrespective of diagnostics being enabled.Actions following diagnostic message in STEP 7Each diagnostic message leads to the following actions:• The diagnostic message is entered in the diagnosis of the digital module andforwarded to the CPU.• The SF LED on the digital module lights.• If you have programmed “Enable Diagnostic Interrupt” in STEP 7, a diagnosticinterrupt is triggered and OB 82 is called.3-12<strong>Programmable</strong> <strong>Logic</strong> <strong>Controllers</strong> <strong>S7</strong>-<strong>300</strong> <strong>Module</strong> <strong>Data</strong>A5E00105505-03
Digital <strong>Module</strong>sReading out diagnostic messagesYou can read out detailed diagnostic messages by means of SFCs in the userprogram (refer to the Appendix “Diagnostic <strong>Data</strong> of Signal <strong>Module</strong>s”).You can view the cause of the error in STEP 7, in the module diagnosis (refer toonline Help for STEP 7).Diagnostic message by means of SF LEDThe digital modules with diagnostics capability indicate errors for you by means oftheir SF LED (group error LED). The SF LED lights as soon as a diagnosticmessage is triggered by the digital module. It goes out when all errors have beenrectified.The group fault (SF) LED also lights up in case of external errors (short circuit ofsensor supply), independent of the operating status of the CPU (if power is on).Diagnostic messages interrupt processing by the digital modulesYou will find the diagnostic messages with their possible causes and remedialaction, together with a description of possible interrupts in the specific section onthe module.3.5 Digital Input <strong>Module</strong> SM 321; DI 32 x VDC 24;(6E<strong>S7</strong>321-1BL00-0AA0)Order number: “Standard module”6E<strong>S7</strong>321-1BL00-0AA0Order number: SIPLUS <strong>S7</strong>-<strong>300</strong> <strong>Module</strong>6AG1321-1BL00-2AA0CharacteristicsThe digital input module SM 321; DI 32 x 24 VDC has the following salientfeatures:• 32 inputs, isolated in groups of 16• 24 VDC rated input voltage• Suitable for switches and two / three / four-wire BEROs (proximity switches).<strong>Programmable</strong> <strong>Logic</strong> <strong>Controllers</strong> <strong>S7</strong>-<strong>300</strong> <strong>Module</strong> <strong>Data</strong>A5E00105505-033-13
Digital <strong>Module</strong>sTerminal assignment and block diagram of the SM 321; DI 32 x 24 VDCBackplane businterface24V24VChannelnumberStatus display – greenFigure 3-1<strong>Module</strong> View and Block Diagram of the Digital Input <strong>Module</strong> SM 321; DI 32 x 24 VDCTerminal assignment of the SM 321; DI 32 x 24 VDCThe following figure shows the assignment of the channels to the addresses.Input byte xInput byte (x+2)Input byte (x+1)Input byte (x+3)Figure 3-2Terminal assignment of the SM 321; DI 32 x 24 VDC3-14<strong>Programmable</strong> <strong>Logic</strong> <strong>Controllers</strong> <strong>S7</strong>-<strong>300</strong> <strong>Module</strong> <strong>Data</strong>A5E00105505-03
Digital <strong>Module</strong>sTechnical specifications of the SM 321; DI 32 x 24 VDCDimensions and WeightInsulation tested with500 VDCDimensions W x H x D(in millimeters)WeightSupports clockedoperation40 x 125 x 120Approx. 260 g<strong>Data</strong> for Specific <strong>Module</strong>NoNumber of inputs 32Length of cable• Unshielded• Shieldedmax. 600 mmax. 1000 mVoltages, Currents, PotentialsNumber of inputs that can betriggered simultaneously• Horizontal configurationUp to 40 CUp to 60 C• Vertical configurationUp to 40 CIsolation• Between channels andbackplane bus• Between the channelsIn groups ofPermitted potential difference• Between the differentcircuits321632YesYes1675 VDC / 60 VACCurrent consumption• From the backplane bus max. 15 mAPower dissipation of the moduleStatus displayInterruptsDiagnostic functionsInput voltage• Rated value• For signal “1”• For signal “0”typ. 6.5 WStatus, Interrupts, DiagnosticsGreen LED per channelNoneNone<strong>Data</strong> for Selecting a Sensor24 VDC13 to 30 V–30 to + 5 VInput current• At signal “1” typ. 7 mAInput delay• At “0” to “1”• At “1” to “0”Input characteristic curveConnection of Two-WireBEROs• Permitted bias current1.2 to 4.8 ms1.2 to 4.8 msAccording toIEC 61131, type 1Possiblemax. 1.5 mA<strong>Programmable</strong> <strong>Logic</strong> <strong>Controllers</strong> <strong>S7</strong>-<strong>300</strong> <strong>Module</strong> <strong>Data</strong>A5E00105505-033-15
Digital <strong>Module</strong>s3.6 Digital Input <strong>Module</strong> SM 321; DI 32 x 120 VAC;(6E<strong>S7</strong>321-1EL00-0AA0)Order number6E<strong>S7</strong>321-1EL00-0AA0CharacteristicsThe SM 321; DI 32 x 20 VAC features the following characteristics:• 32 inputs, isolated in groups of 8• 120 VAC rated input voltage• Suitable for switches and two / three-wire AC proximity switchesTerminal assignment and block diagram of the SM 321; DI 32 x 120 VAC1 L3L1 N2LbackplanebusIM3 N4 L2 N4 NChannelnumberStatus display - greenFigure 3-3<strong>Module</strong>View and Block Diagram of Digital Input <strong>Module</strong> SM 321; DI 32 x 20 VAC3-16<strong>Programmable</strong> <strong>Logic</strong> <strong>Controllers</strong> <strong>S7</strong>-<strong>300</strong> <strong>Module</strong> <strong>Data</strong>A5E00105505-03
Digital <strong>Module</strong>sTechnical specifications of the SM 321; DI 32 x 120 VACDimensions W x H x D(in millimeters)WeightSupports clockedoperationDimensions and Weight40 x 125 x 117Approx. <strong>300</strong> g<strong>Data</strong> for Specific <strong>Module</strong>NoNumber of inputs 32Length of cable• Unshielded• Shieldedmax. 600 mmax. 1000 mVoltages, Currents, PotentialsNumber of inputs that can betriggered simultaneously• Horizontal configurationUp to 40 C 32Up to 60 C 24• Vertical configurationUp to 40 C 32Isolation• Between channels andbackplane busYesStatus displayInterruptsDiagnostic functionsStatus, Interrupts, DiagnosticsGreen LED per channelNoneNone<strong>Data</strong> for Selecting a SensorInput voltage• Rated value120 VAC• For ‘‘1’’ signal74 to 132 V• For ‘‘0’’ signal0 to 20 V• Frequency range47 to 63 HzInput current• At ‘‘1’’ signal typ. 21 mAInput delay• From ‘‘0’’ to ‘‘1’’max. 15 ms• From ‘‘1’’ to ‘‘0’’max. 25 msInput characteristic curveConnection of Two-WireBEROs• Permitted bias currentAccording toIEC 61131, type 2Possiblemax. 4 A• Between the channels YesIn groups of 8Permitted potential difference• Between M internal andthe inputs• Between the inputs ofthe different groupsInsulation tested with120 VAC250 VAC2500 VDCCurrent consumption• From the backplane bus max. 16 mAPower dissipation of the moduletyp. 4 W<strong>Programmable</strong> <strong>Logic</strong> <strong>Controllers</strong> <strong>S7</strong>-<strong>300</strong> <strong>Module</strong> <strong>Data</strong>A5E00105505-033-17
Digital <strong>Module</strong>s3.7 Digital Input <strong>Module</strong> SM 321; DI 16 x VDC 24;(6E<strong>S7</strong>321-1BH02-0AA0)Order number: “Standard module”6E<strong>S7</strong>321-1BH02-0AA0Order number: SIPLUS <strong>S7</strong>-<strong>300</strong> module6AG1321-1BH02-2AA0CharacteristicsThe digital input module SM 321; DI 16 x 24 VDC has the following salientfeatures:• 16 inputs, isolated in groups of 16• 24 VDC rated input voltage• Suitable for switches and two / three / four-wire BEROs (proximity switches).Terminal assignment and block diagram of the SM 321; DI 16 x 24 VDCBackplane businterfaceM24 VChannel numberStatus display – greenFigure 3-4<strong>Module</strong> View and Block Diagram of Digital Input <strong>Module</strong> SM 321; DI 16 x 24VDC3-18<strong>Programmable</strong> <strong>Logic</strong> <strong>Controllers</strong> <strong>S7</strong>-<strong>300</strong> <strong>Module</strong> <strong>Data</strong>A5E00105505-03
Digital <strong>Module</strong>sTechnical specifications of the SM 321; DI 16 x 24 VDCDimensions W x H x D(in millimeters)WeightSupports clockedoperationDimensions and Weight40 x 125 x 117Approx. 200 g<strong>Data</strong> for Specific <strong>Module</strong>NoNumber of inputs 16Length of cable• Unshielded• Shieldedmax. 600 mmax. 1000 mVoltages, Currents, PotentialsNumber of inputs that can betriggered simultaneously• Horizontal configurationUp to 60 C• Vertical configurationUp to 40 C1616Input voltage• Rated value• For signal “1”• For signal “0”<strong>Data</strong> for Selecting a Sensor24 VDC13 to 30 V–30 to + 5 VInput current• At signal “1” typ. 7 mAInput delay• At “0” to “1”• At “1” to “0”Input characteristic curveConnection of Two-WireBEROs• Permitted bias current1.2 to 4.8 ms1.2 to 4.8 msAccording toIEC 61131, type 1Possiblemax. 1.5 mAIsolation• Between channels andbackplane busPermitted potential difference• Between the differentcircuitsInsulation tested withYes75 VDC / 60 VAC500 VDCCurrent consumption• From the backplane bus max. 10 mAPower dissipation of the moduletyp. 3.5 WStatus, Interrupts, DiagnosticsStatus displayInterruptsDiagnostic functionsGreen LED per channelNoneNone<strong>Programmable</strong> <strong>Logic</strong> <strong>Controllers</strong> <strong>S7</strong>-<strong>300</strong> <strong>Module</strong> <strong>Data</strong>A5E00105505-033-19
Digital <strong>Module</strong>s3.8 Digital Input <strong>Module</strong> SM 321;DI 16 x 24 VDC High Speed; (6E<strong>S7</strong>321-1BH10-0AA0)Order number:6E<strong>S7</strong>321-1BH10-0AA0CharacteristicsThe SM 321; DI 16 x 24 VDC High Speed has the following salient features:• 16 inputs, isolated in groups of 16• 24 VDC rated input voltage• Suitable for switches and two / three / four-wire BEROs (proximity switches).• Supports clocked operationTerminal assignment and block diagram of the SM 321;DI 16 x 24 VDC High SpeedBackplane businterfaceM24 VChannel numberStatus display – greenFigure 3-5<strong>Module</strong> view and block diagram of the SM 321; DI 16 x 24VDC High Speed3-20<strong>Programmable</strong> <strong>Logic</strong> <strong>Controllers</strong> <strong>S7</strong>-<strong>300</strong> <strong>Module</strong> <strong>Data</strong>A5E00105505-03
Digital <strong>Module</strong>sTechnical specifications of the SM 321; DI 16 x 24 VDC High SpeedDimensions and Weight<strong>Data</strong> for Selecting a SensorDimensions W x H x D(in millimeters)Weight40 x 125 x 117Approx. 200 g<strong>Data</strong> for Specific <strong>Module</strong>Input voltage• Rated value• For signal “1”• For signal “0”24 VDC13 to 30 V–30 to + 5 VSupports clockedoperationYesNumber of inputs 16Length of cable• Unshielded• Shieldedmax. 600 mmax. 1000 mVoltages, Currents, PotentialsInput current• At signal “1” typ. 7 mAInput delay• At “0” to “1”• At “1” to “0”Input characteristic curve25 to 75 s25 to 75 sAccording toIEC 61131, type 1Number of inputs that can betriggered simultaneously• Horizontal configurationUp to 60 C• Vertical configurationUp to 40 CIsolation• Between channels andbackplane busPermitted potential difference• Between the differentcircuitsInsulation tested with1616Yes75 VDC / 60 VAC500 VDCConnection of Two-WireBEROs• Permitted bias currentPossiblemax. 1.5 mACurrent consumption• From the backplane bus max. 110 mAPower dissipation of the moduletyp. 3.8 WStatus, Interrupts, DiagnosticsStatus displayInterruptsDiagnostic functionsGreen LED per channelNoneNone<strong>Programmable</strong> <strong>Logic</strong> <strong>Controllers</strong> <strong>S7</strong>-<strong>300</strong> <strong>Module</strong> <strong>Data</strong>A5E00105505-033-21
Digital <strong>Module</strong>s3.9 Digital input module SM 321; DI 16 x DC 24 V;with Hardware and Diagnostic Interrupts, clocked;(6E<strong>S7</strong>321-7BH01-0AB0)Order number: “Standard module”6E<strong>S7</strong>321-7BH01-0AB0Order number: SIPLUS <strong>S7</strong>-<strong>300</strong> module6AG1321-7BH01-2AB0CharacteristicsThe SM 321; DI 16 x 24 VDC; with hardware and diagnostic interrupts features thefollowing characteristics:• 16 inputs, isolated in groups of 16• 24 VDC rated input voltage• Input characteristic curve according to IEC 61131, Type 2• Suitable for switches and two / three / four-wire BEROs (proximity switches).• 2 short-circuit-proof sensor supplies for 8 channels each• External redundant power supply possible to supply sensors• “Sensor supply (Vs)” status display• Group error display• Supports clocked operation• Supports the “parameter changing during the RUN” function• <strong>Programmable</strong> diagnostics• <strong>Programmable</strong> diagnostic interrupt• <strong>Programmable</strong> hardware interrupt• <strong>Programmable</strong> input delays3-22<strong>Programmable</strong> <strong>Logic</strong> <strong>Controllers</strong> <strong>S7</strong>-<strong>300</strong> <strong>Module</strong> <strong>Data</strong>A5E00105505-03
Digital <strong>Module</strong>sTerminal assignment and block diagram of the SM 321; DI 16 x 24 VDCSFL+L+Broken–wiredetectionMV sL +V sV sV sBroken–wiredetectionBackplane businterfaceMM24 VChannel numberStatus display – greenFault indicator – redEncoder supplies Vs – greenFigure 3-6<strong>Module</strong> View and Block Diagram of Digital Input <strong>Module</strong> SM 321; DI 16 x 24 VDC<strong>Programmable</strong> <strong>Logic</strong> <strong>Controllers</strong> <strong>S7</strong>-<strong>300</strong> <strong>Module</strong> <strong>Data</strong>A5E00105505-033-23
Digital <strong>Module</strong>sTerminal assignment for redundant supply of encodersThe figure below shows how encoder can additionally be supplied by means of Vswith a redundant voltage source – for example, via another module).Short-circuitproofdriverDigital inputmoduleL+VsMto the sensors1 L+2 L+Figure 3-7 Terminal assignment for redundant supply of encoders of SM 321;DI 16 x VDC 24Terminal assignment for resistive circuit of the encoderIn order to detect a broken wire, it is necessary to wire the encoder contact with aresistor.L +/ V sE x.x15 k ... 18 kFigure 3-8 Terminal assignment for resistive circuit of the encoder of the SM 321;DI 16 x 24 VDC3-24<strong>Programmable</strong> <strong>Logic</strong> <strong>Controllers</strong> <strong>S7</strong>-<strong>300</strong> <strong>Module</strong> <strong>Data</strong>A5E00105505-03
Digital <strong>Module</strong>sTechnical specifications of the SM 321; DI 16 x 24 VDCDimensions W x H x D(in millimeters)WeightSupports clockedoperationDimensions and Weight40 x 125 x 117Approx. 200 g<strong>Data</strong> for Specific <strong>Module</strong>Parameter changing during theRUN is possible• Behavior of the non parameterizedinputsYesYesNumber of inputs 16Length of cable• Unshielded• Shieldedgives the last validoutput value before theparameterizationmax. 600 mmax. 1000 mVoltages, Currents, PotentialsPower rated voltage of theelectronics and encoder L+• Reverse polarity protection Yes24 VDCNumber of inputs that can be triggered simultaneously• Horizontal configurationUp to 60 C 16• Vertical configurationUp to 40 C 16Isolation• Between channels andbackplane busPermitted potential difference• Between the differentcircuitsInsulation tested withYes75 VDC / 60 VAC500 VDCCurrent consumption• From the backplane bus max. 130 mA• From load voltage L +(without sensor supply VS)max. 90 mAPower dissipation of the moduletyp. 4 WStatus, Interrupts, DiagnosticsStatus display• Inputs Green LED per channel• Sensor power supplies (Vs) Green LED per outputInterrupts• Hardware interrupt• Diagnostic interruptDiagnostic functionsParameters can beassignedParameters can beassignedParameters can beassigned• Group error display Red LED (SF)• Diagnostics information Possibleread-outMonitoring of• Wire-break yes, at I < 1 mASensor Power Supply OutputsNumber of outputs 2Output voltage• With load min. L+ (–2.5 V)Output current• Rated value• Permitted rangeAdditional (redundant) supplyShort-circuit protectionInput voltage• Rated value• For signal “1”• For signal “0”120 mA0 to 150 mAPermittedYes, electronic<strong>Data</strong> for Selecting a Sensor24 VDC13 to 30 V30 to + 5 VInput current• At signal “1” typ. 7 mAInput characteristic curveConnection of Two-WireBEROs• Permitted bias currentResistive circuit of the sensorfor detecting broken wiresInternal processing time forstatus processing (in nonsynchronous operation)• Release of process anddiagnosis alarmInput delay• Parameters can beassigned• Rated valueTime/FrequencyAccording toIEC 61131, type 2Possiblemax. 2 mA10 to 18 kOhmmax. 40 sYestyp. 0.1/0.5/3/15/20 ms<strong>Programmable</strong> <strong>Logic</strong> <strong>Controllers</strong> <strong>S7</strong>-<strong>300</strong> <strong>Module</strong> <strong>Data</strong>A5E00105505-033-25
Digital <strong>Module</strong>s3.9.1 SynchronicityCharacteristicsReproducible (i.e. same length) reaction times are achieved for the <strong>SIMATIC</strong> withan equidistant DP bus cycle and synchronization of the following free runningsingle cycles:• Free running of the user program. The length of the cycle time can vary due toacyclic program branches.• Free running, variable DP cycle at the PROFIBUS subnetwork• Free running cycle at the DP slave back plane bus.• Free running cycle during signal processing and conversion in the electronicmodules of the DP slave.In the case of equidistance the DP cycle runs in phase and with the same length.The procedure levels of a CPU (OB 61 to OB 64) and the synchronous peripheralare synchronized in this cycle. The E/A data are therefore transferred at definedand consistent time intervals (clock synchronicity).Requirements• The DP-Master and DP-Slave must support the synchronicity. They requireSTEP 7 from Version 5.2.<strong>Module</strong> filtering mode SynchronicityIn synchronous operation, the following conditions apply:Filter and processing time T WE between reading the current valueand loading it into the transfer buffer(the specified value for T WE applies, independent of the activation ofthe hardware interrupt or diagnosis)including an input delay time ofT DPminDiagnostic interrupt255 to 345 s100 s2.5 msmax. 4 x T DPNoteIn “synchronous” mode the input delay of the inputs is always set to 100 sindependent of the input delay parameterized in STEP 7Further informationFurther information on clock synchronicity is given in the Online help of STEP 7, inthe manual Local peripheral system ET 200Mand in the manualClock synchronicity.3-26<strong>Programmable</strong> <strong>Logic</strong> <strong>Controllers</strong> <strong>S7</strong>-<strong>300</strong> <strong>Module</strong> <strong>Data</strong>A5E00105505-03
Digital <strong>Module</strong>s3.9.2 Assigning Parameters to SM 321; DI 16 x VDC 24Parameter assignmentYou will find a description of the general procedure for assigning parameters todigital modules in the reference manual, section 3.3.Parameters of the SM 321; DI 16 x 24 VDCYou will find an overview of the parameters that you can set and their defaultsettings for the SM 321; DI 16 x 24 VDC in the table below.The default settings apply if you have not performed parameter assignment inSTEP 7.Table 3-8 Parameters of the SM 321; DI 16 x VDC 24Enable• Diagnostic interrupt• Hardware interruptInput delay/voltage typeDiagnostics• Sensor supply missing• Wire-breakTrigger for hardware interrupt• Rising edge• Falling edgeParameter Value Range DefaultSettingsYes/noYes/no0.1 ms (DC)0.5 ms (DC)3 ms (DC)15 ms (DC)20 ms (DC/AC)Yes/noYes/noYes/noYes/noNoNoParameterTypeDynamicScope<strong>Module</strong>(DC) Static <strong>Module</strong>NoNoNoNoStaticDynamicChannelgroupChannelgroupAssignment of the encoder supplies to channel groupsThe two encoder supplies of the module are used to supply two channel groups:inputs 0 to 7 and inputs 8 to 15. In these two channel groups, you parameterize thediagnostics for the encoder supply, too.Assigning interrupt parameters to channel groupsThe table below shows the channels that can be combined to form a channelgroup if you would like to parameterize interrupt processing.You will need the channel group number to set the parameters in the user programwith an SFC.<strong>Programmable</strong> <strong>Logic</strong> <strong>Controllers</strong> <strong>S7</strong>-<strong>300</strong> <strong>Module</strong> <strong>Data</strong>A5E00105505-033-27
Digital <strong>Module</strong>sTable 3-9 Assigning Interrupt Parameters to the Inputs of the SM 321; DI 16 x VDC 24Parameter...Hardware interrupt(for falling, rising or both types of pulseedges)Diagnostic interruptfor missing sensor supplyDiagnostic interruptfor wire–breakCan Be Set in FollowingChannel Groups0 and 12 and 34 and 56 and 78 and 910 and 1112 and 1314 and 150 to 78 to 150 and 12 and 3Channel GroupNumber01234567-01:Tolerances of the programmable input delaysTable 3-10 Tolerances of the Input Delays of SM 321; DI 16 x VDC 24Programmed Input delayTolerance0.1 ms 60 to 140 s0.5 ms 400 to 900 ms3 ms (preset) 2,6 to 3,3 ms15 ms 12 to 15 ms20 ms 17 to 23 ms3-28<strong>Programmable</strong> <strong>Logic</strong> <strong>Controllers</strong> <strong>S7</strong>-<strong>300</strong> <strong>Module</strong> <strong>Data</strong>A5E00105505-03
Digital <strong>Module</strong>s3.9.3 Behavior and Diagnostics of the SM 321; DI 16 x 24 VDCEffect of operating and mode supply voltage on the input valuesThe input values of the SM 321; DI 16 x 24 DC depend on the operating mode ofthe CPU and on the supply voltage of the module.Table 3-11Dependencies of Input Values on the Operating Mode of the CPU and SupplyVoltage L+ of the SM 321; DI 16 x VDC 24CPU Operating State Power Supply L+to Digital <strong>Module</strong>POWER ON RUN L+ exists Process valueL+ missing 0 signalSTOP L+ exists Process valueL+ missing 0 signalPOWER OFF – L+ exists –L+ missing –Input Value of Digital<strong>Module</strong>Diagnostic Messages of the SM 321; DI 16 x 24 VDCThe table below presents an overview of the diagnostic messages for the SM 321;DI 16 x 24 VDC.Table 3-12 Diagnostic Messages of the SM 321; DI 16 x VDC 24Diagnostics Message LED Scope of the DiagnosticsParameterscan beassignedSensor supply missing SF Channel groupWire-break SF Channel group Yes<strong>Module</strong> not parameterized. SF Channel groupExternal auxiliary supply missing SF <strong>Module</strong>Internal auxiliary power missing SF <strong>Module</strong>Fuse blown SF <strong>Module</strong>Incorrect parameter on module SF <strong>Module</strong>Watchdog timeout SF <strong>Module</strong>EPROM error SF <strong>Module</strong>RAM error SF <strong>Module</strong>Hardware interrupt lost SF <strong>Module</strong>No<strong>Programmable</strong> <strong>Logic</strong> <strong>Controllers</strong> <strong>S7</strong>-<strong>300</strong> <strong>Module</strong> <strong>Data</strong>A5E00105505-033-29
Digital <strong>Module</strong>sNoteA prerequisite for detecting the errors indicated by programmable diagnosticmessages is that you have assigned parameters to the digital module accordinglyin STEP 7.Behavior upon failure of the supply voltageA failure of the supply voltage of the SM 321; DI 16 x 24 DC is always indicated bythe SF LED on the module. Furthermore, this information is made available on themodule.The input value is initially held for 20 to 40 ms before the 0 signal is transferred tothe CPU. Supply voltage dips < 20 ms do not modify the process value (refer toTable 3-11).Triggering of the diagnostic interrupt depends on the parameter assignment (seeSection 3.9.4).Failure of the supply voltage with redundant encoder incoming supplyNoteIf an external redundant source is applied simultaneously to the sensor supply(Vs), a failure in the internal sensor supply causes a failure of the internal and/orexternal sensor supply and/or a blown fuse to be indicated instead of a regularsensor supply failure.Short-circuit of sensor supply VsIrrespective of the parameter assignment, the corresponding Vs LED goes out if ashort-circuit of the encoder supply Vs occurs.3-30<strong>Programmable</strong> <strong>Logic</strong> <strong>Controllers</strong> <strong>S7</strong>-<strong>300</strong> <strong>Module</strong> <strong>Data</strong>A5E00105505-03
Digital <strong>Module</strong>sCauses of error and remedial measuresTable 3-13 Diagnostic Messages of the SM 321; DI 16 x DC 24 V, Causes of Error andRemedial ActionDiagnosticsMessageLack of encodersupplyExternal auxiliaryvoltage missingInternal auxiliaryvoltage missingPossible Error CauseOverload of sensor supplyShort circuit of sensor supply to MEliminate overloadRemedyEliminate short circuitPower supply L+ to module missing Feed supply L+Power supply L+ to module missing Feed supply L+Fuse in module defectiveReplace moduleFuse blown Fuse in module defective Replace moduleWrong parameters inmoduleWatchdog trippedEPROM errorRAM errorHardware interrupt lost<strong>Module</strong> notparameterizedOne parameter or the combination ofparameters is not plausibleTemporary high electromagneticinterference<strong>Module</strong> defectiveTemporary high electromagneticinterference<strong>Module</strong> defectiveTemporary high electromagneticinterference<strong>Module</strong> defectiveThe module cannot send an interrupt,since the previous interrupt was notacknowledged; configuration errorpossibleFault during startupReassign module parameterEliminate interferenceReplace moduleEliminate interference and switch on/offpower supply of CPUReplace moduleEliminate interference and switch on/offpower supply of CPUReplace moduleChange interrupt processing in CPUand reconfigure module parameters, ifrequiredThe error continues until the module isconfigured with new parametersReassign module parameters<strong>Programmable</strong> <strong>Logic</strong> <strong>Controllers</strong> <strong>S7</strong>-<strong>300</strong> <strong>Module</strong> <strong>Data</strong>A5E00105505-033-31
Digital <strong>Module</strong>s3.9.4 Interrupts of the SM 321; DI 16 x 24 VDCIntroductionThis section describes the SM 321; DI 16 x 24 VDC with regard to its interruptbehavior. The following interrupts exist:• Diagnostic interrupt• Hardware interruptThe OBs and SFCs mentioned below can be found in the online Help for STEP 7,where they are described in greater detail.Enabling interruptsThe interrupts are not preset – in other words, they are inhibited withoutappropriate parameter assignment. Assign parameters to the Interrupt Enable inSTEP 7 (refer to Section 3.9.2).Diagnostic interruptIf you have enabled diagnostic interrupts, then active error events (initialoccurrence of the error) and departing error events (message aftertroubleshooting) are reported by means of an interrupt.The CPU interrupts the execution of the user program and processes thediagnostic interrupt block (OB 82).In the user program, you can call SFC 51 or SFC 59 in OB 82 to obtain moredetailed diagnostic information from the module.The diagnostic information is consistent until such time as OB 82 is exited. WhenOB 82 is exited, the diagnostic interrupt is acknowledged on the module.Hardware interruptThe SM 321; DI 16 x 24 VDC can trigger a hardware interrupt for every channelgroup with a rising or falling edge, or both, of a signal status change.Perform parameter assignment one channel group at a time. It can be modified atany time (in RUN mode using the user program).Pending hardware interrupts trigger hardware interrupt processing in the CPU(OB 40). The CPU interrupts the execution of the user program or of the priorityclasses with low priority.You can set in the user program of the hardware interrupt OB (OB 40) how theprogrammable logic controller has to react to an edge change. When the hardwareinterrupt OB is exited, the hardware interrupt is acknowledged on the module.The module can buffer one interrupt per channel. If no higher priority run-timelevels are waiting to be processed, the buffered interrupts (of all modules) areserviced one after the other by the CPU according to the order in which theyoccurred.3-32<strong>Programmable</strong> <strong>Logic</strong> <strong>Controllers</strong> <strong>S7</strong>-<strong>300</strong> <strong>Module</strong> <strong>Data</strong>A5E00105505-03
Digital <strong>Module</strong>sHardware interrupt lostIn an interrupt has been buffered for a channel and another interrupt occurs on thatchannel before it has been processed by the CPU, a diagnostic interrupt “hardwareinterrupt lost” is triggered.More interrupts on this channel are not acquired until processing of the interruptbuffered on this channel has been executed.Interrupt-triggering channelsThe channel triggered by the hardware interrupt is entered in the start informationof the OB 40 in the OB40_POINT_ADDR variable. Figure 3-9 shows theassignment of the bits to the local data double word 8.Byte Variable <strong>Data</strong> type Description6/7 OB40_MDL_ADDR WORD B#16#0 Address of the interrupttriggering moduleFrom8OB40_POINT_ADDR DWORD SeeFigure 3-9Display of the interrupttriggering inputsLB 8LB 9LB 10LB 113130 29 28 27 2625 2423 22 21 20 19 1817 1611 1 1 11 1 110Bit no.LD 8reservedEdge change: Channel 8Edge change: Channel 9Edge change channel 10Edge change: Channel 15Edge change: Channel 0Edge change: Channel 1Edge change channel 2Edge change: Channel 7Figure 3-9Start Information of OB 40: Which Event Has Triggered the Hardware Interrupt at the LimitValue<strong>Programmable</strong> <strong>Logic</strong> <strong>Controllers</strong> <strong>S7</strong>-<strong>300</strong> <strong>Module</strong> <strong>Data</strong>A5E00105505-033-33
Digital <strong>Module</strong>s3.10 Digital Input <strong>Module</strong> SM 321; DI 16 x DC 24 V; SourceInput; (6E<strong>S7</strong>321-1BH50-0AA0)Order number6E<strong>S7</strong>321-1BH50-0AA0CharacteristicsThe SM 321; DI 16 x 24 VDC (source input) has the following salient features:• 16 inputs, source input, isolated in groups of 16• 24 VDC rated input voltage• Suitable for switches and two / three / four-wire BEROs (proximity switches).Terminal assignment and block diagram of the SM 321; DI 16 x 24 VDCL +Backplane businterfaceChannel numberStatus display – greenFigure 3-10<strong>Module</strong> View and Block Diagram of Digital Input <strong>Module</strong> SM 321; DI 16 x 24 VDC(Source Input)3-34<strong>Programmable</strong> <strong>Logic</strong> <strong>Controllers</strong> <strong>S7</strong>-<strong>300</strong> <strong>Module</strong> <strong>Data</strong>A5E00105505-03
Digital <strong>Module</strong>sTechnical specifications of the SM 321; DI 16 x 24 VDCDimensions W x H x D(in millimeters)WeightSupports clockedoperationDimensions and Weight40 x 125 x 117Approx. 200 g<strong>Data</strong> for Specific <strong>Module</strong>NoNumber of inputs 16Length of cable• Unshielded• Shieldedmax. 600 mmax. 1000 mVoltages, Currents, PotentialsNumber of inputs that can betriggered simultaneously• Horizontal configurationUp to 60 C 16<strong>Data</strong> for Selecting a SensorInput voltage (reference potential is L+)• Rated value• For signal “1”• For signal “0”24 VDC–13 V to –30 V+30 V to –5 VInput current• At signal “1” typ. 7 mAInput delay• At “0” to “1”• At “1” to “0”1.2 to 4.8 ms1.2 to 4.8 msInput characteristic curve According to IEC 61131,type 1Connection of Two-WireBEROs• Permitted bias currentPossiblemax. 1.5 mA• Vertical configurationUp to 40 C 16Isolation• Between channels andbackplane busPermitted potential difference• Between the differentcircuitsInsulation tested withYes75 VDC / 60 VAC500 VDCCurrent consumption• From the backplane bus max. 10 mAPower dissipation of themoduletyp. 3.5 WStatus, Interrupts, DiagnosticsStatus displayInterruptsDiagnostic functionsGreen LED per channelNoneNone<strong>Programmable</strong> <strong>Logic</strong> <strong>Controllers</strong> <strong>S7</strong>-<strong>300</strong> <strong>Module</strong> <strong>Data</strong>A5E00105505-033-35
Digital <strong>Module</strong>s3.11 Digital Input <strong>Module</strong> SM 321; DI 16 x UC 24/48 V(6E<strong>S7</strong>321-1CH00-0AA0)Order number6E<strong>S7</strong>321-1CH00-0AA0CharacteristicsThe SM 321; DI 16 x UC24/48 V features the following characteristics:• 16 inputs, isolated electrically• Electrical isolation between channels of 120 V• Rated input voltage from 24 to 48 DC)• Inputs are fully independent and can be connected in any required configurationTerminal assignment and block diagram of the SM 321; DI 16 x 24/48 VUC0123456701234567123 234245256267891011121314151617181920Backplane bus interface21222728293031323334353637383940Channel numberStatus display – greenFigure 3-11<strong>Module</strong> View and Block Diagram of Digital Input <strong>Module</strong> SM 321; DI 16 x 24/48VUC3-36<strong>Programmable</strong> <strong>Logic</strong> <strong>Controllers</strong> <strong>S7</strong>-<strong>300</strong> <strong>Module</strong> <strong>Data</strong>A5E00105505-03
Digital <strong>Module</strong>sTechnical specifications of the SM 321; DI 16 x 24/48 VUCDimensions and WeightDimensions W x H x D 40 x 125 x 117WeightSupports clockedoperationApprox. 260 g<strong>Data</strong> for Specific <strong>Module</strong>NoNumber of inputs 16Length of cable• Unshielded• Shieldedmax. 600 mmax. 1000 mVoltages, Currents, PotentialsStatus displayInterruptsDiagnostic functionsStatus, Interrupts, DiagnosticsGreen LEDs perchannelNoneNone<strong>Data</strong> for Selecting a SensorInput voltage• Rated value 24 or 48 VDC/ 24 or48 VAC• At signal “1”• At signal “0”• Frequency range14 V to 60 V–5 V to 5 V0 to 63 HzNumber of inputs that can betriggered simultaneously• Horizontal configurationUp to 60°C16Input current• At signal “1”• At signal “0”typ. 2.7 mA–1 to +1 mA• All other configuration typesUp to 40° CIsolation16Input delay• From “ 0” to “1”• At “1” to “0”max. 16 msmax. 16 ms• Between channels andbackplane busYesInput characteristic curveAccording toIEC 61131, type 1• Between channelsIn groups ofPermitted potential difference• Between the channels andthe backplane bus• Between the inputs of thedifferent groupsInsulation tested with• Between the channels andthe backplane bus• Between the inputs of thedifferent groupsCurrent consumptionYes1170 VDC, 120 VAC170 VDC, 120 VAC1500 VAC1500 VACConnection of Two-Wire PossibleBEROs• Permitted bias current max. 1 mA• From the backplane bus max. 100 mAPower dissipation of the module• Operation with 24 V• Operation with 48 Vtyp. 1.5 Wtyp. 2.8 W<strong>Programmable</strong> <strong>Logic</strong> <strong>Controllers</strong> <strong>S7</strong>-<strong>300</strong> <strong>Module</strong> <strong>Data</strong>A5E00105505-033-37
Digital <strong>Module</strong>s3.12 Digital Input <strong>Module</strong> SM 321; DI 16 x VDC 48-125;(6E<strong>S7</strong>321-1CH20-0AA0)Order number: “Standard module”6E<strong>S7</strong>321-1CH20-0AA0Order number: “SIPLUS <strong>S7</strong>-<strong>300</strong>-<strong>Module</strong>”6AG1321-1CH20-2AA0CharacteristicsThe SM 321; DI 16 x 48-125 VDC features the following characteristics:• 16 inputs, isolated in groups of 8• Rated input voltage 48 to 125 VDC• Suitable for switches and two / three / four-wire BEROs (proximity switches).Terminal assignment and block diagram of the SM 321; DI 16 x 48-125 VDC2M345678910 1M48 to 125 VMBackplane businterface1213141516171819202M48 to 125 VChannel numberStatus display – greenFigure 3-12<strong>Module</strong> View and Block Diagram of SM 321; DI 16 x 48-125 VDC3-38<strong>Programmable</strong> <strong>Logic</strong> <strong>Controllers</strong> <strong>S7</strong>-<strong>300</strong> <strong>Module</strong> <strong>Data</strong>A5E00105505-03
Digital <strong>Module</strong>sTechnical specifications of the SM 321; DI 16 x 48-125 VDCDimensions W x H x D(in millimeters)WeightSupports clockedoperationDimensions and Weight40 x125 x120Approx. 200 g<strong>Data</strong> for Specific <strong>Module</strong>NoNumber of inputs 16Length of cable• Unshielded• Shieldedmax. 600 mmax. 1000 mVoltages, Currents, PotentialsNumber of inputs that can betriggered simultaneously at U EUp to 60 VUp to 146 V• Horizontal installationUp to 50 C8 8Up to 60 C8 6• Vertical configurationUp to 40 C 8 8IsolationStatus displayInterruptsDiagnostic functionsStatus, Interrupts, DiagnosticsGreen LED per channelNoneNoneSensor Selection <strong>Data</strong>Input voltage• Rated value 48 VDC to125 VDC• For signal “1” 30 V to 146 V• For signal “0” –146 V to 15 VInput current• At signal “1” typ. 3.5 mAInput delay• From “ 0” to “1”• At “1” to “0”Input characteristic curveConnection of Two-WireBEROs• Permitted bias current0.1 ms to 3.5 ms0.7 ms to 3.0 msAccording toIEC 61131, type 1Possiblemax. 1 mA• Between channels andbackplane bus• Between the channelsIn groups ofPermiss. potential differences• Between the differentcircuitsInsulation tested withYesYes8146 VDC / 132 VAC1500 VDCCurrent consumption• From the backplane bus max. 40 mAPower dissipation of the moduletyp. 4.3 W<strong>Programmable</strong> <strong>Logic</strong> <strong>Controllers</strong> <strong>S7</strong>-<strong>300</strong> <strong>Module</strong> <strong>Data</strong>A5E00105505-033-39
Digital <strong>Module</strong>s3.13 Digital Input <strong>Module</strong> SM 321; DI 16xAC 120/230 V(6E<strong>S7</strong>321-1FH00-0AA0)Order number6E<strong>S7</strong>321-1FH00-0AA0CharacteristicsThe SM 321; DI 16 x 120/230 VAC features the following characteristics:• 16 inputs, electrically isolated in groups of 4• 120/230 VAC rated input voltage• Suitable for switches and two / three-wire proximity switches (alternatingvoltage)Terminal assignment and block diagram of the SM 321; DI 16 x 120/230 VACNMMBackplane businterfaceNNMMNChannel numberStatus display – greenFigure 3-13<strong>Module</strong> View and Block Diagram of the SM 321; DI 16 x 120/230VAC3-40<strong>Programmable</strong> <strong>Logic</strong> <strong>Controllers</strong> <strong>S7</strong>-<strong>300</strong> <strong>Module</strong> <strong>Data</strong>A5E00105505-03
Digital <strong>Module</strong>sTechnical specifications of the SM 321; DI 16 x 120/230 VACDimensions W x H x D(in millimeters)WeightSupports clockedoperationDimensions and Weight40 x 125 x 117Approx. 240 g<strong>Data</strong> for Specific <strong>Module</strong>NoNumber of inputs 16Length of cable• Unshielded• Shieldedmax. 600 mmax. 1000 mVoltages, Currents, PotentialsRated load voltage L1All load voltages must be of thesame phaseNumber of inputs that can betriggered simultaneously• Horizontal configurationUp to 60 °C• Vertical configurationUp to 40 °CIsolation120/230 V1616Status displayInterruptsDiagnostic functionsInput voltage• Rated value• For signal “1”• For signal “0”• Frequency rangeInput current• At signal “1”120 V, 60 Hz230 V, 50 HzInput delay• “0” to “1”• “0” to “1”Status, Interrupts, DiagnosticsGreen LED per channelNoneNoneSensorSelection <strong>Data</strong>120/230 VAC79 to 264 V0 to 40 V47 to 63 Hztyp. 8.0 mAtyp. 16.0 mAmax. 25 msmax. 25 msInput characteristic curve According to IEC 61131,type 1Connection of Two-WireBEROs• Permitted bias currentPossiblemax. 2 mA• Between channels andbackplane bus• Between channelsIn groups ofYesYes4Permitted potential difference• Between M internal and theinputs• Between the inputs of thedifferent groupsInsulation tested with500 VAC230 VAC4000 VDCCurrent consumption• From the backplane bus max. 29 mAPower dissipation of the moduletyp. 4.9 W<strong>Programmable</strong> <strong>Logic</strong> <strong>Controllers</strong> <strong>S7</strong>-<strong>300</strong> <strong>Module</strong> <strong>Data</strong>A5E00105505-033-41
Digital <strong>Module</strong>s3.14 Digital Input <strong>Module</strong> SM 321; DI 8 x VAC 120/230;(6E<strong>S7</strong>321-1FF01-0AA0)Order number: “Standard module”6E<strong>S7</strong>321-1FF01-0AA0Order number: “SIPLUS <strong>S7</strong>-<strong>300</strong>-<strong>Module</strong>”6AG1321-1FF01-2AA0CharacteristicsThe SM 321; DI 8 x 120/230 VAC features the following characteristics:• 8 inputs, isolated in groups of 2• 120/230 VAC rated input voltage• Suitable for switches and two / three-wire AC proximity switchesTerminal assignment and block diagram of the SM 321; DI 8 x 120/230 VAC1NMMBackplane bus interface2N3NMM4NChannel numberStatus display – greenFigure 3-14<strong>Module</strong> View and Block Diagram of the SM 321; DI 8 x 120/230 VAC3-42<strong>Programmable</strong> <strong>Logic</strong> <strong>Controllers</strong> <strong>S7</strong>-<strong>300</strong> <strong>Module</strong> <strong>Data</strong>A5E00105505-03
Digital <strong>Module</strong>sTechnical specifications of the SM 321; DI 8 x 120/230 VACDimensions W x H x D(in millimeters)WeightSupports clockedoperationDimensions and Weight40 x 125 x 117Approx. 240 g<strong>Data</strong> for Specific <strong>Module</strong>Number of inputs 8Length of cable• Unshielded• ShieldedNomax. 600 mmax. 1000 mVoltages, Currents, PotentialsNumber of inputs that can betriggered simultaneously• Horizontal configurationUp to 60 C 8• Vertical configurationUp to 40 C 8Isolation• Between channels and Yesbackplane bus• Between the channels YesIn groups of 2Permitted potential difference• Between M internal and theinputs• Between the inputs of thedifferent groupsInsulation tested with230 VAC500 VAC4000 VDCCurrent consumption• From the backplane bus max. 29 mAPower dissipation of the module typ. 4.9 WStatus displayInterruptsDiagnostic functionsInput voltage• Rated value• For signal “1”• For signal “0”• Frequency rangeInput current• At signal “1”120 V, 60 Hz230 V, 50 HzInput delay• At “0” to “1”• At “1” to “0”Input characteristic curveStatus, Interrupts, DiagnosticsConnection of Two-WireBEROs• Permitted bias currentGreen LED per channelNoneNone<strong>Data</strong> for Selecting a Sensor120/230 VAC79 to 264 V0 to 40 V47 to 63 Hztyp. 6.5 mAtyp. 11 mAmax. 25 msmax. 25 msAccording toIEC 61131, type 1Possiblemax. 2 mA<strong>Programmable</strong> <strong>Logic</strong> <strong>Controllers</strong> <strong>S7</strong>-<strong>300</strong> <strong>Module</strong> <strong>Data</strong>A5E00105505-033-43
Digital <strong>Module</strong>s3.15 Digital Input <strong>Module</strong> SM 321;DI 8 x 120/230 VAC ISOL (6E<strong>S7</strong>321-1FF10-0AA0)Order number6E<strong>S7</strong>321-1FF10-0AA0CharacteristicsThe digital input module SM 321; DI 8 x 120/230 VAC ISOL has the followingdistinguishing characteristics:• 8 outputs, isolated in groups of 1• 120/230 VAC rated input voltage• Suitable for switches and two / three / four-wire AC proximity switchesTerminal assignment and block diagram of the SM 321; DI 8 x 120/230 VAC ISOL147M10111417MBackplane businterface2021242730313437M40ChannelnumberStatus display – greenFigure 3-15<strong>Module</strong> View and Block Diagram of the SM 321; DI 8 x 120/230 VAC ISOL3-44<strong>Programmable</strong> <strong>Logic</strong> <strong>Controllers</strong> <strong>S7</strong>-<strong>300</strong> <strong>Module</strong> <strong>Data</strong>A5E00105505-03
Digital <strong>Module</strong>sTechnical specifications of the SM 321; DI 8 x 120/230 VAC ISOLDimensions and WeightStatus, Interrupts, DiagnosticsDimensions W x H x D 40 x 125 x 117Status displayGreen LED per channelWeightSupports clockedoperationApprox. 240 g<strong>Data</strong> for Specific <strong>Module</strong>Number of inputs 8Length of cable• Unshielded• ShieldedNomax. 600 mmax. 1000 mVoltages, Currents, PotentialsRated load voltage L1All load voltages must be of thesame phaseNumber of inputs that can betriggered simultaneously• Horizontal configurationUp to 60 °C• Vertical configurationUp to 40 °CIsolation• Between channels andbackplane bus120/230 VAC88YesInterruptsDiagnostic functionsInput voltage• Rated value• For signal “1”• For signal “0”• Frequency rangeInput current• At signal “1”120 V, 60 Hz230 V, 50 HzInput delay• ”0” to “1”• ”0” to “1”Input characteristic curveNoneNone<strong>Data</strong> for Selecting a Sensor120/230 VAC79 to 264 V0 to 40 V47 to 63 Hztyp. 7.5 mAtyp. 17.3 Wmax. 25 msmax. 25 msAccording toIEC 61131, type 1Connection of Two-Wire PossibleBEROs• Permitted bias current max. 2 mA• Between channels YesIn groups of 1Permitted potential difference• Between M internal and theinputs• Between the inputs of thedifferent groups230 VAC500 VACInsulation tested with• Between M internal and theinputs• Between the inputs of thedifferent groups1500 VAC2000 VACCurrent consumption• From the backplane bus max. 100 mAPower dissipation of the moduletyp. 4.9 W<strong>Programmable</strong> <strong>Logic</strong> <strong>Controllers</strong> <strong>S7</strong>-<strong>300</strong> <strong>Module</strong> <strong>Data</strong>A5E00105505-033-45
Digital <strong>Module</strong>s3.16 Digital Output <strong>Module</strong> SM 322;DO 32 x 24 VDC/ 0.5 A; (6E<strong>S7</strong>322-1BL00-0AA0)Order number6E<strong>S7</strong>322-1BL00-0AA0CharacteristicsThe digital output module SM 322; DO 32 x 24 VDC/0.5 A has the following salientfeatures:• 32 outputs, isolated in groups of 8• 0.5 A output current• 24 VDC rated load voltage• Suitable for solenoid valves, DC contactors and indicator lightsUsing the module with high-speed countersPlease take note of the following information on the use of the module inconnection with high-speed counters:NoteWhen connecting the 24 V power supply via a mechanical contact, the outputs ofthe SM 322; DO 32 x DC 24 V/0.5 A carry a “1” signal for approximately 50 s forreasons associated with the circuitry.3-46<strong>Programmable</strong> <strong>Logic</strong> <strong>Controllers</strong> <strong>S7</strong>-<strong>300</strong> <strong>Module</strong> <strong>Data</strong>A5E00105505-03
Digital <strong>Module</strong>s<strong>Module</strong> View and Block Diagram of the SM 322; DO 32 x 24 VDC/ 0.5 A24 V1L+3 L+24 VMM1MBackplane businterface3M24 V2L+4 L+24 VMM2M4MChannelnumberStatus display -greenFigure 3-16<strong>Module</strong> View and Block Diagram of Digital Output <strong>Module</strong> SM 322; DO 32 x 24 VDC/0.5 ATerminal assignmentThe following figure shows the assignment of the channels to the addresses.Output byte xOutput byte (x + 2)Output byte (x + 1)Output byte (x + 3)Figure 3-17Terminal Assignment of the SM 322; DO 32 x 24 VDC<strong>Programmable</strong> <strong>Logic</strong> <strong>Controllers</strong> <strong>S7</strong>-<strong>300</strong> <strong>Module</strong> <strong>Data</strong>A5E00105505-033-47
Digital <strong>Module</strong>sTerminal Assignment of the SM 322; DO 32 x 24 VDC/ 0.5 ADimensions W x H x D(in millimeters)WeightSupports clockedoperationDimensions and Weight40 x 125 x 117Approx. 260 g<strong>Data</strong> for Specific <strong>Module</strong>NoNumber of outputs 32Length of cable• Unshielded• Shieldedmax. 600 mmax. 1000 mVoltages, Currents, PotentialsRated load voltage L+24 VDCTotal current of the outputs(per group)• Horizontal configurationUp to 40 CUp to 60 C• Vertical configurationUp to 40 CIsolation• Between channels andbackplane bus• Between the channelsIn groups ofPermitted potential difference• Between the differentcircuitsInsulation tested withCurrent consumption• From the backplane bus• From load voltage L +(without load)max. 4 Amax. 3 Amax. 2 AYesYes875 VDC / 60 VAC500 VDCmax. 110 mAmax. 160 mAPower dissipation of the module typ. 6.6 WStatus, Interrupts, DiagnosticsStatus displayGreen LED per channelInterruptsNoneDiagnostic functionsNone<strong>Data</strong> for Selecting an ActuatorOutput voltage• At signal “1” min. L + (–0.8 V)Output current• At signal “1”Rated valuePermitted range0.5 A5 mA to 0.6 A• At signal “0”(leakage current)max. 0.5 mAOutput delay (for resistive load)• From “ 0” to “1” max. 100 s• At “1” to “0” max. 500 sLoad resistor rangeLamp load48 to 4 kmax. 5 WParallel connection of 2outputs• For redundant triggering ofa loadPossible (only outputsof the same group)• To increase performance Not possibleTriggering a digital input PossibleSwitch rate• For resistive load max. 100 Hz• Inductive loadsmax. 0.5 Hzaccording to IEC 947-5-1,DC 13• For lamp load max. 10 HzLimit (internal) of the inductive L + (–53 V), typ.circuit interruption voltage upShort-circuit protection of the Yes, electronicoutput• Threshold on 1 A, typ.3-48<strong>Programmable</strong> <strong>Logic</strong> <strong>Controllers</strong> <strong>S7</strong>-<strong>300</strong> <strong>Module</strong> <strong>Data</strong>A5E00105505-03
Digital <strong>Module</strong>s3.17 Digital Output <strong>Module</strong> SM 322;DO 32 x VAC 120/230/1 A; (6E<strong>S7</strong>322-1FL00-0AA0)Order number6E<strong>S7</strong>322-1FL00-0AA0CharacteristicsThe SM 322; DO 32 x VAC 120/230/1 A has the following distinguishingcharacteristics:• 32 outputs, fused and isolated in groups of 8• 1.0 A output current• 120/230 VAC rated load voltage• Blown fuse indicator for each group• Suitable for AC solenoids, contactors, starters, fractional horsepower motorsand indicator lights• Group error display<strong>Programmable</strong> <strong>Logic</strong> <strong>Controllers</strong> <strong>S7</strong>-<strong>300</strong> <strong>Module</strong> <strong>Data</strong>A5E00105505-033-49
Digital <strong>Module</strong>sTerminal assignment and block diagram of the SM 322; DO 32 x VC 120/230/1 ASF101234567SF301234567SF201234567X 23 4SF401234567Channel numbersStatus display – greenError display - redSF1 L12 L1BackplanebusinterfaceSF1N1 L12N2 L11N2NFigure 3-18Terminal assignment and block diagram of the SM 322; D0 32 x VAC 120/230 /1 A3-50<strong>Programmable</strong> <strong>Logic</strong> <strong>Controllers</strong> <strong>S7</strong>-<strong>300</strong> <strong>Module</strong> <strong>Data</strong>A5E00105505-03
Digital <strong>Module</strong>sTerminal assignmentThe following figure shows the assignment of the channels to the addresses.Output byte xOutput byte (x + 2)Output byte (x + 1)Output byte (x + 3)Figure 3-19Terminal assignment of the SM 322; DO 32 x AC 120/230 V/1 A<strong>Programmable</strong> <strong>Logic</strong> <strong>Controllers</strong> <strong>S7</strong>-<strong>300</strong> <strong>Module</strong> <strong>Data</strong>A5E00105505-033-51
Digital <strong>Module</strong>sTechnical specifications of the SM 322; DO 32 x 120 VAC/1.0 ADimensionsW x H x D(in millimeters)WeightSupports clockedoperationDimensions and Weight80 x 125 x 117Approx. 500 g<strong>Data</strong> for Specific <strong>Module</strong>NoNumber of outputs 32Length of cable• Unshielded• Shieldedmax. 600 mmax. 1000 mVoltages, Currents, PotentialsRated load voltage L1120/230 VAC• Permitted frequency range 47 Hz to 63 HzTotal current of the outputs(per group)• Horizontal configurationup to 60 Cup to 40 C• Vertical configurationUp to 40CIsolation• Between channels and Yesbackplane bus• Between the channels YesIn groups of 8Permitted potential difference• Between M internal and theoutputs• Between the outputs of thedifferent groupsInsulation tested withCurrent consumption• From the backplane bus• From load voltage L1(without load)max. 3 Amax. 4 Amax. 4 A250 VAC250 VACDC 4000 Vmax. 190 mAmax. 10 mA<strong>Data</strong> for Selecting an ActuatorOutput voltage• At signal “1” min. L1 (–0,8 V)Output current• At “1” signalRated value1 APermitted rangePermitted current surge(per group)• At “0” signalLeakage currentOutput delay (for resistive load)10 mA to 1 A10 A(for 2 AC scan cycles)max. 2 mA• At “0” to “1” 1 AC scan cycle• At “1” to “0” 1 AC scan cycleBlocking voltageZero transitionSize of the motor starterLamp loadParallel connection of2 outputs• For redundantactuation of a load• To increaseperformanceActuation ofdigital inputSwitch rate• For resistive load• Inductive loads,according toIEC 947-5-1, AC 15• For lamp loadShort-circuit protection of theoutputmax. 60 Vmax. size 4 to NEMAmax. 50 WPossible (only outputsof the same group)Not possiblePossiblemax. 10 Hzmax. 0.5 Hz1 HzNoPower dissipation of the moduletyp. max. 25 WStatus, Interrupts, DiagnosticsStatus displayInterruptsDiagnostic functions• Group error displayGreen LED per channelNoYesRed LED (SF)3-52<strong>Programmable</strong> <strong>Logic</strong> <strong>Controllers</strong> <strong>S7</strong>-<strong>300</strong> <strong>Module</strong> <strong>Data</strong>A5E00105505-03
Digital <strong>Module</strong>s3.18 Digital Output <strong>Module</strong> SM 322;DO 16 x DC 24 V/ 0.5 A; (6E<strong>S7</strong>322-1BH01-0AA0)Order number: “Standard module”6E<strong>S7</strong>322-1BH01-0AA0Order number: “SIPLUS <strong>S7</strong>-<strong>300</strong>-<strong>Module</strong>”6AG1322-1BH01-2AA0CharacteristicsThe digital output module SM 322; DO 16 x 24 VDC/0.5 A has the following salientfeatures:• 16 outputs, isolated in groups of 8• 0.5 A output current• 24 VDC rated load voltage• Suitable for solenoid valves, DC contactors and indicator lightsUsing the module with high-speed countersPlease take note of the following information on the use of the module inconnection with high-speed counters:NoteWhen connecting the 24 V power supply via a mechanical contact, the outputs ofthe SM 322; DO 16 x 24 VDC/0.5 A carry a “1” signal for approximately 50 s forreasons associated with the circuitry.<strong>Programmable</strong> <strong>Logic</strong> <strong>Controllers</strong> <strong>S7</strong>-<strong>300</strong> <strong>Module</strong> <strong>Data</strong>A5E00105505-033-53
Digital <strong>Module</strong>sTerminal assignment and block diagram of the SM 322; DO 16 x 24 VDC/0.5 A1 L+M24 VBackplane businterface1M2 L+M24 V2MChannel numberStatus display – greenFigure 3-20<strong>Module</strong> View and Block Diagram of the SM 322; DO 16 x 24 VDC/0.5 A3-54<strong>Programmable</strong> <strong>Logic</strong> <strong>Controllers</strong> <strong>S7</strong>-<strong>300</strong> <strong>Module</strong> <strong>Data</strong>A5E00105505-03
Digital <strong>Module</strong>sTechnical specifications of the SM 322; DO 16 x 24 VDC/0.5 ADimensions W x H x D(in millimeters)WeightSupports clockedoperationDimensions and Weight40 x 125 x 117Approx. 190 g<strong>Data</strong> for Specific <strong>Module</strong>NoNumber of outputs 16Length of cable• Unshielded• Shieldedmax. 600 mmax. 1000 mVoltages, Currents, PotentialsRated load voltage L+24 VDCTotal current of the outputs(per group)• Horizontal configurationUp to 40 CUp to 60 C• Vertical configurationUp to 40 CIsolation• Between channels andbackplane bus• Between the channelsIn groups ofPermitted potential difference• Between the differentcircuitsInsulation tested withCurrent consumption• From the backplane bus• From load voltage L +(without load)max. 4 Amax. 3 Amax. 2 AYesYes875 VDC / 60 VAC500 VDCmax. 80 mAmax. 80 mAPower dissipation of the module typ. 4.9 WStatus, Interrupts, DiagnosticsStatus displayGreen LED per channelInterruptsNoneDiagnostic functionsNone<strong>Data</strong> for Selecting an ActuatorOutput voltage• At signal “1” min. L + (–0.8 V)Output current• At signal “1”Rated valuePermitted range0.5 A5 mA to 0.6 A• At signal “0”(leakage current)max. 0.5 mAOutput delay(for resistive load)• From “ 0” to “1” max. 100 s• At “1” to “0” max. 500 sLoad resistor rangeLamp load48 to 4 kmax. 5 WParallel connection of2 outputs• For redundant triggering ofa loadPossible (only outputsof the same group)• To increase performance Not possibleTriggering a digital input PossibleSwitch rate• For resistive load max. 100 Hz• Inductive loadsmax. 0.5 Hzaccording to IEC 947-5-1,DC 13• For lamp load max. 10 HzLimit (internal) of the inductive L + (–53 V), typ.circuit interruption voltage upShort-circuit protection of the Yes, electronicoutput• Threshold on 1 A, typ.<strong>Programmable</strong> <strong>Logic</strong> <strong>Controllers</strong> <strong>S7</strong>-<strong>300</strong> <strong>Module</strong> <strong>Data</strong>A5E00105505-033-55
Digital <strong>Module</strong>s3.19 Digital Output <strong>Module</strong> SM 322; DO 16 x 24 VDC/0.5 AHigh Speed;(6E<strong>S7</strong>322-1BH10-0AA0)Order number:6E<strong>S7</strong>322-1BH10-0AA0CharacteristicsThe SM 322; DO 16 x 24 VDC/0.5 A High Speed has the following salient features:• 16 outputs, isolated in groups of 8• 0.5 A output current• 24 VDC rated load voltage• Suitable for solenoid valves, DC contactors and indicator lights• Supports clocked operationUsing the module with high-speed countersPlease take note of the following information on the use of the module inconnection with high-speed counters:NoteWhen connecting the 24 V power supply via a mechanical contact, the outputs ofthe SM 322; DO 16 x 24 VDC/0.5 A High Speed carry a “1” signal forapproximately 50 s for reasons associated with the circuitry.3-56<strong>Programmable</strong> <strong>Logic</strong> <strong>Controllers</strong> <strong>S7</strong>-<strong>300</strong> <strong>Module</strong> <strong>Data</strong>A5E00105505-03
Digital <strong>Module</strong>sTerminal assignment and block diagram of the SM 322; DO16 x 24 VDC/0.5 A High Speed1 L+M24 VBackplane businterface1M2 L+24 V2MChannel numberStatus display – greenFigure 3-21<strong>Module</strong> View and Block Diagram of the SM 322; DO 16 x 24 VDC/0.5 A High Speed<strong>Programmable</strong> <strong>Logic</strong> <strong>Controllers</strong> <strong>S7</strong>-<strong>300</strong> <strong>Module</strong> <strong>Data</strong>A5E00105505-033-57
Digital <strong>Module</strong>sTechnical specifications of the SM 322; DO 16 x 24 VDC/0.5 A High SpeedDimensions W x H x D(in millimeters)WeightSupports clockedoperationDimensions and Weight40 x 125 x 117Approx. 200 g<strong>Data</strong> for Specific <strong>Module</strong>YesNumber of outputs 16Length of cable• Unshielded• Shieldedmax. 600 mmax. 1000 mVoltages, Currents, PotentialsRated load voltage L+24 VDCTotal current of the outputs(per group)• Horizontal configurationUp to 40 CUp to 60 C• Vertical configurationUp to 40 CIsolation• Between channels andbackplane bus• Between the channelsIn groups ofPermitted potential difference• Between the differentcircuitsInsulation tested withCurrent consumption• From the backplane bus• From load voltage L +(without load)max. 4 Amax. 3 Amax. 2 AYesYes875 VDC / 60 VAC500 VDCmax. 70 mAmax. 110 mAPower dissipation of the module typ. 5 WStatus, Interrupts, DiagnosticsStatus displayGreen LED per channelInterruptsNoneDiagnostic functionsNone<strong>Data</strong> for Selecting an ActuatorOutput voltage• At signal “1” min. L + (–0.8 V)Output current• At signal “1”Rated valuePermitted range0.5 A5 mA to 0.6 A• At signal “0”(leakage current)max. 0.5 mAOutput delay(for resistive load)• From “ 0” to “1” max. 100 s• At “1” to “0” max. 200 sInternal module run timebetween the backplane bus andthe output driver input• “0” to “1” 0.1 s to 20 s• At “1” to “0” 0.1 s to 20 sLoad resistor rangeLamp load48 to 4 kmax. 5 WParallel connection of2 outputs• For redundant triggering ofa loadPossible (only outputsof the same group)• To increase performance Not possibleTriggering a digital input PossibleSwitch rate• For resistive load max. 1000 Hz• Inductive loadsmax. 0.5 Hzaccording to IEC 947-5-1,DC 13• For lamp load max. 10 HzLimit (internal) of the inductive L + (–53 V), typ.circuit interruption voltage upShort-circuit protection of the Yes, electronicoutput• Threshold on 1 A, typ.3-58<strong>Programmable</strong> <strong>Logic</strong> <strong>Controllers</strong> <strong>S7</strong>-<strong>300</strong> <strong>Module</strong> <strong>Data</strong>A5E00105505-03
Digital <strong>Module</strong>s3.20 Digital Output <strong>Module</strong> SM 322; DO 16 x 24/48 VUC;(6E<strong>S7</strong>322-5GH00-0AB0)Order number6E<strong>S7</strong>322-5GH00-0AB0CharacteristicsDigital output module SM 322; DO 16 x UC24/48 V has the following features:• 16 individually isolated static relay outputs• Electrical isolation between channels of 120 V• Switch characteristics: R DS ON is typically 0.25 ohms and R DS OFF is typicallygreater than 100 G-ohms• Designed for load voltages up to 48 V AC or DC and there is no minimum loadvoltage• Designed for output loads up to 0.5 A and there is no minimum load current• Outputs are fully independent and can be connected in any requiredconfiguration• Substitute values or “Hold last values” can be programmed for the outputs• The module has diagnostics for parameterization errors and external loss ofvoltage• Suitable for AC solenoids, contact makers, motor starters, fractionalhorsepower motors and indicator lights<strong>Programmable</strong> <strong>Logic</strong> <strong>Controllers</strong> <strong>S7</strong>-<strong>300</strong> <strong>Module</strong> <strong>Data</strong>A5E00105505-033-59
Digital <strong>Module</strong>sTerminal assignment and block diagram of the SM 322; DO 16 x 24/48 VUC01234567SF01234567+24VL+M12345678910111213141516171819205 VBackplane bus2122232425262728293031323334353637383940Channel numberStatus LEDs - greenByte X Byte (X +1)Figure 3-22<strong>Module</strong> View and Block Diagram of SM 322; DO 16 x 24/48 VUC3-60<strong>Programmable</strong> <strong>Logic</strong> <strong>Controllers</strong> <strong>S7</strong>-<strong>300</strong> <strong>Module</strong> <strong>Data</strong>A5E00105505-03
Digital <strong>Module</strong>sTechnical specifications of the SM 322; DO 16 x 24/48 VUCDimensions and WeightDimensions W x H x D40 x 125 x 117(in millimeters)WeightApprox. 260 g<strong>Data</strong> for Specific <strong>Module</strong>Supports clockedNooperationNumber of outputs 16Length of cable• Unshielded• Shieldedmax. 600 mmax. 1000 mVoltages, Currents, PotentialsPower rated voltage of the 24 VDCelectronics L+• Reverse polarityprotection• Power failurejumperingTotal current of the outputs(per group)• Horizontal configurationUp to 60° C• All other mountingpositionsUp to 40° CTotal current of the outputs (permodule)• Horizontal configurationUp to 60° C• All other mountingpositionsUp to 40° CIsolation• Between channels andbackplane bus• Between channels andpower supply of theelectronics• Between channelsIn groups ofPermitted potential difference• Between channels andbackplane bus• Between channels andpower supply of theelectronics• Between the outputs ofthe different groupsYesmin. 5 msmax. 0.5 Amax. 0.5 Amax. 8 Amax. 8 AYesYesYes1170 VDC, 120 VAC170 VDC, 120 VAC170 VDC, 120 VACInsulation tested with• Between channels andbackplane bus• Between channels andpower supply of theelectronics• Between the outputs ofthe different groupsCurrent consumption• From the backplane bus• From supplyvoltage L+Power dissipation of the module1500 VAC1500 VAC1500 VACmax. 100 mAmax. 200 mAtyp. 2.8 WStatus, Interrupts, DiagnosticsStatus displayGreen LEDs perchannelDiagnostic functions• Group error display Red LED (SF)Interrupts• Diagnostic interrupt• Diagnostics informationread-outParameters can beassignedPossible<strong>Data</strong> for Selecting an ActuatorOutput voltage• At signal “1” min. L+ (–0.25 V)Output current• At signal “1”rated valuepermissible surgecurrent (per group)• For “0” signal(leakage current)Output delay (for resistive load)• From “ 0” to “1”• At “1” to “0”External fuse for relay outputsLamp loadContact circuit (internal) parallelswitching of 2 outputs• For redundant triggeringof a load• To increaseperformance0.5 Amax. 1.5 A(max. 50 ms)max. 10 uAmax. 6 msmax. 3 msFuse,I 2 t : 1 A 2 s,quick-acting*max. 2.5 WVaristor, 85 VPossibleNot possible<strong>Programmable</strong> <strong>Logic</strong> <strong>Controllers</strong> <strong>S7</strong>-<strong>300</strong> <strong>Module</strong> <strong>Data</strong>A5E00105505-033-61
Digital <strong>Module</strong>sTriggering a digital inputPossibleSwitch rate• For resistive load max. 10 Hz• Inductive loadsmax. 0.5 Hzaccording toIEC 947-5-1; DC 12AC/12• For lamp load max. 0.5 Hz* Outputs must be protected by a 250 V quick-actingfuse (recommended fuses: Wickman 194-1100 1.1A and Littelfuse 0217-800 V 800 mA).When mounted in a hazardous area in accordancewith the National Electric Code (NEC), use only asuitable tool to remove the fuse if the module is notlocated in a potentially explosive atmosphere.3-62<strong>Programmable</strong> <strong>Logic</strong> <strong>Controllers</strong> <strong>S7</strong>-<strong>300</strong> <strong>Module</strong> <strong>Data</strong>A5E00105505-03
Digital <strong>Module</strong>s3.20.1 Parameters of digital output module SM 322 DO 16 x UC24/48 VParameter assignmentTable 3-14 and Table 3-15 show the data record numbers for static and dynamicparameters.Table 3-14 <strong>Data</strong> record no. 0 (static parameters):ParametersEnable diagnosticsCommentsEnabling an interrupt when the module failsbecause of an operation code error, a hardwarefault or a voltage error.Table 3-15 <strong>Data</strong> record no. 1 (dynamic parameters):ParametersBehavior on CPU STOPHold last valueSubstitute value outputSubstitute valueSubstitute valueCommentsEach bit corresponds to an output.This module supports failure state/substitute value outputs when the CPU changesfrom RUN to STOP.Status displayEach output of this module has a green LED to indicate the status of the relay.There is also a red LED (SF) that indicates the diagnostics status of the module.Diagnostics, troubleshootingDiagnostic data is assigned in accordance with the following technicalspecifications.In the additional interrupt information, the four system diagnostics data bytes canbe read as data record 0 or in the first 4 bytes of data record 1.Structure of the data recordThe structure of data record 1 is as specified in Table 3-16.<strong>Programmable</strong> <strong>Logic</strong> <strong>Controllers</strong> <strong>S7</strong>-<strong>300</strong> <strong>Module</strong> <strong>Data</strong>A5E00105505-033-63
Digital <strong>Module</strong>sTable 3-16 Structure of the data record for SM 322 DO 16 x UC 24/48 V<strong>Data</strong> record 1byte addressAvailable informationContents0..3 System-specific diagnostics data 4 Bytes4 Channel type 72h5 Diagnosis length per channel in bytes 06 Number of channels 167 Channel error vector 0 byte perchannel8..15 Channel-specific diagnostic data 0 byte perchannelTable 3-17 shows the system diagnostics for module SM 322;DO 16 x UC24/48 V.Table 3-17 System diagnostics for SM 322 DO 16 x UC 24/48 VSystem diagnosis byte 1:Technical specificationD0: <strong>Module</strong> error YesD1: Internal malfunction YesD2: External malfunction YesD3: Channel error NoD4: External auxiliary supply missing YesD5: Front connector missing NoD6: <strong>Module</strong> not parameterized. YesD7: Wrong parameters Yes3-64<strong>Programmable</strong> <strong>Logic</strong> <strong>Controllers</strong> <strong>S7</strong>-<strong>300</strong> <strong>Module</strong> <strong>Data</strong>A5E00105505-03
Digital <strong>Module</strong>sTable 3-17 System diagnostics for SM 322 DO 16 x UC 24/48 VSystem diagnosis byte 2:D0..D3 <strong>Module</strong> Type 1111D4: Channel information available NoD5: User information available NoD6: Diagnostic alarm from substitute NoD7: SpareSystem diagnosis byte 3:D0: Memory module incorrect/missing NoD1: Communication error NoD2: RUN/STOP mode NoD3: Time monitoring triggered YesD4: Internal power failure NoD5: Battery 1 empty NoD6: Complete backup failure NoSystem diagnosis byte 4:D7: SpareD0: Rack failure NoD1: Processor failure YesD2: EPROM error YesD3: RAM error YesD4: DAC error NoD5: Blown fuse NoD6: Hardware interrupt lost NoD7: SpareChannel-specific diagnosis byteD0: Parameter setup error NoD1: Grounding error NoD2: Short-circuit to P NoD3: Short-circuit to M NoD4: Wire-break NoD5: SpareD6: Auxiliary supply missing NoD7: Overtemperature No<strong>Programmable</strong> <strong>Logic</strong> <strong>Controllers</strong> <strong>S7</strong>-<strong>300</strong> <strong>Module</strong> <strong>Data</strong>A5E00105505-033-65
Digital <strong>Module</strong>s3.21 Digital Output <strong>Module</strong> SM 322;DO 16 x VAC 120/230/1 A; (6E<strong>S7</strong>322-1FH00-0AA0)Order number6E<strong>S7</strong>322-1FH00-0AA0CharacteristicsDigital output module SM 322; DO 16 x 120/230 VAC/1 A has the followingdistinguishing characteristics:• 16 outputs, fused and electrically isolated in groups of 8• 1 A output current• Rated load voltage 120/230 VAC• Suitable for AC solenoids, contact makers, motor starters, fractionalhorsepower motors and indicator lights3-66<strong>Programmable</strong> <strong>Logic</strong> <strong>Controllers</strong> <strong>S7</strong>-<strong>300</strong> <strong>Module</strong> <strong>Data</strong>A5E00105505-03
Digital <strong>Module</strong>sTerminal assignment and block diagram of the SM 322 DO 16 x120/230 VAC/1 ASF5 VSFL 1MMBackplane businterfaceSF5 VNL 1MMNChannel numberStatus LEDs - greenFault indicator – redFigure 3-23<strong>Module</strong> View and Block Diagram of the SM 322; DO 16 x 120/230 VAC/1 A<strong>Programmable</strong> <strong>Logic</strong> <strong>Controllers</strong> <strong>S7</strong>-<strong>300</strong> <strong>Module</strong> <strong>Data</strong>A5E00105505-033-67
Digital <strong>Module</strong>sDimensions and Weight<strong>Data</strong> for Selecting an ActuatorDimensions W x H x D(in millimeters)Weight40 x 125 x 117Approx. 275 gOutput voltage• At signal “1” min. L + (–0.8 V)Output currentSupports clockedoperation<strong>Data</strong> for Specific <strong>Module</strong>NoNumber of outputs 16Length of cable• Unshielded• Shieldedmax. 600 mmax. 1000 mVoltages, Currents, PotentialsRated load voltage L1All load voltages must be of thesame phaseTotal current of the outputs(per group)• Horizontal configurationUp to 40 CUp to 60 C• Vertical configurationUp to 40 CIsolation• Between channels andbackplane bus• Between channelsIn groups ofPermitted potential difference• Between M internal and theoutputs• Between the outputs of thedifferent groupsInsulation tested withCurrent consumption• From the backplane bus• From load voltage L+(without load)Power dissipation of the moduleStatus display120/230 VACmax. 4 Amax. 2 Amax. 2 AYesYes8500 VAC230 VAC4000 VDCmax. 200 mAmax. 2 mAtyp. 8.6 WStatus, Interrupts, DiagnosticsGreen LED per channelInterrupts• Diagnostic interrupt NoDiagnostic functions• Group error display Red LED (SF)(fuse or no L1/N)• At signal “1”Rated valuePermitted range for 0° C to40° CPermitted range for 0° C to60° CPermitted surge current(per group)• At signal “0”(leakage current)Inhibit voltageZero cross inhibit voltageSize of the motor starterLamp loadConnecting two outputs inparallel• For redundant triggeringof a load• To increaseperformanceTriggering a digital inputSwitch rate1 A10 mA to 1 A10 mA to 0.5 Amax. 20 A(with 2 half-waves)max. 2 mAmax. 60 Vmax. size 4 to NEMAmax. 50 WPossible (only outputsof the same group)NoPossible• For resistive load• Inductive loads,according toIEC 947-5-1, AC 15• For lamp load max. 1 Hzmax. 10 Hzmax. 0.5 HzShort-circuit protection of output Fuse 8 A,250 V; per group• Min. current required for min. 40 Afuse to blow• Max. response time max. <strong>300</strong> msReplacement fuses• Wickman• Schurter• Littlefuse8 A fuse, quick-acting19 194-8 ASP001.1014217.008Fuse carrier• Wickman 19 6533-68<strong>Programmable</strong> <strong>Logic</strong> <strong>Controllers</strong> <strong>S7</strong>-<strong>300</strong> <strong>Module</strong> <strong>Data</strong>A5E00105505-03
Digital <strong>Module</strong>s3.22 Digital Output <strong>Module</strong> SM 322; DO 8 x 24 VDC/2 A;(6E<strong>S7</strong>322-1BF01-0AA0)Order number6E<strong>S7</strong>322-1BF01-0AA0CharacteristicsThe digital output module SM 322; DO 8 x 24 VDC/2 A has the following salientfeatures.• 8 outputs, isolated in groups of 4• 2 A output current• 24 VDC rated load voltage• Suitable for solenoid valves, DC contactors and indicator lightsUsing the module with high-speed countersPlease take note of the following information on the use of the module inconnection with high-speed counters:NoteWhen connecting the 24 V power supply via a mechanical contact, the outputs ofthe SM 322; DO 8 x 24 VDC/2 A carry a “1” signal for approximately 50 s forreasons associated with the circuitry.<strong>Programmable</strong> <strong>Logic</strong> <strong>Controllers</strong> <strong>S7</strong>-<strong>300</strong> <strong>Module</strong> <strong>Data</strong>A5E00105505-033-69
Digital <strong>Module</strong>sTerminal Assignment and Block Diagram of the SM 322; DO 8 x 24 VDC/2 A1 L+M24 VBackplane businterface1M2 L+M24 V2MChannel numberStatus display – greenFigure 3-24<strong>Module</strong> View and Block Diagram of Digital Output <strong>Module</strong> SM 322; DO 8 x 24 VDC/2 A3-70<strong>Programmable</strong> <strong>Logic</strong> <strong>Controllers</strong> <strong>S7</strong>-<strong>300</strong> <strong>Module</strong> <strong>Data</strong>A5E00105505-03
Digital <strong>Module</strong>sTechnical specifications of the SM 322; DO 8 x 24 VDC/2 ADimensions W x H x D(in millimeters)WeightSupports clockedoperationDimensions and Weight40 x 125 x 117Approx. 190 g<strong>Data</strong> for Specific <strong>Module</strong>Number of outputs 8Length of cable• Unshielded• ShieldedRated load voltage L+Total current of the outputs(per group)Nomax. 600 mmax. 1000 mVoltages, Currents, Potentials• Horizontal configurationUp to 60 C• Vertical configurationUp to 40 CIsolation• Between channels andbackplane bus• Between the channelsIn groups ofPermitted potential difference• Between the differentcircuitsInsulation tested withCurrent consumption• From the backplane bus• From load voltage L+(without load)Power dissipation of the moduleStatus displayInterruptsDiagnostic functions24 VDCmax. 4 Amax. 4 AYesYes475 VDC / 60 VAC500 VDCmax. 40 mAmax. 60 mAtyp. 6.8 WStatus, Interrupts, DiagnosticsGreen LED per channelNoneNone<strong>Data</strong> for Selecting an ActuatorOutput voltage• At signal “1” min. L + –0.8 VOutput current• At signal “1”Rated valuePermitted range2 A5 mA to 2.4 A• At signal “0”(leakage current)max. 0.5 mAOutput delay (for resistive load)• From “ 0” to “1” max. 100 s• At “1” to “0” max. 500 sLoad resistor rangeLamp loadParallel connection of2 outputs• For redundant triggering ofa load12 to 4 kmax. 10 WPossible (only outputsof the same group)• To increase performance Not possibleTriggering a digital inputPossibleSwitch rate• For resistive load max. 100 Hz• Inductive loadsmax. 0.5 Hzaccording to IEC 947-5-1,DC 13• For lamp load max. 10 HzLimit (internal) of the inductivecircuit interruption voltage uptyp. L + (–48 V)Short-circuit protection of the Yes, electronicoutput• Threshold on typ. 3 A<strong>Programmable</strong> <strong>Logic</strong> <strong>Controllers</strong> <strong>S7</strong>-<strong>300</strong> <strong>Module</strong> <strong>Data</strong>A5E00105505-033-71
Digital <strong>Module</strong>s3.23 Digital Output <strong>Module</strong> SM 322; DO 8 x DC 24 V/ 0.5 A;with diagnostic interrupt; (6E<strong>S7</strong>322-8BF00-0AB0)Order number: “Standard module”6E<strong>S7</strong>322-8BF00-0AB0Order number: “SIPLUS <strong>S7</strong>-<strong>300</strong>-<strong>Module</strong>”6AG1322-8BF00-2AB0CharacteristicsThe digital output module SM 322; DO x 24 VDC/0.5 A has the following salientfeatures:• 8 outputs, isolated in groups of 8• 0.5 A output current• 24 VDC rated load voltage• Suitable for solenoid valves, DC contactors and indicator lights• 2 terminals per output– Output without series diode– Output with series diode (for redundant load control)• Group error display• Channel-specific status and error LEDs• <strong>Programmable</strong> diagnostics• <strong>Programmable</strong> diagnostic interrupt• <strong>Programmable</strong> substitute value output3-72<strong>Programmable</strong> <strong>Logic</strong> <strong>Controllers</strong> <strong>S7</strong>-<strong>300</strong> <strong>Module</strong> <strong>Data</strong>A5E00105505-03
Digital <strong>Module</strong>sTerminal assignment and block diagram of the SM 322; DO 8 x 24 VDC/0.5 ASFF00F11F22F33F44F55F66F77Channel number, channel fault (F)Status display – greenFault indicator – redConnection DiagramFigure 3-25<strong>Module</strong> view of the SM 322; DO 8 24 V DC/0.5 A<strong>Programmable</strong> <strong>Logic</strong> <strong>Controllers</strong> <strong>S7</strong>-<strong>300</strong> <strong>Module</strong> <strong>Data</strong>A5E00105505-033-73
Digital <strong>Module</strong>sL+ MonitoringFuseMonitoringL+ControlOutputBackplanebus<strong>Logic</strong>DiagnosticsStatusOutputdrivers(8 x)(8x)OutputMChannel status LED (8x)green0 to 7Channel fault LED (8x)redF 0 to 7Group error display (1x)redSFFigure 3-26Block Diagram of the SM 322; DO 8 DC 24 V/0.5 ARedundant control of a loadThe output with series diode can be used for redundant control of a load.Redundant control is possible from two different signal modules without externalcircuitry. Both modules must have the same reference potential, M.NoteIf the output with series diode is used, external short-circuits to L+ cannot bedetected.3-74<strong>Programmable</strong> <strong>Logic</strong> <strong>Controllers</strong> <strong>S7</strong>-<strong>300</strong> <strong>Module</strong> <strong>Data</strong>A5E00105505-03
Digital <strong>Module</strong>sTechnical specifications of the SM 322; DO 8 x 24 VDC/0.5 ADimensions W x H x D(in millimeters)WeightDimensions and Weight40 x 125 x 117Approx. 210 g<strong>Data</strong> for Specific <strong>Module</strong>Diagnostic functions• Group error display• Channel error display (F)• Diagnostics informationreadableParameters can beassignedRed LED (SF)Red LED (F) perchannelPossibleSupports clockedoperationNumber of outputs 8Length of cable• Unshielded• ShieldedRated load voltage L+Nomax. 600 mmax. 1000 mVoltages, Currents, PotentialsTotal current of the outputs (pergroup) without series diode• Horizontal configurationUp to 40 CUp to 60 C• Vertical configurationUp to 40 CTotal current of the outputs (pergroup) with series diode• Horizontal configurationUp to 40 CUp to 60 C• Vertical configurationUp to 40 CIsolation• Between channels andbackplane busPermitted potential difference• Between the differentcircuitsInsulation tested withCurrent consumption• From the backplane bus• From load voltage L+(without load)Power dissipation of the moduleStatus display24 VDCmax. 4 Amax. 3 Amax. 4 Amax. 3 Amax. 2 Amax. 3 AYes75 VDC / 60 VAC500 VDCmax. 70 mAmax. 90 mAtyp. 5 WStatus, Interrupts, DiagnosticsGreen LED per channelInterrupts• Diagnostic interrupt Parameters can beassigned<strong>Data</strong> for Selecting an ActuatorOutput voltage• At signal “1”Without series diodeWith series diodeOutput current• At signal “1”Rated valuePermitted range• At signal “0”(leakage current)min. L + (–0.8 V)min. L + (–1.6 V)0.5 A10 mA to 0.6 A 1)max. 0.5 mAOutput delay (for resistive load)• At “0” to “1”• At “1” to “0” max. 180 smax. 245 sLoad resistor rangeLamp loadParallel connection of2 outputs• For redundantactuation of a load48 to 3 kmax. 5 WOutput with seriesdiode only, must havethe same referencepotential• To increase performance Not possibleTriggering a digital inputSwitch rate• For resistive load• Inductive load according toIEC 947-5-1, 13 DC• For lamp loadLimit (internal) of the inductivecircuit interruption voltage upPossible1 binary inputaccording toIEC 61131, Type 2;Type 1 with disabledopen-circuit monitoringmax. 100 Hzmax. 2 Hzmax. 10 Hztyp. L + (–45 V)Short-circuit protection of the Yes, electronicoutput• Threshold on typ. 0.75 A to 1.5 A1) 5 mA to 0.6 A with disabled open-circuitmonitoring<strong>Programmable</strong> <strong>Logic</strong> <strong>Controllers</strong> <strong>S7</strong>-<strong>300</strong> <strong>Module</strong> <strong>Data</strong>A5E00105505-033-75
Digital <strong>Module</strong>s3.23.1 Assigning Parameters to the SM 322; DO 8 x 24 VDC/0.5 AParameter assignmentYou will find a description of the general procedure for assigning parameters todigital modules in Section 3.3.Parameters of the SM 322; DO 8 x 24 VDC/0.5 AYou will find an overview of the parameters that you can set and their defaultsettings for the SM 322; DO 8 x 24 VDC/0.5 A in the table below.The default settings apply if you have not performed parameter assignment inSTEP 7.Table 3-18 Parameters of the SM 322; DO 8 x 24 VDC/0.5 AParameter Value Range DefaultSettingsParameterTypeScopeEnable• Diagnostic interrupt Yes/no No Dynamic<strong>Module</strong>Behavior on CPU STOP Apply substitute value (EWS)Hold last value (LWH)EWSDiagnostics• Wire-breakYes/noNo• No load voltage L+ Yes/noNo Static Channel• Short-circuit to M• Short-circuit to L+ Yes/noYes/noNoNoApply substitute value “1” Yes/no No Dynamic Channel3-76<strong>Programmable</strong> <strong>Logic</strong> <strong>Controllers</strong> <strong>S7</strong>-<strong>300</strong> <strong>Module</strong> <strong>Data</strong>A5E00105505-03
Digital <strong>Module</strong>s3.23.2 Behavior and Diagnostics of the SM 322; DO 8 24 VDC/0.5 AEffect of operating and mode supply voltage on the output valuesThe output values of the SM 322; DO 8 x 24 VDC/0.5 A depend on the operatingmode of the CPU and on the supply voltage of the module.Table 3-19 Dependence of the output values on the operating mode of the CPU and on thesupply voltage L+ of the SM 322; DO 8 x 24 VDC/0.5 A.CPU Operating StatePower Supply L+ to Digital<strong>Module</strong>POWER ON RUN L+ exists CPU valuePOWEROFFL+ missing 0 signalOutput Value of Digital<strong>Module</strong>STOP L+ exists Substitute value/last value(0 signal preset)L+ missing 0 signal– L+ exists 0 signalL+ missing 0 signalBehavior upon failure of the supply voltageFailure of the supply voltage of the SM 322; DO 8 x 24 VDC/0.5 A is alwaysindicated by the SF LED on the module. Furthermore, this information is madeavailable on the module (entry in diagnosis).Triggering of the diagnostic interrupt depends on the parameter assignment(see Section 3.23.3).<strong>Programmable</strong> <strong>Logic</strong> <strong>Controllers</strong> <strong>S7</strong>-<strong>300</strong> <strong>Module</strong> <strong>Data</strong>A5E00105505-033-77
Digital <strong>Module</strong>sDiagnostic Messages of the SM 322; DO 8 x 24 VDC/0.5 AThe following table provides an overview of the diagnostic messages of theSM 322; DO 8 x 24 VDC/0.5 A.Table 3-20 Diagnostic Messages of the SM 322; DO 8 x 24 VDC/0.5 ADiagnostics Message LED Scope of theDiagnosticsParameters canbe assignedWire-break SF Channel YesLoad voltage missing SF Channel YesShort-circuit to M SF Channel YesShort-circuit to L+ SF Channel YesExternal auxiliary supply missing SF <strong>Module</strong> NoInternal auxiliary power missing SF <strong>Module</strong> NoFuse blown SF <strong>Module</strong> NoWatchdog timeout SF <strong>Module</strong> NoEPROM error SF <strong>Module</strong> NoRAM error SF <strong>Module</strong> No* Open-circuit detection is performed at a current < 1 mA.When suitably parameterized, a wire-break results only in theSF LED and the corresponding channel error LED lighting up.NoteA prerequisite for detecting the errors indicated by programmable diagnosticmessages is that you have assigned parameters to the digital module accordinglyin STEP 7.3-78<strong>Programmable</strong> <strong>Logic</strong> <strong>Controllers</strong> <strong>S7</strong>-<strong>300</strong> <strong>Module</strong> <strong>Data</strong>A5E00105505-03
Digital <strong>Module</strong>sCauses of error and remedial actionTable 3-21 Diagnostic Messages of the SM 322; DO 8 x 24 VDC/0.5 A, Causes of Error and RemedialActionDiagnostics MessageWire-breakNo load voltageShort-circuit to MError Detection...Only withoutput to “1”Only withoutput to “1”Only withoutput to “1”Possible Error CauseOpen circuit between moduleand actuatorChannel not connected(open)Defective outputOverload of outputShort-circuit of output to MShort-circuit to L+ Always Short-circuit at output to L+ ofmodule supplyNo external auxiliaryvoltageNo internal auxiliaryvoltageAlwaysAlwaysPower supply L+ to modulemissingPower supply L+ to modulemissingFuse in module defectiveClose circuitRemedyDisable the “DiagnoseWire-break” parameter for thechannel in STEP 7Replace moduleEliminate overloadEliminate short circuitEliminate short circuitFeed supply L+Feed supply L+Replace moduleFuse blown Always Fuse in module defective Replace moduleWatchdog tripped Always Temporary highelectromagnetic interference<strong>Module</strong> defectiveEPROM error Always Temporary highelectromagnetic interference<strong>Module</strong> defectiveRAM error Always Temporary highelectromagnetic interference<strong>Module</strong> defectiveEliminate interferenceReplace moduleEliminate interference andswitch on/off power supply ofCPUReplace moduleEliminate interference andswitch on/off power supply ofCPUReplace module<strong>Programmable</strong> <strong>Logic</strong> <strong>Controllers</strong> <strong>S7</strong>-<strong>300</strong> <strong>Module</strong> <strong>Data</strong>A5E00105505-033-79
Digital <strong>Module</strong>s3.23.3 Interrupts of the SM 322; DO 8 x VDC 24/0.5 AIntroductionThe SM 322; DO 8 x 24 VDC/0.5 A can trigger diagnostic interrupts.The OBs and SFCs mentioned below can be found in the online Help for STEP 7,where they are described in greater detail.Enabling interruptsThe interrupts are not preset – in other words, they are inhibited withoutappropriate parameter assignment. Assign parameters to the Interrupt Enable inSTEP 7 (refer to Section 3.23.1).Diagnostic interruptIf you have enabled diagnostic interrupts, then active error events (initialoccurrence of the error) and departing error events (message aftertroubleshooting) are reported by means of an interrupt.The CPU interrupts the execution of the user program and processes thediagnostic interrupt block (OB 82).In the user program, you can call SFC 51 or SFC 59 in OB 82 to obtain moredetailed diagnostic information from the module.The diagnostic information is consistent until such time as OB 82 is exited. WhenOB 82 is exited, the diagnostic interrupt is acknowledged on the module.3-80<strong>Programmable</strong> <strong>Logic</strong> <strong>Controllers</strong> <strong>S7</strong>-<strong>300</strong> <strong>Module</strong> <strong>Data</strong>A5E00105505-03
Digital <strong>Module</strong>s3.24 Digital Output <strong>Module</strong> SM 322; DO 8 x VDC 48-125/1,5 A;(6E<strong>S7</strong>322-1CF00-0AA0)Order number: “Standard module”6E<strong>S7</strong>322-1CF00-0AA0Order number: “SIPLUS <strong>S7</strong>-<strong>300</strong>-<strong>Module</strong>”6AG1322-1CF00-2AA0CharacteristicsThe SM 322; DO 8 x 48-125 VDC/1.5 A features the following characteristics:• 8 outputs, reverse polarity protection and isolated in groups of 4• 1.5 A output current• Rated load voltage 48 to 125 VDC• Suitable for solenoid valves, DC contactors and indicator lights• Group error displayUsing the module with high-speed countersPlease take note of the following information on the use of the module inconnection with high-speed counters:NoteWhen connecting the power supply via a mechanical contact, the outputs of theSM 322; DO 8 x 48-125 VDC/1.5 A carry a “1” signal for approximately 50 s forreasons associated with the circuitry.<strong>Programmable</strong> <strong>Logic</strong> <strong>Controllers</strong> <strong>S7</strong>-<strong>300</strong> <strong>Module</strong> <strong>Data</strong>A5E00105505-033-81
Digital <strong>Module</strong>sTerminal assignment and block diagram of the SM 322; DO 8 x 48-125 VDC/1.5 ASF+ 5 V11 L+3SF5748 to125 VBackplane businterface9101M+ 5 V 112 L+13151748 to125 V19202MChannel numberStatus display – greenFault indicator – redFigure 3-27<strong>Module</strong> View and Block Diagram of the SM 322; DO 8 x 48-125 VDC/1.5 A3-82<strong>Programmable</strong> <strong>Logic</strong> <strong>Controllers</strong> <strong>S7</strong>-<strong>300</strong> <strong>Module</strong> <strong>Data</strong>A5E00105505-03
Digital <strong>Module</strong>sTechnical specifications of the SM 322; DO 8 x 48-125 VDC/1.5 ADimensions and Weight<strong>Data</strong> for Selecting an ActuatorDiagnostic functionsis required in the supply cables of the load circuit.2) Potential errors are:• Group error display Red LED (SF) 2) - No load voltageDimensions W x H x D40 x125 x117Output voltage(in millimeters)• At “ 1” signal min. L + (–1.,2 V)WeightApprox. 250 gOutput current<strong>Data</strong> for Specific <strong>Module</strong>• At “ 1” signalSupports clockedNoRated value1.5 AoperationPermitted range10 mA to 1.5 ANumber of outputs 8• Permitted surge current max. 3 A for 10 msLength of cable• For ”0” signalmax. 0.5 mA• Unshieldedmax. 600 m(leakage current)• Shieldedmax. 1000 mOutput delay (for resistive load)Voltages, Currents, Potentials• From “ 0” to “1”max. 2 msRated load voltage L+48 VDC to 125 VDC • At “1” to “0”max. 15 ms• Reverse polarity protection Yes, by means offuse 1)Lamp loadmax. 15 W at 48 Vmax. 40 W at 125 VTotal current of the outputsParallel connection of(per group)2 outputs• Horizontal configuration• For redundant actuation of Possible (only outputsa loadof the same group)Up to 40 Cmax. 6 AUp to 50 Cmax. 4 A• To increase performance Not possibleUp to 60 Cmax. 3 ATriggering a digital input Possible• Vertical configurationSwitch rateUp to 40 Cmax. 4 A• For resistive loadmax. 25 HzIsolation• For inductive loadmax. 0.5 Hz• Between channels and Yes• For lamp loadmax. 10 Hzbackplane busLimit (internal) of the in typ. M (–1V)• Between the channels Yesductive circuit interruptionvoltage upIn groups of4Short-circuit protection of the Yes, electronic 3)Permitted potential differenceoutput• Between the different 146 VDC / 132 VAC• Threshold ontyp. 4.4 AcircuitsInsulation tested with1500 VACReplacement fuses Fuse 6.,3 A/250 V,quick blow, 5 x 20 mmCurrent consumption• SchurterSP0001.1012• From the backplane bus max. 100 mA• Wickman194-1630-0• From the load voltage L+ max. 2 mA(no load)Fuse carrier• Wickman 653 0000 040Power dissipation of the module typ. 7.2 WStatus, Interrupts, Diagnostics1) The fuses on this module are merelyStatus displayGreen LED per channel supplementary fuses. External overcurrentprotection (suitable for branch circuits conformingInterruptsNoneto the local regulations for electrical engineering)- Fuse defective- Output overloaded3) If an overload condition is detected, the output isinhibited for approximately 2.4 s.<strong>Programmable</strong> <strong>Logic</strong> <strong>Controllers</strong> <strong>S7</strong>-<strong>300</strong> <strong>Module</strong> <strong>Data</strong>A5E00105505-033-83
Digital <strong>Module</strong>s3.25 Digital Output <strong>Module</strong> SM 322;DO 8 x VAC 120/230/2 A; (6E<strong>S7</strong>322-1FF01-0AA0)Order number: “Standard module”6E<strong>S7</strong>322-1FF01-0AA0Order number: “SIPLUS <strong>S7</strong>-<strong>300</strong>-<strong>Module</strong>”6AG1322-1FF01-2AA0CharacteristicsThe SM 322; DO 8 x 120/230 VAC/2 A features the following characteristics:• 8 outputs, fused and isolated in groups of 4• 2 A output current• 120/230 VAC rated load voltage• Suitable for AC solenoid valves, contactors, motor starters, fractional h.p.motors and indicator lights.• Group error display3-84<strong>Programmable</strong> <strong>Logic</strong> <strong>Controllers</strong> <strong>S7</strong>-<strong>300</strong> <strong>Module</strong> <strong>Data</strong>A5E00105505-03
Digital <strong>Module</strong>sTerminal assignment and block diagram of the SM 322; DO 8 x 120/230 VAC/2 ASF5 VSF1L1NM*MBackplane businterface5 V2L2NM*MChannel numberStatus display – greenFault indicator – red* Zero cross inhibit voltage triacFigure 3-28<strong>Module</strong> View and Block Diagram of the SM 322; DO 8 x 120/230 VAC/2 A<strong>Programmable</strong> <strong>Logic</strong> <strong>Controllers</strong> <strong>S7</strong>-<strong>300</strong> <strong>Module</strong> <strong>Data</strong>A5E00105505-033-85
Digital <strong>Module</strong>sTechnical specifications of the SM 322; DO 8 x 120/230 VAC/2 ADimensions and WeightDimensions W x H x D40 x 125 x 117(in millimeters)WeightApprox. 275 g<strong>Data</strong> for Specific <strong>Module</strong>Supports clockedNooperationNumber of outputs 8Length of cable• Unshielded• Shieldedmax. 600 mmax. 1000 mVoltages, Currents, PotentialsRated load voltage L1• Permitted frequency rangeTotal current of the outputs(per group)• Horizontal configurationUp to 40 CUp to 60 C• Vertical configurationUp to 40 CIsolation• Between channels andbackplane bus• Between the channelsIn groups ofPermitted potential difference• Between M internal and theoutputs• Between the outputs of thedifferent groupsInsulation tested withCurrent consumption• From the backplane bus• From load voltage L1(without load)120/230 VAC47 Hz to 63 Hzmax. 4 Amax. 2 Amax. 2 AYesYes4230 VAC500 VAC1500 VACmax. 100 mAmax. 2 mAPower dissipation of the module typ. 8.6 WStatus, Interrupts, DiagnosticsStatus displayGreen LED per channelInterruptsNoneDiagnostic functions• Group error displayYesRed LED (SF) 2)<strong>Data</strong> for Selecting an ActuatorOutput voltage• At signal “1”– At maximum current– At minimum currentOutput current• At signal “1”min. L1 (–1.5 V)min. L1 (–8.5 V)Rated value AC 2 A 1)Permitted range for 0 C to 10 mA to 2 A40 CPermitted range for 40 C 10 mA to 1 Ato 60 CPermitted current surge(per group)• At signal “0”(leakage current)max. 20 A(not more than 1 ACscan cycle)max. 2 mAOutput delay (for resistive load)• From “0” to “1” Not more than 1 ACscan cycle• From “1” to “0” Not more than 1 ACscan cycleMinimum load currentZero cross inhibit voltageSize of the motor starterLamp load10 mAmax. 60 Vmax. size 5 to NEMAmax. 50 WConnecting two outputs in parallel• For redundant triggering ofa loadPossible (only outputsof the same group)• To increase performance Not possibleTriggering a digital inputSwitch rate• For resistive load• Inductive loads, accordingto IEC 947-5-1, AC 15• For lamp loadShort-circuit protectionof output• Min. current required forfuse to blowPossiblemax. 10 Hzmax. 0.5 Hz1 HzFuse, 8 A/250 V; pergroupmin. 40 A• Max. response time max. <strong>300</strong> msReplacement fuses• Wickman• Schurter• LittelfuseFuse carrier• Wickman 653 078 A fuse/quick-acting194-1800-0SP001.1013217.0081) The load current must not be half-wave2) Potential errors are:- No load voltage- Fuse defective3-86<strong>Programmable</strong> <strong>Logic</strong> <strong>Controllers</strong> <strong>S7</strong>-<strong>300</strong> <strong>Module</strong> <strong>Data</strong>A5E00105505-03
Digital <strong>Module</strong>s3.26 Digital Output <strong>Module</strong> SM 322;DO 8 x 120/230 VAC/2 A ISOL (6E<strong>S7</strong>322-5FF00-0AB0)Order number6E<strong>S7</strong>322-5FF00-0AB0CharacteristicsDigital output module SM 322; DO 8 x 120/230 VAC/2 A ISOL has the followingdistinguishing characteristics:• 8 outputs, isolated in one group• Group error display• Channel-specific status LEDs• <strong>Programmable</strong> diagnostics• <strong>Programmable</strong> diagnostic interrupt• <strong>Programmable</strong> substitute value output• 2 A output current• 120/230 VAC rated load voltage• Suitable for AC solenoid valves, contactors, motor starters, fractional h.p.motors and indicator lights.<strong>Programmable</strong> <strong>Logic</strong> <strong>Controllers</strong> <strong>S7</strong>-<strong>300</strong> <strong>Module</strong> <strong>Data</strong>A5E00105505-033-87
Digital <strong>Module</strong>sTerminal assignment and block diagram of the SM 322; DO 8 x120/230 VAC/2 A ISOLSFGroup error display – red1L472LMBackplane businterface1011141720213L4LL52427L6M30313437407L8LChannelnumberStatus display – greenFigure 3-29<strong>Module</strong> View and Block Diagram of the SM 322; DO 8 x 120/230 VAC/2 A ISOL3-88<strong>Programmable</strong> <strong>Logic</strong> <strong>Controllers</strong> <strong>S7</strong>-<strong>300</strong> <strong>Module</strong> <strong>Data</strong>A5E00105505-03
Digital <strong>Module</strong>sTechnical specifications of the SM 322; DO 8 x120/230 VAC/2 A ISOLDimensions and WeightDimensions W x H x D 40 x 125 x 117WeightApprox. 275 g<strong>Data</strong> for Specific <strong>Module</strong>Supports clockedNooperationNumber of outputs 8Length of cable• Unshielded• Shieldedmax. 600 mmax. 1000 mVoltages, Currents, PotentialsRated load voltage L1120/230 VACTotal current of the outputs(module)• Horizontal configurationUp to 40 °CUp to 60 °Cmax. 8 Amax. 4 A• Vertical configuration max. 4 AUp to 40 °CIsolation• Between channels and Yesbackplane bus• Between channelsIn groups ofYes1Permitted potential difference• Between M internal and the 230 VACoutputs• Between outputs 500 VACInsulation tested with• Between M internal and the 1500 VACoutputs• Between the outputs of thedifferent groups2000 VACCurrent consumption• From the backplane bus• From load voltage L1(without load)Power dissipation of the modulemax. 100 mAmax. 2 mAtyp. 8.6 W<strong>Data</strong> for Selecting an ActuatorOutput voltage• At signal “1” min. L1 (–8.5 V)Output current• At signal “1”Rated valuePermitted range for 0 °C to40 °CPermitted range for40 °C to 60 °CPermitted surge current(per group)• For “0” signal(leakage current)Zero cross inhibit voltageSize of the motor starterLamp load2 A10 mA to 2 A10 mA to 1 Amax. 20 A(with 2 half-waves)max. 2 mAmax. 60 Vmax. size 5 to NEMAmax. 50 WConnecting two outputs inparallel• For redundant triggering of Possiblea load• To increase performance Not possibleTriggering a digital inputPossibleSwitch rate• For resistive load max. 10 Hz• Inductive loads, according max. 0.5 Hzto IEC 947-5-1, AC 15• For lamp load max. 1 HzShort-circuit protection of outputYes,3.15 A /250 V fuse, fast-actingStatus displayStatus, Interrupts, DiagnosticsGreen LED per channelInterrupts• Diagnostic interrupt Parameters can beassignedDiagnostic functions• Group error display Red LED (SF)<strong>Programmable</strong> <strong>Logic</strong> <strong>Controllers</strong> <strong>S7</strong>-<strong>300</strong> <strong>Module</strong> <strong>Data</strong>A5E00105505-033-89
Digital <strong>Module</strong>sNoteThe outputs must be protected by a high-speed, fast-acting 3.15 A 250 VAC fuse.When mounted in a hazardous area in accordance with the National Electric Code,a tool must be used to remove the fuse and the area must be designated safebefore the fuse is removed/replaced.Parameterization of the SM 322; DO x 120/230 VAC/2 A ISOLA description of the general procedure for parameterizing digital modules can befound in section 3.3.Detailed information on the digital output module parameters can be found inAppendix A.3.Parameters of the SM 322; DO 8 x 120/230 VAC/2 A ISOLTable 3-22 shows the settable parameters with the default settings for the SM 322;DO 8 x 120/230 VAC/2 A ISOL.The default settings apply if you have not performed parameter assignment inSTEP 7.Table 3-22 Parameters of the SM 322; DO 8 x 120/230 VAC/2 A ISOLParameter Value Range DefaultsettingsParametertypeEnable• Diagnostic interrupts Yes/no No Dynamic <strong>Module</strong>Behavior on CPU STOPSwitch substitute value(EWS)Hold last value (LWH)EWS Dynamic ChannelScopeSwitch substitute value“1”Yes/no No Dynamic Channel3-90<strong>Programmable</strong> <strong>Logic</strong> <strong>Controllers</strong> <strong>S7</strong>-<strong>300</strong> <strong>Module</strong> <strong>Data</strong>A5E00105505-03
Digital <strong>Module</strong>sBehavior and Diagnostics of the SM 322; DO 8 x 120/230 VAC/2 A ISOLTable 3-23 gives an overview of the diagnostic messages of theSM 322; DO 8 x 120/230 VAC/2 A ISOL.Table 3-23 Diagnostic Messages of the SM 322; DO 8 x 120/230 VAC/2 A ISOLDiagnostics Message LED Scope of the diagnostics Parameters can beassignedTime-out SF <strong>Module</strong> NoEPROM error SF <strong>Module</strong> NoRAM error SF <strong>Module</strong> NoError causes and remediesTable 3-24 shows the diagnostic messages and error causes as well as theremedies of the SM 322; DO 8 x 120/230 VAC/2 A ISOL.Table 3-24 Diagnostic messages of the SM 322; DO 8 x 120/230 VAC/2 A ISOL,error causes and remediesDiagnosticsmessageError detection Possible error cause RemedyTime-out Always Transient highelectromagneticinterference<strong>Module</strong> defectiveEPROM error Always Transient highelectromagneticinterference<strong>Module</strong> defectiveRAM error Always Transient highelectromagneticinterference<strong>Module</strong> defectiveRemove interference and turnthe CPU power supply off andonReplace moduleRemove interference and turnthe CPU power supply off andonReplace moduleRemove interference and turnthe CPU power supply off andonReplace module<strong>Programmable</strong> <strong>Logic</strong> <strong>Controllers</strong> <strong>S7</strong>-<strong>300</strong> <strong>Module</strong> <strong>Data</strong>A5E00105505-033-91
Digital <strong>Module</strong>sInterrupts of the SM 322; DO 8 x 120/230 VAC/2 A ISOLThe SM 322; DO 8 x 120/230 VAC/2 A ISOL can trigger diagnostic interrupts.The OBs and SFCs mentioned below are described in detail in the online Help forSTEP 7.Enabling interruptsThe interrupts are not available – in other words, they are withheld withoutappropriate parameter assignment. Use STEP 7 to assign parameters for enablinginterrupts.Diagnostic interruptIf you have enabled diagnostic interrupts, then active error events (initialoccurrence of the error) and departing error events (message aftertroubleshooting) are reported by means of interrupts.The CPU interrupts execution of the user program and processes the diagnosticinterrupt block (OB 82).In the user program, you can call SFC 51 or SFC 59 in OB 82 to obtain moredetailed diagnostic information from the module.The diagnostic information is consistent until such time as OB 82 is exited. WhenOB 82 is exited, the diagnostic interrupt is acknowledged at the module.Load restrictions with a horizontal configurationWith a horizontal configuration, the module loads must be restricted so that twoadjacent inputs or outputs do not exceed the maximum rating for an input or anoutput.Load restrictions with a vertical configurationWith a vertical configuration, the module loads must be restricted so that fouradjacent inputs or outputs do not exceed the maximum rating for an input or anoutput.3-92<strong>Programmable</strong> <strong>Logic</strong> <strong>Controllers</strong> <strong>S7</strong>-<strong>300</strong> <strong>Module</strong> <strong>Data</strong>A5E00105505-03
Digital <strong>Module</strong>s3.27 Relay Output <strong>Module</strong> SM 322;DO 16 x Rel. 120/230 VAC; (6E<strong>S7</strong>322-1HH01-0AA0)Order number6E<strong>S7</strong>322-1HH01-0AA0CharacteristicsThe SM 322; DO 16 x Rel. 120/230 VAC features the following characteristics:• 16 outputs, isolated in groups of 8• Rated load voltage 24 VDC to 120 VDC, 48 VAC to 230 VAC• Suitable for AC/DC solenoid valves, contactors, motor starters, fractional h.p.motors and indicator lights.Behavior upon power down of the supply voltageNoteWhen the power supply is switched off, the capacitor still stores energy forabout 200 ms. The relay can therefore still be driven briefly within this time by theuser program.<strong>Programmable</strong> <strong>Logic</strong> <strong>Controllers</strong> <strong>S7</strong>-<strong>300</strong> <strong>Module</strong> <strong>Data</strong>A5E00105505-033-93
Digital <strong>Module</strong>sTerminal assignment and block diagram of the SM 322;DO 16 x Rel. 120/230 VACMBackplane businterfaceL +N24 VMMNChannel numberStatus display – greenFigure 3-30<strong>Module</strong> View and Block Diagram of SM 322; DO 16 x Rel. 120/230 VAC3-94<strong>Programmable</strong> <strong>Logic</strong> <strong>Controllers</strong> <strong>S7</strong>-<strong>300</strong> <strong>Module</strong> <strong>Data</strong>A5E00105505-03
Digital <strong>Module</strong>sTechnical specifications of the SM 322; DO 16 x Rel. 120/230 VACDimensions and WeightDimensions W x H x D 40 x 125 x 117(in millimeters)WeightApprox. 250 g<strong>Data</strong> for Specific <strong>Module</strong>Supports clockedNooperationNumber of outputs 16Length of cable• Unshielded• Shieldedmax. 600 mmax. 1000 mVoltages, Currents, PotentialsRated supply voltage of the 24 VDCrelay L +Total current of the outputs max. 8 A(per group)Isolation• Between channels and Yesbackplane bus• Between the channelsIn groups ofYes8Permitted potential difference• Between M internal and 75 VDC / 60 VACsupply voltage of therelays• Between M internal and 230 VACsupply voltage of therelays and the outputs• Between the outputs of 500 VACthe different groupsInsulation tested with• Between M internal and 500 VDCsupply voltage of therelays• Between M internal and 1500 VACsupply voltage of therelays and the outputs• Between the outputs ofthe different groups2000 VACCurrent consumption• From the backplane bus• From supply voltage L+Power dissipation of themodulemax. 100 mAmax. 250 mAtyp. 4.5 WStatus, Interrupts, DiagnosticsStatus displayGreen LED per channelInterruptsNoneDiagnostic functionsNone<strong>Data</strong> for Selecting an ActuatorContinuous thermal current max. 2 AMinimum load voltage / 10 V / 10 mAcurrentShort-circuit proof toIEC 947-5-1200 A, with B10/B16circuit breakerSwitching capacity and lifetime of the contacts• For resistive loadVoltage Current No. ofswitching cyc.(typ.)24 VDC60 VDC120 VDC24 VAC48 VAC60 VAC120 VAC230 VAC2.0 A1.0 A0.5 A0.5 A0.2 A1.5 A1.5 A1.5 A2.0 A1.0 A0.5 A2.0 A1.0 A0.5 A0.1 million0.2 million1.0 million0.2 million0.6 million1.5 million1.5 million1.5 million1.0 million1.5 million2.0 million1.0 million1.5 million2.0 million• Inductive load according to IEC 947-5-1 DC13/AC15Voltage Current No. ofswitching cyc.(typ.)24 VDC60 VDC120 VDC24 VAC48 VAC60 VAC120 VAC230 VAC2.0 A1.0 A0.5 A0.5 A0.2 A1.5 A1.5 A1.5 A2.0 A1.0 A0.5 A2.0 A1.0 A0.5 A0.05 million0.1 million0.5 million0.1 million0.3 million1 million1 million1 million0.7 million1.0 million1.5 million0.7 million1.0 million1.5 millionAn external protection circuit will enhance the service lifeof the contacts.Size of the motor starter max. size 5 to NEMALamp load50 W / 230 VAC5 W / 24 VDCNoneContact protection (internal)Parallel connection of2 outputs• For redundant triggeringof a load• To increase performance Not possibleTriggering a digital input PossiblePossible (only outputs ofthe same group)Switch rate• Mechanical max. 10 Hz• For resistive load 1 Hz• Inductive loads accordingto IEC 947-5-1, DC 13/AC15• For lamp load 1 Hzmax. 0.5 Hz<strong>Programmable</strong> <strong>Logic</strong> <strong>Controllers</strong> <strong>S7</strong>-<strong>300</strong> <strong>Module</strong> <strong>Data</strong>A5E00105505-033-95
Digital <strong>Module</strong>s3.28 Relay Output <strong>Module</strong> SM 322; DO 8 x Rel. 230 VAC;(6E<strong>S7</strong>322-1HF01-0AA0)Order number6E<strong>S7</strong>322-1HF01-0AA0CharacteristicsThe SM 322; DO 8 x REL. 230 VAC features the following characteristics:• 8 outputs, isolated in groups of 2• Rated load voltage 24 VDC to 120 VDC, 48 VAC to 230 VAC• Suitable for AC/DC solenoid valves, contactors, motor starters, fractional h.p.motors and indicator lights.Behavior upon power down of the supply voltageNoteApplicable only for the SM 322; DO 8 x Rel. 230 VAC with product status 1 is:When the power supply is switched off, the capacitor still stores energy for about200 ms. The relay can therefore still be driven briefly within this time by the userprogram.3-96<strong>Programmable</strong> <strong>Logic</strong> <strong>Controllers</strong> <strong>S7</strong>-<strong>300</strong> <strong>Module</strong> <strong>Data</strong>A5E00105505-03
Digital <strong>Module</strong>sTerminal assignment and block diagram of the SM 322; DO 8 x Rel. 230 VACUMBackplane businterface24 VUMMChannel numberStatus display – greenFigure 3-31<strong>Module</strong> View and Block Diagram of the SM 322; DO 8 x REL. 230 VAC<strong>Programmable</strong> <strong>Logic</strong> <strong>Controllers</strong> <strong>S7</strong>-<strong>300</strong> <strong>Module</strong> <strong>Data</strong>A5E00105505-033-97
Digital <strong>Module</strong>sTechnical specifications of the SM 322; DO 8 x Rel. 230 VACDimensions W x H x D(in millimeters)WeightSupports clockedoperationDimensions and Weight40 x 125 x 117Approx. 190 g<strong>Data</strong> for Specific <strong>Module</strong>Number of outputs 8Length of cable• Unshielded• ShieldedNomax. 600 mmax. 1000 mVoltages, Currents, PotentialsRated supply voltage of therelay L +Total current of the outputs(per group)Isolation• Between channels andbackplane bus• Between the channelsIn groups ofPermitted potential difference• Between M internal andsupply voltage of the relays• Between M internal andsupply voltage of the relaysand the outputs• Between the outputs of thedifferent groupsInsulation tested with• Between M internal andsupply voltage of the relays• Between M internal andsupply voltage of the relaysand the outputs• Between the outputs of thedifferent groupsCurrent consumption• From the backplane bus• From supply voltage L+Power dissipation of the moduleStatus display24 VDCmax. 4 AYesYes275 VDC / 60 VAC230 VAC400 VAC500 VDC1500 VAC1500 VACmax. 40 mAmax. 160 mAtyp. 3.2 WStatus, Interrupts, DiagnosticsGreen LED per channel<strong>Data</strong> for Selecting an ActuatorContinuous thermal currentMinimum load voltage / currentShort-circuit proof according toIEC 947-5-1 2)max. 3 A10 V /5 mAWith circuit-breaker ofcharacteristic B for:cos 1.0: 600 Acos 0.5 to 0.7: 900AWith Diazed 8 A fuse:1000 ASwitching capacity and lifetime of the contacts• For resistive loadVoltage Current No. ofswitchingcyc. (typ.)24 VDC60 VDC120 VDC48 VAC60 VAC120 VAC230 VAC2.0 A1.0 A0.5 A0.5 A0.2 A2.0 A2.0 A2.0 A1.0 A0.5 A2.0 A1.0 A0.5 A0.7 million1.6 million4 million1.6 million1.6 million1.6 million1.2 million0.5 million 2)0.7 million 2)1.5 million 2)0.5 million 2)0.7 million 2)1.5 million• Inductive load according to IEC 947-5-1 13 DC/15 ACVoltage Current No. ofswitchingcyc. (typ.)24 VDC60 VDC120 VDC48 VAC60 VAC120 VAC230 VACContact protection (internal)2.0 A1.0 A0.5 A0.5 A0.2 A1.5 A1.5 A2.0 A1.0 A0.7 A0.5 A2.0 A1.0 A0.5 A0.3 million0.5 million1.0 million0.5 million0.3 million 2)1 million1 million0.2 million0.7 million1 million2.0 million0.3 million 2)0.7 million 2)2 million 2)Varistor SIOV-CU4032K275 GAn external protection circuit will enhance the service lifeof the contacts.InterruptsDiagnostic functionsNoneNone3-98<strong>Programmable</strong> <strong>Logic</strong> <strong>Controllers</strong> <strong>S7</strong>-<strong>300</strong> <strong>Module</strong> <strong>Data</strong>A5E00105505-03
Digital <strong>Module</strong>sLamp load 1)<strong>Data</strong> for Selecting an Actuator, continuedLamp load (230 VAC) 2)max. 50 WPower1000 W1500 WNo. ofswitchingcyc. (typ.)2500010000Energy-saving1058W 25000electronic ballast 2)lamps/fluorescent lamps withFluorescent lamps,158W 25000conventionally compensated 2)Fluorescent lamps,1058W 25000non-compensated 2)Connecting two outputs in parallel• For redundant triggering ofa loadPossible (only outputsof the same group)• To increase performance Not possibleTriggering a digital inputPossibleSwitch rate• Mechanical max. 10 Hz• For resistive load max. 2 Hz• Inductive loads according max. 0.5 Hzto IEC 947-5-1, DC 13/15AC• For lamp load max. 2 Hz1) Product status 12) Product status 2 or later<strong>Programmable</strong> <strong>Logic</strong> <strong>Controllers</strong> <strong>S7</strong>-<strong>300</strong> <strong>Module</strong> <strong>Data</strong>A5E00105505-033-99
Digital <strong>Module</strong>s3.29 Relay Output <strong>Module</strong> SM 322;DO 8 x Rel. 230 VAC/5A; (6E<strong>S7</strong>322-5HF00-0AB0)Order number6E<strong>S7</strong>322-5HF00-0AB0CharacteristicsRelay output module SM 322; DO 8 x Rel. 230 VAC/5A has the followingdistinguishing characteristics:• 8 outputs, isolated in one group• Load voltage 24 VDC to 120 VDC, 24 VAC to 230 VAC• Suitable for AC solenoid valves, contactors, motor starters, fractional h.p.motors and indicator lights.• An RC quenching element can be connected via a jumper (SJ) to protect thecontacts.• Group error display• Channel-specific status LEDs• <strong>Programmable</strong> diagnostic interrupt• <strong>Programmable</strong> substitute value output3-100<strong>Programmable</strong> <strong>Logic</strong> <strong>Controllers</strong> <strong>S7</strong>-<strong>300</strong> <strong>Module</strong> <strong>Data</strong>A5E00105505-03
Digital <strong>Module</strong>sProtection of contacts against overvoltagesYou protect the contacts against overvoltages by inserting jumpers (SJ) on themodule between terminals 3 and 4, 7 and 8, 12 and 13 etc. (refer to Figure 3-32).Terminal assignment and block diagram of the SM 322; DO 8 x Rel. 230 VAC/5AFault indicator – redSF121L+2L+2122SJ3451L+1L+232425SJ24VSJSJSJ678910111213141516171M1L+1M1L+1M1L+Backplane bus interface1M1L+1M1L+1M1L+262728293031323334353637SJSJSJ24V18191M1M383920SF401M2MChannelnumberStatus display – greenFigure 3-32<strong>Module</strong> View and Block Diagram of the SM 322; DO 8 x Rel. 230 VAC/5A<strong>Programmable</strong> <strong>Logic</strong> <strong>Controllers</strong> <strong>S7</strong>-<strong>300</strong> <strong>Module</strong> <strong>Data</strong>A5E00105505-033-101
Digital <strong>Module</strong>sOperation with safe electrical extra-low voltageWhen using relay output module 6E<strong>S7</strong>322-5HF00-0AB0 with safe and electricallyisolated extra-low voltage, take the following special characteristic into account:If a terminal is operated with a safe and electrically isolated extra-low voltage, thehorizontally adjacent terminal must be operated at a rated voltage of not morethan 120 VUC. With operation at voltages greater than 120 VUC, the creepagesand clearances of the 40-pin front connector do not meet the <strong>SIMATIC</strong>requirements for safe electrical isolation.If one of the two horizontally adjacent terminalsis operated with a safe electrical extralowvoltage, the adjacent terminal must beoperated at not more than UC 120 V.Figure 3-33Special Characteristic for Operation with a Safe Electrical Extra-Low VoltageTechnical specifications of the SM 322; DO 8 x Rel. 230 VAC/5 ADimensions W x H x D(in millimeters)WeightSupports clockedoperationDimensions and Weight40 x 125 x 117Approx. 320 g<strong>Data</strong> for Specific <strong>Module</strong>Number of outputs 8Length of cable• Unshielded• ShieldedNomax. 600 mmax. 1000 mVoltages, Currents, Potentials• Between the channels andthe relay supply voltage• Between the channelsIn groups ofPermitted potential difference• Between M internal andsupply voltage of the relays• Between M internal andsupply voltage of the relaysand the outputs• Between the outputs of thedifferent groupsYesYes175 VDC / 60 VAC250 VAC500 VACRated supply voltage of theelectronics L +24 VDC• Reverse polarity protection YesTotal current of the outputs(per group)• Horizontal configurationUp to 60° C• Vertical configurationUp to40 ° Cmax. 5 Amax. 5 AIsolation• Between channels andbackplane busYes3-102<strong>Programmable</strong> <strong>Logic</strong> <strong>Controllers</strong> <strong>S7</strong>-<strong>300</strong> <strong>Module</strong> <strong>Data</strong>A5E00105505-03
Digital <strong>Module</strong>sInsulation tested with• Between M internal andsupply voltage of the relays• Between M internal andsupply voltage of the relaysand the outputs• Between the outputs of thedifferent groupsCurrent consumption• From the backplane bus• From supply voltage L+Power dissipation of the moduleStatus display500 VDC1500 VAC2000 VACmax. 100 mAmax. 160 mAtyp. 3.5 WStatus, Interrupts, DiagnosticsGreen LED per channelInterrupts• Diagnostic interrupt Parameters can beassignedDiagnostic functionsParameters can beassigned• Group error display Red LED (SF)• Diagnostics information Possibleread-out<strong>Data</strong> for Selecting an ActuatorContinuous thermal currentmax. 5 AMinimum load voltage / current 10 V /10 mA 1)Leakage current 11.5 mA 2)Short-circuit proof according toIEC 947-5-1With circuit-breaker ofcharacteristic B for:cos 1.0: 600 Acos 0.5 to 0.7: 900AWith Diazed 8 A fuse:1000 ASwitching capacity and lifetime of the contacts• For resistive loadVoltage Current No. ofswitchingcyc. (typ.)24 VDC24 VDC24 VDC230 VAC230 VAC230 VAC5.0 A2.5 A1.0 A5.0 A2.5 A1.0 A0.2 million0.4 million0.9 million0.2 million0.4 million0.9 million• Inductive load according to IEC 947-5-1 13 DC/15 ACVoltage Current No. ofswitchingcyc. (typ.)24 VDC24 VDC24 VDC230 VAC230 VAC230 VAC5.0 A2.5 A1.0 A5.0 A2.5 A1.0 A0.1 million0.25 million0.5 million0.1 million0.25 million0.5 millionWith a connected RC quenching element (jumper “SJ”inserted) or with an external protection circuit, youlengthen the service life of the contacts.Size of the motor starterLamp load (230 VAC)Energy-savinglamps/fluorescent lamps withelectronic ballastFluorescent lamps,conventionally compensatedFluorescent lamps,non-compensatedContact protectionConnecting two outputs in parallel• For redundant triggering ofa loadmax. size 5 to NEMAPower1000 W1500 WNo. ofswitchingcyc. (typ.)25000100001058W 25000158W 250001058W 25000RC quenching element330 Ω, 0.1 FPossible (only outputswith identical load voltage)• To increase performance Not possibleTriggering a digital inputPossibleSwitch rate• Mechanical max. 10 Hz• For resistive load max. 2 Hz• Inductive loads according max. 0.5 Hzto IEC 947-5-1, DC 13/15AC• For lamp load max. 2 Hz1) Without inserted jumper (SJ).2) For AC load voltage and inserted jumper (SJ).Without jumper (SJ) inserted there is a leakagecurrentNoteDue to the leakage current of the RC quenching element, wrong signal statesmight occur when an IEC Type 1 input is connected (remove SJ jumper)<strong>Programmable</strong> <strong>Logic</strong> <strong>Controllers</strong> <strong>S7</strong>-<strong>300</strong> <strong>Module</strong> <strong>Data</strong>A5E00105505-033-103
Digital <strong>Module</strong>s3.29.1 SM 322; DO 8 x Rel. 230 VAC/5A parameterizationParameter assignmentYou will find the general procedure for assigning parameters to digital modules inSection 3.3.Parameters of the SM 322; DO 8 x Rel. 230 VAC/5AYou will find an overview of the parameters that you can set and their defaultsettings for the SM 322; DO 8 x 230 VDC/0.5 A in the table below.Table 3-25 Parameters of the SM 322; DO 8 x Rel. 230 VAC/5AParameter Value Range DefaultsettingsParametertypeEnable• Diagnostic interrupts Yes/no No Dynamic <strong>Module</strong>Behavior on CPU STOP Switch substitute value(EWS)Hold last value (LWH)EWS Dynamic ChannelScopeSwitch substitute value“1”Yes/no No Dynamic Channel3.29.2 Behavior and Diagnostics of the SM 322; DO 8 x 230 VDC/0.5 ADiagnostic messages of the SM 322; DO 8 x Rel. 230 VAC/5AThe table below presents an overview of the diagnostic messages for theSM 322; DO 8 x Rel. 230 VAC/5 A.Table 3-26 Diagnostic Messages of the SM 322; DO 8 x Rel. AC 230 VDC/0.5 ADiagnostics message LED Scope of the diagnostics Parameters can beassignedTime-out SF <strong>Module</strong> NoEPROM error SF <strong>Module</strong> NoRAM error SF <strong>Module</strong> No3-104<strong>Programmable</strong> <strong>Logic</strong> <strong>Controllers</strong> <strong>S7</strong>-<strong>300</strong> <strong>Module</strong> <strong>Data</strong>A5E00105505-03
Digital <strong>Module</strong>sError causes and remediesTable 3-27 Diagnostic messages of the SM 322; DO 8 x Rel. 230 VAC/5A, error causes and remediesDiagnosticsMessageError Detection Possible Error Cause RemedyTime-out Always Temporary highelectromagneticinterference<strong>Module</strong> defectiveEPROM error Always Temporary highelectromagneticinterference<strong>Module</strong> defectiveRAM error Always Temporary highelectromagneticinterference<strong>Module</strong> defectiveRemove interference and turnthe CPU power supply off andonReplace moduleRemove interference and turnthe CPU power supply off andonReplace moduleRemove interference and turnthe CPU power supply off andonReplace module3.29.3 Interrupts of the SM 322; DO 8 x Rel. 230 VAC/5AIntroductionThe SM 322; DO8 x Rel.230VAC/0.5 A can trigger diagnostic interrupts.The OBs and SFCs mentioned below can be found in the online Help for STEP 7,where they are described in greater detail.Enabling interruptsThe interrupts are not available – in other words, they are inhibited withoutappropriate parameter assignment. Use STEP 7 to assign parameters for enablinginterrupts.Diagnostic InterruptIf you have enabled diagnostic interrupts, then incoming active error events (initialoccurrence of the error) and departing error events (message aftertroubleshooting) are reported by means of interrupts.The CPU interrupts execution of the user program and processes the diagnosticinterrupt block (OB 82).In the user program, you can call SFC 51 or SFC 59 in OB 82 to obtain moredetailed diagnostic information from the module.The diagnostic information is consistent until such time as OB 82 is exited. WhenOB 82 is exited, the diagnostic interrupt is acknowledged on the module.<strong>Programmable</strong> <strong>Logic</strong> <strong>Controllers</strong> <strong>S7</strong>-<strong>300</strong> <strong>Module</strong> <strong>Data</strong>A5E00105505-033-105
Digital <strong>Module</strong>s3.30 Relay Output <strong>Module</strong> SM 322; DO 8 x Rel. VAC 230/5 A;(6E<strong>S7</strong>322-1HF10-0AA0)Order number: “Standard module”6E<strong>S7</strong>322-1HF10-0AA0Order number: “SIPLUS <strong>S7</strong>-<strong>300</strong>-<strong>Module</strong>”6AG1322-1HF10-2AA0CharacteristicsThe SM 322; DO 8 x Rel. 230 VAC/5 A features the following characteristics:• 8 outputs, isolated in groups of 1• Rated load voltage 24 VDC to 120 VDC, 48 VAC to 230 VAC• Suitable for AC/DC solenoid valves, contactors, motor starters, fractional h.p.motors and indicator lights.Measures with switching currents > 3 ANoteTo keep the additional temperature rise of the module near the connectors as lowas possible, you must select a cable cross-section of 1.5 mm 2 for connectingcables with switching currents > 3 A.3-106<strong>Programmable</strong> <strong>Logic</strong> <strong>Controllers</strong> <strong>S7</strong>-<strong>300</strong> <strong>Module</strong> <strong>Data</strong>A5E00105505-03
Digital <strong>Module</strong>sTerminal assignment and block diagram of the SM 322; DO 8 x Rel. 230 VAC/5 AL+L+L+L+ML+ML+1)24 VML+ML+Backplane bus interfaceML+ML+1)1)MMMMChannelnumberStatus display -green1) Connection possibility for contact supplyI aggregate current 8 A for Ta 30 CI aggregate current 5A for Ta 60 CFigure 3-34<strong>Module</strong> View and Block Diagram of the SM 322; DO 8 x Rel. 230 VAC/5 AOperation with safe electrical extra-low voltageWhen using relay output module 322-1HF10 with safe and electrically isolatedextra-low voltage, take the following special characteristic into account:If a terminal is operated with a safe and electrically isolated extra-low voltage, thehorizontally adjacent terminal must be operated at a rated voltage of not morethan 120 VUC. With operation at voltages greater than 120 VUC, the creepagesand clearances of the 40-pin front connector do not meet the <strong>SIMATIC</strong>requirements for safe electrical isolation.If one of the two horizontally adjacent terminalsis operated with a safe electrical extralowvoltage, the adjacent terminal must beoperated at not more than UC 120 V.Figure 3-35Special Characteristic for Operation with a Safe Electrical Extra-Low Voltage<strong>Programmable</strong> <strong>Logic</strong> <strong>Controllers</strong> <strong>S7</strong>-<strong>300</strong> <strong>Module</strong> <strong>Data</strong>A5E00105505-033-107
Digital <strong>Module</strong>sTechnical specifications of the SM 322; DO 8 x Rel. 230 VAC/5 ADimensions W x H x D(in millimeters)WeightSupports clockedoperationDimensions and Weight40 x 125 x 120Approx. 320 g<strong>Data</strong> for Specific <strong>Module</strong>Number of outputs 8Length of cable• Unshielded• ShieldedNomax. 600 mmax. 1000 mVoltages, Currents, PotentialsRated supply voltage of therelay L +Total current of the outputs(per group)• Horizontal configurationUp to 30 CUp to 60 C• Vertical configurationUp to 40 CIsolation24 VDCmax. 8 Amax. 5 Amax. 5 APermitted potential difference• Between M internal andsupply voltage of therelays• Between M internal andsupply voltage of therelays and the outputs• Between the outputs of thedifferent groupsInsulation tested with• Between M internal andsupply voltage of therelays• Between M internal andsupply voltage of therelays and the outputs• Between the outputs of thedifferent groupsCurrent consumption• From the backplane bus• From supply voltage L+Power dissipation of themodule75 VDC / 60 VAC250 VAC500 VAC500 VDC1500 VAC2000 VACmax. 40 mAmax. 125 mAtyp. 4.2 W• Between channels andbackplane bus• Between the channelsIn groups ofYesYes13-108<strong>Programmable</strong> <strong>Logic</strong> <strong>Controllers</strong> <strong>S7</strong>-<strong>300</strong> <strong>Module</strong> <strong>Data</strong>A5E00105505-03
Digital <strong>Module</strong>sStatus displayInterruptDiagnostic functionsStatus, Interrupts, Diagnostics<strong>Data</strong> for Selecting an ActuatorContinuous thermal currentMinimum load voltage / currentShort-circuit proof toIEC 947-5-1Green LED per channelNoneNonemax. 8 A10 V / 5 mAWith circuit-breaker ofcharacteristic B for:cos 1.0: 600 Acos 0.5 to 0.7: 900 AWith Diazed 8 A fuse:1000 ASwitching capacity and lifetime of the contacts• For resistive loadVoltage Current No. ofswitchingcyc. (typ.)24 VDC 8.0 A4.0 A2.0 A0.5 A0.1 million0.3 million0.74.0 million60 VDC 0.5 A 4 million120 VDC 0.2 A 1.6 mill.48 VAC 8.0 A2.0 A60 VAC 8.0 A2.0 A120 VAC 8.0 A4.0 A2.0 A1.0 A0.5 A230 VAC 8.0 A4.0 A2.0 A1.0 A0.5 A0.1 million1.6 million0.1 million1.2 million0.1 million0.3 million0.5 million0.7 million1.5 million0.1 million0.3 million0.5 million0.7 million1.5 millionSwitching capacity and lifetime of the contacts• Inductive load according to IEC 947-5-1 13 DC/15 AC• Aux. contactors Size 0(3TH28)Voltage Current No. ofswitchingcyc. (typ.)24 VDC 2.0 A1.0 A0.5 A60 VDC 0.5 A0.3 A0.3 million0.5 million1 million0.5 million1 million120 VDC 0.2 A 0.5 mill.48 VAC 3.0 A1.5 A60 VAC 3.0 A1.5 A120 VAC 3.0 A2.0 A1.0 A0.5 A230 VAC 3.0 A2.0 A1.0 A0.5 A0.5 million1 million0.3 million1 million0.2 million0.3 million0.7 million2.0 million0.1 million0.3 million0.7 million2.0 million30 mill.An external protection circuit will enhance the service lifeof the contacts.Lamp load (230 VAC)Energy-savinglamps/fluorescent lamps withelectronic ballastFluorescent lamps,conventionally compensatedFluorescent lamps,non-compensatedContact protection (internal)Power1000W1500WNo. ofswitchingcyc. (typ.)25000100001058W 25000158W 250001058W 25000NoneConnecting two outputs in parallel• For redundant actuation of Possiblea load• To increase performance Not possibleTriggering a digital inputPossibleSwitch rate• Mechanical max. 10 Hz• For resistive load max. 2 Hz• Inductive loads according max. 0.5 Hzto IEC 947-5-1, DC 13/15AC• For lamp load max. 2 Hz<strong>Programmable</strong> <strong>Logic</strong> <strong>Controllers</strong> <strong>S7</strong>-<strong>300</strong> <strong>Module</strong> <strong>Data</strong>A5E00105505-033-109
Digital <strong>Module</strong>s3.31 Digital Input/Output <strong>Module</strong> SM 323;DI 16/DO 16 x 24 VDC/0.5 A; (6E<strong>S7</strong>323-1BL00-0AA0)Order number6E<strong>S7</strong>323-1BL00-0AA0CharacteristicsThe SM 323; DI 16/DO 16 x 24 VDC/0.5 A features the following characteristics:• 16 inputs, isolated in groups of 16• 16 outputs, isolated in groups of 8• 24 VDC rated input voltage• 24 VDC rated load voltage• Inputs suitable for switches and two / three / four-wire BEROs (proximityswitches)• Outputs suitable for solenoid valves, DC contactors and indicator lightsUsing the module with high-speed countersPlease take note of the following information on the use of the module inconnection with high-speed counters:NoteWhen connecting the 24 V power supply via a mechanical contact, the outputs ofthe SM 323; DI 16/DO 16 x 24 VDC/0.5 A carry a “1” signal for approximately50 s for reasons associated with the circuitry.3-110<strong>Programmable</strong> <strong>Logic</strong> <strong>Controllers</strong> <strong>S7</strong>-<strong>300</strong> <strong>Module</strong> <strong>Data</strong>A5E00105505-03
Digital <strong>Module</strong>sTerminal assignment and block diagram of the SM 323;DI 16/DO 16 x 24 VDC/0.5 A2L+24VMBackplane businterfaceM2M3L+24VChannelnumberStatus display – green24V1MM3MFigure 3-36<strong>Module</strong> View and Block Diagram of the SM 323; DI 16/DO 16 x 24 VDC/0.5 ATerminal assignmentThe figure below shows the assignment of the channels to the input and outputaddresses.InputsInput byte xOutputsOutput byte xInput byte (x + 1)Output byte (x + 1)Figure 3-37Terminal assignment of the SM 323; DI 16/DO 16 x 24 VDC/0.5 A<strong>Programmable</strong> <strong>Logic</strong> <strong>Controllers</strong> <strong>S7</strong>-<strong>300</strong> <strong>Module</strong> <strong>Data</strong>A5E00105505-033-111
Digital <strong>Module</strong>sTechnical specifications of the SM 323; DI 16/DO 16 x 24 VDC/0.5 ADimensions and WeightDimensions W x H x D40 x 125 x 117(in millimeters)WeightApprox. 260 g<strong>Data</strong> for Specific <strong>Module</strong>ClockedNoNumber of inputs 16Number of outputs 16Length of cable• Unshielded• Shieldedmax. 600 mmax. 1000 mVoltages, Currents, PotentialsRated load voltage L+24 VDCNumber of inputs that can betriggered simultaneously• Horizontal configurationUp to 40 CUp to 60 C168• Vertical configurationUp to 40 C 16Total current of the outputs(per group)• Horizontal configurationUp to 40 CUp to 60 C• Vertical configurationUp to 40 CIsolation• Between channels andbackplane bus• Between the channelsInputs in groups ofOutputs in groups ofPermitted potential difference• Between the differentcircuitsmax. 4 Amax. 3 Amax. 2 AYesYes16875 VDC / 60 VACInsulation tested with VDC 500Current consumption• From the backplane bus• From load voltage L+(without load)max. 80 mAmax. 80 mAPower dissipation of the module typ. 6.5 WStatus, Interrupts, DiagnosticsStatus displayGreen LED per channelInterruptsNoneDiagnostic functionsNoneInput voltage• Rated value• For signal “1”• For signal “0”<strong>Data</strong> for Selecting a Sensor24 VDC13 to 30 V–30 to + 5 VInput current• At signal “1” typ. 7 mAInput delay• At “0” to “1”• At “1” to “0”Input characteristic curveConnection of Two-WireBEROs• Permitted bias current1.2 to 4.8 ms1.2 to 4.8 msAccording toIEC 61131, type 1Possiblemax. 1.5 mA<strong>Data</strong> for Selecting an ActuatorOutput voltage• At signal “1” min. L + (–0.8 V)Output current• At signal “1”Rated valuePermitted range• At signal “0”(leakage current)Output delay(for resistive load)• At “0” to “1”• At “1” to “0”0.5 A5 mA to 0.6 Amax. 0.5 mAmax. 100 smax. 500 s48 to 4 kmax. 5 WLoad resistor rangeLamp loadParallel connection of2 outputs• For redundant triggering ofa load• To increase performance Not possibleTriggering a digital input PossibleSwitch rate• For resistive load• Inductive load according toIEC 947-5-1, 13 DC• For lamp loadLimit (internal) of the inductivecircuit interruption voltage upPossible (only outputsof the same group)max. 100 Hzmax. 0.5 Hzmax. 10 HzL + (–53 V), typ.Short-circuit protection of the Yes, electronicoutput• Threshold on 1 A, typ.3-112<strong>Programmable</strong> <strong>Logic</strong> <strong>Controllers</strong> <strong>S7</strong>-<strong>300</strong> <strong>Module</strong> <strong>Data</strong>A5E00105505-03
Digital <strong>Module</strong>s3.32 Digital Input/Output <strong>Module</strong> SM 323;DI 8/DO 8 x VDC 24/0.5 A; (6E<strong>S7</strong>323-1BH01-0AA0)Order number: “Standard module”6E<strong>S7</strong>323-1BH01-0AA0Order number: “SIPLUS <strong>S7</strong>-<strong>300</strong>-<strong>Module</strong>”6AG1323-1BH01-2AA0CharacteristicsThe SM 323; DI 8/DO 8 x 24 VDC/0.5 A features the following characteristics:• 8 inputs, isolated in groups of 8• 8 outputs, isolated in groups of 8• 24 VDC rated input voltage• 24 VDC rated load voltage• Inputs suitable for switches and two / three / four-wire BEROs (proximityswitches)• Outputs suitable for solenoid valves, DC contactors and indicator lightsUsing the module with high-speed countersPlease take note of the following information on the use of the module inconnection with high-speed counters:NoteWhen connecting the 24 V power supply via a mechanical contact, the outputs ofthe SM 323; DI 8/DO 8 x 24 VDC/0.5 A carry a “1” signal for approximately 50 sfor reasons associated with the circuitry.<strong>Programmable</strong> <strong>Logic</strong> <strong>Controllers</strong> <strong>S7</strong>-<strong>300</strong> <strong>Module</strong> <strong>Data</strong>A5E00105505-033-113
Digital <strong>Module</strong>sTerminal assignment and block diagram of the SM 323; DI 8/DO 8 x 24 VDC/0.5 A1M24V2L+M24VBackplane businterface2MChannel numberStatus display – greenFigure 3-38 <strong>Module</strong> View and Block Diagram of Digital Input/Output <strong>Module</strong> SM 323;DI 8/DO 8 x 24 VDC/0.5 A3-114<strong>Programmable</strong> <strong>Logic</strong> <strong>Controllers</strong> <strong>S7</strong>-<strong>300</strong> <strong>Module</strong> <strong>Data</strong>A5E00105505-03
Digital <strong>Module</strong>sTechnical specifications of the SM 323; DI 8/DO 8 x 24 VDC/0.5 ADimensions W x H x D(in millimeters)WeightSupports clockedoperationDimensions and Weight40 x 125 x 117Approx. 200 g<strong>Data</strong> for Specific <strong>Module</strong>Number of inputs 8Number of outputs 8Length of cable• Unshielded• ShieldedRated load voltage L+Nomax. 600 mmax. 1000 mVoltages, Currents, PotentialsNumber of inputs that can betriggered simultaneously• Horizontal configurationUp to 60 C• Vertical configurationUp to 40 CTotal current of the outputs(per group)• Horizontal configurationUp to 60 C• Vertical configurationUp to 40 CIsolation• Between channels andbackplane bus• Between the channelsInputs in groups ofOutputs in groups ofPermitted potential difference• Between the differentcircuitsInsulation tested withCurrent consumption• From the backplane bus• From load voltage L+(without load)Power dissipation of the moduleStatus displayInterruptsDiagnostic functions24 VDC88max. 4 Amax. 4 AYesYes8875 VDC / 60 VAC500 VDCmax. 40 mAmax. 40 mAtyp. 3.5 WStatus, Interrupts, DiagnosticsGreen LED per channelNoneNoneInput voltage• Rated value• For signal “1”• For signal “0”<strong>Data</strong> for Selecting a Sensor24 VDC13 to 30 V–30 to 5 VInput current• At signal “1” typ. 7 mAInput delay• At “0” to “1”• At “1” to “0”Input characteristic curve1.2 to 4.8 ms1.2 to 4.8 msAccording toIEC 61131, type 1Connection of Two-Wire PossibleBEROsmax. 1.5 mA• Permitted bias current<strong>Data</strong> for Selecting an ActuatorOutput voltage• At signal “1” min. L + (–0.8 V)Output current• At signal “1”Rated valuePermitted range0.5 A5 mA to 0.6 A• At signal “0”(leakage current)max. 0.5 mAOutput delay (for resistive load)• At “0” to “1”• At “1” to “0”Load resistor rangeLamp loadParallel connection of2 outputs• For redundant triggering ofa loadmax. 100 smax. 500 s48 to 4 kmax. 5 WPossible (only outputsof the same group)• To increase performance Not possibleTriggering a digital inputSwitch rate• For resistive load• Inductive load according toIEC 947-5-1, 13 DC• For lamp loadLimit (internal) of the inductivecircuit interruption voltage upPossiblemax. 100 Hzmax. 0.5 Hzmax. 10 HzL + (–53 V), typ.Short-circuit protection of the Yes, electronicoutput• Threshold on 1 A, typ.<strong>Programmable</strong> <strong>Logic</strong> <strong>Controllers</strong> <strong>S7</strong>-<strong>300</strong> <strong>Module</strong> <strong>Data</strong>A5E00105505-033-115
Digital <strong>Module</strong>s3.33 Digital Input/Output <strong>Module</strong> SM 327;DI 8/DX 8 x DC 24 V/0.5 A; parameterizable(6E<strong>S7</strong>327-1BH00-0AB0)Order number6E<strong>S7</strong>327-1BH00-0AB0CharacteristicsThe SM 327; DI 8/DX 8 VDC 24/0.5 A features the following characteristics:• 8 digital inputs and 8 individual parameterizable inputs or outputs, isolated ingroups of 16• 24 VDC rated input voltage• Inputs suitable for switches and two / three / four-wire BEROs (proximityswitches)• 0.5 A output current• 24 VDC rated load voltage• Outputs suitable for solenoid valves, DC contactors and indicator lights• The parameters of the module can be dynamically changed-channel during theRUN (CiR-capable)• Re-readability of the outputs.Using the module with high-speed countersPlease take note of the following information on the use of the module inconnection with high-speed counters:NoteWhen connecting the 24 V power supply via a mechanical contact, the outputs ofthe SM 327; DI 8/DX 8 x DC 24 V/0.5 A carry a “1” signal for approximately 50 sfor reasons associated with the circuitry.3-116<strong>Programmable</strong> <strong>Logic</strong> <strong>Controllers</strong> <strong>S7</strong>-<strong>300</strong> <strong>Module</strong> <strong>Data</strong>A5E00105505-03
Digital <strong>Module</strong>sTerminal assignment and block diagram of the SM 327;DI 8/DX 8 x DC 24 V/0.5 A, parameterizable01234567Backplane businterfaceM2345678901234567Channel numberStatus display – greenL+MM11L+121314151617181920MFigure 3-39 Terminal assignment and block diagram of the SM 327; DI 8/DX 8 x DC 24 V/0.5 A,parameterizable<strong>Programmable</strong> <strong>Logic</strong> <strong>Controllers</strong> <strong>S7</strong>-<strong>300</strong> <strong>Module</strong> <strong>Data</strong>A5E00105505-033-117
Digital <strong>Module</strong>sTechnical data of the SM 327; DI 8/DX 8 x DC 24 V/0.5 A, parameterizableDimensions W x H x D(in millimeters)WeightSupports clockedoperationNumber of inputsNumber of inputs/outputsLength of cable• Unshielded• ShieldedRated load voltage L+Dimensions and Weight40 x 125 x 120Approx. 200 g<strong>Data</strong> for Specific <strong>Module</strong>No8 digital8 single,parameterizablemax. 600 mmax. 1000 mVoltages, Currents, PotentialsNumber of inputs that can betriggered simultaneously• Horizontal configurationUp to 60 C• Vertical configurationUp to 40 CTotal current of the outputs(per group)• Horizontal configurationUp to 40 CUp to 60 C• Vertical configurationUp to 40 C24 VDC1616Isolation• Between channels and Yesbackplane bus• Between the channels NoPermitted potential difference• Between the differentcircuitsInsulation tested withCurrent consumption• From the backplane bus• From load voltage L+(without load)Power dissipation of the modulemax. 4 Amax. 3 Amax. 2 A75 VDC / 60 VAC500 VDCmax. 60 mAmax. 20 mAtyp. 3 WStatus, Interrupts, DiagnosticsInput voltage• Rated value• For signal “1”• For signal “0”<strong>Data</strong> for Selecting a Sensor24 VDC15 to 30 V–30 to 5 VInput current• At signal “1” typ. 6 mAInput delay• At “0” to “1”• At “1” to “0”Input characteristic curve1.2 to 4.8 ms1.2 to 4.8 msAccording toIEC 61131, type 1Connection of Two-Wire PossibleBEROsmax. 1.5 mA• Permitted bias current<strong>Data</strong> for Selecting an ActuatorOutput voltage• At signal “1” min. L + (– 1,5 V)Output current• At signal “1”Rated valuePermitted range0.5 A5 mA to 0.6 A• At signal “0”(leakage current)max. 0.5 mAOutput delay (for resistive load)• At “0” to “1”• At “1” to “0”Load resistor rangeLamp loadmax. 350 smax. 500 s48 to 4 kmax. 5 WParallel connection of2 outputs• For redundant triggering of Possiblea load• To increase performance Not possibleTriggering a digital inputSwitch rate• For resistive load• Inductive load according toIEC 947-5-1, 13 DC• For lamp loadLimit (internal) of the inductivecircuit interruption voltage upPossiblemax. 100 Hzmax. 0.5 Hzmax. 10 Hztyp. L + (–54 V)Status displayInterruptsDiagnostic functionsGreen LED per channelNoneNoneShort-circuit protection of the Yes, electronicoutput• Threshold on 1 A, typ.3-118<strong>Programmable</strong> <strong>Logic</strong> <strong>Controllers</strong> <strong>S7</strong>-<strong>300</strong> <strong>Module</strong> <strong>Data</strong>A5E00105505-03
Digital <strong>Module</strong>s3.33.1 Assigning Parameters to the SM 327; DI 8/DX 8 x VDC 24/0.5 AParameter assignmentYou will find a description of the general procedure for assigning parameters todigital modules in Section 3.3.Parameters of the SM 327; DI 8/DX 8 x DC 24 V/0.5 A, parameterizableYou will find an overview of the parameters that you can set and their defaultsettings for the SM 327; DI 8/DX 8 x VDC 24/0.5 A in the table below.The default settings apply if you have not performed parameter assignment inSTEP 7.You will see which parameters you can modify from the list:• In STEP 7• With SFC 55 “WR_PARM”• with SFB 53 “WRREC” (e. g. for GSD).The parameters set with STEP 7 can also be transferred with SFCs 56 and 57 andthe SFB 53 to the module (refer to the STEP 7 manuals).Table 3-28 Parameters of the SM 327; DI 8/DX 8 VDC 24/0.5 AParameterValueRangeDefaultSettingsParameterTypeScope<strong>Data</strong>RecordNo.Parameters can beassigned with ...SFC 55,SFB 53ProgrammingdeviceDigital output Yes/no No Dynamic Channel 1 Yes Yes<strong>Programmable</strong> <strong>Logic</strong> <strong>Controllers</strong> <strong>S7</strong>-<strong>300</strong> <strong>Module</strong> <strong>Data</strong>A5E00105505-033-119
Digital <strong>Module</strong>sStructure of data record 1The following figure shows the structure of data record 1 of the dynamicparameters of the SM 327; DI 8/DX 8 x DC 24 V/0.5 A.Byte 0Byte 1Byte 2Byte 3Byte 4Not relevantNot relevantNot relevantNot relevantNot relevantByte 51: Use channel 8 as output0: Use channel 8 as input..................+1: Use channel 15 as output0: Use channel 15 as inputFigure 3-40<strong>Data</strong> record 1 of the SM 327; DI 8/DX 8 x VDC 24/0.5 A3-120<strong>Programmable</strong> <strong>Logic</strong> <strong>Controllers</strong> <strong>S7</strong>-<strong>300</strong> <strong>Module</strong> <strong>Data</strong>A5E00105505-03
Digital <strong>Module</strong>sRe-readability of the outputsThe digital outputs can be read back into the user data area: If, e. g. A11.3 isparameterized as an output, it can be read back via E11.3. see Figure3-41InputsByte n Byte n+1.7 .0 .7.0Outputs.7 .0 .70Byte n+1Re–readability.0The following applies:Channel 8: n+1.0Channel 9: n+1.1Channel 10: n+1.2Channel 11: n+1.3Channel 12: n+1.4Channel 13: n+1.5Channel 14: n+1.6Channel 15: n+1.7Figure 3-41Re-readability of the outputs of the SM 327; DI 8/DX 8 x DC 24 V/0.5 A<strong>Programmable</strong> <strong>Logic</strong> <strong>Controllers</strong> <strong>S7</strong>-<strong>300</strong> <strong>Module</strong> <strong>Data</strong>A5E00105505-033-121
Digital <strong>Module</strong>s3-122<strong>Programmable</strong> <strong>Logic</strong> <strong>Controllers</strong> <strong>S7</strong>-<strong>300</strong> <strong>Module</strong> <strong>Data</strong>A5E00105505-03
Analog <strong>Module</strong>s4Structure of the chapterThe present chapter is broken down into the following subjects:1. Chapter overview of which modules are available and described here2. <strong>Module</strong> overview of the most important properties of the modules3. Sequence of Steps from Choosing to Commissioning the Analog <strong>Module</strong>4. Information that is generally available – in other words, affects all analogmodules (such as parameter assignment and diagnostics)5. Information that refers to specific modules (for example, characteristics,diagram of connections and block diagram, technical specifications and specialcharacteristics of the module):a) for analog input modulesb) for analog output modulesc) for analog input/output modulesSTEP 7 blocks for analog functionsYou can use the blocks FC 105 “SCALE” (Scale Values) and FC 106 “UNSCALE”(Unscale Values) for reading and outputting analog values in STEP 7. You will findthe FCs in the standard library of STEP 7 in the subdirectory called“TI-<strong>S7</strong>-Converting Blocks” (for a description, refer to the STEP 7 Online Help forthe FCs).Additional informationAppendix A describes the structure of the parameter sets (data records 0, 1 and128) in the system data. You must be familiar with this configuration if you want tomodify the parameters of the modules in the STEP 7 user program.Appendix B describes the structure of the diagnostic data (data records 0 and 1) inthe system data. You must be familiar with this configuration if you want toevaluate the diagnostic data of the modules in the STEP 7 user program.<strong>Programmable</strong> <strong>Logic</strong> <strong>Controllers</strong> <strong>S7</strong>-<strong>300</strong> <strong>Module</strong> <strong>Data</strong>A5E00105505-034-1
Analog <strong>Module</strong>sIn this chapterSection Contents Page4.1 <strong>Module</strong> Overview 4-34.2 Sequence of Steps from Choosing to Commissioningthe Analog <strong>Module</strong>4.3 Analog Value Representation 4-94.4 Setting the Measuring Method and Measuring Ranges of AnalogInput Channels4-84-284.5 Behavior of Analog <strong>Module</strong>s 4-314.6 Conversion, Cycle, Setting and Response Time of Analog<strong>Module</strong>s4-354.7 Analog <strong>Module</strong> Parameter Assignment 4-394.8 Connecting Sensors to Analog Inputs 4-454.9 Connecting Voltage Sensors 4-504.10 Connecting Current Sensors 4-514.11 Connecting Resistance Thermometers and Resistors 4-534.12 Connecting Thermocouples 4-584.13 Connecting Loads/Actuators to Analog Outputs 4-664.14 Connecting Loads/Actuators to Voltage Outputs 4-674.15 Connecting Loads/Actuators to Current Outputs 4-704.16 Diagnostics of the Analog <strong>Module</strong>s 4-714.17 Interrupts of the Analog <strong>Module</strong>s 4-754.18 Analog Input <strong>Module</strong> SM 331; AI 8 x 16 bits;(6E<strong>S7</strong>331-7NF00-0AB0)4.19 Analog Input <strong>Module</strong> SM 331; AI 8 x 16 bits(6E<strong>S7</strong>331-7NF10-0AB0)4.20 Analog Input <strong>Module</strong> SM 331; AI 8 x 14 bits High Speed;(6E<strong>S7</strong>331-7HF0x-0AB0)4.21 Analog Input <strong>Module</strong> SM 331; AI 8 x 13 bits;(6E<strong>S7</strong>331-1KF01-0AB0)4.22 Analog Input <strong>Module</strong> SM 331; AI 8 x 12 bits;(6E<strong>S7</strong>331-7KF02-0AB0)4.23 Analog Input <strong>Module</strong> SM 331; AI 8 x RTD(6E<strong>S7</strong>331-7PF00-0AB0)4-774-864-974-1084-1154-1254.24 Analog Input <strong>Module</strong> SM 331; AI 8 x TC (6E<strong>S7</strong>331-7PF10-0AB0) 4-1384.25 Analog Input <strong>Module</strong> SM 331; AI 2 x 12 bits;(6E<strong>S7</strong>331-7KB02-0AB0)4.26 Analog Output <strong>Module</strong> SM 332; AO 8 x 12 bits(6E<strong>S7</strong>332-5HF00-0AB0)4.27 Analog Output <strong>Module</strong> SM 332; AO 4 x 16 bits, synchronous;(6E<strong>S7</strong>332-7ND01-0AB0)4.28 Analog Output <strong>Module</strong> SM 332; AO 4 x 12 bits;(6E<strong>S7</strong>332-5HD01-0AB0)4-1534-1634-1694-1764-2<strong>Programmable</strong> <strong>Logic</strong> <strong>Controllers</strong> <strong>S7</strong>-<strong>300</strong> <strong>Module</strong> <strong>Data</strong>A5E00105505-03
Analog <strong>Module</strong>sSectionContents4.29 Analog Output <strong>Module</strong> SM 332; AO 2 x 12 bits;(6E<strong>S7</strong>332-5HB01-0AB0)4.30 Analog Input/Output <strong>Module</strong> SM334; AI 4/AO 2 x 8/8 bits;(6E<strong>S7</strong>334-0CE01-0AA0)4.31 Analog Input/Output <strong>Module</strong> SM334; AI 4/AO 2 x12 bits;(6E<strong>S7</strong>334-0KE00-0AB0)Page4-1824-1884-1944.1 <strong>Module</strong> OverviewIntroductionThe following tables summarize the most important characteristics of the analogmodules. This overview is intended to make it easy to choose the suitable modulefor your task.<strong>Programmable</strong> <strong>Logic</strong> <strong>Controllers</strong> <strong>S7</strong>-<strong>300</strong> <strong>Module</strong> <strong>Data</strong>A5E00105505-034-3
Analog <strong>Module</strong>sTable 4-1Analog Input <strong>Module</strong>s: Characteristics at a GlanceCharacteristics<strong>Module</strong>SM 331;AI 8 x 16 bits(-7NF00-)SM 331;AI 8 x 16 bits(-7NF10-)SM 331;AI 8 x 14 bitsHigh Speed(-7HF0x-)SM 331;AI 8 x 13 bits(-1KF01-)Number ofinputs8 inputs in 4channel groups8 inputs in 4channel groups8 inputs in 4channel groups8 inputs in 8channel groupsResolutionAdjustable for eachchannel group:• 15 bits + signAdjustable for eachchannel group:• 15 bits + signAdjustable for eachchannel group:• 13 bits + signAdjustable for eachchannel group:• 12 bits+signMeasuringMethodSelection ofmeasuringrangeSupportsclockedoperation<strong>Programmable</strong>diagnosticsDiagnosticinterruptLimit valuemonitoringHardwareinterrupt uponlimit violationHardwareinterrupt at endof cyclePotentialrelationshipsPermittedpotentialdifferencebetween theinputs (ECM)SpecialFeaturesSign2-DMUAdjustable for eachchannel group:• Voltage• CurrentArbitrary, perchannel groupAdjustable for eachchannel group:• Voltage• CurrentArbitrary, perchannel groupAdjustable for eachchannel group:• Voltage• CurrentArbitrary, perchannel groupNo No Yes NoYes Yes Yes NoAdjustable Adjustable Adjustable NoAdjustable for2 channelsAdjustable for8 channelsAdjustable for2 channelsAdjustable Adjustable Adjustable NoNo Yes No NoGalvanic isolationto:• CPUGalvanic isolationto:• CPUGalvanic isolationto:• CPU• Load voltage (notfor 2-DMU)Adjustable for eachchannel:• Voltage• Current• Resistors• TemperatureArbitrary,per channel50 VDC 60 VDC 11 VDC 2.0 VDC– - – –Sign2-wire transmitterNoGalvanic isolationto:• CPU4-4<strong>Programmable</strong> <strong>Logic</strong> <strong>Controllers</strong> <strong>S7</strong>-<strong>300</strong> <strong>Module</strong> <strong>Data</strong>A5E00105505-03
Analog <strong>Module</strong>sTable 4-2<strong>Module</strong>CharacteristicsNumber ofinputsResolutionMeasuringMethodSelection ofmeasuringrange<strong>Programmable</strong>diagnosticsSupportsclockedoperationDiagnosticinterruptLimit valuemonitoringAnalog Input <strong>Module</strong>s: Characteristics at a glance (continued)SM 331;AI 8 x 12 bits(-7KF02-)8 inputs in 4channel groupsAdjustable for eachchannel group:• 9 bits+sign• 12 bits+sign• 14 bits+signAdjustable for eachchannel group:• Voltage• Current• Resistors• TemperatureArbitrary, perchannel groupSM 331;AI 8 x RTD(-7PF00-)8 inputs in 4channel groupsAdjustable for eachchannel group:• 15 bits + signAdjustable for eachchannel group:• Resistors• TemperatureArbitrary, perchannel groupSM 331;AI 8 x TC(-7PF10-)8 inputs in 4channel groupsAdjustable for eachchannel group:• 15 bits + signAdjustable for eachchannel group:• TemperatureArbitrary, perchannel groupNo Yes Yes YesYes No No NoSM 331;AI 2 x 12 bits(-7KB02-)2 inputs in 1channel groupAdjustable for eachchannel group:• 9 bits+sign• 12 bits+sign• 14 bits+signAdjustable for eachchannel group:• Voltage• Current• Resistors• TemperatureArbitrary, perchannel groupAdjustable Adjustable Adjustable AdjustableAdjustable for2 channelsAdjustable for8 channelsAdjustable for8 channelsAdjustable for1 channelHardwareinterrupt uponlimit violationHardwareinterrupt at endof cyclePotentialrelationshipsAdjustable Adjustable Adjustable AdjustableNo Adjustable Adjustable NoGalvanic isolationto:• CPU• Load voltage (notfor 2-DMU)Galvanic isolationto:• CPUGalvanic isolationto:• CPUPermitted 2.5 VDC 75 VDC / 60 VAC 75 VDC / 60 VAC 2.5 VDCpotentialdifferencebetween theinputs (ECM)Special – – –FeaturesSign Sign2-DMU 2-wire transmitterGalvanic isolationto:• CPU• Load voltage (notfor 2-DMU)<strong>Programmable</strong> <strong>Logic</strong> <strong>Controllers</strong> <strong>S7</strong>-<strong>300</strong> <strong>Module</strong> <strong>Data</strong>A5E00105505-034-5
Analog <strong>Module</strong>sTable 4-3Analog Output <strong>Module</strong>s: Characteristics at a GlanceCharacteristics<strong>Module</strong>SM 332;AO 8 x 12 bits(-5HF00-)SM 332;AO 4 x 16 bits(-7ND01-)SM 332;AO 4 x 12 bits(-5HD01-)SM 332;AO 2 x 12 bits(-5HB01-)Number of outputs 8 Output channels 4 outputs in 4channel groups4 Output channels 2 Output channelsResolution 12 bits 16 bits 12 bits 12 bitsOutput typeSupportsclocked operation<strong>Programmable</strong>diagnosticsDiagnosticinterruptSubstitute valueoutputPotentialrelationshipsChannel bychannel:• Voltage• CurrentChannel bychannel:• Voltage• CurrentChannel bychannel:• Voltage• CurrentNo Yes No NoYes Yes Yes YesChannel bychannel:• Voltage• CurrentAdjustable Adjustable Adjustable AdjustableNo Adjustable Adjustable AdjustableGalvanic isolationbetween:• CPU• Of the loadvoltageGalvanic isolationbetween:• CPU andchannel• The channels• Output and L+,M• CPU and L+, MGalvanic isolationto:• CPU• Of the loadvoltageSpecial Features – – – –Galvanic isolationto:• CPU• Of the loadvoltage4-6<strong>Programmable</strong> <strong>Logic</strong> <strong>Controllers</strong> <strong>S7</strong>-<strong>300</strong> <strong>Module</strong> <strong>Data</strong>A5E00105505-03
Analog <strong>Module</strong>sTable 4-4Analog Input/Output <strong>Module</strong>s: Characteristics at a GlanceCharacteristics<strong>Module</strong>SM 334;AI 4/AO 2 x 8/8 bits(-0CE01-)SM 334;AI 4/AO 2 x 12 bits(-0KE00-)Number of inputs 4 inputs in 1 channel group 4 inputs in 2 channel groupsNumber of outputs 2 outputs in 1 channel group 2 outputs in 1 channel groupResolution 8 bits 12 bits + signMeasuring MethodOutput typeSupports clockedoperationAdjustable for each channelgroup:• Voltage• CurrentChannel by channel:• Voltage• CurrentNo<strong>Programmable</strong> diagnostics No NoDiagnostic interrupt No NoLimit value monitoring No NoHardware interrupt upon limitviolationHardware interrupt at end ofcycleNoNoSubstitute value output No NoPotential relationships • Non-isolated to CPU• Galvanic isolation to loadvoltageSpecial FeaturesNot parameterizable, setting ofmeasurement and output type bymeans of wiringAdjustable for each channelgroup:• Voltage• Resistors• TemperatureChannel by channel:• VoltageNoNoNoGalvanic isolation to:• CPU• Of the load voltage–<strong>Programmable</strong> <strong>Logic</strong> <strong>Controllers</strong> <strong>S7</strong>-<strong>300</strong> <strong>Module</strong> <strong>Data</strong>A5E00105505-034-7
Analog <strong>Module</strong>s4.2 Sequence of Steps from Choosing to Commissioning the<strong>Module</strong>IntroductionThe following table contains the tasks that you have to perform one after the otherto commission analog modules successfully.The sequence of steps is a suggestion, but you can perform individual steps eitherearlier or later (for example, assign parameters to the module) or install othermodules or install, commission etc. other modules in between times.Sequence of stepsTable 4-5Sequence of Steps from Choosing to Commissioning the Analog <strong>Module</strong>Step Procedure Refer To...1. Select the module Section 4.1 and specific module section fromSection 4.222. With some analog inputmodules: set the measuringmethod and measuring range bymeans of the measuring rangemoduleSection 4.43. Install the module in the<strong>SIMATIC</strong> <strong>S7</strong> network4. Assign parameters to module Section 4.75. Connect measuring sensor orloads to module”Mounting” section in the Installation Manual forthe programmable logic controller being used:• <strong>S7</strong>-<strong>300</strong> <strong>Programmable</strong> <strong>Controllers</strong>, Hardwareand Installation or <strong>S7</strong>-400, M7-400<strong>Programmable</strong> <strong>Controllers</strong>, Hardware andInstallationorSections 4.8 to 4.156. Commission configuration ”Commissioning” section in the InstallationManual for the programmable controller beingused:• <strong>S7</strong>-<strong>300</strong> <strong>Programmable</strong> <strong>Controllers</strong>, Hardwareand Installation or <strong>S7</strong>-400, M7-400<strong>Programmable</strong> <strong>Controllers</strong>, Hardware andInstallationor• ET 200M Distributed I/O Device7. If commissioning was notsuccessful, diagnoseconfigurationSection 4.164-8<strong>Programmable</strong> <strong>Logic</strong> <strong>Controllers</strong> <strong>S7</strong>-<strong>300</strong> <strong>Module</strong> <strong>Data</strong>A5E00105505-03
Analog <strong>Module</strong>s4.3 Analog Value RepresentationIntroductionThis section describes the analog values for all the measuring ranges and outputranges which you can use with the analog modules.Converting Analog ValuesThe CPU processes the analog values in binary form only.Analog input modules convert the analog process signal into digital form.Analog output modules convert the digital output value into an analog signal.Analog value representation with 16-bit resolutionThe digitized analog value is the same for both input and output values having thesame nominal range. The analog values are represented as a fixed-point numberin two’s complement. The resulting assignment is as follows:Bits 15 14 13 12 11 10 9 8 7 6 5 4 3 2 1 0Value of bits 2 15 2 14 2 13 2 12 2 11 2 10 2 9 2 8 2 7 2 6 2 5 2 4 2 3 2 2 2 1 2 0SignThe sign of the analog value is always contained in bit number 15:• “0” • “1” Resolution less than 16 bitsIf the resolution of an analog module has fewer than 16 bits, the analog value isstored left-justified on the module. The lower-order bit positions not used arepadded with zeros (”0”).<strong>Programmable</strong> <strong>Logic</strong> <strong>Controllers</strong> <strong>S7</strong>-<strong>300</strong> <strong>Module</strong> <strong>Data</strong>A5E00105505-034-9
Analog <strong>Module</strong>sExampleIn the following example you can see how the positions not padded with “0” arewritten for low resolution.Table 4-6Example: Bit pattern of a 16-bit and a 13-bit analog valueResolutionAnalog valueBits 15 14 13 12 11 10 9 8 7 6 5 4 3 2 1 016-bit analog value 0 1 0 0 0 1 1 0 0 1 1 1 0 0 1 113-bit analog value 0 1 0 0 0 1 1 0 0 1 1 1 0 0 0 04.3.1 Analog Value Representation for Analog Input ChannelsIntroductionThe tables in this chapter contain the measured value representations for thevarious measuring ranges of the analog input modules. The values in the tablesapply to all modules with the corresponding measuring ranges.Notes for readers of the tablesTables 4-8 to 4-9 contain the binary representation of the measured values.Since the binary representation of the measured values is always the same,starting at 4-10 these tables only contain the measured values and the units.4-10<strong>Programmable</strong> <strong>Logic</strong> <strong>Controllers</strong> <strong>S7</strong>-<strong>300</strong> <strong>Module</strong> <strong>Data</strong>A5E00105505-03
Analog <strong>Module</strong>sMeasured-value resolutionThe resolution of the analog values may differ, depending on the analog moduleand its parameterization. With resolutions < 15 bits, the bits indicated by “x” are setto “0”.Note: This resolution does not apply to temperature values. The convertedtemperature values are the result of a conversion in the analog module (see Tables4-16 to 4-31).Table 4-7Possible analog value resolutionsResolutionUnitsAnalog valuein bits (+ sign)decimal hexadecimal High-Order Byte Low-Order Byte8 128 80 H Sign 0 0 0 0 0 0 0 1 x x x x x x x9 64 40 H Sign 0 0 0 0 0 0 0 0 1 x x x x x x10 32 20 H Sign 0 0 0 0 0 0 0 0 0 1 x x x x x11 16 10 H Sign 0 0 0 0 0 0 0 0 0 0 1 x x x x12 8 8 H Sign 0 0 0 0 0 0 0 0 0 0 0 1 x x x13 4 4 H Sign 0 0 0 0 0 0 0 0 0 0 0 0 1 x x14 2 2 H Sign 0 0 0 0 0 0 0 0 0 0 0 0 0 1 x15 1 1 H Sign 0 0 0 0 0 0 0 0 0 0 0 0 0 0 1<strong>Programmable</strong> <strong>Logic</strong> <strong>Controllers</strong> <strong>S7</strong>-<strong>300</strong> <strong>Module</strong> <strong>Data</strong>A5E00105505-034-11
Analog <strong>Module</strong>sBinary representation of the input rangesThe input ranges shown in Tables 4-8 to 4-9 are defined in two’s complementrepresentation:Table 4-8Bipolar Input RangesUnitsMeasured<strong>Data</strong> WordValuein % 2 15 2 14 2 13 2 12 2 11 2 10 2 9 2 8 2 7 2 6 2 5 2 4 2 3 2 2 2 1 2 0Range32767 118.515 0 1 1 1 1 1 1 1 1 1 1 1 1 1 1 1 Overflow32511 117.589 0 1 1 1 1 1 1 0 1 1 1 1 1 1 1 1 Over27649 100.00 0 1 1 0 1 1 0 0 0 0 0 0 0 0 0 1range427648 100.000 0 1 1 0 1 1 0 0 0 0 0 0 0 0 0 01 0.003617 0 0 0 0 0 0 0 0 0 0 0 0 0 0 0 10 0.000 0 0 0 0 0 0 0 0 0 0 0 0 0 0 0 0 Rated–1 –0.003617 1 1 1 1 1 1 1 1 1 1 1 1 1 1 1 1range–27648 –100.000 1 0 0 1 0 1 0 0 0 0 0 0 0 0 0 0–27649 –100.004 1 0 0 1 0 0 1 1 1 1 1 1 1 1 1 1 Under–32512 –117.593 1 0 0 0 0 0 0 1 0 0 0 0 0 0 0 0range–32768 –117.596 1 0 0 0 0 0 0 0 0 0 0 0 0 0 0 0 UnderflowTable 4-9Unipolar Input RangesUnitsMeasured<strong>Data</strong> WordValuein % 2 15 2 14 2 13 2 12 2 11 2 10 2 9 2 8 2 7 2 6 2 5 2 4 2 3 2 2 2 1 2 0Range32767 118.515 0 1 1 1 1 1 1 1 1 1 1 1 1 1 1 1 Overflow32511 117.589 0 1 1 1 1 1 1 0 1 1 1 1 1 1 1 1 Over-27649 100.004 0 1 1 0 1 1 0 0 0 0 0 0 0 0 0 1rangerange27648 100.000 0 1 1 0 1 1 0 0 0 0 0 0 0 0 0 01 0.003617 0 0 0 0 0 0 0 0 0 0 0 0 0 0 0 1 Ratedrange0 0.000 0 0 0 0 0 0 0 0 0 0 0 0 0 0 0 0–1 –0.003617 1 1 1 1 1 1 1 1 1 1 1 1 1 1 1 1 Under-–4864 –17.593 1 1 1 0 1 1 0 1 0 0 0 0 0 0 0 0rangerange–32768 –17.596 1 0 0 0 0 0 0 0 0 0 0 0 0 0 0 0 Underflow4-12<strong>Programmable</strong> <strong>Logic</strong> <strong>Controllers</strong> <strong>S7</strong>-<strong>300</strong> <strong>Module</strong> <strong>Data</strong>A5E00105505-03
Analog <strong>Module</strong>sAnalog Value Representation in Voltage Measuring RangesTable 4-10 Analog Value Representation in Voltage Measuring Ranges ± 10 V to ± 1 VSystemVoltage Measuring RangeDec. Hex. ±10 V ±5 V ±2.5 V ±1 V32767 7FFF 11.851 V 5.926 V 2.963 V 1.185 V Overflow32512 7F0032511 7EFF 11.759 V 5.879 V 2.940 V 1.176 V27649 6C01Overrange27648 6C00 10 V 5 V 2.5 V 1 V20736 5100 7.5 V 3.75 V 1.875 V 0.75 V1 1 361.7 V 180.8 V 90.4 V 36.17 V0 0 0 V 0 V 0 V 0 V Rated range–1 FFFF–20736 AF00 –7.5 V –3.75 V –1.875 V –0.75 V–27648 9400 –10 V –5 V –2.5 V –1 V–27649 93FF–32512 8100 –11.759 V –5.879 V –2.940 V –1.176 VUnderrange–32513 80FF Underflow–32768 8000 –11.851 V –5.926 V –2.963 V –1.185 VTable 4-11 Analog Value Representation in Voltage Measuring Ranges ± 500 mV to ± 80 mVSystemVoltage Measuring RangeDec. Hex. ±500 mV ±250 mV ±80 mV32767 7FFF 592.6 mV 296.3 mV 94.8 mV Overflow32512 7F0032511 7EFF 587.9 mV 294.0 mV 94.1 mV Overrange27649 6C0127648 6C00 500 mV 250 mV 80 mV20736 5100 375 mV 187.5 mV 60 mV1 1 18.08 V 9.04 V 2.89 V0 0 0 mV 0 mV 0 mV Rated range–1 FFFF–20736 AF00 –375 mV –187.5 mV –60 mV–27648 9400 –500 mV –250 mV –80 mV–27649 93FF Underrange–32512 8100 –587.9 mV –294.0 mV –94.1 mV–32513 80FF Underflow–32768 8000 –592.6 mV –296.3 mV –94.8 mV<strong>Programmable</strong> <strong>Logic</strong> <strong>Controllers</strong> <strong>S7</strong>-<strong>300</strong> <strong>Module</strong> <strong>Data</strong>A5E00105505-034-13
Analog <strong>Module</strong>sTable 4-12 Analog Value Representation in Voltage Measuring Ranges 1 to 5 V and0 to 10 VSystemVoltage Measuring RangeDec. Hex. 1 to 5 V 0 to 10 V32767 7FFF 5.741 V 11.852 V32512 7F0032511 7EFF 5.704 V 11.759 V27649 6C0127648 6C00 5 V 10 V20736 5100 4 V 7.5 V1 1 1 V + 144.7 V 0 V + 361.7 V0 0 1 V 0 V–1 FFFF–4864 ED00 0.296 VNegative values not–4865 ECFFpossible–32768 8000OverflowOverrangeRated rangeUnderrangeUnderflowAnalog Value Representation in Current Measuring RangesTable 4-13 Analog Value Representation in Current Measuring Ranges ± 20 mA to ± 3.2 mASystemCurrent Measuring RangeDec. Hex. ±20 mA ±10 mA ±3.2 mA32767 7FFF 23.70 mA 11.85 mA 3.79 mA Overflow32512 7F0032511 7EFF 23.52 mA 11.76 mA 3.76 mA Overrange27649 6C0127648 6C00 20 mA 10 mA 3.2 mA20736 5100 15 mA 7.5 mA 2.4 mA1 1 723.4 nA 361.7 nA 115.7 nA0 0 0 mA 0 mA 0 mA Rated range–1 FFFF–20736 AF00 –15 mA –7.5 mA –2.4 mA–27648 9400 –20 mA –10 mA –3.2 mA–27649 93FF Underrange–32512 8100 –23.52 mA –11.76 mA –3.76 mA–32513 80FF Underflow–32768 8000 –23.70 mA –11.85 mA –3.79 mA4-14<strong>Programmable</strong> <strong>Logic</strong> <strong>Controllers</strong> <strong>S7</strong>-<strong>300</strong> <strong>Module</strong> <strong>Data</strong>A5E00105505-03
Analog <strong>Module</strong>sTable 4-14 Analog Value Representation in Current Measuring Ranges 0 to 20 mA and 4 to20 mASystemCurrent Measuring RangeDec. Hex. 0 to 20 mA 4 to 20 mA32767 7FFF 23.70 mA 22.96 mA32512 7F0032511 7EFF 23.52 mA 22.81 mA27649 6C0127648 6C00 20 mA 20 mA20736 5100 15 mA 16 mA1 1 723.4 nA 4 mA + 578.7 nA0 0 0 mA 4 mA–1 FFFF–4864 ED00 –3.52 mA 1.185 mA–4865 ECFF–32768 8000OverflowOverrangeRated rangeUnderrangeUnderflowAnalog Value Representation for Resistance-Type TransmittersTable 4-15 Analog Value Representation for Resistance Type Transmitters from 10 kand from 150 to 600 SystemDec. Hex. 10 k 150 <strong>300</strong> 600 32767 7FFF 11.852k32512 7F00 150.01Resistance-Type Transmitter Range177.77 355.54 711.09 Overflow<strong>300</strong>.01 600.02 32511 7EFF 11.759 176.38 352.77 705.53 Overrange27649 6C01k 27648 6C00 10 k 150 <strong>300</strong> 600 20736 5100 7.5 k 112.5 225 450 1 1 361.7m 5.43 m 10.85m21.70m0 0 0 0 0 0 (negative values physicallynot possible)Rated rangeUnderrange<strong>Programmable</strong> <strong>Logic</strong> <strong>Controllers</strong> <strong>S7</strong>-<strong>300</strong> <strong>Module</strong> <strong>Data</strong>A5E00105505-034-15
Analog <strong>Module</strong>sAnalog value representation for RTD Resistance Temperature Detectors Pt x00standardTable 4-16 Analog value representation for RTD Resistance Temperature Detectors PT 100, 200, 500,1000Pt x00standardin CC(1 digit=0.1C)decimalUnitsPt x00standardin FF(1 digit=0.1 F)decimalUnitsPt x00standardin K(1 digit =0.1 K)decimalUnitsRange> 1000.0 32767 7FFF H > 1832.0 32767 7FFF H > 1273.2 32767 7FFF H Overflow1000.0:850.110000:85012710 H:2135 H1832.0:1562.118320:156214790 H:3D05 H1273.2:1123.312732:1123331BC H:2BE1 HOverrange850.0:–200.08500:–20002134 H:F830 H1562.0:–328.015620:–32803D04 H:F330 H1123.2:73.211232:7322BE0 H:2DC HRatedrange–200.1:–243.0–2001:–2430F82F H:F682 H–328.1:–405.4–3281:–4054F32F H:F02A H73.1:30.2731:3022DB H:12E HUnderrange< –243.0 –32768 8000 H < –405.4 –32768 8000 H < 30.2 32768 8000 H UnderflowAnalog value representation for RTD Resistance Temperature Detectors Pt x00climateTable 4-17 Analog value representation for RTD Resistance Temperature Detectors Pt 100, 200, 500,1000Pt x00climatein CC(1 digit =0.01C)decimalUnitsPt x00climatein FF(1 digit =0.01F)decimalUnitshexadecimalhexadecimalhexadecimalhexadecimalhexadecimal>155.00 32767 7FFF H >311.00 32767 7FFF H Overflow155.00:130.01130.00:–120.00–120.01:–145.0015500:1<strong>300</strong>11<strong>300</strong>0:–12000–12001:–145003C8C H 311.00: :32C9 H 266.0132C8 H 266.00: :D120 H –184.00D11F H –184.01: :C75C H –229.0031100:2660126600:–18400–18401:–22900797C H:67E9 HOverrange67E8 H:B820 HRated rangeB81F H:A68C HUnderrange< –145.00 –32768 8000 H < –229.00 –32768 8000 H UnderflowRange4-16<strong>Programmable</strong> <strong>Logic</strong> <strong>Controllers</strong> <strong>S7</strong>-<strong>300</strong> <strong>Module</strong> <strong>Data</strong>A5E00105505-03
Analog <strong>Module</strong>sAnalog value representation for RTD Resistance Temperature Detectors Ni x00standardTable 4-18 Analog value representation for RTD Resistance Temperature Detectors Ni100, 120, 200, 500,1000, LG-Ni 1000Ni x00standardin CC(1 digit =0.1C)decimalUnitsNi x00standardin FF(1 digit =0.1 F)decimalUnitsNi x00standardin K(1 digit =0.1 K)decimalUnitsRange>295.0 32767 7FFF H >563.0 32767 7FFF H >568.2 32767 7FFF H Overflow295.0:250.1250.0:–60.0–60.1:–105.02950:25012500:–600–601:–1050B86 H 563.0: :9C5 H 482.19C4 H 482.0: :FDA8 H –76.0FDA7 H –76.1: :FBE6 H –157.05630:48214820:–760–761:–157015FE H 568.2: :12D5 H 523.312D4 H 523.2: :FD08 H 213.2FD07 H 213.1: :F9DE H 168.25682:52335232:21322131:16821632 H: Overrange1471 H1470 HRated:range854 H853 H: Underrange692 H< –105.0 –32768 8000 H < –157.0 –32768 8000 H 295.00 32767 7FFF H >325.11 32767 7FFF H Overflow295.00:250.01250.00:–60.00–60.01:–105.0029500:2500125000:–6000–6001:–10500733C H 327.66: :61A9 H 280.0161A8 H 280.00: :E890 H –76.00E88F H –76.01: :D6FC H –157.0032766:2800128000:–7600–7601:–157007FFE H:6D61 HOverrange6D60 H:E250 HRated rangeE24F H:C2AC HUnderrange< –105.00 –32768 8000 H < –157.00 –32768 8000 H UnderflowRange<strong>Programmable</strong> <strong>Logic</strong> <strong>Controllers</strong> <strong>S7</strong>-<strong>300</strong> <strong>Module</strong> <strong>Data</strong>A5E00105505-034-17
Analog <strong>Module</strong>sAnalog value representation for RTD Resistance Temperature Detectors Cu 10standardTable 4-20 Analog Value Representation for RTD Resistance Temperature Detectors Cu 10Cu 10standardin CC(1 digit =0.01C)decimalUnitsRange> 312.0 32767 7FFF H >593.6 32767 7FFF H >585.2 32767 7FFF H Overflow312.0:260.13120:2601C30 H:A29 H593.6:500.15936:50011730 H:12D5 H585.2:533.35852:533316DC H:14D5 HOverrange260.0:–200.02600:–2000A28 H:F830 H500.0:–328.05000:–32801389 H:F330 H533.2:73.25332:73214D4 H:2DC HRatedrange–200.1:–240.0–2001:–2400F82F H:F6A0 H–328.1:–400.0–3281:–4000F32F H:F060 H73.1:33.2731:3322DB H:14C HUnderrange< –240.0 –32768 8000 H < –400.0 –32768 8000 H 180.00 32767 7FFF H >325.11 32767 7FFF H Overflow180.00:150.01150.00:–50.00–50.01:–60.0018000:1500115000:–5000–5001:–60004650 H 327.66: :3A99 H 280.013A98 H 280.00: :EC78 H –58.00EC77 H:E890H–58.01:–76.0032766:2800128000:–5800–5801:–76007FFE H:6D61A HOverrange6D60 H:E958 HRated rangeE957 H:E250HUnderrange< –60.00 –32768 8000 H < –76.00 –32768 8000 H UnderflowRange4-18<strong>Programmable</strong> <strong>Logic</strong> <strong>Controllers</strong> <strong>S7</strong>-<strong>300</strong> <strong>Module</strong> <strong>Data</strong>A5E00105505-03
Analog <strong>Module</strong>sAnalog value representation for thermocouples type BTable 4-22 Analog value representation for thermocouples type BType Bin CdecimalUnitsType Bin FdecimalUnitsType Bin KdecimalUnitsRange>2070.0 32767 7FFF H >3276.6 32767 7FFF H >2343.2 32767 7FFF H Overflow2070.0:1821.01820.0:0.020700:1821018200:050DC H 3276.6: :4722 H 2786.64718 H 2786.5: :0000 H 32.032766:2786627865:3207FFE H 2343.2: :6CDA H 2094.26CD9 H 2093.2: :0140 H 273.223432:2094220932:27325B88 H:51CE H51C4 H:0AAC HOverrangeRatedrange:::::: : Underrange–120.0 –1200:FB50 H –184.0 –1840:F8D0 H 153.2 1532 05FC H< –120.0 –32768 8000 H < –184.0 –32768 8000 H 2500.0 32767 7FFFH >3276.6 32767 7FFFH Overflow2500.0:2315.12315.0:0.00.1:–120.025000:2315123150:0–1:–120061A8 H 3276.6: :5A6F H 2786.65A6E H 2786.5: :0000 H 32.0FFFF H 31.9: :FB50 H –184.032766:2786627865:320319:–18407FFE H:6CDA HOverrange6CD9 H: Rated range0140 H013F H:F8D0 HUnderrange< –120.0 –32768 8000 H < –184.0 –32768 8000 H UnderflowRange<strong>Programmable</strong> <strong>Logic</strong> <strong>Controllers</strong> <strong>S7</strong>-<strong>300</strong> <strong>Module</strong> <strong>Data</strong>A5E00105505-034-19
Analog <strong>Module</strong>sAnalog Value Representation for Thermocouples type ETable 4-24 Analog value representation for thermocouples type EType Ein CdecimalUnitsType Ein FdecimalUnitsType Ein KdecimalUnitsRange> 1200.0 32767 7FFF H > 2192,0 32767 7FFF H > 1473.2 32767 7FFF H Overflow1200.0:1000.11000.0:–270.012000:1000110000:–27002EE0 H 2192.0: :2711 H 1833.82710 H 1832.0: :F574 H –454.021920:1833818320:–454055A0 H 1473.2: :47A2 H 1274.24790 H 1273.2: :EE44 H 014732:1274212732:0398C H:31C6 HOverrange31BC HRated:range0000 H< –270.0 < –2700 H < –454.0 < –4540
Analog <strong>Module</strong>sAnalog value representation for thermocouples type KTable 4-26 Analog value representation for thermocouples type KType Kin CdecimalUnitsType Kin FdecimalUnitsType Kin KdecimalUnitsRange> 1622.0 32767 7FFF H >2951.6 32767 7FFF H > 1895.2 32767 7FFF H Overflow1622.0:1373.01372.0:–270.016220:1373013720:–27003F5C H 2951.6: :35A2 H 2503.43598 H 2501.6: :F574 H –454.029516:2503425061:–4540734C H 1895.2: :61CA H 1646.261B8 H 1645.2: :EE44 H 018952:1646216452:04A08 H:404E HOverrange4044 HRated:range0000 H< –270.0 < –2700 < F574 H < –454.0 < –4540 1150.0 32767 7FFF H >2102.0 32767 7FFF H >1423.2 32767 7FFF H Overflow1150.0:901.011500:90102CEC H:2332 H2102.0:1653.821020:16538521C H:409A H1423.2:1174.214232:117423798 H:2DDE HOverrange900.0:–200.09000:–20002328 H:F830 H1652.0:–328.016520:–32804088 H:F330 H1173.2:73.211732:7322DD4 H:02DC HRatedrange< –200.0 < –2000 < F830 H < –328.0 < –3280 H
Analog <strong>Module</strong>sAnalog Value Representation for Thermocouples type NTable 4-28 Analog value representation for thermocouples type NType Nin CdecimalUnitsType Nin FdecimalUnitsType Nin KdecimalUnitsRange> 1550.0 32767 7FFF H >2822.0 32767 7FFF H > 1823.2 32767 7FFF H Overflow1550.0:1<strong>300</strong>.11<strong>300</strong>.0:–270.015500:1<strong>300</strong>11<strong>300</strong>0:–27003C8C H 2822.0: :32C9 H 2373.832C8 H 2372.0: :F574 H –454.028220:2373823720:–45406E3C H 1823.2: :5CBA H 1574.25CA8 H 1573.2: :EE44 H 018232:1574215732:04738 H:3D7E HOverrange3D74 HRated:range0000 H< –270.0 < –2700 < F574 H < –454.0 < –4540 2019.0 32767 7FFF H >3276.6 32767 7FFF H >2292.2 32767 7FFF H Overflow2019.0:1770.01769.0:–50.0–51.0:–170.020190:1777017690:–500–510:–17004EDE H 3276.6: :4524 H 3218.0451A H 3216.2: :FE0C H –58.0FE02 H –59.8: :F95C H –274.032766:3218032162:–580–598:–27407FFE H 2292.2: :7DB4 H 2043.27DA2 H 2042.2: :FDBC H 223.2FDAA H 222.2: :F54C H 103.222922:2043220422:22322222:1032598A H:4FD0 H4FC6 H:08B8 HOverrangeRatedrange08AE H: Underrange0408 H< –170.0 –32768 8000 H < –274.0 –32768 8000 H < 103-2 < 1032 8000 H Underflow4-22<strong>Programmable</strong> <strong>Logic</strong> <strong>Controllers</strong> <strong>S7</strong>-<strong>300</strong> <strong>Module</strong> <strong>Data</strong>A5E00105505-03
Analog <strong>Module</strong>sAnalog Value Representation for Thermocouples type TTable 4-30 Analog value representation for thermocouples type TType Tin CdecimalUnitsType Tin FdecimalUnitsType Tin KdecimalUnitsRange>540.0 32767 7FFF H >1004.0 32767 7FFF H >813.2 32767 7FFF H Overflow540.0:401.0400.0:–270.05400:40104000:–27001518 H:0FAA H1004.0 10040 2738 H 813.2 8132 1FC4 HOverrange0FA0 H 752.0: :F574 H –454.07520:–45401D60 H 673.2: :EE44 H 3.26732:321AAC HRated:range0020 H< –270.0 < –2700 H < –454.0 < –4540 1562.0 32767 7FFF H >1123.2 32767 7FFF H Overflow850.0:601.08500:60102134 H 1562.0: :177A H 1113.815620:111382738.0 H 1123.2: :2B82 H 874.211232:87422BE0 H: Overrange2226 H600.0:–200.06000:–20001770 H:F830 H1112.0:–328.011120:–32802B70 H:F330 H873.2:73.28732:732221C H:02DC HRatedrange< –200.0 < –2000 H < –328.0 < –3280 H
Analog <strong>Module</strong>s4.3.2 Analog Value Representation for Analog Output ChannelsIntroductionThe tables in this chapter contain the analog value representation for outputchannels of the analog output modules. The values in the tables apply to allmodules with the corresponding output ranges.Notes for readers of the tablesTables 4-32 to 4-33 contain the binary representation of the output values.Since the binary representation of the output values is always the same, starting at4-34 these tables only contain the output ranges and the units.Output ranges for the SM 334; AI 4/AO 28/8 bitsThe analog input/output module SM 334; AI 4/AO 2 x 8/8 bits has output rangesfrom 0 to 10 V and from 0 to 20 mA. Unlike the other analog modules, the SM 334has a lower resolution, however. Please not that the SM 334; AI 4/AO 2 x 8/8 bitswith product status 1 does not have overranges.Binary representation of the output rangesThe output ranges shown in Tables 4-32 to 4-33 are defined in two’s complementrepresentation:4-24<strong>Programmable</strong> <strong>Logic</strong> <strong>Controllers</strong> <strong>S7</strong>-<strong>300</strong> <strong>Module</strong> <strong>Data</strong>A5E00105505-03
Analog <strong>Module</strong>sTable 4-32 Bipolar Output RangesUnitsOutput<strong>Data</strong> WordValue in % 2 15 2 14 2 13 2 12 2 11 2 10 2 9 2 8 2 7 2 6 2 5 2 4 2 3 2 2 2 1 2 0Range32512 0 % 0 1 1 1 1 1 1 1 x x x x x x x x Overflow32511 117.589 0 1 1 1 1 1 1 0 1 1 1 1 1 1 1 1 Over27649 100.004 0 1 1 0 1 1 0 0 0 0 0 0 0 0 0 1range27648 100.000 0 1 1 0 1 1 0 0 0 0 0 0 0 0 0 01 0.003617 0 0 0 0 0 0 0 0 0 0 0 0 0 0 0 10 0.000 0 0 0 0 0 0 0 0 0 0 0 0 0 0 0 0 Rated–1 –0.003617 1 1 1 1 1 1 1 1 1 1 1 1 1 1 1 1range–27648 –100.000 1 0 0 1 0 1 0 0 0 0 0 0 0 0 0 0–27649 100.004 1 0 0 1 0 0 1 1 1 1 1 1 1 1 1 1 Under–32512 –117.593 1 0 0 0 0 0 0 1 0 0 0 0 0 0 0 0range32513 0 % 1 0 0 0 0 0 0 0 x x x x x x x x UnderflowTable 4-33 Unipolar Output RangesUnitsOutput<strong>Data</strong> WordValue in % 2 15 2 14 2 13 2 12 2 11 2 10 2 9 2 8 2 7 2 6 2 5 2 4 2 3 2 2 2 1 2 0Range32512 0 % 0 1 1 1 1 1 1 1 x x x x x x x x Overflow32511 117.589 0 1 1 1 1 1 1 0 1 1 1 1 1 1 1 1 Over-27649 100.004 0 1 1 0 1 1 0 0 0 0 0 0 0 0 0 1range27648 100.000 0 1 1 0 1 1 0 0 0 0 0 0 0 0 0 01 0.003617 0 0 0 0 0 0 0 0 0 0 0 0 0 0 0 1 Ratedrange0 0.000 0 0 0 0 0 0 0 0 0 0 0 0 0 0 0 0–11 1 1 1 1 1 1 1 1 1 1 1 1 1 1 1 Limited0.000to ratedrangelower–32512 1 0 0 0 0 0 0 1 0 0 0 0 0 0 0 0limit 0 Vand0 mA32513 0 % 1 0 0 0 0 0 0 0 x x x x x x x x Underflow<strong>Programmable</strong> <strong>Logic</strong> <strong>Controllers</strong> <strong>S7</strong>-<strong>300</strong> <strong>Module</strong> <strong>Data</strong>A5E00105505-034-25
Analog <strong>Module</strong>sAnalog Value Representation in Voltage Output RangesTable 4-34 Analog Value Representation in Output Range ±10 VSystemVoltage Output RangeDec. hex. ±10 V118.5149% 32767 7FFF 0.00 V Overflow, off circuit and de-energized32512 7F00117.589% 32511 7EFF 11.76 V Overrange27649 6C01100 % 27648 6C00 10 V75% 20736 5100 7.5 V0.003617% 1 1 361.7 µV Rated range0 % 0 0 0 V–1 FFFF –361.7 µV–75 % –20736 AF00 –7.5 V–100 % –27648 9400 –10 V–27649 93FF Underrange–117.593% –32512 8100 –11.76 V–32513 80FF Underflow, off circuit and de-energized–118.519% –32768 8000 0.00 VTable 4-35 Analog Value Representation in Output Ranges 0 to 10 V and 1 to 5 VSystemVoltage Output RangeDec. hex. 0 to 10 V 1 to 5 V118.5149% 32767 7FFF 0.00 V 0.00 V Overflow, off circuit and de-32512 7F00energized117.589% 32511 7EFF 11.76 V 5.70 V Overrange27649 6C01100 % 27648 6C00 10 V 5 V75% 20736 5100 7.5 V 3.75 V0.003617% 1 1 361.7µV 1V+144.7µV Rated range0 % 0 0 0 V 1 V–1 FFFF Underrange–25 % –6912 E500 0 V–6913 E4FF Not possible.–117.593% –32512 8100The output value is limitedto 0 V.–32513 80FF Underflow, off circuit and–118.519% –32768 8000 0.00 V 0.00 Vde-energized4-26<strong>Programmable</strong> <strong>Logic</strong> <strong>Controllers</strong> <strong>S7</strong>-<strong>300</strong> <strong>Module</strong> <strong>Data</strong>A5E00105505-03
Analog <strong>Module</strong>sAnalog Value Representation in Current Output RangesTable 4-36 Analog Value Representation in Output Range ±20 mASystemCurrent Output RangeDec. hex. ±20 mA118.5149% 32767 7FFF 0.00 mA Overflow, off circuit and de-energized32512 7F00117.589% 32511 7EFF 23.52 mA Overrange27649 6C01100 % 27648 6C00 20 mA75% 20736 5100 15 mA0.003617% 1 1 723.4 nA0 % 0 0 0 mA Rated range–1 FFFF –723.4 nA–75 % –20736 AF00 –15 mA–100 % –27648 9400 –20 mA–27649 93FF Underrange–117.593% –32512 8100 –23.52 mA–32513 80FF Underflow, off circuit and de-energized–118.519% –32768 8000 0.00 mATable 4-37 Analog Value Representation in Output Ranges 0 and 20 mA and 4 to 20 mASystemCurrent Output RangeDec. hex. 0 to 20 mA 4 to 20 mA118.5149% 32767 7FFF 0.00 mA 0.00 mA Overflow, off circuit32512 7F00and de-energized117.589% 32511 7EFF 23.52 mA 22.81 mA Overrange27649 6C01100 % 27648 6C00 20 mA 20 mA75% 20736 5100 15 mA 15 mA Rated range0.003617% 1 1 723.4 nA 4mA+578.7 nA0 % 0 0 0 mA 4 mA–1 FFFF Underrange–25 % –6912 E500 0 mA–6913 E4FF Not possible. The–117.593% –32512 8100output value is limitedto 0 mA.–32513 80FF Underflow, off circuit–118.519% –32768 8000 0.00 mA 0.00 mAand de-energized<strong>Programmable</strong> <strong>Logic</strong> <strong>Controllers</strong> <strong>S7</strong>-<strong>300</strong> <strong>Module</strong> <strong>Data</strong>A5E00105505-034-27
Analog <strong>Module</strong>s4.4 Setting the Measuring Method and Measuring Ranges ofAnalog Input ChannelsTwo proceduresThere are two procedures for setting the measuring method and the measuringranges of the analog input channels of the analog modules:• With measuring range module and STEP 7• By means of wiring the analog input channel and STEP 7Which of these two methods is used for the individual analog modules depends onthe module and is described in detail in the specific module sections.The procedure for setting the measuring method and measuring range of themodule in STEP 7 is described in Section 4.7.The following section describes how you set the measuring method and themeasuring range by means of measuring range modules.Setting the Measuring Method and the Measuring Ranges with Measuring Range<strong>Module</strong>sIf the analog modules haves measuring range modules, they are supplied with themeasuring range modules plugged in.If necessary, the measuring range modules must be replugged to change themeasuring method and the measuring range.NoteMake sure that the measuring range modules are on the side of the analog inputmodule.Before installing the analog input module, therefore, check whether the measuringrange modules have to be set to another measuring method and anothermeasuring range.Possible settings for the measuring range modulesThe measuring range modules can be set to the following positions: “A”, “B”, “C” and“D”.Which measuring range module positions you must select for the individualmeasuring methods and measuring ranges is described in detail in the specificmodule section.The settings for the various types of measurement and measuring ranges are alsoprinted on the analog module.4-28<strong>Programmable</strong> <strong>Logic</strong> <strong>Controllers</strong> <strong>S7</strong>-<strong>300</strong> <strong>Module</strong> <strong>Data</strong>A5E00105505-03
Analog <strong>Module</strong>sReplugging measuring range modulesIf you want to replug a measuring range module, perform the following steps:1. Use a screwdriver to ease the measuring range module out of the analog inputmodule.21Figure 4-1Easing Measuring Range <strong>Module</strong>s from the Analog Input <strong>Module</strong><strong>Programmable</strong> <strong>Logic</strong> <strong>Controllers</strong> <strong>S7</strong>-<strong>300</strong> <strong>Module</strong> <strong>Data</strong>A5E00105505-034-29
Analog <strong>Module</strong>s2. Insert the measuring range module (correctly positioned (1)) into the analoginput module.The measuring range selected is the one that points to marker point onmodule (2).12Figure 4-2Inserting Measuring Range <strong>Module</strong>s into the Analog Input <strong>Module</strong>Perform the same steps for all other measuring range modules.The next step is to install the module.!CautionIf you have not set the measuring range modules correctly, the module may bedestroyed.Make sure that the measuring range module is in the correct position beforeconnecting a sensor to the module.4-30<strong>Programmable</strong> <strong>Logic</strong> <strong>Controllers</strong> <strong>S7</strong>-<strong>300</strong> <strong>Module</strong> <strong>Data</strong>A5E00105505-03
Analog <strong>Module</strong>s4.5 Behavior of the Analog <strong>Module</strong>sIntroductionIn this section, you will find information on:• How the analog input and output values depend on the operating states of theCPU and the supply voltage of the analog module• The behavior of the analog modules depending on where the analog values liewithin the value range• The effect of the operational limit of the analog module on the analog input andoutput value, as illustrated by an example4.5.1 Effect of Supply Voltage and Operating ModeEffect of supply voltage and operating mode on the modulesThe input and output values of the analog modules depend on the operating stateof the CPU and on the supply voltage of the module.Table 4-38 Dependencies of the Analog Input/Output Values on the Operating State of the CPU and theSupply Voltage L+CPU OperatingStatePOWERONPOWERONPOWEROFFSupply VoltageL+ atAnalog <strong>Module</strong>Input Value of theAnalog Input <strong>Module</strong>RUN L+ present Measured value CPU values7FFF H until first conversionfollowing power-up or afterparameter assignment of themodule has been completedL+ missing Overflow value 0 mA/0 VOutput Value of theAnalog Output <strong>Module</strong>Until the first conversion...• after power-up has beencompleted, a signal of 0 mAor 0 V is output.• after parameterassignment has beencompleted, the previousvalue is output.STOP L+ present Measured value7FFF H until first conversionSubstitute value/last value(default values: 0 mA/0 V)following power-up or afterparameter assignment of themodule has been completedL+ missing Overflow value 0 mA/0 V– L+ present – 0 mA/0 VL+ missing – 0 mA/0 V<strong>Programmable</strong> <strong>Logic</strong> <strong>Controllers</strong> <strong>S7</strong>-<strong>300</strong> <strong>Module</strong> <strong>Data</strong>A5E00105505-034-31
Analog <strong>Module</strong>sBehavior on failure of the supply voltageFailure of the supply voltage of the analog modules is always indicated by the SFLED on the module. Furthermore, this information is made available on the module(entry in diagnostic buffer).Triggering of the diagnostic interrupt depends on the parameter assignment (seeSection 4.7).4.5.2 Effect of Range of Values of the Analog ValuesEffect of errors on analog modules with diagnostics capabilityAny errors that occur can lead to a diagnostics entry and a diagnostic interrupt withanalog modules with diagnostics capability and corresponding parameterassignment. You will find the errors that might be involved in Section 4.16.Effect of range of values on the analog input moduleThe behavior of the analog modules depends on where the input values lie withinthe range of values.Table 4-39 Behavior of the Analog Input <strong>Module</strong>s as a Function of the Position of theAnalog Value within the Range of ValuesMeasuredValue InRated rangeOverrange/underrangeInput Value SF LED Diagnostics InterruptMeasuredvalueMeasuredvalue– – –– – –Overflow 7FFF H Flashes 1) Entered 1) Diagnosticinterrupt 1)Underflow 8000 H Flashes 1) Entered 1) Diagnosticinterrupt 1)Beyond theprogrammedlimitMeasuredvalue– – Hardwareinterrupt 1)1) Only for modules with diagnostics capability and depending on parameter assignment4-32<strong>Programmable</strong> <strong>Logic</strong> <strong>Controllers</strong> <strong>S7</strong>-<strong>300</strong> <strong>Module</strong> <strong>Data</strong>A5E00105505-03
Analog <strong>Module</strong>sEffect of range of values on the analog output moduleThe behavior of the analog modules depends on where the output values lie withinthe value range.Table 4-40 Behavior of the Analog Output <strong>Module</strong>s as a Function of the Position of theAnalog Value within the Range of ValuesProcess ValueLies WithinOutput Value SF LED Diagnostics InterruptRated range CPU value – – –Overrange/underrangeCPU value – – –Overflow 0 signal – – –Underflow 0 signal – – –<strong>Programmable</strong> <strong>Logic</strong> <strong>Controllers</strong> <strong>S7</strong>-<strong>300</strong> <strong>Module</strong> <strong>Data</strong>A5E00105505-034-33
Analog <strong>Module</strong>s4.5.3 Effect of Operational Limit and Basic Error LimitOperational limitThe operational limit is the measuring error or output error of the analog moduleover the entire temperature range authorized for the module, referred to the ratedrange of the module.Basic error limitThe basic error limit is the operational limit at 25 °C, referred to the rated range ofthe module.NoteThe percentage details of operational and basic error limits in the technicalspecifications of the module always refer to the highest possible input and outputvalue in the rated range of the module.Example of determination of the output error of a moduleAn analog output module SM 332; AO 4 x 12 bits is being used for voltage output.The output range from “0 to 10 V” is being used. The module is operating at anambient temperature of 30 °C. Thus the operational limit applies. The technicalspecifications of the module state:• Operational limit for voltage output: 0.5 %An output error, therefore, of 0.05 V (0.5% of 10 V) over the whole rated rangeof the module must be expected.This means that with an actual voltage of, say, 1 V, a value in the range from 0.95V to 1.05 V is output by the module. The relative error is 5 % in this case.The figure below shows for the example how the relative error becomesincreasingly less the more the output value approximates to the end of the ratedrange of 10 V.0.05 V( 5 %)0.05 V( 0.625 %)0.05 V( 0.5 %*)Output Value–1 V 0 V 1 V8 V 10 V* Operational limitFigure 4-3 Example of the Relative Error of an Analog Output <strong>Module</strong>4-34<strong>Programmable</strong> <strong>Logic</strong> <strong>Controllers</strong> <strong>S7</strong>-<strong>300</strong> <strong>Module</strong> <strong>Data</strong>A5E00105505-03
Analog <strong>Module</strong>s4.6 Conversion, Cycle, Setting and Response Time of Analog<strong>Module</strong>sConversion time of analog input channelsThe conversion time consists of a basic conversion time and additional processingtimes of the module for:• Resistance test• Wire-break monitoringThe basic conversion time depends directly on the conversion method of theanalog input channel (integrating method, instantaneous value conversion).In the case of integrating conversion methods, the integration time has a directinfluence on the conversion time. The integration time depends on the interferencefrequency suppression that you set in STEP 7 (refer to Section 4.7.1).For the basic conversion times and additional processing times of the differentanalog modules refer to the technical specifications of the module concerned,starting at Section 4.18.Scan time of analog input channelsAnalog-to-digital conversion and the transfer of the digitized measured values tothe memory and/or to the bus backplane are performed sequentially – in otherwords, the analog input channels are converted one after the other. The scan time– in other words, the time elapsing until an analog input value is again converted, isthe sum of the conversion times of all activated analog input channels of theanalog input module.The following figure illustrates the components of the scan time for an n-channelanalog module.Conversion time,channel 1Conversion time,channel 2Scan timeConversion time,channel nFigure 4-4Scan time of an analog input or output module<strong>Programmable</strong> <strong>Logic</strong> <strong>Controllers</strong> <strong>S7</strong>-<strong>300</strong> <strong>Module</strong> <strong>Data</strong>A5E00105505-034-35
Analog <strong>Module</strong>sConversion and scan times for analog input channels in channel groupsWhen the analog input channels are grouped in channel groups, you must take intoaccount the conversion time channel group by channel group.ExampleTwo analog input channels of the analog input module SM 331; AI 212 bits arecombined to form a channel group. You must therefore grade the scan time insteps of 2.Setting smoothing of analog valuesYou can set the smoothing of the analog values in STEP 7 for some analog inputmodules.Using smoothingSmoothing of analog values ensures a stable analog signal for further processing.It makes sense to smooth the analog values with slow variations of measuredvalues – for example, with temperature measurements.Smoothing principleThe measured values are smoothed by digital filtering. Smoothing is accomplishedby the module calculating average values from a defined number of converted(digitized) analog values.The user assigns parameters to smoothing at not more than four levels (none, low,average, high). The level determines the number of analog signals used foraveraging.The higher the smoothing level chosen, the more stable is the smoothed analogvalue and the longer it takes until the smoothed analog signal is applied after astep response (refer to the following example).4-36<strong>Programmable</strong> <strong>Logic</strong> <strong>Controllers</strong> <strong>S7</strong>-<strong>300</strong> <strong>Module</strong> <strong>Data</strong>A5E00105505-03
Analog <strong>Module</strong>sExampleThe following figure shows the number of module cycles for a step response afterwhich the smoothed analog value is approximately 100% applied, as a function ofthe smoothing that has been set. The figure applies to every change of signal atthe analog input.Signal variationin percent100Step response for any analog input signal6350Smoothing:Figure 4-5050 100 150 200low:<strong>Module</strong> cyclesaverage:high:Example of the Influence of Smoothing on the Step ResponseAdditional information on smoothingRefer to the specific section on the analog input module (from Section 4.22) todetermine whether smoothing can be set for the specific module and for anyspecial features that have to be taken into account.Conversion time of the analog output channelsThe conversion time of the analog output channels comprises the transfer of thedigitized output values from the internal memory and the digital-to-analogconversion.Scan time of analog output channelsThe analog output channels are converted sequentially – in other words, theanalog output channels are converted one after the other.The scan time – in other words, the time elapsing until an analog output value isagain converted, is the sum of the conversion times of all activated analog outputchannels (refer to 4-4).<strong>Programmable</strong> <strong>Logic</strong> <strong>Controllers</strong> <strong>S7</strong>-<strong>300</strong> <strong>Module</strong> <strong>Data</strong>A5E00105505-034-37
Analog <strong>Module</strong>sTipYou should disable any analog channels that are not being used to reduce the scantime in STEP 7.Overview of the settling time and response time of the analog output modulest At Zt Et 1 t 2t 3t A = Response timet Z = Scan time corresponds to n conversion time (n = activated channels)t E = Settling timet 1 = New digitized output value is presentt 2 = Output value transferred and convertedt 3 = Specified output value reachedFigure 4-6Settling and Response times of the Analog Output ChannelsSettling timeThe settling time (t 2 to t 3 ) – in other words, the time elapsing from application theconverted value until the specified value is reached at the analog output – isload-dependent. A distinction is made between resistive, capacitive and inductiveloads.For the settling times of the different analog output modules as a function of loadrefer to the technical specifications of the module concerned, starting at Section4.28.Response timeThe response time (t 1 to t 3 ) – in other words, the time elapsing from application ofthe digital output values in the internal memory until the specified value is reachedat the analog output – in a worst case scenario is the sum of the scan time and thesettling time.You have a worst case situation, if, shortly prior to the transfer of a new outputvalue, the analog channel has been converted and is not converted again until allother channels are converted (scan time).4-38<strong>Programmable</strong> <strong>Logic</strong> <strong>Controllers</strong> <strong>S7</strong>-<strong>300</strong> <strong>Module</strong> <strong>Data</strong>A5E00105505-03
Analog <strong>Module</strong>s4.7 Analog module parameter assignmentIntroductionAnalog modules can have different characteristics. You can set the characteristicsof the modules by means of parameter assignment.Tools for parameter assignmentYou assign parameters to analog modules with STEP 7. You must performparameter assignment in STOP mode of the CPU.When you have set all the parameters, download the parameters from theprogramming device to the CPU. On a transition from STOP to RUN mode, theCPU then transfers the parameters to the individual analog modules.In addition, if necessary you must place the measuring range modules of themodule in the necessary position (refer to Section 4.4).Static and dynamic parametersThe parameters are divided into static and dynamic parameters.Set the static parameters in STOP mode of the CPU, as described above.You can similarly modify the dynamic parameters in the current user program bymeans of SFCs. Note, however, that after a change from RUN STOP, STOP RUN of the CPU, the parameters set in STEP 7 apply again. You will find adescription of the parameter assignment of modules in the user program inAppendix A.Parameter Settable with CPU OperatingStateStatic PG (STEP 7 HW CONFIG) STOPDynamic PG (STEP 7 HW CONFIG) STOPSFC 55 in the user programRUN<strong>Programmable</strong> <strong>Logic</strong> <strong>Controllers</strong> <strong>S7</strong>-<strong>300</strong> <strong>Module</strong> <strong>Data</strong>A5E00105505-034-39
Analog <strong>Module</strong>s4.7.1 Parameters of the Analog Input <strong>Module</strong>sThe analog input modules use a subset of the parameters and ranges of valueslisted in the table below, depending on the functionality. Refer to the section on themodule concerned, starting from Section 4.22, for the subset “mastered” by thespecific analog modules.The default settings apply if you have not performed parameter assignment inSTEP 7.Table 4-41 Parameters of the Analog Input <strong>Module</strong>sParameter Value Range DefaultSettingsEnable• Diagnostic interrupt• Hardware interruptupon limit violation• Hardware interrupt atend of cycleTrigger for hardwareinterrupt• Upper limit value• Lower limit valueDiagnostics• Group diagnostics• With wire-breakcheckYes/noYes/noYes/noConstraint possible due to measuringrange32511 to –32512–32512 to 32511Yes/noYes/noNoNoNoParameterTypeDynamic– DynamicNoNoStaticScope<strong>Module</strong>Channel orChannelgroupChannel orChannelgroup4-40<strong>Programmable</strong> <strong>Logic</strong> <strong>Controllers</strong> <strong>S7</strong>-<strong>300</strong> <strong>Module</strong> <strong>Data</strong>A5E00105505-03
Analog <strong>Module</strong>sTable 4-41 Parameters of the Analog Input <strong>Module</strong>s, continuedParameterValue RangeDefaultSettingsParameterTypeScopeMeasurement• Measuring method DeactivatedU4DMU2DMUR-4LR-3LRTD-4LRTD-3LTC-I 1)TC-E 1)TC-IL 2)TC-EL 2)TC-L00C 2)TC-L50C 2)VoltageCurrent(4-wire transmitter)Current(2-wire transmitter)Resistance(four-conductorconnection)Resistance(three-conductorconnection)Bulb resistor (linear,four-conductorconnection)Bulb resistor(linear, three-conductorconnection)Thermocouple(internal comparison)Thermocouple(external comparison)Thermocouple(linear, internalcomparison)Thermocouple(linear, externalcomparison)Thermocouple (linear,reference temp. 0 °C)Thermocouple (linear,reference temp. 50°C)UDynamicChannel orChannelgroup• Measuring range For the settable measuring ranges ofthe input channels, please refer to theindividual module description.10 V• Reaction with openthermocoupleOverflow; underflowOverflow• Temperature unit 3) Degrees Celsius; degrees Fahrenheit;degrees KelvinDegreesCelsiusDynamic<strong>Module</strong>• <strong>Module</strong> filtering mode 8 channels hardware filter8 channels software filter4 channels hardware filter8channels,hardwarefilterDynamic<strong>Module</strong><strong>Programmable</strong> <strong>Logic</strong> <strong>Controllers</strong> <strong>S7</strong>-<strong>300</strong> <strong>Module</strong> <strong>Data</strong>A5E00105505-034-41
Analog <strong>Module</strong>sTable 4-41 Parameters of the Analog Input <strong>Module</strong>s, continuedParameter• Temperaturecoefficient fortemperaturemeasurement withbulb resistor (RTD)• Interferencefrequencysuppression• Smoothing NoneLowAverageHighPlatinum (Pt)0.00385 / °C0.003916 / °C0.003902 / °C0.003920 / °C0.003851 / °CNickel (Ni)0.00618 / °C0.00672 / °CCopper (Cu)0.00427 / °CValue Range400/60/50 Hz; 400 Hz; 60 Hz; 50 Hz;10 HzDefaultSettingsParameterTypeScope0.00385 Dynamic Channel orChannelgroup50 Hz Dynamic Channel orChannelgroupNone Dynamic Channel orChannelgroup1) The module supplies a decimal value of the measured thermal voltage to the CPU –for example, 27648 at 80 mV (refer to Table 4-11)2) The module supplies a temperature value to the CPU – for example, 120°C (refer to Table 4-17)3) 1 digit =0.1 °C; 1 digit =0.1 °F4-42<strong>Programmable</strong> <strong>Logic</strong> <strong>Controllers</strong> <strong>S7</strong>-<strong>300</strong> <strong>Module</strong> <strong>Data</strong>A5E00105505-03
Analog <strong>Module</strong>s4.7.2 Parameters of the Analog Output <strong>Module</strong>sThe analog output modules use a subset of the parameters and ranges of valueslisted in the table below, depending on the functionality. Refer to the section on themodule concerned, starting from Section 4.28, for the subset “mastered” by thespecific analog modules.The default settings apply if you have not performed parameter assignment inSTEP 7.Table 4-42 Parameters of the Analog Output <strong>Module</strong>sParameter Value Range DefaultSettingsEnable• DiagnosticinterruptParameterTypeScopeYes/no No Dynamic <strong>Module</strong>Diagnostics• Group diagnostics Yes/no No Static ChannelOutput• Output type DeactivatedVoltageCurrent• Output range For the settable measuring ranges of theoutput channels, please refer to theindividual module description.Response withCPU-STOPASSLWHEWSOutputs de-energizedHold last valueApply substitute valueU10 VASSDynamicDynamicChannelChannel<strong>Programmable</strong> <strong>Logic</strong> <strong>Controllers</strong> <strong>S7</strong>-<strong>300</strong> <strong>Module</strong> <strong>Data</strong>A5E00105505-034-43
Analog <strong>Module</strong>s4.7.3 Parameters of the analog input/output modulesThe analog input/output modules make available the parameters in the followingtable. The default settings apply if you have not performed parameter assignmentin STEP 7.Table 4-43 Parameters of the Analog Input/Output <strong>Module</strong>sParameter Value Range DefaultSettingsInputMeasurement• MeasuringmethodDeactivatedU VoltageR-4L• Measuring Range 0 to 10 V10000 Pt 100 climateResistance(four-conductor connection)RTD-4L Bulb resistor (linear,four-conductor connection)RTD-4LPt 100climate• Integration time 20 ms; 16.6 ms 20 msOutput• Output type DeactivatedVoltageU• Output range 0 to 10 V 0 to 10 VParameterTypeDynamicDynamicScopeChannelChannel4-44<strong>Programmable</strong> <strong>Logic</strong> <strong>Controllers</strong> <strong>S7</strong>-<strong>300</strong> <strong>Module</strong> <strong>Data</strong>A5E00105505-03
Analog <strong>Module</strong>s4.8 Connecting Sensors to Analog InputsIntroductionYou can connect different sensors to the analog input modules depending on themeasuring method; voltage and current sensors, and resistors.This section contains general information that is generally applicable to all theconnection options for sensors described in the sections that follow.Cables for analog signalsTo reduce electrical interference, you should use twisted-pair shielded cables forthe analog signals. The shield of the analog signal cables should be grounded atboth cable ends.If there are potential differences between the cable ends, an equipotential bondingcurrent can flow over the shield, which leads to an interference of the analogsignals. In such a case, you should ground the shield at one end of the cable only.Isolated analog input modulesIn the case of isolated analog input modules, there is no electrical connectionbetween the reference point of the measuring circuit M ANA and the M terminal ofthe CPU.You must use isolated analog input modules if a potential difference U ISO canoccur between the reference point of the measuring circuit M ANA and theM terminal of the CPU. An equipotential bonding conductor between the M ANAterminal and the M terminal of the CPU ensures that U ISO does not exceed thepermitted value.Non-isolated analog input modulesIn the case of the non-isolated analog input modules, you must establish aconnection between the reference point of the measuring circuit M ANA and the Mterminal of the CPU or IM 153. To do so, connect the M ANA terminal with the Mterminal of the CPU or IM 153. A potential difference between M ANA and the Mterminal of the CPU or IM 153 can result in corruption of the analog signal.Limited potential difference UCMOnly a limited potential difference U CM (common mode voltage) may occurbetween the measuring lines M– of the input channels and the reference point ofthe measuring circuit M ANA . In order to prevent the permissible value from beingexceeded, you must take different actions, described below, depending on thepotential connection of the sensors.<strong>Programmable</strong> <strong>Logic</strong> <strong>Controllers</strong> <strong>S7</strong>-<strong>300</strong> <strong>Module</strong> <strong>Data</strong>A5E00105505-034-45
Analog <strong>Module</strong>sAbbreviations and mnemonics used in the figures belowThe abbreviations and mnemonics used in the figures below have the followingmeanings:M +: Measuring lead (positive)M–: Measuring lead (negative)M ANA : Reference potential of the analog measuring circuitM: Ground terminalL +: Terminal for 24 VDC supply voltageU CM : Potential difference between inputs and reference potential ofthe M ANA measuring circuitU ISO : Potential difference between M ANA and M terminal of CPUI +: Measuring lead for current inputU +: Measuring lead for voltage inputConnecting isolated measuring sensorsIsolated sensors are not connected with the local ground potential (local ground).They can be operated free of potential.With isolated sensors, potential differences might arise between the differentsensors. These potential differences can arise as a result of interference or thelocal distribution of the sensors.To prevent the permissible value for U CM being exceeded when used inenvironments with a high level of EMC interference, we advise you to connect M–with M ANA .4-46<strong>Programmable</strong> <strong>Logic</strong> <strong>Controllers</strong> <strong>S7</strong>-<strong>300</strong> <strong>Module</strong> <strong>Data</strong>A5E00105505-03
Analog <strong>Module</strong>sYou can operate the CPU in Grounded mode (refer to the figure below) orUngrounded mode.L+MIsolatedsensorsRecommendedconnectionM+M–M+M–M ANAADC<strong>Logic</strong>BackplanebusCPUU ISOM internalL+MGround busFigure 4-7Connecting Isolated Sensors to an Isolated AIL+MIsolatedsensorsRecommendedconnectionM+M–M+M–M ANAADC<strong>Logic</strong>BackplanebusCPUM internalL+MGround busFigure 4-8Connecting Isolated Sensors to a Non-Isolated AINoteDo not connect M– to M ANA when connecting 2-wire transmitters for currentmeasurement and resistance-type sensors. This also applies to inputs which arenot used.<strong>Programmable</strong> <strong>Logic</strong> <strong>Controllers</strong> <strong>S7</strong>-<strong>300</strong> <strong>Module</strong> <strong>Data</strong>A5E00105505-034-47
Analog <strong>Module</strong>sNon-isolated sensorsThe non-isolated sensors are connected with the local ground potential (localground). When using non-isolated sensors, you must connect M ANA to the localground.Connecting non-isolated sensorsCaused by local conditions or interferences, potential differences U CM (static ordynamic) can occur between the locally distributed individual measuring points. Ifthe potential difference U CM exceeds the permissible value, you must provideequipotential bonding conductors between the measuring points.When connecting non-isolated sensors to optically isolated modules, you canoperate the CPU in Grounded mode (refer to the figure below) or Ungroundedmode.L+MNon-isolated sensorsM+M–M+M–ADC<strong>Logic</strong>Backplane busU CMM ANAEquipotentialbondingconductorU ISOCPUM internalL+MGround busFigure 4-9Connecting Non-Isolated Sensors to an Isolated AI4-48<strong>Programmable</strong> <strong>Logic</strong> <strong>Controllers</strong> <strong>S7</strong>-<strong>300</strong> <strong>Module</strong> <strong>Data</strong>A5E00105505-03
Analog <strong>Module</strong>sWhen connecting non-isolated sensors to non-isolated modules, you can operatethe CPU only in Grounded mode.L+MNon-isolatedsensorsM+M–M+ ADCM– Backplanebus<strong>Logic</strong>U CMM ANACPUEquipotentialbondingconductorM internalL+MGround busFigure 4-10Connecting non-isolated sensors to a non-isolated AINoteYou must not use non-isolated two-wire transmitters and non-isolatedresistance-type sensors with a non-isolated AI!<strong>Programmable</strong> <strong>Logic</strong> <strong>Controllers</strong> <strong>S7</strong>-<strong>300</strong> <strong>Module</strong> <strong>Data</strong>A5E00105505-034-49
Analog <strong>Module</strong>s4.9 Connecting Voltage SensorsNoteThe necessary connecting cables, which result from the potential connection of theanalog input module and the sensors, are not drawn in the figures shown below.In other words, you must continue to take note of and implement Section 4.8 withits generally valid information for connecting sensors.Abbreviations and mnemonics used in the figure belowThe abbreviations and mnemonics used in the figure below have the followingmeanings:M +:M–:M ANA :M :L +:U +:Measuring lead (positive)Measuring lead (negative)Reference potential of the analog measuring circuitGround terminalTerminal for 24 VDC supply voltageMeasuring lead for voltage inputConnection of voltage sensorsL+M+M+UM––+M+ ADCM–– U Backplanebus<strong>Logic</strong>M ANAFigure 4-11Connecting Voltage Sensors to an Isolated AI4-50<strong>Programmable</strong> <strong>Logic</strong> <strong>Controllers</strong> <strong>S7</strong>-<strong>300</strong> <strong>Module</strong> <strong>Data</strong>A5E00105505-03
Analog <strong>Module</strong>s4.10 Connecting Current SensorsNoteThe necessary connecting cables, which result from the potential connection of theanalog input module and the sensors, are not drawn in the figures shown below.In other words, you must continue to take note of and implement Section 4.8 withits generally valid information for connecting sensors.Abbreviations and mnemonics used in the figures belowThe abbreviations and mnemonics used in the figures below have the followingmeanings:M +:M–:M ANA :M :L +:I +:Measuring lead (positive)Measuring lead (negative)Reference potential of the analog measuring circuitGround terminalTerminal for 24 VDC supply voltageMeasuring lead for current inputSupply voltage of the sensorsThe 2-wire transmitter receives its short-circuit-proof power supply via theterminals of the analog input module.This transmitter then converts the measured variable into a current. Two-wiretransmitters must be isolated sensors.Four-wire transmitters have separate power supplies.<strong>Programmable</strong> <strong>Logic</strong> <strong>Controllers</strong> <strong>S7</strong>-<strong>300</strong> <strong>Module</strong> <strong>Data</strong>A5E00105505-034-51
Analog <strong>Module</strong>sConnecting 2-wire transmittersSensor,for example,pressure gaugePPL+MTwo-wiretransmitter +–Two-wire +transmitter –M+M–M+M–ADC<strong>Logic</strong>BackplanebusM ANAFigure 4-12Connecting two-wire transmitters to an isolated AIWhen the supply voltage L+ is fed from the module, you must assign parametersto the two-wire transmitter as a four-wire transmitter in STEP 7.Sensor,for example,pressure gaugeL+MP2-wiretransmitter+–M+M–ADC<strong>Logic</strong>BackplanebusM ANAFigure 4-13Connecting two-wire transmitters supplied from L+ to anisolated AIConnecting four-wire transmittersSensor,for example,pressure gaugePPL+MFour-wiretransmitter+–+–M+M–M+M–ADC<strong>Logic</strong>BackplanebusL+ MM ANAFigure 4-14Connecting four-wire transmitters to an isolated AI4-52<strong>Programmable</strong> <strong>Logic</strong> <strong>Controllers</strong> <strong>S7</strong>-<strong>300</strong> <strong>Module</strong> <strong>Data</strong>A5E00105505-03
Analog <strong>Module</strong>s4.11 Connecting Resistance Thermometers and ResistorsNoteThe necessary connecting cables, which result from the potential connection of theanalog input module and the sensors, are not drawn in the figures shown below.In other words, you must continue to take note of and implement Section 4.8 withits generally valid information for connecting sensors.Abbreviations and mnemonics used in the figures belowThe abbreviations and mnemonics used in the figures below have the followingmeanings:I C+ :I C– :M + :M – :M ANA :Constant-current lead (positive)Constant-current lead (negative)Measuring lead (positive)Measuring lead (negative)Reference potential of the analog measuring circuitM: Ground terminalL + : Terminal for 24 VDC supply voltageS–: Detector lead (negative)Connecting Resistance Thermometers and ResistorsThe resistance thermometers/resistors are wired in a four-conductor,three-conductor or two-conductor connection.With four-conductor and three-conductor connections, the module supplies aconstant current via terminals I C+ and I C– so that the potential drop occurring onthe measuring cables is compensated. It is important that the connected constantcurrent cables are directly connected to the resistance thermometer/resistor.Measurements with four-conductor or three-conductor connections supply a moreprecise measuring result due to compensation than measurements with atwo-conductor connection.<strong>Programmable</strong> <strong>Logic</strong> <strong>Controllers</strong> <strong>S7</strong>-<strong>300</strong> <strong>Module</strong> <strong>Data</strong>A5E00105505-034-53
Analog <strong>Module</strong>sFour-conductor connection of a resistance thermometerThe voltage generated at the resistance thermometer is measured via the M + andM – terminals. When you connect, watch out for the polarity of the connected cable(connect I C+ and M + as well as I C– and M– to the resistance thermometer).When connecting, make sure that the connected cables I C + and M+ and thecables I C – and M– are connected directly to the resistance thermometer.L+MM+I CM–ADCI C+I C–M ANA<strong>Logic</strong>BackplanebusFigure 4-15Four-conductor connection of resistance thermometers to an isolated AIThree-conductor connection of a resistance thermometerWith a three-conductor connection on modules with four terminals, you mustnormally insert a jumper between M – and I C– (refer to Figure 4-16). Take note ofthe exception for the SM 331; AI 8 RTD (refer to Figure 4-18).When connecting, make sure that the connected cables I C + and M+ areconnected directly to the resistance thermometer.L+MM+I CM–ADCI C+I C–M ANA<strong>Logic</strong>BackplanebusFigure 4-16Three-Conductor Connection of Resistance Thermometers to an Isolated AI4-54<strong>Programmable</strong> <strong>Logic</strong> <strong>Controllers</strong> <strong>S7</strong>-<strong>300</strong> <strong>Module</strong> <strong>Data</strong>A5E00105505-03
Analog <strong>Module</strong>sTwo-conductor connection of a resistance thermometerWith a two-conductor connection, you must insert jumpers on the module betweenM + and I C+ and between M – and I C– .L+MM+M–ADCI C+I C–M ANA<strong>Logic</strong>BackplanebusFigure 4-17Two-Conductor Connection of Resistance Thermometers to an Isolated AIThree-conductor connection to the SM 331; AI 8 RTDWith a three-conductor connection to the SM 331; AI 8 RTD you must insert ajumper between M + and I C+ (refer to figure4-18).When connecting, make sure that the connected cables I C – and M– are connecteddirectly to the resistance thermometer.L+MM+I CM–ADCI C+I C–M ANA<strong>Logic</strong>BackplanebusFigure 4-18 Three-Conductor Connection of Resistance Thermometers to the SM 331;AI 8 x RTD!CautionDue to incorrect wiring of the three-conductor connection, unforeseen operation ofthe module and dangerous conditions can result in the system.<strong>Programmable</strong> <strong>Logic</strong> <strong>Controllers</strong> <strong>S7</strong>-<strong>300</strong> <strong>Module</strong> <strong>Data</strong>A5E00105505-034-55
Analog <strong>Module</strong>s4.11.1 Connecting resistance thermometers to the SM 331;AI 8 x 13 bitsTwo-conductor connectionWith a two-conductor connection, you must insert jumpers on the module betweenM– and S–.S–M+M–ADC<strong>Logic</strong>BackplanebusFigure 4-19 Two-conductor connection of resistance thermometers to the SM 331;AI 8x 13 bitsThree-conductor connectionS–M+M–ADC<strong>Logic</strong>BackplanebusFigure 4-20 Three-conductor connection of resistance thermometers to the SM 331;AI 8 x 13 bits4-56<strong>Programmable</strong> <strong>Logic</strong> <strong>Controllers</strong> <strong>S7</strong>-<strong>300</strong> <strong>Module</strong> <strong>Data</strong>A5E00105505-03
Analog <strong>Module</strong>sFour-conductor connectionWith a four-conductor connection, you must not connect the fourth conductor(the conductor is not used at all, see Figure 4-21).4th conductornot connectedS–M+M–ADC<strong>Logic</strong>BackplanebusFigure 4-21 Four-Conductor Connection of Resistance Thermometers to the SM 331;AI 8 x 13 bits<strong>Programmable</strong> <strong>Logic</strong> <strong>Controllers</strong> <strong>S7</strong>-<strong>300</strong> <strong>Module</strong> <strong>Data</strong>A5E00105505-034-57
Analog <strong>Module</strong>s4.12 Connecting ThermocouplesDesign of thermocouplesA thermocouple consists of a pair of sensors and the necessary installation andconnecting parts. The thermocouple consists of two wires of dissimilar metals ormetal alloys soldered or welded together at the ends.There are different types of thermocouple, depending on the composition of thematerial used – for example, K, J, N thermocouples. The measuring principle of allthermocouples is the same, irrespective of their type.Measuring junctionThermocouple with positive or negative limbsConnecting pointCompensating leadsReference junctionLeads° CPoint at which thermo-e. m. f. is measuredFigure 4-22Design of ThermocouplesPrinciple of Operation of ThermocouplesIf the measuring point is subjected to a temperature different from that of the freeends of the thermocouple (point of connection), a voltage, the thermo emf, occursat the free ends. The magnitude of the thermo-e.m.f. generated depends on thedifference between the temperature at the measuring junction and the temperatureat the free ends, as well as on the material combination used for the thermocouple.Since a thermocouple always measures a temperature difference, the free endsmust be kept at a known temperature at a reference junction in order to determinethe temperature of the measuring junction.The thermocouples can be extended from their point of connection to the referencejunction by means of compensating wires. These compensating wires consist ofthe same material as the thermocouple wires. The supply leads are copper wire.Note: Make sure these wires are connected with the correct polarity, otherwisethere will be considerable measuring errors.4-58<strong>Programmable</strong> <strong>Logic</strong> <strong>Controllers</strong> <strong>S7</strong>-<strong>300</strong> <strong>Module</strong> <strong>Data</strong>A5E00105505-03
Analog <strong>Module</strong>sCompensation of the reference junction temperatureYou can compensate for the effects of temperature fluctuations at the referencejunction by means of compensating leads.There are several options for you to choose from for acquiring the referencejunction temperature in order to obtain an absolute temperature value from thedifference in temperature between the reference junction and measuring point.You can use internal or external compensation, depending on where you want thereference junction to be.Table 4-44 Options for Compensation of the Reference Junction TemperatureNo compensationOptionInternal compensation(refer to Figure 4-23 for connection)External compensation with compensatingbox in the leads of an individualthermocouple (refer to Figures 4-24 and4-25 for its connection)Only for SM 331; AI 8 x TC:External compensation with resistancethermometer for acquisition of the referencejunction temperature(refer to Figure 4-26 and 4-27forconnection)ExplanationIf you want to acquire only the difference in temperaturebetween the measuring point and the reference junction.If you employ internal compensation, the internaltemperature (thermocouple internal comparison) of themodule is used for comparison purposes.You have already acquired and compensated thereference junction temperature (thermocouple externalcomparison) using a compensating box, which you havelooped into an individual thermocouple.No further processing is necessary owing to the module.You can acquire the reference temperature by means of aresistance thermometer (platinum or nickel) and have itcalculated by the module for any thermocouple.Theory of operation of internal compensationWith internal compensation, you can establish the reference point across theterminals of the analog input modules. In this case, you must run thecompensating lines right up to the analog module. The internal temperature sensoracquires the temperature of the module and supplies a compensation voltage.Note that internal compensation is not as accurate as external compensation.Theory of operation of external compensation with compensating boxIf you employ external compensation, the temperature of the reference junction ofthe thermocouples is taken into account via a compensating box, for example.The compensating box contains a bridge circuit calibrated for a definite referencejunction temperature. The reference junction is formed by the connections for theends of the thermocouple’s compensating leads.If the actual temperature deviates from the compensating temperature, thetemperature-sensitive bridge resistance changes. This results in a positive ornegative compensating voltage, which is added to the thermo-e.m.f.<strong>Programmable</strong> <strong>Logic</strong> <strong>Controllers</strong> <strong>S7</strong>-<strong>300</strong> <strong>Module</strong> <strong>Data</strong>A5E00105505-034-59
Analog <strong>Module</strong>sAbbreviations and mnemonics used in the figures belowThe abbreviations and mnemonics used in the figures below have the followingmeanings:M +:M–:I C +:I C -:COMP + :COMP – :M ANA :M :L +:P5V:KV +/KV –:Measuring lead (positive)Measuring lead (negative)Positive connection of constant current outputNegative connection of constant current outputCompensating terminal (positive)Compensating terminal (negative)Reference potential of the analog measuring circuitGround terminalTerminal for 24 VDC supply voltage<strong>Module</strong> logic power supplyConnections to the shunt comparisonNoteThe necessary connecting cables, which result from the potential connection of theanalog input module and the sensors, are not drawn in the figures shown below.In other words, you must continue to take note of and implement Section 4.8 withits generally valid information for connecting sensors.4-60<strong>Programmable</strong> <strong>Logic</strong> <strong>Controllers</strong> <strong>S7</strong>-<strong>300</strong> <strong>Module</strong> <strong>Data</strong>A5E00105505-03
Analog <strong>Module</strong>sConnection of thermocouples with internal compensationConnect the thermocouples to the inputs of the module, either directly or by meansof compensating lines. Each channel group can use a thermocouple typesupported by the analog module independently of the other channel groups.ThermocoupleL+MK0M+M–...K7M+M–ADC<strong>Logic</strong>BackplanebusCompensating leads(same material asthermocouple)COMP+COMP–/M ANAFigure 4-23Connection of Thermocouples with Internal Compensation to anIsolated AIConnecting the compensating boxConnect the compensating box to the COMP terminals of the module, locating thecompensating box at the reference junction of the thermocouples. Thecompensating box must have an isolated supply. The power supply must haveadequate filtering, for example by means of a grounded shielding winding.The terminals for connecting the thermocouple to the compensating box are notrequired and must therefore be shorted (refer to Figure 4-25 for an example).The following constraints apply:• The parameters of a channel group are general valid for all channels of thatgroup (for example, input voltage, integrating time etc.)• External compensation with connection of the compensating box to the COMPterminals of the module can be performed only for one thermocouple type. Inother words, all channels operating with external compensation must use thesame type.<strong>Programmable</strong> <strong>Logic</strong> <strong>Controllers</strong> <strong>S7</strong>-<strong>300</strong> <strong>Module</strong> <strong>Data</strong>A5E00105505-034-61
Analog <strong>Module</strong>sConnecting thermocouples with compensating boxIf all thermocouples connected to the inputs of the module have the samecomparison point, you compensate as follows:CopperwireL+MThermocouplesCompensatingleads (samematerial asthermocouple)L+ MComp.BoxRef. junctionM+M–M+M–ADCCOMP +COMP – /M ANA<strong>Logic</strong>BackplanebusFigure 4-24Connection of Thermocouples with Compensation Box to an Isolated AINoteUse compensating boxes with a reference junction temperature of 0C foranalog input modules.Recommended compensating boxWe recommend you to use a comparison point (with integrated power supply unit)from Siemens as a compensating box. You will find the necessary ordering data inthe table below.4-62<strong>Programmable</strong> <strong>Logic</strong> <strong>Controllers</strong> <strong>S7</strong>-<strong>300</strong> <strong>Module</strong> <strong>Data</strong>A5E00105505-03
Analog <strong>Module</strong>sTable 4-45 Ordering <strong>Data</strong> of the Comparison PointRecommended Compensating BoxReference junction with integrated power supplyunit, for rail mountingOrder numberM72166-Auxiliary power220 VAC110 VAC24 VAC24 VDCB1B2B3B4Connectionto thermocouple Fe-CuNi Type LFe/Cu Ni Type JNi Cr/Ni Type KPt 10% Rh/Pt Type SPt 13% Rh/Pt Type RCu/Cu Ni Type UCu/Cu Ni Type T1234567Reference temperature0C00Connecting to the comparison point (Order No. M72166-xxx00)If all thermocouples connected to the inputs of the module have the samecomparison point, you compensate as follows:Compensating leads(same material asthermocouple)CopperwireL+MThermocouplesM+M–M+M–ADC<strong>Logic</strong>BackplanebusAuxiliary power+ –The terminals for thecompensating wiremust be shortcircuited!3 1SIEMENSM72166-12 11COMP +COMP – /M ANA9+8–Output (Cu wires)Figure 4-25Connection of Thermocouples with Comparison Point (Order No. M72166-xxx00) to anIsolated AI<strong>Programmable</strong> <strong>Logic</strong> <strong>Controllers</strong> <strong>S7</strong>-<strong>300</strong> <strong>Module</strong> <strong>Data</strong>A5E00105505-034-63
Analog <strong>Module</strong>sConnecting thermocouples with temperature compensation to theSM 331; AI 8 x TCAll 8 inputs are available as measurement channels when the thermocouples areconnected via reference junctions that are controlled at 0 °C or 50 °C.CopperwireL+MK0M+M-Reference junctioncontrolled at0C or 50C...K6M+M-ADUs<strong>Logic</strong>BackplanebusK7M+M-Figure 4-26Connecting thermocouples via a reference junction to theSM 331; AI 8 x TC4-64<strong>Programmable</strong> <strong>Logic</strong> <strong>Controllers</strong> <strong>S7</strong>-<strong>300</strong> <strong>Module</strong> <strong>Data</strong>A5E00105505-03
Analog <strong>Module</strong>sConnecting thermocouples with resistance thermometer to theSM 331; AI 8 x TCWith this type of compensation, the reference junction terminal temperature isdetermined by a bulb resistor sensor with a temperature range of -25 °C to 85 °C.CopperwireL+MThermocouplesK0KV+KV–ADCP5VCompensatingleads (samematerial asthermocouple)Pt 100K7KV+KV–KV+KV–IC +IC –<strong>Logic</strong>M internalBackplanebusRef. junctionFigure 4-27Connecting thermocouples with external compensation via resistance thermometers to theSM 331; AI 8 x TC<strong>Programmable</strong> <strong>Logic</strong> <strong>Controllers</strong> <strong>S7</strong>-<strong>300</strong> <strong>Module</strong> <strong>Data</strong>A5E00105505-034-65
Analog <strong>Module</strong>s4.13 Connecting Loads/Actuators to analogo outputIntroductionYou can use the analog output modules to supply loads and actuators with currentand voltage.This section contains general information that is generally applicable to all theconnection options for loads and actuators described in the sections that follow.Cables for analog signalsFor the analog signals, you should use shielded and twisted pair cables. The cablesQ V and S+ and M and S–, respectively, are to be twisted together. This reduces theinterference. Ground the screen of the analog cables at both ends of the cables.If there are potential differences between the cable ends, an equipotential bondingcurrent, which can flow over the shield, can cause interference of the analogsignals. In such a case, you should ground the shield at one end of the cable only.Isolated Analog Output <strong>Module</strong>sWith the isolated analog output modules there is no electrical connection betweenthe reference point of the measuring circuit M ANA and the M terminal of the CPU.You must use isolated analog output modules if a potential difference U ISO canoccur between the reference point of the measuring circuit M ANA and theM terminal of the CPU. By means of a equipotential bonding conductor betweenthe M ANA terminal and the M terminal of the CPU, make sure that U ISO does notexceed the permitted value.Non-Isolated Analog Output <strong>Module</strong>sWith the non-isolated analog output modules, you must establish a connectionbetween the reference point of the measuring circuit M ANA and the M terminal ofthe CPU. Therefore, connect the M ANA terminal with the M terminal of the CPU. Apotential difference between M ANA and the M terminal of the CPU can lead to acorruption of the analog signal.4-66<strong>Programmable</strong> <strong>Logic</strong> <strong>Controllers</strong> <strong>S7</strong>-<strong>300</strong> <strong>Module</strong> <strong>Data</strong>A5E00105505-03
Analog <strong>Module</strong>s4.14 Connecting Loads/Actuators to Voltage OutputsConnecting Loads to a Voltage OutputConnecting loads to a voltage output is possible both in a four-conductor and atwo-conductor connection. However, not all analog output modules allow bothtypes of connection.NoteThe necessary connecting cables, which result from the potential connection of theanalog output module, are not drawn in the figures shown below.In other words, you must continue to take note of and implement Section 4.13 withits generally valid information for connecting loads and actuators.Abbreviations and mnemonics used in the figures belowThe abbreviations and mnemonics used in the figures below have the followingmeanings:Q V :S +:S–:M ANA :R L :L +:M :U ISO :Analog output voltageDetector lead (positive)Detector lead (negative)Reference potential of analog circuitLoad impedanceTerminal for 24 VDC supply voltageGround terminalPotential difference between M ANA and M terminal of CPU.<strong>Programmable</strong> <strong>Logic</strong> <strong>Controllers</strong> <strong>S7</strong>-<strong>300</strong> <strong>Module</strong> <strong>Data</strong>A5E00105505-034-67
Analog <strong>Module</strong>sConnecting Loads to a Voltage Output of an Isolated <strong>Module</strong> over aFour-Conductor ConnectionA high accuracy at the load can be achieved through the four-conductorconnection. You must therefore connect the sensor leads (S– and S+) directly tothe load. The voltage is thus measured and corrected directly at the load.Interferences or a voltage drop can result in a potential difference between thesensor lead S– and the reference circuit of the analog circuit M ANA . This potentialdifference must not exceed the permissible value. If the permissible potentialdifference is exceeded, the accuracy of the analog signal is impaired.L+MQ VBackplanebus<strong>Logic</strong>DACS+S–R LM ANACPUU ISOM internalL+MGround busFigure 4-28Connecting Loads to a Voltage Output of an Isolated AO over a Four-Conductor Connection4-68<strong>Programmable</strong> <strong>Logic</strong> <strong>Controllers</strong> <strong>S7</strong>-<strong>300</strong> <strong>Module</strong> <strong>Data</strong>A5E00105505-03
Analog <strong>Module</strong>sConnecting loads to a voltage output of a non-isolated module via atwo-conductor connectionWith a two-conductor connection, the S+ and S– terminals can be left open.However, you will not achieve the accuracy of a four-conductor connection.Connect the load to terminals Q V and the reference point of the measuring circuit,M ANA .L+MQ VBackplanebus<strong>Logic</strong>DACR LM ANACPUM internalL+MGround busFigure 4-29Connecting Loads to a Voltage Output of a Non-Isolated AO over a Two-ConductorConnection<strong>Programmable</strong> <strong>Logic</strong> <strong>Controllers</strong> <strong>S7</strong>-<strong>300</strong> <strong>Module</strong> <strong>Data</strong>A5E00105505-034-69
Analog <strong>Module</strong>s4.15 Connecting Loads/Actuators to Current OutputsNoteThe necessary connecting cables, which result from the potential connection of theanalog output module, are not drawn in the figures shown below.In other words, you must continue to take note of and implement Section 4.13 withits generally valid information for connecting loads and actuators.Abbreviations and mnemonics used in the figures belowThe abbreviations and mnemonics used in the figures below have the followingmeanings:Q I :M ANA :R L :L +:M :U ISO :Analog output currentReference potential of analog circuitLoad impedanceTerminal for 24 VDC supply voltageGround terminalPotential difference between M ANA and M terminal of CPU.Connecting Loads to a Current OutputYou must connect loads to Q I and the reference point of the analog circuit M ANA ofa current output.L+MQ IBackplanebus<strong>Logic</strong>DACR LCPUM ANAU ISOM internalL+MGround busFigure 4-30Connecting Loads to a Current Output of an Isolated AO4-70<strong>Programmable</strong> <strong>Logic</strong> <strong>Controllers</strong> <strong>S7</strong>-<strong>300</strong> <strong>Module</strong> <strong>Data</strong>A5E00105505-03
Analog <strong>Module</strong>sL+MQ IBackplanebus<strong>Logic</strong>DACR LCPUM ANAM internalL+MGround busFigure 4-31Connecting Loads to a Current Output of a Non-Isolated AO4.16 Diagnostics of the Analog <strong>Module</strong>s<strong>Programmable</strong> and Non-<strong>Programmable</strong> Diagnostic MessagesIn diagnostics, we make a distinction between programmable andnon-programmable diagnostic messages.You obtain programmable diagnostic messages only if you have enableddiagnostics by parameter assignment. You perform parameter assignment in the“Diagnostics” parameter field in STEP 7 (refer to Section 4.7).Non-programmable diagnostic messages are always made available by the analogmodule irrespective of diagnostics being enabled.Actions following diagnostic message in STEP 7Each diagnostic message leads to the following actions:• The diagnostic message is entered in the diagnosis of the analog module andforwarded to the CPU.• The error LED on the analog module lights.• If you have programmed “Enable Diagnostic Interrupt” with STEP 7, adiagnostic interrupt is triggered and OB 82 is called (refer to Section 4.17).<strong>Programmable</strong> <strong>Logic</strong> <strong>Controllers</strong> <strong>S7</strong>-<strong>300</strong> <strong>Module</strong> <strong>Data</strong>A5E00105505-034-71
Analog <strong>Module</strong>sReading out diagnostic messagesYou can read out detailed diagnostic messages by means of SFCs in the userprogram (refer to the Appendix “Diagnostic <strong>Data</strong> of Signal <strong>Module</strong>s”).You can view the cause of the error in STEP 7, in the module diagnosis (refer toonline Help for STEP 7).Diagnostic message in the measured value of analog input modulesEvery analog input module supplies the measured value 7FFF H irrespective of theparameter assignment when an error is detected. This measured value meanseither Overflow, Malfunction or a channel is disabled.Diagnostic message by means of SF LEDEvery analog module indicates errors for you by means of your SF LED (grouperror LED). The SF LED lights as soon as a diagnostic message is triggered by theanalog module. It goes out when all errors have been rectified.Diagnostic messages of the analog input modulesThe table below gives an overview of the diagnostic messages for the analog inputmodules.Table 4-46 Diagnostic Messages of the Analog Input <strong>Module</strong>sDiagnostics Message LED DiagnosticsEffective forParameters canbe assignedExternal auxiliary supply missing SF <strong>Module</strong> NoConfiguring/parameter assignmenterrorSFChannelCommon-mode error SF Channel YesWire-break SF Channel YesUnderflow SF Channel YesOverflow SF Channel YesYes4-72<strong>Programmable</strong> <strong>Logic</strong> <strong>Controllers</strong> <strong>S7</strong>-<strong>300</strong> <strong>Module</strong> <strong>Data</strong>A5E00105505-03
Analog <strong>Module</strong>sDiagnostic messages of the analog output modulesThe table below gives an overview of the diagnostic messages for the analogoutput modules.Table 4-47 Diagnostics Messages of the Analog Output <strong>Module</strong>sDiagnostics Message LED Diagnostics EffectiveforParameters canbe assignedExternal auxiliary supply missing SF <strong>Module</strong> NoConfiguring/parameter assignmenterrorSFChannelShort-circuit to M SF Channel YesWire-break SF Channel YesYesNoteA prerequisite for detecting the errors indicated by programmable diagnosticmessages is that you have assigned parameters to the analog module accordinglyin STEP 7.Causes of errors and remedial measures for analog input modulesTable 4-48 Diagnostics Messages of the Analog Input <strong>Module</strong>s, Causes of Errors andRemedial MeasuresDiagnosticsMessageExternal load voltagemissingConfiguring/parameterassignment errorCommon-mode errorWire-breakPossible Error CauseLoad voltage L+ of module missing Feed supply L+Illegal parameters transferred tomodulePotential difference U CM betweenthe inputs (M–) and referencepotential of measuring circuit (M ANA )too highResistance too high in the sensorconnectionOpen circuit between module andsensorChannel not connected (open)RemedyCheck measuring range moduleReassign module parameterConnect M– with M ANAUse different type of sensor orconnection, e.g. use conductors with alarger cross-sectional core areaClose circuitDisable channel group (“measuringprocedure” parameterConnect channel<strong>Programmable</strong> <strong>Logic</strong> <strong>Controllers</strong> <strong>S7</strong>-<strong>300</strong> <strong>Module</strong> <strong>Data</strong>A5E00105505-034-73
Analog <strong>Module</strong>sTable 4-48 Diagnostics Messages of the Analog Input <strong>Module</strong>s, Causes of Errors andRemedial MeasuresDiagnosticsMessagePossible Error CauseRemedyUnderflowInput value underflows underrange,error may be caused:Wrong measuring range selectedWith the measuring ranges 4 to20 mA and 1 to 5 V, if necessary bypolarity reversal of sensorconnectionConfigure other measuring rangeCheck terminalsOverflow Input value overflows overrange Configure other measuring rangeCauses of errors and remedial measures for analog output modulesTable 4-49 Diagnostics Messages of the Analog Output <strong>Module</strong>s, Causes of Errors andRemedial MeasuresDiagnosticsMessageExternal load voltagemissingConfiguring/parameterassignment errorPossible Error CauseLoad voltage L+ of modulemissingIllegal parameters transferred tomoduleFeed supply L+RemedyReassign module parameterShort-circuit after M Overload of output Eliminate overloadShort-circuit of output Q V afterM ANAEliminate short circuitWire-break Actuator resistance too high Use different type of actuator or connection,e.g. use conductors with a largercross-sectional core areaOpen circuit between moduleand actuatorChannel not used (open)Close circuitDisable channel group (”output type”parameter)4-74<strong>Programmable</strong> <strong>Logic</strong> <strong>Controllers</strong> <strong>S7</strong>-<strong>300</strong> <strong>Module</strong> <strong>Data</strong>A5E00105505-03
Analog <strong>Module</strong>s4.17 Interrupts of the Analog <strong>Module</strong>sIntroductionIn this Section, the interrupt behavior of the analog modules is described. Thefollowing interrupts exist:• Diagnostic interrupt• Hardware interruptNote that not all analog modules have interrupt capability or they are only capableof a subset of the interrupts described here Refer to the technical specifications ofthe modules, starting at Section 4.18, to determine which analog modules haveinterrupt capability.The OBs and SFCs mentioned below can be found in the online Help for STEP 7,where they are described in greater detail.Enabling interruptsThe interrupts are not preset – in other words, they are inhibited withoutappropriate parameter assignment. Assign parameters to the Interrupt Enable inSTEP 7 (refer to Section 4.7).Diagnostic interruptIf you have enabled diagnostic interrupts, then active error events (initialoccurrence of the error) and departing error events (message aftertroubleshooting) are reported by means of an interrupt.The CPU interrupts the execution of the user program and processes thediagnostic interrupt block (OB 82).In the user program, you can call SFC 51 or SFC 59 in OB 82 to obtain moredetailed diagnostic information from the module.The diagnostic information is consistent until such time as OB 82 is exited. WhenOB 82 is exited, the diagnostic interrupt is acknowledged on the module.Hardware interrupt with trigger “Upper or lower limit exceeded”Define a working range by setting parameters for an upper and lower limit value. Ifthe process signal (for example, the temperature) leaves this working range, themodule triggers a hardware interrupt, provided the interrupt is enabled.The CPU interrupts execution of the user program and processes the hardwareinterrupt block (OB 40).In the user program of OB 40, you can set how the programmable logic controlleris required to react to a limit value being surpassed or not being reached.When OB 40 is exited, the hardware interrupt is acknowledged on the module.<strong>Programmable</strong> <strong>Logic</strong> <strong>Controllers</strong> <strong>S7</strong>-<strong>300</strong> <strong>Module</strong> <strong>Data</strong>A5E00105505-034-75
Analog <strong>Module</strong>sNoteNote that a hardware interrupt is not triggered if you have set the upper limit abovethe overrange or the lower limit below the underrange.Structure of the start information tag OB40_POINT_ADDR of OB 40The limit values exceeded by the different channels are entered in the startinformation of OB 40 in the tag OB40_POINT_ADDR. The following figure showsthe assignment to the bits of local data double word 8.LB 8 LB 931 30 29 28 27 2625 241 1LB 11.1 .017 16 1 0 Bit no.1 1LD 8Value falls below lower limit in channel 0Value falls below lower limit in channel 1Value exceeds upper limit in channel 0Value exceeds upper limit in channel 1Figure 4-32Start Information of OB 40: Which Event Has Triggered the Hardware Interrupt at theLimit ValueHardware interrupt upon trigger “Reached end of scan cycle”By parameterizing the hardware interrupt a the end of the scan cycle, you have theoption of synchronizing a process with the scan cycle of the analog input module.A scan cycle includes the conversion of the measured values of all enabledchannels of the analog input module. The module processes the channels oneafter the other. After all the measured values have been converted, the module ofthe CPU reports by means of an interrupt that there are new measured values onall channels.You can use the interrupt to load the currently converted analog values.4-76<strong>Programmable</strong> <strong>Logic</strong> <strong>Controllers</strong> <strong>S7</strong>-<strong>300</strong> <strong>Module</strong> <strong>Data</strong>A5E00105505-03
Analog <strong>Module</strong>s4.18 Analog Input <strong>Module</strong> SM 331; AI 8 x 16 bits;(6E<strong>S7</strong>331-7NF00-0AB0)Order number6E<strong>S7</strong>331-7NF00-0AB0CharacteristicsThe analog input module SM 331; AI 8x 16 bits has the following characteristicfeatures:• 8 inputs in 4 channel groups• Measured-value resolution 15 bits + sign (independent of integration time)• Measurement mode selectable per channel group:– Voltage– Current• Arbitrary measuring range and filter/update rate selection per channel group• <strong>Programmable</strong> diagnostics• <strong>Programmable</strong> diagnostic interrupt• Two channels with limit monitoring• <strong>Programmable</strong> hardware interrupt when limit has been exceeded• Isolated against the backplane bus interface• Permissible common mode voltage between channels of 50 VDC maximum<strong>Programmable</strong> <strong>Logic</strong> <strong>Controllers</strong> <strong>S7</strong>-<strong>300</strong> <strong>Module</strong> <strong>Data</strong>A5E00105505-034-77
Analog <strong>Module</strong>sTerminal connection diagram and block diagram of the SM 331; AI 8 x 16 bitsFault indicator – redSF12A 250 OHM+323– CHO4250 OHM56250 OHM7ADC212224252627VV+– CH1+– CH28250 OHM91011BackplanebusinterfacemoduleIsolation28293031V+– CH312250 OHM13SF3233V+– CH414250 OHM153435V+– CH516250 OHM17ADC3637V+– CH618250 OHM1920383940V +– CH7Figure 4-33<strong>Module</strong> view and block diagram of the analog input module SM 331; AI 8 x 16 bitsPlease note that in Figure 4-33, channel 0 is configured for current measurementand channel 7 for voltage measurement.4-78<strong>Programmable</strong> <strong>Logic</strong> <strong>Controllers</strong> <strong>S7</strong>-<strong>300</strong> <strong>Module</strong> <strong>Data</strong>A5E00105505-03
Analog <strong>Module</strong>sWiring of the module for measuring currentCurrent measurements are made by paralleling a channel’s voltage input terminalswith its respective current sense resistor. This is accomplished by jumpering thechannels input terminals to the adjacent terminals on the field connector.Example: To configure channel 0 for current mode, you must jumper terminal 22 to2 and terminal 23 to 3.The channel being configured for current measurements must be paired with thesense resistor connected to the channel’s adjacent terminals in order to achievethe specified accuracy.Technical specifications of the SM 331; AI 8 x 16 bitsDimensions and WeightAnalog value generationDimensions W x H x D(in millimeters)WeightSupports clocked operation40 x 125 x 117Approx. 272 g<strong>Data</strong> for Specific <strong>Module</strong>Number of inputs 8NoLength of cable• Shielded max. 200 mVoltages, Currents, PotentialsIsolation• Between channels andbackplane busPermitted potential difference• Between the inputs(ECM)• Between M ANA andM internal (U ISO )Insulation tested withYes50 VDC, 35 VAC75 VDC / 60 VAC500 VDCCurrent consumption• From the backplane bus max. 130 mAPower dissipation of themoduletypically 0.6 WMeasuring principleIntegration time/conversiontime/ resolution (per channel)• Parameters can beassigned• Integration time inmilliseconds• Basic conversion timeper channel groupwhen more than onechannel group isactive• Channel conversiontime per channelgroup if only channelgroup 0 or 1 isenabledChannel integration time(1/f1)in ms• Resolution includingsign• Suppression ofinterference voltage forinterference frequency f1in HertzBasic execution time of themodule, in ms (all channelsenabled)IntegratingYes10 16.7 20 10035 55 65 30510 16.7 20 10010 16.7 20 10015 bits + sign100 60 50 10140 220 260 1220<strong>Programmable</strong> <strong>Logic</strong> <strong>Controllers</strong> <strong>S7</strong>-<strong>300</strong> <strong>Module</strong> <strong>Data</strong>A5E00105505-034-79
Analog <strong>Module</strong>sSuppression of interference, Limits of ErrorNoise suppression for f = n (f1 ± 1%),(f1 = interference frequency); n= 1, 2, ...• Common-mode noise(U cm < 50 V)• Series-modeinterference (peakvalue of interference< rated value of inputrange)Crosstalk between the inputs> 100 dB> 90 dB> 100 dBOperational limit (over entire U CM = 0 / U CM = ±50 Vtemperature range, referredto input range)• Voltage input ±0.1% / ± 0.7%• Current input ±0.3% / ± 0.9%Basic error (operational limit at 25° C referred to inputrange)• Voltage input ±0.05%• Current input ±0.05%Temperature error (withreference to the input range)±0.005%/KStatus, Interrupts, DiagnosticsInterrupts• Hardware interrupt whenlimit has been exceeded<strong>Programmable</strong>channels 0 and 2• Diagnostic interrupt <strong>Programmable</strong>Diagnostic functions• Group error display• Diagnostics informationread-out<strong>Programmable</strong>Red LED (SF)Possible<strong>Data</strong> for Selecting a SensorInput range (rated values)/Input resistance• Voltage ± 5 V1 to 5 V± 10 V• Current 0 to 20 mA;± 20 mA4 to 20 mA:Maximum input voltage forvoltage input (destructionlimit)Maximum input current forcurrent input (destructionlimit)/ 2MΩ/ 2MΩ/ 2MΩ/ 250 Ω/ 250 Ω/ 250 Ωmax. 50 V continuousmax. 32 mALinearity error (with referenceto the input range)Repeat accuracy (in thesteady state at 25°C, referredto the input range)±0.03%±0.025%Connection of the sensor• For measuring voltage Possible• For measuring currentAs two-wire transmitterPossible with separatesupply for the transmitterAs four-wire transmitter• Load of the two-wiretransmitterPossiblemax. 820 Ω4-80<strong>Programmable</strong> <strong>Logic</strong> <strong>Controllers</strong> <strong>S7</strong>-<strong>300</strong> <strong>Module</strong> <strong>Data</strong>A5E00105505-03
Analog <strong>Module</strong>s4.18.1 Commissioning the SM 331; AI 8 x 16 bitsYou set the mode of operation of the SM 331; AI 8 x 16 bits STEP 7.ParameterYou will find a description of the general procedure for assigning parameters toanalog modules in Section 4.7.An overview of the parameters that you can set and their default settings areshown in the table below.Table 4-50 Parameters of the SM 331; AI 8 x 16 bitsParameter Value Range DefaultSettingsEnable• Diagnostic interrupt• Hardware interruptupon limit violationYes/noYes/noNoNoParameterTypeDynamicScope<strong>Module</strong>Trigger for hardwareinterrupt• Upper limit value• Lower limit valueDiagnostics• Group diagnostics• With wire-breakcheckConstraint possible due to measuringrange.32511 to –32512–32512 to 32511Yes/noYes/noMeasurement• Measuring Method DeactivatedUU Voltage4DMU Current (4-wire transmitter)• Measuring Range Refer to Section 4.18.2 for the10 Vmeasuring ranges of the inputchannels that you can set.• Interference400 Hz; 60 Hz; 50 Hz; 10 Hz 50 HzSuppression– DynamicNoNoStaticDynamicChannelChannelgroupChannelgroup<strong>Programmable</strong> <strong>Logic</strong> <strong>Controllers</strong> <strong>S7</strong>-<strong>300</strong> <strong>Module</strong> <strong>Data</strong>A5E00105505-034-81
Analog <strong>Module</strong>sChannel groupsThe channels of the SM 331; AI 8 x 16 bits are arranged in four groups of two. Youcan only ever assign parameters to one channel group.The table below shows which channels are parameterized as a channel group ineach case. You will need the channel group number to set the parameters in theuser program with an SFC.Table 4-51 Assignment of Channels of the SM 331; AI 8 x 16 bits to Channel GroupsChannels ...Channel 0Channel 1Channel 2Channel 3Channel 4Channel 5Channel 6Channel 7... form one Channel Group eachChannel group 0Channel group 1Channel group 2Channel group 3High Speed Update ModeIn the high speed update mode, updates for the two channels in the group occurthree times faster than with multiple channel groups enabled.Example: If channels 0 and 1 are enabled with 2.5 ms filtering, data updates forboth channels will be available to the PLC every 10 msec. (For other filter settings,the filter setting equals the update rate.)The high speed update mode is only available when both channels are enabled onchannel group 0 or 1, in other words, the “measuring method” parameter is set.However, only channel group 0 or only channel 1 (in other words, not bothtogether) must be enabled.Special characteristic of channel groups for hardware interruptsYou can set hardware interrupts in STEP 7 for the channel groups 0 and 1. Note,however, that a hardware interrupt is set only for the first channel in the channelgroup in each case – in other words, for channel 0 or channel 2DiagnosticsYou will find the diagnostic messages that are grouped under the “group diagnosis”parameter in Table 4-46, on page 4-72.4-82<strong>Programmable</strong> <strong>Logic</strong> <strong>Controllers</strong> <strong>S7</strong>-<strong>300</strong> <strong>Module</strong> <strong>Data</strong>A5E00105505-03
Analog <strong>Module</strong>s4.18.2 Measuring Methods and Measuring Ranges of the SM 331;AI 8 x 16 bitsMeasuring MethodsYou can set the following measuring methods for the input channels:• Voltage measurement• Current measurementYou perform the setting with the “measuring method” parameter in STEP 7.Unused ChannelsSet the “measuring method” parameter for unused channels to “disabled”. In thisway you shorten the scan time of the module.Since configured inputs can remain unused because of the channel groupgeneration, you must take note of the following special characteristics of theseinputs to enable the diagnostic functions on the used channels.• Measuring range 1 to 5 V: Connect the unused input in parallel with a usedinput of the same channel group.• Current measurement 4 to 20 mA: Connect the unused input in series with aninput of the same channel group. Ensure that a current sense resistor isconnected for each active and unused channel.• Other ranges: Short the positive to the negative input of the channel.Measuring rangesThe measuring ranges are set with the “measuring range” parameter in STEP 7.Table 4-52 Measuring Ranges of the SM 331; AI 8 x 16 bitsMethod Selected Measuring Range DescriptionU: Voltage ±5 V1 to 5 V±10 V4DMU: Current (4-wiretransmitter)from 0 to 20 mA±20 mAfrom 4 to 20 mAYou will find the digitized analog values inSection 4.3.1 in the voltage measuringrangeYou will find the digitized analog values inSection 4.3.1 in the current measuringrange<strong>Programmable</strong> <strong>Logic</strong> <strong>Controllers</strong> <strong>S7</strong>-<strong>300</strong> <strong>Module</strong> <strong>Data</strong>A5E00105505-034-83
Analog <strong>Module</strong>sDefault SettingsThe default settings of the module are “voltage” for the measuring method “ and 10 V” for the measuring range. You can use this combination of measuringmethod and measuring range without parameterizing the SM 331; AI 8 x 16 bits inSTEP 7.Measuring errors with common-mode voltagesThe SM 331; AI 8 x 16 bits can make measurements in the presence of AC or DCcommon mode voltage.For AC common mode voltages at multiples of the filter frequency setting, thesuppression of interference is accomplished by the integration period of the A/Dconverter and by the common mode suppression of the input amplifiers. For ACcommon mode voltages < 35 V RMS , the suppression ratio of > 100 dB results innegligible measurement error.For DC common mode voltages, only the interference suppression of the inputamplifier stage is available to minimize the effect of the common mode voltage.Therefore, some accuracy degradation occurs in proportion to the common modevoltage. The worst case error occurs with 50 VDC between one channel and theother seven channels. The calculated worst case error is 0.7 % at 0 to 60 °C, andmeasured error is typically ≤ 0.1% at 25 °C.Special characteristic of parameter assignment to upper and lower limit valuesThe parameterizable limit values (triggers for hardware interrupt) differ for theSM 331; AI 8 x 16 bits from the range of values contained in Table 4-50.The reason for this is that numerical methods in the module software for evaluatingthe process variables prevent values up to 32511 from being reported in somecases. The process input value at which a hardware interrupt for an underflow oroverflow occurs depends on the calibration factors for an individual channel andcan vary between the lower limits shown in the table below and the value 32511(7EFF H ).4-84<strong>Programmable</strong> <strong>Logic</strong> <strong>Controllers</strong> <strong>S7</strong>-<strong>300</strong> <strong>Module</strong> <strong>Data</strong>A5E00105505-03
Analog <strong>Module</strong>sLimit values should not be set at values higher than the minimum potential limitvalues shown in the table below.Table 4-53 Minimum Possible Upper and Lower Limit Values of SM 331; AI 8 x 16 bitsMeasuring Range±10 V 11.368 V314307AC6 H±5 V 5.684 V314307AC6 H1 to 5 V 5.684 V323767E78 H0 to 20 mA 22.737 mA314327AC8 H4 to 20 mA 22.737 mA323787E7A H±20 mA 22.737 mA314327AC8 HMinimum PossibleUpper Limit ValueMinimum PossibleLower Limit Value–11.369 V–314338537 H–5.684 V–31430853A H0.296 V–4864ED00 H–3.519 mA–4864ED00 H1.185 mA–4864ED00 H–22.737 mA–314328538 HWire-Break CheckThe wire-break check is available for the 1 to 5 V voltage range and the 4 to 20 mAcurrent range.The following applies to both measuring ranges:Enabled wire-break check, the analog input module enters a wire-break in thediagnosis if a current falls below 3.6 mA (0.9 V).If you have enabled diagnostic interrupts during configuration, the moduleadditionally triggers a diagnostic interrupt.If no diagnostic interrupt has been enabled, the illuminated SF LED is the onlyindication of the wire-break and you must evaluate the diagnostic bytes in the userprogram.With a disabled wire-break check and enabled diagnostic interrupt, the moduletriggers a diagnostic interrupt when the underflow is reached.<strong>Programmable</strong> <strong>Logic</strong> <strong>Controllers</strong> <strong>S7</strong>-<strong>300</strong> <strong>Module</strong> <strong>Data</strong>A5E00105505-034-85
Analog <strong>Module</strong>s4.19 Analog Input <strong>Module</strong> SM 331; AI 8 x 16 bits(6E<strong>S7</strong>331-7NF10-0AB0)Order number6E<strong>S7</strong>331-7NF10-0AB0CharacteristicsThe isolated analog input module SM 331; AI 8 x 16 bits has the followingcharacteristic features:• 8 isolated inputs in 4 channel groups• Measured-value resolution 15 bits + sign• Rapid measured value updating for up to 4 channels• Measuring method selectable per channel group• <strong>Programmable</strong> diagnostics• <strong>Programmable</strong> diagnostic interrupt• 8 channels with limit monitoring• <strong>Programmable</strong> hardware interrupt when limit has been exceeded• <strong>Programmable</strong> end-of-scan-cycle interrupt• Electrical isolation to the backplane bus interfaceSpecial featureWhen you use the SM 331; AI 8 x 16 bits in the distributed peripheral ET 200M,you must have one of the following IM 153-x:• IM 153-1 6E<strong>S7</strong>153-1AA03-0XB0, E 01• IM 153-2 6E<strong>S7</strong>153-2AA02-0XB0, E 05• IM 153-2 6E<strong>S7</strong>153-2AB01-0XB0, E 044-86<strong>Programmable</strong> <strong>Logic</strong> <strong>Controllers</strong> <strong>S7</strong>-<strong>300</strong> <strong>Module</strong> <strong>Data</strong>A5E00105505-03
Analog <strong>Module</strong>sTerminal connection diagram and block diagram of the SM 331; AI 8 x 16 bitsFault indicator – redSFChannel 0AChannel 1M0+VM0–M1+1234567250 LMDCtoDC250 21222324252627L+M4+VM4–M5+Channel 4AAChannel 2AChannel 3AVM1–M2+VM2–M3+VM3–8910111213141516171819250 250 250 ADCADCSFInterfacemodulelogicandbackplanebusADCADC250 250 250 282930313233343536373839VM5–M6+VM6–M7+VM7–Channel 5AChannel 6AChannel 7A2040MFigure 4-34<strong>Module</strong> View and Block Diagram of the SM 331; AI 8 x 16 bits<strong>Programmable</strong> <strong>Logic</strong> <strong>Controllers</strong> <strong>S7</strong>-<strong>300</strong> <strong>Module</strong> <strong>Data</strong>A5E00105505-034-87
Analog <strong>Module</strong>sTechnical specifications of the SM 331; AI 8 x 16 bitsDimensions W x H x D(in millimeters)WeightSupports clockedoperationDimensions and Weight40 x 125 x 117Approx. 272 g<strong>Data</strong> for Specific <strong>Module</strong>Number of inputs 8NoLength of cable• Shielded max. 200 mVoltages, Currents, PotentialsPower rated voltage of the 24 VDCelectronics L+• Reverse polarity protection YesIsolation• Between channels andbackplane bus• Between channels andpower supply of theelectronics• Between the channelsIn groups ofYesYesYes2Permitted potential difference• Between the inputs (ECM) 75 VDC / 60 VAC• Between M ANA andM internal (U ISO )75 VDC / 60 VACInsulation tested with500 VACCurrent consumption• From the backplane bus max. 100 mA• From the power supply L+ max. 200 mAPower dissipation of the moduletyp. 3.0 WAnalog value generationSmoothing of the measuredvaluesBasic execution time of themodule, in ms(8-channel-mode)Basic execution time of themodule, in ms(4-channel-mode)None / low/average/ high190/166/144//4610 1)Suppression of interference, Limits of ErrorInterference suppression forF = n x (f1 ± 1%) (f1 = interference frequency, n = 1, 2,...)• Common-mode> 100 dBinterference (U cm < AC 60V)• Series-mode interference(peak value of interference< rated value of inputrange)>90 dB 3)Crosstalk between the inputs> 100 dBOperational limit (in the entire temperature range, withreference to the input range)• Input voltage 0.1%• Input current 0.1%Basic error (operational limit at 25 °C, referred to inputrange)• Voltage input 0.05%• Current input 0.05%Temperature error (withreference to the input range)Linearity error (with reference tothe input range)Repeatability (in steady state at25 °C, referred to the inputrange)0.005%/K0.01%0.01%Status, interrupts, diagnosticsMeasuring principleIntegratingInterruptsIntegration time/conversiontime/ resolution (per channel)• Hardware interrupt if thelimit value is exceeded<strong>Programmable</strong>channels 0 – 7• Parameters can beassignedYes• Hardware interrupt at endof cycleParameters can beassigned• Basic conversion time inms (8-channel mode)95/83/72/23• Diagnostic interrupt Parameters can beassigned• Basic conversion time inms (4-channel mode)10 1)Diagnostic functionsParameters can beassigned• Resolution including sign 16 bits• Group error display Red LED (SF)• Noise suppression forfrequency f1in HzAll 2) /50/60/400• Diagnostics informationread-outPossible4-88<strong>Programmable</strong> <strong>Logic</strong> <strong>Controllers</strong> <strong>S7</strong>-<strong>300</strong> <strong>Module</strong> <strong>Data</strong>A5E00105505-03
Analog <strong>Module</strong>s<strong>Data</strong> for selecting a sensorInput range (rated values) /input resistance• Voltage 5 V / 2 MΩ1 to 5 V / 2 MΩ 10 V / 2 MΩ• Current 0 to 20 mA / 250 Ω4 to 20 mA / 250 Ω20 mA / 250 ΩMaximum input voltage forvoltage input(destruction limit)Maximum input current forcurrent input(destruction limit)Connection of the sensor35 VDC continuous;75 VDC for max. 1 s(duty factor 1:20)40 mA• For measuring voltage Possible• For measuring currentAs two-wire transmitterAs four-wire transmitterPossible with separatesupply for thetransmitterPossible1) Interference frequency for 4-channel mode is “All”2) Interference frequencies 50/60/400 Hz are designated as“All”3) Series-mode rejection for8-channel mode is reduced as follows:50 Hz > 70 dB60 Hz > 70 dB400 Hz > 80 dB50/60/400 Hz > 90 dB4.19.1 Commissioning the SM 331; AI 8 x 16 bitsParameterThe mode of operation of the SM 331; AI 8 x 16 bits is set with STEP 7.You will find a description of the general procedure for parameterizing the SM 331;AI 8 x 16 bits, in section 4.7.Parameterization restrictions when using the analog input module SM 331;AI 8 x 16 bits with PROFIBUS masters that only support DPV0.When you use the isolated analog input module SM 331; AI 816 bits in anET200M PROFIBUS slave system with a PROFIBUS master which is not an <strong>S7</strong>master, certain parameters are not permitted. Masters that are not <strong>S7</strong> masters donot support hardware interrupts. So all the parameters associated with thesefunctions are deactivated. The deactivated parameters are hardware interruptenable, hardware restrictions and end-of-scan-cycle interrupt enable. All the otherparameters are permitted.<strong>Programmable</strong> <strong>Logic</strong> <strong>Controllers</strong> <strong>S7</strong>-<strong>300</strong> <strong>Module</strong> <strong>Data</strong>A5E00105505-034-89
Analog <strong>Module</strong>sAn overview of the parameters that you can set and their default settings areshown in the table below.Table 4-54 Parameters of the SM 331; AI 8 x 16 bitsParameter Value Range DefaultsettingsEnable• Hardware interrupt ifthe limit value isexceeded• Hardware interrupt atend of cycle• Diagnostic interruptHardware interrupt trigger• Upper limit• Lower limitDiagnostics• Group diagnostics• Wire-Break CheckMeasurement• <strong>Module</strong> mode• InterferenceSuppressionYes/noYes/noYes/no32511 to –32512–32512 to 32511Yes/noYes/no• 8 channels• 4 channels50 Hz60 Hz400 Hz50/60/400 Hz• Smoothing • None• Low• Average• High• Measuring Method • MeasuringRange:DeactivatedVoltage • 5 V• 1 to 5 V• 10 VCurrent (4-wiretransmitter)• 0 to 20 mA• 4 to 20 mA• 20 mANoNoNo––NoNoYesNo50/60/400 HzParameterTypeDynamicDynamicDynamicDynamicDynamicStaticDynamicScope<strong>Module</strong>ChannelChannelChannelChannel<strong>Module</strong>ChannelgroupNone Dynamic Channelgroup 10 V4 to 20 mADynamicChannelgroup4-90<strong>Programmable</strong> <strong>Logic</strong> <strong>Controllers</strong> <strong>S7</strong>-<strong>300</strong> <strong>Module</strong> <strong>Data</strong>A5E00105505-03
Analog <strong>Module</strong>sChannel groupsThe channels of the SM 331; AI 8 x16 bits are arranged in groups of two inputseach. You must assign the same parameters to both the inputs in a group. Theinterrupt limits are the exception here.Table 4-55 shows which channels of the isolated analog input module SM 331;AI 8 x 16 bits are configured as a channel group. To set the parameters by meansof SFC in the user program, you need the numbers of the channel groups. Detailedinformation on this can be found in Appendix A.Table 4-55 Assignment of the channels of the isolated analog input module SM 331;AI 8 x 16 bits to channel groupsChannels ...Channel 0Channel 1Channel 2Channel 3Channel 4Channel 5Channel 6Channel 7... form one channel group eachChannel group 0Channel group 1Channel group 2Channel group 3Operating statesThe following modes are available for the isolated analog input module SM 331;AI 8 x 16 bits:• 8 channels• 4 channels<strong>Programmable</strong> <strong>Logic</strong> <strong>Controllers</strong> <strong>S7</strong>-<strong>300</strong> <strong>Module</strong> <strong>Data</strong>A5E00105505-034-91
Analog <strong>Module</strong>s4.19.2 8-channel modeDescription of the module cycleIn 8-channel mode, the isolated analog input module SM 331; AI 8 x 16 bitsswitches between the two channels in each group. As the module contains fouranalog/digital converters (ADC), all four of the ADCs simultaneously convert forchannels 0, 2, 4 and 6. Once the even-numbered channels have been converted,all the ADCs simultaneously convert for the odd-numbered channels 1, 3, 5 and 7(see Figure 4-35).Start analog conversion(simultaneous)K0 K2 K4 K6Scan timeStart analog conversion(simultaneous)K1 K3 K5 K7Figure 4-358-channel mode cycle4-92<strong>Programmable</strong> <strong>Logic</strong> <strong>Controllers</strong> <strong>S7</strong>-<strong>300</strong> <strong>Module</strong> <strong>Data</strong>A5E00105505-03
Analog <strong>Module</strong>sScan time of the moduleIn the 8-channel mode of the SM 331; AI 8 x 16 bits, the channel conversion timedepends on the selected interference frequency. When you set an interferencefrequency of 50 Hz, the channel conversion time including communication time is76 ms. When you set an interference frequency of 60 Hz, the channel conversiontime is 65 ms. When you set an interference frequency of 400 Hz, the channelconversion time is reduced to 16 ms. When you set an interference frequency of50, 60 and 400 Hz, the channel conversion time is 88 ms. The module must thenbe switched over to the other channel of the group by means of opto-MOS relays.Opto-MOS relays need 7 ms to switch and settle. Table 4-56 shows the scan timesof the module at certain interference frequencies.Table 4-56 Scan times in 8-channel modeInterference frequency(Hz)Channel scan time(ms)<strong>Module</strong> scan time(All channels)50 83 16660 72 144400 23 46400/60/50 95 1904.19.3 4-channel modeDescription of the module cycleIn 4-channel mode, the SM 331; AI 8 x 16 bits does not switch over between thechannels of the individual groups. As the module contains four analog/digitalconverters (ADC), all four of the ADCs convert simultaneously for channels 0, 2, 4and 6.Start analog conversion(simultaneous)K0 K2 K4 K6Scan timeFigure 4-364-channel mode cycle<strong>Programmable</strong> <strong>Logic</strong> <strong>Controllers</strong> <strong>S7</strong>-<strong>300</strong> <strong>Module</strong> <strong>Data</strong>A5E00105505-034-93
Analog <strong>Module</strong>sScan time of the moduleIn 4-channel mode, the channel conversion time including communication time ofthe SM 331; AI 8 x 16 bits is 10 ms. As the module does not switch over betweenthe channels in a group, the channel scan time and the modulescan time are the same: 10 ms.4.19.4 Measuring Methods and Measuring Ranges of the SM 331;AI 8 x16 bitsMeasuring MethodsYou can set the following measuring methods for the input channels:• Voltage measurement• Current measurement (4-wire transmitter)You perform the setting with the “measuring method” parameter in STEP 7.Unused ChannelsSet the “measuring method” parameter for unused channels to “disabled”. In thisway you shorten the scan time of the module.Since configured inputs can remain unused because of the channel groupgeneration, you must take note of the following special characteristics of theseinputs to enable the diagnostic functions on the used channels.• Measuring range 1 to 5 V: Connect the unused input in parallel with a usedinput of the same channel group.• Current measurement, 4 to 20 mA: Connect the unused input in series withan input of the same channel group. Ensure that a current sense resistor isconnected for each active and unused channel.• Other ranges: Short the positive to the negative input of the channel.4-94<strong>Programmable</strong> <strong>Logic</strong> <strong>Controllers</strong> <strong>S7</strong>-<strong>300</strong> <strong>Module</strong> <strong>Data</strong>A5E00105505-03
Analog <strong>Module</strong>sWire–break checkThe wire-break check is a module software function that is available for all thevoltage ranges and the current range of 4 to 20 mA.• With the ± 5 V, 1 to 5 V or ± 10 V measuring ranges and an enabled wire-breakcheck, the isolated analog input module enters a wire-break in the diagnosiswhen the process value achieves a positive full-scale deflection (32768). If youenabled the diagnostic interrupt during configuration, the analog input modulealso triggers a diagnostic interrupt.If the diagnostic interrupt has not been enabled, the illuminated SF display isthe only indication that there is a wire-break. You must then analyze thediagnosis bytes in the user program.• With a measuring range of 4 to 20 mA and an enabled wire-break check, theisolated analog input module enters wire-break in the diagnosis when theprocess value falls below 3.6 mA. If you enabled the diagnostic interrupt duringconfiguration, the analog input module also triggers a diagnostic interrupt.If the diagnostic interrupt has not been enabled, the illuminated SF display isthe only indication that there is a wire-break. You must then assess thediagnosis bytes in the user program.• If the wire-break check is not enabled, the isolated analog input module triggersa diagnostic interrupt if the limit value for underflow is not reached.Measuring rangesYou perform setting of the measuring ranges with the “measuring range” parameterin STEP 7.Table 4-57 Measuring ranges of the SM 331; AI 8 x 16 bitsVoltageMethod Selected Output Range DescriptionCurrent (4-wire transmitter) 5 VFrom 1 to 5 V 10 VFrom 0 to 20 mAFrom 4 to 20 mA 20 mAYou will find the digitalanalog values fromSection 4.3.1 in the voltageand current output ranges<strong>Programmable</strong> <strong>Logic</strong> <strong>Controllers</strong> <strong>S7</strong>-<strong>300</strong> <strong>Module</strong> <strong>Data</strong>A5E00105505-034-95
Analog <strong>Module</strong>sShort circuit to M or LIf you short an input channel to M or L, the module does not suffer any damage.The channel continues to issue valid data; neither is a diagnosis reported.Overflow, underflow and hardware interrupt limitsThe diagnosis operating limits for overflow and underflow for some of themeasuring ranges differ from those given in section 4.3.1 of the manual. In somecases, numerical methods in the module software for evaluating the processvariables prevent values up to 32511 being signaled.Hardware interrupt limits must not be set to values greater than the smallestpossible limit value of the overflow or underflow operating limits for theend-of-scan-cycle interrupt in section 4.3.1.End-of-scan-cycle interruptBy enabling the end-of-scan-cycle interrupt, you can synchronize a process withthe conversion cycle of the module. The interrupt occurs when the conversion of allthe enabled channels is complete.Table 4-58 Content of the 4 bytes with additional information from OB40 during a hardwareinterrupt or an end-of-scan-cycle interruptContent of the 4 bytes withadditional information2 7 2 6 2 5 2 4 2 3 2 2 2 1 2 0 ByteSpecialanalogmarkers2 bits per channel to identify the rangeUpper limit exceededin channelLower limit exceededin channelEnd-of-scan-cycleevent7 6 5 4 3 2 1 0 07 6 5 4 3 2 1 0 1Unassigned bit 3X24-96<strong>Programmable</strong> <strong>Logic</strong> <strong>Controllers</strong> <strong>S7</strong>-<strong>300</strong> <strong>Module</strong> <strong>Data</strong>A5E00105505-03
Analog <strong>Module</strong>s4.20 Analog input moduleSM 331; AI 8 x 14 bits High Speed; synchronous;(6E<strong>S7</strong>331-7HF0x-0AB0)Order number6E<strong>S7</strong>331-7HF00-0AB0 resp.6E<strong>S7</strong>331-7HF01-0AB0CharacteristicsThe SM 331; AI 8 x 14 bits High Speed has the following features:• 8 inputs in 4 channel groups• Measured-value resolution: 13 bits + sign• Measuring method selectable per channel group:– Voltage– Current• Arbitrary measuring range selection per channel group• <strong>Programmable</strong> hardware interrupt• <strong>Programmable</strong> diagnostics• <strong>Programmable</strong> diagnostic interrupt• Two channels with limit monitoring• <strong>Programmable</strong> hardware interrupt when limit has been exceeded• Supports clocked operation• Isolated against the backplane bus interface• Isolated against the load voltage (not for 2-wire transducers)<strong>Programmable</strong> <strong>Logic</strong> <strong>Controllers</strong> <strong>S7</strong>-<strong>300</strong> <strong>Module</strong> <strong>Data</strong>A5E00105505-034-97
Analog <strong>Module</strong>sTerminal assignment and block diagram of the SM 331; AI 8 x 14 bit High SpeedGroup error display – redVoltage measurementCurrent measurementSFInternalsupplyMultiplexerMeas. rangemodule12345678910L+24VM 0 +M 0 CH0M 1 +M 1 CH1M 2 +M 2 CH2M 3 +M 3 – CH3M anaADCBackplanebusinterfaceIsolationSF11121314151617181920MM anaM 4 +M 4 CH4M 5 +M 5 CH5M 6 +M 6 CH6M 7 +M 7 CH7Figure 4-37Terminal assignment and block diagram of the SM 331; AI 8 x 14 bits High Speed4-98<strong>Programmable</strong> <strong>Logic</strong> <strong>Controllers</strong> <strong>S7</strong>-<strong>300</strong> <strong>Module</strong> <strong>Data</strong>A5E00105505-03
Analog <strong>Module</strong>sTechnical specifications of the SM 331; AI 8 x 14 bit High SpeedDimensions W x H x D(in millimeters)WeightSupports clocked operationDimensions and Weight40 x 125 x 117Approx. 230 g<strong>Data</strong> for Specific <strong>Module</strong>Number of inputs 8YesLength of cable• Shielded max. 200 mVoltages, Currents, PotentialsRated supply voltage of theelectronics L +• Reverse polarityprotectionPower supply of thetransmitters24 VDCYes• Supply current max. 30 mA (per channel)• Short-circuit-proof YesIsolation• Between channels and Yesbackplane bus• Between the channels No• Between channels andpower supply of theelectronicsYesPermitted potentialdifference• Between inputs andM ANA (UCM)– At signal = 0 V– Not for 2-wiretransmitter• Between the inputs(E CM )• Between M ANA andM internal (U ISO )Insulation tested with• Channels against backplane bus and loadvoltage L +VDC 11/VAC 8 VVDC 11/VAC 8 V75 VDC / 60 VAC500 VDCCurrent consumption• From the backplane bus max. 100 mA• From load voltage L +(without 2–wiretransducer)max. 50 mAPower dissipation of themoduletyp. 1.5 WMeasuring principleIntegration time/conversiontime/ resolution (perchannel)• Parameters can beassigned• Basic conversion timeper channel• Resolution (incl.overrange)• Noise suppression forfrequency f1 in Hz• Basic execution time ofthe module(independent of thenumber of releasedchannels)Analog value generationInstantaneous valueconversionYes52 s14 bitsNone 400 60 500.42 msSuppression of interference, Limits of ErrorNoise suppression for f = n (f1 1 %),(f1 = interference frequency) n=1.2...• Common-mode > 80 dBinterference(U CM < 11 V SS )• Series-modeinterference(peak valueof interference < ratedvalue of input range)> 40 dBCrosstalk between theinputs> 65 dBOperational limit (in the entire temperature range, withreference to the input range)• Voltage input 1 V 0.3 %5 V 0.4 % 10 V 0.3 %1 to 5 V; 0.4 %• Current input 20 mA 0.3 %0 to 20 mA; 0.3 %4 to 20 mA: 0.3 %<strong>Programmable</strong> <strong>Logic</strong> <strong>Controllers</strong> <strong>S7</strong>-<strong>300</strong> <strong>Module</strong> <strong>Data</strong>A5E00105505-034-99
Analog <strong>Module</strong>sBasic error (operational limit at 25 C, referred to inputrange)• Voltage input 1 V 0.2 % 5 V 0.25 % 10 V 0.2 %1 to 5 V; 0.25 %• Current input 20 mA 0.2 %Temperature error (withreference to the input range)Linearity error (withreference to the input range)Repeat accuracy (in thesteady state at 25 C,referred to the input range)Interrupts• Hardware interrupt• Diagnostic interrupt0 to 20 mA; 0.2 %4 to 20 mA: 0.2 % 0.004 %/K 0.03% 0.1 %Status, interrupts, diagnosticsDiagnostic functions• Group error display• Diagnostics informationread-outParameters can beassignedParameters can beassignedRed LED (SF)Possible<strong>Data</strong> for Selecting a SensorInput range (ratedvalues)/Input resistance• Voltage 1 V 5 V 10 V1 to 5 V;• Current 20 mA0 to 20 mA;4 to 20 mA:Maximum input voltage forvoltage input (destructionlimit)Maximum input current forcurrent input (destructionlimit)Connection of the sensor/10 MΩ/100 kΩ/100 kΩ/100 kΩ/50 Ω/50 Ω/50 Ωmax. 20 V continuous;75 V for max. 1 s(duty factor 1:20)40 mA• For measuring voltage Possible• For measuring currentAs two-wire transmitterAs four-wire transmitter• Load of the 2–wiremeasurementtransducer(at L+ = DC 24 V)Characteristic linearizationPossiblePossiblemax. 820 ΩNone4.20.1 SynchronicityCharacteristicsReproducible (i.e. same length) reaction times are achieved with the <strong>SIMATIC</strong> withan equidistant DP bus cycle and the synchronization of the following free runningsingle cycles:• Free running of the user program. The length of the cycle time can vary due toacyclic program branching.• Free running, variable DP cycle at the PROFIBUS subnetwork• Free running cycle at the DP slave backplane bus.• Free running cycle during the signal processing and conversion in the electronicmodules of the DP slave.In the case of equidistance the DP cycle runs in phase and with the same length.In this cycle the processing levels of a CPU (OB 61 to OB 64) and thesynchronous peripheral are synchronized. The I/O data are therefore transferred atdefined and consistent time intervals (clock synchronicity).4-100<strong>Programmable</strong> <strong>Logic</strong> <strong>Controllers</strong> <strong>S7</strong>-<strong>300</strong> <strong>Module</strong> <strong>Data</strong>A5E00105505-03
Analog <strong>Module</strong>sRequirements• The DP-Master and DP-Slave must support the synchronicity. They requireSTEP 7 from Version 5.2.<strong>Module</strong> filtering mode: SynchronicityIn synchronous operation the following conditions apply:Standard ModeFilter and processing time T WE between reading the current valueand loading it into the transfer buffer(the specified value for T WE applies, independent of the activation ofthe diagnosis)including an input delay time ofT DPminDiagnostic interruptmax. 625 s10 s3.5 msmax. 4 x T DPFast Mode (only possible with 6E<strong>S7</strong>331-7HF01-0AB0)Filter and processing time T WE between reading in the current valueand allocation in the transfer buffer(diagnosis not selectable)including an input delay time ofT DPminmax. 625 s10 s1 msNoteBy using “Fast Mode” the cycle of the DP system can be accelerated. However,this is at the expense of the diagnosis: The diagnosis is switched off in thisoperating mode.Together with the calculation and transfer times required on the IM 153, thespecified value for T WE results in the minimum settable value of HW Config of875 s for T i .The specified value for T DPmin is dependent on the extent of extension of the DPslave/IM 153: If there are a number of different plugged in modules, the slowestmodule determines the time T DPmin .NoteIn “Synchronous” mode, independent of the parameterization made in STEP 7, themodule always sets itself to “Integration time: no /parasitic frequency”. The“hardware interrupt” functionality is not possible in “Synchronous” mode.<strong>Programmable</strong> <strong>Logic</strong> <strong>Controllers</strong> <strong>S7</strong>-<strong>300</strong> <strong>Module</strong> <strong>Data</strong>A5E00105505-034-101
Analog <strong>Module</strong>sCalculation of the filter and processing timeIndependent of the number parameterized channels, the same time conditions arealways valid. The time related to the clock signal for the reading of a specificchannel is calculated according to the formula:T WE _CH = (Channel number +1) x 52 s + tv; tv = 119 to 209 sT WEA/D conversioninternal processing (tv)CH7 CH6 CH5 CH4 CH3 CH2 CH1 CH052s 52s 52s 52s 52s 52s 52s 52s 209sFigure 4-38Calculation of the filter and processing timeExplanation of the mode of operation in synchronous operationThe module begins with the A/D conversion of channel 7 and saves this resultinternally. Then channels 6...0 are converted sequentially at intervals of 52 s inthe same way. After a further internal processing time the result becomes availableto all converted channels at the backplane bus for collection by the CPU.Further informationFurther information on synchronicity can be found in the Online help of STEP 7, inthe manualLocal peripheral system ET 200M and in the manual Synchronicity.4-102<strong>Programmable</strong> <strong>Logic</strong> <strong>Controllers</strong> <strong>S7</strong>-<strong>300</strong> <strong>Module</strong> <strong>Data</strong>A5E00105505-03
Analog <strong>Module</strong>s4.20.2 Commissioning the SM 331; AI 8 x 14 bits High SpeedYou set the mode of operation of the SM 331; AI 8 x 14 bits High Speed by meansof measuring range modules on the module and in STEP 7.Meas. range moduleIf necessary, the measuring range modules must be replugged to change themeasuring method and the measuring range. You must then switch the 24 Vsupply off and on at the front connector. The steps you have to perform to do thisare described in detail in the reference manual, Section 4.4.The corresponding table in the reference manual, Section 4.20.3, tells you whichassignment you have to select for which measuring method and measuring range.In addition, the necessary settings are embossed on the module.Default settings for measuring range moduleThe measuring range modules are preset to “B” (voltage; 10 V) when themodule is supplied.To use the following preset measuring methods and measuring ranges, you onlyhave to change the measuring range module to the corresponding setting.Parameter assignment in STEP 7 is not necessary.Table 4-59 Default Settings of the SM 331; AI 8 x 14 bits High Speed using MeasuringRange <strong>Module</strong>sMeasuring Range<strong>Module</strong> SettingMeasuring MethodMeasuring RangeA Voltage 1 V*B Voltage 10 VCDCurrent,Four-wire transmitterCurrent,Two-wire transmitter4 to 20 mA4 to 20 mA* You must short-circuit unused channels and connect them to M ANA .ParameterYou will find a description of the general procedure for assigning parameters toanalog modules in the reference manual, section 4.7.An overview of the parameters that you can set and their default settings areshown in the table below.<strong>Programmable</strong> <strong>Logic</strong> <strong>Controllers</strong> <strong>S7</strong>-<strong>300</strong> <strong>Module</strong> <strong>Data</strong>A5E00105505-034-103
Analog <strong>Module</strong>sTable 4-60 Parameters of the SM 331; AI 8 x 14 bits High SpeedParameter Value Range DefaultSettingsEnable• Diagnostic interrupt• Hardware interruptupon limit violationFast Mode (only settableif the 331-7HF01 wasregistered insynchronous operationin the properties of theDP slave)Trigger for hardwareinterrupt• Upper limit value• Lower limit valueYes/noYes/noNoNoParameterTypeDynamicScope<strong>Module</strong>Yes/no No Static <strong>Module</strong>Constraint possible due to measuringrange.32511 to –32512–32512 to 32511Diagnostics• Group diagnostics Yes/no NoMeasurement• Measuring Method DeactivatedU VoltageU4DMU Current (4-wire transmitter)2DMU Current (2-wire transmitter)• Measuring Range Refer to the reference manual, section 10 V4.20.3, for the measuring ranges of theinput channels that you can set.• Interferencenone; 400 Hz; 60 Hz; 50 Hz50 HzSuppression–DynamicStaticDynamicChannelChannelgroupChannel orChannelgroupChannel groupsThe channels of the SM 331; AI 8 x 14 bits High Speed are arranged in fourgroups of two. You can only ever assign parameters to one channel group.Die SM 331; AI 8 x 14 bits High Speed has a measuring range module for eachchannel group.The table below shows which channels are parameterized as a channel group ineach case. You will need the channel group number to set the parameters in theuser program with an SFC.4-104<strong>Programmable</strong> <strong>Logic</strong> <strong>Controllers</strong> <strong>S7</strong>-<strong>300</strong> <strong>Module</strong> <strong>Data</strong>A5E00105505-03
Analog <strong>Module</strong>sTable 4-61 Assignment of the channels of the SM 331; AI 8 x 14 bits High Speed tochannel groupsChannels ...Channel 0Channel 1Channel 2Channel 3Channel 4Channel 5Channel 6Channel 7... form one Channel Group eachChannel group 0Channel group 1Channel group 2Channel group 3Special characteristic of channel groups for hardware interruptsYou can set hardware interrupts in STEP 7 for the channel groups 0 and 1. Note,however, that a hardware interrupt is set only for the first channel in the channelgroup in each case – in other words, for channel 0 or channel 2DiagnosticsYou will find the diagnostic messages that are grouped under the “group diagnosis”parameter in Table 4-47 in the reference manual.4.20.3 Measuring Methods and Measuring Ranges of the SM 331;AI 8 x 14 bits High SpeedMeasuring MethodsYou can set the following measuring methods for the input channels:• Voltage measurement• Current measurementYou perform the setting by means of the measuring range modules on the moduleand with the “measuring method” parameter in STEP 7.Unused ChannelsYou must short-circuit unused channels and connect them to MANA. In this way,you obtain an optimum interference immunity for the analog input module. Set the“measuring method” parameter for unused channels to “disabled”.<strong>Programmable</strong> <strong>Logic</strong> <strong>Controllers</strong> <strong>S7</strong>-<strong>300</strong> <strong>Module</strong> <strong>Data</strong>A5E00105505-034-105
Analog <strong>Module</strong>sSpecial characteristics of unused channels for some measuring rangesSince configured inputs can remain unused because of the channel groupgeneration, you must take note of the following special characteristics of theseinputs to enable the diagnostic functions on the used channels.• Measuring range 1 to 5 V: Connect the unused input in parallel with a usedinput of the same channel group.• Current measurement, 2-wire transmitter:There are two ways to use the channels:a) Leave the unused input open and do not enable diagnostics for thischannel group. Otherwise, if diagnostics are enabled, the analog moduletriggers a single diagnostic interrupt and the SF LED of the analog modulecomes on.b) Connect the unused input with a resistance of 1.5 to 3.3 kW. You may thenenable diagnostics for this channel group.• Current measurement 4 to 20 mA, 4-wire transmitter: Connect the unusedinput in series with an input of the same channel group.Measuring rangesYou perform the setting of the measuring ranges by means of the measuring rangemodules on the module and with the “measuring method” parameter in STEP 7.Table 4-62 Measuring Ranges of the SM 331; AI 8 x 14 bits High SpeedMethod SelectedMeasuring Range(Type of Sensor)Measuring Range<strong>Module</strong> SettingDescriptionU: Voltage 1 V A You will find the digitized 5 VBanalog values in thereference manual, section1 to 5 V4.3.1, in the voltage 10 Vmeasuring range4DMU: Current (4-wire 0 to 20 mACtransmitter)You will find the digitized4 to 20 mAanalog values in the 20 mAreference manual, section4.3.1, in the current2DMU: Current (2-wire 4 to 20 mA Dmeasuring rangetransmitter)Default SettingsThe default settings of the module in STEP 7 are the “voltage” measuring methodand the ”10 V” measuring range. You can use this combination of measuringmethod and measuring range without parameterizing the SM 331;AI 8 x 14 bits High Speed with STEP 7.4-106<strong>Programmable</strong> <strong>Logic</strong> <strong>Controllers</strong> <strong>S7</strong>-<strong>300</strong> <strong>Module</strong> <strong>Data</strong>A5E00105505-03
Analog <strong>Module</strong>sSpecial characteristics of the wire-break check for the 4 to 20 mA measuringrangeWith a parameterized measuring range of 4 to 20 mA and enabled wire-breakcheck, the analog input module enters wire-break in the diagnosis when a currentfalls below 3.6 mA.If you have enabled diagnostics interrupt during configuration, the moduleadditionally triggers a diagnostic interrupt.If no diagnostic interrupt has been enabled, the illuminated SF LED is the onlyindication of the wire-break and you must evaluate the diagnostic bytes in the userprogram.With a parameterized measuring range of 4 to 20 mA and disabled wire-breakcheck and enabled diagnostic interrupt, the module triggers a diagnostic interruptwhen the underflow is reached.<strong>Programmable</strong> <strong>Logic</strong> <strong>Controllers</strong> <strong>S7</strong>-<strong>300</strong> <strong>Module</strong> <strong>Data</strong>A5E00105505-034-107
Analog <strong>Module</strong>s4.21 Analog Input <strong>Module</strong> SM 331; AI 8 x 13 bits;(6E<strong>S7</strong>331-1KF01-0AB0)Order number6E<strong>S7</strong>331-1KF01-0AB0CharacteristicsThe analog input module SM 331; AI 8 x 13 bits has the following characteristicfeatures:• 8 inputs• Measured-value resolution 12 bits + sign• Measuring method selectable:– Voltage– Current– Resistors– Bulb resistor• Isolated against the backplane bus interface4-108<strong>Programmable</strong> <strong>Logic</strong> <strong>Controllers</strong> <strong>S7</strong>-<strong>300</strong> <strong>Module</strong> <strong>Data</strong>A5E00105505-03
Analog <strong>Module</strong>sTerminal Connection Diagram and Block Diagram of the SM 331; AI 8 x 13 bitsThe following figure shows some examples of connections for the different types ofmeasurements on channels 4 to 7. Basically, these connection examples apply toall channels (channel 0 to 7).Connection example01234567012345670123456701234567U+I+S–Ch 0M+M–U+I+S–Ch 1M+M–U+I+S–Ch 2M+M–U+I+S–Ch 3M+M–1234567891011121314151617181920<strong>Logic</strong>andbackplanebusactivationElectricalisolation+ 5 V frombackplane busADCInternal supplyMultiplexerCurrentsource2122232425262728293031323334353637383940U+I+S–M+M–U+I+S–M+M–U+I+S–M+M–U+I+S–M+M–VAmVCh 4Ch 5Ch 6Ch 7ChannelnumberFigure 4-39 <strong>Module</strong> View and Block Diagram of the Analog Input <strong>Module</strong> SM 331; AI 8 x 13bitsNoteWhen connecting the voltage and current sensors, make sure that you do notexceed the maximum permitted common-mode voltage U CM of 2 V between theinputs. So to prevent measuring errors, interconnect the individual M– terminals.It is not necessary to interconnect the M– terminals when measuring resistors andresistance temperature detectors.<strong>Programmable</strong> <strong>Logic</strong> <strong>Controllers</strong> <strong>S7</strong>-<strong>300</strong> <strong>Module</strong> <strong>Data</strong>A5E00105505-034-109
Analog <strong>Module</strong>sTechnical specifications of the SM 331; AI 8 x 13 bitsDimensions and WeightAnalog value generationDimensions W x H x D(in millimeters)Weight40 x 125 x 117Approx. 250 gMeasuring principleIntegration time/resolution(per channel)IntegratingSupports clockedoperationNumber of inputs• For resistance-typesensor<strong>Data</strong> for Specific <strong>Module</strong>NoLength of cable• Shielded max. 200 mmax. 50 m at 50 mVConstant current forresistance-type sensor• Resistance thermometerandresistance measurement0 ... 600 Ω• Resistance measurement0 ... 6 kΩ88Voltages, Currents, Potentials0.83 mA0.25 mAIsolation• Between channels and Yesbackplane bus• Between the channels NoPermitted potentialdifference• Between the inputs(E CM )2.0 VDC• <strong>Programmable</strong> Yes• Noise suppression 50 60for frequency f1 in Hz• Integration time in 60 50milliseconds• Basic conversiontime includingIntegration time inmilliseconds66 55Additional conversiontime for measuringresistance, in ms• Resolution in bits (incl.Overrange66 5513 bits 13 bitsSuppression of interference, Limits of ErrorNoise suppression for f = n (f1 1 %),(f1 = interference frequency) n = 1.2• Common-mode > 86 dBinterference(U CM < 2 V)• Series-mode noise(peak value ofnoise < nominalvalue of inputrange)> 40 dBCrosstalk between theinputs> 50 dB• Between the inputsand M internal (U ISO )Insulation tested withCurrent consumption• From the backplanebusPower dissipation of themodule75 VDC / 60 VAC500 VDCmax. 90 mAtyp. 0.4 W4-110<strong>Programmable</strong> <strong>Logic</strong> <strong>Controllers</strong> <strong>S7</strong>-<strong>300</strong> <strong>Module</strong> <strong>Data</strong>A5E00105505-03
Analog <strong>Module</strong>sOperational limit (in the entire temperature range, withreference to the input range)• Voltage input 5V10 V1 to 5 V0 to 10 V 0.6 % 50 mV 500 mV1 V• Current input 20 mA0 to 20 mA4 to 20 mA• Resistors 0 to 6 kΩ0 to 600 Ω• ResistancethermometerPt 100Ni 100StandardPt 100Ni 100ClimateNi 1000, LG-Ni1000 StandardNi 1000LG-Ni 1000Climate 0.5 % 0.5 % 0.5 % 0.5 % 1.2 K 1 K 1 K 1 KBasic error (operational limit at 25 C, referred to inputrange)Temperature error (withreference to the inputrange)Linearity error (withreference to the inputrange)Repeat accuracy (in thesteady state at 25 C,referred to the input range)InterruptsDiagnostic functions 0.006 %/K / 0.006 K/K 0.1 % / 0.1 K 0.1 % / 0.1 KStatus, interrupts, diagnosticsNoneNone<strong>Data</strong> for Selecting a SensorInput range (ratedvalues)/Input resistance• Voltage 50 mV 500 mV1 V 5 V 10 V1 to 5 V;0 to 10 V• Current 20 mA0 to 20 mA;4 to 20 mA:100 kΩ50 Ω• Voltage input 5V10 V1 to 5 V0 to 10 V 50 mV 500 mV 1V• Current input 20 mA0 to 20 mA4 to 20 mA• Resistors 0 to 6 kΩ0 to 600 Ω• ResistancethermometerPt 100Ni 100StandardPt 100Ni 100ClimateNi 1000LG-Ni 1000StandardNi 1000 LG-Ni1000Climate 0.4 % 0.3 % 0.3 % 0.3 % 0.3 % 1 K 0.8 K 0.8 K 0.8 K• Resistors 0 to 6 kΩ0 to 600 Ω• ResistancethermometerMaximum input voltage forvoltage input U+(destruction limit)Maximum input voltage forvoltage inputs M+, M-, S–(destruction limit)Maximum input current forcurrent input I+(destruction limit)Pt 100Ni 100Ni 1000LG-Ni 1000Standard /Climate100 MΩ100 MΩmax. 30 V continuousmax. 12 V continuous;30 V for max. 1 s40 mA<strong>Programmable</strong> <strong>Logic</strong> <strong>Controllers</strong> <strong>S7</strong>-<strong>300</strong> <strong>Module</strong> <strong>Data</strong>A5E00105505-034-111
Analog <strong>Module</strong>sConnection of thesensorCharacteristiclinearization<strong>Programmable</strong>• For measuringvoltage• For measuring currentAs two-wiretransmitterAs four-wiretransmitter•For measuringresistancewith two-conductorconnectionwith three-conductorconnectionwith four-conductorconnectionPossiblePossible, with externalsupplyPossiblePossiblePossiblePossible• For RTD Pt 100 Standard / ClimateNi 100 Standard / ClimateNi 1000 Standard / ClimateLG-Ni 1000 Standard /Climate• Technical unit fortemperaturemeasurementDegrees Celsius,degrees Fahrenheit, Kelvin4-112<strong>Programmable</strong> <strong>Logic</strong> <strong>Controllers</strong> <strong>S7</strong>-<strong>300</strong> <strong>Module</strong> <strong>Data</strong>A5E00105505-03
Analog <strong>Module</strong>s4.21.1 Parameters of the SM 331; AI 8 x 13 bitsParameterYou will find a description of the general procedure for assigning parameters toanalog modules in the reference manual, section 4.7.An overview of the parameters that you can set and their default settings areshown in the table below.Table 4-63 Parameters of the SM 331; AI 8 x 13 bitsParameter Value Range DefaultSettingsMeasurement• Measuring Method DeactivatedU VoltageI CurrentR ResistorsRTD Bulb resistor• Measuring Range Voltage50 mV; 500 mV; 1 V;1 to 5 V;5 V; 0 to 10 V; 10 VU10 VCurrent0 to 20 mA; 4 to 20 mA; 20 mA 20 mAResistors0 to 600 Ω; 0 to 6 kΩ 600 ΩBulb resistor (linear)Pt 100 Climate / StandardNi 100 Climate / StandardNi 1000 Climate / StandardLG-Ni 1000 Climate / Standard• Temperature Pt 100coefficient0.003850 ΩΩ/ °C (IST-90)Ni 100 / Ni 10000.006180 Ω/Ω/ °CLG-Ni 10000.005000 Ω/Ω/ °C• InterferenceFrequencySuppression• Temperature unit Degrees Celsius, degreesFahrenheit, Kelvin*Pt 100standard0.00385050 Hz; 60 Hz 50 HzDegreesCelsius* only Pt 100 Standard, Ni 100 Standard, Ni 1000 Standard, LG-Ni 1000 StandardParameterTypeDynamicScopeChannel<strong>Module</strong><strong>Programmable</strong> <strong>Logic</strong> <strong>Controllers</strong> <strong>S7</strong>-<strong>300</strong> <strong>Module</strong> <strong>Data</strong>A5E00105505-034-113
Analog <strong>Module</strong>s4.21.2 Measuring Methods of the SM 331; AI 8 x 13 bitsMeasuring MethodsYou can set the following measuring methods for the input channels:• Voltage measurement• Current measurement• Resistance testYou perform the setting with the “measuring method” parameter in STEP 7.Unused ChannelsSet the “measuring method” parameter for unused channels to “disabled”. In thisway you shorten the scan time of the module.4-114<strong>Programmable</strong> <strong>Logic</strong> <strong>Controllers</strong> <strong>S7</strong>-<strong>300</strong> <strong>Module</strong> <strong>Data</strong>A5E00105505-03
Analog <strong>Module</strong>s4.22 Analog Input <strong>Module</strong> SM 331; AI 8 x 12 bits;(6E<strong>S7</strong>331-7KF02-0AB0)Order number6E<strong>S7</strong>331-7KF02-0AB0CharacteristicsThe analog input module SM 331; AI 8 x 12 bits has the following characteristicfeatures:• 8 inputs in 4 channel groups• Measured-value resolution; settable per group (depending on the integrationtime set)– 9 bits + sign– 12 bits + sign– 14 bits + sign• Measuring method selectable per channel group:– Voltage– Current– Resistors– Temperature• Arbitrary measuring range selection per channel group• <strong>Programmable</strong> diagnostics• <strong>Programmable</strong> diagnostic interrupt• Two channels with limit monitoring• <strong>Programmable</strong> hardware interrupt when limit has been exceeded• Isolated against the backplane bus interface• Isolated against load voltage (except when at least onecoding key is inserted in position D)ResolutionThe resolution of the measured value is a direct function of the integration timeselected. In other words the longer the integration time for an analog input channel,the more accurate the resolution of the measured value will be (see TechnicalSpecifications of the module and Table 4-6 on page 4-10).<strong>Programmable</strong> <strong>Logic</strong> <strong>Controllers</strong> <strong>S7</strong>-<strong>300</strong> <strong>Module</strong> <strong>Data</strong>A5E00105505-034-115
Analog <strong>Module</strong>sTerminal Connection Diagram and Block Diagram of the SM 331; AI 8 x 12 bitsFault indicator – redThermocouples,Voltage measurementCurrent measurementResistance testSFInternalsupplyCurrent MultiplexersourceMeas. rangemoduleL+24VM 0 +M 0M 1CH0 M 0 + CH0M 0CH1 I C0 +I C0M 1 +Comp +M 2 + CH2 M 1 +M 2 M 1CH2+ADCTNoneIsolationInt.Comp.Ext.compensationCompM 3 + CH3 I C1 +M 3 I C1Comp–/ ManaM 4 + CH4 M 2 + CH4M 4 M 2M 5 + CH5 I C2 +M 5 I C2BackplanebusinterfaceSFMMM 6 + CH6 M 3 + CH6M 6 M 3M 7 + CH7 I C3 +M 7 I C3Figure 4-40<strong>Module</strong> View and Block Diagram of the Analog Input <strong>Module</strong> SM 331; AI 8 x 12 bitsThe input resistances depend on the measuring range selected (see TechnicalSpecifications).4-116<strong>Programmable</strong> <strong>Logic</strong> <strong>Controllers</strong> <strong>S7</strong>-<strong>300</strong> <strong>Module</strong> <strong>Data</strong>A5E00105505-03
Analog <strong>Module</strong>sTechnical specifications of the SM 331; AI 8 x 12 bitsDimensions W x H x D(in millimeters)WeightSupports clocked operationNumber of inputs• For resistance-typesensorLength of cable• ShieldedDimensions and Weight40 x 125 x 117Approx. 250 g<strong>Data</strong> for Specific <strong>Module</strong>No84max. 200 mmax. 50 m at 80 mV andthermocouplesVoltages, Currents, PotentialsRated supply voltage of theelectronics L +• Reverse polarityprotectionPower supply of thetransmitters24 VDCYes• Supply current max. 60 mA (per channel)• Short-circuit-proof YesConstant current forresistance-type sensorIsolation• Between channels andbackplane bus• Between channels andpower supply of theelectronics– Not for 2-wiretransmitterPermitted potentialdifference• Between inputs andM ANA (U CM )– At signal = 0 Vtyp. 1.67 mAYesYes2.5 VDCMeasuring principleAnalog value generationIntegratingIntegration time/conversiontime/ resolution (perchannel)• <strong>Programmable</strong> Yes• Integration time in 2.5 16 2 / 3 20 100milliseconds• Basic conversion timeincluding Integrationtime in milliseconds3 17 22 102Additional conversiontime for measuringresistance, in msorAdditional conversiontime for open-circuitmonitoring, in msorAdditional conversiontime for measuringresistance andopen-circuit monitoring,in ms• Resolution in bits (incl.overrange)• Noise suppression forfrequency f1 in Hz• Basic execution time ofthe module, in ms (allchannels enabled)Smoothing of the measuredvalues1 1 1 110 10 10 1016 16 16 169bits12bits12bits14bits400 60 50 1024 136 176 816None• Between the inputs(ECM)• Between M ANA andM internal (U ISO )2.5 VDC75 VDC / 60 VACInsulation tested with500 VDCCurrent consumption• From the backplane bus max. 50 mA• From the backplane busL +Power dissipation of themodulemax. 30 mA(without two-wiretransmitter)typ. 1 W<strong>Programmable</strong> <strong>Logic</strong> <strong>Controllers</strong> <strong>S7</strong>-<strong>300</strong> <strong>Module</strong> <strong>Data</strong>A5E00105505-034-117
Analog <strong>Module</strong>sSuppression of interference, Limits of ErrorNoise suppression for F = n (f1 1 %),(f1 = interference frequency)• Common-modeinterference(U CM < 2.5 V)• Series-mode noise(peak value ofnoise < nominal value ofinput range)Crosstalk between theinputs> 70 dB> 40 dB> 50 dBOperational limit (in the entire temperature range, withreference to the input range)• Voltage input 80 mV 1 %250 to 1000mV 0.6 %2.5 to 10 V 0.8 %• Current input 3.2 to 20 mA 0.7 %• Resistors 150Ω; <strong>300</strong>Ω; 0. 7 %600 Ω• Thermocouple Type E, N, J,K, L 1. 1 %• ResistancethermometerPt 100/Ni 100Pt 100climate 0. 7 % 0. 8 %Basic error (operational limit at 25 C referred to inputrange)• Voltage input 80 mV 0.7 %250 to 1000mV 0.4 %2.5 to 10 V 0.6 %• Current input 3.2 to 20 mA 0.5 %• Resistors 150Ω; <strong>300</strong>Ω; 0.5 %600 Ω• Thermocouple Type E, N, J,K, L 0.7 %• ResistancethermometerTemperature error (withreference to the input range)Linearity error (withreference to the input range)Repeatability (in steadystate at 25 C referred toinput range)Temperature error of internalcompensationPt 100/Ni 100Pt 100climate 0.005 %/K 0.05 % 0.05 % 1 % 0.5 % 0.6 %Interrupts• Hardware interruptwhen limit has beenexceededStatus, Interrupts, Diagnostics<strong>Programmable</strong>channels 0 and 2• Diagnostic interrupt <strong>Programmable</strong>Diagnostic functions• Group error display• Diagnostics informationread-out<strong>Programmable</strong>Red LED (SF)Possible<strong>Data</strong> for Selecting a SensorInput range (ratedvalues)/Input resistance• Voltage 80 mV 250 mV 500 mV1000 mV 2.5 V 5 V1 to 5 V; 10 V• Current 3.2 mA 10 mA 20 mA0 to 20 mA;4 to 20 mA:• Resistors 150 Ω<strong>300</strong> Ω600 Ω• Thermocouples Type E, N, J,K, L• ResistancethermometerMaximum input voltage forvoltage input (destructionlimit)Maximum input current forcurrent input (destructionlimit)Pt 100,Ni 100/10 MΩ/10 MΩ/10 MΩ/10 MΩ/100kΩ/100kΩ/100kΩ/100kΩ/25 Ω/25 Ω/25 Ω/25 Ω/25 Ω/10 ΜΩ/10 ΜΩ/10 ΜΩ/10 ΜΩ/10 ΜΩmax. 20 V continuous;75 V for max. 1 s(duty factor 1:20)40 mA4-118<strong>Programmable</strong> <strong>Logic</strong> <strong>Controllers</strong> <strong>S7</strong>-<strong>300</strong> <strong>Module</strong> <strong>Data</strong>A5E00105505-03
Analog <strong>Module</strong>sConnection of the sensor• For measuring voltage Possible• For measuring currentAs two-wire transmitterAs four-wire transmitter• For measuringresistanceWith two-conductorconnectionWith three-conductorconnectionWith four-conductorconnection• Load of the two-wiretransmitterPossiblePossiblePossiblePossiblePossiblemax. 820 ΩCharacteristic linearization <strong>Programmable</strong>• for thermocouples Type E, N, J, K, L• For RTD Pt 100(standard, climate range)Ni 100(standard, climate range)Temperature compensation• Internal temperaturecompensation• External temperaturecompensation withcompensating box• Compensation for 0 Ccomparison pointtemperature• Technical unit fortemperaturemeasurement<strong>Programmable</strong>PossiblePossiblePossibleDegrees Celsius4.22.1 Commissioning the SM 331; AI 8 x 12 bitsYou set the mode of operation of the SM 331; AI 8 x 12 bits by means ofmeasuring range modules on the module and in STEP 7.Meas. range moduleIf necessary, the measuring range modules must be replugged to change themeasuring method and the measuring range. The steps you have to perform to dothis are described in detail in Section 4.4.The corresponding table in Section 4.22.2 tells you which assignment you have toselect for which measuring method and measuring range. In addition, thenecessary settings are embossed on the module.<strong>Programmable</strong> <strong>Logic</strong> <strong>Controllers</strong> <strong>S7</strong>-<strong>300</strong> <strong>Module</strong> <strong>Data</strong>A5E00105505-034-119
Analog <strong>Module</strong>sDefault settings for measuring range moduleThe measuring range modules are preset to “B” (voltage; 10 V) when themodule is supplied.To use the following preset measuring methods and measuring ranges, you onlyhave to change the measuring range module to the corresponding setting.Parameter assignment in STEP 7 is not necessary.Table 4-64 Default Settings of the SM 331; AI 8 x 12 bits Using Measuring Range <strong>Module</strong>sMeasuring Range<strong>Module</strong> SettingMeasuring MethodMeasuring RangeA Voltage 1000 mVB Voltage 10 VCDCurrent,Four-wire transmitterCurrent,Two-wire transmitter4 to 20 mA4 to 20 mAParameterYou will find a description of the general procedure for assigning parameters toanalog modules in Section 4.7.An overview of the parameters that you can set and their default settings areshown in the table below.Table 4-65 Parameters of the SM 331; AI 8 x 12 bitsParameter Value Range DefaultSettingsEnable• Diagnostic interrupt• Hardware interruptupon limit violationYes/noYes/noNoNoParameterTypeDynamicScope<strong>Module</strong>Trigger for hardwareinterrupt• Upper limit value• Lower limit valueConstraint possible due to measuringrange.From 32511 to –32512–32512 to 32511– Dynamic ChannelDiagnostics• Group diagnostics• With wire-breakcheckYes/noYes/noNoNoStaticChannelgroup4-120<strong>Programmable</strong> <strong>Logic</strong> <strong>Controllers</strong> <strong>S7</strong>-<strong>300</strong> <strong>Module</strong> <strong>Data</strong>A5E00105505-03
Analog <strong>Module</strong>sTable 4-65 Parameters of the SM 331; AI 8 x 12 bits, continuedParameterValue RangeDefaultSettingsMeasurement• Measuring Method DeactivatedUU Voltage4DMU Current (4-wire transmitter)2DMU Current (2-wire transmitter)R-4L Resistance(four-conductor connection)RTD-4L Bulb resistor(linear, four-conductorconnection)TC-I Thermocouple(internal comparison)TC-E Thermocouple(external comparison)TC-IL Thermocouple(linear, internal comparison)TC-EL Thermocouple(linear, external comparison)• Measuring Range Refer to Section 4.22.2 for the10 Vmeasuring ranges of the inputchannels that you can set.• Interference400 Hz; 60 Hz; 50 Hz; 10 Hz 50 HzSuppressionParameterTypeDynamicScopeChannel orChannelgroupChannel groupsThe channels of the SM 331; AI 8 x 12 bits are arranged in four groups of two. Youcan only ever assign parameters to one channel group.The analog input module SM 331; AI 8 x 12 bits has a measuring range module foreach channel group.The table below shows which channels are parameterized as a channel group ineach case. You will need the channel group number to set the parameters in theuser program with an SFC.Table 4-66 Assignment of Channels of the SM 331; AI 8 x 12 bits to Channel GroupsChannels ...Channel 0Channel 1Channel 2Channel 3Channel 4Channel 5Channel 6Channel 7... form one Channel Group eachChannel group 0Channel group 1Channel group 2Channel group 3<strong>Programmable</strong> <strong>Logic</strong> <strong>Controllers</strong> <strong>S7</strong>-<strong>300</strong> <strong>Module</strong> <strong>Data</strong>A5E00105505-034-121
Analog <strong>Module</strong>sSpecial characteristic of channel groups with resistance measurementIf you use the resistance measurement method, there is only one channel perchannel group. The “2nd” channel of each group is used for current injection (I C ).The measured value is obtained by accessing the “1st” channel of the group. The“2nd” channel of the group has the default carry value “7FFF H ”.Special characteristic of channel groups for hardware interruptsYou can set hardware interrupts in STEP 7 for the channel groups 0 and 1. Note,however, that a hardware interrupt is set only for the first channel in the channelgroup in each case – in other words, for channel 0 or channel 2DiagnosticsYou will find the diagnostic messages that are grouped under the “group diagnosis”parameter in Table 4-46, on page 4-72.4.22.2 Measuring Methods and Measuring Ranges of the SM 331;AI 8 x 12 bitsMeasuring MethodsYou can set the following measuring methods for the input channels:• Voltage measurement• Current measurement• Resistance test• Temperature measurementYou perform the setting by means of the measuring range modules on the moduleand with the “measuring method” parameter in STEP 7.Unused ChannelsYou must short-circuit unused channels and connect them to M ANA . In this way,you obtain an optimum interference immunity for the analog input module. Set the“measuring method” parameter for unused channels to “disabled”. In this way youshorten the scan time of the module.If you do not use the COMP input, you must short-circuit it also.4-122<strong>Programmable</strong> <strong>Logic</strong> <strong>Controllers</strong> <strong>S7</strong>-<strong>300</strong> <strong>Module</strong> <strong>Data</strong>A5E00105505-03
Analog <strong>Module</strong>sSpecial characteristics of unused channels for some measuring rangesSince configured inputs can remain unused because of the channel groupgeneration, you must take note of the following special characteristics of theseinputs to enable the diagnostic functions on the used channels.• Measuring range 1 to 5 V: Connect the unused input in parallel with a usedinput of the same channel group.• Current measurement, 2-wire transmitter:There are two ways to use the channels:a) Leave the unused input open and do not enable diagnostics for thischannel group. Otherwise, if diagnostics are enabled, the analog moduletriggers a single diagnostic interrupt and the SF LED of the analog modulecomes on.b) Connect the unused input with a resistance of 1.5 to 3.3 k. You may thenenable diagnostics for this channel group.• Current measurement 4 to 20 mA, 4-wire transmitter: Connect the unusedinput in series with an input of the same channel group.Special characteristic when all channels are disabledIf you disable all input channels of the module and enable diagnostics whenparameterizing the analog input module SM 331; AI 8 12 bits, the module doesnot indicate that the “external auxiliary voltage” is missing.Measuring rangesYou perform the setting of the measuring ranges by means of the measuring rangemodules on the module and with the “measuring method” parameter in STEP 7.Table 4-67 Measuring Ranges of the SM 331; AI 8 x 12 bitsMethod SelectedMeasuring Range(Type of Sensor)U: Voltage 80 mV 250 mV 500 mV 1000 mVTC-I:thermocouple(internal compensation)(thermovoltagemeasurement)TC-E: Thermocouple(external compensation)(thermovoltagemeasurement) 2.5 V 5 V1 to 5 V 10 VType N [NiCrSi-NiSi]Type E [NiCr-CuNi]Type J [Fe-CuNi]Type K [NiCr-Ni]Type L [Fe-CuNi]Measuring Range<strong>Module</strong> SettingABADescriptionYou will find the digitizedanalog values in Section4.3.1 in the voltagemeasuring rangeYou will find the digitizedanalog values in Section4.3.1 in 80 mV the voltagemeasuring range<strong>Programmable</strong> <strong>Logic</strong> <strong>Controllers</strong> <strong>S7</strong>-<strong>300</strong> <strong>Module</strong> <strong>Data</strong>A5E00105505-034-123
Analog <strong>Module</strong>sTable 4-67 Measuring Ranges of the SM 331; AI 8 x 12 bits, continuedMethod Selected2DMU: Current (2-wiretransmitter)4DMU: Current (4-wiretransmitter)R-4L: Resistors(four-conductorconnection)TC-IL: Thermocouple(linear, internalcompensation)(temperaturemeasurement)TC-EL: Thermocouple(linear, externalcompensation)(temperaturemeasurement)RTD-4L: Bulb resistor(linear, four-conductorconnection)(temperaturemeasurement)Measuring Range(Type of Sensor)Measuring Range<strong>Module</strong> SettingDescription4 to 20 mA D You will find the digitizedanalog values in Section4.3.1 in the current 3.2 mACmeasuring range 10 mA0 to 20 mA4 to 20 mA 20 mA150 <strong>300</strong> 600 Type N [NiCrSi-NiSi]Type E [NiCr-CuNi]Type J [Fe-CuNi]Type K [NiCr-Ni]Type L [Fe-CuNi]Pt 100 climateNi 100 climatePt 100 standardNi 100 standardAAAYou will find the digitizedanalog values in Section4.3.1 in the resistancemeasuring rangeYou will find the digitizedanalog values in Section4.3.1 in the temperaturerangeThe characteristics arelinearized:• Pt 100 to DIN IEC 751• Ni 100 according to IECDIN 43760• Thermocouple to DIN584, type L toDIN 43710.Default SettingsThe default settings of the module in STEP 7 are the “voltage” measuring methodand the “ 10 V” measuring range. You can use this combination of measuringmethod and measuring range without parameterizing the SM 331; AI 8 x 12 bitswith STEP 7.Wire-Break CheckThe wire-break check is intended primarily for temperature measurements(thermocouples and bulb resistors.4-124<strong>Programmable</strong> <strong>Logic</strong> <strong>Controllers</strong> <strong>S7</strong>-<strong>300</strong> <strong>Module</strong> <strong>Data</strong>A5E00105505-03
Analog <strong>Module</strong>sSpecial characteristics of the wire-break check for the 4 to 20 mA measuringrangeWith a parameterized measuring range of 4 to 20 mA and enabled wire-breakcheck, the analog input module enters wire-break in the diagnosis when a currentfalls below 3.6 mA.If you have enabled diagnostics interrupt during configuration, the moduleadditionally triggers a diagnostic interrupt.If no diagnostic interrupt has been enabled, the illuminated SF LED is the onlyindication of the wire-break and you must evaluate the diagnostic bytes in the userprogram.With a parameterized measuring range of 4 to 20 mA and disabled wire-breakcheck and enabled diagnostic interrupt, the module triggers a diagnostic interruptwhen the underflow is reached.4.23 Analog Input <strong>Module</strong> SM 331; AI 8 x RTD(6E<strong>S7</strong>331-7PF00-0AB0)Order number6E<strong>S7</strong>331-7PF00-0AB0CharacteristicsThe analog input module SM 331; AI 8 x RTD has the following characteristicfeatures:• 8 differential inputs for RTD resistance temperature detector in 4 channelgroups• Optional setting of the resistance thermometer type per channel group• Rapid measured value updating for up to 4 channels• Measured-value resolution 15 bits + sign (independent of integration time)• <strong>Programmable</strong> diagnostics• <strong>Programmable</strong> diagnostic interrupt• 8 channels with limit monitoring• <strong>Programmable</strong> hardware interrupt when limit has been exceeded• <strong>Programmable</strong> end-of-scan-cycle interrupt• Isolated against the backplane bus interface<strong>Programmable</strong> <strong>Logic</strong> <strong>Controllers</strong> <strong>S7</strong>-<strong>300</strong> <strong>Module</strong> <strong>Data</strong>A5E00105505-034-125
Analog <strong>Module</strong>sUse of the module in the distributed peripheral ET 200MWhen you use the SM 331; AI 8 x RTD in the distributed peripheral ET 200M, youmust have one of the following IM 153 x:• IM 153-1; ab 6E<strong>S7</strong>153-1AA03-0XB0, E 01• IM 153-2; ab 6E<strong>S7</strong>153-2AA02-0XB0, E 05• IM 153-2; ab 6E<strong>S7</strong>153-2AB01-0XB0, E 04Terminal connection diagram and block diagram of the SM 331; AI 8 x RTDFault indicator – redL+1L+ M-21L+SFK0M0+M0-I c 0+I c 0-23456ADCDCtoDCADC2223242526M4+M4-I c 4+I c 4-K4M1+727M5+K1K2K3M1-I c 1+I c 1-M2+M2-I c 2+I c 2-M3+M3-I c 3+I c 3-89101112131415161718DACADCDACDACADCDAC2829303132333435363738BackplanebusactivationM5-I c5 +I c5-M6+M6-I c6 +I c6 -M7+M7-I c 7+I c 7-K5K6K71939M2040MFigure 4-41<strong>Module</strong> View and Block Diagram of the SM 331; AI 8 x RTD4-126<strong>Programmable</strong> <strong>Logic</strong> <strong>Controllers</strong> <strong>S7</strong>-<strong>300</strong> <strong>Module</strong> <strong>Data</strong>A5E00105505-03
Analog <strong>Module</strong>sTechnical specifications of the SM 331; AI 8 x RTDDimensions W x H x D(in millimeters)WeightSupports clockedoperationDimensions and Weight40 x 125 x 117Approx. 272 g<strong>Data</strong> for Specific <strong>Module</strong>Number of inputs 8NoLength of cable• Shielded max. 200 mVoltages, Currents, PotentialsPower rated voltage of the 24 VDCelectronics L+• Reverse polarity protection YesConstant measured current forresistance-type sensorIsolation• Between channels andbackplane bus• Between channels andpower supply of theelectronics• Between the channelsIn groups ofmax. 5 mAYesYesYes2Permitted potential difference• Between the inputs (U CM ) 75 VDC / 60 VAC• Between M ANA andM internal (U ISO )75 VDC / 60 VACInsulation tested withCurrent consumption• From the backplane bus• From the power supply L+Power dissipation of the module500 VDCmax. 100 mAmax. 240 mAtyp. 4.6 WMeasuring principle<strong>Module</strong> filtering modeAnalog value generationIntegrating8 channels, hardwareIntegration/conversion time/resolution (per channel)• <strong>Programmable</strong> Yes• Basic conversion time in 80ms• Additional conversion time 185*for measuring resistance,in ms• Additional conversion time 100for open-circuit monitoring,in ms• Resolution including sign 16 bits• Noise suppressionfor interference frequencyf1 in Hz400 / 60 / 50Smoothing of the measuredvaluesConversion time (per channel)Basic response time of module(all channels enabled)<strong>Module</strong> filtering modeNone / low/average/ high100 ms200 ms8 channels, softwareIntegration/conversion time/resolution (per channel)• <strong>Programmable</strong> Yes• Basic conversion time in 8 / 25 / 30ms• Additional conversion time 45 / 79 / 89*for measuring resistance,in ms• Additional conversion time 20 / 37 / 42for open-circuit monitoring,in ms• Resolution including sign 16 bits• Noise suppression for interferencefrequency f1 in HzSmoothing of the measuredvaluesConversion time (per channel)Basic response time of module(all channels enabled)400 / 60 / 50None / low/average/ high20 / 37 / 42 ms40 / 79 / 84 ms<strong>Programmable</strong> <strong>Logic</strong> <strong>Controllers</strong> <strong>S7</strong>-<strong>300</strong> <strong>Module</strong> <strong>Data</strong>A5E00105505-034-127
Analog <strong>Module</strong>s<strong>Module</strong> filtering modeIntegration/conversion time/resolution (per channel)• <strong>Programmable</strong> Yes• Basic conversion time in 3.3ms• Additional conversion timefor measuring resistance,in ms185*4 channels, hardwareLinearity error (with reference tothe input range)Repeat accuracy (in the steadystate at 25 °C, referred to theinput range)0.02 %0.01 %Status, Interrupts, DiagnosticsInterrupts• Hardware interrupt <strong>Programmable</strong>(channels 0 – 7)• Additional conversion timefor open-circuit monitoring,in ms85**• Diagnostic interrupt <strong>Programmable</strong>Diagnostic functions<strong>Programmable</strong>• Resolution including sign 16 bits• Noise suppression for interferencefrequency f1 in Hz400 / 60 / 50Smoothing of the measuredvaluesBasic response time of module(all channels enabled)None / low/average/ high10 msSuppression of interference, Limits of ErrorNoise suppression for f = n (f1 1%),”(f1 = interference frequency) n = 1.2, etc.• Common-mode> 100 dBinterference(U CM < 60 VAC)• Series-mode interference(peak value of interference< rated value of inputrange)> 90 dBCrosstalk between the inputs> 100 dBOperational limit (over entire temperature range, referredto 0 to 60 C input range)• Resistance thermometer 1.0 °C• Resistors 0.1 %Basic error (operational limit at 25°C, referred to inputrange)• Resistance thermometer 0.5 °C• Resistors 0.05 %Temperature error (withreference to the input range)0.005 %/K• Group error display Red LED (SF)• Diagnostic information can Possiblebe displayed<strong>Data</strong> for Selecting a SensorInput range (rated values) inputresistance• Resistance thermometer Pt 100, Pt 200, Pt 500,Pt 1000, Ni 100, Ni120, Ni 200, Ni 500, Ni1000, Cu 10• Resistors 150, <strong>300</strong>, 600 Maximum input voltage forvoltage input (destruction limit)Connection of the sensor• For measuring resistanceWith two-conductorconnectionWith three-conductorconnectionWith four-conductorconnection35 VDC continuous;75 VDC for max. 1 s(duty factor 1:20)Possible (withoutresistance correction)PossiblePossibleCharacteristic linearization• Resistance thermometer Pt 100, Pt 200, Pt 500,Pt 1000, Ni 100, Ni120, Ni 200, Ni 500, Ni1000, Cu 10 (standardand climatic range)• Technical unit fortemperature measurementDegrees Celsius;degrees Fahrenheit* The resistance measurement for a three-conductor connection is performed every 5 minutes.** Open-circuit monitoring in module filtering mode 4 Channels, Hardware is performed every 3 seconds.4-128<strong>Programmable</strong> <strong>Logic</strong> <strong>Controllers</strong> <strong>S7</strong>-<strong>300</strong> <strong>Module</strong> <strong>Data</strong>A5E00105505-03
Analog <strong>Module</strong>s4.23.1 Commissioning the SM 331; AI 8 x RTDYou set the mode of operation of the SM 331; AI 8 x RTD in STEP 7.ParameterYou will find a description of the general procedure for assigning parameters toanalog modules in Section 4.7.Parameterization restrictions when using the SM 331; AI 8 x RTD withPROFIBUS masters that only support DPV0.When you use the analog input module SM 331; AI 8 x RTD in an ET 200MPROFIBUS slave system with a PROFIBUS master which is not an <strong>S7</strong> master,certain parameters are not permitted. Masters that are not <strong>S7</strong> masters do notsupport hardware interrupts. So all the parameters associated with these functionsare deactivated. The deactivated parameters are hardware interrupt enable,hardware restrictions and end-of-scan-cycle interrupt enable. All the otherparameters are permitted.An overview of the parameters that you can set and their default settings areshown in the table below.Table 4-68 Parameters of the SM 331; AI 8 x RTDParameter Value Range DefaultSettingsEnable• Diagnostic interrupt• Hardware interruptupon limit violation• Hardware interrupt atend of cycleTrigger for hardwareinterrupt• Upper limit value• Lower limit valueDiagnostics• Group diagnostics• With wire-breakcheckYes/noYes/noYes/no32511 to –32512–32512 to 32511Yes/noYes/noNoNoNo32767-32768NoNoParameterTypeDynamicDynamicStaticScope<strong>Module</strong>ChannelChannelgroup<strong>Programmable</strong> <strong>Logic</strong> <strong>Controllers</strong> <strong>S7</strong>-<strong>300</strong> <strong>Module</strong> <strong>Data</strong>A5E00105505-034-129
Analog <strong>Module</strong>sTable 4-68 Parameters of the SM 331; AI 8 x RTD, continuedParameterValue RangeMeasurement• Measuring Method DeactivatedR-4L Resistance(four-conductor connection)R-3L Resistance,three-conductor connectionRTD-4L Bulb resistor(linear, four-conductorconnection)RTD-3L Bulb resistor(linear, three-conductorconnection)• Measuring Range Refer to Section 4.23.2 for themeasuring ranges of the inputchannels that you can set.DefaultSettingsRTD-4LPt 100climate0.003850(IPTS-68)• Temperature unit Degrees Celsius; degrees Fahrenheit DegreesCelsius• <strong>Module</strong> filtering mode 8 channels hardware filter8 channels software filter4 channels hardware filter• Temperaturecoefficient fortemperaturemeasurement withbulb resistor (RTD)• Interferencesuppression*Platinum (Pt)0,003850 / °C0.003916 / °C0.003902 / °C0.003920 / °C0,003850 / °C (ITS-90)Nickel (Ni)0.006180 / °C0.006720 / °CCopper (Cu)0.00427 / °C8channels,hardwarefilter0.00385050/60/400 Hz; 400 Hz; 60 Hz; 50 Hz 50/60/400HzParameterTypeDynamicDynamicDynamicDynamicDynamicScopeChannelgroup<strong>Module</strong><strong>Module</strong>ChannelgroupChannelgroup• Smoothing NoneLowAverageHighNone Dynamic Channelgroup* 50/60/400 Hz programmable only for modes 8 or 4-Channel Hardware Filter Modes;50 Hz, 60 Hz or 400 Hz programmable only for mode 8-Channel Hardware Filter Mode4-130<strong>Programmable</strong> <strong>Logic</strong> <strong>Controllers</strong> <strong>S7</strong>-<strong>300</strong> <strong>Module</strong> <strong>Data</strong>A5E00105505-03
Analog <strong>Module</strong>sChannel groupsThe channels of the SM 331; AI 8 x RTD are arranged in four groups of two. Youcan only ever assign parameters to one channel group.The table below shows which channels are parameterized as a channel group ineach case. You will need the channel group number to set the parameters in theuser program with an SFC.Table 4-69 Assignment of Channels of the SM 331; AI 8 x RTD to Channel GroupsChannels ...Channel 0Channel 1Channel 2Channel 3Channel 4Channel 5Channel 6Channel 7... form one Channel Group eachChannel group 0Channel group 1Channel group 2Channel group 3Special characteristic of channel groups for hardware interrupts upon limitviolationYou can set the upper and lower limits for each channel with hardware interrupts inSTEP 7.<strong>Module</strong> filtering modeThe SM 331; AI 8RTD operates in one of the following modes:• “Hardware filter, 8 channels”• “Software filter, 8 channels”• “Hardware filter, 4 channels”The operating mode affects the scan time of the module.<strong>Programmable</strong> <strong>Logic</strong> <strong>Controllers</strong> <strong>S7</strong>-<strong>300</strong> <strong>Module</strong> <strong>Data</strong>A5E00105505-034-131
Analog <strong>Module</strong>s”Hardware filter 8 channels” modeIn “Hardware filter 8 channels” mode, the analog input module SM331; AI 8 x RTDswitches over between the two channels in each group. As the module containsfour analog/digital converters (ADC), all four of the ADCs convert simultaneouslyfor channels 0, 2, 4 and 6. Once the even-numbered channels have beenconverted all the ADCs simultaneously convert for the odd-numbered channels 1,3, 5 and 7 (see Figure 4-42).Start analog conversion(simultaneous)K0 K2 K4 K6Scan timeStart analog conversion(simultaneous)K1 K3 K5 K7Figure 4-42Hardware filter 8 channels scan timeScan time of the moduleIn 8-channel hardware filter mode, the channel conversion time including thecommunication time of the analog input module SM 331; AI 8 x RTD is 85 ms. Themodule must then be switched over to the other channel in the group by means ofopto-MOS relays. Opto-MOS relays need 12 ms to switch and settle. Eachchannel needs a time of 97 ms, so that the scan time is exactly 194 ms.Scan time = (t K + t U ) x 2Scan time = (85 ms + 12 ms) x 2Scan time = 194 mst K :t U :channel conversion time for one channeltime for switching to the other channel in the channel group4-132<strong>Programmable</strong> <strong>Logic</strong> <strong>Controllers</strong> <strong>S7</strong>-<strong>300</strong> <strong>Module</strong> <strong>Data</strong>A5E00105505-03
Analog <strong>Module</strong>s”Software filter 8 channels” modeIn “Software filter 8 channels” mode, the analog/digital conversion occurs in exactlythe same way as in “hardware filter 8 channels” mode. That is to say, as themodule contains four analog/digital converters (ADC), all four of the ADCs convertsimultaneously for channels 0, 2, 4 and 6. Once the even-numbered channels areconverted, all the ADCs convert simultaneously for the odd-numbered channels 1,3, 5 and 7 (see Figure 4-43).Start analog conversion(simultaneous)K0 K2 K4 K6Scan timeStart analog conversion(simultaneous)K1 K3 K5 K7Figure 4-43Software filter 8 channels scan timeScan time of the moduleThe channel conversion time depends, however, on the programmed interferencefrequency suppression. When you set an interference frequency of 50 Hz, thechannel conversion time including communication time is 30 ms. When you set aninterference frequency of 60 Hz, the channel conversion time is 25 ms. When youset an interference frequency of 400 Hz, the channel conversion time is reduced to8 ms. As with 8-channel hardware filter mode, the module must be switched overby means of opto MOS relays with a time of 12 ms for switching to the otherchannel of the group. This relationship is shown in the table that follows.<strong>Programmable</strong> <strong>Logic</strong> <strong>Controllers</strong> <strong>S7</strong>-<strong>300</strong> <strong>Module</strong> <strong>Data</strong>A5E00105505-034-133
Analog <strong>Module</strong>sTable 4-70 Scan Times in “Software Filter, 8 Channels” ModeProgrammedInterference FrequencySuppressionChannel Scan Time*<strong>Module</strong> Scan Time (AllChannels)50 Hz 42 ms 84 ms60 Hz 37 ms 74 ms400 Hz 20 ms 40 ms* Channel scan time = channel conversion time + 12 ms switching time to the other channelin the channel groupScan time in “Hardware Filter, 4 Channels” modeIn this mode, the module does not switch between the channels of the differentgroups. As the module contains four analog/digital converters (ADC), all four of theADCs convert simultaneously for channels 0, 2, 4 and 6.Start analog conversion(simultaneous)K0 K2 K4 K6Scan timeFigure 4-44Hardware filter 4 channels scan timeScan time of the moduleIn 4-channel hardware filter mode, the channel conversion time including thecommunication time of the analog input module SM 331; AI 8 x RTD is 10 ms. Asthe module does not switch over between the channels in a group, the channelscan time and the module scan time are the same: 10 ms.Channel conversion time = channel scan time = module scan time = 10 ms4-134<strong>Programmable</strong> <strong>Logic</strong> <strong>Controllers</strong> <strong>S7</strong>-<strong>300</strong> <strong>Module</strong> <strong>Data</strong>A5E00105505-03
Analog <strong>Module</strong>sProlongation of the scan time with a wire-break checkThe wire-break check is a software function of the module that is available in alloperating modes.In the 8-channel hardware and software filter operating modes, the scan timeof the module is doubled, irrespective of the number of channels for whichwire-break has been enabled.In the 4-channel hardware filter operating mode, the module interruptsprocessing of the input data 170 ms and performs a wire-break check. In otherwords, each wire-break check prolongs the scan time of the module by 170 ms.Smoothing of the measured valuesYou fill find information that is generally applicable to the smoothing of analogvalues in Section 4.6.Special characteristic with short-circuit to M or LIf you short an input channel to M or L, the module does not suffer any damage.The channel continues to issue valid data; neither is a diagnosis reported.DiagnosticsYou will find the diagnostic messages that are grouped under the “group diagnosis”parameter in Table 4-46, on page 4-72.4.23.2 Measuring Methods and Measuring Ranges of theSM 331; AI 8 x RTDMeasuring MethodsYou can set the following measuring methods for the input channels:• RTD 4-conductor measurement• RTD 3-conductor measurement• Resistor 4-conductor measurement• Resistor 3-conductor measurementYou perform the setting with the “measuring method” parameter in STEP 7.<strong>Programmable</strong> <strong>Logic</strong> <strong>Controllers</strong> <strong>S7</strong>-<strong>300</strong> <strong>Module</strong> <strong>Data</strong>A5E00105505-034-135
Analog <strong>Module</strong>sUnused ChannelsSet the “measuring method” parameter for unused channels to “disabled”. In thisway you shorten the scan time of the module.You must terminate an unused channel of an enabled channel group with anominal resistance in order to avoid diagnostic errors for the unused channel (referto the block diagram, Figure 4-41, for the connection).In the “4-Channel Hardware Filter” operating mode, termination is not necessaryprovided that you have disabled the unused channel groups. Channels 1, 3, 5 and7 are not monitored in this mode.Measuring rangesYou perform setting of the measuring ranges with the “measuring range” parameterin STEP 7.Table 4-71 Measuring ranges of the SM331; AI 8 x RTDMethod Selected Measuring Range DescriptionResistors:(Three-conductor/four-conductor terminal)Resistance RTD(Three-conductor/four-conductor terminal)150 <strong>300</strong> 600 Pt 100 climatePt 200 climatePt 500 climatePt 1000 climateNi 100 climateNi 120 climateNi 200 climateNi 500 climateNi 1000 climateCu 10 climatePt 100 standardPt 200 standardPt 500 standardPt 1000 standardNi 100 standardNi 120 standardNi 200 standardNi 500 standardNi 1000 standardCu 10 standardYou will find the digital analog values inSection 4.3.14-136<strong>Programmable</strong> <strong>Logic</strong> <strong>Controllers</strong> <strong>S7</strong>-<strong>300</strong> <strong>Module</strong> <strong>Data</strong>A5E00105505-03
Analog <strong>Module</strong>sSpecial characteristic of parameter assignment to upper and lower limit valuesThe programmable limit values (triggers for hardware interrupt) differ for the AI 8RTD from the range of values shown in Table 4-68.The reason for this is that numerical methods in the module software for evaluatingthe process variables prevent values up to 32511 from being reported in somecases. The process input value at which a hardware interrupt for an underflow oroverflow occurs depends on the calibration factors for an individual channel andcan vary between the lower limits shown in the table below and 32511 (7EFF H ).Limit values should not be set at values higher than the minimum potential limitvalues shown in the table below.End-of-scan-cycle interruptBy enabling the end-of-scan-cycle interrupt, you can synchronize a process withthe conversion cycle of the module. The interrupt occurs when the conversion of allthe enabled channels is complete.Table 4-72 Content of the 4 bytes with additional information from OB40 during a hardwareinterrupt or an end-of-scan-cycle interruptContent of the 4 bytes withadditional information2 7 2 6 2 5 2 4 2 3 2 2 2 1 2 0 ByteSpecialanalogmarkers2 bits per channel to identify the rangeUpper limit exceeded inchannelLower limit exceeded inchannel7 6 5 4 3 2 1 0 07 6 5 4 3 2 1 0 1End-of-scan-cycle event X 2Unassigned bit 3<strong>Programmable</strong> <strong>Logic</strong> <strong>Controllers</strong> <strong>S7</strong>-<strong>300</strong> <strong>Module</strong> <strong>Data</strong>A5E00105505-034-137
Analog <strong>Module</strong>s4.24 Analog Input <strong>Module</strong> SM 331; AI 8 x TC(6E<strong>S7</strong>331-7PF10-0AB0)Order number6E<strong>S7</strong>331-7PF10-0AB0CharacteristicsThe analog input module SM 331; AI 8 x TC has the following features:• 8 differential inputs for thermocouples (TC) in 4 channel groups• Optional setting of the thermocouple type per channel group• Rapid measured value updating for up to 4 channels• Measured-value resolution 15 bits + sign (independent of integration time)• <strong>Programmable</strong> diagnostics• <strong>Programmable</strong> diagnostic interrupt• 8 channels with limit monitoring• <strong>Programmable</strong> hardware interrupt when limit has been exceeded• <strong>Programmable</strong> end-of-scan-cycle interrupt• <strong>Programmable</strong> reaction to open thermocouple• Isolated against the backplane bus interfaceUse of the module in the distributed peripheral ET 200MWhen you use the SM 331; AI 8 x TC in the distributed peripheral ET 200M, youmust have one of the following IM 153-x:• IM 153-1; as of 6E<strong>S7</strong>153-1AA03-0XB0, E 01• IM 153-2; as of 6E<strong>S7</strong>153-2AA02-0XB0, E 05• IM 153-2; as of 6E<strong>S7</strong>153-2AB01-0XB0, E 044-138<strong>Programmable</strong> <strong>Logic</strong> <strong>Controllers</strong> <strong>S7</strong>-<strong>300</strong> <strong>Module</strong> <strong>Data</strong>A5E00105505-03
Analog <strong>Module</strong>sTerminal connection diagram and block diagram of the SM 331; AI 8 x TCFault indicator – redSF1L- M+21L+222345DCtoDC232425Channel0Channel1Channel2Channel3TC+0TC-0TC+1TC-1TC+2TC-2TC+3TC-36789101112131415161718ADCADCADCADCExtKV26272829303132333435363738BackplanebusinterfaceTC+4TC-4 K4TC+5TC-5 K5TC+6TC-6 K6TC+7TC-7 K7KV+KV-Ext KVlc+lc-19392040MChannelnumberFigure 4-45<strong>Module</strong> View and Block Diagram of the SM 331; AI 8 x TC<strong>Programmable</strong> <strong>Logic</strong> <strong>Controllers</strong> <strong>S7</strong>-<strong>300</strong> <strong>Module</strong> <strong>Data</strong>A5E00105505-034-139
Analog <strong>Module</strong>sTechnical specifications of the SM 331; AI 8 x TCDimensions W x H x D(in millimeters)WeightSupports clockedoperationDimensions and Weight40 x 125 x 117Approx. 272 g<strong>Data</strong> for Specific <strong>Module</strong>NoMeasuring principle<strong>Module</strong> filtering modeAnalog value generationIntegration time/conversiontime/ resolution (perchannel)• <strong>Programmable</strong> YesIntegrating8 channels, hardwareLength of cable• Shielded max. 100 mVoltages, Currents, PotentialsPower rated voltage of the 24 VDCelectronics L+• Reverse polarity protection Yes• Basic conversion time inms• Additional conversiontime for open-circuitmonitoring, in ms• Resolution includingsign95416 bitsConstant measured current forresistance-type sensorIsolation• Between channels andbackplane bus• Between channels andpower supply of theelectronics• Between the channelsIn groups ofPermitted potential differencetyp. 0.7 mAYesYesYes2• Noise suppressionfor interferencefrequency f1 in HzSmoothing of the measuredvaluesBasic response time ofmodule (all channelsenabled)<strong>Module</strong> filtering modeIntegration time/conversiontime/ resolution (perchannel)400/60/50None / low/ average/ high190 ms8 channels, software• Between the inputs (U CM ) 75 VDC / 60 VAC• <strong>Programmable</strong> Yes• Between M ANA andM internal (U ISO )75 VDC 60 VAC• Basic conversion time inms23/72/83Insulation tested with500 VDCCurrent consumption• From the backplane bus max. 100 mA• From supply voltageL+max. 240 mAPower dissipation of the moduletyp. 3.0 W• Additional conversiontime for open-circuitmonitoring, in ms• Resolution includingsign• Noise suppressionfor interferencefrequency f1 in HzSmoothing of the measuredvaluesBasic response time ofmodule (all channelsenabled)416 bits400/60/50None / low/ average/ high46/144/166 ms4-140<strong>Programmable</strong> <strong>Logic</strong> <strong>Controllers</strong> <strong>S7</strong>-<strong>300</strong> <strong>Module</strong> <strong>Data</strong>A5E00105505-03
Analog <strong>Module</strong>sAnalog Value Generation (Cont’d)-230 °C to -200 °C ±3.0 °CMeasuring principle<strong>Module</strong> filtering modeIntegrating4 channels, hardwareType R +100 °C to +1769 °C ±1.5 °C-50 °C to +100 °C ±1.8 °CIntegration time/conversion time/ resolution (per channel)• <strong>Programmable</strong> YesType S +100 °C to +1769 °C ±1.7 °C-50 °C to +100 °C ±2.0 °C• Basic conversion time inms• Additional conversiontime for open-circuitmonitoring, in ms• Resolution includingsign• Noise suppression forfrequency f1 in HzSmoothing of the measuredvaluesBasic response time ofmodule (all channelsenabled)1.093 1 )16 bits400/60/50None / low/ average/ high10 msType B 4) +200 °C to +1820 °C ±2.3 °C+45 °C +200 °C ±2.5 °CType C +100 °C to +2315 °C ±2.3 °C0 °C +100 °C ±2.5 °CBasic error (operational limit at 25°C, referred to inputrange)• ThermocoupleType T -200 °C to +400 °C ±0.2 °C-230 °C to -200 °C ±0.5 °CType U -150 °C to +400 °C ±0.2 °C-200 °C to -150 °C ±0.5 °CSuppression of interference, Limits of ErrorNoise suppression for f = n (f1 ± 1%),(f1 = interference frequency) n = 1.2, etc.• Common-mode > 100 dBinterference (U cm < 60VAC)• Series-modeinterference (peak valueof interference < ratedvalue of input range)> 90 dB 2)Crosstalk between theinputs> 100 dBOperational limit (over entire temperature range, referredto 0 to 60 °C input range) Note: This limit does not coverthe error cold connection point 3)• ThermocoupleType T -200 °C to +400 °C ±0.7 °C-230 °C to -200 °C ±1.0 °CType U -150 °C to +400 °C ±0.9 °C-200 °C to -150 °C ±1.2 °CType E -200 °C to +1000 °C ±1.2 °C-230 °C to -200 °C ±1.5 °CType E -200 °C to +1000 °C ±0.2 °C-230 °C to -200 °C ±0.5 °CType J -150 °C to +1200 °C ±0.2 °C-210 °C to -150 °C ±0.5 °CType L -150 °C to +900 °C ±0.2 °C-200 °C to -150 °C ±0.5 °CType K -200 °C to +1372 °C ±0.2 °C-230 °C to -200 °C ±1.0 °CType N -200 °C to +1<strong>300</strong> °C ±0.2 °C-230 °C to -200 °C ±1.0 °CType R +100 °C to +1769 °C ±0.2 °C-50 °C to +100 °C ±0.5 °CType S +100 °C to +1769 °C ±0.2 °C-50 °C to +100 °C ±0.5 °CType B 4 ) +200 °C to +1820 °C ±0.3 °C+45 °C to +200 °C ±0.5 °CType C +100 °C to +2315 °C ±0.3 °C0 °C +100 °C ±0.5 °CType J -150 °C to +1200 °C ±1.4 °C-210 °C to -150 °C ±1.7 °CType L -150 °C to +900 °C ±1.5 °C-200 °C to -150 °C ±1.8 °CType K -200 °C to +1372 °C ±2.1 °C-230 °C to -200 °C ±2.9 °CType N -200 °C to +1<strong>300</strong> °C ±2.2 °C<strong>Programmable</strong> <strong>Logic</strong> <strong>Controllers</strong> <strong>S7</strong>-<strong>300</strong> <strong>Module</strong> <strong>Data</strong>A5E00105505-034-141
Analog <strong>Module</strong>sTemperature error (withreference to the input range)Linearity error (withreference to the input range)Repeat accuracy (in thesteady state at 25 °C,referred to the output range3)±0.005%/K± 0.02%±0.01%Status, interrupts, diagnosticsInterrupts• Hardware interrupt <strong>Programmable</strong>(channels 0 to 7)• Diagnostic interrupt <strong>Programmable</strong>Diagnostic functions <strong>Programmable</strong>• Group error display Red LED (SF)• Diagnostics informationread-outPossible<strong>Data</strong> for Selecting a SensorInput ranges (rated values)/input resistance• Thermocouples Type B, C, N, E, R, S, J, L,T, K, UMaximum input voltage forvoltage input (destructionlimit)Characteristic linearizationTemperature compensation• Internal temperaturecompensation• External temperaturecompensation withPt 100• Compensation for 0°Ccomparison pointtemperature• Compensation for 50°Ccomparison pointtemperature• Technical unit fortemperaturemeasurement20 VDC continuous; 75VDC for max. 1 s (dutyfactor 1:20)<strong>Programmable</strong><strong>Programmable</strong>PossiblePossiblePossiblePossibleDegrees Celsius/degrees Fahrenheit1) Open-circuit monitoring in 4 channels, Hardware operating mode is performed every 3 seconds.2) Series-mode rejection in 8 channels, software mode is reduced as follows:50 Hz > 70 dB60 Hz > 70 dB400 Hz > 80 dB3) The operational limit comprises only the basic error of the analog input at Ta = 25 °C and the totaltemperature error. The total error must cover the error for the compensation of the cold connectionpoint. Internal compensation of the cold connection point = max. 1.5 °CExternal compensation of the cold connection point = accuracy of the used external RTD is +0.1 °CExternal compensation of the cold connection point, where the connection point is held at 0 °C or 50°C = accuracy of the connection point temperature control.4) Because of the slight rise over the range of approx. 0 °C to 85 °C, the lack of compensation of thecomparison point temperature only has a negligible effect on a type B thermocouple. If there is nocompensation and the measuring method “Compensation to 0 °C” is set, the deviation in the type Bthermocouple duringtemperature measurement is: 200 °C to 1802 °C
Analog <strong>Module</strong>s4.24.1 Commissioning the SM 331; AI 8 x TCYou set the mode of operation of the SM 331; AI 8 x TC bits in STEP 7.ParameterYou will find a description of the general procedure for assigning parameters toanalog modules in Section 4.7.Parameterization restrictions when using the analog input module SM 331;AI 8 x TC with PROFIBUS masters that only support DPV0.When you use the analog input module SM 331; AI 8 x TC in an ET 200MPROFIBUS slave system with a PROFIBUS master which is not an <strong>S7</strong> master,certain parameters are not permitted. Masters that are not <strong>S7</strong> masters do notsupport hardware interrupts. So all the parameters associated with these functionsare deactivated. The deactivated parameters are hardware interrupt enable,hardware restrictions and end-of-scan-cycle interrupt enable. All the otherparameters are permitted.An overview of the parameters that you can set and their default settings areshown in the table below.Table 4-73 Parameters of the SM 331; AI 8 x TCParameter Value Range DefaultSettingsEnable• Diagnostic interrupt• Hardware interruptupon limit violation• Hardware interruptat end of cycleTrigger for hardwareinterrupt• Upper limit value• Lower limit valueDiagnostics• Group diagnostics• With wire-breakcheckYes/noYes/noYes/no32511 to –32512–32512 to 32511Yes/noYes/noNoNoNo32767-32768NoNoParameterTypeDynamicDynamicStaticScope<strong>Module</strong>ChannelChannelgroup<strong>Programmable</strong> <strong>Logic</strong> <strong>Controllers</strong> <strong>S7</strong>-<strong>300</strong> <strong>Module</strong> <strong>Data</strong>A5E00105505-034-143
Analog <strong>Module</strong>sTable 4-73 Parameters of the SM 331; AI 8 x TC, continuedParameterValue RangeMeasurement• Measuring Method DeactivatedTC-IL Thermocouple(linear, internalcomparison)TC-EL Thermocouple(linear, externalcomparison)TC-L00C Thermocouple (linear, ref.temperature 0°C)TC-L50C Thermocouple (linear, ref.temperature 50°C)• Measuring Range For the settable measuring ranges ofthe input channels, please refer tothe individual module description.• Reaction to open Overflow; underflowthermocouple• Temperature unit Degrees Celsius; degreesFahrenheit• <strong>Module</strong> filteringmode• Interferencesuppression*• Smoothing NoneLowAverageHigh8 channels hardware filter8 channels software filter4 channels hardware filterDefaultSettingsTC-ILType KOverflowDegreesCelsius8 channels,hardwarefilter50/60/400 Hz; 400 Hz; 60 Hz; 50 Hz; 50/60/400HzParameterTypeDynamicDynamicDynamicDynamicScopeChannelgroup<strong>Module</strong><strong>Module</strong>ChannelgroupNone Dynamic Channelgroup* 50/60/400 Hz programmable only for modes 8 or 4-Channel Hardware Filter Modes;50 Hz, 60 Hz or 400 Hz programmable only for mode 8-Channel Hardware Filter Mode4-144<strong>Programmable</strong> <strong>Logic</strong> <strong>Controllers</strong> <strong>S7</strong>-<strong>300</strong> <strong>Module</strong> <strong>Data</strong>A5E00105505-03
Analog <strong>Module</strong>sChannel groupsThe channels of the SM 331; AI 8 x TC are arranged in four groups of two. Youcan only ever assign parameters to one channel group.The table below shows which channels are parameterized as a channel group ineach case. You will need the channel group number to set the parameters in theuser program with an SFC.Table 4-74 Assignment of Channels of the SM 331; AI 8 x TC to Channel GroupsChannels ...Channel 0Channel 1Channel 2Channel 3Channel 4Channel 5Channel 6Channel 7... form one Channel Group eachChannel group 0Channel group 1Channel group 2Channel group 3Special characteristic of channel groups for hardware interrupts upon limitviolationYou can set the upper and lower limits for each channel with hardware interrupts inSTEP 7.<strong>Module</strong> filtering modeThe SM 331; AI 8 x TC operates in one of the following modes:• “Hardware filter, 8 channels”• “Software filter, 8 channels”• “Hardware filter, 4 channels”The operating mode affects the scan time of the module.<strong>Programmable</strong> <strong>Logic</strong> <strong>Controllers</strong> <strong>S7</strong>-<strong>300</strong> <strong>Module</strong> <strong>Data</strong>A5E00105505-034-145
Analog <strong>Module</strong>s“Hardware filter 8 channels” modeIn 8-channel hardware filter mode, the analog input module SM331; AI 8 x TCswitches over between the two channels in each group. As the module containsfour analog/digital converters (ADC), all four of the ADCs convert simultaneouslyfor channels 0, 2, 4 and 6. Once the even-numbered channels have beenconverted all the ADCs simultaneously convert for the odd-numbered channels 1,3, 5 and 7 (see Figure 4-35).Start analog conversion(simultaneous)K0 K2 K4 K6Scan timeStart analog conversion(simultaneous)K1 K3 K5 K7Figure 4-46Hardware filter 8 channels scan timeScan time in the modeIn 8-channel hardware filter mode, the channel conversion time including thecommunication time of analog input module SM331; AI 8 x TC is 91 ms. Themodule must then be switched over to the other channel in the group by means ofopto-MOS relays. Opto-MOS relays need 7 ms to switch and settle. Each channelneeds a time of 98 ms, so that the scan time is exactly 196 ms.Scan time = (t K + t U ) x 2Scan time = (91 ms + 7 ms) x 2Scan time = 196 mst K :t U :channel conversion time for one channeltime for switching to the other channel in the channel group4-146<strong>Programmable</strong> <strong>Logic</strong> <strong>Controllers</strong> <strong>S7</strong>-<strong>300</strong> <strong>Module</strong> <strong>Data</strong>A5E00105505-03
Analog <strong>Module</strong>s“Software filter 8 channels” modeIn 8-channel software filter mode, the analog input module SM331; AI 8 x TCswitches over between the two channels in each group. As the module containsfour analog/digital converters (ADC), all four of the ADCs convert simultaneouslyfor channels 0, 2, 4 and 6. Once the even-numbered channels have beenconverted all the ADCs simultaneously convert for the odd-numbered channels 1,3, 5 and 7 (see Figure 4-47).Start analog conversion(simultaneous)K0 K2 K4 K6Scan timeStart analog conversion(simultaneous)K1 K3 K5 K7Figure 4-47Software filter 8 channels scan time<strong>Programmable</strong> <strong>Logic</strong> <strong>Controllers</strong> <strong>S7</strong>-<strong>300</strong> <strong>Module</strong> <strong>Data</strong>A5E00105505-034-147
Analog <strong>Module</strong>sScan time of the moduleIn the 8-channel software filter mode of analog input module SM331; AI 8 x TC, thechannel conversion time is guided by the interference frequency set. When you setan interference frequency of 50 Hz, the channel conversion time includingcommunication time is 76 ms. When you set an interference frequency of 60 Hz,the channel conversion time is 65 ms. When you set an interference frequency of400 Hz, the channel conversion time is reduced to 16 ms. As with 8-channelhardware filter mode, the module must be switched over by means of opto MOSrelays with a switchover time of 7 ms to the other channel of the group. Table 4-75shows the scan time of the module at a certain interference frequency.Table 4-75 Scan Times in “Software Filter, 8 Channels” ModeProgrammedInterference FrequencySuppressionChannel Scan Time*<strong>Module</strong> Scan Time (AllChannels)50 Hz 83 ms 166 ms60 Hz 72 ms 144 ms400 Hz 23 ms 46 ms* Channel scan time = channel conversion time + 7 ms switching time to the other channelin the channel group“Hardware filter 4 channels” modeIn 4-channel hardware filter mode, the analog input module SM331; AI 8 x TC doesnot switch over between the channels of the individual groups. As the modulecontains four analog/digital converters (ADC), all four of the ADCs convertsimultaneously for channels 0, 2, 4 and 6.Start analog conversion(simultaneous)K0 K2 K4 K6Scan timeFigure 4-48Hardware filter 4 channels scan time4-148<strong>Programmable</strong> <strong>Logic</strong> <strong>Controllers</strong> <strong>S7</strong>-<strong>300</strong> <strong>Module</strong> <strong>Data</strong>A5E00105505-03
Analog <strong>Module</strong>sScan time of the moduleIn 4-channel hardware filter mode, the channel conversion time including thecommunication time of analog input module SM331; AI 8 x TC is 10 ms. As themodule does not switch over between the channels in a group, the channel scantime and the module scan time are the same: 10 ms.Channel conversion time = channel scan time = module scan time = 10 msProlongation of the scan time with a wire-break checkThe wire-break check is a software function of the module that is available in alloperating modes.In the 8-Channel Hardware and Software Filter operating mode prolongs thescan time of the module by 4 ms, irrespective of the number of channels for whichwire-break has been enabled.In the 4-Channel Hardware Filter operating mode, the module interruptsprocessing of the input data 170 ms and performs a wire-break check. In otherwords, each wire-break check prolongs the scan time of the module by 93 ms.Smoothing of the measured valuesYou fill find information that is generally applicable to the smoothing of analogvalues in Section 4.6.Special characteristic with short-circuit to M or LIf you short an input channel to M or L, the module does not suffer any damage.The channel continues to issue valid data; neither is a diagnosis reported.DiagnosticsYou will find the diagnostic messages that are grouped under the “group diagnosis”parameter in Table 4-46, on page 4-72.<strong>Programmable</strong> <strong>Logic</strong> <strong>Controllers</strong> <strong>S7</strong>-<strong>300</strong> <strong>Module</strong> <strong>Data</strong>A5E00105505-034-149
Analog <strong>Module</strong>s4.24.2 Measuring Methods and Measuring Ranges of the SM 331;AI 8 x TCMeasuring MethodsYou can set the following measuring methods for the input channels:• Thermocouple, linearization with reference temperature 0 °C• Thermocouple, linearization with reference temperature 50 °C• Thermocouples, linearization with internal comparison• Thermocouple, linearization with external comparisonYou perform the setting with the “measuring method” parameter in STEP 7.Unused ChannelsSet the “measuring method” parameter for unused channels to “disabled”. In thisway you shorten the scan time of the module.You must terminate an unused channel in an enabled channel group to avoiddiagnostic errors for the unused channel. To do this, short the Plus input and Minusinput of the channel.In the “4-Channel Hardware Filter” operating mode, termination is not necessaryprovided that you have disabled the unused channel groups. Channels 1, 3, 5 and7 are not monitored in this mode.Measuring rangesYou perform setting of the measuring ranges with the “measuring range” parameterin STEP 7.Table 4-76 Measuring Ranges of the SM331; AI 8 x TCMethod Selected Measuring Range DescriptionTC-L00C:(thermocouple, linear,reference temperature0 °C)TC-L50C:(thermocouple, linear,reference temperature50 °C)TC-IL:(thermocouple, linear,internal compensation)TC-EL:(thermocouple, linear,external compensation)Type BType CType EType JType KType LType NType RType SType TType UYou will find the digitized analog valuesin Section 4.3.1 in the temperature range4-150<strong>Programmable</strong> <strong>Logic</strong> <strong>Controllers</strong> <strong>S7</strong>-<strong>300</strong> <strong>Module</strong> <strong>Data</strong>A5E00105505-03
Analog <strong>Module</strong>sSpecial characteristic of parameter assignment to upper and lower limit valuesThe programmable limit values (triggers for hardware interrupt) differ for theAI 8 x TC from the range of values shown in Table 4-73.The reason for this is that numerical methods in the module software for evaluatingthe process variables prevent values up to 32511 from being reported in somecases. The process input value at which a hardware interrupt for an underflow oroverflow occurs depends on the calibration factors for an individual channel andcan vary between the lower limits shown in the Table below and 32511 (7EFF H ).Limit values should not be set at values higher than the minimum potential limitvalues shown in the tables below.Table 4-77 Minimum Possible Upper and Lower Limit Values of SM 331; AI 8 x TC in °CThermocoupleMinimum PossibleUpper Limit ValueMinimum PossibleLower Limit Valuein °C Dec. Hex. in °C Dec. Hex.Type B 1820.1 18201 471A H 0 0 0Type C --- --- --- --- --- ---Type E --- --- --- --- --- ---Type J 1200.1 12001 2EE1 H
Analog <strong>Module</strong>sTable 4-78 Minimum Possible Upper and Lower Limit Values of SM 331; AI 8 x TC in °FThermocoupleMinimum PossibleUpper Limit ValueMinimum PossibleLower Limit Valuein °F Dec. Hex. in °F Dec. Hex.Type B 2786.6 27866 6CDA H 0 0 0Type C --- --- --- --- --- ---Type E --- --- -- --- --- --Type J 2192.2 21922 55A2 H
Analog <strong>Module</strong>s4.25 Analog Input <strong>Module</strong> SM 331; AI 2 x 12 bits;(6E<strong>S7</strong>331-7KB02-0AB0)Order number: “Standard module”6E<strong>S7</strong>331-7KB02-0AB0Order number: “SIPLUS <strong>S7</strong>-<strong>300</strong>-<strong>Module</strong>”6AG1 331-7KB02-2AB0CharacteristicsThe analog input module SM 331; AI 2 x 12 bits has the following characteristicfeatures:• Two inputs in one channel group• Measured-value resolution (depending on the integration time set)– 9 bits + sign– 12 bits + sign– 14 bits + sign• Measuring method selectable per channel group:– Voltage– Current– Resistors– Temperature• Arbitrary measuring range selection per channel group• <strong>Programmable</strong> diagnostics• <strong>Programmable</strong> diagnostic interrupt• One channel with limit monitoring• <strong>Programmable</strong> hardware interrupt when limit has been exceeded• Isolated against the backplane bus interface• Isolated against load voltage (except when at least onecoding key is inserted in position D)ResolutionThe resolution of the measured value is a direct function of the integration timeselected. In other words the longer the integration time for an analog input channel,the more accurate the resolution of the measured value will be (see TechnicalSpecifications of the module and Table 4-6 on page 4-10).<strong>Programmable</strong> <strong>Logic</strong> <strong>Controllers</strong> <strong>S7</strong>-<strong>300</strong> <strong>Module</strong> <strong>Data</strong>A5E00105505-034-153
Analog <strong>Module</strong>sTerminal Connection Diagram and Block Diagram of the SM 331; AI 2 x 12 bitsFault indicator – redThermocouples,Voltage measurementCurrent measurementResistance testSFInternalsupplyCurrent MultiplexersourceMeas. rangemoduleL+24VM 0 + CH0M 0M 0 + CH0M 0M 1 + CH1M 1I C0 +I C0+InternalT compensationExternalcompensationNoneCompComp +Comp–/ ManaADCIsolationBackplanebusinterfaceSFMFigure 4-49<strong>Module</strong> View and Block Diagram of the Analog Input <strong>Module</strong> SM 331; AI 2 x 12 bitsThe input resistances depend on the measuring range selected (refer to thetechnical specifications for the module).4-154<strong>Programmable</strong> <strong>Logic</strong> <strong>Controllers</strong> <strong>S7</strong>-<strong>300</strong> <strong>Module</strong> <strong>Data</strong>A5E00105505-03
Analog <strong>Module</strong>sTechnical specifications of the SM 331; AI 2 x 12 bitsDimensions W x H x D(in millimeters)WeightSupports clocked operationNumber of inputs• For resistance-typesensorLength of cable• ShieldedDimensions and Weight40 x 125 x 117Approx. 250 g<strong>Data</strong> for Specific <strong>Module</strong>No21max. 200 mmax. 50 m at 80 mV andthermocouplesVoltages, Currents, PotentialsRated supply voltage of theelectronics L +• Reverse polarityprotectionPower supply of thetransmitters24 VDCYes• Supply current max. 60 mA (per channel)• Short-circuit-proof YesConstant current forresistance-type sensorIsolation• Between channels andbackplane bus• Between channels andpower supply of theelectronics– Not for 2-wiretransmitterPermitted potentialdifference• Between inputs andM ANA (U CM )– At signal = 0 V• Between M ANA andM internal (U ISO )Insulation tested withtyp. 1.67 mAYesYes2.5 VDC75 VDC / 60 VAC500 VDCCurrent consumption• From the backplane bus max. 50 mA• From the backplane busL +Power dissipation of themodulemax. 30 mA (withouttwo-wire transmitter)typ. 1.3 WMeasuring principleIntegration time/conversiontime/ resolution (perchannel)• Parameters can beassigned• Integration time inmilliseconds• Basic conversion timeincluding Integrationtime in millisecondsAdditional conversiontime for measuringresistance, in msorAdditional conversiontime for open-circuitmonitoring, in msorAdditional conversiontime for measuringresistance andopen-circuit monitoring,in ms• Resolution in bits (incl.overrange)• Noise suppression forfrequency f1 in Hz• Basic response time ofmodule, in ms (allchannels enabled)Smoothing of the measuredvaluesAnalog value generationIntegratingYes2.5 16 2 / 3 20 1006 34 44 2041 1 1 110 10 10 1016 16 16 169bits12bits12bits14bits400 60 50 106 34 44 204None<strong>Programmable</strong> <strong>Logic</strong> <strong>Controllers</strong> <strong>S7</strong>-<strong>300</strong> <strong>Module</strong> <strong>Data</strong>A5E00105505-034-155
Analog <strong>Module</strong>sSuppression of interference, Limits of ErrorNoise suppression for f = n (f1 1 %),(f1 = interference frequency) n=1.2...• Common-modeinterference(U CM < 2.5 V)• Series-mode noise(peak value ofnoise < nominal value ofinput range)Crosstalk between theinputs> 70 dB> 40 dB> 50 dBOperational limit (in the entire temperature range, withreference to the input range)• Voltage input 80 mV 1 %250 to 1000mV 0.6 %2.5 to 10 V 0.8 %• Current input 3.2 to 20 mA 0.7 %• Resistors 150Ω; <strong>300</strong>Ω; 0, 7 %600 Ω• Thermocouple Type E, N, J,K, L 1, 1 %• ResistancethermometerPt 100/Ni 100Pt 100climate 0, 7 % 0, 8 %Basic error (operational limit at 25 C referred to inputrange)• Voltage input 80 mV 0.6 %250 to 1000mV 0.4 %2.5 to 10 V 0.6 %• Current input 3.2 to 20 mA 0.5 %• Resistors 150Ω; <strong>300</strong>Ω; 0.5 %600 Ω• Thermocouple Type E, N, J,K, L 0.7 %• ResistancethermometerTemperature error (withreference to the input range)Linearity error (withreference to the input range)Repeatability (in steadystate at 25 C referred toinput range)Temperature error of internalcompensationPt 100/Ni 100Pt 100climate 0.005 %/K 0.05 % 0.05 % 1 % 0.5 % 0.6 %Interrupts• Hardware interruptwhen limit has beenexceededStatus, Interrupts, Diagnostics<strong>Programmable</strong>channel 0• Diagnostic interrupt <strong>Programmable</strong>Diagnostic functions• Group error display• Diagnostics informationread-out<strong>Programmable</strong>Red LED (SF)Possible<strong>Data</strong> for Selecting a SensorInput range (ratedvalues)/Input resistance• Voltage 80 mV 250 mV 500 mV1000 mV 2.5 V 5 V1 to 5 V; 10 V• Current 3.2 mA 10 mA 20 mA0 to 20 mA;4 to 20 mA:• Resistors 150 Ω<strong>300</strong> Ω600 Ω• Thermocouples Type E, N, J,K, L• ResistancethermometerMaximum input voltage forvoltage input (destructionlimit)Maximum input current forcurrent input (destructionlimit)Pt 100,Ni 100/10 MΩ/10 MΩ/10 MΩ/10 MΩ/100kΩ/100kΩ/100kΩ/100kΩ/25 Ω/25 Ω/25 Ω/25 Ω/25 Ω/10 ΜΩ/10 ΜΩ/10 ΜΩ/10 ΜΩ/10 ΜΩmax. 20 V continuous;75 V for max. 1 s(duty factor 1:20)40 mA4-156<strong>Programmable</strong> <strong>Logic</strong> <strong>Controllers</strong> <strong>S7</strong>-<strong>300</strong> <strong>Module</strong> <strong>Data</strong>A5E00105505-03
Analog <strong>Module</strong>sConnection of the sensor• For measuring voltage Possible• For measuring currentAs two-wire transmitterAs four-wire transmitter•For measuringresistanceWith two-conductorconnectionWith three-conductorconnectionWith four-conductorconnection• Load of the two-wiretransmitterPossiblePossiblePossiblePossiblePossiblemax. 820 ΩCharacteristic linearization• for thermocouplesParameters can beassignedType E, N, J, K, L• For RTD Pt 100(standard, climate range)Ni 100(standard, climate range)Temperature compensation• Internal temperaturecompensation• External temperaturecompensation withcompensating box• Compensation for 0 Ccomparison pointtemperature• Technical unit fortemperaturemeasurementParameters can beassignedPossiblePossiblePossibleDegrees Celsius4.25.1 Commissioning the SM 331; AI 2 x 12 bitsYou set the mode of operation of the SM 331; AI 2 x 12 bits by means of ameasuring range module on the module and in STEP 7.Measuring range moduleIf necessary, the measuring range module must be replugged to change themeasuring method and the measuring range. The steps you have to perform to dothis are described in detail in Section 4.4.The corresponding table in Section 4.25.2 tells you which assignment you have toselect for which measuring method and measuring range. In addition, thenecessary settings are embossed on the module.Default settings for measuring range moduleThe measuring range module is preset to “B” (voltage; 10 V) when the moduleis supplied.<strong>Programmable</strong> <strong>Logic</strong> <strong>Controllers</strong> <strong>S7</strong>-<strong>300</strong> <strong>Module</strong> <strong>Data</strong>A5E00105505-034-157
Analog <strong>Module</strong>sTo use the following preset measuring methods and measuring ranges, you onlyhave to change the measuring range module to the corresponding setting.Parameter assignment in STEP 7 is not necessary.Table 4-80 Default Settings of the SM 331; AI 2 x 12 bits Using Measuring Range <strong>Module</strong>Measuring Range<strong>Module</strong> SettingMeasuring MethodMeasuring RangeA Voltage 1000 mVB Voltage 10 VCDCurrent,Four-wire transmitterCurrent,Two-wire transmitter4 to 20 mA4 to 20 mAParameterYou will find a description of the general procedure for assigning parameters toanalog modules in Section 4.7.An overview of the parameters that you can set and their default settings areshown in the table below.Table 4-81 Parameters of the SM 331; AI 2 x 12 bitsParameter Value Range DefaultSettingsEnable• Diagnostic interrupt• Hardware interruptupon limit violationYes/noYes/noNoNoParameterTypeDynamicScope<strong>Module</strong>Trigger for hardwareinterrupt• Upper limit value• Lower limit valueDiagnostics• Group diagnostics• With wire-breakcheck32511 to –32512–32512 to 32511Yes/noYes/no– Dynamic ChannelNoNoStaticChannelgroup4-158<strong>Programmable</strong> <strong>Logic</strong> <strong>Controllers</strong> <strong>S7</strong>-<strong>300</strong> <strong>Module</strong> <strong>Data</strong>A5E00105505-03
Analog <strong>Module</strong>sTable 4-81 Parameters of the SM 331; AI 2 x 12 bits, continuedParameterValue RangeDefaultSettingsMeasurement• Measuring Method DeactivatedUU Voltage4DMU Current (4-wire transmitter)2DMU Current (2-wire transmitter)R-4L Resistance (four-conductorconnection)RTD-4L Bulb resistor(linear, four-conductorconnection)TC-I Thermocouple(internal comparison)TC-E Thermocouple(external comparison)TC-IL Thermocouple(linear, internal comparison)TC-EL Thermocouple(linear, external comparison)• Measuring Range Refer to Section 4.25.2 for the10 Vmeasuring ranges of the inputchannels that you can set.• Interference400 Hz; 60 Hz; 50 Hz; 10 Hz 50 HzSuppressionParameterTypeDynamicScopeChannel orChannelgroupChannel groupsThe two channels of the analog input module SM 331; AI 2 x 12 bits are combinedto a channel group. You can only ever assign parameters to the channel group.The SM 331; AI 2 x 12 bits has a measuring range module for the channel group 0.Special characteristic of channel groups with resistance measurementIf you use the resistance measurement method, the analog input module has onlyone channel. The “2nd” channel is used for current injection (I C ).The measured value is obtained by accessing the “1st” channel. The “2nd” channelhas the default carry value “7FFF H ”.Special characteristic of channel groups for hardware interruptsYou can set a hardware interrupt in STEP 7 for the channel group. Note, however,that a hardware interrupt is set only for the first channel in the channel group ineach case – in other words, for channel 0.DiagnosticsYou will find the diagnostic messages that are grouped under the “group diagnosis”parameter in Table 4-46, on page 4-72.<strong>Programmable</strong> <strong>Logic</strong> <strong>Controllers</strong> <strong>S7</strong>-<strong>300</strong> <strong>Module</strong> <strong>Data</strong>A5E00105505-034-159
Analog <strong>Module</strong>s4.25.2 Measuring Methods and Measuring Ranges of the SM 331;AI 2 x 12 bitsMeasuring MethodsYou can set the following measuring methods for the input channels:• Voltage measurement• Current measurement• Resistance test• Temperature measurementYou perform the setting by means of the measuring range module on the moduleand with the “measuring method” parameter in STEP 7.Unused ChannelsYou must short-circuit unused channels and connect them to M ANA . In this way,you obtain an optimum interference immunity for the analog input module. Set the“measuring method” parameter for unused channels to “disabled”. In this way youshorten the scan time of the module.If you do not use the COMP input, you must short-circuit it also.Special characteristics of unused channels for some measuring rangesSince configured inputs can remain unused because of the channel groupgeneration, you must take note of the following special characteristics of theseinputs to enable the diagnostic functions on the used channels.• Measuring range 1 to 5 V: Connect the unused input in parallel with a usedinput of the same channel group.• Current measurement, 2-wire transmitter:There are two ways to use the channels:a) Leave the unused input open and do not enable diagnostics for thischannel group. Otherwise, if diagnostics are enabled, the analog moduletriggers a single diagnostic interrupt and the SF LED of the analog modulecomes on.b) Connect the unused input with a resistance of 1.5 to 3.3 k You may thenenable diagnostics for this channel group.• Current measurement 4 to 20 mA, 4-wire transmitter: Connect the unusedinput in series with an input of the same channel group.Measuring rangesYou perform the setting of the measuring ranges by means of the measuring rangemodule on the module and with the “measuring method” parameter in STEP 7.4-160<strong>Programmable</strong> <strong>Logic</strong> <strong>Controllers</strong> <strong>S7</strong>-<strong>300</strong> <strong>Module</strong> <strong>Data</strong>A5E00105505-03
Analog <strong>Module</strong>sTable 4-82 Measuring Ranges of the SM 331; AI 2 x 12 bitsMethod SelectedU: Voltage 80 mVTC-I: Thermocouple(internal compensation)(thermovoltagemeasurement)TC-E: Thermocouples(external compensation)(thermovoltagemeasurement)2DMU: Current (2-wiretransmitter)4DMU: Current (4-wiretransmitter)R-4L: Resistors(four-conductor connection)Measuring Range(Type of Sensor) 250 mV 500 mV 1000 mV 2.5 V 5 V1 to 5 V 10 VType N [NiCrSi-NiSi]Type E [NiCr-CuNi]Type J [Fe-CuNi]Type K [NiCr-Ni]Type L [Fe-CuNi]TC-IL: thermocouples Type N [NiCrSi-NiSi](linear, internalType E [NiCr-CuNi]compensation)Type J [Fe-CuNi](temperature measurement)Type K [NiCr-Ni]Type L [Fe-CuNi]TC-EL: Thermocouples Type N [NiCrSi-NiSi](linear, externalType E [NiCr-CuNi]compensation)Type J [Fe-CuNi](temperature measurement)Type K [NiCr-Ni]Type L [Fe-CuNi]RTD-4L: Bulb resistor Pt 100 climate(linear, four-conductor Ni 100 climateconnection)Pt 100 standard(temperature measurement)Ni 100 standardMeasuring Range<strong>Module</strong> SettingABADescriptionYou will find the digitized analogvalues in Section 4.3.1 in thevoltage measuring rangeYou will find the digitized analogvalues in Section 4.3.1 in 80 mVthe voltage measuring range4 to 20 mA 3.2 mADCYou will find the digitized analogvalues in Section 4.3.1 in thecurrent measuring range 10 mA0 to 20 mA4 to 20 mA 20 mA150 AYou will find the digitized analog<strong>300</strong> values in Section 4.3.1 in theresistance measuring range600 AAAYou will find the digitized analogvalues in Section 4.3.1 in thetemperature rangeThe characteristics are linearized:• Pt 100 to DIN IEC 751• Ni 100 according to IEC DIN43760• Thermocouple to DIN 584,type L to DIN 43710.<strong>Programmable</strong> <strong>Logic</strong> <strong>Controllers</strong> <strong>S7</strong>-<strong>300</strong> <strong>Module</strong> <strong>Data</strong>A5E00105505-034-161
Analog <strong>Module</strong>sDefault SettingsThe default settings of the module in STEP 7 are the “voltage” measuring methodand the “ 10 V” measuring range. You can use this combination of measuringmethod and measuring range without parameterizing the SM 331; AI 8 12 bitswith STEP 7.Wire-Break CheckThe wire-break check is intended primarily for temperature measurements(thermocouples and bulb resistors.Special characteristics of the wire-break check for the 4 to 20 mA measuringrangeWith a parameterized measuring range of 4 to 20 mA and enabled wire-breakcheck, the analog input module enters wire-break in the diagnosis when a currentfalls below 3.6 mA.If you have enabled diagnostics interrupt during configuration, the moduleadditionally triggers a diagnostic interrupt.If no diagnostic interrupt has been enabled, the illuminated SF LED is the onlyindication of the wire-break and you must evaluate the diagnostic bytes in the userprogram.With a parameterized measuring range of 4 to 20 mA and disabled wire-breakcheck and enabled diagnostic interrupt, the module triggers a diagnostic interruptwhen the underflow is reached.4-162<strong>Programmable</strong> <strong>Logic</strong> <strong>Controllers</strong> <strong>S7</strong>-<strong>300</strong> <strong>Module</strong> <strong>Data</strong>A5E00105505-03
Analog <strong>Module</strong>s4.26 Analog Output <strong>Module</strong> SM 332; AO 8 x12 bits;(6E<strong>S7</strong>332-5HF00-0AB0)Order number6E<strong>S7</strong>332-5HF00-0AB0CharacteristicsThe analog input module SM 332; AO 8 x 12 bits has the following characteristicfeatures• 8 Output channels• The individual output channels can be programmed as– Voltage outputs– Current outputs• Resolution 12 bits• <strong>Programmable</strong> diagnostics• <strong>Programmable</strong> diagnostic interrupt• Isolated against backplane bus interface and load voltage<strong>Programmable</strong> <strong>Logic</strong> <strong>Controllers</strong> <strong>S7</strong>-<strong>300</strong> <strong>Module</strong> <strong>Data</strong>A5E00105505-034-163
Analog <strong>Module</strong>sTerminal connection and block diagram of analog output module SM 332;AO 8 x12 bitsVoltage outputsFault indicator – redCurrent outputsVoltage outputsCurrent outputsDACInternalsupplyDACIsolationBackplanebusinterfaceFigure 4-50<strong>Module</strong> View and Block Diagram of the Analog Output <strong>Module</strong> SM 332; AO 8 12 bits4-164<strong>Programmable</strong> <strong>Logic</strong> <strong>Controllers</strong> <strong>S7</strong>-<strong>300</strong> <strong>Module</strong> <strong>Data</strong>A5E00105505-03
Analog <strong>Module</strong>sTechnical specifications of the SM 332; AO 8 x 12 bitsDimensions W x H x D(in millimeters)WeightSupports clockedoperationDimensions and Weight40 x 125 x 117Approx. 272 g<strong>Data</strong> for Specific <strong>Module</strong>Number of inputs 8NoLength of cable• Shielded max. 200 mVoltages, Currents, PotentialsRated load voltage L+• Reverse polarity protectionIsolation• Between channels andbackplane bus• Between channels andpower supply of theelectronics• Between the channels• Between channels and loadvoltage L+Permitted potential difference• Between S– and M ANA(U CM )• Between M ANA andM internal (U ISO )24 VDCYesYesYesNoYes3 VDC75 VDC / 60 VACInsulation tested with500 VDCCurrent consumption• From the backplane bus max. 100 mA• From supply voltage L+ (noload)max. 340 mAPower dissipation of the moduletypically 6.0 W• Resolution including signAnalog value generation• ± 10 V; ± 20 mA;4 to 20 mA; 1 to 5 V• 0 to 10 V; 0 to 20 mA;• Conversion time (per channel)Settling time• For resistive load• For capacitive load• For inductive load11 bits +sign12 bitsmax. 0.8 ms0.2 ms3.3 ms0.5 ms (1 mH)3.3 ms (10 mH)Suppression of interference, Limits of Error• Crosstalk between theoutputs> 40 dBOperational limit (in the entire temperature range, withreference to the output range)• Voltage outputs ±0.5 %• Current outputs ±0.6 %Basic error (operational limit at 25 °C referred to theoutput range)• Output voltage± 0.4 %• Output current± 0.5 %• Temperature error (with ±0.002 % /Kreference to the outputrange)• Linearity error (with + 0.05 %reference to the outputrange)• Repeat accuracy (in the ±0.05 %steady state at 25°C,referred to the outputrange)• Output ripple; bandwidth 0 to 50 kHz (withreference to the outputrange)± 0.05 %<strong>Programmable</strong> <strong>Logic</strong> <strong>Controllers</strong> <strong>S7</strong>-<strong>300</strong> <strong>Module</strong> <strong>Data</strong>A5E00105505-034-165
Analog <strong>Module</strong>sStatus, interrupts, diagnosticsInterrupts• Diagnostic Interrupt <strong>Programmable</strong>Diagnostic functions• Group error display• Diagnostics informationread-outParameters can beassignedRed LED (SF)Possible<strong>Data</strong> for Selecting an ActuatorOutput ranges (rated values)• Voltage± 10 V0 to 10 V1 to 5 V• Current ± 20 mA0 to 20 mA4 to 20 mAImpedance (in the nominaloutput range)• For voltage outputs min. 1 kΩ– capacitive load max. 1 F• For current outputs max. 500 Ω– At U CM < 1 Vmax. 600 Ω– For inductive load max. 10 mHVoltage outputs• Short-circuit protection• Short-circuit currentYesmax. 25 mACurrent outputs• No-load voltage max. 18 VDestruction limit forvoltages/currents connectedfrom outside• Voltage at outputs to M ANA max. 18 V continuous;75 V for max. 1 s(mark-to-space ratio1:20)• Current max. 50 mA DCConnection of actuators• For voltage outputFour-conductor connection• For current outputTwo-conductor connectionPossiblePossible4.26.1 Commissioning the SM 332; AO 8 x 12 bitsNoteIf the load voltage (L+) is switched off and on, this may result in incorrect outputvalues at the output for approx. 10 ms.ParameterYou will find a description of the general procedure for assigning parameters toanalog modules in Section 4.7.You will find an overview of the programmable parameters and their default valuesin Table 4-42, on page 4-43.4-166<strong>Programmable</strong> <strong>Logic</strong> <strong>Controllers</strong> <strong>S7</strong>-<strong>300</strong> <strong>Module</strong> <strong>Data</strong>A5E00105505-03
Analog <strong>Module</strong>sAssigning parameters to channelsYou can configure each output channel of the SM 332; AO 8 x 12 bits individually.You can thus assign separate parameters for each output channel.When you set the parameters with SFCs in the user program, the parameters areassigned to channel groups. Every output channel of the SM 332; AO 8 x 12 bits isassigned to a channel group in this instance – in other words, for example outputchannel 0 = channel group0.NoteIf you modify output ranges when the analog output module SM 332; AO 8 x 12bits is in operation, incorrect intermediate values may arise across the output.DiagnosticsYou will find the diagnostic messages that are grouped under the “group diagnosis”parameter in Table 4-47, on page 4-73.4.26.2 Output Ranges of the Analog Output <strong>Module</strong> SM 332;AO 8 x 12 bitsConnecting the analog outputsYou can connect the outputs as voltage or current outputs, or disable them. Youperform connection of the outputs with the “output type” parameter in STEP 7.Unused ChannelsSo that unused output channels of the SM 332; AO 8 x 12 bits remainde-energized, you must set the “output type” parameter to “disabled” and leave theterminal open.<strong>Programmable</strong> <strong>Logic</strong> <strong>Controllers</strong> <strong>S7</strong>-<strong>300</strong> <strong>Module</strong> <strong>Data</strong>A5E00105505-034-167
Analog <strong>Module</strong>sOutput rangesYou program the output ranges for voltage and current outputs in STEP 7.Table 4-83 Output Ranges of the Analog Output <strong>Module</strong> SM 332; AO 8 x 12 bitsSelected Type of Output Output Range DescriptionVoltageCurrent1 to 5 V0 to 10 V 10 VFrom 0 to 20 mAFrom 4 to 20 mA 20 mAYou will find the digitalanalog values in Section4.3.2 in the voltage andcurrent output rangesDefault SettingsThe default settings of the module are “Voltage” for the output type and “ 10 V”for the output range. You can use this combination of output type and output rangewithout parameterizing the SM 332; AO 8 x 12 bits in STEP 7.Wire-Break CheckThe analog output module SM 332; AO 8 x 12 bits carries out a wire-break checkonly for current outputs.Short-circuit testThe analog output module SM 332; AO 8 x 12 bits carries out a short-circuit testonly for voltage outputs.4-168<strong>Programmable</strong> <strong>Logic</strong> <strong>Controllers</strong> <strong>S7</strong>-<strong>300</strong> <strong>Module</strong> <strong>Data</strong>A5E00105505-03
Analog <strong>Module</strong>s4.27 Analog output module SM 332; AO 4 x 16 bit;synchronous; (6E<strong>S7</strong>332-7ND01-0AB0)Order number6E<strong>S7</strong>332-7ND01-0AB0CharacteristicsThe analog output module SM 332; AO 4 x 6 bits has the following characteristicfeatures:• 4 outputs in 4 channel groups• The individual output channels can be programmed as– Voltage outputs– Current outputs• Resolution of 16 bits• Supports clocked operation• Supports the “parameter changing during the RUN” function• <strong>Programmable</strong> diagnostics• <strong>Programmable</strong> diagnostic interrupt• <strong>Programmable</strong> substitute value output• Galvanic isolation between:– Backplane bus interface and analog output channel– The different analog output channels– Analog output and L+, M– Backplane bus interface and L+, M<strong>Programmable</strong> <strong>Logic</strong> <strong>Controllers</strong> <strong>S7</strong>-<strong>300</strong> <strong>Module</strong> <strong>Data</strong>A5E00105505-034-169
Analog <strong>Module</strong>sTerminal connection and block diagram of analog output module SM 332;AO 4 x 16 bitFault indicator – redSF1CurrentOutputsL+24 VVoltageOutputsIsolation3456QI0 QV 0S 0 +CH0 S 0 – CH0MANA 0 M ANA 07QI1QV 189S 1 +CH1 S 1 –CH110MANA 1MANA 1Backplanebusinterface1112131415161718QI2 QV 2CH2S 2 +S 2 – CH2MANA 2 MANA 2QI3 QV 3CH3S 3 +S 3 – CH3MANA 3 MANA 320MFigure 4-51<strong>Module</strong> View and Block Diagram of the SM 332; AO 4 x 16 bitsNoteSwitching the rated load voltage (L+) off and on for approx. 10 ms can lead toincorrect intermediate values at the output.4-170<strong>Programmable</strong> <strong>Logic</strong> <strong>Controllers</strong> <strong>S7</strong>-<strong>300</strong> <strong>Module</strong> <strong>Data</strong>A5E00105505-03
Analog <strong>Module</strong>sTechnical specifications of the SM 332; AO 4 x 16 bitDimensions W x H x D(in millimeters)WeightDimensions and Weight40 x 125 x 117Approx. 220 g<strong>Data</strong> for Specific <strong>Module</strong>• 0 to 20 mAV 14 bits• 4 to 20 mA 14 bitsConversion time (per channel)• in standard operation• in clocked operationmax. 0.8 ms1.6 msSupports clockedoperationChanging parameters duringthe RUNpossible• Behavior of the nonparameterized outputsNumber of outputs 4Length of cableYesYesoutputs the last validoutput value before theparameterizationBasic response time of module(independent of number ofreleased channels)• in standard operation• in clocked operationSettling time• For resistive load• For capacitive load• For inductive load3.2 ms2.4 ms0.2 ms3.3 ms0.5 ms (1 mH)3.3 ms (10 mH)• Shielded max. 200 mVoltages, Currents, and PotentialsRated load voltage L+• Reverse polarity protection24 VDCYesIsolation• Between channels and Yesbackplane bus• Between channels and Yespower supply of theelectronics• Between the channels YesPermitted potential difference• Between the outputs (ECM) 200 VDC / 120 VAC• Between M ANA andM internal (U ISO )200 VDC / 120 VACInsulation tested with500 VDCCurrent consumption• From the backplane bus max. 100 mA• From the load voltage L+(no load)max. 240 mASuppression of interference, Limits of ErrorCrosstalk betweenoutputs> 100 dBOperational limit (in the entire temperature range, withreference to the output range)• Voltage outputs 0.12%• Current outputs 0.18%Basic error (operational limit at 25° C, referred to outputrange)• Voltage outputs10 V0.02%0 to 10 V0.02%1 to 5 V0.04%• Current outputs20 mA0.02%0 to 20 mA;0.02%4 to 20 mA0.04%Temperature error (withreference to the output range)• Voltage outputs• Current outputs0.0025% / K0.004% / KPower dissipation of the moduletyp. 3 WAnalog value generationResolution(incl. sign)• 10 V 16 bits• 0 to 10 V 15 bits• 1 to 5 V 14 bits• 20 mA 15 bitsLinearity error (with reference tothe output range)Repeat accuracy (in the steadystate at 25° C, referred to theoutput range)Output ripple; band width 0 to50 kHz (with reference to theoutput range)0.004%0.002 %0.05%<strong>Programmable</strong> <strong>Logic</strong> <strong>Controllers</strong> <strong>S7</strong>-<strong>300</strong> <strong>Module</strong> <strong>Data</strong>A5E00105505-034-171
Analog <strong>Module</strong>sStatus, interrupts, diagnosticsInterrupts• Diagnostic interrupt <strong>Programmable</strong>Diagnostic functions<strong>Programmable</strong>• Group error display Red LED (SF)• Diagnostic informationreadableSubstitute value can be appliedPossibleYes, programmable<strong>Data</strong> for Selecting an ActuatorOutput ranges (rated values)• Voltage ±10 V0 to 10 V1 to 5 VVoltage outputs• Short-circuit protection• Short-circuit currentYesmax. 40 mACurrent outputs• No-load voltage max. 18 VDestruction limit againstvoltages/currents applied fromoutside• Voltage at outputs to M ANA max. 15 V continuous75 VDC for no more than0.1 s(pulse duty factor 1 : 20)• Current max. 50 mA DCConnection of actuators• Current ±20 mA0 to 20 mA4 to 20 mALoad resistance (in the nominalrange of the output)• For voltage outputs– capacitive loadmin. 1 kΩmax. 1 µF• For voltage output– Four-conductorconnection (measuringcircuit)• For current output– Two-conductorconnectionPossiblePossible• For current outputs– Inductive loadmax. 500 Ωmax. 1 mH4.27.1 SynchronicityCharacteristicsReproducible (i.e. same length) reaction times are achieved with the <strong>SIMATIC</strong> withan equidistant DP bus cycle and the synchronization of the following free runningsingle cycles:• Free running of the user program. The length of the cycle time can vary due toacyclic program branching.• Free running, variable DP cycle at the PROFIBUS subnetwork• Free running cycle at the DP-Slave back plane bus.• Free running cycle during the signal conditioning and conversion in theelectronic modules of the DP-Slave.In the case of equidistance the DP cycle runs in phase and with the same length.In this cycle the processing levels of a CPU (OB 61 to OB 64) and thesynchronous peripheral are synchronized. The I/O data are therefore transferred atdefined and consistent time intervals (clock synchronicity).Requirements• The DP-Master and DP-Slave must support the synchronicity. They requireSTEP 7 from Version 5.2.4-172<strong>Programmable</strong> <strong>Logic</strong> <strong>Controllers</strong> <strong>S7</strong>-<strong>300</strong> <strong>Module</strong> <strong>Data</strong>A5E00105505-03
Analog <strong>Module</strong>s<strong>Module</strong> filtering mode: SynchronicityIn synchronous operation the following conditions apply:Processing and activation time T WA between reading the outputvalue into the output buffer and loading it into the D/A converter forthe outputT DPminDiagnostic interrupt1.6 ms2.4 msmax. 4 x T DPCalculation of the filter and processing timeIndependent of the number parameterized channels the same time conditions arealways valid.T WAD/A conversion and internal processingCH3Updating of theoutputCH2CH1CH01400s200sT OFigure 4-52Calculation of the processing time and the time for updating the outputExplanation of the mode of operation in synchronous operationDuring the time T O - T WA , the module reads the output data and saves the datainternally. After the internal processing time of each channel the results are writtenin the individual D/A converters.Further informationFurther information on clock synchronicity can be found in the Online help ofSTEP 7, in the manualLocal Peripheral System ET 200M and in the manualClock Synchronicity.<strong>Programmable</strong> <strong>Logic</strong> <strong>Controllers</strong> <strong>S7</strong>-<strong>300</strong> <strong>Module</strong> <strong>Data</strong>A5E00105505-034-173
Analog <strong>Module</strong>s4.27.2 Commissioning the SM 332; AO 4 x 16 bitNoteWhen switching on and off the rated load voltage (L+), wrong intermediate valuescan occur across the output for approximately 10 ms.ParameterYou will find a description of the general procedure for assigning parameters toanalog modules in the reference manual, section 4.7.You will find an overview of the programmable parameters and their default valuesin Table 4-42 in the reference manual.Assigning parameters to channelsYou can configure each output channel of the SM 332; AO 4 x 16 bits individually.You can thus assign separate parameters for each output channel.When you set the parameters with SFCs in the user program, the parameters areassigned to channel groups. Every output channel of the SM 332; AO 4 x 16 bits isassigned to a channel group in this instance – in other words, for example outputchannel 0 = channel group0.NoteIf you modify output ranges when the analog output module SM 332;AO 4 x 16 bits is in operation, incorrect intermediate values may arise across theoutput.DiagnosticsYou will find the diagnostic messages that are grouped under the “group diagnosis”parameter in Table 4-47 in the reference manual.4-174<strong>Programmable</strong> <strong>Logic</strong> <strong>Controllers</strong> <strong>S7</strong>-<strong>300</strong> <strong>Module</strong> <strong>Data</strong>A5E00105505-03
Analog <strong>Module</strong>s4.27.3 Output Ranges of the Analog Output <strong>Module</strong> SM 332;AO 4 x 16 bitsConnecting the analog outputsYou can connect the outputs as voltage or current outputs, or disable them. Youperform connection of the outputs with the “output type” parameter in STEP 7.Unused ChannelsSo that unused output channels of the SM 332; AO 4 x 16 bits remainde-energized, you must set the “output type” parameter to “disabled” and leave theterminal open.Output rangesYou program the output ranges for voltage and current outputs in STEP 7.Table 4-84 Output Ranges of the Analog Output <strong>Module</strong> SM 332;AO 4 x 16 bitsSelected Type of Output Output Range DescriptionVoltageCurrent1 to 5 V0 to 10 V 10 VFrom 0 to 20 mAFrom 4 to 20 mA 20 mAYou will find the digitalanalog values in section4.3.2 in the referencemanual in the voltage andcurrent output rangesDefault SettingsThe default settings of the module are “Voltage” for the output type and “ 10 V”for the output range. You can use this combination of output type and output rangewithout parameterizing the SM 332; AO 4 x 16 bits in STEP 7.Substitute valuesYou can configure the SM 332; AO 4 x 16 bits for the CPU operating mode STOPas follows: Outputs De-energized, Hold Last Value or Inject Substitute Values. Ifyou inject substitute values, they must be within the output range.<strong>Programmable</strong> <strong>Logic</strong> <strong>Controllers</strong> <strong>S7</strong>-<strong>300</strong> <strong>Module</strong> <strong>Data</strong>A5E00105505-034-175
Analog <strong>Module</strong>s4.28 Analog Output <strong>Module</strong> SM 332; AO 4 x 12 bits;(6E<strong>S7</strong>332-5HD01-0AB0)Order number6E<strong>S7</strong>332-5HD01-0AB0CharacteristicsThe analog output module SM 332; AO 4 x 12 bits has the following characteristicfeatures:• 4 Output channels• The individual output channels can be programmed as– Voltage outputs– Current outputs• Resolution 12 bits• <strong>Programmable</strong> diagnostics• <strong>Programmable</strong> diagnostic interrupt• <strong>Programmable</strong> substitute value output• Isolated against backplane bus interface and load voltage4-176<strong>Programmable</strong> <strong>Logic</strong> <strong>Controllers</strong> <strong>S7</strong>-<strong>300</strong> <strong>Module</strong> <strong>Data</strong>A5E00105505-03
Analog <strong>Module</strong>sTerminal connection and block diagram of analog output module SM 332;AO 4 x 12 bitsFault indicator – redCurrentoutputVoltageoutputsSFInternalsupplyDACL + 24VQI 0QV 0BackplanebusinterfaceIsolationSFCH0M ANAQI 1CH1M ANAQI 2CH2M ANAQI 3CH3M ANAS 0 +S 0CH0M ANAQV 1S 1 +S 1CH1M ANAQV 2S 2 +S 2CH2M ANAQV 3S 3 +S 3CH3M ANAMMFigure 4-53<strong>Module</strong> View and Block Diagram of the Analog Output <strong>Module</strong> SM 332; AO 4 x 12 bits<strong>Programmable</strong> <strong>Logic</strong> <strong>Controllers</strong> <strong>S7</strong>-<strong>300</strong> <strong>Module</strong> <strong>Data</strong>A5E00105505-034-177
Analog <strong>Module</strong>sTechnical specifications of the SM 332; AO 4 x 12 bitsDimensions W x H x D(in millimeters)WeightSupports clockedoperationDimensions and Weight40 x 125 x 117Approx. 220 g<strong>Data</strong> for Specific <strong>Module</strong>Number of outputs 4NoLength of cable• Shielded max. 200 mVoltages, Currents, PotentialsRated load voltage L +24 VDC• Reverse polarity protection YesIsolation• Between channels and Yesbackplane bus• Between channels and Yespower supply of theelectronics• Between the channels No• Between channels and loadvoltage L+YesPermitted potential difference• Between S– and M ANA(U CM )• Between M ANA andM internal (U ISO )Insulation tested with3 VDC75 VDC / 60 VAC500 VDCCurrent consumption• From the backplane bus max. 60 mA• From the load voltage L+(no load)max. 240 mAPower dissipation of the moduletyp. 3 WAnalog value generationResolution including sign• 10 V; 20 mA; 11 bits + sign4 to 20 mA; 1 to 5 V• 0 to 10 V; 0 to 20 mA 12 bitsConversion time (per channel)Settling time• For resistive load• For capacitive load• For inductive loadmax. 0.8 ms0.2 ms3.3 ms0.5 ms (1 mH)3.3 ms (10 mH)Suppression of interference, Limits of ErrorCrosstalk between the outputs> 40 dBOperational limit (in the entire temperature range, withreference to the output range)• Voltage outputs• Current outputs 0.5 % 0.6 %Basic error (operational limit at 25° C, referred to outputrange)• Voltage outputs• Current outputsTemperature error (withreference to the output range)Linearity error (with reference tothe output range)Repeatability (in steady state at25 C, referred to output range)Output ripple; range 0 to 50 kHz(referred to output range) 0.4 % 0.5 % 0.002 %/K 0.05 % 0.05 % 0.05 %Status, interrupts, diagnosticsInterrupts• Diagnostic interrupt Parameters can beassignedDiagnostic functions<strong>Programmable</strong>• Group error display Red LED (SF)• Diagnostic informationreadablePossibleSubstitute value can be appliedYes, programmable4-178<strong>Programmable</strong> <strong>Logic</strong> <strong>Controllers</strong> <strong>S7</strong>-<strong>300</strong> <strong>Module</strong> <strong>Data</strong>A5E00105505-03
Analog <strong>Module</strong>s<strong>Data</strong> for Selecting an ActuatorOutput ranges (rated values)• Voltage ±10 V0 to 10 V1 to 5 V• Current ±20 mA0 to 20 mA4 to 20 mADestruction limit againstvoltages/currents applied fromoutside• Voltage at outputs to M ANA max. 18 V continuous;75 V for max. 1 s (dutyfactor 1:20)• Current max. 50 mA DCConnection of actuatorsLoad resistance (in the nominalrange of the output)• For voltage outputs– capacitive load• For current outputs– At U CM < 1V– Inductive loadmin. 1 kΩmax. 1 µFmax. 500 Ωmax. 600 max. 10 mH• For voltage output– Four-conductorconnection (measuringcircuit)• For current output– Two-conductorconnectionPossiblePossibleVoltage outputs• Short-circuit protection• Short-circuit currentYesmax. 25 mACurrent outputs• No-load voltage max. 18 V4.28.1 Commissioning the SM 332; AO 4 x 12 bitsNoteWhen switching on and off the rated load voltage (L+), wrong intermediate valuescan occur across the output for approximately 10 ms.ParameterYou will find a description of the general procedure for assigning parameters toanalog modules in Section 4.7.You will find an overview of the programmable parameters and their default valuesin Table 4-42, on page 4-43.<strong>Programmable</strong> <strong>Logic</strong> <strong>Controllers</strong> <strong>S7</strong>-<strong>300</strong> <strong>Module</strong> <strong>Data</strong>A5E00105505-034-179
Analog <strong>Module</strong>sAssigning parameters to channelsYou can configure each output channel of the SM 332; AO 4 x 12 bits individually.You can thus assign separate parameters for each output channel.When you set the parameters with SFCs in the user program, the parameters areassigned to channel groups. Every output channel of the SM 332; AO 4 x 12 bits isassigned to a channel group in this instance – in other words, for example outputchannel 0 = channel group0.NoteIf you modify output ranges when the analog output module SM 332; AO 4 x 12bits is in operation, incorrect intermediate values may arise across the output.DiagnosticsYou will find the diagnostic messages that are grouped under the “group diagnosis”parameter in Table 4-47, on page 4-73.4.28.2 Output Ranges of the Analog Output <strong>Module</strong> SM 332;AO 4 x 12 bitsConnecting the analog outputsYou can connect the outputs as voltage or current outputs, or disable them. Youperform connection of the outputs with the “output type” parameter in STEP 7.Unused ChannelsSo that unused output channels of the SM 332; AO 4 x 12 bits remainde-energized, you must set the “output type” parameter to “disabled” and leave theterminal open.4-180<strong>Programmable</strong> <strong>Logic</strong> <strong>Controllers</strong> <strong>S7</strong>-<strong>300</strong> <strong>Module</strong> <strong>Data</strong>A5E00105505-03
Analog <strong>Module</strong>sOutput rangesYou program the output ranges for voltage and current outputs in STEP 7.Table 4-85 Output Ranges of the Analog Output <strong>Module</strong> SM 332; AO 4 x 12 bitsSelected Type of Output Output Range DescriptionVoltageCurrent1 to 5 V0 to 10 V 10 VFrom 0 to 20 mAFrom 4 to 20 mA 20 mAYou will find the digitalanalog values in Section4.3.2 in the voltage andcurrent output rangesDefault SettingsThe default settings of the module are “Voltage” for the output type and “ 10 V”for the output range. You can use this combination of output type and output rangewithout parameterizing the SM 332; AO 4 x 12 bits in STEP 7.Wire-Break CheckThe analog output module SM 332; AO 4 x 12 bits carries out a wire-break checkonly for current outputs.Short-circuit testThe analog output module SM 332; AO 4 x 12 bits carries out a short-circuit testonly for voltage outputs.Substitute valuesYou can configure the SM 332; AO 4 x 12 bits for the CPU operating mode STOPas follows: Outputs De-energized, Hold Last Value or Inject Substitute Values. Ifyou inject substitute values, they must be within the output range.Special characteristic of substitute values for output ranges 1 to 5 V and4 to 20 mAThe following special characteristic applies to output ranges 1 to 5 V and4 to 20 mA:You have to set the substitute value E500 H for the output to become de-energized(refer to Tables 4-35 and 4-37 on pages 4-26 and 4-27).<strong>Programmable</strong> <strong>Logic</strong> <strong>Controllers</strong> <strong>S7</strong>-<strong>300</strong> <strong>Module</strong> <strong>Data</strong>A5E00105505-034-181
Analog <strong>Module</strong>s4.29 Analog Output <strong>Module</strong> SM 332; AO 2 x 12 bits;(6E<strong>S7</strong>332-5HB01-0AB0)Order number: “Standard module”6E<strong>S7</strong>332-5HB01-0AB0Order number: “SIPLUS <strong>S7</strong>-<strong>300</strong>-<strong>Module</strong>”6AG1 332-5HB01-2AB0CharacteristicsThe analog output module SM 332; AO 2 x 12 bits has the following characteristicfeatures:• 2 Output channels• The individual output channels can be programmed as– Voltage outputs– Current outputs• Resolution 12 bits• <strong>Programmable</strong> diagnostics• <strong>Programmable</strong> diagnostic interrupt• <strong>Programmable</strong> substitute value output• Isolated against backplane bus interface and load voltage4-182<strong>Programmable</strong> <strong>Logic</strong> <strong>Controllers</strong> <strong>S7</strong>-<strong>300</strong> <strong>Module</strong> <strong>Data</strong>A5E00105505-03
Analog <strong>Module</strong>sTerminal connection diagram and block diagram of the SM 332; AO 2 x 12 bitsFault indicator – redCurrentoutputVoltageoutputsSFInternalsupplyDACL + 24VQI 0QV 0IsolationCH0M ANAQI 1CH1M ANAS 0 +S 0CH0M ANAQV 1S 1 +S 1CH1M ANABackplanebusinterfaceSFMMFigure 4-54<strong>Module</strong> View and Block Diagram of the Analog Output <strong>Module</strong> SM 332; AO 212 bits<strong>Programmable</strong> <strong>Logic</strong> <strong>Controllers</strong> <strong>S7</strong>-<strong>300</strong> <strong>Module</strong> <strong>Data</strong>A5E00105505-034-183
Analog <strong>Module</strong>sTechnical specifications of the SM 332; AO 2 x 12 bitsDimensions W x H x D(in millimeters)WeightSupports clockedoperationDimensions and Weight40 x 125 x 117Approx. 220 g<strong>Data</strong> for Specific <strong>Module</strong>Number of outputs 2NoLength of cable• Shielded max. 200 mVoltages, Currents, PotentialsRated load voltage L +24 VDC• Reverse polarity protection YesIsolation• Between channels and Yesbackplane bus• Between channels and Yespower supply of theelectronics• Between the channels No• Between channels and loadvoltage L+YesPermitted potential difference• Between S– and M ANA(U CM )• Between M ANA andM internal (U ISO )Insulation tested with3 VDC75 VDC / 60 VAC500 VDCCurrent consumption• From the backplane bus max. 60 mA• From the load voltage L+(no load)max. 135 mAPower dissipation of the moduletyp. 3 WAnalog value generationResolution including sign• 10 V; 20 mA; 11 bits + sign4 to 20 mA; 1 to 5 V• 0 to 10 V; 0 to 20 mA 12 bitsConversion time (per channel)Settling time• For resistive load• For capacitive load• For inductive loadmax. 0.8 ms0.2 ms3.3 ms0.5 ms (1 mH)3.3 ms (10 mH)Suppression of interference, Limits of ErrorCrosstalk between the outputs> 40 dBOperational limit (in the entire temperature range, withreference to the output range)• Voltage outputs• Current outputs 0.5 % 0.6 %Basic error (operational limit at 25° C, referred to outputrange)• Voltage outputs• Current outputsTemperature error (withreference to the output range)Linearity error (with reference tothe output range)Repeatability (in steady state at25 C, referred to output range)Output ripple; range 0 to 50 kHz(referred to output range) 0.4 % 0.5 % 0.002 %/K 0.05 % 0.05 % 0.05 %Status, interrupts, diagnosticsInterrupts• Diagnostic interrupt Parameters can beassignedDiagnostic functions<strong>Programmable</strong>• Group error display Red LED (SF)• Diagnostic informationreadablePossibleSubstitute value can be appliedYes, programmable4-184<strong>Programmable</strong> <strong>Logic</strong> <strong>Controllers</strong> <strong>S7</strong>-<strong>300</strong> <strong>Module</strong> <strong>Data</strong>A5E00105505-03
Analog <strong>Module</strong>s<strong>Data</strong> for Selecting an ActuatorOutput ranges (rated values)• Voltage ±10 V0 to 10 V1 to 5 V• Current ±20 mA0 to 20 mA4 to 20 mADestruction limit againstvoltages/currents applied fromoutside• Voltage at outputs to M ANA max. 18 V continuous;75 V for max. 1 s (dutyfactor 1:20)• Current max. 50 mA DCConnection of actuatorsLoad resistance (in the nominalrange of the output)• For voltage outputs– capacitive load• For current outputs– At U CM < 1V– Inductive loadVoltage outputs• Short-circuit protection• Short-circuit currentmin. 1 kΩmax. 1 µFmax. 500 Ωmax. 600 max. 10 mHYesmax. 25 mA• For voltage output– Two-conductorconnection– Four-conductorconnection(measuring circuit)• For current output– Two-conductorconnectionPossiblePossiblePossibleCurrent outputs• No-load voltage max. 18 V4.29.1 Commissioning the SM 332; AO 2 x 12 bitsNoteWhen switching on and off the rated load voltage (L+), wrong intermediate valuescan occur across the output for approximately 10 ms.ParameterYou will find a description of the general procedure for assigning parameters toanalog modules in Section 4.7.You will find an overview of the programmable parameters and their default valuesin Table 4-42, on page 4-43.<strong>Programmable</strong> <strong>Logic</strong> <strong>Controllers</strong> <strong>S7</strong>-<strong>300</strong> <strong>Module</strong> <strong>Data</strong>A5E00105505-034-185
Analog <strong>Module</strong>sAssigning parameters to channelsYou can configure each output channel of the SM 332; AO 2 x 12 bits individually.You can thus assign separate parameters for each output channel.When you set the parameters with SFCs in the user program, the parameters areassigned to channel groups. Every output channel of the SM 332; AO 2 x 12 bits isassigned to a channel group in this instance – in other words, for example outputchannel 0 = channel group0.NoteIf you modify output ranges when the analog output module SM 332; AO2 12 bits is in operation, incorrect intermediate values can arise across theoutput.DiagnosticsYou will find the diagnostic messages that are grouped under the “group diagnosis”parameter in Table 4-47, on page 4-73.4.29.2 Output Ranges of the Analog Output <strong>Module</strong> SM 332;AO 2 x 12 bitsConnecting the analog outputsYou can connect the outputs as voltage or current outputs, or disable them. Youperform connection of the outputs with the “output type” parameter in STEP 7.Unused ChannelsSo that unused output channels of the SM 332; AO 2 x 12 bits remainde-energized, you must set the “output type” parameter to “disabled” and leave theterminal open.4-186<strong>Programmable</strong> <strong>Logic</strong> <strong>Controllers</strong> <strong>S7</strong>-<strong>300</strong> <strong>Module</strong> <strong>Data</strong>A5E00105505-03
Analog <strong>Module</strong>sOutput rangesYou program the output ranges for voltage and current outputs in STEP 7.Table 4-86 Output Ranges of the Analog Output <strong>Module</strong> SM 332; AO 2 x 12 bitsSelected Type of Output Output Range DescriptionVoltageCurrent1 to 5 V0 to 10 V 10 VFrom 0 to 20 mAFrom 4 to 20 mA 20 mAYou will find the digitalanalog values in Section4.3.2 in the voltage andcurrent output rangesDefault SettingsThe default settings of the module are “Voltage” for the output type and “ 10 V”for the output range. You can use this combination of output type and output rangewithout parameterizing the SM 332; AO 2 x 12 bits in STEP 7.Wire-Break CheckThe analog output module SM 332; AO 2 x 12 bits carries out a wire-break checkonly for current outputs.Short-circuit testThe analog output module SM 332; AO 2 x 12 bits carries out a short-circuit checkonly for voltage outputs.Substitute valuesYou can configure the SM 332; AO 2 x 12 bits for the CPU operating mode STOPas follows: Outputs De-energized, Hold Last Value or Inject Substitute Values. Ifyou inject substitute values, they must be within the output range.Special characteristic of substitute values for output ranges 1 to 5 V and4 to 20 mAThe following special characteristic applies to output ranges 1 to 5 V and 4 to 20mA:You have to set the substitute value E500 H for the output to remain de-energized(refer to Tables 4-35 and 4-37 on pages 4-26 and 4-27).<strong>Programmable</strong> <strong>Logic</strong> <strong>Controllers</strong> <strong>S7</strong>-<strong>300</strong> <strong>Module</strong> <strong>Data</strong>A5E00105505-034-187
Analog <strong>Module</strong>s4.30 Analog Input/Output <strong>Module</strong> SM334;AI 4/AO 2 x 8/8 bits; (6E<strong>S7</strong>334-0CE01-0AA0)Order number6E<strong>S7</strong>334-0CE01-0AA0CharacteristicsThe analog input/output module SM 334: AI 4/AO 2 x 8/8 bits has the followingcharacteristic features:• Four inputs, two outputs• Resolution 8 bits• Not parameterizable, setting of measurement and output type by means ofwiring• Measuring range of 0 to 10 V or 0 to 20 mA• Output range of 0 to 10 V or 0 to 20 mA• Both voltage and current output options• Non-isolated against the backplane bus interface• Isolated from load voltage4-188<strong>Programmable</strong> <strong>Logic</strong> <strong>Controllers</strong> <strong>S7</strong>-<strong>300</strong> <strong>Module</strong> <strong>Data</strong>A5E00105505-03
Analog <strong>Module</strong>s<strong>Module</strong> View and Block Diagram of the SM 334; AI 4/AO 2 x 8/8 bitsSelect the measuring method of the input channels and the output type of theoutput channels via the wiring.InternalsupplyBackplanebusinterfaceADCDACM ANAM ANAL + 24VVAVAVAVAVAVAMMMV 0 +M 0 CH0MI 0 +MV 1 +M 1 CH1MI 1 +MV 2 +M 2 CH2MI 2 +MV 3 +M 3MI CH3 3 +QV 0M ANA CH0QI 0QV 1M ANA CH1QI 1VoltageCurrent measurementVoltageCurrent outputsFigure 4-55 <strong>Module</strong> View and Block Diagram of the Analog Input/Output <strong>Module</strong> SM 334;AI 4/AO 2 x 8/8 bitsNoteNote when connecting the SM 334 that:• the analog chassis ground M ANA (terminal 15 or 18) is connected to thechassis ground M of the CPU and/or the interface module (IM). Use a wirewith a minimum cross-section of 1 mm 2 for this.If there is no ground connection between M ANA and M, the module switchesoff. Inputs are read with 7FFF H ; outputs return a value of 0. If the module is runwithout a ground connection for some time, it may be destroyed.• The supply voltage for the CPU and/or the interface module (IM) must notbe connected with reversed polarity. Reverse polarity causes thedestruction of the module because M ANA is subjected to an unauthorized highpotential (+24 V).<strong>Programmable</strong> <strong>Logic</strong> <strong>Controllers</strong> <strong>S7</strong>-<strong>300</strong> <strong>Module</strong> <strong>Data</strong>A5E00105505-034-189
Analog <strong>Module</strong>sTechnical specifications of the SM 334; AI 4/AO 2 x 8/8 bitsDimensions W x H x D(in millimeters)WeightSupports clockedoperationDimensions and Weight40 x 125 x 117Approx. 285 g<strong>Data</strong> for Specific <strong>Module</strong>Number of inputs 4Number of outputs 2NoLength of cable• Shielded max. 200 mRated load voltage L +Voltages, Currents, PotentialsPower rated voltage of the ratedelectronics voltage and ratedload voltage L+Isolation• Between channels andbackplane bus• Between channels andpower supply of theelectronicsBetween the channels24 VDC24 VDCNoYesNoPermitted potential difference• Between inputs and M ANA 1 VDC(U CM )• Between the inputs (ECM) 1 VDCInsulation tested with500 VDCCurrent consumption• From the backplane bus max. 55 mA• From power supply andload voltage L+ (no load)max. 110 mAPower dissipation of the moduletyp. 3 WAnalog Value Generation for the InputsMeasuring principleIntegration/conversion time (perchannel)• Parameters can be Noassigned• Integration time in500milliseconds• Basic conversion time 100including Integration time inmilliseconds• Resolution including sign 8 bitsInstantaneous valueconversionTime constant of the inputfilterBasic execution time of themodule (all channels enabled)max. 0.8 msmax. 5 msAnalog Value Generation for the OutputsResolution including signConversion time (per channel)Settling time• For resistive load• For capacitive load• For inductive load8 bitsmax. 500 s0.3 ms3.0 ms0.3 msSuppression of interference, Limits of Error for theInputsNoise suppression for f = n (f1 1 %)(f1 = interference frequency)• Common-modeinterference (U pp< 1 V)> 60 dBCrosstalk between the outputs> 50 dBOperational limit (in the entire temperature range, withreference to the input range)• Voltage input• Current input 0.9 % 0.8 %Basic error (operational limit at 25° C, referred to inputrange)• Voltage input• Current inputTemperature error (withreference to the input range)Linearity error (with reference tothe input range)Repeatability (in steady state at25 C referred to input range)Output ripple; range 0 to 50 kHz(referred to output range) 0.7 % 0.6 % 0.005 %/K 0.05 % 0.05 % 0.05 %4-190<strong>Programmable</strong> <strong>Logic</strong> <strong>Controllers</strong> <strong>S7</strong>-<strong>300</strong> <strong>Module</strong> <strong>Data</strong>A5E00105505-03
Analog <strong>Module</strong>sSuppression of interference, Limits of Error<strong>Data</strong> for Selecting an ActuatorCrosstalk between the outputs> 40 dBOperational limit (in the entire temperature range, withreference to the output range)Output ranges (rated values)• Voltage• Current0 to 10 V0 to 20 mA• Voltage outputs• Current outputs0.6 %1.0 %Basic error (operational limit at 25 C referred to theoutput range)• Voltage outputs• Current outputsTemperature error (with referenceto the output range)Linearity error (with reference tothe output range)Repeat accuracy (in the steadystate at 25 C referred to theoutput range)Output ripple (bandwidthreferred to the output range)Interrupts0.5 %0.5 %0.02 %/K 0.05 % 0.05 % 0.05 %Status, interrupts, diagnosticsNoneImpedance (in the nominaloutput range)• For voltage outputs– capacitive load• For current outputs– Inductive loadVoltage outputs• Short-circuit protection• Short-circuit currentmin. 5 kmax. 1 Fmax. <strong>300</strong> max. 1 mYesmax. 11 mACurrent outputs• No-load voltage max. 15 VDestruction limit againstvoltages/currents applied fromoutside• Voltage at outputs to M ANA• Currentmax. 15 V continuous;max. 50 mA DCDiagnostic functionsNone<strong>Data</strong> for Selecting a SensorInput range (rated values)/Inputresistance• Voltage• CurrentMaximum input voltage forvoltage input (destruction limit)0 to 10 V/100 k 0 to 20 mA/50 max. 20 V continuous;75 V for max. 1 s(duty factor 1:20)Connection of actuators• For voltage outputTwo-conductor connectionFour-conductor connection(measuring circuit)Connection of the sensor• For measuring currentTwo-conductor connectionPossibleNot possiblePossibleMaximum input current forcurrent input (destruction limit)Connection of the sensor• For measuring voltage• For measuring currentAs two-wire transmitterAs four-wire transmitter40 mAPossibleNot possiblePossible<strong>Programmable</strong> <strong>Logic</strong> <strong>Controllers</strong> <strong>S7</strong>-<strong>300</strong> <strong>Module</strong> <strong>Data</strong>A5E00105505-034-191
Analog <strong>Module</strong>s4.30.1 Commissioning the SM 334; AI 4/AO 2 x 8/8 bitsThe analog/output module SM 334; AI 4/AO 2 x 8/8 bits is a non-isolated module.You cannot program the SM 334; AI 4/AO 2 x 8/8 bits.Important information on connecting the moduleNoteNote when connecting the SM 334 that:• the analog chassis ground M ANA (terminal 15 or 18) is connected to thechassis ground M of the CPU and/or the interface module (IM). Use a wirewith a minimum cross-section of 1 mm 2 for this.If there is no ground connection between M ANA and M, the module switchesoff. Inputs are read with 7FFF H ; outputs return a value of 0. If the module is runwithout a ground connection for some time, it may be destroyed.• the supply voltage for the CPU and/or the interface module (IM) must notbe connected with reversed polarity. Reverse polarity causes thedestruction of the module because M ANA is subjected to an unauthorized highpotential (+24 V).AddressingThe inputs and outputs of the module are addressed as of the initial moduleaddress.The address of a channel is obtained from the module start address and anaddress offset.Input AddressesThe following addresses apply to the inputs:ChannelAddress0 Initial module address1 <strong>Module</strong> start address + 2 bytes address offset2 <strong>Module</strong> start address + 4 bytes address offset3 <strong>Module</strong> start address + 6 bytes address offset4-192<strong>Programmable</strong> <strong>Logic</strong> <strong>Controllers</strong> <strong>S7</strong>-<strong>300</strong> <strong>Module</strong> <strong>Data</strong>A5E00105505-03
Analog <strong>Module</strong>sOutput AddressesThe following channel addresses apply to the module outputs:Channel0 Initial module addressAddress1 <strong>Module</strong> start address + 2 bytes address offset4.30.2 Measuring/output method and measuring/output range of theSM 334; AI 4/AO 2 x 8/8 bitsYou cannot program the SM 334; AI 4/AO 2 x 8/8 bits.Selecting the Measurement Method and the Type of OutputSelect the measuring method of an input channel (voltage, current) by wiring theinput channel appropriately.Select the type of output of an output channel (voltage, current) by wiring theoutput channel appropriately.Unused ChannelsYou must short-circuit unused input channels and you should connect them toM ANA . In this way, you obtain an optimum noise immunity for the analog module.Unused output channels must be left open.Measuring rangesThe SM 334; AI 4/AO 2 x 8/8 bits has the measuring ranges 0 to 10 V and 0 to 20mA.Unlike the other analog modules, the SM 334 has a lower resolution and nonegative measuring ranges. Take this into account when you read measured valuetables 4-10 and 4-14 on pages 4-13 and 4-15.Output rangesThe SM 334; AI 4/AO 2 x 8/8 bits has the output ranges 0 to 10 V and 0 to 20 mA.Unlike the other analog modules, the SM 334 has a lower resolution the analogoutputs do not have underranges. Take this into account when you read tables4-35 and 4-37 on pages 4-26 and 4-27.<strong>Programmable</strong> <strong>Logic</strong> <strong>Controllers</strong> <strong>S7</strong>-<strong>300</strong> <strong>Module</strong> <strong>Data</strong>A5E00105505-034-193
Analog <strong>Module</strong>s4.31 Analog Input/Output <strong>Module</strong> SM 334;AI 4/AO 2 x 12 bits; (6E<strong>S7</strong>334-0KE00-0AB0)Order number: “Standard module”6E<strong>S7</strong>334-0KE00-0AB0Order number: “SIPLUS <strong>S7</strong>-<strong>300</strong>-<strong>Module</strong>”6AG1 334-0KE00-2AB0CharacteristicsThe SM 334 has the following characteristic features:• Four inputs in two groups• 2 outputs (voltage outputs)• Resolution of 12 bits + sign• Measuring method selectable– Voltage– Resistors– Temperature• Isolated against the backplane bus interface• Isolated from load voltage4-194<strong>Programmable</strong> <strong>Logic</strong> <strong>Controllers</strong> <strong>S7</strong>-<strong>300</strong> <strong>Module</strong> <strong>Data</strong>A5E00105505-03
Analog <strong>Module</strong>sTerminal connection and block diagram of the SM334; AI 4/AO 2 x 12 bitsVoltage inputResistance testInternalsupplyBackplanebusinterfaceCurrentsourceMultiplexerDACM ANAM ANAM ANAM ANAL+UUM24VVVMI C23Q V0M CH0M 2+M 2M 3 +M 3ANAQ V1I C01+M 0 +M 0M 1 +M 1I C01I C23+M 2 +M 2M 3 +M 3CH0CH1CH2CH3M ANACH1VoltageoutputsFigure 4-56<strong>Module</strong> View and Block Diagram of the SM 334; AI 4/AO 2 x 12 bits<strong>Programmable</strong> <strong>Logic</strong> <strong>Controllers</strong> <strong>S7</strong>-<strong>300</strong> <strong>Module</strong> <strong>Data</strong>A5E00105505-034-195
Analog <strong>Module</strong>sTechnical specifications of the SM334; AI 4/AO 2 x 12 bitsDimensions W x H x D(in millimeters)WeightSupports clockedoperationDimensions and Weight40 x 125 x 117Approx. 200 g<strong>Data</strong> for Specific <strong>Module</strong>NoNumber of inputs 4• For resistance-type sensor 4Number of outputs 2Shielded line lengthmax. 100 mVoltages, Currents, PotentialsRated load voltage L +24 VDC• Reverse polarity protection YesSupply voltage of the rated 24 VDCelectronics voltage and ratedload voltage L+Power supply of thetransmitters• Short-circuit-proof YesConstant measured current forresistance-type sensor• For PT 100 typ. 490 A• At 10 k at 105 AIsolation• Between channels andbackplane bus• Between channels andpower supply of theelectronicsBetween the channelsYesYesNoPermitted potential difference• Between inputs and M ANA 1 V(U CM )• Between the inputs (ECM) 1 V• Between M ANA andM internal -(U ISO )75 VDC / 60 VACInsulation tested with500 VDCCurrent consumption• From the backplane bus max. 60 mA• From power supply andload voltage L+ (no load)max. 80 mAPower dissipation of the moduletyp. 2 WAnalog Value Generation for the InputsMeasuring principleIntegration/conversion time (perchannel)• Parameters can beassigned• Integration time inmilliseconds• Basic conversion timeincluding Integration time inmilliseconds• Additional conversion timefor measuring resistance, inms• Resolution in bits (incl.)overrange)• Suppression of interferencevoltage for interferencefrequency f1 in HertzSmoothing of the measuredvaluesTime constant of the inputfilterBasic response time of module(all channels enabled)IntegratingYes16 2 / 3 2072 8572 8512 bits 12 bits60 50<strong>Programmable</strong>,in 2 stages0.9 ms350 msAnalog Value Generation for the OutputsResolution (incl. OverrangeConversion time (per channel)Settling time• For resistive load• For capacitive load12 bits500 smax. 0.8 msmax. 0.8 ms4-196<strong>Programmable</strong> <strong>Logic</strong> <strong>Controllers</strong> <strong>S7</strong>-<strong>300</strong> <strong>Module</strong> <strong>Data</strong>A5E00105505-03
Analog <strong>Module</strong>sSuppression of interference, Limits of Error for theInputsNoise suppression for f = n (f1 1 %)(f1 = interference frequency)• Common-mode> 38 dBinterference(U pp < 1 V)• Series-mode interference(peak value of interference< rated value of inputrange)> 36 dBCrosstalk between the inputs> 88 dBOperational limit (in the entire temperature range, withreference to the input range)• Voltage input 0 to 10 V 0.7 %• Resistor input 10 k 3.5 %• Temperature input Pt 100 1 %Basic error (operational limit at 25 C, referred to inputrange)• Voltage input 0 to 10 V 0.5 %• Resistor input 10 k 2.8 %• Temperature input Pt 100 0.8 %Temperature error (withreference to the input range)Linearity error (with reference tothe input range)Repeat accuracy (in the steadystate at 25 C, referred to theinput range)0.01 %/K0.05 % 0.05 %Suppression of interference, Limits of ErrorCrosstalk between the outputs> 88 dBOperational limit (in the entire temperature range, withreference to the output range)• Voltage outputs 1.0 %Basic error (operational limit at 25 C, referred to outputrange)• Voltage outputs 0.85 %Temperature error (with 0.01 %/Kreference to the output range)Linearity error (with reference tothe output range)Repeat accuracy (in the steadystate at 25C, referred to theoutput range)Output ripple; band width 0 to50 kHz (with reference to theoutput range) 0.01 % 0.01 % 0.1 %InterruptsDiagnostic functionsStatus, interrupts, diagnosticsNoneNone<strong>Data</strong> for Selecting a SensorInput range (rated values)/Inputresistance• Voltage 0 to 10 V 100 k • Resistors 10 k 10 m• Temperature PT 100 10 mMaximum input voltage forvoltage input (destruction limit)Connection of the sensor• For measuring voltage Possible• For measuring resistanceWith two-conductorconnectionWith three-conductorconnectionWith four-conductorconnectionCharacteristic linearizationmax. 20 V continuous;75 V for max. 1 s(duty factor 1:20)PossiblePossiblePossibleParameters can beassigned• For RTD PT 100 (climate range)User data in engineeringformatDegrees Celsius<strong>Data</strong> for Selecting an ActuatorOutput range (rated value)• Voltage 0 to 10 VImpedance (in the nominal output range)• For voltage outputs min. 2.5 k– capacitive load max. 1.0 FVoltage outputs• Short-circuit protection Yes• Short-circuit current max. 10 mADestruction limit for voltages/currents connected fromoutside• Voltage at outputs to M ANA max. 15 V continuous;Connection of actuators• For voltage outputTwo-conductor connectionFour-conductor connectionPossibleNot possible(measuring circuit)<strong>Programmable</strong> <strong>Logic</strong> <strong>Controllers</strong> <strong>S7</strong>-<strong>300</strong> <strong>Module</strong> <strong>Data</strong>A5E00105505-034-197
Analog <strong>Module</strong>s4.31.1 Commissioning the SM 334; AI 4/AO 2 x 12 bitsNoteBelow the rated load voltage range, incorrect intermediate values occur at theoutput when the rated load voltage supply (L+) is switched on/off.STEP 7 V 4.0 tool for parameter assignmentThe SM 334; AI 4/AO 2 x 12 bits is contained in the module catalog in STEP 7V 4.0 or higher.ParameterYou will find a description of the general procedure for assigning parameters toanalog modules in Section 4.7.You will find an overview of the programmable parameters and their default valuesin Table 4-43, on page 4-44.4.31.2 Measuring/output method and measuring/output range of theSM 334; AI 4/AO 2 x 12 bitsConnecting the inputs and outputsYou can connect the inputs as voltage, resistance or temperature measurementinputs, or deactivate them.You can connect the outputs as voltage, or disable them.Perform connection of the inputs and outputs with the parameters “measuringmethod” and “output method” in STEP 7.Connection options for the input channelsYou can connect the SM 334; AI 4/AO 2 x 12 bits in the following combinations:ChannelChannels 0and 1Channels 2and 3Wiring Versions• 2 x temperature or• 2 x resistance• 2 x voltage,• 2 x resistance,• 2 x temperature,• 1 x temperature and 1 x voltage, or• 1 x resistance and 1 x voltage4-198<strong>Programmable</strong> <strong>Logic</strong> <strong>Controllers</strong> <strong>S7</strong>-<strong>300</strong> <strong>Module</strong> <strong>Data</strong>A5E00105505-03
Analog <strong>Module</strong>sNoteSimultaneous connection of a temperature sensor and a resistor to channels 0 and1 and 2 and 3 is not allowed.The reason common current source for both channels.Unused ChannelsSet the “measuring method” parameter for unused input channels to “disabled”. Inthis way you shorten the scan time of the module.You must short-circuit unused input channels and you should connect them toM ANA . In this way, you obtain an optimum interference immunity for the analoginput module.So that unused output channels of the SM 334; AI 4/AO 2 x 12 bits remainde-energized, you must set the “output type” parameter to “disabled” and leave theterminal open.Measuring rangesUse STEP 7 for programming the measuring ranges.Table 4-87 Measuring ranges of the SM 334;AI 4/AO 2 x 12 bitsMethod Selected Measuring Range DescriptionU: Voltage 0 to 10 V You will find the digitalanalog values in SectionR-4L: Resistance (four-conductor 10 k4.3.1connection)RTD-4L: Bulb resistorPt 100 climate(linear, four-conductor connection)(temperature measurement)Default settings of inputsThe default settings of the module are the “Bulb resistor (linear, four-conductorconnection)” measuring method and the “Pt 100 climate” measuring range. Youcan use this combination of measuring method and measuring range withoutparameterizing the SM 334; AI 4/AO 2 x 12 bits in STEP 7.<strong>Programmable</strong> <strong>Logic</strong> <strong>Controllers</strong> <strong>S7</strong>-<strong>300</strong> <strong>Module</strong> <strong>Data</strong>A5E00105505-034-199
Analog <strong>Module</strong>sOutput rangesUse STEP 7 for programming the output ranges.Table 4-88 Output ranges of the SM 334;AI 4/AO 2 x 12 bitsSelected Type of Output Output Range DescriptionVoltage 0 to 10 V You will find the digitalanalog values in Section4.3.2 in the voltage outputrangeDefault settings of outputsThe default settings of the module are “Voltage” for the output type and “0 to 10 V”for the output range. You can use this combination of measuring method andmeasuring range without parameterizing the SM 334; AI4/AO 2 x 2 bits in STEP 7.4-200<strong>Programmable</strong> <strong>Logic</strong> <strong>Controllers</strong> <strong>S7</strong>-<strong>300</strong> <strong>Module</strong> <strong>Data</strong>A5E00105505-03
Special Signal modules5In this AppendixSection Contents Page5.1 <strong>Module</strong> Overview 5-25.2 Simulator <strong>Module</strong> SM 374; IN/OUT 16;(6E<strong>S7</strong>374-2XH01-0AA0)5.3 Dummy <strong>Module</strong> DM 370; (6E<strong>S7</strong>370-0AA01-0AA0) 5-55.4 Position Decoder <strong>Module</strong> SM 338; POS-INPUT;(6E<strong>S7</strong>338-4BC01-0AB0)5-35-7<strong>Programmable</strong> <strong>Logic</strong> <strong>Controllers</strong> <strong>S7</strong>-<strong>300</strong> <strong>Module</strong> <strong>Data</strong>A5E00105505-035-1
Special Signal modules5.1 <strong>Module</strong> OverviewIntroductionThe following table summarizes the most important features of the signal modulesdescribed in this chapter. This overview is intended to make it easy to choose thesuitable module for your task.Table 5-1Special signal modules: Characteristics at a GlanceCharacteristics<strong>Module</strong>Number ofinputs/outputsSuitable for...Supports clockedoperation<strong>Programmable</strong>diagnosticsDiagnosticinterruptSimulator moduleSM 374; IN/OUT 16• max. 16 inputs oroutputsSimulation of:• 16 inputs or• 16 outputs or• 8 in– and outputsDummy module DM 3701 slot reserved for 1non-parameterizedmodulePlaceholder for:• Interface <strong>Module</strong>s• Non-parameterizedsignal modules• <strong>Module</strong>s which occupy2 slotsNo No YesNo No NoNo No AdjustablePosition decodermoduleSM 338; POS-INPUT• 3 inputs for connectionof absolute valueencoders (SSI)• 2 digital inputs forfreezing the encodervaluesPosition decoding with upto 3 absolute valueencoders (SSI)Encoder types: Absolutevalue encoder (SSI)with 13-bit, 21-bit or 25-bitmessage lengths<strong>Data</strong> format: Gray code orbinary codeSpecial FeaturesFunction adjustable withscrewdriverWhen replacing theDM 370 with anothermodule, the mechanicalassembly and addressassignment/addresslocation of the entireassembly remainunchangedAbsolute value encoderswith a monoflop timegreater than 64s cannotbe used on the SM 3385-2<strong>Programmable</strong> <strong>Logic</strong> <strong>Controllers</strong> <strong>S7</strong>-<strong>300</strong> <strong>Module</strong> <strong>Data</strong>A5E00105505-03
Special Signal modules5.2 Simulator <strong>Module</strong> SM 374; IN/OUT 16;(6E<strong>S7</strong>374-2XH01-0AA0)Order number6E<strong>S7</strong>374-2XH01-0AA0CharacteristicsThe simulator module SM 374; IN/OUT 16 is distinguished by the followingfeatures:• Simulation of:– 16 inputs or– 16 outputs or– 8 inputs and 8 outputs (each with the same start addresses!)• Status displays for simulation of inputs and outputs• Function adjustable with screwdriverNoteDo not activate the switch for setting the function in RUN!Configuration with STEP 7The simulator module SM 374; IN/OUT 16 is not included in the module catalog ofSTEP 7 i.e., the order number of the SM 374 is not recognized by STEP 7. Youmust therefore “simulate” the function of the simulator module required for theconfiguration as follows:• If you want to use SM 374 with 16 inputs, enter the order number of a digitalinput module with 16 inputs in STEP 7;e.g.: 6E<strong>S7</strong>321-1BH02-0AA0• If you want to use SM 374 with 16 outputs, enter the order number of a digitaloutput module with 16 outputs in STEP 7;e.g.: 6E<strong>S7</strong>322-1BH01-0AA0• If you want to use SM 374 with 8 inputs and 8 outputs, enter the ordernumber of a digital input/output module with 8 inputs and 8 outputs in STEP 7;e.g.: 6E<strong>S7</strong>323-1BH02-0AA0<strong>Programmable</strong> <strong>Logic</strong> <strong>Controllers</strong> <strong>S7</strong>-<strong>300</strong> <strong>Module</strong> <strong>Data</strong>A5E00105505-035-3
Special Signal modules<strong>Module</strong> view (without front door)Switch for input statusSwitch for setting the functionChannel numberStatus display – greenFigure 5-1 <strong>Module</strong> view of the simulator module SM 374; IN/OUT 16Technical specifications of the SM 374; IN/OUT 16Dimensions and WeightDimensions W x H x D(in millimeters)Weight<strong>Data</strong> for Specific <strong>Module</strong>Optional simulation of40 125 110Approx. 190 g16 inputs16 outputs8 in– and outputsVoltages, Currents, PotentialsCurrent consumption from thebackplane busPower dissipation of the moduleStatus, Interrupts, DiagnosticsStatus displayInterruptsDiagnostic functionsmax. 80 mAtype. 0.35 Wyes, green LED perchannelNoNo5-4<strong>Programmable</strong> <strong>Logic</strong> <strong>Controllers</strong> <strong>S7</strong>-<strong>300</strong> <strong>Module</strong> <strong>Data</strong>A5E00105505-03
Special Signal modules5.3 Dummy <strong>Module</strong> DM 370; (6E<strong>S7</strong>370-0AA01-0AA0)Order number6E<strong>S7</strong>370-0AA01-0AA0CharacteristicsThe dummy module DM 370 reserves a slot for a non-parameterized module. Theycan be used as placeholders for:• Interface modules (without reservation of address space)• Non-parameterized signal modules (with reservation of address space)• <strong>Module</strong>s which occupy 2 slots (with reservation of address space)When replacing the dummy module with another module from <strong>S7</strong>-<strong>300</strong>, themechanical assembly and the address assignment/address allocation of the entireassembly remain unchanged.Configuration with STEP 7You must only configure the dummy module DM 370 with STEP 7 if the module ofthe slot is to be reserved for a parameterized signal module. If the module isreserving the slot for an interface module, the configuration cannot be carried outwith STEP 7.<strong>Module</strong>s which occupy 2 slotsFor modules which occupy 2 slots, you must plug in 2 dummy modules. Only thedummy module in slot “x” reserves the address space (not the dummy module inslot “x + 1”; for details of the procedure, see table 5-2).A maximum of 8 modules may be plugged into a module carrier (SM/FM/CP). Ifyou, for example, reserve a slot for an 80 mm wide module with 2 dummymodules, you may still plug in 7 other modules (SM/FM/CP) because the dummymodule only occupies the address space for 1 module.<strong>Programmable</strong> <strong>Logic</strong> <strong>Controllers</strong> <strong>S7</strong>-<strong>300</strong> <strong>Module</strong> <strong>Data</strong>A5E00105505-035-5
Special Signal modules<strong>Module</strong> viewNAASwitch for addressassignmentFront ViewRear viewFigure 5-2 <strong>Module</strong> view of the dummy module DM 370Switch settings for address assignmentThe following table shows how to set the switch on the rear side of the moduleaccording to the module type.Table 5-2 Meaning of the switch settings of the dummy module DM 370Switch setting Meaning UseNAANAAThe dummy module reserves oneslot.The module is not configured anddoes not occupy any addressspace.The dummy module reserves oneslot.The module must be configuredand occupies 1 byte input addressspace (with system default outsidethe process image).• Without active backplane bus:In configurations for which a purelyphysical single slot should be reserved,with electrical connection to the <strong>S7</strong> <strong>300</strong>bus.• With active backplane bus: NoIn configurations for which a slot with anaddress should be reserved.5-6<strong>Programmable</strong> <strong>Logic</strong> <strong>Controllers</strong> <strong>S7</strong>-<strong>300</strong> <strong>Module</strong> <strong>Data</strong>A5E00105505-03
Special Signal modulesTechnical specifications of the DM 370Dimensions and WeightVoltages, Currents, PotentialsDimensions W x H x D(in millimeters)40 x 125 x 120Current consumption from thebackplane busca. 5 mAWeightApprox. 180 gPower losstyp. 0.03 W5.4 Position Decoder <strong>Module</strong> SM 338; POS-INPUT;(6E<strong>S7</strong>338-4BC01-0AB0)Order number6E<strong>S7</strong>338-4BC01-0AB0CharacteristicsThe position decoder module SM 338; POS-INPUT is distinguished by thefollowing features:• 3 inputs for the connection of maximum three absolute value encoders (SSI)and 2 digital inputs to freeze the encoder values• Direct reaction possible to encoder values in moving systems• Processing of acquired encoder values of the SM 338 in user program• Supports clocked operation• Type of encoder value acquisition (see chapter 5.4.4) can be selected:– Free running– Clocked• 24 VDC rated input voltage• Non-isolated against the CPUSupported encoder typesThe following encoder types are supported by the SM 338; POS-INPUT:• Absolute value encoder (SSI) with 13-bit message length• Absolute value encoder (SSI) with 21-bit message length• Absolute value encoder (SSI) with 25-bit message lengthSupported data formatsThe SM 338; POS-INPUT supports the gray code and binary code data formats.<strong>Programmable</strong> <strong>Logic</strong> <strong>Controllers</strong> <strong>S7</strong>-<strong>300</strong> <strong>Module</strong> <strong>Data</strong>A5E00105505-035-7
Special Signal modules5.4.1 Synchronous OperationNoteThe basics of synchronous operation are described in a separate manual.Hardware requirementsFor the synchronous operation of the SM 338, you require:• CPU which supports clocked operation• DP master which supports the equidistant bus cycle• Slave interface (IM 153-x) which supports synchronous operationCharacteristicsDepending on the system parameterization, the SM 338 works in eithernon-synchronous or synchronous mode.In synchronous operation, the data exchange between DP master and SM 338 issynchronous to the PROFIBUS DP cycle.In synchronous operation all 16 bytes of the checkback interface are consistent.If synchronicity is lost due to faults or failure or delay of Global Control (GC), theSM 338 goes back into synchronous operation in the next cycle without errorresponse.If synchronicity is lost, the checkback interface is not updated.5-8<strong>Programmable</strong> <strong>Logic</strong> <strong>Controllers</strong> <strong>S7</strong>-<strong>300</strong> <strong>Module</strong> <strong>Data</strong>A5E00105505-03
Special Signal modules5.4.2 Terminal Connection Diagram and Block DiagramFault indicator – redConnection to theground of the CPUSFDI 0DI 1<strong>S7</strong>–<strong>300</strong> Backplane busVoltage monitoring<strong>Logic</strong>Short-circuitprotection1234RS 422 567891011121314151617181920L+ 24VMSSISSISSIOD (<strong>Data</strong>)OD (<strong>Data</strong>)OC (Clock)OC (Clock)1D (<strong>Data</strong>)1D (<strong>Data</strong>)1C (Clock)1C (Clock)2D (<strong>Data</strong>)2D (<strong>Data</strong>)2C (Clock)2C (Clock)DI 0 (Digital-DI 1 input)DC24V (encoder)DC24V (encoder)M (encoder)M (encoder)Twisted pair cablesFigure 5-3<strong>Module</strong> View and Block Diagram of the SM 338; POS-INPUTWiring rulesPlease observe the following important rules of the wiring of the module:• The ground of the encoder supply is connected non-isolated to the ground ofthe CPU. Thus, connect pin 2 of the SM 338 (M) with low impedance with theground of the CPU.• The encoder lines (pins 3 to 14) must be twisted pairs and shielded. Apply theshield to both sides.For the shield connection to the SM 338, use the shield connection element(order number 6E<strong>S7</strong>390-5AA00-0AA0).• If the output current (900 mA) of the encoder supply is exceeded, then youmust connect an external power supply.<strong>Programmable</strong> <strong>Logic</strong> <strong>Controllers</strong> <strong>S7</strong>-<strong>300</strong> <strong>Module</strong> <strong>Data</strong>A5E00105505-035-9
Special Signal modules5.4.3 Functions of the SM 338; POS INPUT5.4.4 Encoder value acquisitionThe absolute value encoder transfers its encoder values in messages to theSM 338. The transfer of the message is initiated by the SM 338.• In non-synchronous operation, the encoder values are acquired while it is freerunning.• In synchronous operation the encoder values are acquired synchronized to thePROFIBUS DP cycle at each T i .Free running encoder value acquisitionThe SM 338 always initiates the transfer of a message after the end of theparameterized monoflop time.Asynchronous to these free running messages, the SM 338 processes theacquired encoder values during the cycle of its updating rate (see Technical <strong>Data</strong>).Thus, in the case of free running encoder value acquisition, encoder values ofdifferent ages result. The difference between the maximum and minimum age isthe jitter (see Technical <strong>Data</strong>).Synchronous encoder values acquisitionSynchronous encoder values acquisition is automatically set if, in the DP mastersystem, the equidistant bus cycle is activated and the DP Slave is synchronized tothe DP cycle.The SM 338 initiates the transfer of a message in each PROFIBUS DP cycleat the time T i .Synchronous to the PROFIBUS DP cycle, the SM 338 processes the transferredencoder values.5-10<strong>Programmable</strong> <strong>Logic</strong> <strong>Controllers</strong> <strong>S7</strong>-<strong>300</strong> <strong>Module</strong> <strong>Data</strong>A5E00105505-03
Special Signal modules5.4.5 Gray/Dual ConverterIn the Gray setting, the encoder values provided by the absolute value encoder ingray code is converted into Dual code. In the Dual setting, encoder valuesprovided by the absolute value encoder remain unchanged.NoteIf you have selected the Gray setting, the SM 338 always converts the entireencoder value (13, 21, 25 bits). As a result, preceding special bits affect theencoder values and following bits could be falsified under certain circumstances.5.4.6 Transferred Encoder Value and NormalizationThe transferred encoder value contains the encoder position of the absolute valueencoder. Depending on the encoder used, additional bits which are located beforeand after the encoder position are also transferred in addition to the encoderposition.So that the SM 338 can detect the encoder position, make the following settings:• Normalization, places (0..12), or• Normalization, units / revolutionNormalization, placesThe normalization determines the position of the encoder values in the checkbackinterface.• If “Places” = 1, 2....12, this indicates that the following non relevant bits in theencoder values are removed and the encoder value is right justified in theaddress range (see following example).• If “Places” = 0, this indicates that the following bits are retained and availablefor evaluation.This can be useful if you use an absolute value encoder which transfersinformation in the following bits (see manufacturer information) and you want toevaluate these (see also chapter 5.4.5).Parameter units / revolutionA maximum of 13 bits are available for the units/revolution. According to the“Places” data, the resulting number of units/revolution is automatically displayed.<strong>Programmable</strong> <strong>Logic</strong> <strong>Controllers</strong> <strong>S7</strong>-<strong>300</strong> <strong>Module</strong> <strong>Data</strong>A5E00105505-035-11
Special Signal modulesExample of normalization of an encoder valueYou are using a single-turn encoder with 2 9 units= 512 units/ revolution(resolution/360°).In STEP 7 you have set the following parameters:• Absolute encoder: 13 bits• Normalization: 4 places• Units / revolution: 512Before the normalization: cyclically acquired encoder values 10031Double data word0 0 0 0 0 0 0 0 0 0 0 0 0 0 0 0 0 0 0 0 0 1 1 0 0 1 0 0 X X X XRelevant bits0Transferred bitsAfter the normalization: encoder values 10031Double data word00 0 0 0 0 0 0 0 0 0 0 0 0 0 0 0 0 0 0 0 0 0 0 0 0 1 1 0 0 1 0 0Relevant bitsResult: Bits 0 to 3 (4 places, marked with “x”) are omitted.5.4.7 Freeze FunctionThe freeze function “freezes” the current encoder values of the SM 338. Thefreeze function is coupled to the digital inputs DI 0 and DI 1 of the SM 338.The freeze is triggered by an edge change (rising edge) on DI 0 or DI 1. A frozenencoder value is identified by the bit 31 (output address) being set. With a digitalinput you can freeze one, two or three encoder values.You must switch on the freeze function, i.e. set the corresponding parameters inSTEP 7 .The encoder values are retained until the freeze function is ended and can thus beevaluated dependent on the event.5-12<strong>Programmable</strong> <strong>Logic</strong> <strong>Controllers</strong> <strong>S7</strong>-<strong>300</strong> <strong>Module</strong> <strong>Data</strong>A5E00105505-03
Special Signal modulesEnding the freeze functionThe freeze function must be ended at every encoder input. You acknowledge thefunction in the user program by setting the bit 0, 1 or 2 depending on the channelwith the STEP 7-Operation T PAB “xyz” (for a program example, see chapter5.4.9).After exiting, bit 31 of the corresponding encoder value is again deleted and theencoder values are again updated. A renewed freezing of the encoder values isagain possible as soon as you have deleted the acknowledgment bit in the outputaddress of the module.In synchronous operation the acknowledgment is processed at time T o . From thispoint in time a renewed freezing of the encoder values can take place via thedigital inputs.NoteThe freeze function is automatically acknowledged if you newly parameterize thecorresponding channel with different parameters (see 5.4.8 chapter).If the parameters remain identical, the freeze function remains unaffected.5.4.8 SM 338; POS-INPUT ParameterizationYou parameterize the SM 338; POS-INPUT with STEP 7. You must performparameter assignment in STOP mode of the CPU.As soon as you have set all the parameters, download the parameters from theprogramming device to the CPU. On a transition from STOP to RUN mode, theCPU then transfers the parameters to the SM 338.The parameters cannot be changed by the user program.<strong>Programmable</strong> <strong>Logic</strong> <strong>Controllers</strong> <strong>S7</strong>-<strong>300</strong> <strong>Module</strong> <strong>Data</strong>A5E00105505-035-13
Special Signal modulesParameters of the SM 338; POS-INPUTYou will find an overview of the parameters that you can set and their defaultsettings for the SM 338 in the table below.The default settings apply if you have not performed parameter assignment inSTEP 7 (default setting bold).Table 5-3Parameters of the SM 338; POS-INPUTParameter values Range NoteEnableRelease parameter.• Diagnosis interrupt Yes/noAffects all 3 channels.Absolute value encoder(SSI) 1) none; 13 bits; 21 bits; 25 bits none: The encoder input isswitched off.Code type 1) Gray; Binary Code provided by encoder.Baud rate 1) ,3) 125 kHz; 250 kHz; 500 kHz; 1 MHz <strong>Data</strong> transfer rate of the SSIposition decoder. Observe therelationship between the cablelength and baud rate (seeTechnical <strong>Data</strong>)Monoflop time 1),2),3) 16 s; 32 s; 48 s; 64 s The monoflop time is theminimum time interval between 2SSI message frames.The parameterized monofloptime must always be greater thanthe monoflop time of the absolutevalue encoder.Normalization• Places0 to 12• Units / revolution 4) 2 to 8192Normalizing right justifies theencoder values of the encoderabsolute; non-relevant places arediscarded.Switching on freeze off; 0; 1 Designation of the digital inputwhose rising edge causes afreezing of the encoder value.1) See technical data of the absolute value encoder2) The monoflop time is the time interval between 2 SSI message frames. The parameterized monofloptime must be greater than the monoflop time of the absolute value encoder (see technical data of themanufacturer). The time 2 (1 / baud rate) is added to the value parameterized in HW config. At abaud rate of 125 kHz with a parameterized monoflop time of 16 s, an effective monoflop time of 32 sis actually achieved.3) The following restriction applies to the monoflop time of the absolute value encoder:(1 / baud rate) < Monoflop time of the absolute value encoder < 64 s + 2 (1 / baud rate)4) to the power of twoNotePlease note that in non synchronous operation the baud rate and the monofloptime affect the accuracy and actuality of the encoder values.In synchronous operation the baud rate and the monoflop time affect the accuracyof the freeze function.5-14<strong>Programmable</strong> <strong>Logic</strong> <strong>Controllers</strong> <strong>S7</strong>-<strong>300</strong> <strong>Module</strong> <strong>Data</strong>A5E00105505-03
Special Signal modules5.4.9 SM 338; POS-INPUT Addressing<strong>Data</strong> range for the encoder valuesThe inputs and outputs of the SM 338 are addressed as of the initial moduleaddress. The input and output address is determined at the configuration of theSM 338 in STEP 7.Input AddressesTable 5-4SM 338; POS-INPUT: Input AddressesEncoder input Input address (from the configuration) + address offset0 ”Initial module address”1 ”<strong>Module</strong> start address” + 4 bytes address offset2 ”<strong>Module</strong> start address” + 8 bytes address offsetStructure of the double data wordFor each encoder input the double data word is made up as follows:31 0Encoder value in gray or binary codeFreeze0 = encoder value is not frozen. The value is constantly updated.1 = encoder value is frozen. The value remains constant untilacknowledgment.Output Address70Initial module addressAcknowledging the freeze function:Bit 0 = encoder input 0Bit 1 = encoder input 1Bit 2 = encoder input 2Reading out data areasYou can read out the data areas in your user program with the STEP 7-Operation LPED “xyz”.<strong>Programmable</strong> <strong>Logic</strong> <strong>Controllers</strong> <strong>S7</strong>-<strong>300</strong> <strong>Module</strong> <strong>Data</strong>A5E00105505-035-15
Special Signal modulesExample of access to encoder values and use of the freeze functionYou want to read out and evaluate the value of the encoder at the encoder inputs.The module start address is 256.AWLL PED 256 //T MD 100 //U M 100.7 //= M 99.0 //L PED 260 //T MD 104 //U M 104.7 //= M 99.1 //L PED 264 //T MD 108 //U M 108.7 //= M 99.2 //L MB 99 //T PAB 256 //ExplanationRead encoder value in the address range forencoder input 0Store encoder value in marker double wordAcquire and store freeze status for lateracknowledgmentRead encoder value in the address range forencoder input 1Store encoder value in marker double wordAcquire and store freeze status for lateracknowledgmentRead encoder value in the address range forencoder input 2Store encoder value in marker double wordAcquire and store freeze status for lateracknowledgmentLoad and acknowledge freeze condition(SM 338: output address 256)Afterwards you can further process the encoder values from the marker range MD100, MD 104 and MD 108. The encoder value is contained in bits 0 to 30 of themarker double word.5-16<strong>Programmable</strong> <strong>Logic</strong> <strong>Controllers</strong> <strong>S7</strong>-<strong>300</strong> <strong>Module</strong> <strong>Data</strong>A5E00105505-03
Special Signal modules5.4.10 Diagnosis of the SM 338; POS-INPUTThe SM 338 makes diagnostic messages available, i.e., all diagnostic messagesare always provided by the SM 338 without your assistance.Actions following diagnostic message in STEP 7Each diagnostic message leads to the following actions:• The diagnostic message is entered in the diagnosis of the module andforwarded to the CPU.• The SF LED on the module lights.• If you have programmed “Enable Diagnostic Interrupt” in STEP 7 , a diagnosticinterrupt is triggered and OB 82 is called.Reading out diagnostic messagesYou can read out detailed diagnostic messages by means of SFCs in the userprogram (refer to the Appendix “Diagnostic <strong>Data</strong> of Signal <strong>Module</strong>s”).You can view the cause of the error in STEP 7, in the module diagnosis (refer toonline Help for STEP 7).Diagnostic message via SF LEDThe SM 338 indicate errors for you by means of their SF LED (group error LED).The SF LED lights as soon as a diagnostic message is triggered by the SM 338. Itgoes out when all errors have been rectified.The group fault (SF) LED also lights up in case of external errors (short circuit ofencoder supply), independent of the operating status of the CPU (if power is on).The SF LED lights up temporarily at startup during the self test of the SM 338.<strong>Programmable</strong> <strong>Logic</strong> <strong>Controllers</strong> <strong>S7</strong>-<strong>300</strong> <strong>Module</strong> <strong>Data</strong>A5E00105505-035-17
Special Signal modulesDiagnostic messages of the SM 338; POS INPUTThe table below gives an overview of the diagnostic messages for the SM 338.Table 5-5Diagnostic messages of the SM 338; POS INPUTDiagnostics Message LED Scope of the Diagnostics<strong>Module</strong> problem SF <strong>Module</strong>Internal malfunction SF <strong>Module</strong>External malfunction SF <strong>Module</strong>Channel error present SF <strong>Module</strong>External auxiliary supply missing SF <strong>Module</strong><strong>Module</strong> not parameterized. SF <strong>Module</strong>Wrong parameters SF <strong>Module</strong>Channel information available SF <strong>Module</strong>Time monitoring triggered SF <strong>Module</strong>Channel error present SF Channel(encoder input)Configuring/parameter assignment error SF Channel(encoder input)External channel error (encoder fault) SF Channel(encoder input)5-18<strong>Programmable</strong> <strong>Logic</strong> <strong>Controllers</strong> <strong>S7</strong>-<strong>300</strong> <strong>Module</strong> <strong>Data</strong>A5E00105505-03
Special Signal modulesCauses of errors and remedial measuresTable 5-6Diagnostics Messages of the SM 338, Causes of Errors and Remedial MeasuresDiagnosticsMessage<strong>Module</strong> faultInternal errorExternal errorChannel error presentExternal auxiliarysupply missing<strong>Module</strong> notparameterizedWrong parametersChannel informationpresentWatchdog trippedChannel error presentConfiguration /parameterization errorExternal channel error(encoder error)Possible Error CauseAn error detected by the module hasoccurred.<strong>Module</strong> has detected an error withinthe automation system.<strong>Module</strong> has detected an error outsideof the automation system.Indicates that only specific channelsare faulty.The power supply L+ to the module ismissing<strong>Module</strong> requires information whether itshould work with parameters preset bythe system or with your parameters.One parameter or the combination ofparameters is not plausibleChannel error present; module canprovide additional channel information.Temporary high electromagneticinterferenceAn error detected by the module hasoccurred at the encoder input.Illegal parameter had been transferredto moduleBroken wire in encoder cable, encodercable not connected or encoderdefective.Feed supply L+RemedyMessage present after network activeuntil transfer of the parameters by theCPU complete; parameterize module ifnecessary.Reassign module parameterEliminate interferenceReassign module parameterCheck connected encoder<strong>Programmable</strong> <strong>Logic</strong> <strong>Controllers</strong> <strong>S7</strong>-<strong>300</strong> <strong>Module</strong> <strong>Data</strong>A5E00105505-035-19
Special Signal modules5.4.11 Interrupts of the SM 338; POS INPUTIntroductionIn this Section, the interrupt behavior of the SM 338; POS-INPUT is described.The SM 338 can trigger diagnostic interrupts.The OBs and SFCs mentioned below can be found in the online Help for STEP 7,where they are described in greater detail.Enabling interruptsThe interrupts are not preset – in other words, they are inhibited withoutappropriate parameter assignment. Assign parameters to the Interrupt Enable inSTEP 7 (refer to Section 5.4.8).Diagnostic interruptIf you have enabled diagnostic interrupts, then incoming active error events (initialoccurrence of the error) and departing error events (message aftertroubleshooting) are reported by means of interrupts.The CPU interrupts execution of the user program and processes the diagnosticinterrupt block (OB 82).In the user program, you can call SFC 51 or SFC 59 in OB 82 to obtain moredetailed diagnostic information from the module.The diagnostic information is consistent until such time as OB 82 is exited. WhenOB 82 is exited, the diagnostic interrupt is acknowledged on the module.5-20<strong>Programmable</strong> <strong>Logic</strong> <strong>Controllers</strong> <strong>S7</strong>-<strong>300</strong> <strong>Module</strong> <strong>Data</strong>A5E00105505-03
Special Signal modules5.4.12 Technical Specifications of the 338; POS-INPUTDimensions and WeightDimensions B x H x T 40 x 125 x 120(mm)WeightApprox. 235 gVoltages, Currents, Potentials24 VDC20.4 ... 28.8 VNoRated load voltage L+• Range• Reverse polarityprotectionIsolationPermitted potentialdifference• between input(M connection) andcentral grounding pointof the CPUEncoder supply• Output voltage• Output currentCurrent dissipation• From the backplanebus• From the load voltageL+ (no load)no, only against shield1 VDCL+ –0.8 Vmax. 900 mA, shortcircuit–proofmax. 160 mAmax. 10 mAPower dissipation of the typ. 3 WmoduleEncoder inputs POS INPUT 0 to 2Position decodingabsoluteDifference signals for SSIdata and SSI clock<strong>Data</strong> transfer rate and cablelength of absolute valueencoders (twisted pair andshielded)Message duration of theSSI transmission• 125 kHz• 250 kHz• 500 kHz• 1 MHzaccording to RS422• 125 kHz max. 320 m• 250 kHz max. 160 m• 500 kHz max. 60 m• 1 MHz max. 20 m13 bits 21 bits 25 bits112 s 176 s 208 s56 s 88 s 104 s28 s 44 s 52 s14 s 22 s 26 sMonoflop time 216 s, 32 s, 48 s, 64 sDigital inputs DI 0, DI 1Isolationno, only against shieldInput voltage0-Signal: –3 V ... 5 V1-Signal: 11 V ... 30.2 VInput current0-Signal: 2 mA(quiescent current)Input delay1-Signal: 9 mA (typ.)0 > 1: max. <strong>300</strong> s1 > 0: max. <strong>300</strong> sMaximum repeat frequency 1 kHzConnection of a two–wire PossibleBEROS, type 2Shielded line length 600 mUnshielded line length 32 mStatus, Interrupts, DiagnosticsInterrupts• Diagnostic interrupt Parameters can beassignedStatus display of digital LED (green)inputsGroup error/faultLED (red)Inaccuracy of the encoder valueFree running encoder value acquisition• maximum age 1) (2 × Message duration)+ monoflop time+ 580 s• minimum age 1) Message duration+ 130 s• Jitter Message duration+ monoflop time+ 450 sUpdate rateEvaluation of the messageevery 450 sSynchronous encoder value acquisition• Age Encoder value at time T iof the currentPROFIBUS DP cycleInaccuracy of the frozen encoder value (freeze)Free running encoder value acquisition• maximum age 1) (2 × Message duration)+ monoflop time + 580s• minimum age 1) Message duration + 130s• Jitter Message duration +monoflop time + 450 sSynchronous encoder value acquisition• Jitter Max (messageduration n + param.Monoflop time n )n = 0, 1, 2, (Channel)1) Age of the encoder values determined by thetransfer process and the processing2) The following restriction applies to the monofloptime of the absolute value encoder:(1 / baud rate) < Monoflop time of the absolutevalue encoder < 64 s + 2 x (1 / baud rate)<strong>Programmable</strong> <strong>Logic</strong> <strong>Controllers</strong> <strong>S7</strong>-<strong>300</strong> <strong>Module</strong> <strong>Data</strong>A5E00105505-035-21
Special Signal modules5-22<strong>Programmable</strong> <strong>Logic</strong> <strong>Controllers</strong> <strong>S7</strong>-<strong>300</strong> <strong>Module</strong> <strong>Data</strong>A5E00105505-03
Interface <strong>Module</strong>s6Interface modulesIn this chapter you will find the technical specifications and characteristic featuresof the interface modules for the <strong>S7</strong>-<strong>300</strong>.ContentsThe following interface modules are described in this chapter:Section Contents Page6.1 <strong>Module</strong> Overview 6-26.2 Interface <strong>Module</strong> IM 360; (6E<strong>S7</strong>360-3AA01-0AA0) 6-36.3 Interface <strong>Module</strong> IM 361; (6E<strong>S7</strong>361 3CA01-0AA0) 6-56.4 Interface <strong>Module</strong> IM 365; (6E<strong>S7</strong>365-0BA01-0AA0) 6-7<strong>Programmable</strong> <strong>Logic</strong> <strong>Controllers</strong> <strong>S7</strong>-<strong>300</strong> <strong>Module</strong> <strong>Data</strong>A5E00105505-036-1
Interface <strong>Module</strong>s6.1 <strong>Module</strong> OverviewIntroductionThe following table summarizes the most important characteristics of the interfacemodules described in this chapter. This overview is intended to make it easy tochoose the suitable module for your task.Table 6-1Interface <strong>Module</strong>s: Characteristics at a GlanceCharacteristics<strong>Module</strong>Suitable forplugging into<strong>S7</strong>-<strong>300</strong> mountingracksInterface <strong>Module</strong> IM 360 Interface <strong>Module</strong> IM 361 Interface <strong>Module</strong> IM 365• 0 • 1 to 3 • 0 and 1<strong>Data</strong> transmission • From IM 360 to IM 361over the connectingcable 386Distancebetween...• From the IM 360 to theIM 361 or from the IM361 to the IM 361 viaconnecting cable 386• Max. 10 m • Max. 10 m • 1 m, permanentlyconnected• From IM 365 to IM 365via connecting cable386Special Features --- --- • Preassembled modulepair• Install only signalmodules in rack 1• IM 365 does not routethe communicationbus to subrack 16-2<strong>Programmable</strong> <strong>Logic</strong> <strong>Controllers</strong> <strong>S7</strong>-<strong>300</strong> <strong>Module</strong> <strong>Data</strong>A5E00105505-03
Interface <strong>Module</strong>s6.2 Interface <strong>Module</strong> IM 360; (6E<strong>S7</strong>360-3AA01-0AA0)Order number6E<strong>S7</strong>360-3AA01-0AA0CharacteristicsThe interface module IM 360 has the following characteristic features:• Interface for rack 0 of the <strong>S7</strong>-<strong>300</strong>• <strong>Data</strong> transfer from IM 360 to IM 361 over the connecting cable 368• Maximum distance between IM 360 and IM 361 is 10 m (32.8 ft.)Status and fault LEDsThe interface module IM 360 has the following status and fault LEDs.LED Meaning ExplanationSF Group error/fault The LED lights up if• the connecting cable is missing.• IM 361 is switched off.<strong>Programmable</strong> <strong>Logic</strong> <strong>Controllers</strong> <strong>S7</strong>-<strong>300</strong> <strong>Module</strong> <strong>Data</strong>A5E00105505-036-3
Interface <strong>Module</strong>sFront ViewFigure 6-1 shows the front view of the interface module IM 360.SFX1 OUTFront ViewFigure 6-1 Front View of the Interface <strong>Module</strong> IM 360Technical specificationThe following overview lists the technical specifications for the interface moduleIM 360.Dimensions and WeightDimensions W x H x D(in millimeters)Weight<strong>Data</strong> for Specific <strong>Module</strong>Length of cable• Maximum length tonext IMCurrent consumption• From the backplanebusPower lossStatus and fault LEDs40 x 125 x 120Approx. 250 g10 m350 mAtyp. 2 WYes6-4<strong>Programmable</strong> <strong>Logic</strong> <strong>Controllers</strong> <strong>S7</strong>-<strong>300</strong> <strong>Module</strong> <strong>Data</strong>A5E00105505-03
Interface <strong>Module</strong>s6.3 Interface <strong>Module</strong> IM 361; (6E<strong>S7</strong>361-3CA01-0AA0)Order number6E<strong>S7</strong>361-3CA01-0AA0CharacteristicsThe interface module IM 361 has the following characteristic features:• 24 VDC power supply• Interface for racks 1 to 3 of the <strong>S7</strong>-<strong>300</strong>• Current output via the <strong>S7</strong>-<strong>300</strong> backplane bus max. 0.8 A• <strong>Data</strong> transfer from the IM 360 to the IM 361 or from the IM 361 to the IM 361via connecting cable 368• Maximum distance between IM 360 and IM 361 is 10 m (32.8 ft.)• Maximum distance between IM 361 and IM 361 is 10 mStatus and fault LEDsThe interface module IM 361 has the following status and fault LEDs.LED Meaning ExplanationSF Group error/fault The LED lights up if• the connecting cable ismissing• the series-connectedIM 361 is switched off• the CPU is in thePOWER OFF state5 VDC 5 VDC supply for the <strong>S7</strong>-<strong>300</strong>backplane bus–<strong>Programmable</strong> <strong>Logic</strong> <strong>Controllers</strong> <strong>S7</strong>-<strong>300</strong> <strong>Module</strong> <strong>Data</strong>A5E00105505-036-5
Interface <strong>Module</strong>sFront ViewFigure 6-2 shows the front view of the interface module IM 361.SFX1 OUT5 VDCML+MX2 INFigure 6-2 Front View of the Interface <strong>Module</strong> IM 3616-6<strong>Programmable</strong> <strong>Logic</strong> <strong>Controllers</strong> <strong>S7</strong>-<strong>300</strong> <strong>Module</strong> <strong>Data</strong>A5E00105505-03
Interface <strong>Module</strong>sTechnical specificationThe following overview lists the technical specifications for the interface moduleIM 361.Dimensions and WeightDimensions W x H x D(in millimeters)Weight<strong>Data</strong> for Specific <strong>Module</strong>Length of cableMaximum length to next IMCurrent consumptionFrom 24 VDCPower lossCurrent outputTo backplane busStatus and fault LEDs80 x 125 x 120505 g10 m0.5 Atyp. 5 W0.8 AYes6.4 Interface <strong>Module</strong> IM 365; (6E<strong>S7</strong>365-0BA01-0AA0)Order number: “Standard module”6E<strong>S7</strong>365-0BA01-0AA0Order number: “SIPLUS <strong>S7</strong>-<strong>300</strong>-<strong>Module</strong>”6AG1365-0BA01-2AA0CharacteristicsThe interface module IM 365 has the following characteristic features:• Pre-assembled pair of modules for rack 0 and rack 1• Total power supply of 1.2 A, of which up to 0.8 A can be used per rack.• Connecting cable with a length of 1 m already permanently connected• Install only signal modules in rack 1• IM 365 does not forward the C bus to rack 1, i.e. you cannot plug FMs with aC bus function in rack 1.<strong>Programmable</strong> <strong>Logic</strong> <strong>Controllers</strong> <strong>S7</strong>-<strong>300</strong> <strong>Module</strong> <strong>Data</strong>A5E00105505-036-7
Interface <strong>Module</strong>sFront ViewFigure 6-3 shows the front view of the interface module IM 365.IM 365RECEIVEIM 365SENDIn rack 1 In rack 0Figure 6-3 Front View of the Interface <strong>Module</strong> IM 365Technical specificationThe following overview lists the technical specifications for the interface moduleIM 365.Dimensions and Weight<strong>Data</strong> for Specific <strong>Module</strong>Dimensions W x H x Dper rack (in millimeters)Total weight40 x 125 x 120580 gLength of cableMaximum length to next IMCurrent consumptionFrom the backplane busPower loss1 m100 mAtyp. 0.5 WCurrent outputPer rackmax. 1.2 A0.8 AStatus and fault LEDsNo6-8<strong>Programmable</strong> <strong>Logic</strong> <strong>Controllers</strong> <strong>S7</strong>-<strong>300</strong> <strong>Module</strong> <strong>Data</strong>A5E00105505-03
RS 485 Repeater7In this chapterIn this chapter, you will find a detailed description of the RS 485-Repeater.Included in the description are:• The purpose of the RS 485 repeater• The maximum cable lengths possible between two RS 485 repeaters• The functions of the individual operating elements and terminals• Information about grounded and non-grounded operation• Technical specifications and the block diagramFurther informationYou will find further information on the RS 485 repeater in the manuals Hardwareand Installation in the Chapter “Configuring of an MPI or PROFIBUS-DP network”.Diagnostic repeaterCompared to the RS 485 repeater, the diagnostic repeater has new characteristics:Diagnostic function and modeling as the DP slave. For additional information, referto the Diagnostic Repeater for PROFIBUS-DP manual, order no.6E<strong>S7</strong>972-0AB00-8xA0.In this chapterSection Contents Page7.1 Application and Characteristics;(6E<strong>S7</strong>972-0AA01-0XA0)7.2 Appearance of the RS-485 Repeater; (6E<strong>S7</strong>972-0AA01-0XA0) 7-37.3 RS 485 Repeater in Ungrounded and Grounded Operation 7-47.4 Technical Specification 7-67-2<strong>Programmable</strong> <strong>Logic</strong> <strong>Controllers</strong> <strong>S7</strong>-<strong>300</strong> <strong>Module</strong> <strong>Data</strong>A5E00105505-037-1
RS 485 Repeater7.1 Application and Characteristics;(6E<strong>S7</strong>972-0AA01-0XA0)Order number6E<strong>S7</strong>972-0AA01-0XA0What is an RS 485 repeater?The RS 485 repeater amplifies data signals on bus lines and interconnects bussegments.Application of the RS 485 repeaterYou need an RS 485 repeater if:• More than 32 nodes are connected to the bus• Bus segments are to be operated non-grounded on the bus, or• The maximum cable length of a segment is exceeded. (See table 7-1).Table 7-1Maximum Cable Length of a SegmentBaud Rate Max. Cable Length of a Segment (in m)9.6 to 187.5 kbd 1000500 kbaud 4001.5 Mbaud 2003 to 12 Mbaud 100RulesIf you configure the bus with RS 485 repeaters:• Up to 9 RS 485 repeaters can be connected in series.• The maximum cable length between two nodes must not exceed the values inTable 7-2.Table 7-2Maximum Cable Length between Two RS 485 RepeatersBaud RateMaximum Length of Cable between 2 Nodes (in m) withRS 485 Repeater (6E<strong>S7</strong>972-0AA01-0XA0)9.6 to 187.5 kbaud 10000500 kbaud 40001.5 Mbaud 20003 to 12 Mbaud 10007-2<strong>Programmable</strong> <strong>Logic</strong> <strong>Controllers</strong> <strong>S7</strong>-<strong>300</strong> <strong>Module</strong> <strong>Data</strong>A5E00105505-03
RS 485 Repeater7.2 Appearance of the RS 485 Repeater;(6E<strong>S7</strong>972-0AA01-0XA0)The table below shows the appearance of the RS 485 repeater and lists itsfunctions.Table 7-3Description and Functions of the RS 485 Repeater10Repeater Design No. Function24 VDC L+ M PE M 5.2 A1 B1 A1 B1PGOPONDP1OFFDP2ONSIEMENSRS 485-REPEATER1112Connection for the RS 485 repeater power supply (pin “M5.2” isthe ground reference, if you want to measure the voltagedifference between terminals “A2” and “B2”).Shield clamp for the strain relief and grounding of the bus cableof bus segment 1 or bus segment 2 Terminals for the bus cable of bus segment 1 Terminating resistance for bus segment 1Switch for OFF operating mode(= isolate bus segments from each other – for example, forstartup Terminating resistance for bus segment 2 Terminals for the bus cable of bus segment 2A2 B2 A2 B2 Slide for mounting and removing the RS 485 repeater on the standard rail Interface for programming device/OP in bus segment 110 LED 24 V supply voltage11 LED for bus segment 112 LED for bus segment 2<strong>Programmable</strong> <strong>Logic</strong> <strong>Controllers</strong> <strong>S7</strong>-<strong>300</strong> <strong>Module</strong> <strong>Data</strong>A5E00105505-037-3
RS 485 Repeater7.3 RS 485 Repeater in Ungrounded andGrounded OperationGrounded or ungroundedThe RS 485 repeater is ...• Grounded, if all other nodes in the segment are also operated with a groundedpotential• Ungrounded, if all other nodes in the segment are operated with an ungroundedpotentialNoteThe bus segment 1 is grounded if you connect a programming device to thePG/OP socket of the RS 485 repeater. Ground connection is effected since theMPI in the programming device is grounded and the PG/OP socket is connectedinternally with bus segment 1 in the RS 485 repeater.Grounded operation of the RS 485 repeaterFor grounded operation of the RS 485 repeater, you must jump terminals “M” and“PE” on the top of the RS 485 repeater.Ungrounded operation of the RS 485 repeaterFor ungrounded operation of the RS 485 repeater, “M” and “PE” on the top of theRS 485 repeater must not be interconnected. In addition, the supply voltage of theRS 485 repeater must be ungrounded.Terminal connection diagramIn the case of a repeater configuration with ungrounded reference potential(ungrounded operation), any interference currents and static charges aredischarged by means of an RC network integrated in the repeater (refer toFigure 7-1) to the protective conductor.PE24 VDC L+ M PE M 5.222 nF 10 MΩMA1 B1 A1 B1Ground busFigure 7-1RC Network with 10 MΩ for Configuration with Ungrounded ReferencePotential7-4<strong>Programmable</strong> <strong>Logic</strong> <strong>Controllers</strong> <strong>S7</strong>-<strong>300</strong> <strong>Module</strong> <strong>Data</strong>A5E00105505-03
RS 485 RepeaterIsolation between bus segmentsBus segment 1 and bus segment 2 are galvanically isolated from each other. ThePG/OP interface is connected internally to the port for bus segment 1. Figure 7-2shows the front panel of the RS 485 repeater.24 VDC L+ M PE M 5.2Terminals for bus segment 1A1 B1 A1 B1ONPG/OPinterfacePGOPDP1OFFDP2IsolationONSIEMENSRS 485-REPEATERA2 B2 A2 B2Terminals for bus segment 2Figure 7-2Isolation between the Bus SegmentsAmplification of the bus signalsThe amplification of the bus signals takes place between the port for bus segment1 or the PG/OP interface and the port for bus segment 2.<strong>Programmable</strong> <strong>Logic</strong> <strong>Controllers</strong> <strong>S7</strong>-<strong>300</strong> <strong>Module</strong> <strong>Data</strong>A5E00105505-037-5
RS 485 Repeater7.4 Technical SpecificationsTechnical specifications of the RS 485 repeaterTechnical SpecificationPower supply• Rated voltage24 VDC• Ripple20.4 to 28.8 VDCCurrent consumption at rated voltage• Without node at PG/OP socket100 mA• Node at PG/OP socket (5 V/90 mA)130 mA• Node at PG/OP socket (24 V/100 mA) 200 mAIsolationConnection of fiber optic cablesRedundancy operationTransmission rate (automatically detected by the repeater)Degree of protection IP 20Yes, 500 VACYes, via repeater adaptersDimensions W x H x D 45 x 128 x 67Weight (incl. packaging)No9.6 kbaud, 19.2 kbaud, 45.45 kbaud,93.75 kbaud, 187.5 kbaud, 500 kbaud.1.5 Mbaud. 3 Mbaud, 6 Mbaud, 12Mbaud350 gPin assignment of the sub-D connector (PG/OP socket)View Pin No. Signal Name Designation1 – –2 M24V Ground 24 V53 RxD/TxD-P <strong>Data</strong> line B43219 4 RTS Request To Send8 5 M5V2 <strong>Data</strong> reference potential (from station)7 6 P5V2 Supply plus (from station)6 7 P24V 24 V8 RxD/TxD-N <strong>Data</strong> line A9 – –7-6<strong>Programmable</strong> <strong>Logic</strong> <strong>Controllers</strong> <strong>S7</strong>-<strong>300</strong> <strong>Module</strong> <strong>Data</strong>A5E00105505-03
RS 485 RepeaterBlock diagram of the RS 485 repeater• Bus segment 1 and bus segment 2 are galvanically isolated from each other.• Bus segment 2 and the PG/OP socket are galvanically isolated from eachother.• Signals are amplified– between bus segment 1 and bus segment 2– between PG/OP socket and bus segment 2Segment 1A1B1A1B1<strong>Logic</strong>Segment 2A2B2A2B2PG/OPsocketL+ (24 V)MA1B15 VM5 V5V24V1M 5V24V1ML+ (24 V)MPEM 5.2Figure 7-3Block diagram of the RS 485 repeater<strong>Programmable</strong> <strong>Logic</strong> <strong>Controllers</strong> <strong>S7</strong>-<strong>300</strong> <strong>Module</strong> <strong>Data</strong>A5E00105505-037-7
RS 485 Repeater7-8<strong>Programmable</strong> <strong>Logic</strong> <strong>Controllers</strong> <strong>S7</strong>-<strong>300</strong> <strong>Module</strong> <strong>Data</strong>A5E00105505-03
<strong>SIMATIC</strong> TOP Connect and <strong>SIMATIC</strong> TOPConnect TPA8In this chapterSection Contents Page8.1 <strong>Module</strong> Overview 8-28.2 Wiring Components 8-48.3 Wiring <strong>SIMATIC</strong> TOP Connect with Digital <strong>Module</strong>s 8-128.4 Wiring <strong>SIMATIC</strong> TOP Connect TPA with Analog <strong>Module</strong>s 8-20Structure of the chapterSections 8.1 and 8.2 apply to <strong>SIMATIC</strong> TOP connect and <strong>SIMATIC</strong> TOP connectTPA.Section 8.3 contains specific information on <strong>SIMATIC</strong> TOP connect and thussupplements the preceding sections.Section 8.4 contains specific information on <strong>SIMATIC</strong> TOP connect TPA and thussupplements Sections 8.1 and 8.2.<strong>Programmable</strong> <strong>Logic</strong> <strong>Controllers</strong> <strong>S7</strong>-<strong>300</strong> <strong>Module</strong> <strong>Data</strong>A5E00105505-038-1
<strong>SIMATIC</strong> TOP Connect and <strong>SIMATIC</strong> TOP Connect TPA8.1 <strong>Module</strong> OverviewIntroduction“<strong>SIMATIC</strong> TOP connect” denotes components for wiring digital modules.“<strong>SIMATIC</strong> TOP connect TPA” denotes components for wiring analog modules.WiringWiring with <strong>SIMATIC</strong> TOP connect/... TPA is a fast and cost-effective alternative toconventional wiring of the actuators and sensors directly at the front connector ofthe module. When using these components, you wire actuators and sensors “insitu” on one more terminal blocks. You establish the connection to the module bymeans of a connecting cable (round-sheath ribbon cable).Configuration of <strong>SIMATIC</strong> TOP connect with a <strong>S7</strong>-<strong>300</strong>A <strong>SIMATIC</strong> TOP connect and a <strong>SIMATIC</strong> TOP connect TPA always consist of:• A front connector module with flat ribbon connection ,• One or more terminal blocks and• One or more connecting cables with plug-and-socket connectors at ends Figure 8-1 <strong>SIMATIC</strong> TOP connect on a <strong>S7</strong>-<strong>300</strong>8-2<strong>Programmable</strong> <strong>Logic</strong> <strong>Controllers</strong> <strong>S7</strong>-<strong>300</strong> <strong>Module</strong> <strong>Data</strong>A5E00105505-03
<strong>SIMATIC</strong> TOP Connect and <strong>SIMATIC</strong> TOP Connect TPAAdvantagesUse of <strong>SIMATIC</strong> TOP connect/... TPA features the following advantages:• Fast, low-cost wiring (the use of central terminal blocks is no longer necessary)• Simple mounting of the components (front connector module, connecting cable,terminal block)• Each component can be replaced separately• Connecting cable configurable without waste• Wiring errors are drastically reduced• Neat and tidy cabinet wiring• The supply voltage for the module can be connected to components of<strong>SIMATIC</strong> TOP connect/... TPA• Simplification of the terminals for M- and L+ connectionRange of modulesThe table below lists all the modules which you can wire with <strong>SIMATIC</strong> TOPconnect and <strong>SIMATIC</strong> TOP connect TPA.You will find a detailed list of the components of <strong>SIMATIC</strong> TOP connect/... TPAwith their order numbers in Table 8-5 on page 8-12 and Table 8-13 on page 8-20.Table 8-1<strong>SIMATIC</strong> TOP connect/... TPA: Connectable <strong>Module</strong>sComponent Front view of terminal block Wiring possible with module...<strong>SIMATIC</strong> TOPconnect<strong>SIMATIC</strong> TOPconnect TPAA B C D E F G HI KY Y K K A A A A Z ZYZSM 321; DI 32 x DC 24 VSM 321; DI 16 x DC 24 VSM 321; DI 16 x 24 VDC; source inputSM 322; DO 32 x DC 24 V/0.5 ASM 322; DO 16 x DC 24 V/0.5 ASM 322; DO 8 x 24 VDC/0.5 A with diagnosticinterruptSM 322; DO 8 x DC 24 V/2 ASM 323; DI 16/DO 16 x DC 24 V/0.5 ASM 323; DI 8/DO 8 x DC 24 V/0.5 ASM 331 analog input module; AI 2 x 12 bitsSM 331; AI 8 x 12 bitsSM 332; AO 4 x 12 bitsSM 332 analog output module; AO 2 x 12 bitsSM 332; AO 4 x 16 bitsSM 334; AI 4/AO 2 x 8/8 bitsSM 334; AI 4/AO 2 x 12 bitsSM 335; AI 4/AO 4 x 14 bits;<strong>Programmable</strong> <strong>Logic</strong> <strong>Controllers</strong> <strong>S7</strong>-<strong>300</strong> <strong>Module</strong> <strong>Data</strong>A5E00105505-038-3
<strong>SIMATIC</strong> TOP Connect and <strong>SIMATIC</strong> TOP Connect TPA8.2 Wiring ComponentsIntroductionThe following table contains the tasks that you have to perform one after the otherto commission <strong>SIMATIC</strong> TOP connect/... TPA successfully.The sequence of steps is a suggestion but you can perform individual steps sooneror later.Sequence of steps for wiringTable 8-2Sequence of Steps for Wiring <strong>SIMATIC</strong> TOP connect/... TPAStep Procedure Refer to Section...1. Cut connecting cable to length and terminate 8.2.12. Wire the front connector module 8.2.2 and 8.3 or 8.43. Connect the connecting cable to the terminalblock8.2.3 and 8.3 or 8.44. Wire actuators/sensors to the terminal block 8.2.48.2.1 Cut the Connecting Cable to Length and TerminateMaximum length of cableThe length of the connecting cable (round-sheath ribbon cable) between the<strong>SIMATIC</strong> <strong>S7</strong> and the terminal blocks must not be more than 30 m.Using the connectorsYou must attach connectors to either end of the round-sheath ribbon cable, forconnection to the front connector module and the terminal block.Connect the round-sheath ribbon cable to connector1. Cut the round-sheath ribbon cable to the length required and remove part of thecable sheath at both ends.You will find the length of the cable sheath that has to be removed in thefollowing table:8-4<strong>Programmable</strong> <strong>Logic</strong> <strong>Controllers</strong> <strong>S7</strong>-<strong>300</strong> <strong>Module</strong> <strong>Data</strong>A5E00105505-03
<strong>SIMATIC</strong> TOP Connect and <strong>SIMATIC</strong> TOP Connect TPACable end to ...... top connector of frontconnector module... bottom connector offront connector module1 x 16 coreshielded/unshieldedCable sheath tobe removed20-pinfrontconnector40-pinfrontconnector110 mm 115 mm70 mm 75 mmexternalribboncableinternalribboncable20-pinfront connectorexternalribboncable... top connector of frontconnector module 95 mm 115 mm... bottom connector offront connector module... socket of terminalblock2 x 16 coreunshielded95 mm 115 mm40 mm 100 mminternalribboncable40-pinfront connector40 mm 75 mm2. Thread the cable into the 16-pin connector.It is important that you note the position of the details marked in the followingfigure.TriangleNoseMarked CoreFigure 8-2Threading the Round-Sheath Ribbon Cable into the Connector3. Clamp the end of the cable into the connector with the crimping tool.4. Attach the strain relief device to the connector of the terminal block as follows:– Fold back the cable over the connector– Push the enclosed strain relief device over the cable– Snap the strain relief device into place on the connector<strong>Programmable</strong> <strong>Logic</strong> <strong>Controllers</strong> <strong>S7</strong>-<strong>300</strong> <strong>Module</strong> <strong>Data</strong>A5E00105505-038-5
<strong>SIMATIC</strong> TOP Connect and <strong>SIMATIC</strong> TOP Connect TPA8.2.2 Wiring the Front Connector <strong>Module</strong>IntroductionThis chapter describes the principle of wiring the front connector modules. Notealso the special sections for <strong>SIMATIC</strong> TOP connect and <strong>SIMATIC</strong> TOP connectTPA (Section 8.3 and 8.4, respectively). In those sections, you will find, amongother things, selection criteria for the front connector modules and specificconnection examples.Using the front connector moduleYou require the front connector module to connect the connecting cable to themodule. In addition, you can connect the supply voltage of the module to the frontconnector module.8-6<strong>Programmable</strong> <strong>Logic</strong> <strong>Controllers</strong> <strong>S7</strong>-<strong>300</strong> <strong>Module</strong> <strong>Data</strong>A5E00105505-03
<strong>SIMATIC</strong> TOP Connect and <strong>SIMATIC</strong> TOP Connect TPAWiring rules for connecting the supply voltageThe following table shows you what you have to consider when connecting themodule supply voltage to the terminal block or front connector module.The terminals for the supply voltage are screws or spring-loaded terminals (refer toSection 8.2.4 for handling spring-loaded terminals).Table 8-3Wiring Rules for Connecting the Supply VoltageRules for ... Terminal block Front connectorConductorcross-sections suitablefor connection:Spring-loadedconnectionScrew-typeconnectionUp to 4TerminalsUp to 8TerminalsSolid conductors No No NoStranded conductors• Without end ferrules• With end ferrulesNo of conductors perterminalMax. diameter ofconductor insulationModel A; up to 12 mmLength of conductorinsulation to be stripped• Without insulationcollar• With insulation collarEnd ferrules toDIN 46228• Without insulation– 1.5 mm 2 longcollarlong• With insulation collar– 0.25 to 1.0 mm 2 Model E; up to 12 mmModel E; 12 mm long0.25 to 1.5 mm 20.25 to 1.5 mm 2 0.25 to1.5 mm 20.25 to1.5 mm 2 0.25 to0.75 mm 20.25 to0.75 mm 21 or combination of 2 conductors up to 1.5 mm 2 (sum) in a commonend ferrule∅ 3.1 mm ∅ 3.1 mm ∅ 2.0 mm11 mm11 mmModel A; up to 12 mmlongModel E; up to 12 mmlongModel E; 18 mm long6 mm–Model A; 5 to 7 mm long–<strong>Programmable</strong> <strong>Logic</strong> <strong>Controllers</strong> <strong>S7</strong>-<strong>300</strong> <strong>Module</strong> <strong>Data</strong>A5E00105505-038-7
<strong>SIMATIC</strong> TOP Connect and <strong>SIMATIC</strong> TOP Connect TPAConnect the connecting cable and the supply voltage to the front connectormodule1. Open the front door of the module.2. Bring the front connector into the wiring position.3. If necessary, connect the cables for the incoming supply of the module supplyvoltage.4. Insert the connecting cable into the front connector module as shown in thefollowing figure:Figure 8-3Inserting the Connecting Cable into the Front Connector <strong>Module</strong>5. Twist every connecting cable 90 downwards and turn through one whole turnto the extent possible.Additional steps for wiring for 32-channel digital modulesNoteWhen using 32-channel digital modules, you must observe the assignment of thesupply connections to the connecting cable terminals and the assignment of theconnecting cable terminals to the address bytes of the module (refer to Figure 8-4and Table 8-4).6. Thread a strain relief assembly into the middle of the front connector. Thisstrain relief assembly is used to fix the connecting cables in the narrow cablestowage area of the module.7. Thread the strain relief assembly into the front connector.8-8<strong>Programmable</strong> <strong>Logic</strong> <strong>Controllers</strong> <strong>S7</strong>-<strong>300</strong> <strong>Module</strong> <strong>Data</strong>A5E00105505-03
<strong>SIMATIC</strong> TOP Connect and <strong>SIMATIC</strong> TOP Connect TPAFront connector module for 32-channel digital modulesThe following figure shows the front view of the front connector module for32-channel digital modules.Opening for the cable to be connectedOpening for thescrewdriverSupply terminals for Supply terminalsfor +_+ _+ _+ _Supply terminals for Legend: Openings for strain relief to : Terminals for connecting cable;refer to Table 8-4 for the address assignmentSupply terminalsfor Figure 8-4Front connector module for 32-channel digital modulesAssignment of connecting cable terminals to address bytes of 32-channel digitalmodulesTable 8-4Assignment of Connecting Cable Terminals to Address Bytes of 32-ChannelDigital <strong>Module</strong>sRefer toFigure 8-4:ConnectingCable TerminalDigital Input<strong>Module</strong>Address Assignment forDigital Output<strong>Module</strong>Digital Input/Output<strong>Module</strong> IB x QB x IB x IB (x+1) QB (x+1) IB (x+1) IB (x+2) QB (x+2) QB x IB (x+3) QB (x+3) QB (x+1)<strong>Programmable</strong> <strong>Logic</strong> <strong>Controllers</strong> <strong>S7</strong>-<strong>300</strong> <strong>Module</strong> <strong>Data</strong>A5E00105505-038-9
<strong>SIMATIC</strong> TOP Connect and <strong>SIMATIC</strong> TOP Connect TPA8.2.3 Connecting the Connecting Cable to the Terminal BlockIntroductionA description of how to mount the terminal blocks is presented in the following.Note also the special sections for <strong>SIMATIC</strong> TOP connect and <strong>SIMATIC</strong> TOPconnect TPA (Section 8.3 and 8.4, respectively). In those sections, you will find,among other things, selection criteria for the different terminal blocks and specificconnection examples.Mounting the terminal block and connecting cable1. Attach the terminal block to a 35 mm standard rail in accordance withEN 50 022.2. Insert the connecting cable into the terminal block as shown in the followingfigure:Figure 8-5Insert the connecting cable into the terminal block8.2.4 Wiring Actuators/Sensors to the Terminal BlockScrew-type or spring-loaded terminalsTo mount the signal leads of the actuators/sensors to the terminal block and thesupply lines to the terminal block and front connector module, you can choosebetween screw-type and spring-loaded components.The principle of spring-loaded components is dealt with in greater detail in thefollowing, since it allows fast and simple connection of the signal lines and supplycables.8-10<strong>Programmable</strong> <strong>Logic</strong> <strong>Controllers</strong> <strong>S7</strong>-<strong>300</strong> <strong>Module</strong> <strong>Data</strong>A5E00105505-03
<strong>SIMATIC</strong> TOP Connect and <strong>SIMATIC</strong> TOP Connect TPASpring-loaded terminal blockOpening for the cable tobe connectedOpening for thescrewdriver for pressingthe spring-loaded contactFigure 8-6Spring-loaded terminal block!CautionThe spring-loaded contact will be damaged, if you insert the screwdriver into theopening for the cable.Make sure that you insert the screwdriver only into the rectangular opening of theterminal block.Attaching the cable to the spring-loaded contactAttach the cables to the spring-loaded contacts as follows:1. Use a screwdriver to press down the spring-loaded terminal in therectangular opening and to hold it down.2. Insert the cable into the round opening of the corresponding spring-loadedterminal as far as it will go.3. Remove the screwdriver from the spring-loaded terminal. The cable is heldby the spring-loaded contact.Figure 8-7Principle of Spring-Loaded Connections<strong>Programmable</strong> <strong>Logic</strong> <strong>Controllers</strong> <strong>S7</strong>-<strong>300</strong> <strong>Module</strong> <strong>Data</strong>A5E00105505-038-11
<strong>SIMATIC</strong> TOP Connect and <strong>SIMATIC</strong> TOP Connect TPA8.3 Wiring <strong>SIMATIC</strong> TOP Connect with Digital <strong>Module</strong>sIntroductionFor wiring the module with actuators/sensors using <strong>SIMATIC</strong> TOP connect, youmust first select the components as a function of the module and method ofconnection (screw type or spring-loaded terminal, one-conductor, three-conductoror 2A connection; relay).8.3.1 <strong>SIMATIC</strong> TOP Connect Components and Selection AidComponentsThe following table contains all the component of <strong>SIMATIC</strong> TOP connect.Table 8-5Components of <strong>SIMATIC</strong> TOP connectTerminalblockFrontconnectorComponents of <strong>SIMATIC</strong> TOP connect... for one-conductorconnection... for one-conductorconnection (10 items)... for three-conductorconnection... for three-conductorconnection (10 items)Spring-loaded screw-typeSpring-loaded screw-typeSpring-loaded screw-typeSpring-loaded screw-typeOrder number6E<strong>S7</strong>924-0AA00-0AB06E<strong>S7</strong>924-0AA00-0AA06E<strong>S7</strong>924-0AA00-1AB06E<strong>S7</strong>924-0AA00-1AA06E<strong>S7</strong>924-0CA00-0AB06E<strong>S7</strong>924-0CA00-0AA06E<strong>S7</strong>924-0CA00-1AB06E<strong>S7</strong>924-0CA00-1AA0... for 2A modules Spring-loaded screw-type 6E<strong>S7</strong>924-0BB00-0AB06E<strong>S7</strong>924-0BB00-0AA0... for 2A modules (10 items) Spring-loaded screw-type 6E<strong>S7</strong>924-0BB00-1AB06E<strong>S7</strong>924-0BB00-1AA0... for relays Spring-loaded screw-type 6E<strong>S7</strong>924-0CD00-0AB06E<strong>S7</strong>924-0CD00-0AA0for 32-channel modules(refer to Figure 8-4)for 16-channel modulesfor 16-channel 2A modulesVoltage supply via:Spring-loaded terminalsVoltage supply via:spring-loaded screw-typeVoltage supply via:spring-loaded screw-typeConnectors (plug-in connectors), set of 8 (insulation displacementconnectors)Round-sheathribbon cable1 x 16UnshieldedShielded30 m60 m30 m60 m6E<strong>S7</strong>921 3AA20-0AA06E<strong>S7</strong>921-3AA00-0AA06E<strong>S7</strong>921-3AB00-0AA06E<strong>S7</strong>921-3AC00-0AA06E<strong>S7</strong>921-3AD00-0AA06E<strong>S7</strong>921-3BE10-0AA06E<strong>S7</strong>923-0CD00-0AA06E<strong>S7</strong>923-0CG00-0AA06E<strong>S7</strong>923-0CD00-0BA06E<strong>S7</strong>923-0CG00-0BA08-12<strong>Programmable</strong> <strong>Logic</strong> <strong>Controllers</strong> <strong>S7</strong>-<strong>300</strong> <strong>Module</strong> <strong>Data</strong>A5E00105505-03
<strong>SIMATIC</strong> TOP Connect and <strong>SIMATIC</strong> TOP Connect TPATable 8-5Components of <strong>SIMATIC</strong> TOP connect, continuedRound-sheathribbon cable2 x 16Components of <strong>SIMATIC</strong> TOP connectUnshieldedCrimping tool for 16-pin connector30 m60 mOrder number6E<strong>S7</strong>923-2CD00-0AA06E<strong>S7</strong>923-2CG00-0AA06E<strong>S7</strong>928-0AA00-0AA0Selection aidIn the following table you will find the components of <strong>SIMATIC</strong> TOP connect withwhich you can wire the digital modules.Table 8-6Selection Table for <strong>SIMATIC</strong> TOP connect ComponentsDigital <strong>Module</strong>s Terminal block for... Front connectormodule for...One-conductorconnectionThree-conductorconnection2AmodulesRelaysSM; 16 or32channels2AmodulesSM 321; DI 32 x 24 VDC – – –SM 321; DI 16 x 24 VDC – – –SM 321; DI 16 x 24 VDC;source inputSM 322; DO 32 x24 VDC/0.5 VSM 322; DO 16 x24 VDC/0.5 VSM 322; DO 8 x24VDC/0.5 V; with diagnosticinterrupt – – – – – – – – – –SM 322; DO 8 x 24 VDC/2 A – – – – SM 323;DI 16/DO 16 x 24VDC/ 0.5 ASM323;DI 8/DO 8 x 24 VDC/0.5 A – – – – – –One-conductor or three-conductor connectionWith the three-conductor connection, you can optionally apply the supply voltagefor the module to the front connector module or to the terminal block. With theone-conductor connection, this can only be done to the front connector module.2A module connectionYou require the following information on wiring 2A modules only when you want touse the SM 322; 8 x DO 24 VDC/2 A with <strong>SIMATIC</strong> TOP connect.<strong>Programmable</strong> <strong>Logic</strong> <strong>Controllers</strong> <strong>S7</strong>-<strong>300</strong> <strong>Module</strong> <strong>Data</strong>A5E00105505-038-13
<strong>SIMATIC</strong> TOP Connect and <strong>SIMATIC</strong> TOP Connect TPA8.3.2 Wiring the <strong>Module</strong> with Terminal Block for One-ConductorConnectionConnection NotesTable 8-7Connection Notes for <strong>SIMATIC</strong> TOP connect with One-Conductor ConnectionDigital <strong>Module</strong>sAt frontconnectoronlySupply Voltage Feed-InAdd.groundconn. atterminalblockConnection NotesAt frontconnectoror terminalblockAdditionaljumperrequired atpowersupplyDescrip-tion onterminalblock notin line withdescriptionon SMSM 321; DI 32 x DC 24 V – – – –SM 321; DI 16 x DC 24 V – – – –SM 321; DI 16 x 24 VDC; sourceinput – – – –SM 322; DO 32 x DC 24 V/0.5 A – – – –SM 322; DO 16 x DC 24 V/0.5 A – – – –SM 322; DO 8 x 24 VDC/0.5 A withdiagnostic interruptSM 323;DI 16/DO 16 x DC 24 V/0.5 A – – – – – – –SM 323; DI 8/DO 8 x 24 VDC/0.5 A – – – –Assignments of the terminal block for one-conductor connectionTable 8-8Terminal Assignments of the Terminal Block for One-Conductor ConnectionFront view of terminal blockAssignments of the TerminalsTop row:Terminals 0 to 7: inputs/outputs x.0 to x.78-14<strong>Programmable</strong> <strong>Logic</strong> <strong>Controllers</strong> <strong>S7</strong>-<strong>300</strong> <strong>Module</strong> <strong>Data</strong>A5E00105505-03
<strong>SIMATIC</strong> TOP Connect and <strong>SIMATIC</strong> TOP Connect TPAConnecting the power supplyAlways connect the supply voltage to the front connector module Observe thewiring rules in Table 8-3 on page 8-7.In the following example, you must connect L+ to Plus of the upper terminal and Mto Minus of the lower terminal.Connecting the terminal block for one-conductor connection–+L+ 1 23 4 567891011112 131451671819M 20–+Front connectormoduleTerminal blockTerminal blockFigure 8-8Wiring a Digital <strong>Module</strong> with Terminal Block for a One-Conductor Connection<strong>Programmable</strong> <strong>Logic</strong> <strong>Controllers</strong> <strong>S7</strong>-<strong>300</strong> <strong>Module</strong> <strong>Data</strong>A5E00105505-038-15
<strong>SIMATIC</strong> TOP Connect and <strong>SIMATIC</strong> TOP Connect TPA8.3.3 Wiring the <strong>Module</strong> with Terminal Block for Three-ConductorConnectionConnection NotesTable 8-9Connection Notes for <strong>SIMATIC</strong> TOP connect with Three-Conductor ConnectionDigital <strong>Module</strong>sAt frontconnectoronlySupply Voltage Feed-InAdd.groundconn. atterminalblockConnection NotesAt frontconnectoror terminalblockAdditionaljumperrequired atpowersupplyDescrip-tion onterminalblock notin line withdescriptionon SMSM 321; DI 32 x DC 24 V – – –SM 321; DI 16 x DC 24 V – – –SM 321; DI 16 x 4 VDC; source input – – –SM 322; DO 32 x DC 24 V/0.5 A – – – –SM 322; DO 16 x DC 24 V/0.5 A – – – –SM 322; DO 8 x 24 VDC/0.5 A withdiagnostic interrupt– – SM 323; DI 16/DO 16 x 24 VDC/0.5 A – – – –SM 323; DI 8/DO 8 x 24 VDC/0.5 A – – – –Assignment of the terminal block for three-conductor connectionTable 8-10 Terminal Assignments of the Terminal Block for Three-Conductor ConnectionFront view of terminal blockAssignments of the TerminalsTop row:Terminals 0to 7:inputs/outputs x.0 to x.7Center row:All terminals: M potentialBottom row:All terminals: L + potential8-16<strong>Programmable</strong> <strong>Logic</strong> <strong>Controllers</strong> <strong>S7</strong>-<strong>300</strong> <strong>Module</strong> <strong>Data</strong>A5E00105505-03
<strong>SIMATIC</strong> TOP Connect and <strong>SIMATIC</strong> TOP Connect TPAConnecting the power supplyObserve the wiring rules in Table 8-3 on page 8-7.With some digital modules, two jumpers are generally required for connecting thesupply voltage (refer to Table 8-9 on page 8-16).You can wire the jumpers either in the front connector or in the terminal block.Irrespective of this, you must interconnect the two Plus terminals and the twoMinus terminals.Connecting the terminal block for three-conductor connection– +L+12345678910111213141516171819M 20–+Front connectorJumper (1)Terminal blockTerminal blockJumper (1) or jumper (2) requiredJumper (2)Figure 8-9Wiring a Digital <strong>Module</strong> with Terminal Block for a Three-Conductor Connection<strong>Programmable</strong> <strong>Logic</strong> <strong>Controllers</strong> <strong>S7</strong>-<strong>300</strong> <strong>Module</strong> <strong>Data</strong>A5E00105505-038-17
<strong>SIMATIC</strong> TOP Connect and <strong>SIMATIC</strong> TOP Connect TPA8.3.4 Wiring the <strong>Module</strong> with Terminal Block for 2A <strong>Module</strong>sYou can use the terminal block for 2A modules to wire the SM 322;8 x DO 24 VDC/2A.Connection NotesTable 8-11Connection Notes for <strong>SIMATIC</strong> TOP connect with 2A <strong>Module</strong> ConnectionDigital <strong>Module</strong>sAt frontconnectoronlySupply Voltage Feed-InAdd.groundconn. atterminalblockConnection NotesAt frontconnectoror terminalblockAdd.jumperrequiredfor powersupplyDescr. onterminalblock notin line withdescr. onSMSM 322; DO 1624 VDC/2 A – – –Assignment of the Terminal Block for Connection of 2A <strong>Module</strong>sTable 8-12 Terminal Assignments of the Terminal Block for 2A <strong>Module</strong>sFront view of terminal blockM1M2Assignments of theTerminals (left)Top row:Terminals 0 to 3:outputs x.0 to x.3Center row:Terminals 0 to 3:potential M1 for x.0 tox.3Bottom row:two-terminalconnection for M1Assignments of theTerminals (right)Top row, on right:Terminals 0 to 3:outputs x.4 to x.7Center row, on right:Terminals 0 to 3:potential M2 for x.4 tox.7Bottom row:two-terminalconnection for M2Connecting the power supplyPlease observe the following when connecting the power supply:• Apply the wiring rules in Table 8-3 on page 8-7.• Connect the supply voltage at the front connector module to the potentialterminals using separate cables.• You must equip each terminal block with a cable for M1 or M2, in addition to theconnecting cable.• Connect M1 or M2 via a separate line with the front connector and the terminalblock. You may jumper the potential of M1 and M2.8-18<strong>Programmable</strong> <strong>Logic</strong> <strong>Controllers</strong> <strong>S7</strong>-<strong>300</strong> <strong>Module</strong> <strong>Data</strong>A5E00105505-03
<strong>SIMATIC</strong> TOP Connect and <strong>SIMATIC</strong> TOP Connect TPAConnection to terminal block for 2A modules– +M11 L+ 1234567891 M 102 L+ 1112131415161718192 M 20–+Front connectorM2TerminalblockFigure 8-10Wiring with Terminal Block for 2A <strong>Module</strong><strong>Programmable</strong> <strong>Logic</strong> <strong>Controllers</strong> <strong>S7</strong>-<strong>300</strong> <strong>Module</strong> <strong>Data</strong>A5E00105505-038-19
<strong>SIMATIC</strong> TOP Connect and <strong>SIMATIC</strong> TOP Connect TPA8.4 Wiring <strong>SIMATIC</strong> TOP Connect TPA with Analog <strong>Module</strong>sIntroductionFor wiring the module with actuators/sensors using <strong>SIMATIC</strong> TOP connect TPA,you must first select the components as a function of the method of connection(screw-type or spring-loaded terminal).8.4.1 <strong>SIMATIC</strong> TOP connect TPA Components and Selection AidComponentsThe following table contains all the component of <strong>SIMATIC</strong> TOP connect TPA.Table 8-13 Components for <strong>SIMATIC</strong> TOP connect TPAComponents of <strong>SIMATIC</strong> TOP connect TPATerminal block Quantity: 1 Spring-loaded terminalsScrew-type terminalsFront connectorQuantity: 10Connectors (plug-in connectors), set of 8 (insulationdisplacement connectors)Shielding plate for terminal block, set of 4Terminal element for:2 cables, each with a shield diameter of 2 to 6 mm1 cable with a shield diameter of 3 to 8 mm1 cable with a shield diameter of 4 to 13 mmRound-sheath ribbon cable, shielded 30 m∅ 8 mm60 mCrimping tool for 16-pin connectorSpring-loaded terminalsScrew-type terminalsVoltage supply via:Spring-loaded terminalsScrew-type terminalsOrder number6E<strong>S7</strong>924-0CC00-0AB06E<strong>S7</strong>924-0CC00-0AA06E<strong>S7</strong>924-0CC00-1AB06E<strong>S7</strong>924-0CC00-1AA06E<strong>S7</strong>921-3AF00-0AA06E<strong>S7</strong>921-3AG00-0AA06E<strong>S7</strong>921-3BE10-0AA06E<strong>S7</strong>928-1BA00-0AA06E<strong>S7</strong>390-5AB00-0AA06E<strong>S7</strong>390-5BA00-0AA06E<strong>S7</strong>390-5CA00-0AA06E<strong>S7</strong>923-0CD00-0BA06E<strong>S7</strong>923-0CG00-0BA06E<strong>S7</strong>928-0AA00-0AA08-20<strong>Programmable</strong> <strong>Logic</strong> <strong>Controllers</strong> <strong>S7</strong>-<strong>300</strong> <strong>Module</strong> <strong>Data</strong>A5E00105505-03
<strong>SIMATIC</strong> TOP Connect and <strong>SIMATIC</strong> TOP Connect TPA8.4.2 <strong>SIMATIC</strong> TOP Connect TPA Terminal Assignment and TerminalAllocationTerminal markingOn the TPA terminal block, the terminals are identified by letters. This simplifiesthe allocation of the terminals on the analog module to the terminals on theterminal block.Terminal block assignmentTable 8-14 Terminal Assignment of the Terminal Block of <strong>SIMATIC</strong> TOP connect TPAFront view of terminal blockAssignments of the TerminalsTerminals Z and Y can be used for multiplying arbitrarypotentials and signals.ABCDEFGH I KYYKKAAAAZZYZThe terminals having identical letters are electricallyinterconnected, with the exception of terminals Z andZ, and also Y and Y.Multiplier terminalThe lower tier of terminals on the terminal block is designed as 2 x 5 multiplierterminals.<strong>Programmable</strong> <strong>Logic</strong> <strong>Controllers</strong> <strong>S7</strong>-<strong>300</strong> <strong>Module</strong> <strong>Data</strong>A5E00105505-038-21
<strong>SIMATIC</strong> TOP Connect and <strong>SIMATIC</strong> TOP Connect TPATerminal allocation of an analog module to <strong>SIMATIC</strong> TOP connect TPATerminalnumber onmoduleTerminal assignment onterminal block TPATerminal block 1 Terminal block 21234567891012345678910YBCDEFGHIKYK1112131415161718192011121314151617181920AZABCDEFGHIZFigure 8-11Terminal Assignment of Analog <strong>Module</strong> to <strong>SIMATIC</strong> TOP connect TPA8-22<strong>Programmable</strong> <strong>Logic</strong> <strong>Controllers</strong> <strong>S7</strong>-<strong>300</strong> <strong>Module</strong> <strong>Data</strong>A5E00105505-03
<strong>SIMATIC</strong> TOP Connect and <strong>SIMATIC</strong> TOP Connect TPA8.4.3 Connecting the Signal-Line ShieldTwo options for connecting the shieldYou can connect the signal line shield to ground as follows:• On the analog module by means of a shield-support element(refer to the manual Hardware and Installation for the <strong>S7</strong>-<strong>300</strong> or the manualDistributed I/O device ET 200M in the section on wiring)• Directly to the terminal block by means of a shielding plateConnecting the shield to the terminal block using a shielding plate1. Before mounting, attach a shielding plate to the terminal block.2. Mount the terminal block on the DIN rail.(In the figure below, you can see that the shielding plate is applied to the rear ofthe terminal block and thus there is a connection to the grounded rail.)3. Place the signal-line shield with the shield terminals on the shielding plate.Loosenshielding plateShield support for shield terminal andconnecting cable to analog modulePress down lightly on therelease to loosen theshielding plateTerminal blockShielding plateSnap theshielding plateinto placeShield support fro shield terminaland signal lines fromactuators/sensorsSnap the shielding plate into place at the rear of the terminal block.Figure 8-12<strong>SIMATIC</strong> TOP connect TPA Terminal Block with Shielding Plate<strong>Programmable</strong> <strong>Logic</strong> <strong>Controllers</strong> <strong>S7</strong>-<strong>300</strong> <strong>Module</strong> <strong>Data</strong>A5E00105505-038-23
<strong>SIMATIC</strong> TOP Connect and <strong>SIMATIC</strong> TOP Connect TPA8.4.4 Connection ExampleConnecting the load voltage supplyYou can connect the load voltage supply of the analog module to the frontconnector module. There are separate terminals on the front connector module forthe load voltage L+ and M. Observe the wiring rules in Table 8-3 on page 8-7.Allocation of front connector to terminal blockThe upper socket of the front connector module is the connection for terminalblock 1 and the lower socket of the front connector module is the connection forterminal block 2.Connection exampleThe illustration below shows an example of connecting the analog input moduleSM 321; AI 8 x 12 bits in “Resistance Test” mode.ResistancetestTerminal numberon moduleTerminal assignmenton terminal block TPATerminalblock 1Terminalblock 2SFL+L +M 0 + CH0M 0I C0 +I C0M 1 + CH2M 1I C1 +I C1Comp +12345678910YBCDEFGHIKYKCompMMComp–/ ManaM 2 + CH4M 2I C2 +I C2M 3 + CH6M 3I C3 +I C3M11121314151617181920AZABCDEFGHIZFigure 8-13Example of Connecting <strong>SIMATIC</strong> TOP connect TPA to SM 321; AI 8 x 12 bits8-24<strong>Programmable</strong> <strong>Logic</strong> <strong>Controllers</strong> <strong>S7</strong>-<strong>300</strong> <strong>Module</strong> <strong>Data</strong>A5E00105505-03
Parameter Sets for Signal <strong>Module</strong>sAIn this chapterSection Contents PageA.1 How to Assign the Parameters for Signal <strong>Module</strong>s in the UserProgramA.2 Parameters of the Digital Input <strong>Module</strong>s A-3A.3 Parameters of the Digital Output <strong>Module</strong>s A-5A.4 Parameters of the Analog Input <strong>Module</strong>s A-7A.5 Parameters of the SM 331; AI 8 x RTD A-11A.6 Parameters of the SM 331; AI 8 x TC A-19A.7 Parameters of the SM 331; AI 8 x 13 bits A-27A.8 Parameters of the SM 331; AI 8 x 16 bits A-30A.9 Parameters of the Analog Output <strong>Module</strong>s A-36A.10 Parameters of the SM 332; AO 8 x 12 bits A-39A.11 Parameters of the Analog Input/Output <strong>Module</strong>s A-41A-1A.1 How to Assign the Parameters for Signal <strong>Module</strong>s in theUser ProgramParameter assignment in the user programYou have already assigned parameters to the modules in STEP 7.In the user program, you can use a SFC:• To reassign parameters to the module and• To transfer the parameters from the CPU to the addressed signal module<strong>Programmable</strong> <strong>Logic</strong> <strong>Controllers</strong> <strong>S7</strong>-<strong>300</strong> <strong>Module</strong> <strong>Data</strong>A5E00105505-03A-1
Parameters stored in data recordsThe parameters of the signal modules are located in data records 0 and 1; forsome other analog input modules, in data record 128 as well.Modifiable parametersYou can change the parameters of record 1 and pass them to the signal moduleusing SFC 55. The parameters set on the CPU are not changed when you do this!You cannot modify the parameters of data record 0 in the user program.SFCs for parameter assignmentThe following SFCs are available for assigning parameters to the signal modules inthe user program:Table A-1SFCs for assigning Parameters to Signal <strong>Module</strong>sSFC IdentifierApplicationNo.55 WR_PARM Transfer modifiable parameters (data record 1 and 28)to the addressed signal module.56 WR_DPARM Transfer parameters (data record 0, 1 or 128) from theCPU to the addressed signal module.57 PARM_MOD Transfer all parameters (data record 0, 1 and 128)from the CPU to the addressed signal module.Description of the parametersThe following sections contain all the modifiable parameters for the various moduleclasses. The parameters of the signal modules are described:• In the on-line help of STEP 7• In this reference manualYou will find the parameters that can be adjusted for the signal moduleconcerned in the specific sections for the different signal modules.Further referencesAn in-depth description of the principle of assigning parameters to signal modulesin the user program and a description of the SFCs that can be used for thatpurpose will be found in the STEP 7 manuals.A-2<strong>Programmable</strong> <strong>Logic</strong> <strong>Controllers</strong> <strong>S7</strong>-<strong>300</strong> <strong>Module</strong> <strong>Data</strong>A5E00105505-03
Parameter Sets for Signal <strong>Module</strong>sA.2 Parameters of the Digital Input <strong>Module</strong>sParametersThe table below contains all the parameters you can set for digital input modules.NoteFor details of the parameters of parameterized digital input/output modules, seethe respective chapter of the module concerned.You will see which parameters you can modify from the list:• In STEP 7• With SFC 55 “WR_PARM”• With SFB 53 “WRREC” (e. g. for GSD).The parameters set with STEP 7 can also be transferred with SFCs 56 and 57 andthe SFB 53 to the module (refer to the STEP 7 manuals).Table A-2Parameters of the Digital Input <strong>Module</strong>sParameter<strong>Data</strong> RecordNo.Parameters can be assignedwith ...... SFC 55,SFB 53...ProgrammingDeviceInput delay No YesDiagnosis of missing sensor supply 0No YesDiagnosis of broken wireNoYesHardware interrupt enable Yes YesDiagnostics interrupt enableYesYes1Hardware interrupt with rising edgeYesYesHardware interrupt with falling edge Yes YesNoteIf you want to enable the diagnostic interrupt in the user program in data record 1,you must enable the diagnosis in data record 0 beforehand using STEP 7.<strong>Programmable</strong> <strong>Logic</strong> <strong>Controllers</strong> <strong>S7</strong>-<strong>300</strong> <strong>Module</strong> <strong>Data</strong>A5E00105505-03A-3
<strong>Data</strong> record 1 structureThe figure below shows the structure of data record 1 for the parameters of thedigital input modules.You activate a parameter by setting the corresponding bit to “1”.Byte 07 6 0Diagnostics interrupt enableHardware interrupt enableByte 17 6 5 4 3 2 1 0Hardware interrupton rising edge at channel group 0on falling edge at channel group 0on rising edge at channel group 1on falling edge at channel group 1on rising edge at channel group 2on falling edge at channel group 2on rising edge at channel group 3on falling edge at channel group 3Byte 27 6 5 4 3 2 1 0Hardware interrupton rising edge at channel group 4on falling edge at channel group 4on rising edge at channel group 5on falling edge at channel group 5on rising edge at channel group 6on falling edge at channel group 6on rising edge at channel group 7on falling edge at channel group 7Byte 3Not relevantFigure A-1<strong>Data</strong> Record 1 for Parameters of the Digital Input <strong>Module</strong>sA-4<strong>Programmable</strong> <strong>Logic</strong> <strong>Controllers</strong> <strong>S7</strong>-<strong>300</strong> <strong>Module</strong> <strong>Data</strong>A5E00105505-03
Parameter Sets for Signal <strong>Module</strong>sA.3 Parameters of the Digital Output <strong>Module</strong>sParametersThe table below contains all the parameters you can set for digital output modules.NoteFor details of the parameters of parameterized digital input/output modules, seethe respective chapter of the module concerned.You will see which parameters you can modify from the list:• In STEP 7• With SFC 55 “WR_PARM”• With SFB 53 “WRREC” (e. g. for GSD).The parameters set with STEP 7 can also be transferred with SFCs 56 and 57 andthe SFB 53 to the module (refer to the STEP 7 manuals).Table A-3Parameters of the Digital Output <strong>Module</strong>sParameter<strong>Data</strong> RecordNo.Parameters can be assignedwith ...... SFC 55,SFB 53...ProgrammingDeviceDiagnosis of missing load voltage L+ No YesDiagnosis of broken wireNoYesDiagnosis of short–circuit to M0NoYesDiagnosis of short–circuit to L+ No YesDiagnostics interrupt enable Yes YesBehavior on CPU STOP 1Yes YesEnable substitute value “1”YesYesNoteIf you want to enable the diagnostic interrupt in the user program in data record 1,you must enable the diagnosis in data record 0 beforehand using STEP 7.<strong>Programmable</strong> <strong>Logic</strong> <strong>Controllers</strong> <strong>S7</strong>-<strong>300</strong> <strong>Module</strong> <strong>Data</strong>A5E00105505-03A-5
<strong>Data</strong> record 1 structureThe figure below shows the structure of data record 1 for the parameters of thedigital output modules.You activate a parameter by setting the corresponding bit in byte 0 to “1”.Byte 07 6 1 0Behavior on CPU STOPHold last valid valueApply substitute valueDiagnostics interrupt enableByte 17 6 5 4 3 2 1 0Substitute valueEnable substitute value 1 on channel 0Enable substitute value 1 on channel 1Enable substitute value 1 on channel 2Enable substitute value 1 on channel 3Enable substitute value 1 on channel 4Enable substitute value 1 on channel 5Enable substitute value 1 on channel 6Enable substitute value 1 on channel 7Byte 27 6 5 4 3 2 1 0Substitute valueEnable substitute value 1 on channel 8Enable substitute value 1 on channel 9Enable substitute value 1 on channel 10Enable substitute value 1 on channel 11Enable substitute value 1 on channel 12Enable substitute value 1 on channel 13Enable substitute value 1 on channel 14Enable substitute value 1 on channel 15Byte 3Not relevantFigure A-2<strong>Data</strong> Record 1 for Parameters of the Digital Output <strong>Module</strong>sNoteYou should only enable the parameters in byte 0, “Hold last valid value” and“Enable substitute value” as an alternative.A-6<strong>Programmable</strong> <strong>Logic</strong> <strong>Controllers</strong> <strong>S7</strong>-<strong>300</strong> <strong>Module</strong> <strong>Data</strong>A5E00105505-03
Parameter Sets for Signal <strong>Module</strong>sA.4 Parameters of the Analog Input <strong>Module</strong>sParametersThe table below contains all the parameters you can set for analog input modules.You will see which parameters you can modify from the list:• In STEP 7• With SFC 55 “WR_PARM”The parameters set with STEP 7 can also be transferred with SFCs 56 and 57 tothe module (refer to the STEP 7 manuals).Table A-4Parameters of the Analog Input <strong>Module</strong>sParameter<strong>Data</strong> RecordNo.Parameters can be assignedwith ...... SFC 55 ...ProgrammingDeviceDiagnostics: Group diagnostics No YesDiagnostics: With wire-break check No YesTemperature unit 0No YesTemperature coefficientNoYesSmoothing No YesDiagnostics interrupt enable Yes YesLimit value interrupt enable Yes YesCycle end interrupt enable Yes YesInterference SuppressionYesYes1Measuring MethodYesYesMeasuring Range Yes YesUpper limit value Yes YesLower limit value Yes YesNoteIf you want to enable the diagnostic interrupt in the user program in data record 1,you must enable the diagnosis in data record 0 beforehand using STEP 7.<strong>Programmable</strong> <strong>Logic</strong> <strong>Controllers</strong> <strong>S7</strong>-<strong>300</strong> <strong>Module</strong> <strong>Data</strong>A5E00105505-03A-7
<strong>Data</strong> record 1 structureThe figure below shows the structure of data record 1 for the parameters of theanalog input modules.You activate a parameter by setting the corresponding bit in byte 0 and 1 to “1”.Byte 07 6 2 0Cycle end interrupt enableDiagnostics interrupt enableLimit value interrupt enableByte 1Interference suppressionChannel group 0Channel group 1Channel group 2Channel group 3See Table A-5Byte 2Byte 3Byte 4Byte 57 4 3 0Measurement channel group 0Measurement channel group 1Measurement channel group 2Measurement channel group 3Measuring MethodMeasuringRangeSee Table A-6Byte 6Byte 7Byte 8Byte 9Byte 10Byte 11Byte 12Byte 13High-Order Byte Upper limit value channelLow-Order Byte group 0; channel 0High-Order ByteLower limit value channelLow-Order Byte group 0; channel 0High-Order Byte Upper limit value channelLow-Order Byte group 1; channel 2High-Order Byte Lower limit value channelLow-Order Byte group 1; channel 2Note: For the channel groups, only one limit valuefor channel 1 is ever set.Figure A-3<strong>Data</strong> Record 1 for Parameters of the Analog Input <strong>Module</strong>sNoteThe representation of the limit values matches the analog value representation(see Chapter 4). Please observe the range limits when setting the limit values.A-8<strong>Programmable</strong> <strong>Logic</strong> <strong>Controllers</strong> <strong>S7</strong>-<strong>300</strong> <strong>Module</strong> <strong>Data</strong>A5E00105505-03
Parameter Sets for Signal <strong>Module</strong>sInterference frequency suppressionThe table below contains the codes for the different frequencies, which you enter inbyte 1 of data record 1 (refer to Figure A-3). You must count the resultingintegration time separately for each channel!Table A-5Codes for Interference Suppression of the Analog Input <strong>Module</strong>sInterference SuppressionIntegrationTimeCode400 Hz 2.5 ms 2#0060 Hz 16.7 ms 2#0150 Hz 20 ms 2#1010 Hz 100 ms 2#11Measuring methods and measuring rangesThe table below contains all the measuring methods and measuring ranges of theanalog input modules and their codes. You must enter these codes in bytes 2 to 5of data record 1 (refer to Figure A-3).NotePlease note that a measuring range module may need to be reconnected,depending on the measuring range (see Chapter 4)!Table A-6Codes for the Measuring Ranges of the Analog Input <strong>Module</strong>sMeasuringMethodCode Measuring Range CodeDeactivated 2#0000 Deactivated 2#0000Voltage 2#0001 80 mV 250 mV 500 mV 1 V 2.5 V 5 V1 to 5 V0 to 10 V 10 V 25 mV 50 mV2#00012#00102#00112#01002#01012#01102#01112#10002#10012#10102#1011<strong>Programmable</strong> <strong>Logic</strong> <strong>Controllers</strong> <strong>S7</strong>-<strong>300</strong> <strong>Module</strong> <strong>Data</strong>A5E00105505-03A-9
Table A-6Codes for the Measuring Ranges of the Analog Input <strong>Module</strong>sMeasuringMethodFour-wiretransmitterTwo-wiretransmitterResistance,four-conductorconnectionResistorfour-conductorconnection; 100 compensationThermalresistance + linearizationfour-conductorconnectionThermocouplesinternalcomparisonThermocouplesexternalcomparisonThermocouples+ linearizationinternalcomparisonThermocouples+ linearizationexternalcomparisonCode2#0010 3.2 mA 10 mA0 to 20 mA4 to 20 mA 20 mA 5 mAMeasuring RangeCode2#00002#00012#00102#00112#01002#01012#0011 4 to 20 mA 2#00112#0100 150 <strong>300</strong> 600 10 k2#0110 52 to 148 250 400 700 2#1000 Pt 100 climateNi 100 climatePt 100 standard rangePt 200 standard rangePt 500 standard rangePt 1000 standard rangeNi 1000 standard rangePt 200 climatePt 500 climatePt 1000 climateNi 1000 climateNi 100 standard range2#1010 Type B [PtRh – PtRh]Type N [NiCrSi – NiSi]Type E [NiCr – CuNi]Type R [PtRh –Pt]2#1011Type S [PtRh –Pt]Type J [Fe – CuNi IEC]Type L [Fe – CuNi]2#1101 Type T [Cu – CuNi]Type K [NiCr – Ni]Type U [Cu –Cu Ni]2#11102#00102#01002#01102#10012#00012#00112#01012#01112#00002#00012#00102#00112#01002#01012#01102#01112#10002#10012#10012#10112#00002#00012#00102#00112#01002#01012#01102#01112#10002#1001A-10<strong>Programmable</strong> <strong>Logic</strong> <strong>Controllers</strong> <strong>S7</strong>-<strong>300</strong> <strong>Module</strong> <strong>Data</strong>A5E00105505-03
Parameter Sets for Signal <strong>Module</strong>sA.5 Parameters of the SM 331; AI 8 x RTDParametersThe table below contains all the parameters which you can set for analog inputmodule SM 331; AI 8 x RTD.You will see which parameters you can modify from the list:• In STEP 7• With SFC 55 “WR_PARM”The parameters set with STEP 7 can also be transferred with SFCs 56 and 57 tothe module (refer to the STEP 7 manuals).Table A-7Parameters of the SM 331; AI 8 x RTDParameter<strong>Data</strong> RecordNo.Parameters can be assignedwith ...... SFC 55 ...ProgrammingDeviceNoYesNoYesDiagnostics: Group diagnosticsDiagnostics: With wire-break check0Diagnostics interrupt enable Yes YesLimit value interrupt enableYesYesCycle end interrupt enable1YesYesTemperature unit Yes YesMeasuring Method Yes YesMeasuring Range Yes Yes<strong>Module</strong> filtering mode Yes YesTemperature coefficientYesYes128Interference SuppressionYesYesSmoothing Yes YesUpper limit value Yes YesLower limit value Yes YesNoteIf you want to enable the diagnostic interrupt in the user program in data record 1,you must enable the diagnosis in data record 0 beforehand using STEP 7.<strong>Programmable</strong> <strong>Logic</strong> <strong>Controllers</strong> <strong>S7</strong>-<strong>300</strong> <strong>Module</strong> <strong>Data</strong>A5E00105505-03A-11
Structure of data record 1The figure below shows the structure of data record 1 for SM 331;AI 8 xRTD. You activate a parameter by setting the corresponding bit to “1”.Byte 07 6 2 0Temperature unit 0: degrees Celsius1: degrees FahrenheitCycle end interrupt enableDiagnostics interrupt enableLimit value interrupt enableBytes 1 to 13 are not assignedFigure A-4<strong>Data</strong> Record 1 of the Parameters for SM 331; AI 8 x RTDA-12<strong>Programmable</strong> <strong>Logic</strong> <strong>Controllers</strong> <strong>S7</strong>-<strong>300</strong> <strong>Module</strong> <strong>Data</strong>A5E00105505-03
Parameter Sets for Signal <strong>Module</strong>sStructure of data record 128The figure below shows the structure of data record 128 for SM 331;AI 8 x RTD.Byte 0Byte 17 6 5 4 3 2 1 0<strong>Module</strong> filtering mode (refer to Table A-8)Interference suppressionChannel group 0Channel group 1Channel group 2Channel group 3(refer to Table A-9)Byte 2Measuring method, channel group 0(refer to Table A-10)Byte 3Measuring range, channel group 0(refer to Table A-10)Byte 4Byte 5Temperature coefficient, channel group 0(refer to Table A-11)Smoothing, channel group 0(refer to Table A-12)Measuring method, channel group 1(refer to Table A-10)Byte 6Measuring range, channel group 1(refer to Table A-10)Byte 7Temperature coefficient, channel group 1(refer to Table A-11)Smoothing, channel group 1(refer to Table A-12)Figure A-5<strong>Data</strong> Record 128 of the Parameters for SM 331; AI 8RTD<strong>Programmable</strong> <strong>Logic</strong> <strong>Controllers</strong> <strong>S7</strong>-<strong>300</strong> <strong>Module</strong> <strong>Data</strong>A5E00105505-03A-13
Byte 8Measuring method, channel group 2(refer to Table A-10)Byte 9Measuring range, channel group 2(refer to Table A-10)Byte 10Temperature coefficient, channel group 2(refer to Table A-11)Smoothing, channel group 2(refer to Table A-12)Byte 11Measuring method, channel group 3(refer to Table A-10)Byte 12Measuring range, channel group 3(refer to Table A-10)Byte 13Temperature coefficient, channel group 3(refer to Table A-11)Smoothing, channel group 3(refer to Table A-12)Byte 14Byte 15Byte 16Byte 17Byte 18Byte 19Byte 20Byte 21High ByteLow ByteHigh ByteLow ByteHigh ByteLow ByteHigh ByteLow ByteUpper limit valuechannel group 0;channel 0Lower limit valuechannel group 0;channel 0Upper limit valuechannel group 0;channel 1Lower limit valuechannel group 0;channel 1Figure A-6<strong>Data</strong> Record 128 of the SM 331; AI 8 x RTD (Continued)A-14<strong>Programmable</strong> <strong>Logic</strong> <strong>Controllers</strong> <strong>S7</strong>-<strong>300</strong> <strong>Module</strong> <strong>Data</strong>A5E00105505-03
Parameter Sets for Signal <strong>Module</strong>sByte 22Byte 23Byte 24Byte 25Byte 26Byte 27Byte 28Byte 29Byte 30Byte 31Byte 32Byte 33Byte 34Byte 35Byte 36Byte 37Byte 38Byte 39Byte 40Byte 41Byte 42Byte 43Byte 44Byte 45High ByteLow ByteHigh ByteLow ByteHigh ByteLow ByteHigh ByteLow ByteHigh ByteLow ByteHigh ByteLow ByteHigh ByteLow ByteHigh ByteLow ByteHigh ByteLow ByteHigh ByteLow ByteHigh ByteLow ByteHigh ByteLow ByteUpper limit valuechannel group 1;channel 2Lower limit valuechannel group 1;channel 2Upper limit valuechannel group 1;channel 3Lower limit valuechannel group 1;channel 3Upper limit valuechannel group 2;channel 4Lower limit valuechannel group 2;channel 4Upper limit valuechannel group 2channel 5Lower limit valuechannel group 2;channel 5Upper limit valuechannel group 3;channel 6Lower limit valuechannel group 3;channel 6Upper limit valuechannel group 3;channel 7Lower limit valuechannel group 3;channel 7Figure A-7<strong>Data</strong> Record 128 of the SM 331; AI 8 x RTD (Continued)NoteThe representation of the limit values matches the analog value representation(see Chapter 4). Please observe the range limits when setting the limit values.<strong>Programmable</strong> <strong>Logic</strong> <strong>Controllers</strong> <strong>S7</strong>-<strong>300</strong> <strong>Module</strong> <strong>Data</strong>A5E00105505-03A-15
Operating modes of the SM 331; AI 8RTDThe table below contains the codes for the different operating modes, which youenter in byte 0 of data record 128 (refer to Figure A-5).Table A-8Codes of Operating Modes of the SM 331; AI 8 x RTD<strong>Module</strong> filtering modeCode8 channels hardware filter 2#000000008 channels software filter 2#000000014 channels hardware filter 2#00000010Interference frequency suppression of the SM 331; AI 8 x RTDThe table below contains the codes for the different frequencies, which you enter inbyte 1 of data record 128 (refer to Figure A-5). Note that the settings 50 Hz, 60 Hzand 400 Hz only apply to 8-channel software filter mode. The setting 50, 60 and400 Hz only applies to 8-channel and 4-channel hardware filter mode.Table A-9Interference Frequency Suppression Codes for SM 331; AI 8 x RTDInterference SuppressionCode400 Hz 2#0060 Hz 2#0150 Hz 2#1050/60/400 Hz 2#11Measuring methods and measuring ranges of the SM 331; AI 8 x RTDThe table below contains all the measuring methods and measuring ranges of themodule and its codes. You must enter these codes in the corresponding bytes ofdata record 128 (refer to Figure A-3).Table A-10 Codes for the Measuring Ranges of the SM 331; AI 8 x RTDMeasuring Method Code Measuring Range CodeDeactivated 2#0000 Deactivated 2#0000Resistance, four-conductorconnectionResistance, three-conductorconnection2#0100 150 <strong>300</strong> 600 2#0101 150 <strong>300</strong> 600 2#00102#01002#01102#00102#01002#0110A-16<strong>Programmable</strong> <strong>Logic</strong> <strong>Controllers</strong> <strong>S7</strong>-<strong>300</strong> <strong>Module</strong> <strong>Data</strong>A5E00105505-03
Parameter Sets for Signal <strong>Module</strong>sTable A-10 Codes for the Measuring Ranges of the SM 331; AI 8 x RTD, continuedMeasuring MethodThermalresistance + linearizationfour-conductor connectionThermal resistance +linearization three-conductorconnectionCode Measuring Range2#1000 Pt 100 climateNi 100 climatePt 100 standardNi 100 standardPt 500 standardPt 1000 standardNi 1000 standardPt 200 climatePt 500 climatePt 1000 climateNi 1000 climatePt 200 standardNi 120 standardNi 120 climateCu 10 climateCu 10 standardNi 200 standardNi 200 climateNi 500 standardNi 500 climate2#1001 Pt 100 climateNi 100 climatePt 100 standardNi 100 standardPt 500 standardPt 1000 standardNi 1000 standardPt 200 climatePt 500 climatePt 1000 climateNi 1000 climatePt 200 standardNi 120 standardNi 120 climateCu 10 climateCu 10 standardNi 200 standardNi 200 climateNi 500 standardNi 500 climateCode2#000000002#000000012#000000102#000000112#000001002#000001012#000001102#000001112#000010002#000010012#000010102#000010112#000011002#000011012#000011102#000011112#000100002#000100012#000100102#000100112#000000002#000000012#000000102#000000112#000001002#000001012#000001102#000001112#000010002#000010012#000010102#000010112#000011002#000011012#000011102#000011112#000100002#000100012#000100102#00010011<strong>Programmable</strong> <strong>Logic</strong> <strong>Controllers</strong> <strong>S7</strong>-<strong>300</strong> <strong>Module</strong> <strong>Data</strong>A5E00105505-03A-17
Temperature coefficient of the SM 331; AI 8 x RTDThe table below contains the codes for the temperature coefficient which you enterin the corresponding byte of data record 128 (refer to Figure A-5).Table A-11 Codes of Temperature Coefficients of the SM 331; AI 8 x RTDTemperature coefficientCodePt0.003850 Ω/Ω/°C (IPTS-68) 2#0000Pt0.003916 Ω/Ω/°C 2#0001Pt0.003902 Ω/Ω/°C 2#0010Pt0.003920 Ω/Ω/°C 2#0011Pt0.003850 Ω/Ω/°C (ITS-90) 2#0100Ni 0.006180 Ω/Ω/°C 2#1000Ni 0.006720 Ω/Ω/°C 2#1001Cu0.00427 Ω/Ω/°C 2#1100Smoothing of the SM 331; AI 8 x RTDThe table below contains the codes for all smoothing modes, which you enter inthe corresponding byte of data record 128 (refer to Figure A-5).Table A-12 Codes Smoothing of the SM 331; AI 8 x RTDSmoothingCodeNone 2#00Low 2#01Average 2#10High 2#11A-18<strong>Programmable</strong> <strong>Logic</strong> <strong>Controllers</strong> <strong>S7</strong>-<strong>300</strong> <strong>Module</strong> <strong>Data</strong>A5E00105505-03
Parameter Sets for Signal <strong>Module</strong>sA.6 Parameters of the SM 331; AI 8 x TCParametersThe table below contains all the parameters which you can set for analog inputmodule SM 331; AI 8 x TC.You will see which parameters you can modify from the list:• In STEP 7• With SFC 55 “WR_PARM”The parameters set with STEP 7 can also be transferred with SFCs 56 and 57 tothe module (refer to the STEP 7 manuals).Table A-13 Parameters of the SM 331; AI 8 x TCParameter<strong>Data</strong> RecordNo.Parameters can be assignedwith ...... SFC 55 ...ProgrammingDeviceNoYesNoYesDiagnostics: Group diagnosticsDiagnostics: With wire-break check0Diagnostics interrupt enable Yes YesLimit value interrupt enableYesYesCycle end interrupt enable1YesYesTemperature unit Yes YesMeasuring MethodYesYesMeasuring Range128YesYes<strong>Module</strong> filtering mode Yes YesReaction to open thermocouple Yes YesInterference SuppressionYesYes128SmoothingYesYesUpper limit value Yes YesLower limit value Yes YesNoteIf you want to enable the diagnostic interrupt in the user program in data record 1,you must enable the diagnosis in data record 0 beforehand using STEP 7.<strong>Programmable</strong> <strong>Logic</strong> <strong>Controllers</strong> <strong>S7</strong>-<strong>300</strong> <strong>Module</strong> <strong>Data</strong>A5E00105505-03A-19
Structure of data record 1The figure below shows the structure of data record 1 of the SM 331; AI 8 x TC.You activate a parameter by setting the corresponding bit to “1”.Byte 07 6 2 0Temperature unit 0: degrees Celsius1: degrees FahrenheitCycle end interrupt enableDiagnostics interrupt enableLimit value interrupt enableBytes 1 to 13 are not assignedFigure A-8<strong>Data</strong> Record 1 of the Parameters for SM 331; AI 8 x TCA-20<strong>Programmable</strong> <strong>Logic</strong> <strong>Controllers</strong> <strong>S7</strong>-<strong>300</strong> <strong>Module</strong> <strong>Data</strong>A5E00105505-03
Parameter Sets for Signal <strong>Module</strong>sStructure of data record 128The figure below shows the structure of data record 128 for SM 331;AI 8 x TC.Byte 0Byte 17 6 5 4 3 2 1 0<strong>Module</strong> filtering mode (refer to Table A-14)Interference suppressionChannel group 0Channel group 1Channel group 2Channel group 3(refer to Table A-15)Byte 2Measuring method, channel group 0(refer to Table A-16)Byte 3Measuring range, channel group 0(refer to Table A-16)Byte 4Smoothing, channel group 0 (refer to Table A-18)Reaction with open thermocouple, channel group 0(refer to Table A-17)Byte 5Measuring method, channel group 1(refer to Table A-16)Byte 6Measuring range, channel group 1(refer to Table A-16)Byte 7Smoothing, channel group 1 (refer to Table A-18)Reaction with open thermocouple, channel group 1(refer to Table A-17)Figure A-9<strong>Data</strong> Record 128 of the SM 331; AI 8 x TC<strong>Programmable</strong> <strong>Logic</strong> <strong>Controllers</strong> <strong>S7</strong>-<strong>300</strong> <strong>Module</strong> <strong>Data</strong>A5E00105505-03A-21
Byte 8Measuring method, channel group 2(refer to Table A-16)Byte 9Measuring range, channel group 2(refer to Table A-16)Byte 10Smoothing, channel group 2 (refer to Table A-18)Reaction with open thermocouple, channel group 2(refer to Table A-17)Byte 11Measuring method, channel group 3(refer to Table A-16)Byte 12Measuring range, channel group 3(refer to Table A-16)Byte 13Smoothing, channel group 3 (refer to Table A-18)Reaction with open thermocouple, channel group 3(refer to Table A-17)Byte 14Byte 15Byte 16Byte 17Byte 18Byte 19Byte 20Byte 21High ByteLow ByteHigh ByteLow ByteHigh ByteLow ByteHigh ByteLow ByteUpper limit valuechannel group 0;channel 0Lower limit valuechannel group 0;channel 0Upper limit valuechannel group 0;channel 1Lower limit valuechannel group 0;channel 1Figure A-10<strong>Data</strong> Record 128 of the SM 331; AI 8 x TC (Continued)A-22<strong>Programmable</strong> <strong>Logic</strong> <strong>Controllers</strong> <strong>S7</strong>-<strong>300</strong> <strong>Module</strong> <strong>Data</strong>A5E00105505-03
Parameter Sets for Signal <strong>Module</strong>sByte 22Byte 23Byte 24Byte 25Byte 26Byte 27Byte 28Byte 29Byte 30Byte 31Byte 32Byte 33Byte 34Byte 35Byte 36Byte 37Byte 38Byte 39Byte 40Byte 41Byte 42Byte 43Byte 44Byte 45High ByteLow ByteHigh ByteLow ByteHigh ByteLow ByteHigh ByteLow ByteHigh ByteLow ByteHigh ByteLow ByteHigh ByteLow ByteHigh ByteLow ByteHigh ByteLow ByteHigh ByteLow ByteHigh ByteLow ByteHigh ByteLow ByteUpper limit valuechannel group 1;channel 2Lower limit valuechannel group 1;channel 2Upper limit valuechannel group 1;channel 3Lower limit valuechannel group 1;channel 3Upper limit valuechannel group 2;channel 4Lower limit valuechannel group 2;channel 4Upper limit valuechannel group 2channel 5Lower limit valuechannel group 2;channel 5Upper limit valuechannel group 3;channel 6Lower limit valuechannel group 3;channel 6Upper limit valuechannel group 3;channel 7Lower limit valuechannel group 3;channel 7Figure A-11<strong>Data</strong> Record 128 of the SM 331; AI 8 x TC (Continued)NoteThe representation of the limit values matches the analog value representation(see Chapter 4). Please observe the range limits when setting the limit values.<strong>Programmable</strong> <strong>Logic</strong> <strong>Controllers</strong> <strong>S7</strong>-<strong>300</strong> <strong>Module</strong> <strong>Data</strong>A5E00105505-03A-23
Operating modes of the SM 331; AI 8 x TCThe table below contains the codes for the different operating modes, which youenter in byte 0 of data record 128 (refer to Figure A-9).Table A-14 Codes of Operating Modes of the SM 331; AI 8 x TC<strong>Module</strong> filtering modeCode8 channels hardware filter 2#000000008 channels software filter 2#000000014 channels hardware filter 2#00000010Interference frequency suppression of the SM 331; AI 8 x TCThe table below contains the codes for the different frequencies, which you enter inbyte 1 of data record 128 (refer to Figure A-9). Note that the settings 400 Hz,60 Hz and 50 Hz only apply to 8-channel software filter mode. The setting 50, 60and 400 Hz only applies to 8-channel and 4-channel hardware filter mode.Table A-15 Interference Frequency Suppression Codes for SM 331; AI 8 x TCInterference SuppressionCode400 Hz 2#0060 Hz 2#0150 Hz 2#1050/60/400 Hz 2#11A-24<strong>Programmable</strong> <strong>Logic</strong> <strong>Controllers</strong> <strong>S7</strong>-<strong>300</strong> <strong>Module</strong> <strong>Data</strong>A5E00105505-03
Parameter Sets for Signal <strong>Module</strong>sMeasuring methods and measuring ranges of the SM 331; AI 8 x TCThe table below contains all the measuring methods and measuring ranges of themodule and its codes. You must enter these codes in the corresponding bytes ofdata record 128 (refer to Figure A-3).Table A-16 Codes for the Measuring Ranges of the SM 331; AI 8 x TCMeasuring Method Code MeasuringRangeCodeDeactivated 2#0000 Deactivated 2#0000Thermocouple, linear,reference temperature 0 °CThermocouple, linear,reference temperature 50 °C2#1010 BNERSJLTKUC2#1011 BNERSJLTKUCThermocouple, linear, internal comparison 2#1101 BNERSJLTKUCThermocouple, linear, external comparison 2#1110 BNERSJLTKUC2#00002#00012#00102#00112#01002#01012#01102#01112#10002#10012#10102#00002#00012#00102#00112#01002#01012#01102#01112#10002#10012#10102#00002#00012#00102#00112#01002#01012#01102#01112#10002#10012#10102#00002#00012#00102#00112#01002#01012#01102#01112#10002#10012#1010<strong>Programmable</strong> <strong>Logic</strong> <strong>Controllers</strong> <strong>S7</strong>-<strong>300</strong> <strong>Module</strong> <strong>Data</strong>A5E00105505-03A-25
Reaction to open thermocouple of the SM 331; AI 8 x TCThe table below contains the codes for the reactions to an open thermocouple,which you enter in the corresponding byte of data record 128 (refer to Figure A-9).Table A-17 Codes of Reaction to Open Thermocouple of the SM 331; AI 8 x TCReaction to open thermocoupleCodeOverflow 2#0Underflow 2#1Smoothing of the SM 331; AI 8 x TCThe table below contains the codes for all smoothing modes, which you enter inthe corresponding byte of data record 128 (refer to Figure A-9).Table A-18 Codes Smoothing of the SM 331; AI 8 x TCSmoothingCodeNone 2#00Low 2#01Average 2#10High 2#11A-26<strong>Programmable</strong> <strong>Logic</strong> <strong>Controllers</strong> <strong>S7</strong>-<strong>300</strong> <strong>Module</strong> <strong>Data</strong>A5E00105505-03
Parameter Sets for Signal <strong>Module</strong>sA.7 Parameters of the SM 331; AI 8 x 13 bitsStructure of data record 1The figure below shows the structure of data record 1 for the parameters of theanalog input module.You activate a parameter by setting the corresponding bit in byte to “1”.Byte 07 6 5 4 3 2 1 0Temperature measurementByte 17 6 5 4 3 2 1 0Interference suppressionByte 2Byte 3Byte 4Byte 5Byte 6Byte 7Byte 8Byte 97 6 5 4 3 2 1 0Measuring method and measuring range channel 0Measuring method and measuring range channel 1Measuring method and measuring range channel 2Measuring method and measuring range channel 3Measuring method and measuring range channel 4Measuring method and measuring range channel 5Measuring method and measuring range channel 6Measuring method and measuring range channel 7Measuring RangeMeasuring Method7 6 5 4 3 2 1 0Byte 10 Temperature coefficient channel 0 and 1Byte 11 Temperature coefficient channel 2 and 3Byte 12 Temperature coefficient channel 4 and 5Byte 13 Temperature coefficient channel 6 and 7Channel 1, 3, 5, 7Channel 0, 2, 4, 6Figure A-12<strong>Data</strong> Record 1 for Parameters of the Analog Input <strong>Module</strong>s<strong>Programmable</strong> <strong>Logic</strong> <strong>Controllers</strong> <strong>S7</strong>-<strong>300</strong> <strong>Module</strong> <strong>Data</strong>A5E00105505-03A-27
Temperature measurementThe table below contains the codes for the different temperature measurements,which you enter in byte 0 of data record 1 (refer to Figure A-12).Table A-19 Codes for temperature measurement of the analog input moduleTemperature unit for linearizationCodeDegrees Celsius 2#0000 0000Degrees Fahrenheit 2#0000 1000Kelvin 2#0001 0000Interference frequency suppressionThe table below contains the codes for the different frequencies, which you enter inbyte 1 of data record 1 (refer to Figure A-12). You must work out the resultingintegration time separately for each module!Table A-20 Codes for Interference Suppression of the Analog Input <strong>Module</strong>Interference Suppression Integration Time Code60 Hz 50 ms 2#0150 Hz 60 ms 2#10Measuring methods and measuring rangesThe table below contains all the measuring methods and measuring ranges of theanalog input module and their codes. You must enter these codes in bytes 2 to 13of data record 1 (refer to Figure A-12).NotePlease note that the analog input module must be wired in accordance with themeasuring range and at the front connector correspondingly!Table A-21 Codes for the Measuring Ranges of the Analog Input <strong>Module</strong>MeasuringMethodCode Measuring Range CodeDeactivated 2#0000 Deactivated 2#0000Voltage 2#0001 50 mV 500 mV 1 V 5 V1 to 5 V0 to 10 V 10 V2#10112#00112#01002# 01102#01112#10002#1001A-28<strong>Programmable</strong> <strong>Logic</strong> <strong>Controllers</strong> <strong>S7</strong>-<strong>300</strong> <strong>Module</strong> <strong>Data</strong>A5E00105505-03
Parameter Sets for Signal <strong>Module</strong>sTable A-21 Codes for the Measuring Ranges of the Analog Input <strong>Module</strong>MeasuringMethodCodeCurrent 2#0010 0 to 20 mA4 to 20 mA 20 mAResistors 2#0101 600 Ω6 kΩBulb resistor(linear)Measuring Range2#1001 Pt 100 ClimatePt 100 StandardNi 100 ClimateNi 100 StandardNi 1000 / LG-Ni 1000 ClimateNi 1000 / LG-Ni 1000 StandardCode2#00102#00112#01002#01102#10002#00002#00102#00012#00112#10102#0110Temperature coefficientThe table below contains the codes for the temperature coefficient which you enterin the corresponding byte of data record (refer to Figure A-12).Table A-22 Codes for temperature measurement of the analog input moduleTemperature coefficient Measuring Range CodePt0.003850 Ω/Ω/°C (ITS-90) Pt 100 2#0100Ni 0.006180 Ω/Ω/°C Ni 100 / Ni 1000 2#1000Ni 0.005000 Ω/Ω/°C LG-Ni 1000 2#1010<strong>Programmable</strong> <strong>Logic</strong> <strong>Controllers</strong> <strong>S7</strong>-<strong>300</strong> <strong>Module</strong> <strong>Data</strong>A5E00105505-03A-29
A.8 Parameters of the SM 331; AI 8 x 16 bitsParametersTable A-23contains all the parameters which you can set for the isolated analoginput module SM 331; AI 8 x bits. This comparison indicates which methods youcan use for the configuration of the individual parameters:• SFC 55 “WR_PARM”• STEP 7 programming deviceThe parameters that you have set with STEP 7 can also be transferred to themodule by means of SFC 56 or SFC 57.Table A-23 Parameters for the isolated analog input module SM 331; AI 8 x 16 bitsParameter<strong>Data</strong> RecordConfigurable with...No. ... SFC 55 ...programming deviceDiagnostics: Group diagnosticsDiagnostics: With wire-breakcheckNoYes0 No YesLimit value interrupt enableYesYesDiagnostics interrupt enable 1 Yes YesCycle end interrupt enable Yes Yes<strong>Module</strong> mode Yes YesInterference Suppression Yes YesMeasuring Method Yes YesMeasuring RangeSmoothing128Upper limit value Yes YesLower limit value Yes YesYesYesYesYesNoteIf you want to enable the diagnostic interrupt in the user program in data record 1,you must enable the diagnosis in data record 0 beforehand using STEP 7.A-30<strong>Programmable</strong> <strong>Logic</strong> <strong>Controllers</strong> <strong>S7</strong>-<strong>300</strong> <strong>Module</strong> <strong>Data</strong>A5E00105505-03
Parameter Sets for Signal <strong>Module</strong>sStructure of data record 1Figure A-13 shows the structure of data record 1 for the parameters of the isolatedanalog input module SM 331; AI 8 x 16 bits.You can activate a parameter by setting the corresponding bit in byte 0 to “1”.7 6 5 4 3 2 1 0Bit numberByte 0Cycle end interrupt enableDiagnostics interrupt enableLimit value interrupt enableBytes 1 to 13 are not assignedFigure A-13<strong>Data</strong> Record 1 of the Parameters for SM 331; AI 8 x 16 bits<strong>Programmable</strong> <strong>Logic</strong> <strong>Controllers</strong> <strong>S7</strong>-<strong>300</strong> <strong>Module</strong> <strong>Data</strong>A5E00105505-03A-31
Structure of data record 128Figure shows the structure of data record 128 for the parameters of the isolatedanalog input module SM 331; AI 8 x 16 bits.Byte 0Byte 17 6 5 4 3 2 1 0Bit number<strong>Module</strong> mode (see Table A-24)Interferencefrequency suppressionChannel group 0Channel group 1Channel group 2Channel group 3Refer to Table A-25Byte 2Measuring method, channel group 0(refer to Table A-26)Byte 3Measuring range, channel group 0(refer to Table A-26)Byte 4Smoothing, channel group 0(refer to Table A-12)Byte 5Measuring method, channel group 1(refer to Table A-26)Byte 6Measuring range, channel group 1(refer to Table A-26)Byte 7Smoothing, channel group 1(refer to Table A-12)Figure A-14<strong>Data</strong> record 128 for parameters of the SM 331; AI 8 x 16 bitsA-32<strong>Programmable</strong> <strong>Logic</strong> <strong>Controllers</strong> <strong>S7</strong>-<strong>300</strong> <strong>Module</strong> <strong>Data</strong>A5E00105505-03
Parameter Sets for Signal <strong>Module</strong>sByte 8Measuring method, channel group 2(refer to Table A-26)Byte 9Measuring range, channel group 2(refer to Table A-26)Byte 10Smoothing, channel group 2(refer to Table A-12)Byte 11Measuring method, channel group 3(refer to Table A-26)Byte 12Measuring range, channel group 3(refer to Table A-26)Byte 13Byte 14Byte 15Byte 16Byte 17Byte 18Byte 19Byte 20Byte 21Smoothing, channel group 3(refer to Table A-12)High ByteLow ByteHigh ByteLow ByteHigh ByteLow ByteHigh ByteLow ByteUpper limit valuechannel group 0;channel 0Lower limit valuechannel group 0;channel 0Upper limit valuechannel group 0;channel 1Lower limit valuechannel group 0;channel 1Figure A-15<strong>Data</strong> record 128 for SM 331; AI 8 x 16 bits (continued)<strong>Programmable</strong> <strong>Logic</strong> <strong>Controllers</strong> <strong>S7</strong>-<strong>300</strong> <strong>Module</strong> <strong>Data</strong>A5E00105505-03A-33
Byte 22Byte 23Byte 24Byte 25Byte 26Byte 27Byte 28Byte 29Byte 30Byte 31Byte 32Byte 33Byte 34Byte 35Byte 36Byte 37Byte 38Byte 39Byte 40Byte 41Byte 42Byte 43Byte 44Byte 45High ByteLow ByteHigh ByteLow ByteHigh ByteLow ByteHigh ByteLow ByteHigh ByteLow ByteHigh ByteLow ByteHigh ByteLow ByteHigh ByteLow ByteHigh ByteLow ByteHigh ByteLow ByteHigh ByteLow ByteHigh ByteLow ByteUpper limit valuechannel group 1;channel 2Lower limit valuechannel group 1;channel 2Upper limit valuechannel group 1;channel 3Lower limit valuechannel group 1;channel 3Upper limit valuechannel group 2;channel 4Lower limit valuechannel group 2;channel 4Upper limit valuechannel group 2channel 5Lower limit valuechannel group 2;channel 5Upper limit valuechannel group 3;channel 6Lower limit valuechannel group 3;channel 6Upper limit valuechannel group 3;channel 7Lower limit valuechannel group 3;channel 7Figure A-16<strong>Data</strong> record 128 for parameters of the SM 331; AI 8 x 16 bits (continued)NoteThe representation of the limit values matches the analog value representation(see Chapter 4). Please observe the range limits when setting the limit values.A-34<strong>Programmable</strong> <strong>Logic</strong> <strong>Controllers</strong> <strong>S7</strong>-<strong>300</strong> <strong>Module</strong> <strong>Data</strong>A5E00105505-03
Parameter Sets for Signal <strong>Module</strong>s<strong>Module</strong> modesTable A-24 contains the codes for the module modes, which you enter in byte 0 ofdata record 128 (see Figure A-14).Table A-24 Codes for the modes of SM 331; AI 8 x 16 bits<strong>Module</strong> modeCode8 channels 2#000000004 channels 2#00000001Interference suppressionTable A-25 contains the codes for the different frequencies, which you enter in byte1 of data record 128 (see Figure A-14). Note that 4-channel mode only functions ifinterference frequency suppression of 50, 60 and 400 Hz is set.Table A-25 Codes for interference frequency suppression of the SM 331; AI 8 x 16 bitsInterference SuppressionCode400 Hz 2#0060 Hz 2#0150 Hz 2#1050, 60 and 400 Hz 2#11Measuring methods and measuring rangesTable A-26 contains all the measuring ranges for the isolated analog input moduleSM 331; AI 8 x 16 bits. Table A-26 also shows the codes for measuring methodsand measuring ranges. You must enter these codes in accordance with therequired measuring range in the relevant byte of data record 128(see Figure A-14).Table A-26 Codes for the measuring ranges of the SM 331; AI 8 x16 bitsMeasuring Method Code Measuring Range CodeDeactivated 2#0000 Deactivated 2#0000Voltage 2#0001 ± 5 V1 to 5 V± 10 VCurrent (4-wire transmitter) 2#0002 0 to 20 mA4 to 20 mA± 20 mA2#01102#01112#10012#00102#00112#0100Settings for input smoothingTable A-27 contains all the smoothing settings for the isolated analog input moduleSM 331; AI 8 x 16 bits. According to the smoothing required, you must enter thesecodes in the corresponding byte of data set 128 (see imag eA-14.<strong>Programmable</strong> <strong>Logic</strong> <strong>Controllers</strong> <strong>S7</strong>-<strong>300</strong> <strong>Module</strong> <strong>Data</strong>A5E00105505-03A-35
Table A-27 Codes for the smoothing mode settings of the SM 331;AI 8 x 16 bitsSmoothing mode settingCodeNone 2#00Low 2#01Average 2#10High 2#11A.9 Parameters of the Analog Output <strong>Module</strong>sParametersTable A-28 contains all the parameters you can set for analog output modules..The comparison shows:• Which parameters you can change with STEP 7 and• Which parameters you can change with SFC 55 “WR_PARM”.The parameters which you set with STEP 7 can also be transferred to the modulewith SFCs 56 and 57.Table A-28 Parameters of the Analog Output <strong>Module</strong>sParameter<strong>Data</strong> RecordNo.Parameters can be assignedwith ...... SFC 55 ...ProgrammingDeviceDiagnostics: Group diagnostics 0 No YesDiagnostics interrupt enable Yes YesBehavior on CPU STOP Yes YesOutput type 1Yes YesOutput RangeYesYesSubstitute value Yes YesNoteIf you want to enable the diagnostic interrupt in the user program in data record 1,you must enable the diagnosis in data record 0 beforehand using STEP 7.A-36<strong>Programmable</strong> <strong>Logic</strong> <strong>Controllers</strong> <strong>S7</strong>-<strong>300</strong> <strong>Module</strong> <strong>Data</strong>A5E00105505-03
Parameter Sets for Signal <strong>Module</strong>s<strong>Data</strong> record 1 structureThe figure below shows the structure of data record 1 for the parameters of theanalog output modules.You activate the diagnostics interrupt enable by setting the corresponding bit inbyte 0 to “1”.Byte 07 6 0Diagnostics interrupt enableByte 17 3 2 1 0Behavior on CPU STOPChannel group 0Channel group 1Channel group 2Channel group 30 = Outputsde-energized1 = Hold last valueByte 2Byte 3Byte 4Byte 57 4 3 0Output channel group 0Output channel group 1Output channel group 2Output channel group 3Output RangeOutput typeRefer to Table A-29Byte 6Byte 7Byte 8Byte 9Byte 10Byte 11Byte 12Byte 13High-Order ByteLow-Order ByteHigh-Order ByteLow-Order ByteHigh-Order ByteLow-Order ByteHigh-Order ByteLow-Order ByteSubstitute value channelgroup 0Substitute value channelgroup 1Substitute value channelgroup 2Substitute value channelgroup 3Figure A-17<strong>Data</strong> Record 1 for Parameters of the Analog Output <strong>Module</strong>s<strong>Programmable</strong> <strong>Logic</strong> <strong>Controllers</strong> <strong>S7</strong>-<strong>300</strong> <strong>Module</strong> <strong>Data</strong>A5E00105505-03A-37
Setting substitute valuesNoteFor output ranges 4 to 20 mA and 1 to 5 V you must set the substitute valueE500 H so that the output remains de-energized (refer to Tables 4-35 and 4-37 onpages 4-26 and 4-27).The representation of the substitute values corresponds to the analog valuerepresentation. You should observe the relevant range limits when setting thesubstitute values.Output methods and output rangesThe table below contains all the output methods and output ranges of the analogoutput modules and their codes. You must enter these codes in bytes 2 to 5 ofdata record 1 (refer to FigureA-17).Table A-29 Codes for the Output Ranges of the Analog Output <strong>Module</strong>sOutput type Code Output Range CodeDeactivated 2#0000 Deactivated 2#0000Voltage 2#0001 1 to 5 V0 to 10 V 10 VCurrent 2#0010 0 to 20 mA4 to 20 mA 20 mA2#01112#10002#10012#00102#00112#0100A-38<strong>Programmable</strong> <strong>Logic</strong> <strong>Controllers</strong> <strong>S7</strong>-<strong>300</strong> <strong>Module</strong> <strong>Data</strong>A5E00105505-03
Parameter Sets for Signal <strong>Module</strong>sA.10 Parameters of the SM 332; AO 8 x 12 bitsParametersTable A-28 contains all the parameters that you can set for the analog outputmodule SM 332; AO 8 x 12 bits. The comparison shows:• Which parameters you can change with STEP 7 and• Which parameters you can change with SFC 55 “WR_PARM”.The parameters which you set with STEP 7 can also be transferred to the modulewith SFCs 56 and 57.Table A-30 Parameters of the SM 332; AO 8 x 12 bits.Parameter<strong>Data</strong> RecordNo.Parameters can be assignedwith ...... SFC 55 ...ProgrammingDeviceDiagnostics: Group diagnostics 0 No YesDiagnostics interrupt enable Yes YesBehavior on CPU STOPYesYes1Output typeYesYesOutput Range Yes YesNoteIf you want to enable the diagnostic interrupt in the user program in data record 1,you must enable the diagnosis in data record 0 beforehand using STEP 7.<strong>Programmable</strong> <strong>Logic</strong> <strong>Controllers</strong> <strong>S7</strong>-<strong>300</strong> <strong>Module</strong> <strong>Data</strong>A5E00105505-03A-39
Structure of data record 1The diagram below shows the structure of data record 1 of the parameters of theSM 332; AO 8 x 12 bits.You activate the diagnostics interrupt enable by setting the corresponding bit inbyte 0 to “1”.Byte 07 6 0Diagnostics interrupt enableByte 17 6 5 4 3 2 1 0Behavior on CPU STOPChannel 4Channel 5Channel 6Channel 7Channel 0Channel 1Channel 2Channel 30 = Outputsde-energized1 = Hold last valueByte 2Byte 3Byte 4Byte 5Byte 6Byte 7Byte 8Byte 97 4 3 0Output channel 0Output channel 1Output channel 2Output channel 3Output channel 4Output channel 5Output channel 6Output channel 7Output RangeOutput typeSee Table A-31Bytes 10 to 13 are not assignedFigure A-18<strong>Data</strong> Record 1 for Parameters of the Analog Output <strong>Module</strong>sA-40<strong>Programmable</strong> <strong>Logic</strong> <strong>Controllers</strong> <strong>S7</strong>-<strong>300</strong> <strong>Module</strong> <strong>Data</strong>A5E00105505-03
Parameter Sets for Signal <strong>Module</strong>sOutput method and output rangeThe following table contains all the output methods and output ranges of theSM 332; AO 8 x 12 bits , with their coding. You must enter these codes in bytes 2to 9 of data record 1 (refer to FigureA-18).Table A-31 Codes for the output ranges of the analog output module SM332;AO 8 x 12 bitsOutput type Code Output range CodeDeactivated 2#0000 Deactivated 2#0000Voltage 2#0001 1 to 5 V0 to 10 V± 10 VCurrent 2#0010 0 to 20 mA4 to 20 mA± 20 mA2#01112#10002#10012#00102#00112#0100A.11 Parameters of the Analog Input/Output <strong>Module</strong>sParametersThe table below contains all the parameters you can set for analog input/outputmodules.You will see which parameters you can modify from the list:• In STEP 7• With SFC 55 “WR_PARM”The parameters set with STEP 7 can also be transferred with SFCs 56 and 57 tothe module (refer to the STEP 7 manuals).Table A-32 Parameters of the Analog Input/Output <strong>Module</strong>sParameter<strong>Data</strong> RecordNo.Parameters can be assignedwith ...... SFC 55 ...ProgrammingDeviceMeasuring Method Yes YesMeasuring Range Yes YesIntegration Time 1Yes YesOutput typeYesYesOutput Range Yes Yes<strong>Programmable</strong> <strong>Logic</strong> <strong>Controllers</strong> <strong>S7</strong>-<strong>300</strong> <strong>Module</strong> <strong>Data</strong>A5E00105505-03A-41
Structure of data record 1The figure below shows the structure of data record 1 for the parameters of theanalog input/output modules.You activate a parameter by setting the corresponding bit in byte 0 and 1 to “1”.Byte 07 0Not relevantByte 17 0Channel 0Channel 1Channel 2Channel 3Reset TimeSet the same parameters forall channels.Byte 2Byte 3Byte 4Byte 57 4 3 0Meas. channel 0Meas. channel 1Meas. channel 2Meas. channel 3Byte 6Byte 7MeasuringMethodMeasuringRange7 4 3 0Output channel 0Output channel 1Output typeOutput RangeByte 8:Byte 13:Not relevantFigure A-19<strong>Data</strong> Record 1 for Parameters of the Analog Input/Output <strong>Module</strong>sA-42<strong>Programmable</strong> <strong>Logic</strong> <strong>Controllers</strong> <strong>S7</strong>-<strong>300</strong> <strong>Module</strong> <strong>Data</strong>A5E00105505-03
Parameter Sets for Signal <strong>Module</strong>sMeasuring methods and measuring rangesThe table below contains all the measuring methods and measuring ranges of theanalog input/output modules and their codes. You must enter these codes in bytes2 to 5 of data record 1 (refer to Figure A-19).Table A-33 Codes for the Measuring Ranges of the Analog Input/Output <strong>Module</strong>sMeasuring Method Code Measuring Range CodeDeactivated 2#0000 Deactivated 2#0000Voltage 2#0001 0 to 10 V 2#1000Resistance, four-conductor connection 2#0100 10 k 2#1001Thermal resistance + linearizationfour-conductor connection2#1000 Pt 100 climate 2#0000Output methods and output rangesThe table below contains all the output methods and output ranges of the analoginput/output modules and their codes. You must enter these codes in bytes 6 and 7of data record 1 (refer to Figure A-19).Table A-34 Codes for the Output Ranges of the Analog Input/Output <strong>Module</strong>sOutput type Code Output Range CodeDeactivated 2#0000 Deactivated 2#0000Voltage 2#0001 0 to 10 V 2#1000<strong>Programmable</strong> <strong>Logic</strong> <strong>Controllers</strong> <strong>S7</strong>-<strong>300</strong> <strong>Module</strong> <strong>Data</strong>A5E00105505-03A-43
A-44<strong>Programmable</strong> <strong>Logic</strong> <strong>Controllers</strong> <strong>S7</strong>-<strong>300</strong> <strong>Module</strong> <strong>Data</strong>A5E00105505-03
Diagnostics <strong>Data</strong> of Signal <strong>Module</strong>sBIn this AppendixSection Contents PageB.1 Evaluating Diagnostic <strong>Data</strong> of the Signal <strong>Module</strong>s in theUser ProgramB.2 Structure and Content of Diagnostic <strong>Data</strong> Bytes 0 to 7 B-2B.3 Channel-Specific Diagnostic <strong>Data</strong> from Byte 7 B-5B.4 Diagnostic data of the SM 338; POS-INPUT B-7B-1B.1 Evaluating Diagnostic <strong>Data</strong> of the Signal <strong>Module</strong>s in theUser ProgramIn this AppendixThis Appendix describes the structure of the diagnostic data in the system data.You must be familiar with this configuration if you want to evaluate the diagnosticsdata of the signal module in the STEP 7 user program.Diagnostic data are contained in data recordsThe diagnostic data of a module can be up to 16 bytes long and are contained indata records 0 and 1:• <strong>Data</strong> record 0 contains 4 bytes of diagnostic data that describe the currentstatus of a programmable logic controller.• <strong>Data</strong> record 1 contains the four bytes of diagnostic data that are also containedin data record 0 and as many as 12 bytes of module specific diagnostic data.Further referencesAn in-depth description of the principle of evaluating the diagnostic data of signalmodules in the user program and a description of the SFCs that can be used forthat purpose will be found in the STEP 7 manuals.<strong>Programmable</strong> <strong>Logic</strong> <strong>Controllers</strong> <strong>S7</strong>-<strong>300</strong> <strong>Module</strong> <strong>Data</strong>A5E00105505-03B-1
B.2 Structure and Content of Diagnostic <strong>Data</strong> Bytes 0 to 7The structure and contents of the different bytes of the diagnostic data aredescribed below. The following general rule applies: When an error occurs, the bitconcerned is set to “1”.Bytes 0 and 1Byte 07 6 5 4 3 2 1 0<strong>Module</strong> problemInternal malfunctionExternal malfunctionChannel error presentExternal auxiliary supply missingFront connector missing<strong>Module</strong> not parameterized.Incorrect parameter in the moduleByte 17 6 5 4 3 2 1 00 0<strong>Module</strong> type (see Table B-1)Channel information availableUser information availableFigure B-1Bytes 0 and 1 of the Diagnostic <strong>Data</strong><strong>Module</strong> typesThe following table contains the IDs of the module classes (bits 0 to 3 in byte 1).Table B-1Codes of the <strong>Module</strong> TypesCode<strong>Module</strong> Type0101 Analog module0110 CPU1000 Function module1100 CP1111 Digital moduleB-2<strong>Programmable</strong> <strong>Logic</strong> <strong>Controllers</strong> <strong>S7</strong>-<strong>300</strong> <strong>Module</strong> <strong>Data</strong>A5E00105505-03
Diagnostics <strong>Data</strong> of Signal <strong>Module</strong>sBytes 2 and 3Byte 27 6 5 4 3 2 1 00Memory module or measuring range module(for analog modules) incorrect or missingCommunication faultOperating status 0: RUN1: STOPScan time-out<strong>Module</strong>-internal supply voltage failureBattery emptyComplete backup supply failureByte 37 6 5 4 3 2 1 00Rack failureProcessor failureEPROM errorRAM errorADC/DAC errorFuse blownHardware interrupt lostFigure B-2Bytes 2 and 3 of the Diagnostics <strong>Data</strong><strong>Programmable</strong> <strong>Logic</strong> <strong>Controllers</strong> <strong>S7</strong>-<strong>300</strong> <strong>Module</strong> <strong>Data</strong>A5E00105505-03B-3
Bytes 4 to 7Byte 47 6 5 4 3 2 1 0Byte 5Byte 6Byte 7Channel typeB#16#70: Digital inputB#16#71: Analog inputB#16#72: Digital outputB#16#73: Analog outputFurther channel type available?0: no1: yes7 07 07 6 5 4 3 2 1 0Number of diagnostics bits thatthe module outputs per channelNumber of channels of the sametype in one moduleChannel error channel 0 / channel group 0Channel error channel 1 / channel group 1............Channel ... error channel 6 / channel group 6Channel error channel 7 / channel group 7Figure B-3Bytes 4 to 7 of the Diagnostics <strong>Data</strong>B-4<strong>Programmable</strong> <strong>Logic</strong> <strong>Controllers</strong> <strong>S7</strong>-<strong>300</strong> <strong>Module</strong> <strong>Data</strong>A5E00105505-03
Diagnostics <strong>Data</strong> of Signal <strong>Module</strong>sB.3 Channel-Specific Diagnostic <strong>Data</strong> from Byte 8From byte 8 up to byte 15, data record 1 contains the channel-specific diagnosticdata. The figures below show the assignment of the diagnostic byte for a channelor a channel group of the specific module. The following general rule applies:When an error occurs, the bit concerned is set to “1”.You will find a description of possible error causes and appropriate remedies in thesection called “Diagnostics of the <strong>Module</strong>s”.Digital input channel of the SM 321; DI 1624 VDC; with hardware anddiagnostic interrupts7 6 5 4 3 2 1 00 0Configuring/parameter assignment errorGround faultShort-circuit to L+Short-circuit to MWire-breakSensor supply missingFigure B-4Diagnostic Byte for a Digital Input Channel of the SM 321; DI 16 x 24 VDCDigital output channel of the SM 322; DO 8 x 24 VDC/0.5 A; with diagnosticinterrupt7 6 5 4 3 2 1 00Configuring/parameter assignment errorGround faultShort-circuit to L+Short-circuit to MWire-breakExternal auxiliary supply missingOvertemperatureFigure B-5 Diagnostic Byte for a Digital Output Channel of the SM 322;DO 8 x 24 VDC/0.5 A<strong>Programmable</strong> <strong>Logic</strong> <strong>Controllers</strong> <strong>S7</strong>-<strong>300</strong> <strong>Module</strong> <strong>Data</strong>A5E00105505-03B-5
Analog input channel of the SM 331 modules with diagnostics capability7 6 5 4 3 2 1 0UnderflowOverflowConfiguring/parameter assignment errorCommon mode errorShort-circuit to L+Short-circuit to MWire-breakReference channel errorFigure B-6Diagnostic Byte for an Analog Input Channel of a SM 331 with DiagnosticsCapabilityAnalog output channel of the SM 332 modules with diagnostics capability7 6 5 4 3 2 1 00 0Configuring/parameter assignment errorCommon mode errorShort-circuit to L+Short-circuit to MWire-breakExternal auxiliary supply missingFigure B-7Diagnostic Byte for an Analog Output Channel of a SM 332 with DiagnosticsCapabilityB-6<strong>Programmable</strong> <strong>Logic</strong> <strong>Controllers</strong> <strong>S7</strong>-<strong>300</strong> <strong>Module</strong> <strong>Data</strong>A5E00105505-03
Diagnostics <strong>Data</strong> of Signal <strong>Module</strong>sB.4 Diagnostic <strong>Data</strong> of the SM 338; POS-INPUTThe structure and contents of the different bytes of the diagnostic data for positiondetection module SM 338; POS-INPUT are described below. The following generalrule applies: When an error occurs, the bit concerned is set to “1”.Section 5.4 includes a description of possible error causes and appropriateremedies.Bytes 0 and 1Byte 07 6 5 4 3 2 1 00 0<strong>Module</strong> problemInternal malfunctionExternal malfunctionChannel error present<strong>Module</strong> not parameterized.Incorrect parameter in the moduleByte 17 6 5 4 3 2 1 00 0 0<strong>Module</strong> class 05 HChannel information availableFigure B-8Bytes 0 and 1 of the Diagnostic <strong>Data</strong> for the SM 338; POS-INPUT<strong>Programmable</strong> <strong>Logic</strong> <strong>Controllers</strong> <strong>S7</strong>-<strong>300</strong> <strong>Module</strong> <strong>Data</strong>A5E00105505-03B-7
Bytes 2 to 7Byte 27 6 5 4 3 2 1 00Scan time-outByte 37 6 5 4 3 2 1 0Not relevantByte 47 6 5 4 3 2 1 00Byte 5Channel type79 H : SM POS-INPUT7 0Number of diagnostics bits that the moduleoutputs per channel: 8 bits longByte 6Byte 77 07 6 5 4 3 2 1 00 0 0 0 0Number of channels of the sametype in one module: 3 channelsChannel error, channel 0Channel error, channel 1Channel error, channel 2Figure B-9Bytes 2 and 7 of the Diagnostic <strong>Data</strong> for the SM 338; POS-INPUTBytes 8 to 10From byte 8 up to byte 10, data record 1 contains the channel-specific diagnosticdata. The figure below shows the assignment of the diagnostic byte for a channelof the SM 338; POS-INPUT.7 6 5 4 3 2 1 00 0 0 0 0 0Configuration/parameterization error(internal channel error)Encoder error (external channel error)Figure B-10Diagnostic Byte for a Channel of the SM 338; POS-INPUTB-8<strong>Programmable</strong> <strong>Logic</strong> <strong>Controllers</strong> <strong>S7</strong>-<strong>300</strong> <strong>Module</strong> <strong>Data</strong>A5E00105505-03
Dimension DrawingsCIntroductionIn this appendix you will find the dimension drawings for the most importantcomponents of an <strong>S7</strong>-<strong>300</strong>. The specifications in these dimension drawings arerequired for dimensioning the <strong>S7</strong>-<strong>300</strong> configuration. The dimensions of an <strong>S7</strong>-<strong>300</strong>configuration must be taken into account when installing an <strong>S7</strong>-<strong>300</strong> in cabinets,switchgear rooms, etc. This appendix does not contain any dimension drawings ofthe CPUs of the <strong>S7</strong>-<strong>300</strong> or M7-<strong>300</strong> or of the IM 153-1. These dimension drawingsare contained in the relevant manuals.ContentsIn this appendix, you will find the dimension drawings of the following <strong>S7</strong>-<strong>300</strong>components.Section Contents PageC.1 Dimension Drawings of the Rails C-2C.2 Dimension Drawings of the Power Supply <strong>Module</strong>s C-8C.3 Dimension Drawings of the Interface <strong>Module</strong>s C-13C.4 Dimension Drawings of the Signal <strong>Module</strong>s C-13C.5 Dimension Drawings for Accessories C-15<strong>Programmable</strong> <strong>Logic</strong> <strong>Controllers</strong> <strong>S7</strong>-<strong>300</strong> <strong>Module</strong> <strong>Data</strong>A5E00105505-03C-1
C.1 Dimension Drawings of the Rails483 mm standard railFigure C-1 shows the dimension drawing of the 483 mm standard rail.8.7 465.2163.9 15535241971511482.6Figure C-1Dimension Drawing of the 483 mm Standard Rail530 mm standard railFigure C-2 shows the dimension drawing of the 530 mm standard rail.15 20 25 = 500253524195.21518530Figure C-2Dimension Drawing of the 530 mm Standard RailC-2<strong>Programmable</strong> <strong>Logic</strong> <strong>Controllers</strong> <strong>S7</strong>-<strong>300</strong> <strong>Module</strong> <strong>Data</strong>A5E00105505-03
Dimension Drawings830 mm standard railFigure C-3 shows the dimension drawing of the 830 mm standard rail.15 32 25 = 800253524195.21518830Figure C-3Dimension Drawing of the 830 mm Standard Rail2000 mm standard railFigure C-4 shows the dimension drawing of the 2000 mm standard rail.352419152000Figure C-4Dimension Drawing of the 2000 mm Standard Rail<strong>Programmable</strong> <strong>Logic</strong> <strong>Controllers</strong> <strong>S7</strong>-<strong>300</strong> <strong>Module</strong> <strong>Data</strong>A5E00105505-03C-3
160 mm railFigure C-5 shows the dimension drawing of the 160 mm rail.57.2 32.5M6710122101406160 15Figure C-5Dimension Drawing of the Rail with 160 mm Standard Width482.6 mm railFigure C-6 shows the dimension drawing of the 482.6 mm rail.57.2 32.5M67101228.3466482.6156Figure C-6Dimension Drawing of the Rail with 482.6 mm Standard WidthC-4<strong>Programmable</strong> <strong>Logic</strong> <strong>Controllers</strong> <strong>S7</strong>-<strong>300</strong> <strong>Module</strong> <strong>Data</strong>A5E00105505-03
Dimension Drawings530 mm railFigure C-7 shows the dimension drawing of the 530 mm rail.57.2 32.5M6710122155006530 15Figure C-7Dimension Drawing of the Rail with 530 mm Standard Width830 mm railFigure C-8 shows the dimension drawing of the 830 mm rail.57.2 32.5M6710122158006830 15Figure C-8Dimension Drawing of the Rail with 830 mm Standard Width<strong>Programmable</strong> <strong>Logic</strong> <strong>Controllers</strong> <strong>S7</strong>-<strong>300</strong> <strong>Module</strong> <strong>Data</strong>A5E00105505-03C-5
2000 mm railFigure C-9 shows the dimension drawing of the 2000 mm rail.1222000156Figure C-9Dimension Drawing of the 2000 mm RailC-6<strong>Programmable</strong> <strong>Logic</strong> <strong>Controllers</strong> <strong>S7</strong>-<strong>300</strong> <strong>Module</strong> <strong>Data</strong>A5E00105505-03
Dimension DrawingsRail for “Insert and Remove” functionFigure C-10 shows the dimension drawing of the rail for the “Insert and Remove”function with active bus module, <strong>S7</strong>-<strong>300</strong> module and explosion-proof partition. Therail is 482.6 mm or 530 mm long.Explosion-proofpartition<strong>S7</strong>-<strong>300</strong> module152166Active bus module59Rail for the ”Insertand Remove”function122125155Figure C-10Complete Dimension Drawing of a Rail for “Insert and Remove” Function with ActiveBus <strong>Module</strong>, <strong>S7</strong>-<strong>300</strong> <strong>Module</strong> and Explosion-proof Partition<strong>Programmable</strong> <strong>Logic</strong> <strong>Controllers</strong> <strong>S7</strong>-<strong>300</strong> <strong>Module</strong> <strong>Data</strong>A5E00105505-03C-7
Bus modules (Expansion buses)Figure C-11 shows the dimension drawing of the active bus module for the “Insertand Remove” function.Bus modulesBM PS/IM (...7HA)BM IM/IM (...7HD)BM 240 (...7HB)BM 180 (...7HC)9792Figure C-11Dimension Drawing of the Active Bus <strong>Module</strong>sC.2 Dimension Drawings of the Power Supply <strong>Module</strong>sPS 307; 2 AFigure C-12 shows the dimension drawing of the PS 307; 2 A power supplymodule.50 120127.5125Figure C-12Power Supply <strong>Module</strong> PS 307; 2 AC-8<strong>Programmable</strong> <strong>Logic</strong> <strong>Controllers</strong> <strong>S7</strong>-<strong>300</strong> <strong>Module</strong> <strong>Data</strong>A5E00105505-03
Dimension DrawingsPS 307; 5AFigure C-13 shows the dimension drawing of the PS 307; 5 A power supplymodule.127.580120125Figure C-13Power Supply <strong>Module</strong> PS 307; 5 A<strong>Programmable</strong> <strong>Logic</strong> <strong>Controllers</strong> <strong>S7</strong>-<strong>300</strong> <strong>Module</strong> <strong>Data</strong>A5E00105505-03C-9
PS 307; 10 AFigure C-14 shows the dimension drawing of the PS 307; 10 A power supplymodule.127.5200120125Figure C-14Power Supply <strong>Module</strong> PS 307; 10 AC-10<strong>Programmable</strong> <strong>Logic</strong> <strong>Controllers</strong> <strong>S7</strong>-<strong>300</strong> <strong>Module</strong> <strong>Data</strong>A5E00105505-03
Dimension DrawingsPS 307; 5 A with CPUs 313/314/315/315-2 DPFigures C-15 and C-16 show the dimension drawings of the configuration of apower supply module PS 307; 5 A with the CPUs 313/314/315/315-2 DP. Observethe dimensions that result from the use of the power connector for wiring thePS 307; 5 A with the CPU.1322768Figure C-15Dimension Drawing of the Power Supply <strong>Module</strong> PS 307; 5 A with CPUs313/314/315/315-2 DP. Front View<strong>Programmable</strong> <strong>Logic</strong> <strong>Controllers</strong> <strong>S7</strong>-<strong>300</strong> <strong>Module</strong> <strong>Data</strong>A5E00105505-03C-11
PS 307; 5 A with CPUs 313/314/315/315-2 DPFigure C-16 shows the dimension drawing of the power supply module PS 307; 5 Awith the CPUs 313/314/315/315-2 DP in the side view.120130125613Figure C-16Dimension Drawing of the Power Supply <strong>Module</strong> PS 307; 5 A with CPUs313/314/315/315-2 DP. Side ViewC-12<strong>Programmable</strong> <strong>Logic</strong> <strong>Controllers</strong> <strong>S7</strong>-<strong>300</strong> <strong>Module</strong> <strong>Data</strong>A5E00105505-03
Dimension DrawingsC.3 Dimension Drawings of the Interface <strong>Module</strong>sIM 360Figure C-17 shows the dimension drawing of the interface module IM 360.40120125Figure C-17 Interface <strong>Module</strong> IM 360IM 361Figure C-18 shows the dimension drawing of the interface module IM 361.80120125Figure C-18 Interface <strong>Module</strong> IM 361<strong>Programmable</strong> <strong>Logic</strong> <strong>Controllers</strong> <strong>S7</strong>-<strong>300</strong> <strong>Module</strong> <strong>Data</strong>A5E00105505-03C-13
IM 365Figure C-19 shows the dimension drawing of interface module IM 365.401201259120125Figure C-19 Interface <strong>Module</strong> IM 365C-14<strong>Programmable</strong> <strong>Logic</strong> <strong>Controllers</strong> <strong>S7</strong>-<strong>300</strong> <strong>Module</strong> <strong>Data</strong>A5E00105505-03
Dimension DrawingsC.4 Dimension Drawings of the Signal <strong>Module</strong>sSignal <strong>Module</strong>Figure C-20 shows the dimension drawing of the signal module.A signal module might look slightly different than the example below. Thedimensions however are always the same.40120125130Figure C-20Signal <strong>Module</strong><strong>Programmable</strong> <strong>Logic</strong> <strong>Controllers</strong> <strong>S7</strong>-<strong>300</strong> <strong>Module</strong> <strong>Data</strong>A5E00105505-03C-15
C.5 Dimension Drawings for AccessoriesShield connecting elementFigure C-21 shows the dimension drawing of the shield connecting element inconnection with two signal modules.1204019080Figure C-212 Signal <strong>Module</strong>s with Shield Connecting ElementC-16<strong>Programmable</strong> <strong>Logic</strong> <strong>Controllers</strong> <strong>S7</strong>-<strong>300</strong> <strong>Module</strong> <strong>Data</strong>A5E00105505-03
Dimension Drawings<strong>SIMATIC</strong> TOP connect, 3-tierFigure C-22 shows the dimension drawing of the 3-tier <strong>SIMATIC</strong> TOP connect.703560 40.535.5Figure C-22<strong>SIMATIC</strong> TOP connect, 3-tier<strong>SIMATIC</strong> TOP connect, 2-tierFigure C-23 shows the dimension drawing of the 2-tier <strong>SIMATIC</strong> TOP connect.703560 40.535.5Figure C-23<strong>SIMATIC</strong> TOP connect, 2-tier<strong>Programmable</strong> <strong>Logic</strong> <strong>Controllers</strong> <strong>S7</strong>-<strong>300</strong> <strong>Module</strong> <strong>Data</strong>A5E00105505-03C-17
<strong>SIMATIC</strong> TOP connect, 1-tierFigure C-24 shows the dimension drawing of the 1-tier <strong>SIMATIC</strong> TOP connect.55355240.535.5Figure C-24<strong>SIMATIC</strong> TOP connect, 1-tierRS 485 repeater on standard railFigure C-25 shows the dimension drawing of the RS 485 repeater on the standardrail.4573125128Figure C-25RS 485 Repeater on Standard RailC-18<strong>Programmable</strong> <strong>Logic</strong> <strong>Controllers</strong> <strong>S7</strong>-<strong>300</strong> <strong>Module</strong> <strong>Data</strong>A5E00105505-03
Dimension DrawingsRS 485 repeater on <strong>S7</strong>-<strong>300</strong> railFigure C-26 shows the dimension drawing of the RS 485 repeater on the <strong>S7</strong>-<strong>300</strong>rail.4570125Figure C-26RS 485 repeater on <strong>S7</strong>-<strong>300</strong> rail<strong>Programmable</strong> <strong>Logic</strong> <strong>Controllers</strong> <strong>S7</strong>-<strong>300</strong> <strong>Module</strong> <strong>Data</strong>A5E00105505-03C-19
C-20<strong>Programmable</strong> <strong>Logic</strong> <strong>Controllers</strong> <strong>S7</strong>-<strong>300</strong> <strong>Module</strong> <strong>Data</strong>A5E00105505-03
Spare Parts and Accessories for<strong>S7</strong>-<strong>300</strong> <strong>Module</strong>sDSpare partsTable D-1 lists all the parts you can order separately or later for <strong>S7</strong>-<strong>300</strong>programmable controllers.Table D-1Accessories and Spare Parts<strong>S7</strong>-<strong>300</strong> Parts Order numberBus connector6E<strong>S7</strong>390-0AA00-0AA0Power connector between power supply unit 6E<strong>S7</strong>390-7BA00-0AA0and CPULabeling strip (Qty 10)• For 8/16-channel modules• For 32-channel modulesLabeling strips to be printed• For 16-channel modules (petrol)(light beige)(yellow)(red)• For 32-channel modules (petrol)(light beige)(yellow)(red)• Instructions for printing labeling strips withartworkSlot numbering labelFront connector 20-pin• Screw-type Connection• Spring-loaded Connection6E<strong>S7</strong>392-2XX00-0AA06E<strong>S7</strong>392-2XX10-0AA06E<strong>S7</strong>392-2AX00-0AA06E<strong>S7</strong>392-2BX00-0AA06E<strong>S7</strong>392-2CX00-0AA06E<strong>S7</strong>392-2DX00-0AA06E<strong>S7</strong>392-2AX10-0AA06E<strong>S7</strong>392-2BX10-0AA06E<strong>S7</strong>392-2CX10-0AA06E<strong>S7</strong>392-2DX10-0AA0www.siemens.de/automation/csi/productContribution ID No.: 119780226E<strong>S7</strong>912-0AA00-0AA06E<strong>S7</strong>392-1AJ00-0AA06E<strong>S7</strong>392-1BJ00-0AA0Front connector 40-pin• Screw-type Connection 6E<strong>S7</strong>392-1AM00-0AA0Front connector for 2 flat ribbon terminals• Screw-type Connection6E<strong>S7</strong>921-3AB00-0AA0• Spring-loaded Connection6E<strong>S7</strong>921-3AA00-0AA0<strong>Programmable</strong> <strong>Logic</strong> <strong>Controllers</strong> <strong>S7</strong>-<strong>300</strong> <strong>Module</strong> <strong>Data</strong>A5E00105505-03D-1
Table D-1Accessories and Spare Parts, continued<strong>S7</strong>-<strong>300</strong> Parts Order numberFront connector for 4 flat ribbon terminals• Spring-loaded Connection 6E<strong>S7</strong>921-3AA20-0AA0<strong>SIMATIC</strong> TOP connect, 1-tier, with• Screw-type Connection• Spring-loaded Connection<strong>SIMATIC</strong> TOP connect, 2-tier, with• Screw-type Connection• Spring-loaded Connection<strong>SIMATIC</strong> TOP connect, 3-tier, with• Screw-type Connection• Spring-loaded ConnectionRound-sheath ribbon cable (16-pin)• Unshielded 30 m• Unshielded 60 m• Shielded 30 m• Shielded 60 mPlug-in connectors, 16-pin, set of 8 (insulationdisplacement connectors)Shield connecting elementShield connection terminals for• 2 cables, each with a shield diameter of 2to 6 mm• 1 cable with a shield diameter of 3 to 8mm• 1 cable with a shield diameter of 4 to 13mmMeasuring range module for analog modulesFuse set for 120/230 VAC digital outputmodules (contains 10 fuses and 2 fusecarriers)Interconnecting cable between IM 360 andIM 361 or IM 361 and IM 361• 1 m• 2.5 m• 5 m• 10 m6E<strong>S7</strong>924-0AA00-0AA06E<strong>S7</strong>924-0AA00-0AB06E<strong>S7</strong>924-0BB00-0AA06E<strong>S7</strong>924-0BB00-0AB06E<strong>S7</strong>924-0CA00-0AA06E<strong>S7</strong>924-0CA00-0AB06E<strong>S7</strong>923-0CD00-0AA06E<strong>S7</strong>923-0CG00-0AA06E<strong>S7</strong>923-0CD00-0BA06E<strong>S7</strong>923-0CG00-0BA06E<strong>S7</strong>921-3BE10-0AA06E<strong>S7</strong>390-5AA00-0AA06E<strong>S7</strong>390-5AB00-0AA06E<strong>S7</strong>390-5BA00-0AA06E<strong>S7</strong>390-5CA00-0AA06E<strong>S7</strong>974-0AA00-0AA06E<strong>S7</strong>973-1HD00-0AA06E<strong>S7</strong>368-3BB01-0AA06E<strong>S7</strong>368-3BC51-0AA06E<strong>S7</strong>368-3BF01-0AA06E<strong>S7</strong>368-3CB01-0AA0D-2<strong>Programmable</strong> <strong>Logic</strong> <strong>Controllers</strong> <strong>S7</strong>-<strong>300</strong> <strong>Module</strong> <strong>Data</strong>A5E00105505-03
Guidelines for Handling ElectrostaticSensitive Devices (ESD)EIntroductionIn this appendix, we explain• what is meant by “electrostatic sensitive devices”• the precautions you must observe when handling and working with electrostaticsensitive devices.ContentsThis chapter contains the following sections on electrostatic sensitive devices:Section Contents PageE.1 What is ESD? E-2E.2 Electrostatic Charging of Persons E-3E.3 General Protective Measures Against Electrostatic DischargeDamageE-4<strong>Programmable</strong> <strong>Logic</strong> <strong>Controllers</strong> <strong>S7</strong>-<strong>300</strong> <strong>Module</strong> <strong>Data</strong>A5E00105505-03E-1
E.1 What is ESD?DefinitionAll electronic modules are equipped with large-scale integrated ICs or components.Due to their design, these electronic elements are very sensitive to overvoltagesand thus to any electrostatic discharge.The abbreviation ESD has been introduced for these Electrostatic SensitiveDevices/<strong>Module</strong>s. The designation ESD is used internationally for electrostaticsensitive device.Electrostatic sensitive devices are labeled with the following symbol:!CautionElectrostatic sensitive devices are subject to voltages that are far below thevoltage values that can still be perceived by human beings. These voltages arepresent if you touch a component or the electrical connections of a module withoutpreviously being electrostatically discharged. In most cases, the damage causedby an overvoltage is not immediately noticeable and results in total damage onlyafter a prolonged period of operation.E-2<strong>Programmable</strong> <strong>Logic</strong> <strong>Controllers</strong> <strong>S7</strong>-<strong>300</strong> <strong>Module</strong> <strong>Data</strong>A5E00105505-03
Guidelines for Handling Electrostatic Sensitive Devices (ESD)E.2 Electrostatic Charging of PersonsChargingEvery person with a non-conductive connection to the electrical potential of itssurroundings can be charged electrostatically.Figure E-1 shows you the maximum values for electrostatic voltages which canbuild up on a person coming into contact with the materials indicated in the figure.These values are in conformity with the specifications of IEC 801-2.Voltage in kV(kV)16151413121110987654321351020 30 40 50 60 70 80 90 100121 Synthetic material2 Wool3 Antistatic material,for example, woodor concreteRelative airhumidity in %Figure E-1Electrostatic Voltages which Can Build up on a Person<strong>Programmable</strong> <strong>Logic</strong> <strong>Controllers</strong> <strong>S7</strong>-<strong>300</strong> <strong>Module</strong> <strong>Data</strong>A5E00105505-03E-3
E.3 General Protective Measures Against Electrostatic DischargeDamageEnsure sufficient groundingMake sure that the personnel, working surfaces and packaging are sufficientlygrounded when handling electrostatic sensitive devices. You thus avoidelectrostatic charging.Avoid direct contactYou should touch electrostatic sensitive devices only if it is unavoidable(for example, during maintenance work). Hold modules without touching the pins ofcomponents or printed conductors. In this way, the discharged energy cannotaffect the sensitive devices.If you have to carry out measurements on a module, you must discharge yourbody before you start the measurement by touching grounded metallic parts. Usegrounded measuring devices only.E-4<strong>Programmable</strong> <strong>Logic</strong> <strong>Controllers</strong> <strong>S7</strong>-<strong>300</strong> <strong>Module</strong> <strong>Data</strong>A5E00105505-03
List of AbbreviationsFAbbreviationExplanationACAlternating currentADCAnalog-to digital converterAIAnalog inputAOAnalog outputPLC<strong>Programmable</strong> logic controllerCOMP Compensating terminalCPCommunications processorCPUCentral processing unit of a PLCDACDigital-to-analog converterDB<strong>Data</strong> blockDCDirect currentDIDigital inputDODigital outputESDElectrostatic sensitive devicesEMCElectromagnetic compatibilityEPROM Erasable programmable read-only memoryEWSApply substitute valueFBFunction blockFCFunctionFEPROM Flash erasable programmable read only memoryESEncoder supplyI+ Measuring lead for current inputI CConstant-current leadKVShunt comparisonL+ Terminal for 24 VDC supply voltageLWHHold last valid valueFOCFiber-optic cableMGround terminalM+ Measuring lead (positive)M– Measuring lead (negative)M ANA Reference potential of the analog measuring circuitMPIMultipoint interface<strong>Programmable</strong> <strong>Logic</strong> <strong>Controllers</strong> <strong>S7</strong>-<strong>300</strong> <strong>Module</strong> <strong>Data</strong>A5E00105505-03F-1
OBOPOSPIQPIIProgrammingdevicePSQ IQ VRAMR LS +Organization blockOperator panelOperator systemProcess-image output tableProcess-image input tableProgramming devicePower supplyAnalog output currentAnalog output voltageRandom access memoryLoad impedanceDetector lead (positive)S– Detector lead (negative)SFSFBSFCSMPLCSSITD”Group error” error LEDSystem function blockSystem functionSignal module<strong>Programmable</strong> logic controlSynchronous serial interfaceText displayU+ Measuring lead for voltage inputU CMU isoSignCommon mode voltagePotential difference between M ANA and local groundSignF-2<strong>Programmable</strong> <strong>Logic</strong> <strong>Controllers</strong> <strong>S7</strong>-<strong>300</strong> <strong>Module</strong> <strong>Data</strong>A5E00105505-03
GlossaryAddressAn address denotes a specific operand or address area; examples of this are:input I 12.1; memory word MW 25; data block DB 3.Aggregate current→Sum of the currents of all output channels on a digital output module.Backplane bus →→ The backplane bus is a serial data bus that is used by the modules to communicatewith each other and to supply them with the voltage they require. Theinterconnection of the modules is established by the bus connector.Basic conversion timeTime for the actual encoding of a channel (integration time) plus the requiredtimes for the internal control; i. e. after this time a channel is completely processed.Basic error limitThe basic error limit is the operational limit at 25 °C, referred to the rated rangeof the analog module.Basic response timeTime which an analog input/output module requires for a cycle if all channels arereleased; it corresponds to the “number of all channels x basic conversion time”.BusA bus is a transmission medium that interconnects several nodes. <strong>Data</strong> transmissioncan be serial or parallel, and be performed over electric conductors or fiberopticcables.Bus segmentA bus segment is a self-contained section of a serial bus system. Bus segmentsare interconnected by means of →repeaters.<strong>Programmable</strong> <strong>Logic</strong> <strong>Controllers</strong> <strong>S7</strong>-<strong>300</strong> <strong>Module</strong> <strong>Data</strong>A5E00105505-03Glossary-1
GlossaryCiREquipment changes in running operations (Configuration in RUN)Common mode voltageA voltage that is common to all inputs/outputs of a group and is measured betweenthis group and any reference point (usually to ground).Communication processor<strong>Programmable</strong> module for communication tasks, such as networking, point-topointconnection.Comparison pointWhen using thermocouples on analog input modules: point of known temperature(for example, → compensating box).Compensating boxCompensating boxes can be used for measuring temperatures with thermocoupleson analog input modules. The compensating box is a compensation circuitfor compensating temperature fluctuations at the → Comparison point.Complete restartWhen a CPU starts up (say, when the mode selector switch is moved fromSTOP to RUN or when the mains supply is turned on), OB 100 (Restart) is processedbefore cyclic programming processing (OB 1).With a complete restart, the → Process input image is read in and the STEP 7user program is processed, starting with the first instruction in OB1.ConfigureSelect and put together different components on a programmable logic controllerand install the requisite software and adapt to the specific use (for example, byassigning parameters to the modules).CP→Communications processorCPUThe CPU (central processing unit) is a CPU module of the →programmablelogic controller that stores and runs the user program. It contains the operatingsystem, memory, processing unit and communication interface.Glossary-2<strong>Programmable</strong> <strong>Logic</strong> <strong>Controllers</strong> <strong>S7</strong>-<strong>300</strong> <strong>Module</strong> <strong>Data</strong>A5E00105505-03
GlossaryDefault settingThe default setting is a sensible basic setting that is used whenever no othervalue is used.Destruction limitLimit of permitted input voltage / input current.If this limit is exceeded, the measuring accuracy may deteriorate. If the destructionlimit is exceeded by a vast amount, this may destroy the internal measuringcircuit.Diagnostic bufferThe diagnostic buffer is a buffered memory area in the CPU which stores thediagnostics events in the order in which they occurred.For troubleshooting, the user can read out the exact error cause in STEP 7(PLC –> <strong>Module</strong> State) from the diagnostic buffer.Diagnostic dataAll the diagnostics events that occurred are collected in the CPU and entered inthe → Diagnostic buffer. If there is an error OB, it is started.Diagnostic Interrupt<strong>Module</strong>s with diagnostics capability report system errors by means of diagnosticinterrupts to the → CPU. The operating system of the CPU calls OB 82 in thecourse of a diagnostic interrupt.DiagnosticsGeneric term for → System diagnostics, process error diagnosis and user-defineddiagnostics.Direct accessA direct access is the direct accessing of the CPU by means of the → Backplanebus to modules while avoiding the → Process image.Encoder absoluteAn encoder absolute determines the path traveled during position detection byreading a numerical value. In the case of encoders absolute with a serial interface(SSI), path information is transferred synchronously and serially accordingto the SSI protocol (synchronous serial interface).<strong>Programmable</strong> <strong>Logic</strong> <strong>Controllers</strong> <strong>S7</strong>-<strong>300</strong> <strong>Module</strong> <strong>Data</strong>A5E00105505-03Glossary-3
GlossaryEquipotential bondingElectrical connection (equipotential bonding conductor), which brings the bodiesof electrical resources and foreign conductive bodies to an identical or approximatelyidentical potential in order to avoid interfering or hazardous voltages betweenthese bodies.FREEZEParameter in STEP 7 for position detection module SM 338; POS-INPUT. TheFREEZE function is a control command for freezing current encoder values ofthe SM 338 to the instantaneous value.GroundThe conductive ground whose electric potential can be set equal to zero at everypoint.In the proximity of grounding electrodes, the ground can have a potential differingfrom zero. The term “reference ground” is frequently used to describe such circumstances.Ground, toTo ground means connect an electrically conductive part by means of a groundingsystem to the grounding electrode (one or more conductive parts having avery good contact to ground).Hardware interruptA hardware interrupt is triggered by interrupt-triggering modules as a result of acertain event in the process (overshooting or undershooting of a limit value; amodule has completed the cyclic conversion of its channels).The hardware interrupt is reported to the CPU. In accordance with the priority ofthis interrupt, the →Organization block assigned to it is scanned.Hold last value (LWH)The module retains the last value read out before STOP mode.Input delayParameter in STEP 7 for digital input modules. The input delay is used to suppressinjected interference. Interfering pulses from 0 ms to the set input delayare suppressed.The set input delay is subject to a tolerance, which can be taken from the technicalspecifications of the module. A high input delay suppresses long interferingpulses, whereas a low input delay suppresses short ones.The permissible input delay depends on the length of the cable between the encoderand the module. For example, a high input delay has to be set for long unshieldedsupply conductors to the encoder (longer than 100m).Glossary-4<strong>Programmable</strong> <strong>Logic</strong> <strong>Controllers</strong> <strong>S7</strong>-<strong>300</strong> <strong>Module</strong> <strong>Data</strong>A5E00105505-03
GlossaryIntegration timeParameter in STEP 7 for analog input modules. The integration time is the inversevalue of the → Interference frequency suppression in ms.Interface, multipoint→ MPIInterference frequency suppressionParameter in STEP 7 for analog input modules. The frequency of the AC networkcan interfere with the measured value, especially with measurements in lowvoltage ranges and with thermocouples. This parameter is used by the user tospecify the prevailing line frequency on his system.InterruptThe <strong>SIMATIC</strong> <strong>S7</strong> is familiar with 28 different run-time level, which govern runningof the user program. These run-time levels include interrupts such as hardwareinterrupts, among other things. When an interrupt occurs, the operating systemautomatically calls an assigned organization block in which the user can programthe reaction he wants (for example, in an FB).Interrupt, diagnostic→ Diagnostic InterruptInterrupt, end-of-scan-cycle interrupt→ Hardware interruptInterrupt, hardware→ Hardware interruptLinearity errorThe linearity error identifies the maximum deviation of the measured/output valuefrom the ideal linear relationship between the measuring/output signal and thedigital value. The data is a percentage and relates to the rated range of the analogmodule.<strong>Logic</strong> blockIn a <strong>SIMATIC</strong> <strong>S7</strong> context, a logic block is a block that contains a part of theSTEP 7 user program. By contrast, a data block only contains data. There arethe following logic blocks: organization blocks (OBs), function blocks (FBs), functions(FCs), system function block (SFBs), system functions (SFCs).<strong>Programmable</strong> <strong>Logic</strong> <strong>Controllers</strong> <strong>S7</strong>-<strong>300</strong> <strong>Module</strong> <strong>Data</strong>A5E00105505-03Glossary-5
GlossaryMeasuring range moduleMeasuring range modules are plugged into the analog input modules for adaptationto different measuring ranges.<strong>Module</strong> filtering modeBy operating mode we mean:1. The selection of an operating mode of the CPU using the mode switch or thePG2. The type of program execution in the CPU3. A parameter in STEP 7 for analog input modulesMonoflop timeParameter in STEP 7 for position detection module SM 338; POS-INPUT. Themonoflop time is the time interval between 2 SSI message frames (→ Encoderabsolute).MPIThe multipoint interface (MPI) is the programmer port of the <strong>SIMATIC</strong> <strong>S7</strong>. It isused to access programmable modules ((CPUs, CPs), text displays and operatorpanel from a central point. The nodes on the MPI can communicate with eachother.Non-isolatedIn the case of non-isolated input/output modules, the reference potentials of thecontrol and load circuit are electrically connected.NormalizingParameter in STEP 7 for position detection module SM 338; POS-INPUT.Normalizing right justifies the encoder value of the → encoder absolute; non-relevantplaces are discarded.OB→ Organization blockOperational limitThe operational limit is the measuring or output error of the analog module overthe entire temperature range, referred to the rated range of the analog module.Glossary-6<strong>Programmable</strong> <strong>Logic</strong> <strong>Controllers</strong> <strong>S7</strong>-<strong>300</strong> <strong>Module</strong> <strong>Data</strong>A5E00105505-03
GlossaryOptically isolatedWith optically isolated input/output modules, the reference potentials of the controland load circuit are galvanically isolated; for example, by an optocoupler,contact assembly or repeater. Input/output circuits can be connected to commonpotential.Organization blockOrganization blocks (OBs) form the interface between the operating system ofthe CPU and the user program. The order in which the user program is processedis defined in the organization blocks.Parameters1. Tag of a → <strong>Logic</strong> block2. Tag for setting the characteristics of a module (one or more per module).When delivered to the customer, each module has a practical basic setting for itsparameters, which the user can modify in STEP 7.Process imageThe signal states of the digital input and output modules are stored in the CPU inprocess image.A distinction is made between the process-image of inputs and of outputs. Theprocess input image (PII) is read by the input modules before the operating systemscans the user program. The process output image (PIQ) is transferred tothe output modules at the end of program scanning.Product statusProducts having an identical order number are distinguished by their product status.The product status is incremented for upwards compatible extensions, modificationsdue to production reasons (use of new component parts and components)and troubleshooting.Programming device→Programming deviceProgramming deviceA programming device (PG) is a personal computer in a specific industry-standardand compact design. A PG is completely equipped for programming<strong>SIMATIC</strong> programmable logic controllers.Reaction to open thermocoupleParameter in STEP 7 for analog input modules when using Thermocouples. Thisparameter defines whether “Overflow” (7FFF 0H 0) or “Underflow” (8000 0H 0) isoutput by the module in the event of an open thermocouple.<strong>Programmable</strong> <strong>Logic</strong> <strong>Controllers</strong> <strong>S7</strong>-<strong>300</strong> <strong>Module</strong> <strong>Data</strong>A5E00105505-03Glossary-7
GlossaryReference potentialPotential from the point of view of which the voltages of the involved circuits areanalyzed and measured.Repeat accuracyThe repeat accuracy identifies the maximum deviation among the measured/outputvalues that then occurs, when the same input signal is again applied or thesame input value specified. The repeat accuracy relates to the rated range of themodule and applies to the settled temperature state.RepeaterEquipment for the amplification of bus signals and connection of →bus segmentsover long distances.ResolutionWith analog modules, the number of bits which represent the digitized analogvalue in binary. Resolution depends on the module and with analog input moduleson the →integration time. The precision of the resolution of a measuredvalue increases with the length of the integration time. The resolution can be asmany as 16 bits, including sign.Retentivity<strong>Data</strong> areas in data blocks, and also timers, counters and memory markers areretentive when their contents are not lost upon a complete restart or POWERDOWN.Scan timeThe scan time is the time required by the → CPU to scan the → user programonce.Segment→ Bus segmentSFC→ System functionSignal moduleSignal modules (SM) form the interface between the process and the programmablelogic controller. There are input modules, output modules, input/outputmodules (both digital and analog).Glossary-8<strong>Programmable</strong> <strong>Logic</strong> <strong>Controllers</strong> <strong>S7</strong>-<strong>300</strong> <strong>Module</strong> <strong>Data</strong>A5E00105505-03
GlossarySmoothingParameter in STEP 7 for analog input modules. The measured values aresmoothed by digital filtering. For specific modules it is possible to choose betweenno, low, medium and high smoothing. The higher the smoothing, thegreater is the time constant of the digital filter.STARTUPThe STARTUP mode is transvered during the transition from STOP mode toRUN mode. STARTUP can be triggered by the → Mode switch or following power-onor by means of an operator input on the programming device. With the<strong>S7</strong>-<strong>300</strong> and M7-<strong>300</strong>, a → Complete restart is performed.Status modeThe <strong>SIMATIC</strong> <strong>S7</strong> programmable logic controllers are familiar with the following ofstatus modes: STOP, → STARTUP, RUN and STOP.Substitute valueSubstitute values are values that can be output to the process when signal outputmodules have failed or be used in the user program instead of a processvalue when signal input modules have failed.The substitute values can be assigned parameters by the user in STEP 7 (oldvalue retained, substitute value 0 or 1). They are values which the output(s) haveto output in the event of a CPU STOP.System diagnosticsSystem diagnostics is the detection, analysis and reporting of errors that occurwithin the programmable logic controller. Examples of such errors are: programerrors or failures on modules. System errors can be indicated with LED displaysor in STEP 7.System functionA system function (SFC) is a function that is integrated in the operating systemof the CPU a function that can be triggered in the STEP 7 user program, if necessary.Temperature coefficientParameter in STEP 7 for analog input modules when measuring temperatureswith a resistance thermometer (RTD). The temperature coefficient you selectdepends on the resistance thermometer being used (to DIN standard).Temperature errorThe temperature error identifies the drift of the measured/output value caused bythe change in the ambient temperature of the analog module. It is specified as apercentage per Kelvin and relates to the rated range of the analog module.<strong>Programmable</strong> <strong>Logic</strong> <strong>Controllers</strong> <strong>S7</strong>-<strong>300</strong> <strong>Module</strong> <strong>Data</strong>A5E00105505-03Glossary-9
GlossaryTemperature errors of internal compensationThe temperature error of internal compensation only occurs during thermocouplemeasurement. It identifies the additional error which is to be taken into accountand added to the actual temperature error when “internal comparison” mode isselected. The data is either given as a percentage relative to the physical ratedrange of the analog module or as an absolute value in °C.Two-conductor/three-conductor/four-conductor connectionMethod of connection to the module – for example, of resistance thermometers/resistors to the front connector of the analog input module or of loads at the voltageoutput of an analog output module.Two-wire transmitter/four-wire transmitterKind of transmitter (two-wire transmitter: supply (via terminals of the analog inputmodule; 4-wire transmitter: supply via separate terminals of the transmitter)UngroundedWithout galvanic connection to groundUser programThe user program contains all the statements, tags and data for signal processingused to control a system or a process. It is assigned to a programmablemodule (CPU, FM, for example) and can be structured in smaller units (blocks).Wire-breakParameter in STEP 7. A wire-break test is used for monitoring the connectionfrom the input to the encoder and from the output to the actuator. With wirebreak,the module detects a flow of current at the appropriately parameterizedinput/output.Glossary-10<strong>Programmable</strong> <strong>Logic</strong> <strong>Controllers</strong> <strong>S7</strong>-<strong>300</strong> <strong>Module</strong> <strong>Data</strong>A5E00105505-03
IndexNumbers2-wire transmitters, 4-52AAbsolute value encoder (SSI), SM 338;POS-INPUT, 5-14Accessories, D-1Active bus module, dimension drawing, C-8Actuator connection, to analog output module,4-66Address, Glossary-1Addressing, SM 338; POS-INPUT, 5-15Aggregate current, Glossary-1Ambient conditionsmechanical, 1-10, 1-16SIPLUS <strong>S7</strong>-<strong>300</strong>-modules, 1-16Analog functions, STEP 7 blocks, 4-1Analog Input <strong>Module</strong>, SM 331; AI 8 x 13 bits,4-108Analog input modulecommon-mode error, 4-73configuring error, 4-73connecting resistance thermometers, 4-53connecting resistors, 4-53connecting sensor, 4-45connecting thermocouple, 4-58diagnostic interrupt, 4-40diagnostic message in measured value,4-72diagnostics, 4-40group diagnostics, 4-40interference frequency suppression, 4-42,A-9isolated, 4-45limit value, 4-40load voltage missing, 4-73measurement, 4-41measuring method, 4-41measuring methods and measuring ranges,A-9measuring range, 4-41module filtering mode, 4-41non-isolated, 4-45Overflow, 4-74parameter assignment error, 4-73parameters, 4-40, A-7potential difference, 4-45reaction with open thermocouple, 4-41SM 331; AI 8 x 12 bits, 4-115SM 331; AI 8 x 14 bits High Speed, 4-97SM 331; AI 8 x 16 bits, 4-86SM 331; AI 8 x RTD, 4-125SM 331; AI 8 x TC, 4-138smoothing of analog input values, 4-42structure of data record 1, A-8temperature coefficient, 4-42temperature unit, 4-41underflow, 4-74wire-break, 4-73, 4-74wire-break check, 4-40Analog Input <strong>Module</strong>SM 331; AI 2 x 12 bits, 4-153SM 331; AI 8 x 16 bits, 4-77Analog input modulescauses of errors and remedies, 4-73diagnostic messages, 4-72Analog input modules, SM 331,channel-specific diagnostic data, B-6Analog input/module, structure of data record1, A-42Analog input/output moduleintegration time, 4-44measurement, 4-44measuring method, 4-44measuring range, 4-44output range, 4-44output type, 4-44parameters, 4-44, A-41SM 334; AI 4/AO 2 x 8/8 bits, 4-188Analog Input/Output <strong>Module</strong> , SM 334; AI 4/AO2 x 12 bits, 4-194Analog moduleassigning parameters, 4-39behavior, 4-31Determination of measuring error/outputerror, 4-34diagnostics, 4-71dimension drawing, C-15group error LED, 4-72interrupts, 4-75sequence of steps for commissioning, 4-8SF LED, 4-72supply voltage failure, 4-32Analog output channel, conversion time, 4-37<strong>Programmable</strong> <strong>Logic</strong> <strong>Controllers</strong> <strong>S7</strong>-<strong>300</strong> <strong>Module</strong> <strong>Data</strong>A5E00105505-03Index-1
IndexAnalog Output <strong>Module</strong>, SM 332;AO 2 x 12 bits, 4-182Analog output moduleconnecting loads and actuators, 4-66connecting loads to current output, 4-70connecting loads to voltage output, 4-67diagnostic interrupt, 4-43diagnostic messages, 4-73diagnostics, 4-43group diagnostics, 4-43isolated, 4-66load voltage missing, 4-74M short-circuit, 4-74non-isolated, 4-66output methods and output ranges, A-38output range, 4-43output type, 4-43parameter assignment error, 4-74parameters, 4-43response with CPU-STOP, 4-43setting substitute values, A-38settling time, 4-38SM 332; AO 4 x 12 bits, 4-176SM 332; AO 4 x 16 bit, 4-169SM 332; AO 8 x 12 bits, 4-163structure of data record 1, A-37analog output module, response time, 4-38Analog output modulescauses of errors and remedies, 4-74parameters, A-36Analog output modules, SM 332,channel-specific diagnostic data, B-6Analog valueconversion, 4-9sign, 4-9Analog value representation, 4-9binary representation of input ranges, 4-12binary representation of output ranges, 4-24for current measuring ranges, 4-14–4-17for current output ranges, 4-27–4-30for resistance type transmitters, 4-15for RTD Resistance Temperature Detectors,4-16, 4-17, 4-19, 4-20, 4-21, 4-22, 4-23for RTD resistance temperature detectors,4-18for voltage measuring ranges, 4-13–4-15for voltage output ranges, 4-26–4-29Analog-to-digital conversion, 4-35ApprovalCE, 1-2CSA, 1-3FM, 1-4Shipbuilding, 1-4UL, 1-3Approvals, Standards, 1-2Auxiliary supply missing, SM 338; POS-INPUT,5-19BBackplane bus, Glossary-1Backup battery, 1-9shipping and storage conditions, 1-8Basic conversion time, Glossary-1Basic error limit, 4-34Basic response time, Glossary-1Battery. See backup batteryBaud rate, SM 338; POS-INPUT, 5-14Behavior, SM 321; DI 16 x 24 VDC, 3-29Bus segment, Glossary-1Bytes 0 and 1of diagnostic data, B-2of diagnostic data for SM 338; POS-INPUT,B-7Bytes 2 and 3, of diagnostic data, B-3Bytes 2 to 7, of diagnostic data for SM 338;POS-INPUT, B-8Bytes 4 to 7, of diagnostic data, B-4Bytes 8 to 10, of diagnostic data for SM 338;POS-INPUT, B-8CCables, for analog signals, 4-45, 4-66Causes of error and remedial action, SM 322;DO 8 x 24 VDC/0.5 A, 3-79Causes of error and remedial measures,SM 321; DI 16 x 24 VDC, 3-31Causes of Errors and Remedial Measures,SM 338; POS-INPUT, 5-19Causes of errors and remediesanalog input module, 4-73analog output module, 4-74CE, Approval, 1-2Channel error, SM 338; POS-INPUT, 5-19Channel information present, SM 338;POS-INPUT, 5-19Channel-specific diagnostics, B-5Climatic conditions, 1-11Code type, SM 338; POS-INPUT, 5-14Commissioning analog modules, sequence ofsteps, 4-8Commissioning digital modules, sequence ofsteps, 3-10Common mode voltage, Glossary-2Common-mode error, analog input module,4-73Communication processor, Glossary-2Comparison point, 4-62, Glossary-2Index-2<strong>Programmable</strong> <strong>Logic</strong> <strong>Controllers</strong> <strong>S7</strong>-<strong>300</strong> <strong>Module</strong> <strong>Data</strong>A5E00105505-03
IndexCompensating box, 4-59connecting, 4-61Compensationexternal, 4-59internal, 4-59, 4-61Complete restart, Glossary-2Configuration error, SM 338; POS-INPUT, 5-19Configure, Glossary-2Configuring error, analog input module, 4-73Conversion timeanalog input channels, 4-35analog output channel, 4-37Converting, analog values, 4-9CP, Glossary-2CPU, Glossary-2CSA, Approval, 1-3Current sensors, connecting, 4-51D<strong>Data</strong> record, for diagnostic data, B-1<strong>Data</strong> record 1analog input module configuration, A-8analog output module configuration, A-37Configuration SM 332; AO 8 x 12 bits, A-40digital input module configuration, A-4digital output module configuration, A-6structure for SM 331; AI 8 x 13 bits, A-27structure for SM 331; AI 8 x RTD, A-12structure for SM 331; AI 8 x TC, A-20structure of analog input/output module,A-42Structure of digital input-/output module,3-120<strong>Data</strong> record 128structure for SM 331; AI 8 x RTD, A-13structure for SM 331; AI 8 x TC, A-21<strong>Data</strong> records, for parameters, A-2Default setting, Glossary-3Degree of protection, 1-12IP 20, 1-12Destruction limit, Glossary-3Diagnosis, SM 338; POS-INPUT, 5-17, 5-18Diagnosis interrupt release, SM 338;POS-INPUT, 5-14Diagnostic buffer, Glossary-3Diagnostic data, Glossary-3bytes 0 and 1, B-2bytes 2 and 3, B-3bytes 4 to 7, B-4channel-specific, B-5channel-specific, for analog input modulesof SM 331, B-6channel-specific, for analog output modulesof SM 332, B-6channel-specific, for SM 321;DI 16 x 24 VDC, B-5channel-specific, for SM 322;DO 8 x 24 VDC/0.5 A, B-5channel-specific, for SM 338; POS-INPUT,B-8data record, B-1SM 338; POS-INPUT, B-7Diagnostic data for SM 338; POS-INPUT,bytes 0 and 1, B-7Diagnostic data of SM 338; POS-INPUTBytes 2 to 7, B-8Bytes 8 to 10, B-8Diagnostic interruptanalog input module, 4-40analog output module, 4-43of analog modules, 4-75SM 321; DI 16 x 24 VDC, 3-27, 3-32SM 322; DO 8 x 24 VDC/0.5 A, 3-76, 3-80SM 338; POS-INPUT, 5-20Diagnostic messages, 3-12, 4-71, 5-17of analog input modules, 4-72of analog output modules, 4-73reading out, 3-13, 4-72, 5-17SM 322; DO 8 x 24 VDC/0.5 A, 3-78Diagnosticsanalog input module, 4-40analog output module, 4-43of analog modules, 4-71of digital modules, 3-12SM 321; DI 16 x 24 VDC, 3-27, 3-29system, Glossary-9Diagnostics entry, 4-32Digital Input <strong>Module</strong>SM 321; DI 16 x 24 VDC High Speed, 3-20SM 321; DI 16 x 24 VDC; source input,3-34SM 321; DI 16 x VDC 24, 3-18Digital input moduleSM 321; DI 16 x UC 24/48 V, 3-36SM 321; DI 32 x 120/230 VAC ISOL, 3-44structure of data record 1, A-4Digital Input <strong>Module</strong>SM 321; DI 16 x DC 24 V; with process anddiagnostic interrupt, 3-22SM 321; DI 16 x VDC 48-125, 3-38SM 321; DI 32 x VDC 24, 3-13SM 321; DI 8 x VAC 120/230, 3-42Digital input moduleSM 321; DI 16 x AC 120/230 V, 3-40SM 321; DI 32 x 120 VAC, 3-16Digital input modules, parameters, A-3Digital Input/Output <strong>Module</strong>, SM 323;DI 8/DO 8 x VDC 24/0.5 A, 3-113Digital input-/output module<strong>Programmable</strong> <strong>Logic</strong> <strong>Controllers</strong> <strong>S7</strong>-<strong>300</strong> <strong>Module</strong> <strong>Data</strong>A5E00105505-03Index-3
IndexSM 323; DI 16/DO 16 x 24 VDC/0.5 A,3-110SM 327; DI 8/DX 8 x DC 24 V/0.5 A,parameterizable, 3-116Structure of data record 1, 3-120Digital moduleassigning parameters, 3-11diagnostics, 3-12dimension drawing, C-15group error LED, 3-13sequence of steps for commissioning, 3-10SF LED, 3-13Digital Output <strong>Module</strong>SM 322; DO 32 x VAC 120/230/1 A , 3-49SM 322; DO 8 x DC 24 V/0.5 A withdiagnostic interrupt, 3-72Digital output moduleparameters, A-5SM 322; DO 16 x 24 VDC/0.5 A HighSpeed, 3-56SM 322; DO 32 x 120/230 VAC/2 A ISOL ,3-87SM 322; DO 32 x 24 VDC/0.5 A, 3-46structure of data record 1, A-6Digital Output <strong>Module</strong>SM 322; DO 16 x 24/48 VUC, 3-59SM 322; DO 16 x DC 24 V/0.5 A, 3-53SM 322; DO 16 x VAC 120/230/1 A, 3-66SM 322; DO 8 x VAC 120/230/2 A , 3-84SM 322; DO 8 x VDC 48–125/1,5 A , 3-81Digital output module , SM 322;DO 8 x 24 VDC/2 A, 3-69Dimension drawing, active bus module, C-8Dimension drawings, C-1analog module, C-15digital module, C-15IM 361, C-13interface module, C-13power supply module PS 307, C-8PS 307, C-8rail, C-2RS 485 repeater, C-18shield connecting element, C-16signal module, C-15<strong>SIMATIC</strong> TOP connect, C-17Direct access, Glossary-3Dummy module , DM 370, 5-5EElectromagnetic compatibility, 1-6Encoder absolute, Glossary-3encoder error, SM 338; POS-INPUT, 5-19Environmental conditions, 1-9extended, 1-14EPROM errorSM 321; DI 16 x 24 VDC, 3-31SM 322; DO 8 x 24 VDC/0.5 A, 3-79Equipotential bonding, Glossary-4Error, of an analog module, 4-34Extended environmental conditions, 1-14External auxiliary voltage missing, SM 321;DI 16 x 24 VDC, 3-31FFM, Approval, 1-4Four-conductor connection, 4-54, Glossary-10Four-wire transmitter, Glossary-10Four-wire transmitters, 4-52FREEZE, Glossary-4Freeze-function, SM 338; POS-INPUT, 5-12,5-14Fuse blownSM 321; DI 16 x 24 VDC, 3-31SM 322; DO 8 x 24 VDC/0.5 A, 3-79GGround, Glossary-4Grounded operation, RS 485 repeater, 7-4Group diagnosticsanalog input module, 4-40analog output module, 4-43Group error LEDanalog module, 4-72digital module, 3-13Group fault-LED, SM 338; POS-INPUT, 5-17HHardware interrupt, Glossary-4End of scan cycle, 4-76SM 321; DI 16 x 24 VDC, 3-27, 3-32when limit exceeded, 4-75Hardware interrupt lost, SM 321; DI 16 x 24DI 16 x 24 VDC, 3-31, 3-33Hold last value, SM 322; DO 8 x 24 VDC/0.5A, 3-76IIdentifiers for Australia, 1-4IEC 61131, 1-4IM 360dimension drawing, C-13interface module, 6-3IM 361, interface module, 6-5Index-4<strong>Programmable</strong> <strong>Logic</strong> <strong>Controllers</strong> <strong>S7</strong>-<strong>300</strong> <strong>Module</strong> <strong>Data</strong>A5E00105505-03
IndexIM 365dimension drawing, C-14Interface <strong>Module</strong> , 6-7Input delay, Glossary-4SM 321; DI 16 x 24 VDC, 3-27Insulation test, 1-12Integration time, Glossary-5analog input/output module, 4-44Interface module, 6-1dimension drawing, C-13IM 360, 6-3IM 361, 6-5Interface <strong>Module</strong> , IM 365, 6-7Interferencepulse-shaped, 1-6sinusoidal, 1-7Interference frequency suppression,Glossary-5analog input module, 4-42, A-9SM 331; AI 8 x 13 bits, A-28SM 331; AI 8 x RTD, A-16SM 331; AI 8 x TC, A-24Internal auxiliary voltage missing, SM 321;DI 16 x 24 VDC, 3-31Internal compensation, Temperature error,Glossary-10Internal error, SM 338; POS-INPUT, 5-19Interrupt, Glossary-5Interrupt-triggering channels, SM 321;DI 16 x 24 VDC, 3-33Interruptsenabling, 3-32, 3-80, 4-75, 5-20of analog modules, 4-75SM 321; DI 16 x 24 VDC, 3-32SM 322; DO 8 x 24 VDC/0.5 A, 3-80SM 338; POS-INPUT, 5-20IP 20, 1-12Isolated measuring sensors, 4-46connecting, 4-46LLack of encoder supply, SM 321; DI 16 x 24VDC, 3-31Limit value, analog input module, 4-40Linearity error, Glossary-5Load connection, to analog output module,4-66Load connection to current output, to analogoutput module, 4-70Load connection to voltage output, to analogoutput module, 4-67Load voltage missinganalog input module, 4-73analog output module, 4-74<strong>Logic</strong> block, Glossary-5LWH, Glossary-4MM short-circuit, analog output module, 4-74Measurementanalog input module, 4-41analog input/output module, 4-44Measuring methodanalog input channels, 4-28analog input module, 4-41, A-9analog input/output module, 4-44SM 331; AI 8 x 13 bits, A-28SM 331; AI 8 x RTD, A-16SM 331; AI 8 x TC, A-25Measuring rangeanalog input module, 4-41, A-9analog input/output module, 4-44SM 331; AI 8 x 13 bits, A-28SM 331; AI 8 x RTD, A-16SM 331; AI 8 x TC, A-25Measuring range module, 4-28replugging, 4-29Measuring ranges, analog input channels, 4-28Measuring sensors, isolated, 4-46<strong>Module</strong> Classes, ID, B-2<strong>Module</strong> fault, SM 338; POS-INPUT, 5-19<strong>Module</strong> filtering mode, Glossary-6analog input module, 4-41<strong>Module</strong> not parameterized, SM 321;DI 16 x DC 24 V , 3-31<strong>Module</strong> overview, 4-3digital modules, 3-4<strong>SIMATIC</strong> TOP connect/...TPA, 8-2special signal modules, 5-2<strong>Module</strong>s, shipping and storage conditions, 1-8Monoflop time, Glossary-6SM 338; POS-INPUT, 5-14MPI, Glossary-6NNo external auxiliary voltage, SM 322;DO 8 x 24 VDC/0.5 A, 3-79No internal auxiliary voltage, SM 322;DO 8 x 24 VDC/0.5 A, 3-79No load voltage L+, SM 322; DO 8 x 24VDC/0.5 A, 3-76, 3-79Non-isolated, Glossary-6Non-isolated sensors, 4-48connecting, 4-48Normalization, SM 338; POS-INPUT, 5-11,5-14<strong>Programmable</strong> <strong>Logic</strong> <strong>Controllers</strong> <strong>S7</strong>-<strong>300</strong> <strong>Module</strong> <strong>Data</strong>A5E00105505-03Index-5
IndexNormalizing, Glossary-6OOB, Glossary-7OB 40, 3-32, 4-75start information, 4-76OB 82, 3-32, 3-80, 4-75Operating conditions, 1-9Operating modeof CPU, 4-31SM 331; AI 8 x RTD, A-16SM 331; AI 8 x TC, A-24operational limit, 4-34, Glossary-6Optically isolated, Glossary-7Order number6AG1 321-1BH02-2AA0, 3-186AG1 321-1BL00-2AA0, 3-136AG1 321-1CH20-2AA0, 3-386AG1 321-1FF01-2AA0, 3-426AG1 321-7BH01-2AB0, 3-226AG1 322-1BH01-2AA0, 3-536AG1 322-1CF00-2AA0, 3-816AG1 322-1FF01-2AA0, 3-846AG1 322-1HF10-2AA0, 3-1066AG1 322-8BF00-2AB0, 3-726AG1 323-1BH01-2AA0, 3-1136AG1 331-7KB02-2AB0, 4-1536AG1 332-5HB01-2AB0, 4-1826AG1 334-0KE00-2AB0, 4-1946AG1 365-0BA01-2AA0, 6-76E<strong>S7</strong>305-1BA80-0AA0, 2-26E<strong>S7</strong>307-1BA00-0AA0, 2-66E<strong>S7</strong>307-1EA00-0AA0, 2-96E<strong>S7</strong>307-1EA80-0AA0, 2-96E<strong>S7</strong>307-1KA00-0AA0, 2-146E<strong>S7</strong>321-1BH02-0AA0, 3-186E<strong>S7</strong>321-1BH10-0AA0, 3-206E<strong>S7</strong>321-1BH50-0AA0, 3-346E<strong>S7</strong>321-1BL00-0AA0, 3-136E<strong>S7</strong>321-1CH00-0AA0, 3-366E<strong>S7</strong>321-1CH20-0AA0, 3-386E<strong>S7</strong>321-1EL00-0AA0, 3-166E<strong>S7</strong>321-1FF01-0AA0, 3-426E<strong>S7</strong>321-1FF10-0AA0, 3-446E<strong>S7</strong>321-1FH00-0AA0, 3-406E<strong>S7</strong>321-7BH01-0AB0, 3-226E<strong>S7</strong>322-1BF01-0AA0, 3-696E<strong>S7</strong>322-1BH01-0AA0, 3-536E<strong>S7</strong>322-1BH10-0AA0, 3-566E<strong>S7</strong>322-1BL00-0AA0, 3-466E<strong>S7</strong>322-1CF00-0AA0, 3-816E<strong>S7</strong>322-1FF01-0AA0, 3-846E<strong>S7</strong>322-1FH00-0AA0, 3-666E<strong>S7</strong>322-1FL00-0AA0, 3-496E<strong>S7</strong>322-1HF01-0AA0, 3-966E<strong>S7</strong>322-1HF10-0AA0, 3-1066E<strong>S7</strong>322-1HH01-0AA0, 3-936E<strong>S7</strong>322-5FF00-0AB0, 3-876E<strong>S7</strong>322-5GH00-0AB0, 3-596E<strong>S7</strong>322-5HF00-0AB0, 3-1006E<strong>S7</strong>322-8BF00-0AB0, 3-726E<strong>S7</strong>323-1BH01-0AA0, 3-1136E<strong>S7</strong>323-1BL00-0AA0, 3-1106E<strong>S7</strong>327-1BH00-0AB0, 3-1166E<strong>S7</strong>331-1KF01-0AB0, 4-1086E<strong>S7</strong>331-7HF00-0AB0, 4-976E<strong>S7</strong>331-7HF01-0AB0, 4-976E<strong>S7</strong>331-7KB02-0AB0, 4-1536E<strong>S7</strong>331-7KF02-0AB0, 4-1156E<strong>S7</strong>331-7NF00-0AB0, 4-776E<strong>S7</strong>331-7NF10-0AB0, 4-866E<strong>S7</strong>331-7PF00-0AB0, 4-1256E<strong>S7</strong>331-7PF10-0AB0, 4-1386E<strong>S7</strong>332-5HB01-0AB0, 4-1826E<strong>S7</strong>332-5HD01-0AB0, 4-1766E<strong>S7</strong>332-5HF00-0AB0, 4-1636E<strong>S7</strong>332-7ND01-0AB0, 4-1696E<strong>S7</strong>334-0CE01-0AA0, 4-1886E<strong>S7</strong>334-0KE00-0AB0, 4-1946E<strong>S7</strong>338-4BC01-0AB0, 5-76E<strong>S7</strong>360-3AA01-0AA0, 6-36E<strong>S7</strong>361 3CA01-0AA0, 6-56E<strong>S7</strong>365-0BA01-0AA0, 6-76E<strong>S7</strong>370-0AA01-0AA0, 5-56E<strong>S7</strong>374-2XH01-0AA0, 5-36E<strong>S7</strong>972-0AA01-0XA0, 7-2Organization block (OB), Glossary-7Output analog values, STEP 7 blocks, 4-1Output method, analog output module, A-38Output rangeanalog input/output module, 4-44analog output module, 4-43, A-38Output typeanalog input/output module, 4-44analog output module, 4-43Overflow, analog input module, 4-74PParameter assignmentfor analog modules, 4-39for digital modules, 3-11in user program, A-1Parameter assignment erroranalog input module, 4-73analog output module, 4-74Parameterization error, SM 338; POS-INPUT,5-19Index-6<strong>Programmable</strong> <strong>Logic</strong> <strong>Controllers</strong> <strong>S7</strong>-<strong>300</strong> <strong>Module</strong> <strong>Data</strong>A5E00105505-03
IndexParameterization missing, SM 338;POS-INPUT, 5-19Parameters, Glossary-7analog input module, 4-40, A-7analog input/output module, 4-44, A-41analog output module, 4-43analog output modules, A-36data records, A-2digital input modules, A-3digital output module, A-5dynamic, 3-11, 4-39modifying in user program, 3-11, 4-39SM 321; DI 16 x 24 VDC, 3-27SM 322; DO 8 x 24 VDC/0.5 A, 3-76SM 327; DI 8/DX 8 x DC 24 V/0.5 A,parameterizable, 3-119SM 331; AI 8 x RTD, A-11SM 331; AI 8 x TC, A-19SM 332; AO 8 x 12 bits, A-39SM 338; POS-INPUT , 5-14static, 3-11, 4-39Parameters, wrongSM 321; DI 16 x 24 VDC, 3-31SM 338; POS-INPUT, 5-19PARM_MOD, SFC 57, A-2Pin assignment, RS 485 repeater, 7-6POS-Input module SM 338, 5-7Position decoder module, SM 338;POS-INPUT, 5-7Potential difference, with analog input modules,4-45Power supply module, 2-1dimension drawing, C-8PS 305 2 A, 2-2PS 307 10 A, 2-14PS 307 2 A, 2-6PS 307 5 A, 2-9Process image, Glossary-7Product status, Glossary-7Programming device (PG), Glossary-7Protection class, 1-12PS 307, dimension drawing, C-8Pulse edge, 3-27Pulse-shaped interference, 1-6RRadio interference, emission of, 1-7Rail for the ”Insert and Remove” function,dimension drawing, C-7Rails, dimension drawing, C-2RAM errorSM 321; DI 16 x 24 VDC, 3-31SM 322; DO 8 x 24 VDC/0.5 A, 3-79Rated voltages, 1-13Reaction to open thermocouple, SM 331;AI 8 x TC, A-26Read analog values, STEP 7 blocks, 4-1Reference junction temperature withthermocouples, compensating, 4-59Reference potential, Glossary-8Relay output moduleSM 322; DO 16 x Rel. 120/230 VAC, 3-93SM 322; DO 8 x Rel. 230 VAC/5A, 3-100Relay Output <strong>Module</strong> , SM 322; DO 8 x Rel.VAC 230/5 A, 3-106Relay output module , SM 322; DO 8 x Rel.230 VAC, 3-96Repeat accuracy, Glossary-8Repeater, Glossary-8See RS 485-RepeaterResistance thermometer connection, toanalog input module, 4-53Resistor connection, to analog input module,4-53Resolution, 4-9, Glossary-8Response time, 4-38Response with CPU-STOP, analog outputmodule, 4-43Retentivity, Glossary-8RS 485 repeaterAppearance, 7-3application, 7-2definition, 7-2dimension drawing, C-18grounded operation, 7-4rules, 7-2ungrounded operation, 7-4RS 485-Repeater, 7-1grounded, 7-4ungrounded, 7-4SScan time, Glossary-8analog input channels, 4-35analog output channels, 4-37Screw-type terminals, <strong>SIMATIC</strong> TOPconnect/...TPA, 8-10Sensor connection, to analog input module,4-45Sensors, non-isolated, 4-48Settling time, 4-38SF LEDanalog module, 4-72digital module, 3-13SF-LED, SM 338; POS-INPUT, 5-17SFC, Glossary-8, Glossary-9SFC 51, 3-32, 3-80, 4-75SFC 55 WR_PARM, A-2<strong>Programmable</strong> <strong>Logic</strong> <strong>Controllers</strong> <strong>S7</strong>-<strong>300</strong> <strong>Module</strong> <strong>Data</strong>A5E00105505-03Index-7
IndexSFC 56 WR_DPARM, A-2SFC 57 PARM_MOD, A-2SFC 59, 3-32, 3-80, 4-75Shield connecting element, dimension drawing,C-16Shipbuilding, Approval, 1-4Short-circuit to L+, SM 322; DO 8 x 24VDC/0.5 A, 3-76, 3-79Short-circuit to M, SM 322; DO 8 x 24 VDC/0.5A, 3-76, 3-79Sign, analog value, 4-9Signal module, Glossary-8dimension drawing, C-15<strong>SIMATIC</strong> TOP connectcomponents, 8-12connection for 2A modules, 8-18dimension drawing, C-17one-conductor connection, 8-14selecting components, 8-13three-conductor connection, 8-16wiring 32-channel digital modules, 8-8<strong>SIMATIC</strong> TOP connect TPAcomponent selection, 8-20connection example, 8-24multiplier terminal, 8-21shield connection, 8-23terminal allocation to analog module, 8-22terminal assignment, 8-21<strong>SIMATIC</strong> TOP connect/...TPAadvantages of using, 8-3components, 8-3Configuration, 8-2connecting cable, 8-4connectors, 8-4mounting terminal block and connectingcable, 8-10screw-type terminals, 8-10spring-loaded terminals, 8-10wiring, 8-4wiring actuators/sensors to terminal block,8-10wiring rules, 8-7wiring the front connector module, 8-6wiring with modules..., 8-3Simulator module, SM 374; IN/OUT 16, 5-3Sinusoidal interference, 1-7SIPLUS <strong>S7</strong>-<strong>300</strong>-modules, 1-14SM 321; DI 16 x 24 VDCchannel-specific diagnostic data, B-5diagnostic interrupt, 3-32diagnostics, 3-27EPROM error, 3-31external auxiliary voltage missing, 3-31fuse blown, 3-31input delay, 3-27internal auxiliary voltage missing, 3-31interrupts, 3-32lack of encoder supply, 3-31redundant encoder supply, 3-24voltage type, 3-27watchdog, 3-31SM 321; DI 16 x 24 VDCcauses of error and remedial measures,3-31diagnostic interrupt, 3-27hardware interrupt, 3-27, 3-32hardware interrupt lost, 3-31, 3-33interrupt-triggering channels, 3-33parameters, wrong, 3-31RAM error, 3-31SM 321; DI 16 x DC 24 VResistive circuit of the encoder, 3-24Synchronous operation, 3-26SM 321; DI 16 x DC 24 V , <strong>Module</strong> notparameterized, 3-31SM 322; DO 8 x 24 VDC/0.5 Aapply substitute value ”1”, 3-76causes of error and remedial action, 3-79channel-specific diagnostic data, B-5diagnostic interrupt, 3-76, 3-80diagnostic messages, 3-78EPROM error, 3-79fuse blown, 3-79hold last value, 3-76interrupts, 3-80no external auxiliary voltage, 3-79no internal auxiliary voltage, 3-79no load voltage L+, 3-76, 3-79parameters, 3-76RAM error, 3-79short-circuit to L+, 3-76, 3-79short-circuit to M, 3-76, 3-79substitute value application, 3-76watchdog, 3-79wire-break, 3-76, 3-79SM 327; DI 8/DX 8 x DC 24 V/0.5 A,parameterizable, Parameters, 3-119SM 331; AI 8 x 13 bit, Parasitic frequencysuppression, A-29SM 331; AI 8 x 13 bitsInterference frequency suppression, A-28Measuring methods and measuring ranges,A-28structure of data record 1, A-27SM 331; AI 8 x 14 bits High Speed,Synchronous operation, 4-101SM 331; AI 8 x RTDinterference frequency suppression, A-16operating modes, A-16parameters, A-11Index-8<strong>Programmable</strong> <strong>Logic</strong> <strong>Controllers</strong> <strong>S7</strong>-<strong>300</strong> <strong>Module</strong> <strong>Data</strong>A5E00105505-03
Indexsmoothing, A-18structure of data record 1, A-12structure of data record 128, A-13Temperature coefficient, A-18SM 331; AI 8 x RTD x 24 bits, measuringmethods and measuring ranges, A-16SM 331; AI 8 x TCinterference frequency suppression, A-24measuring methods and measuring ranges,A-25operating modes, A-24parameters, A-19reaction to open thermocouple, A-26smoothing, A-26structure of data record 1, A-20structure of data record 128, A-21SM 332; AO 4 x 16 bits, Synchronousoperation, 4-173SM 332; AO 8 x 12 bitsParameters, A-39Structure of data record 1, A-40SM 338Encoder value acquisition, 5-10Free running encoder value acquisition,5-10POS-Input module, 5-7Synchronous operation, 5-8SM 338; POS-INPUTAbsolute value encoder (SSI), 5-14Addressing, 5-15Auxiliary supply missing, 5-19Baud rate, 5-14Causes of Errors and Remedial Measures,5-19Channel error, 5-19Channel information present, 5-19channel-specific diagnostic data, B-8Code type, 5-14Configuration error, 5-19Diagnosis, 5-17Diagnosis interrupt release, 5-14diagnostic data, B-7Diagnostic interrupt, 5-20encoder error, 5-19External error, 5-19Freeze-function, 5-12, 5-14Group fault-LED, 5-17Internal error, 5-19Interrupts, 5-20<strong>Module</strong> fault, 5-19Monoflop time, 5-14Normalization, 5-11, 5-14Parameterization error, 5-19Parameterization missing, 5-19SF-LED, 5-17Watchdog tripped, 5-19Wrong parameters, 5-19Smoothing, Glossary-9SM 331; AI 8 x RTD, A-18SM 331; AI 8 x TC, A-26Smoothing analog input values, 4-36Smoothing of analog input values, analog inputmodule, 4-42Spare parts, D-1Spring-loaded terminals, <strong>SIMATIC</strong> TOPconnect/...TPA, 8-10Standards and approvals, 1-2Startup, Glossary-9Status mode, Glossary-9STEP 7 blocks, for analog functions, 4-1Substitute value, Glossary-9analog output module, A-38Substitute value ”1” application, SM 322; DO 8x 24 VDC/0.5 A, 3-76Substitute value application, SM 322; DO 8 x24 VDC/0.5 A, 3-76Supply voltage failure, of the analog module,4-32Synchronous operationSM 321; DI 16 x DC 24 V, 3-26SM 331; AI 8 x 14 bits High Speed, 4-101SM 332; AO 4 x 16 bits, 4-173SM 338, 5-8System diagnostics, Glossary-9System function (SFC), Glossary-9TTechnical specifications, RS 485 repeater, 7-6Temperature coefficient, Glossary-9analog input module, 4-42SM 331; AI 8 x 13 bit, A-29SM 331; AI 8 x RTD, A-18Temperature error, Glossary-9Temperature errors of internal compensation,Glossary-10Temperature measurement, SM 331; AI 8 x 13bit, A-28Temperature unit, Analog input module, 4-41Test voltages, 1-12Thermo emf, 4-58Thermocoupledesign, 4-58open, reaction to, Glossary-7principle of operation, 4-58Thermocouple connection, to analog inputmodule, 4-58Three-conductor connection, 4-54,Glossary-10Two-conductor connection, 4-55, Glossary-10<strong>Programmable</strong> <strong>Logic</strong> <strong>Controllers</strong> <strong>S7</strong>-<strong>300</strong> <strong>Module</strong> <strong>Data</strong>A5E00105505-03Index-9
IndexTwo-wire transmitter, Glossary-10UUL, Approval, 1-3Underflow, analog input module, 4-74Ungrounded operation, RS 485 repeater, 7-4Use in an industrial environment, 1-5Use in residential environments, 1-5Use of the ET 200 / <strong>S7</strong>-<strong>300</strong> in Zone 2, 1-17User program, Glossary-10parameter assignment in, A-1WWatchdogSM 321; DI 16 x 24 VDC, 3-31SM 322; DO 8 x 24 VDC/0.5 A, 3-79Watchdog tripped, SM 338; POS-INPUT, 5-19Wire-break, Glossary-10Analog input module, 4-73analog input module, 4-74SM 322; DO 8 x 24 VDC/0.5 A, 3-76, 3-79wire-break check, analog input module, 4-40WR_DPARM, SFC 56, A-2WR_PARM, SFC 55, A-2VVibrations, 1-10Voltage sensors, connecting, 4-50Voltage type, SM 321; DI 16 x 24 VDC, 3-27Index-10<strong>Programmable</strong> <strong>Logic</strong> <strong>Controllers</strong> <strong>S7</strong>-<strong>300</strong> <strong>Module</strong> <strong>Data</strong>A5E00105505-03
Product Information on the ManualEdition 12.2004 <strong>S7</strong>-<strong>300</strong> <strong>Programmable</strong> Controller; <strong>Module</strong> Specifications, as of Edition 02/2004(A5E00105505)ET 200M Distributed I/O Device Signal <strong>Module</strong>s for Process Automation,as of Edition 10/2004 (A5E00085262)<strong>S7</strong>-<strong>300</strong>, ET 200M <strong>Programmable</strong> Controller, <strong>Module</strong>s with Intrinsically-SafeSignals, as of Edition 08/2003 (A5E00172008)IntroductionParameterizable signal modules of the <strong>S7</strong>-<strong>300</strong> product family mentioned in thisproduct information document can be reparameterized online usingSTEP7 HWCONFIG in RUN mode of the CPU.In other words, the module parameters can be changed without switching the CPUto STOP mode or affecting other modules.The following prerequisites must be met in order to use this function:• STEP7 as of Version 5.2• Distributed use of the <strong>S7</strong>-<strong>300</strong> modules described in the <strong>S7</strong>-400 programmablecontroller (CPUs as of V3.1 or CP 443-5 extended as of V5.0).• Use of the ET 200M with the IM 153-2 as of 6E<strong>S7</strong>153-2BA00-0XB0 or6E<strong>S7</strong>153-2BB00-0XB0• Use of the IM 157 as of 6E<strong>S7</strong>157-0AA82-0XA00You will find a detailed description of the prerequisites and principles of operation inthe manual Modifying the System during Operation via CiR(visit http://www.siemens.com/automation/service&support and enterthe entry ID: 14044916).Copyright 2004 by Siemens AGA5E00201782-03
Reparameterization steps in RUN modeObserve the reparameterization steps described in the above manual.Note the peculiarities of certain modules described in the table.Example 1:To change a measuring range for modules, proceed as follows:1. Change the user program so that the channel to be reparameterized is nolonger evaluated, and download it to the CPU.2. Change the measuring range for the module in HWCONFIG, and download thechanged configuration to the CPU.3. Adapt the user program to the changed channel, and download it to the CPU.Example 2:When reparameterizing certain modules (see the table), you should ensure thatthere is no pending diagnostic event (e.g. a wire break message) before carryingout reparameterization, since otherwise it may happen in some cases that outgoingdiagnostic events are no longer reported. As a result, the SF LEDs on the CPU,IM, or module will continue to shine, for example, although the reparameterizedmodule is working correctly. If such a situation does arise, however, the modulemust be removed and then plugged in again.2Product Information on the ManualA5E00201782-03
Notes on the tableThere is a separate table for each manual that describes the technicalspecifications of the signal modules of the <strong>S7</strong>-<strong>300</strong> product family.The “Behavior of the Inputs/Outputs” column indicates the behavior of theinputs/outputs when reparameterization is carried out in RUN mode, provided theyare not affected by reparameterization.<strong>Module</strong><strong>S7</strong>-<strong>300</strong> module specifications6E<strong>S7</strong> 321-7BH00-0AB06E<strong>S7</strong> 321-7BH80-0AB0SM 321; DI 16DC 24 V;with hardware interrupt anddiagnostic interrupt6E<strong>S7</strong> 321-7BH01-0AB0SM 321; DI 16DC 24 V;with hardware interrupt anddiagnostic interrupt, clocked6E<strong>S7</strong> 322-8BF00-0AB06E<strong>S7</strong> 322-8BF80-0AB0SM 322; DO 8DC 24 V/0.5 A; with diagnosticinterrupt6E<strong>S7</strong> 322-5FF00-0AB0SM 322;DO 8AC 120/230V/2A ISOL6E<strong>S7</strong> 322-5GH00-0AB0SM 322;DO 16UC 24/48V6E<strong>S7</strong> 322-5HF00-0AB0SM 322;DO 8Rel. AC 230V/5A6E<strong>S7</strong> 331-7NF00-0AB0SM 331; AI 816 Bit6E<strong>S7</strong> 331-7NF10-0AB0SM 331; AI 816 Bit6E<strong>S7</strong> 331-7PF00-0AB0SM 331; AI 8RTD6E<strong>S7</strong> 331-7PF10-0AB0SM 331; AI 8TCBehavior of theinputs/outputsSupply the last validprocess value beforeparameterizationOutput the last validoutput value beforeparameterizationSupply the last validprocess value beforeparameterizationPeculiarities when reparameterizing------SF LED shines:If there was a pending diagnosis beforereparameterization, the SF LEDs (on theCPU, IM, or module) may still be shiningalthough there is no longer a pendingdiagnosis and the module is workingcorrectly.Remedy:• Only reparameterize when there is nopending diagnosis on the module, or• Remove the module, and then plug it inagainProduct Information on the ManualA5E00201782-033
<strong>Module</strong>6E<strong>S7</strong> 332-5HD01-0AB0SM 332; AO 412 Bit6E<strong>S7</strong> 332-5HB01-0AB06E<strong>S7</strong> 332-5HB81-0AB0SM 332; AO 212 Bit6E<strong>S7</strong> 332-5HF00-0AB0SM 332; AO 812 Bit6E<strong>S7</strong> 332-7ND00-0AB06E<strong>S7</strong> 332-7ND01-0AB0SM 332; AO 416 BitBehavior of theinputs/outputsOutput the last validoutput value beforeparameterizationtiPeculiarities when reparameterizingSF LED shines:If there was a pending diagnosis beforereparameterization, the SF LEDs (on theCPU, IM, or module) may still be shiningalthough there is no longer a pendingdiagnosis and the module is workingcorrectly.Remedy:• Only reparameterize when there is nopending diagnosis on the module, or• Remove the module, and then plug it inagain------<strong>Module</strong>Behavior of theinputs/outputsET 200M signal modules for process automation (PC<strong>S7</strong>)6E<strong>S7</strong> 321-7TH00-0AB0SM 321; DI 16NAMUR6E<strong>S7</strong> 322-8BH00-0AB0SM 322; DO 16DC 24V/0,5ASupply the last validprocess value (includingthe value status) beforeparameterizationOutput the last validoutput value beforeparameterizationPeculiarities when reparameterizingSF LED shines:If there was a pending diagnosis beforereparameterization, the SF LEDs (on theCPU, IM, or module) may still be shiningalthough there is no longer a pendingdiagnosis and the module is workingcorrectly.Remedy:• Only reparameterize when there is nopending diagnosis on the module, or• Remove the module, and then plug it inagain4Product Information on the ManualA5E00201782-03
<strong>Module</strong>Behavior of theinputs/outputs<strong>S7</strong>-<strong>300</strong>, ET 200, I/O modules with intrinsically-safe signals6E<strong>S7</strong> 321-7RD00-0AB0SM 321; DI 4NAMURSupply the last validprocess value beforeparameterizationPeculiarities when reparameterizingSF LED shines:If there was a pending diagnosis beforereparameterization, the SF LEDs (on theCPU, IM, or module) may still be shiningalthough there is no longer a pendingdiagnosis and the module is workingcorrectly.Remedy:• Only reparameterize when there is nopending diagnosis on the module, or• Remove the module, and then plug it inagain6E<strong>S7</strong> 322 5RD00-0AB0 Output the last validSM 322; DO 415V/20mA output value beforeparameterization6E<strong>S7</strong> 322-5SD00-0AB0---SM 322; DO 424V/10mA6E<strong>S7</strong> 331-7RD00-0AB0SM 331; AI 40/4...20mA ---6E<strong>S7</strong> 331-7SF00-0AB0 Supply the last valid---process value beforeSM 331; AI 8TC/4RTDparameterization6E<strong>S7</strong> 331-7TB00-0AB0SM 331; AI 20/4...20mAHART---6E<strong>S7</strong> 332-5RD00-0AB0SM 332; AO 40/4...20mA6E<strong>S7</strong> 332-5TB00-0AB0SM 332; AO 20/4...20mAHARTOutput the last validoutput value beforeparameterizationSF LED shines:If there was a pending diagnosis beforereparameterization, the SF LEDs (on theCPU, IM, or module) may still be shiningalthough there is no longer a pendingdiagnosis and the module is workingcorrectly.Remedy:• Only reparameterize when there is nopending diagnosis on the module, or• Remove the module, and then plug it inagain---Product Information on the ManualA5E00201782-035
6Product Information on the ManualA5E00201782-03
Product Information<strong>SIMATIC</strong> <strong>S7</strong>-<strong>300</strong>Analog Output <strong>Module</strong> SM 332; AO 4 16 BitX 2as of Version 3 4New Analog Output <strong>Module</strong> AvailableThe <strong>S7</strong>-<strong>300</strong> Analog Output <strong>Module</strong> SM 332; AO 4 × 16 Bit has been added to the<strong>S7</strong>-<strong>300</strong> family. The order number for this module is 6E<strong>S7</strong> 332-7ND02-0AB0.This product information includes details about the characteristics and technicalspecifications of the Analog Output module SM 332; AO 4 × 16 Bit. Refer to the<strong>S7</strong>-<strong>300</strong> Installation and Hardware Manual for more information about the <strong>S7</strong>-<strong>300</strong>product family.You will also learn:How to start up the analog output moduleThe output ranges available for the analog output moduleHow to configure the analog output moduleAdditional AssistanceFor assistance in answering technical questions, for training on this product, or forordering, contact your Siemens distributor or sales office.Copyright by Siemens AG 2004A5E0033348892-01
Analog Output <strong>Module</strong> SM 332; AO 4 16 Bit; (6E<strong>S7</strong> 332-7ND02-0AB0)Order No.6E<strong>S7</strong> 332-7ND02-0AB0Characteristic FeaturesThe Analog Output <strong>Module</strong> SM 332; AO 4 × 16 Bit has the following characteristicfeatures:4 outputs in 4 channel groupsIndividual output channels can be programmed as– voltage outputs– current outputsResolution of 16 bitsSupports clocked operation<strong>Programmable</strong> diagnostics<strong>Programmable</strong> diagnostic interrupt<strong>Programmable</strong> substitute value outputGalvanic Isolation between:– backplane bus interface and analog output channels– the different analog output channels– analog output and L+, M– backplane bus interface and L+, M2Product Information <strong>S7</strong>–<strong>300</strong> Analog Output <strong>Module</strong> SM 332; AO 4 x 16 BitA5E0033348892-01
Terminal Connection DiagramFigure 1 shows the analog terminal connection diagram and the wiring diagram forthe Output Analog <strong>Module</strong> SM 332 AO 4 × 16 Bit.The detailed technical specifications for this analog output module are on thefollowing page.SM332AO 4x16 BITFault Indicator – redSF1L+24 VCurrentOutputsVoltageOutputsGalvanic Isolation3456QI0 QV 0S 0 +CH0 S 0 – CH0MANA 0 MANA 0Internalsupply789QI1QV 1S 1 +CH1 S 1 –CH110MANA 1M ANA 1Back–planebusIM1112131415161718QI2 QV 2S 2 +CH2 S 2 – CH2MANA 2 M ANA 2QI3 QV 3S 3 +CH3 S 3 – CH3MANA 3 M ANA 320MM332–7ND02–0AB0Figure 1Connection Diagram of Analog Output <strong>Module</strong> SM 332; AO 4 x 16 BitNoteSwitching the rated load voltage (L+) on and off, can cause wrong intermediatevalues at the output for approximately 10 ms.Product Information <strong>S7</strong>–<strong>300</strong> Analog Output <strong>Module</strong> SM 332; AO 4 x 16 BitA5E0033348892-013
Hazardous Location Information“Power, input and output (I/O) wiring must be in accordance with Class I, Division 2wiring methods [Article 501-4 (b) of the National Electric Code, NFPA 70] and inaccordance with the authority having jurisdiction.”Peripheral equipment must be suitable for the location it is used in.The equipment must be suitable for use in Class I, Div. 2, Groups A, B, C, and DHazardous Locations and nonhazardous locations only.!WarningExplosion HazardSubstitution of components may impair suitability for Class I, Div. 2 Hazardous Locations.Different or lesser quality components may cause an explosion or other hazardous situation,which could result in death or serious injury, and/or damage to equipment.To avoid potentially hazardous situations, always use the appropriate components.!WarningExplosion HazardNever disconnect equipment before powering off or before ascertaining that the area isnonhazardous. Disconnecting equipment before powering off or in a hazardous area may causean explosion, which could result in death or serious injury, and/or damage to equipment.To avoid potentially hazardous situations, always power off equipment and assure that the areais nonhazardous before disconnecting.4Product Information <strong>S7</strong>–<strong>300</strong> Analog Output <strong>Module</strong> SM 332; AO 4 x 16 BitA5E0033348892-01
Dimensions and WeightDimensions W × H × D (inmillimeters)Weight<strong>Data</strong> for Specific <strong>Module</strong>Supports clocked operationNumber of outputs40 × 125 × 117Approx. 220 gYes4Length of cable Shielded max. 200 mVoltages, Currents, PotentialsPower rated voltage of theelectronics L+ Reverse polarityprotectionIsolation Between channels andbackplane bus Between channels andpower supply of theelectronics Between the channelsPermitted potentialdifference Between the outputs(E CM ) Between M ANA andM internal (E ISO )Insulation tested withCurrent consumption From the backplane bus From the power supplyL+Power dissipation of themodule24 VDCYesYesYesYesDC 200 V/AC 120 VDC 200 V/AC 120 VDC 1500 Vmax. 120 mAmax. 290 mAtyp. 3 WAnalog Value GenerationResolution including sign ± 10 V 0 to 10 V 1 to 5 V ± 20 mA 0 to 20 mA 4 to 20 mAConversion time (perchannel) In standard mode In clocked modeBasic response time ofmodule (all channelsenabled) In standard mode In clocked modeSettling time For resistive load For capacitive load For inductive load(1 mH) For inductive load(10 mH)16 bits15 bits14 bits16 bits15 bits15 bits< 200 s640 s< 800 s750 s0.2 ms3.3 ms0.5 ms3.3 msProduct Information <strong>S7</strong>–<strong>300</strong> Analog Output <strong>Module</strong> SM 332; AO 4 x 16 BitA5E0033348892-015
Suppression of interference, Limits of ErrorCrosstalk between theoutputsOperational limit (in theentire temperaturerange, with reference tothe output range) Voltage output Current outputBasic error(operational limit at25° C, with reference tothe output range) Voltage output± 10 V0 to 10 V1 to 5 V Current output± 20 mA0 to 20 mA4 to 20 mATemperature error (withreference to the outputrange) Voltage output Current outputLinearity error (withreference to the outputrange)Repeatability (in steadystate at 25° C, withreference to the outputrange)> 100 dB±0.12%±0.18%± 0.02%± 0.02%± 0.04%± 0.02%± 0.02%± 0.04%± 0.0025% / K± 0.004% / K± 0.004%±0.002%Status, Interrupts, DiagnosticsInterrupts Diagnostics interrupt Parameters can beassignedDiagnostics functionsGroup error displayDiagnostics informationcan be displayedSubstitute value can beapplied<strong>Data</strong> for Selecting an ActuatorParameters can beassignedRed LED (SF)PossibleYes. Parameterscan be assignedOutput ranges (ratedvalues) Voltage ± 10 V0 to 10 V1 to 5 VCurrentLoad resistance (in thenominal range of theoutput) For voltage outputsCapacitive loadFor current outputsInductive loadVoltage output Short-circuit protectionShort-circuit currentCurrent output No-load voltage± 20 mA0 to 20 mA4 to 20 mAmin. 1 kΩmax. 1 µFmax. 500 Ωmax. 1 mHYesmax. 40 mAmax. 18 VOutput ripple; bandwidth0 to 50Khz (withreference to the outputrange)±0.05%6Product Information <strong>S7</strong>–<strong>300</strong> Analog Output <strong>Module</strong> SM 332; AO 4 x 16 BitA5E0033348892-01
Destruction limit againstvoltages/currents appliedfrom outside Voltage to the outputsagainst M ANACurrentConnection of actuators For voltage outputFour–conductorconnection (measuringcircuit) For current outputTwo–conductorconnectionmax. 15 Vcontinuous; 75 V formax. 1 s (pulse dutyfactor 1:20)max. DC 50 mAPossiblePossibleSynchronous OperationCharacteristicsReproducible response times (i.e., of equal length) are achieved in <strong>SIMATIC</strong> withan equidistant DP bus cycle and synchronization of the following individualasynchronous cycles:Asynchronous cycle of the user program. Cycle length can vary, due toacyclical program branches.Asynchronous, variable DP cycle on the PROFIBUS subnetAsynchronous cycle on the DP slave backplane busAsynchronous cycle during signal conditioning and conversion in the electronicmodules of the DP slavesWith equidistance, the DP cycle operates in the same clock cycle, with the samelength. The execution levels of a CPU (OB61 to OB64) and the synchronous I/Oare synchronized with this clock cycle. Thus, I/O data are transferred in defined,constant time intervals (synchronous operation). The maximum “jitter” is 50 µs.RequirementsThe DP master and DP slave must support synchronous operation. You musthave Step 7 Version 5.2 or higher.Product Information <strong>S7</strong>–<strong>300</strong> Analog Output <strong>Module</strong> SM 332; AO 4 x 16 BitA5E0033348892-017
Operating Mode: Synchronous OperationThe following conditions are applicable for synchronous operation:Table 1 Conditions for Synchronous OperationProcessing and activation time T WA between read inof output value in the transfer buffer and loading inthe output DACT DPminDiagnostic interrupt750s1100s4 x T DP , maxProcessing and Output Update TimeThe same time conditions are always applicable, irrespective of the number ofchannels programmed.T WAD/A-Conversion and Internal ProcessingCH3Output UpdateCH2CH1CH0ssT OFigure 2Calculation of the Processing Time and Output Update TimeDescription of the Method of Functioning in Synchronous OperationAt time T 0 – T WA , the module reads in the output data and saves the datainternally. Following internal processing time for each channel, the results arewritten to each D/A converter.Additional InformationYou will find additional information about synchronous operation in the STEP 7online Help, the ET 200M Distributed I/O System manual and the SynchronousOperation Manual.8Product Information <strong>S7</strong>–<strong>300</strong> Analog Output <strong>Module</strong> SM 332; AO 4 x 16 BitA5E0033348892-01
Starting Up the Analog Output <strong>Module</strong> SM 332; AO 4 16 BitParameter AssignmentThe Analog Output <strong>Module</strong> SM 332; AO 4 × 16 Bit is set using one of the followingmethods.With STEP 7 (see the STEP 7 User Manual)In the user program by means of SFCs (see the STEP 7 System and StandardFunctions Reference Manual)NoteIf you modify output ranges when the Analog Output <strong>Module</strong> SM 332; AO 4 x 16Bit is in operation, intermediate values can appear at the output.Default SettingThe Analog Output <strong>Module</strong> SM 332; AO 4 × 16 Bit has default settings for the typeof output, diagnostics, interrupts, etc. (see Table 1).These default settings apply if you do not re-initialize the module with STEP 7.Product Information <strong>S7</strong>–<strong>300</strong> Analog Output <strong>Module</strong> SM 332; AO 4 x 16 BitA5E0033348892-019
Table 1Parameters and Default Settings for the Analog Output <strong>Module</strong>SM 332 AO 4 x 16 Bit.Parameter SM 332; AO 4 16 Bit ParameterValue Range DefaultTypeSettingsScopeEnable Diagnostics interrupt Yes/No No Dynamic <strong>Module</strong>Diagnostics Channel Diagnostics Yes/No No Static ChannelResponse with CPU-STOPLWH Hold last valueASSOutput de-energizedOutput Output Type DeactivatedVoltageCurrent Output Range 0 to 20 mA4 to 20 mA± 20 mA1 to 5 V0 to 10 V± 10 VASS Dynamic ChannelU Dynamic Channel± 10 V Dynamic ChannelParameter Assignment in the User ProgramYou can configure each output channel of the SM 332; AO 4 × 16 Bit individually.This allows you to assign individual parameters for each output channel. When youset the parameters in the user program, the parameters are assigned to channelgroups. Each output channel of the Analog Output <strong>Module</strong> SM 332; AO 4 × 16 Bitis then assigned to one channel group, i.e. output channel 0 = channel group 0.Unused Output ChannelsTo ensure the unused output channels of the Analog Output <strong>Module</strong> SM 332;AO 4 × 16 Bit are not active. You must deactivate them and leave them open.Deactivate the output channel using the “Output” parameter block when youprogram with STEP 7.Substitute ValuesYou can configure the SM 332; AO 4 × 16 Bit for the CPU operating mode STOPas follows: Outputs De-energized, Hold Last Value or Inject Substitute Values. Ifyou inject substitute values, they must be within the output range.10Product Information <strong>S7</strong>–<strong>300</strong> Analog Output <strong>Module</strong> SM 332; AO 4 x 16 BitA5E0033348892-01
Output Ranges for the Analog Output <strong>Module</strong> SM 332; AO 4 x 16 BitAnalog OutputsYou can use the outputs of the Analog Output <strong>Module</strong> SM 332; AO 4 × 16 Bit as: Voltage outputs Current outputsSet the outputs group-wise, using STEP 7 for programming the output type.Output RangesSet the output ranges for the voltage and/or current outputs with STEP 7.Table 2 lists all the possible output ranges for the Analog Output <strong>Module</strong> SM 332;AO 4 × 16 Bit.Table 2Output Ranges for Analog Output <strong>Module</strong>Selected Typeof OutputVoltageCurrentDescriptionTable 3 and Table 4 show the digitalanalog values in the analog outputrange.Table 3 and Table 4 show the digitalanalog values in the analog outputmeasuring range.Output Range1 to 5V0 to 10 V± 10 V0 to 20 mA4 to 20 mA± 20 mADefault SettingsThe default settings of the module are “Voltage” for the output type and“± 10 V” for the output range. You can use this combination of output type andoutput range without parameterizing the SM 332; AO 4 × 16 Bit in STEP 7.Product Information <strong>S7</strong>–<strong>300</strong> Analog Output <strong>Module</strong> SM 332; AO 4 x 16 BitA5E0033348892-0111
Analog Value Representation of the Output Ranges for the Analog Output<strong>Module</strong> SM 332; AO 4 16 BitIntroductionThe tables in this section contain the digitized analog values for the various outputranges of the analog output module.How to Read the Output-Value TablesTables 3 and 4 contain the digital analog values for the various ouput ranges.Since the binary representation for the analog values is always the same, thesetables only contain the output values and the units.Voltage and Current Output RangesTable 3 shows the representation of the digitized output value: For the voltage output ranges ±10 V and For the current output range ± 20 mA.Table 3Representation of the Digital Output Value of the Analog Output <strong>Module</strong>(Voltage and Current Output Ranges)RangeSystem Word UnitsDecimalHexadecimalOutput Range± 10 VOutput Range± 20 mAOverflow 32767 7FFF H 0.0000 0.0000Overrange 32511:27649Nominal Range 2764820736:–20736–27648Underrange –27649:–325127EFF H11.7589::6C01 H 10.00046C00 H10.005100 H7.5::AF00 H–7.59400 H –10.0093FF H–10.0004::8100 H –11.758923.515:20.000720.00014.998:–14.998–20.000–20.0007:–23.515Underflow –32768 8000 H 0.0000 0.000012Product Information <strong>S7</strong>–<strong>300</strong> Analog Output <strong>Module</strong> SM 332; AO 4 x 16 BitA5E0033348892-01
Table 4 shows the representation of the digitized output value:For the voltage output ranges 1 to 5 V, 0 to10 V andFor the current output ranges 0 to 20 mA, 4 to 20 mATable 4Representation of the Digital Output Value of the Analog Output <strong>Module</strong>(Voltage and Current Output Ranges)System Word Units Output Output Output OutputRangeRangeRangeRangeRangeDecimal Hexadecimal 1 to 5 V 0 to 10 V 0 to 20 mA 4 to 20 mAOverflow 32767 7FFF H 0.0000 0.0000 0.0000 0.0000Overrange 32511:27649NominalRangeUnderrange2764820736:0–1:–69127EFF H 5.8794::6C01 H 5.00026C00 H 5.0005100 H 4.000::0 H 1.000FFFF H 0.9999::E500 H 0.000011.7589:10.000410.007.50:0.0000.0000:0.000023.515:20.000720.00014.998:0.0000.0000:0.000022.810:20.000520.00016.000:4.0003.9995:0.0000Underflow –32768 8000 H 0.0000 0.0000 0.0000 0.0000Product Information <strong>S7</strong>–<strong>300</strong> Analog Output <strong>Module</strong> SM 332; AO 4 x 16 BitA5E0033348892-0113
14Product Information <strong>S7</strong>–<strong>300</strong> Analog Output <strong>Module</strong> SM 332; AO 4 x 16 BitA5E0033348892-01
s<strong>SIMATIC</strong>Product Information01/2005Use of subassemblies/modules in a Zone 2 Hazardous AreaLanguage Titel PageDeutsch Einsatz der Baugruppen/<strong>Module</strong> im explosionsgeschützten Bereich Zone 2 3English Use of subassemblies/modules in a Zone 2 Hazardous Area 5Français Utilisation des modules / coupleurs dans la zone à risque d'explosion 2 7Español Aplicación de los módulos / tarjetas en áreas con peligro de explosión, zona 2 9Italiano Impiego delle unità/moduli nell'area a pericolo di esplosione zona 2 11Nederlands Gebruik van de componenten/modulen in het explosief gebied zone 2 13Dansk Brug af komponenter/moduler i det eksplosionsfarlige område zone 2 15Suomi Rakenneryhmien/moduulien käyttö räjähdysvaarannetuilla alueilla, vyöhyke 2 17Svenska Användning av komponentgrupperna/modulerna i explosionsriskområde zon 2 19Português Uso de grupos construtivos/módulos em área exposta ao perigo de explosão 2 21Ελληνικά Χρήση των δοµικών συγκροτηµάτων/µονάδων σε επικίνδυνη για έκρηξη περιοχή, ζώνη 2 23Česky Použití konstrukčních skupin / modulů v prostředí s nebezpečím výbuchu Zóna 2 25Estnisch Sõlmede/moodulite kasutamine plahvatusohtliku piirkonna tsoonis 2 27Latviski Ierīču/moduļu pielietojums sprādzienbīstamas teritorijas zonā 2 29Lietuviška Konstrukcinių grupių/modulių panaudojimas sprogioje 2 zonos aplinkoje 31Magya A főegységek/modulok alkalmazása a 2. zóna robbanásveszélyes környezetben 33Malti Tqegħid tal-Komponenti / <strong>Module</strong>s fiż-Żona 2, fejn hemm Riskju ta' Splużjoni 35Polski Zastosowanie grup konstrukcyjnych / modułów w 2 strefie zagrożenia wybuchem 37Slovensky Použitie konštrukčných skupín / modulov v prostredí s nebezpečenstvom výbuchu zóny 2 39Slovensko Uporaba sklopov/modulov v eksplozivno ogroženem območju cone 2 41Türkçe Patlama tehlikesi olan Alan 2 bölgesinde ünite gruplarının/modüllerin kullanılması 43Copyright © Siemens AG 2005Siemens AktiengesellschaftA5E00352937-02
Product Information on the Use of subassemblies/modules in a Zone 2 Hazardous Area2 A5E00352937-02
DeutschEinsatz der Baugruppen/<strong>Module</strong> im explosionsgefährdetenBereich Zone 2Zone 2Explosionsgefährdete Bereiche werden in Zonen eingeteilt. Die Zonen werdennach der Wahrscheinlichkeit des Vorhandenseins einer explosionsfähigenAtmosphäre unterschieden.Zone Explosionsgefahr Beispiel2 explosive Gasatmosphäre trittnur selten und kurzzeitig aufsichererBereichBereiche um Flanschverbindungen mitFlachdichtungen bei Rohrleitungen ingeschlossenen Räumennein • außerhalb der Zone 2• Standardanwendungen von dezentralerPeripherieNachfolgend finden Sie wichtige Hinweise für die Installation derBaugruppen/<strong>Module</strong> im explosionsgefährdeten Bereich.Weitere InformationenWeitere Informationen zu den Baugruppen/<strong>Module</strong>n finden Sie im dazugehörigenHandbuch.Fertigungsort / ZulassungII 3 G EEx nA II T3 .. T6 nach EN 50021 : 1999Prüfnummer: siehe TabelleFertigungsort Baugruppen/<strong>Module</strong> PrüfnummerSiemens AG, Bereich A&DWerner-von-Siemens-Straße 5092224 AmbergGermanySiemens AG, Bereich A&DÖstliche Rheinbrückenstr. 5076187 KarlsruheGermanyHinweisET 200SET 200S Fehlersichere <strong>Module</strong><strong>S7</strong>-<strong>300</strong>ET 200MBuskopplung DP/PADiagnoserepeater<strong>S7</strong>-<strong>300</strong> Fehlersichere BaugruppenKEMA 01ATEX 1238XKEMA 02ATEX 1096X<strong>S7</strong>-400 KEMA 03ATEX 1125X<strong>S7</strong>-<strong>300</strong> CPTS Adapter IIKEMA 03ATEX 1228X<strong>SIMATIC</strong> NET KEMA 03ATEX 1226XBaugruppen/<strong>Module</strong> mit der Zulassung II 3 G EEx nA II T3 .. T6 dürfen nur in<strong>SIMATIC</strong>-Systemen der Gerätekategorie 3 eingesetzt werden.Product Information on the Use of subassemblies/modules in a Zone 2 Hazardous Area 3A5E00352937-02
DeutschInstandhaltungFür eine Reparatur müssen die betroffene Baugruppen/<strong>Module</strong> an denFertigungsort geschickt werden. Nur dort darf die Reparatur durchgeführt werden.Besondere Bedingungen1. Baugruppen/<strong>Module</strong> müssen in einen Schaltschrank oder ein metallischesGehäuse eingebaut werden. Diese müssen mindestens die Schutzart IP 54(nach EN 60529) gewährleisten. Dabei sind die Umgebungsbedingungen zuberücksichtigen, in denen das Gerät installiert wird. Für das Gehäuse musseine Herstellererklärung für Zone 2 vorliegen (gemäß EN 50021).2. Wenn am Kabel bzw. an der Kabeleinführung dieses Gehäuses unter Betriebsbedingungeneine Temperatur > 70 °C erreicht wird oder wenn unter Betriebsbedingungendie Temperatur an der Aderverzweigung > 80 °C sein kann,müssen die Temperatureigenschaften der Kabel mit den tatsächlichgemessenen Temperaturen übereinstimmen.3. Die eingesetzten Kabeleinführungen müssen der geforderten IP-Schutzart unddem Abschnitt 7.2 (gemäß EN 50021) entsprechen.4. Alle Geräte, einschließlich Schalter etc., die an den Ein- und Ausgängen von<strong>SIMATIC</strong>-Systemen angeschlossen werden, müssen für den ExplosionsschutzTyp EEx nA oder EEx nC genehmigt sein.5. Es müssen Maßnahmen getroffen werden, dass die Nennspannung durchTransienten um nicht mehr als 40 % überschritten werden kann.6. Umgebungstemperaturbereich: 0° C bis 60° C7. Innerhalb des Gehäuses ist an einem nach dem Öffnen gut sichtbaren Platz einSchild mit folgender Warnung anzubringen:! WarnungDas Gehäuse darf nur kurze Zeit geöffnet werden, z. B. für visuelle Diagnose.Betätigen Sie dabei keine Schalter, ziehen oder stecken keine Baugruppen undtrennen keine elektrischen Leitungen (Steckverbindungen).Diese Warnung kann unberücksichtigt bleiben, wenn bekannt ist, dass keineexplosionsgefährdete Atmosphäre herrscht.Liste der zugelassenen Baugruppen/<strong>Module</strong>Die Liste mit den zugelassenen Baugruppen/<strong>Module</strong> finden Sie im Internet:http://www4.ad.siemens.de/view/cs/unter der Beitrags-ID 13702947.4 Product Information on the Use of subassemblies/modules in a Zone 2 Hazardous AreaA5E00352937-02
EnglishUse of subassemblies/modules in a Zone 2 HazardousAreaZone 2Hazardous areas are divided up into zones. The zones are distinguished accordingto the probability of the existence of an explosive atmosphere.Zone Explosion Hazard Example2 Explosive gas atmosphereoccurs only seldom and for ashort timeSafe area No • Outside zone 2Areas around flange joints with flatgaskets in pipes in enclosed spaces• Standard distributed I/O applicationsBelow you will find important information on the installation of thesubassemblies/modules in a hazardous area.Further InformationYou will find further information on the subassemblies/modules in thecorresponding manual.Production Location / CertificationII 3 G EEx nA II T3 .. T6 to EN 50021 : 1999Test number: see table belowProduction Location Subassemblies/<strong>Module</strong>s Test NumberSiemens AG, Bereich A&DWerner-von-Siemens-Straße 5092224 AmbergGermanySiemens AG, Bereich A&DÖstliche Rheinbrückenstr. 5076187 KarlsruheGermanyET-200SET 200S fault-tolerant modules<strong>S7</strong>-<strong>300</strong>ET-200MDP/PA bus interfaceDiagnostics repeater<strong>S7</strong>-<strong>300</strong> fault-tolerant modulesKEMA 01ATEX 1238XKEMA 02ATEX 1096X<strong>S7</strong>-400 KEMA 03ATEX 1125X<strong>S7</strong>-<strong>300</strong> CPTS Adapter IIKEMA 03ATEX 1228X<strong>SIMATIC</strong> NET KEMA 03ATEX 1226XNoteSubassemblies/modules with II 3 G EEx nA II T3 .. T6 certification can only beused in <strong>SIMATIC</strong> systems rated as category 3 equipment.Product Information on the Use of subassemblies/modules in a Zone 2 Hazardous Area 5A5E00352937-02
EnglishMaintenanceIf repair is necessary, the affected subassemblies/modules must be sent to theproduction location. Repairs can only be carried out there.Special Conditions1. Subassemblies/modules must be installed in a cabinet or metal housing. Thesemust comply with the IP 54 degree of protection as a minimum. Theenvironmental conditions under which the equipment is installed must be takeninto account. There must be a manufacturer's declaration for zone 2 availablefor the housing (in accordance with EN 50021).2. If a temperature of > 70 °C is reached in the cable or at the cable entry of thishousing under operating conditions, or if a temperature of > 80 °C can bereached at the junction of the conductors under operating conditions, thetemperature-related properties of the cables must correspond to thetemperatures actually measured.3. The cable entries used must comply with the required IP degree of protectionand Section 7.2 (in accordance with EN 50021).4. All devices (including switches, etc.) that are connected to the inputs andoutputs of <strong>SIMATIC</strong> systems must be approved for EEx nA or EEx nC explosionprotection.5. Steps must be taken to ensure that the rated voltage through transients cannotbe exceeded by more than 40 %.6. Ambient temperature range: 0° C to 60° C7. A sign containing the following warning must be put up inside the housing in aneasily visible position when the housing is opened:!WarningThe housing can only be opened for a short time (e.g. for visual diagnostics). Ifyou do this, do not operate any switches, remove or install any modules ordisconnect any electrical cables (plug-in connections).You can disregard this warning if you know that the atmosphere is not hazardous(i.e. there is no risk of explosion).List of Approved Subassemblies/<strong>Module</strong>sYou will find the list of approved subassemblies/modules under the ID 13702947on the Internet:http://www4.ad.siemens.de/view/cs/.6Product Information on the Use of subassemblies/modules in a Zone 2 Hazardous AreaA5E00352937-02
FrançaisUtilisation des modules / coupleurs dans la zone àrisque d'explosion 2Zone 2Les environnements à risque d'explosion sont répartis en zones. Les zones sedistinguent par la probabilité de présence d'une atmosphère explosive.Zone Risque d'explosion Exemple2 Formation rare et brève d'uneatmosphère gazeuse explosiveEnvironnement de raccords à joints platsdans le cas de conduites dans des locauxfermésZone sûre Non • A l'extérieur de la zone 2• Utilisation standard de périphériedécentraliséeVous trouverez ci-après des remarques importantes pour l'installation de la stationde périphérie décentralisée des modules / coupleurs dans la zone à risqued'explosion.Informations complémentairesDes informations complémentaires sur les modules / cartouches se trouvent dansle manuel correspondant.Lieu de fabrication / HomologationII 3 G EEx nA II T3 .. T6 selon EN 50021 : 1999Numéro de contrôle :voir tableauLieu de fabrication <strong>Module</strong>s / coupleurs Numéro decontrôleSiemens AG, Bereich A&DWerner-von-Siemens-Straße 5092224 AmbergGermanySiemens AG, Bereich A&DÖstliche Rheinbrückenstr. 5076187 KarlsruheGermanyET 200S<strong>Module</strong>s à sécurité intrinsèqueET 200S<strong>S7</strong>-<strong>300</strong>ET 200MCouplage de bus DP/PARépéteur de diagnostic<strong>Module</strong>s à sécurité intrinsèque<strong>S7</strong>-<strong>300</strong>KEMA 01ATEX 1238XKEMA 02ATEX 1096X<strong>S7</strong>-400 KEMA 03ATEX 1125X<strong>S7</strong>-<strong>300</strong> CPTS Adapter IIKEMA 03ATEX 1228X<strong>SIMATIC</strong> NET KEMA 03ATEX 1226XProduct Information on the Use of subassemblies/modules in a Zone 2 Hazardous AreaA5E00352937-027
FrançaisNotaLes modules / coupleurs homologués II 3 G EEx nA II T3 .. T6 ne peuventêtre utilisés que dans des systèmes <strong>SIMATIC</strong> de catégorie 3.EntretienSi une réparation est nécessaire, le module / coupleur concerné doit être expédiéau lieu de production. La réparation ne doit être effectuée qu'en ce lieu.Conditions particulières1. Les modules / coupleurs doivent être installés dans une armoire ou un boîtiermétallique. Ceux-ci doivent assurer au moins l'indice de protection IP 54. Il fautalors tenir compte des conditions d'environnement dans lesquelles l'appareil estinstallé. Le boîtier doit faire l’objet d’une déclaration de conformité du fabricantpour la zone 2 (selon EN 50021).2. Si dans les conditions d’exploitation, une température > 70 °C est atteinte auniveau du câble ou de l’entrée du câble dans ce boîtier, ou bien si latempérature au niveau de la dérivation des conducteurs peut être > 80 °C, lescapacités de résistance thermique des câbles doivent corespondre auxtempératures effectivement mesurées.3. Les entrées de câbles utilisées doivent avoir le niveau de protection IP exigé etêtre conformes au paragraphe 7.2 (selon EN 50021).4. Tous les appareillages (y compris les interrupteurs, etc.) raccordés aux entréeset sorties de systèmes <strong>SIMATIC</strong> doivent être homologués pour la protectionantidéflagrante type EEx nA ou EEx nC.5. Il faut prendre des mesures pour que la tension nominale ne puisse pas êtredépassée de plus de 40% sous l’influence de transitoires.6. Plage de température ambiante : 0° C à 60° C7. A l’intérieur du boîtier, il faut placer, à un endroit bien visible après ouverture,une plaquette comportant l’avertissement suivant :!AvertissementOuvir le boîtier le moins longtemps possible, par exemple pour effectuer undiagnostic visuel. Ce faisant, n’actionnez aucun commutateur, ne déconnectezaucun module et ne débanchez pas de câbles électriques (connexions).Le respect de cet avertissement n’est pas impératif s’il est certain quel’environnement ne présente pas de risque d’explosion.Liste des modules / coupleurs homologuésVous trouverez sur Internet la liste des modules / coupleurs homologués :http://www4.ad.siemens.de/view/cs/référence ID 13702947.8 Product Information on the Use of subassemblies/modules in a Zone 2 Hazardous AreaA5E00352937-02
EspañolAplicación de los módulos / tarjetas en áreas conpeligro de explosión, zona 2Zona 2Las áreas con peligro de explosión se clasifican en zonas. Las zonas sediferencian según la probabilidad de la existencia de una atmósfera capaz de sufriruna explosión.Zona Peligro de explosión Ejemplo2 La atmósfera explosiva de gassólo se presenta rara vez y muybrevementeÁrea segura no • fuera de la zona 2Áreas alrededor de uniones abridadas con juntasplanas en tuberías en locales cerrados• Aplicaciones estándar de la periferiadescentralizadaA continuación encontrará importantes informaciones para la instalación de losmódulos / tarjetas en áreas con peligro de explosión.Otras informacionesEncontrará otras informaciones relativas a los módulos / tarjetas en el Manualcorrespondiente.Lugar de fabricación / HomologaciónII 3 G EEx nA II T3 .. T6 según norma EN 50021 : 1999Número de comprobación:véase tablaLugar de fabricación Módulos / tarjetas Número decomprobaciónSiemens AG, Bereich A&DWerner-von-Siemens-Straße 5092224 AmbergGermanyET 200SGrupos ET 200S a prueba de fallos<strong>S7</strong>-<strong>300</strong>ET 200MAcoplamiento de bus DP/PARepetidor de diagnósticoGrupos <strong>S7</strong>-<strong>300</strong> a prueba de fallosKEMA 01ATEX 1238 XKEMA 02ATEX 1096 XSiemens AG, Bereich A&DÖstliche Rheinbrückenstr.50 76187 KarlsruheGermany<strong>S7</strong>-400 KEMA 03ATEX 1125 X<strong>S7</strong>-<strong>300</strong> CPTS AdapterKEMA 03ATEX 1228 X<strong>SIMATIC</strong> NET KEMA 03ATEX 1226 XProduct Information on the Use of subassemblies/modules in a Zone 2 Hazardous AreaA5E00352937-029
EspañolNotaLos módulos / tarjetas con la homologación II 3 G EEx nA II T3 .. T6 puedenutilizarse únicamente en los sistemas <strong>SIMATIC</strong> de la categoría de equipo 3.MantenimientoPara una reparación se ha de remitir el módulo / tarjeta afectado al lugar defabricación. Sólo allí se puede realizar la reparación.Condiciones especiales1. Los módulos / tarjetas se han de montar en un armario eléctrico de distribucióno en una carcasa metálica. Éstos deben garantizar como mínimo el grado deprotección IP 54 (conforme a EN 60529). Para ello se han de tener en cuentalas condiciones ambientales, en las cuales se instala el equipo. La caja deberácontar con una declaración del fabricante para la zona 2 (conforme aEN 50021).2. Si durante la operación se alcanzara una temperatura > 70° C en el cable o laentrada de cables de esta caja o bien una temperatura > 80° C en labifurcación de hilos, deberán adaptarse las propiedades térmicas de los cablesa las temperaturas medidas efectivamente.3. Las entradas de cable utilizadas deben cumplir el grado de protección IPexigido y lo expuesto en el apartado 7.2 (conforme a EN 50021).4. Todos los dispositivos –inclusive interruptores, etc.– conectados a las entradasy salidas de sistemas <strong>SIMATIC</strong> deben estar homologados para la proteccióncontra explosiones del tipo EEx nA o EEx nC.5. Es necesario adoptar las medidas necesarias para evitar que la tensiónnominal pueda rebasar en más del 40 % debido a efectos transitorios.6. Margen de temperatura ambiente: 0° C hasta 60° C7. Dentro de la caja deberá colocarse en un lugar perfectamente visible tras suapertura un rótulo con la siguiente advertencia:! PrecauciónAbrir la caja sólo brevemente, p.ej. para el diagnóstico visual. Durante estetiempo Ud. no deberá activar ningún interruptor, desenchufar o enchufar módulosni separar conductores eléctricos (conexiones enchufables).Esta advertencia puede ignorarse si Ud. sabe que en la atmósfera existente nohay peligro de explosión.Lista de los módulos / tarjetas homologadosEn la internet hallará Ud. una lista con los módulos / tarjetas homologados:http://www4.ad.siemens.de/view/cs/bajo el ID de asignación 13702947.10 Product Information on the Use of subassemblies/modules in a Zone 2 Hazardous AreaA5E00352937-02
ItalianoImpiego delle unità/moduli nell'area a pericolo diesplosione zona 2Zona 2Le aree a pericolo di esplosione vengono suddivise in zone. Le zone vengonodistinte secondo la probabilità della presenza di un'atmosfera esplosiva.Zona Pericolo di esplosione Esempio2 L'atmosfera esplosiva sipresente solo raramente ebrevementeAree intorno a collegamenti a flange conguarnizioni piatte nelle condotte in ambientichiusiArea sicura No • Al di fuori della zona 2• Applicazioni standard di periferiadecentrataQui di seguito sono riportate delle avvertenze importanti per l'installazione delleunità/moduli nell'area a pericolo di esplosione.Ulteriori informazioniUlteriori informazioni sulle unità/moduli si trovano nel corrispondente manuale.Luogo di produzione / OmologazioneII 3 G EEx nA II T3 .. T6 secondo EN 50021 : 1999Numero di controllo: vedi tabellaLuogo di produzione Unità/moduli Numero di controlloSiemens AG, Bereich A&DWerner-von-Siemens-Straße 5092224 AmbergGermanyET 200SUnità ad elevata sicurezzaET 200S<strong>S7</strong>-<strong>300</strong>ET 200MAccoppiamento di bus DP/PARepeater di diagnosticaUnità ad elevata sicurezza<strong>S7</strong>-<strong>300</strong>KEMA 01ATEX 1238XKEMA 02ATEX 1096XSiemens AG, Bereich A&DÖstliche Rheinbrückenstr. 5076187 KarlsruheGermany<strong>S7</strong>-400 KEMA 03ATEX 1125X<strong>S7</strong>-<strong>300</strong> CPTS Adapter IIKEMA 03ATEX 1228X<strong>SIMATIC</strong> NET KEMA 03ATEX 1226XProduct Information on the Use of subassemblies/modules in a Zone 2 Hazardous AreaA5E00352937-0211
ItalianoAvvertenzaLe unità/moduli con l'omologazione II 3 G EEx nA II T3 .. T6 possono essereimpiegati solo nei sistemi <strong>SIMATIC</strong> della categoria di apparecchiature 3.ManutenzionePer una riparazione, le unità/i moduli interessati devono essere inviati al luogo diproduzione. La riparazione può essere effettuata solo lì.Condizioni particolari1. Le unità/i moduli devono essere montati in un armadio elettrico o in uncontenitore metallico. Questi devono assicurare almeno il tipo di protezioneIP 54. In questo caso bisogna tenere conto delle condizioni ambientali nellequali l'apparecchiatura viene installata. Per il contenitore deve essere presenteuna dichiarazione del costruttore per la zona 2 (secondo EN 50021).2. Se nei cavi o nel loro punto di ingresso in questo contenitore viene raggiunta incondizioni di esercizio una temperatura > 70 °C o se in condizioni di esercizio latemperatura nella derivazione dei fili può essere > 80 °C, le caratteristiche ditemperatura dei cavi devono essere conformi alla temperatura effettivamentemisurata.3. Gli ingressi dei cavi usati devono essere conformi al tipo di protezione richiestoe alla sezione 7.2 (secondo EN 50021).4. Tutte le apparecchiature, inclusi interruttori, ecc. che vengono collegati agliingressi/uscite di sistemi <strong>SIMATIC</strong>, devono essere stati omologati per laprotezione da esplosione tipo EEx nA o EEx nC.5. Devono essere prese delle misure per evitare che la tensione nominale possaessere superata per più del 40% da parte di transienti.6. Campo termico ambientale: da 0° C a 60° C7. All’interno del contenitore va apportata, in un luogo ben visibile dopo l’apertura,una targhetta con il seguente avvertimento:! AttenzioneIl contenitore può rimanere aperto solo per breve tempo, ad esempio per unadiagnostica a vista. In tal caso non azionare alcun interruttore, non disinnestare oinnestare unità e non staccare connessioni elettriche (connettori).Non è necessario tenere conto di questo avvertimento se è noto che non c’èun’atmosfera a rischio di esplosioneElenco delle unità/moduli omologatiL'elenco con le unità/moduli omologati si trova in Internet al sito:http://www4.ad.siemens.de/view/cs/all’ID di voce 13702947.12 Product Information on the Use of subassemblies/modules in a Zone 2 Hazardous AreaA5E00352937-02
NederlandsGebruik van de componenten/modulen in het explosiefgebied zone 2Zone 2Explosieve gebieden worden ingedeeld in zones. Bij de zones wordtonderscheiden volgens de waarschijnlijkheid van de aanwezigheid van eenexplosieve atmosfeer.Zone Explosiegevaar Voorbeeld2 Een explosieve gasatmosfeertreedt maar zelden op en voorkorte duurVeiliggebiedGebieden rond flensverbindingen metpakkingen bij buisleidingen in geslotenvertrekkenneen • Buiten de zone 2• Standaardtoepassingen van decentraleperiferieHierna vindt u belangrijke aanwijzingen voor de installatie van decomponenten/modulen in het explosief gebied.Verdere informatieIn het bijhorende handboek vindt u verdere informatie over decomponenten/modulenProductieplaats / VergunningII 3 G EEx nA II T3 .. T6 conform EN 50021 : 1999Keuringsnummer: zie tabelProductieplaats Componenten/modulen KeuringsnummerSiemens AG, Bereich A&DWerner-von-Siemens-Strasse 5092224 AmbergGermanyET 200SET 200S tegen foutenbeveiligde componenten<strong>S7</strong>-<strong>300</strong>ET 200 MBuskoppeling DP/PADiagnoserepeater<strong>S7</strong>-<strong>300</strong> tegen fouten beveiligdecomponentenKEMA 01ATEX 1238XKEMA 02ATEX 1096XSiemens AG, Bereich A&DÖstliche Rheinbrückenstr. 5076187 KarlsruheGermany<strong>S7</strong>-400 KEMA 03ATEX 1125X<strong>S7</strong>-<strong>300</strong> CPTS Adapter IIKEMA 03ATEX 1228X<strong>SIMATIC</strong> NET KEMA 03ATEX 1226XProduct Information on the Use of subassemblies/modules in a Zone 2 Hazardous AreaA5E00352937-0213
NederlandsOpmerkingComponenten/modulen met de vergunning II 3 G EEx nA II T3 .. T6 mogenslechts worden gebruikt in <strong>SIMATIC</strong>-systemen van de apparaatcategorie 3.InstandhoudingVoor een reparatie moeten de betreffende componenten/modulen naar de plaatsvan vervaardiging worden gestuurd. Alleen daar mag de reparatie wordenuitgevoerd.Speciale voorwaarden1. Componenten/modulen moeten worden ingebouwd in een schakelkast of in eenbehuizing van metaal. Deze moeten minstens de veiligheidsgraad IP 54waarborgen. Hierbij dient rekening te worden gehouden met deomgevingsvoorwaarden waarin het apparaat wordt geïnstalleerd. Voor debehuizing dient een verklaring van de fabrikant voor zone 2 te wordeningediend (volgens EN 50021).2. Als aan de kabel of aan de kabelinvoering van deze behuizing onderbedrijfsomstandigheden een temperatuur wordt bereikt > 70 °C of als onderbedrijfsomstandigheden de temperatuur aan de adervertakking > 80 °C kanzijn, moeten de temperatuureigenschappen van de kabel overeenstemmen metde werkelijk gemeten temperaturen.3. De aangebrachte kabelinvoeringen moeten de vereiste IP-veiligheidsgraadhebben en in overeenstemming zijn met alinea 7.2 (volgens EN 50021).4. Alle apparaten, schakelaars enz. inbegrepen, die worden aangesloten op de inenuitgangen van <strong>SIMATIC</strong>-systemen, moeten zijn goedgekeurd voor deexplosiebeveiliging type EEx nA of EEx nC.5. Er dienen maatregelen te worden getroffen, zodat de nominale spanning doortransiënten met niet meer dan 40 % kan worden overschreden.6. Omgevingstemperatuurbereik: 0° C tot 60° C7. Binnen de behuizing dient op een na het openen goed zichtbare plaats eenbord te worden aangebracht met de volgende waarschuwing:! WaarschuwingDe behuizing mag slechts voor korte tijd worden geopend, bijv. voor een visuelediagnose. Bedien hierbij geen schakelaar, trek of steek geen modulen enontkoppel geen elektrische leidingen (steekverbindingen).Deze waarschuwing kan buiten beschouwing blijven, indien bekend is dat ergeen explosieve atmosfeer heerst.Lijst van de toegelaten componenten/modulenDe lijst met de toegelaten componenten/modulen vindt u in het internet:http://www4.ad.siemens.de/view/cs/onder de bijdrage-ID 13702947.14Product Information on the Use of subassemblies/modules in a Zone 2 Hazardous AreaA5E00352937-02
DanskBrug af komponenter/moduler i det eksplosionsfarligeområde zone 2Zone 2Eksplosionsfarlige områder inddeles i zoner. Zonerne adskiller sig indbyrdes efterhvor sandsynligt det er, at der er en eksplosiv atmosfære.Zone Eksplosionsfare Eksempel2 Eksplosiv gasatmosfæreoptræder kun sjældent og varerkortSikkertområdeNej • Uden for zone 2Områder rundt om flangeforbindelser medflade pakninger ved rørledninger i lukkederum• Standardanvendelser decentral periferiI det følgende findes vigtige henvisninger vedr. installation af komponenter/moduleri det eksplosionsfarlige område.Yderligere informationerYderligere informationer om komponenterne/modulerne findes i den pågældendemanual.Produktionssted / GodkendelseII 3 G EEx nA II T3 .. T6 efter EN 50021 : 1999Kontrolnummer: se tabelProduktionssted Komponenter/moduler KontrolnummerSiemens AG, Bereich A&DWerner-von-Siemens-Straße 5092224 AmbergGermanyET 200SET 200S fejlsikrekomponenter<strong>S7</strong>-<strong>300</strong>ET 200MBuskobling DP/PADiagnoserepeater<strong>S7</strong>-<strong>300</strong> fejlsikre komponenterKEMA 01ATEX 1238XKEMA 02ATEX 1096XSiemens AG, Bereich A&DÖstliche Rheinbrückenstr. 5076187 KarlsruheGermany<strong>S7</strong>-400 KEMA 03ATEX 1125X<strong>S7</strong>-<strong>300</strong> CPTS Adapter IIKEMA 03ATEX 1228X<strong>SIMATIC</strong> NET KEMA 03ATEX 1226XBemærkKomponenter/moduler med godkendelsen II 3 G EEx nA II T3 .. T6 må kunmonteres i <strong>SIMATIC</strong>-systemer for udstyrskategori 3.Product Information on the Use of subassemblies/modules in a Zone 2 Hazardous AreaA5E00352937-0215
DanskVedligeholdelseHvis de pågældende komponenter/moduler skal repareres, bedes De sende demtil produktionsstedet. Reparation må kun udføres der.Særlige betingelser1. Komponenterne/modulerne skal monteres i et kontrolskab eller et metalkabinet.Disse skal mindst kunne sikre beskyttelsesklasse IP 54. I denne forbindelseskal der tages højde for de omgivelsestemperaturer, i hvilke udstyret erinstalleret. Der skal være udarbejdet en erklæring fra fabrikanten for kabinettetfor zone 2 (iht. EN 50021).2. Hvis kablet eller kabelindføringen på dette hus når op på en temperatur på> 70 °C under driftsbetingelser eller hvis temperaturen på åreforegreningen kanvære > 80 °C under driftsbetingelser, skal kablernes temperaturegenskaberstemme overens med de temperaturer, der rent faktisk måles.3. De benyttede kabelindføringer skal være i overensstemmelse med denkrævede IP-beskyttelsestype og afsnittet 7.2 (iht. EN 50021).4. Alle apparater, inkl. kontakter osv., der forbindes med ind- og udgangene til<strong>SIMATIC</strong>-systemerne, skal være godkendt til eksplosionsbeskyttelse aftype EEx nA eller EEx nC.5. Der skal træffes foranstaltninger, der sørger for, at den nominelle spænding viatransienter ikke kan overskrides mere end 40 %.6. Omgivelsestemperaturområde: 0° C til 60° C7. I kabinettet skal der anbringes et skilt, der skal kunne ses, når kabinettet åbnes.Dette skilt skal have følgende advarsel:!AdvarselKabinettet må kun åbnes i kort tid, f.eks. til visuel diagnose. Tryk i denneforbindelse ikke på kontakter, træk eller isæt ikke komponenter og afbryd ikkeelektriske ledninger (stikforbindelser).Der skal ikke tages højde for denne advarsel, hvis man ved, at der ikke er nogeneksplosionsfarlig atmosfære.Liste over godkendte komponenter/modulerListen med de godkendte komponenter/moduler findes på internettet:http://www4.ad.siemens.de/view/cs/under bidrags-ID 13702947.16 Product Information on the Use of subassemblies/modules in a Zone 2 Hazardous AreaA5E00352937-02
SuomiRakenneryhmien/moduulien käyttöräjähdysvaarannetuilla alueilla, vyöhyke 2Vyöhyke 2Räjähdysvaarannetut alueet jaetaan vyöhykkeisiin. Vyöhykkeet erotellaanräjähdyskelpoisen ilmakehän olemassa olon todennäköisyyden mukaan.Vyöhyke Räjähdysvaara Esimerkki2 Räjähtävä kaasuilmakehäilmaantuu vain harvoin jalyhytaikaisestiturvallinenalueeiAlueet putkistojen lattatiivisteillä varustuillalaippaliitoksilla suljetuissa tiloissa• vyöhykkeen 2 ulkopuolella• Hajautetun ulkopiirin vakiosovelluksetSeuraavasta löydätte tärkeitä ohjeita rakenneryhmien/moduulien asennukseenräjähdysvaarannetuilla alueilla.LisätietojaLisätietoja rakenneryhmiin/moduuleihin löydätte niihin kuuluvista ohjekirjasta.Valmistuspaikka / HyväksyntäII 3 G EEx nA II T3 .. T6 EN 50021 mukaan: 1999Tarkastusnumero: katso taulukkoValmistuspaikka Rakenneryhmät/moduulit TarkastusnumeroSiemens AG, Bereich A&DWerner-von-Siemens-Straße 5092224 AmbergGermanySiemens AG, Bereich A&DÖstliche Rheinbrückenstr. 5076187 KarlsruheGermanyET 200SET 200S läpi-iskuvarmatrakenneryhmät<strong>S7</strong>-<strong>300</strong>ET 200MVäyläkytkin DP/PADignoositoistin<strong>S7</strong>-<strong>300</strong> läpi-iskuvarmatrakenneryhmätKEMA 01ATEX 1238XKEMA 02ATEX 1096X<strong>S7</strong>-400 KEMA 03ATEX 1125X<strong>S7</strong>-<strong>300</strong> CPTS Adapter IIKEMA 03ATEX 1228X<strong>SIMATIC</strong> NET KEMA 03ATEX 1226XOhjeRakenneryhmät/moduulit hyväksynnän II 3 G EEx nA II T3 .. T6 kanssasaadaan käyttää ainoastaan laitekategorian 3 <strong>SIMATIC</strong>-järjestelmissä.Product Information on the Use of subassemblies/modules in a Zone 2 Hazardous AreaA5E00352937-0217
SuomiKunnossapitoKorjausta varten täytyy kyseinen rakenneryhmä/moduuli lähettäävalmistuspaikkaan. Korjaus voidaan suorittaa ainoastaan siellä.Erityiset vaatimukset1. Rakenneryhmät/moduulit täytyy asentaa kytkentäkaappiin tai metalliseenkoteloon. Näiden täytyy olla vähintään kotelointiluokan IP 54 mukaisia. Tällöinon huomioitava ympäristöolosuhteet, johon laite asennetaan. Kotelolle täytyyolla valmistajaselvitys vyöhykettä 2 varten (EN 50021 mukaan).2. Kun johdolla tai tämän kotelon johdon sisäänviennillä saavutetaan > 70 °Clämpötila tai kun käyttöolosuhteissa lämpötila voi piuhajaotuksella olla > 80 °C,täytyy johdon lämpötilaominaisuuksien vastata todellisesti mitattuja lämpötiloja.3. Käytettyjen johtojen sisäänohjauksien täytyy olla vaaditun IP-kotelointiluokan jakohdan 7.2 (EN 50021 mukaan) mukaisia.4. Kaikkien laitteiden, kytkimet jne. mukaan lukien, jotka liitetään <strong>SIMATIC</strong>järjestelmientuloille ja lähdöille, täytyy olla hyväksyttyjä tyypin EEx nA taiEEx nC räjähdyssuojausta varten.5. Toimenpiteet täytyy suorittaa, ettei nimellisjännite voi transienttien kautta ylittyäenemmän kuin 40 %.6. Ympäristölämpötila-alue: 0° C ... 60° C7. Kotelon sisälle, avauksen jälkeen näkyvälle paikalle, on kiinnitettävä kilpi, jossaon seuraava varoitus:! VaroitusKotelo saadaan avata ainoastaan lyhyeksi ajaksi, esim. visuaalista diagnoosiavarten. Älä tällöin käytä mitään kytkimiä, vedä tai liitä mitään rakenneryhmiä,äläkä erota mitään sähköjohtoja (pistoliittimiä).Tätä varoitusta ei tarvitse huomioida, kun on tiedossa, että minkäänlaistaräjähdysvaarannettua ilmakehää ei ole olemassa.Hyväksyttyjen rakenneryhmien/moduulien listaLista hyväksytyistä rakennesarjoista/moduuleista löytyy internetistä osoitteesta:http://www4.ad.siemens.de/view/cs/käyttäjätunnuksella 13702947.18 Product Information on the Use of subassemblies/modules in a Zone 2 Hazardous AreaA5E00352937-02
SvenskaAnvändning av komponentgrupperna/modulerna iexplosionsriskområde zon 2Zon 2Explosionsriskområden delas in i zoner. Zonerna delas in enligt sannolikheten atten atmosfär med explosionsfara föreligger.Zon Explosionsfara Exempel2 Explosiv gasatmosfär uppstårendast sällan eller kortvarigtSäkertområdeNej • Utanför zon 2Områden kring flänsförbindelser medpackningar vid rörledningar i slutnautrymmen• Standardanvändning av decentralperiferiNedan följer viktiga anvisningar om installationen avkomponentgrupperna/modulerna i ett explosionsriskområde.Ytterligare informationYtterligare information om komponentgrupperna/modulerna finner du i tillhörandehandbok.Tillverkningsort / GodkännandeII 3 G EEx nA II T3 .. T6 enligt EN 50021 : 1999Kontrollnummer: se tabellTillverkningsortSiemens AG, Bereich A&DWerner-von-Siemens-Straße 5092224 AmbergGermanySiemens AG, Bereich A&DÖstliche Rheinbrückenstr. 5076187 KarlsruheGermanyKomponentgrupper/modulerET 200SET 200S Felsäkrakomponentgrupper<strong>S7</strong>-<strong>300</strong>ET 200MBusskoppling DP/PADiagnosrepeater<strong>S7</strong>-<strong>300</strong> FelsäkrakomponentgrupperKontrollnummerKEMA 01ATEX 1238XKEMA 02ATEX 1096X<strong>S7</strong>-400 KEMA 03ATEX 1125X<strong>S7</strong>-<strong>300</strong> CPTS Adapter IIKEMA 03ATEX 1228X<strong>SIMATIC</strong> NET KEMA 03ATEX 1226XProduct Information on the Use of subassemblies/modules in a Zone 2 Hazardous Area 19A5E00352937-02
SvenskaAnvisningKomponentgrupper/moduler med godkännande II 3 G EEx nA II T3 .. T6 fårendast användas i <strong>SIMATIC</strong>-system i apparatgrupp 3.UnderhållVid reparation måste den aktuella komponentgrupperna/modulerna insändas tilltillverkaren. Reparationer får endast genomföras där.Särskilda villkor1. Komponentgrupperna/modulerna måste monteras i ett kopplingsskåp ellermetallhus. Dessa måste minst vara av skyddsklass IP 54. Därvid skaomgivningsvillkoren där enheten installeras beaktas. För kåpan måste entillverkardeklaration för zon 2 föreligga (enligt EN 50021).2. Om en temperatur på > 70°C uppnås vid husets kabel resp kabelinföring underdriftvillkor eller om temperaturen vid trådförgreningen kan vara > 80°C underdriftvillkor, måste kabelns temperaturegenskaper överensstämma med denverkligen uppmätta temperaturen.3. De använda kabelinföringarna måste uppfylla kraven i det krävda IPskyddsutförandetoch i avsnitt 7.2 (enligt EN 50021).4. Alla apparater, inklusive brytare osv, som ansluts till in- och utgångarna på<strong>SIMATIC</strong>-system, måste vara godkända för explosionsskydd av typ EEx nAeller EEx nC.5. Åtgärder måste vidtas så, att märkspänningen ej kan överskridas med mer än40 % genom transienter.6. Omgivningstemperatur: 0° C till 60° C7. När huset öppnats ska en skylt med följande varning monteras på ett tydligtsynligt ställe huset:! VarningHuset får endast öppnas under kort tid, t ex för visuell diagnos. Använd därvidinga brytare, lossa eller anslut inga enheter och frånskilj inga elektriska ledningar(insticksanslutningar).Ingen hänsyn måste tas till denna varning om det är säkert att det inte rådernågon explosionsfarlig atmosfär.Lista över godkända komponentgrupper/modulerLista över godkända komponentgrupper/moduler finns på Internetadressen:http://www4.ad.siemens.de/view/cs/under bidrags-ID 13702947.20 Product Information on the Use of subassemblies/modules in a Zone 2 Hazardous AreaA5E00352937-02
PortuguêsUso de grupos construtivos/módulos em área expostaao perigo de explosão 2Zona 2As áreas expostas ao perigo de explosão são divididas em zonas. As zonas sãodiferenciadas de acordo com a probabilidade da existência de uma atmosferaexplosiva.Zona Perigo de explosão Exemplo2 Só raramente e por um breveperíodo de tempo surgematmosferas explosivasÁrea segura não • fora da zona 2Áreas em torno de ligações flangeadascom vedações chatas em tubulações emrecintos fechados• Aplicações descentralizadas deperiferia descentralizadaA seguir, o encontrará avisos importantes para a instalação de gruposconstrutivos/ módulos em área exposta ao perigo de explosão.Mais informaçõesPara obter mais informações sobre grupos construtivos/módulos, consulte orespectivo manual.Local de produção / LicençaII 3 G EEx nA II T3 .. T6 seg. EN 50021 : 1999Número de ensaio: veja a tabelaLocal de produçãoSiemens AG, Bereich A&DWerner-von-Siemens-Straße 5092224 AmbergAlemanhaSiemens AG, Bereich A&DÖstliche Rheinbrückenstr. 5076187 KarlsruheAlemanhaGruposconstrutivos/módulosET 200SET 200S Grupos construtivosprotegidos contra erro<strong>S7</strong>-<strong>300</strong>ET 200MAcoplador bus DP/PARepetidor de diagnóstico<strong>S7</strong>-<strong>300</strong> Grupos construtivosprotegidos contra erroN° de ensaioKEMA 01ATEX 1238XKEMA 02ATEX 1096X<strong>S7</strong>-400 KEMA 03ATEX 1125X<strong>S7</strong>-<strong>300</strong> CPTS Adapter IIKEMA 03ATEX 1228X<strong>SIMATIC</strong> NET KEMA 03ATEX 1226XProduct Information on the Use of subassemblies/modules in a Zone 2 Hazardous Area 21A5E00352937-02
PortuguêsAvisoOs grupos construtivos/módulos com a licença II 3 G EEx nA II T3 .. T6 sópodem ser aplicados em sistemas <strong>SIMATIC</strong> da categoria de aparelho 3.ReparoOs grupos construtivos/módulos em questão devem ser remetidos para o local deprodução a fim de que seja realizado o reparo. Apenas lá deve ser efetuado oreparo.Condições especiais1. Os grupos construtivos/módulos devem ser montados em um armário dedistribuição ou em uma caixa metálica. Estes devem garantir no mínimo o tipode protecção IP 54. Durante este trabalho deverão ser levados emconsideração as condições locais, nas quais o aparelho será instalado. Para acaixa deverá ser apresentada uma declaração do fabricante para a zona 2 (deacordo com EN 50021).2. Caso no cabo ou na entrada do cabo desta carcaça sob as condiçõesoperacionais seja atingida uma temperatura de > 70 °C, ou caso sob condiçõesoperacionais a temperatura na ramificação do fio poderá atingir > 80 °C, ascaraterísticas de temperatura deverão corresponder às temperaturas realmentemedidas.3. As entradas de cabo utilizadas devem corresponder ao tipo exigido deprotecção IP e à seção 7.2 (de acordo com o EN 50021).4. Todos os aparelhos, inclusive as chaves, etc., que estejam conectadas ementradas e saídas dos sistemas <strong>SIMATIC</strong> devem possuir a licença para aprotecção de explosão do tipo EEx nA ou EEx nC.5. Precisam ser tomadas medidas para que a tensão nominal através detransitórios não possa ser ultrapassada em mais que 40 %.6. Área de temperatura ambiente: 0° C até 60° C7. No âmbito da carcaça deve ser colocada, após a abertura, em um ponto bemvisível uma placa com a seguinte advertência:! AdvertênciaA carcaça deve ser aberta apenas por um breve período de tempo, por ex. paradiagnóstico visual. Não acione nenhum interruptor, não retire ou conecte nenhummódulo e não separe nenhum fio elétrico (ligações de tomada).Esta advertência poderá ser ignorada caso se saiba que não há nenhumaatmosfera sujeita ao perigo de explosão.Lista dos grupos construtivos/módulos autorizadosA lista com os grupos construtivos/módulos autorizados encontram-se na Internet:http://www4.ad.siemens.de/view/cs/sob o número de ID 13702947.22 Product Information on the Use of subassemblies/modules in a Zone 2 Hazardous AreaA5E00352937-02
ΕλληνικάΧρήση των δοµικών συγκροτηµάτων/µονάδων σεεπικίνδυνη για έκρηξη περιοχή, ζώνη 2Ζώνη 2Οι επικίνδυνες για έκρηξη περιοχές χωρίζονται σε ζώνες. Οι ζώνες διαφέρουνσύµφωνα µε την πιθανότητα ύπαρξης ενός ικανού για έκρηξη περιβάλλοντος.Ζώνη Κίνδυνος έκρηξης Παράδειγµα2 Εκρηκτικό περιβάλλον αερίουπαρουσιάζεται µόνο σπάνια καιγια σύντοµο χρονικό διάστηµαΑσφαλήςπεριοχήόχι • Εκτός της ζώνης 2Περιοχές γύρω από φλαντζωτέςσυνδέσεις µε τσιµούχες σε σωληνώσεις σεκλειστούς χώρους• Τυπικές εφαρµογές αποκεντρωµένηςπεριφέρειαςΣτη συνέχεια θα βρείτε σηµαντικές υποδείξεις για την εγκατάσταση των δοµικώνσυγκροτηµάτων/µονάδων σε επικίνδυνη για έκρηξη περιοχή.Επιπλέον πληροφορίεςΕπιπλέον πληροφορίες για τα δοµικά συγκροτήµατα/µονάδες θα βρείτε στοαντίστοιχο εγχειρίδιο.Τόπος κατασκευής / ΆδειαII 3 G EEx nA II T3 .. T6 σύµφωνα µε το πρότυποEN 50021 : 1999Αριθµός ελέγχου: βλέπε πίνακαΤόπος κατασκευής ∆οµικά συγκροτήµατα/µονάδες Αιθµ. ελέγχουSiemens AG, Bereich A&DWerner-von-Siemens-Straße 5092224 AmbergGermanySiemens AG, Bereich A&DÖstliche Rheinbrückenstr. 5076187 KarlsruheGermanyET 200SET 200S Ασφαλή σε περίπτωσηβλάβης δοµικά συγκροτήµατα<strong>S7</strong>-<strong>300</strong>ET 200MΣύζευξη διαύλου DP/PAΕπαναλήπτης διάγνωσης<strong>S7</strong>-<strong>300</strong> Ασφαλή σε περίπτωσηβλάβης δοµικά συγκροτήµαταKEMA 01ATEX 1238XKEMA 02ATEX 1096X<strong>S7</strong>-400 KEMA 03ATEX 1125X<strong>S7</strong>-<strong>300</strong> CPTS Adapter IIKEMA 03ATEX 1228X<strong>SIMATIC</strong> NET KEMA 03ATEX 1226XProduct Information on the Use of subassemblies/modules in a Zone 2 Hazardous Area 23A5E00352937-02
ΕλληνικάΥπόδειξηΤα δοµικά συγκροτήµατα/οι µονάδες µε την άδεια II 3 G EEx nA II T3 .. T6επιτρέπεται να τοποθετηθούν µόνο σε συστήµατα αυτοµατισµού <strong>SIMATIC</strong> τηςκατηγορίας συσκευής 3.ΣυντήρησηΓια µια επισκευή πρέπει να σταλθούν τα αντίστοιχα δοµικά συγκροτήµατα/µονάδεςστον τόπο κατασκευής. Μόνο εκεί επιτρέπεται να γίνει η επισκευή.Ιδιαίτερες προϋποθέσεις1. Τα δοµικά συγκροτήµατα/µονάδες πρέπει να ενσωµατωθούν σε ένα ερµάριοζεύξης ή σε ένα µεταλλικό περίβληµα. Αυτά πρέπει να εξασφαλίζουν τολιγότερο το βαθµό προστασίας IP 54 (κατά EN 60529). Σε αυτήν τηνπερίπτωση πρέπει να ληφθούν υπόψη οι περιβαλλοντικές συνθήκες, στιςοποίες θα εγκατασταθεί η συσκευή. Για το περίβληµα πρέπει να προβλέπεταιδήλωση του κατασκευαστή για τη ζώνη 2 (σύµφωνα µε το πρότυπο EN 50021).2. Εάν στο καλώδιο ή στην είσοδο του καλωδίου αυτού του περιβλήµατος κάτωαπό συνθήκες λειτουργίας η θερµοκρασία ξεπεράσει τους 70 °C ή όταν κάτωαπό συνθήκες λειτουργίας η θερµοκρασία στη διακλάδωση του σύρµατοςµπορεί να είναι µεγαλύτερη από 80 °C, πρέπει οι θερµοκρασιακές ιδιότητες τωνκαλωδίων να ταυτίζονται µε τις πραγµατικά µετρηµένες θερµοκρασίες.3. Οι χρησιµοποιούµενες εισόδοι καλωδίων πρέπει να συµµορφώνονται µε τοβαθµό προστασίας IP 54 στην ενότητα 7.2 (σύµφωνα µε το πρότυποEN 50021).4. Όλες οι συσκευές, συµπεριλαµβανοµένων διακοπτών κ.α., που συνδέονται στιςεισόδους και εξόδους των συστηµάτων <strong>SIMATIC</strong>, πρέπει να φέρουν εγκριµένηπροστασία κατά έκρηξης τύπου EEx nA ή EEx nC.5. Πρέπει να ληφθούν µέτρα, να µην µπορεί να γίνει υπέρβαση της ονοµαστικήςτάσης µέσω αιφνίδιας µεταβολής της τάσης πάνω από 40 %.6. Περιοχή θερµοκρασίας περιβάλλοντος: 0° C έως 60° C7. Πρέπει να τοποθετηθεί µέσα στο περίβληµα σε ευδιάκριτο σηµείο µετά τοάνοιγµα µία πινακίδα µε την ακόλουθη προειδοποίηση:! ΠροειδοποίησηΤο περίβληµα επιτρέπεται να ανοίγει µόνο για µικρό χρονικό διάστηµα, π.χ. για τηδιενέργεια οπτικής διάγνωσης. Μην κάνετε χρήση διακοπτών, µην τραβάτε ήεµβυσµατώνετε δοµικά συγκροτήµατα και µη διαχωρίζετε ηλεκτροφόρουςαγωγούς (εµβσυµατώσιµες συνδέσεις).Η προειδοποίηση αυτή δε χρειάζεται να ληφθεί υπ’ όψιν, εάν είναι γνωστό ότι δενυφίσταται ατµόσφαιρα παρουσιάζουσα κίνδυνο έκρηξης.Κατάλογος των εγκεκριµένων δοµικών συγκροτηµάτων/µονάδωνΗ λίστα µε τα εγκριµένα δοµικά συγκροτήµατα/µονάδες υπάρχει στο διαδίκτυο:http://www4.ad.siemens.de/view/cs/µε τον κωδικό συνδροµής 13702947.24 Product Information on the Use of subassemblies/modules in a Zone 2 Hazardous AreaA5E00352937-02
ČeskyPoužití konstrukčních skupin / modulů v prostředí snebezpečím výbuchu Zóna 2Zóna 2Oblasti s nebezpečím výbuchu jsou rozděleny do zón. Zóny jsou rozlišeny podlepravděpodobnosti výskytu explosivní atmosféry.Zóna Nebezpečí exploze Příklad2 Explosivní plynová atmosférase vyskytuje pouze zřídka akrátkodoběBezpečnáoblastnení • Mimo zónu 2Oblasti kolem přírubových spojů splochým těsněním u potrubí v uzavřenýchprostorech• Standardní aplikace necentrálníchperiferiíDále naleznete důležité pokyny pro instalaci konstrukčních skupin/modulů voblastech s nebezpečím výbuchu.Další informaceDalší informace ke konstrukčním skupinám/modulům naleznete v příslušnépříručce.Místo výroby / RegistraceII 3 G EEx nA II T3 .. T6 dle EN 50021 : 1999Zkušební číslo: viz tabulkaMísto výroby Konstrukční skupiny/Moduly Kontrolní čísloSiemens AG, Bereich A&DWerner-von-Siemens-Straße 5092224 AmbergGermanySiemens AG, Bereich A&DÖstliche Rheinbrückenstr. 5076187 KarlsruheGermanyET 200SET 200S Konstrukční skupinyodolné proti chybám<strong>S7</strong>-<strong>300</strong>ET 200MSpojka sběrnice DP/PADiagnostické translační relé<strong>S7</strong>-<strong>300</strong> Konstrukční skupiny odolnéproti chybámKEMA 01ATEX 1238XKEMA 02ATEX 1096X<strong>S7</strong>-400 KEMA 03ATEX 1125X<strong>S7</strong>-<strong>300</strong> CPTS Adapter IIKEMA 03ATEX 1228X<strong>SIMATIC</strong> NET KEMA 03ATEX 1226XProduct Information on the Use of subassemblies/modules in a Zone 2 Hazardous AreaA5E00352937-0225
ČeskyUpozorněníKonstrukční skupiny/Moduly s osvědčením II 3 G EEx nA II T3 .. T6 smějí býtpoužity pouze v systémech <strong>SIMATIC</strong>, přístrojové kategorie 3.ÚdržbaK opravě musí být příslušné konstrukční skupiny/moduly zaslány do výrobníhomísta. Oprava smí být provedena pouze zde.Zvláštní podmínky1. Konstrukční skupiny/moduly musí být zabudovány v rozvaděči nebo kovovémkrytu. Ty musí minimálně zajišťovat druh ochrany IP 54 (dle EN 60529). Přitomje nutno respektovat okolní podmínky, v nichž je přístroj instalován. Pro krytmusí být k dispozici prohlášení výrobce pro zónu 2 (dle EN 50021).2. Pokud je na kabelu popř. kabelovém vedení tohoto krytu dosaženo zaprovozních podmínek teploty > 70 °C, nebo když za provozních podmínekmůže být na kabelových větvích teplota > 80 °C, musí teplotní vlastnosti kabelusouhlasit se skutečně naměřenými teplotami.3. Použité kabelové přívody musí odpovídat požadovanému druhu ochrany IP aodstavci 7.2 (dle EN 50021).4. Všechny přístroje, včetně spínačů atd. napojených na vstupy a výstupy systémů<strong>SIMATIC</strong>, musí mít osvědčení vůči výbuchu typu EEx nA nebo EEx nC.5. Musí být provedena opatření k zamezení přechodného překročení jmenovitéhonapětí, nepřesahující více než 40 %.6. Rozsah teploty okolí: 0° C do 60° C7. Uvnitř krytu je nutno na dobře viditelném místě po otevření připevnit štítek snásledujícím varováním:! VarováníKryt smí být otevřen pouze krátce, např. pro vizuální diagnostiku. Nepoužívejtepřitom žádný spínač, nevytahujte ani nezasunujte žádné konstrukční skupiny aneoddělujte žádná elektrická vedení (konektorové spoje).Toto varování nemusíte respektovat, pokud je známo, že se na místě nevyskytujeexplozivní atmosféra.Seznam konstrukčních skupin/modulů s osvědčenímSeznam konstrukčních skupin/modulů s osvědčením naleznete na Internetu:http://www4.ad.siemens.de/view/cs/pod identifikací příspěvku ID 13702947.26 Product Information on the Use of subassemblies/modules in a Zone 2 Hazardous AreaA5E00352937-02
EstnischSõlmede/moodulite kasutamine plahvatusohtlikupiirkonna tsoonis 2Tsoon 2Plahvatusohtlikud piirkonnad jagatakse tsoonideks. Tsoone eristatakse vastavaltplahvatusohtliku keskkonna esinemise tõenäosusele.Tsoon Plahvatusoht Näide2 üldine plahvatav keskkondesineb ainult harva jalühiajaliseltohutupiirkondPiirkonnad lamedate rõngastihenditegatorustike äärikliidete ümbruses suletudruumidesei • väljaspool tsooni 2• Mittstsentraalse välisseadmestandardsed rakendusedJärgnevalt leaite Te olulisi juhiseid sõlmede/moodulite paigaldamiseksplahvatusohtlikus piirkonnas.Täiendav infoÜksikasjalik info sõlmede/moodulite kohta on toodud seadme juurde kuuluvaskäsiraamatus.Valmistamiskoht / KasutuslubaII 3 G EEx nA II T3 .. T6 vastavalt standardile EN 50021 : 1999Katsetusnumber: vaadake tabelitValmistamiskoht Sõlmed/moodulid KatsetusnumberSiemens AG, Bereich A&DWerner-von-Siemens-Straße 5092224 AmbergGermanySiemens AG, Bereich A&DÖstliche Rheinbrückenstr. 5076187 KarlsruheGermanyET 200SET 200S Rikkekindlad sõlmed<strong>S7</strong>-<strong>300</strong>ET 200MSiinühendus DP/PADiagnostikarepiiter<strong>S7</strong>-<strong>300</strong> Rikkekindlad sõlmedKEMA 01ATEX 1238XKEMA 02ATEX 1096X<strong>S7</strong>-400 KEMA 03ATEX 1125X<strong>S7</strong>-<strong>300</strong> CPTS Adapter IIKEMA 03ATEX 1228X<strong>SIMATIC</strong> NET KEMA 03ATEX 1226XJuhisSõlmi/mooduleid kasutusloaga II 3 G EEx nA II T3 .. T6 tohib kasutada ainult<strong>SIMATIC</strong>-süsteemides, mille seadmeklass on 3.Product Information on the Use of subassemblies/modules in a Zone 2 Hazardous AreaA5E00352937-0227
EstnischKorrashoidParandamiseks tuleb sõlmed/moodulid saata valmistamiskohta. Parandustöid tohibteha ainult seal.Eritingimused1. Sõlmed/moodulid tuleb monteerida jaotuskarpi või metallkorpusesse. Needpeavad tagama kaitseastme vähemalt IP 54 (vastavalt standardile EN 60529).Seejuures peab arvesse võtma seadme paigaldamise keskkonna tingimusi.Korpuse jaoks peab tsooni 2 jaoks olema tootja juhis (vastavalt standardileEN 50021).2. Kui selle korpuse kaabli juures või kaabelvaheliku (kaabelsisestuse) juurestöötingimustes saavutatakse temperatuur > 70 °C või, kui töötingimustestemperatuur soone hargnemiskoha juures võib olla > 80 °C, peavad kaablitermilised omadusd olema vastavuses tegelikult mõõdetud temperatuuridega.3. Kasutatavad kaabelvahelikud (kaabelsisestused) peavad vastama nõutud IPkaitseastmeleja osas 7.2 toodud nõuetele (vastavalt standardile EN 50021).4. Kõik seadmed, kaasa arvatud lülitid, jt., mis <strong>SIMATIC</strong>-süsteemide sisendite javäljundite külge ühendatakse, peavad võimaldama plahvatuskaitsetüüpi EEx nA või EEx nC.5. Peab rakendama abinõusid, et nimipinget üleminekute tõttu ei saaks ületatadaüle 40 %.6. Ümbritseva keskkona temperatuurivahemik: 0° C kuni 60° C7. Korpuse sisse tuleb sellisesse kohta, mis pärast avamist on hästi nähtav, pannasilt järgmise hoiatusega:! EttevaatustKorpust tohib avada ainult lühikeseks ajals, näiteks visuaalse diagnostika jaoks.Seejuures ärge kasutage ühtegi lülitit ega võtke välja ega pange sisse ühtegisõlme ega lahutage ühtegi elektrijuhet (pistikühendused).Seda hoiatust võib mitte arvesse võtta, kui on teada, et ei esine mingitplahvatusohtlikku keskkonda.Lubatud sõlmede/moodulite loeteluLubatud sõlmede/modulite loetelu leiate Te internetist:http://www4.ad.siemens.de/view/cs/lisas-ID 13702947.28 Product Information on the Use of subassemblies/modules in a Zone 2 Hazardous AreaA5E00352937-02
LatviskiIerīču/moduļu pielietojums sprādzienbīstamasteritorijas zonā 2Zona 2Sprādzienbīstamās teritorijas ir sadalītas zonās. Šīs zonas atšķir pēcsprādzienbīstamas atmosfēras pastāvēšanas iespējamības.Zona Sprādzienbīstamība Piemērs2 eksplozīva gāzes atmosfēraizveidojas reti un uz īsu laikudrošateritorijanē • Ārpus zonas 2Teritorijas ap atloku savienojumiem arplakaniem blīvējumiem uz cauruļvadiemslēgtās telpās• Decentralizētas perifērijas ierīcesstandartlietojumiTurpmāk atrodamas svarīgas norādes par ierīču/moduļu uzstādīšanusprādzienbīstamajā zonā.Turpmāka informācijaTurpmāka informācija par ierīcēm/moduļiem ir atrodama attiecīgajā rokasgrāmatā.Izgatavošanas vieta / AtļaujaII 3 G EEx nA II T3 .. T6 saskaņā ar EN 50021 : 1999Pārbaudes numurs: skatīt tabuluIzgatavošanas vieta Ierīces/moduļi PārbaudesnumursSiemens AG, Bereich A&DWerner-von-Siemens-Straße 5092224 AmbergGermanySiemens AG, Bereich A&DÖstliche Rheinbrückenstr. 5076187 KarlsruheGermanyET 200S KEMA 01ATEX 1238X<strong>S7</strong>-<strong>300</strong>ET 200MKopnes savienotājs DP/PADiagnostikas atkārtotājs<strong>S7</strong>-<strong>300</strong> Pret kļūdām aizsargātasierīcesKEMA 02ATEX 1096X<strong>S7</strong>-400 KEMA 03ATEX 1125X<strong>S7</strong>-<strong>300</strong> CPTS Adapter IIKEMA 03ATEX 1228X<strong>SIMATIC</strong> NET KEMA 03ATEX 1226XProduct Information on the Use of subassemblies/modules in a Zone 2 Hazardous Area 29A5E00352937-02
LatviskiNorādeIerīces/moduļi ar atļauju II 3 G EEx nA II T3 .. T6 var tikt pielietotas tikai3.kategorijas <strong>SIMATIC</strong> sistēmās.Tehniskā apkopeAttiecīgu ierīču/moduļu remontam tie ir jānosūta ražotājam. Remontu drīkst veikttikai tur.Īpaši apstākļi1. Ierīces/moduļi jāiebūvē sadales skapī vai metāla korpusā. Tiem jānodrošinaaizsardzības līmenis ne mazāks kā IP 54 (saskaņā ar EN 60529). Turklāt,ierīces uzstādīšanā jāievēro apkārtējas vides apstākļi. Korpusam irnepieciešams izgatavotāja apliecinājums zonai 2 (saskaņā ar EN 50021).2. Ja uz kabeļa vai šī korpusa kabeļu ievades ekspluatācijas apstākļos tieksasniegta temperatūra > 70 °C vai ja ekspluatācijas apstākļos uz kabeļaatzariem var būt temperatūra > 80 °C, kabeļu temperatūras īpašībām jāatbilstfaktiski nomērītām temperatūrām.3. Pielietojamām kabeļu ievadēm jāatbilst nepieciešamajam aizsardzības veidamIP un sadaļai 7.2 (saskaņā ar EN 50021).4. Visām ierīcēm, ieskaitot pārslēgus utt., kas tiek pieslēgti pie <strong>SIMATIC</strong> sistēmuievadēm un izvadēm, jābūt atļaujām EEx nA vai EEx nC tipasprādzienaizsardzībai.5. Nepieciešams veikt pasākumus, lai pārejas spriegums nepārsniegtu nominālospriegumu vairāk kā par 40 %.6. Apkārtējas temperatūras diapazons: 0° C līdz 60° C7. Korpusa iekšpusē, vietā, kas ir labi redzama, atverot to, ir jāizvieto plāksne arsekojošo brīdinājumu:! BrīdinājumsKorpusu var atvērt tikai īslaicīgi, piemēram, vizuālai diagnostikai. Pie tamnenospiediet nekādus slēdžus, neievietojiet un neizņemiet nekādas ierīces unnepārtrauciet elektriskās līnijas (spraudsavienojumus).Šis brīdinājums var tikt neņemts vērā, ja ir zināms, ka nepastāv sprādzienbīstamaatmosfēra.Pieļaujamo ierīču/moduļu sarakstsPieļaujamo ierīču/moduļu saraksts ir atrodams Internetā:http://www4.ad.siemens.de/view/cs/zem datu ID 13702947.30 Product Information on the Use of subassemblies/modules in a Zone 2 Hazardous AreaA5E00352937-02
LietuviškaKonstrukcinių grupių/modulių panaudojimassprogioje 2 zonos aplinkojeZona 2Sprogi aplinka yra apibūdinama keliomis zonomis. Zonos skirstomos pagal galimossprogios terpės atsiradimo tikimybę.Zona Sprogimo pavojus Pavyzdys2 sprogi atmosfera būna retai irtrumpaisaugiojisritisnėra • ne zonoje 2Uždarų patalpų vamzdynuose - flanšo sutarpikliais sujungimų vietose• Standartinė periferinė sistemaToliau pateikiamas informacija apie konstrukcinių grupių ir modulių montavimąsprogioje aplinkoje.Papildoma informacijaPapildomos informacijos apie konstrukcines grupes/modulius rasite eksploatacijosvadove.Pagaminimo vieta / Saugos reikalavimaiII 3 G EEx nA II T3 .. T6 pagal EN 50021 : 1999Patikros numeris: žiūr. lentelėjePagaminimo vieta Konstrukcinės grupės/moduliai PatikrosnumerisSiemens AG, Bereich A&DWerner-von-Siemens-Straße 5092224 AmbergasVokietijaSiemens AG, Bereich A&DÖstliche Rheinbrückenstr. 5076187 KarlsruheVokietijaET 200SET 200S nuo trukdžių apsaugotoskonstrukcinės grupės<strong>S7</strong>-<strong>300</strong>ET 200MMagistralinė jungtis DP/PADiagnozės retransliatorius<strong>S7</strong>-<strong>300</strong> nuo trukdžių apsaugotoskonstrukcinės grupėsKEMA 01ATEX 1238XKEMA 02ATEX 1096X<strong>S7</strong>-400 KEMA 03ATEX 1125X<strong>S7</strong>-<strong>300</strong> CP KEMA 03ATEX 1228X<strong>SIMATIC</strong> NET KEMA 03ATEX 1226XProduct Information on the Use of subassemblies/modules in a Zone 2 Hazardous Area 31A5E00352937-02
LietuviškaNuorodaKonstrukcines grupes/modulius, kurių leidimas eksploatuoti yra II 3 GEEx nA II T3 .. T6 galima naudoti tik 3 kategorijos sistemose "<strong>SIMATIC</strong>".PriežiūraEsant gedimams, konstrukcinę grupę/modulį išsiųskite gamintojui. Tik jis galikvalifikuotai suremontuoti įtaisą.Specialiosios sąlygos1. Konstrukcines grupes/modulius montuokite jungimo spintoje arba metaliniamekorpuse. Korpuso ar jungimo spintos saugos klasė turi būti mažiausiai "IP 54"(pagal EN 60529). Būtina atsižvelgti į kitas aplinkos sąlygas. Norint korpusąeksploatuoti zonoje 2, būtinas gamintojo pažymėjimas (pagal EN 50021).2. Jei korpuso kabelio arba kabelio prijungimo temperatūra pakyla daugiau nei70 °C arba laidų atšakoje temperatūra padidėja daugiau nei 80 °C, reikianaudoti kabelius, kurių terminės savybės atitinka išmatuotas temperatūrosvertes.3. Kabelių sujungimai turi būti saugos klasės IP ir atitikti 7.2 skyriaus (pagalEN 50021) reikalavimus.4. Visi prietaisai, įskaitant ir jungiklius, jungiami sistemų "<strong>SIMATIC</strong>" įeigose irišeigose, turi būti tipo "EEx nA" arba "EEx nC" - apsaugoti nuo sprogimo.5. Būtina imtis priemonių, kad pereinamųjų grandžių vardinė įtampa neviršytų40 %.6. Leistina aplinkos temperatūra: 0° C iki 60° C7. Atidarę korpusą, jo viduje gerai matomoje vietoje, įtaisykite lentelę su įspėjimu:!ĮspėjimasKorpusą` atidaryti tik trumpam laikui, pvz., patikrai. Neliesti jungiklių,konstrukcinių grupių neištraukti ir nekišti, neatjungti elektrinių sujungimų(kištukinių sujungimų).Šio įspėjimo galima nepaisyti, kai yra žinoma, jog darbinė aplinka yra nesprogi.Leistinų konstrukcinių grupių/modulių sąrašasLeistinų konstrukcinių grupių/modulių sąrašą rasite interneto puslapyje:http://www4.ad.siemens.de/view/cs/įvedę kodą 13702947.32 Product Information on the Use of subassemblies/modules in a Zone 2 Hazardous AreaA5E00352937-02
MagyaA főegységek/modulok alkalmazása a 2. zónarobbanásveszélyes környezetben2. zónaA robbanásveszélyes környezeteket zónákba sorolják be. A robbanásveszélyeslégkör előfordulásának valószínűsége alapján különböztetik meg a zónákat.Zóna Robbanásveszély Példa2 robbanásveszélyes gázattartalmazó légkör csak ritkán ésrövid ideig lép felbiztonságoskörnyezetnemzárt helységekben elhelyezettcsővezetékeknél a lapos tömítésselrendelkező karimás kötésekkörnyezetében• a 2. zónán kívül• a decentrális periféria készülékekstandard alkalmazásaiA következőkben fontos utasításokat talál a főegységek/modulok telepítéséhez arobbanásveszélyes környezetbe.További információkA további információkat a főegységekhez/modulokhoz megtalálja a hozzátartozókézikönyvben.Gyártási hely / EngedélyezésII 3 G EEx nA II T3 .. T6 az EN 50021 : 1999 szerintEllenőrző szám: lásd a táblázatotGyártási hely Főegységek/modulok Ellenőrző számSiemens AG, Bereich A&DWerner-von-Siemens-Straße 5092224 AmbergGermanySiemens AG, Bereich A&DÖstliche Rheinbrückenstr. 5076187 KarlsruheGermanyET 200SET 200S hibabiztos főegységek<strong>S7</strong>-<strong>300</strong>ET 200MDP/PA buszcsatolóDiagnózisrepeater<strong>S7</strong>-<strong>300</strong> hibabiztos főegységekKEMA 01ATEX 1238XKEMA 02ATEX 1096X<strong>S7</strong>-400 KEMA 03ATEX 1125X<strong>S7</strong>-<strong>300</strong> CPTS Adapter IIKEMA 03ATEX 1228X<strong>SIMATIC</strong> NET KEMA 03ATEX 1226XProduct Information on the Use of subassemblies/modules in a Zone 2 Hazardous AreaA5E00352937-0233
MagyaUtasításAz II 3 G EEx nA II T3 .. T6 engedélyezéssel rendelkezőfőegységeket/modulokat alkalmazhatja csak a 3. felszerelés-kategóriába tartozó<strong>SIMATIC</strong> rendszerekbe.KarbantartásJavítás esetén küldje az érintett főegységeket/modulokat a gyártási helyre. Csak itthajthatják végre a javítást.Különleges feltételek1. A főegységeket/modulokat egy kapcsolószekrénybe vagy egy fém házba kellbeszerelni. Ezeknek kell biztosítaniuk legalább az IP 54 védettségi fokozatot(EN 60529 szerint). Itt figyelembe kell venni azokat a környezeti feltételeket,amelyek fellépnek a készülék telepítésekor. A házhoz meg kell legyen a gyártóinyilatkozat a 2. zónához (az EN 50021 szerint).2. Ha a jelen ház kábelén ill. kábelvezetésen üzemi feltételek mellett ahőmérséklet > 70 °C, vagy ha az üzemi feltételek mellett a hőmérséklet > 80 °Caz érelágazásokon, akkor meg kell egyezzenek a kábel hőmérsékletitulajdonságai a ténylegesen mért hőmérsékletekkel.3. Az alkalmazott kábelvezetések meg kell feleljenek a követelt IP védettségifokozatnak és a 7.2. bekezdésnek (EN 50021 szerint).4. Minden készülék, kapcsolót stb. beleértve, amelyeket a <strong>SIMATIC</strong> rendszerekbe- és kimeneteire csatlakoztattak, engedélyezve kell legyen az EEx nA vagyEEx nC típusú robbanásvédelemhez.5. Intézkedéseket kell hozni, hogy a tranziensek ne lépjék túl a névlegesfeszültséget több mint 40 %-al.6. Környezeti hőmérséklet tartomány: 0° C ... 60° C7. A házon belül -a nyitáskor jól látható helyen- helyezzen el egy táblát akövetkező figyelmeztetéssel:!FigyelmeztetésA házat csak rövid ideig szabad nyitani, pl. optikai diagnózishoz. Eközben neműködtessen egy kapcsolót sem, ne húzzon ki vagy dugjon be egy főegységetsem és ne válasszon le villamos vezetékeket (dugós csatlakozók).Ez a figyelmeztetés mellőzhető, ha tudott, hogy nem áll fenn robbanásveszélyeslégkör.A megengedett főegységek/modulok listájaA megengedett főegységek/modulok listáját megtalálja az interneten:http://www4.ad.siemens.de/view/cs/a 13702947 cikk azonosító szám alatt.34 Product Information on the Use of subassemblies/modules in a Zone 2 Hazardous AreaA5E00352937-02
MaltiTqegħid tal-Komponenti / <strong>Module</strong>s fiż-Żona 2, fejnhemm Riskju ta' SplużjoniŻona 2Sezzjonijiet fejn hemm riskju ta' splużjoni jitqassmu f'żoni. Tagħmel distinzjoni bejnżona u oħra skond il-probabbiltà li jkun hemm ambjent li jista' jwassal għalsplużjoni.Żona Periklu ta' Splużjoni Eżempju2 ambjent gassuż li jista' jisplodijfeġġ rarament u għal żmienqasirżona ż-żguraŻoni madwar flanġ ġojnts b'gaskits ċattif'kanni ġewwa spazji magħluqinle • barra miż-żona 2• użu normali ta' devices periferalideċentralizzatiIssib hawn taħt indikazzjonijiet importanti għall-installazzjoni ta' komponenti /modules fiż-żona fejn hemm riskju ta' splużjoni.Aktar TagħrifAktar tagħrif fuq il-komponenti / modules jinstab fil-manwal ikkonċernat.Post ta' Manifattura / ApprovazzjoniII 3 G EEx nA II T3 .. T6 skond EN 50021 : 1999Numru taċ-Ċertifikat: ara t-tabellaPost ta' Manifattura Komponenti / <strong>Module</strong>s Numru taċ-ĊertifikatSiemens AG, Bereich A&DWerner-von-Siemens-Straße 5092224 AmbergGermanySiemens AG, Bereich A&DÖstliche Rheinbrückenstr. 5076187 KarlsruheGermanyET 200SET 200S modules ma jistgħux ifallu<strong>S7</strong>-<strong>300</strong>ET 200Mbus coupling DP/PARipetitur ta' dijanjosi<strong>S7</strong>-<strong>300</strong> modules ma jistgħux ifalluKEMA 01ATEX 1238XKEMA 02ATEX 1096X<strong>S7</strong>-400 KEMA 03ATEX 1125X<strong>S7</strong>-<strong>300</strong> CPTS AdapterKEMA 03ATEX 1228X<strong>SIMATIC</strong> NET KEMA 03ATEX 1226XNotaKomponenti / modules bl-approvazzjoni II 3 G EEx nA II T3 .. T6 jistgħujintużaw biss ġewwa sistemi <strong>SIMATIC</strong> tal-kategorija 3.Product Information on the Use of subassemblies/modules in a Zone 2 Hazardous AreaA5E00352937-0235
MaltiManutenzjoniFil-każ li jkun hemm bżonn ta' tiswija, il-komponenti / modules ikkonċernatigħandhom jintbagħtu fil-post ta' manifattura. It-tiswijiet jistgħu jsiru biss f'dan il-post.Kundizzjonijiet Speċjali1. Komponenti / modules għandhom jiġu mmontati ġewwa swiċċ kabinett jewkaxxa tal-metall. Dawn iridu jiggarantixxu protezzjoni mill-inqas tat-tip IP 54(skond EN 60529). Inti u tagħmel hekk, trid taħseb għall-kundizzjonijietambjentali ta' waqt l-installazzjoni tad-device. Irid ikun hemm dikjarazzjoni talmanifatturiergħall-kaxxa għaż-żona 2 (skond EN 50021).2. Jekk fil-kejbil, jew fil-kaxxa mad-daħla għall-kejbil, tintlaħaq temperatura ta'aktar minn 70 °C taħt kundizzjonijiet ta' ħidma, jew jekk fil-post fejn jinfirdu l-wajers jista' jkun li hemm temperatura ta' aktar minn 80 °C, il-kejbil irid ikolluproprjetajiet ta' temperatura xierqa għat-temperaturi tabilħaqq imkejlin.3. Id-daħliet għall-kejbil li jintużaw iridu jikkonformaw mat-tip ta' protezzjoni IPmitlub u t-taqsima 7.2 (skond EN 50021).4. Id-devices kollha, swiċċijiet etc. inklużi, li jitqabbdu ma' l-inputs u l-outputs ta'sistemi <strong>SIMATIC</strong>, iridu jkunu approvati għal protezzjoni kontra splużjoni tat-tipEEx nA jew EEx nC.5. Iridu jittieħdu miżuri biex il-vultaġġ nominali ma jitqabbiżx b'aktar minn 40%minħabba transitorji.6. Varjazzjoni tat-temperatura ambjentali: 0° C sa 60° C7. Għandha titqiegħed tabella bit-twissija li ġejja ġewwa l-kaxxa, f'post li jidher sewwara li tinfetaħ il-kaxxa:!TwissijaIl-kaxxa tista' tinfetaħ biss għal żmien qasir, per eżempju għal dijanjosi viżwali. Intiu tagħmel hekk, ma tista' tmiss l-ebda swiċċ, ddaħħal jew tneħħi l-ebda module utneħħi l-ebda kejbil elettriku (konnessjonijiet li tipplaggjahom).Tista' ma tagħtix każ ta' din it-twissija meta taf li m'hemmx riskju ta' splużjoni flambjent.Lista ta' Komponenti / <strong>Module</strong>s ApprovatiIssib il-lista ta' komponenti / modules approvati fl-internet:http://www4.ad.siemens.de/view/cs/bin-numru ta' identifikazzjoni 13702947.36 Product Information on the Use of subassemblies/modules in a Zone 2 Hazardous AreaA5E00352937-02
PolskiZastosowanie grup konstrukcyjnych / modułów w 2strefie zagrożenia wybuchemStrefa 2Otoczenie zagrożone wybuchem dzielone jest na strefy. Strefy dzielą się zewzględu na stopień prawdopodobieństwa powstania atmosfery stwarzającejmożliwość powstania wybuchu.Strefa Niebezpieczeństwo eksplozji Przykład2 atmosfera gazowa zzagrożeniem wybuchemwystępuje rzadko i na krótkiokres czasuobszarbezpiecznyniemiejsca wokół łącz w kanałachtechnicznych z opaskami przyprzewodach instalacyjnych wpomieszczeniach zamkniętych• poza 2 strefą• standardowe zastosowaniedecentralnych urządzeń peryferyjnychDalej znajdą Państwo informacje dotyczące instalacji grup konstrukcyjnych /modułów w otoczeniu zagrożonym wybuchem.Pozostałe informacjeDalsze informacje dotyczące grup konstrukcyjnych / modułów znajdą państwo wodpowiedniej instrukcji.Miejsce produkcji / RejestracjaII 3 G EEx nA II T3 .. T6 stosownie do EN 50021 : 1999Nr testu: zobacz tabelaMiejsce produkcji Grupy konstrukcyjne / moduły Nr testuSiemens AG, Bereich A&DWerner-von-Siemens-Straße 5092224 AmbergNiemcySiemens AG, Bereich A&DÖstliche Rheinbrückenstr. 5076187 KarlsruheNiemcyET 200SET 200S grupy konstrukcyjneodporne na uszkodzenia<strong>S7</strong>-<strong>300</strong>ET 200MZbierające łącze sprzężająceDP/PApowtarzacz diagnozy<strong>S7</strong>-<strong>300</strong> grupy konstrukcyjneodporne na uszkodzeniaKEMA 01ATEX 1238XKEMA 02ATEX 1096X<strong>S7</strong>-400 KEMA 03ATEX 1125X<strong>S7</strong>-<strong>300</strong> CPTS Adapter IIKEMA 03ATEX 1228X<strong>SIMATIC</strong> NET KEMA 03ATEX 1226XProduct Information on the Use of subassemblies/modules in a Zone 2 Hazardous AreaA5E00352937-0237
PolskiUwagaGrupy konstrukcyjne / moduły zarejestrowane jako II 3 G EEx nA II T3 .. T6wolno stosować jedynie w systemach <strong>SIMATIC</strong> o 3 kategorii urządzenia.KonserwacjaW celu naprawy należy odpowiednie grupy konstrukcyjne / moduły przesłać domiejsca produkcji. Jedynie serwis producenta jest upoważniony do dokonywanianapraw.Warunki szczególne!1. Grupy konstrukcyjne / moduły muszą zostać zamontowane do skrzynkiochronnej lub metalowej puszki ochronnej. Muszą one spełniać wymagania conajmniej stopnia IP 54 (stosownie do EN 60529). Należy brać pod uwagęwarunki otoczenia, w którym urządzenie będzie instalowane. Należy posiadaćoświadczenie producenta dopuszczające puszkę do użytku w strefie 2(stosownie do EN 50021).2. W przypadku, gdyby na przewodzie tej puszki podczas pracy temperaturamogła przekroczyć > 70 °C, lub żyła przewodu mogłaby osiągnąć temperaturę> 80 °C, właściwości cieplne przewodu muszą zostać dobrane do takichwartości.3. Wszystkie stosowane przewody muszą odpowiadać właściwemu stopniowiochrony IP oraz warunkom określonym w punkcie 7.2 (stosownie do EN50021).4. Wszystkie urządzenia włączając w to przełączniki itp., które podłączane są dowejść lub wyjść systemów <strong>SIMATIC</strong> muszą być dopuszczone do ochronyprzeciw wybuchom typu EEx nA lub EEx nC.5. Muszą zostać spełnione takie warunki, aby napięcie miana w przejściach niemogło przekroczyć więcej niż 40 %.6. Temperatura otoczenia: od 0° C do 60° C7. W puszce w dobrze widocznym po otwarciu miejscu należy umieścićostrzeżenie następującej treści:UwagaPuszkę wolno otworzyć jedynie na krótki okres czasu na przykład w celu kontrolioptycznej. Nie wolno przy tym naciskać na żaden z przełączników, nie wolnowyciągać ani montować żadnej grupy konstrukcyjnej ani też odłączać żadnychprzewodów elektrycznych (łącza wsuwkowe).Powyższego ostrzeżenia nie trzeba przestrzegać jeśli wiadomo jest, iż na miejscunie ma zagrożenia wybuchem.Lista dopuszczonych grup konstrukcyjnych / modułówWykaz dopuszczonych grup konstrukcyjnych / modułów znajduje się na stronieinternetowej:http://www4.ad.siemens.de/view/cs/w części ID 13702947.38 Product Information on the Use of subassemblies/modules in a Zone 2 Hazardous AreaA5E00352937-02
SlovenskyPoužitie konštrukčných skupín / modulov v prostredí snebezpečenstvom výbuchu zóny 2Zóna 2Prostredia s nebezpečenstvom výbuchu sa rozdeľujú do zón. Zóny sa rozlišujúpodľa pravdepodobnosti prítomnosti atmosféry so schopnosťou výbuchu.Zóna Nebezpečenstvo explózie Príklad2 plynová atmosféra snebezpečenstvom výbuchu savyskytuje len zriedka akrátkodobobezpečnáoblasťnie • mino zóny 2priestory okolo prírubových spojov splochými tesneniami pri potrubnýchvedeniach v uzavretých priestoroch• štandardné použitia decentrálnejperiférieĎalej nájdete dôležité pokyny pre inštaláciu konštrukčných skupín / modulov vprostredí s nebezpečenstvom výbuchu.Ďalšie informácieĎalšie informácie ku konštrukčným skupinám / modulom nájdete v príslušnejpríručke.Miesto vyhotovenia / OsvedčenieII 3 G EEx nA II T3 .. T6 podľa EN 50021 : 1999Číslo skúšky : pozri tabuľkaMiesto vyhotovenia Konštrukčné skupiny / moduly Číslo skúškySiemens AG, divízia A&DWerner-von-Siemens-Straße 5092224 AmbergNemeckoSiemens AG, divízia A&DÖstliche Rheinbrückenstr. 5076187 KarlsruheNemeckoET 200SET 200S konštrukčné skupinyodolné voči poruchám<strong>S7</strong>-<strong>300</strong>ET 200MZbernicový väzbový člen DP/PAopakovač diagnózy<strong>S7</strong>-<strong>300</strong> konštrukčné skupinyodolné voči poruchámKEMA 01ATEX 1238XKEMA 02ATEX 1096X<strong>S7</strong>-400 KEMA 03ATEX 1125X<strong>S7</strong>-<strong>300</strong> CPTS Adapter IIKEMA 03ATEX 1228X<strong>SIMATIC</strong> NET KEMA 03ATEX 1226XProduct Information on the Use of subassemblies/modules in a Zone 2 Hazardous Area 39A5E00352937-02
SlovenskyUpozornenieKonštrukčné skupiny / moduly s osvedčením II 3 G EEx nA II T3 .. T6 sa smúpoužívať len v systémoch <strong>SIMATIC</strong> kategórie zariadenia 3.ÚdržbaZa účelom opravy sa musia príslušné konštrukčné skupiny / moduly zaslať namiesto vyhotovenia. Oprava sa smie vykonávať len na tomto mieste !Špeciálne podmienky1. Konštrukčné skupiny / moduly sa musia vmontovať do spínacej skrine alebo dokovového puzdra schránky. Tie musia zabezpečovať druh ochrany minimálneIP 54 (podľa EN 60529). Pritom je potrebné zohľadniť podmienky prostredia, doktorého sa bude zariadenie inštalovať. V prípade puzdra musí existovaťvyhlásenie výrobcu pre zónu 2 (podľa EN 50021).2. V prípade, že na kábli, prípadne na káblovom prívode tohto puzdra presiahneteplota pri prevádzkových podmienkach hodnotu > 70 °C, alebo ak na vetve žilymôže byť pri prevádzkových podmienkach teplota > 80 °C, musia tepelnévlastnosti kábla vyhovovať skutočne nameraným hodnotám.3. Všetky použité káblové prívody musia zodpovedať požadovanému druhuochrany IP a odseku 7.2 (podľa EN 50021).4. Všetky zariadenia, vrátane prepínača, atď., ktoré sa pripoja na vstupy a výstupysystémov <strong>SIMATIC</strong>, musia byť schválené pre ochranu voči výbuchutypu EEx nA alebo EEx nC.5. Musia sa splniť také opatrenia, aby sa menovité napätie cez prechody nemohloprekročiť o viac ako 40 %.6. Rozsah okolitých teplôt: 0° C až 60° C7. V puzdre je na dobre viditeľné miesto po otvorení potrebné umiestniť štítok snasledovnou výstrahou:!VýstrahaPuzdro sa môže otvoriť len počas krátkej doby, napríklad pre vizuálnu diagnózu.Nestlačte pritom žiadny prepínač, nevytiahnite alebo nezasuňte žiadnukonštrukčnú skupinu a neoddeľte žiadne elektrické vedenia (zástrčkovéspojenia).Túto výstrahu si nemusíte všímať v takom prípade, ak je známe, že sa na miestenevyskytuje atmosféra s nebezpečenstvom výbuchu.Zoznam dovolených konštrukčných skupín / modulovZoznam dovolených konštrukčných skupín / modulov sa nachádza na internete :http://www4.ad.siemens.de/view/cs/v článku ID 13702947.40 Product Information on the Use of subassemblies/modules in a Zone 2 Hazardous AreaA5E00352937-02
SlovenskoUporaba sklopov/modulov v eksplozivno ogroženemobmočju cone 2Cona 2Eksplozivno ogrožena območja se delijo na cone. Cone se ločijo po verjetnostiprisotnosti eksplozivne atmosfere.Cona Nevarnost eksplozije Primer2 eksplozivna zmes plinov vatmosferi je redka in traja lekratko.sigurnoobmočjene • izven cone 2Območja okoli prirobnih spojev z ploskimitesnili pri cevnih napeljavah v zaprtihprostorih.• Standardna uporaba decentralneperiferije.Sledijo pomembni napotki o inštalaciji sklopov/modulov v eksplozivno ogroženemobmočju.Nadaljnje informacijeNadaljnje informacije o sklopih/modulih najdete v priloženem priročniku.Mesto izdelave / Dovoljenje - AtestII 3 G EEx nA II T3 .. T6 po EN 50021 : 1999kontrolna številka: glej tabeloMesto izdelave Sklopi/moduli kontrolnaštevilka:Siemens AG, Bereich A&DWerner-von-Siemens-Straße 5092224 AmbergGermanySiemens AG, Bereich A&DÖstliche Rheinbrückenstr. 5076187 KarlsruheGermanyET 200SET 200S Sklopi varovani protiokvari<strong>S7</strong>-<strong>300</strong>ET 200Mbus vezava DP/PADiagnozni repeater<strong>S7</strong>-<strong>300</strong> Sklopi varovani proti okvariKEMA 01ATEX 1238XKEMA 02ATEX 1096X<strong>S7</strong>-400 KEMA 03ATEX 1125X<strong>S7</strong>-<strong>300</strong> CPTS Adapter IIKEMA 03ATEX 1228X<strong>SIMATIC</strong> NET KEMA 03ATEX 1226XOpozoriloSklopi/moduli z dovoljenjem II 3 G EEx nA II T3 .. T6 se lahko uporabijo samov <strong>SIMATIC</strong>-Sistemih kategorije 3 .Product Information on the Use of subassemblies/modules in a Zone 2 Hazardous AreaA5E00352937-0241
SlovenskoVzdrževanjeV primeru popravila pošljete sklope/module na kraj izdelave. Popravila lahkoizvajajo samo na tem naslovu!Posebni pogoji1. Sklopi/moduli se morajo vgraditi v elektro omaro ali metalno ohišje.Omara/ohišje mora zadostiti varovanju IP 54 (po EN 60529). Pri tem jepotrebno upoštevati tudi pogoje okolice, v kateri se naprava nahaja. Ohišjemora imeti izjavo (atest) proizvajalca za uporabo v coni 2 (po EN 50021).2. Če na kablu oz. uvodnici tega ohišja v režimu obratovanja temperatura doseževrednost > 70 °C ali če doseže na razcepih vodnikov v obratovanju temperaturavrednost > 80 °C, se morajo temperaturne lastnosti kablov skladati z dejanskonamerjenimi.3. Uporabljene uvodnice morajo ustrezati predpisani IP zaščiti in poglavju 7.2 (poEN 50021).4. Vse naprave, vključno s stikali itd., ki so priklopljene na vhodih oz. izhodihsistemov <strong>SIMATIC</strong>, morajo biti odobrene za zaščito proti eksplozijam tipaEEx nA ali EEx nC.5. Zagotoviti se mora, da nazivna napetost ne prekorači več kot 40% pritranzienci (preklopih, vklopih,...).6. Temperaturno območje okolice: 0° C do 60° C7. V notranjosti ohišja, na odprtem dobro vidljivem mestu, se pritrdi napis znaslednjim opozorilom:!OpozoriloOhišje se lahko odpre samo za kratek čas, npr. za vizualno diagnozo. Pri tem nevklapljajte/izklaplajte stikal, sklopov ali električnih vodnikov (vtičnih spojev).Opozorilo ne velja, kadar je znano, da ni eksplozivne atmosfere.Seznam dovoljenih sklopov/modulovSeznam dovoljenih sklopov/modulov najdete na internetu na spletni strani:http://www4.ad.siemens.de/view/cs/pod ID prispevka 13702947.42 Product Information on the Use of subassemblies/modules in a Zone 2 Hazardous AreaA5E00352937-02
TürkçePatlama tehlikesi olan Alan 2 bölgesinde ünitegruplarının/modüllerin kullanılmasıAlan 2Patlama tehlikesi olan bölgeler alanlara ayrılır. Alanlar, patlayabilecek atmosferesahip ortam ihtimaline göre farklı derecelere ayrılır.Alan Patlama tehlikesi Örnek2 Patlayıcı gaz atmosferi sadecenadir ve kısa bir süre için sözkonusuGüvenlibölgehayırKapalı alanlardaki boru bağlantılarındayassı contalı flanş bağlantıları civarındakibölgeler• Alan 2 haricinde• Merkezi olmayan periferi standartuygulamalarıAşağıda, ünite gruplarının/modüllerin patlama tehlikesi olan bölgelerde kurulmasıiçin önemli bilgiler bulacaksınız.Daha başka bilgilerÜnite grupları/modüller hakkında daha fazla bilgi için ilgili kılavuza bakınız.İmalat yeri / LisansII 3 G EEx nA II T3 .. T6 EN 50021 standartına göre: 1999Test numarası: bkz. Tabloİmalat yeri Ünite grupları/Modüller KontrolnumarasıSiemens AG, Bereich A&DWerner-von-Siemens-Straße 5092224 AmbergGermanySiemens AG, Bereich A&DÖstliche Rheinbrückenstr. 5076187 KarlsruheGermanyET 200SET 200S Hataya karşı emniyetliünite grupları<strong>S7</strong>-<strong>300</strong>ET 200MBus kuplajı DP/PADiyagnoz repeater ünitesi<strong>S7</strong>-<strong>300</strong> Hataya karşı emniyetliünite gruplarıKEMA 01ATEX 1238XKEMA 02ATEX 1096X<strong>S7</strong>-400 KEMA 03ATEX 1125X<strong>S7</strong>-<strong>300</strong> CPTS Adapter IIKEMA 03ATEX 1228X<strong>SIMATIC</strong> NET KEMA 03ATEX 1226XProduct Information on the Use of subassemblies/modules in a Zone 2 Hazardous AreaA5E00352937-0243
TürkçeBilgiII 3 G EEx nA II T3 .. T6 lisanslı ünite grupları/modüller sadece 3 numaralıcihaz kategorisine ait <strong>SIMATIC</strong> sistemlerine kullanılabilir.Bakım ve korumaBir onarım gerekli olması halinde, ilgili ünite grupları/modüller imalat yerinegönderilmelidir. Onarım sadece orada yapılabilir ve yapılmalıdır.Özel koşullar1. Ünite grupları/modüller bir şalter dolabı içine veya metal kasa içine monteedilmelidir. Bu kasalar en az IP 54 (EN 60529 standartına göre) koruma türüneait olmalıdır. Burada, cihazın kurulduğu çevre koşulları dikkate alınmalıdır.Kullanılacak kasa için, alan 2 için geçerli bir üretici beyanı mevcut olmalıdır(EN 50021 standartına istinaden).2. Kabloda ya da bu kasanın kablo girişindeki işletme koşullarında sıcaklık > 70 °Coluyorsa veya işletme koşullarında kablo telleri (damarları) ayrılma noktasındasıcaklık > 80 °C olma ihtimali varsa, kablonun sıcaklık ile ilgili özellikleri,gerçekten ölçülmüş sıcaklıklara uygun olmalıdır.3. Kullanılmış olan kablo girişleri, talep edilen IP koruma türüne ve bölüm 7.2(EN 50021 standartına göre) dahilindeki taleplere uygun olmalıdır.4. <strong>SIMATIC</strong> sistemlerinin giriş ve çıkışlarına bağlanan tüm cihazlar (şalterler vs.dahil) için, EEx nA veya EEx nC patlamaya karşı koruma tipine istinaden izinalınmış olmalıdır.5. Nominal gerilimin transiyentlerden (hatlardaki dalgalanmalardan dolayı anigerilim ve akım değişiklikleri) dolayı azami %40 aşılması için gerekli önlemleralınmalıdır.6. Çevre sıcaklığı aralığı: 0° C ile 60° C arasında7. Kasa dahilinde, açıldıktan sonra iyi görülebilen bir yere aşağıdaki uyarıtakılmalıdır:! İkazKasa sadece kısa bir süre açılmalıdır, örn. görsel diyagnoz için. Herhangi birşaltere basmayınız, herhangi bir ünite grubunu çekip çıkarmayınız veyatakmayınız, elektrik hatlarını (soket bağlantıları) ayırmayınız.Eğer patlama tehlikesi söz konusu olan bir atmosfer olmadığı biliniyorsa, işbuikaz göz ardı edilebilir.İzin verilmiş olan ünite gruplarının/modüllerin listesiİzin verilmiş olan ünite gruplarının/modüllerin listesi için internete bakınız:http://www4.ad.siemens.de/view/cs/Doküman ID 13702947.44 Product Information on the Use of subassemblies/modules in a Zone 2 Hazardous AreaA5E00352937-02
Product Information<strong>SIMATIC</strong> <strong>S7</strong>-<strong>300</strong>Analog Input <strong>Module</strong> SM 331; AI 8RTDX 2Release 3 4New analog input module availableThe <strong>S7</strong>-<strong>300</strong> Analog Input <strong>Module</strong> SM 331; AI 8RTD has been added to the<strong>S7</strong>-<strong>300</strong> family. The order number for this module is 6E<strong>S7</strong> 331-7PF01-0AB0.This product information includes details about the characteristics and technicalspecifications of analog input module SM 331; AI 8RTD. Refer to the <strong>S7</strong>-<strong>300</strong>Installation and Hardware Manual for more information about the <strong>S7</strong>-<strong>300</strong> productfamily.You will also learn:How to start up analog input module SM 331; AI 8RTDThe measuring ranges available for analog input moduleSM 331; AI 8RTDHow to configure analog input module SM 331; AI 8RTDAdditional assistanceFor assistance in answering technical questions, for training on this product, or forordering, contact your Siemens distributor or sales office.Copyright 2004 by Siemens Energy & Automation, Inc.A5E00400156-01
Analog Input <strong>Module</strong> SM 331; AI 8RTD (6E<strong>S7</strong> 331-7PF01-0AB0)Order no.6E<strong>S7</strong> 331-7PF01-0AB0Characteristic featuresThe analog input module SM 331; AI 8RTD has the following characteristicfeatures:8 differential inputs for RTD resistance temperature detector in 4 channelgroupsOptional setting of the resistance thermometer type per channel groupRapid measured value updating for up to 4 channelsMeasured-value resolution 15 bits + sign (independent of integration time)<strong>Programmable</strong> diagnostics<strong>Programmable</strong> diagnostic interrupt8 channels with limit monitoring<strong>Programmable</strong> hardware interrupt when limit has been exceeded<strong>Programmable</strong> end-of-scan-cycle interruptIsolated against the backplane bus interfaceFully compatible with predecessor module SM 331-7PF00Includes Russian GOST RTD characteristicsSpecial featureWhen operated in an ET200M distributed I/O configuration, the analog inputmodule SM 331; AI 8RTD can only be used in the ET200M distributed I/Oconfiguration with the following versions of the IM153 (or later) IM153-1 6E<strong>S7</strong> 153-1AA03-0XB0 V.1 IM153-2 6E<strong>S7</strong> 153-2AA02-0XB0 V.56E<strong>S7</strong> 153-2AB01-0XB0 V.42Product Information <strong>S7</strong>-<strong>300</strong> Analog Input <strong>Module</strong> SM 331; AI 8 x RTDA5E00400156-01
Terminal connection diagramFigure 1 shows the terminal connection diagram and the 4-wire wiring diagram forthe SM331; AI 8 RTD <strong>Module</strong>.The detailed technical specifications for this analog input module are on thefollowing page.1LM21L+CH0M0+M0–I c 0+I c 0–23456ADCDCtoDCADC2223242526M4+M4–I c 4+I c 4–CH4M1+727M5+CH1CH2M1–I c 1+I c 1–M2+M2–I c 2+I c 2–M3+89101112131415DACADC<strong>Logic</strong>andbackplanebusinterfaceDACADC2829303132333435M5–I c5 +I c5–M6+M6–I c6 +I c6 –M7+CH5CH6CH3M3–I c 3+I c 3–161718DACDAC363738M7–I c 7+I c 7–CH719392040MFigure 1Connection Diagram of Analog Input <strong>Module</strong> SM 331; AI 8RTDProduct Information <strong>S7</strong>-<strong>300</strong> Analog Input <strong>Module</strong> SM 331; AI 8 x RTDA5E00400156-013
Technical specifications of the SM 331; AI 8 x RTDDimensions W x H x D(in millimeters)WeightSupports clockedoperationDimensions and Weight40 x 125 x 117Approx. 272 g<strong>Data</strong> for Specific <strong>Module</strong>Number of inputs 8NoLength of cable Shielded max. 200 mVoltages, Currents, PotentialsPower rated voltage of the 24 VDCelectronics L+ Reverse polarity protection YesConstant measured current forresistance-type sensorIsolation Between channels andbackplane busBetween channels andpower supply of theelectronicsBetween the channelsIn groups ofmax. 5 mAYesYesYes2Permitted potential difference Between the inputs (U CM ) 75 VDC / 60 VACBetween M ANA andM internal (U ISO )Insulation tested withCurrent consumption From the backplane bus From the power supply L+Power dissipation of the module75 VDC / 60 VAC500 VDCmax. 100 mAmax. 240 mAtyp. 4.6 WMeasuring principle<strong>Module</strong> filtering modeAnalog value generationIntegration/conversion time/resolution (per channel) <strong>Programmable</strong> YesBasic conversion time inmsAdditional conversion timefor measuring 3Lresistance, in msIntegrating8 channels, hardware80100*Additional conversion time 0for open-circuit monitoring,in ms Resolution including sign 16 bitsNoise suppressionfor interference frequencyf1 in HzSmoothing of the measuredvaluesConversion time (per channel)Basic response time of module(all channels enabled)<strong>Module</strong> filtering mode400 / 60 / 50None / low/average/ high100 ms200 msIntegration/conversion time/resolution (per channel) <strong>Programmable</strong> YesBasic conversion time inmsAdditional conversion timefor measuring 3Lresistance, in ms8 channels, software8 / 25 / 3025 / 43 / 48*Additional conversion time 0for open-circuit monitoring,in ms Resolution including sign 16 bitsNoise suppressionfor interference frequencyf1 in Hz400 / 60 / 50Smoothing of the measuredvaluesConversion time (per channel)Basic response time of module(all channels enabled)None / low/average/ high25 / 43 / 48 ms50 / 86 / 96 ms4Product Information <strong>S7</strong>-<strong>300</strong> Analog Input <strong>Module</strong> SM 331; AI 8 x RTDA5E00400156-01
<strong>Module</strong> filtering modeIntegration/conversion time/resolution (per channel) <strong>Programmable</strong> YesBasic conversion time inmsAdditional conversion timefor measuring 3Lresistance, in ms4 channels, hardware3.3100*Additional conversion time 100**for open-circuit monitoring,in ms Resolution including sign 16 bitsNoise suppression for interferencefrequency f1 in HzSmoothing of the measuredvaluesBasic response time of module(all channels enabled)400 / 60 / 50None / low/average/ high10 msSuppression of interference, Limits of ErrorNoise suppression for f = n (f1 1%),”(f1 = interference frequency) n = 1.2, etc.Common-modeinterference(U CM < 60 VAC)Series-mode interference(peak value of interference< rated value of inputrange)Crosstalk between the inputs> 100 dB> 90 dB> 100 dBOperational limit (over entire temperature range, referredto 0 to 60 C input range)Resistance thermometerPt 50, Pt 100, Pt 200,Pt 500, Pt 1000, Ni 100,Ni 120, Ni 200, Ni 500, Ni1000, Cu 50, Cu 100,Pt 10, Cu 101.0 °C2.0 °CBasic error (operational limit at 25°C, referred to inputrange)Resistance thermometerPt 50, Pt 100, Pt 200, 0.5 °CPt 500, Pt 1000, Ni 100,Ni 120, Ni 200, Ni 500, Ni1000, Cu 50, Cu 100,Pt 10, Cu 101.0 °C Resistors 0.05 %Temperature error (withreference to the input range) Resistance thermometerResistorsLinearity error (with reference tothe input range) Resistance thermometerResistorsRepeat accuracy (in the steadystate at 25 °C, referred to theinput range) Resistance thermometerResistors0.015 °C/K0.005 %/K0.2 °C0.02 %0.2 °C0.01 %Status, Interrupts, DiagnosticsInterrupts Hardware interrupt <strong>Programmable</strong>(channels 0 – 7) Diagnostic interrupt <strong>Programmable</strong>Diagnostic functions<strong>Programmable</strong> Group error display Red LED (SF)Diagnostic information canbe displayedPossible Resistors 0.1 %Product Information <strong>S7</strong>-<strong>300</strong> Analog Input <strong>Module</strong> SM 331; AI 8 x RTDA5E00400156-015
<strong>Data</strong> for Selecting a SensorInput range (rated values) inputresistance Resistance thermometer Pt 10, Pt 50, Pt 100,Pt 200, Pt 500,Pt 1000, Ni 100,Ni 120, Ni 200, Ni 500,Ni 1000, Cu 10, Cu 50,Cu 100, Resistors 150, <strong>300</strong>, 600 Maximum input voltage forvoltage input (destruction limit)35 VDC continuous;75 VDC for max. 1 s(duty factor 1:20)Connection of the sensorFor measuring resistanceWith two-conductorconnectionWith three-conductorconnectionWith four-conductorconnectionPossiblePossible ***PossibleCharacteristic linearization Resistance thermometer Pt 10, Pt 50, Pt 100,Pt 200, Pt 500,Pt 1000, Ni 100,Ni 120, Ni 200, Ni 500,Ni 1000, Cu 10, Cu 50,Cu 100 (standard andclimatic range)Technical unit fortemperature measurementDegrees Celsius;degrees Fahrenheit* The resistance measurement for a three-conductor connection is performed every 5 minutes.** Open-circuit monitoring in module filtering mode 4 Channels, Hardware is performed every 3 seconds.*** Maximum lead resistance for 3-wire sensor measurements for PT 10 and Cu 10 RTD elements is 10 . For all other RTDelements. The maximum lead resistance for 3-wire sensor measurements is 20 .6Product Information <strong>S7</strong>-<strong>300</strong> Analog Input <strong>Module</strong> SM 331; AI 8 x RTDA5E00400156-01
Commissioning the SM 331; AI 8 x RTDYou set the mode of operation of the SM 331; AI 8 x RTD:With STEP 7 (see the STEP 7 User Manual) orIn the user program by means of SFCs (see the STEP 7 System and StandardFunctions Reference Manual)Parameterization restrictions when using the SM 331; AI 8 x RTD withPROFIBUS masters that only support DPV0.When you use the analog input module SM 331; AI 8 x RTD in an ET 200MPROFIBUS slave system with a PROFIBUS master which is not an <strong>S7</strong> master,certain parameters are not permitted. Masters that are not <strong>S7</strong> masters do notsupport hardware interrupts. So all the parameters associated with these functionsare deactivated. The deactivated parameters are hardware interrupt enable,hardware restrictions and end-of-scan-cycle interrupt enable. All the otherparameters are permitted.An overview of the parameters that you can set and their default settings areshown in the table below.Table 1Parameters of the SM 331; AI 8 x RTDParameter Value Range DefaultSettingsEnable Diagnostic interrupt Hardware interruptupon limit violation Hardware interrupt atend of cycleTrigger for hardwareinterrupt Upper limit value Lower limit valueDiagnostics Group diagnosticsWith wire-breakcheckYes/noYes/noYes/no32511 to –32512–32512 to 32511Yes/noYes/noNoNoNo32767-32768NoNoParameterTypeDynamicDynamicStaticScope<strong>Module</strong>ChannelChannelgroupProduct Information <strong>S7</strong>-<strong>300</strong> Analog Input <strong>Module</strong> SM 331; AI 8 x RTDA5E00400156-017
Table 1Parameters of the SM 331; AI 8 x RTD, continuedParameterValue RangeMeasurement Measuring Method DeactivatedR-4L Resistance(four-conductor connection)R-3L Resistance,(three-conductor connection)RTD-4L Temperature resistor(linear, four-conductorconnection)RTD-3L Temperature resistor(linear, three-conductorconnection) Measuring Range Refer to the section on measuringranges of the input channels that youcan set.DefaultSettingsRTD-4LPt 100climatic0.003850(IPTS-68) Temperature unit Degrees Celsius; degrees Fahrenheit DegreesCelsius <strong>Module</strong> filtering mode 8 channels hardware filter8 channels software filter4 channels hardware filterTemperaturecoefficient fortemperaturemeasurement withbulb resistor (RTD)Interferencesuppression*Platinum (Pt)0.003850 / °C (IPTS-68)0.003916 / °C0.003902 / °C0.003920 / °C0.003850 / °C (ITS-90)0.003910 / °CNickel (Ni)0.006170 / °C0.006180 / °C0.006720 / °C0.005000 / °C (LG Ni 1000)Copper (Cu)0.004260 / °C0.004270 / °C0.004280 / °C8channels,hardwarefilter0.00385050/60/400 Hz; 400 Hz; 60 Hz; 50 Hz 50/60/400HzParameterTypeDynamicDynamicDynamicDynamicDynamicScopeChannelgroup<strong>Module</strong><strong>Module</strong>ChannelgroupChannelgroup Smoothing NoneLowAverageHighNone Dynamic Channelgroup* 50/60/400 Hz programmable only for modes 8 or 4-Channel Hardware Filter Modes;50 Hz, 60 Hz or 400 Hz programmable only for mode 8-Channel Hardware Filter Mode8Product Information <strong>S7</strong>-<strong>300</strong> Analog Input <strong>Module</strong> SM 331; AI 8 x RTDA5E00400156-01
Channel groupsThe channels of the SM 331; AI 8 x RTD are arranged in four groups of two. Youcan only ever assign parameters to one channel group.The table below shows which channels are parameterized as a channel group ineach case. You will need the channel group number to set the parameters in theuser program with an SFC.Table 2Assignment of Channels of the SM 331; AI 8 x RTD to Channel GroupsChannels ...Channel 0Channel 1Channel 2Channel 3Channel 4Channel 5Channel 6Channel 7... form one Channel Group eachChannel group 0Channel group 1Channel group 2Channel group 3Special characteristic of channel groups for hardware interrupts upon limitviolationYou can set the upper and lower limits for each channel with hardware interrupts inSTEP 7.<strong>Module</strong> filtering modeThe SM 331; AI 8RTD operates in one of the following modes: “Hardware filter, 8 channels” “Software filter, 8 channels” “Hardware filter, 4 channels”The operating mode affects the scan time of the module.Product Information <strong>S7</strong>-<strong>300</strong> Analog Input <strong>Module</strong> SM 331; AI 8 x RTDA5E00400156-019
”Hardware filter 8 channels” modeIn “Hardware filter 8 channels” mode, the analog input module SM331; AI 8 x RTDswitches over between the two channels in each group. As the module containsfour analog/digital converters (ADC), all four of the ADCs convert simultaneouslyfor channels 0, 2, 4 and 6. Once the even-numbered channels have beenconverted all the ADCs simultaneously convert for the odd-numbered channels 1,3, 5 and 7 (see Figure 2).Start analog conversion(simultaneous)K0 K2 K4 K6Scan timeStart analog conversion(simultaneous)K1 K3 K5 K7Figure 2Hardware filter 8 channels scan timeScan time of the moduleIn 8-channel hardware filter mode, the channel conversion time including thecommunication time of the analog input module SM 331; AI 8 x RTD is 84 ms. Themodule must then be switched over to the other channel in the group by means ofopto-MOS relays. Opto-MOS relays need 16 ms to switch and settle. Eachchannel needs a time of 100 ms, so that the scan time is exactly 200 ms.Scan time = (t K + t U ) x 2Scan time = (84 ms + 16 ms) x 2Scan time = 200 mst K :t U :channel conversion time for one channeltime for switching to the other channel in the channel group10Product Information <strong>S7</strong>-<strong>300</strong> Analog Input <strong>Module</strong> SM 331; AI 8 x RTDA5E00400156-01
”Software filter 8 channels” modeIn “Software filter 8 channels” mode, the analog/digital conversion occurs in exactlythe same way as in “hardware filter 8 channels” mode. That is to say, as themodule contains four analog/digital converters (ADC), all four of the ADCs convertsimultaneously for channels 0, 2, 4 and 6. Once the even-numbered channels areconverted, all the ADCs convert simultaneously for the odd-numbered channels 1,3, 5 and 7 (see Figure 3).Start analog conversion(simultaneous)K0 K2 K4 K6Scan timeStart analog conversion(simultaneous)K1 K3 K5 K7Figure 3Software filter 8 channels scan timeScan time of the moduleThe channel conversion time depends, however, on the programmed interferencefrequency suppression. When you set an interference frequency of 50 Hz, thechannel conversion time including communication time is 32 ms. When you set aninterference frequency of 60 Hz, the channel conversion time is 27 ms. When youset an interference frequency of 400 Hz, the channel conversion time is reduced to9 ms. As with 8-channel hardware filter mode, the module must be switched overby means of opto MOS relays with a time of 16 ms for switching to the otherchannel of the group. This relationship is shown in the table that follows.Product Information <strong>S7</strong>-<strong>300</strong> Analog Input <strong>Module</strong> SM 331; AI 8 x RTDA5E00400156-0111
Table 3Scan Times in “Software Filter, 8 Channels” ModeProgrammedInterference FrequencySuppressionChannel Scan Time*<strong>Module</strong> Scan Time (AllChannels)50 Hz 48 ms 96 ms60 Hz 43 ms 86 ms400 Hz 25 ms 50 ms* Channel scan time = channel conversion time + 16 ms switching time to the other channelin the channel groupScan time in “Hardware Filter, 4 Channels” modeIn this mode, the module does not switch between the channels of the differentgroups. As the module contains four analog/digital converters (ADC), all four of theADCs convert simultaneously for channels 0, 2, 4 and 6.Start analog conversion(simultaneous)K0 K2 K4 K6Scan timeFigure 4Hardware filter 4 channels scan timeScan time of the moduleIn 4-channel hardware filter mode, the channel conversion time including thecommunication time of the analog input module SM 331; AI 8 x RTD is 10 ms. Asthe module does not switch over between the channels in a group, the channelscan time and the module scan time are the same: 10 ms.Channel conversion time = channel scan time = module scan time = 10 ms12Product Information <strong>S7</strong>-<strong>300</strong> Analog Input <strong>Module</strong> SM 331; AI 8 x RTDA5E00400156-01
Prolongation of the scan time with a wire-break checkThe wire-break check is a hardware function of the module that is available in alloperating modes.In the 8-channel hardware and software filter operating modes, the scan timeof the module is unchanged, irrespective of the number of channels for whichwire-break has been enabled.In the 4-channel hardware filter operating mode, the module interruptsprocessing of the input data 100 ms and performs a wire-break check. In otherwords, each wire-break check prolongs the scan time of the module by 100 ms.Smoothing of the measured valuesYou fill find information that is generally applicable to the smoothing of analogvalues in Section 4.6 of the <strong>SIMATIC</strong> <strong>Programmable</strong> <strong>Logic</strong> Controller <strong>S7</strong>-<strong>300</strong><strong>Module</strong> <strong>Data</strong> Reference Manual .Special characteristic with short-circuit to M or LIf you short an input channel to M or L, the module does not suffer any damage.The channel continues to issue valid data; neither is a diagnosis reported.DiagnosticsYou will find the diagnostic messages that are grouped under the “group diagnosis”parameter in Section 4.16 of the <strong>SIMATIC</strong> <strong>Programmable</strong> <strong>Logic</strong> Controller <strong>S7</strong>-<strong>300</strong><strong>Module</strong> <strong>Data</strong> Reference Manual .Product Information <strong>S7</strong>-<strong>300</strong> Analog Input <strong>Module</strong> SM 331; AI 8 x RTDA5E00400156-0113
Measuring Methods and Measuring Ranges of the SM 331; AI 8 x RTDMeasuring MethodsYou can set the following measuring methods for the input channels: RTD 4-conductor measurement RTD 3-conductor measurement Resistor 4-conductor measurement Resistor 3-conductor measurementYou perform the setting with the “measuring method” parameter in STEP 7.Unused ChannelsSet the “measuring method” parameter for unused channels to “disabled”. In thisway you shorten the scan time of the module.You must terminate an unused channel of an enabled channel group with anominal resistance in order to avoid diagnostic errors for the unused channel (referto the block diagram, Figure 1, for the connection).In the “4-Channel Hardware Filter” operating mode, termination is not necessaryprovided that you have disabled the unused channel groups. Channels 1, 3, 5 and7 are not monitored in this mode.Measuring rangesYou perform setting of the measuring ranges with the “measuring range” parameterin STEP 7.Table 4Measuring ranges of the SM331; AI 8 x RTDMethod SelectedDeactivatedResistance, four-conductorconnectionResistance, three-conductorconnectionDeactivated150 <strong>300</strong> 600 150 <strong>300</strong> 600 Measuring Range14Product Information <strong>S7</strong>-<strong>300</strong> Analog Input <strong>Module</strong> SM 331; AI 8 x RTDA5E00400156-01
Table 4Measuring ranges of the SM331; AI 8 x RTDMethod SelectedThermal resistance+linearizationfour-conductorconnectionMeasuring RangePt 100 ClimaticNi 100 ClimaticPt 100 StandardNi 100 StandardPt 500 StandardPt 1000 StandardNi 1000 StandardPt 200 ClimaticPt 500 ClimaticPt 1000 ClimaticNi 1000 ClimaticPt 200 StandardNi 120 StandardNi 120 ClimaticCu 10 ClimaticCu 10 StandardNi 200 StandardNi 200 ClimaticNi 500 StandardNi 500 ClimaticPt 10 GOST ClimaticPt 10 GOST StandardPt 50 GOST ClimaticPt 50 GOST StandardPt 100 GOST ClimaticPt 100 GOST StandardPt 500 GOST ClimaticPt 500 GOST StandardCu 10 GOST ClimaticCu 10 GOST StandardCu 50 GOST ClimaticCu 50 GOST StandardCu 100 GOST ClimaticCu 100 GOST StandardNi 100 GOST ClimaticNi 100 GOST StandardProduct Information <strong>S7</strong>-<strong>300</strong> Analog Input <strong>Module</strong> SM 331; AI 8 x RTDA5E00400156-0115
Method SelectedThermal resistance+linearizationthree-conductorconnectionMeasuring RangePt 100 ClimaticNi 100 ClimaticPt 100 StandardNi 100 StandardPt 500 StandardPt 1000 StandardNi 1000 StandardPt 200 ClimaticPt 500 ClimaticPt 1000 ClimaticNi 1000 ClimaticPt 200 StandardNi 120 StandardNi 120 ClimaticCu 10 ClimaticCu 10 StandardNi 200 StandardNi 200 ClimaticNi 500 StandardNi 500 ClimaticPt 10 GOST ClimaticPt 10 GOST StandardPt 50 GOST ClimaticPt 50 GOST StandardPt 100 GOST ClimaticPt 100 GOST StandardPt 500 GOST ClimaticPt 500 GOST StandardCu 10 GOST ClimaticCu 10 GOST StandardCu 50 GOST ClimaticCu 50 GOST StandardCu 100 GOST ClimaticCu 100 GOST StandardNi 100 GOST ClimaticNi 100 GOST Standard16Product Information <strong>S7</strong>-<strong>300</strong> Analog Input <strong>Module</strong> SM 331; AI 8 x RTDA5E00400156-01
End-of-scan-cycle interruptBy enabling the end-of-scan-cycle interrupt, you can synchronize a process withthe conversion cycle of the module. The interrupt occurs when the conversion of allthe enabled channels is complete.Table 5Content of the 4 bytes with additional information from OB40 during a hardwareinterrupt or an end-of-scan-cycle interruptContent of the 4 bytes withadditional information2 7 2 6 2 5 2 4 2 3 2 2 2 1 2 0 ByteSpecialanalogmarkers2 bits per channel to identify the rangeUpper limit exceeded inchannelLower limit exceeded inchannel7 6 5 4 3 2 1 0 07 6 5 4 3 2 1 0 1End-of-scan-cycle event X 2Unassigned bit 3Wiring DiagramsFigure 5 shows the wiring diagrams for 4-wire and 3-wire sensor elements. Whenyou use a 3-wire sensor, ensure you insert the jumper between M+ and I c +.Incorrect wiring results in unpredictable module behavior.M+M–I c +I c –Jumper M+ to I c +M+M–I c +I c –4-Wire Wiring3-Wire WiringFigure 54-Wire and 3-Wire Wiring DiagramUnused Input ChannelsIn order to reduce unnecessary wiring, use STEP 7 to deactivate unused channelgroups of the SM331; AI 8RTD module (see Table 1).You must terminate an unused channel within an activated group to eliminatediagnostic errors for the unused input. Figure 5 shows how to attach a nominalresistor for the selected input range to terminate the unused input.When you operate in the 4 Channel Hardware <strong>Module</strong> Mode, no channeltermination is required if you deactivate the unused input channel groups.Channels 1, 3, 5 and 7 are not monitored during this module mode of operation.Product Information <strong>S7</strong>-<strong>300</strong> Analog Input <strong>Module</strong> SM 331; AI 8 x RTDA5E00400156-0117
Analog Value Representation of the Measuring Ranges of the AnalogInput <strong>Module</strong> SM 331: AI 8RTDIntroductionThe tables in this section contain the digitized analog values for the variousmeasuring ranges of the analog input module. See table 6 through table 17.How to Read the Measured-Value TablesSince the binary representation for the analog values is always the same, thesetables only contain the measured values and the units.Resistance-Type Sensors Measuring RangesTable 6 shows the representation of the digitized measured value forresistance-type sensors with the measuring ranges 150 Ω, <strong>300</strong> Ω, and 600 Ω.Table 6Analog Value Representation for Resistance Type Transmitters from 150 to 600 SystemDec. Hex. 150 <strong>300</strong> 600 Resistance-Type Transmitter Range32767 7FFF 177.77 355.54 711.09 Overflow32512 7F00 150.01 <strong>300</strong>.01 600.02 32511 7EFF 176.38 352.77 705.53 Overrange27649 6C0127648 6C00 150 <strong>300</strong> 600 20736 5100 112.5 225 450 1 1 5.43 m 10.85m21.70m0 0 0 0 0 (negative values physicallynot possible)Rated rangeUnderrange18Product Information <strong>S7</strong>-<strong>300</strong> Analog Input <strong>Module</strong> SM 331; AI 8 x RTDA5E00400156-01
Pt Standard Temperature RangesTable 7 shows the representation of the digitized measured value for the standardtemperature range of the Pt 100, Pt 200, Pt 500 and Pt 1000 sensors. In addition,GOST Pt 0.003850 (ITS-90) 10, 50, 100, and 500 temperature ranges arerepresented.Table 7Analog value representation for RTD Resistance Temperature DetectorsPt 10, 50, 100, 200, 500, 1000Pt x00standardin C(1 digit=0.1C)decimalUnitsPt x00standardin F(1 digit=0.1 F)decimalUnitshexadecimalhexadecimal> 1000.0 32767 7FFF H > 1832.0 32767 7FFF H Overflow1000.0:850.1850.0:–200.0–200.1:–243.010000:85018500:–2000–2001:–24302710 H 1832.0: :2135 H 1562.12134 H 1562.0: :F830 H –328.0F82F H –328.1: :F682 H –405.418320:1562115620:–3280–3281:–40544790 H:3D05 HOverrangeRange3D04 H:F330 HRated rangeF32F H:F02A HUnderrange< –243.0 –32768 8000 H < –405.4 –32768 8000 H UnderflowProduct Information <strong>S7</strong>-<strong>300</strong> Analog Input <strong>Module</strong> SM 331; AI 8 x RTDA5E00400156-0119
Pt Climatic Temperature RangesTable 8 shows the representation of the digitized measured value for the climatictemperature range of the Pt 100, Pt 200, Pt 500 and Pt 1000 sensors. In addition,GOST Pt 10, 50, 100, and 500 temperature ranges are represented.Table 8Analog value representation for RTD Resistance Temperature DetectorsPt 10, 50, 100, 200, 500, 1000Pt x00climaticin C(1 digit =0.01C)decimalUnitsPt x00climaticin F(1 digit =0.01F)decimalUnits>155.00 32767 7FFF H >311.00 32767 7FFF H Overflow155.00:130.01130.00:–120.00–120.01:–145.0015500:1<strong>300</strong>11<strong>300</strong>0:–12000–12001:–145003C8C H 311.00: :32C9 H 266.0132C8 H 266.00: :D120 H –184.00D11F H –184.01: :C75C H –229.0031100:2660126600:–18400–18401:–22900797C H:67E9 HOverrangeRange67E8 H:B820 HRated rangeB81F H:A68C HUnderrange< –145.00 –32768 8000 H < –229.00 –32768 8000 H UnderflowNi Standard Temperature RangesTable 9 shows the representation of the digitized measured value for the standardtemperature range of the Ni 100, Ni 120, Ni 200, Ni 500 and Ni 1000 sensors.Table 9Analog value representation for RTD Resistance Temperature DetectorsNi100, 120, 200, 500, 1000, LG-Ni 1000Ni x00standardin C(1 digit =0.1C)decimalUnitsNi x00standardin F(1 digit =0.1F)decimalUnitshexadecimalhexadecimalhexadecimalhexadecimal>295.0 32767 7FFF H >563.0 32767 7FFF H Overflow295.0:250.1250.0:–60.0–60.1:–105.02950:25012500:–600–601:–1050B86 H 563.0: :9C5 H 482.19C4 H 482.0: :FDA8 H –76.0FDA7 H –76.1: :FBE6 H –157.05630:48214820:–760–761:–157015FE H:12D5 HOverrangeRange12D4 H:FD08 HRated rangeFD07 H:F9DE HUnderrange< –105.0 –32768 8000 H < –157.0 –32768 8000 H Underflow20Product Information <strong>S7</strong>-<strong>300</strong> Analog Input <strong>Module</strong> SM 331; AI 8 x RTDA5E00400156-01
Ni Climatic Temperature RangesTable 10 shows the representation of the digitized measured value for the standardtemperature range of the Ni 100, Ni 120, Ni 200, Ni 500 and Ni 1000 sensors.Table 10Analog value representation for RTD Resistance Temperature DetectorsNi 100, 120, 200, 500, 1000, LG-Ni 1000Ni x00climaticin C(1 digit =0.01C)decimalUnitsNi x00climaticin F(1 digit =0.01F)decimalUnits> 295.00 32767 7FFF H >325.11 32767 7FFF H Overflow295.00:250.01250.00:–60.00–60.01:–105.0029500:2500125000:–6000–6001:–10500733C H 327.66: :61A9 H 280.0161A8 H 280.00: :E890 H –76.00E88F H –76.01: :D6FC H –157.0032766:2800128000:–7600–7601:–157007FFE H:6D61 HOverrangeRange6D60 H:E250 HRated rangeE24F H:C2AC HUnderrange< –105.00 –32768 8000 H < –157.00 –32768 8000 H UnderflowCu Standard Temperature RangesTable 11 shows the representation of the digitized measured value for the standardtemperature range of the Cu 10 sensor.Table 11Analog Value Representation for RTD Resistance TemperatureDetectors Cu 10Cu 10standardin C(1 digit =0.01C)decimalUnitshexadecimalhexadecimalUnits Cu 10standarddecimal hexadecimal(1 digit =in F0.01F)hexadecimal> 312.0 32767 7FFF H >593.6 32767 7FFF H Overflow312.0:260.1260.0:–200.0–200.1:–240.03120:26012600:–2000–2001:–2400C30 H 593.6: :A29 H 500.1A28 H 500.0: :F830 H –328.0F82F H –328.1: :F6A0 H –400.05936:50015000:–3280–3281:–40001730 H:12D5 HOverrangeRange1389 H:F330 HRated rangeF32F H:F060 HUnderrange< –240.0 –32768 8000 H < –400.0 –32768 8000 H UnderflowProduct Information <strong>S7</strong>-<strong>300</strong> Analog Input <strong>Module</strong> SM 331; AI 8 x RTDA5E00400156-0121
Cu Climatic Temperature RangesTable 12 shows the representation of the digitized measured value for the climatictemperature range of the Cu 10 sensor. In addition, GOST Cu 10, 50, and 100temperature ranges are represented.Table 12Analog Value Representation for RTD Resistance TemperatureDetectors Cu 10, 50, 100Cu 10climaticin C(1 digit =0.01C)decimalUnits> 180.00 32767 7FFF H >327.66 32767 7FFF H Overflow180.00:150.01150.00:–50.00–50.01:–60.0018000:1500115000:–5000–5001:–60004650 H 327.66: :3A99 H 280.013A98 H 280.00: :EC78 H –58.00EC77 H:E890H–58.01:–76.0032766:2800128000:–5800–5801:–76007FFE H:6D61A HOverrangeRange6D60 H:E958 HRated rangeE957 H:E250HUnderrange< –60.00 –32768 8000 H < –76.00 –32768 8000 H UnderflowPt 0.003910 GOST Standard Temperature RangesTable 13 shows the representation of the digitized measured value for the GOSTstandard temperature range of the Pt 10, 50, 100, 500 sensors.Table 13Analog value representation for GOST RTD Resistance TemperatureDetectors Pt 10, 50, 100, 500Pt x00standardin C(1 digit=0.1C)decimalUnitsPt x00standardin F(1 digit=0.1F)decimalUnitsUnits Cu 10climaticdecimal hexadecimal(1 digit =in F0.01F)hexadecimalhexadecimalhexadecimal> 1295.0 32767 7FFF H > 2363.0 32767 7FFF H Overflow1295.0:1100.11100.0:–260.0–260.1:–273.212950:1100111000:–2600–2601:–27323296 H 2363.0: :2AF9 H 2012.12AF8 H 2012.0: :F5D8 H –436.0F5D7 H –436.1: :F554 H –459.723630:2012120120:–4360–4361:–45975CE4 H:4E99 HOverrangeRange4E98 H:EEF8 HRated rangeEEF7 H:EE0B HUnderrange< –273.2 –32768 8000 H < –459.7 –32768 8000 H Underflow22Product Information <strong>S7</strong>-<strong>300</strong> Analog Input <strong>Module</strong> SM 331; AI 8 x RTDA5E00400156-01
Ni GOST Standard Temperature RangesTable 14 shows the representation of the digitized measured value for the GOSTstandard temperature range of the Ni 100 sensor.Table 14Analog value representation for GOST RTD Resistance TemperatureDetector Ni100Ni 100standardin C(1 digit =0.1C)decimalUnits>212.4 32767 7FFF H >414.3 32767 7FFF H Overflow212.4:180.1180.0:–60.0–60.1:–105.02124:18011800:–600–601:–1050084C H 414.3: :0709 H 356.10708 H 356.0: :FDA8 H –76.0FDA7 H –76.1: :FBE6 H –157.04143:35613560:–760–761:–1570102F H:0DE9 HOverrangeRange0DE8 H:FD08 HRated rangeFD07 H:F9DE HUnderrange< –105.0 –32768 8000 H < –157.0 –32768 8000 H UnderflowNi GOST Climatic Temperature RangesTable 15 shows the representation of the digitized measured value for the GOSTclimatic temperature range of the Ni 100 sensor.Table 15Analog value representation for GOST RTD Resistance TemperatureDetector Ni 100Ni 100climaticin C(1 digit =0.1C)decimalUnitsUnits Ni 100standarddecimal hexadecimal(1 digit =in F0.1F)hexadecimalUnits Ni 100climaticdecimal hexadecimal(1 digit =in F0.1F)hexadecimal> 212.40 32767 7FFF H >327.66 32767 7FFF H Overflow212.40:180.01180.00:–60.00–60.01:–105.0021240:1800118000:–6000–6001:–1050052F8 H 327.66: :4651 H 280.014650 H 280.00: :E890 H –76.00E88F H –76.01: :D6FC H –157.0032766:2800128000:–7600–7601:–157007FFE H:6D61 HOverrangeRange6D60 H:E250 HRated rangeE24F H:C2AC HUnderrange< –105.00 –32768 8000 H < –157.00 –32768 8000 H UnderflowProduct Information <strong>S7</strong>-<strong>300</strong> Analog Input <strong>Module</strong> SM 331; AI 8 x RTDA5E00400156-0123
Cu 0.00426 GOST Standard Temperature RangesTable 16 shows the representation of the digitized measured value for the GOSTstandard temperature range of the Cu 10, 50, 100, 500 sensors.Table 16Analog Value Representation for GOST RTD Resistance TemperatureDetectors Cu 10, 50, 100, 500Cu xx0standardin C(1 digit =0.1C)decimalUnitsCu xx0standardin F(1 digit =0.01F)decimalUnits> 240.0 32767 7FFF H >464.0 32767 7FFF H Overflow240.0:200.1200.0:–50.0–50.1:–60.02400:20012000:–500–501:–6000960 H 464.0: :07D1 H 392.107D0 H 392.0: :FE0C H –58.0FE0B H –58.1: :FDA8 H –76.04640:39213920:–580–581:–760Range1220 H: Overrange0F51 H0F50 HRated range:FDBC HFDBB H:FD08 HUnderrange< –60.0 –32768 8000 H < –76.0 –32768 8000 H UnderflowCu 0.00428 GOST Standard Temperature RangesTable 17 shows the representation of the digitized measured value for the GOSTstandard temperature range of the Cu 10, 50, 100, 500 sensors.Table 17Analog Value Representation for RTD Resistance TemperatureDetectors Cu 10, 50, 100, 500Cu xx0standardin C(1 digit =0.1C)decimalUnitsCu xx0standardin F(1 digit =0.01F)decimalUnitshexadecimalhexadecimalhexadecimalhexadecimal> 240.0 32767 7FFF H >464.0 32767 7FFF H Overflow240.0:200.1200.0:–200.0–200.1:–240.02400:20012000:–2000–2001:–24000960 H 464.0: :07D1 H 392.107D0 H 392.0: :F830 H –328.0F82F H –328.1: :F6A0 H –405.44640:39213920:–3280–3281:–40541220 H:0F51 HOverrangeRange0F50 H:F330 HRated rangeF32F H:F02A HUnderrange< –240.0 –32768 8000 H < –405.4 –32768 8000 H Underflow24Product Information <strong>S7</strong>-<strong>300</strong> Analog Input <strong>Module</strong> SM 331; AI 8 x RTDA5E00400156-01
Parameter Sets for Analog Input <strong>Module</strong> SM 331; AI 8RTDParameter assignment in the user programYou have already assigned parameters to the modules in STEP 7.In the user program, you can use a SFC: To reassign parameters to the module and To transfer the parameters from the CPU to the addressed modulesParameters stored in data recordsThe parameters of the AI 8 x RTD module are located in data records 0 and 1; forsome other analog input modules, in data record 128 as well.Modifiable parametersYou can change the parameters of record 1 and pass them to the module usingSFC 55. The parameters set on the CPU are not changed when you do this!You cannot modify the parameters of data record 0 in the user program.SFCs for parameter assignmentThe following SFCs are available for assigning parameters to the AI 8 x RTDmodule in the user program:Table 18SFCs for assigning Parameters to Signal <strong>Module</strong>sSFC IdentifierApplicationNo.55 WR_PARM Transfer modifiable parameters (data record 1 and 28)to the addressed signal module.56 WR_DPARM Transfer parameters (data record 0, 1 or 128) from theCPU to the addressed signal module.57 PARM_MOD Transfer all parameters (data record 0, 1 and 128)from the CPU to the addressed signal module.Description of the parametersThe following sections contain all the modifiable parameters for the AI 8 x RTDmodule. The parameters of the AI 8 x RTD modules are described: In the on-line help of STEP 7 In this Product Information document.You will find the parameters that can be adjusted for the signal moduleconcerned in the specific sections for the different signal modules.Product Information <strong>S7</strong>-<strong>300</strong> Analog Input <strong>Module</strong> SM 331; AI 8 x RTDA5E00400156-0125
Parameters of Analog Input <strong>Module</strong> SM 331; AI 8RTDParametersThe table below contains all the parameters which you can set for analog inputmodule SM 331; AI 8 x RTD.You will see which parameters you can modify from the list: In STEP 7 With SFC 55 “WR_PARM”The parameters set with STEP 7 can also be transferred with SFCs 56 and 57 tothe module (refer to the STEP 7 manuals).Table 19Parameters of the SM 331; AI 8 x RTDParameter<strong>Data</strong> RecordNo.Parameters can be assignedwith ...... SFC 55 ...ProgrammingDeviceNoYesNoYesDiagnostics: Group diagnosticsDiagnostics: With wire-break check0Diagnostics interrupt enable Yes YesLimit value interrupt enableYesYesCycle end interrupt enable1YesYesTemperature unit Yes YesMeasuring Method Yes YesMeasuring Range Yes Yes<strong>Module</strong> filtering mode Yes YesTemperature coefficientYesYes128Interference SuppressionYesYesSmoothing Yes YesUpper limit value Yes YesLower limit value Yes YesNoteIf you want to enable the diagnostic interrupt in the user program in data record 1,you must enable the diagnosis in data record 0 beforehand using STEP 7.26Product Information <strong>S7</strong>-<strong>300</strong> Analog Input <strong>Module</strong> SM 331; AI 8 x RTDA5E00400156-01
Structure of <strong>Data</strong> Record 1Figure 6 shows the structure of data record 1 for the parameters of the AnalogInput <strong>Module</strong> SM 331; AI 8RTD.You can activate a parameter by setting the corresponding bit in byte 0 to “1”.7 6 5 4 3 2 1 0Bit numberByte 0Celsius / FahrenheitCycle end interrupt enableDiagnostics enableLimit value interrupt enableByte 1Byte 2Byte 3Byte 4Byte 5Byte 6Byte 7Byte 8Byte 9Byte 10Byte 11Byte 12Byte 13UnusedUnusedUnusedUnusedUnusedUnusedUnusedUnusedUnusedUnusedUnusedUnusedUnusedFigure 6<strong>Data</strong> Record 1 for Parameters of the Analog Input <strong>Module</strong> SM 331; AI 8RTDProduct Information <strong>S7</strong>-<strong>300</strong> Analog Input <strong>Module</strong> SM 331; AI 8 x RTDA5E00400156-0127
Structure of <strong>Data</strong> Record 128Figure 7 shows the structure of data record 128 for the parameters of the AnalogInput <strong>Module</strong> SM 331; AI 8RTD.Byte 0Byte 17 6 5 4 3 2 1 0Bit number<strong>Module</strong> Mode (See Table 20)Interference frequencysuppressionChannel group 0Channel group 1Channel group 2Channel group 3(See Table 21)Byte 2Measurement Type, Group 0(see Table 22)Byte 3Measurement Range, Group 0(see Table 22)Byte 4Byte 5Alpha Selection, Group 0(see Table 23)Smoothing, Group 0(see Table 24)Measurement Type, Group 1(see Table 22)Byte 6Measurement Range, Group 1(see Table 22)Byte 7Alpha Selection, Group 1(see Table 23)Smoothing, Group 1(see Table 24)Figure 7<strong>Data</strong> Record 128 for Parameters of the Analog Input <strong>Module</strong>SM 331; AI 8RTD28Product Information <strong>S7</strong>-<strong>300</strong> Analog Input <strong>Module</strong> SM 331; AI 8 x RTDA5E00400156-01
Byte 8Measurement Type, Group 2(see Table 22)Byte 9Measurement Range, Group 2(see Table 22)Byte 10Alpha Selection, Group 2(see Table 23)Smoothing, Group 2(see Table 24)Byte 11Measurement Type, Group 3(see Table 22)Byte 12Measurement Range, Group 3(see Table 22)Byte 13Alpha Selection, Group 3(see Table 23)Smoothing, Group 3(see Table 24)Byte 14Byte 15Byte 16Byte 17Byte 18Byte 19Byte 20Byte 21High ByteLow ByteHigh ByteLow ByteHigh ByteLow ByteHigh ByteLow ByteUpper limit valueGroup 0;Channel 0Lower limit valueGroup 0;Channel 0Upper limit valueGroup 0;Channel 1Lower limit valueGroup 0;Channel 1Figure 7<strong>Data</strong> Record 128 for Parameters of the Analog Input <strong>Module</strong> SM 331; AI 8RTD(continued)Product Information <strong>S7</strong>-<strong>300</strong> Analog Input <strong>Module</strong> SM 331; AI 8 x RTDA5E00400156-0129
Byte 22Byte 23Byte 24Byte 25Byte 26Byte 27Byte 28Byte 29Byte 30Byte 31Byte 32Byte 33Byte 34Byte 35Byte 36Byte 37Byte 38Byte 39Byte 40Byte 41Byte 42Byte 43Byte 44Byte 45High ByteLow ByteHigh ByteLow ByteHigh ByteLow ByteHigh ByteLow ByteHigh ByteLow ByteHigh ByteLow ByteHigh ByteLow ByteHigh ByteLow ByteHigh ByteLow ByteHigh ByteLow ByteHigh ByteLow ByteHigh ByteLow ByteUpper limit valueGroup 1;Channel 2Lower limit valueGroup 1;Channel 2Upper limit valueGroup 1;Channel 3Lower limit valueGroup 1;Channel 3Upper limit valueGroup 2;Channel 4Lower limit valueGroup 2;Channel 4Upper limit valueGroup 2;Channel 5Lower limit valueGroup 2;Channel 5Upper limit valueGroup 3;Channel 6Lower limit valueGroup 3;Channel 6Upper limit valueGroup 3;Channel 7Lower limit valueGroup 3;Channel 7Figure 7<strong>Data</strong> Record 128 for Parameters of the Analog Input <strong>Module</strong> SM 331; AI 8RTD(continued)The representation of the limit values matches the analog value representation.Observe the range limits when setting the limit values.30Product Information <strong>S7</strong>-<strong>300</strong> Analog Input <strong>Module</strong> SM 331; AI 8 x RTDA5E00400156-01
<strong>Module</strong> ModeTable 20 contains the codes for the various module operating modes that you enterin byte 0 of data record 128 (see Figure 7).Table 20Codes for the module modes of the Analog Input <strong>Module</strong> SM 331; AI 8RTD<strong>Module</strong> ModeCode8 Channel Hardware Filtering 2#000000008 Channel Software Filtering 2#000000014 Channel Hardware Filtering 2#00000010Interference Frequency SuppressionTable 21 contains the codes for the various frequencies that you enter in record128 (see Figure 7). Note that the 50 Hz, 60 Hz, and 400 Hz selections are for the 8Channel Software Filtering module mode only. The 50, 60, and 400 Hz selection isfor the 8 Channel and 4 Channel Hardware Filtering module modes only.Table 21Codes for the Interference Frequency Suppression of Analog Input <strong>Module</strong>SM 331; AI 8RTDInterference Frequency SuppressionCode400 Hz 2#0060 Hz 2#0150 Hz 2#1050, 60, and 400 Hz 2#11Measurement Type and Measurement RangeTable 22 contains all the measuring ranges for the Analog Input <strong>Module</strong> SM 331;AI 8RTD. Table 22 also shows the codes for the measurement types and themeasuring range. You must enter these codes, according to the measuring rangedesired, in the appropriate bytes of data record 128 (see Figure 7).Table 22Measuring ranges of the SM331; AI 8 x RTDMethod SelectedCode(Hex)Measuring RangeCode(Hex)Deactivated 0x0 Deactivated 0x00Resistance, four-conductorconnectionResistance, three-conductorconnection0x40x5150 <strong>300</strong> 600 150 <strong>300</strong> 600 0x020x040x060x020x040x06Product Information <strong>S7</strong>-<strong>300</strong> Analog Input <strong>Module</strong> SM 331; AI 8 x RTDA5E00400156-0131
Table 22Measuring ranges of the SM331; AI 8 x RTDMethod SelectedCode(Hex)Measuring RangeCode(Hex)Thermal resistance+linearizationfour-conductorconnection0x8Pt 100 ClimaticNi 100 ClimaticPt 100 StandardNi 100 StandardPt 500 Standard0x000x010x020x030x04Pt 1000 StandardNi 1000 StandardPt 200 Climatic0x050x060x07Pt 500 ClimaticPt 1000 ClimaticNi 1000 ClimaticPt 200 Standard0x080x090x0A0x0BNi 120 StandardNi 120 ClimaticCu 10 Climatic0x0C0x0D0x0ECu 10 StandardNi 200 StandardNi 200 ClimaticNi 500 Standard0x0F0x100x110x12Ni 500 ClimaticPt 10 GOST ClimaticPt 10 GOST Standard0x130x140x15Pt 50 GOST ClimaticPt 50 GOST StandardPt 100 GOST ClimaticPt 100 GOST Standard0x160x170x180x19Pt 500 GOST ClimaticPt 500 GOST StandardCu 10 GOST Climatic0x1A0x1B0x1CCu 10 GOST StandardCu 50 GOST ClimaticCu 50 GOST StandardCu 100 GOST Climatic0x1D0x1E0x1F0x20Cu 100 GOST StandardNi 100 GOST ClimaticNi 100 GOST Standard0x210x220x2332Product Information <strong>S7</strong>-<strong>300</strong> Analog Input <strong>Module</strong> SM 331; AI 8 x RTDA5E00400156-01
Method SelectedCode(Hex)Measuring RangeCode(Hex)Thermal resistance+linearizationthree-conductorconnection0x9Pt 100 ClimaticNi 100 ClimaticPt 100 StandardNi 100 StandardPt 500 Standard0x000x010x020x030x04Pt 1000 StandardNi 1000 StandardPt 200 Climatic0x050x060x07Pt 500 ClimaticPt 1000 ClimaticNi 1000 ClimaticPt 200 Standard0x080x090x0A0x0BNi 120 StandardNi 120 ClimaticCu 10 Climatic0x0C0x0D0x0ECu 10 StandardNi 200 StandardNi 200 ClimaticNi 500 Standard0x0F0x100x110x12Ni 500 ClimaticPt 10 GOST ClimaticPt 10 GOST Standard0x130x140x15Pt 50 GOST ClimaticPt 50 GOST StandardPt 100 GOST ClimaticPt 100 GOST Standard0x160x170x180x19Pt 500 GOST ClimaticPt 500 GOST StandardCu 10 GOST Climatic0x1A0x1B0x1CCu 10 GOST StandardCu 50 GOST ClimaticCu 50 GOST StandardCu 100 GOST Climatic0x1D0x1E0x1F0x20Cu 100 GOST StandardNi 100 GOST ClimaticNi 100 GOST Standard0x210x220x23Product Information <strong>S7</strong>-<strong>300</strong> Analog Input <strong>Module</strong> SM 331; AI 8 x RTDA5E00400156-0133
Resistance-type Thermometer Alpha SelectionTable 23 contains all the alpha selections for the resistance-type thermometermeasuring range of the Analog Input <strong>Module</strong> SM 331; AI 8RTD. You must enterthese codes, according to the measuring range desired, in the appropriate bytes ofdata record 128 (see Figure 7).Table 23Codes for the Alpha Selection of the Analog Input <strong>Module</strong>SM 331; AI8 RTDAlpha SelectionCodePt 0.003850 Ω/Ω/°C (IPTS-68) 2#0000Pt 0.003916 Ω/Ω/°C 2#0001Pt 0.003902 Ω/Ω/°C 2#0010Pt 0.003920 Ω/Ω/°C 2#0011Pt 0.003850 Ω/Ω/°C (ITS-90) 2#0100Pt 0.003910 Ω/Ω/°C 2#0101Ni 0.006170 Ω/Ω/°C 2#0111Ni 0.006180 Ω/Ω/°C 2#1000Ni 0.006720 Ω/Ω/°C 2#1001Ni 0.005000 Ω/Ω/°C (LG Ni 1000) 2#1010Cu 0.004260 Ω/Ω/°C 2#1011Cu 0.004270 Ω/Ω/°C 2#1100Cu 0.004280 Ω/Ω/°C 2#1101Input Smoothing SelectionTable 24 contains all the smoothing selections for the Analog Input <strong>Module</strong> SM331; AI 8RTD. You must enter these codes, according to the measuring rangedesired, in the appropriate bytes of data record 128 (see Figure 7).Table 24Codes for the Smoothing Selection of the Analog Input <strong>Module</strong>SM 331; AI 8 RTDSmoothing SelectionCodeNone 2#00Weak 2#01Medium 2#10Strong 2#1134Product Information <strong>S7</strong>-<strong>300</strong> Analog Input <strong>Module</strong> SM 331; AI 8 x RTDA5E00400156-01
Product Information<strong>SIMATIC</strong> <strong>S7</strong>-<strong>300</strong>Analog Input <strong>Module</strong> SM 331; AI 8×TCX 2as of Version 3 4New Analog Input <strong>Module</strong> AvailableThe <strong>S7</strong>-<strong>300</strong> Analog Input <strong>Module</strong> SM 331; AI 8×TC has been added to the<strong>S7</strong>-<strong>300</strong> family. The order number for this module is 6E<strong>S7</strong> 331-7PF11-0AB0.This product information includes details about the characteristics and technicalspecifications of analog input module SM 331; AI 8×TC. Refer to the <strong>S7</strong>-<strong>300</strong>Installation and Hardware Manual for more information about the <strong>S7</strong>-<strong>300</strong> productfamily.You will also learn:SSSHow to start up the analog input moduleThe measuring ranges available for the analog input moduleHow to configure the analog input moduleAdditional AssistanceFor assistance in answering technical questions, for training on this product, or forordering, contact your Siemens distributor or sales office.Copyright 2005 by Siemens Energy & Automation, Inc.A5E00455107-01
Characteristic Features and Technical Specifications of the Analog Input<strong>Module</strong> SM 331; AI 8×TCOrder No.6E<strong>S7</strong> 331-7PF11-0AB0CharacteristicsThe analog input module SM 331; AI 8 x TC has the following features:S 8 differential inputs for thermocouples (TC) in 4 channel groupsS Optional setting of the thermocouple type per channel groupS Rapid measured value updating for up to 4 channelsS Measured-value resolution 15 bits + sign (independent of integration time)S <strong>Programmable</strong> diagnosticsS <strong>Programmable</strong> diagnostic interruptS 8 channels with limit monitoringS <strong>Programmable</strong> hardware interrupt when limit has been exceededS <strong>Programmable</strong> end-of-scan-cycle interruptS <strong>Programmable</strong> reaction to open thermocoupleS Isolated against the backplane bus interfaceS Fully compatible with predecessor module 6E<strong>S7</strong> 331-7PF10-0AB0S Added support for Russian GOST thermocouple characteristics, TXK/XK(L)Use of the module in the distributed peripheral ET 200MWhen you use the SM 331; AI 8 x TC in the distributed peripheral ET 200M, youmust have one of the following IM 153-x:S IM 153-1; as of 6E<strong>S7</strong>153-1AA03-0XB0, E 01S IM 153-2; as of 6E<strong>S7</strong>153-2AA02-0XB0, E 05S IM 153-2; as of 6E<strong>S7</strong>153-2AB01-0XB0, E 042Product Information <strong>S7</strong> -<strong>300</strong> Analog Input <strong>Module</strong> SM 331; AI 8 x TCA5E00455107-01
Terminal connection diagram and block diagram of the SM 331; AI 8 x TCFault indicator -- redSF1L- M+21L+222345DCtoDC232425Channel0Channel1Channel2Channel3TC+0TC-0TC+1TC-1TC+2TC-2TC+3TC-36789101112131415161718ADCADCADCADCExtKV26272829303132333435363738BackplanebusinterfaceTC+4TC-4 K4TC+5TC-5 K5TC+6TC-6 K6TC+7TC-7 K7KV+KV-Ext KVlc+lc-19392040MChannelnumberFigure 1<strong>Module</strong> View and Block Diagram of the SM 331; AI 8 x TCProduct Information <strong>S7</strong> -<strong>300</strong> Analog Input <strong>Module</strong> SM 331; AI 8 x TCA5E00455107-013
Technical specifications of the SM 331; AI 8 x TCDimensions W x H x D(in millimeters)WeightSupports clockedoperationDimensions and Weight40 x 125 x 117Approx. 272 g<strong>Data</strong> for Specific <strong>Module</strong>NoLength of cableS Shielded max. 100 mVoltages, Currents, PotentialsPower rated voltage of the 24 VDCelectronics L+S Reverse polarity protection YesConstant measured current forresistance-type sensorIsolationSSSBetween channels andbackplane busBetween channels andpower supply of theelectronicsBetween the channelsIn groups oftyp. 0.7 mAYesYesYes2Permitted potential differenceS Between the inputs (U CM ) 75 VDC / 60 VACSBetween M ANA andM internal (U ISO )Insulation tested with75 VDC / 60 VAC500 VDCCurrent consumptionS From the backplane bus max. 100 mASFrom supply voltageL+Power dissipation of the modulemax. 240 mAtyp. 3.0 WMeasuring principle<strong>Module</strong> filtering modeAnalog value generationIntegration time/conversiontime/ resolution (perchannel)S <strong>Programmable</strong> YesSSSSBasic conversion time inmsAdditional conversiontime for open-circuitmonitoring, in msResolution includingsignNoise suppressionfor interferencefrequency f1 in HzSmoothing of the measuredvaluesBasic response time ofmodule (all channelsenabled)<strong>Module</strong> filtering modeIntegrating8 channels, hardware95416 bits400/60/50None / low/ average/ high190 msIntegration time/conversiontime/ resolution (perchannel)S <strong>Programmable</strong> YesSSSSBasic conversion time inmsAdditional conversiontime for open-circuitmonitoring, in msResolution includingsignNoise suppressionfor interferencefrequency f1 in Hz8 channels, software23/72/83416 bits400/60/50Smoothing of the measuredvaluesBasic response time ofmodule (all channelsenabled)None / low/ average/ high46/144/166 ms4Product Information <strong>S7</strong> -<strong>300</strong> Analog Input <strong>Module</strong> SM 331; AI 8 x TCA5E00455107-01
Analog Value Generation (Cont’d)Type N -150 °C to +1<strong>300</strong> °C ±2.2 °CMeasuring principle<strong>Module</strong> filtering modeIntegrating4 channels, hardware-200 °C to -150 °C ±3.0 °CType R +100 °C to +1769 °C ±1.5 °CIntegration time/conversion time/ resolution (per channel)S <strong>Programmable</strong> YesSSSSBasic conversion time inmsAdditional conversiontime for open-circuitmonitoring, in msResolution includingsignNoise suppression forfrequency f1 in HzSmoothing of the measuredvaluesBasic response time ofmodule (all channelsenabled)1.093 1 )16 bits400/60/50None / low/ average/ high10 msSuppression of interference, Limits of ErrorNoise suppression for f = n× (f1 ± 1%),(f1 = interference frequency) n = 1.2, etc.SSCommon-modeinterference (U cm 100 dB>90dB 2)> 100 dBOperational limit (over entire temperature range, referredto0to60°C input range) Note: This limit does not coverthe error cold connection point 3)SThermocoupleType T -200 °C to +400 °C ±0.7 °C-230 °C to -200 °C ±1.5 °CType U -150 °C to +600 °C ±0.9 °C-200 °C to -150 °C ±1.2 °CType E -200 °C to +1000 °C ±1.2 °C-230 °C to -200 °C ±1.5 °CType J -150 °C to +1200 °C ±1.4 °C-210 °C to -150 °C ±1.7 °CType L -150 °C to +900 °C ±1.5 °C-200 °C to -150 °C ±1.8 °CType K -150 °C to +1372 °C ±2.1 °C-50 °C to +100 °C ±1.8 °CType S +100 °C to +1769 °C ±1.7 °C-50 °C to +100 °C ±2.0 °CType B 4) +800 °C to +1820 °C ±2.3 °C+200 °C +800 °C ±3.8 °CType C +100 °C to +2315 °C ±2.3 °C0 °C +100 °C ±2.5 °CType -150 °C to +800 °C ±1.0 °CTxk/xk(L) -200 °C -150 °C ±1.5 °CBasic error (operational limit at 25°C, referred to inputrange)SThermocoupleType T -200 °C to +400 °C ±0.5 °C-230 °C to -200 °C ±1.0 °CType U -150 °C to +600 °C ±0.5 °C-200 °C to -150 °C ±1.0 °CType E -200 °C to +1000 °C ±0.5 °C-230 °C to -200 °C ±1.0 °CType J -150 °C to +1200 °C ±0.5 °C-210 °C to -150 °C ±1.0 °CType L -150 °C to +900 °C ±0.5 °C-200 °C to -150 °C ±1.0 °CType K -150 °C to +1372 °C ±0.5 °C-220 °C to -150 °C ±1.0 °CType N -150 °C to +1<strong>300</strong> °C ±0.5 °C-200 °C to -150 °C ±1.0 °CType R +100 °C to +1769 °C ±0.5 °C-50 °C to +100 °C ±1.0 °CType S +100 °C to +1769 °C ±0.5 °C-50 °C to +100 °C ±1.0 °CType B 4 ) +800 °C to +1820 °C ±1.0 °C+200 °C to +800 °C ±2.0 °CType C +100 °C to +2315 °C ±0.5 °C0 °C +100 °C ±1.0 °CType -150 °C to +800 °C ±0.5 °CTxk/xk(L) -200 °C -150 °C ±1.0 °C-220 °C to -150 °C ±2.9 °CProduct Information <strong>S7</strong> -<strong>300</strong> Analog Input <strong>Module</strong> SM 331; AI 8 x TCA5E00455107-015
Temperature error (withreference to the input range)Linearity error (withreference to the input range)Repeat accuracy (in thesteady state at 25 °C,referred to the output range3)±0.005%/K± 0.02%±0.01%Status, interrupts, diagnosticsInterruptsS Hardware interrupt <strong>Programmable</strong>(channels 0 to 7)S Diagnostic interrupt <strong>Programmable</strong>Diagnostic functions <strong>Programmable</strong>S Group error display Red LED (SF)S Diagnostics informationread-outPossible<strong>Data</strong> for Selecting a SensorInput ranges (rated values)/input resistanceS Thermocouples Type B, C, N, E, R, S, J, L,T, K, U, Txk/xk(L)Maximum input voltage forvoltage input (destructionlimit)Characteristic linearizationTemperature compensationSSInternal temperaturecompensationExternal temperaturecompensation withPt 100 (0.003850)S Compensation for 0°Ccomparison pointtemperatureS Compensation for 50°Ccomparison pointtemperatureSTechnical unit fortemperaturemeasurement20 VDC continuous; 75VDC for max. 1 s (dutyfactor 1:20)<strong>Programmable</strong><strong>Programmable</strong>PossiblePossiblePossiblePossibleDegrees Celsius/degrees Fahrenheit1) Open-circuit monitoring in 4 channels, Hardware operating mode is performed every 3 seconds.2) Series-mode rejection in 8 channels, software mode is reduced as follows:50 Hz > 70 dB60 Hz > 70 dB400 Hz > 80 dB3) The operational limit comprises only the basic error of the analog input at Ta = 25 °C and the totaltemperature error. The total error must cover the error for the compensation of the cold connectionpoint. Internal compensation of the cold connection point = max. 1.5 °CExternal compensation of the cold connection point = accuracy +0.1 °C of the used external RTD.External compensation of the cold connection point, where the connection point is held at 0 °C or50°C = accuracy of the connection point temperature control.4) Because of the slight rise over the range of approx. 0 °C to85°C, the lack of compensation of thecomparison point temperature only has a negligible effect on a type B thermocouple. If there is nocompensation and the measuring method “Compensation to 0 °C” is set, the deviation in the type Bthermocouple duringtemperature measurement is: 200 °C to 1802 °C
Commissioning the SM 331; AI 8×TCYou set the mode of operation of the SM 331; AI 8 x TC bits in STEP 7.ParameterYou will find a description of the general procedure for assigning parameters toanalog modules in Section 4.7 of the <strong>SIMATIC</strong> <strong>Programmable</strong> <strong>Logic</strong> <strong>Controllers</strong><strong>S7</strong> -<strong>300</strong> <strong>Module</strong> <strong>Data</strong> Manual.Parameterization restrictions when using the analog input module SM 331; AI 8 x TCwith PROFIBUS masters that only support DPV0.When you use the analog input module SM 331; AI 8 x TC in an ET 200MPROFIBUS slave system with a PROFIBUS master which is not an <strong>S7</strong> master,certain parameters are not permitted. Masters that are not <strong>S7</strong> masters do notsupport hardware interrupts. So all the parameters associated with these functionsare deactivated. The deactivated parameters are hardware interrupt enable,hardware restrictions and end-of-scan-cycle interrupt enable. All the otherparameters are permitted.An overview of the parameters that you can set and their default settings areshown in the table below.Table 1Parameters of the SM 331; AI 8 x TCParameter Value Range DefaultSettingsEnableS Diagnostic interruptS Hardware interruptupon limit violationS Hardware interruptat end of cycleTrigger for hardwareinterruptS Upper limit valueLower limit valueSDiagnosticsS Group diagnosticsSWith wire-breakcheckYes/noYes/noYes/no32511 to --32512*--32512 to 32511*Yes/noYes/noNoNoNo32767-32768NoNoParameterTypeDynamicDynamicStatic* These values are within overrange and underrange limits. See Tables 7 through 17.Scope<strong>Module</strong>ChannelChannelgroupProduct Information <strong>S7</strong> -<strong>300</strong> Analog Input <strong>Module</strong> SM 331; AI 8 x TCA5E00455107-017
Table 1Parameters of the SM 331; AI 8 x TC, continuedParameterValue RangeMeasurementS Measuring Method DeactivatedTC-IL Thermocouple(linear, internalcomparison)TC-EL Thermocouple(linear, externalcomparison)TC-L00C Thermocouple (linear, ref.temperature 0°C)TC-L50C Thermocouple (linear, ref.temperature 50°C)S Measuring Range For the settable measuring ranges ofthe input channels, please refer tothe individual module description.SReaction to open Overflow; underflowthermocoupleS Temperature unit Degrees Celsius; degreesFahrenheitSS<strong>Module</strong> filteringmodeInterferencesuppression*S Smoothing NoneLowAverageHigh8 channels hardware filter8 channels software filter4 channels hardware filterDefaultSettingsTC-ILType KOverflowDegreesCelsius8 channels,hardwarefilter50/60/400 Hz; 400 Hz; 60 Hz; 50 Hz; 50/60/400HzParameterTypeDynamicDynamicDynamicDynamicScopeChannelgroup<strong>Module</strong><strong>Module</strong>ChannelgroupNone Dynamic Channelgroup* 50/60/400 Hz programmable only for modes 8 or 4-Channel Hardware Filter Modes;50 Hz, 60 Hz or 400 Hz programmable only for mode 8-Channel Hardware Filter Mode8Product Information <strong>S7</strong> -<strong>300</strong> Analog Input <strong>Module</strong> SM 331; AI 8 x TCA5E00455107-01
Channel groupsThe channels of the SM 331; AI 8 x TC are arranged in four groups of two. Youcan only ever assign parameters to one channel group.The table below shows which channels are parameterized as a channel group ineach case. You will need the channel group number to set the parameters in theuser program with an SFC.Table 2Assignment of Channels of the SM 331; AI 8 x TC to Channel GroupsChannels ...Channel 0Channel 1Channel 2Channel 3Channel 4Channel 5Channel 6Channel 7... form one Channel Group eachChannel group 0Channel group 1Channel group 2Channel group 3Special characteristic of channel groups for hardware interrupts upon limit violationYou can set the upper and lower limits for each channel with hardware interrupts inSTEP 7.<strong>Module</strong> filtering modeThe SM 331; AI 8 x TC operates in one of the following modes:S “Hardware filter, 8 channels”S “Software filter, 8 channels”S “Hardware filter, 4 channels”The operating mode affects the scan time of the module.Product Information <strong>S7</strong> -<strong>300</strong> Analog Input <strong>Module</strong> SM 331; AI 8 x TCA5E00455107-019
“Hardware filter 8 channels” modeIn 8-channel hardware filter mode, the analog input module SM331; AI 8 x TCswitches over between the two channels in each group. As the module containsfour analog/digital converters (ADC), all four of the ADCs convert simultaneouslyfor channels 0, 2, 4 and 6. Once the even-numbered channels have beenconverted all the ADCs simultaneously convert for the odd-numbered channels 1,3, 5 and 7 (see Figure 2).Start analog conversion(simultaneous)K0 K2 K4 K6Scan timeStart analog conversion(simultaneous)K1 K3 K5 K7Figure 3Hardware filter 8 channels scan timeScan time in the modeIn 8-channel hardware filter mode, the channel conversion time including thecommunication time of analog input module SM331; AI 8 x TC is 91 ms. Themodule must then be switched over to the other channel in the group by means ofopto-MOS relays. Opto-MOS relays need 7 ms to switch and settle. Each channelneeds a time of 98 ms, so that the scan time is exactly 196 ms.Scan time = (t K +t U )x2Scan time = (91 ms + 7 ms) x 2Scan time = 196 mst K :t U :channel conversion time for one channeltime for switching to the other channel in the channel group10Product Information <strong>S7</strong> -<strong>300</strong> Analog Input <strong>Module</strong> SM 331; AI 8 x TCA5E00455107-01
“Software filter 8 channels” modeIn 8-channel software filter mode, the analog input module SM331; AI 8 x TCswitches over between the two channels in each group. As the module containsfour analog/digital converters (ADC), all four of the ADCs convert simultaneouslyfor channels 0, 2, 4 and 6. Once the even-numbered channels have beenconverted all the ADCs simultaneously convert for the odd-numbered channels 1,3,5and7(seeFigure4).Start analog conversion(simultaneous)K0 K2 K4 K6Scan timeStart analog conversion(simultaneous)K1 K3 K5 K7Figure 4Software filter 8 channels scan timeProduct Information <strong>S7</strong> -<strong>300</strong> Analog Input <strong>Module</strong> SM 331; AI 8 x TCA5E00455107-0111
Scan time of the moduleIn the 8-channel software filter mode of analog input module SM331; AI 8 x TC, thechannel conversion time is guided by the interference frequency set. When you setan interference frequency of 50 Hz, the channel conversion time includingcommunication time is 76 ms. When you set an interference frequency of 60 Hz,the channel conversion time is 65 ms. When you set an interference frequency of400 Hz, the channel conversion time is reduced to 16 ms. As with 8-channelhardware filter mode, the module must be switched over by means of opto MOSrelays with a switchover time of 7 ms to the other channel of the group. Table 3shows the scan time of the module at a certain interference frequency.Table 3Scan Times in “Software Filter, 8 Channels” ModeProgrammedInterference FrequencySuppressionChannel Scan Time*<strong>Module</strong> Scan Time (AllChannels)50 Hz 83 ms 166 ms60 Hz 72 ms 144 ms400 Hz 23 ms 46 ms* Channel scan time = channel conversion time + 7 ms switching time to the other channelin the channel group“Hardware filter 4 channels” modeIn 4-channel hardware filter mode, the analog input module SM331; AI 8 x TC doesnot switch over between the channels of the individual groups. As the modulecontains four analog/digital converters (ADC), all four of the ADCs convertsimultaneously for channels 0, 2, 4 and 6.Start analog conversion(simultaneous)K0 K2 K4 K6Scan timeFigure 5Hardware filter 4 channels scan time12Product Information <strong>S7</strong> -<strong>300</strong> Analog Input <strong>Module</strong> SM 331; AI 8 x TCA5E00455107-01
Scan time of the moduleIn 4-channel hardware filter mode, the channel conversion time including thecommunication time of analog input module SM331; AI 8 x TC is 10 ms. As themodule does not switch over between the channels in a group, the channel scantime and the module scan time are the same: 10 ms.Channel conversion time = channel scan time = module scan time = 10 msProlongation of the scan time with a wire-break checkThe wire-break check is a software function of the module that is available in alloperating modes.In the 8-Channel Hardware and Software Filter operating mode prolongs thescan time of the module by 4 ms, irrespective of the number of channels for whichwire-break has been enabled.In the 4-Channel Hardware Filter operating mode, the module interruptsprocessing of the input data 170 ms and performs a wire-break check. In otherwords, each wire-break check prolongs the scan time of the module by 93 ms.Smoothing of the measured valuesYou fill find information that is generally applicable to the smoothing of analogvalues in Section 4.6 of the <strong>SIMATIC</strong> <strong>Programmable</strong> <strong>Logic</strong> <strong>Controllers</strong> <strong>S7</strong> -<strong>300</strong><strong>Module</strong> <strong>Data</strong> Manual.Special characteristic with short-circuit to M or LIf you short an input channel to M or L, the module does not suffer any damage.The channel continues to issue valid data; neither is a diagnosis reported.DiagnosticsYou will find the diagnostic messages that are grouped under the “group diagnosis”parameter in Table 4--46, on page 4--72 of the <strong>SIMATIC</strong> <strong>Programmable</strong> <strong>Logic</strong><strong>Controllers</strong> <strong>S7</strong> -<strong>300</strong> <strong>Module</strong> <strong>Data</strong> Manual.Product Information <strong>S7</strong> -<strong>300</strong> Analog Input <strong>Module</strong> SM 331; AI 8 x TCA5E00455107-0113
Connecting ThermocouplesDesign of thermocouplesA thermocouple consists of a pair of sensors and the necessary installation andconnecting parts. The thermocouple consists of two wires of dissimilar metals ormetal alloys soldered or welded together at the ends.There are different types of thermocouple, depending on the composition of thematerial used -- for example, K, J, N thermocouples. The measuring principle of allthermocouples is the same, irrespective of their type.Measuring junctionThermocouple with positive or negative limbsConnecting pointCompensating leadsReference junctionLeads° CPoint at which thermo-e. m. f. is measuredFigure 6Design of ThermocouplesPrinciple of Operation of ThermocouplesIf the measuring point is subjected to a temperature different from that of the freeends of the thermocouple (point of connection), a voltage, the thermo emf, occursat the free ends. The magnitude of the thermo-e.m.f. generated depends on thedifference between the temperature at the measuring junction and the temperatureat the free ends, as well as on the material combination used for the thermocouple.Since a thermocouple always measures a temperature difference, the free endsmust be kept at a known temperature at a reference junction in order to determinethe temperature of the measuring junction.The thermocouples can be extended from their point of connection to the referencejunction by means of compensating wires. These compensating wires consist ofthe same material as the thermocouple wires. The supply leads are copper wire.Note: Make sure these wires are connected with the correct polarity, otherwisethere will be considerable measuring errors.14Product Information <strong>S7</strong> -<strong>300</strong> Analog Input <strong>Module</strong> SM 331; AI 8 x TCA5E00455107-01
Compensation of the reference junction temperatureYou can compensate for the effects of temperature fluctuations at the referencejunction by means of compensating leads.There are several options for you to choose from for acquiring the referencejunction temperature in order to obtain an absolute temperature value from thedifference in temperature between the reference junction and measuring point.You can use internal or external compensation, depending on where you want thereference junction to be.Table 4Options for Compensation of the Reference Junction TemperatureNo compensationOptionInternal compensation(refer to Figure 7 for connection)External compensation with resistancethermometer for acquisition of the referencejunction temperature(refer to Figure 8 and LEERER MERKERforconnection)ExplanationIf you want to acquire only the difference in temperaturebetween the measuring point and the reference junction.If you employ internal compensation, the internaltemperature (thermocouple internal comparison) of themodule is used for comparison purposes.You can acquire the reference temperature by means of aresistance thermometer and have it calculated by themodule for any thermocouple.Theory of operation of internal compensationWith internal compensation, you can establish the reference point across theterminals of the analog input modules. In this case, you must run thecompensating lines right up to the analog module. The internal temperature sensoracquires the temperature of the module and supplies a compensation voltage.Note that internal compensation is not as accurate as external compensation.Product Information <strong>S7</strong> -<strong>300</strong> Analog Input <strong>Module</strong> SM 331; AI 8 x TCA5E00455107-0115
Abbreviations and mnemonics used in the figures belowThe abbreviations and mnemonics used in the figures below have the followingmeanings:M +:M--:I C +:I C -:COMP + :COMP - :M ANA :M :L +:P5V:KV +/KV --:Measuring lead (positive)Measuring lead (negative)Positive connection of constant current outputNegative connection of constant current outputCompensating terminal (positive)Compensating terminal (negative)Reference potential of the analog measuring circuitGround terminalTerminal for 24 VDC supply voltage<strong>Module</strong> logic power supplyConnections to the shunt comparisonNoteThe necessary connecting cables, which result from the potential connection of theanalog input module and the sensors, are not drawn in the figures shown below.16Product Information <strong>S7</strong> -<strong>300</strong> Analog Input <strong>Module</strong> SM 331; AI 8 x TCA5E00455107-01
Connection of thermocouples with internal compensationConnect the thermocouples to the inputs of the module, either directly or by meansof compensating lines. Each channel group can use a thermocouple typesupported by the analog module independently of the other channel groups.ThermocoupleL+MK0M+M--...K7M+M--ADC<strong>Logic</strong>BackplanebusCompensating leads(same material asthermocouple)Figure 7Connection of Thermocouples with Internal Compensation to anIsolated AIConnecting thermocouples with temperature compensation to theSM 331; AI 8 x TCAll 8 inputs are available as measurement channels when the thermocouples areconnected via reference junctions that are controlled at 0 °C or50°C.CopperwireL+MK0M+M-Reference junctioncontrolled at0_C or50_C...K6M+M-ADUs<strong>Logic</strong>BackplanebusK7M+M-Figure 8Connecting thermocouples via a reference junction to theSM 331; AI 8 x TCProduct Information <strong>S7</strong> -<strong>300</strong> Analog Input <strong>Module</strong> SM 331; AI 8 x TCA5E00455107-0117
Connecting thermocouples with resistance thermometer to theSM 331; AI 8 x TCWith this type of compensation, the reference junction terminal temperature isdetermined by a bulb resistor sensor with a temperature range of -25 °C to85°C.CopperwireL+MThermocouplesK0KV+KV--ADCP5VCompensatingleads (samematerial asthermocouple)Pt 100K7KV+KV--KV+KV--IC +IC --<strong>Logic</strong>M internalBackplanebusRef. junctionFigure 9Connecting thermocouples with external compensation via resistance thermometers to theSM 331; AI 8 x TC18Product Information <strong>S7</strong> -<strong>300</strong> Analog Input <strong>Module</strong> SM 331; AI 8 x TCA5E00455107-01
Measuring Methods and Measuring Ranges of the Analog Input <strong>Module</strong>SM 331; AI 8×TCMeasuring MethodsYou can set the following measuring methods for the input channels:S Thermocouple, linearization with reference temperature 0 °CS Thermocouple, linearization with reference temperature 50 °CS Thermocouples, linearization with internal comparisonS Thermocouple, linearization with external comparisonYou perform the setting with the “measuring method” parameter in STEP 7.Unused ChannelsSet the “measuring method” parameter for unused channels to “disabled”. In thisway you shorten the scan time of the module.You must terminate an unused channel in an enabled channel group to avoiddiagnostic errors for the unused channel. To do this, short the Plus input and Minusinput of the channel.In the “4-Channel Hardware Filter” operating mode, termination is not necessaryprovided that you have disabled the unused channel groups. Channels 1, 3, 5 and7 are not monitored in this mode.Measuring rangesYou perform setting of the measuring ranges with the “measuring range” parameterin STEP 7.Table 5Measuring Ranges of the SM331; AI 8 x TCMethod Selected Measuring Range DescriptionTC-L00C:(thermocouple, linear,reference temperature0 °C)TC-L50C:(thermocouple, linear,reference temperature50 °C)TC-IL:(thermocouple, linear,internal compensation)TC-EL:(thermocouple, linear,external compensation)Type BType CType EType JType KType LType NType RType SType TType UType Txk/xk(l)You will find the digitized analog valuesin Section 4.3.1 in the temperature rangeof the <strong>SIMATIC</strong> <strong>Programmable</strong> <strong>Logic</strong><strong>Controllers</strong> <strong>S7</strong> -<strong>300</strong> <strong>Module</strong> <strong>Data</strong> ManualProduct Information <strong>S7</strong> -<strong>300</strong> Analog Input <strong>Module</strong> SM 331; AI 8 x TCA5E00455107-0119
End-of-scan-cycle interruptBy enabling the end-of-scan-cycle interrupt, you can synchronize a process withthe conversion cycle of the module. The interrupt occurs when the conversion of allthe enabled channels is complete.Table 6Content of the 4 bytes with additional information from OB40 during a hardwareinterrupt or an end-of-scan-cycle interruptContent of the 4 bytes withadditional information2 7 2 6 2 5 2 4 2 3 2 2 2 1 2 0 ByteAnalogspecialmarkers2 bits per channel to identify the rangeUpper limit exceeded inchannelLower limit exceeded inchannel7 6 5 4 3 2 1 0 07 6 5 4 3 2 1 0 1End-of-scan-cycle event X 2Unassigned byte 320Product Information <strong>S7</strong> -<strong>300</strong> Analog Input <strong>Module</strong> SM 331; AI 8 x TCA5E00455107-01
Analog Value Representation of the Measuring Ranges of the AnalogInput <strong>Module</strong> SM 331: AI 8×TCIntroductionThe tables in this section contain the digitized analog values for the variousmeasuring ranges of the analog input module. See Table 7 through TableLEERER MERKER.How to Read the Measured-Value TablesSince the binary representation for the analog values is always the same, thesetables only contain the measured values and the units.Analog value representation for thermocouples type BTable 7Analog value representation for thermocouples type BType Bin °CdecimalUnitsType Bin °FdecimalUnitshexadecimalhexadecimal>2070.0 32767 7FFF H >3276.6 32767 7FFF H Overflow2070.0:1821.01820.0:0.020700:1821018200:050DC H 3276.6: :4722 H 2786.64718 H 2786.5: :0000 H 32.032766:2786627865:3207FFE H:6CDA HOverrange6CD9 H: Rated range0140 HRange:: :FB50:: :F8D0Underrange-120.0 -1200H -184.0 -1840H< -120.0 -32768 8000 H < -184.0 -32768 8000 H UnderflowProduct Information <strong>S7</strong> -<strong>300</strong> Analog Input <strong>Module</strong> SM 331; AI 8 x TCA5E00455107-0121
Analog Value Representation for Thermocouples type CTable 8Analog value representation for thermocouples type CType Cin °CdecimalUnitsType Cin °FdecimalUnits>2500.0 32767 7FFFH >3276.6 32767 7FFFH Overflow2500.0:2315.12315.0:0.00.1:-120.025000:2315123150:0- 1:-120061A8 H 3276.6: :5A6F H 2786.65A6E H 2786.5: :0000 H 32.0FFFF H 31.9: :FB50 H -184.032766:2786627865:320319:-18407FFE H:6CDA HOverrange6CD9 H: Rated range0140 H013F H:F8D0 HUnderrange< -120.0 -32768 8000 H < -184.0 -32768 8000 H UnderflowRangeAnalog Value Representation for Thermocouples type ETable 9Analog value representation for thermocouples type EType Ein °CdecimalUnitsType Ein °FdecimalUnitshexadecimalhexadecimalhexadecimalhexadecimal> 1200.0 32767 7FFF H > 2192,0 32767 7FFF H Overflow1200.0:1000.11000.0:-270.012000:1000110000:-27002EE0 H 2192.0: :2711 H 1833.82710 H 1832.0: :F574 H -454.021920:1833818320:-454055A0 H:47A2 HOverrange4790 H:EE44 HRated range< -270.0 < -2700
Analog Value Representation for Thermocouples type JTable 10Analog value representation for thermocouples type JType Jin °CdecimalUnitsType Jin °FdecimalUnits> 1450.0 32767 7FFF H > 2642,0 32767 7FFF H Overflow1450.0:1201.01200.0:-210.014500:1201012000:-210038A4 H 2642.0: :2EEA H 2193.82EE0 H 2192.0: :F7CC H -346.026420:2193821920:-34606734 H:55B2 HOverrange55A0 H:F27C HRated range< -210.0 < -2100 2951.6 32767 7FFF H Overflow1622.0:1373.01372.0:-270.016220:1373013720:-27003F5C H 2951.6: :35A2 H 2503.43598 H 2501.6: :F574 H -454.029516:2503425061:-4540734C H:61CA HOverrange61B8 H:EE44 HRated range< -270.0 < -2700 < F574 H < -454.0 < -4540
Analog value representation for thermocouples type LTable 12Analog value representation for thermocouples type LType Lin °CdecimalUnitsType Lin °FdecimalUnits>1150.0 32767 7FFF H >2102.0 32767 7FFF H Overflow1150.0:901.0900.0:-200.011500:90109000:-20002CEC H 2102.0: :2332 H 1653.82328 H 1652.0: :F830 H -328.021020:1653816520:-3280521C H:409A HOverrange4088 H:F330 HRated range< -200.0 < -2000 < F830 H < -328.0 < -3280 1550.0 32767 7FFF H >2822.0 32767 7FFF H Overflow1550.0:1<strong>300</strong>.11<strong>300</strong>.0:-270.015500:1<strong>300</strong>11<strong>300</strong>0:-27003C8C H 2822.0: :32C9 H 2373.832C8 H 2372.0: :F574 H -454.028220:2373823720:-45406E3C H:5CBA HOverrange5CA8 H:EE44 HRated range< -270.0 < -2700 < F574 H < -454.0 < -4540
Analog Value Representation for Thermocouples type R, STable 14Analog value representation for thermocouples type R, STypes R, Sin °CdecimalUnitsTypes R,Sin °FdecimalUnits>2019.0 32767 7FFF H >3276.6 32767 7FFF H Overflow2019.0:1770.01769.0:-50.0-51.0:-170.020190:1777017690:-500-510:-17004EDE H 3276.6: :4524 H 3218.0451A H 3216.2: :FE0C H -58.0FE02 H -59.8: :F95C H -274.032766:3218032162:-580-598:-27407FFE H:7DB4 HOverrange7DA2 H:FDBC HRated rangeFDAA H:F54C HUnderrange< -170.0 -32768 8000 H < -274.0 -32768 8000 H UnderflowRangeAnalog Value Representation for Thermocouples type TTable 15Analog value representation for thermocouples type TType Tin °CdecimalUnitsType Tin °FdecimalUnitshexadecimalhexadecimalhexadecimalhexadecimal>540.0 32767 7FFF H >1004.0 32767 7FFF H Overflow540.0:401.0400.0:-270.05400:40104000:-27001518 H:0FAA H1004.0 10040 2738 HOverrange0FA0 H 752.0: :F574 H -454.07520:-45401D60 H:EE44 HRated range< -270.0 < -2700
Analog Value Representation for Thermocouples type UTable 16Analog value representation for thermocouples type UType Uin °CdecimalUnitsType Uin °FdecimalUnits>850.0 32767 7FFF H >1562.0 32767 7FFF H Overflow850.0:601.0600.0:-200.08500:60106000:-20002134 H 1562.0: :177A H 1113.81770 H 1112.0: :F830 H -328.015620:1113811120:-32802738.0 H:2B82 HOverrange2B70 H:F330 HRated range< -200.0 < -2000 1922.0 32767 7FFFH Overflow1050.0:800.1800.0:0.0:-200.010500:80018000:0:-20002904 H 1922.0: :1F41 H 1472.11F40 H 1472.0: :0000 H 32.0: :F830 H -328.019220:1472114720:320:-32804B14 H: Overrange3981 H3980 H:0140 H:F330 HRated rangeRange< -200.0 -32768 8000 H < -328.0 -32768 8000 H Underflow26Product Information <strong>S7</strong> -<strong>300</strong> Analog Input <strong>Module</strong> SM 331; AI 8 x TCA5E00455107-01
Parameter Sets for Analog Input <strong>Module</strong> SM 331; AI 8×TCParameter Assignment in the User ProgramYou have already set the parameters for the <strong>S7</strong>-<strong>300</strong> module using STEP 7. Youcan use an SFC in the user program to change the AI 8×TC module dynamicparameters. You can also use an SFC in the user program to transfer theparameters from the CPU to the addressed module.Parameters Stored in <strong>Data</strong> RecordsThe parameters for the AI 8×TC module are stored in three data records: records0, 1 and 128.Modifiable ParametersYou can change the parameters of record 1 and/or record 128 and pass them tothe AI 8×TC module using SFC 55. This does not change the parameters set onthe CPU. You cannot change the <strong>S7</strong>-<strong>300</strong> parameters of record 0 in the userprogram.The following section shows an overview of the parameters that are stored inrecords 0, 1, and 128 for the AI 8×TC module.SFCs for Parameter AssignmentThe following SFCs are available for assigning the parameters for the AI 8×TCmodule in the user program.Table 18SFCs for Assigning <strong>Module</strong> ParametersSFC No. Identifier Application55 WR_PARM56 WR_DPARM57 PARM_MODTransfer modifiable parameters (record 1 and 128) tothe addressed signal module.Transfer parameters (records 0, 1 or 128) from theCPU to the addressed signal module.Transfer all parameters (records 0, 1, and 128) fromthe CPU to the addressed signal module.Description of the ParametersThe following section contains all the modifiable parameters for the AI 8×TCmodule.The parameters for the AI 8×TC module are described in this Product Informationdocument and in the online help of STEP 7.Product Information <strong>S7</strong> -<strong>300</strong> Analog Input <strong>Module</strong> SM 331; AI 8 x TCA5E00455107-0127
Parameters of Analog Input <strong>Module</strong> SM 331; AI 8×TCParametersTable 19 contains all the parameters that you can set for the Analog Input <strong>Module</strong>SM 331; AI 8×TC. The comparison shows:S Parameters you can change using STEP 7.SParameters you can change using SFC 55 “WR_PARM”.The parameters you set using STEP 7 can also be transferred to the module usingSFCs 56 and 57.Table 19Parameters for the Analog Input <strong>Module</strong> SM 331; AI 8×TCParameter<strong>Data</strong> RecordConfigurable with...No. ...SFC 55 ...Programming DeviceDiagnostics: Group 0 No YesDiagnostics: with wire-break 0 No YesLimit value interrupt enable 1 Yes YesDiagnostic interrupt enable 1 Yes YesEnd of cycle interrupt enable 1 Yes YesMeasurement units 1 Yes Yes<strong>Module</strong> Mode 128 Yes YesInterference frequencysuppression128 Yes YesMeasurement type 128 Yes YesMeasurement range 128 Yes YesMeasurement smoothing 128 Yes YesMeasurement TC burnout 128 Yes YesUpper limit value 128 Yes YesLower limit value 128 Yes YesNote: Before you can enable the diagnostic interrupt in record 1 in the user program, you must firstNote: Before you can enable the diagnostic interrupt in record 1 in the user program, you must firstenable the diagnostics in record 0 with STEP 7.28Product Information <strong>S7</strong> -<strong>300</strong> Analog Input <strong>Module</strong> SM 331; AI 8 x TCA5E00455107-01
Structure of <strong>Data</strong> Record 1Figure 10 shows the structure of data record 1 for the parameters of the AnalogInput <strong>Module</strong> SM 331; AI 8×TC.You can activate a parameter by setting the corresponding bit in byte 0 to “1”.7 6 5 4 3 2 1 0Bit numberByte 0Celsius / FahrenheitCycle end interrupt enableDiagnostics enableLimit value interrupt enableByte 1Byte 2Byte 3Byte 4Byte 5Byte 6Byte 7Byte 8Byte 9Byte 10Byte 11Byte 12Byte 13UnusedUnusedUnusedUnusedUnusedUnusedUnusedUnusedUnusedUnusedUnusedUnusedUnusedFigure 10<strong>Data</strong> Record 1 for Parameters of the Analog Input <strong>Module</strong> SM 331; AI 8×TCProduct Information <strong>S7</strong> -<strong>300</strong> Analog Input <strong>Module</strong> SM 331; AI 8 x TCA5E00455107-0129
Structure of <strong>Data</strong> Record 128Figure 11 shows the structure of data record 128 for the parameters of the AnalogInput <strong>Module</strong> SM 331; AI 8×TC.Byte 0Byte 17 6 5 4 3 2 1 0Bit number<strong>Module</strong> Mode (See Table 20)Interference frequencysuppressionChannel group 0Channel group 1Channel group 2Channel group 3(See Table 21)Byte 2Measurement Type, Group 0(see Table 22)Byte 3Measurement Range, Group 0(see Table 22)Byte 4Smoothing, Group 0(see Table 23)TC Burnout Selection, Group 0(see Table 24)Byte 5Measurement Type, Group 1(see Table 22)Byte 6Measurement Range, Group 1(see Table 22)Byte 7Smoothing, Group 1(see Table 23)TC Burnout Selection, Group 1(see Table 24)Figure 11<strong>Data</strong> Record 128 for Parameters of the Analog Input <strong>Module</strong> SM 331; AI 8×TC30Product Information <strong>S7</strong> -<strong>300</strong> Analog Input <strong>Module</strong> SM 331; AI 8 x TCA5E00455107-01
Byte 8Measurement Type, Group 2(see Table 22)Byte 9Measurement Range, Group 2(see Table 22)Byte 10Smoothing, Group 2(see Table 23)TC Burnout Selection, Group 2(see Table 24)Byte 11Measurement Type, Group 3(see Table 22)Byte 12Measurement Range, Group 3(see Table 22)Byte 13Byte 14Byte 15Byte 16Byte 17Byte 18Byte 19Byte 20Byte 21Smoothing, Group 3(see Table 23)TC Burnout Selection, Group 3(see Table 24)High ByteLow ByteHigh ByteLow ByteHigh ByteLow ByteHigh ByteLow ByteUpper limit valueGroup 0;Channel 0Lower limit valueGroup 0;Channel 0Upper limit valueGroup 0;Channel 1Lower limit valueGroup 0;Channel 1Figure 11<strong>Data</strong> Record 128 for Parameters of the Analog Input <strong>Module</strong> SM 331; AI 8×TC(continued)Product Information <strong>S7</strong> -<strong>300</strong> Analog Input <strong>Module</strong> SM 331; AI 8 x TCA5E00455107-0131
Byte 22Byte 23Byte 24Byte 25Byte 26Byte 27Byte 28Byte 29Byte 30Byte 31Byte 32Byte 33Byte 34Byte 35Byte 36Byte 37Byte 38Byte 39Byte 40Byte 41Byte 42Byte 43Byte 44Byte 45High ByteLow ByteHigh ByteLow ByteHigh ByteLow ByteHigh ByteLow ByteHigh ByteLow ByteHigh ByteLow ByteHigh ByteLow ByteHigh ByteLow ByteHigh ByteLow ByteHigh ByteLow ByteHigh ByteLow ByteHigh ByteLow ByteUpper limit valueGroup 1;Channel 2Lower limit valueGroup 1;Channel 2Upper limit valueGroup 1;Channel 3Lower limit valueGroup 1;Channel 3Upper limit valueGroup 2;Channel 4Lower limit valueGroup 2;Channel 4Upper limit valueGroup 2;Channel 5Lower limit valueGroup 2;Channel 5Upper limit valueGroup 3;Channel 6Lower limit valueGroup 3;Channel 6Upper limit valueGroup 3;Channel 7Lower limit valueGroup 3;Channel 7Figure 11<strong>Data</strong> Record 128 for Parameters of the Analog Input <strong>Module</strong> SM 331; AI 8×TC(continued)The representation of the limit values matches the analog value representation.Observe the range limits when setting the limit values.32Product Information <strong>S7</strong> -<strong>300</strong> Analog Input <strong>Module</strong> SM 331; AI 8 x TCA5E00455107-01
<strong>Module</strong> ModeTable 20 contains the codes for the various module operating modes that you enterin byte 0 of data record 128 (see Figure 11).Table 20Codes for the module modes of the Analog Input <strong>Module</strong> SM 331; AI 8×TC<strong>Module</strong> ModeCode8 Channel Hardware Filtering 2#000000008 Channel Software Filtering 2#000000014 Channel Hardware Filtering 2#00000010Interference Frequency SuppressionTable 21 contains the codes for the various frequencies that you enter in byte 1 ofdata record 128 (see Figure 11). Note that the 50 Hz, 60 Hz, and 400 Hzselections are for the 8 Channel Software Filtering module mode only. The 50, 60,and 400 Hz selection is for the 8 Channel and 4 Channel Hardware Filteringmodule modes only.Table 21Codes for the Interference Frequency Suppression of Analog Input <strong>Module</strong>SM 331; AI 8×TCInterference Frequency SuppressionCode400 Hz 2#0060 Hz 2#0150 Hz 2#1050, 60, and 400 Hz 2#11Product Information <strong>S7</strong> -<strong>300</strong> Analog Input <strong>Module</strong> SM 331; AI 8 x TCA5E00455107-0133
Measuring Methods and Measuring Ranges of the SM 331; AI 8 x TCTable 22 contains all the measuring methods and measuring ranges of the moduleand its codes. You must enter these codes in the corresponding bytes of datarecord 128 (see Figure 11).Table 22 Codesforthe MeasuringRangesoftheSM331;AI 8×TCMeasurement Type Code Measurement Range CodeDeactivated 2#0000 Deactivated 2#0000Thermocouple,linearization, referencetemperature 0° CThermocouple,linearization, referencetemperature 50° CThermocouple,linearization, internalcomparisonThermocouple,linearization, externalcomparison2#1010 BNERSJLTKUCTXK/XK(L)2#1011 BNERSJLTKUCTXK/XK(L)2#1101 BNERSJLTKUCTXK/XK(L)2#1110 BNERSJLTKUCTXK/XK(L)2#00002#00012#00102#00112#01002#01012#01102#01112#10002#10012#10102#10112#00002#00012#00102#00112#01002#01012#01102#01112#10002#10012#10102#10112#00002#00012#00102#00112#01002#01012#01102#01112#10002#10012#10102#10112#00002#00012#00102#00112#01002#01012#01102#01112#10002#10012#10102#101134Product Information <strong>S7</strong> -<strong>300</strong> Analog Input <strong>Module</strong> SM 331; AI 8 x TCA5E00455107-01
Input Smoothing SelectionTable 23 contains all the smoothing selections for the Analog Input <strong>Module</strong>SM 331; AI 8×TC. You must enter these codes, according to the smoothing optiondesired, in the appropriate bytes of data record 128 (see Figure 11).Table 23Codes for the Smoothing Selection of the Analog Input <strong>Module</strong> SM 331; AI8×TCSmoothing SelectionCodeNone 2#00Weak 2#01Medium 2#10Strong 2#11TC Burnout SelectionTable 24 contains all the TC burnout selections for the Analog Input <strong>Module</strong>SM 331; AI 8×TC. You must enter these codes, according to the TC burnoutselection desired, in the appropriate bytes of data record 128 (see Figure 11).Table 24Codes for the TC Burnout Selection of the Analog Input <strong>Module</strong> SM 331; AI8×TCSmoothing SelectionCodeUpscale 2#0Downscale 2#1Product Information <strong>S7</strong> -<strong>300</strong> Analog Input <strong>Module</strong> SM 331; AI 8 x TCA5E00455107-0135
36Product Information <strong>S7</strong> -<strong>300</strong> Analog Input <strong>Module</strong> SM 331; AI 8 x TCA5E00455107-01