Jands-Event-24-48-Manual - SXS Events
Jands-Event-24-48-Manual - SXS Events
Jands-Event-24-48-Manual - SXS Events
- No tags were found...

Create successful ePaper yourself
Turn your PDF publications into a flip-book with our unique Google optimized e-Paper software.
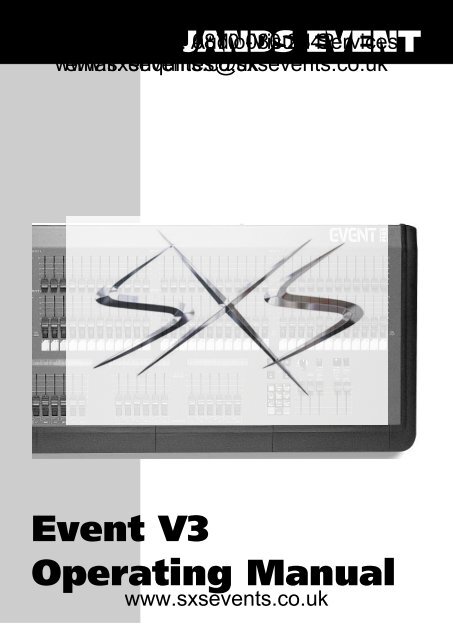
JANDS EVENT© <strong>Jands</strong> Electronics May 1995ent production courtesy Phone: of and Audio-Visual 0870 080 2342 Serviceswww.sxsevents.co.ukemail: enquiries@sxsevents.co.uk<strong>Event</strong> V3Operating <strong>Manual</strong>www.sxsevents.co.uk<strong>Event</strong> V3 <strong>Manual</strong> 1
ent production courtesy Phone: of and Audio-Visual 0870 080 2342 ServicesTable Introductionof Contentswww.sxsevents.co.ukemail: enquiries@sxsevents.co.ukJANDS, one of the world’s leading lighting console manufacturers, now offers theEVENT PLUS series of control consoles. Equipped with all the outstandingfeatures of the original <strong>Event</strong>, the EVENT PLUS offers many new functions andfeatures. Available in two configurations: <strong>48</strong> and 60 channels, each with <strong>24</strong> Assignmasters and 2 Presets, the EVENT PLUS features a “first” for JANDS - single presetoperation. In today’s lighting rigs there is an increasing emphasis on moving lightsand colour scrollers both of which quickly use up available channels. The EVENTPLUS’s ability to operate as a single preset board means that it can offer up to 120channels for programming and playback.Recording on the EVENT PLUS has been simplified with the addition of OneTouch Recording, simply hold the Record button and press an Assign master flashbutton to store a memory to that Assign fader. To make labelling and the additionof fade times easier, Memories that have been recorded are tagged with an “r” in theMemory menu.The EVENT PLUS Page consists of 20 Memories and 1 Chase, the remaining3 Assign faders are set to control 2 fixed Memories and 1 fixed Chase. However itis possible to edit the standard Page setup or to Assign any combination of crossfadeStacks, Chases or Memories to the <strong>24</strong> Assign faders. A further enhancement to theAssign master section is the ability to use the Hold master as a submaster controllingall <strong>24</strong> Assign faders.Output from the console is available via a standard DMX-512 socket or throughoptional analogue Socapex connectors, using either method it’s possible to use theonboard softpatch to create up to 3 different channel to dimmer patching tables.The EVENT PLUS is a further extension of the committment to ongoingdevelopment which makes JANDS lighting consoles the most exciting and innovativeproducts available today.2 <strong>Event</strong> V3 <strong>Manual</strong>www.sxsevents.co.uk
ent production courtesy Phone: of and Audio-Visual 0870 080 2342 ServicesTable of Contentswww.sxsevents.co.ukemail: enquiries@sxsevents.co.uk© <strong>Jands</strong> Electronics May 1995General Description _____________________________1.00 General Description Of Major Parts .................................................. 102.00 How The <strong>Event</strong> Stores Information.................................................... 113.00 The <strong>Event</strong> Menu System ...................................................................... 13Getting Started _________________________________4.00 Hardware Setup ................................................................................... 16Connecting Power .................................................................................. 17Connecting Desklights ........................................................................... 17Connecting a VDU ................................................................................. 15Connecting MIDI Device ....................................................................... 17Connecting a Slave Console................................................................... 17Turning the Power On ............................................................................ 175.00 Software Setup...................................................................................... 18Setting the Number of Console Channels .............................................. 18- To Increase the Number of Channels Available On the Consoles .... 18Patch ....................................................................................................... 20- To Patch Dimmers to the Consoles ................................................... 20- Patching Multiple Dimmers to a Consoles ........................................ 20- Storing Changes Made in Patch ........................................................ 20Labelling Patch....................................................................................... 226.00 <strong>Manual</strong> Controls................................................................................... 23The Presets / Presets Faders / Flash Buttons .......................................... 23Creating Memories & Chases______________________7.00 Memories............................................................................................... 26Recording Memories .............................................................................. 26- METHOD 1: Record and Point ......................................................... 28- METHOD 2: Using the Menu............................................................ 30Labelling a Memories ............................................................................ 30Playing back a Memory ......................................................................... 31Editing a Memory .................................................................................. 32- METHOD 1: Record and Point ......................................................... 32- METHOD 2: Using the Menu............................................................ 34www.sxsevents.co.uk<strong>Event</strong> V3 <strong>Manual</strong> 3
ent production courtesy Phone: of and Audio-Visual 0870 080 2342 ServicesTable of Contentswww.sxsevents.co.ukemail: enquiries@sxsevents.co.uk8.00 Chases .................................................................................................... 36Recording a Chase-Using the Menu ...................................................... 36Lablling a Chase..................................................................................... 38Setting the Chase Direction.................................................................... 39Setting the Chase Speed ......................................................................... 40Adding Attack / Decay to the Chase ...................................................... 41Adding a Dipless Crossfade Between Steps (X) .................................... 42Playing Back a Chase ............................................................................. 43Recall a Chase - Introduction to Assign................................................. 44- METHOD 1: Change Page................................................................ 44- METHOD 2: Assign the Chase.......................................................... 46Editing a Chase ...................................................................................... <strong>48</strong>- METHOD 1: Using the Menu............................................................ <strong>48</strong>- METHOD 2: Using Assign Flash Button .......................................... 50Deleting a Step ....................................................................................... 52Adding a Step ......................................................................................... 53Recording Changes Made in Edit .......................................................... 53Managing Memories & Chases ____________________9.00 Pages ...................................................................................................... 56Page Make-Up........................................................................................ 56Loading a New Page .............................................................................. 56Freeze ..................................................................................................... 58Labelling a Page ..................................................................................... 6010.00 Assign .................................................................................................... 61Assign Memory ...................................................................................... 62Assign Chase .......................................................................................... 64Assign Stack ........................................................................................... 66Special Feature - Assign Edit ................................................................. 6611.00 File ......................................................................................................... 68Saving a File........................................................................................... 68Loading a File ........................................................................................ 68Labelling a File ...................................................................................... 704 <strong>Event</strong> V3 <strong>Manual</strong>12.00 Stacks..................................................................................................... 71Control File ............................................................................................ 71- NEXT Fields ...................................................................................... 71- INFADE / OUTFDE (Outfade) Fields............................................... 71- Delay Field ........................................................................................ 72Changing the NEXT Field ..................................................................... 72- Changing the NEXT Field - Memory................................................. 72www.sxsevents.co.uk
ent production courtesy Phone: of and Audio-Visual 0870 080 2342 Serviceswww.sxsevents.co.ukemail: enquiries@sxsevents.co.uk© <strong>Jands</strong> Electronics May 1995- Changing the NEXT Field - Chase .................................................... 74Infade/Outfade - Adding Fade Times .................................................... 76- Adding Fade Times to a Memory ...................................................... 76- Adding Fade Times to a Chase .......................................................... 78Adding Delay Time ................................................................................ 80- Adding Delay Times to a Memory ..................................................... 80- Adding Delay Times to a Chase ........................................................ 82Control Functions - Playback______________________13.00 Playback ................................................................................................ 86Controls .................................................................................................. 86- Preset Faders..................................................................................... 86- Assign Masters................................................................................... 86- Flash Buttons ..................................................................................... 86- LCD Windows .................................................................................... 87Controlling Memories ............................................................................ 87- Assign Masters................................................................................... 87- LCD Windows .................................................................................... 87Controlling Chases ................................................................................. 87- Assign Masters................................................................................... 87- Flash Buttons ..................................................................................... 88- To Change the Operation of the Chase Flash Button ....................... 88- LCD Windows .................................................................................... 88Controlling Stacks .................................................................................. 88- METHOD 1: Using the Assign Stack Menu ...................................... 89- METHOD 2: Using the Stack Menu/Assign Faders .......................... 89Playback of a Stack ................................................................................ 89- Stack Controls.................................................................................... 89- Assign Master Faders ........................................................................ 90- Go / Back Buttons .............................................................................. 90- LCD Windows .................................................................................... 90Clear Output From a Stack..................................................................... 90Taking <strong>Manual</strong> Control of a Fade .......................................................... 90- Taking <strong>Manual</strong> Control Fade When a Fade is Not Running............. 91Altering the Playback Order................................................................... 91The SMaster / Hold Master .................................................................... 92- To Set the Operation of the Hold / SMaster ...................................... 92- SMaster as Assign Faders Master ..................................................... 94- SMaster as Hold Master .................................................................... 94- SMaster as <strong>Manual</strong> Crossfade Master .............................................. 94- SMaster as Memory / Chase Control ................................................ 9414.00 Overall Master Controls ...................................................................... 95P1 and P2 Faders .................................................................................... 95- Reversing the P2 Master fader .......................................................... 96Add / Solo Master Switch ...................................................................... 98DBO Switch ........................................................................................... 98- To Chang the Operation of the DBO Switch ..................................... 98Add / Solo Fader .................................................................................... 99Grand Master Fader................................................................................ 99Rate Control ........................................................................................... 99www.sxsevents.co.uk<strong>Event</strong> V3 <strong>Manual</strong> 5
ent production courtesy Phone: of and Audio-Visual 0870 080 2342 ServicesTable of Contentswww.sxsevents.co.ukemail: enquiries@sxsevents.co.ukAdvanced Features ______________________________15.00 Advanced Control .............................................................................. 102Build ..................................................................................................... 102To see the changes in a Build Memory ................................................ 103Other Build Menu Features .................................................................. 104Edit Memory ........................................................................................ 105- Restoring theatrically-Using Edit Nemory Menu .............................. 105Edit Page .............................................................................................. 106- Changing the Make-up of a Page ...................................................... 106Edit File ................................................................................................ 109- Changing the Default File Settings.................................................... 109- Restoring the Factory Setting for File ............................................... 10916.00 Restricting Access to Various Menus and Controls ........................ 11017.00 Function Keys ..................................................................................... 111To Record a Function Key ................................................................... 112To Play Back a Function Key .............................................................. 11218.00 Advanced Channel Control ............................................................... 114Setting Channels to Ignore Crossfade Timing ..................................... 114- To Set Channels to Ignore Timing ..................................................... 114Setting Channels to Always Have a Background Intensity-Preheat .... 116- To set Channels to Preheat the Filament........................................... 116Setting Channels to Ignore Flash button Solo Operation ..................... 11819.00 Advanced Desk Options..................................................................... 120Setting Default Infade and Outfade Times........................................... 120Changing the Increment Between Memories When Recording ........... 122Turning the Help Screen On and Off ................................................... 12220.00 Using the MCard - Option................................................................. 123To Open the MCard Menu ................................................................... 123To Save the Information Recorded in the <strong>Event</strong> .................................. 123Loading From the MCard..................................................................... 12321.00 Clearing Memories Chases and Patches .......................................... 1<strong>24</strong>Clearing Memories ............................................................................... 1<strong>24</strong>Clearing a Stack ................................................................................... 126Clearing Chases.................................................................................... 126Clearing a Patch ................................................................................... 1286 <strong>Event</strong> V3 <strong>Manual</strong>22.00 Copying Memories Chases and Patches........................................... 130Copying a Memory .............................................................................. 130Copying a Chase .................................................................................. 132www.sxsevents.co.ukCopying a Patch ................................................................................... 132
ent production courtesy Phone: of and Audio-Visual 0870 080 2342 Serviceswww.sxsevents.co.ukemail: enquiries@sxsevents.co.uk© <strong>Jands</strong> Electronics May 199523.00 Resetting the Console ......................................................................... 136To reset the Console ............................................................................. 136<strong>24</strong>.00 Connecting a Slave Console............................................................... 138To Set an <strong>Event</strong> Console as a Master ................................................... 138To Set an <strong>Event</strong> Console as a Slave ..................................................... 13825.00 <strong>Event</strong> LCD Displays ........................................................................... 139LCD Control......................................................................................... 13926.00 Setting the Intensity of the Desklights .............................................. 14027.00 Using MIDI to Control the <strong>Event</strong> ..................................................... 141To Select the MIDI Menu .................................................................... 14128.00 Connecting an External Monitor to the <strong>Event</strong> - Option ................. 14229.00 Analogue Output - Option ................................................................. 14330.00 Floppy Disc Drive - Option................................................................ 144General ...........................................................31.00 Maintenance........................................................................................ 14632.00 Service ................................................................................................. 14733.00 Battery Replacement.......................................................................... 1<strong>48</strong>Appendix A.......................................................33.00 <strong>Event</strong> <strong>24</strong> Output Menu Structure ..................................................... 150Appendix B.........34.00 Pin Assignments ................................................................................. 152DMX Connector Wiring ...................................................................... 152Midi Connector Wiring ........................................................................ 152Desklight Connector Wiring ................................................................ 152Desk Link Cable Wiring ...................................................................... 153Power Connector Wiring...................................................................... 153Midi Note Table ................................................................................... 153www.sxsevents.co.uk<strong>Event</strong> V3 <strong>Manual</strong> 7
ent production courtesy Phone: of and Audio-Visual 0870 080 2342 ServicesTable of Contentswww.sxsevents.co.ukemail: enquiries@sxsevents.co.uk8 <strong>Event</strong> V3 <strong>Manual</strong>www.sxsevents.co.uk
ent production courtesy Phone: of and Audio-Visual 0870 080 2342 Serviceswww.sxsevents.co.ukemail: enquiries@sxsevents.co.uk© <strong>Jands</strong> Electronics July 1995GeneralDescriptionwww.sxsevents.co.uk<strong>Event</strong> V3 <strong>Manual</strong> 9
ent production courtesy Phone: of and Audio-Visual 0870 080 2342 ServicesGeneral Descriptionwww.sxsevents.co.ukemail: enquiries@sxsevents.co.uk1.00 General Description of Major Parts1.10 <strong>Manual</strong> Control SectionDiagram 1A☞This section is used to control the level of individual desk channels. There are 2faders (Preset 1 and Preset 2) and a Flash button with an inbuilt level indicator perchannel. There is also a writing strip below the Flash buttons.▲ 1A <strong>Manual</strong> control section▲ 1B Assign master section▲ 1C Master section▲ 1D Menu control section1.20 Assign Master SectionDiagram 1B☞This section is used to control the playback of Memories, Chases and crossfadeStacks. There are either 12 or <strong>24</strong> Assign Masters (depending on the desk type) anda corresponding number of Flash buttons. The LCDs located above the AssignMaster faders display labels for the items being controlled.1.30 Master SectionDiagram 1CThis section includes the Grand Master fader and DBO button, Flash Master faderand selector switch, Preset Master faders, and a Chase rate control. There is also aHold / SMaster fader and switch.1.40 Menu Control SectionDiagram 1DThe <strong>Event</strong> menu system is used to enter and modify settings for Memories, Chases,Stacks, Pages and Files while recording and during playback. It is also used toconfigure the various setup options.1.50 Back PanelDiagram 1E☞☞☞All power and control connections are made on the rear of the console. This is alsowhere option panels are fitted. Possible options include:* 60 way analogue output option* 30 way analogue output extender option* MCard option* MCard/VDU (Mono, CGA, EGA)* MCard/VDU (VGA)* Floppy disk drive▲ 1E Back panel showing Mcard option fittedNOTE:The keyboard and RS 232 Connections on the rear of the <strong>Event</strong> Plus are for factoryuse only.10 <strong>Event</strong> V3 <strong>Manual</strong>www.sxsevents.co.uk
ent production courtesy Phone: of and Audio-Visual 0870 080 2342 Serviceswww.sxsevents.co.ukemail: enquiries@sxsevents.co.uk© <strong>Jands</strong> Electronics July 19952.00 How the <strong>Event</strong> Stores Information☞Diagram 2AThe information required to control stage lighting instruments is recorded into twobasic units: Memories and Chases.These basic units can be further organised and grouped to suit a particularperformance or show.- APage consists of a factory-defined group of Memories and Chases.- AFile consists of a user-defined group of Memories, Chases and Stacks.- AStack consists of a sequence of Memories and Chases.The way these items relate to each other can be seen in diagram 2A.PageM 10 M 11 M 12 M 13 M 15 9 C 1 C 100M 29(<strong>Event</strong> Plus)<strong>Event</strong> Plus onlyMemories and Chases in sequential set of memories plus two Chases and two undefined faderson <strong>Event</strong> PlusFileM 10 M 11 C 10 M 99 M200 M201 C 1 C 10 C 11User-defined set of memories and ChasesStackM 10 M 10M 10M 10M 10MC 10M 10M 10M 10M 10M 10M 10MC 10M 10M 10MMemories and Chases for10M 10M 10Mplayback in a user-defined order10M 10▲ 2A Basic organisation of memories and chaseswww.sxsevents.co.uk<strong>Event</strong> V3 <strong>Manual</strong> 11
ent production courtesy Phone: of and Audio-Visual 0870 080 2342 ServicesGeneral Descriptionwww.sxsevents.co.ukemail: enquiries@sxsevents.co.uk2.10 MemoriesA Memory consists of level settings for all of the lights, colour scrollers etc.connected to the console. These level settings range from 0% (when the light is notincluded in the Memory) through to 100%.Memories include a label that is displayed on the LCD above the Assign Masterfaders controlling it, and can also include timing information to control fade rates.Memories can be assigned one at a time to the Assign Master faders or to a Stack(i.e. a sequence of Memories) that in turn can be assigned to a pair of faders.2.20 ChasesA Chase consists of one or more Steps, each of which contain level settings for allof the lights, colour scrollers etc. connected to the console. These level settingsrange from 0% (when the light is not included in the Chases) through to 100%.Chases include a label along with speed, direction and fade information, and canalso include timing information to control the fade rate.Chases can be assigned one at a time to the Assign Master faders or, as part of aStack, to a pair of Assign Master faders.2.30 PagesA Page consists of a factory-defined group of Memories and Chases that are loadedto the Assign Master faders. Changing Pages completely replaces the previous setof Memories and Chases. Many operators allocate a Page for each song or act oftheir show.2.40 FilesA File is like a Page but it can be customised to include any combination ofMemories, Chases and even Stacks. A File is created by loading the items you wantonto the Assign Master faders and then saving these settings as a File.2.50 StacksMemories (and Chases) can be automatically crossfaded in a sequence called aStack. Initially all Memories (and Chases) are linked together in numeric order -Memory 1 is followed by Memory 2 and so on to Memory 999. This is followed byChase 1 which is followed by Chase 2 and so on to Chase 999.However this order can be changed so that Memories follow a non-numeric order.For example Memory 10 might be followed by Memory 20 which is followed byMemory 25.Stacks can also start and stop anywhere within the available range of Memorynumbers. For example you might use Memories 100 through 120 as one Stack andMemories 150 through 200 as another.Fortunately it’s not necessary to decide which Memories you want to include in aStack when you are first recording. The links that join Memories and Chases canbe changed at any time. Likewise, crossfade timing information can be added oraltered after a Memory is recorded.(The use of Stacks is explained more fully in section 12.00).12 <strong>Event</strong> V3 <strong>Manual</strong>www.sxsevents.co.uk
ent production courtesy Phone: of and Audio-Visual 0870 080 2342 Serviceswww.sxsevents.co.ukemail: enquiries@sxsevents.co.uk© <strong>Jands</strong> Electronics July 19957 8 9MEMORY EDIT CHASE4 5 6PAGE ASSIGN FILE1 2 3BUILD CLEAR STACKMod ui f y tada c s toe or d cmi s n os c n t r o ls0EXIT SETUP RECORD▲ 3A Function keypadns&olesett ingsoutputs.▲ 3B Typical help message3.00 The <strong>Event</strong> Menu System☞Diagram 3A, 3BAll recording, editing, setup and other console functions are controlled via a seriesof menus. The function keypad along with cursor and value buttons provide themeans of opening the menus and entering information.Since the <strong>Event</strong> menus are used in many operations it's worth taking some time tofamiliarise yourself with what the various buttons do and some of the shortcuts thatare available.Whenever one of the ten function buttons : Setup, Build, Clear, Stack, Page, Assign,File, Memory, Edit or Chase is pressed, a menu opens up in the LCD nearest to thefunction buttons and a help message is displayed in the adjacent LCD .Some functions like Edit and Assign which are used in conjunction with others usea second button press to select the appropriate menu (i.e. Edit Memory or EditChase). Others such as Setup and Clear provide a number of sub-menus to choosefrom.S ETUPD ESK P t ch C tr l U t i l P r e f M crd+ t o + t o + t o + to + t o + to▲ 3C Typical menu field3.10 Menu FieldsDiagram 3C☞Each menu consists of a number of fields. The name of the field appears on the topline of the display and the setting or value for that field appears underneath it.Sometimes a field is used to lead to another menu; in this case, the bottom line shows[ + to ] which means “Press the (On) button to open another menu”.NOTE: As the cursor is moved, the field the cursor is in changes to UPPERCASE.▲ 3D Cursor buttons3.20 Cursor Buttons☞Diagram 3DThe left arrow and right arrow buttons are used to move the cursor between thevarious fields in each menu.OFFON▲ 3E (On) and (Off) Buttons3.30 (On) and (Off) Buttons☞Diagram 3EThe (On) and (Off) Buttons are used to change values. The (On) button willeither increase a value or change a setting from Off to On or change a letter/characteron a label. Likewise, the (Off) button will decrease values or change a settingfrom On to Off. These buttons are also used in a few menus to toggle betweenseveral choices, e.g. Setting a Chase to forward or reverse.The buttons operate in three ways:-* Press: The value increases by 1 with the (On) button or decreases by 1with the (Off) button.* Press and Hold: The value scrolls up with the (On) button, or down withthe (Off) button.* Double Press: The value snaps to maximum with the (On) button or tominimum with the (Off) button. It may take a couple of attempts to doublepress at a fast enough speed to see this work.www.sxsevents.co.uk<strong>Event</strong> V3 <strong>Manual</strong> 13
ent production courtesy Phone: of and Audio-Visual 0870 080 2342 ServicesGeneral Descriptionwww.sxsevents.co.ukemail: enquiries@sxsevents.co.uk3.40 Entering Numbers Directly to FieldsOnce a menu has been opened the function buttons change to a numeric keypad.Numbers can be entered directly into menu fields such as Page number, Memorynumber and so on.3.50 Entering LabelsDiagram 3F, 3G, 3HME M:M 10_M___10PRESETFLASH▲ 3F Preset Flash buttonASSIGNFLASH▲ 3G Assign Flash buttonInfadeOutfde0:00 0 0:000 Mo r e▲ 3H Memory Menu▲ 3I Exit button77PAGE ASSIGN1 2BUILD CLEAR0EXIT SETUPMEMORY EDIT4 5PAGE ASSIGN1 2BUILD CLEAR0EXIT88MEMORY EDIT4 5SETUPCHASE6FILE39STACKRECORDCHASE6FILE3STACKRECORD▲ 3J Record button9The Memory, Chase, Page, File and Patch menus all have a Label field. The sectioncircled in Diagram 3H shows the Memory menu with the Label field highlighted(the other menus all have the Label field in the same position). The <strong>Event</strong>automatically supplies a label for each field (in the diagram shown as M10) but thePreset/Assign Flash buttons can be used to type a label of your choice. Below eachFlash button there is a character marking.Example:• Open the Memory menu and use the right arrow button to move the cursorto the first character position of the label field.• Type BLUE WASH or something similar. If you make a mistake just use thecursor buttons to move back and type over the incorrect character. Thesquare box marking below the third (fifth on <strong>Event</strong> Plus) Assign MasterFlash button represents a space. You can also use the numeric keypadto type numbers.3.60 Exit ButtonDiagram 3IThe Exit button is used to back out of the menu system. If a top level menu is open,pressing Exit closes the menu system. If a nested menu is open pressing the Exitbutton makes the display return to the previous (higher level) menu.If no menu is open the Exit button can be used to show the <strong>Event</strong> software versionnumber.3.70 Record ButtonDiagram 3JWhen a menu is open the Record button is used to save new or modified intensitysettings.If no menu is open the Record button can be used to change the LCD window fromshowing Memory and Chase labels to showing Memory and Chase numbers. Thisfeature is useful if you have given names to Memories and Chases and need to knowwhat number they were, or need to see the steps of a Chase sequencing.14 <strong>Event</strong> V3 <strong>Manual</strong>www.sxsevents.co.uk
ent production courtesy Phone: of and Audio-Visual 0870 080 2342 Serviceswww.sxsevents.co.ukemail: enquiries@sxsevents.co.uk© <strong>Jands</strong> Electronics July 1995Getting Startedwww.sxsevents.co.uk<strong>Event</strong> V3 <strong>Manual</strong> 15
ent production courtesy Phone: of and Audio-Visual 0870 080 2342 ServicesGetting Startedwww.sxsevents.co.ukemail: enquiries@sxsevents.co.uk4.00 Hardware Setup4.10 Connecting PowerPlug the socket end of the power cord into the IEC power receptacle located on therear face of the <strong>Event</strong>. The other end of the power cord should be plugged into a3-pin grounded outlet. It is important that the <strong>Event</strong> is electrically grounded; if indoubt, contact a licensed electrician.4.20 Connecting the Output to a Dimmer<strong>Event</strong> provides two methods of connection to dimmer systems. The DMX outputis standard on all consoles. Optional Socapex output panels can also be fitted to theconsole to provide 0 - 10V wire-per-channel analogue outputs.METHOD 1. DMX-512 OutputConnect from the console's DMX output to the DMX input on the dimmer rack.Check the dimmer instruction manual for details on selecting DMX channelsand looping the DMX line to other dimmer racks.Up to 512 dimmer channels can be controlled in this way.METHOD 2. Analogue Outputs (Option)Connect from the console's Socapex outputs to the dimmer rack input. Up toeight Socapex connectors can be fitted to a console to provide up to <strong>24</strong>0 channelsof dimmer control.16 <strong>Event</strong> V3 <strong>Manual</strong>www.sxsevents.co.uk
ent production courtesy Phone: of and Audio-Visual 0870 080 2342 Serviceswww.sxsevents.co.ukemail: enquiries@sxsevents.co.uk© <strong>Jands</strong> Electronics July 19954.30 Connecting DesklightsDesklights are available as an optional accessory. Only 12V Littlite or compatibledesklights with 3-pin Cannon XLR type connectors should be used (for wiring seeAppendix B).4.40 Connecting a VDUConnect from any Monochrome, CGA, EGA or VGA monitor to the connector onthe option panel. Two video output options are available to suit the above range ofmonitors (for wiring see Appendix B).4.50 Connecting a MIDI DeviceThe <strong>Event</strong> console is equipped with a MIDI input (there is no through connector).Use a standard MIDI cable to conect from the MIDI device to the MIDI In connectoron the backpanel (for wiring see Appendix B).4.60 Connecting a Slave ConsoleAny <strong>Jands</strong> Stage 12, ESP II or <strong>Event</strong> console can be slaved to the <strong>Event</strong>.Connect from the DMX output of the slave console to the MIDI input of the mainconsole. This cable should be wired as detailed (for wiring see Appendix B).4.70 Turning the Power OnOnce all connections have been made the console can be turned on using the mainspower switch located next to the power lead input.www.sxsevents.co.uk<strong>Event</strong> V3 <strong>Manual</strong> 17
ent production courtesy Phone: of and Audio-Visual 0870 080 2342 ServicesGetting Startedwww.sxsevents.co.ukemail: enquiries@sxsevents.co.uk5.00 Software Setup5.10 Setting the Number of Console Channels5.11 To increase the number of channels available on the console☞Diagram 5AOne of the most powerful features of the <strong>Event</strong> is its ability to work as a single presetboard outputting double the number of channels normally available. In applicationswhere colour scrollers or moving lights are being controlled this feature greatlyextends the usefulness of the console. An <strong>Event</strong> <strong>24</strong>, for instance could control <strong>48</strong>colour scrollers.NOTE:WIDE should be turned on before any Memories or Chases have been recorded.When WIDE is turned on the number of available Memories is reduced.Once a console has been set to WIDE the Preset 2 faders are used to control thehigher numbered channels. For example, on an <strong>Event</strong> <strong>48</strong> the Preset 2 faders wouldcontrol channels 49 to 96. The Preset 2 Master fader is disabled.When Wide mode is on an indicator appears at the far right end of the right LCDwindow. W1 indicates the desk is in Wide mode with a single preset, W2 indicatesthe desk is in Wide mode with dual presets.12345Press the Setup button to open the Setup menu.Move the cursor to the DESK field and press the (On) button to open theSet Desk menu.Move the cursor to the WIDE field and press the (On) button to open theSet Desk Wide menu.In the Set Desk Wide menu move the cursor to the WIDE field and press the (On) button to change the field to On.Move the cursor to the CHANS field - this field will have automaticallychanged to double the number of channels [i.e. a 60 channel console willhave changed to 120. Type in any number of channels to a maximum of 252(120 on <strong>Event</strong>)].NOTE:If more than double the number of channels are selected in step 5 you will needa slave console to control the extra channels (see Section <strong>24</strong>.00).6789Move the cursor to the PSETS field and change this field to Single to allowall the Preset faders on the console to be used as a single preset. On an <strong>Event</strong>60 this means you will have 120 console channels with the top preset controllingchannels 1-60 and the bottom preset controlling channels 61 - 120.Move the cursor to the CONFIRM field. If all the settings are correct pressthe (On) button to confirm the changes.Press Exit to close the Set Desk Wide menu.Press Exit once more to close the Setup menu completely.18 <strong>Event</strong> V3 <strong>Manual</strong>www.sxsevents.co.uk
ent production courtesy Phone: of and Audio-Visual 0870 080 2342 Serviceswww.sxsevents.co.ukemail: enquiries@sxsevents.co.uk© <strong>Jands</strong> Electronics July 1995END[STANDARD SCREEN]789MEMORY4 5EDIT6CHASEPAGEASSIGNFILE28 & 91 2BUILD CLEAR0EXIT SETUP3STACKRECORDSET U PDESK t oP t ch t oC t I t orU t I t oiP rteotMctrodSeD t eskMOER D e cWi de t oL i t n o kDisp tl ao yn Extto 7CONFIRMN o6PSETS Dua lPSETSS i ngl e7 8 9MEMORY EDIT CHASE4 5 6PAGE ASSIGN FILE1 2 3BUILD CLEAR STACK0CHANS120EXIT SETUP RECORDORCHANSx x x5SeW t ideWIEf D O fChansPset s Con f irm60Du a l No 4WIDEOnChans120SeD t eskMODERecWide t oL i nk t oDispl ay t oExt n t o3WItDoE7MEMORY4 5PAGE8EDITASSIGN96CHASEFILESEU PTDESK t oP t ch t oC t r I t oU t i I t oP r e t t oMcr d t o21 23BUILDCLEAR0STACKEXITSETUPRECORD1STARTwww.sxsevents.co.uk▼5A Setting the Number of Console Channels<strong>Event</strong> V3 <strong>Manual</strong> 19
ent production courtesy Phone: of and Audio-Visual 0870 080 2342 ServicesGetting Startedwww.sxsevents.co.ukemail: enquiries@sxsevents.co.ukPT__ __Ch#Dm i : A t D i m: A t Dim:At1 M 101 1 F F NCF F NC F F▼5B Patch menu5.20 PatchDiagram 5B☞The <strong>Event</strong> will control up to 512 dimmer channels via the DMX output or <strong>24</strong>0channels via the optional analogue output panels. The Patch menu allows thesedimmer channels to be patched at any level to the console channels. There are threePatch tables available.Normally when you turn the console on Channel 1 will be patched to dimmerchannel 1, Channel 2 will be patched to dimmer channel 2 and so on for all theconsole channels. To change this you use the Patch menu.TIP:It is possible, for example, to set one Patch which includes all dimmers for themain act, and a different Patch which might not include all dimmers for thesupport act. Similarly if a light was knocked out of focus during the show thePatch could be used to reduce the level of its dimmer to 0 so the light would notcome on at any time.Changing the Patch number will make the new Patch active immediately - becareful about making any changes during a show.5.21 To Patch Dimmers to the Console1234☞Diagram 5CPress the Setup button to open the Setup menu.Move the cursor to the PTCH field and press the (On) button to open thePatch menu.Press the (On) button or Keypad to change the Patch number in PT field(there are 3 Patches available - 1, 2 and 3).Move the cursor to the CH# field and set a console channel number (i.e. 1).NOTE:Patch tables 1d/2d/3d display Patches 1/2/3 in reverse, i.e. a dimmer numberis specified and the control channel is shown.56Move the cursor to the DIM: field and set a dimmer number (i.e. 1).Move the cursor to the AT field and set the intensity (normally FF or 100%).5.22 Patching Multiple Dimmers to a Channel7The CH#, DIM: and AT fields are repeating fields, so it is possible to patchseveral dimmers to the one desk channel. However a dimmer can only bepatched to one channel at a time.20 <strong>Event</strong> V3 <strong>Manual</strong>5.23 Storing Changes Made in Patch8910When all changes to a patch have been made, press the Record button to savethese changes and leave the Patch menu. If you press the Exit key you areprompted to either save the changes by pressing the (On) button or toabandon them by pressing the (Off) button.Press Exit to close Patch menu.Press Exit again to close Setup menu.(For information on Clearing a Patch or setting a Null Patch see Section 21.00).www.sxsevents.co.uk
ent production courtesy Phone: of and Audio-Visual 0870 080 2342 Serviceswww.sxsevents.co.ukemail: enquiries@sxsevents.co.uk© <strong>Jands</strong> Electronics July 1995S ETUPD ESK+ t oP t ch C t r l U t i l P r e f M c r d+ t o + t o + t o + t o + t o[STANDARD SCREEN]END7MEMORY8EDIT9CHASE4 5 6PAGE ASSIGN FILE1 2 3BUILD CLEAR STACK0RECORDEXIT SETUP8P T1_ _ __C h # Dm i : A t D i m: A t Dim:AM 101 1 F F NCNCtF F F F29&7MEMORY8EDIT9CHASE4 5 6PAGE ASSIGN FILE1 2 3BUILD CLEAR STACK0EXIT SETUP RECORD107 8 9MEMORY EDIT CHASE4 5 6OPTION: To connect additional dimmers to a channel(max. munber: 512)7 8 9MEMORY EDIT CHASE4 5 6PAGE ASSIGN FILE1 2 3BUILD CLEAR STACK0EXIT SETUP RECORDDI M : ORD IM: AT1x x xF F5 6PAGE ASSIGN FILE1 2 3BUILD CLEAR STACK0EXIT SETUP RECORDOR7ATx x7 8 9MEMORY EDIT CHASE4 5 6PAGE ASSIGN FILE1 2 3See diagram 5C (5.30 Labelling a Patch)4CH#1BUILD CLEAR STACK0EXIT SETUP RECORDORCH#x x xP T1_ _ __C h # Dm i : A t D i m: A t Dim:A101tM1 F F NC F F NCF F3PT1231d2d3d7MEMORY8EDIT9CHASE4 5 6PAGE ASSIGN FILES ETUPD ESK+ t oP t ch C t r l U t i l P r e f M c r d+ t o + t o + t o + t o + t o12PTCH T o1 23BUILDCLEAR0STACKEXITSETUPRECORD1START5C To Patch Dimmers to the Consolewww.sxsevents.co.uk▼<strong>Event</strong> V3 <strong>Manual</strong> 21
ent production courtesy Phone: of and Audio-Visual 0870 080 2342 ServicesGetting Startedwww.sxsevents.co.ukemail: enquiries@sxsevents.co.uk5.30 Labelling a Patch☞Diagram 5C + 5BThe label field is used to name a Patch. An eight character label can be typed usingthe flash buttons for characters and the function keypad for numbers.789_ ___P ch1A 1PRESETFLASHOR7 8 9MEMORY EDIT CHASE4 5 6PAGE ASSIGN FILE1 2 3BUILD CLEAR STACK0ASSIGNFLASHEXIT SETUP RECORDORMEMORY4 5PAGE1 2BUILDEXITPress ExitIf onlyenteringa label0x x x xx x x xEDITASSIGNCLEARSETUP6CHASE3FILESTACKRECORD▼5C Labelling a Patch22 <strong>Event</strong> V3 <strong>Manual</strong>www.sxsevents.co.uk
ent production courtesy Phone: of and Audio-Visual 0870 080 2342 Serviceswww.sxsevents.co.ukemail: enquiries@sxsevents.co.uk© <strong>Jands</strong> Electronics July 19956.00 <strong>Manual</strong> Controls6.10 The Presets☞Diagram 6AThe Preset faders are used to set up lighting levels during a show and whileprogramming Memories and Chases. It is possible to run a show entirely on thepresets but generally these controls are used for recording or to make impromptuchanges to the stage lighting.6.20 Preset FadersDiagram 6A, 6B, 6C☞▼6A Presetfaders▼6B Presetmaster▼6C GrandmasterThere are two rows of Presets faders on the <strong>Event</strong>. The top row of faders is Preset1 and the bottom row is Preset 2. These faders can be used to smoothly fade a lightto the desired level. The output level produced by the Preset faders is dependent onthe level of the P1 (or P2) Master and the Grand Master fader.Example:• Bring the Grand Master and P1 Master faders to 10 (100%).• Move the Channel 1 Preset fader to 100% and you should see the lightsconnected to that channel fade up to full level.• Now fade up Channel 2 to 5 (50%). Check that the lights connected toChannel 2 are at about 50% level.• Finally fade the P1 Master down and up to see how it scales the ChannelPreset faders.6.30 Flash Buttons☞Diagram 6D, 6EFlash buttons are located below each Channel and Assign master fader. Theyperform three functions:* Flash: The buttons are used to momentarily flash a channel to the level set bythe Add/Solo Master fader. The type of operation of the Flash button depends onthe setting of the Add / Solo Master switch.▼6D Flashbuttons▼6E Add/Soloswitch* Inhibit: To prevent a channel from appearing in any output, hold the Flashbutton down and press the DBO button. Repeat this procedure to cancel inhibit.When a channel is inhibited, the channel LED and DBO LED flash together.* Text: When a menu is opened and with the cursor in the Label field, the Flashbuttons are used to type various characters as marked on the front panel.www.sxsevents.co.uk<strong>Event</strong> V3 <strong>Manual</strong> 23
ent production courtesy Phone: of and Audio-Visual 0870 080 2342 ServicesGetting Startedwww.sxsevents.co.ukemail: enquiries@sxsevents.co.uk<strong>24</strong> <strong>Event</strong> V3 <strong>Manual</strong>www.sxsevents.co.uk
ent production courtesy Phone: of and Audio-Visual 0870 080 2342 Serviceswww.sxsevents.co.ukemail: enquiries@sxsevents.co.uk© <strong>Jands</strong> Electronics July 1995CreatingMemories& Chaseswww.sxsevents.co.uk<strong>Event</strong> V3 <strong>Manual</strong> 25
ent production courtesy Phone: of and Audio-Visual 0870 080 2342 ServicesCreating Memories & Chaseswww.sxsevents.co.ukemail: enquiries@sxsevents.co.uk7.00 MemoriesThis section explains the steps involved in recording a Memory. Recording Chasesis detailed in the next section, but the procedures are very similar to that involvedin recording Memories.If you want to try these procedures, be sure that you have patched the console (seeSection 5.00) and are able to fade lights up and down using the Preset faders.7.10 Recording a MemoryA Memory records the level settings of all the <strong>Event</strong> channels (some lighting boardsrefer to Memories as scenes or cues). The <strong>Event</strong> offers two alternative methods ofrecording Memories.7.11 METHOD 1: Record and Point1☞2Diagram 7AUse the Preset faders (and any other console controls) to set up the lightingoutput required.Press and hold the Record buttonNOTE: The LCDs above the Assign Masters show the Memory numbers being controlledby the faders.345While holding the Record button down press the Assign Flash buttonbeneath the Memory number to be recorded.A message displays on the LCD showing the percentage of availableMemory space that has been used and how much remains.Release Record button.26 <strong>Event</strong> V3 <strong>Manual</strong>www.sxsevents.co.uk
ent production courtesy Phone: of and Audio-Visual 0870 080 2342 Serviceswww.sxsevents.co.ukemail: enquiries@sxsevents.co.uk© <strong>Jands</strong> Electronics July 1995[STANDARD SCREEN]END7 8 9MEMORY EDIT CHASE4 5 6PAGE ASSIGN FILE1 2 3BUILD CLEAR STACK0EXIT SETUP RECORD53ASSIGNFLASHS tora g e:R e c o rded0% us ed, 100%free.47 8MEMORY EDIT9CHASEP g1 M20 M 21 M 22 M 23 M <strong>24</strong> M 254 56PAGEASSIGNFILESTART1CONSOLE SETTINGSTO BE RECORDED1 2BUILD CLEAR0EXIT SETUP3STACKRECORD2www.sxsevents.co.uk▼7A Recording a Memory - Record and Point (Method 1)<strong>Event</strong> V3 <strong>Manual</strong> 27
ent production courtesy Phone: of and Audio-Visual 0870 080 2342 ServicesCreating Memories & Chaseswww.sxsevents.co.ukemail: enquiries@sxsevents.co.uk7.12 METHOD 2: Using the Menu123☞Diagram 7BPress the Memory button.Use the Preset faders (and any other console controls) to set up the lightingoutput required.Enter the Memory number (0 - 999) to be recorded using the numeric keypador alternatively use the (On)/ (Off) buttons to change the displayedMemory number.NOTE: The cursor automatically moves to the Label field if a three digit number isentered.456Press the Record button (a message displays on the LCD shows the percentageof available memory space that has been used and how muchremains).Another Memory can now be recorded by repeating steps 2 , 3 and 4(see Note below).Press the Exit button if no more Memories are to be recorded.NOTE: The number in the Memory menu automatically advances by 1 when the Recordbutton is released. This allows a number of Memories to be recorded withoutleaving the Memory menu.28 <strong>Event</strong> V3 <strong>Manual</strong>www.sxsevents.co.uk
ent production courtesy Phone: of and Audio-Visual 0870 080 2342 Serviceswww.sxsevents.co.ukemail: enquiries@sxsevents.co.uk© <strong>Jands</strong> Electronics July 1995[STANDARD SCREEN]END789MEMORY4 5EDIT6CHASE6PAGE ASSIGN FILE1 2 3BUILD CLEAR STACK0EXIT SETUP RECORD789MEMORYEDITCHASE4 56PAGEASSIGNFILESee diagram 7C (7.20 Labelling a memory)1 2BUILD CLEAR0EXIT SETUP3STACKRECORD4S to rage:R e c o rded0%us ed, 100%free.7 8 9MEMORY EDIT CHASE4 5 6PAGE ASSIGN FILE1 2 3BUILD CLEAR STACK0EXIT SETUP RECORDOR3MEM:M x x xNEW CONSOLESETTINGS TOBE RECORDED5START1CONSOLESETTINGSTO BE RECORED27 8 9MEMORY EDIT CHASE4 5 6PAGE ASSIGN FILE1 2 3BUILD CLEAR STACK0EXIT SETUP RECORDM___ E M_:M10I n f adeOut f de0 : 0 0 0 0 : 000 Mo r eMEM: NEXTDel ayM 1 0 M 110 : 00. 0▼7B Recording a Memory - Using the Menu (Method 2)www.sxsevents.co.uk<strong>Event</strong> V3 <strong>Manual</strong> 29
ent production courtesy Phone: of and Audio-Visual 0870 080 2342 ServicesCreating Memories & Chaseswww.sxsevents.co.ukemail: enquiries@sxsevents.co.uk7.20 Labelling a Memory☞Diagram 7C + 7BMemories can be labelled to allow easy identification of their contents. Forexample, Memories might be labelled BLUE WASH or DRUM SOLO; wheneverthese Memories are loaded to the Assign Masters their labels are displayed in theLCD window above the Assign fader.1. Press the Memory button.2. Enter the Memory number (0 - 999) to be labelled using the numeric keypador alternatively use the (On)/ (Off) buttons to change the displayedMemory number.NOTE: The cursor automatically moves to the Label field if a 3 digit number is entered.3. Use the arrow buttons to move the cursor to the Label field (to the right ofthe Memory number field).4. Type a label of up to eight characters using the Flash buttons.NOTE: Each Flash button is marked on the front panel with a character (1=A, 2=B etc.).Typing a label will NOT cause lights to flash on at the same time.5. Press the Exit button if no more Memories are to be labelled.6. Do NOT press the Record button if you are only entering or changing alabel.TIP:Memories can be labelled while they are being recorded (using the menumethod) or labelled later by using the Memory menu.789_ ___M 10A 1PRESETFLASHOR7 8 9MEMORY EDIT CHASE4 5 6PAGE ASSIGN FILE1 2 3BUILD CLEAR STACK0ASSIGNFLASHEXIT SETUP RECORDORMEMORY4 5PAGE1 2BUILDEXITPress Exitif onlyenteringa labelASSIGNCLEAR0x x xx x x x xEDITSETUP6CHASE3FILESTACKRECORD30 <strong>Event</strong> V3 <strong>Manual</strong>▼7C Labelling a Memorywww.sxsevents.co.uk
ent production courtesy Phone: of and Audio-Visual 0870 080 2342 Serviceswww.sxsevents.co.ukemail: enquiries@sxsevents.co.uk© <strong>Jands</strong> Electronics July 19957.30 Playing Back a MemoryTo see what is recorded so far follow these steps:1. Pull down all the Preset faders so you can see just what has been recordedin the Memory.2. Check that you can see the Memory number or the label you gave it in theLCD window above one of the Assign Masters.3. Move the Assign fader to 100%.If you do not see anything, check that the Grand Master is at full. If you can not seewhat you expected try recording again, paying careful attention to the procedures.(For more information on Play Back see Section 13.00).www.sxsevents.co.uk<strong>Event</strong> V3 <strong>Manual</strong> 31
ent production courtesy Phone: of and Audio-Visual 0870 080 2342 ServicesCreating Memories & Chaseswww.sxsevents.co.ukemail: enquiries@sxsevents.co.uk7.40 Editing a MemoryThere are two ways to make changes to the channel intensities.TIP:A Memory can be edited to change the levels of channels or groups of channels.Editing can be carried out ‘blind’, that is, without the changes being seen onstage, or ‘live’if that Memory is currently being outputted to the stage (by one ofthe Assign Masters).Whenever the EDIT MEMORY menu is opened the Preset faders are disabled fromoutputting to the stage. However, they can be used to set levels for the item beingedited.7.41 METHOD 1: Record and Point☞1234Diagram 7DPress the Edit button.Press the flash button beneath the Assign fader controlling the item to beedited.Use the Preset 1 (top preset) faders to set new levels for the channels youwant to change. To edit a channel this way, the fader first has to be movedto match the existing level of the channel and then moved to the new level.The simplest way to do this is to move the fader from zero to full and thento the new level.Press Record button. The LCD will display the percentage of availableMemory space that has been used and that which remains, and will returnto standard screen after the button is released.32 <strong>Event</strong> V3 <strong>Manual</strong>www.sxsevents.co.uk
ent production courtesy Phone: of and Audio-Visual 0870 080 2342 Serviceswww.sxsevents.co.ukemail: enquiries@sxsevents.co.uk© <strong>Jands</strong> Electronics July 1995[STANDARD SCREEN]ENDS to rage:R e c o rded0%us ed, 100%free.789MEMORYEDITCHASE2ASSIGNFLASH3CONSOLESETTINGS TOBE RECORDED4 5 6PAGE ASSIGN FILE1 2 3BUILD CLEAR STACK0RECORDEXIT SETUP47 8 9EDITMEMORYCHASE4 5 6Edi tSelect Mem,o r F i l e ( orCha s e , Pag eP r e s s E x i t )STARTPAGE ASSIGN FILE1 2 3BUILD CLEAR STACK0EXIT SETUP RECORD1▼7D Editing a Memory -Record and Point (Method 1)www.sxsevents.co.uk<strong>Event</strong> V3 <strong>Manual</strong> 33
ent production courtesy Phone: of and Audio-Visual 0870 080 2342 ServicesCreating Memories & Chaseswww.sxsevents.co.ukemail: enquiries@sxsevents.co.uk7.42 METHOD 2: Using The Menu☞12345Diagram 7EPress the Edit button.Press the Memory button. Enter the Memory number (0 - 999) to beedited.Move the cursor to the CH# (channel) field. Use the (On)/ (Off) buttonor keypad to enter the new channel number.Move the cursor to the TO# field. Use the (On)/ (Off) button or keypadto enter the new number for the range of channels to be edited.Move the cursor to the AT (value) field. Use the (On)/ (Off) button orkeypad to enter the new level values.Example:In the menu illustrated in diagram 7E channels 10 through to 15 have beenset to 50%.TIP:As each channel or group of channels is adjusted, using either edit method, thechanges are stored temporarily so there is no need to press Record to save eachindividual change.6Press the Record button. The LCD will display the percentage of availableMemory space which has been used and remains, and will then return to thestandard screen after the button is released.34 <strong>Event</strong> V3 <strong>Manual</strong>www.sxsevents.co.uk
ent production courtesy Phone: of and Audio-Visual 0870 080 2342 Serviceswww.sxsevents.co.ukemail: enquiries@sxsevents.co.uk© <strong>Jands</strong> Electronics July 1995[STANDARD SCREEN]ENDS torage:R e c o rded0%us ed, 100%free.7 8 9MEMORY EDIT CHASE4 5 6789AT0PAGE ASSIGN FILE1 2 3BUILD CLEAR STACK0SETUPOR AT 50EXIT RECORDMEMORY EDIT CHASE4 5 6PAGE ASSIGN FILE1 2 3BUILD CLEAR STACK0RECORDEXIT SETUP564TO#17 8 9MEMORY EDIT CHASE4 5 6PAGE ASSIGN FILE1 2 3BUILD CLEAR STACK0SETUPOR TO# 15EXIT RECORD7 8 9MEMORY EDIT CHASE4 5 6PAGE ASSIGN FILE1 2 3BUILD CLEAR STACKSee diagram 7C (7.20 Labelling a Memory)3CH#10EXIT SETUP RECORDOR CH# 1027 8 9MEMORY EDIT CHASE4 5 6PAGE ASSIGN FILE1 2 3BUILD CLEAR STACK0EXIT SETUP RECORDE DITM 10_ __C h # To M 101 1At07 8 9MEMORY EDIT CHASE4 5 6PAGE ASSIGN FILE1 2 3BUILD CLEAR STACK0EXIT SETUP RECORDORE D I TM x x x7 8 9EDITMEMORYCHASE4 5 6Edi tSelect Mem,o r F i l e ( orCha s e , Pag eP r e s s E x i t )PAGE ASSIGN FILE1 2 3STARTBUILD CLEAR STACK0EXIT SETUP RECORD1www.sxsevents.co.uk▼7E Editing a Memory - Using the Menu (Method 2)<strong>Event</strong> V3 <strong>Manual</strong> 35
ent production courtesy Phone: of and Audio-Visual 0870 080 2342 ServicesCreating Memories & Chaseswww.sxsevents.co.ukemail: enquiries@sxsevents.co.uk8.00 ChasesChases are recorded in the same way as Memories.8.10 Recording a Chase - Using The Menu123456Diagram 8APress the Chase button.Use the Preset faders (and any other console controls) to set up the lightingoutput required for the first step of the Chase.Enter the Chase number (0 - 999) to be recorded.Press the Record button.The first step of the Chase is recorded and the Step field automaticallychanges to the next step number.Set up the lighting output required for the next step of the Chase.Press the Record button.• Continue recording new steps until the Chase is complete (Max. no. 99).7☞Press the Exit button if no more Chase steps are to be recorded.36 <strong>Event</strong> V3 <strong>Manual</strong>www.sxsevents.co.uk
ent production courtesy Phone: of and Audio-Visual 0870 080 2342 Serviceswww.sxsevents.co.ukemail: enquiries@sxsevents.co.uk© <strong>Jands</strong> Electronics July 1995END[STANDARD SCREEN]See:-Diagram 8C (8.30 Setting the Chase Direction)Diagram 8D (8.40 Setting the Chase Speed)Diagram 8E (8.50 Adding Attack/Decay to the Chase)Diagram 8F [8.60 Adding a Dipless CrossfadeBetween Steps (X)]7MEMORY8EDIT9CHASE4 5 6PAGE ASSIGN FILE1 2 3BUILD CLEAR STACK0EXIT SETUP RECORD7CH S :C 1_C___1S t O f1 0Dr\> > B P X /12m 0 0 0 0 More9 99 9See diagram 8B (8.20 Labelling a Chase)7MEMORY8EDIT9CHASE4 5 6PAGE ASSIGN FILE1 2 3BUILD CLEAR STACK0RECORDEXIT SETUP4S to rage:R e c o rded0%us ed, 100%free.NEW CONSOLESETTINGS TO BERECORDED FORNEXT STEP57 8 96MEMORY EDIT CHASE1CONSOLE SETTINGSTO BE RECORDEDFOR FIRST STEP27MEMORY8EDIT9CHASE4 5 6PAGE ASSIGN FILE1 2 3BUILD CLEAR STACK0EXIT SETUP RECORDCH S : ____StOf DrC 1 C 1 1 0 > >BPm120X0/ \00 More4 5 6PAGE ASSIGN FILE1 2 3BUILD CLEAR STACK0EXIT SETUP RECORDORC H S :C 19 9 93START8A Recording a Chasewww.sxsevents.co.uk▼<strong>Event</strong> V3 <strong>Manual</strong> 37
ent production courtesy Phone: of and Audio-Visual 0870 080 2342 ServicesCreating Memories & Chaseswww.sxsevents.co.ukemail: enquiries@sxsevents.co.uk8.20 Labelling a Chase☞Diagram 8B + 8AChases can be labelled to allow easy identification of their contents. For example,Chases might be labelled FAST or SLOW and then whenever those Chases areloaded to the Assign Masters the label is displayed in the LCD window above thefader. Chases can be labelled while they are being recorded or at a later time.1. Move the cursor to the Label field (to the right of the Chase number field).2. Type a label of up to eight characters using the Flash buttons.3. Press the Exit button if no more Chases are to be labelled.NOTE: Do NOT press the Record button if only entering or changing a label.789_ ___C 1A 1PRESETFLASHOR7 8 9MEMORY EDIT CHASE4 5 6PAGE ASSIGN FILE1 2 3BUILD CLEAR STACK0ASSIGNFLASHEXIT SETUP RECORDORMEMORY4 5PAGE1 2BUILDEXITPress Exitif onlyenteringa label0x x x xx x x xEDITASSIGNCLEARSETUP6CHASE3FILESTACKRECORD▼8B Labelling a Chase38 <strong>Event</strong> V3 <strong>Manual</strong>www.sxsevents.co.uk
ent production courtesy Phone: of and Audio-Visual 0870 080 2342 Serviceswww.sxsevents.co.ukemail: enquiries@sxsevents.co.uk© <strong>Jands</strong> Electronics July 19958.30 Setting the Chase Direction☞Diagram 8C + 8A1. Use the arrow buttons to move the cursor to the DR (Direction) field.2. Press the (On) button to change the existing setting. Each press of the (On) button changes to a new setting. Possible directions are:* >> - Forward* - Bounce* >▼8C Setting the Chase Directionwww.sxsevents.co.uk<strong>Event</strong> V3 <strong>Manual</strong> 39
ent production courtesy Phone: of and Audio-Visual 0870 080 2342 ServicesCreating Memories & Chaseswww.sxsevents.co.ukemail: enquiries@sxsevents.co.uk8.40 Setting the Chase Speed☞Diagram 8D + 8A1. Use the arrow buttons to move the cursor to the BPM (Speed in Beats PerMinute) field.2. Enter a number using the numeric keypad or alternatively use the (On)/ (Off) buttons to change the displayed number; 999 is the highest speed.At 0 the Chase is stopped (HH) and can be single stepped using the ChaseFlash button.3. Press the Exit button.NOTE: Do NOT press the Record button if only entering or changing the Speed.TIP:Chase rates can be adjusted using the Rate Control.MEMORY EDIT CHASEBPM 1207418520963PAGE ASSIGN FILEBUILD CLEAR STACKEXIT SETUP RECORDORB P MH I T9 9 9▼8D Setting the Chase Speed40 <strong>Event</strong> V3 <strong>Manual</strong>www.sxsevents.co.uk
ent production courtesy Phone: of and Audio-Visual 0870 080 2342 Serviceswww.sxsevents.co.ukemail: enquiries@sxsevents.co.uk© <strong>Jands</strong> Electronics July 19958.50 Adding Attack / Decay to the Chase☞Diagram 8E + 8A1. Use the arrow buttons to move the cursor to the / (Attack) field.2. Press the (On) button to turn Attack on (I). Press the (Off) button to turnit off (0).3. Use the arrow buttons to move the cursor to the \ (Decay) field.4. Press the (On) button to turn Decay on (I). Press the (Off) button to turnit off (0).5. Press the Exit button.TIP:Do NOT press the Record button if only entering or changing the Attack / Decaysettings./ \0 0/ \0 0I/ \0 0/ \0 0I▼8E Adding Attack / Decay to the Chasewww.sxsevents.co.uk<strong>Event</strong> V3 <strong>Manual</strong> 41
ent production courtesy Phone: of and Audio-Visual 0870 080 2342 ServicesCreating Memories & Chaseswww.sxsevents.co.ukemail: enquiries@sxsevents.co.uk8.60 Adding a Dipless Crossfade Between Steps (X)☞Diagram 8F + 8A, 8G1. Move the cursor to the X field and press the (On) button to turn thecrossfade on (I).2. When X fade is turned on the attack (/) and decay (\) fields are disabled andthe menu changes to show the % (percentage) field. The % field sets whatpercentage of the total crossfade time each step is fully on.Example:1. Set the Chase speed to 6 BPM (1 step every 10 seconds)2. Set the % field to 50Step 1 takes 2.5 secs to fade in, stays on for 5 secs and then takes 2.5 secsto fade out.TIP:Xfade is automatically disabled at chase speeds greater 300BPM.%05\0F%0FX / X %0 0 I 5 0▼8F Adding a Dipless Crossfade Between Steps (X)Dipless CrossfadeBetween Steps100%Step 1 Step 275%50%25%Level1 2 3 4 5 6 7 8 9 10Time▼8G How Crossfade works in a Chase42 <strong>Event</strong> V3 <strong>Manual</strong>www.sxsevents.co.uk
ent production courtesy Phone: of and Audio-Visual 0870 080 2342 Serviceswww.sxsevents.co.ukemail: enquiries@sxsevents.co.uk© <strong>Jands</strong> Electronics July 19958.70 Playing Back ChasesTo see what is recorded so far, follow these steps:1. Pull down all the Preset faders so you can see what has been recorded in theChase.2. Check that you can see the Chase number or the label you gave it in the LCDwindow above one of the Assign Faders.3. Move the Assign fader to 100%.(For more detail see Playback section Section 13.00)www.sxsevents.co.uk<strong>Event</strong> V3 <strong>Manual</strong> 43
ent production courtesy Phone: of and Audio-Visual 0870 080 2342 ServicesCreating Memories & Chaseswww.sxsevents.co.ukemail: enquiries@sxsevents.co.uk8.80 Recall a Chase - Introduction to AssignIf you are unable to see the Chase number / name above one of the Assign fadersyou have probably recorded a Chase number that is not part of the Page that is loadedto the Assign Masters. There are two ways to get the Chase you want.8.81 METHOD 1: Change Page☞Diagram 8HThe <strong>Event</strong> has Pages preset so that Chase 1 is on Page 1,Chase 2 is on Page 2 andso on. If you’ve recorded Chase 10 you will want to change to Page 10:1234Press Page.Enter the Page number.Move the cursor to the LOAD field.Press the (On) button.TIP:If you don’t see anything check that the Grand Master is at full. If you still don’tsee what you expected try recording again, paying careful attention to theprocedures above.44 <strong>Event</strong> V3 <strong>Manual</strong>www.sxsevents.co.uk
ent production courtesy Phone: of and Audio-Visual 0870 080 2342 Serviceswww.sxsevents.co.ukemail: enquiries@sxsevents.co.uk© <strong>Jands</strong> Electronics July 1995[STANDARD SCREEN]ENDLOA O D f f47 8 9MEMORY EDIT CHASE4 5 6PAGE ASSIGN FILE1 2 3BUILD CLEAR STACK0EXIT SETUP RECORDORPAGE x x xx237 8 9MEMORY EDIT CHASE4 5 6P AGE1____Pg1Lo aO d Memorie sf f 1 0 1 91PAGE ASSIGN FILE1 2 3BUILD CLEAR STACKSTART0EXIT SETUP RECORD8H Change Page (Method 1)www.sxsevents.co.uk▼<strong>Event</strong> V3 <strong>Manual</strong> 45
ent production courtesy Phone: of and Audio-Visual 0870 080 2342 ServicesCreating Memories & Chaseswww.sxsevents.co.ukemail: enquiries@sxsevents.co.uk8.82 METHOD 2 : Assign the Chase12345☞Diagram 8IPress Assign.Press Chase.Enter the Chase number - the <strong>Event</strong> will remember the Chase you have justrecorded so this number should be set already.Press the Flash button below the Assign fader you want to use to controlthe Chase.Push the Assign fader to fill.TIP:If you do not see anything after following either of the methods described, checkthat the Grand Master is at full. If you still do not see what you expected tryrecording again, paying careful attention to the procedures detailed above.46 <strong>Event</strong> V3 <strong>Manual</strong>www.sxsevents.co.uk
ent production courtesy Phone: of and Audio-Visual 0870 080 2342 Serviceswww.sxsevents.co.ukemail: enquiries@sxsevents.co.uk© <strong>Jands</strong> Electronics July 1995[STANDARD SCREEN]END4ASSIGNFLASH7 8 9MEMORY EDIT CHASE4 5 63PAGE ASSIGN FILE1 2 3BUILD CLEAR STACK0EXIT SETUP RECORDORC H S :C x x x2789MEMORYEDITCHASE4 5 6PAGE ASSIGN FILE1 2 3BUILD CLEAR STACKA s gC h n s eC S: ____1 C 1 P rC H( E e x s i s tADDBu t t onc a nc e l s )0EXITSETUPRECORD7 8 9MEMORY EDIT CHASE4 5 6AsgnSelect Mem,o r F i l e ( orCha s e , Pag eP r e s s E x i t )PAGEASSIGNFILE1 2 3BUILD CLEAR STACKSTART0EXIT SETUP RECORD18I Assign the Chase (Method 2)www.sxsevents.co.uk▼<strong>Event</strong> V3 <strong>Manual</strong> 47
ent production courtesy Phone: of and Audio-Visual 0870 080 2342 ServicesCreating Memories & Chaseswww.sxsevents.co.ukemail: enquiries@sxsevents.co.uk8.90 Editing a ChaseA Chase can be edited to change the levels of channels or groups of channels.Editing can be carried out ‘blind’, that is, without the changes being seen on stage,or ‘live’. An edit will be Live if that Chase is currently being outputted to the Stage(by one of the Assign Masters).There two way to make changes to the channel intensities:8.91 METHOD 1: Using the Menu☞ Diagram 8J123456Press the Edit button.Press the Chase button, then use the (On)/ (Off) button or keypad toenter the Chase number (0 - 999) to be edited.Move the cursor to the ST (step) field. Use the (On)/ (Off) button orkeypad to enter the step number.Move the cursor to the CH# (channel) field. Use the (On)/ (Off) buttonor keypad to enter the new channel number.Move the cursor to the TO# field. Use the (On)/ (Off) button or keypadto enter the new number for the range of channel.Move the cursor to the AT (value) field. Use the (On)/ (Off) button orkeypad to enter the new level values.7Press the Record button. The LCD will display the percentage of availableMemory space that has been used and that which remains, and return to thestandard screen after the button is released.Example:In the menu illustrated in diagram 8J, channels 10 through to 15 have beenset to 50%.• Labelling a Chase as an option (see Section 8.20).• Deleting a Step as an option (see Section 8.100).• Adding a Step as an option (see Section 8.110).<strong>48</strong> <strong>Event</strong> V3 <strong>Manual</strong>www.sxsevents.co.uk
ent production courtesy Phone: of and Audio-Visual 0870 080 2342 Serviceswww.sxsevents.co.ukemail: enquiries@sxsevents.co.uk© <strong>Jands</strong> Electronics July 1995[STANDARD SCREEN]ENDSee:-Diagram 8L (8.100 Deleting a Step)Diagram 8M (8.110 Adding a Step)7 8 9MEMORY EDIT CHASE4 5 6PAGE ASSIGN FILE1 2 3BUILD CLEAR STACKS tora ge:R e c o rded0%us ed, 100%free.0EXITSETUPRECORD77 8 97 8 9MEMORY EDIT CHASEMEMORY EDIT CHASE4 5 64 5 6PAGE ASSIGN FILEPAGE ASSIGN FILE1 2 31 2 3BUILD CLEAR STACKBUILD CLEAR STACK0SETUPOR TO# 15EXIT RECORD6AT00SETUPOR AT 50EXIT RECORD7 8 9MEMORY EDIT CHASE4 5 6PAGE ASSIGN FILE1 2 3BUILD CLEAR STACK4CH#10OR CH#10EXIT SETUP RECORD5TO#17 8 9MEMORY EDIT CHASE4 5 6PAGE ASSIGN FILE1 2 3BUILD CLEAR STACKSee diagram 8B (8.20 Labelling a Chase)ST10EXIT SETUP RECORDORSTx x327897 8 9MEMORY EDIT4 5CHASE6MEMORY EDIT CHASE4 5 6PAGE ASSIGN FILE1 2 3BUILD CLEAR STACK0EXIT SETUP RECORDE DITC 1E DITC 1_C___C__1__1St1St1Of0O f0Ch#1Del AddO f f O f fTo#1A t0 >>PAGE ASSIGN FILE1 2 3BUILD CLEAR STACK0EXIT SETUP RECORDORE D I TC x x x7 8 9EDITMEMORYCHASE4 5 6Edi tSelect Mem,o r F i l e ( orCha s e , Pag eP r e s s E x i t )PAGE ASSIGN FILE1 2 3BUILD CLEAR STACKSTART0EXIT SETUP RECORD1www.sxsevents.co.uk▼8J Editing a Chase-Using the Menu (Method 1)<strong>Event</strong> V3 <strong>Manual</strong> 49
ent production courtesy Phone: of and Audio-Visual 0870 080 2342 ServicesCreating Memories & Chaseswww.sxsevents.co.ukemail: enquiries@sxsevents.co.uk8.92 METHOD 2: Using Assign Flash Buttons123☞Diagram 8KPress the Edit button.Press the Flash button beneath the Assign fader controlling the item to beedited.Use the Preset 1 (top preset) faders to set new levels for the channels youwant to change. To edit a channel this way the fader first has to be movedto match the existing level of the channel and then moved to the new level.The simplest way to do this is to move the fader from zero to full and thento the new level.TIP:Finding the Step to editIf you want to edit a particular Step of the Chase but are not sure of the Stepnumber there is an easy solution. First bring the Chase up on one of the AssignMasters, then use the rotary speed control to slow the chase right down until itstops. Now use the Assign Flash button to single step the Chase to the Step youwant. Finally, press the Edit button followed by the Chase Flash button and theedit Chase menu will open with the Step you want to edit already selected.NOTE: As each channel or group of channels is adjusted using either edit method, thechanges are stored temporarily so there is no need to press Record to save eachindividual change.4Press the Record button. The LCD will display the percentage of availableMemory space that has been used and that which remains, and return to thestandard screen after the button is released.NOTE: Whenever the EDIT CHASE menu is opened the Preset faders are disabled fromoutputting to the stage. However, they can be used to set levels for the item beingedited.50 <strong>Event</strong> V3 <strong>Manual</strong>www.sxsevents.co.uk
ent production courtesy Phone: of and Audio-Visual 0870 080 2342 Serviceswww.sxsevents.co.ukemail: enquiries@sxsevents.co.uk© <strong>Jands</strong> Electronics July 1995[STANDARD SCREEN]ENDS to rag e:R e c o rded0% us ed, 100%free.789MEMORYEDITCHASE2ASSIGNFLASH3NEW CONSOLESETTINGS TOBE RECORDED4 5 6PAGE ASSIGN FILE1 2 3BUILD CLEAR STACK0RECORDEXIT SETUP47 8 9EDITMEMORYCHASE4 5 6Edi tSelect Mem,o r F i l e ( orCha s e , Pag eP r e s s E x i t )STARTPAGE ASSIGN FILE1 2 3BUILD CLEAR STACK0EXIT SETUP RECORD1▼8K Editing a Chase-Using Assign Flash Buttons (Method 2)www.sxsevents.co.uk<strong>Event</strong> V3 <strong>Manual</strong> 51
ent production courtesy Phone: of and Audio-Visual 0870 080 2342 ServicesCreating Memories & Chaseswww.sxsevents.co.ukemail: enquiries@sxsevents.co.uk8.100Deleting a Step☞Diagram 8L + 8JTo delete a Step use the following procedure:1. Set the ST (Step) field to the Step number that you wish to remove.2. Move the cursor to the DEL field.3. Press the (On) button.NOTE: The Delete and Add fields are not shown when the Edit Chase menu is opened.Move the cursor to the More field (at the right hand end of the menu) to revealthese fields.E DITC 1_C___1St1O f0DelO f fAddO f f>S torag e:D e l e t ed 0% us e d , 100%free._ _ _ _C 1S t1P res s + toDel e te5 - t o KeepE DITC 1_C___1St1O f1DelO f fAddO f f>▼8L Deleting a Step52 <strong>Event</strong> V3 <strong>Manual</strong>www.sxsevents.co.uk
ent production courtesy Phone: of and Audio-Visual 0870 080 2342 Serviceswww.sxsevents.co.ukemail: enquiries@sxsevents.co.uk© <strong>Jands</strong> Electronics July 19958.110Adding a Step☞Diagram 8M + 8JTo add a Step use the following procedure:1. Set the ST (Step) field to the Step number that you wish to add.2. Move the cursor to the ADD field.3. Press the (On) button.NOTE: When Step is added it pushes all the old Step which had an equal or highernumber one number higher.For example, when adding a new first Step set ST to1. The old Step1 will becomeStep2 and so on.Adding the Step does NOT record any levels. After adding the Step either use thefaders or the CH# and AT fields to set the levels and press Record button.8.120Recording Changes Made in EditTo save the changes made using Edit press the Record button. It is not necessary topress the Record button after each channel (or group of channels) is set to a newlevel.E DITC 1_C___1St1O f1DelO f fAddO f f>S tora g e:A dde d0% u s ed, 100%free._ _ _ _C 1S t1P res s + toAdd Step5 - t o EditE DITC 1_ __ StO f De l AdC_ d 1 1 0 O f f O f f>▼8M Adding a Stepwww.sxsevents.co.uk<strong>Event</strong> V3 <strong>Manual</strong> 53
ent production courtesy Phone: of and Audio-Visual 0870 080 2342 ServicesManaging Memories & Chaseswww.sxsevents.co.ukemail: enquiries@sxsevents.co.uk54 <strong>Event</strong> V3 <strong>Manual</strong>www.sxsevents.co.uk
ent production courtesy Phone: of and Audio-Visual 0870 080 2342 Serviceswww.sxsevents.co.ukemail: enquiries@sxsevents.co.uk© <strong>Jands</strong> Electronics July 1995ManagingMemories& Chaseswww.sxsevents.co.uk<strong>Event</strong> V3 <strong>Manual</strong> 55
ent production courtesy Phone: of and Audio-Visual 0870 080 2342 ServicesManaging Memories & Chaseswww.sxsevents.co.ukemail: enquiries@sxsevents.co.uk9.00 PagesIf you have been using the Record and Point method you will soon have recordedMemories and Chases on all the Assign faders. To make a new set of Memories andChases available you will need to change to a new Page.Pages provide a familiar method of grouping Memories (and Chases) into sets thatare used together. It is common to have a Page for each song that a band performs.The <strong>Event</strong> provides 99 Pages but memory limitations prevent every Memory andChase in every Page being used.9.10 Page Make-UpOn an <strong>Event</strong> Plus a Page normally consists of 20 Memories and one Chase. Notethat the Assign Master faders 23 and <strong>24</strong> (<strong>Event</strong> Plus only) are not normally includedin a Page. They are set aside for fixed Memories or to control a Stack ( to alter themake-up of a Page see Section 15.00).9.20 Loading a New Page12☞Diagram 9APress the Page button to open the Page menu.Enter a new Page number.TIP:Type the Page number using two digits i.e. 02. The cursor automatically movesto the load field after the Page number is entered.34Use the arrow keys to move the cursor to the LOAD field.Press the (On) button. The menu closes and the new Page is loaded.NOTE: If Freeze is on, any Assign faders that were above zero% when the Page waschanged will continue to control the old Page Memory until the faders arereturned to zero at which time they will join the new Page.Any 'frozen' item'slabel will flash between its label and number to make it easy to identify.56 <strong>Event</strong> V3 <strong>Manual</strong>www.sxsevents.co.uk
ent production courtesy Phone: of and Audio-Visual 0870 080 2342 ServicesManaging Memories & Chaseswww.sxsevents.co.ukemail: enquiries@sxsevents.co.uk© <strong>Jands</strong> Electronics July 1995END[STANDARD SCREEN]Idl eM 16Idl eM 17Idl eM 18Idl eM 19CIdl1eC 1Idl10e C 0ReSee diagram 9B (9.30 Labelling a Page)LOA O D f f3 47 8 9MEMORY EDIT CHASE4 5 6PAGE ASSIGN FILESTART17MEMORY8EDIT9CHASE4 5 6PAGE ASSIGN FILE1 2 3BUILD CLEAR STACK0EXIT SETUP RECORDPAGE1____Pg1Lo aO d Memorie sf f 1 0 1 91 2 3BUILD CLEAR STACK0EXIT SETUP RECORDOR2PAGE xx9A Loading a New Pagewww.sxsevents.co.uk▼<strong>Event</strong> V3 <strong>Manual</strong> 57
ent production courtesy Phone: of and Audio-Visual 0870 080 2342 ServicesManaging Memories & Chaseswww.sxsevents.co.ukemail: enquiries@sxsevents.co.uk9.30 FreezeDiagram 9BTo turn Freeze on or off:123456☞Press the Setup button to open the Setup menu.Move the cursor to the PREF (Preferences) field.Press the (On) button to open the Set Preferences menu.Move the cursor to the FREEZE field.Press the (On) button to turn Freeze On. Press the (Off) button to turnFreeze Off.Press Exit to close this menu (press Exit twice to return to the standardscreen).NOTE: If Freeze is on, the output from any Assign Master fader which is above zero willNOT change when a new Page or File is loaded. When an Assign Master is ‘frozen’its display will flash between its label and its number, making it easier todetermine which faders are not on the current page. When a ‘frozen’ AssignMaster is faded to zero level it will join the current page and may be used to outputits current page memory. Its display will also change to indicate the currentcontents.58 <strong>Event</strong> V3 <strong>Manual</strong>www.sxsevents.co.uk
ent production courtesy Phone: of and Audio-Visual 0870 080 2342 Serviceswww.sxsevents.co.ukemail: enquiries@sxsevents.co.uk© <strong>Jands</strong> Electronics July 1995[STANDARD SCREEN]END789MEMORY4 5EDIT6CHASEPAGEASSIGNFILE261 2BUILD CLEAR0EXIT SETUP3STACKRECORDSEUPTDESK toPtchtoCtItor UtItoi PRtEoFMctrod5FREEZEO nOff3Se tP r e f sHELPO NFreeze T imesIncrmtOf f 0: 00 . 0 14FREEZO n E7MEMORY EDIT4 5PAGE8ASSIGN9CHASE6FILESEU PTDESK t oP t chtoC t It orU t It oiP rteofMctrod2PREFto1 23BUILDCLEAR0STACKSTARTEXITSETUPRECORD19B Freezewww.sxsevents.co.uk▼<strong>Event</strong> V3 <strong>Manual</strong> 59
ent production courtesy Phone: of and Audio-Visual 0870 080 2342 ServicesManaging Memories & Chaseswww.sxsevents.co.ukemail: enquiries@sxsevents.co.uk9.40 Labelling a Page☞Diagram 9C + 9APages can be labelled to allow easy identification of their contents. To Label a Page:1. Move the cursor to the Label field (to the right of the Pages number field).2. Type a Label of up to eight characters using the Flash buttons.3. Press the Exit button if no more Pages are to be labelled.789MEMORY EDIT4 5CHASE6_ ___Pg1PRESETFLASHOR7 8 9MEMORY EDIT CHASE4 5 6PAGE ASSIGN FILE1 2 3BUILD CLEAR STACK0ASSIGNFLASHEXIT SETUP RECORDORPAGE ASSIGN FILE1 2 3BUILD CLEAR STACK0EXIT SETUP RECORDPress Exitif onlyenteringa labelx x x xx x x x▼9C Labelling a Page60 <strong>Event</strong> V3 <strong>Manual</strong>www.sxsevents.co.uk
ent production courtesy Phone: of and Audio-Visual 0870 080 2342 Serviceswww.sxsevents.co.ukemail: enquiries@sxsevents.co.uk© <strong>Jands</strong> Electronics July 199510.00 AssignIf you have been recording using the menu system, you probably have recorded alist of Memory and Chase numbers but they may not be on the Assign Masters. Theymight not even be in any kind of numeric order. To put them onto the Assign Mastersyou will need to use the <strong>Event</strong>’s Assign & File menus.E n t r y doesnot exist.R E C t o cre ate or EXIT▲ 10A menu screenAssigning is very easy and involves the following steps:☞Diagram 10A1. Use the Assign menu to select the Memory, Chase or start of a Stack.2. Press the Flash button below the Assign fader you want to control that item.NOTE: Only recorded Memories/Chases/Stacks can be assigned to an Assign fader. Ifthe selected item has not been recorded the console will give the option to recordthe Memory/Chase/Stack or Exit (see screen display diagram on the left side).www.sxsevents.co.uk<strong>Event</strong> V3 <strong>Manual</strong> 61
ent production courtesy Phone: of and Audio-Visual 0870 080 2342 ServicesManaging Memories & Chaseswww.sxsevents.co.ukemail: enquiries@sxsevents.co.uk10.10Assign Memory☞1234Diagram 10BPress the Assign button.Press the Memory button to open the Assign Memory menu.Use the (On)/ (Off) button or keypad to enter a Memory number.Press the Flash button beneath the Assign fader to be used to control thisMemory.Once the flash button has been pressed, the Assign menu is closed and you will seethe Assigned Memory has replaced whatever was previously controlled by theAssign Master.62 <strong>Event</strong> V3 <strong>Manual</strong>www.sxsevents.co.uk
ent production courtesy Phone: of and Audio-Visual 0870 080 2342 Serviceswww.sxsevents.co.ukemail: enquiries@sxsevents.co.uk© <strong>Jands</strong> Electronics July 1995[STANDARD SCREEN]END4ASSIGNFLASH27 8 9MEMORY EDIT CHASE4 5 6PAGE ASSIGN FILE1 2 3BUILD CLEAR STACK0A s gC h n s e37 8 9C S: ____1 C 1 P rC H (MEMORY EDIT CHASE4 5 6PAGE ASSIGN FILE1 2 3BUILD CLEAR STACK0EXIT SETUP RECORDORCHS:Cxxx____Cxx xButtonE e x s i s ADDt c ancels)EXITSETUPRECORDSTART7MEMORY8EDIT9CHASE4 5 6PAGE ASSIGN FILE1 2 3BUILD CLEAR STACK0EXIT SETUP RECORDAsgn1SelectMe m,Edit,ChaseorStack( Exi t cancels)▼10B Assign Memorywww.sxsevents.co.uk<strong>Event</strong> V3 <strong>Manual</strong> 63
ent production courtesy Phone: of and Audio-Visual 0870 080 2342 ServicesManaging Memories & Chaseswww.sxsevents.co.ukemail: enquiries@sxsevents.co.uk10.20 Assign Chase☞1234Diagram 10CPress the Assign button.Press the Chase button to open the Assign Chase menu.Use the (On)/ (Off) button or keypad to enter a Chase number.Press the Flash button beneath the Assign fader to be used to control thisChase.Once the Flash button has been pressed, the Assign menu is closed and you will seethe Assigned Chase has replaced whatever was previously controlled by the AssignMaster.64 <strong>Event</strong> V3 <strong>Manual</strong>www.sxsevents.co.uk
ent production courtesy Phone: of and Audio-Visual 0870 080 2342 Serviceswww.sxsevents.co.ukemail: enquiries@sxsevents.co.uk© <strong>Jands</strong> Electronics July 1995[STANDARD SCREEN]END4ASSIGNFLASH7 8 9MEMORY EDIT CHASE4 5 63PAGE ASSIGN FILE1 2 3BUILD CLEAR STACK0EXIT SETUP RECORDORC H S :C x x x____Cxx x2789CHASEMEMORY EDIT4 5 6PAGE ASSIGN FILE1 2 3BUILD CLEAR STACKA s gC h n s eC S: ____1 C 1 P rC H( E e x s i s tADDButtonc ancels)0EXITSETUPRECORDSTART7MEMORY8EDIT9CHASE4 5 6PAGE ASSIGN FILE1 2 3BUILD CLEAR STACK0EXIT SETUP RECORDAsgnSelectS a M ec k m , Edit, Chase or t ( Ex i t c an cel s)110C Assign Chasewww.sxsevents.co.uk▼<strong>Event</strong> V3 <strong>Manual</strong> 65
ent production courtesy Phone: of and Audio-Visual 0870 080 2342 ServicesManaging Memories & Chaseswww.sxsevents.co.ukemail: enquiries@sxsevents.co.uk10.30Assign Stack☞Diagram 10DWhen a Stack is assigned it uses two Assign faders. The possible fader pairs are:1&2, 3&4 ...... 23&<strong>24</strong>.The left hand fader controls the Infade rate while the right hand fader controls theOutfade rate.The Flash buttons beneath these faders become GO & BACK buttons.The LED below the Flash buttons illuminates.123Press the Assign button.Press the Stack button to open the Assign Stack menu.Enter the first Memory / Chase number of the Stack.NOTE: This does not have to be the lowest number in the Stack, just the first number youwant to use.4 Press the Flash button beneath the Assign fader to be used to control thisStack.NOTE: Two faders are required, and as such the console automatically sets the adjacentfader.Once the Flash button has been pressed, the Assign menu is closed and you will seethe Assigned Stack has replaced whatever was previously controlled by the AssignMasters.10.40Special Feature - Assign EditIf you are used to working with theatrical consoles you may want to recordMemories using the menu system to enter Channel - Thru - At values. <strong>Event</strong> allowsthis but unless the Memory is already recorded you will not be able to put thememory on an Assign fader and thus be able to see what you are doing.To get around this problem it is possible to assign the edit output to a fader:• Press the Assign button followed by the Edit button.• Press the Flash button beneath the Assign Fader to be used to control the EditoutputOnce the Flash button has been pressed, the Assign menu is closed and you will seethe Edit output has replaced whatever was previously controlled by the AssignMaster.66 <strong>Event</strong> V3 <strong>Manual</strong>www.sxsevents.co.uk
ent production courtesy Phone: of and Audio-Visual 0870 080 2342 Serviceswww.sxsevents.co.ukemail: enquiries@sxsevents.co.uk© <strong>Jands</strong> Electronics July 1995[STANDARD SCREEN]END4ASSIGNFLASH7 8MEMORY EDIT4 5PAGE ASSIGN1 2BUILD CLEAR09CHASE6FILE3STACKEXIT SETUP RECORD7 8 9MEMORY EDIT CHASE4 5 6PAGE ASSIGN FILE1 2 3BUILD CLEAR STACK0EXIT SETUP RECORDOR2A s gn S t ck31ST: ____Mxxx Mxx x1 Tton10: ____M 1 0 P rBu t( E e x s i s ADDM S t c a nc e l s )START7MEMORY8EDIT9CHASE4 5 6PAGE ASSIGN FILE1 2 3BUILD CLEAR STACK0EXIT SETUP RECORDAsgn1SelectMe m,Edit,ChaseorStack( Exi t cancels)10D Assign Stackwww.sxsevents.co.uk▼<strong>Event</strong> V3 <strong>Manual</strong> 67
ent production courtesy Phone: of and Audio-Visual 0870 080 2342 ServicesManaging Memories & Chaseswww.sxsevents.co.ukemail: enquiries@sxsevents.co.uk11.00 FilesThe previous section described how to assign Memories, Chases and Stacks to theAssign faders. However, assigning items one at a time is slow and after you haveset up the faders for a particular song or part of the show you will want to save thosesettings for easy recall later.Files are just like Pages except that, while the makeup of a Page is factory set, aFile can contain any combination of Memories, Chases and Stacks.The steps involved in saving and loading Files are described below.11.10Saving a File☞Diagram 11A + 11CEnsure that the Assign Masters are loaded with Memories, Chases and Stacks asyou require.1234Press the File button.Use the keypad or (On)/ (Off) buttons to enter a File number (0 - 25).Use the arrow buttons to move the cursor to the SAVE field.Press the ON (+) button to save the file.11.20Loading a File☞Diagram 11B1 Press the File button.2 Use the keypad or ON (+)/OFF (-) buttons to enter a File number (0 - 25).3 Use the arrow buttons to move the cursor to the LOAD field.4 Press the (On) button.The Assign Masters are loaded with the Memories, Chases and Stacks that werepreviously saved in the File.TIP:If Freeze is on, any Assign faders that were above zero% when the File waschanged will continue to control the old Memory / Chase until the faders arereturned to zero, at which time they will join the new File.68 <strong>Event</strong> V3 <strong>Manual</strong>www.sxsevents.co.uk
ent production courtesy Phone: of and Audio-Visual 0870 080 2342 Serviceswww.sxsevents.co.ukemail: enquiries@sxsevents.co.uk© <strong>Jands</strong> Electronics July 1995[STANDARD SCREEN]END4See diagram 11C (11.30 Labelling a File)3S AfVfEO7 8 9MEMORY EDIT CHASE4 5 6PAGE ASSIGN FILE1 2 3BUILD CLEAR STACK7MEMORY EDIT4 5PAGE8ASSIGN9CHASE6FILEF I LE 1____Load SaveF11 OffOff0EXIT SETUP RECORDOR2F I L EF x x x1 2 3STARTBUILD CLEAR STACK0EXIT SETUP RECORD1▼11A Saving a File[STANDARD SCREEN]END4See diagram 11C (11.30 Labelling a File)3LOfAfDOSTART789MEMORY EDIT CHASE4 5 6PAGE ASSIGN FILE1 2 3BUILD CLEAR STACK0EXIT SETUP RECORDF I LE1____LoadSaveF11 OffOff111B Loading a Filewww.sxsevents.co.uk▼7 8 9MEMORY EDIT CHASE4 5 6PAGE ASSIGN FILE1 2 3BUILD CLEAR STACK0EXIT SETUP RECORDOR2F Ix L EF x x<strong>Event</strong> V3 <strong>Manual</strong> 69
☞ent production courtesy Phone: of and Audio-Visual 0870 080 2342 ServicesManaging Memories & Chaseswww.sxsevents.co.ukemail: enquiries@sxsevents.co.uk11.30 Labelling a FileDiagram 11CFiles can be labelled to allow easy identification of their contents. To Label a File:1. Move the cursor to the Label field (to the right of the Files number field).2. Type a label of up to eight characters using the Flash buttons.3. Press the Exit button if no more Files are to be labelled.789MEMORY EDIT4 5CHASE6_ ___F l 1PRESETFLASHOR7 8 9MEMORY EDIT CHASE4 5 6PAGE ASSIGN FILE1 2 3BUILD CLEAR STACK0ASSIGNFLASHEXIT SETUP RECORDORPAGE ASSIGN1 2BUILDEXITPress Exitif onlyenteringa labelx x x xx x x xCLEAR0SETUPFILE3STACKRECORD▼11C Labelling a File70 <strong>Event</strong> V3 <strong>Manual</strong>www.sxsevents.co.uk
ent production courtesy Phone: of and Audio-Visual 0870 080 2342 Serviceswww.sxsevents.co.ukemail: enquiries@sxsevents.co.uk© <strong>Jands</strong> Electronics July 199512.00 StacksSection 10 explained how to control Memories and Chases using the Assign faders.Many shows are run this way, with the operator manually fading Memories andChases in and out to suit whatever is happening on stage.An alternate approach, commonly used in the theatre, is to automate this process bysetting infade and outfade times for each Memory and Chase and then simplypressing a Go button which fades in a new lighting ‘look’, and at the same time fadesout whatever lights were on previously.The <strong>Event</strong> offers this theatrical method through the use of Stacks. The name comesfrom the idea of a Stack of Memories that can be played back one after another.Sometimes operators plan to use Stacks and record each of the lighting looks theywant to use in order. However, with the <strong>Event</strong> it is not necessary to do this andMemories and Chases can be linked together in any order. However any Memoryor Chase can only be used once in a Stack.Usually the operator instigates the start of each new lighting look by pressing theGo button. However, sometimes it is useful to have several Memories follow eachother at a preset time, fading in and out automatically. Some industrial shows whichrun to an exact schedule are fully programmed this way. The <strong>Event</strong> also includesthis feature.12.10 Control fieldsBoth the Memory and the Chase menus include fields which control how theybehave when used in Stacks:M em : NEXTM 1 0 M 1 1▼Me m:____M 10M 10▼12A Next field12B Infade fieldMe m:____M 10M 10De l aỵ0 : 000INFADEOut fde0:00.0 0:00.0 MoreInfadeOUTFDE0:00.0 0:00.0 Mo r e12.11 NEXT fieldsDiagram 12A☞This field sets which item follows the Memory or Chase. The field is factory set innumeric order, i.e. The NEXT field in Memory 10 is set to Memory 11.12.12 INFADE / OUTFDE (Outfade) fieldsDiagram 12B, 12C☞The INFADE field sets the time the Memory or Chase will take to fade from 0% to100%, i.e. if set to 0:10.5, it will take this Memory or Chase 10.5 seconds to fadeup to full output.The OUTFDE (Outfade) field sets the time the Memory or Chase will take to fadefrom 100% to 0%, i.e. if set to 0:08.2, it will take this Memory or Chase 8.2 secondsto fade out completely.▼12C Outfade fieldwww.sxsevents.co.uk<strong>Event</strong> V3 <strong>Manual</strong> 71
ent production courtesy Phone: of and Audio-Visual 0870 080 2342 ServicesManaging Memories & Chaseswww.sxsevents.co.ukemail: enquiries@sxsevents.co.ukMem: Next DELAYM 1 0 M 110 : 00.0▼12D Delay field12.13 Delay field☞Diagram 12DThis field sets the time between the start of this Memory or Chase and the start ofthe Infade of the Memory or Chase set in the NEXT field, i.e. if set to 0:10.5 thenext Memory or Chase will begin to fade in 10.5 seconds after this Memory startedto fade in.NOTE: In the Memory menu the Infade and Outfade fields can be seen when the menu isopened and the NEXT field is revealed by moving the cursor to the extreme right handside of the menu.In the Chase menu the Infade, Outfade and NEXT fields are revealed by moving thecursor to the extreme right hand side of the menu (to where it shows MORE).12.20Changing the NEXT FieldThe NEXT field is used to determine the playback order of Memories and Chasesin a crossfade Stack. This facility can also be used to insert a Chase or Memory intoa Stack sequence.12.21 Changing the NEXT Field - Memory☞12345Diagram 12EPress the Memory button.Enter the required Memory (0 - 999) using the numeric keypad oralternatively use the (On)/ (Off) buttons to change the displayedMemory number.Move the cursor to the MORE field and keep moving the cursor to the NEXTfield after the MORE window is opened.Enter the number of the Memory which is to follow this Memory.Press the Exit button, if no more Memories are to be set.NOTE: Do NOT press the Record button if only entering or changing the NEXT field.TIP:If in the Memory menu you want to change the setting from a Memory numberto a Chase, use the left arrow button to move the cursor over the M and then pressthe (On) button to change the M to a C, (this can also be achieved by pressingthe Flash button marked C).72 <strong>Event</strong> V3 <strong>Manual</strong>www.sxsevents.co.uk
ent production courtesy Phone: of and Audio-Visual 0870 080 2342 Serviceswww.sxsevents.co.ukemail: enquiries@sxsevents.co.uk© <strong>Jands</strong> Electronics July 1995[STANDARD SCREEN]END789MEMORY EDIT4 5CHASE65PAGE ASSIGN FILE1 2 3BUILD CLEAR STACK0EXIT SETUP RECORD7 8 9MEMORY EDIT CHASE4 5 6PAGE ASSIGN FILE1 2 3BUILD CLEAR STACK0EXIT SETUP RECORDORNEXTMxxx4See diagram 7C (7.20 Labelling a Memory)3M em :M 1 0NEXTM 11Del ay0 : 00. 07 8 9MEMORY EDIT CHASE4 5 6PAGE ASSIGN FILE1 2 3BUILD CLEAR STACKSTART17 8 9MEMORY EDIT CHASE4 5 6PAGE ASSIGN FILE1 2 3BUILD CLEAR STACK0EXIT SETUP RECORDME M:M 1 0_M___10M em : NEXTM 1 0 M 1 1In 0 0f adeOut fde: 0 0 0 : 000 Mo r eDe l aỵ0 : 0000EXIT SETUP RECORDOR2MEM:M x x x12E Changing the NEXT Field - Memorywww.sxsevents.co.uk▼<strong>Event</strong> V3 <strong>Manual</strong> 73
ent production courtesy Phone: of and Audio-Visual 0870 080 2342 ServicesManaging Memories & Chaseswww.sxsevents.co.ukemail: enquiries@sxsevents.co.uk12.22 Changing the NEXT Field - Chase☞12345Diagram 12FPress the Chase button.Enter the required Chase number (0 - 999) using the numeric keypad oralternatively use the (On)/ (Off) buttons to change the displayed Chasenumber.Move the cursor to the MORE field and keep moving the cursor to the NEXTfield after the MORE window of Chase opens.Enter the number of the Chase which is to follow this Chase.Press the Exit button if no more Chases are to be set.NOTE: Do NOT press the Record button if only entering or changing the NEXT field.TIP:If in the Chase menu you want to change the setting from a Chase number to aMemory, use the left arrow button to move the cursor over the C and then pressthe (On) button to change the C to a M, (this can also be achieved by pressingthe flash button marked M).74 <strong>Event</strong> V3 <strong>Manual</strong>www.sxsevents.co.uk
ent production courtesy Phone: of and Audio-Visual 0870 080 2342 Serviceswww.sxsevents.co.ukemail: enquiries@sxsevents.co.uk© <strong>Jands</strong> Electronics July 1995[STANDARD SCREEN]END789MEMORY EDIT4 5CHASE65PAGE ASSIGN FILE1 2 3BUILD CLEAR STACK0EXIT SETUP RECORDNEXTC 27 8 9MEMORY EDIT CHASE4 5 6PAGE ASSIGN FILE1 2 3BUILD CLEAR STACK0EXIT SETUP RECORDORNEXTC xxx4See diagram 8B (8.20 Labelling a Chase)Chs: INFADEC 1 0:00. 0Outfde0 : 00.0NexCt2Delay0 : 00.037 8 9MEMORY EDIT CHASE4 5 6PAGE ASSIGN FILE1 2 3BUILD CLEAR STACK17 8 9MEMORY EDIT CHASE4 5 6PAGE ASSIGN FILE1 2 3CH S:____StOf DrBPmC 1 C 1 1 0 > > 120X0Chs : IN FAḌEOu t f e Next De l aỵC 1 0 : 000 0 : 0 0 ḍ0 C 2 0 : 000/ \00 More0EXIT SETUP RECORDOR2C HxSx C:xBUILDCLEARSTACKSTARTEXIT0SETUPRECORD12F Changing the NEXT Field - Chasewww.sxsevents.co.uk▼<strong>Event</strong> V3 <strong>Manual</strong> 75
ent production courtesy Phone: of and Audio-Visual 0870 080 2342 ServicesManaging Memories & Chaseswww.sxsevents.co.ukemail: enquiries@sxsevents.co.uk12.30 Infade/Outfade - Adding Fade TimesFade times can be added to Memories and Chases so that they can then be playedback as part of a Stack with automatic timed crossfades.12.31 Adding Fade Times to a Memory☞Diagram 12G1 Press the Memory button.2 Enter the required Memory number (0 - 999) using the numeric keypad oralternatively use the (On)/ (Off) button to change the displayed number.3 Use the arrow button to move the cursor to the INFADE field.4 Enter an Infade time of up to 99 minutes 59 seconds using the numerickeypad or alternatively use the (On)/ (Off) buttons to change theexisting value.5 Use the arrow button to move the cursor to the OUTFDE (Outfade) field.6 Enter an Outfade time of up to 99 minutes 59 seconds using the numerickeypad or alternatively use the (On)/ (Off) buttons to change theexisting value.7 Press the Exit button if no more Memories are to be set.NOTE: Do NOT press the Record button if only entering or changing the fade times.TIP:Set a default fade time in Setup:Pref:Time76 <strong>Event</strong> V3 <strong>Manual</strong>www.sxsevents.co.uk
ent production courtesy Phone: of and Audio-Visual 0870 080 2342 Serviceswww.sxsevents.co.ukemail: enquiries@sxsevents.co.uk© <strong>Jands</strong> Electronics July 1995[STANDARD SCREEN]END789MEMORY4 5EDIT6CHASE7PAGE ASSIGN FILE1 2 3BUILD CLEAR STACK0EXIT SETUP RECORD7 8 9MEMORY EDIT CHASE4 5 6PAGE ASSIGN FILE1 2 3BUILD CLEAR STACKOU T0 : 0FḌE0 00EXIT SETUP RECORDOROU Tx : xFḌEx x567 8 9MEMORY EDIT CHASE4 5 6PAGE ASSIGN FILE1 2 3See diagram 7C (7.20 Labelling a Memory)3IN 0 0F AḌE: 0 0BUILD CLEAR STACK0EXIT SETUP RECORDORIN x F AḌE: x x x47 8 9MEMORY EDIT CHASE4 5 6PAGE ASSIGN FILE1 2 3BUILD CLEAR STACK17MEMORY8EDIT9CHASE4 5 6PAGE ASSIGN FILE1 2 3ME M:M 10_M___10M em : NEXTM 1 0 M 1 1InfadeOut fde0:00 0 0:000 Mo r eDe l aỵ0 : 0000EXIT SETUP RECORDOR2MExMx M:xBUILD CLEAR STACKSTART0EXIT SETUP RECORD12G Adding Fade Times to a Memorywww.sxsevents.co.uk▼<strong>Event</strong> V3 <strong>Manual</strong> 77
ent production courtesy Phone: of and Audio-Visual 0870 080 2342 ServicesManaging Memories & Chaseswww.sxsevents.co.ukemail: enquiries@sxsevents.co.uk12.32 Adding Fade Times to a Chase☞1234567Diagram 12HPress the Chase button.Enter the required Chase number (0 - 999) using the numeric keypad or alternativelyuse the (On)/ (Off) button to change the displayed number.Move the cursor to the MORE field, and keep moving the cursor to theINFADE field after the MORE window of Chase opens.Enter an Infade time of up to 99 minutes 59 seconds using the numerickeypad or alternatively use the (On)/ (Off) button to change the existingvalue.Use the arrow buttons to move the cursor to the OUTFDE (Outfade) field.Enter an Outfade time of up to 99 minutes 59 seconds using the numerickeypad or alternatively use the (On)/ (Off) button to change the existingvalue.Press the Exit button if no more Chases are to be set.NOTE: Do NOT press the Record button if only entering or changing the fade times.78 <strong>Event</strong> V3 <strong>Manual</strong>www.sxsevents.co.uk
ent production courtesy Phone: of and Audio-Visual 0870 080 2342 Serviceswww.sxsevents.co.ukemail: enquiries@sxsevents.co.uk© <strong>Jands</strong> Electronics July 1995[STANDARD SCREEN]END789MEMORY4 5EDIT6CHASE7PAGE ASSIGN FILE1 2 3BUILD CLEAR STACK0EXIT SETUP RECORD7 8 9MEMORY EDIT CHASE4 5 6PAGE ASSIGN FILE1 2 3BUILD CLEAR STACKOU T0:0FḌE0 00EXIT SETUP RECORDOROU Tx:xFḌEx x567 8 9MEMORY EDIT CHASE4 5 6PAGE ASSIGN FILE1 2 3BUILD CLEAR STACK0EXIT SETUP RECORDORIN x F AḌE: xxx4See diagram 8B (8.20 Labelling a Chase)3Chs: INFADEC 1 0:00. 0Outfde0 : 00.0NexCt2Delay0 : 00.07 8 9MEMORY EDIT CHASE4 5 6PAGE ASSIGN FILE1 2 3BUILD CLEAR STACK1START7MEMORY8EDIT9CHASE4 5 6PAGE ASSIGN FILE1 2 3BUILD CLEAR STACK0EXIT SETUP RECORDCH S:____StOf DrBPmC 1 C 1 1 0 > > 120Chs: INFADEC 1 0:00. 0Outfde0 : 00.0NexCX0/ \00 Moret Delay2 0 : 00.00EXIT SETUP RECORDOR2C HxSx C:x12H Adding Fade Times to a Chasewww.sxsevents.co.uk▼<strong>Event</strong> V3 <strong>Manual</strong> 79
ent production courtesy Phone: of and Audio-Visual 0870 080 2342 ServicesManaging Memories & Chaseswww.sxsevents.co.ukemail: enquiries@sxsevents.co.uk12.40 Adding Delay TimeThis function can be used to automate industrial shows by setting delay times forall Memories used in the show.Complex chase patterns can be created by setting delay times and using the Nextfield to loop Memories (and Chases) back on themselves12.41 Adding Delay Time to a Memory☞ Diagram 12I1 Press the Memory button.2 Enter the required Memory number (0-999) using the numeric keypad oralternatively use the (On)/ (Off) button to change the displayedMemory number.3 Move the cursor to the MORE field, and keep moving the cursor to theDELAY field after the MORE window of Chase opens.4 Enter a Delay time of up to 99 minutes 59 seconds using the numeric keypador alternatively use the (On)/ (Off) button to change the existing value.5 Press the Exit button to close the window and return to the standard window.(To use the Assign Masters to control a Stack see Playback Section 13.00)80 <strong>Event</strong> V3 <strong>Manual</strong>www.sxsevents.co.uk
ent production courtesy Phone: of and Audio-Visual 0870 080 2342 Serviceswww.sxsevents.co.ukemail: enquiries@sxsevents.co.uk© <strong>Jands</strong> Electronics July 1995[STANDARD SCREEN]END789MEMORY EDIT4 5CHASE65PAGE ASSIGN FILE1 2 3BUILD CLEAR STACK0EXIT SETUP RECORD7 8 9MEMORY EDIT CHASE4 5 6PAGE ASSIGN FILE1 2 3BUILD CLEAR STACKDE L0 : 0AỴ0 00EXIT SETUP RECORDORDE LAỴx : x 6xx4See diagram 7C (7.20 Labelling a Memory)M em :M 1 0NEXTM 11Del ay0 : 00. 037 8 9MEMORY EDIT CHASE4 5 6PAGE ASSIGN FILE1 2 3BUILD CLEAR STACK17MEMORY8EDIT9CHASE4 5 6PAGE ASSIGN FILE1 2 3BUILD CLEAR STACKME M:M 10_M___10M em : NEXTM 1 0 M 1 1InfadeOut fde0:00 0 0:000 Mo r eDe l aỵ0 : 0000EXIT SETUP RECORDOR2MExMx M:xSTART0EXIT SETUP RECORD12I Adding Delay Time to a Memorywww.sxsevents.co.uk▼<strong>Event</strong> V3 <strong>Manual</strong> 81
ent production courtesy Phone: of and Audio-Visual 0870 080 2342 ServicesManaging Memories & Chaseswww.sxsevents.co.ukemail: enquiries@sxsevents.co.uk12.42 Adding Delay Time to a Chase123☞4Diagram 12JPress the Chase button.Enter the required Chase number (0-999) using the numeric keypad or alternativelyuse the (On)/ (Off) button to change the displayed Memorynumber.Move the cursor to the MORE field, and keep moving the cursor to theDELAY field after the MORE window of Chase opens.Enter a Delay time of up to 99 minutes 59 seconds using the numeric keypador alternatively use the (On)/ (Off) button to change the existing value.5Press the Exit button to close the window and return to the standard window.(To use the Assign Masters to control a Stack see Section 13.00)82 <strong>Event</strong> V3 <strong>Manual</strong>www.sxsevents.co.uk
ent production courtesy Phone: of and Audio-Visual 0870 080 2342 Serviceswww.sxsevents.co.ukemail: enquiries@sxsevents.co.uk© <strong>Jands</strong> Electronics July 1995STARTEND[STANDARD SCREEN]1 4 5 6PAGE ASSIGN FILEChs : IN FAḌEOu t f e Next De l aỵ1 2 3C 1 0 : 000 0 : 0 0 ḍ 0 C 2 0 : 00027 8 9MEMORY EDIT CHASE4 5 6PAGE ASSIGN FILE1 2 3BUILD CLEAR STACK05EXIT SETUP RECORD7 8 9MEMORY EDIT CHASE4 5 6PAGE ASSIGN FILE1 2 3BUILD CLEAR STACK0EXIT SETUP RECORDDE LAỴDE LAỴOR0 : 0 0 0x : x 6xx4See diagram 8B (8.20 Labelling a Chase)Chs: INFADEOutfdeNex tC 1 0:00. 0 0 : 00.0 C 237 8 9MEMORY EDIT CHASE4 5 6PAGE ASSIGN FILE1 2 3BUILD CLEAR STACK0EXIT SETUP RECORDCH S:____StOf DrBPmX / \C H S :7 8 9ORC 1 C 1 1 0 > > 1200 00 MoreC x x xCHASEMEMORY EDITBUILDEXITCLEAR0SETUPSTACKRECORDDelay0 : 00.012J Adding Delay Time to a Chasewww.sxsevents.co.uk▼<strong>Event</strong> V3 <strong>Manual</strong> 83
ent production courtesy Phone: of and Audio-Visual 0870 080 2342 ServicesControl Functions - Playbackwww.sxsevents.co.ukemail: enquiries@sxsevents.co.uk84 <strong>Event</strong> V3 <strong>Manual</strong>www.sxsevents.co.uk
ent production courtesy Phone: of and Audio-Visual 0870 080 2342 Serviceswww.sxsevents.co.ukemail: enquiries@sxsevents.co.uk© <strong>Jands</strong> Electronics July 1995ControlFunctions- Playbackwww.sxsevents.co.uk<strong>Event</strong> V3 <strong>Manual</strong> 85
ent production courtesy Phone: of and Audio-Visual 0870 080 2342 ServicesControl Functions - Playbackwww.sxsevents.co.ukemail: enquiries@sxsevents.co.uk13.00 PlaybackThe <strong>Event</strong> offers a combination of manual and automated playback controls whichare both powerful and easy to use:- Two banks of Presets of channel faders provide direct control of each channel.- The Assign Masters control individual Memories and Chases.- A pair of Assign faders can control a Stack containing any number ofMemories and Chases.- Flash buttons on each channel and Assign Master.- The Hold/Smaster fader can be used for any one of four functions: AssignMaster, Snapshot, Assign Submaster or manual Crossfader.- Overall controls are provided for: Preset 1 & 2, Flash buttons, DBO, Chase rateand Grand Master.▼1313A Preset faders / Flash buttons13.10 Controls13.11 Preset FadersDiagram 13A 1There are two rows of Presets faders on the <strong>Event</strong>. The top row of faders is Preset1 and the bottom row is Preset 2. These faders can be used to smoothly fade a lightto the desired level. The output level produced by the preset faders is dependent onthe level of the Grand Master and the P1 (or P2) Master fader.Example:• Bring the Grand Master and P1 Master faders to 10 (100%).• Move the Channel 1 Preset fader to 100% and you should see the lightsconnected to that channel fade up to full level.• Now fade up Channel 2 to 5 (50%) and check that the lights connected toChannel 2 are at about 50% level.• Finally fade the P1 Master down and up to see how it scales the ChannelPreset faders.13.12 Assign MastersDiagram 13B 22The Assign Master faders provide a powerful array of features. Underneath eachfader is a Flash button with LED and above the fader is a two line, four characterLCD window. These faders can be used to:* To control a single Memory* To control a single Chase* To control a Stack made up of Memories and / or Chases313.13 Flash ButtonsDiagram 13A, 13B 3▼13B Assign faders / Flash buttons86 <strong>Event</strong> V3 <strong>Manual</strong>The Flash buttons operate in three ways, depending on the setting of the Add / Solomaster switch:* Add : The Memory goes to the level set by the Add / Solo Master.www.sxsevents.co.uk
ent production courtesy Phone: of and Audio-Visual 0870 080 2342 Serviceswww.sxsevents.co.ukemail: enquiries@sxsevents.co.uk© <strong>Jands</strong> Electronics July 1995* Solo: The Memory goes to the level set by the Add / Solo Master and at the sametime blacks out the other console controls.* Latch: Press once to switch the Memory on at the level set by the Add / SoloMaster. Press again to switch the Memory off.TIP:Timed FadesIf you have set an Infade time, the Memory will fade in over that time wheneverthe Flash button is pressed. Likewise, if you have set an Outfade time, theMemory will fade out over that time when the Flash button is released.13.14 LCD WindowsDiagram 13CThe windows above the Assign Master faders show the Memory number or name(to add a name at any time use the Memory menu see Section 7.00).▼13C LCD displayTIP:If you have given a Memory a name and want to know what number it is, hold downthe Record button. The LCD will then change to show the number of each item onthe display.13.20 Controlling MemoriesOnce a Memory has been assigned to a fader or loaded as part of a Page or File itis ready for use.13.21 Assign MastersDiagram 13BDiagram 13C2The Assign Master fader is used to scale the intensity of the Memory from 0% to100%.13.22 LCD WindowsThe Memory number or name, if one is used, will appear in the LCD window abovethe fader (to add a name at any time use the Memory menu see Section 7.00).TIP:If you have given a Memory a name and want to know what it is, hold downthe Record button. The LCD will then change to show the label of each item onthe display.13.30 Controlling ChasesChases are controlled in much the same way as Memories.13.31 Assign MastersDiagram 13B 2The Assign Master fader is used to scale the intensity of the Chase from 0% to 100%.www.sxsevents.co.uk<strong>Event</strong> V3 <strong>Manual</strong> 87
ent production courtesy Phone: of and Audio-Visual 0870 080 2342 ServicesControl Functions - Playbackwww.sxsevents.co.ukemail: enquiries@sxsevents.co.uk13.32 Flash ButtonsDiagram 13A,13B 3The Flash buttons operate in three ways, depending on the setting of the Add / Solomaster switch:* Add : The Chase goes to the level set by the Add / Solo Master* Solo: The Chase goes to the level set by the Add / Solo Master and at the sametime blacks out the other console controls.* Latch: Press once to switch the Chase on at the level set by the Add / SoloMaster. Press again to switch the Chase off.TIP:The Flash button can be further configured through the Setup menu to provideeither normal operation where the Chase runs as long as the button is held down,or single operation where if the button is pressed, the Chase runs from the first tothe last Step and then stops.13.33 To Change the Operation of the Chase Flash Button1. Press the Setup button to open the Setup Menu.2. Move the cursor to the CTRL (Controls) field and press the (On) buttonto open the Set Control menu.3. Move the cursor to the CHS field and press the (On) button to togglebetween NORM (Normal) and SNGL (Single).4. Press Exit to close this menu (press Exit several times to close all menus).TIP: Timed FadesIf you have set an Infade time, the Chase will fade in over that time wheneverthe Flash button is pressed. Likewise, if you have set an Outfade time, theChase will fade out over that time when the Flash button is released.13.34 LCD WindowDiagram 13CThe LCD window above the fader shows the Chase number or name if one isprovided. (To add a name at any time use the Chase menu see Section 8.00).TIP: If you have given a Chase a name and want to know what number it is, hold downthe Record button. The LCD will then change to show the number of each item onthe display.If a Chase is running the current step is also shown when you hold down the recordbutton.13.40 Controlling StacksStacks require more time and pre-show planning to set up but offer the advantageof dipless crossfading between Memories and Chases. A complete show could berun from one Stack, or a number of Stacks could be used during playback to controlspecific segments of a show.The <strong>Event</strong> allows you to use several Stacks simultaneously.88 <strong>Event</strong> V3 <strong>Manual</strong>To control a Stack you have to use two adjacent Assign Masters. To get the Stackonto these Masters you can use two different methods. The best method to use willdepend on the type of show that you are running, as explained below:www.sxsevents.co.uk
ent production courtesy Phone: of and Audio-Visual 0870 080 2342 Serviceswww.sxsevents.co.ukemail: enquiries@sxsevents.co.uk© <strong>Jands</strong> Electronics July 199513.41 METHOD 1: Using the Assign Stack MenuThis method is best if you are only using a Stack occasionally or for a specific partof a show (assigning a Stack is explained in Section 10.30).1S T :M 10▼_M___10F11aḏe1r s213D Stack menu screen2Load &Of f1Fix13.42 METHOD 2: Using the Stack Menu/Assign Faders as Stack ControlsDiagram 13DIf you want to have a Stack available all the time it is best to use the Stack menu todedicate two faders to Stack playback. However, this does not mean that thesefaders can only playback memories in a specific order. It is possible to change theplayback order, skip unwanted items and even take manual control of the memoriesin the Stack.Press Stack to open the Stack Menu. The Stack menu contains four fields:* 1st:The first Memory / ChaseThe 1st field sets which Memory or Chase will become the first cue.TIP:* Label: The Label field uses both lines of the LCDThe label of the Memory or Chase selected as the 1st cue is shown but can notbe changed in this menu.* Faders: The Assign FadersThe Assign Faders field sets which pair of Assign Masters will be used to controlthe Stack. Possible settings are 1&2, 3&4, ..... 23&<strong>24</strong>.* Load & Fix:This field turns the Stack On or Off. When this field is changed to On (or Off),the menu is automatically closed.13.50 Playback of a StackNo matter which method you’ve used to set up a Stack, playback is controlled thesame way. But before going any further there a few features of the Stack system thatshould be understood:* In a Stack, Memories and Chases follow each other according to the order setin the Next field of the Memory and Chase menus.* If no Next fields have been changed, Memory 10 will be followed by Memory11 and so on to Memory 999. Memory 999 is followed by Chase 1 and thenChase 2 and so on.* If a Memory or Chase number has not been used it will be ignored and the nextrecorded item, if any, will be the next Memory.* Since Memories and Chases can be used together in a Stack they are sometimesreferred to collectively as Cues.13.51 Stack ControlsDiagram 13E 1If a Memory number is showing and you wish to use a Chase as the firstCue you can type a C (Add / Solo flash button 3) and then a number.When a Stack is turned on, the LEDs underneath the flash buttons turn on. Theseare marked Go and Back and provide an indication that a Stack is running.▼13E Assign faders / Flash buttonswww.sxsevents.co.uk<strong>Event</strong> V3 <strong>Manual</strong> 89
ent production courtesy Phone: of and Audio-Visual 0870 080 2342 ServicesControl Functions - Playbackwww.sxsevents.co.ukemail: enquiries@sxsevents.co.uk13.52 Assign Master FadersDiagram 13E 2The Assign Master faders controlling a Stack do two things:1. During a crossfade they act as fade override controls. The left hand fadercontrols the Infade rate of the cue fading in and the right hand fader controlsthe Outfade rate of the cue fading out.2. When the crossfade is completed the left hand fader becomes a level controlscaling the level of the current Memory or Chase.Normally the faders are left up (at 100%). When they are in this position they do notaffect the timing of the crossfade (to take manual control of the crossfade seeSection 13.70).13.53 Go / Back ButtonsDiagram 13F▼13F Go/Back ButtonsThe Flash button below the left hand fader is the GO button for a Stack. Pressingthe GO button initiates the infade of the next Cue and the outfade of the current(stage) Cue.The Flash button below the right hand fader is the BACK button for a Stack.Pressing the BACK button returns the current (stage) output to the previous Cue.It is only possible to back up one cue.13.54 LCD WindowDiagram 13CWhen a Stack is on, the LCD window shows the current (on stage) Cue label abovethe right hand fader and the next Cue label above the left hand fader. When thestack is first turned on there is no output to stage so the right hand display is blank.NOTE: When a Cue is running the display changes to show the percentage of fadecompleted and the time, in seconds, left to run.7 8 9MEMORY EDIT CHASE4 5 6PAGE ASSIGN FILE1 2 3▼BUILD CLEAR STACK0EXIT SETUP RECORD13G Clear button13.60 Clear Output From a StackDiagram 13GTo clear the output from a Stack:1. Press the Clear button on the function keypad.2. Press the Go button of the Stack to be cleared.Clearing a Stack snaps the current output from the Stack to zero level. However,the Stack is still ON and a new infade can be started by pressing GO.13.70 Taking <strong>Manual</strong> Control of a FadeIt is not unusual to need to take control of a Cue to allow for changes that occur ina live performance. A performer might be late arriving on stage or skip over somepart of the show.90 <strong>Event</strong> V3 <strong>Manual</strong>1. The left hand fader controls the infade. To take manual control of an Infademove the fader to match the elapsed fade percentage. The LCD windowchanges to show MAN: / 20% (or whatever fade percentage has elapsed).www.sxsevents.co.uk
ent production courtesy Phone: of and Audio-Visual 0870 080 2342 Serviceswww.sxsevents.co.ukemail: enquiries@sxsevents.co.uk© <strong>Jands</strong> Electronics July 19952. The fader can now be moved up or down to control the progress of theinfading Cue. If the level is taken to 100% the infade is completed.3. To take manual control from the beginning of the Cue, pull the fader downto zero before pressing the Go button.4. The right hand fader (above the Back button) controls the Outfade. To takemanual control of an Outfade move the fader to match the elapsed fadepercentage. The display changes to show: MAN: / 20% (or whatever fadepercentage has elapsed).5. The fader can now be moved up or down to control the progress of theoutfading Cue(s). If the level is taken to 100% the outfade is complete.NOTE: Leaving the Outfade under manual control means that all subsequent memorieswill come under manual control when the fade percentage reaches the fadersetting. Thus if Memory 2 was taken under control after 50% of the fade time hadelapsed it would stay on at 50%. If the fader was left at this level the next pressof GO would cause Memory 3 to fade to 50% and Memory 2 to fade from 50% to25% (i.e. 50% of 50%).13.71 Taking <strong>Manual</strong> Control When a Fade has completedWhen the Infade of a new Cue and the Outfade of the old Cue are completed, thefader that normally controls the Outfade time (the right hand fader) switches tocontrol the stage level. The fader can then be used to scale the intensity of the currentCue.13.80 Altering the Playback OrderCues normally run in a sequential order or according to the settings in the NEXTfield of each Memory and Chase. However, it is possible to quickly move forwardor backwards in a Stack to run a different Cue.To run a Cue other than the one showing above the Go button:1. Press the Assign button followed by the Memory (or Chase) button.2. Enter the required Memory / Chase number.3. Press the Stack Go button.The required Memory is now ready as the next Memory. Pressing the GO button willinitiate Infade.www.sxsevents.co.uk<strong>Event</strong> V3 <strong>Manual</strong> 91
ent production courtesy Phone: of and Audio-Visual 0870 080 2342 ServicesControl Functions - Playbackwww.sxsevents.co.ukemail: enquiries@sxsevents.co.uk13.90 The SMaster / Hold MasterThe SMaster on the <strong>Event</strong> Plus and the Hold Master on the <strong>Event</strong> are multipurposecontrols which perform a number of functions:* Master: As a Submaster to scale the overall level of the Assign Master faders* Hold: To Hold and control a “snapshot” of the console output* XFade: As a manual Crossfade control* Assign: As an additional Assign Master controlling a Memory or Chase13.91 To Set the Operation of the Hold / SMaster☞123456Diagram 13HPress the Setup button to open the Setup Menu.Move the cursor to the CTRL (Controls) field.Press the (On) button to open the Set Control menu.Move the cursor to the SMAST field.Press the (On) button to toggle between Master / Hold / Xfade / Assign.Press Exit to close this menu (press twice to return to the standard screen).92 <strong>Event</strong> V3 <strong>Manual</strong>www.sxsevents.co.uk
ent production courtesy Phone: of and Audio-Visual 0870 080 2342 Serviceswww.sxsevents.co.ukemail: enquiries@sxsevents.co.uk© <strong>Jands</strong> Electronics July 1995[STANDARD SCREEN]END789MEMORY EDIT4 5CHASE6PAGEASSIGNFILE5SMASTH o l dA s gnX F adeMem/Ch261 2BUILD CLEAR0EXIT SETUP3STACKRECORDSEU PTDes ktoP t chtoCTRLtoU t i ItoP r e ttoMcr dtoSeC t P12trl o r/ d o SMastChs FkeysN m M b omtH o l d Nor m t o3 4T SdSMoAl H7MEMORY EDIT4 5PAGE8ASSIGN9CHASE6FILESEU T PDESK toPtchtoCtItorUtItoiPrteotMctrod2CTRL t o1 23STARTBUILDEXITCLEAR0SETUPSTACKRECORD113H To Set the Operation of the Hold/SMasterwww.sxsevents.co.uk▼<strong>Event</strong> V3 <strong>Manual</strong> 93
ent production courtesy Phone: of and Audio-Visual 0870 080 2342 ServicesControl Functions - Playbackwww.sxsevents.co.ukemail: enquiries@sxsevents.co.uk13.92 SMaster as Assign Faders Master1. Check that the ASSIGN LED is lit.2. The SMaster fader scales the intensity of the Assign Master faders.Example: (Grand Master at 100%)Assign Master 1 includes Channel 1 at 90%, Assign fader 1 is set to 80%and the SMaster is set to 50%. The resultant intensity of the output fromchannel 1 is 36%:0.9 x 0.8 x 0.5 = 0.36 (36%)13.93 SMaster as Hold MasterThe Hold function is used to control the console output while changing Pages or tostore a special look that is used at the end of each song.1. Check that the Hold LED is lit. If the LED in the Sample button is lit, pressthe button to clear it.2. Set up a console output using the Preset (or Assign) faders.3. Press the Sample button. This takes a “snapshot” of the console output andthe LED in the Sample button lights.4. Fade the Preset and Assign faders to 0.5. Grand Master at 100%.6. The SMaster fader can now be used to fade the “snapshot” up and down.13.94 SMaster as <strong>Manual</strong> Crossfade MasterUse manual crossfades to achieve a smooth transition between any Memoriescurrently on the Assign faders1. Check that the SMAST field in the Setup Control menu is set to XFADE.Check that the fader is at zero.2. Press and hold the button above the SMaster fader.3. Press the Flash button beneath any of the Assign faders.4. Release both buttons.5. Move the SMaster fader up to fade in the chosen Memory.6. Repeat steps 2 ~ 4 to chose another Memory.7. Move the SMaster fader down to perform a dipless crossfade between thetwo Memories.94 <strong>Event</strong> V3 <strong>Manual</strong>13.95 SMaster as Memory / Chase ControlUse the SMaster as an extra Assign Master when all other Assign Masters areoccupied.1. Check that the SMAST field in the Setup Control menu is set to MEM /CH.2. Press the Assign button followed by the Memory or Chase button.3. Select a Memory or Chase number.4. Press the button above the SMaster fader.5. The SMaster controls now control that Memory / Chase in the same way asthe Assign faders.www.sxsevents.co.uk
ent production courtesy Phone: of and Audio-Visual 0870 080 2342 Serviceswww.sxsevents.co.ukemail: enquiries@sxsevents.co.uk© <strong>Jands</strong> Electronics July 199514.00 Overall Master Controls14.10 P1 and P2 FadersThe P1 Master fader scales the top row of Preset faders, likewise the P2 Master faderscales the overall level of the bottom row of Preset faders. By moving the P1 faderup while moving the P2 fader down it is possible to crossfade between the settingson the two rows of channel Preset faders.www.sxsevents.co.uk<strong>Event</strong> V3 <strong>Manual</strong> 95
ent production courtesy Phone: of and Audio-Visual 0870 080 2342 ServicesControl Functions - Playbackwww.sxsevents.co.ukemail: enquiries@sxsevents.co.uk14.11 Reversing the P2 Master Fader☞Diagram 14ASome operators who use the Preset faders while running a show prefer to move thetwo Preset Master faders together, with one hand, to crossfade between Presets. Toallow this on an <strong>Event</strong> the Preset 2 Master fader can be reversed such that at the topof its travel output from Preset 2 is zero (0) and at the bottom of its travel the outputis 100%.To change the P2 master:1 Press the Setup button to open the Setup Menu.2 Move the cursor to the CTRL (Controls) field.3 Press the (On) button to open the Set Ctrl menu.4 Move the cursor to the P1/2 field.5 Press the (On) button to toggle between NORM (Normal) and REV(Reverse).6 Press Exit to close this menu (press twice to return to the standard screen).96 <strong>Event</strong> V3 <strong>Manual</strong>www.sxsevents.co.uk
ent production courtesy Phone: of and Audio-Visual 0870 080 2342 Serviceswww.sxsevents.co.ukemail: enquiries@sxsevents.co.uk© <strong>Jands</strong> Electronics July 1995[STANDARD SCREEN]END789MEMORY EDIT4 5CHASE6PAGEASSIGNFILE5P 1 / 2N o rmR e v261 2BUILD CLEAR0EXIT SETUP3STACKRECORDSEU PTDes ktoP t chtoCTRLtoU t i ItoP r e ttoMcr dtoSeC t P12trl o r/ d o SMastChs FkeysN m M b omtH o l d Nor m t o3 4P12o r/ N m7MEMORY EDIT4 5PAGE8ASSIGN9CHASE6FILESEU T PDES KtoPtchtoCtr ItoUti ItoPre ttoMcr dt o2C RL T t o1 23STARTBUILDEXITCLEAR0SETUPSTACKRECORD114A Reversing the P2 Master Faderwww.sxsevents.co.uk▼<strong>Event</strong> V3 <strong>Manual</strong> 97
ent production courtesy Phone: of and Audio-Visual 0870 080 2342 ServicesControl Functions - Playbackwww.sxsevents.co.ukemail: enquiries@sxsevents.co.uk▼1 214B Add/Solo switch,DBO switch.14.20 Add / Solo Master Switch☞Diagram 14B 1The Flash buttons can be set to operate in three different ways or turned offcompletely. To change the operation of the Flash buttons press the Add / Soloswitch. With each press of the button, the two LEDs within the switch change toindicate which mode has been selected.* Add: Indicated by the Green LED. Pressing a Flash button causes that outputto flash instantly to the level set by the Add/Solo Master fader.* Add Latch: Indicated by the Green LED Flashing. The Flash buttons push-onand push-off instead of flashing. When a Flash button is latched on, the channelLED will flash synchronously with the Add / Solo switch LED. IfAdd Latch is disabled while some channels are latched, the channels will unlatchbut will not become latched again if Add Latch is subsequently enabled.* Solo: Indicated by the Red LED. Pressing a Flash button causes that output toflash instantly to the level set by the Add/Solo Master fader, while at the sametime turning off all other desk output.* Disabled: Indicated by neither LED being on. Pressing a channel Flash buttonhas NO effect.14.30 DBO SwitchDiagram 14B 2☞This button performs two functions:* BlackoutWhen the button is pressed the entire output of the console is blacked out. Thebutton can be set to:Momentary - the console is Blacked Out only while the DBO button isdepressed.ORLatching - the console is Blacked Out by pressing the DBO button. Outputis restored when the DBO button is pressed again.* InhibitTo prevent a channel from appearing in any output, hold a channel Flash buttondown and press the DBO button.14.51 To change the operation of the DBO switch from LTCH to MOMT:1. Press the Setup button to open the Setup Menu.2. Move the cursor to the CTRL (Controls) field and press the (On) buttonto open the Set Control menu.3. Move the cursor to the DBO field and press the (On) button to togglebetween MOMT (Momentary) and LTCH (Latching).4. Press Exit to close this menu (press Exit several times to close all menus).98 <strong>Event</strong> V3 <strong>Manual</strong>NOTE: When a channel is inhibited the LED in the associated Flash button flashes on andoff. However, if the console is set for Wide or Super Wide operation it is notpossible to inhibit the channels which do not have Flash buttons.www.sxsevents.co.uk
ent production courtesy Phone: of and Audio-Visual 0870 080 2342 Serviceswww.sxsevents.co.ukemail: enquiries@sxsevents.co.uk© <strong>Jands</strong> Electronics July 199514.40 Add / Solo FaderDiagram 14C 1This fader controls the level of the Flash buttons.1214.50 Grand Master FaderDiagram 14C 2This fader controls the level of all console outputs except the Flash buttons.▼14C Add/Solo fader,Grand Master fader.14.60 Rate ControlDiagram 14DThe Rate Control scales the speed of all Chases that are running. This control shouldnormally be set to the mid or 12 o’clock position. Chases will then run at the speedset in the Chase menu. Turning the control clockwise will speed the chase(s) up,turning the control counter clockwise will slow the chase(s) down.▼14D Rate Controlwww.sxsevents.co.uk<strong>Event</strong> V3 <strong>Manual</strong> 99
ent production courtesy Phone: of and Audio-Visual 0870 080 2342 ServicesAdvanced Featureswww.sxsevents.co.ukemail: enquiries@sxsevents.co.uk100 <strong>Event</strong> V3 <strong>Manual</strong>www.sxsevents.co.uk
ent production courtesy Phone: of and Audio-Visual 0870 080 2342 Serviceswww.sxsevents.co.ukemail: enquiries@sxsevents.co.uk© <strong>Jands</strong> Electronics May 1995AdvancedFeatureswww.sxsevents.co.uk<strong>Event</strong> V3 <strong>Manual</strong> 101
ent production courtesy Phone: of and Audio-Visual 0870 080 2342 ServicesAdvanced Featureswww.sxsevents.co.ukemail: enquiries@sxsevents.co.uk15.00 Advanced Control15.10 BuildWhen controlling moving lights and in some theatrical applications it can be usefulto use Memories as “building blocks”. In this way Memories that have been “built”will reflect any changes made in the Memories they are built from. This feature iscommonly used to simplify the refocusing of moving lights when moving fromvenue to venue.A show might include a number of Memories that have moving lights focused onthe lead singer. When the show moves to a new venue the trim height of the trussmight be different or the singer might move to a slightly different position.Normally all Memories that had lights focused on the singer would have to be editedto correct the focus.An easier solution is to record one Memory that focuses the lights on the singer -that memory ONLY contains Pan and Tilt information. After turning on the Buildrecord feature the Memory is used when recording any other Memories that havethe lights focused on the singer. Then if the focus needs to be changed its onlynecessary to edit the one memory, containing the pan and tilt information to see thatchange reflected in all the other memories that were built from it.EXAMPLE:The steps below detail an example of how to record a Memory that only includesposition settings and how to build from that Memory:1. Record a Memory that only controls the Pan an Tilt settings for a numberof lights.NOTE: To do this you’ll need to have the light on and the iris open so you can see whereit is being focused but remember to pull all the preset faders, except thosecontrolling Pan and Tilt, down to zero before recording the Memory. That wayonly the channels controlling Pan and Tilt will be recorded with a level greaterthan 0.2. Open the Build menu and set the Record field to Build.3. Make sure the Memory you recorded at step 1 is on the Assign masters. Fadeup the Memory to position the lights.4. Use the Preset Faders to set Colour, Intensity and so on.5. Record a new Memory.This new Memory will now track any changes made to the Memory it was built from.NOTE: Built memories are NOT automatically updated if they are on the Assign masters.The Built memory MUST be reloaded to the Assign faders by changing Page orAssigning.102 <strong>Event</strong> V3 <strong>Manual</strong>www.sxsevents.co.uk
ent production courtesy Phone: of and Audio-Visual 0870 080 2342 Serviceswww.sxsevents.co.ukemail: enquiries@sxsevents.co.uk© <strong>Jands</strong> Electronics May 199515.20 To see the changes in a Built MemoryThere are two Methods to see changes in a Built Memory:METHOD 11. Edit the Memory that is being Built from (i.e. in our example the focusMemory)2. Assign the Built memory to one of the Assign faders.NOTE: If the Built Memory is already on an Assign fader just Assign the same Memoryover the top of it.METHOD 21. Load the Page containing the Built memoryNOTE: If the Build Memory is part of the Page on the Assign faders just reload the samePage.2. Fade in the Built memory to see the changes.TIP:After recording a number of position memories, set them up as a Stack so thatwhen recording Built Memories you can ‘scroll’ through various position settings.Colour and Beam information can also be recorded and used in the same way.www.sxsevents.co.uk<strong>Event</strong> V3 <strong>Manual</strong> 103
ent production courtesy Phone: of and Audio-Visual 0870 080 2342 ServicesAdvanced Featureswww.sxsevents.co.ukemail: enquiries@sxsevents.co.uk15.30 Other Build Menu FeaturesThe Build menu also includes a From field. This allows you to isolate the Assignmaster output from the recording process.When the From field is set to All any output from the console is included in aMemory. However when the From field is set to Presets only the levels coming fromthe Preset faders are recorded. If an Assign master is faded up it is ignored.This feature is designed to make recording Position memories easier. The examplebelow shows how.Example - Moving Lights1. Set the FROM field to All.2. Set the RECORD field to Normal.3. Choose a number of moving lights which will normally be used in a group.4. Use the presets controls to turn the lights on, open the iris and do whateverelse is necessary for you to be able to see the light BUT make sure you leavethe Pan, Tilt, Colour and Gobo controls at zero.5. Record this output and Assign the Memory to one of the Assign Masters.6. Set the FROM field to Preset.7. Set the RECORD field to Build.Now this Memory can be left up on an Assign fader to let you see the lights whileyou record some position Memories as detailed above.104 <strong>Event</strong> V3 <strong>Manual</strong>www.sxsevents.co.uk
ent production courtesy Phone: of and Audio-Visual 0870 080 2342 Serviceswww.sxsevents.co.ukemail: enquiries@sxsevents.co.uk© <strong>Jands</strong> Electronics May 199515.40 Edit Memory15.31 Recording Theatrically- Using Edit Memory MenuMany theatre lighting consoles do not have individual channel faders. To recordMemories on these consoles the operator uses a keypad and enters channel numbersand level settings:eg. CH# - TO# - At1 - 10 - 50(channel 1 to channel 10 at 50% intensity)<strong>Event</strong> offers this quick and convenient method through the Edit Memory (or EditChase) menu:1. Press the Edit button then press the Memory button.2. Enter the Memory number (0 - 999) to be recorded.3. Enter new level values into the menu’s CH# - TO# - AT fields.NOTE: As each channel or group of channels is adjusted using either edit method, thechanges are stored temporarily so there is no need to press Record to save eachindividual change.4. When all settings have been made press the Record button. If you want toabandon all the changes and start again, press Exit.5. A message displays on the LCD showing the number of Memories recordedand the number still available for future recording.TIP:Unless the Memory is already recorded you will not be able to put the Memoryon an Assign fader and so be able to see what you are doing.To get around this problem it’s possible to assign the edit output to a fader:• Press the Assign button followed by the Edit button.• Press the Flash button beneath the Assign fader to be used to control theEdit output.Once the Flash button has been pressed, the Assign menu is closed and you willsee the Edit output has replaced whatever was previously controlled by theAssign Master.www.sxsevents.co.uk<strong>Event</strong> V3 <strong>Manual</strong> 105
ent production courtesy Phone: of and Audio-Visual 0870 080 2342 ServicesAdvanced Featureswww.sxsevents.co.ukemail: enquiries@sxsevents.co.uk15.50 Edit Page15.51 Changing the Make-up of a Page:☞It is possible to change the default make-up of a Page by using the Edit Page menu.This menu is used to configure the make up of Pages so as to set how manyMemories will be included in a Page. The numerical increment between the firstMemory in each Page and whether Chases will automatically be loaded with eachPage, can be altered by this procedure:123456789Diagram 15B/Examples 1, 2, 3Press the Edit button.Press the Page button.Move the cursor to the MEMS field.Use the (On)/ (Off) button or keypad to enter the number of Memoriesper Page (1 - <strong>24</strong>).Move the cursor to the INCR (Increment) field.Using the (On)/ (Off) button or keypad to enter the number of theincrement between the first Memory in each Page.Move the cursor to the CHS: (Chase) field.Use the (On) button to change from AUTO to OFF or vice versa. WhenAuto is selected a Chase is automatically loaded to Assign Master 21 whenevera new Page is loaded. The Chase number corresponds to the Pagenumber.Press the Exit key to return to the standard screen.106 <strong>Event</strong> V3 <strong>Manual</strong>www.sxsevents.co.uk
ent production courtesy Phone: of and Audio-Visual 0870 080 2342 Serviceswww.sxsevents.co.ukemail: enquiries@sxsevents.co.uk© <strong>Jands</strong> Electronics May 1995[STANDARD SCREEN]END789CHS:Aut o7 8CHS:Aut oO f fMEMORY EDIT CHASE4 5 6PAGE ASSIGN FILE1 2 3BUILD CLEAR STACK0EXIT SETUP RECORD97 8 9MEMORY EDIT CHASE4 5 6PAGE ASSIGN FILE5I NCR101 2 3BUILD CLEAR STACK0EXIT SETUP RECORDORI NCRx x x67 8 9MEMORY EDIT CHASE4 5 6PAGE ASSIGN FILE3MEMS1 01 2 3BUILD CLEAR STACK0EXIT SETUP RECORDORMEMS x x x4789MEMORY EDIT CHASE4 5 62ASSIGNPAGEFILE1 2 3BUILD CLEAR STACK0EXIT SETUP RECORDE d i tP a g eMEMS10Inc r Chs : Resto re1 0 Aut o Off17 8 9MEMORY EDIT CHASE4 5 6PAGE ASSIGN FILE1 2 3BUILD CLEAR STACK0EXIT SETUP RECORDEdi t Se lec t Me m, Ch a s e , Pa g eo r F i l e ( orP r e s s E x i t )START15B Edit pagewww.sxsevents.co.uk▼<strong>Event</strong> V3 <strong>Manual</strong> 107
ent production courtesy Phone: of and Audio-Visual 0870 080 2342 ServicesAdvanced Featureswww.sxsevents.co.ukemail: enquiries@sxsevents.co.ukExample 1:When shipped from the factory the <strong>Event</strong> Plus has the EDITPAGE menu set as described below. The makeup of each Pagewill be:Example 3:The Increment between the first Memory of each Page can bechanged to suit a particular numbering scheme or to allowoverlapping Pages. In this case Memories per Page has beenset to 20 and the Increment to 100. Chase is on Auto.Page # Assign Faders Control0 1 - 20 Memories 0 - 1921 Chase 01 1 - 20 Memories 20 - 3921 Chase 12 1 - 20 Memories 40 - 5921 Chase 210 1 - 20 Memories 200 - 21921 Chase 10Page # Assign Faders Control0 1 - 20 Memories 0 - 1921 Chase 01 1 - 20 Memories 100 - 11921 Chase 12 1 - 20 Memories 200 - 22921 Chase 25 1 - 20 Memories 500 - 51921 Chase 10Example 2:The Number of Memories can be changed to suit particularapplications. A show might call for a number of Stacks andChases to be permanently set on Assign faders 12 - <strong>24</strong>. In thiscase the operator can set the number of Memories per Pageto 10 with an Increment of 10. The Auto Chase load is left onin this example - note that it loads on the next fader after thelast memory.Page # Assign Faders Control0 1 - 10 Memories 0 - 911 Chase 01 1 - 10 Memories 10 - 1911 Chase 1NOTE: If the CHS: field is changed from AUTO to OFF, no Chasesare loaded with each Page.15.42 Restoring the Factory Settings for PageTo restore the default settings for EDIT PAGE :1. Press the Edit button.2. Press the Page Button.3. Move cursor to the RESTORE field.4. Press the (On) button to set the restore function"ON".5. Press Exit to return to the standard screen.2 1 - 10 Memories 20 - 2911 Chase 210 1 - 10 Memories 100 - 119108 <strong>Event</strong> V3 <strong>Manual</strong>11 Chase 10www.sxsevents.co.uk
ent production courtesy Phone: of and Audio-Visual 0870 080 2342 Serviceswww.sxsevents.co.ukemail: enquiries@sxsevents.co.uk© <strong>Jands</strong> Electronics May 199515.60 Edit File15.61 Changing the Default File SettingsIt is possible to change the way Files work using the Edit File menu.However, this is an advanced feature and will probably not be required by mostusers. The Edit File menu is used to limit the number of Assign Masters that willbe loaded when a new File is loaded.Note: When a File is saved ALL the settings of the Assign Masters are saved. Edit Fileis only used to limit the number of Assign faders that are updated by loading aFile.1. Press the Edit button then press the File button.2. With the cursor in the FIRST field, set the Assign Master fader numberwhich will be the first of a group to be loaded with the contents of a File.3. Move the cursor to the LAST field, set the Assign Master fader numberwhich will be the last of a group to be loaded with the contents of a File.4. Press the Exit keyExample:The operator might want to use the first six memories stored in a file.However, when this file is loaded to the Assign Masters, the remaining 18Assign Masters are not to be changed. Set the FIRST field to 1 and the LASTfield to 6.15.62 Restoring The Factory Settings for FileTo restore the default settings for Edit File:1. Press the Edit button then press the File button.2. Move the cursor to the RESTORE field.3. Press the (On) button.4. Press the Exit key.www.sxsevents.co.uk<strong>Event</strong> V3 <strong>Manual</strong> 109
ent production courtesy Phone: of and Audio-Visual 0870 080 2342 ServicesAdvanced Featureswww.sxsevents.co.ukemail: enquiries@sxsevents.co.uk16.00 Restricting Access to VariousMenus and ControlsIt is possible to limit the access a user has to the <strong>Event</strong> menus and controls:1. Press the Setup button to open the Setup menu.2. Move the cursor to the DESK field and press the ON (+) button to open theSet Desk menu.3. Move the cursor to the MODE field and press the ON (+)/OFF (- ) button totoggle between REC and PLAY.In the PLAY mode the following menus and menu fields are not available:Memory Edit ChasePage Label Page Chs 1 Page Chs 2File Save Patch ClearFile LabelMCardIn the Record mode all console functions are available.TIP:The <strong>Event</strong> also allows a PASSWORD to be set so that it is not possible to changefrom PLAY to RECORD until the password has been correctly entered.(To set a Password see Section 23.00).110 <strong>Event</strong> V3 <strong>Manual</strong>www.sxsevents.co.uk
ent production courtesy Phone: of and Audio-Visual 0870 080 2342 Serviceswww.sxsevents.co.ukemail: enquiries@sxsevents.co.uk© <strong>Jands</strong> Electronics May 199517.00 Function KeysFunction keys are only available on the <strong>Event</strong> Plus consoles. The right hand bankof Assign Master Flash buttons become Function Keys whenever Function Keys areenabled.Any operation that involves numerous button presses can be simplified by the useof Function Keys (Macros). That way, pressing one button will reproduce theactions of up to 30 button presses.TIP:Use Macros to speed up recordings by having words as Macros, e.g. RAYS,WASH, or use Macros to change to the next page during a show.www.sxsevents.co.uk<strong>Event</strong> V3 <strong>Manual</strong> 111
ent production courtesy Phone: of and Audio-Visual 0870 080 2342 ServicesAdvanced Featureswww.sxsevents.co.ukemail: enquiries@sxsevents.co.uk17.10To Record a Function Key.☞1234567891011Diagram 17APress the Setup button to open the Setup Menu.Move the cursor to the CTRL (Control) field.Press the (On) button to open the Set Control menu.Move the cursor to the FKEYS (Function Keys) field.Press the (On) button to open the Set Function Keys menu.Move the cursor to the ENABLE field.Press Exit to close this menu (press Exit several times to close all menus).Ensure that the Add/Solo Master switch is Off.Press one of the Flash buttons on the right hand bank of Assign Masters. TheLED in the button will turn on.Press the sequence of button presses to be recorded.Press the Assign Master Flash button again. The LED in the button will turnoff.17.20To Play Back a Function Key1. Ensure that the Add/Solo Master switch is Off.2. Press the same Assign Master Flash button as used to record the sequence.3. The recorded sequence will be replayed.112 <strong>Event</strong> V3 <strong>Manual</strong>www.sxsevents.co.uk
ent production courtesy Phone: of and Audio-Visual 0870 080 2342 Serviceswww.sxsevents.co.ukemail: enquiries@sxsevents.co.uk© <strong>Jands</strong> Electronics May 1995A 1PRESETFLASHASSIGNFLASHOR7 8 9MEMORY EDIT CHASE4 5 6PAGE ASSIGN FILE1 2 3BUILD CLEAR STACK0EXIT SETUP RECORDOR11ASSIGNFLASHEND10789MEMORYEDITCHASE4 5627PAGE ASSIGN FILE1 2 3BUILD CLEAR STACK0EXIT SETUP RECORD[STANDARD SCREEN]8 9OFFADD/SOLOBUTTONASSIGNFLASHSetF keyE NABLEF k e y Name:On1DelOff65SetF keyENBO A LEf fSetP1/ 2 dboSMast ChsFke y sCtrl NormMomt Hol d Norm t o3 4FKEYS t oSTART7MEMORY4 5PAGE1 2BUILDEXIT8EDITASSIGNCLEAR0SETUP96CHASE3FILESTACKRECORD1SEU PTDESK t oP t ch t oC t r I t oU t i I t oP rteot17A To Record a Function Keywww.sxsevents.co.uk▼Mctrod2C RL T t o<strong>Event</strong> V3 <strong>Manual</strong> 113
ent production courtesy Phone: of and Audio-Visual 0870 080 2342 ServicesAdvanced Featureswww.sxsevents.co.ukemail: enquiries@sxsevents.co.uk18.00 Advanced Channel Control18.10Setting Channels to Ignore Crossfade TimingWhen a timed crossfade is being used it can be useful to set some channels to ignorethe timing information. For example, you might want to snap change a colourscroller while slowly fading the intensity.18.11 To Set Channels to Ignore Timing:☞1234567Diagram 18APress the Setup button to open the Setup Menu.Move the cursor to the UTIL (Utilities) field.Press the (On) button to open the Set Utilities menu.Move the cursor to the PREC (Precedence) field.Press the (On) button to open the Setup Precedence menu.Move the cursor to the CHAN# field and set a start channel number.Move the cursor to the THRU (Through) field and set an end channelnumber.TIP:If you just want to set one channel, leave this field the same as the CHAN# field.8910Move the cursor to the PREC field and set it to LAST.Repeat steps 2 to 8 for any other channels or groups of channels.Press Exit to close this menu (press Exit several times to close all menus).114 <strong>Event</strong> V3 <strong>Manual</strong>www.sxsevents.co.uk
ent production courtesy Phone: of and Audio-Visual 0870 080 2342 Serviceswww.sxsevents.co.ukemail: enquiries@sxsevents.co.uk© <strong>Jands</strong> Electronics May 1995[STANDARD SCREEN]END789MEMORY4 5EDIT6CHASE210PAGE ASSIGN FILE1 2 3BUILD CLEAR STACK0EXIT SETUP RECORD7 8 9MEMORY EDIT CHASE4 5 6PAGE ASSIGN FILE1 2 3BUILD CLEAR STACK07THRU<strong>24</strong>EXIT SETUP RECORDORTHRU218PRECH i ghes tPRECL a s t95Chan CHAN# Th r u Pr e cNP r e c 1 1 H i ghes t167 8 9MEMORY EDIT CHASEC HA # 4 5 6HANPAGE ASSIGN FILE1 2 3BUILD CLEAR STACK0EXIT SETUP RECORDORC #<strong>24</strong>SetUtilPRtEoCHetaotSotloo4PREC t o7MEMORY4 5PAGE8EDITASSIGN96CHASEFILESEU T PDESK t oP t ch t oC t r I t oU t i I t oP r e t t oMcr d t o2UTI L t o31 23STARTBUILDEXITCLEAR0SETUPSTACKRECORD118A To Set Channels to Ignore Timingwww.sxsevents.co.uk▼<strong>Event</strong> V3 <strong>Manual</strong> 115
ent production courtesy Phone: of and Audio-Visual 0870 080 2342 ServicesAdvanced Featureswww.sxsevents.co.ukemail: enquiries@sxsevents.co.uk18.20 Setting Channels to Always Have a Back - GroundIntensity - PreheatSome lamps with large filaments (such as aircraft landing lights) are slow to turnon. The turn on response of such lamps can be improved by maintaining a smallvoltage to them which warms the filament.18.21 To Set Channels to Preheat the Filament:☞12345678Diagram 18BPress the Setup button to open the Setup menu.Move the cursor to the UTIL (Utilities) field.Press the (On) button to open the Set Utilities menu.Move the cursor to the HEAT (Preheat) field.Press the (On) button to open the Setup Preheat menu.Move the cursor to the DIM# field.Set a start dimmer number.Move the cursor to the THRU (Through) field and set the end dimmernumber.TIP:If you just want to set one dimmer, leave this field the same as the DIM# field.9101112Move the cursor to the AT field.Set it in the range 1 - 10%.Repeat steps from 2 to 11 for any other dimmers or groups of dimmers.Press Exit to close this menu (press Exit twice to return to the standardscreen).TIP: Setting preheat to 5% for example, will cause the dimmer to output about 10volts.Setting preheat to around 2% usually does not cause any visible glow.116 <strong>Event</strong> V3 <strong>Manual</strong>www.sxsevents.co.uk
ent production courtesy Phone: of and Audio-Visual 0870 080 2342 Serviceswww.sxsevents.co.ukemail: enquiries@sxsevents.co.uk© <strong>Jands</strong> Electronics May 1995[STANDARD SCREEN]END789MEMORY4 5EDIT6CHASE2PAGE ASSIGN FILE1 2 3BUILD CLEAR STACK0EXIT SETUP RECORD127 8 97 8 9MEMORY EDIT CHASEMEMORY EDIT CHASE4 5 64 5 6PAGE ASSIGN FILEPAGE ASSIGN FILE1 2 31 2 3BUILD CLEAR STACKBUILD CLEAR STACK8THRU5120EXIT SETUP RECORDOR9U1THR210AT0%0EXIT SETUP RECORDORAT10%117 8 95ChanHea tDIM#1Th r u1Saf e t yOff6DI M# 1MEMORY EDIT CHASE4 5 6PAGE ASSIGN FILE1 2 3BUILD CLEAR STACK0DI M# 10EXIT SETUP RECORDOR7SeU t tilPRtEoCHetaotSotloo4AoT HEt 7MEMORY4 5PAGE8EDITASSIGN96CHASEFILESEU T PDESK t oP t ch t oC t I t orU t I t oiP rteotMctrod2UTI L t o31 23STARTBUILDEXITCLEAR0SETUPSTACKRECORD118B To Set Channels to Preheat the Filamentwww.sxsevents.co.uk▼<strong>Event</strong> V3 <strong>Manual</strong> 117
ent production courtesy Phone: of and Audio-Visual 0870 080 2342 ServicesAdvanced Featureswww.sxsevents.co.ukemail: enquiries@sxsevents.co.uk18.30 Setting Channels to Ignore Flash Button Solo Operation☞Pressing A Flash button when in Solo mode will cause all other console channelsto “black out”. This can cause unwanted effects on channels controlling movinglights or colour changers.To set channels to ignore Solo:123456789Diagram 18CPress the Setup button to open the Setup menu.Move the cursor to the UTIL (Utilities) field.Press the (On) button to open the Set Utilities menu.Move the cursor to the SOLO field.Press the (On) button to open the Setup Channel Solo menu.Move the cursor to the CHAN# (Channel) field.Set a channel number.Move the cursor to the THRU (Through) field.Set an end channel number.Note: If you just want to set one channel, leave this field as same as the CHAN# field.10111213Move the cursor to the SAFETY field.Set it to ON.Repeat steps from 2 to 11 for any other channels or groups of channels.Press Exit to close this menu (press Exit twice to return to the standardscreen).118 <strong>Event</strong> V3 <strong>Manual</strong>www.sxsevents.co.uk
ent production courtesy Phone: of and Audio-Visual 0870 080 2342 Serviceswww.sxsevents.co.ukemail: enquiries@sxsevents.co.uk© <strong>Jands</strong> Electronics May 1995[STANDARD SCREEN]END789MEMORY4 5EDIT6CHASE213PAGE ASSIGN FILE1 2 3BUILD CLEAR STACK0EXIT SETUP RECORD7 8 9MEMORY EDIT CHASE4 5 6PAGE ASSIGN FILE1 2 3BUILD CLEAR STACK8THRU<strong>24</strong>0EXIT SETUP RECORDOR9U1THR210SAF ETYO f fSAFETYO n11 125ChanSOLOCHAN 1# Th r u Sa f e t yHAN 1 O f f167 8 9C #MEMORY4PAGEEDIT5ASSIGNCHASE6FILEN41 2 3BUILD CLEAR STACK0EXIT SETUP RECORDOR7C HA #2SetUtilPRtEoCHetaotSotloo4SOLO t o7MEMORY4 5PAGE8EDITASSIGN96CHASEFILESEU PTDESK t oP t ch t oC t I t orU t I t oiP rteotMctrod2U I L T t o31 23BUILDCLEAR0STACKSTARTEXITSETUPRECORD1▼www.sxsevents.co.uk18C Setting Channels to Ignore Flash Button Solo Operation<strong>Event</strong> V3 <strong>Manual</strong> 119
ent production courtesy Phone: of and Audio-Visual 0870 080 2342 ServicesAdvanced Featureswww.sxsevents.co.ukemail: enquiries@sxsevents.co.uk19.00 Advanced Desk Options19.10 Setting Default Infade and Outfade Times☞Diagram 19ABefore recording Memories that will be used in a crossfade Stack it can beconvenient to set default fade times to avoid the necessity of setting times for eachMemory.Note: Default times will only be added to new Memories. It is possible to change thesetting for any Memory later.12345Press the Setup button to open the Setup menu.Move the cursor to the PREF (Preferences) field.Press the (On) button to open the Set Preferences menu.Move the cursor to the TIMES field and set a time in the format MM:SS orM:SS.s (M=minute, S=seconds, s = tenths of a second).Press Exit to close this menu (press Exit several times to close all menus).120 <strong>Event</strong> V3 <strong>Manual</strong>www.sxsevents.co.uk
ent production courtesy Phone: of and Audio-Visual 0870 080 2342 Serviceswww.sxsevents.co.ukemail: enquiries@sxsevents.co.uk© <strong>Jands</strong> Electronics May 1995[STANDARD SCREEN]END789MEMORY4 5EDIT6CHASE26PAGE ASSIGN FILE1 2 3BUILD CLEAR STACK0EXIT SETUP RECORD7 8 9MEMORY EDIT CHASE4 5 6PAGE ASSIGN FILE1 2 3BUILD CLEAR STACK0EXIT SETUP RECORDOR0 T I: xẸ5Mx xx : x xSsSetPrefHEPO L nFreeze T iOn0 : 0 m 0 ẹs 0Inc rmt T IM ẸS1 0 : 0 0 03 47MEMORY4 5PAGE8EDITASSIGN96CHASEFILESEU PTDESK t oP t ch t oC t r I t oU t i I t oP r e f t oMcr d t o2PREF t o1 23STARTBUILDEXITCLEAR0SETUPSTACKRECORD1www.sxsevents.co.uk▼19A Setting Default Infade and Outfade Times<strong>Event</strong> V3 <strong>Manual</strong> 121
ent production courtesy Phone: of and Audio-Visual 0870 080 2342 ServicesAdvanced Featureswww.sxsevents.co.ukemail: enquiries@sxsevents.co.uk19.20 Changing the Increment Between Memories WhenRecordingNormally when a Memory is recorded the Memory menu automatically advancesto the next Memory number, allowing a number of Memories to be quicklyrecorded.However it can be useful to change the increment between Memories when themenu advances.1. Press the Setup button to open the Setup menu.2. Move the cursor to the PREF (Preferences) field and press the (On) buttonto open the Set Preferences menu.3. Move the cursor to the Incr (Increment) field and set an Increment between1 and 10.4. Press Exit to close this menu (press Exit several times to close all menus).Example:Normally when Memories are recorded (using the Memory menu) theMemory number automatically advances by 1 after the Record button ispressed. However, in first plotting a show which is to be run using thecrossfade controls, you might want to leave a number of free Memoriesbetween each Memory being recorded, to make it easier to insert extra cuesat a later time.TIP:If the increment was set to 10 and the first Memory recorded was M 10 theMemory menu would advance to M 20.The Memory number can still be set to any intermediate value by typing therequired number from the keypad.19.30 Turning the Help Screen On and OffThe help screen which displays on the LCD to the left of the menu LCD can beturned off when the user becomes more familiar with the console.1. Press the Setup button to open the Setup menu.2. Move the cursor to the Pref (Preferences) field and press the (On) buttonto open the Set Pref menu.3. Move the cursor to the Help field and press the (Off) button to turn Helpoff, or press the (On) button to turn Help back on.4. Press Exit to close this menu (press Exit several times to close all menus).122 <strong>Event</strong> V3 <strong>Manual</strong>www.sxsevents.co.uk
ent production courtesy Phone: of and Audio-Visual 0870 080 2342 Serviceswww.sxsevents.co.ukemail: enquiries@sxsevents.co.uk© <strong>Jands</strong> Electronics May 199520.00 Using the MCard - OptionThe <strong>Event</strong> MCard is an optional accessory which allows all the informationrecorded in the console to be saved to a compact RAM disk. Anyone who regularlyruns the same show is strongly advised to fit an MCard. It is not possible to accessthe MCard menu unless the console is fitted with the MCard option panel.20.10 To Open the MCard Menu1. Press the Setup button to open the Setup menu.2. Move the cursor to the MCARD field and press the (On) button to openthe Set MCard menu.NOTE: If the MCard option is not fitted, it is not possible to activate the MCard menu.20.20 To Save the Information Recorded in the <strong>Event</strong>:1. First ensure that the MCard batteryis fitted and the write enable switch ison, then insert the MCard in the rear panel slot.2. Open the MCARD menu as detailed above.3. Move the cursor to the TO MCARD field and press the (On) button.4. A record confirmation screen shows.5. Press Exit to close this menu.20.30 Loading From the MCard.When information is loaded from MCard all Memories, Chases and Patches areoverwritten.To retrieve information recorded on MCard to the <strong>Event</strong>:1. First ensure that the MCard batteryis fitted and the write enable switch ison, then insert the recorded MCard in the rear panel slot.2. Open the MCARD menu as detailed above.3. Move the cursor to the FROM MCARD field and press the (On) button.4. A loaded confirmation screen shows.5. Press Exit to close this menu.NOTE: Remove MCard from the slot immediately after loading from or saving to aMCard. Leaving the MCard in the slot while turning console On/Off may corruptthe information stored.www.sxsevents.co.uk<strong>Event</strong> V3 <strong>Manual</strong> 123
ent production courtesy Phone: of and Audio-Visual 0870 080 2342 ServicesAdvanced Featureswww.sxsevents.co.ukemail: enquiries@sxsevents.co.uk21.00 Clearing Memories, Chases andPatchesMemories and Chases can be cleared to free console Memory or prevent further use.Patches can be cleared to provide either a factory default (1 to 1) Patch or a noconnection (Null) Patch.21.10 Clearing Memories☞1Diagram 21APress the Clear button to open the Clear/Copy Menu.NOTE: Move the cursor to the Function field and press the ON (+) button to toggle the fieldfrom Copy to Clear if necessary.23456789Move the cursor to the MEM (Memory) field.Press the (On) button to open the Clear Memory menu.Move the cursor to the MEM: (Memory:) field.Set the Memory number to be cleared (deleted)Move the cursor to the TO: field.Set the last of a range of Memory numbers to be cleared (deleted).Move the cursor to the CONFIRM field.Press the (On) button to delete the Memory block.1<strong>24</strong> <strong>Event</strong> V3 <strong>Manual</strong>www.sxsevents.co.uk
ent production courtesy Phone: of and Audio-Visual 0870 080 2342 Serviceswww.sxsevents.co.ukemail: enquiries@sxsevents.co.uk© <strong>Jands</strong> Electronics May 1995F unc t ion:C l e a rP t c M EM + t oh+ t oC h s e+ t oS+ttcokEND7 8 9MEMORY EDIT CHASE4 5 6PAGE ASSIGN FILE1 2 3BUILD CLEAR STACK0OR T O :M x xxEXIT SETUP RECORD_M___10CONFIRMO f f7 8 9CONFIRMOn7 8 9MEMORY EDIT CHASE4 5 6PAGE ASSIGN FILE1 2 3BUILD CLEAR STACK0EXIT SETUP RECORDORMEM:M x x x_M___10T O :M 10_M___1056C l rMmryME M:M 10_M___10T o:M 10_M___10Confi rmOff4ME M:M 10_M___107 8MEMORY EDIT4 596CHASEFUNCT ION : P t chM em C h s e S t c kC l e a r + t o + t o + t o + t oFUNCTION: P t ch M emC h s e S t c kCopy + t o + t o + t o + t oM EM+ t o2 3PAGE ASSIGN FILE1BUILD2CLEAR3STACKSTART0SETUP1EXIT RECORD21A Clearing Memorieswww.sxsevents.co.uk▼<strong>Event</strong> V3 <strong>Manual</strong> 125
ent production courtesy Phone: of and Audio-Visual 0870 080 2342 ServicesAdvanced Featureswww.sxsevents.co.ukemail: enquiries@sxsevents.co.uk21.20 Clearing a StackThis procedure is explained in the section on using Stacks (see Section 13.00).21.30 Clearing Chases☞12Diagram 21BPress the Clear button to open the Clear/Copy menu.Move the cursor to the CHSE (Chase) field.Note:Move the cursor to the FUNCTION: field and press the ON(+) button to toggle the field from Copy to Clear if necessary.3456789Press the (On) button to open the Clear Chase menu.Move the cursor to the CHS: (Chase:) field.Set the Chase number to be cleared (deleted).Move the cursor to the TO: field.Set the last of a range of Chase numbers to be cleared (deleted).Move the cursor to the CONFIRM field.Press the (On) button to delete the Chase(s).126 <strong>Event</strong> V3 <strong>Manual</strong>www.sxsevents.co.uk
ent production courtesy Phone: of and Audio-Visual 0870 080 2342 Serviceswww.sxsevents.co.ukemail: enquiries@sxsevents.co.uk© <strong>Jands</strong> Electronics May 1995F unc t ion:C l e a rP+ttcoh M+etmoC+HtSoES+ttcokEND7 8 9MEMORY EDIT CHASE4 5 6PAGE ASSIGN FILE1 2 3BUILD CLEAR STACK0EXIT SETUP RECORDORT O :C x xx_C___1CONFIRMO f f7 8 9CONFIRMOn7 8 9MEMORY EDIT CHASE4 5 6PAGE ASSIGN FILE1 2 3BUILD CLEAR STACK0EXIT SETUP RECORDOR5C HS :C x x x_C___T O :1C 16_C___1C l rC hseC H S :C 1_C___1T o: ____C 1 C 1Confi rmOff4C H S :C 1_C___17 8MEMORY EDIT4 596CHASEFUNCT ION : P t chM em C h s e S t c kC l e a r + t o + t o + t o + t oFUNCTION: P t ch M emC h s e S t c kCopy + t o + t o + t o + t oC HSE+ t o2 3PAGE ASSIGN FILE1BUILD2CLEAR3STACKSTART 1EXIT SETUP RECORD021B Clearing Chaseswww.sxsevents.co.uk▼<strong>Event</strong> V3 <strong>Manual</strong> 127
ent production courtesy Phone: of and Audio-Visual 0870 080 2342 ServicesAdvanced Featureswww.sxsevents.co.ukemail: enquiries@sxsevents.co.uk21.40 Clearing a Patch☞1Diagram 21CPress the Clear button to open the Clear/Copy menu.Note: Move the cursor to the Function field and press the (On) button to toggle thefield from Copy to Clear if necessary.23456789Move the cursor to the PTCH (Patch) field.Press the (On) button to open the Clear Patch menu.Move the cursor to the PCH: (Patch:) field.Set the Patch number to be cleared.Move the cursor to the Type field and set the type of Patch which will beformed after the old one is cleared. The two options are:1 to 1 - Patches Channel 1 to Dimmer 1, Channel 2 to Dimmer 2 and so onto the maximum number of desk channels. On a <strong>48</strong> Channel <strong>Event</strong> channel<strong>48</strong> is patched to dimmer <strong>48</strong> in normal mode and channel 96 is patched todimmer 96 if in wide mode. Dimmers above this number are NOT patchedto begin with.Null - Does not patch any channel to any dimmer. It is sometimes easier toset up a new Patch by starting from a “clean slate”.Move the cursor to the LVLS (Levels) field.Set the default level for each dimmer in the Patch.For example:As shown in diagram 21C, if the field is set to 50 all dimmers would bepatched at 50%. However, this level can then be changed on a dimmer bydimmer basis.Move the cursor to the CONFIRM field and press the (On) button to clearthe Patch.128 <strong>Event</strong> V3 <strong>Manual</strong>www.sxsevents.co.uk
ent production courtesy Phone: of and Audio-Visual 0870 080 2342 Serviceswww.sxsevents.co.ukemail: enquiries@sxsevents.co.uk© <strong>Jands</strong> Electronics May 1995F un c t :C r ionl e aP TCM em + t oH+ t oC+htsoeS t c k+ t oEND7 8 9MEMORY EDIT CHASE4 5 6PAGE ASSIGN FILE1 2 3BUILD CLEAR STACK0EXIT SETUP RECORDOR8s9CONFIRMO f fCONFIRMOn7 8 97 8 9MEMORY EDIT CHASEMEMORY EDIT CHASE4 5 64 5 6PAGE ASSIGN FILEPAGE ASSIGN FILE1 2 31 2 3BUILD CLEAR STACKBUILD CLEAR STACK0EXIT SETUP RECORDORP CH :P x x x____P t c hType1 t o1Lv5l070EXIT SETUP RECORDORTypex t oxLvFlFs56C l rC hseP C H : ____P 1 P t c hTypeLv l s1 t o1F FConfi rmOff4P C H : ____P 1 P t c h7 8MEMORY EDIT4 596CHASEFUNCTION : P t chM em C h s e S t c kC l e a r + t o + t o + t o + t oFUNCTION : P t ch M em C h s e S t c kC opy + t o + t o + t o + t oP+TCoH2 3STARTPAGE ASSIGN FILE1 2 3BUILD CLEAR STACK0EXIT SETUP RECORD121C Clearing a Patchwww.sxsevents.co.uk▼<strong>Event</strong> V3 <strong>Manual</strong> 129
ent production courtesy Phone: of and Audio-Visual 0870 080 2342 ServicesAdvanced Featureswww.sxsevents.co.ukemail: enquiries@sxsevents.co.uk22.00 Copying Memories, Chases andPatches22.10 Copying a Memory☞1Diagram 22APress the Clear button to open the Clear/Copy menu.Note: Move the cursor to the FUNCTION: field and press the (On) button to toggle thefield from Copy to Clear if necessary.23456789Move the cursor to the MEM (Memory) field.Press the (On) button to open the Copy Memory menu.Move the cursor to the MEM: field (the number of the memory to be copied).Set the Memory number to be copied.Move the cursor to the TO: field (the number where the memory is to go).Set the Memory number to be copied to.Move the cursor to the CONFIRM field.Press the (On) button to copy the Memory.Example:Diagram 22A shows Memory 10 being copied to Memory 50.130 <strong>Event</strong> V3 <strong>Manual</strong>www.sxsevents.co.uk
ent production courtesy Phone: of and Audio-Visual 0870 080 2342 Serviceswww.sxsevents.co.ukemail: enquiries@sxsevents.co.uk© <strong>Jands</strong> Electronics May 1995S to rag e:C opi ed 0% us ed, 100%free.F untion:Copc yP t ch M EM+ t o + t oC+htsoeENDCONF IRM CONF IRMO f f On 8 97 8 97 8 9MEMORY EDIT CHASEMEMORY EDIT CHASE4 5 64 5 6PAGE ASSIGN FILEPAGE ASSIGN FILE1 2 31 2 3BUILD CLEAR STACKBUILD CLEAR STACK0EXIT SETUP RECORDORME M:M 1 0_M___10T O :M 100EXIT SETUP RECORDORT O :M 5056 7C o pyMmr yME M:M 10_M___10T o:M 10_M___10Confi rmOff4ME M:M 10_M___107 8MEMORY EDIT4 596CHASEFUNCTION : P t chM em C h s e S t c kC opy + t o + t o + t o + t oFUNCTION : P t ch M emC h s e S t c kC l e a r + t o + t o + t o + t oM EM+ t o2 3STARTPAGE ASSIGN FILE1 2 3BUILD CLEAR STACK0EXIT SETUP RECORD122A Copying a Memorywww.sxsevents.co.uk▼<strong>Event</strong> V3 <strong>Manual</strong> 131
ent production courtesy Phone: of and Audio-Visual 0870 080 2342 ServicesAdvanced Featureswww.sxsevents.co.ukemail: enquiries@sxsevents.co.uk22.20 Copying a Chase☞Diagram 22B1 Press the Clear button to open the Clear/Copy menu.Note: Move the cursor to the FUNCTION: field and press the (On) button to toggle thefield from Copy to Clear if necessary.23456789Move the cursor to the CHSE (Chase) fieldPress the (On) button to open the Copy Chase menu.Move the cursor to the CHS:(Chase:) field (the number of the Chase to becopied).Set the Chase number to be copied.Move the cursor to the TO: field (the number of where the chase is to go).Set the new Chase number.Move the cursor to the CONFIRM field.Press the (On) button to copy the chase.Example:Diagram 22B shows Chase 1 being copied to Chase 10.132 <strong>Event</strong> V3 <strong>Manual</strong>www.sxsevents.co.uk
ent production courtesy Phone: of and Audio-Visual 0870 080 2342 Serviceswww.sxsevents.co.ukemail: enquiries@sxsevents.co.uk© <strong>Jands</strong> Electronics May 1995S to rag e:C opi ed 0% us ed, 100%free.F untion:Copc yP t ch M em+ t o + t oC+HtSoEENDCONF IRM CONF IRMO f f On 8 97 8 97 8 9MEMORY EDIT CHASEMEMORY EDIT CHASE4 5 64 5 6PAGE ASSIGN FILEPAGE ASSIGN FILE1 2 31 2 3BUILD CLEAR STACK0EXIT SETUP RECORDORC H S :C 1_C___T O :1C 1BUILD CLEAR STACK0EXIT SETUP RECORDORT O :C 1056 7C o pyC h seC H S :C 1_C___1T o: ____C 1 C 1Confi rmOff4C H S :C 1_C___17 8MEMORY EDIT4 596CHASEFUNCTION : P t chM em C h s eC opy + t o + t o + t oFUNCTION :C l e a r P + t t o ch M + em t oC+ht s o eC HSE+ t o2 3STARTPAGE ASSIGN FILE1 2 3BUILD CLEAR STACK0EXIT SETUP RECORD1▼22B Copying a Chasewww.sxsevents.co.uk<strong>Event</strong> V3 <strong>Manual</strong> 133
ent production courtesy Phone: of and Audio-Visual 0870 080 2342 ServicesAdvanced Featureswww.sxsevents.co.ukemail: enquiries@sxsevents.co.uk22.30 Copying a Patch☞1Diagram 22CPress the Clear button to open the Clear/Copy menu.NOTE: Move the cursor to the FUNCTION: field and press the (On) button to toggle thefield from Copy to Clear if necessary.2345Move the cursor to the PTCH (Patch) field.Press the (On) button to open the Copy Patch menu.Move the cursor to the FROM field (the Patch table to be copied).Set the Patch table to be copied.NOTE: The maximun number of Patches is three (3).6789Move the cursor to the TO: field (the new Patch table to be copied to).Set the Patch table number.Move the cursor to the CONFIRM field.Press the (On) button to copy the Patch.Example:Diagram 22C shows Patch 1 being copied to Patch 2.134 <strong>Event</strong> V3 <strong>Manual</strong>www.sxsevents.co.uk
ent production courtesy Phone: of and Audio-Visual 0870 080 2342 Serviceswww.sxsevents.co.ukemail: enquiries@sxsevents.co.uk© <strong>Jands</strong> Electronics May 1995S to rag e:C opi ed 0% us ed, 100%free.F unc tion:CopyP+TtCoH M+etmoC+htsoeENDCONF IRM CONF IRMO f f On 897 8 97 8 9MEMORY EDIT CHASEMEMORY EDIT CHASE4 5 64 5 6PAGE ASSIGN FILEPAGE ASSIGN FILE1 2 31 2 3BUILD CLEAR STACKBUILD CLEAR STACK0EXIT SETUP RECORDORFROM____P c h 1 P t c hTO :P c h 10EXIT SETUP RECORDORTO:Pc h 2567C o pyP t chFROM____Pch 1 P t c hTO: ____Pc h 1 P t c hConfi rmOff4FROM____Pch 1 P t c h7 8MEMORY EDIT4 596CHASEFUNCTION:CopyP t ch+ t oM em+ t oC h s e S t c k+ t o + t oFUNCT ION : P t ch M emC h s e S t c kC l e a r + t o + t o + t o + t oP TCH+ o2 3PAGE ASSIGN FILE1 2 3BUILD CLEAR STACK0EXIT SETUP RECORD1START22C Copying a Patchwww.sxsevents.co.uk▼<strong>Event</strong> V3 <strong>Manual</strong> 135
ent production courtesy Phone: of and Audio-Visual 0870 080 2342 ServicesAdvanced Featureswww.sxsevents.co.ukemail: enquiries@sxsevents.co.uk23.00 Resetting the ConsoleReset is used to reset the console and optionally clear all data including Memories,Chases, Patches and the Password. Reset can be used to quickly erase all data thathas been recorded in an <strong>Event</strong>.NOTE: It is recommemded that a Deep Clear be performed each time a new show is tobe recorded.23.10 To Reset the Console☞1234567Diagram 23ATurn power switch off first before resetting the console, then follow the stepsbelow to reset the console:Hold the DBO, ADD/SOLO MASTER and HOLD buttons down whileturning power on to the console.The menu illustrated in diagram 23A appears on the right hand side LCDwindow.Move the cursor to the CONSOLE field.Press the (On) button.Press the RECORD button to confirm the console Reset.If required, enter a Password (up to 6 characters) using the flash buttons.If no Password is required press Exit. All data is now cleared from theconsole and all settings revert to the factory set defaults.136 <strong>Event</strong> V3 <strong>Manual</strong>www.sxsevents.co.uk
ent production courtesy Phone: of and Audio-Visual 0870 080 2342 Serviceswww.sxsevents.co.ukemail: enquiries@sxsevents.co.uk© <strong>Jands</strong> Electronics May 1995789MEMORY4 5EDIT6CHASEPAGEASSIGNFILE1 2BUILD CLEAR03STACK[STANDARD SCREEN]END7EXITSETUPRECORDTypene. .w.passwor d , Ex i t - none. . .FLASHBUTTONOR7 8 9MEMORY EDIT CHASE4 5 6PAGE ASSIGN FILE1 2 3BUILD CLEAR STACK0EXIT SETUP RECORDTypenew pas swor d ,*** * **6789MEMORYEDITCHASECONSOLEO f f3 4R e setC o nsoleALLdat a wi l l bel ost ! !RECORDt o c onfi rm.4 5 6PAGE ASSIGN FILE1 2 3BUILD CLEAR STACK0RECORDEXIT SETUP5STARTSAMPLE ADDHOLDADD/SOLOBUTTONBUTTOND.B.O.D.B.O.BUTTON1ResetPASSWORDO f f2Conso leO f f▼23A Resetting the Consolewww.sxsevents.co.uk<strong>Event</strong> V3 <strong>Manual</strong> 137
ent production courtesy Phone: of and Audio-Visual 0870 080 2342 ServicesAdvanced Featureswww.sxsevents.co.ukemail: enquiries@sxsevents.co.uk<strong>24</strong>.00 Connecting a Slave ConsoleA second console (<strong>Jands</strong> <strong>Event</strong>, ESP II or Stage 12/<strong>24</strong>) can be connected to provideextra Preset faders when the main console is set to wide mode (see Sction 5.00).To do this the main console must be set to Master operation and the other consolemust be set to Slave operation.<strong>24</strong>.10 To Set an <strong>Event</strong> Console as a Master1. Press the Setup button to open the Setup Menu.NOTE: The master desk has to be set into wide mode first.2. Move the cursor to the DESK field and press the (On) button to open theSet Desk menu.3. Move the cursor to the LINK field and press the (On) button to open theSet Link menu.4. Move the cursor to the MASTER field and press the (On) button to changethe field to ON.5. The StartCh# (Start Channel Number) field now appears. This field sets thechannel number that the first Preset fader on the slave console will control.The field defaults to one greater than the number of Preset Flash buttons.6. Move the cursor to the CONFIRM field and press the (On) button.TIP:If you want to use the Slave console to control a different range of channels,change the StartCh# field to the preferred setting.<strong>24</strong>.20 To Set an <strong>Event</strong> Console as a Slave1. Press the Setup button to open the Setup menu.2. Move the cursor to the DESK field and press the (On) button to open theSet Desk menu.3. Move the cursor to the LINK field and press the (On) button to open theSet Desk Link menu.4. Move the cursor to the SLAVE field and press the (On) button to changethe field to ON.5. Press the Exit button to cancel Slave operation.NOTE: The mimic LEDs do not function when in slave mode.138 <strong>Event</strong> V3 <strong>Manual</strong>www.sxsevents.co.uk
ent production courtesy Phone: of and Audio-Visual 0870 080 2342 Serviceswww.sxsevents.co.ukemail: enquiries@sxsevents.co.uk© <strong>Jands</strong> Electronics May 199525.00 <strong>Event</strong> LCD Displays25.10 LCD ControlThe two LCDs located on the front panel of the <strong>Event</strong> can be configured to suitdifferent lighting conditions and viewing angles.1. Press the Setup button to open the Setup menu.2. Move the cursor to the DESK field and press the (On) button to open theSet Desk menu.3. Move the cursor to the DISPLAY field and press the (On) button to openthe Setup Display menu.4. Move the cursor to the LCDS (LCDs) field and press the (On) button toopen the Setup LCDs menu.5. The menu includes three fields:* Bright[0 - 15]At 0 there is minimal backlighting of the LCDs. At 15 maximum backlightingis provided.* Contrast [0 - 15]Higher contrast settings tend to make the LCDs more legible from lowerviewing angles.* Cursor [Block / Line]Sets the cursor style in the LCDs. Generally a block cursor is easier tolocate.www.sxsevents.co.uk<strong>Event</strong> V3 <strong>Manual</strong> 139
ent production courtesy Phone: of and Audio-Visual 0870 080 2342 ServicesAdvanced Featureswww.sxsevents.co.ukemail: enquiries@sxsevents.co.uk26.00 Setting the Intensity of theDesklightsThe <strong>Event</strong> can be fitted with optional gooseneck type desklights. The brightness ofthe lights can be set in the Setup Desk Display menu.1. Press the Setup button to open the Setup menu.2. Move the cursor to the DESK field and press the (On) button to open theSet Desk menu.3. Move the cursor to the DISPLAY field and press the (On) button to openthe Setup Display menu.4. Move the cursor to the LAMP field and adjust the setting between 0 and FFusing the (On)/ (Off) buttons or the numeric keypad.5. Press the Exit key to close the menu.NOTE: The desk lights can NOT be dimmed off.140 <strong>Event</strong> V3 <strong>Manual</strong>www.sxsevents.co.uk
ent production courtesy Phone: of and Audio-Visual 0870 080 2342 Serviceswww.sxsevents.co.ukemail: enquiries@sxsevents.co.uk© <strong>Jands</strong> Electronics May 199527.00 Using MIDI to Control the <strong>Event</strong>The Musical Instrument Digital Interface (MIDI) is a well established standardwhich allows communication between suitably equipped devices. The <strong>Event</strong> isequipped with a MIDI input socket which is used to allow MIDI control of variousconsole functions.27.10 To select the MIDI menu:1. Press the Setup button to open the Setup menu.2. Move the cursor to the DESK field and press the (On) button to open the SetDesk menu.3. Move the cursor to the EXTN (External) field and press the (On) button toopen the Setup External menu.4. Move the cursor to the MIDI field and press the the (On) button to open theSetup MIDI menu. The MIDI menu contains five fields:* MIDI: The MIDI field must be turned ON for MIDI to be used. The MIDIinterface can be configured (using the other menu fields) to suit yourrequirements and then turned On and Off as required.* MIDI-Ch (Channel): MIDI information can be broadcast on any of 16channels. To set which channel the <strong>Event</strong> will ‘respond’ to, enter a valuebetween 1 and 16.* Prog (MIDI Program change messages): The <strong>Event</strong> responds to MIDIProgram change information. Program change messages can be used toactivate any of the Memories from 1 to 128 inclusive. To use the Programchange messages turn PROG field ON.NOTE: When Program is turned ON Assign Masters 23 & <strong>24</strong> on an <strong>Event</strong> Plus are fixedas a Crossfade STACK and Memories are played back through those faders.Example:If MIDI Program Change message 25 is received, Memory 25 will play backon Assign Masters 23 & <strong>24</strong> using the fade times set for that Memory.* Assign (Assign fader number): The Assign field sets which Flash buttonwill be triggered by the Note set in the NOTE field. Assign 1 is on the extremeleft hand side of the Assign Masters. Each Assign Master can be set to respondto a different Note, to do this step through the ASSIGN field settingeach fader to the desired Note. The ASSIGN / NOTE fields update immediatelyand there is no need to press Record to save changes.* Note (MIDI Note message): MIDI allows for 128 Note messages to bebroadcast. The NOTE field is used to set which of the 128 Notes will beassociated with each of the 12 Assign Masters. Whenever a Note that hasbeen specified in this menu is received it will be equivalent to pressing theassociated Assign Flash button.5. First set the ASSIGN field from 1 to 12.6. Set the NOTE field from 1 through 128 - corresponding to the 128 MIDI Notes.TIP:If you do not want to use MIDI NOTE messages on a particular Assign Master, setthe NOTE field to zero (displayed as OFF). To set the field to off, enter a zero ordouble click on the OFF (-) button.www.sxsevents.co.uk<strong>Event</strong> V3 <strong>Manual</strong> 141
ent production courtesy Phone: of and Audio-Visual 0870 080 2342 ServicesAdvanced Featureswww.sxsevents.co.ukemail: enquiries@sxsevents.co.uk28.00 Connecting an External Monitor tothe <strong>Event</strong> - OptionThe Video Display MCard (VDU) option allows the user to display console dataon an IBM-type video monitor, and to save and restore console data on a removablememory card. Two types of VDU options support the most common VDUmonitors available as follows:* EGA / CGA / Monochrome (obsolete)* VGAAs of January 1995, the EGA / CGA / Monochrome option panels are obsolete asthese monitor types are no longer manufactured. VGA monitors are available fromcomputer stores. Regardless of the monitor type, the information displayed is stillthe same.Memory Cards are available from <strong>Jands</strong> dealers.The Video/MCard option can be used with all other <strong>Event</strong> option panels, includingthe FDD option.28.10 InstallationFollow the instructions in the upgrade kit (if used), making sure you follow thecorrect instructions for your console. Put the old parts to one side so that if theupgrade does not work correctly, the original parts can be replaced to restoreconsole operation.When the installation is complete, check that the console operates normally. If thesoftware has been changed then a Deep Clear (reset) must be performed as perSection 23 of the user manual.28.20 OperationUse the SETUP/DESK/DISPLAY menu to adjust the VIDEO option to select thetype of video monitor/option panel combination that has been installed.NOTE: Damage can occur to a video monitor if it is not set to the correct video type.Once installed, the VDU shows console data at all times. When in no menu (ie. nokeypad button pressed), use the cursor keys to select between either the stagedisplay or a recorded memory/chase list. Pressing a function key activates a screen,eg. when the FILE button is pressed, the VDU changes to show a display of the filecontents as recorded.28.30MCardSee Section 20 of the user manual for information on using the MCard option.142 <strong>Event</strong> V3 <strong>Manual</strong>www.sxsevents.co.uk
ent production courtesy Phone: of and Audio-Visual 0870 080 2342 Serviceswww.sxsevents.co.ukemail: enquiries@sxsevents.co.uk© <strong>Jands</strong> Electronics May 199529.00 Analogue Output - OptionAs an option on the <strong>Event</strong> console Socapex output connections can be fitted. TheseSocket kits are available from <strong>Jands</strong> dealers.Up to eight connectors can be fitted to the console to provide up to <strong>24</strong>0 channelsof analogue dimmer control.Each Socket provides 30 x outputs 10V(+) / Max. Capacity: 10mA.NOTE: See installation information provided with this option.www.sxsevents.co.uk<strong>Event</strong> V3 <strong>Manual</strong> 143
ent production courtesy Phone: of and Audio-Visual 0870 080 2342 ServicesAdvanced Featureswww.sxsevents.co.ukemail: enquiries@sxsevents.co.uk30. 00 Floppy Disc Drive - Option30.10IntroductionThe Floppy Disk Drive (FDD) option allows the user to save and restore data on apre-formatted IBM PC format 3.5 inch diskette. These diskettes are available frommost computer stores. The FDD option can be used in conjunction with all other<strong>Event</strong> option panels, including the VDU/MCard option. Note, however, that a partchange is necessary on the MCard if both the FDD and MCard options are to be usedtogether.NOTE: When fitting a FDD to an existing <strong>Event</strong>, check first with your distributor to ensurecompactability.30.10 InstallationFollow the instructions in the upgrade kit (if used), making sure you use the correctinstruction for your console. Put the old parts to one side so that if the upgrade doesnot work correctly, the original parts can be replaced to restore console operation.When the installation is complete perform a Deep Clear (reset) as described inSection 23 of the user manual.30.20 OperationThe FDD option functions are accessed through the SETUP/BKUP menu. In thismenu there are four options:* MCard: The MCard option functions as described in Section 20 of the usermanual.* Disk: The DISK option is used when data is to be transferred to or from thediskette. Move the cursor to the DISK option and press the (On) button to openthe Diskette control menu. Ensure a diskette has been inserted into the drive slotbefore this option is selected. When the diskette drive has been initialised, amenu similar to the MCard save/load menu will be opened.NOTE: If no diskette is present in the disk drive when the DISK option is selected, an errormessage will be displayed and the DISK transfer will be aborted.1. Move the cursor to the FILENAME option2. Type in the name of the diskette file to be saved or loaded.3. Move the cursor to either the SAVE or LOAD field (as appropriate)4. Press the (On) button to initiate transfer. Data transfer takes approximatelyone minute.NOTE: Do not remove the diskette while the drive light is on.* Time and Date: The TIME and DATE options are used to set the time and dateof the clock on the FDD option. Once set, the time and date are added to the diskfile attributes when a show is saved. These only need to be set once - the clockruns automatically after that and only needs to be reset if it becomes inaccurate.NOTE: Time is displayed in <strong>24</strong> hour mode eg. 13:00 = 1:00pm. Use the numeric keypador (On)/(Off) button to set the time.144 <strong>Event</strong> V3 <strong>Manual</strong>30.30MaintenanceThe diskette drive mechanism is mechanical and should always be treated with care.Never allow the entry of fluids into the slot, and always ensure a diskette is in thedrive when the console is moved.www.sxsevents.co.uk
ent production courtesy Phone: of and Audio-Visual 0870 080 2342 Serviceswww.sxsevents.co.ukemail: enquiries@sxsevents.co.uk© <strong>Jands</strong> Electronics May 1995Generalwww.sxsevents.co.uk<strong>Event</strong> V3 <strong>Manual</strong> 145
ent production courtesy Phone: of and Audio-Visual 0870 080 2342 ServicesGeneralwww.sxsevents.co.ukemail: enquiries@sxsevents.co.uk31.00 MaintenanceWith care the <strong>Event</strong> console will require little or no maintenance. However, theinternal battery will need to be replaced on regular basis (see Section 32.00).WARNINGDO NOT ALLOW THE ENTRY OF LIQUIDS OF ANY SORT INTOTHE CONSOLE CHASSIS.If the front panel requires cleaning, wipe with a mild detergent on a damp soft cloth.DO NOT spray liquids onto the front panel.DO NOT use solvents for cleaning the front panel.146 <strong>Event</strong> V3 <strong>Manual</strong>www.sxsevents.co.uk
ent production courtesy Phone: of and Audio-Visual 0870 080 2342 Serviceswww.sxsevents.co.ukemail: enquiries@sxsevents.co.uk© <strong>Jands</strong> Electronics May 199532.00 ServiceNOTE:Contact your authorised <strong>Jands</strong> Distributor for repairs orservicing.In Australia refer all repair to an authorised <strong>Jands</strong> serviceagent or return the faulty unit in suitable packaging to:JANDS ELECTRONICS Service Department.Rear, 578 Princes Highway, St Peters, NSW 2044, Australia.Phone: +61 2 516 3622, Fax: +61 2 517 1045.www.sxsevents.co.uk<strong>Event</strong> V3 <strong>Manual</strong> 147
ent production courtesy Phone: of and Audio-Visual 0870 080 2342 ServicesGeneralwww.sxsevents.co.ukemail: enquiries@sxsevents.co.uk33.00 Battery ReplacementThe internal battery within the <strong>Event</strong> should be replaced every 3 years or wheneverproblems are experienced with the console in terms of losing memories. To replacethe battery follow the procedure listed below:WARNINGReplacing the battery will make the console lose all storedmemories. Record ALL critical information to an Mcard forfloppy diskette prior to replacement.1. Remove base of console.2. Desolder battery making note of polarity connections.3. Install new battery and solder into place.4. Install base of console.1<strong>48</strong> <strong>Event</strong> V3 <strong>Manual</strong>www.sxsevents.co.uk
ent production courtesy Phone: of and Audio-Visual 0870 080 2342 Serviceswww.sxsevents.co.ukemail: enquiries@sxsevents.co.uk© <strong>Jands</strong> Electronics July 1995Appendix Awww.sxsevents.co.uk<strong>Event</strong> V3 <strong>Manual</strong> 149
ent production courtesy Phone: of and Audio-Visual 0870 080 2342 ServicesAppendix A Awww.sxsevents.co.ukemail: enquiries@sxsevents.co.ukEVENT Setup Menu StructureSet Desk Ptch Ctrl Util Pref McrdUp +to↑ +to↑ +to↑ +to↑ +to↑ +to↑Mcard not found.Press ExitSet From Card to CardMcard Off OffSet Help Freeze Times IncrmtPrefs On On 0:00.0 0Set Prec Heat SoloUtil +to↑ +to↑ +to↑Off Off 0:59.0 10Chan Chan# Thru SafetySolo 1 1 Off<strong>24</strong> <strong>24</strong> OnChan Dim# Thru AtHeat 1 1 0%512 512 10%Chan Chan# Thru PrecPrec 1 1 Highest<strong>24</strong> <strong>24</strong> LastPress + to keep ChangsPress - to CancelSet P1/2 dbo SMast Chs FkeysCtrl Norm Momt Hold Norm +to↑Rev Ltch Asgn SnglXFadeMem/chFunction not available when only12 Assign masters. Press ExitPt ---- Ch# Dim#:At Dim#:At Dim#:At1 Pch1 1 NC FF NC FF NC FF2 <strong>24</strong> 512 0 512 0 512 031d2d3dSet Mode Wide Link Display ExtnDesk Rec +to↑ +to↑ +to↑ +to↑PlaySet MidiExtn +to↑Midi Midi-Ch Program Assign NoteOff 1 Off 1 OffSet Lcds Video LampDisp +to↑ Mono FFEga 0CgaVgaSet Master Slave ConfirmLink Off Off No16 On 12 128Set Cursor Contrast BrightLcds Block 0 0Line 15 15Set Wide Chans Psets ConfirmWide Off 0 Single NoOn150 <strong>Event</strong> V3 <strong>Manual</strong>120 Dualwww.sxsevents.co.ukDesk in Slave mode…Ress EXIT to resume control.Set Master Start#Ch ConfirmLink On 1 NoOff <strong>24</strong>
ent production courtesy Phone: of and Audio-Visual 0870 080 2342 Serviceswww.sxsevents.co.ukemail: enquiries@sxsevents.co.uk© <strong>Jands</strong> Electronics July 1995Appendix Bwww.sxsevents.co.uk<strong>Event</strong> V3 <strong>Manual</strong> 151
ent production courtesy Phone: of and Audio-Visual 0870 080 2342 ServicesAppendix B Bwww.sxsevents.co.ukemail: enquiries@sxsevents.co.ukPin AssignmentsDMX Digital Output SocketPIN NoSignal1 SHIELD2 SIGNAL -3 SIGNAL +4 NOT USED5 NOT USEDConnector type: Cannon 5 pin AXRRS-<strong>48</strong>5 Standard USITT DMX-512 ProtocolMIDI In SocketPIN NoSignal1 NOT USED2 NOT USED3 NOT USED4 MIDI +5 MIDI SIGNALConnector type: DIN 5 pinDesklight SocketPIN NoSignal1 No Connection2 Ground3 0 - 12 volts +Connector type: Cannon 3 pin AXR152 <strong>Event</strong> V3 <strong>Manual</strong>www.sxsevents.co.uk
ent production courtesy Phone: of and Audio-Visual 0870 080 2342 Serviceswww.sxsevents.co.ukemail: enquiries@sxsevents.co.uk© <strong>Jands</strong> Electronics July 1995Desk Link CableTo link two <strong>Event</strong> desks together connect a cable, wired as detailed below betweenthe DMX output of the slave desk to the MIDI input on the master desk.Cannon 5 PinPIN NoDin 5 PinPIN No3 390R 1/4w 5% 52 4PowerRequirementsConsumptionConnectorFuse90 volts to 265 volts AC, 50-60 Hz40 watts (85 watts with analogue outputs)IEC 3-pin inc. fuse, switch and mains filter2 amp M205MIDI Note MessagesMidi Note messages run from 0 to 127.The <strong>Event</strong> software up to version 3.1 has the MIDI Note numbers as 1 - 128. When usingthe table below add 1 to each Note number.MIDI Note MIDI Note MIDI Note MIDI Note MIDI Note MIDI Note36 C1 <strong>48</strong> C2 60 C3 72 C4 84 C5 96 C637 C#1 49 C#2 61 C#3 73 C#4 85 C#5 97 C#638 D1 50 D2 62 D3 74 D4 86 D5 98 D639 D#1 51 D#2 63 D#3 75 D#4 87 D#5 99 D#640 E1 52 E2 64 E3 76 E4 88 E5 100 E641 F1 53 F2 65 F3 77 F4 89 F5 101 F642 F#1 54 F#2 66 F#3 78 F#4 90 F#5 102 F#643 G1 55 G2 67 G3 79 G4 91 G5 103 G644 G#1 56 G#2 68 G#3 80 G#4 92 G#5 104 G#645 A1 57 A2 69 A3 81 A4 93 A5 105 A646 A#1 58 A#2 70 A#3 82 A#4 94 A#5 106 A#647 B1 59 B2 71 B3 83 B4 95 B5 107 B6www.sxsevents.co.uk<strong>Event</strong> V3 <strong>Manual</strong> 153