D&RGW M-64 Owner's Manual web site.cdr - Weaver Models
D&RGW M-64 Owner's Manual web site.cdr - Weaver Models
D&RGW M-64 Owner's Manual web site.cdr - Weaver Models
- No tags were found...

You also want an ePaper? Increase the reach of your titles
YUMPU automatically turns print PDFs into web optimized ePapers that Google loves.
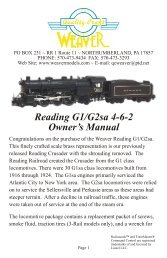
PO BOX 231 ~ RR 1 Route 11 ~ NORTHUMBERLAND, PA 17857PHONE: 570-473-9434 FAX: 570-473-3293Web Site: www.weavermodels.com ~ E-mail: qcweaver@ptd.netD&<strong>RGW</strong> M-<strong>64</strong> 4-8-4Owner’s <strong>Manual</strong>Congratulations on the purchase of the D&<strong>RGW</strong> M-<strong>64</strong>class Northern. This workhorse of the "Scenic Line of theWorld" as the D&<strong>RGW</strong> was commonly known, was firstused strictly for passenger service. In later years, freightservice was added to the M-<strong>64</strong>'s regiment.Because this locomotive is hand assembled with sheet andcast brass parts, please take care in handling the unit toprevent any accidental damage.The locomotive package contains a replacement packet ofscrews, smoke fluid, traction tires (3-Rail models only),Page 1Railsounds and TrainMaster®Command Control are registeredtrademarks of and licensed byLionel LLC.
and a wrench for the side rods for your convenience.Should you need additional parts or service, contact ourfactory at the address listed on the front of this booklet.Before You Use Your Engine:The D&<strong>RGW</strong> M-<strong>64</strong> has been tested and greased beforeleaving the factory and is ready-to-run on any 0-54 layoutor larger. However, it is recommended that all movingparts on this engine are lubricated lightly upon the firstinitial use and after a heavy or extended period of use, inorder to enhance performance. For specific lubricationpoints please refer to the diagram in Figure 1.Maintaining Your Engine:The engine and tender should be maintained periodicallyto insure proper operation and performance. All movingparts should be oiled after 25 hours of operation. Onheavily used engines, bearing grease (or a similarlubricant) should be added to the gear box, locatedFigure 1Lubrication PointsLubrication PointsFigure 2Greasing PointsPage 2
etween the blind drivers on the drive train. To addgrease, remove the four small Phillips screws on theinspection cover and insert the grease using a screwdriver. For specific greasing points, please refer to thediagram in Figure 2. Reassemble and run the engine asnormal.Smoke Unit Instructions:This engine is equipped with an operating smoke unit andis wired with an ON/OFF switch located under the cabdirectly behind the trailing truck. If you decide not to usethe smoke unit, then the ON/OFF switch should be in theOFF position. This step is highly recommended as thesmoke unit will heat up and could eventually burn out. Toadd fluid, simply pour about 10 drops of smoke fluidprovided with your locomotive, into the smoke stack.After adding the smoke fluid, apply power to your trackand after several seconds the engine will begin to smoke.Battery Installation Instructions ForConventional Mode:To operate this engine successfully in conventional mode,a 9 volt battery needs to be installed in your tender. Thereare four 3mm screws, one on each corner of the tenderfloor. To install your battery, remove the four screws fromthe bottom of the tender and the tender shell will thenremove easily. You will find a 9 volt battery connector endwrapped in black electrical tape among the wires. Installthe battery, place the tender shell back on the tender floor,and reinstall the four 3mm screws.Sound System Operating Instructions (ThisSection Applies Only To 3-Rail LocomotivesWith Sound):All our 3-Rail with sound engines are equipped withPage 3
Railsounds the finest sound system available today andthe industry's premier digital operating control system,TrainMaster® Command Control. This system willoperate with a conventional transformer but theadditional sound features which include squealing brakes,coupler sound, steam chuff, up and down whistle pitches,steam sound, bell, volume control, tower command, andcrew talk will not function without the remote control andcommand base.In order to properly function all the additionalfeatures you will need:6-12868 CAB-1 Remote Control6-12911 Command Base(CAB-1 and Base are available together as 6-12969TrainMaster Command set.)Installation is easy:1. Connect the base output wire to the outer rail. PlugBase into wall outlet.2. Set your transformer to 18 volts.TransformerCommand BaseCab-1Press , turn red throttle clockwise to go. Tochange directions, press once. The train will stop.Turn the throttle clockwise to go.Page 4
To operate Towercomm message, press , .Message will play in 4 seconds. To operate Crewtalkmessage, press , .Horn, Bell, and F and R coupler should be selfexplanatory.Pressing speeds the engine up momentarily toclimb a grade. slows or stops the enginemomentarily. The engine will resume its original speedafter the or button is released.All engines come set as engine #1. To change the ID toany number between 1 and 99, move the"PROGRAM/RUN" switch on the engine to PROG. Turnon track power. Press then then .The horn will blow. Move the switch to the RUN position.To run, press then , and turn throttle.3-Rail With Sound in Conventional Mode:If you are running your 3-Rail with sound locomotive on aconventional transformer you will only receive a selectnumber of sounds. These sounds include steam chuff,bell, and up and down whistle pitches.Service And Warranty Information:This item is warranted for one year from the date ofpurchase. We will repair or replace (at our option) thedefective part without charge for parts or labor, if the itemis returned in the manner listed below within one year ofthe original date of purchase. This warranty does notcover items that have been abused or damaged bycareless handling. Transportation costs incurred by thecustomer are not covered under this warranty.For warranty repair, DO NOT return your product to thePage 5
place of purchase. Instead, follow the instructions belowto obtain warranty service as our dealer network is notprepared to service the product under the terms of thiswarranty.1. First: WRITE, CALL or FAX <strong>Weaver</strong> <strong>Models</strong>, PO Box231, RR 1 Route 11, Northumberland, PA 17857, 570-473-9434 (FAX #570-473-3293), requesting a ReturnAuthorization Number and stating when the unit waspurchased and a description of the problem.2. CAUTION: Make sure the product is packed in itsoriginal factory packaging including its foam and plasticwrapping material so as to prevent damage duringshipping. The shipment must be prepaid and werecommend that it be insured. A cover letter, includingyou name, address, daytime phone number and a fulldescription of the problem MUST be included tofacilitate the repairs. Please include the descriptionregardless of whether you discussed the problem withone of our service technicians when contacting <strong>Weaver</strong><strong>Models</strong>.3. Please make sure you have followed the instructionscarefully before returning any merchandise for service.• • • •We Also Offer Several Items To Compliment YourD&<strong>RGW</strong> M-<strong>64</strong> LocomotivePage 6