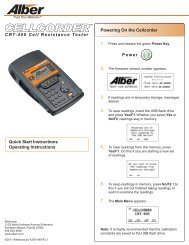
BCT-2000 Software and BCT-128 and BCT-256 User's Guide - Alber
BCT-2000 Software and BCT-128 and BCT-256 User's Guide - Alber
BCT-2000 Software and BCT-128 and BCT-256 User's Guide - Alber
- No tags were found...

You also want an ePaper? Increase the reach of your titles
YUMPU automatically turns print PDFs into web optimized ePapers that Google loves.
10.2. <strong>BCT</strong>-<strong>128</strong>/<strong>BCT</strong>-<strong>256</strong> Connection StepsAfter completing all preliminary test preparations, connect the <strong>BCT</strong>-<strong>2000</strong> system to thebattery being tested. This section describes how to connect equipment for a single string test.Refer to drawing <strong>BCT</strong>-2436-D1110 for connection of the cables from the computer to the<strong>BCT</strong>-<strong>128</strong> or <strong>BCT</strong>-<strong>256</strong>. Refer to drawing <strong>BCT</strong>-350-D1105 for connection to the cells.1. Before making any connections, ensure all equipment is powered off.2. Connect one end of the 9-pin to 9-pin cable to the serial port of the computer.3. Connect the other end of the cable to the <strong>BCT</strong> computer port.4. Connect the AC power cable to the <strong>BCT</strong>-<strong>128</strong> or <strong>BCT</strong>-<strong>256</strong>, <strong>and</strong> plug the other end into a120VAC 60Hz receptacle.5. If printing of test results is desired, unpack the printer. Plug the AC adapter into the smallpower receptacle on the printer, <strong>and</strong> the other end into a 120VAC 60Hz receptacle. Waituntil completion of the test before printing.6. Connect the male end of the six foot printer cable to the printer cable port near the ACadapter input. Connect the other end to the computer 25-pin D-Sub female connector onthe rear of the unit.7. Load paper into the printer.8. Connect the DB37 end of the 25 foot sense lead extender cable (DB37 on one end,Amphenol round 37-pin on other end) to the <strong>BCT</strong> Cell 1-32 port.9. Connect the black connector end of the red individual cell wire (small numbered clips onone end, Amphenol 37-pin on the other) to the sense lead extender cable. (Open end fromabove step.)10. Repeat above two steps for all other extender cables <strong>and</strong> sense lead cables until there areenough clips for all the cells.11. Connect one end of another sense lead extender cable to the System connector on the rearof the <strong>BCT</strong>, <strong>and</strong> connect the individual red sense leads labeled OV+, OV-, IT-1, IT-2, <strong>and</strong>so on, to the open end of the sense lead extender cable.12. Connect the clip labeled OV+ (Overall Voltage+) to the most positive post on the battery.Connect the clip labeled OV- to the most negative post on the battery.13. Connect Clip 0 from the first set of red sense leads to the positive post of Cell 1. This isthe same point the OV+ lead was placed in the previous step.14. Place Clip 1 on the positive post of Cell 2, unless Cell 1 is the most negative cell. If it isthe most negative cell, then connect the lead to the negative post of Cell 2. Continue thisstep until the entire battery has been outfitted.15. In installations of more than 32 cells or modules, it is necessary to use another set ofsense leads. Connect the “A” lead of each new set to the same post as the last lead fromthe previous set.16. The last cell will have two leads: the overall voltage lead <strong>and</strong> sense lead. Place the clipwith the ‘Cell Number minus 1’ count on the positive post <strong>and</strong> the Cell Number on thenegative post of the final cell.15