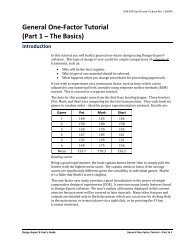
DX7 Tutorial - General Factorial (Part-1 Categoric ... - Quality Coach
DX7 Tutorial - General Factorial (Part-1 Categoric ... - Quality Coach
DX7 Tutorial - General Factorial (Part-1 Categoric ... - Quality Coach
- No tags were found...

You also want an ePaper? Increase the reach of your titles
YUMPU automatically turns print PDFs into web optimized ePapers that Google loves.
Starting a new design via menu (option: click blank-sheet icon () on the toolbar)Then from the default <strong>Factorial</strong> tab, click <strong>General</strong> <strong>Factorial</strong>. Choose 2 as thenumber of factors. If you are in Horizontal entry mode, change it to Vertical.(Design-Expert will remember this the next time you set up a design.)Selecting number of factors for general factorial designEnter Material for factor name A (<strong>Categoric</strong>). Key in the word Type as your Units.Enter the value 3 for the number of levels. Change the treatment names to A1, A2and A3. Notice that Type in the far left column defaults to Nominal (named) asopposed to ordinal (ordered). This difference in the nature of factors affects howDesign-Expert codes the categorical levels, which changes the model coefficientsreported under ANOVA in the subsequent response analysis. Your design shouldnow appear as that shown below.Entering material as a nominal factor<strong>Tutorial</strong>s such as this one on general factorials will quickly get you up to speed onhow to use Design-Expert software, but it does not serve as a statistical primer fordesign and analysis of experiments. If you crave such details, Help is at your fingertips! For example, go to Help, Contents and work your way down the tree2 <strong>General</strong> <strong>Factorial</strong> <strong>Tutorial</strong> – <strong>Part</strong> 1 Design-Expert 8 User’s Guide
DX8-02C-Gen2<strong>Factorial</strong>-P1.docx Rev. 12/8/09structure through the factorial branches to <strong>General</strong> (Multi-Level) <strong>Factorial</strong>Design. Note the details on the distinction in categoric contrasts (Nominal vsOrdinal).Help on general factorial designClose Help by pressing X on its window. Now enter factor B data by keying inTemperature for factor name B (<strong>Categoric</strong>), deg F for units, 3 for the number oflevels, and 15, 70 and 125 for the levels. Press Nominal, click the arrow on thedrop list, then choose Ordinal as shown below. This change from Nominal toOrdinal indicates that although this factor is being treated categorically (forexample, due to controls offering only the three levels), temperature is really acontinuous factor. Click Continue at the screen’s far lower right.Entering information on factor BDesign-Expert 8 User’s Guide <strong>General</strong> <strong>Factorial</strong> <strong>Tutorial</strong> – <strong>Part</strong> 1 3
Enter 4 for replicates. The number of runs (36) won’t be updated until you pressthe Tab key or move from the cell. Leave the blocks option alone because theseexperiments are completely randomized.Entering the number of replicatesClick Continue to move on to the entry screen for responses. Leave the defaultresponses at 1. Enter name as Life and units as hours.Now we will walk you through a calculation of power – the ability of yourexperiment to detect meaningful differences in treatments. If you do too few runsand underpower your experiment, an important change in response (the “signal”)will become obscured by normal system/test variation (the “noise”). That wouldbe a waste of time and materials. Design-Expert makes the calculation of powereasy and puts it in upfront in the design-building process so you have a chance tobolster your experiment, if necessary. Let’s assume that battery life must improveby at least 50 hours to be of any interest and that quality control records produce astandard deviation of 30. Enter these values as shown below, Tab (or click) out of30, and Design-Expert then calculates the signal to noise ratio.Response entry screenPress Continue to see the power of this design for the difference that the engineershope to detect, at a minimum. It is calculated to be 94.5 % probability of seeing adifference (delta) as small as 50 hours. This exceeds the rule-of-thumb for powerof 80 % at a minimum, thus it can be concluded that the planned design will suffice.Power calculation4 <strong>General</strong> <strong>Factorial</strong> <strong>Tutorial</strong> – <strong>Part</strong> 1 Design-Expert 8 User’s Guide
DX8-02C-Gen2<strong>Factorial</strong>-P1.docx Rev. 12/8/09Analyze the ResultsClick Continue to complete the design specification process. Design-Expert nowdisplays the 36 runs (in random order) from the 3x3 factorial design with fourreplicates.To save time, simulate the experimental results by right-clicking the responseheader and selecting Simulate Response. (A heads-up for statistics educators:You can build your own simulations via the Design Tools. Feel free to bring up thecontrols for this and press Help for details on using it.)Choosing a simulationClick the file named Battery.sim and Open it. You should now see data slowlyflow in from the experiment (we added a delay in the simulator so you can read theresults as they get entered by the computer – also, this makes it seem a bit harderto do the runs: Let’s not make things look too easy!). This is a good time topreserve your work: Select File and Save As. Change the file name toBattery.dxp and Save.Then under the Analysis branch of the program, click the node labeled Life. Younow see options for performing response transformations.First step in the analysis – transformation optionsLeave the transformation at the default of “None” and go ahead and click theEffects button displayed next in the toolbar for response analysis. Design-ExpertDesign-Expert 8 User’s Guide <strong>General</strong> <strong>Factorial</strong> <strong>Tutorial</strong> – <strong>Part</strong> 1 5
now provides an initial effect selection and displays it graphically on a specializedstatistical plot called a “half-normal.”Initial effect selectionThe program displays the absolute value of all effects (plotted as squares) on thebottom axis. The procedure is detailed in a presentation by Patrick Whitcomb on“Graphical Selection of Effects in <strong>General</strong> <strong>Factorial</strong>s” (2007 Fall TechnicalConference co-sponsored by the American Society for <strong>Quality</strong> and the AmericanStatistical Association) – contact Stat-Ease for a copy.Design-Expert pre-selected two outstanding effects – the main effects of factors Aand B. You can, and in this case should, modify the default effect selection. Moveyour mouse cursor over the unlabeled square and click it. (Note that this goes bothways, that is, you can deselect chosen effects with a simple mouse click.)Another effect chosenInteraction AB is now identified. Notice that Design-Expert adjusts the line toexclude the chosen effects. You will gain more practice on the use of half-normalplots for picking effects in the Two-Level <strong>Factorial</strong> <strong>Tutorial</strong>. It’s best to now pressahead in this case.6 <strong>General</strong> <strong>Factorial</strong> <strong>Tutorial</strong> – <strong>Part</strong> 1 Design-Expert 8 User’s Guide
To see how the software identifies points, click the highest one (green) at the upperleft of the graph. The result is shown below.Point highlighted for identificationNote how to the left of the plot the software identifies the point by: the actual result (188) standard order number (7)run number (due to randomization yours may differ from that shown)factor levels (temperature of 15 with material A2).The actual results are represented by various-colored circles. You can also click onthe non-circular symbols (square, triangle or diamond) to display the predictedoutcome and least significant difference (LSD). Try this!To produce a cleaner looking plot, go to View and deselect Show Legend.Legend turned offLet’s do some more clean-up for report purposes: Right-click over the graph andselect Graph Preferences.Right-click menu selection for graph preferences10 <strong>General</strong> <strong>Factorial</strong> <strong>Tutorial</strong> – <strong>Part</strong> 1 Design-Expert 8 User’s Guide
LifeDX8-02C-Gen2<strong>Factorial</strong>-P1.docx Rev. 12/8/09Now click the All Graphs tab and turn off (uncheck) the Show design points ongraph option, as shown below.Turning off design pointsPress OK. This is an optional sidetrack on this tutorial: To have your graph looklike that shown below for reporting purposes, do the following: Edit, Copy fromDesign-Expert, then Edit, Paste into Microsoft Word.200InteractionA: Material150A2A3A110050015 70 125B: TemperatureClean-looking interaction graphFrom this graph you can see that all three materials work very well at the lowtemperature (15 degrees). Based on the overlapping LSD bars, it would be fair tosay that no material stands out at this low temperature end of the scale. However,the A1 material clearly falls off at the 70 degree temperature, which would beencountered most often, so it must be rejected. None of the materials perform verywell at the highest temperature (125 degrees), but the upper end of the LSD bar forA2 barely overlaps the bottom end of the LSD bar for A3. Therefore, with respect totemperature sensitivity, material A3 may be the most robust material for makingbatteries.Design-Expert 8 User’s Guide <strong>General</strong> <strong>Factorial</strong> <strong>Tutorial</strong> – <strong>Part</strong> 1 11
Finally, if you do have an opportunity to present graphics in color, here’s a dazzlingnew and easy way to display general factorial effects with Design-Expert: Click 3DSurface on the floating Graphs Tool.3D surface plotNow place your mouse cursor on the graph – notice that it changes to a hand ().While pressing the left mouse button, spin the graph so the temperature axis is atthe bottom. (Alternatively, to match our graph most precisely, select View, ShowRotation and enter coordinates of h (horizontal) 20 and v (vertical) 80.)3D surface plot – rotated slightly for a better viewThe 3D view presents a different perspective of the general factorial effects – moreon a macro level of the overall experimental landscape. Now the inferiority ofmaterial A1 (red bars) becomes obvious: The other two materials tower over it atthe mid-temperature of 70 degrees F. Clearly the next step is to eliminate materialA1 from contention and perhaps do some further investigations on A2 and A3.12 <strong>General</strong> <strong>Factorial</strong> <strong>Tutorial</strong> – <strong>Part</strong> 1 Design-Expert 8 User’s Guide