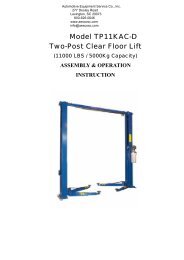
4050A Tire Changer - aesco
4050A Tire Changer - aesco
4050A Tire Changer - aesco
- No tags were found...

Create successful ePaper yourself
Turn your PDF publications into a flip-book with our unique Google optimized e-Paper software.
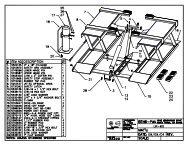
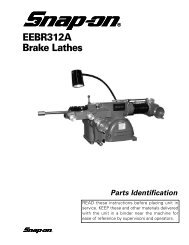
Parts IdentificationCAUTIONRead and follow installation and maintenanceinstructions on this page and in theunit's Operation Instructions manual tohelp insure proper, safe operation and toobtain the best possible service life fromthe unit. Correct installation, regularinspections, and proper maintenance areessential to help prevent accidents andinjuries.Installation Instructions1. The COATS <strong>4050A</strong> should be securely bolted tothe floor using the slotted holes on each side of theframe. Use all 4 anchor points. Use high-strength corrosionresistant industrial fasteners.2. The operating pressure range at the machinemust be 100 to 175 PSI. DO NOT EXCEED 175 PSI atthe machine. Sufficient air pressure is required forgood performance. The <strong>4050A</strong> is supplied with a 1/4"male pipe thread for easy connection. The connectionis located at the lower left corner on the operatorsside. DO NOT HAVE AN UNATTACHED, UNRE-STRICTED AIR LINE AVAILABLE AT OR NEAR THEMACHINE. ALL AIR/SERVICE LINES AVAILABLE TOOPERATORS SHOULD BE THROUGH THE TIRECHANGER.3. Read and follow additional instructions in themachines Operating Instructions manual.General Maintenance1. The moving parts of the COATS <strong>4050A</strong> are selflubricatingthrough the use of powdered metal andnylon bearings for extended trouble-free performance.2. Lower bead loosener shoe adjustment:A. Mount a 14" or 15" steel wheel without a tireon the machine table top.B. Cycle the machine and note the clearancebetween the flange of the wheel and the smalllower shoe (ref. 25). The proper shoe clearance isfrom 1/16" to 1/8". If clearance is not within theselimits, the shoe must be adjusted.C. To adjust the shoe, loosen 3/8"x1-1/2" bolt (ref.32) and add or remove shims (ref. 31) to bringshoe to the correct adjustment.D. Tighten the bolt (ref. 32) and check adjustmentagain as described in steps A and B above.3. Air gauge calibration:A. Mount a large 15" tire/wheel assembly on themachine table top. Pressurize the tire to 32 PSI.Measure the pressure with a high quality sticktypetire gauge. Connect the machine's air chuckto the tire valve.B. If the gauge does not read 32 PSI, remove thescrew-on gauge lens and loosen the two screwslocated at the edge of the dial face. Do not loosenthe screws more than 3 turns.C. Rotate the dial face until the 32 PSI graduationmark is aligned with the gauge pointer.D. Tighten the dial face screws and clean andreplace the screw-on lens.E. If the gauge is inoperative or defective, replaceit immediately. Order part number 107985 fromthe COATS Company, phone (615) 641-7533. Ifyour machine is equipped with the optionalpressure limiter, the function of the limiter shouldbe checked weekly.6 • COATS <strong>4050A</strong> <strong>Tire</strong> <strong>Changer</strong>