60-924-3-XT-2WTTS Simon XT Touch Screen Installation ... - Interlogix
60-924-3-XT-2WTTS Simon XT Touch Screen Installation ... - Interlogix
60-924-3-XT-2WTTS Simon XT Touch Screen Installation ... - Interlogix

You also want an ePaper? Increase the reach of your titles
YUMPU automatically turns print PDFs into web optimized ePapers that Google loves.
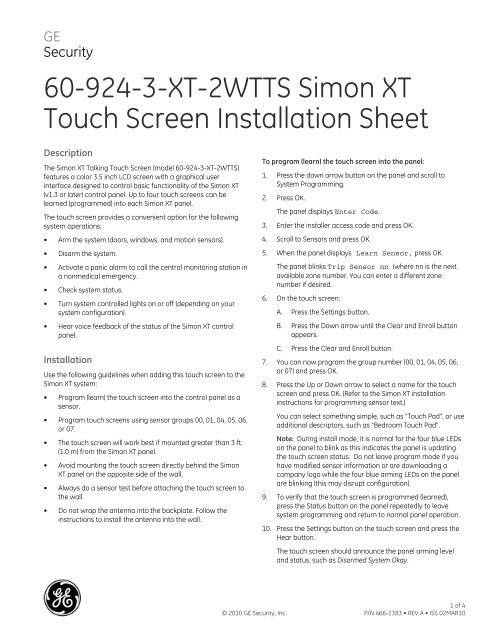
GESecurity<strong>60</strong>-<strong>924</strong>-3-<strong>XT</strong>-<strong>2WTTS</strong> <strong>Simon</strong> <strong>XT</strong><strong>Touch</strong> <strong>Screen</strong> <strong>Installation</strong> SheetDescriptionThe <strong>Simon</strong> <strong>XT</strong> Talking <strong>Touch</strong> <strong>Screen</strong> (model <strong>60</strong>-<strong>924</strong>-3-<strong>XT</strong>-<strong>2WTTS</strong>)features a color 3.5 inch LCD screen with a graphical userinterface designed to control basic functionality of the <strong>Simon</strong> <strong>XT</strong>(v1.3 or later) control panel. Up to four touch screens can belearned (programmed) into each <strong>Simon</strong> <strong>XT</strong> panel.The touch screen provides a convenient option for the followingsystem operations:• Arm the system (doors, windows, and motion sensors).• Disarm the system.• Activate a panic alarm to call the central monitoring station ina nonmedical emergency.• Check system status.• Turn system controlled lights on or off (depending on yoursystem configuration).• Hear voice feedback of the status of the <strong>Simon</strong> <strong>XT</strong> controlpanel.<strong>Installation</strong>Use the following guidelines when adding this touch screen to the<strong>Simon</strong> <strong>XT</strong> system:• Program (learn) the touch screen into the control panel as asensor.• Program touch screens using sensor groups 00, 01, 04, 05, 06,or 07.• The touch screen will work best if mounted greater than 3 ft.(1.0 m) from the <strong>Simon</strong> <strong>XT</strong> panel.• Avoid mounting the touch screen directly behind the <strong>Simon</strong><strong>XT</strong> panel on the opposite side of the wall.• Always do a sensor test before attaching the touch screen tothe wall.• Do not wrap the antenna into the backplate. Follow theinstructions to install the antenna into the wall.To program (learn) the touch screen into the panel:1. Press the down arrow button on the panel and scroll toSystem Programming.2. Press OK.The panel displays Enter Code.3. Enter the installer access code and press OK.4. Scroll to Sensors and press OK.5. When the panel displays Learn Sensor, press OK.The panel blinks Trip Sensor nn (where nn is the nextavailable zone number. You can enter a different zonenumber if desired.6. On the touch screen:A. Press the Settings button.B. Press the Down arrow until the Clear and Enroll buttonappears.C. Press the Clear and Enroll button.7. You can now program the group number (00, 01, 04, 05, 06,or 07) and press OK.8. Press the Up or Down arrow to select a name for the touchscreen and press OK. (Refer to the <strong>Simon</strong> <strong>XT</strong> installationinstructions for programming sensor text.)You can select something simple, such as “<strong>Touch</strong> Pad”, or useadditional descriptors, such as “Bedroom <strong>Touch</strong> Pad”.Note: During install mode, it is normal for the four blue LEDson the panel to blink as this indicates the panel is updatingthe touch screen status. Do not leave program mode if youhave modified sensor information or are downloading acompany logo while the four blue arming LEDs on the panelare blinking (this may disrupt configuration).9. To verify that the touch screen is programmed (learned),press the Status button on the panel repeatedly to leavesystem programming and return to normal panel operation.10. Press the Settings button on the touch screen and press theHear button.The touch screen should announce the panel arming leveland status, such as Disarmed System Okay.© 2010 GE Security, Inc.1 of 4P/N 466-2383 • REV A • ISS 02MAR10
Refer to your <strong>Simon</strong> <strong>XT</strong> panel documentation for otherprogramming options.Sensor testThe touch screen is sensitive to its orientation to the control panel.For that reason, we recommend you test the touch screen beforeyou mount it on the wall.To test the touch screen with the <strong>Simon</strong> <strong>XT</strong> panel:1. Make sure the panel is disarmed.2. Press the down arrow button on the panel and scroll toSystem Programming.3. Press OK.4. When the panel displays Enter Code, enter the appropriatecode and press OK.5. Scroll until the panel displays Sensor Test, press OK tostart the sensor test.The panel will prompt you to trip each sensor one at a time.6. To trip the touch screen, press and hold the Emergencybutton for 5 seconds.You can follow the panel voice prompting to test the sensorsin any order. You should hear the panel beep the number ofpackets received. The panel will also display the number ofpackets received. If you do not hear 6 to 8 panel beeps, see“To relocate the touch screen:” below.We recommend that you test the touch screen after allprogramming is completed and whenever a touch screen relatedproblem occurs.To verify communication between the panel and the touch screen,exit programming mode and then press the System Status icon onthe touch screen. The touch screen should announce the correctsystem status.4. Push the two plastic anchors into the drilled holes and tightenscrews within a ¼ inch of the anchors.5. Feed the power supply plug through the power wire opening.6. Hang the base over the screws, level, and tighten the screws.7. Load four AAA batteries into the battery compartment on theback of the touch screen.8. Plug the power into the back of the touch screen, and securethe power wire to the loop with the tie wrap provided.9. Feed the antenna wire from the back of the touch screenthrough the rectangular wire drop opening in the wall.10. Angle the top of the touch screen into the hooks on the top ofthe base. Start feeding the power cable through the wiredrop, and swing the bottom of the touch screen into thelower part of the base until you hear it click.Note: If necessary, use a soft cloth to clear smudges on thescreen; do not use glass cleaner on the screen.Figure 1: MountingMountingholeReset buttonAntenna wire openingOpening slotMountingholeTo relocate the touch screen:1. Test the touch screen a few inches from the original position.2. Increase the distance from the original position. Retest untilan acceptable location is found.3. Mount the touch screen in the new location (see Mounting).Note: If you cannot get the touch screen to trip, test a known goodtouch screen at the same location. If the replacement touchscreen functions, contact GE Security for repair or replacement ofthe faulty touch screen.To mount the touch screen:BatteriesPower wire openingPower plug-inPower wire loop1. Remove the touch screen from the mounting base byinserting a small screwdriver into the slot on the bottom ofthe touch screen (see Figure 1 below).2. Hold the base on the wall at the mounting location and markthe mounting holes, antenna drop, and power drop.3. Drill 1/8 inch holes into the wall for plastic anchors at themounting hole locations. Cut both the antenna and powerwire drop openings to the size of the opening in the base.OperationRefer to the <strong>Simon</strong> <strong>XT</strong> <strong>Touch</strong> <strong>Screen</strong> Quick Operation Guide forbasic touch screen operation information. Refer to the paneldocumentation for complete <strong>Simon</strong> <strong>XT</strong> programming andoperation information.2 of 4 P/N 466-2383 • REV A • ISS 02MAR10
Battery replacementWhen the touch screen batteries are low, the touch screen willdisplay the red battery icon on the Home and Settings screens.1. Remove the touch screen from the mounting plate byinserting a small screwdriver into the slot on the bottom ofthe touch screen.2. Replace all batteries being sure to follow the polarityinstructions (see Specifications for recommended batteries).Avoid touching the touch screen face while you are replacingthe batteries.3. Briefly disconnect the AC power (this will clear the batteryfault).4. Reconnect AC power.Note: If AC power is lost and batteries are not present or aredepleted, the touch screen will not power up until AC power isrestored (even if new batteries are installed).Regulatory informationFCCContact informationThis device complies with part 15 of the FCC rules.Operation is subject to the following conditions:1. This device may not cause harmful interference.2. This device must accept any interferencereceived, including interference that may causeundesired operation.Changes or modifications not expressly approvedby the party responsible for compliance could voidthe user’s authority to operate the equipment.FCC ID: B4Z-<strong>924</strong>-<strong>2WTTS</strong>IC: 1175C-<strong>924</strong><strong>2WTTS</strong>For contact information see our Web site: www.gesecurity.com.Reset buttonThe Reset button is located on the bottom left side of the touchscreen mounting plate (see Figure 1 on page 2). To power cyclethe touch screen, use a toothpick to depress the recessed Resetbutton.Note: Do not press the Reset button while in programming mode.Clear operationIf the <strong>Simon</strong> <strong>XT</strong> panel is connected to an online service, someinformation (such as a dealer logo) can be stored in the touchscreen memory. To erase touch screen memory and restore tofactory default, simply relearn the touch screen into the panelagain. The learn in process begins by clearing the touch screenmemory. To keep memory clear, learn the touch screen into a<strong>Simon</strong> <strong>XT</strong> panel that has no online service supported.SpecificationsCompatibilityPowerBatteriesDimensions (W × H × D)ColorOperating environmentTemperatureRelative humidity<strong>Simon</strong> <strong>XT</strong> (version 1.3 and later)6 VDC, 500 mAFour 1.5 V, Alkaline, AAA5.5 × 3.6 × 1.1 in. (140 × 92 × 28 mm)White32 to 104°F (0 to 40°C)0 to 90% noncondensingP/N 466-2383 • REV A • ISS 02MAR10 3 of 4
4 of 4 P/N 466-2383 • REV A • ISS 02MAR10