Tecnotion Ironless Linear Motors - Grp6.com
Tecnotion Ironless Linear Motors - Grp6.com
Tecnotion Ironless Linear Motors - Grp6.com
You also want an ePaper? Increase the reach of your titles
YUMPU automatically turns print PDFs into web optimized ePapers that Google loves.
TECNOTIONINSTALLING IRONLESS LINEAR MOTORSChapterCh 1. Before you startPlease read the following instructions very carefully. They are importantfor a safe and warranted installation and operation of the <strong>Linear</strong> Motor.1.1. Important noticeBefore installing and using the <strong>Linear</strong> Motor, read thisinstruction manual carefully. The manufacturer declines allresponsibility in case of accident or damage due tonegligence or lack of observance of the instructionsdescribed in this manual. The manufacturer also declines allresponsibility in case of accident or damage in conditionsthat differ from those indicated in the manual; <strong>Tecnotion</strong> alsodeclines all responsibility for damage caused by improperuse of the <strong>Linear</strong> Motor.Handle the components of the <strong>Linear</strong> Motor with care,packed as well as unpacked. Especially the magnet yokesare sensitive to mechanical shocks. Never drop a magnetyoke or release it in an uncontrolled way.Do not expose the magnets to temperatures higher than70° C. The magnets may be demagnetized at highertemperatures.Unpack the <strong>Linear</strong> Motor and check its integrity. If there isany irregularity, contact the dealer or manufacturer,signalling the nature of the defects.Make a note of the serial number. This facilitates thecorrespondence with the supplier.DOCUMENT NR 4022.363.4193.33BEFORE YOU START
TECNOTIONINSTALLING IRONLESS LINEAR MOTORS1.2. Safety warningsThe <strong>Linear</strong> Motor is used as a part of a machine. The userhas to take care that the machine as a whole fulfils all CErequirements.The magnet yokes contain a strong magnetic field. Lose ironobjects that are brought within 5cm of the yokes, can bedrawn into the yokes and cause damage.Magnetic sensitive objects like banking cards or othermagnetic information carriers may be damaged if they arebrought within 10cm of the magnet yokes.The magnet yokes do attract each other while mounting.Take care that the closing plates of one yoke do not damagethe magnets of the neighbour magnet yoke while mounting.If at any time and in any situation there is any doubt aboutthe safety of the <strong>Linear</strong> Motor, do not use it and contact yoursupplier.The <strong>Linear</strong> Motor is powered by a servo amplifier. In case ofa power disruption or fatal error this may automatically resultin a free run out of the motor. Make mechanical precautionsto prevent damage on the motor or your machine in the caseof such an event.DOCUMENT NR 4022.363.4193.34BEFORE YOU START
TECNOTIONINSTALLING IRONLESS LINEAR MOTORSBefore installing the motor, make sure that the supply mainsare grounded and operate in conformity with the regulationsin force.Make sure that there is an effective protective earth. Makesure that there is no voltage at the line wire terminals beforeconnecting.An earth connection does not work on non-conductingmounting surfaces like granite. In these cases the protectiveearth must be established by an earthing wireBefore carrying out checks or doing any maintenance, clearthe system by disconnecting the voltage. Be sure that thereis no possibility of accidental connections.1.3. EC declaration<strong>Tecnotion</strong> B.V. declares that the all linear motors produced by<strong>Tecnotion</strong> are manufactured in accordance with the applicableEuropean directives and in conformity with the following standards:Standard # Date of issue Name of StandardEN 60034 05-1998 Rotating electrical machinesEN 60204 (-1) 02-1995 Safety of machineryEN 50081-2 08-1993 Emission requirements for products in anindustrial environmentEN 50082-2 03-1995 Immunity requirements for products in anindustrial environmentDOCUMENT NR 4022.363.4193.35BEFORE YOU START
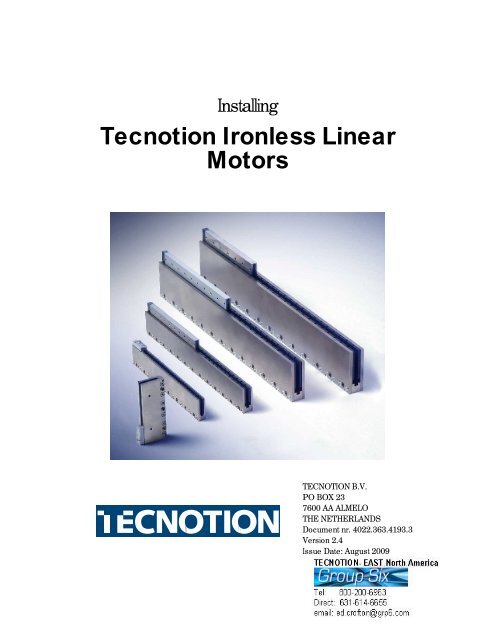
TECNOTIONINSTALLING IRONLESS LINEAR MOTORSChapterCh 2. ComponentsFigure 1: A complete ironless linear motor systemAn ironless linear motor of <strong>Tecnotion</strong> is not a system on itself. Itcontains several components, such as a coil unit and magnet yokes.The components should be build within a total machine concept or aworking unit. The size and the shape of the mounting frame, the designof the slide, the type bearings or the kind of dampers depend of therequired application. For instance the mounting frame and the slideshould be designed in such a way that a correct air gap between coilunit and magnet yokes will be obtained.<strong>Tecnotion</strong> provides standard and special components which aresuitable for numerous linear motor applications. These componentscan easily be applied in your system.DOCUMENT NR 4022.363.4193.36COMPONENTS
TECNOTIONINSTALLING IRONLESS LINEAR MOTORS2.1. Basic componentsThe basic <strong>Linear</strong> Motor components supplied by <strong>Tecnotion</strong> are:The coil unit (the N and S version differing in voltage and currentrequirements)Figure 2: Coil unitThe magnet yoke (in different lengths, varying in outer dimensionsand mounting)Figure 3: Magnet yokeDOCUMENT NR 4022.363.4193.37COMPONENTS
TECNOTIONINSTALLING IRONLESS LINEAR MOTORSBefore starting the installation, check the presence of theright number and type of the delivered components. In caseof doubt, please contact <strong>Tecnotion</strong> immediately.2.2. Additional FeaturesFor a proper installation of your linear motor system you also needfixing components, like bolts and pins;additional devices, like a servo controller and a linear encoder;the right tools.These features are no part of <strong>Tecnotion</strong>’s standard delivery. If desired<strong>Tecnotion</strong> can supply all additional components as well as some typesof devices.DOCUMENT NR 4022.363.4193.38COMPONENTS
TECNOTIONINSTALLING IRONLESS LINEAR MOTORS2.2.1. Bolts and dowel pinsFigure 4: Dowel pinsThe following bolts and dowel pins are required for positioning andfixing the coil unit to the slide as well as connecting the magnet yokesto the mounting frame:Features UM UL UXXBolts for coil unit (steel)Bolts for magnet yoke(steel)Dowel pins for magnetyoke (optional)M3x16,DIN912M4x25,DIN912M4x20,DIN912M5x35,DIN9123h8,DIN7M5x20,DIN912M6x50,DIN912FeaturesBolts for coil unit (steel)Tightening torqueDept bolt in threat holeBolts for magnet yoke(steel)Dowel pins for magnetyoke (optional)UCM3, DIN912,Class 12.91.0 - 2.0 NmTop: through coil unitSide: 1.5 – 2.8mmM4x20,DIN79843h8,DIN7DOCUMENT NR 4022.363.4193.39COMPONENTS
TECNOTIONINSTALLING IRONLESS LINEAR MOTORS2.2.2. Controller and measurement unitRequired is:An appropriate servo controller/amplifierA ruler and a linear encoder or an analogue Hall modulePower supply, cabling and connectorsFor more information please contact <strong>Tecnotion</strong>.2.2.3. ToolsNecessary for the installation is:Allen Key setOccasionally useful are:Heat sink compound (optional)Wipes to clean mounting surfacesDOCUMENT NR 4022.363.4193.310COMPONENTS
TECNOTIONINSTALLING IRONLESS LINEAR MOTORSChapterCh 3. InstallationDOCUMENT NR 4022.363.4193.311INSTALLATION
TECNOTIONINSTALLING IRONLESS LINEAR MOTORS3.1. Installation orderFigure 5: <strong>Ironless</strong> linear motor systemCoil unitMagnetYokeSlideMounting surfac efor magnet trackFigure 6: Coil unit, slide, magnet yoke and mounting surface, schematicallyThe installation order of this instruction manual must befollowed. A different order may cause damage to yourmachine.Before installing the <strong>Linear</strong> Motor components, the installation of themounting frame should be completed. The slide should be providedwith bearings, dampers, linear probe and required cabling in such away that a smooth, save and well positioned transport of the slide overthe stroke is established. The ruler should be properly positioned andfixed to the frame. The operation of bearings and dampers should betested as well as the guidance of the moving cables.The correct installation order is for electrical safety reasons:DOCUMENT NR 4022.363.4193.312INSTALLATION
TECNOTIONINSTALLING IRONLESS LINEAR MOTORS1. Mount the magnet yokes to the mounting surface of the machine.2. Mount the coil unit to the involved machine parts3. Connect the wiring to the coil unit.From a magnetical point of view the installation order of the mechanicsis not critical, because no attraction is present between the coil unit andmagnet yokes.The de-installation order is:1. Disconnect the wiring from the coil unit.2. Dismount the coil unit from the machine parts.3. Dismount the magnet yokes from the machine’s mounting surfaceBefore mounting the <strong>Linear</strong> Motor, special attention must be paid totthe mounting surface of the motor.DOCUMENT NR 4022.363.4193.313INSTALLATION
TECNOTIONINSTALLING IRONLESS LINEAR MOTORS3.2. Requirements for the mounting surfaces0.10.05 A (paperplane only)AFigure 7: Flatness and parallelism of mounting surfaces, schematicallyThe mounting surfaces of both magnet yokes and coil units have to beflat to prevent them from being submitted to bending forces.Specifications:Surface for coil unit having a flatness better then 0.1mm.Surface for the track of magnet yokes having a flatness better than0.1mm.The track of the magnet yokes – from now on to be called the magnettrack – and the coil unit have to be aligned with respect to each other.Note that this has to be accomplished by the machine’s construction.To guarantee a non-contact running, the mounting surfaces of coil unitand the magnet track must be parallel:Parallelism of both surfaces better then 0.05mm in the planeperpendicular to the travelling direction.To prevent disturbance forces, the axial direction of both componentsshould be parallel. This has to be accomplished by supporting axialreferences for both the coil unit and the magnet yokes.DOCUMENT NR 4022.363.4193.314INSTALLATION
TECNOTIONINSTALLING IRONLESS LINEAR MOTORSaxial references for both coil unit and magnet track with parallelismbetter than 0.2mm.A1A2MRCRFigure 8: Air gaps and axial references, schematicallyAxial reference for the magnet track (MR, see figure above) can beobtained by the use ofdowel pins in the middle yoke of a short track,dowel pins along the complete side of a long track,milled reference along complete side of a long track (inner radius
TECNOTIONINSTALLING IRONLESS LINEAR MOTORS3.3. Magnet track mounting instructionsEspecially the magnet yokes must be handled with care.They are sensitive to mechanical shocks. Never drop amagnet yoke or release it in an uncontrolled way!Be sure that the mounting surfaces are free ofcontamination. Particles > 0.1mm can cause inaccurateplacement and consequently damage to your <strong>Linear</strong> Motor.The magnet yokes contain a strong magnetic field. Lose ironobjects that are brought within 5cm of the yokes, can bedrawn into the yokes and cause damage.Magnetic sensitive objects like banking cards or othermagnetic information carriers may be damaged if they arebrought within 10cm of the magnet yokes.The magnet yokes do attract each other while mounting.Take care that the closing plates of one yoke do not damagethe magnets of the neighbour magnet yoke while mounting.It is recommended to start the mounting of the magnet track with themiddle – and preferably the longest – magnet yoke. This middle yokecan be aligned using the 3mm dowel pins or a milled reference.Fix the magnet yoke on the mounting surface with bolts using theprescripted tightening torque.The following yokes can be mounted with mechanical contact using themutual attraction force of the magnet yokes.Take care: apply the principle of controlled rotationalmounting. Uncontrolled approach may cause damage to themagnets (see Figure 9).DOCUMENT NR 4022.363.4193.316INSTALLATION
TECNOTIONINSTALLING IRONLESS LINEAR MOTORSBecause a straight forward directing and placing of the yokes impliesthe risk of striking due to magnetical forces (as well as the risk ofdamaged magnets), the principle of rotational mounting isrecommended here.Yoke 1Figure 9: Principle of controlled rotational mounting of the magnet yokesThe next magnet yokes should not be aligned on dowel pins. Using atrack of pins has namely two disadvantages:1. In that situation rotational mounting is difficult.2. Mounting can be impossible because of tolerances. The yokes aredesigned for a contact mounting without guaranteed gap betweenthem.Using a milled axial reference is advised for placement of the nexttracks (longer than 200mm).Placement of just one yoke on each side of the middle yoke can bedone by simply aligning the yokes with respect to each other.There is no danger of mounting the magnet yokes with an incorrectorientation, they are “Murphy-safe”. A 180° rotated yoke does not haveany effect on the motor function.DOCUMENT NR 4022.363.4193.317INSTALLATION
TECNOTIONINSTALLING IRONLESS LINEAR MOTORS3.4. Coil unit mounting instructionsBe sure that the mounting surfaces are free ofcontamination. Particles > 0.1mm can cause inaccurateplacement and consequently damage to your <strong>Linear</strong> Motor.The mounting of the coil unit on appropriate and clean mountingsurfaces is very straightforward because no attraction forces arepresent between coil unit and magnet yokes.The coil unit can be placed into the machine by hand carefully, pushedto the axial reference and fixed with bolts. Tightening torque of the boltsas prescripted.For applications which are susceptible to vibrations, thebolts have to be secured against loosening by means ofrings or (Loctite) thread lock.In case of high continous forces, apply a heatsink compoundto obtain optimal thermal contact between the coil unit andthe mounting surface.DOCUMENT NR 4022.363.4193.318INSTALLATION
TECNOTIONINSTALLING IRONLESS LINEAR MOTORS3.5. Electrical ConnectionsBefore starting any activity on the wiring, make sure that themains are disconnected.Work carefully according the instructions belonging to theapplied servo controller. Be sure your machine as a wholemeets the requirements of all applicable electrical standards,such as the EN 60204 standard.3.5.1. General remarksThe linear motor’s electrical wiring is externally configured with two 1.0meter cables: a power cable and a temperature cable. If desired youcan shorten these cables and provide them with appropriateconnectors.Both power cable and temperature cable are shielded with a plaitedmetal cable sheath for electromagnetic immunity.Besides this manual you should follow carefully the installationinstructions of your servo amplifier supplier. Make sure that the linearmotor system as a whole meets all the applicable electrical directives.For wiring scheme of the UM, UL and UXX series see figure 10 below.The wiring scheme of the UC type is shown in figure 11.DOCUMENT NR 4022.363.4193.319INSTALLATION
TECNOTIONINSTALLING IRONLESS LINEAR MOTORSL1L2L1L3PEgr/yeL3L2ServoamplifierwhitePTCKTYb rownyegreen<strong>Linear</strong>motorSlideFigure 10: Wiring scheme UM, UL and UXX series ironlessL1L1L2L3PEgr/yeServoamplifierL3L2<strong>Linear</strong>motorSlideFigure 11: Wiring scheme UC series ironlessDOCUMENT NR 4022.363.4193.320INSTALLATION
TECNOTIONINSTALLING IRONLESS LINEAR MOTORS3.5.2. Power linesThe three phases of the motor’s power cable have to be connected tothe servo amplifier in such a way that the positive three phase directionof the motor conforms the positive direction of the linear encoder. Thispolarization has to be tested, it cannot be seen at first sight.Testing the polarization is very important, because a wrongpolarization will result in an uncontrolled run out of the slide.The power cable can be confectioned by the user to fit on the servodrive. For moving cables it is advised to make the moving partsreplaceable. This can be done by making a connection of the coil unitcable to the moving cable on the slide.Powerlines3-phasesL1L2L3Color – UC, UM, ULand UXXblackredwhiteConnection to servocontroller3-phasesProtective Earth green Protective EarthShield(Protective) Earth3.5.3. Protective earthBe sure that the earth shield of the cable is well connected – alsothrough the connecting devices – to the PE connector or the housing ofthe amplifier. Most TL linear motors are driven on the principle of pulsewidth modulation. This involves large electrical impulses and causes asignificant risk of electromagnetical interference.Internally the motor’s PE wire (green/yellow) is galvanic connected tothe motor housing. This wire must be connected to the PE connector ofthe servo amplifier. Provide the motor system with PE lines to theamplifier that are as short as possible.DOCUMENT NR 4022.363.4193.321INSTALLATION
TECNOTIONINSTALLING IRONLESS LINEAR MOTORS3.5.4. Temperature SensorThe coil unit of the ironless <strong>Linear</strong> <strong>Motors</strong> – except for the UC series –is equipped with two temperature sensors, one of the PTC-1k-type andone NTC-sensor(or former type KTY 21-6). The PTC resistor is themotor’s standard device for checking the heat production in the coilunit.The temperature cable consists of four wires. For wire color andfunction, see table below.Sensor LinesPTCPTCNTCNTCShieldColorWhiteBrownGreenYellowProtective EarthAttention: In start-2009 the KTY-sensor is gradually replacedby a NTC-sensor. For more information please contact<strong>Tecnotion</strong>.3.5.5. Temperature protectionThe temperature sensors are normally used for overheating protectionof the coil unit. The NTC-sensor can be used for monitoringtemperature, the PTC can be used as switch when maximaltemperature is exceeded. For specifications and behavior see the nexttwo paragraphs.In some cases where long peak current are demanded, the thermalresponse time of the coil unit is too long to ensure a proper overheatingprotection of the sensors. This can occur for example during anaccidental run or by taking a new axis in control.In this case the I 2 t protection is essential to prevent the coil unit fromoverheating. In almost all controllers an I 2 t-protention can be set in thesoftware. We can ensure proper protection of the temperature sensorsup to an Irms of 25% of the ultimate current(20°C/s) of the motor.For more information contact <strong>Tecnotion</strong>’s Application support team.3.5.6. PTC specificationThe PTC-1k type is a sensor which has a very sudden resistance risenear the critical temperature of the coils. It is almost a digital indicator:DOCUMENT NR 4022.363.4193.322INSTALLATION
TECNOTIONINSTALLING IRONLESS LINEAR MOTORStemperature below vs. over critical temperature. Therefore it is veryuseful for signalizing over temperature without requiring sensitiveelectronics. Disadvantage is that it is not possible to obtain a temperatesignal.At room temperature the PTC has an electrical resistance of about 65Ohms. When the temperature raises to the critical temperature theresistance will increase rather uniformly up to 1000 Ohms. Above thistemperature the resistance increases exponentially. Now, 1000 Ohmsis the switching resistance. The amplifier should immediately stop thepower supply when this resistance is exceeded. In this wayoverheating and motor damage can be prevented. No need to say thatthe PTC cable must be connected properly to the amplifier.TemperatureUp to 20°C below critical temperatureUp to 5°C below critical temperatureNominal switching resistanceAbove critical temperatureResistance< 250 Ω< 550 Ω1000 Ω> 1330 Ω3.5.7. NTC specification(former KTY 21-6)The Coil has a NTC(or former KTY) temperature sensor for monitoringthe temperature. In 2009 the change from KTY to NTC has set in.Attention: In Start-2009 the KTY-sensor is gradually replacedby a NTC-type sensor. For more information please contact<strong>Tecnotion</strong>.If your resistance values does not match the NTC values you haveprobably an KTY 21-6 version.Temperature dependency of NTC35000RNTC (Ω)3000025000Resistance NTC (Ohm)200001500010000500000 20 40 60 80 100 120 140Temperature (C)Figure 12: Temperature dependency of the NTCDOCUMENT NR 4022.363.4193.323INSTALLATION
TECNOTIONINSTALLING IRONLESS LINEAR MOTORSSensor Specification of NTC-sensorTolerance ∆R R /R R 5%Max power60mWBelow table with numerical values of the NTC and former KTYT (ºC) 0 10 20 30 40 50 60 70 80 90 100 110 120 130R NTC (Ω) 32650 19900 12490 8057 5327 3603 2488 1752 1258 918 680 511 389 301R KTY (Ω) 815 886 961 1040 1123 1209 1300 1394 1492 1594 1700 1810 1923 20413.5.8. Polarization testBefore testing, make sure that the electrical and mechanicalprotection of the linear motor system is well configured!There is one regular way of testing the polarization. Some servoamplifiers can operate in an in moment service mode. By means ofregulating an external resolver manually, it can be determined whetherthe motor’s direction of running conforms the resolver’s sense ofrotation. If so, the motor is well connected. If not, two phases of thepower cable – phase 1 and 3 – must be changed.Internally all ironless linear motors are equally wired and connected, soone test satisfies to find out the polarization of a motor rulercombination. If more axes are constructed in a similar way thepolarization will be equal.For more information, please contact <strong>Tecnotion</strong>.DOCUMENT NR 4022.363.4193.324INSTALLATION
TECNOTIONINSTALLING IRONLESS LINEAR MOTORSChapterCh 4. Operation4.1. GeneralWhen you are convinced that your application’s linear motor system isassembled in a proper way, both mechanically and electrically, you cando the next step. You can put your motor system into operation.But before powering the system, please do have a final check:1. Does the slide have a free run along the whole magnettrack, without rubbing against any part of the track?2. Are the mechanical end stops, end switches and thedampers well dimensioned and properly configured?3. Does your system have an emergency stop within reach?4. Has the PE connection been made?5. Has the temperature cable been properly connected?6. Has the power cable been properly connected?DOCUMENT NR 4022.363.4193.325OPERATION
TECNOTIONINSTALLING IRONLESS LINEAR MOTORS4.2. ConfiguringThe amplifier can be powered up.The following items should be configured as parameter settings of yourspecific servo amplifier:Presence and switch mode of end switches,Presence of an electromechanical brake,Type and interface of feedback device,Motor type,Maximum continuous current,Maximum peak current,Switching resistance of the temperature sensor,Safety set-up: what should be the systems reaction in case ofcontacting end-switches, disable, over-current, over-speed,emergency stop, etcetera,Magnetic alignment,Homing procedure,Analogue inputs for receiving analogue commands of controller,Current loop settings,Speed loop settings,Position loop settings.Depending of the use of rotary or linear based software some itemsmust be configured as well.For rotary based software:Number of poles: 2 (makes one rotation equal to one polepitch NN),DOCUMENT NR 4022.363.4193.326OPERATION
TECNOTIONINSTALLING IRONLESS LINEAR MOTORSMaximum speed (rpm),Number of increments or periods of feedback device in one rotation(divide pole pitch length by increments per pole pitch).For linear based software:Pole pitch,Maximum speed (units!),Resolution or period of feedback device.4.3. TestingBefore handing over the control of the linear motor to the closed loopfeedback controllers, it is wise to perform some tests. Most importantissue for testing are the end switches.Before testing, make sure that the electrical and mechanicalprotection of the linear motor system is well configured!4.3.1. End switchesCheck the end switches by pushing the slide manually to the switchposition. Simultaneously check whether the signal is detected by theamplifier.DOCUMENT NR 4022.363.4193.327OPERATION
TECNOTIONINSTALLING IRONLESS LINEAR MOTORS4.4. Starting upGenerally spoken, build it up in small steps. Don’t climb the stairs with2 or 3 steps in one time.Start the tuning with only the speed loop, initially with very low speeds.Then make the step to position control, but still with limited speeds.Increase maximum speed only if everything operates properly and onlywhen you are in the right configuration. Speed limits save themechanics.4.5. Optimization of control settingsGenerally, current loop settings are not very critical for the motorperformance and mostly there is a wide band of settings that will do.The current loop settings are only depending on amplifier and motor,not on other application parameters.The speed loop is often the limiting factor of the servo performance,because it is sensitive for all kinds of oscillations, noise and (filter)delays. You should spend some time to get this loop proper, beforeoptimizing the position loop. Two tips:Vary the filter time on the feedback speed signal. Balance noiseagainst bandwidth reduction.Mostly the hardest setting possible is not the best.The position loop can only be tuned with a correct speed loop.DOCUMENT NR 4022.363.4193.328OPERATION


