à - Product Reviews - corded headsets
à - Product Reviews - corded headsets
à - Product Reviews - corded headsets
- No tags were found...

You also want an ePaper? Increase the reach of your titles
YUMPU automatically turns print PDFs into web optimized ePapers that Google loves.
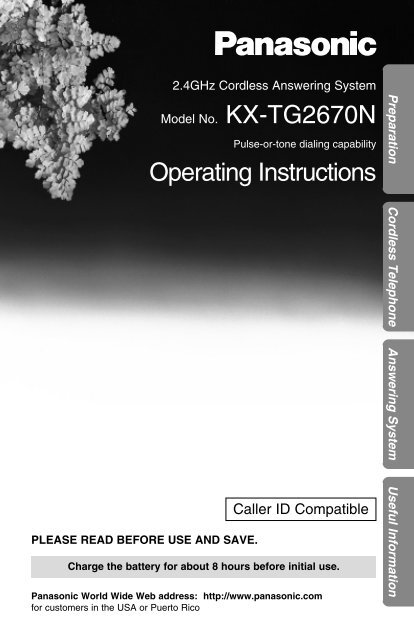
PLEASE READ BEFORE USE AND SAVE.2.4GHz Cordless Answering SystemModel No. KX-TG2670NPulse-or-tone dialing capabilityOperating InstructionsCaller ID CompatibleCharge the battery for about 8 hours before initial use.Panasonic World Wide Web address: http://www.panasonic.comfor customers in the USA or Puerto RicoPreparation Cordless Telephone Answering System Useful Information
Before Initial UsePlease read IMPORTANT SAFETYINSTRUCTIONS on page 88 before use.Read and understand all instructions.Thank you for purchasing your new Panasonic cordlesstelephone.Caller ID and Call Waiting Service, where available, are telephonecompany services. After subscribing to Caller ID, this phone will display acaller’s name and phone number. Call Waiting Caller ID, which displays asecond caller’s name and phone number while the user is on anothercall, requires a subscription to both Caller ID and Call Waiting.Attach your purchase receipt here.For your future referenceSerial No.(found on the bottom of the unit)Date of purchaseName and address of dealerAccessories (included) For extra orders, call 1-800-332-5368.AC Adaptor (p. 10)Order No. PQLV10ZTelephone Line Cord (p. 10)oneWall Mounting Adaptor (p. 72)Order No. PQKL10038Z1oneBelt Clip (p. 73)Order No. PQKE10109Z12oneone
For Best PerformanceBattery ChargeA rechargeable Nickel-Metal Hydride(Ni-MH) battery powers the handset.Charge the battery for about 8 hoursbefore initial use (p. 11).The batteryis beneaththis cover.Base Unit Location/NoiseCalls are transmitted between the base unit and the handset usingwireless radio waves. For maximum distance and noise-freeoperation, the recommended base unit location is:Away from electrical appliances suchas a TV, personal computer or anothercordless phone.In a HIGH and CENTRAL locationwith no obstructions such as walls.Raisethe antennas.Note:While using the handset:•If you are near a microwave oven which is being used, noise may be heard fromthe receiver. Move away from the microwave oven and closer to the base unit.•If more than one cordless phone is being used and your handset is near anothercordless phone’s base unit, noise may be heard. Move away from the othercordless phone’s base unit and closer to your base unit.3
Contents4PreparationLocation of Controls . . . . . . . . . . . . . . . . . . . . . . . . . . . . . . . . . 6Displays . . . . . . . . . . . . . . . . . . . . . . . . . . . . . . . . . . . . . . . . . . . 9Settings. . . . . . . . . . . . . . . . . . . . . . . . . . . . . . . . . . . . . . . . . . . . 10Connections . . . . . . . . . . . . . . . . . . . . . . . . . . . . . . . . . . . . . . . 10Battery Charge . . . . . . . . . . . . . . . . . . . . . . . . . . . . . . . . . . . . . 11Selecting the Dialing Mode . . . . . . . . . . . . . . . . . . . . . . . . . . . . 13Selecting the Line Mode . . . . . . . . . . . . . . . . . . . . . . . . . . . . . . 14Programmable Functions . . . . . . . . . . . . . . . . . . . . . . . . . . . . . 15Setting the Auto Talk Feature . . . . . . . . . . . . . . . . . . . . . . . . . . 16Selecting the Ringer Volume . . . . . . . . . . . . . . . . . . . . . . . . . . . 17Preparing the Answering System . . . . . . . . . . . . . . . . . . . . . . . 18Greeting Message. . . . . . . . . . . . . . . . . . . . . . . . . . . . . . . . . . . 18Programming Summary for the Answering System . . . . . . . . . . 20Selecting the Caller’s Recording Time. . . . . . . . . . . . . . . . . . . . 21Day and Time Adjustment . . . . . . . . . . . . . . . . . . . . . . . . . . . . . 22Selecting the Number of Rings . . . . . . . . . . . . . . . . . . . . . . . . . 24Cordless TelephoneMaking Calls . . . . . . . . . . . . . . . . . . . . . . . . . . . . . . . . . . . . . . . . 25With the Handset . . . . . . . . . . . . . . . . . . . . . . . . . . . . . . . . . . . 25With the Base Unit . . . . . . . . . . . . . . . . . . . . . . . . . . . . . . . . . . 28Simultaneous Keypad Dialing . . . . . . . . . . . . . . . . . . . . . . . . . . 30Answering Calls . . . . . . . . . . . . . . . . . . . . . . . . . . . . . . . . . . . . . 31With the Handset . . . . . . . . . . . . . . . . . . . . . . . . . . . . . . . . . . . 31With the Base Unit . . . . . . . . . . . . . . . . . . . . . . . . . . . . . . . . . . 31Caller ID Service. . . . . . . . . . . . . . . . . . . . . . . . . . . . . . . . . . . . . 32Using the Caller List. . . . . . . . . . . . . . . . . . . . . . . . . . . . . . . . . . 34Viewing the Caller List. . . . . . . . . . . . . . . . . . . . . . . . . . . . . . . . 34Calling Back from the Caller List . . . . . . . . . . . . . . . . . . . . . . . . 35Editing the Caller’s Phone Number . . . . . . . . . . . . . . . . . . . . . . 36Storing Caller List Information in the Directory. . . . . . . . . . . . . . 38Erasing Caller List Information . . . . . . . . . . . . . . . . . . . . . . . . . 39One-Touch Dialer . . . . . . . . . . . . . . . . . . . . . . . . . . . . . . . . . . . . 40Storing a Phone Number in the DIRECT Button . . . . . . . . . . . . 40Dialing the Stored Number in the DIRECT Button . . . . . . . . . . . 41Using the Directory . . . . . . . . . . . . . . . . . . . . . . . . . . . . . . . . . . 41Storing Names and Numbers in the Directory . . . . . . . . . . . . . . 42Selecting Characters to Enter Names . . . . . . . . . . . . . . . . . . . . 44Finding Items in the Directory . . . . . . . . . . . . . . . . . . . . . . . . . . 46Dialing from the Directory . . . . . . . . . . . . . . . . . . . . . . . . . . . . . 47
Editing an Item in the Directory . . . . . . . . . . . . . . . . . . . . . . . . 48Erasing an Item from the Directory . . . . . . . . . . . . . . . . . . . . . . 49Intercom . . . . . . . . . . . . . . . . . . . . . . . . . . . . . . . . . . . . . . . . . . . 50Transferring a Call Using the Intercom . . . . . . . . . . . . . . . . . . . 51Special Features. . . . . . . . . . . . . . . . . . . . . . . . . . . . . . . . . . . . . 52Automatic Security Code Setting . . . . . . . . . . . . . . . . . . . . . . . . 52For Call Waiting Service Users . . . . . . . . . . . . . . . . . . . . . . . . . 52How to Use the PAUSE Button(For Analog PBX Line/Long Distance Service Users). . . . . . . 52Temporary Tone Dialing(For Rotary or Pulse Service Users) . . . . . . . . . . . . . . . . . . . 53FLASH Button. . . . . . . . . . . . . . . . . . . . . . . . . . . . . . . . . . . . . . 53Answering SystemAutomatic Answering Operation . . . . . . . . . . . . . . . . . . . . . . . . 54Setting the Unit to Answer Calls . . . . . . . . . . . . . . . . . . . . . . . . 54Listening to Messages . . . . . . . . . . . . . . . . . . . . . . . . . . . . . . . . 55From the Handset . . . . . . . . . . . . . . . . . . . . . . . . . . . . . . . . . . . 56Erasing Messages . . . . . . . . . . . . . . . . . . . . . . . . . . . . . . . . . . . 57Pager Call . . . . . . . . . . . . . . . . . . . . . . . . . . . . . . . . . . . . . . . . . . 58Storing a Pager Number . . . . . . . . . . . . . . . . . . . . . . . . . . . . . . 58Storing Your Home Telephone Number. . . . . . . . . . . . . . . . . . . 60Pager Mode Setting . . . . . . . . . . . . . . . . . . . . . . . . . . . . . . . . . 62Setting the Unit to Call a Pager . . . . . . . . . . . . . . . . . . . . . . . . . 63Remote Operation from a Touch Tone Phone . . . . . . . . . . . . . 64Setting the Remote Code . . . . . . . . . . . . . . . . . . . . . . . . . . . . . 65Voice Menu. . . . . . . . . . . . . . . . . . . . . . . . . . . . . . . . . . . . . . . . 66Direct Remote Operation. . . . . . . . . . . . . . . . . . . . . . . . . . . . . . 68Remote Operation with the Handset . . . . . . . . . . . . . . . . . . . . . 70Useful InformationWall Mounting. . . . . . . . . . . . . . . . . . . . . . . . . . . . . . . . . . . . . . . 72Using the Belt Clip . . . . . . . . . . . . . . . . . . . . . . . . . . . . . . . . . . . 73Using an Optional Headset . . . . . . . . . . . . . . . . . . . . . . . . . . . . 74Battery Replacement . . . . . . . . . . . . . . . . . . . . . . . . . . . . . . . . . 76Adding Another Phone . . . . . . . . . . . . . . . . . . . . . . . . . . . . . . . 77Fashion Plate TM Snap-On Color Covers (Optional). . . . . . . . . . 78Error Messages . . . . . . . . . . . . . . . . . . . . . . . . . . . . . . . . . . . . . 80Before Requesting Help. . . . . . . . . . . . . . . . . . . . . . . . . . . . . . . 82Important Safety Instructions . . . . . . . . . . . . . . . . . . . . . . . . . . 88FCC and Other Information . . . . . . . . . . . . . . . . . . . . . . . . . . . . 90Preparation Cordless Telephone Answering System Useful Information5
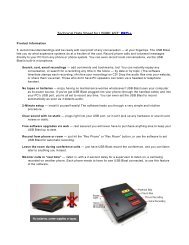
Location of ControlsBase unitAntennas (p. 3, 10)(LOCATOR/INTERCOM) Button (p. 50)(RINGER) Button (p. 17)Display (p. 9, 81)Charge Contacts (p. 12)DIGITALSPREAD SPECTRUMGREETING RECORD CHECKNEWMESSAGECHECKSTOPERASESTOPLOUDSEARCHFLASHPAUSE CLEARCALLER IDCALL WAITRINGEREDITEXITLOCATOR INTERCOMREDIALDIGITAL SP-PHONEHOLDHEADSETMIC(FLASH/CALL!WAIT)Button (p. 53)(PAUSE) Button (p. 52)(REDIAL) Button (p. 29)(HOLD) Button (p. 29)MIC (Microphone) (p. 18, 28, 31, 50)DIGITAL SP-PHONE (Speakerphone) /HEADSETButton and Indicator (p. 28, 31, 74)6
FLASHCALL WAITDIGITALRINGERERASECALLER IDLOCATORINTERCOMGREETINGRECORDSTOPMESSAGE(GREETING!CHECK) Button (p. 18)(ANSWER!ON) Button and Indicator (p. 54, 55, 57)Preparation(GREETING!RECORD) Button (p. 18)(ERASE) Button (p. 19, 57)(STOP) Button(p. 18, 34, 47, 55)(NEW!MESSAGE)Button (p. 55)SPREAD SPECTRUMCHECKNEWPAUSE CLEARLOUDSEARCHEDITREDIALEXITHOLDDIGITAL SP-PHONE(TONE) Button (p. 53)MICHEADSETHeadset Jack(p. 75)(CLEAR) Button (p. 39, 49)Navigator Key( , , , )(p. 29, 34, 46, 55)CALLER ID Indicaor (p. 33)(EDIT) Button (p. 37)(EXIT) Button (p. 34, 47)7
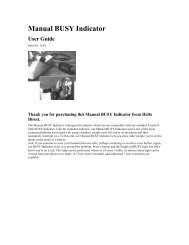
HandsetLocation of ControlsRinger/ChargeIndicator (p. 11, 41)Antenna (extendable)(p. 25, 27)Back sideSpeaker(p. 26)Receiver (p. 26)TMFashion Plate Snap-OnColor Cover (p. 78)Display (p. 9, 80)(DIRECT) Button (p. 41)(INTERCOM) Button(p. 50)Headset Jack (p. 74)(Talk) Button(p. 25, 31)(Speakerphone)Button (p. 26, 31)Navigator Key( , , , )(p. 15, 26, 34, 46)Charge Contact (p. 12)(TONE) Button (p. 53)INTERCOM DIRECT FUNCTION/CHTONE17250OFFCLEAR34 6CALLWAITPLAYBACKLOUD/SEARCH8 9REDIALPAUSEFLASHREDIAL(FUNCTION/CH) (Channel)Button (p. 15, 27, 42)(OFF) Button(p. 15, 25, 34, 47)(CLEAR) Button(p. 39, 44, 49)(REDIAL/PAUSE) Button(p. 27, 52)Charge Contact (p. 12)Microphone (p. 26, 31)(FLASH/CALL!WAIT/PLAYBACK) Button(p. 52, 53, 70)How to handle the handset antenna:You can even use thehandset withoutextending the antenna.But for bestperformance, extendthe antenna until itclicks.To put away theantenna, slidedown verticallyholding the lowerpart until it stops.8
DisplaysHandset#Base unit$ %#The display shows the dialed number,call status, programming options anddirectory items etc. If you subscribe to aCaller ID service, caller information willbe displayed (p. 32). The number of newcalls will be also displayed.$The directory icon displays when storing or viewing the directory items(p. 42, 46).%The battery icon indicates the battery strength (p. 11).Standby mode:While the handset is off the base unit, the display becomes blank afteryou finish using the handset (making/answering a call, viewing the CallerList or directory list etc.). The handset can receive calls. The battery life isconserved in this state. While the handset is on the base unit, the batteryicon and the number of new Caller ID calls are displayed in the standbymode (p. 33).SUN 12:00AM #The time and day and the number of new#incoming messages are displayed in the0 Messagestandby mode. The display shows thedialed number, call status, programmingoptions and directory items etc.$ % &If you subscribe to a Caller ID service, caller information will bedisplayed (p. 32). The number of new calls will be also displayed.$The directory icon displays when storing or viewing the directory items(p. 42, 46).%The clock icon flashes with the time and day if the clock needsadjusting (p. 22).&The pager icon indicates the pager mode is on (p. 63).PreparationBacklight LCD DisplaysThe handset and the base unit have the backlight LCD displays. Thedisplays will light when you start using the handset or the base unit, andwhen a call is received. The handset display light will stay on for about 10seconds after pressing a button or lifting the handset off the base unit.You can change the backlight color to orange for certain callers by storingthem in the directory (p. 41).9
SettingsConnectionsRaise the antennas.Fasten the AC adaptor cord toprevent it from beingdisconnected.HookPower Outlet (AC 120 V, 60 Hz)AC AdaptorSingle-Line Telephone Jack (RJ11C)Telephone Line Cord10•USE ONLY WITH Panasonic AC ADAPTOR PQLV10 (Order No. PQLV10Z).•The AC adaptor must remain connected at all times. (It is normal for the adaptorto feel warm during use.)•To connect a standard telephone on the same line, see page 77.•If your unit is connected to a PBX which does not support Caller ID services, youcannot access those services.
Battery ChargePlace the handset on the base unit and charge for about 8 hours beforeinitial use.•The ringer/charge indicator lights.•If the battery has been fully charged, theringer/charge indicator light will turn fromred to green.Ringer/ChargeIndicatorPreparationBattery strengthYou can check the battery strength on the handset display while thehandset is on the base unit, while it is in use (making/answering a calletc.), or after viewing the Caller List or directory items, programming etc.The battery strength will remain for 5 seconds after using the handset,then the display will return to the standby mode (p. 9).The battery strength is as shown in the chart below.Display prompt(flashing)Battery strengthFully chargedMediumLowNeeds to be recharged.•If the battery has been fully charged, the ringer/charge indicator will light ingreen.11
SettingsRechargeRecharge batteryRecharge the battery when:—“Recharge battery” is displayed onthe handset,—“ ” flashes on the display, or—the handset beeps intermittently while it is in use.•If you DO NOT recharge the handset battery for more than 15 minutes, thedisplay will keep indicating “Recharge battery” and/or “ ” will continueto flash.Battery informationAfter your Panasonic battery is fully charged (p. 11):OperationWhile in use near the base unit*(TALK) away from the base unitWhile not in use (Standby)Approx. battery lifeUp to 4.5 hoursUp to 3.5 hoursUp to 14 days*Within about 10 feet (3 m)•Battery life may be shortened depending on usage conditions, such as viewingthe Caller ID Caller List or directory list, and ambient temperature.•Clean the handset and the base unit charge contacts with a soft, dry clothonce a month. Clean more often if the unit is subject to grease, dust orhigh humidity. Otherwise the battery may not charge properly.•If the battery is fully charged, you do not have to place the handset on the baseunit until “Recharge battery” is displayed and/or “ ” flashes. This willmaximize the battery life.•The battery cannot be overcharged.12
Selecting the Dialing ModeYou can program the dialing mode using the handset near the baseunit.If you have touch tone service, set to “Tone”. If rotary or pulse service isused, set to “Pulse”. Your phone comes from the factory set to “Tone”.Make sure the unit is in the standby mode initially.1Press2Press3Press4Press5Press6Press7Press(FUNCTION/CH).Ö or Ñ repeatedly until the arrowpoints to “Program”.á (Yes key).Ö or Ñ repeatedly until the arrowpoints to “Set dial mode”.á (Yes key).Ö or Ñ to select “Pulse” or“Tone”.á (Save key).•A beep sounds.•To return to the standby mode, press (OFF).HSave directoryRinger volumeGFH=YesHProgramCalling pagerGFH=YesHSave DIRECT#Set flash timeGFH=YesHSet dial modeTAD programGFH=YesDial modeGFDial mode:ToneH=SaveDial mode:PulseGFH=Save:PulsePreparation•You can exit the programming mode any time by pressing (OFF).•If the handset has lost communication with the base unit, an alarm tone soundsand “No link to base. Place on cradle and try again.” isdisplayed.•If 3 beeps sound and the display shows “Save error”, move closer to the baseunit and start again from step 1.13
SettingsSelecting the Line ModeIf the line is connected to a low voltage system such as a PBX, set to “B”.Otherwise the Call Waiting Caller ID Feature may not be used (p. 52), andthe unit may not alert your pager (p. 58). Your phone comes from thefactory set to “A”. Use the handset near the base unit.Make sure the unit is in the standby mode initially.1Press2Press3Press4Press5Press6Press7Press(FUNCTION/CH).Ö or Ñ repeatedly until the arrowpoints to “Program”.á (Yes key).Ö or Ñ repeatedly until the arrowpoints to “Set line mode”.á (Yes key).Ö or Ñ to select “B” or “A”.á (Save key).•A beep sounds.•To return to the standby mode, press (OFF).HSave directoryRinger volumeGFH=YesHProgramCalling pagerGFH=YesHSave DIRECT#Set flash timeGFH=YesHSet line modeTalk switchingGFH=YesLine modeGFLine mode:AH=SaveLine mode:BGFH=Save:B•You can exit the programming mode any time by pressing (OFF).•If the handset has lost communication with the base unit, an alarm tone soundsand “No link to base. Place on cradle and try again.” isdisplayed.•If 3 beeps sound and the display shows “Save error”, move closer to the baseunit and start again from step 1.14
Programmable FunctionsYou can program the following function items using the handset nearthe base unit. The display shows the programming instructions. See thecorresponding pages for function details.Make sure the unit is in the standby mode initially.Press (FUNCTION/CH).Preparation*HSave directoryRinger volumeProgramCalling pagerTo store an item in the directory (p. 42).To select the ringer volume (p. 17).To dial the stored pager number (p. 61).Press á.*HSave DIRECT#Set flash timeSet line modeTalk switchingSet dial modeTAD programTo store a phone number in the DIRECT button(p. 40).To select the flash time (p. 53).To select the line mode (p. 14).To set the auto talk feature (p. 16).To select the dial mode (p. 13).To program answering system functions (p. 20).During programming:*To select a desired function item, press Ö or Ñ repeatedly until thearrow points to the item. Then press á to go to the next step.•You can exit the programming mode any time by pressing (OFF).•If you do not press any buttons for 60 seconds, the unit will return to the standbymode.•If the handset has lost communication with the base unit, an alarm tone soundsand “No link to base. Place on cradle and try again.” isdisplayed.•If 3 beeps sound and the display shows “Save error”, move closer to the baseunit and try again.15
Programmable FunctionsSetting the Auto Talk FeatureThe Auto Talk feature allows you to answer a call by lifting the handset offthe base unit without pressing or . To view caller’s informationon the display after lifting the handset, turn this feature OFF. Your phonecomes from the factory set to ON.Make sure the unit is in the standby mode initially.1Press (FUNCTION/CH).2Press3Press4Press5Press6Press7PressÖ or Ñ repeatedly until the arrowpoints to “Program”.á (Yes key).Ö or Ñ repeatedly until the arrowpoints to “Talk switching”.á (Yes key).Ö or Ñ to select “On” or “Off”.á (Yes key).•A beep sounds.•To return to the standby mode, press (OFF).HProgramCalling pagerGFH=YesSet line modeHTalk switchingGFH=YesAuto talkGFAuto talk:OnH=SaveAuto talk:OffGFH=Save:Off•You can exit the programming mode any time by pressing (OFF).•To answer a call when the Auto Talk feature is OFF, lift the handset off the baseunit and press or .16
Selecting the Ringer VolumeYou can set the handset and base unit ringer volumes to HIGH, LOW orOFF. If set to OFF, the handset/base unit will not ring. Your phone comesfrom the factory set to HIGH.Handset ringer volumeMake sure the unit is in the standby mode initially.1Press (FUNCTION/CH).Save directoryHRinger volume2GFH=YesPress Ö or Ñ repeatedly until thearrow points to “Ringer volume”,Ringerand press á (Yes key).HIGH Low ❚❚❚❚❚❚ High3Press Ö or Ñ to select theGFdesired volume.•The selected volume is displayed andRingerrings.LOW Low ❚❚❚❚❚❚ High•To turn the ringer OFF, press andGFhold Ö until 2 beeps sound. Whenset to OFF, “Ringer off” will flashfor about 45 seconds before thehandset returns to the standby mode. OFF Ringer offTo turn the ringer ON, press Ñ in step 3.•The ringer will sound at the LOW level.Preparation•You can also select the ringer volume while a call is being received. Press Ö orÑ while the unit is ringing.•When you replace the battery, the ringer volume will return to HIGH (factorypreset).Base unit ringer volumeMake sure the unit is in the standby mode initially. (You can also selectthe ringer volume while a call is being received.)•To select HIGH or LOW, press (RINGER).Each time you press the button, the selected ringer volume will bedisplayed and ring. (Refer to the handset display above.)•To turn the ringer OFF, press and hold (RINGER) until 2 beeps sound.“Ringer off” will be displayed and will keep displaying in the standbymode.•To turn the ringer ON, press (RINGER).The ringer will sound at the HIGH level.17
Preparing the Answering SystemGreeting MessageYou can record a personal greeting message of up to 2 minutes. If agreeting message is not re<strong>corded</strong>, one of two pre-re<strong>corded</strong> greetings willbe played when a call is received (p. 19).All messages (greeting, incoming, etc.) are stored in digital memory(p. 19). The total recording time is about 15 minutes.We recommend you record a brief greeting message (see sample onnext page) in order to leave more time for recording new messages.To record a greeting message1Press (GREETING!RECORD) to start the recording mode.•“Press RECORD again to record greeting” is heard.2Within3After4When5 seconds, press(GREETING!RECORD) again to record yourgreeting.•A long beep sounds.the long beep, talk clearly, about 8inches (20 cm) away from the MIC(microphone).•The base unit display shows the elapsedrecording time.•If you record for over 2 minutes, the unit willautomatically stop recording.finished, press (STOP).•To check the re<strong>corded</strong> greeting,press (GREETING!CHECK).Greeting check00-12•To change the message,start again from step 1.Greeting record00-00Greeting record(GREETING!RECORD)(STOP)(GREETING!CHECK)00-1218To increase the volume, press .To decrease, press .MIC
Greeting message sample“Hello, this is (your name and/or number). Sorry I cannot take yourcall. Please leave a message after the beep. Thank you.”To erase the re<strong>corded</strong> greeting messagePress (GREETING!CHECK) \ press (ERASE) while the message is beingplayed.•The unit will answer a call with a pre-re<strong>corded</strong> greeting.PreparationPre-re<strong>corded</strong> greeting messageIf you do not record a greeting message (p. 18), one of two messages willbe played when a call is received, depending on the caller’s recordingtime (p. 21).To check the pre-re<strong>corded</strong> greeting, press (GREETING!CHECK).•A pre-re<strong>corded</strong> greeting will be played as follows:■ When the recording time is set to “1 minute” or “3 minutes”:“Hello, we are not available now. Please leave your name and phone numberafter the beep. We will return your call.”■ When the recording time is set to “Greeting only”:“Hello, we are not available now. Please call again. Thank you for your call.”Flash Memory Message BackupMessages are stored on a “flash memory” IC chip and will not beaffected by power failures. All messages are saved until you erasethem.19
Preparing the Answering SystemProgramming Summary for the Answering SystemYou can program the following functions using the handset near thebase unit. Make sure the unit is in the standby mode initially.Press (FUNCTION/CH). Press Ö or Ñ to select “Program”, andpress á (Yes key).GPress Ö or Ñ to select “TAD program”, and press á (Yes key).•“Answering system setting. See base unit.” is displayed on thehandset.GThe base unit display shows programming options. Enter a requiredcommand on the display using the handset dialing buttons. See thepage numbers for details.0=Date and Time1=Remote code2=Number of ring*5=Recording time6=Pager mode7=Home number*#=Pager numberAdjusts the day and time (p. 22).Sets the remote code (p. 65).Selects the number of rings (p. 24).Selects the caller’s recording time (p. 21).Selects the pager mode setting (p. 62).Stores your home telephone no. (p. 60).Stores a pager number (p. 58).*Press á (Save key).*The display will change every 3 seconds.G20•You can exit the programming mode any time by pressing (OFF).•If you do not press any buttons for 60 seconds, the unit will return to the standbymode.•If 6 beeps sound on the base unit during programming, a wrong key waspressed. Enter the correct number.•If the handset has lost communication with the base unit, an alarm tone soundsand “No link to base. Place on cradle and try again.” isdisplayed on the handset.
Selecting the Caller’s Recording TimeYou can select “1 minute”, “3 minutes” or “Greeting only” for the caller’srecording time. Your phone comes from the factory set to “3 minutes”.1Press (FUNCTION/CH).HSave directoryRinger volumeGFH=Yes2Press3Press4Press5PressÖ or Ñ repeatedly until the arrowpoints to “Program”.á (Yes key).Ö or Ñ repeatedly until the arrowpoints to “TAD program”.á (Yes key).•The base unit display shows programmingoptions.HProgramCalling pagerGFH=YesHSave DIRECT#Set flash timeGFH=YesSet dial modeHTAD programGFH=YesAnsweringsystem setting.See base unit.Preparation6Press7Press8Press(5).•The current setting is displayed on the baseunit.(1), (2) or (3) to select the recordingtime.1: 1 minute2: 3 minutes3: Greeting onlyá (Save key).•A beep sounds.•To return to the standby mode, press (OFF).Base unit displayRecording time:3minBase unit displayRecording time:Greeting onlyIf you select “Greeting only”, the unit will answer a call with the greetingmessage, and then hang up. The unit will not record any incomingmessages. The base unit display will show “Greeting only” in thestandby mode.21
1Press2Press3Press4Press5PressPreparing the Answering SystemDay and Time AdjustmentVoice Time/Day Stamp: During playback, a synthesized voice willannounce the time and day that each message was re<strong>corded</strong>.(FUNCTION/CH).Ö or Ñ repeatedly until the arrowpoints to “Program”.á (Yes key).Ö or Ñ repeatedly until the arrowpoints to “TAD program”.á (Yes key).•The base unit display shows programmingoptions.HSave directoryRinger volumeGFH=YesHProgramCalling pagerGFH=YesHSave DIRECT#Set flash timeGFH=YesSet dial modeHTAD programGFH=YesAnsweringsystem setting.See base unit.6Press7Enter8Press(0).•“Set time” is announced.If previously adjusted, the day/time will beheard.the time (hour and minute) using a 4-digit number.(Ex. To set 9:30, enter “0930”.)(*) to select “AM” or “PM”.Press (#) repeatedly to set the day.Base unit displayMON 12:00 AM=AM/PM #=Day22
9Pressá (Save key).•The unit announces the day/time. The clock starts working.•If 6 beeps sound, the setting is not correct. Start again from step 4.•To return to the standby mode, press (OFF).•In step 7, you cannot enter numbers greater than 12. Do not use military time.(To set 13:00 hours, enter “0100”, and select “PM” by pressing (*).)PreparationIf a power failure occurs, the adjusted time/day will be erased. Readjustthe day/time.For Caller ID service users (p. 32)•The Caller ID information will re-set the clock after the first ring if the adjustedtime is incorrect. However, the day will not be re-set. Set the day following theprocedures on pages 22 and 23.•If the time has not previously been set, the Caller ID information will not adjustthe clock.•The Caller ID information will automatically adjust the clock for daylight savingtime.23
Preparing the Answering SystemSelecting the Number of RingsYou can select the number of times the unit rings before the answeringsystem answers a call, from “2” to “7” or “Toll saver”*.Your phone comes from the factory set to “Toll saver”*.1Press (FUNCTION/CH).HSave directoryRinger volumeGFH=Yes2Press3Press4Press5Press6PressÖ or Ñ repeatedly until the arrowpoints to “Program”.á (Yes key).Ö or Ñ repeatedly until the arrowpoints to “TAD program”.á (Yes key).•The base unit display shows programmingoptions.(2).•The current setting is displayed on the baseunit.HProgramCalling pagerGFH=YesHSave DIRECT#Set flash timeGFH=YesSet dial modeHTAD programGFH=YesAnsweringsystem setting.See base unit.Base unit displayNumber of rings:Toll saver7Press8Press(0), or (2) to (7) to set the number of rings.0: Selects “Toll saver”*.2–7: The unit will answer after the selected number of rings.á (Save key).•A beep sounds.•To return to the standby mode, press (OFF).*Toll saverWhen you call the unit from a touch tone telephone:If the unit answers on the 2nd ring, there is at least one new message.If the unit answers on the 4th ring, there are no new messages.Hang up when you hear the 3rd ring. This will save you the tollcharge for the call.24
Making CallsWith the HandsetFor best performance,extend the antennafully (p. 8).Back sideRecieverSpeakerMicrophone(OFF)(CLEAR)(REDIAL/PAUSE)Cordless Telephone1Press.Talk2Dial3Toa phone number.•The dialed number is displayed.•After a few seconds, the display will show thelength of the call and the battery strength.hang up, press (OFF) or place thehandset on the base unit.Talk1112222Talk00-00-00•If the handset has lost communication with the base unit in step 1, an alarm tonesounds and “No link to base. Place on cradle and try again.” isdisplayed.25
26Making CallsTo have a hands-free phone conversation (Using DigitalDuplex Speakerphone)1Press .Talk•The button lights.2Dial3When4Toa phone number.•The dialed number is displayed.•After a few seconds, the display will show thelength of the call and the battery strength.the other party answers, talk into themicrophone.hang up, press (OFF) or place the handseton the base unit.•The button light goes out.Hands-free Digital Duplex SpeakerphoneFor best performance, please note the following:•Talk alternately with the caller in a quiet room.•If the other party has difficulty hearing you, press Ö to decrease thespeaker volume.•If the other party’s voice from the speaker cuts in/out during aconversation, press Ö to decrease the speaker volume.•While talking using , you can switch to the hands-free phoneconversation by pressing . To switch back to the receiver, press.To select the receiver volume (High, Medium or Low) orspeaker volume (6 levels) while talkingTo increase, press Ñ.To decrease press Ö.Talk1112222Talk00-00-00•If the handset has lost communication with the base unit in step 1, an alarm tonesounds and “No link to base. Place on cradle and try again.” isdisplayed.Ex. Receiver volume: HighSpeaker volume: level 6•Each time you press Ö or Ñ, theLoudvolume level will change.•The display will return to the length ofLow ❚❚❚❚❚❚ Highthe call.•When you replace the battery, the receiver/speaker volume will return to thefactory preset (medium for the receiver volume, level 3 for the speaker volume).
If noise interferes with the conversationExtend the antenna, press (FUNCTION/CH) to select a clearer channel ormove closer to the base unit.To redial the last number dialed on the handsetPress or and press (REDIAL/PAUSE).To dial after confirming the entered number1Dial a phone number.•If you misdial, press (CLEAR) and dial again.2Press3To.ORTo have a hands-free phone conversation,press , and when the other partyanswers talk into the microphone.•After a few seconds, the display will show thelength of the call and the battery strength.hang up, press (OFF) or place the handseton the base unit.3334444Talk3334444Talk00-00-00Cordless TelephoneTo redial after confirming the last number dialedPress (REDIAL/PAUSE) and press or .Lighted handset keypadThe handset dialing buttons will light when you press a button or lift thehandset off the base unit, and flash when a call is received. The lights willgo out about 10 seconds after pressing a button, lifting the handset oranswering a call.27
Making CallsWith the Base Unit (Digital Duplex Speakerphone)(REDIAL)1Press2Dial3When4To(HOLD)(DIGITAL!SP-PHONE).•The DIGITAL SP-PHONE indicatorlights.a telephone number.the other party answers,talk into the MIC (microphone).hang up, press (DIGITAL!SP-PHONE).•The indicator light goes out.MIC(DIGITAL!SP-PHONE)and IndicatorTalkTalk1112222Talk00-00-00•To switch to the handset while using the base unit speakerphone:—If the handset is off the base unit, press or .—If on the base unit, just lift up.•During a call using the handset, the call can be switched to the base unitspeakerphone by pressing (DIGITAL!SP-PHONE) on the base unit.28
Hands-free Digital Duplex SpeakerphoneFor best performance, please note the following:•Talk alternately with the caller in a quiet room.•If the other party has difficulty hearing you, press Ö to decrease thespeaker volume.•If the other party’s voice from the speaker cuts in/out during aconversation, press Ö to decrease the speaker volume.To adjust the speaker volume (8 levels) while talkingTo increase, press Ñ.To decrease, press Ö.To redial the last number dialed on the base unitPress (DIGITAL!SP-PHONE) and press (REDIAL).To put a call on holdPress (HOLD).•The DIGITAL SP-PHONE indicator flashes.Ex. Level 8LoudLow ❚❚❚❚❚❚❚❚HighHoldCordless TelephoneTo release the holdFrom the base unit, press (DIGITAL!SP-PHONE).From the handset, press or , or lift the handset off the baseunit.•If another phone is connected on the same line (p. 77), you can also release thehold by lifting its handset.29
Making CallsSimultaneous Keypad DialingYou can use the base unit like a standard telephone. After pressingto make a call with the handset near the base unit, you can also dial usingthe base unit keypad.1 Handset:Press .2Base unit:Dial a telephone number whilehearing a dial tone on thehandset.•When the other party answers, talkusing the handset.(OFF)3 Handset:To hang up, press (OFF) or placethe handset on the base unit.Simultaneous Keypad Dialing is only possible after pressing .30Useful informationYou can enter numbers using the base unit keypad during a call with thehandset. For example, to access an answering service, electronic bankingservice, etc.1. Handset:Press .2. Handset:Dial a telephone number.•You can also dial with base unit keypad.3. Base unit:Enter the required numbers while listening to the pre-re<strong>corded</strong>instructions.4. Handset:To hang up, press (OFF) or place the handset on the base unit.
Answering CallsWhen a call is received, the unit rings, “Incoming call” is displayedand the ringer/charge indicator flashes.If you subscribe to a Caller ID service, the calling party information will bedisplayed after the first ring (p. 32). In order to view the Caller IDinformation, please wait until the second ring to answer a call.With the HandsetIf the handset is off the base unit;Press .•You can also answer a call by pressing any dialingbutton (0) to (9), (*) or (#) (—Any Key Talk).ORPress , and when the other party answerstalk into the microphone.ORIf on the base unit, just lift up. (This is notpossible when the Auto Talk feature is set toOFF. See page 16.)Ringer/ChargeIndicatorMicrophoneCordless TelephoneWith the Base Unit1Press2Talk3To(DIGITAL!SP-PHONE).into the MIC.hang up, press(DIGITAL!SP-PHONE).MIC(DIGITAL!SP-PHONE)31
Caller ID ServiceThis unit is compatible with a Caller ID service offered by your telephonecompany. If you subscribe to a Caller ID service, the calling party’sinformation will be shown on the handset and base unit displays after thefirst ring.The unit can record information of up to 50 different callers in the CallerList. The Caller List information is sorted by the most recent to the oldestcall. When the 51st call is received, the first call is deleted.Using the list, you can automatically call back a caller. You can store thecallers’ names and numbers from the Caller List into the directory.If you subscribe to both Caller ID and Call Waiting services, when asecond call is received while talking, the new caller’s name and phonenumber will be displayed (p. 52).How caller information is displayed when a call isreceivedThe handset and base unit displays show thecaller’s name and number after the first ring.•If the handset is on the base unit, caller informationwill be displayed on the base unit.•After you answer the call, the display will show thelength of the call.TINA ROBINSON1-000-222-3333•Caller information cannot be displayed in the following cases:•—If the caller dialed from an area which does not provide a Caller ID service, thedisplay will show “Out of area”.•—If the caller has requested not to display his/her information, the display willshow “Private caller”.•If your unit is connected to a PBX which does not support Caller ID services, youcannot access those services.•The name display service may not be available in some areas. For furtherinformation, please contact your telephone company.Call group feature (Dual-Color Visual Ringer):If you receive a caller ID call from one of the phone numbers stored inthe directory and the item has set the feature;– the handset and base unit will ring with a different ringer pattern,– the handset and base unit displays will light in orange, and– the ringer/charge indicator will flash in orange.You can then distinguish the caller from others easily. To use thisfeature, store items in the directory and turn the feature on for requireditems (p. 38, 41, 42).32
To check the number of new callsWhen new calls have been received, the CALLER ID indicator flashes onthe base unit. The handset and base unit displays show the number ofnew calls.Ex. You have received 10 new calls.While the handset is on the base unit:Handset display10 new callsBase unit displaySUN 12:00AM10 new calls0 messageCordless TelephoneCALLER ID IndicaorWhile the handset is off the base unit:Press Ñ or Ö to turn the display on.10 new callsGF H=Directory33
Using the Caller ListViewing the Caller ListYou can view the caller list with the handset or base unit. Caller Listinformation includes the caller’s name and phone number, the time anddate the call was received, and the number of times that caller called.Make sure the unit is in the standby mode initially.With the handset1PressÖ or Ñ to enter theCaller List.•The display will show, forexample, the following.With the base unit1Press Ö or Ñ to enter theCaller List.•The display will show, forexample, the following.2 new callsGF H=Directory2 new callsGF H=Directory2To•You can go to the directory listby pressing á (p. 46).search from the mostrecent call, press Ö.To search from the oldest call,press Ñ.•To scroll between callers, pressÖ or Ñ.2To•You can go to the directory listby pressing á (p. 46).search from the mostrecent call, press Ö.To search from the oldest call,press Ñ.•To scroll between callers, pressÖ or Ñ.3ToJACK SMITH1-222-333-44443:10P JUN.10exit the list, press (OFF).•The handset will return to thestandby mode.3ToJACK SMITH1-222-333-44443:10P JUN.10exit the list, press (EXIT) or(STOP).•The base unit will return to thestandby mode.•If “No items stored” is displayed in step 1, the Caller List is empty.•If there is no name information for a caller, the display will only show the phonenumber.•While you are viewing the Caller List with the handset, another person cannotaccess the list using the base unit, and vice versa.34
What “√” meansWhen the display shows “√”, you have alreadyviewed this calling information, answered thecall, called back the caller or played back themessage (p. 55).JACK SMITH1-222-333-44443:10P JUN.10 √If a caller calls more than onceThe number of times the same caller called isdisplayed (✕2 to ✕9). The date and time ofthe most recent call will be re<strong>corded</strong>. Afterchecking, ✕2 to ✕9 will be replaced with “√”.Calling Back from the Caller ListWith the handset1Press Ö or Ñ to enter theCaller List.2To3 new callsGF H=Directorysearch from the mostrecent call, press Ö.To search from the oldest call,press Ñ.JACK SMITH1-222-333-44443:10P JUN.10 ✕3With the handset1Press Ö or Ñ to enter theCaller List.2To3 new callsGF H=Directorysearch from the mostrecent call, press Ö.To search from the oldest call,press Ñ.Cordless Telephone3PressCINDY TURNER1-234-456-789011:20A JAN.12 ✕3or .•The displayed phone number isdialed automatically.3PressCINDY TURNER1-234-456-789011:20A JAN.12 ✕3(DIGITAL!SP-PHONE).•The displayed phone number isdialed automatically.Talk12344567890Talk12344567890•In some cases, you may have to edit the number before dialing (p. 36, 37).(Ex. You may have to delete “1” and the area code.)•If a phone number is not displayed in the caller information, you cannot call backthat caller.35
Using the Caller ListEditing the Caller’s Phone NumberThe handset/base unit can edit a phone number into one of 4 patterns.Make sure the unit is in the standby mode initially.With the handset1Press Ö or Ñ to enter the Caller List.2Press Ö or Ñ repeatedly to find thedesired caller, and press á.3While4Press5Afterthe arrow points to “Edit”,press á (Yes key).á (Edit key) to select apattern.•Each time you press á, the number isrearranged into one of 4 differentpatterns.abPhone no.Area code – Phone no.c 1 – Phone no.d 1 – Area code – Phone no.•The order in which patterns a–d aredisplayed depends on how the telephonenumber is displayed in step 3.•Select a pattern within 60 seconds, or theunit will return to the standby mode.FRED PARKER1-234-321-555511:20A JAN.12 √editing the number, you can continue with calling back orstoring procedures. To call back, press or (p. 35).To store the number in the directory, press Ö (Next key), and followthe instructions on the display (see page 38, from step 4).a5 new callsGF H=DirectoryHEditSave directoryGFH=YesFRED PARKER1-234-321-5555G=Next H=Edit321-5555G=NextH=Editb 234-321-5555G=Next H=Editc 1-321-5555G=Next H=Editd 1-234-321-5555G=Next H=Edit•The number edited in step 4 will not be maintained in the Caller List.36
With the base unit1Press Ö or Ñ to enter the CallerList.2PressÖ or Ñ repeatedly to findthe desired caller.5 new callsGF H=DirectoryFRED PARKER1-234-321-555511:20A JAN.12 √3Press4After(EDIT) to select a pattern.•Each time you press (EDIT), thenumber is rearranged into one of4 different patterns.abPhone no.Area code – Phone no.c 1 – Phone no.d 1 – Area code – Phone no.•The order in which patterns a–dare displayed depends on how thetelephone number is displayed instep 2.a FRED PARKER321-5555b FRED PARKER234-321-5555c FRED PARKER1-321-5555d FRED PARKER1-234-321-5555editing the number, you can continue with calling back.Press (DIGITAL!SP-PHONE) (p. 35).Cordless Telephone•The number edited in step 3 will not be maintained in the Caller List.37
Using the Caller ListStoring Caller List Information in the DirectoryYou can store names and phone numbers that are in the Caller List intothe directory. You can also turn the call group feature on for certaincallers (p. 41).Storing must be carried out with the handset.Make sure the unit is in the standby mode initially.1Press2Press3PressÖ or Ñ to enter the Caller List.Ö or Ñ repeatedly to find thecaller you want to store in the directory,and press á (Yes key).•If the number requires editing, see page 36.Ö or Ñ to select “Savedirectory”, and press á (Yes key).If there is no name information for thecaller, “Enter name” will bedisplayed.a) If a name is not required, press Ö(Next key).b) If a name is required, enter the name(p. 44). When finished, press Ö(Next key).10 new callsGF H=DirectoryCINDY TURNER1-234-456-789011:20A JAN.12 ✕3HEditSave directoryGFH=YesEditHSave directoryGFH=YesEnter nameIHG=NextEnter nameCINDY TURNERIHG=Next4Toturn the call group feature on, select“On” by pressing Ü or á.If not required, select “Off”.(See page 43, from step 7.)Set groupIH:OffG=Next•You can exit the programming mode any time by pressing (OFF).•If the display shows “Directory full” in step 3, press (OFF) to exit the list.To erase other stored items from the directory, see page 49.•You cannot store caller information in the directory if a phone number is notdisplayed.38
Erasing Caller List InformationAfter checking the Caller List, you can erase some or all of the entrieswith the handset or the base unit.Make sure the unit is in the standby mode initially.To erase a specific callerfrom the Caller ListWith the handset/base unit:1Press Ö or Ñ to enter theCaller List.2Press3Press10 new callsGF H=DirectoryÖ or Ñ repeatedly tofind the caller you want toerase from the Caller List.TOM REAGAN1-888-777-666612:20A JAN.12 √(CLEAR).Clear•A beep sounds and theinformation is erased.•To erase other items, repeatfrom step 2.•To return to the standby mode, ifusing the handset, press (OFF).If using the base unit, press(EXIT) or (STOP).To erase all entries in theCaller ListBefore erasing all entries, makesure that “0 new call” isdisplayed.With the handset/base unit:1Press Ö or Ñ to enter theCaller List.2Press3Press4Press0 new callGF H=Directory(CLEAR).HExitAll clearGFÖ or Ñ to select “Allclear”.ExitHAll clearGFH=Yesá (Yes key) or(CLEAR).H=YesCordless TelephoneAll clear•A beep sounds and all entriesare erased.39
One-Touch DialerYou can store a phone number in the (DIRECT) button of the handset. Thestored number is dialed with a one-touch operation.Storing a Phone Number in the DIRECT ButtonMake sure the unit is in the standby mode initially.1Press (FUNCTION/CH).2Press Ö or Ñ repeatedly until the arrow Ringer volumepoints to “Program”.HProgramGFH=Yes3Press á (Yes key).HSave DIRECT#Set flash timeGFH=Yes4While the arrow points to “SaveDIRECT#”, press á (Yes key).IHG=Next5Enter a phone number, up to 22 digits. 1234567890123456•Each time you press (CLEAR) the digit to the 789012left of the cursor is erased. To erase all digits,press and hold (CLEAR).•The last 32 digits number you entered will bedisplayed. To confirm the remaining number, pressÜ or á.IHG=Next6Press Ö (Next key).1234567890123456•If you want to edit the entered number, press 789012Ñ (Edit key) and return to step 5.F=Edit H=Save7Pressá (Save key).•A beep sounds.•To return to the standby mode, press (OFF).1234567890123456789012Save DIRECT#•You can exit the programming mode any time by pressing (OFF).•If a pause is required for dialing, (REDIAL/PAUSE) can be stored in a phonenumber in step 5. This counts as one digit (p. 52).To erase the stored number:Press and hold (CLEAR) in step 5.40
Dialing the Stored Number in the DIRECTButton1Press2Press(DIRECT).•The stored number is displayed.or .•The number is dialed1234567Direct•You can also dial the stored number by pressing or then pressing(DIRECT).Using the DirectoryYou can store up to 90 names and phone numbers in the directory usingthe handset. All directory items are sorted by the first word in alphabeticalorder. Using the directory, you can make a call by selecting a name onthe handset or base unit display.Call group feature (Dual-Color Visual Ringer):You can distinguish certain callers from others by the ringer pattern, thecolor of the display backlight and the ringer charge indicator light when acall is received. Turn the call group feature on for required items (forexample, for family). When a Caller ID call is received from those callers,the handset and the base unit will ring with a different ringer pattern, thehandset and base unit displays will light in orange and the ringer/chargeindicator will flash in orange.Cordless TelephoneCall group feature Backlight color RingerRinger/Charge indicator light color patternOff Green OrdinaryOn Orange Higher pitch41
Using the DirectoryStoring Names and Numbers in the DirectoryStore a name and number, then if required, turn the call group feature onfor the item.Make sure the unit is in the standby mode initially.1Press (FUNCTION/CH).HSave directoryRinger volumeGFH=Yes2While the arrow points to “SaveDirectory=directory”, press á (Yes key).20 items•The display shows the number of stored itemsin the directory.3Enter a name, up to 15 characters usingthe dialing buttons (p. 44).•To move the cursor, press Ü or á.Enter nameIHG=Next•If a name is not required, press Ö (Next key)and go to step 5.Enter nameTom JonesIHG=Next4Press Ö (Next key).5Enter a phone number, up to 22 digits.•If you misdial, press (CLEAR). Digits areEnter phone no.0987654321erased from the right. To erase all digits, press IHG=Nextand hold (CLEAR).6Press Ö (Next key). Set group:OffIHG=Next42
7To8Press9Pressturn the call group feature on, select“On” by pressing Ü or á.If not required, select “Off”.•When “On” is selected, the display andringer/charge indicator will light in orange anda different ringer pattern will be heard.Ö (Next key).•If you want to change the storing name,number or group setting, press Ñ (Edit key)repeatedly to reach the desired display andchange it.á (Save key).•A beep sounds.•To continue storing other items, repeat fromstep 2.•To return to the standby mode, press (OFF).Set groupTom Jones0987654321F=Edit H=Save•If a pause is required for dialing, (REDIAL/PAUSE) can be stored in a phonenumber in step 5. This counts as one digit (p. 52).•You can exit the programming mode any time by pressing (OFF).•If the display shows “Directory full” in step 2, press (OFF) to exit the list.To erase other stored items from the directory, see page 49.•If 3 beeps sound and the display shows “Save error”, move closer to the baseunit and start again from step 1IHTom Jones0987654321:OnG=NextCordless Telephone43
Using the DirectorySelecting Characters to Enter NamesThe handset dialing buttons ((0) to (9)) can beused to enter letters and symbols. The lettersare printed on the dialing buttons.Pressing each button selects a character asshown below.TONE17LOUD/SEARCH20OFFCLEAR34 5 689Number of times key is pressedFLASHREDIALKeys(1)(2)(3)(4)(5)(6)(7)(8)(9)(0)Üá1 2 3 4 5 6 7 8 9 10 11# & ’ ( ) , – . / 1A B C a b c 2D E F d e f 3G H I g h i 4J K L j k l 5M N O m n o 6P Q R S p q r s 7T U V t u v 8W X Y Z w x y z 90 BlankTo move the cursor to the leftTo move the cursor to the right44•To enter another character using the same dialing button, press á to move thecursor to the next space.If you make a mistake while entering a nameUse Ü or á to move the cursor to the incorrect character, press(CLEAR) to delete and enter the correct character. Each time you press(CLEAR), a character is erased from the right.To erase all characters, press and hold (CLEAR).
For example, to enter “Tom Jones”:1Press (FUNCTION/CH).2Whilethe arrow points to “Savedirectory”, press á (Yes key).HSave directoryRinger volumeGFH=YesDirectory=20 itemsEnter name3Press4Press5Press6Press7Press8Press9Press101112(8).(6) six times, then press á tomove the cursor to the right.(6) four times.á twice to enter a blank.(5).(6) six times, then press á tomove the cursor to the right.(6) five times.Press (3) five times.Press (7) eight times.When finished, press Ö (Next key).•To enter a phone number and continuestoring, see page 42, from step 5.IHTToTomTomTom JTom JoTom JonTom JoneG=NextEnter nameTom JonesIHG=NextEnter phone no.Cordless Telephone45
Finding Items in the DirectoryYou can search the directory using the handset or the base unit.With the handset/base unitMake sure the unit is in the standby mode initially.1Press2PressUsing the DirectoryÜ or á to enter the directory list.Ö or Ñ.•The first item is displayed.Directory listGFH=Caller’s listAnn12345678903Press.Ö or Ñ repeatedly until thedesired item is displayed•All directory items are stored in theorder shown on the right.Press Ö. Press Ñ.Alphabet letterSymbolNumberTelephone number(If no name is stored)To search for a name by initial1Press Ü or á to enter the directory list. Directory list2GFPress Ö or Ñ.H=Caller’s list•The first item is displayed.3Press the dialing button for the first letter of the desired name untilany name with the same initial is displayed (see the Index table onpage 47).Ex. To find “Frank”, press (3) repeatedly until the first item under “F” isdisplayed.4Press Ö repeatedly until the name is displayed.46
Index tableKeysIndex(1) Other symbols, 1(2) A, B, C, 2(3) D, E, F, 3(4) G, H, I, 4(5) J, K, L, 5Keys(6)(7)(8)(9)(0)IndexM, N, O, 6P, Q, R, S, 7T, U, V, 8W, X, Y, Z, 90•You can leave the directory list any time. If using the handset, press (OFF). Ifusing the base unit, press (EXIT) or (STOP).•If “No items stored” is displayed in step 2, the directory is empty.•In step 1, you can go to the Caller List by pressing á (p. 34).•If you are viewing the directory with the handset, another person cannot accessthe directory using the base unit, and vice versa.Dialing from the DirectoryMake sure the unit is in the standby mode initially.With the handsetWith the base unit1Press Ü or á to enter the1Press Ü or á to enter thedirectory list.directory list.Directory listDirectory listGFGFH=Caller’s listH=Caller’s list2Press Ö or Ñ.2Press Ö or Ñ.•The first item is displayed.•The first item is displayed.3Press Ö or Ñ repeatedly to3Press Ö or Ñ repeatedly tofind the directory item thatfind the directory item thatyou want to dial.you want to dial.•To search for the item by initial,see page 46. .•To search for the item by initial,see page 46. .•To exit the directory, press•To exit the directory, press(OFF).(EXIT) or (STOP).4Press or .4Press (DIGITAL!SP-PHONE).•The number is dialed•The number is dialedautomatically.automatically.Cordless Telephone47
Using the DirectoryEditing an Item in the DirectoryYou can edit a name and phone number of a stored item and change thegroup setting (p. 41).Programming must be carried out with the handset.Make sure the unit is in the standby mode initially.1Press Ü or á to enter the directory list.2Press Ö or Ñ.•The first item is displayed.3Press Ö or Ñ repeatedly to find thedirectory item you want to change, andpress á.•To search for the item by initial, see page 46.•If you do not need to change the name, pressÖ (Next key) and go to step 5.4Edit the name using the dialing buttons, Üor á (p. 44), up to 15 characters.5Press6Add7Press8ToÖ (Next key).•If you do not need to change the number,press Ö (Next key) and go to step 7.a number to the current number.•Pressing (CLEAR) erases the digit to the leftof the cursor. To erase all digits, press andhold (CLEAR).Ö (Next key).turn the call group feature on, select“On” by pressing Ü or á.If not required, select “Off”.•When “On” is selected, the display andringer/charge indicator will light in orange anda different ringer pattern will be heard.Directory listGFH=Caller’s listJane1234567Enter nameJaneIHG=NextEnter nameJane WalkerIHG=Next1234567IH0981234567IHSet groupIHSet groupIHG=NextG=Next:OffG=Next:OnG=Next48
9Press Ö (Next key).•If you want to change the storing name,number or group setting, press Ñ (Edit key)repeatedly to reach the desired to reach thedesired display and change it.Press á (Save key).10 •A beep sounds.•To continue editing other items, repeat from 3.•To return to the standby mode, press (OFF).Jane Walker0981234567F=Edit H=SaveJane Walker0981234567•You can exit the programming mode any time by pressing (OFF).Erasing an Item from the DirectoryWith the handset/base unitYou can erase an item using the handset or the base unit.Make sure the unit is in the standby mode initially.1Press2PressÜ or á to enter the directory list.Ö or Ñ.•The first item is displayed.Directory listGFH=Caller’s listHelen1234567890Cordless Telephone3PressÖ or Ñ repeatedly to find thedirectory item you want to erase.•To search for the item by initial, see page 46.Clear?I=NoH=Yes4Press(CLEAR).•To stop erasing, press Ü (No key).Clear5Pressá (Yes key).•A beep sounds and the item is erased.•To erase other items, repeat from step 3.•To return to the standby mode, if using thehandset, press (OFF). If using the base unit,press (EXIT) or (STOP).49
IntercomA 2-way intercom is possible between the handset and the base unit.Paging the base unit from the handset1 Handset:Press (INTERCOM). Talk to thepaged party after the beeps.2Base•“Intercom” is displayed.unit:When the other party’s voice isheard, answer using the MIC.3 Handset:To end the intercom, press(OFF).(INTERCOM)(OFF)Paging the handset from the base unit (Handset locator)Using this feature, you can locate a misplaced handset.1Base unit:Press (LOCATOR/INTERCOM).•“Paging” is displayed on thebase unit.•The handset beeps for 1 minuteand “Paging PressINTERCOM” is displayed.•To stop paging, press(LOCATOR/INTERCOM) again.2 Handset:Press (INTERCOM) to answer.MIC•“Intercom” is displayed.3Baseunit:Talk into the MIC.4 Handset:To end the intercom, press(OFF).(LOCATOR/INTERCOM)MIC(INTERCOM)(OFF)50
During an intercom call:•Intercom calls can only be ended with the handset.•If the handset user has difficulty hearing the base unit user, decrease thebase unit speaker volume by pressing Ö.•If an incoming call is received, the intercom call stops and the unit starts toring. To answer, if you are using the handset, press or . If youare using the base unit, press (DIGITAL!SP-PHONE).Transferring a Call Using the IntercomThe intercom can be used during a call. This feature enables you totransfer a call between the handset and the base unit.From the handset to thebase unit1 Handset:During a call, press(INTERCOM). Talk to thepaged party after the beeps.2Base3Base•The call is put on hold and“Intercom hold” is displayed.•If the base unit user does notanswer, press or .unit:When the paging party’svoice is heard, answer usingthe MIC.unit:To answer the call, press(DIGITAL!SP-PHONE).•The transfer is complete.From the base unit to thehandset1Base unit:During a call, press(LOCATOR/INTERCOM).•The call is put on hold and“Paging” is displayed.•If the handset user does notanswer, press(DIGITAL!SP-PHONE).2 Handset:Press (INTERCOM) to answerthe page.3 Handset:To answer the call, pressor .•The transfer is complete.Cordless Telephone51
Special FeaturesAutomatic Security Code SettingEach time you place the handset on the base unit, the unit automaticallyselects one of more than a million security codes. These codes helpprevent the unauthorized use of your telephone line by another cordlesstelephone user.For Call Waiting Service UsersPress (FLASH/CALL!WAIT/PLAYBACK) or (FLASH/CALL!WAIT) if you heara call-waiting tone while talking.•The first call is put on hold and you can answer the second call.•To return to the first caller, press (FLASH/CALL!WAIT/PLAYBACK) or(FLASH/CALL!WAIT) again.•The call waiting service cannot be used when:—the answering system is recording someone’s message, or—a parallel connected telephone is in use.•If this function does not operate properly, consult your telephone company fordetails.Call Waiting Caller ID FeatureCall Waiting Caller ID Feature allows your unitto display the second caller’s information. Afteryou hear a call-waiting tone while talking, theunit will display the caller’s name with the phonenumber and “----Waiting-----”.NANCY BROWN1-000-222-3333----Waiting-----•Please contact your telephone company for details and availability in your area.How to Use the PAUSE Button(For Analog PBX Line/Long Distance Service Users)We recommend you press (REDIAL/PAUSE) or (PAUSE) if a pause isrequired for dialing with a PBX or to access a long distance service.Ex. Line access number (9) (PBX)(9) \ (REDIAL/PAUSE) or (PAUSE) \ Phone number•Pressing (REDIAL/PAUSE) or (PAUSE) once creates a 3.5 second pause. Thisprevents misdialing when you redial or dial a stored number.•Pressing (REDIAL/PAUSE) or (PAUSE) more than once increases the length ofthe pause between numbers.52
Temporary Tone Dialing(For Rotary or Pulse Service Users)Press (TONE) before entering access numbers which require tone dialing.•The dialing mode changes to tone. You can enter numbers to access ananswering service, electronic banking service, etc. When you hang up, the modewill return to pulse.•Access numbers entered after pressing (TONE) will not be included whenredialing.FLASH ButtonPressing (FLASH/CALL!WAIT/PLAYBACK) or (FLASH/CALL!WAIT) allowsyou to use special features of your host PBX such as transferring anextension call or accessing special telephone services (optional) such ascall waiting.Selecting the flash timeThe flash time depends on your telephone exchange or host PBX.You can select the following flash times: “700, 600, 400, 300, 250, 110,100 or 90 ms (milliseconds)”. Your phone comes from the factory set to“700 ms”. Make sure the unit is in the standby mode initially.1Press (FUNCTION/CH).2Press3PressÖ or Ñ repeatedly until the arrow points to “Program”, andpress á (Yes key).Ö or Ñ repeatedly until the arrowpoints to “Set flash time”, and pressá (Yes key).Save DIRECT#HSet flash timeGFH=YesCordless Telephone4PressÖ or Ñ repeatedly until thedesired time is displayed, and press á(Save key).•A beep sounds.•To return to the standby mode, press (OFF).Flash time:700msGFH=Save•You can exit the programming mode any time by pressing (OFF).•If you are connected via a PBX, a longer flash time may be necessary to usePBX functions (transferring a call etc.). Consult your PBX supplier for the correctsetting.53
Automatic Answering OperationWhen the unit answers a call, a greeting message is played and thecaller’s message is re<strong>corded</strong>. While recording, “-Answering-” will flashon the base unit display.•The total recording time (including greeting message) is about15 minutes. If messages are re<strong>corded</strong> in noisy rooms, the time maybe shortened by up to 3 minutes.•A maximum of 64 messages (including greeting message) can bere<strong>corded</strong>.Setting the Unit to Answer CallsPress (ANSWER!ON) to turn on the answering system.•The indicator lights and “Answer set” isheard.•The unit will announce the remainingrecording time if it is less than 5 minutes.•If you hear “Memory full”, “Messagefull” is displayed on the base unit andthe ANSWER ON indicator flashesrapidly, erase some, or all, of themessages (p. 57).(ANSWER!ON)and Indicator•If you do not want the unit to answer calls, press (ANSWER!ON) again to turn offthe answering system. The indicator light goes out and “Answer off” is heard.•You can also turn on the answering system remotely using any other phone(p. 69).Monitoring incoming callsWhile a call is being re<strong>corded</strong>, you can monitor it through the base unitspeaker.To answer the call with the base unit speakerphone, press(DIGITAL!SP-PHONE). For the handset, lift the handset off the base unit orpress or . The unit stops recording.54
Listening to MessagesYou can see the total number of re<strong>corded</strong> messages on the base unitdisplay. If the ANSWER ON indicator flashes, new messages have beenre<strong>corded</strong>.Listening to only newmessagesPress (NEW!MESSAGE) briefly.•The unit announces the number of newmessages and plays them back.Listening to all re<strong>corded</strong>messages(NEW!MESSAGE)(STOP)Press and hold (NEW!MESSAGE)until playback starts.To increase the volume, press .To decrease, press .•During each message playback, the message number is displayed.(Ex. While the first message is being played back, “Message 1 ” is displayed.)•At the end of the last message, “End of final message” is heard. The unit willannounce the remaining recording time if it is less than 5 minutes.During playbackTo repeatmessageTo repeat from the beginning of the messagePress Ü.•If you press within 5 seconds of playback, the previousmessage will be played.Answering SystemTo skipmessageTo stopoperationTo skip to the next messagePress á.Press (STOP).•To resume playback, press (NEW!MESSAGE).•If you do not press any button for 60 seconds or if you press(STOP) again, the unit will return to the standby mode.55
Listening to MessagesFor Caller ID service users (p. 32)During playback, the base unit display willshow the name and/or number of the callerwhose message is being played.JACK SMITH1-222-333-4444---Message 3----To call back the displayed number:During playback, press (DIGITAL!SP-PHONE).•The unit stops playback and automatically dials the displayed phone number.•After listening to new incoming messages, “√” will be added to the call entriesin the Caller ID Caller List (p. 35).From the HandsetIf someone else is in the room and you want to listen to the re<strong>corded</strong>messages privately, you can use the handset.1 Handset:Press (FLASH/CALL!WAIT/PLAYBACK).•The number of new messages is heard on the handset.2Base3Whenunit:To listen to new messages, press(NEW!MESSAGE) briefly. To listento all messages, press and hold(NEW!MESSAGE) until playbackstarts.•The messages will be heardon the handset.•Ü, á and (STOP) can alsobe used during playback(p. 55).finished, press(FLASH/CALL!WAIT/PLAYBACK)or place the handset on thebase unit.•You can also listen to messages without using the base unit. See page 70.56
Erasing MessagesThe unit will announce the remaining recording time after playback, if it isless than 5 minutes. New messages cannot be re<strong>corded</strong> when:—“Memory full” is heard.—“Message full” is displayed on the base unit.—the ANSWER ON indicator flashes rapidly.Erase some, or all, of the messages. We recommend you eraseunnecessary messages after each playback.Erasing a specific messagePress (ERASE) while the message you want to erase is being played.•The unit erases the message.•A short beep will sound and the unit will continue to play the next message.Erasing all messagesAll re<strong>corded</strong> messages, except the greeting message, can be erased atone time.1Press2Within(ERASE).•“Press ERASE again to erase allmessages” is heard.5 seconds, press (ERASE)again.•A beep sounds and “No messages” isheard.•The base unit display shows“0 message”.(ERASE)Answering SystemANSWER ON Indicator•The information in the Caller List will not be erased. To erase Caller Listinformation, see page 39.57
Pager CallThis feature allows you to alert your pager when the unit records anincoming message or receives a Caller ID call (p. 32). You can retrievethe message from a touch tone telephone (p. 64). If you subscribe to aCaller ID service, the caller’s telephone number will be displayed on yourpager. First program the following settings (p. 58–62), then set the unit tocall the pager. Use the handset near the base unit.Make sure that the unit is in the standby mode initially.Storing a Pager NumberIf you use a 1-800 pager number, see the next page for the storingprocedure.1Press (FUNCTION/CH).2Press3Press4Press5PressÖ or Ñ repeatedly until the arrowpoints to “Program”.á (Yes key).Ö or Ñ repeatedly until the arrowpoints to “TAD program”.á (Yes key).•The base unit display shows programmingoptions.HProgramCalling pagerGFH=YesHSave DIRECT#Set flash timeGFH=YesSet dial modeHTAD programGFH=YesAnsweringsystem setting.See base unit.6Press(#).Base unit displayEnter pager no.7Enteryour pager number, and press (REDIAL/PAUSE) twice.* Enterthe access code, if required by your pager company, and press(REDIAL/PAUSE) twice again.*•The entered number is displayed on the base unit.•If you misdial, press (CLEAR) and enter the correct number.•You can enter a total of 44 digits.58
8Pressá (Save key).•A beep sounds.•To return to the standby mode, press (OFF).* Pager companies require a delay after the pager number and/or theaccess code is dialed. Contact your pager company regarding therequired pause time. Pressing (REDIAL/PAUSE) once creates a3.5 second delay and counts as one digit.•If the line has rotary or pulse service, press (TONE) between the pager numberand (REDIAL/PAUSE) in step 7.Storing a 1-800 pager numberIf you use a 1-800 pager number with a PIN code, store the pagernumber as follows.1Follow steps 1 through 6 on page 58.2 # Enter the 1-800 pager number, and press (REDIAL/PAUSE)3 times.*$ Enter the PIN code, and press (REDIAL/PAUSE) twice.*3Press•The entered number is displayed on the base unit.•If you misdial, press (CLEAR) and enter the correct number.•You can enter a total of 44 digits.á (Save key).•A beep sounds.•To return to the standby mode, press (OFF).* Pager companies require a delay after the pager number and the PINcode are dialed. Contact your pager company regarding the requiredpause time. Pressing (REDIAL/PAUSE) once creates a 3.5 seconddelay and counts as one digit.Answering System•If the line has rotary or pulse service, press (TONE) between the pager numberand (REDIAL/PAUSE) in step 2.•Alphanumeric voice dispatch pager services will not work with this function.59
Pager CallStoring Your Home Telephone NumberAfter storing your home telephone number, it will then be displayed onyour pager when your family wants you to call home. (See usefulinformation on page 61.)1Press (FUNCTION/CH).2Press3Press4Press5PressÖ or Ñ repeatedly until the arrowpoints to “Program”.á (Yes key).Ö or Ñ repeatedly until the arrowpoints to “TAD program”.á (Yes key).•The base unit display shows programmingoptions.HProgramCalling pagerGFH=YesHSave DIRECT#Set flash timeGFH=YesSet dial modeHTAD programGFH=YesAnsweringsystem setting.See base unit.6Press(7).Base unit displayEnter home No.:7Enter8Pressyour home telephone number up to 11 digits.•The entered number is displayed on the base unit.•If you misdial, press (CLEAR) and enter the correct number.á (Save key).•A beep sounds.•To return to the standby mode, press (OFF).•Your pager will also display your home number if the unit receives a call from anarea which does not provide the Caller ID service or the caller requests not toshow their information. Please call home to check who alerted your pager.60
To confirm the stored pager and home numbers1. Press (FUNCTION/CH).2. Press Ö or Ñ to select “Calling pager”.3. Press á (Yes key).4. Press or .•The unit dials the stored pager number.•The pager beeps, and displays your home number and “11”*.•If the pager does not beep or does not display your home number and “11”, storethe pager and home numbers again (p. 58–60).Useful InformationYour family can let you know when they want you to call home bypressing (FUNCTION/CH) \ Ö or Ñ to select “Calling pager” \\ á (Yes key) \ or .* What “11” meansWhen your unit alerts your pager, “11” will be displayed after the caller’stelephone number. “11” will not be displayed when another phone alerts yourpager.Ex. When the unit records a caller’s message whose number is “2345678”:“234567811” will be displayed on your pager. If you select pager mode “2”(p. 62) and a caller does not leave a message, “00” will be displayedinstead of “11”.Ex. When the caller whose number is “2345678” alerts your pager directly:“2345678” will be displayed on your pager.To erase the stored pager numberFollow steps 1 through 6 on page 58. \ (CLEAR) \\ á (Save key) \ (OFF).•The pager call mode will automatically return to OFF (p. 63).Answering SystemTo erase the stored home telephone numberFollow steps 1 through 6 on page 60. \ (CLEAR) \\ á (Save key) \ (OFF).61
62Pager CallPager Mode SettingAfter subscribing to a Caller ID service (p. 34), you can select one ofthe following pager mode settings. The unit will alert your pager:Re<strong>corded</strong> MSG: After the unit records an incoming message(factory preset),ORReceived call:If you want to change the mode, proceed as follows.1Press (FUNCTION/CH).2HProgramPress Ö or Ñ repeatedly until the arrowCalling pagerpoints to “Program”.GFH=Yes3Press4Press5Press6Press7To8Pressá (Yes key).Ö or Ñ repeatedly until the arrowpoints to “TAD program”.á (Yes key).•The base unit display shows programmingoptions.(6).•The current setting is displayed on the baseunit.select “Received call”, press (2).ORTo select “Re<strong>corded</strong> MSG”, press (1).á (Save key).Each time the unit receives a Caller ID call, even ifthe caller does not leave a message.•A beep sounds.•To return to the standby mode, press (OFF).HSave DIRECT#Set flash timeGFH=YesSet dial modeHTAD programGFH=YesAnsweringsystem setting.See base unit.Base unit displayPager mode:Re<strong>corded</strong> MSGBase unit displayPager mode:Received call•If you select “Received call” and set the unit to call your pager (p. 63), the unitwill alert your pager even if the answering system is not turned on.•If you select “Received call”, and a Call ID call is received with no telephonenumber, the unit will only alert your pager if the caller leaves a message.
Setting the Unit to Call a Pager1Press(FLASH/CALL!WAIT/PLAYBACK).•The number of new messagesis heard on the handset.2Press3Press(3).•“ PAGER ” is displayed on thebase unit.•If “ PAGER ” is not displayed, thepager number has not beenstored. Store the number(p. 58, 59), and try again.(FLASH/CALL!WAIT/PLAYBACK).To turn off the pager call mode,repeat steps 1 through 3.•“ PAGER ” will disappear.•Each time you press (3) in step 2, themode will turn on or off.(FLASH/CALL!WAIT/PLAYBACK)If you have not subscribed to a Caller ID service, the caller’stelephone number will not be displayed on your pager.•If another message (or Caller ID call) is received before the unit alerts your pagerfor a previous message (or Caller ID call), the previous caller information will notbe sent to your pager. Only the last call received will be sent to your pager.•If someone else makes or answers another call with the unit or a parallelconnected phone before the unit alerts your pager for a previous message (orCaller ID call), the unit will stop alerting your pager for that message (or Caller IDcall).•If you receive a telephone number on your pager but cannot recognize the caller,you may have received a direct inward dial (DID) call, such as from a PBX.Please call your unit to check the caller’s message.Answering System63
Remote Operation from a Touch Tone PhoneYou can operate the answering system from any touch tone phone.A synthesized voice menu will guide you on how to operate the unit(p. 66).•To skip the voice menu and operate theunit directly, see page 68.Summary of remote operationCall your unit from a touch tone phone.Enter your remote code (p. 65) during or after the greeting message.•The number of new messages is heard.After 3 seconds, the voice menu will start (p. 66).Follow the menu or enter the direct commands (p. 68).To end remote operation, hang up.•The messages are saved.•The unit will announce the remaining recording time after playback, if it is lessthan 5 minutes.64
Setting the Remote CodeThe remote code prevents unauthorized people from accessing your unitand listening to your messages. Choose any 2-digit number (00–99).The factory preset remote code is “11”. If you do not program your ownremote code, you can use “11”.Make sure that the unit is in the standby mode initially.1Press (FUNCTION/CH).2Press3Press4Press5Press6Press7Enter8PressÖ or Ñ repeatedly until the arrowpoints to “Program”.á (Yes key).Ö or Ñ repeatedly until the arrowpoints to “TAD program”.á (Yes key).•The base unit display shows programmingoptions.(1).•The current remote code is displayed on thebase unit.a remote code using a 2-digitnumber (00–99).á (Save key).•A beep sounds.•To return to the standby mode, press (OFF).HProgramCalling pagerGFH=YesHSave DIRECT#Set flash timeGFH=YesSet dial modeHTAD programGFH=YesAnsweringsystem setting.See base unit.Base unit displayRemote code:11Answering System•If 6 beeps sound during programming, a wrong key was pressed. Enter thecorrect number.To check the remote codeRepeat steps 1 to 6.•The current remote code is displayed on the base unit. When finished, press(OFF).65
Remote Operation from a Touch Tone PhoneVoice MenuThe shaded boxes are voice prompts.Press 1 to play back all messages.Press 2 for other functions.Press (1).All messageplayback.Press (2).Press 1 to play back new messages.Press 2 for other functions.Press (1).New messageplayback.Press (2).Press 1 to record your message.Press 2 for other functions.Press (1).Please leaveyour message.Press (2).Press 1 to erase all messages.Press 2 for other functions.Press (1).Press (2).Press 1 to record your greeting.Press 2 for other functions.Press (2).Press (1).Press 7 to recordyour greeting.Press 9 to endrecording.66
All Message PlaybackAll re<strong>corded</strong> messages are played back. At the end of the lastmessage, “End of final message” is heard. The unit willannounce the remaining recording time if it is less than5 minutes.New Message PlaybackOnly new messages are played back. At the end of the lastmessage, “End of final message” is heard. The unit willannounce the remaining recording time if it is less than5 minutes.Recording a Memo MessageYou can leave a personal message.1. Talk after you hear “Please leave your message”.2. When you finish recording, hang up.Erasing All MessagesAll re<strong>corded</strong> messages (except greeting message) areerased.Recording a Greeting MessageYou can re-record your greeting message.1. Press (7).You will hear a voice prompt followed by a long beep.2. After the beep, talk for up to 2 minutes.3. When you finish recording, press (9).4. Your greeting will be played back for confirmation.Answering System•3 seconds after playback, the voice menu will start again from the beginning.•If you hear “Memory full” after playback, erase some, or all, of the messages(p. 68).67
Remote Operation from a Touch Tone PhoneDirect Remote OperationOnce you have entered the remote code, you can also control your unitby direct commands instead of using the voice menu. To end the remoteoperation, hang up anytime.Direct commandsNEW MESSAGEPLAYBACKALL MESSAGEPLAYBACKREPEAT(During playback)SKIP(During playback)STOPGREETINGMESSAGERECORDINGERASING ASPECIFICMESSAGE(During playback)ERASING ALLMESSAGES(4)(5)(1)(2)(9)(7)[RECORD[(9)(*) (4)(*) (5)•Only new messages are played back.•All messages are played back.•The current message is repeated.•The current message is skipped.The next message is played.•Operation is stopped temporarily.•To resume operation, enter a directcommand within 15 seconds, or thevoice menu will start.•A long beep sounds.•After the beep, talk immediately for up to2 minutes.•The recording is stopped.•The re<strong>corded</strong> message is played.•The current message is erased.•A short beep will sound and the nextmessage will be played.•All re<strong>corded</strong> messages are erased.•A long beep sounds and “No messages” isheard.68
PAGER CALLON/OFFANSWERINGSYSTEM OFF(3)(0)•Each time you press (3), “On/Off” isheard and the mode will turn on or off.•If you have not stored a pager number,6 beeps will sound and the mode will notturn on.•The unit hangs up and will not answercalls until turned on again.Turning on the answering systemCall your unit and wait for 15 rings.•The unit will answer and the greeting message will be played.•The answering system will turn on. Hang up or enter the remote code for otheroptions.•When turning on the answering system using a rotary or pulse service telephone,you cannot enter the remote code for other options.Skipping the greeting messageAfter calling your unit, press (*) during the greeting message.•The unit skips the rest of the greeting message and you can start recording yourmessage after the long beep.Answering System69
Remote Operation with the HandsetYou can operate your answering systemwith the handset.The announcements and re<strong>corded</strong>messages can only be heard with thehandset.(FLASH/CALL!WAIT/PLAYBACK)Summary of remote operationPress (FLASH/CALL!WAIT/PLAYBACK).•The number of new messages is heard.•“Remote operation” is displayed on the handset.Enter the desired direct commands (p. 71).•If you do not enter a command, the voice menu will start (see below).•After the voice menu, all message playback will start.To end remote operation, press (FLASH/CALL!WAIT/PLAYBACK).•The messages are saved.•The unit will announce the remaining recording time after playback, if it is lessthan 5 minutes.•If the unit starts to ring during the remote operation, press or toanswer the call. The remote operation is ended.•If you hear “Memory full” after playback, erase some, or all, of the messages(p. 71).70Voice menuIf no commands are entered after you press(FLASH/CALL!WAIT/PLAYBACK), the unit will start the following voicemenu.“Press 4 to play back new messages. Press 5 to play back all messages.”•You can enter direct commands even if the voice menu has started.
Direct commandsNEW MESSAGEPLAYBACKALL MESSAGEPLAYBACKREPEAT(During playback)SKIP(During playback)STOP(4)(5)(1)(2)(9)•Only new messages are played back.•All messages are played back.•The current message is repeated.•You can also press Ü to repeat amessage.•The current message is skipped.The next message is played.•You can also press á to skip amessage.•Operation is stopped temporarily.•To resume operation, enter a directcommand within 15 seconds, or thevoice menu will start (p. 70).ERASING ASPECIFICMESSAGE(During playback)ERASING ALLMESSAGESPAGER CALLON/OFF(*) (4)(*) (5)(3)•The current message is erased.•A short beep will sound and the nextmessage will be played.•All re<strong>corded</strong> messages are erased.•A long beep sounds and “No messages” isheard.•Each time you press (3), the mode willturn on or off.•If you have not stored a pager number,“ PAGER ” will not be displayed on thebase unit, and the mode will not turn on.Answering SystemANSWERINGSYSTEM OFF(0)•“Answer off” is heard and the answeringsystem is turned off.ANSWERINGSYSTEM ON(8)•“Answer set” is heard and the answeringsystem is turned on.71
Wall MountingThis unit can be mounted on a wall phone plate.1Connectthe AC adaptor.To PowerOutlet2Tuckthe telephone line cord insidethe wall mounting adaptor, thenpush it in the direction of the arrow.•The word “UP” should face upward.3Connectthe telephone linecord. Mount the unit, thenslide down.•Raise the antennas.72
4Tocharge the handset battery:Place the handset on the cradle andadjust the angle of the cradle in the Ringer/Charge Indicatordirection of the arrow as shown.•The ringer/charge indicator lights.Using the Belt ClipYou can hang the handset on your belt or pocket using the belt clip.To attach the belt clipTo remove the belt clipUseful Information73
Using an Optional HeadsetPlugging an optional headset into the handset or the base unit allows ahands-free phone conversation. Please use only the Panasonic KX-TCA88headset. To order call the accessories telephone number on page 2.With the HandsetConnecting the headset to the handsetOpen the headset jack cover, and connect the headset to the headsetjack as shown below.HHeadset JackWhen the headset is connected to the handset, make sure to use theheadset to talk with the caller. If you want to have a normal cordlessphone conversation, disconnect the headset.74
With the Base UnitConnecting the headset to the base unitConnect the headset to the headset jack as shown.Microphone(EXIT)Fasten the headsetcord to prevent it frombeing disconnected.EarpieceHeadsetJackHook(DIGITAL!SP-PHONE/HEADSET)Making/Answering calls1Press (DIGITAL!SP-PHONE/HEADSET) to make or answer a call.•If you misdial when making a call, press (DIGITAL!SP-PHONE/HEADSET)twice and dial again.2To hang up, press (DIGITAL!SP-PHONE/HEADSET).To adjust the headset receiver volume (High, Medium or Low):While using the headset, press Ñ or Ö.To switch to the speakerphone while using the headset:“EXIT=SP-phone” is displayed. Press (EXIT).To return to the headset, press (EXIT) again.•Each time you press (EXIT), the call will switch to the headset orspeakerphone. While in the speakerphone mode, “EXIT=Headset” isdisplayed.•During a conversation using the headset, you can switch the call to the handsetby lifting it off the cradle.•If you disconnect the headset during a conversation, you can continue theconversation with the speakerphone.75Useful Information
Battery ReplacementIf “Recharge battery” is displayed and/or “ ” flashes after beingfully charged, replace the battery with a new Panasonic PQHHR150AA23battery. To order, call the accessories telephone number on page 2.1Remove the cover bysliding while pressing thearrow.2Removethe old battery.Then install the new one:#Pinch the rubber coated partof the battery leads with thered lead on the right and theblack lead on the left.$Insert the battery plug intothe connector in thehandset.%Press the plug to ensure it isconnected properly.3Closethe cover. Make sure you charge the new battery for about8 hours in order to display the battery strength prompt correctly(p. 11).76
Adding Another PhoneThis unit will not function during a power failure. To connect a standardtelephone on the same line, use the Panasonic T-adaptor KX-J66.To order, call the accessories telephone number on page 2.Standard TelephoneSingle-LineTelephone JackTelephoneLine CordT-Adaptor (KX-J66)Useful Information77
Fashion Plate TM Snap-On ColorCovers (Optional)You can change the look of your phone’s handset with optional FashionPlate TM snap-on color covers, KX-TGA10. Three different color covers areincluded; brownstone, charcoal and wineberry. To order, call theaccessories telephone number on page 2.1Remove the battery cover by sliding while pressing the arrow.Remove the battery.H2Thecolor cover is locked with the right and left tabs. Unlock one ofthe tabs by pressing horizontally (#) and vertically ($), and partiallypull down the color cover (%, &) as shown.21TabTab3478
3Unlockthe other tab by pressing horizontally(#) and vertically ($), and partially pull downthe color cover (%) in the same way. Removecompletely the cover from the handset.12TabTab34Place5Snap6Connectthe new color cover fitting thetabs on the cover into their slots onthe handset.TabsSlotthe color cover shut on the upper(#), middle ($) and lower (%) parts ofthe handset.11 223the battery and close the battery cover.Slot379Useful Information
Error MessagesIf the unit detects a problem, one of the following messages will bedisplayed on the base unit or cordless handset.Handset displayRecharge batteryThe battery needs to be charged. Place thehandset on the base unit to charge the battery(p. 11).No link to base.Place on cradleand try again.The handset has lost communication with thebase unit. Place the handset on the base unitand try again.Please lift upand try againÖ, Ñ, Ü or á was pressed while thehandset was on the base unit. Lift the handsetand press the button again.Directory fullWhen trying to store an item or Caller Listinformation in the directory, the directorymemory is full (p. 38, 42). Erase other storeditems (p. 49).Not availableÖ, Ñ, Ü, á, (INTERCOM) or(FLASH/CALL!WAIT/PLAYBACK) was pressedwhile the base unit was not in the standbymode.Save errorWhile programming, the handset has lostcommunication with the base unit. Move closerto the base unit and try again.80
Base unit displaySUN 12:00AM0 messagesWhen the clock needs adjusting, the day andtime flashes with “ ”. Adjust the clock (p. 22).Greeting recordRecording errorYour greeting message was not re<strong>corded</strong>correctly. Record it again (p. 18).SUN 12:00AMMessage fullIf message memory is full, “Message full”will flash. Erase some, or all, of the messages(p. 57).Handset in useThe display will be shown when the handset isin use (making/answering a call, viewing theCaller List or directory list, listening tomessages, etc.).Useful Information81
Before Requesting HelpCordless TelephoneProblem“No link to base.Place on cradle andtry again.” is displayedand an alarm tone sounds.Static, sound cuts in/out,fades. Interference fromother electrical units.The handset and/or the baseunit do not ring.The handset display isblank.The handset display is stillblank after pressing Ö, Ñ,Ü or á.You cannot store a nameand phone number in thedirectory.While programming orsearching, the unit starts toring and stops the program/search.Remedy•You are too far from the base unit. Movecloser and try again.•Place the handset on the base unit andtry again.•Plug in the AC adaptor.•Extend the handset antenna fully.•Raise the base unit antennas.•Locate the handset and the base unitaway from other electrical appliances(p. 3).•Move closer to the base unit.•Extend the handset antenna fully.•Raise the base unit antennas.•Press (FUNCTION/CH) to select a clearerchannel.•The ringer volume is set to OFF. Set toHIGH or LOW (p. 17).•The handset is in the standby mode(p. 9). Press Ö, Ñ, Ü or á to turnthe display on.•Charge the battery fully (p. 11).•You cannot store an item in the directorywhile the unit is in the talk,speakerphone or intercom mode, orwhile the answering system is in use.•Do not pause for over 60 seconds whilestoring.•To answer the call, press , or(DIGITAL!SP-PHONE). Start again fromthe beginning after hanging up.82
ProblemThe unit does not display thecaller’s name and/or phonenumber.The handset or the base unitdisplay goes to the standbymode while viewing theCaller List.When a second call isreceived during aconversation, the unit doesnot display the new caller’sname and/or phone number.You cannot page thehandset or the base unit.You cannot redial bypressing (REDIAL/PAUSE) or(REDIAL).Remedy•You need subscribe to a Caller IDservice from telephone companies.•Other telephone equipment may beinterfering with your phone. Disconnectit and try again.•Other electrical appliances connected tothe same outlet may be interfering withthe Caller ID information.•Telephone line noise may be affectingthe Caller ID information.•Do not pause for over 60 seconds whilesearching.• , or (DIGITAL!SP-PHONE).was pressed.•The line mode selection is incorrect. Seepage 14.•The handset is too far from the base unit.•The handset or the base unit is engagedin an outside call or is viewing the CallerList/directory list. Try again later. If youare using the base unit, wait until“Handset in use” disappears.•If the last number dialed was more than32 digits long, the number will not beredialed correctly.•Access numbers entered after pressing(TONE) will not be included whenredialing.•The (REDIAL/PAUSE) button on thehandset has a double function as eitherredial or pause. It will redial the lastnumber dialed if pressed at the outset ofa call (p. 27). If another number hasbeen dialed first, it will operate as apause button (p. 52).Useful Information83
Before Requesting HelpProblemYou cannot have aconversation using thehandset.You cannot have aconversation using theheadset.Remedy•When the headset is connected (p. 74),you must use the headset to talk withthe caller. To have a normal cordlessphone conversation, disconnect theheadset.•Make sure that the headset is connectedproperly (p. 74).• may have been pressed. If thebutton lights, press to continue theconversation with the headset.•If “EXIT=Headset” is displayed on thebase unit, press (EXIT) to switch fromthe speakerphone to the headset.Answering SystemProblemThe answering system is on,but incoming messages arenot re<strong>corded</strong>.You cannot listen to there<strong>corded</strong> messages.“Message full” isdisplayed and the ANSWERON indicator flashes rapidly,and no new messages arere<strong>corded</strong>.You cannot operate theanswering system at thebase unit.Remedy•The recording time is set to “Greetingonly”. Select “1 minute” or “3 minutes”(p. 21).•Memory is full. Erase some, or all, of themessages (p. 57).•Make sure that the unit is in the standbymode.•Memory is full. Erase some, or all, of themessages (p. 57).•The handset user is operating theanswering system, or is engaged in anoutside call. Wait until the “Handset inuse” disappears.84
ProblemYou cannot operate theanswering system from atouch tone phone.You cannot operate theanswering system with thehandset.While recording a greetingmessage, the unit starts toring and stops recording.During playback, the unitstarts to ring and stopsplayback.The base unit does notdisplay the name and/ornumber of the caller whosemessage is being played.Remedy•Make sure you enter the correct remotecode.•The answering system may not respondif the tones are too short to activate theunit. Press each button firmly.•The answering system is off. Turn it on(p. 69).•Someone is operating the answeringsystem.•You are too far from the base unit. Movecloser to the base unit.•The unit is recording a message.To answer the call, press or .•To answer the call, press(DIGITAL!SP-PHONE), or lift the handsetoff the base unit or press or .Start again from the beginning afterhanging up.•To answer the call, press(DIGITAL!SP-PHONE), or lift the handsetoff the base unit or press or .To resume playback, press(NEW!MESSAGE) after hanging up.•If the caller is not stored in the CallerList, the handset will not display thecaller’s information.The unit does not alert yourpager.•The line mode selection is incorrect.See page 14.Useful Information85
GeneralBefore Requesting HelpProblemThe unit does not work.You cannot program items,such as the dialing mode.Previously programmedinformation is erased.“Recharge battery” isdisplayed on the handset,“ ” flashes or the unitbeeps intermittently.You charged the batteryfully, but “Rechargebattery” is still displayedand/or “ ” continues toflash.Remedy•Check the settings (p. 10–14).•Charge the battery fully (p. 11).•Clean the charge contacts and chargeagain (p. 12).•Install the battery properly (p. 76).•Place the handset on the base unit andunplug the AC adaptor to reset. Plug in,and try again.•Re-install the battery and place thehandset on the base unit. Try again.•Programming is not possible while theunit is in the talk or speakerphone mode,when viewing the Caller List/directorylist, or while the answering system is inuse.•Do not pause for over 60 seconds whileprogramming.•Move closer to the base unit.•Ö, Ñ, Ü or á may have beenpressed when you picked up thehandset. Press (FUNCTION/CH) and tryagain.•If a power failure occurs, programmedinformation may be erased. Reprogramif necessary.•Charge the battery fully (p. 11).•Clean the charge contacts and chargeagain (p. 12).•Install a new battery (p. 75).86
ProblemThe ringer/charge indicatorlight does not go out whilecharging.If you cannot solve yourproblem.•This is normal.Remedy•Call our customer call center at1-800-211-PANA(7262).•Panasonic’s e-mail address for customerinquiries:consumerproducts@panasonic.comfor customers in the USA or Puerto RicoONLYUseful Information87
88Important Safety InstructionsWhen using this unit, basic safety precautions should always be followedto reduce the risk of fire, electric shock, or personal injury.11. Read and understand all instructions.12. Follow all warnings and instructions marked on this unit.13. Unplug this unit from AC outlets before cleaning. Do not use liquid oraerosol cleaners. Use a damp cloth for cleaning.14. Do not use this unit near water, for example, near a bathtub,washbowl, kitchen sink, or the like.15. Place this unit securely on a stable surface. Serious damage and/orinjury may result if the unit falls.16. Do not cover slots and openings on the unit. They are provided forventilation and protection against overheating. Never place the unitnear radiators, or in a place where proper ventilation is not provided.17. Use only the power source marked on the unit. If you are not sure ofthe type of power supplied to your home, consult your dealer or localpower company.18. Do not place objects on the power cord. Install the unit where no onecan step or trip on the cord.19. Do not overload wall outlets and extension cords. This can result inthe risk of fire or electric shock.10. Never push any objects through slots in this unit. This may result inthe risk of fire or electric shock. Never spill any liquid on the unit.11. To reduce the risk of electric shock, do not disassemble this unit.Take the unit to an authorized servicenter when service is required.Opening or removing covers may expose you to dangerous voltagesor other risks. Incorrect reassembly can cause electric shock whenthe unit is subsequently used.12. Unplug this unit from the wall outlet and refer servicing to anauthorized servicenter when the following conditions occur:A. When the power supply cord or plug is damaged or frayed.B. If liquid has been spilled into the unit.C. If the unit has been exposed to rain or water.D. If the unit does not work normally by following the operatinginstructions. Adjust only controls covered by the operatinginstructions. Improper adjustment may require extensive work byan authorized servicenter.E. If the unit has been dropped or physically damaged.F. If the unit exhibits a distinct change in performance.13. During thunderstorms, avoid using telephones except cordless types.There may be a remote risk of an electric shock from lightning.14. Do not use this unit to report a gas leak, when in the vicinity of theleak.SAVE THESE INSTRUCTIONS
CAUTION:To reduce the risk of fire or injury to persons, read and follow theseinstructions.1. Use only the battery(ies) specified.2. Do not dispose of the battery(ies) in a fire. They may explode. Checkwith local waste management codes for special disposal instructions.3. Do not open or mutilate the battery(ies). Released electrolyte iscorrosive and may cause burns or injury to the eyes or skin. Theelectrolyte may be toxic if swallowed.4. Exercise care in handling batteries in order not to short the battery toconductive materials such as rings, bracelets, and keys. The batteryand/or conductor may overheat and cause burns.5. Charge the battery(ies) provided with or identified for use with thisproduct only in accordance with the instructions and limitationsspecified in this manual.WARNING:TO PREVENT FIRE OR SHOCK HAZARD, DO NOT EXPOSE THISPRODUCT TO RAIN OR ANY TYPE OF MOISTURE.Useful Information89
FCC and Other Information90If requested by the telephone company, inform them as follows:FCC Registration No. . . . . . . . . . . . . . . . . . . . . . (found on the bottom of the unit)Ringer Equivalence . . . . . . . . . . . . . . . . . . . . . . . . . . . . . . . . . . . . . . . . . . . . 0.1BThe particular telephone line to which the equipment is connected.This unit must not be connected to a coin operated line.If you are on a party line, check with your local telephone company.Ringer Equivalence No. (REN):The REN is useful in determining the quantity of devices you may connect to yourtelephone line and still have all of those devices ring when your telephone numberis called. In most, but not all areas, the sum of the REN’s of all devices connectedto one line should not exceed five (5.0). To be certain of the number of devicesyou may connect to your line, as determined by the REN, you should contact yourlocal telephone company to determine the maximum REN for your calling area.In the event terminal equipment causes harm to the telephone network, the telephonecompany should notify the customer, if possible, that service may be stopped.However, where prior notice is impractical, the company may temporarily ceaseservice providing that they:(a) Promptly notify the customer.(b) Give the customer an opportunity to correct the problem with their equipment.(c) Inform the customer of the right to bring a complaint to the FederalCommunication Commission pursuant to procedures set out in FCC Rules andRegulations Subpart E of Part 68.The Telephone Company may make changes in its communications facilities,equipment, operations or procedures, where such action is reasonably required inthe operation of its business and is not inconsistent with the rules and regulationsin FCC Part 68.If such changes can be reasonably expected to render any customer terminalequipment incompatible with telephone company communications facilities, orrequire modification or alteration of such terminal equipment, or otherwise materiallyaffect its use or performance, the customer shall be given adequate notice inwriting, to allow the customer an opportunity to maintain uninterrupted service.When programming emergency numbers and/or making test calls to emergencynumbers:1. Remain on the line and briefly explain to the dispatcher the reason for the callbefore hanging up.2. Perform such activities in the off-peak hours, such as early morning hours orlate evenings.This device complies with Part 15 of the FCC Rules. Operation is subject to thefollowing two conditions: (1) This device may not cause harmful interference, and(2) this device must accept any interference received, including interference thatmay cause undesired operation.Privacy of communications may not be ensured when using this phone.
CAUTION:Any changes or modifications not expressly approved by the party responsible forcompliance could void the user’s authority to operate this device.Note:This equipment has been tested and found to comply with the limits for a Class Bdigital device, pursuant to Part 15 of the FCC Rules. These limits are designed toprovide reasonable protection against harmful interference in a residentialinstallation. This equipment generates, uses, and can radiate radio frequencyenergy and, if not installed and used in accordance with the instructions, maycause harmful interference to radio communications. However, there is noguarantee that interference will not occur in a particular installation. If thisequipment does cause harmful interference to radio or television reception, whichcan be determined by turning the equipment off and on, the user is encouraged totry to correct the interference by one or more of the following measures:—Reorient or relocate the receiving antenna.—Increase the separation between the equipment and receiver.—Connect the equipment into an outlet on a circuit different from that to which thereceiver is connected.—Consult the dealer or an experienced radio/TV technician for help.Some cordless telephones operate at frequencies that may cause interference tonearby TVs and VCRs. To minimize or prevent such interference, the base of thecordless telephone should not be placed near or on top of a TV or VCR. Ifinterference is experienced, move the cordless telephone further away from theTV or VCR. This will often reduce, or eliminate, interference.Operating near 2.4GHz electrical appliances may cause interference. Move awayfrom the electrical appliances and/or press the CH (Channel) button.• Environment — do not place the unit in a room where the temperature is lessthan 5°C (41°F) or greater than 40°C (104°F). Allow 10 cm (4") clearancearound the unit for proper ventilation. Avoid excessive smoke, dust, mechanicalvibration, shock, or direct sunlight.• Medical — consult the manufacturer of any personal medical devices, such aspacemakers, to determine if they are adequately shielded from external RF(radio frequency) energy. (The unit operates in the frequency range of2401MHz to 2472MHz, and the power output level can range from 0.001 wattsto 0.20 watts.) Do not use the unit in health care facilities if any regulationsposted in the area instruct you not to do so. Hospitals or health care facilitiesmay be using equipment that could be sensitive to external RF (radiofrequency) energy.• Routine care — wipe the unit with a soft cloth. Do not use benzine, thinner, orany abrasive powder. When you leave the unit unused for a long period of time,unplug the AC adaptor from the outlet.• If there is any trouble — disconnect the unit from the telephone line andconnect a known working phone. If the known working phone operates properly,have your unit repaired by one of the authorized Panasonic Factory ServiceCenters. If the known working phone does not operate properly, consult yourtelephone company.91Useful Information
For product service•Panasonic Servicenters are listed in the servicenter directory.•Call 1-800-211-PANA(7262) for the location of an authorized servicenter.•Panasonic’s e-mail address for customer inquiries:consumerproducts@panasonic.comfor customers in the USA or Puerto Rico ONLYWhen you ship the product•Carefully pack your unit, preferably in the original carton.•Attach a letter, detailing the symptom, to the outside of the carton.Symptom•Send the unit to an authorized servicenter, prepaid and adequatelyinsured.•Do not send your unit to the Panasonic Consumer Electronics Companylisted below or to executive or regional sales offices. These locations donot repair consumer products.Panasonic Consumer Electronics Company,Division of Matsushita Electric Corporation of AmericaOne Panasonic Way, Secaucus, New Jersey 07094Panasonic Sales Company,Division of Matsushita Electric of Puerto Rico, Inc.Ave. 65 de Infantería, Km. 9.5, San Gabriel Industrial ParkCarolina, Puerto Rico 00985Printed in Japan PQQX12840ZA-R SS0900NA0