Alexandria X-2 Series 2 - Wilson Audio
Alexandria X-2 Series 2 - Wilson Audio
Alexandria X-2 Series 2 - Wilson Audio
- No tags were found...

Create successful ePaper yourself
Turn your PDF publications into a flip-book with our unique Google optimized e-Paper software.
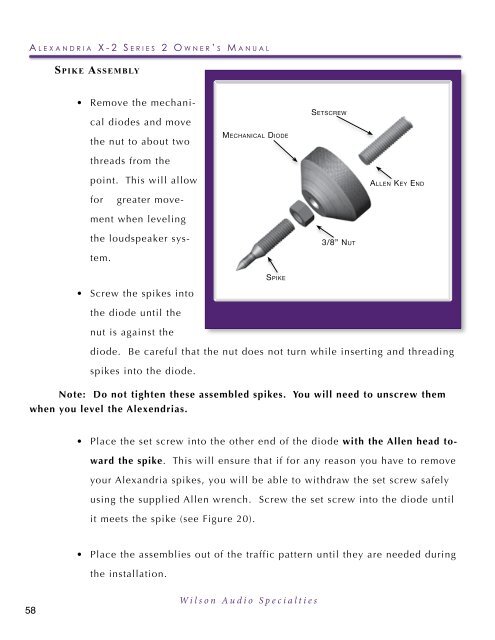
A l e x a n d r i a X - 2 S e r i e s 2 O w n e r ’ s M a n u a lSpike Assembly• Remove the mechanicaldiodes and moveSetscrewthe nut to about twoMechanical Diodethreads from thepoint. This will allowAllen Key Endforgreater movementwhen levelingthe loudspeaker system.3/8” NutSpike• Screw the spikes intothe diode until theFigure 20 - <strong>Alexandria</strong> Spike and Diode Assemblynut is against thediode. Be careful that the nut does not turn while inserting and threadingspikes into the diode.Note: Do not tighten these assembled spikes. You will need to unscrew themwhen you level the Alexendrias.• Place the set screw into the other end of the diode with the Allen head towardthe spike. This will ensure that if for any reason you have to removeyour <strong>Alexandria</strong> spikes, you will be able to withdraw the set screw safelyusing the supplied Allen wrench. Screw the set screw into the diode untilit meets the spike (see Figure 20).• Place the assemblies out of the traffic pattern until they are needed duringthe installation.58<strong>Wilson</strong> <strong>Audio</strong> Specialties