
Create successful ePaper yourself
Turn your PDF publications into a flip-book with our unique Google optimized e-Paper software.
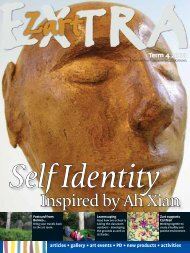
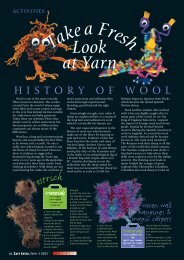
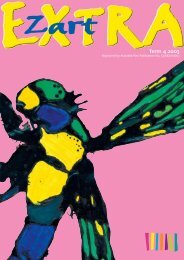
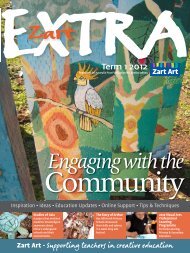
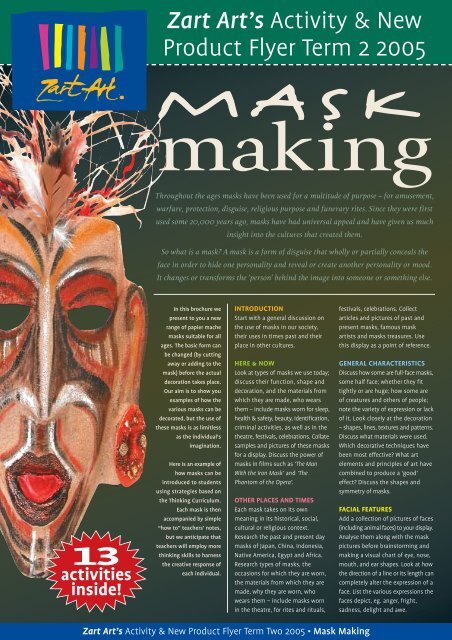
<strong>Zart</strong> <strong>Art</strong>’s Activity & NewProduct Flyer Term 2 2005MASKmakingThroughout the ages masks have been used for a multitude of purpose – for amusement,warfare, protection, disguise, religious purpose and funerary rites. Since they were firstused some 20,000 years ago, masks have had universal appeal and have given us muchinsight into the cultures that created them.So what is a mask? A mask is a form of disguise that wholly or partially conceals theface in order to hide one personality and reveal or create another personality or mood.It changes or transforms the ‘person’ behind the image into someone or something else.13activitiesinside!In this brochure wepresent to you a newrange of papier machemasks suitable for allages. The basic form canbe changed (by cuttingaway or adding to themask) before the actualdecoration takes place.Our aim is to show youexamples of how thevarious masks can bedecorated, but the use ofthese masks is as limitlessas the individual’simagination.Here is an example ofhow masks can beintroduced to studentsusing strategies based onthe Thinking Curriculum.Each mask is thenaccompanied by simple“how to” teachers’ notes,but we anticipate thatteachers will employ morethinking skills to harnessthe creative response ofeach individual.INTRODUCTIONStart with a general discussion onthe use of masks in our society,their uses in times past and theirplace in other cultures.HERE & NOWLook at types of masks we use today;discuss their function, shape anddecoration, and the materials fromwhich they are made, who wearsthem – include masks worn for sleep,health & safety, beauty, identification,criminal activities, as well as in thetheatre, festivals, celebrations. Collatesamples and pictures of these masksfor a display. Discuss the power ofmasks in films such as ‘The ManWith the Iron Mask’ and ‘ThePhantom of the Opera’.OTHER PLACES AND TIMESEach mask takes on its ownmeaning in its historical, social,cultural or religious context.Research the past and present daymasks of Japan, China, Indonesia,Native America, Egypt and Africa.Research types of masks, theoccasions for which they are worn,the materials from which they aremade, why they are worn, whowears them – include masks wornin the theatre, for rites and rituals,festivals, celebrations. Collectarticles and pictures of past andpresent masks, famous maskartists and masks treasures. Usethis display as a point of reference.GENERAL CHARACTERISTICSDiscuss how some are full-face masks,some half face; whether they fittightly or are huge; how some areof creatures and others of people;note the variety of expression or lackof it. Look closely at the decoration– shapes, lines, textures and patterns.Discuss what materials were used.Which decorative techniques havebeen most effective? What artelements and principles of art havecombined to produce a ‘good’effect? Discuss the shapes andsymmetry of masks.FACIAL FEATURESAdd a collection of pictures of faces(including animal faces) to your display.Analyse them along with the maskpictures before brainstorming andmaking a visual chart of eye, nose,mouth, and ear shapes. Look at howthe direction of a line or its length cancompletely alter the expression of aface. List the various expressions thefaces depict, eg. anger, fright,sadness, delight and awe.<strong>Zart</strong> <strong>Art</strong>’s Activity & New Product Flyer Term Two 2005 • Mask Making
Paper MaskMATERIALSCartridge Paper A3Cover Paper Black 38 x 51 cmOil PastelsRaffiaOne Hole PunchStaplerPVA1. Use a black Oil pastel topractise a variety of interestinglines on white paper. Eg. zig zag,spiral, parallel, scalloped etc.Draw dots and dashes to makelines, to make patterns, tosimulate texture. On anothersheet play with colour from OilPastels eg. contrast, clashing,overlapping, smudging,outlined, striped, etc.4. Connect the eye outlineshape to the face outline withinteresting lines. Run parallellines around the nose shape andadd nostrils. Connect the mouthand nose with lines.5. Decorate the forehead andcheeks with patterns. Build up acolourful face by adding strongcolours to the shapes andspaces.6. Cut out the face outline.7. Mount the mask on blackCover Paper leaving a 2 cmmargin of the black for the hair.8. Make two slits in the top andbottom of the mask, overlapand staple these darts to createa 3D shape.2. On an A3 sheet of CartridgePaper, draw an outline of a faceas large as can fit on the sheet.Colour the outline in a brightcoloured border.9. Use a hole punch to punchout a row of holes across thetop of the mask. Tie or staplelengths of Raffia or woolto create hair.3. Colour the eyeballs in astrong black line and createshapes and line patterns on theface by adding lines to join theeyes to the eyebrows. Enclosethe eyes/eyebrows in oneshape- match this with theother eye.Butterfly Mask...Did youknow?The Africans still usemasks that symbolisethe spirits of animals& people in theirinitiation rites.MATERIALSButterfly Mask on a StickJo Sonja PaintMetallic Tinsel StemsGlitter Pom PomsJewelsSequins in a Jar DiamondsSequins HologramCurling RibbonMetallic Curling RibbonPolymark Paint PenLiquid GlitterCellophane Shimmerbutterfly on1. Divide the Butterfly Mask upinto different shapes and coloureach one with Jo Sonja Paint.Keep the colours symmetricaland set aside to dry.2. Decorate each shape withSequins, Jewels and PolymarkPaint pens.3. Wind the Curling Ribbonastickaround the stick andtie some curls to thetop of the stick.4. Add Glitter Pom Pomsfor the eyes and TinselStems for the feelers.5. Cover the eyeholes withCellophane Shimmer.<strong>Zart</strong> <strong>Art</strong>’s Activity & New Product Flyer Term Two 2005 • Mask Making
MATERIALSShield MaskLiquitemp CopperChromatemp BlackHologram SequinsPolymark Iridescent CopperTissue Paper MetallicMetallic Pattern PaperDefraction PaperGlass Mirror TilesPVAFlorist Wire FineAluminium Foil/MetallicTwist RopeHot Melt Glue Gun1. Paint the Shield Mask a basecolour such as copper and setaside to dry.2. Use black paint or a markerto outline the eyes, nose, mouthand ears.Cat Mask.3. Glue on Sequins, smallsquares of Metallic Tissue,Defraction paper and PatternPaper to add colour to the mask.4. Glue a row of Mirror Tilesabove each eye.5. Twist Florist Wire around fourlengths of Twist Rope orAluminium Foil. Tie the lengthstogether at their mid point andglue them on to the mask withthe Hot Melt Glue Gun. Bendeach length to representwhiskers.. shield maskDid you know?The earliest use of masks are 20,000 year old imagesof humans with animal heads found in cavedrawings in southern France. The masks are believedto have been used in some sort of ritual or rite.<strong>Zart</strong> <strong>Art</strong>’s Activity & New Product Flyer Term Two 2005 • Mask Making
primitive maskMATERIALSPrimitive Mask Papier MachePVASandLiquid GlitterChromacryl PaintFeathersJuteRaffiaCreative Bead Box Gold & SilverArbee Craft Glue1. Paint the Papier MachePrimitive Mask with PVA andcover with sand. Shake offexcess sand and set aside todry.2. Use a dry brush to getminimal paint on the bristles,paint excess paint off the brushon to cardboard first. Paint linesto resemble tribal markingswith the dry brush technique toresemble pastel- like lines.3. Paint the lips and ears with asolid colour of paint.4. Tie lengths of Jute and Raffiainto a bundle and glue this tothe inside of the mask toresemble hair. Glue feathers onthe forehead to finish theheadwear off.5. Glue beads to the ears fordecoration and cover the lipswith Liquid Glitter.Satin masks...cardboard mask1. On a sheet of Bond Paper,trace around the eyes of aCardboard Mask as the startingpoint.2. Draw the design of the maskaround the eye shape, withCrayola Fabric Crayons.3. Use Transfer Dyes as awatercolour wash/paint – thecrayon will resist the dye.(1 teaspoon of dye to approximately50 ml water) Set aside to dry.4. Iron the mask shape face downon to Polysatin (30 seconds oncotton/ wool setting)5. Iron Vilene on to the back ofthe Polysatin. Cut out the twoholes for the eyes.6. Pad with wadding and backwith a piece of Polycotton. Use asewing machine to createdifferent shapes within themask with lines of straightsewing.7. Trim the edges and satinstitch around the outside andaround the eyeholes.8. Glue a cardboard mask on tothe back for support.9. Attach feathers, streamers,stick etc. to the mask withDouble Sided Tape.10. Decorate the front of themask with Polymark Paint Pens,sequins etc.11. Glue a piece of felt to theback of the mask to finish.<strong>Zart</strong> <strong>Art</strong>’s Activity & New Product Flyer Term Two 2005 • Mask Making
1. Cut an oval shapeapproximately A3 out of BrownKraft card.2. Cut three slits in to the top ofthe oval and three slits at thebottom.3. Fold and staple the slits overeach other to create a roundedshape to form the base of themask. To support this form fill itwith scrunched up newspaper.4. Build up the features of themask with plastic containers forthe eyes, cylinders of card forthe nose and rolls of newspaperfor the eyebrows and lips. UseMasking tape to attach these tothe mask base.5. Cut up many squares ofNatural Hessian approximately6cm square.6. Make up a solution of PVAand water (60% PVA and 40%water) and dip squares ofHessian into the solution. Wringeach piece through the fingersand lay them on to the maskbase. Overlap the pieces ofHessian until the entire mask iscovered. Set aside to dry on apiece of plastic sheeting.7. Wind Jute and Raffia around acouple of Cardboard Cones andsecure the ends with glue.8. Wind Armature Wire aroundrolls of newspaper and thencover the roll by winding Raffiaor Jute around them.9. Bundles of Raffia may be tiedto lengths of Cane fordecoration.10. Use a Hot Melt Glue Gun toglue the cones and rolls to theHessian mask to create thetribal mask.11. Fringe two squares of BrownHessian and glue these on foreyelashes.12. Paint two circles of brownpaint on for the eyes and gluewooden beads down the nose.MATERIALSBrown Kraft CardCardboard CylindersMasking TapeCardboard ConesHessian NaturalChromacryl Paint BrownWooden Beads Oval 14 x25mmJuteRaffiaCaneHot Melt Glue GunPVAPlastic Containers...Tribal MaskDid youknow?The AncientEgyptians placed afunerary mask ofthe deceased personover the mummy’shead so when itentered the next lifeit could recogniseits body upon itsreturn.Lion m<strong>Zart</strong> <strong>Art</strong>’s Activity & New Product Flyer Term Two 2005 • Mask Making
MATERIALSHeaddress MaskJo Sonja Rich GoldAcrylic Wool BlackVipond Paint BlackPrinting FoamMetallic Yarn GoldFoilboard GoldCraft PunchCover Paper BlackLiquid Glitter GoldLow Melt Glue GunJewelsSupertacEgyptian Mask1. Paint the face of the maskwith Jo Sonja Rich gold and setaside to dry.2. Paint the headdress sectionof the mask with black VipondPaint and paint the lips,eyebrows and around the eyeswith the black paint.3. Create four long plaits with1metre lengths of black wooland gold Metallic Yarn. Tie eachplait off with gold Metallic Yarn.4. Glue black wool on to theforehead of the mask for thefringe and then glue the fourplaits of wool over the head.Headress mask5. Draw a design on to PrintingFoam and create multiple printsof gold paint on to black CoverPaper. Set aside to dry.6. Cut the multiple prints outand glue them around theheaddress section of the mask.ask...7. Use a Craft Punch to punchout a shape from small squaresof gold Foilboard. Glue thesesquares and punched out shapearound the headdress section ofthe mask.Papier mache mask8. Finish off with Liquid Glitterdots and a jewel.MATERIALSPapier Mache Full Face MaskFoodwrapMuslinPVALiquitemp Gold, Silver & CopperFelt Black and BrownSynthetic WooltopsMetallic Tinsel StemsHot Melt Glue GunChromatemp Black BrownSequins1. Cover a Papier Mache Maskwith Foodwrap.2. Make up a mix of water andPVA (40% water 60% PVA)3. Saturate a piece of Muslin inthis mix, wring out the excessmoisture and drape the wet clothover the mask. Manipulate thematerial to create a textured faceand mane. Work on a piece ofplastic and set aside to dry for afew days.4. When the material iscompletely dry, paint the maskwith metallic colours and acombination of black andbrown paint. Set aside to dry.5. From the back of the mask,pierce two holes for the eyes.6. Create the facial features frompieces of felt. Use Wool Tops for thehair & Tinsel Stems for the whiskers.Use the Hot Melt Glue gun toglue these features on to the mask.<strong>Zart</strong> <strong>Art</strong>’s Activity & New Product Flyer Term Two 2005 • Mask Making
BlackMATERIALSMask LightweightCartridge Paper 120 gsmBlack Cover Paper A3Permanent Marker BlackFineliner BlackTinsel Stem PearlAcrylic Wool black and whiteChenille Stems 30 cm WhiteFeathers Black and whiteGlass Mirror TilesLiquid Glitter SilverPosca Marker BlackSigno Broad White pen1. Place the Plastic Mask in themiddle of a sheet of A3Cartridge Paper and tracearound it.2. Create an interesting shapearound the mask outline andcut the shape out.3. Trace around this shape on asheet of black Cover Paper, andcut it out.4. Place the black shape on topof the white shape; leave aborder of white paper showingon one side and glue themtogether.5. Position the plastic mask inthe middle of the black shapeand trace around it. Draw a line4 cm inside this drawn shape.6. Cut out the inside shape andcreate a flange around thisshape by cutting slits aroundthe edge into the first line&White Maskplastic maskdrawn. Cut through theblack and the white paper.6. Place the mask back intoposition on top of the blackpaper and tape or glue thepaper to the inside of the mask,use the flange to bend into themask in order to secure the twotogether.7. Decorate the mask and papershape with any black or whitemedia eg. Chenille Stems,Permanent Marker Black,Fineliner Black, Tinsel StemPearl, Acrylic Wool black andwhite, Chenille Stems 30 cmWhite, Feathers black and white,Glass Mirror Tiles, Liquid GlitterSilver, Posca Marker Black andSigno Broad White pen.8. Use the Posca Markers todraw directly on to the plasticmask to add shapes and lines tothe mask.white papermask shapeflangeblack paperDid youknow?People in Mexico donWrestling <strong>Masks</strong> inorder to transformthemselves into Aztecheroes and othercultural icons whenappearing in ‘poorman’s theatre’.Drama complementsmask wearing becausewithout an act ordance performance,the mask wouldremain arepresentationwithout a full lifeforce.Pape<strong>Zart</strong> <strong>Art</strong>’s Activity & New Product Flyer Term Two 2005 • Mask Making
MATERIALSBird MaskWave Tissue PaperChromacryl PaintPolymark Paint PensPearl Beads Gold 4 mmPVACraft GlueBird Mask1. Cut out multiple size trianglesfrom Wave Tissue Paper in a varietyof colours. Cut some triangles tolook more like a feather shape.2. Begin gluing the feather-liketriangles around the outer edge ofthe bird mask.3. Continue gluing the triangles oftissue paper around the mask faceuntil the mask is completelycovered in overlapping triangles.Leave the beak free of paper.4. Paint around the eyes and beakof the bird mask a strong brightcolour and set aside to dry.5. Decorate the beak with Polymarklines or patterns. Use the samecolours to add lines to the eyelid ofthe mask and finish off with a rowof gold beads for the eyebrows.r plate maskBug MaskMATERIALSPaper Plate 23cmPaper Plate 15cmDefraction Paper SilverDefraction Paper AssortedMetallic Prism PaperTinsel StemChenille Stems GiantMetallic Plastic FoilChenille BumpsHand Plier StaplerPVALow Melt Glue Gun1. Cut a slit in the 23 cm PaperPlate from the outer edge intothe middle of the plate.2. Overlap the two edges andstaple them together. This willgive a dome shape for the bodyof the bug.3. Cut Metallic Prism Paper intosmall squares and glue these onto the body, overlapping theshapes until the body iscompletely covered in colour.4. Glue silver Defraction Papersquares on to create the face.Use the coloured DefractionPaper for two eyes and a nose.Use a Hole Punch to punch outtwo eyeholes.5. Use a Giant Chenille Stemand Tinsel Stems to frame theface and create feelers.6. Cut the rim away from asmall Paper Plate and then cutthe plate in half to form thewings.7. Cover each half in MetallicPrism Paper squares and trimwith a length of Chenille Stemalong the straight edges.8. Glue a strip of Metallic Foilaround the curved edge of eachhalf plate.9. Use the Low Melt Glue Gun toattach the two wings to thebody of the bug.10. Staple on the ChenilleBumps for the legs.<strong>Zart</strong> <strong>Art</strong>’s Activity & New Product Flyer Term Two 2005 •