

proform 730 sightline - Fitness Equipment
proform 730 sightline - Fitness Equipment
proform 730 sightline - Fitness Equipment
- No tags were found...

You also want an ePaper? Increase the reach of your titles
YUMPU automatically turns print PDFs into web optimized ePapers that Google loves.
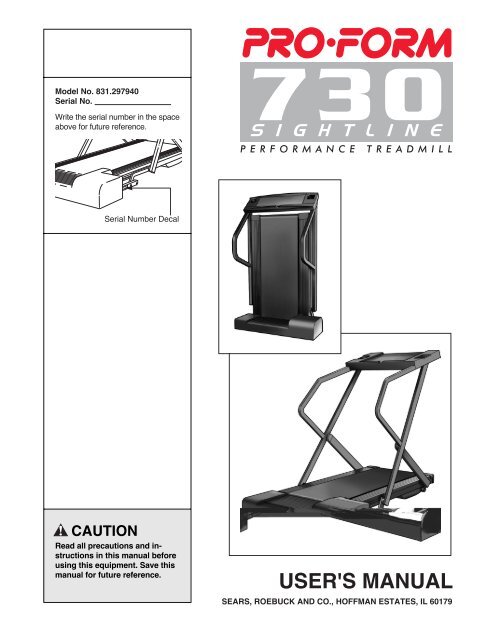
DO NOT ALTERModel No. 831.297940Serial No.Write the serial number in the spaceabove for future reference.Serial Number DecalCAUTIONRead all precautions and instructionsin this manual beforeusing this equipment. Save thismanual for future reference.USER'S MANUALSEARS, ROEBUCK AND CO., HOFFMAN ESTATES, IL 60179
TABLE OF CONTENTSFULL 90 DAY WARRANTY . . . . . . . . . . . . . . . . . . . . . . . . . . . . . . . . . . . . . . . . . . . . . . . . . . . . . . . . . . . . . . . . . . .2IMPORTANT PRECAUTIONS . . . . . . . . . . . . . . . . . . . . . . . . . . . . . . . . . . . . . . . . . . . . . . . . . . . . . . . . . . . . . . . . .3BEFORE YOU BEGIN . . . . . . . . . . . . . . . . . . . . . . . . . . . . . . . . . . . . . . . . . . . . . . . . . . . . . . . . . . . . . . . . . . . . . . .5SET-UP . . . . . . . . . . . . . . . . . . . . . . . . . . . . . . . . . . . . . . . . . . . . . . . . . . . . . . . . . . . . . . . . . . . . . . . . . . . . . . . . . .6OPERATION AND ADJUSTMENT . . . . . . . . . . . . . . . . . . . . . . . . . . . . . . . . . . . . . . . . . . . . . . . . . . . . . . . . . . . . .7HOW TO FOLD AND MOVE THE TREADMILL . . . . . . . . . . . . . . . . . . . . . . . . . . . . . . . . . . . . . . . . . . . . . . . . . .10MAINTENANCE AND TROUBLE-SHOOTING . . . . . . . . . . . . . . . . . . . . . . . . . . . . . . . . . . . . . . . . . . . . . . . . . . .12CONDITIONING GUIDELINES . . . . . . . . . . . . . . . . . . . . . . . . . . . . . . . . . . . . . . . . . . . . . . . . . . . . . . . . . . . . . . .14PART LIST . . . . . . . . . . . . . . . . . . . . . . . . . . . . . . . . . . . . . . . . . . . . . . . . . . . . . . . . . . . . . . . . . . . . . . . . . . . . . . .15ORDERING REPLACEMENT PARTS . . . . . . . . . . . . . . . . . . . . . . . . . . . . . . . . . . . . . . . . . . . . . . . . . .Back CoverNote: An EXPLODED DRAWING is attached in the center of this manual. Please save the EXPLODED DRAWINGfor future reference.FULL 90 DAY WARRANTYFor 90 days from the date of purchase, if failure occurs due to defect in material or workmanship in thisSEARS TREADMILL EXERCISER, contact the nearest SEARS Service Center throughout the UnitedStates and SEARS will repair or replace the TREADMILL EXERCISER, free of charge.This warranty does not apply when the TREADMILL EXERCISER is used commercially or for rental purposes.This warranty gives you specific legal rights, and you may also have other rights which vary from stateto state.SEARS, ROEBUCK AND CO., DEPT. 817WA, HOFFMAN ESTATES, IL 601792
IMPORTANT PRECAUTIONSWARNING: To reduce the risk of burns, fire, electric shock, or injury to persons, read thefollowing important precautions and information before operating the treadmill.1. It is the responsibility of the owner to ensurethat all users of this treadmill are adequatelyinformed of all warnings and precautions.2. Use the treadmill only as described in thismanual.3. Place the treadmill on a level surface with atleast one foot of clearance behind it. Do notplace the treadmill on any surface that blocksair openings. To protect the floor or carpetfrom damage, place a mat under the treadmill.4. Keep the treadmill indoors, away from moistureand dust. Do not put the treadmill in agarage or covered patio, or near water.5. Do not operate the treadmill where aerosolproducts are used or where oxygen is beingadministered.6. Keep children under the age of 12 and petsaway from the treadmill at all times.7. The treadmill should not be used by personsweighing more than 250 pounds.8. Never allow more than one person on thetreadmill at a time.9. Wear appropriate exercise clothing whenusing the treadmill. Do not wear loose clothingthat could become caught in the treadmill.Athletic support clothes are recommended forboth men and women. Always wear athleticshoes. Never use the treadmill with bare feet,wearing only stockings, or in sandals.10. When connecting the power cord (see page 7),plug the power cord into a surge suppressor(not included) and plug the surge suppressorinto a grounded circuit capable of carrying 15or more amps. No other appliance should beon the same circuit. Do not use an extensioncord.11. Use only a single-outlet surge suppressorthat is UL 1449 listed as a transient voltagesurge suppressor (TVSS). The surgesuppressor must have a UL suppressed voltagerating of 400 volts or less and a minimumsurge dissipation of 450 joules. The surgesuppressor must be electrically rated for 120volts AC and 15 amps.12. Keep the power cord and the surge suppressoraway from heated surfaces.13. Never move the walking belt while the poweris turned off. Do not operate the treadmill ifthe power cord or plug is damaged, or if thetreadmill is not working properly. (See BE-FORE YOU BEGIN on page 5 if the treadmill isnot working properly.)14. Never start the treadmill while you are standingon the walking belt. Always hold thehandrails while using the treadmill.15. The treadmill is capable of high speeds.Adjust the speed in small increments to avoidsudden jumps in speed.16. To reduce the possibility of the treadmill overheating,do not operate the treadmill continuouslyfor longer than one hour.17. The pulse sensor is not a medical device.Various factors, including the user's movement,may affect the accuracy of heart ratereadings. The pulse sensor is intended onlyas an exercise aid in determining heart ratetrends in general.18. Never leave the treadmill unattended while itis running. Always remove the key when thetreadmill is not in use.19. Do not attempt to raise, lower, or move thetreadmill until it is properly assembled. (SeeSET-UP on page 6, and HOW TO MOVE THETREADMILL on page 10.) You must be able tosafely lift 65 pounds (30 kg) in order to raise,lower, or move the treadmill.20. When folding or moving the treadmill, makesure that the storage latch is fully closed.3
21. Inspect and tighten all parts of the treadmillevery three months.22. Never insert any object into any opening.23. Always unplug the power cord before performingthe maintenance and adjustmentprocedures described in this manual. Neverremove the motor hood unless instructed todo so by an authorized service representative.Servicing other than the procedures inthis manual should be performed by an authorizedservice representative only.24. This treadmill is intended for in-home useonly. Do not use this treadmill in any commercial,rental, or institutional setting.WARNING: Before beginning this or any exercise program, consult your physician. Thisis especially important for persons over the age of 35 or persons with pre-existing health problems.Read all instructions before using. SEARS assumes no responsibility for personal injury or propertydamage sustained by or through the use of this product.SAVE THESE INSTRUCTIONSThe decal shown below has been placed on your treadmill. If the decal is missing, or if it is not legible,please call our toll-free HELPLINE to order a free replacement decal (see the back cover of this manual).Apply the decal in the location shown.4
BEFORE YOU BEGINThank you for selecting the revolutionary PROFORM¨<strong>730</strong> SIGHTLINE treadmill. The <strong>730</strong> SIGHTLINE blendsadvanced technology with innovative design to let youenjoy an excellent form of cardiovascular exercise inthe convenience and privacy of your home.For your benefit, read this manual carefully beforeusing the treadmill. If you have questions after readingthe manual, please call our toll-free HELPLINE at1-800-736-6879, Monday through Saturday, 7 a.m.until 7 p.m. Central Time (excluding holidays). To helpus assist you, please note the product model numberand serial number before calling. The model number ofthe treadmill is 831.297940. The serial number can befound on a decal attached to the treadmill (see thefront cover of this manual for the location).Before reading further, please review the drawingbelow and familiarize yourself with the parts that arelabeled.Water Bottle Holder(Bottle not included)ConsoleAccessory TrayHandrailStorageLatchKey/ClipUprightLEFTSIDERIGHTSIDEWalking BeltFront RollerAdjustment BoltsFoot RailEmergency Off SwitchCircuit BreakerWheelPower Cord5
SET-UPSetting up the treadmill requires two people. Set the treadmill in a cleared area and remove the packingmaterials. Do not dispose of the packing materials until set-up is completed. Scissors(notincluded) are needed.1. With the help of a second person, carefully raise thetreadmill to the position shown at the right.12. Cut the shipping tie.Refer to HOW TO LOWER THE TREADMILL FOR USEon page 11. Follow the instructions on page 11 to lowerthe treadmill. Make sure there is at least one foot ofclearance behind the treadmill.2Shipping Tie3. Remove the backing from the Adhesive Clip (68). Pressthe Adhesive Clip onto the Front Endcap (29) in theindicated location. Press the Allen Wrench (69) into theAdhesive Clip.36869294. To protect the floor or carpet, place a mat under the treadmill. To order a mat, refer to the back cover of thismanual.6
DIAGRAM OF THE CONSOLEMonitor DisplaysLED TrackIncline Control Clip KeySpeed ControlPulse SensorCAUTION: Before operating theconsole, read the following precautions.¥ Do not stand on the walking belt when turningon the power.¥ Always wear the clip while using the treadmill.When the key is removed from the console, thewalking belt will stop.¥ An emergency shut-off switch is built into themotor hood behind the walking belt. Any timethat you step on the motor hood, the walkingbelt will stop.¥ Adjust the speed in small increments.¥ The settings marked above the speed control(warm-up/cool-down, fat burn, aerobic, andperformance) are general guidelines only. Seepage 14 for more information.¥ To reduce the possibility of electric shock,keep the console dry. Avoid spilling liquids onthe console and use only a sealable waterbottle.STEP BY STEP CONSOLE OPERATIONIf there is a thin sheet of clear plastic on the face of theconsole, remove it. Next, make sure that the powercord is properly plugged in (see HOW TO PLUG INTHE POWER CORD on page 7).Stand on the foot rails of the treadmill. Find the clipattached to the key (see the drawing above), andslide the clip onto the waistband of your clothing.Follow the steps below to operate the console.1Insert the key fully into the power switch.After a moment, thefour displays and oneindicator in the LEDtrack will light.23Reset the speed control.Slide the speedcontrol to thethe RESETposition. Note:Each time thewalking belt isstopped, thespeed control must be moved to the RESET positionbefore the walking belt can be restarted.Start the walking belt.Slowly slide the speed control to the right until thewalking belt begins to move at slow speed. Steponto the walking belt. Change the speed of thewalking belt as desired by sliding the speed control.To stop the walking belt, step onto the foot railsand slide the speed control to the RESET position.After a few seconds, the displays will pause.7
4Follow your progress with the LED track andthe four displays.The LEDTrackÑThe LEDtrack representsa distance of 1/4mile. As you exercise,the indicatorsaround thetrack will light oneat a time until youhave completed 1/4 mile. A new lap will then begin.DISTANCE/LAPSdisplayÑThis displayshows the distance thatyou have walked andthe number of laps youhave completed. Thedisplay will change from one number to the otherevery seven seconds. An ÒLÓ will appear in the displaywhen the number of laps is shown. Note: If theKPH indicator beside the SPEED display is lit, thedistance will be shown in kilometers; if the indicatoris not lit, the distance will be shown in miles.SPEED displayÑThisdisplay shows the speedof the walking belt. If theKPH indicator besidethe display is lit, thespeed will be shown inkilometers; if the indicator is dark, the speed will beshown in miles. To change the unit of measurement,press the START/RESET button for seven seconds.CALS/FAT CALS/PULSE displayÑThisdisplay shows the approximatenumbers ofcalories and fat caloriesyou have burned.(See BURNING FAT on page 14 for an explanationof fat calories.) Every seven seconds, the displaywill change from one number to the other. The FATindicator will light when the number of fat calories isshown. Note: This display also shows your pulsewhen the pulse sensor is used.56To reset the displays,press the START/RESET button. The displayswill darken for amoment and then light.Measure your pulse, if desired.Stand on the foot rails and place your thumb on thepulse sensor as shown. The pulse sensor is pressure-activatedÑfullypress it down. (Do not presstoo hard, or thecirculation inyour thumb willbe restricted,and your pulsewill not be detected.)Next,raise your thumbslightly until theheart-shapedindicator by theCALS/FAT CALS/PULSE displayflashes steadily.IndicatorHold your thumb at this level. After a few seconds,three dashes will appear in the display and yourpulse will be shown. Hold your thumb on the sensorfor another 15 seconds for the most accurate reading.If the displayed pulse appears to be too high ortoo low, or if your pulse is not displayed, lift yourthumb off the sensor and allow the display to reset.Press down again on the sensor as described above.Make sure that your thumb is positioned as shown,and that you are applying the proper amount of pressureto the pulse sensor. Try the sensor severaltimes until you become familiar with it. Remember tostand still while measuring your pulse.Change the incline of the treadmill, if desired.To change the incline, hold downthe top or bottom of the incline controluntil the desired incline level isreached. Important: Before foldingthe treadmill, adjust the inclineto the lowest position.PulseSensorTIME displayÑThisdisplay shows the totaltime that you havewalked since the displaywas reset.Note: If the walking belt is stopped and noconsole buttons are pressed for five minutes,the displays will automatically turn off. To lightthe displays, press the START/RESET button.87When you are finished exercising, stop thewalking belt and remove the key.Step onto the foot rails, stop the walking belt, andremove the key from the console. Store the key in asecure place.
OPERATION AND ADJUSTMENTTHE PERFORMANT LUBE TM WALKING BELTYour treadmill features a walking belt coated withPERFORMANT LUBE TM , a high-performance lubricant.IMPORTANT: Never apply silicone spray or othersubstances to the walking belt or the walking platform.Such substances will deteriorate the walkingbelt and cause excessive wear.This product is for use on a nominal 120-volt circuit,and has a grounding plug that looks like the plug illustratedin drawing 1 below. A temporary adapter thatlooks like the adapter illustrated in drawing 2 may beused to connect the surge suppressor to a 2-polereceptacle as shown in drawing 2 if a properlygrounded outlet is not available.HOW TO PLUG IN THE POWER CORDDANGER: Improper connectionof the equipment-grounding conductor canresult in an increased risk of electric shock.Check with a qualified electrician or servicemanif you are in doubt as to whether theproduct is properly grounded. Do not modifythe plug provided with the productÑif it willnot fit the outlet, have a proper outletinstalled by a qualified electrician.Your treadmill, like any other type of sophisticatedelectronic equipment, can be seriously damaged bysudden voltage changes in your homeÕs power.Voltage surges, spikes, and noise interference canresult from weather conditions or from other appliancesbeing turned on or off. To decrease the possibility ofyour treadmill being damaged, always use a surgesuppressor with your treadmill (see drawing 1 atthe right).12Grounded Outlet BoxSurge SuppressorGrounding PinGrounding PinGrounded OutletGrounding PlugGrounded Outlet BoxAdapterSurge SuppressorLugMetal ScrewSurge suppressors are sold at most hardware storesand department stores. Use only a single-outlet surgesuppressor that is UL 1449 listed as a transient voltagesurge suppressor (TVSS). The surge suppressor musthave a UL suppressed voltage rating of 400 volts orless and a minimum surge dissipation of 450 joules.The surge suppressor must be electrically rated for120 volts AC and 15 amps.This product must be grounded. If it should malfunctionor break down, grounding provides a path of leastresistance for electric current to reduce the risk of electricshock. This product is equipped with a cord havingan equipment-grounding conductor and a groundingplug. Plug the power cord into a surge suppressor,and plug the surge suppressor into an appropriateoutlet that is properly installed and grounded inaccordance with all local codes and ordinances.The temporary adapter should be used only until aproperly grounded outlet (drawing 1) can be installedby a qualified electrician.The green-colored rigid ear, lug, or the like extendingfrom the adapter must be connected to a permanentground such as a properly grounded outlet box cover.Whenever the adapter is used it must be held in placeby a metal screw. Some 2-pole receptacle outlet boxcovers are not grounded. Contact a qualified electricianto determine if the outlet box cover isgrounded before using an adapter.9
HOW TO FOLD AND MOVE THE TREADMILLHOW TO FOLD THE TREADMILL FOR STORAGEBefore folding the treadmill, unplug the power cord. Caution: You must be able to safely lift 65 pounds(30 kg) in order to raise, lower, or move the treadmill.1. Grasp the storage handle with your right hand as shown.Caution: To avoid pinching your hands, do not holdthe treadmill in any location other than the storagehandle. To decrease the possibility of injury, bendyour legs and keep your back straight. As you raisethe treadmill, make sure to lift with your legs ratherthan your back. Raise the treadmill about halfway to thevertical position.Do nothold hereStorageHandle2. Continue to raise the treadmill. Pull the left upright withyour left hand until the storage latch closes over theupright support. Make sure that the storage latch closesfully over the upright support.To protect the floor or carpet from damage, place amat under the treadmill. Keep the treadmill out ofdirect sunlight. Do not leave the treadmill in thestorage position in temperatures above 85¡Fahrenheit.HandleStorage LatchUpright SupportClosedHOW TO MOVE THE TREADMILLBefore moving the treadmill, convert the treadmill to the storage position as described above. Make sure that thestorage latch is closed fully over the upright support.1. Hold the upper ends of the treadmill. Place one foot onthe base as shown.2. Tilt the treadmill back until it rolls freely on the wheels.Carefully move the treadmill to the desired location. Nevermove the treadmill without tipping it back. To reducethe risk of injury, use extreme caution while movingthe treadmill. Do not attempt to move the treadmillover an uneven surface.3. Place one foot on the base, and carefully lower the treadmilluntil it is resting in the storage position.BaseWheels10
HOW TO LOWER THE TREADMILL FOR USE1. Hold the storage handle with your right hand as shown. Using your left thumb, slide open the storage latch andhold it open. Hold the left upright with your left hand and pivot the treadmill until the upright support is past thestorage latch.2. Hold the storage handle firmly with you right hand, and lower the treadmill to the floor. Caution: To avoidpinching your hands, do not hold the treadmill in any location other than the storage handle. To decreasethe possibility of injury, bend your legs and keep your back straight. As you lower the treadmill,the console will move to a position above your head; be careful to avoid hitting the console.11
MAINTENANCE AND TROUBLE-SHOOTINGMost treadmill problems can be solved by following the simple steps below. If further assistance isneeded, call our toll-free HELPLINE at 1-800-736-6879, Monday through Saturday, 7 a.m. until 7 p.m.Central Time (excluding holidays).PROBLEM: The power does not turn onSOLUTION: a. Make sure that the power cord is plugged into a surge suppressor, and that the surge suppressoris plugged into a properly grounded outlet (see page 7). Use only a single-outlet surge suppressorthat is UL 1449 listed as a transient voltage surge suppressor (TVSS). The surge suppressormust have a UL suppressed voltage rating of 400 volts or less and a minimum surge dissipationof 450 joules. The surge suppressor must be electrically rated for 120 volts AC and 15 amps.b. After the power cord has been plugged in, make sure that the key is fully inserted into the console.c. Check the circuit breaker located on the treadmillnear the power cord. If the switch protrudes asshown, the circuit breaker has tripped. To reset thecircuit breaker, wait for five minutes and then pressthe switch back in.cTrippedTrippedResetResetPROBLEM: The power turns off during useSOLUTION: a. Check the circuit breaker located on the treadmill frame near the power cord (see 1. c. above). Ifthe circuit breaker has tripped, wait for five minutes and then press the switch back in.b. Make sure that the power cord is plugged in.c. Remove the key from the console. Reinsert the key fully into the console.d. Make sure that there is nothing pressing on the emergency shut-off switch built into the motor hood.e. If the treadmill still will not run, please call our toll-free HELPLINE.PROBLEM: The walking belt is off-center or slips when walked onSOLUTION: a. If the walking belt has shifted to the left, first removethe key and UNPLUG THE POWER CORD.Using the allen wrench, turn the left front roller adjustmentbolt clockwise, and the right bolt counterclockwise,1/4 of a turn each. Be careful not to overtightenthe walking belt. Plug in the power cord, insert the keyand run the treadmill for a few minutes. Repeat untilthe walking belt is centered.ab. If the walking belt has shifted to the right, first removethe key and UNPLUG THE POWER CORD.Using the allen wrench, turn the left front roller adjustmentbolt counterclockwise, and the right bolt clockwise,1/4 of a turn each. Be careful not to overtightenthe walking belt. Plug in the power cord, insert the keyand run the treadmill for a few minutes. Repeat untilthe walking belt is centered.b12
c. If the walking belt slips when walked on, first removethe key and UNPLUG THE POWER CORD.Using the allen wrench, turn both front roller adjustmentbolts clockwise 1/4 of a turn. When the walkingbelt is correctly tightened, you should be able to lifteach side of the walking belt 3 to 4 inches off thewalking platform. Be careful to keep the walking beltcentered. Plug in the power cord, insert the key andrun the treadmill for a few minutes. Repeat until thewalking belt is properly tightened.cPROBLEM: The walking belt slows when walked onSOLUTION: a. Use only a single-outlet surge suppressor that is UL 1449 listed as a transient voltage surge suppressor(TVSS). The surge suppressor must have a UL suppressed voltage rating of 400 volts orless and a minimum surge dissipation of 450 joules. The surge suppressor must be electricallyrated for 120 volts AC and 15 amps.b. If the walking belt is overtightened, treadmill performancemay decrease and the walking belt may bepermanently damaged. Remove the key and UN-PLUG THE POWER CORD. Using the allen wrench,turn both front roller adjustment bolts counterclockwise1/4 of a turn. When the walking belt is properlytightened, you should be able to lift each side of thewalking belt 3 to 4 inches off the walking platform. Becareful to keep the walking belt centered. Plug in thepower cord, insert the key and run the treadmill for afew minutes. Repeat until the walking belt is properlytightened.bFront Roller Adjustment Bolts3ÓÐ4Óc. If the walking belt still slows when walked on, please call our toll-free HELPLINE.13
CONDITIONING GUIDELINESWARNING: Before beginningthis or any exercise program, consult yourphysician. This is especially important for individualsover the age of 35 or individualswith pre-existing health problems.The pulse sensor is not a medical device.Various factors, including your movement,may affect the accuracy of heart rate readings.The sensor is intended only as an exercise aidin determining heart rate trends in general.The following guidelines will help you to plan yourexercise program. For more detailed exercise information,obtain a book or consult your physician.EXERCISE INTENSITYWhether your goal is to burn fat or to strengthen yourcardiovascular system, the key to achieving the desiredresults is to exercise with the proper intensity. Theproper intensity level can be found by using your heartrate as a guide. The chart below shows recommendedheart rates for fat burning and aerobic exercise. (Thechart is also found on the treadmill console.)adjust the speed and incline of the treadmill until yourheart rate is near one of the lower two numbers in yourtraining zone. It may also be helpful to set the speedcontrol on the console to FAT BURN to help you maintainthe proper intensity level (see page 8).Aerobic ExerciseIf your goal is to strengthen your cardiovascular system,your exercise must be Òaerobic.Ó Aerobic exerciseis activity that requires large amounts of oxygen forprolonged periods of time. This increases the demandon the heart to pump blood to the muscles, and on thelungs to oxygenate the blood. For aerobic exercise,adjust the speed and incline of the treadmill until yourheart rate is near the higher number in your trainingzone. It may also be helpful to set the speed control onthe console to AEROBIC to help you maintain theproper intensity level (see page 8).High Performance Athletic ConditioningIf your goal is high performance athletic conditioning,set the speed control on the console to PERFOR-MANCE to help you maintain the proper intensity level(see page 8). Note: During the first few weeks of yourexercise program, keep your heart rate near the lowend of your training zone.WORKOUT GUIDELINESEach workout should include the following three parts:To find the proper heart rate for you, first find your ageat the bottom of the chart (ages are rounded off to thenearest ten years). Next, find the three numbers aboveyour age. These numbers are your Òtraining zone.Ó Thesmaller two numbers are recommended heart rates forfat burning; the larger number is the recommendedheart rate for aerobic exercise. To measure your heartrate during exercise, use the pulse sensor on the console.(See page 9.) If your heart rate is too high or toolow, adjust the speed or incline of the treadmill.Burning FatTo burn fat effectively, you must exercise at a relativelylow intensity level for a sustained period of time. Duringthe first few minutes of exercise, your body uses easilyaccessible carbohydrate calories for energy. Only afterthe first few minutes does your body begin to usestored fat calories for energy. If your goal is to burn fat,A Warm-upÑStart each workout with 5 to 10 minutesof stretching and light exercise. A proper warm-up increasesyour body temperature, heart rate, and circulationin preparation for exercise.Training Zone ExerciseÑAfter warming up, increasethe intensity of your exercise until your heart rate is inyour training zone for 20 to 60 minutes. (During thefirst few weeks of your exercise program, do not keepyour heart rate in your training zone for longer than 20minutes.)A Cool-downÑFinish each workout with 5 to 10 minutesof stretching to cool down. This will increase theflexibility of your muscles and will help to prevent postexerciseproblems.To maintain or improve your condition, complete threeworkouts each week, with at least one day of rest betweenworkouts. After a few months of regular exercise,you may complete up to five workouts each weekif desired. The key to success is to make exercise aregular and enjoyable part of your everyday life.14
PART LISTÑModel No. 831.297940R1297AKey No. Part No. Qty.DescriptionKey No. Part No. Qty.Description1 143089 1 Motor Hood2 126996 16 Hood Screw/Spacer Screw3 013576 26 Hood Support Screw4 141081 1 Hood Support5 131738 1 Storage Latch6 141506 1 Emergency Off Switch7 141001 1 Base8 136728 29 Screw9 139345 1 Circuit Board10 137857 1 Controller11 141366 1 Electronics Plate12 130993 1 Choke13 124695 1 Grommet14 124669 1 Power Cord15 143296 1 Outlet Bracket16 109382 1 Circuit Breaker17 126130 1 Plug18 141168 4 Right Upright Support19 126650 4 Base Pad20 143092 1 Wire Harness21 013322 25 Console Screw22 120630 1 Ground Screw23 119994 2 Frame Pivot Bolt24 132314 2 Front Wheel25 119425 12 Nut26 130868 2 Wheel Bolt27 141173 2 Frame Pivot Spacer28 141127 1 Right Link Arm29 141264 1 Front Endcap30 141370 1 Switch Bracket31 141489 1 Pulley Cover32 119038 1 Key Clip33 107503 1 Motor Pivot Bolt34 143090 1 Motor35 139767 1 Shock36 012149 1 Motor Pivot Nut37 122812 1 Motor Tension Washer38 013547 3 Motor Tension Bolt39 118016 1 Motor Belt40 014117 1 Motor Star Washer41* 143107 1 Motor/Pulley/Flywheel/Fan42 126747 1 Pulley/Flywheel/Fan43 031108 1 Incline Control44 112609 1 Rear Roller Adj. Bolt45 014063 3 Adjustment Washer46 138853 8 Belly Pan Fastener47 100498 1 Magnet48 143094 1 Rear Roller/Pulley49 100691 4 Walking Platform Screw50 142029 1 Roller Shield51 013510 1 Shield Screw52 143096 1 Walking Belt53 143098 1 Walking Platform54 143099 1 Left Foot Rail55 013342 2 Front Roller Adj. Bolt56 141367 1 Console Base57 141953 1 Folding Handle58 143101 1 Front Roller59 128643 2 Handle Bolt60 NSP 1 Frame61 143102 1 Belly Pan62 143103 1 Right Foot Rail63 138141 1 Latch Warning Decal64 132449 2 Incline Leg Pivot Bolt65 129639 1 Console Cover66 109265 2 Belt Guide67 141446 1 Reed Switch68 016028 1 Wrench Clip69 128457 1 Allen Wrench70 117806 2 Incline Wheel Bolt71 052012 2 Incline Wheel72 012056 4 Incline Nut73 140692 1 Incline Leg74 013162 4 Roller Guard Screw75 131753 1 Latch Bracket76 143288 1 Console Plate77 136377 2 Latch Spring78 141363 1 Incline Motor79 114270 1 Incline Motor Spacer80 135622 2 Link Arm Bolt81 140137 1 Hood Bracket82 141126 1 Left Link Arm83 141254 2 Link Arm Spacer84 143106 1 Speed Potentiometer85 141262 10 Washer86 014132 4 Link Arm Washer87 120867 1 Motor Tension Nut88 131161 1 Speed Control Knob89 143076 4 Rod Housing90 143219 4 Rod Housing Screw91 141123 4 Slider Rod92 141026 2 Slider93 141382 2 Lower Upright Spacer94 143246 1 Warning Decal95 141169 1 Left Upright Support96 141256 2 Small Upright Spacer97 141006 1 Upright98 116927 1 Tie Holder99 131090 1 Reed Switch Clip100 116926 4 Releasable Cable Tie101 016057 3 8Ó Cable Tie102 143104 1 Console103 140940 4 Support Endcap104 125328 6 Small Washer105 126960 1 Base Plug107 143185 1 Roller Guard# 139834 1 8Ó White Wire, Pigtail# 137389 1 8Ó Blue Wire, Pigtail# 139833 1 6Ó Blue Wire, 2 Female/Male# 141449 1 8Ó White Wire, Male/Female# 141453 1 8Ó Black Wire, Male/Flag# 141454 1 8Ó Black Wire, Female/Flag# 141455 1 26Ó Red Wire, Male/Female# 141457 1 22Ó Blue Wire, Male/Female# 141456 1 22Ó Black Wire, Male/Female# 141475 1 UserÕs Manual* Includes all parts shown in the box# These parts are not illustrated15
DO NOT ALTERModel No. 831.297940QUESTIONS?If you find that:¥ you need help assembling oroperating the PROFORM¨ <strong>730</strong>SIGHTLINE treadmill¥ a part is missing¥ or you need to schedule repairservicecall our toll-free HELPLINE1-800-736-6879MondayÐSaturday, 7 amÐ7 pmCentral Time (excluding holidays)REPLACEMENTPARTSThe model number and serial number of your PROFORM¨ <strong>730</strong>SIGHTLINE treadmill are listed on a decal attached to the frame.See the front cover of this manual to find the location of the decal.All replacement parts are available for immediate purchase orspecial order when you visit your nearest SEARS Service Center.To request service or to order parts by telephone, call the toll-freenumbers listed at the left.When requesting help or service, or ordering parts, please be preparedto provide the following information:¥ The NAME OF THE PRODUCT (PROFORM¨ <strong>730</strong> SIGHTLINEtreadmill)¥ The MODEL NUMBER OF THE PRODUCT (831.297940)¥ The PART NUMBER OF THE PART (see the PART LIST onpage 15 and the EXPLODED DRAWING attached in the center ofthis manual)¥ The DESCRIPTION OF THE PART (see the PART LIST on page15 and the EXPLODED DRAWING attached in the center of thismanual).If parts become worn and needto be replaced, call the followingtoll-free number1-800-FON-PART(1-800-366-7278)Part No. 141475 G03983BC R1297APrinted in USA © 1997 Sears, Roebuck and Co.


