2100 Series Fire Rescue Saw - Cutters Edge
2100 Series Fire Rescue Saw - Cutters Edge
2100 Series Fire Rescue Saw - Cutters Edge
- No tags were found...
Create successful ePaper yourself
Turn your PDF publications into a flip-book with our unique Google optimized e-Paper software.
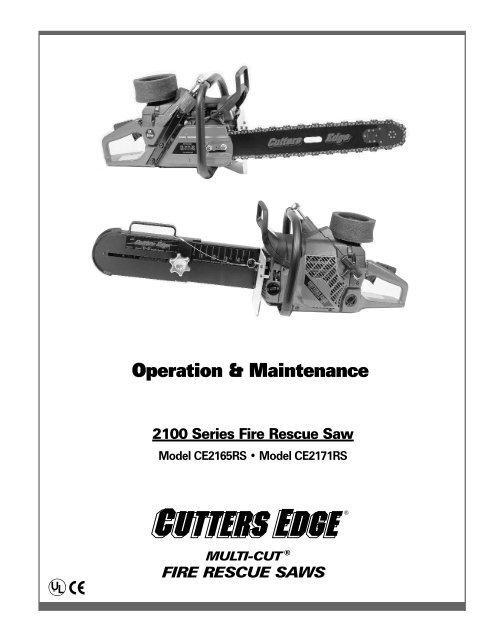
Operation & Maintenance<strong>2100</strong> <strong>Series</strong> <strong>Fire</strong> <strong>Rescue</strong> <strong>Saw</strong>Model CE2165RS • Model CE2171RSU®LMULTI-CUTFIRE RESCUE SAWS®
1/CUTTERS EDGE FIRE RESCUE SAWSYour <strong>Cutters</strong> <strong>Edge</strong> Shipping Carton Should Include the Following:(C)(B)(D, E, F)(J)(A)(G)(H)(L)(K)(I)(A) <strong>Cutters</strong> <strong>Edge</strong><strong>Fire</strong> <strong>Rescue</strong> <strong>Saw</strong>(B) Warranty card(C) <strong>Cutters</strong> <strong>Edge</strong> <strong>Fire</strong> <strong>Rescue</strong><strong>Saw</strong> Operations Manual(D) Chainsaw Operators Manual(E) Chainsaw Safety Manual(F) Illustrated Parts List(G) <strong>Cutters</strong> <strong>Edge</strong> Bar & Chain Oil(H) 8 oz. Bottle <strong>Cutters</strong> <strong>Edge</strong>2-Cycle Oil(I) Allen Wrenches(J) Filter Oil(K) Grease Gun(L) Grease PacketInformation in this manual is forthe following <strong>Cutters</strong> <strong>Edge</strong><strong>Fire</strong> <strong>Rescue</strong> <strong>Saw</strong> Model Numbers:CE2165RS-12”, CE2165RS-16”, CE2165RS-20”, CE2165RS/D6, CE2165RS/D8,CE2171RS-12”, CE2171RS-16”, CE2171RS-20”, CE2171RS/D6, CE2171RS/D8.Copyright 2001 <strong>Edge</strong> Industries, Inc • All rights reserved. No part of this manual may be reproduced or transmitted in any form or byany means, electronic, mechanical, photocopying, recording or otherwise, without prior written consent of the publisher. Forinformation, contact <strong>Edge</strong> Industries, Inc.Notice of Liability • The information contained in this manual is distributed on an “As Is” basis without warranty. <strong>Edge</strong> Industries shallhave no liability to any person or entity with respect to any liability, loss or damage caused or alledged to be caused directly orindirectly by the instructions contained in this manual. The information in this manual is subject to change without notice.Please take note of the WARNINGS HIGHLIGHTED IN THIS MANUAL and the warning labels attached tothe various parts of the saw and its accessories. Read these warnings and heed their advice. Failure to doso could result in injury to you and/or damage to the saw. Any warranties provided by the manufacturerwill not cover abuse, neglect or mishandling of the saw.WARNING!UNDER NO CIRCUMSTANCES MAY THE DESIGN OF THE MACHINE BE MODIFIED WITHOUT THEPERMISSION OF THE MANUFACTURER. Always use genuine accessories. Non-authorized modificationsand/or accessories can result in serious personal injury or the death of the operator or others. Yourwarranty does not cover damage or liability by the use of non-authorized accessories or replacement parts.CUTTERS EDGE ® , MULTI-CUT ® , FIRE RESCUE SAW ® , BULLET ® CHAIN, GUARD/DEPTH GAUGE ® – Patent Numbers:UNITED STATES - 5,156,156, 5,056,395 FRANCE - 0439085 ITALY - 0439085 AUSTRALIA - 627393 NORWAY - 176168 AUSTRIA - 0439085RUSSIAN FED - 2021885 BRAZIL - PI 9100284-2 SPAIN - 2055928 CANADA - 2034,798 SWEDEN - 0439085CZECH REPUBLIC - 279.962 SWITZERLAND - 0439085 FINLAND - 910356 UNITED KINGDOM - 0439085
CUTTERS EDGE FIRE RESCUE SAWS/2Operation & MaintenanceTable of ContentsIntroduction ................................................................... 3Kickback Warning ........................................................... 3Visual Description ........................................................... 4Part OneFamiliarization of Operation .............................................. 5Installing Bar and Chain ................................................... 6Starting ........................................................................ 9Installing Guard Depth Gauge ............................................ 12Part TwoMaintenance ................................................................. 15Specifications ............................................................ 20/21Warranty....................................................................... 22
3/CUTTERS EDGE FIRE RESCUE SAWSIntroductionVENTILATION: <strong>Cutters</strong> <strong>Edge</strong> <strong>Fire</strong> <strong>Rescue</strong> <strong>Saw</strong>s are designed and built exclusively for use by trained firefighters. Although<strong>Cutters</strong> <strong>Edge</strong> <strong>Fire</strong> <strong>Rescue</strong> <strong>Saw</strong>s are essentially modified chainsaws their use and applications differ substantially. This manual isprovided to assist you in learning the safe and proper set-up, start-up and maintenance of your new <strong>Cutters</strong> <strong>Edge</strong> <strong>Fire</strong> <strong>Rescue</strong> <strong>Saw</strong>.However, you should not attempt to use this tool without knowledge of the safe and proper applications of power saws in fighting fires.This manual is in no way intended to replace the basic chainsaw manual; rather it should be used as a supplemental manual dealingwith the specific applications of this specialized firefighting tool. Nor are the guidelines for operational procedures described hereinintended to contradict the standard operating procedures (SOP) of your individual fire department.There are a number of excellent training publications available about the principles and techniques of ventilation. <strong>Cutters</strong> <strong>Edge</strong>recommends the book “FIRE RESCUE METHODS AND TECHNIQUES”, by Los Angeles City <strong>Fire</strong> Department Battalion Chief (Ret.),John MittendorfThe purpose of ventilation is to establish a safer interior environment through planned and systematic removal of heat, smoke, andtoxic gases and their replacement with fresh air. Ventilation is an offensive technique that, when accomplished early and effectively, canspeed tactical operations and provide a safer environment for firefighters.As fire develops within a structure, several conditions result. First, the temperature and toxicity of the atmosphere increase rapidly.Then radiated and convected heat result in flashover and the subsequent rapid spread of fire throughout the structure. Withoutventilation the fire will develop a super-heated, oxygen deficient and fuel-rich environment ripe for backdraft.<strong>Fire</strong>fighters can minimize these dangerous conditions with proper ventilation techniques and proper tools. Knowledge, training and<strong>Cutters</strong> <strong>Edge</strong> <strong>Fire</strong> <strong>Rescue</strong> <strong>Saw</strong>s are the proper tools.RESCUE: With the development of the BULLET® CHAIN, applications for your CUTTERS EDGE ® FIRE RESCUE SAW haveincreased dramatically compared to conventional chain saws and rotary saws.Your <strong>Fire</strong> <strong>Rescue</strong> <strong>Saw</strong> can be used for many operations, including: Ventilation, Forcible Entry, Storm Damage, <strong>Rescue</strong>, Crash <strong>Rescue</strong>and many conventional rotary and chain saw applications.While chain wear and damage may be accelerated when cutting materials other than wood, your BULLET ® CHAIN equipped saw iscapable of cutting most building materials, including roofing nails, joist hangers, nailing plates, flashing, light gauge sheet metal andsome lightweight concretes. It is capable of cutting automotive sheet metal, automotive glass, hurricane glass, bulletproof glass,plastics, fiberglass, and many other composite materials. It can also cut aircraft skin, cockpit and aircraft windows, including someaircraft structural materials*.There are, of course, limitations but your CUTTERS EDGE FIRE RESCUE SAW with BULLET ® CHAIN will cut a wide variety of materialsunder the most severe fire ground and rescue scene conditions.This manual will familiarize you with your new <strong>Fire</strong> <strong>Rescue</strong> <strong>Saw</strong> and take you through the proper procedures for installing the guide barand BULLET ® CHAIN and Guard/Depth Gauge ®. It will also show you how to clean and maintain the saw after use.Before attempting to assemble or use your saw, we strongly suggest that you read this manual completely. Then carefully follow theinstructions in this manual as you proceed to prepare your <strong>Cutters</strong> <strong>Edge</strong> <strong>Fire</strong> <strong>Rescue</strong> <strong>Saw</strong> for use.* When materials other than wood are cut, increased wear and damage should be anticipated. The possibility of chain breakage also increases.All materials listed have been successfully cut under controlled conditions or during actual fireground and rescue incidents. However, quantity,composition of specific materials, operator experience, existing conditions and unknown factors can adversely affect the outcome.Beware of Kickback!There are two types of kickback that can be encountered with the improper use of a chainsaw.ROTATIONAL KICKBACK is the violent reaction which occurs when the chain at the upper section of the nose issuddenly stopped, thereby dangerously driving the bar nose in an upward arc toward the operator.WARNING! LINEAR KICKBACK is a push reaction, which can occur when the saw is buried in the cut and the cut closes,pinching the chain along the top rails of the bar, pushing the saw into the operator.CUTTERS EDGE FIRE RESCUE SAWS WITH BULLET ® CHAINS HAVE THE LOWEST KICKBACK POTENTIAL AND HIGHESTLEVEL OF SAFETY AVAILABLE.The <strong>Cutters</strong> <strong>Edge</strong> <strong>Fire</strong> <strong>Rescue</strong> <strong>Saw</strong>, equipped with the BULLET ® CHAIN was tested for kickback by SMP, The Swedish TestingInstitute. Because of the unique cutting action of the BULLET ® CHAIN, the test results on the CUTTERS EDGE FIRE RESCUE SAWshowed it to have extremely low kickback, in fact, the lowest kickback potential of any chainsaw style saw.
The <strong>Cutters</strong> <strong>Edge</strong> <strong>Fire</strong> <strong>Rescue</strong> <strong>Saw</strong>CUTTERS EDGE FIRE RESCUE SAWS/4<strong>Cutters</strong> <strong>Edge</strong> <strong>Fire</strong> <strong>Rescue</strong> <strong>Saw</strong>s are shipped fully assembled. The 12”, 16” and 20” RS Models come with aprotective scabbard covering the BULLET ® CHAIN. The GUARD/DEPTH GAUGE ® on the D6 and D8 Modelscovers the BULLET ® CHAIN so a scabbard is not included on these models.1984Familiarize yourselfwith variouscomponents and partsof the saw.23510671. Chain Brake Handle2. Oil Tank Cap3. Starter Handle4. Sparkplug/CarburetorAccess Latch5. Fuel Tank Cap6. Throttle Trigger7. Throttle TriggerSafety Lock8. Pre-Filter9. Main Filter Element10. On/Off MomentaryContact Switch121411181311. Scrench Tool12. Scrench Tool Holder13. Guard Deflector14. Choke Control15. Full Wrap Handle16. Chain TensionAdjustment Screw17. Clutch Cover/Bar Mount Nuts18. Compression Release151617MULTI-CUT ®FIRE RESCUE SAWS
5/CUTTERS EDGE FIRE RESCUE SAWSPart One:FAMILIARIZATION OF OPERATIONTHE CHAIN BRAKEThe chain brake is designed to stopthe rotation of the chain in less thanone-twentieth of a second. If kickbackshould occur, the violent reverseaction will actuate the inertia chainbrake (same principle as a carseatbelt) or drive the chain brakehandle back into the operator’s hand,engaging the chain brake andstopping the movement of the chain.The chain brake has threepositions:Fig. 1. Center- operating position,chain brake disengaged.(Normal cutting position).During operation, the brake is in theneutral or center position (Fig.1). Thisallows the chain to turn freely.Fig. 2. Forward Position - chainbrake engagedWhen engaged, the chain brakehandle is in the fully forward position(Fig. 2). In this position the chain willnot turn.Fig. 3. Back position - to disengagechain brakeTo disengage the chain brake, pull thechain brake handle back completelyto the saw’s top handle (Fig. 3).It is important that the chain brakehandle comes into full contact withthe saw’s handle. Any obstructions,such as your hand, will preventdisengagement of the chain brake.Once you have pulled the chain brakehandle back completely, let go and itwill snap back to the center operatingposition. (See Fig. 1)3. 1. 2.3. 1. 2.3. 1. 2.Fig. 1.Fig. 2.Fig. 3.
CUTTERS EDGE FIRE RESCUE SAWS/6REMOVAL AND REINSTALLATIONOF THE GUIDE BAR AND CHAINREMOVE CLUTCH COVERUsing the scrench tool loosen the two clutch coverbar mount nuts Shown in Fig. 4.Remove Chain and Guide Bar from the saw.Fig. 4. Clutch Cover Bar Mount NutsTO REINSTALL CHAIN AND GUIDE BARTo mount the guide bar, slide the guide bar ontothe two bar mount studs. See Fig. 5.To install the chain, align the chain so that thecutters are pointing toward the tip of the guide baras they lay on the top of the bar. Slip the chain ontothe clutch sprocket rim (Fig. 5). Then slip the chaininto the groove of the guide bar, again verifying thatthe top cutters point toward the tip of the guide bar.Pull the chain around the bar to be sure the drivelinks are properly seated in the drive sprocket.Fig. 5. Bar Mount Studs and Clutch SprocketMount Clutch Cover onto the two bar mount studs(Fig.5) Using the scrench tool, turn the tensioningadjustment screw to align the chain adjuster pinwith the hole in the guide bar. (Figs. 6 and 7).When the adjuster pin is aligned with the hole inthe guide bar push the clutch cover to set it fullyagainst the saw. Install the two bar nuts finger tight.Fig. 6. Tensioning Adjustment ScrewFig. 7. Chain Adjustment Pin
7/CUTTERS EDGE FIRE RESCUE SAWSADJUSTING THE CHAIN TENSIONWearing gloves or using a rag to protect yourhand, pull up on the tip of the guide bar. Whileholding up the guide bar tip, tighten the chaintension adjustment screw (Fig. 6 on page 6) byturning it clockwise. While still holding up the bartip, tighten the two clutch cover nuts (Fig. 8).Holding up the tip of the bar takes out any slackbetween the bar mounting slot and the twomounting studs. This will eliminate any upwardmovement of the guide bar when cuttingpressure is applied at the bottom of the bar.Any such upward movement of the bar couldcause the chain to loosen.Fig. 8. Tighten two clutch cover nuts so chainis at proper tensionProper chain tension is a key factor in reducingcarbide breakage and increasing guide bar life.Proper chain tension has the chain as tightas possible without restricting chainmovement. (Fig. 8)At proper tension, the chain should move alongthe bar freely. You should feel only the resistanceof the sprocket and clutch drum turning. If thechain does not move smoothly (catches orrequires excessive force to move) it is too tight.At proper tension, the chain is in full contact withthe bar along the bottom rails, (Fig.8) there is no“sag”. (Fig. 9).Fig. 9 “Sag” chain is too looseAt the midpoint along the bottom rails, whenpulling down on the chain, you should be able topull the chain away from the rails, to the distancewhere the point of the drive link is “just clearingthe rail” (Fig. 10) and snaps back into place whenyou release it.Fig. 10. Proper chain tension - while pulling chaindown, drive links just clearing the rail
CUTTERS EDGE FIRE RESCUE SAWS/8FILLING THE TANKSLay the saw on its side and remove the fuel tankcap (Fig. 11). Fill with a fresh mixture of highoctane leaded or unleaded gasoline and <strong>Cutters</strong><strong>Edge</strong> Synthetic 2-Cycle Oil or a high quality twocycleoil. Replace the fuel cap.Please note that each time youfill up or top off the fuel tank,always top off the bar and chainoil tank. The fuel tank and theWARNING! bar and chain oil tank are sizedso that the saw will always run out of fuelbefore it runs out of bar and chain oil,eliminating the possibility of running thechain without proper lubrication.IMPORTANT!• Fuel/Oil Mix ratio using <strong>Cutters</strong><strong>Edge</strong> Oil ... 100:1• Using synthetic oils mix ... follow oilmanufacturers recommendation• Using any petroleum based oil ... 50:1.Oil CapFig. 11. Fuel Cap and Oil CapFuel CapNext, remove the bar and chain oil tank cap(Fig. 11) and fill the tank with bar and chain oil.Replace the cap.You do not need special detergent oils; as thechain reaches high enough temperatures toprevent the buildup of tars on the chain. Werecommend the use of <strong>Cutters</strong> <strong>Edge</strong> Bar & ChainOil for its excellent lubricating and anti-slingproperties. This oil has been developed toprovide high flash and fire points for optimumperformance during harsh fire-groundapplications, with high flow properties for use,even in extreme cold temperatures. This antirust,anti-wear formula is recommended for useon all <strong>Fire</strong> <strong>Rescue</strong> saws and on conventionalchainsaws.WARNING!WARNING!Do not mix the bar and chainoil with diesel fuel, kerosene orany solvents as this actuallyreduces its lubricatingproperties, increases its flashpoint and does not reducetar buildup on the chain.IF POSSIBLE AVOID USINGGASOHOL OR ALCOHOLBLENDED FUELS
9/CUTTERS EDGE FIRE RESCUE SAWSTHE MOMENTARY CONTACT SWITCHBefore starting the saw, you should know how tostop it. The <strong>Cutters</strong> <strong>Edge</strong> <strong>Fire</strong> <strong>Rescue</strong> <strong>Saw</strong> isequipped with a momentary contact switch that isalways in the “on” position (Fig 12). To stop thesaw, push and hold the momentary contact switchto the right. This kills the saw. When released, theswitch will snap back into the “on” positionautomatically.STARTING THE SAWIMPORTANT!Before starting the saw, it is important to notethat you should not run the saw at full throttleuntil after breaking in the engine.To start the saw, place it on the ground. Grip thetop handle firmly and step on the outer edge of theback handle. (Fig.13)Fig. 12. Momentary Contact SwitchIMPORTANT! CHECK THE CHAINBRAKE BEFORE STARTINGDo not start the saw with the chain brakeengaged. Be sure the chain brake is disengagedby pulling back the chain brake handle untilit contacts the front of the full wrap handle.(See Fig. 3 on page 5).COLD START(1) Pull out the choke knob*. This automaticallylocks the throttle trigger and the carburetor intotheir optimum positions for starting. If you donot touch the throttle during starting, there isno possibility of flooding.(2) Grasp the starter handle and pull sharplyupward a few times until the engine catches.(3) Push the choke in.(4) Pull the starter handle again.The engine will start.(5) Let saw run at fast idle for 5 seconds.(6) Quickly squeeze and release the throttletrigger to set the idle.* We recommend storing the saw with thechoke knob pulled out.Fig. 13. Proper starting position
CUTTERS EDGE FIRE RESCUE SAWS/10WARM START(Engine still warm from previous use)(1) Pull starter handle until saw starts.NOTEYou must depress the safety lock on top of thehandle (Figs. 14 & 15) to be able to engage thetrigger. The trigger will not function withoutdepressing the safety lock.Fig. 14 Safety LockRUNNING-IN THE CHAINRunning-in the chain stretches and fully lubricatesthe chain for optimum longevity and performance.Start the saw and run it at three-quarter speed forapproximately 10 minutes or until the bar andchain begin to smoke.Now turn off the saw. The chain has reached itsoperating temperature. You will notice the chainnow sags from the bar. (Fig. 16) Before readjusting,allow the chain to cool down for three to fiveminutes, or until it is cool enough to touch.Fig. 15 Depressing the Safety LockOnce it is cool enough to handle, readjust thechain to the proper tension. See Page 7 forchain tension adjustment.NOTEWe recommend you repeat this entire chainrunning-in procedure at least once more.Fig. 16 The chain will sag when hot
11/CUTTERS EDGE FIRE RESCUE SAWSBREAKING IN THE ENGINEProper breaking in of the engineis a crucial step in the set-up ofyour saw. This procedureallows the cylinder to coat withWARNING! oil and seat the piston ringproperly. If you skip thisprocedure and run the saw at full throttle,severe damage to the engine can occur.IMPORTANT: OIL TANK MUST BE FULLAlthough the chain will not turn at idle and no bar andchain oil will be pumped, this break in procedure mustbe performed with the bar and chain installed andthe bar and chain oil tank filled. Also, be sure the chainbrake remains disengaged throughout this procedure.To perform the initial engine break in, start the saw and let it idlethrough a complete tank of fuel. It is advisable to briefly operatethe saw at 3/4 throttle periodically during this procedure to clearout unburned fuel.WARNING!During break-in do not runthe engine at full throttle formore than 2 seconds orengine damage may occur.This is an initial engine break in only. The engine will not becompletely broken in until it has been operated through severaltanks of fuel.NOTECutting clean wood; plywood, trees, etc. (no nails or roofingmaterial) during the chain stretching procedure and/ orengine break in procedure will decrease the required time andresult in a more complete break in. If you do cut clean woodduring these procedures make sure you do not exceed3/4 throttle (75% maximum engine speed).
CUTTERS EDGE FIRE RESCUE SAWS/12CUTTERS EDGE ® D-6 & D-8 TOOL-LESSGUARD/DEPTH GAUGE ®Installation, Operation & Maintenance(1) Outer Section(2) Inner Section(5) Safety Lanyard(4) Safety Pin(3) Adjusting Knob with WasherGuard/Depth Gauge Parts(1) Outer Section(2) Inner Section(3) Adjusting Knob with Washer(4) Safety Pin(5) Safety LanyardCUTTERS EDGE ® Tool-less D-8 & D-6Guard/Depth Gauge ®The <strong>Cutters</strong> <strong>Edge</strong> Tool-less GUARD/DEPTH GAUGE ®has been designed, engineered and carefully tested toprovide increased safety and efficiency in firefightingand rescue applications.In its fully extended position, the Guard/Depth Gaugecompletely covers the guide bar and cutting chain,protecting the operator from accidental contact withthe chain. Even when retracted and set for specificdepths of cut, the Guard/Depth Gauge covers all butthe chain exposed for cutting.The Guard/Depth Gauge allows you to set a specificdepth of cut to prevent cutting any deeper than isabsolutely necessary. This prevents possibleFig. 17.weakening of the roof structure and preventsexposure to hidden hazards like electricalwiring and pipes.These Guard/Depth Gauge features aredesigned to provide the operator withincreased confidence resulting in faster cutswith less worry. The operator can concentratemore on cutting position, fire behavior andthe surrounding fire rescue environment.Of course, as with any tool, it is only as safeas its operator. You must be careful to take allnecessary safety precautions and to follow allsafe operating procedures.These instructions are intended to help youinstall and safely utilize the <strong>Cutters</strong> <strong>Edge</strong>Tool-Less Guard/Depth Gauge ® , whether youare installing it on a new <strong>Cutters</strong> <strong>Edge</strong> <strong>Saw</strong> orupgrading an older <strong>Cutters</strong> <strong>Edge</strong> <strong>Saw</strong>.Take the time to read these instructionscarefully. Familiarize yourself with the partsand components of the Tool-LessGuard/Depth Gauge ®
13/CUTTERS EDGE FIRE RESCUE SAWSInstalling The Tool-LessGuard/Depth Gauge ®The Inner SectionPlace the inner section over the chain andguide bar, sliding the mounting slots (A) ontothe locking key (B) and mounting bolt (C) onthe guard deflector. Push down to lock inplace. (Fig. 18 & 19).(A)(C)(B)Fig. 18. Slide mounting slots (A) onto locking key (B)and bolt (C)The Guard/Depth Gauge Outer SectionWith Lanyard and Quick Release SafetyPin (Fig. 20)Place the outer section onto the guide bar andslide it over the inner section. Insert the safetypin into the hole on the guard deflector, abovethe locking key. Insert the Adjustment knobshaft through the slot in the outer section andscrew into the threaded hole.Fig. 19 . Push down to lock in placeSafety PinAdjustment KnobFig. 20 . Completed Installation
CUTTERS EDGE FIRE RESCUE SAWS/14Operation of the Tool-LessGuard/Depth Gauge ®(Fig. 21) To adjust the Guard/Depth Gauge, if the sawis running, first set the saw’s chain brake. Loosen theadjusting knob and slide the outer section to the desiredsetting. Retighten the adjusting knob and release thechain brake.IMPORTANT: In its fully extendedposition, the Guard/Depth Gauge completely covers thecutting chain. Thus, you can now start the saw onthe ground and carry it up to the roof or to your cuttingposition while it is running.This eliminates the need to restart the saw after you are inposition and assures a warmed up, operational saw.Cutting Deeper than the Guard/Depth Gauge ® SettingEven with the Guard/Depth Gauge set to a pre-determineddepth you can increase the depth of your cut withoutchanging the setting by increasing the angle of the saw inrelation to the roof surface. While cutting at the standard45º angle (Fig. 22), the saw will cut to the depth indicated onthe depth of cut scale. But by raising the angle of the sawto 90º (Fig. 23), you can cut up to .414 inch (10.5mm)deeper for every one inch (25.4mm) indicated on thedepth of cut scale.Removing the Tooless Guard Depth Gauge(1) Remove the adjustment knob.(2) Pull off the outer section. (Safety pin willrelease as you pull outer section off)(3) Remove the inner section by pulling up from thelocking key. (Fig 18 - See page 13)Cleaning the Guard/Depth GaugeIt is important that the Guard/Depth Gauge be cleanedand inspected after each use. To clean the Guard/DepthGauge, simply remove it, wipe off all inner and outersurfaces and reinstall on the saw. Cleaning may alsobe done with solvent in a parts washer.Fig. 21. Set to the desired depth of cut.45ºFig. 22. Depth of cut at 45º90ºFig. 23. Depth of cut at 90ºWARNING!Before setting theGuard/Depth Gauge Engagethe Chain BrakeNote the increased depth of cut inFig. 23 at a 90º cutting angle
15/CUTTERS EDGE FIRE RESCUE SAWSPart Two:MAINTENANCEAfter each use, your <strong>Cutters</strong> <strong>Edge</strong> <strong>Fire</strong> <strong>Rescue</strong> <strong>Saw</strong>should be cleaned and inspected. We recommendyou develop a departmental standard operationprocedure (SOP) for periodic inspection, testing andmaintenance of your <strong>Fire</strong> <strong>Rescue</strong> <strong>Saw</strong>.WARNING!Failure to clean the saw aftereach use can lead to a loss ofperformance, engine failure andpremature wear.CLEANINGFig. 24. Thoroughly clean the clutch coverRemove the clutch cover. Inspect it and clean allforeign matter and debris from it (Fig. 24).THE CHAINRemove the chain and inspect it closely. (Fig. 25)THE BULLET ® CHAIN COMPONENTS (Fig. 26)Note: The BULLET ® CHAIN is designed to allowchips of carbide to break away under normal use.If six or more cutters have 50% or more of thecarbide missing you should have the chainrepaired and sharpened. Do not judge the usabilityof the BULLET ® CHAIN on visual appearance alone.The only true determination should be made onhow it cuts. If you are in doubt, make a test cut todetermine the chain’s performance.CHAIN REPAIR AND SHARPENINGContact your local <strong>Cutters</strong> <strong>Edge</strong> Distributor orreturn your chain to <strong>Cutters</strong> <strong>Edge</strong>:<strong>Cutters</strong> <strong>Edge</strong>1435 Manzanita DriveJulian, CA 92036 U.S.A.Contact <strong>Cutters</strong> <strong>Edge</strong> for return InstructionsTel: 760-765-0597Fax: 760-765-0594E-mail: repair@cuttersedge.comWe recommend you keep a minimumof two chains for each saw.Fig. 25. Inspect the chain(1) Carbide Tip(10)Top Plate(9) Side Plate(2) Gullet(3) Depth Gauge Bullet(8) Safety Groove(4) Side Plate(7) Rivet Hole(6) Heel (5) Toe(15) Preset Tie Strap(14) Right Hand Cutter](11) Left Hand Cutter(12) Drive Link(13)Tie StrapFig. 26. Components of the BULLET ® CHAIN
CUTTERS EDGE FIRE RESCUE SAWS/16THE GUIDE BARRemove the guide bar and wipe debris from it.Clean out the chain groove using a bar cleaning toolor a putty knife (Fig. 27). If there is excess tar ordebris buildup on the bar, clean it off with solvent.Fig. 27. Cleaning bar grooveIt is also important to thoroughly clean the oil holeson both sides of the guide bar. (Fig. 28 )After cleaning the bar, lubricate the bearings in thesprocketnose (Fig. 29) with the grease and greasegun provided with each saw.Fig. 28. Cleaning oil holes on guide barFig. 29. Lubricating sprocket bearingsWhen you reinstall the guide bar, flip the guide barover so the edge that was on the bottom is now onthe top. This allows even wear to the guide bar rails.Reference the logo position each time the bar isreinstalled (Fig. 30)Fig. 30. Reference logo position each timeyou reinstall the guide bar.
17/CUTTERS EDGE FIRE RESCUE SAWSTHE POWER HEADInspect and clean the power head. (Fig. 31)Wipe all debris and foreign matter from the powerhead, making sure to clean carefully around theclutch.Make sure the oil slot on the power head is clear andopen. Use a bar cleaning tool or a small screwdriverto remove any debris from this slot. (Fig. 32)THE AIR FILTERSRemove the foam pre-wrap air filter from thesaw (Fig. 33). Wash the pre-wrap with soapywater, rinse with clean water and squeeze dry.The main filter element is coated at the factory andneeds no oiling prior to its first use. The main filterelement needs to be cleaned only if there issubstantial buildup of debris. To remove the mainfilter, loosen the filter clamp with a screwdriver or thescrench tool. (Fig. 34)Note: Pull out the choke to close the butterflybefore removing the main filter. This will preventforeign objects from entering the carburetor afteryou have removed the filter.Fig. 31. Power HeadFig. 32. Carefully clean out the oil slotClean the main filter element with soap and water,rinse with clean water and allow to thoroughly dry. Itis important that the main filter element is thoroughlydry. When dry, recoat main filter element with thefilter oil provided with the saw. Spray filter oil onlyaround the exterior of the filter. Do not spray oil insidethe filter element.WARNING!Do not use solvents to clean,or compressed air to dry thefilter as this may damage thefilter element.IMPORTANT! It may take up an to hour forthe main filter element to thoroughly dry, dependingon the weather. NOTE: It is a goodidea to have a spare filter. Drying time can be overan hour and the extra filter can get your sawback in service faster.Fig. 33. Removethe Pre-filterFig. 34 Main filterclamp screw
CUTTERS EDGE FIRE RESCUE SAWS/18CLEANING THE COOLING FINSON THE CYLINDERRemove the carburetor compartment cover by firstopening the two carburetor compartment latches(1 & 2) and remove the top of the compartment thatincludes the main filter. Next, loosen the twoscrews; A & B. Then loosen the one cylinder headcover screw, C. (Fig. 35)Remove the cylinder head cover. Check the coolingfins (Fig. 36) for excess buildup of tar and debris. Ifnecessary, scrape clean or clean with a solvent.(C)(1)(B)(2)(A)WARNING!The heat exchanging action of thecooling fins is critical to cooling theengine. If the fins are coated withtar or blocked by debris over heatingand engine damage can occur!Fig. 35. The top cover with filter removedREASSEMBLYWhen you have completed all maintenanceprocedures, reassemble the saw paying attentionto flip the guide bar over before you reassemblethe saw.Flip the guide bar each time you reassemble thesaw. This provides even wear on the guide bar.Reference the logo position each time the bar isflipped (Fig. 30 - See page 16).For specific engine adjustments and settings,consult the accompanying chainsaw operationsmanual.Fig. 36. Cylinder cooling finsFINAL MAINTENANCE CHECKWhen the maintenance and cleaning is completedcheck to make sure all nuts and screws are properlyretightened. Start and run the saw briefly.Shut off and store for its next use.
19/CUTTERS EDGE FIRE RESCUE SAWSIMPORTANT! THINK!...IS WHAT I AM ABOUT TO DO SAFE?Read and follow all instructions for the proper setup, operation and maintenance ofyour <strong>Cutters</strong> <strong>Edge</strong> <strong>Fire</strong> <strong>Rescue</strong> <strong>Saw</strong>. Be alert while using your saw, and alwaysstrictly observe all safety procedures.<strong>Cutters</strong> <strong>Edge</strong> <strong>Fire</strong> <strong>Rescue</strong> <strong>Saw</strong>s are designed specifically for fire department use and areexceptional tools. However, as with all tools, they have their limitations. With proper care, andespecially common sense, your <strong>Cutters</strong> <strong>Edge</strong> <strong>Fire</strong> <strong>Rescue</strong> <strong>Saw</strong> will give you many years ofoutstanding performance and reliability.If you should have questions about the operation and/or maintenance of your<strong>Cutters</strong> <strong>Edge</strong> <strong>Fire</strong> <strong>Rescue</strong> <strong>Saw</strong>, call ourService Department at 1-800-433-3716 or (760) 765-0597.
CUTTERS EDGE FIRE RESCUE SAWS/20CUTTERS EDGE FIRE RESCUE SAW SPECIFICATIONS..MODEL #CE-2165-RSENGINECUTTING CHAINTYPE: Single-cylinder 2-cycle, with loop scavenging STYLE: CUTTERS EDGE BULLET® CHAINDISPLACEMENT: 4.0 cu. in. (65.1cc) TYPE: Carbide Tipped with “Locking Key”BORE: 1.89 in. (48mm) and Solid Bullet Raker GaugeSTROKE: 1.4 in (36mm) DESIGN: Patented <strong>Fire</strong> <strong>Rescue</strong> Design…U.S. Patent No. 5,056,395COMPRESSION RATIO: 9.4:1 SIZE: .404”Pitch x .063” GaugeBEARINGS: Heavy-duty deep-groove ball bearings on with .068 “Drive Links (coined to .063”)crankshaft, needle cage bearings onHeavy Duty Tie Straps, Tempered Rivets and .068”Hubsconnecting rod, piston pin and clutch CERTIFICATION: Meets or exceeds ANSI and OSHA standardsCYLINDER/PISTON: Open ported single ring design,Certified according to ISO 9518 Standards aswith four transfer ports“Extremely Low Kickback”CYLINDER MATERIAL: NikasilMAX ENGINE SPEED: No load…12,500 RPMCUTTING CHAIN LUBRICATION SYSTEMHORSEPOWER: 5.06hp (DIN) TYPE: Fully automatic, adjustableDRIVE SYSTEM: Geared to Centrifugal ClutchIGNITION SYSTEM LUBRICANT: <strong>Cutters</strong> <strong>Edge</strong> “High Tack” Bar & Chain OilTYPE: Electronic, one piece modular, CD or High Quality Bar & Chain OilBRAND: FHP OIL TANK CAPACITY:14.24 fl.oz. (0.42 liters)SPARK PLUG: Champion CJ7Y or equivalentGAP: 0.020 in. (0.5mm) HANDLESTYPE:Front/Top…Full WrapSTARTING SYSTEM(For ease of use with gloves, from either side of saw)ONE STEP STARTING SYSTEM WITHRubber coated for sure gripCOMPRESSION RELEASERear…Flared base for kickback guard. Full isolationComprised of…anti-vibrationMomentary contact switchCombined choke/throttle lock withVIBRATION LEVELSThrottle safety guard *FRONT HANDLE m/s 2 : Idling 3.1Racing 2.6AIR FILTRATION *REAR HANDLE m/s 2 : Idling 1.8SYSTEM: “RAM-AIR INDUCTION” Racing 3.84-stage external mount with oil tack barrier SILENCING MUFFLER:SURFACE AREA: 211.4 sq.in.effective filtration surface area Oversize, top ported, low restriction with fire screenMICRON RATING:
21/CUTTERS EDGE FIRE RESCUE SAWSCUTTERS EDGE FIRE RESCUE SAW SPECIFICATIONS..MODEL #CE-2171-RSENGINECUTTING CHAINTYPE: Single-cylinder 2-cycle, with loop scavenging STYLE: CUTTERS EDGE BULLET ® CHAINDISPLACEMENT: 4.3 cu.in. (70.7cc) TYPE: Carbide Tipped with “Locking Key”BORE: 1.97 in. (50mm) and Solid Bullet Raker GaugeSTROKE: 1.4 in (36mm) DESIGN: Patented <strong>Fire</strong> <strong>Rescue</strong> Design…U.S. Patent No. 5,056,395COMPRESSIONRATIO: 10.2:1 SIZE: .404”Pitch x .063” GaugeBEARINGS: Heavy-duty deep-groove ball bearings on with .068 “Drive Links (coined to .063”)crankshaft, needle cage bearings onHeavy Duty Tie Straps, Tempered Rivets and .068”Hubsconnecting rod, piston pin and clutch CERTIFICATION: Meets or exceeds ANSI and OSHA standardsCYLINDER/PISTON: Closed ported, dual rings with four transfer ports Certified according to ISO 9518 Standards asCYLINDER MATERIAL:Nikasil“Extremely Low Kickback”MAX ENGINE SPEED: No load…13,500 RPMHORSEPOWER: 5.67hp (DIN) CUTTING CHAIN LUBRICATION SYSTEMTYPE:Fully automatic, adjustableIGNITION SYSTEM DRIVE SYSTEM: Geared to Centrifugal ClutchTYPE: Electronic, one piece modular, CD LUBRICANT: <strong>Cutters</strong> <strong>Edge</strong> “High Tack” Bar & Chain OilBRAND: FHP or High Quality Bar & Chain OilSPARK PLUG: Champion CJ7Y or equivalent OIL TANK CAPACITY: 14.24 fl.oz. (0.42 liters)GAP:0.020 in. (0.5mm)HANDLESSTARTING SYSTEM TYPE: Front/Top…Full WrapONE STEP STARTING SYSTEM WITH(For ease of use with gloves, from either side of saw)COMPRESSION RELEASERubber coated for sure gripComprised of…Rear…Flared base for kickback guard. Full isolation anti-Momentary contact switchvibrationCombined choke/throttle lock withThrottle safety guardVIBRATION LEVELS*FRONT HANDLE m/s 2 : Idling 3.4AIR FILTRATION Racing 2.2SYSTEM: “RAM-AIR INDUCTION” *REAR HANDLE m/s 2 : Idling 1.8TYPE: 4-stage external mount with oil tack barrier Racing 3.8SURFACE AREA: 211.4 sq.in. effective filtration surface area (*see Note 2)MICRON RATING:
CUTTERS EDGE FIRE RESCUE SAWS/22As Limited Below,CUTTERS EDGE LIMITED WARRANTYEffective 7-1-92<strong>Edge</strong> Industries, Inc., warrant to the original retail purchaser that this <strong>Cutters</strong> <strong>Edge</strong> <strong>Saw</strong> is free from defects in materials andworkmanship and agree to repair and/or replace any defective saw part or component free of charge as follows:1. Parts other than electronic ignition partsAt no cost to the original retail purchaser, <strong>Edge</strong> Industries, Inc., will replace defective parts supplied or manufacturedby <strong>Edge</strong> Industries, Inc.:A. For one year from date of original purchase when used for fire department applications.B. For 30 days from date of original purchase when saw is used for commercial purposes, except as listed below in section 2.C. A saw is used for commercial purposes when it is used to derive income.2. Extended warranty:Selected saw models used commercially may have warranty extended.Electronic ignition parts:A. For six months from the date of original purchase, <strong>Edge</strong> Industries, Inc., will replace any defective electronic ignition partssupplied or manufactured by <strong>Edge</strong> Industries, Inc. at no cost to the original purchaser.B. For a period starting six months and ending one year after the original retail purchase, <strong>Edge</strong> Industries, Inc., will replace anydefective electronic ignition parts supplied or manufactured by <strong>Edge</strong> Industries, Inc., at a charge to the original purchaser of50% of <strong>Edge</strong> Industries suggested retail price.Engine parts:A. For six months from date of original purchase, <strong>Edge</strong> Industries, Inc., will replace any defective engine part supplied ormanufactured by <strong>Edge</strong> Industries, Inc. at no cost to the original purchaser subject to the limitations of paragraph 5 below.B. Engine parts are limited to cylinder assembly, crankshaft, crankcase and flywheel.3. Labor:For 30 days from the date of original purchase, an authorized <strong>Edge</strong> Industries, Inc. dealer will provide labor at no charge to theoriginal retail purchaser for the replacement of any defective part supplied or manufactured by <strong>Edge</strong> Industries, Inc.4. Grantor of Warranty:<strong>Edge</strong> Industries, Inc. • 1435 Manzanita Drive , Julian, CA 92036 U.S.A. • 760-765-05975. Limitations of Warranty:This warranty is not transferable, does not cover damage caused by unreasonable use or damage resulting from other thandefects in material or workmanship, does not cover damages contributed to by a failure to provide reasonable and necessarymaintenance, does not cover engine failure due to lack of or improper lubrication. Tune-ups or replacement of non-defective partssuch as mounts, starter springs, ropes, spark plugs, and filters that may be expected to wear out with reasonable use during thewarranty period are not covered. This warranty applies only to saws sold through dealers appointed by <strong>Edge</strong> Industries, Inc.THE WARRANTOR WILL BE LIABLE FOR NO INCIDENTIAL OR CONSEQUENTIAL DAMAGES. THERE ARE NO EXPRESSWARRANTIES OTHER THAN THOSE SET FORTH ABOVE. ANY WARRANTY IMPLIED BY STATE LAW WHETHERMERCHANTABILITY OR FITNESS FOR A PARTICULAR PURPOSE OR OTHERWISE SHALL BE EFFECTIVE ONLY FORTHE DURATION OF THE APPLICABLE WARRANTY PERIOD LISTED ABOVE. Some states do not allow exclusions of incidentalor consequential damages and/or limitations on how long an implied warranty lasts, so the above exclusions and limitations mayapply to you.6. Responsibilities of the purchaser under this Warranty:A. To deliver or ship the saw covered under this Warranty to the dealer from whom it was originally purchased or to an <strong>Edge</strong>Industries, Inc., authorized service center. Time limits on warranties are measured to the date of delivery or shipment.B. Freight costs, if any, will be borne by the purchaser.C. To provide reasonable care and maintenance of the <strong>Edge</strong> Industries, Inc., product.7. Timely repair of warranted product:Any product which qualifies under this Warranty shall be repaired in a timely manner, consistent with the normal work flow at theservicing location and depending on the availability of replacement parts.8. Purchaser rights and remedies:This Warranty gives you specific legal rights. You may also have other rights, which vary from state to state. If you do not receivesatisfactory results from authorized servicing stations, you may contact <strong>Edge</strong> Industries, Inc., Customer Relations Department,P.O. Box 1179, Julian, CA. 92036.
Division of <strong>Edge</strong> Industries, Inc.<strong>Cutters</strong> <strong>Edge</strong> OfficesP.O. Box 8463855 23rd StreetBaker City, Oregon 97814Telephone: 541-524-9999Fax: 541-524-9996Email info@cuttersedge.comEast Coast Service CenterEastern <strong>Fire</strong> Equipment Services326 Pleasant View Rd.New Cumberland, PA 17070Tel: 717-412-7746Email: office@efesinc.comwww.cuttersedge.com


