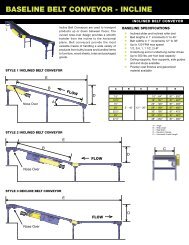
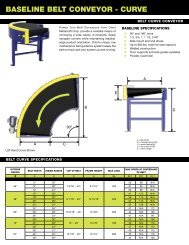
FMDR Technical Handbook.pdf - Omni Metalcraft Corp.
FMDR Technical Handbook.pdf - Omni Metalcraft Corp.
FMDR Technical Handbook.pdf - Omni Metalcraft Corp.

Create successful ePaper yourself
Turn your PDF publications into a flip-book with our unique Google optimized e-Paper software.
<strong>FMDR</strong> TECHNICAL HANDBOOK 2014.1<strong>FMDR</strong> TECHNICAL HANDBOOK 2014.1
FLAT MOTOR DRIVEN ROLLER CONVEYOR STRAIGHT AND CURVE TECH HANDBOOKTABLE OF CONTENTSTABLE OF CONTENTS .................................................................................................................................. 2, 3GENERAL SAFETY STATEMENTS .................................................................................................................. 4-Introduction ..................................................................................................................................................... 4-Cautions, Warnings and Hazards ..................................................................................................................... 4SAFETY INFORMATION ............................................................................................................................... 5-Safety Labels .................................................................................................................................................... 5, 6-Installation Safety ............................................................................................................................................ 7-Electrical Safety ................................................................................................................................................ 8-Operational Safety ........................................................................................................................................... 9-Maintenance and Service Safety...................................................................................................................... 10, 11RECEIVING AND INSPECTION ...................................................................................................................... 12-Returns, Damages and Shortages ................................................................................................................... 12-Removal of Crating .......................................................................................................................................... 12GENERAL INSTALLATION ............................................................................................................................ 13-Checking Unit Squareness ................................................................................................................................ 13-Coupling / Attaching Bed Sections .................................................................................................................. 14LEG SUPPORTS AND INSTALLATION............................................................................................................ 15-Permanent Installation of Legs ........................................................................................................................ 15-Leg Adjustments .............................................................................................................................................. 15KNEE BRACES, CASTERS AND CEILING HANGERS ........................................................................................ 16-Installing Knee Braces and Casters .................................................................................................................. 16-Installing Ceiling Hangers ................................................................................................................................. 17MULTI-TIER SUPPORTS ............................................................................................................................... 18-Installation of Multi-Tier Supports ................................................................................................................... 18ZERO-PRESSURE CONTROLS ....................................................................................................................... 19-Overview ......................................................................................................................................................... 19, 20-Flat Motor ........................................................................................................................................................ 21-Universal Control Flat Motor ZPA Module ....................................................................................................... 22, 23-Sensor .............................................................................................................................................................. 24-Communication Wiring .................................................................................................................................... 25POWER SUPPLY ................................................................................................................................................ 26-Power Distribution Wiring ............................................................................................................................... 26-30-Entry Zone ........................................................................................................................................................ 31, 32-Exit Zone .......................................................................................................................................................... 33-Transport Zone................................................................................................................................................. 34-Remote/Slave Zone .......................................................................................................................................... 35-Manual Zone .................................................................................................................................................... 36DRIVER CONTROLS MODULE ...................................................................................................................... 37-Overview .......................................................................................................................................................... 37-Universal Control Flat Motor Driver Module ................................................................................................... 38, 39-Power Distribution Wiring ............................................................................................................................... 40- I/O Connections .............................................................................................................................................. 41, 42-Preparing for Initial Start-Up............................................................................................................................ 43MAINTENANCE ........................................................................................................................................... 44-Maintenance Schedules ................................................................................................................................... 44<strong>FMDR</strong> TECHNICAL HANDBOOK 2014.12
FLAT MOTOR DRIVEN ROLLER CONVEYOR STRAIGHT AND CURVE TECH HANDBOOKTABLE OF CONTENTS (Continued)-Report on Miscellaneous Maintenance Performance ..................................................................................... 45TROUBLESHOOTING AND REPLACEMENT PARTS ........................................................................................ 46-Troubleshooting .............................................................................................................................................. 46, 47-LED Start-Up Sequence .................................................................................................................................... 48PARTS LISTS ................................................................................................................................................ 49-<strong>FMDR</strong> Straight .................................................................................................................................................. 49-<strong>FMDR</strong> Curve ..................................................................................................................................................... 50NOTES ........................................................................................................................................................ 51WARRANTY ................................................................................................................................................ 52<strong>FMDR</strong> TECHNICAL HANDBOOK 2014.13
FLAT MOTOR DRIVEN ROLLER CONVEYOR STRAIGHT AND CURVE TECH HANDBOOKGENERAL SAFETY STATEMENTSIMPORTANTREQUIRED READING!¡IMPORTANTE!¡LECTURA OBLIGATORIA!To ensure this quality product is safely and correctly utilized, all instructions within this manual must be read andunderstood prior to equipment start-up. Be aware of all safety labels on machinery. If you do not understand anyof the safety instructions or feel there may be safety labels missing, contact your supervisor or productsupplier immediately!Para garantizar que este producto de calidad se utilice correctamente y con seguridad, es necesario leer ycomprender las instrucciones incluidas en este manual, antes de comenzar a utilizar el equipo. Esté atento atodas las etiquetas de seguridad que se encuentran en las máquinas. Si no entiende alguna de las instruccionesde seguridad o considera que faltan algunas etiquetas de seguridad, ¡comuníquese inmediatamente con susupervisor o proveedor del producto!COMPLIANCE WITH SAFETY STANDARDSCompliance with safety standards, including federal, state and local codes or regulations is the responsibility of the conveyorpurchaser(s). Placement of guards, safety labels and other safety equipment is dependent upon the area and use to which thesystem is applied. A safety study should be made of the conveyor application by the purchaser(s). It is the purchaser’sresponsibility to provide any additional guards, safety labels or other safety equipment deemed necessary based on thissafety study.The information contained in this safety manual is correct at the time of printing. Due to the continuing development ofproduct lines, changes in specifications are inevitable. The company reserves the right to implement such changes withoutprior notice.If you suspect fire hazards, safety hazards, dangers towards health or any other job safety concerns,consult your federal, state or local codes.Certain safety information in this document was reprinted from ASME B20.1-2000 by permission of TheAmerican Society of Mechanical Engineers. All rights reserved.Inspect equipment for safety labels. Make sure personnel are aware of and follow safety instructions.Maintain an orderly environment in the vicinity of the conveyor at all times. Clean up spilled materials orlubricants immediately.All personnel shall be instructed regarding the necessity for continuous care and attention to safetyduring the operation of a conveyor. They must be trained to identify and immediately report all unsafeconditions or practices relating to the conveyor and its operation.Know your company’s machine specific Lockout / Tagout procedure. Do Not perform maintenance untilelectrical disconnect has been turned off!Replace all safety devices, guards and guarding prior to equipment start-up.References used for safety instructions in this manual are from: Conveyor Equipment Manufacturers Association (CEMA) and TheAmerican Society of Mechanical Engineers (ASME)4<strong>FMDR</strong> TECHNICAL HANDBOOK 2014.1
FLAT MOTOR DRIVEN ROLLER CONVEYOR STRAIGHT AND CURVE TECH HANDBOOKSAFETY INFORMATION: SAFETY LABELSSafety labels have been placed at various points on the equipment to alert everyone of potential dangers. Inspectequipment for proper position of safety labels and make sure all personnel are aware of the labels and obey theirwarnings. As mentioned in the previous section, a safety study should be made of the conveyor application by thepurchaser(s). It is the purchaser’s responsibility to provide any additional guards, safety labels or other safetyequipment deemed necessary based on this safety study. The following pages contain typical safety labels thatmay have been attached to your equipment.#110479 ( 5” x 2 1/2” )Placed on terminating ends (both ends) where there are exposedmoving parts which must be unguarded to facilitate function, i.e.rollers, pulleys, shafts, chains, etc.#113529 (5” X 2 1/2” )Placed next to drive (both sides) to warn personnel that the lineshaftconveyor utilizes a rotating shaft which may be hazardous if hair or looseclothing become entangled around the rotating shaft. Also used on anyother conveyors where the exposed shaft may create similar hazards.#111744 (5” X 2 1/2” )General warning to personnel that the equipment’s moving parts,which operate unguarded by necessity or function, i.e., air cylinders,etc., create hazards to be avoided.#110478 ( 5” X 2 1/2” )Placed on all chain guards to warn that operation of the machinery withguards removed would expose chains, belts, gears, shafts, pulleys,couplings, etc. which create hazards.#111752 ( 5” X 2 1/2” )Placed on max. of 20’ centers (both sides) along conveyors whichprovide surfaces and profiles attractive, but hazardous, for climbing,sitting, walking or riding.#113513 ( 5” X 2 1/2” )Placed on chain guard base so label is visible when guard cover is removed.#113528 ( 5” X 2 1/2” )Placed next to drive (both sides) to warn maintenance personnel thatconveyors must be shut off and locked out prior to servicing. Examples:drives, take-ups, and lubrication points, which require guard removal.#111870 ( 5” X 3” )General warning of pinch point hazards.<strong>FMDR</strong> TECHNICAL HANDBOOK 2014.15(Continued on next page)
FLAT MOTOR DRIVEN ROLLER CONVEYOR STRAIGHT AND CURVE TECH HANDBOOKSAFETY INFORMATION: SAFETY LABELS (Continued)#111750 ( 1 3/4” x 1 1/4” )Generally placed on smaller guards toalert personnel of potential danger ifguard is removed and power is notlocked out.#111749 ( 3” x 1 1/4” )Placed on shipping brace which stabilizesequipment during shipping. Brace must beremoved before operating! May cause severeinjury if not removed.#110491 (10” x 7” )Placed on equipment where conveyors maystart without warning.<strong>FMDR</strong> TECHNICAL HANDBOOK 2014.16
FLAT MOTOR DRIVEN ROLLER CONVEYOR STRAIGHT AND CURVE TECH HANDBOOKSAFETY INFORMATION: INSTALLATION SAFETY1) LOADING / UNLOADINGHave trained personnel load or unload equipment. The conveyor must be properly handled when transferringfrom the unloading area to final site location to prevent damage.2) GUARDS / GUARDINGInterfacing of Equipment. When two or more pieces of equipment are interfaced, special attention shall begiven to the interfaced area to ensure the presence of adequate guardingand safety devices.Guarding Exceptions. Wherever conditions prevail that would requireguarding under this standard but such guarding would render the conveyorunusable, seek guidance from your safety professional.3) ANCHORINGDO NOT operate conveyor unless it is properly anchored. Serious injury or death may result.4) SAFETY WARNINGInstall all safety devices, guards and guarding prior to equipment start-up.<strong>FMDR</strong> TECHNICAL HANDBOOK 2014.17
FLAT MOTOR DRIVEN ROLLER CONVEYOR STRAIGHT AND CURVE TECH HANDBOOKSAFETY INFORMATION: ELECTRICAL SAFETY1) ELECTRICAL CODEAll electrical installations and wiring shall conform to federal, state and local codes.When conveyor operation is not required for a maintenance procedure,electrical power must be turned off and locked / tagged out following yourcompany’s machine specific procedure.2) CONTROL STATIONControl stations should be so arranged and located that the operation of the affected equipment is visible fromthem. Control stations shall be clearly marked or labeled to indicate the function controlled.A conveyor that would cause injury when started shall not be started until personnel in the area are alerted by asignal or by a designated person that the conveyor is about to start.Where system function would be seriously hindered or adversely affected by the required time delay, or where theintent of the warning may be misinterpreted (i.e., a work area with many different conveyors and allied devices), aclear, concise and legible warning sign needs to be provided. The warning sign shall indicate that conveyors andallied equipment may be started at any time, that danger exists and that personnel must keep clear. Thesewarning signs shall be provided along the conveyor at areas not guarded by position or location.Remotely and automatically controlled conveyors, and conveyors where operator stations are not manned or arebeyond voice or visual contact from drive areas, loading areas, transfer points and other potentially hazardouslocations on the conveyor path not guarded by location, position or guards shall be furnished with emergency stopbuttons, pull cords, limit switches or similar emergency stop devices.All such emergency stop devices shall be easily identifiable in the immediate vicinity of such locations unlessguarded by location, position or guards. Where the design, function and operation of such conveyor clearly is nothazardous to personnel, an emergency stop device is not required.The emergency stop device shall act directly on the control of the conveyor concerned and shall not depend on thestopping of any other equipment. The emergency stop devices shall be installed so that they cannot be overriddenfrom other locations.Inactive and unused actuators, controllers and wiring should be removed from control stations and panel board,together with obsolete diagrams, indicators, control labels and other material that might confuse the operator.3) SAFETY DEVICESAll safety devices, including wiring of electrical safety devices, shall be arranged to operate such that a powerfailure or failure of the device itself will not result in a hazardous condition.4) EMERGENCY STOPS AND RESTARTSConveyor controls shall be so arranged that, in case of emergency stop, manual reset or start at the locationwhere the emergency stop was initiated shall be required for the conveyor(s) and associated equipment to resumeoperation.Before restarting a conveyor that has been stopped because of an emergency, an inspection of the conveyor shallbe made and the cause of the stoppage determined. The starting device and electrical power must be turned offand locked / tagged out according to your company’s machine specific procedure before any attempt is made toremove the cause of the stoppage, unless operation is necessary to determine the cause or to safely remove thestoppage.5) SAFETY WARNINGReplace all safety devices, guards and guarding prior to equipment start-up.8<strong>FMDR</strong> TECHNICAL HANDBOOK 2014.1
FLAT MOTOR DRIVEN ROLLER CONVEYOR STRAIGHT AND CURVE TECH HANDBOOKSAFETY INFORMATION: OPERATIONAL SAFETYOnly trained, qualified personnel shall be permitted to operate a conveyor. Training shall include instruction inoperation under normal conditions and emergency situations.Where safety is dependent upon stopping / starting devices, they shall be kept free of obstructions to permitaccess.The area around loading and unloading points shall be kept clear of obstructions that could endanger personnel.Do not ride the load-carrying element of a conveyor under anycircumstances, unless the conveyor is designed and equipped withsafety and control devices intended to carry personnel. For noreason shall a person ride any element of a vertical conveyor.Warning labels reading “DO NOT RIDE CONVEYOR” shall beaffixed by the owner of the conveyor.Personnel working on or near a conveyor shall be instructed as to the location and operation of pertinentstopping devices.A conveyor shall be used to transport only a load that it is designed to handle safely.Under no circumstances shall the safety characteristics of the conveyor be altered.Routine inspections and preventative and corrective maintenance programs shall be conducted to ensurethat all safety features and guards are retained and function properly. Inspect equipment for safety labels. Makesure personnel are aware of and follow safety label instructions.Alert all personnel to the potential hazard of entanglement inconveyors caused by items such as long hair, loose clothing andjewelry.SAFETY WARNINGReplace all safety devices, guards and guarding prior toequipment start-up.<strong>FMDR</strong> TECHNICAL HANDBOOK 2014.19
FLAT MOTOR DRIVEN ROLLER CONVEYOR STRAIGHT AND CURVE TECH HANDBOOKSAFETY INFORMATION: MAINTENANCE / SERVICE SAFETYELECTRICAL POWER MUST BE TURNED OFF AND LOCKED / TAGGED OU T followingyour company’s machine specific procedures when servicing conveyor to prevent accidentalrestarting by other persons or interconnecting equipment (when used).1) MAINTENANCE (REPAIR)Maintenance and service shall be performed by trained, qualified personnel only.Where lack of maintenance and service would cause a hazardous condition, the user shall establish amaintenance program to ensure that conveyor components are maintained in a condition that does notconstitute a hazard to personnel.No maintenance or service shall be performed when a conveyor is in operation. See “Lubrication” and“Adjustment or Maintenance During Operation” for exceptions.When a conveyor is stopped for maintenance or service, the starting devices, prime mover, poweredaccessories or electrical must be locked / tagged out in accordance with a formalized procedure designed toprotect all persons or groups involved with the conveyor against an unexpected restart. Personnel should bealerted to the hazard of stored energy, which may exist after the power source is locked out. All safetydevices and guards shall be replaced before starting equipment for normal operation.2) ADJUSTMENT OR MAINTENANCE DURING OPERATIONWhen adjustments or maintenance must be done while equipment is in operation, only trained, qualifiedpersonnel who are aware of the hazards of the conveyor in motion shall be allowed to make adjustments,perform maintenance or service.Conveyors shall NOT be maintained or serviced while in operation unless proper maintenance or servicerequires the conveyor to be in motion. If conveyor operation is required, personnel shall be made aware ofthe hazards and how the task may be safely accomplished.3) LUBRICATIONConveyors shall NOT be lubricated while in operation unless it is impractical to shut them down forlubrication. Only trained and qualified personnel who are aware of the hazards of the conveyor in motion shallbe allowed to lubricate a conveyor that is operating.Where the drip of lubricants or process liquids on the floor constitutes a hazard, drip pans or other means ofeliminating the hazard must be provided by purchaser(s).4) MAINTENANCE OF GUARDS AND SAFETY DEVICESGuards and safety devices shall be maintained in a serviceable and operational condition. Warning signs arethe responsibility of the owner of the conveyor and must be maintained in a legible / operational condition.<strong>FMDR</strong> TECHNICAL HANDBOOK 2014.110
FLAT MOTOR DRIVEN ROLLER CONVEYOR STRAIGHT AND CURVE TECH HANDBOOKSAFETY INFORMATION: MAINTENANCE / SERVICE SAFETY (Continued)5) INSPECTIONSRoutine inspections with preventative and /or corrective maintenance programs shall be conducted to ensurethat all safety features and devices are maintained and function properly.All personnel shall inspect for hazardous conditions at all times. Remove sharp edges or protruding objects.Repair or replace worn or damaged parts immediately.6) CLEANINGWhere light cleaning and/or casing cleaning are required, they shall be performed by trained personnel. Theconveyor electrical power must be turned off and locked / tagged out following your company’s machinespecific procedures. Special attention may be required at feed and discharge points.7) SAFETY WARNINGReplace all safety devices, guards and guarding prior to equipment start-up.<strong>FMDR</strong> TECHNICAL HANDBOOK 2014.111
FLAT MOTOR DRIVEN ROLLER CONVEYOR STRAIGHT AND CURVE TECH HANDBOOKRECEIVING AND INSPECTION: RETURNS, DAMAGES AND SHORTAGESUNCRATING CHECKLIST1) Compare the bill of lading with what you have received (including accessories).2) Examine the equipment for damage.3) Immediately report shortage or damages to the vendor and carrier.4) Obtain a signed damage report from the carrier and send a copy to the vendor.Do not attempt to modify or repair damaged equipment without authorization from vendor.Note:Do not return equipment to the factory without a written return authorization. Returns without writtenauthorization will not be accepted.Single sectionMultiple sectionsNote: Custom products may be crated differently to fit the conveyor design.MOTOR DRIVEN ROLLER CONVEYOR STRAIGHT AND CURVE TECH HANDBOOKRECEIVING AND INSPECTION: REMOVAL OF CRATINGAFTER COMPLETING THE “UNCRATING CHECKLIST”1) Remove crating and packaging.2) Look for boxes, accessories, bags or components such as fasteners, manuals, guard rails etc. that may bebanded or fastened to the crating material.Note: Make sure all fasteners, guards and essential components are not discarded.<strong>FMDR</strong> TECHNICAL HANDBOOK 2014.112
FLAT MOTOR DRIVEN ROLLER CONVEYOR STRAIGHT AND CURVE TECH HANDBOOKGENERAL INSTALLATION: CHECKING UNIT SQUARENESSSQUARINGFrame squareness can be checked by using a simple right angle square as shown or by measuring from the samepoints diagonally, corner to corner.Note:Make sure frames are square(as shown) or products willskew and tumble from theconveyor. Failure to squareframes may also causepremature conveyor wearand failure.<strong>FMDR</strong> TECHNICAL HANDBOOK 2014.113
FLAT MOTOR DRIVEN ROLLER CONVEYOR STRAIGHT AND CURVE TECH HANDBOOKGENERAL INSTALLATION: COUPLING / ATTACHING BED SECTIONSCOUPLING1) Prior to coupling the conveyor sections, make sure that the drive cards are all on the same side of eachconveyor.2) Couple the sections using bolts provided per the drawing below.Note:For ease of installation, mount legs on each conveyor section prior to coupling.<strong>FMDR</strong> TECHNICAL HANDBOOK 2014.114
FLAT MOTOR DRIVEN ROLLER CONVEYOR STRAIGHT AND CURVE TECH HANDBOOKLEG SUPPORTS AND INSTALLATIONPERMANENT INSTALLATION OF LEGSSecure leg supports to the floor utilizing the lag holes in the adjustable leg boot.SIDE FRAMESNote:Make sure the conveyor islevel by placing a level on theconveyor side frames. If theconveyor is not level, adjustthe legs appropriately asshown below.LAG HOLESLEG ADJUSTMENT: BOLT-TOGETHER LEGS1) The conveyor electrical power must be turned off andlocked / tagged out following your company’s machinespecific procedures.2) Remove all load from the conveyor.3) Position conveyor in the location to be installed.4) Support conveyor section with jack, hoist or forklift.5) Carefully loosen the fasteners within the slots.6) Lift or lower conveyor until it is at the desired height.7) Ensure that the conveyor is completely level. (referenceleveling note below)8) Tighten fasteners using torque appropriate for eachfastener’s size and grade. (grade 5 fasteners provided)HEX HEADCAP SCREWSPIVOTBRACKETUPRIGHTBOOTNote:Only qualified installationprofessionals should leveland install conveyor.<strong>FMDR</strong> TECHNICAL HANDBOOK 2014.115
FLAT MOTOR DRIVEN ROLLER CONVEYOR STRAIGHT AND CURVE TECH HANDBOOKKNEE BRACES, CASTERS AND CEILING HANGERS: INSTALLING KNEE BRACESINSTALLING KNEE BRACES1) After leg supports are set in place, attach thebrace bracket.2) Attach knee brace angle to the leg supportand brace bracket.(Knee brace angle may need to be cut, drilled andtrimmed for proper fit and to eliminateinterference with adjacent equipment)Note:Knee braces are recommended when theconveyor height exceeds 36” and/or whenadditional stability is needed.DETAIL DESCRIPTION1 UPRIGHT2 SPREADER3 BRACE BRACKET4 KNEE BRACE ANGLE5 PIVOT BRACKET6 FOOT7 HEX HEAD CAP SCREWMOTOR DRIVEN ROLLER CONVEYOR STRAIGHT AND CURVE TECH HANDBOOKKNEE BRACES, CASTERS AND CEILING HANGERS: INSTALLING CASTERSNOTE: CUSTOMER TO LOCATEAND DRILL IF NECSSARYINSTALLING CASTERSOnce in position, castersshould be locked untilconveyor needs to bemoved again.Note:Leg supports with castersfollow similar installationinstructions as standard legsupports and knee braces.<strong>FMDR</strong> TECHNICAL HANDBOOK 2014.116DETAIL DESCRIPTION1 UPRIGHT2 SPREADER3 BRACE BRACKET4 KNEE BRACE ANGLE5 PIVOT BRACKET6 FOOT7 Z-PLATE8 PHENOLIC CASTER9 HEX HEAD CAP SCREW
FLAT MOTOR DRIVEN ROLLER CONVEYOR STRAIGHT AND CURVE TECH HANDBOOKKNEE BRACES, CASTERS AND CEILING HANGERS: INSTALLING CEILING HANGERSINSTALLING CEILING HANGERSWhen using conveyors in an overhead scenario, mount hangers at section joints.Note:When installing ceiling hangers,refer to local building codes toensure that materials comply.Only experienced material handlinginstallers should attempt to installconveyors.CONVEYOR SECTIONDETAIL DESCRIPTION1 HANGER CHANNEL2 PIPE SPREADER3 THREADED ROD4 U-BOLT5 WHIZ NUT6 HEX HEAD CAP SCREW7 HEX NUT8 LOCK WASHER<strong>FMDR</strong> TECHNICAL HANDBOOK 2014.117
FLAT MOTOR DRIVEN ROLLER CONVEYOR STRAIGHT AND CURVE TECH HANDBOOKMULTI-TIER SUPPORTS: INSTALLATION OF MULTI-TIER SUPPORTSINSTALLING MULTI-TIER SUPPORTS1) Remove the upper spreader (detail 2) from support.2) Lower the conveyor section onto the lower spreader (detail 2) and attach using supplied fasteners.3) Check for appropriate elevation and attach the knee bracket assembly (detail 3,4,6,7,8).4) For upper conveyor assembly, replace upper spreader and repeat steps 2 and 3.5) Make sure all multi-tier supports are in line and square prior to conveyor start-up.Note: Make sure that the conveyor is stable priorto multi-tier assembly. Use of a forklift or crane maybe required to ensure safe handling. Only experiencedinstallation professionals should install conveyor.DETAIL DESCRIPTION1 UPRIGHT2 SPREADER3 BRACE BRACKET4 KNEE BRACE ANGLE5 FOOT WELDMENT6 WHIZ NUT7 HEX HEAD CAP SCREW8 FLAT WASHER<strong>FMDR</strong> TECHNICAL HANDBOOK 2014.118
FLAT MOTOR DRIVEN ROLLER CONVEYOR STRAIGHT AND CURVE TECH HANDBOOKZERO-PRESSURE CONTROLS: OVERVIEWFLAT MOTOR CONVEYOR CONTROLS COMPONENTSZero-pressure flat motor conveyor is configured into zones with at least one flat motor and one Universal ControlFlat Motor ZPA Module in each zone. Each flat motor will always have its own dedicated ZPA Module in everyapplication. For zero-pressure applications, each zone will also have a sensor, power distribution wiring andcommunication wiring. A typical zero-pressure flat motor conveyor will have three types of zones:ENTRY ZONEThe zone where the first product enters the conveyor is referred to as an entry zone. The entry zone mustbe configured with a wake-up signal to activate the rollers in anticipation of a product. The wake-up signalcan be provided with an upstream sensor or a 24VDC signal from an upstream device. See page 32 for wiringdirections and ZPA Module settings.TRANSPORT ZONEDownstream of the entry zone, a typical zero-pressure flat motor conveyor will have a series of transportzones. Transport zones convey the product downstream while maintaining separation between products. Atthe end of the conveyor, products will accumulate with separation of one product per zone. See page 34 foradditional settings of transport zones.EXIT ZONEThe last zone, or furthest downstream zone, is referred to as an exit zone. As product is conveyed through aseries of transport zones it will enter the exit zone and stop as it reaches the sensor. Product will not exit theexit zone until the ZPA Module receives a 24VDC signal from an external device to release the product. Seepage 33 for wiring directions and ZPA Module settings.FLAT MOTORPAGE 21UNIVERSAL CONTROL FLAT MOTORZPA MODULEPAGE 22SENSORPAGE 24COMMUNICATION WIRINGPAGE 25POWER DISTRIBUTION WIRINGPAGE 26<strong>FMDR</strong> TECHNICAL HANDBOOK 2014.119
FLAT MOTOR DRIVEN ROLLER CONVEYOR STRAIGHT AND CURVE TECH HANDBOOKZERO-PRESSURE CONTROLS: UNIVERSAL CONTROL FLAT MOTOR ZPA MODULEUNIVERSAL CONTROL FLAT MOTOR ZPA MODULES INTERFACE1) MOTOR CONNECTION: The flat motor is provided with a pre-wired cable assembly. Do not disassemble. Ifthe cable is damaged and on-site repairs are required, the wiring sequence is (from position 1 on the leftthrough position 8 on the right): Green, Gray, Blue, Violet, Yellow, Brown, Red, Black.Note: Use of extension cables may cause permanent damage and will void the warranty.2) I/O CONNECTIONS: The module is provided with four PNP I/O connections. The I/O are configured asfollows:Position 1 = Smart Input 1Position 2 = Smart Input 2Position 3 = Smart Output 2Position 4 = Smart Output 1Smart Inputs must be pulled to at least 18VDC above the DC ground in order to ensure reliable response. Ifthe smart I/O is not being used, leave the connector in place to avoid accidentally shorting the pins.Directions for wiring the I/O are included in each of the zone setup sections.Dry Contact Relay is the appropriate method for handshaking signals to ensure voltage isolation. A 24VDCremote signal can be used if the DC grounds are tied together. The Smart Input’s “On State” turns on at 18VDC and guaranteed “Off State” below 12VDC with a 3 milliamp (ma) current draw. The Smart Outputs havea 2VDC drop from input voltage at a 10 ma current draw.Only solid state devices/dry contact relays are to be connected to the Smart Input/Output. Connectingdirectly to a coil or standard relay could create an induction response and damage the module.3) POWER CONNECTION: The module has two terminals on the power connectors. The left terminal is for +DCbetween +22 and +28VDC. The right terminal is for the DC ground. Reversing the polarity of theseconnectors could cause catastrophic damage to the module. USE CAUTION.Note: Systems requiring multiple power supplies must have the DC grounds connected to ensure properoperation of the module.4) FUSE LED: This LED will be illuminated constantly if the fuse (5) is blown and power is applied with theproper polarity. Replace the fuse with a 10 AMP Littlefuse 0451010.Note: This fuse will not blow under normal circumstances. Inspect all wiring connections to clockwisethat there are no short circuits.5) SPEED CONTROL POTENTIOMETER: Use this potentiometer to control the speed of the motor. Fullyclockwise is the maximum speed, fully counterclockwise is the minimum speed. Use a tachometer to set thedesired conveyor speed.22<strong>FMDR</strong> TECHNICAL HANDBOOK 2014.1
FLAT MOTOR DRIVEN ROLLER CONVEYOR STRAIGHT AND CURVE TECH HANDBOOKZERO-PRESSURE CONTROLS: UNIVERSAL CONTROL FLAT MOTOR ZPA MODULE (Continued)6) DIAGNOSTIC LEDs: See LED troubleshooting on pages 46 through 48.7) DIP SWITCHES: DIP switch settings are only read by the module during power-up. Make all DIP switchchanges with power removed from the module and then reconnect power. Slide the DIP switch to the rightto turn it ON, slide it to the left to turn it OFF.Switch 1: When switch 1 is OFF the motor will rotate counterclockwise. ON sets the direction of themotor to clockwise. Direction of rotation is described as viewing the back of the motor. (non-shaftside)Switch 2: Switch 2 is reserved for future use. Leave switch 2 in the OFF position.Switch 3 and 4: Switch 3 and 4 are used to configure the zone type.Zone Type Switch 3 Switch 4Standard ZPA Zone OFF ONEntry/Exit Zone ON OFFZIP Transport Zone ON ONRemote Controlled Zone OFF OFFAdditional details of zone type settings included in each of the zone setup sections.8) SENSOR CONNECTION: The first position (left-most) is the DC ground connection for the sensor, the secondposition is for the input from the sensor and the third position is the +VDC power to the sensor, fused for 0.1Amps. This fuse is not replaceable, but is self-resetting. Use of this output for any purpose that requiresmore than 0.1 Amps will blow the fuse and temporarily disable this output.Note: If the sensor is mounted on non-conductive equipment, such as a plastic slide, be certain to ground thebody of the sensor to provide for nondestructive discharge of static electricity.9) DOWNSTREAM CONNECTION: The downstream connection provides communication to the downstreamzone. Connect a 6-wire modular phone cable to this port and to the upstream port on the downstream zone.10) UPSTREAM CONNECTION: The upstream connection provides communication to the upstream zone.Connect a 6-wire modular phone cable to this port and to the downstream port on the upstream zone.11) MOUNTING PLATE: The mounting plate should be attached to the conveyor frame with two 1/4” bolts.When mounting the module on a curved conveyor frame, make sure to fixture the module to ensure that themounting plate is not bent or distorted. Bending the mounting plate will damage the enclosed circuit boardassembly.12) COVER: The module cover is designed to prevent incidental damage to the control by foreign objects. It isneither waterproof nor dustproof. Removal of the cover will void the warranty.<strong>FMDR</strong> TECHNICAL HANDBOOK 2014.123
FLAT MOTOR DRIVEN ROLLER CONVEYOR STRAIGHT AND CURVE TECH HANDBOOKZERO-PRESSURE CONTROLS: SENSORZONE PHOTO-EYEPOWER WIRESENSORThe standard photo-eye sensor for zero-pressure flat motor conveyor is a Banner #DS18VP6LP. This is a polarizedretro-reflective photo-eye sensor with a DARK Operate PNP (sourcing) output. Each photo-eye sensor must bepositioned to work with its own dedicated reflector. Visually align red beam to center of reflector. When poweris supplied to the Universal Control Flat Motor ZPA Module and a product is positioned in front of the photo-eyesensor, an amber light will illuminate. When product is removed from the zone, the light turns off. The sameamber light will indicate proper photo-eye sensor alignment with the reflector. If the sensor and reflector are notaligned, the sensor light will turn on. If they are aligned properly, no light will be illuminated on the sensor.The position of the photo-eye sensor controls the position of the product as it stops in the zone. Typically, photoeyesensors are positioned in the last 3 to 6 inches of the zone. Product construction, product weight andconveyor speed will all have an impact on the required stopping distance. If product is not stopping in thedesired location, adjust the photo-eye position accordingly. Zone stops as the product passes the photo-eyes,small products may hang up if conveyor speed is slow or photo-eye is not adjusted close enough to end of zone.WIRING INSTRUCTIONS FOR MODEL #DS18VP6LP PHOTO-EYE SENSORBrown Wire: +24V DC, connect to the (+) sensor terminal on the ZPA moduleBlue Wire: DC Ground, connect to the (-) sensor terminal on the ZPA moduleBlack Wire: Dark Operate Signal, connect to the (in) sensor terminal on the ZPA moduleWhite Wire: Light Operate Signal, not used(10-30 VDC, overhead current < 20 ma exclusive of load, 100 ma maximum output)<strong>FMDR</strong> TECHNICAL HANDBOOK 2014.124
FLAT MOTOR DRIVEN ROLLER CONVEYOR STRAIGHT AND CURVE TECH HANDBOOKZERO-PRESSURE CONTROLS: COMMUNICATION WIRINGPRODUCT FLOWDOWNSTREAMCOMMUNICATION WIRINGUPSTREAMCOMMUNICATION WIRINGCOMMUNICATION WIRINGThe ZPA Module has two communication ports, upstream and downstream. Depending upon the zone type,communication ports are connected as follows:TRANSPORTATION ZONEThe upstream connection provides communication to the upstream zone. Connect a 6-wire modular phonecable to this port and to the downstream port on the upstream zone. The downstream connection providescommunication to the downstream zone. Connect a 6-wire modular phone cable to this port and to theupstream port on the downstream zone.ENTRY ZONEAn Entry zone does not use the upstream communication port. All upstream communication is handled withthe I/O. See page 31 and 32 for entry zone communication wiring. The downstream connection providescommunication to the downstream zone. Connect a 6-wire modular phone cable to this port and to theupstream port on the downstream zone.EXIT ZONEAn Exit zone does not use the downstream communication port. All downstream communication is handledwith the I/O. See page 33 for exit zone communication wiring. The upstream connection providescommunication to the upstream zone. Connect a 6-wire modular phone cable to this port and to thedownstream port on the upstream zone.CABLE CONSTRUCTIONRefer to the drawings below when building or replacing communication wiring cables.RIGHTWRONGSIDE VIEWSIDE VIEWBOTTOM VIEW<strong>FMDR</strong> TECHNICAL HANDBOOK 2014.125BOTTOM VIEW
FLAT MOTOR DRIVEN ROLLER CONVEYOR STRAIGHT AND CURVE TECH HANDBOOKZERO-PRESSURE CONTROLS: POWER DISTRIBUTION WIRINGPOWER DISTRIBUTION WIRINGPOWER DISTRIBUTION WIRING24V DC power is distributed along the conveyor frame to each ZPA module as show in the figure above. Thepower distribution wiring system contains the following components: 24VDC Power Supply Power Distribution Trunk Line Wiring Isolation Connectors Patch Cables Terminating Caps24VDC POWER SUPPLYThe 24V DC power supply converts the plant line voltage. The 24V DC power supply must be configured to theline voltage of your plant. Confirm that the power supply is correct for the plant line voltage before applying ACpower. Depending upon the application, flat motor conveyor may include 1 or more 24V DC power supplies.SPECIFICATIONSNominal AC Input Voltage: Single Phase (100-240V), Three Phase (3 x 400-500V)Frequency: 47-63 HzNominal DC Output Voltage: 24VDC +/- 2%Operating Temperate: (0 deg. F-80 deg. F @ 20amp), (0 deg. F-115 deg. F @ 5-10 Amps)Environment Protection: NEMA 12Current Limitation: 150% of Pout max @ 1 sec.The recommended maximum cycle rate for the power supply is one per hour.Depending upon 24V DC power supply size and plant line voltage, each power supply will draw a maximumcurrent as indicated in the chart below:FLA @ 115V FLA @ 230V FLA @ 460V10 AMP 2.4A 1.2A 0.6A20 AMP 4.8A 2.4A 1.0A40 AMP 9.6A 4.7A 2.5A<strong>FMDR</strong> TECHNICAL HANDBOOK 2014.126
FLAT MOTOR DRIVEN ROLLER CONVEYOR STRAIGHT AND CURVE TECH HANDBOOKZERO-PRESSURE CONTROLS: POWER DISTRIBUTION WIRING (Continued)POWER DROPPOWER DISTRIBUTION TRUNK LINE WIRINGPOWER DISTRIBUTION TRUNK LINE WIRINGFrom the 24VDC power supply, the trunk line wiring delivers power along the side frame to each of the ZPAmodules. Depending upon the application, the trunk line cable may have single power drops or up to five powerdrops on a single cable. Three power drops are shown in the diagram above. During installation, the quickdisconnects at the ends of the power distribution trunk line must be connected to the adjacent conveyor. Thepower drops are connected to the ZPA module as shown in the diagram below.ZONE PHOTO EYEMOTORWIREBLACK WIRE CONNECTEDTO (-) TERMINALRED WIRE CONNECTEDTO (+) TERMINALPOWER WIRE<strong>FMDR</strong> TECHNICAL HANDBOOK 2014.127
FLAT MOTOR DRIVEN ROLLER CONVEYOR STRAIGHT AND CURVE TECH HANDBOOKZERO-PRESSURE CONTROLS: POWER DISTRIBUTION WIRING (Continued)24VDC POWER SUPPLYTERMINATING CAPTERMINATING CAPPOWER DISTRIBUTION TRUNK LINE WIRINGTHRU DOOR ISOLATION CONNECTORISOLATION CONNECTORPOWER DISCONNECTISOLATION CABLESSystems with multiple power supplies require isolation connectors to isolate the +24VDC power between suppliesand to carry the DC Ground wire throughout the conveyor. Without isolation connectors, the logic within theZPA modules may act erratically. Isolation connectors are used as shown in the diagram above and placed todistribute the DC Load evenly between the power supplies.POWER ISOLATION CONNECTORUPSTREAM POWERDISTRIBUTIONDOWNSTREAM POWERDISTRIBUTIONISOLATIONCONNECTOR<strong>FMDR</strong> TECHNICAL HANDBOOK 2014.128
FLAT MOTOR DRIVEN ROLLER CONVEYOR STRAIGHT AND CURVE TECH HANDBOOKZERO-PRESSURE CONTROLS: POWER DISTRIBUTION WIRING (Continued)INCOMING POWER TO POWER SUPPLYL1CB1—10 AMPCUSTOMERSUPPLIED POWER12 AWG MINIMUMRECOMMENDEDL2L3CUSTOMER SUPPLIED SHORTCIRCUIT PROTECTION DUALELEMENT TIME DELAY FUSERECOMMENDED OR UL489 - CLASSC THERMAL/ MAGNETIC BREAKERPOWER SUPPLYDISCONNECT SWITCHSTANDARD POWER SUPPLY OUTPUTPOWER SUPPLYQD1CB2CB3QD2<strong>FMDR</strong> TECHNICAL HANDBOOK 2014.129
FLAT MOTOR DRIVEN ROLLER CONVEYOR STRAIGHT AND CURVE TECH HANDBOOKZERO-PRESSURE CONTROLS: POWER DISTRIBUTION WIRING (Continued)E-STOP (WHEN REQUIRED)POWER SUPPLYE-STOP LOAD BREAKCONNECTORQD1CB2CB3QD2PATCH CABLESPatch cables are used to bring power from a 24VDC power supply to flat motor zones that cannot be reachedwith standard trunk line wiring. Adjacent conveyors may also be powered by using patch cables. Care must betaken not to exceed power supply capacity as well as the current limit per power supply circuit, depending uponpower supply size.TERMINATING CAPSTerminating caps are installed at each end of the power distribution trunk line to prevent accidental shock orshort circuit.NOTE: Power supply cycling is not recommended. A load break contactor should be installed after the powersupply in order to break power to the power distribution system as required.<strong>FMDR</strong> TECHNICAL HANDBOOK 2014.130
FLAT MOTOR DRIVEN ROLLER CONVEYOR STRAIGHT AND CURVE TECH HANDBOOKZERO-PRESSURE CONTROLS: ENTRY ZONEENTRY ZONEThe zone where the first product enters the conveyor is referred to as an entry zone. This entry zone must beconfigured with a wake-up signal to activate the rollers in anticipation of a product. This wake-up signal can beprovided with an upstream sensor or a 24VDC signal from an upstream device. The entry zone will also havedifferent DIP switch settings and communication wiring than other flat motor zone types.Configure an entry zone as follows:DIP SWITCHESSwitch 1: Set for correct motor directionSwitch 2: OFFSwitch 3: ONSwitch 4: OFFNote: An entry zone cannot be configured to be an entry zone while controlling a slave zone at the sametime.COMMUNICATION WIRINGDownstream communication wiring in an entry zone is configured with a 6-wire modular phone cable as shownon page 25. Upstream communication must be configured through the I/O connections. Do not connect a 6-wiremodular phone cable to the upstream communication port. Connecting a cable to the upstream port may causeundesirable results. Entry zones can be set up as manually loaded or automatically loaded. Manually loadedentry zones must have a sensor (photo-eye) located on the upstream equipment to wake-up the conveyor whenthe first product arrives. Automatically loaded entry zones are configured to handshake with upstreamequipment by providing a ready signal and accepting a sending signal. Each configuration must be wired asfollows:MANUALLY LOADED ENTRY ZONEA manually loaded entry zone must have a sensor located about 6 inches upstream from the entry zone.Typically, this sensor is a photo-eye, referred to as a wake-up photo-eye. If the entry zone is the first zone inthe system and there is no equipment upstream, place the wake-up photo-eye near the beginning of thezone. A manually loaded entry zone will have two photo-eye sensors wired to the same ZPA module. Thezone photo-eye, located at the downstream edge of the zone, will be wired the same as a typical sensor,shown on page 24. The wake-up photo-eye will have the (+24VDC) and (-) wires connected to the sensorterminals. The black signal wire from the wake-up photo-eye must be connected to Smart Input 2, as shownbelow.WAKE-UP PHOTO-EYEZONE PHOTO-EYEPOWER WIRE<strong>FMDR</strong> TECHNICAL HANDBOOK 2014.131
FLAT MOTOR DRIVEN ROLLER CONVEYOR STRAIGHT AND CURVE TECH HANDBOOKZERO-PRESSURE CONTROLS: ENTRY ZONE (Continued)AUTOMATICALLY LOADED ENTRY ZONEAutomatically loaded entry zones are configured to handshake with an upstream device by providing a readysignal and accepting a sending signal. Similar to a Manually Loaded zone, connect the zone photo-eye to thesensor connections as shown on page 24. To handle upstream communication, connect a single lead wire fromthe upstream device to Smart Input 2 to present a request to the zone to allow transport of product into thezone. Also install a single lead wire from Smart Output 2 to send permission to the upstream device when zone isready to accept a product. All signals must be PNP (sourcing). See page 22 I/O connections section for proper useof devices connected to Smart I/O.HANDSHAKINGWIRINGZONE PHOTO-EYEREADYSENDPOWERWIRE<strong>FMDR</strong> TECHNICAL HANDBOOK 2014.132
FLAT MOTOR DRIVEN ROLLER CONVEYOR STRAIGHT AND CURVE TECH HANDBOOKZERO-PRESSURE CONTROLS: EXIT ZONEEXIT ZONEThe last zone, or furthest downstream zone, is referred to as an exit zone. As product is conveyed through aseries of transport zones it will enter the exit zone and stop as it reaches the sensor. Product will not leave theexit zone until the Universal Control Flat Motor ZPA Module receives a 24VDC signal to release the product. This24VDC signal may be configured to handshake with a downstream device. The exit zone will also have differentDIP switch settings and communication wiring than other flat motor zone types. Configure an exit zone asfollows:DIP SWITCHESSwitch 1: Set for correct motor directionSwitch 2: OFFSwitch 3: ONSwitch 4: OFFNote: An exit zone cannot be configured to be an exit zone while controlling a slave zone at the same time.COMMUNICATION WIRINGUpstream communication wiring in an exit zone is configured with a 6-wire modular phone cable as shown onpage 25. Downstream communication must be configured through the I/O connections. Do not connect a 6-wiremodular phone cable to the downstream communication port. Connecting a cable to the downstream port maycause undesirable results. Exit zones can be set up as manually unloaded or automatically unloaded. Manuallyunloaded exit zones do not require additional communication wiring. An operator must manually removeproduct. Automatically unloaded exit zones are configured to handshake with downstream equipment bysending a ready signal and accepting a send signal. Each configuration must be wired as follows:MANUALLY UNLOADED EXIT ZONEConnect the zone photo-eye to the sensor connections as shown on page 24. Do not connect any cables tothe downstream communication port or I/O connections. An operator or robot must manually remove theproduct from the exit before product will advance from the upstream transport zone.AUTOMATICALLY UNLOADED EXIT ZONEConnect the zone photo-eye to the sensor connections as shown on page 24. Do not connect any cables tothe downstream communication port. Connect a single lead wire from the downstream device to SmartInput 1 to present permission to the zone to allow discharge of product. Also install a single lead wirefrom Smart Output 1 to send a ready signal to the downstream device to allow discharge of product. Allsignals must be PNP (sourcing). See page 22 I/O connections section for proper use of devices connected toSmart I/O.HANDSHAKINGWIRINGZONE PHOTO-EYEDOWNSTREAM EMPTY/SENDZONE FULL/READY<strong>FMDR</strong> TECHNICAL HANDBOOK 2014.1POWER WIRE33
FLAT MOTOR DRIVEN ROLLER CONVEYOR STRAIGHT AND CURVE TECH HANDBOOKZERO-PRESSURE CONTROLS: TRANSPORT ZONETRANSPORT ZONEDownstream of the entry zone, a typical zero-pressure flat motor conveyor will have a series of transport zonesbefore reaching the exit zone. Transport zones convey the product downstream while maintaining separationbetween products. At the end of the conveyor, products will accumulate with a separation of one product perzone or one product per multiple zones if long zone ZP logic is required. There are two types of transport zones,ZPA and ZIP. ZPA and ZIP transport zones are wired the same, however, the DIP switch settings are different asindicated below.Each transport zone must have its own photo-eye wired to the sensor connections as shown on page 24.Transport zones must also have communication cables connected to both the upstream and downstream ports asshown on page 25. Typical zero-pressure flat motor conveyor transport zones do not utilize the I/O connectionsunless they are configured to control a remote/slave zone (Output 1) as shown on page 35 or as “No Fault”Output (Output 2).ZPA TRANSPORT ZONEA ZPA transport zone will convey product with an empty zone between each product while in transit. At the endof the conveyor, product will accumulate one per zone. Most flat motor conveyor is configured with ZPAtransport zones.ZPA TRANSPORT ZONE DIP SWITCHESSwitch 1: Set for correct motor directionSwitch 2: OFFSwitch 3: OFFSwitch 4: ONZIP TRANSPORT ZONEA ZIP transport zone will increase the throughput. Upon the release of a group of accumulated zones, eachsubsequent upstream zone will release product after a ~0.1 second delay. The conveyor will also run less whileoperating in ZIP mode. Confirm your application with <strong>Omni</strong> engineering before configuring ZIP transport zones.ZIP TRANSPORT ZONE DIP SWITCHESSwitch 1: Set for correct motor directionSwitch 2: OFFSwitch 3: ONSwitch 4: ONSwitch 4: ONZONE PHOTO EYEMOTORWIRE<strong>FMDR</strong> TECHNICAL HANDBOOK 2014.1POWERWIRE34
FLAT MOTOR DRIVEN ROLLER CONVEYOR STRAIGHT AND CURVE TECH HANDBOOKZERO-PRESSURE CONTROLS: REMOTE/SLAVE ZONEREMOTE/SLAVE ZONEA remote/slave zone, or remote controlled zone, is a zone that will turn on and off as directed by its parent zone.Remote zones are used in applications requiring very long zones that exceed the flat motor’s capacity and inareas such as merges where an extra long zone is required due to the geometry of the conveyor intersection. Aremote zone does not use a sensor or communication wiring. Connect a single lead from Smart Output 1 on theparent zone to Smart Input 1 on the remote/slave zone as shown below.DIP SWITCHESSwitch 1: Set for correct motor directionSwitch 2: OFFSwitch 3: OFFSwitch 4: OFFPARENT ZONECOMMUNICATIONCABLESZONE PHOTO EYEPOWER WIREHANDSHAKINGWIRINGREMOTE ZONEPOWER WIRE<strong>FMDR</strong> TECHNICAL HANDBOOK 2014.135
FLAT MOTOR DRIVEN ROLLER CONVEYOR STRAIGHT AND CURVE TECH HANDBOOKZERO-PRESSURE CONTROLS: MANUAL ZONEMANUAL ZONEA manual zone is a zone that is completely controlled by a PLC or similar device. A manual zone does not requirea zone photo-eye or communication cables. All motor operation is controlled through the I/O connections asdirected by the PLC or remote logic.DIP SWITCHESSwitch 1: Set for correct motor directionSwitch 2: OFFSwitch 3: OFFSwitch 4: OFFI/O CONNECTIONSA manual zone must have single lead wires connected from the PLC to both Smart Input 1 and Smart Input 2. Themanual zone will operate in four modes depending upon the 24VDC signals received from the PLC, as shown inthe chart below. See page 22 I/O connections section for proper use of devices connected to Smart I/O.Action Smart Input 1 Smart Input 2Brake OFF OFFRun ON OFFRun Reverse OFF ONCoast ON ONONOFFSmart Output 1 Motor Running Motor StoppedSmart Output 2 No Fault Motor /Card FaultLEAD WIRES FROM PLCSMART INPUT 1POWER WIRESMART OUTPUT 1SMART INPUT 2<strong>FMDR</strong> TECHNICAL HANDBOOK 2014.136SMART OUTPUT 2
FLAT MOTOR DRIVEN ROLLER CONVEYOR STRAIGHT AND CURVE TECH HANDBOOKDRIVER CONTROLS MODULE: OVERVIEWFLAT MOTOR CONVEYOR CONTROLS COMPONENTSBasic flat motor conveyor is configured into individually controlled zones with at least one flat motor and oneUniversal Control Flat Motor Driver Module in each zone. Each flat motor will always have its own dedicatedMotor Control Driver Module. Individually controlled zone applications as standard will have power distributionwiring only but logic wiring could be added per the system requirements. A typical manually controlled basic flatmotor conveyor would be controlled from the customer’s dry contact type device or 24VDC logic signals. Noentry or zone photo eyes are required but may be added to the conveyor if required by the application andutilized by the customer’s logic.<strong>FMDR</strong> TECHNICAL HANDBOOK 2014.137
FLAT MOTOR DRIVEN ROLLER CONVEYOR STRAIGHT AND CURVE TECH HANDBOOKDRIVER CONTROLS: UNIVERSAL CONTROL FLAT MOTOR DRIVER MODULEUNIVERSAL CONTROL FLAT MOTOR DRIVER MODULE INTERFACE1) MOTOR CONNECTION: The flat motor is provided with a pre-wired cable assembly. Do not disassemble. If thecable is damaged and on-site repairs are required, the wiring sequence is (from position 1 on the left throughposition 8 on the right): Green, Gray, Blue, Violet, Yellow, Brown, Red, Black.Note: Use of extension cables may cause permanent damage and will void the warranty.Reference Motor Data on page 21.2) I/O CONNECTIONS: The module is provided with four 24VDC PNP I/O connections. The I/O are configured asfollows:Position 1 = Smart Input 1Position 2 = Smart Input 2Position 3 = Smart Output 2Position 4 = Smart Output 1Smart Inputs must be pulled to at least 18VDC above the DC ground in order to ensure reliable response. Ifthe smart I/O is not being used, leave the connector in place to avoid accidentally shorting the pins.Dry Contact Relay is the appropriate method for handshaking signals to ensure voltage isolation. A 24VDCremote signal can be used if the DC signal grounds are tied together.Only solid state devices/dry contact relays are to be connected to the Smart Input/Output. Connectingdirectly to a coil or standard relay could create an induction response and damage the module.3) POWER CONNECTION: The module has two terminals on the power connectors. The left terminal is for +DCbetween +22 and +28 VDC. The right terminal is for the DC ground. Reversing the polarity of theseconnectors could cause catastrophic damage to the module. USE CAUTION. (2-position plug supplied –Phoenix PT1.5/2-PVH-3.5)4) FUSE LED: This led will be illuminated constantly if the fuse is blown and power is applied with the properpolarity.5) FUSE: Replace the fuse with a 10 AMP Littlefuse 0451010.Note: This fuse will not blow under normal circumstances. Inspect all wiring connections to ensure that thereare no short circuits.<strong>FMDR</strong> TECHNICAL HANDBOOK 2014.138
FLAT MOTOR DRIVEN ROLLER CONVEYOR STRAIGHT AND CURVE TECH HANDBOOKDRIVER CONTROLS: UNIVERSAL CONTROL FLAT MOTOR DRIVER MODULE (Continued)6) SPEED CONTROL POTENTIOMETER: DIP Switches 2, 3, 4 are used in combination to set the maximum speedfor the UniDrive® Motor in discrete 35 RPM steps from 350 RPM down to 105 RPM. The potentiometer isused to adjust the speeds downward from those speeds. Fully clockwise, the control will be at the speed setby the switches, turning the pot counterclockwise will adjust the speed down by as much as 35 RPM, thusmaking it possible to select any speed from 350 down to 70 RPM using the switches and pot in combination.Use a tachometer to set the desired conveyor speed.7) DIAGNOSTIC LEDs: See LED troubleshooting on pages 47 and 48.8) DIP SWITCHES: DIP switch settings are only read by the module during power-up. Make all DIP switchchanges with power removed from the module and then reconnect power. Slide the DIP switch to the rightto turn it ON. Slide it to the left to turn it OFF.SW2 SW3 SW4 SpeedOff Off Off 350Off Off On 315Off On Off 280Off On On 245On Off Off 210On Off On 175On On Off 140On On On 105Key: SW2 = Switch 2, SW3 = Switch 3, SW4 = Switch 4, Speed = Motor RPMNote: Switches are only read at power-up. Set switches then apply power to the board.9) MOUNTING PLATE: The mounting plate should be attached to the conveyor frame with two 1/4” bolts. Whenmounting the module on a curved conveyor frame, make sure to fixture the module to ensure that themounting plate is not bent or distorted. Bending the mounting plate will damage the enclosed circuit boardassembly.10) COVER: The module cover is designed to prevent incidental damage to the control by foreign objects. It isneither waterproof nor dustproof. Removal of the cover will void the warranty.<strong>FMDR</strong> TECHNICAL HANDBOOK 2014.139
FLAT MOTOR DRIVEN ROLLER CONVEYOR STRAIGHT AND CURVE TECH HANDBOOKDRIVER CONTROLS: POWER DISTRIBUTION WIRINGPOWER DISTRIBUTION TRUNK LINE WIRINGFrom the 24VDC power supply, the trunk line wiring delivers power along the side frame to each of the flat motordriver modules. Depending upon the application, the trunk line cable may have single power drops or up to fivepower drops on a single cable. During installation, the quick disconnect connections at the ends of the powerdistribution trunk line must be connected to the adjacent conveyor unless it is the end of the power supply run,in which case the cable end cap should be installed on the last connector. The power drops are connected to theflat motor driver module as shown in the diagram below. See power supply specifications page 26. See powerdistribution trunk line wiring on page 27. Isolation connectors, as described on page 28, are not requiredbetween power supplies on flat motor driver modules where there is not card-to-card logic handshaking. Seepage 30 for trunk line connector terminating caps.MOTORWIREBLACK WIRE CONNECTEDTO (-) TERMINALRED WIRE CONNECTEDTO (+) TERMINALPOWER WIRESee page 30 for recommended E-stop option when required.<strong>FMDR</strong> TECHNICAL HANDBOOK 2014.140
FLAT MOTOR DRIVEN ROLLER CONVEYOR STRAIGHT AND CURVE TECH HANDBOOKDRIVER CONTROLS: I/O CONNECTIONSI/O CONNECTIONSA flat motor driver module must have single lead wires connected from the remote logic to Smart Input 1 andSmart Input 2 for full motor control. The flat motor driver module will operate in four modes depending upon the24VDC signals received from the remote logic, as shown in the chart below. Card I/O Connector (4 position plugsupplied – Phoenix PT1.5/4-PVH-3.5).CONNECT PNP INPUTS TO OPERATE MOTORIn direct response to two inputs the motor does one of four things: Brake and Hold, Run Forward, Run Reverse, orCoast.BRAKE AND HOLD: This is the default state with no inputs to either Smart In 1 or Smart In 2.RUN FORWARD: An input to Smart 1, in the absence of an input to Smart 2 will result in the motoroperating in the direction set by Switch 1.RUN REVERSE: An input to Smart 2, in the absence of an input to Smart 1 will result in the motor operatingin the direction opposite the direction set by Switch 1.COAST: Simultaneous inputs to Smart 1 and Smart 2 will result in the motor coasting with no brakingaction.CONNECT PNP OUTPUTS IF DESIREDPosition 3 (Smart Output 2) is a PNP module health output that is active whenever no faults have been detected.If the fuse is blown, power is not connected with the correct polarity or the motor is disconnected, this signal willnot be active.Position 4 (Smart Output 1) is a PNP motor running output that is active whenever the motor is running in eitherdirection. This is intended for use in unidirectional systems to operate a second motor simultaneously with theAction Smart Input 1 Smart Input 2Brake OFF OFFRun Forward ON OFFRun Reverse OFF ONCoast ON ONONOFFSmart Output 1 Motor Running Motor StoppedSmart Output 2 No Fault Motor /Card Fault<strong>FMDR</strong> TECHNICAL HANDBOOK 2014.141
FLAT MOTOR DRIVEN ROLLER CONVEYOR STRAIGHT AND CURVE TECH HANDBOOKDRIVER CONTROLS: I/O CONNECTIONS (Continued)LEAD WIRES FROM REMOTE LOGICSMART INPUT 1POWER WIRESMART OUTPUT 1SMART INPUT 2SMART OUTPUT 2See page 22 I/O connections section for proper use of devices connected to Smart I/O.<strong>FMDR</strong> TECHNICAL HANDBOOK 2014.142
FLAT MOTOR DRIVEN ROLLER CONVEYOR STRAIGHT AND CURVE TECH HANDBOOKCONTROLS: PREPARING FOR INITIAL START-UP1) Review pages 7 and 8 prior to starting any equipment.2) Verify that conveyor sections, leg supports, etc. were installed properly.3) Verify that all zone-to-zone cabling is connected properly.4) Verify that all sensor cabling is connected properly.5) Verify that conveyor is not loaded with product.6) Verify flat motors are securely bolted to side frame.7) Verify all slave rollers are attached to flat motor drive sheaves with proper drive bands.8) Check all flat motors, photo-eyes and drive modules for proper wiring.9) Check all drive module DIP switch settings. (DIP switches must be set before supplying power to drivemodules)10) Verify correct power supply sizing and distribution.11) Verify power supply DC Grounds are connected if multiple power supplies are utilized in ZPA system.12) Verify power supply line voltage is correct to voltage on name plate (SCCR panel sticker) before powering up.<strong>FMDR</strong> TECHNICAL HANDBOOK 2014.143
FLAT MOTOR DRIVEN ROLLER CONVEYOR STRAIGHT AND CURVE TECH HANDBOOKMAINTENANCE: MAINTENANCE SCHEDULESNote:Review pages 9 and 10 prior to performing maintenance on any equipment.WEEKLY MAINTENANCEUnit Safety Check Confirm placement of all warning labels. Check for loose bolts, unrestrained wiring, loose wiring connectors,nip points and other hazards. Check ZPA modules for any warning lights.MONTHLY MAINTENANCEBand Tension Check for consistent band tension between rollers and replace bands as needed.<strong>FMDR</strong> TECHNICAL HANDBOOK 2014.144
FLAT MOTOR DRIVEN ROLLER CONVEYOR STRAIGHT AND CURVE TECH HANDBOOKMAINTENANCE: REPORT ON MISCELLANEOUS MAINTENANCE PERFORMANCEREPORT ON MISCELLANEOUS MAINTENANCE PERFORMANCEDate___________Maintenance Performed:____________________________________________________________________________________________________________________________________________________________________________________________________________________________________________________________________________________Date___________Maintenance Performed:____________________________________________________________________________________________________________________________________________________________________________________________________________________________________________________________________________________Date___________Maintenance Performed:____________________________________________________________________________________________________________________________________________________________________________________________________________________________________________________________________________________Date___________Maintenance Performed:____________________________________________________________________________________________________________________________________________________________________________________________________________________________________________________________________________________Date___________Maintenance Performed:____________________________________________________________________________________________________________________________________________________________________________________________________________________________________________________________________________________Date___________Maintenance Performed:____________________________________________________________________________________________________________________________________________________________________________________________________________________________________________________________________________________Date___________Maintenance Performed:____________________________________________________________________________________________________________________________________________________________________________________________________________________________________________________________________________________<strong>FMDR</strong> TECHNICAL HANDBOOK 2014.145
FLAT MOTOR DRIVEN ROLLER CONVEYOR STRAIGHT AND CURVE TECH HANDBOOKTROUBLESHOOTING AND REPLACEMENT PARTS: TROUBLESHOOTINGPROBLEM CAUSE SOLUTIONPower supply if offTurn on power supplyPower supply is not receiving ACpowerCheck AC powerAC power fuse is blown or breaker isNone of the Zones Will Run trippedReplace fuse, check breakerPower supply breaker is tripped Check power supply breakerEntry Zone Will Not Turn OnTransport Zone Will Not Turn OnTransport Zone Will Not Turn OffEntry Zone or Transport Zone willNot Discharge ProductExit Zone Will Not DischargeProductNo power to flat motor ZPA modulePower supply voltage too high ortoo lowMissing wake-up zone photo-eyeEntry zone photo-eye not alignedproperlyMissing/incorrect handshakingwiringIncorrect DIP switch settingNo power to ZPA moduleMotor cable not connected to ZPAmoduleCommunication wiring missing ornot plugged inPhoto-eye is blocked or misalignedIncorrect DIP switch settingNo power to ZPA moduleMotor cable not connected to ZPAmoduleUpstream zone is attempting tosend productCommunication wiring missing ornot plugged inDownstream zone is fullDownstream zone photo-eye notaligned properlyIncorrect handshaking wiringDownstream device not sending arelease signalDIP switch not configured properlyCheck output power of power supplyCheck output voltage of powerAdd wake-up photo-eyeCheck wake-up photo-eye alignmentCheck handshaking wiringCheck DIP switchesCheck power connectionsCheck motor connectionsCheck upstream and downstreamcommunication wiringCheck photo-eye and reflectorCheck DIP switchesCheck power connectionsCheck motor connectionsCheck photo-eye alignment inupstream zoneCheck for jammed product inupstream zoneCheck communication wiringRemove product from downstreamzoneCheck downstream photo-eyeCheck handshaking wiringCheck downstream device outputsignalsCheck DIP switches<strong>FMDR</strong> TECHNICAL HANDBOOK 2014.146
FLAT MOTOR DRIVEN ROLLER CONVEYOR STRAIGHT AND CURVE TECH HANDBOOKTROUBLESHOOTING AND REPLACEMENT PARTS: TROUBLESHOOTING (Continued)POWER LED 7.3(GREEN)FUSE LED(RED)FAULT LED 7.1(RED)MOTOR LED 7.2(AMBER)ZPA MODULE LED’sThe LED’s on the ZPA and basic modules provide diagnostic information for various fault and connection issues.LED’s 7.1, 7.2, and 7.3 will flash when power is first applied to the module, this is normal and should stop within 5seconds.PROBLEM CAUSE SOLUTIONNo LED’s On No power to the system Check power supplyFUSE LED (RED) is OnFAULT LED 7.1 (RED) -Constantly OnFAULT LED 7.1 (RED) - 1 Flash in4 SecondsFAULT LED 7.1 (RED) - 2 Flashesin 4 SecondsFAULT LED 7.1 (RED) - 3 Flashesin 4 SecondsFAULT LED 7.1 (RED) - 4 Flashesin 4 SecondsMOTOR LED 7.2 (AMBER) -Constantly OnMOTOR LED 7.2 (AMBER) -FlickeringMOTOR LED 7.2 (AMBER) - 4Flashes in 4 SecondsFuse is blownStalled motor or blocked photoeyeZPA module problemInput voltage too highInput voltage too lowProblem with motor cableconnectionZPA module is current limiting theflat motorFlat motor is drawing significantcurrent during startup, ZPA moduleis current limitingZPA module has overheated andcurrent limiting the flat motor toabout 1/2 normal operationCheck wiringReplace fuseCheck for mechanical obstructionsReplace ZPA moduleCheck power supplyCheck power supplyCheck motor cable for damage andsecure connection to ZPA moduleIf condition persists, check forobstructionsNo action requiredMotor may not reach full speedCheck for mechanical obstructionAllow ZPA module to cool, beforerestartingPOWER LED 7.3 (GREEN) -Constantly OnPower is properly applied and fuseis not blownNormal operation<strong>FMDR</strong> TECHNICAL HANDBOOK 2014.147
FLAT MOTOR DRIVEN ROLLER CONVEYOR STRAIGHT AND CURVE TECH HANDBOOKTROUBLESHOOTING AND REPLACEMENT PARTS: LED START-UP SEQUENCELED START-UP SEQUENCE3 LEDs are used to communicate the firmware revision of the control assembly during the start-up sequence.Each time that power is applied to the board, the green and red LEDs will turn on for one second, then the amberLED will flash on for 0.75 seconds followed by an off period. An off period of 1.5 seconds represents a decimalpoint separating major revisions from minor revisions.START-UP SEQUENCEGREENONREDONOFFAMBER0 1 2 3 4 5 6 7 8SecondsCONTINUOUSONOFFThe sequence above is an example that would represent firmware revision 1.2. The current revision for product110163 (BMC-2) is 1.1. When the red LED turns off, the start-up sequence has ended and normal operation willcommence.<strong>FMDR</strong> TECHNICAL HANDBOOK 2014.148
FLAT MOTOR DRIVEN ROLLER CONVEYOR STRAIGHT AND CURVE TECH HANDBOOKPARTS LISTS: FLAT MOTOR DRIVEN ROLLER STRAIGHTDETAILDESCRIPTION1 SIDEFRAME2 END COUPLER3 BOLT-IN SPEADER4 POWER SUPPLY BRACKET5 POWER SUPPLY6 POWER DISTRIBUTION CABLE7 COMMUNICATION CABLE8 DRIVE CARD MODULE9 FLAT MOTOR10 PHOTO-EYE BRACKET11 PHOTO-EYE12 DRIVE SHEAVE13 URETHANE DRIVE BAND14 GROOVED ROLLER: 2 GROOVE15 REFLECTOR16 REFLECTOR BRACKET17 SIDE COVER18 CARRIAGE BOLT19 HEX HEAD CAP SCREW20 WHIZ NUT21 HEX NUT<strong>FMDR</strong> TECHNICAL HANDBOOK 2014.149
FLAT MOTOR DRIVEN ROLLER CONVEYOR STRAIGHT AND CURVE TECH HANDBOOKPARTS LISTS: FLAT MOTOR DRIVEN ROLLER CURVEDETAILDESCRIPTION1 OUTSIDE RAIL2 INSIDE RAIL3 END COUPLER4 BOLT-IN SPREADER5 POWER DISTRIBUTION CABLE6 COMMUNICATION CABLE7 DRIVE CARD MODULE8 FLAT MOTOR9 PHOTO-EYE BRACKET10 PHOTO-EYE11 DRIVE SHEAVE12 URETHANE DRIVE BAND13 GROOVED ROLLER: 2 GROOVE14 REFLECTOR15 REFLECTOR BRACKET16 SIDE COVER17 CARRIAGE BOLT18 HEX HEAD CAP SCREW19 WHIZ NUT20 HEX NUT<strong>FMDR</strong> TECHNICAL HANDBOOK 2014.150
FLAT MOTOR DRIVEN ROLLER CONVEYOR STRAIGHT AND CURVE TECH HANDBOOKNOTESNotes:______________________________________________________________________________________________________________________________________________________________________________________________________________________________________________________________________________________________________________________________________________________________________________________________________________________________________________________________________________________________________________________________________________________________________________________________________________________________________________________________________________________________________________________________________________________________________________________________________________________________________________________________________________________________________________________________________________________________________________________________________________________________________________________________________________________________________________________________________________________________________________________________________________________________________________________________________________________________________________________________________________________________________________________________________________________________________________________________________________________________________________________________________________________________________________________________________________________________________________________________________________________________________________________________________________________________________________________________________________________________________________________________________________________________________________________________________________<strong>FMDR</strong> TECHNICAL HANDBOOK 2014.151
FLAT MOTOR DRIVEN ROLLER CONVEYOR STRAIGHT AND CURVE TECH HANDBOOKWARRANTY REFERENCE<strong>Omni</strong> <strong>Metalcraft</strong> <strong>Corp</strong>. warrants that the Equipment will be free of defects in workmanship and material (ifproperly installed, operated and maintained) for a period of one year or 2080 hours of use, whichever is sooner,from date of shipment to Customer, subject to the limitations hereunder set forth. If within the one yearwarranty period, <strong>Omni</strong> receives from the Customer written notice of any alleged defects in the Equipment and ifthe Equipment is not found to be in conformity with this warranty (the Customer having provided <strong>Omni</strong> areasonable opportunity to perform any appropriate tests thereon) <strong>Omni</strong> will, at its option, either repair theEquipment or supply a replacement therefore. The Motor is a supplied part, not manufactured by <strong>Omni</strong>, and isbacked by the manufacturer’s three year warranty where approved applications are applied.*The above stated information is in reference to a section of <strong>Omni</strong> <strong>Metalcraft</strong>’s full Terms and Conditions of sale. This information does notconstitute an agreement, but simply reference information. To obtain a full copy of <strong>Omni</strong> <strong>Metalcraft</strong>’s Terms and Conditions of Sale, pleasecontact your Sales Representative.<strong>FMDR</strong> TECHNICAL HANDBOOK 2014.152
<strong>FMDR</strong> TECHNICAL HANDBOOK 2014.153