Software User's Manual - Kirtland Air Force Base
Software User's Manual - Kirtland Air Force Base
Software User's Manual - Kirtland Air Force Base

Create successful ePaper yourself
Turn your PDF publications into a flip-book with our unique Google optimized e-Paper software.
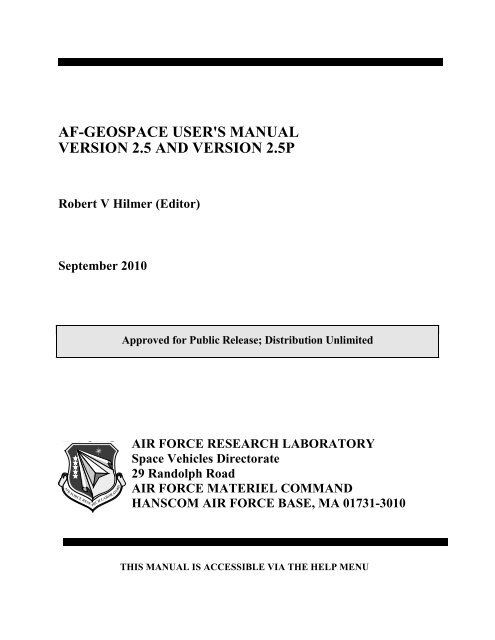
AF-GEOSPACE USER'S MANUALVERSION 2.5 AND VERSION 2.5PRobert V Hilmer (Editor)September 2010Approved for Public Release; Distribution UnlimitedAIR FORCE RESEARCH LABORATORYSpace Vehicles Directorate29 Randolph RoadAIR FORCE MATERIEL COMMANDHANSCOM AIR FORCE BASE, MA 01731-3010THIS MANUAL IS ACCESSIBLE VIA THE HELP MENU
WELCOME TO AF-GEOSPACE VERSIONS 2.5 AND 2.5P ..................................................... 1Development Overview .............................................................................................................. 1What’s New? ............................................................................................................................... 2Code Architecture ....................................................................................................................... 3Comments ................................................................................................................................... 3Release Notes on the User’s <strong>Manual</strong> and <strong>Software</strong> .................................................................... 4Automated Installation of AF-GEOSpace .................................................................................. 4<strong>Manual</strong> Installation of AF-GEOSpace ........................................................................................ 5Running AF-GEOSpace.............................................................................................................. 6Removing AF-GEOSpace ........................................................................................................... 6A Note on Virtual Memory ......................................................................................................... 6ENVIRONMENTS ......................................................................................................................... 7Static versus Dynamic Mode ...................................................................................................... 7Global Parameters ....................................................................................................................... 8Archive .................................................................................................................................... 9Prelim .................................................................................................................................... 10Latest ..................................................................................................................................... 10Daily Parameters Via the Internet ......................................................................................... 10Mouse Buttons .......................................................................................................................... 12Getting Started .......................................................................................................................... 13MENUS......................................................................................................................................... 14File Menu .................................................................................................................................. 15Open Paramesh ..................................................................................................................... 15Open Model .......................................................................................................................... 15Open View ............................................................................................................................ 16Save Model ........................................................................................................................... 16Save Window As................................................................................................................... 16Save View ............................................................................................................................. 17Print (or Ctrl+P) .................................................................................................................... 17Print Preview ......................................................................................................................... 17Print Setup ............................................................................................................................. 17Exit ........................................................................................................................................ 17Edit Menu.................................................................................................................................. 18Run/Update (or Ctrl+R) ........................................................................................................ 18ii AF-GEOSpace User’s <strong>Manual</strong> Version 2.5
Delete (Active Module) ........................................................................................................ 18Rename ................................................................................................................................. 18Data Tool .............................................................................................................................. 18Grid Tool (or Ctrl+G) ........................................................................................................... 19Dynamic Tool ....................................................................................................................... 20Animate Tool (or Ctrl+A) ..................................................................................................... 20View Menu................................................................................................................................ 22Tool Bar ................................................................................................................................ 22Status Bar .............................................................................................................................. 22Module Menu ............................................................................................................................ 23Science (or F2) ...................................................................................................................... 23Applications (or F3) .............................................................................................................. 23Graphics (or F4) .................................................................................................................... 23Data (or F5)........................................................................................................................... 23Worksheets (or F7) ............................................................................................................... 23Window Menu .......................................................................................................................... 24Create 1D Viewport .............................................................................................................. 24Create 2D Viewport .............................................................................................................. 24Create 3D Viewport .............................................................................................................. 24Background Colors ............................................................................................................... 24Full Screen (or F8) ................................................................................................................ 24Cascade ................................................................................................................................. 24Tile ........................................................................................................................................ 24Arrange Icons ........................................................................................................................ 251:1, 2:2, 3:3, … ..................................................................................................................... 25Viewport Menu ......................................................................................................................... 26Split ....................................................................................................................................... 26Projection .............................................................................................................................. 26View Position ........................................................................................................................ 26Delete (window).................................................................................................................... 27Color Bar Color..................................................................................................................... 27Color Bar Tics ....................................................................................................................... 27Show Color Bar..................................................................................................................... 27Perspective ............................................................................................................................ 27AF-GEOSpace User’s <strong>Manual</strong> Version 2.5iii
Globals Menu ............................................................................................................................ 28Show ..................................................................................................................................... 28Help Menu ................................................................................................................................ 29About AF-GEOSpace ........................................................................................................... 29<strong>Manual</strong> .................................................................................................................................. 29SCIENCE MODULES.................................................................................................................. 30Running Science Modules ........................................................................................................ 33The APEXRAD Science Module.............................................................................................. 34The AURORA Science Module................................................................................................ 37The CAMMICE Science Module ............................................................................................. 42The CHIME Science Module (Static Only) .............................................................................. 45The CRRESELE Science Module ............................................................................................ 50The CRRESPRO Science Module ............................................................................................ 54The CRRESRAD Science Module ........................................................................................... 58The CUTOFF Science Module ................................................................................................. 61The GCPM Science Module ..................................................................................................... 65The IONSCINT Science Module (V2.5 Only) ......................................................................... 67The IONSCINT-G Science Module.......................................................................................... 71The IRI2007 Science Module ................................................................................................... 76The ISPM Science Module (V2.5 and Static Only) .................................................................. 81The MAGNETOPAUSE Science Module ................................................................................ 86The METEOR IMPACT MAP Science Module ...................................................................... 89The METEOR SKY MAP Science Module ............................................................................. 95The MSM Science Module (V2.5 Only)................................................................................... 99The NASAELE Science Module ............................................................................................ 108The NASAPRO Science Module ............................................................................................ 110The NRLMSISE-00 Science Module ..................................................................................... 112The PIM Science Module ....................................................................................................... 115The PPS Science Module (V2.5 and Static Only) .................................................................. 118The SAAMAPS-2007 Science Module (Static Only) ............................................................ 123The SEEMAPS-1998 Science Module (Static Only) ............................................................. 124The STOA Science Module (V2.5 and Static Only)............................................................... 126The TPM-1 Science Module (V2.5 Only) .............................................................................. 131The WBMOD Science Module (V2.5 Only) .......................................................................... 135iv AF-GEOSpace User’s <strong>Manual</strong> Version 2.5
APPLICATION MODULES ...................................................................................................... 138Running Application Modules ................................................................................................ 140The APEXRAD-APP Module ................................................................................................ 141The BFIELD-APP Module ..................................................................................................... 143The BFOOTPRINT-APP Module (Static Only) ..................................................................... 149The CRRESELE-APP Module ............................................................................................... 151The CRRESPRO-APP Module ............................................................................................... 153The CRRESRAD-APP Module .............................................................................................. 155The IONSCINT-G-APP Module ............................................................................................ 157The LET-APP Module ............................................................................................................ 161The METEOR IMPACT-APP Module ................................................................................... 167The NASAELE-APP Module ................................................................................................. 169The NASAPRO-APP Module................................................................................................. 170The RAYTRACE-APP Module .............................................................................................. 172The SATEL-APP Module ....................................................................................................... 176The TPM-1-APP Module (V2.5 Only) ................................................................................... 182The WBPROD-APP Module (V2.5 and Static Only) ............................................................. 184GRAPHICS MODULES ............................................................................................................ 187Running Graphics Modules .................................................................................................... 189ANNOTATION ...................................................................................................................... 190AXES ...................................................................................................................................... 191COORD-PROBE .................................................................................................................... 193COORD-SLICE ...................................................................................................................... 195DETECTOR ............................................................................................................................ 197DMSP ...................................................................................................................................... 199EARTH ................................................................................................................................... 202EMITTER ............................................................................................................................... 204FIELD-LINES......................................................................................................................... 207GLOBAL INPUTS ................................................................................................................. 208GRID ....................................................................................................................................... 210IONSCINT-G .......................................................................................................................... 211ISOCONTOUR ....................................................................................................................... 213LINK ....................................................................................................................................... 214ORBIT-PROBE ...................................................................................................................... 216AF-GEOSpace User’s <strong>Manual</strong> Version 2.5v
ORBIT-SLICE ........................................................................................................................ 218PLANE-SLICE ....................................................................................................................... 221RAY TRACE .......................................................................................................................... 223SATELLITE ........................................................................................................................... 224STARS .................................................................................................................................... 226STATION ............................................................................................................................... 228VOLUME ............................................................................................................................... 230PARAMESH-COORDSLICE ................................................................................................ 231PARAMESH-FIELDLINES ................................................................................................... 233PARAMESH-FIELDLINES-II ............................................................................................... 236PARAMESH-GRID ................................................................................................................ 238PARAMESH-ISOCONTOUR ................................................................................................ 240PARAMESH-VOLUME ........................................................................................................ 240GRAPHICAL MODULE OPTIONS .......................................................................................... 242The DISPLAY Graphical Option............................................................................................ 243The INTERACTIVE Graphical Option .................................................................................. 243The USE TEXTURE Graphical Option .................................................................................. 243The LIGHTING Graphical Option ......................................................................................... 243The CLIPPING Graphical Option .......................................................................................... 243The TRANSPARENCY Graphical Option ............................................................................. 244The LIGHTS Graphical Option .............................................................................................. 244The MATERIAL Graphical Option ........................................................................................ 245The COLOR Graphical Option ............................................................................................... 245The COLOR MAP Graphical Option ..................................................................................... 246The DATA MAP Graphical Option ........................................................................................ 247DATA MODULES ..................................................................................................................... 248Running Data Modules ........................................................................................................... 249The DMSP Data Module ........................................................................................................ 250The EPHEMERIS Data Module ............................................................................................. 253The GRID Data Module.......................................................................................................... 255WORKSHEET MODULES........................................................................................................ 258Running Worksheet Modules ................................................................................................. 259The CALENDAR Worksheet Module .................................................................................... 260The COORD-TRANSFORM Worksheet Module .................................................................. 261vi AF-GEOSpace User’s <strong>Manual</strong> Version 2.5
EXAMPLES ............................................................................................................................... 2631) Space Particle Hazards ....................................................................................................... 2642) Low Earth Orbit Particle Environment ............................................................................... 2743) The Earth’s Magnetic Field: Placement of the Current Sheet (Dynamic).......................... 2824) UHF/L-Band Scintillation on a Geostationary Downlink (V2.5 Only).............................. 2885) HF Ray-Tracing in the Ionosphere ..................................................................................... 2926) The Energetic Solar Event of 20 February 1994 (V2.5 Only)............................................ 2957) The Magnetic Storm of 13 March 1989 (Dynamic)........................................................... 3008) HELIOSpace: Loading and Viewing PARAMESH Files (Dynamic)................................ 3059) IONSCINT: Ionospheric Scintillation Simulation (V2.5 Only, Dynamic) ........................ 31110) The Magnetospheric Cusp and Auroral Equatorward Boundary ..................................... 31711) Low Earth Orbit Total Dose ............................................................................................. 32412) Geomagnetic Cutoff Rigidity (Dynamic)......................................................................... 33013) Meteor Impact Hazards .................................................................................................... 33614) DMSP Precipitating Particles: Data vs. Climatology ....................................................... 34215) Magnetospheric Specification Model (V2.5 Only, Dynamic) .......................................... 34816) Ionospheric Plasma Bubbles: Flux Tube Specification .................................................... 35817) Radar Auroral Clutter ....................................................................................................... 364PRODUCT INFORMATION ..................................................................................................... 369ERRATA..................................................................................................................................... 370AF-GEOSpace User’s <strong>Manual</strong> Version 2.5vii
viii AF-GEOSpace User’s <strong>Manual</strong> Version 2.5
WELCOME TO AF-GEOSPACE VERSIONS 2.5 AND 2.5PAF-GEOSpace is a user-friendly, graphics-intensive master program bringing together many ofthe space environment models and applications developed over the years by the <strong>Air</strong> <strong>Force</strong>Research Laboratory, its contractors, and collaborators. The program has grown steadily in aneffort to address the concerns of the space weather community, to assist in providing anhistorical validation baseline for relating models covering similar domains, and to act as adevelopment tool for automated space weather visualization products. It provides common inputdata sets, application modules, and 1-D, 2-D, and 3-D visualization tools to all of its models. AF-GEOSpace provides operators, engineers, forecasters, scientists, students, and teachers with toolsto accomplish a wide variety of tasks, for example:• Optimal orbit specification for avoidance of radiation hazards• Satellite design assessment and post-event anomaly analysis• Forecasting of solar disturbance effects• Frequency and antenna management for radar and HF communications• Determination of communication link outage regions for active ionospheric conditions• Specification of meteor flux rates along orbits plus probabilities of incurring damage• Display of user-formatted space environment sensor data with orbit trajectories• Display of user-generated 3-D gridded simulation results for model comparison• Display of DMSP particle spectra and integrated flux from the SSJ4/5 particle sensors• Display tools for interpreting MHD simulation results on large-scale structured grids• Determination of location of geomagnetic footprints of satellites for conjunction studies• Determination of spacecraft distance from the magnetopause boundary layer• Specification of overall atmosphere, ionosphere, aurora, plasmasphere, radiation belt, andmagnetosphere particle populations• General interplanetary, magnetospheric, and ionospheric physics research and educationWhile AF-GEOSpace Version 2.5 does contain new science, application, graphics, and datamodules, a review of the software development history reveals a strong emphasis on retainingand enhancing the capabilities of earlier releases.Development OverviewThe first public release of AF-GEOSpace was Version 1.21 (1996; IRIX on SGI) containedradiation belt particle flux and dose models derived from CRRES satellite data, an aurora model,an ionospheric model and HF ray tracing capabilities. Version 1.4, (1999; IRIX on SGI) addedscience modules related to the cosmic ray and solar proton environment, low-Earth orbitradiation dosages, single event effects probability maps, and ionospheric scintillation, solarproton, and shock propagation models. New application modules for estimating linear energytransfer (LET) and single event upset (SEU) rates in solid-state devices, and modules forAF-GEOSpace User’s <strong>Manual</strong>: Version 2.5 1
visualizing radar fans, communication domes, and satellite detector cones and links were added.Automated FTP scripts permitted users to automatically update their global input parameter dataset directly from the NOAA National Geophysical Data Center (NGDC).AF-GEOSpace Version 2.0 (2002; Windows) included the first true dynamic run capabilities andoffers new and enhanced graphical and data visualization tools such as 3-D volume renderingand eclipse umbra and penumbra determination. The dynamic run capability enables theanimation of all model results, in all dimensions, as a function of time. Version 2.0 also includeda new realistic day-to-day ionospheric scintillation simulation generator [IONSCINT], anupgrade to the WideBand Model scintillation code [WBMOD], a simplified HF ionospheric raytracing module [RAYTRACE-APP], and applications built on the NASA AE-8 and AP-8radiation belt models [NASAELE-APP and NASAPRO-APP]. In addition, user-generatedsatellite data sets could be visualized along with their orbital ephemerides [EPHEMERIS] and atool was provided for visualizing MHD model results stored in structured grids [PARAMESH].AF-GEOSpace V2.1 (2006; Windows) followed with new capabilities: (1) to trace geomagneticfield-lines from user-specified points or points along a satellite orbital track [BFOOTPRINT-APP], (2) calculate cutoff rigidity values for solar protons and cosmic rays for any altitude fromwithin the Earth’s atmosphere to beyond geosynchronous orbit [CUTOFF], (3) display particleenergy spectra and integrated precipitating flux from the DMSP SSJ4/5 sensors [DMSP], (4)calculate hourly meteor impact or damage rates for a given cross section, pit depth, and materialtype on a user-specified surface area at positions outside of the Earth's atmosphere [METEORIMPACT MAP], (5) estimate meteor flux or damage rates as well as cumulative probabilities fora user-specified surface as a function of time along an orbit path [METEOR IMPACT-APP], (6)estimate the number of meteors visible from ground-level resulting from active meteor showers(or user-specified storms) [METEOR SKY MAP], (7) generate time-dependent flux profiles ofelectron, H + , and O + particle fluxes in the inner and middle magnetosphere as seen in Figure 1[MSM], (8) compute atmospheric number densities, total mass density and temperature as wellas anomalous oxygen number density and exospheric temperature [NRLMSISE-00], (9) modelthe solar-cycle dependent low-altitude extension of the proton radiation belt [TPM-1], and (10)calculate omni-directional proton fluence (integral and differential) along user-specified orbits[TPM-1-APP].What’s New?AF-GEOSpace Version 2.5 expands on the content of Version 2.1 by including new modules andupdates related to the following topics: (1) energetic proton maps for the South AtlanticAnomaly for the epoch 2000-2006 [SAAMAPS-2007], (2) GPS scintillation outage simulationtools [IONSCINT-G, IONSCINT-G-APP, plus a related skymap graphics module], (3)magnetopause boundary location determination [MAGNETOPAUSE], (4) a 2008 empiricaldescription of thermal plasma densities in the plasmasphere, plasmapause, magnetospherictrough, and polar cap [GCPM], (5) the International Reference Ionosphere model [IRI-2007], (6)a new inner magnetosphere plasma population model [CAMMICE], (7) new dynamic magneticfield models driven by archived input coefficients valid back to 1963 [BFIELD-APP andBFOOTPRINT-APP], (8) the ability to display externally-produced 3D gridded data sets[GRID], (9) a 2005 update to the geomagnetic cutoff rigidity model [CUTOFF], (10) a 2005update to the ionospheric scintillation Wide-Band Model [WBMOD], (11) improved magneticfield flux mapping options for the existing set of AF-GEOSpace radiation belt models2AF-GEOSpace User’s <strong>Manual</strong>: Version 2.5
[APEXRAD, CRRESELE, CRRESPRO, CRESSRAD and TPM-1], and (11) the capability todisplay the latest DMSP data sets [DMSP].Code ArchitectureAF-GEOSpace Version 2.5 is an object-oriented code written in C++ for Windows XP andVista. It is rigorously object oriented and contains separate user interface, kernel, and graphicslibraries. The software is divided into five explicit module classes to simplify the integration ofnew algorithms and increase portability. Science Modules control individual science models andproduce output data sets on user-specified grids. Application Modules typically manipulate thesedata sets, e.g., by integrating dose calculated by a radiation belt model or tracing HF rays througha model ionosphere. Application modules also provide orbit generation and magnetic field linetracing capabilities. Data Modules read and assist with the analysis of user-generated and DMSPdata sets. Graphics Modules control the one, two, and three-dimensional windows and enabledisplay features such as plane slices, magnetic field lines, line plots, axes, the Earth, stars, andsatellites. Worksheet Modules provide commonly requested coordinate transformations and acalendar system conversion tools.CommentsPerhaps the most important parts of this document are found at the end in the EXAMPLESsection. There you will find click-by-click instructions for using AF-GEOSpace to investigatesolar, magnetospheric, and ionospheric phenomena that have well known effects oncommunications and spacecraft systems. Examples exercising the dynamic run feature of AF-GEOSpace are marked as such in the title.AF-GEOSpace software is distributed exclusively by the Space Weather Center of Excellencewithin the Space Vehicles Directorate of AFRL. The AF-GEOSpace development teamappreciates comments, bug reports, and content suggestions for future software versions (pleasesend via e-mail to Robert.Hilmer@us.af.mil).AF-GEOSpace User’s <strong>Manual</strong>: Version 2.5 3
Release Notes on the User’s <strong>Manual</strong> and <strong>Software</strong>The AF-GEOSpace User’s <strong>Manual</strong>, Version 2.5 and Version 2.5P (this document), approved forunlimited public distribution, describes two AF-GEOSpace software application packagesreleased concurrently by the <strong>Air</strong> <strong>Force</strong> Research Laboratory (AFRL). AF-GEOSpace softwarewas developed by the US <strong>Air</strong> <strong>Force</strong> and cannot be redistributed or copied in whole or in part forsale. The USAF and the <strong>Air</strong> <strong>Force</strong> Research Laboratory are not liable for any damages resultingfrom the use of the information contained in this document or the computer software it describes.Version 2.5 software (DVD), distributed by AFRL to pre-approved government institutions andtheir agents, includes the complete inventory of Science and Application Modules listed in thetable of contents of this User’s <strong>Manual</strong>. Members of the general public who wish to obtain thisversion of the software should contact the AF-GEOSpace development team to initiate thenecessary release approval procedure.Version 2.5P software (CD), approved for unlimited public distribution, is identical to theVersion 2.5 software except for the absence of seven Science Modules (i.e., IONSCINT, ISPM,MSM, PPS, STOA, TPM-1, and WBMOD) and two Application Module (i.e., TPM-APP andWBPROD-APP) marked “V2.5 Only” in the table of contents. If interested in obtaining themodules excluded from Version 2.5P, please contact the AF-GEOSpace development team.Automated Installation of AF-GEOSpace(1) Insert the AF-GEOSpace <strong>Software</strong> MediaIf the Install window does not appear, then run the setup.exe program directly. [If the setuppopup window does not appear or you are requested to provide an administrative username/password but do not have administrative privileges, then please follow the <strong>Manual</strong>Installation instructions detailed in the next section.](2) Set the Install DirectoryA new directory named “AFGeospace” will be created in the selected Install Directory. TheInstall Directory path name can have a maximum of 35 characters. All executable and data fileswill be copied into the Install Directory. Note: All future references made in this document to the“AFGeospace” directory path will use the name “$AFGS_HOME”.(3) Set the Scratch DirectoryWhen AF-GEOSpace runs each model creates a directory where temporary data needed to runthe model is stored. When the model is deleted, or AF-GEOSpace exits, these directories aredeleted. The Scratch Directory path tells AF-GEOSpace where to create these directories.(4) Select links to be created (to Start Menu and/or Desktop)Links to run AF-GEOSpace can be automatically placed in the Start >Programs menu and on thewindows Desktop. Place a check in the Add to Start Menu and/or Make Desktop Shortcut boxesto create the links. Note: AF-GEOSpace will need to be installed with write permission to theStart menu directory structure for the links to be successfully created.(5) Install AF-GEOSpaceClick the Install button to begin the actual installation. The Install window will show installationprogress and issue a completion message. The Cancel button will interrupt installation.Option for Version 2.5: If the MSM Science Module is required, copy the DVD directories4AF-GEOSpace User’s <strong>Manual</strong>: Version 2.5
TLBMAT and BMATRIX (1.5 GB total) into the directory $AFGS_HOME\models\data\MSM.<strong>Manual</strong> Installation of AF-GEOSpace(1) Insert the AF-GEOSpace <strong>Software</strong> Media(2) Create the Install DirectoryCreate a new directory called “AFGeospace” for use as the installation location. The path nameof the directory where “AFGeospace” is placed can have a maximum of 35 characters. Copy thebin and models directories from the media and place them in the new directory AFGeospace.Note that all future references made in this document to the “AFGeospace” directory path willuse the name “$AFGS_HOME”.(3) Edit the Batch Files for Running AF-GEOSpace and Updating Global InputsCopy the files named AFGeospace.bat and AFGetSec.bat and place them in the newly createdmachine directory $AFGS_HOME\bin. Each file contains a set of commands to set machineenvironment variables followed by a call to an executable file, namelyFile AFGeospace.bat:1) set PLGS_MODELS=C:\Users\username\AFGeospace2) set PLGS_SCRATCH_DIRECTORY=C:\TEMP3) set PLGS_DMSP_DATADIR=C:\Users\username\AFGeospace\models\data\DMSP\20034) "C:\Users\username\AFGeospace\bin\AFGeospace.exe"File AFGetSec.bat:1) set PLGS_MODELS=C:\Users\username\AFGeospace2) set PLGS_SCRATCH_DIRECTORY=C:\TEMP3) "C:\Users\username\AFGeospace\bin\AFGetSec.exe"Initially, fictitious paths are set for the location of the bin and models directories, i.e.,$AFGS_HOME = C:\Users\username\AFGeospace in the sample file content shown above. Editboth files to reflect your install location, i.e., replace the character string “C:\Users\username” ineach of lines 1, 3, and 4 of file AFGeospace.bat and also in lines 1 and 3 of file AFGetSec.batwith a character string designating the actual location of directory AFGEOSpace.(4) Confirm Location of the Scratch DirectoryAs AF-GEOSpace runs, each new module creates a directory where temporary data needed torun the model is stored. The default location of the scratch directory as noted in both batch filesis C:\TEMP. If this directory does not currently exist on your machine, then either create one oredit line 2 of both batch files to specify the location of an existing directory to be utilized forscratch space. Note that when the model is deleted, or AF-GEOSpace exits, the temporary datadirectories are deleted.(5) Create a Desktop ShortcutRight-click on the newly edited file $AFGS_HOME\bin\AFGeospace.bat and select CreateShortcut. Place the shortcut on your Desktop or elsewhere for convenient access to the software.(6) Option for Version 2.5: If the MSM Science Module is required, copy the DVD directoriesTLBMAT and BMATRIX (1.5 GB total) into the directory $AFGS_HOME\models\data\MSM.AF-GEOSpace User’s <strong>Manual</strong>: Version 2.5 5
Running AF-GEOSpaceTo run AF-GEOSpace, double-click on the AF-GEOSpace Desktop icon or use the Start menu(Start > Programs >AFGeospace > AFGeospace). If no links were created during installation,start AF-GEOSpace by going to the $AFGS_HOME\bin directory and double-clicking on theAFGeospace.bat file. Be aware that the file AFGeospace.bat contains Environment Variablesettings specific to the Install and Scratch directories you selected during the installation process.For this reason, if you would like to change the location of any part of the installation it is best tofirst remove AF-GEOSpace completely (see Removing AF-GEOSpace below) and then re-installit to properly designate the preferred Install and Scratch directory locations.Note: AF-GEOSpace will not work properly if you run the AFGeoSpace.exe file directly.Three windows will appear on your screen. One is the AF-GEOSpace graphical user interface(GUI) with a set of pull-down menu items across the top. The other two are shell windows (plaintext windows, usually with black backgrounds). You can minimize these to clean the desktop,but the shell windows must remain open for AF-GEOSpace to function. To optimize thequality of the display layout and increase ease of use, it is best to maximize the AF-GEOSpaceGUI window immediately upon starting a session.When large fonts are used in your display, the text in the GUI Environment Window may appearto overlap or be crowded. If this occurs, adjusting your display to use small fonts should clean upyour AF-GEOSpace display layout. To use smaller display fonts within WindowsXP, openDisplay in the Control Panel (Start > Settings > Control Panel), select the Advanced button onthe Settings tab, and then choose “Normal Size” from the Font Size list on the General tab. ForVista, select Personalization from the Control Panel, select the Adjust font size (DPI) option onthe left, and use the DPI Scaling dialog box to make the adjustment.At the end of this document, some AF-GEOSpace examples are provided with detailed step-bystepinstructions to help the user visualize results from both static and dynamic model runs.An electronic copy of this document can be found in $AFGS_HOME\models\HELP.Removing AF-GEOSpaceTo remove AF-GEOSpace, delete the $AFGS_HOME directory. If a desktop icon was createdthen place it in the recycle bin. If a link in the Start menu was created, remove the AFGeospacesubmenu item by following the Start Menu handling instructions available using Start > Help.Because the installation does not modify the machine registry, removal is complete at this point.A Note on Virtual MemoryIf users find the machine running out of virtual memory, the virtual memory paging file size canbe adjusted by accessing the System option in the Control Panel (Start > Settings > ControlPanel). For WindowsXP use the Advanced tab within the System option, click the Performancesection Settings button. Select the Advanced tab of the Performance Options window and clickthe Change button in the Virtual memory section. In the Drive list, select the drive that containsthe paging file you want to change, edit the text boxes to adjust the Initial size (MB) andMaximum size (MB), and click the Set button. You may have to restart your computer for thesechanges to take effect. Please see the Windows Help feature accessible via the Start button onyour computer for more details. Also see the Help feature for modifying Windows Vista systems.6AF-GEOSpace User’s <strong>Manual</strong>: Version 2.5
ENVIRONMENTSEnvironment modules provide interfaces to the science models and related applications needed toinvestigate the solar, interplanetary, magnetospheric, auroral, and ionospheric environments andtheir effects on communications and spacecraft systems. AF-GEOSpace Version 2.5 supportstwo basic environment module types: static and dynamic. Modules that do not operate indynamic mode are marked as “Static Only” in the table of contents of this manual.Upon opening AF-GEOSpace, an Environment Window is displayed containing a menu bar andan input section for specifying the module run times and global parameters used to drive modelsduring the session. When using AF-GEOSpace to do comparative studies of space environmentsfor different geophysical conditions it is recommended that a new AF-GEOSpace session beused for each case, i.e., for each time or time period. Remember that the models contained in AF-GEOSpace were developed independently over a period of many years by a variety of authors.Static versus Dynamic ModeStatic Mode: A Science or Application module run is called static if it produces outputrepresenting a single Universal Time, i.e., only the Start: Year, Day, and UT text fields arecompleted in the global input row at the top of the Environment Window. All environmentmodels and applications are run using a fixed set of geophysical parameters, e.g., thegeomagnetic activity index Kp. With the exception of the MSM Science Module and the satelliteorbit generator SATEL-APP and associated applications (APEXRAD-APP, BFOOTPRINT-APP, CRRESELE-APP, CRRESPRO-APP, CRRESRAD-APP, LET-APP, METEOR IMPACT-APP, NASAELE-APP, NASAPRO-APP, TPM-APP) all environment models and applicationscan be run for a fixed Universal Time.Dynamic Mode: A Science or Application module run is called dynamic if it produces output atmore than one Universal Time, i.e., both the Start: and End: Year, Day, and UT text fields arecompleted in the global input row at the top of the Environment Window. It must be emphasizedthat most dynamic module runs are composed of a time-ordered sequence of static runs. Adynamic mode run is established by placing a check mark in the small box to the right of theStart: UT text field to activate the End: Year, Day, and UT text fields. Selecting one of theGlobals options to the right of the time input text fields will create a chronological list of globalinput parameters that module runs will share during the session. This common set of global inputparameters allows you to automatically run models in a coordinated manner so that outputdisplays of varying types of generated physical parameters, e.g., auroral precipitation patternsand geomagnetic field lines, will be consistent with each other to the greatest extent possiblewithout truly coupling the models. Again, the SATEL-APP orbit generation module and relatedapplications work in both static and dynamic mode. When SATEL-APP is opened in staticmode, the satellite orbit will be calculated for the 1-day interval beginning with the Start time.However, when SATEL-APP is opened in dynamic mode the satellite orbit will automatically becalculated for the entire time period defined by the entered Start/End time limits.AF-GEOSpace User’s <strong>Manual</strong>: Version 2.5 7
Global ParametersGlobal parameters are the date, time, and geophysical indices shared between many of themodels. The purpose of the global parameters section is to help maintain consistent inputs to theplurality of models that can be created within a single static or dynamic environment. Mostmodels have additional parameter inputs that will be requested when initializing the appropriatemodule.IMPORTANT NOTE: THE FIRST THING A USER MUST DO AFTER OPENING AN AF-GEOSPACE APPLICATION IS SET THE TIME AND OBTAIN THE GLOBAL INPUTPARAMETERS. The following time and global parameter input controls are located in a rowjust below the pull-down menus at the top of the window:Start: (three items are set for both static and dynamic runs)Year: Start YearDay: Start Julian day of year in the form DDDUT: Start Universal Time in the form HH:MM“Box”: To set up a dynamic run, place a check mark in the box next to the Start: UT text fieldand the following three end time text fields will become active.End: (three items are set for dynamic runs only)Year: End YearDay: End Julian day of year in the form DDDUT: End Universal Time in the form HH:MMKp: Planetary magnetic activity index input in decimal formSSN: Daily sunspot numberF10.7: Instantaneous solar radio flux at 10.7 cm (2800 MHz) in 10 22 Wm -2 Hz -1Ap: Planetary magnetic index in integer formThe definitions of Kp, SSN, F10.7, and Ap are identical to those used for the geophysical indexarchives maintained by the National Geophysical Data Center (NGDC) in Boulder, Colorado.After the time text fields are adjusted, the user must use the Global selector (options are Archive,Prelim, or Latest as described below) to retrieve the global inputs and initialize AF-GEOSpacewith the run time. The geophysical indices are flagged with the unphysical values of “-1” if dataare not available for the selected time or interval. Values for these flagged parameters or any ofthe parameters can then be directly edited using the text boxes. As described in the Menu section,the input parameters extracted from the data files can be adjusted for dynamic runs using theGlobals:Show pulldown menu. Editing the parameters directly before running a module allowsthe user to run the entered time or interval using parameters not contained in the global data sets.Additional parameters accessible via the Globals:Show pulldown menu are,Dst: Geomagnetic activity index in nT (through March 2010)EqE:Equatorward boundary of the diffuse aurora at midnight in units of degrees magneticlatitude (through Day 83 of 2010)8AF-GEOSpace User’s <strong>Manual</strong>: Version 2.5
The procedure for updating the Dst data follows the same pattern, e.g., at a Windows commandprompt, typecd $AFGS_HOME\models\data\GLOBALS\DSTftp ftp.ngdc.noaa.gov(log in using the username “anonymous” and your local e-mail address as a password)ftp> cd STP/GEOMAGNETIC_DATA/INDICES/DSTftp> ls dst200*(screen listing shows latest file is dst2001.v11, containing data through November 2001)ftp> get dst2001.v11ftp> quitrename dst2001 dst2001oldrename dst2001.v11 dst2001PrelimWhen Prelim is selected from the Globals button, the values of the geomagnetic indices (Kp,SSN, F10.7, Ap) from the near-real time file (see Latest below) valid for the Year, Day, and Timevalues entered in the global parameter boxes are automatically loaded. The data base of near-realtime estimates can be used to run AF-GEOSpace for time periods not yet covered by the NGDCarchive. Before using Prelim, try the Latest option to determine the extent of the available data.LatestWhen Latest is selected with the Globals button, the most recent time and global indices (Kp,SSN, F10.7, Ap) available for the Year entered in the global parameter box are automaticallyloaded from the corresponding file in directory,$AFGS_HOME\models\data\GLOBALS\RTThe files in this directory contain estimates of the indices as computed by NOAA/SEC and canbe updated daily (see Daily Parameters Over the Internet below). If kept current, the dataestimates will be valid for the previous day. File naming conventions and formats are identical tothe NGDC archive files, with the exception of a header line giving the data and time of the mostrecent update. Note that these parameter estimates for a given date often differ from the valuesthat eventually appear in the NGDC archive files. Note: The anonymous ftp script controlled byfile AFGetSec.bat (see next section) must be executed at least once for the Latest function towork.Daily Parameters Via the InternetDaily updates of files from NOAA/NGDC containing selected geomagnetic and solar activityindices are available via anonymous FTP from ftp.sec.noaa.gov in the directory namedpub/latest. AF-GEOSpace provides the scripts needed to automatically retrieve these files on adaily basis and use them to update the data file accessed when using the Prelim and Latestfeatures described above. The procedure for establishing the daily update is given below andrelies on the following files:$AFGS_HOME\bin\AFGetSec.bat (created during installation)$AFGS_HOME\bin\AFGetSec.exe10AF-GEOSpace User’s <strong>Manual</strong>: Version 2.5
$AFGS_HOME\models\data\Sec\ftpcmdThe batch file AFGetSec.bat is created during installation. It sets the two environment variablesPLGS_MODELS (location of bin and models directories) and PLGS_SCRATCH_DIRECTORY(location where FTP files are processed), and calls the executable program AFGetSec.exe. Notethat the default installation sets PLGS_MODELS=c:\Program Files\AFGeospace and setsPLGS_SCRATCH_DIRECTORY=c:\TEMPAFGetSec.exe performs an FTP session using input from file ftpcmd, then appends the new datafrom the SEC files to the latest Kp file in $AFGS_HOME\models\data\GLOBALS\RT. Note thatthe source file for this procedure is $AFGS_HOME\models\data\Sec\AFGetSec.for.Procedure for setting up automated daily parameter updates:(1) Follow the first set of FTP instructions in the Archive section above to place the most recentfull Kp file, e.g., file kp2002, in the directory $AFGS_HOME\models\data\GLOBALS\KP.(2) Place a duplicate copy of the most recent full Kp file (obtained in step above) in the directory$AFGS_HOME\models\data\GLOBALS\RT and adjust its properties so that it can beupdated (e.g., right-click on file Kp2002, select the Properties option, and clear the Readonlycheck box).(3) Edit the second line of file ftpcmd to use your e-mail address as the anonymous ftp password.The file can be opened using a text editor like Notepad.(4) Test the procedure by double-clicking on the file AFGetSec.bat. A shell window will appearbriefly as the ftp process takes place. If successful, the PLGS_SCRATCH_DIRECTORYwill contain five temporary files, e.g., ftpcmd, kp2002, MAda.txt, sec.bat, and SGAS.txt. File$AFGS_HOME\models\data\GLOBALS\RT\kp2002 should now contain a new first line (thedate) and last line (date and data). If the five new files appear but the Kp file was notupdated, check that the Kp file Properties (right-click on file) are not set as Read-only andtest again.(5) To establish an automated daily data update, use the Windows Task Scheduler to run the fileAFGetSec.bat once daily. On a WindowsXP system, follow the instructions provided via theStart Menu options, i.e., Start>Settings>Control Panel>Scheduled Tasks. The schedulerrequires a valid username and password to function. To insure that daily updates are notinterrupted, it is suggested that the task be scheduled using the local machine administratoraccount or some other local account that does not require frequent password changes.AF-GEOSpace User’s <strong>Manual</strong>: Version 2.5 11
Mouse ButtonsMouse controls are provided to facilitate manipulation of the 2D and 3D window view anddisplay environment window options and color bars associated with displayed graphical objects.Left:Right:Depress the left mouse button and move it around while its pointer is within a 3Dwindow to rotate displayed objects.Depress the right mouse button and move it toward/away from the screen whileits pointer is within a 2D or 3D window to expand/contract the view, i.e., to zoom.Shift+Left: While depressing the Shift key, apply the left mouse button and move its pointeraround within a 3D window to translate the view in the X, Y, or Z directions andmove it around. In a 2D window, this same combination can be used to re-centerthe Earth map display. Users with an Intellimouse can also depress the mouse’scenter wheel to perform this translate function.Ctrl+Left:While depressing the Ctrl key, use the left mouse button to click on an object in a2D or 3D window and the related environment window options and color bar willbe displayed.12AF-GEOSpace User’s <strong>Manual</strong>: Version 2.5
Getting StartedTo run AF-GEOSpace, double-click on the AFGeospace.bat icon in the $AFGS_HOME\binfolder (or on a shortcut icon if one was created) and two windows will appear: the AF-GEOSpace graphical user interface (GUI) with a set of pulldown menus and a blank diagnosticscreen with a blinking prompt. The blank diagnostic windows can be minimized to clean up yourdesktop, but they must remain open for the application to function properly (for some modules,the diagnostic window will contain run-time messages). To optimize the quality of the GUIlayout, it is best to maximize the AF-GEOSpace GUI window. The Help menu will guide you tothe PDF version of this document.To start using AF-GEOSpace Version 2.5 most effectively, review the MENUS section of thismanual and then go directly to the EXAMPLES section. The examples contain step-by-stepinstructions that will guide you through a complete AF-GEOSpace session that includes thegeneration and visualization of space environment parameters. The Exit option in the File menuterminates AF-GEOSpace and deletes all objects and graphics created during the session.All comments regarding the current capabilities of AF-GEOSpace and ideas for future versionsof the software are appreciated. Contact information is in the PRODUCT INFORMATIONsection at the end of this document.AF-GEOSpace User’s <strong>Manual</strong>: Version 2.5 13
MENUSThe menu bar at the top of each environment provides access to functions for managing science,application, data, and graphics modules; create graphics windows, and access help. This sectiondescribes the File, Edit, View, Module, Window, Viewport, Globals, and Help menus in turn.14AF-GEOSpace User’s <strong>Manual</strong>: Version 2.5
File MenuThe File menu provides access to features enabling the user to load MHD simulation data filesfor viewing, save/open completed model runs, save/open window views, save window graphics,and exit an AF-GEOSpace session. The File menu button accesses the following options.Open ParameshThe Open Paramesh function allows the user to read-in or load MHD simulation run resultsproduced externally to AF-GEOSpace using large-scale parallel grid generation and MHDscience codes developed by the Navel Research Laboratory (NRL) for the Common HighPerformance Computing (HPC) <strong>Software</strong> Support Initiative (CHSSI) collaborative projectunder way with AFRL. Each simulation is stored in an individual folder in the form of aflicks.hdr file, a flicks.ftr file, and a numbered set of flicks.##### files with one file for eachtime step. The Open Paramesh function produces a popup window for locating the foldercontaining the data files for the simulation of interest. Selecting the flicks.hdr file within afolder and using the Open button in the popup window will load the saved data files andplace an NRLMHD entry in the Active Modules list of the Science Environment Window.The data will then be available for display using the Paramesh related graphics moduleswithin a special Heliospace viewport. Create a Heliospace viewport by changing any activewindow by using the Viewport menu and selecting Projection and then the Heliospaceoptions. More details regarding a description of and access to Paramesh data files can befound at the NRL website (http://www.lcp.nrl.navy.mil/hpcc-ess/amrmhd3d.10.html) or bycontacting the AF-GEOSpace team at AFRL. An AF-GEOSpace session entitled“HELIOSPACE: Loading and Viewing PARAMESH Files” is described in the EXAMPLESsection at the end of this manual.Open ModelThe Open Model function allows the user to read-in or load Environment Window inputs andrun results of previously saved Science and Application modules. Modules are saved assingle Common Data Format (CDF) files using the Save Model function (see below).The Open Model function produces a popup window for selecting from existing CDF files.Selecting a *.cdf file and using the Open button in the popup window will load the savedmodule and place an appropriate entry in the Active Modules list of either the Science orApplication Environment Window. The data produced by the module is then available fordisplay using the graphics modules. Note that while the original grid settings do not appearwhen the new entry in the Active Modules list is selected and the Edit menu Grid Tool option(see below) is selected, the grid information is stored internally. For modules producing onlytext output, the Show Text button in the Environment Window of the reloaded Science orApplication module must be selected to see the output.Before opening a static model run, the appropriate Start time should be re-enterer in the textfields at the top of the window and the Globals:Archive feature should be selected.Before opening dynamic model runs, the appropriate Start and End times should be reenteredin the text fields at the top of the window and the Globals: Archive feature should beAF-GEOSpace User’s <strong>Manual</strong>: Version 2.5 15
-reselected. Then when using the Animate Tool (in the Edit pulldown menu), the RangeTimes button can be used to automatically set its Time Start and Time End fields.For both the static and dynamic run cases, it is very convenient to store all saved model filesrepresenting a particular time period in a directory with a name containing a time label (seehint in Save Model section below).Open ViewThe Open View function allows the user to load a view saved previously using the Save Viewfunction described below. The Open View function produces an Open popup window forselecting from existing view files (no specific file suffix required). Select a view file and usethe Open button in the popup window to reset the view of the active 3D window to match thesaved view.Save ModelThe Save Model function allows the user to save Environment Window input settings and runresults of Science and Application modules as single CDF files for future use. This featureworks for modules run in both static and dynamic modes. Saved models can be reloadedusing the Open Model function described above.To save a model run: (1) Select/highlight a science or application module entry in an ActiveModules list for a module that has been run, i.e., the message MODEL IS READY AND UPTO DATE must appear in the Model Status window at the bottom of the EnvironmentWindow. Note that graphics, data, and worksheet module results cannot be saved. (2) Accessthe Save Model option in the Edit pulldown menu and a Save As popup window will appear.Locate the directory for storing the CDF to be created, enter a file name, and click the Savebutton. When the Save As window disappears, the inputs and data from the run module havebeen written to a CDF file in the designated directory and can be accessed in the future usingthe Open Model feature described above.Hint: It is suggested that models representing a particular time period be saved together in adirectory named to designate the time period, e.g., one might place saved model runs in adirectory called “1995_185_0000to1400by7200” to represent a run made for UT=00:00 to14:00 on day 185 of year 1995 using a dynamic step size of 7200 seconds. This will makeviewing and animating the saved output much simpler after using the Open Model featuredescribed above. Note that the Exit option of the File pulldown menu removes all fileslocated in folders generated by AF-GEOSpace during a session so it is best to place CDFfiles elsewhere.Save Window AsThe Save Window As function is used to save the contents of the active window in TaggedImage File Format (TIFF) or Joint Photographic Experts Group (JPEG) format. This featureopens a Save As window to specify the format, file name, and save location. While TIFFimages are sharper than JPEG images, they also result in much larger files. Note that the Exitoption of the File pulldown menu removes all files located in folders generated by AF-GEOSpace during a session so it is best to place saved graphics files elsewhere.16AF-GEOSpace User’s <strong>Manual</strong>: Version 2.5
Save ViewThe Save View function is used to save the view currently visible in an active 3D window.This feature opens a Save As window to specify the file name (no specific file suffixrequired) and save location. No specific file suffix is required. After a view is saved, and theEarth has been moved for example, the saved view can be restored by using the Open Viewfunction described above. Note that the Exit option of the File pulldown menu removes allfiles located in folders generated by AF-GEOSpace during a session so it is best to placesaved view files elsewhere.Print (or Ctrl+P)The Print function is currently inactive. To print a window’s contents, use the Save WindowAs option above and then imbed the saved TIFF or JPEG images in another file for printing.To print the entire screen, use the Print Screen Key (PrntScrn or PrtScn) to capture the entirescreen in the buffer and then “paste” it into another document for printing.Print PreviewThe Print Preview function is currently inactive.Print SetupThe Print Setup function displays the standard Windows Print Setup window.ExitThe Exit function terminates the program and deletes all session folders in the assignedscratch folder that were created by AF-GEOSpace. Files generated using the Save Model,Save Window As, and Save View functions should not be stored in these temporary sessionfolders if they need to be accessed in the future.AF-GEOSpace User’s <strong>Manual</strong>: Version 2.5 17
Edit MenuThe Edit menu provides access to features enabling the user to run models, delete models,rename entries in the Active Modules lists, examine text representations of module produceddata, setup computation grids, set dynamic run mode time step values and parameter selection,and animate results from dynamic module runs (including satellite orbits in static mode). TheEdit menu accesses the following options.Run/Update (or Ctrl+R)The Run/Update function is used to run Science, Application, and Data modules after settingall desired inputs. A Process View popup window will appear indicating that the module isrunning and will disappear when complete. A message in the Model Status window at thebottom of the environment window will read that the “MODEL IS READY AND UP TODATE” to indicate that the generated data are available for use by the graphics modules.Depending on the type of module run, the Model Status window may also provide a briefmessage regarding the time of the run and the global parameters used. A scroll featureenables the user to view longer text outputs to the Model Status window.Delete (Active Module)The Delete function is used to remove entries from the Active Modules lists. When displayedgraphics modules are deleted, the graphic will disappear from the viewport the next time thewindow is accessed. Before deleting active Science, Application, or Data modules, allrelated graphics displays must be removed (popup warnings are displayed if this is not done).RenameThe Rename function enables the user to rename entries in the Active Modules lists. ARename Model popup window will appear containing an editable text box for entering a newname for the module. This feature is convenient, for example, when multiple coordinateslices (produced using the Coord Slice graphics module) representing multiple types ofscience model data appear in the active graphics modules list.Data ToolThe Data Tool function provides an interface to view a data set in a formatted, tabular outputform. Selecting the Data Tool function after highlighting a science or application module inan Active Modules list will produce a Data Viewer popup window for viewing the data setproduced using that module. In order to view three-dimensional data sets in a twodimensionaltabular format, the Data Viewer window allows the user to assign one dimensionof the dataset to the columns and another dimension to the rows of the tabular output. Thedata selector appears at the top of the Data Viewer window. Dimensions are assigned toColumns and Rows using the button switches at the bottom of the window. The “slice” (i.e.,the third unassigned dimension) at which the columns and rows are extracted is controlledusing the lower slider. The user can scan through the two assigned dimensions using thescroll bars immediately adjacent to the text window. The Done button retires the DataViewer window.18AF-GEOSpace User’s <strong>Manual</strong>: Version 2.5
Grid Tool (or Ctrl+G)The Grid Tool option opens a popup window that allows one to specify the type andresolution of the grid used by science and application modules. If the default grid settings aredesired then the Grid Tool need not be used. After selecting from the Grid Tool optionsdescribed below, clicking the Apply button or closing the Grid Tool window will generate thegrid. The Cancel button should be used to exit the Grid Tool Window if no grid changes aredesired. Note: The coordinate labels Radius, etc., will change to correspond to the differenttypes of systems chosen. One must close the Grid Tool window in order to activate anychanges.The Grid Tool options are:Spacing: Specifies the manner in which the grid spacing is calculated. Choices are:Linear: Equally spaced grid points along the coordinate direction are generated.N-S Symm: Symmetrically spaced grid points along the North-South direction aregenerated and no grid points exist in the equatorial regions (useful for auroralcalculations). For example, with a spherical Geometry setting the grid points are evenlyspaced between the absolute value of the specified minimum and maximum latitudes inboth the Southern and Northern hemisphere, e.g., for a minimum latitude of 50 o and amaximum latitude of 90 o , grid points will be evenly spaced between 50 o and 90 o Northlatitude and 50 o and 90 o South latitude. No grid points will exist between 50 o South and50 o North latitude.Geometry: Specifies the geometry of the grid. Choices are:Cartesian: generate a grid in Cartesian geometry.Cylindrical: generate a grid in cylindrical geometry.Spherical: generate a grid in spherical geometry.System: Specifies the coordinate system of the grid. The choices are:GEOC: Geocentric coordinate system: The Z axis is aligned with the north rotational pole,the X axis pierces the Greenwich Meridian on the equator (0 o Long, 0 o Lat), and the Yaxis is minus the cross-product of X and Z.GSM: Geocentric solar magnetospheric coordinate system: The X axis points to the Sun.The Z axis is perpendicular to X and lies in the plane containing the magnetic dipole axis.The Y axis completes the right-handed system and is positive towards dusk.SM: Solar magnetic coordinate system: The X axis is perpendicular to Z and lies in theplane containing the Z axis and the Earth-Sun line. The Z axis is coincident with themagnetic dipole axis. The Y axis completes the right-handed system and is positivetowards dusk.GEI: Geocentric equatorial inertial coordinate system: The Z axis is the same as for thegeocentric coordinate system (GEOC). The X axis points in the direction of the first pointof Aries (vernal equinox). The Y-axis completes the right-handed system. The anglebetween the X-axis and Greenwich Meridian is set by the UT.AF-GEOSpace User’s <strong>Manual</strong>: Version 2.5 19
Set (?, ?, ?): For each of the three coordinates, the user must input the grid sizes. Eachcoordinate contains a selection list for setting combinations of three of the four variablesneeded to specify this coordinate. The variables are,Delta: the interval between nodes.NPoint: the total number of nodes.Min: the minimum coordinate value.Max: the maximum coordinate value.Dynamic ToolThe Dynamic Tool allows the user to select the time steps for running science and applicationmodules and choose which data parameters to write to file for viewing dynamic run results.A text box indicates the number of dynamic steps to be taken (maximum allowed is 200), thetimes at which to run the model, and information regarding global parameters to be used.To reduce both run time and the size of environment data files created by AF-GEOSpace, theuser should take into account the time-dependent nature of the module to be run whenselecting the Time Step. For example, if a radiation belt model such as CRRESELE is runusing the very slowly time-varying IGRF85 magnetic field, then setting Time Step to valuesless than a day (86400 sec) does not improve the accuracy of the CRRESELE sciencemodule output. If, however, the same CRRESELE model is run using the dipole tiltdependentIGRF85/O-P option (that includes an external magnetic field component), a TimeStep of two hours (7200 sec) could be considered reasonable.A Dynamic Tool window appears with the following settings:Variable to write to file: Select: This section shows the available data parameters that canbe generated by the selected module. Only those selected will be viewable with thegraphics modules. If no parameters are selected, then an Error popup reading “No dataselected for output” will appear when a run is attempted.Time Step (sec): The time between dynamic steps. The selected module will be run once ateach time step.Update List: The Update List button uses the selected Time Step to adjust the number oftimes a model is run within the Start and End times specified at the top of the EnvironmentWindowDone: Exits the Dynamic ToolAnimate Tool (or Ctrl+A)Selecting the Animate Tool allows the user to animate orbits and data sets in the 1D, 2D, 3D,and Heliospace windows. This tool brings up an Animate Window for controlling animationeffects. Graphics representing data from science, application, and data modules are updatedindividually as the animation time slider passes a time at which a model was processed. Forexample, if the selected Time Step is 60 seconds and a satellite position was generated every60 seconds but magnetic field lines were only produced once every 3 hours, the magneticfield lines will appear to jump suddenly at three hour intervals.The Animate Window entries are described below.20AF-GEOSpace User’s <strong>Manual</strong>: Version 2.5
Time: Text box and slider to set the current date and time.Animate: Starts/stops the animation stepper at the time indicated by the Time slider.Interactive: When activated, all environments update automatically when the Time sliderposition is changed.Time Start: Sets the start time for the stepper in day, hour, and minute.Time End: Sets the stop time for the stepper in day, hour, and minute.Time Step (Sec): Sets the time increment for the stepper in seconds.Update: Registers changes made to settings in the Animate window.Range Times: Set the range of the step times from the overall minimum and maximum timefor all the dynamic modules used. In static mode, when SATEL-APP is the only dynamicmodel engaged, the range is set for one day in length beginning with the Start time.Done: Exits the animation module.AF-GEOSpace User’s <strong>Manual</strong>: Version 2.5 21
View MenuThe View menu button accesses the following options.Tool BarThe Tool Bar option is currently inactive.Status BarThe Status Bar is located at the bottom of the Environment Window. It indicates when theinterface is ready for input and also indicates the function of some pulldown menu itemswhen selected using the left mouse button.22AF-GEOSpace User’s <strong>Manual</strong>: Version 2.5
Module MenuThe Module menu provides access to Science, Application, Data, Graphics, and Worksheetmodules. Most of the functionality of AF-GEOSpace is accessed via this menu. The Modulemenu button accesses the following options.Science (or F2)The Science option under the modules pulldown menu provides access to the sciencemanager. Once activated, lists of Available and Active Science modules are visible. Sciencemodules may be managed by making appropriate choices from these lists.Applications (or F3)The Applications option under the modules pulldown menu provides access to the applicationmanager. Once activated, lists of Available and Active Application modules are visible.Applications may be managed by making appropriate choices from these lists.Graphics (or F4)The Graphics option under the modules pulldown menu provides access to the graphicsmodule manager. Once activated, lists of Available and Active Graphics modules are visible.Graphical modules may be managed by making appropriate choices from these lists.Data (or F5)The Data option under the modules pulldown menu provides access to the data modulemanager. Once activated, lists of Available and Active Data modules are visible. Datamodules may be managed by making appropriate choices from these lists.Worksheets (or F7)The Worksheet option under the modules pulldown menu provides access to the worksheetsmanager. Once activated, lists of Available and Active Worksheet modules are visible.Worksheets may be managed by making appropriate choices from these lists.AF-GEOSpace User’s <strong>Manual</strong>: Version 2.5 23
Window MenuThe Windows menu enables the user to create 1D, 2D, and 3D viewports, arrange existingviewports, and view individual viewports in full screen mode. Control of window backgroundcolors is also provided. The Window menu button accesses the following options.Create 1D ViewportActivating the Create 1D Viewport option will create a new plot window. The 1D plotwindows are designed for displaying line plots of data created by science, application, or datamodules. Note that the Projection option of the Viewport menu can be used to change thedimensionality of any viewport to 1D.Create 2D ViewportActivating the Create 2D Viewport option will create a new plot window. The 2D plotwindows are designed for projection of data created by science, application, or data modulesonto a 2D surface (the Earth’s surface). Note that the Projection option of the Viewport menucan be used to change the dimensionality of any viewport to 2D.Create 3D ViewportActivating the Create 3D Viewport option will create a new plot window. The 3D plotwindows are designed for display of 3D data created by science, application, or datamodules. Note that the Projection option of the Viewport menu can be used to change thedimensionality of any viewport to 3D.Background ColorsThe Background Color option controls background color of the active viewport which can beset to Black (default), Grey, White, or another arbitrary color using the Background Color…option. This last option causes a Background Color popup window to appear containing RGBand HSV color sliders and a color wheel option. Move the sliders or simply click the mousepointer on the color wheel to select the corresponding color.Full Screen (or F8)The Full Screen option displays the contents of the active graphics window in full screenmode. The Esc key is used to return the display to its previous state.CascadeThe Cascade option resizes and arranges all windows in an overlapping cascading patternwith the highest numbered window at the front.TileThe Tile option resizes and shows all windows and completely fills the graphics portion ofthe GUI.24AF-GEOSpace User’s <strong>Manual</strong>: Version 2.5
Arrange IconsThe Arrange Icons option organizes all minimized graphics windows and lines them up atbottom of the graphic window space.1:1, 2:2, 3:3, …One number entry appears in this menu for each active window. Numbers are assigned inorder of window creation. Select a number to bring the corresponding window to the front.AF-GEOSpace User’s <strong>Manual</strong>: Version 2.5 25
Viewport MenuSplitActivating the Split option will divide the active viewport in the Horizontal or Verticaldirection such that two viewport windows now occupy the space of the original viewport.The two resulting viewports contain the same Projection (see next entry) of the originalgraphical object set.ProjectionThe Projection option allows the projection of the active viewport to be transformed into aone-dimensional (One D) viewport, a two-dimensional (Two D) viewport, a threedimensional(Three D) viewport, a special three-dimensional HelioSpace viewport used toproject Paramesh data, or a special Spectral viewport used to display DMSP particle data.Hint: Use the Create 1D Viewport option in the Window menu and use the new 1D windowto plot results if the existing window already contains data. Only graphical objectsappropriate to the new dimensionality of the viewport will remain viewable, e.g., the Earth,coordinate slices, and satellite orbits will remain in a viewport whose projection is changedbetween Two D and Three D, but none will appear if that same viewport is changed to OneD. In this latter case, you can quickly view the 2D or 3D graphic objects again by changingthe 1-D window back into 2-D or 3-D and redisplaying the existing graphic objects. To dothis, select Graphics from the Modules menu, highlight a graphic object in the ActiveModules list on the right of the environment window, and click Display.View PositionThe View Position option is used to set the coordinate frame used for animating Two D andThree D viewport projections, i.e., for fixing the viewers location relative to a selectedcoordinate systems. The choices are:GEOC, GSM, SM, GEI: Select one of these coordinate systems to fix the viewer’sperspective. The default setting is GEOC, i.e., the viewer remains at a fixed geographiclocation. Definitions of these coordinate systems are provided in the Edit: Grid Tool menudescription above.View: The View option sets the viewing position in both 2D and 3D ViewportsWhen a 3D viewport is active, selecting the View option results in a View Position 3D: Viewpopup window with settings for tailoring the 3D view. The options are:View (Fixed, Tracking)View Positions (Lat Lon, Noon, Midnight, Dawn, Dusk, UT, North, South, Mag North,Mag South, Satellite, Sun)View Position Options (Latitude, Longitude, UT)View Up (Longitude, Noon, Midnight, Dawn, Dusk, UT, North, South, Mag North, MagSouth)When a 2D viewport is active, selecting the View option results in a View Position: 2D Viewpopup window with settings for tailoring the 2D view. The options are:26AF-GEOSpace User’s <strong>Manual</strong>: Version 2.5
View Options (Fixed, Tracking)View Position (Longitude, Noon, Midnight, Dawn, Dusk, UT)View Position Options (Longitude, UT)Delete (window)The Delete option removes the active portion of split windows. Use the close button at theupper right of each viewport to delete it entirely, but note that the last remaining viewportcannot be deleted.Color Bar ColorThe Color Bar Color option controls the text color of the color bar labels. This option causesa Background Color popup window to appear containing RGB and HSV color sliders and acolor wheel option. Move the sliders or simply click the mouse pointer on the color wheel toselect the corresponding color.Color Bar TicsThe Color Bar Tics option is used to adjust the number of minor and major tic marksappearing along the color bar in the active graphics window. Only major tic marks arelabeled. After changing the number of tic marks in the popup window, update the color barby either placing the cursor in the other text box or using the OK button.Show Color BarThe Show Color Bar option is used to remove/replace the color bar appearing on the rightside of the active window.PerspectiveThe Perspective option changes the orthographic projection to a perspective projection, i.e., itshows foreshortening.AF-GEOSpace User’s <strong>Manual</strong>: Version 2.5 27
Globals MenuShowWhen in dynamic mode (after both a Start and End time are specified and Globals:Archive isused) the Globals menu provides read, write, and save access to the global parametersappropriate to the selected time period. A Globals popup window will appear showing theparameters Date, Time, Frac_Day, Kp, S_Kp, Ap, SSN, F10.7, Dst, and EqE. See theGlobal Parameters section in this document for details on the definitions and sources forthese parameters. These values can be edited and line entries can be added or deleted directlyin the text window. The user can then Apply and Save changes made, Restore the originalvalues to the list, or Cancel (close the window) using the buttons at the bottom of the Globalswindow. All Science and Application modules run will utilize this same set of global inputvalues (see individual description detailing which global inputs are used by individualmodules). Note: The Globals menu is inactive when running in static mode, i.e., when only aStart time is specified. In static mode, the global parameters used to represent the singleselected time are contained in the Kp, SSN, F10.7, and Ap text boxes at the top of theEnvironment window.28AF-GEOSpace User’s <strong>Manual</strong>: Version 2.5
Help MenuThe Help menu provides access to the AF-GEOSpace User’s <strong>Manual</strong>, software version andpoint-of-contact information.About AF-GEOSpaceDisplays version number and point-of-contact information.<strong>Manual</strong>Connects the user to an electronic version of this documentation stored in the directory$AFGS_HOME\models\HELPAF-GEOSpace User’s <strong>Manual</strong>: Version 2.5 29
SCIENCE MODULESScience modules provide methods for generating data sets from various models of the spaceenvironment. The science modules are accessed through the science module manager thatbecomes visible when the Science option in the Module pulldown menu is activated. The sciencemodule manager consists of two lists - Available Modules and Active Modules. AvailableModules are all the modules currently supported by AF-GEOSpace. Active Modules are modulesthat have been created and used by the AF-GEOSpace user during the current session.Initially, the science module manager will show a list of science modules under AvailableModules. No science modules have yet been created, so the Active Modules list will be empty.Currently, the following science modules are supported by AF-GEOSpace:• APEXRAD: The APEXRAD space radiation dose model specifies the location and intensityof the radiation dose rate behind four different thicknesses of aluminum shielding for fivegeomagnetic activity levels as specified by Ap15. It covers the Low Earth Orbit (LEO)altitude region (360-2400 km) and was developed to supplement the CRRESRAD model (seebelow) which has limited resolution in the LEO regime.• AURORA: The auroral precipitation model specifies the location and intensity of electronnumber and energy flux, ion number and energy flux, Pederson and Hall conductivities, andthe equatorward boundary at 110 km altitude. This module also provides the capability tomap flux, conductivity, and equatorial boundary values up magnetic field lines into the threedimensionalmagnetospheric grid.• CAMMICE: The CAMMICE/MICS model of the inner magnetosphere plasma populationprovides pitch angle resolved particle fluxes based on 1-200 keV/q ion data (H+, He+, He++,O
• GCPM: The Global Core Plasma Model of 2009 is an empirical description of thermalplasma densities (e-, H+, He+, and O+) in the plasmasphere, plasmapause, magnetospherictrough, and polar cap.• IONSCINT: The High Fidelity Ionospheric Scintillation Simulation Algorithm (IONSCINT)model provides realistic scenarios of disruptions in trans-ionospheric radio wavecommunications with spacecraft due to equatorial scintillation. IONSCINT addresses onlyintensity (or amplitude) scintillation of 244 MHz signals from geosynchronous satellites.• IONSCINT-G: The GPS Version of the High Fidelity Ionospheric Scintillation SimulationProgram (IONSCINT-G) provides realistic scenarios of disruptions in L1 frequency transionosphericradio wave communications with spacecraft due to equatorial scintillation. Skymapsof the S4 scintillation index are generated for stationary platform locations.• IRI2007: The International Reference Ionosphere (IRI2007) model specifies monthlyaverages of electron density, ion composition, electron temperature, and ion temperature inthe altitude range 50-1500 km.• ISPM: The Interplanetary Shock Propagation Model predicts the transit time ofinterplanetary shocks from the sun to the Earth and the shock strength upon arrival.• MAGNETOPAUSE: The Magnetopause Model determines if a given point lies inside oroutside of the model magnetopause boundary and determines the magnetopause locationclosest to the point of interest.• METEOR IMPACT MAP: The Meteor Impact Map Model calculates the hourly meteorimpact rate or damage rate for a given cross section, pit depth, and material type on a userspecifiedsurface area at positions outside of the Earth's atmosphere. A yearly showerdatabase is used to determine the active showers, their intensity, direction of travel, and massdistribution characteristics.• METEOR SKY MAP: The Meteor Sky Map module calculates the number of visiblemeteors from active meteor showers (and any user-specified storms) at the specified date,over a grid of ground-level positions covering the entire globe.• MSM (Magnetospheric Specification Model): The Magnetospheric Specification Model(MSM) module generates time-dependent magnetic field values as well as electron, H + , andO + particle fluxes (100 eV to 200 keV) in the inner and middle magnetosphere.• NASAELE: The NASA AE-8 radiation belt models are used to compute the intensity andlocation of differential omnidirectional electron flux for ten energy intervals between 0.5 and6.6 MeV which correspond to the ranges of the CRRES HEEF instrument.• NASAPRO: The NASA AP-8 radiation belt models are used to compute the intensity andlocation of differential omnidirectional proton flux for 22 energy intervals between 1 and 100MeV which correspond to the ranges of the CRRES PROTEL instrument.• NRLMSISE-00: The NRLMSISE-00 empirical model computes atmospheric numberdensities of He, O, N 2 , O 2 , Ar, H, and N, plus total mass density and temperature. Anomalousoxygen number density, i.e., hot atomic oxygen (O h ) or atomic oxygen ions (O + ) present athigh altitudes (> 500 km), and exospheric temperature are also calculated.AF-GEOSpace User’s <strong>Manual</strong>: Version 2.5 31
• PIM (Parameterized Ionospheric Model): A global ionosphere model generating electronnumber density as well as maps of total electron content (TEC), Height of E and F2 peaks(HE, HF2), and plasma frequencies at the E and F2 peaks (FoE, FoF2) as a function of avariety of geophysical activity indices.• PPS (Proton Prediction System): Provides forecasts of the intensity and duration of solarproton events.• SAAMAPS-2007: South Atlantic Anomaly Maps (SAAMAPS) of flux intensities forprotons (> 23, >38, >66, and >94 MeV) were created for the epoch 2000-2006 based on datafrom the Compact Environment Anomaly Sensor (CEASE) flown onboard the TSX-5satellite (410 km x 1710 km, 69 degree inclination orbit).• SEEMAPS-1998: Normalized flux and dose data for protons with energy > 50 MeV fromthe APEX and CRRES satellites were used to produce contour maps of relative probabilitiesof experiencing Single Event Effects (SEEs) in the Earth’s inner radiation belts.• STOA (Shock Time-of-Arrival Model): Predicts the transit time of interplanetary shocksfrom the sun to the Earth. STOA is a predecessor of ISPM.• TPM-1 (Trapped Proton Model): The Trapped Proton Model (TPM-1) provides a solarcycledependent low-altitude extension to the CRRESPRO trapped energetic proton model.• WBMOD (WideBand Model): An RF ionospheric scintillation model specifying S4, SI,and other scintillation parameters between any location on the globe and a satellite above 100km altitude at any frequency above 100 MHz as a function of a variety of geophysicalactivity indices.32AF-GEOSpace User’s <strong>Manual</strong>: Version 2.5
Running Science ModulesTo run a science module, use the mouse to select the Science option in the Module pulldownmenu and Available Modules and Active Modules lists will appear in the Environment Window.Click on the desired choice under Available Modules. For example, to create a new version ofCRRESELE, click the mouse on CRRESELE in the Available Modules list. Choosing a sciencemodule will do two things: first, the choice is added to the Active Modules list; second, theoptions associated with the chosen science module will appear in the Environment Window. Ingeneral, each science module will have a different Environment Window representing themodule specific inputs. Adjust the module inputs as required. Before actually running themodule, the following two adjustments might be considered which can effect run time and thesize of the output files.First, the Grid Tool option in the Edit pulldown menu can be used to modify the grid to be filledwith data using the selected science module.Second, the Dynamic Tool option in the Edit pulldown menu can be used to adjust both the timestep to be used and the specific output parameters to be calculated if a Start and End time havebeen set at the top of the window, i.e., the run is dynamic. For static runs only a Start time isspecified and all output parameters are calculated by default.Finally, the Run/Update option in the Edit pulldown menu is used to run or re-run the moduleafter any settings have been changed. When the module run is complete a message stating thatthe MODEL IS READY AND UP TO DATE will appear in the Model Status box at the bottomof the Environment Window. At this point, the data produced is ready for display using graphicalmodules.Also, the Delete option in the Edit pulldown menu is used to remove the highlighted sciencemodule member of the Active Modules list. Note that all active graphics objects must be removedbefore the science module used to generate their data can be removed.AF-GEOSpace User’s <strong>Manual</strong>: Version 2.5 33
The APEXRAD Science ModuleModel Name:APEXRADVersion: 15 September 1997; IGRF updates 2009Developer:References:<strong>Air</strong> <strong>Force</strong> Research Laboratory and AER, Inc.Bell, J.T., and M.S. Gussenhoven, APEXRAD Documentation, PL-TR-97-2117 (1997), ADA 331633Gussenhoven, M.S., E.G. Mullen, D.A. Hardy, D. Madden, E. Holeman,D. Delorey, and F. Hanser, Low Altitude Edge of the Inner Radiation Belt:Dose Models from the APEX Satellite, IEEE Trans. Nucl. Sci., 42, 2035(1995)Gussenhoven, M.S., E.G. Mullen, J.T. Bell, D. Madden, and E. Holeman,APEXRAD: Low Altitude Orbit Dose as a Function of Inclination,Magnetic Activity and Solar Cycle, IEEE Trans. Nucl. Sci., 44, 2161(1997)Hanser, F.A., and P.R. Morel, Analyze Data from the PASP PlusDosimeter on the APEX Spacecraft, PL-TR-96-2088, ADA 311336 (1996)Mullen, E.G., M.S. Gussenhoven, J.T. Bell, D. Madden, E. Holeman, andD. Delorey, Low Altitude Dose Measurements from APEX, CRRES, andDMSP, Advances in Space Res., 21, 1651 (1997)Note: It is recommended that AF-GEOSpace users read the original modeldocumentation and descriptive articles before using the models.APEXRAD OverviewThe APEXRAD module is a PC program APEXRAD developed and released by the <strong>Air</strong> <strong>Force</strong>Research Laboratory. APEXRAD has been produced to supplement the higher altitudeCRRESRAD dose models. The following description of APEXRAD is excerpted from theAPEXRAD Documentation:“APEXRAD uses empirical models based on data from the APEX/PASP+ dosimeter topredict the amount of radiation received in a user specified orbit behind four differentaluminum shielding thicknesses. The Advanced Photovoltaic and ElectronicsExperiments (APEX) Satellite was operational from 3 Aug 94 to 2 Jun 96, just prior tosolar minimum. APEX was in an elliptical orbit with a 70 o inclination, a perigee of 362km and an apogee of 2544 km. The instrument used to measure accumulated dose wasthe APEX Space Radiation Dosimeter which measures both dose rate and accumulateddose in four silicon detectors, each of which is behind an aluminum shield of a differentthickness (Gussenhoven et al., 1995; Gussenhoven et al., 1997; Mullen et al., 1997). Oneshield was a 4.28 mil thick slab of Al. The other three were hemispheres of Al withthicknesses of 80.1, 225.8 and 444.4 mils. [...] The minimum energies required forparticles to penetrate the shields and accumulate dose in the silicon detectors underneathare 0.15, 1, 2.5, and 5 MeV [respectively] for electrons and 5, 20, 35, and 50 MeV forprotons [respectively] (Hanser and Morel, 1996). Dose from particles depositing 0.05-134AF-GEOSpace User’s <strong>Manual</strong>: Version 2.5
MeV and 1-10 MeV is accumulated in two different channels called LOLET and HILETrespectively. Contributions to HILET dose are primarily from protons with energies of 5-125 MeV, but electrons with energies >5 MeV may contribute during large electronenhancement periods. Contributions to LOLET dose are from electrons, bremsstrahlung,and protons with energies >80MeV. Dosimeter data are available for approximately 14 ofthe 22 months that APEX was operational.”The APEXRAD science module is used to map the radiation dose rate models from the APEXmission into a three-dimensional grid specified by the user. A variety of magnetic field modelscan be used for the mapping. Six dose rate models were derived from the APEX data asdescribed by the following excerpt from the APEXRAD User’s <strong>Manual</strong>:“The dose models used by APEXRAD are based on in-situ dose rate measurements madeon board the APEX satellite [as described in the excerpt above]. The delta dose measuredby the dosimeter over the 24-second intervals was used to build the APEXRAD models.A background subtraction is performed to remove the dose due to constant sources,which include both the on-board alpha source used for calibration, and cosmic rays(Gussenhoven et al., 1997). The measured dose rates for each dome were binned by Land B/B0 to make average dose rate models in rads (Si) per second. The width of eachbin in L is 1/100 RE, and the width of each bin in B/B0 is one degree of acrsin (B/B0)-1/2 (approximately 0.75 o latitude in a dipole field). The bins form a two-dimensionalarray of 500 (L) by 90 (B/B0) and over L values of 1 to 6 RE and magnetic latitudes of 0 oto ~60 o . Many of these bins do not contain data because APEX was in a low altitude orbitand only reached high L values at high B/B0’s. To save storage space most of the emptydata bins are not stored as part of the models.Six sets of APEXRAD models were produced. The first set of models is the entiremission average. The other five sets of models are based on the Earth’s magnetic activityas recorded by Ap15, a fifteen day running average of the Ap index. The location andintensity of the outer belt horns is dependent on the magnetic activity. Higher activitylevels coincide with a significant increase in the LOLET dose rate (up to a factor of 10)where the horns of the outer belt come down to low altitudes. The position of the hornsalso change[s] with magnetic activity. The HILET dose rate in portions of the inner beltis found to decrease slightly as the magnetic activity increases, however, this decrease issmall (less than 20 percent from one activity level to the next) and restricted to the inneredge of the belt. Thus varying magnetic activity has negligible effect on the HILET dosepredictions for most orbits. The cumulative effect of varying magnetic activity on totaldose received will depend on the orbit. For orbits that pass through the heart of the innerbelt[, the] dose from inner belt protons will dominate the total dose and magnetic activitywill have little impact. For a certain class of low altitude, high inclination orbits,increases in magnetic activity can lead to a significant increase in total dose rate.”After the user selects which data model is desired, the APEXRAD science module calculates theB/L coordinates of each grid point from the user-specified magnetic field model. The resultingdose rate is then obtained from the B/L coordinates and the chosen data model. That dose rate isassigned to the grid point. In this manner a fully three-dimensional map of the dose rate data maybe made from the APEX data.AF-GEOSpace User’s <strong>Manual</strong>: Version 2.5 35
Warning: Although AF-GEOSpace allows the data to be mapped in three dimensions using avariety of magnetic field models, the original APEX data was binned into B/L coordinates usingthe IGRF95 magnetic field model. The user should be aware that using other magnetic fieldmodels to map the data into three-dimensional space is inconsistent with the original datareduction.APEXRAD InputsThe APEXRAD science module requires the user to specify the combination of dosimeterparticle energy ranges and aluminum shielding thickness as well as the magnetic activity leveland the magnetic field model used in mapping the data.The APEXRAD options are,B-Model:The magnetic field model is used to convert from the B-L coordinates ofthe model to three-dimensional space. The default is the field model usedto reduce the APEX data set: IGRF95. The complete options are:Dipole: A dipole fieldDipole-Tilt: A tilted dipole fieldDip-Tilt-Off: A tilted-offset dipole fieldIGRF: The International Geomagnetic Reference Field with noexternal contributions.IGRF/O-P:The IGRF internal field with the Olson and Pfitzer(1977) static model to represent the external field.IGRF95: The International Geomagnetic Reference Field (1995)with no external contributions.IGRF95/O-P:The IGRF95 internal field with the Olson and Pfitzer(1977) static model to represent the external field.Shielding: The shielding parameter specifies whether the 4.29, 82.5, 232.5, or 457.5mil Al hemisphere shielding thickness data set is to be used.Channel:Activity:The channel parameter specifies which dose rate data set is to be used:Lo Let:Hi Let:Total:(0.05 - 1 MeV)(1 - 10 MeV)= Lo Let + Hi LetThis parameter specifies which of the five flux model sets correspondingto the five geomagnetic activity levels as specified by Ap15 is to beconsidered, i.e., 5.0 - 7.5, 7.5 - 10, 10 - 15, 15 - 20, or 20 - 25. Alsopossible is the choice of the mission average (Whole Mission) model set.APEXRAD OutputsThe APEXRAD science module returns a 3D Gridded Data Set of the dose rate in units of rads(Si) per second for the selected shielding level, detector channel, and activity combination.36AF-GEOSpace User’s <strong>Manual</strong>: Version 2.5
The AURORA Science ModuleModel Name:AuroraVersion: September 1998Developer:References:<strong>Air</strong> <strong>Force</strong> Research LaboratoryBrautigam, D.H., M.S. Gussenhoven, and D.A. Hardy, A Statistical Studyon the Effects of IMF Bz and Solar Wind Speed on Auroral Ion andElectron Precipitation, J. Geophys. Res, 96, 5525-5538 (1991)Hardy, D.A., W. McNeil, M.S. Gussenhoven, and D. Brautigam, AStatistical Model of Auroral Ion Precipitation 2. Functional Representationof the Average Patterns, J. Geophys. Res, 96, 5539-5547 (1991)Madden, D., and M.S. Gussenhoven, Auroral Boundary Index from 1983to 1990, GL-TR-90-0358, Phillips Laboratory, Hanscom AFB, MA (1990)Hardy, D. A., M.S. Gussenhoven, and D. Brautigam, A Statistical Modelof Auroral Ion Precipitation, J. Geophys. Res., 94, 370-392 (1989)Hardy, D. A., M.S. Gussenhoven, R.A. Raistrick, and W. McNeil,Statistical and Functional Representations of the Pattern of AuroralEnergy Flux, Number Flux, and Conductivity, J. Geophys. Res., 92,12275-12294 (1987)Hardy, D. A., M.S. Gussenhoven, and E. Holeman, A Statistical Model ofAuroral Electron Precipitation, J. Geophys. Res., 90, 4229-4248 (1985)Gussenhoven, M.S., D.A. Hardy, and N. Heinemann, Systematics of theEquatorward Diffuse Auroral Boundary, J. Geophys. Res., 88, 5692-5708(1983)Gussenhoven, M.S., D.A. Hardy, and W.J. Burke, DMSP/F2 ElectronObservations of Equatorward Auroral Boundaries and their Relationshipto Magnetospheric Electric Fields, J. Geophys. Res., 86, 768-778 (1981)Note: It is recommended that AF-GEOSpace users read the original modeldocumentation and descriptive articles before using the models.AURORA OverviewThe AURORA science module accesses the set of <strong>Air</strong> <strong>Force</strong> Statistical Auroral Models(AFSAM), a compilation of time averaged auroral ion and electron models. These models werederived from precipitating particle measurements made by the SSJ/4 electrostatic analyzersflown on the F6 and F7 satellites of the Defense Meteorological Satellite Program (DMSP). TheSSJ/4 analyzers determined the electron and ion spectrum in the local satellite zenith directiononce per second over 20 channels spanning the energy range from 30 eV to 30 keV.Statistical hemispheric particle precipitation maps were created for a range of differentmagnetospheric activity levels using the same spatial grid defined in corrected geomagneticlatitude (CGL) and magnetic local time (MLT). The high-latitude region grid was defined by 30AF-GEOSpace User’s <strong>Manual</strong>: Version 2.5 37
zones in CGL between 50 o and 90 o and 48 half-hour zones in MLT. The latitude zones were 2 owide between 50 o and 60 o and 1 o wide between 60 o and 80 o latitude.For a given level of activity, one-second spectra were accumulated in the CGL x MLT spatialgrid defined above. For each spatial element, the average value of precipitating particle flux(electrons or ions) in each of the energy channels were then determined, and the resultingaverage spectra extrapolated to 100 keV. The large size of the DMSP data set ensured that areasonable number of individual 1-s spectra occurred in each spatial element traversed by thesatellite such that a statistically meaningful average spectrum could be determined. From thesefinal differential number flux spectra, a number of key parameters were derived, includingintegral number flux, integral energy flux, average energy (ratio of integral energy flux tointegral number flux), and the height-integrated Hall and Pedersen conductivities. To calculatethe conductivities, we used the functional relations of Spiro et al. [J. Geophys. Res., 87, 8215,1982] as corrected by Robinson et al. [J. Geophys. Res., 92, 2565, 1987].The AFSAM models are separated according to (1) the magnetic activity index Kp and (2) the z-component of the interplanetary magnetic field (IMF Bz) in combination with the solar windspeed (Vsw). For the Kp model, there are 7 maps separated by whole values of Kp, i.e., onedetermination for Kp = 0, 0+, one for Kp = 1-, 1, 1+, etc., up to Kp= 5-, 5, 5+. One finalseparation is made for all cases with Kp >= 6-. For the Bz/Vsw model, there are 30 maps definedby the paired combinations of the 6 Bz values (-4.5, -2.2, -0.7, 0.7, 2.2, 4.5 nT) and the 5 Vswvalues (346, 408, 485, 572, and 677 km/s).The original Kp electron model [Hardy et al., 1985] was constructed using data from the olderSSJ/3 spectrometers flown on the DMSP F2 satellite and the P78-1 satellite. This model wasfollowed by the Kp ion model [Hardy et al., 1989] which was constructed using data from thenewer SSJ/4 spectrometers flown on DMSP F6 and F7 satellites. For consistency, the original Kpelectron model has been updated by a newer model (identical format) constructed from the sameF6/F7 database which was used for the Kp ion model. The most recent AFSAM models are theBz/Vsw models for both electrons and ions [Brautigam et al., 1991].AF-GEOSpace uses analytic representations of the key parameters derived from the averagespectra and noted above. At this point, the reference for the analytical fits to the most currentmodels has not yet been published in its complete form. However, the original reference for theKp ion model fits to integral number flux and integral energy flux [Hardy et al., 1991] remainsvalid. A publication referencing the complete set of AFSAM model fits is forthcoming.The output domain of the AFSAM models is a two-dimensional (MLT, CGL) grid located at 110km altitude (1.017 Earth radii). The default output grid in AF-GEOSpace is the AFSAM twodimensionalgrid mapped to three-dimensional geocentric coordinates (GEOC) at an altitude of110 km and at the time and activity level specified by the Global Parameter Kp or Bz/Vsw.Though the nominal altitude of the DMSP satellites is 840 km, the measured fluxes were mappeddown the magnetic field lines to 110 km (the base of the ionospheric E layer) before constructingthe AFSAM models.The AF-GEOSpace AURORA science module extends the AFSAM models by providing thecapability to map into three dimensions the magnetic field lines that intersect constant flux orconductivity contours on the two-dimensional model grid. This is done as follows: for each gridpoint in the user-specified three-dimensional grid, the unique magnetic field line intersecting this38AF-GEOSpace User’s <strong>Manual</strong>: Version 2.5
point is traced down to the original two-dimensional model domain at 110 km using a userspecifiedmagnetic field model. The grid point is then given the flux (integral number or integralenergy flux), average energy, or conductivity value existing at the point of intersection betweenthe field line and the original model domain at 110 km. By using the ISOCONTOUR orCOORD-SLICE graphics objects on the resultant 3D AURORA dataset, magnetic field linessurfaces intersecting contours of constant flux in the original model domain can be easilyvisualized.Note: The value of the flux, average energy, or conductivity specified by AF-GEOSpaceat any altitude other than 110 km is NOT necessarily a meaningful value for thatquantity. AF-GEOSpace uses the flux values on the three-dimensional grid above110 km to denote sets of field lines emanating from the respective flux valueisocontours at 110 km. The actual physical processes involved in determining thevariation of flux values along the magnetic field lines have not been considered.Also contained in the AURORA science module is an algorithm to determine the equatorwardboundary of the aurora at 110 km altitude and map it along field lines generated by a userspecifiedmagnetic field model. The algorithm represents a linear fit between the equatorwardboundary (in the CGL coordinate) of the electron integral number flux and the Kp index for 24sectors in MLT [Gussenhoven et al., 1981; Gussenhoven et al., 1983]. AF-GEOSpace uses thecoefficients determined from over 200,000 DMSP boundary crossings in the interval 1983-1990[Madden and Gussenhoven 1990]. Options are given to either (a) input Kp and output the entireequatorward edge boundary or (b) input a single observation of the equatorward edge in CGLand MLT (e.g., from one DMSP satellite crossing) and output the entire equatorward edgeboundary. In the latter case, an “effective Kp” is computed by inverting the linear regressionrelation for the measurement in the single MLT bin and then using the effective Kp to calculatethe equatorward edge in the remaining MLT bins.AURORA InputsThe Aurora science module requires the Global Parameters: Year, Day, UT, and Kp.Note: When a 3-D grid is chosen, magnetic field model inputs necessary for magneticfield line mapping are required to be specified in the Internal Field and ExternalField sections outlined below. Additional information and references on themagnetic field models can be found in the BFIELD-APP section of thedocumentation.The Generate section allows the user to produce the following output data sets:Gridded Data: A set of 3D Gridded Data Sets for auroral electron number flux, electronenergy flux, ion number flux, ion energy flux, electron average energy, ionaverage energy, Hall conductivity, and Pedersen conductivity is produced.The default settings for the Grid define a two-dimensional geocentriccoordinate slice at the constant radius of 110 km (1.017 Re). When athree-dimensional Grid is specified with the Grid Tool, the data valuesfrom the default two-dimensional slice are mapped to the grid points alongfield lines determined from the user-specified magnetic field model.AF-GEOSpace User’s <strong>Manual</strong>: Version 2.5 39
Eq Edge:Field Line data sets are produced that represent the equatorward edge ofthe auroral electron number flux boundary and its mapping out alongmagnetic field lines of the user-specified magnetic field model. Thefollowing options become applicable:Use Kp or IMF/SW Model: If this option is selected the AURORAscience module calculates the equatorward boundaryusing the Kp or IMF/SW option described below in theModel section. For dynamic runs, Kp inputs are thoselisted using the Globals menu Show option whileIMF/SW selections remain constant.Use single observation: If this option is selected the AURORA sciencemodule calculates the equatorward boundary bydetermining an effective Kp from a single MLTobservation of the boundary location. The effective Kpis then applied to determine the boundary for theremaining MLT points. For dynamic runs, the selectedsettings remain fixed. If selected, the followingquantities must be entered,MLT: The magnetic local time of the observationin decimal hours.Observed MLAT: The magnetic latitude in CorrectedGeomagnetic Coordinates of the observedequatorward boundary at the specified MLT.Typical values of this parameter formidnight local time (MLT = 0.0) can beviewed using the Globals menu Show optionwhen a dynamic run is performed.Note: If the effective Kp determined from the MLT, Observed MLAT values entered is outsideof the acceptable range (Kp = 0.0 to 9.0) or if the Observed MLAT value entered is notvalid for the selected MLT value, then an error popup window will warn the user. To bestresolve this, select the Use Kp option and set the global Kp value equal to either 0.0 or9.0, whichever is appropriate.Map from North: Magnetic field line mapping originates from the auroralequatorward boundary in the northern hemisphere.Map from South: Magnetic field line mapping originates from the auroralequatorward boundary in the southern hemisphere.Note: Magnetic field lines emanating from the northern hemisphere auroral equatorwardboundary will not generally match those emanating from the southern auroralboundary. This is because no magnetic field model in AF-GEOSpace exactlymatches the models used to construct CGM coordinates. The closest match ariseswhen using the IGRF internal field for the year 1990 without an external field.40AF-GEOSpace User’s <strong>Manual</strong>: Version 2.5
The match is not exact due to interpolation and function fitting of the CGMcoefficients in the CGM to geographic coordinate conversion routine used.The Internal B-Field section allows the user to specify which model to use for the Earth’sinternal magnetic field: Dipole, IGRF(1945-2010), or Fast IGRF. Additional information andreferences on the magnetic field models can be found in the BFIELD-APP section of thedocumentation.The External B-Field section allows the user to specify which model to use for externalcontributions to the magnetic field: None, Hilmer-Voigt, Olson-Pfitzer, Tsyganenko ‘89, orTsyganenko ‘87. Additional information and references on the magnetic field models can befound in the BFIELD-APP section of the documentation.The Model section allows the user to specify the data to drive the model. The options are:Kp:Selects the Kp index from the Global parameters as the model driver.IMF/SW:Selects the interplanetary magnetic field and solar wind data as modeldriver. When this option is chosen the following quantities must beentered:AURORA OutputsBz(nT):Vsw(km/s):The value of the z-component of the interplanetarymagnetic field available as six selectable values from -4.5 to 4.5 nanotesla (nT).The value of the magnitude of the solar wind velocityavailable as five selectable values between 346 and 677kilometers/second (km/s).When the Gridded Data output option is selected the AURORA science module returns theintegral electron energy flux (keV/(cm 2 s sr)), the integral electron number flux (#/(cm 2 s sr)), theintegral ion energy flux (keV/(cm 2 s sr)), the integral ion number flux (#/(cm 2 s sr)), the electronaverage energy (keV), the ion average energy (keV), the height-integrated Pedersen conductivity(mhos), and the height-integrated Hall conductivity (mhos) as separate 3D Gridded Data Sets. Inthe default mode, the 3D Gridded Data Set will contain only a two-dimensional constant radiusslice at an altitude of 110 km (1.017 Re). When the user specifies a three-dimensional grid withthe Grid Tool, a grid point is assigned a value equal to the data value existing at the point ofintersection between the original constant-radius data slice at 110 km and the magnetic field linethat maps through the point in question. It is thus possible to denote surfaces of field linesemanating from separate flux value isocontours at 110 km.When the Eq Edge output option is selected the AURORA science module returns a Field LineData Set containing magnetic field lines emanating from the equatorward edge of the auroralelectron number flux (referred to as Mapped Eq. Edge in the data selection list). An additionalField Line data set is generated representing the equatorward edge oval (referred to as Eq. Edge).AF-GEOSpace User’s <strong>Manual</strong>: Version 2.5 41
The CAMMICE Science ModuleModel Name:CAMMICEVersion: August 2010Developer:References:AER, Inc. and <strong>Air</strong> <strong>Force</strong> Research Laboratory (based on particle fluxdatabase files provided by J.L. Roeder of The Aerospace Corporation)Olson, W.P., and K.A. Pfitzer, A Quantitative Model of theMagnetospheric Magnetic Field, J. Geophys. Res., 79, 3739 (1974)Olson, W.P., and K.A. Pfitzer, Magnetospheric Magnetic Field Modeling,Annual Scientific Report, <strong>Air</strong> <strong>Force</strong> Office of Scientific Research contractF44620-75-C-0033, McDonnell Douglas Astronautics Co., HuntingtonBeach, CA (1977)Roeder, J.L., M.W. Chen, J.F. Fennell, and R. Friedel, Empirical Modelsof the Low-Energy Plasma in the Inner Magnetosphere, Space Weather, 3,S12B06, doi:10.1029/2005SW000161 (2005)Russell, C.T., R.C. Snare, J.D. Means, D. Pierce, D. Dearborn, M. Larson,G. Barr, and G. Le, The GGS/Polar Magnetic field Investigation, SpaceSci. Rev., 71, 563-582 (1995)Schulz, M., and L.J. Lanzerotti, Particle Diffusion in the Radiation Belts,Springer, New York, (1974)Scudder, J., et al., Hydra---A 3-dimensional electron and ion hot plasmainstrument for the Polar spacecraft of the GGS mission, Space Sci. Rev.,71, 459-495 (1995)Note: It is recommended that AF-GEOSpace users read the original modeldocumentation and descriptive articles before using the models.CAMMICE OverviewThe CAMMICE science module provides an implementation of the CAMMICE/MICS empiricalplasma flux model described by Roeder et al. [2005].“Data from two instruments on the Polar satellite [1.8 x 9 R E orbit with a 90° inclinationand an 18-hour period] were used to construct a model of the charged particleenvironment. The Magnetospheric Ion Composition Spectrometers (MICS) was part ofthe Charge and Mass Magnetospheric Ion Composition Experiment (CAMMICE) on thePolar satellite. MICS measured all positively charged ion species ranging in mass fromhydrogen to iron in the range 1-200 keV/e. […] The CAMMICE/MICS data weresupplemented by measurements from the Hydra instrument, also on the Polar mission.Hydra measured ion and electron flux in the range 2 eV/e to 35 keV/e [Scudder et al.,1995].”Multiple equatorial data sets were derived from the CAMMICE/MICS data as described by thisadditional excerpt from Roeder et al.:42AF-GEOSpace User’s <strong>Manual</strong>: Version 2.5
“The CAMMICE/MICS data for 3.5 years (March 1996 to September 1999) wereaveraged into 5-min distributions in energy and local pitch angle to build the database.The 24 energy steps from the MICS instrument were combined into 12 channels byaveraging the fluxes for every other step to improve statistics. The local pitch angles foreach measurement were computed using the simultaneous data from the Polar magneticfield experiment [Russell et al, 1995]. The local pitch angle distribution for each energywas averaged into 18 equally spaced bins of 10° widths. Then the local pitch angles wereconverted into equatorial pitch angles using the ration of the measured local magneticfield magnitude to the equatorial magnetic field magnitude [Schulz and Lanzerotti, 1974].The equatorial magnetic field was calculated for this purpose using the IGRF model ofthe geomagnetic field. The equatorial pitch angle distribution at each energy was thenaveraged into spatial bins in equatorial magnet coordinates. The magnetic equatorialplane was divided into a grid of 16 equally space bins in L in the range 2-10 and 2-hourbins in MLT.”An additional complete set of data files were also created by the authors which exclude dataobtained during geomagnetically active intervals, i.e., to represent quieter conditions when thegeomagnetic index Dst > -100 nT.The CAMMICE module is used to map the ion flux data sets onto a three-dimensional gridspecified by the user. Two different magnetic field models can be used for the mapping. Afterselecting an ion species, a geomagnetic Dst activity option, and a pitch angle range of interest,the module calculates the B/L coordinates for each grid point in the user-specified magnetic fieldmodel. Resulting flux values are then obtained from the B/L coordinates and the chosen data fileand assigned to the grid point. In this manner, a fully three-dimensional map of the ion flux datamay be made from the CAMMICE/MICS equatorial data sets.CAMMICE InputsThe CAMMICE science module requires the Global Parameters: Year, Day, and UT.B-Model:DST:The magnetic field model used to convert from the B-L coordinates of themodel to three-dimensional space. The B-Model options include:IGRF:IGRF/O-P:The International Geomagnetic Reference Field with noexternal contributions.The IGRF internal field with the Olson and Pfitzer(1977) static model to represent the external field.Two ranges of geomagnetic activity can be specified, namelyAll:DST > -100:This option provides results of the complete data set.This option presents results generated from datacollected when the Dst index was less negative than -100 nT, i.e., during only geomagnetically quieterconditions.Species: The particle species available include: H+, He+, He++, O
Pitch Angle:The equatorial pitch angle distribution options include Omnidirectional orone of 18 equally spaced bins of 10° widths, i.e., 0-10, 10-20, …, 170-180degrees.CAMMICE OutputsThe CAMMICE Science module returns a 3D Gridded Data Set of the particle flux for theselected species and Dst level in units of (#/cm 2 /s/keV) in the following 12 energy channels allin units of keV/q: (1) [1.0-1.3], (2) [1.8-2.4], (3) [3.2-4.2], (4) [5.6-7.4], (5) [9.9-13.2], (6) [17.5-23.3], (7) [30.9-41.1], (8) [54.7-72.8], (9) [80.3-89.7], (10) [100.1-111.7], (11) [124.7-139.1],and (12) [155.3-193.4]. The L-Shell and B/Bo values used to determine off-equator fluxes arealso returned.Note: All species do not have the same energy coverage in the model, therefore particle fluxesfor the following [species, energy channel] combinations are not part of the CAMMICEScience module output: [H+, ch.1-3], [He+, ch. 1-5], [O
The CHIME Science Module (Static Only)Model Name:CRRES/SPACERAD Heavy Ion Model of the Environment (CHIME)Version: 3.5, December 1995Developer: Lockheed Martin Advanced Technology Center and AFRL, adapted toAF-GEOSpace by Radex, Inc. (now AER, Inc.)References: Chenette, D. L., J.D. Tobin, and S.P. Geller, CRRES/SPACERAD HeavyIon Model of the Environment, CHIME, PL-TR-95-2152, PhillipsLaboratory, Hanscom AFB, MA (1995) (User’s guide for Version 3.5)ADA 321996Chenette, D.L., J. Chen, E. Clayton, T.G. Guzik, J.P. Wefel, M. Garcia-Munoz, C. Lopate, K.R. Pyle, K.P. Ray, E.G. Mullen, D.A. Hardy, TheCRRES/SPACRAD Heavy Ion Model of the Environment (CHIME) forCosmic Ray and Solar Particle Effects on Electronic and BiologicalSystems in Space, IEEE Trans. Nucl. Sci., 41, 2332-2339 (1994)Feynman, J., G. Spitale, J. Wang, and S. Gabriel, Interplanetary ProtonFluence Model: JPL 1991, J. Geophys. Res., 98, 13281 (1993)Note: It is recommended that AF-GEOSpace users read the original model documentation anddescriptive articles before using the models.CHIME OverviewThe CRRES Heavy Ion Model of the near-Earth Space Environment (CHIME) Science Moduleand Linear Energy Transfer (LET) Application Module are based on the PC program CHIMEdeveloped and released under the auspices of the <strong>Air</strong> <strong>Force</strong> Research Laboratory. The followingdescription is excerpted from the CHIME User’s <strong>Manual</strong>:“[CHIME] is a set of programs and data files which permit a user to (1) calculate accuratemodels of the fluxes and energy spectra of ions in the near-Earth space environmentunder a wide variety of conditions, (2) convert these particle flux models to linear energytransfer spectra, and (3) estimate rates for single-particle radiation effects inmicroelectronic devices exposed to the environmental model fluxes.... The [environment]model covers the energy range from 10 MeV/nucleon to 60 GeV/nucleon for all knownstable elements, and includes the known major sources of heavy ions in the near-Earthinterplanetary medium over this energy range, namely: galactic cosmic rays (GCR), theanomalous component (AC), and heavy ions from solar energetic particle events (SEP).”The CHIME Science Module calculates ion flux models (Step 1 in the paragraph above) andproduces a 3D data set as a function of geographic coordinates. Calculation of the LET spectraand single event effect (SEE) rates (Steps 2 and 3 in paragraph above) are accomplished in theLET-APP Module. The CHIME Science Module provides an option to normalize the fluxes tothe regular CHIME units (particles/(m 2 s sr MeV/nucleon)) or the units used in the CRRESPROtrapped proton model (particles/(m 2 s MeV)). Using the CRRESPRO units, intensities of thecosmic rays and solar energetic particles can be directly compared to the intensity in theradiation belts.AF-GEOSpace User’s <strong>Manual</strong>: Version 2.5 45
The models for the GCR and AC are described as follows in the CHIME User’s manual:“The long-term time- and energy-variations of the GCR and AC heavy ions near earth arewell understood as the result of “modulation” by the sun of a set of “local interstellarspectra” (LIS) defined at the outer boundary of the heliosphere. The amount of thismodulation is described by a single parameter for all particle species: the solarmodulation parameter, Φ, which is in units of electric potential, typically megavolts(MV).CHIME contains a comprehensive [GCR] data base describing the heavy ion fluxenvironment near earth under the full range of expected solar modulation conditions. Thisdatabase is a set of differential (in energy) heavy ion fluxes as a function of kineticenergy (E) and Φ. The E, Φ range covered by this database is from 10 MeV/nucleon to60 GeV/nucleon in kinetic energy and 300 MV through 1700 MV in solar modulationlevel. All ions from hydrogen (Z=1) through nickel (Z=28) are tabulated. Ions heavierthan nickel are modeled using abundance ratios to iron. [...]For the elements He, N, O, and Ne an additional component, the anomalous component(AC), is also tabulated in the database. The AC was calculated using the same solarmodulation code and for the same range of solar modulation as the GCR flux. Due to thenature of this source, however, the AC-LIS decrease very rapidly with increasing energycompared to the GCR-LIS. Thus the AC fluxes become insignificant compared to theGCR fluxes above a few hundred MeV per nucleon. Additionally, in the solar modulationcalculation the AC was treated as singly charged, and the AC charge state is assumed tobe 1 (singly charged) in the calculation of the geomagnetic shielding [described below].”Solar Energetic Particles are treated in a variety of ways as described in the CHIME User’s<strong>Manual</strong> excerpts that follow.“Several different SEP models are incorporated into CHIME. These include modelsbased on measurements made during the CRRES mission and models based on statisticaldistributions of energetic solar proton event intensities. The user of CHIME may selectany one of these models to add to the GCR and AC fluxes determined as described[above].”“The two largest SEP events observed during the CRRES mission occurred in March andJune 1991. Due to the significance of these events to CRRES investigations, they aremade directly available for use in CHIME. The March event was an “iron-rich” event, butwith a significantly softer energy spectrum than the June event (see Chen et al. [Adv.Space. Res., 14, 675, 1994] for a more detailed description of these events). Thus for verythin amounts of passive shielding, the March environment was more severe than that forJune.... The user can select the peak instantaneous flux or the highest 24-hour averageflux for either event.”“For predictive purposes CHIME also provides heavy ion fluence models as a function ofmission duration and probability of occurrence. (In this context fluence refers to fluxintegrated over time.) These models are based on the “Interplanetary Proton FluenceModel: JPL 1991” [Feynman et al., 1993]. This is a statistical description of the observeddistribution of energetic solar proton event sizes. For a given mission start date andduration, the model provides a proton fluence spectrum which would be exceeded at a46AF-GEOSpace User’s <strong>Manual</strong>: Version 2.5
probability of occurrence, or confidence level, selected by the user (from 50% to 0.1%).Heavy ion fluences as a function of energy are scaled from the proton fluence spectrumusing a table of energy independent, average solar energetic particle event, [and] ioncomposition factors.It is important to remember that the JPL 1991 model describes ion fluences, which arefluxes integrated over a specific time interval. If a time interval is specified by the user indefining the GCR and AC fluxes, that same interval will be used in the SEP model if theJPL 1991 model is selected.”To compute the GCR, AC, and SEP particle fluxes in the near-Earth region magneticallyshielded by the Earth’s magnetosphere (taken to be radial distances less than 15 Earth radii inCHIME) a geomagnetic cutoff model is employed as described in the CHIME User’s <strong>Manual</strong>:“The model is based on an offset, tilted dipole approximation for the earth’s magneticfield [Wilson et al., NASA Ref. Pub. 1257, 475, 1991]. Despite its simplicity, this modelcaptures the major features of the combined total average geomagnetic shielding effectwith good accuracy.... [For each point on the user-specified grid in the CHIME sciencemodule], the GEOMAG Transmission function in CHIME calculates the access solidangle as a function of the ion energy and applies this filter function to the interplanetaryheavy ion flux calculated by the procedures described [above]... The transmission filter isapplied separately to the GCR[+SEP] and AC spectra. While the GCR[+SEP] source isassumed to consist of fully stripped ions (Q=Z), the AC is treated as singly charged(Q=1) in this part of the calculation.”Note: The CHIME science module has not been optimized and can take a significantamount of run time on high-resolution grids.CHIME InputsInput to the CHIME science module comprises the environment inputs required to run the modeland the requested particle limits for the output fluxes.Specify environment:GCR/AC Flux Input: Several methods for generating cosmic ray fluxes (Galactic CosmicRays/Anomalous Component Spectra) are provided. The options are:Off:No cosmic ray fluxes generated.Modulation: CHIME provides fluxes corresponding to the Level(entered in the text box, approximate range: 400 to1600 megavolts) of solar modulation selected from afull range of monthly values over the period 1970-2010.Period:CHIME computes the average of the fluxes for each ionspecies over the user-specified time interval entered inthe Year 1, Day 1, Year 2, and Day 2 text boxesactivated when this option is selected. Tabulatedmonthly values of the solar modulation parameter forthe period 1970-2010 are used.AF-GEOSpace User’s <strong>Manual</strong>: Version 2.5 47
SEP Events:The CHIME model provides several models for specifying the flux orfluence of heavy ions originating at the Sun as a result of solar energeticparticle (SEP) events. The options are:Off:March 91 Peak:June 91 Peak:March 91 Ave:June 91 Ave:No SEP event related flux/fluence is generated.Model based on peak CRRES measurements from theMarch 1991 eventModel based on peak CRRES measurements from theJune 1991 eventModel based on average CRRES measurements fromthe March 1991 eventModel based on average CRRES measurements fromthe June 1991 eventJPL 1991 Model: Models based on statistical distributions of solar protonevent intensities (JPL 1991, Feynmann et al., [1993]). Itprovides the proton fluence that would be exceeded at aprobability level of occurrence (Pr), or confidencelevel, from 50% to 0.1%. If the GCR/AC Flux optionOff or Period is selected above, then fluxes arecalculated from the fluences using the user-specifiedtime interval. If Modulation is selected as the GCR/ACFlux option, then a random period of 1 year is used.Note: The cosmic ray flux input and solar event options are identical to those used in theLET-APP Module.Galactic cosmic ray (GCR) and solar energetic particles (SEP):Atomic Z(1-28): The range (Min, Max) of species atomic Z value.Accepted values range from 1 to 28 AMU.Energy(MeV/n): The energy range (Min, Max) of the particles. Acceptedvalues range from 10 to 50000 MeV/n.The Anomalous component cosmic ray (AC) particles:Flux Units:Mass(4-20):The mass range (Min, Max) of the particles. Acceptedvalues range from 4 to 20 AMU.Energy(MeV/n): The energy range (Min, Max) of the particles. Acceptedvalues range from 10 to 2050 MeV/n.Two proton output flux unit options are available. Note that output can bedisplayed using either units without re-running the CHIME module (seeCHIME Outputs section below for details). The options are:CHIME: Flux is given in units of #/(m 2 s sr MeV/n).CRRESPRO: Omni-directional flux is given in units #/(cm 2 s MeV/n).48AF-GEOSpace User’s <strong>Manual</strong>: Version 2.5
CHIME OutputsThe CHIME science module outputs a 3D gridded data set of either the cosmic ray (and/or solarevent fluxes) or the anomalous cosmic ray fluxes. Output units are #/(m 2 s sr MeV/nucleon) inCHIME units or #/(cm 2 s MeV/nucleon) in CRRESPRO units.Note: After generating a graphic object such as a coordinate slice, you can view output in thealternate flux units by doing the following: return to the CHIME Science Module (i.e., go to theModule Menu, Science option, and highlight the SciChime entry in the Active Modules list),reset your Flux Units selection, (DO NOT rerun CHIME), return to the graphics object to beupdated and then reselect the CHIME data. Use of the CRRESPRO flux unit option will producemuch smaller numbers (factor of 10 -4 ) than will use of the CHIME flux unit option. To properlyview output in the new units, the color scale range must be adjusted using the Data Map optionsAF-GEOSpace User’s <strong>Manual</strong>: Version 2.5 49
The CRRESELE Science ModuleModel Name:CRRESELEVersion: July 1995; IGRF updates 2009Developer:References:<strong>Air</strong> <strong>Force</strong> Research Laboratory and AER, Inc.Brautigam, D.H., and J. Bell, CRRESELE Documentation, PL-TR-95-2128, Phillips Laboratory, Hanscom AFB, MA (1995), ADA 301770Brautigam, D.H., M.S. Gussenhoven, and E.G. Mullen, Quasi-staticModel of Outer Zone Electrons, IEEE Trans. Nucl. Sci., 39, 1797-1803(1992)Brautigam, D.H., CRRES in Review: Space Weather and Its Effects onTechnology, J. of Atmos. And Solar-Terr. Phys., 64, 1709-1721 (2002)Olson, W.P., and K.A. Pfitzer, Magnetospheric Magnetic Field Modeling,Annual Scientific Report, <strong>Air</strong> <strong>Force</strong> Office of Scientific Research contractF44620-75-C-0033, McDonnell Douglas Astronautics Co., HuntingtonBeach, CA (1977), ADA 037492Note: It is recommended that AF-GEOSpace users read the original modeldocumentation and descriptive articles before using the models.CRRESELE OverviewThe CRRESELE science and application modules use the PC program CRRESELE developedand released by the <strong>Air</strong> <strong>Force</strong> Research Laboratory. The following description of CRRESELE isexcerpted from the CRRESELE documentation:“CRRESELE utilizes electron radiation belt models constructed from data measured bythe High Energy Electron Fluxmeter (HEEF) flown on the Combined Release andRadiation Effects Satellite (CRRES). CRRES flew in a geosynchronous transfer orbit for14 months during solar maximum. The electron models are omnidirectional flux mapsbinned in L shell and B/B0 (azimuthal symmetry is assumed) for a given energy. TheCRRESELE utility [uses these models] to calculate electron omnidirectional fluences(differential or integral) for 10 energy intervals (0.5-6.60 MeV). A user-specified orbit istraced through eight different outer zone electron flux models, at each energy, to providean estimate of electron fluences received by a satellite under a wide range ofmagnetospheric conditions. Six of the eight CRRESELE models are parameterized bygeomagnetic activity [using the Ap15 index], the seventh is simply a mission average,and the eighth is constructed from maximum flux values. Caution must be used wheninterpreting the results [of fluence calculations using the electron models] becauseCRRESELE is restricted to modeling the outer zone electrons [from L=2.5-6.8] and,consequently, excludes any electron fluence contributions from the inner zone and slotregion.”Central to the construction of the CRRESELE electron models is the new geomagnetic activityindex, Ap15, defined as follows in the CRRESELE Documentation:50AF-GEOSpace User’s <strong>Manual</strong>: Version 2.5
“For the purpose of constructing the [CRRESELE electron flux models] we define a newindex derived from the Ap value. For a given day, the preceding 15 daily values of Apare averaged to form the Ap15 index. The Ap15 index may be derived from either theestimated (NOAA-USAF Space Environment Services Center, Preliminary Report andForecast of Solar Geophysical Data) or archived (NOAA World Data Center-A, SolarGeophysical and Prompt Reports) Ap values; the results agree within plus/minus 20%and display the same qualitative variations. A linear regression was performed of 455days of estimated and archived indices and yielded the following linear relation:Ap15(estimated)= 0.8*Ap15(archived) + 2.6, with a correlation coefficient of 0.99. WhenAp15 is referred to in this document, it is assumed that it is derived either directly fromthe weekly estimated Ap or indirectly (via the linear relationship given above) from thearchived version of Ap.”The CRRESELE science module is used to map the electron flux models used by CRRESELEinto a three-dimensional grid specified by the user. A variety of magnetic field models can beused for the mapping. The eighty electron flux models used in CRRESELE were derived fromthe CRRES data as explained by the following excerpt from the CRRESELE Documentation,“The 0.512 second count rates [from each of the 10 energy channels of the HEEFinstrument] are first binned by L (0.05 Re bins) and pitch angle (5 degree wide bins),folding the pitch angles > 90 degrees into the 0-90 degree quadrant. Various correctionalgorithms are next applied to these average count rates, which are then converted toaverage fluxes. For a given energy and L, the bin average pitch angle distributions aremapped to the magnetic equator [using the Olson-Pfitzer static external magnetic fieldmodel and the IGRF85 internal magnetic field model]. A database of daily averageequatorial fluxes binned by day, energy, pitch angle, and L (2.5
point. In this manner, a fully three-dimensional map of the outer zone flux data may be madefrom the CRRES data.Note: Although AF-GEOSpace allows the data to be mapped in three dimensions usinga variety of magnetic field models, the original CRRES data was binned into B/Lcoordinates using the IGRF85 magnetic field with the Olson-Pfitzer (1977)external field. The user should be aware that using other magnetic field models tomap the data to three-dimensional space is inconsistent with the original reductionof the data.CRRESELE InputsThe CRRESELE science module requires the user to specify the following information todetermine which data set to use and which magnetic field model to use in mapping the data,B-Model:The magnetic field model used to convert from the B-L coordinates of themodel to three-dimensional space. While the model used to reduce theCRRES data was IGRF85/O-P, the default setting uses IGRF/O-P. The B-Model options include:Dipole: A dipole fieldDipole-Tilt: A tilted dipole fieldDip-Tilt-Off: A tilted-offset dipole fieldIGRF: The International Geomagnetic Reference Field with noexternal contributions (Extrapolation beyond 2010).IGRF/O-P:The IGRF internal field with the Olson and Pfitzer(1977) static model to represent the external field.IGRF85: The International Geomagnetic Reference Field (1985)with no external contributions.IGRF85/O-P:The IGRF85 internal field with the Olson and Pfitzer(1977) static model to represent the external field. Theoriginal CRRES data was reduced using this option.Note: The IGRF85 internal field uses the Year, Day, and UT Global Parameters.Although less consistent with the original data reduction, models are computedsignificantly faster when one of the dipole field options is chosen.Energy Channel (MeV):The energy channel parameter selects which of the ten flux modelscorresponding to the ten HEEF energy channels with central energiesbetween 0.65 and 5.75 MeV is to be considered. The channel numbersand assigned limits are listed here. The E central column corresponds to theEnergy Channel options shown in the Environment Window:CH E lower E central E upper ∆E0 0.50 0.65
4 2.10 2.35
The CRRESPRO Science ModuleModel Name:CRRESPROVersion: 28 July 1994; IGRF updates 2009Developer:References:<strong>Air</strong> <strong>Force</strong> Research Laboratory and AER, Inc.Meffert, J.D., and M.S. Gussenhoven, CRRESPRO Documentation, PL-TR-94-2218, Phillips Laboratory, Hanscom AFB, MA (1994), ADA284578Gussenhoven, M.S., E.G. Mullen, M.D. Violet, C. Hein, J. Bass, and D.Madden, CRRES High Energy Proton Flux Maps, IEEE Trans. Nucl. Sci.,40, 1450-1457 (1993)Olson, W.P., and K.A. Pfitzer, Magnetospheric Magnetic Field Modeling,Annual Scientific Report, <strong>Air</strong> <strong>Force</strong> Office of Scientific Research contractF44620-75-C-0033, McDonnell Douglas Astronautics Co., HuntingtonBeach, CA (1977), ADA 037492Note: It is recommended that AF-GEOSpace users read the original modeldocumentation and descriptive articles before using the models.CRRESPRO OverviewThe CRRESPRO science and application modules are based on the PC program CRRES-PROdeveloped by the <strong>Air</strong> <strong>Force</strong> Research Laboratory. Note that the TPM-1 Science Module,described elsewhere in this document, is a low-altitude extension of the CRRESPRO model. ACRRESPRO Documentation excerpt:“CRRESPRO predicts proton omnidirectional fluence per year and integralomnidirectional fluence per year at selected energies in the range 1-100 MeV for an orbitspecified by the user. It closely parallels its counterpart, CRRESRAD, which predictsdose behind four thicknesses of hemispherical aluminum shielding. [...] The CRRESPROsoftware uses flux models created from data collected by the proton telescope (PROTEL)on board the Combined Release and Radiation Effects Satellite (CRRES) flown from 25July 1990 to 12 October 1991 during solar maximum. CRRES was in a geosynchronoustransfer orbit with an inclination of 18 degrees, a perigee of 350 km, and an apogee of33000 km. It traversed the radiation belts twice per orbit with a period of 9 hours 52minutes. In March 1991, a magnetic storm caused a reconfiguration of the innermagnetosphere, resulting in, among other features, double proton belts forming over acertain energy range. Because of this change, two CRRES models were created. Thequiet model uses data from July 1990 to March 1991, and the active model uses datafrom March 1991 to October 1991. Note that in this documentation and the CRRESPROsoftware, “quiet” refers to the period from July 1990 to March 1991 (single proton belt)and “active” refers to March 1991 to October 1991 (double proton belt). Quiet and activeas used here for the inner radiation belt have no correspondence to quiet and active asdetermined by Kp. In fact, the average Kp for the two CRRES periods was the same,namely 2.2.”54AF-GEOSpace User’s <strong>Manual</strong>: Version 2.5
The CRRESPRO science module is used to map the proton flux data sets used by CRRESPROonto a three-dimensional grid specified by the user. A variety of magnetic field models can beused for the mapping. Forty-four data sets were derived from the CRRES data as described bythe following excerpt from the CRRESPRO documentation:“The flux models used by CRRESPRO are based on in situ flux measurements made byCRRES. [...] The instrument used to measure flux on CRRES was the proton telescope(PROTEL). PROTEL had two detector heads, which together measured protons from 1 to100 MeV in 24 energy steps, giving a complete spectrum every 1.024 seconds. Theangular resolution of the detector low (high) energy head was +/- 10 degrees by +/- 10degrees (+/- 12 degrees by +/- 17 degrees). [...] For the CRRES proton models, a database of differential number flux values on the magnetic equatorial plane was createdusing each PROTEL data point. The in situ values were mapped point by point to themagnetic equator conserving the first adiabatic invariant in the combined IGRF85 andOlson-Pfitzer quiet magnetic field model. The equatorial data were averaged by channelfor each leg of each orbit in L shell bins of extent 1/20th Re and pitch angle bins of width5 degrees. The equatorial data from all orbits occurring before (after) the March 1991storm were then combined in the same L and pitch angle bins to create the CRRES quiet(active) proton model. [...] In summary, we have created two proton models from theCRRES PROTEL data base: a quiet model using data acquired before the March 1991storm and an active model using data acquired after the storm. Each model potentiallyconsists of twenty-four sub models, one for each energy channel. [...] We eliminate oneof the 8.5 MeV channels and the 15.2 MeV channel [see full documentation fordiscussion]. This results in 44 different flux model files.”After selecting a proton data set, the module calculates the B/L coordinates for each grid point inthe user-specified magnetic field model. Resulting flux values are then obtained from the B/Lcoordinates and the chosen data file and assigned to the grid point. In this manner, a fully threedimensionalmap of the proton flux data may be made from the CRRES data.Note: Although AF-GEOSpace allows the data to be mapped in three dimensions usinga variety of magnetic field models, the original CRRES data was binned into B/Lcoordinates using the IGRF85 magnetic field with the Olson and Pfitzer (1977)external field. The user should be aware that using other magnetic field models tomap the data to three-dimensional space is inconsistent with the original reductionof the data.CRRESPRO InputsThe CRRESPRO science module requires the user to specify the following information todetermine which data set to use and which magnetic field model to use in mapping the data,B-Model:The magnetic field model used to convert from the B-L coordinates of themodel to three-dimensional space. While the model used to reduce theCRRES data was IGRF85/O-P, the default setting uses IGRF/O-P. The B-Model options include:Dipole:Dipole-Tilt:A dipole fieldA tilted dipole fieldAF-GEOSpace User’s <strong>Manual</strong>: Version 2.5 55
Dip-Tilt-Off:IGRF:IGRF/O-P:A tilted-offset dipole fieldThe International Geomagnetic Reference Field with noexternal contributions (Extrapolation beyond 2010).The IGRF internal field with the Olson and Pfitzer(1977) static model to represent the external field.IGRF85: The International Geomagnetic Reference Field (1985)with no external contributions.IGRF85/O-P:The IGRF85 internal field with the Olson and Pfitzer(1977) static model to represent the external field. Theoriginal CRRES data was reduced using this option.Note: The IGRF85 internal field uses the Year, Day, and UT Global Parameters.Although less consistent with the original data reduction, models are computedsignificantly faster when one of the dipole field options is chosen.Energy Channel (MeV):The energy channel parameter selects which of the proton flux data setscorresponding to the twenty-two PROTEL energy channels between 1 and100 MeV is to be considered. The E central column corresponds to theEnergy Channel options shown in the Environment Window:CH E lower E central E upper ∆E1 1.1 1.5 1.9 0.82 1.9 2.1 2.3 0.43 2.3 2.5 2.7 0.44 2.7 2.9 3.1 0.45 3.1 4.3 5.5 2.46 5.5 5.7 5.9 0.47 5.9 6.8 7.7 1.88 7.7 8.5 9.3 1.69 9.3 9.7 10.1 0.810 10.1 10.7 11.3 1.211 11.3 13.2 15.1 3.812 15.1 19.4 23.7 8.613 23.7 26.3 28.9 5.214 28.9 30.9 32.9 4.015 32.9 36.3 40.2 7.316 40.2 41.1 43.2 3.017 43.2 47.0 50.8 7.618 50.8 55.0 59.2 8.419 59.2 65.7 72.2 13.020 72.2 81.3 90.4 18.2Activity: The activity parameter specifies whether the Quiet (obtained before the 24March 1991 storm) or Active (obtained after the 24 March 1991 storm)proton flux data sets are to be used.56AF-GEOSpace User’s <strong>Manual</strong>: Version 2.5
CRRESPRO OutputsThe CRRESPRO Science module returns a 3D Gridded Data Set of the proton flux for theselected energy channel and activity level in units of #/(cm 2 s MeV).AF-GEOSpace User’s <strong>Manual</strong>: Version 2.5 57
The CRRESRAD Science ModuleModel Name:CRRESRADVersion: August 1992; IGRF updates 2009Developer:References:<strong>Air</strong> <strong>Force</strong> Research Laboratory and AER, Inc.Kearns, K.J., and M.S. Gussenhoven, CRRESRAD Documentation, PL-TR-92-2201, Phillips Laboratory, Hanscom AFB, MA (1992), ADA256673Gussenhoven, M.S., E.G. Mullen, M. Sperry, K.J. Kerns, and J.B. Blake,The Effect of the March 1991 Storm on Accumulated Dose for SelectedSatellite Orbits: CRRES Dose Models, IEEE Trans. Nuc. Sci., 39, 1765-1772 (1992)Gussenhoven, M.S., E.G. Mullen, D.H. Brautigam, E. Holeman, C.Jordan, F. Hanser, and B. Dichter, Preliminary Comparison of DoseMeasurements on CRRES to NASA Model Predictions, IEEE Trans. Nucl.Sci., 38, 1655-1662 (1991)Olson, W.P., and K.A. Pfitzer, Magnetospheric Magnetic Field Modeling,Annual Scientific Report, <strong>Air</strong> <strong>Force</strong> Office of Scientific Research contractF44620-75-C-0033, McDonnell Douglas Astronautics Co., HuntingtonBeach, CA (1977), ADA 037492Note: It is recommended that AF-GEOSpace users read the original modeldocumentation and descriptive articles before using the models.CRRESRAD OverviewThe CRRESRAD application is based on the PC program CRRESRAD developed and releasedby the <strong>Air</strong> <strong>Force</strong> Research Laboratory. A CRRESRAD Documentation excerpt:“CRRESRAD predicts the amount of radiation received in a specified orbit behind fourhemispheres of aluminum with thicknesses of 82.5, 232.5, 457.5, and 886.5 mils. Theprediction uses empirical models of accumulated dose measured on the CombinedRelease and Radiation Effects Satellite (CRRES) flown from 25 July 1990 to 12 October1991 during solar maximum. CRRES was in a geosynchronous transfer orbit with aninclination of 18 degrees, a perigee of 350 km and an apogee of 33000 km. CRREStraversed the radiation belts twice per orbit with a period of 9 hours 52 minutes. Theinstrument used to measure accumulated dose is the CRRES Space Radiation Dosimeterwhich measures both dose rate and accumulated dose in four silicon detectors each ofwhich is behind an aluminum dome of different thickness. The minimum energiesrequired for particles to penetrate the domes and accumulate dose in the silicon detectorsunderneath are 20, 35, 50 and 75 MeV for protons and 1, 2.5, 5 and 10 MeV forelectrons. Dose from particles depositing 0.05-1 MeV and 1-10 MeV is accumulated intwo different channels called LOLET and HILET, respectively. HILET dose accumulatesprimarily from protons with energies of 20-100 MeV, but electrons with energies > 558AF-GEOSpace User’s <strong>Manual</strong>: Version 2.5
MeV may contribute during large electron enhancement periods. LOLET doseaccumulates from electrons, bremsstrahlung, and protons with energies > 100 MeV.”The CRRESRAD science module is used to map the radiation dose rate data sets from theCRRES mission onto a three-dimensional grid specified by the user. A variety of magnetic fieldmodels can be used for the mapping. Thirty-six data sets were derived from the CRRES data asdescribed by the following excerpt from the CRRESRAD documentation:“The dose models used by CRRESRAD are based on in situ dose rate measurementsmade by CRRES. The instrument used to measure dose is the CRRES Space RadiationDosimeter. [...] The dosimeter measured accumulated dose once every 4.096 secondsthroughout the CRRES mission. The measured dose rates for each dome were binned byL shell and B/B0 to make average dose rate models in rads (Si) per second. The width ofeach bin in L shell is 1/20 Re, and the width of each bin in B/B0 is ~2 degrees latitude ina dipole field. The bins form a two dimensional array of 140 (L Shell) by 20 (B/B0) andcover L shells from 1 to 8 Re and magnetic latitudes of 0 degrees to ~40 degrees. TheCRRES mission is divided into two parts. The magnetosphere is assumed to be in a quietconfiguration before the March 1991 storm and in an active configuration after the Marchstorm. A model was made separately for LOLET, HILET and LOLET+HILET for eachof the four domes. Three sets of these models were made: one for quiet conditions beforethe storm (27 July 1990 to 19 March 1991), one for active conditions after the storm (31March 1991 to 12 October 1991) and one for average conditions over the entire mission(27 July 1991 to 12 October 1991). These combinations result in 36 different dose ratemodels.”After the user selects which dataset is desired, the CRRESRAD science module calculates theB/L coordinates of each grid point from the user-specified magnetic field model. The resultingdose rate is then obtained from the B/L coordinates and the chosen data file. In this manner, afully three-dimensional map of the dose rate data may be made from the CRRES data.Note: Although AF-GEOSpace allows the data to be mapped in three-dimensions usinga variety of magnetic field models, the original CRRES data was binned into B/Lcoordinates using the IGRF85 magnetic field with an Olson and Pfitzer (1977)external field. The user should be aware that using other magnetic field models tomap the data to three-dimensional space is inconsistent with the original reductionof the data.CRRESRAD InputsThe CRRESRAD science module requires the user to specify the information to determine whichdata set to use and which magnetic field model to use in mapping the data,B-Model:The magnetic field model used to convert from the B-L coordinates of themodel to three-dimensional space. While the model used to reduce theCRRES data was IGRF85/O-P, the default setting uses IGRF/O-P. The B-Model options include:Dipole:Dipole-Tilt:A dipole fieldA tilted dipole fieldAF-GEOSpace User’s <strong>Manual</strong>: Version 2.5 59
Dip-Tilt-Off:IGRF:IGRF/O-P:A tilted-offset dipole fieldThe International Geomagnetic Reference Field with noexternal contributions (Extrapolation beyond 2010).The IGRF internal field with the Olson and Pfitzer(1977) static model to represent the external field.IGRF85: The International Geomagnetic Reference Field (1985)with no external contributions.IGRF85/O-P:The IGRF85 internal field with the Olson and Pfitzer(1977) static model to represent the external field. Theoriginal CRRES data was reduced using this option.Shielding: The shielding parameter specifies whether the 82.5, 232.5, 457.5 or 886.5mil aluminum hemisphere shielding thickness data set is to be used.Channel:The channel parameter specifies which dose rate data set is to be used:LoLet:Hi/Lo Let:HiLet:(0.05-1 MeV deposited from electrons, bremsstrahlung,and > 100 MeV protons)(0.05-10 MeV deposited) = LoLet + HiLet(1-10 MeV deposited from 20 - 100 MeV protons and> 5 MeV electrons during large enhancement periods)Activity: The activity parameter specifies whether the Quiet (obtained before the 24March 1991 storm), Active (obtained after the 24 March 1991 storm), orAverage (average of the Active and Quiet intervals) dose rate data sets areto be used.CRRESRAD OutputsThe CRRESRAD science module returns a 3D Gridded Data Set of the dose rate in units of rads(Si) per second for the selected shielding level and detector combination.60AF-GEOSpace User’s <strong>Manual</strong>: Version 2.5
The CUTOFF Science ModuleModel Name:Geomagnetic Vertical Cutoff Rigidity Interpolation ModelVersion: 30 September 2005 (Version 4.03)Developer:References:D.F. Smart and M.A. Shea, <strong>Air</strong> <strong>Force</strong> Research LaboratoryFlückiger, E.O., and Kobel, E., Aspects of Combining Models of theEarth's Internal and External Magnetic Field, J. Geomag. Geoelectr., 42,1123 (1990)Kahler, S., and A. Ling, Comparisons of High Latitude E > 20 MeVProton Geomagnetic Cutoff Observations with Predictions of the SEPTRModel, Annales Geophysicae, 20, 997-1005 (2002)Sabaka, T.J., Langel, R.L., Baldwin, J.A., and Conrad, J.A., TheGeomagnetic Field 1900-1995, Including the Large-Scale Field fromMagnetospheric Sources, and the NASA Candidate Models for the 1995Revision of the IGRF, J. Geomag. Geoelect., 49, 157 (1997)Shea, M.A., Smart, D.F., and McCracken, K.G., A Study of verticalCutoff Rigidities Using Sixth degree simulations of the GeomagneticField, J. Geophys. Res., 70, 4117-4130 (1965)Shea, M.A., and Flückiger, E.O., Magnetospheric Models and TrajectoryCalculations, Space Science Reviews, 93, 305-333 (2000)Smart, D.F., and Shea, M.A., Geomagnetic Cutoffs: a Review for SpaceDosimetry Applications, Adv. Space Res., 14(10), 787-796 (1994)Smart, D.F., and Shea, M.A., World Grid of Cosmic Ray Vertical CutoffRigidities for Epoch 1990.0, Proc. Int. Cosmic Ray Conf. 25 th , 2, 401-404(1997a)Smart, D.F., and Shea, M.A., Calculated Cosmic Ray Cutoff Rigidities at450 km for Epoch 1990.0, Proc. Int. Cosmic Ray Conf. 25 th , 2, 397-400(1997b)Smart, D.F, Shea, M.A., and Flückiger, E.O., Calculated Vertical CutoffRigidities for the International Space Station during Magnetically QuietTimes, Proc. Int. Cosmic Ray Conf. 26 th , 7, 394-397 (1999a)Smart, D.F., Shea, M.A., Flückiger, E.O., Tylka, A.J., and Boberg, P.R.,Calculated Vertical Cutoff Rigidities for the International Space Stationduring Magnetically Active Times, Proc. Int. Cosmic Ray Conf. 26 th , 7,398-401 (1999b)Smart, D.F., Shea, M.A., Flückiger, E.O., Tylka, A.J., and Boberg, P.R.,Changes in Calculated Vertical Cutoff Rigidities at the Altitude of theInternational Space Station as a Function of Magnetically Activity, Proc.Int. Cosmic Ray Conf. 26th, 7, 337-340 (1999c)AF-GEOSpace User’s <strong>Manual</strong>: Version 2.5 61
Smart, D.F., and Shea, M.A., A Comparison of the Tsyganenko ModelPredicted and Measured Geomagnetic Cutoff Latitudes, Adv. Space Res.,28(12), 1733-1738 (2001)Smart, D.F., and Shea, M.A., The Space-Developed Dynamic VerticalCutoff Rigidity Model and Its Applicability to <strong>Air</strong>craft Radiation Dose,Adv. Space Res., 32(1), 103-108 (2003)Smart, D.F., M.A. Shea, A.J. Tylka, and P.R. Boberg, A GeomagneticCutoff Rigidity Interpolation Tool: Accuracy Verification and Applicationto Space Weather, Adv. Space Res., 37, 1206-1217 (2006)Tsyganenko, N.A., A Magnetospheric Field Model with a Warped TailCurrent Sheet, Planetary Space Sci., 37, 5-20 (1989)Note: It is recommended that AF-GEOSpace users read and understand the original modeldocumentation and descriptive articles before using the models.CUTOFF OverviewThe CUTOFF science module accesses the Geomagnetic Vertical Cutoff Rigidity InterpolationModel to generate cutoff rigidity values for any altitude from in the earth’s atmosphere (≥ 20km) to beyond geosynchronous orbit. The magnetic rigidity of a particle is a measure of itsresistance to a magnetic field that deflects it from a straight-line trajectory. Specifically, rigidityR = pc/q where p is the particle momentum, c is the speed of light, and q is the particle charge.Generally, particles with higher rigidities are more likely to gain access to a given location insidethe magnetosphere. Typically, at a given location there is an upper cutoff rigidity value (abovewhich all rigidities are allowed, and a lower cutoff rigidity value (below which all rigidities areforbidden). Between the upper cutoff and the lower cutoff there is an alternating series ofallowed and forbidden trajectories called the cosmic ray penumbra which is both rigidity andmagnetic activity dependent. Owing to penumbral transparency, an "effective cutoff rigidity"value is also determined. Geomagnetic cutoffs also depend on particle direction with themaximum geomagnetic cutoff in the magnetic east direction (90° from the zenith) and theminimum geomagnetic cutoff in the magnetic west direction (90° from the zenith). Thegeomagnetic cutoffs in the north and south magnetic planes are approximately equal to the cutoffin the vertical (zenith) direction. For convenience, the geomagnetic cutoff values are providedboth in terms of rigidity [in GV] and proton energy [in MeV]. Modeled and measured cutoffs at620 km exhibit the same general trend, however, measured cutoffs were about one degree inlatitude equatorward of those modeled during magnetically active times [Smart and Shea, 2001].Extending down into the atmosphere, cutoff rigidity model output used for computing aircraftradiation dose resulted in good agreement during the high-energy solar cosmic ray event of 24October 1982 [Smart and Shea, 2003]. The following is a summary of the procedure used todetermine the cutoff rigidity model quantities within AF-GEOSpace.Background: Smart et al. [1999c] performed basic geomagnetic vertical cutoff rigiditycalculations using proton trajectory-tracings initiated from 450 km altitude on a 5° x 5° worldgrid for specified levels of magnetic activity quantified by integer Kp value and quantizedUniversal time (0000, 0600, 1200, and 1800 hours UT). Please note that the previous release,AF-GEOSpace V2.1, contained CUTOFF Version 4.01 of 3 June 2003.62AF-GEOSpace User’s <strong>Manual</strong>: Version 2.5
For this version of the model, these calculations were performed using quantized Universal timeevery three hours (0000, 0300, 0600, 0900, 1200, 1500, 1800, and 2100 hours UT) [see Smart etal., 2006]. Orbits of particles with specific rigidity values were traced backwards to determine ifaccess from space was allowed or forbidden at each location. Penumbral transparency, a valuefrom between 0 and 1, is the fraction of allowed rigidities as determined by going through thepenumbra in steps of 0.01 GV. The effective cutoff rigidity within the penumbra is thendetermined by subtracting the transparent fraction of the penumbra from the upper cutoff rigidityvalue [Shea et al., 1965]. The magnetospheric magnetic field was defined for 1 January 1995 andused the IGRF 1995 internal field [Sabaka et al., 1997] and the Tsyganenko [1989]magnetospheric model as combined by Flückiger and Kobel [1990]. Because the Tsyganenko[1989] model only describes magnetospheric configurations for Kp indices of 0 to 5, the Boberg[1995] extension was used in increments of -100 nT to include Dst effects to represent probableconditions for Kp 6 through 9 and "10". For example, the Kp = 7 configuration is represented bythe Tsyganenko [1989] Kp = 5 model plus a -200 nT ring current extension. See Smart et al.,[1999a, 1999b, 1999c, 2000, 2006] for more details on the geomagnetic cutoff rigiditydeterminations and the trajectory tracing processes. The results of these calculations are archivedwithin AF-GEOSpace for use in the general interpolation procedure described below.Interpolation Method: The McIlwain "L" parameter can be utilized in the cutoff equation forthe cosine squared of the magnetic latitude such that the vertical cutoff rigidity equation used hasthe form:R = V(k)/ L 2with V(k) being a constant in the cutoff rigidity equation that varies with grid location, i.e.,latitude and longitude (see Smart and Shea [1994]). First, a linear interpolation uses the V(k)values and associated L values at 450 km from the nearest 4 points in the 5° x 5° world grid todetermine the cutoff rigidity R at the satellites latitude, longitude and an altitude of 450 km.Multiplying the interpolated R value by L 2 (using the L appropriate for the satellite's latitude,longitude, and a 450 km altitude) produces the V(k) constant appropriate for the satellitelocation. This V(k) is then combined with the satellite's actual L value in the above equation toproduce an extrapolated vertical geomagnetic cutoff rigidity for the satellite's position. After thevertical cutoff rigidity is determined, Störmer theory is used to translate to cutoff values at 90degrees east and 90 degrees west. The Störmer equation (valid in a magnetic dipoleconfiguration) can be written in the form:R α = 4R {[ 1 + (1 - sinε sinφ cos 3 λ) ½ ] 2 }In this equation R α is the cutoff rigidity in a specific angular direction, R is the vertical cutoffrigidity, λ is an appropriate magnetic latitude, ε is the angle from the zenith direction, and φ isthe azimuth angle measured clockwise from magnetic north. Owing to discrepancies arisingbetween invariant and magnetic latitude at high altitudes, the corrected geomagnetic latitude isalso calculated and used above for λ if it is smaller than the invariant latitude Λ = acos(L -½ ). Asnoted above, the angular geomagnetic cutoffs are lowest from the magnetic west and highestfrom the magnetic east while the cutoffs in the magnetic north and south directions are the sameas the vertical cutoff.AF-GEOSpace User’s <strong>Manual</strong>: Version 2.5 63
CUTOFF InputsThe CUTOFF science module requires the Global Parameters Year, Day, UT, and Kp (SSN,F10.7 and Ap are not used). The Kp index has 28 defined values, i.e., {0, 0 + , 1 - , 1, 1 + , 2 - , 2, 2 + , 3 -, 3, 3 + , 4 - , 4, 4 + , 5 - , 5, 5 + , 6 - , 6, 6 + , 7 - , 7, 7 + , 8 - , 8, 8 + , 9 - , 9}. The decimal equivalents from theGlobal data set represent a Kp index of 0 with 0.0, 0 + with 0.3, 1 - with 0.7, 1 with 1.0, 1 + with1.3, 2 - with 1.7, 2 with 2.0, 2 + with 2.3, etc. Note that there is no Kp = 0 - or 9 + . The CUTOFFmodule utilizes 10 Kp-dependent coefficient sets with a different set for each Kp integer-basedgrouping such as Kp = {2-, 2, or 2+}. For manual entry in the AF-GEOSpace Global text field,the same Kp = “2” coefficient set, for example, can be accessed if the decimal index is in therange 1.60 < Kp ≤ 2.60. Note that while the model authors provide sets of coefficients torepresent the extreme Kp = 9 and “Kp=10” conditions, these sets are not presently accessiblewith AF-GEOSpace owing to fixed input restrictions on the input Global Kp. Note that themodel determines output by interpolating tabulated rigidity and proton cutoff values stored atspatial intervals of 5 degrees in latitude by 5 degree in longitude. The default Grid Tool uses 37latitude and 73 longitude grid points to match this resolution. Note: 20 km is the lowest radialinput, i.e., the top of the atmosphere, so any lower number will be assigned the 20 km result.CUTOFF OutputsThe CUTOFF science module returns a 3D Gridded Data Set of the following quantities:LMcIlwain L coordinate (Earth radii)InvLt Invariant or corrected geomagnetic latitude (degrees)PTV Penumbral transparency at this cutoff rigidityRLGVPV Lower cutoff rigidity (GV) in the vertical direction.RUGVPV Upper cutoff rigidity (GV) in the vertical direction.RCGVPV Effective cutoff rigidity (GV) in the vertical direction.RLGVPE Lower cutoff rigidity (GV) in the 90° East direction.RUGVPE Upper cutoff rigidity (GV) in the 90° East direction.RCGVPE Effective cutoff rigidity (GV) in the 90° East direction.RLGVPW Lower cutoff rigidity (GV) in the 90° West direction.RUGVPW Upper cutoff rigidity (GV) in the 90° West direction.RCGVPW Effective cutoff rigidity (GV) in the 90° West direction.EPNRLV Lower proton cutoff (MeV) in the vertical direction.EPNRUV Upper proton cutoff (MeV) in the vertical direction.EPNRCV Effective proton cutoff (MeV) in the vertical direction.EPNRLE Lower proton cutoff (MeV) in the 90° East direction.EPNRUE Upper proton cutoff (MeV) in the 90° East direction.EPNRCE Effective proton cutoff (MeV) in the 90° East direction.EPNRLW Lower proton cutoff (MeV) in the 90° West direction.EPNRUW Upper proton cutoff (MeV) in the 90° West direction.EPNRCW Effective proton cutoff (MeV) in the 90° West direction.We recommend displaying output in 2D or 3D plots using the COORD-SLICE graphical objector examining output along an orbit by running the SATEL-APP application followed by theORBIT-PROBE graphical object.64AF-GEOSpace User’s <strong>Manual</strong>: Version 2.5
The GCPM Science ModuleModel Name:Global Core Plasma ModelVersion: Version 2.4 of 19 June 2009 based on Gallagher et al. [2000]Developer:D.L. Gallagher, NASA Marshall Space Flight Center, Huntsville, AL(Code source- http://plasmasphere.nasa.gov/models/)References: D. Bilitza and Reinisch, B., International Reference Ionosphere 2007:Improvements and new parameters, J. Adv. Space Res., 42, #4, 599-609,doi:10.1016/j.asr.2007.07.048 (2008)Gallagher, D., P. Craven, and R. Comfort, Global core plasma model, J.Geophys. Res., 105(A8), 18819-18833 (2000).Note: It is recommended that AF-GEOSpace users read the original modeldocumentation and descriptive articles before using the models.GCPM OverviewThe Global Core Plasma Model (GCPM) of Gallagher et al. [2000] is an empirical description ofthermal plasma densities (e-, H + , He + , and O + ) in the plasmasphere, plasmapause,magnetospheric trough, and polar cap. The authors note that GCPM is intended to providerepresentative thermal plasma densities in these regions, but is not intended to represent thedistribution of thermal plasma density at any given time. GCPM-2008 uses the Kp index and iscoupled to the International Reference Ionosphere [Bilitza and Reinisch, 2008] in the transitionregion 500-600 km (see IRI2007 Science Module section for details) which requires additionalinput quantities provided in data files.GCPM InputsNote: Valid run times are limited by the content of file ig_rz.dat described below.Global Parameters:Year, Day, UT, and Kp(SSN is not required)F10.7 and Ap are required for IRI2007, but the values entered in theGlobals section are ignored. F10.7 and Ap are read directly from file$AFGS_HOME/models/data/IRI2007/ap.dat. File updates are madeavailable periodically via FTP (http://iri.gsfc.nasa.gov/).Required Data files: IRI2007 retrieves all input quantities (except for the time) from data filesfound in folder $AFGS_HOME/models/data/IRI2007, namelydgrf##.dat, igrf05.dat, igrf05s.dat: Definitive IGRF and IGRF coefficientsfor the years 1945-2010 (## = two-digit year)URSI##.asc: Coefficient files for the URSI model (## = month + 10)AF-GEOSpace User’s <strong>Manual</strong>: Version 2.5 65
ig_rz.dat:ap.dat:File contains (1) the ionospheric index (IG12) based onfoF2 measurements from a dozen ionosondes correlatedwith CCIR foF2 maps [Liu et al., 1983] and (2) the 12-month running mean of sunspot number (Rz12) for1958 thru 2012. If a date outside this range is used, novalid output can be generated owing to lack of inputsfor the IRI2007 model. File updates are made availableperiodically via FTP at http://iri.gsfc.nasa.gov/.Contains 3-hour Ap magnetic index and F10.7 dailyindex from 1958 thru 30 April 2010. If a date outsidethis range is used, then the Ap-dependent “foF2 stormmodel” [Fuller-Rowell et al., 2000; Araujo-Pradere etal., 2002] will be turned off within the IRI2007 model.File updates available periodically via FTP athttp://iri.gsfc.nasa.gov/.GCPM OutputsThe GCPM Science Module returns 3D Gridded data sets of total density (#/cm 3 ) of electrons,hydrogen (H + ), helium (He + ), and oxygen (O + ). Best viewed by checking the Log10 box withinof the Data Map Graphical Option.66AF-GEOSpace User’s <strong>Manual</strong>: Version 2.5
The IONSCINT Science Module (V2.5 Only)Model Name:High Fidelity Ionospheric Scintillation Simulation Algorithm(IONSCINT)Version: 2.00 (13 March 2000)Developer:Sponsor:References:Radex, Inc. (now AER, Inc.) and the <strong>Air</strong> <strong>Force</strong> Research Laboratory<strong>Air</strong> and Space Natural Environment, Modeling and Simulation ExecutiveAgent (ASNE MSEA), Ashville, NCUser’s Guide for the High Fidelity Ionospheric Scintillation SimulationAlgorithm, Prepared for AFRL/VSB by Radex, Inc. (W. McNeil), March8 (2000)Secan, J.A., and R.M. Bussey, An Improved Model of High-Latitude F-Region Scintillation (WBMOD Version 13), PL-TR-94-2254 (1994), ADA288558Note: It is recommended that AF-GEOSpace users read and understand the original modeldocumentation and descriptive articles before using the models.IONSCINT OverviewThe High Fidelity Ionospheric Scintillation Simulation Algorithm (IONSCINT) providesrealistic scenarios of disruptions in trans-ionospheric radio wave communications with spacecraftdue to equatorial scintillation. The resulting signal fades encountered by ground-to-satellite linksare due to instabilities in the ionospheric F-region related to spread-F plumes that develop aftersunset when conditions are favorable. This module addresses only satellites positioned ingeosynchronous orbit and is limited to a frequency of 244 MHz. While scintillation can occur inboth amplitude and phase, IONSCINT treats only the intensity (or amplitude) scintillation.This excerpt from the user’s manual contains more background and description:“Prior to the development of IONSCINT, the only tools available for the prediction ofscintillation for simulation purposes were statistical (climatological) models, mostnotably the Wide Band model (WBMOD). Although expressing the seasonal, daily andsolar cycle variability of equatorial scintillations on average, these models did not allowfor the introduction of day-to-day variability in scintillation, even in an average sense.Since equatorial scintillations are in fact extremely variable from day-to-day at a givenlocation, simulation results based only on the average scintillation levels were necessarilylacking in a critical feature of the spread-F phenomenon itself. The IONSCINT programwas developed to overcome the limitations of climatological models for simulations byreproducing both the climatological and the day-to-day variability of equatorialscintillations, thereby producing a simulation result [that] is much more in line withactual expected conditions for any particular simulation scenario.IONSCINT generates simulated scintillation results by “replaying” measured scintillationscenarios for a specified season and set of geophysical conditions, drawing on nightlydata measured over [the four years prior to 2000] in the South America sector. Thesenightly measured scenarios are used to drive a model for spread-F plume developmentAF-GEOSpace User’s <strong>Manual</strong>: Version 2.5 67
and evolution that was developed as part of the Scintillation Network Decision Aid(SCINDA) model, from extensive experience with scintillation data. The scenarios areselected pseudo-randomly to conform to the correct average seasonal behavior yetpreserve the day-to-day variability. The South America data set is extrapolated toarbitrary positions on the Earth through the use of average climatology predictions(WBMOD). The basic result is a simulated prediction of scintillation intensitythroughout a specified time of day and year and under specified geophysical conditions.The result is suitable for the production of geographic maps of satellite outages”.IONSCINT InputsThe IONSCINT science module requires the following inputs,Global Parameters: Year, Day, UT, Kp, and SSN (F10.7 and Ap are not used).Random Number Seed: A negative integer (magnitude < 30,000) used to select from among 51scintillation scenarios available to the model. Using the same input seedwill cause the same sequence of scintillation scenarios to be generated. Torecreate the same scenario for more than one satellite, perform additionalseparate IONSCINT runs using the same Random Number Seed for eachsatellite (as defined by its Satellite Longitude, see below).Theater:The following geographic latitude and longitude values define the theaterover which scintillation conditions will be computed. Theater width islimited to a maximum of 90°.Lat 1:Lat 2:Lon 1:Lon 2:Southern boundary of the theater in geocentric latitudein degrees.Northern boundary of the theater in geocentric latitudein degrees.Western boundary of the theater in geocentric Eastlongitude in degrees.Eastern boundary of the theater in geocentric Eastlongitude in degrees.Note: The Grid Tool is not active for the IONSCINT science module. The calculation isperformed using a fixed resolution geographical grid (1° x 1°) defined by the integervalues of the Theater latitude and longitude boundaries given above. The scintillationclimatology produced in the simulation is representative of the seasonal behavior atthe mid-point of the chosen theater.Satellite Longitude:Geographic longitude (degrees East) of the geosynchronous satellite(geographic latitude is internally fixed equal to zero degrees).Sunspot Number and KP: The sunspot number and geomagnetic activity level may be providedto IONSCINT in the following two ways,Globals: IONSCINT will obtain SSN and Kp from the globalparameter values available to AF-GEOSpace. For staticruns, these parameters appear in the text boxes at the68AF-GEOSpace User’s <strong>Manual</strong>: Version 2.5
Constant:top of the environment window. For dynamic runs, theSSN and Kp values to be used are listed in thedynamics global parameter list viewable by accessingthe Globals menu and selecting the Show option. Bothsources can be edited directly by the user.IONSCINT will use constant SSN and Kp values thatthe user provides by editing the following two textboxes directly in the IONSCINT Options window.SSN: Sunspot number (see note below)Kp: Geomagnetic activity index (values 0.00 to 9.00)Note: The SSN values provided by AF-GEOSpace are identical to the daily values archivedby NGDC. The IONSCINT authors note that the daily sunspot number is not wellcorrelated with scintillation and that the preferred sunspot number to use shouldrepresent the smoothed ~90-day average of the daily values, e.g., it will suffice tochoose a value representative of the position in the solar cycle. The authors suggest,for example, using SSN = 10 to represent solar minimum, SSN = 50 to represent theramp up or down from solar maximum, and SSN = 100 and 150 to represent “lowactivity”and “high-activity” solar maximum values, respectively.Operational Mode:IONSCINT output can be calculated using two different methods,Plume:Climo:IONSCINT produces scintillation output based on dayto-daymeasurements such that scintillation at a giventime of day and location differs substantially from dayto day. This mode incorporates realistic statistical“random” variations in the scintillation.IONSCINT produces scintillation output made with theaverage scintillation model WBMOD. For details, seethe WBMOD Science Module section of this document.For both the Plume and Climo methods, two parameters must be specified.Scintillation Intensity: This specifies the desired scintillation intensity(0.00 to 1.00). The scintillation intensity shouldtypically be set to ~0.5 when in the Plume mode. ForClimo mode (when WBMOD results are utilized) avalue of 0.5 tends to give rather weak results so it issuggested that a value ~0.90 be used. This will result inthe evaluation of the WBMOD climatology at the 90 thpercentile level as is quite commonly done forprediction purposes.Percentile for S4 to dB fade: This specifies the percentile (0 to 100) usedto produce the dB fade corresponding to each S4 valueproduced in the output, e.g., if 0.95 is specified, thenthe dB fade value will correspond to the fade level ofAF-GEOSpace User’s <strong>Manual</strong>: Version 2.5 69
IONSCINT Outputsthe top 5% of all fades corresponding to each S4. Theparameter is also known as the Nakagami percentile.The IONSCINT science module returns 2D Gridded Data Sets representing the scintillationparameters on a 1° x 1° geographic coordinate grid. We recommend displaying output in 2Dplots using the COORD-SLICE graphical object. AF-GEOSpace will then display a spatialdistribution (map) for the following parameters:S4Index:The S4 scintillation index, a normalized standard deviation of the signalintensity (dimensionless). It is common to refer to scintillation thresholdlevels of 0.3 and 0.6 as “yellow” and “red” to indicate interference andoutage, respectively.dBfade:ProbCom:SatElev:The dB fade depth of the signal intensity (decibels). It is directly related tothe S4Index through the selection of the Percentile for S4 to dB Fade inputparameter. For a given value of S4Index, the value of dBfade increases asthe value of Percentile for S4 to dB Fade increases.The probability of communication breakdown is a value between zero and100% indicating the probability of communications problems. This isdefined as zero when S4Index is below 0.3 (“yellow” threshold) and as100% when S4Index is greater than 0.6 (“red” threshold). Note that it istherefore possible to have non-zero S4Index and dBfade values with nocommunications problems indicated.The elevation angle (degrees) of the satellite as measured from locationswithin the defined theater, i.e., equal to 90 degrees when satellite isdirectly overhead.70AF-GEOSpace User’s <strong>Manual</strong>: Version 2.5
The IONSCINT-G Science ModuleModel Name:Version: July 2009Developer:References:GPS Version of the High Fidelity Ionospheric Scintillation SimulationAlgorithm (IONSCINT-G)AER, Inc. and the <strong>Air</strong> <strong>Force</strong> Research LaboratoryUser’s <strong>Manual</strong> for the GPS Version of the High Fidelity IonosphericScintillation Simulation Program (IONSCINT-G), Version 1.0, Preparedfor AFRL/VSB by Radex, Inc., 20 June 2002 (Draft Release).User’s Guide for the High Fidelity Ionospheric Scintillation SimulationAlgorithm, Prepared for AFRL/VSB by Radex, Inc. (W. McNeil), March8 (2000)Secan, J.A., and R.M. Bussey, An Improved Model of High-Latitude F-Region Scintillation (WBMOD Version 13), PL-TR-94-2254 (1994), ADA288558Steenburgh, R.A., C.G. Smithtro, and K.M. Groves, Ionosphericscintillation effects on single frequency GPS, Space Weather, 6, S04D02,doi:10.1029/2007SW000340 (2008)Note: It is recommended that AF-GEOSpace users read and understand the original modeldocumentation and descriptive articles before using the models.IONSCINT-G OverviewThe IONSCINT-G Science Module is a simulation tool for producing realistic scenarios ofdisruptions in trans-ionospheric radio communications at GPS frequencies between spacecraftand stationary platforms. It is based on the model “The GPS Version of the High FidelityIonospheric Scintillation Simulation Algorithm (IONSCINT-G).” Given a time interval, aselection of scintillation database options related to solar activity conditions, a random numberseed, and a platform position, the IONSCINT-G Science Module can produce a time series ofskymaps showing S4 scintillation as a function of azimuth and elevation angle as measured fromthe platform position. The scintillation scenarios are selected at random from data taken from afixed L-Band link over various years (1997 – 2001). The following background information isexcerpted from the IONSCINT-G user’s manual.“Equatorial scintillation exhibits pseudo-random elements in that it is composed ofdiscrete “plumes” which stretch along magnetic field lines rather predictably, but vary inlongitudinal extent in an unpredictable manner. Scintillation, especially at GPSfrequencies, can best be thought of as an on-again, off-again process when viewed from afixed point on the Earth, with a time scale of perhaps an hours. The occurrence ofscintillation on a night-to-night basis is also difficult to predict. Although there are timesof the year for various longitude sectors during which scintillation is nearly absent, it istypical for a night with no scintillation in a particular region to follow a night of strongscintillation. This makes “average” climatological scintillation models (WBMOD)difficult to incorporate into realistic simulations of scintillation impact on receivers.AF-GEOSpace User’s <strong>Manual</strong>: Version 2.5 71
The IONSCINT-G program addresses this need by incorporating the random nature ofscintillation into the production of nightly scintillation scenarios, which are constrainedby geomagnetic latitude, solar cycle, and time of year. The scenarios are generated bypiecing together nightly measurements of scintillation from a fixed ground-to-satellitelink at GPS frequencies to form a global picture of scintillation which contains thediscrete “plumes” which are characteristic of actual nightly scintillation, as opposed tothe time-averaged probabilities which would be obtained from climatological modeling.The IONSCINT-G representation of scintillation in a theater, consisting of regions ofhigh intensity separated by regions of no scintillation, is especially important for GPSnavigation investigations where the number of satellites effected and their positions arethe critical issue. However, this improved realism comes with a price which, ForIONSCINT-G, is the fact that a single run cannot be used to assess overall impact.Rather, a run of the software represents what might be expected on a single day. It isentirely possible, for example, for a run to produce no significant scintillation for a givenplatform and night, even at the height of scintillation season and at solar maximum.Therefore, multiple runs for the system with subsequent analysis must be used to assesspossible impacts. Worst case scenarios are built into IONSCINT-G to aid in thisevaluation.”IONSCINT-G InputsThe IONSCINT-G Science Module requires four types of inputs used to define (1) a static runtime or dynamic run time interval, (2) scintillation database options to characterize the type ofscenario desired along with a large random number seed (typically a 5-digit number), (3) thestatic platform position, and (4) the resolution in azimuth and elevation of the S4 scintillationskymap to be created representing the view from the user-specified platform. Specifically, thefollowing inputs are required.Global Parameters: Year, Day, UT (Kp, SSN, F10.7, and Ap are not used).Scintillation Database Options: Scenarios are generated from the scintillation database using aninput solar activity level and four related selection modifiers, namelySunspot Activity Level: Scintillation scenarios corresponding to fourdifferent levels of solar activity as defined by sunspotnumber (SSN) are represented. It should be noted thatno significant scintillation at GPS frequencies occurs atsolar minimum and “worst case” scenarios areassociated with maximum SSN values.1 = Low (10-30): This SSN range represents solarminimum conditions.2 = Moderate (50-75): This SSN range representsconditions during the ramp up or down from solarmaximum.3 = High (85-100): This SSN range representsconditions from a “low-activity” maximum.72AF-GEOSpace User’s <strong>Manual</strong>: Version 2.5
4 = Maximum (100-120): This SSN range representsconditions from a “high-activity” maximum.Use Seasonal Climatology: This option provides the most realisticrepresentation of the seasonal dependence ofscintillation as a function of longitude. If the occurrenceof scintillation is desired at all longitudes regardless ofscintillation season, then uncheck this option. Note thatquiet scintillation-free nights can still occur even withthis option unchecked.Use Only Top 10% Scintillation Scenarios: Selecting this optionhighlights the “worst” of the possible scenarios, i.e., itrestricts scenario selection to be made randomly fromonly those portions of the database representing the top10% of nights based on the total time of activescintillation per night. If left unchecked, then scenariosets will be chosen randomly from all in-season nightsfor the chosen solar activity level.Retain Generated Random Number Seed Between Runs: Each time a newIONSCINT-G entry appears in the Active Modules list,e.g., SciIonScintg0, a new random number is placed inthe text box to the right of the next input line. Each runutilizes the random number seed that is visible beforethe run is made. This value is used to randomize theselection of scenario sets from the appropriate solaractivity level section of the database. For a given set ofactivity settings, using the same number seed will causethe same scintillation scenario to be generated. Selectthis option to retain use of the random number seed foradditional runs. If neither this nor the next option ischecked, then a Run/Update will place a new randomnumber seed in the text box (to be used for the nextrun!). If you complete a run without checking thisoption and did not record the number seed, you canrecover the value used in your last run from fileC:\TEMP\SciIonScintg#\IONSCINTG.OUT (assumingdefault scratch directory C:\TEMP).Specify and Retain Random Number Seed: Select this option and edit thenumber seed value in the text box to retain use of thenumber seed for the current and future runs. Using thesame input seed will cause the same scintillationscenario to be generated. To recreate the same scenariofor more than one Platform Position, perform additionalIONSCINT-G Science Module runs using the sameRandom Number Seed for each platform location.AF-GEOSpace User’s <strong>Manual</strong>: Version 2.5 73
Platform Position:The Platform Position defines the fixed reference position used for allGPS scintillation scenario calculations. Note that there will be noscintillation directly overhead (i.e., at the center of the skymap viewedwith the IONSCINT-G graphic module) if the platform is placed at amagnetic latitude poleward of 30 degrees. The location is input ingeographic coordinates assuming a spherical Earth, namelyLatitude:The platform’s North latitude in degrees.Longitude: The platform’s East longitude in degrees (0-360).Altitude (km):The platform’s altitude in kilometers above theEarth’s surface.S4 Skymap Output Resolution: For a given Platform Position, the following settings controlthe skymap output resolution in azimuth and elevation.Delta Azimuth(Deg): Degrees per step in azimuth. Permitted inputrange is 1.0 to 36.0 and the value will be adjustedinternally to create an integer number of steps.Delta Sin(Elevation): Elevation step size expressed in units ofsin(elevation). Permitted input range is 0.01 to 0.10and the value will be adjusted internally to create aninteger number of steps.Notes: (1) The Data Tool and Grid Tool are not active for the IONSCINT-G science module.The calculation is performed using the grid defined in the S4 Skymap OutputResolution section defined above. However, Data Probes available via theIONSCINT-G Graphical Module can be used to view details in S4 as a function offixed azimuth and elevation in 1-D viewports(2) The File menu Save Model/Open Model features work only when the RetainGenerated Random Number Seed Between Runs or Specify and Retain RandomNumber Seed option has been used.IONSCINT-G OutputsThe IONSCINT-G science module returns 2D Gridded Data Sets with the S4 scintillationparameter for plotting in skymaps representing the view (in azimuth and elevation) from astationary platform position. The S4 scintillation index is a normalized standard deviation of thesignal intensity (dimensionless). S4 index skymaps can be viewed in Spectral viewports usingthe IONSCINT-G Graphical Module. To prepare an active graphics window for viewing the S4scintillation skymaps, use the Viewport menu to select Spectral under the Projection option.Note that the IONSCINT-G Graphical Module also provides data probes for viewing the S4parameter as a function of fixed azimuth and elevation values in 1-D viewports.Hint: To produce realistic S4 scintillation time profiles for a given platform-satellite link, thisscience module should be run in dynamic mode for a time period using a fixed Platform Positionwith a variety of Scintillation Database Options settings. The user should examine the resultingskymap sequences to select a suitable S4 scenario and then run the IONSCINT-G Application74AF-GEOSpace User’s <strong>Manual</strong>: Version 2.5
Module using the IONSCINT-G Science Module input settings for that scenario along with thoseof the satellite of interest. This will enable the generation of 1D plots of the S4 scintillation indexvs. time for the desired platform-satellite link.AF-GEOSpace User’s <strong>Manual</strong>: Version 2.5 75
The IRI2007 Science ModuleModel Name: International Reference Ionosphere (IRI) Model 2007Version: May 2007Developer:References:IRI is sponsored by the Committee on Space Research (COSPAR) and theUnion Radio Scientifique Internationale (URSI). Code provided byNASA’s Space Physics Data Facility and the National Space Science DataCenter via FTP (http://iri.gsfc.nasa.gov/).Araujo-Pradere, E. A., T. J. Fuller-Rowell, and M. V. Codrescu, STORM:An empirical storm-time ionospheric correction model, 1, Modeldescription, Radio Sci., 37(5), 1070, doi:10.1029/2001RS002467 (2002)Bilitza, D., International Reference Ionosphere 2000, Radio Sci., 36(2),261-275 (2001)Bilitza, D., A correction for the IRI topside electron density model basedon Alouette/ISIS topside sounder data, Adv. Space Res., 33(6), 838-843(2004)Bilitza, D., S. Radicella, B. Reinisch, J. Adeniyi, M. Mosert de Gonzalez,S. Zhang, and O. Obrou, New B 0 and B 1 models for IRI, Adv. Space Res.,25(1), 89-96 (2000)Bilitza, D., and B. Reinisch, International Reference Ionosphere 2007:Improvements and new parameters, J. Adv. Space Res., 42(4), 599-609,doi:10.1016/j.asr.2007.07.048 (2008)CCIR, Atlas of ionospheric characteristics, Comite´ ConsultatifInternational des Radiocummnications, Report 340-4, InternationalTelecommunication Union, Geneva (1967)Coisson, P., S.M. Radicella, R. Leitinger, B. Nava, Topside electrondensity in IRI and NeQuick: features and limitations, Adv. Space Res.,37(5), 75-79 (2006)Coisson, P., B. Nava, and S.M. Radicella, On the use of NeQuick topsideoption in IRI-2007, Adv. Space Res., 43, 1688-1693 (2009)Danilov, A. D., and V. K. Semenov, Relative ion composition model atmidlatitudes, J. Atmos. Terr. Phys., 40, 1093-1102 (1978)Danilov, A. D., and A. P. Yaichnikov, A new model of the ioncomposition at 75 km to 1000 km for IRI , Adv. Space Res., 5(7), 75-79(1985)Danilov, A., A. Rodevich, and N. Smirnova, Problems with incorporatinga new D-region model into the IRI, Adv. Space Res., 15, 165-169 (1995)Danilov, A., and N. Smirnova, Improving the 75 km to 300 km ioncomposition model of the IRI, Adv. Space Res., 15, 171-178 (1995)76AF-GEOSpace User’s <strong>Manual</strong>: Version 2.5
DuCharme, E., L. Petrie, and R. Eyfrig, A method for predicting the F1-layer critical frequency, Radio Sci., 6, 369-378 (1971)DuCharme, E., L. Petrie, and R. Eyfrig, A method for predicting the F1-layer critical frequency based on Zurich smoothed sunspot number, RadioSci., 8, 837-839 (1973)Fuller-Rowell, T., E. Araujo-Pradere, and M. Codrescu, An empiricalionospheric storm-time correction model, Adv. Space Res., 25(1), 139-148(2000)Gulyaeva, T., Progress in ionospheric informatics based on electrondensity profile analysis of ionograms, Adv. Space Res., 7(6), 39 (1987)Liu, R.Y., P.A. Smith, and J.W. King, A new solar index which leads toimprove foF2 predictions using the CCIR-Atlas, TelecommunicationsJournal, 50, 408-414, (1983)Radicella, S. M., and R. Leitinger, The evolution of the DGR approach tomodel electron density profiles, Adv. Space Res., 27(1), 35-40 (2001)Scotto, C., M. Mosert de Gonzalez, S. Radicella, and B. Zolesi, On theprediction of the F 1 ledge occurrence and critical frequency, Adv. SpaceRes., 20(9), 1773-1776 (1997)Scotto, C., S. Radicella, and B. Zolesi, An improved probability functionto predict the F 1 layer occurrence and L condition, Radio Sci., 33, 1763-1765 (1998)Truhlik, V., L. Triskova, and J. Smilauer, A empirical model of ioncomposition in the outer ionosphere, Adv. Space, Res., 31, 653-663 (2003)Truhlik, V., L. Triskova, and J. Smilauer, New advances in empiricalmodeling of ion composition in the outer ionosphere, Adv. Space Res., 33,844-849 (2004)Truhlik, V., L. Triskova, and J. Smilauer, An empirical topside electrondensity model for calculation of absolute ion densities in IRI, Adv. SpaceRes., 71(5), 928-934 (2006)Note: It is recommended that AF-GEOSpace users read the original modeldocumentation and descriptive articles before using the models.IRI2007 OverviewThe IRI2007 Science Module utilizes the International Reference Ionosphere (IRI) model of2007, an empirical model specifying monthly averages of electron density, ion composition,electron temperature, and ion temperature in the altitude range 50 to 1500 km with extrapolatedoutput up to 2000 km [Bilitza and Reinisch, 2008]. The International Reference Ionosphere (IRI)is an international project sponsored by the Committee on Space Research (COSPAR) and theInternational Union of Radio Science (URSI) and is the de facto international standard forclimatological specification of ionospheric quantities. Updated frequently, several steadilyimproved editions of the model have been released over the years based on major data sourcesAF-GEOSpace User’s <strong>Manual</strong>: Version 2.5 77
including the worldwide network of ionosondes, the powerful incoherent scatter radars(Jicamarca, Arecibo, Millstone Hill, Malvern, St. Santin), the ISIS and Alouette topsidesounders, and in situ instruments on several satellites and rockets (see http://iri.gsfc.nasa.gov/).While IRI is capable of specifying a variety of other quantities, the AF-GEOSpaceimplementation calculates only electron density, neutral, ion, and electron temperatures and iondensities (O + , H + , He + , O + 2, NO + , and N + ).IRI2007 InputsThe IRI2007 Science Module requires the following inputs:Global Parameters: Year, Day, UTNote: Input values for F10.7 and Ap are read directly from the file$AFGS_HOME/models/data/IRI2007/ap.dat. File updates are madeavailable periodically via FTP. The values entered in the Globals inputsection are not utilized.Required Data files: IRI2007 retrieves all input quantities (except for the time) from data filesfound in folder $AFGS_HOME/models/data/IRI2007, namelydgrf##.dat, igrf05.dat, igrf05s.dat: Definitive IGRF and IGRF coefficientsfor the years 1945-2010 (## = two-digit year)CCIR##.asc: Coefficient files for the CCIR model (## = month + 10)URSI##.asc: Coefficient files for the URSI model (## = month + 10)ig_rz.dat: File contains (1) the ionospheric index (IG12) based onfoF2 measurements from a dozen ionosondes correlatedwith CCIR foF2 maps [Liu et al., 1983] and (2) the 12-month running mean of sunspot number (Rz12) for1958 thru 2012. If a date outside this range is used, novalid output will be generated and all output quantitieswill be set to values of -1. File updates are madeavailable periodically via FTP.ap.dat:Contains 3-hour Ap magnetic index and F10.7 dailyindex from 1958 thru 30 April 2010. If a date outsidethis range is used, then the Ap-dependent “foF2 stormmodel” [Fuller-Rowell et al., 2000; Araujo-Pradere etal., 2002] will be turned off. File updates availableperiodically via FTP.The eight input options offered below were chosen from a larger list of available IRI options onthe basis of likelihood of selection as well as their lack of additional input/database requirements.Bottomside Thickness: The bottomside thickness can be specified two ways:Internal table:This coefficient table (B 0 ) is based on incoherent scatterdata [see Bilitza et al., 2000].Gulyaeva model: The Gulyaeva model is based on ionosonde data mostlyfrom mid-latitiudes [Gulyaeva, 1987].78AF-GEOSpace User’s <strong>Manual</strong>: Version 2.5
F Layer:Ion Composition:Global representation of the F2 peak parameters (FoF2, M3000) areavailable from two models:URSI model:CCIR model:Model of the International Union of Radio Science(URSI)Model of the Comite´ Consultatif International desRadiocummnications (CCIR) [CCIR, 1967]The CCIR model is recommended for the continents and the URSI modelfor the ocean areas. If a single model is needed globally then the URSImodel is recommended.Ion composition representation is available from one of two sets ofmodels.DS-95 and TTS-03: The models of Danilov-Smirnova [Danilov andSmirnova, 1995] and Truhlik, Triskova, Smilauer[Truhlik et al., 2003] will be used.DS-78 and DY-85: The models of Danilov and Semenov [1978] andDanilov and Yaichnikov [1985] will be used.Te calculation: The electron temperature can be specified two ways.Standard: Use the standard electron temperature descriptionTe/Ne correlation: Use electron temperature based on correlation withdensity.Ne calculation: The electron density can be specified two ways.Standard: Use the standard electron density description.Lay-functions: Use normalized electron density using lay-functions.F1 calculation: The F1 plasma frequency can be specified two ways [Bilitza, 2001].Standard: The frequency foF1 is from the IRI-95 model[DuCharme et al., 1971, 1973]L-condition transitions: This option adds the so-called L-conditiontransitions developed by Scotto et al. [1997, 1998].Topside Ne calculation: Two options are available for the topside electron density profile.Intercosmos: The Intercosmos-based topside model based on Truhliket al. [2006].Te tops (Aero, ISIS): The standard IRI model based on Aeros/ISIS data.Topside Te calculation: Topside electron density profile computation can beNeQuick: The topside model based on Radicella and Leitinger[2001] and Coisson et al. [2006] is used.TTS:The topside model based on Truhlik et al. [2006] isused.AF-GEOSpace User’s <strong>Manual</strong>: Version 2.5 79
Corrected IRI 2001: Correction factors from Bilitza [2004] are used withinthe original 2001 topside model.Original IRI 2001: The original 2001 model is used.Note: The code implementation within the IRI-2007 Science Module follows all default optionsettings of the original FORTRAN code. For completeness, options not offered above but whichare accessible in the original code are listed here along with their default settings. Chart notationcomes directly from file irisub.for acquired via the FTP code source..True. .False. default---------------------------------------------------------------------Ne computed Ne not computed trueTe, Ti computed Te, Ti not computed trueNe & Ni computed Ni not computed trueNe - Tops: f10.7
The ISPM Science Module (V2.5 and Static Only)Model Name:Version: 94Developer:References:Interplanetary Shock Propagation Model (ISPM)M. Dryer and Z. Smith, NOAA Space Environment CenterFry, C. D., M. Dryer, Z. Smith, W. Sun, C.S. Deehr, and S.-I. Akasofu,Forecasting solar wind structures and shock arrival times using anensemble of models, J. Geophys. Res., 108(A2), 1070,doi:10.1029/2002JA009474 (2003)Hilmer, R.V., G.P. Ginet, K. Kadinsky-Cade, S. Quigley, D.T. Decker,P.H. Doherty, Space Environment Models Addressing OperationalHazards: An AF-GEOSpace Perspective on Current Capabilities,American Institute of Aeronautics and Astronautics, AIAA 2000-0366,from 38th Aerospace Sciences Meeting, 10-13 January 2000, Reno NV,2000.Smith, Z.K., M. Dryer, and L.D. Lewis, User’s <strong>Manual</strong>, Volume II of theInterplanetary Shock Propagation Model: 1994, Final Contract ReportGLH3-611, Phillips Laboratory, 31 March (1994)Smith, Z.K., and M. Dryer, Detailed Documentation of the ISPM, VolumeIV of the Interplanetary Shock Propagation Model: 1994, Final ContractReport GLH3-611, Phillips Laboratory, 31 March (1994).The preceding document is also available as:Smith, Z. and M. Dryer, The Interplanetary Shock Propagation Model: AModel for Predicting Solar-Flare-Caused Geomagnetic Storms, <strong>Base</strong>d onthe 2 1/2 D, MHD Numerical Simulation Results from the InterplanetaryGlobal Model (2D IGM), NOAA Tech. Mem. ERL SEL-89, (1995)Note: It is recommended that AF-GEOSpace users read the original modeldocumentation and descriptive articles before using the models.ISPM OverviewThe Interplanetary Shock Propagation Model (ISPM) was developed to estimate thecharacteristics of interplanetary shocks caused by energetic solar events. We hereafter refer tothese shock-producing solar events, whether they are coronal mass ejections or solar flares, as“solar flares” since flare data are a crucial input to the model. This description of ISPM isexcerpted from the User’s <strong>Manual</strong>:“The ISPM program calculates the arrival time and strength at 1 AU of a shock from asolar flare. The shock strength is characterized by the jump in dynamic pressure acrossthe shock front: this parameter is used to estimate the likelihood of the shock being geoeffective.The arrival time and strength are calculated from algebraic equations derivedfrom a parametric study of solar-caused interplanetary shocks that was made using [twodimensionalmagnetohydrodynamic] simulations.”AF-GEOSpace User’s <strong>Manual</strong>: Version 2.5 81
ISPM is based on magnetohydrodynamic computations of a shock wave initiated at the Sun thatpropagates through a normal solar wind. The initial energy of the shock is estimated by aformulation based on the X-ray energy output of a solar flare and the associated speed derivedfrom the Type II frequency drift rate. The angular extent of the shock wave from the presumedsolar flare location is a function of the energy estimated by this formulation.As input, the ISPM requires specification of the flare location, start time of the shock, shockdriver duration, and initial shock speed. The flare location (solar latitude and longitude) isobtained from H-alpha observations made by USAF SOON sites. The shock start time is definedas the onset time of the Type II radio burst associated with the flare as observed by the USAFRSTN sites. Initial shock speed is set to the Type II drift speeds estimated by the RSTN sites.Shock duration times can either be directly input or estimated from the decay time of the soft X-ray event associated with the solar flare. If the X-ray level option is chosen, the ISPM assumesthe shock driver end time to be the time at which the logarithm of the magnitude of the GOESsatellite 1-8 Angstrom X-ray signal falls to one-half the logarithm of the peak value observed forthe event.For output, the ISPM gives the predicted transit time (TT) of the shock from Sun to Earth and itsstrength in terms of the dynamic pressure jump (DPJ) across the shock front and the shockstrength index (SSI). According the ISPM User’s <strong>Manual</strong>, the SSI “is based on the difference of(the log10 of) the DPJ from the [background] state used in the numerical modeling study.” If theSSI is greater than or equal to zero then the shock will likely be geo-effective. If SSI is less than-1 there will likely be no measurable effects. TT and DPJ are provided by numerical algorithmsrelating TT and DPJ to total net energy (E) input by the solar source into the interplanetarymedium as a function of angular separation φ between observer and solar source. The algorithmswere constructed in algebraic form from a parametric study that used representativecombinations of the shock starting velocity and starting pulse width and duration.The range of applicability is given by Smith and Dryer [1994] as follows,29 ergSolar flare input energy, EE > 10Angular distance of pulse central meridian from Earth-sun line, φ -90 deg < φ < 80 degTransit time, TTTT < 120 hoursThe flare input energy can be estimated from the pulse duration time T d and the initial shockspeed Vs according to the formula, E = C*ω*(Td +D)*(Vs 3 ) with C=2.83e+19 erg/(m 3 s 2 deg), thepulse longitudinal width ω=60 degrees, and D=0.52 hours. Total energy is assumed to beproportional to kinetic energy flux, i.e., V s3 . The spatial input pulse shape is a sine curve of widthω, where the area under the sine curve is proportional to ω. The temporal input pulse has a flatsection of width T d with 1-hour ramps at the beginning and end of the pulse.ISPM InputsThe ISPM science module requires the following inputs:Global Parameters: Year, Day, UT (used to initialize event onset and end times)82AF-GEOSpace User’s <strong>Manual</strong>: Version 2.5
Specify Event Duration: The user can choose to specify either the Stop Time of the event, theDuration of the event, or have the event duration estimated from inputs ofthe associated GOES soft X-ray Levels.Event onset time:Event end time:Event duration:Backg. Class:Peak. Class:Time of onset of Type II radio burst from USAF RSTN site in the formatMM/DD/YY HH:MM.When Stop Time is selected to specify the event duration, the user inputshere the event end time in the format MM/DD/YY HH:MM. GOESsatellite X-ray levels are not used to estimate the event duration. TheISPM resets any duration greater than 2 hours to 2 hours.When Duration is selected to specify the event duration the user inputs theevent duration in hours here. GOES satellite X-ray levels are not used toestimate the event duration. The ISPM resets any duration greater than 2hours to 2 hours.When X-ray Levels is selected to specify the event duration, the userinputs here the background X-ray level measured by the 1-8 Angstrom X-ray instrument on a GOES satellite before the event occurred. Thesevalues are entered with a classification letter and a numeric field. Theusual X-ray event classification letters A, B, C, M, or X can be used withthe numeric field consisting of 1-3 characters which may be digits or anoptional decimal point. The numeric field multiplies the flux level. Therange of allowed values is A1 through X99.When X-ray Levels is selected to specify the event duration, the userinputs here the peak X-ray level measured by the 1-8 Angstrom X-rayinstrument on a GOES satellite during the X-ray event. The format is thestandard X-ray event classification scheme as explained above. Afterentering this value the user should click in the Decay time box and thelevel corresponding to 1/2 log of the peak signal will be displayed next tothis box.Decay time, level XN.N: When X-ray Levels is selected to specify the event duration the userinputs here the time in the format MM/DD/YY HH:MM at which the X-ray level measured by the 1-8 Angstrom X-ray instrument on a GOESsatellite during the X-ray event decays to the level XN.N. The level XN.Nis calculated from the Backg. Class. and Peak. Class. Of course, this timewill occur after the peak of the X-ray event.Type II speed (km/s): The Type II drift speed in km/s calculated by the USAF RSTN networkfrom observations of Type II radio bursts. This value must be greater than0 and less than 10000 km/s.Flare lat. (deg N):The solar latitude, between -90 o and +90 o North, of the solar flareassociated with the Type II radio burst. This information can be obtainedfrom H-alpha observations by the USAF SOON sites. Degrees South areentered as negative numbers. ISPM does not use this input.AF-GEOSpace User’s <strong>Manual</strong>: Version 2.5 83
Flare lon. (deg W).:The solar longitude, between -180 o and +180 o West, of the solar flareassociated with the Type II radio burst. This information can be obtainedfrom H-alpha observations by the USAF SOON sites. Degrees East areentered as negative numbers. Note: Flare locations beyond the limb areunrealistic.Event in previous 24 hours?: If the user checks this box then the following guidelines concerningthe interpretation of the ISPM are displayed in a text window:If an event has occurred in the previous 24 hours, you need to check for the possibility ofinteraction of the shock from this event with that from the previous event.If the first shock arrives well before the expected arrival of the second shock, the firstshock is independent. If not, you need to look at the relative spacing of sources in spaceand time.If the source of the first shock (F1) is within 25 deg of Central Meridian (CM) [the Earth-Sun line] its reverse shock (R1) will interact with the forward shock of the followingevent (F2). If R1 is strong enough, F2 may be significantly weakened or even annihilatedin the interaction. In this case, F1 may travel independently to 1AU. (Note: reverseshocks form some 5-10 hours after initiation of a flare. If the time interval between thetwo flares is too short, the reverse shock may not have had time to form).If not, F1 is likely to be overtaken. In this case, the ISPM prediction does not apply toeither F1 or F2.The shock from the second event (F2) will be independent if:1. F2 is significantly faster than F1, its source is located closer to CM than F1 and it startssoon after F1 (within a few hours).2. F2 travels independently for the majority of its transit time to Earth. That is:a. It does not encounter R1 (source of F1 is >30 deg from CM).b. It does not travel through the high-speed wake of F1.In case 2.a, an encounter with a reverse shock will weaken or annihilate a fast forwardshock. The exact nature of the resultant of the interaction depends on the relative strengthof the interacting shocks. In case 2.b, traveling through the disturbed (high speed, lowdensity) wake of a preceding fast forward shock will accelerate the following shock.If a prediction for the previous event is not available you can get it by running ISPM forit separately.Display Text: Clicking this button will display the text output window if currently closed.ISPM OutputsISPM returns a text message window containing the results of the model calculations and asummary of the input parameters. The model outputs are:Time of shock arrival at Earth in the format YYYY MM DD HHMM (Zulu)Total propagation time in the format HH MM84AF-GEOSpace User’s <strong>Manual</strong>: Version 2.5
Shock Strength (the dynamic pressure jump, DPJ) in units of dynes/cm 2In addition, ISPM computes the shock strength index (SSI) based on the difference of (the log10of) the DPJ from the [background] state used in the numerical modeling study. If the SSI isgreater than or equal to zero then the shock will likely be geo-effective. If SSI is less than -1there will likely be no measurable effects.AF-GEOSpace User’s <strong>Manual</strong>: Version 2.5 85
The MAGNETOPAUSE Science ModuleModel Name:MagnetopauseVersion: 9 Aug 2009Developer:References:<strong>Air</strong> <strong>Force</strong> Research Laboratory (based on the magnetopause location codeof N. A. Tsyganenko; GEOPACK-2008 software version 21 April 2008)Jerab, M., Z. Nemecek, J. Safrankova, K. Jelinek, and J. Merka, Improvedbow shock model with dependence on the IMF strength, Planet. SpaceSci., 53, 85-93 (2005)Lin et al., Comparison of a new model with previous models for the lowlatitudemagnetopause size and shape, Chinese Sci. Bull, 55: 179-187, doi:10.1007/s11434-009-0533-4 (2010)Shue, J.-H., P. Song, C.T. Russell, J.T. Steinberg, J.K. Chao, G. Zastenker,O.L. Vaisberg, S. Kokubun, H.J. Singer, T.R. Detman, and H. Kawano,Magnetopause location under extreme solar wind conditions, J. Geophys.Res., 103 (A8), 17,691-17,700 (1998)Shue, J.-H., P. Song, C.T. Russell, J.K. Chao, and Y.-H. Yang, Towardpredicting the position of the magnetopause within geosynchronous orbit,J. Geophys. Res., 105 (A2), 2641-2656 (2000)Shue, J.-H., C.T. Russell, and P. Song, Shape of the low-latitudemagnetopause: Comparison of models, Adv. Space Res., 25, 1471-1484(2000)Shue, J.-H., and P. Song, The location and shape of the magnetopause,Planet. Space Sci., 50, 549-558 (2002)Tsyganenko, N.A., S.B.P. Karlsson, S. Kokubun, T. Yamamoto, A.J.Lazarus, K.W. Ogilvie, C.T. Russell, and J.A. Slavin, Globalconfiguration of the magnetotail current sheet as derived from Geotail,Wind, IMP 8 and ISEE ½ data, J. Geophys. Res., 103 (A4), 6827-6841,(1998)Yang, Y.-H., J.K. Choa, C.-H. Lin, J.-H. Shue, X.-Y. Wang, P. Song, C.T.Russell, R.P. Lepping, and A.J. Lazarus, Comparison of threemagnetopause prediction models under extreme solar wind conditions, J.Geophys. Res., 107 (A1), 1008, 10.1029/2001JA000079 (2002)Note: It is recommended that AF-GEOSpace users read the original modeldocumentation and descriptive articles before using the models.Magnetopause OverviewSolar wind interaction with the Earth’s internal magnetic field forms a magnetic cavity called themagnetosphere. The outer boundary of this cavity is called the magnetopause which is shaped byinteractions of the internal fields and particle populations of the magnetosphere with thestreaming solar wind particles and the Interplanetary Magnetic Field (IMF) flowing past the86AF-GEOSpace User’s <strong>Manual</strong>: Version 2.5
Earth. The magnetopause boundary is the location where mass, energy, and momentum from thesolar wind are exchanged with the magnetosphere. As a result, the characteristics of the magneticfield and charged particle populations can be extremely different on either side of this boundary,e.g., the magnetic field component perpendicular to the geosynchronous orbit plane can changesign abruptly as a spacecraft crosses the magnetopause. Characteristics of the charged particlepopulations can also vary rapidly across this boundary. To assist with determining spacecraftlocation relative to this important physical boundary, the MAGNETOPAUSE Science Modulespecifies the location of the Earth’s magnetopause boundary using the model of Shue et al.[1998] which is driven by solar wind dynamic pressure and the z-component of the IMF. Thebasic output of the model is the distance measured in Earth radii to the magnetopause boundaryso it can be used to estimate the timing of spacecraft magnetopause crossings.Magnetopause InputsThe Magnetopause science module requires the following inputs:Global Parameters: Year, Day, UTThe Solar Wind section allows the user to specify how the solar wind input will be characterized.Input text boxes will activate according to the chosen method. Note that the default settingsrepresent typical solar wind conditions and that all methods require the same InterplanetaryMagnetic Field (IMF) information. The three options are:Velocity + Density: The Velocity + Density option requires input of the following quantities:VGSE-X (km/s), VGSE-Y (km/s), and VGSE-Z (km/s) are the GSE X, Y,and Z velocity components of the solar wind. In the Geocentric SolarEcliptic (GSE) coordinate system, the X axis points from the Earth to theSun (thus VGSE-X (km/s) < 0), the Z axis is perpendicular to the eclipticplane (positive towards north), and the Y axis completes the right-handedsystem.Speed + Density:Dynamic Pressure:SW-Density (#/cm 3 ) is the solar wind proton number density.IMF-Bz(nT) is the GSE z-component of the IMF.The Speed + Density option requires input of the following quantities:SW-Speed (km/s) is the solar wind speed.SW-Density (#/cm 3 ) is the solar wind proton number density.IMF-Bz(nT) is the GSE z-component of the IMF.Note that this option assumes VGSE-X(km/s) = -[SW-Speed (km/s)] andVGSE-Y (km/s) = VGSE-Z (km/s) = 0 to determine the aberration angle.The Dynamic Pressure option requires input of the following quantities:SW-Press (nPa) is the solar wind dynamic pressure in units of nanoPascal.IMF-Bz(nT) is the GSE z-component of the IMF.Note that this option automatically sets VGSE-X(km/s) = -400 km/s andVGSE-Y (km/s) = VGSE-Z (km/s) = 0 to determine the aberration angle.AF-GEOSpace User’s <strong>Manual</strong>: Version 2.5 87
GSW Aberration Correction: Checked by default, selecting the Add 29.78 km/s to VGSE-Y boxassumes, as is typically the case in available data sets, that the value usedfor VGSE-Y (km/s) was already reduced by that amount in order to accountfor the aberrations caused by Earth’s orbital motion around the Sun. Notethat the “Geocentric Solar-Wind” (GSW) coordinate system is analogousto the GSM system except it’s X-axis is align anti-parallel to the actualobserved direction of solar wind flow. With this correction selected andgiven average solar wind conditions, the magnetopause boundary surfacewill rotate ~4° about the GSE Z-axis such that the magnetotail swingstoward the GSE-Y direction.Magnetopause OutputsThe MAGNETOPAUSE Science Module returns a 3D Gridded Data Set of the Distancemeasured in Earth radii to the magnetopause boundary with positive and negative valuescorresponding to points inside and outside the magnetopause, respectively. A summary ofselected model inputs and assumed values will appear listed in the Model Status box.88AF-GEOSpace User’s <strong>Manual</strong>: Version 2.5
The METEOR IMPACT MAP Science ModuleModel Name:Meteor Impact Map ModelVersion: February 2004Developer:Radex, Inc. (now AER, Inc.) and the <strong>Air</strong> <strong>Force</strong> Research LaboratoryReferences: Ceplecha, Z., J. Borovicka, W.G. Elford, D.O. Revelle, R.L. Hawkes, V.Porubcan, and M. Simek, Meteor Phenomena and Bodies, Space Sci. Rev.,84, 327-471 (1998)Foschini, L., Meteoriod Impacts on Spacecraft, in Meteors in the Earth'sAtmosphere, edited by E. Murad and I.P. Williams, Cambridge UniversityPress, Cambridge, UK, 249-263 (2002)Jenniskens, P., Meteor stream activity: I. The Annual Streams, Astronomyand Astrophysics., 287, 990-1013 (1994)Lai, S.T., E. Murad, and W.J. McNeil, Hazards of Hypervelocity Impactson Spacecraft, J. of Spacecraft and Rockets, 39, 106-114 (2002)Love, S. G., and D. E. Brownlee, A Direct Measurement of the TerrestrialMass Accretion Rate of Cosmic Dust, Science, 262, 550-553 (1993)McBride, N., The Importance of the Annual Meteoroid Streams toSpacecraft and Their Detectors, Advanced Space Research, 20(8), 1513-1516 (1997)McDonnell, J.A.M., and K. Sullivan, Hypervelocity Impacts on SpaceDetectors: Decoding the Projectile Parameters, Proceedings of theWorkshop on Hypervelocity Impacts in Space, U. of Kent, Canterbury,UK, 1-5 July (1991)McKinley, D. W. R., Meteor Science and Engineering, McGraw-Hill,New York (1961)McNeil, W. J., E. Murad, and J. M. C. Plane, Models of Meteoric Metalsin the Atmosphere, in Meteors in the Earth's Atmosphere, edited by E.Murad and I.P. Williams, Cambridge University Press, Cambridge, UK,265-287 (2002)Williams, I.P., and E. Murad, Introduction, in Meteors in the Earth'sAtmosphere, edited by E. Murad and I.P. Williams, Cambridge UniversityPress, Cambridge, UK, 1-11 (2002)Note: It is recommended that AF-GEOSpace users read and understand the original modeldocumentation and descriptive articles before using the models.METEOR IMPACT MAP OverviewMeteors enter the Earth’s atmosphere during well-known meteor shower periods, as well as atirregular periods. The former are attributed to dust released by comets as they approachperihelion (an exception to this statement being that the Geminids arise from the fragmentationof Asteroid Phaethon), while the latter represent a variety of sources, such as cosmic dust,AF-GEOSpace User’s <strong>Manual</strong>: Version 2.5 89
meteoroids that have scattered by collisions, and fragmentation of asteroids and meteoritesfollowing collisions (see Ceplecha et al., [1998] and Williams & Murad [2002] for detailedintroductions). In total about 40,000 tons of extraterrestrial matter are captured by Earthannually, most of which disappears during reentry due to the high temperatures achieved due tofrictional heating [Love & Brownlee, 1993]. The vaporization process occurs primarily in the E-region of the ionosphere, at altitudes between 130 and 90 km (Cf. review by McNeil et al.,[2002]). The meteor showers are generally quite well known and most of the meteoroids consistof particles that have masses in the range 1 μg – 10 mg with a peak near 10 μg [Love &Brownlee, 1993].The extraterrestrial matter enters the Earth at high velocities that vary between 12 km/s and 70km/s, the exact velocity depending on the relative positions of Earth in its orbit and of the dustcloud. Because of this high velocity, even the smallest of the meteoroids can cause severedamage to spacecraft upon impact. The damage can be in the form of surface damage(weakening of the surface through formation of pits, or perhaps penetration) or generation ofplasma with consequent damage to electrical systems on board of spacecraft. This moduleprovides several pieces of information that are useful in the evaluation of meteoric phenomena assources of anomalies on spacecraft.Two important characteristics of meteors are the radiant (the point where the backwardprojection of the meteor trajectory intersects the celestial sphere or more generally, the point inthe sky where meteors from a specific shower seem to come from) and the Zenithal Hourly Rate(ZHR - the number of shower meteors per hour one observer would see if his limiting magnitudeis 6.5, and if the radiant is in the zenith). Generally, the known showers are relatively weak,corresponding to a zenithal hourly rate (ZHR) of 200 or less. However, occasionally a stormoccurs during an orbital conjunction of the Earth and cometary dust. In those cases, the ZHRmay be as high as 10,000 for a short time (1-2 hours). Another important characteristic is thevisual magnitude, M, of a meteor. This magnitude is an arbitrary visual scale related to theabsolute luminous power (I) by the formula: M = 6.8 – 2.5 log[I], where I is given in wattsradiated by the meteor (Öpik, quoted by McKinley [1961]). We will not make use of this quantityin this part of the meteor module.The Meteor Impact Map Model calculates the rate of meteor impacts on a user-specified surfacearea at positions outside of the Earth's atmosphere. For the specified date, the shower database isused to determine the active showers, their intensity, direction of travel, and mass distributioncharacteristics. The “damage” calculations are based on the work of McDonnell and Sullivan[1991], who derived material penetration formulas based on the size, density and velocity of theincident meteor and the material properties. Given the user-selected satellite material propertiesand the characteristics of each active shower, the minimum meteor mass (for each shower)required to cause the specified damage is calculated. The Love and Brownlee [1993] massdistribution characteristics are used to determine the number of meteors per second at or abovethis mass that will be present. This flux rate is then multiplied by a user-specified surface area todetermine the impact rate. The effects on the damage of varying angles of meteor impacts on thesurface is ignored due to the satellite-specific geometry that would be required for propermodeling. By assuming all meteor impacts are exactly perpendicular to the surface, this givesthe “worst-case” scenario. For the “damage” calculations, the Earth’s shadowing of meteors isincluded in the model. Meteor showers that are blocked by the Earth from reaching the model'sspecific grid positions, or the positions along a satellite path, are removed from the impact rate90AF-GEOSpace User’s <strong>Manual</strong>: Version 2.5
calculation at those points. The “flux only” calculations are an extension of the damage-typecalculations. Because no material or pit depth is specified, the selection of a minimum meteormass is handled in a different manner. A method has been derived to normalize the effects of thevarying velocities between the different showers. This method relates a minimum pressure-likevalue imposed by impacting meteors to calculate the minimum mass for each shower. The “fluxonly”calculations do not take into account any Earth-shadowing of the meteor showers.The essential part of the meteor model code is a database that describes the annual meteorshowers. Jenniskens [1994] produced a set of parameterized values for describing 50 annualmeteor showers (note that these differ from those posted by the International MeteorOrganization at www.imo.net). Given a date and time, the shower parameters are used inJenniskens' equations to calculate the current intensity and radiant position (which defines thedirection of travel) for each of the currently active showers. This database also includes eachshower’s typical meteor velocity and particle size distribution parameter. McBride [1997] madesome revisions and updates to this database of shower parameters. A fixed set of parameters hasbeen assigned for the “sporadics” shower, though without a radiant position. The meteor massdistribution derived by Love and Brownlee [1993] is used for calculating the number of meteorsper second (flux) at or above/below a certain mass, depending on the application. When a userincludes an optional storm, its basic characteristics are based on the associated shower.However, the intensity of the storm is modeled as a Gaussian curve, reaching the specifiedmaximum ZHR value at the storm peak time, and dropping off towards zero symmetricallybefore and after the peak.If the user is interested in examining the influence of meteoroid showers on spacecraft orbitsover an extended period, then the METEOR IMPACT-APP module should be used.METEOR IMPACT MAP Reference DataReference materials describing annual meteor shower activity can be accessed using the set ofthree buttons at the top of the Meteor Impact Environment Window.Flux Sums The Flux Sums button displays a single page PDF with a plot of "AnnualMeteor Shower Flux (#/meter 2 /s)" for a typical year. Most flux peaks arelabeled with the name of the dominant shower.ZHR Sums The ZHR Sums button displays a single page PDF with a plot of "ZenithalHourly Rate (ZHR) Sum of Active Showers" and a plot of "Number ofActive Showers" for a typical year. Most ZHR sum peaks are labeled withthe name of the dominant shower.Annual Shower Table The Annual Shower Table button displays a text dialog (matching Table 1)with a list of meteor showers with basic features, i.e., Shower Name,Julian Day of Year (DOY) Range, Peak Date, Zenithal Hourly Rate at thepeak date (i.e., ZHR@Peak), Calendar Date Range, and velocity (km/s).AF-GEOSpace User’s <strong>Manual</strong>: Version 2.5 91
TABLE 1Shower Name (DOY Range) PeakDate ZHR@Peak Date Range V(km/s)Bootids (002-006) 04 Jan 127.22 02Jan-06Jan 43.0gamma-Velids (359-018) 06 Jan 2.39 25Dec-18Jan 35.0alpha-Crucids (003-029) 16 Jan 2.99 03Jan-29Jan 50.0alpha-Hydrusids (009-032) 20 Jan 2.00 09Jan-01Feb 44.0alpha-Carinids (023-040) 31 Jan 2.29 23Jan-09Feb 25.0delta-Velids (028-048) 07 Feb 1.29 28Jan-17Feb 35.0alpha-Centaurids (029-050) 08 Feb 7.26 29Jan-19Feb 57.0omicron-Centaurids(035-052) 12 Feb 2.18 04Feb-21Feb 51.0theta-Centaurids (039-068) 23 Feb 4.48 08Feb-09Mar 60.0delta-Leonids (034-075) 24 Feb 1.10 03Feb-16Mar 23.0Virginids (049-070) 29 Feb 1.50 18Feb-11Mar 26.0gamma-Normids (063-079) 13 Mar 5.76 04Mar-20Mar 56.0delta-Pavonids (079-114) 31 Mar 5.28 20Mar-24Apr 60.0Lyrids (102-122) 22 Apr 12.67 12Apr-02May 49.0mu-Virginids (120-151) 30 Apr 2.20 30Mar-31May 30.0eta-Aquarids (093-160) 06 May 36.66 03Apr-09Jun 66.0alpha-Scorpiids (124-148) 16 May 3.18 04May-28May 35.0beta-Australids (122-150) 16 May 3.00 02May-30May 45.0omega-Scorpiids (141-165) 02 Jun 5.18 21May-14Jun 21.0day-Arietids (130-187) 07 Jun 53.97 10May-06Jul 38.0gamma-Sagitarids (132-210) 20 Jun 2.40 12May-29Jul 29.0tau-Cetids (088-267) 27 Jun 3.60 29Mar-24Sep 66.0tau-Aquarids (172-188) 29 Jun 7.10 21Jun-07Jul 27.0theta-Ophiuchids (142-219) 29 Jun 2.30 22May-07Aug 63.0v-Phoenicids (187-201) 13 Jul 4.97 06Jul-20Jul 48.0o-Cygnids (188-211) 19 Jul 2.49 07Jul-30Jul 37.0Capricornids (171-240) 25 Jul 2.20 20Jun-28Aug 25.0delta-Aquarids(N) (191-224) 26 Jul 1.00 10Jul-12Aug 42.0Pices-Australids (202-214) 27 Jul 2.89 21Jul-02Aug 42.0delta-Aquarids(S) (185-232) 28 Jul 11.37 04Jul-20Aug 43.0iota-Aquarids(S) (198-233) 03 Aug 1.50 17Jul-21Aug 36.0Perseids (209-239) 12 Aug 83.78 28Jul-27Aug 61.0kappa-Cygnids (210-251) 19 Aug 2.29 29Jul-08Sep 27.0epsilon-Eridanids (219-255) 25 Aug 39.81 07Aug-12Sep 59.0gamma-Doradids (231-250) 28 Aug 4.76 19Aug-07Sep 41.0Aurigids (232-253) 31 Aug 8.93 20Aug-10Sep 69.0kappa-Aquarids (249-276) 19 Sep 2.69 06Sep-03Oct 19.0epsilon-Geminids (274-310) 19 Oct 2.90 01Oct-06Nov 71.0Orinids (274-314) 21 Oct 24.98 01Oct-10Nov 67.0Leo-Minorids (286-305) 22 Oct 1.89 13Oct-01Nov 61.0Taurids (236-016) 05 Nov 7.29 24Aug-16Jan 30.0delta-Eridanids (305-324) 11 Nov 0.90 01Nov-20Nov 31.0squiggle-Puppids (306-329) 14 Nov 3.19 02Nov-25Nov 41.0Leonids (315-327) 17 Nov 22.77 11Nov-23Nov 71.0Puppids (289-021) 03 Dec 4.50 16Oct-21Jan 40.0Phoenicids (333-343) 04 Dec 2.79 29Nov-09Dec 18.0Monocerotids (341-351) 12 Dec 2.00 07Dec-17Dec 43.0Geminids (340-355) 13 Dec 87.85 06Dec-21Dec 36.0sigma-Hydrusids (337-364) 17 Dec 2.49 03Dec-30Dec 59.0Ursids (353-359) 22 Dec 11.68 19Dec-25Dec 35.092AF-GEOSpace User’s <strong>Manual</strong>: Version 2.5
METEOR IMPACT MAP InputsThe METEOR IMPACT science module requires the following inputs,Global Parameters: Year, Day, and UT (Kp, SSN, F10.7 and Ap are not used).Meteor shower fluxes can be determined using two different Count Methods,Flux Only: Select the Flux Only option to specify the total meteor shower hourlyimpact rate on an assumed cross sectional area of 1 square meter. Sporadicmeteors are included if the Sporadics option is also selected (see below).Damage:Selecting the Damage option to account for only those meteors that willintersect a user-defined cross sectional area and damage a given materialtype by exceeding a prescribed pit depth threshold. Sporadic meteors areincluded if the Sporadics option is also selected (see below). Selecting theDamage option requires the following additional inputs,Cross Section: The cross section of the material of interest (m 2 )Pit Depth:Material Type:The threshold minimum pit depth (mm) causing by ameteor impact.Fixed material options include aluminum, copper,stainless steel, beryllium/copper, iron, silver, platinum,gold, titanium, Mylar, and glass.User Def: Select this option to set the user-definedmaterial characteristics Density (g/cm 3 ) and Tensilestrength (MPa).Sporadics:The Sporadics option adds sporadic meteors and dust to the Flux Only orDamage calculations above. Sporadic meteors are considered to berandom occurrences and not associated with a particular meteor shower.Note that the sporadic meteors occur year-round. The exclusion of theSporadic meteors can be useful when studying low activity periods of theannual showers, where their effects could be masked by the sporadics.The Storm Simulation (Optional) section allows user-defined meteor storms to be added to theannual meteor showers that are active at the specified date. Meteor storm characteristics aredefined in terms of (1) an active associated shower, (2) the peak Zenithal Hourly Rate, (3) astorm peak time, and (4) the storm duration. Once the parameters are set for the user-definedstorm, use the Add button to place the storm in the active list located just above the Add andDelete buttons. Use the Delete button to remove storms from the active list. A maximum of fivestorms may be specified. The meteor storm input parameters include the following:Shower Name:To create a meteor storm associated with a particular shower, use theselector button to browse the list of named showers. For a meteor storm tobe properly applied, the run-time Day entered at the globals section mustfall within the valid day-of-year range noted in parentheses next to theshower name.AF-GEOSpace User’s <strong>Manual</strong>: Version 2.5 93
ZHR Max:To set the size of the meteor storm, enter the Zenithal Hourly Ratemaximum in the ZHR Max text box. Note that as a guide, the Shower Databutton contains the typical ZHR@Peak value and velocity for eachshower.Two methods are provided for specifying meteor storm time and duration,Solar Long/Duration Delta: If the Solar Long/Duration Delta method is selected, center themeteor storm on a specific time by entering the Solar Longitude value indegrees into the Solar Long text box. Set the length of the storm in degreesusing the Duration Delta (deg) text box. Note that 1-hour is equal to~0.042 degrees solar longitude. The maximum allowed storm duration is0.5 degrees (~12 hours). Tables of solar longitude versus day-of-yearequivalents can be found at the International Meteor Organization website(www.imo.net). Zero degrees solar longitude generally occurs on or about20 March.Date/Duration:METEOR IMPACT MAP OutputsIf the Date/Duration method is selected, center the meteor storm on aspecific time by using the Year, Day, Hour, Minute text boxes and set thelength of the storm in hours using the Duration (Hr) text box. Themaximum allowed storm duration is 12 hours.The METEOR IMPACT MAP science module returns a 3D Gridded Data Set representing thehourly impact rate (meteors/hour) for the single time entered in the Globals section. Using theFlux Only mode, the hourly impact (on a cross sectional area of 1 m 2 ) includes meteors from allshowers active at the run time. Using the Damage mode, the hourly impact output includes onlythose meteors that would impact the user-defined material area and result in damage to at leastthe user-defined pit depth. We recommend displaying output in 2D or 3D plots using theCOORD-SLICE graphical object. The geometry of multiple coincident shows can be viewedusing the ISOCONTOUR graphical object.The SATEL-APP application and ORBIT PROBE graphics modules can be used together toview hourly meteor impact rates along an orbit path, but the result is only approximate if thescience module is run in static mode. While a dynamic science module run can be performed anda satellite flown though stepped outputs, a much more realistic estimate of the hourly impact ofmeteors along a satellite orbit can be obtained by using the application designed specifically forthis purpose, namely METEOR IMPACT-APP.94AF-GEOSpace User’s <strong>Manual</strong>: Version 2.5
The METEOR SKY MAP Science ModuleModel Name:Version: February 2004Developer:Meteor Ground-<strong>Base</strong>d Sky Map ModelRadex, Inc. (now AER, Inc.) and the <strong>Air</strong> <strong>Force</strong> Research LaboratoryReferences: Ceplecha, Z., J. Borovicka, W.G. Elford, D.O. Revelle, R.L. Hawkes, V.Porubcan, and M. Simek, Meteor Phenomena and Bodies, Space Sci. Rev.,84, 327-471 (1998)Foschini, L., Meteoriod Impacts on Spacecraft, in Meteors in the Earth'sAtmosphere, edited by E. Murad and I.P. Williams, Cambridge UniversityPress, Cambridge, UK, 249-263 (2002)Jenniskens, P., Meteor Stream Activity: I. The Annual Streams,Astronomy and Astrophysics., 287, 990-1013 (1994)Lai, S.T., E. Murad, and W.J. McNeil, Hazards of Hypervelocity Impactson Spacecraft, J. of Spacecraft and Rockets, 39, 106-114 (2002)Love, S. G., and D. E. Brownlee, A Direct Measurement of the TerrestrialMass Accretion Rate of Cosmic Dust, Science, 262, 550-553 (1993)McBride, N., The Importance of the Annual Meteoroid Streams toSpacecraft and Their Detectors, Advanced Space Research, 20(8), 1513-1516 (1997)McDonnell, J.A.M., and K. Sullivan, Hypervelocity Impacts on SpaceDetectors: Decoding the Projectile Parameters, Proceedings of theWorkshop on Hypervelocity Impacts in Space, U. of Kent, Canterbury,UK, 1-5 July (1991)McKinley, D. W. R., Meteor Science and Engineering, McGraw-Hill,New York (1961)McNeil, W. J., E. Murad, and J. M. C. Plane, Models of Meteoric Metalsin the Atmosphere, in Meteors in the Earth's Atmosphere, edited by E.Murad and I.P. Williams, Cambridge University Press, Cambridge, UK,265-287 (2002)Williams, I.P., and E. Murad, Introduction, in Meteors in the Earth'sAtmosphere, edited by E. Murad and I.P. Williams, Cambridge UniversityPress, Cambridge, UK, 1-11 (2002)Note: It is recommended that AF-GEOSpace users read and understand the original modeldocumentation and descriptive articles before using the models.METEOR SKY MAP OverviewThe METEOR SKY MAP science module calculates the number of visible meteors from theactive meteor showers (and any user-specified storms) at the specified date, over a grid ofground-level positions covering the entire globe. An unobstructed field of view of the sky isassumed, with conditions permitting meteors of 6.5 magnitude or brighter to be observed.AF-GEOSpace User’s <strong>Manual</strong>: Version 2.5 95
Meteor shower intensities are expressed in a zenith hourly rate, or ZHR [see Table 1 of theprevious section (The METEOR IMPACT MAP Science Module) or access the Annual ShowerTable button in the Environment Window]. These values are estimates of the number of visiblemeteors per hour when the shower's radiant is at the zenith (directly overhead) of the observer'slocation, and under optimal viewing conditions. The number of viewable meteors decreasesconsiderably due to atmospheric effects and geometry (i.e., the horizon) as the shower's radiantand observer position become separated by a larger angular extent. The apparent brightness ofthe meteors decreases as a function of this angular distance, causing many to fall below the 6.5magnitude brightness viewing threshold. The sporadic meteors, however, are treated differently.While no true shower radiant exists, the intensity of the sporadic meteors is modeled to vary withboth local time and geographic latitude.METEOR SKY MAP Reference DataReference materials describing annual meteor shower activity can be accessed using the set ofthree Database buttons at the top of the METEOR SKY MAP Environment Window.Flux Sums The Flux Sums button displays a single page PDF with a plot of "AnnualMeteor Shower Flux (#/meters 2 /s)" for a typical year. Most flux peaks arelabeled with the name of the dominant shower.ZHR Sums The ZHR Sums button displays a single page PDF with a plot of "ZenithalHourly Rate (ZHR) Sum of Active Showers" and a plot of "Number ofActive Showers" for a typical year. Most ZHR sum peaks are labeled withthe name of the dominant shower.Annual Shower Table The Annual Shower Table button displays a text dialog with a list ofmeteor showers with basic features, i.e., Shower Name, Julian Day ofYear (DOY) Range, Peak Date, Zenithal Hourly Rate at the peak date (i.e.,ZHR@Peak), Calendar Date Range, and velocity (km/s).METEOR SKY MAP InputsThe METEOR SKY MAP science module requires the following inputs,Global Parameters: Year, Day, and UT (Kp, SSN, F10.7 and Ap are not used).Meteor ground-based sky maps can be produced using two different Count Methods,Flux: The Flux count method is used to determine meteoric total flux (#/s/m 2 )over the entire Earth's surface. If selected, a value for the limiting low-endMass (grams) must be entered in the text box. Note that the outputbecomes vanishingly small when the mass reaches approximately 10grams. Sporadic meteors (see description below) can be included bychecking the box to the far right.Visual:The Visual count method is used to determine the meteoric observedZethinal Hourly Rate (ZHR) from ground level. If selected, a value for thelimiting low-end Magnitude must be entered in the text box. Note thatobserved brightness of a meteor decreases as its visual magnitude96AF-GEOSpace User’s <strong>Manual</strong>: Version 2.5
increases. Sporadic meteors (see description below) can be included bychecking the box to the far right.Sporadics:The Sporadics option adds sporadic meteors and dust to the Flux or Visualcalculations above. Sporadic meteors are considered to be randomoccurrences and not associated with a particular meteor shower. Note thatthe sporadic meteors occur year-round. The exclusion of the sporadicmeteors can be useful when studying low activity periods of the annualshowers, where their effects could be masked by the sporadics.The Storm Simulation (Optional) section allows user-defined meteor storms to be added to theannual meteor showers that are active at the specified date. Meteor storm characteristics aredefined in terms of (1) an active associated shower, (2) the peak Zenithal Hourly Rate, (3) astorm peak time, and (4) the storm duration. Once the parameters are set for the user-definedstorm, use the Add button to place the storm in the active list located just above the Add andDelete buttons. Use the Delete button to remove storms from the active list. A maximum of fivestorms may be specified. The meteor storm input parameters include the following:Shower Name:ZHR Max:To create a meteor storm associated with a particular shower, use theselector button to browse the list of named showers. For a meteor storm tobe properly applied, the run-time Day entered at the Globals section mustfall within the valid day-of-year range noted in parentheses next to theshower name.To set the size of the meteor storm, enter the Zenithal Hourly Ratemaximum in the ZHR Max text box. Note that as a guide, the Shower Databutton contains the typical ZHR@Peak value and velocity for eachshower.Two methods are provided for specifying meteor storm time and duration,Solar Long/Duration Delta: If the Solar Long/Duration Delta method is selected, center themeteor storm on a specific time by entering the Solar Longitude value indegrees into the Solar Long text box. Set the length of the storm in degreesusing the Duration Delta (deg) text box. Note that 1-hour is equal to~0.042 degrees solar longitude. The maximum allowed storm duration is0.5 degrees (~12 hours). Tables of solar longitude versus day-of-yearequivalents can be found at the International Meteor Organization website(www.imo.net). Zero degrees solar longitude generally occurs on or about20 March.Date/Duration:If the Date/Duration method is selected, center the meteor storm on aspecific time by using the Year, Day, Hour, Minute text boxes and set thelength of the storm in hours using the Duration (Hr) text box. Themaximum allowed storm duration is 12 hours.AF-GEOSpace User’s <strong>Manual</strong>: Version 2.5 97
METEOR SKY MAP OutputsThe METEOR SKY MAP science module returns a 2D Gridded Data Set at the Earth surface. Ifthe Flux count method was used then the data are given in units of flux (meteors/s/m 2 ). If theVisual count method was used then the data are given in terms of a Zenithal Hourly Rate (ZHR).Display output in 2D or 3D plots using the COORD-SLICE graphics object.98AF-GEOSpace User’s <strong>Manual</strong>: Version 2.5
The MSM Science Module (V2.5 Only)Model Name:Magnetospheric Specification Model (MSM)Version: 5.20 (November 1996)Developer:References:Rice University and the <strong>Air</strong> <strong>Force</strong> Research LaboratoryFreeman, Jr., J.W., Wolf, R.A., Spiro, R.W., Voigt, G.-H., Hausman, B.A.,Bales, B.A., Hilmer, R.V., Nagai, A., and Lambour, R., MagnetosphericSpecification Model Development Code and Documentation. Report forUSAF contract F19628-90-K-0012, Rice University, Houston, TX (1993)Gussenhoven, M.S., Hardy, D.A., and Heinemann, N., Systematics of theEquatorward Diffuse Auroral Boundary, J. Geophys. Res., 88, 5692-5708(1983)Harel, M.,Wolf, R.A., Reiff, P.H., Spiro, R.W., Burke, W.J., Rich, F.J. andSmiddy, M., Quantitative Simulation of a Magnetospheric Substorm 1,Model Logic and Overview, J. Geophys. Res., 86, 2217-2241 (1981)Heppner, J.P., and Maynard, N.C., Empirical High-Latitude Electric FieldModels, J. Geophys. Res., 92, 4467-4489 (1987)Hilmer, R.V., Wolf, R.A., and Hausman, B.A., Mapping MagnetosphericSpecification Model Results to Arbitrary Positions in the 3-DMagnetosphere: Development of FORTRAN Application Codes MAP3Dand FLUX3D. Final Report for Hughes STX Corp. subcontract 93-F04-I1902, Rice University, Houston, TX (1993)Hilmer, R.V. and G.-H. Voigt, A Magnetospheric Magnetic Field Modelwith Flexible Current Systems Driven by Independent PhysicalParameters. J. Geophys. Res., 100, 5613-5626 (1995)Hilmer, R.V., A Magnetospheric Neutral Sheet-Oriented CoordinateSystem for MSM and MSFM Applications, USAF Phillips LaboratoryTechnical Report, PL-TR-97-2133 (1997)Hilmer, R.V., and Ginet, G.P., A Magnetospheric Specification ModelValidation Study: Geosynchronous Electrons, J. Atmos. Solar-Terr. Phys.,62, 1275-1294 (2000)[see $AFGS_HOME\models\REFS\HilmerGinet2000.pdf]Rich, F.J., and Maynard, N.C., Consequences of Using Simple AnalyticFunctions for the High-Latitude Convection Electric Field. J. Geophys.Res., 94, 3687-3701 (1989)Tascione, T., Kroehl, H.W., Creiger, R., Freeman, J.W., Wolf, R.A. Spiro,R.W., Hilmer, R.V., Shade, J., and Hausman, B., New Ionospheric andMagnetospheric Specification Models. Radio Sci., 23, 211-222 (1988)Note: It is recommended that AF-GEOSpace users read the original modeldocumentation and descriptive articles before using the models.AF-GEOSpace User’s <strong>Manual</strong>: Version 2.5 99
MSM OverviewThe Magnetospheric Specification Model (MSM) was developed by Rice University for theUSAF to address spacecraft charging issues in the inner and middle magnetosphere [Tascione etal., 1988]. It combines theoretical and empirical approaches to make maximal use of real-timedata streams so it can respond to changing geophysical conditions on 15-30 minute time scales.The MSM first became operational in 1995. The following is from Hilmer and Ginet [2000].“The MSM specifies fluxes (#/cm 2 /s/sr/keV) of charged particles having energies up to100 keV (electron, H+, and O+). The model is driven by any combination of parameterswith the minimum input requirement being Kp. […] The MSM tracks particles in a twodimensionalsimulation region as they E × B and gradient-curvature drift through dawndusksymmetric magnetic field configurations with the (Earth centered, spin-aligned)dipole tilt angle fixed equal to zero, i.e., aligned with the GSM z-axis. The inner limit ofthe modeling region is set at a geocentric distance of 3 Re (Earth Radii). The outerboundary extends from just inside the dayside magnetopause to roughly twice thatgeocentric distance on the nightside. It remains inside the magnetopause at dawn anddusk local times. A set of regularly spaced ionospheric grid points is magneticallymapped to the simulation plane to define the grid where the particle dynamics areactually tracked. At geosynchronous altitude (~6.6 Re) the resulting grid spacing istypically ~0.2 to 1.0 Re in the radial direction and 7.5° in longitude, i.e., equivalent to 30minutes for [a geosynchronous] spacecraft.The magnetic field model (Hilmer and Voigt, 1995) uses Dst and the auroral boundaryindex (ABI) defined as the midnight equatorward boundary of the diffuse aurora at localmidnight (Gussenhoven et al., 1983). It also uses the magnetopause standoff distance asestimated from solar wind density and velocity measurements. The nightside magneticfield, especially near geosynchronous altitudes, becomes more distended or stretched asthe ABI moves to lower latitudes. With magnetic field lines assumed to be lines ofconstant potential, the electric potential pattern is imposed on the equatorial simulationplane. Inductive electric fields affects are introduced implicitly through ionosphereequatorialplane magnetic field line mapping changes.The electric field model incorporates a version of the Heppner-Maynard empirical model(Heppner and Maynard, 1987; Rich and Maynard, 1989) in the polar cap which isextended to lower latitudes using analytical methods based on more self-consistentmodeling approaches (e.g., Harel et al., 1981). It uses the polar cap potential drop, polarcap pattern type or interplanetary magnetic field (IMF), and the ABI. The ionosphericelectric field strengthens as the polar cap potential increases and the electric potentialpattern enlarges as the ABI moves to lower latitudes. An important dynamic feature isthat the penetration of electric fields to sub-auroral latitudes is dependent on the rate ofchange of the ABI.The initial and time-dependent particle boundary conditions are controlled by Kp butboundary conditions are also modified according to the polar cap potential […].Minimum and maximum particle flux levels assigned throughout the simulation regionare enforced such that model output will fall within specified limits.”100AF-GEOSpace User’s <strong>Manual</strong>: Version 2.5
MSM InputsThe MSM science module runs only in dynamic mode and thus requires the Global ParametersStart: Year, Day, UT and End: Year, Day, and UT. While the minimum run interval is only 15minutes (900 s), in practice the simulation interval should be set to include the interval 3-6 hoursbefore the actual period of interest to allow the initial dawn-dusk symmetric boundary conditionsto dissipate. Note that while the Global inputs Kp and SSN are used (F10.7 and Ap are not used),the MSM science module obtains those input values from an archived data set separate from thestandard AF-GEOSpace global inputs (see the Archive Input Data Files section below). TheMSM Options are as follows:Run ID:User-created run identification (68 characters maximum). This descriptivecharacter string is recorded in file _msmin.dat (where “_” represents thesingle letter Run Prefix described below) created in the MSM folder of thescratch space. It is suggested that users include the Global: Start and Endtimes so that they can be reset when loading saved MSM runs.Run Type:Kp Mode:While two modes of MSM runs are possible, only one is currentlyimplemented in this software release.New Run:(Hot Restart):Indicates that a new MSM run is requested.(not yet activated, future option will indicate that apreviously completed MSM run will be continued orextended from a user-defined point)The MSM can be driven with different combinations of input parameters.Note that the Kp index is automatically used in all MSM runs andrepresents the default input set. The Kp Mode option offers three differentmodes of running the MSM:Full MSM (Kp to fill gaps): This mode represents the most general way torun MSM and it allows the user to select from thecomplete set of available input parameters. If selected,an MSM: Use Input popup window will appear toregister global parameter input preferences. Each datatype will be used if entries exist within the chosendynamic run interval. The geomagnetic index Kp isrequired to be available and is used to generate proxiesfor missing input data, to fill data gaps, and to driveinternal parts of the MSM including boundaryconditions. The file locations of the Kp values andparameter types listed here are given below in theArchived Input Data Files section. The addition inputdata types include:DST: The Dst (disturbance storm time) hourly magneticindex in units of nT.EQ Edge: The equatorward edge boundary of thediffuse aurora at midnight in degrees latitude in units ofAF-GEOSpace User’s <strong>Manual</strong>: Version 2.5 101
degrees latitude. (Also called the ABI above in theliterature and EqE below when related to the ShowMSM Inputs feature).PCP: The polar cap potential input represents estimatesof the total potential drop across the polar cap measuredin kilovolts by the DMSP SSIES drift meter.SWDEN, SWVEL: These options represent the solarwind density (H+/cm 3 ) and velocity (m/s), respectively.If selected, then the user must select a data source(WIND or IMP8 spacecraft) and a resolution (HourlyAverages or Hi Resolution (90 sec)). Note: Owing tospace limitation, only 1996 data provided (see below toobtain data for other years) and no Hi Resolution (90sec) data is included with this release so the hourlyvalues will always be used if the SWDEN, SWVELoption is selected.Finally, the ionospheric electric field pattern isdetermined using one of three methods:IMFBY, IMFBZ: The IMF B y and B z components inunits of nT (from the WIND data set) are used todetermine the value of XIPATT (see next entry) if noDMSP observations of the polar cap pattern areavailable. Note: Owing to space limitation, only 1996data provided. See below to obtain data for other years.XIPATT: The DMSP-derived potential pattern is used.The type of pattern used is listed after a run under thecolumn labeled “P” via the Show MSM Inputs button.Pattern P=0 is for IMF-B z > 0. For IMF-B z < 0, thepatterns correspond to IMF-B y 0 (P=3). A negative sign indicatesthat the observation was derived from a DMSP southernhemisphere pass.No IMF, XIPATT: Select if no specific method isdesired. A default symmetric ionospheric electric fieldpattern is used.Kp depend empir. flux output: This option skips the actual particle tracingportion of the MSM and fills the output files with Kpdependentempirical flux values. Fluxes are distributedsymmetrically about the noon-midnight plane in amanner similar to those used for the initial conditions.Kp=> proxies for all input: This option represents the “Kp-Only” runningmode of the MSM. The Kp index is the only required102AF-GEOSpace User’s <strong>Manual</strong>: Version 2.5
Run Prefix:(Static Inputs)Species:input parameter and all other input parameters arereplaced by proxy values derived using the Kp-basedrelationships described by Hilmer and Ginet [2000].A single character selected by the user to define the run. This character isused as a file name prefix for many of the files created in the MSM folderin the scratch space.The following parameters are either not currently activated or have fixedvalues for this implementation of the MSM program:Last Record#: (not activated, relates to future Run Type: Hot Restart)Start Record#: (not activated, relates to future Run Type: Hot Restart)Act Start Time: (not activated, relates to future Run Type: Hot Restart)Min Energy (keV): (Fixed) Minimum geosynchronous energy invariant tobe tracked by the MSM. Fixed equal to 0.030 keV.Max Energy (keV): (Fixed) Maximum geosynchronous energy invariant tobe tracked by the MSM. Fixed equal to 200 keV.Energy Spacing: (Fixed) Tracked geosynchronous invariant energies arespread equally by the fixed value of 0.50 in log10(eV),i.e., MSM tracks particles of 10., 31.63, 100., 316.2,1000., 3162., 10000., 31622., and 100000. eV (plus a200000 eV ending value). Tracked values are selectedfrom this set to span the Min Energy and Max Energyinvariants.PCP Factor:(Fixed) Factor used to adjust the DMSP-derived polarcap potential drop value. With algorithm improvementsover the years, the current value is fixed equal to 1.0.The MSM offers the option to track electrons (e-), protons (H+), andoxygen (O+). For each species selected, the model tracks a set of particlesat set invariant energies with values dependent on selections made fromEnergy Range and L-Shell Range options which follow. If those twooptions are not changed from their default values, then MSM will track 10invariant energies for each species, giving a total of 30 species/energypairs that the model can follow.Energy Range (keV): Low and High particle energies defining range of interest (default settingand min/max range is 0.03 to 200 keV). Along with the L-Shell Rangeinputs below, these values are used to determine which invariant energieswill be traced by the MSM.L-Shell Range:Low and High L-shell range of interest (default setting and min/max rangeis 1.1 to 100 Re). In this context, the L-shell is basically the geocentricradial distance in the equatorial plane. Along with the Energy Rangeinputs above, these values are used to determine which invariant energieswill be traced by the MSM.AF-GEOSpace User’s <strong>Manual</strong>: Version 2.5 103
Run Modes:This science module performs two basic functions which can be runconsecutively or separately within AF-GEOSpace. The first function iscalled the <strong>Base</strong> run and represents input data collection and processingplus the actually MSM simulation run over the user-defined dynamicinterval. The second function maps particle fluxes from the generic MSMoutput file set on to the user-defined grid created within AF-GEOSpaceusing the Edit menu Grid Tool option. The mapping procedure uses theMAP3D and FLUX3D codes of Hilmer et al. [1993] and Hilmer [1997].<strong>Base</strong>/Map:<strong>Base</strong>:Map:Selecting this run mode will run the MSM simulationand populate the user-defined AF-GEOSpace outputgrid with particle fluxes for the species/energy pairsspecified using the Set Map Energies button (below).Selecting this run mode will simply run the MSMsimulation. In order to visualize the model output, theuser must subsequently select the Map mode (below)and again use the Run/Update option of the Edit menu.Selecting this run mode will cause the software to lookfor an existing set of MSM run files corresponding tothe Run Prefix entered. If the files are located in theSciMsm folder being used, then the mapping procedureis applied to populate the user-defined output grid withparticle fluxes for the species/energy pairs specifiedusing the Set Map Energies button (below). This optioncan be used to extract fluxes for different particlespecies/energies from an existing run of the currentsession or by loading results of a run saved during aprevious session, i.e., load previously saved results withthe Open Model option of the File menu, selectdifferent particle energies to map, and use the RunModes: Map option so that the <strong>Base</strong> simulation will notbe unnecessarily rerun.Note: An MSM <strong>Base</strong> run does not need to be done if the user simply wants to mapoutput from an existing run using either a modified grid or a different set ofspecies/energy pairs. Simply make adjustments to the grid using the Grid Tooloption of the Edit menu or adjust the species/energy pairs using the Set MapEnergies button, then set Run Modes = Map and use the Run/Update option of theEdit menu. Remember that if you add a species/energy pair with the Set MapEnergies button, then the corresponding entry of the Dynamic Tool of the Editmenu must be selected so that the new quantity will be written to file.Check Modes:The Check Modes button provides a popup window with a run statussummary indicating if a run with the currently selected Run Prefix alreadyexists and providing a list of the available valid run options.104AF-GEOSpace User’s <strong>Manual</strong>: Version 2.5
Show MSM Inputs:Set Map Energies:After an MSM run is complete, selecting this button produce a ShowInputs popup window containing the derived inputs used to drive theMSM at its 15-minute time steps. The values listed were derived byinterpolation from the initial input parameter data sets. These derivednumbers are from the file _parameter in the MSM folder in the scratchspace. In order to produce 15-minute Kp values and avoid a step-likechange in the parameters, that Kp is transitioned gradually each 3 hours.This is done because the MSM electric field model uses the time-rate-ofchangeof Kp. If available, the values for Dst, EqE, PCP, IMFBY, IMFBZ,SWDEN, and SWVEL are all determined via interpolation. Themagnetopause standoff distance (Std) is derived via a Kp relationship ifSWDEN and SWVEL are not available. The column labeled “P” refers tothe polar cap potential pattern type XIPATT described above.The Set Map Energies button activates the MSM Energies popup windowused set the particles energies to be processes for viewing with thegraphics modules. The user may enter up to five energies (in keV) peractive species where active species are those checked in the main MSMenvironment window, i.e., e-, H+, and O+. By default, the MSM Energieswindow is set such that only 30 keV electrons will be tracked. For a givenspecies/energy pair to be available for plotting, the corresponding entriesin the Dynamic Tool of the Edit menu must be selected (see next note).Note: To visualize all user-designated species/energy pairs selected using the Set MapEnergies button, the Dynamic Tool of the Edit menu for an active MSM sciencemodule must be set to write the appropriate quantities to file. The MSM DynamicTool window entries eEnergy0 to eEnergy4 correspond to the e- Energy (keV)entries 0-to-4 in the MSM Energies window. Similarly, the Dynamic Tool entrieshEnergy0 to hEnergy4 correspond to the H+ Energy (keV) entries 0-to-4 and theentries oEnergy0 to oEnergy4 correspond to the O+ Energy (keV) entries 0-to-4.In addition, if the GSM X, Y, Z, and total magnetic field values (Bx, By, Bz, andBtot) from the MSM are to be plotted then they must also be selected in theDynamic Tool.Required Library FilesThe mapping procedure used to fill AF-GEOSpace grids with MSM output is from Hilmer et al.[1993] and includes updates related to the location of the magnetotail neutral sheet as describedby Hilmer [1997]. The following library files are required to run the MSM and map results(Note: the “*” represents a variety of numeric character strings).$AFGS_HOME\models\data\MSM\BMATRIX – bo3*.dat (1864 files, 350 MB)$AFGS_HOME\models\data\MSM\TBLMAT – TBL*.DAT, MAT*.DAT (1864 files, 1.16 GB)$AFGS_HOME\models\data\MSM – static files COORD, DKTABLE, EFCOEF, HARDY,IONENG, and IONNUMAF-GEOSpace User’s <strong>Manual</strong>: Version 2.5 105
Archived Input Data FilesThe following input data files are provided for running the MSM. Input data used to drive theMSM are archived in a separate location from the parameters used by the rest of the software(i.e., the Global Parameters described in the ENVIRONMENT section of this document). Fordetails on the input data types used to drive the MSM and a description of proxy valuesdetermined using the Kp index please see section 5 of Hilmer and Ginet [2000]. Note thatadditions to the archive must be done manually as no automatic updates are available. Editingand saving data values via the Show option of the Globals menu does not change the inputs usedby MSM. In the following descriptions the characters “YYYY” indicate the calendar year.$AFGS_HOME\models\data\MSM\PARAMS contains directories:DST:Hourly Dst index from files dstYYYY for years 1957-2010 (March). These filesmatch those supplied via $AFGS_HOME\models\data\GLOBALS\DST andcan be updated by the user in the same manner. Source: NGDC at websiteftp://ftp.ngdc.noaa.gov/STP/GEOMAGNETIC_DATA/INDICES/DST/. Seethe file 00info_DST for format details.KP_AP: Three-hour Kp index and SumKp value from files kpYYYY for years 1932-2010 (June). These files match those in$AFGS_HOME\models\data\GLOBALS\KP and can be updated by the userin the same manner. Source: NGDC at websiteftp://ftp.ngdc.noaa.gov/STP/GEOMAGNETIC_DATA/INDICES/KP_AP/.See the file 00info_KP_AP for format details.$AFGS_HOME\models\data\MSM\SPACECRAFT\DMSP contains directories:SSJ4\MEB:Midnight equatorward boundary values (for Eq. Edge) for 1983 to day 104 of2010 from files mnitYYYY.new. Source: AFRL (Dan Madden and F. J. Rich).See the file 00info_MEB for details.SSIES\PCSHRT: Cross-polar cap potential (for PCP) and electric field pattern type (forXIPATT) for years 1987-2004 from DMSP data files sDDYYYY.txt where DDis the DMSP satellite number 08, 10, 11,12, or 13. See the file00info_PCSHRT for details.$AFGS_HOME\models\data\MSM\SPACECRAFT contains directories:IMP8:WIND:Hourly solar wind velocity (for SWVEL), density (SWDEN), temperature fromfile imp8.1996.hravg.subset. Files for other years can be obtained from theMIT website ftp://space.mit.edu/pub/plasma/imp/hr_avg/. See the file00info_IMP8 for format details. [Acknowledgements: A.J. Lazarus, P.A.Milligan, and K.I. Paularena (all of MIT)]Hourly IMF (for IMFBY, IMFBZ) from files 1996_wnd_mfi.asc and solarwind velocity and density from files 1996_WIND_hourly_averages. See thefile 00info_WIND for format details. Files for other years can be obtainedfrom the MIT website ftp://space.mit.edu/pub/plasma/wind/kp_files_hr_aves/.[Acknowledgements: Principal Investigator K.W. Ogilvie (NASA GSFC),A.J. Lazarus (MIT) and J.C. Kasper (MIT)]106AF-GEOSpace User’s <strong>Manual</strong>: Version 2.5
Before each MSM run, input data falling within the simulation interval are time sorted andrewritten to create the actual MSM input data files (i.e., DST, EQEDGE, FKP, IMFBY, IMFBZ,PCP, SWDEN, SWVEL, SUMKP, and XIPATT) that are recorded in the SciMsm directory in theuser’s scratch space. The Show MSM Inputs button can be used to view the parameters finallyused to drive the MSM at15-minute time steps.Notes on the MSM Run ProcedureFor a detailed description of an MSM simulation using this module, please see “MagnetosphericSpecification Model” in the EXAMPLES section of this document.Quick-Start Procedure: The default MSM module run setup will produce output for 30 keVelectrons using the Kp Mode option Kp=>proxies for all input (also known as the “Kp-Only”mode). To run in this simplest of modes, the user must (1) open an AF-GEOSpace session, (2)establish a dynamic run by placing a check mark in the box to the right of the Start:UT text fieldand completing the Start and End time fields, and (3) use the Run/Update option of the Editmenu. The software will read Kp indices from the archived data directories described above, runthe MSM simulation, and fill the grid (see the Grid Tool option of the Edit menu) with 30 keVelectron flux values.Note: If no environment data is available (not even Kp) then a popup message will appearindicating "ERROR: NTLINE=0, global.dat file empty". In the SciMsm folder created at runtime, see the file global.inf for a summary of data sources, quantities available, and names ofother files with more details. The file dbg.txt shows what the session looks like running inFORTRAN and the contents of newly created files ENCHAN and _msmin.dat are repeated there.MSM OutputsThe MSM science module returns a 3D Gridded Data set of the following magnetosphericquantities: electron (e-), proton (H+), and oxygen (O+) particle fluxes in units of Log[#/cm2-skeV-ster],and magnetic field values for GSM components Bx, By, Bz, and |B| in units of nT.Note that particles of a given species/energy will be found in a limited region of themagnetosphere and that, in general, the more energetic particles will be found closer to Earth.Otherwise, if no particle flux information is given at a specific grid location for an energy setusing the Set Map Energies button, then either (a) the grid point is outside of the MSMsimulation region, or (b) that particle energy was not covered by the geosynchronous invariantenergy channels calculated with the user-selected Species: Energy Range (keV) and L-ShellRange values.AF-GEOSpace User’s <strong>Manual</strong>: Version 2.5 107
The NASAELE Science ModuleModel Name:Version:Developer:References:NASA Trapped Electron Model AE-8National Space Science Data Center (NSSDC) Data Set PT-11B, Oct1987; IGRF updates 2009NASA/NSSDC (distributed in AF-GEOSpace with permission); IGRFoption updates by AER, Inc.Complete NASA radiation belt model references are available viaanonymous ftp from NSSDCA.GSFC.NASA.GOV or the World WideWeb sitehttp://nssdc.gsfc.nasa.gov/space/model/magnetos/aeap.html.Vette, J.I., The AE-8 Trapped Electron Model Environment,NSSDC/WDC-A-RS 91-24 (1991)Vette, J.I., The NASA/National Space Science Data Center TrappedRadiation Environment Model Program (1964-1991), NSSDC/WDC-A-RS91-29 (1991)Jordan, C.E., NASA Radiation Belt Models AP-8 and AE-8, GL-TR-89-0267, Geophysics Laboratory, Hanscom AFB, MA (1989), ADA 223660Note: It is recommended that AF-GEOSpace users read the original modeldocumentation and descriptive articles before using the models.NASAELE OverviewThe NASAELE science module computes the differential omni-directional electron flux usingthe NASA AE-8 radiation belt models for ten energy intervals between 0.5 and 6.6 MeV whichcorrespond to the ranges of the CRRES HEEF instrument data channels used in the constructionof the CRRESELE science module. Two additional channels are computed that represent theenergy ranges 0.04-0.5 MeV and 6.6-7 MeV covered in the NASA models but not covered bythe HEEF instrument. The following NASA radiation belt models description is excerpted fromthe on-line summary and instructions available at the anonymous ftp siteNSSDCA.GSFC.NASA.GOV:“[The NASA radiation belt] models describe the differential or integral, omni-directionalfluxes of electrons (AE-8) and protons (AP-8) in the inner and outer radiation belts(electrons: L=1.1 to 11, protons: L=1.1 to 7) for two epochs representing solar maximum(1970) and minimum (1964) conditions. The energy spectrum ranges from 0.1 to 400MeV for the protons and from 0.04 to 7 MeV for the electrons. AE-8 and AP-8 are themost recent ones in a series of models established by J. Vette and his colleges at NSSDCstarting in the early sixties. The models are based on almost all available satellite data”.The NASAELE science module is used to map the NASA AE-8 electron flux models for eithersolar maximum (AE8MAX) or minimum (AE8MIN) conditions onto a three-dimensional spatialgrid specified by the user. A variety of magnetic field models can be used for the mapping.108AF-GEOSpace User’s <strong>Manual</strong>: Version 2.5
NASAELE InputsThe NASAELE science module requires the user to specify the following information todetermine which data set to use and which magnetic field model to use in mapping the data,Energy Channel(MeV): The energy channel parameter specifies which of 10 electron fluxmodels, corresponding to the 10 HEEF instrument energy channels used inthe CRRESELE models, is to be used. The channels used for theCRRESELE models are to be considered. The channels span the rangefrom 0.5-6.6 MeV. Two additional channels are included spanning theranges above (6.6-7.0 MeV) and below (0.04-0.5 MeV) the HEEFchannels covered by the NASA models.B-Model:Activity:The magnetic field model used to convert from the B-L coordinates of themodel to three-dimensional space. Originally and as presented in AF-GEOSpace Version 2.1, the default magnetic field was the model used toreduce the CRRES data, i.e., IGRF85/O-P. However, after including timedependentIGRF internal field capabilities covering 1945-2010, the currentB-Model options include:Dipole:Dipole-Tilt:Dip-Tilt-Off:IGRF:IGRF/O-P:A dipole fieldA tilted dipole fieldA tilted-offset dipole fieldThe International Geomagnetic Reference Field with noexternal contributions (Extrapolation beyond 2010).The IGRF internal field with the Olson and Pfitzer(1977) static model to represent the external field.The activity parameter specifies whether the AE8MAX (representative ofsolar maximum conditions) or the AE8MIN (representative of solarminimum conditions) electron flux models are to be used.NASAELE OutputsThe NASAELE science module returns a 3D Gridded Data Set of the electron flux for theselected energy channel and activity level in units of #/(cm 2 s keV).AF-GEOSpace User’s <strong>Manual</strong>: Version 2.5 109
The NASAPRO Science ModuleModel Name:Version:Developer:References:NASA Trapped Proton Model AP-8National Space Science Data Center (NSSDC) Data Set PT-11B, Oct1987; IGRF updates 2009NASA/NSSDC (distributed in AF-GEOSpace with permission); IGRFoption updates by AER, Inc.Complete NASA radiation belt model references are available viaanonymous ftp from NSSDCA.GSFC.NASA.GOV or the World WideWeb sitehttp://nssdc.gsfc.nasa.gov/space/model/magnetos/aeap.html.Vette, J.I., The AE-8 Trapped Electron Model Environment,NSSDC/WDC-A-RS 91-24 (1991)Vette, J.I., The NASA/National Space Science Data Center TrappedRadiation Environment Model Program (1964-1991), NSSDC/WDC-A-RS91-29 (1991)Jordan, C.E., NASA Radiation Belt Models AP-8 and AE-8, GL-TR-89-0267, Geophysics Laboratory, Hanscom AFB, MA (1989), ADA 223660Note: It is recommended that AF-GEOSpace users read the original modeldocumentation and descriptive articles before using the models.NASAPRO OverviewThe NASAPRO science module computes the differential omni-directional proton flux using theNASA AP-8 radiation belt models for twenty-two energy intervals between 1 and 100 MeVwhich correspond to the ranges of the CRRES PROTEL instrument channels used in theconstruction of the CRRESPRO science module. [Note that Version 2.1 computed two additionalchannels that represented the energy ranges 0.1-1.0 MeV and 100-400 MeV covered in theNASA models but not covered by the PROTEL instrument.] The following NASA radiation beltmodels description is excerpted from the on-line summary and instructions available at theanonymous ftp site NSSDCA.GSFC.NASA.GOV:“[The NASA radiation belt] models describe the differential or integral, omni-directionalfluxes of electrons (AE-8) and protons (AP-8) in the inner and outer radiation belts(electrons: L=1.1 to 11, protons: L=1.1 to 7) for two epochs representing solar maximum(1970) and minimum (1964) conditions. The energy spectrum ranges from 0.1 to 400MeV for the protons and from 0.04 to 7 MeV for the electrons. AE-8 and AP-8 are themost recent ones in a series of models established by J. Vette and his colleges at NSSDCstarting in the early sixties. The models are based on almost all available satellite data”.The NASAPRO science module is used to map the NASA AP-8 proton flux models for eithersolar maximum (AP8MAX) or minimum (AP8MIN) conditions onto a three-dimensional spatialgrid specified by the user. A variety of magnetic field models can be used for the mapping.110AF-GEOSpace User’s <strong>Manual</strong>: Version 2.5
NASAPRO InputsThe NASAPRO science module requires the user to specify the following information todetermine which data set to use and which magnetic field model to use in mapping the data,Energy Channel(MeV): The energy channel parameter selects which of 22 proton flux models,corresponding to the 22 PROTEL instrument energy channels used in theconstruction of the CRRESPRO models, is to be used. The channels rangefrom 1.5 to 81.3 MeV. Two additional channels are included spanning theranges above (100 to 400 MeV) and below (0.1 to 1.0 MeV) the PROTELchannels covered by the NASA models.B-Model:Activity:The magnetic field model used to convert from the B-L coordinates of themodel to three-dimensional space. Originally and as presented in AF-GEOSpace Version 2.1, the default magnetic field was the model used toreduce the CRRES data, i.e., IGRF85/O-P. However, after including timedependentIGRF internal field capabilities covering 1945-2010, the currentB-Model options include:Dipole:Dipole-Tilt:Dip-Tilt-Off:IGRF:IGRF/O-P:A dipole fieldA tilted dipole fieldA tilted-offset dipole fieldThe International Geomagnetic Reference Field with noexternal contributions (Extrapolation beyond 2010).The IGRF internal field with the Olson and Pfitzer(1977) static model to represent the external field.The activity parameter specifies whether the AP8MAX (representative ofsolar maximum conditions) or the AP8MIN (representative of solarminimum conditions) proton flux models are to be used.NASAPRO OutputsThe NASAPRO science module returns a 3D Gridded Data Set of the proton flux for the selectedenergy channel and activity level in units of #/(cm 2 s MeV).AF-GEOSpace User’s <strong>Manual</strong>: Version 2.5 111
The NRLMSISE-00 Science ModuleModel Name: NRLMSISE-00 Model 2001Version:Developer:Official release file NRLMSISE-00.DIST17.TXT obtained fromhttp://uap-www.nrl.navy.mil/models_web/msis/msis_home.htm.J. M. Picone, A.E. Hedin, and D.P. Drob, Navel Research laboratoryReferences: Hedin, A.E., MSIS-86 Thermospheric Model, J. Geophys. Res. 92, 4649(1987)Hedin, A.E., Extension of the MSIS Thermospheric Model into the Middleand Lower Atmosphere, J. Geophys. Res., 96, 1159 (1991)Jacchia, L., New Static Models of the Thermosphere and Exosphere withEmpirical Temperature Profiles, Spec. Rep., 313, Smithsoni. Astrophys.Observ., Cambridge, Mass., May 6 (1970)Labitzke, K., J.J. Barnett, and B. Edwards (eds.), Handbook MAP 16,SCOSTEP, University of Illinois, Urbana (1985)Picone, J.M., A.E. Hedin, D.P Drob, and A.C. Aikin, NRLMSISE-00Empirical Model of the Atmosphere: Statistical Comparisons andScientific Issues, J. Geophys. Res., 107(A12), 1468,doi:10.1029/2002JA009430 (2002)Note: It is recommended that AF-GEOSpace users read and understand the original modeldocumentation and descriptive articles before using the models.NRLMSISE-00 OverviewThe NRLMSISE-00 model provides a description of the atmosphere as a function of location,time, solar activity (F10.7), and geomagnetic activity (Ap). NRLMSISE-00 models altitudeprofiles of temperature T(z), the number density of various species (i.e., He, O, N 2 , O 2 , Ar, H,and N) that are in equilibrium with temperature T(z), the total mass density, and the numberdensity of a high-altitude “anomalous oxygen” component not in equilibrium at T(z) [Picone etal., 2002]. These authors also note that the NRLMSISE-00 empirical atmospheric model is amajor upgrade of the MSISE-90 thermosphere model of Hedin [1991] and for estimating totalmass density, it is comparable to or better than the Jacchia-class models (e.g., see Jacchia[1970]). Below 72.5 km, the MSISE-90 model is primarily based in the Labitzke et al. [1985]tabulation of zonal average temperature and pressure. Above 72.5 km, MSISE-90 is basically arevised MSIS-86 model [Hedin, 1987]. Note that for user only interested in the thermosphere(above 120 km), the authors recommend the MSIS-86 model. As noted on the NSSDC websitereferenced above, the upgrade from MSISE-90 to NRLMSISE-00 involves (1) extensive use ofdrag and accelerometer data on total mass density, (2) the addition of contributions from O+ andhot oxygen at altitudes above 500 km, and (3) the inclusion of Solar Maximum Mission UVoccultation data on 0 2 number density. The code is also made available, along with many otherrelated links, by NSSDC at (http://nssdc.gsfc.nasa.gov/space/model/atmos/nrlmsise00.html).112AF-GEOSpace User’s <strong>Manual</strong>: Version 2.5
NRLMSISE-00 InputsThe NRLMSISE-00 science module requires the following inputs,Global Parameters:Day, UT, F10.7, and Ap (Year, Kp, and SSN are not used).10.7 cm Radio Flux for the previous day: Daily average solar radio flux at 10.7 cm for theprevious day (F10.7P) can be determined two ways.From Globals:Set:The program assigns F10.7P a value equal to F10.7 forthe previous day as noted in the global parameter files.If selected, the program uses the value entered in thenewly activated text window F10.7P.81-day Average (+/- 40 days) 10.7 cm Radio Flux: This input is the 81-day average (including+/- 40 days from day of interest) of F10.7 daily values (F10.7A) and canbe determined two ways.From Globals: The program assigns F10.7A a value equal to theaverage determined using the global parameter files. Asnoted above, the last valid run day is the day before thelast day listed in the Kp data files (which contain dailyF10.7 values). If a valid day is selected, then theaverage is constructed using the previous 40 days plusany available forward data, with the last good dayrepeated to fill out the required forward 40-day span.Set:If selected, the program uses the value entered in thenewly activated text window F10.7A.Notes: (1) The next day’s F10.7 value is needed for a successful run (see F10.7A descriptionabove), thus the last valid day to run the model is the day before the last day listed inthe Kp data files (see directory $AFGS_HOME\models\data\GLOBALS\KP).(2) While the model uses the global parameter F10.7, it does not use the single valueappearing at the top of the environment window.(3) As noted in the Model Status box after a run, this installation of the modelsubstitutes the 3-hour Ap index value for the Daily Ap index it expects as input, i.e.,the user can specify the Daily Ap value used by the model by editing the Ap text boxat the top of the environment window.(4) For dynamic runs, the values of F10.7P and F10.7A determined for the start daywill be used unchanged for the entire run interval.NRLMSISE-00 OutputsThe NRLMSISE-00 science module returns a 3D Gridded Data Set of the following quantities:HE Number Density: Helium (He) number density (cm -3 ).O Number Density:Atomic oxygen (O) number density (cm -3 ). Set to zero below 72.5 km.N2 Number Density: Molecular nitrogen (N 2 ) number density (cm -3 ).AF-GEOSpace User’s <strong>Manual</strong>: Version 2.5 113
O2 Number Density: Molecular oxygen (O 2 ) number density (cm -3 ).AR Number Density: Argon (Ar) number density (cm -3 ).Total Mass Density: Total mass density (g/cm 3 ).H Number Density:N Number Density:anO Num. Density:T Exospheric:T at Alt:Atomic hydrogen (H) number density (cm -3 ). Set to zero below 72.5 km.Atomic nitrogen number density (cm -3 ). Set to zero below 72.5 km.Anomalous oxygen number density (cm -3 ). Anomalous oxygen refers tohot atomic oxygen (O h ) or atomic oxygen ions (O + ) present at highaltitudes (> 500 km) that are not in thermal equilibrium.Exospheric temperature (Degrees K).Temperature (Degrees K).For 1D vertical profile displays, we recommend increasing the default number of radial pointscalculated (using the Grid Tool option of the Edit menu) and displaying a COORD-PROBEgraphical object in a 1D Viewport. For 2D or 3D displays, use the COORD-SLICE graphicalobject. To examine output along an orbit run the SATEL-APP application followed by theORBIT-PROBE graphical object.114AF-GEOSpace User’s <strong>Manual</strong>: Version 2.5
The PIM Science ModuleModel Name:Parameterized Ionospheric Model (PIM)Version: 1.7 (16 December 1999)Developer:References:Computational Physics, Inc. and <strong>Air</strong> <strong>Force</strong> Research LaboratoryDaniell, R.E., Jr., L.D. Brown, D.N. Anderson, M.W. Fox, P.H. Doherty,D.T. Decker, J.J. Sojka, and R.W. Schunk, Parameterized IonosphericModel: A Global Ionospheric Parameterization <strong>Base</strong>d on First PrinciplesModels, Radio Sci., 30, 1499-1510 (1995)Strickland, D.J., J. E. Bishop, J. S. Evans, T. Majeed, P. M. Shen, R. J.Cox, R. Link, and R. E. Huffman, Atmospheric ultraviolet radianceintegrated code (PIM): theory, software architecture, inputs, and selectedresults, J. Quant. Spect. Rad. Transfer, 62, 689 (1999)Computational Physics, Inc., PIM 1.7 User Guide, 13-January-1998(see $AFGS_HOME\models\REFS\pim17ug.pdf)Note: It is recommended that AF-GEOSpace users read the original modeldocumentation and descriptive articles before using the models.PIM OverviewThe PIM science module is a relatively fast global ionospheric model based on the combinedoutput of several physical ionospheric models. The following description of PIM is excerptedfrom Daniell et al. (1995),“[The Parameterized Ionosphere Model (PIM)] is a global model of theoreticalionospheric climatology based on diurnally reproducible runs of four physics-basednumerical models of the ionosphere. The four models, taken together, cover the E and Flayers for all latitudes, longitudes, and local times. PIM consists of a semi-analyticrepresentation of diurnally reproducible runs of these models for low, moderate, and highlevels of solar and geophysical activity and for June and December solstices and Marchequinox conditions.”From a user-specified set of geophysical parameters, including year, day, UT, solar activityindex F10.7, sunspot number, geomagnetic activity index Kp, and the directions of theinterplanetary field components By and Bz, the PIM science module computes values of theelectron density on a user-specified 3D grid. The range in altitude is 90 to 1600 km. Alsocomputed by PIM and output on 2D grids are the height-independent critical frequencies andheights for the ionospheric E- and F2-regions (FoE, HE, FoF2, and HF2) as well as the TotalElectron Content (TEC).PIM InputsThe PIM science module requires the following inputs:Global Parameters: Year, Day, UT, Kp, SSN, and F10.7. Either SSN or F10.7 can be omittedif the appropriate F10.7/SSN option is chosen as discussed below.AF-GEOSpace User’s <strong>Manual</strong>: Version 2.5 115
F2 Model Norm:E Model Norm:IMF By:IMF Bz:F10.7/SSN:Write to File:Ext:This option tells PIM whether to normalize the critical frequency of theionospheric F2-layer (FoF2).None:URSI:No FoF2 normalization is performed.FoF2 normalization is performed using the URSI globalempirical model.This option tells PIM whether to normalize the critical frequency of theionospheric E-layer (FoE).None:Empirical:No FoE normalization is performed.FoE normalization is performed using a semi-empiricalmodel.The orientation of the Y-component of the interplanetary magnetic fieldmay be set to Positive or Negative.The orientation of the Z-component of the interplanetary magnetic fieldmay be set to Positive, Zero, or Negative.The relationship between the instantaneous F10.7 cm solar radio flux andthe sun spot number can be set several ways, namelyDecoupled: The sun spot number and solar radio flux will be treatedas independent quantities.F10.7->SSN: The sun spot number will be estimated from the solarradio flux.SSN->F10.7: The solar radio flux will be estimated from the sun spotnumber.Specifies the base file name that the PIM results should be stored in.The Ext option must be selected if electron densities are generated indynamic mode and if RAYTRACE-APP is to be used to trace a set of raysat each time step, i.e., selecting this option will create a series of files(with the base file name specified above) with sequentially numberedextensions.PIM OutputsPIM returns the spatial distribution of the following ionospheric quantities,Elec. Density: The electron density (#/cm 3 ) is returned as a 3D Gridded Data Set.FoE:The critical frequency (MHz) of the E layer of the ionosphere is returnedas a 2D Gridded Data Set in latitude and longitude.HE:The altitude (km) of the peak of the ionospheric E layer is returned as a2D Gridded Data Set in latitude and longitude.FoF2:The critical frequency (MHz) in the F2 layer of the ionosphere is returnedas a 2D Gridded Data Set in latitude and longitude.116AF-GEOSpace User’s <strong>Manual</strong>: Version 2.5
HF2:The altitude (km) of the peak of the ionospheric F2 layer is returned as a2D Gridded Data Set in latitude and longitude.TEC: The total electron content (height integrated electron density in units of 10 12 cm -2 ) isreturned as a 2D Gridded Data Set in latitude and longitude.The PPS Science Module (V2.5 andStatic Only)AF-GEOSpace User’s <strong>Manual</strong>: Version 2.5 117
The PPS Science Module (V2.5 and Static Only)Model Name:Version: 96Developer:References:Proton Prediction System (PPS)D. Smart and M. Shea, <strong>Air</strong> <strong>Force</strong> Research LaboratorySmart, D.F., and M.A. Shea, PPS76 - A Computerized “Event Mode”Solar Proton Forecasting Technique, in Solar Terrestrial PredictionsProceedings, edited by R.F. Donnelly, U.S. Department of Commerce,NOAA/ERL, 1, p. 406 (1979)Smart, D.F., and M.A. Shea, PPS-87: A New Event Oriented Solar ProtonPrediction Model, Adv. Space Res., 9, No. 10, (10)281-(10)284, (1989)Smart, D.F., and M.A. Shea, Modeling the Time-Intensity Profile of SolarFlare Generated Particle Fluxes in the Inner Heliosphere, Adv. Space Res.,12, No. 2-3, (2)303-(2)313, (1992)Preliminary <strong>Software</strong> User’s <strong>Manual</strong> for the Proton Prediction System,Critical Design Review Data Package for the Proton Prediction Model,Prepared by C. B. Tang, Inc for contract no. F19628-87-C-0044, March(1987)Note: It is recommended that AF-GEOSpace users read the original modeldocumentation and descriptive articles before using the models.PPS OverviewThe PPS Science module is based on the Proton Prediction System (PPS) program developed bythe <strong>Air</strong> <strong>Force</strong> Research Laboratory. Previous versions for DOS PCs have been released. AsSmart and Shea (1979) explain:“[PPS] has been developed to generate a computerized time-intensity profile of the solarproton intensity expected at the Earth after the occurrence of a significant solar flare onthe sun. This procedure is a combination of many pieces of independent research andtheoretical results. It is not a comprehensive self-consistent analytical method, but is aconstruction of selected experimental and theoretical results from the entire domain ofsolar-terrestrial physics.”PPS has been constructed to model protons that are accelerated during energetic solar events(i.e., those associated with flares) near the solar surface. It does NOT model proton accelerationthat might occur in an interplanetary shock propagating towards the Earth. Most proton events atEarth are the result of protons accelerated near the solar surface. “Hybrid” solar flareinterplanetaryshock accelerated events occur on the order of a dozen times during a solar cycle.While such hybrid events are infrequent, they can be quite large.The PPS system is designed to generate a solar proton flux distribution in space that will matchthe Earth-observed statistical average intensity-time profile, flux and time-of-maximum spectrafound by spacecraft measurements to be associated with solar activity at a specific heliolongitudewith respect to the Earth.118AF-GEOSpace User’s <strong>Manual</strong>: Version 2.5
The solar proton flare event diagnostics of the 1970’s and 1980’s are identical to the fast CMEproxies of the 1990’s. The concept of particle acceleration in the solar corona by fast CME’s isstill consistent with the fundamental parameters of the Proton Prediction system. It is assumedthat the maximum possible flux will be encountered on the Archimedean spiral path leading fromthe solar active region. It is also assumed that there is a relation between the energy in theelectromagnetic emission parameters and the proton flux observed in space. It is further assumedthat there will be a helio-longitudinal gradient of particle intensity in space that decreases oneorder of magnitude per radian of angular separation for the most favorable propagation path. Theparticle flux intensity in space will be mapped in accordance with the Archimedean spiralconfiguration of the interplanetary magnetic field. The connection of the Earth to the solar activeregion via the interplanetary magnetic field is a controlling parameter in the prediction of howmuch solar particle flux will be received at the Earth.The PPS system is designed to take many input parameters. The first available reports of intenseradio or solar X-ray emissions, from onset to maximum, can be utilized for a quick predictionmode. This allows for a possible prediction of the solar proton event before the solar protonsreach the Earth. Unfortunately, this quick prediction mode based on peak flux data is also theleast accurate. The PPS prediction accuracy essentially doubles when event integrated data areused for the input.The input needed to specify the time and intensity of the solar flare source in the PPS can taketwo forms: (a) solar radio emissions observed by the USAF RSTN sites at 8800, 4995, 2695,1415, 606 MHz or 10 cm (b) soft X-ray events observed by the GOES satellites in either the 0.5-4.0 or 1-8 Angstrom bands. The location of the solar flare is determined from H-alphaobservations made by the USAF SOON sites. PPS contains an “expert” mode enabling the userto override certain PPS default values used to classify the proton energy spectra at the Earth, butits use is NOT recommended unless the user has considerable experience in interpreting solarproton events.The version of PPS implemented in AF-GEOSpace provides output showing the timedependence of proton fluxes in several differential and integral energy channels relevant to theGOES satellite. Also given are the time intervals for which the > 5 MeV, > 10 MeV and > 50MeV integral proton fluxes, such as measured on the GOES satellites, are above the thresholdvalue of 10 particles/(cm 2 -s-sr). The time and value of the peak response in each of the abovechannels during the solar proton event is estimated. Several user-specific quantities are alsocalculated including forecasts for the riometer absorption in Thule, Greenland, maximumradiation dosage for pilots in high-flying aircraft above the poles, and maximum radiation dosageto be expected both inside and outside a polar-orbiting space shuttle.PPS InputsThe PPS science module requires the following inputs:Global Parameters: Year, Day, UT (used to initialize event onset time and time of maximum)Specify Data: The user can choose whether solar X-Ray emissions as measured by theGOES satellite or solar Radio emission data as measured by the USAFRSTN sites are to be used to parameterize the solar flare.AF-GEOSpace User’s <strong>Manual</strong>: Version 2.5 119
Specify Flux Type:X-ray Data:Radio Frequency:Event Onset Time:Time of Maximum:Flare lat (deg N):Flare lon (deg W):The user can choose whether Peak Flux or Integrated Flux values are tobe used to characterize the amplitude of the X-Ray or solar Radioemissions.If X-Ray is chosen as the data type (and Use X-ray classification input isnot selected), the user chooses whether to use either the 0.5 - 4.0 Angstromor 1.0 - 8.0 Angstrom bands.If Radio is chosen as the data type, the user selects which fixed frequencyband, centered at 8800, 4995, 2695, or 1415 MHz, is to be used.Depending on the choice of data type, the onset time of either the radio orX-ray event in the format MM/DD/YY HH:MM.Depending on the choice of data type, the time of the maximum amplitudeof either the radio or X-ray event in the format MM/DD/YY HH:MM.The solar latitude, in degrees North, of the solar flare associated witheither the X-ray or radio event. This information can be obtained from H-alpha observations by the USAF SOON sites. Degrees South are enteredas negative numbers.The solar longitude, in degrees West, of the solar flare associated with theX-ray or radio event. This information can be obtained from H-alphaobservations by the USAF SOON sites. Degrees East are entered asnegative numbers.Use X-ray classification input?: If X-Ray is the input data type and Peak Flux is the flux type, theuser can select here whether to use the standard X-ray event classificationscheme to specify the magnitude of the peak.Peak class.:“Event amplitude”:If the X-Ray classification type is used to specify the peak magnitude of anX-ray event, the user enters the peak X-ray level measured by either the0.5-4.0 or 1-8 Angstrom (depending on the X-ray band selected above) X-ray instrument on the GOES satellites. These values are entered with aclassification letter and a numeric field. The usual X-ray eventclassification letters C, M, and X are used with a numeric field to multiplythe flux level. The range of allowed values is C1.0 through X99.0.The descriptor for this text box changes depending on what options forinput data have been selected. The beginning of the line plainly states thetype of input data required and what units need to be used, that is,Peak X-Ray = Peak X-ray emission in units of ergs/cm 2 /s (if the X-rayclassification option has not been selected).Integ. X-Ray = Integrated X-ray emission in units of Joules/cm 2.Peak Radio = Peak Radio emission in Solar Flux Units (=1.0 x 10 -22W/m 2 Hz)Integ. Radio = Integrated Radio emission in units of SFU-s120AF-GEOSpace User’s <strong>Manual</strong>: Version 2.5
Expert Mode:The six character code at the end of the descriptor line summarizes theinput and has the following format: AAANNB, where,AAA = XRY if X-Ray has been selected as the input data typeNN =B =RAD if Radio has been selected as the input data type54 if the 0.5-4.0 Angstrom X-Ray data band has been chosen18 if the 1.0-8.0 Angstrom X-Ray data band has been chosen14 if the 1415 MHz Radio Frequency has been chosen26 if the 2695 MHz Radio Frequency has been chosen49 if the 4995 MHz Radio Frequency has been chosen88 if the 8800 MHz Radio Frequency has been chosenP if the Peak Flux has been chosenI if the Integrated Flux has been chosenAmplitude data can be entered in the standard integer, real number, orexponential formatsThis mode allows the user to override certain PPS default input quantities,i.e., spectral slope, spectra type (differential or integral), fluxnormalization, time of flux maximum, and GOES energy channel.Note: Use of the Expert Mode is NOT recommended unless the user has considerableexperience in interpreting solar proton events.The remainder of the buttons in the PPS environment window control various output options andare described below.PPS OutputsPPS returns a text message window containing the results of the model calculations and asummary of the input parameters. The model provides the following predictions:− Maximum day polar riometer absorption at Thule, Greenland, in db, and the time that thismaximum will occur in HH:MM (UT) MON DD. This prediction is valid if it is daytime atThule (i.e., between 6:00 and 18:00 LOCAL Thule time) during the interval of the solarevent. Note that ionospheric absorption is a function of the solar zenith angle.− Maximum night polar riometer absorption at Thule, Greenland, in db, and the time that thismaximum will occur in HH:MM (UT) MON DD. This prediction is valid if it is nighttime atThule (i.e., between 18:00 and 6:00 LOCAL Thule time) during the interval of the solarevent.− Maximum dose rate expected at an altitude of 70,000 feet above the polar regions, inmRad/hr, and time this maximum will occur in HH:MM (UT) MON DD. This output can beused to estimate pilot dosages.AF-GEOSpace User’s <strong>Manual</strong>: Version 2.5 121
− Maximum dose rate expected at an altitude of 50,000 feet above the polar regions, inmRad/hr, and time this maximum will occur in HH:MM (UT) MON DD. This output can beused to estimate pilot dosages.− Maximum dose rate above the polar regions at altitudes corresponding to typical spaceshuttle orbits (about 250 km). Dose rates in Rad/hr are given for both Extra VehicularActivities (no shielding) and inside the shuttle behind 2 g/cm 2 of Aluminum shielding. Thetime of maximum is also given in HH:MM (UT) MON DD.− The interval of time for which the > 5 MeV proton flux near Earth (e.g., as measured on theGOES satellites) will be above the threshold value of 10 particles/(cm 2 -s-sr) in the formMON DD HH:MM (UT, start time) - MON DD HH:MM (UT, end time). The maximum fluxvalue, in particles/(cm 2 -s-sr), and the time of the maximum in HH:MM (UT) MON DD aregiven. Also estimated is the > 5 MeV fluence (= flux*time) for the duration of the event.− The interval of time for which the > 10 MeV proton flux near Earth (e.g., as measured on theGOES satellites) will be above the threshold value of 10 particles/(cm 2 -s-sr) in the formMON DD HH:MM (UT, start time) - MON DD HH:MM (UT, end time). The maximum fluxvalue, in particles/(cm 2 -s-sr), and the time of the maximum in HH:MM (UT) MON DD isgiven. Also estimated is the > 10 MeV fluence (= flux*time) for the duration of the event.− The interval of time for which the > 50 MeV proton flux near Earth (e.g., as measured on theGOES satellites) will be above the threshold value of 10 particles/(cm 2 -s-sr) in the formMON DD HH:MM (UT, start time) - MON DD HH:MM (UT, end time). The maximum fluxvalue, in particles/(cm 2 -s-sr), and the time of the maximum in HH:MM (UT) MON DD isgiven. Also estimated is the > 50 MeV fluence (= flux*time) for the duration of the event.PPS also provides three plots selectable from buttons in the PPS Environment window:Diff Flux-GOES: Differential proton flux as a function of time at geosynchronous altitudefor the energy ranges measured by the Space Environment Monitor on theGOES satellites, i.e., 1-4 MeV, 4-8 MeV, 8-16 MeV, and 16-215 MeV.The dotted red line corresponds to the threshold of 10 protons/(cm 2 -s-sr).Diff Flux-GWC: Differential proton flux as a function of time for the energy ranges 0.8-1.2MeV, 4-6 MeV, 9-11 MeV, 14-16 MeV, and 49-51 MeV. The dotted redline corresponds to a threshold of 10 protons/(cm 2 -s-sr).Integ Flux:Integral proton flux as a function of time at geosynchronous altitude forenergy ranges measured by the Space Environment Monitor on the GOESsatellites, i.e., at greater than 10, 30, 50, 100, and 500 MeV, respectively.The dotted red line corresponds to a threshold of 10 protons/(cm 2 -s-sr).The following output options are also selectable from the PPS Environment window,Plot Options: This widget allows one to set the Y-axis min, max and number of tics forthe plots. The Auto button gives (rounded) limits spanning the data and thedefault is set at -5 to 5 (log10).Display Text: Clicking the Display Text button displays the text window if it was closed.122AF-GEOSpace User’s <strong>Manual</strong>: Version 2.5
The SAAMAPS-2007 Science Module (Static Only)Model Name:SAAMAPS-2007Version: July 2007Developer: <strong>Air</strong> <strong>Force</strong> Research Laboratory and Boston CollegeReference: Ginet, G. P., Madden, D., Dichter, B.K., and Brautigam, D.H., Energeticproton maps for the South Atlantic anomaly, AFRL-RV-HA-TR-2008-1060, <strong>Air</strong> <strong>Force</strong> Research Laboratory, Hanscom AFB MA (2008) ADA485155 [see $AFGS_HOME/models/REFS/SAAMAPS_2007.pdf]Note: It is recommended that AF-GEOSpace users read the original modeldocumentation and descriptive articles before using the models.SAAMAPS-2007 OverviewFor low-Earth orbit (LEO) satellites, anomalies related to single event effects (SEEs) can resultfrom interaction with the high-energy radiation belt protons. The dominant source of protonfluence (outside of solar proton events) is the South Atlantic Anomaly (SAA), a localized regionat fixed altitude with high flux intensities resulting from the asymmetry in the Earth’s magneticfield. As summarized by Ginet et al. (2008), previously, the location of the SAA was oftendetermined by using the proton intensity maps derived from the NASA AP radiation beltclimatology models (see The NASAPRO Science Module chapter of this document for details).However, with the SAA drifting westward approximately 0.3 degrees/year updates are needed.Subsequently, an improved set of single event effects maps was developed from data taken bythe <strong>Air</strong> <strong>Force</strong> APEX and CRRES satellites for epoch 1990-1996 (see The SEEMAPS-1998Science Module chapter of this document). Most recently, the South Atlantic Anomaly Maps(SAAMAPS) represented in this science module were developed by Ginet et al. (2008) whoconfirmed the continued westward drift of the SAA. SAAMAPS-2007 provides access to ageographically tagged database of energetic proton flux intensities for the epoch 2000-2006based on data from the Compact Environment Anomaly Sensor (CEASE) flown onboard the Tri-Service Experiment-5 (TSX-5) satellite in a 410 km x 1710 km, 69° inclination orbit.SAAMAPS-2007 InputsThe SAAMAPS Science Module requires the user to specify the following information todetermine which data set to use in mapping the data,Altitude:SAAMAPS-2007 OutputsThis parameter determines which of the proton flux data sets representing26 altitude bins (400 and 1,650 km) is to be considered. The altitude rangeof each value extends 50 km above the listed value. Select All at the top ofthe list to load all altitudes or select a single altitude (km) from the list.The SAAMAPS Science Module returns a 3D Gridded Data Set of proton flux (#/cm 2 -sec-str)for 5 integral energy channels (>23, >38, >66, and >94 MeV) for the selected altitude bin (or allbins). The output map resolution is fixed (3° latitude x 3° longitude x 50 km).AF-GEOSpace User’s <strong>Manual</strong>: Version 2.5 123
The SEEMAPS-1998 Science Module (Static Only)Model Name:SEEMAPS-1998Version: September 1998Developer: Radex, Inc. (now AER, Inc.)Reference: Gussenhoven, M.S., E.G. Mullen, D.A. Hardy, D. Madden, E. Holeman,D. Delorey, and F. Hanser, Low Altitude Edge of the Inner Radiation Belt:Dose Models from the APEX Satellite, IEEE Trans. Nucl. Sci., 43, 2035-2042 (1995)Mullen, E.G., G. Ginet, M.S. Gussenhoven, and D. Madden, SEE RelativeProbability Maps for Space Operations, IEEE Trans. Nuc. Sci., 45, 2954-2963 (1998)Sawyer, D.M. and J.I. Vette, Trapped Proton Environment for SolarMaximum and Solar Minimum, NSSCE 76-06, NASA/GSFC, Greenbelt,MD (1976)Note: It is recommended that AF-GEOSpace users read the original modeldocumentation and descriptive articles before using the models.SEEMAPS OverviewThe Single Event Effects Maps (SEEMAPs) are a geographically tagged database of the relativeprobability for satellite on-board micro-electronics to suffer single event effects in the low Earthorbit (LEO) regime. Until now, the most readily accessible and usable means to determine theSEE risk, either for design or operations, was by using proton contours from the NASA ParticleMaps [Sawyer and Vette, 1976]. However, both data and our physical understanding of theEarth’s magnetic field movement indicate that the location of the energetic proton belts haschanged significantly since these maps were made in 1970.The SEEMAPs are an improved model for determining relative risk assessment from SEEs in thenear-Earth space in the present epoch based on data taken from the Advanced Photovoltaic andElectronics (APEX) and Combined Radiation and Release Experiment (CRRES) satellites. Thedata cover the period from July 1990 to October 1991 (CRRES, near solar maximum) and fromAugust 1994 to May 1996 (APEX, near solar minimum). A comparison of radiation dose fromthe two spacecraft as well as from the Defense Meteorological Satellite Program (DMSP) F7spacecraft for the previous solar minimum period (1984-1987) is given by Gussenhoven et al.[1995]. This work showed that there was a small variation in proton dose over the last solarcycle. The fact that the change was small for inner belt protons gives us reason to believe that thecombined APEX and CRRES databases give a near worst-case model (solar minimum) usefulfor orbit trade-off studies and mission operations planning.An excerpt from Mullen et al. [1998] describes the basic SEEMAP construction and capability:“Normalized flux and dose data for protons with energies >50 MeV are used to producecontour maps of relative probabilities of experiencing SEEs in the Earth’s inner radiationbelt. The data were taken on the APEX and CRRES satellites. To make the maps, thedata are averaged in 3 o x 3 o bins in geographic latitude and longitude, and in 50 km steps124AF-GEOSpace User’s <strong>Manual</strong>: Version 2.5
in altitude. All geographic longitudes and latitudes less than or equal to 70 o are covered.The altitude range extends from 350 km to 14,000 km. This geographic range includesthe complete region of inner belt > 50 MeV protons, except in the South AtlanticAnomaly region below 350 km. The maps easily locate regions of high risk for SEEs andare designed primarily for use in space mission planning and operations. The data baseincludes the added proton peak following the March 1991 magnetic storm, but does notinclude SEE probabilities in the polar cap region associated with high energy solarparticle events.”Though the SEE relative probability maps are constructed from data sets of flux ratescorresponding to > 50 MeV particles depositing energy in the APEX and CRRES dosimeters,these flux rates were carefully compared with both the >50 MeV dose rate and single eventupsets measured in a solid state tape recorder on-board APEX. The correlation was found to begood. Relative probabilities were computed by dividing the dosimeter flux rate by anormalization factor of 2360.45, which gives relative probability values in the range of 0 to 5.5.This factor was based on APEX measurements as explained in Mullen et al. [1998]:“... a normalization factor is calculated from the average flux rate for the HILET A Dome4 [dosimeter] between the altitudes of 1,000 and 1,050 km for data points between 1,000and 5,000 counts/s. This altitude and count rate level were chosen because they are nearthe middle of the altitude range, have sufficient points for good statistics, are the highestcount rates for the altitude range, and are most easily remembered (>1000 counts/s at1000 km).”The SEEMAPS should be most useful for a space system operator to a) tell when and how thespacecraft enters regions of high intensity (like the SAA) and the time spent in the region, b)estimate how many upsets to expect in every region by keeping track of when and where upsetsoccur and then using the normalization factors, and c) determine the factor to go fromnormalized values to upsets/device/unit time/region once the upset data base is large enough.SEEMAPS InputsThe SEEMAPS Science Module requires the user to specify the following information todetermine which data set to use in mapping the data,Altitude Bins: The altitude bins parameter determines which of the proton flux data setscorresponding to bins between 350 and 15,000 km is to be considered.Select the All to load all altitude or select One to load a single altitude andhighlight one of altitude ranges in the Bin Ranges (Km) list.Activity: The activity parameter specifies whether the Quiet (obtained before the 24March 1991 storm) or Active (obtained after the 24 March 1991 storm)proton flux data sets are to be used. This parameter is the same as thatused in the CRRESPRO module (see the CRRESPRO Science Module).SEEMAPS OutputsThe SEEMAPS Science Module returns a 3D Gridded Data Set of the proton flux (#/sec) andrelative probability value (RELATIVE PROB) for the selected altitude bin (or all bins) andactivity level.AF-GEOSpace User’s <strong>Manual</strong>: Version 2.5 125
The STOA Science Module (V2.5 and Static Only)Model Name:Version: 1.0 (1987)Developer:References:Shock Time of Arrival (STOA)D. Smart, <strong>Air</strong> <strong>Force</strong> Research Laboratory; M. Dryer and L.D. Lewis,NOAA Space Environment CenterFry, C.D., M. Dryer, Z. Smith, W. Sun, C.S. Deehr, and S.-I. Akasofu,Forecasting solar wind structures and shock arrival times using anensemble of models, J. Geophys. Res., 108(A2), 1070,doi:10.1029/2002JA009474(2003)Hilmer, R.V., G.P. Ginet, K. Kadinsky-Cade, S. Quigley, D.T. Decker,P.H. Doherty, Space Environment Models Addressing OperationalHazards: An AF-GEOSpace Perspective on Current Capabilities,American Institute of Aeronautics and Astronautics, AIAA 2000-0366,from 38th Aerospace Sciences Meeting, 10-13 January 2000, Reno NV,2000.Smart, D.F., M.A. Shea, M. Dryer, A. Quintana, L.C. Gentile and A.A.Bathurst, Estimating the Arrival Time of Solar - Flare - Initiated Shocksby Considering them to be Blast Waves Riding over the Solar Wind, inSimon, P.A., G. Heckman and M.A. Shea, Eds., Solar-TerrestrialPredictions: Proceedings of a Workshop at Meudon, France, June 18-22,1984, U.S. Government Printing Office, Washington, D.C., pp. 471-481(1986)Smart, D.F. and M.A. Shea, A Simplified Model for Timing the Arrival ofSolar Flare-Initiated Shocks, J. Geophys. Res., 90, 183-190 (1985)Note: It is recommended that AF-GEOSpace users read the original modeldocumentation and descriptive articles before using the models.STOA OverviewThe sudden release of energy into the solar atmosphere will create a shock wave. The STOAmodel applies the Sedov similarity theory to the general characteristics of the interplanetarymedium [Sedov, Similarity and Dimensional Methods in Mechanics, Academic Press, New York,1959]. The STOA concept is a blast wave propagating over the pre-existing solar wind. When aninterplanetary shock has been generated by a solar disturbance, the STOA science module can beinvoked to predict the arrival time of the shock at the Earth or at another ecliptic plane location.We refer to the shock-producing solar events, whether they are coronal mass ejections or solarflares, as “solar flares,” because the model was originally developed assuming that solar flareswere the drivers for the interplanetary shocks.The STOA shock speed profile as a function of radial distance has been found to comparefavorably with 2 1/2-D MHD simulations of interplanetary shocks propagating along the flareradialdirection, for test cases where the initial shock speeds were identical (see review by Wu126AF-GEOSpace User’s <strong>Manual</strong>: Version 2.5
[Space Science Reviews, 32, 115, 1982]). The MHD models simulate the behavior of solar flareinitiated shock waves propagating through interplanetary space.The STOA arrival time is calculated by modeling the shock propagation in two phases: a“driven” phase and a “blast” phase. During the initial driven phase the shock is assumed to bedriven by the solar flare. It is assumed that the shock disturbance originates in the solaratmosphere at a distance R=0.007 AU from the center of the Sun. A constant speed is assigned tothis driven phase and is assumed to be given by the frequency drift rate of the Type II radio burstwith the onset time coinciding with the beginning of the burst. The end time of the driven phaseis the time when the soft X-ray emission power has decayed to half of the log of the maximumflux above the pre-event background. The radial distance covered by the driven phase is given bythe product of the Type II drift speed multiplied by the driver time.The distance from the Sun’s center to the end point of the driven phase in a flare radial directionisR d = 0.007 + V d T d (AU).The initial condition simulated by STOA is a shock front that may extend across a major part ofthe Sun, with a shock front speed profile given byV θ = V r fwith f = (cos(θ)+1)/2where θ is the angle measured at the center of the Sun between the flare radial direction and anyother radial direction. The driven distance at an angle θ isR dθ = 0.007 + f V d T d (AU).After the driven phase it is assumed that the propagation of the disturbance through the interplanetarymedium can be described as a blast wave superimposed on the preexisting solar wind.Only the shock front or leading edge of the blast wave is considered in this model; no informationis provided on the structure of the shock wave. The average radial blast wave speed isobtained by integrating the blast wave equation in the flare radial direction.In the interplanetary medium it is assumed that the density is proportional to the inverse squareof the distance R from the center of the Sun, and that the blast wave speed decreases as R -1/2 . Theaverage radial blast wave speed is projected onto the Sun-observer direction using theforeshortening factor described earlier. It is assumed that the speed anisotropy adopted for thedriven phase persists through the blast phase. Finally, the average speed of the disturbanceduring the blast phase is the average blast wave speed in the observer direction added vectoriallyto the average solar wind speed. For simplicity, it is assumed that the solar wind is movingradially away from the Sun at a constant speed. In a flare radial direction, the wave speed isV = B R -1/2 + V sw with constant B = V d R d 1/2 .In a non flare-radial direction the shape factor is involved and the wave speed isV θ = f B R -1/2 + V sw with V θ = dR/dt,that is integrated from R = R dθ to obtain the shock’s propagation time to the desired radius R.The predicted shock arrival time is simply the sum of the initial Type II burst time, the drivenphase duration and the travel time of the disturbance through the interplanetary medium. As theAF-GEOSpace User’s <strong>Manual</strong>: Version 2.5 127
last wave loses energy during its propagation through the interplanetary medium, the shockspeed decays to the magneto-acoustic speed. The program computes the sonic Mach number andAlfven speed in interplanetary space, using simple approximations for interplanetary plasmadensity, temperature and magnetic field as a function of distance from the Sun, and derives themagneto-acoustic Mach number of the shock. If this number is less than Mach 1 at the Earth orother selected observation point, no shock is predicted to arrive.The STOA documentation and associated references suggest that shocks that are capable ofpropagating to 1 AU are likely to be associated with “big flares”. The criteria for identifying abig flare are not, however, clearly established. There is an indication, based on the original testingof the program, that the better STOA predictions are associated with “long duration soft X-ray events”. This means a decay time T d of one hour or more, together with a velocity Vd equalor greater than 1000 km/s. Other diagnostics of shock generation and propagation into the solarcorona may be coronal mass ejection information and forecaster judgment.STOA InputsThe STOA science module requires the following inputs:Global Parameters:Year, Day, UT (used to initialize event onset and end times)Specify Event Duration: The user can choose to specify either the Stop Time of the event, theDuration of the event, or have the event duration estimated from inputs ofthe associated GOES soft X-ray Levels.Observer Location:Event onset time:Event end time:Event duration:Backg. Class:The observer location can be designated as Earth or the user can Specify alocation. The latter choice prompts the user to enter the observer distance(Obs. Distance), offset angle (Obs. Offset Angle), and name (Obs. Name)in the lowest three text boxes on the right side of the window as describedbelow.Time of onset of Type II radio burst from USAF RSTN site in the formatMM/DD/YY HH:MM. Default is the start time from the top of theenvironment window.When Stop Time is selected to specify the event duration, the user entersthe event end time in the format MM/DD/YY HH:MM. The end time ofthe shock driver must not be earlier than the Type II event onset time. Theshock driver time must be less than 7 days (168 hours). Shock driverdurations are typically a fraction of a day. In this case, GOES satellite X-ray levels are not used to estimate the event duration.When Duration is selected to specify event duration the user enters theevent duration in hours. The shock driver time must be < 7 days (168hours). Shock driver durations are typically a fraction of a day. In thiscase, GOES satellite X-ray levels are not used to estimate the eventduration.When X-ray Levels is selected to specify the event duration, the userenters the background X-ray level measured by the 1-8 Angstrom X-rayinstrument on a GOES satellite before the event occurred. This value is128AF-GEOSpace User’s <strong>Manual</strong>: Version 2.5
Peak Class:entered with a classification letter and a numeric field. The usual X-rayevent classification letters A, B, C, M, or X can be used with the numericfield consisting of 1-3 characters which may be digits or an optional decimalpoint. The numeric field multiplies the flux level. The range ofallowed values is A1 through X99.When X-ray Levels is selected to specify the event duration, the userinputs here the peak X-ray level measured by the 1-8 Angstrom X-rayinstrument on a GOES satellite during the X-ray event. The format is thestandard X-ray event classification scheme as explained above. Afterentering this value the user should click a different Specify Event Durationoption and then the X-ray Levels choice again so that the level XN.Ncorresponding to 1/2 log of the peak signal will be displayed next toDecay time box.Decay time, level XN.N: When X-ray Levels is selected to specify the event duration the userenters the time in the format MM/DD/YY HH:MM at which the X-raylevel measured by the 1-8 Angstrom X-ray instrument on a GOES satelliteduring the X-ray event decays to the level XN.N. The level XN.N iscalculated from the Backg. Class. and Peak. Class. Of course, this timewill occur after the peak of the X-ray event.Type II Speed(km/s): The Type II drift speed in km/s calculated by the USAF RSTN networkand select other radio telescope sites from observations of Type II radiobursts. This value must be greater than 0 and less than 10000 km/s.Flare lat (deg N):Flare lon (deg W):Solar Wind (km/s):Obs. Distance:Obs. Offset Angle:The solar latitude, between +90 o and -90 o North, of the solar flareassociated with the Type II radio burst. This information can be obtainedfrom H-alpha observations by the USAF SOON or other optical sites orfrom X-ray images. Degrees South are entered as negative numbers.The solar longitude, between +180 o and -180 o West, of the solar flareassociated with the Type II radio burst. This information can be obtainedfrom H-alpha observations by the USAF SOON or other optical sites orfrom X-ray images. Degrees East are entered as negative numbers.Longitudes greater than +/- 90 o from the direction of the observer may notbe realistic.The solar wind speed must be positive and less than 1000 km/s.When the user wishes to Specify the Observer Location they enter theobserver distance in AU. It must be greater than 0.007 AU and less than100 AU. Note that observer distances less than 0.2 AU or greater than 50AU are unrealistic. This condition is not detected until all of the data havebeen entered because it depends on several data entries.When the user wishes to Specify the Observer Location they enter theobserver offset angle in degrees. It is the offset angle from the Sun-Earthline, from -360 o to +360 o , and is measured in the ecliptic plane, in the samesense as the longitude of the solar flare: west is positive, east is negative.AF-GEOSpace User’s <strong>Manual</strong>: Version 2.5 129
Obs. Name:Display Text:When the user wishes to Specify the Observer Location they enter theobserver name as a 5 character alphanumeric value. If this field is leftblank STOA uses the Earth as the default observer.Click the Display Text button to display the text window if it was closed.STOA OutputsSTOA returns a text message window containing the results of the model calculations and asummary of the input parameters. The model outputs are:• Magneto-acoustic Mach number and arrival time of shock at observation point• Total propagation time of shock in hours and minutes• Type II onset time• X-ray or other event end time• Driver duration time in hours• Type II speed in km/s• Solar flare latitude and longitude• Solar wind speed• Distance from Sun to observer (e.g., Earth) in AU130AF-GEOSpace User’s <strong>Manual</strong>: Version 2.5
The TPM-1 Science Module (V2.5 Only)Model Name:Trapped Proton Model (TPM-1)Version: Version 1.2, 15 April 2003; IGRF updates 2009Developer:References:S. L. Huston, The Boeing Company; IGRF option updates by AER, Inc.Huston, S.L., Space Environment and Effects: Trapped Proton Model,NASA/CR-2002-211784, NASA Marshall Spaceflight Center (2002)[see $AFGS_HOME\models\REFS\TPM.pdf]Huston, S.L., and K.A. Pfitzer, Space Environment Effects: Low AltitudeTrapped Proton Model, NASA/CR-1998-208593, NASA MarshallSpaceflight Center (1998)Huston, S.L, G.A. Kuck, and K.A. Pfitzer, Low altitude trapped radiationmodel using TIROS/NOAA data, in Radiation Belts: Models andStandards, J.F. Lemaire, D. Heynderickx, and D.N. Baker (eds.),Geophysical Monograph 97, American Geophysical Union, 119 (1996)Meffert, J.D., and M.S. Gussenhoven, CRRESPRO Documentation, PL-TR-94-2218, Phillips Laboratory, Hanscom AFB, MA (1994), ADA284578Olson, W.P., and K.A. Pfitzer, Magnetospheric Magnetic Field Modeling,Annual Scientific Report, <strong>Air</strong> <strong>Force</strong> Office of Scientific Research contractF44620-75-C-0033, McDonnell Douglas Astronautics Co., HuntingtonBeach, CA (1977), ADA 037492Note: It is recommended that AF-GEOSpace users read the original modeldocumentation and descriptive articles before using the models.TPM-1 OverviewThe TPM-1 science and application modules are based on the Trapped Proton Model (TPM)developed by Boeing Corporation for the NASA Space Environment and Effects (SEE) Program[Huston, 2002]. TPM combines both the Low Altitude Trapped Radiation Model (LATRM)[Huston et al., 1998], also developed by Boeing for NASA/SEE, and the <strong>Air</strong> <strong>Force</strong> ResearchLaboratory's (AFRL) CRRESPRO model [Meffert and Gussenhoven, 1994] covering higheraltitudes. From the introduction of the TPM-1 report [Huston, 2002]:“This new model [TPM-1] combines elements of LATRM and CRRESPRO to obtain amodel which covers the full spatial extent of the trapped proton belts, determines thedifferential proton flux over the range of 1 to 100 MeV, and contains a solar cyclevariation at low altitudes.”A description of the CRRESPRO model can be found in the CRRESPRO Science Modulesection of this manual. The LATRM model (also known as the NOAAPRO model) is describedin the LATRM report [Huston and Pfitzer, 1998] as follows:“Under NASA's Space Environment Effects (SEE) program, the Boeing Company hasdeveloped a new model for the low-altitude trapped proton environment. The model isAF-GEOSpace User’s <strong>Manual</strong>: Version 2.5 131
ased on nearly 20 years of data from the [Medium Energy Proton and Electron Detector(MEPED), a component of the Space Environment Monitor (SEM) package onboard the]TIROS/NOAA weather satellites [orbiting at 840 km and 93 degrees inclination].The model, which we have designated NOAAPRO (for NOAA protons), predicts theintegral omni-directional proton flux in three energy ranges: >16, >36, and >80 MeV. Itcontains a true solar cycle variation and accounts for the secular variation in the Earth'smagnetic field. It also extends to lower values of the magnetic L parameter than doesAP8. Thus, the model addresses [some of the] major shortcomings of AP8 ...For each energy channel, the model data are organized in terms of L and B/B min (althoughthese parameters are mapped into coordinates more appropriate to the data space). Themodel consists of parameters which determine the absolute magnitude of the proton flux,the variation of the proton flux with the solar 10.7 cm radio flux (F 10.7 ), and the phase lagbetween F 10.7 and the proton flux. This approach results in a well-organized data set fortwo solar cycles, and can be extended into the future.”The features of TPM-1 are further summarized in the conclusions of the TPM-1 report:“The development of TPM-1 represents a significant advance in the field of trappedproton modeling. It is now possible to predict the trapped proton flux in the energy range1-100 MeV with good accuracy over several solar cycles. TPM-1:• Covers the geographic region from approximately 300 km to geosynchronousorbit.• Calculates omni-directional differential flux in 22 energy channels ranging from1.5 to 81.5 MeV.• Contains a continuous variation with solar activity, valid over the time span 1960-2020. The solar cycle variation is driven by the solar 10.7 cm radio flux (F 10.7 ).• Contains a model for both quiet (nominal) and active conditions, e.g., after anevent such as the one observed by CRRES [in which a new belt was produced bythe March 1991 interplanetary shock event].• Can be used to obtain the flux at a particular point in space [TPM-1 ScienceModule], or combined with an orbital integration to obtain orbit-averaged energyspectra [TPM-1 Applications Module].At low altitudes, TPM-1 tends to predict harder energy spectra than does the previousAP-8 model [see NASAPRO Science Module section of this manual]. The TPM-1flux at energies above about 10 MeV is higher than the AP-8 predictions, while thereverse is true below 10 MeV. At higher altitudes, the shapes of the TPM-1 and AP-8spectra are similar. Orbital integrations show that the proton flux varies over the solarcycle by a factor of two at higher energies, with the variation decreasing as the energydecreases.”The TPM-1 Science Module is used to map the proton flux data sets used by TPM-1, stored inmodified magnetic coordinates [see TPM-1 report], onto a three-dimensional spatial gridspecified by the user. The mapping is accomplished using either the original TPM-1 algorithms(which uses the IGRFXX model, where XX is the year, mod 5, closest to but earlier then the data132AF-GEOSpace User’s <strong>Manual</strong>: Version 2.5
eing requested) or the AFRL algorithms which give a choice of simpler magnetic field models,e.g. a tilted/offset dipole.After selecting a proton energy and magnetic field model, the module calculates the modifiedmagnetic coordinates for each user-specified spatial grid point. Resulting flux values are thenobtained from interpolating between the TPM-specified modified magnetic grid point values inthe TPM data files. In this manner, a fully three-dimensional map of the proton flux data may beobtained.Note: Although AF-GEOSpace allows the data to be mapped in three dimensions usinga variety of magnetic field models, the TPM-1 option is most consistent with thereduction of the original data.TPM-1 InputsThe TPM-1 Science Module requires the user to specify the following information to determinewhich data set to use and which magnetic field model to use in mapping the data,Energy Channel (MeV):The energy channel parameter selects which of the proton flux data setscorresponding to the twenty-two energy channels between 1 and 100 MeVused in CRRESPRO is to be used [see CRRESPRO Science Modulesection for detailed energy channel descriptions].Mode:B-Model:Determines whether the original TPM-1 mapping or AFRL mapping isused to go between spatial and magnetic coordinates.TPM-1: Uses TPM-1 mappingAFRL: Uses AFRL mapping. If selected, then the user must pick themagnetic field model to be used. Originally and as presented in AF-GEOSpace Version 2.1, magnetic field models IGRF85 and IGRF85/O-Pwere offered. However, after including time-dependent IGRF internal fieldcapabilities covering 1945-2010, the current B-Model options include.Dipole: A dipole fieldDipole-Tilt: A tilted dipole fieldDip-Tilt-Off: A tilted-offset dipole fieldIGRF: The International Geomagnetic Reference Field with no externalcontributions (Extrapolation beyond 2010).IGRF/O-P: The IGRF internal field with the Olson and Pfitzer (1977)static model to represent the external field.Activity: The activity parameter specifies whether the Quiet (obtained before the 24March 1991 storm) or Active (obtained after the 24 March 1991 storm)proton flux data sets are to be used.Plot F10.7:F10.7:Produces a plot of the F10.7 data associated with the File option of theF10.7 source selection (see next item).Specifies the F10.7 data source used for calculation of the TPM-1 solarcycle variation.AF-GEOSpace User’s <strong>Manual</strong>: Version 2.5 133
File:Global:Use the file supplied with the original distributionwhich contains projections of F10.7 out to 2020.Use the global parameter set within AF-GEOSpace.Note that if Globals is selected then the time ofexecution must by less than or equal to the time of thelatest update of the Global parameter set.TPM-1 OutputsThe TPM-1 Science Module returns a 3D Gridded Data Set of the omni-directional proton fluxfor the selected energy channel and activity level in units of #/(cm 2 s MeV).134AF-GEOSpace User’s <strong>Manual</strong>: Version 2.5
The WBMOD Science Module (V2.5 Only)Model Name:Wide-Band Model (WBMOD)Version: 15.03 (08 July 2005)Developer:References:Northwest Research Associates, Defense Nuclear Agency, and <strong>Air</strong> <strong>Force</strong>Research LaboratoryCervera, M.A., R.M.Thomas, K.M. Groves, A.G. Ramli, and Effendy,Validation of WBMOD in the Southeast Asian region, Radio Science, 36,1559-1572 (2001)Secan, J.A., and R.M. Bussey, An Improved Model of High-Latitude F-Region Scintillation (WBMOD Version 13), PL-TR-94-2254 (1994), ADA288558Secan, J.A., R.M. Bussey, E.J. Fremouw, and Sa. Basu, An ImprovedModel of Equatorial Scintillation, Radio Sci., 30, 607-617 (1995)Note: It is recommended that AF-GEOSpace users read and understand the originalmodel documentation and descriptive articles before using the models.WBMOD OverviewWBMOD is a climatological model for ionospheric scintillation. Because WBMOD is aclimatological model, it is best suited for long-range planning and engineering studies. It is notas well suited for daily planning or operations. WBMOD specifies S4, 95th percentile fades, andother scintillation parameters for trans-ionospheric radio-wave propagation paths given: alocation on the globe, a satellite above 100 km altitude, an RF frequency above 100 MHz, andseveral geophysical activity indices. Please note that the previous release, AF-GEOSpace V2.1,contained WBMOD Version 14.02 (31 December 2000).WBMOD InputsThe WBMOD science module requires the following inputs,Global Parameters: Day, UT, Kp, and SSN (note: Year, F10.7 and Ap are not used).Propagation: Specifies whether 1-Way or 2-Way propagation effects should becalculated. For the 2-Way option, the user must also input the following,Up/Dn Link Corr: The correlation between up-link and down-link signals.For up/down links between the same transmitter andreceiver, this parameter should be set to 1; for bi-staticlinks with spatially separated receivers set it to 0.In-situ Vd:F region plasma drifts; calculated by WBMOD using models when theModel option is selected or specified explicitly by the user when the Inputoption is selected. When the Input option is selected the user must specifythe following,Vd, North (m/s): Northward F region plasma drift in meters/second.AF-GEOSpace User’s <strong>Manual</strong>: Version 2.5 135
Step:Vd, East (m/s): Eastward F region plasma drift in meters/second.Vd, Down (m/s): Downward F region plasma drift in meters/second.Option to step (move) the receiver (Rcvr) or the transmitter (Tran).Normally the transmitter is a satellite and the receiver is ground-based.Moving the receiver or satellite maps out regions of scintillation. Werecommend that the user use the step receiver mode Rcvr. This mode willproduce a map that is easiest to interpret.Note: In the step transmitter mode, Tran, data are for scintillation on the ray-path fromthe satellite to the receiver and plotted at the sub-satellite point. This displaylocation is not the ionospheric location where the scintillation occurred. Similarly,for the step receiver mode, Rcvr, the data will be plotted at the receiver location,not the ionospheric location where scintillation occurred.EP Boundary:Output:The location of the equatorward boundary of auroral precipitation may becalculated by WBMOD in the following ways,Eff. Kp: An effective Kp calculated explicitly from a DMSPobservation of the equatorward boundary in magneticlatitude and local time is used. If selected, the followingmust be specified,Explicit:Use Kp:Effective Kp: The effective Kp derived from theequatorward boundary location observed by a DMSPSSJ/4 sensor (different from the Global Parameter Kp).EP boundary locations are specified directly by theuser. If selected, the following must be specified,EP Bndry MLAT: The magnetic latitude of anequatorward boundary crossing observed by the SSJ/4sensor on DMSP.EP Bndry LT: The local time of an equatorwardboundary crossing observed by the SSJ/4 sensor onDMSP. This must be consistent with the EP BndryMLAT entered above.Kp from the Global Parameters is used.WBMOD output can be determined by two different calculation methods,Percentile: WBMOD computes the S4 scintillation index and otherparameters for user defined climatological percentile,i.e., level of disturbance. If selected, the following mustbe specified,Percentile(0.0-1.0): This percentile selects the level ofdisturbance, i.e., the S4 that corresponds to thispercentile. Typical procedures use 90th percentile (the10th worst disturbance level).136AF-GEOSpace User’s <strong>Manual</strong>: Version 2.5
Trans. Freq (MHz):Trans.Alt (km):Fixed End Lat:Fixed End Lon:Phase Stability (s):Kp@Local Sunset:Threshold:WBMOD computes the percentage of time that eitherthe S4 or phase index exceeds a certain threshold value.If selected, the following must be specified,Thresh. Param: Either the S4 or Phase index can beselected for threshold parameterization (toggle).Threshold: The threshold level is dimensionless for S4,ranging from 0.0 to 1.2, and is in radians for Phase.Specifies transmitter frequency for scintillation calculation in MHz.Specifies altitude of transmitter (satellite) in km.Geographic latitude in degrees of transmitter or receiver, depending onwhich is fixed as specified by Step option.Geographic longitude in degrees of transmitter or receiver, depending onwhich is fixed as specified by Step option.Length of time in seconds over which phase stability is required foroperational system. For communication applications this parameterapproaches zero and is not critical. For applications involving coherentdata integration (e.g., radar) this parameter should be set equal to theintegration period.The value of Kp at the time of last sunset at the ground-based transmitteror receiver location. If a value of -1 is used, the program defaults to thevalue of Kp used in the EP Boundary computation.WBMOD OutputsThe WBMOD science module returns 2D Gridded Data Sets. We recommend displaying outputin 2D plots using the COORD-SLICE graphical object. AF-GEOSpace will then display a spatialdistribution (map) for the following parameters:95%tile FADE:The 95th percentile fade depth of the signal intensity (decibels). Don’tconfuse this percentile with the climatological percentile input toWBMOD. For example, if the user selected a 90th percentile climatology,then this output represents the 5th most severe fade on the 10th mostdisturbed day. Fades are plotted as positive values.S4: The S4 scintillation index, a normalized standard deviation of the signalintensity (dimensionless).STDDEV PHASE:STDDEV LOG(I):%Time:The standard deviation of the phase (radians), also known as sigma-phi.The standard deviation of the log of the intensity (decibels).The percentage of time that S4 or Phase exceeds a specified thresholdlevel for given conditions (%). This parameter is meaningful only whenthe model has been run in Threshold mode.AF-GEOSpace User’s <strong>Manual</strong>: Version 2.5 137
APPLICATION MODULESApplication modules provide orbit creation/prediction, dataset integration along orbits, magneticfield model generation, and access to specialized ionospheric ray-tracing, graphics, andscintillation products. The application modules are accessed through the application manager thatbecomes visible when the Application option in the Module pulldown menu is activated. Theapplication manager consists of two lists - Available Modules and Active Modules. AvailableModules are the modules that are currently supported by AF-GEOSpace. Active Modules aremodules that have been created and used by the AF-GEOSpace user during the current session.When initially accessed, the application manager will show a list of applications under AvailableModules. Since no applications have yet been created, the Active Modules list will be empty.Currently, the following applications are supported by AF-GEOSpace:• APEXRAD-APP: Advanced Photovoltaic and Electronics Experiments (APEX) radiationdose model calculates expected accumulated yearly dose (in units of rads silicon/year) forfour thicknesses of aluminum shielding during four levels of magnetic activity. Best fororbits with apogees less than 2500 km (see the CRRESRAD-APP for higher altitudes).• BFIELD-APP: The B-Field application allows the generation of datasets representing themagnetic field in the near-Earth space environment. A variety of internal (dipole, IGRF) andexternal [Olson and Pfitzer 1977; Hilmer and Voigt 1995; Tsyganenko 1987; Tsyganenko1989; Tsyganenko 2002; Tsyganenko and Sitnov 2005] field models are used to generategridded data set, field lines, and flux tubes.• BFOOTPRINT-APP: Traces geomagnetic field-lines from single user-specified points(defined in either geographic or magnetic coordinates) or multiple points along a satelliteorbital track. The resulting field-lines, orbital track, and list of footprint locations on theEarth’s surface can be viewed.• CRRESELE-APP: Combined Radiation and Release Effects Satellite (CRRES) electronflux model specifies the location and intensity of electron omnidirectional fluence (integraland differential) over the energy range 0.5-6.6 MeV for a range of geomagnetic activitylevels. A user-specified orbit is traced through the electron flux models to provide anestimate of electron fluence received by the satellite under a wide range of magnetosphericconditions.• CRRESPRO-APP: Combined Radiation and Release Effects Satellite (CRRES) proton fluxmodel calculates proton omnidirectional fluence (integral and differential) over the range 1 to100 MeV for user specified orbits and quiet, active, or average geophysical activity levels.• CRRESRAD-APP: Combined Radiation and Release Effects Satellite (CRRES) spaceradiation dose model calculates expected satellite dose accumulation behind four differentthicknesses of aluminum shielding for user-specified orbits for active or quiet geophysicalactivity levels.• IONSCINT-G-APP: This application combines the GPS scintillation scenario tools of theIONSCINT-G Science Module with the orbital ephemerides of individual spacecraft toprovide a time-series of S4 scintillation index values for each platform-spacecraft link.138AF-GEOSpace User’s <strong>Manual</strong>: Version 2.5
• LET-APP: Calculates the linear energy transfer (LET) spectrum and its associated singleevent upset (SEU) rate in a microelectronic device resulting from the penetration of energeticspace particles. Effects from both cosmic rays and the trapped protons are estimated by usingthe CHIME and CRRESPRO models as inputs.• METEOR IMPACT-APP: Calculates meteor flux or damage rates for given cross section,pit depth, and material type as a function of time along a user-specified orbit. Cumulativeprobabilities for flux and damage rates are also determined. The module accounts for meteorflux variations at the satellite owing to both position changes and meteor shower and stormtemporal variations.• NASAELE-APP: Calculates electron omni-directional fluence (differential and integral) forten energy intervals in the range 0.65-5.75 MeV. A user-specified orbit is traced throughNASA AE-8 trapped electron model to provide an estimate of electron fluence received bythe satellite under a wide range of magnetospheric conditions.• NASAPRO-APP: Calculates proton omni-directional fluence (differential and integral) overthe energy range 1.5-81.3 MeV for user specified orbits and quiet or active geophysicalconditions using the NASA AP-8 trapped proton model.• RAYTRACE-APP: Calculates the behavior of MHz rays in an ionosphere specified by aParameterized Ionosphere Model (PIM) data set.• SATEL-APP: Calculates orbital trajectories for satellites from a variety of user specifiedorbital element input sets. Also calculates properties of associated satellite detector cones andground-to-satellite links• TPM-APP: Following the procedures established for CRRESPRO-APP, this applicationinstead uses the TPM-1 proton flux maps to calculate proton omni-directional fluence(integral and differential) over the range 1 to 100 MeV for user specified orbits duringperiods with quiet, active, or average geophysical activity levels.• WBPROD-APP: Gives a 24hr WBMOD climatology prediction of the dB fade levels due toionospheric scintillation effects for specific ground-to-satellite communication links.AF-GEOSpace User’s <strong>Manual</strong>: Version 2.5 139
Running Application ModulesTo run an application module, use the mouse to select the Applications option in the Modulepulldown menu and Available Modules and Active Modules lists will appear in the EnvironmentWindow. Click on the desired choice under Available Modules. For example, to create a newversion of CRRESELE-APP, click the mouse on CRRESELE-APP in the Available Modules list.Choosing an applications module will do two things: first, the choice is added to the ActiveModules list; second, the options associated with the chosen application module will appear inthe Environment Window. In general, each application module will have a different EnvironmentWindow representing the module specific inputs. Adjust the module inputs as required. Beforeactually running the module, the following two adjustments might be considered which caneffect run time and the size of the output files.First, the Grid Tool option in the Edit pulldown menu can be used to modify the grid to be filledwith data using the selected application module.Second, the Dynamic Tool option in the Edit pulldown menu can be used to adjust both the timestep to be used and the specific output parameters to be calculated if a Start and End time havebeen set at the top of the window, i.e., the run is dynamic. For static runs only a Start time isspecified and all output parameters are calculated by default.Finally, the Run/Update option in the Edit pulldown menu is used to run or re-run the moduleafter any settings have been changed. When the module run is complete a message stating thatthe MODEL IS READY AND UP TO DATE will appear in the Model Status box at the bottomof the Environment Window. At this point, the data produced are ready for display usinggraphical modules.Also, the Delete option in the Edit pulldown menu is used to remove the highlighted applicationmodule member of the Active Modules list. Note that all active graphics objects must be removedbefore the application module used to generate their data can be removed.140AF-GEOSpace User’s <strong>Manual</strong>: Version 2.5
The APEXRAD-APP ModuleModel Name:APEXRADVersion: 15 September 1997; IGRF updates 2009Developer:References:<strong>Air</strong> <strong>Force</strong> Research LaboratoryBell, J.T., and M.S. Gussenhoven, APEXRAD Documentation, PL-TR-97-2117 (1997), ADA 331633Gussenhoven, M.S., E.G. Mullen, D.A. Hardy, D. Madden, E. Holeman,D. Delorey, and F. Hanser, Low Altitude Edge of the Inner Radiation Belt:Dose Models from the APEX Satellite, IEEE Trans. Nucl. Sci., 42, 2035(1995)Gussenhoven, M.S., E.G. Mullen, J.T. Bell, D. Madden, and E. Holeman,APEXRAD: Low Altitude Orbit Dose as a Function of Inclination,Magnetic Activity and Solar Cycle, IEEE Trans. Nucl. Sci., 44, 2161,(1997)Mullen, E.G., M.S. Gussenhoven, J.T. Bell, D. Madden, E. Holeman, andD. Delorey, Low Altitude Dose Measurements from APEX, CRRES, andDMSP, Advances in Space Res., 21, 1651, (1997)Note: It is recommended that AF-GEOSpace users read the original modeldocumentation and descriptive articles before using the models.APEXRAD-APP OverviewThe APEXRAD application and science modules are based on the PC program APEXRADdeveloped and released by the <strong>Air</strong> <strong>Force</strong> Research Laboratory. More information can be found inthe APEXRAD Science Module section of this document.The APEXRAD-APP module calculates satellite radiation dose accumulations behind fourdifferent thicknesses of aluminum (either slab or hemisphere) for user-specified orbits. Doseaccumulation is predicted using empirical dose rate models created from data measured on theAdvanced Photovoltaic and Electronics Experiment (APEX) which flew in a 362 x 2544 kmelliptical orbit inclined at 70 degrees. These dose models have a higher position resolution at lowaltitudes than the previously released CRRESRAD models. The APEXRAD models give doserates averaged over the entire APEX mission and for four different levels of magneticdisturbance, based on a 15 day (offset by 1 day) running average of the linear geomagneticactivity index Ap. APEXRAD is best applied to orbits with apogees less than 2500 km, perigeesgreater than 350 km, inclinations less than 60 degrees and for times during solar cycle minimum.It can be useful for orbits with higher inclinations or lower perigees, but the user must accountfor any dose that may be received outside the region covered by the model. For higher altitudeorbits the use of CRRESRAD is recommended.Note: The APEXRAD science module need NOT be run before APEXRAD-APP.AF-GEOSpace User’s <strong>Manual</strong>: Version 2.5 141
APEXRAD-APP InputsThe inputs to the APEXRAD-APP module are the orbit elements needed to calculate the satelliteorbit. The Environment Window for the APEXRAD-APP module is the same as that for theSATEL-APP module except that the SMean option is inactive and APEXRAD-APP is set to usethe orbit propagator Lokangle. See the SATEL-APP Module documentation section for details.The IGRF/O-P magnetic field model is used with extrapolation beyond 2010.APEXRAD-APP OutputsThe APEXRAD-APP module generates a return text window. Included in the text are the orbitelements and tables of the accumulated yearly dose (in units of rads silicon/yr) for all fourthicknesses of aluminum shielding during four levels of magnetic activity. Also generated is a1D Gridded Data Set giving the position of the satellite as a function of time that can bedisplayed using the Satellite graphics module. The Show Text button can be used to display thetext window if it has been closed.142AF-GEOSpace User’s <strong>Manual</strong>: Version 2.5
The BFIELD-APP ModuleModel Name:BFGEOSVersion: 4 June 2008Developer:References:<strong>Air</strong> <strong>Force</strong> Research LaboratoryHilmer, R.V., and G.-H. Voigt, A Magnetospheric Magnetic Field Modelwith Flexible Current Systems Driven by Independent PhysicalParameters, J. Geophys. Res., 100, 5613 (1995)Huang, C.-L ., H.E. Spence, H.J. Singer, and N.A. Tsyganenko, Aquantitative assessment of empirical magnetic field models atgeosynchronous orbit during magnetic storms, J. Geophys. Res., 113,A04208, doi:10.1029/2007JA012623 (2008)Olson, W.P., and K.A. Pfitzer, A Quantitative Model of theMagnetospheric Magnetic Field, J. Geophys. Res., 79, 3739 (1974)Olson, W.P., and K.A. Pfitzer, Magnetospheric Magnetic Field Modeling,Annual Scientific Report, <strong>Air</strong> <strong>Force</strong> Office of Scientific Research contractF44620-75-C-0033, McDonnell Douglas Astronautics Co., HuntingtonBeach, CA (1977)Pfitzer, K.A., Improved Models of the Inner and Outer Radiation Belts,Scientific Report No. 1, PL-TR-91-2187, Phillips Laboratory, HanscomAFB, MA (1991), ADA 242579Qin, Z., R.E. Denton, N.A. Tsyganenko, and S. Wolf, Solar windparameters for magnetospheric magnetic field modeling, Space Weather,5, S11003, doi:10:1029/2006SW000296 (2007)Tsyganenko, N.A., Global Quantitative Models of the Geomagnetic Fieldin the Cislunar Magnetosphere for Different Disturbance Levels, Planet.Space Sci., 35, 1347-1358 (1987)Tsyganenko, N.A., A Magnetospheric Magnetic Field Model with aWarped Tail Current Sheet, Planet. Space Sci., 37, 5-20 (1989)Tsyganenko, N.A., A model of the near magnetosphere with a dawn-duskasymmetry, 1. Mathematical structure, J. Geophys. Res., 107 (A8), 1179,10.029/2001JA000219 (2002a)Tsyganenko, N.A., A model of the near magnetosphere with a dawn-duskasymmetry, 2. Parameterization and fitting to observations, J. Geophys.Res., 107 (A8), 1176, 10.029/2001JA000220 (2002b)Tsyganenko, N.A., and M.I. Sitnov, Modeling the dynamics of the innermagnetosphere during strong geomagnetic storms, J. Geophys. Res., 110,A03208, doi: 10.029/2004JA010798 (2005)AF-GEOSpace User’s <strong>Manual</strong>: Version 2.5 143
Note: It is recommended that AF-GEOSpace users read the original modeldocumentation and descriptive articles before using the models.BFIELD-APP OverviewThe B-Field application generates maps of the magnetic field in the near-Earth spaceenvironment. It can be used to generate gridded data sets of magnetic field magnitudes, to tracefield lines and to construct flux tubes. The application code was written by Robert V. Hilmer ofAFRL. To trace magnetic field-lines originating from points along a satellite orbit track, the usershould use BFOOTPRINT-APP.B-FIELD InputsInputs to the BFIELD-APP are needed to specify which type of data set to generate and whichfield models to implement.The Generate section specifies the data sets to be generated when the B-FIELD application isrun. The user may choose any combination of data set choices.Gridded Data:MLAT Field Lines:MLT Field Lines:Flux Tube:Choosing this option generates magnetic field GSM components andmagnitude at each point on the grid specified under the Grid Tool.Choosing this option generates field lines emanating from constant(dipole) magnetic latitude. The user specifies the magnetic latitude,minimum magnetic local time, maximum magnetic local time (all at oneEarth radius), and the number of local time steps in the MLAT Field LineInputs section.Choosing this option generates field lines starting at a constant magneticlocal time. The user specifies the magnetic local time, minimum magneticlatitude, maximum magnetic latitude (all at one Earth radius) and thenumber of latitude steps in the MLT Field Line Inputs section.Choosing this option generates field lines representing a flux tube. Theuser specifies either the geographic (latitude, longitude, altitude) ormagnetic (MLAT, MLT, Radius) coordinates of the center of the footprintof the flux tube, a diameter and the number of field lines to generate in theFlux Tube Inputs section. If a single field line is requested or the diameteris zero then a single field line is constructed anchored at the footprintcenter. Magnetic dipole coordinates are also available.The Internal B-Field section allows the user to specify which model to use for the Earth’sinternal magnetic field. The options are:Dipole:An Earth centered dipole field with the tilt determined by UT, Julian day,and year. The equatorial surface field is approximately 30750 nT.IGRF(1945-2010):The International Geomagnetic Reference Field. The coefficient set ischosen according to the time between the first day of 1945 and the last dayof 2010. Code source: National Space Sciences Data Center (NSSDC).144AF-GEOSpace User’s <strong>Manual</strong>: Version 2.5
Fast IGRF:A computationally faster truncated version of the IGRF field developed byPfitzer (1991). The typical speed advantage is 7 to 8 times while theoutput differs from that of the full IGRF routine by no more than 0.1 nT.The External B-Field section allows the user to specify which model to use for externalcontributions to the magnetic field. The options are:None:No external field model is used.Hilmer-Voigt: The external field model developed by Hilmer and Voigt [1995] is applied.Choosing this option requires additional inputs to be specified in theHilmer-Voigt Options window that appears upon selection.Olson-Pfitzer:Tsyganenko ‘89:Tsyganenko ‘87:Tsyganenko ’02The external field model developed by Olson and Pfitzer [1977] isapplied.The external field model developed by Tsyganenko [1989] is applied.There are two model versions: (1) The Kp driven model uses the Kp indexfrom the Global Parameters section of the Environments window and (2)the AE driven model requires an AE range to be selected from theTsyganenko ‘89 Options Window. Code source: NSSDC.The external field model developed by Tsyganenko [1987] is applied usingthe “long” warped tail with no aberration. The Kp index is input from theGlobal Parameters section of the Environment Window.Code source: NSSDC.The external field model developed by Tsyganenko [2002a, 2002b] isapplied (via subroutine T01_01 released date 8 August 2001; last updated24 June 2006; code source: http://modelweb.gsfc.nasa.gov). The six basicmodel inputs include Dst, IMF-B y , IMF-B z , solar wind pressure SW-Press(nPa), and the coefficients denoted G1 and G2. There are three methodsfor generating these six basic input parameters:Current Dst 1-Hr IMF/SW Trends: In this option, the coefficients G1 andG2 are derived from a 1-hour time history of the IMFand the solar wind speed SW-Vel (km/s) [Tsyganenko,2002a].Read current values from VIRBO file: The six input parameters will beread from file solarwind.dat located in the directory$AFGS_HOME/models/data/BMODELS. This filecurrently contains values for 1963 – day 107 of 2009with average values listed to complete the remainder of2009. Parameter updates for amending this file areavailable from the Virtual Radiation Belt Observatory(http://virbo.org). The parameters included here werecopied from a file called “WGhour-v2.d” found inftp://virbo.org/QinDenton/hour/merged/WGhour-v2.d.zip. Afterrunning the module, a status variable (equal to 0, 1, or2) will appear in parentheses next to the each VIRBOAF-GEOSpace User’s <strong>Manual</strong>: Version 2.5 145
Tsyg-Sitnov ’05parameter read from file solarwind.dat. The file headerprovided by the original authors explains that the usershould “note carefully: If the status variable is 2, thequantity you are using is fairly well determined. If it is1, the value has some connection to measured values,but is not directly measured. These values are stillbetter than just using an average value, but not as goodas those with the status variable equal to 2. If the statusvariable is 0, the quantity is based on averagequantities, and the values listed are no better than anaverage value. The lower the status variable, the lessconfident you should be in the value.”Current Dst, IMF, SW-Press, G1, G2: In this option, the user can manuallyenter the six basic model input parameters.The external field model developed by Tsyganenko and Sitnov [2005] isapplied (via subroutine T04_s released date 25 March 2004; last updated24 June 2006; code source: http://modelweb.gsfc.nasa.gov). The ten basicmodel inputs include Dst, IMF-B y , IMF-B z , solar wind pressure SW-Press(nPa), and the coefficients denoted W1 - W6. There are three methods forgenerating these ten basic input parameters:Current Dst Multi-Hr IMF/SW Trends: In this option, the coefficients W1-W6 are derived from a multi-hour time history of theIMF and the solar wind speed SW-Vel (km/s) anddensity SW Den (#/cm 3 ) [Tsyganenko and Sitnov,2005].Read current values from VIRBO file: The ten input parameters will beread from file solarwind.dat located in the directory$AFGS_HOME/models/data/BMODELS. For data filedetails, see the “Read current values from VIRBO file”portion of the Tsyganenko ’02 section above.Current Dst, IMF, SW-Press, W1-W6: In this option, the user canmanually enter the ten basic model input parameters.The MLAT Field Line Inputs section allows the user to specify the parameters needed if theMLAT Field Lines option has been chosen. The inputs required to specify the field lines are:MLAT:MLT0, MLT1:Steps:The constant magnetic latitude (dipole) specified in degrees from which totrace field lines.The minimum and maximum magnetic local times specified in hours.Field lines will be traced at magnetic local times between MLT0 andMLT1.The number of field lines to trace (= Steps+1). This specifies the numberof field lines to trace from MLT0 to MLT1. Hence, field lines will betraced at MLT = MLT0 + i * (MLT1 - MLT0) / Steps where i = 0 to Steps146AF-GEOSpace User’s <strong>Manual</strong>: Version 2.5
The MLT Field Line Inputs section allows the user to specify the parameters needed if the MLTField Lines option has been chosen. The inputs required to specify the field lines are:MLTMLAT0, MLAT1StepsThe constant magnetic local time specified in hours from which to tracefield lines.The minimum and maximum magnetic latitude (dipole) specified indegrees. Field lines will be traced at magnetic latitudes from MLT0 toMLT1.The number of field lines to trace (= Steps+1). This specifies the numberof field lines to trace from MLAT0 to MLAT1. Hence, field lines will betraced at MLAT = MLAT0 + i * (MLAT1 - MLAT0) / Steps where i = 0 toStepsThe Flux Tube Inputs section allows the user to specify the parameters needed if the Flux Tubehas been chosen. Either Geographic or Magnetic coordinates can be selected by clicking theappropriate button. The inputs required to specify the flux tube are:Lat, Long, Alt:MLAT, MLT, Rad:Diam:Steps:Hilmer-Voigt InputsThe geographic latitude, longitude and altitude of the center of the fluxtube. Latitude and Longitude are input in degrees. Altitude is specified inkilometers above the Earth’s surface.The magnetic latitude, local time and geocentric radius of the center of theflux tube. MLAT is specified in degrees, MLT is specified in hours, andRad is specified in Earth radii.The diameter of the flux tube specified in kilometers for geocentriccoordinates and degrees for geomagnetic coordinates. The edges of theflux tube are specified at the same altitude(radius) as the center. If Diam =0 then a single field line is drawn from the center location.The number of field lines to generate to represent the flux tube. The fieldlines will be traced from the boundary of a circle with diameter Diamcentered at Lat, Long, Alt. If Steps = 1 then a single field line is drawnfrom Lat, Long, Alt or MLAT, MLT, Rad location.If the Hilmer-Voigt External Field is chosen, a popup window appears requesting further inputs.Several different input modes are available for the Hilmer-Voigt model,Kp Only:For this case, only the Environment window global Kp is used to drive themodel. Note that the Hilmer-Voigt model in Kp Only mode only acceptsKp as an integer between 0 and 9. AF-GEOSpace will automaticallyconvert the global Kp to an integer in this range. The value used will bedisplayed in the label next to Kp Only.Standoff, Dst, EquatorwardEdge: The user must choose from discrete values of the standoffdistance, the Dst value, and the equatorward edge of the diffuse aurora atmidnight. Choosing this input will sensitize the inputs at the right side ofthe Hilmer-Voigt ‘95 options window.AF-GEOSpace User’s <strong>Manual</strong>: Version 2.5 147
Vacuum Config:For the vacuum configuration, the standoff input box will be sensitized.There are no restrictions for standoff distance (other than Standoff > 0).Combinations of input boxes at the right side of the Hilmer-Voigt ‘95 options window will beavailable according to the input mode setting. These boxes allow inputs of Dst, Equator Edge ofthe diffuse aurora at midnight and standoff distance to be selected. Because configurationsrepresenting all permutations of the Hilmer-Voigt input options do not exist (many areunphysical), the model status window will show the actual inputs used. If the parameters listed inthe status window differ from those selected, then a configuration substitution occurredinternally.Dst:The value of Dst to use for the model. Used only in Standoff, Dst,Equatorward Edge input mode. Only discrete values of Dst are allowed.Eq Edge:The latitude of the equatorward edge of the diffuse aurora at midnight.Used only in Standoff, Dst, Equatorward Edge input mode. Only discretevalues of equatorward edge are allowed.Standoff:The magnetopause standoff distance is specified in Re. This input is usedby the Vacuum Config and Standoff, Dst, Equatorward Edge input modes.If in Vacuum Config. mode, then arbitrary values for the standoff distancecan be introduced by editing the text box. If the input mode is Standoff,Dst, Equatorward Edge, then only discrete input values are allowed.BFIELD-APP OutputsDepending on the Generate options selected, the BFIELD application will produce (1) a 3DGridded Data Set of the GSM coordinates and magnitude values of the B-Field, (2) a Field LineData Set containing field line traces from a constant MLAT, (3) a Field Line Data Set containingfield line traces from a constant MLT, and (4) a Field Line Data Set containing field line tracesrepresenting a flux tube. Outputs (2), (3), and (4) are displayed using the Field Lines graphicmodule. The dipole tilt angle is also calculated and appears in the model status window.148AF-GEOSpace User’s <strong>Manual</strong>: Version 2.5
The BFOOTPRINT-APP Module (Static Only)Model Name:Version: June 2008Developer:References:BFGEOS and LOKANGL<strong>Air</strong> <strong>Force</strong> Research Laboratory(See the BFIELD-APP and SATEL-APP sections of this document)Note: It is recommended that AF-GEOSpace users read the original modeldocumentation and descriptive articles before using the models.BFOOTPRINT-APP OverviewThe BFOOTPRINT application traces geomagnetic field-lines from single user-specified pointsor from multiple points from along a satellite orbital track and determines their footprintlocations on the Earth’s surface. Magnetic field model options are identical to those offered inthe BFIELD-APP module. Satellite orbits are determined using the LOKANGL orbit generatoroptions in the SATEL-APP module.BFOOTPRINT InputsThe inputs to the BFOOTRINT-APP module include (1) the parameters needed to specify thegeomagnetic field configuration and (2) locations from which to trace magnetic field lines, i.e.,either single user-specified points or multiple points from an interval of a satellite orbit. Accessto the required Setup input sections is controlled by the Footprint Model and Satellite options atthe top of the Environment Window. The BFOOTPRINT-APP module can be run and/or updatedwhile either Setup section is showing.The Setup: Footprint Model button changes the lower portion of the Environment Window toshow Foot Line Input and B-Field Parameter options.Foot Line Input:Geographic: Choosing this option generates a field line through a single GeographicPoint Coordinate. The user specifies the point’s Altitude (Alt) in km,Latitude (Lat) in degrees North, and Longitude (Lon) in degrees East.Magnetic: Choosing this option generates a field line through a single MagneticPoint Coordinate. The user specifies the point’s geocentric Radius inEarth Radii (RE), Magnetic Latitude (MLAT) in degrees North, andMagnetic Local Time (MLT) in hours.From Satellite: Choosing this option generates field lines through multiple points along asatellite orbit interval defined by the following Satellite Orbit Fractionsand Steps options.Start Frac: The first trace will originate from the satellite's locationat time = [T_start + (Start Frac)(T_stop - T_start)],e.g., Start Frac = 0.0 produces a trace at time T_start.Permitted value is from 0.0 and 1.0.AF-GEOSpace User’s <strong>Manual</strong>: Version 2.5 149
Stop Frac:Steps:The last trace will originate from the satellite's locationat time = [T_start + (Stop Frac)(T_stop - T_start)], e.g.,Stop Frac = 1.0 produces a trace at time T_stop.Permitted value is from 0.0 and 1.0.The number of field lines to trace (100 maximum).Traces will be generated from orbit locationscorresponding to times Start Frac, Stop Frac, and atequal time intervals between the two, i.e., = (T_stop -T_start)(Stop Frac - Start Frac)/(Steps - 1). If StopFrac < Start Frac, then only a single field line tracefrom the location corresponding to Stop Frac will bedetermined.Note: If this From Satellite option is selected, the user must use the Setup:Satellite option at the top of the Environment Window to define the orbit.To produce traces from particular points along an orbit, it is easiest to limitthe interval using the orbit T_start and T_stop options accessible viaSetup: Satellite.B-Field Parameters: The geomagnetic field configuration is a combination of modelsrepresenting the Internal B-field (i.e., Centered Dipole, IGRF(1945-2010),or Fast IGRF) and External B-field (i.e., None, Hilmer-Voigt ’95, Olson-Pfitzer ’77, Tsyganenko ’89, ’87, ’02, and Tsyg-Sitnov ‘05). Please refer tothe BFIELD-APP Module section of this document for model details.The Setup: Satellite button changes the lower portion of the Environment Window to show thestandard set of Ephemeris Data inputs and is fixed to use the LOKANGL propagator. See theSATEL-APP section of this document for details.Note: This is a Static module, i.e., the global time is used to establish a single magnetic fieldconfiguration. If field lines from along a satellite track are to be calculated, higher accuracy willbe achieved if orbit intervals are short and centered about the global time.BFOOTPRINT-APP OutputsThe BFOOTPRINT application will produce a Field Line Data Set containing a field line tracethrough a single user-specified point defined in geographic or magnetic coordinates or field linetraces from points (spaced equally in time) along a portion of a satellite orbit. The traces aredisplayed using the FIELD LINE graphics module. The Show Footprints button displays a list offield-line footprint locations on the Earth's surface given in Earth Radii (rad), degrees latitude(lat), and East Longitude (lon). Footprints determined by tracing in the direction parallel (antiparallel)to the magnetic field are labeled F1 (F2). Footprint positions of field lines traces that donot connect to the Earth, e.g., field lines map beyond the boundary of the magnetic field model,are assigned rad, lat, and lon values of zero.If the From Satellite option is used, then a 1D Gridded Data Set of the position of the selectedsatellite as a function of time is produced that can be viewed using the SATELLITE graphicsmodule. Single user-specified points are also viewed using the SATELLITE graphics module.150AF-GEOSpace User’s <strong>Manual</strong>: Version 2.5
The CRRESELE-APP ModuleModel Name:CRRESELEVersion: July 1995; IGRF updates 2009Developer:References:<strong>Air</strong> <strong>Force</strong> Research LaboratoryBrautigam, D.H., and J. Bell, CRRESELE Documentation, PL-TR-95-2128, Phillips Laboratory, Hanscom AFB, MA (1995), ADA 301770Brautigam, D.H., M.S. Gussenhoven, and E.G. Mullen, Quasi-staticModel of Outer Zone Electrons, IEEE Trans. Nucl. Sci., 39, 1797-1803(1992)Note: It is recommended that AF-GEOSpace users read the original modeldocumentation and descriptive articles before using the models.CRRESELE-APP OverviewThe CRRESELE science and application modules are based on the PC program CRRESELEdeveloped and released by the <strong>Air</strong> <strong>Force</strong> Research Laboratory. More information on CRRESELEcan be found in the CRRESELE Science Module section of this document.The CRRESELE-APP module determines yearly electron omni-directional fluence (differentialand integral) for ten energy intervals in the range 0.5-6.60 MeV. A user-specified orbit is tracedthrough all of the eight different CRRESELE outer zone electron flux models to provide anestimate of electron fluence received by the satellite under a wide range of magnetosphericconditions. The differential and integral omni-directional fluences are calculated from theelectron flux models as explained by this excerpt from the CRRESELE documentation:“To obtain the desired yearly differential omni-directional fluence and integral omnidirectionalfluence, the time spent in each spatial bin traversed by the user-specified orbitis first determined. It is important to realize that only those spatial bins within the boundsof the model (2.5
CRRESELE-APP InputsThe inputs to the CRRESELE-APP module are the orbit elements needed to calculate thesatellite orbit. The Environment Window for the CRRESELE-APP module is the same as that forthe SATEL-APP application except it is set to use the orbit propagator Lokangle. See theSATEL-APP Module section of the documentation for input descriptions. The IGRF/O-Pmagnetic field model is used with extrapolation beyond 2010.CRRESELE-APP OutputsThe CRRESELE application generates a return text window that can be displayed using theShow Text button if it was closed. Included in the text are the orbit elements and tables of boththe differential fluence (in #/cm 2 -keV-yr) and integral omni-directional fluence (in #/cm 2 -yr)calculated for all ten energy channels and all eight outer zone electron flux models. Alsogenerated is a 1D Gridded Data Set giving the position of the satellite as a function of time thatcan be displayed using the Satellite graphics module.Note that the “Model Number” values (0, 1, 2, 3, 4, 5, 6, and 7) reported in the text windowcorrespond to the eight Ap15 Model Range options (5.0-7.5, 7.5-10.0, 10.0-15.0, 15.0-20.0, 20.0-25.0, 25.0-55.0, AVE, and MAX) described in the CRRES Science Module section, respectively.152AF-GEOSpace User’s <strong>Manual</strong>: Version 2.5
The CRRESPRO-APP ModuleModel Name:CRRESPROVersion: 28 July 1994; IGRF updates 2009Developer:References:<strong>Air</strong> <strong>Force</strong> Research LaboratoryMeffert, J.D., and M.S. Gussenhoven, CRRESPRO Documentation, PL-TR-94-2218, Phillips Laboratory, Hanscom AFB, MA (1994), ADA284578Gussenhoven, M.S., E.G. Mullen, M.D. Violet, C. Hein, J. Bass, and D.Madden, CRRES High Energy Proton Flux Maps, IEEE Trans. Nucl. Sci.,40, 1450-1457 (1993)Note: It is recommended that AF-GEOSpace users read the original modeldocumentation and descriptive articles before using the models.CRRESPRO-APP OverviewThe CRRESPRO application and science modules are based on the PC program CRRESPROdeveloped and released by the <strong>Air</strong> <strong>Force</strong> Research Laboratory. More information onCRRESPRO can be found in the CRRESPRO Science Module section of this document. Notethat the TPM-1-APP application module produces results similar to those of CRRESPRO-APP.The CRRESPRO-APP module calculates proton omni-directional fluence (differential andintegral) over the energy range 1-100 MeV for user specified orbits and quiet or activegeophysical conditions. Fluences are calculated from the CRRES proton flux maps as explainedby this excerpt from the CRRESPRO Documentation:“To calculate differential omni-directional fluences per year for an orbit input by the user,the time in seconds spent in each (L,B/B0) bin is calculated [...] and the differential fluxfor each bin is multiplied by the time in seconds spent in that bin. The figures in theindividual bins are then summed [and] the resulting figure is then multiplied by secondsper year divided by the sum of time in seconds for all bins [including the time the orbitspends outside the model region].”Integral omni-directional fluence for a given energy channel is calculated from the differentialomni-directional fluence by summing over all energy channels with energy greater than thegiven channel (eliminating those with overlapping energy ranges, channels 5 and 15) andmultiplying by appropriate bandwidths, as discussed in the CRRESPRO documentation.Note: The CRRESPRO science module need NOT be run before CRRESPRO-APP.CRRESPRO-APP InputsThe inputs to the CRRESPRO-APP module are the orbit elements needed to calculate thesatellite orbit. The Environment Window for the CRRESPRO-APP module is the same as thatfor the SATEL-APP application except CRRESPRO-APP is set to use the orbit propagatorLokangle. See the SATEL-APP Module section of the documentation for input descriptions. TheIGRF/O-P magnetic field model is used with extrapolation beyond 2010.AF-GEOSpace User’s <strong>Manual</strong>: Version 2.5 153
CRRESPRO-APP OutputsThe CRRESPRO application module generates a return text window which can be displayedusing the Show Text button if it has been closed. Included in the text are the orbit elements andtables of both the differential fluence (in #/cm 2 -MeV-yr) and integral omni-directional fluence(in #/cm 2 -yr) calculated for all 22 retained energy channels and for both active and quietconditions. Also generated is a 1D Gridded Data Set giving the position of the satellite as afunction of time that can be displayed using the Satellite graphics module.154AF-GEOSpace User’s <strong>Manual</strong>: Version 2.5
The CRRESRAD-APP ModuleModel Name:CRRESRADVersion: 6 August 1992; IGRF updates 2009Developer:References:<strong>Air</strong> <strong>Force</strong> Research LaboratoryKearns, K.J., M.S. Gussenhoven, CRRESRAD Documentation, PL-TR-92-2201, Phillips Laboratory, Hanscom AFB, MA (1992), ADA 256673Gussenhoven, M.S., E.G. Mullen, M. Sperry, K.J. Kerns, and J.B. Blake,The Effect of the March 1991 Storm on Accumulated Dose for SelectedSatellite Orbits: CRRES Dose Models, IEEE Trans. Nuc. Sci., 39, 1765-1772 (1992)Gussenhoven, M.S., E.G. Mullen, D.H. Brautigam, E. Holeman, C.Jordan, F. Hanser, and B. Dichter, Preliminary Comparison of DoseMeasurements on CRRES to NASA Model Predictions, IEEE Trans. Nucl.Sci., 38, 1655-1662 (1991)Note: It is recommended that AF-GEOSpace users read the original modeldocumentation and descriptive articles before using the models.CRRESRAD-APP OverviewThe CRRESRAD application and science modules are based on the PC program CRRESRADdeveloped and released by the <strong>Air</strong> <strong>Force</strong> Research Laboratory. More information can be found inthe CRRESRAD Science Module section of this document.The CRRESRAD-APP module calculates expected satellite dose accumulation behind fourdifferent thicknesses of aluminum shielding for user specified orbits during quiet, active, oraverage geophysical activity levels. Dose accumulation is calculated from the CRRES dose ratemaps for each of the four shielding domes (82.5, 232.5, 457.5, and 886.5 mils) and for each ofthe two dose rate detectors (HILET and LOLET) by determining the time in seconds that aspecified orbit stays in a (L, B) coordinate bin and multiplying this time by the dose rate for thisbin. These figures are then summed over the bins and multiplied by the number of seconds in ayear divided by the sum of the time in seconds for all bins (including time the orbit spendsoutside the model region).Note: The CRRESRAD science module need NOT be run before CRRESRAD-APP.CRRESRAD-APP InputsThe inputs to the CRRESRAD-APP module are the orbit elements needed to calculate thesatellite orbit. The Environment Window for the CRRESRAD-APP module is the same as thatfor the SATEL-APP module except CRRESRAD-APP is set to use the orbit propagatorLokangle. See the SATEL-APP Module documentation section for details. The IGRF/O-Pmagnetic field model is used with extrapolation beyond 2010.AF-GEOSpace User’s <strong>Manual</strong>: Version 2.5 155
CRRESRAD-APP OutputsThe CRRESRAD-APP module generates a return text window that can be displayed using theShow Text button if it has been closed. Included in the text are the orbit elements and tables ofthe accumulated yearly dose (in units of rads silicon/yr) for all four shielding domes and bothdetectors. Also generated is a 1D Gridded Data Set giving the position of the satellite as afunction of time that can be displayed using the Satellite graphics module.156AF-GEOSpace User’s <strong>Manual</strong>: Version 2.5
The IONSCINT-G-APP ModuleModel Name:Version: July 2009Developer:References:GPS Version of the High Fidelity Ionospheric Scintillation SimulationAlgorithm (IONSCINT-G)AER, Inc., Boston College, and the <strong>Air</strong> <strong>Force</strong> Research LaboratoryUser’s <strong>Manual</strong> for the GPS Version of the High Fidelity IonosphericScintillation Simulation Program (IONSCINT-G), Version 1.0, Preparedfor AFRL/VSB by Radex, Inc., 20 June 2002 (Draft Release).User’s Guide for the High Fidelity Ionospheric Scintillation SimulationAlgorithm, Prepared for AFRL/VSB by Radex, Inc. (W. McNeil), March8 (2000)Secan, J.A., and R.M. Bussey, An Improved Model of High-Latitude F-Region Scintillation (WBMOD Version 13), PL-TR-94-2254 (1994), ADA288558Steenburgh, R.A., C.G. Smithtro, and K.M. Groves, Ionosphericscintillation effects on single frequency GPS, Space Weather, 6, S04D02,doi:10.1029/2007SW000340 (2008)Note: It is recommended that AF-GEOSpace users read and understand the original modeldocumentation and descriptive articles before using the models.IONSCINT-G-APP OverviewThe IONSCINT-G Application Module generates a simulated time-based series of S4scintillation values representing conditions between a user-specified platform position and eithera satellite. An option to use a fixed targeting angle (defined in azimuth and elevation angle) isalso provided. The IONSCINT-G-APP simulation options are identical to those offered in thescience module based on the same model (see complete details in the IONSCINT-G ScienceModule chapter). Satellite orbits are determined using the LOKANGL orbit generator optionsfrom within the SATEL-APP module.IONSCINT-G-APP InputsThe IONSCINT-G Application Module requires four types of inputs used to define (1) a staticrun time or dynamic run time interval, (2) scintillation database options to characterize the typeof scenario desired along with a large random number seed (typically a 5-digit number), (3) thestatic platform position, and (4) either orbital details for defining the platform-satellite link or anazimuth/elevation targeting angle for defining a fixed look direction from the specified platformposition. Access to the required Setup input sections is controlled by the Satellite and Ionscint-Goptions at the top of the Environment Window. The IONSCINT-G-APP module can be runand/or updated while either Setup section is showing. The following inputs are required.Global Parameters: Year, Day, UT (Kp, SSN, F10.7, and Ap are not used).The Setup: Satellite button changes the lower portion of the Environment Window to show thestandard set of Ephemeris Data inputs and is fixed to use the LOKANGL propagator. See theAF-GEOSpace User’s <strong>Manual</strong>: Version 2.5 157
SATEL-APP section of this document for details. In Static mode, the T_start and T_stop valueswill correspond to a 24-hour interval starting from the Global Start time. In Dynamic mode,those same values will reflect the user-specified Global Start and End times of the run. The S4scintillation index will be calculated for the satellite-platform link at intervals specified in theTime Step(s) text box.The Setup: Ionscint-G button changes the lower portion of the Environment Window to showIonscint-G Model Parameters options which match those of the IONSCINT-G Science Module,namelyScintillation Database Options: Scenarios are generated from the scintillation database using aninput solar activity level and four related selection modifiers, namelySunspot Activity Level: Scintillation scenarios corresponding to fourdifferent levels of solar activity as defined by sunspotnumber (SSN) are represented. It should be noted thatno significant scintillation at GPS frequencies occurs atsolar minimum and “worst case” scenarios areassociated with maximum SSN values.1 = Low (10-30): This SSN range represents solarminimum conditions.2 = Moderate (50-75): This SSN range representsconditions during the ramp up or down from solarmaximum.3 = High (85-100): This SSN range representsconditions from a “low-activity” maximum.4 = Maximum (100-120): This SSN range representsconditions from a “high-activity” maximum.Use Seasonal Climatology: This option provides the most realisticrepresentation of the seasonal dependence ofscintillation as a function of longitude. If the occurrenceof scintillation is desired at all longitudes regardless ofscintillation season, then uncheck this option. Note thatquiet scintillation-free nights can still occur even withthis option unchecked.Use Only Top 10% Scintillation Scenarios: Selecting this optionhighlights the “worst” of the possible scenarios, i.e., itrestricts scenario selection to be made randomly fromonly those portions of the database representing the top10% of nights based on the total time of activescintillation per night. If left unchecked, then scenariosets will be chosen randomly from all in-season nightsfor the chosen solar activity level.Retain Generated Random Number Seed Between Runs: Each time a newIONSCINT-G entry appears in the Active Modules list,158AF-GEOSpace User’s <strong>Manual</strong>: Version 2.5
Platform Position:e.g., SciIonScintg0, a new random number is placed inthe text box to the right of the next input line. Each runutilizes the random number seed that is visible beforethe run is made. This value is used to randomize theselection of scenario sets from the appropriate solaractivity level section of the database. For a given set ofactivity settings, using the same number seed will causethe same scintillation scenario to be generated. Selectthis option to retain use of the random number seed foradditional runs. If neither this nor the next option ischecked, then a Run/Update will place a new randomnumber seed in the text box (to be used for the nextrun!). If you complete a run without checking thisoption and did not record the number seed, you canrecover the value used in your last run from fileC:\TEMP\SciIonScintg#\IONSCINTG.OUT (assumingdefault scratch directory C:\TEMP).Specify and Retain Random Number Seed: Select this option and edit thenumber seed value in the text box to retain use of thenumber seed for the current and future runs. Using thesame input seed will cause the same scintillationscenario to be generated. To recreate the same scenariofor more than one Platform Position, perform additionalIONSCINT-G Science Module runs using the sameRandom Number Seed for each platform location.The Platform Position defines the fixed reference position used for allGPS scintillation scenario calculations. Note that there will be noscintillation directly overhead (i.e., at the center of the skymap viewedwith the IONSCINT-G graphic module) if the platform is placed at amagnetic latitude poleward of 30 degrees. The location is input ingeographic coordinates assuming a spherical Earth, namelyLatitude:The platform’s North latitude in degrees.Longitude: The platform’s East longitude in degrees (±360°).Altitude (km):The platform’s altitude in kilometers above theEarth’s surface.Use Fixed Targeting Angles: This option causes the module to display scintillation output for afixed location in the sky as viewed from the Platform Position definedabove. Note that a satellite selection must still be made as the timinginputs (T_start, T_stop, and Time Step(s)) from the Setup: Satellite settingsare still required. Any arbitrary satellite may be used for this purpose, butnote that the “name” to appear in plots comes from the Sat Name field inthe Setup:Satellite settings so to eliminate confusion it should be edited toAF-GEOSpace User’s <strong>Manual</strong>: Version 2.5 159
ead something appropriate like “Platform1”.Azimuth(Deg):Elevation(Deg):Azimuth angle in degrees as measured from thePlatform Position (0° is North, 90° is East, etc.).Elevation angle in degrees as measured from thePlatform Position (90° is zenith).Notes: The File menu Save Model/Open Model features work only when either the RetainGenerated Random Number Seed Between Runs or the Specify and Retain RandomNumber Seed option has been used.IONSCINT-G-APP OutputsThe IONSCINT-G-APP module generates a time series of the S4 scintillation index representingthe changing environment between the platform position and either a satellite or fixed GPS targetlocation. The S4 index, with values ranging from 0.0 to 1.0, is a dimensionless quantityrepresenting the normalized standard deviation of the signal intensity. The scintillation index(S4Index), azimuth and elevation angles, and local time in hours (LocalTimeHrs) can be plottedas a function of time in a 1D window by using the Orbit Probe graphics module. A tabulatedversion of the output can be found in file C:\TEMP\AppIonScintg#\IONSCINTG.OUT (assumingdefault scratch directory C:\TEMP). If the Platform Position is displayed in a 3D window usingthe Station graphics module when tracking a satellite, then the Satellite and Link graphicsmodules can be used to better visualize when a satellite is viewable from the specified platform.Note that use of the Station graphics module for this situation will require converting theplatform altitude units from kilometers to Earth radii, i.e., Alt(Re) ~ 1.0 + Alt(km)/6370.Hint: To establish a context for interpreting the S4 scintillation time profiles generated for agiven platform-satellite link using this module, the user should also run the IONSCINT-GScience Module for the same time period using the same fixed Platform Position andScintillation Database Options settings.160AF-GEOSpace User’s <strong>Manual</strong>: Version 2.5
The LET-APP ModuleModel Name:Version: 3.5 (December 1995)Developer:References:CRRES/SPACERAD Heavy Ion Model of the Environment (CHIME) andCRRESPROLockheed Martin Advanced Technology Center and AFRL, adapted toAF-GEOSpace by Radex, Inc. (now AER, Inc.)Chenette, D.L., J.D. Tobin, S.P. Geller, CRRES/SPACERAD Heavy IonModel of the Environment, CHIME, PL-TR-95-2152, Phillips Laboratory,Hanscom AFB, MA (1995) (User’s guide for Version 3.5), ADA 321996Chenette, D.L., J. Chen, E. Clayton, T.G. Guzik, J.P. Wefel, M. Garcia-Munoz, C. Lopate, K.R. Pyle, K.P. Ray, E.G. Mullen, D.A. Hardy, TheCRRES/SPACRAD Heavy Ion Model of the Environment (CHIME) forCosmic Ray and Solar Particle Effects on Electronic and BiologicalSystems in Space, IEEE Trans. Nucl. Sci., 41, 2332-2339 (1994)Feynman, J., G. Spitale, J. Wang, and S. Gabriel, Interplanetary ProtonFluence Model: JPL 1991, J. Geophys. Res., 98, 13281 (1993)Meffert, J.D., and M.S. Gussenhoven, CRRESPRO Documentation, PL-TR-94-2218, Phillips Laboratory, Hanscom AFB, MA (1994), ADA284578Note: It is recommended that AF-GEOSpace users read the original modeldocumentation and descriptive articles before using the models.LET-APP OverviewThe Linear Energy Transfer (LET) Application Module and CRRES Heavy Ion Model of thenear-Earth Space Environment (CHIME) Science Module are based on the PC program CHIME(with modifications) developed and released under the auspices of the <strong>Air</strong> <strong>Force</strong> ResearchLaboratory. More information on CHIME can be found in the CHIME Science Module sectionof this document.The LET-APP Module calculates the LET spectra and associated Single-particle Event Upset(SEU) rate in an electronic device for a user-specified location or orbit. In addition to theGalactic Cosmic Rays (GCR), Anomalous Component (AC), and Solar Energetic Particles (SEP)modeled in the original CHIME, AF-GEOSpace provides the capability to include trappedprotons, as specified by the CRRESPRO model (see the CRRESPRO Science Module section ofthis document), in the calculation of LET spectra and SEU rates. The importance of the LETspectra and method of determination are described as follows in the CHIME User’s <strong>Manual</strong>:“For the purposes of estimating single-particle upset effects (including latchup), theheavy ion flux distributions as a function of particle type and energy are transformed intodistributions as a function of the ion’s linear energy transfer (LET). The LET is theenergy lost by an ion and deposited into the target material per unit distance along theion’s path. LET generally increases with the atomic number of the ion (Z) and generallydecreases with increasing velocity (V) approximately as Z 2 V -2 (except at low and highAF-GEOSpace User’s <strong>Manual</strong>: Version 2.5 161
velocities where atomic effects and relativistic effects, respectively, become important).Thus a faster iron ion and a slower oxygen ion can have the same LET and, byassumption, the same ability to produce a single event upset in a specific device. TheLET spectrum is a convenient way to integrate and keep track of the contributions of thevarious ion species and energies, ordered according to LET.”“The LET spectrum calculator in CHIME employs an integral method and a two-part(shield and target) spherical geometry model. The thickness of the shield and the targetare specified by the user in one of several column density units: milligrams per squarecentimeters (mg cm -2 ), mils of aluminum equivalent, or microns of silicon. Since therange of an ion depends on the density of the target and only weakly on the targetcomposition, the mass density option (mg cm -2 ) permits the model to be used withdifferent materials, e.g., GaAs.Working from the sensitive region out, and for each ion species, minimum and maximumincident ion energies are calculated corresponding to pre-defined LET thresholds. At eachthreshold LET, the integral LET spectrum is calculated by integrating the heavy ion fluxspectrum over this energy range and summing over all particle species. The method andits results have been described in greater detail by Chennette et al. (1994).”The LET spectrum is calculated both for the interplanetary flux environment model and for thenear-Earth flux distribution, shielded by the effects of the Earth and its magnetic field. For theGCR, AC, and SEP, the interplanetary LET spectra will always be a “worst case” in terms ofenergy deposition. If the trapped proton option is selected, both the interplanetary and shieldedLET spectra are modified to include the trapped proton fluxes corresponding to the userspecifiedorbit or location. To compute the geomagnetically shielded fluxes used in the LETcalculation, a geomagnetic filter function is computed (see CHIME Science Module) for eitherthe user-specified location or as an average over a user-specified orbit. This filter function is thenapplied to the GCR, AC, and SEP particle spectra used in the LET spectra computation. For thetrapped protons, the LET spectrum is calculated separately at each point along an orbit and thenaveraged before being added to the total LET spectra (the limiting case is a single point if alocation is specified).The method for determining SEU rates is described in the CHIME User’s <strong>Manual</strong> as follows:“To calculate a single-particle upset rate, CHIME combines the LET spectrum, calculatedas described above, together with user specifications or measurements of the upset crosssection, and a model for the geometry for a specific device, and performs a numericalintegration. This procedure incorporates a rectangular parallelepiped model like that ofPickel and Blandford [IEEE Trans. Nuc. Sci., NS-27, 1006, 1980] to estimate thegeomagnetic factor of the sensitive region as a function of path length. It provides a wayto allow the user to input a measured upset cross-section (as a function of LET) as animprovement on the “step function” approximation. The only restriction on thistabulation is that it must be monotonic non-decreasing with increasing LET. This methodand its sensitivity to assumptions of the geometry model have been described by Shoga etal. [IEEE Trans. Nuc. Sci., NS-34, 1256, 1987]. It is a direct application of a few simplegeometrical concepts.”162AF-GEOSpace User’s <strong>Manual</strong>: Version 2.5
“The upset rate is determined as the rate at which energetic heavy ions in the spaceradiation environment can deposit more than a certain minimum amount of energy into aspecific volume. The minimum energy deposit required to cause an upset is called theupset threshold. The specific volume is the sensitive volume of a cell in the device. Thesingle-particle upset rate is determined from the product of the local particle flux orfluence and the geometrical factor presented by the sensitive volume.”In LET-APP the parameters of the on-board microelectronic device can be specified in thewindow or read from a device file. The user is urged to consult the CHIME User’s <strong>Manual</strong> formore details of the SEU rate calculation and required formats for the device input files.Note: The CHIME Science Module need NOT be run before the LET-APP module.LET-APP InputsInput to the LET-APP application comprises the inputs required to run the CHIME model, asadapted from the PC version. Several methods for inputting variables are available. The inputwindow is logically divided into three areas: an environment specification section, a satellitelocation and/or microelectronic device section, and an auxiliary section for controlling moduleoutput.Specify Environment:GCR/AC Flux: Several methods for generating cosmic ray fluxes (Galactic CosmicRays/Anomalous Component Spectra) are provided. The options are:Off:No cosmic ray fluxes generated.Modulation: CHIME provides fluxes corresponding to the Level(entered in the text box, approximate range: 400 to1600 megavolts) of solar modulation selected from afull range of monthly values over the period 1970-2010.SEP Event:Period:CHIME computes the average of the fluxes for each ionspecies over the user-specified time interval entered inthe Year 1, Day 1, Year 2, and Day 2 text boxesactivated when this option is selected. Tabulatedmonthly values of the solar modulation parameter forthe period 1970-2010 are used.The CHIME model provides several models for specifying the flux orfluence of heavy ions originating at the Sun as a result of solar energeticparticle (SEP) events. The options are:Off:March 91 Peak:June 91 Peak:No SEP event related flux/fluence is generated.Model based on peak CRRES measurements from theMarch 1991 eventModel based on peak CRRES measurements from theJune 1991 eventAF-GEOSpace User’s <strong>Manual</strong>: Version 2.5 163
Atomic Z:March 91 Ave:June 91 Ave:Model based on average CRRES measurements fromthe March 1991 eventModel based on average CRRES measurements fromthe June 1991 eventJPL 1991 Model: Models based on statistical distributions of solar protonevent intensities (JPL 1991, Feynmann et al., [1993]). Itprovides the proton fluence that would be exceeded at aprobability level of occurrence (Pr), or confidencelevel, from 50% to 0.1%. If the Flux Inputs option Offor Period is selected above, then fluxes are calculatedfrom the fluences using the user-specified time interval.If Modulation is selected as the GCR/AC Flux option,then a random period of 1 year is used.Two ranges for the ion species atomic number are offered, the full range(1 to 92) or a reduced range (1 to 30) may be used to save calculationtime. If the full range is specified, the code uses tabulated values forhydrogen (Z=1) to nickel (Z=28) and all ions heavier than nickel aremodeled using abundance ratios to iron.Note: The cosmic ray flux input and solar event options are identical to those used in theCHIME Science Module.Trapped Protons:Two models of trapped protons in the radiation belts corresponding to aquiet and active period, CRRESPRO Quiet and Active, are available (seeCRRESPRO Documentation). The CRRESPRO flux data are read in forall available energies and incorporated into the CHIME system, using thesame LET and SEU algorithms as for the cosmic ray protons.Satellite/Device: There is a single row of options for selecting the satellite location and anotherfor specifying the device.Sat. Location: Input the satellite location as a single point or specify an orbit:Single Point: The pop-up menu for the Single Point option asks forthe satellite’s altitude (km), latitude (degrees), andlongitude (degrees).Orbit:While not dynamic LET-APP permits the entry ofsatellite orbits as input. The orbit elements can be oftwo types:Mean elements: These are the same as the elementsthat are normally read in by theSATEL-APP module, except thereare no derivative or drag terms.Chime elements: These simple elements represent theoriginal inputs to the CHIMEpropagator and consist of the above164AF-GEOSpace User’s <strong>Manual</strong>: Version 2.5
Mean elements, except that the meananomaly is fixed at zero, so thereference time becomes the time ofperigee, and the eccentricity andmean motion are replaced byaltitudes for apogee and perigee.Entering a set of Mean elements and then selecting theChime elements toggle effects a translation to Chimeelements. The Default button sets default orbit elementvalues taken from Meffert and Gussenhoven [1994].Note: The CHIME simple elements are listed as those parameters differing from the meanelements (right column) and those in common with the mean elements (left, highlighted).If entering Mean elements, one must convert to CHIME elements (by selecting the Chimeelements toggle) before running because the CHIME propagator uses only the CHIMEsimple elements. A run error will occur if either (1) the orbit interval designated byT_start and T_stop is not within ± 1 year of T_ref or (2) more than approximately 3000steps are calculated, e.g., running for more than ~3.47 days at 100 seconds per step.SEU Device:From File:The From File button enables one to read in an inputfile containing mean orbital elements, in analogy to theSATEL-APP module. The mean elements areautomatically converted to the equivalent simpleelements for use by the CHIME propagator. TheUpdate button ensures that the start, stop times andintervals are up to date. The Orbit popup window isautomatically updated to show the parameters that wereread. Note that a run error will occur if the orbit intervaldesignated by T_start and T_stop is not within ± 1 yearof the reference time listed next to the satellite name inthe Chime Satellite File Options popup window.The on-board microelectronic device can be specified by individualparameters or from a device file:Parameters:From File:The pop-up menu sets the device parameters as requiredfor a single energy deposit SEU calculation. Theyinclude LET Threshold, Upset cross-section, number ofBits per device, sensitive region dimensions (X and Yare transverse, Z is depth) and Density of material. TheDefault button sets default parameter values taken fromMeffert and Gussenhoven [1994].The pop-up presents a file selection menu. Files listed(in $AFGS_HOME\models\data\CHIME\devices) arethose that came with the PC distribution. They containAF-GEOSpace User’s <strong>Manual</strong>: Version 2.5 165
Thickness:Let Params:detailed upset cross-sections versus LET, for input intothe calculation of integrated SEU rates.The pop-up menu sets the Shield and Target thicknesses. The units foreach can be toggled between three choices: mg/cm 2 , mils Al, or microns Si.The Default button sets default thickness values from Meffert andGussenhoven [1994].The pop-up menu sets minimum (LET MIN), maximum (LET MAX), andnumber of points (NLETS) for the LET spectrum. The Default button setsdefault spectrum parameter values from Meffert and Gussenhoven [1994].LET-APP OutputsThe LET application outputs a summary text file for the selected case. The text file may beaccessed by three toggle options. For each option, hit the Display Text button to update anddisplay the current window:SEU:Shows the final SEU rate for the case. The results are presented in twoforms: a “worst case” which has the geometrically unshielded cosmic rayand/or solar flare rate (wo_Bgeo) along with any trapped protoncontributions and a “best case” which is the same except thatgeometrically shielded cosmic/solar particles (w_Bgeo) are used. If thetrapped protons are not included, then the rates should be the same as forthe original PC version (there called interplanetary and geomagneticallyshielded rates).LET:LET/TRAPPED:This describes the two LET spectra that are used as input to the SEU ratecalculation. The two flux columns represent the “worst/best” case results.This contains the original PC version cosmic ray and/or solar flare LETgeometrically unshielded and shielded components, and in a separatecolumn, the trapped proton LET contribution.Options SEU and LET above are, with some minor changes, the same as the output printed by thePC version of CHIME in the .SEU and .LET files.Hit the Display Text button to update and display the current text window.LET-APP outputs a 1D plot of the LET spectrum (see above) in the form of a log-log function,for the selected case. Hit the Display Plot button to display the 1D plot. If inputs are changed andthe module is rerun, then the labels in the plot can be updated by again using the Display Plotbutton. The LET spectrum represents the total flux of particles of all types with an energydeposit per thickness (MeV/mg/cm 2 ) larger than the threshold for the bin. The two data linesrepresent the “worst/best” case LET results, as described above. Note that if the JPL solar flaremodel is chosen, flux is replaced by fluence.The Plot Options button provides a menu for modifying the X and Y axes of the 1D plot.The LET application also outputs a 1D Gridded Data Set of the position of the satellite as afunction of time that can be displayed using the Satellite graphics module. The orbits can besingle points or a complete trajectory, as calculated by the CHIME propagator.166AF-GEOSpace User’s <strong>Manual</strong>: Version 2.5
The METEOR IMPACT-APP ModuleModel Name:Meteor Impact Map ModelVersion: February 2004Developer:References:Radex, Inc. (now AER, Inc.) and the <strong>Air</strong> <strong>Force</strong> Research Laboratory(see reference lists in the manual sections entitled “The METEORIMPACT MAP Science Module” and “The SATEL-APP Module”)Note: It is recommended that AF-GEOSpace users read and understand the original modeldocumentation and descriptive articles before using the models.METEOR IMPACT-APP OverviewThe METEOR IMPACT application module is based on the Meteor Impact Map Model. Moreinformation on the model can be found in the METEOR IMPACT MAP Science Module sectionof this document. If used in dynamic mode, the METEOR IMPACT MAP Science Module cancertainly be used in combination with SATEL-APP to provide a rough measure of the hourlymeteor impact rate along a satellite orbit, but the procedure is very inefficient. To increase bothefficiency and accuracy, METEOR IMPACT-APP was developed to calculate the same impactparameter as a function of time only along a user-specified orbit. This feature enables the user tosee meteor flux variations at the satellite owing to both position changes, e.g., observed fluxesdecrease when blocked by the Earth, and shower and storm temporal variations. This applicationalso calculates the probabilities of a satellite being damaged by meteor shower particle impactsover a period of time.Note: The METEOR IMPACT MAP science module need NOT be run before METEORIMPACT-APP.METEOR IMPACT-APP InputsThe inputs to the METEOR IMPACT-APP module include both the orbit elements needed tocalculate the satellite orbit and the parameters needed to specify concurrent meteor showers andstorms. While the meteor impact portion of the application will run using the default settings, theuser must provide orbital elements or select a satellite from file for a successful run. Access tothe two groups of inputs is provided in the Setup section at the top of the user interface, namelySatellite:The Satellite button changes the lower portion of the EnvironmentWindow to show satellite orbit options identical to those described in theSATEL-APP module section of this document. The user must provideeither orbital elements or select a satellite from files provided.Meteor Impact Model: The Meteor Impact Model button changes the lower portion of theEnvironment Window to show meteor shower and storm input optionsidentical to those described in the METEOR IMPACT MAP ScienceModule section of this document.AF-GEOSpace User’s <strong>Manual</strong>: Version 2.5 167
METEOR IMPACT-APP OutputsThe METEOR IMPACT application module returns a 1D Gridded Data Set representing theposition of the satellite and the hourly impact rate and cumulative probability of being impactedby a meteor. To view the impact rate or probability output as a function of time in a 1D graphicswindow, for example, use the ORBIT PROBE graphics module and select the Path/Abscissabutton option AppMeteorImpact: Time and the Data/Ordinate button options AppMeteorImpact:Hourly Impact or CumProb.168AF-GEOSpace User’s <strong>Manual</strong>: Version 2.5
The NASAELE-APP ModuleModel Name:Version:Developer:References:NASA Trapped Electron Model AE-8National Space Science Data Center (NSSDC) Data Set PT-11B, Oct1987; IGRF updates 2009NASA/NSSDC (distributed in AF-GEOSpace with permission)Complete NASA radiation belt model references are available viaanonymous ftp from NSSDCA.GSFC.NASA.GOV or the World WideWeb site http://nssdc.gsfc.nasa.gov/space/model/magnetos/aeap.html.Vette, J.I., The AE-8 Trapped Electron Model Environment,NSSDC/WDC-A-RS 91-24 (1991)Vette, J.I., The NASA/National Space Science Data Center TrappedRadiation Environment Model Program (1964-1991), NSSDC/WDC-A-RS91-29 (1991)Jordan, C.E., NASA Radiation Belt Models AP-8 and AE-8, GL-TR-89-0267, Geophysics Laboratory, Hanscom AFB, MA (1989), ADA 223660Note: It is recommended that AF-GEOSpace users read the original modeldocumentation and descriptive articles before using the models.NASAELE-APP OverviewThe NASAELE-APP module determines yearly electron omni-directional fluence (differentialand integral) for ten energy intervals in the range 0.65-5.75 MeV. A user-specified orbit is tracedthrough the two different NASAELE outer zone electron flux models (min and max), at eachenergy, to provide an estimate of electron fluence received by the satellite under a wide range ofmagnetospheric conditions. The differential and integral omni-directional fluences are calculatedusing the same method employed by the CRRESELE-APP module.Note: The NASAELE science module need NOT be run before NASAELE-APP.NASAELE-APP InputsThe inputs to the NASAELE-APP module are the orbit elements needed to calculate the satelliteorbit. The Environment Window for the NASAELE-APP module is the same as that for theSATEL-APP application except NASAELE-APP is set to use the orbit propagator Lokangle. Seethe SATEL-APP Module section of the documentation for input descriptions. The IGRF/O-Pmagnetic field model is used with extrapolation beyond 2010.NASAELE-APP OutputsThe NASAELE application generates a return text window that can be displayed using the ShowText button if it was closed. Included in the text are the orbit elements and tables of both thedifferential and integral omni-directional fluence (in units of #/(cm 2 keV yr) and #/(cm 2 yr),respectively) calculated for all ten energy channels and two outer zone electron flux models.Also generated is a 1D Gridded Data Set giving the position of the satellite as a function of timethat can be displayed using the Satellite graphics module.AF-GEOSpace User’s <strong>Manual</strong>: Version 2.5 169
The NASAPRO-APP ModuleModel Name:Version:Developer:References:NASA Trapped Proton Model AP-8National Space Science Data Center (NSSDC) Data Set PT-11B, Oct1987; IGRF updates 2009NASA/NSSDC (distributed in AF-GEOSpace with permission)Complete NASA radiation belt model references are available viaanonymous ftp from NSSDCA.GSFC.NASA.GOV or the World WideWeb site http://nssdc.gsfc.nasa.gov/space/model/magnetos/aeap.html.Vette, J.I., The AE-8 Trapped Electron Model Environment,NSSDC/WDC-A-RS 91-24 (1991)Vette, J.I., The NASA/National Space Science Data Center TrappedRadiation Environment Model Program (1964-1991), NSSDC/WDC-A-RS91-29 (1991)Jordan, C.E., NASA Radiation Belt Models AP-8 and AE-8, GL-TR-89-0267, Geophysics Laboratory, Hanscom AFB, MA (1989), ADA 223660Note: It is recommended that AF-GEOSpace users read the original modeldocumentation and descriptive articles before using the models.NASAPRO-APP OverviewThe NASAPRO-APP module calculates yearly proton omni-directional fluence (differential andintegral) over the energy range 1.5-81.3 MeV for user specified orbits and through two differentNASAPRO flux models (AP-8 min and max). Fluences are calculated from the NASA protonflux maps using the same method employed by the CRRESPRO-APP module. Integral omnidirectionalfluence for a given energy channel is calculated from the differential omni-directionalfluence by summing over all energy channels with energy greater than the given channel andmultiplying by appropriate bandwidths.Note: The NASAPRO science module need NOT be run before NASAPRO-APP.NASAPRO-APP InputsThe inputs to the NASAPRO-APP module are the orbit elements needed to calculate the satelliteorbit and the Environment Window is the same as that for the SATEL-APP application exceptNASAPRO-APP is set to use the orbit propagator Lokangle. See the SATEL-APP Modulesection of the documentation for input descriptions. The IGRF/O-P magnetic field model is usedwith extrapolation beyond 2010.NASAPRO-APP OutputsThe NASAPRO application module generates a return text window which can be displayedusing the Show Text button if it has been closed. Included in the text are the orbit elements andtables of both the differential and integral omni-directional fluences (in units of #/(cm 2 MeV yr)and #/(cm 2 yr), respectively) calculated for all 22 energy channels and for both active and quiet170AF-GEOSpace User’s <strong>Manual</strong>: Version 2.5
conditions. Also generated is a 1D Gridded Data Set giving the position of the satellite as afunction of time that can be displayed using the Satellite graphics module.AF-GEOSpace User’s <strong>Manual</strong>: Version 2.5 171
The RAYTRACE-APP ModuleModel Name:RAYTRACEVersion: November 2001Developer:References:Radex, Inc. (now AER, Inc.) and <strong>Air</strong> <strong>Force</strong> Research LaboratoryColeman, C.J., A General Purpose Ionosphere Ray Tracing Procedure,Report SRL0131TR, Defence Science and Technology Organization,Australia (1993)Daniell, R.E., Jr., L.D. Brown, D.N. Anderson, M.W. Fox, P.H. Doherty,D.T. Decker, J.J. Sojka, and R.W. Schunk, Parameterized IonosphericModel: A Global Ionospheric Parameterization <strong>Base</strong>d on First PrinciplesModels, Radio Sci., 30, 1499-1510 (1995)Jones, R.M., and J.J. Stephenson, A Versatile Three-Dimensional RayTracing Computer Program for Radio Waves in the Ionosphere, OTReport 75-76, US Govt. Printing Office, Washington, DC 20402 (1975)Note: It is recommended that AF-GEOSpace users read the original modeldocumentation and descriptive articles before using the models.OverviewRay tracing allows the user to plot the behavior of rays in an ionosphere specified by a PIM dataset. The PIM science module must be run before the ray tracing application can be used. WhenPIM is run in dynamic mode, this application will perform the same ray trace calculations foreach time frame of the dynamic PIM output using a fixed set of transmitter coordinates andfrequency/elevation properties. Transmitter coordinates and selected ray frequency and elevationranges are submitted to the Australian 2D ray tracing algorithm [Coleman, 1993] or the Jones-Stephenson 3D ray trace model [Jones and Stephenson, 1975] and the resulting ray traces can beviewed. The viewing options include a special 1D display window activated from within the RayTracing Application or use of the Ray Trace Graphics Module within a standard AF-GEOSpace3D window.Ray Tracing Application InputsDynamic PIM files must have time extension to work with RAYTRACE-APPModel:The plot type field determines which ray features are displayed.Australian 2D: The Australian 2D model algorithm [Coleman, 1993]provides the ability to plot rays along an arbitraryazimuth. All rays generated remain in the same plane.Jones-Stephenson 3D: The Jones-Stephenson 3D model algorithm [Jonesand Stephenson, 1975] provides the ability to plot raysin arbitrary directions. Rays generated do notnecessarily remain within the same plane.172AF-GEOSpace User’s <strong>Manual</strong>: Version 2.5
Freq (MHz):Elev (deg):Ray traces at one or more frequencies can be performed simultaneously.Freq (MHz) options include:Single: The single frequency option requires that a singlefrequency value given in MHz be entered in the Singletext box.Multi: The multi-frequency option requires that a frequencyrange and increment be specified.From: The minimum frequency value in MHz.To: The maximum frequency value in MHz.Step: The size in MHz of the frequency steps to betaken starting at the From value, e.g., if From= 1, To = 5, and Step = 2 then traces will becalculated at 1, 3, and 5 MHz for eachelevation.Ray traces at one or more elevation angles can be performedsimultaneously. Elevation is an indication of initial ray direction measuredin degrees relative to the horizon with elevation equal to 90 degreesrepresenting zenith. Elev (deg) options include:Single:Multi:The single elevation angle option requires that a singleelevation angle value given in degrees be entered in theSingle text box.The multi-elevation angle option requires that anelevation angle range and increment be specified.From:To:Step:The minimum elevation angle value indegrees.The maximum elevation angle value indegrees.The size in degrees of the elevation steps to betaken starting at the From value, e.g., if From= 10, To = 16, and Step = 2 then traces will becalculated at 10, 12, 14, and 16 degrees foreach frequency.Note: Up to 25 rays can be traced per application. This fact should be taken into considerationwhen Freq (MHz) and Elev (deg) selections are made.Azimuth:Range(1000 km):The Azimuth value specifies the initial angle of the rays to be traced withazimuth = 0 indicating a northward traveling ray.The Range value specifies the maximum range from the transmitterlocation that a ray will be traced. Note: Results will change if the Range ischanged because the ray-trace step-size is a function of this input.AF-GEOSpace User’s <strong>Manual</strong>: Version 2.5 173
Max Hops:The Max Hops value specifies the maximum number of hops or bounces atraced ray can have as it refracts off of the ionospheric plasma and reflectsoff of the ground.Transmitter Location: Transmitter Location option controls the coordinates for a ground-basedtransmitter. The transmitter altitude is fixed equal to zero.Open Pim File:Lat:Lon:RAYTRACE-APP OutputsThe Lat text box is used to set the latitude location indegrees of the transmitter.The Lon text box is used to set the longitude in degreesof the transmitter.The Open Pim File button is used to select generated PIM data beforerunning the ray trace application. Select Run/Update from the Edit menuonly after selecting the PIM data. If PIM was run in static mode, then theuser should select the pim_pud.out (default name) file from a PIMdirectory located in the directory containing the AF-GEOSpaceexecutable, e.g., select (Scratch Directory)\SciPim# \pim_pud.out. If PIMwas run in dynamic mode, then the user must select any one of thepim_pud.out files with a time extension.The RAYTRACE application outputs a 1D Gridded Data set of ray traces plus a slice of the PIMelectron densities approximately in the plane of the traced rays. These outputs are displayedusing the RAYTRACE graphical object. If a dynamic PIM run was performed and the fileextension option was selected when running PIM, then the RAYTRACE-APP output will also bedynamic with one set of traced rays for each PIM time frame.Plot Options:The Plot Options button activates a Ray Plot Options popup window usedto tailor the appearance of the special 1D plot activated by the DisplayPlot button (see below). The display options include:Range:Alt:Defaults:The Range text box set controls the minimum (Min)and maximum (Max) values to be plotted as well as thenumber of tic marks (Tic) along the horizontal axisrepresenting range in km.The Alt text box set controls the minimum (Min) andmaximum (Max) values to be plotted as well as thenumber of tic marks (Tic) along the vertical axisrepresenting altitude in Km.The Defaults buttons reset the Range and Alt text boxvalues back to their default settings. The defaultminimum range and altitude is 0 km. The defaultmaximum range is 12000 km. The default maximumaltitude is 600 km.174AF-GEOSpace User’s <strong>Manual</strong>: Version 2.5
Display Plot:Auto:Captions:The Auto buttons set the Min/Max values of Range andAlt such that all of the data fits in the special 1D plotwindow.Selecting this option displays color coded captions ofthe form “F #.# E #.#” for each ray traced, e.g., acaption “F15.0 E20.0” indicates that the ray trace of thesame color as the caption was determined using afrequency of 15 MHz and was emitted at an elevationangle of 20 degrees. Only the first six rays are colorcoded, the rest are white. No captions appear for whiteray traces. The Caption X and Caption Y sliders areused to position the caption text within the special 1Dplot.Plasma Frequency: Selecting this option displays an isocontour of theplasma frequency selected using the adjacent slider.The slider is labeled with the relative frequency (0.0-1.0), the frequency in MHz, and the equivalent plasmadensity in #/cm 3 .OK:The OK button dismisses the Ray Plot Options popupwindow.The Display Plot button produces a special 1D viewport displaying the raytraces as a function of altitude and range from the transmitting location.The Plot Options button (see above) can be used to add color-codedcaptions providing frequency (F) and elevation (E) information for eachray trace as well as plasma frequency contours.Note: In dynamic mode, the 1-D special window animates only if a 3-D window containing thecorresponding RAY TRACE graphical object is currently displayed.AF-GEOSpace User’s <strong>Manual</strong>: Version 2.5 175
The SATEL-APP ModuleModel Name:LOKANGL and SPACETRK (SGP4)Version: LOKANGL: 18 August 1997SPACETRK (SGP4): 15 August 1997Developer:References:LOKANGL: Radex, Inc. (now AER, Inc.)SPACETRK (SGP4): <strong>Air</strong> <strong>Force</strong> Institute of Technology (modified byRadex, Inc. (now AER, Inc.))Bass, J.N., K.H. Bhavnani, B-Z.J. Guz, R.R. Hayes, P.N. Houle, S.T. Lai,and L.A. Whelan, Analysis and Programming for Research in Physics ofthe Upper Atmosphere, AFGL-TR-76-0231, p. 56-71 (1976)(LOKANGL), ADA 034066Kerns, K.J., and M.S. Gussenhoven, CRRESRAD Documentation, PL-TR-92-2201, Phillips Laboratory, Hanscom AFB, MA (1992) (LOKANGL),ADA 256673Hoots, F. R, and R.L. Roehrich, SPACETRACK Report No 3, available atthe web site http://celestrak.com/NORAD/documentation/index.htmlNote: It is recommended that AF-GEOSpace users read the original modeldocumentation and descriptive articles before using the models.SATEL OverviewThe SATEL application module provides an interface to the LOKANGL and SGP4 orbitgeneration and prediction codes. The interface and code generation are shared among severalmodules requiring code orbit ephemerides. Other modules using the orbit generation module arethe BFOOTPRINT, CRRESRAD, CRRESPRO, CRRESELE, NASAELE, NASAPRO, LET,and TPM applications.SATEL InputsInput to the SATEL application comprises orbital elements, start and stop times of the orbitinterval to be predicted, and parameters defining detector and link options. Several methods forinputting the orbital elements are available.The input window is logically divided into three areas: a propagator/element type section, anorbital element input section, and an auxiliary input area. The paragraphs below will describe theinputs requested by each of the three logical input areas.Propagator/Element Type SpecificationThe SATEL application allows the orbit to be generated by using either the LOKANGLE orSGP4 orbit propagator codes. In addition, the orbital elements to be used by the propagator maybe specified in a variety of ways.The Propagator input section allows the user to specify which of the following propagators touse in calculating the orbit,176AF-GEOSpace User’s <strong>Manual</strong>: Version 2.5
Lokangle:SGP4:Lokangle, an orbit prediction code developed by Radex, Inc. (now AER,Inc.) (see notes below).The SGP4 portion of the SPACETRK code developed by the <strong>Air</strong> <strong>Force</strong>Institute of Technology.The Element Type input section allows the user to specify how the orbital elements will be input.The choices areMean Elements:P/V (ECI):Solar:SMean:From File:The Mean orbital elements will be specified. When this selection ischosen, the orbital element input section will display text boxes and labelsfor input of Inclination, Arg. of Perigee, Mean Anomaly, Eccentricity,Right Ascension of Ascending Node and Mean Motion of the satellite. SeeMean Elements Inputs below for more information. Note: When the FromFile option is selected, the elements read from file will appear in the MeanElement text boxes.The Position/Velocity orbital elements will be specified. When thisselection is chosen, the orbital element input section will display textboxes and labels for input of three position components and three velocitycomponents. See P/V (ECI) Inputs below for more information.The Solar orbital elements will be specified. When this selection ischosen, the orbital element input section will display text boxes and labelsfor input of Inclination, Apogee, Perigee, and local time of Apogee andmaximum latitude. See Solar Inputs below for more information. If thePerigee altitude is less than the Apogee value entered then an error popupwindow appears and a message is written to standard output.The Simple Mean orbital elements will be specified. When this selection ischosen, the orbital elements input section will display text boxes andlabels for input of Inclination, Right Ascension of Ascending Node,Argument of Perigee, Apogee Altitude, and Perigee Altitude (MeanAnomaly is fixed equal to zero). See SMean Inputs below for moreinformation. If the Perigee altitude is less than the Apogee value enteredthen an error popup window appears and a message is written to standardoutput.It is common to store orbital elements in files of two-line NORAD orbitalelements. The From File option allows a user to choose a file containing aseries of two-line NORAD elements. When this option is chosen, theorbital element input section will display a list of satellite namescorresponding to the element sets read from the specified file. See SelectFrom File below for more information on this choice, the format of theNORAD element set file, and how to obtain a file of orbital elements.Note: When the From File option is selected, the elements read from filewill appear in the Mean Element text boxes.Note: Lokangle supports all of the provided Element Type options. SGP4 supports allElement Type options except the position-velocity element option P/V (ECI).AF-GEOSpace User’s <strong>Manual</strong>: Version 2.5 177
Element Input SectionOne of five sets of text fields will appear depending on the orbital Element Type selected,(1) Mean Elements Inputs,Inclination: The inclination of the satellite orbit specified in degrees.Arg. of Perigee: The argument of the perigee of the satellite orbit measured in degrees.Mean anomaly: The mean anomaly of the satellite orbit specified in degrees.Eccentricity: The eccentricity of the satellite orbit.R. A. Asc. Node: The right ascension of the ascending node of the satellite orbit specified indegrees.Mean Motion: The mean motion of the satellite specified in rev/day.d(MM)/dt/2: One-half the first time-derivative of the mean motion of the satellite isspecified in rev/day 2 .d2(MM)/dt2/6: One-sixth the second time-derivative of the mean motion of the satellite isspecified in rev/day 3 .BSTAR:The SGP4-type drag term (units of Re -1 ), the ballistic coefficientrepresents how susceptible an object is to drag with a value of zerorepresenting no drag.Note: The original PC-based versions of the CRRESELE, CRRESRAD andCRRESPRO applications do not use the mean motion time derivatives in the orbitcalculations. Although the differences should be small, if precisely matching theoriginal PC-based results is important to the user, d(MM)/dt and d2(MM)/dt2should be set to zero when running the BFOOTPRINT, CRRESELE,CRRESRAD, CRRESPRO, NASAELE, NASAPRO, LET, and TPMapplications.(2) P/V (ECI) Input unit type is controlled by the km and ft option switches below the velocitytext boxes. With the km option selected, position and velocity values are entered in units of kmand km/sec, respectively. With the ft option selected, position and velocity values are entered inunits of ft and ft/sec, respectively. After entering the text field, switching between the km and ftoptions will translate the position and velocity values automatically to the other set of units.Px, Py, Pz: The X, Y, and Z position of the satellite specified in km. The coordinatesystem is Earth Centered Inertial (X = first point of Ares, Y = X x Z, Z =north rotational pole).Vx, Vy, Vz:The Vx, Vy, and Vz velocity components of the satellite specified in km/s.The coordinate system is Earth Centered Inertial (X = first point of Ares,Y = X × Z, Z = north rotational pole).P. Decay: The period decay of the satellite orbit, specified in s/rev.Note: The PC-based versions of the CRRESELE, CRRESRAD and CRRESPROapplications do not use the period decay in the orbit calculations. Although thedifferences should be small, if precisely matching the PC-based results is178AF-GEOSpace User’s <strong>Manual</strong>: Version 2.5
important then P. Decay should be set to zero when running the BFOOTPRINT,CRRESELE, CRRESRAD, CRRESPRO, NASAELE, NASAPRO, LET, andTPM applications.(3) Solar Inputs,Inclination: The inclination of the satellite orbit specified in degrees.Apogee (km): The altitude of the satellite orbit apogee specified in kilometers.LT of Max Lat: The local time of maximum latitude (inclination) specified in hours.Perigee (km): The altitude of the satellite orbit perigee specified in kilometers.LT of Apogee: The local time of apogee specified in hours.(4) SMean Inputs,Inclination (deg): The inclination of the satellite orbit specified in degrees.RAA Node (deg): The right ascension of the ascending node of the orbit specified in degrees.Perigee Arg (deg): The argument of the perigee of the satellite orbit measured in degrees.Apogee Alt (km): The altitude of the satellite orbit apogee specified in kilometers.Perigee Alt (km): The altitude of the satellite orbit perigee specified in kilometers.(5) Select From File,Files containing sets of NORAD two-line element sets are commonly available. The From Fileinput option provides a means of reading files containing element sets and using them togenerate orbits in AF-GEOSpace. When the From File button is activated the Ephemeris Datawindow displays a label showing the currently opened file, a Select File button to open a fileselection box to change the current file, and a list of elements parsed from the current file. Whenthe Sort button (next to the Select File button) is checked, the next execution of Select Filereturns an alphabetically sorted list of elements parsedAfter a file is opened the user can click the desired label in the element selection box to choosethe orbit elements associated with the named satellite. When this is done, the elements for thechosen orbit are loaded and will appear in the text boxes associated with the Mean element type.In order to correctly parse the element sets, AF-GEOSpace expects the chosen file to containelements in a specific format. Information on the supported NORAD two-line element format isavailable from Celestrak.com via anonymous ftp (see below). A copy of this document may alsobe found in $AFGS_HOME\models\data\EPHEMERIS\NORAD_Two.doc.Standard installations of AF-GEOSpace Version 2.5 set the default start-up element file as$AFGS_HOME\models\data\EPHEMERIS\tle.new.Files containing ephemeris data for a large number of current and historic satellites are availablefrom http://Celestrak.com. A broad array of satellite orbit classes are represented at this site withephemeris for each type typically stored in a different text file, e.g., the file goes.txt containsGOES satellite two-line element sets. To download the current goes.txt file, for example, go tothe Current Data section of the website, right-click on GOES and choose “Save Link As”, andplace the file in the $AFGS_HOME\models\data\EPHEMERIS.AF-GEOSpace User’s <strong>Manual</strong>: Version 2.5 179
Note that ephemeris files received from Celetrak.com representing multiple satellites aretypically written using the 3-line format that the AF-GEOSpace software expects to handle.These files contain the name of the spacecraft on the first line and the element set on the nexttwo lines, e.g.,NOAA 91 15427U 84123A 06191.17285276 -.00000060 00000-0 -93142-5 0 34372 15427 98.4952 228.3827 0013953 269.2867 90.6712 14.15238022113188NOAA 101 16969U 86073A 06191.20809939 .00000079 00000-0 50616-4 0 27132 16969 98.7581 202.8899 0013370 83.8117 276.4588 14.27298964 30444NOAA 111 19531U 88089A 06191.20315288 -.00000028 00000-0 85243-5 0 19102 19531 98.8270 279.3724 0010851 285.5674 74.4282 14.14811788917794Archive files representing orbit elements over time for a single spacecraft from Celestrak.comtypically do not include the first line with the spacecraft name, so the user must manually insertthe name if AF-GEOSpace is expected to process it properly. The simplest way to accomplishthis is to use standard word processing software and perform a universal “replace”, e.g., thefollowing 6 lines in a single text file might represent three sets of two-line elements for theCHAMP spacecraft.1 26405U 00039B 02010.72651584 +.00020203 +00000-0 +33586-3 0 04962 26405 087.2608 305.3408 0032340 002.8614 357.2836 15.51317492083981 26405U 00039B 02011.75860482 +.00023132 +00000-0 +38401-3 0 04972 26405 087.2615 304.9473 0032032 358.5732 001.5494 15.51368604084141 26405U 00039B 02012.66165175 +.00026059 +00000-0 +43202-3 0 05002 26405 087.2614 304.6013 0031672 354.9710 005.1235 15.5141864208428If the character string“1 26405U”is universally replaced by a line with the spacecraft name (plus a line return) and the charactersused to locate the naming text, e.g.,“CHAMP”(with a line return)“1 26405U”then the file will be properly formatted for AF-GEOSpace use and appear as follows.CHAMP1 26405U 00039B 02010.72651584 +.00020203 +00000-0 +33586-3 0 04962 26405 087.2608 305.3408 0032340 002.8614 357.2836 15.5131749208398CHAMP1 26405U 00039B 02011.75860482 +.00023132 +00000-0 +38401-3 0 04972 26405 087.2615 304.9473 0032032 358.5732 001.5494 15.5136860408414CHAMP1 26405U 00039B 02012.66165175 +.00026059 +00000-0 +43202-3 0 05002 26405 087.2614 304.6013 0031672 354.9710 005.1235 15.5141864208428180AF-GEOSpace User’s <strong>Manual</strong>: Version 2.5
Auxiliary Input SectionThe auxiliary input area is used to specify information such as the reference time of the satelliteorbit elements and the time period for which the orbit should be calculated. The information iseither input by the user or loaded from the satellite ephemeris files when the From File option isused. Specifically, the inputs are:T_ref:T_start, T_stop:Time Step:Sat. Name:Time Step:The reference time of the orbital elements of the satellite, specified in theform DD/MM/YY HH:MM:SS.SSSThe start and stop time for which the orbit is to be calculated, specified inthe form DD/MM/YY HH:MM:SS.SSS. Note that T_start and T_stopmust be greater than T_ref (strictly enforced when using SGP4propagator). Also, when the SGP4 propagator is used, the orbit intervalshould be within a year of T_ref or the application may issue an errorwarning. In static mode, the default T_stop value is 24 hours after T_start.In dynamic mode, the T_start and T_stop times match the Start and Endtimes entered at the top of the environment window.The time step interval used to calculate the orbit is specified in seconds.The orbit calculation will go from T_start to T_stop in Time Stepincrements.A mnemonic for the satellite useful for display purposes.The time step, in seconds, at which the orbit should be calculated.SATEL OutputsThe SATEL application outputs a 1D Gridded Data Set of the position of the selected satellite asa function of time. The output can be viewed using the SATELLITE graphics module.AF-GEOSpace User’s <strong>Manual</strong>: Version 2.5 181
The TPM-1-APP Module (V2.5 Only)Model Name:Trapped Proton Model (TPM-1)Version: Version 1.2, 15 April 2003; IGRF updates 2009Developer:References:S. L. Huston, The Boeing CompanyHuston, S.L., Space Environment and Effects: Trapped Proton Model,NASA/CR-2002-211784, NASA Marshall Spaceflight Center (2002)[see $AFGS_HOME\models\REFS\TPM.pdf]Huston, S.L., and K.A. Pfitzer, Space Environment Effects: Low AltitudeTrapped Proton Model, NASA/CR-1998-208593, NASA MarshallSpaceflight Center (1998)Huston, S.L, G.A. Kuck, and K.A. Pfitzer, Low altitude trapped radiationmodel using TIROS/NOAA data, in Radiation Belts: Models andStandards, J.F. Lemaire, D. Heynderickx, and D.N. Baker (eds.),Geophysical Monograph 97, American Geophysical Union, 119 (1996)Meffert, J.D., and M.S. Gussenhoven, CRRESPRO Documentation, PL-TR-94-2218, Phillips Laboratory, Hanscom AFB, MA (1994), ADA284578Olson, W.P., and K.A. Pfitzer, Magnetospheric Magnetic Field Modeling,Annual Scientific Report, <strong>Air</strong> <strong>Force</strong> Office of Scientific Research contractF44620-75-C-0033, McDonnell Douglas Astronautics Co., HuntingtonBeach, CA (1977), ADA 037492Note: It is recommended that AF-GEOSpace users read the original modeldocumentation and descriptive articles before using the models.TPM-1-APP OverviewThe TPM-1 science and application modules are based on the Trapped Proton Model (TPM)developed by Boeing Corporation for the NASA Space Environment and Effects (SEE) Program[Huston, 2002]. TPM combines both the Low Altitude Trapped Radiation Model (LATRM)[Huston et al., 1998], also developed by Boeing for NASA/SEE, and the <strong>Air</strong> <strong>Force</strong> ResearchLaboratory's (AFRL) CRRESPRO model [Meffert and Gussenhoven, 1994] covering higheraltitudes. More information on TPM-1 can be found in the TPM-1 Science Module section ofthis document.The CRRESPRO-APP module calculates proton omni-directional fluence (differential andintegral) over the energy range 1-100 MeV for user specified orbits and quiet or activegeophysical conditions. For this application, the TPM-1 data base is accessed and copied to alocal (time dependent) set of data files in CRRESPRO format. The calculation of fluences thenproceeds in the same manner as in CRRESPRO-APP.Integral omni-directional fluence for a given energy channel is calculated from the differentialomni-directional fluence by summing over all energy channels with energy greater than thegiven channel (eliminating those with overlapping energy ranges, channels 5 and 15) andmultiplying by appropriate bandwidths, as discussed in the CRRESPRO Science Module.182AF-GEOSpace User’s <strong>Manual</strong>: Version 2.5
Note: The TPM-1 Science Module need NOT be run before TPM-1-APP.TPM-1-APP InputsThe inputs to the TPM-1-APP module are the orbit elements needed to calculate the satelliteorbit. The Environment Window for the TPM-1-APP module is the same as that for the SATEL-APP application except TPM-1-APP is set to use the orbit propagator Lokangle. See the SATEL-APP Module section of the documentation for input descriptions. The IGRF/O-P magnetic fieldmodel is used with extrapolation beyond 2010.TPM-1-APP OutputsThe TPM-APP Applications Module generates a return text window which can be displayedusing the Show Text button if it has been closed. Included in the text are the orbit elements andtables of both the differential and integral omni-directional fluences (in units of #/(cm 2 MeV yr)and #/(cm 2 yr), respectively) calculated for all 22 retained energy channels and for both activeand quiet conditions. Also generated is a 1D Gridded Data Set giving the position of the satelliteas a function of time that can be displayed using the Satellite Graphics Module.AF-GEOSpace User’s <strong>Manual</strong>: Version 2.5 183
The WBPROD-APP Module (V2.5 and Static Only)Model Name:Wide-Band Model (WBMOD)Version: September 1998 (Uses WBMOD Version 15.03 of 08 July 2005)Developer:USAF 55SWXS, <strong>Air</strong> <strong>Force</strong> Research Laboratory, and Radex, Inc. (nowAER, Inc.)References: Secan, J.A., and R.M. Bussey, An Improved Model of High-Latitude F-Region Scintillation (WBMOD Version 13.04), PL-TR-94-2254 (1994),ADA 288558Note: It is recommended that AF-GEOSpace users read the original modeldocumentation and descriptive articles before using the models.WBPROD-APP OverviewThe WBPROD-APP application produces a 24-hour forecast of the 95th percentile dB fadelevels along user-specified communication link(s) between a receiver site and satellites. TheWBMOD climatological ionospheric scintillation model is used and is described in more detailin the WBMOD Science Module section of this <strong>User's</strong> <strong>Manual</strong>. In the science module, WBMODis executed in a transmitter- or receiver-step mode at a fixed time. This application executesWBMOD in a time-step mode with the communication link(s) fixed in location. WBPROD-APPoutputs a summary text file of the hourly 95th percentile fades for a specified day of year andground-to-satellite link. Multiple satellite links to a single ground point can be written to thesame file. An option also exists to output a text file with the set of WBMOD parameters for thespecified link.Note: WBPROD-APP does not produce gridded output data for viewing with the AF-GEOSpace graphics modules. This module is a tailored product designed to runWBMOD scripts quickly and efficiently. This is an excellent tool for generatingscintillation products required for routine customers.WBPROD-APP InputsThe following Run Variables are mandatory,Note: This application DOES NOT use the AF-GEOSpace global parameters at the topof the Environment Window, but uses those entered in the following text fields.Day#:Kp:SSN:The day of the year, e.g., 1 = 1 Jan and 365 = 31 Dec (for non-leap year).The average geomagnetic Kp index forecast for the day.The sunspot number forecast for the day.The following Station variables are required to specify the ground station location,Name:Name of the ground station. If you saved a previous session and wish tore-load it, type in the name of the ground station (exactly as named before)and click on the Load Script button (see related discussion below).Lat (deg N): The geographic latitude of the ground station in degrees North.184AF-GEOSpace User’s <strong>Manual</strong>: Version 2.5
Lon (deg E):The geographic longitude of the ground station in degrees East.Alt (km):The altitude of the ground station above sea level in kilometers.The following Satellite variables are required to specify the locations and communicationfrequencies for the satellites,Name:The satellite name (must be unique).Lat (deg N): The geographic latitude of the satellite in degrees North. Remember, thisapplication steps WBMOD in time, the satellite link will be fixed inposition.Lon (deg E):Alt (km):Freq (MHz):The geographic longitude of the satellite in degrees East. Remember, thisapplication steps WBMOD in time, the satellite link will be fixed inposition.The satellite altitude above the center of the Earth in kilometers. Note thatstation altitude is specified using a different zero point. Because thecurrent version of WBMOD does not include doppler effects due tosatellite velocity, it is recommended that only geosynchronous satellitepositions are inputted (Alt ~ 36,000 km).The carrier frequency of the communications signal in MHz.Once the satellite variables have been input, the satellite must be added to the active satellite listdisplayed at the bottom of the window by clicking on the Add/Update button. Additionalsatellites can then be entered in the variable boxes and added to the list in a similar fashion.Satellites can be deleted from the list by first clicking on the satellite name in the active satellitelist and then clicking on the Delete button. WBPROD-APP will produce forecasts for all thesatellites in the active satellite list.Before running WBPROD-APP, the Save Script button must be clicked. This will save thestation and satellite parameters in a file labeled stationname.wb, where stationname is the Nameentered for the station in the current window.The Load Script button resets inputs from the last Save Script action and not from a previoussession. Use the Save Model option from the File menu to save session details for future use.The file entitled stationname.wb, where stationname is the Name entered for the station in thecurrent window will be loaded into WBPROD-APP.The user can choose to have either a Summary output (SI index only) or All the WBMOD outputparameters saved to a file by selecting the appropriate Text option before execution.Note: The Save Script button must be clicked before executing WBPROD-APP or elsethe last saved script will be run.WBPROD-APP OutputsUse the Display Text button to display output in an AF-GEOSpace text window. The followingoptions are available.Summary:Creates an ASCII text file labeled stationname_summary, wherestationname is the Name entered for the station in the current session. ThisAF-GEOSpace User’s <strong>Manual</strong>: Version 2.5 185
All:file lists the hourly values of the 95th percentile fades for links from theground station to all the satellites in the active satellite list. Fades arereported as negative values (dB).Creates an ASCII text file labeled stationname_all, where stationname isthe Name entered for the station in the current session. This file lists thehourly values of all the WBMOD output parameters including S4, sigmaphi, 95th percentile fade, STDEV LOG(I), and %Time for links from theground station to all the satellites in the active satellite list. See theWBMOD Science Module section of this <strong>User's</strong> <strong>Manual</strong> for further details.186AF-GEOSpace User’s <strong>Manual</strong>: Version 2.5
GRAPHICS MODULESGraphics modules are used to visualize the data sets created with the Application, Data, andScience modules. The inputs to a graphics module are 1D, 2D, 3D, Spectral, or Heliospace DataSets and the outputs are defined as graphical objects. A variety of graphics modules are providedfor one-, two-, and three-dimensional visualization. The graphics modules are accessed throughthe graphics manager that becomes visible when the Graphics option in the Module pulldownmenu is activated. The graphics manager consists of two lists - Available Modules and ActiveModules. Available Modules are the modules that are currently supported by AF-GEOSpace.Active Modules are modules that have been created and used by the AF-GEOSpace user duringthe current session.When initially accessed, the graphics manager will show a list of graphics under AvailableModules and the Active Modules list will be empty.Currently, the following graphics are supported by AF-GEOSpace:• ANNOTATION: Create and display descriptive text or time labels for viewports.• AXES: Plot a set of axes or the sun vector.• COORD-PROBE: Provides a method for probing data along lines defined in user-specifiedcoordinate systems.• COORD-SLICE: Display a slice of a data set along a constant coordinate surface.• DETECTOR: Define and associate fixed or tracking detector cones with satellites or stationlocations.• DMSP: Display DMSP precipitating particle data (processed using the DMSP Data Module)in 1D and Spectral windows.• EARTH: Plot an outlined or solid Earth. A variety of outline detail and grid options areavailable.• EMITTER: Define and associate fixed or tracking emitters, e.g., radar fan structures, withsatellites or stations.• FIELD-LINES: Plot magnetic field lines, flux tubes, and auroral equatorward boundaries.• GLOBAL INPUTS: Produce a line plot of the global input data values, e.g., Kp or Dst, as afunction of time.• GRID: Plot the grid associated with a data set.• IONSCINT-G: Display platform-based GPS frequency S4 scintillation simulation results(generated using the IONSCINT-G Science Module) in 1-D and Spectral windows.• ISOCONTOUR: Calculate an isocontour of a data set and plot the resulting surface.• LINK: View a line-of-sight link between stations and satellites or between satellites.• ORBIT-PROBE: Plot data sets from along satellite orbits.• ORBIT-SLICE: Cut the data set with a plane placed at the orbital plane of a satellite (or aplane perpendicular to or containing the satellite velocity vector) and plot the resulting slice.AF-GEOSpace User’s <strong>Manual</strong>: Version 2.5 187
• PLANE-SLICE: Cut the data set with an arbitrary plane and plot the resulting slice.• RAY TRACE: Produce a depiction of the ionospheric rays traced through the PIM sciencemodel data sets.• SATELLITE: Provides a means of viewing satellite trajectories, detector cones, andcommunications links.• STARS: Plot the celestial background including stars, planets, and the moon.• STATION: Plot a labeled location on or above the surface of the Earth.• VOLUME: View the entire volume of a data set as a single three-dimensional object• PARAMESH-COORDSLICE: Produce a slice or constant coordinate surface through aPARAMESH data set.• PARAMESH-FIELDLINES: Produce field lines generated by tracing a vector field througha PARAMESH data set.• PARAMESH-FIELDLINES II: Produce field lines generated by tracing a vector fieldthrough a PARAMESH data set.• PARAMESH-GRID: Display the grid, block structure (e.g., leaf and parent block), andoverall domain of a PARAMESH data set.• PARAMESH-ISOCONTOUR: Produce a surface of constant value through a threedimensionalPARAMESH data set.• PARAMESH-VOLUME: View the entire volume of a PARAMESH data set as a singlethree-dimensional object.188AF-GEOSpace User’s <strong>Manual</strong>: Version 2.5
Running Graphics ModulesTo run a graphics module, use the mouse to select the Graphics option in the Module pulldownmenu and Available Modules and Active Modules lists will appear in the Environment Window.Click on the desired choice under Available Modules. For example, to create a new COORDSLICE, click the mouse on Coord Slice in the Available Modules list. Choosing a graphicsmodule will do two things: first, the choice is added to the Active Modules list; second, theoptions associated with the chosen graphics module will appear in the Environment Window. Ingeneral, each graphics module will have a different Environment Window representing themodule specific inputs. Before attempting to display a graphics object, adjust the settings and/orselect an existing data set from the options presented in the Environment Window.The Display selector places the graphical object in the active viewport window. Note that thisselector is only active when the dimensionality of the data is appropriate for the current activewindow, e.g., 3D data cannot be displayed in a 1D viewport. If required, use one of the CreateViewport options in the Window pulldown menu to create a window of appropriatedimensionality or use the Projection option in the Viewport pulldown menu to change thedimensionality of the active viewport window.Alternating the Projection option in the Viewport pulldown menu between Two D and Three D isone way to view the same data in both dimensions. An even easier method is to use the Splitoption in the Viewport pulldown menu to divide a 2D (3D) viewport and then change thedimensionality of one of the viewports to 3D (2D).The Interactive selector (usually active by default) controls whether graphical renderings areupdated as changes are made to the graphic inputs.The Use Texture selector (usually active by default) option improves the appearance of colordata contours and its use is recommended.The appearance of the graphical object also be modified using the Lighting, Clipping,Transparency, Lights, Material, Color, Color Map, and Data Map options also available in theEnvironment Window. See the Graphical Module Options section of this manual for details ofthese features.The Animate Tool option in the Edit pulldown menu can be used to display data produced indynamic mode, i.e., if a science or application module was run using a Start and End time.SATEL-APP module output, i.e., satellite orbits, can be animated using this tool even if whenrun in static mode because the satellite module permits settingThe Delete option in the Edit pulldown menu is used to remove the highlighted science modulemember of the Active Modules list. Note that all active graphics objects must be removed beforethe science module used to generate their data can be removed.AF-GEOSpace User’s <strong>Manual</strong>: Version 2.5 189
ANNOTATIONThe ANNOTATION graphical object is used to display fixed text messages or the time and datein the graphics windows.The ANNOTATION graphical object rendering is dependent on the window type.In a 1D window, the ANNOTATION graphical object displays text in the graphics window.In a 2D window, the ANNOTATION graphical object displays text in the graphics window.In a 3D window, the ANNOTATION graphical object displays text in the graphics window.In a HelioSpace window, the ANNOTATION graphical object displays text in the graphicswindow.In a Spectral window, ANNOTATION does nothing.The ANNOTATION graphical object supports the Color option.ANNOTATION InputsText:The Text field can be edited to contain the text to be displayed in thegraphics window. The text will not appear while the Show Data option isactivated.Show Date:Font:X Position:Y Position:This option displays the time and date in place of the contents of the Textfield.The Font selector controls the font size used for the annotation. Theoptions include the machines Default font (size 20) and Times font (sizes10, 20, 30, 40, and 50).The X Position slider is used to position the annotation in the horizontaldirection.The Y Position slider is used to position the annotation in the vertical direction.190AF-GEOSpace User’s <strong>Manual</strong>: Version 2.5
AXESThe AXES graphical object will produce a set of AXES for different coordinate systems. It willalso produce a vector representing the sun direction, given the current time as set by the UTGlobal parameter or the Animation Window.The AXES graphical object rendering is dependent on the window type.In a 1D window, the AXES graphical object does nothing.In a 2D window, the AXES graphical object does nothing.In a 3D window, the AXES graphical object plots lines representing X, Y, and Z axes with theorigin at the center of the Earth.In a Heliospace window, AXES does nothing.In a Spectral window, AXES does nothing.The AXES graphical object supports the Color option.AXES InputsAxes Frame:The coordinate system in which the axes should be aligned. Assigned axiscolors can be changed using the Color display option. Choices are:GEOC: Geocentric coordinate system axes: The Z axis (blue) isaligned with the north rotational pole, the X axis (red)pierces the Greenwich Meridian on the equator (0 degLong, 0 deg Lat), and the Y axis (green) is equal to thenegative of the cross-product of X and Z.GEI:GSM:SM:Geocentric equatorial inertial coordinate system axes:The Z axis (blue) is the same as for the GEOCcoordinate system. The X axis (red) is aligned along thevernal equinox. The angle between the vernal equinoxand the Greenwich Meridian is set using the current UTfrom the Animation Window.Geocentric solar magnetospheric coordinate systemaxes: The X axis (red) points to the Sun. The Z axis(blue) is perpendicular to X and lies in the planecontaining the magnetic dipole axis. The Y axis (green)completes the right-handed system and is positivetowards dusk.Solar magnetic coordinate system axes: The X axis(red) is perpendicular to Z and lies in the planecontaining the Z axis and the Earth-Sun line. The Z axis(blue) is coincident with the magnetic dipole axis. TheY axis (green) completes the right-handed system and ispositive towards dusk.AF-GEOSpace User’s <strong>Manual</strong>: Version 2.5 191
Axes Specification:Axes Length:Sun vector:Solar direction axis: The direction of the sun (yellow) isbased on the current UT from the Animation Window.This section controls the display of the axes. The options are:Show Axes:Show Tics:For each of the axis components, activating the ShowAxes toggle button makes the axis visible.For each of the axis components, activating the ShowTics toggle button makes the tick marks on the axisvisible.Major Tic Spacing: The spacing (in Re) between major tick marks.Minor Tic Spacing: The spacing (in Re) between minor tick marks.The Axis Length slider controls the length of the axis to be drawn. Unitsare Earth radii (Re).192AF-GEOSpace User’s <strong>Manual</strong>: Version 2.5
COORD-PROBEThe COORD-PROBE graphical object is used to produce a line plot through a data set. The linevariable may be specified along a given coordinate direction in one of several coordinatesystems.The COORD-PROBE graphical object rendering is dependent on the window type.In a 1D window, the COORD-PROBE graphical object produces a line plot of data valuescolored according to the parameter value.In a 2D window, COORD-PROBE will project the line through the data set onto a 2D grid oflongitude (horizontal) and latitude (vertical). Note: Use the Earth grid to frame the plot.In a 3D window, COORD-PROBE will display the line through the data set in three-dimensionalspace around the Earth.In a Heliospace window, COORD-PROBE does nothing.In a Spectral window, COORD-PROBE does nothing.The COORD-PROBE graphical object supports the Color and Data Map options.COORD-PROBE InputsData:This option menu is used to select the main data set the COORD-PROBEis to be taken through. This option must be set before rendering is allowed.The option menu contains a list of valid, previously run science, data, andapplication data sets.System:Geometry:Vary:Steps:Type:Thickness:X Axis:The coordinate system in which the coordinate line will be generated. Theuser may select to probe the data set in geocentric (GEOC), geocentricsolar magnetospheric (GSM), solar magnetic (SM), or geocentricequatorial inertial (GEI) coordinates.Specify the geometry in which the coordinate line will be generated. Theuser may select Cartesian, Cylindrical, or Spherical geometry.Specify the coordinate along which the probe is to vary. These optionswill change depending on the settings of the Data, System, and Geometryinputs. In the cylindrical geometry, for example, the Vary selections willread Radius, Phi, and Z. The two sliders below the Vary options controlthe values of the two fixed coordinates.The number of points along the coordinate variable at which the data set isto be sampled.The Type options are used to select how the linear data are plotted, i.e., asdiscrete points (Point), a solid line (Line), or stippled line (Stipple 1 andStipple 2).The Thickness slider controls the width of plotted points and lines.Displayed X Axis features are controlled by the following options:AF-GEOSpace User’s <strong>Manual</strong>: Version 2.5 193
Y-Axis:Enabled:Grid:Min, Max:Auto:Format:Num Tics:The Enabled check box controls the display of axislabels.The Grid check box places grid lines at axis tic marklocations.The Min and Max text boxes are used to control therange of values plotted. After editing either value, theplot will update when the cursor is placed in any one ofthe other text boxes in the environment window.The Auto button adjacent to the Min and Max text boxesautomatically resets the plot range to the minimum andmaximum values of the data set.The Format text box determines the format of the ticmark labels. “C”-like format statements are accepted,e.g., “%5.2f” will label the tics using floating pointnumbers with two decimal places. Substitute an “e”for “f” and exponential formatting will be used. Afterediting a Format text box, the display will update whenthe cursor is placed in any other text box in theenvironment window.The Num Tics text box controls the number of labelsand tic marks along the axis. Update by placing thecursor in another text box.The Y Axis options are the same as the X Axis options described abovewith the following additional capabilities:Side:Left, Right: The Left and Right buttons determine the display side ofthe axis labels.Log: The Log check box activates the use of a log base 10scale. When applied to number values less than or equalto zero, the Log function will display a “-6” on the logscale.Save: The Save button activates a Save As popup window used to save the 1-Ddisplayed data to a text file. Designated file names should end with “.txt”for viewing convenience.194AF-GEOSpace User’s <strong>Manual</strong>: Version 2.5
COORD-SLICEThe COORD-SLICE graphical object is used to produce a slice or surface through a data set. Theslice is produced along a constant of one coordinate direction. For example, if the data set wasproduced on a spherical grid, the COORD-SLICE graphical object can produce slices at constantradius, constant latitude, or constant longitude. If the data set was produced using a Cartesiangrid, the COORD SLICE graphical object could produce a slice at constant X, Y, or Z value.The COORD-SLICE graphical object rendering is dependent on the window type.In a 1D window, the COORD-SLICE graphical object does nothing.In a 2D window, COORD-SLICE will project the constant coordinate slice onto the Earth’ssurface. Note that for this to be meaningful, the slice should be produced at constant altitude on aspherical grid, i.e., use Cut Plan C0.In a 3D window, COORD-SLICE will display the coordinate slice through the data set in threedimensionalspace around the Earth.In a Heliospace window, COORD-PROBE does nothing.In a Spectral window, COORD-PROBE does nothing.The COORD-SLICE graphical object supports the Clipping, Transparency, Lights, Material,Color, Color Map, and Data Map options.COORD-SLICE InputsData:The Data option menu is used to select the main data set the COORD-SLICE is to be taken through. This option must be set to a data set beforerendering is allowed. The option menu contains a list of valid, previouslyrun science, data, and application data sets.Block Rendering:The Block Rendering option displays the data using single-colored blockscentered on grid points which are colored according to the their data value.Cut Plane: The Cut Plane option defines the constant coordinate from the choices C0,C1, and C2. The generic names represent specific coordinate choicesdepending upon the grid type of the data set. For example, if the grid typeof the data set is spherical, C0 will produce a slice at constant radius; C1will produce a slice at constant latitude; C2 will produce a slice at constantlongitude. Similarly, if the data set has a Cartesian grid, the C0, C1, andC2 will produce slices at constant X, Y, and Z, respectively.Display Options:The Display Options field will allow the COORD-SLICE to be filled ascolored or white contours, filled or discrete. Any combination of theoptions may be selected.Filled: Render the COORD-SLICE as solid, filled, colorcontours.Grey:If the grid extends beyond meaningful datain the data set, the points without valid datawill be filled in as grey.AF-GEOSpace User’s <strong>Manual</strong>: Version 2.5 195
Position Value:Contours:Grid:Render the COORD-SLICE as discrete white lines. Thelines represent isovalues of the data evenly spacedbetween the data minimum and the data maximum. Thenumber of contours is determined by the Number ofContours input.ColorThe isovalue lines are colored according tothe color bar to represent the magnitude ofthe isovalue.An outline of the grid will be shown in the plane of thecoordinate slice.The Position Value option determines the position of the coordinate slice.The position value represents the position along the constant coordinate.For example, if the dataset has a spherical grid and the C0 coordinate ischosen, COORD-SLICE will produce a slice at constant radius. Theposition value input will select the value of the radius at which to producethe slice. The value will range from the grid minimum to the gridmaximum for the chosen coordinate.Number of Contours: The Number of Contours input slider determines the number of contourlines to be plotted between the data minimum and the data maximum if theDisplay Option selection is just Contours or Contours: Color (see above).196AF-GEOSpace User’s <strong>Manual</strong>: Version 2.5
DETECTORThe DETECTOR graphical object is used to view a detector located at a station or in orbit on asatellite. The stations and satellites to be associated with a detector must have been displayedpreviously using the STATION graphics module and the SATEL-APP and SATELLITEmodules, respectively.The DETECTOR graphical object rendering is dependent on the window type.In a 1D window, the DETECTOR graphical object does nothing.In a 2D window, the DETECTOR graphical object displays the detector cone footprint on theEarth’s surface.In a 3D window, the DETECTOR graphical object displays a cone in space around the Earth.In a Heliospace window, DETECTOR graphical object does nothing.In a Spectral window, DETECTOR graphical object does nothing.The DETECTOR graphical object supports the Transparency and Color options.DETECTOR InputsTo display a detector cone coming from a station or satellite, highlight an entry in the OriginStations list and click the Display button. The detector properties can be adjusted using theProperties and Look Dir options. Characteristics can be created and saved for future use withthe File option.Origin Station: The Origin Station list presents a list of stations and satellites currentlyavailable for associating with a detector. To add a station to the OriginStation list, use the STATIONS graphics module to display a station. Toadd a satellite to the Origin Station list, run the SATEL-APP module anddisplay a satellite using the SATELLITE graphics module.Properties:Look Dir:The Properties switch accesses to the following detector cone properties.View Angle:Solid:The View Angle slider and text box are used to set thewidth in degrees of the detector cone.The Solid toggle button is used to display solid detectorcones. By default only the silhouette edges of thedetector cone are displayed.The default look direction for a detector cone coming from a satellite anda station is toward the nadir and the zenith, respectively. The Look Dirswitch provides access to the following detector look direction options:Fixed: The Fixed switch reveals slider and equivalent textfields used to adjust the Pitch and Azimuth direction.Pitch:For a satellite detector with azimuth angleequal to zero degrees, a 90 (-90) degreepitch angle is parallel (anti-parallel) to thesatellite geographic velocity vector. For aAF-GEOSpace User’s <strong>Manual</strong>: Version 2.5 197
File:Tracking:station detector, a 90 (-90) degree pitchangle points the cone northward(southward).Azimuth: For a satellite detector with a 90 degreepitch angle, a zero degree azimuth anglealigns the detector cone with the satellitegeographic velocity vector. For a stationdetector with a 90 degree pitch angle, a zerodegree azimuth angle directs the detectorcone northward.The Tracking switch reveals a Track Station list. Thedetector cone look direction will be fixed on a station orsatellite if an entry is highlighted. The detector conewill only remain visible while there is an open directline-of-sight between the Origin Station and the TrackStation objects. To add a station to the Track Stationlist, use the STATIONS graphics module to display astation. To add a satellite to the Track Station list, runthe SATEL-APP module and display a satellite usingthe SATELLITE graphics module.The File option allows the user to display pre-defined detectors as well asdefine new detectors and edit the list of saved detector descriptions. Thesave detector configurations can only be used when the Look Dir: Fixedoption is selected (see above). The following input options are provided:Detector Views: The Detector Views list presents a list of detector conescurrently available for associating with the station orsatellite highlighted in the Origin Station list. Todisplay one of these detectors, highlight an entry in thelist and click on the Display button. To save the currentdetector setting as a new entry in this list, use the Nameand Save features detailed below.Name:The Name text field represents the name to be assignedto a new detector entry that will appear in the DetectorViews list. The current Properties and Look Dir settingswill be associated with this name when saved.Save:The Save button adds a detector called Name to theDetector Views list. The characteristics to be associatedwith the new detector are those currently appearing inthe Properties and Look Dir settings.Delete: The Delete button allows the user to remove a detector from the Detector Views list. Toremove a detector, highlight its name in the Detector Views list and click on the Delete button.198AF-GEOSpace User’s <strong>Manual</strong>: Version 2.5
DMSPThe DMSP graphical object is used to view 1-D plots and 2-D spectral plots of DMSP SSJ/4 & 5and SSI/ES sensor data that were previously prepared using the DMSP Data Module.The DMSP graphical object rendering is dependent on the window type.In a 1D window, the DMSP graphical object will display a set of DMSP data derived quantitiesas a function of time.In a 2D window, the DMSP graphical object does nothingIn a 3D window, the DMSP graphical object does nothing.In a Heliospace window, DMSP graphical object does nothing.In a Spectral window, the DMSP graphical object displays energy spectrograms of precipitatingelectron and ion particle counts and flux as a function of time for a single DMSP satellite orbit.The DMSP graphical object supports the Color Map option.DMSP InputsBefore using this DMSP graphics module, a set of data files for a DMSP satellite orbit must firstbe processed using the DMSP Data Module. The 1D Plot quantities described below are viewedusing a 1D window (e.g., select the Viewport menu, then the option Projection and sub-optionOne D). The Counts and Flux quantities accessible via the Data button are viewed using aSpectral window (e.g., select the Viewport menu, then the options Projection and sub-optionSpectral). See “DMSP Precipitating Particles: Data Versus Climatology” in the EXAMPLESsection of this manual for a demonstration of basic module functions.Data:The Data option button is used to select either Counts in units ofcounts/observation or Flux in units of log[#/(cm2-s-sr)] as the quantity tobe viewed in the 2-D Spectral window. If no options appear, then the usermust use the DMSP Data Module to process an orbit of data. Checking theDisplay option while a Spectral window is active will produce a 2Denergy versus time plot in the Spectral window.Eq. Edge:If the equatorward edge boundary of the diffuse auroral precipitation wascontained in the DMSP data files processed, then selecting this option willcause the boundary locations to appear in the Spectral plot.1D Plot: The 1D Plot options listed here are quantities to be viewed in a 1-Dwindow. Checking the Display option while a 1-D window is active willproduce a 1-D plot of the selected quantity versus time in that window. Ifno plot appears, then the user must use the DMSP Data Module to processan orbit of data.None:No data has been selected for viewing in a 1-D window.Data Probe 0Selecting the Data Probe 0 option will cause a line tobe drawn in the spectral plot window and the spectraldata along that line will appear in the 1-D plot window.If this option is selected then the X Axis, Y Axis, andAF-GEOSpace User’s <strong>Manual</strong>: Version 2.5 199
X Axis, Y Axis:Position:IEF-E, IEF-PINF-E, INF-P:AE-E, AE-P:Bx, By, Bz:V Hori, V Vert:Position options described below control the orientationand placement of the data probe line.Integral energy flux of electrons (IEF-E) or protons(IEF-P) will be plotted by selecting these options.Integral number flux of electrons (INF-E) or protons(INF-P) will be plotted by selecting these options.Average energy of electrons (AE-E) or protons (AE-P)will be plotted by selecting these options.The magnetic field components (in nT) are measureddown along the local vertical direction (Bx), along theforward direction (By; perpendicular to Bx), and“vertical” (Bz, perpendicular to both Bx and By) to thespacecraft orbit.Ion drift velocities (m/s) in the horizontal (V Hori) andvertical (V Vert) direction will be plotted by selectingthese options.The following BMode options apply only to J5 data available on DMSPF16 and future missions.BMode:IEF-E,BMode:IEF-P:BMode:INF-E,BMode: INF-P:BMode:AE-E,BMode: AE-P:For the BMode pitch-angle selected in the DMSP DataModule, these options result in plots of the integralenergy flux of electrons (IEF-E) or protons (IEF-P).For the BMode pitch-angle selected in the DMSP DataModule, these options result in plots of the integralnumber flux of electrons (INF-E) or protons (INF-P).For the BMode pitch-angle selected in the DMSP DataModule, these options result in plots of the averageenergy of electrons (AE-E) or protons (AE-P).If the 1D Plot option called Data Probe 0 is selected, then selecting the XAxis or Y Axis option determines whether the data probe line will runvertically or horizontally, respectively, through the spectral plot. If theData Probe 0 option is not selected, then these options do nothing.If the 1D Plot option called Data Probe 0 is selected, then the Positionslider controls the vertical (if the X Axis option was selected) or horizontal(if the Y Axis option was selected) location in the spectral plot of the linedefining the quantity to be assigned to the Data Probe 0 option. The datato appear in the 1-D window will then represent the spectral plot contentalong the line. If the Data Probe 0 option is not selected, then this optiondoes nothing.200AF-GEOSpace User’s <strong>Manual</strong>: Version 2.5
Type:Thickness:X Axis:Y-Axis:The Type options are used to select how the linear data are plotted, i.e., asdiscrete points (Point), a solid line (Line), or stippled line (Stipple 1 andStipple 2).The Thickness slider controls the width of plotted points and lines.Displayed X Axis features are controlled by the following options:Enabled:Grid:Min, Max:Auto:Format:Num Tics:The Enabled check box controls the display of axislabels.The Grid check box places grid lines at axis tic marklocations.The Min and Max text boxes are used to control therange of values plotted. After editing either value, theplot will update when the cursor is placed in any one ofthe other text boxes in the environment window.The Auto button adjacent to the Min and Max text boxesautomatically resets the plot range to the minimum andmaximum values of the data set.The Format text box determines the format of the ticmark labels. “C”-like format statements are accepted,e.g., “%5.2f” will label the tics using floating pointnumbers with two decimal places. Substitute an “e”for “f” and exponential formatting will be used. Afterediting a Format text box, the display will update whenthe cursor is placed in any other text box in theenvironment window.The Num Tics text box controls the number of labelsand tic marks along the axis. Update by placing thecursor in another text box.The Y Axis options are the same as the X Axis options described abovewith the following additional capabilities:Side:Left, Right: The Left and Right buttons determine the display side ofthe axis labels.Log: The Log check box activates the use of a log base 10scale. When applied to number values less than or equalto zero, the Log function will display a “-6” on the logscale.AF-GEOSpace User’s <strong>Manual</strong>: Version 2.5 201
EARTHThe EARTH graphical object can be used to plot a representation of the Earth as well as surfacegrids, the day/night terminator, and political boundaries, and rivers. The color of all surfacefeatures is adjustable. Rendering of the EARTH graphical object is dependent on the windowtype.In a 1D window, the EARTH graphical object does nothing.In a 2D window, the EARTH graphical object plots outlines or solid representations of theEarth’s continents. The horizontal axis is longitude; the vertical axis is latitude.In a 3D window, the EARTH graphical object plots a sphere with either outlines or filledrepresentations of the Earth’s continents.In a Heliospace window, EARTH does nothing.In a Spectral window, EARTH does nothing.The EARTH graphical object supports the Clipping, Lights, Material, and Color options.EARTH InputsOutline Detail:Grid Options:Resolution:Detail Level:The user can select any of the buttons in this section to determine how theEarth is drawn. The choices are:Textured: Draw the continents filled with a textured map.Geographic Bndys: Draw white outlines of geographic boundary features.Political Bndys: Draw yellow outlines of political boundaries.Rivers: Draw green outlines of rivers.The selections within this section allow the user to place several differentgrids on the representation of the Earth. The choices are:Lat/Lon Grid: Render a grid showing geographic latitude andlongitude. The default resolution is 10 o .Mag Dipole Grid: Render a grid showing magnetic latitude and longitudeof the tilted dipole field. The default resolution is 10 o .CGM Grid: Render a grid showing magnetic latitude and longitudeof the CGM field. The default resolution is 10 o.Terminator: Draw a line at the terminator using the global UT.These up/down arrows determine the resolution with which outlinefeatures are rendered and rendering becomes more detailed as theresolution is decreased. The Resolution setting only affects outlinedgeographic boundaries, political boundaries, and rivers.The database from which the outline features are rendered on the Earth isdivided by “detail level”. As Detail Level is increased, more minorgeographic features are included on the plot. For example, withgeographic boundaries, a detail level of one will render continents and202AF-GEOSpace User’s <strong>Manual</strong>: Version 2.5
“major” islands. Increasing the detail level will increase the number of“minor” islands and other small geographic features included in theoutput. These up/down arrows only affect outlined geographic boundariesand rivers.AF-GEOSpace User’s <strong>Manual</strong>: Version 2.5 203
EMITTERThe EMITTER graphical object is used to view an emitter, such as a radar fan, located at astation or in orbit on a satellite. The stations and satellites to be associated with an EMITTERmust have been displayed previously using the STATION graphics module and the SATEL-APPand SATELLITE modules, respectively.The EMITTER graphical object rendering is dependent on the window type.In a 1D window, the EMITTER graphical object does nothing.In a 2D window, the EMITTER graphical object does nothing.In a 3D window, the EMITTER will display the emitter fan in three-dimensional space aroundthe Earth.In a Heliospace window, EMITTER does nothing.In a Spectral window, EMITTER does nothing.The EMITTER graphical object supports the Transparency and Color options.EMITTER InputsTo display an emitter fan coming from a station or satellite, highlight an entry in the OriginStation list and click the Display button. The EMITTER properties can be adjusted using theProperties and Look Dir options. EMITTER characteristics can be created and saved to file forfuture use with the File option.Origin Station: The Origin Station list presents a list of stations and satellites currentlyavailable for associating with an EMITTER. To add a station to the OriginStation list, use the STATIONS graphics module to display a station. Toadd a satellite to the Origin Station list, run the SATEL-APP module anddisplay a satellite using the SATELLITE graphics module.Properties:Look Dir:The Properties switch provides access to the following EMITTER fanproperties.View Horizontal: The View Horizontal slider and text box are used to sethorizontal width in degrees of the EMITTER fan.View Vertical: The View Vertical slider and text box are used to set thevertical width in degrees of the EMITTER fan.View Range(km): The View Range slider and text box are used to set therange in kilometers of the EMITTER fan.Solid:The Solid toggle button is used to display solidEMITTER cones. By default only the silhouette edgesof the EMITTER cone are displayed.The default look direction for an EMITTER cone coming from a satelliteand a station is toward the nadir and the zenith, respectively. The Look Dirswitch provides access to the following EMITTER look direction options:204AF-GEOSpace User’s <strong>Manual</strong>: Version 2.5
File:Fixed:Tracking:The Fixed switch reveals slider and equivalent textfields used to adjust the Pitch and Azimuth direction.Pitch:For a satellite EMITTER with azimuth angleequal to zero degrees, a 90 (-90) degreepitch angle is parallel (anti-parallel) to thesatellite velocity vector, respectively. For astation EMITTER, a 0 degree pitch anglepoints the cone northward tangent to theEarth’s surface. Positive (negative) pitchangles direct the fan below (above) thehorizon.Azimuth: For a satellite EMITTER with a 90 degreepitch angle, a zero degree azimuth anglealigns the EMITTER cone with the satellitevelocity vector. For a station EMITTERwith a 0 degree pitch angle, a zero degreeazimuth angle directs the EMITTER conenorthward with positive (negative) azimuthangles rotating the fan eastward (westward).The Tracking switch reveals a Track Station list. TheEMITTER fan look direction will be fixed on a stationor satellite if an entry is highlighted. The EMITTERcone will only remain visible while there is an opendirect line-of-sight between the Origin Station and theTrack Station objects. To add a station to the TrackStation list, use the STATIONS graphics module todisplay a station. To add a satellite to the Track Stationlist, run the SATEL-APP module and display a satelliteusing the SATELLITE graphics module.The File option allows the user to display pre-defined EMITTERs as wellas define new EMITTERs and edit the list of saved EMITTERdescriptions. The saved EMITTER configurations can only be used whenthe Look Dir: Fixed option is selected (see above). The following inputoptions are provided:EMITTER Views: The EMITTER Views list presents a list of EMITTERcones currently available for associating with thestation or satellite highlighted in the Origin Station list.To display one of these EMITTERs, highlight an entryin the list and click on the Display button. To save thecurrent EMITTER setting as a new entry in this list usethe Name and Save features detailed below.Name:The Name text field represents the name to be assignedto a new EMITTER entry that will appear in theAF-GEOSpace User’s <strong>Manual</strong>: Version 2.5 205
Save:Delete:EMITTER Views list. The current Properties and LookDir settings will be associated with this name whensaved.The Save button adds an EMITTER called Name to theEMITTER Views list. The characteristics to beassociated with the new EMITTER are those currentlyappearing in the Properties and Look Dir settings.The Delete button allows the user to remove anEMITTER from the EMITTER Views list. To removean EMITTER, highlight its name in the EMITTERViews list and click on the Delete button.206AF-GEOSpace User’s <strong>Manual</strong>: Version 2.5
FIELD-LINESThe FIELD-LINES graphical object is used to produce a depiction of magnetic field lines fromthe geomagnetic field model applications BFIELD-APP and BFOOTPRINT-APP and from theequatorial boundary produced by the AURORA science module.The FIELD-LINES graphical object rendering is dependent on the window type.In a 1D window, the FIELD-LINES graphical object does nothing.In a 2D window, FIELD-LINES will project the lines onto a 2D grid of longitude (horizontal)and latitude (vertical).In a 3D window, FIELD-LINES will display the lines in three-dimensional space around theEarth.In a Heliospace window, FIELD-LINES does nothing.In a Spectral window, FIELD-LINES does nothing.The FIELD-LINES graphical object supports the Clipping, Transparency, Lights, Material, andColor options.FIELD-LINES InputsData:The Data option menu is used to select the main data set and the type offield lines to be displayed. This option must be set before rendering isallowed. The option menu contains a list of valid, previously generatedBFIELD-APP, BFOOTPRINT-APP, and AURORA items.Plot Type:Line Width:Line Type:SmoothThe plot type field determines how the FIELD-LINES should be rendered.Field Lines:Filled Surface:Render the FIELD-LINES as separate field lines.Render the FIELD-LINES as a surface connecting thefield lines.These up/down arrows are used to select the width of the field lines in thedisplay from 1 (thinnest) to 5 (thickest).This option renders smooth depictions of the field lines.AF-GEOSpace User’s <strong>Manual</strong>: Version 2.5 207
GLOBAL INPUTSThe GLOBAL INPUTS graphical object is used to produce a line plot of the global input datavalues as a function of time. For dynamic runs, the time range is determined by the Start andEnd times entered at the top of the Environment Window. For static runs, the time range is fixedequal to 24-hours beginning with the Start time.The GLOBAL INPUTS graphical object rendering is dependent on the window type.In a 1D window, the GLOBAL INPUTS graphical object produces a line plot.In a 2D window, GLOBAL INPUTS does nothing.In a 3D window, GLOBAL INPUTS does nothing.In a Heliospace window, GLOBAL INPUTS does nothing.In a Spectral window, GLOBAL INPUTS does nothing.The GLOBAL INPUTS graphical object supports the Transparency and Color options.GLOBAL INPUTS InputsValue:The Value options represent global input parameters available for plotting.The choices include magnetic activity indices Kp, Sum Kp, Ap, Ap15, aswell as the sunspot number SSN, F10.7 cm solar radiation flux, thegeomagnetic index Dst, and the equatorward edge of the diffuse aurora atmidnight (Eq Edge). For details about these parameters please refer to theGlobal Parameters section of this user’s manual. In dynamic mode, thetext version of these values can be edited directly using the Globalspulldown menu.Type:Thickness:X Axis:The Type options are used to select how the linear data are plotted, i.e., asdiscrete points (Point), a solid line (Line), or stippled line (Stipple 1 andStipple 2).The Thickness slider controls the width of plotted points and lines.Displayed X Axis features are controlled by the following options:Enabled:Grid:Min, Max:Auto:The Enabled check box controls the display of axislabels.The Grid check box places grid lines at axis tic marklocations.The Min and Max text boxes are used to control therange of values plotted. After editing either value, theplot will update when the cursor is placed in any one ofthe other text boxes in the environment window.The Auto button adjacent to the Min and Max text boxesautomatically resets the plot range to the minimum andmaximum values of the data set.208AF-GEOSpace User’s <strong>Manual</strong>: Version 2.5
Y-Axis:Format:Num Tics:The Format text box determines the format of the ticmark labels. “C”-like format statements are accepted,e.g., “%5.2f” will label the tics using floating pointnumbers with two decimal places. Substitute an “e”for “f” and exponential formatting will be used. Afterediting a Format text box, the display will update whenthe cursor is placed in any other text box in theenvironment window.The Num Tics text box controls the number of labelsand tic marks along the axis. Update by placing thecursor in another text box.The Y Axis options are the same as the X Axis options described abovewith the following additional capabilities:Side: Left, Right: The Left and Right buttons determine the display side ofthe axis labels.Log: The Log check box activates the use of a log base 10scale. When applied to number values less than or equalto zero, the Log function will display a “-6” on the logscale.Save: The Save button activates a Save As popup window used to save the 1-Ddisplayed data to a text file. Designated file names should end with “.txt”for viewing convenience.AF-GEOSpace User’s <strong>Manual</strong>: Version 2.5 209
GRIDThe GRID graphical object can be used to draw the calculation grid for the dataset. Rendering ofthe GRID graphical object is dependent on the window type.In a 1D window, the GRID graphical object does nothing.In a 2D window, the GRID graphical object plots the grid of the dataset with the horizontal axisrepresenting longitude and the vertical axis representing latitude.In a 3D window, the GRID graphical object draws the grid of the data set in three-dimensionalspace.In a Heliospace window, GRID does nothing.In a Spectral window, GRID does nothing.The GRID graphical object supports the Color option.GRID InputsData:Plot as:The Data option menu is used to select the main data set for which theGRID is to be plotted. This option must be set to a data set beforerendering is allowed. The option menu contains a list of valid, previouslyrun science, data, and application data sets.This input is used to specify whether the grid should be plotted as a seriesof Points, one to a grid vertex, or as a series of connected Lines.210AF-GEOSpace User’s <strong>Manual</strong>: Version 2.5
IONSCINT-GThe IONSCINT-G graphical object is used to view GPS scintillation scenarios for fixed receiverplatforms generated by the IONSCINT-G Science Module. Results can be viewed in 1-D plots ofscintillation vs. azimuth or elevation and 2-D all-sky scintillation maps in azimuth and elevation.The IONSCINT-G graphical object rendering is dependent on the window type.In a 1D window, the IONSCINT-G graphical object will display a set of scintillation data (the S4index) as a function of either elevation or azimuth angle.In a 2D window, the IONSCINT-G graphical object does nothingIn a 3D window, the IONSCINT-G graphical object does nothing.In a Heliospace window, IONSCINT-G graphical object does nothing.In a Spectral window, the IONSCINT-G graphical object displays a 2D all-sky plot representingthe view from a fixed platform of the S4 index as a function of elevation and azimuth angle for agiven time.The IONSCINT-G graphical object supports the Color Map and Data Map options.IONSCINT-G InputsThe IONSCINT-G Science Module must be run before using this IONSCINT-G graphicsmodule. The Data Probe quantities described below are viewed using a 1D window (e.g., selectthe Viewport menu, then the option Projection and sub-option One D). The S4Index outputaccessible via the Data button are viewed using a Spectral window (e.g., select the Viewportmenu, then the options Projection and sub-option Spectral).Data:Data Probe:Sin(elev), Azimuth:The Data option button is used to select the scintillation output (i.e., theS4 index) to be viewed in active 1-D and/or 2-D Spectral windows. If nooptions appear, then the user must run the IONSCINT-G Science Module.Checking the Display option while a Spectral window is active willproduce a 2D all-sky plot of the S4 index as a function of elevation(actually sin(elevation angle) and azimuth angle (0° for North, 90° forEast, etc).Eight different Data Probes can be activated and viewed by checking theEnabled box while the corresponding probe number (0-7) is showing. If anall-sky plot is visible in an active spectral window, then a data probe linewill be drawn in it and the data along that line can also be displayed in anactive 1-D window. The Sin(elev), Azimuth, and Position optionsdescribed below control the orientation and placement of the data probe. Ifno Data Probe is Enabled, then the following options do nothing.Selecting one of these options to determine if the data probe appears in thespectral window as a circle of constant Sin(elev) or a radial line ofconstant Azimuth.AF-GEOSpace User’s <strong>Manual</strong>: Version 2.5 211
Position:1D OptionsType:Thickness:X Axis:Y-Axis:The Position slider controls the value of Sin(elev) or Azimuth associatedwith the Data Probe.The Type options are used to select how the linear data are plotted, i.e., asdiscrete points (Point), a solid line (Line), or stippled line (Stipple 1 andStipple 2).The Thickness slider controls the width of plotted points and lines.Displayed X Axis features are controlled by the following options:Enabled: The Enabled check box controls the display of axislabels.Grid:Min, Max:Auto:Format:Num Tics:The Grid check box places grid lines at axis tic marklocations.The Min and Max text boxes are used to control therange of values plotted. After editing either value, theplot will update when the cursor is placed in any one ofthe other text boxes in the environment window.The Auto button adjacent to the Min and Max text boxesautomatically resets the plot range to the minimum andmaximum values of the data set.The Format text box determines the format of the ticmark labels. “C”-like format statements are accepted,e.g., “%5.2f” will label the tics using floating pointnumbers with two decimal places. Substitute an “e”for “f” and exponential formatting will be used. Afterediting a Format text box, the display will update whenthe cursor is placed in any other text box in theenvironment window.The Num Tics text box controls the number of labelsand tic marks along the axis. Update by placing thecursor in another text box.The Y Axis options are the same as the X Axis options described abovewith the following additional capabilities:Side:Left, Right: The Left and Right buttons determine the display side ofthe axis labels.Log: The Log check box activates the use of a log base 10scale. When applied to number values less than or equalto zero, the Log function will display a “-13” on the logscale.212AF-GEOSpace User’s <strong>Manual</strong>: Version 2.5
ISOCONTOURThe ISOCONTOUR graphical object is used to produce a surface of constant value through athree-dimensional data set.The ISOCONTOUR graphical object rendering is dependent on the window type.In a 1D window, the ISOCONTOUR graphical object does nothing.In a 2D window, ISOCONTOUR will project the outline of the constant value surface onto a 2Dgrid representing longitude (horizontal) and latitude (vertical).In a 3D window, ISOCONTOUR will display the constant value surface through the data set inthree-dimensional space around the Earth.In a Heliospace window, ISOCONTOUR does nothing.In a Spectral window, ISOCONTOUR does nothing.The ISOCONTOUR graphical object supports the Clipping, Transparency, Lights, Material,Color Map, and Data Map options.ISOCONTOUR InputsData:The Data option menu is used to select the main data set theISOCONTOUR is to be taken through. This option must be set beforerendering is allowed. The option menu contains a list of valid, previouslyrun science, data, and application data sets.Contour Value: The Contour Value slider input determines the value of the constantsurface. The values will range from the minimum to the maximum for the chosen data set. Thenumbers below the slider represents the relative and actual data values.AF-GEOSpace User’s <strong>Manual</strong>: Version 2.5 213
LINKThe LINK graphical object is used to view a line-of-sight link between stations and satellites orbetween separate satellites. The link can be colored with interpolated values from a selected dataset. All stations to be used must have been displayed previously using the STATIONS graphicsmodule. All satellites to be used must have been produced previously using the SATEL-APPapplication module and displayed using the SATELLITE graphics module.The LINK graphical object rendering is dependent on the window type.In a 1D window, the LINK graphical object produces a line plot of data values colored accordingto the parameter values along the link. The distance between the link ends is normalized to one.In a 2D window, the LINK will project the link onto a 2D grid representing longitude(horizontal) and latitude (vertical).In a 3D window, the LINK will display the link in three-dimensional space around the Earth.In a Heliospace window, LINK does nothing.In a Spectral window, LINK does nothing.The LINK graphical object supports the Color and Color Map options.LINK InputsStation 1, Station 2:Data:Num Steps:Type:Thickness:X Axis:The Station 1 and Station 2 lists contain all active station and satellitegraphics objects that can be linked. To view a link between two stations,two satellites, or between a station and a satellite, select one entry fromeach Station list and click the Display button. To add a station to the lists,use the STATIONS graphics module to display a station. To add asatellite to the lists, run the SATEL-APP module and display a satelliteusing the SATELLITE graphics module.The Data button is used to select a main data set for display along the link.The option menu contains a list of valid, previously run science andapplication data sets. When a data set is selected, the link should appearcolored, representing interpolated data values along the track. If the Dataoption is off, the orbit trajectory appears as a single color.The Num Steps text box indicates the number of steps used in renderingcolors representing data values along the link. The number of colors usedto represent data along the link increases with the value of Num Steps.The Type options are used to select how the linear data are plotted, i.e., asdiscrete points (Point), a solid line (Line), or stippled line (Stipple 1 andStipple 2).The Thickness slider controls the width of plotted points and lines.Displayed X Axis features are controlled by the following options:Enabled:The Enabled check box controls the display of axislabels.214AF-GEOSpace User’s <strong>Manual</strong>: Version 2.5
Y-Axis:Grid:Min, Max:Auto:Format:Num Tics:The Grid check box places grid lines at axis tic marklocations.The Min and Max text boxes are used to control therange of values plotted. After editing either value, theplot will update when the cursor is placed in any one ofthe other text boxes in the environment window.The Auto button adjacent to the Min and Max text boxesautomatically resets the plot range to the minimum andmaximum values of the data set.The Format text box determines the format of the ticmark labels. “C”-like format statements are accepted,e.g., “%5.2f” will label the tics using floating pointnumbers with two decimal places. Substitute an “e”for “f” and exponential formatting will be used. Afterediting a Format text box, the display will update whenthe cursor is placed in any other text box in theenvironment window.The Num Tics text box controls the number of labelsand tic marks along the axis. Update by placing thecursor in another text box.The Y Axis options are the same as the X Axis options described abovewith the following additional capabilities:Side: Left, Right: The Left and Right buttons determine the display side ofthe axis labels.Log: The Log check box activates the use of a log base 10scale. When applied to number values less than or equalto zero, the Log function will display a “-6” on the logscale.Save: The Save button activates a Save As popup window used to save the 1-Ddisplayed data to a text file. Designated file names should end with “.txt”for viewing convenience.AF-GEOSpace User’s <strong>Manual</strong>: Version 2.5 215
ORBIT-PROBEThe ORBIT-PROBE graphical object is used to produce a line plot through a data set along anorbit.The ORBIT-PROBE graphical object rendering is dependent on the window type.In a 1D window, the ORBIT-PROBE graphical object produces a line plot.In a 2D window, ORBIT-PROBE does nothing.In a 3D window, ORBIT-PROBE does nothing.In a Heliospace window, ORBIT-PROBE does nothing.In a Spectral window, ORBIT-PROBE does nothing.The ORBIT-PROBE graphical object supports the Transparency and Color options.ORBIT-PROBE InputsPath/Abscissa: This option menu is used to select an orbit from a list of valid, previouslyproduced orbits.Data/Ordinate: This option menu is used to select the main data set the ORBIT-PROBE isto be taken through. This option must be set before rendering is allowed.The option menu contains a list of valid, previously run science, data, andapplication data sets.Type:Thickness:Integral:X Axis:The Type options are used to select how the linear data are plotted, i.e., asdiscrete points (Point), a solid line (Line), or stippled line (Stipple 1 andStipple 2).The Thickness slider controls the width of plotted points and lines.For single-valued functions y = f(x), selecting the Integral box changesthe 1-D x-y parameter plot to an integral plot with value y = Σf(x)dx.Displayed X Axis features are controlled by the following options:Enabled:Grid:Min, Max:Auto:The Enabled check box controls the display of axislabels.The Grid check box places grid lines at axis tic marklocations.The Min and Max text boxes are used to control therange of values plotted. After editing either value, theplot will update when the cursor is placed in any one ofthe other text boxes in the environment window.The Auto button adjacent to the Min and Max text boxesautomatically resets the plot range to the minimum andmaximum values of the data set.Log: The Log check box activates the use of a log base 10scale. When applied to number values less than or equal216AF-GEOSpace User’s <strong>Manual</strong>: Version 2.5
Y-Axis:Format:Num Tics:to zero, the Log function will display a “-6” on the logscale.The Format text box determines the format of the ticmark labels. “C”-like format statements are accepted,e.g., “%5.2f” will label the tics using floating pointnumbers with two decimal places. Substitute an “e”for “f” and exponential formatting will be used. Afterediting a Format text box, the display will update whenthe cursor is placed in any other text box in theenvironment window.The Num Tics text box controls the number of labelsand tic marks along the axis. Update by placing thecursor in another text box.The Y Axis options are the same as the X Axis options described abovewith the following additional capability:Side: Left, Right: The Left and Right buttons determine the display side ofthe axis labels.Save: The Save button activates a Save As popup window used to save the 1-Ddisplayed data to a text file. Designated file names should end with “.txt”for viewing convenience.AF-GEOSpace User’s <strong>Manual</strong>: Version 2.5 217
ORBIT-SLICEThe ORBIT-SLICE graphical object is used to produce a data set slice that contains a satelliteand the slice is produced in a plane defined relative to a specified orbit. The planes are definedusing the coordinate system used to produce the data set or are planes perpendicular to orcontaining the satellite velocity vector. When a data set is produced using spherical coordinates,for example, the displayed data can be “slaved” to the altitude of the satellite by selecting thesatellite radius (P0) as the defining coordinate.The ORBIT-SLICE graphical object rendering is dependent on the window type.In a 1D window, the ORBIT-SLICE graphical object does nothing.In a 2D window, ORBIT-SLICE will project the slice onto the Earth’s surface. Althoughallowed, usually this is not meaningful unless a geocentric radius coordinate is used to define thedisplay slice.In a 3D window, ORBIT-SLICE will display the slice through the data set in three-dimensionalspace around the Earth.In a Heliospace window, ORBIT-SLICE does nothing.In a Spectral window, ORBIT-SLICE does nothing.The ORBIT-SLICE graphical object supports the options Clipping, Transparency, Lights,Material, Color, Color Map, and Data Map.ORBIT-SLICE InputsSatellite:The Satellite option is used to slave the position of the slice to the positionof a satellite along its orbit. This option must be set to an orbit beforerendering is allowed. The option menu contains a list of valid, previouslyrun orbits.Data:Label:Pop Label:The Data option menu is used to select the main data set the ORBIT-SLICE is to be taken through. This option must be set to a data set beforerendering is allowed. The option menu contains a list of valid, previouslyrun science, data, and application data sets.The label specifies the nature of the text written at the current position ofthe satellite. The available labels are:Sat Name:Rad, Lat, Lon:The satellite name set when it was created.The satellite position in spherical coordinates.X, Y, Z: The satellite position in Cartesian coordinates.Data Value:Time:The interpolated data value at the satellite position.The current time from the Satellite position (%) slider.By default, if a marker is displayed, it will be positioned based on thesatellite’s three-dimensional location. Other objects may obscure it. If the218AF-GEOSpace User’s <strong>Manual</strong>: Version 2.5
Reference Frame:Orbit Planes:Display Options:Pop Label toggle is on, the label will always be rendered in front of allother objects and will therefore always be visible.The Reference Frame section determines how the SATELLITE orbitshould be rendered. The two coordinate options are geocentric (GEOC)and Earth centered inertial (ECI).Geocentric:Inertial:Render the SATELLITE orbit in geocentric (GEOC)coordinates. Since these coordinates are rigidly attachedto the spinning Earth and represent a non-inertial frame,the trajectory will not be approximately elliptical inshape.Render the SATELLITE orbit in Earth centered inertial(ECI) coordinates. Here the trajectory will have anapproximately elliptical shape. Note that the position ofthe orbit rotates when animation is selected because theinertial orbit plane is not fixed in geocentriccoordinates.The Orbit Planes toggle switches determine which orbital planes arerendered. The choices are:P0: Draws a coordinate slice at the satellite position at afixed value of the first coordinate of the system used toproduce the data, e.g., P0 is the radius in sphericalcoordinates.P1: Draws a coordinate slice at the satellite position at afixed value of the second coordinate of the system usedto produce the data, e.g., P1 is the latitude in sphericalcoordinates.P2: Draws a coordinate slice at the satellite position at afixed value of the third coordinate of the system used toproduce the data, e.g., P2 is the longitude in sphericalcoordinates.P3: Draws a plane containing the inertial orbital plane ofthe satellite.P4: Draws a plane at the satellite position that contains thesatellite’s velocity vector and is perpendicular to theinertial orbital plane.P5: Draws a plane at the satellite position and perpendicularto the satellite velocity vector.The Display Options field will allow the ORBIT-SLICE to be filled ascolored or white contours, filled or discrete. Any combination of theoptions may be selected.AF-GEOSpace User’s <strong>Manual</strong>: Version 2.5 219
Filled:Contours:Grid:Render the ORBIT-SLICE as solid, filled, colorcontours.Grey: If the grid extends beyond meaningful datain the data set, the points without valid datawill be filled in as grey.Render the ORBIT-SLICE as discrete white lines. Thelines represent isovalues of the data evenly spacedbetween the data minimum and the data maximum. Thenumber of contours is determined by the Number ofContours input.ColorThe isovalue lines are colored according tothe color bar to represent the magnitude ofthe isovalue.An outline of the grid will be shown in the plane of thecoordinate slice.Number of Contours: The Number of Contours input slider determines the number of contourlines to be plotted between the data minimum and the data maximum if theDisplay Options selection is Contours or Contours: Color.220AF-GEOSpace User’s <strong>Manual</strong>: Version 2.5
PLANE-SLICEThe PLANE-SLICE graphical object is used to produce a planar slice through a data set. Theorientation of the slice is set by three user specified rotations. The PLANE-SLICE can berepresented by filled color contours or discrete solid or colored contour lines. The grid within theslice can also be represented.The PLANE SLICE graphical object rendering is dependent on the window type.In a 1D window, the PLANE-SLICE graphical object does nothing.In a 2D window, the PLANE-SLICE graphical object does nothing.In a 3D window, PLANE-SLICE will display the planar slice through the data set in threedimensionalspace around the Earth.In a Heliospace window, PLANE-SLICE does nothing.In a Spectral window, PLANE-SLICE does nothing.The PLANE-SLICE graphical object supports the Clipping, Transparency, Lights, Material,Color, Color Map, and Data Map options.PLANE-SLICE InputsData:This option menu is used to select the main data set the PLANE-SLICE isto be taken through. This option must be set before rendering is allowed.The option menu contains a list of valid, previously run science andapplication data sets.Fill:Show Gray:Show Grid:Contours: WhiteContours: ColorRotate X:Rotate Y:Rotate Z:Render the PLANE-SLICE as solid filled color contours.If the grid extends beyond meaningful data in the data set, the pointswithout valid data will be filled in as gray if this option is turned on.An outline of the grid will be shown if this option is turned on. The colorof the grid lines can be adjusted using the Color option.Render the PLANE-SLICE as discrete white lines. The lines representisovalues of the data evenly spaced between the data minimum and thedata maximum. The number of contours is determined by the Number ofContours slider. The color of the contours lines can be adjusted using theColor option.Similar to Contours: White, but the isovalue lines are colored according tothe color bar to represent the magnitude of the isovalue.The Rotate X input slider rotates the position of the planar slice around thehorizontal direction in the plane of the user’s computer screen.The Rotate Y input slider rotates the position of the planar slice around thevertical direction in the plane of the user’s computer screen.The Rotate Z input slider rotates the position of the planar slice around thedirection normal to the plane of the user’s computer screen.AF-GEOSpace User’s <strong>Manual</strong>: Version 2.5 221
Translate:The Translate input slider translates the position of the planar slice alongthe direction perpendicular to the current position of the plane, as set bythe rotation sliders.Number of Contours: The Number of Contours input slider determines the number of contourlines to be plotted between the data minimum and the data maximum ifone of the Contour options is activated.222AF-GEOSpace User’s <strong>Manual</strong>: Version 2.5
RAY TRACEThe RAY TRACE graphical object is used to produce a depiction of the ionospheric rays tracedthrough the PIM science model data sets. The PIM science module and RAYTRACE applicationmodule must be run before this graphics module can be used.The RAY TRACE graphical object rendering is dependent on the window type.In a 1D window, the RAY TRACE graphical object does nothing.In a 2D window, RAY TRACE will project the lines onto a 2D grid of longitude (horizontal) andlatitude (vertical).In a 3D window, RAY TRACE will display the lines in three-dimensional space around theEarth.In a Heliospace window, RAY TRACE does nothing.In a Spectral window, RAY TRACE does nothing.The RAY TRACE graphical object supports the Clipping, Lights, and Material options.RAY TRACE InputsData:The Data option menu is used to select the main data set and the type offield lines to be displayed. This option must be set before rendering isallowed. The option menu contains a list of valid, previously generatedRAYTRACE-APP items.Plot Type:Line Width:Line Type: SmoothThe plot type field determines which ray features are displayed.Ray Lines:Ground Points:Render the ray lines.Render the transmitter location and mark all groundintersection points of the ray’s path with the Earth’ssurface.Plasma Frequency: Render a 2D contour of the PIM generated plasmafrequency in the plane of the traced rays. If the Jones-Stephenson 3D model was selected in RAYTRACE-APP to generate the rays, then the alignment of the raysand the contour will only be approximate.These up/down arrows are used to select the width of the traced ray linesin the display from 1 (thinnest) to 5 (thickest).Render smoothed depictions of the traced ray lines.AF-GEOSpace User’s <strong>Manual</strong>: Version 2.5 223
SATELLITEThe SATELLITE graphical object is used to view a satellite trajectory. The trajectory can becolored with interpolated values from a selected data set. The orbit trajectory must have beenproduced previously using the SATEL-APP application module.The SATELLITE graphical object rendering is dependent on the window type.In a 1D window, the SATELLITE graphical object does nothing.In a 2D window, the SATELLITE will project the trajectory onto a 2D grid representinglongitude (horizontal) and latitude (vertical).In a 3D window, the SATELLITE will display the trajectory in three-dimensional space aroundthe Earth.In a Heliospace window, SATELLITE does nothing.In a Spectral window, SATELLITE does nothing.The SATELLITE graphical object supports the Color option.SATELLITE InputsSatellite:This option menu is used to select the SATELLITE orbit. This optionmust be set before rendering is allowed. The option menu contains a list ofvalid orbits produced previously using the SATEL-APP applicationmodule.Data:Label:Pop Label:This option menu is used to select a main data set for display along theSATELLITE trajectory. The option menu contains a list of valid,previously run science, data, and application data sets. When a data set isselected, the orbit should appear colored, representing interpolated datavalues along the track. If the Data option is off, the orbit trajectoryappears as a single color.The label specifies the nature of the text written at the current position ofthe satellite. The available labels are:Sat Name:Rad, Lat, Lon:The satellite name set when it was created.The satellite position in spherical coordinates.X, Y, Z: The satellite position in Cartesian coordinates.Data Value:Time:The interpolated data value at the satellite position.The current time from the Satellite position (%) slider.By default, if a marker is displayed, it will be positioned based on thesatellite’s three-dimensional location. Other objects may obscure it. If thePop Label toggle is on, the label will always be rendered in front of allother objects and will therefore always be visible.224AF-GEOSpace User’s <strong>Manual</strong>: Version 2.5
Label Font:Reference Frame:Thickness:The Label Font selector controls the font size used for the annotation. Theoptions include the machines Default font (size 20) and Times font (sizes10, 20, 30, 40, and 50).The Reference Frame section determines how the SATELLITE orbitshould be rendered. The two coordinate options are geocentric (GEOC)and Earth centered inertial (ECI).Geocentric:Inertial:Render the SATELLITE orbit in geocentric (GEOC)coordinates. Since these coordinates are rigidly attachedto the spinning Earth and represent a non-inertial frame,the trajectory will not be approximately elliptical inshape.Render the SATELLITE orbit in Earth centered inertial(ECI) coordinates. Here the trajectory will have anapproximately elliptical shape. Note that the position ofthe orbit rotates when animation is selected because theinertial orbit plane is not fixed in geocentriccoordinates.The Thickness slider controls the width of the plotted orbit line.AF-GEOSpace User’s <strong>Manual</strong>: Version 2.5 225
STARSReferences: Chapront-Touze, M., and J. Chapront, Astron. Astrophys., 124, 50 (1983)STARS OverviewHoffleit, D., and W.H. Warren, Jr., The Bright Star Catalogue,Astronomical Data Center, NSSDC/GSFC (1991)Montenbruck, O., and T. Pfleger, Astronomy on the Personal Computer,Springer-Verlag (1991)Simon, J.L., P. Bretagnon, J. Chapront, M. Chapront-Touze, G. Francou,and J. Laskar, Astron. Astrophys. 282, 663 (1994)The STARS graphical object renders the celestial background as seen from the Earth for a givendate and time. Stars as dim as visual magnitude eight, the planets, and the moon can berepresented with this module. This module uses the Yale Bright Star catalogue, compiled by D.Hoffleit, as a stellar data base. Apparent equatorial coordinates are computed for the equinox ofdate from J2000 catalogued positions; these are corrected for stellar proper motion as well as theprecession and nutation of the Earth. Lunar and planetary positions are computed from theFORTRAN codes ELP82B and PLANETAP, as obtained from the Astronomical Data Center ofGoddard Space Flight Center. Apparent planetary positions in the Earth’s frame of reference arecorrected for precession and nutation.In a 1D window, the STARS graphical object does nothing.In a 2D window, STARS does nothing.In a 3D window, the STARS graphical object plots the celestial sphere as a 3-dimensionalbackground to the near-Earth space environment. An option exists to plot this background as a 3-dimensional sphere of varying radius.In a Heliospace window, STARS does nothing.In a Spectral window, STARS does nothing.The STARS graphical object supports none of the standard options.STARS InputsThe STARS graphical module requires the following inputs:Detail:The user can select buttons in this section to determine which objects aredrawn in the celestial sphere. The choices are:Stars:Stars: color:Stars: circle:Sun:Locate and draw the stars as white squares.Plot stars in color instead of white. Rendered colors arebased on stellar spectral classification type(OBAFGKM) and are approximately those seen by thehuman eye from the Earth’s surface.Plot stars as circles instead of squares.Locate and draw the Sun.226AF-GEOSpace User’s <strong>Manual</strong>: Version 2.5
Grid Options:Planets:Moon:Locate and draw the eight major planets. Planets arecolor coded shaded spheres, and are approximately thecolors seen by the human eye through a small telescope- Mercury and Venus are white, Mars is red, Jupiter is asandy brown, Saturn is yellowish, Uranus isaquamarine while Neptune is a dark turquoise.Locate and draw the Earth’s moon. Plotted as a whiteshaded sphere and is drawn to the same scale as theEarth 3D object.Several types of grids may be placed upon the surface of the celestialsphere. The options are:Lat/Lon Grid: Render a grid showing geographic latitude andlongitude upon the celestial sphere to help an observercharacterize the local sky at a given location. Theresolution is ten degrees.RA/DEC Grid:Render a grid showing Right Ascension andDeclination of the background celestial sphere.Resolution is ten degrees.Maximum Magnitude: This slider selects the visual stellar maximum magnitude (or minimumbrightness) that will be plotted from the database (magnitude eightcorresponds to minimum brightness setting). A total of 9110 stars arecatalogued in this database. Relative brightness is modeled within the codeby adjusting the pixel size and RGB color intensity of a plotted star, andcorresponds approximately to the visual magnitude as catalogued in theYale database.Maximum Size (pixels): This slider controls the maximum pixel size used to plot the brighteststar, i.e., Sirius. Down to an area of one pixel, the brightness of the star isrepresented by the size of the star in pixels. Below one pixel size, wereduce the intensity of the individual pixel. Thus, the larger the value ofthe maximum pixel size, the dimmer the star that will be visible in thewindow.Celestial Radius:The radius of the celestial sphere, in Earth radii, can be adjusted with thisslider when the Finite Radius option is activated (see below).Finite Radius: Plot stars on the surface of a sphere with a radius determined by theCelestial Radius slider.R=Infinity: Plot stars in a perspective view such that an arbitrarily large celestial sphere isused within which the viewer is effectively contained.AF-GEOSpace User’s <strong>Manual</strong>: Version 2.5 227
STATIONThe STATION graphical object can be used to plot a labeled location on or above the surface ofthe Earth. Rendering of the STATION graphical object is dependent on the window type.In a 1D window, the STATION graphical object does nothing.In a 2D window, the STATION graphical object plots the station with label at the designatedgeographic latitude and longitude.In a 3D window, the STATION graphical object plots the station with label at the designatedgeographic latitude, longitude, and altitude.In a Heliospace window, STATION does nothing.In a Spectral window, STATION does nothing.The STATION graphical object supports the Color option.STATION InputsStations:Pop Label:Label:Label Font:Lat:The Stations list presents a list of stations currently available for display in2D and 3D windows. To display a station, highlight it by clicking on it inthe Stations list and click the Display button. To create a new station andadd it to the Stations list, fill in the Lat, Lon, Alt(Re), and Label text fieldsnear the bottom of the environment options and click the Add button. Toremove a station from the Stations list, highlight it by clicking on it in theStations list and click the Delete button. Changes to the Stations list aresaved in the file $AFGS_HOME\models\data\STATIONS\stations.datwhich can also be edited directly.The Pop Label switch forces the station location and label to be renderedin front of all other objects.The Label type selector specifies the nature of the text written at thecurrent position of the station. The available labels are:Off:No label is displayed.Label: The station name is displayed.Rad, Lat, Lon: The station position is displayed in geographicspherical coordinates.X, Y, Z: The station position is displayed in geographicCartesian coordinates.The Label Font selector controls the font size used for the annotation. Theoptions include the machines Default font (size 20) and Times font (sizes10, 20, 30, 40, and 50).The Lat text field represents the station’s North geographic latitude indegrees.228AF-GEOSpace User’s <strong>Manual</strong>: Version 2.5
Lon:Alt(Re):Label (text field):Add:Delete:The Lon text field represents the station’s East geographic longitude indegrees.The Alt(Re) text field represents the station’s altitude in Km above theEarth’s surface.The Label text field represents the name assigned to the station that willappear in the Stations list.The Add button allows the user to add a station to the Stations list. Thecharacteristics to be associated with the new station are those currentlyappearing in the Lat, Lon, Alt(Re), and Label text boxes.The Delete button allows the user to remove a station from the Stationslist. To remove a station, highlight its name in the Stations list and clickon the Delete button.AF-GEOSpace User’s <strong>Manual</strong>: Version 2.5 229
VOLUMEThe VOLUME graphical object is used to view the entire volume of a data set as a single threedimensionalobject.The VOLUME graphical object rendering is dependent on the window type.In a 1D window, the VOLUME graphical object does nothing.In a 2D window, the VOLUME graphical object does nothing.In a 3D window, the VOLUME graphical object renders the entire data set as a single threedimensionalobject.In a Heliospace window, VOLUME does nothing.In a Spectral window, VOLUME does nothing.The VOLUME graphical object supports the Clipping, Transparency, Color Map, and Data Mapoptions.Hint: The Transparency option and the Color Map: Alpha option are very useful for creatingviewable 3-D structures.VOLUME InputsData: The Data option menu is used to select the data set to be used by the VOLUME graphicsoption. This option must be set to a data set before rendering is allowed. The option menucontains a list of valid data sets.230AF-GEOSpace User’s <strong>Manual</strong>: Version 2.5
PARAMESH-COORDSLICEThe PARAMESH-COORD-SLICE graphical object is used to produce a slice or surface througha PARAMESH data set. The slice is produced along a constant of one coordinate direction. Forexample, if the data set was produced using a Cartesian grid, the PARAMESH-COORDSLICEgraphical object produces a slice at constant X, Y, or Z value. Use the Open Paramesh optionunder the File pulldown menu to access Paramesh data files.The PARAMESH-COORD-SLICE graphical object rendering functions only within theHeliospace window.In a 1D window, the PARAMESH-COORDSLICE graphical object does nothing.In a 2D window, the PARAMESH-COORDSLICE graphical object does nothing.In a 3D window, the PARAMESH-COORDSLICE graphical object does nothing.In a HelioSpace window, the PARAMESH-COORDSLICE graphical object will display thecoordinate slice through the data set in three-dimensional space.In a Spectral window, PARAMESH-COORDSLICE does nothing.The PARAMESH-COORDSLICE graphical object supports the Clipping, Transparency, Lights,Material, Color, Color Map, and Data Map options.PARAMESH-COORDSLICE InputsData:The Data option menu is used to select the Paramesh data set throughwhich the PARAMESH-COORDSLICE is to be taken. This option mustbe set to a data set before rendering is allowed. The option menu containsa list of valid, previously opened NRLMHD Paramesh data sets.Cut Plane: The Cut Plane option defines the constant coordinate from the choices C0,C1, and C2. The generic names represent specific coordinate choicesdepending upon the grid type of the data set. For example, if the grid typeof the data set is spherical, C0 will produce a slice at constant radius; C1will produce a slice at constant latitude; C2 will produce a slice at constantlongitude. Similarly, if the data set has a Cartesian grid, the C0, C1, andC2 will produce slices at constant X, Y, and Z, respectively.Display Options:The Display Options field will allow the PARAMESH-COORDSLICE tobe filled as colored or white contours, filled or discrete. Any combinationof the options may be selected.Filled: Render the PARAMESH-COORDSLICE as solid,filled, color contours.Grid:An outline of the grid will be shown if this option isturned on.Values:Contours:Data values will be displayed at grid points.Render the PARAMESH-COORDSLICE as discreteblack lines. The lines represent isovalues of the dataAF-GEOSpace User’s <strong>Manual</strong>: Version 2.5 231
Position Value:Contours: ColorVectors:Vectors: ColorVectors: Normevenly spaced between the data minimum and the datamaximum. The number of contours is determined bythe Number of Contours input.Similar to Contours, but the isovalue lines are coloredaccording to the color bar to represent the magnitude ofthe isovalue.Render white segments to represent the direction of thevector field of the selected vector type data at the Gridpoints within the PARAMESH-COORDSLICE.Selection of the parameter magnitude or one of itscomponents all result in the complete vector. Vectorscan be modified using the Color and Norm features.Vector segments are colored according to the color barto represent its magnitude.Vectors are all plotted using equal length segments togive only direction information.The Position Value option determines the position of the coordinate slice.The position value represents the position (normalized to range from 0 to1) along the constant coordinate. For example, if the dataset has aspherical grid and the C0 coordinate is chosen, PARAMESH-COORDSLICE will produce a slice at constant radius. The position valueinput will select the value of the radius at which to produce the slice.Number of Contours: The Number of Contours input slider determines the number of contourlines to be plotted between the data minimum and the data maximum if theDisplay Options selection is Contours or Contours: Color.Vector Scale Value: The Vector Scale Value input slider is used to amplify the length of allvectors plotted by a constant scaling factor.232AF-GEOSpace User’s <strong>Manual</strong>: Version 2.5
PARAMESH-FIELDLINESThe PARAMESH-FIELDLINES graphical object is used to produce fieldlines generated bytracing a vector field through a PARAMESH data set. Use the Open Paramesh option under theFile pulldown menu to access Paramesh data files.The PARAMESH- FIELDLINES graphical object rendering functions only within theHeliospace window.In a 1D window, the PARAMESH-FIELDLINES graphical object does nothing.In a 2D window, the PARAMESH-FIELDLINES graphical object does nothing.In a 3D window, the PARAMESH-FIELDLINES graphical object does nothing.In a HelioSpace window, the PARAMESH-FIELDLINES graphical object will display fieldlines of vector quantities such as magnetic field and momentum density through the data set inthree-dimensional space.In a Spectral window, PARAMESH-FIELDLINES does nothing.The PARAMESH-FIELDLINES graphical object supports the Clipping, Lights, Material, Color,Color Map, and Data Map options.PARAMESH-FIELDLINES InputsData:The Data option menu is used to select the Paramesh data set throughwhich the PARAMESH-FIELDLINES are traced. This option must be setto a data set before rendering is allowed. The option menu contains a listof valid, previously opened NRLMHD Paramesh data sets.Two methods for defining the starting points of field-lines are provided, Start Plane and UserDefined, and their selectors are located immediately under the Data button. Field-lines derivedusing both methods can be viewed simultaneously using a single PARAMESH-FIELDLINESgraphical object.Start Plane: The Start Plane method allows the generation of field-line sets originatingfrom evenly distributed points in pre-defined planes. Field-lines startingfrom the following Start Planes can be displayed simultaneously:X Min, Y Min, Z Min: Designate planes coincident with the minimumvalues of the X, Y, or Z coordinates.X Mid, Y Mid, Z Mid: Designate planes coincident with the mid-pointvalues of the X, Y, or Z coordinates.X Max, Y Max, Z Max: Designate planes coincident with the maximumvalues of the X, Y, or Z coordinates.Number of Starting Points: The number of field-lines traced from eachStart Plane is the same and are evenly distributed alongthe remaining two dimensions. Each dimension isAF-GEOSpace User’s <strong>Manual</strong>: Version 2.5 233
User Defined:divided in the designated number of cells and one fieldlinefrom the center of each one is traced.X and Y:Number of starting points evenlydistributed along the X and Y directions,respectively. For an X plane, the numberof starting points in the Z direction isrepresented by the X entry. Similarly, fora Y plane, the number of starting points inthe Z direction is represented by the Yentry.With the User Defined method, field-lines with arbitrary starting pointlocations can be added or deleted to the Current Field Line list by usingthe Add and Delete buttons, respectively. The settings for each field-lineare displayed when its entry is visible in the Current Field Line list.Current Field Line: The starting point location for the field-line entryvisible in the Current Field Line list is controlled byposition sliders and coordinate position values appear intext boxes under each slider.X Position: Translate the field-line start point alongthe X axis (red axis of grid domain)Y Position: Translate the field-line start point alongthe Y axis (green axis of grid domain)Z Position: Translate the field-line start point alongthe Z axis (blue axis of grid domain)Update:This button refreshes the field-lineThe following common options appear at the bottom of the Environment Window.Direction: Three options are provided designating the direction of field-line tracingForward: Trace the field-line in the direction of the vector field.Back:Trace the field-line in the direction opposite the field.Forward + Back: Trace the field-line in both the Forward and BackdirectionsRender Direction: The Render Direction option modifies the color intensity along the lengthof the field lines in a repeating pattern that indicates the direction of thevector. The bright end of each segment is oriented to designate the headof the vector. During use of Animation, these features will appear to movealong the field line. To function, the field lines must be rendered as Linesor Cylinders (see below).Off:The option is inactive.234AF-GEOSpace User’s <strong>Manual</strong>: Version 2.5
Render As:Show Color:Smooth:Line Width:Type 1, 2, 3:Selecting one of the Type indicators actives theRendering Direction option. The three types differ inthe length along the field line containing the bright-todimcoloring patternThree options are provided for modifying the appearance of field-linesLines:Lit Lines:Cylinders:Represent field-lines as simple lines.Represent field-lines as simple lighted lines.Represent field-lines as 3-D cylinders with shadows.Field-lines are colored according to the color bar to represent themagnitude of the field.Smooths the rendering of the field-lines.Adjust the apparent width of the field-linesAF-GEOSpace User’s <strong>Manual</strong>: Version 2.5 235
PARAMESH-FIELDLINES-IIThe PARAMESH-FIELDLINES-II graphical object is used to produce fieldlines generated bytracing a vector field through a PARAMESH data set. Use the Open Paramesh option under theFile pulldown menu to access Paramesh data files.The PARAMESH- FIELDLINES-II graphical object rendering functions only within theHeliospace window.In a 1D window, the PARAMESH-FIELDLINES-II graphical object does nothing.In a 2D window, the PARAMESH-FIELDLINES-II graphical object does nothing.In a 3D window, the PARAMESH-FIELDLINES-II graphical object does nothing.In a HelioSpace window, the PARAMESH-FIELDLINES-II graphical object will display fieldlines of vector quantities such as magnetic field and momentum density through the data set inthree-dimensional spaceIn a Spectral window, PARAMESH-FIELDLINES-II does nothing.The PARAMESH-FIELDLINES-II graphical object supports the Clipping, Lights, Material,Color, Color Map, and Data Map options.PARAMESH-FIELDLINES InputsData:The Data option menu is used to select the Paramesh data set throughwhich the PARAMESH-FIELDLINES-II is traced. This option must beset to a data set before rendering is allowed. The option menu contains alist of valid, previously opened NRLMHD Paramesh data sets.Two methods for defining the starting points of field-lines are provided, Start Plane and UserDefined, and their selectors are located immediately under the Data button. Field-lines derivedusing both methods can be viewed simultaneously using a single PARAMESH-FIELDLINES-IIgraphical object.Direction: Three options are provided designating the direction of field-line tracingBoth:Trace the field-line in both the Forward and Backdirections.Forward: Trace the field-line in the direction of the vector field.Back:Trace the field-line in the direction opposite the field.Render As: Three options are provided for modifying the appearance of field-linesLines:Represent field-lines as simple lines.Lit Lines: Represent field-lines as simple lighted lines.Cylinders: Represent field-lines as 3-D cylinders with shadows.Smooth:Smooths the rendering of the field-lines.Show Color: Field-lines are colored according to the color bar to represent themagnitude of the field.236AF-GEOSpace User’s <strong>Manual</strong>: Version 2.5
Line Width:Current Group:Transform:Adjust the apparent width of the field-lines.An organized collection or grouping of fieldlines can be displayed withthis graphics module. The Current Group pulldown list shows the namegiven to the set of fieldline traces currently viewable with the module. IfNONE is visible, then no fieldline groups are currently available forviewing. The following two options can be used to create/delete groups.Create: The Create button generates a Para-Mesh Field LineCreate popup window used to generate a new entry forthe Current Group list. For each new group of fieldlinestarting points, the following options are available.Name: The Name text box is used to create the name toappear in the Current Group list.Type: The user can select to generate either a singlePoint or a collection of points arranged in a Line,Circle, Plane, or Sphere.Delete:Start Position: The starting location for the next groupof points can set as either the Last Position used by theprevious group or as the Origin.Axis: The axis of orientation for the newly createdgroup will be the X, Y, or Z axis.X Res (and/or) Y Res: The number of trace startingpoints along the X and Y coordinate directions isassigned using these text fields.The Delete button will remove the group currentlyvisible in the Current Group list.The following transformation options enable the user to translate, rotate,and scale the Current Group of fieldline starting points.Translate: Selecting the Translate option activates three sliders(Translate X, Translate Y, and Translate Z) that enablethe user to move the Current Group of fieldlines alongthe X, Y, and Z coordinates.Rotate:Scale:Selecting the Rotate option activates three sliders (RotateX, Rotate Y, and Rotate Z) that enable the user to rotatethe Current Group of fieldlines about the X, Y, and Zcoordinates.Selecting the Scale option activates the top slider whichcan then be used to spread or shrink the cluster offieldline tracing start points.AF-GEOSpace User’s <strong>Manual</strong>: Version 2.5 237
PARAMESH-GRIDThe PARAMESH-GRID graphical object is used to display the grid, block structure (e.g., leafand parent block), and overall domain of a PARAMESH data set. Grid features can be colorcoded to reflect processor used and block level. Use the Open Paramesh option under the Filepull-down menu to access Paramesh data files.The PARAMESH-GRID graphical object rendering functions only within the Heliospacewindow.In a 1D window, the PARAMESH-GRID graphical object does nothing.In a 2D window, the PARAMESH-GRID graphical object does nothing.In a 3D window, the PARAMESH-GRID graphical object does nothing.In a HelioSpace window, the PARAMESH-GRID graphical object will display the Parameshgrid.In a Spectral window, PARAMESH-GRID does nothing.The PARAMESH-GRID graphical object supports the Lights and Color options.PARAMESH-GRID InputsData:The Data option menu is used to select the Paramesh data set to be usedby the PARAMESH-GRID graphics option. This option must be set to adata set before rendering is allowed. The option menu contains a list ofvalid, previously opened NRLMHD Paramesh data sets.Render Styles:Color Method:Render Blocks:The Render Styles field allows the PARAMESH-GRID to be displayed asdiscrete points, representing the grid cell vertices, or the lines connectingthose grid cell vertices.Point:Outline:Display grid cell vertices as discrete pointsDisplay the lines connecting grid cell verticesThe Color Method field allows the PARAMESH- GRID to be coloredusing a single user-selected color, or according to processor number, orgrid level.Solid:Render the grid using a single solid color. The Colorgraphics option can be used to set Grid color when thismethod is selected.Processor Number: Set grid colors according to the assigned processornumber, i.e., all grid points of a common color share aprocessor.Level:Set grid colors according to the assigned level number,i.e., all grid points of a common color represent gridpoints at the same level.Render a selection of PARAMESH- GRID blocks.238AF-GEOSpace User’s <strong>Manual</strong>: Version 2.5
Leaf:Leaf + Parent:Max Depth:Root Blocks:All:Domain:Domain Hull:Display only Leaf grid cells. Leaf cells are those usedto divide a Parent grid cells into smaller divisions.Display both Leaf + Parent grid cells. Parent grid cellsrepresent the initial divisions of the computation grid.Display only the smallest size grid cells representingthe maximum depth within the grid.Display only grid cells representing Root Blocks.Display Root, Parent, and Leaf grid cell blocksDisplay the overall domain of the grid with filled sidepanels and colored arrows representing the gridcoordinate directions, i.e., for Cartesian coordinates thex, y, and z directions are show using red, green, andblue arrows, respectively. The Color graphics optioncan be used to set the color of the Domain and DomainLines color.Display grid domain cube only with colored axes (nofilled side panels).AF-GEOSpace User’s <strong>Manual</strong>: Version 2.5 239
PARAMESH-ISOCONTOURThe PARAMESH-ISOCONTOUR graphical object is used to produce a surface of constantvalue through a three-dimensional PARAMESH data set. Use the Open Paramesh option underthe File pulldown menu to access Paramesh data files.The PARAMESH-ISOCONTOUR graphical object rendering functions only within theHelioSpace window.In a 1D window, the PARAMESH-ISOCONTOUR graphical object does nothing.In a 2D window, the PARAMESH-ISOCONTOUR graphical object does nothing.In a 3D window, the PARAMESH-ISOCONTOUR graphical object does nothing.In a HelioSpace window, the PARAMESH-ISOCONTOUR graphical object will display theconstant value surface through the data set in three-dimensional space.In a Spectral window, PARAMESH-ISOCONTOUR does nothing.The PARAMESH-ISOCONTOUR graphical object supports the Clipping, Transparency,Material, Lighting, Material, Color Map, and Data Map options.PARAMESH-ISOCONTOUR InputsData:Contour Value:The Data option menu is used to select the main data set through whichthe PARAMESH-ISOCONTOUR is to be taken. This option must be setto a data set before rendering is allowed. The option menu contains a listof valid, previously opened NRLMHD Paramesh data sets.The Contour Value slider input determines the value of the constantsurface. The values will range from the minimum to the maximum for thechosen data set. The number below the slider (0-to-1) corresponds to therange (minimum-to-maximum) of the data values shown on the colorbar.PARAMESH-VOLUMEThe PARAMESH-VOLUME graphical object is used to view the entire volume of aPARAMESH data set as a single three-dimensional object. Use the Open Paramesh optionunder the File pulldown menu to access Paramesh data files.The PARAMESH-VOLUME graphical object rendering functions only within the HelioSpacewindow.In a 1D window, the PARAMESH-VOLUME graphical object does nothing.In a 2D window, the PARAMESH-VOLUME graphical object does nothing.In a 3D window, the PARAMESH-VOLUME graphical object does nothing.In a HelioSpace window, the PARAMESH-VOLUME graphical object will display the entirevolume of a data set in three-dimensional space.In a Spectral window, PARAMESH-VOLUME does nothing.240AF-GEOSpace User’s <strong>Manual</strong>: Version 2.5
The PARAMESH-VOLUME graphical object supports the Clipping, Transparency, Lights,Material, Color Map, and Data Map options.Hint: The Transparency option and the Color Map: Alpha option are very useful for creatingviewable 3-D structures.PARAMESH-VOLUME InputsData:The Data option menu is used to select the Paramesh data set to be usedby the PARAMESH-VOLUME graphics option. This option must be setto a data set before rendering is allowed. The option menu contains a listof valid, previously opened NRLMHD Paramesh data sets.Use Lighting: The Use Lighting option activates directional lighting on the rendered volume.AF-GEOSpace User’s <strong>Manual</strong>: Version 2.5 241
GRAPHICAL MODULE OPTIONSThis section describes the visualization controls and options available when running graphicsmodules. The options appear as buttons on the right side of each Graphics Module window and aset of controls for each will appear at the bottom of the Environment Window as options areselected. Options unavailable for a particular graphics module are grayed out. The effects ofselecting and editing an option apply only to the graphics module currently highlighted in theActive Modules list. To alter the appearance of another graphics object, select its entry in theActive Modules list so that it is highlighted.The following options are currently supported in AF-GEOSpace,• DISPLAY: The Display option is used to display a graphics object in an active viewport.This option appears in all graphics modules.• INTERACTIVE: The Interactive option controls whether graphical renderings are updatedas changes are made to the graphic inputs. This option appears in all graphic modules.• USE TEXTURE: The Use Texture mapping option improves the appearance of color datacontours. This option appears in all graphics modules.• LIGHTING: The Lighting option enables the Lights and Material options to be active.• CLIPPING: The Clipping option applies clipping planes to a graphical object.• TRANSPARENCY: The Transparency option controls the degree of transparency of agraphical object.• LIGHTS: The Lights option controls lighting effects on a graphical object.• MATERIAL: The Material option controls the light reflection properties of a graphicalobject.• COLOR: The Color option controls the color of a graphical object.• COLOR MAP: The Color Map option controls the color map representing a data set in thewindow color bar.• DATA MAP: The Data Map option controls the range and linear/log scale used to displaydata.242AF-GEOSpace User’s <strong>Manual</strong>: Version 2.5
The DISPLAY Graphical OptionThe Display option determines whether the graphical object is displayed in the active plotwindow. It provides a convenient method for temporarily stopping the display of the object.The INTERACTIVE Graphical OptionThe Interactive option is used to force the appearance of displayed graphical object to updateautomatically as changes are made to the graphical settings. If Interactive is not selected, thensome selection changes made in the graphics module window will not appear on screen until theDisplay button is toggled off/on.The USE TEXTURE Graphical OptionThe Use Texture option is used to improve the rendering of graphical objects by applying texturemapping smoothing algorithms to the data set before displaying. The use of this option providesthe most accurate display of data sets so it is recommended that this option remain active.The LIGHTING Graphical OptionThe Lighting option enables the Lights and Material options to be active. If Lighting is notselected, then uniform light is applied on all objects.The CLIPPING Graphical OptionThe CLIPPING graphical option is used to produce the effect of clipping planes on a graphicalobject. The user can activate and define up to 6 clipping planes at a time. To activate and definean individual clipping plane: Select a plane (i.e., Plane 0, Plane 1, Plane 2, Plane 3, Plane 4, orPlane 5), activate it using the Enabled toggle switch, and adjust the rotation and translationsliders. The slider settings apply only to the Plane currently selected. The settings for individualplanes are saved for the duration of a session. Additional clipping planes are created the sameway and can be toggled On/Off to tailor 3D displays.Clipping ParametersPlane 0-5: Select one of 6 independent clipping planes.Rotate X:The Rotate X input slider rotates the position of the clipping plane aroundthe horizontal direction in the plane of the user’s computer screen.Rotate Y:The Rotate Y input slider rotates the position of the clipping plane aroundthe vertical direction in the plane of the user’s computer screen.Rotate Z:The Rotate Z input slider rotates the position of the clipping around thedirection normal to the plane of the user’s computer screen.Translate:The Translate input slider translates the position of the clipping planealong the direction perpendicular to the current position of the plane, as setby the rotation sliders.Enabled: Toggle for activating the selected clipping plane, i.e., Plane 0.AF-GEOSpace User’s <strong>Manual</strong>: Version 2.5 243
The TRANSPARENCY Graphical OptionThe TRANSPARENCY graphical option is used to produce the effect of transparency on agraphical object.Transparency ParameterTransparency: The Transparency slider controls the fraction of light, “Alpha”,transmitted through the object. A value of 1.0 corresponds to completeopacity and a value of 0.0 corresponds to complete transmission, i.e., theobject is invisible.The LIGHTS Graphical OptionThe LIGHTS option is used to model the effect of light on a graphical object. The user canactivate and define up to 4 independent lighting sources plus activate 2 solar oriented lightingsources at a time. To activate and define an individual lighting source: Select a source (i.e., Light0, Light 1, Light 2, or Light 3), activate it using the Enabled toggle switch, and adjust theproperties of the source, e.g., Position. The slider settings apply only to the light source currentlyselected. The settings for individual sources are saved for the duration of a session. Additionallight sources are created the same way and can be toggled using the Enable switch to tailor 3Ddisplays.Lighting ParametersAmbient:Set the ambient intensity of the light.Specular:Set the specular intensity of the light.Diffuse:Set the diffuse intensity of the light.Position:Set the position of the selected light source.Red/Lat:Specify the fraction of red or the latitude when position is selected.Green/Long: Specify the fraction of green or the longitude when position is selected.Blue:Specify the fraction of blue.Light 0-3: Select one of 4 independent lighting sources.Sun:Select a light source coming from the solar direction.Opp Sun:Select a light source coming from the anti-solar direction.Enabled:Toggle the lighting characteristics.244AF-GEOSpace User’s <strong>Manual</strong>: Version 2.5
The MATERIAL Graphical OptionThe MATERIAL option is used to modify the light reflection properties of graphical objects.Material ParametersEmission: Set the emissiveness of material.Diffuse:Set the diffuseness of the material.Specular:Set the specular property of the material.Shininess: Set the shininess of the material.The COLOR Graphical OptionThe COLOR option is used to modify the color of graphical objects. Selecting the Color optionwhile viewing a graphical module displays color selection inputs for the RGB and HSV colorsystems along with a list of graphical object components to which they may be applied. Colorscan also be selected directly from the color wheel by placing the cursor in the color wheel andclicking the left mouse button. The current color selection appears in the solid colored rectanglebelow the color wheel. All color selections made will apply to the component of the graphicalobject current selected from the list appearing to the left of the sliders and the color wheel. Colorchanges remain in affect for the remainder of the session.Color ParametersRGB:HSV:Selecting the RGB option displays a set of Red-Green-Blue sliders forblending color.Selecting the HSV option displays a set of Hue-Saturation-Value slidersfor blending color.AF-GEOSpace User’s <strong>Manual</strong>: Version 2.5 245
The COLOR MAP Graphical OptionThe COLOR MAP option is used to modify the mapping of colors assigned to data values shownin the color bar. This option is accessed using the Color Map button on the right side of theGraphics Module option windows.Color Mapping ParametersColor/data mapping characteristics are adjusted by manipulating plotted functions that appear inthe Color Map Editor window representing each characteristic, e.g., the RGB or HSV coloroptions. The representative functions consist of anchor blocks connected by lines that can bemoved by clicking on anchor blocks and dragging them to new positions using the mouse. TheColor Map options are:Line:The Line option is used to connect all adjacent anchor blocks by linesegments.Curve:The Curve option is used to change the lines connecting all anchor blocksinto a single simple curve.RGB:HSV:Selecting the RGB option displays a set of Red-Green-Blue-Alpha optionsfor blending color. Selecting a RGB option will result in its color map lineappearing in the Color Map Editor window. The anchor blocks of eachline can be moved vertically by clicking and dragging on it using themouse. As an anchor block is moved, the color bars at the bottom of theEnvironment Window and in the graphics window will change. Interioranchor blocks can be added/removed using the Insert/Delete buttonsdescribed below. The RGB options are:Red:Green:Blue:Alpha:Specify the fraction of red.Specify the fraction of green.Specify the fraction of blue.Specify the fraction of light transmitted.Selecting the HSV option displays a set of Hue-Saturation-Value-Alphaoptions for blending color. Selecting an HSV option will result in its colormap line appearing in the Color Map Editor window. The anchor blocksof each line can be moved vertically by clicking and dragging on it usingthe mouse. As an anchor block is moved, the color bars at the bottom ofthe Environment Window and in the graphics window will change.Interior anchor blocks can be added/removed using the Insert/Deletebuttons described below. The HSV options are:Hue:Sat:Value:Alpha:Specify the color hues.Specify the saturation of the colors.Specify the value of the color intensities.Specify the fraction of light transmitted.246AF-GEOSpace User’s <strong>Manual</strong>: Version 2.5
Addition flexibility in prescribing color mapping is gained by inserting/removing interior anchorblocks. Interior anchor blocks can be moved horizontally and vertically with the mouse byclicking and dragging them. The tools for editing the anchor blocks are:Insert:The Insert button is used to add an interior anchor block. To add a block,first use the mouse to click on the anchor block marking the left border ofthe segment to contain the new anchor block, then click on the Insertbutton and the new moveable anchor block will appear.Delete:The DATA MAP Graphical OptionThe Delete button is used to remove an interior anchor block. The endanchor blocks cannot be removed. To remove a block, use the mouse toclick on the block, then use the Delete button and chosen anchor blockwill disappear.The DATA MAP option is used to modify the range and linear/log scaling of the data displayed.The range of the data displayed must fall within the range of the data set being displayed.Data Mapping ParametersData Min:Data Max:Auto:Log 10:The Data Min text window controls the minimum data value to bedisplayed. To update the displayed plotting scale after editing this textbox, place the cursor in the Data Max text box or use the Update button.Selecting values less than the actual minimum of the data set is notpermitted.The Data Max text window controls the maximum data value to bedisplayed. To update the displayed plotting scale after editing this textbox, place the cursor in the Data Min text box or use the Update button.Selecting values greater than the actual maximum of the data set is notpermitted.The Auto option resets the displayed data minimum and maximum valuesto those of the original data set.The Log 10 option changes the displayed data scale from linear to Logscale base 10 and vice versa. For x ≤ 0, the value of Log10(x) will be setequal to –6.AF-GEOSpace User’s <strong>Manual</strong>: Version 2.5 247
DATA MODULESData modules provide methods for reading and plotting data sets produced and formattedexternal to AF-GEOSpace. The data modules are accessed through the data module manager thatbecomes visible when the Data option in the Module pulldown menu is activated. The datamodule manager consists of two lists - Available Modules and Active Modules. AvailableModules are the modules that are currently supported by AF-GEOSpace. Active Modules aremodules that have been created and used by the AF-GEOSpace user during the current session.When initially accessed, the data module manager will show a list of data modules underAvailable Modules. Since no data modules have yet been created, the Active Modules list will beempty.Currently, the following data modules are supported by AF-GEOSpace:• DMSP: The DMSP data module enables the display (via the DMSP graphics module) ofelectron and ion energy spectra and integrated precipitating flux measured by the DMSPSSJ4/5 particle sensors.• EPHEMERIS: The EPHEMERIS Data Module allows user-generated time-ordered data andsatellite ephemeris to be loaded into AF-GEOSpace. After loading a file, data and satellitetrajectory can be displayed using the Orbit Probe (1D) and Satellite (3D) graphical modules,respectively. This module facilitates data/model comparisons as the user-provided satellitetrajectory can be used to sample other AF-GEOSpace environment models.• GRID: The GRID Data Module allows user-generated files of gridded data in eitherspherical or Cartesian coordinates to be loaded into AF-GEOSpace. After loading a file, datacan be displayed using all AF-GEOSpace graphical modules.248AF-GEOSpace User’s <strong>Manual</strong>: Version 2.5
Running Data ModulesTo run a data module, use the mouse to select the Data option in the Module pulldown menu andAvailable Modules and Active Modules lists will appear in the Environment Window. Click onthe desired choice under Available Modules. For example, to create a new version ofEPHEMERIS, click the mouse on EPHEMERIS in the Available Modules list. Choosing a datamodule will do two things: first, the choice is added to the Active Modules list; second, theoptions associated with the chosen data module will appear in the Environment Window. Ingeneral, each data module will have a different Environment Window representing the modulespecific inputs. Adjust/select the module inputs as required.The Delete option in the Edit pulldown menu is used to remove the highlighted data modulemember of the Active Modules list. Note that all active graphics objects must be removed beforethe science module used to generate their data can be removed.AF-GEOSpace User’s <strong>Manual</strong>: Version 2.5 249
The DMSP Data ModuleModel Name:DMSPVersion: 2010Developer:References:DMSP OverviewBoston College and the <strong>Air</strong> <strong>Force</strong> Research LaboratoryBrautigam, D.H., M.S. Gussenhoven, and D.A. Hardy, A Statistical Studyon the Effects of IMF Bz and Solar Wind Speed on Auroral Ion andElectron Precipitation, J. Geophys. Res, 96, 5525-5538 (1991)The DMSP Data Module enables the display of electron and ion energy spectra measured by theDMSP SSJ/4 (SSJ/5 for DMSP F16) and SSI/ES sensors as a function of time. The spectra aredetermined in the local satellite zenith direction once per second over 20 energy channelsspanning the range 30 eV to 30 keV [e.g., Brautigam et al. (1991)]. The current version allowsthe user to view a list of daily data files for DMSP spacecraft F6 through F20 (F18 was the lastspacecraft launched before this software release) and process an orbit from one file set forviewing with the DMSP Graphical Module. The five daily data files processed by this modulefor each spacecraft have names which include date and spacecraft identifiers in the followingformats:Four files with naming formats fNNCCYYMMMDD.dat (NN is the DMSP spacecraft number, CCis the two-character string “dm”, “mp”, “rp”, or “sm”, YY is the two-digit year, MMM is the 3-letter month abbreviation, and DD is the day of month) and one file with name formatj4fNNYYDOY (where DOY is the 3-digit day of year) are required. For example, for the DMSPF13 spacecraft on 4 April 2003 (day of year 94) the user would require access to the followingfive files: f13dm03apr04.dat, f13mp03apr04.dat, f13rp03apr04.dat, f13sm03apr04.dat, andj4f1303095. As described in the following note, some sample DMSP data files are provided toallow users to exercise the DMSP Data and Graphical Modules (see “DMSP PrecipitatingParticles: Data Versus Climatology” in the EXAMPLES section of this manual). For qualifiedusers, DMSP data files may be obtained from the <strong>Air</strong> <strong>Force</strong> Research Laboratory.Note: If the DMSP data files to be accessed are always stored in a fixed location thenthey can be automatically located by the DMSP Data Module if a startupenvironment variable is set. At the time of installation, the startup file$AFGS_HOME\bin\AFGeospace.bat contains the following line:set PLGS_DMSP_DATADIR=$AFGS_HOME\models\data\DMSP\2003where $AFGS_HOME represents the AF-GEOSpace install directory. A few daysof data for DMSP spacecraft F13 are stored within this directory. It isrecommended that DMSP data be stored in the designated directory in individualyearly directories, e.g., in directories named 2003, 2004, etc. If data are to beroutinely stored in a different fixed location, then the AFGeospace.bat file shouldbe updated appropriately.250AF-GEOSpace User’s <strong>Manual</strong>: Version 2.5
DMSP InputsThe user can select the DMSP data source and individual quantities of interest by using thefollowing DMSP Options:Global Parameters: Year (Day, UT, Kp, SSN, and Ap are not used). If DMSP data are storedin directories named by years, as suggested in the above note, then theYear input helps locate appropriate files. Note that the entered year valueis also used to construct some plotting labels by the DMSP GraphicalModule so the proper year should be entered to avoid confusion.Satellite:The Satellite selection feature provides access to daily DMSP data files forindividual spacecraft F06 through F20 or for All available spacecraft data.If any data is located for the selected satellite(s), a list of J4 data files (withnames formatted as j4fNNYYDOY) will appear in the sliding list below.Although they do not appear in the list, the other required DMSP data filesassociated with the J4 file selected will be processed when the Run/Updateoption of the Edit menu is used. If data files are not stored in the locationdesignated in the AFGeospace.bat file (see note above), then use theBrowse button provided to locate the directory containing the data filesand hit the Select button in the Choose Folder popup window to list the J4file names in the environment window. Highlighting the J4 file of interestis required to designate the file set of interest.Orbit Number (1-15): Because the DMSP orbit is approximately 90 minutes, the Orbit Numberselector offers daily orbit options numbered 1-15.J5 Mode B (1-6):Data Values:[Note: This option is currently inactive]. The J5 sensor carried onspacecraft starting with DMSP F16 include particle data from 6 differentpitch angle bins this J5 Mode B option prepares a selected bin for viewing.The values 1-6 correspond to six 15º directional zones (0º to 90º relative tolocal vertical).The six data options available for each DMSP daily files are as follows:Integral Energy Flux: Prepare electron and proton integral energy flux forplotting in units of keV/(cm 2 -s-sr) by selecting thisoption.Integral Number Flux: Prepare electron and proton integral number fluxfor plotting in units of log[#/(cm 2 -s-sr)] by selectingthis option.Average Energy: Prepare electron and proton average energy for plottingin units of keV by selecting this option.Drift Velocity:Prepare horizontal and vertical drift velocities forplotting in units of m/s by selecting this option. Notethat not all data file sets contain drift velocity data.AF-GEOSpace User’s <strong>Manual</strong>: Version 2.5 251
Browse:B Vector:Background:Prepare magnetic field components Bx, By, and Bz forplotting in units of nT by selecting this option. Notethat not all data file sets contain magnetic field data.Remove sensor contamination, i.e., false particle countsresulting from the presence of energetic radiation beltparticle, by selecting this option.The Browse button is used to locate the directory containing the DMSPdata file sets (Five files per satellite per day). Selecting the Browse buttonbrings up a Choose Folder popup window. Locate the directory containingthe data files and hit the Select button to list the J4 file names in theenvironment window. Highlighting a J4 file is required to designate thefile set of interest. Note that none of the DMSP data files actually appearlisted in the Choose Folder popup window.After all DMSP input selections are made, use the Run/Update option of the Edit menu toprepare the selected DMSP orbit data for viewing.DMSP OutputsThe Run/Update option of the Edit menu is used to prepare the selected DMSP output quantities(i.e., integrated energy flux, integral number flux, average energy, drift velocity, and magneticfield along the selected DMSP orbit) for viewing using the DMSP Graphical Module inconjunction with 1-D and Spectral Viewports. Once the data has been displayed using theGraphical Module, the user may return to this module, adjust the options, and use theRun/Update option again to refresh the existing graphics. Note that the corresponding DMSPsatellite orbit track is not currently automatically generated but see “DMSP PrecipitatingParticles: Data Versus Climatology” in the EXAMPLES section of this manual for instructionson generating the orbit using the SATEL-APP module and the appropriate orbital element files.252AF-GEOSpace User’s <strong>Manual</strong>: Version 2.5
The EPHEMERIS Data ModuleModel Name:EPHEMERISVersion: November 2001Developer:EPHEMERIS OverviewRadex, Inc. (now AER, Inc.) and the <strong>Air</strong> <strong>Force</strong> Research LaboratoryThe EPHEMERIS Data Module allows user-generated time-ordered data and satellite ephemeristo be loaded into AF-GEOSpace. After loading the data and satellite trajectory can be displayedusing the Orbit Probe (1D) and Satellite (3D) graphical modules, respectively. This module isconvenient for comparing observed satellite data with models as the user-provided satellite canbe “flown” through other AF-GEOSpace environments.EPHEMERIS InputThe EPHEMERIS input consists of a user-created ASCII data file containing a single header lineand an arbitrary number of data lines describing a satellite position and data values associatedwith that position. The file format is described in the next section. To load a data file into AF-GEOSpace use the Open File button and the Open window appears. After selecting an ephemerisfile, the Open button loads the data, closes the popup window, and places the chosen file’s namein the Environment Window just above the Open File button. The file contents should then beready for display using the Orbit Probe and Satellite graphics modules. Note that theEPHEMERIS Data File FormatThe EPHEMERIS Data module accepts data files containing a single header line followed by anarbitrary number of data lines. The format is as follows:Year Day Coordtype Ncolumns Caption-1 Caption-2 Caption-3Time Coord-1 Coord-2 Coord-3 Column-1 Column-2 Column-3Time Coord-1 Coord-2 Coord-3 Column-1 Column-2 Column-3……Time Coord-1 Coord-2 Coord-3 Column-1 Column-2 Column-3The file $AFGS_HOME\models\data\EPHEMERIS\ephemeris_sample2001_161.dat is providedfor the user to exercise this module. In the sample file, the Year and Day in the first line are equalto 2001 and 161, respectively.The elements of the header line are defined:Year:Year (Integer)Day:Day of year (Integer). Note that the Calendar Worksheet can be used todetermine day of a given Year/Month/Day of Month.Coordtype:Integer specifying the coordinate system used to represent the satellitelocation. The options are:Coordtype = 0 for Cartesian GEOC system X, Y, Z measured in km)AF-GEOSpace User’s <strong>Manual</strong>: Version 2.5 253
Ncolumns:Caption-1, -2, -3:Coordtype = 1 for Spherical GEOC system expressed in geocentric Radius(km), Latitude(degrees), and East Longitude (degrees)Geocentric GEOC coordinate system: The Z axis is aligned with the northrotational pole, the X axis pierces the Greenwich Meridian on the equator(0 deg Long, 0 deg Lat), and the Y axis completes the right handedsystem.Integer number of columns of data to be read (limit 0 - 3) after the timeand position.Text captions for data columns (number of captions must matchNcolumns)The elements the arbitrary number of data line are:Time:Coord-1, -2, -3:Column-1, -2, -3:Elapsed time in seconds from the start of the Day given in the header line.Coordinate values depend on the coordinate type specified in the headerline by Coordtype.If Coordtype = 0, then (Coord-1, Coord-2, Coord-3) = (X, Y, Z ) of theCartesian GEOC system (km, km, km).If Coordtype = 1, then (Coord-1, Coord-2, Coord-3) = (Radius, Latitude,East Longitude) of the spherical GEOC system (km, degrees, degrees).Data values (floats) for columns (number of data values must matchNcolumns)Viewing EPHEMERIS Data and Satellite OrbitThe data loaded can be viewed in a 1D window using the Orbit Probe graphics module. AfterEPHEMERIS has been run, the Path/Abscissa and Data/Ordinate buttons in the Orbit ProbeEnvironment Window will contain an option labeled AppReadOrbit representing the ephemerisdata from this module.The orbit represented by the Coord-1, -2, -3 values can be displayed in a 3D window using theSatellite graphic module by selecting the satellite named EPHEMERIS. The orbit can also becolored to correspond to the loaded data by selecting a data option using the Data button. Notethat for orbits derived from Ephemeris data, only the Geocentric Reference Frame option willfunction (not Inertial).To animate 1D or 3D plots containing Ephemeris data, the Global time interval (or the timeinterval in the Animate window) must encompass the Year, Day and Times in the Ephemeris file.For this reason, it is convenient to include the day number in the ephemeris data file name. Notethat if the satellite locations are entered using Cartesian X, Y, Z (Coordtype = 0), they areautomatically translated into Spherical coordinates (with radius in Re) for output displays.254AF-GEOSpace User’s <strong>Manual</strong>: Version 2.5
The GRID Data ModuleModel Name:GRID DataVersion: August 2009Developer:GRID OverviewAER, Inc. and the <strong>Air</strong> <strong>Force</strong> Research LaboratoryThe GRID Data Module allows a user-generated file of 3-D gridded data in either spherical orCartesian coordinates to be loaded into AF-GEOSpace. After loading a file, data can bedisplayed using all AF-GEOSpace graphical models. This module is convenient for comparinggridded output from external models with each other and with the model environments of AF-GEOSpace and extracting model results along portions of satellite orbits.GRID InputThe GRID input consists of a user-created ASCII data file formatted as described in the nextsection. The file $AFGS_HOME\models\data\GRIDDATA\griddata_sample.dat is provided forthe user to exercise this module. To load a data file into AF-GEOSpace use the Select Filebutton and an Open popup window appears. After selecting a GRID Data file, the Open buttonloads the data, closes the popup window, and places the chosen file’s name in the EnvironmentWindow just above the Select File button. When a properly formatted data file is selected, theheader information in the file is displayed so the user can Select data values to read byhighlighting, i.e., clicking on, each desired data parameter to be loaded, and then selectingRun/Update from the Edit menu. The gridded data will then be loaded into memory and readyfor display. Note that not selecting at least one parameter from the list will result in a genericpopup error message. Other error messages are displayed when necessary, but note that some ofthese are currently only shown in one of the text shell windows. Note that the Grid Tool optionin the Edit menu can be used before selecting Run/Update to specify internal spherical displaygrid characteristics. After using Run/Update, the Data Tool option in the Edit menu can be usedto examine actual grid point locations and the parameter values loaded for display.GRID Data File FormatThe GRID Data module accepts data files containing a single header line followed by anarbitrary number of data lines. The contents of the file header are verified to contain thenecessary keywords, parameters and information; error messages are displayed if therequirements are not met. Data values of magnitude 3.0x10 38 and greater are considered invalidvalues, and are so honored in the graphical displays. The grid locations may be specified interms of radius, latitude, and longitude values, and/or GEOC geocentric Cartesian X, Y, Zcoordinates. Some alternative coordinate options are described in the data file header descriptionbelow. A maximum of 32 data values may be loaded simultaneously. The data values aremapped to a regularly-spaced geocentric grid. When multiple data values are assigned to thesame grid point, the maximum value is used.There is no limit to the number of data points contained in a file but larger numbers will, ofcourse, require more read time and computer memory resources.AF-GEOSpace User’s <strong>Manual</strong>: Version 2.5 255
The file can contain any number of leading comment lines, each starting with a ‘#’ character.The Grid Data module only examines these comment lines following a line with ‘# GRIDDATA’.An example header is shown below, and a line-by-line description and explanation follows:# example Grid Data file header# ONERA IGRF magnetic field 2004/001 00:00 UT# ~~ any number of leading comment lines, starting with a ‘#’#a) # GRIDDATAb) # SPEC 6371.2 31371.2 500.0 10.0 10.0c) # LABELS index rad colat lon geox geoy geoz Bx By Bz Angle Bmagd) # UNITS index km deg deg km km km unit unit unit deg nTe) # EXCL 0 1 1 1 1 1 1 1 1 1 0 11 6371.2 10.0 0.0 1106.3473 0.0000 6274.4072 -0.29053679-0.01779209 -0.95669839 -73.07731 5.430498251e+042 6371.2 10.0 10.0 1089.5394 192.1152 6274.4072 -0.28753001-0.05122019 -0.95640106 -73.01888 5.441620738e+043 6371.2 10.0 20.0 1039.6264 378.3931 6274.4072 -0.27717132-0.08372591 -0.95716563 -73.16953 5.464138182e+044 6371.2 10.0 30.0 958.1248 553.1736 6274.4072 -0.25962456-0.11439485 -0.95891027 -73.51827 5.497171473e+04……Required line ‘a’, starting with “# GRIDDATA”, is the first line that will be recognized by the GridData module. This line must be before any other of the other specification lines. The otherspecification lines may be in any order, as long as they appear before the first line of data.Optional line ‘b’, starting with “# SPEC”, describes the spherical grid used in the display of thedata in the file. The values, in this specific order, are as follows: radius (R e or km) or altitude(km) minimum, maximum, and increment, latitude increment (deg), and longitude increment(deg). When this line is omitted, the spherical grid ranges and increments will be automaticallyascertained from the data file contents. In general, at least three corner grid points need to bepopulated to get a color block/triangle, thus if input points are too sparse for the grid then datalimits will be detected but no graphics can be generated. The grid configuration may also bemodified via the Grid Tool option of the Edit menu prior. Note that defining a grid which ismuch finer than that of the data provided can result in, for example, stripped coordinate slices.Required line ‘c’, starting with “# LABELS”, lists the space-separated data name labels for each ofthe file’s data columns. Specific data name labels are used for indicating which of the gridcoordinate columns are available in the file. Not all need be present.• ‘geox’, ‘geoy’ and ‘geoz’ correspond to the GEOC Cartesian XYZ coordinates (in km).• ‘rad’ or ‘radius’ correspond to radius (in km, or R e if value
Required line ‘d’, starting with “# UNITS”, lists the corresponding space-separated unit labelsassociated with the data name labels on line ‘c’. These labels will be shown at the bottom of thecolor scale legend of the graphical displays.Optional line ‘e’, starting with “# EXCL”, enables certain columns of data to be excluded frombeing recognized as data parameters for display. This is useful for excluding columns containingcharacter strings, date/time strings, or values with no meaning to the other data (i.e. line counter).Values of ‘1’ indicate data parameters to be included, and ‘0’ to be excluded. The number ofvalues specified on this line must match those for the labels and units. This example shows thatthe first column, ‘index’, and the 11 th column, ‘Angle’, will be ignored.All remaining lines of the file contain the grid coordinate and data values, as specified in theheader lines.Note that missing/misspelled required key words (GRIDDATA, LABELS, UNITS), too few/manyentries in required lines, or excluding one of three coordinate values will result in no parameterchoices appearing in the data values box and the appearance of an “error running model” popup.Data values in the file are assumed to be space-separated integer or floating point values on eachline, corresponding to the specified column labels. Data values greater or equal to 3.0x10 38 areconsidered to be the special ‘No Data’ value, and will not be shown in the graphical display.Any instances of ‘NaN’ or ‘Inf’ should be replaced with a ‘No Data’ value. All character stringsused to specify LABELS and UNITS must be free of any internal spaces so they will be read assingle entries associated with a given column.As the file is processed, the coordinate values are first read from the line, and converted toradius, latitude and longitude if required. If these coordinates do not match up to the sphericalgrid points as defined in line ‘b’ (or the defaults), the nearest grid point is used. The selecteddata values are read from the rest of the line and are loaded into memory associated to thespherical grid point. In the case where more than one set of data values is associated to the samespherical grid point, the maximum data values are retained. Any spherical grid points withoutany data are filled with the special ‘No Data’ value.While there is no limit to the number of positions in the spherical grid definition, nor a limit onthe number of grid positions specified in the file, an excessive number of points will cause longfile processing times and the memory required could potentially surpass the amount available onthe host computer.GRID Data OutputsThe GRID Data module returns a static 3D Gridded Data Set of the quantities listed in theLABELS line of the user-generated data file.AF-GEOSpace User’s <strong>Manual</strong>: Version 2.5 257
WORKSHEET MODULESWorksheet modules provide auxiliary tools that are often helpful in AF-GEOSpace calculations.The worksheet modules are accessed through the worksheet module manager that becomesvisible when the Worksheet option in the Module pulldown menu is activated. The worksheetmodule manager consists of two lists - Available Modules and Active Modules. AvailableModules are the modules that are currently supported by AF-GEOSpace. Active Modules aremodules that have been created and used by the AF-GEOSpace user during the current session.When initially accessed, the worksheet module manager will show a list of worksheet modulesunder Available Modules. Since no worksheet modules have yet been created, the ActiveModules list will be empty.Currently, the following worksheet modules are supported by AF-GEOSpace:• CALENDAR: A calendar showing month and day, day of year, and modified Julian day.• COORD_TRANSFORM: Perform coordinate transformations on point locations usingdifferent coordinate systems (GEOC, GSM, SM, GEI) and coordinate geometries (Cartesian,Cylindrical, Spherical) at a given Year, Day, and UT.258AF-GEOSpace User’s <strong>Manual</strong>: Version 2.5
Running Worksheet ModulesTo run a worksheet module, use the mouse to select the Worksheet option in the Modulepulldown menu and Available Modules and Active Modules lists will appear in the EnvironmentWindow. Click on the desired choice under Available Modules. For example, to create a newversion of CALENDAR, click the mouse on Calendar in the Available Modules list. Choosing aworksheet module will do two things: first, the choice is added to the Active Modules list;second, the options associated with the chosen worksheet module will appear in the EnvironmentWindow. In general, each worksheet module will have a different Environment Windowrepresenting the module specific inputs. The outputs of worksheet modules are displayed in thesame interactive Environment Window with the inputs. The user edits text boxes and setsselectors in the Environment Window and then places the cursor in some other text box to runthe module and update the displayed result.The Delete option in the Edit pulldown menu is used to remove the highlighted worksheetmodule member of the Active Modules list.AF-GEOSpace User’s <strong>Manual</strong>: Version 2.5 259
The CALENDAR Worksheet ModuleModel Name:CalendarVersion: 1996Developer:References:CALENDAR OverviewRodger Biasca, Boston CollegeNONEThe CALENDAR Worksheets module displays a calendar showing a specified month. If theYear (Month) text box is edited directly, the calendar updates when the cursor is placed insidethe Month (Year) text box or by exiting and re-entering the Calendar worksheet.CALENDAR InputsThe CALENDAR worksheet module requires the following inputs:Year:The year of the calendar to display. Year values can be changed by editingthe Year text box or by advancing the month using the up/down arrowbuttons next to the Month text box.Month:CALENDAR OutputsThe month of the calendar to display. Month values can be changed byediting the text box or by using the arrow buttons.CALENDAR displays the specified month of the specified year. The dates include day of year(DOY) and modified Julian day (MJD = 0 on 1 Jan 1950).260AF-GEOSpace User’s <strong>Manual</strong>: Version 2.5
The COORD-TRANSFORM Worksheet ModuleModel Name:Version:Developer:References:COORD-TRANSFORMCOORD-TRANSFORM Overview2006 (includes IGRF 2005 updates for magnetic coordinates)Boston College and <strong>Air</strong> <strong>Force</strong> Research LaboratoryBhavnani, K.H., and R.P. Vancour, Coordinate Systems for Space andGeophysical Applications, PL-TR-91-2296, Phillips Laboratory, HanscomAFB, MA (1991), ADA 247550Russell, C.T., Geophysical Coordinate Systems, Cosmic Electrodynamics,2, 184-196 (1971)The COORD_TRANSFORM worksheet module allows the user to perform a coordinatetransform of a single point.COORD-TRANSFORM InputsThe COORD-TRANSFORM worksheet module requires the following inputs:Year/Day/UT: The year, day of year, and UT at which to perform the coordinateconversion.Inputs:The geometry and coordinate system options for the input point are:Geometry: The Geometry options for the input point are:Cartesian: Generate a grid in Cartesian geometry.Cylindrical: Generate a grid in cylindricalgeometry.Coord System:Spherical:Generate a grid in spherical geometry.The Coord System options for coordinate system of theinput point are:GEOC: Geocentric coordinate system: The Zaxis is aligned with the north rotationalpole, the X axis pierces the GreenwichMeridian on the equator (0 deg Long, 0deg Lat), and the Y axis completes theright handed system.GSM:Geocentric solar magnetosphericcoordinate system: The X axis points tothe Sun. The Z axis is perpendicular to Xand lies in the plane containing themagnetic dipole axis. The Y axiscompletes the right handed system and ispositive towards dusk.AF-GEOSpace User’s <strong>Manual</strong>: Version 2.5 261
Outputs:SM:GEI:Solar magnetic coordinate system: TheX axis is perpendicular to Z and lies inthe plane containing the Z axis and theEarth-Sun line. The Z axis is coincidentwith the magnetic dipole axis. The Yaxis completes the right handed systemand is positive towards dusk.Geocentric equatorial inertial coordinatesystem: The Z axis is the same as for thegeocentric coordinate system (GEOC).The X axis points in the direction of thefirst point of Aries (vernal equinox). TheY axis completes the right handedsystem. The angle between the X axisand Greenwich Meridian is set by theUT from the animation widget.C0, C1, C2: The three coordinate components of the input point areentered by editing text boxes with names that changeaccording to the Geometry/Coord System combinationselected.The geometry and coordinate system options for the output point are thesame as for the input point.COORD-TRANSFORM OutputsCOORD-TRANSFORM displays the three components of the output point in the new units at thebottom of the Environment Window. These values are updated every time a Geometry or CoordSystem selection is changed or whenever a Year, Day, UT, C0, C1, or C2 text box is edited andthe cursor is then placed in another text boxes.262AF-GEOSpace User’s <strong>Manual</strong>: Version 2.5
EXAMPLESThis section provides a set of detailed examples demonstrating some of the modeling and displaycapabilities of AF-GEOSpace. Each one starts with a brief statement describing the goal of theexample. It is the authors’ belief that the most efficient way to learn the program is by workingthrough an example or two.Example titles containing the comment “(Dynamic)” make use of the AF-GEOSpace dynamicrun capability, i.e., the environment will be calculated for a series of time steps using a history ofglobal input parameters. Examples without this designation are “Static”, i.e., environments arecalculated at a single time using one set of global parameters.Example titles containing the comment “(V2.5 Only)” require Science or Application modulesprovided only in AF-GEOSpace Version 2.5 distributed to pre-approved government institutionsand their agents. See Release Notes on the User’s <strong>Manual</strong> and <strong>Software</strong> at the beginning of thisdocument.AF-GEOSpace User’s <strong>Manual</strong>: Version 2.5 263
1) Space Particle HazardsThe following example demonstrates the use of the DMSP aurora Science Module (AURORA),the CRRES electron and proton radiation belt flux Science Modules (CRRESELE, CRRESPRO),the Satellite Application Module (SATEL-APP), and a variety of visualization tools includinganimated satellite orbits, links, and detector cones.Goal: View auroral electron precipitation patterns and the 3-D distribution of 1.6 MeVelectrons and 10.7 MeV proton radiation belt fluxes during magnetically active timesrelative to spacecraft in Low, Medium, Geosynchronous, and High Earth Orbit (a.k.a.,LEO, MEO, GEO, and HEO). Build satellite-to-ground communications links andsatellite detector cones.Start an AF-GEOSpace session and set global input parameters,• Initiate AF-GEOSpace via the Start menu (Start>Programs>AFGeospace>AFGeospace),the desktop icon, or by double-clicking on the file $AFGS_HOME\bin\AFGeospace.bat.Maximize the AF-GEOSpace user interface window. The shell windows can be minimizedbut must remain open for AF-GEOSpace to function.• For this run, set the date and time in the Environment Window by editing the text boxes toread: Start:Year=1996, Day=315, and UT=18:00. Select the Archive option using the Globalsselector to the right of the time inputs and the values of the Kp geomagnetic index, sunspotnumber (SSN), F10.7 cm radio flux, and the Ap geomagnetic index for this time will becopied from archived NGDC parameters (Kp=1.7, SSN=12, F10.7=69.6, and Ap=6). ResetKp=5.0 and Ap=25 to represent a magnetically active period by manually editing thecorresponding text boxes.Create a 3-D graphic of the Earth with the <strong>Air</strong> <strong>Force</strong> Research Laboratory location displayed,• Select the Graphics option in the Module menu and Available Modules and Active Moduleslists will appear. Scroll down the Available Modules list and select Earth. An Earth objectwill be added to the Active Modules list and a set of Earth Options will appear in theEnvironment Window.• Under Outline Detail, leave Geographic Bndys selected. Under Grid Options select Lat/LonGrid. Check the Display box and the Earth globe will appear in the default 3D window.• To place a station marker representing the location of AFRL, scroll down the AvailableModules list and select Station and a Station object will be added to the Active Modules list.Highlight the AFRL entry in the Stations list and click Display and an AFRL label shouldappear in the 3D window at the location (Alt (Re)= 1.0, Lat = 42.30, and Lon = -71.05)representing AFRL. Note: Station entries can be added by editing the four text boxes andclicking the Add button. Stations can be removed from the list by highlighting the entry in theStations list and clicking on the Delete button. The Pop Label control can be used to makethe station always visible. All changes to the Stations list will be saved for future sessions.• With no data plotted, use the Viewport menu to turn off Show Color Bar.264AF-GEOSpace User’s <strong>Manual</strong>: Version 2.5
• The Earth’s size can be scaled in the 3D Window using the right mouse button. With thecursor in the 3D Window, depress the right button and draw the mouse toward yourself.Rotate the Earth so that the AFRL location marker is visible by depressing the left button andmoving the mouse sideways.Display a Time/Date Label in the Active Graphic Window,• Select Annotation from the Available Modules list. An Annotation object will be added to theActive Modules list and a set of Annotation Options will appear in the bottom of theEnvironment Window. To display a time label in the graphics window, place a check mark inthe Show Date box and click Display and a time/date label will appear in the far lower leftcorner of the graphic window. Move the X Position and Y Position sliders to a value ofapproximately 0.04 to make them easier to read.Create and display an orbiting Low Earth Orbit (LEO) satellite,• Select the Applications option from the Module menu and Available Modules and ActiveModules lists will appear. Scroll down the Available Modules list and click on SATEL-APP.A SATEL-APP object will be added to the Active Modules list and a set of Ephemeris Dataoptions will appear in the Environment Window.• Under Propagator leave the Lokangle option set and under Element Type choose the Meanoption. Edit the text boxes that appear so that Inclination=98.583, Arg. of Perigee=114.661,Mean Anomaly=246.292, Eccentricity=0.0008, R.A. Asc. Node= 19.714, and Mean Motion =14.327 (leave d(MM)/dt/2, d2(MM)/dt2/6, and BSTAR at their default values). Set the orbitreference time by editing the T_ref text box to read “11/04/96 19:48:29”. Type “LEO” in theSat. Name text box and leave Time Step (s) set at 60 seconds. Select the Run/Update optionin the Edit menu and a Process View Window will appear as orbit data are generated. Note:Example 2 demonstrates the use of From File feature which is not as general but muchsimpler to use.• Select the Graphics option from the Module menu and Available Modules and ActiveModules lists will appear. Scroll down the Available Modules list and select Satellite. ASatellite object will be added to the Active Modules list and a set of Satellite Options willappear.• Click on the Satellite button and select the option LEO, leave the Data button set to No Date,use the Label selector to choose Sat. Name, and check Pop Marker. Under Reference Frameplace a check next to Inertial (ECI) and uncheck Geocentric (GEOC). Click on in theDisplay box and the LEO satellite will appear in orbit near Antarctica (under India) in the 3DWindow.• Select the Animate Tool option in the Edit menu and an Animate window will appear. Clickthe Find Range button to allow the animator to register the times span covered by the orbitgenerated. Use the right arrow on the time slider until you reach “11/11/96 06:00” and the 3DWindow should resemble the figure below.AF-GEOSpace User’s <strong>Manual</strong>: Version 2.5 265
• Edit the Time Step text box to read “300”, click on the Update button, and then click theAnimate button under the slider and the changing LEO satellite position will be displayed at300 second intervals. Clicking the Animate button again halts the animation. The Donebutton will halt the animation and dismiss the Animation Window.Create and Display an AURORA Science Module data set,• Select the Science option in the Module menu and Available Modules and Active Moduleslists will appear. Click on AURORA in the Available Modules list and a SciAurora object willbe added to the Active Modules list. A set of AURORA Options will appear in theEnvironment Window.• Leave all AURORA Options set at the default values. Select the Run/Update option in theEdit menu and a Process View Window appears momentarily. When the model is complete,this window disappears and the Model Status box will indicate that the Global ParametersDay, Time, and Kp were used and the “MODEL IS READY AND UP TO DATE.”• Select the Graphics option in Module menu and Available Modules and Active Modules listswill appear. Scroll up the Available Modules list, select Coord Slice, and a Coord Slice objectwill be added to the Active Modules list. A set of Coord Slice Options will appear in theEnvironment Window. The Cut Plane options C0, C1, and C2 correspond to the threespherical coordinates used when building the aurora data set. Use the default setting calledC0 to slice the data at a constant radius.• Click the Data button, go to the SciAurora option, and select Elec. Number Flux. Click in theDisplay box and auroral electron data will appear in the 3D Window. From the Viewportmenu, use the Show Color Bar option to show the color bar with units now representingauroral electron number flux.• To make the auroral display more transparent, click the Transparency button in theEnvironment Window and move the slider to a value of 0.70. Rotate the Earth and notice thatthe auroral electron number flux is displayed at both poles. To see more detail on the266AF-GEOSpace User’s <strong>Manual</strong>: Version 2.5
continents, highlight the Earth entry in the Active Modules list on the right and check-offTextured in the Outline Detail section of the Earth Options inputs.• Use the Viewport menu to select Projection and then its Two D option (the Three D optionwill convert it back to a 3D window). To get the AURORA color bar to reappear highlightthe Coord Slice entry in the Active Modules list on the right (or hold down the Ctrl key andclick the mouse on the colored electron precipitation data in the graphic window). Thewindow should resemble the following figure.• Use the Viewport menu to select Projection and then its Three D option to transform the viewback to 3D.Create a CRRESELE Science Module data set,• Select the Science option from the Module menu and Available Modules and Active Moduleslists will appear. Click on CRRESELE in the Available Modules list. A SciCrresEle objectwill be added to the Active Modules list and a set of CRRESELE Options will appear.• Click on the B-Model button and select Dip-Tilt-Off. This is not the magnetic field modeloriginally used to reduce the CRRES data but will suffice for this example. From the EnergyChannel (MeV) list, select 1.6 MeV and from the Ap15 Model Range list, select the Ap1520.0 - 25.0 option. Leave the Compute button alone.• Select the Run/Update option in the Edit menu and a Process View Window will appearwhile CRRESELE is running. When the model is complete that window will disappear andthe model inputs will appear in the Model Status box at the bottom of the EnvironmentWindow with the message “MODEL IS READY AND UP TO DATE.”AF-GEOSpace User’s <strong>Manual</strong>: Version 2.5 267
Display two CRRESELE data coordinate slices at constant longitude,• Select the Graphics option in the Module menu and Available Modules and Active Moduleslists will appear. Click on Coord Slice in the Available Modules list and a second Coord Sliceobject will be added to the Active Modules list. A set of Coord Slice Options will appear inthe Environment Window.• Click the Data button and select Flux under the SciCrresEle option. Select the Cut Plane C2to slice the CRRESELE data at a constant longitude. Click on Display and CRRESELE dataappear near -180 degrees Longitude. Move the Position Value slider until the longitude valuedisplayed under the slider is approximately zero.• Notice that the color bar units now represent CRRESELE electron number flux. In general,the color bar units correspond to the graphics object currently highlighted in the ActiveModules list and the input options displayed in the Environment window. To quickly regainthe color bar corresponding to the aurora data, depress the Ctrl key and click the left mousebutton on the auroral data. This action will restore the AURORA environment window also.• Click again on Coord Slice in the Available Modules list and a third Coord Slice object willbe added to the Active Modules list. A set of Coord Slice options will appear in theEnvironment Window. Click the Data button and select Flux under the SciCrresEle option.Select the Cut Plane option C2, click on Display, and CRRESELE data appears again near180 degrees Longitude. There are now two electron belt coordinate slices on opposite sidesof the Earth.Renaming Like-Named Objects in the Active Modules List,• To help keep track of which Active Modules entry corresponds to which graphic element,AF-GEOSpace contains a renaming feature. This example now has three Coord Slice entriesin the Active Modules list on the right, one for the AURORA and two for CRRES-ELE data.Highlight the first Coord Slice entry in the Active Modules list, select the Rename option inthe Edit menu and a Rename Model window appears. Edit the Name text box to read“Aurora” and click OK to change the Coord Slice entry’s name. Repeat the process with theremaining two Coord Slice entries in the Active Modules list and rename them “CRRES-ELE1” and “CRRES-ELE2”. Because more orbits will be generated below, highlight theSatellite entry and rename it “LEO”.Create a CRRESPRO Science Module data set,• Select the Science option in the Module menu and Available Modules and Active Moduleslists will appear. Click on CRRESPRO in the Available Modules list. A SciCrresPro objectwill be added to the Active Modules list and a set of CRRESPRO Options will appear.• Click on the B-Model button and select Dip-Tilt-Off. Again, this is not the magnetic fieldmodel originally used to reduce the CRRES data but will suffice for this example. From theEnergy Channel (MeV) list select 10.7 MeV and use the Activity button to select the Activeoption.268AF-GEOSpace User’s <strong>Manual</strong>: Version 2.5
• Select the Run/Update option from the Edit menu button and a Process View Window willappear while CRRESPRO is running. When the model is complete that window willdisappear and the model inputs will appear in the Model Status box at the bottom of theEnvironment Window along with the message “MODEL IS READY AND UP TO DATE.”Display two CRRESPRO data coordinate slices at constant longitude,• Select the Graphics option in the Module menu and Available Modules and Active Moduleslists will appear. Click on Coord Slice in the Available Modules list and a Coord Slice objectwill be added to the Active Modules list. A set of Coord Slice options will appear in theEnvironment Window.• Click the Data button and select Flux under the SciCrresPro option. Select the Cut Planeoption C2 to slice the CRRESPRO data at a constant longitude. Click on Display andCRRESPRO data appears near 180 degrees Longitude. The units for the color bar nowrepresent CRRESPRO proton number flux. Select Rename from the Edit menu and enter“CRRES-PRO1” as the new coordinate slice name.• Click on Coord Slice in the Available Modules list and a Coord Slice object will be added tothe Active Modules list under CRRES-PRO2. A set of Coord Slice Options will appear in theEnvironment Window.• Click the Data button and select Flux under the SciCrresPro option. Select the “Coordinate”C2 to slice the data at constant longitude and click on Display. CRRESPRO data appearsagain near 180 degrees Longitude. Move the Position Value slider to read approximately 0.5.This places the proton data slice just west of the nearby electron data.• To make more room for the data displayed, go to the Viewport menu and turn off the ShowColor Bar feature. The figure should now resemble the following figure.AF-GEOSpace User’s <strong>Manual</strong>: Version 2.5 269
Create and display a Medium Earth Orbit (MEO) data set with a communications link to AFRL,• Select the Applications option in the Module menu and Available Modules and ActiveModules lists will appear. Click on SATEL-APP in the Available Modules list. A secondAppSatel object will be added to the Active Modules list and a set of Ephemeris Data optionswill appear in the Environment Window.• Under Propagator leave Lokangle selected and under Element Type choose the option Mean.Edit the text boxes that appear so that Inclination=55.057, Arg. of Perigee = 203.685, MeanAnomaly=156.036, Eccentricity=0.007, R.A. Asc. Node=314.183, and Mean Motion = 2.006(leave d(MM)/dt/2, d2(MM)/dt2/6, and BSTAR at their default values. Edit the orbit referencetime so that the T_ref text box reads “11/04/96 08:44:20”. Type “MEO” in the Sat. Name textbox and leave Time Step(s) set at 60. Use the Edit menu to Rename this application entry“MEO”.• Select the Run/Update option in the Edit menu and a Process View Window will appear asorbit data are generated. Select the Graphics option in the Module menu and AvailableModules and Active Modules lists will appear. Scroll down the Available Modules list andclick on Satellite. A Satellite object will be added to the Active Modules list and a set ofSatellite Options will appear in the Environment Window.• Use the Satellite button to select MEO, leave Data set to off, use the Label button to selectSat. Name, and check Pop Marker. Under Reference Frame, check Inertial (ECI) anduncheck Geocentric (GEOC). Click in the Display box and the MEO orbit will appear in the3D Window. Use the Edit menu to Rename the Satellite entry as “MEO”• Scroll down the Available Modules list and select Link. A Link object will appear in theActive Modules list and Link options will appear in the Environment Window. Highlight theAFRL entry in one of the Station lists and highlight MEO in the other Station list. Click theDisplay box to create the line-of-sight link connecting AFRL to the MEO satellite.• If AFRL and the MEO satellite are not within line-of-sight of each other, select the AnimateTool in the Edit menu to use the Animate Window. Move the slider in the Animate windowuntil you will notice that the link line will appear only when the MEO satellite is within lineof-sightof AFRL. Click on the Done button to retire the Animate window.Create and display a High Earth Orbit (HEO) data set with a downward looking detector cone,• Select the Applications option from the Module menu and Available Modules and ActiveModules lists will appear. Click on SATEL-APP in the Available Modules list. An AppSatelobject will be added to the Active Modules list and a set of Ephemeris Data options willappear in the Environment Window.• Under Propagator leave the Lokangle option selected and choose Mean under Element Type.Edit the text boxes that appear so that Inclination=86.302, Arg. of Perigee= 278.085, MeanAnomaly=22.234, Eccentricity=0.6338, R.A. Asc. Node=24.922, and Mean Motion = 1.362(leave d(MM)/dt/2, d2(MM)/dt2/6, and BSTAR at their default values). Adjust the orbit270AF-GEOSpace User’s <strong>Manual</strong>: Version 2.5
eference time by editing the T_ref text box to read “10/29/96 17:06:38”. Type “HEO” in theSat. Name text box and leave Time Step(s) = 60. Use the Edit menu to Rename this entry“HEO”.• Select the Run/Update option in the Edit menu and a Process View window will appear, thenvanish and the Model Status box will say the “MODEL IS READY AND UP TO DATE.”• Select the Graphics option in the Module menu and Available Modules and Active Moduleslists will appear. Scroll down and click on Satellite in the Available Modules list. A Satelliteobject will be added to the Active Modules list and a set of Satellite Options will appear.• Select HEO with the Satellite button, leave the Data button set to off, use the Label button toselect Sat. Name, and check Pop Marker. Under Reference Frame check Inertial (ECI) anduncheck Geocentric (GEOC). Use the Edit menu to Rename the Satellite entry as “HEO”• Scroll up in the Available Modules list and select Detector. A Detector object will appear inthe Active Modules list and Detector option will appear in the Environment Window.Highlight the HEO entry in the Origin Station list by clicking on it. Move the View Angleslider (or edit the text box) until the angle equals 7 degrees. Click on Display and the detectorcone should appear coming from the HEO satellite. Click the Transparency button and movethe slider that appears to a value of 0.70 to make the cone slightly transparent. As with theLink visualized above, you can open the Animate Tool in the Edit menu and move theAnimate Window slider around to see the detector cone at different positions.• A better picture of the detector’s footprint can be viewed by simply changing thedimensionality of the active 3D window. Open the Viewport menu and slide down to theProjection item and select the Two D option. Again, the Animate Tool in the Edit menu canbe used to see how the detector visualization changes with time. Note that the detectorfootprint in 2D can breakup near the poles. Move the Animate Window time slider to read“11/11/96 16:15” and the 2D display should resemble the next figure. Switch back to 3DAF-GEOSpace User’s <strong>Manual</strong>: Version 2.5 271
with the Viewport menu by selecting Projection and then Three D.Create and display a Geosynchronous Orbit (GEO) data set with a detector cone,• Select the Applications option in the Module menu and Available Modules and ActiveModules lists will appear. Click on SATEL-APP in the Available Modules list. An AppSatelobject will be added to the Active Modules list and a set of Ephemeris Data options willappear in the Environment Window.• Under Propagator leave Lokangle selected and choose Mean under Element Type. Edit thetext boxes that appear so that Inclination=0.1233, Arg. of Perigee=332.651, MeanAnomaly=263.618, Eccentricity=0.0004, R.A. Asc. Node=266.253, and Mean Motion = 1.003(leave d(MM)/dt/2, d2(MM)/dt2/6, and BSTAR at their default values). Edit the orbitreference time so that the T_ref text box reads “11/04/96 15:31:55”. Type “GEO” in the Sat.Name text box and leave Time Step(s) set at 60 seconds. Use the Edit menu to Rename thisapplication entry “GEO”.• Select the Run/Update option in the Edit menu and a Process View Window appears brieflyand the Model Status box will indicate “MODEL IS READY AND UP TO DATE.”• Select the Graphics option in the Module menu and Available Modules and Active Moduleslists will appear. Click on Satellite in the Available Modules list and a Satellite object will beadded to the Active Modules list and a set of Satellite Options will appear in the EnvironmentWindow.• Use the Satellite button to select GEO, leave the Data button set to No Date, use the Labelbutton to select Sat. Name, and check Pop Marker. Under Reference Frame check Inertial(ECI) and uncheck Geocentric (GEOC). Click the Display box and the GEO orbit will appearover the Pacific Ocean in the 3D Window. For completeness, use the Edit menu to Renamethis graphic entry “GEO”.• To associate a detector cone with the GEO satellite, scroll up in the Available Modules listand select Detector. A second Detector object will appear in the Active Modules list andDetector option will appear in the Environment Window. Scroll down the Origin Station listand highlight the GEO entry by clicking on it. Move the View Angle slider (or edit the textbox) until the angle equals 8 degrees. Click on Display and the detector cone should appearcoming from the HEO satellite. Uncheck the Solid box to produce a wire frame rendering ofthe detector.Display an Annotation Label in the Active Graphic Window,• Select the Graphics option in the Modules menu and Available Modules and Active Moduleslists will appear. Select Annotation from the Available Modules list. An Annotation objectwill be added to the Active Modules list and a set of Annotation Options will appear in thebottom of the Environment Window.272AF-GEOSpace User’s <strong>Manual</strong>: Version 2.5
• Edit the Text field to read “AF-GEOSPACE” and click Display and the label will appear inthe far lower left corner of the graphic window. Move the X Position slider to 0.04 and the YPosition sliders to approximately 0.90 to place it in the upper left of the graphic window.• Move the Animate Window time slider to read “11/10/96 22:25” and the 3D display shouldresemble the figure above.While the HEO detector is scanning the aurora over Alaska, the MEO satellite is entering theheart of the 1.6 MeV electron radiation belt and is in line-of-sight of AFRL. The LEO satellite ismoving southward over equator in the Pacific while the GEO satellite detector is still monitoringa nearby patch of open water.This completes the Example of Space Particle Hazards.AF-GEOSpace User’s <strong>Manual</strong>: Version 2.5 273
2) Low Earth Orbit Particle EnvironmentThis example demonstrates the use of the CRRES proton (CRRESPRO) and the CRRES electron(CRRESELE) radiation belt flux Science Modules, the DMSP Aurora Science Module(AURORA), the Satellite Application Module (SATEL-APP), and a variety of graphical tools.Goal: Demonstrate the spatial distribution of the particle populations encountered by theDefense Meteorological Satellite Program (DMSP) satellite (in a low Earth orbit),including the low altitude projections of the inner and outer radiation belts as well asthe auroral oval. It will be shown that the inner belt protons penetrate to DMSPaltitude in a localized region above the South Atlantic (South Atlantic Anomaly) dueto the asymmetry of the Earth’s magnetic field. A low altitude projection of the outerradiation belt electrons appears in both hemispheres and the particle flux from themagnetosphere’s plasma sheet precipitates into the ionosphere forming the highlatitude auroral oval. Both 2D and 3D representations of these populations, along witha trace of a DMSP orbit, will be shown juxtaposed over the Earth. 1D flux plotsversus time will also be generated for each of the three populations.Procedure Summary: Section 1 starts a Static Model session, Sections 2-4 generate theCRRESPRO, CRRESELE, and AURORA Science Module data sets, Section 5 generates theDMSP orbit data set, Section 6 creates a 2D and a 3D view of the Earth with a superimposedDMSP orbit, Section 7 creates a 2D view of the particle environment, Section 8 creates a 3Dview of the particle environment, and Section 9 creates a 1D plot of flux vs. time for the DMSPorbit.1) Start an AF-GEOSpace session and set global input parameters,• Initiate AF-GEOSpace via the Start menu (Start>Programs>AFGeospace>AFGeospace),the desktop icon, or by double-clicking on the file $AFGS_HOME\bin\AFGeospace.bat.Maximize the AF-GEOSpace user interface window. The shell windows can be minimizedbut must remain open for AF-GEOSpace to function.• For this run, set the date and time by editing the Globals text boxes to read: Start:Year =1997, Day = 200, and UT = 10:30 (Day 200 = 19 July). Click on the Archive option of theGlobals button and the values of the Kp geomagnetic index, sunspot number (SSN), F10.7cm radio flux, and the Ap geomagnetic index that have been archived by NGDC will beretrieved for the appropriate time (Kp=1.7, SSN=0, F10.7=72.8, and Ap=6).2) Create a CRRESPRO Science Module (inner proton belt) data set,• Choose Module from the Environment Window Menu Bar and select Science from theoptions. Available Modules and Active Modules lists will appear. Click on CRRESPRO in theAvailable Modules list. A SciCrresPro object will be added to the Active Modules list and aset of CRRESPRO Options will appear in the Environment Window.• Scroll down the Energy Channel (MeV) list select the 47.0 MeV channel.274AF-GEOSpace User’s <strong>Manual</strong>: Version 2.5
• Click on the B-Model button and select the IGRF85 option to generate a realisticallypositioned South Atlantic Anomaly (SAA) for Low Earth Orbit (LEO) altitudes relativelyquickly. Note that the IGRF85/O-P model was used to construct CRRESPRO but take longerto run. Also, while the offset-tilted dipole option Dip-Tilt-Off is fastest, it does not yield arealistically positioned SAA. Leave the Activity button set to the Quiet model option. TheQuiet model contains only the primary inner belt and is more typical of the innermagnetosphere. The Active model was constructed from CRRES data following the 24March 1991 magnetic storm and contains the second proton belt.• Select the Grid Tool option in the Edit menu and the Grid Tool window will appear. Leaveunchanged the default grid Spacing, Geometry, and coordinate System in order to generate alinearly spaced spherical grid defined by radius, geocentric latitude, and geocentric longitude.Increase all three Npoint text boxes from values of 20 to 40. In the Rad, GEOC (Re) sectionset Min=1.0 and Max=3.0. Close the Grid Tool Window by clicking the OK button.• Select the Run/Update option in the Edit menu. A Process View Window will appear whileCRRESPRO is running and then disappear. Identification and status of the model will appearin the Model Status box in the lower part of the window.3) Create a CRRESELE Science Module (outer electron radiation belt) data set,• Click on CRRESELE in the Available Modules list. A SciCrresEle object will be added to theActive Modules list and a set of CRRESELE Options will appear. From the Energy Channel(MeV) list select the 1.6 MeV channel. Click on the B-Model button and select the IGRF85model as was done for CRRESPRO. From the Ap15 Model Range list, choose Ap15 7.5 -10.0 to approximate the global value of 7.56 (shown below the Compute button) which wasdetermined for day 200/1997. This will select a model constructed from CRRES data duringthose time intervals when the average value of daily Ap over the preceding 15 days wasbetween 7.5 and 10.• Select the Grid Tool option in the Edit menu and the Grid Tool window will appear. UnderRad, GEOC (Re) set Npoint=60, Min=1.0, and Max=7.0. Under Lat, GEOC (Deg N) setNpoint=60, Min= -85, and Max=75. Under Lon, GEOC (Deg E) set Npoint=40, Min= -180,and Max=180. Close the Grid Tool window by clicking the OK button.• Select the Run/Update option in the Edit menu and a Process View window will appear whileCRRESELE is running. When the model is complete the window will disappear and theidentification and status of the model will appear in the Model Status.4) Create an AURORA Science Module data set,• Click on AURORA in the Available Modules list and a SciAurora object will be added to theActive Modules list. Within the set of AURORA Options appearing in the EnvironmentWindow, select the Fast IGRF option under Internal B-Field and leave all other settingsunchanged.AF-GEOSpace User’s <strong>Manual</strong>: Version 2.5 275
• Select the Grid Tool option in the Edit menu. The default is a two-dimensional latitudelongitudegrid at a constant radius of 1.0173 Earth radii. This is the original domain on whichthe aurora model was constructed. Under Rad, GEOC (Re) set Npoint=2, leave Min=1.0173,and reset Max=1.14 Re to bracket the DMSP altitude of 840 km (1.1318 Re). Set Npointequal to 80 in the Lat, GEOC (Deg N) and Lon, GEOC (Deg E) sections. Close the Grid Toolwindow by clicking on the OK button.• Select the Run/Update option in the Edit menu. When the model is complete the ProcessView window will disappear and the Model Status box will be updated indicate that theGlobal Parameters Day, Time, and Kp are being used to construct the model.5) Create the DMSP orbit data set,• Select the Applications option in the Module menu. Available Modules and Active Moduleslists will appear. Scroll down the Available Modules list and select SATEL-APP (satelliteapplication). An AppSatel object will be added to the Active Modules list and a set ofEphemeris Data options will appear in the Environment Window.• With the From File Element Type selected, click on the File button and a window appearsshowing the contents of the folder $AFGS_HOME\models\data\EPHEMERIS. Click on thefile icon labeled “dmsp.txt” and click the Open button.• A list of DMSP satellites will appear in the Current Element File list in the middle of thewindow. Select DMSP F14 and the satellite name and the reference time associated with theorbital elements are given in boxes below the list box. To view the orbital elements for anysatellite loaded using the From File option, click on the Mean element type button. Reselectthe From File element type button to return to the previous view. The default value for thestart time (T_start) is taken from the global values at the top of the Environment Window.Whenever a SATEL-APP module is run in “static” mode, a 1-day interval with a 60-secondtime step is used by default.• Edit the T_start text box to read “07/19/97 08:30:00” and edit the T_stop text box to read“07/19/97 12:30:00”. Select the Run/Update option in the Edit menu to create the orbit dataset. When completed, the Model Status box will indicate that the “MODEL IS READY ANDUP TO DATE.”6) Create 2D and 3D views of Earth with an orbit trace,• Select the Create 2D Viewport option in the Window menu and a 2D window will be created.The Window menu options labeled 1:1 (the default 3D viewport) and 2:2 (the 2D viewportjust created) can be used to bring the windows to the front. Use the Tile option in the Windowmenu to make both windows viewable.• Select the Graphics option from the Module menu and Available Modules and ActiveModules lists will appear. Select Earth from the Available Modules list. An Earth object willbe added to the Active Modules list and a set of Earth Options will appear in the EnvironmentWindow. Select Outline Detail options Textured and Geographic Bndys. Click on Display276AF-GEOSpace User’s <strong>Manual</strong>: Version 2.5
and the Earth will appear in the active 2D window. To place the Earth in the 3D window,simply click on that window to activate it and select Display again.• Scroll down the Available Modules list and select Satellite. A Satellite object will be added tothe Active Modules list and a set of Satellite Options will appear. Click the Satellite list andchoose DMSP F14. Click Display to place the orbit in the active window. To place the orbitin the other window, simply click on that window and select Display again.• Click on the Label button and select the Rad, Lat, Lon option. Radius (1.13 Re), latitude (-81.14), and longitude (-119.94 o ) will be displayed at the current satellite position (solid redcircle). Click the Label button and select Time. The coordinate label will be replaced by theday of year/time. After clicking in the 3D window to ensure it is active, uncheck the ShowColor Bar option in the Viewport menu to remove the color bars from the graphics windows.The 3D window should resemble the following figure.• To move the satellite along its orbit, select the Animate Tool option in the Edit menu and anAnimate window will appear. The Time Start and Time End text field values in the Animatewindow key off the global start time. Edit these two windows to match the start and stoptimes entered in the SATEL-APP module, i.e., 07/19/97 08:30 and 07/19/97 10:30. Nowreset the Time Step field to 60 seconds and click the Update button. Moving the slider until itreads 07/19/97 10:12 to position DMSP14 over the South Atlantic Anomaly (SAA) at“r”=1.14, “lat”= -29.80 o , “lon”= -29.99 o . To move the satellite in 60-second increments, usethe left/right arrow buttons located at the slider ends. Note that while the Animate box underthe slider is checked, the satellite will move continuously using the designated Time Step.Click the Done button to remove the Animate window (it will retain the current settings).7) View of the inner proton radiation belt, the outer electron radiation belt, and the auroral ovalat the DMSP altitude,• CRRESPRO - Scroll up the Available Modules list and select Orbit Slice. An OrbitSliceobject will be added to the Active Modules list and a set of Orbit Slice Options will appear.• Use the Satellite selector to pick DMSPF14. Click the Data button and select Flux under theSciCrresPro option. The coordinate parameters P0, P1, and P2 correspond to the threeAF-GEOSpace User’s <strong>Manual</strong>: Version 2.5 277
coordinates that are set by the Grid Tool in the appropriate Science Module (for this examplethey represent geocentric radius, latitude, and longitude). Select P0 to produce a slice of fluxvalues at constant radius. Select Display to place the orbit slice in the active window.• Click in the window that does not have proton data showing, and click Display once more toplace the coordinate slice in the other window. At DMSP altitude the inner belt appears as arelatively localized area centered near 304 o E longitude and -30 o latitude.• The transparency of the CRRESPRO Orbit Slice can be changed by clicking on theTransparency button at the right side of the Orbit Slice Options section. A Transparencyslider will be displayed at the bottom of the window. Changing the slider value of 0.70 so thecontinent outlines can be seen. At this altitude, it should be apparent that a maximum in fluxintensity appears near the east coast of South America. This feature is referred to as the SouthAtlantic Anomaly (SAA).• CRRESELE – Select Orbit Slice again in the Available Modules list on the left. AnotherOrbitSlice object will be added to the Active Modules list and a set of Orbit Slice options willappear. Use the Satellite selector to pick DMSPF14. Click the Data button and select Fluxunder the SciCrresEle option. Select P0 to produce a slice of flux values at constant radius.Select Display to place the orbit slice in the active window. Click in the window that does nothave electron data showing, and click Display once more to place the coordinate slice in theother window. Use the Transparency feature to set a Transparency value of 0.70.• AURORA - Select Orbit Slice again in the Available Modules list on the left. AnotherOrbitSlice object will be added to the Active Modules list and a set of Orbit Slice Optionswill appear. Use the Satellite selector to pick DMSPF14. Click the Data button and select IonNumber Flux under the SciAurora option. Select P0 to produce a slice of flux values atconstant radius. Select Display to place the orbit slice in the active window. Click in thewindow that does not have aurora data showing, and click Display once more to place thecoordinate slice in the other window. Use the Transparency feature to set a Transparencyvalue of 0.70. With the 2D window active, uncheck the Show Color Bar option listed in theViewport menu and the 2D graphic window should resemble the following figure.278AF-GEOSpace User’s <strong>Manual</strong>: Version 2.5
8) Create constant longitude 3D views of the inner proton radiation belt and the outer electronradiation belt,• Scroll up the Available Modules list and click on Coord Slice. A Coord Slice Object will beadded to the Active Modules list and a set of Coord Slice Options will appear.• Click the Data button and select Flux under the SciCrresPro option. Under Cut Plane, selectthe C2 option. Click in the 3D window to make it active and select Display to place acoordinate slice at a constant longitude in the 3D window. You may need to use the leftmouse button to rotate the Earth to see the coordinate slice.• Return to Available Modules and click on Coord Slice. A second Coord Slice Object will beadded to the Active Modules list and a new set of Coord Slice Options will appear.• Click the Data button and select the Flux under the SciCrresEle option. Under Cut Planeselect the C2 option and click Display to place cross-section of the outer electron belt fromthe CRRESELE model in the 3D Window.• Repeat the first 4 steps in this Section 8 to generate a second cross-section of the inner protonand outer electron belts. In each of these two new cross-sections, move the Position Valueslider under Coord Slice Options to ~0.5 so that the longitude slice is diametrically opposed(at 180 o ) to the two original cross-sections.• The image in the 3D Window can be rotated/scaled by using the left/right mouse buttonwhen the pointer is in the 3D Window. Use the mouse controls to arrange the Earth in the 3DWindow so it resembles the following figure.• Scroll down the Available Modules list and select Isocontour and an Isocontour object willbe added to the Active Modules list and a set of Isocontour options will appear.• Use the Data button to select SciCrresPro and the Flux option. Click Display and a greenIsocontour will appear representing the proton belt. Move the Contour Value slider to a valueAF-GEOSpace User’s <strong>Manual</strong>: Version 2.5 279
of 0.75 and use Transparency and set the Transparency slider to 0.70. A view from thehigher northern latitudes should resemble the following figure.9) A one-dimensional plot of the CRRESPRO proton flux, CRRESELE electron flux, andAURORA ion number flux as seen by the DMSP satellite can be generated as follows,• Return to the Window menu of the Environment Window and select Create 1D Viewport. Anempty 1D Window with a white lined frame will appear and fill the graphics window area.This new 1D menu is represented by the new 3:3 entry in the Window menu.• Scroll down the Available Modules list and select Orbit Probe. An Orbit Probe Object willbe added to the Active Modules list and a set of Orbit Probe Options will appear.• Click on the Path/Abscissa button and select the Time option under AppSatel (this representsthe DMSP F14 satellite. Click on the Data/Ordinate button and select the Flux option underSciCrresPro. Click on Display and a Flux vs. Time along the DMSP orbit will appear.• Repeat the last 2 steps, replacing SciCrresEle for SciCrresPro. Now, repeat those same 2steps once again but select Ion Number Flux under SciAurora instead of Flux underSciCrresPro.• Since the time scale (x-axis) is the same for all flux curves, two of the three may be deletedto avoid redundancy. To do this, uncheck the Enabled option in the X Axis section. Nowhighlight a different Orbit Probe object under the Active Modules list (not the AvailableModules list!). Repeat the above procedure to delete a second x-axis. The 1D Window shouldresemble the final figure below.This 1D figure and the 2D figure produced earlier illustrate how DMSP can be exposed, in turn,to auroral (green), proton belt (white), and electron belt (red) fluxes. Select Animate Tool fromthe Edit menu and start the Animation. If you view the 1-D (follow the colored dots showing thecurrent flux) and 2-D (follow the satellite marker) plots together you can see the correspondencebetween them.280AF-GEOSpace User’s <strong>Manual</strong>: Version 2.5
This completes the Example of the Low Earth Orbit Particle Environment.AF-GEOSpace User’s <strong>Manual</strong>: Version 2.5 281
3) The Earth’s Magnetic Field: Placement of the Current Sheet (Dynamic)The following dynamic example demonstrates the use of the magnetic field BFIELD-APPModule, the COORDSLICE and FIELD-LINES Graphics Module, Animation, and a variety ofother visualization tools.Goal: The solar wind interacts with the Earth’s intrinsic magnetic field to form a magneticcavity called the magnetosphere. Solar wind pressure (from particles and magneticfield) compresses the magnetosphere on the dayside and helps to form an extendedmagnetotail of several hundred Earth radii in length on the nightside. The overallinteraction results in a sheet of westward traveling current on the nightside thatseparates a region of anti-sunward directed field lines from a region of sunwarddirected field lines, i.e., magnetic field lines emanate from the south pole and extenddown the magnetotail before passing up through the cross-tail current sheet andreturning to Earth to connect at the north pole. In addition, the placement of the crosstailcurrent sheet (where the magnetic field lines change polarity) changes as afunction of Earth’s dipole tilt angle relative to the solar direction. The goal of thisexample is to examine the motion of the current sheet and the magnetic field linesnear the midnight meridian during a period when the dipole tilt angle is large.Start a dynamic AF-GEOSpace session and set global input parameters,• Initiate AF-GEOSpace via the Start menu (Start>Programs>AFGeospace>AFGeospace),the desktop icon, or by double-clicking on the file $AFGS_HOME\bin\AFGeospace.bat.Maximize the AF-GEOSpace user interface window. The shell windows can be minimizedbut must remain open for AF-GEOSpace to function.• Establish a dynamic session by placing a check mark in the small box to the right of theStart: UT text field to activate the End: Year, Day, UT text fields. For this example, we willselect a time period with large dipole tilt angles. Edit the Start text fields so that Year = 1989,Day = 160, and UT = 03:00. Edit the End text fields so that Year = 1989, Day = 161, and UT= 03:00. From the Globals: selector options (on the same bar as the time inputs) pick Archiveto automatically load parameters from the NGDC archive. Note that the only globalparameters affecting the magnetic field configurations are the Day, UT, and Kp.• View the global parameters for the interval selected using the Globals menu (between theViewport and Help menus at the very top of the environment window) and selecting the Showoption. Scroll down the Globals text window that appears and notice that the geomagneticactivity index Kp ranges from 2.3 to 5.7 during the interval selected. Dismiss the Globals textwindow using the Save or Cancel buttons at the bottom.Display the Earth, Solar Magnetic Axes, Sun Vector,• Select the Graphics option in the Modules menu and Available Modules and Active Moduleslists will appear. Scroll down the Available Modules list and select Earth and an Earth objectwill be added to the Active Modules list and a set of Earth Options will appear in the bottomof the Environment Window.282AF-GEOSpace User’s <strong>Manual</strong>: Version 2.5
• Under Outline Detail select the Textured and Geographic Bndys options. Under Grid Optionsselect the Lat/Lon Grid option. Click in the Display box to place the Earth in the default 3Dwindow. The left and right mouse buttons can be used to rotate and scale the Earth imagewhile the cursor is in the Window.• Select Axes from the Available Modules list and an Axes object will be added to the ActiveModules list. Change the Axes Frame selection from the default GEOC to SM and also selectthe Sun Vector option. The Solar Magnetic (SM) coordinate system is useful because theEarth’s magnetic dipole is aligned with the SM z-axis (see the Grid Tool section of thedocumentation for coordinate system definitions) and we would like to view the magneticfield on the nightside. Click the Display box and a set of orthogonal axes in the SMcoordinate system (red, green, blue) will appear. Notice that the North magnetic pole (blueaxis) is located about 11 degrees from the geographic North Pole near Greenland. The yellowaxis is the sun vector.• From the Viewport menu, remove the check mark next to the Show Color Bar option.Display a Time/Date Label and Animate in the GSM View Position,• From the Viewport menu, select View Position and then the GSM option. This will keep the3-D graphics window fixed in the GSM frame during animation, i.e., the Earth will rotate andthe sun vector will remain fixed. From the Viewport menu, remove the check mark from thePerspective setting. Use the left mouse button to orient the Earth such that the sun vector(yellow) points to the left and the SM y-axis (green) points directly out of the screen.• To display a time label in the graphics window, select Annotation from the top of theAvailable Modules list and an Annotation object will be added to the Active Modules list. Aset of Annotation Options will appear in the Environment Window. Place a check mark in theShow Date box and click Display and a time/date label will appear in the far lower left cornerof the graphic window. Move the X Position and Y Position sliders to a value ofapproximately 0.04 to make them easier to read.• To view the rotation of the Earth and motion of the SM coordinate axes, select the AnimateTool option in the Edit menu and an Animate window will appear. Reset the Time Step (sec)text field to match the dynamic step we plan to use, i.e., 10800 seconds, and click the Updatebutton. Click the right arrow on the time slider to advance time at 10800-second steps and the3-D graphic will update automatically. Notice that the sun vector (yellow) and SM y-axisremain fixed in the GSM view position while the SM x-axis (red) remains below the sunvector for the entire day. Set the time slider to 15:00 06/09/1989 using the slider arrows. Thegraphic should resemble the following figure. Click the Done button to close the Animatewindow.AF-GEOSpace User’s <strong>Manual</strong>: Version 2.5 283
Generate Magnetic Field Data,• Choose Module from the Menu Bar and select Applications from the options. AvailableModules and Active Modules lists will appear. Select BFIELD-APP from the AvailableModules list. A BFIELD-APP object will appear in the Active Modules list and options for B-Field Application Parameters will appear in the Environment Window.• Under Generate select the Gridded Data and MLT Field Lines options and remove the checkmark from MLAT Field Line. Leave the Internal B-Field option set as Centered Dipole andpick the External B-Field option Tsyganenko ‘89. When the Tsyganenko ‘89 Windowappears leave the Kp Only option selected and close the window using the OK button.• To view field lines in or near a meridian they must originate from a constant Magnetic LocalTime (MLT). Set the MLT Field Line Inputs to MLT=0, MLAT0=65, MLAT1=85, andSteps=10. With these settings, field lines from local midnight will be separated by 2-degreeincrements between 65 and 85 degrees latitude.• The near-Earth portion of the magnetic field resembles a dipole field centered about the SolarMagnetic (SM) z-axis. On the nightside of the magnetosphere, the geomagnetic tail alignsitself along the Earth-Sun direction, i.e., with the sun vector. To track the motion of themagnetic field minimum (the approximate location of the cross-tail current sheet) we willcalculate field quantities in SM coordinates. To set up a 3D grid in this coordinate system,select the Grid Tool option in the Edit menu. At the top of the Grid Tool window thatappears, select Spacing = Linear, Geometry = Cartesian and System = SM and thecoordinates listed will change to X, Y, and Z, SM (Re). To form a grid box on the nightsideof the Earth: (1) set X, SM (Re) NPoint=20, Min= -30, and Max= -10, (2) set Y, SM (Re)NPoints=10, Min= -5, and Max=5, and (3) set Z, SM (Re) NPoints=20, Min= -10, andMax=10. Click the OK button to close the Grid Tool Window.284AF-GEOSpace User’s <strong>Manual</strong>: Version 2.5
• Select the Dynamic Tool option in the Edit menu and a Dynamic Tool option window willappear. Place a check mark in the boxes next to the Variables Bx, By, Bz, |B|, and MLT Linesnoted at the top. Edit the Time Step (sec) text field to read 10800 seconds and click theUpdate List button. These settings indicate which available BFIELD-APP output variableswill be calculated during the Start/End period at intervals of 3 hours (10800 sec). Click theDone button to register your selections and dismiss the Dynamic Tool window.• Select the Run/Update option in the Edit menu to start the calculation of the MLT field linetraces and the gridded data set. A Process View window appears briefly. When complete, theModel Status box lists the dipole tilt angles and the Kp used.Display Dynamic Sequence of Magnetic Field Lines in 3-D,• Choose Module from the Menu Bar and select Graphics from the options. Available Modulesand Active Modules lists will appear. To display magnetic field lines, select Field Lines fromthe Available Modules list. A Fieldlines object appears in the Active Modules list and a set ofField-Lines Options appears in the Environment Window.• Click on the Data button, go down to AppBfield and choose Field Lines-MLT. Leave FieldLines selected as the Plot Type and click Display. Click on the Color button and click on thecenter of the color wheel so that the field lines become white.• Use the mouse buttons while the cursor is in the 3D Window to rotate and rescale the image.By increasing the viewing distance we see that some of the field lines close in the southernhemisphere while the higher latitude magnetic lines are open and extend well beyond ourview. Owing to model symmetry, the midnight field lines are coplanar.• Open the Animate window again (select Animate Tool from the Edit menu) and step thrutime to see the magnetic field-line reversal region move up and down in our GSM viewframe as the dipole field (aligned with the blue axis) changes its orientation relative to thesolar vector. Set the time slider to 15:00 06/09/1989 using the slider arrows. The graphicshould resemble the following figure.AF-GEOSpace User’s <strong>Manual</strong>: Version 2.5 285
Display Dynamic Sequence of Magnetic Field Coordinate Slices in 3-D,• To display the magnetic field magnitude values stored on our SM grid, select Coord Slicefrom the Available Modules list. A Coord Slice object appears in the Active Modules list anda set of Coordslice Options appear in the Environment Window.• Click on the Data button and choose /B/ under the AppBfield option and click Display.Display the color bar by activating the Show Color Bar option in the Viewport menu. If thecoordinate slice does not appear on the nightside of the Earth, use the Animate Tool (in Editmenu) to get all graphics display for the same time. To get a contour of magnetic fieldstrength in the Y-GSM plane select Cut Plane C1, move the Position Value slider to 0.500.• View the sequence using the Animate switch in the Animate Window. Notice that theminimum field strength region (dark blue) corresponds to the magnetic field reversal region.This minimum field strength region is also the location of the cross-tail current system that286AF-GEOSpace User’s <strong>Manual</strong>: Version 2.5
contributes to the sharp field reversal. In this situation, as the North magnetic pole tiltstoward the Sun the field reversal region and current sheet move above the GSM z= 0 plane.Set the animate slider to 12:00 06/09/1989 so that the graphic resembles the upper figureabove.Display and Track Geomagnetic Index Kp in 1-D,• Select Create 1D Viewport from the Window menu and a 1-D graphic window will appeardistinguished by white line border. Select the Tile option from the Window menu to viewboth existing graphic windows together. Place the mouse cursor in the 1-D window and clickto activate that window. Place the time/date label in the 1-D window by highlighting theAnnotation entry in the Active Modules list (on the right) and selecting Display. The labelwill appear in the lower left corner of the 1-D window.• Scroll down the Available Modules list and select Global Inputs. A Global Inputs object willbe added to the Active Modules list and a set of Global Input Options will appear in theEnvironment Window. From the Value input section, select the Kp option and click Displayto produce a plot of Kp versus time. To clean up this 1-D plot, reset the Y Axis text fieldsMin = 0.0 and Max = 9.0. Click the mouse in any other text field to update the plot. The 1-Dplot should resemble the lower figure above. This profile of the geomagnetic index Kp wasused to drive the Tsyganenko ‘89 magnetic field model.• Use the Animate window to view the magnetic field changes as the magnetic activity indexKp changes. Typically, the geomagnetic field becomes more stretched on the nightside as theKp index increases, i.e., the magnetic field lines become gradually more stretched after 09:0006/09/1989. Again, the field reversal region rises above the GSM z = 0 plane as the dipole tiltangle becomes more positive (blue axis points more sunward).This completes the Example of The Earth’s Magnetic Field: Placement of the Current SheetAF-GEOSpace User’s <strong>Manual</strong>: Version 2.5 287
4) UHF/L-Band Scintillation on a Geostationary Downlink (V2.5 Only)The following example demonstrates the use of the WBMOD (WideBand Model) ScienceModule and a variety of other visualization tools.Goal: The WideBand Model (WBMOD) specifies scintillation parameters betweenlocations on the globe and a satellite above 100 km altitude as a function of signalfrequency and geomagnetic activity. Scintillation is the rapid amplitude and phasefluctuations of signals passing through ionospheric irregularities. The goal of thisexample is to determine where the disturbance level of scintillation (S4) of UHF (250MHz) and L-Band (1500 MHz) signals will be severe at least 10% of the time forground-based receivers within the footprint of a geostationary satellite undermoderately active solar/magnetic conditions.• Initiate AF-GEOSpace via the Start menu (Start>Programs>AFGeospace>AFGeospace),the desktop icon, or by double-clicking on the file $AFGS_HOME\bin\AFGeospace.bat.Maximize the AF-GEOSpace user interface window. The shell windows can be minimizedbut must remain open for AF-GEOSpace to function.• For this static run, set the Global Parameters as follows: Start:Year=1990, Day=260,UT=21:00. The Kp and SSN (sunspot number) corresponding to the specified date and timemay now be obtained by clicking on the Globals: Archive option to the right of the time inputfields. The NGDC archived values of these parameters are then automatically loaded (Kp=3,SSN=137, F10.7 =210.7, and Ap=15). Note that Year, F10.7 and Ap are not used byWBMOD. These parameters describe conditions following passage of the solar terminator inthe Euro-African longitude sector during moderate magnetic and solar activity conducive tothe development of scintillation near the magnetic equator on September 17, 1990.• Choose Modules from the Environment Window Menu Bar and select Science from theoptions. Available Modules and Active Modules lists will appear.• Scroll to the bottom of the Available Modules list and click on WBMOD. A SciWbmodobject will be added to the Active Modules list and a WBMOD Options panel will appear inthe Environment Window. To model the upper 10% (90th percentile) of 250 MHzscintillation observed on the ground from a geostationary satellite located over the AtlanticOcean set the WBMOD options: Propagation=1-Way, In-situ Vd=Model, Step=Rcvr, EPBoundary=Use Kp, Output=Percentile, Trans. Freq (MHz)=250, Trans. Alt. (km)=36000,Fixed End Lat=0, Fixed End Lon= -15, Phase Stability(s)=10, Percentile=0.9, andKp@LocalSunset= -1. All other input parameters remain inactive.• Select the Run/Update option in the Edit menu. The Model Status box will. When the run iscomplete the Process View Window will disappear and the Model Status box will be updatedwith the text “MODEL IS READY AND UP TO DATE” and the Global Parameters used toconstruct the model run.288AF-GEOSpace User’s <strong>Manual</strong>: Version 2.5
Plot UHF WBMOD Results in 2D,• Return to the Menu Bar at the top of the Environment Window, click on Modules and selectGraphics. Available Modules and Active Modules lists will appear. Scroll down and selectEarth from the Available Modules list. An Earth object will be added to the Active Moduleslist and an Earth Options panel will appear in the bottom of the Environment Window. SelectTextured and Geographic Bndys under Outline Detail. Select Terminator under Grid Options.Click in the Display box in the Environment Window and the Earth will be displayed in the3D Window; a purple line shows the location of the solar terminator at the surface.• Change the 3D projection of Earth to a 2D projection by using the Viewport menu to selectProjection and then Two D. The default 3D window should now have been converted to a 2Dwindow with an Earth map.• Select Coord Slice from the Available Modules list. A Coord Slice object will be added to theActive Modules list and a corresponding options panel will appear in the bottom of theEnvironment Window. Under Coord Slice Options click on the Data button, slide down thepopup menu to the SciWbmod option, and select S4. Click in the Display box to display thescintillation results on the 2-D map.• Select the Transparency button in the Coord Slice Options panel. Increase the transparencyof the S4 plot by moving the Transparency slider to a value of 0.7. This provides good imagebrightness while making underlying geographic features visible. The plot should resemblethe following figure.Create WBMOD Model Output for L-band (1.5 GHz),• Click on Module menu and select Science and Available Modules and Active Modules listswill appear. Scroll down the Available Modules list on the left and select WBMOD again anda second SciWbmod entry appears in the Active Modules list on the right. The WBMODOptions panel will appear in the bottom of the Environment Window.AF-GEOSpace User’s <strong>Manual</strong>: Version 2.5 289
• To model the upper 10% (90th percentile) of 1500 MHz scintillation observed on the groundfrom a geostationary satellite located at the equator over the Atlantic Ocean set the followingWBMOD options: Propagation=1-Way, Step=Rcvr, Output=Percentile, Trans. Freq(MHz)=1500, Trans. Alt. (Km)=36000, Fixed End Lon= -15, Percentile=0.9, andKp@LocalSunset= -1. All other WBMOD parameters may be left at the default values. Theseinputs are the same as those entered to get the existing 2D plot except for the increase inTrans. Freq (MHz). Note that the Global Parameters at the top of the Environment Windowset earlier do not change.• Select the Run/Update option in the Edit menu and after the View Process Window hasdisappeared and the Model Status box has been updated, there is a second WBMOD data setavailable for display.• Return to the Menu Bar at the top of the Environment Window, click on Window and selectCreate 2D Viewport. A second 2D Window will appear. Click on the Window menu againand select Tile. The graphic area should now be shared by the 2D windows.• Return to the Menu Bar at the top of the Environment Window, click on Module and selectGraphics. Available Modules and Active Modules lists will appear. The Active Modules listwill already contain Earth and Coord Slice objects from the UHF results plot. Select Earthfrom the Active Modules list on the right, click in the empty graphics window to activate it,and check the Display box. This procedure simply places a copy of the Earth with terminatorin the new window.• Select Coord Slice from the Available Modules list on the left. A second Coord Slice objectwill be added to the Active Modules list and a set of Coord Slice Options will appear in thebottom of the Environment Window. Under Coord Slice Options click on the Data button,slide down the popup menu to the second SciWbmod option, and select S4. Click in theDisplay box to display the scintillation results on the new two-dimensional map. Notice thatthe color scale label matches the second entry of the data button. To reproduce the finalfigure, click on the Transparency button and set the slider value to 0.7.290AF-GEOSpace User’s <strong>Manual</strong>: Version 2.5
Interpretation of Results: The results indicate that the 90th percentile of S4 index at 250 MHzwithin 20 degrees of the magnetic equator over most of Africa at 21:00 UT will be unity, i.e.,severely scintillated at least 10% of the time (i.e., 1 out of 10 days) for the geophysicalconditions specified (see first plot made). Recall, for the step-receiver mode, the data will beplotted at the receiver location, not at the ionospheric location where scintillation occurred.Similarly, in the step-transmitter mode, data is for scintillation on the ray-path from the satelliteto the receiver and plotted at the sub-satellite point. This display location would not be theionospheric location where the scintillation occurred. As expected, the level of scintillationexperienced by L-band (1.5 GHz) signals is substantially lower over most of the affected region(see second plot). The 95th percentile fade (dB) can be displayed by returning to the Coord SliceOptions panel (select Graphics under the Module menu, click on the second Coord Slice in theActive Modules list) and selecting 95%tile FADE from the second of the WBMOD Data options.Both UHF and L-band results may be obtained in this manner by selecting the Coord Slice entrythat corresponds to each frequency. Do not confuse this percentile with the climatologicalpercentile input to run WBMOD. For example, we selected a 90 th percentile climatology for thisexample. This display represents the 5th most severe fade on the 10th most disturbed day. Recall,that scintillation is the rapid fluctuation of the signal’s amplitude and phase. Therefore, if any ofthe fades are below the receiver’s fade-margin even for small amounts of time, this may beenough to cause communication problems, especially if the message is encrypted.This completes the Example of UHF/L-Band Scintillation on a Geostationary Downlink.AF-GEOSpace User’s <strong>Manual</strong>: Version 2.5 291
5) HF Ray-Tracing in the IonosphereThe following example demonstrates the use of the Parameterized Ionospheric Model (PIM)Science Module, the 2-D ray-tracing Application Module, and a variety of visualization tools.Goal: Electron density variations in the ionosphere determine how radio communicationssignals propagate. Signals tend to bounce off regions where the local critical plasmafrequency is greater than the signal frequency (high electron density correlates withhigh critical plasma frequency). Therefore, an HF signal transmitted from a groundstation with just the right frequency can experience multiple “hops” and be receivedat several geographic locations along its ray path. The goal of this example is togenerate ionospheric data sets, including 3D electron density profiles and a 2D mapof critical frequencies in the F2 layer (called foF2), and examine how HF rayspropagating from ground-based transmitters follow frequency dependent paths, i.e.,travel different distances before returning to the Earth’s surface.• Initiate AF-GEOSpace via the Start menu (Start>Programs>AFGeospace>AFGeospace),the desktop icon, or by double-clicking on the file $AFGS_HOME\bin\AFGeospace.bat.Maximize the AF-GEOSpace user interface window. The shell windows can be minimizedbut must remain open for AF-GEOSpace to function.• For this static run, set the Global Parameters as follows: Start:Year=1991, Day=187,UT=00:00. Click on the Archive option of the Globals button and the Kp, SSN (sunspotnumber), F10.7 radio flux, and Ap index corresponding to the specified date and time will beloaded automatically from archived NGDC values (Kp=1.3, SSN=204, F10.7=240.8, andAp=5).Create a PIM Model data set,• Choose Modules from the Menu Bar and select Science from the options. Available Modulesand Active Modules lists will appear. Scroll down in the Available Modules list and click onPIM. A PIM object will be added to the Active Modules list on the right and a set of PIMOptions will appear in the Environment Window.• Click on the IMF By menu button and select Positive. Leave the other options at their defaultvalues. These settings will run PIM with no normalization under conditions with a positiveInterplanetary Magnetic Field (IMF) B y component and negative B z component. The defaultgrid is set to 2 o latitude x 5 o longitude, the resolution most compatible with the ray-tracingprogram. The PIM model results are written to the default output file named “pim_pud.out”.• Select the Run/Update option in the Edit menu. When the Process View Window disappearsthe Model Status box will indicates the Global Parameters used.Plot the PIM critical frequency profile in the F2 layer (called foF2),• At the top of the Environment Window, click on Module and select Graphics. AvailableModules and Active Modules lists will appear. Select Earth from the Available Modules list.292AF-GEOSpace User’s <strong>Manual</strong>: Version 2.5
An Earth object will be added to the Active Modules list and an Earth Options panel willappear in the bottom of the Environment Window. Click in the Display box in theEnvironment Window and the Earth will be displayed in the 3D Window.• Select Coord Slice from the Available Modules list. A Coord Slice object will be added to theActive Modules list and a corresponding options panel will appear in the bottom of theEnvironment Window. Use the Data button to select the FoF2 option under SciPim, click theDisplay box to place the FoF2 coordinate slice in the 3D window. Next select Transparencyand adjust the slider that appears at the bottom of the window to a value of 0.75.• Select Annotation from the Available Modules list and an Annotation object will be added tothe Active Modules list and Annotation Options will appear. Place a check mark in the ShowDate box and click Display. A time/date label appears in the lower left corner of the graphicwindow. Reset the X Position and Y Position sliders to 0.04 to make the label easier to read.• Highlight the Coord Slice entry in the Active Modules list on the right and the FoF2 color barwill reappear in the graphic window. Use the left and right mouse buttons to rotate andrescale, respectively, the view until it resembles the figure above.Plot HF Ray-Traces,• At the top of the Environment Window, click on Module and select Applications. AvailableModules and Active Modules lists will appear. Scroll down the Available Modules list andselect RAYTRACE-APP. An AppRayTrace entry will appear in the Active Modules list and aselection of Ray Tracing Application options will appear.AF-GEOSpace User’s <strong>Manual</strong>: Version 2.5 293
• Leave the Model: Australian 2D selection. In the Freq (MHz) input section pick Multi andset the Freq(MHZ) parameters to go From 16 To 26 with a Step of 5.0. In the Elev (deg)section select Single and set the Single value to 10 degrees. Leave the Azimuth, Range(1000km), and Max Hops settings at their default values. Adjust the Transmitter Location settingsto reflect Bangor Maine as the location, i.e., set Lat = 44.8 degrees and Lon = -68.8 degrees.• To perform the ray traces through the PIM ionosphere just calculated, click on the Open PimFile button and open the file “pim_pud.out” found in the SciPim folder newly created in theScratch Directory.• To trace the selected rays, select the Run/Update option in the Edit menu. The View ProcessWindow will vanish when the ray tracing is complete.• Click on the Display Plot button and a 2D plot will fill the graphics display window. Nowclick on the Plot Options button to adjust this ray trace plot. In the Ray Plot Options window,click on the Captions button and the Plasma Frequency button. Move the Plasma Frequencyslider to 0.90 MHz and click OK. The plot should now look like the following figure.• The same set of ray trace can be viewed in a 3D window by using the RayTrace graphic andchoosing the only Data button option available.This completes the Example of HF Ray-Tracing in the Ionosphere.294AF-GEOSpace User’s <strong>Manual</strong>: Version 2.5
6) The Energetic Solar Event of 20 February 1994 (V2.5 Only)The following example demonstrates the use of the Interplanetary Shock Propagation Model(ISPM), Shock Time of Arrival (STOA), and Proton Prediction System (PPS) Science Modules.Goal: High-speed interplanetary shocks originate near the Sun’s surface and propagate outinto the solar system to disrupt the character of the nominally steady solar wind.Large shocks that hit the Earth’s magnetosphere can drastically change the near-earthparticle and electric and magnetic field environment and affect the operation of manmadesystems. Energetic protons, also originating with solar disturbances, arrive onmuch shorter time scales and can penetrate deep into the near-earth environment andadversely affect both instruments and biological systems. The goal of this example isto investigate the forecasting capabilities of ISPM, STOA, and PPS usingobservations of the energetic solar event of 20 Feb 94 and subsequent terrestrialeffects. The energetic solar event involved a disappearing filament and an M4/3Bflare at 0104UT on 20 Feb 94. This event was responsible for enhanced levels ofenergetic protons observed by the GOES satellite at geosynchronous orbit and isbelieved to have caused a CME/shock that arrived at the Earth the next day. All inputdata were taken from the NOAA Solar-Geophysical Data Preliminary, Prompt, andComprehensive Reports.• Initiate AF-GEOSpace via the Start menu (Start>Programs>AFGeospace>AFGeospace),the desktop icon, or by double-clicking on the file $AFGS_HOME\bin\AFGeospace.bat.Maximize the AF-GEOSpace user interface window. The shell windows can be minimizedbut must remain open for AF-GEOSpace to function.• For this static run, set the global time parameters to match the observed solar flare time, i.e.,set Start:Year=1994, Day=51, and UT=01:04. Click on the Globals: Archive selection to theright of the time inputs to automatically load the appropriate parameters from the NGDCarchive (Kp=4.7, SSN=16, F10.7=105.2, and Ap=39). None of these global parameters areused as inputs for this example.Run the ISPM and display text results,• From the Modules menu at the top of the Environment Window, select the Science option.Available Modules and Active Modules lists will appear. Scroll down the Available Moduleslist and click on ISPM. A SciIspm object will be added to the Active Modules list and a set ofISPM Options will appear in the Environment Window.• Under Specify Event Duration, select the X-ray Levels option. We will use the GOES 7 1-8Angstrom X-ray data to determine the duration of the event. Leave the Event in the previous24 hours? box empty as there were none.• Both Palehua and Learmonth RSTN sites observed Type II radio bursts for this event withestimated shock speeds of 1000 km/s and 1400 km/s, respectively, starting at 0108UT. An H-alpha flare of magnitude 3B was observed on the solar surface at N09 and W02 byLearmonth at 0138UT and lasted for 90 minutes. Given this, edit the Event onset time textAF-GEOSpace User’s <strong>Manual</strong>: Version 2.5 295
ox to read “02/20/94 01:08”, set Flare lat (deg N) =9, and Flare lon (deg W) =2. Assumethe shock velocity to be the average of the two observations and set Type II speed (km/s)=1200.• Examining the GOES 7 X-ray data in the 1-8 Angstrom band, the background classificationbefore the event was approximately B2.0 and the classification of the peak of the event wasM4.0. Enter Backg. Class =B2.0 and Peak Class. =M4.0. Further examination of the GOESdata indicates that after the peak of the X-ray event, the level decayed to class C2.8 at about0320UT on 2/20/94. Edit the Event end time text box to read “02/20/94 03:20”.• Select the Run/Update option in the Edit menu to execute ISPM and a text box will appearcontaining the following results. The Display Text button redisplays the text result.---- ISPM - Interplanetary Shock Propagation Model - Version 1.0 ---------Shock will reach Earth 1994 02 21 1109ZTotal propagation time34h 01mShock strength (jump in dynamic pressure), 6.8 dynes/cm2 x 10-8Shock Strength Index, SSI 1.1if > 0 expect shock to be sufficiently strongmagnitude of SSI reflects strength of shock,if = 0, then shock strength borderlineif
• Under “Specify Event Duration” select the X-ray Levels option. We will use the same GOES7 1-8 Angstrom X-ray data we used for the ISPM module. As in the ISPM case, enter thefollowing data in the appropriate boxes so that the STOA program can compute eventduration: Event onset time = “02/20/94 01:08”, Flare lat (deg N) =9, Flare lon (deg W) =2,Type II speed (km/s) = 1200, Back. Class. =B2.0 and Peak Class. =M4.0. Click in the Decaytime text box (and label will change) and edit the Decay time, level=C2.8 text box to read“02/20/94 03:20”.• In the STOA model we have the option of entering a solar wind speed. Enter Solar windspeed (km/s) =400 to match the value used by default in the ISPM case. It should be notedthat the real solar wind speed can be quite variable. On 02/20/94 the IMP-8 satellite recordeda solar wind speed that varied from about 580 km/s at 08:00 to about 500 km/s near the endof the day. Prior to 08:00 there was a data gap on that day. The next morning the solar windspeed had decreased to about 400 km/s by 01:00. Another data gap ensued and then the solarwind speed was 400 km/s from about 07:20 until the time of the observed shock at 09:00.• Select the Earth option under Observer Location.• Select the Run/Update option in the Edit menu to execute STOA and a text box will appearcontaining the following results. The Display Text button redisplays the text result.--------- STOA - Shock Time of Arrival - Version 1.0 ---------Mach 5.4 shock will reach Earth 1994 02 21 2309ZTotal propagation time46h 01mType II onset time 1994 02 20 0108ZX-ray event end time 1994 02 20 0320ZDriver duration2h 12mType II speedSolar flare atSolar wind speedSun-Earth distance1200.0 km/sN09 W02 deg400.0 km/s0.9889 AU---------------------------------------------------------------The above STOA results show that a Mach 5.4 shock will reach Earth at 23:09 UT on 02/21/94,after traveling for a period of 46 hours and 01 minute. This is 14 hours and 08 minutes later thanthe observed shock described earlier, and exactly 12:00 hours later than the ISPM predicted time.Run PPS and display text results,• Click on PPS in the Available Modules list. A SciPPS object will be added to the ActiveModules list and a set of Proton Prediction system (PPS) Options will appear in theEnvironment Window.• Under Specify Data, select the Radio option and under Specify Flux Type, leave Peak Fluxas the default flux type. Also leave the Radio Frequency button set at the default value of2695 MHz. Since we are considering the same event as discussed above enter Flare lat (degN) =9 and Flare lon (deg W) =2.AF-GEOSpace User’s <strong>Manual</strong>: Version 2.5 297
• The Palehula RISTN site observed a 2695 MHz fixed frequency radio emission eventbeginning at 0105UT on 2/20/94 and reaching a maximum at 0114UT with a duration of 85minutes and a peak flux of 190 SFU. Edit the Event Onset Time text box to read “02/20/9401:05”, set Time of Maximum = “02/20/94 01:14”, and set Peak Radio: RAD26P(SFU) =190.• Select the Run/Update option in the Edit menu to execute PPS and a text box will appearcontaining the following results. The Display Text button redisplays the text result.---- PPS - Proton PredictionSystem-Version '95 ----Maximum day polar riometer absorption will be 1.64 db at 10:51 Feb 20Maximum night polar riometer absorption will be 0.63 db at 12:22 Feb 2070000 ft high flyer polar max dosage will be 0.0 mR/hr at 08:10 Feb 2050000 ft high flyer polar max dosage will be 0.0 mR/hr at 08:07 Feb 20E V A max. astronaut dosage will be 0.005 R/hr at 10:10 Feb 20Inside [ 2 gm/(sqcm) ] max dosage will be 0.001 R/hr at 08:55 Feb 20Protons: >10 MeV gt 10 Feb 20 10:00 to Feb 20 21:00; max flux of 1.83E+01 at 10:01 Feb 20fluence of 1.11E+06Protons: > 5 MeV gt 10 Feb 20 11:00 to Feb 21 07:00; max flux of 2.99E+01 at 11:12 Feb 20fluence of 1.90E+06Protons: >50 MeV gt 10 00 00:00 to 00 00:00; max flux of 7.44E-01 at 08:48 Feb 20fluence of 4.65E+04Input Parameters:Input Type:RAD26PPDate of onset: 02/20/94Time of onset: 01:05Time of maximum: 01:14Event lat (deg N): 9.00Event lon (deg W): 2.00Event amplitude: 1.90E+002Expert mode parameters:Normalization energy channel: 0Flux normalization value: 0Time of flux maximum:00/00 00:00Slope of integral spectrum: 0.0Slope of differential spectrum: 0.0---------------------------------------In the above results, PPS predicts that the > 10 MeV proton flux at the Earth, as measured by theGOES satellite, will exceed a threshold of 10 protons/(cm 2 s sr) for a period beginning at10:00UT 02/20 and ending at 21:00UT 02/20/94 with a maximum flux of 18.3 ptns/(cm 2 s sr) at10:01 02/20/94. The same flux threshold will be exceeded by the > 5 MeV flux beginning at11:00UT 02/20/94 and ending at 07:00UT 02/21/94 with a maximum flux of 29.9 ptns/(cm 2 s sr)at 11:12 02/20/94. For the > 50 MeV protons the threshold is never reached and the maximumflux is 0.744 ptns/(cm 2 s sr) at 8:48 on 02/20/94. In this example we will not consider the userspecifiedquantities that are also displayed in the PPS output window. These include polarriometer absorption forecasts and maximum radiation dosages at specific altitudes, and aredescribed in the manual pages for the PPS Science Module.298AF-GEOSpace User’s <strong>Manual</strong>: Version 2.5
Examining the GOES-7 proton data for this interval it can be seen that the > 5 and > 10 MeVfluxes both exceed the threshold value at about 03:00UT 02/20/94. The first maximum of the > 5MeV flux is reached at about 09:45UT 02/20/94 and has a value of about 220 protons/(cm2 s sr).Likewise, the first maximum of the > 10 MeV flux is reached at about 06:00UT 02/20/94 and hasa value of about 80 ptns/(cm 2 s sr). The maximum value of the > 50 MeV channel is reached atroughly 03:00UT and has a value of about 1.5 ptns/(cm 2 s sr). For this event, PPS does areasonable job for the > 50 MeV fluxes and gets progressively worse for the lower energychannels, overestimating transit times and underestimating intensities. This event, however, turnsout to be a fairly rare example of a “hybrid” solar proton event. Besides the initial population ofenergetic protons generated by the energy release near the Sun (the population that PPS is builtto model), there is another population of energetic protons reaching the Earth that is generated bythe energetic interplanetary shock traveling towards the Earth (i.e., the shock that ISPM andSTOA are modeling). Indeed, after the initial rise and a very small decay, the >5 and >10 MeVfluxes rise again to reach a maximum of 4.e+4 and 8.e+3 ptns/(cm 2 s sr), respectively, at09:00UT on 2/21/94. This is exactly when the interplanetary shock arrived at Earth. Acombination of an unexpectedly strong shock with the correct propagation path towards Earthmade this event one of the strongest solar proton events of solar cycle 22.This completes the Example of The Energetic Solar Event of 20 February 1994.AF-GEOSpace User’s <strong>Manual</strong>: Version 2.5 299
7) The Magnetic Storm of 13 March 1989 (Dynamic)The following example demonstrates a dynamic application of the aurora science module(AURORA) and a variety of visualization tools including the creation of a station, animation of2-D and 3-D coordinate slices, and tracking of global input parameters.Goal: On March 13 th 1989, the second largest geomagnetic storm in the past 50 years hit theEarth’s magnetosphere causing havoc with the power grid serving Canada’s Quebecprovince. At 2:45 AM EST (Day 72, UT 0745) widespread geomagnetically inducedcurrents (GIC) caused transformer saturation at the Hydro-Quebec power system onJames Bay resulting in electric service outages for the following nine hours in theQuebec province. Voltage fluctuations were first noticed on March 12. The goal ofthis example is to view the dynamic sequence of auroral precipitation (statisticaldistribution) as it sweeps over James Bay and the Quebec province area in the NorthAmerican sector in response to changes in the observed geomagnetic index Kp.Start a dynamic AF-GEOSpace session and set global input parameters,• Initiate AF-GEOSpace via the Start menu (Start>Programs>AFGeospace>AFGeospace),the desktop icon, or by double-clicking on the file $AFGS_HOME\bin\AFGeospace.bat.Maximize the AF-GEOSpace user interface window. The shell windows can be minimizedbut must remain open for AF-GEOSpace to function.• Establish a dynamic session by placing a check mark in the small box to the right of theStart: UT text field to activate the End: Year, Day, UT text fields. Edit the Start text fields sothat Year = 1989, Day = 71, and UT = 12:00. Edit the End text fields so that Year = 1989,Day = 72, and UT = 21:00. From the Globals: selector options (on the same bar as the timeinputs) pick Archive to automatically load parameters from the NGDC archive.• View the global parameters for the interval selected using the Globals menu (between theViewport and Help menus at the very top of the environment window) and selecting the Showoption. Scroll down the Globals text window that appears and notice that the Kpgeomagnetic activity index reaches its maximum level of 9 near the end of the intervalselected. Dismiss the Globals text window using the Save or Cancel buttons at the bottom.Display plot of Geomagnetic Index Kp in 1-D,• Convert the default 3-D graphics window to a 1-D window by using the Viewport menu,selecting Projection and then the One D option. (1-D windows are identifiable by the whiteline framing the graphic window border). Note that a 1-D window can be converted back to a3-D window at any time by repeating this step and selecting the Three D option instead.Also, converting a window between 1-D and 2-D or 3-D (or vis-a-versa) results in the loss ofthe graphic in the window but not the graphics object in the Graphics Active Modules list.• Select the Graphics option in the Module menu and Available Modules and Active Moduleslists will appear. Scroll down the Available Modules list and select Global Inputs. A Global300AF-GEOSpace User’s <strong>Manual</strong>: Version 2.5
Inputs object will be added to the Active Modules list and a set of Global Input Options willappear in the Environment Window.• From the Value input section, select the Kp option and click Display to produce a plot of Kpversus time. To clean up this 1-D plot, reset the Y Axis text fields Min = 0.0 and Max = 9.0.Click the mouse in any other text field to update the plot. This profile of the geomagneticindex Kp will be used below to drive a sequence of auroral precipitation patterns to emulatethe March 1989 event. We will retain this plot for later viewing.Display Earth with Quebec and James Bay locations,• Select the Create 3D Viewport option from the Window menu and a new 3-D window willfill the graphics area to cover the 1-D Kp vs. time plot just created. Note that there are severaloptions are handling windows listed in the lower part of the Window menu, e.g., the twoexisting windows can be arrange using the Cascade or Tile options. A list of numberedwindow references appear at the bottom of the Window menu and more are added to the listas new windows are created, i.e., currently the entries 1:1 and 2:2 can be used to bring the 1-D and 3-D windows to the foreground. Check that the 3-D window is currently being viewed(the 2:2 option of the Window menu)• Select the Graphics option in the Module menu and Available Modules and Active Moduleslists will appear. Select Earth from the Available Modules list. An Earth object will be addedto the Active Modules list and a set of Earth Options will appear in the Environment Window.• Under Outline Detail, select Textured and Geographic Bndys. Under Grid Options selectLat/Lon Grid, and then select Display and the Earth globe will appear in the 3-D window.• To create and display a station marker representing the location of Quebec Canada, scrolldown the Available Modules list and select Station and a Station object will be added to theActive Modules list. If Quebec does not appear on the Stations list, then a new station entrycan be added by editing the four text boxes appropriately, i.e., set Lat = 46.80, Lon = -71.25,Alt(Re) = 1.0, and Label = “Quebec” and click the Add button. A highlighted Quebec entrywill appear in the Stations list. Click Display and a Quebec marker will appear. Use the PopLabel feature to make the station always visible. Note: Stations can be removed from the listby highlighting the entry in the Stations list and clicking on the Delete button. All changes tothe Stations list will be saved for future sessions.• Create and display a station marker representing the location of James Bay Canada byrepeating the last step with the Station inputs set as Lat = 52.0, Lon = -80.0, Alt(Re) = 1.0,and Label = “James Bay”. This will result in a second Station entry in the Active Moduleslist. With no data plotted, use the Viewport menu to turn off Show Color Bar.• The Earth’s size can be scaled in the 3D Window using the right mouse button. With thecursor in the 3D Window, depress the right button and draw the mouse toward yourself.Rotate the Earth so that the Quebec and James Bay location markers are visible using the leftmouse button.AF-GEOSpace User’s <strong>Manual</strong>: Version 2.5 301
Generate a Dynamic Auroral Sequence,• Select the Science option in the Module menu and Available Modules and Active Moduleslists will appear. Click on AURORA in the Available Modules list and a SciAurora object willbe added to the Active Modules list. A set of AURORA Options will appear in theEnvironment Window.• Select the Gridded Data option in the Generate input section. Leave the Internal B-Field andExternal B-Field selections set at their default values.• Select the Dynamic Tool option in the Edit menu and a Dynamic Tool option window willappear. Place a check mark in top two rows of Variables noted at the top. Edit the Time Step(sec) text field to read 10800 seconds and click the Update List button. These settingsindicate which available AURORA science model output variables will be calculated duringthe Start/End period at intervals of 3 hours (10800 sec). Click the Done button to registeryour selections and dismiss the Dynamic Tool window.• Select the Run/Update option in the Edit menu and a Process View Window will appear. Asthe model is completed for each time step, the Model Status box is updated to indicate themodel run time and the Global Parameters Day, Time, and Kp used. When the complete setof model runs is complete the Process View Window disappears.Display the Dynamic Sequence of Auroral Electron Precipitation Patterns in 2-D and 3-D,• Select the Graphics option in Module menu and Available Modules and Active Modules listswill appear. Select Coord Slice and a Coord Slice object will be added to the Active Moduleslist. A set of Coord Slice Options will appear in the Environment Window. Use the defaultsetting under Cut Plane option C0 to slice the data at a constant radius. Note that the defaultgrid for AURORA consists only of two constant radius caps at the Earth’s poles.• Click the Data button, go to the SciAurora option, and select Elec. Number Flux. Click in theDisplay box and auroral electron data will appear in the 3D Window. From the Viewportmenu, use the Show Color Bar option to show the color bar with units now representingauroral electron number flux. The displayed data type can be changed to view Ion orconductivity variables by resetting the Data button in the Coord Slice Options window(highlight the Coord Slice entry of the graphics Active Module window to view theseoptions).• To make the auroral display more transparent, click the Transparency button in theEnvironment Window and move the slider to a value of 0.70. Rotate the Earth and notice thatthe auroral electron number flux is displayed at both poles.• To display a time label in the graphics window, select Annotation from the AvailableModules list and an Annotation object will be added to the Active Modules list. A set ofAnnotation Options will appear in the Environment Window. Place a check mark in the ShowDate box and click Display and a time/date label will appear in the far lower left corner of302AF-GEOSpace User’s <strong>Manual</strong>: Version 2.5
the graphic window. Move the X and Y Position sliders to a value of approximately 0.04 tomake them easier to read. The graphics window should now resemble the following figure.• To view the sequence of the aurora, select the Animate Tool option in the Edit menu and anAnimate window will appear. Reset the Time Step (sec) text field to match the dynamic step,i.e., 10800 seconds, and click the Update button. Click the Animate check box and the timeslider will advance at 10800-second increments and the 3-D graphic will updateautomatically. Click the Animate box again to stop the animation. Reset the time slider to thebeginning by using the slider arrows or manually moving the slider marker to the far left.• Use the Viewport menu to select Projection followed by Two D option and the 3-D windowwill be converted to 2-D while retaining the data display. Use the Show Color Bar option inthe Viewport menu to remove the color bar. If the Show Color Bar feature does not respond,try highlighting the Coord Slice entry in the Active Modules list and retry the Show Color Baroption. Use the Animate window (still open) to view the changing aurora as in the last step.• To track the Kp geomagnetic activity index used to generate this display, select the Tileoption from the Window menu and the Kp vs time plot will share the graphics window space.Click in the 1-D window to activate it, highlight Annotation in the Active Modules list, andclick Display to produces a time/date label in the 1-D window. The 1-D and 2-D windowsshould now display the same time/date annotation label and resemble the following figures.AF-GEOSpace User’s <strong>Manual</strong>: Version 2.5 303
• Use the Animate window (still open) again to follow the progression of Kp (current value isindicated by marker dot in 1-D plot) with the changing auroral precipitation. As Kp increasesthe aurora tends to move to lower magnetic latitudes. Note that this statistical representationof the aurora indicates that the auroral electrons extend equatorward over the James Bay andQuebec area at midnight UT of 12 March when Kp jumps to 6. The aurora remains veryactive in this example for the next 12 hours. Remember that the actual Hydro-Quebec poweroutages started occurring at 0745 UT on March 13. Note again that the model represents onlya statistical pattern and, in fact, observed auroral displays were seen as far south as theMediterranean and Japan.This completes the Example of The Magnetic Storm of 13 March 1989 (Dynamic)304AF-GEOSpace User’s <strong>Manual</strong>: Version 2.5
8) HELIOSpace: Loading and Viewing PARAMESH Files (Dynamic)Note: PARAMESH data files are not generated using AF-GEOSpace, but a sample files havebeen provided for the purposes of this example.The following example demonstrates the use of the Open Paramesh option of the File Menu andthe graphics modules PARAMESH-COORDSLICE, PARAMESH-FIELDLINES, PARAMESH-GRID, and PARAMESH-ISOCONTOUR. These features make up the HELIOSPACE viewportextension of AF-GEOSpace.Goal: This example demonstrates the procedure for loading and viewing MHD science codesimulation results stored in large-scale structured grids using the PARAMESH fileformat. These visualization capabilities were developed in collaboration with theNavel Research Laboratory (NRL) for the Common High Performance Computing(HPC) <strong>Software</strong> Support Initiative (CHSSI). For more details regarding Paramesh,see the notes describing the Open Paramesh option in the File menu documentationat the beginning of this document. A sample test file set provided by NRL for thisAF-GEOSpace release will enable the user to view the dynamic evolution of collidingmagnetic flux tubes using the PARAMESH graphic modules appearing at the end ofthe graphics Active Modules list.• Initiate AF-GEOSpace via the Start menu (Start>Programs>AFGeospace>AFGeospace),the desktop icon, or by double-clicking on the file $AFGS_HOME\bin\AFGeospace.bat.Maximize the AF-GEOSpace user interface window. The shell windows can be minimizedbut must remain open for AF-GEOSpace to function.• Establish a dynamic run by placing a check mark in the small box to the right of the Start:UT text field to activate the End: Year, Day, UT text fields. For this dynamic run, Parameshdata files will be viewed sequentially so the global time interval and parameters can bearbitrary. From the Globals: selector options (on the same bar as the time inputs) pickArchive to automatically load parameters from the NGDC archive. The global parameters forthe Start/End interval selected can be viewed using the Globals menu and selecting the Showoption. The text window that appears can be dismissed using the Save or Cancel buttons atthe bottom. Note that none of these global parameters are used as inputs for this example.Load Paramesh files,• Choose File from the menu bar of the Environment Window and select the Open Parameshoption and an Open popup window will appear.• Use the Open window to Look in the folder containing the Paramesh sample files, i.e., viewthe contents of $AFGS_HOME\models\data\PARAMESH\CARTESIAN\Sequence. Thisfolder contains a flicks.hdr file, a flicks.ftr file, and a numbered set of flicks.##### files withone file for each time step. By default, the flicks.hdr file is the only one viewable with theOpen window.• Select the header file flicks.hdr in the Sequence folder and click on the Open button. After afew moments the Open window will disappear indicating that the Paramesh files have beenAF-GEOSpace User’s <strong>Manual</strong>: Version 2.5 305
loaded. To confirm this, select the Science option in the Module menu and you will find aSciNRLMHD entry in the Active Modules list.Activate a Heliospace Viewport• Paramesh data files can only be viewed in a Heliospace viewport. To change the currentlyactive graphics window for Heliospace displays, choose the Viewport menu, highlight theProjection submenu, and select the HelioSpace option. The active graphics window has nowbeen assigned as a Heliospace viewport and can be used to display Paramesh data.• Select the Graphics option in the Module menu and Available Modules and Active Moduleslists will appear. To display a Heliospace label in the window, select Annotation from theAvailable Modules list and an Annotation object will be added to the Active Modules list. Aset of Annotation Options will appear in the Environment Window. Enter “HELIOSPACE”in the Text box and click Display and a label will appear in the lower left corner of thegraphic window. Move the X and Y Position sliders to a value of approximately 0.04 toimprove the display.• To also display a time label in the graphics window, select Annotation from the AvailableModules list and an Annotation object will be added to the Active Modules list. A set ofAnnotation Options will appear in the Environment Window. Place a check mark in the ShowDate box and click Display and a time/date label will appear in the far lower left corner ofthe graphic window. Move the X Position slider to 0.4 and the Y Position sliders to 0.04 sothat the time/date label appears to the right of the HELIOSPACE label.Display Paramesh Grid,• Scroll down to the bottom of the Available Modules list and select ParaMesh-Grid. AParaMeshGrid object will be added to the Active Modules list and a ParaMesh Grid optionsset will appear in the environment window.• Use the Data button to select the SciNRLMHD0 option that corresponds to the Paramesh dataset loaded earlier. Click the Display box on right side of the Para-Mesh Grid options windowand a white grid cube will appear.• Use the left/right mouse buttons to rotate/zoom in on the cube and notice that the structuredgrid is composed of a combination of blocks with sides of different lengths. At this point, nodata are being viewed so the color scale indicates a constant value. To more easilydistinguish the differently sized blocks, select the Level option in the Color Method inputsection. The graphic window should resemble the following figure.306AF-GEOSpace User’s <strong>Manual</strong>: Version 2.5
Display a Paramesh Coordinate Slice and Isocontour,• From the Para-Mesh Grid environment window, select the Domain option in the RenderBlocks input section. This changes the grid into a gray colored domain background withcolored x , y, and z axes represented by red, green, and blue arrows, respectively. This Griddisplay option is the most favorable for viewing the other Paramesh graphics objects.• From the Available Modules list select ParaMesh-CoordSlice. A Pmesh Coord Slice objectwill be added to the Active Modules list and a ParaMesh Coord Slice options set will appearin the environment window.• Use the Data button to highlight the SciNRLMHD0 option then select the Magnetic Fieldoption. Click the Display box on right side of the Para-Mesh Grid options window and one ofthe domain faces, i.e., the x = 0 plane, will appear solid blue. The default Cut Plane setting ofC0 causes coordinate slices at constant x values to be displayed. Moving the Position Valueslider between 0.0 and 1.0 will enable you to see the initial structure of the magnetic fluxtubes in the domain space. The color bar now corresponds to magnetic field strength. To cutthrough the center of a flux tube aligned with the z-axis, move the Position Value slider to avalue of approximately 0.375. Move the slider to approximately 0.630 to see the center ofanother flux tube oriented on a diagonal, as well as small portions of two other flux tubes thatrun parallel to the diagonal one.• Change the Cut Plane selection to C2 to view coordinate slices at constant z values. Move thePosition Value slider between 0.0 and 1.0 to slide along the flux tube structures. Leave thePosition Value slider set at approximately 0.25.AF-GEOSpace User’s <strong>Manual</strong>: Version 2.5 307
• From the Available Modules list select ParaMesh-IsoSurface. A ParaMesh-IsoSurface objectwill be added to the Active Modules list and ParaMesh-Isocontour options will appear in theenvironment window.• Use the Data button to highlight the SciNRLMHD0 option then select the Magnetic Fieldoption. Click the Display box on right side of the Para-Mesh Isocontour options window anda set of flux tubes will appear in the form of isocontours. Slide the Contour Value slider tothe right until the isocontours become blue-green (at a value of approximately 0.30). Byusing the left mouse button, you should be able to rotate the picture until you can see downthe center of the fully-formed isocontour tubes to see the target-like pattern formed by thecoordinate slice within each flux tube isocontour. With some adjustment, the Heliospaceviewport should resemble the following figure.Animate the Flux Tube Sequence,• To view the development of the magnetic flux tubes as they collide, we will animate theisocontours. Use the Edit menu and select the Animate Tool option and an Animate windowwill appear. The animation start and end times are the default dynamic time fields from thetop of the environment window. For a sequence of Paramesh data files, the file suffixnumbers are used to display the simulation output in the proper order with the lowest andhighest numbered files corresponding to the animation start and end times, respectively. Tobegin continuous animation, place a check mark in the Animate box under the time slider.The animate slider will progress at 900-second time steps and the magnetic flux tubes willchange every four hours. Note that to get the animation time to correspond correctly with thesimulation time, the proper Start and End times would need to be entered at the top of theenvironment window at the very beginning of this exercise. Stop the animation by clickingagain in the Animate box. Reset the picture by moving the time slider to the far left.308AF-GEOSpace User’s <strong>Manual</strong>: Version 2.5
• To view the sequence a single frame at a time, move the time slider manually to the right.Again, the data will be updated every 4 hours. The fourth frame of the sequence shouldresemble the next figure.Prepare for viewing magnetic field lines structures,• Turn off the coordinate slice display by highlighting the Pmesh Coord Slice entry in theActive Modules list (on the right side) and removing the check mark from Display.• Reset the Animation window time slider to the far left position.• Make the isocontours slightly transparent by highlighting the ParaMesh-Isocontour entry inthe Active Modules list, selecting the Transparency option, and setting the Transparencyslider that appears at the bottom of the window to a value of 0.25.Display and Probe Magnetic Field Line Structure,• From the Available Modules list select ParaMesh-FieldLines. A ParaMeshFieldLine objectwill be added to the Active Modules list and a Para Mesh Field Lines options set will appearin the environment window. Remove the check mark from the Start Planes X Mid option.• To view single magnetic field lines, select the User Defined option (below the Data button)and the selection options will change. Use the Data button to highlight the SciNRLMHD0option and then select the Magnetic Field option.• Click the Add button and the Current Field Line selector will show a Field Line 0 entry.Click Display and a green dot will appear in the center of the domain. Due to the weak fieldAF-GEOSpace User’s <strong>Manual</strong>: Version 2.5 309
strength at this location, no field line is traced. Move the X Position slider to –0.3 and a fieldline should be visible inside the vertical flux tube.• Click the Add button again and the Current Field Line selector will show a Field Line 1entry. Move the X Position slider to 0.45 and a field line will appear wrapped around thediagonally oriented flux tube. Use the left mouse button to rotate the graphic and view thefield lines from different angles. To change the settings of either field line, use the CurrentField Line selector to view the entry of interest and adjust the settings for that line. Thetracing direction can be adjusted using the Direction selector near the bottom of the window.Note that these field line starting points remain fixed in space when the Animate Tool is used.• To improve the appearance of the field lines, perform the following tasks: (1) set the LineWidth selector to 2, (2) set the Render As selection to Cylinders, and (3) click the Colorselector and click the mouse in the red part of the color wheel that appears. The Heliospacewindow should now resemble the following figure.This completes the Example HELIOSpace: Loading and Viewing PARAMESH Files.310AF-GEOSpace User’s <strong>Manual</strong>: Version 2.5
9) IONSCINT: Ionospheric Scintillation Simulation (V2.5 Only, Dynamic)The following dynamic example demonstrates the use of the ionospheric scintillation simulationIONSCINT Science Module, the COORDSLICE Graphics Module, Animation, and a variety ofother visualization tools.Goal: This example exercises the IONSCINT science module for two separate timeintervals. The user chooses which interval to investigate then follows the same set ofsteps to obtain the plots using AF-GEOSpace. In the first scenario option, weexamine scintillation in the South America sector at one-hour intervals such that allplots are generated using a single scenario representing a single evening. As timeprogresses, scintillation structures appear about one hour to the East of the day/nightterminator. These structures begin near the equator, grow in latitudinal extent anddrift eastward with the drifting ionosphere, then begin to decay in intensity. In thesecond scenario, we examine the height of the scintillation season over Africa bylooking at one-day intervals showing the high degree of day-to-day variability inscintillation produced by IONSCINT.Start a dynamic AF-GEOSpace session and set global input parameters,• Initiate AF-GEOSpace via the Start menu (Start>Programs>AFGeospace>AFGeospace),the desktop icon, or by double-clicking on the file $AFGS_HOME\bin\AFGeospace.bat.Maximize the AF-GEOSpace user interface window. The shell windows can be minimizedbut must remain open for AF-GEOSpace to function.• Establish a dynamic session by placing a check mark in the small box to the right of theStart: UT text field to activate the End: Year, Day, UT text fields. To enter the date and timeinputs for the South America (Africa) scenario, edit the Start text fields so that Year = 2000(1999), Day = 75 (69), and UT = 00:00 (21:00) and edit the End text fields so that Year =2000 (1999), Day = 75 (74), and UT = 06:00 (21:00). From the Globals: selector options (onthe same bar as the time inputs) pick Archive to automatically register the time interval andload parameters from the NGDC archive. The only global parameters that can affectIONSCINT are the Day, UT, Kp and SSN, however, in both scenarios described here we willopt for the constant input option.Display the Earth in 2-D,• Select the Graphics option in the Modules menu and Available Modules and Active Moduleslists will appear. Select Earth from the Available Modules list. An Earth object will be addedto the Active Modules list and a set of Earth Options will appear in the bottom of theEnvironment Window.• Under Outline Detail select the Textured and Geographic Bndys options. Under Grid Optionsselect the Lat/Lon Grid option. Click in the Display box to place the Earth in the default 3Dwindow. The left and right mouse buttons can be used to rotate and scale the Earth imagewhile the cursor is in the Window.AF-GEOSpace User’s <strong>Manual</strong>: Version 2.5 311
• From the Viewport menu, select Projection and then the Two D option. The graphic windowcontaining the Earth will change to 2-D. The space to the right of the Earth graphic will befilled later with a data color bar. The center and right mouse buttons can be used to translateand scale the Earth image.Generate Dynamic IONSCINT Data,• Choose Module from the Menu Bar and select Science from the options. Available Modulesand Active Modules lists will appear. Scroll down and select IONSCINT from the AvailableModules list. A SciIonScint0 object will appear in the Active Modules list and IONSCINTOptions will appear in the Environment Window.• For the South America (Africa) scenario, set the Random Number Seed = -12345 (-123).Under Theater enter Lat 1 = -40 (-20), Lat 2 = 40 (40), Lon 1 = 250 (-20), and Lon 2 = 330(60) and just below that set Satellite Longitude = 260 (2). In the Sunspot Number and KPinput section choose the Constant option and enter SSN = 100 (100) and Kp = 2.0 (1.0).Select the Operational Mode called Plume and enter Scintillation Intensity = 0.5 (0.5) andPercentile for S4 to dB Fade = 99.5 (90.5). Note that the calculation is automaticallyperformed on a grid with 1-degree spacing and Grid Tool changes will NOT alter thisdefault.• For the South America (Africa) scenario, we will run IONSCINT once every hour (day).Select the Dynamic Tool option in the Edit menu and a Dynamic Tool option window willappear. Leave the check marks in all boxes next to all four variables listed for IONSCINT,i.e., S4Index, dBFade, ProbCom, and SatElev. Edit the Time Step (sec) text field to read 3600(86400) seconds and click the Update List button. The list in the lower part of the DynamicTool window should now be updated to show that IONSCINT will be run once every hour(day). Click the Done button to register you selections and dismiss the Dynamic Toolwindow.• Select the Run/Update option in the Edit menu to start the calculation. A Process Viewwindow appears briefly. The Model Status window at the bottom of the EnvironmentWindow will indicate the IONSCINT run times. Because we selected the Constant option forspecifying the SSN and Kp, the values shown in the Model Status window represent globalarchive data and will not be used in these scenarios.Display a Time/Date Label in the Active Graphic Window,• Select the Graphics option in the Modules menu and Available Modules and Active Moduleslists will appear. Select Annotation from the Available Modules list. An Annotation objectwill be added to the Active Modules list and a set of Annotation Options will appear in thebottom of the Environment Window.• To display a time label in the graphics window, place a check mark in the Show Date boxand click Display and a time/date label will appear in the far lower left corner of the graphicwindow. Move the X Position and Y Position sliders to a value of approximately 0.04 tomake them easier to read.312AF-GEOSpace User’s <strong>Manual</strong>: Version 2.5
Display and Animate a Dynamic Sequence of IONSCINT Scintillation Results,• To display the S4 scintillation index output, return to the Available Modules list and selectCoord Slice. A Coord Slice object appears in the Active Modules list and a set of Coord Sliceoptions appears in the Environment Window. Click on the Data button, go down toSciIonScint0 and choose S4Index. Click Display to display the S4 Index pattern in the 2DWindow.• While the cursor is in the graphics window, use the center and right mouse buttons totranslate and rescale the image, respectively, so that the theater almost fills the window.Select the Transparency feature on the right side of the Environment Window and move theTransparency slider that appears to a value of 0.50.For the South America scenario, the graphic should resemble the following figure.For the Africa scenario, the graphic should resemble the following figure.AF-GEOSpace User’s <strong>Manual</strong>: Version 2.5 313
• To see the position of the geosynchronous satellite associated with this scintillation pattern,click on the Data button, go down to SciIonScint0 and choose SatElev.For the South America scenario, notice that the spacecraft is located directly above thegeographic equator just west of South America as shown in the following figure.For the Africa scenario, notice that the spacecraft is located directly above the geographicequator and off the Ivory Coast as shown in the following figure.• Use the Data button to reset the data display to show S4Index. Select the Animate Tooloption in the Edit menu and an Animate window will appear. For the South America (Africa)scenario, reset the Time Step (sec) text field to match the dynamic step, i.e., 3600 (86400)seconds, and click the Update button. Click the Animate check box and the time slider willadvance at 3600-second (86400-second) steps and the 2-D graphic will update automatically.Note that you can change the Data button select while the animation is continuing toexamine other parameters.314AF-GEOSpace User’s <strong>Manual</strong>: Version 2.5
• Click the Animate box again to stop the animation. <strong>Manual</strong>ly move the time slider in theAnimate window to the far left. Use the arrows at the ends of the slider to view the data onestep at a time. The scenario sequence should resemble the following figure sets.South America Scenario S4Index: 01:00 – 06:00 03/15/2000 (00:00 shown above) -Scintillation structures appear about one hour to the East of the day/night terminator. Thesestructures begin near the equator, grow in latitudinal extent and drift eastward with thedrifting ionosphere, then begin to decay in intensity.AF-GEOSpace User’s <strong>Manual</strong>: Version 2.5 315
Africa Scenario S4Index: 21:00 03/10/1999 - 03/15/1999 - These plots illustrate the height ofthe scintillation season over Africa at one-day intervals and show the high degree of day-todayvariability in scintillation produced by IONSCINT.This completes the Example of IONSCINT: Ionospheric Scintillation Simulation (Dynamic)316AF-GEOSpace User’s <strong>Manual</strong>: Version 2.5
10) The Magnetospheric Cusp and Auroral Equatorward BoundaryThe following example demonstrates the use of the AURORA Science Module, the magneticfield BFIELD-APP Module, COORD-SLICE and FIELD-LINES Graphic Modules, and avariety of other visualization tools.Goal: Magnetospheric magnetic fields contribute to the particle precipitation patternsobserved in the polar caps, i.e., the magnetic cusp is associated with a peak in ionprecipitation near noon magnetic local time and plasma sheet electrons followmagnetic field lines down to the ionosphere to form the auroral oval. To illustratethese magnetic field-particle precipitation connections, the goal of this example istwo-fold: (1) Examine the location of the magnetospheric cusp and its mapping asdetermined by several magnetic field models in relation to statistically determinedauroral ion number fluxes; (2) Examine the location of the equatorward boundary ofthe auroral region, as determined by the electron number flux, and visualize itsmagnetic connection to the equatorial region of the magnetosphere.Start an AF-GEOSpace session and set global input parameters,• Initiate AF-GEOSpace via the Start menu (Start>Programs>AFGeospace>AFGeospace),the desktop icon, or by double-clicking on the file $AFGS_HOME\bin\AFGeospace.bat.Maximize the AF-GEOSpace user interface window. The shell windows can be minimizedbut must remain open for AF-GEOSpace to function.• For this run, set the date and time in the Environment Window by editing the text boxes toread: Start:Year=1993, Day=81, and UT=09:00. Select the Archive option using the Globalsselector to the right of the time inputs and the values of the Kp geomagnetic index, sunspotnumber (SSN), F10.7 cm radio flux, and the Ap geomagnetic index for this time will becopied from archived NGDC parameters (Kp=4.3, SSN=73, F10.7=126.6, and Ap=32). Notethat the modules accessed in this example will not use SSN, F10.7, and Ap.Create and plot an aurora ion data set,• Select the Science option from the Modules menu and Available Modules and Active Moduleslists will appear. Click on AURORA in the Available Modules list. An AURORA object willappear in the Active Modules list and a set of AURORA Options will appear in theEnvironment Window.• Leave the Generate, Internal B-Field, and External B-Field inputs selections as GriddedData, Centered Dipole, and None, respectively. Select the Grid Tool option in the Edit menuand a Grid Tool window will appear. Note that the radius minimum and maximum settingsare the same because the default auroral grid is a surface at ionospheric altitude. To get asmoother contour plot, increase NPoint in the Lat, GEOC (Deg N) section to 100 andincrease Npoint in the Lon, GEOC (Deg E) section to 96. Hit the OK button to generate thegrid and close the Grid Tool Window.AF-GEOSpace User’s <strong>Manual</strong>: Version 2.5 317
• Select the Run/Update option in the Edit menu and a Process View window will appear. TheModel Status box will show the global parameters used and indicate that the model is readyafter the Process View window disappears.• Click on the Modules menu and select Graphics. Available Modules and Active Modules listswill appear. Select Earth from the Available Modules list. An Earth object will be added tothe Active Modules list and a set of Earth Options will appear.• Under Outline Detail leave Geographic Bndys checked off and under Grid Options selectLat/Lon Grid. Click in the Display box to place the Earth in the default 3-D window.• While the cursor is in the graphic window, the left and right mouse buttons can be used torotate and resize the view of Earth, respectively. Use the right mouse button to rescale theview so that the Earth fills a large portion of the window. Now use the left mouse button torotate the Earth downward so you can view the North Pole.• From the Available Modules list select Coord Slice. A Coord Slice object will be added to theActive Modules list and a set of Coord Slice Options will appear in the EnvironmentWindow. Click on the Data button and select Ion Number Flux under the SciAurora optionslist that appears. Click in the Display box to view the ion number flux. To make geographicfeatures visible through the ion precipitation pattern, click the Transparency button and aslider appears. Move the Transparency slider to a value 0.80.• To further highlight the peak flux region select the Contours and Color options in theDisplay Options input section and move the Number of Contours slider to a value of 25.Notice the flux maximum near 80 degrees geographic latitude just east of the Greenwichmeridian. The corresponding maximum in the southern hemisphere appears on the coast ofAntarctica at a longitude of approximately 90 degrees. The view of the northern hemisphereshould resemble the figure above.318AF-GEOSpace User’s <strong>Manual</strong>: Version 2.5
Create and plot cusp region magnetic flux tubes,• To check the location of magnetic field model cusps relative to the ion number flux we willplot magnetic flux tubes centered about their respective magnetic cusps. If centered properly,the flux tube field lines will continue to spread as they approach the magnetopause. Somefield lines will pass through the magnetic equator and connect to the opposite hemispherewhile others are swept anti-sunward into the magnetotail.• B-field Case 1: Return to the Modules menu and select Applications. Available Modules andActive Modules lists will appear. Select BFIELD-APP from the Available Modules list. AnAppBField object will appear in the Active Modules list and B-Field Application Parametersoptions will appear in the Environment Window.• Under Generate check the Flux Tube option (the Gridded Data and MLT Field Lines optionswill not be used and can be unchecked). Under Internal B-Field select the IGRF (1945-2010)option. Under External B-Field select the Hilmer-Voigt ’95. Choose the Kp Only defaultoption in the Hilmer-Voigt ‘95 Options Window that appears and click the Done button todismiss the window.• Set the Flux Tube Inputs coordinates to Geographic and set Lat=75, Long=21, Alt(km)=0,Diam(km)=600, and Steps=40. Select the Run/Update option in the Edit menu. The ProcessView window will appear momentarily and the Model Status box will show the dipole tiltangle (-4.1 degrees) and the Hilmer-Voigt model settings that correspond to the global Kp =4.3, i.e., magnetopause standoff distance of 8.6 Re, Dst = -20 nT, and Eq. Edge = 59.51degrees.• Choose the Modules menu and select the Graphics option. Available Modules and ActiveModules lists will appear. Scroll down and select Field Lines from the Available Moduleslist. A FieldLines object will appear in the Active Modules list and a set of Field LinesOptions will appear in the Environment Window.• Click on the Data button, slide down to AppBField, and select the Flux Tube option. ClickDisplay to view the field lines. Click the Color button and use the left mouse button to clickin the yellow region of the color wheel that appears so that the field lines will change fromthe default green color to become yellow. Select the Smooth Line Type option and increasethe Line Width to 2.• Use the right mouse button while the cursor is in the graphic window to zoom out until fieldlines can be seen hitting the southern hemisphere. Some field lines connect to the southernhemisphere while others hit the magnetopause. Now zoom in very close until only thefootprint of the flux tube is showing and notice that the magnetic cusp in this model iscentered a few degrees equatorward of the statistical ion number flux maximum shown in redin both hemispheres.• B-field Case 2: Return to the Modules menu and select Applications. Available Modules andActive Modules lists will appear. Select BFIELD-APP from the Available Modules list on theAF-GEOSpace User’s <strong>Manual</strong>: Version 2.5 319
left and a second AppBField object will appear in the Active Modules list and B-FieldApplication Parameters options will appear in the Environment Window.• Under Generate check the Flux Tube option (the Gridded Data and MLT Field Lines optionswill not be used and can be unchecked). Under Internal B-Field select the IGRF(1945-2010)option. Under the External B-Field option select the Olson-Pfitzer “77 option.• Set the Flux Tube Inputs coordinates to Geographic and set Lat=83, Long=13, Alt(km)=0,Diam(km)=600, and Steps=40. Select the Run/Update option in the Edit menu. The ProcessView window will appear momentarily and the Model Status box will show the dipole tiltangle (-4.1 degrees). Note that this model does not use the global inputs displayed, but ratherrepresents an average quiet state of the magnetosphere.• Choose the Modules menu and select the Graphics option. Available Modules and ActiveModules lists will appear. Scroll down and select Field Lines from the Available Modules liston the left. A second FieldLines object will appear in the Active Modules list and a set ofField Lines Options will appear in the Environment Window.• Click on the Data button, slide down to the second AppBField entry, and select the Flux Tubeoption. Click Display to view the field lines. Click the Color button and use the left mousebutton to click in the very center of the color wheel so that the new field lines appear white.Select the Smooth Line Type option and increase the Line Width to 2.• Zoom in to see that the Olson-Pfitzer model magnetic cusp is several degrees poleward of theion number flux maximum in both hemispheres.• B-field Case 3: Return to the Modules menu and select Applications. Available Modules andActive Modules lists will appear. Select BFIELD-APP from the Available Modules list on theleft and a third AppBField object will appear in the Active Modules list and B-FieldApplication Parameters options will appear in the Environment Window.• Under Generate check the Flux Tube option (the Gridded Data and MLT Field Lines optionswill not be used and can be unchecked). Under Internal B-Field select the IGRF (1945-2010)option. Under External B-Field select the Tsyganenko ‘89 option. Click OK in theTsyganenko (1989) Options window that appears to use the default Kp Only option.• Set the Flux Tube Inputs coordinates to Geographic and set Lat=78, Long=18, Alt(km)=0,Diam(km)=600, and Steps=40. Select the Run/Update option in the Edit menu. The ProcessView window will appear momentarily and the Model Status box will show the dipole tiltangle (-4.1 degrees) and the Kp = 4-, 4, 4+ version of the model used.• Choose the Modules menu and select the Graphics option. Available Modules and ActiveModules lists will appear. Scroll down and select Field Lines from the Available Modules liston the left. A third FieldLines object will appear in the Active Modules list and a set of FieldLines Options will appear in the Environment Window.320AF-GEOSpace User’s <strong>Manual</strong>: Version 2.5
• Click on the Data button, slide down to the third AppBField entry, and select the Flux Tubeoption. Click Display to view the field lines. Click the Color button and change the new fieldlines to be red. Select the Smooth Line Type option and increase the Line Width to 2.• Zoom in and notice that the Tsyganenko ‘89 red cusp flux tube seems centered fairly wellabout the ion number flux maximum.Compare Magnetic Field Model Cusp Locations,• Cusp comparisons can be made by using the mouse button to rotate and scale the picturewhile selectively turning the field-line displays on and off. Hide a set of field lines byselecting one of the FieldLines objects listed in the Active Modules list and clicking theDisplay button. Remember that the active graphic objects and the data sets are listed in theorder produced: Hilmer-Voigt ‘95 (Yellow), Olson-Pfitzer “77 (White), and Tsyganenko ‘89(Red). By viewing one set of cusp field lines at a time and selecting the Filled Surface PlotType option the true funnel formed by the cusp magnetic field lines becomes more evident.• To duplicate the next figure you must use the Viewport menu to uncheck Show Color Barand then rotate and scale the view with the left and right mouse buttons, respectively.Display the equatorward boundary of the aurora mapped out along magnetic field lines,• Choose the Science options of the Modules menu and Available Modules and Active Moduleslists will appear. Select AURORA in the Available Modules list. A second SciAurora objectwill appear in the Active Modules list and a set of AURORA Options will appear in theEnvironment Window.AF-GEOSpace User’s <strong>Manual</strong>: Version 2.5 321
• Under Generate check the Eq Edge option and uncheck the Gridded Data option. Select theIGRF (1945-2010) Internal B-Field option and the Tsyganenko ‘89 External B-Field option.Choose the Kp Only option in the Tsyganenko (1989) Options window that appears and clickOK. Leave the Equatorward Edge Parameter and Model input sections unchanged.• Select the Run/Update option in the Edit menu and a Process Window will appear. TheModel Status box will show the global parameters used and indicate that the model is readyafter the Process Window vanishes.• Select Graphics from the Modules menu and turn off the Hilmer-Voigt (yellow) and Olson-Pfitzer (white) cusp flux tubes by removing the check mark in the Display box while the firstand second FieldLines Graphics Objects are highlighted in the Active Modules list.• Click on Field Lines in the Available Modules list that appears and a fourth FieldLines objectappears in the Active Modules list and a set of Field-Lines Options appears. Click the Databutton, slide down to the second SciAurora option listed, and select Mapped Eq. Edge. ClickDisplay to see the field lines mapped from the electron equatorward boundary correspondingto the Kp = 4.3 global input parameter.• To improve the picture, select the Filled Surface Plot Type option and remove the checkmark from the Field Lines option. Next activate the Transparency option and move its sliderto a value of 0.50. Now use the Lights option and select Enable (lower left of LightingParameters that appear) to add a diffuse lighting source. The graphic should now resemblethe following figure.322AF-GEOSpace User’s <strong>Manual</strong>: Version 2.5
• The labels were added using the annotation feature. To place a label in the active graphicswindow, select Annotation from the Available Modules list and an Annotation object will beadded to the Active Modules list. A set of Annotation Options will appear in the EnvironmentWindow. Type the desire label in the Text field and click Display. The position of the labelcan be adjusted using the X Position and Y Position sliders. Two separate annotations wereused for the figure above.This completes the Example of The Magnetospheric Cusp and Auroral Equatorward Boundary.AF-GEOSpace User’s <strong>Manual</strong>: Version 2.5 323
11) Low Earth Orbit Total DoseThe following example demonstrates the use of the APEXRAD Science and ApplicationModules, the Satellite Application Module (SATEL-APP), the Orbit Slice and Orbit ProbeGraphic Modules, and a variety of visualization tools.Goal: View the total radiation dose distribution encountered by the low Earth orbit DefenseMeteorological Satellite Program (DMSP) satellite. Contributions are from the SouthAtlantic Anomaly (SAA), where unusually high fluxes of inner zone particles(predominantly protons) are encountered due to the asymmetry of the Earth’smagnetic field, and from the high latitude / low altitude projection of the outerradiation belt MeV electron population. (See Example 2 for an illustration of theindividual electron and proton populations impacting the low Earth orbit particleenvironment)Start an AF-GEOSpace session and set global input parameters,• Initiate AF-GEOSpace via the Start menu (Start>Programs>AFGeospace>AFGeospace),the desktop icon, or by double-clicking on the file $AFGS_HOME\bin\AFGeospace.bat.Maximize the AF-GEOSpace user interface window. The shell windows can be minimizedbut must remain open for AF-GEOSpace to function.• For this run, set the date and time in the Environment Window by editing the text boxes toread: Start:Year=1997, Day=200, and UT=08:30. This date is consistent with the referencetime of the orbit elements to be used. Select the Globals: Archive option from the selector tothe right of the time inputs and the Kp, SSN, F10.7, and Ap values appear that areappropriate for this time (although they will not be used in this example).Create APEXRAD Science Module data set,• Select Science from the Modules menu options and Available Modules and Active Moduleslists will appear. Click on APEXRAD in the Available Modules list and a SciApexDose objectwill be added to the Active Modules list and a set of APEXDOSE Options will appear in theEnvironment Window.• Click on the B-Model button and select the IGRF95 option to generate a realisticallypositioned South Atlantic Anomaly (SAA) for Low Earth Orbit (LEO) altitudes relativelyquickly. Note that IGRF95/O-P model was used to construct CRRESPRO but it takesconsiderably longer to run. Also, while the offset-tilted dipole option Dip-Tilt-Off is fastest, itdoes not yield a realistically positioned SAA.• Use the Shielding button to select 232.5 mil Al, corresponding to the shielding thickness ofthe hemispheric dome number 3 of the APEX satellite.• Leave the Channel button set at the default called Total to represent the sum of the High LET(Linear Energy Transfer) and Low LET dose channels.324AF-GEOSpace User’s <strong>Manual</strong>: Version 2.5
• Click on the Activity button to see that there are several activity ranges represented(parameterized by the 15-day average Ap index), plus an average activity level for the wholemission. Select the Whole Mission model (default).• Select the Grid Tool option from the Edit menu and a Grid Tool window will appear. Leavethe default Spacing, Geometry, and System settings unchanged. In the Rad, GEOC (Re)section set Npoint=40, Min=1.1 Re, and Max=3.0 Re. In the Lat, GEOC (Deg N) section setNpoint=60, Min= -70 o , and Max=+70 o . In the Lon, GEOC (Deg E) section set Npoint=60,Min= -180 o , and Max=+180 o . Click the OK button to register the grid choices and close theGrid Tool window.• Select the Run/Update option in the Edit menu and a Process View window will appear.When complete the Process Window will disappear and the identification and status of themodel will appear in the Model Status box in the lower part of the Environment Window.Create the DMSP orbit data set,• From the Modules menu, select Applications and Available Modules and Active Modules listswill appear. Scroll down the Available Modules list and select SATEL-APP (satelliteapplication). An AppSatel object will be added to the Active Modules list and a set ofEphemeris Data options will appear in the Environment Window.• With the Element Type set as From File, click on the File button to view the Open window.Highlight the file “dmsp.txt” in the folder $AFGS_HOME\models\data\EPHEMERIS andclick the Open button. Highlight DMSPF14 in the Current Element File list of satellites. Theorbital elements for DMSPF14 can be viewed by selecting the Mean option in the “ElementType” input section. Reselect the From File option to return to the previous view.• The reference time T_ref (01/11/99, 03:43:39) and default run interval (T_stop - T_start = 1day) are shown in the text boxes below. Leave T_start set at “07/19/97 8:30:00” but changethe T_stop text box to read “07/19/97 15:30:00” to setup a 7-hour orbit run. Select theRun/Update option in the Edit menu and a Process Window will appear momentarily. Whencomplete, the Model Status box indicates the “MODEL IS READY AND UP TO DATE.”Display the Earth, Satellite Orbit, and Time Label in 3-D,• Select Graphics from the Modules menu and Available Modules and Active Modules lists willappear. Select Earth from the Available Modules list and an Earth object will be added to theActive Modules list. A set of Earth Options appears in the Environment Window.• Select the Outline Detail options Textured and Geographic Bndys. Click Display and theEarth will appear in the default 3D window. The left, center (or shift key + left), and rightmouse buttons can be used to rotate, translate, and rescale, respectively, the contents of thegraphics window. Alternatively, the image orientation may be set using the Viewport menu(select View Position and then the View…options).AF-GEOSpace User’s <strong>Manual</strong>: Version 2.5 325
• Scroll down the Available Modules list and select Satellite. A Satellite object will be added tothe Active Modules list and a set of Satellite Options will appear in the EnvironmentWindow. Pick the Satellite selection DMSPF14, click the Label button and select Sat. Name,check the Pop Label box, and click Display. The DMSP orbit (in the geocentric referenceframe) will appear in the window with the satellite name (solid red circle). With no dataselected, the color bar appearing reads “No Data”.• To display a time label in the graphics window, select Annotation from the AvailableModules list and an Annotation object will be added to the Active Modules list. A set ofAnnotation Options will appear in the Environment Window. Place a check mark in the ShowDate box and click Display and a time/date label will appear in the far lower left corner ofthe graphic window. Move the X Position and Y Position sliders to a value of 0.04.Display and Animate Satellite and Orbit slices in 3-D and 2-D,• Return to the Available Modules list and select Orbit Slice. An OrbitSlice Object will beadded to the Active Modules list and a set of Orbit Slice options will appear. Pick the Satelliteselection DMSPF14 and click the Data button and select Dose under the SciApexDoseoption. In the Orbit Planes section, select the P0 and P2 options to generate data slices slavedto the satellite’s radial and longitudinal positions. The coordinate geometry of the planes isdetermined by the Grid Tool selections made earlier, i.e., a spherical geographic coordinates.• (Optional step) To improve the display appearance, click on the Transparency button andmove the Transparency slider to a value of 0.80 to make the continent outlines more visiblethrough the data. Next, click on the Color Map button and a Color Map Editor will appear.Click on the small light-blue box anchoring the left end of the blue segment and drag itdownward very slightly until the dose data in the region over southeastern South Americanbecomes greenish in color.• This session is referred to as being a static one because the environment is calculated for asingle time. The results of the satellite applications, however, can still be animated. SelectAnimate Tool from the Edit menu and an Animate window will appear. Edit the Time Endtext to read “07/19/97 15:30”, change the Time Step to 360 seconds, and click the Updatebutton. Click the Animate box and the satellite and slaved orbit slices will move at 360-second steps. Click the Animate box again to stop the animation.• Reset the Animate window time slider to the far left, i.e., to 08:30. Use the time slider endarrows to forward the animation to 07/09/1997 11:54. DMSP F14 should now be directlyover the South American coast in the middle of the South Atlantic Anomaly (SAA) and thegraphic should resemble the next figure.• From the Viewport menu, select the Projection then Two D. The viewport will change itsdimensionality and retain all data. Remove the color bar to make more room by using theViewport menu and deactivate the Show Color Bar option. Click the Animate box in theAnimate window to move the satellite. The dose data does not change because the satellitealtitude is nearly constant. You might notice that the orbit path seems to appear slightly326AF-GEOSpace User’s <strong>Manual</strong>: Version 2.5
above and below the current satellite altitude at various times. Click the Animate box again tostop the animation. The graphic should resemble the following figure.Generate a one-dimensional plot of the APEXRAD dose as seen by the DMSP satellite,• To create a new window to display 1D results use the Window menu and select the Create1D Viewport option. A blank graphics window with a white line just inside the frame willappear. Use the Window menu and select the Tile option to fit both open windows neatly inthe available graphics window space.AF-GEOSpace User’s <strong>Manual</strong>: Version 2.5 327
• Click in the 1-D window to activate it and then highlight the Annotation entry in the ActiveModules list on the left. The Annotation Options will reappear. Click Display and the sametime/data label used in the 3-D window will appear in the 1-D window.• Return to the Available Modules list on the left and select Orbit Probe. An Orbit Probeobject will be added to the Active Modules list and a set of Orbit Probe options will appear inthe Environment Window. Use the Path/Abscissa button to select AppSatel (representing theDMSPF14 satellite) and then the Time option. Use the Data/Ordinate button to selectSciApexDose and then Dose. The two data selection buttons should now read “Time” and“Dose”. Click Display and a dose vs. time plot will appear in the active 1-D window.• The Dose values are small numbers so the y-axis labels appear as 0.00 in the default labelingformat. To adjust the y-axis labels, edit the Y Axis section Format text box to read “%1.2e”to use an exponential format. Now reset the Y Axis section text boxes to Min = 0.00 and Max= 0.0008. Click in any other text box to register the changes. The 1-D window shouldresemble the following figure.• Use the Animate window so that the satellite markers in both the 2D and 1D plots step along(in 360 second steps) in phase with each other as the satellite periodically encounters peakflux in the SAA. Remember that the APEX data in the 2D Window is set to track thesatellite’s altitude.• (Optional) To switch the Earth plot between 2-D and 3-D, click in the 2-D window toactivate it. Now use the Projection option of the Viewport menu and select Two D or ThreeD. This can be done while animating.• (Optional) To see both the 2-D and 3-D plots simultaneously, maximize the 2-D window tofill the screen. Now use the Viewport menu to Split the graphic window with the Horizontaloption. This will create two identical 2-D views stacked in the graphic window. Click in oneof the graphic frames to activate it and use the Viewport menu to change the Projection toThree D. Use the left and right mouse buttons in the 3-D window to rotate and rescale the 3-D image. To remove one of the two visible windows, click in the frame to activate it then328AF-GEOSpace User’s <strong>Manual</strong>: Version 2.5
select the Delete option from the Viewport menu. To find the 1-D plot again, use theCascade, Tile, or 2:2 options in the Window menu. The last option is so named owing to thefact that the 1-D viewport was the second one created (the 1:1 option corresponds to originalwindow which is either 2-D or 3-D depending on which steps you took above).Run the APEXRAD Application Module to determine approximate annual doses for thespecified DMSP orbit,• Choose Modules from the Menu Bar and select Applications from the options. AvailableModules and Active Modules lists will appear. Click on APEXRAD-APP in the AvailableModules list and an AppApexRad object will be added to the Active Modules list. A set ofEphemeris Data options will appear. These options are similar to those used by the SatelliteApplication we used above.• With Element Type left set as From File, click on the File button to view the Open window.Highlight the file “dmsp.txt” in the folder $AFGS_HOME\models\data\EPHEMERIS andclick the Open button. Highlight DMSPF14 in the Current Element File list of satellites. Theorbital elements for DMSPF14 can be viewed by selecting the Mean option in the ElementType input section. Reselect the From File option to return to the previous view.• The reference time T_ref (01/11/99, 03:43:39) and default run interval (T_stop - T_start = 1day) are shown in the text boxes below. Select the Run/Update option in the Edit menu and aProcess Window appears. When complete, a scrolling text window will appear with orbitaverageddose, normalized to 1 year, for the various channels and model activities. The textwindow is two full pages long and will not be reproduced here. The OK button dismisses thetext box. To redisplay it, use the Show Text button in the Ephemeris Data options.This completes the Example of the Low Earth Orbit Total DoseAF-GEOSpace User’s <strong>Manual</strong>: Version 2.5 329
12) Geomagnetic Cutoff Rigidity (Dynamic)The following example demonstrates the use of the Geomagnetic Vertical Cutoff RigidityInterpolation Model (CUTOFF Science Module), the SATEL-APP Module, and visualizationtools including the COORD-SLICE, ORBIT-SLICE, and ORBIT-PROBE Graphical Modules.Goal: Cosmic rays are very energetic particles that penetrate the Earth’s magnetic field todifferent depths and contribute to the radiation dose accumulated by spacecraft. Themagnetic rigidity of a particle is a measure of its resistance to a magnetic field thatdeflects it from a straight-line trajectory. Generally, particles with higher rigidities aremore likely to gain access to a given location inside the magnetosphere. The goal ofthis example is to examine changes in the effective rigidity of the geomagnetic cutoffalong the Space Station orbit during a period of time when the geomagnetic activitywas increasing, i.e., as the three-hour Kp index increased from 1+ to 8+.Start an AF-GEOSpace session and set global input parameters• Initiate AF-GEOSpace via the Start menu (Start > Programs > AFGeospace > AFGeospace),the desktop icon, or by double-clicking on the file $AFGS_HOME\bin\AFGeospace.bat.Maximize the AF-GEOSpace user interface window. The shell windows can be minimizedbut must remain open for AF-GEOSpace to function.• The following steps will create an 18-hour dynamic session during an interval of increasinggeomagnetic activity. Set the global “Start” time parameters such that Year=1998, Day=267,and UT=12:00. Now place a check mark in the box to the right of the UT text field todesignate a dynamic run (this activates the End time input fields) and set the parameters“End: Year”=1998, Day=268, UT=06:00. Click on the Globals: Archive option to the right ofthe time input fields to register the selected time interval and the corresponding set of NGDCarchived global input parameter to be used during this session. View the list of inputs byselecting the Show option of the Globals pulldown menu. The Globals popup window showsthat the value of Kp increases from 1.3 to 8.3 during the interval, i.e., from 1+ to 8+. Closethe Globals window using the Cancel button.Create an International Space Station (ISS) orbit data set• Select the Applications option in the Module menu. Available Modules and Active Moduleslists will appear. Scroll down the Available Modules list and select SATEL-APP (satelliteapplication). An AppOrbit object will be added to the Active Modules list and a set ofEphemeris Data options will appear in the Environment Window• Leave From File as the selected Element Type option. Click on the File button and a windowwill appears showing the contents of the folder $AFGS_HOME\models\data\EPHEMERIS.Click on the file icon labeled “iss.txt” and click the Open button.• Select the one option appearing in the Current Element File list in the middle of the window,i.e., highlight the “ISS (ZARYA)” entry. The satellite name and the reference time (T_ref)associated with the orbital elements are given in boxes below the list box. To view the330AF-GEOSpace User’s <strong>Manual</strong>: Version 2.5
orbital elements for any satellite loaded using the From File option, click on the Meanelement type button. Reselect the From File element type button to return to the previousview. When run in dynamic mode, the start and stop times (T_start and T_stop) for thesatellite are automatically set to match the time interval entered earlier.• Select the Run/Update option in the Edit menu to create the orbit data set. When completed,the Model Status box will indicate that the “MODEL IS READY AND UP TO DATE.”Create 3D view of the Earth with an orbit trace• Select the Graphics option from the Module menu. Available Modules and Active Moduleslists will appear. Select Earth from the Available Modules list. An Earth object will beadded to the Active Modules list and a set of Earth Options will appear in the EnvironmentWindow. Select “Outline Detail” options Textured and Geographic Bndys. Click on Displayand the Earth will appear in the default 3D graphics Window.• Scroll down the Available Modules list and select Satellite. A Satellite object will be addedto the Active Modules list and a set of Satellite Options will appear. Click the Satellite listand choose ISS (ZARYA). Leave the Data button set to “No Data” and the Label button set toSat. Name. Check the Pop Label option and then click Display and the space station orbitwill appear in the 3D window.Create a Cutoff Science Module data set for the 18-hour interval• Select the Science option from the Modules menu. Available Modules and Active Moduleslists will appear. Scroll through the Available Modules list and click on CUTOFF. ASciGeoMagCutoff object will be added to the Active Modules list.• The Geomagnetic Vertical Cutoff Rigidity Interpolation Model is driven by Kp and Timefrom the global parameters already registered so no other inputs are required. Because thecutoff rigidity model results are derived using both a fixed internal (IGRF 1995) and a timedependentexternal (Tsyganenko [1989]) geomagnetic field model, the cutoff rigidity valueswill change with time even when Kp remains constant. To reflect this time-dependence, inthe following step we will calculate model output every 6 hours, i.e., every 21600 seconds.• Select the Dynamic Tool option from the Edit menu and the Dynamic Tool popup window forthe CUTOFF module will appear. Place check marks in the top row of output parameters(i.e., L, INVLT, PTV, and RCGVPV), reset the Time Step (sec) = 21600, and click theUpdate List button. The updated window now indicates that four model runs will beperformed and that the four selected parameters will be calculated for each grid point. Clickthe Done button to register these choices and to close the window. The 3D grid to beprocessed can be examined by selecting the Grid Tool option of the Edit menu.• Select the Run/Update option in the Edit menu to create the Geomagnetic Cutoff data set.When completed, the Model Status box will show the Kp values actually used at each timestep and indicate that the “MODEL IS READY AND UP TO DATE.”AF-GEOSpace User’s <strong>Manual</strong>: Version 2.5 331
Create a 3D view of the Effective Cutoff Rigidity• Select the Graphics option from the Module menu. Available Modules and Active Moduleslists will appear. Select Coord Slice from the Available Modules list. A Coord Slice Objectwill be added to the Active Modules list and a set of Coord Slice Options will appear in theEnvironment Window. Click the Data button and select RCGVPV (effective cutoff rigidity inGV in the vertical direction) under the SciGeoMagCutoff option. Select the C2 Cut Planeoption and select Display to place a constant longitude coordinate slice in the 3D window.• Move the Position Value slider to longitude = -108 degrees (Position Value = 0.200). Afterrotating the Earth and zooming, the 3D display should resemble the figure above. Thisdisplay helps to emphasize the fact that the CUTOFF Science Module covers the 3D spacefrom low earth orbit out to beyond geostationary orbit.332AF-GEOSpace User’s <strong>Manual</strong>: Version 2.5
• Change the displayed filled coordinate slice to reveal colored contours at the currentcoordinate slice location by doing the following. In the Display Options section, uncheck theFilled option and then place check marks in both the Contours and Color option boxes. Theplot should now resemble the figure above.• Next we will animate the dynamic sequence to observe how the rigidity contours change asKp increases (remember that Kp increases steadily with time during this interval). Toanimate the contours, start by opening the Animate Tool in the Edit menu. To match the stepused in the Dynamic Tool earlier, set Time Step (Sec) = 21600 and click Update. Now clickon the slider’s right arrow to advance the time by this new time step. Note that the rigiditycontours move equatorward as magnetic activity increases owing to the overall weakening ofthe magnetic field. Thus energetic particles typically penetrate deeper into the magnetosphereduring geomagnetic storm events. Use the Done button to close the Animate window.Create a 2D View of Rigidity at Space Station Altitude• Scroll down the Available Modules list and select Orbit Slice. An Orbit Slice object will beadded to the Active Modules list and a set of Orbit Slice Options will appear. Use the Satelliteselector to pick “ISS (ZARYA)”. Click the Data button and select RCGVPV (effective cutoffrigidity in GV in the vertical direction) under the SciGeoMagCutoff option. Remove thecheck from the Geocentric option so as not to replot the orbit. Select the P0 option under“Orbit Planes” (to produce a coordinate slice of constant radius slaved to the satellite’saltitude) and leave the Filled Display Option selected. Check the Display button to displaycutoff values. Select Transparency and change the slider setting to 0.5.• Use the Viewport menu to select Projection and then its Two D option. All data is nowproject on a 2D Earth. Note that the constant longitude coordinate slice contours appear as astraight vertical line cutting through the Americas. Return to Active Modules and highlightSatellite. Under “Reference Frame”, uncheck Geocentric and select Inertial. Highlight theCoord Slice entry in the Active Modules list to refresh the color bar label. The 2D windowshould resemble the figure below. Note that you can get back to a 3-D view by using theProjection option of the Viewport menu and select Three D.AF-GEOSpace User’s <strong>Manual</strong>: Version 2.5 333
Display a 1D Rigidity data set along the ISS orbit track• Use the Window menu to select Create 1D Viewport and an empty 1-D graphics window willappear. Note that the Window menu options Cascade and Tile can be used to access theexisting original 3-D window.• Scroll through the Available Modules list and click on Orbit Probe. An Orbit Probe objectwill be added to the Active Modules list and an Orbit Probe Option Panel will appear in theEnvironment Window. Click on the Path/Abscissa button and select the Time option underAppOrbit. Click on the Data/Ordinate button and select the RCGVPV option underSciGeoMagCutoffKp. Click Display and a plot of RCGVPV vs. Time for the ISS orbit willappear.• Click on Orbit Probe in the Available Modules list again. A second Orbit Probe object willbe added to the Active Modules list. Click on the Path/Abscissa button and select the Timeoption under AppOrbit. Click on the Data/Ordinate button and select the Latitude optionunder AppOrbit. Click Display and a plot of Latitude vs. Time for the ISS will appear. In theY-axis Options section, select the Right button to move the labels to the other side of the plot.Remove the redundant x-axis by removing the check from the X Axis Enabled box. The 1Dplot should now resemble the next figure.The final figure below (not generated as part of this example) was made using the Orbit Probemodule and shows the RCGVPV parameter along the ISS orbit when Kp is held constant at Kp =1.3 (red line) and Kp = 8.3 (white line). The cutoff values (in GV) peak near the geomagneticequator and are larger for the low Kp case, i.e., the overall geomagnetic field values are strongerfor this case and thus particles need more energy to penetrate to those locations. The RCGVPVcurve in the figure above would fall between the red and white curves in the figure below.334AF-GEOSpace User’s <strong>Manual</strong>: Version 2.5
This completes the Example of the Geomagnetic Cutoff RigidityAF-GEOSpace User’s <strong>Manual</strong>: Version 2.5 335
13) Meteor Impact HazardsThe following example demonstrates the use of the Meteor Impact Science Module, the MeteorSky Map Science Module, the Meteor Impact Application Module and a variety of visualizationtools.Goal: View the meteor flux and counts of two coincident meteor showers with a userdefinedstorm inserted in both 2D and 3D. Fly a satellite through the meteorenvironment and create a 1D plot of meteor flux along the satellite path that includesthe cumulative impact probability.Start an AF-GEOSpace session and set global input parameters• Initiate AF-GEOSpace via the Start menu (Start > Programs > AFGeospace > AFGeospace),the desktop icon, or by double-clicking on the file $AFGS_HOME\bin\AFGeospace.bat.Maximize the AF-GEOSpace user interface window. The shell windows can be minimizedbut must remain open for AF-GEOSpace to function.• For this static run, set the Global Parameters as follows: Start:Year=1995, Day=225,UT=12:00. Click on the Globals: Archive option to the right of the time input fields toautomatically load the set of NGDC parameters for this time (Kp=2, SSN=9, F10.7=72.7, andAp=7).Create the DMSP orbit data set• Select the Applications option in the Module menu. Available Modules and Active Moduleslists will appear. Scroll down the Available Modules list and select SATEL-APP (satelliteapplication). An APPOrbit object will be added to the Active Modules list and a set ofEphemeris Data options will appear in the Environment Window• Leave the From File Element Type option selected and click on the File button and awindow will appears showing the contents of the folder$AFGS_HOME\models\data\EPHEMERIS. Click on the file icon labeled “dmsp.txt” andclick the Open button.• A list of DMSP satellites will appear in the Current Element File list in the middle of thewindow. Select DMSP F8 (USA 26). The satellite name and the reference time associatedwith the orbital elements are given in boxes below the list box. To view the orbital elementsfor any satellite loaded using the From File option, click on the Mean element type button.Reselect the From File element type button to return to the previous view. The default valuefor the start time (“T_Start”) is taken from the global values at the top of the EnvironmentWindow. Whenever a SATEL-APP module is run in “static” mode, a 1-day interval with a60-second time step is used by default.• Select the Run/Update option in the Edit menu to create the orbit data set. When completed,the Model Status box will indicate that the “MODEL IS READY AND UP TO DATE.”336AF-GEOSpace User’s <strong>Manual</strong>: Version 2.5
Create 2D view of the Earth with an orbit trace• Select the Graphics option from the Module menu. Available Modules and Active Moduleslists will appear. Scroll down the Available Modules list and select Earth. An Earth objectwill be added to the Active Modules list and a set of Earth Options will appear in theEnvironment Window. Select “Outline Detail” options Textured and Geographic Bndys.Click on Display and the Earth will appear in the Window. Convert the image to 2D byusing the Viewport menu to select Projection and then its Two D option (note that the ThreeD option can be used to convert it back to a 3D window).• Scroll down the Available Modules list and select Satellite. A Satellite object will be addedto the Active Modules list and a set of Satellite Options will appear. Click the Satellite listand choose DMSP F8. Under “Reference Frame”, check Inertial (ECI) and uncheckGeocentric (GEOC). Click in the Display box and the DMSP orbit will appear.Create a Meteor Impact Science Module data set• Select the Science option from the Module menu. Available Modules and Active Moduleslists will appear. Scroll through the Available Modules list and click on METEOR IMPACT.A SciMeteorImpact object will be added to the Active Modules list and Meteor Impact Mapoptions will appear in the Environment Window. In the Show Simulation section, theSporadics and Flux Only options should be selected.• Within the optional Storm Simulations section, change the “Shower Name” to delta-Aquarids(S) (185-232). With the Date/Duration button selected, change the storm durationby setting “Duration (Hr)”= 6.00. Click the Add button to register the item in the Storms list.• Select the Run/Update option in the Edit menu to create the Meteor Impact data set. Whencompleted, the Model Status box will indicate that the “MODEL IS READY AND UP TODATE.”Create a 2D view of Meteor Flux• Select the Graphics option from the Module menu. Available Modules and Active Moduleslists will appear. Select Coord Slice from the Available Modules list. A Coord Slice Objectwill be added to the Active Modules list and a set of Coord Slice Options will appear in theEnvironment Window.• Click the Data button and select Meteor Flux under the SciMeteorImpact option. SelectDisplay to produce a fixed radius coordinate slice (corresponding to the default Cut PlaneC0).• Click the Transparency button on the right side of the environment window and aTransparency slider will be displayed at the bottom of the window. Change the slider valueto 0.7 so the continent outlines can be seen. Resize the window so it resembles the followingfigure.AF-GEOSpace User’s <strong>Manual</strong>: Version 2.5 337
Create a 3D view of Meteor Flux• Use the Viewport menu to select Projection and then its Three D option. Return to AvailableModules and click on Isocontour. An IsoContour Object will be added to the Active Moduleslist and a set of Isosurface Options will appear.• Click the Data button and select Meteor Flux under the SciMeteorImpact option. ClickDisplay and move the Contour Value slider to 0.859. After rotating the image, Isosurfacesfor two showers from different directions will appear as in the next figure.Create a 2D Meteor Sky Map Science Module data set• Select the Science option from the Module menu. Available Modules and Active Moduleslists will appear. Scroll through the Available Modules list and click on METEOR SKYMAPS. A SciMeteorMap object will be added to the Active Modules list and Meteor Ground<strong>Base</strong>d Sky Map and Storm Simulation options panels will appear in the EnvironmentWindow. The Visual and Sporadics options should already be selected.338AF-GEOSpace User’s <strong>Manual</strong>: Version 2.5
• Within the Storm Simulations section, change the “Shower Name” to delta-Aquarids(S)(185-232). With the Date/Duration button selected, change the storm duration by setting“Duration (Hr)”= 6.00. Click the Add button to register the item in the Storms list.• Select the Run/Update option in the Edit menu to create the Meteor Impact data set. Whencompleted, the Model Status box will indicate that the “MODEL IS READY AND UP TODATE.”Create a view of the Meteor Sky Map• Use the Window menu to select the Create 2D Viewport option and a new 2D window willappear. Select the Graphics option from the Module menu and Available Modules and ActiveModules lists will appear. From the Active Modules list, highlight Earth and click Display.To show the orbit already generated, highlight the Satellite entry in the Active Modules listand click Display.• Scroll up the Available Modules list and select Coord Slice and a Coord Slice entry willappear in the Active Modules list. Click the Data button and select Count under theSciMeteorMap option and click Display. After using the Transparency option to set atransparency value of 0.75, the 2D plot should resemble the figure below.Create a Meteor Impact Application data set.• Select the Applications option from the Module menu. Available Modules and ActiveModules lists will appear. Scroll through the Available Modules list and click on METEORIMPACT APP. An AppMeteorImpact object will be added to the Active Modules and aMeteor Impact Application and Storm Simulation options panels will appear in theEnvironment Window.• Within the Storm Simulations section, change the “Shower Name” to delta-Aquarids(S)(185-232). With the Date/Duration button selected, change the storm duration by setting“Duration (Hr)”= 6.00. Click the Add button to register the item in the Storms list.• Under Meteor Impact Application Options, select Setup option Satellite to see satelliteoptions. With the From File element type option selected, click on the File button and aAF-GEOSpace User’s <strong>Manual</strong>: Version 2.5 339
window will appear showing the contents of $AFGS_HOME\models\data\EPHEMERIS.Click on the file icon labeled “dmsp.txt” and click the Open button.• A list of DMSP satellites will appear in the Current Element File list in the middle of thewindow. Select DMSP F8 and edit the text boxes so that “T_start” reads “08/10/9512:00:00.00” and “T_stop” reads “08/17/95 12:00:00.00”. Select the Run/Update option inthe Edit menu to create the orbit data set. When completed, the Model Status box willindicate that the “MODEL IS READY AND UP TO DATE.”Display a Meteor Impact Application data set• Use the Window menu to select the Create 1D Viewport option and an empty 1-D graphicswindow will appear. Note that the Window menu options Cascade and Tile can be used toaccess the existing original 3-D window.• Select the Graphics option from the Module menu. Available Modules and Active Moduleslists will appear. Scroll through the Available Modules list and click on Orbit Probe. AnOrbitProbe object will be added to the Active Modules list and an Orbit Probe options willappear in the Environment Window.• Click on the Path/Abscissa button and select the Time option under AppMeteorImpact(AppOrbit). Click on the Data/Ordinate button and select the Meteor Flux option underAppMeteorImpact. Click Display and a plot of Meteor Flux vs. Time (along the DMSPorbit) will appear.• In the X-Axis Options section, change the information in the Format text box to read %1.2f.Click in any other text box to register the change.• Click on Orbit Probe in the Available Modules list again. A second OrbitProbe object will beadded to the Active Modules list. Click on the Path/Abscissa button and select the Timeoption under AppMeteorImpact. Click on the Data/Ordinate button and select the Cum Proboption under AppMeteorImpact. Click Display and a plot of Cum Probability vs. Time (alongthe DMSP orbit) will appear.• In the X-axis Options section, uncheck the Enabled option. In the Y-axis Options section,select Right. The 1D plot should now resemble the figure below, which shows how theshower gradually grows and wanes in intensity over the seven day period. The optional storminserted appears as a spike centered on the global time of 12:00 on day 225. The red linerepresents the cumulative probability of a meteor strike.340AF-GEOSpace User’s <strong>Manual</strong>: Version 2.5
This completes the Example of Meteor Impact Hazards.AF-GEOSpace User’s <strong>Manual</strong>: Version 2.5 341
14) DMSP Precipitating Particles: Data vs. ClimatologyThe following example demonstrates the use of the DMSP Data Module, the DMSP GraphicsModule and the Spectral Viewport, the AURORA Science Module, the Satellite ApplicationModule (SATEL-APP), and the Orbit Probe Graphic Module.Goal: View DMSP precipitating electron and ion data using energy versus time spectralplots. For the same orbit, create a 1D plot comparing the observed electron integralnumber flux along a DMSP orbit with that specified by the Hardy Aurora model.Start an AF-GEOSpace session and set global input parameters• Initiate AF-GEOSpace via the Start menu (Start > Programs > AFGeospace > AFGeospace),the desktop icon, or by double-clicking on the file $AFGS_HOME\bin\AFGeospace.bat.Maximize the AF-GEOSpace user interface window. The shell windows can be minimizedbut must remain open for AF-GEOSpace to function.• For this static run, set the Global Parameters as follows: Start:Year=2003, Day=94,UT=00:00. The Kp index and other parameters corresponding to the specified date and timemay now be obtained by clicking on the Globals: Archive option to the right of the time inputfields. The NGDC archived values of these parameters are then automatically loaded(Kp=4.3, SSN=72, F10.7=148.8, and Ap=32).View 2-D Energy Spectra Plots of DMSP Data• Select the Data option in the Module menu. Available Modules and Active Modules lists willappear. Select DMSP from the Available Modules list. An AppDmsp object will be added tothe Active Modules list and a set of DMSP Options will appear in the Environment Window.Use the Satellite selector and choose All (so all available data files will eventually bedisplayed). The next step will be to locate the sample DMSP data sets supplied with the AF-GEOSpace software.• There are two methods of accessing DMSP data: (1) If $AFGS_HOME\bin\AFGeospace.batwas edited before this AF-GEOSpace session to define the environment variable associatedwith the DMSP data, then a selection of files with names of the form “j4f1303###” appearedin the environment window during the previous step (see note in section “The DMSP DataModule” of this document), or (2) if the DMSP environment variable was not previously set,then select the Browse button to locate this data. The Browse button will call up a Choosefolder window. Use it to look inside the directory $AFGS_HOME\models\data\DMSP\2003(which will appear to be empty!). Choose the Select button and five file names of the form“j41303###” will appear in the environment window.• The five entries now appearing in the environment window represent five days of DMSP-F13data for days 92 to 96 of year 2003. Highlight entry j41303094 and change the Orbit Number(1-15) selector to read 3. These settings will process data from the SSJ/4 sensor of DMSP-F13 orbit 3 of day 94 of 2003. Use the Run/Update option of the Edit menu to prepare theselected DMSP data for viewing. The status bar at the bottom of the environment window342AF-GEOSpace User’s <strong>Manual</strong>: Version 2.5
will indicate when the data is “Ready”. Now that the DMSP data is ready, we next need toaccess the DMSP Graphics Module.• Select the Graphics option in the Module menu. Available Modules and Active Modules listswill appear. Select DMSP from the Available Modules list. A 2D Plot object will be addedto the Active Modules list and a set of DMSP Options will appear in the EnvironmentWindow. Now use the Data button to select Counts under AppDmsp option and notice thatthe Display options remains inactive. This is because the display of 2D spectral data requiresuse of a special spectral window.• To create the spectral viewport required, use the Viewport menu and select the Spectral underthe Projection option. A white line frame will appear in the active window indicating that ithas been converted to the spectral format. Now that a spectral viewport is active, the Displayoption also becomes active. Select Display and a pair of 2D energy spectrum plots willappear with ions and electrons represented in the upper and lower panels, respectively. Thetime range noted on the horizontal axis represents that of orbit 3 of DMSP-F13 on this day.Resize the graphics window so that the spectral window matches the following figure.• (optional) To view data from another orbit, return to the Module menu and select the Dataoption again. Available Modules and Active Modules lists will appear. With the AppDmspoption highlighted in the Active Modules list, change the Orbit Number (1-15) setting from“3” to “4” and select Run/Update from the Edit pulldown menu to refresh the spectralviewport display. The display will now contain DMSP spectral data from orbit 4 of day 94 of2003. To continue this exercise, reset Orbit Number (1-15) back to “3” and use theRun/Update option of the Edit menu to regain the display above. Now use the Module menuto reselect Graphics to return the display to the DMSP graphics window.AF-GEOSpace User’s <strong>Manual</strong>: Version 2.5 343
View 1-D Plots of DMSP Data Parameters as a Function of Energy Channel and Time• To view 1D quantities available with the DMSP data set, use the Window menu and selectCreate 1D Viewport and a new 1D window will appear. Use the Tile option of the Windowmenu to get unobstructed views of the windows. Use the 1D Plot selector and choose DataProbe 0 and select Display. Move the Position slider to read 0.150 and the horizontal dataprobe line in the 2D window will be sampling an electron energy channel with relatively highfluxes. The counts measured along this probe line will now be displayed in the 1D windowwhich should match the following figure.• Select the Y Axis option above the Position slider and the data probe will sample all energychannels for a given time. With the Position slider set equal to 0.225, the 1D window shouldnow match the following figure.344AF-GEOSpace User’s <strong>Manual</strong>: Version 2.5
• To view one of the electron flux quantities integrated over all energy channels, use the 1DPlot selector to choose the INF-E (integrated number flux for electrons). Change the Typefrom Point to Line and move the Thickness slider to the far left and the 1D window shouldresemble the following figure. Note the plot units are actually log(particles/cm 2 /sec/ster).Generate and View the DMSP-F13 Orbit in 3D• Select the Applications option in the Module menu. Available Modules and Active Moduleslists will appear. Scroll down the Available Modules list and select SATEL-APP (satelliteapplication). An AppSatel object will be added to the Active Modules list and a set ofEphemeris Data options will appear in the Environment Window• With the From File element type option selected, click on the File button and a window willappears showing the contents of the folder $AFGS_HOME\models\data\EPHEMERIS.Click on the file icon labeled “orbits_for_ex14.txt” and click the Open button. A list ofDMSP satellites will appear in the Current Element File list in the middle of the window.• Highlight the DMSP F13 04/02/03 23:24:24.00 entry of the Current Element File list as itcontains the orbital elements appropriate for our start time. The satellite name and thereference time associated with the orbital elements are given in boxes below the list box. Toview the orbital elements for this orbit satellite, click on the Mean element type button.Reselect the From File element type button to return to the previous view. The default valuefor the start time (“T-Start”) is taken from the global values at the top of the EnvironmentWindow. Whenever a SATEL-APP module is run in “static” mode, a 1-day interval with a60-second time step is used by default.• Select the Run/Update option in the Edit menu to create the orbit data set. When completed,the Model Status box will indicate that the “MODEL IS READY AND UP TO DATE.”• Use the Window menu and select Create 3D Viewport and a new 3D window will appear.AF-GEOSpace User’s <strong>Manual</strong>: Version 2.5 345
Select the Graphics option in the Module menu. Available Modules and Active Modules listswill appear. Scroll down the Available Modules list and select Earth. An Earth object willbe added to the Active Modules list and a set of Earth Options will appear in the EnvironmentWindow. Select the Lat/Lon Grid option and select Display and the Earth will appear in theactive 3D window.• Now scroll down the Available Modules list and highlight Satellite. A Satellite object will beadded to the Active Modules list and a set of Satellite Options will appear in the EnvironmentWindow. Use the Satellite selector to choose DMSP-F13, change the Reference Frameselections from Geocentric to Inertial (ECI) and select Display, and the DMSP satellite orbitwill appear in the active 3D window.Generate and View a 3-D Auroral Science Model Data Set at DMSP Altitudes• Select the Science option in the Module menu. Available Modules and Active Modules listswill appear. Select AURORA from the Available Modules list. A SciAurora object will beadded to the Active Modules list and a set of AURORA Options will appear in theEnvironment Window. To generate model output on a 3D grid that includes the DMSP orbit,select the Grid Tool option of the Edit menu and a Grid Tool window will appear. Within theRad, GEOC (Re) section change NPoint from “1” to “3”, set Max = 1.3, and click OK. Selectthe Run/Update option in the Edit menu to create the 3-D auroral data set. When completed,the Model Status box will indicate that the “MODEL IS READY AND UP TO DATE.”• Select Graphics from the Modules menu. Available Modules and Active Modules lists willappear. Select Coord Slice from the Available Modules list and a Coord Slice object will beadded to the Active Modules list and a set of Coord Slice options will appear. Use the Databutton to select Elec. Number Flux under the SciAurora option and click Display. The modelelectron number flux for the current Kp value will appear. Move the Position Value slider toapproximately 0.410 to place the coordinate slide near the DMSP altitude. Use the left/rightmouse buttons to rotate/resize the Earth to produce a picture resembling the following figure.346AF-GEOSpace User’s <strong>Manual</strong>: Version 2.5
View the Auroral Model Output Along the DMSP Orbit Path• Click on the existing1D Viewport to activate it. Scroll down the Available Modules list andselect Orbit Probe. An Orbit Probe entry will appear in the Active Modules lists and a set ofOrbit Probe options will appear in the environment window. Use the Path/Abscissa button toselect Time under the AppSatel option. Use the Data/Ordinate button to select Elec. NumberFlux under the SciAurora option. Select Display and the modeled electron number flux willappear in the 1D window. To make the Orbit Probe time axis match the DMSP orbit 3 timeaxis, adjust the entries in the X Axis section to read Min = 94.10764 and Max = 94.17846.Click in any other text box to update the plot. Uncheck the Enabled box in the X Axis sectionto remove the redundant horizontal axis scale (note that one was decimal days and the otherin decimal hours). To add contrast, select the Color options and click the mouse in the yellowportion of the color wheel that appears. Move the Thickness slider slightly to the right.Finally, in the Y Axis section of the Orbit Probe options, set Min = 5.0 and Max = 10.0 anduncheck the Enabled box to remove the redundant vertical scale. With these adjustments, the1D window should resemble the final figure.In this last figure, we can see that the Hardy aurora model, driven solely by the Kp index, does agood job of specifying electron flux levels in the auroral bands. Remember that the flux isactually plotted on a log scale.This completes the Example of DMSP Precipitating Particles: Data Versus Climatology.AF-GEOSpace User’s <strong>Manual</strong>: Version 2.5 347
15) Magnetospheric Specification Model (V2.5 Only, Dynamic)The following example demonstrates the use of the Magnetospheric Specification Model (MSM)science module, the Satellite Application Module (SATEL-APP), and the Global Inputs,Coordinate Slice, Orbit Slice, and Orbit Probe graphical modules, and a variety of visualizationtools.Goal: View the 3-D evolution of plasma sheet electron and proton fluxes generated by theMagnetospheric Specification Model during a geomagnetically disturbed period andcompare modeled particle fluxes along a geosynchronous and GPS orbit as a functionof time.Start an AF-GEOSpace session and set global input parameters• Initiate AF-GEOSpace via the Start menu (Start > Programs > AFGeospace > AFGeospace),the desktop icon, or by double-clicking on the file $AFGS_HOME\bin\AFGeospace.bat.Maximize the AF-GEOSpace user interface window. The shell windows can be minimizedbut must remain open for AF-GEOSpace to function.• Establish a dynamic session by placing a check mark in the small box to the right of theStart: UT text field to activate the End: Year, Day, UT text fields. Edit the Start text fields sothe Year = 1996, Day = 12, and UT = 18:00. Edit the End text fields so that Year = 1996, Day= 13, and UT = 18:00. Use the Globals: Archive option next to the time input fields toregister the time period and automatically load parameters from the NGDC archive.• View the global parameters for the interval selected using the Globals menu (between theViewport and Help menus at the very top of the environment window) and selecting the Showoption. Note that for all modules except the MSM, the global parameters can be modified bythe user and saved for use during the current session. While the MSM actually accesses itsown set of archived data to generate its inputs (see the MSM science module section), thevalues used for Kp, SumKp, SSN, Dst, and EqE (Equatorward Edge) will match those nowvisible in the Globals popup window. Dismiss the Globals window using the Save or Cancelbuttons at the bottom.Display plots of Kp, Dst, and the Equatorward Edge in a 1-D Window• Select the Create 1D Viewport option from the Window menu to create a new 1-D graphicswindow to display the geomagnetic activity indices Kp and Dst.• Select the Graphics option in the Module menu. Available Modules and Active Modules listswill appear. Scroll down the Available Modules list and select Global Inputs. A GlobalInputs object will be added to the Active Modules list and a set of Global Inputs options willappear in the Environment Window.• From the Value input section, select the Kp option and check off Display to produce a plot ofKp versus time. Move the Thickness slider slightly to the right. To clean up this 1-D plot,reset the X Axis text field so that Num Tics = 5 to display 6 hour (0.25 day) intervals and348AF-GEOSpace User’s <strong>Manual</strong>: Version 2.5
uncheck the Grid option in both the X Axis and Y Axis sections. Reset the Y Axis Min = 0.0,Max = 9.0, and Num Tics = 4. Click in any other text field to update the plot. Note that theKp index ranges between 1.3 and 5.0 for this 30 hour interval.• Select Global Inputs again from the Available Modules list. A second Global Inputs objectwill be added to the Active Modules list and a new set of Global Inputs options will appear inthe Environment Window.• From the Value input section, select the DST option and select Display to plot Dst in theexisting 1-D window. Move the Thickness slider slightly to the right. Uncheck the Enablebox for the X Axis to remove the redundant time labels, select the Right option for the YAxis, and uncheck the Grid option in both the X Axis and Y Axis sections. Reset the Y AxisMin = -100.0, Max = +20.0, and Num Tics = 7. Click in any other text field to update the plot.Note that the Dst index ranges between -88 nT and +8 nT for this same interval.• Select Global Inputs again from the Available Modules list. A third Global Inputs object willbe added to the Active Modules list and a new set of Global Inputs options will appear in theEnvironment Window.• From the Value input section, select the EqEdge option and select Display to plot Eq Edge inthe existing 1-D window. Move the Thickness slider slightly to the right. Uncheck the Enablebox for the X Axis to remove the redundant time labels and uncheck the Grid option in the YAxis sections. Reset the Y Axis Min = 54.0 and Max = 66.0. Click in any other text field toupdate the plot. Note that the equatorward edge of the diffuse aurora at midnight (Eq Edge),measured in degrees latitude, is an indicator of magnetic field line stretching in themagnetotail. Typically, the nightside magnetic field becomes more stretched (i.e., Eq Edgedecreases) as the inner magnetospheric magnetic field becomes more inflated (i.e., as Dstdecreases) and thus Dst and Eq Edge profiles often resemble each other. The Eq Edge alsohas an inverse relationship with Kp which is not very evident in this example.• Scroll up the Available Modules list and select Annotation. An Annotation object will beadded to the Active Modules list and a set of Annotation Options will appear in theEnvironment Window. Check the Show Date and the Display boxes and use the X and YPosition sliders to move the annotation to the top. The 1D window should resemble the nextfigure.Run an MSM Simulation and Create Electron and Proton Data Sets,• Select the Science option in the Module menu. Available Modules and Active Modules listswill appear. Scroll down the Available Modules list and select MSM (MagnetosphericSpecification Model). An MSM object will be added to the Active Modules list and a set ofMSM Options will appear in the Environment Window• While not a model input, a descriptive phrase (maximum of 68 characters) can be placedin the Run ID text box to label the simulation run. It can serve as a useful reminder of theglobal time interval settings, for example, when the science module is saved to beaccessed in the future. Edit the Run ID text box to read “MSM – Example 15, 1996 DayAF-GEOSpace User’s <strong>Manual</strong>: Version 2.5 349
12 18:00 – Day 13 18:00”.• For the Kp Mode, select the Full MSM (Kp to fill gaps) option and an MSM: Use Inputpopup window will appear. Place check marks next to DST, EQ. Edge, and PCP andleave the default No IMF, XIPATT selection. Click the OK button and the Dst index, theequatorward edge boundary of the diffuse aurora, and the polar cap potential drop will beused as direct inputs to the model. All other required model inputs will either be defaultvalues or be derived automatically using Kp-proxy relationships internal to the MSMscience code. In this case, the default symmetric ionospheric electric potential pattern(otherwise determined using either the IMFBY, IMFBZ or XIPATT inputs) will beassumed and the magnetopause stand-off distance (calculated internally by the modelusing SWDEN and SWVEL) will be calculated from Kp.• Leave the Run Prefix text box reading “x” (used as a file name prefix internally by theMSM) and place a check mark next to the H+ option below (e- should already bechecked) so that both electrons and protons will be tracked by the simulation. The EnergyRange (keV) and L-Shell Range options can remain unchanged as the default settings willresult in the maximum energy range of particles to be followed. Leave the Run Mode setas <strong>Base</strong>/Map so that the base MSM simulation and the mapping procedure will beexecuted in sequence. The Check Modes button will bring up a window with short notesapplicable to the MSM run associated with the entered Run Prefix, e.g., it will indicate ifa run with that prefix already exists• The particle species/energy pairs to be mapped onto the 3-D grid (to be defined in thenext step using the Grid Tool option of the Edit menu) are selected using the Set MapEnergies button. Click this button and an MSM Energies window appears with activecolumns for electron and proton energies (because e- and H+ were selected in the mainMSM environment window). Leave the default 30 keV entry for the “0” entry in the e-Energy (keV) column and edit the “0” entry in the H+ Energy (keV) column to also read30 keV. Click the Update and Done buttons to register the selection and close thewindow.350AF-GEOSpace User’s <strong>Manual</strong>: Version 2.5
• Select the Grid Tool option of the Edit menu and note that the default settings extend thegrid out to beyond 14 Re which is the largest magnetopause stand-off distance used bythe geomagnetic field model employed by the MSM. The mapping procedure willattempt to extract particle fluxes from the simulation at the energies selected in theprevious step for each grid point. Leave the default setting and close the Grid Toolwindow using the OK button. In the future, if the user is interested in limiting the volumeprocessed then the grid can be adjusted. For example, if geosynchronous orbit is the onlyregion of interest, then the Grid Tool System could be changed to GEOC and the Latituderange could be limited to values closer to the equator. Note that the mapping procedurespeed increases as the grid volume gets smaller.• One additional step is required in order to plot magnetic field quantities and thespecies/energy pairs selected two steps above. Select the Dynamic Tool option of the Editmenu to get the Dynamic Tool popup window to appear. Because we filled in the “0”entries for both the e- and H+ Energy (keV) columns of the MSM Energies windowearlier, we must also check the corresponding write-to-file quantities, i.e., leave the checknext to eEnergy0 and place a check next to the hEnergy0 options. Check the Bx, By, Bz,and Btot options also if you like to view magnetic field values generated by the MSMmagnetic field model [Hilmer and Voigt, 1995]. Note that with the 900 second (15-minute) native time-step of the MSM, 97 simulation steps will be calculated to cover the24 hour period. To reduce running time, set the Time Step (sec) = 1800 to map the outputonly once every 30 minutes. Click the Update List button to fix the selections and theDone button to close the window.• Select the Run/Update option in the Edit menu to create the particle flux and magnetic fielddata set. Note that this run will take several minutes. While the Process View window doesnot indicate progress until the mapping procedure begins, the actually running of the MSMsimulation can be followed by looking at one of the DOS execution windows. Whencompleted, the Model Status box will indicate that the “MODEL IS READY AND UP TODATE.”• As mentioned above, the inputs selected to drive this run (default Kp plus optionalparameters DST, EQ. Edge, and PCP) are used by the MSM to produce the complete set ofparameters needed at the 15-minute simulation mark times. To view these parameters clickon the Show MSM Inputs button at the bottom of the MSM environment window. The valuesfor Dst, EqE, and PCP are all determined via interpolation and the magnetopause standoffdistance (Std) is derived via a Kp relationship. If parameters IMFBY, IMFBZ or SWDEN,SWVEL had been selected above, then their interpolated values would also be listed and theStd value would have been derived using SWVel and SWDen values. The column labeled“P” refers to the polar cap potential pattern type used and in this case the value of 2 indicatesa dawn-dusk symmetric electric field pattern. If the user is interested in seeing the raw inputsused to create the Show Inputs table, they can examined some of the files in the SciMSM#folder created in the user’s scratch space (see details in the Show Inputs portion of the MSMScience Module section).Display the Earth, SM Axes, and Sun Vector in the GSM Coordinate Reference Frame,AF-GEOSpace User’s <strong>Manual</strong>: Version 2.5 351
• Click on the original blank 3-D graphics window to activate it. Select the Graphics option inthe Modules menu and Available Modules and Active Modules lists will appear. Select Earthfrom the Available Modules list. An Earth object will be added to the Active Modules list anda set of Earth Options will appear in the bottom of the Environment Window. Select the GridOption Lat/Lon Grid to add the geographic markings. Click in the Display box to place theEarth in the 3D Window. The left and right mouse buttons can be used to rotate and scale theEarth image while the cursor is in the Window.• Highlight the Annotation entry in the Active Modules list on the right side of the environmentwindow and check Display to place the existing time/date annotation in the 3-D window.• Select Axes from the Available Modules list and an Axes object will be added to the ActiveModules list. Change the Axes Frame selection from the default GEOC to SM and also selectthe Sun Vector option. The Solar Magnetic (SM) coordinate system is useful because theEarth’s magnetic dipole is aligned with the SM z-axis (see the Grid Tool section of thedocumentation for coordinate system definitions). Click the Display box and a set oforthogonal axes in the SM coordinate system (red, green, blue) will appear. Notice that theNorth magnetic pole (blue axis) is located about 11 degrees from the geographic North Polenear Greenland. The yellow axis is the sun vector.• From the Viewport menu, select View Position and then the GSM option. This will keep the3-D graphics window fixed in the GSM frame during animation (matching the MSMsimulation Grid Tool coordinate frame), i.e., the Earth will rotate and the sun vector (definedto be coincident with the GSM x-axis) will remain fixed. From the Viewport menu, removethe check mark from the Perspective setting. Use the left mouse button to orient the Earthsuch that the sun vector (yellow) points to the left and the SM y-axis (green) points directlyout of the screen.• Select the Animate Tool from the Edit menu and the Animate window will appear. Reset theTime Step (Sec) field to 1800 and click the Update button. Use the left-right slider arrows tochange the time by 1800 second steps and note how the Earth’s magnetic dipole (coincidentwith the SM z-axis; blue) wobbles in this GSM coordinate frame. During this early time ofyear, the northern dipole is always tilted away from the Sun. In the 1-D window, thechanging time can be seen as the annotation changes and marks move along the Kp, Dst, andEq Edge parameter lines. Return the Animate window slider to the far left and close thewindow with the Done button.View an Animation of Electron Fluxes in the GSM Noon-Midnight Plane• To display the electron particle flux values stored on our GSM grid, select Coord Slice fromthe Available Modules list. A Coord Slice object appears in the Active Modules list and a setof Coordslice Options appear in the Environment Window. Click on the Data button, andunder the SciMsm0 option, choose E- Flux0 30.0, and click Display. To get a coordinate slicealigned with the GSM X-Z plane select Cut Plane C2. Remember that the right mouse buttoncan be used to resize the display contents. Select the Data Map option and reset Data Min =3.00 and Data Max = 7.00 at the bottom of the environment window.352AF-GEOSpace User’s <strong>Manual</strong>: Version 2.5
• To view a similar coordinate slice on the sunward side of the Earth, repeat the last step tocreate another coordinate slice and then move the Position Value slider to 0.500. The 3-Dgraphic window should resemble the following figure.• Open the Animate Tool in the Edit menu and view the MSM sequence using the Animateswitch and the slider arrow in the Animate Window. Note that some of the peak fluxes occurnear and the Dst minimum during this event. The 30 keV electrons remain trapped onmagnetic field lines which are fairly dipolar near the Earth, thus the electron distributionsstay approximately aligned with the SM axis plotted. The peak fluxes near the SM equatorialplane designate the center of the magnetospheric plasma sheet. The motion of this plasmasheet is discussed in relation to magnetic field topology in Example 3 in this document. Thedistribution of 30 keV protons is similar but fluxes are lower and not as broadly distributed.The next (optional) step will produce a similar picture of proton fluxes.• (Optional step) To obtain the same view of the proton flux values stored on our GSM grid,highlight each Coord Slice entry in the Active Modules list, click on the Data button, andunder the SciMsm0 option, choose H+ Flux0 30.0. For each Coord Slice entry you mustagain select the Data Map option and reset Data Min = 3.00 and Data Max = 7.00 at thebottom of the environment window. If the Data Map option is already selected (and itsoptions are not visible), then select any other option and reselect Data Map to view them.The 3-D graphic window would now resemble the following figure.AF-GEOSpace User’s <strong>Manual</strong>: Version 2.5 353
Create and Display a GEO Orbit• Select the Applications option in the Module menu. Available Modules and Active Moduleslists will appear. Scroll down the Available Modules list and select SATEL-APP. AnAppSatel object will be added to the Active Modules list and a set of Ephemeris Data optionswill appear in the Environment Window• With the From File element type option selected, click on the File button and a window willappears showing the contents of the folder $AFGS_HOME\models\data\EPHEMERIS.Click on the file icon labeled “goes.txt” and click the Open button. A list of GOES satelliteswill appear in the Current Element File list in the middle of the window. Highlight theGOES 7 entry and then use the Run/Update option in the Edit menu to create the orbit dataset. When completed, the Model Status box will indicate that the “MODEL IS READYAND UP TO DATE.”View Electron Fluxes in the GEO Orbit Plane• Select the Graphics option in the Module menu and Available Modules and Active Moduleslists will reappear. Scroll down the Available Modules list, select Satellite, and SatelliteOptions will appear. Pick the GOES 7 entry of the Satellite selector, check Display, and theGOES 7 satellite will appear in the 3-D window. Under Reference Frame, uncheckGeocentric and then check Inertial (ECI) so that a trace of the entire orbit path is visible. Usethe Color option to change the orbit to the color blue by clicking directly on the blue area ofthe color wheel that appears With the left mouse button depressed, move the mouse down tobring the north geographic pole and the entire geosynchronous orbit path in view so that the3-D window now resembles the following figure. Note that highlighting one of the activeCoord Slice entries will refresh the color bar labels.354AF-GEOSpace User’s <strong>Manual</strong>: Version 2.5
• To view the electron flux in the geosynchronous orbit plane, scroll up the AvailableModules list, select the Orbit Slice option and a set of Orbit Slice options appear. SelectGOES 7 from the Satellite list. Click on the Data button and choose E- Flux0 30.0 underthe SciMsm0 option, select the Orbit Plane option P3, and click Display. Use the DataMap option to set Data Min = 3.00 and Data Max = 7.00 to match the existing coordinateslices displayed. Use the Animate Tool from the Edit menu to toggle the time step awayand back to the 11:00 mark so that the Orbit Plane fluxes are properly set. The 3-Dwindow should now resemble the following figure.• Use the Animate Tool of the Edit menu to survey the development of the 30 keV electronflux in the geosynchronous orbit plane. (Note that because we fixed the view in the GSMcoordinate frame earlier, the geosynchronous orbit will appear to wobble slightly. Use theView Position option of the Viewport menu and select the GEI option to fix geographic basedorbit in the window during animation while keeping the sun vector pointing to the left.) NoteAF-GEOSpace User’s <strong>Manual</strong>: Version 2.5 355
that the initial MSM particle fluxes are symmetric about the Earth and that it takes severalhours for realistic distributions to become established. After the artificial effects of the initialcondition disappear, it is evident that the modeled source for electrons is on the night side ofmagnetosphere and that the electrons drift earthward from the magnetotail and then moveeastward to wrap around to the dayside. The size of the simulation region changes as themagnetopause standoff distance changes (in this case following Kp) to decrease in sizeduring the middle period then increase again toward the end of the interval. With the OrbitSlice entry highlighted in the Active Modules list and change the Data selection to H+ Flux030.0 and view an animation of the protons. Use the Data Map option to ser the Data Min =3.0 and the Data Max = 7.0. Although not apparent in this view, the proton distribution isalso initially symmetric like the electrons, but protons drift westward when they reach theinner magnetosphere from the tail. (To properly view the symmetric initial condition, oneshould really view a CoordSlice using Cut Plane C1 with Position Value = 0.5.)Create and Display a GPS Orbit• Select the Applications option in the Module menu. Available Modules and Active Moduleslists will appear. Scroll down the Available Modules list and select SATEL-APP. AnAPPSatel object will be added to the Active Modules list and a set of Ephemeris Data optionswill appear in the Environment Window• Select the From File element type option and click on the File button and a window willappears showing the contents of the folder $AFGS_HOME\models\data\EPHEMERIS.Click on the file icon labeled “gps.txt” and click the Open button. A list of GPS satellites willappear in the Current Element File list in the middle of the window. Select GPS BII-08.Select the Run/Update option in the Edit menu to create the orbit data set. When completed,the Model Status box will indicate that the “MODEL IS READY AND UP TO DATE.”• Select the Graphics option in the Module menu and the Available Modules and ActiveModules lists will reappear. Scroll down the Available Modules, select Satellite, and SatelliteOptions will appear. Pick the GPS BII-08 entry of the Satellite selector, and then checkDisplay and the GPS satellite will appear in the 3-D window. Under Reference Frame,uncheck Geocentric and then check Inertial (ECI) so that a trace of the entire orbit path isvisible.Compare Electron Fluxes Along a GEO and GPS Orbit• Select the Create 1D Viewport option from the Window menu to create a new 1-D graphicswindow. Remember that the Window menu options Tile and Cascade can be used to managewindow viewing.• Scroll up the Available Modules list and select Orbit Probe. An Orbit Probe object will beadded to the Active Modules list and a set of Orbit Probe options will appear in theEnvironment Window.• Select the Time option of the first AppSatel entry using the Path/Abscissa button. Now selectthe E- Flux0 30.0 option of the SciMsm entry using the Data/Ordinate button and click356AF-GEOSpace User’s <strong>Manual</strong>: Version 2.5
Display and a plot of GOES 7 electron flux vs. time will appear in the new 1-D window.Reset the Y Axis values Min = 3.5 and Y Axis Max = 6.5. Move the Thickness slider to theright slightly to thicken the line. Click in any other text box to update labels. If necessary, usethe Color option and click in the center of the color wheel that appears to change the fluxtrace white.• To generate a similar plot for the GPS satellite, repeat the procedure in the previous twobullets except this time select the Time option of the second AppSatel entry using thePath/Abscissa button. After resetting the Y Axis Min = 3.5 and Max =6.5 so that the Y Axislabels match those of the GOES plot, remove the redundant axes labels by removing thecheck mark in the two Enable boxes in both the X Axis and Y Axis sections. Use the Coloroption to change the trace to red and increase the line thickness slightly. The new 1-Dwindow should resemble the following figure.• Use the Animate Tool of the Edit menu to survey the time history of the 30 keV electron fluxin the GOES and GPS satellites. As indicated in the 1-D window, the 3-D window alsoshows that the GPS satellite at 4.2 Re traverses the plasma sheet twice an orbit and actuallysamples higher fluxes than the GOES satellite which remains within the plasma sheet theentire simulation at 6.62 Re.This completes the Example of the Magnetospheric Specification Model.AF-GEOSpace User’s <strong>Manual</strong>: Version 2.5 357
16) Ionospheric Plasma Bubbles: Flux Tube SpecificationThe following example demonstrates the use of the BFOOTPRINT Application Module, theBFIELD Application Module, and a variety of visualization tools.Goal: Ionospheric plasma bubbles are depletions in ionospheric electron density which aredetectable by instruments on the DMSP and ROCSAT satellites. If satellites ondifferent orbits detect depletions in a particular region at nearly the same time, it ispossible that they may be sampling parts of a larger plasma bubble structure. The goalof this example is to estimate the spatial extent of an ionospheric plasma bubblemeasured by multiple spacecraft by mapping geomagnetic field lines from locationswithin the bubble. The volume defined by this collection of field lines will be used toestimate the full extent of the plasma depletion.Start an AF-GEOSpace session and set global input parameters• Initiate AF-GEOSpace via the Start menu (Start > Programs > AFGeospace > AFGeospace),the desktop icon, or by double-clicking on the file $AFGS_HOME\bin\AFGeospace.bat.Maximize the AF-GEOSpace user interface window. The shell windows can be minimizedbut must remain open for AF-GEOSpace to function.• For this static run, set the Global Parameters as follows: Start:Year=2000, Day=62,UT=13:15. Click on the Globals: Archive option to the right of the time input fields to loadthe archived NGDC parameter values (Kp=2, SSN=130, F10.7=209.6, and Ap=7).Create the DMSP and ROCSAT orbit data sets• Select the Applications option in the Module menu. Available Modules and Active Moduleslists will appear.• Select BFOOTPRINT-APP from the Available Modules list. An APPBFootprint object willbe added to the Active Modules list and a set of B-Field Footprint Application options willappear in the Environment Window• For each satellite that encountered a plasma bubble, we will trace field lines from threelocations along the portion of the orbit path intersecting the bubble, i.e., from the plasmabubble entry and exit points and from one point between the two. To accomplish this, makethe following changes:- While the Setup: Footprint Model option is selected, set the Foot Line Inputs to be FromSatellite, change the Satellite Orbit Steps to “3”, and select the Internal B-field optionIGRF(1945-2010).- Select the Setup: Satellite option and Ephemeris Data options will appear. Leave the FromFile option selected and click the File button and a window will appear showing the contentsof the folder $AFGS_HOME\models\data\EPHEMERIS. Click on the file icon labeled“orbits_for_ex16.txt” and click the Open button. A list of three satellites will appear in the358AF-GEOSpace User’s <strong>Manual</strong>: Version 2.5
Current Element File list in the middle of the window.• Select the DMSP-F12 entry and the satellite name and the reference time associated with theorbital elements will appear in boxes below the list box. DMSP-F12 measured a plasmadepletion for 4 minutes. To generate the orbit for this interval, edit the text boxes such thatT_start = “03/02/00 12:50:00.0”, T_stop = “03/02/00 12:54:00.0”, and Time Step(s) = “10”.Select the Run/Update option in the Edit menu to create the orbit data set. When completed,the Model Status box will indicate that the “MODEL IS READY AND UP TO DATE.”• Process the next two satellites of the Current Element File list in the same manner byrepeating the instructions in the last three bullets twice but changing the choices used in thelast bullet each time. This will result in three AppBFootprint items in the Active Modules list.- For DMSP-F15, which passed thru a plasma depletion for six minutes, edit the text boxessuch that T_start = “03/02/00 13:28:30.0”, T_stop = “03/02/00 13:34:30.0”, and Time Step(s)= “10”.- For ROCSAT, which passed thru a plasma depletion for more than a minute, edit the textboxes such that T_start = “03/02/00 13:14:25.0”, T_stop = “03/02/00 13:15:35.0”, and TimeStep(s) = “10”.Display the Earth and Time/Date Annotation• Select the Graphics option in the Module menu. Available Modules and Active Modules listswill appear. Scroll down the Available Modules list and select Earth. An Earth object willbe added to the Active Modules list and a set of Earth Options will appear in the EnvironmentWindow. Select CGM Grid from the Grid Options section and select Display and an Earthwith corrected geomagnetic coordinate grid will appear. Use the Viewport pulldown menu todeactivate (uncheck) the Show Color Bar and Perspective options.• Scroll up the Available Modules list and select Annotation. An Annotation object will beadded to the Active Modules list. Select the Show Date option and click Display. Adjust the Xand Y Position sliders so that the annotation appears in the upper left of the window.Display the DMSP and ROCSAT Orbit Paths with Traced Field Lines• Scroll down the Available Modules list and select Satellite. A Satellite object will be addedto the Active Modules list and a set of Satellite Options will appear in the EnvironmentWindow. Select the Satellite called DMSP-F12, select the Pop Label option, and clickDisplay and a short section of that orbit will appear over Southeast Asia. Use the left mousebutton to reposition the Earth to bring the orbit within view. Now scroll up the AvailableModules list and select Field Lines and a FieldLines object will be added to the ActiveModules list. Use the Data button to select the Footprint Lines options under the firstAppBFootprint listed and click Display. Increase the Line Width to “2” and use the Coloroption to change the field line color to match that of the orbit, i.e., red. Now zoom in usingthe right mouse button to get the following figure.AF-GEOSpace User’s <strong>Manual</strong>: Version 2.5 359
• Repeat the previous step once for DMSP-F15 and once for ROCSAT using theircorresponding field lines represented by the 2 nd and 3 rd AppBFootprint choices in the FieldLines Options Data list, respectively. As each new item is displayed, use the Color option tocolor all DMSP-F15 related items green and all ROCSAT related items yellow. Use the rightmouse button to zoom in and the window should resemble the following figure.360AF-GEOSpace User’s <strong>Manual</strong>: Version 2.5
• Because electrons move much more freely along magnetic field lines, this collection of fieldlines helps define a larger volume, i.e., a magnetic flux tube, where the plasma depletion wasobserved. Use the left/right mouse buttons to rotate/zoom the picture so you can see thecollection of field lines from the side as in the next figure. Note that the DMSP and ROCSATsatellite traverse this region at different altitudes and that the magnetic field lines straddle themagnetic equator and their footprints cluster near ±20º CGM.Create and Display a Single Flux Tube Enclosing the Traced Magnetic Field Lines• Select the Applications option in the Module menu. Available Modules and Active Moduleslists will appear. Select BFIELD-APP from the Available Modules list and an APPBFieldobject will be added to the Active Modules list and a set of B-Field Application Parameteroptions will appear in the Environment Window. Adjust the selections in the Generatesection such that Flux Tube is the only selected item. Select IGRF (1945-2010) in theInternal B-Field section and leave the External B-Field set to None. In the Flux Tube Inputssection leave the Geographic option selected and edit the other text boxes such that Lat =28.9, Long = 113.9, Alt(km) = 0.0, Diam(km) = 650, and Steps = 30. Select the Run/Updateoption in the Edit menu to create the flux tube data set. When completed, the Model Statusbox will indicate that the “MODEL IS READY AND UP TO DATE.”• Select the Graphics option in the Module menu. Available Modules and Active Modules listswill appear. Scroll down the Available Modules list and select Field Lines. A FieldLinesobject will be added to the Active Modules list and a set of Field Line Options will appear inthe Environment Window. Use the Data button to select Flux Tube under the AppBFieldoption and click Display. Change the Plot Type from Field Lines to Filled Surface and thenuse the Color option to change the tube color to white. Finally, use the Transparency optionAF-GEOSpace User’s <strong>Manual</strong>: Version 2.5 361
and move the transparency slider to 0.50. The figure should now resemble the following.• To get a view of just the satellite orbits and the flux tube they are traversing, select each ofthe first three FieldLines entries in the Active Modules lists and remove the check fromDisplay. Open the Animate Tool using the Edit menu and the Animate window will appear.Edit the text fields such that Time Start = “03/02/00 12:50”, Time End = “03/02/00 13:35”,and Time Step (Sec) = “60” and click the Update button.• View the sequence of satellites as they traverse the model of the plasma depletion flux tubeby clicking on the right-hand slider arrow in the Animate window. You will see DMSP-F12move northward during the first few minutes, ROCSAT move eastward starting at time362AF-GEOSpace User’s <strong>Manual</strong>: Version 2.5
13:14, and DMSP-F15 move northward starting at 13:28. With the Animate window sliderset at 12:51, the display should resemble the figure on the left above. Now rotate/translate theEarth to create the alternate view above. It is easier to see with these displays that while theDMSP spacecraft may have sampled the plasma depletion over a relatively wide set oflatitudes, the ROCSAT satellite seems to have just caught the lower edge of the flux tubestructure.This completes the Example of Ionospheric Plasma Bubbles: Flux Tube Specification.AF-GEOSpace User’s <strong>Manual</strong>: Version 2.5 363
17) Radar Auroral ClutterThe following example demonstrates the use of the Satellite Application Module (SATEL-APP),the AURORA Science Module, the EMITTER Graphics Module (to create a 3D radar fan), and avariety of visualization tools.Goal: Backscatter reflections from electron density irregularities aligned along the Earth’smagnetic field lines can contribute to radar clutter at high latitudes and thus degraderadar performance. Radar clutter is concentrated at points in space where the radar ispropagating perpendicular to the local magnetic field direction. Precipitating auroralelectrons following magnetic field lines contribute to these electron densityirregularities. The goal of this example is to use the position of the equatorward edgeof the auroral electron precipitation (observed by DMSP F12 at UT=00:36 on Day 50of 1999) and map out the magnetic field line surface defining where radar cluttermight first be experienced by radar penetrating into auroral latitudes. Specifically, wewill create a Kp-based statistical picture of where aurora might interfere with radaroperations on Cape Cod, MA.Start an AF-GEOSpace session and set global input parameters• Initiate AF-GEOSpace via the Start menu (Start > Programs > AFGeospace > AFGeospace),the desktop icon, or by double-clicking on the file $AFGS_HOME\bin\AFGeospace.bat.Maximize the AF-GEOSpace user interface window. The shell windows can be minimizedbut must remain open for AF-GEOSpace to function.• For this static run, set the Global Parameters as follows: Start:Year=1999, Day=50,UT=00:00. The Kp index and other parameters corresponding to the specified date and timemay now be obtained by clicking on the Globals: Archive option to the right of the time inputfields. The NGDC archived values of these parameters are then automatically loaded(Kp=5.7, SSN=85, F10.7=160.5, and Ap=67).Generate and View the DMSP-F12 Orbit in 3D• Select the Applications option in the Module menu. Available Modules and Active Moduleslists will appear. Scroll down the Available Modules list and select SATEL-APP (satelliteapplication). An AppOrbit object will be added to the Active Modules list and a set ofEphemeris Data options will appear in the Environment Window.• With the From File Element Type option selected, click on the File button and a window willappears showing the contents of the folder $AFGS_HOME\models\data\EPHEMERIS.Click on the file icon labeled “dmsp.txt” and click the Open button. A list of DMSP satelliteswill appear in the Current Element File list in the middle of the window.• Highlight the DMSP F12(USA 106) 01/11/99 05:05:47.00 entry of the Current Element Filelist as it contains the orbital elements suitable for our start time. Edit the text boxes such thatSat Name = “DMSP F12” and T-stop = ”02/19/99 02:00:00.0”. The latter change limits theorbit to 2-hours in length. Select the Run/Update option in the Edit menu to create the orbit364AF-GEOSpace User’s <strong>Manual</strong>: Version 2.5
data set. When completed, the Model Status box will indicate that the “MODEL IS READYAND UP TO DATE.”• Select the Graphics option in the Module menu. Available Modules and Active Modules listswill appear. Scroll down the Available Modules list and select Earth. An Earth object willbe added to the Active Modules list and a set of Earth Options will appear in the EnvironmentWindow. Select the Mag Dipole Grid option and select Display and the Earth will appear inthe default 3D window.• Now scroll down the Available Modules list and highlight Satellite. A Satellite object will beadded to the Active Modules list and a set of Satellite Options will appear in the EnvironmentWindow. Use the Satellite selector to choose DMSP-F12, change the Reference Frameselections from Geocentric to Inertial (ECI) and select Display, and the DMSP satellite orbitwill appear with DMSP behind the Earth. Move the Thickness slider slightly to the right.As mentioned in the introduction, DMSP-F12 instruments measuring precipitating particles wereused to determine that there was an equatorward boundary crossing observed at UT = 00:36 onday 50 of 1999. The observed boundary was located at magnetic local time (MLT) = 20.6 hoursand magnetic latitude (MLAT) = 58.5º. We will determine the statistical placement of the entireauroral equatorward edge and map the boundary out into the magnetosphere in the next section.Generate and Map the Auroral Equatorward Edge Boundary• Select the Science option in the Module menu. Available Modules and Active Modules listswill appear. Select AURORA from the Available Modules list. A SciAurora object will beadded to the Active Modules list and a set of AURORA Options will appear in theEnvironment Window. To generate a 3D grid of Aurora data, use the Grid Tool option in theEdit menu to open the Grid Tool window. Edit text boxes in the Rad, GEOC (Re) section sothat NPoints=7 and Max=2.0. Click OK to dismiss the window. In the Generate section of theAURORA Options, place a check next to Eq Edge. Select the IGRF(1945-2010) option in theInternal B-Field section and the Olson-Pfitzer ’77 option in the External B-Field section. Inthe Equatorward Edge Parameters section, select the Use single observation selection andtwo text boxes to the right will become active. Edit these text boxes such that MLT = 20.6and Observed MLAT = 58.5. Select the Run/Update option in the Edit menu to create theauroral data set. When completed, the Model Status box will indicate that the “MODEL ISREADY AND UP TO DATE.”• Select Graphics from the Modules menu. Available Modules and Active Modules lists willappear. Select Coord Slice from the Available Modules list and a Coord Slice object will beadded to the Active Modules list and a set of Coord Slice options will appear. Use the Databutton to select Elec. Number Flux under the SciAurora option and click Display. The modelelectron number flux for the current Kp value will appear. These are the electrons which canpotentially contribute to radar clutter. Select the Transparency option and move the slider toread 0.75 to reveal the geographical features.• To see the equatorward boundary and the mapped field lines, scroll down the AvailableModules list and select Field Lines and Field Line Options will appear. Use the Data buttonAF-GEOSpace User’s <strong>Manual</strong>: Version 2.5 365
to select the Eq. Edge option under SciAurora. Increase the Line Width to “2” and clickDisplay and a green boundary line will appear. Select Field Lines again from the AvailableModules list and a second FieldLines entry will appear in the Active Modules list. This timeuse the Data button to select the Mapped Eq. Edge option under SciAurora. Increase the LineWidth to “2” and click Display and magnetic field lines emanating from the boundary willappear. Highlight the Coord Slice entry in the Active Modules list (to show the color barunits) and the window should resemble the following figures. Note that at time 00:00,DMSP-F12 is in the southern hemisphere.• To see where the DMSP-F12 equatorward boundary measurement was made we need toview the satellite’s location at around UT=00:36. Use the Edit menu to open the AnimateTool and edit the text boxes to match the SATEL-APP settings used earlier, i.e., set TimeStart = “02/19/99 00:00:00.0”, Time End = ”02/19/99 02:00:00.0”, and Time Step(Sec)=”60”.Click the Update button and move the time slider to see that the satellite crosses theequatorward boundary line between times 00:36 and 00:37. This location (58.5 MLAT,MLT=20.6 hours) is used by the Aurora model to provide the statistical location of theequatorward auroral boundary shown at all other magnetic local times. Close the Animatewindow using the Done button. Use the Viewport menu to deactivate both the Show ColorBar and Perspective options.Create and Display a Radar Fan Originating from Cape Code, MA• To set up a new station for locating our radar fan, scroll down the Available Modules list andselect Station. A Station entry will be added to the Active Modules list and a set of Stationoptions will appear. Scroll down the Stations list and highlight the entry Otis ANGB (<strong>Air</strong>National Guard <strong>Base</strong>) and the properties of that station will appear in the four text boxesbelow. [If Otis ANGB is not already in the Stations list, then edit the four text boxes suchthat Lat=41.75, and Lon= -70.54, Altitude(Km)=0.0, Label=Otis ANGB. Click the Add buttonand there will now be an Otis ANGB entry in the Stations list.] Click Display and the stationwill appear out on Cape Code, MA. Use the Color option to change the station color toyellow by clicking on the color wheel that appears. Use the left/right mouse buttons torotate/zoom the view to reproduce the following figure.366AF-GEOSpace User’s <strong>Manual</strong>: Version 2.5
• To setup a radar fan, scroll up the Available Modules list and select Emitter and Emitteroptions will appear. Highlight the Otis ANGB entry in the Origin Station list and clickDisplay and a default emitter fan will be displayed. The actual radar at Otis ANGB has arange of approximately 4000 km, azimuth limits of from -12º to +245º, and elevation anglelimits of from 5º and 60º. To approximate these dimensions set the view sliders such thatView Horizontal = 240, View Vertical = 55, and View Range (Km) = 4000. Use theTransparency option and set the slider to 0.30. Zoom out to achieve the following view.Examine the Region Where Precipitating Electrons Might Cause Radar Auroral Clutter• Note that the radar fans penetrate poleward of the field lines mapped out along theequatorward edge boundary. It is in this region that radar auroral clutter is possible. To seewhere the radar actually penetrates the field lines carrying the auroral precipitation, highlightthe second FieldLines entry in the Active Modules list (representing the mapped field lines).Check the Plot Type section Filled Surface option. Click on the Transparency option andAF-GEOSpace User’s <strong>Manual</strong>: Version 2.5 367
move the transparency slider that appears to a value of 0.75. Rotating the Earth up and downlets you view the region poleward of the field line surface and reproduce the next figure.• To clean up the view for this next step, highlight the second FieldLines entry in the ActiveModules list and uncheck Display. To view the intersection of precipitating particles and theradar fan is to highlight the Coord Slice entry in the Active Modules list and select Cut Plane:C2. This action creates a coordinate slice along constant longitude meridians. Move thePosition Value slider between the values 0.3 and 0.425 to see where the particle flux and fanoverlap and obtain the view in the next figure. Radar clutter requires propagationperpendicular to the local magnetic field direction and the presence of precipitating electronsso the affected volume is actually much smaller than the one defined using thesevisualization tools.This completes the Example of Radar Auroral Clutter.368AF-GEOSpace User’s <strong>Manual</strong>: Version 2.5
PRODUCT INFORMATIONAF-GEOSpace was developed by the Space Vehicles Directorate of the <strong>Air</strong> <strong>Force</strong> ResearchLaboratory. Duplication or redistribution of AF-GEOSpace is prohibited.Members of the Version 2.5 development team are:• T. Hall, E. Holeman, and D. Madden: Institute for Scientific Research, Boston College• A. Ling and C. Roth: Space Plasmas and Interactions Group, AER, Inc.• G. P. Ginet: MIT Lincoln Laboratory• R. V. Hilmer: Space Vehicles Directorate, <strong>Air</strong> <strong>Force</strong> Research LaboratoryContributors, consultants, and former team members: D. Anderson, S. Basu, R. Biasca, G.Bishop, D. Bilitza, W. Borer, D. Brautigam, T. Bullet, R. Daniell, M. Dryer, D.P. Gallagher, K.Groves, M. S. Gussenhoven, S. L. Huston, M. Kendra, A. Long, J. Lopriore, A. Mazzella, W.McNeil, E. G. Mullen, K. L. Perry, F. Rich, J.L. Roeder, J.A. Secan, M.A. Shea, J.-H. Shue, D.Smart, M. Smitham, M. F. Tautz, N. Tsyganenko, J. Wise.This work was supported at Boston College by AFRL contracts FA8718-06-C0015 and FA8718-10-C-0001, at AER, Inc. by AFRL contract FA8718-05-C-0036, and at MIT Lincoln Laboratoryby AFRL contract FA8721-10-C-0007.To report program bugs, get technical help, or obtain a copy of AF-GEOSpace, please contactRobert.Hilmer@us.af.mil. Comments on AF-GEOSpace’s capabilities and suggestions for futureversions are appreciated.AF-GEOSpace User’s <strong>Manual</strong>: Version 2.5 369
ERRATAWhile the AF-GEOSpace Version 2.5 software has been extensively tested, there remain knownsoftware bugs. In most cases, each bug listed is labeled using the most relevant entry in the Tableof Contents.AURORA Science Module: 3-D extensions (using Edit Menu Grid Tool option) to get GriddedData at radii greater than 10 Re do not function when selecting the Tsyganenko ’87 or ’89external B-Field models.COLOR MAP Graphical Option: Curve option not functional.CUTOFF Science Module: Locks up if Cartesian Grid Tool is used with point (0, 0, 0).DATA MAP Graphical Option: Log10 not functioning properly when applied to thePARAMESH related graphical objects.Edit Menu-Data Tool: During the animation of dynamic run results, the selected Data fieldlabel will vanish but the displayed Data Viewer window values remain valid.EMITTERS Graphics Module: Tracking feature is not functional.Global Inputs Graphics Module: Values do not plot properly in 1D across year boundary.GRID Data Module: “Select Data Parameters to Load” messages does not update until userleaves and then returns to the active GRID Data module.ISPM Science Module: <strong>Software</strong> my lockup if input formats are not followed, e.g., inserting“2.0” instead of “B2.0” as a Backg. Class input or inserting a Flare Lat (deg N) > 90 degrees.For hints on possible input format problems, check the file called “dbg.txt” in the ISPM foldergenerated in the scratch folder at run time.LET-APP Application Module: When setting the Sat Location using the From File option viathe Attrib… button, the orbit element reference time may not properly register and must bemanually corrected by the user. To see if this occurred, first make note of the satellite referencetime while the Chime Satellite File Options window is still open. The reference time appearsafter the satellite name and contains the date and time, e.g., “08/23/06 20:56:43.00”. Next selectthe Sat Location: Orbit option and select the Attrib … button again and the Chime Satellite Orbitwindow will appear. Select Mean at the top of that window and update the T-ref text box withthe just noted. Select the Chime option at the top of the popup window to convert to Chimeelements. Finally, click OK and use the Run/Update option of the Edit menu to complete the run.METEOR IMPACT Science Module: File menu Save Model and Open Model options notfunctional.METEOR IMPACT MAP Application Module: File menu Open Model options notfunctional.MSM Science Module: Does not work across year boundary or for first day of a year.Model Status Text Box: For dynamic runs with large number of steps (>25), format of textwritten to Model Status box can become disrupted, i.e., multiple entries written to a single line.ORBIT PROBE Graphics Module: Output does not animate properly across year boundaries.370AF-GEOSpace User’s <strong>Manual</strong>: Version 2.5
PARAMESH: If in Static mode (no Stop time specified at top of Environment Window), theEdit: Animate slider must be moved manually because the animate button only works inDynamic mode.PARAMESH-COORDSLICE: Cut Plane C1 not working for spherical coordinates.PARAMESH-FIELDLINES II: For Current Group creation, option Last Position not workingproperly and Sphere not implemented.PPS Science Module: Expert mode locks if selecting Differential energy spectra and enteringSpectral Slope equal 1.00.RAYTRACE Application Module: File menu Open Model option not working when Jones-Stephenson 3D tracer is used. Solution is to save PIM Science Module results, record ray tracingGUI settings, and rerun tracer application.SATELLITE Graphics Module: Satellite orbits do not animate properly in 3D across yearboundaries.STOA Science Module: File menu Save Model option only saves module settings. To recreateresults use the Save Model and Open Model options, then use the Edit menu Run/Update optionto rerun the module.VOLUME Graphics Module: Does not work for data rendered in cylindrical coordinates.WBPROD Application Module: Text window for the All selection only shows results for thefirst satellite processed from the list. Model Save/Open not working. The numbers from the"Fade" column of the Text: All option text display should also appear as the second column ofthe Text: Summary text display. (suggest running only one satellite at a time).END OF DOCUMENTAF-GEOSpace User’s <strong>Manual</strong>: Version 2.5 371