Radiateur soufflant salle de bains B a d k a m e r ... - Calor
Radiateur soufflant salle de bains B a d k a m e r ... - Calor
Radiateur soufflant salle de bains B a d k a m e r ... - Calor

You also want an ePaper? Increase the reach of your titles
YUMPU automatically turns print PDFs into web optimized ePapers that Google loves.
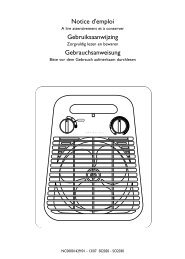
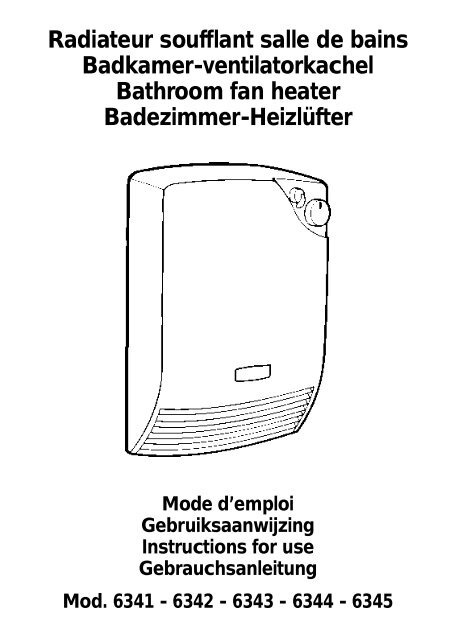
<strong>Radiateur</strong> <strong>soufflant</strong> <strong>salle</strong> <strong>de</strong> <strong>bains</strong>B a d k a m e r- v e n t i l a t o r k a c h e lB a t h room fan heaterB a d e z i m m e r- H e i z l ü f t e rMo<strong>de</strong> d’emploiG e b ru i k s a a n w i j z i n gI n s t ructions for useG e b r a u c h s a n l e i t u n gMod. 6341 - 6342 - 6343 - 6344 - 6345
4 63425634163436 63447 63458 6345 9 6345
F F r a n ç a i s .Vous venez d’acheter un radiateur <strong>soufflant</strong> mural et nous vous en re m e rcions. Cet appare i lbénéficie d’une protection spécifique pour les projections d’eau .D E S C R I P T I FFACE AVA N T.A . T h e rm o s t a t .B . Bouton Marche / A rrêt (mod. 6341-6342-6343).Bouton Arrêt / M a rche manuelle / Marche avec minuterie (mod. 6344).Bouton Arrêt / M a rche manuelle / Marche programmée (mod. 6345).C . P rogrammateur (mod. 6345).D . Grille <strong>de</strong> sortie d’air chaud.FACE ARRIÈRE.E . Grille d’entrée d’air fro i d .F. Vis <strong>de</strong> verro u i l l a g e .G . S u p p o rt <strong>de</strong> fixation.H . C o rdon d’alimentation.1. CARACTÉRISTIQUES TECHNIQUESR é f é re n c e sP u i s s a n c eP o i d sDimensions (H. x L. x P.)I n t e rupteur Marc h e / A rr ê tT h e rmostat avec position hors-gelChoix <strong>de</strong> la puissanceP rogrammateur 24 hMinuterie 2 h63416342750/1500 W 2000 W2,8 kg 2,8 kg386 x 290 x 100 mmO u iO u iO u iO u iO u iN o nN o nN o nN o nN o n63431000 / 2000 W2,8 kg63442000 W2,8 kg63452000 W2,8 kg386 x 290 x 100 mm 386 x 290 x 100 mm 386 x 290 x 100 mmO u iO u iO u iN o nN o nO u iO u iN o nN o nO u iO u iO u iN o nO u iN o n2. TENSIONVo t re appareil est prévu pour fonctionner en 230-240 V, 50 Hz monophasé. Il est inutile <strong>de</strong> lebrancher sur une prise <strong>de</strong> courant avec terre, car, conformément aux normes, c’est un appare i l<strong>de</strong> Classe II, donc double isolement .
3. AV E RT I S S E M E N T S■ Cet appareil est <strong>de</strong>stiné à ê t re exclusivement fixé au mur (voir paragraphe «10. Installation»).■ Ne le placez pas juste en <strong>de</strong>ssous d’une prise murale.■ Il doit être installé <strong>de</strong> sorte que les interrupteurs ou autres dispositifs <strong>de</strong> comman<strong>de</strong> nepuissent pas être touchés par une personne utilisant la baignoire ou la douche.■ Cet appareil est <strong>de</strong>stiné à un usage domestique uniquement. Il ne peut donc pas être utilisépour une application industrielle.■ N ’ i n t roduisez jamais rien à l’intérieur <strong>de</strong>s grilles.■ S u rveillez votre appareil lors <strong>de</strong> la pre m i è re mise en fonctionnement.■ Il est toutefois normal qu’il se dégage pendant les premiers instants une légère o<strong>de</strong>ur lors <strong>de</strong>la pre m i è re mise en route ou après un nettoyage (dépôt <strong>de</strong> poussière ) .■ Il est conforme aux directives 73/23/CEE et 89/336/CCE.F4. SÉCURITÉI M P O RTANT :Le marquage «NE PAS COUVRIR» sur votre appareil indique que les grilles d’entrée et<strong>de</strong> sortie d’air ne doivent pas être obstruées lors <strong>de</strong> son utilisation et que rien ne doitpouvoir empêcher la libre circulation <strong>de</strong> l’air, sinon il se mettrait en mo<strong>de</strong> «SÉCURITÉ».Mo<strong>de</strong> «SÉCURITÉ».En cas d’échauffement anormal, un limiteur <strong>de</strong> sécurité coupe automatiquement le fonctionne m e n t .Dans ce cas, mettez le bouton B sur la position 0, supprimez la cause d’échauffement et lorsquela température <strong>de</strong> l’appareil re<strong>de</strong>vient normale (15 mn environ), vous pouvez re m e t t re en marc h el ’ a p p a reil en positionnant le bouton B sur la position ●.Si le défaut réapparaît après avoir remis en marche, nous vous conseillons <strong>de</strong> contacter votreréparateur agréé.Pour couper l’alimentation <strong>de</strong> votre appareil : mettez l’interrupteur Marc h e / A rrêt B sur laposition 0.5. UTILISATION EN SALLE DE BAINSPour la France : la construction <strong>de</strong> cet appareil permet <strong>de</strong> l’utiliser dans toutes les pièces <strong>de</strong> lamaison, même celles présentant <strong>de</strong>srisques <strong>de</strong> projections d’eau : cuisine, <strong>salle</strong><strong>de</strong> <strong>bains</strong>, etc.L’installation électrique <strong>de</strong> la pièce, l’installation<strong>de</strong> l’appareil et son utilisation doiventcependant être conformes aux normes env i g u e u r. La norme NFC 15-100 définit 4volumes dans la <strong>salle</strong> <strong>de</strong> <strong>bains</strong> selon leschéma ci-contre (0, 1, 2, 3).Cet appareil peut être utilisé uniquementdans les volumes 2 et 3 d’une telle pièce.Pour les autres pays : c o n f o rmez-vous àla législation en vigueur.
F6. MISE EN MARCHEa) Modèle 6342 (fig. 4).Placez le bouton B sur la position ●.- L’ a p p a reil peut délivrer alors une puissance maxi <strong>de</strong> 2000 W régulée en fonction <strong>de</strong> la positiondu bouton <strong>de</strong> thermostat A.- Vo t re appareil fonctionnera jusqu’à ce que vous replaciez le bouton B sur la position 0 : arr ê t .b) Modèles 6341 (750/1500 W) et 6343 (1000/2000 W) (fig. 5).Vous pouvez choisir la puissance la plus appropriée en fonction <strong>de</strong> la rapidité <strong>de</strong> montée en tempé r a t u re désirée dans la pièce.Pour obtenir 750 W (Mod. 6341) ou 1000 W (Mod. 6343), placez le bouton B sur la position ●.Pour obtenir 1500 W (Mod. 6341) ou 2000 W (Mod. 6343), chauffage rapi<strong>de</strong> <strong>de</strong> la pièce, placezle bouton B sur la position ● ●.- Dans les <strong>de</strong>ux cas, la température <strong>de</strong> la pièce sera régulée en fonction <strong>de</strong> la position du bouton<strong>de</strong> thermostat A.- Vo t re appareil fonctionnera jusqu’à ce que vous replaciez le bouton B sur la position 0 : arr ê t .c) Modèle 6344 (fig. 6).Placez le bouton B sur la position ●.- L’ a p p a reil peut délivrer alors une puissance <strong>de</strong> 2000 W régulée en fonction <strong>de</strong> la position dubouton <strong>de</strong> thermostat A.- Vo t re appareil fonctionnera jusqu’à ce que vous replaciez le bouton B sur la position 0 : arr ê t .- En plaçant le bouton B sur la position , l’appareil fonctionnera pendant une durée <strong>de</strong> 2 heure set sera toujours régulé par le therm o s t a t .- Au bout <strong>de</strong>s 2 heures, l’appareil s’arrêtera <strong>de</strong> fonctionner. Pour le re m e t t re en route, tourn e zle bouton sur la position ● puis <strong>de</strong> nouveau sur la position “minuterie” si vous voulez re l a n-cer un cycle <strong>de</strong> 2 heure s .d) Modèle 6345 (fig. 7).Vo t re appareil peut être mis en marche manuellement ou par pro g r a m m a t i o n .Dans les <strong>de</strong>ux cas,v o t re appareil délivrera une puissance <strong>de</strong> 2000 W régulée en fonction <strong>de</strong> la position du bouton<strong>de</strong> thermostat A.■ Mise en marche manuelle.Placez le bouton B sur la position ●.Vo t re appareil fonctionnera jusqu'à ce que vous replaciez le bouton B en position 0.■ Mise en marche pro g r a m m é e .To u rnez le bouton B sur la position Programmation (fig. 7).Le programmateur vous permet <strong>de</strong> programmer <strong>de</strong>s temps <strong>de</strong> fonctionnement et <strong>de</strong>s tempsd ’ a rrêt <strong>de</strong> votre appareil par intervalle <strong>de</strong> 30 mn minimum sur une pério<strong>de</strong> <strong>de</strong> 24 h.- Vous <strong>de</strong>vez tout d’abord mettre à l’heure l’horloge <strong>de</strong> l’appareil en tournant le disque du programmateurvers la dro i t e afin <strong>de</strong> positionner le chiff re indiquant l’heure par rapport au re p è resur le boîtier (fig. 9).- Ensuite, t i rez les ergots vers l’extérieur pour les pério<strong>de</strong>s <strong>de</strong> fonctionnement choisies.Exemple : si vous voulez programmer votre appareil pour chauffer votre <strong>salle</strong> <strong>de</strong> <strong>bains</strong> <strong>de</strong> 6 h à8 h du matin, t i rez vers l’extérieur les 4 ergots situés entre les graduations 6 et 8 (fig. 9).Vo t re appareil ainsi programmé se mettra en route tous les jours <strong>de</strong> 6 h à 8 h du matin et serarégulé en fonction <strong>de</strong> la position du therm o s t a t .
Nota : vous pouvez arrêter manuellement votre appareil en cours <strong>de</strong> fonctionnementp rogrammé en positionnant le bouton B sur 0 ou le faire fonctionner en <strong>de</strong>hors <strong>de</strong>s heure sp rogrammées en positionnant le bouton B sur la position marche manuelle ●, ceci sans modifierv o t re programmation quotidienne.F7. RÉGLAGE DU THERMOSTATVo t re appareil est équipé d’un thermostat d’ambiance A qui permet <strong>de</strong> maintenir la températureconstante choisie dans la pièce à chauff e r. La position maxi assure la marche continue <strong>de</strong> l’appa reil dans <strong>de</strong>s conditions normales d’utilisation. Les positions interm é d i a i res correspon<strong>de</strong>nt auxd i ff é rents réglages <strong>de</strong> température et assurent automatiquement les arrêts et remises en ro u t e<strong>de</strong> l’appare i l .- Position 9 : plus chaud.- Position 1 : moins chaud.Dès que la température ambiante désirée est atteinte, l’appareil s’arrête et se remet automatiquementen marche afin <strong>de</strong> maintenir cette température .8. POSITION HORS-GELCette position vous permettra <strong>de</strong> maintenir automatiquement la température au-<strong>de</strong>ssus <strong>de</strong> 5°Cdans un local normalement isolé et d’un volume inférieur à 30 m 3 pour une température extéri e u re supérieure à - 10°C.- Placez le bouton thermostat A sur la position .- Placez le bouton B sur la position ● : marc h e .9. INSTA L L ATION MURALEA s s u rez-vous que l’appareil soit bien positionné dans le bon sens, boutons <strong>de</strong> comman<strong>de</strong>en haut à dro i t e .Pose et branchement <strong>de</strong> l’appare i l .■ Installez impérativement votre appareil verticalement, dans le sens prescrit sur le schéma n° 2.■ Vous <strong>de</strong>vez raccor<strong>de</strong>r votre appareil à un poste fixe en position verticale (le boîtier <strong>de</strong> comman<strong>de</strong>se trouvant à droite <strong>de</strong> l’appareil) et suivant la prescription en vigueur.■ Avant d’installer votre appareil, dévissez le support mural situé au dos <strong>de</strong> votre appare i l .■ Utilisez les moyens d’installation adéquats (vis + chevilles) pour installer le support mural G surle mur.■ Fixez le support mural G sur le mur, à l’emplacement désiré, en respectant par rapport au sol,p a rois, etc. les distances minimales prescrites. (Fig. 2)C o n f o rmément aux normes, vous ne <strong>de</strong>vez pas adapter à ce cordon une fiche pour branchementsur une prise.Lors du raccor<strong>de</strong>ment, le cordon <strong>de</strong>vra être coupé afin <strong>de</strong> ne gar<strong>de</strong>r que la longueur nécessaireau branc h e m e n t .Pour la France, l’appareil doit être installé conformément à la norm eNFC 15-100. Une coupure bi-polaire doit être prévue sur l’installation électrique <strong>de</strong> votrehabitation. Cet interrupteur doit avoir une ouverture <strong>de</strong> contact <strong>de</strong> 3 mn.
F■ A c c rochez l’appareil conformément au <strong>de</strong>ssin.■ R e p é rez les 2 fentes d’accrochage situées au dos <strong>de</strong> votre appareil :- placez l’appareil contre le mur, la fente supérieure au-<strong>de</strong>ssus du support mural,- faites glisser votre appareil vers le bas jusqu’à accrochage <strong>de</strong>s 2 attaches supérieure et inféri e u re ,- verrouillez à l’ai<strong>de</strong> <strong>de</strong> la vis F livrée avec le support mural (fig. 3).■ P renez éventuellement conseil auprès d’un spécialiste.10. ENTRETIENL’ a p p a reil ne nécessite aucun entretien part i c u l i e . r■ Utilisez un chiffon doux pour enlever la poussière .■ Humidifiez le chiffon pour enlever une tache.■ Au moins une fois par an, nettoyez les grilles avec un aspirateur.Pour ces opérations, il est impératif <strong>de</strong> mettre votre appareil sur la position arr ê t .I m p o rtant : n’utilisez jamais <strong>de</strong> produits abrasifs qui risqueraient <strong>de</strong> détériorer le re v ê t e m e n t .■ Un nettoyage plus complet ne peut être réalisé que par un réparateur agréé.■ Cette intervention n’est pas prise en compte dans le cadre <strong>de</strong> la garantie.Changement <strong>de</strong> cord o n .Si le cordon d’alimentation est endommagé, faites-le obligatoirement remplacer par un centres e rvice agréé, <strong>de</strong>s outils spéciaux étant nécessaires pour le démontage <strong>de</strong> cet appare i l .11. EN CAS DE PROBLÈMEP ro b l è m eVo t re appareil ne chauff ep a s .C a u s e sIl n’est pas branché.Le bouton Marc h e / A rr ê test sur 0.Le thermostat est réglé surune position trop faible parr a p p o rt à la température<strong>de</strong> la pièce.En cas d’échauff e m e n ta n o rmal, un limiteur <strong>de</strong>sécurité coupeautomatiquement lefonctionnement <strong>de</strong>l ’ a p p a re i l .Ex.: Empoussiérageexcessif <strong>de</strong> la grilled’entrée d’air (E)S o l u t i o n sB r a n c h e z - l e .Placez-le en position ●.Placez le thermostat sur uneposition plus élevée.Mettez le bouton sur la position 0,supprimez la caused ’ é c h a u fement. Lorsque lat e m p é r a t u re <strong>de</strong> l’appareil re d e v i e n tn o rmale, remettez l’appareil enm a rche avec la position ●.Pour tout autre problème, prenez contact avec un centre service agréé (liste jointe ou sur 3615C A L O R ) .I m p o rtant : cet appareil ne peut être réparé qu’à l’ai<strong>de</strong> d’outils spéciaux.
NL3. BELANGRIJK■ Dit apparaat is uitsluitend bestemd om aan <strong>de</strong> wand bevestigd te word e n(zie hoofdstuk 10).■ Plaats het apparaat nooit vlak on<strong>de</strong>r een stopcontact.■ Het moet zodanig wor<strong>de</strong>n geïnstalleerd dat <strong>de</strong> schakelaars of overige bedieningsknoppenniet bereikbaar zijn voor <strong>de</strong> persoon die zich in het bad of on<strong>de</strong>r <strong>de</strong> douche bevindt.■ Dit apparaat is uitsluitend bestemd voor huishou<strong>de</strong>lijk gebruik en mag dus niet wor<strong>de</strong>n gebru i k tvoor industriële doelein<strong>de</strong>n.■ Steek nooit iets in <strong>de</strong> ro o s t e r s .■ Houd het apparaat in <strong>de</strong> gaten wanneer u het voor <strong>de</strong> eerste keer in gebruik neemt.■ Bij <strong>de</strong> eerste inwerkingstelling van het apparaat, of na reiniging hiervan (stofafzetting), kan er<strong>de</strong> eerste minuten een lichte geur wor<strong>de</strong>n verspre i d .■ Het apparaat is uitgevoerd volgens <strong>de</strong> richtlijnen 73/23/EEG en 89/336/EEG.4. VEILIGHEIDBELANGRIJK : De inscriptie «NIET BEDEKKEN» op het apparaat wijst erop dat <strong>de</strong> luchtinlaat-en luchtuitlaatroosters nooit tij<strong>de</strong>ns het gebruik mogen wor<strong>de</strong>n afgesloten endat geen enkel obstakel <strong>de</strong> luchtcirculatie mag verh i n d e re n .Is dit wel het geval, danw o rdt het apparaat automatisch op <strong>de</strong> «VEILIGHEIDSSTAND» geschakeld.« V E I L I G H E I D S S TA N D » .Bij overv e rhitting wordt het apparaat automatisch door een beveiligingsschakelaar buiten werkinggesteld.Zet in dit geval <strong>de</strong> knop B op 0 en hef <strong>de</strong> oorzaak van <strong>de</strong> overv e rhitting op. Zodra <strong>de</strong> temperatuurweer normaal is (na ongeveer 15 min.), kunt u het apparaat weer in werking stellen doorknop B op ● af te stellen.Doet <strong>de</strong> storing zich daarna opnieuw voor, dan ra<strong>de</strong>n we u aan contact op te nemen met <strong>de</strong>C o n s u m e n t e n s e rvice van TEFAL Ne<strong>de</strong>rland BV (tel. 0318-519058) of TEFAL Belgium NV (tel.071825211), of een an<strong>de</strong>re, erken<strong>de</strong> re p a r a t e u r.Uitschakelen van <strong>de</strong> stroomtoevoer : Zet <strong>de</strong> aan/uit-schakelaar B op 0 .5. GEBRUIK IN DE BADKAMERAlleen voor Ne<strong>de</strong>rland : De elektrische installatie van het vert rek, <strong>de</strong> installatie van het apparaaten het gebruik ervan dienen te voldoen aan <strong>de</strong>n o rmen, die in Ne<strong>de</strong>rland van kracht zijn (NEN1010 ).In Ne<strong>de</strong>rland gel<strong>de</strong>n in <strong>de</strong> badkamer <strong>de</strong>volgen<strong>de</strong> bepalingen. In <strong>de</strong> tekeningen zijn <strong>de</strong>meest voorkomen<strong>de</strong> situaties geschetst. In <strong>de</strong>d a a rop aangegeven zone 3 mag <strong>de</strong> kachel geïnsta l l e e rd word e n .Bovendien mag in zone 3 eenwandcontactdoos (= stopcontact) wor<strong>de</strong>n aangebracht,mits <strong>de</strong>ze <strong>de</strong>el uitmaakt van een eindgroep die is beveiligd door een aard l e k s c h a k e l a a rvan 30 milli-Ampère . Mocht <strong>de</strong> badkamer echterniet voorzien zijn van een aard l e k s c h a k e l a a , rdan dient het apparaat aangesloten te wor<strong>de</strong>n opeen dubbelpolige waterdichte schakelaar.Voor <strong>de</strong> overige lan<strong>de</strong>n : installatie volgens <strong>de</strong> gel<strong>de</strong>n<strong>de</strong> voorschriften.
6. INWERKINGSTELLINGa) Mo<strong>de</strong>l 6342 (fig. 4).Zet <strong>de</strong> knop B op ●.- Het apparaat kan nu maximaal 2000 W leveren, overeenkomstig <strong>de</strong> stand van <strong>de</strong> therm o -staatknop A.- Het apparaat zal net zolang in werking blijven tot u <strong>de</strong> knop B weer op 0 (Uit) zet.NLb) Mo<strong>de</strong>llen 6341 (750/1500 W) en 6343 (1000/2000 W) (fig. 5).Naar gelang <strong>de</strong> snelheid waarmee u het vert rek op <strong>de</strong> gewenste temperatuur wilt brengen, kuntu het hiervoor geschikte vermogen kiezen.Voor 750 W (Mod. 6341) of 1000 W (Mod. 6343) stelt u knop B af op ●.Voor 1500 W (Mod. 6341) of 2000 W (Mod. 6343), ofwel een snelle verw a rming van het vert re k ,stelt u knop B af op ● ●.- In bei<strong>de</strong> gevallen zal <strong>de</strong> temperatuur in het vert rek geregeld wor<strong>de</strong>n volgens <strong>de</strong> stand van <strong>de</strong>t h e rmostaatknop A.- Het apparaat zal net zolang in werking blijven tot u <strong>de</strong> knop B weer op 0 (Uit) zet.c) Mo<strong>de</strong>l 6344 (fig. 6).Zet <strong>de</strong> knop B op ●.- Het apparaat kan nu maximaal 2000 W leveren, overeenkomstig <strong>de</strong> stand van <strong>de</strong> therm o -staatknop A.- Het apparaat zal net zolang in werking blijven tot u <strong>de</strong> knop B weer op 0 (Uit) zet.- Wanneer u <strong>de</strong> knop B op <strong>de</strong> 2-uurs timer zet, zal het apparaat geduren<strong>de</strong> 2 uur verw a rm e n .Ook in dit geval wordt <strong>de</strong> temperatuur altijd geregeld door <strong>de</strong> therm o s t a a t .- Naar 2 uur wordt het apparaat automatisch uitgeschakeld. Om het apparaat weer in werkingte stellen, dient u <strong>de</strong> knop op ● te zetten. Wenst u opnieuw een droogcyclus te starten, danzet u <strong>de</strong> knop vervolgens weer op <strong>de</strong> 2-uurs timer.d) Mo<strong>de</strong>l 6345 (fig. 7).Het apparaat kan zowel met <strong>de</strong> hand als met behulp van <strong>de</strong> pro g r a m m e e r s t a n din werkingw o r<strong>de</strong>n gesteld. In bei<strong>de</strong> gevallen wordt een vermogen van 2000 W geleverd, waarbij <strong>de</strong> temperatuurgeregeld wordt volgens <strong>de</strong> stand van <strong>de</strong> thermostaatknop A.■ Handmatige inschakeling.Zet <strong>de</strong> knop B op ●.Het apparaat zal net zolang verw a rmen tot u knop B weer op 0 (uit) zet.■ G e p ro g r a m m e e r<strong>de</strong> inschakeling.Draai knop B op <strong>de</strong> programmeerstand (fig. 7).U kunt nu met <strong>de</strong> tijdklok <strong>de</strong> tij<strong>de</strong>n pro g r a m m e ren waarop het apparaat ingeschakeld of uitgeschakeldmoet word e n .Dit gebeurt per 30 min. over een perio<strong>de</strong> van 24 uur.- H i e rvoor dient u, om te beginnen, <strong>de</strong> klok op het apparaat gelijk te zetten door <strong>de</strong> schijf van<strong>de</strong> tijdklok naar rechts te draaien om het uurcijfer tegenover het merkteken op het apparaat teplaatsen (fig. 9).- Tre k v e rvolgens <strong>de</strong> pennetjes van <strong>de</strong> gekozen verw a rmingstij<strong>de</strong>n naar buiten.Voorbeeld : wenst u het apparaat te pro g r a m m e ren voor verw a rming van uw badkamer tussen6 en 8 uur ’s morgens, dan trekt u <strong>de</strong> 4 pennetjes tussen <strong>de</strong> cijfers 6 en 8 naar buiten (fig. 9).Het aldus gepro g r a m m e e r<strong>de</strong> apparaat zal <strong>de</strong> badkamer nu elke dag verw a rmen van 6 tot 8 uur ’sm o rgens, waarbij <strong>de</strong> temperatuur geregeld wordt volgens <strong>de</strong> stand van <strong>de</strong> therm o s t a a t k n o p .
NLN.B. : het apparaat kan tij<strong>de</strong>ns <strong>de</strong> geprogrammeer<strong>de</strong> werking met <strong>de</strong> hand wor<strong>de</strong>n uitgesch a k e l ddoor knop B op 0 te zetten, of buiten <strong>de</strong> gepro g r a m m e e r<strong>de</strong> tij<strong>de</strong>n in werking word e ngesteld door knop B op ● (aan) te zetten. H i e rdoor zal <strong>de</strong> dagelijkse programmering niet gewijzigdword e n .7. INSTELLING VAN DE THERMOSTATHet apparaat is voorzien van een kamert h e rmostaat A, zodat het te verw a rmen vert rek constantop <strong>de</strong>zelf<strong>de</strong> temperatuur wordt gehou<strong>de</strong>n. Op <strong>de</strong> hoogste stand zal het apparaat continu werkenon<strong>de</strong>r normale gebru i k s o m s t a n d i g h e d e n .De tussenstan<strong>de</strong>n zijn bestemd voor het instellenvan <strong>de</strong> verschillen<strong>de</strong> temperaturen en zorgen voor <strong>de</strong> automatische in- en uitschakeling van heta p p a r a a t .- Stand 9 : maximale warm t e .- Stand 1 : minimale warm t e .Wanneer <strong>de</strong> gewenste temperatuur is bereikt, wordt het apparaat automatisch uitgeschakeld enwat later weer automatisch ingeschakeld tenein<strong>de</strong> <strong>de</strong> gewenste temperatuur te behou<strong>de</strong>n.8. VORSTVRIJSTA N DIn een normaal geïsoleerd vertrek met een volume van min<strong>de</strong>r dan 30 m 3 , kunt u op <strong>de</strong>zestand <strong>de</strong> temperatuur automatisch boven 5°C hou<strong>de</strong>n bij een buitentemperatuur van hoogst e n s - 10°C.- Zet <strong>de</strong> thermostaatknop A op .- Zet <strong>de</strong> knop B op ● ( a a n ) .9. BEVESTIGEN AAN DE MUURZ o rg dat het apparaat in <strong>de</strong> juiste richting is geplaatst en <strong>de</strong> bedieningsknoppen zichrechtsboven bevin<strong>de</strong>n.Bevestiging en aansluiting van het apparaat.■ Installeer het apparaat altijd verticaal, in <strong>de</strong> richting als aangegeven in fig. 2.■ U moet uw apparaat op een vaste contacdoos in verticale stand aansluiten (waarbij het bedieningskastjezich rechts van het apparaat bevindt), met inachtneming van <strong>de</strong> gel<strong>de</strong>n<strong>de</strong> voorschriften.■ A l v o rens het apparaat te installeren, moet <strong>de</strong> op <strong>de</strong> achterkant van het apparaat bevestig<strong>de</strong>wandsteun vor<strong>de</strong>n losgeschro e f d .■ G e b ruik <strong>de</strong> juiste bevestigingsmid<strong>de</strong>len (schroeven + pluggen) om <strong>de</strong> steun (G) aan <strong>de</strong> muurte bevestigen.■ Zet <strong>de</strong> steun (G) op <strong>de</strong> gewenste plaats aan <strong>de</strong> muur vast, waarbij rekening moet word e ngehou<strong>de</strong>n met <strong>de</strong> voorg e s c h reven minimum afstan<strong>de</strong>n t.o.v. <strong>de</strong> vloer, <strong>de</strong> wan<strong>de</strong>n, enz. (Fig. 2)O v e reenkomstig <strong>de</strong> normen mag u op dit snoer geen stekker bevestigen voor aansluitingop een stopcontact.Het snoer moet bij het aansluiten zodanig wor<strong>de</strong>n ingekort, dat alleen <strong>de</strong> voor <strong>de</strong> aansluitingbenodig<strong>de</strong> lengte wordt overg e h o u d e n .Voor Frankrijk moet het apparaat geïnstalleerd word e nvolgens <strong>de</strong> norm NFC 15-100. De elektrische installatie van <strong>de</strong> woning moet voorzien zijn vaneen dubbelpolige schakelaar. Deze schakelaar moet een contactopening van 3 mm bezitten.
■ Hang het apparaat op zoals aangegeven op <strong>de</strong> tekening.■ Bepaal <strong>de</strong> plaats van <strong>de</strong> 2 bevestigingsgleuven op <strong>de</strong> achterkant van het apparaat :- plaats het apparaat tegen <strong>de</strong> muur met <strong>de</strong> bovenste gleuf boven <strong>de</strong> wandsteun,- schuif het apparaat net zover naar bene<strong>de</strong>n totdat <strong>de</strong> bovenhaak en on<strong>de</strong>rhaak correct zijnv a s t g e z e t ,- zet het geheel met <strong>de</strong> bijgelever<strong>de</strong> schroef vast (fig. 3).■ Vraag eventueel advies aan een vakman.NL10. ONDERHOUDVoor dit apparaat is geen speciaal on<strong>de</strong>rhoud vere i s t .■ G e b ruik een zachte doek om het stof af te nemen.■ G e b ruik een vochtige doek om vlekken te verw i j d e re n .■ Maak minstens éénmaal per jaar met een stofzuiger <strong>de</strong> roosters schoon.Bij al <strong>de</strong>ze han<strong>de</strong>lingen moet het apparaat altijd in <strong>de</strong> 0-stand geschakeld zijn.Belangrijk : g e b ruik nooit schuurmid<strong>de</strong>len, aangezien <strong>de</strong>ze <strong>de</strong> lak kunnen aantasten.■ Een intensievere reiniging mag alleen maar door een bevoeg<strong>de</strong> reparateur wor<strong>de</strong>n uitgevoerd .■ Deze on<strong>de</strong>rh o u d s b e u rt wordt niet door <strong>de</strong> garantie ge<strong>de</strong>kt.Ve rvanging van het snoer.Een eventueel beschadigd netsnoer mag uitsluitend wor<strong>de</strong>n vervangen door <strong>de</strong> technischedienst van TEFAL Ne<strong>de</strong>rland BV of TEFAL Belgium NV, of een an<strong>de</strong>re erken<strong>de</strong> reparateur die over<strong>de</strong> benodig<strong>de</strong>, specifieke gereedschappen beschikt om het apparaat te <strong>de</strong>montere n .11. BIJ EVENTUELE PROBLEMENP ro b l e e mHet apparaat verw a rm tn i e t .O o rz a a kHet apparaat is nieta a n g e s l o t e nDe aan/uit-knop staat op 0.De thermostaat staat opeen te lage stand inv e rgelijking met <strong>de</strong>k a m e rt e m p e r a t u u . rO p l o s s i n gSluit het apparaat aan.Zet <strong>de</strong> knop op ●.Zet <strong>de</strong> thermostaat op een hogeres t a n d .Bij overv e rhitting wordt <strong>de</strong>werking van het apparaatautomatisch on<strong>de</strong>rbro k e ndoor eenv e i l i g h e i d s s c h a k e l a . a rVoorb: extreem veel stof inhet luchtinlaatrooster (E).Zet <strong>de</strong> knop op 0, en hef <strong>de</strong>o v e rv e rh i t t i n g s o o zaak r op.Wanneer <strong>de</strong> temperatuur van hetapparaat weer normaal is, kan hetapparaat opnieuw met <strong>de</strong> ● s t a n din werking wor<strong>de</strong>n gesteld.Neem voor alle an<strong>de</strong>re problemen contact op met <strong>de</strong> Consumentenservice van TEFAL Ne<strong>de</strong>rlandBV (tel. 0318-519058) of in België, van TEFAL Belgium NV ( tel. 071825211) of richt u tot eenerken<strong>de</strong> re p a r a t e u r.Belangrijk : dit apparaat kan uitsluitend gere p a re e d r wor<strong>de</strong>n met behulp van speciaal gere e d s c h a p .
E n g l i s h .ENGThank you for purchasing this wall-mounted fan heater. This appliance is specifically pro t e c t e dagainst splashes .D E S C R I P T I O NFRONT PA N E L .A . T h e rm o s t a t .B . Mod. 6341-6342-6343 : On/Off switch.Mod. 6344 : Switch Off / Manual use / 2 hours timer .Mod. 6345 : Switch Off / Manual use / P rogram .C . Mod. 6345 : 24 h pro g r a m m e r.D . Hot air outlet.REAR PA N E L .E . Cold air intake grill.F. Locking scre w s .G . Fastening bracket.H . Power lead.1. TECHNICAL CHARACTERISTICSR e f e re n c e6 3 4 16 3 4 26 3 4 36 3 4 46 3 4 5P o w e r750/1500 W2000 W1000 / 2000 W2000 W2000 WWe i g h t2,8 kg2,8 kg2,8 kg2,8 kg2,8 kgDimensions (H. x L. x D.)386 x 290 x 100 mm386 x 290 x 100 mm386 x 290 x 100 mm386 x 290 x 100 mmO n / O f dialYe sYe sYe sYe sYe sT h e rmostat with frost pro t e c t i o ns e t t i n gYe sYe sYe sYe sYe sChoice of powerYe sN oYe sN oN o24 h pro g r a m m e rN oN oN oN oYe s2 hours timerN oN oN oYe sN o2. VOLTA G EYour appliance is <strong>de</strong>signed to operate at a single-phase voltage of 230-240 V, 50 Hz. This is aClass II appliance, with dual insulation .
3. WA R N I N G S■ This appliance is <strong>de</strong>signed for wall-mounted installation (see installation chapter 10).■ Do not place it immediately below a wall power socket.■ It must be installed so that the dials or other control <strong>de</strong>vices cannot be touched by perso n s taking a bath or shower.■ This appliance is <strong>de</strong>signed solely for domestic use. It cannot there f o re be used for industriala p p l i c a t i o n s .■ Never insert anything insi<strong>de</strong> the grill.■ O b s e rve your appliance when turning it on for the first time.■ It is nonetheless normal for a slight odour to be smelt when the appliance is turned on for thefirst time or after cleaning (dust <strong>de</strong>posited on the appliance).■ It complies with directives 73/23/EEC and 89/336/EEC.ENG4. SAFETYI M P O RTANT :The indicate «DO NOT COVER» on your appliance means that the air intake and outletgrills must not be blocked during use and that nothing must be able to prevent air fro mc i rculating fre e l y, otherwise the appliance dials to «SAFETY» mo<strong>de</strong>.«SAFETY» mo<strong>de</strong>.In the event of abnormal heating, a safety limiter automatically cuts out the appliance.In this case, turn the B dial to 0, eliminate the cause of overheating and, once the temperatureof the appliance re t u rns to normal (approx. 15 min.), you can turn the appliance back on by turningdial B to position ●.If the fault reappears when you turn the appliance back on, we recommend that you contact ana p p roved service agent.To cut the power supply to your appliance : t u rn the On/Off dial B to position 0.5. USING THE APPLIANCE IN A BAT H R O O MPlease comply with applicable legislation.6. TURNING ON THE APPLIANCEa) Mo<strong>de</strong>l 6342 (fig. 4).Tu rn dial B to position ●.- The appliance can then generate a maximum power of 2000 W, regulated according to theposition of the thermostat dial A.- Your appliance will operate until you turn dial B back to position 0 : off .
ENGb) Mo<strong>de</strong>ls 6341 (750/1500 W) and 6343 (1000/2000 W) (fig. 5).You can choose the most appropriate power according to the re q u i red speed of the temperatu re increase in the ro o m .To obtain 750 W (Mod. 6341) or 1000 W (Mod. 6343), turn dial B to position ●.To obtain 1500 W (Mod. 6341) or 2000 W (Mod. 6343), for rapid heating of the room, turn dial Bto position ● ●.- In both cases, the room temperature must be regulated according to the position of the thermostatdial A.- Your appliance will operate until you turn dial B back to position 0 : off .c) Mo<strong>de</strong>l 6344 (fig. 6).Tu rn dial B to position ●.- The appliance can then generate a maximum power of 2000 W, regulated according to theposition of the thermostat dial A.- Your appliance will operate until you turn dial B back to position 0 : off .- If you turn dial B to position , the appliance will operate for 2 hours and will still be re g u l a t e dby the therm o s t a t .- After 2 hours, the appliance cuts out. To turn it on again, turn the dial to position ● then backto position if you wish to re s t a rt a 2 hours cycle.d) Mo<strong>de</strong>l 6345 (fig. 7).Your appliance can be turned on manually or by pro g r a m m i n g .In both cases, your appliance willgenerate a power of 2000 W, regulated according to the position of the thermostat dial A.■ Tu rning on the appliance manually.Tu rn dial B to position ●.Your appliance will operate until you turn dial B back to position 0.■ P rogramming the appliance.Tu rn dial B to position (fig. 7).With the pro g r a m m e r, you can programme the operating and stop times in intervals of at least30 min. over a 24 hour period.- You must first set the time on the appliance’s clock, by turning the programming dial to the right,in or<strong>de</strong>r to position the figure re p resenting the time against the mark on the housing (fig. 9).- Then pull the studs outward s to <strong>de</strong>fine the re q u i red operating periods.For example : if you wish to programme your appliance to heat your bathroom from 6 a.m. to8 a.m., pull out the 4 studs located between graduations 6 and 8 (fig. 9).A c c o rd i n g l y, your appliance will start up every day from 6 a.m. to 8 a.m. and will be re g u l a t e da c c o rding to the thermostat position.Nota : you can stop your appliance m a n u a l l yduring programmed operation by positioning dialB on 0 or operate it outsi<strong>de</strong> the programmed operating times by positioning dial B on manualoperation position ●, without modifying your daily pro g r a m m i n g .
7. ADJUSTING THE THERMOSTATYour appliance is equipped with an ambient thermostat A which maintains the chosen tempe r a t u re at a constant level in the room you wish to heat. The maximum position enablesc o n t inuous operation of the appliance in normal conditions of use. The intermediate positionsc o rrespond to the diff e rent temperature settings and automatically stop and re s t a rt the appliance.- Position 9 : hotter.- Position 1 : cooler.As soon as the re q u i red ambient temperature is reached, the appliance stops and re s t a rts automaticallyto maintain this temperature .ENG8. FROST PROTECTION SETTINGThis position enables you to automatically maintain the temperature above 5°C in an o rmally insulated room, with a volume of less than 30 m 3 , when the outer temperature isg reater than - 10°C.- Tu rn the thermostat dial A to position .- Tu rn dial B to position ● : on.9. INSTA L L ATION ON THE WA L LE n s u re that the appliance is correctly positioned in the right direction, with the control dialsin the top right-hand corn e r.Installing and connecting the appliance.■ Your appliance must be installed vert i c a l l y, in the direction shown in diagram n° 2.■ Connect your appliance to a fixed vertical unit (with the control box on the right-hand si<strong>de</strong> ofthe appliance) and in accordance with applicable re g u l a t i o n s .■ B e f o re installing your appliance, unscrew the wall bracket located on the back of the appliance.■ Use appropriate means of installation (screws + wall plugs) to install the wall bracket (G) on thew a l l .■ S e c u re the wall bracket (G) to the wall, at the re q u i red location, respecting the prescribed minimumdistances in relation to the floor, walls, etc. (Fig. 2)In compliance with norms, you must not fit a power plug onto this lead.When connecting, the lead must be cut, in or<strong>de</strong>r to keep no more than the length re q u i red forc o n n e c t i o n .If you are in any doubt consult a qualified electrician. A two-pole circ u i t - b re a k e rmust be installed in your home’s electrical installation. The circ u i t - b reaker must have a 3 mmcontact gap.■ Hook the appliance in place according to the drawing.■ Note the 2 hooking slots located on the back of your appliance :- place the appliance against the wall, with the upper slot above the wall bracket,- sli<strong>de</strong> your appliance downwards until it hooks into the 2 upper and lower attachments,- lock in place using the screw (F) supplied with the installation kit (fig. 3).■ If necessary, seek advice from a specialist.
ENG10. MAINTENANCEThe appliance does not re q u i re any particular maintenance.■ Use a soft cloth to remove dust.■ Moisten the cloth to remove stains.■ Clean the grills with a vacuum cleaner at least once per year.For these operations, you appliance must be turned off .I m p o rtant : never use abrasive products, which may damage the coating.■ M o re thorough cleaning can only be carried out by an approved service agent■ This operation is not covered by the guarantee.Changing the power lead.If the power lead is damaged, it must be replaced by an approved service centre, as special toolsa re nee<strong>de</strong>d to disassemble this appliance.11. IN THE EVENT OF A PROBLEMP ro b l e mYour appliance does noth e a t .C a u s e sIt is not plugged in.The On/Off dial is on 0.The thermostat position isset too low compared withthe temperature in thero o m .In the event of abnorm a lheating, a safety limiterautomatically cuts out thea p p l i a n c e .E.g.: Excessive dust on airvent (E).S o l u t i o n sPlug it in.Tu rn it to position ●.Set the thermostat to a highers e t t i n g .Tu rn the dial to position 0 an<strong>de</strong>liminate the cause of overh e a t i n g .When the temperature of theappliance re t u rns to normal, turnthe appliance back on, by turn i n gthe dial to position ●.For any other problems, please contact an approved service centre (see enclosed list).I m p o rtant : special tools are nee<strong>de</strong>d to repair this appliance.
D e u t s c h .Sie haben gera<strong>de</strong> einen Wand-Heizlüfter erworben und wir möchten uns bei Ihnen dafür bedanke n .Dieses Gerät ist mit einem speziellen Spritzwasserschutz ausgerüstet.B E S C H R E I B U N GV O R D E R S E I T E .A . T h e rm o s t a t .B . Mod. 6341-6342-6343 : Ein/Aus-schalter.Mod. 6344 : Wahlschalter Aus / Manueller Betrieb / 2 Std.-Automatik .Mod. 6345 : Wahlschalter Aus / Manueller Betrieb / Ti m e r-Betrieb .C . Mod. 6345 : Pro g r a m m i e r b a re 24 Std.-Zeitschaltuhr.D . Wa rm l u f t a u s t r i t t s g i t t . e rDR Ü C K S E I T E .E . K a l t l u f t e i n t r i t t s g i t t . e rF. B e f e s t i g u n g s s c h r a u b e .G . Wa n d a u f h ä n g u n g .H . K a b e l .1. TECHNISCHE DAT E NR e f e re n z6 3 4 16 3 4 26 3 4 36 3 4 46 3 4 5L e i s t u n g750/1500 W2000 W1000 / 2000 W2000 W2000 WG e w i c h t2,8 kg2,8 kg2,8 kg2,8 kg2,8 kgMaße (H. x L. x T. )386 x 290 x 100 mm386 x 290 x 100 mm386 x 290 x 100 mm386 x 290 x 100 mmE i n / A u s - S c h a l t e rJ aJ aJ aJ aJ aT h e rmostat mit Fro s t s c h u t z s t e l l u n gJ aJ aJ aJ aJ aM e h re re LeistungsstufenJ aN e i nJ aN e i nN e i n2 4S t d . - Timer pro g r a m m i e r b a rN e i nN e i nN e i nN e i nJ a2 Std.-AutomatikN e i nN e i nN e i nJ aN e i n2. SPA N N U N GIhr Gerät ist für 230-240 V, 50 Hz Einphasensystem, ausgerichtet. Es ist nicht nötig, dieses Gerätan eine Steckdose mit Erdung anzuschließen, da es sich in Übereinstimmung mit <strong>de</strong>n anzuwen<strong>de</strong>n<strong>de</strong>nNormen um ein Gerät <strong>de</strong>r Kategorie II mit doppelter Isolierung han<strong>de</strong>lt.
D3. WA R N U N G■ Dieses Gerät ist ausschließlich als Wandgerät zu benutzen (siehe Kapitel «10. Installation»).■ Befestigen Sie das Gerät nicht direkt unter einer Wa n d s t e c k d o s e .■ Das Gerät ist so anzubringen, daß die Ein/Aus-Schalter o<strong>de</strong>r an<strong>de</strong>re Schaltvorr i c h t u n -gen von einer Person, welche Dusche o<strong>de</strong>r Ba<strong>de</strong>wanne benutzt, nicht berührt werd e nk ö n n e n .■ Dieses Gerät ist ausschließlich für <strong>de</strong>n Hausgebrauch bestimmt. Es darf nicht für industrielleZwecke verwen<strong>de</strong>t werd e n .■ Achten Sie darauf, daß keine Gegenstän<strong>de</strong> in die Gitter gelangen.■ Ü b e rwachen Sie Ihr Gerät bei <strong>de</strong>r ersten Benutzung.■ Es ist vollkommen normal, daß es bei <strong>de</strong>r ersten Inbetriebnahme o<strong>de</strong>r nach einer Reinigung<strong>de</strong>s Geräts kurzfristig zu einer geringfügigen Geruchsbildung kommen kann (Staubablageru n g ) .■ Das Gerät entspricht <strong>de</strong>n Richtlinien 73/23/EWG und 89/336/EWG.4. SICHERHEITWichtig :Die auf Ihrem Gerät angebrachte Beschriftung «NICHT BEDECKEN» weist darauf hin,daß die Lufteintritts- und - austrittsgitter während <strong>de</strong>s Betriebs nicht abge<strong>de</strong>ckt seind ü rfen bzw. die freie Luftzirkulation nicht behin<strong>de</strong>rt wer<strong>de</strong>n darf. Ist dies doch <strong>de</strong>r Fall,w i rd automatisch <strong>de</strong>r Überhitzungsschutz wirksam.Der Überh i t z u n g s s c h u t z .Bei anormalem Temperaturanstieg stellt sich das Gerät durch <strong>de</strong>n eingebauten Überh i t z u n g s -schutz automatisch aus.Stellen Sie in diesem Fall <strong>de</strong>n Schalter B auf Position 0 und beseitigen Sie die Ursache für <strong>de</strong>nTe m p e r a t u r a n s t i e g .Sobald die Gerätetemperatur wie<strong>de</strong>r normal ist (nach ungefähr 15 Min.), könnenSie das Gerät erneut einschalten, in<strong>de</strong>m Sie <strong>de</strong>n Schalter B auf Position ● s t e l l e n .Falls das Gerät nach <strong>de</strong>m Einschalten wie<strong>de</strong>r nicht normal funktioniert, sollten Sie mit einemzugelassenen Reparaturdienst Kontakt aufnehmen.Um die Stromzufuhr zu Ihrem Gerät zu unterbrechen : müssen Sie <strong>de</strong>n Ein/Aus-Schalter Bauf 0 stellen.5. VERWENDUNG IM BADEZIMMERIn Übereinstimmung mit <strong>de</strong>n gelten<strong>de</strong>n Vo r s c h r i f t e n .6. INBETRIEBNAHMEa) Mo<strong>de</strong>ll 6342 (Abb. 4).Stellen Sie <strong>de</strong>n Schalter B auf Position ●.- Das Gerät arbeitet in dieser Stellung mit einer Höchstleistung von 2000 W, je nach<strong>de</strong>m, auf welcherPosition <strong>de</strong>r Thermostatschalter A steht.- Ihr Gerät läuft so lange, bis Sie <strong>de</strong>n Schalter B auf 0 bzw. auf die Aus-Position stellen.
) Mo<strong>de</strong>lle 6341 (750/1500 W) und 6343 (1000/2000 W) (Abb. 5).Sie können je nach gewünschter Schnelligkeit, mit <strong>de</strong>r <strong>de</strong>r Raum erw ä rmt wer<strong>de</strong>n soll, die entsprechen<strong>de</strong> Leistung einstellen.Für 750 W (Mod. 6341) o<strong>de</strong>r 1000 W (Mod. 6343) ist Schalter B auf Position ● zu stellen.Für 1500 W (Mod. 6341) o<strong>de</strong>r 2000 W (Mod. 6343), die schnelle Erw ä rmung <strong>de</strong>s Raumes, istSchalter B auf Position ● ● zu stellen.- In bei<strong>de</strong>n Fällen wird die Raumtemperatur entsprechend <strong>de</strong>r Position <strong>de</strong>s Therm o s t a t s c h a l t e r sA re g u l i e rt .- Ihr Gerät läuft so lange, bis Sie <strong>de</strong>n Schalter B auf Position 0 bzw. auf die Aus-Position stellen.Dc) Mo<strong>de</strong>ll 6344 (Abb. 6).Stellen Sie <strong>de</strong>n Schalter B auf Position ●.- Das Gerät arbeitet in dieser Stellung mit einer Höchstleistung von 2000 W, je nach<strong>de</strong>m, auf welcherPosition <strong>de</strong>r Thermostatschalter steht A.- Ihr Gerät läuft so lange, bis Sie <strong>de</strong>n Schalter B auf 0 bzw. auf die Aus-Position stellen.- Wenn Sie <strong>de</strong>n Schalter B auf Position stellen, wird das Gerät 2 Stun<strong>de</strong>n in Betrieb sein. D i eTemperatur wird entsprechend <strong>de</strong>r Thermostateinstellung re g u l i e rt .- Nach 2 Stun<strong>de</strong>n wird sich das Gerät ausschalten. Möchten Sie das Gerät wie<strong>de</strong>r einschalte n , müssen Sie <strong>de</strong>n Schalter erst auf Position ● und anschließend auf Position stellen, u meinen neuen 2 Std.Zyklus zu start e n .d) Mo<strong>de</strong>ll 6345 (Abb. 7).Ihr Gerät kann manuell o<strong>de</strong>r per pro g r a m m i e r b a rem 24 Std.-Timer betrieben werd e n .In bei<strong>de</strong>nFällen arbeitet das Gerät mit einer Leistung von 2000 W, je nach<strong>de</strong>m, auf welcher Position <strong>de</strong>rT h e rmostatschalter A steht.■ Manuelle Inbetriebnahme.Stellen Sie <strong>de</strong>n Schalter B auf Position ●.Ihr Gerät wird so lange laufen, bis Sie <strong>de</strong>n Schalter B auf Position 0 stellen.■ Inbetriebnahme durch pro g r a m m i e r b a ren 24 Std.-Ti m e r.D rehen Sie <strong>de</strong>n Schalter B auf die Position «Ti m e r-Betrieb» (fig. 7).Mit <strong>de</strong>r 24 Std.-Zeitschaltuhr können Sie die Dauer <strong>de</strong>s Betriebs und die Stillstandszeit inZeitabstän<strong>de</strong>n von min<strong>de</strong>stens 30 Min. über einen Zeitraum von 24 Stun<strong>de</strong>n hinweg einstellen.- Stellen Sie als erstes die richtige Uhrzeit ein, in<strong>de</strong>m Sie die Scheibe <strong>de</strong>r Zeitschaltuhr so weitnach rechts drehen, bis die <strong>de</strong>r Uhrzeit entsprechen<strong>de</strong> Ziffer auf die Gehäusemarkierung zeigt(Abb. 9).- Drücken Sie anschließend die Stifte, die <strong>de</strong>r gewünschten Betriebszeit <strong>de</strong>s Gerätes entsprechen,nach außen.Beispiel : wenn Sie das Gerät so pro g r a m m i e ren möchten, daß Ihr Bad von 6.00 Uhr bis 8.00Uhr morgens geheizt wird, müssen Sie die 4 Stifte zwischen <strong>de</strong>r Stricheinteilung 6 und 8nach außen drücken (Abb. 9).Mit dieser Pro g r a m m i e rung wird sich Ihr Gerät je<strong>de</strong>n Tag von 6.00 Uhr bis 8.00 Uhr morgens einsc h a l t e n .Die Te m p e r a t u regelung erfolgt gemäß <strong>de</strong>r gewählten Therm o s t a t p o s i t i o n .Anmerkung : Sie können ein Gerät, das nach vorpro g r a m m i e rter Einstellung läuft, manuellausschalten, in<strong>de</strong>m Sie <strong>de</strong>n Schalter B auf 0 stellen. Sie können das Gerät auch außerhalb <strong>de</strong>rv o rp ro g r a m m i e rten Zeiten in Betrieb nehmen, in<strong>de</strong>m Sie <strong>de</strong>n Schalter B auf die manuelle Einschaltposition● stellen. Ihre Ta g e s p ro g r a m m i e ung r wird dadurch nicht verän<strong>de</strong>rt .
7. THERMOSTAT R E G E L U N GDIhr Gerät ist mit einem Raumthermostat A ausgerüstet, <strong>de</strong>r dafür sorgt, daß die für <strong>de</strong>n zu heizen<strong>de</strong>nRaum gewählte Temperatur immer konstant bleibt. Steht <strong>de</strong>r Thermostat auf maximalerPosition, bleibt das Gerät unter normalen Benutzungsbedingungen ständig in Betrieb. D i eZwischenstellungen entsprechen <strong>de</strong>n verschie<strong>de</strong>nen Te m p e r a t u reinstellungen und bewirken dasautomatische Ein- und Ausschalten <strong>de</strong>s Geräts.- Position 9 : wärm e r.- Position 1 : weniger warm .Sobald die gewünschte Raumtemperatur erreicht wur<strong>de</strong>, schaltet sich das Gerät aus und stelltsich erst dann wie<strong>de</strong>r automatisch ein, wenn zur Beibehaltung <strong>de</strong>r gewünschten Temperatur wie<strong>de</strong>rgeheizt wer<strong>de</strong>n muß.8. FROSTSCHUTZSTELLUNGMit dieser Stellung können Sie die Temperatur in einem normal isolierten Raum mit einerQ u a d r a t m e t e rzahl unter 30 m 3 bei einer Außentemperatur von mehr als - 10°C automatisch über5°C halten.- Stellen Sie <strong>de</strong>n Thermostatschalter A auf Position .- Stellen Sie <strong>de</strong>n Schalter B auf Position ● : Ein.9. BEFESTIGUNG AN DER WA N DVe rg e w i s s e rn Sie sich, daß das Gerät richtig ausgerichtet ist und sich die Schalter re c h t soben befin<strong>de</strong>n.Anbringen und Anschließen <strong>de</strong>s Geräts.■ Das Gerät muß senkrecht angebracht wer<strong>de</strong>n, so wie es auf Abb. Nr 2 gezeigt wird .■ Sie müssen Ihr Gerät, unter Berücksichtigung <strong>de</strong>r gelten<strong>de</strong>n Vorschriften, unverän<strong>de</strong>rlich aneiner bestimmten Stelle in senkrechter Position befestigen (<strong>de</strong>r Schaltkasten befin<strong>de</strong>t sich re c h t sam Gerät).■ Schrauben Sie vor <strong>de</strong>r Installation die Wandaufhängung an <strong>de</strong>r Rückseite <strong>de</strong>s Gerätes ab.■ Ve rwen<strong>de</strong>n Sie für die Befestigung <strong>de</strong>r Wandaufhängung (G) an <strong>de</strong>r Wand die geeignetenSchrauben und Dübel.■ Befestigen Sie die Wandaufhängung (G) an <strong>de</strong>r gewünschten Stelle. Beachten Sie dabei diev o rgeschriebenen Min<strong>de</strong>stabstän<strong>de</strong> zum Bo<strong>de</strong>n, zu <strong>de</strong>n Wän<strong>de</strong>n, zur Decke und zu sonstigenGegenstän<strong>de</strong>n. (Abb. 2).Gemäß <strong>de</strong>n Normen dürfen Sie an dieses Kabel keinen Stecker anpassen, <strong>de</strong>r für <strong>de</strong>nAnschluß an eine Steckdose gedacht ist.Beim Anschließen <strong>de</strong>s Gerätes wird das Kabel auf die für <strong>de</strong>n Anschluß benötigte Länge gekürz t .Bei <strong>de</strong>r Elektroinstallation Ihrer Wohnung sollte eine zweipolige Unterbrechung vorgesehen sein.Dieser Schalter muß eine 3 mm große Kontaktöffnung aufweisen.■ Bringen Sie das Gerät so an, wie es auf <strong>de</strong>r Abbildung 3 gezeigt wird .■ L o k a l i s i e ren Sie die bei<strong>de</strong>n Längsöffnungen zum Einhängen <strong>de</strong>s Geräts, die sich auf <strong>de</strong>rRückseite befin<strong>de</strong>n :- Halten Sie das Gerät an die Wand, wobei sich die obere Öffnung über <strong>de</strong>r Wa n d a u f h ä n g u n gbefin<strong>de</strong>n muß,
- Schieben Sie das Gerät langsam nach unten, bis sich die obere und die untere Halterung in diejeweilige Öffnung eingehakt hat,- S i c h e rn Sie die Halterungen mit Hilfe <strong>de</strong>r im Installationssatz mitgelieferten Schraube F (Abb. 3).■ Ziehen Sie erf o r<strong>de</strong>rlichenfalls einen Fachmann zu Rate.D10. WA RT U N GDas Gerät benötigt keine spezielle Wa rt u n g .■ E n t f e rnen Sie <strong>de</strong>n Staub mit einem weichen Lappen.■ Zum Entfernen von Flecken <strong>de</strong>n Lappen befeuchten.■ Saugen Sie min<strong>de</strong>stens einmal pro Jahr die Gitter mit <strong>de</strong>m Staubsauger ab.Bei diesen Reinigungsarbeiten muß das Gerät immer ausgeschaltet sein.Wichtig : Ve rwen<strong>de</strong>n Sie niemals Scheuermittel, da diese <strong>de</strong>n Belag zerkratzen könnten.■ Eine vollständige Reinigung kann nur vom zugelassenen Reparaturdienst vorgenommen werd e n .■ Dieser Eingriff fällt nicht unter die Garantie.Auswechseln <strong>de</strong>s Kabels.Falls das Kabel beschädigt ist, muß es von einer zugelassenen Servicestelle ausgewechselt wer<strong>de</strong>n,da für Zerlegen <strong>de</strong>s Geräts Spezialwerkzeug benötigt wird .11. FALLS PROBLEME AUFTA U C H E NP ro b l e mIhr Gerät heiztn i c h t .U r s a c h e nEs ist nicht angeschlossen.Der Ein/Aus-Schalter steht auf 0.Der Thermostat steht im Ve rh ä l t n i szur Raumtemperatur auf einer zuniedrigen Position.Bei anormalem Te m p e r a t u ranstieg schaltet sich das Gerätd u rch <strong>de</strong>n eingebautenÜ b e rhitzungsschutz automatischa b .Z.B.: Übermäßige Ve r s t a u b u n g<strong>de</strong>s Gitters für <strong>de</strong>n Lufteinlaß. (E).L ö s u n g e nSchließen Sie es an.Stellen Sie ihn auf Position ●.Stellen Sie <strong>de</strong>n Thermostat höher.Stellen Sie <strong>de</strong>n Schalter aufPosition 0, beseitigen Sie dieUrsache <strong>de</strong>r Überh i t z u n g .S o b a l ddas Gerät wie<strong>de</strong>r seine norm a l eTemperatur erreicht hat, könnenSie es wie<strong>de</strong>r einschalten, in<strong>de</strong>mSie <strong>de</strong>n Schalter auf ● s t e l l e n .Für sonstige Probleme bitte mit einer autorisierten Servicestelle Kontakt aufnehmen (siehe beigefügteListe).Wichtig : dieses Gerät kann nur mit Spezialwerkzeug re p a r i e rt werd e n .